ksechler
Free Member
-
Joined
-
Last visited
Everything posted by ksechler
-
 I meant to do this last night and I forgot. I'll also try to get some pics.
 -
-
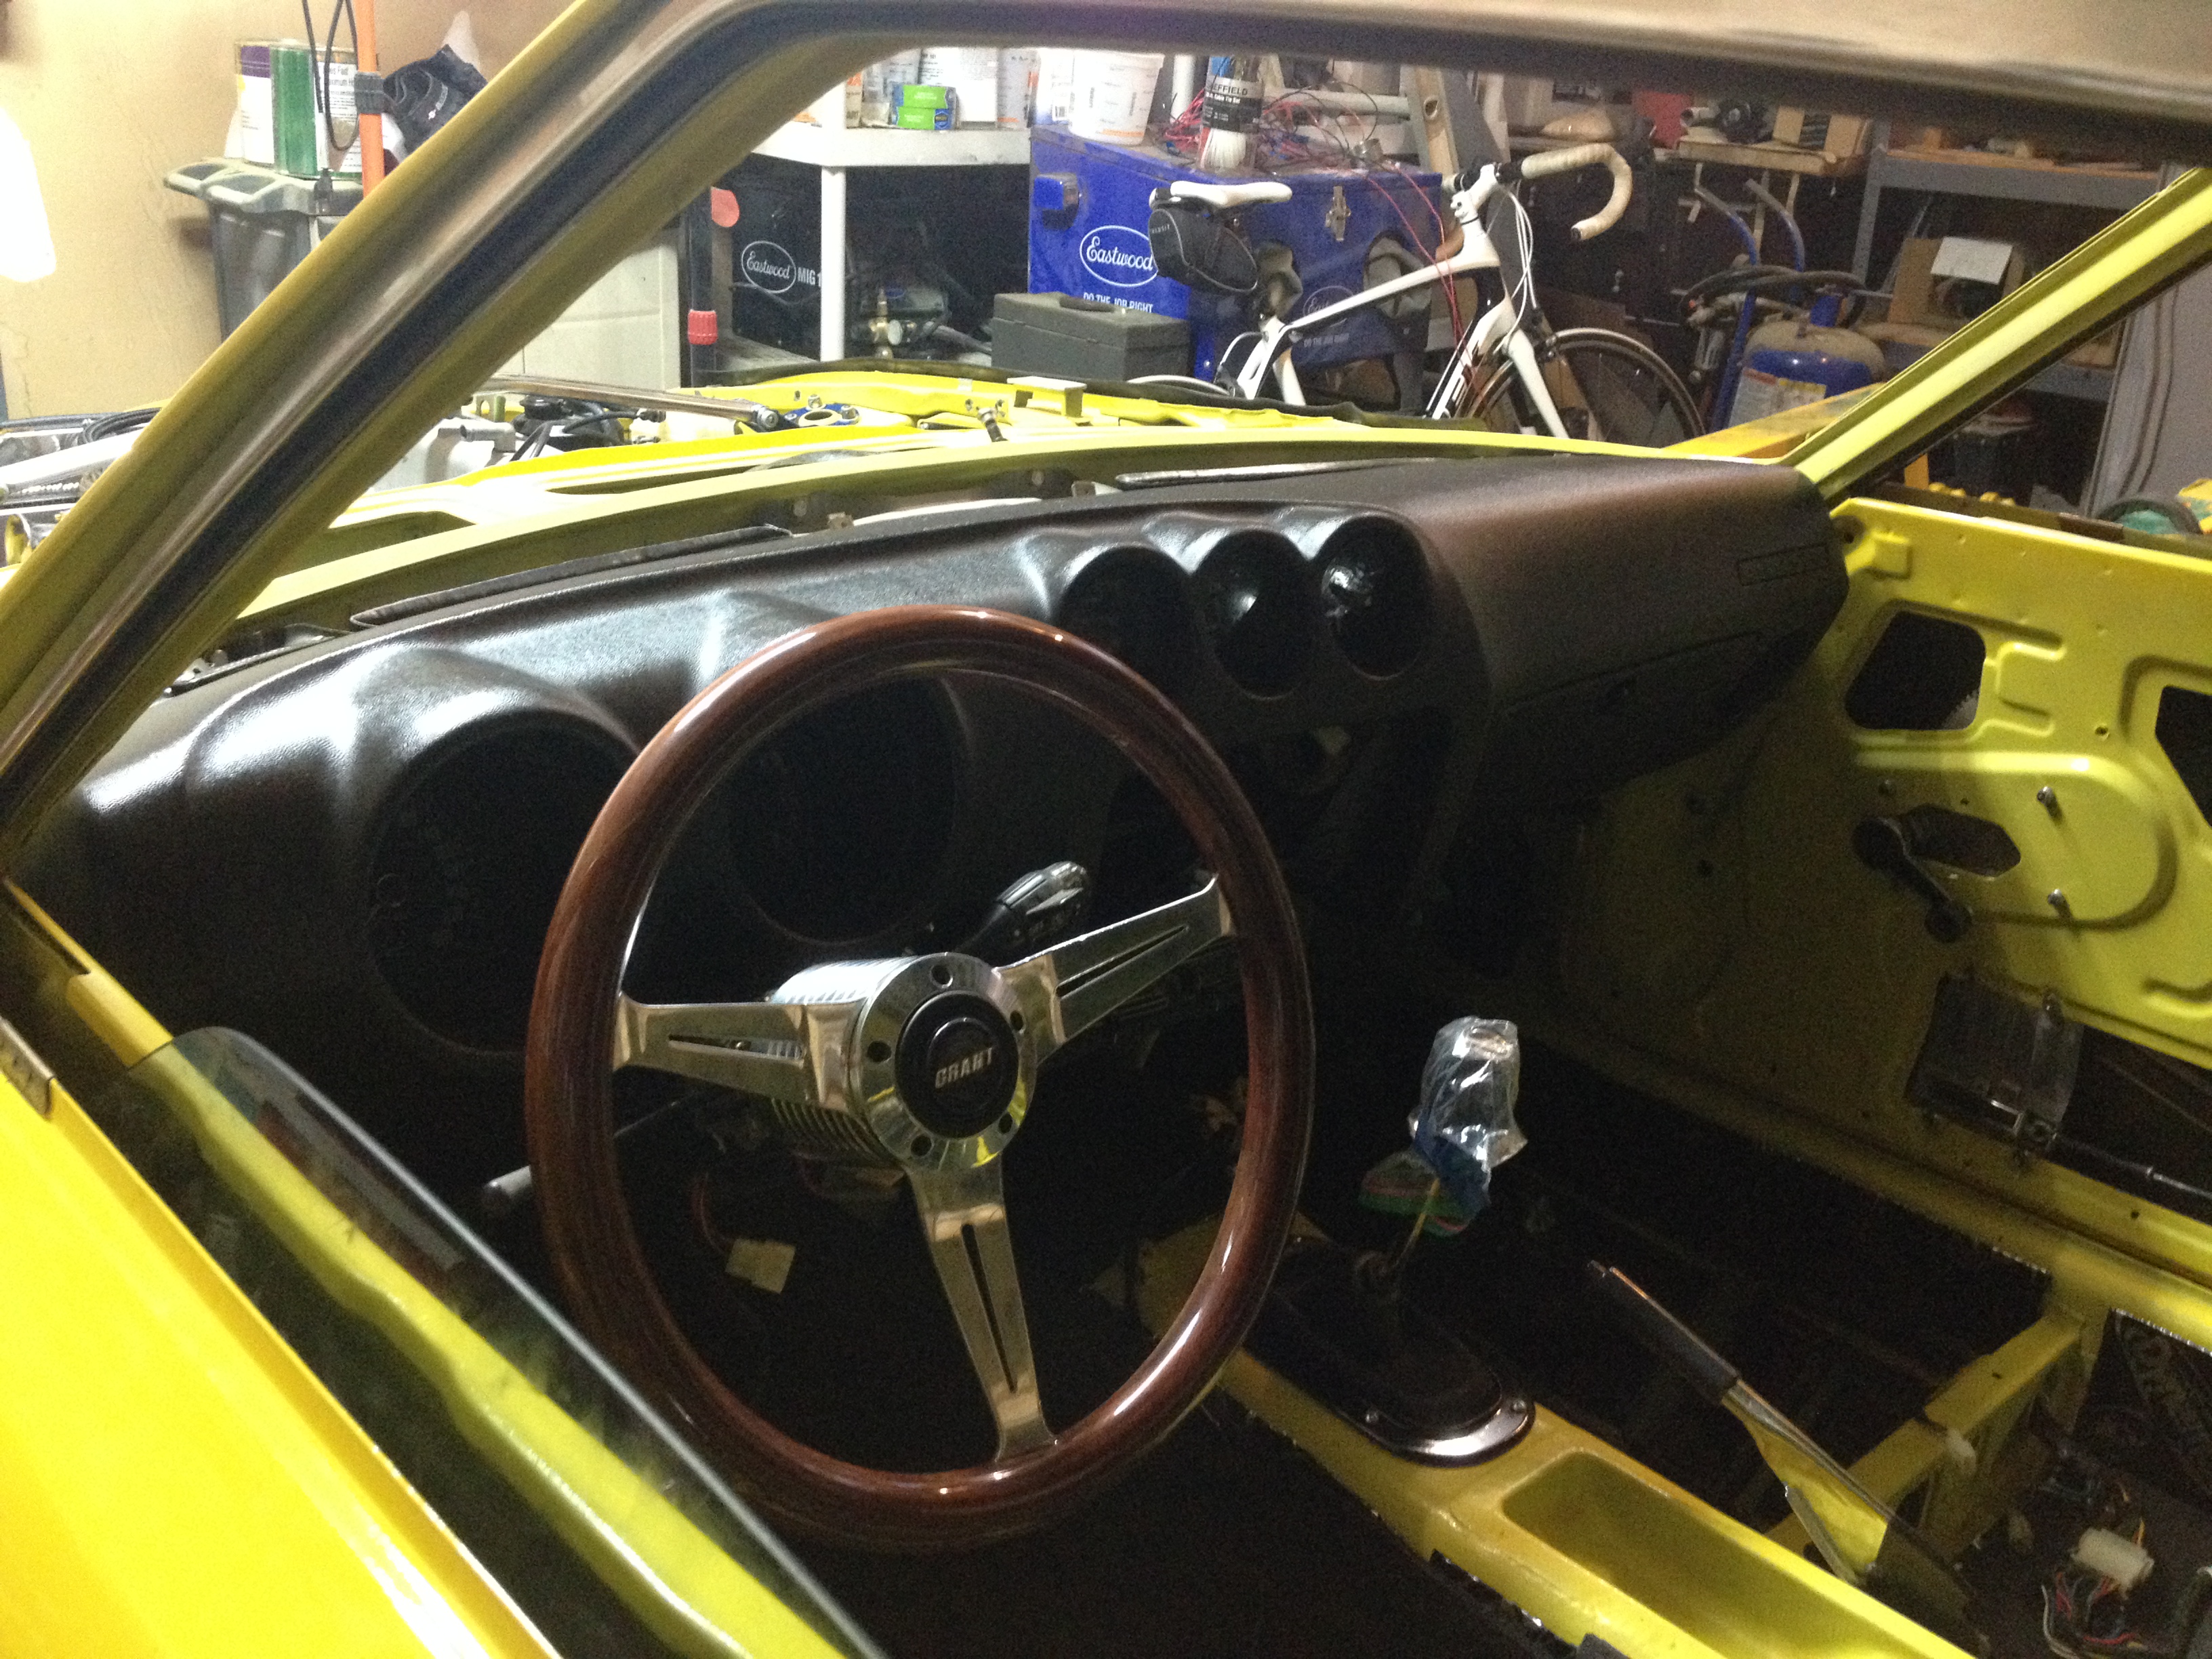
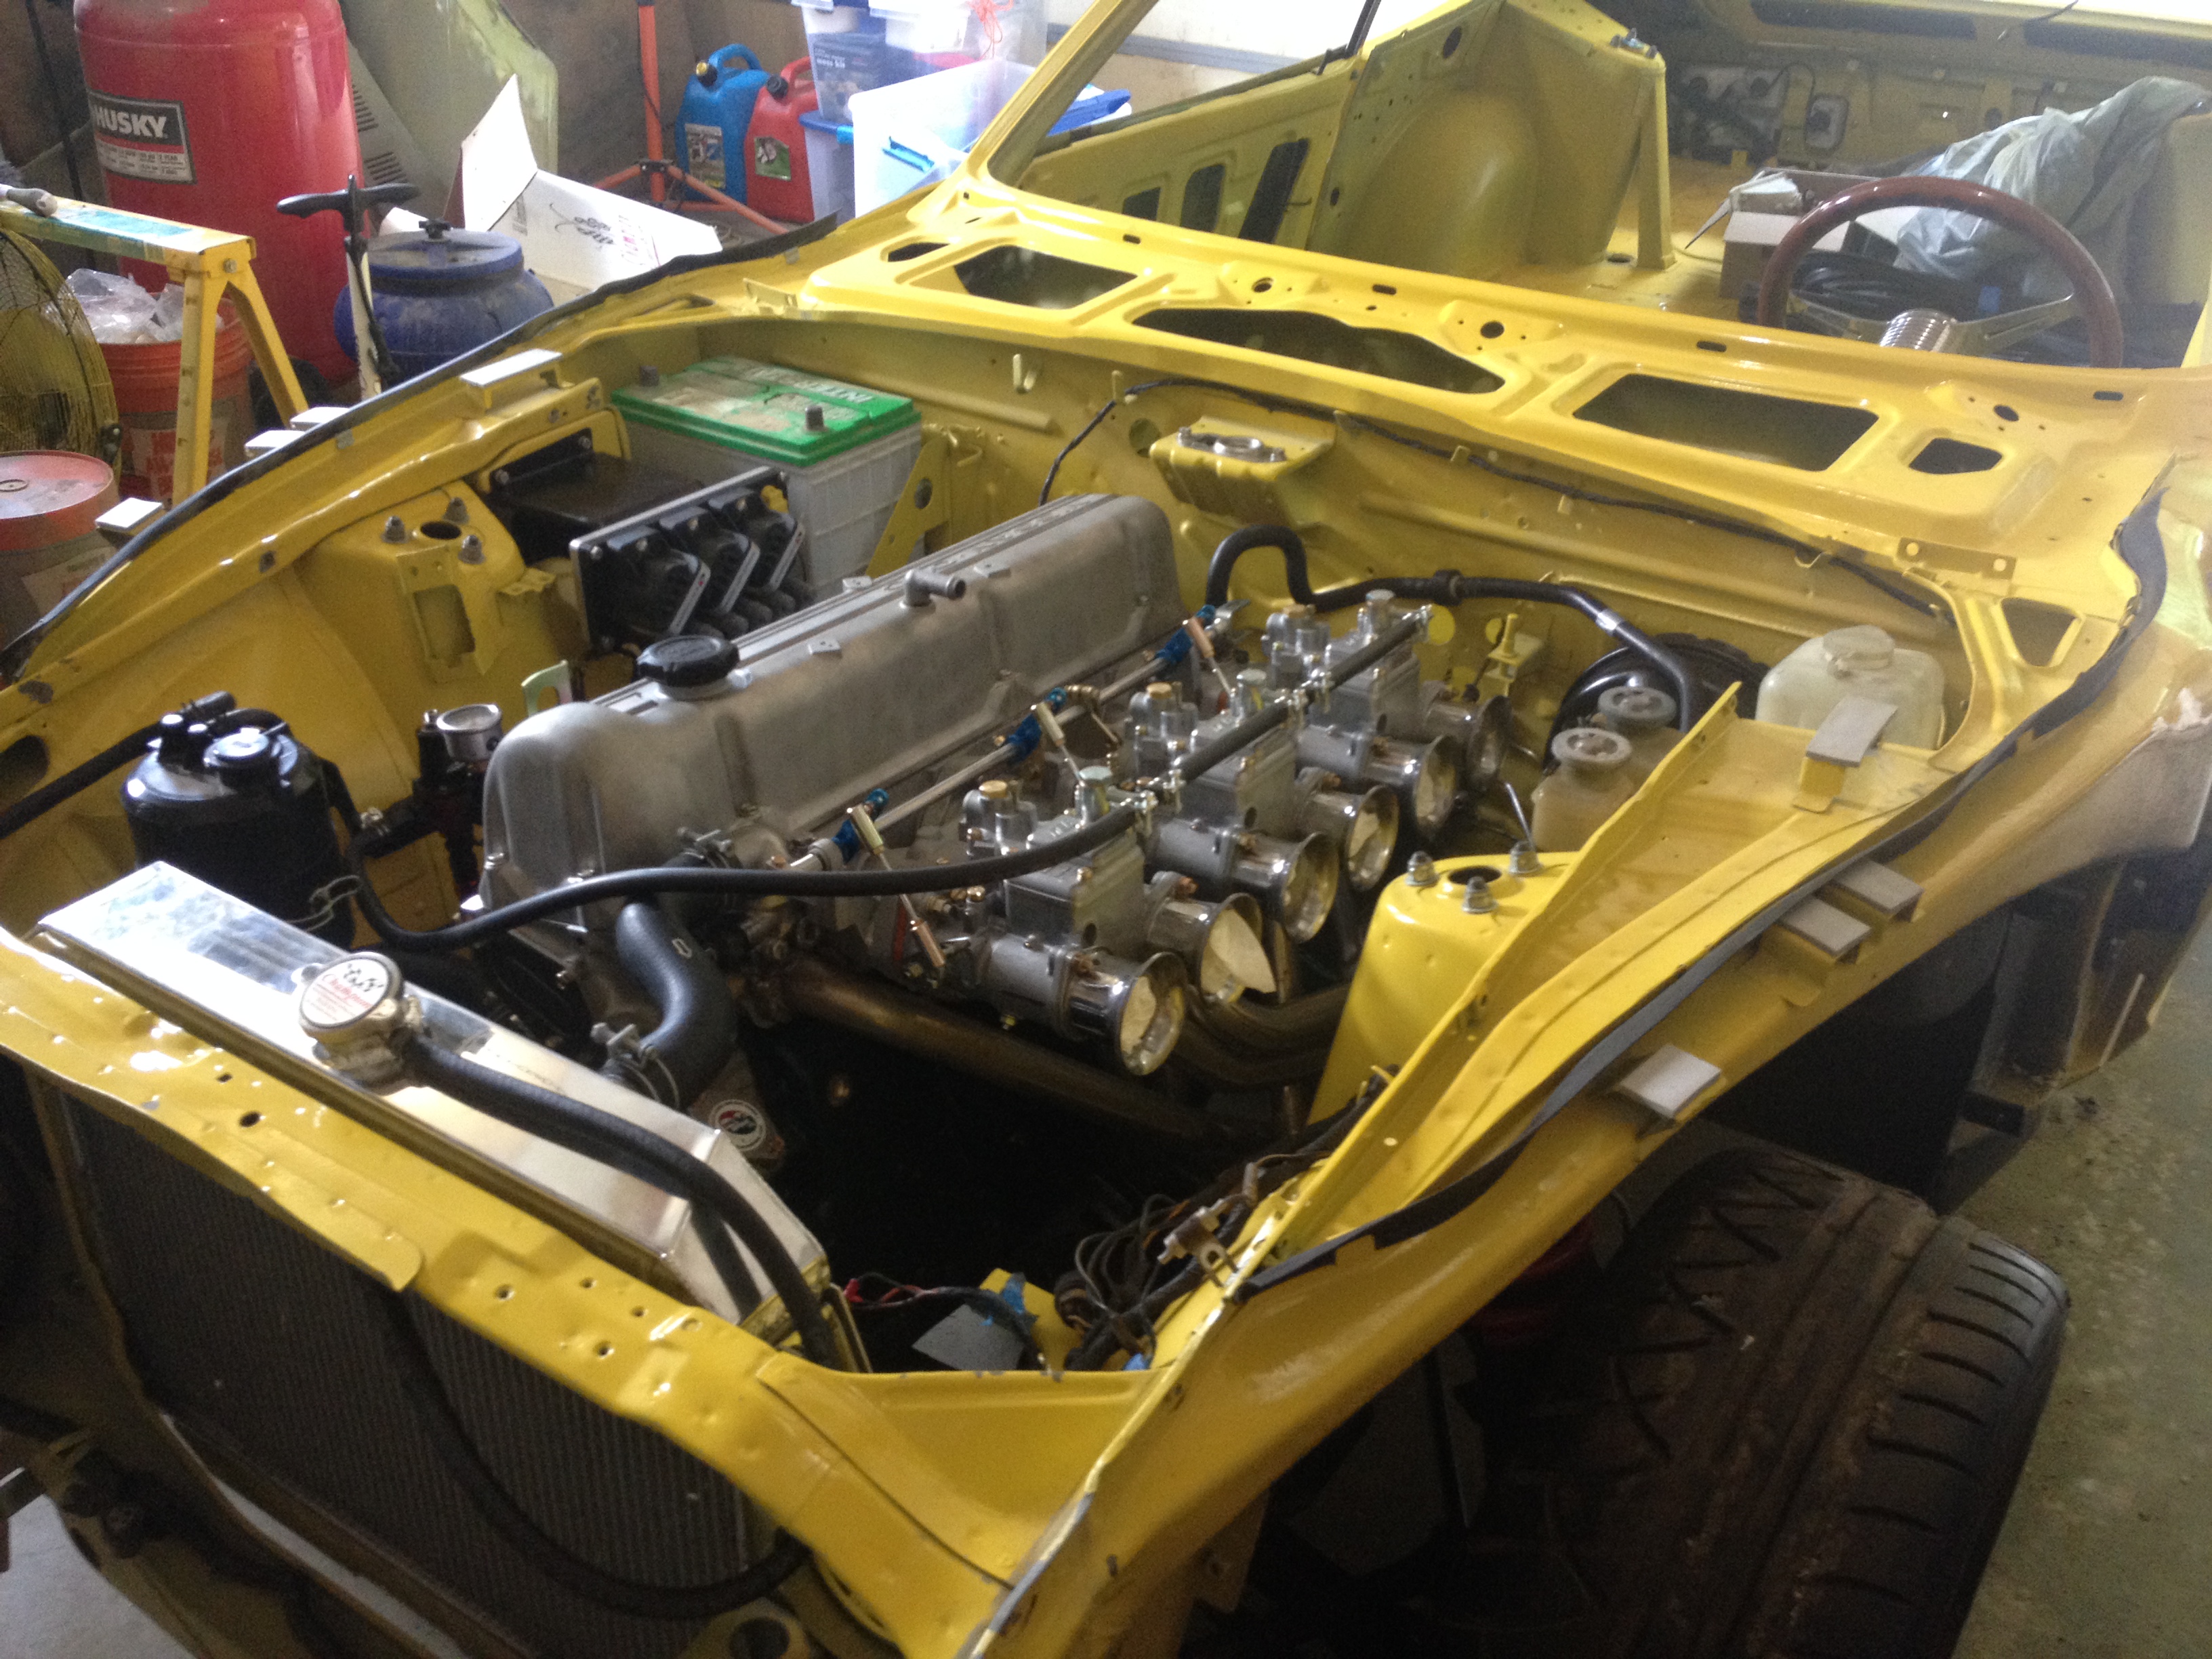
Check this out! I scored a crack-free dash on e-bay about a year ago. Now it's in the car. The car now starts on the key. Thanks SteveJ for the starter assistance! Fuel gauge works, oil pressure works, voltage meter works (but car wont charge). Temperature gauge does not work. I have ordered a new sending unit. I still have to install the interior, glass, and paint and install the front fenders, hood and valence. Oh, and for those who saw my post about gas tank woes, I cleared the blockage and I'm good to go.

-
-
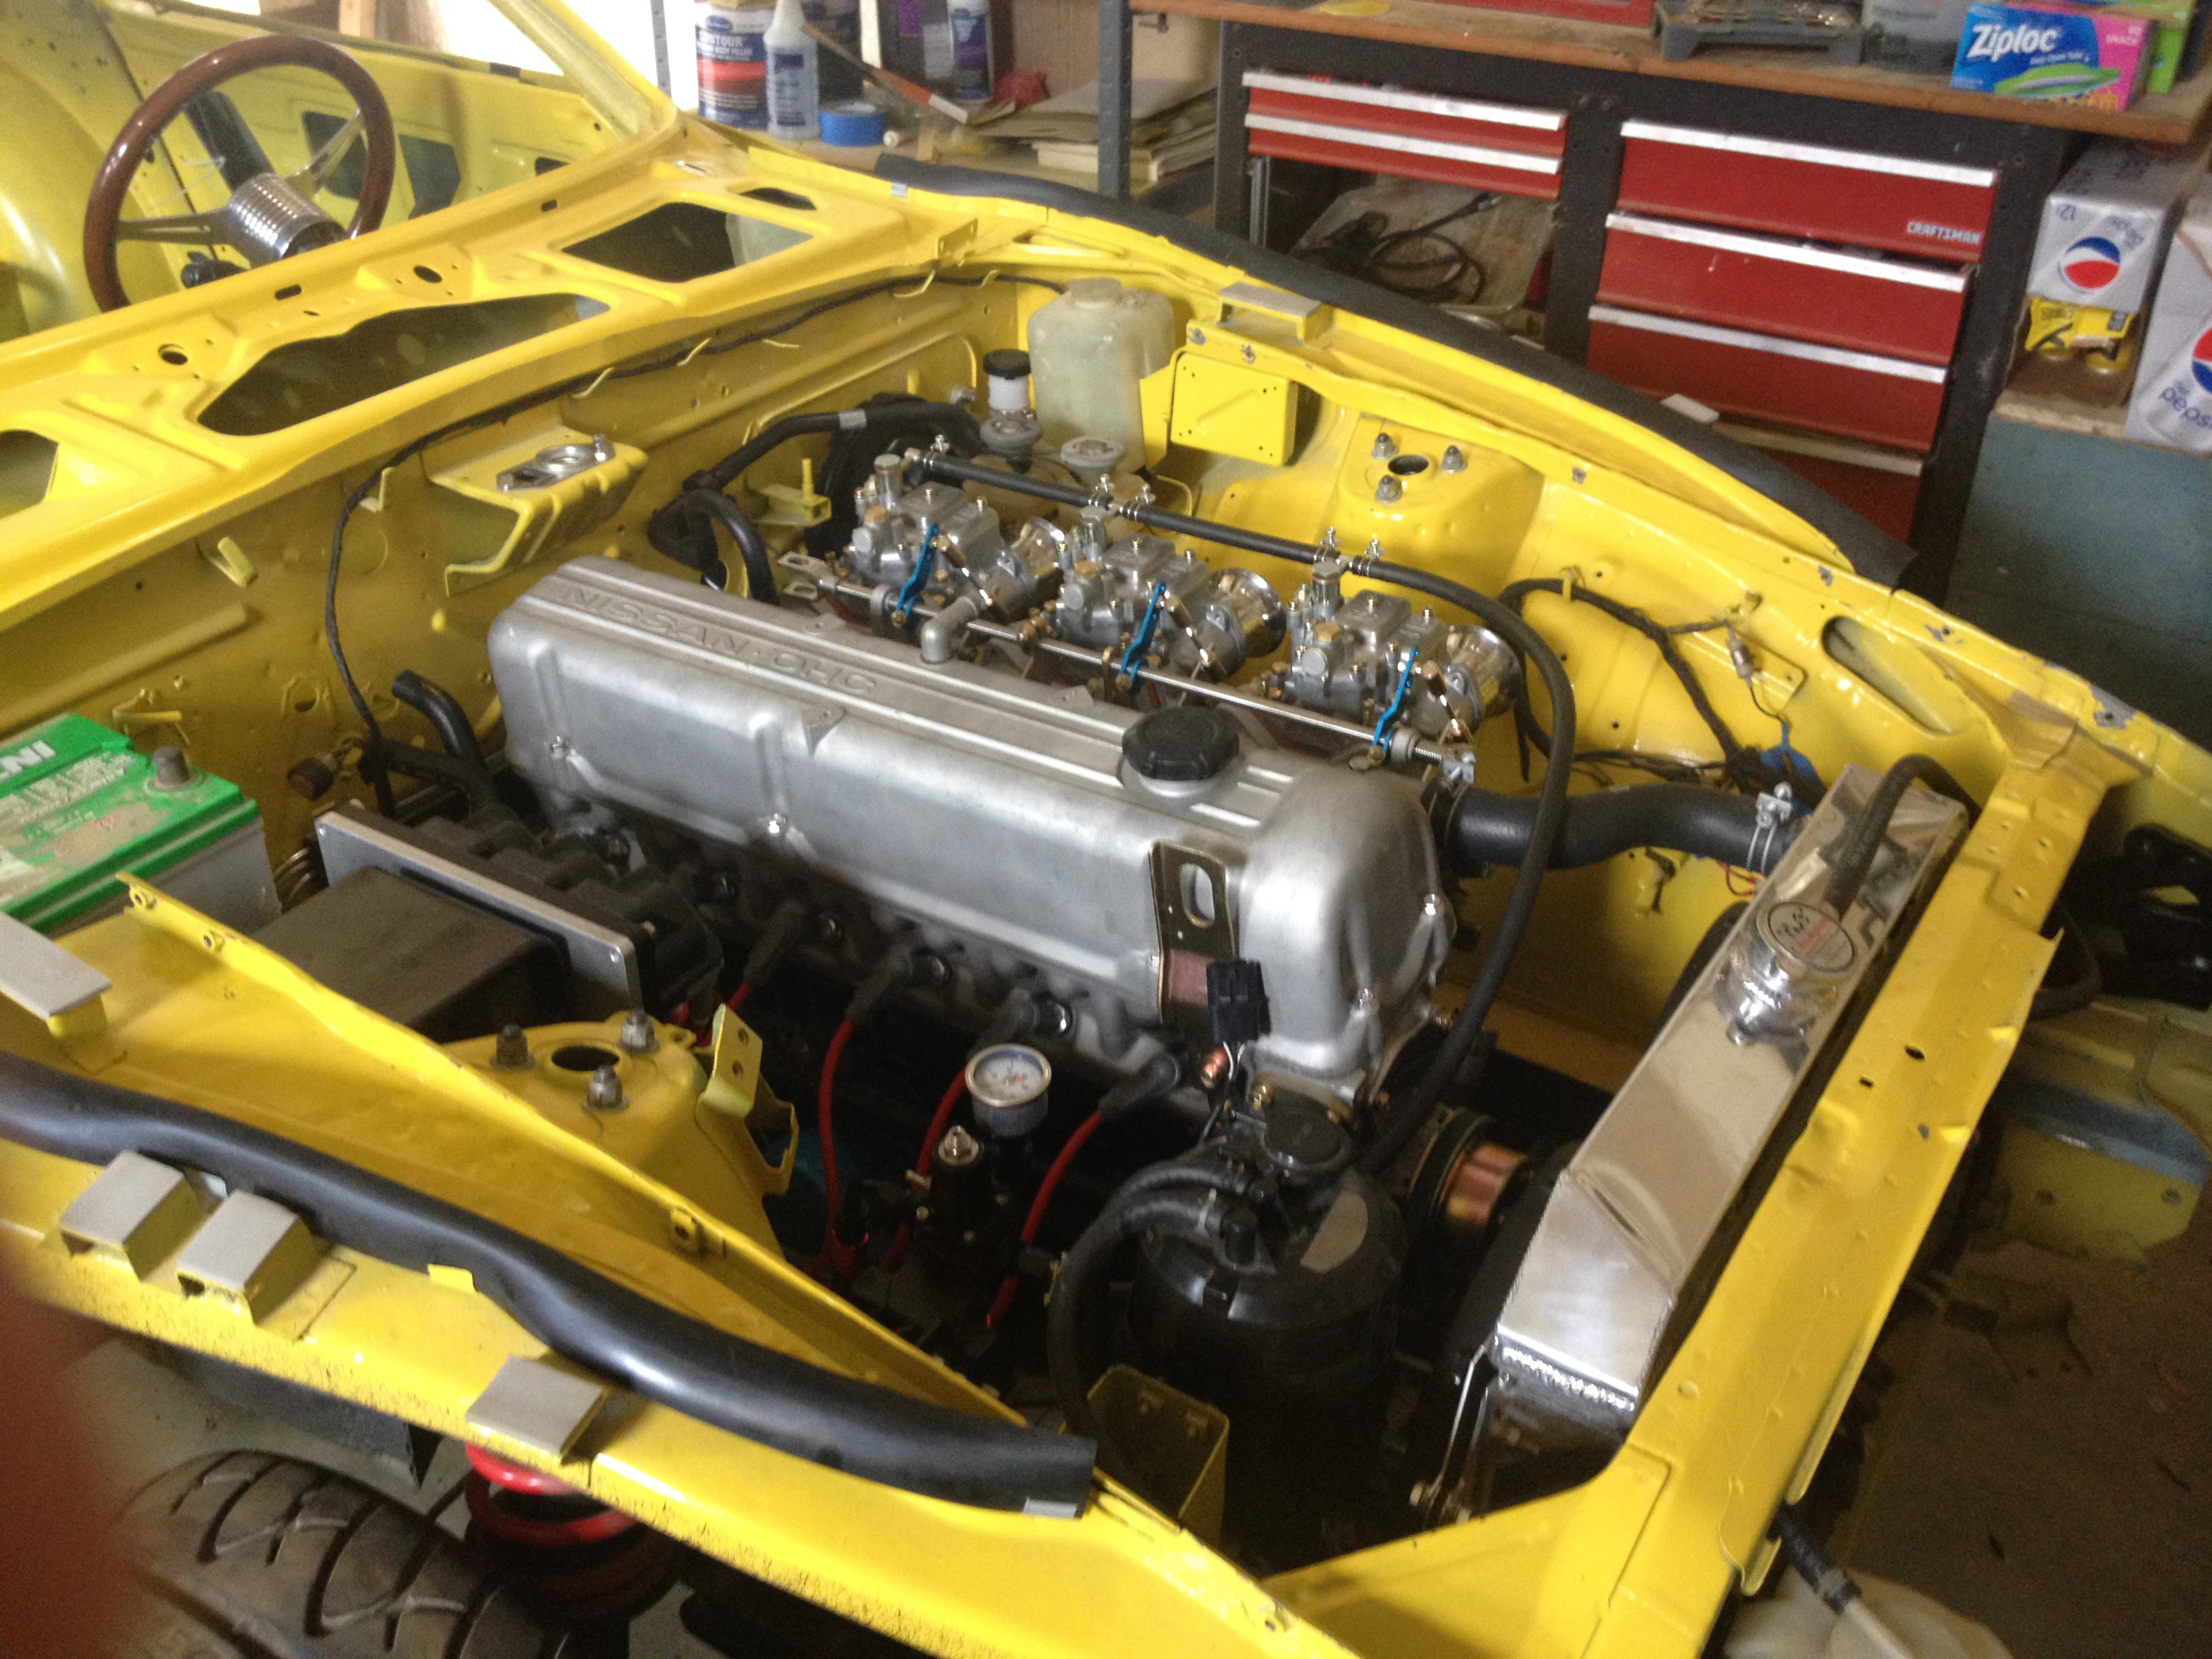
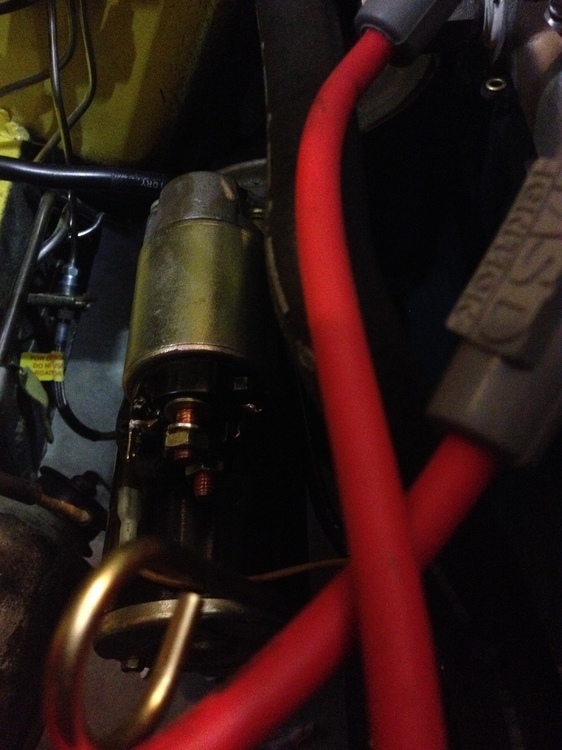
I need some help with my internally regulated alternator. I have a 1976 280z that I have been restoring (full rotisserie resto-mod). The car is pretty complete mechanically. I have removed the fuel injection and fuel injector harness and control. I have removed the distributor and transistor ignition module. In their place I have triple OER Carbs and an XDI electronic ignition. I don't that either mod bears on my present problem. I have installed a 60a internally regulated alternator. I performed the wiring modifications shown here: http://atlanticz.ca/zclub/techtips/alternatorswap/index.html The problem is that it doesn't seem to work. I can start the car, but the red charge light is on and the voltage shows less than 12V on the gauge and using a multimeter. I noticed something else suspicious. When I jumper the 2/3 wires as shown in the article I linked, I can hear a relay pulling in (probably the ignition relay but I'm not sure) without the key being in. This doesn't seem right at all. I removed the jumpers and If I connect a lead directly from the battery to the "F" terminal then I can get 12.5-13V, but my charge light wont work. Can anyone lend any insight? First of all what voltage should I see off a properly charging IC alternator? How should I check it? Why do I hear that relay pulling in when jumpering the plug? Also there was a small canister (diode or a capacitor of something) on my old alternator. The wire is broken. Do I still need it with an IC alternator?
-
So I should land the positive lead from the battery and the white lead from the harness on the top post shown in the photo, right? What's the bottom one for?
-
I need some help with my electrical system. I have been trying to use the manual but the schematic is giving me headaches, and it doesn't show one of the things I need to know. I would post this in the electrical forum, but I'm hoping to keep as much of my thread together as possible. Hope that's ok. First question. Would somebody please post a photo of give me a description of how to land on my starter. I'll enclosed a picture of what I have if my stupid computer starts acting right. I know that the Positive battery cable, white wire in the main harness and white wire in the engine harness are in play. I know the engine harness white wire goes to the solenoid, I'm not sure about the rest. Second question has to do with keyed power (cranking and running). I thought that I could pick up the two wires from the coil (one for cranking and the other for running) and use them to excite some relays to pull in power for my Ignition module and fans. To get cranking and running power it looks like I need to land both wires on the relay. Is this sound wiring practice or do I run the risk of back feeding something. It doesn't seem quite right to me. Thanks!
-
Ditto... I still don't think I could bring myself to write that big check for $28K. My project has been more like a death by a thousand cuts (or credit card charges). I'll bet I'm up to $45K by now but that includes a really hot engine setup by Datsun Spirit. Matt: Reassembly from a rotisserie resto is still a lot of work. Take it from me to save every part. Even the ones you don't think you'll reuse. Sometimes you need them just to see where stuff is supposed to go. I'm glad I saved all the grommets and whatnots. I even saved broken bolts so I'd know what needed to be replaced. Label things by subassemblies and tape them to the parts they hold on. Take lots of pictures. I still find myself going back to 3 year old pictures of the engine bay to see where things go.
-
Stupid carrots. That's what you get for eating vegetables.
-
That hole isn't very hard to plug because of the o-ring. I just cut a circular piece of plastic and used the locking ring from the sending unit to hold it on. It worked fine.
-
-
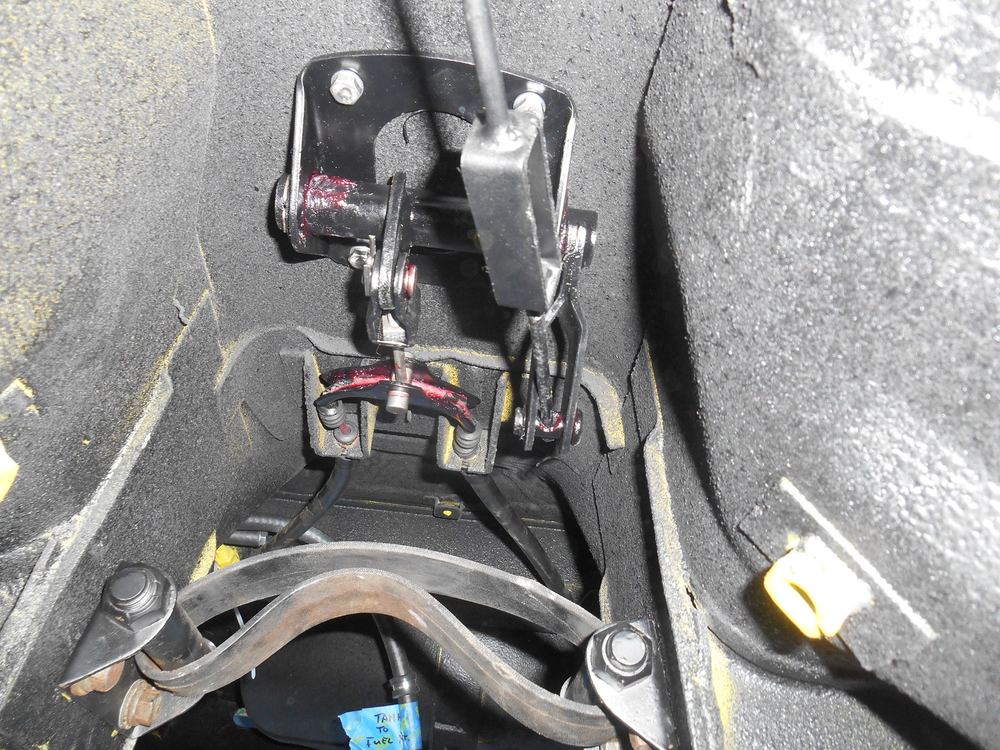
It's your project! We all have our own thresholds for perfection. Lord knows I spent a lot of time restoring bits and pieces that will never see the light of day because I wanted them just so (see my parking brake linkage?). Personally if some joker gets down on the ground and tries to crawl under my car to criticize my welding I think I'll just stomp him!
-
I wouldn't touch it. These Craigslist Dreamers crack me up with their claims of "surface rust" and "the frame's fine". That car is a complete basket case. You can see where the firewall has rusted completely through under the battery tray. It has also rusted into the wheel well. From there the rust will extend down into the frame and the rail under the passenger floor is going to be shot. The rocker panels are also going to be shot. Those bolt on ground effects are hiding something. Unless you have another $20K sitting around to restore this car then don't even bother. The next stop for this car is going to be the junkyard. I'm not trying to sound like a jerk and I hope I don't come off that way. This car is not a good candidate for restoration.
-
I used a 135 amp from Eastwood. It worked pretty well. With regards to grinding and dressing those welds, keep in mind where you're working. Everything you're welding is gonna be hidden so you don't need to kill yourself making them pretty. Right doesn't have to be pretty. IMHO that's why you start on the bottom of the car. Make the mistakes and learn where it won't show so that you know what you're doing when you get to the stuff that does show. Anyway, it looks great, but get a new dust mask!
-
-
Oops, tried to post a video and did it wrong. Might try again later. I got the motor running.
-
I'm curious, what got you thinking about this? If there is something about your car that concerns you as being a fire hazard my opinion is that you should park the car until you can get it fixed.
-
All: Thanks for your replies. I think I got it last night. I chucked' a piece of 3/16" braided stainless cable in my cordless drill and ran it through the fuel pickup at low speed. I can blow air into the tank pretty easily so I think the blockage is clear. I'll find out for sure this weekend.
-
Do you know if it ever worked? I don't mean to be a doubter but I am... I wonder if that setup lead to the car being the neglected rust bucket that it is.
-
Not yet. That's my next step. I had to take a mental health pause and work on something else. I make mistakes (or make them worse) when I'm frustrated.
-
Too many corners.
-
I made a very frustrating discovery this weekend. I've been working hard to get my 280z to the point where I could fire the engine. Saturday was the day. I managed to download my ignition parameters to my XDi2 pretty easily which was a treat since I was expecting it to be difficult. So I put power to the fuel pump and couldn't get any pressure. That was not an area I was expecting trouble. After a lot of cussing and some trial and error I found that the fuel pickup from the tank was plugged. Man did a light go off in my head! I had to do a LOT of work on that tank including patching it and lining it. Should've blown out the pickups before the liner dried... So my tanks probably ruined. Can anyone suggest a method for unplugging those lines? I haven't been able to find a small diameter snake and I doubt it could make the 90 degree pend in the pickup anyway. Now assuming the tank is a write off... I've never been real confident about this tank because I did have to weld on it and I'm not a very good welder. So a few months ago I chanced upon a '76 280z tank in fairly decent condition and knowing how hard they are to find I snatched it up. The tank is solid but has a lot of rust inside. No pitting, but It needs to be cleaned. That I can do, but I'm a little nervous about coating it for the obvious reason. If the tank cleans up nice and doesn't leak, does it need to be coated?
-
I always heard you weren't supposed to open the hood. Gives the fire more oxygen. I think the best option is to not have a fire. :-)
-
Good luck! It'll be an uphill battle. I think I have built my car 4 or 5 times (trial and error) partly because I didn't label things real well.
-
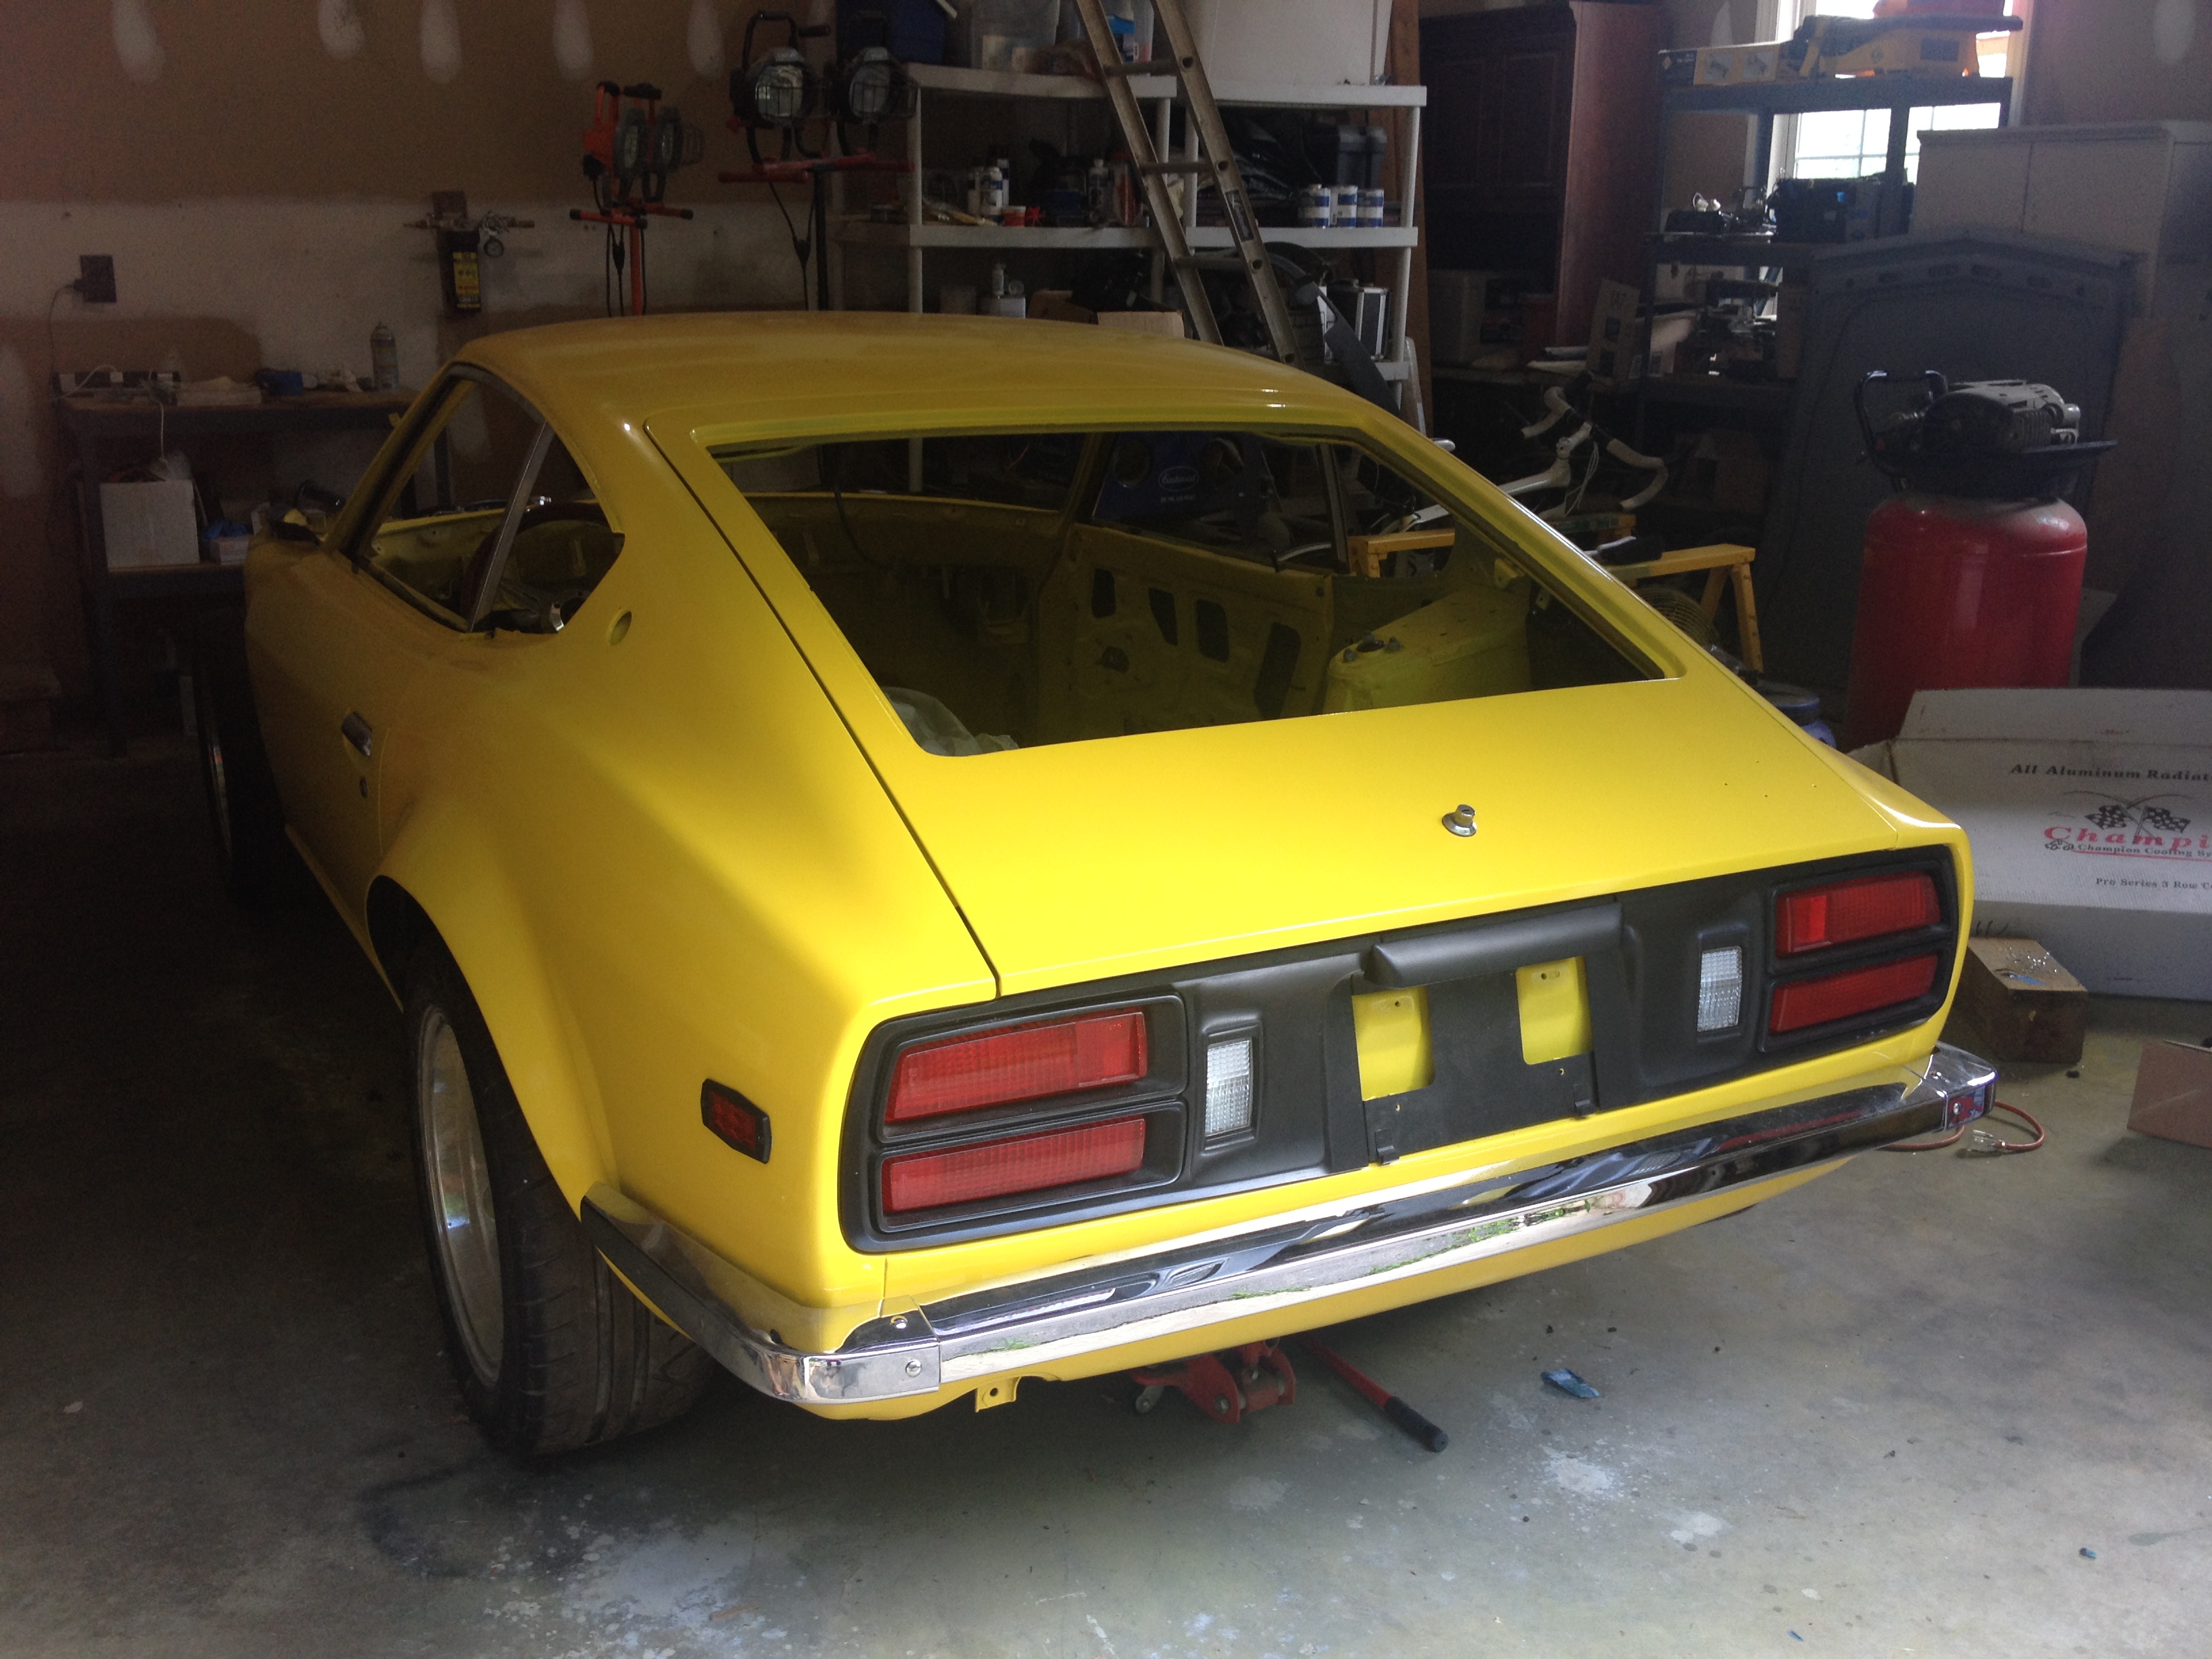
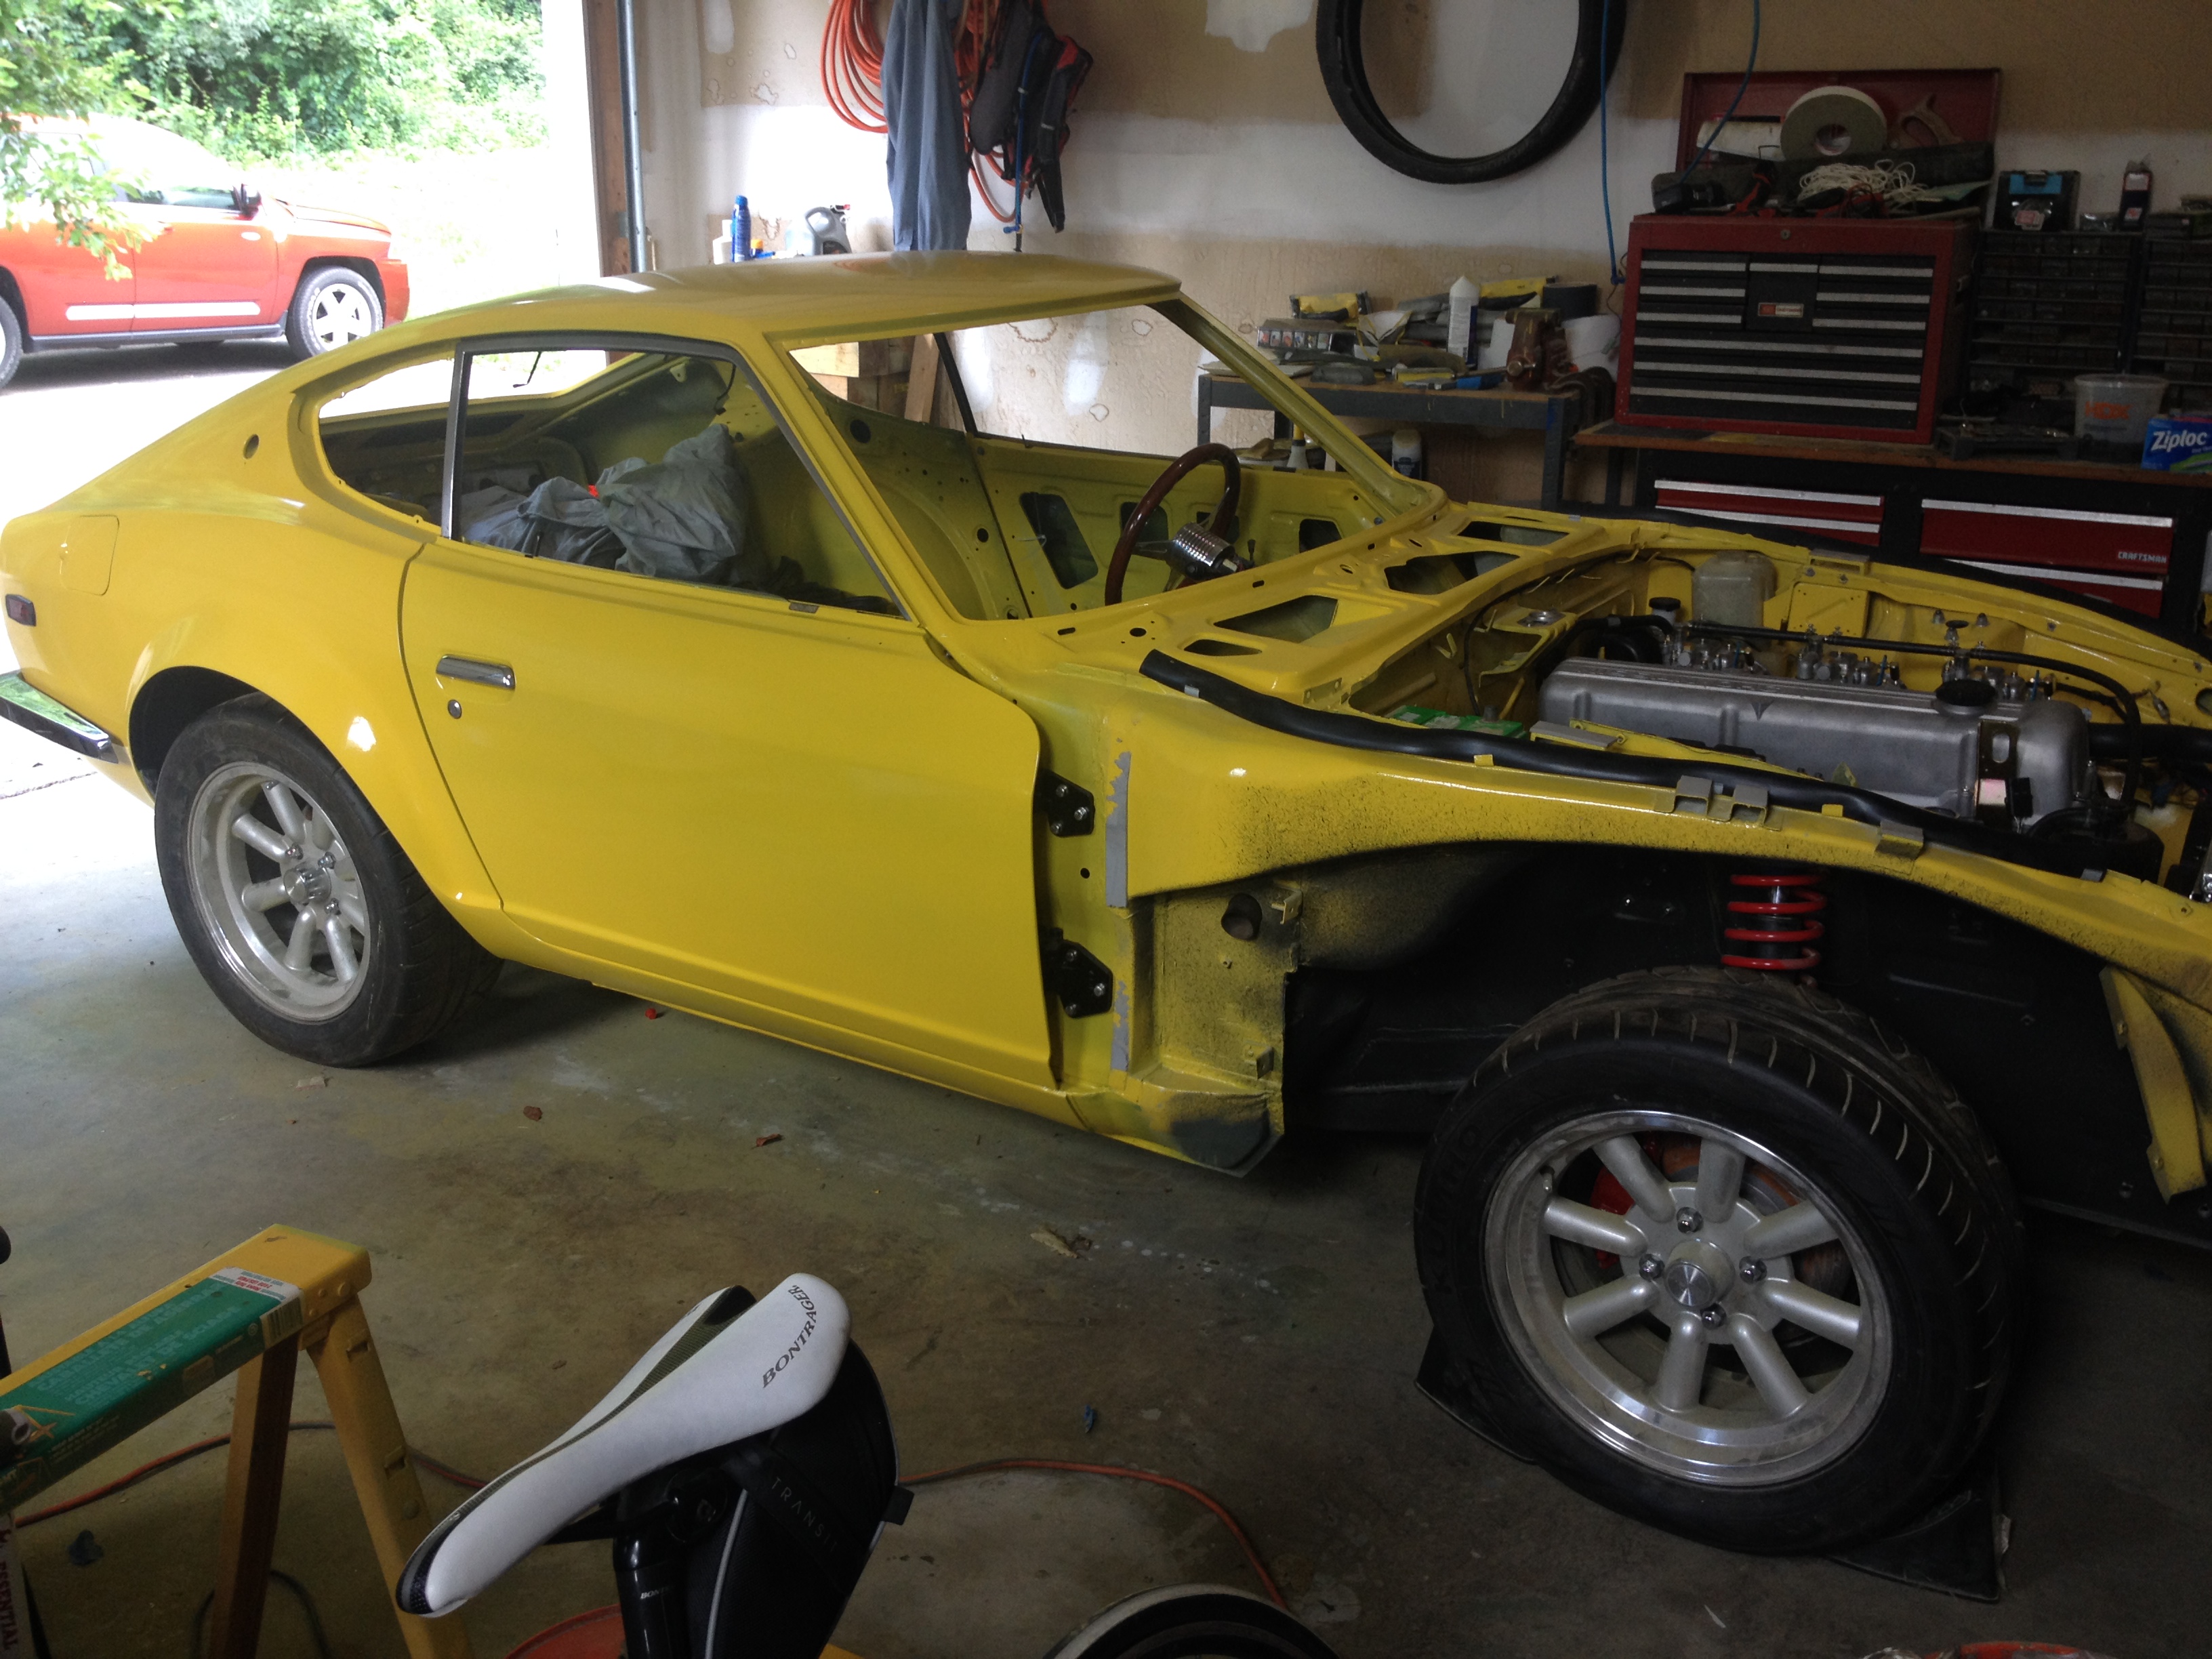
I haven't posted in awhile so I thought I would give an update. I have been focusing on getting the mechanics of the car worked out before finishing the front body panels and putting it all back together. I am just about ready to fire the motor. I completed the fuel system but haven't wet tested it yet. I have also completed the cooling system except my heater core is shot. I am waiting for a replacement and once I get that in I will be ready to put coolant in the car. I have started wiring the XDi2 ignition setup. I think that is just about ready to go. I have an ignition map to start with and the motor has been bench run. Once I get everything working I will integrate the new ignition, fuel pump and cooling fans into the existing wiring harness. I haven't quite figured that all out yet - one thing at a time... The biggest time killer (at least for me) seems to be the restoration of the pieces. Just as a example: want to put the doors back on? That means sandblasting and painting the hinges, blasting or chemically cleaning the door latches, plating them, polishing them and then installation. Then there's windows. I put the windows in and had to take the whole mess apart because I hadn't installed the door latch, which has to go in first. The I couldn't get the windows to line up - had the front sashes reversed - d'uh. Anyway, enough whining, enjoy the pics.