ksechler
Free Member
-
Joined
-
Last visited
Everything posted by ksechler
-
 So now you're into it for another $85. I admire your enthusiasm. I still think you're making a HUGE mistake. Why are you so in love with that particular car? I know in your mind you are thinking; "Hey! I got it for $500. I'm gonna work real hard and have a z-car for cheap." You won't. The most likely scenario is that you will start and never finish because that car is too far gone. Life will get in the way, and next thing you know you're 35 and watching them load it on the wrecker headed for the salvage yard because your wife is sick of looking at a rusty old car in the yard. All your time and money will be wasted and you still wont have a z-car. The second scenario is that you employ your considerable drive and finish the car. No matter how dedicated you are, though, it's going to take money for repair panels, sheet metal, or whatever. You'll spend at least $2K. So you'll be into the car for $2,585 plus your time, but you have to paint it. If you do it yourself maybe $700 for paint and consumables. Now you're at $3,285. You see how this goes? $2,500 will get you a decent chassis. This will save you a lot of grief, give you a much better chance at succeeding in your dream to have a z-car, and also provide you a better end product. I have a long history of doing things the hard way so I speak from experience.
 -
I saved the old foam pads. I'll see if it makes a difference. Thanks.
-
-
All: Thanks for taking the time to read this. I'm trying to figure out the sequencing for painting and assembling my project. My plan is to mostly reassemble my shell and check panel alignment, adjust as needed and then disassemble and paint all the edges and hidden areas (doors and window sills). Then reassemble, wet sand and paint the rest of the car. My thought process is to minimize the possibility of damage to the finish during reassembly and to make sure the fitment is right while I can still do something about it. Does this make sense? It's a lot more work. What do (did) you guys do with your projects? I'm a little curious how panel alignment in particular is done because right now my cowl sits about 1/16 to 1/8" lower than the passenger fender and I don't really see any good way to adjust it except either fill it or shim it. This could be a real problem during final assembly of a finished car. Thoughts?
-
Can you find repair panels for the sections in question? I found it very difficult to form sheet metal by hand. However, if you can find a repair panel then you don't need to.
-
Couple things.... I'm also restoring a 1976 280z. I'm converting to disc. I saved all my drum hardware. If you want, maybe we can work something out. PM me if interested and I will go through and verify I have everything in and it is in good shape. If memory serves it was. Second, gas tanks for the 280z are hard to find and expensive. So most likely, you're going to have to invest whatever labor is needed to save yours. Mine had holes rusted in it under the straps which I had to weld up. That was never racking...
-
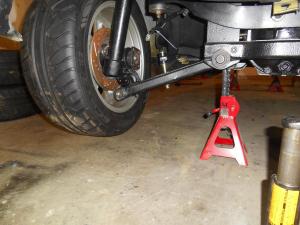
You ever had one of these happen? I was test fitting my front passenger fender and went to put the one of the M8 bolts in - the one that goes into the front of the rocker on the bottom right behind the front wheel. It was a little tight but not bad. As I'm turning the wrench - snap! The weld on the nut inside the rocker breaks. My first thought was, "Oh sh1t! How am I gonna fix that?" followed by, "do I REALLY need that bolt. Of course the last thought was, "Do it right! You've come this far." So long story short, I had to cut the bolt, remove the fender, cut a hole in the rocker, weld a new nut in and then weld the rocker shut. It took me about 3 hours and pissed me off a lot. I was done with that stupid rocker and had already painted it (you can see the offending rocker in my avatar before I cut it up). I thought it might be interesting to hear some of your stories. Please share!
-
There isn't enough of that car left to save. Sorry, but no amount of enthusiasm can make up for the fact that the car doesn't have any structure left. I'm surprised it doesn't sag. No restoration guru would touch it. Take everything worth saving and find another chassis. Take a step back and answer a few questions: 1). Does the chassis still line up? I seriously doubt it. 2). How will you keep it from folding in half when you put it on a rotisserie? 3). Have you sourced and priced all the repair panels you will need? What's the cost? 4). Is there really anything special about this particular z? There are others available. If nothing else #3 should clinch it. The price for repair panels alone would exceed the cost of a much better chassis. As always, good luck, and don't misunderstand me. This is my opinion - you're free to do as you wish.
-
Congrats on the new project! I don't want to be a downer, but make sure you take some time to consider what you are in for. That car has some pretty serious rust issues. To do proper repairs will require you to put the car on a rotisserie because the floors and frames are probably shot. The rockers are shot, doglegs, too, and I'll bet there's a hole in the firewall and inner fender on the passenger side under the battery. It will take a lot of time and a fair amount of money to get that car on the road. You might be able to find a better chassis to start with somewhere in the southwest. Please don't get me wrong! I'm not telling you not to do this or trying to rain on your parade. I bought a car that looked much better that yours and I ended up replacing both floors, parts of the rockers, doglegs, and a spot behind the passenger back wheel. I also had to do extensive repairs to the firewall and front passenger inner fender. It was on a rotisserie for 2 years! Just make sure you know what you're getting into. It would suck to get 2 years and $20K into your project and give up.
-
Some folks pay and just have the whole thing media blasted. I think I would do that if I ever do another one of these projects. Don't forget to check it out. From my own experience media blasting sucks especially with my 5 hp compressor. Just not enough muscle to keep up (I'm not sure if it's a crappy compressor or just too small). So if you can find someone to do it for a reasonable price then do it!
-
I used a heat gun and scraper. I would highly recommend trying the dry ice, though, because the scraper method is a PITA and dry ice is supposed to make it a lot easier. I believe Lacquer thinner dissolves the residue once you get the big pieces off, but be safe the fumes are very bad for you. Take it from me, you have a long project in front of you so take every opportunity to do things the easy way. I'm three years into my own project and could have been a little smarter at a few points and saved some work. Wait until you start trying to get the undercoating off!
-
Yikes! I totally missed that at first. I was thinking, "What's he talking about?" Then all of the sudden I realized that wasn't light reflecting off the van.
-
-
Speakers?! If it were me I'd rustproof everything I could get to inside the holes since you have access and then weld in a sheet metal patch.
-
Thanks. I feel stupid for not looking there. I was so busy trying to find them at Belmetric and other places that I didn't try the obvious choice. Nice 370z BTW. I have a 350z NISMO and a 1976 280z (was running too... getting closer to running again).
-
Hi, could someone tell me the bolt size for the front fender to the body. It's a 10mm head and I think 6mm bolt. Fine threads?? I'm having a little trouble sourcing them. Any help is appreciated. My original hardware is pretty rusty and I'd rather replace it than get into tumbling and zinc plating them if I can help it.
-
All, thanks for the replies. I think that my pressure regulation is inadequate. I ordered a better regulator so I can get a consistent pressure setting at the gun. I'll find out if that is the issue in a couple days.
-
Hi, I'm having trouble getting the hang of setting up my HVLP gun. I sprayed some primer this weekend and wasn't happy with the results. I'm hoping someone here can help me out a little. I've watched to usual youtube videos and understand the controls, but because I'm inexperienced I don't think I know what the spray pattern should look like or what adjustments to make to get there. Pressure seems to be my biggest problem. I understand the concept of HVLP - high volume, low pressure. Some of the paints I'm using talk about pressure at the cap. There's no way that I'm aware of to measure this. Obviously there's a pressure drop in the gun. I notice, though that when I start to get to lower pressure at the gun (20 psi) the atomization is poor and the paint comes more in large globs than spray. Obviously this causes a poor finish. Can someone explain pressure at the gun vs. cap and give me some pointers about where you are setting your guns. I also think that my pressure reducing setup may be inadequate. What are you guys using for pressure regulation? FWIW - I am using a dessicant air dryer, filter and mixing the paint per manufacturer's recommendations. I'm also using the recommended tip size in my gun. So I think I'm good there.
-
A bit of advice on disassembly... No matter how well you think you are documenting you aren't. Get a bunch of ziplock bags, tape, a sharpie and a camera. Take tons of pictures and bag the parts by sub-assembly. Bags are cheap, readily available and digital photography is a piece of cake. My car spent 2 years on the rotisserie and memories get kinda vague in that time frame. Even though I thought I was doing a good job with documenting I was not. I've spent a lot of hours digging through boxes and assembling things only to take them apart later so I can put it back together right. I found that one of the best favors I did myself was to label and bag harware and then tape the bag of parts to what they held on. I wish I'd done more of that. Good luck!
-
Thanks Pat. Dry guide coat is what I was talking about. I'm going to try this stuff out and see: http://3mcollision.com/3m-dry-guide-coat-applicator-kit-05861.html
-
Dennis: Thanks for that. Excellent article. I'll give it a try.
-
Hi, I have a general question about filling. I watched a petty good Eastwood video on youtube and in the video the guy used something that looked like a dark powder for flaw detection (to show scratches and pinholes, etc). He never mentioned what he used and I wondered if any of you could make any recommendations. I don't want to use paint because you'd have to sand if off again if you needed more filler. Thanks!
-
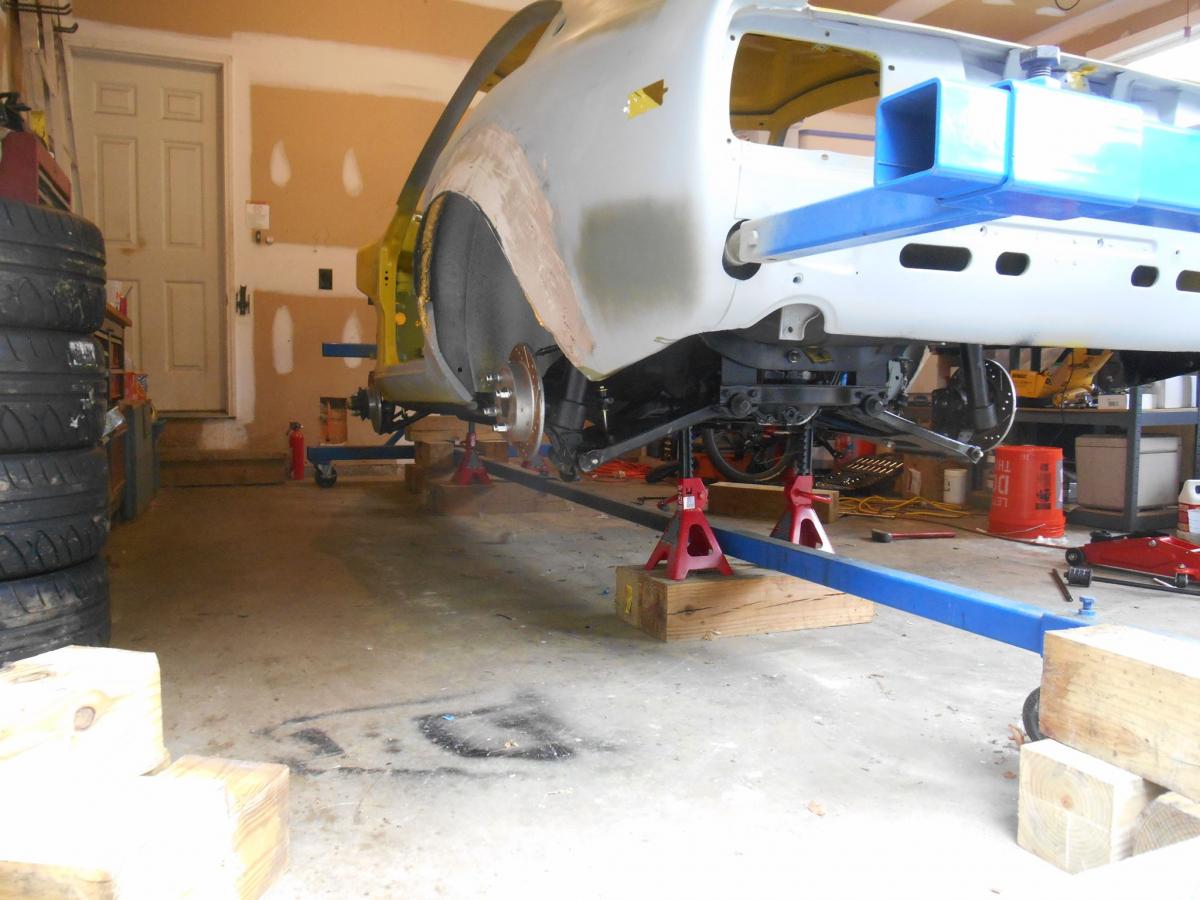
The battery tray is from Summit Racing. The original was rusted out and had to be removed to repair the firewall and inner fender. The motor will be the original L28 but it will be beefed up a little. Not sure about induction yet. I waffle between fuel injection and triples.
-
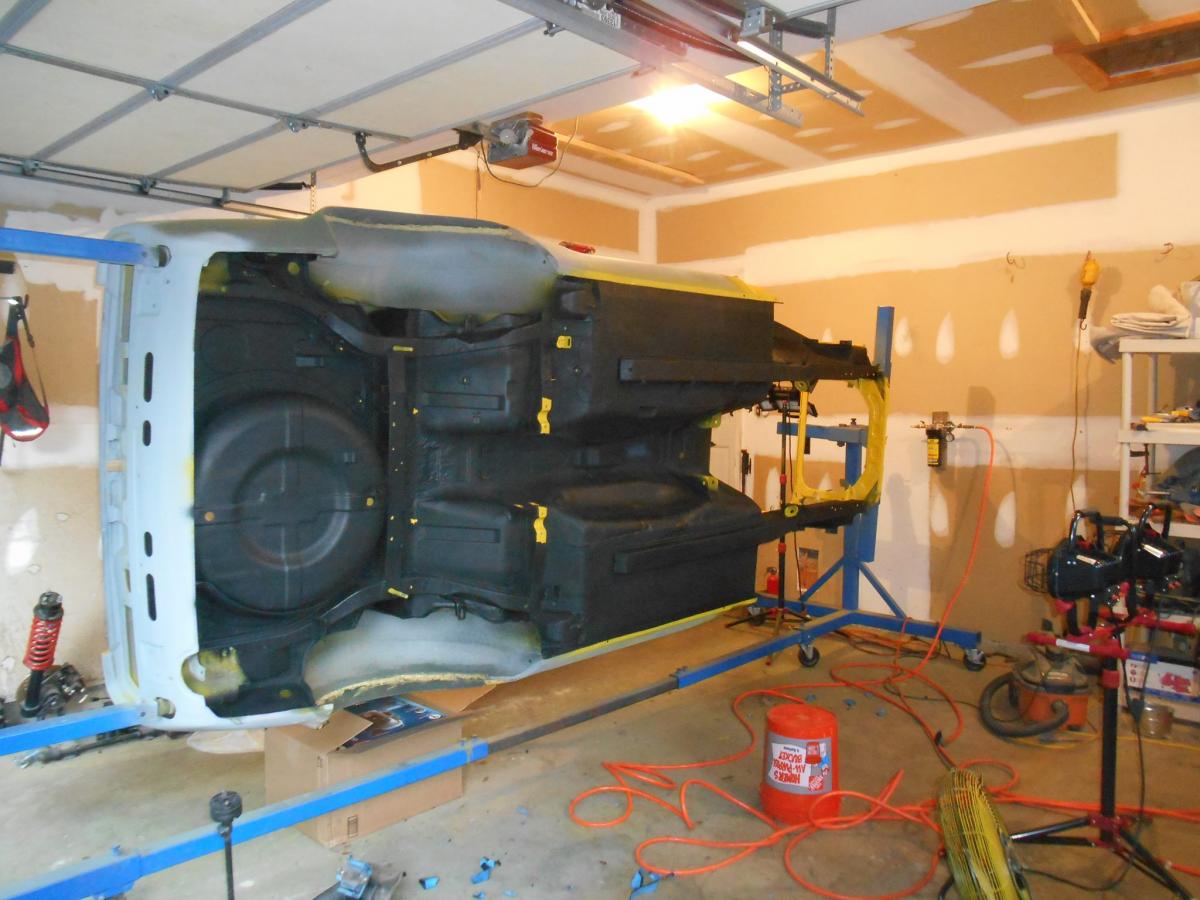
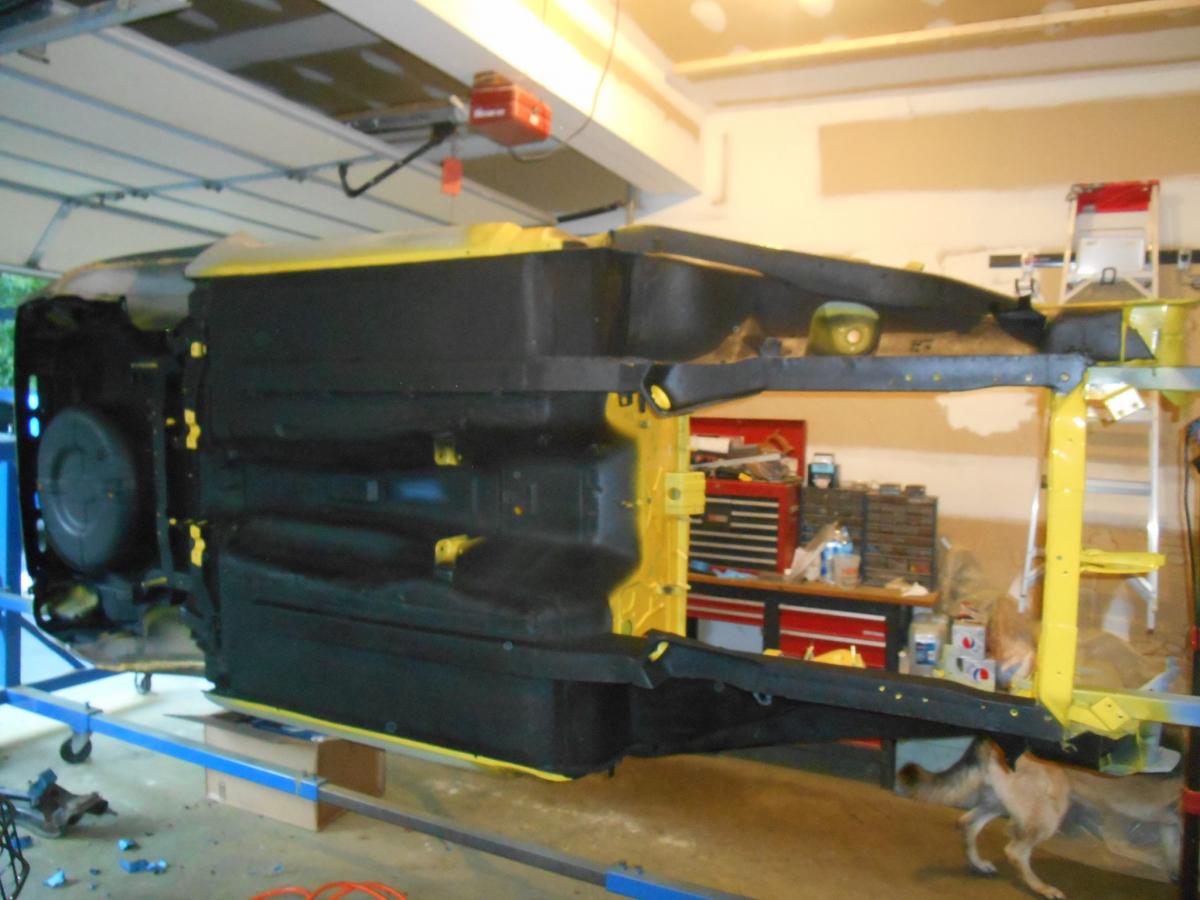
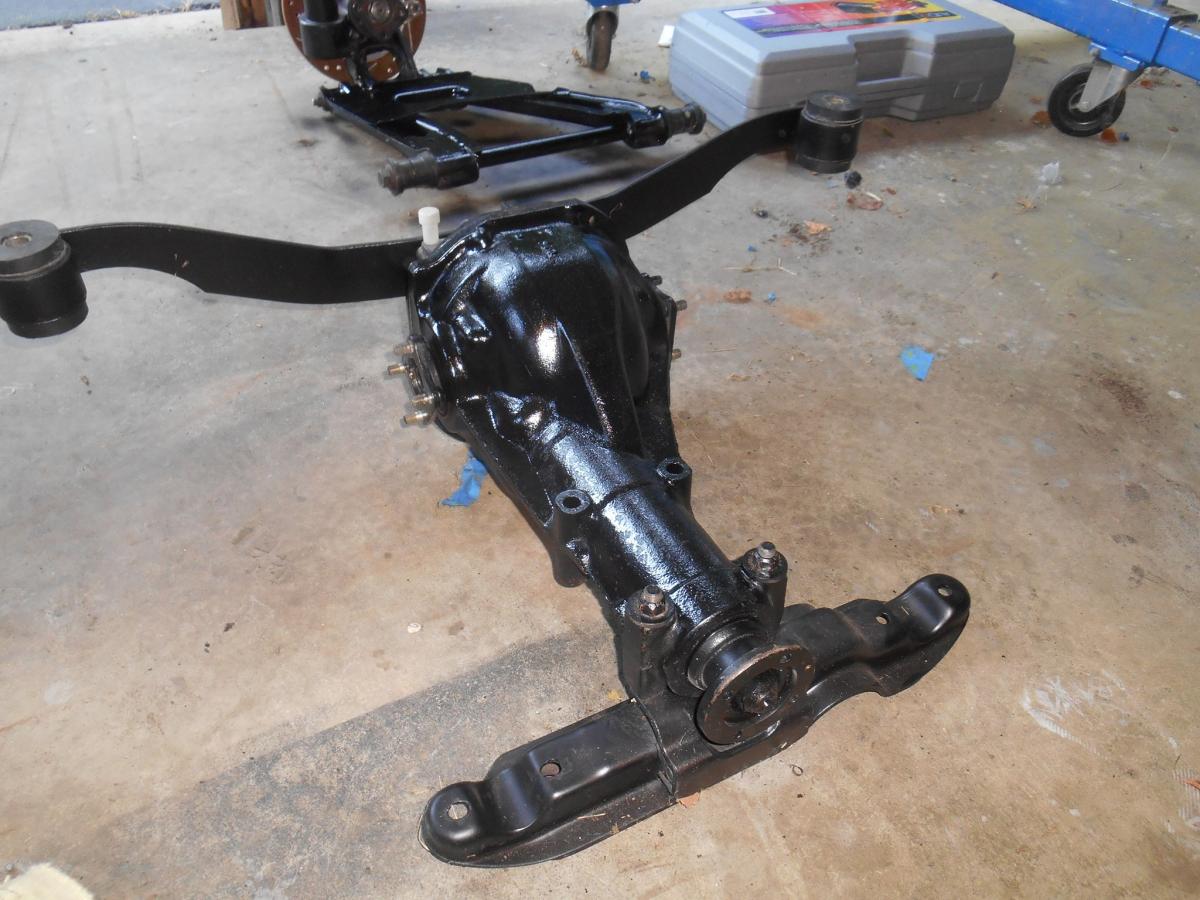
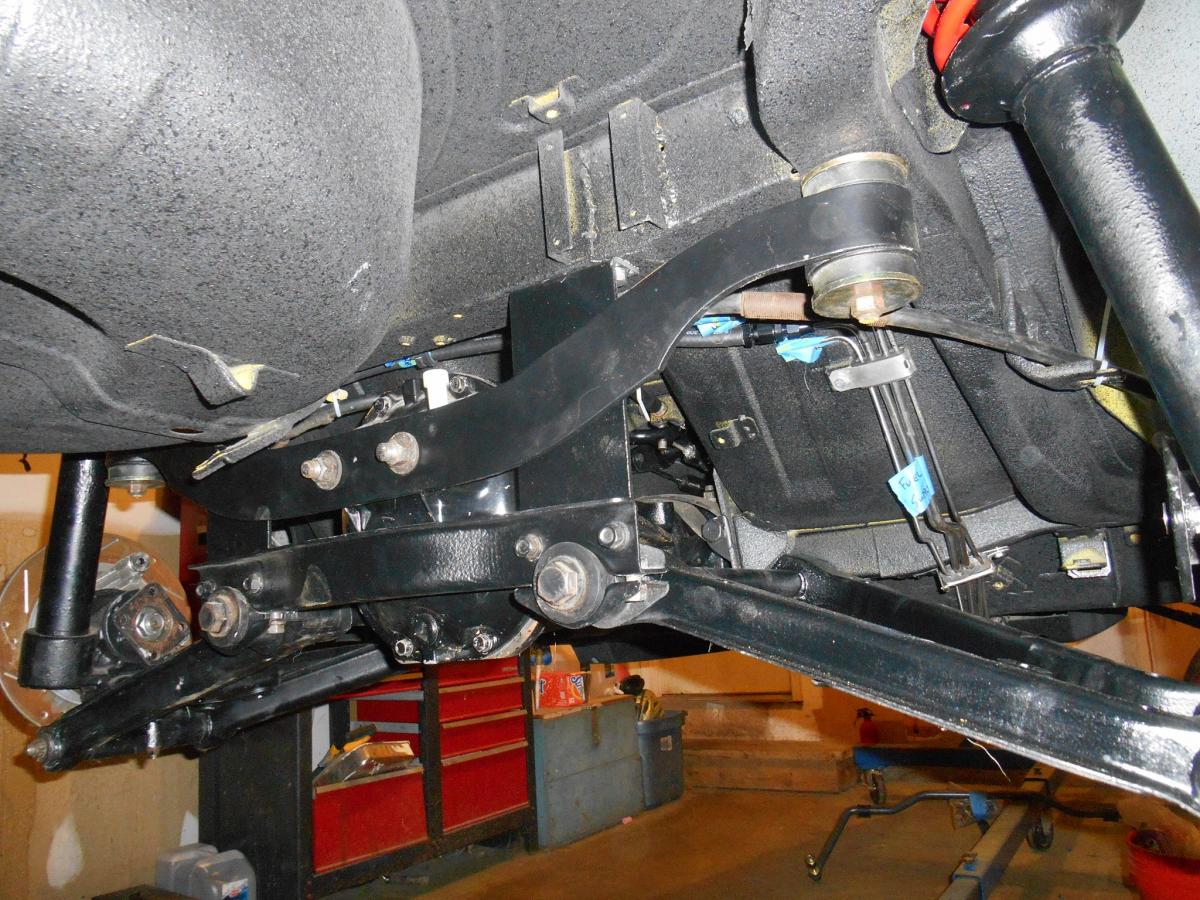
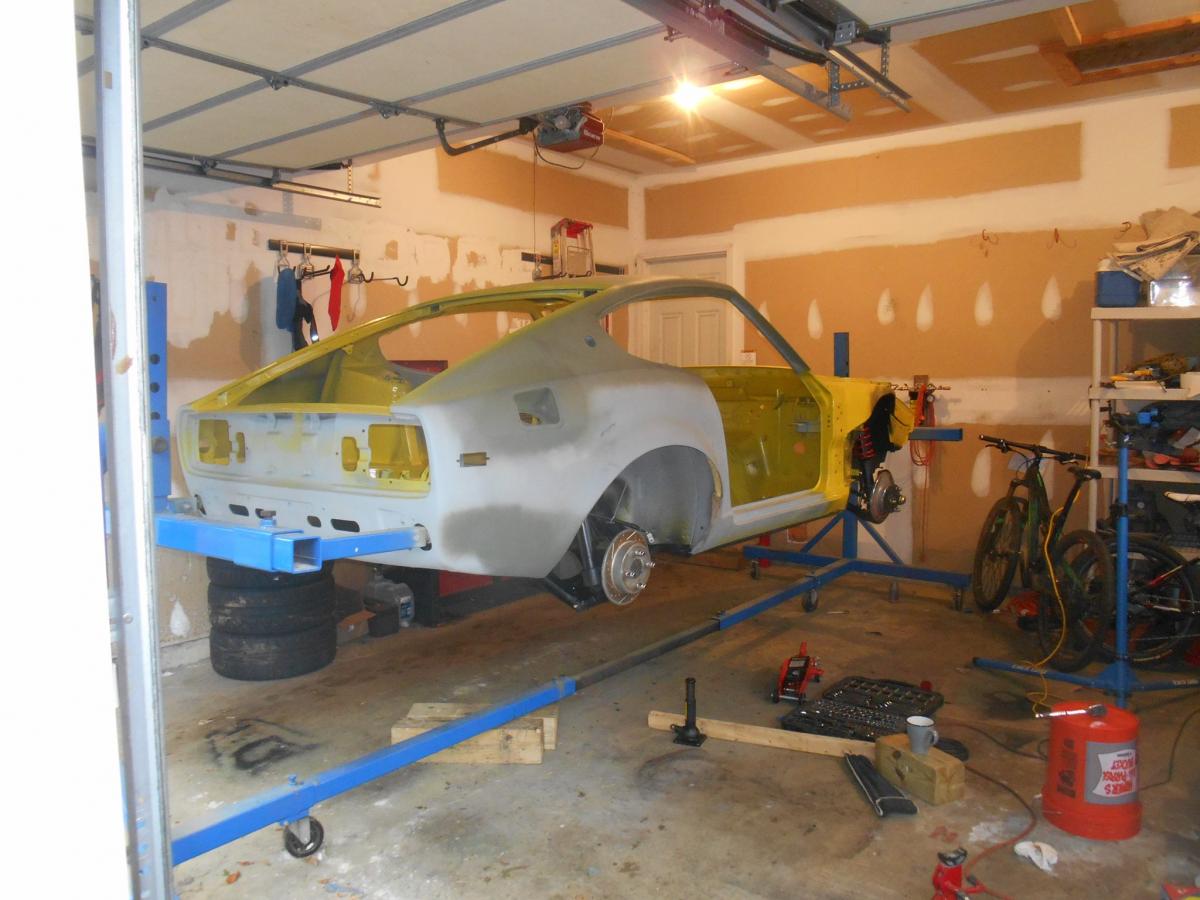
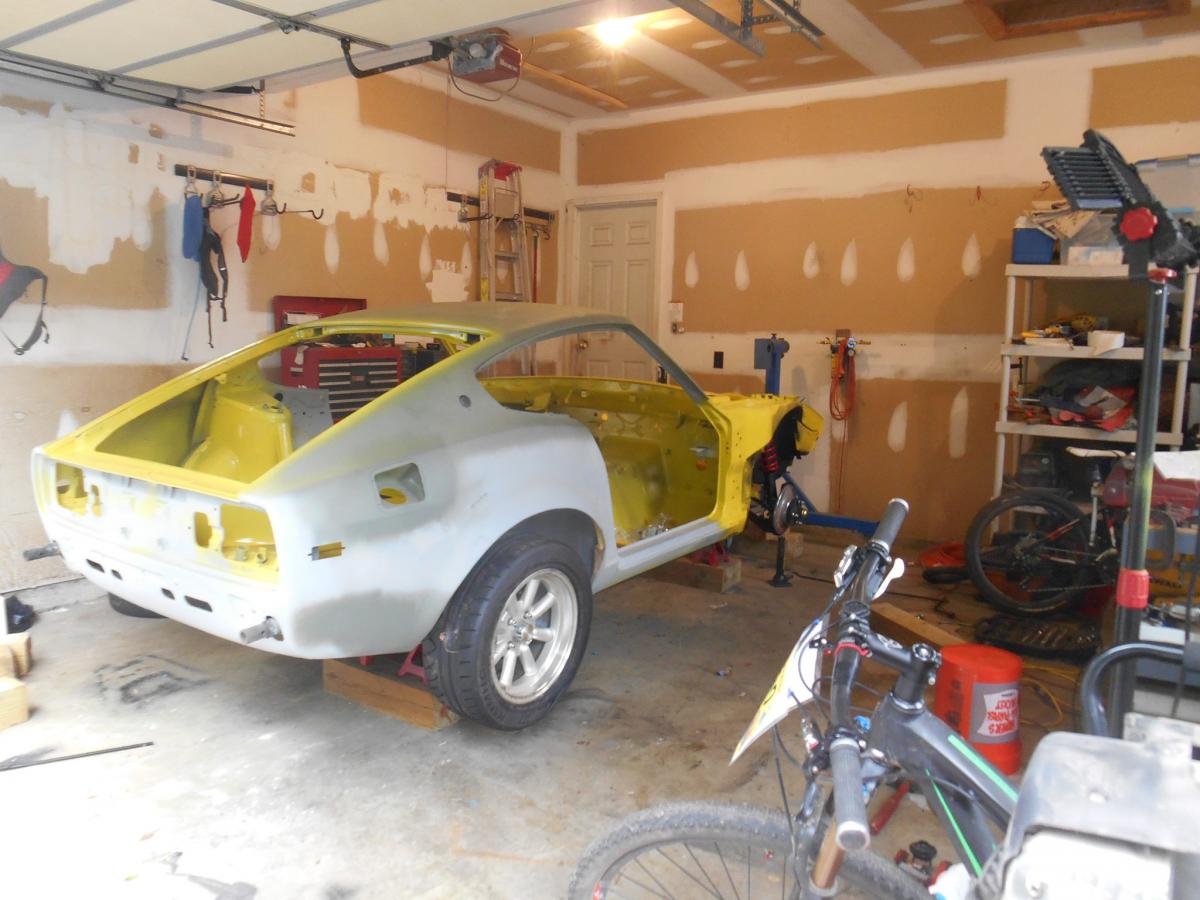
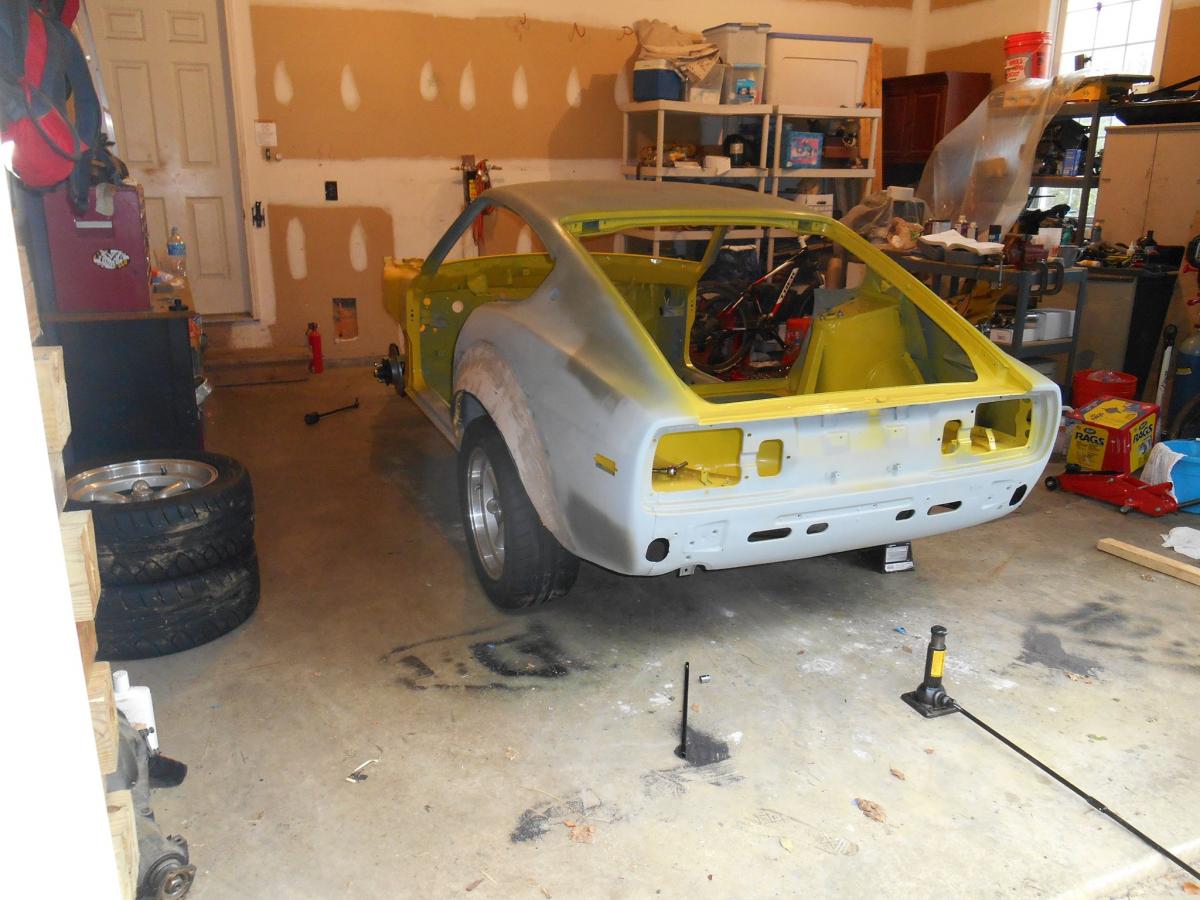
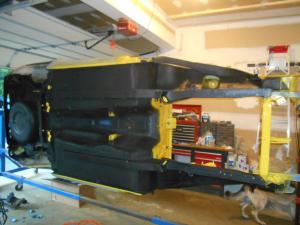
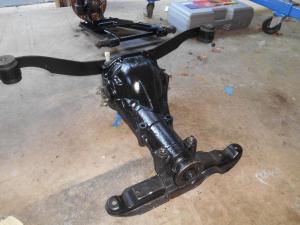
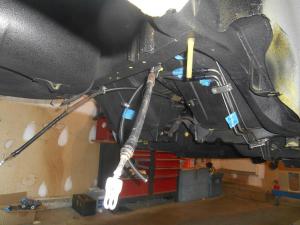
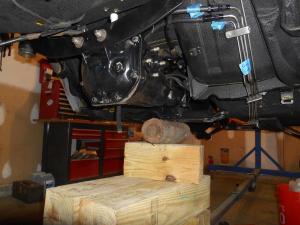
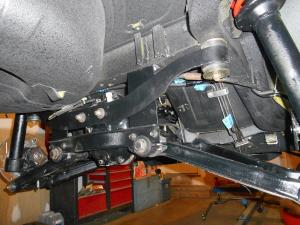
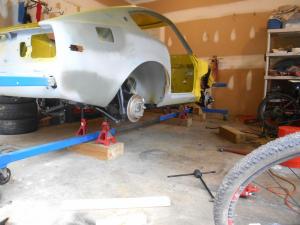
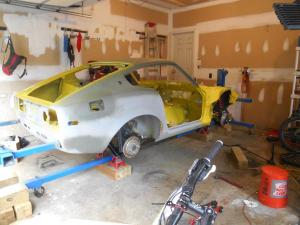
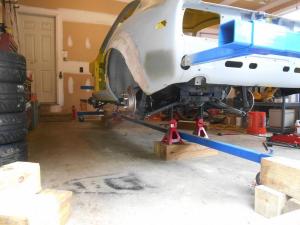
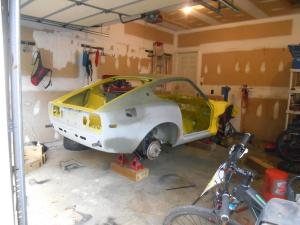
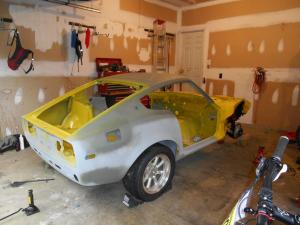
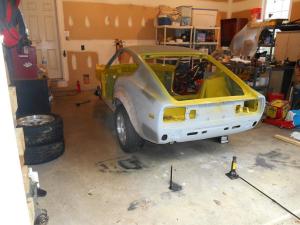
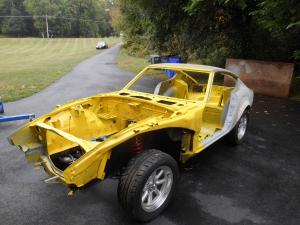
I'm going to skip a few steps here, but I thought that I would share a few pictures with my fellow z-car enthusiasts. About three years ago I bought my '76 280z which I paid too much for. The car turned into a basket case and went on a rotisserie 2 years ago for pretty extensive rust repairs (including floors and subframe on both sides). Finally, it is off the rotisserie and sitting on 4 wheels again. There is still a long way to go, but there is no denying that a milestone has been reached. Enjoy the photos.


-
Could anyone who has converted a 280z to triples share their fuel system with me. My main questions are did you use the fuel return line? Where did you return the fuel from? What type of regulator did you use? Did you change to a low pressure fuel pump? Thanks!