Everything posted by StephenJ
-
Air Vent not moving to Defrost
It was vacuum. I replaced the three original vacuum lines going to the white canister and solenoids. Heater turns on, air transfers to the defrost, and air is nice and hot. Thanks for the help.
-
Air Vent not moving to Defrost
There were definite splits on the vacuum lines going into the solenoids as well as to the white bottle. I am currently replacing the lines will give 'er a try in a few minutes.
-
Air Vent not moving to Defrost
Hello All. The winter here in Oregon is fast approaching and I find that the air will not change from the center exhaust to the defrost. Further the temp will not get warm. Here is what I have: - 76 280z - no leaks in the heater core - plenty of coolant - Original AC works...though doesn't seem as cold as last year (no biggie) - Had replace the heater control valve with a rebuild from The ZMan (original was leaking) When I turn on the air, it comes out the from. When I move the lever to Defrost, the air remains coming out the front. Moving the temp lever to Hot, the air remains coming out the front and does NOT warm up. I see a couple of splits in some of the vacuum lines, which I replace out today. However, I thought the change in air flow was all mechanical. Any thoughts on what it could be prior to tearing everything apart?? Thanks in advance.
-
Fuel Gauge Reads "Empty"
Thanks Steve. I imagine you are right to replace it. Would the proper test be to hook up a 9V battery to it with the positive going to green, neg going to black, and jump from yellow to black?
-
Fuel Gauge Reads "Empty"
Though a faulty gauge is not altogether urgent, my wife thought it would be good to have it working before our trip to the coast next week. Have just abount finished restoring Zoey (our 76 280Z). When I purchased her, the gauge would work periodically. Now, it just stays all the way to the left. Am looking for help on how to diagnose the issue. Here is what I have done: 1. Replace the fuel sending unit with a new OEM unit. (no help) 2. Removed the gauge and inspected the connections...and also cleaned the points. 3. Connected a 9-volt battery (+ to yellow and - to black). The needle moved slowly to the "E", but not any further. I thought that perhaps that was good...and that there simply was not enough amperage to move it further. 4. Reconnected the gauge and turned key to "On"...moved just a smidge...but not even to the "E". 5. Disconnected the connector at the fuel sender and jumped the black to the yellow wire. Barely to the "E". 5. I get a strong buzz on my craftsman volt/ohm multimeter when testing for continuity from the black ground wire to the frame. 6. Not sure this would be accurate, but checked for voltage on the yellow wire at both the meter and at the sensor connector...there is NO voltage. 7. Checked the fuses...all are good. 8. Spinkled mojo dust and rattled the chicken bones...no help. Any thoughts out there in how to test the gauge? Can I hook up 12vdc to the yellow and ground the black wire...or will that blow the thing? Or should there be voltage at the yellow wire? Looking at the FSM, I see no voltage going there. All other gauges work...except the clock (of course).
-
Door Weatherstrip Installation
Btw - where can I get more information on the Medford show for the 25th?
-
Door Weatherstrip Installation
No apology needed. I took the advise of this awesome group....and works perfect. The doors close well....just a bit tight, but not to tight where I have to slam the door. Wiped the edges of the weatherstrip down with a shot of silicone spray. ...now onto applying sound deadener (Damplifier and Sound Deadener Showdown).
-
Door Weatherstrip Installation
I checked around the other posts...but did not see an answer. I purchased the door weatherstrip from BD. It has the built in welt. Do I need to use adhesive when attaching? The strip looks as if it would pinch onto the metal. Thanks!
-
Anyone know what the heater coil thing is in the heater unit?
Thanks folks. It is a set of three little coils about 1.5 inches long right next to each other. They were not riveted in, rather had two screws holding in. When I say fried, I mean that I melted the housing and crispified the wires where they attach to to coils.
-
Anyone know what the heater coil thing is in the heater unit?
I accidently plug the wrong connector on the fan unit (6 wires) and fried the coil thingy. Any one know what it does? Also, any idea where I can get another one?
-
1978 Datsun 280Z w/5 speed in NorCal/Bay Area California with smog issues and other r
Hahahaha. I'm sorry. All I can do is laugh. I've earned the right...with replacing an fixing so many little items. It's almost like fixing up your home, it never ends. It starts out with fixing a heater contrl valve.....and before you know it, you have entire interior of the car ripped out. Honestly though, isn't that part of the fun? Hahahaha.
-
Hood Closing Alignment
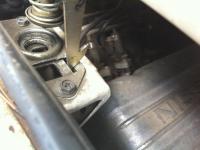
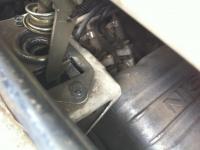
Just posting a follow up. I place a small flat piece of metal under the spring which extended under the pivoting latch. That straightened it right out. Works perfect now. With the amount of frustration that it brought, I can do nothing but go wild with a simple fix. Thanks again.
-
Introduction
I could smell a bit of exhaust in the morning when letting it warm up. I replaced the rear hatch seals.....no more smell.
-
Carpet Kit and Speaker Panel
You have come a long way on your Z Tavel'n Man. The speaker box looks to fit perfectly.
-
Carpet Kit and Speaker Panel
I'm afraid to ask on the LSD side...
-
Carpet Kit and Speaker Panel
Thanks all. Great pic on the box. I am going to order the carpet from Z Specialties tomorrow. Also, he has a slightly modified speaker box that he is beginning to sell. I'll give 'er a try and post some pics. Stephen
-
Carpet Kit and Speaker Panel
Thanks Chris. Does the box span the whole width of the back?
-
Carpet Kit and Speaker Panel
Does anyone have experience with the carpet kits from the Datsun Store / z Specialties? http://www.datsunstore.com They have a 13 piece sectional carpet that I am thinking about buying. Also, while replacing the carpet, thought I would add a new audio system. (Alpine deck, Boston Accutics Amp, Infinity 3-way 6x9s) I noticed that MSA has a 6x9 speaker panel that replaces the tail light panel. Has anyone seen these panels? If so, do they work well? Do they look good? Are they fair quality?
-
Hood Closing Alignment
You know...that makes the most sense. That wold explain why EVERYTHING else looks fine (hood alighment, adjustments to the latch and keep, etc.). I bet there was stop. I would prefer to have the latch...just in case I do go 100mph backwards. I think I will check out another, or simply create my own stop point. WELL DONE!!!
-
Hood Closing Alignment
Thank Michael. Mine looks just the same....but dirtier. I checked the metal that the latch is attached to on the hood...and see that it is not bent. Oh well. If this is the most of my problems, I have it made.
-
Hood Closing Alignment
I don't think that it is...but will check tonight. I may have missed it when putting it back on. EScanlon also mentioned it being bent I'll let you know what it looks like. Stephen
-
Hood Closing Alignment
Matt- thanks. If there is not much movement in the hood by loosening those bolts, then I would agree that maybe I should not do it. It really is not a big deal...just looking to fine-tune the closure. Thanks All!
-
Hood Closing Alignment
Meant to add: It does not appear to be installed at an angle. I did take both pieces off (hood and body) just to clean. reinstalled, but same issue. I moved the latch as far toward the cab as I could, and the catch as far toward the nose as I could. What you see in the pic is each at its furtherst point. Leads me to wonder if I should adjust the hood hinges that attach to the body. Thoughts?
-
Hood Closing Alignment
I tried adjusting the catch on the firewall...but it would not move out far enough. I have included pics that help show the problem. Pic "As-Is" shows how the latch is hitting the catch. Pic "S/B" shows where I think it should be if....without me having to pull on it. Again, this pin hits perfectly.
-
Hood Closing Alignment
Thanks EScanlon. The Saftey catch latch (fixed to the hood) is hitting the catch on the fire wall. The latch, as you know, is angled so that as it closed on the catch, it pushes back until the hood closes to the 1-1/2 in mark, or so. However, in my case, it seems that the latch is too forward, making the "point" of the latch hit the catch. Isn't that confusint to say. I'll try to get some picks tomorrow. The pin is going in fine, and the hood releases fine. Simply put, I cannot simply slam the hood shut from an open position. I must pull the latch back so that it does not hit the catch...then I push the hood completely closed.


