Willoughby Z
Free Member
-
Joined
-
Last visited
Everything posted by Willoughby Z
-
 Sent PM to your (posted) email -Kris
 -
I stand corrected. It is in fact, M8x1.25. I need better glasses or bigger numbers on the tap and die set.
-
Also, use a thin M8 jam nut under the knob.
-
I have a '77/ 4-speed manual. The shift rod is M8-1.5
-
See page 2... http://www.classiczcars.com/forums/showthread.php?39425-AC-Expansion-Valve-Repair-and-Setting
-
I did receive it. I'm satisfied and please accept my apologies for not confirming receipt. I appreciate the quick offer and shipping.
-
Removed remnants of LH bumper end. Checked out the mis-alignment of headlight bucket-inside edge next to the grille opening is not vertical. Top, inside corner adjacent to hood is off- 1/8 inch tighter than the passenger side. The angled sideswipe sledge-hammered the bumper and shocks sideways 7/8 of an inch towards the passenger side. The shocks aren't bent, appears the frame/sheet metal where the LH shock is bolted is tweaked, causing the turn signal to be angled off the horizontal and the bucket to be angled off the vertical. This is gonna get expensive...
-
I found a pricey one on eBay ( compared to Black Gold Man's offer but it was condition unknown Yeah, you're probably correct that it isn't real rubber. Definitely not resin, i.e. hard. Someone on this site probable knows more about the composition of the materials of the 70's than I do. FWIW, years ago, I repaired a split in the bellows using a material that was rubber-like, flexible,black-don't think it was actually silicone. Used a fabric patch from the back, like I was doing a fiberglass job. That way, I wasn't relying on the silicone type material for strength and the outside appearance didn't show more than a seam, in case UV and weathering changed the color of the patch material. Worked pretty good for years (not sure beyond that, sold it).
-
Potentially damaging and possibly dangerous, given the high rev. nature of an L engine, IMO. I've done this- rebuild an original (33 years/ 110k)-tedious but it lasted a few years. http://www.hammondsplains.com/newtechtips/cooling/index.htm And I've done this, Bap-Geon (HAYDEN) FAN CLUTCH 2560 / alt. for: 130-0086 (Beck-Arnley) $43.01
-
No,'5th' said: "As for the harness, I pull the gromets back into the cabin and bag and mask the harness and suspend the bag between the strut towers and paint around it, just my 2 cents." By pushing/pulling grommets so that they are inside the cabin, the firewall can be painted 100% around the edges that would have been covered by rubber. Mask and suspend the harness/wires in the center of every hole-a little bit of puppetry- I've used a very stiff, thin rod across strut tower, as 5th said, with strings supporting/tugging/suspending the masked/taped wires and harness. BTW, I find masking wires with painters tape works a lot better if you run the tape along the length-don't spiral!. Takes forever to remove!
-
Thanks! That's a quick reply and a generous offer... I'll accept the left end rubber piece-dependent on the condition once you have a chance to evaluate it. The bumper is OK, loosened the shock and lowered the bumper- only a 1/4 inch high- the headlamp bucket is misaligned at the inner /front/ bottom, towards the turn signal. I think there is a little flex in the sheet metal around the hood hinge. I'll PM you regarding payment/shipping. Kris I just removed the damaged rubber, pretty easy-12mm deep-well socket, three nuts/ one bolt I'm trying to avoid stocking parts that I don't need
-
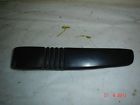
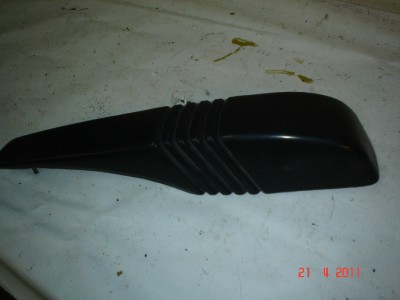
Definitely rubber- metal plate/bolt(s) inside

-
I posted a WTB in the Classified- not much confidence, since the form to be filled out is for items offered FS. Back story is that a young woman side-swiped our car while pulling into a parking space in front of us. Parallel, street parking. She went in nose first, catching the left end front bumper with her right rear tire. :stupid: Thank the stars there was no damage to the body work, parking lamp, etc. The bumper is higher by a 1/2 inch or so. Hopefully, the mount/shock isn't bent. Maybe it can be re-positioned. Bumper could be torqued. Either part is more available than the the rubber piece- which is shredded! :mad: Perhaps someone who has done a bumper mod or a donor car or or just needs to clean out their stuff? I've already checked the usual suppliers- it's a NLA item. Fingers crossed. Thanks, Kris
-
Definitely the smell of pig...
-
Vacuum leak - very likely in the small tubing on or near the mag valves, vacuum canister (aka 'football'). Cuts in the tubing between canister and the mag valves and, and ultimately, to the selector switch/valve (behind center dash) would mean no control of doors (floor/defrost/dash) or mode (heat/ac/vent). And easier to find, being under the hood, rather than inside the dash . Default is air flow from center vents. Unless there was a mechanical failure (diaphragm valve/return spring, etc.), my bet is a cut or split in the tubing. Every one that I have found is near the end of a tube where it slips over a pipette or a 'T'.
-
If you can't find replacements, try Plasti Dip.
-
Maybe this will help. http://www.precisionballs.com/ball_material_selection.htm#chromesteel
-
Without a bumper, the locations are limited. I would think the grill area, which is the most obvious, would potentially block air flow. Maybe not. Below the grill, ground clearance issues. Personally, I dislike the look of a plate on the front of the Z, particularly being off-center. I wish Virginia didn't require front plates.
-
Try typing "replacing seat foam" in the Search box. There many previous threads on the subject, perhaps you'll find an answer to your question there.
-
Maybe during the wire change, the cap/rotor became dislodged. It happens. There are wires and connectors in the distributor area that can be disturbed, such as coolant sensor, thermo-time, etc. The point is- if everything was fine, excepting the coil wire, and then you changed something (the wire set) and now there is a new problem, you have to troubleshoot the problem from scratch, as if you have a no-start engine. Fuel,fire,air. Clean connections. Good grounds. Properly installed and adjusted components. Can't get a wrinkle out carpet without pushing it to the edge 'til it's gone...
-
Stating the obvious here- verify cap/wire/plug firing order. Connection/seating won't help if the firing order is off.
-
My thought is that it maybe possible that the problem is with the original dash, rather than the cap. Posters may provide some input that there have been fitment issues with full dash caps but I'm thinking that because the misalignment is around the knob area, which is very far to the left and lower end of the dash, that maybe there was body damage to the car in the door hinge/ frame area that was repaired and now, undetectable. If there was damage to the door frame and the dash assembly frame was pushed or bent towards the center of the car or upwards? Not knowing the geometry of the misalignment, this maybe way off the mark for figuring out a solution. It could as simple that a PO had the dash out of the car and did not get it reinstalled properly. Perhaps the very-uncomfortable-human-origami-lay-on-your-back-with-flashlight inspection of the dash frame and attachment points may reveal a clue. Or everyone will jump in and tell us "Yes, the dash caps don't fit" -kdm
-
I had saved this link for future use: http://www.customcoatings.net/ I have yet to use or even inquire about their services and prices.
-
In the same boat here- good motor unit, broken 'string'/mast. Some punk broke mine off while it was parked at night out in public, stupid me for leaving it extended. Can't say how the plastic is attached in the upper section, probably doesn't matter, I think it would impossible to repair the mast sections. I have disassembled mine and found that there is a small metal ferrule with a very small screw that acts a keeper that fits into a slot in the wheel. It'll make more sense when you take it apart, which isn't hard to do, just lots of parts so keep track of order/orientation. Trimmer string sounds like a great idea, the ferrule could re-used, even if it's a micro-surgery process. I'm not sure about grafting or splicing the plastic rods together, there are pastic welding tools around, not sure if it's an appropriate solution. My problem was findind an undamaged sectional mast and how to remove the lower mast section from the main body, even if I could find one. I did order and receive one (actually two, one as a back-up) from AntennaX that was supposed to work for several years of Zs but it was only similar. The plastic 'string' was not smooth but had teeth and was a different diameter. So I returned them. For the moment, I have a short, black rubber, fixed aftermarket unit in place until I find the good mast/bad motor unicorn to marry with my broken mast/good motor unit.
-
Member: pczbh Total Posts:4,294,967,295 Posts Per Day:84,420,943.67 Visitor Messages Total Messages:0 Most Recent Message:Never