240 in OZ
Free Member
-
Joined
-
Last visited
Everything posted by 240 in OZ
-
Hey Simon You bumped the pic of my car! Regards Joseph
-
There should be four bolts, 4 nuts and four washers holding the half shaft to the hub assembly. Sounds like yours has had some "modification". Regards Joseph
-
I have heard that you can remove the glove box lining by pushing it towards the firewall and it comes out undamaged.
-
6 (last)
-
5

-
4

-
3
-
2

-
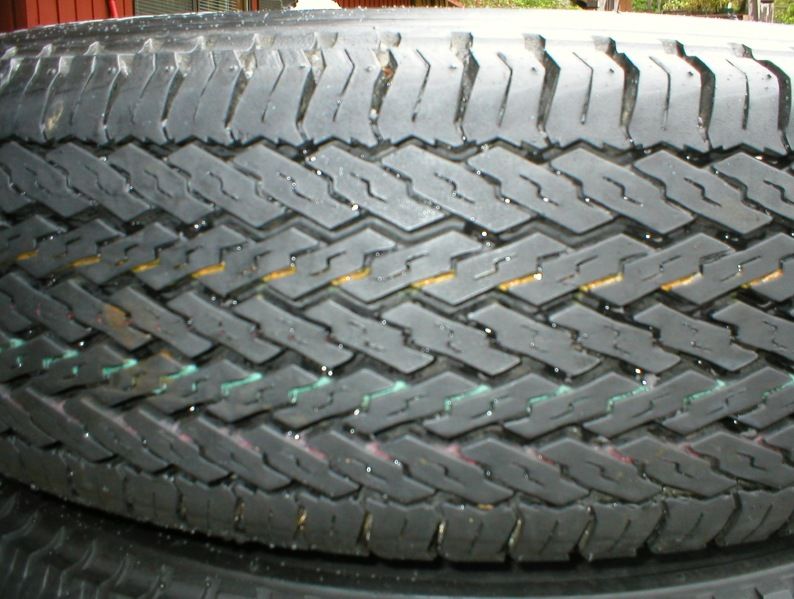
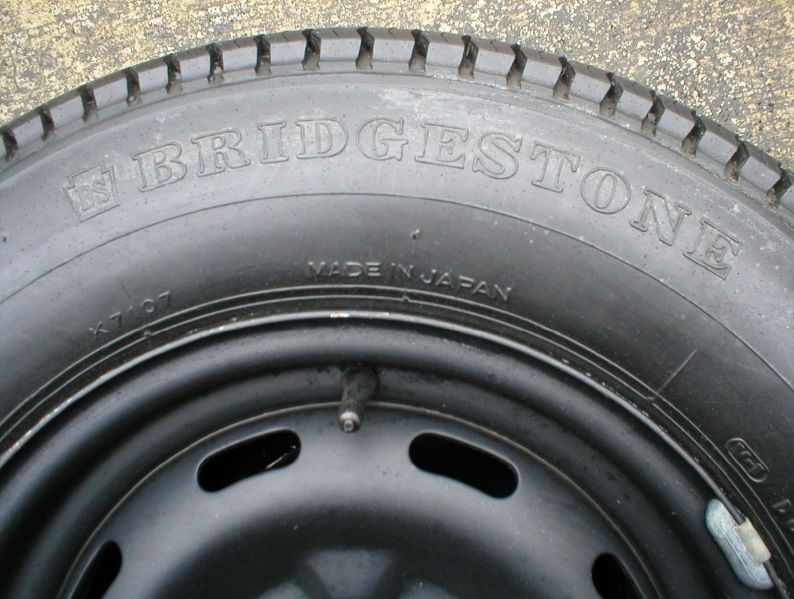
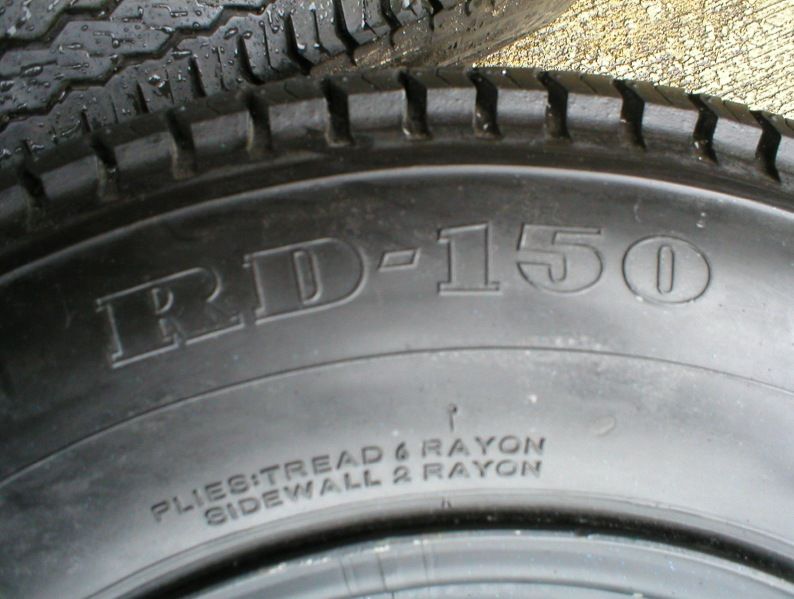
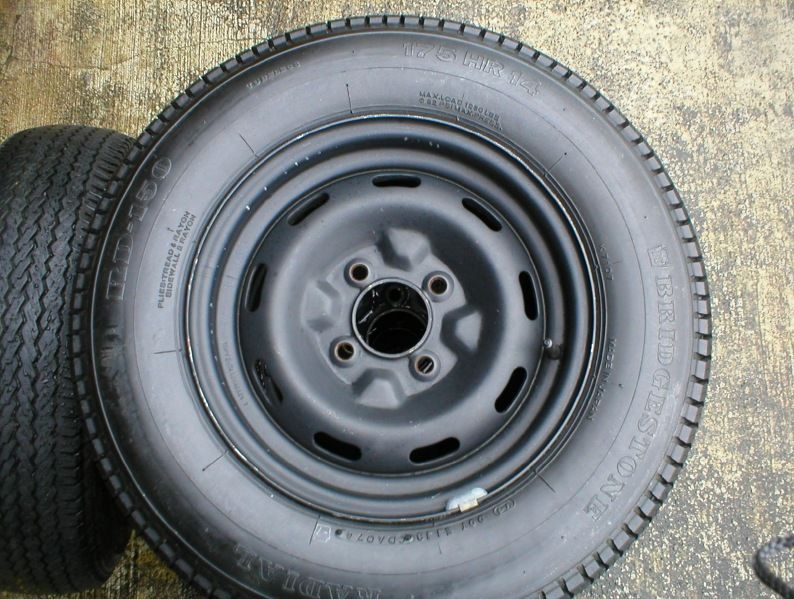
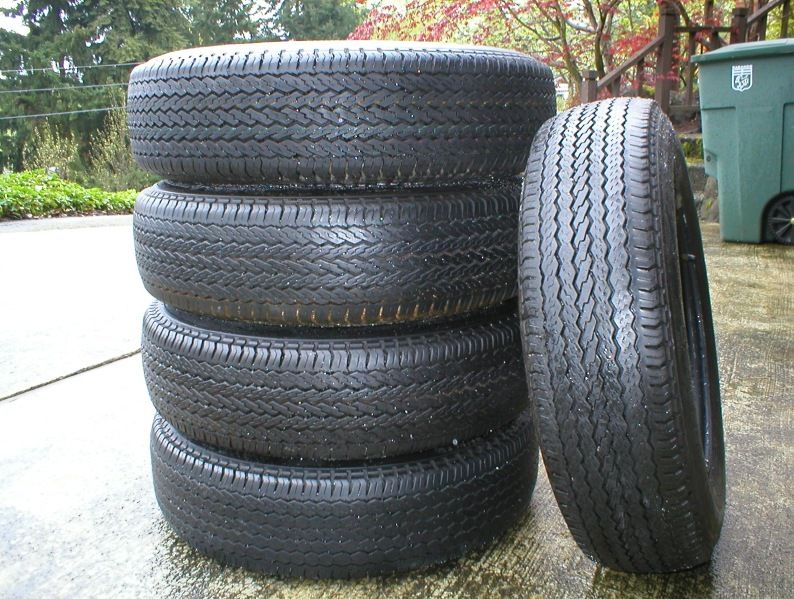
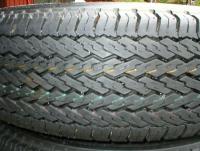
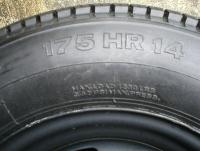
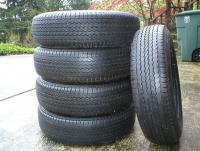
Kats/all I saved the following pictures from an ebay auction some time back. They depict original USA spec wheels and tires for the 240z. Regards Joseph
-
I just had a look at the pic of the "new" splash pan that Carl Beck posted and wanted to point out that the one that I have on my RHD specification car is different to the one seen in the picture. Mine is basically identical in shape, size and mounting but it doesnt have the holes in it that are seen in the one in the picture to the rear edge of the pan. Maybe different markets got different types of splash pans and hence different colours? Just a thought. Regards Joseph
-
Its a pre-production model and the final badging would have still to be finalised at the stage the photos were taken. Joseph
-
Maybe Mr. Matsuo should learn how to use ebay ;>
-
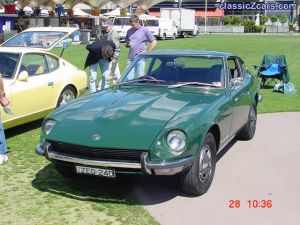 Does anyone know who owns this?
 -
This is turning into a great discussion thread. Some more information: The 240z scale model produced by Franklin Mint a few years ago has a splash pan fitted and it is black. This is meant to be identical to a factory produced car. Saying this though the exhaust system is also painted silver on the model and it was black from the factory. From memory (Ill have to check tonight when I get home) there is a white JDM Fairlady Z on the cover of Brian Longs book and I believe that you can pick up that it has a splash pan and it is plain pressed steel, not painted; someone may be able to verify this before I can. My source stated in an email to me that he has three splash pans, one which came on a car he bought new from the factory in 1970, one from a 1969 car and one that he bought new over the Nissan/Datsun parts counter and they are all plain pressed metal, not painted. It is also my understanding that they came fitted from the factory in the USA on the 1970 model cars. They were then discontinued from the factory and re-introduced as factory fitted in 1973 when the bad carbs were put on the cars and they were used to aid cooling of the engine. However, they were available over the parts counter throughout the production run. Regards Joseph
-
2Many No probs, just wanted to clear it up for the record as I would hate for hundreds of people to go out and start to paint their stone/splash pans black ;> I just hope that the original poster of the query hasnt been able to get to the auto parts store as yet to pick up their rattle can of gloss black. Later Joseph
-
2Many Like I said I have it on good authority that they were just plain pressed steel from the factory. I think that the later ones (ie for the 260z/280z) were black as I use to own a 75 260z (yes, they exist here in Australia) and it had one that was black. The person I got the info from use to work for Datsun back in the 70's and purchased one over the parts counter for his car. I believe that the 240z used for the photos in the official Nissan workshop manual is a LHD USA specification car. If you have a manual take a look at the towing section which is within the first few pages and also the front suspension section and there is some good pics in there. Wish I had a pic to post but unfortunately I dont. Mine is currently painted black and I plan to strip it and clear coat it for the original look. Please post any more info that you find. At this stage Im happy to stick with the plain pressed steel finish.
-
Hey Guys Sorry, both incorrect. It was plain steel pressed and wasnt painted at all. I have this on good authority. If you have a workshop manual and you look through the pics in there you will see that it is a very light colour (ie black and white photos) which indicates to me that the info I have is correct. Just strip it down and clear coat it for the original look. Sorry to go against the concensus on this one. Hope this helps you out. Regards Joseph
-
Steve I understand your current mission and really encourage you to keep up the recording of the production dates of the Aussie 240z cars. But, as this car is not mine, I dont feel right about posting the details of the VIN and the engine number. I only remember that the VIN# was 14xx. The car was white exterior with a black interior, originally an auto. It also had a black vinyl roof. The car has been completely stripped and is going to be used in Targa Tasmania next year. It was a real shame to see it the way I did as it was a totally original car, original elderly lady owner, under 70k miles on it, minimal rust, etc. I know I shed a few tears over it. Regards Joseph
-
Just to add a little more confusion to the mix, my car is RHD VIN#1282 and it has been dated as 09/71 production from the engine number and comparison with USA numbers. I have recently got some parts from a guy who is wrecking out RHD VIN#14xx and the engine number on this car is a lower number than mine.It was complianced in 10/71. Also FWIW it was originally an auto. Regards Joseph
-
Andrew Hey. Im currently going through the same problem with my mirror, but interestingly (or not !) mine had the reverse problem of yours, ie the movement had seized up and someone has tried to adjust the mirror and the thin stainless steel mirror body has dented. Im told that this is a common problem with these mirrors. I attempted to carefully remove the mirror glass with a flat bladed knife, but the glass broke. I also got a few small kinks in the stainless steel trim. I am currently lost with what to do with mine. Im not sure where to take it to to have the kinks removed and I cannot see how to get them out by myself. If anyone has any ideas, please let me know. I assume that the mirror will be relatively easy to attain from a glass place as I have the old one, albeit in two pieces ;> Also not sure how to go about fitting the glass and bending the stainless steel lip around the mirror. I spoke with someone here in Australia a while back who had the same problem as me. They decided to break the glass rather than try and remove it. They removed the dent in the stainless steel mirror body and then took it to a glass place and had them cut a piece of mirror which was slightly smaller than the original and could fit into the body without the need to bend the lip back. They then glued the mirror in place. They were happy with the result, I never saw the finished mirror so cannot comment on the final appearance. Again if anyone has any ideas please post them as Im keen to get the mirror fitted on the car. Regards Joseph
-
Some also on ebay
-
Hello After experiencing and repairing water leaks in both my old 75 260z 2+2 and my current 71 240z I think that i have the necessary experience to offer some assistance on this matter. The key to tracing waterleaks is determining exactly what becomes wet in the footwells. There are two scenarios: (1) The tops of the floor mats are wet and have soaked completely through from the top side; (2) Only the undersides of the floor mats are wet, and the tops are bone dry. Scenario (1) was experienced by myself in my old 2+2. After close inspection done by sitting in the car and someone hosing it down I determined that I has a small leak in the windshield weatherstrip, between the glass and the rubber on either lower side of the screen. I bought a windscreen sealant from the parts store and resealed it myself. I used the complete tube doing both the front and rear screen; had a heck of a time with the clean up but got there in the end. I thought that was it, but it wasnt. I was still getting a little in there. Decided to pull the upper cowl/scuttle panel for a closer look. I found that the fresh air "chimney" for want of a better description was rusted through where it meets the base of the scuttle panel and I also found two small holes. I sealed them temporary with slilcon and all was well after that. Another potential source of scenario (1) may be the seam sealer used by the factory in this area may be dry and cracked and allowing water to leak in there, but this wasnt the case with mine. The drain hoses that the dude in NZ mentioned may also be split, so look at them closely. To try and stem the cause of scenario (1) I suggest to fellow owners that they remove the upper scuttle/cowl panel and clean out the cowl every 6 months or so. It is surprising just the amount of crud and muck that accumulates in there. Scenario (2) was experienced a few years back when I first got my 240z. It really drove me crazy. The top sides of the floor mats would be bone dry, yet the undersides of them and the floor itself was always wet after washing the car. I discovered after much frustration that the leak was being caused by two problems. The first was the windshield weatherstrip where the rubber joins the body on the roof edge. Water was getting in there, running out to the sides. down the roof pillars (A pillars) and behind the jute padding on the firewall and underneath the floor mats and soaking them from the bottom upwards. I resealed the screen and that stopped 90% of the problem. I then discovered that water was getting in between the door seal and the door jamb. It was getting in the front top edge of the door, where the little stubby weatherstrip is, running around the periphery of the door to the base and then dripping down to the floor underneath the mat and again soaking it from the bottom upwards. I havent stopped this 100% as yet but feel with new weatherstrips on the top edges of the doors it will be cured. You could always caulk them temporary to try and stop the water. One suggested cure for this problem is not to drive the car in the rain and was it by hand using the two bucket method rather than with a hose. I hope this sheds some pretty common water leaking problems on the z car and saves someone from going insane trying to track them down.
-
Post engine number for comparison, it cannot be dated via VIN#.
-
Zach You must have a 72 model year car as the dash was changed to incorporate the cigarette lighter in the dash.
-
The hole above the hazard switch was generally cut out by the factory to install the optional driving light operational switch. The early 69 cars didnt have any rear defroster bars on the rear hatch glass.