cgsheen1
Free Member
-
Joined
-
Last visited
Everything posted by cgsheen1
-
 I bought the Newark Auto carpet kit for my 260Z and I'm very pleased with it. It's loop and they had two different kits - one that's stock (only carpet that the factory 260 would have) and a full kit that adds carpet pieces for the trans tunnel, flat vertical panel behind the seats, and under the door sill (interior to the rocker panel) which all have vinyl in the factory cars. I used the pieces for the door sill and behind the seats but I like the vinyl on the trans tunnel so I think I'll keep that carpet piece in the box. The fit of the Newark Auto kit is really good, they cut the padding perfectly to keep the carpet from moving around. I've been really impressed. The only negative is the floor pieces don't have slits cut and sewn for the two "keepers" at the seat end but they do come with snaps for the firewall. Even without the slits (I didn't bother to cut mine) the carpet stays in place.
 -
They have a filter and desiccant and are generally designed to trap stuff you want to keep away from the expansion valve and the compressor. In the stock system, there's also a fine screen in the liquid line fitting at the bulkhead - just ahead of the expansion valve - as a second line of defense. And YUP "Cruzzar", the early A/C systems only had a high pressure switch. Low pressure switches didn't come until the ZX's. The FSM does create some confusion by calling it merely a "Pressure Switch" (without specifying if the switch is "cut" on overly high pressure OR at low pressure).
-
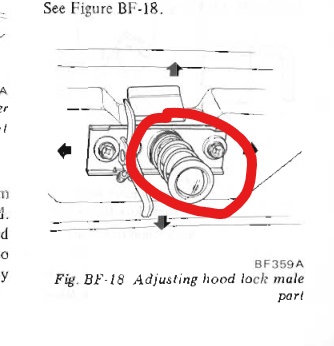
There is adjustment in this part - it can be screwed farther in or out so it properly mates with the depth of the hood latching mechanism below. You should also check the latching plate for wear. If it's worn to a bevel underneath, it may be unable to hold this part securely in place.
-
They welded one side of that support and NOT the other side for a reason. Find a piece of medium stiff closed cell foam to insert OR get some elastic (non-hardening) panel adhesive to squirt in there.
-
That's the same media they used under the front fenders as support/cushion material in three places. To me it looks like asphalt impregnated cork, but I've only seen 30-40 year old examples and never one in good condition. These days they use a stiff closed cell foam or a rubber caulk type stuff - look between the hood skin and skeleton on an F31 or S13/14 and you'll see how they've joined the skin with the skeleton with dabs of rubbery interface material. It sticks them together, provides a cushion, and keeps vibration of the sheet metal in check.
-
I guess that's what I like about my early 260... It is kind of odd mix of 240Z and the changes coming for the 280Z. And they sold more 260Z's in a single year in the US than any other Z model! RLS30 - dare to be different...
-
Well. I have an early 260Z, build date 07/74 and it had an 3.36 R180 stock. Can't remember but I don't think I've seen a late 260 with an R200 stock... (Good friend Patrick has a late 260 - but it was an auto car originally - with an R180...) I'm interested in knowing too as the late 260's were fairly close otherwise to the early 280Z.
-
-
Yup, those are the ones I installed to replace my H4's in Goldie. They are bright.
-
I didn't read all of this thread completely but there's a lot of misinformation here. Any S30 that had Metallic paint WAS TWO STAGE from the factory. Solid colors (nonmetallic) were single stage enamel. If (where) your CLEARCOAT is gone or peeling off you will NOT get good results trying to buff it! You can't buff basecoat and get a good result. You need to either leave your paint as is or have the car repainted - especially since you're dealing with silver.
-
Automatic transmission? (ever?) The reason I ask is that the start "signal" generally goes straight from the ignition switch to the starter solenoid - in Datsun Z cars it's a Black/Yellow always. But in an auto car the B/Y goes through an inhibitor switch first. So if the car is/was auto and that wiring and/or switch is screwed up? The other thing that comes to mind is in some years the B/Y was also run to the ballast resistor as a by-pass to give full battery voltage to the coil at start. Do you have a B/Y at/near the ballast resistor (or where it would have been). Otherwise the start circuit is one of the most simple circuits in the car - just ignition switch to the starter solenoid... Easiest fix would be to just run a new solenoid wire from the ignition switch to the starter. That would eliminate all other possible sources of voltage to the solenoid.
-
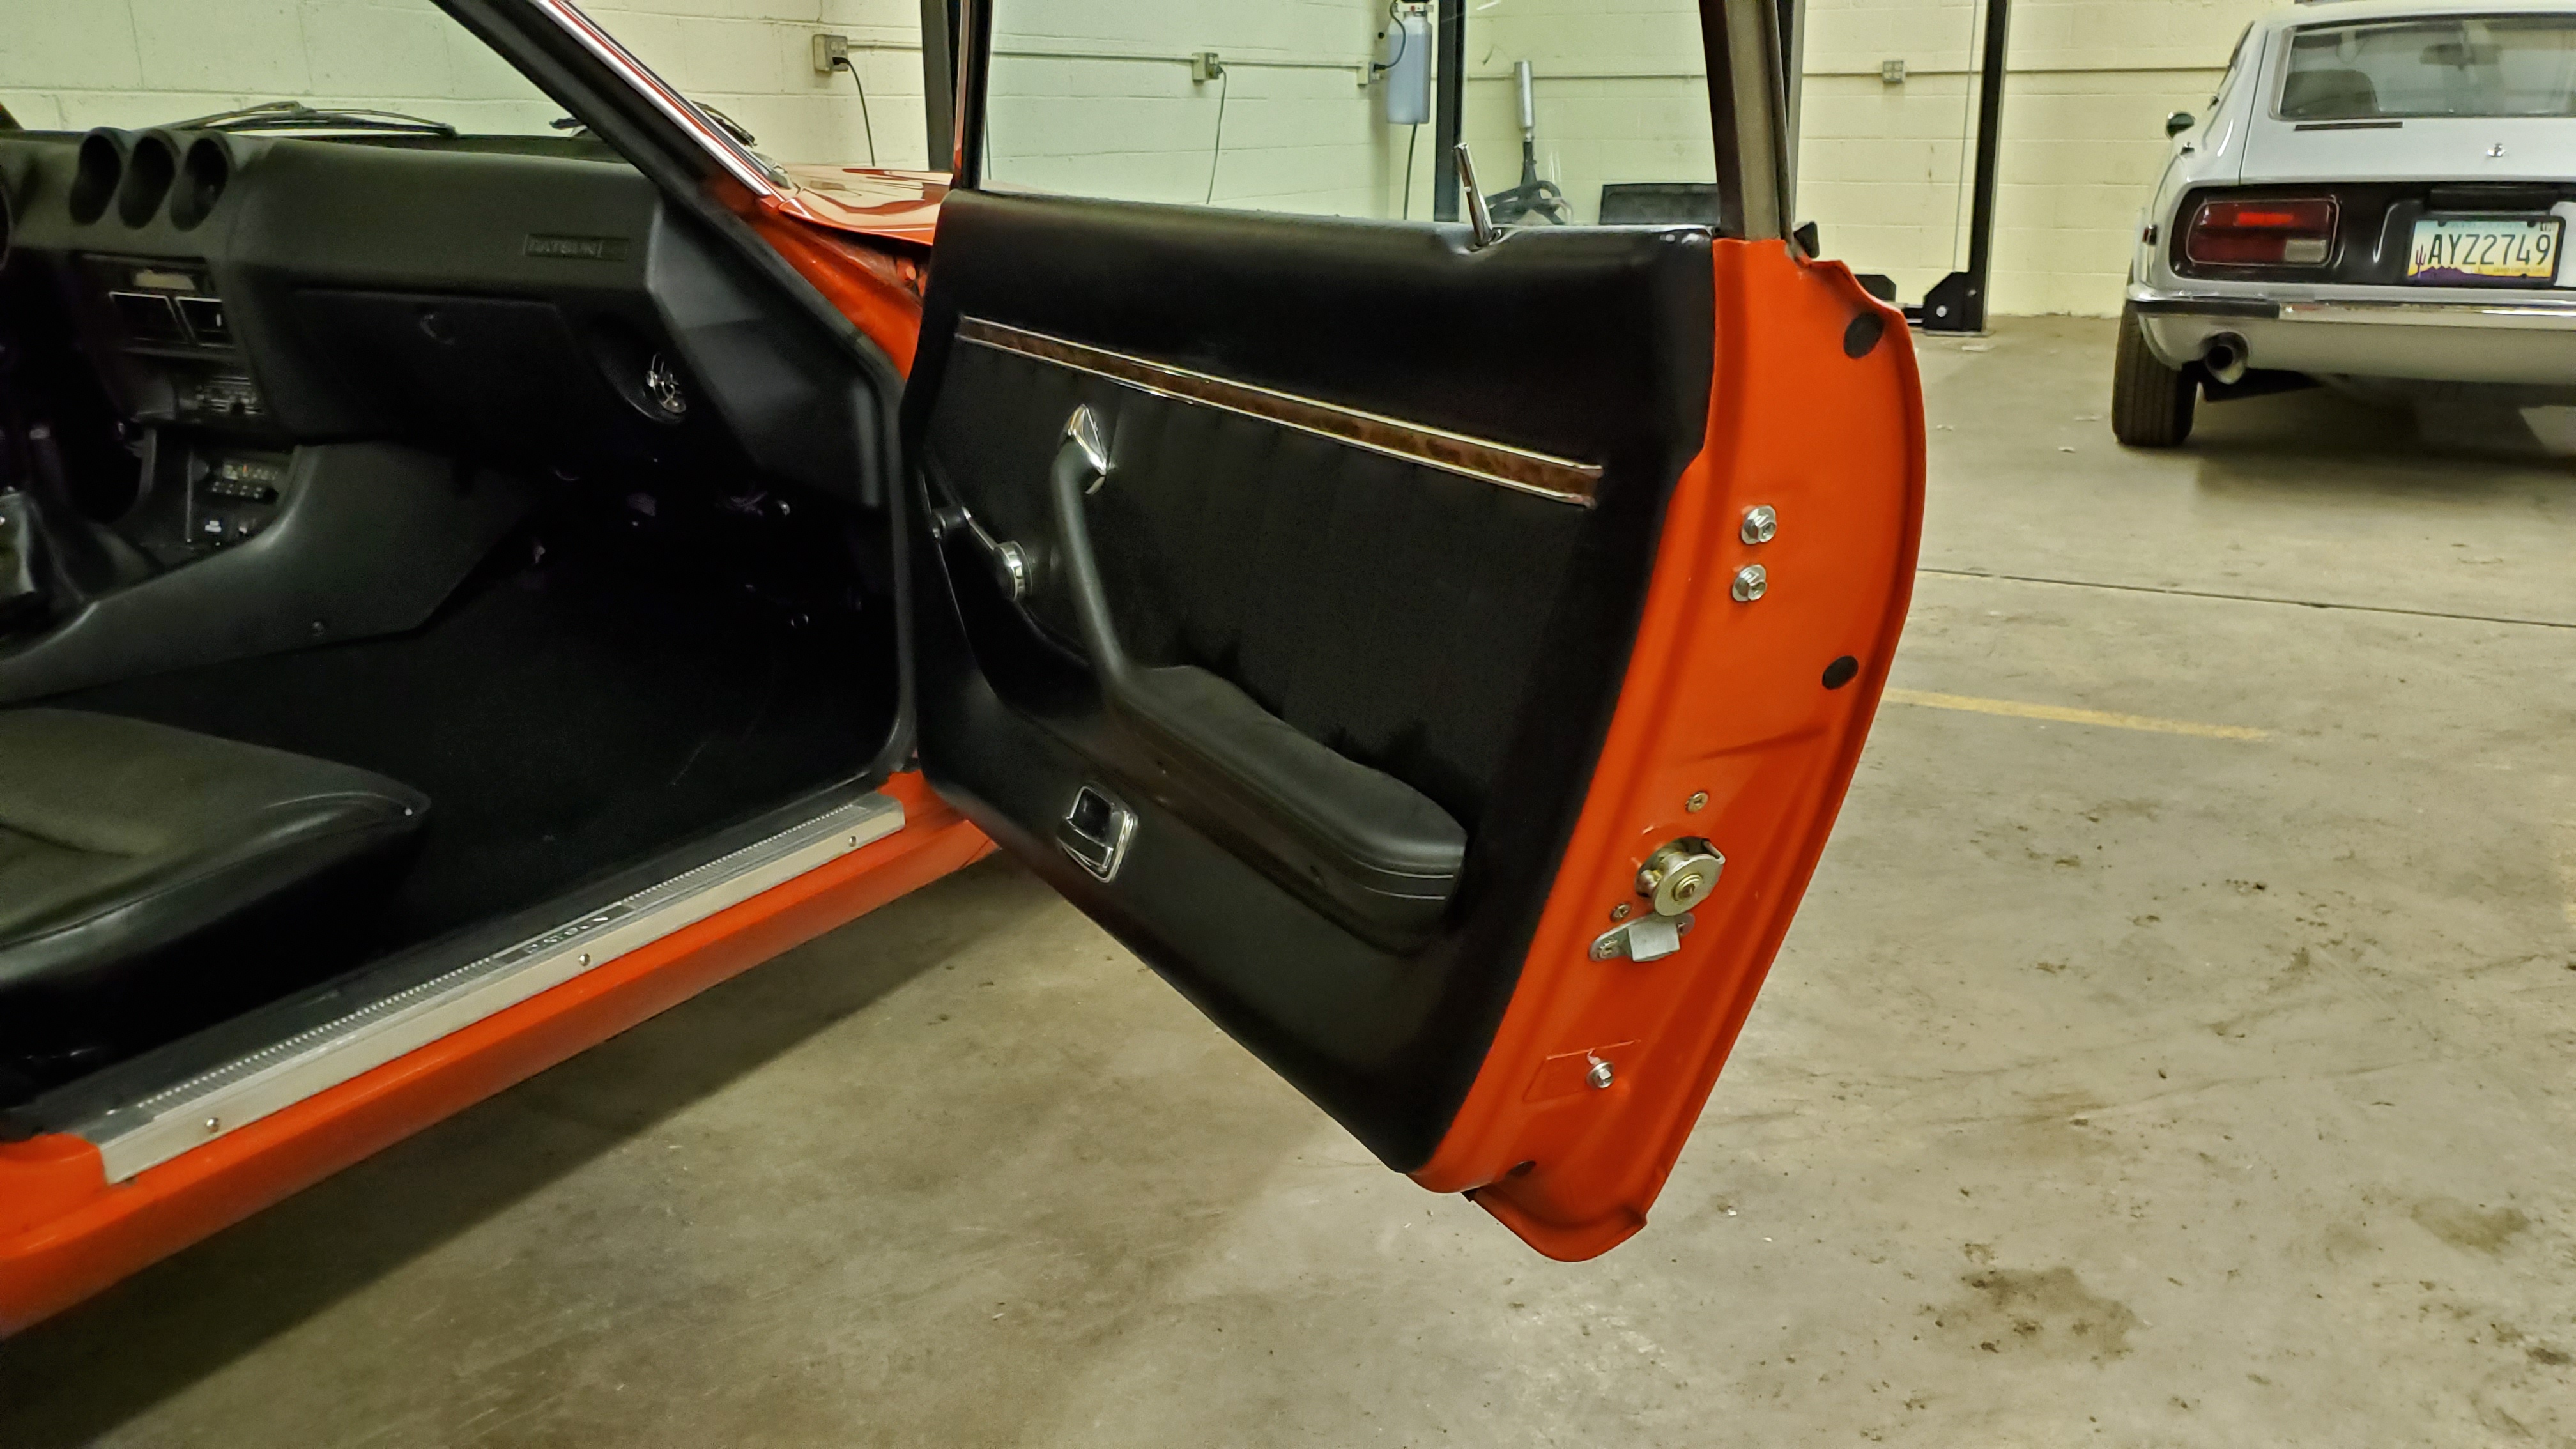
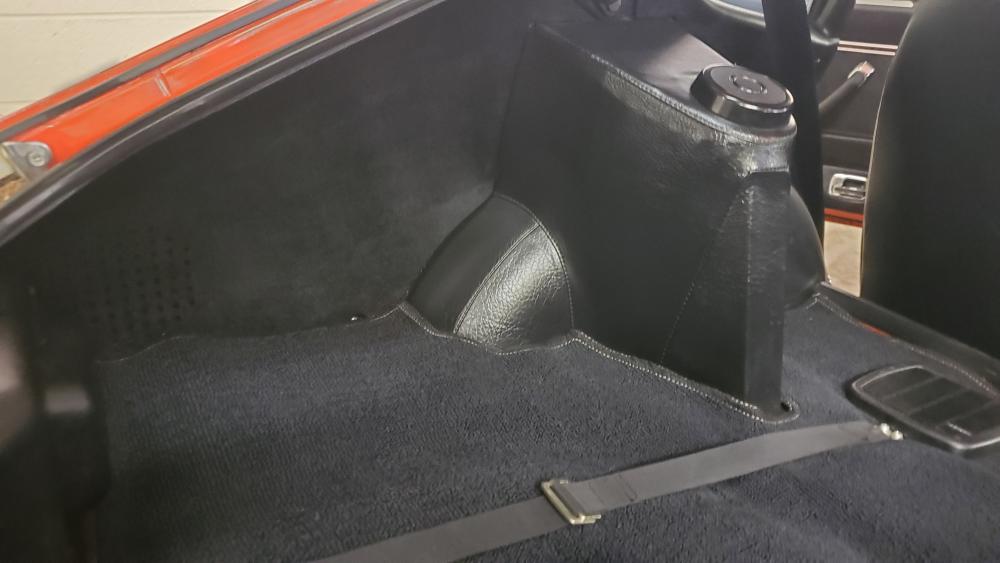
The 260's have small diamond pattern vinyl on the trans tunnel and on the panel behind the seats, hide grain vinyl on the inner rocker. Vinyl (hide grain) on the rear strut towers. The 280's have carpet on the trans tunnel, vinyl on the rear strut towers. Can't remember what's on the panel behind the seats. Pics of the '75:

-
Still, the top picture shows the reverse idler gear to be engaged. And Patcon is correct, In the Neutral position all of the slots on the shift forks should line up so the control lever moves smoothly from left to right into a position that would move each/any of them. Remember that the shift lever is a force multiplier - it may take more effort than you think to move the shift forks manually especially with the end of the fork rods dangling in front rather than being held in proper alignment by the front case.
-
My 260Z was loop, the "museum" '75 280Z is loop, my son's '76 was loop so maybe it's just the late 280Z's that had cut pile.
-
You have to drop the oil pump, adjust the shaft and push the oil pump back up. There are a BUNCH of threads about the process and various methods people use to get it positioned correctly. Sometimes easier with a helper and long needle nose pliers but doable by yourself. Patience is the key to joy.
-
You can, but I wouldn't. Your trans and clutch parts are either 280Z or 280ZX. And, you should figure out which. Collars can be found and there's a HUGE thread discussing the various collars and clutch package dimensions. You might want to check it.
-
99%. There were no US 5-speeds until the late 280Z and were offered as an option. The 280z came with a 4-speed stock and the lates had the 5-speed option. The 280ZX came with a 5-speed and it's more likely to find one of those. They were all L-series engines and that's a very popular swap. There are threads that describe how to tell what 5-speed you have. Easiest way is to look at the bolt that fastens the speedo pinion gear body into the trans. If the bolt is on the bottom, it's from a ZX.. None of that means a great deal with your particular problem except you want the correct slave cylinder for the trans. Your issue is more likely the clutch package. The clutch package (dimensions of the pressure plate) determines which of the several available throw out bearing collars you need to use. That's the "adjustable" part as the fork pivot, fork, slave cylinder and it's push rod length is fixed. The adjustment in the clutch master cylinder rod is for clutch wear and personal preference of clutch engagement. When you have the proper collar installed, the fork should push the slave rod almost all the way back into the cylinder. The end of your clutch fork is way too far forward...
-
What he said. You can undo all the distributor fasteners and turn it past it's ordinary adjustment range temporarily to see if you can get it to fire. Then note how far off the rotor is from number one position when you get the crank back to TDC. A bit hard to tell from your pics but the distributor shaft looks off to me. I would say it may need to be rotated clockwise.
-
You have the wrong length collar on the throw out bearing. Your clutch fork end should be much closer to the slave cylinder. The slave cylinder push rod should normally be pushed in about as far as it will go as it's static position. Unfortunately that means pulling the trans back to expose the collar and throw out bearing for replacement. (you're buying transmission & engine parts for a late 280Z (1978) or 280ZX - not a 240Z - correct? Just checking...)
-
No. Nearly every inline 6 cylinder engine uses the same scheme not just the L-series engines. Cylinder one is at the front and numbers in order to the rear of the engine - six is the cylinder near the firewall. The firing order is 1-5-3-6-2-4. All of this is determined by the mechanical build of the engine (crankshaft, camshaft, timing gears and chain). You need to be able to verify that the mechanical timing of your engine is correct. That is the position of the mechanical parts are as they should be - including crank shaft position relative to camshaft position and distributor (rotor) position. That's the very basis of your engine mechanics.
-
The distributor cap normally has a raised "line" in the plastic along the number one spark wire plug. None of the other plugs in the cap are marked that way so just find the one with the bump... The rotor at TDC faces nearly forward - toward the radiator - slightly offset to the left side of the car. There are pictures of all this stuff in the Factory Service Manual - Download it. xenons30.com or nicoclub.com
-
Did you remove the stock 280Z Electronic Ignition Module or at a minimum disconnect the Blue wire from the Module? The blue wire to the "-" post of the coil originates at the Electronic Ignition Module under the dash and supplies the "signal to fire" that has now been replaced with your 123 Module. The signal to the Tach tees off that wiring and goes through the 2.2 Ohm resistor before feeding the Tach. If the stock EIM is still wired in it could be interfering with the Tach signal. I've used many different ignition schemes and on a single coil ignition I've always been able to drive my tach properly with the stock blue wire no matter what EIM I used. But I completely removed the stock Ignition module under my dash first thing.
-
Not me... I would have wired in new relays. I've been beat down working on the electrical of these old Datsuns and now I replace rather than mess with the 40+ year old electrical stuff for the most part.
-
I'd lift up some vinyl around the pillar and look at that. Find someplace that hasn't been shot over the top of.
-
Why would you connect the High Beam? Just to wizz off everyone in town as you drive your Z? (I mean, sealed beam headlights do suck, but still...) All you need is Low Beam for now...