cgsheen1
Free Member
-
Joined
-
Last visited
Everything posted by cgsheen1
-

-
The height adjustment in these struts are in the threaded adapter tubes - NOT by moving the spring perches! (as I've stated elsewhere:) Generally, the spring perches should never be adjusted. On this strut cartridge you would only change the position of the lower spring perch (at the bottom of the spring) to add pre-load to the spring. Most installs do not want or need any pre-load on the springs. IF the spring is loose between the upper and lower perch, the lower perch should be adjusted so that the spring is just snug. The upper perch is not adjustable. A quote from the Stance USA FAQ site: "When adjusting the height, do not adjust the height by the spring perch. All height adjustments should be done through the lower mounting bracket.Adjusting the spring perch will change the spring preload and should only be done when corner weighting and balancing the car." You do not, will not gain any "height" (additional length of the strut cartridge) by adjusting the spring perches. If you installed a longer spring, you would have to move the lower spring perch down on the strut cartridge to complete the installation. You would not gain additional length in the strut cartridge. That "rod" you see coming out the top of the cartridge is at the maximum range of it's travel - it simply cannot extend any further upward. The "no loss of travel" comment on the website refers to being able to move the strut cartridge up and down in the threaded adapter without affecting the damper travel in any way. The damper is fully contained in the cartridge and can't be affected by moving the cartridge up or down in the threaded adapter. (Certain other coilover setups use a stock-ish damper cartridge whose range of motion is affected when the ride height is changed.) Albatross knows what he needs to do to get his install where he wants it. My response is mainly to clear up any misconceptions or misinformation.
-
It the rust (dirt, crud, water deposits) wasn't enough, I've seen several that were "mushroomed" internally on one or both sides of the Lock Bolt. The spindle is "softer" than I would have originally thought. If it's out of place, or the lock bolt is over-tightened, or installed incorrectly, it can deform the pin in that area - making it even harder to remove. Besides the anti-sieze, use caution installing the spindle pin and lock bolt - and don't over-tighten. To remove, I use impact. A couple of old lug nuts on the threads of either end (or both...). If I can get the spindle pin to turn, I can always get them out.
-
AFAIK, the 1971 FSM was a supplement to the original Datsun 240Z Sports Service Manual. Available in 3 parts on the Nicoclub.com website http://www.nicoclub.com/datsun-service-manuals . I have it. It shows the 1971 wiring diagram and whatever changes they made elsewhere from the Series One.
-
That looks way too red to be the stock Datsun #110 "Persimmon Red" to me. The stock 110 single-stage paint starts out kind of a deep red-orange and fades to a almost more orange-than-red over the years. The paint oversprayed on the interior is definitely 110. The exterior doesn't look 110 to me - but that may be your camera - or my old eyeballs... (This showed up when we painted Patrick's Late 260Z. He wanted Orange "like his car was" - but when I showed him the original mostly unaltered paint under one of the side markers - which was WAY too red for him - he decided against the stock 110 color and we used a GM Orange for his new paint. Lucas has a 280Z with the original, never been repainted, Datsun #110 that he drives into the shop every day.)
-
I solved this years ago using 3/8" plastic tube. I'm a Journeyman Plumber, so this is stuff I have lying around practically everywhere - you civilians can get it at any Home Depot, Lowes, Ace Hardware, or any hardware store. Used to be Poly but now it's probably PEX - it's cheap, plentiful, easy to get, the correct thickness, and easy to cut and install. It's pretty tough too, but adds a little cushion to the latching mechanism. Just grab a piece of 3/8" tubing, cut about 1/4" off the end (whatever is the width of the oblong lobe), and make a slice down the side. Spread it out at the slit and you'll have exactly what the OP did in metal above. Don't take the latch out, just roll it around until you can see the oblong lobe on top (hold it with a screwdriver if you need to) and install the "C" shaped piece of plastic tube on the lobe. Lift the door handle to get the latch back into proper position. Close your door without slamming. I did mine years ago and haven't had a problem. If it breaks or falls off, I'll just get out the utility knife, cut another little piece of tube, and replace it. If you buy a foot of 3/8" tube at the store, you'll have enough replacements for the rest of your life... I keep a piece of tube in the car. I've fixed dozens of doors for the other Datsun guys in town. When they show up to a meet and are slamming their door, I just cut off another little piece or two.
-
I had to do this once in the shop to remove a Tachometer. Not easy but I was eventually successful. I ended up using a plastic sign (placard) like the ones you get from uLine - "Customers Not Allowed in Work Area" - "No Smoking", etc. If the material you use is too thin, the edge of the gauge won't ride up over the edge of the dash cap. The material needs to be thin enough to fit between the stock dash and gauge, strong enough not collapse as the gauge nears the edge of the cap. Plus, it was long enough to go "full circle" around the hole. You'll still need a thin, relatively narrow, non-marring tool to help coax the edge of the gauge to come completely through the hole by running it around the edge as you work the gauge out. You'll have to tilt the gauge a little and get part of the edge into the cap, then go around the circle and coax the rest of it. (I'd get it out a ways, and then lose the opposite edge) It'll take time and patience and steady pressure on the back of the gauge. Hair dryer is probably a much better option than a heat gun in this case. Honestly, I never want to do that again - but at least I know it's possible...
-
Randalla, the E88 in the back of the shop is a '73 and had flat tops when it came in here. I have a L26 with an E88 at home I can take pictures of if it'll help narrow down which E88 head you have.
-
+1 Years ago with an internet search I found a very good explanation of the differences of the lubricant specs and why GL5 is not an "upgrade" to GL4 but a completely different spec. (You'll notice Nissan specifies GL4 for the manual transmission and GL5 for the differential) I've used both Pennzoil Syncromesh and MTL-90 in my late "close ratio" 5-speed, but I settled on a standard GL4 product from Sta-Lube (SAE 85W90 Multi-Purpose Hypoid Gear Oil).
-
Meguiar's Hyper Dressing...
-
It's a simple switch. If you look at the wiring diagram in the A/C section it shows as such. That means in actuality it's a single wire that's being broken (switched) by the thermostatic valve. Either wire can connect to either terminal. There is no "wrong way" to connect it. The wiring diagram actually shows both wires attached to the thermostat switch would normally be Black/Green and transition to B/G and Yellow coming out the other side of the white "T" connector... (AC-38 1978 280Z FSM) That would have been much less confusing if both wires were B/G. Another "give away" is that the connection is not "keyed" - it uses two male spades on the control and two female on that bit of harness. If it were important that a certain wire go to a certain terminal, they would have made the connector such that it was obvious - one wire can connect only here, the other wire can connect only there.
-
The trim is stainless steel. Powder coat is plastic. Might be a pain, but you can probably clean up the stainless. Mask off the surround at the edges of the trim and sand the powder coat away or scrape it off carefully. You can polish the SS back up to as much gloss as you have patience.
-
The 1975 FSM circuit diaram shows a "T" connector in that area for the Fog Lamp Switch (option). It shows a GW / RG though. It also shows two bullet connectors for the Auto Trans Indicator Lamp - so you can see if the lever is in "P" or "D" at night... RL male and a GW female. Unused of course if you don't have an auto.
-
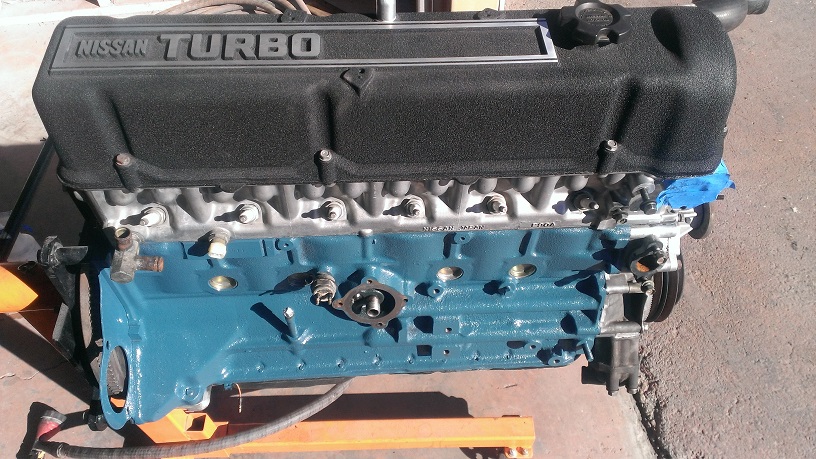
We found a fairly unmolested part (back side of a idler piece) that was a pretty good representation of the original block & block parts color (idlers, brackets, and etc.) and took it to a local paint shop to have them match color and make us a formula for future use. I thought they'd give us the formula itself, but no... We can just go back in at any time and ask for this color and they'll mix it up. Still, it turned out pretty darn close and we ended up with plenty of block paint for the shop. (the picture above is not that great - too much sun - washed it out a little)

-
The clutch is on the front of the compressor. Where the v-belt and it's pulley are... The clutch is electrically operated - one wire - usually blue on z-cars. The ports you're referring to are the high and low pressure refrigerant ports (and have little-to-nothing to do with the clutch).
-
I think everybody has a 4-speed... I have two...
-
Yup... Same dash, same controls. My son has a '76 with factory A/C. I have an early (07/74) 260 with stock factory A/C. There's virtually no difference (only how the tubing on the high pressure side is placed along the passenger side of the engine bay...). I could swap mine to his and his to mine. Although his was running R12 until the end of last summer, we've converted both to R134a.
-