BoldUlysses
Free Member
-
Joined
Everything posted by BoldUlysses
-
I've been meaning to drive down to Auburn to pay them a visit. Seems like a good outfit. They sold me a nice reproduction set of 4 rear finisher panel bottom clips for $20 off eBay when other online sources wanted $30 per clip. Anyway, nice find and story! Always nice to rediscover a car you had a connection to. Makes the restoration process that much more meaningful. In for some "current state" engine bay + interior pics, and that list of mechanical sins the previous owners committed!
-
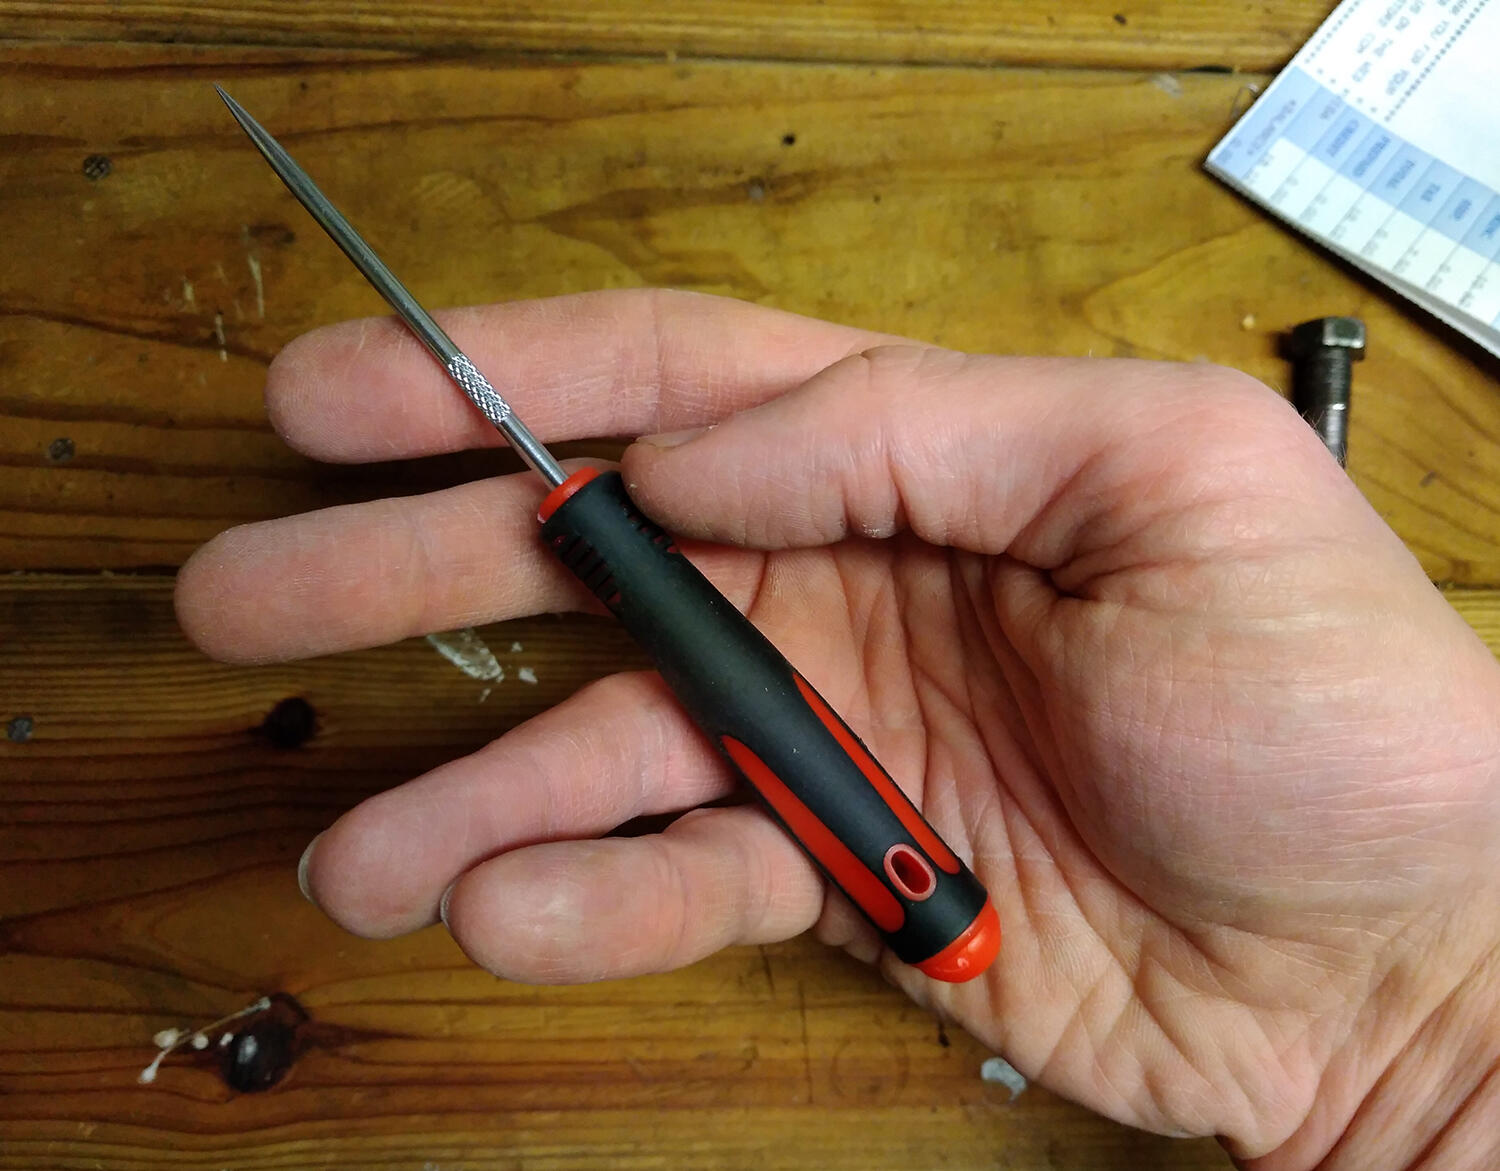
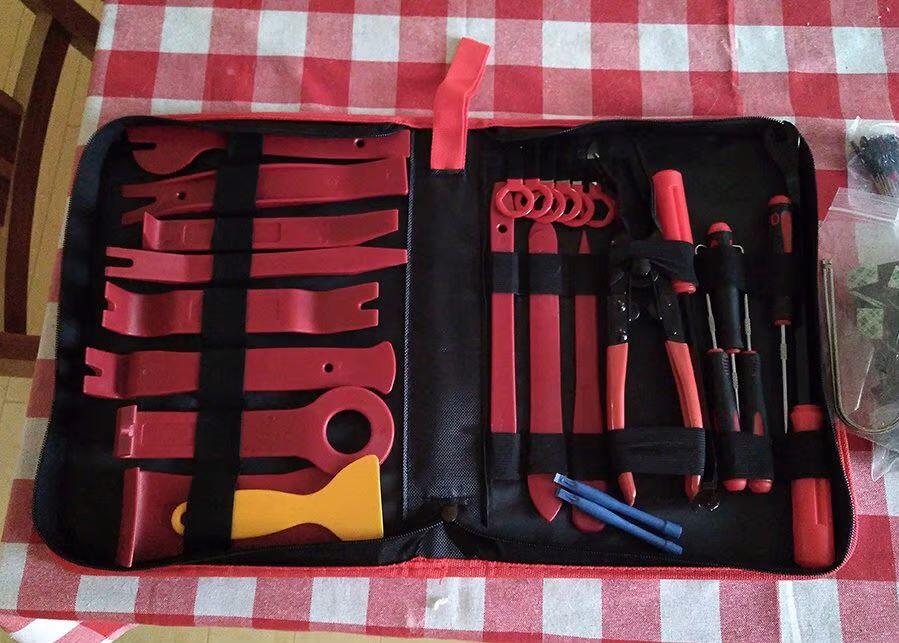
^Those were a HUGE help! Thank you! I actually got smart for once and broke out the trim kit: and used the pick to find the holes: The center ones ended up being offset just a bit: But everything went fine once the center screws were on, as expected: Still probably need to replace those screws with a black version; they stick out like a sore thumb...


-
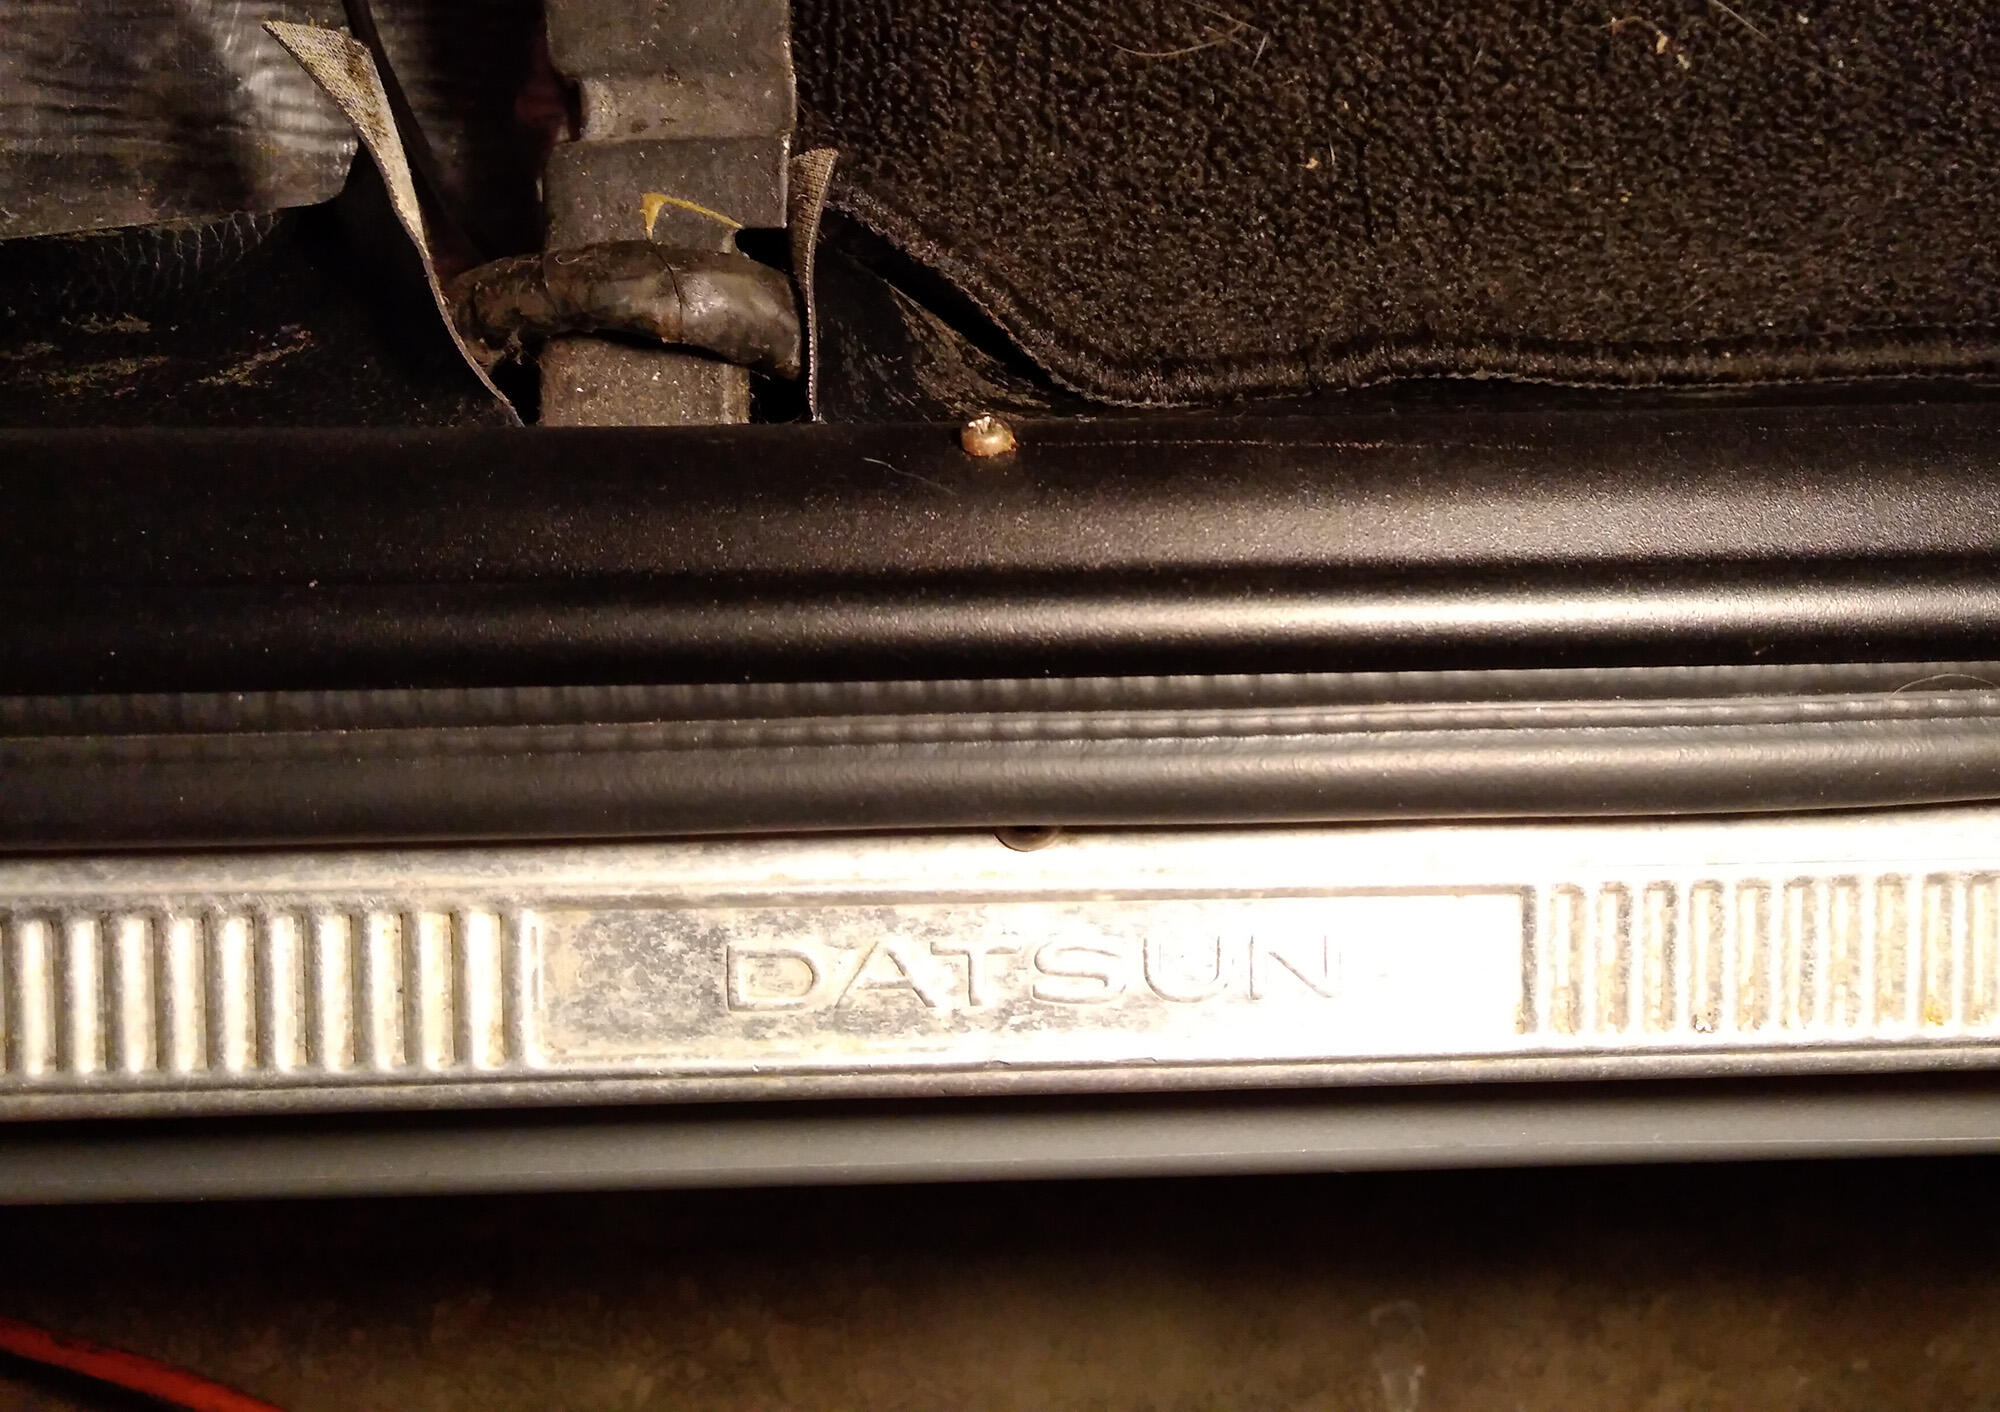
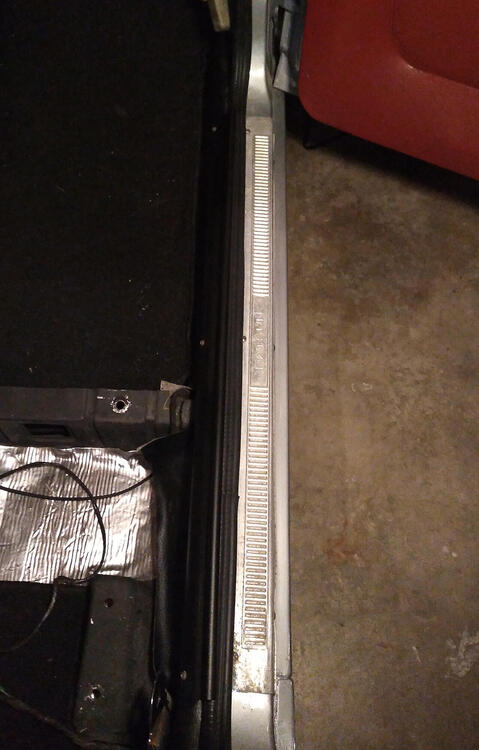
OK next question: Can anyone tell me where the center screw hole for the inner sill plate is in relation to the center screw hole for the outer sill plate? Obviously the upholstery guy covered those holes without marking the vinyl, and I'd prefer not to either 1) pull up the glued-down vinyl and check or 2) make random cuts in the vinyl and root around in there with the screw head. If I can get the center screws aligned, the ones at either end should be fairly easy to locate.
-
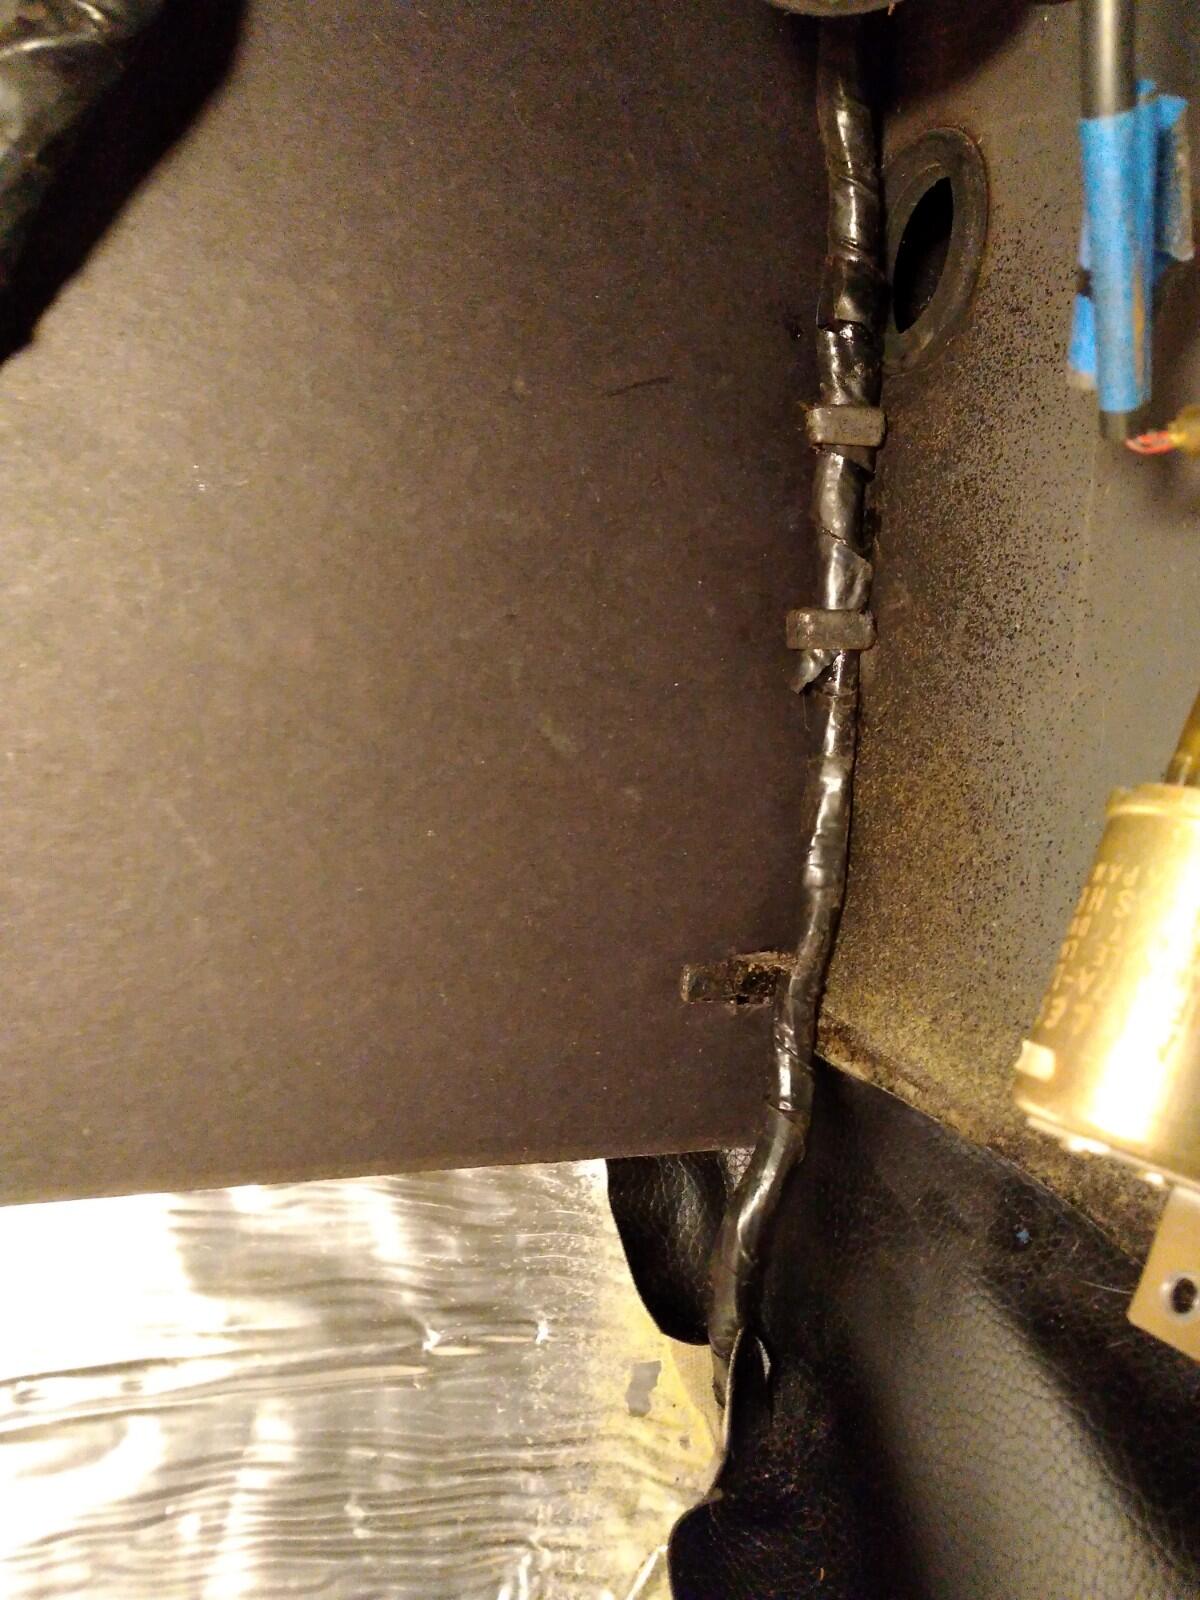
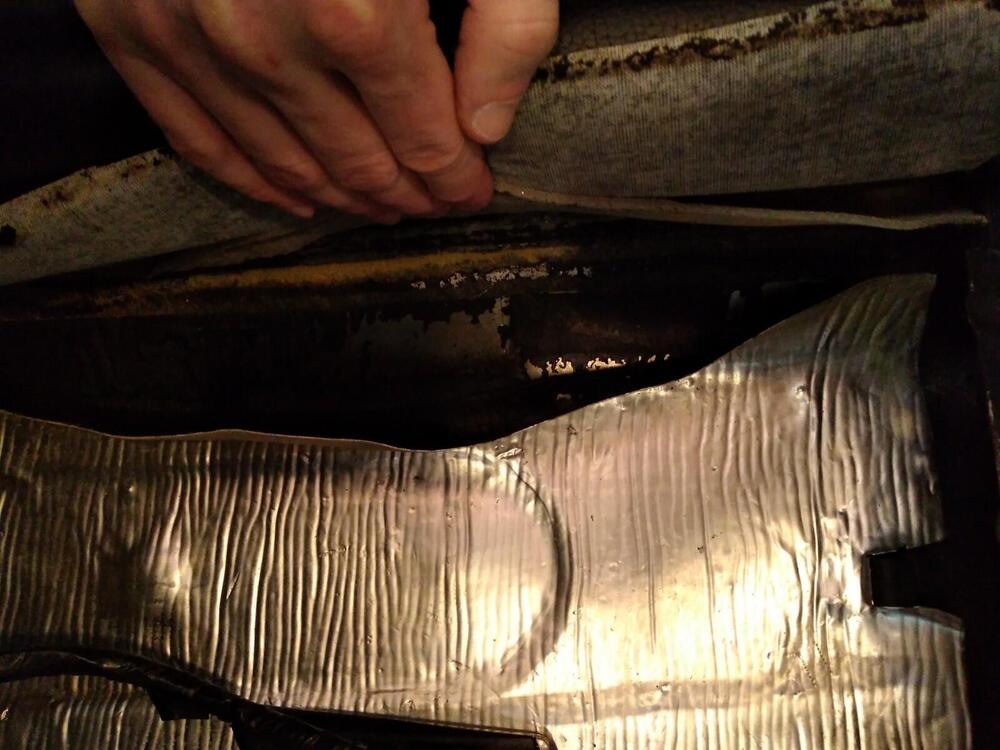
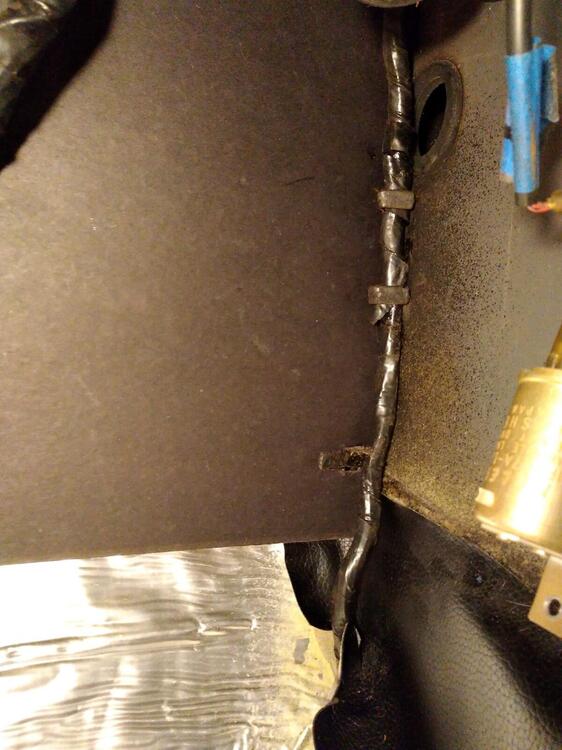
^Thanks! Those are REALLY helpful. So here's what I was dealing with: So either 1) the '72s didn't have tabs for the harness (unlikely), or 2) the body or interior guys removed them at some point: Nothing underneath the vinyl. I'm thinking someone removed them, since there ARE tabs on the driver side for the antenna and speaker wires. I tucked the body harness into the corner underneath the sound deadening as best I could, and hitched it up along the corner of the firewall. Came out OK. The vinyl looks a little lumpy, but hopefully it will settle down with time.
-
Found one: (courtesy https://www.nicoclub.com/archives/datsun-240z-restoration-and-modification-12.html) Looks like I'm going to have to dig up the flooring and find the metal fingers. Joy...
-
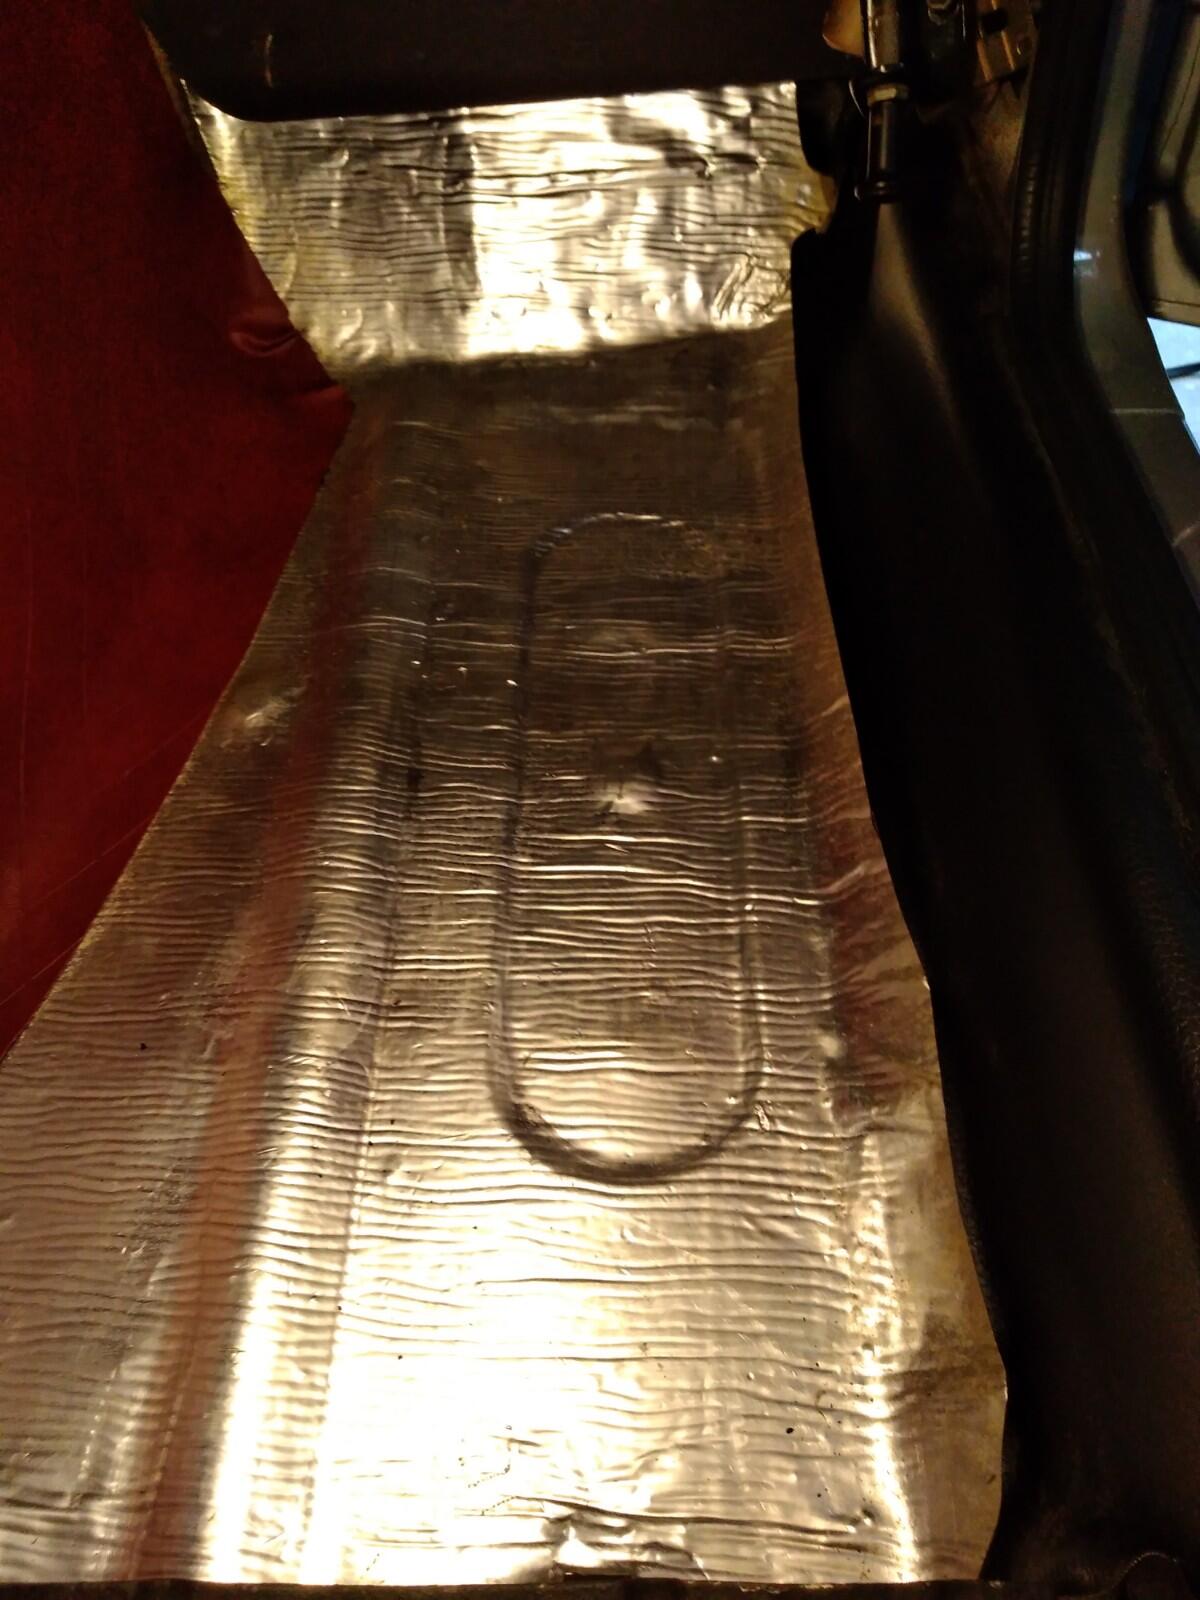
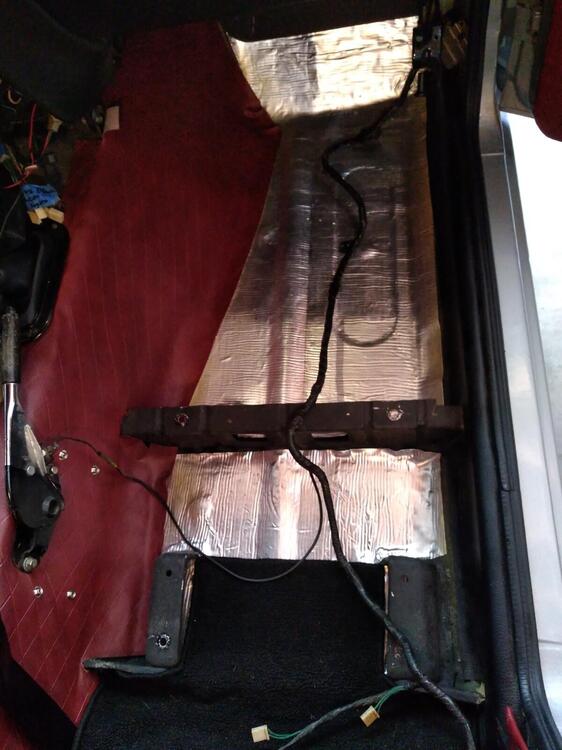
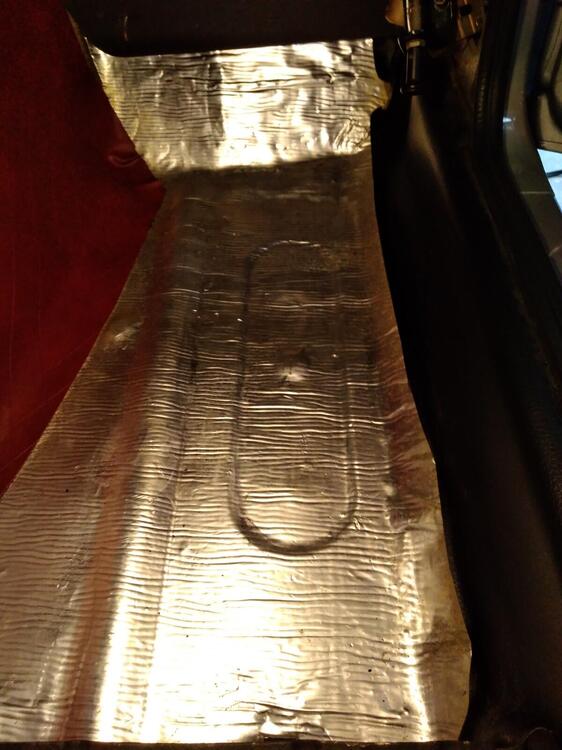
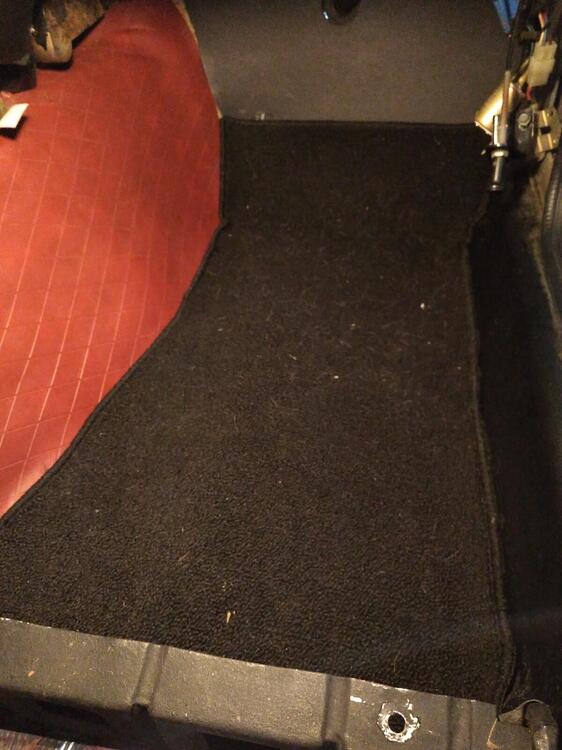
So the interior guy already laid down the undercoating, vinyl and carpeting. I'm having to peel it back to reinstall things like seatbelts as part of the restoration. Next up: Routing the body harness from the connections on the right side of the dash to the notch in the dogleg panel. The harness has already been run, but it's not tucked away. I assume it goes under the carpeting and vinyl along the passenger sill, but I'd like to get an exact visual so I only have to peel and reapply things once. Does anyone have a mid-restoration picture of the passenger sill area showing the harness tucked where it's supposed to live? Thanks.
-
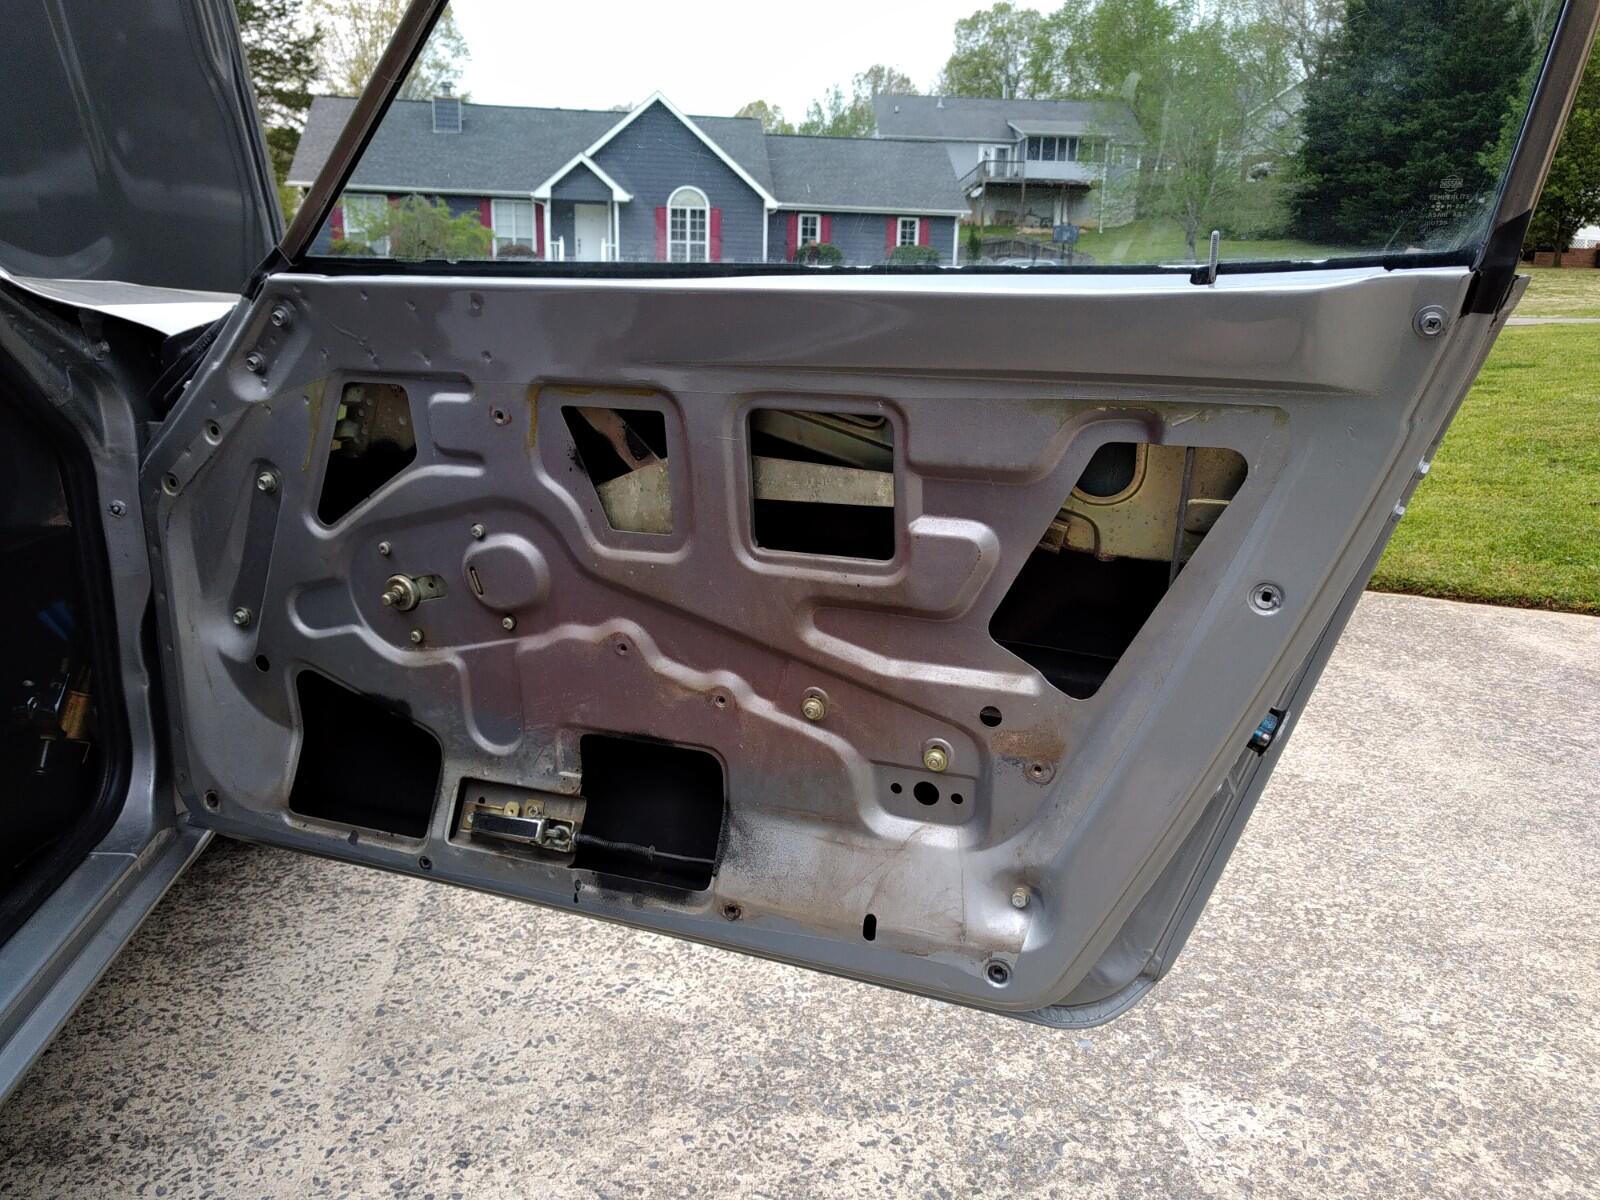
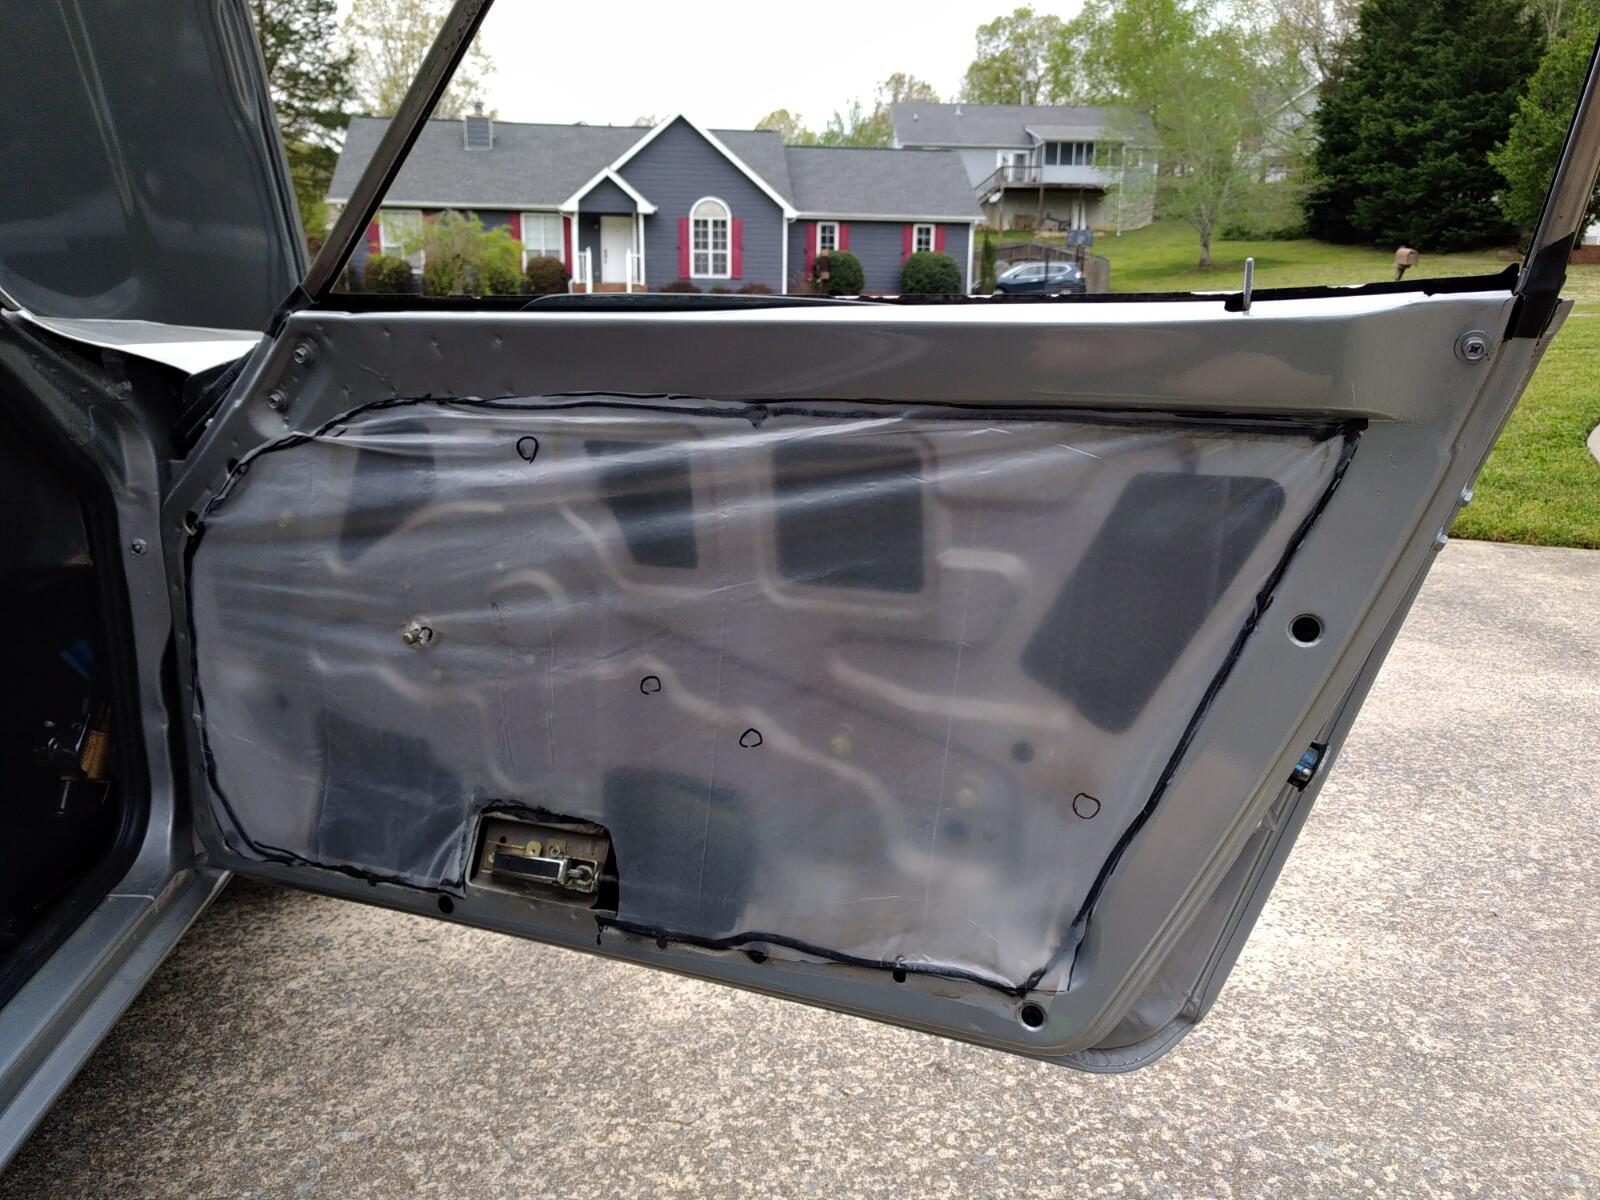
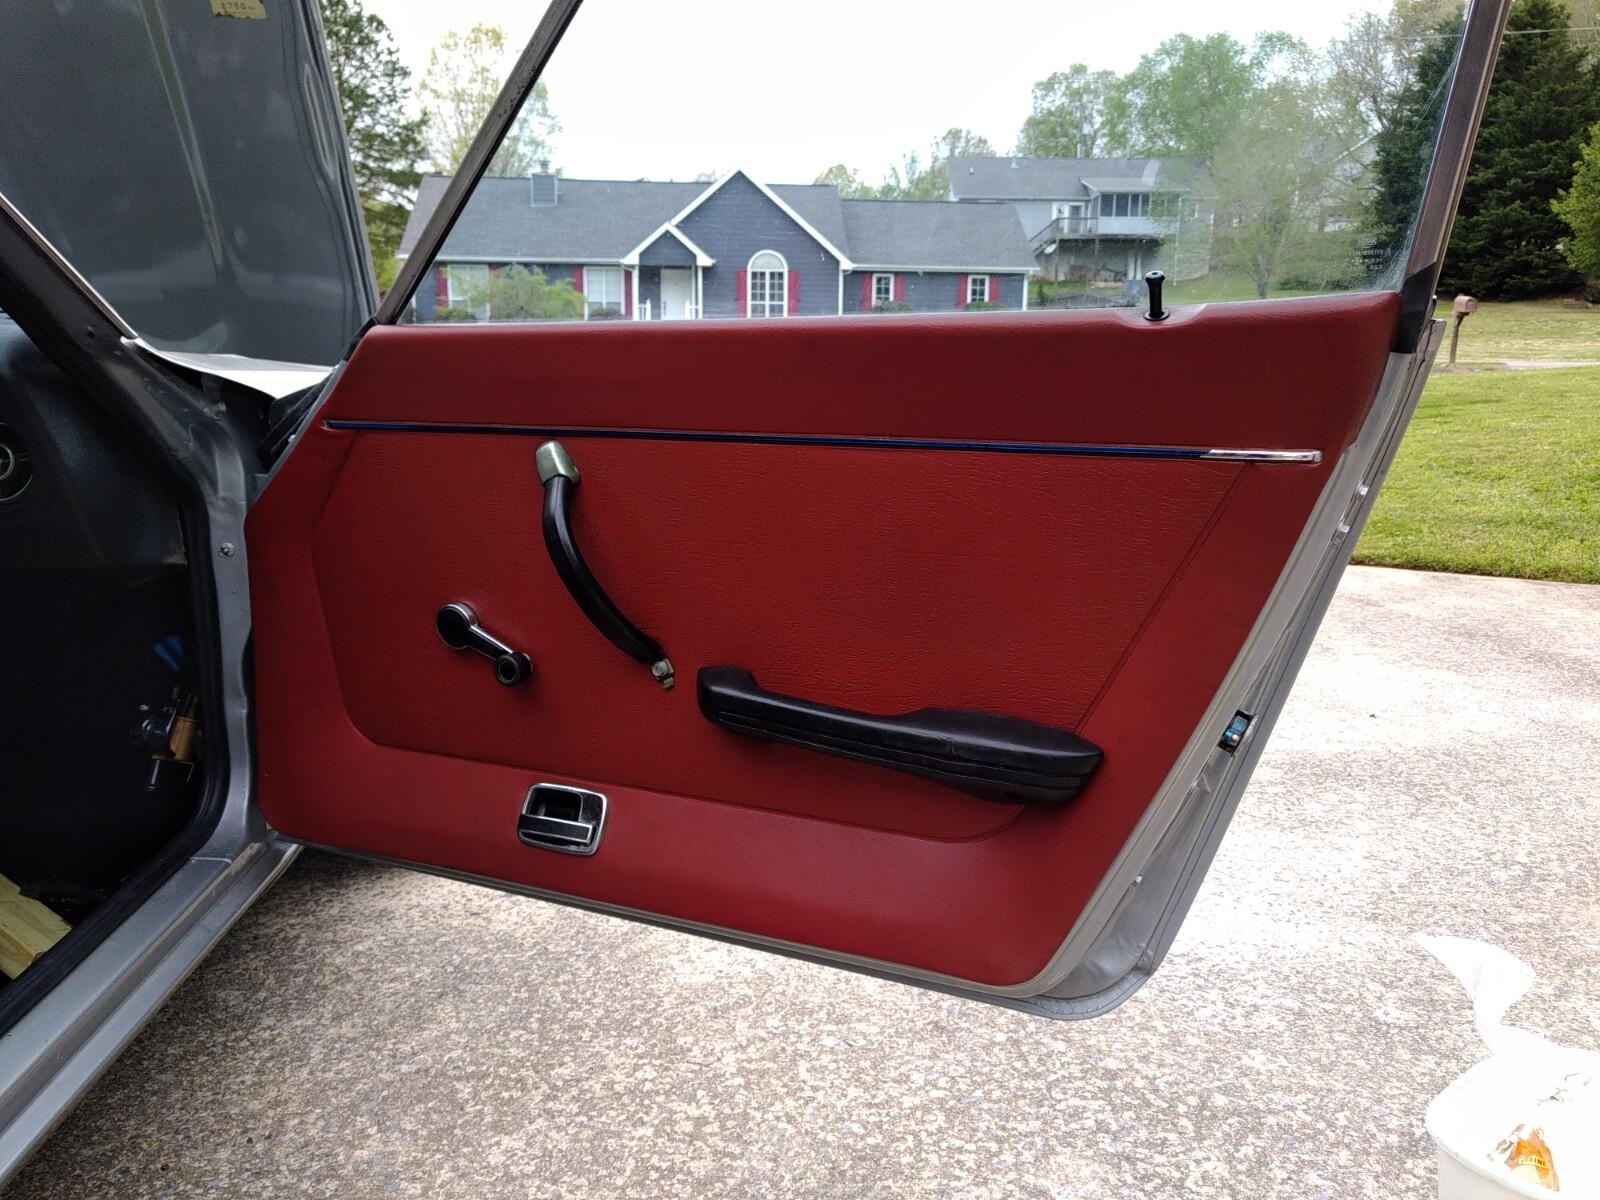
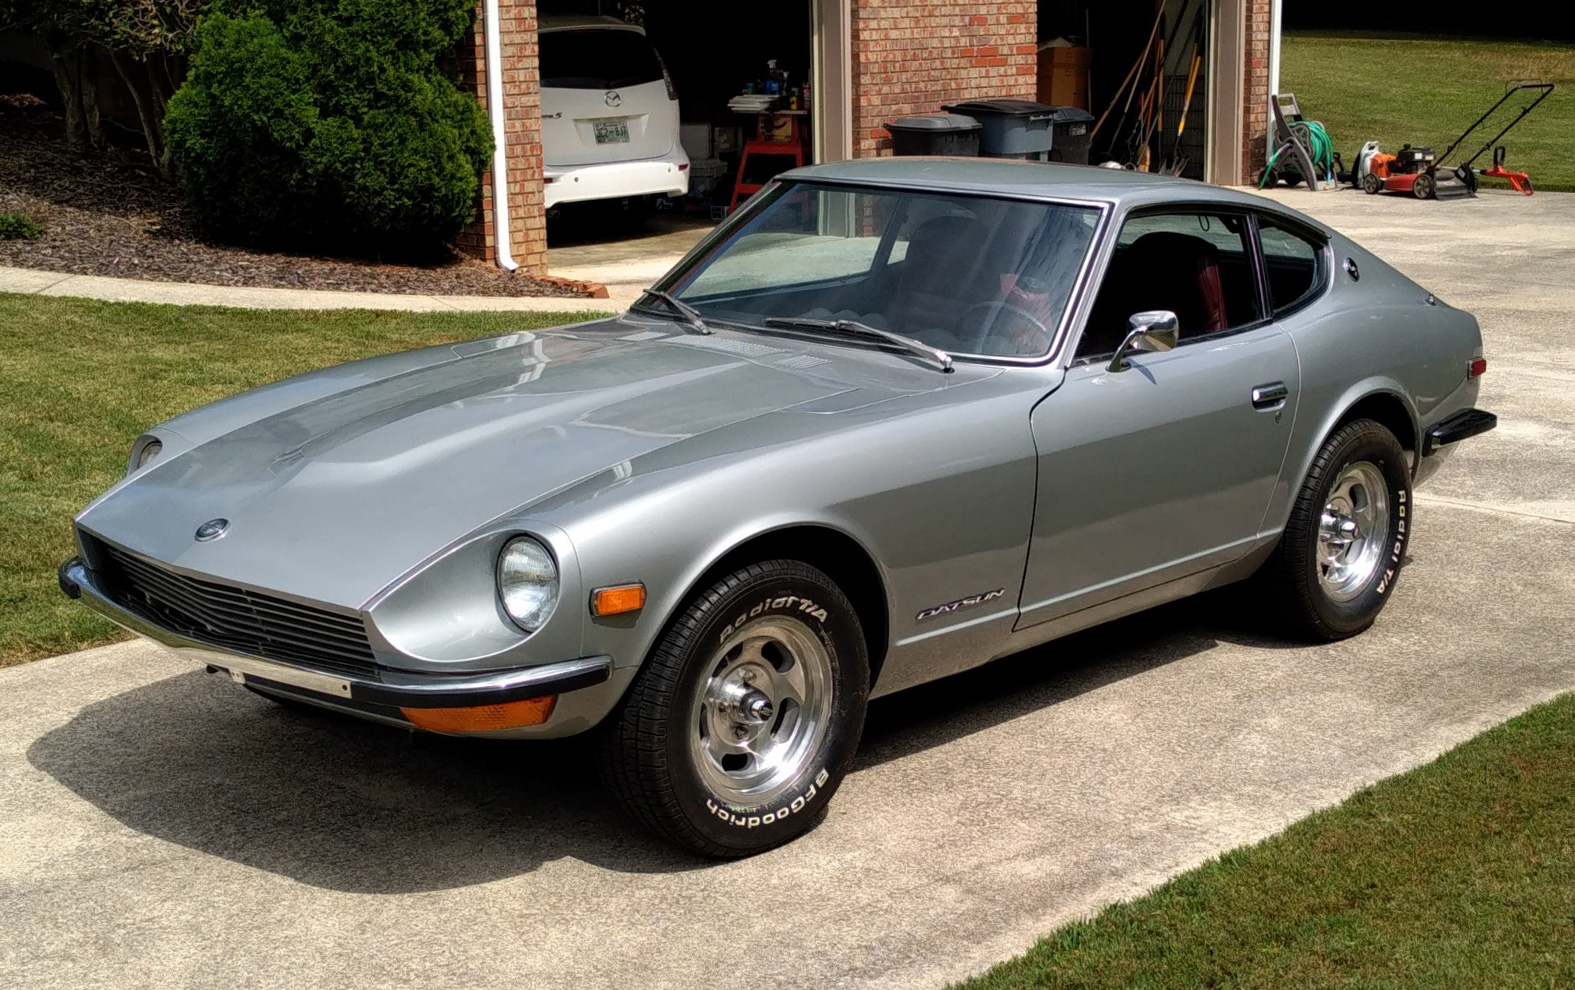
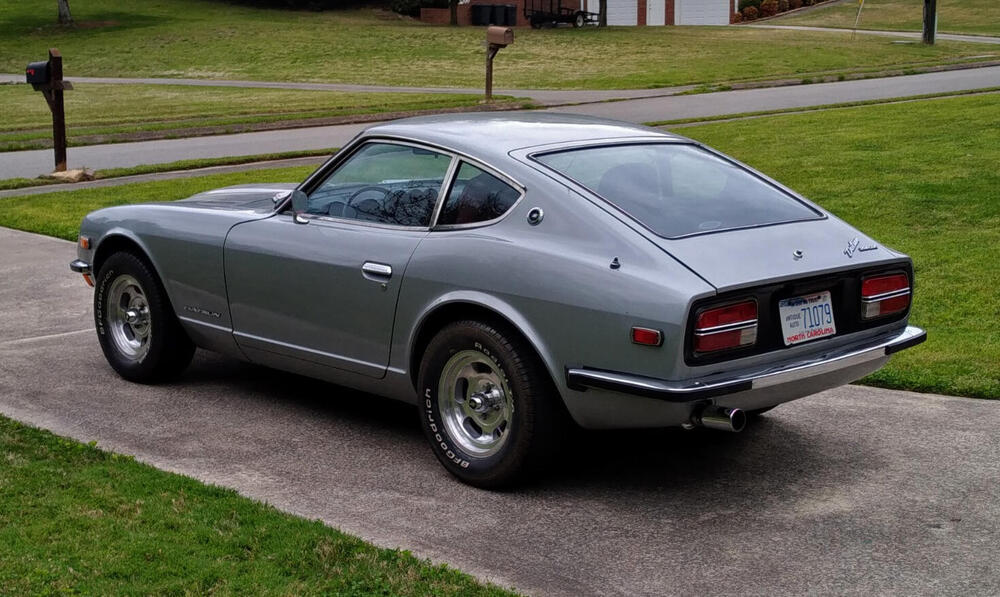
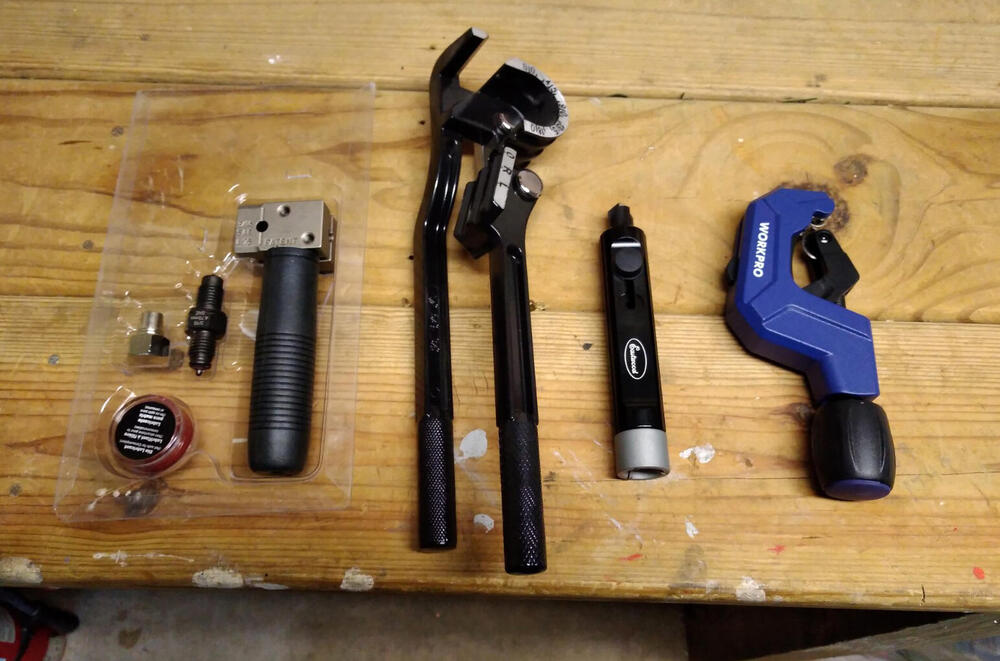
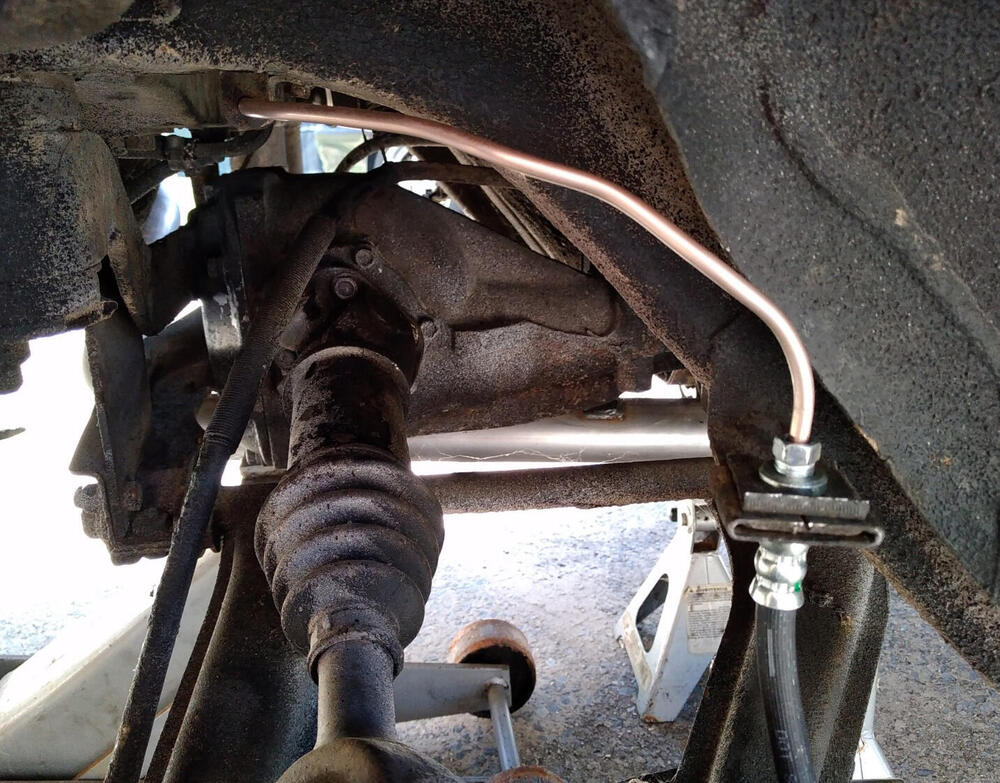
So I'm getting back into Z work after taking a winter break to work on some house projects (pantry, painting, etc). Discovered one of the rear brake lines was clogged, so I bought some tools and fabricated new ones: Came out pretty well, I think. The left rear still only bleeds in fits and starts, so if the braking performance still isn't there after a good bleed, I'll probably get the later S30 brake cylinder retrofit kit so I KNOW they're working. Got the door cards back on this past weekend: The pics don't show it, but they're actually pretty trashed, being 50 years old and made of glorified cardboard. All new vapor barriers (I used the 3M sticky strips), clips and rubber receivers. Little bumpers for the door release handles on order. I'll need to re-chrome the piping as well. * * * * * * So I actually got the car out on the road for the first time since the restoration began. I drove about 10 minutes down the road to the local O'Reilly's to pick up some fuel stabilizer, and stopped at the gas station on the way home. Some impressions: The car is pretty loud with the stock exhaust manifold and MSA exhaust (no resonator, just the muffler). A little too loud, if I'm honest, but it does sound pretty good passing up through 3K rpm. The car still needs a good tune. Colortune on the way, and I'll need some advice about how to time it. I have a points delete kit ready to install in the distributor. It attracts a LOT of attention, and I feel REALLY self-conscious driving it (I'm not a high-profile guy). It's really strange---I've never owned a car that stood out this much---and is going to take some getting used to. One more exterior pic for good measure:


-
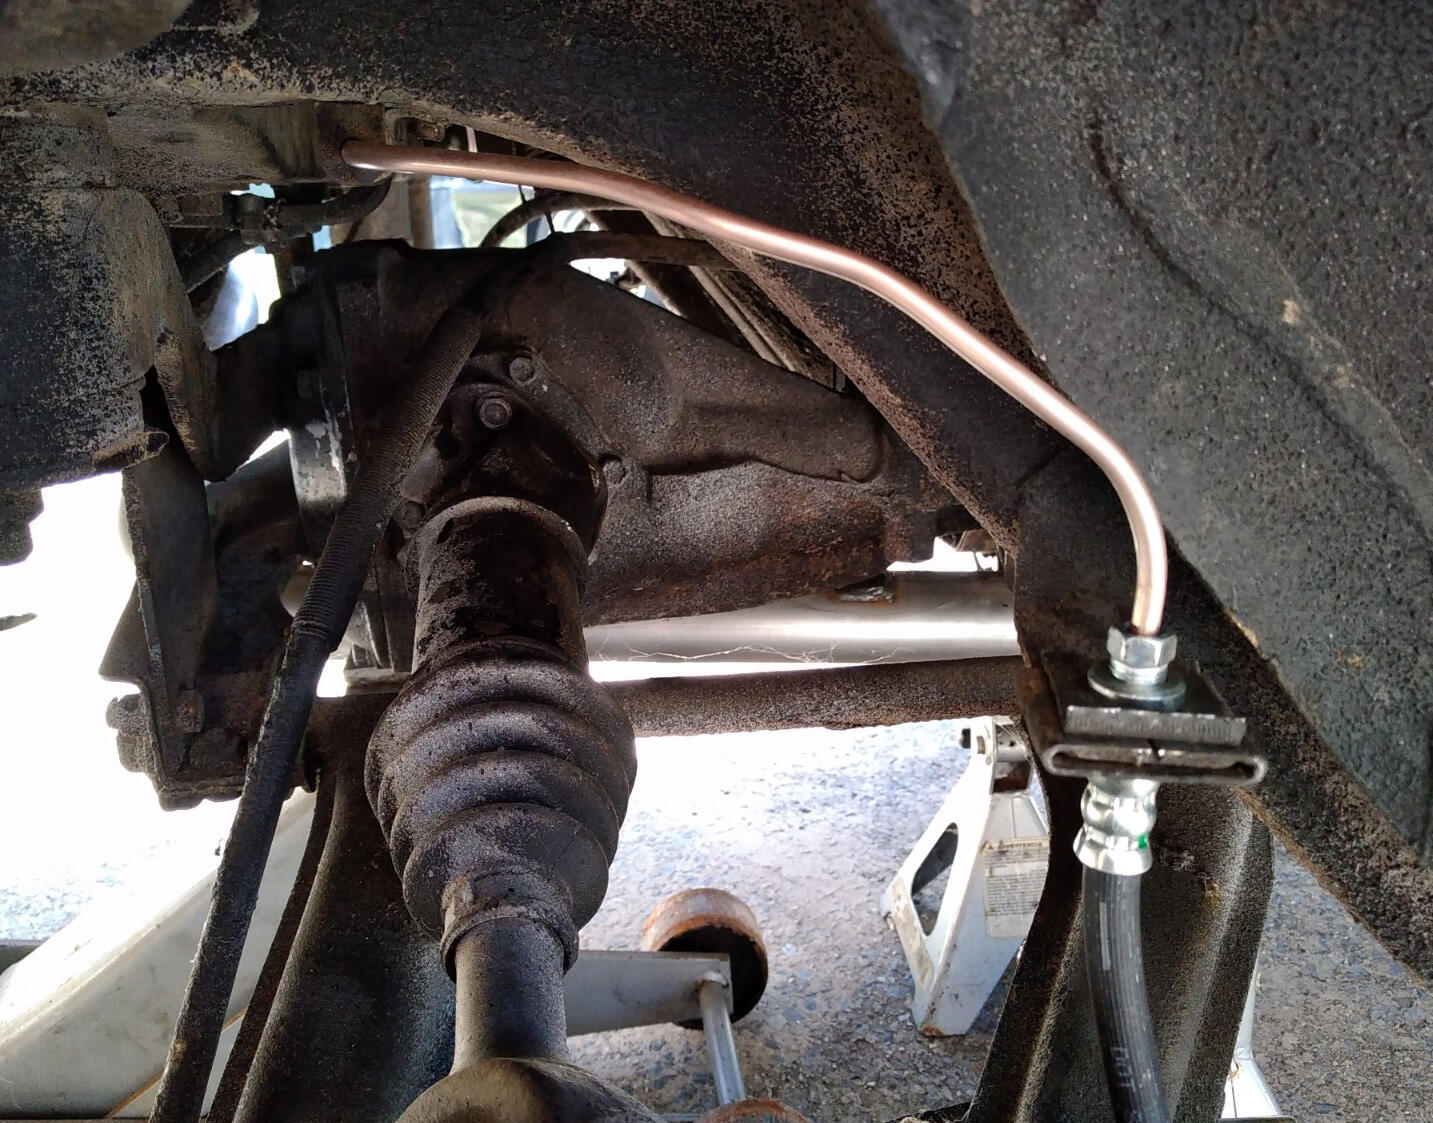
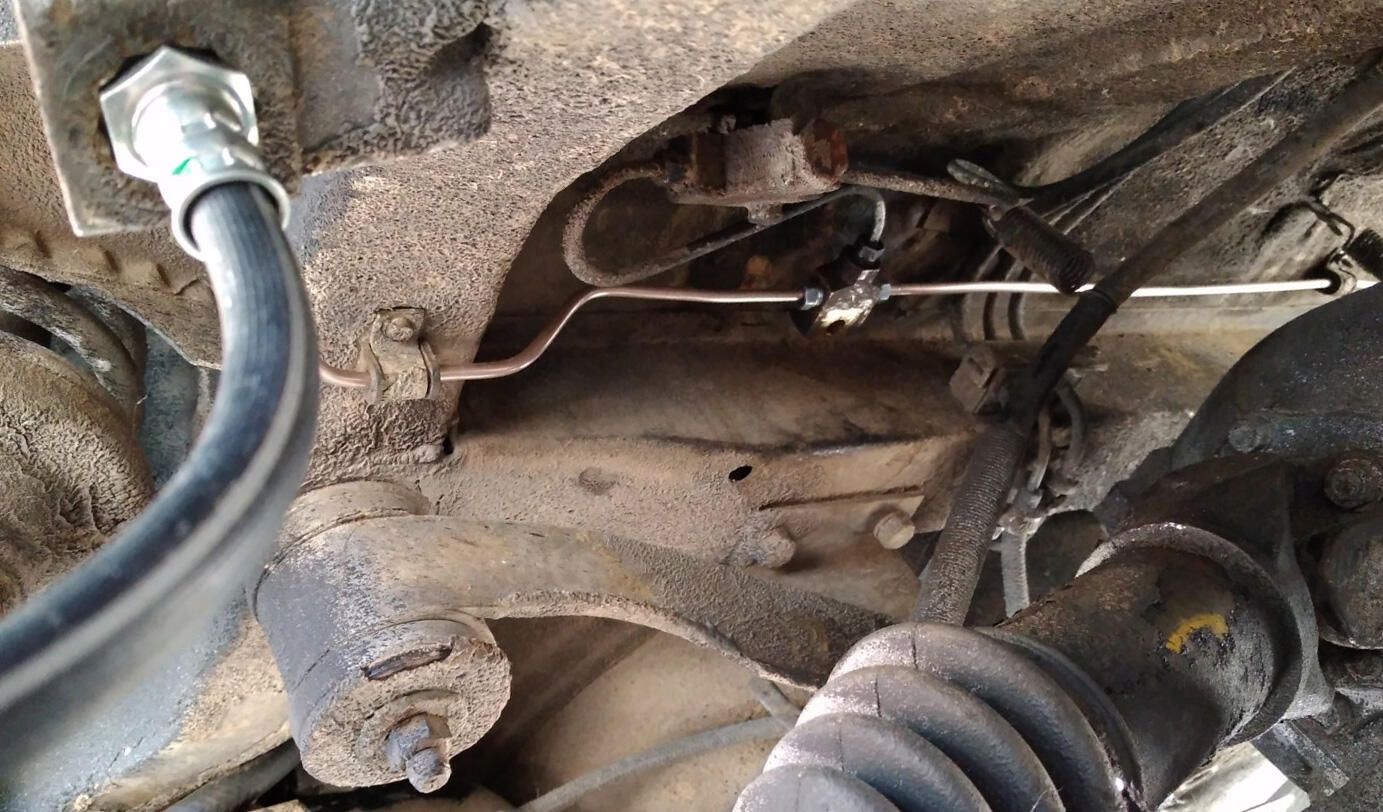
Reporting back here. Winter got caught up in some home improvement projects (our pantry looks fantastic now), but I'm back on the Z kick. All the tools and supplies came: And I practiced a bit before attempting to fabricate lines for the car: I think they came out OK: All new rubber lines as well, no leaks and we're back in business. Still might buy the later S30 conversion kit, though, since early Z brake cylinders are NLA.

-
How does my shopping cart look? Anything you guys would add/remove/change before I pull the trigger?
-
Thank you all for the GREAT input. I think I'm going to try to tackle this myself. I really appreciate the links to the tools in particular. Re:the link to the full set for $300, I'd seen that (those guys are somewhat local to me and I follow them on Twitter), but I really don't have any inclination to re-run the whole braking system at this point. Maybe 1.5 years ago when the engine and trans were out and I didn't have to work around them... Will report back once I have some supplies.
-
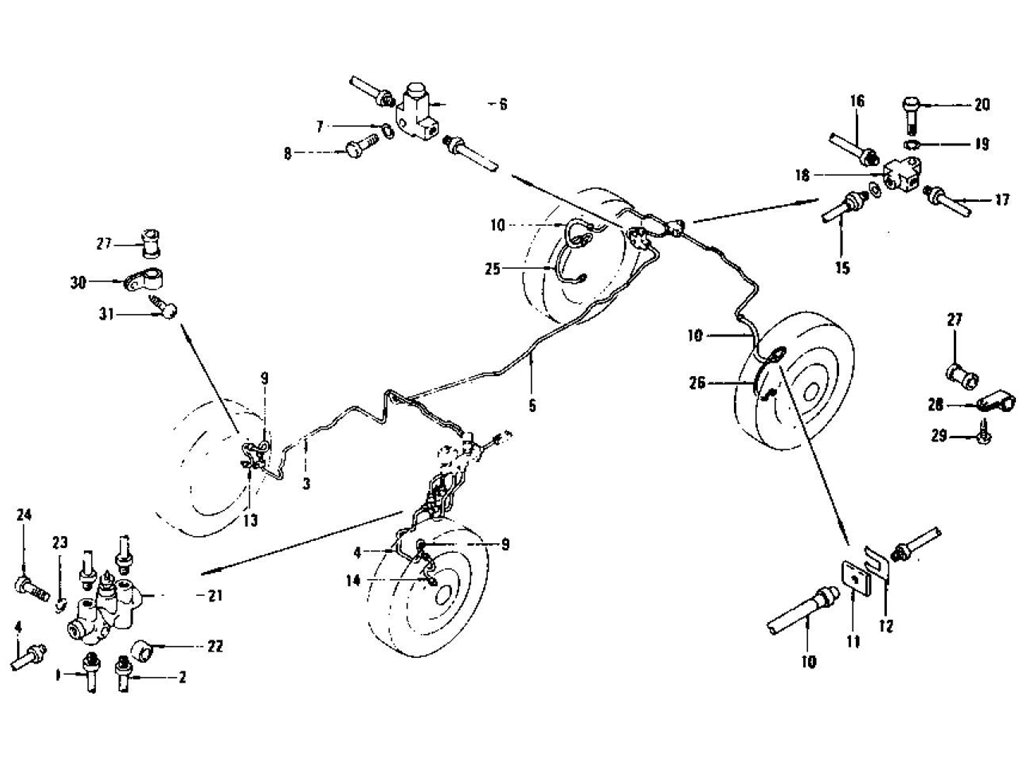
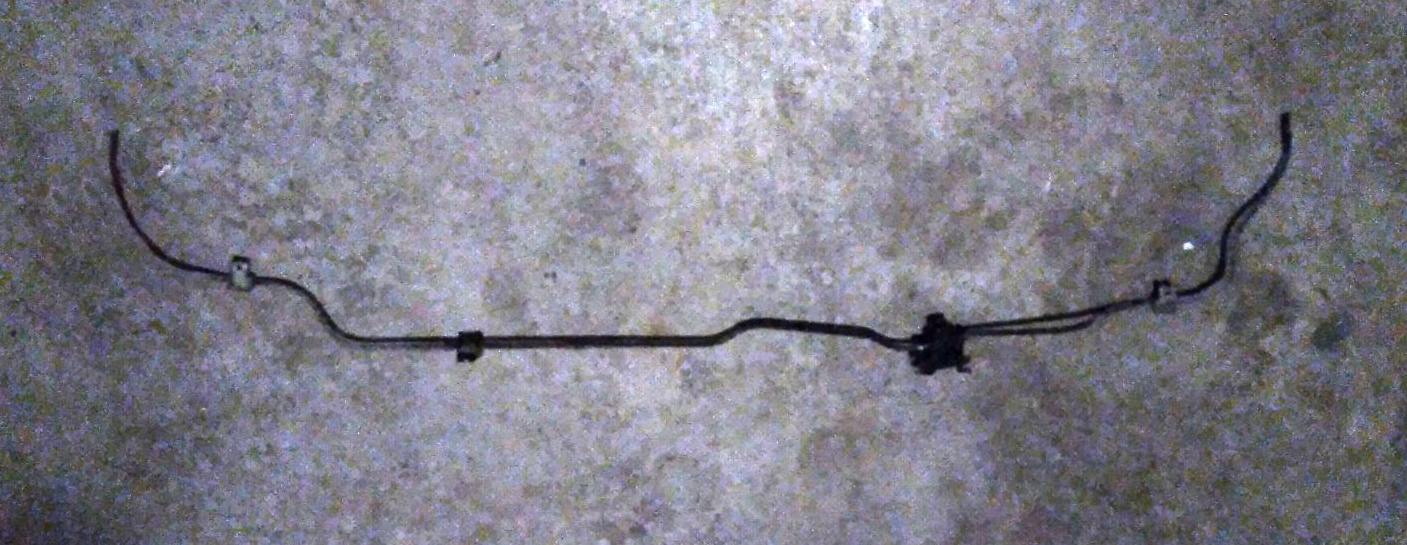
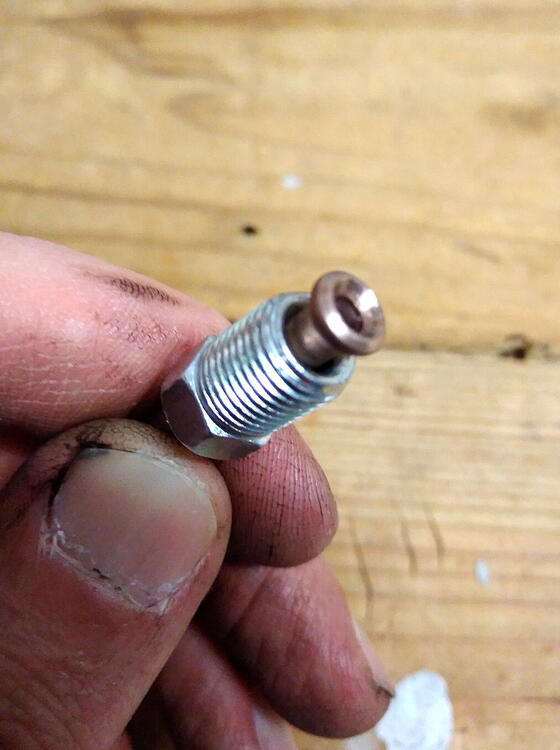
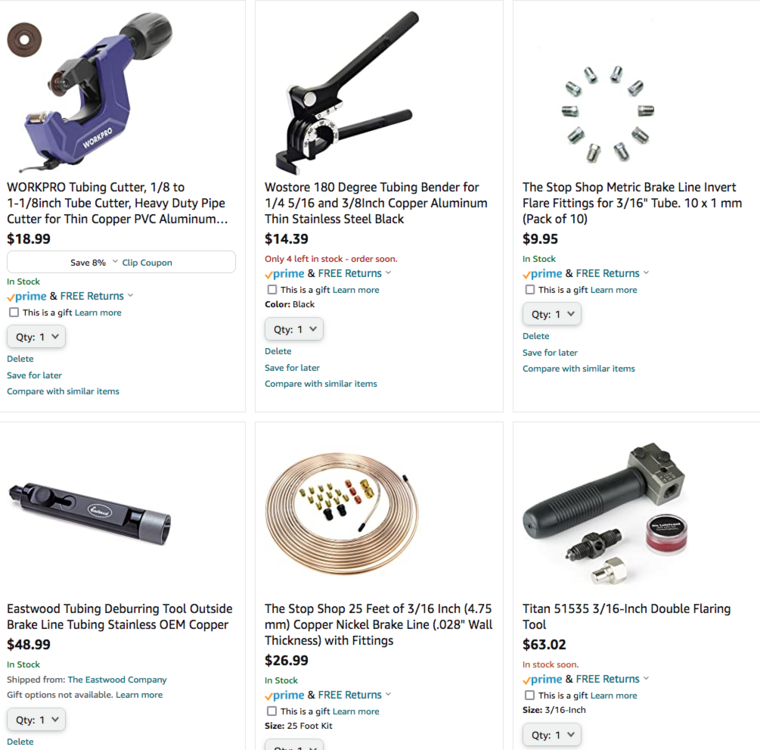
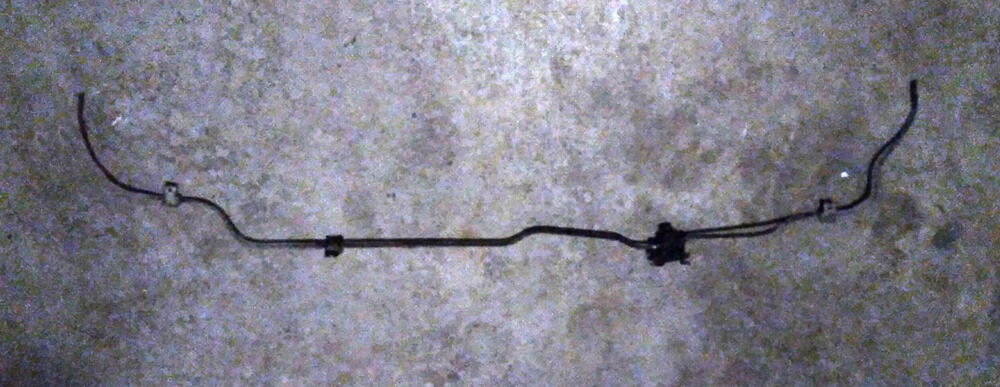
Need some input here. My car is a 7/72 build but still has the early braking layout. So the left rear brake line is clogged. Nothing comes out the bleeder screw. I disconnected the rubber line from the hardline on the hub, still nothing. I disconnected #15 from #18 above, and brake fluid came out. I'm pretty handy with a wrench, and was using the right tools (10mm and 19mm flare nut wrenches + PB Blaster), but 49 years of never being disconnected must've taken its toll, and neither hardline would separate from the rubber lines near the brake drums. Nuts rounded completely. So I had to cut the hardlines next to the nuts (sorry for the terrible pic; I took it in the garage afterward): Question: Should I try to source replacement lines, or just buy parts and tools and bend new lines myself? I have new rubber lines ready to go; just need to get the hardlines sorted. Am I correct in assuming the lines are 3/16" with inverted flare 10mm x 1.0 fittings? And I can buy a brake tubing bender and flare tool? Thanks for any and all input.

-
Glad to hear the battery tray is OK. If the frame rails and floor pans are OK, then you're ahead of most, I'd say...
-
Welcome! 1-family Z-owner here also. Car looks like a great starting point! I see all the emissions controls have been removed. Any rust to deal with?
-
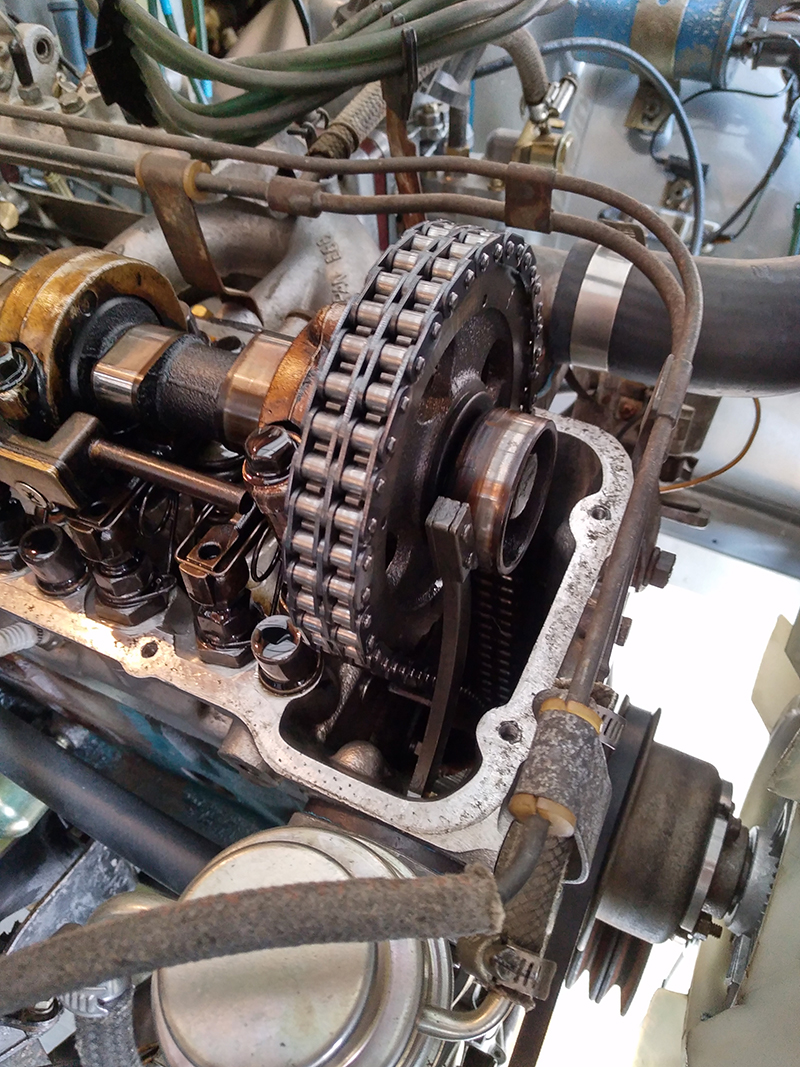
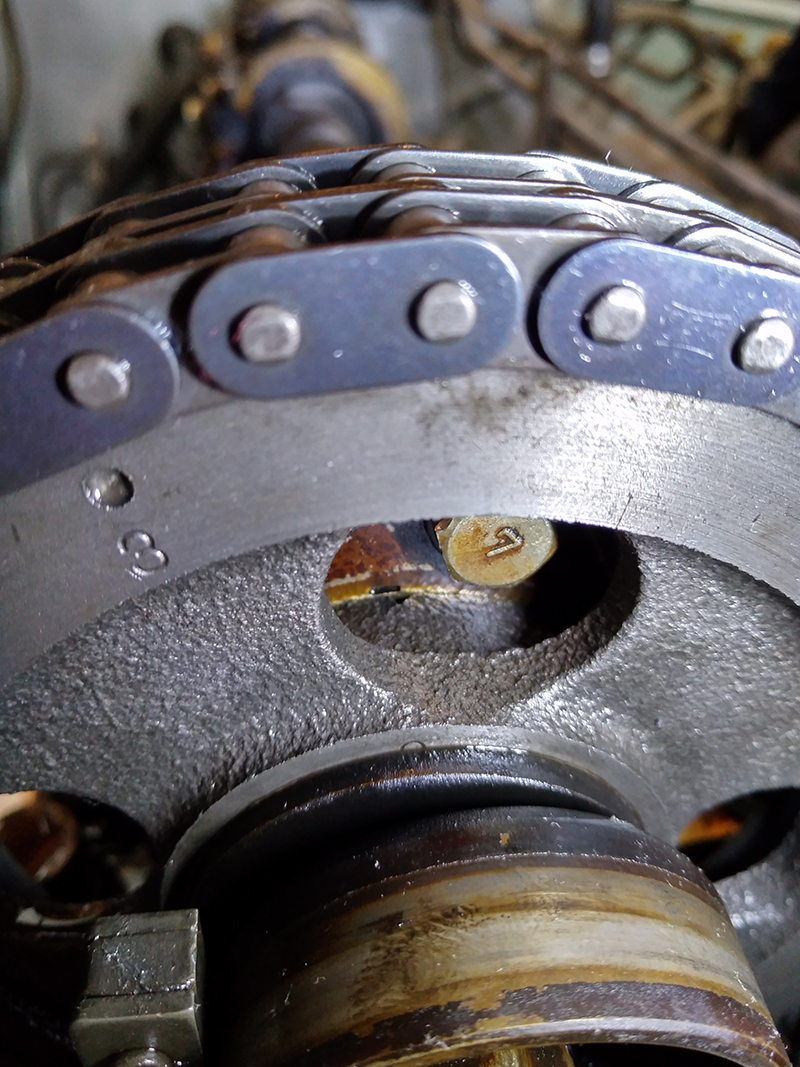
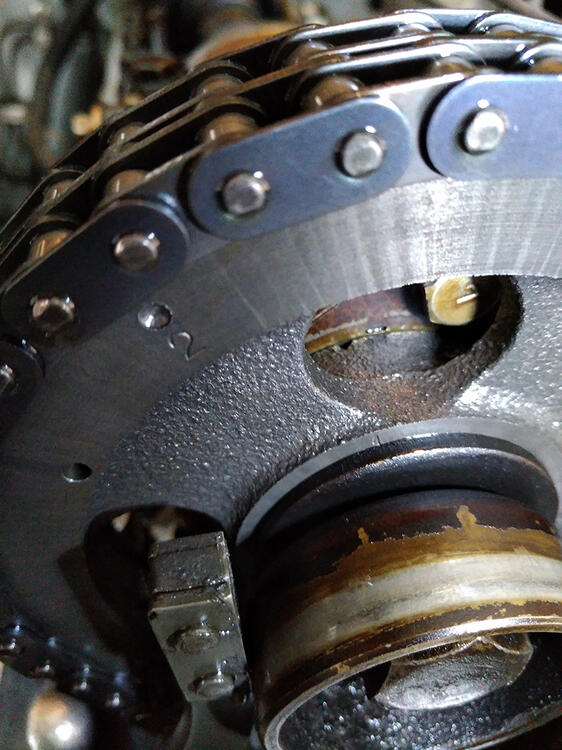
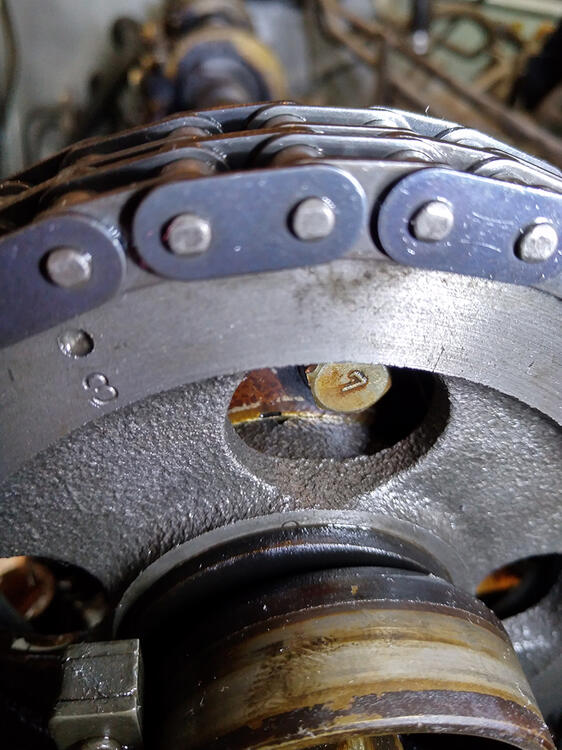
So here's a weird one from a couple of weekends ago: I've been trying to get the timing right for a while now. Points and distributor cap are new, points gapped correctly (I don't remember the exact number but I did it by the Haynes manual). I put a dab of white-out on the pulley marks, started the car, let it warm up and then hooked up the inductive timing light. No matter which way I twisted the distributor, I couldn't get the timing in range. It was right on one of the end marks when the dist. was turned one way, and way off the marks when turned completely the other way. Two weekends ago, I decided to check the cam sprocket for slack in the timing chain. I've adjusted the rocker clearance before, but I'd never done the timing chain check. So I pulled off the cam cover: found a suitable screwdriver to block the timing chain, and looked at the marks. Before: and after: I think that's enough right? The weird thing is that the timing can now be adjusted within range. I set it to 10 deg. BTDC and the car purred like a kitten with a rock-solid 700-rpm idle. I wonder if it's correlation but not causation? To my knowledge, there's no relationship between the cam timing and spark timing, since the dist. is run off the crankshaft... The carbs have a good base tune, but the mixture still needs to be dialed in. I wish the 14mm Colortune wasn't on backorder... Ugh.

-
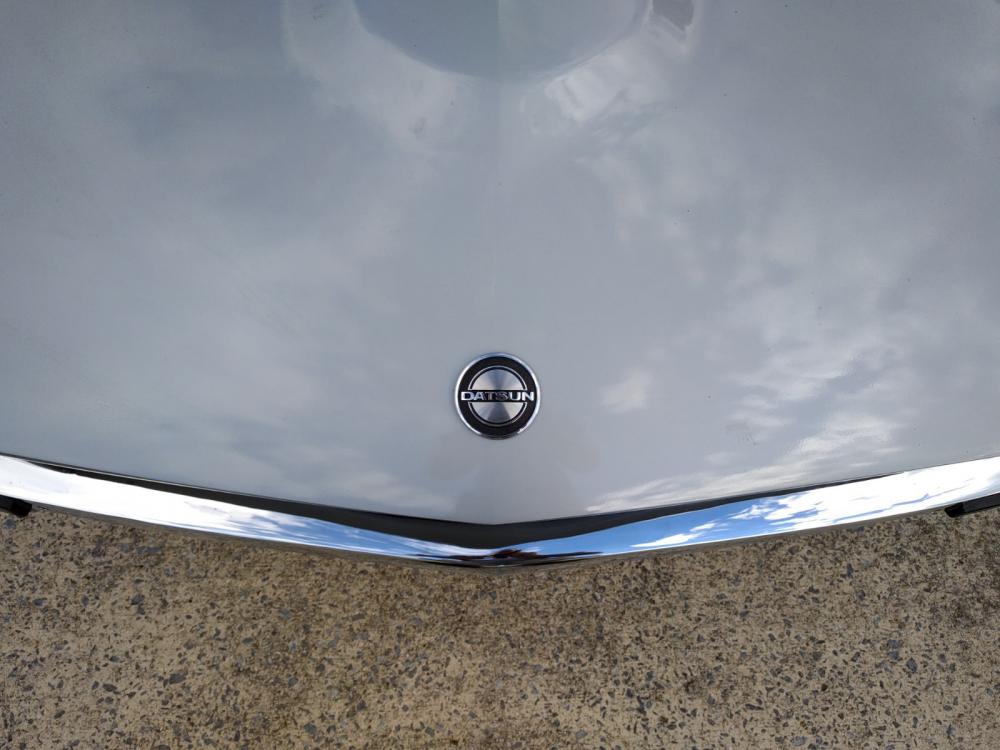
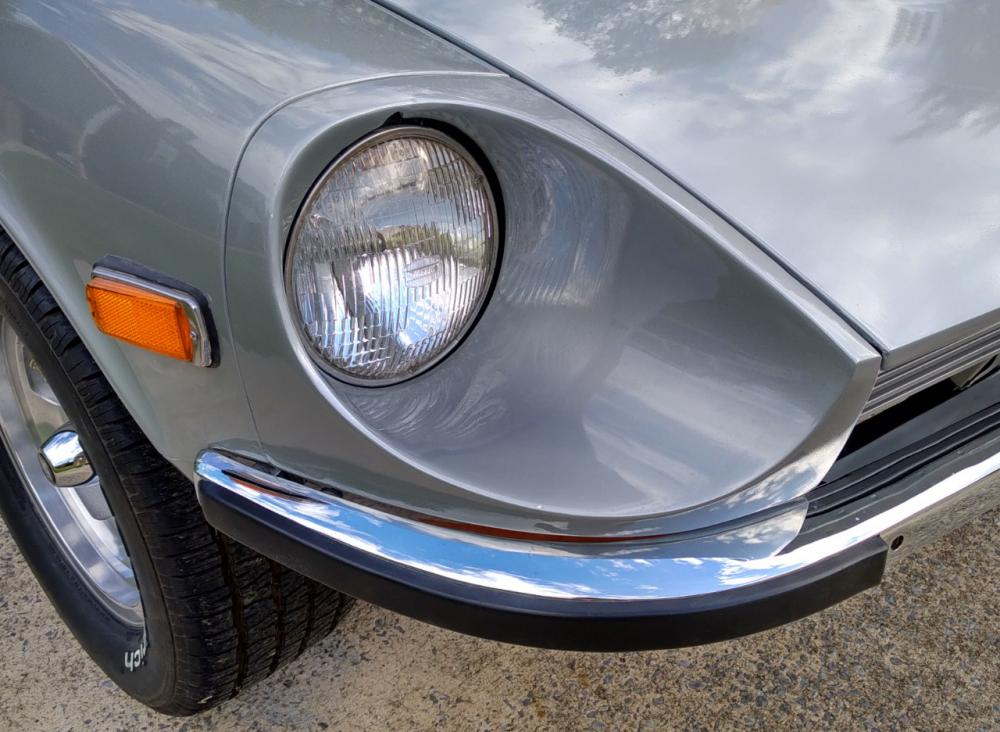
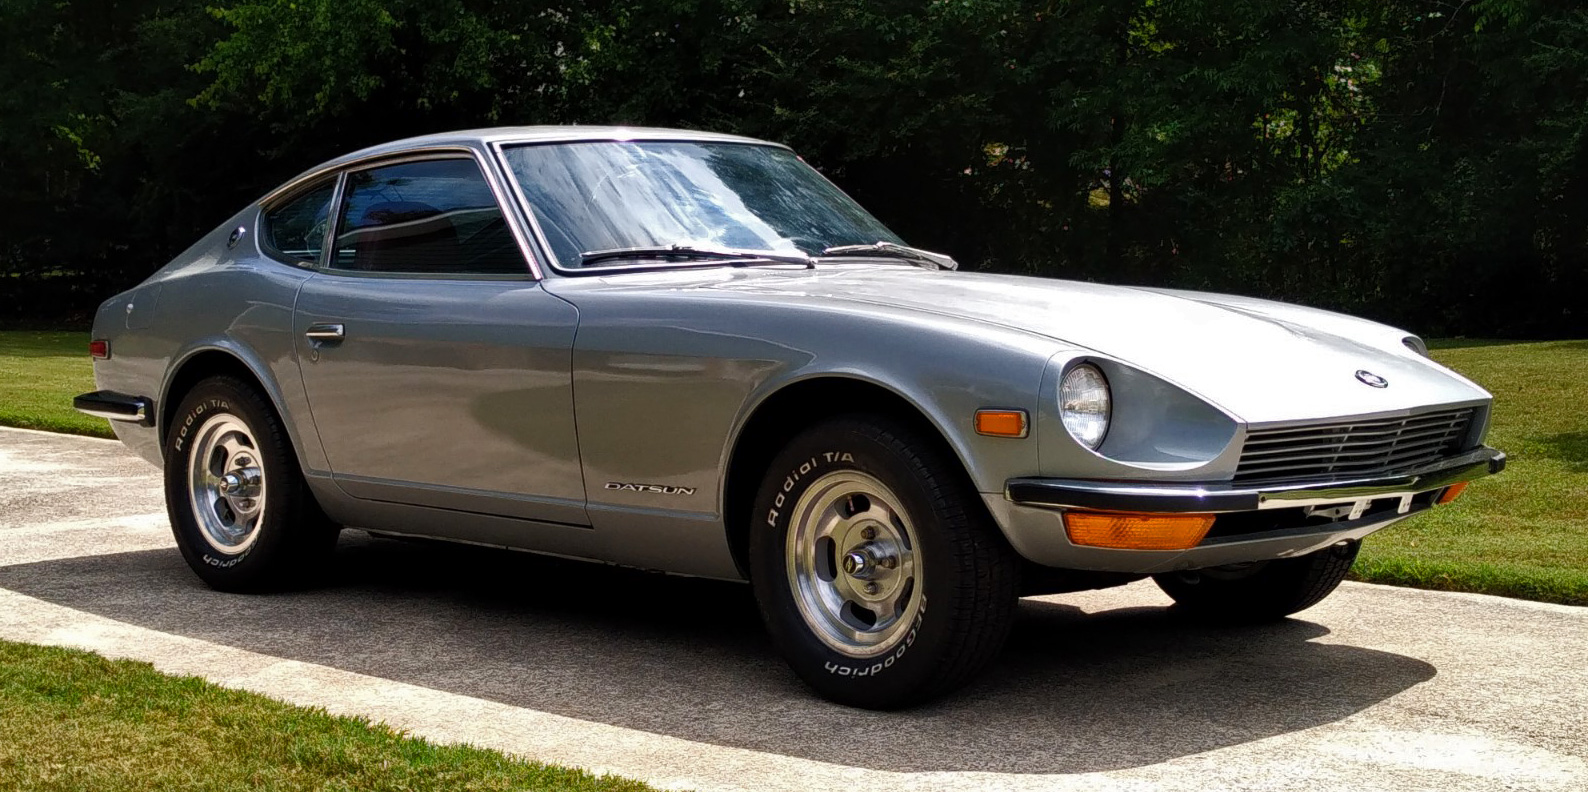
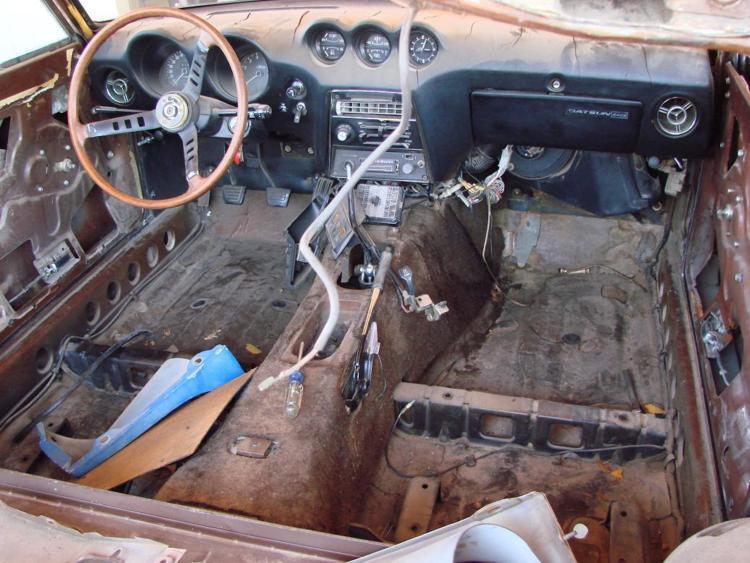
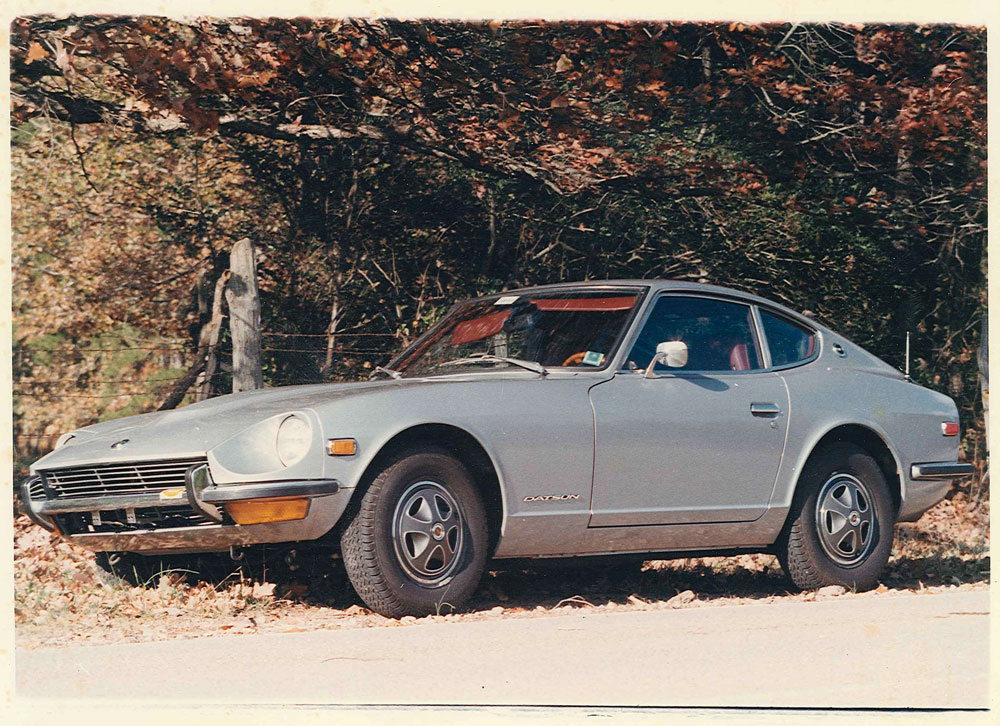
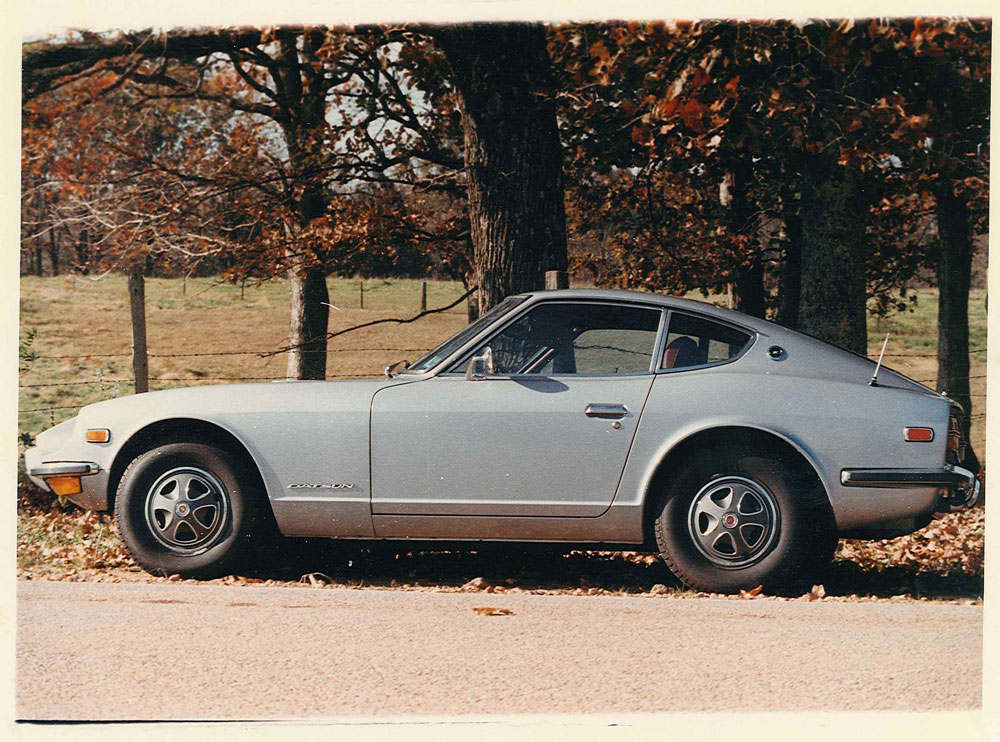
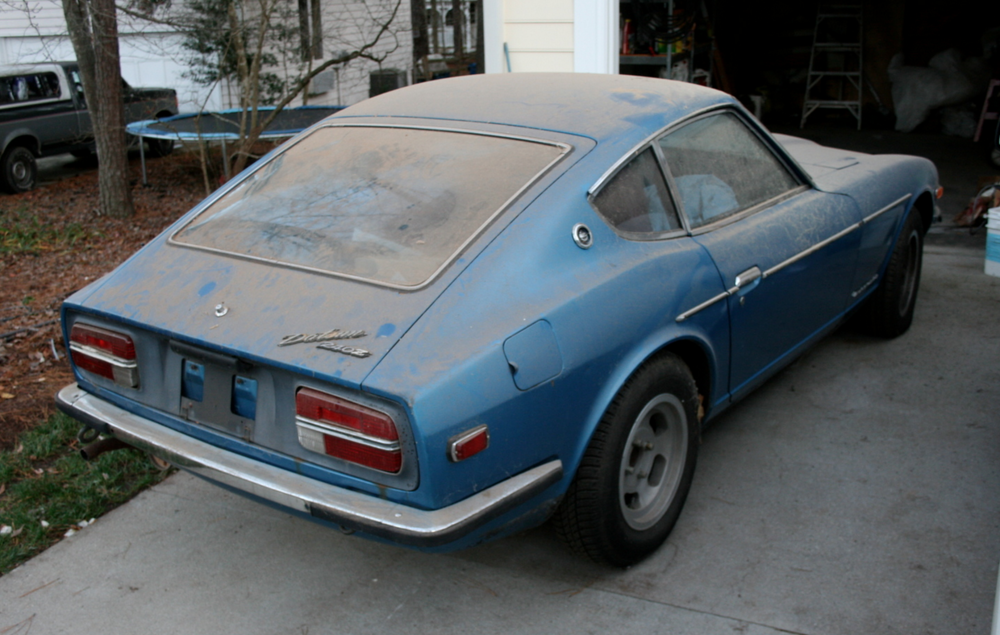
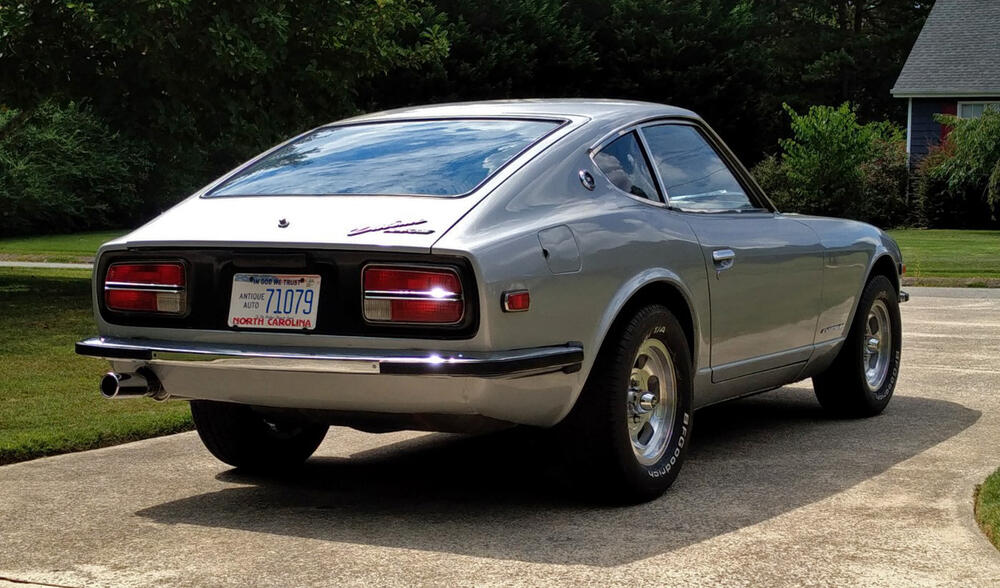
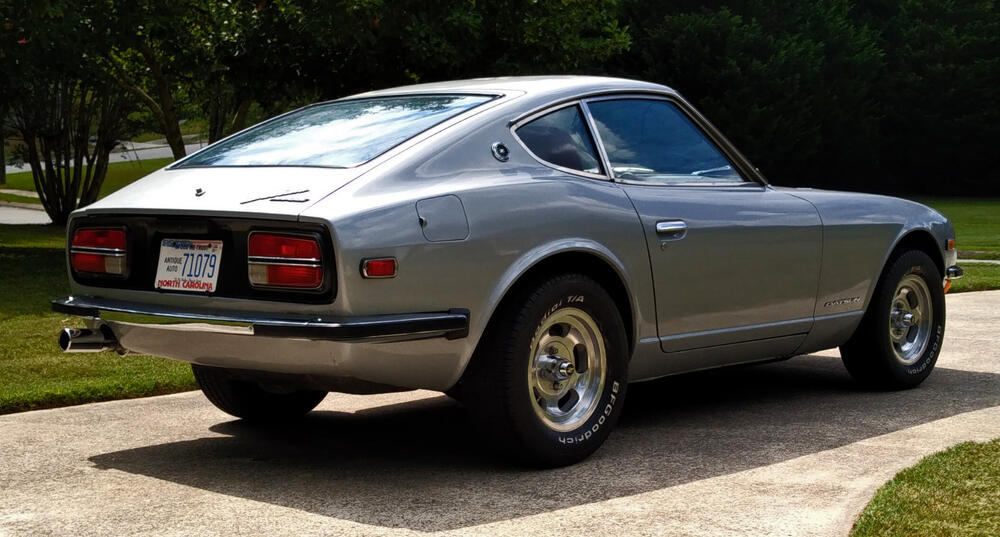
Hi guys. I figured I should start a build thread in here. The actual restoration is very close to being complete, but this seems like a good place to document a few things and perhaps ask little questions so I don't clutter up the main subforums with little inquiries when I can't find the answer. Anyway, this is about 93069, which my dad bought new in October of 1972 from Cardinal Motors in Jacksonville, NC. He was 21 years old at the time and just starting his senior year at NC State. The car's block number is 118555 and it has a built date of 07/72 (right around the brake system crossover). Original color: 901 Silver over red vinyl, dealer-installed factory air. Here are a couple of pictures my dad took in November of 1972, one month after he bought it: My dad had it repainted blue in the late '70s. My mom has always liked blue cars, so it's possible she had a hand in choosing the color. It seems rub strips were installed at that time also. I obviously remember the car all growing up. It was my dad's daily driver, and my brothers and I crammed into the back of it on more than one occasion, legs dangling behind the front seats, lying on our backs in under the hatch glass, watching the trees flick by overhead. Very unsafe, but it was a different time. The car deteriorated over the years. Battery acid ate a hole in the inner fender well and firewall, water seeped down and rusted out the passenger side floor pan. Rust started to pop up other places also, like the rocker panels and the trunk sill. My dad had the engine rebuilt in the '90s, and the carbs refurbished by the original owner of ZTherapy around the same time. I still have his "Just SU Carbs" and "240Z Tuneup" videos on VHS. Pretty nice viewing. I've always been into cars, but was never wild about the Z, which always felt weird because everyone I talked to said it was an incredibly cool car. Maybe familiarity just breeds contempt (or indifference in this case)? Who knows. Regardless, I got into wrenching about 20 years ago and have had a long succession of project cars (FB RX-7s, mk3 Supra, Type 85 Audi, various BMWs, etc), but found it hard to muster the motivation to start restoring the Z. Finally, about 10 years ago, I was at a point in my life where I had a place of my own with a 2-car garage and wanted to start bringing the Z back into focus. This was its state then: Pretty much a "barn find" in my parents' own garage. Dusty, rusty, mismatched tires, etc. I had chucked the bumper overriders years ago and managed to talk my dad into buying a set of slotted mags since he kept losing hubcaps. It hadn't run in 6+ years at that point. Back in 2005, I was driving it and the battery wasn't properly secured. It slipped off the its pedestal and impacted the oil filter, creating a nice gash (and minor fire, which I beat out). I was young and stupid and continued driving, trying to make it to the nearest auto parts store for a filter in spite of the fact that I likely had marginal oil pressure. The moment the engine started acting funny I parked it and walked the remaining 1/2 mile to CarQuest for an oil filter. I put it on and drove it home, but was scared that I had permanently damaged something, so I just let it sit. Fast forward to 2011, Stage 1 of the restoration was determining if it would run properly or if the engine needed a rebuild. I replaced all the consumables on the engine, had the carbs rebuilt (again) by ZTherapy and drained and resealed the fuel tank. Got everything hooked back up and after a few hiccups...it started and ran just fine. That was a relief. Stage 2 had to wait a few more years. I moved for work about 6 hours further away from my parents (they had been 1.5 hours away before), and took the Z with me. In early 2014, I partially disassembled the car, removing the engine and some other key bits. The next spurt of motivation came in 2016, when I finally got my garage organized and finished stripping the car down. In 2017, my dad came with a trailer and took the car back to his house to have the body restored. He took it to a local body shop to have the rust repaired and the car repainted its original 901 Silver. The body shop did an OK job. I wish I had been local in order to supervise the work more closely, since they cut a few corners, especially in the engine bay. Long story short, the car returned back to me for reassembly on Labor Day 2019. I was initially pretty intimidated by the task at hand, but started chipping away at it and it started coming together. I finally got it started again a little over a year ago so it could move under its own power to our new (local) home. Since then, reassembly has continued in fits and starts, but this is where it stands now: Still quite a lot to do, especially as regards the interior, but I've been pleased with the progress so far. Thanks for reading and stay tuned. -Matt


-
The title's still in my dad's name and he lives in NC.
-
Voilà: https://jdm-car-parts.com/products/rear-finisher-panel-bottom-clip-parts-for-datsun-240z-sold-individually?variant=15530867359853 $35 actually... Oof.
-
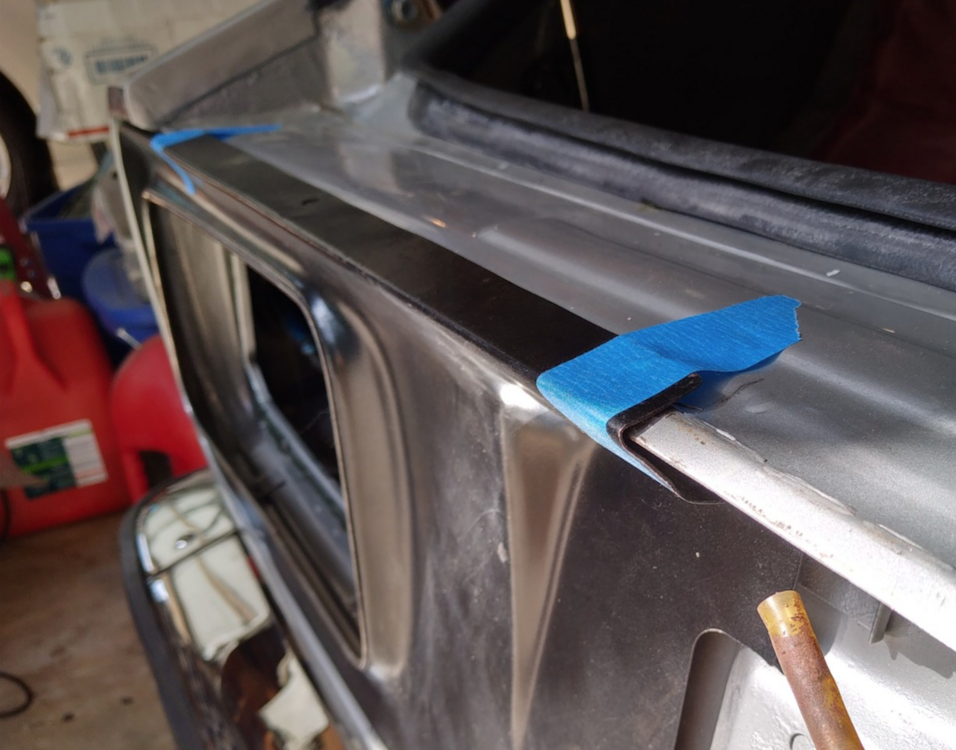
Update: I ended up bending the flange UP back to 180° to fit inside the finisher bend. Trying to bend it down using the block of wood technique just bent the metal above the bend, if that makes sense. I'll get it more flat, cleaned up and painted, but that ended up being my solution. Now, if only the clips that hold on the bottoms of the finisher panels weren't $30 EACH (one broke). Sigh...
-
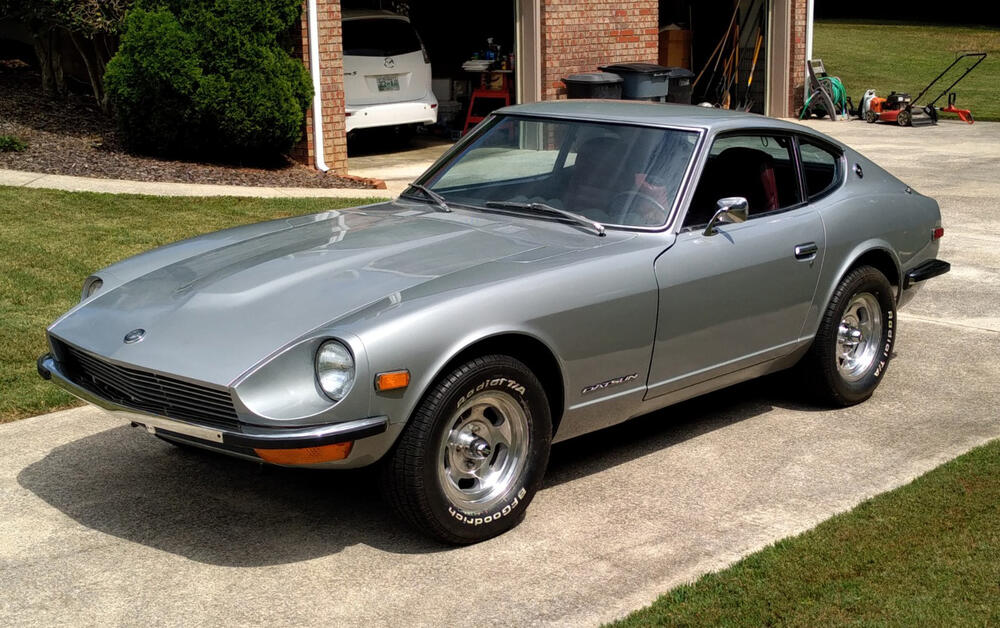
Quick update: FINALLY finished the car's exterior. 100% done. Need a bath, but it's all there. Feels good. Couldn't have done it without all the great resources here and elsewhere.

-
Quick update here: I managed to get the left corner of the hood to align by removing one of the torsion springs. The hood doesn't stay up with just the one spring, but the hood prop keeps it in place when opened.

-
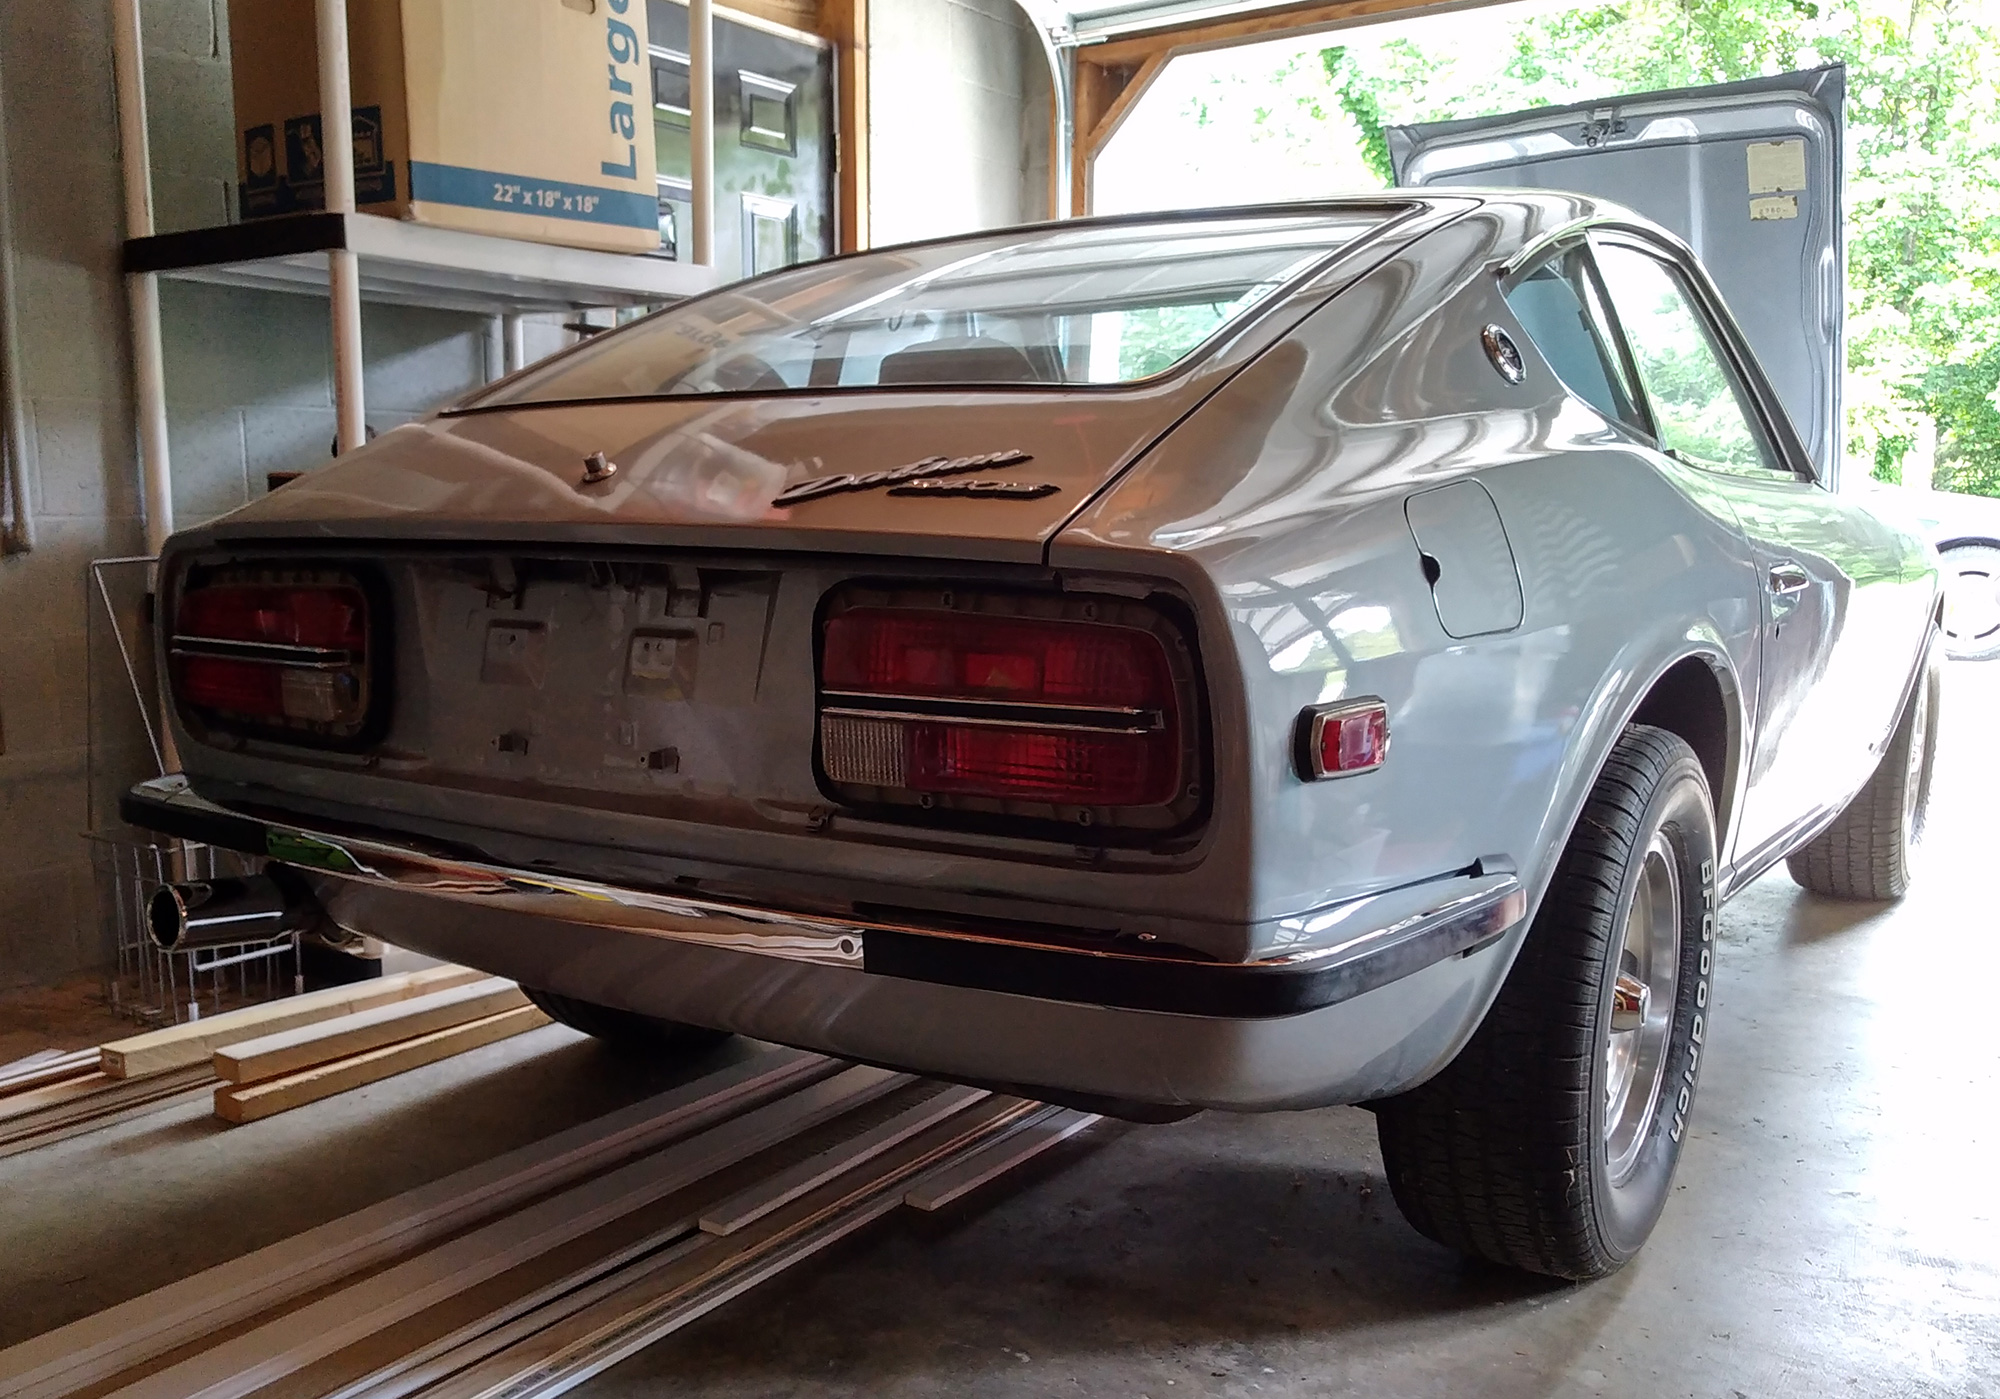
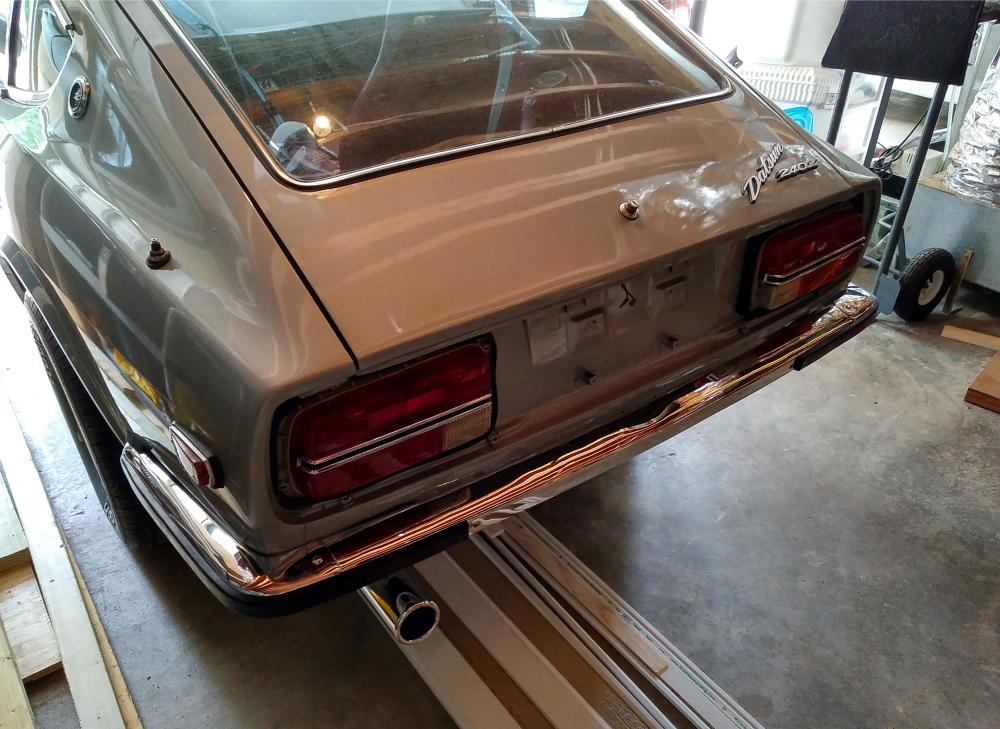
Got the rear bumper assembled and installed today. The innermost nuts for the rubber bumper strips were a real bear. I installed the bumper end rubber "cushions" also. I don't see them on many early Zs, but they're apparently OEM and still available, so I bought a pair and put them on. I might take them off; they look kind of clunky and to my knowledge, my Z never had them (or they were pulled off / fell off very early in its life). We'll see.

-
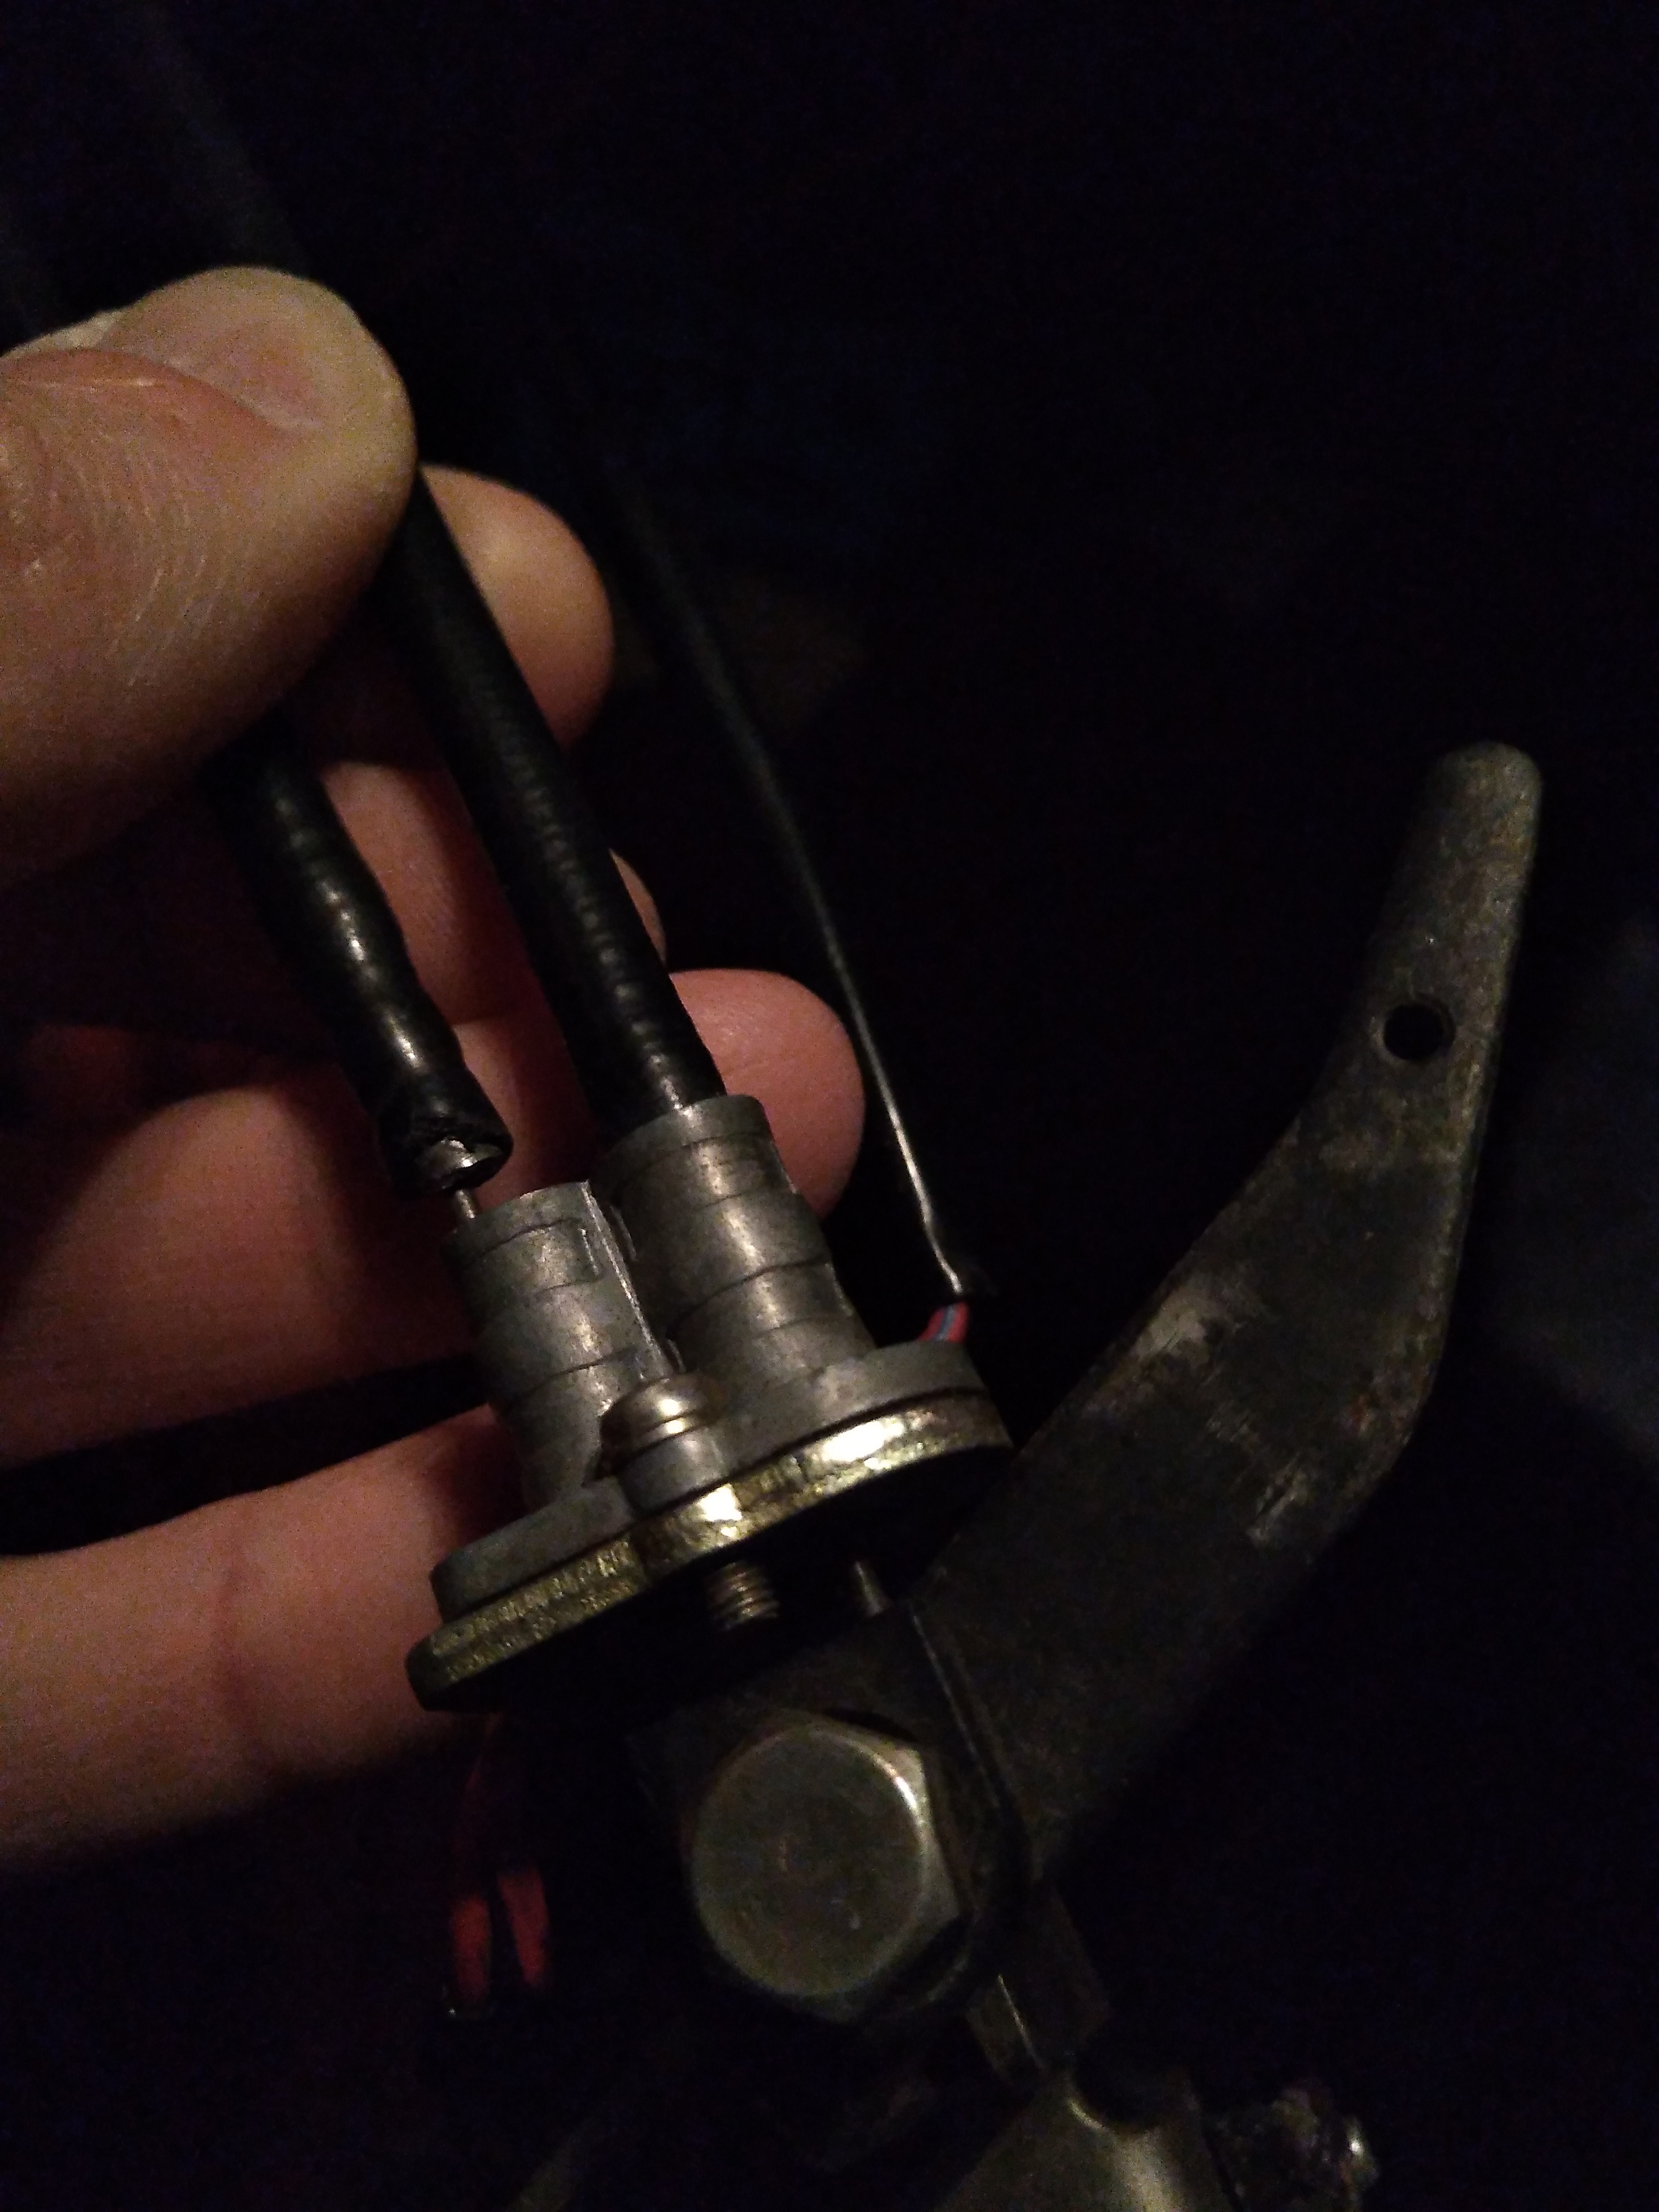
I don't think I can re-swage something that's already been swaged... The metal looks thick, almost like a casting, probably swaged at the factory using some industrial press. Surprised to find no hits on this when I searched... I can't be the only Z owner with this issue, can I? Yep; already bought that... It's waiting to go in, but first I have to get the cable situation sorted.
-
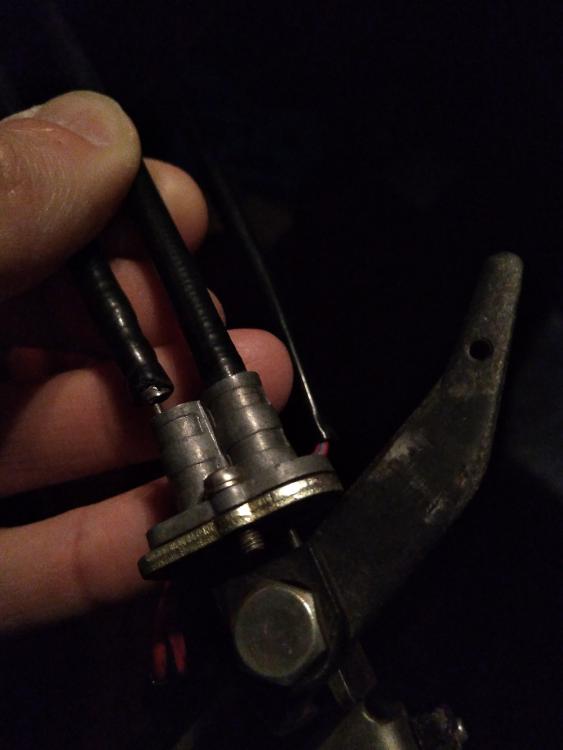
I searched for a solution here, and unfortunately the title is the only way I know to describe it. See pic below: Does anyone have any tips for how to secure the choke cable sleeve in the lever assembly? I thought about JB Welding it, but I don't want to risk getting JB on the cable itself and gumming up the works. Thanks all.
-
Thanks! I'm aware of the left-right distinction, but for clarity in this particular situation, given that all the work was done outside the car and facing the nose, I used left-right designations as observed. Re:the rubber plugs, I'd rather have a couple of chromed "buttons" in those holes. I honestly should have had the rechromer weld them up when he was repairing the rust and rechroming...
-
Sorry for the late follow-up here. Been working on house projects for the last few months and today is the first time in a while I've been able to devote some time to it. It actually only took me about 15 minutes to fix. Undid the passenger side, centered the bumper, secured the middle and then cinched the ends down, no problem. Thanks for the help guys.