BoldUlysses
Free Member
-
Joined
Everything posted by BoldUlysses
-
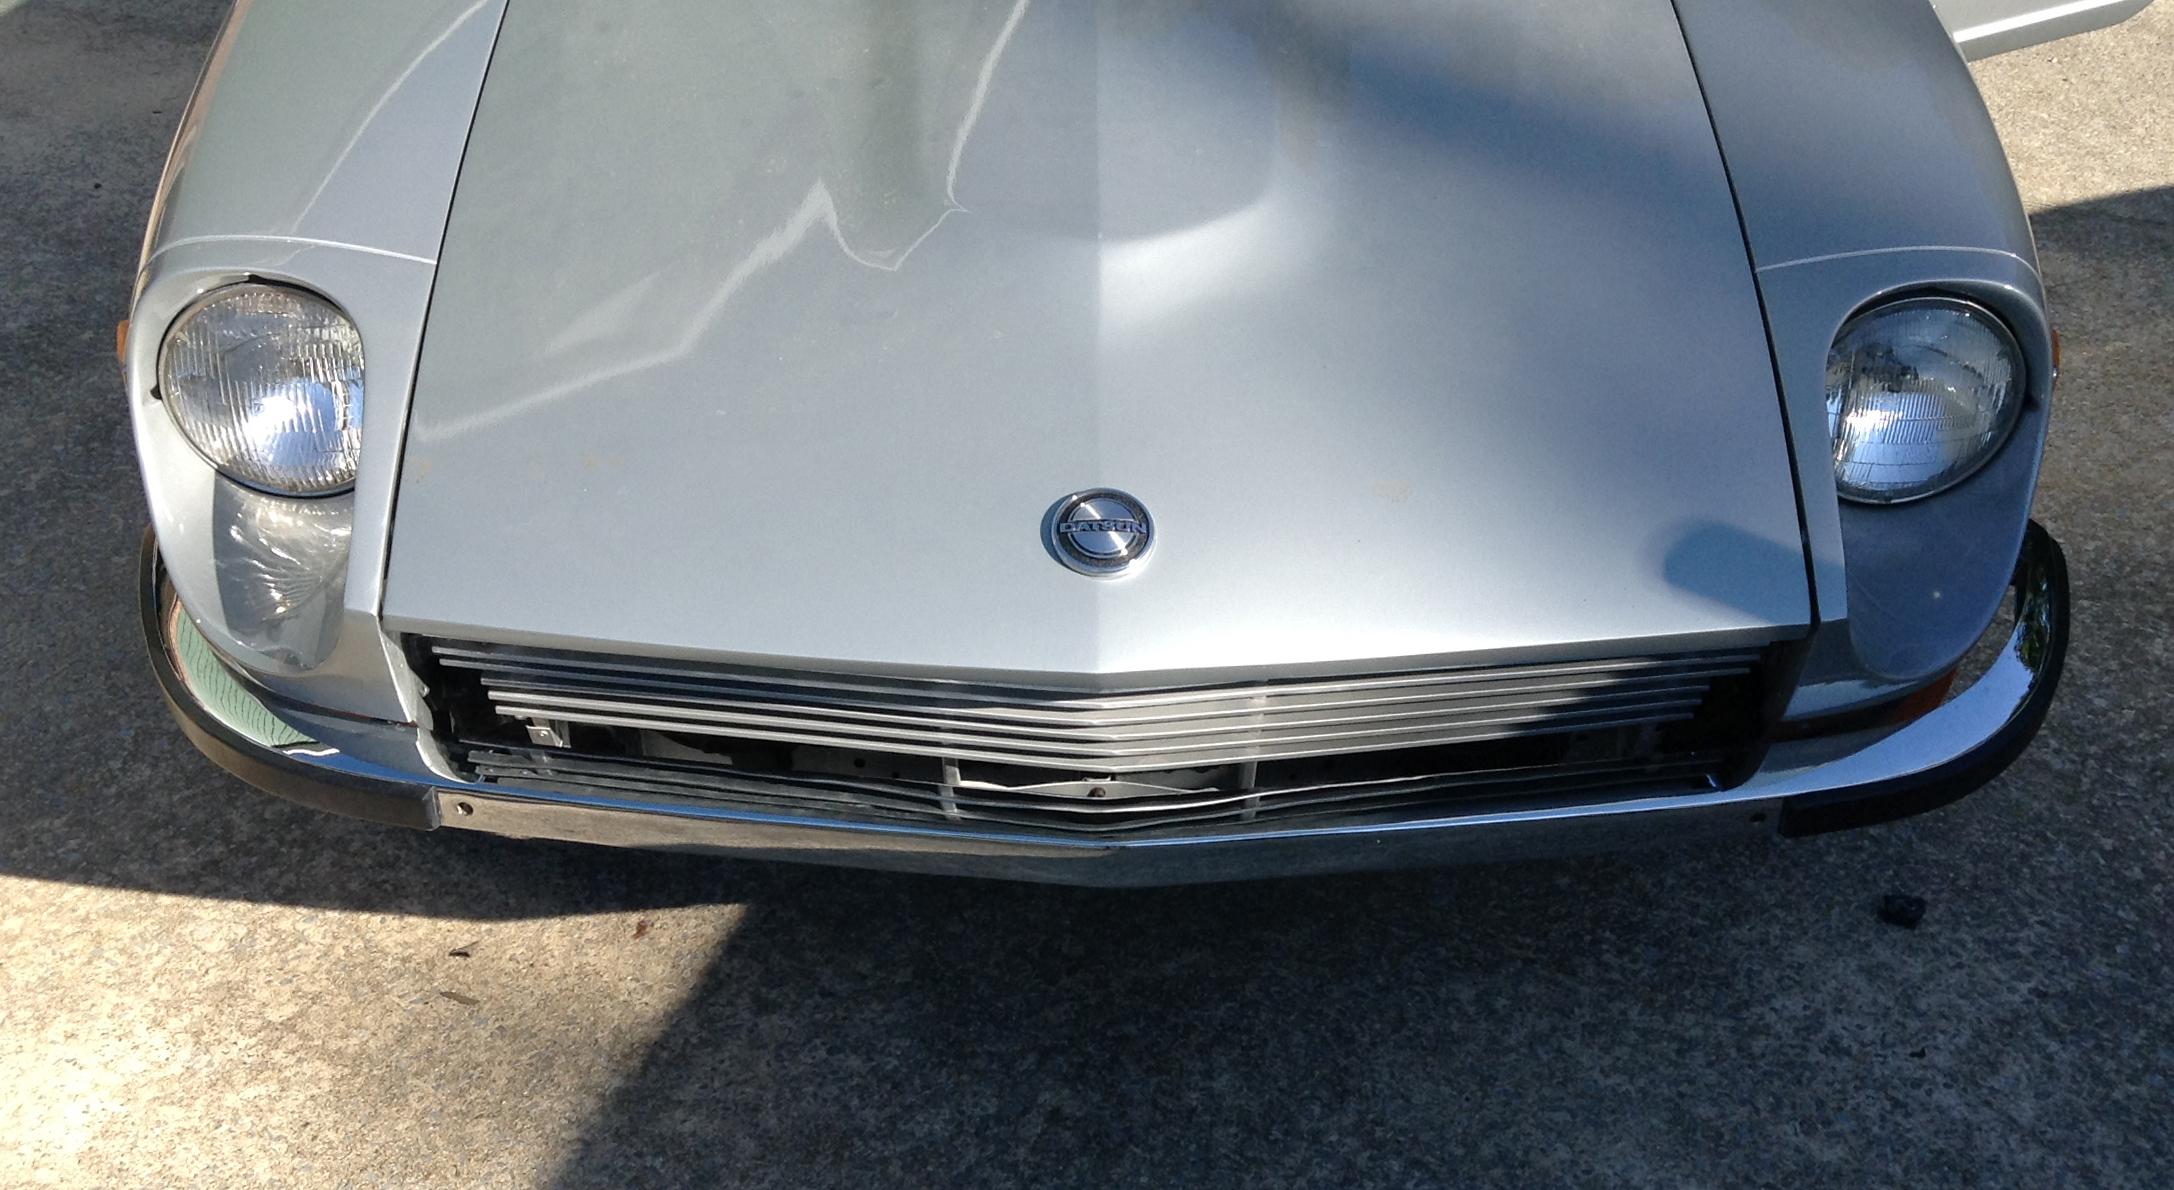
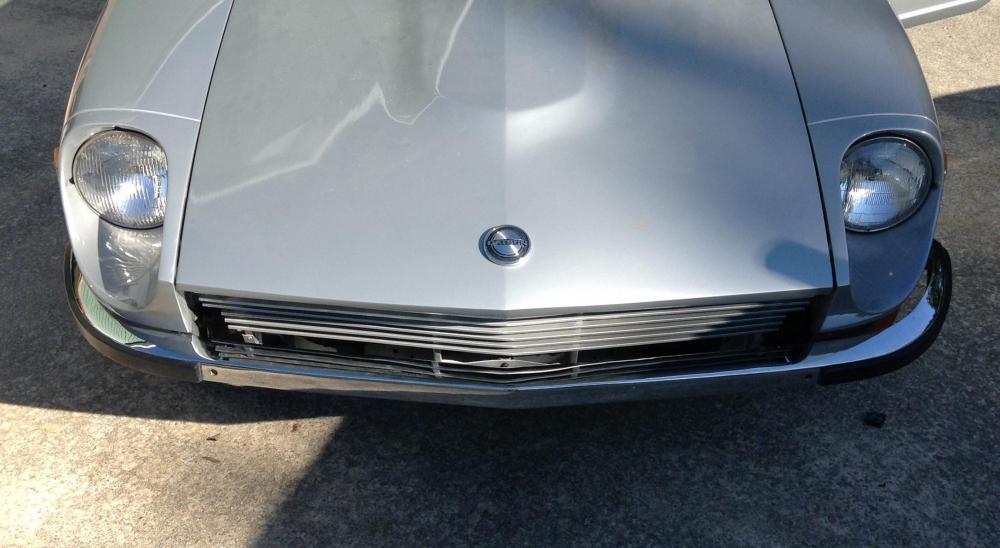
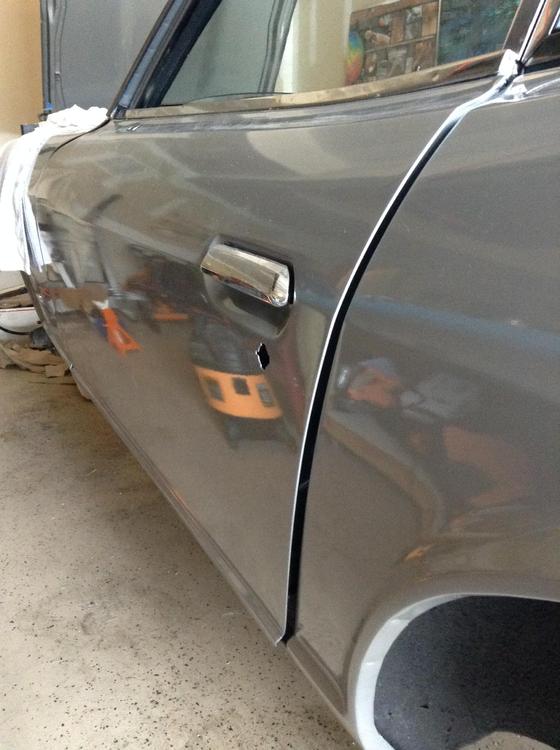
No sir. It's original, but it got rechromed last year. Here's a front view: The bumper seems offset to the right just a bit. Barring some "eureka moment," the only thing I can think to do would be to loosen the passenger side end bolt and try shifting it over. I think the gap on the passenger side is perfect though...
-
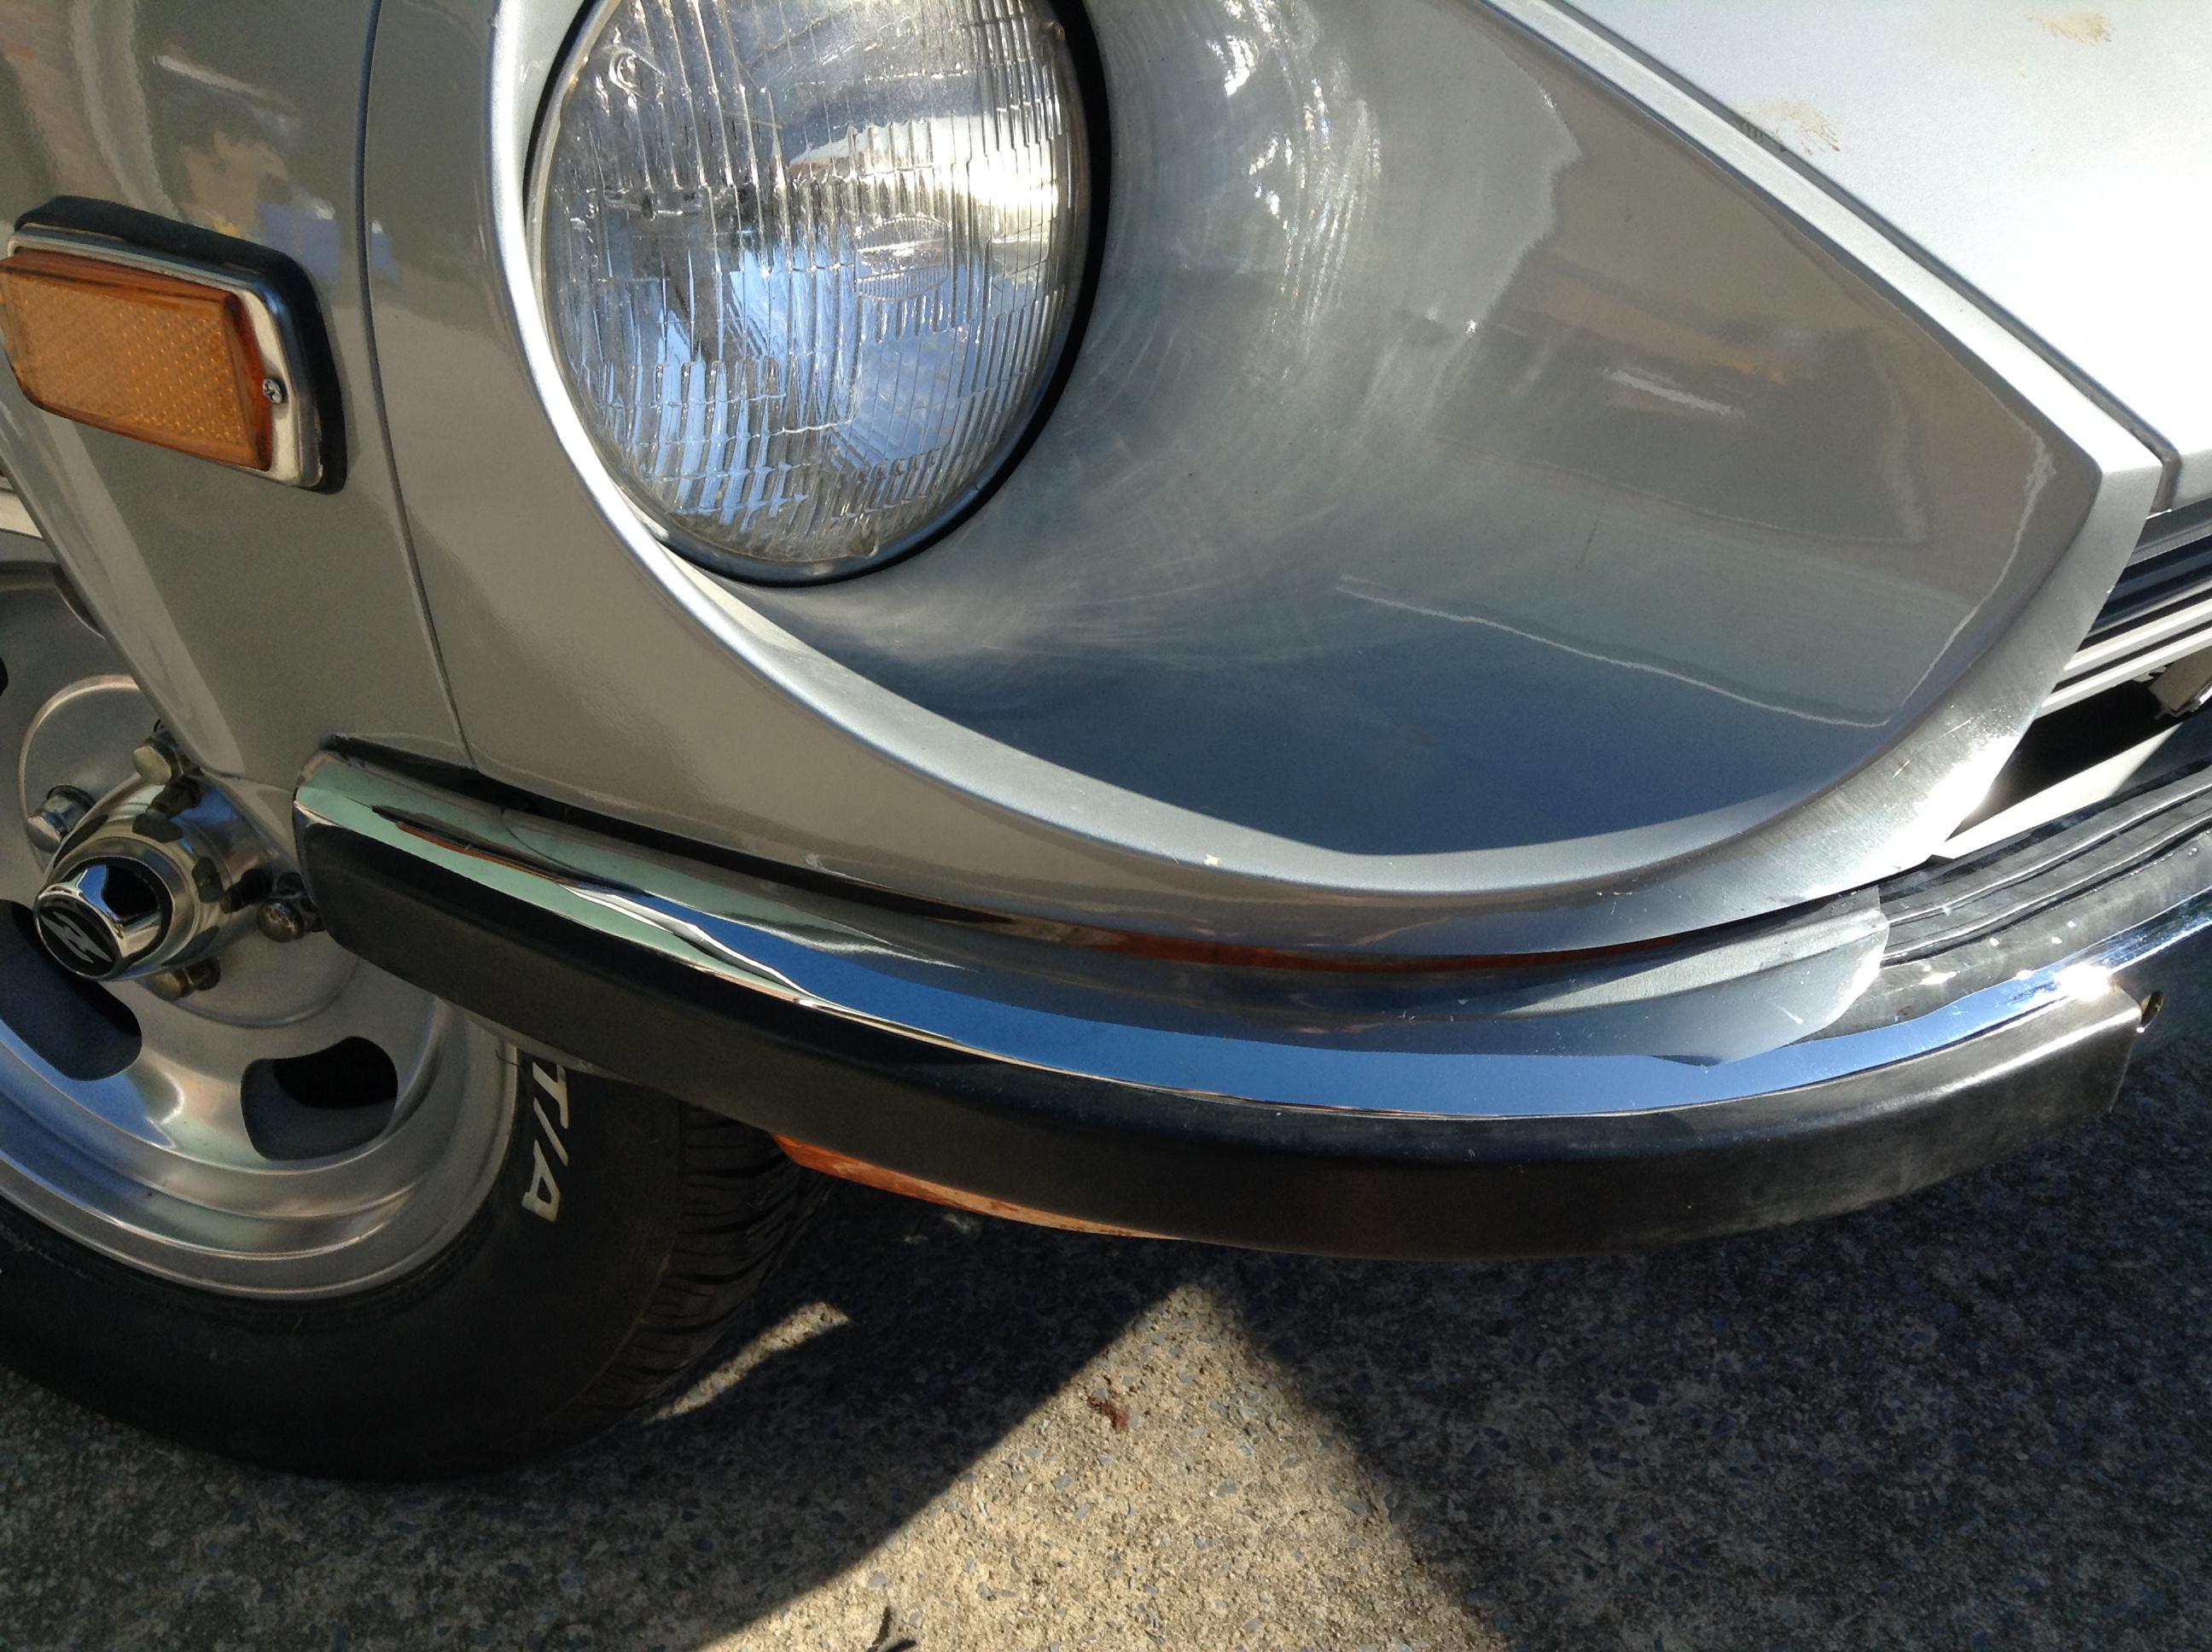
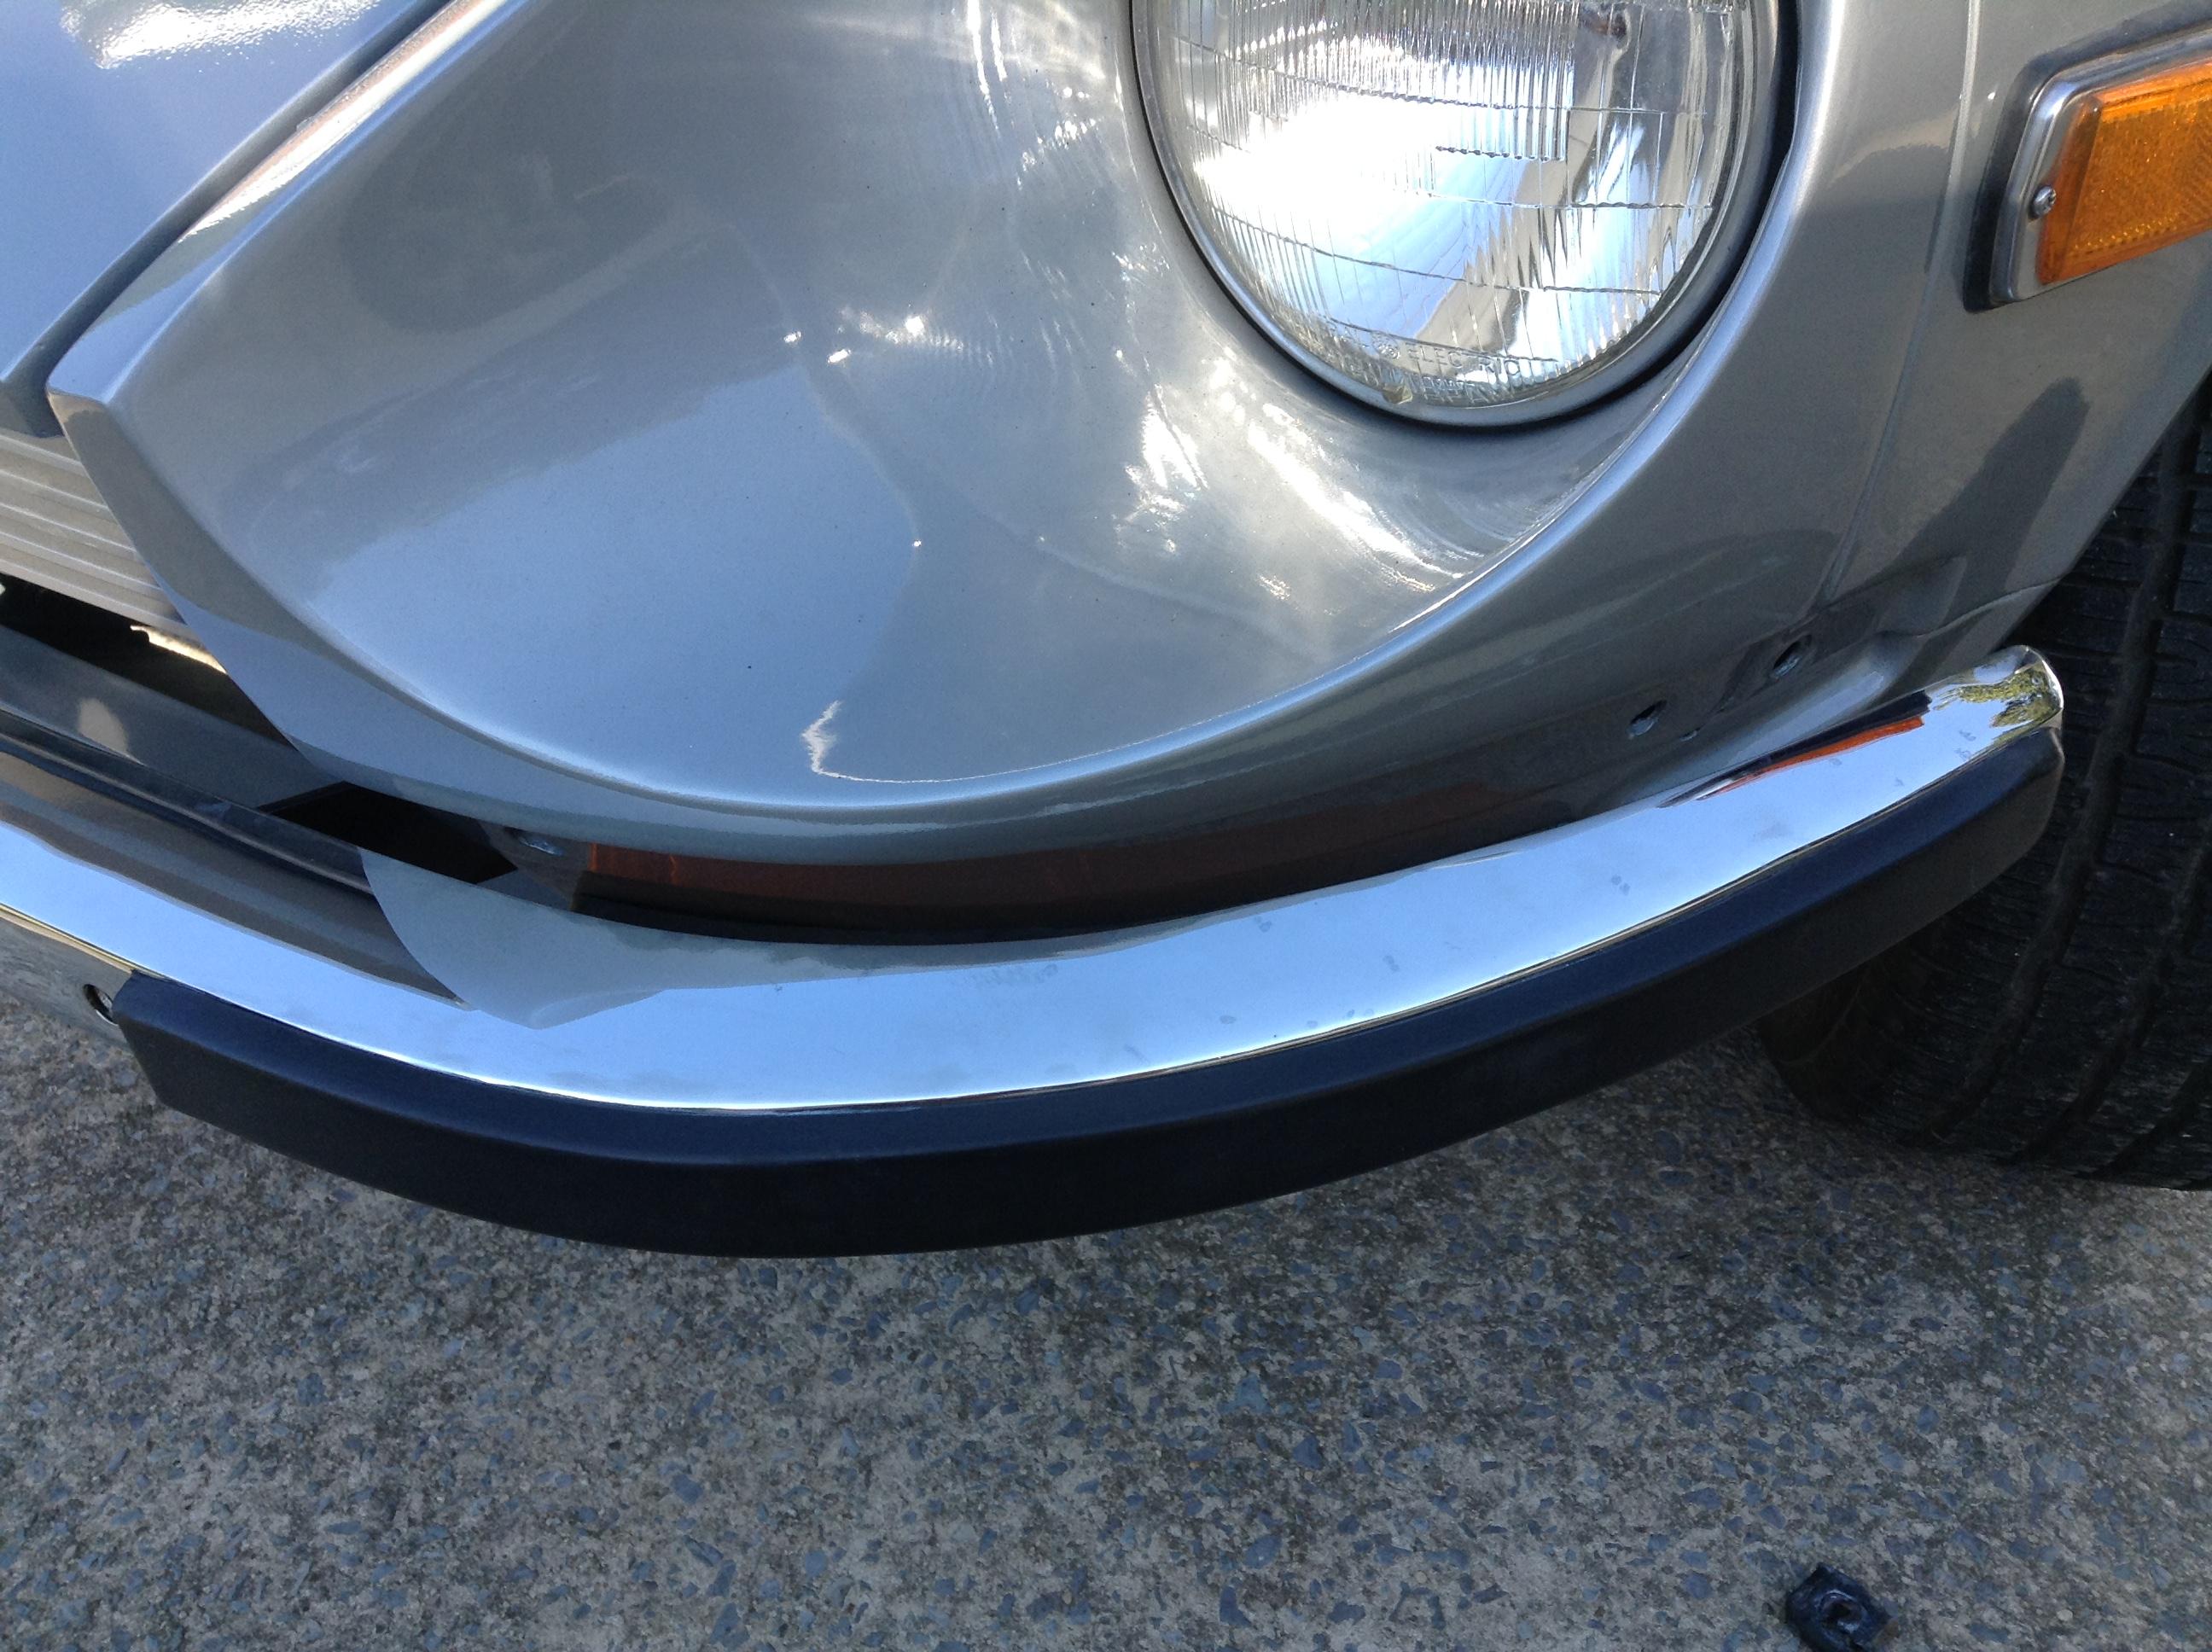
OK guys; what's going on here? Passenger side perfect, driver side way off. I got everything on loosely and then attached the passenger side bumper end bolt. All the body panels are straight; everything lines up except for the bumper on the driver side. Car has never been in an accident. Both bumper brackets are identical length and profile (I checked). I tried swapping them side-to-side; no difference. The bumper brackets are all the way back in their slots behind the grille. If I really force it, I can move the driver side bumper end close enough to fit the bolt, but it would be under some massive tension (would pull on the bodywork around the fender lip) and the part of the bumper under the headlight bucket still wouldn't align. What am I missing here?


-
That's a good call—undoing the line further up to try to find out where the blockage is. Will do it and report back. Thanks!
-
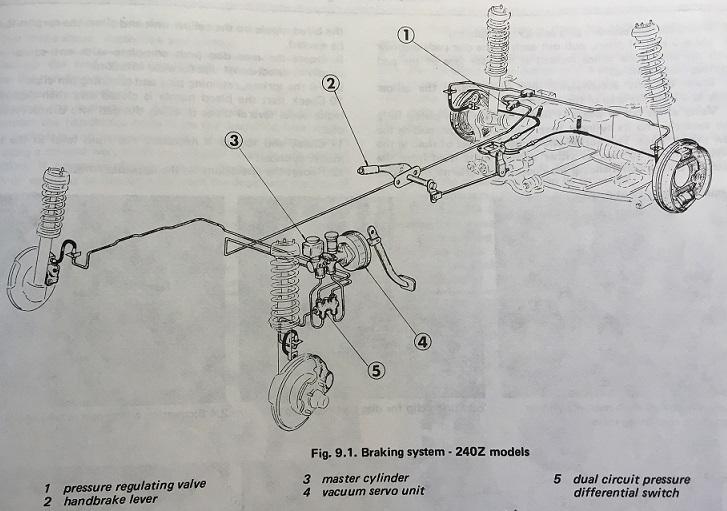
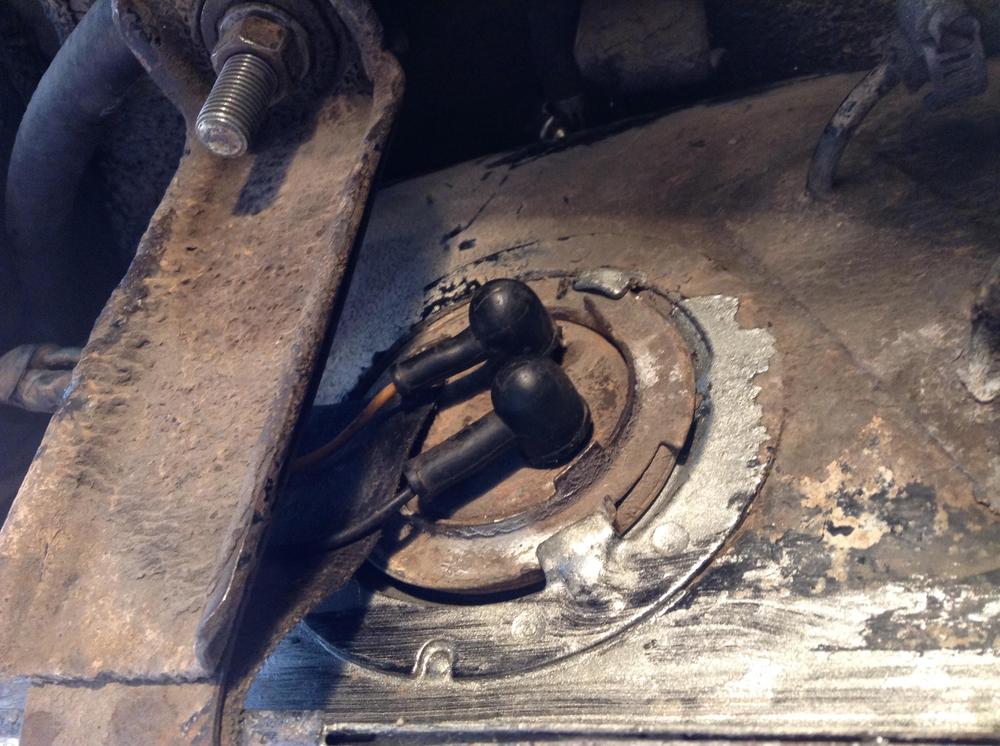
Hi guys. Hoping for some insight into what's going on with my left rear drum brake. So my car is a 7/72 build, right on the cusp when the brake system was updated. It has the older-style wheel cylinders (with the line coming off at an angle rather than perpendicular to the backing plate) BUT it has the newer-style brake line routing, with the proportioning valve in the engine bay: The older-style wheel cylinders are very hard to find replacements for, but I was able to find rebuild kits and rebuilt both. New steel drums and all hardware on both sides. The problem is that although I'm able to get fluid to come through the bleeding screws on all 3 of the other brakes, nothing comes out of the left rear with the screw open and an assistant pumping the pedal. Do I have a blockage? Is something else going on? Has anyone else experienced this issue? Thanks for any and all help.
-
Hi Garrett. Thanks! I don't know, sorry. My dad (the car's original owner) was the point man for the body restoration phase of the project... I could see if he could find out if you're really curious.
-
Hi over here Brandon! Nice photos, and beautiful Z! Also it reminded me to swap my Z's windshield wipers, lol. I have the longer one on the driver's side at the moment...
-
Thanks guys! I'm really happy with how it's coming together. Back when it was blue and dirty/rusty (although it still needs a good bath), I was concerned it looked a little "over-tired" with the 225-width Radial T/As, but with the new paint job and polished wheels I think it looks just right. Also I'm shocked (pun intended) that I was able to get the wiring exactly right the first time... I labeled some of the connectors, but not nearly enough of them, and I was half expecting to blow fuses and/or smell burning insulation, but.... It turned right over. Took a while for the fuel filter and float bowls to fill, but when they did, it fired up no problem. I have a synchrotester but I guess I need to source a Colortune? Never used one before...
-
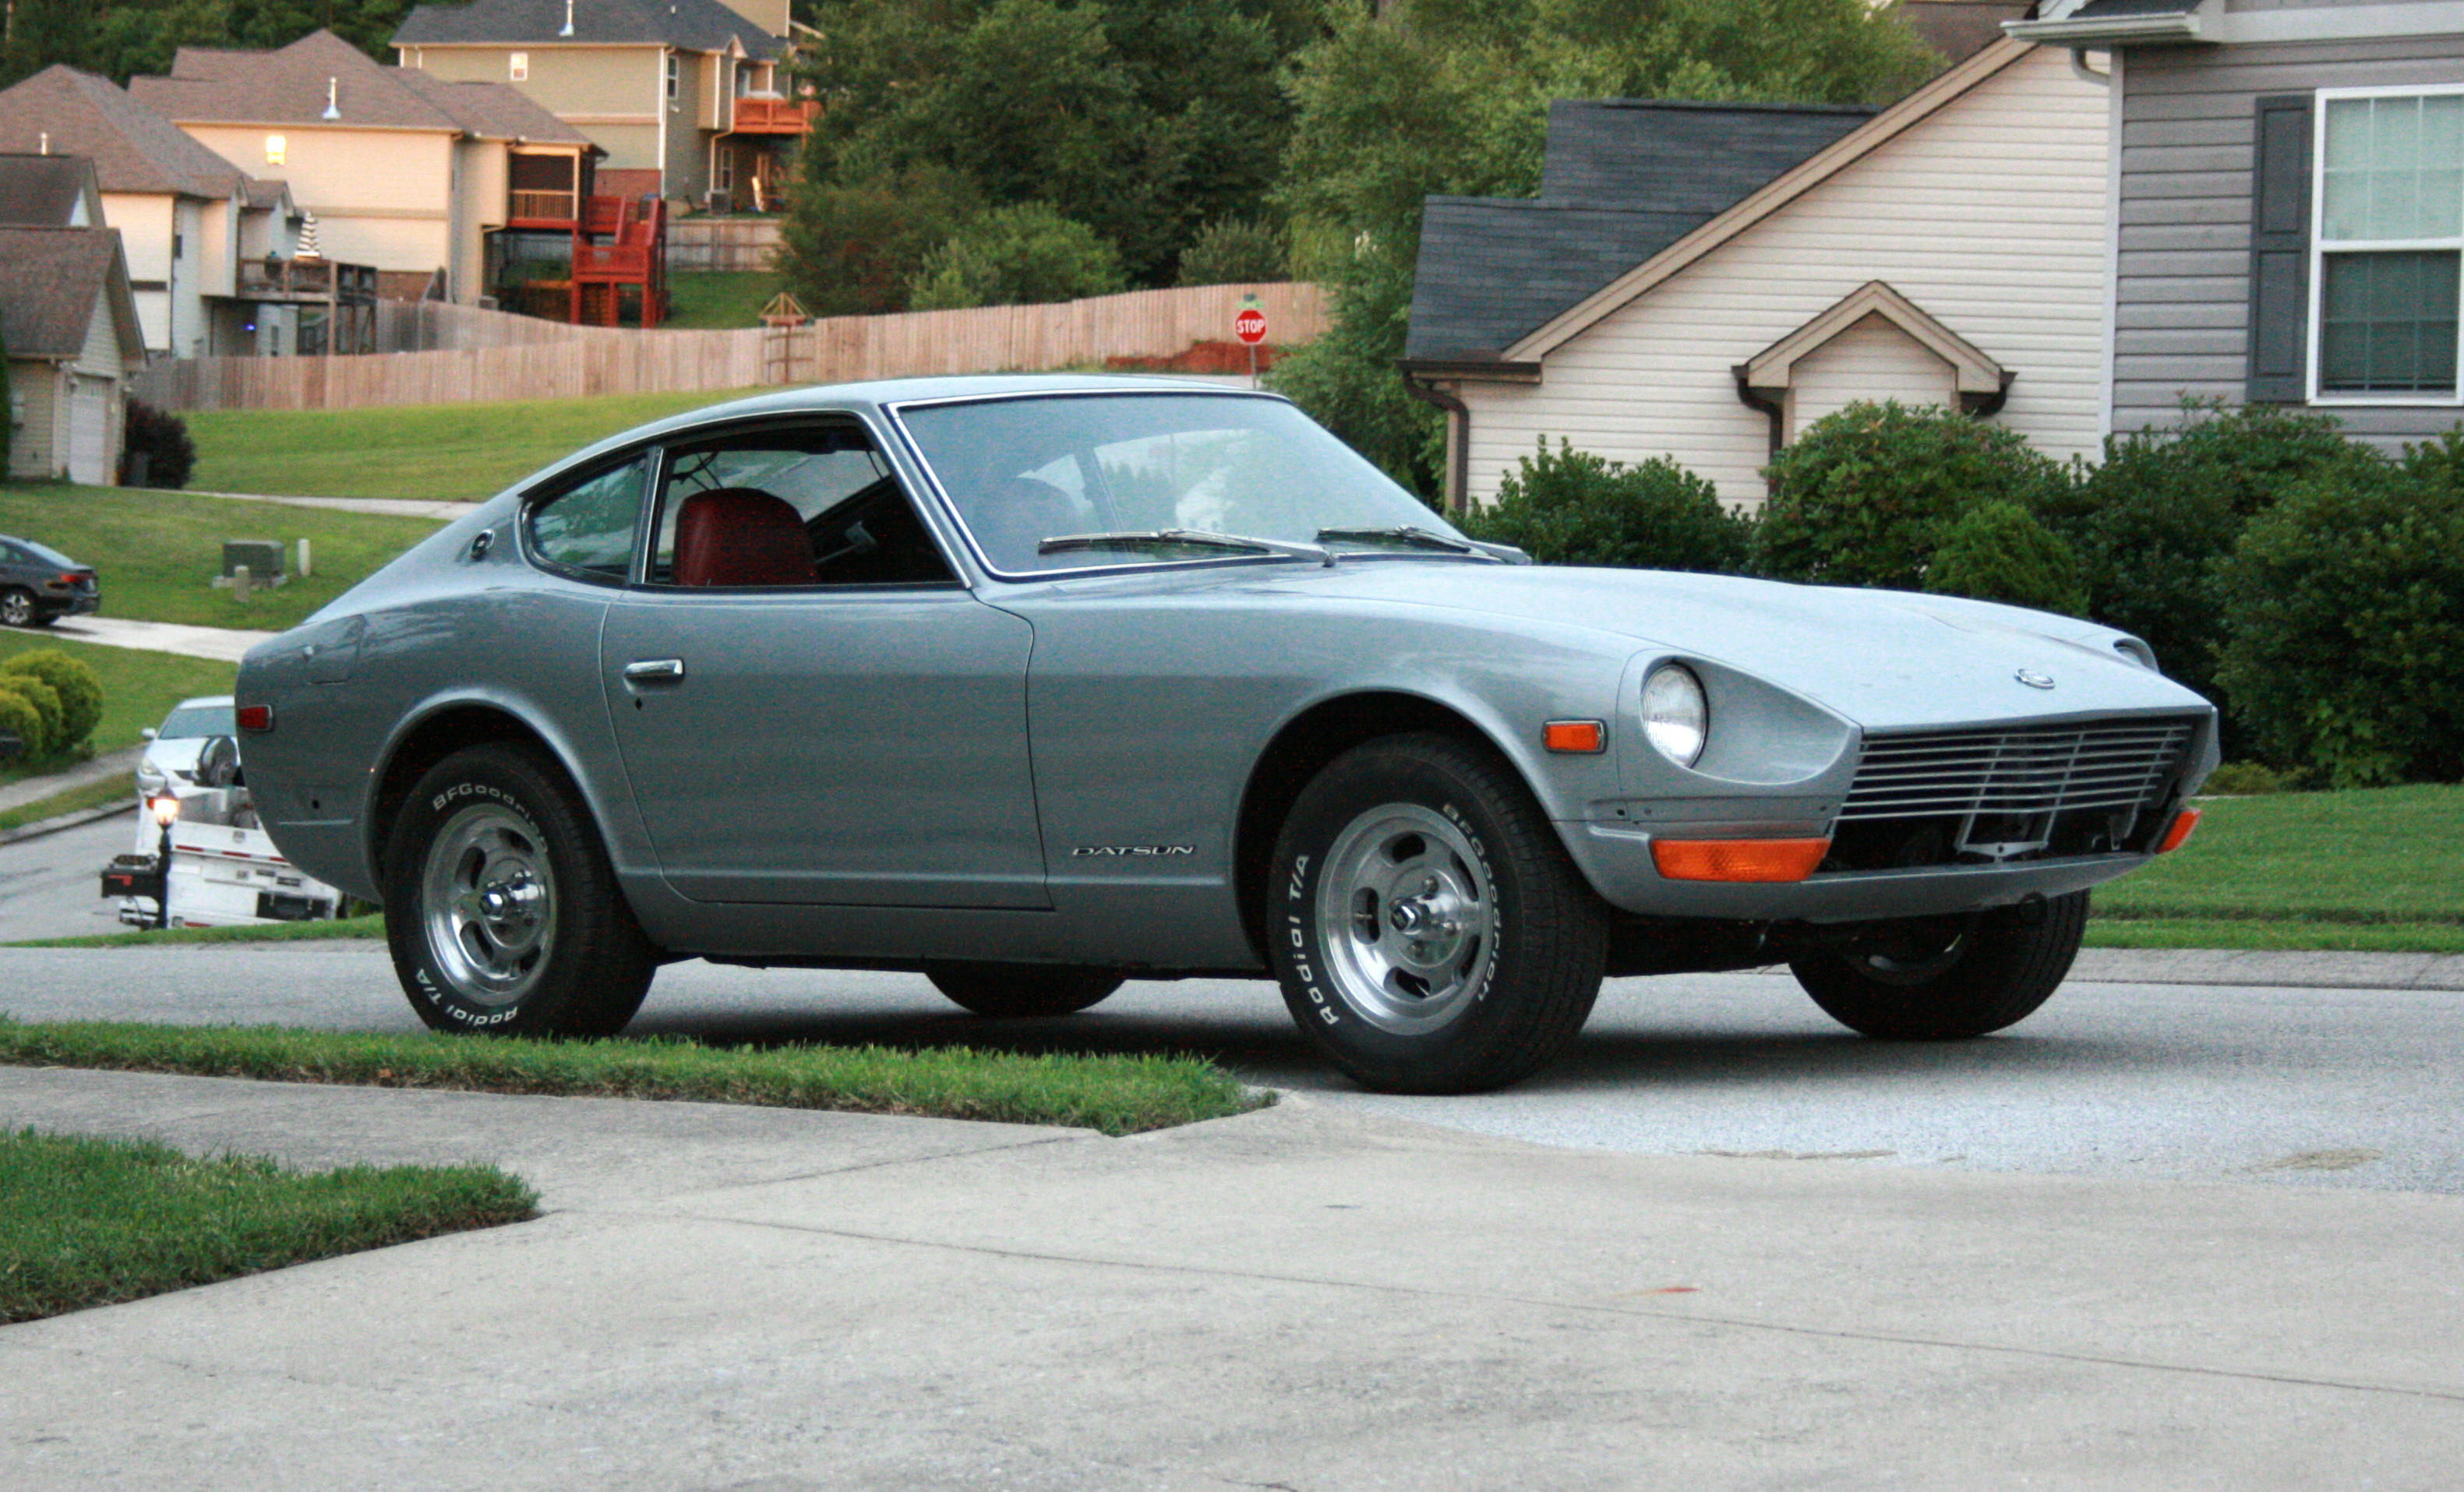
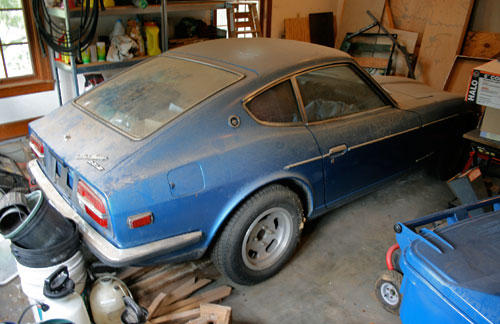
Still needs a tune and bumpers and a myriad of other things, but I started it for the first time in 6.5 years (and since the body was restored) yesterday: Before the restoration, way back in 2011: Totally rusted out pass. floor pan and rockers, mismatched tires, faded non-original color paint, etc etc. I've done everything except the actual body restoration (welding, paint, etc). All the disassembly, reconditioning of parts, reassembly, etc. It's been a LOT of work, and it's not over yet, but... I just wanted to take a short victory lap. Thanks for all the support and great advice.

-
Thanks guys. FYI I posted the above in the wrong thread; it should be here: I've let a mod know. Anyway. So I adjusted the hatch hinge so the driver's side sits flush and I didn't open the hatch. I'm going to leave it there for a while and see if seals relax. Re:the door; you're absolutely right that it's only engaged at the first detent. I moved the striker outboard as far as it could go, and it still would only engage at the first detent, and this is with me giving the door a decent shove. I put the striker right in the middle of its range and slammed the door REALLY hard—which I've never done before—and it actually closed flush (except for the bottom of the door which is still 1/4" or so out). I'm going to leave it like that and hope the seals relax to the point where I don't have to slam it that hard any more. Before the restoration we never had to slam the doors, and the hatch was flush............. Really hoping stiff seals are the only thing wrong here.
-
Boy I hate bodywork. All the mechanical parts? Done. No issues. Wiring harness and dash back in last weekend? No problem. Every piece of bodywork has been a struggle and REFUSES to align. Everything is an hours-long losing battle. /rant First it was the hood, and I was advised to start with the doors and work my way forward, so I removed the cowl, loosened the doors and fenders and set to work. The door wasn't aligned before, and still will not align. This is with the striker on the door jamb all the way inboard and there's still a 1/2" gap. What is going on? As for the hatch, the front driver's side will not stay down. I used the technique earlier in this thread to align it, and it stays aligned the first time I close the hatch, but then it drifts back up again. Also, the rear lip of the hatch isn't aligned and all the shims have been removed from under the hinge. So discouraged. I'm preparing myself to having to drive around in a Z with janky-looking bodywork.

-
OK thanks. I'll just order two of the right-hand ones then. The dash is currently out of the car, so it should (hopefully) be easier to disable it. I understand accessing it with the dash in place is the big challenge.
-
So both of my door pin switches are dead. The geniuses who did the rust repair and repaint just left them in place and painted over them, and the plungers are crushed in besides... Apparently these are different between left (3-wire) and right (2-wire) sides. And the 3-wire ones seem to be NLA. Question: Is it possible to use the same switch (2-wire) on both sides? I understand this will cause issues with the seatbelt buzzer (the reason for the 3rd wire), but fastening my seatbelt is something I do instinctively anyway, so I have no qualms about disabling it if I need to. Thanks as always for any and all help. You guys are great.
-
Good point! Two thoughts: - I am going to retrofit (slightly) longer bolts with an actual hex head. Way too much pressure on the tiny phillips screws and they strip out too easily. - Wick Humble says the later Z actually went to longer screws b/c (his theory) the factory assembly line workers were having the same issue we are...
-
^Great resourcefulness! I'm glad I didn't have to go that far, though...
-
Thanks guys. The seals are brand new and soft and supple already, so heat was of limited effect. I also didn't want to remove them since they're already bonded to the quarterlight frames with weatherstripping adhesive. This was the winning technique: I pivoted the rear corner up and in just enough to be able to insert a thick drift punch (my "awl") through the top rear holes and draw it toward the back. I was concerned I would crush the threads but it was OK. While holding it with one hand, the other hand secured the top front screw. After having lubed the bottom of the cavity, I was able to push the bottom of the window in enough to secure the bottom two screws. What a pain.
-
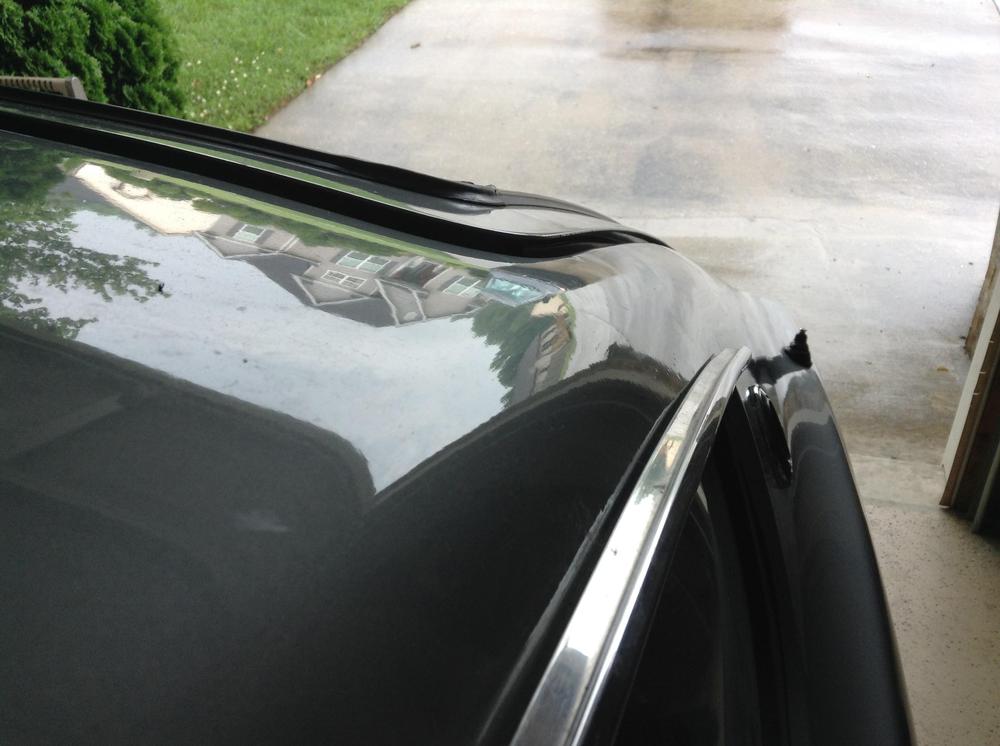
Being struggling with these for FAR too long this afternoon. Yes, the seals are installed correctly, with the longer "leg" of the seal's "U" toward the outside. I knew it was going to be a struggle, but holy cow. I can get the bottom 2 screws in (barely), but the top two end up 1/2" or so off and will not go any farther. Gap between the seal and the body at the back at the window. I've tried silicone spray on the seals, and it helped a bit, but it feels like it's just bottoming out mechanically, not sticking. Any and all advice appreciated. Thanks as always.
-
Thanks again guys. Used my wife's hair dryer to soften the boots and got them on no problem: Yes, there is a large hose clamp that secures the filler neck to the tank pipe. One of the most annoying parts of reinstalling the tank is getting both straps AND the filler neck to line up...
-
It's OK! Thanks for chiming in. I got the fuel sender harness routed earlier this evening. It was easier than I thought it would be: I undid the fuel tank straps and filler neck and pivoted the tank down just enough to be able to get the harness through and secure the ground screw to the frame. I routed it through the rubber finger on the frame and hitched up the tank again. Done. Only issue now is that the terminal boots are hard as rocks. Going to try a hair dryer tomorrow and see if I can soften them. Since they're interchangeable, does it matter which wire goes to which terminal on the sender end plate?
-
If it's the hole you're referring to, I believe I routed one of the evap lines (the small one that comes off the top of the tank) through there using this image as a guide: ^Actually, now that I look at it again, that's most likely the fuel level sender wire wrapping underneath the filler neck toward the back of the tank... Thank you all. Looks like I'll have to drop the tank again... Grrrr.
-
OK I can't find any info for this specific question online and I can't remember for the life of me how it came off the car. Where exactly does the fuel level sender harness come up through the unibody so it can connect with the body harness? I.e. which hole in the hatch area? There's a hole directly above the tank and I'm reeeeeeeeally hoping I don't have to drop the tank again because I did things out of sequence... Thanks in advance all.
-
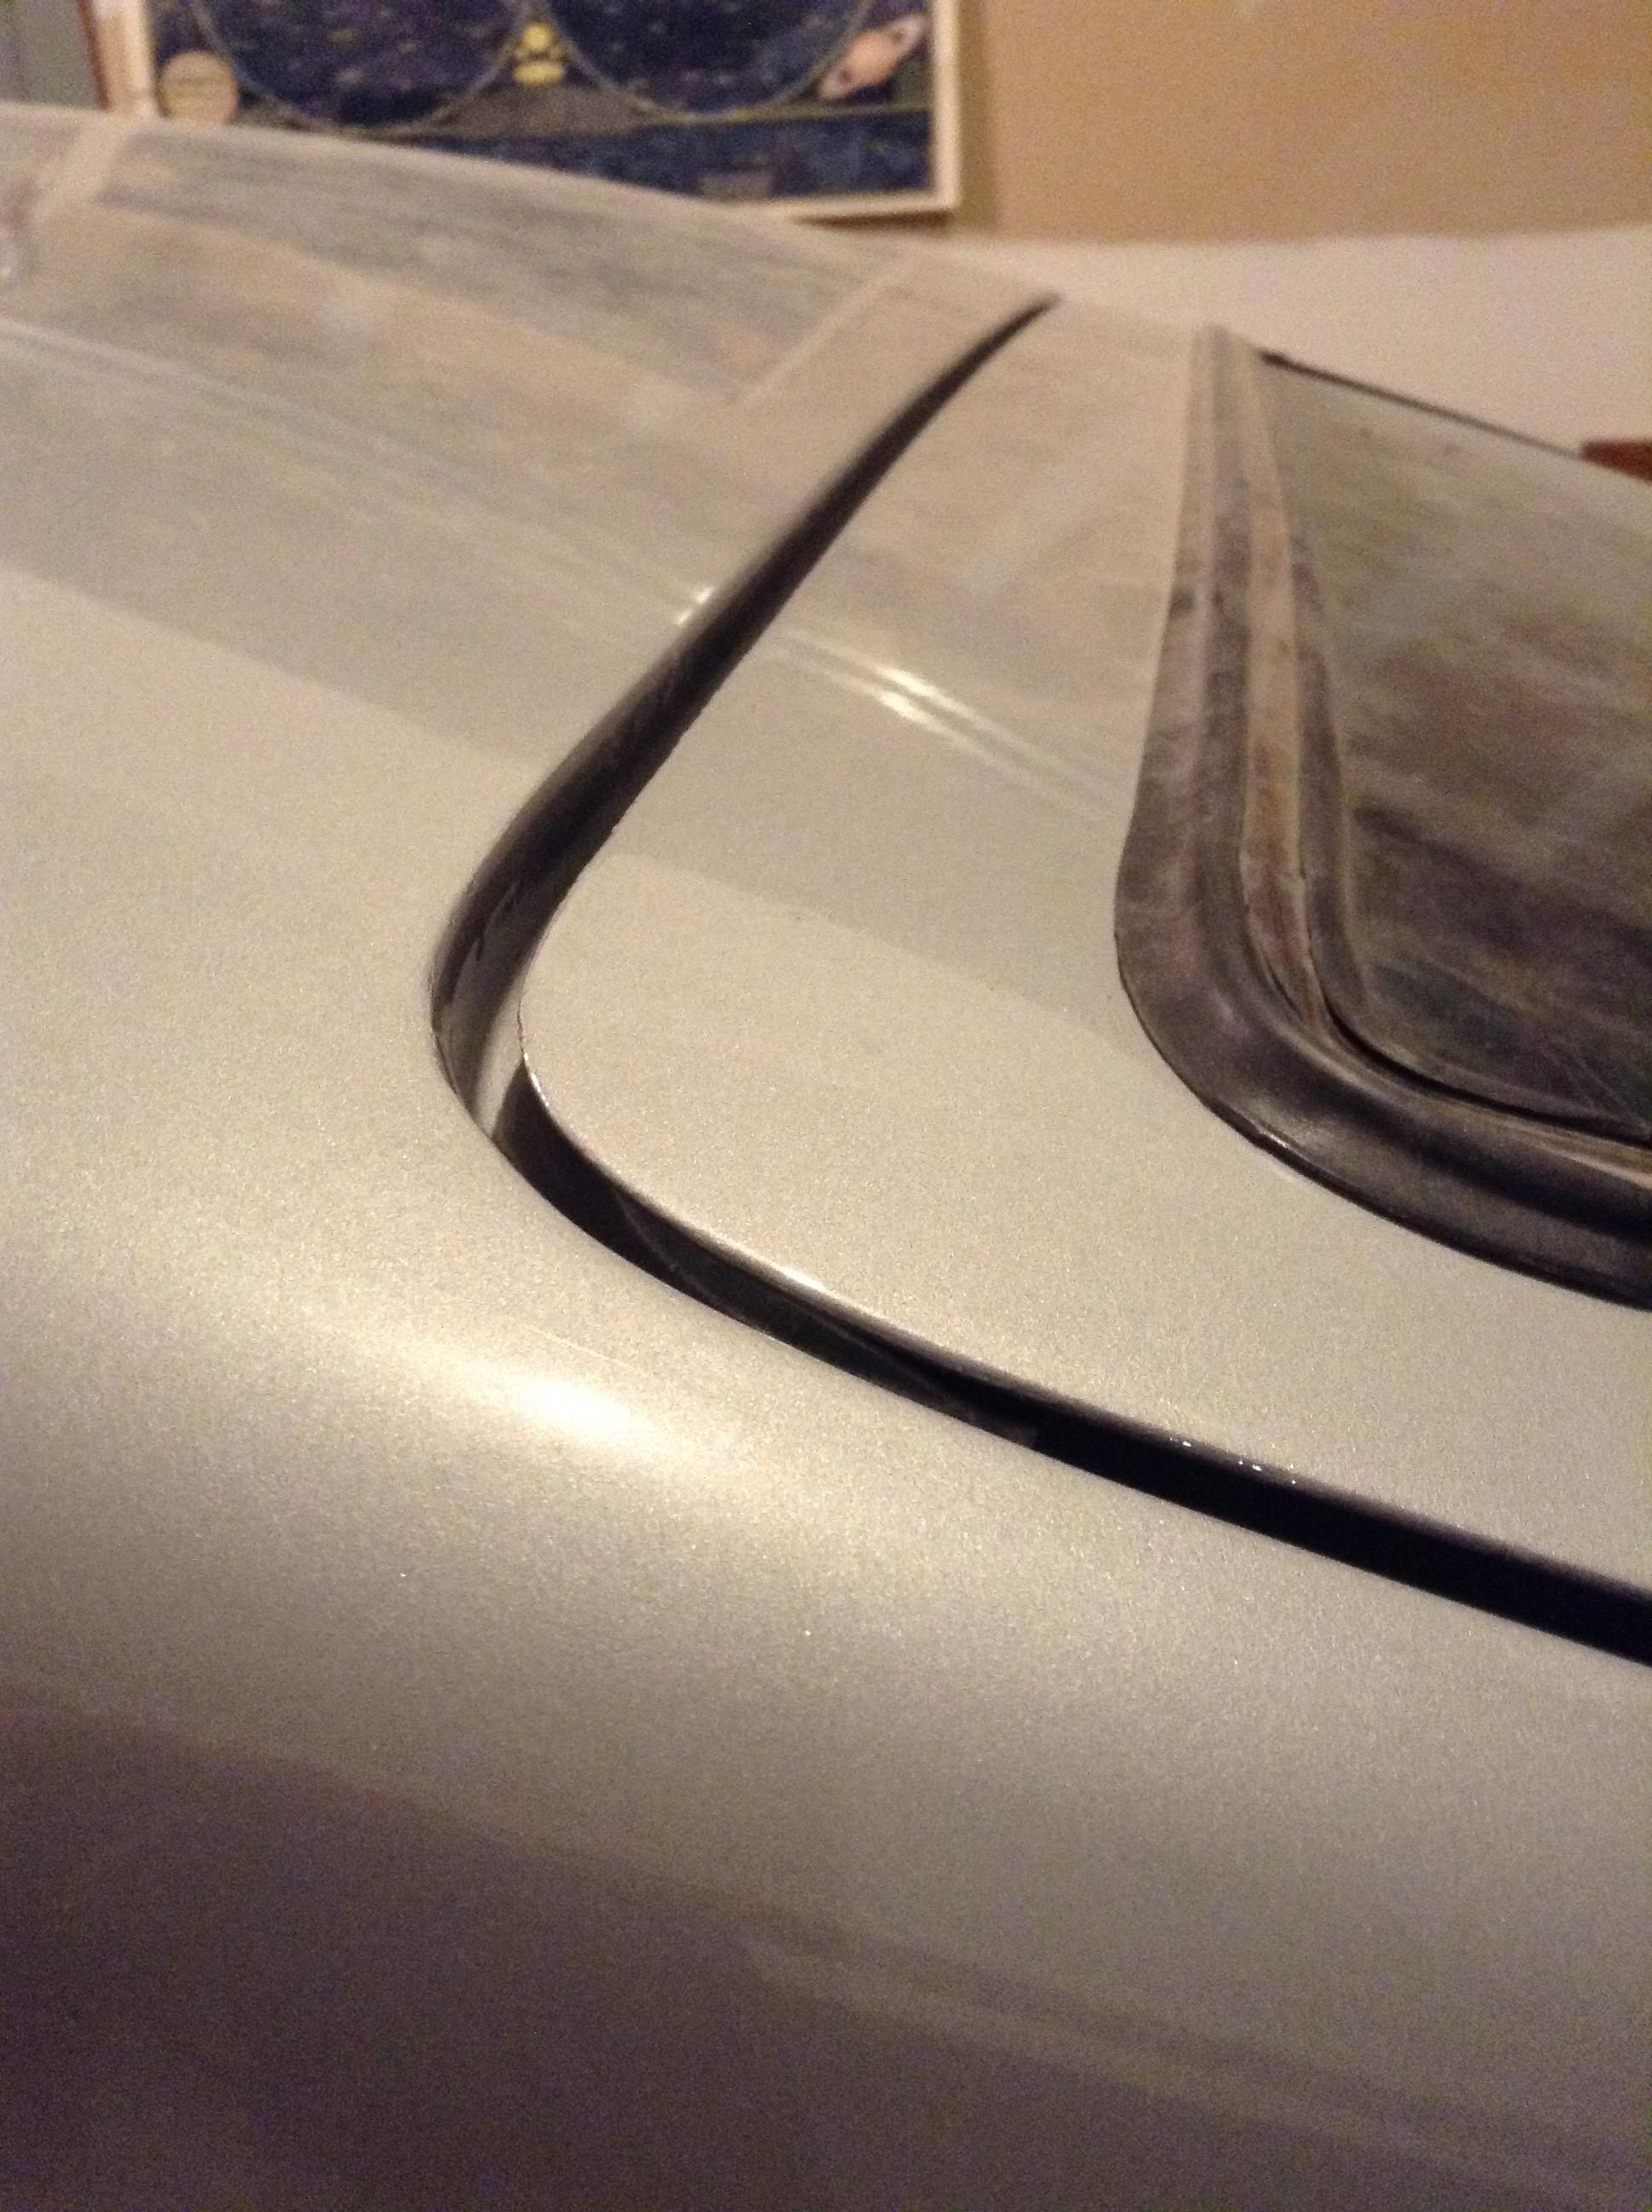
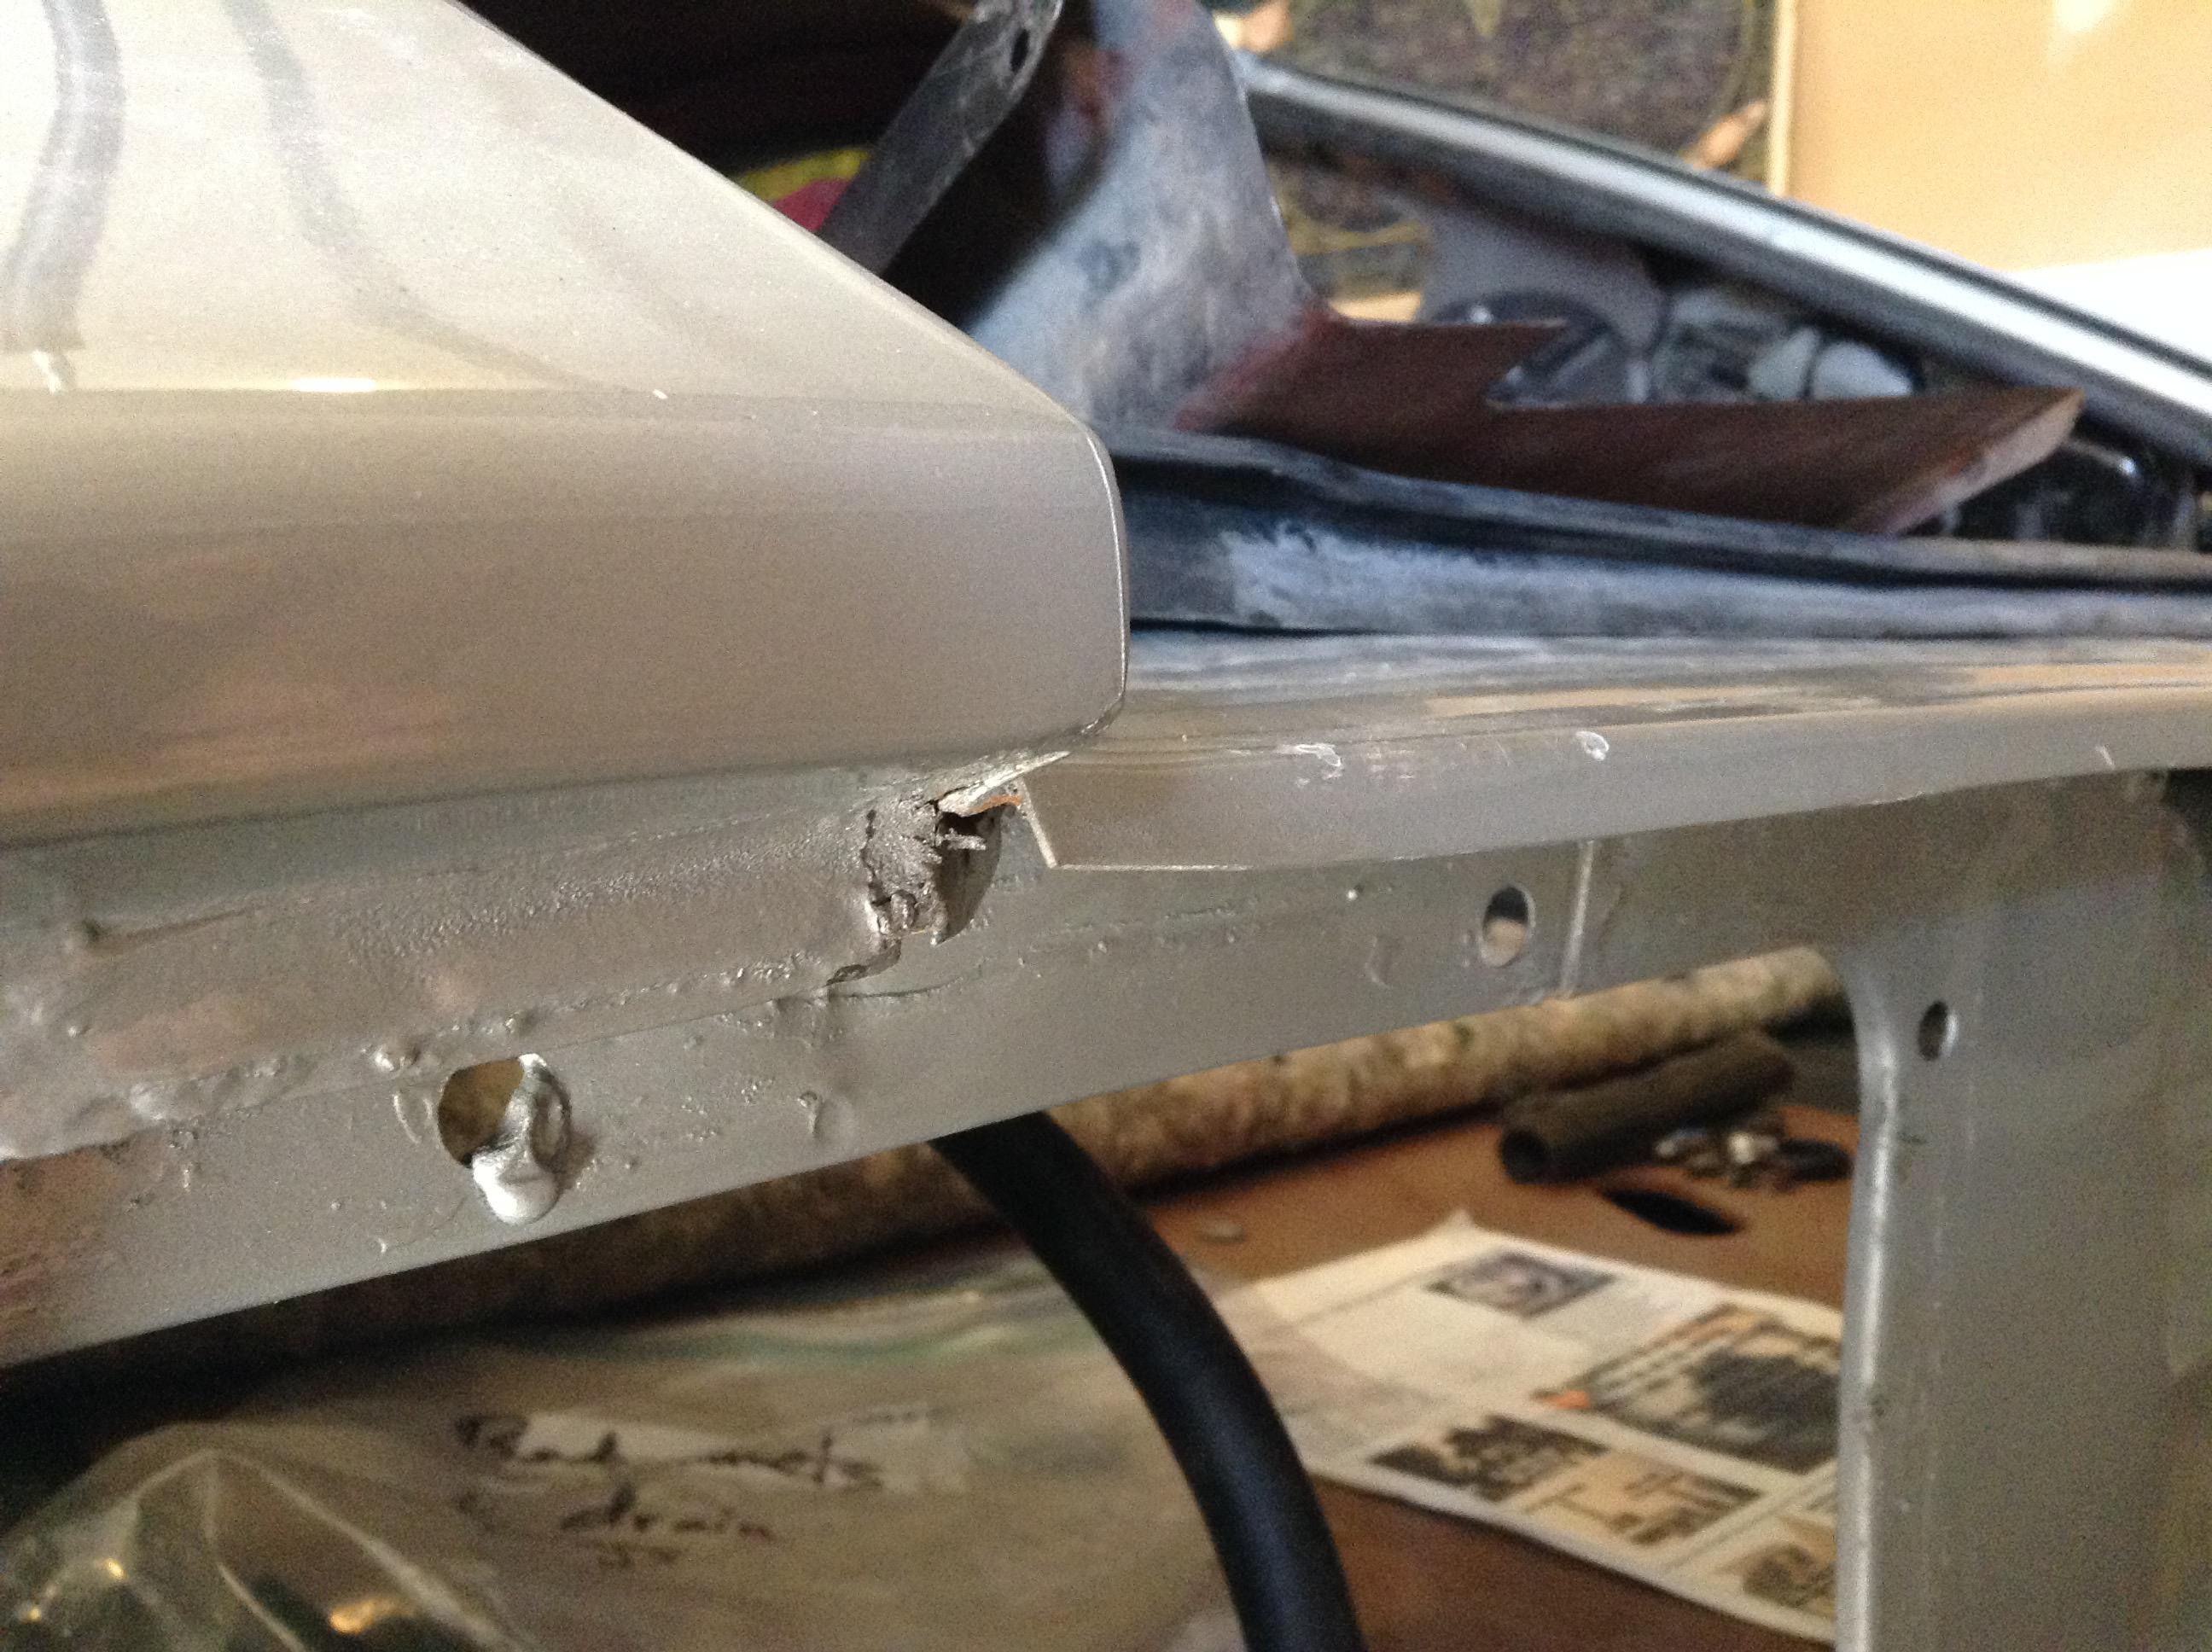
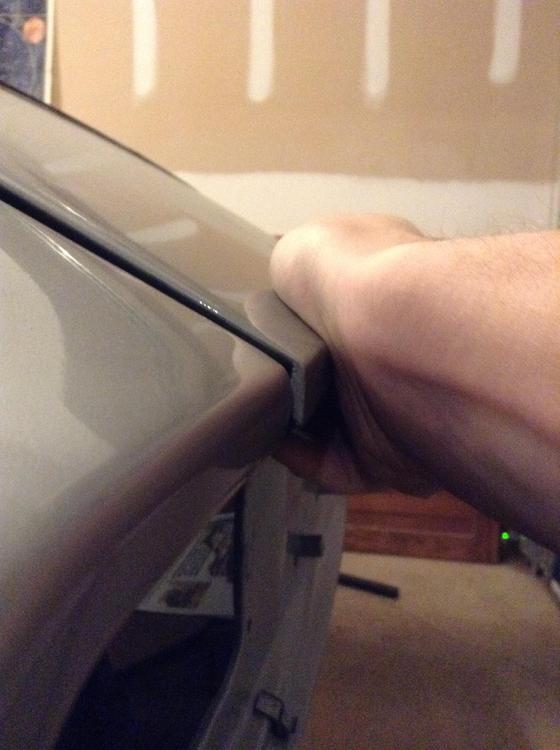
10-4. Thanks for the warning. It's pretty close when opening as-is. Will be careful. Yes that's very helpful! Thank you! So it looks like the lip on the end of the sill is supposed to be more like a 90° angle down. Got it; I'll try that. If/when the paint cracks in the process of bending that lip a little further toward 90°, I'm glad it will be hidden by the finisher---but I've got a bottle of touchup 901 silver just in case. Thanks!
-
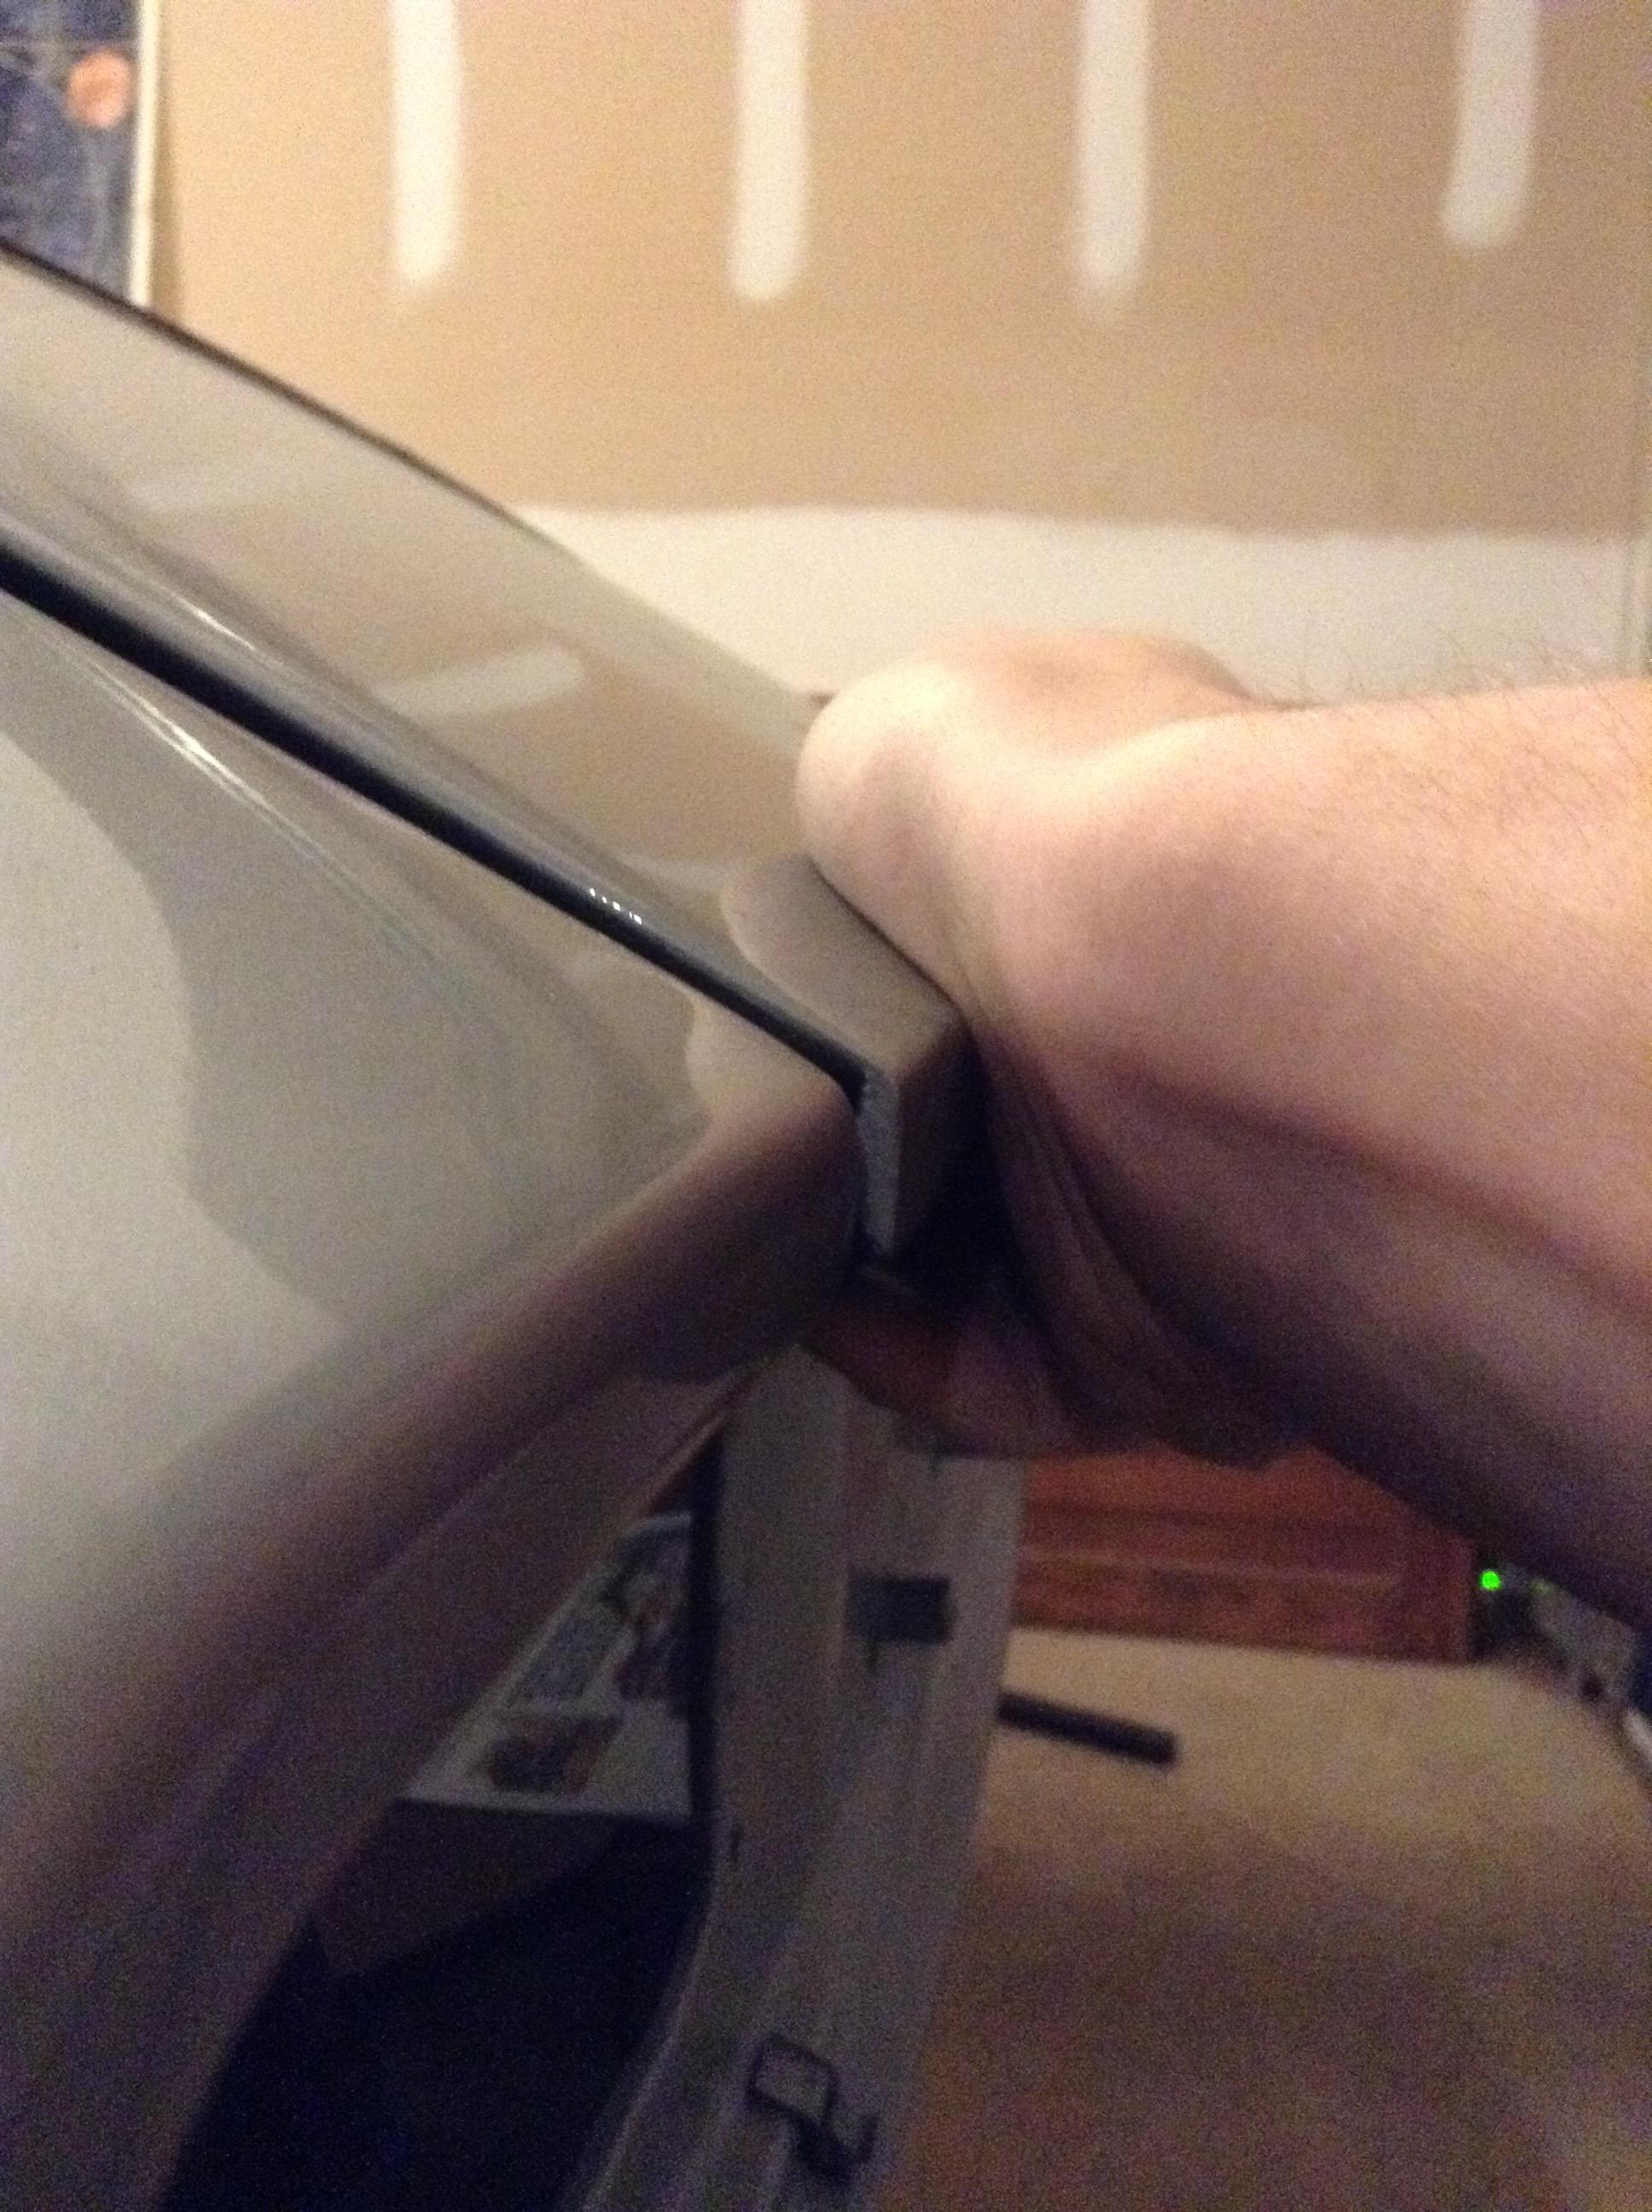
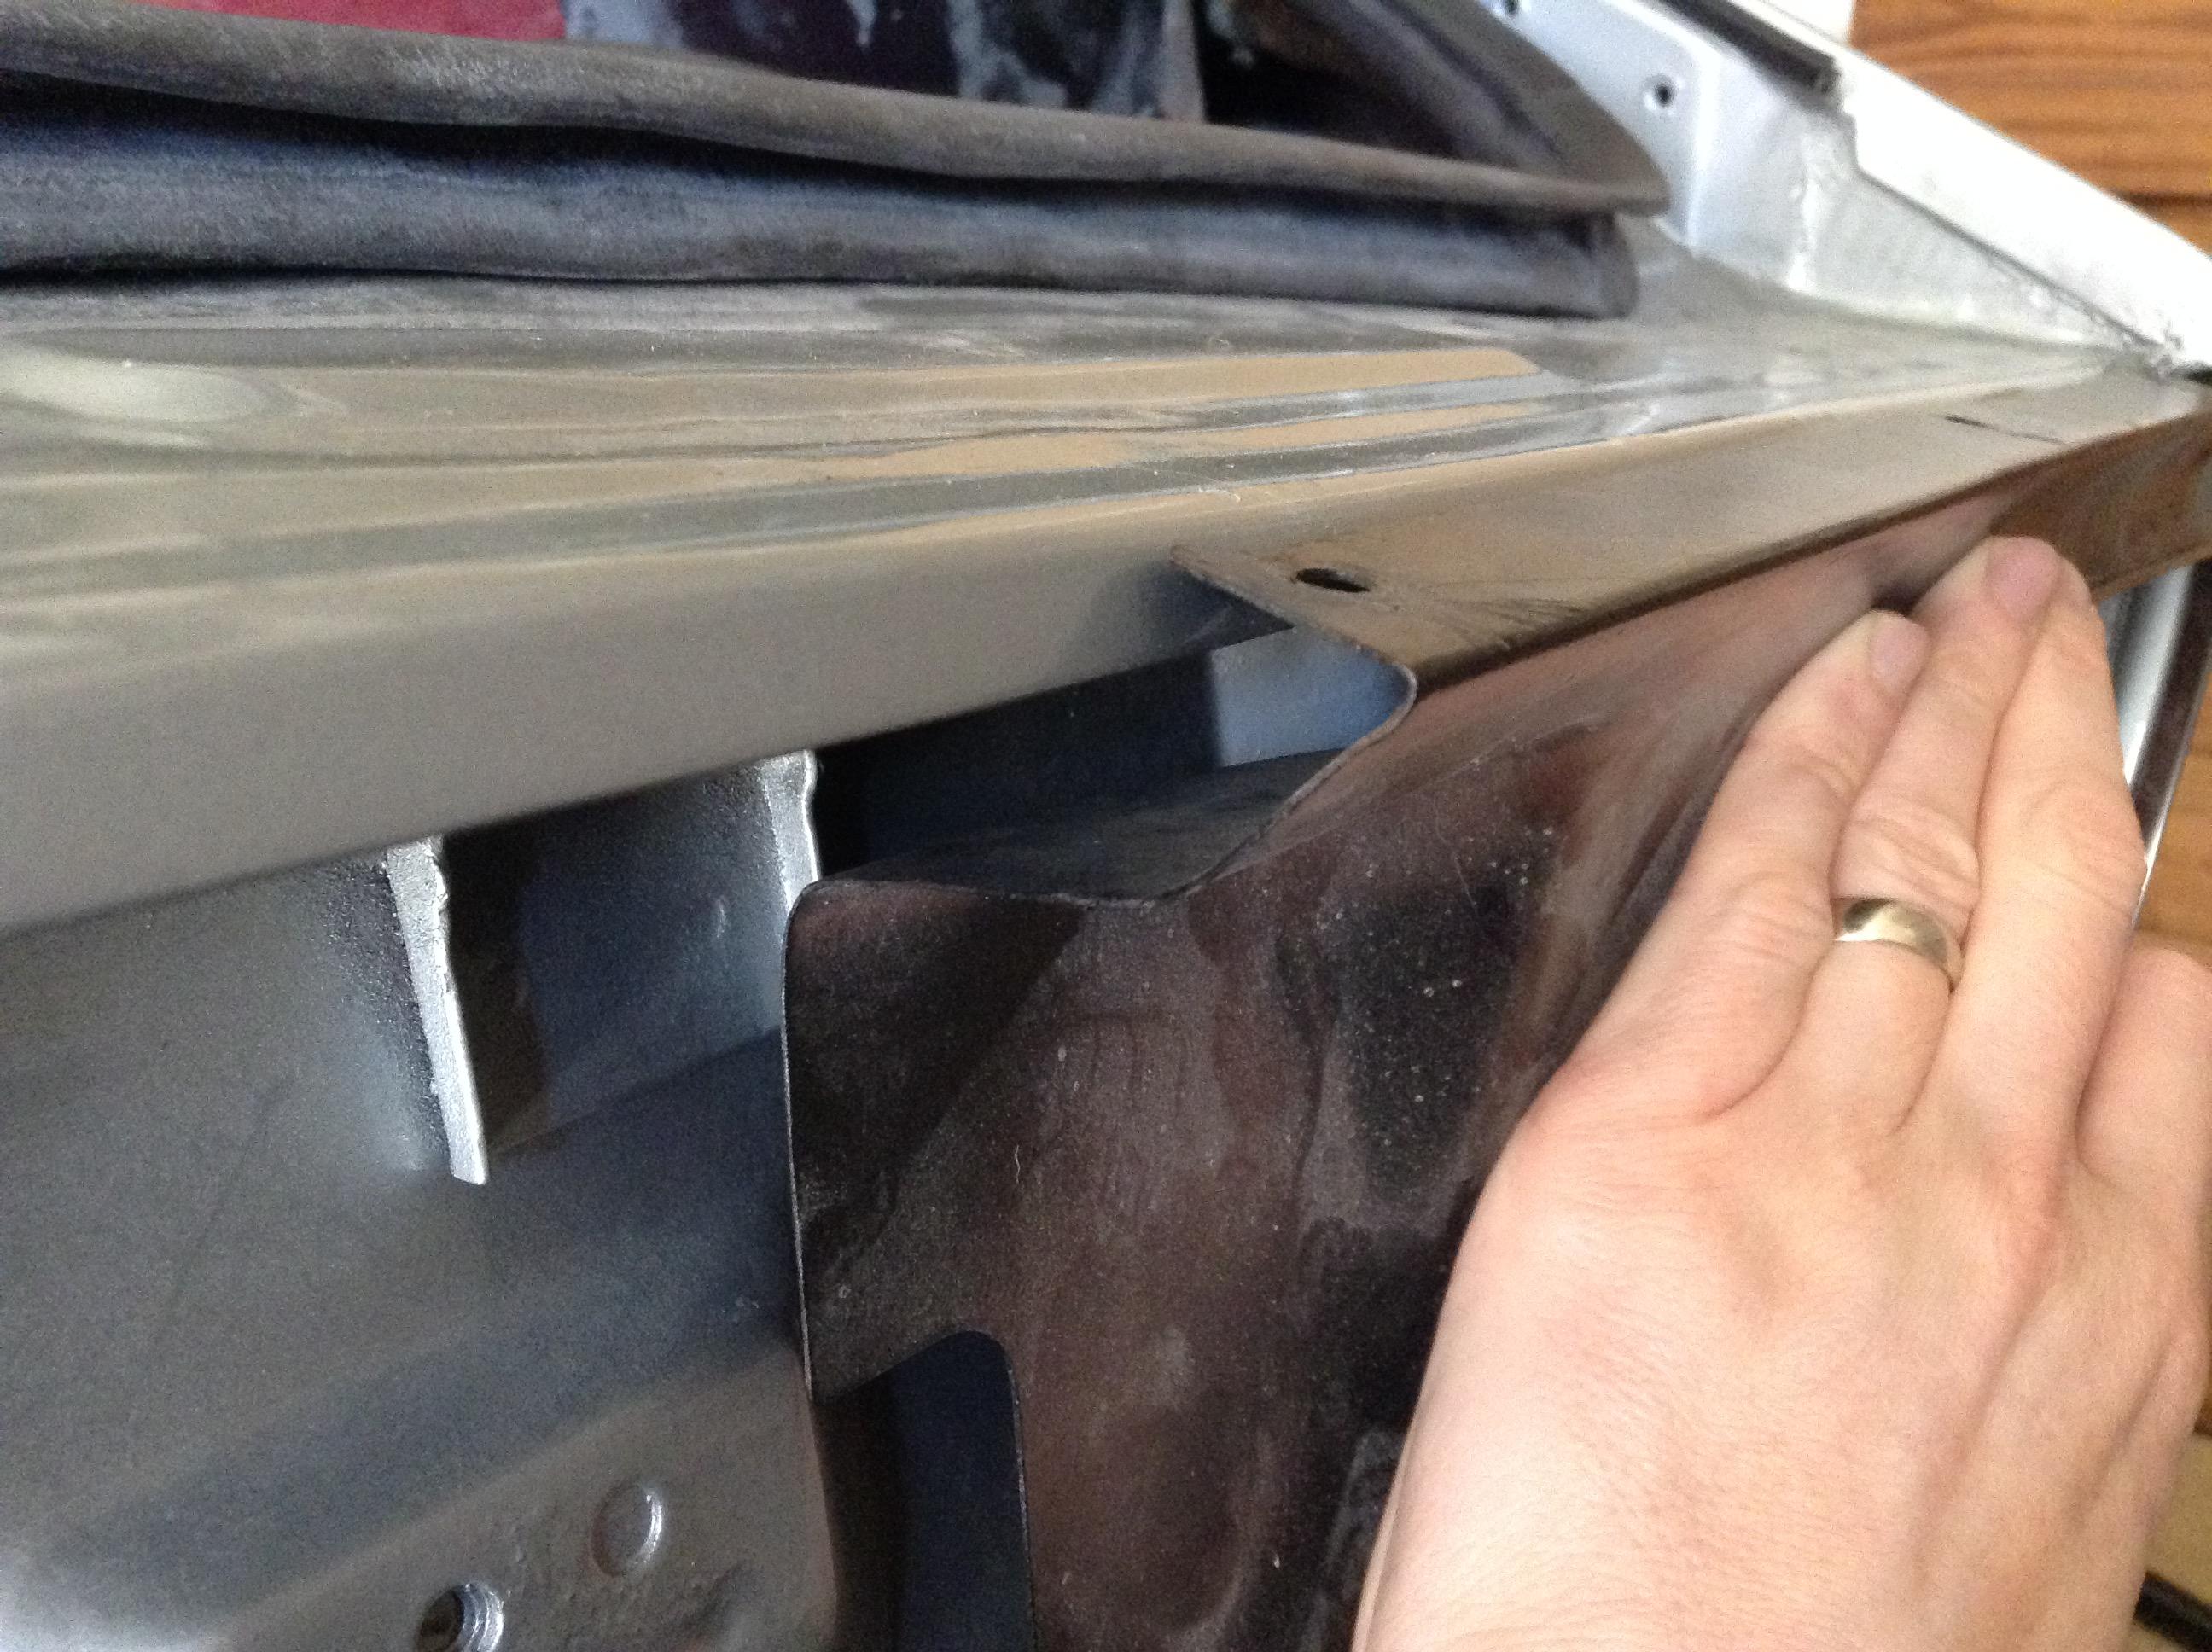
^This worked like a charm! Thank you SO much. Perfectly aligned now. So, two more questions: 1. Can anyone snap a photo of their rear hatch sill lip WITHOUT the finisher panels attached? Still unsure of how to make that work, see post #1 in this thread. 2. The hatch is still about 1/4" misaligned at the rear. Can I remove the shims under the hinges and move it forward, or is there another adjustment method for this direction?

-
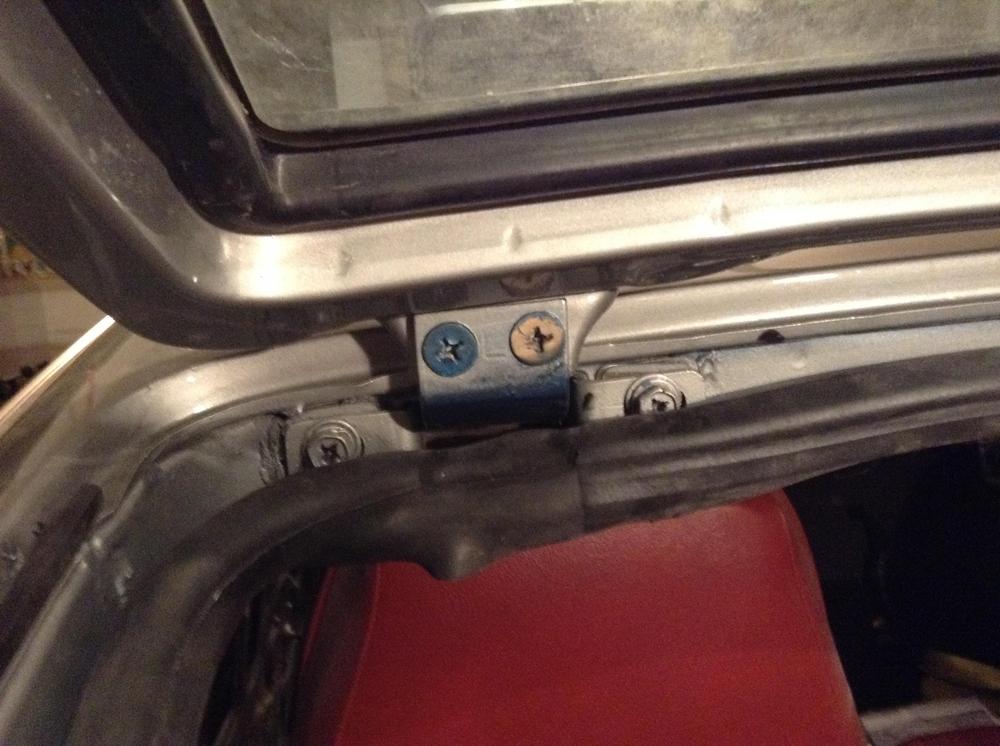
Thanks for the input guys. Here are pics of the hinges. They look identical to me re:alignment, so what accounts for the difference in hatch height when it's closed? I've attached a pic of the passenger side of the hatch also. It's actually marginally below the edge of the roof / C-pillar. FYI the car was repainted in its original 901 Silver (it had been blue since the late '70s, which is why the hinge bolts are blue---another thing I need to fix).
-
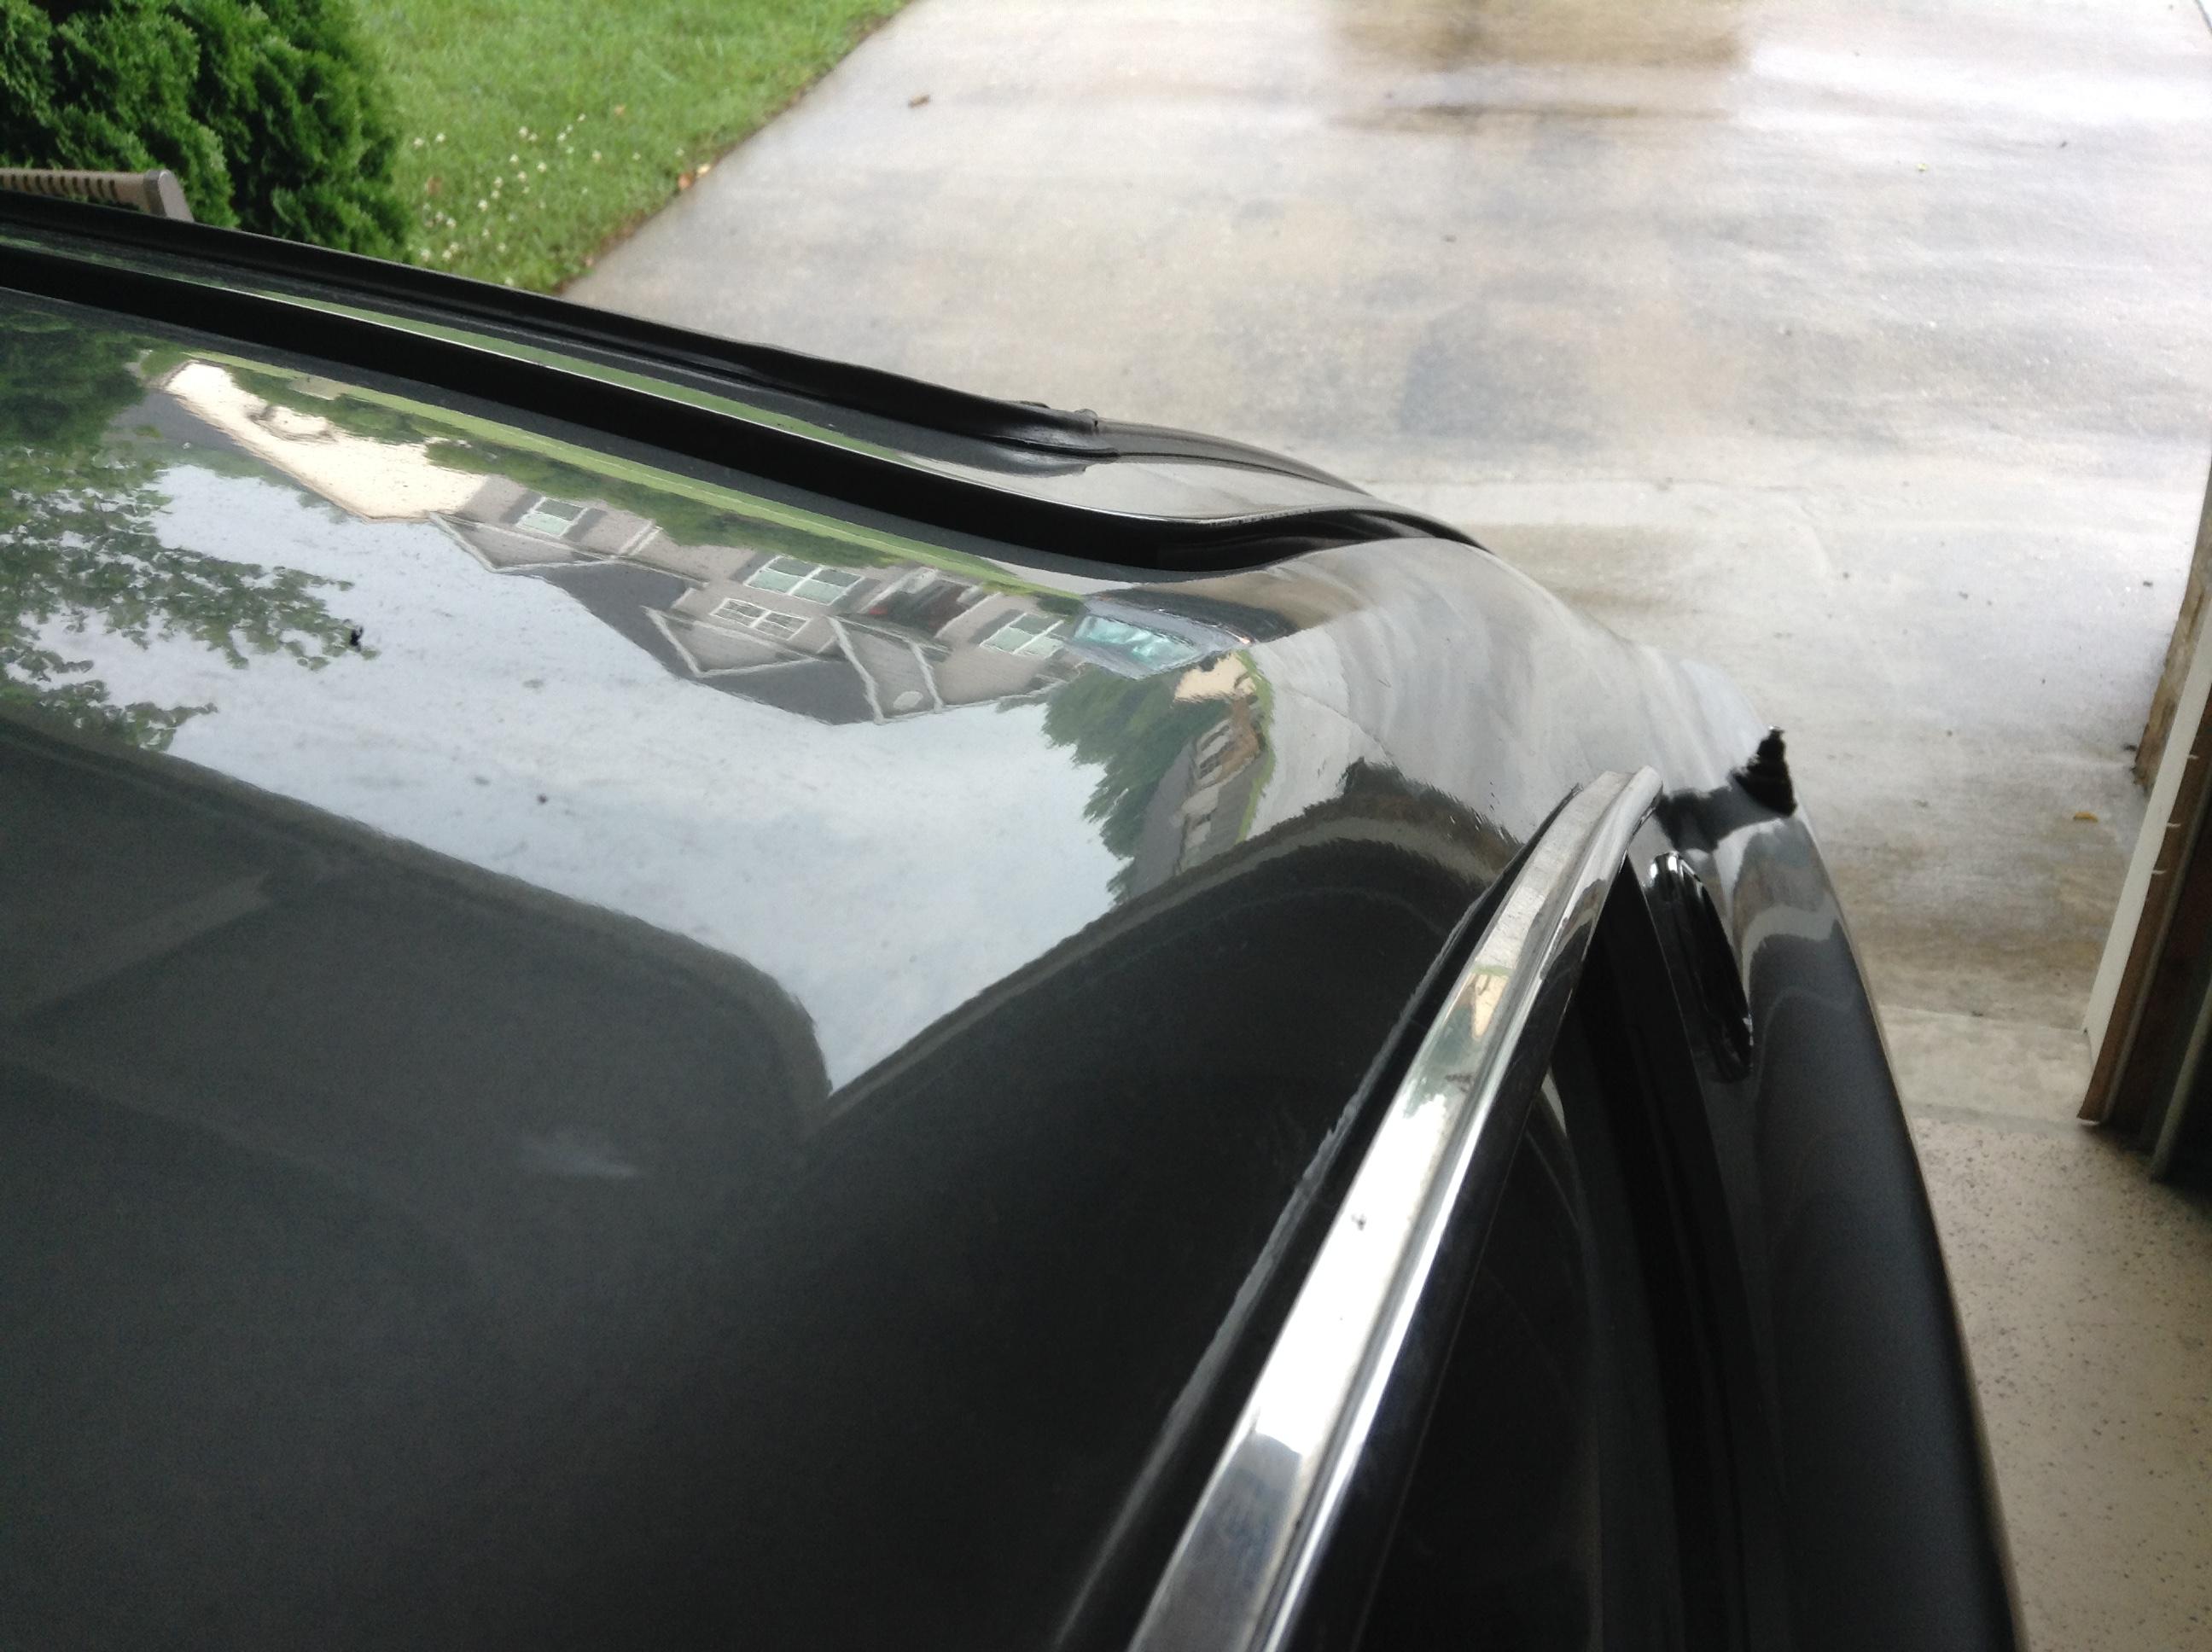
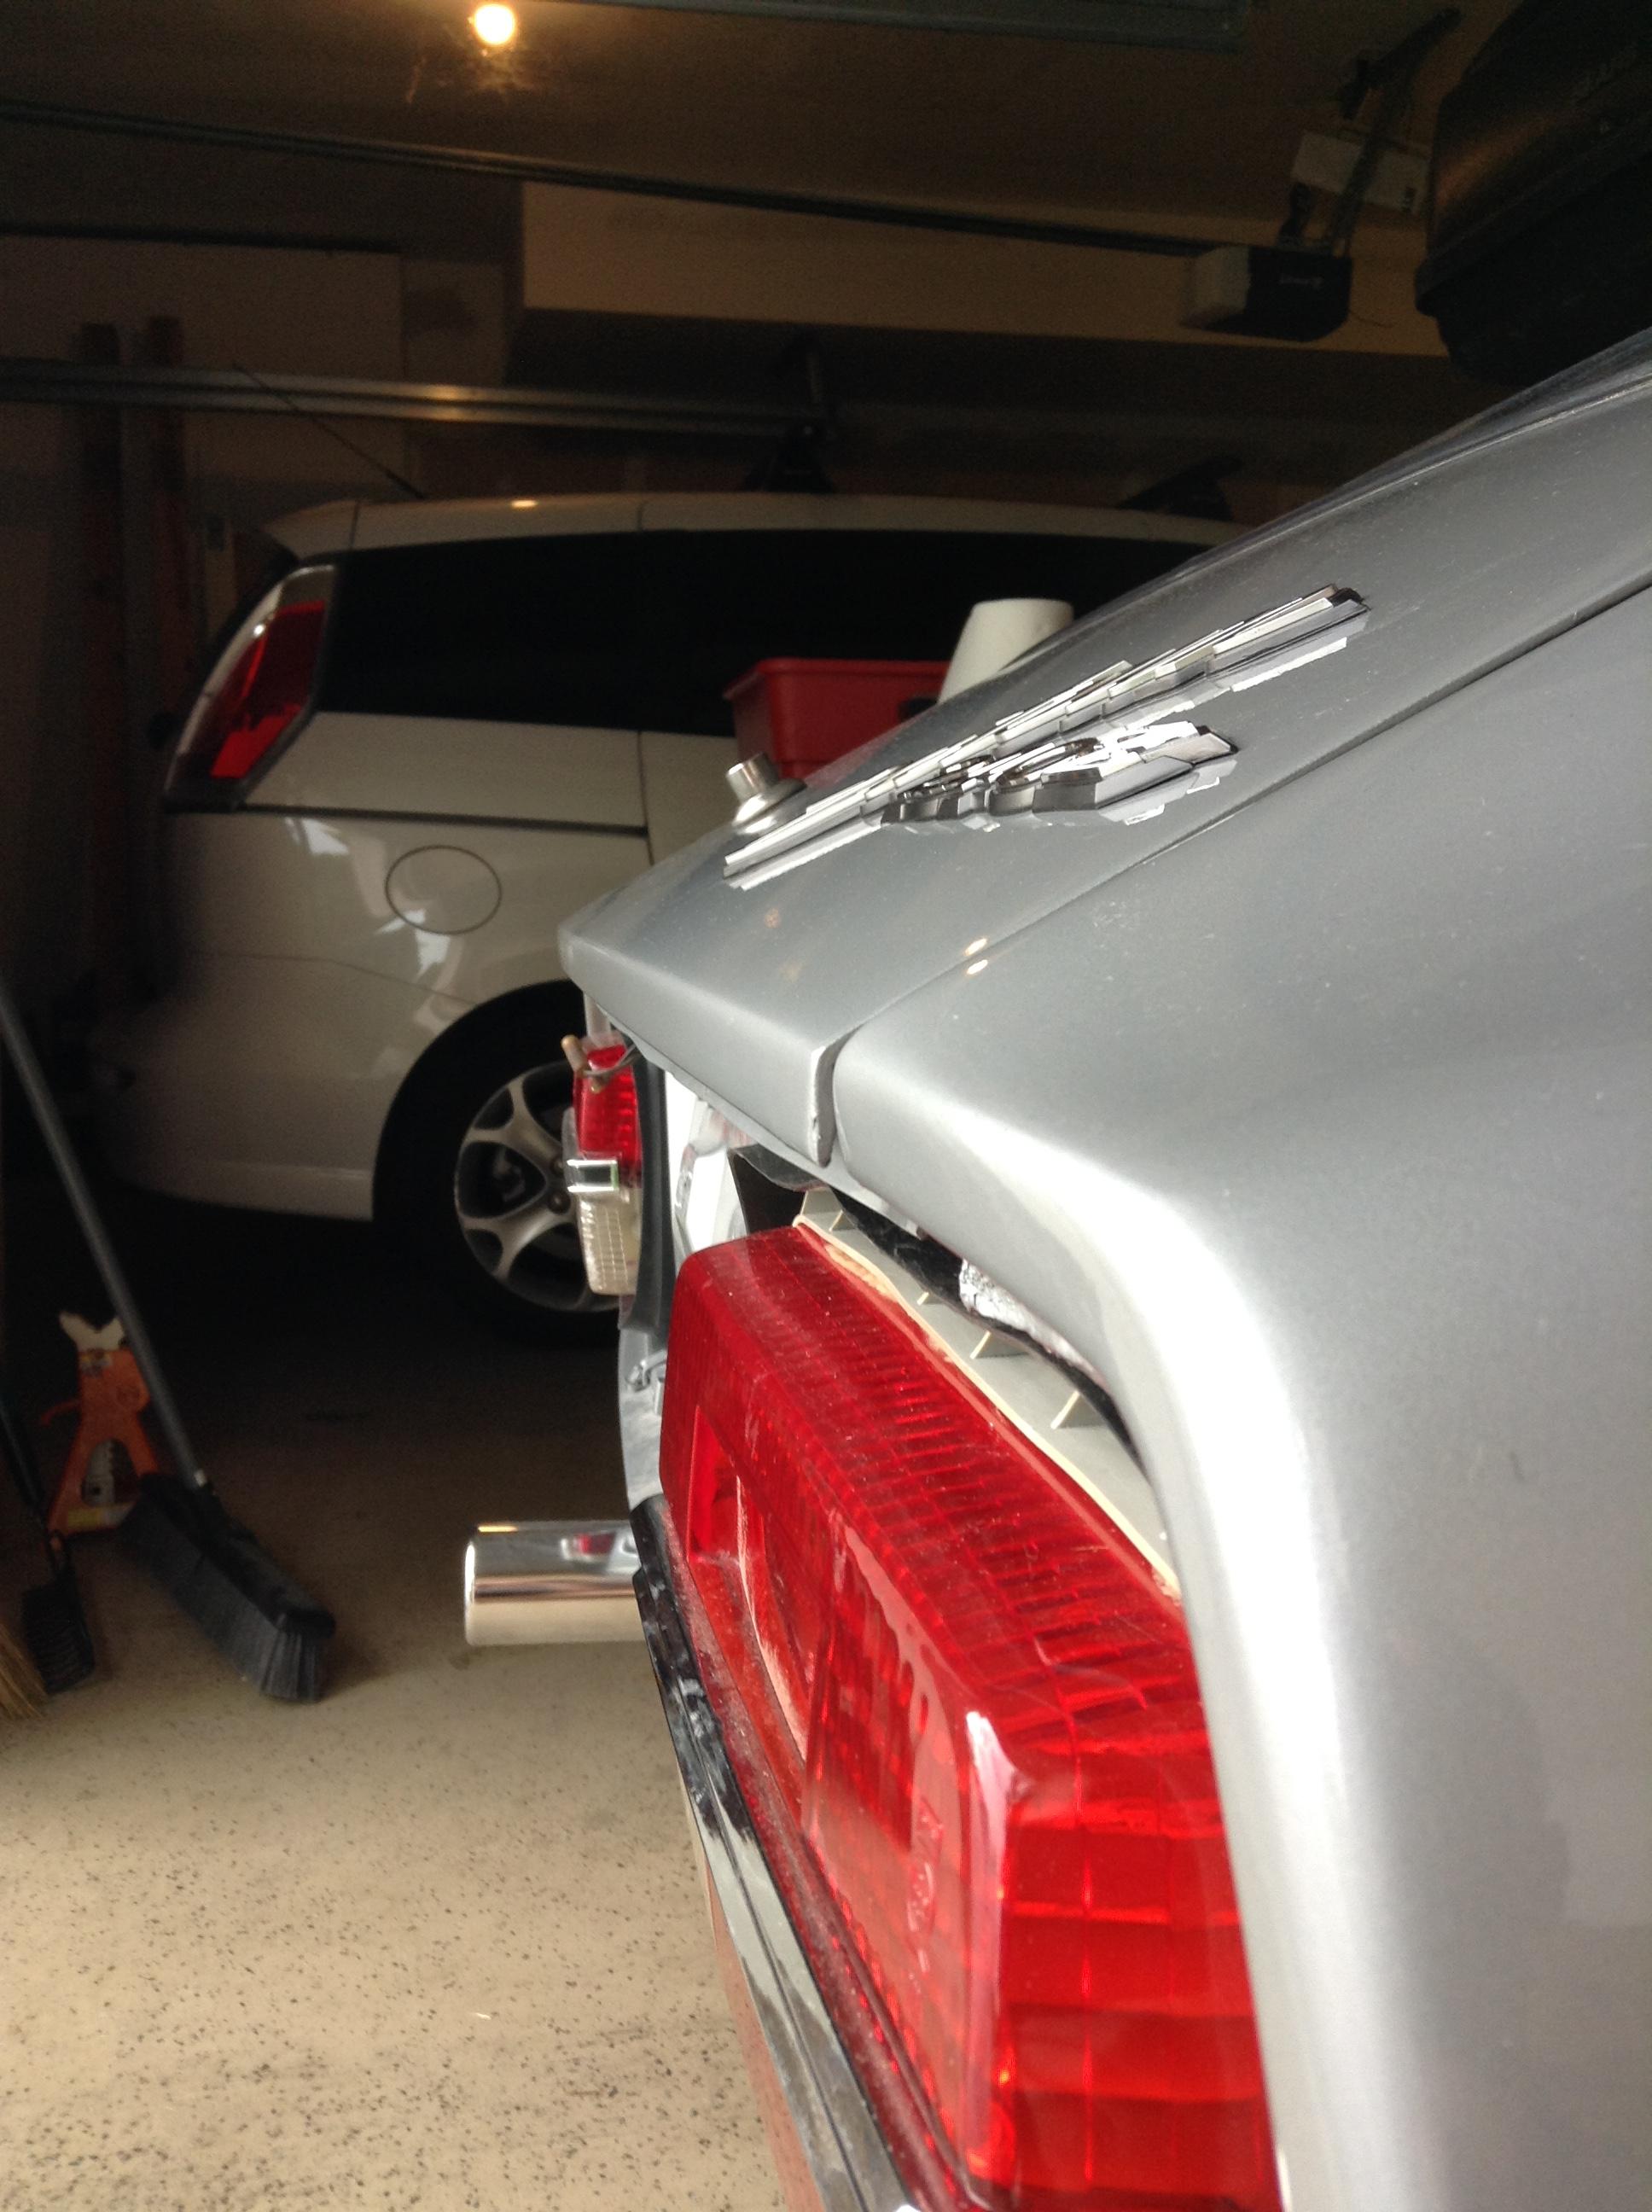
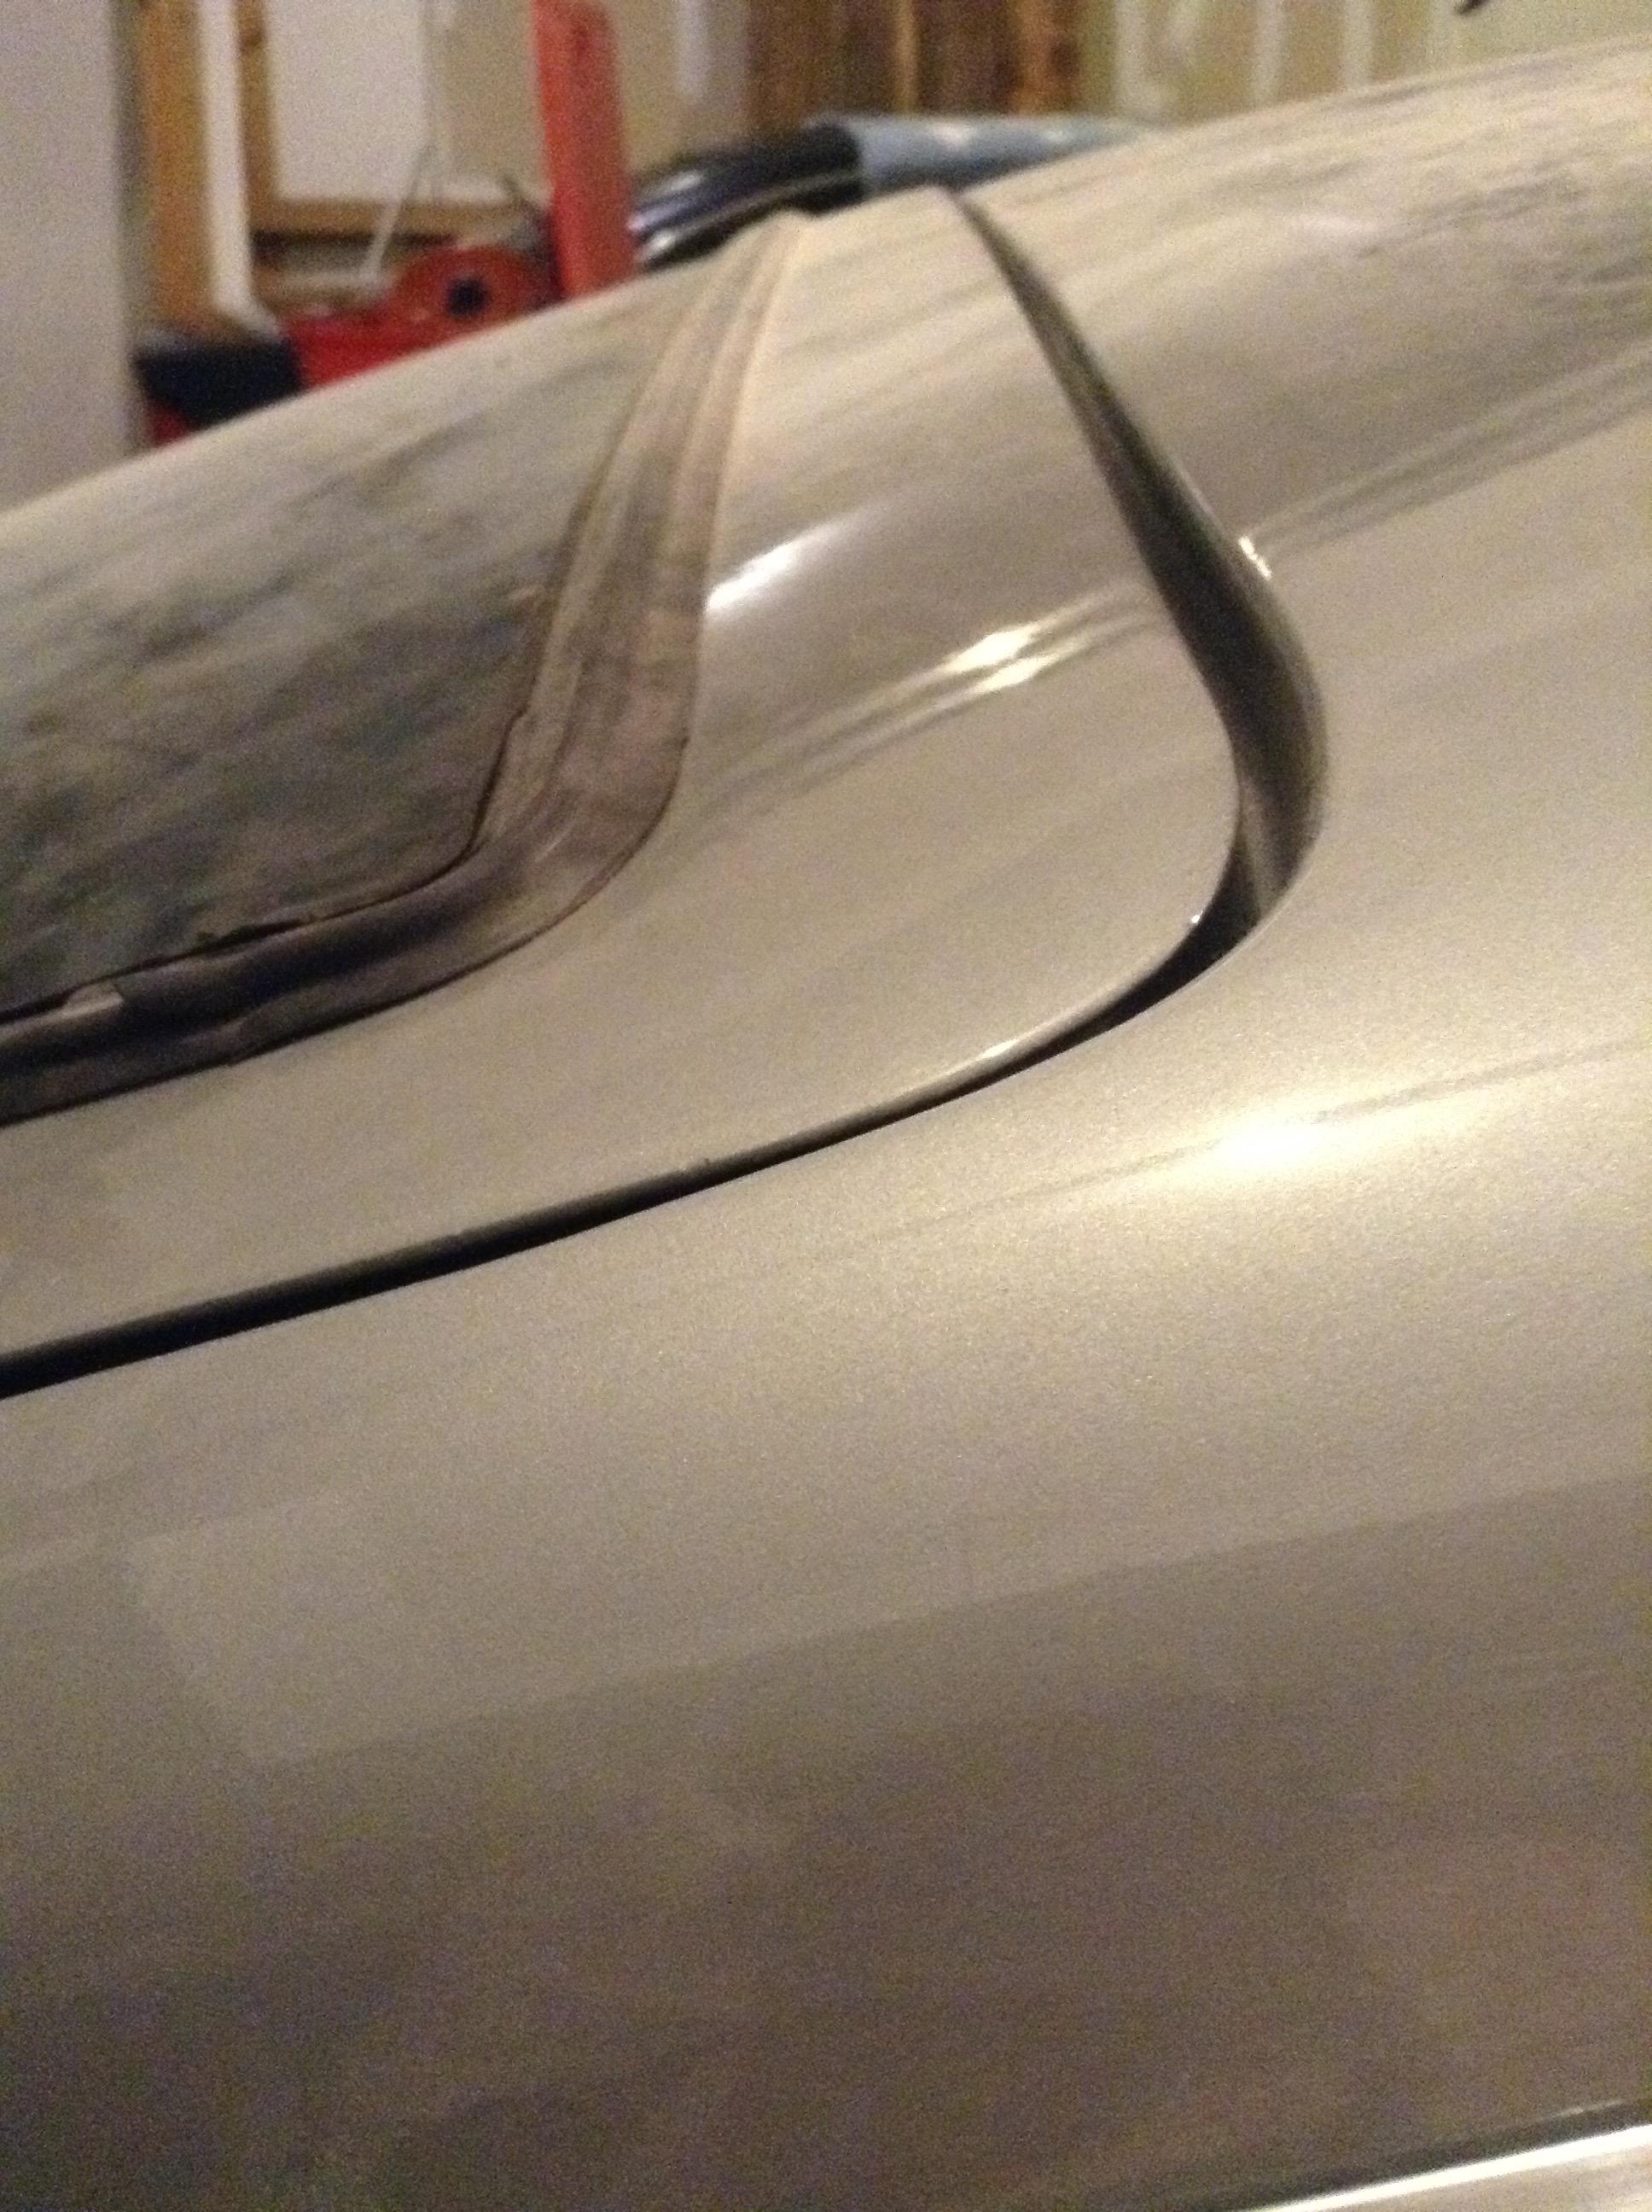
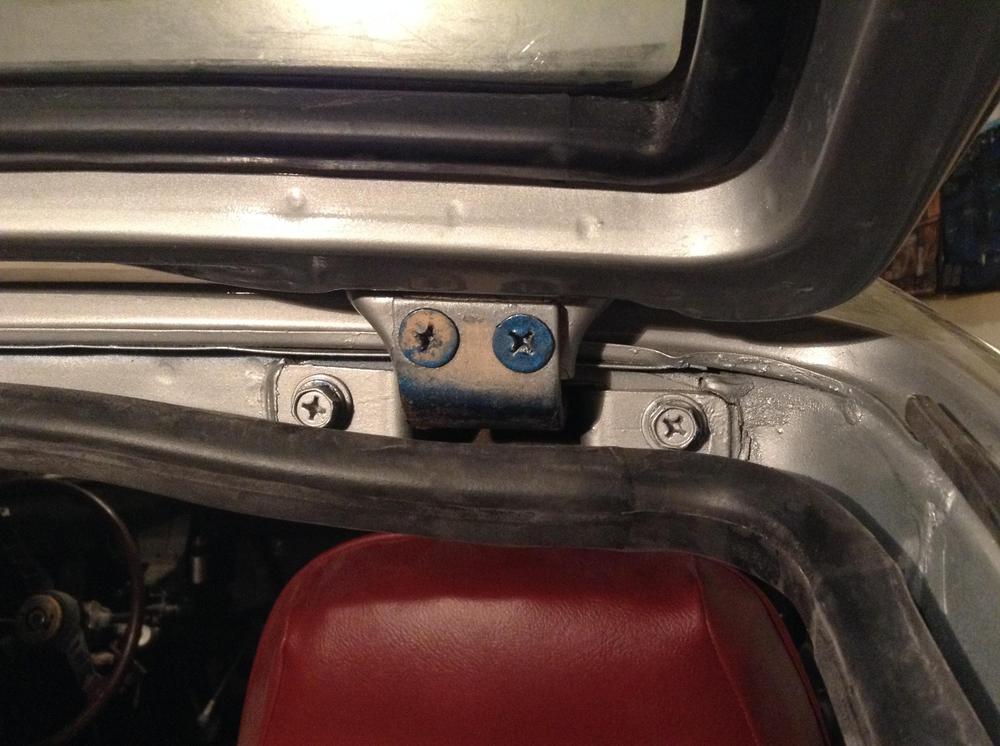
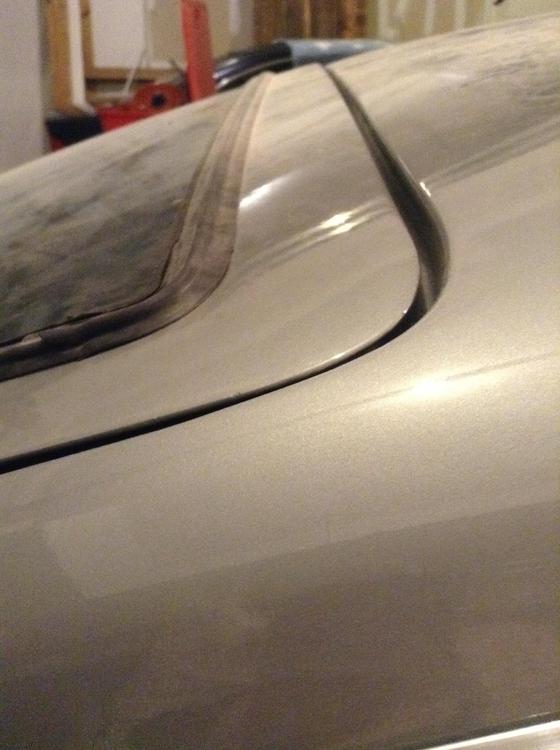
So...I'm realizing that I should have been a lot more involved in the body restoration of our Z. I did all the disassembly and I'm doing all the reassembly, but the body was restored by a shop near where my dad lives, about 450 miles away. Of note, the body shop didn't have any specific Z restoration experience, and it kind of shows. Two questions for today. See attached pics. 1. The passenger side of the hatch sits flush with the roof, but the driver's side is elevated. It wasn't like this before. The adjustment slots for the hinge don't have enough travel to bring the edge down. Any ideas as to what might have happened and how I can line it up? 2. The hatch sill was rusted so the shop welded on a new piece. The rear lip is turned down, as shown. Is this how it's supposed to be? I can't find any close-ups online to compare. It doesn't mate with top corner of the rear finisher panels. There are also no holes for the finisher panel rivets. Any input here would be helpful also. Thanks again guys. She's coming together...


-
Thanks again for all the input. As far as I remember, the hood lined up before it was removed for the body resto. At the very least, it didn't stand out to me that it was misaligned, and I notice that kind of stuff... The grille and bumper have been removed for better hinge bolt access. I'm not going to remove the torsion bars b/c they preload the hinges and will help keep it from clunking around on the road. As mentioned previously, I'd like to keep up momentum with the project, so I'm working on the rest of the stuff forward of the firewall right now and I'll circle back to the hood in a bit. I just don't want to stall out on it for 2-3 days.