


Captain Obvious
Free Member
-
Joined
-
Last visited
Everything posted by Captain Obvious
-
 So your one passenger is really cranky, and the other is really shifty?
 -
I know I should be stronger than this, but I just can't get Austin Powers out of my head.... "That's not my bag, baby."
-
LOL! I'm beginning to think you're just stalling. You don't have to pretty it up first. We're not that kind of crowd.
-
That's awesome. I was watching the news and they mentioned a line of rain that went through the PNW. Is everything still on fire, or did the rain help with that too?
-
Pics of the underside or it didn't happen.
-
What he said! Somebody put a lot of effort into that interior. I thought I could deal with it until I saw the e-brake boot. Then I decided that I couldn't. Haha!! The rest of the car (other than the choice of interior) looks great! So what are the two switches under the aftermarket console cover?
-
I took a quick five second look on the internets for info on the tested and turned up what appears to be a manual? Maybe? http://datsunforum.com/efi-troubleshooting-kent-moore-j25400-analyzer/ It's in .jpg form (not pdf), so reading through it is a little more difficult. I'm assuming you have already trawled the web looking for info on the tester and with that in mind, I'm assuming you've already been through this doc? I could get lost for hours looking for info...
-
-
Site, Glad you're out of danger. Now I just hope all you guys on the west coast can do the same!
-
-
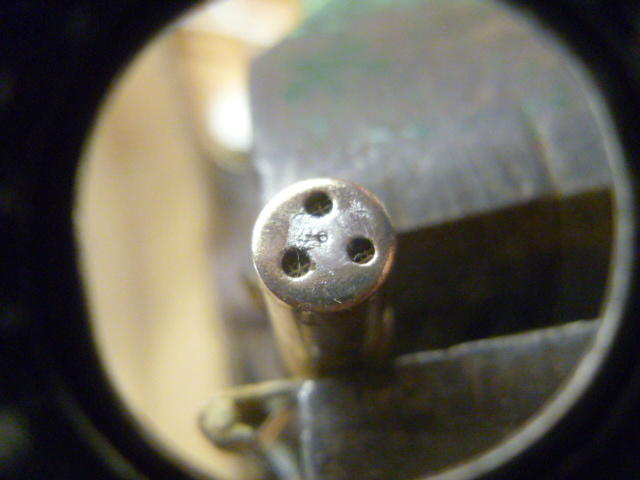
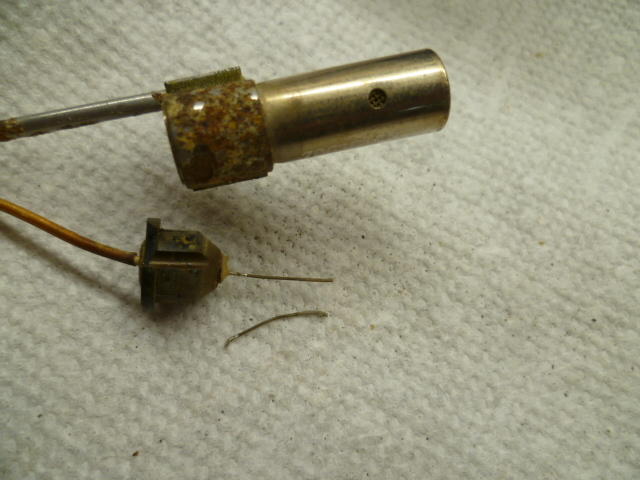
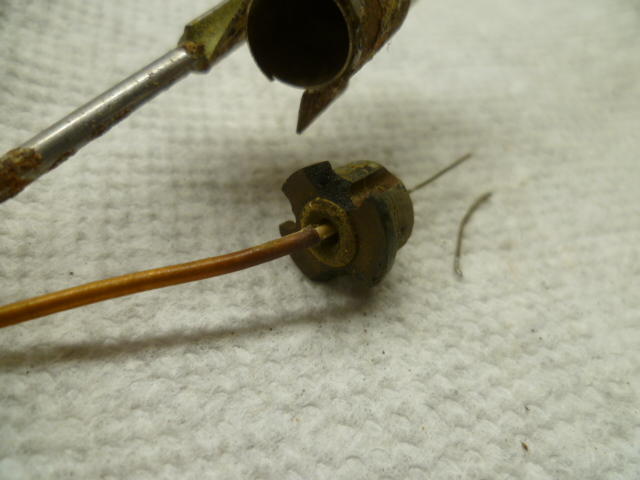
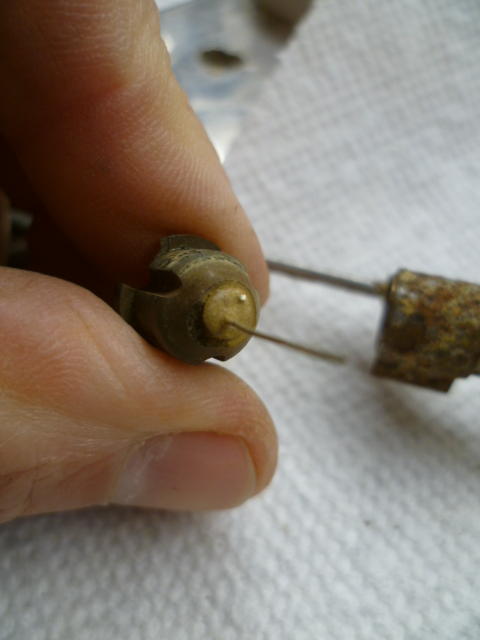
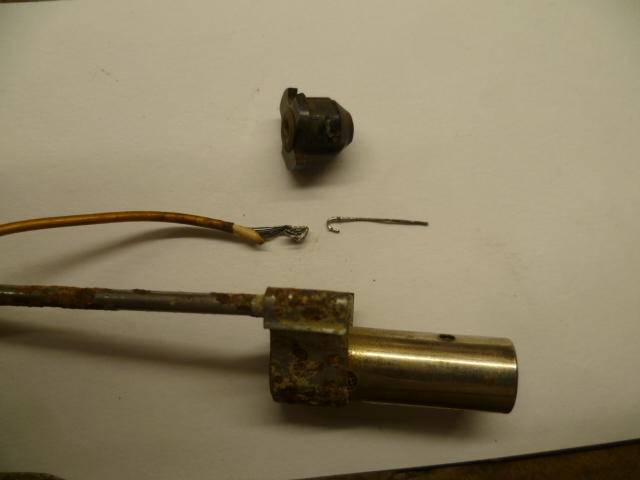
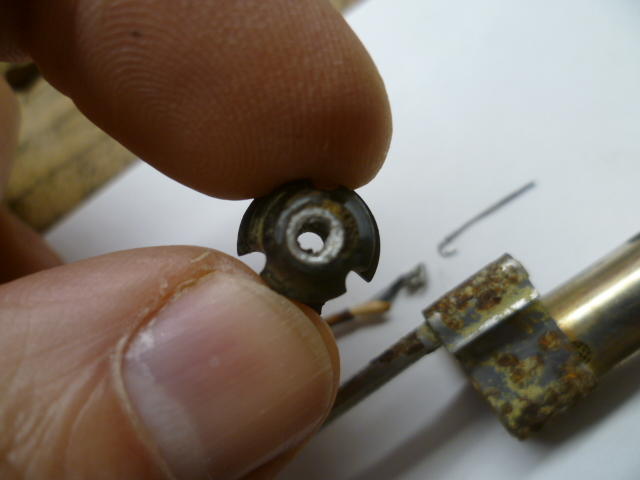
Couple days ago I picked up a spare fuel sending unit to mess around with. First thing I did was checked the thermistor, and it's open circuit. So unfortunately no help there with analyzing a working one, but at least I get to see the thing with my own two eyes. So since the thermistor was already dead, I figured no harm in starting the autopsy. Desoldered the end lead: And pulled (what's left of) the thermistor out of the can. The thermistor nugget itself is completely vaporized. Just like what you guys found, all that was left was the two leads: I still contend that there is nothing interesting inside the black plastic end plug. Here's some shots of the two ends: A And for confirmation, I took it apart. It's just a brass ferrule with flared over ends so it stays in place inside the black plastic cap. And then they use that brass tube as a connection point to solder the flexible wire to one of the thermistor leads. Looks like this. They just bent the ends of the two wires into "U" shapes and hooked them together and then soldered the whole thing together: Here's the hollow brass tube after the solder has been removed: So there's no mystery hidden inside that plastic cap. It's just transition from yellow lead wire to the thermistor lead. @Dave WM If you're going to do another thermistor swap, you don't have to splice the wire to the old stub. You can just solder it into the ferrule.
-
-
Very nice! Thanks for the pics. That tester is very cool. Hope you can actually get it to work! Looking at the back of the board, I don't see anything that looks like a microprocessor. I I would have expected it to be computer based, but unless they used something small (unlikely during that time), it doesn't appear so. That thing must've cost thousands when it was new.
-
Lots of engines use the rail to hold the injectors in place, but all the parts used need to be designed to be used that way. The holes in the manifold need to be sized correctly for the O-ring on the nose. The holes in the fuel rail need to be sized correctly for the O-ring on the tail. And the distance between the manifold and the fuel rail needs to be correct. If those three things are achieved, there's nothing wrong with using the fuel rail to hold the injectors in place. Of course... The current engine does none of these. Boring the manifold out to accept the Green Giants, is just one necessary step.
-
Site, I was thinking of you earlier today when I saw the map. Hold on tight and be ready to get to higher ground!!
-
Yeah, I don't see how the disparaging comments about rotaries would cause this much of an issue. So I have no idea what I'm looking at with that graph. I mean, I can read the legend in the lower left, but I don't know what "normal" looks like. What's the horizontal time scale on that screen capture? It was running for minutes, seconds, a second? What's Haltech's response to this whole thing?
-
Wait! Don't cut the stub off! First thing to try would be penetrating oil, some heat, and grabbing that stub with a pair of pliers. If you cut it off, you'll lose that opportunity. Wiggle it back and forth. If you can get it to move at all, you're pretty much home free. And you've got another advantage in that it's not a blind hole. You have access to both side. Is there any bolt length sticking out the other side? And what is the base piece made out of? Is it steel or aluminum?
-
-
We've got the hazy milky sunlight here at the eastern end of PA. I hope for the best for everyone dealing with the fires. No fun at all.
-
Thanks for the tool info. Some guys are artists with the angle grinder, but I'm not one of them. I'm worried that I'll slip into the strut tube. Maybe I'll try it on the band saw first and see how slow that goes. If that's excruciatingly slow, I guess I'll try the grinder.
I'm not sure the desired question is being answered... @texasz, Has your question been answered, or is the question a more general one: "Why do aftermarket parts cost so much less than genuine OEM dealer parts? Are the dealer parts really that much better to deserve such a premium price?"
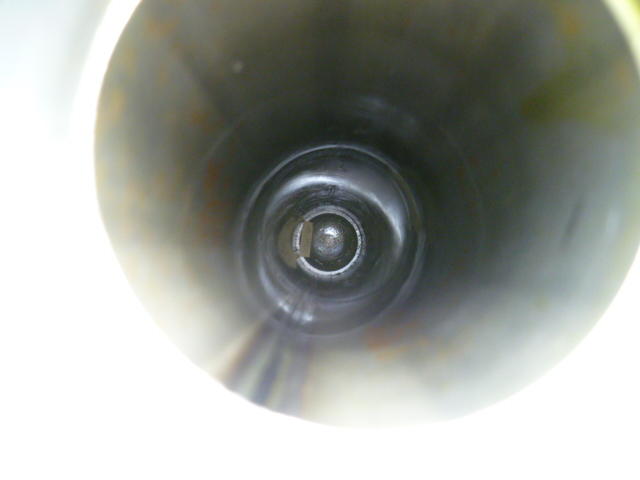
I recently stripped down a pair of strut tubes and I took this pic down the tube. With the right reflected light, you can get a decent look down there. Enough to see the center portion convex outward and the weld bead around the perimeter of the dome: So any idea how much interference you have? Is it something that you could "workaround" by chamfering the bottom corner of the strut body? Take a little material off the OD at the bottom? Just a little? Maybe? Without creating a weak spot and blowing out the strut on rapid compression?
 Haha!! Just like on the playground back in.... Wait, it's been so long that I don't remember how far back it was. So how was the event??? I'm so sorry I had to miss this and I'm looking forward to living vicariously through others!
@grannyknot, What tool did you use to cut your perches loose on your 510? When I cut the perches off the stubs I got from @wheee!, I did it on the lathe by boring the inside out until the perches fell off. Can't do that with the bodies I want to put on the car. I had originally planned to just go completely postal with the grinder and cut the perches off my tubes in pieces (since I didn't need to salvage them). But your removal method looked gentle enough that you could reuse the perches (which I assume was your plan).
Haha!! Just like on the playground back in.... Wait, it's been so long that I don't remember how far back it was. So how was the event??? I'm so sorry I had to miss this and I'm looking forward to living vicariously through others!
@grannyknot, What tool did you use to cut your perches loose on your 510? When I cut the perches off the stubs I got from @wheee!, I did it on the lathe by boring the inside out until the perches fell off. Can't do that with the bodies I want to put on the car. I had originally planned to just go completely postal with the grinder and cut the perches off my tubes in pieces (since I didn't need to salvage them). But your removal method looked gentle enough that you could reuse the perches (which I assume was your plan).


Important Information
By using this site, you agree to our Privacy Policy and Guidelines. We have placed cookies on your device to help make this website better. You can adjust your cookie settings, otherwise we'll assume you're okay to continue.