Captain Obvious
Free Member
-
Joined
-
Last visited
Everything posted by Captain Obvious
-
 You won't be able to push the bolt back out that way. You need to turn it. Pushing it straight won't do anything good, and if you push too hard, threads somewhere (either on the stub you've got stuck in there or the bolt your using to push) will give way and tear out. However, if you do have access to the other side and there is some exposed threads on the back, you can use that hole on the back side as a guide for a drill bit to get it centered. You want something that is the minor diameter of the threads (do you know what I mean by that), and then you should be able to use a tap from that back side to clear out the threads. Are there enough threads exposed on the back for you to catch a tap on to get started properly?
 -
My pleasure!! And I second the Loctite ban. If you use the distorted thread ZX nuts, you won't need any thread lock. And if you use the original style, you'll just peen them. In either event, you won't need any Loctite.
-
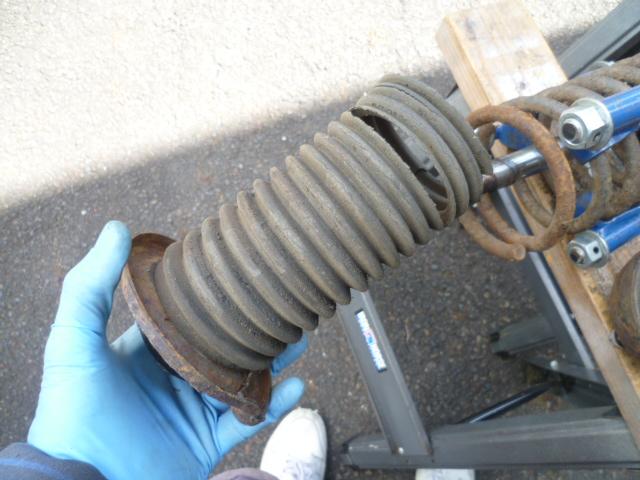
Crapsticks. That's not the answer I wanted. I really thing the original design (with the bellows and the retaining ring at the bottom) is pretty slick. @AK260, you mentioned in another thread that you were using the bellows from the front of a dirt bike or something? How did that work out?
-
OK, so there are a whole bunch of votes that say the spacer I described isn't there. And admittedly, I did not go out to take a look at my car. It's quite conceivable that I was mistaken and simply describing how I THINK it should be designed. In any event, you're in good hands. Ignore me.
-
-
LOL. Commitment issues. Here's what I did: After I got the original peened nuts off, I completely removed the shoulder where the peening was originally located. I cut mine off in a lathe, but you could do the same thing with a file or grinding wheel. The end result was a "test nut" that I could install and remove any number of times without damage to anything. Using test nuts, I could put everything together and make sure it all worked the way I wanted it to. Here's what my nuts look like: Then when I was completely convinced everything was done right, I took the test nuts off for the last time and replaced with the one-time-use ZX nuts.
-
I believe the poly should operate the same way the originals do. Meaning... There should be a metal sleeve that runs through the center of the bushings. You're supposed to tighten the nut down until there is metal-to-metal contact between the washers and that sleeve. The compliance of the bushings is supposed to compress until that point. In theory, you should be able to feel the tightening torque shoot up once all the play has been taken up.
-
So today's question... Does anyone have a good manufacturer and specific details for a bellows set that fit's well on the 280 struts? I bought a pair of KYB's couple years ago when I was into the struts last time and they were too big. Couldn't get them to fit right. No surprise, but the bellows that came in my donor strut assemblies were worn out and need to be replaced. Anyone got something that really does fit well?
-
I was thinking the same thing. Manufacturing fixturing only. That, and you can't tell 70's Japanese welder on the line "It doesn't matter... Put it anywhere." He would likely self combust from the internal ambiguity. And on a related note, I found a pic of the plastic spacers they use in the rear (instead of the bearings). I think I might make some steel replacements to use when I put mine back together. Might be able make them a little thinner than the originals for more lowering:

-
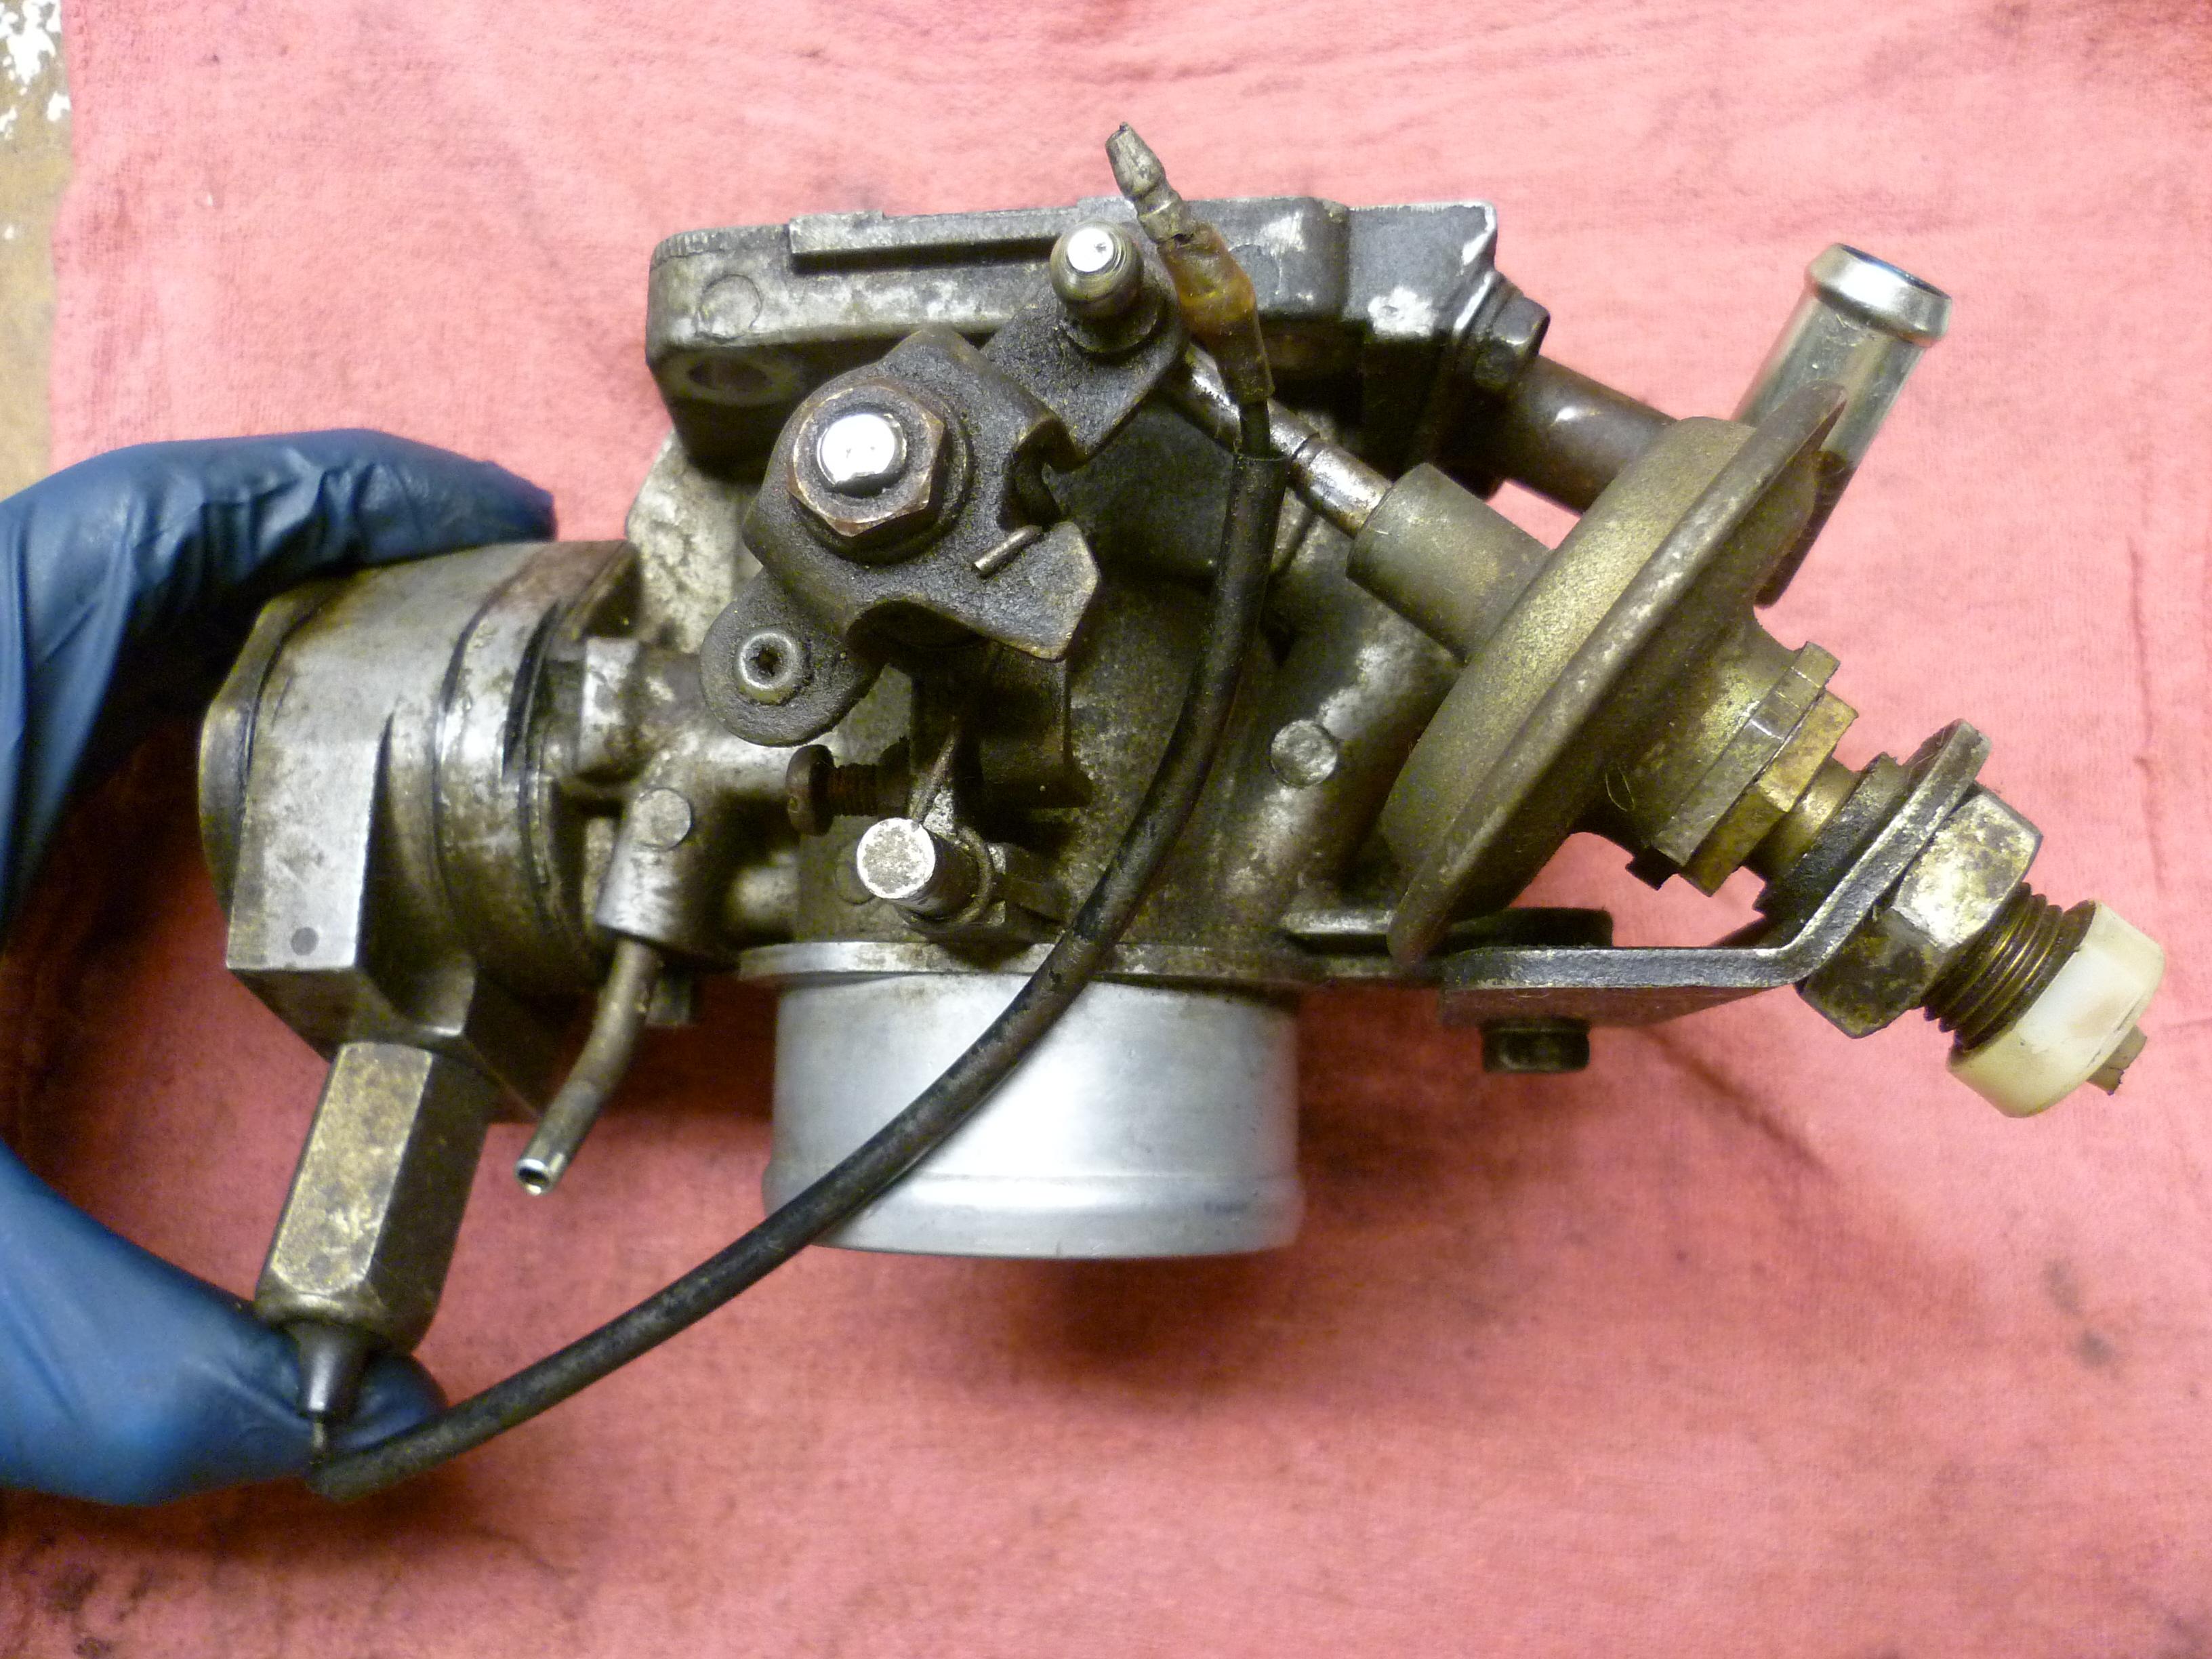
I guess it's physically possible that something inside the BCDD is sticky causing it to "latch" into a semi-open position and staying that way until the engine is shut off. But I'm considering that very unlikely. We can talk about BCDD diagnostics, but that will have to be after you pull up on the throttle linkage. Make sure your dashpot isn't sticking and pull up on the throttle linkage. Here's a pic showing the linkage and the dashpot. To increase the engine speed, you push down on the linkage here. So to return to idle, you pull up:
-
Even though the FSM says not to bother un-peen the original nut before removal, don't believe it!! They say just put a wrench on it and take it off. Again... Don't believe it!! As grannyknot mentioned above, if you take the original off without relaxing the peened area first, it will mess up a bunch of thread. I've tried it and (while still usable), the results weren't pretty. And as far as being able to un-peen and reuse the original nut, I think it would be very unlikely. More power to ya, but for the cost of a new nut, it's a theory that I wouldn't spend a lot of time trying to prove. I do a lot of unnecessary time consuming stuff like that, but that's below even my threshold!
-
Yes, you use the same original washer. Everything else is the same except for the nut. Every distorted thread nut I've ever come across is listed as "one time use" and is non-reusable. That said, depending on the application, sometimes I violate that directive and reuse them. However for this application, I would not do that. I would get new ones. But if you do this job right, you hopefully won't be needing to go back in there again for a long time.
-
Agreed. I just can't come up with any functional reason why it would really matter at all. And the hat in the rear spins as well. No bearing, but the rubber mounting block with the three studs sticking up out of it is independent of the upper perch below it. It's got that goofy hard plastic spacer in there or something? Been a while since I messed with one. Doesn't spin as easily as the front with the bearing, but it should still spin. Of course, all that said, My OCD will force me to put the perches back on the same way they came off. Lower, but same rotational orientation.
-
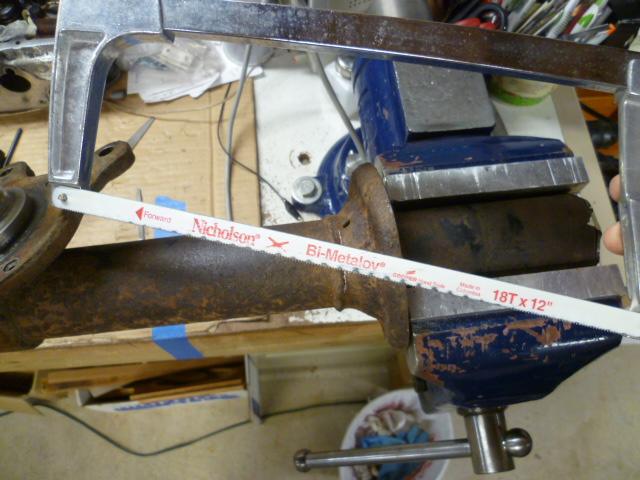
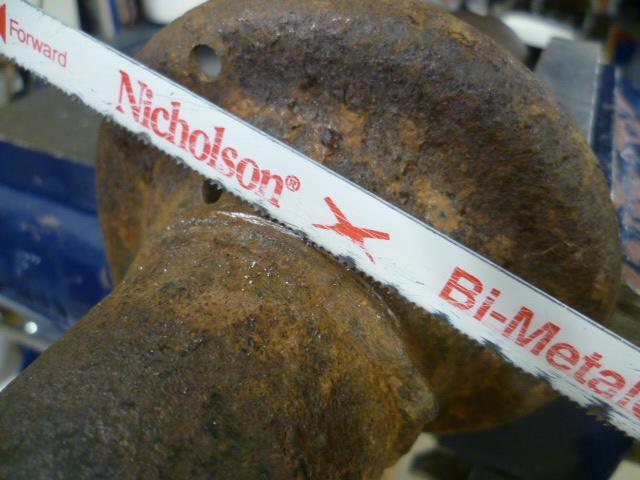
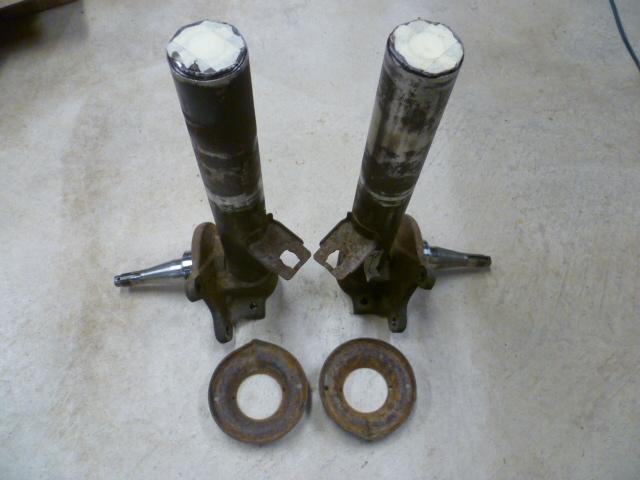
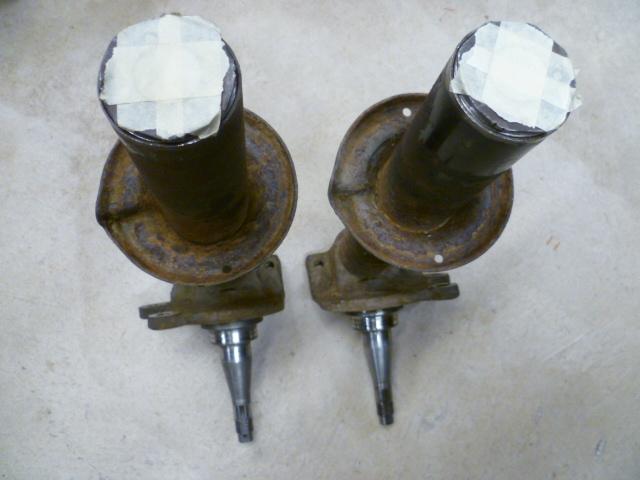
And as for the project, I made some progress. Hacksaw with a sharp new blade made quick work of the perches. I was worried that it would be a real chore doing it manually without a machine, but it was actually quite easy: Turning the strut in the vise as I broke through. And it was quite easy to tell when I broke through as well, so I didn't cut into the strut tube: Go all the way around and then used a rubber mallet to tap the perch up and off: Rinse and repeat on the other side and here's where I am right now after grinding off the weld beads:


-
I got a question... Here's a pic of my donor strut tubes. Note that the right side (left unit) perch spring end points toward the rear of the car, while the spring tip on right side unit points towards the front of the car: I confirmed on my stock units which are still on my 77 280Z. The spring tip sections of the perches on the left side spring tips point away from eachother (front strut points forward and rear strut points backward), while the right side tubes do the opposite. On the right side, the spring tips are both on the inboard sides. Question is.... Does it matter at all where the spring tips end up? I'm assuming that there was some simple fixturing reason Datsun put them where they did, but I'm having a hard time coming up with any function reason it would matter where they end up. However, I'm not a suspension guy. Anyone have any input?
-
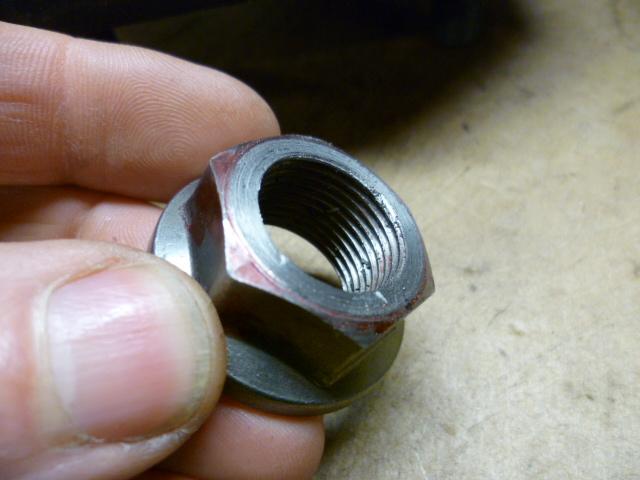
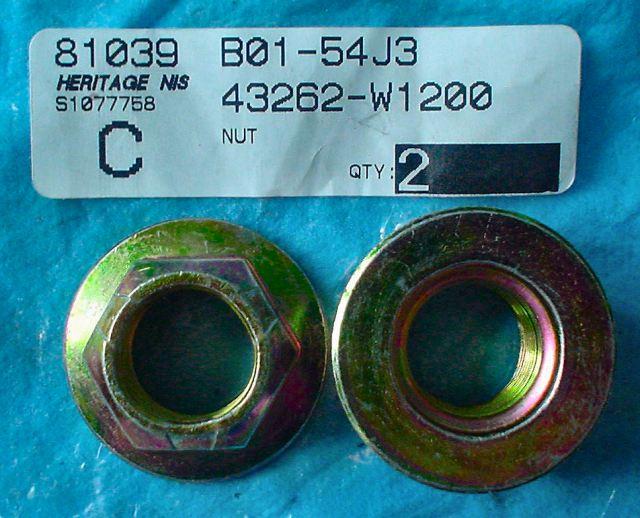
The 280ZX used a distorted thread prevailing torque type nut. Pic. Thanks Blue!!
-
Looking forward to it (or them). Would be nice to take yon on an excursion with site! Vorticity, Glad you got the brakes sorted out, and sorry for the diversions. Glad you caught the heater hose before it went wide open. I split one of mine a couple years ago and didn't notice until the gauge was pegged. By the time I got home, there wasn't enough coolant left to leak.
-
ZH, Yes I did some of that thought work because that's the only thing I could come up with for my sticking throttle plate. I had all the springs in place, but the theory was the worn throttle shaft was sticky and a high pressure differential would pull the plate in tight which would put max pressure on the bearings (and they would stick) Might just be a different point of reference, but when I picture the throttle body, you push down to OPEN it. Pull up to close it. While the RPM's are hanging. reach in and pull up on the throttle linkage sticking out the side of the throttle body. Don't just look at it and believe it's closing correctly. Pull up. What happens if you blip the throttle? Does it ever return to normal?
-
Oh No!!! Is the insurance company involved, at least for reimbursement? In other words... Was the accident deemed the other guy's fault? I had the exact same accident occur in my past. I bought a new car and went over to my Dad's place to show it off. He asked if he could take it for a spin. Of course, I tossed him the keys, and while he was out, the exact same thing happened to him. I wasn't with him, and I was really wondering what was taking so long... Thankfully there were witnesses and the accident was deemed 100% the other guy's fault, but the damage was done. Car had under 2000 miles on it at the time.
-
When you disconnect the BCDD, it becomes enabled. That means yours is currently enabled full time, even when the car is sitting still. So it's doubtful that is what's causing the issue. It really sounds like the throttle is hanging up mechanically. You said that the throttle linkage is working smoothly and the throttle plate is closing. How do you know? Have you manually grabbed the throttle linkage right at the throttle body and pulled it up to make double dog sure the plate is closed? I've had issues with that in the past.
-
Since one end of the spring pushes against the threaded in plug, increasing the thickness of that spring could (under certain circumstances that aren't in play here) reduce the oil pressure. The thicker that washer, the further the inside surface is from the overpressure relief, and the easier it will be to open that bypass. The only thing that bypass valve does is limit the upper end of the oil pressure. If the oil is thick (cold) and the engine is tight, that bypass will open and limit the pressure to an upper psi. If the oil is thin (hot) or the engine is worn, or the RPM's are low, that bypass valve will be closed and not be doing anything at all. In other words, if you've got low oil pressure, changing the bypass valve spring won't do anything to help. When the oil pressure is low, that valve is already closed and not having any impact at all on the pressure. So unless that spring is so weak that the bypass is being opened accidently at a very low pressure (unlikely), it's got nothing to do with the oil pressure level.
-
Man's got to know his limitations.
-
Oops! Sorry! Memory like a goldfish. Well that, and I kinda wander in and out of on-line consciousness. I'll put something together. I just took some pics.
-
So your one passenger is really cranky, and the other is really shifty?
-
I know I should be stronger than this, but I just can't get Austin Powers out of my head.... "That's not my bag, baby."