


Captain Obvious
Free Member
-
Joined
-
Last visited
Everything posted by Captain Obvious
-

-
Wow. You guys are great!!
-
Haha!! You guys are awesome!! Once I get my hands on some ill tempered sea bass, I'll be set!
-
Hahaha!!!!! It's true!!
-
-
LOL! I have a lathe and I'm not afraid to use it!
-
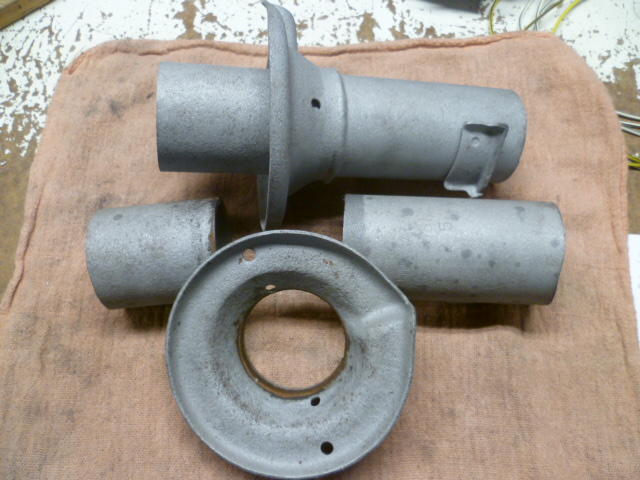
Just for proof of concept, before I cut the second perch off, I tested the first one. Used a rubber mallet to tap the now liberated loose perch back onto the strut tube and position it a little lower than it was originally: And here's a shot showing the relative heights of the perches. You can tell by the position of the tab welded onto the tubes that the perch on the left is lower by about an inch. The idea would be to re-weld the perch back into this new lower position on another set of complete strut tubes. :


-
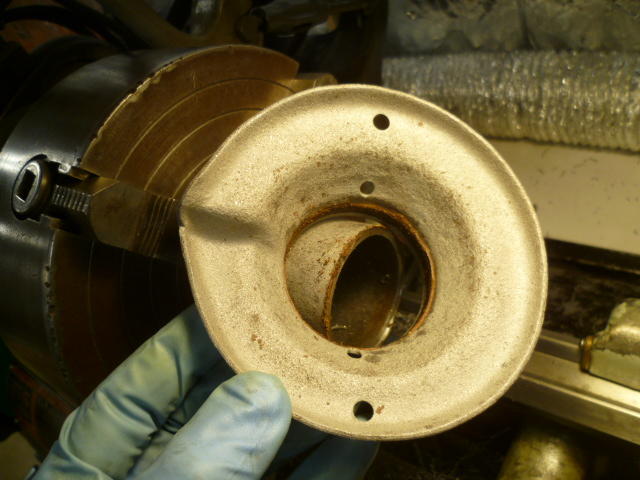
The process went like this. Chucked them up in the lathe and cut off the remaining lower portion of the original tube: Then once that was out of the way, I went in with a boring tool and opened up the inside diameter: Bore out the ID a little at a time just until the original tube has been cut out of the perch ring. Once that happens, the perch can be pulled off:


-
You know the radiator is at the other end of the car, right?
-
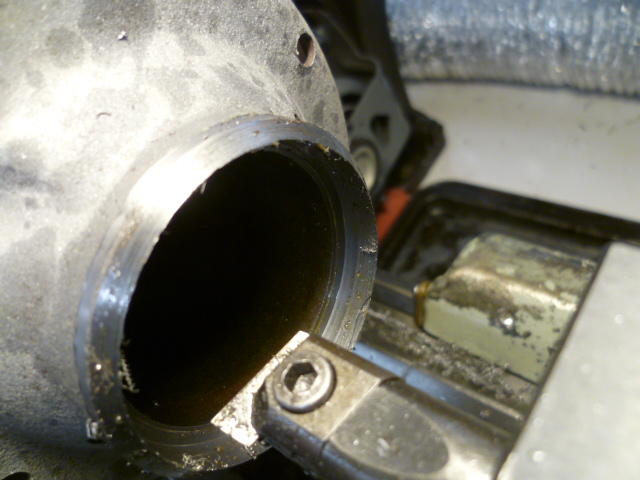
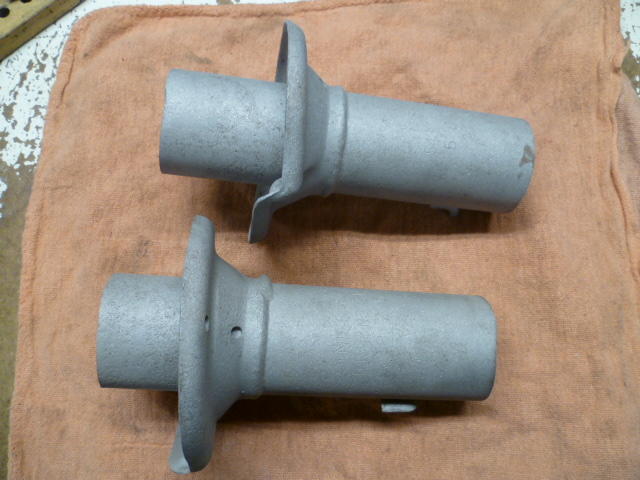
LOL. My story didn't quite play out as described by Blue, but there has been non-ideal events occurring all over the place that have pushed the priority of this project back a little. So the short answer to your question is... No, nothing that you haven't already seen. Here's where the project stands. I got the strut tubes from you (I thank you again immensely): I chucked them up in the lathe one at a time and cut the spring perches off the tubes: Here's what they looked like before and after they met Mr. Lathe: And here's both of them done: And that's where the project stalled. They've been helping hold down my workbench since this point.

-
Wow. You guys have been on a roll in my absence. Glad to provide you with so much amusement at my expense! I would usually deflect stuff like this with "Yeah, whatever. My car runs great", but that's not currently the case. So go ahead... Poke your fun. I'll get even someday!
-
Ouch. That's not cool, man. (See what I did there?)
-
Man... It's still too early to admit that. Must have really been eatin' at you. Glad it's running!! We'll never speak of this again.
-
I'm no timing expert, but I don't think there's really any way to really "compensate" with any static source for not having vacuum advance on the distributor. You could maybe squeak your 10 degree base static timing up a degree or two, but there's just no true "substitute" for the vacuum advance at light cruise.
-
Happy Canada Day to you all!!!
-
Well therrrrre's your problem.
-
Glad it's running!! Woot!! When (if?) you reach the point when you can talk about it, we're all ears.
-
in 73, I'm not sure if that heat wrap came from the factory or was added by dealers as part of a TSB. If you look at the pics in the FSM's, the heat wrap does not appear in the 73 manual, but it is shown in the pics for 74. @Zup might have some insights. I think he and that wrap stuff have a long and troubled relationship.
-
Fuel pressure sounds fine. Don't worry about the test #3 - 3 cold start system circuit when it showed voltage immediately. All that means is that your cold start injector never fired. Either your thermotime switch is burned open, or it was just too warm to close, but in any event, that's not what's causing your problem. I've been running with no cold start injector for years now, and it takes a little longer to start, but it still starts. And I will double check my notes, but I don't think your AFM test #1-3b is a problem either. Can we go back to basics.... Are you 1000% sure you have the firing order correct? Are you 1000% sure you have the ignition timing correct? Are you 1000% sure you are getting good spark on more than just one plug?
-
LOL. Maybe I should whip up a pair of flat top throttle bodies!
-
So it seems that whatever was going on that made the chemical change color has been fixed, right? Did you find a smoking gun as to what was going on? Did you do anything other than replace the head gasket?
-
It was our discussions in Atlanta, wasn't it? Don't forget about the built in return springs. Or the heavy calibrated weighted suction pistons. Or the heating water that goes all the way around the nozzle to aid in fuel atomization. Or the real choke function. Or that they came with an automatic thermostatically controlled air cleaner. OK. Back to the boat with thee.
-
Yeah, That's the Kameari tensioner that I see mentioned in threads about this topic, and the only problem with it seems to be the price. Nice piece of engineering: So in summary, here's the issue in a nutshell... When you remove material from the bottom of the head, it brings the centerlines of the cam and crank closer together. With the cam and crank closer together, the valve timing becomes retarded and the chain has more slack. One solution to these issues is to shim the cam towers upwards and use either longer valves or thicker lash pads. Another solution is to account for the timing change using an adjustable cam pulley, and adjust for the chain slack with a different tensioning design, such as the Kameari tensioner.
-
Haha!! I understand completely. I went to Penn State, and the EE department forced all the other disciplines to take one introductory electrical class for non-EE majors. Every one of the other disciplines had to take it, and every one of the students universally hated it. So... By the time I got there, the ME department had retaliated and made the other disciplines take one introductory ME class for non ME's. It was thermo and fluid flow, and of all the classes I ever took, I think I despised that one the most. Now that I have identified so many automotive related applications, I'm sure I could get much more out of it. But at the time, it was pure torture. It was even rumored that sometimes people would swap... Your ME friend would take your thermo test for you and you would take their Intro to Circuits tests for them. Not that I ever participated in anything like that, of course.
-
Yup, I'm an electrical engineer. And I don't usually read the directions either.

