


Captain Obvious
Community Member
-
Joined
-
Last visited
Everything posted by Captain Obvious
-
Haha! Yes, black with yellow. not white. Sorry. That's what I get for relying on memory. Glad I got the starter location correct at least. Pull that small black with the yellow stripe off and then turn your key to START. You should hear the fuel pump run.
-
I'm not far from Strafford. And that's not too far from Devo either. LOL!
-
Disconnect the small black wire with a white stripe. Should be a spade connector, and it should just pull off. No tools required. Don't let the dangling B/W wire short to anything. Put a piece of tape over it if you aren't confident.
-
Uhhhhh... That's not the starter. The starter is the other big electric thing behind you below the battery.
-
Absolutely. If you travel to the Northeast, make sure I know about it!
-
No, I haven't taken any measurements off mine. I know I popped two of them out enough that they could have spun 180 degrees. I don't know for sure if they really did spin or not. And the two that popped out far enough that they could have spun were not on the same piston. So I know with certainty that both bolts are in their original positions on four pistons and at least one of the two bolts are correct on the other two pistons. That's all I got right now. I ain't skeeered. Haha!!
-
Sweet. Looking forward to the first test drive. Good thing you remembered to tighten up the oil pan bolts!!
-
The ITM gear does have the marks. Reptoid Overlords confirmed that earlier. Here's my current list. Yes Timing Marks: TRW S462 - pic from ebay has the marks Beck Arnley 025-0266 Pic from ebay has the marks ITM 053-90400 has the marks (note this is a full kit) (Confirmed by Reptoid Overlords) No Timing Marks: Melling - Pic from rockauto shows no marks on back OSK does not have the timing marks - (Confirmed by Dave WM) Federal Mogul (Sealed power) - pic from ebay shows no marks on back One of the brands I haven't yet determined is Cloyes. Anyone seen a pic of the back of that one?
-
LOL!!
-
The restarting procedure sounds good to me. I made up a little remote starter button that I use. Push button switch with two pigtail wires. One of the pigtails has a female spade that plugs onto the starter solenoid (after disconnecting the original B/W wire) and the other pigtail has a clip that attaches to the battery terminal. Cranking that way (with the rest of the car completely off) produces motion without any of the other ancillary functions like spark or fuel. Fuel pump doesn't run, and the ignition and FI systems don't get power so they sleep through the process. Make sure the car is not in gear. And as for the thing about the OSK timing marks, my mistake. I thought you had said that the OSK did have the marks, but I guess that was the voices in my head. Make sure the car is not in gear. Oh, and make sure the car is not in gear.
-
Carp. Well at least you caught it before it did something unrecoverable. You must have pretty good ears to have heard that issue so early! Clean room... That's what I need.
-
Right, it doesn't care. And probably neither will anyone else. I've been in to multi-thousand mile engines recently and the timing marks still looked good. That said, if I get the option, I'd like to have the marks. @Dave WM, I thought you had said earlier that the OSK had the timing marks. Is what you got different than a pic you were shown prior?
-
Yuck. No fun. I don't get the weld spatter. Anything else you think of that it could be? I mean, I gotta admit that nugget on your valve guide sure looks like a weld spatter bead, but honestly.... How? Really? Still hot enough to stick there down inside on a valve guide? Are you sure it's metal? Is it magnetic? I'm going to build myself a clean room when it comes assembly time.
-
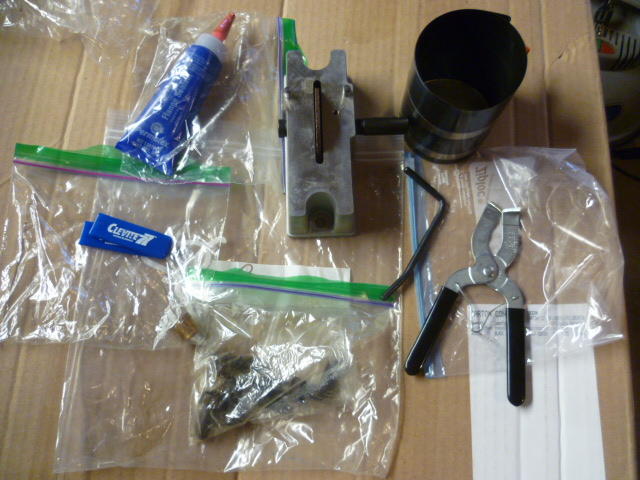
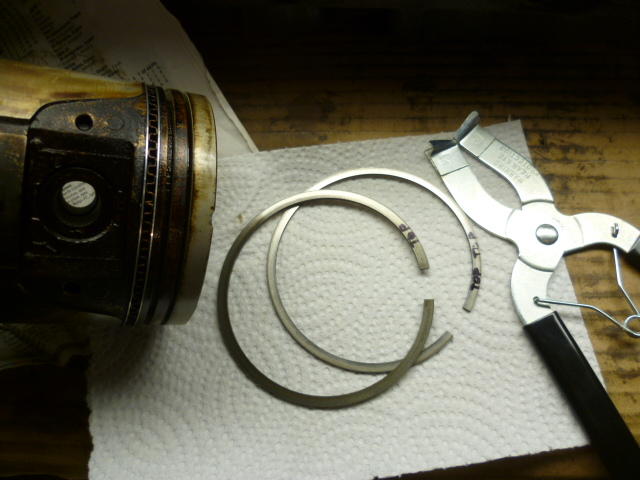
The Canadian Tool Exchange visited last night!! Thanks @240260280!! And even though I'm jumping the gun, I just had to try out the ring pliers. Seem to work just fine: And speaking of such things... The Ring Fairy made a recent visit as well:

-
I thought it was "M sub f".
-
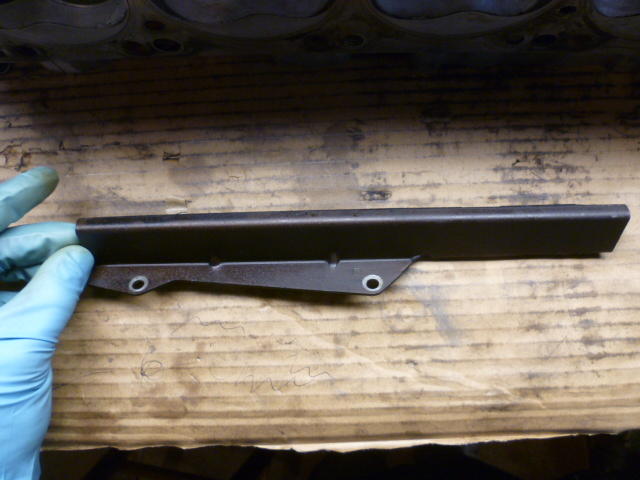
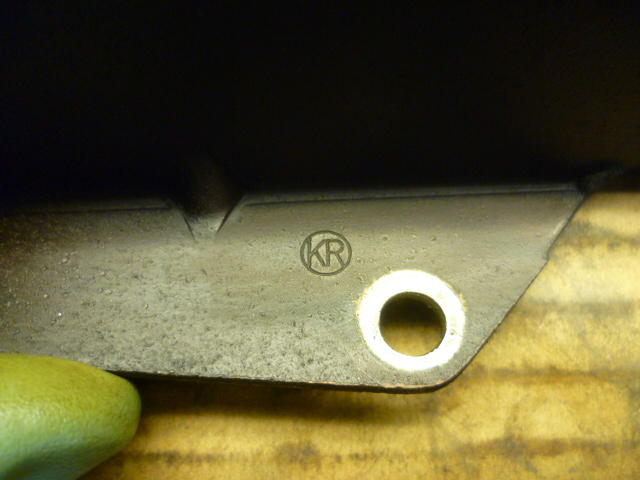
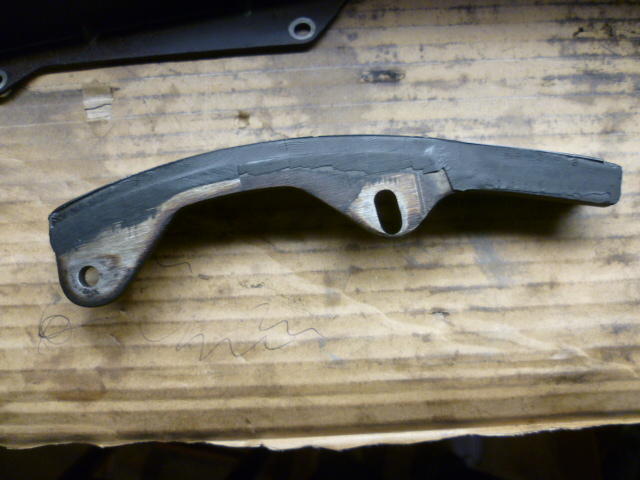
I've been into two later model ZX motors in recent past and they did not have gaskets on the tensioner. I don't know about earlier years. As you mentioned, it could be something they dropped somewhere along the way. So I took a good look at the tensioner and guides from my 83 motor... There were no markings that I could find on the tensioner, but I did find some markings on the guides. tight side side (left). Had a KR inside a circle. Did a little web searching and came up empty: The slack side (left) has a marking from Tsubaki. They are an old Japanese chain company which makes perfect sense: I cannot prove it, but I believe these parts are original from the factory.

-
I'm no expert on the finer points, but I do not think there was a gasket behind the tensioner when that motor left the factory. I believe the gasket behind the tensioner is an indication that someone had replaced all that stuff in the past. Do you see any manufacturer marks on any of the parts? I'll look the factory stuff over from my F54 tensioner. If anything, I would expect to see either a Nissan mark, or a Hitachi mark on my original stuff. I'll check.
-
Word.
-
I've only got one of my pistons here (the rest are out at GGRs), but the one I have here was assembled like the one you pictured above. And I'm confident that the one I have here was NOT one of the two bolts that came out during disassembly. (Point is, I have high confidence that the one I have here is the way it came from the factory.) I don't know if my other five pistons are like the one I have here but I'll let you know when I get a chance.
-
Although, I'm not convinced that "interchanging rod bolts has the same effect as interchanging rods and caps". I think interchanging rods and caps is much more risky than interchanging rod bolts. As a testament to that... You can buy and install a whole new set of rod bolts. In fact, some people even recommend that. Of course, it would be a better idea to keep everything together and in the exact same orientation as it was originally, but I certainly don't think it's as high an impact as mixing up all the caps.
-
I'm guessing the reason it's important to keep the rod bolts in the original location is that they locate the lower bearing cap against the bottom of the rod. Take a look at the rod bolts... there's a thicker section up by the head. That thicker section is a locating shaft for the caps. Now that you mentioned it, I've got to take care of that too. I dropped two of them and I'm relatively sure I got them back in the original orientation. I know they're on the right rod and the correct side of that rod... Only thing I'm not positive about is the rotational orientation. When mine fell out, I put them back with what looked like (in crappy light) the cleaner side towards the rod, but I need to double check them now. Have you looked at yours to see if you can use the oil staining as a guide?
-
Good progress. I'm with you... I'd put a little sealant around the oil holes and the water holes. The rest of that gasket's sealing work is oil, but it's not under pressure.
-
Yup. That's exactly what I meant. So the ITM has the timing marks, and according to Dave, so does the OSK.
-
As suggested, a hook on a slide hammer tool (or a crude substitute) would probably pop that out. Or just let the machine shop take care of it. It won't add any significant cost. Did you get the front one out? If not, be careful drilling that one too. #1 is close behind that front plug.
-
If it makes you feel any better, that's not the first time I've heard of that. I haven't done it (yet), but apparently it's easier than expected to do that. I don't think you are the only one.


