Captain Obvious
Community Member
-
Joined
-
Last visited
Everything posted by Captain Obvious
-
Ummmm... The rust?
-
Thanks for the input everyone. @Terrapin Z, I'll reach out about that cylinder you have. And @inline6, did you have to pry those valve seat sleeves out, or did they pretty much fall out after you had cleaned everything up?
-
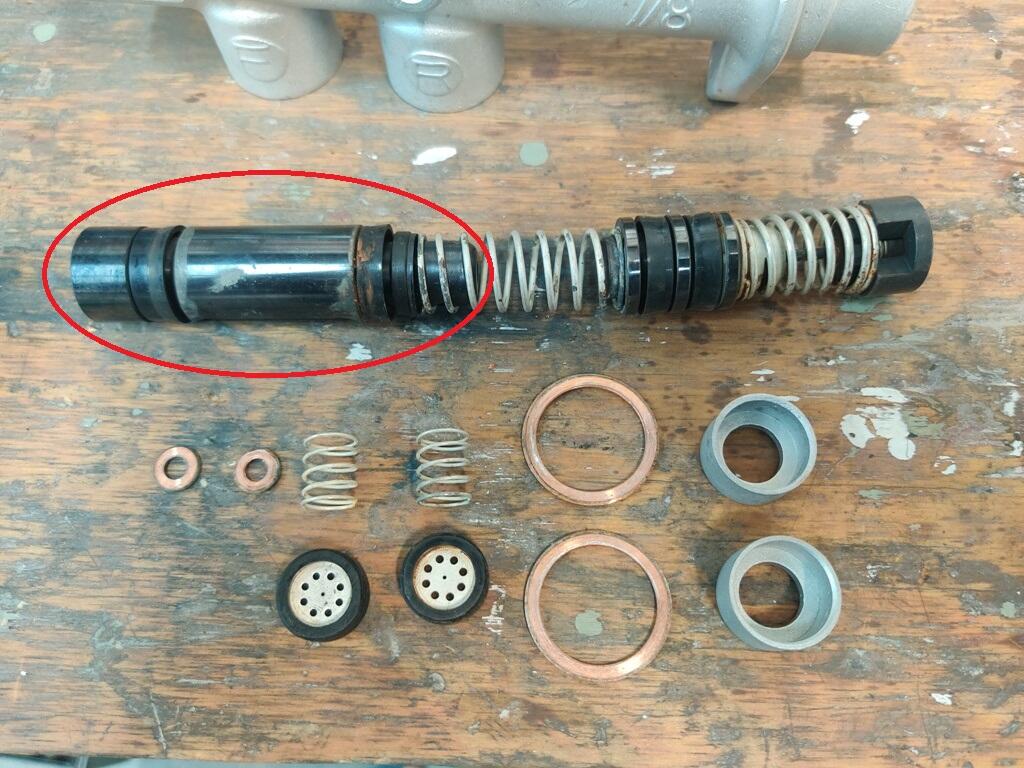
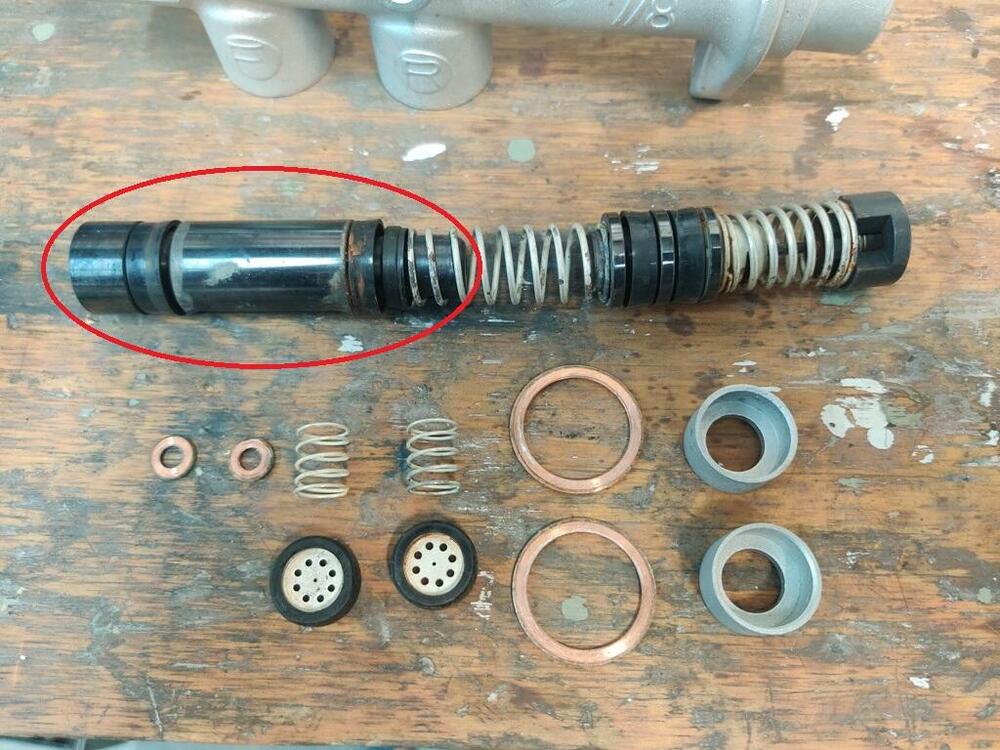
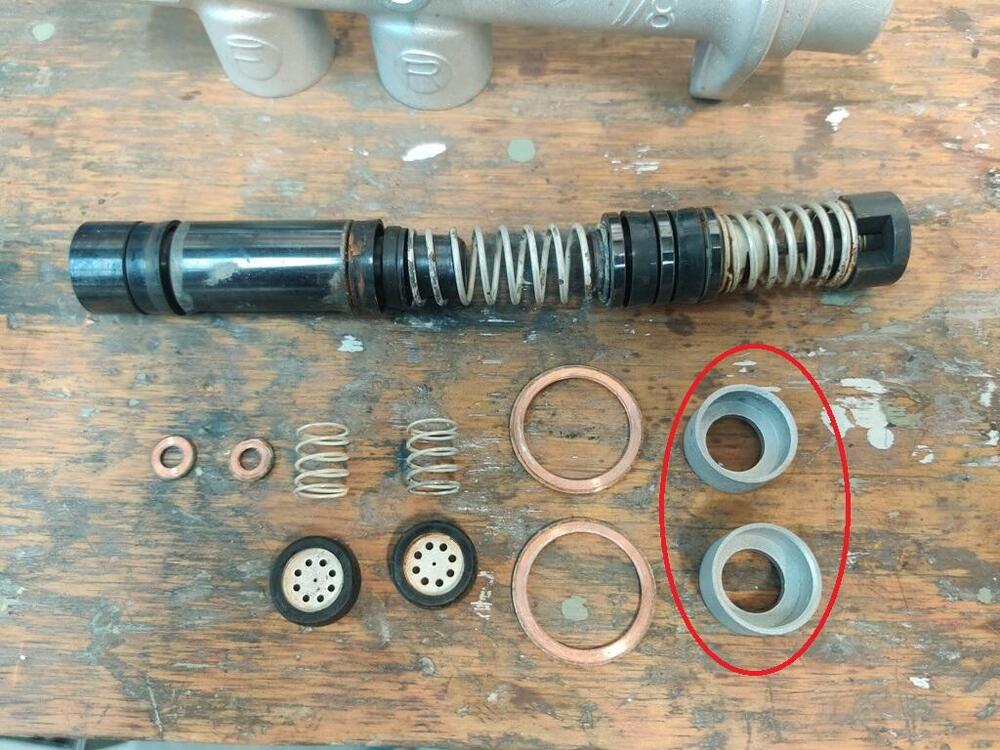
I'm working on an early master cylinder now. @inline6 How did yours turn out? I had to resort to drastic measures to get the rear circuit piston out... Anyone got a half dead early master cylinder around they would offer up as parts? I could use one of these: Also, the valve seats for the output check valves... Mine are stuck in there. How did you get these out?: And just to make searching easier, here are a couple master cylinder related links: https://www.classiczcars.com/forums/topic/68100-master-cylinder-anomaly/ https://www.classiczcars.com/forums/topic/66276-brakes-dragging/ https://www.classiczcars.com/forums/topic/66168-brake-master-cylinder-identification/ https://www.classiczcars.com/forums/topic/21826-brake-master-cylinder-240z/
-
My understanding is that the tapered hardware used elsewhere on the Z's is BSPT. So my expectation is that the original plug on the diff is BSPT as well. That said... I sure wouldn't fault you if you decided to use NPT instead of BSPT for a full custom part of your own design. I probably would.
-
Does it smell like gauss? You know... When you tell someone to smell your finger?
-
What he said. Nice work!
-
LOL! That one looks like the snapped off lower bolt that came off the car! So I think I already have that one!
-
Looks like I got here late and the good ideas are already taken! That idea of a spacer ring inside the tail housing sounds like a great way to mitigate the damage. It looks like there is enough of the original circumference to locate the spacer ring, Some epoxy or sleeve retainer loctite to hold it in place, and you're good to go. Do you have a lathe to make the spacer ring? I don't remember who has one and who doesn't anymore.
-
I was just recently messing around with a window (fumbling moderately successfully?) and I found that rubber roller had seized on it's axle and had worn a flat into the rubber. That can't help matters as far a scratching the glass goes.
-
@Terrapin Z, I have verified the hardware size I'm looking for... M10 x 1.50 x 45mm long (measured under the head). I believe what you offered up would be perfect, even the patina! I'll send you a PM! Thanks for the help!!
-
Haha!! Yes, that is way too much bling for me! My goal with this car is that it will show it's years. I'm not intending (nor qualified to perform) a restoration, I'm intending "a display of well earned experience". I want stuff to work, but there isn't much bling left from 1970.
-
Well I don't have anything yet, but that stuff that Terrapin posted looks like the kind of stuff elsewhere on my elite early 240 junk. Thank you, my friend for your offer to help, and the hardware you have would work in a pinch. A pinch that I may yet take you up on! Certainly better than what I have been using.
-
That hardware style looks like what I'm dealing with here. Thick heads and that older style numbering font on them. And the patina is perfect as well. I forgot to double check the thread pitch yesterday. I'll try to do that today. Thanks!
-
That would be fantastic. Is it a little rusty? That would be a bonus.
-
At this point, I got the door guts back in and it's a whole lot better than it was. the alignment of everything isn't perfect, but I can roll the window up and down without excessive force, and it's pretty good. Good enough for me to move to the next emergency at least. Between the help from you guys and a couple youtube videos, I managed to get the glass back into the doors and onto the regulator wheels with way less issue than I expected! Thanks guys!!
-
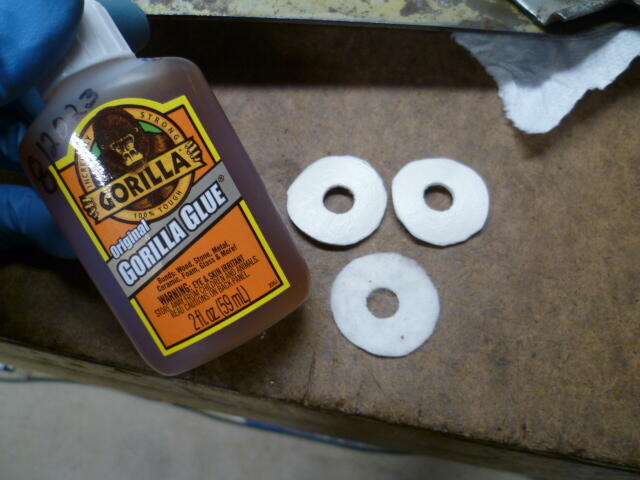
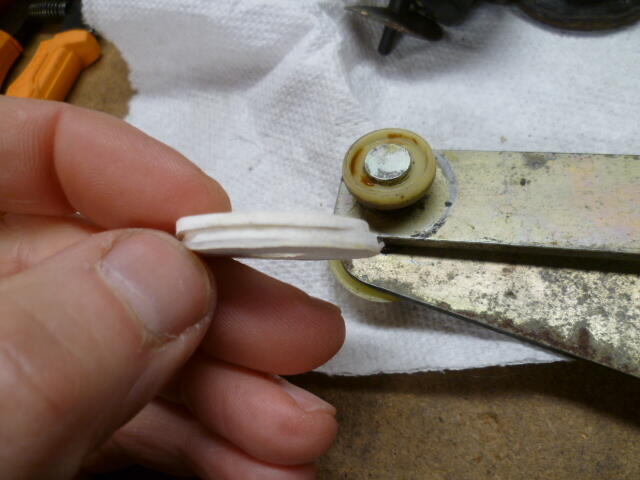
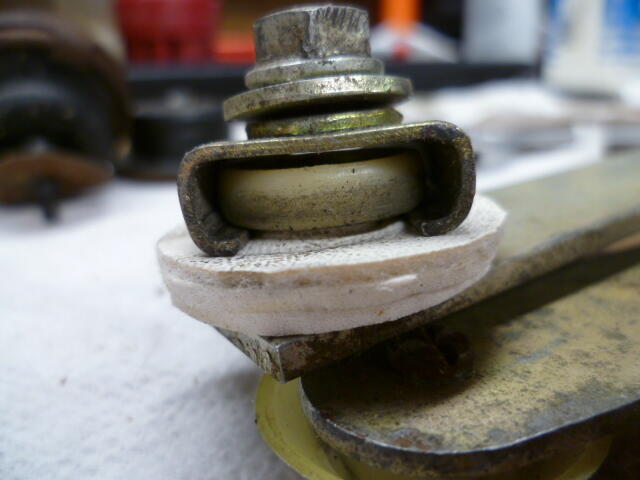
OK, I cleaned out all the old tracks, lubed everything with fresh lube, and I made a couple "space taker-up" washers to replace two original flexible plastic washers. One of the originals was in good shape so I left it alone, but here's what I did for the other two. Two layers of shelf anti-slip foam and one layer of vinyl. I wasn't sure how the shelf foam would handle the abrasion of sliding against the track metal, so (like @Namerow) I used a layer of vinyl on that sliding surface. Here's some pics:
-
@Terrapin Z I will double check the size and pitch of the bolts the next chance I get. Thanks, and I'll let you know!
-
Thanks for the input. I was thinking the same thing as you... All you really need is something compressible to take up the gap, and I really like what you came up with. Especially the part about being able to stretch it over the nylon roller so you don't have to take all the rollers off. Only thing I'm still not convinced about is the real necessity for the existence at all, other than vibration prevention. You said your the rollers on your guides were fairly wobbly and that the flexible washers helped steer the rollers. I'm skeptical. The forces on those wheels can be high enough to bend the metal arms of the regulators. There's no way a little piece of flexible plastic is going to do anything to steer those wheels under that kind of load. I'm thinking that those wheels are gonna go where those wheels want to go whether there is a flexible backing washer or not. That said... If I can figure out something here that is similar to what you did, I'm gonna copy it. Really necessary or not.
-
So I did what I originally suggested and just started taking bolts out of the door guts until everything collapsed (gently) inside and then fished out the pieces. At this point I have all the window parts out of the door shell. That was the easy part. I looked the regulator over and found maybe a little bit of bend tweaking? Not having a known good "gold standard" example here, it's hard for me to know what is an intentional bend vs. what is the result of previous reefing as @zKars indicated. So I did some very minor modification adjustments hoping that I was moving things in the correct direction? The only other thing I found of real interest was some torn up flexible washers behind the plastic roller wheels. Reference the tarp grommet mod by @240Ziggyhttps://www.classiczcars.com/forums/topic/47753-window-not-lining-up/?page=2 I'm not convinced that those flexible washers really do anything other than act as an anti-vibration dampener, but I have to decide if it's worth the risk that they do more than just that. So other than that, of course, I've got old dried up grease that was more like candle wax at this point. I will clean all that out and replace with new. What are the thoughts on those flexible washers? I say all they do is take up the slop and keep stuff from vibrating. What say Ye?
-
Thanks guys. Those bolts on ebay are "close" and are "fit and function" correct, but not quite "form" correct though. I'm finding that much of the older hardware from the early cars is non-captive washers. Makes sense that as the car sales took off and production increased, Datsun quickly switched to easier to assemble hardware (with captive washers), but that's not the case for the early cars. I could certainly use newer style hardware. but I'd really like to have a bolt like what was originally used. No captive washers and no indent on the head. A little dirty, with patina, and unrestored would be a bonus.
-
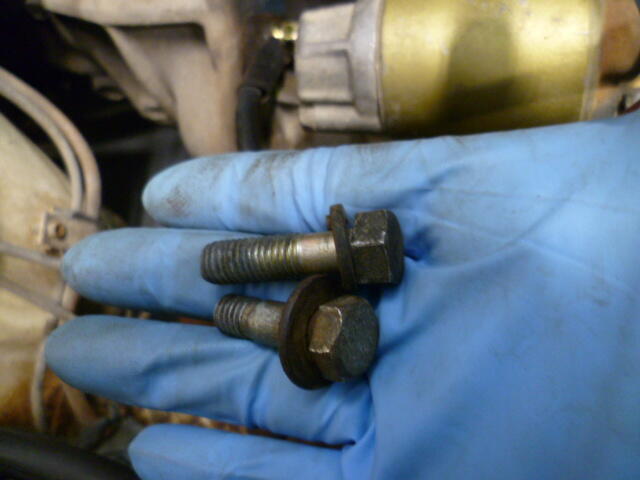
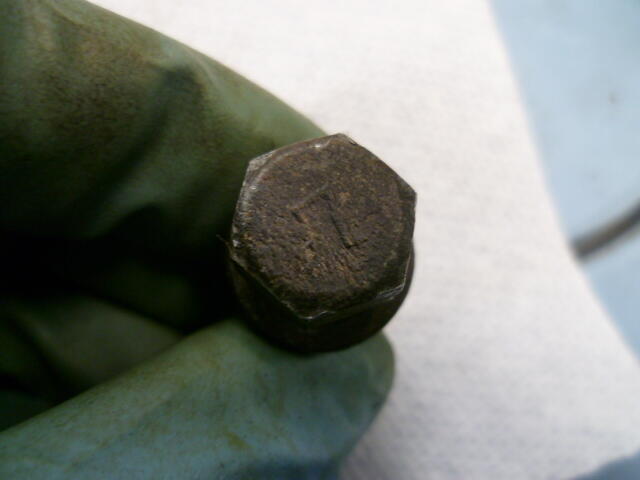
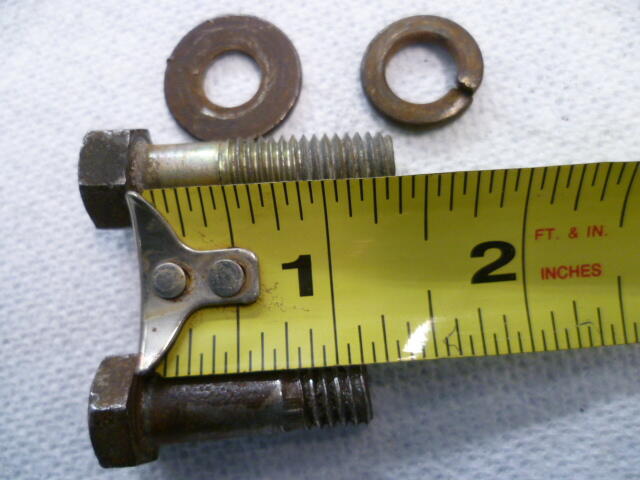
Thanks guys. So the parts manual says the two bolts should be different lengths. One of them is 35mm long and the other is 45mm long. And that makes sense... I just took a look at the starter and the two mounting ears are different thicknesses. The upper one is significantly thinner than the lower. I have the 35mm long bolt here, but I'm missing the 45mm long bolt. Anybody have old hardware lying around? BOLT-HEX M10X1.SX45 (M10 bolt, 45mm long, no captive washers and has a "7" on the head.)
-
Thanks @bluez, but I got a follow up question... The two bolts that came off were different. Which one was like yours? The one with the 7 on the head? And did your car use any captive washers, or was everything loose?
-
Thanks for the details guys. @cgsheen1 @zKars When I first started messing with the window, it would not move at all. I traced that issue to the front nylon guide that was stuck frozen solid. I lubed that up and got it moving smooth and easy, and after that, I was able to get the window to move, but it still required an uncomfortable amount of force. And that's when I came here for guidance. So I'm guessing that the problem now is the regulator bent screwing with the geometry. I'll pull stuff apart and see what I can find. The taking apart will be easy. I'm more worried about the putting back together and getting stuff adjusted.
-
Sigh... It was a moment of weakness. Happens to everybody?
-
Speaking of hardware needed, Anyone know what hardware was used to attach the starter on the mid 70 cars? Here's a pic of what was holding the starter in, and I'm not sure either of them are correct. One has a "7" on the head, and the other has no marking. And there was no captive washers on either bolt. Here's what I took out: