


disepyon
Free Member
-
Joined
-
Last visited
Everything posted by disepyon
-
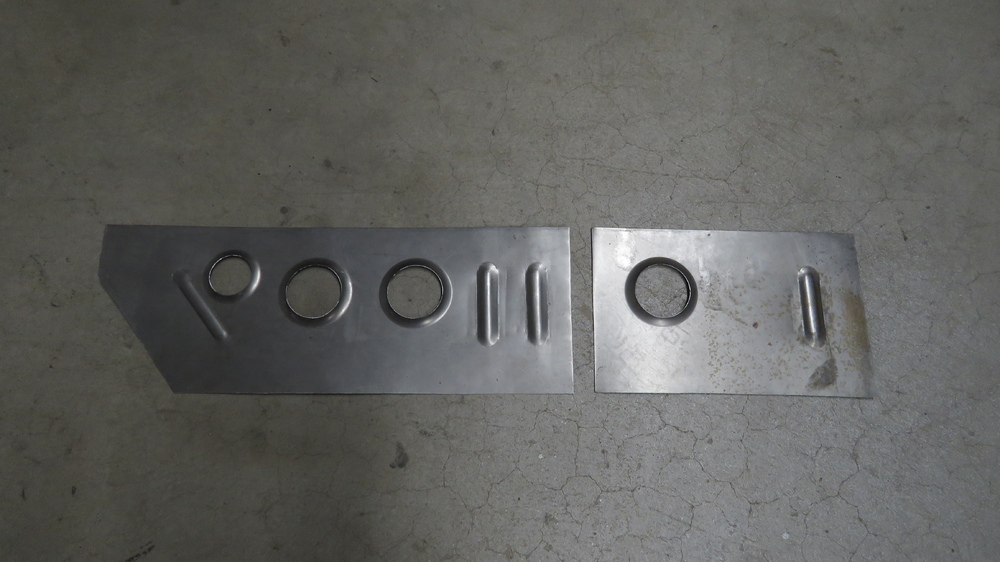
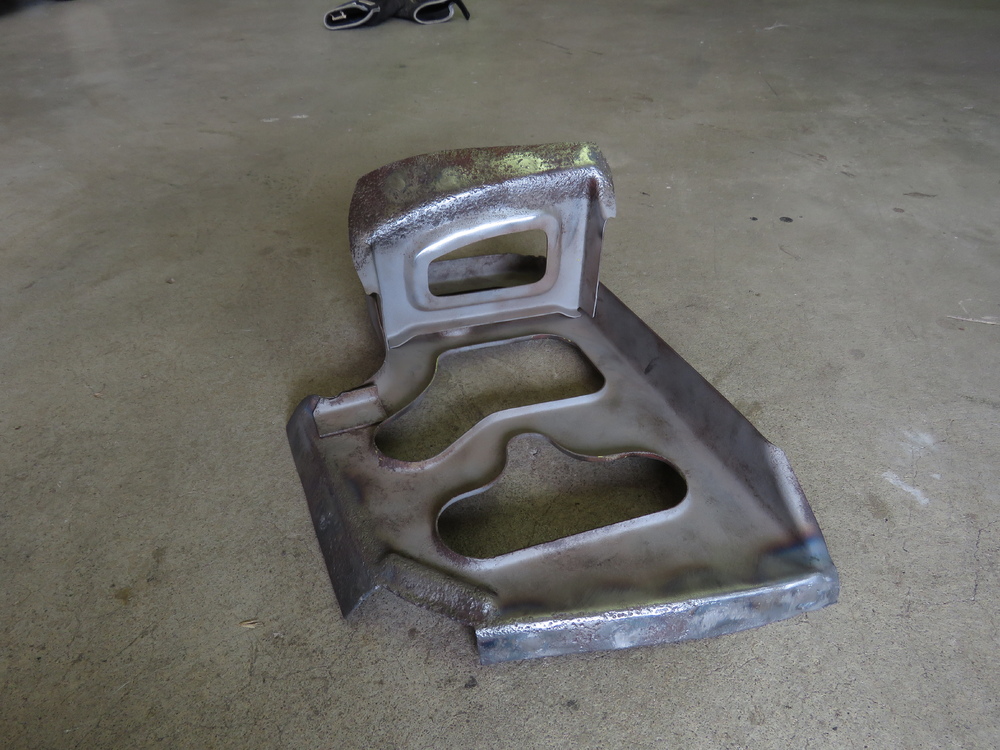
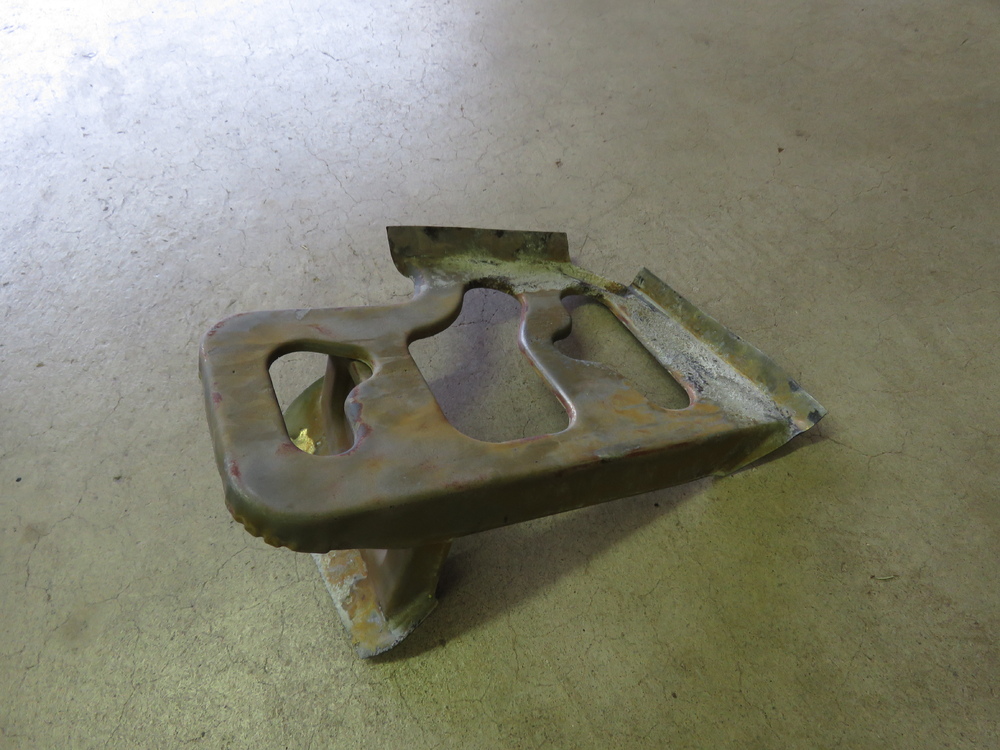
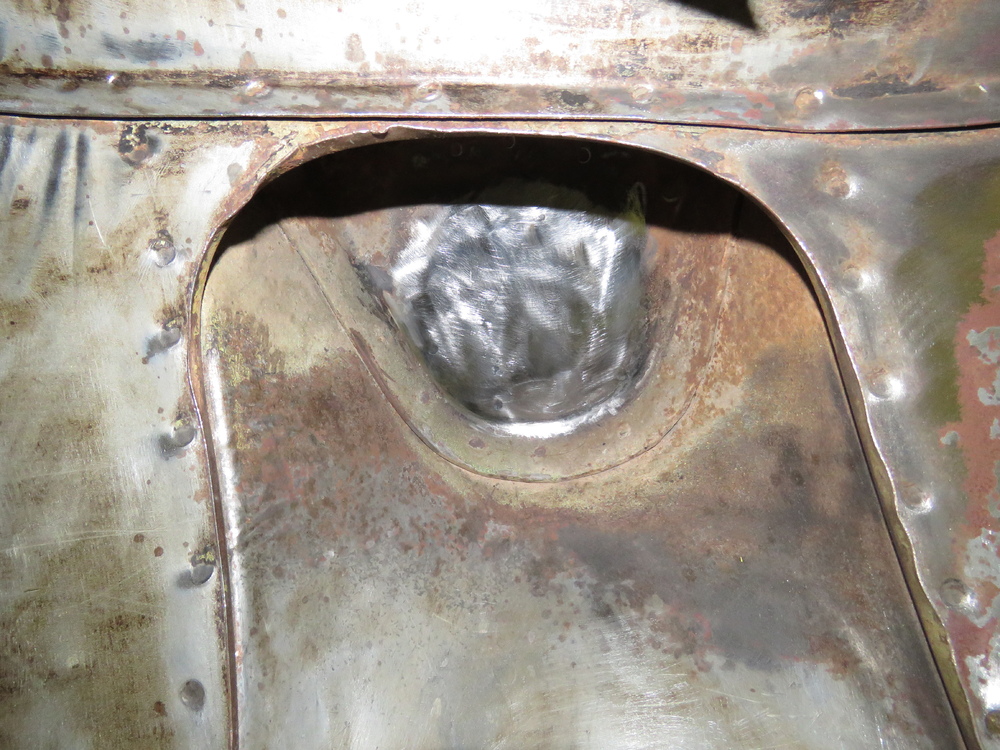
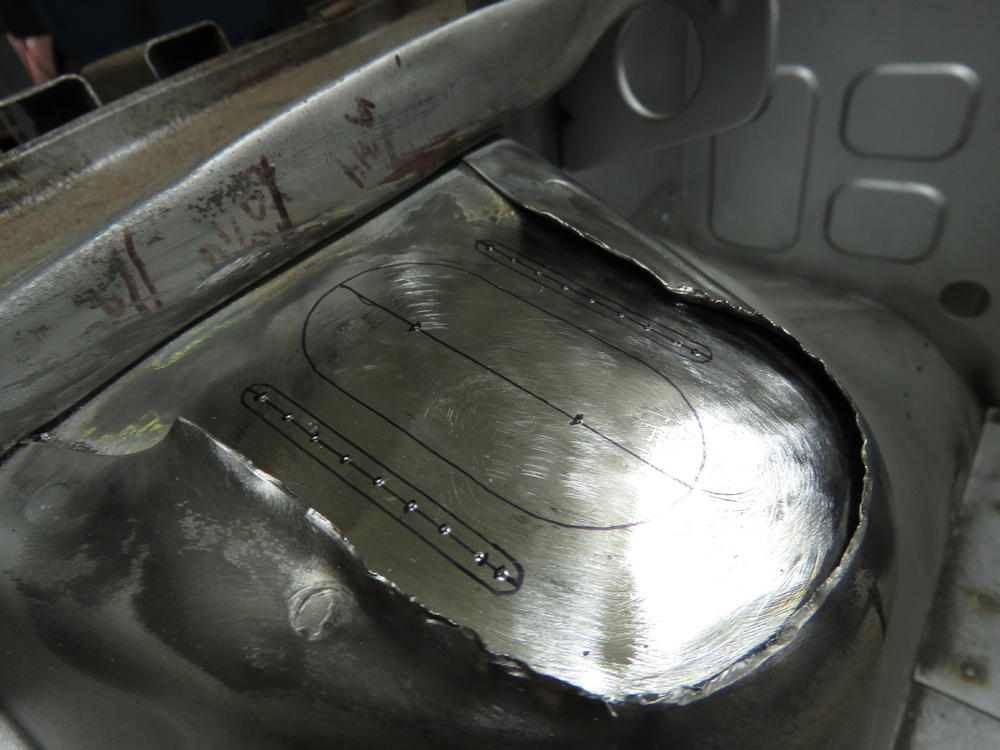
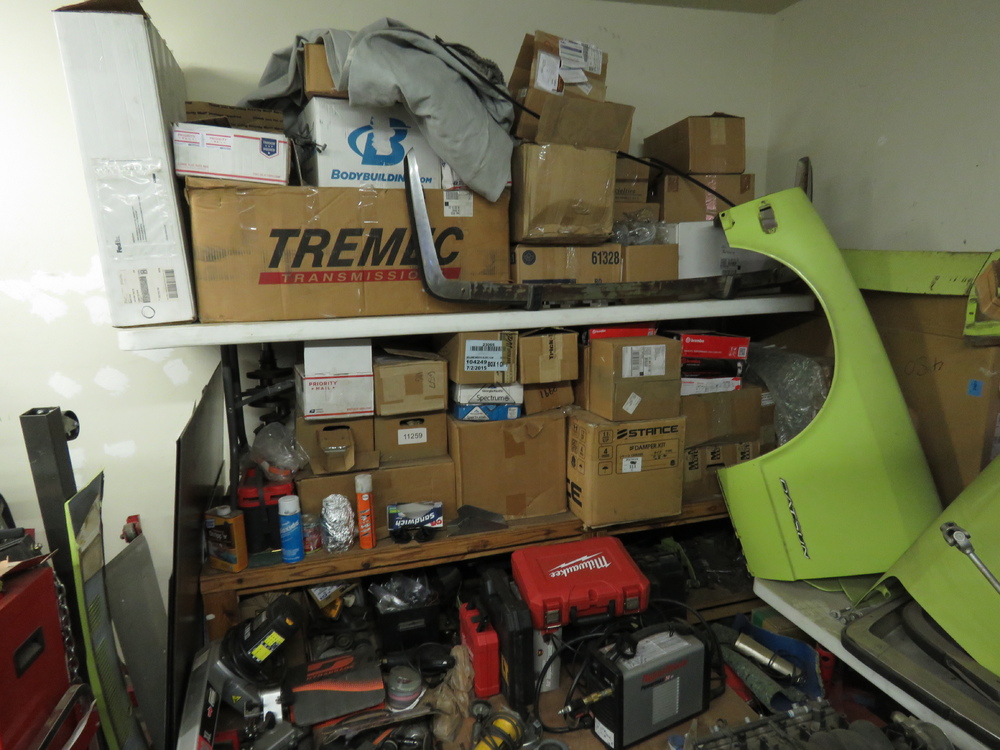
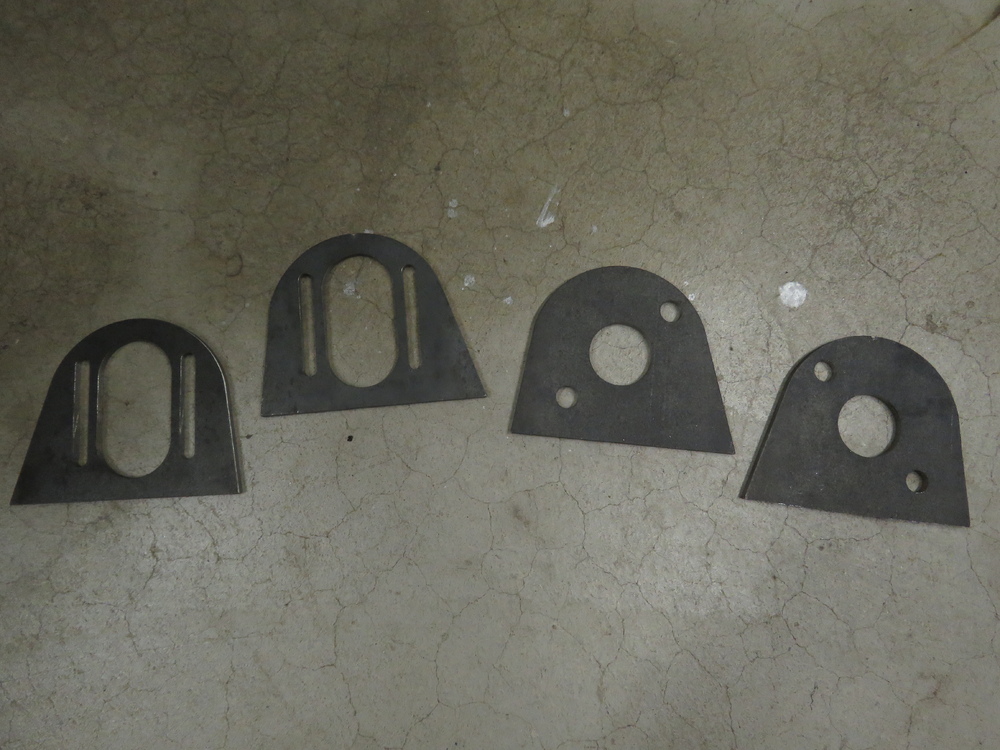
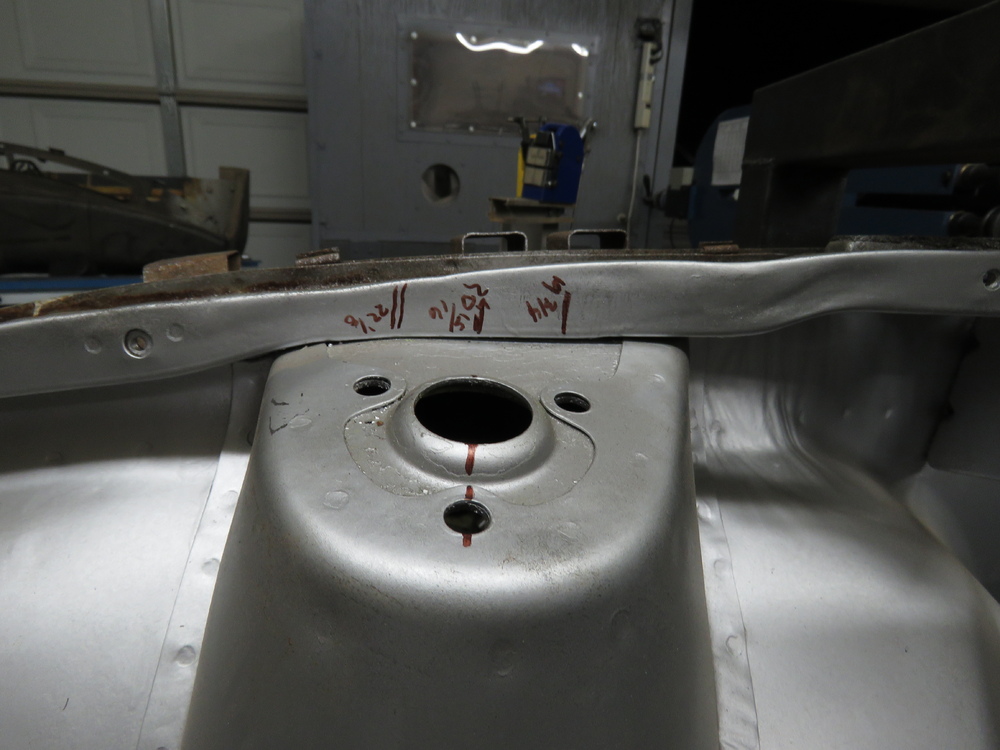
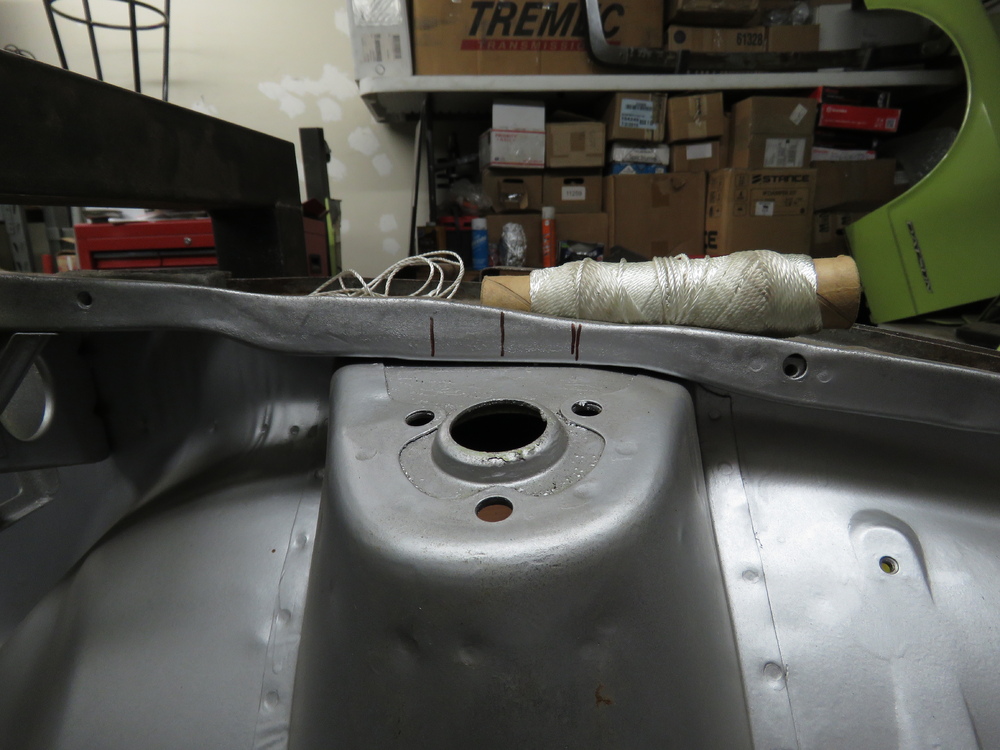
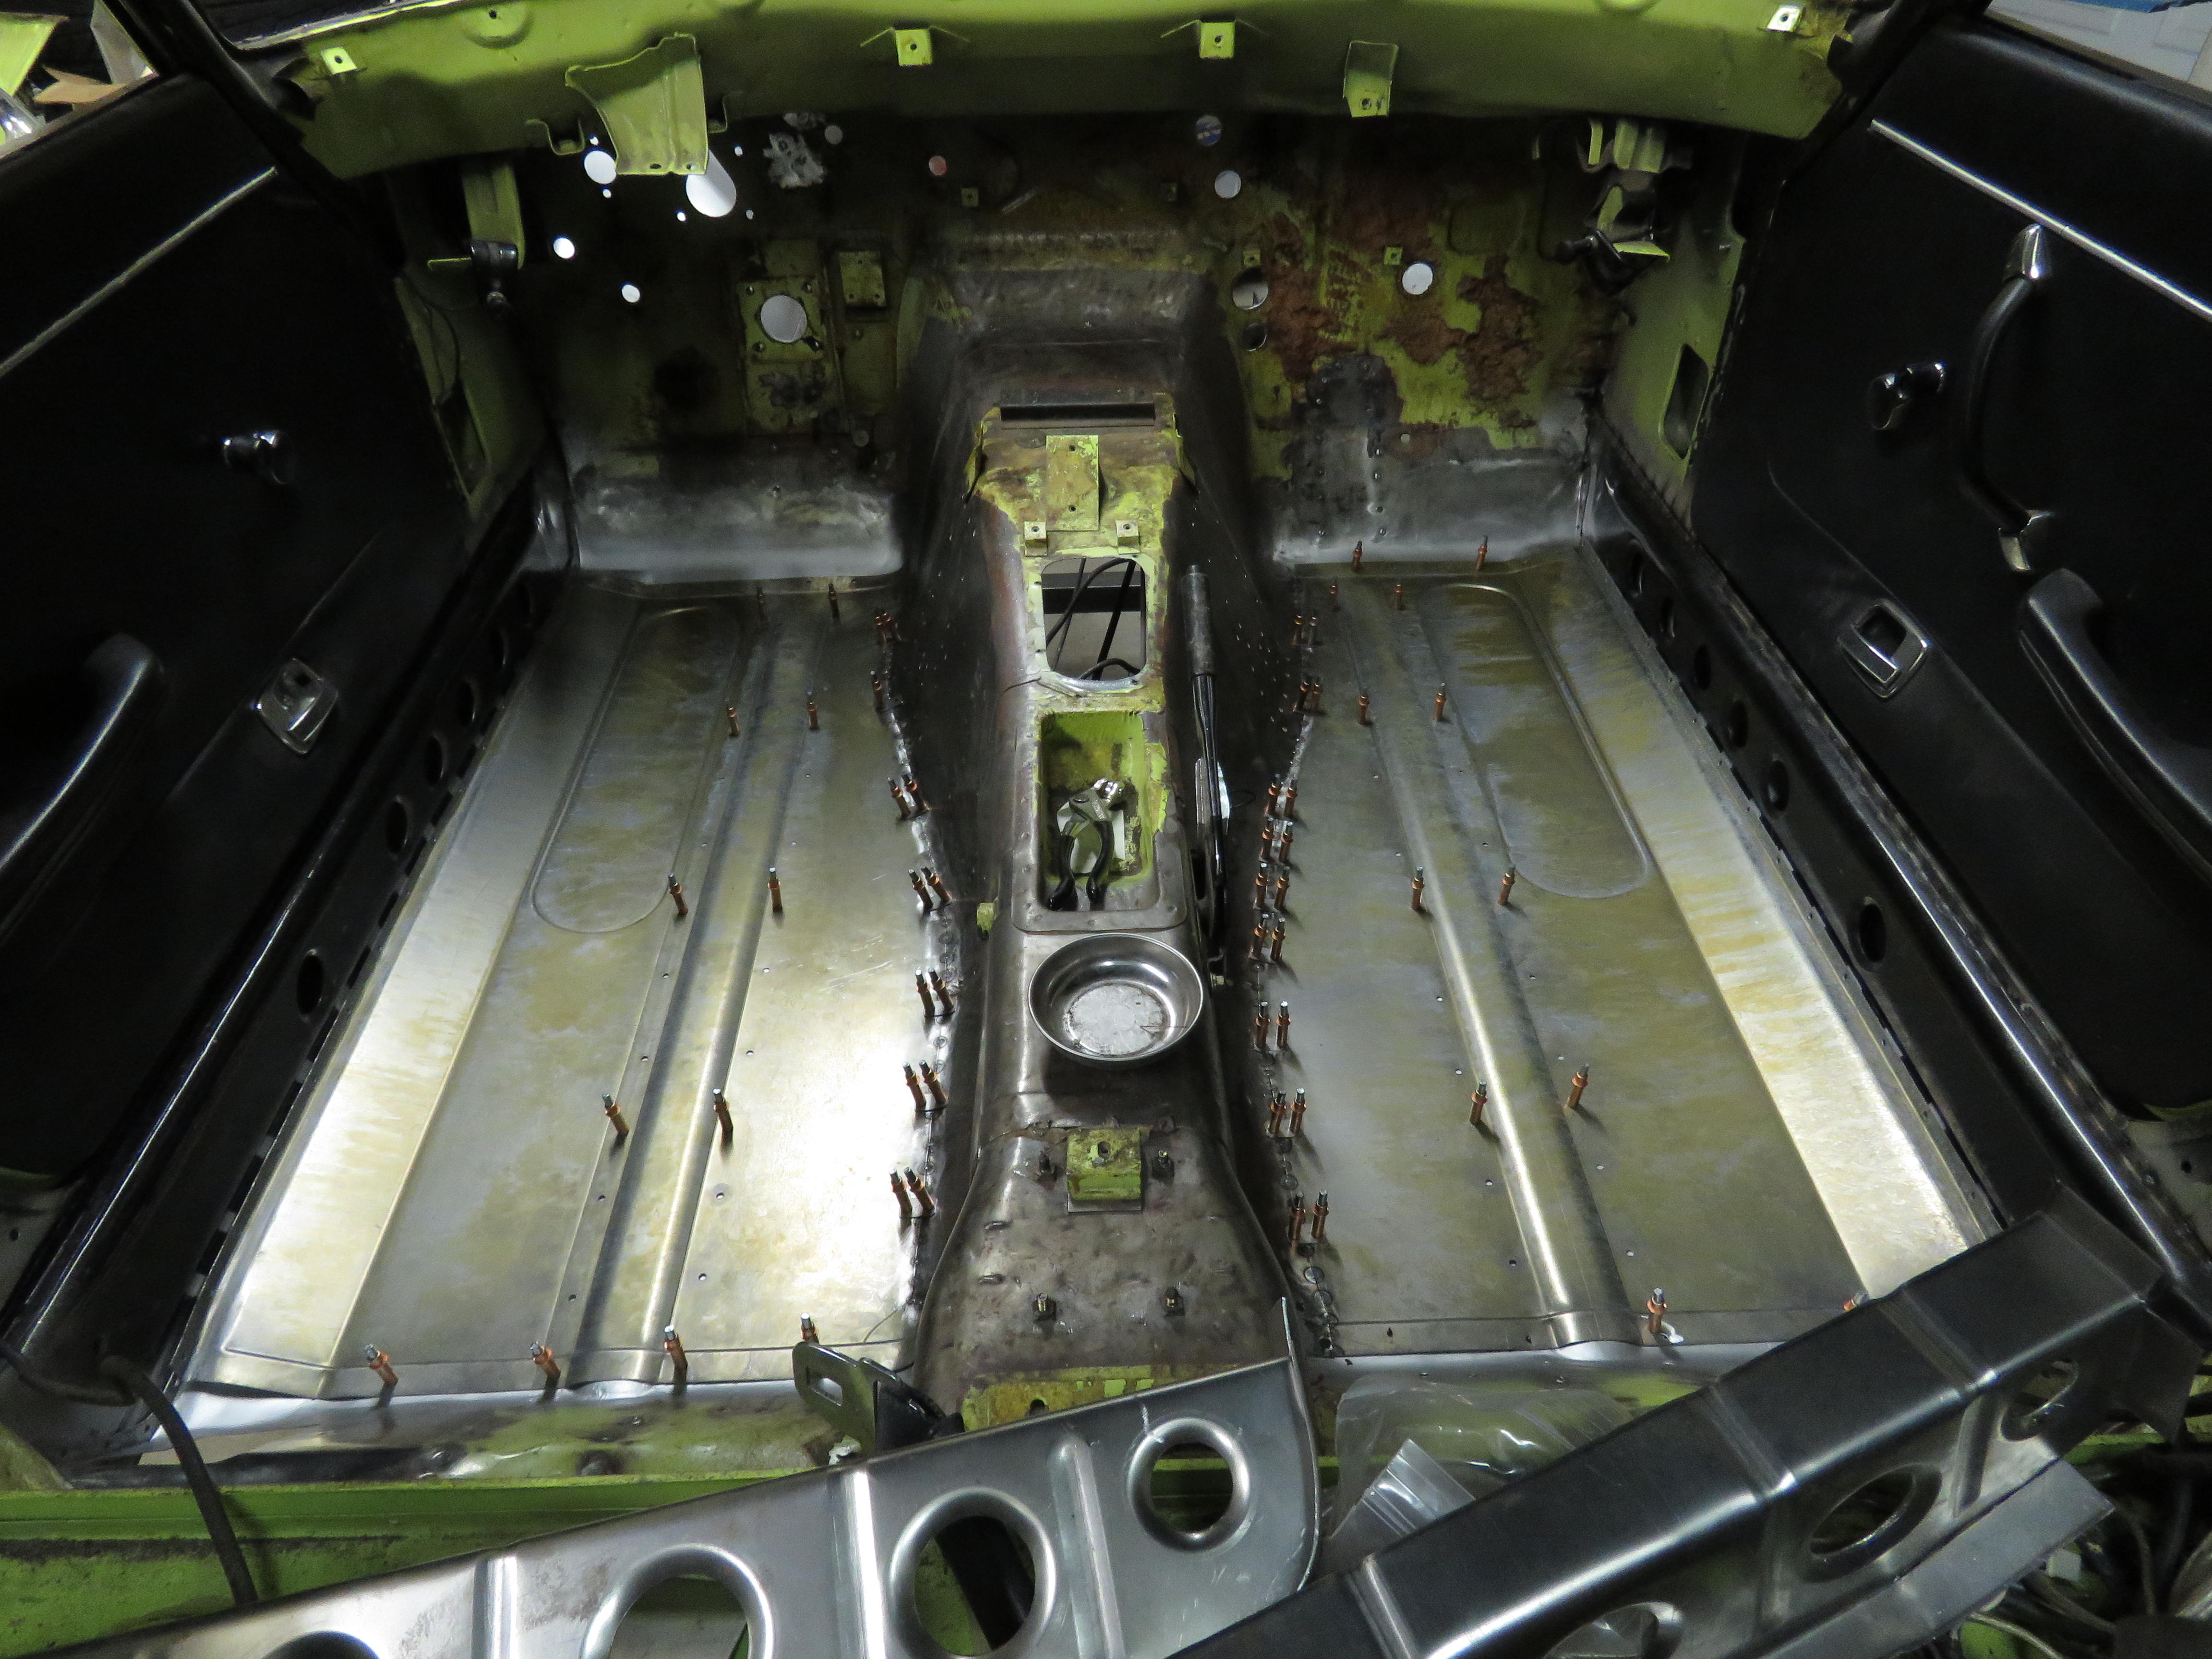
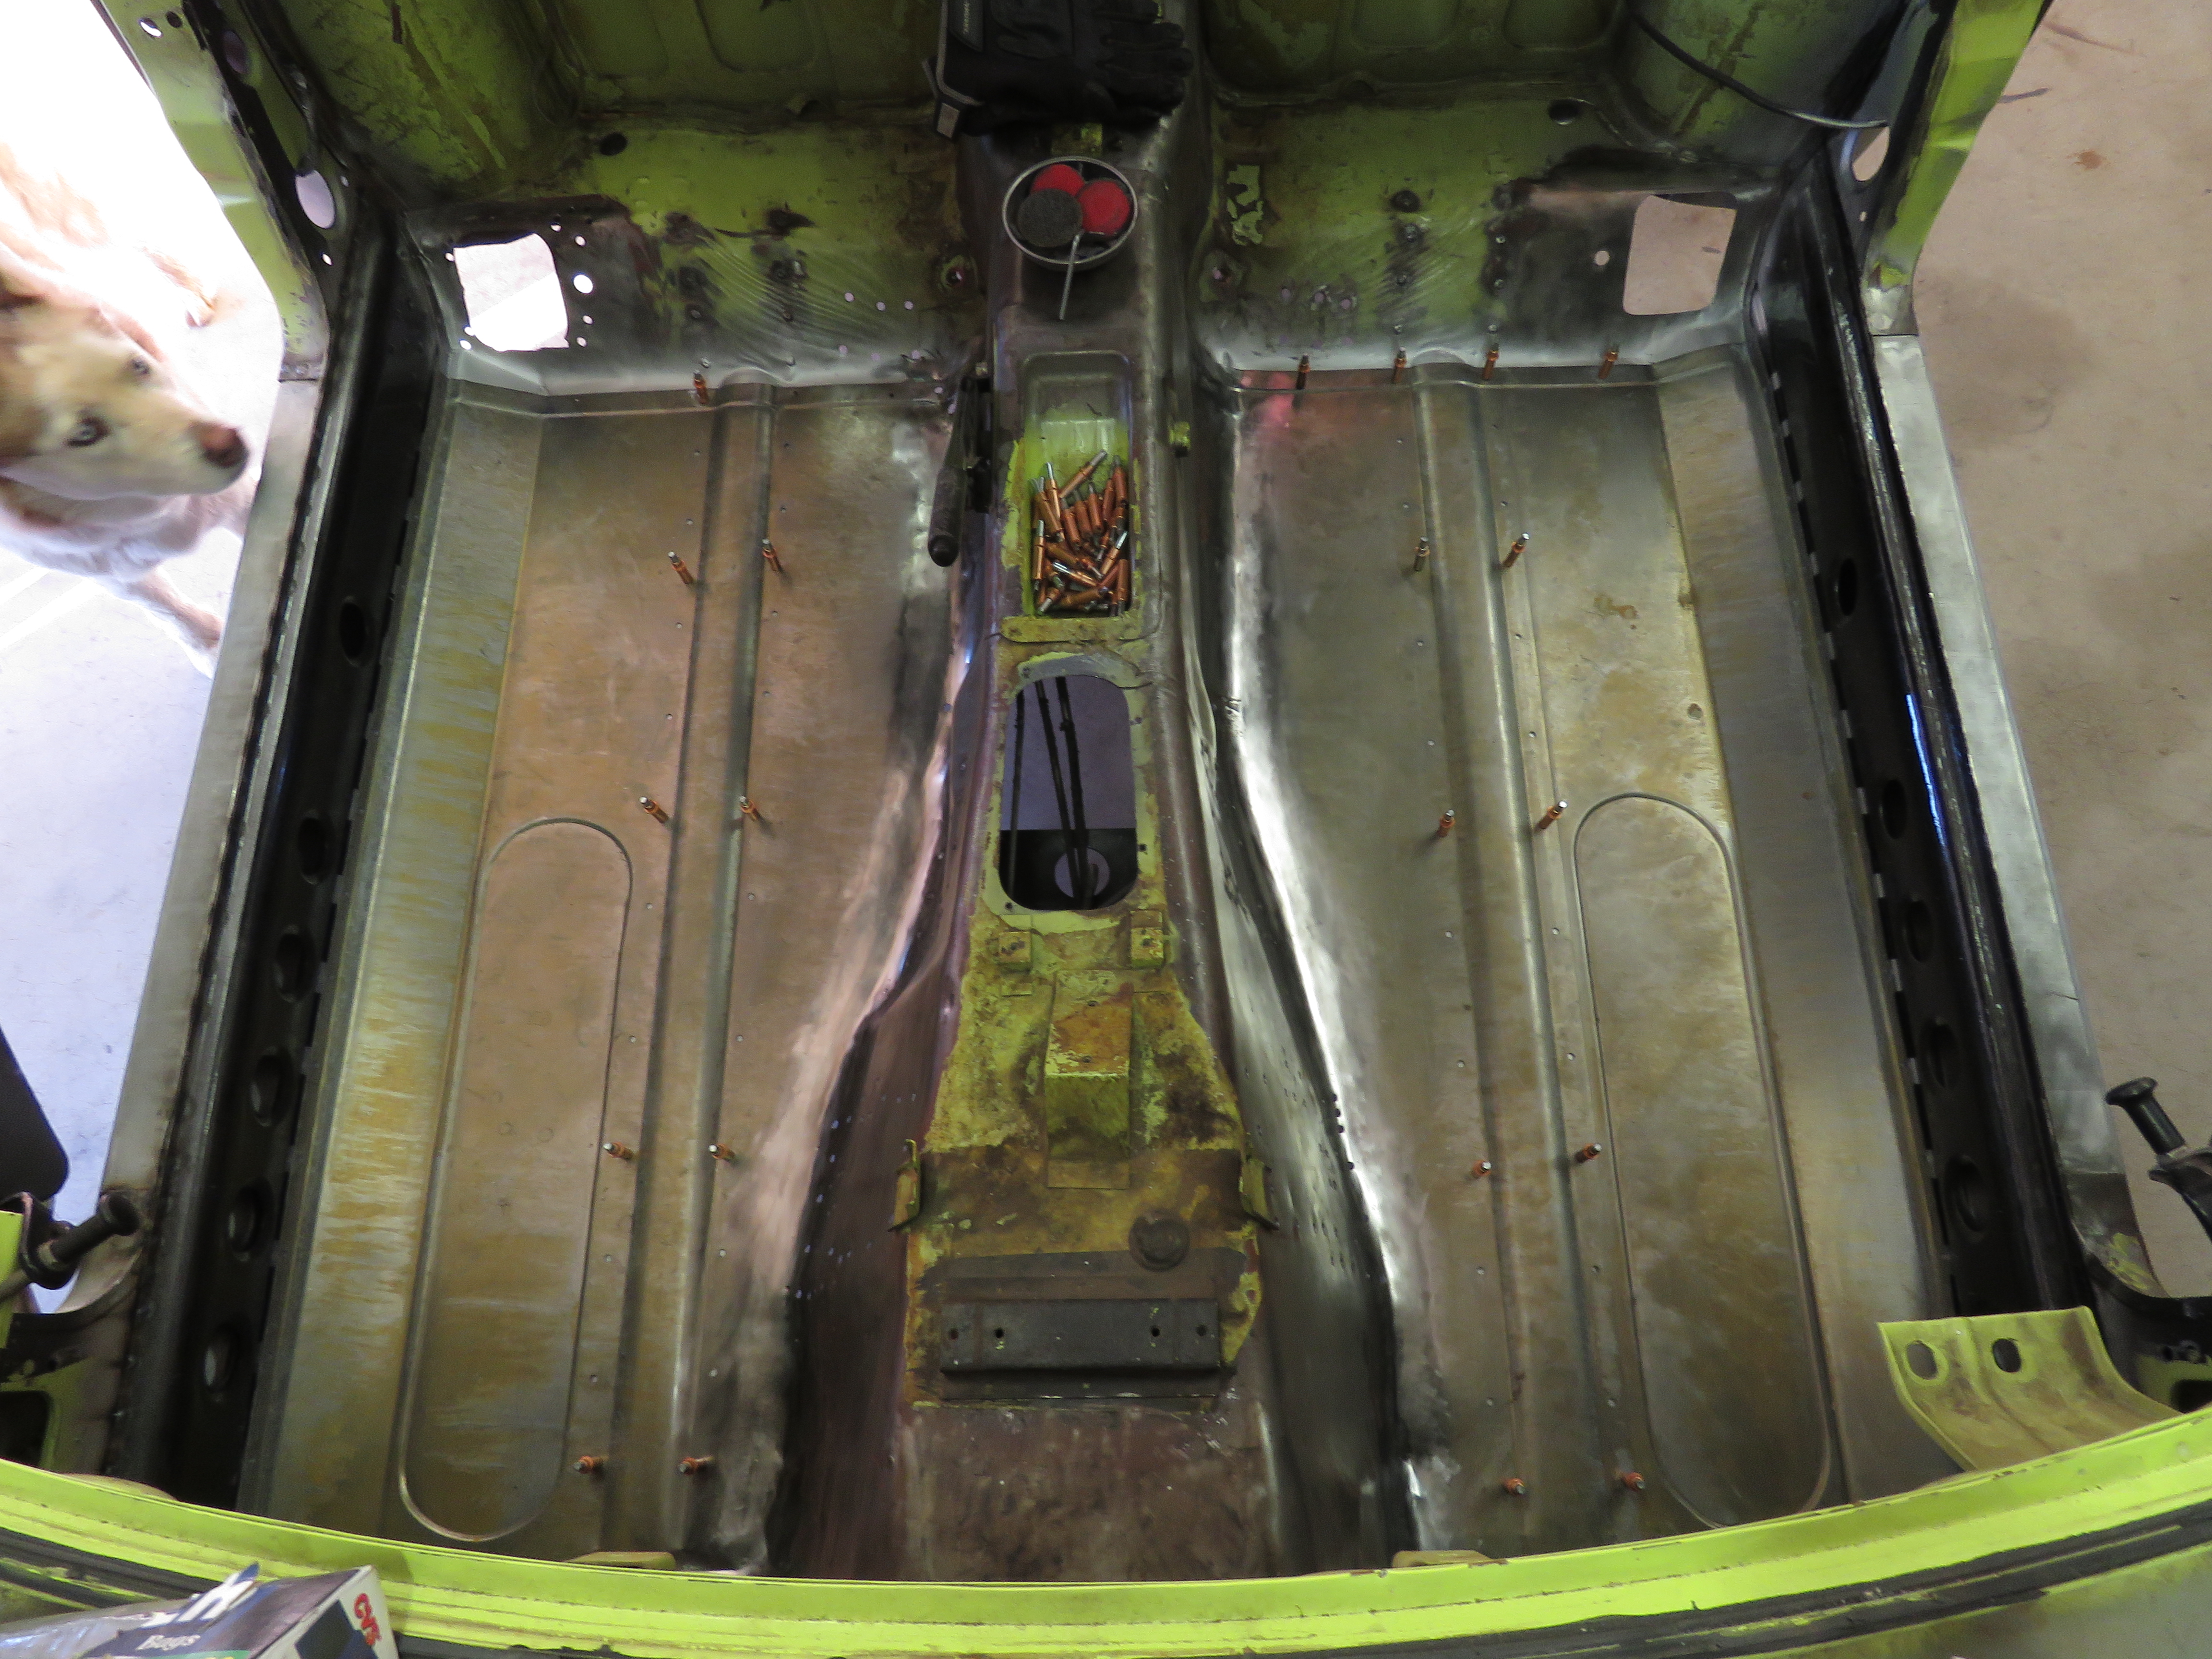
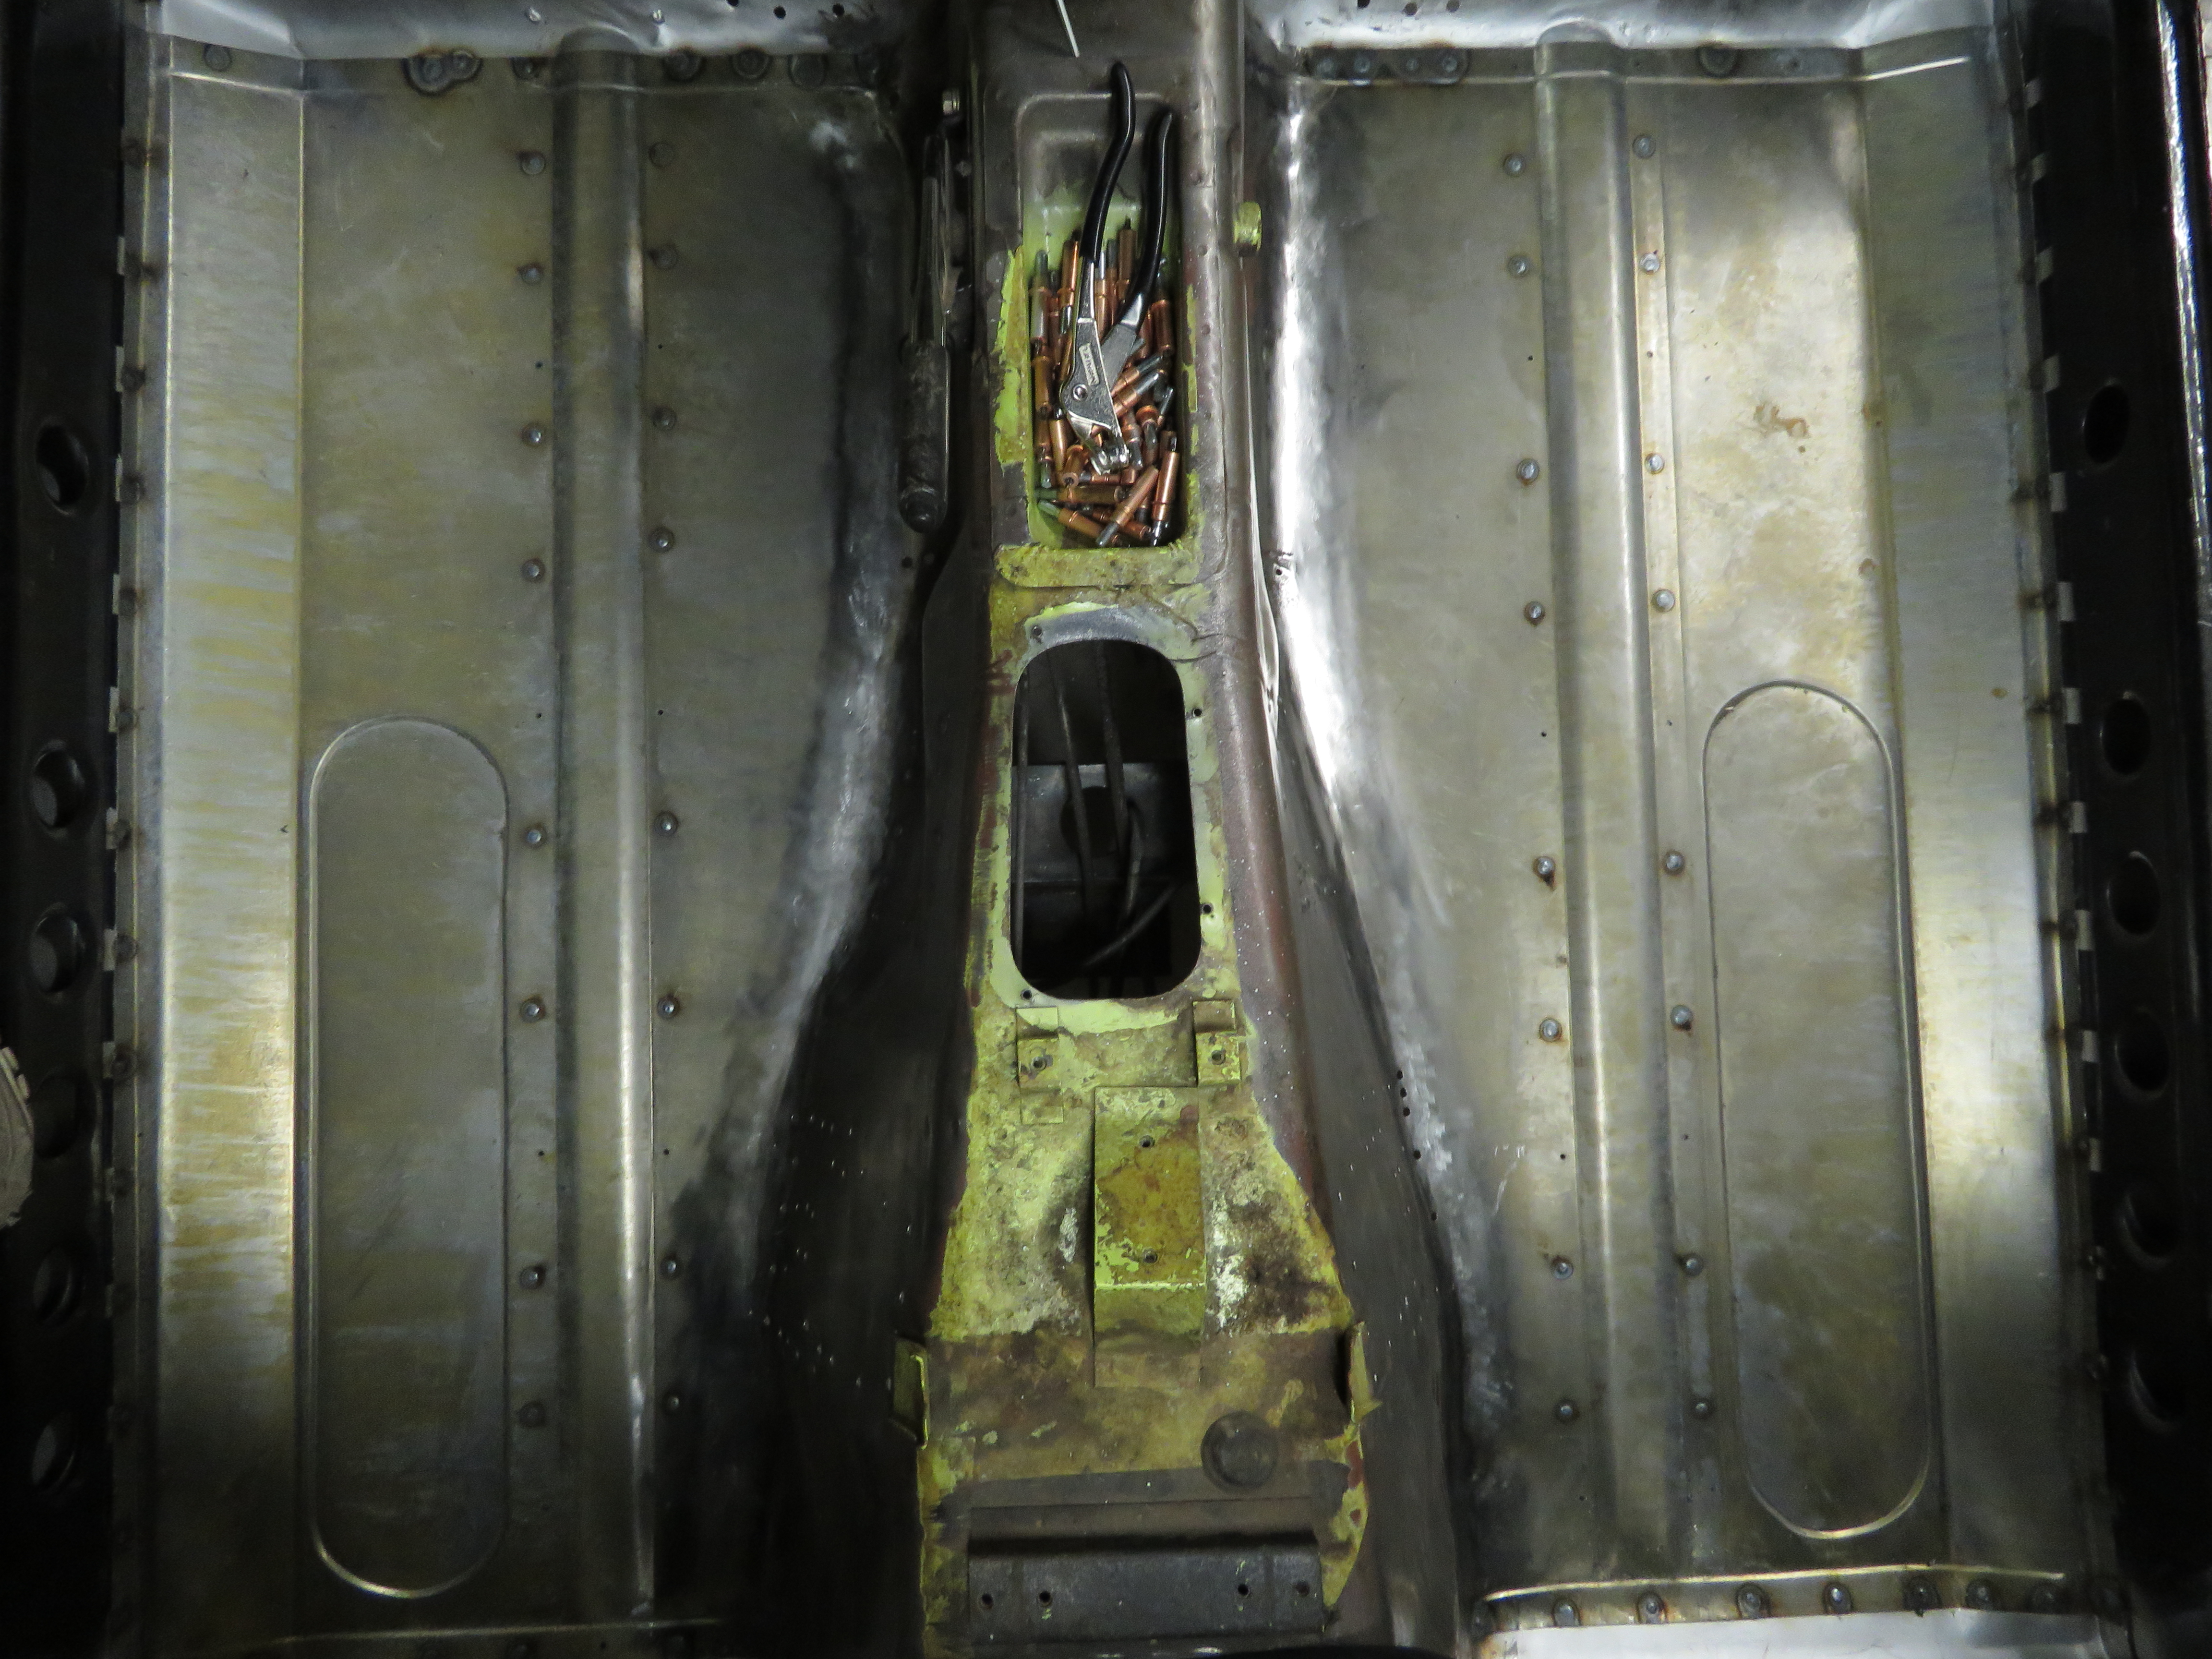
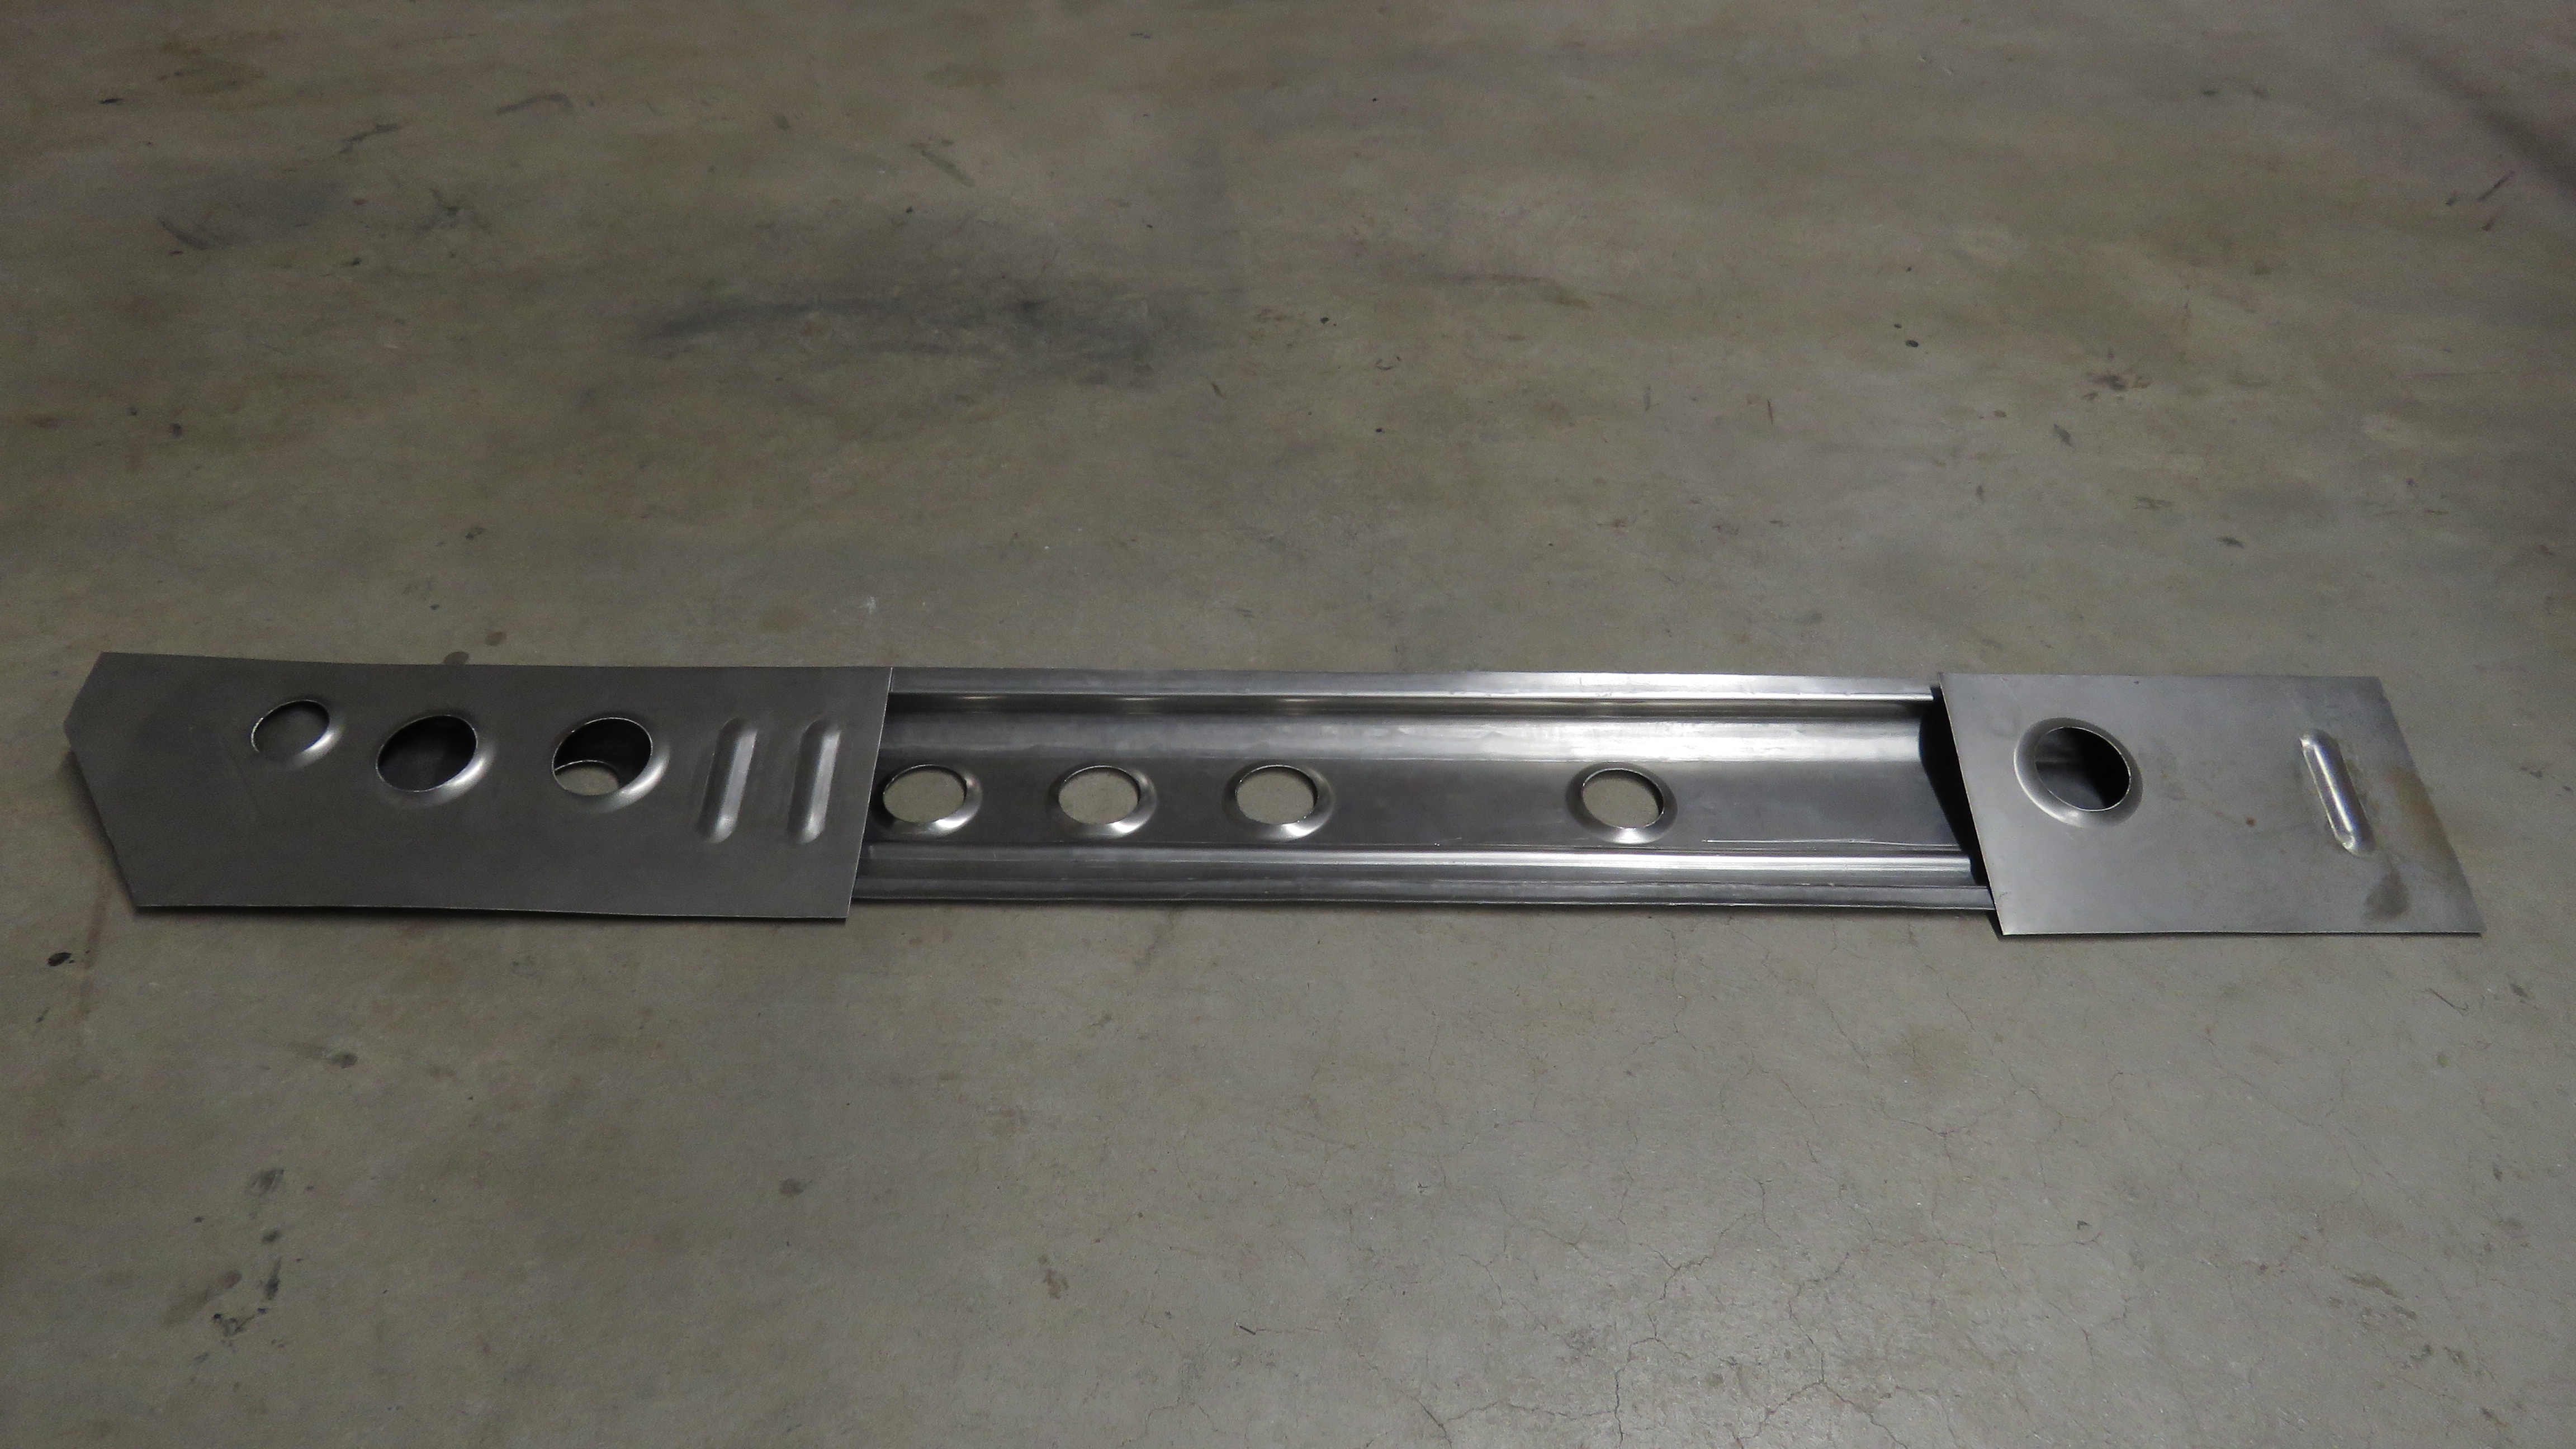
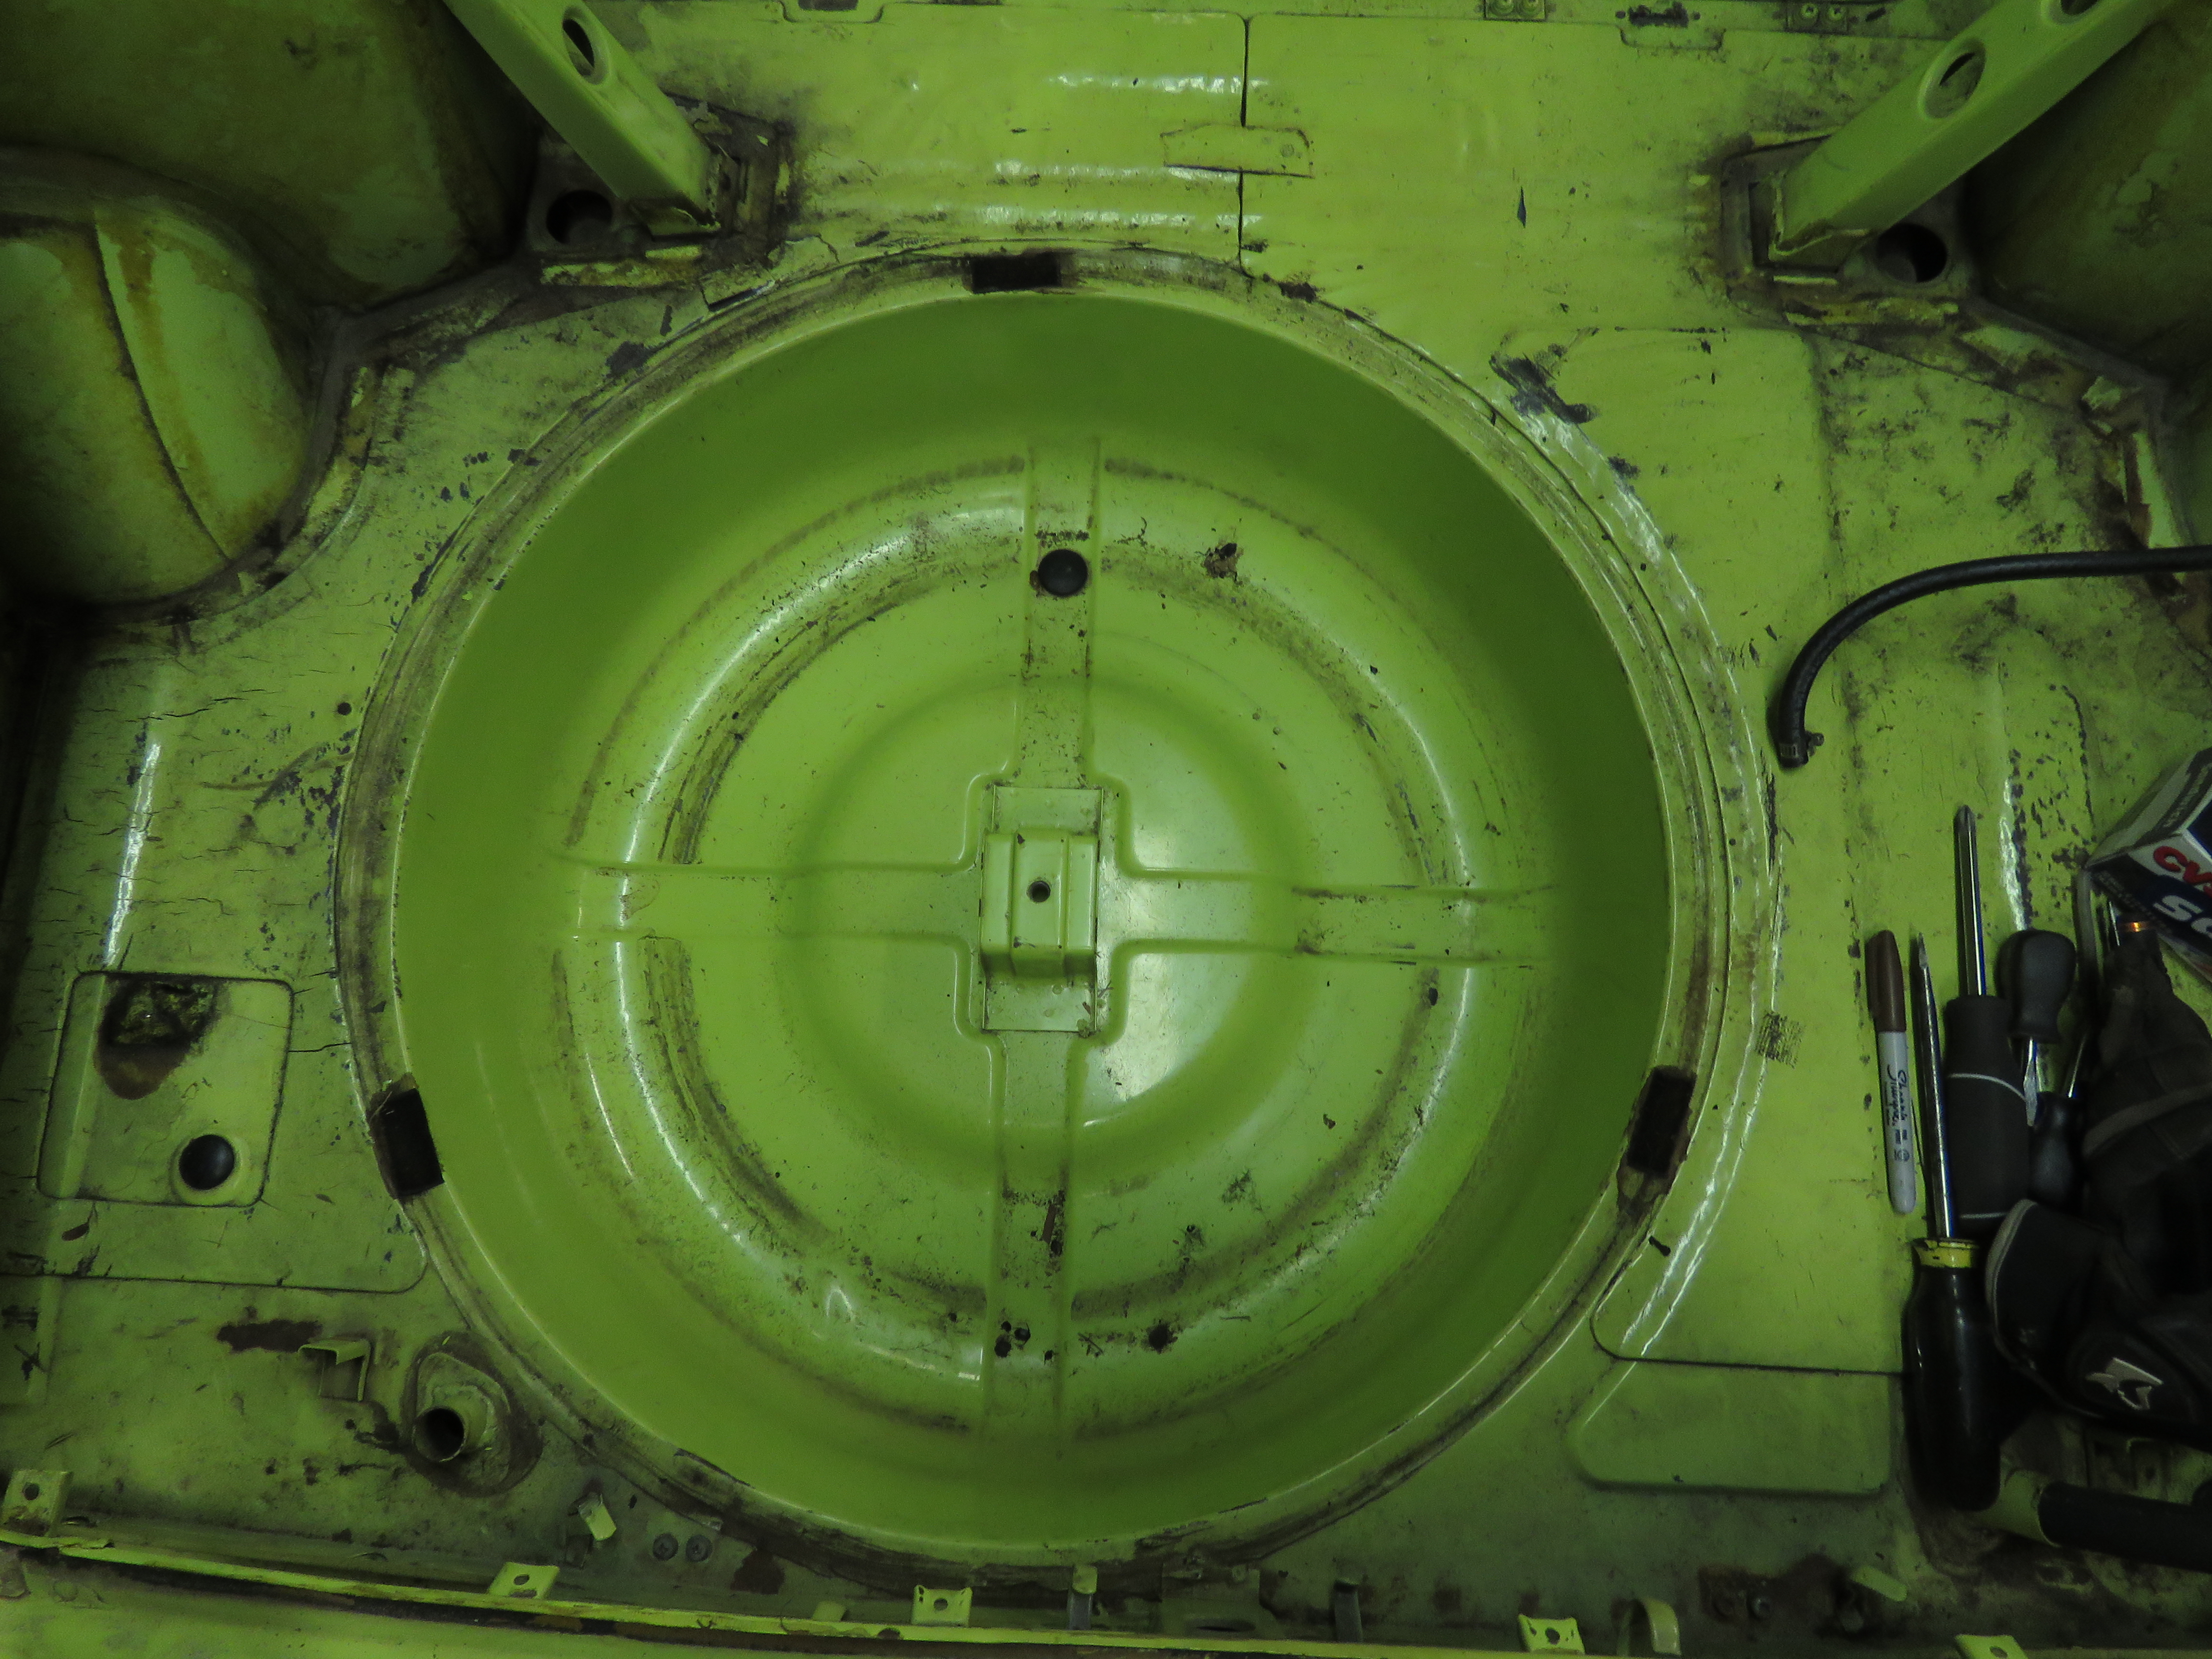
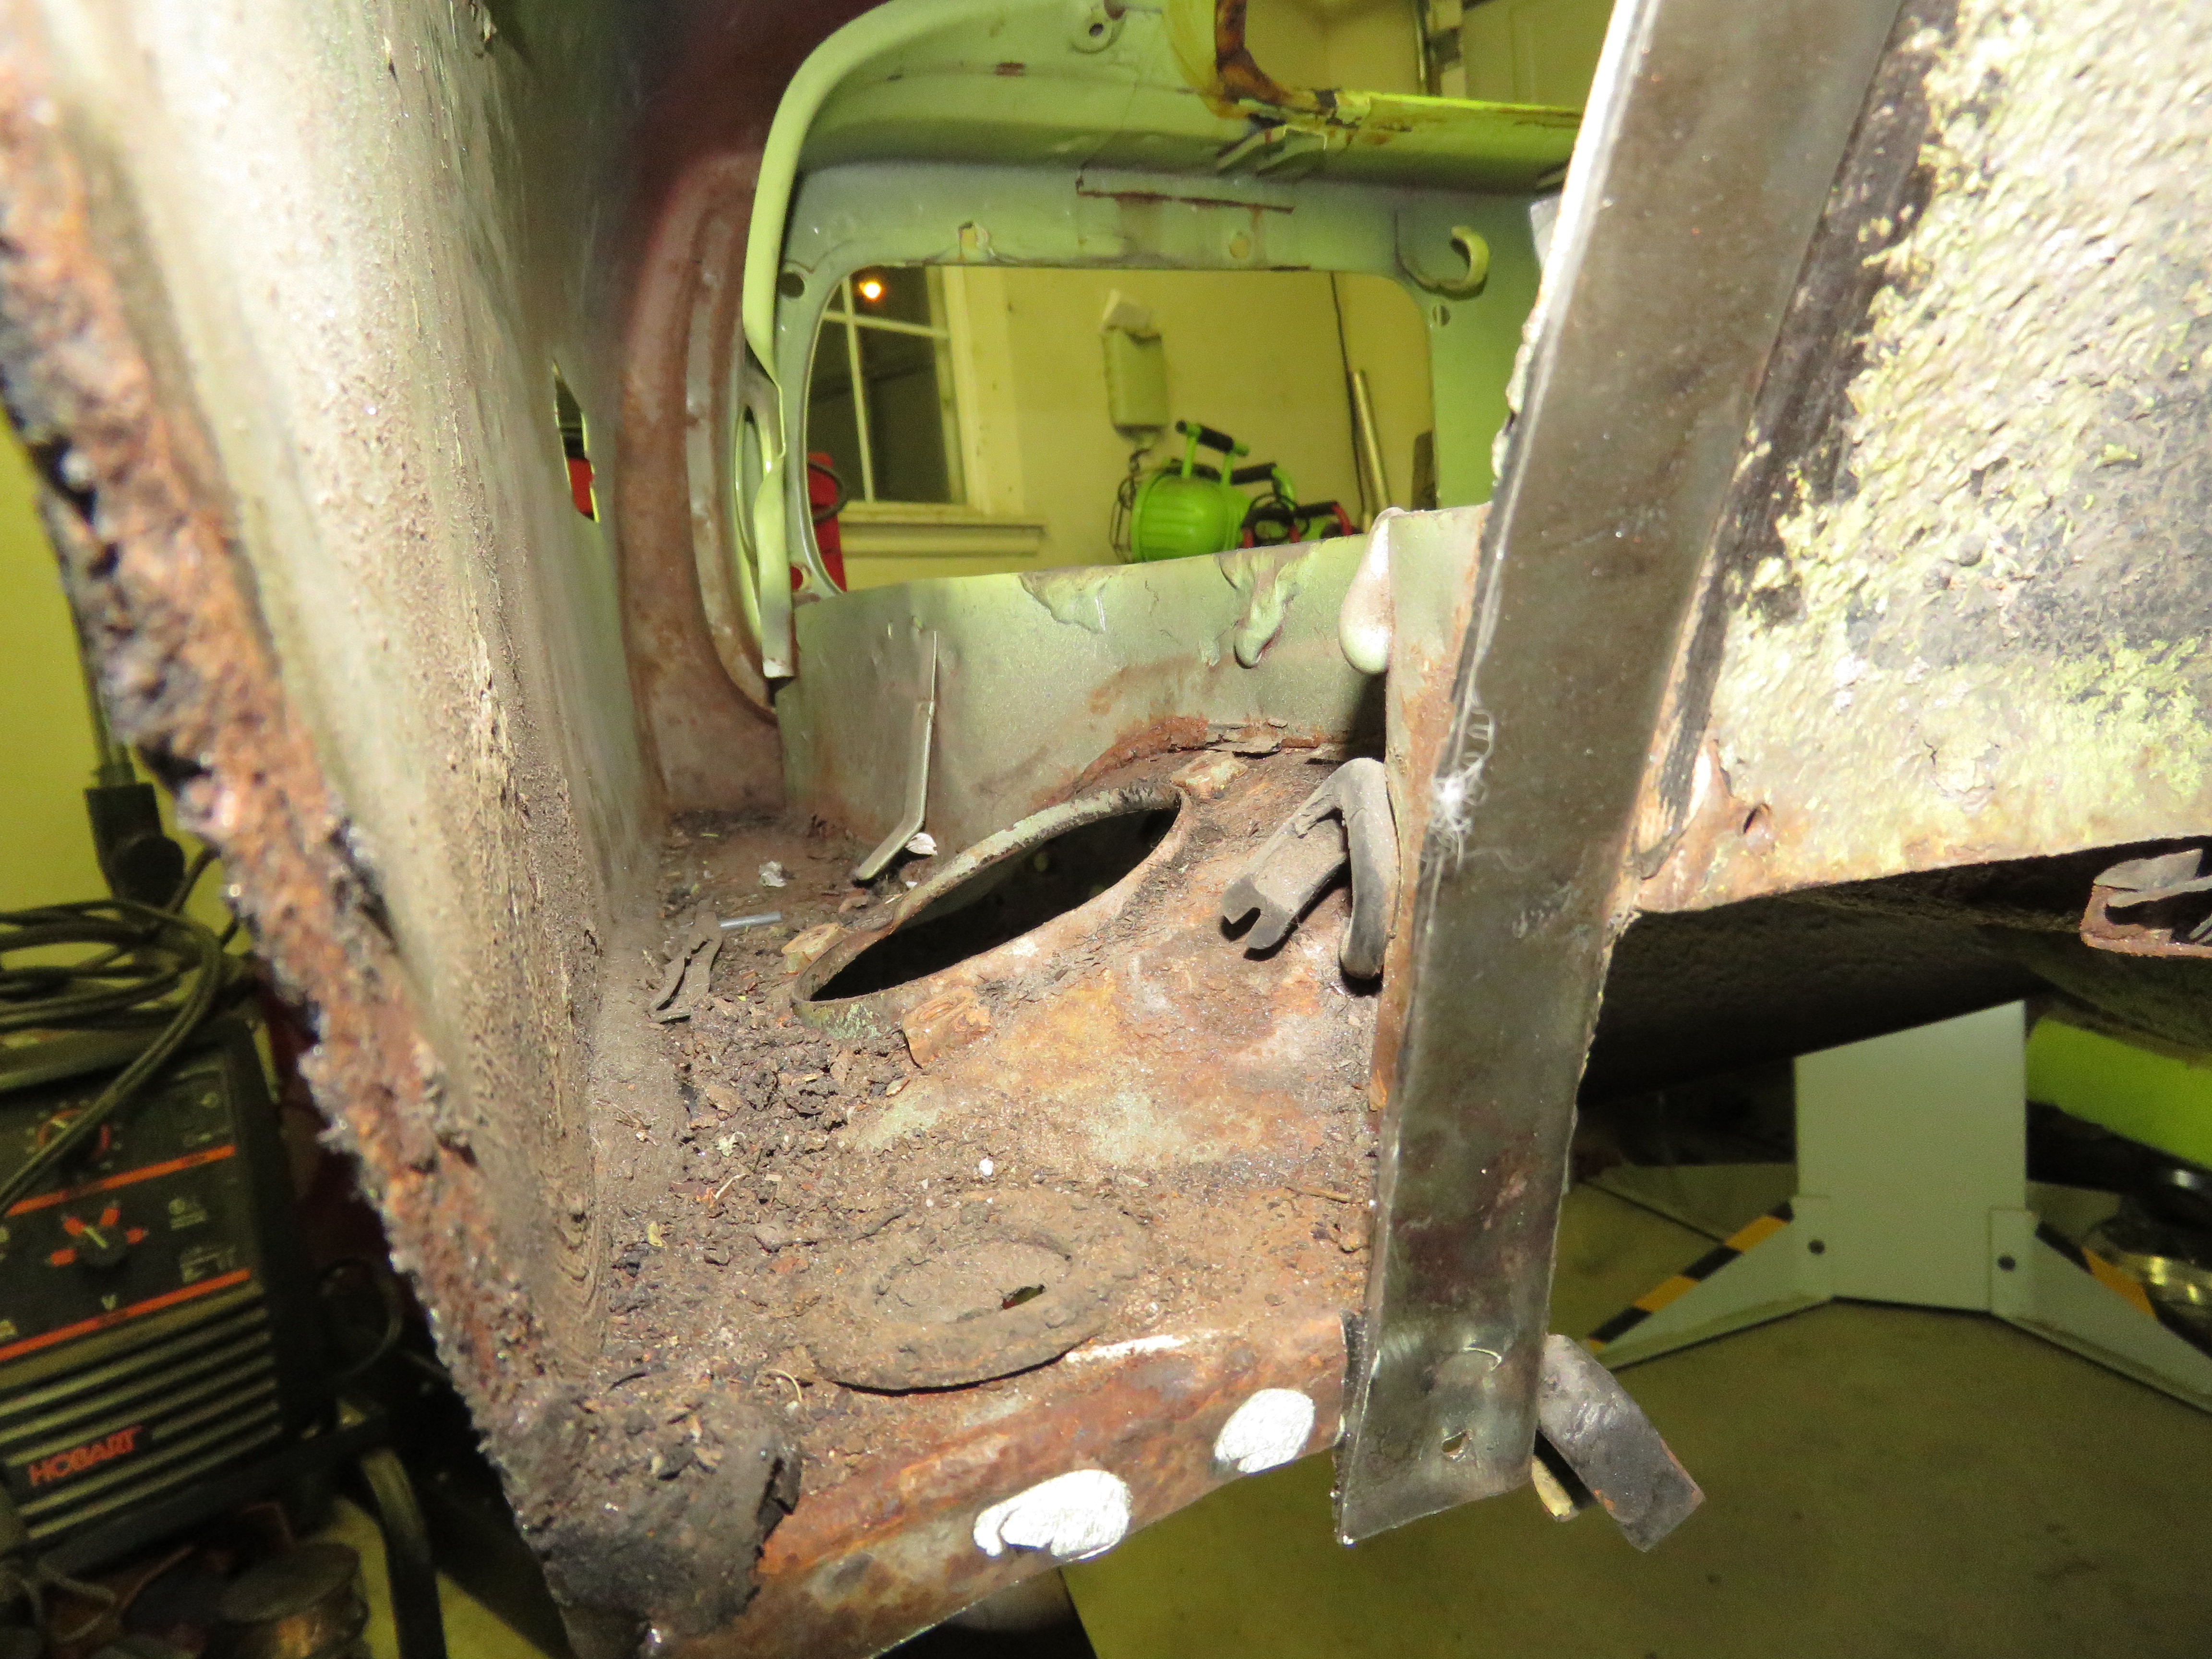
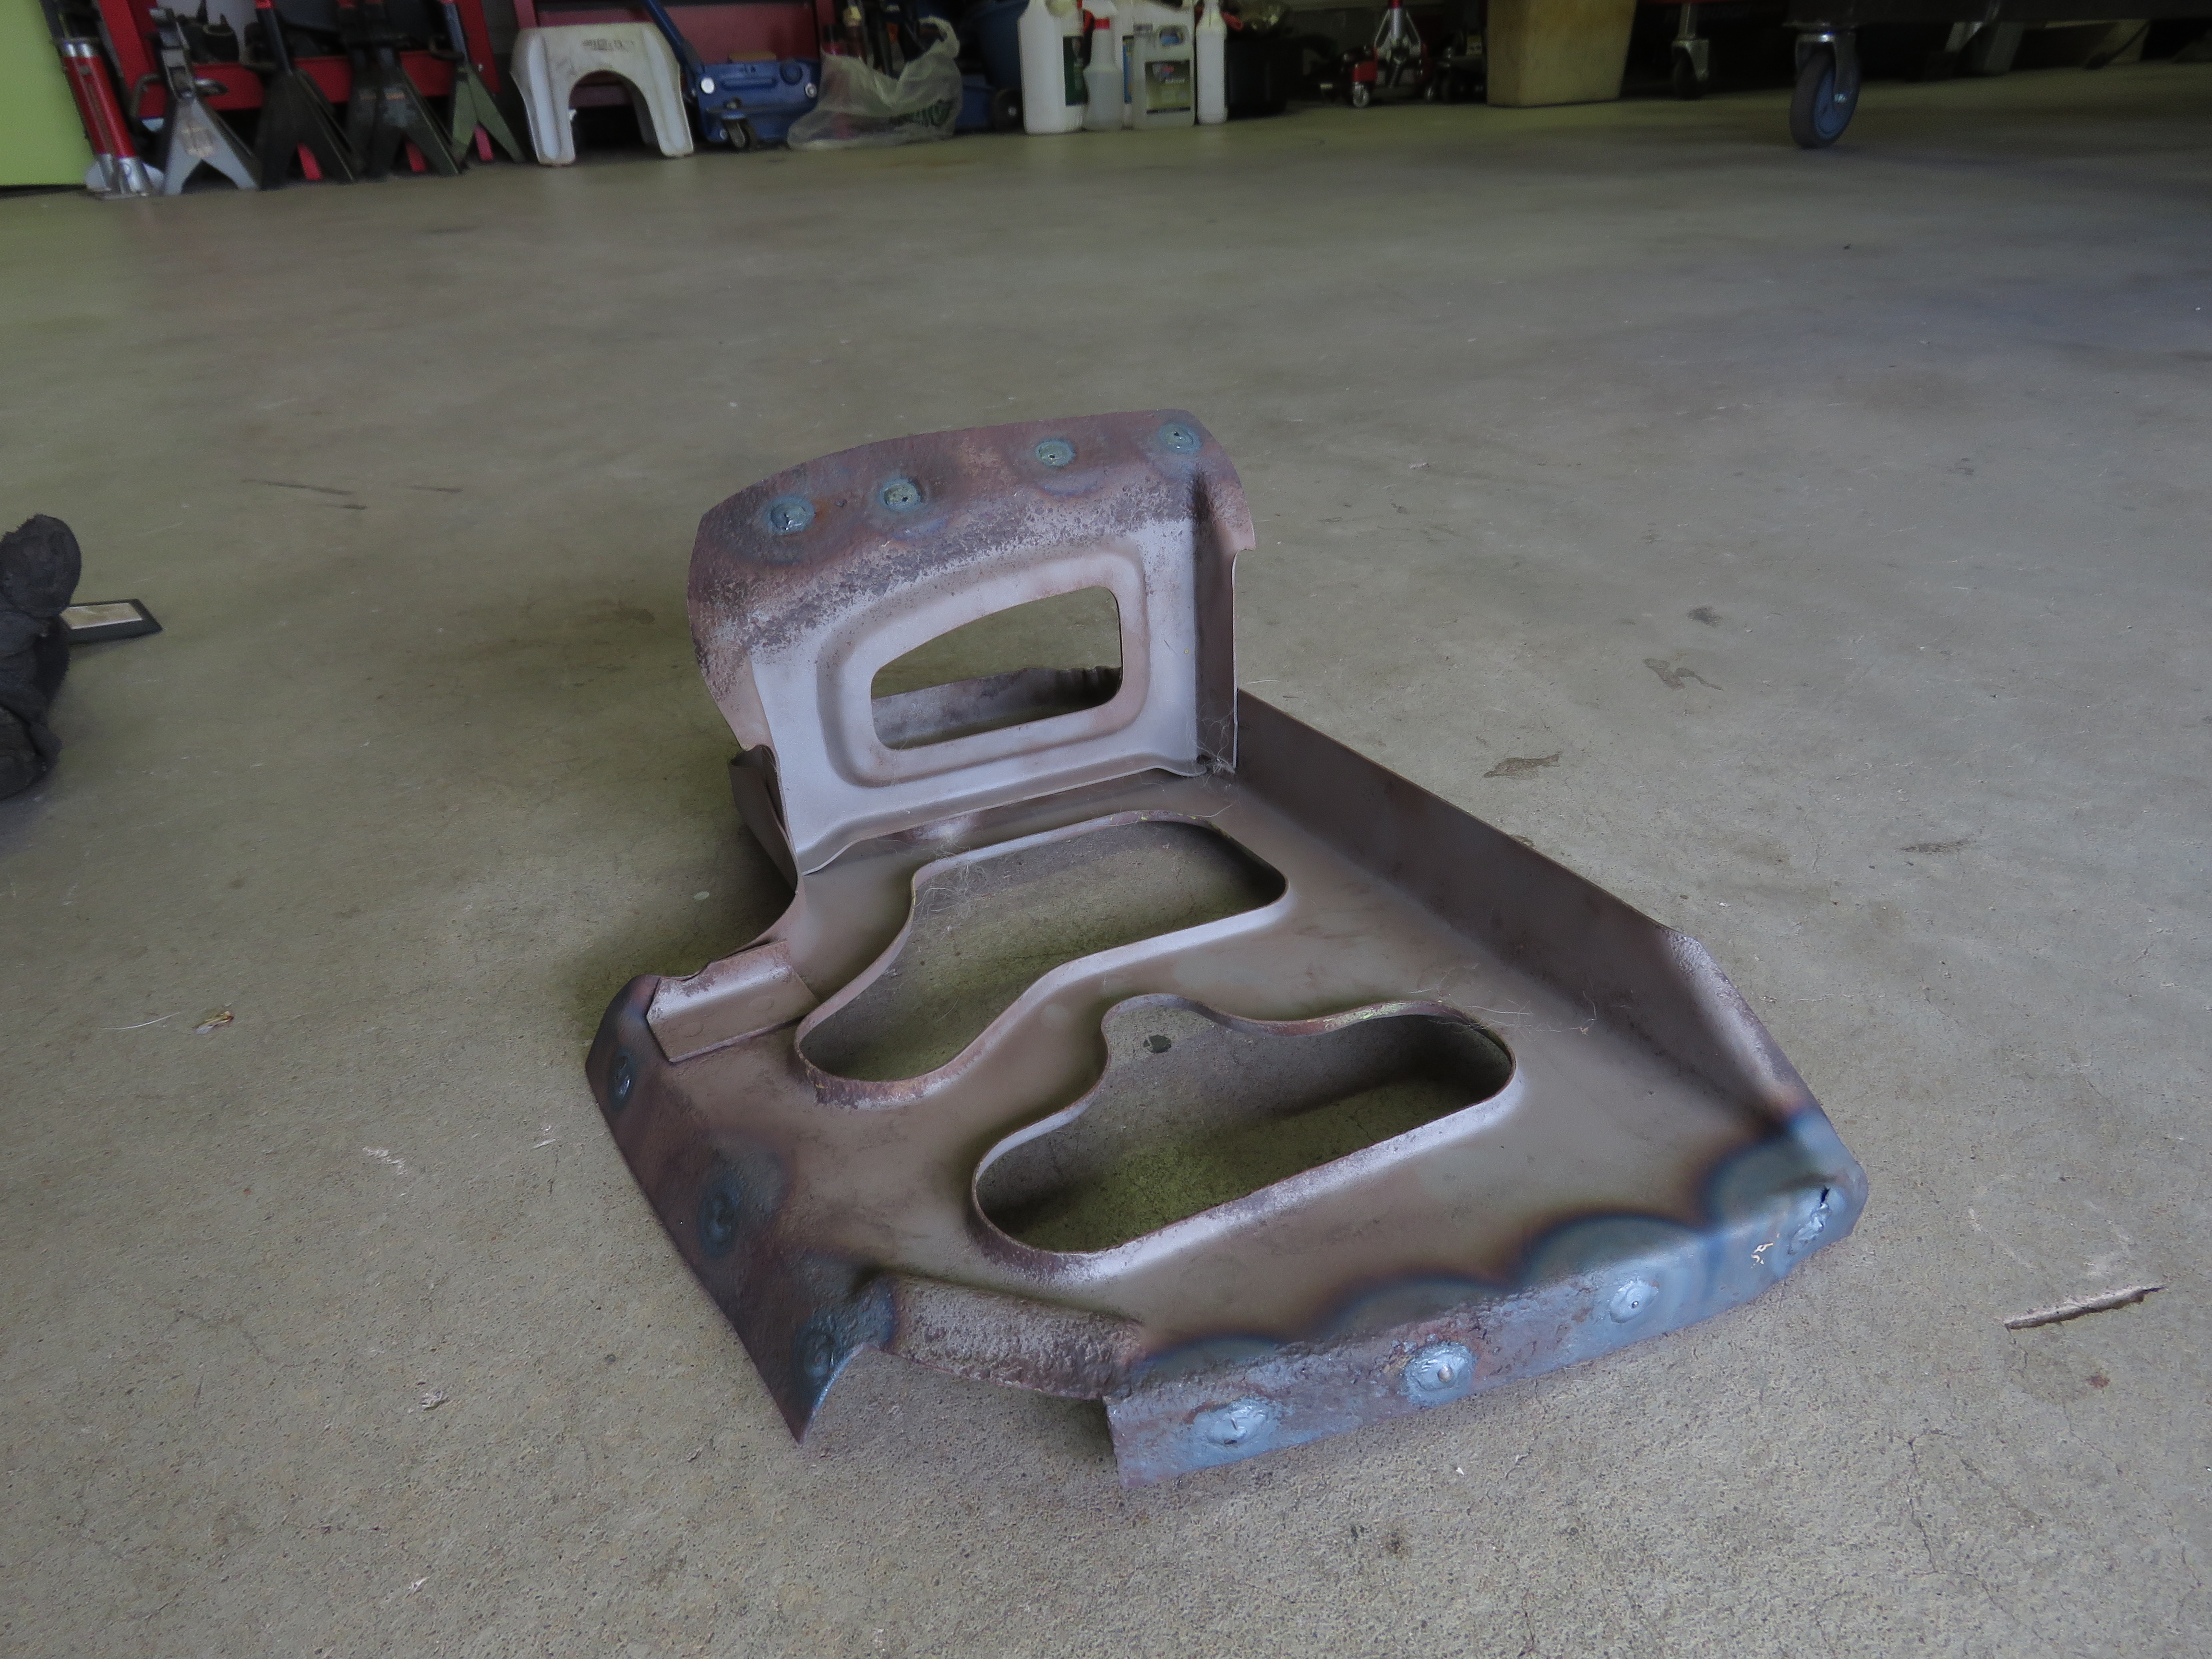
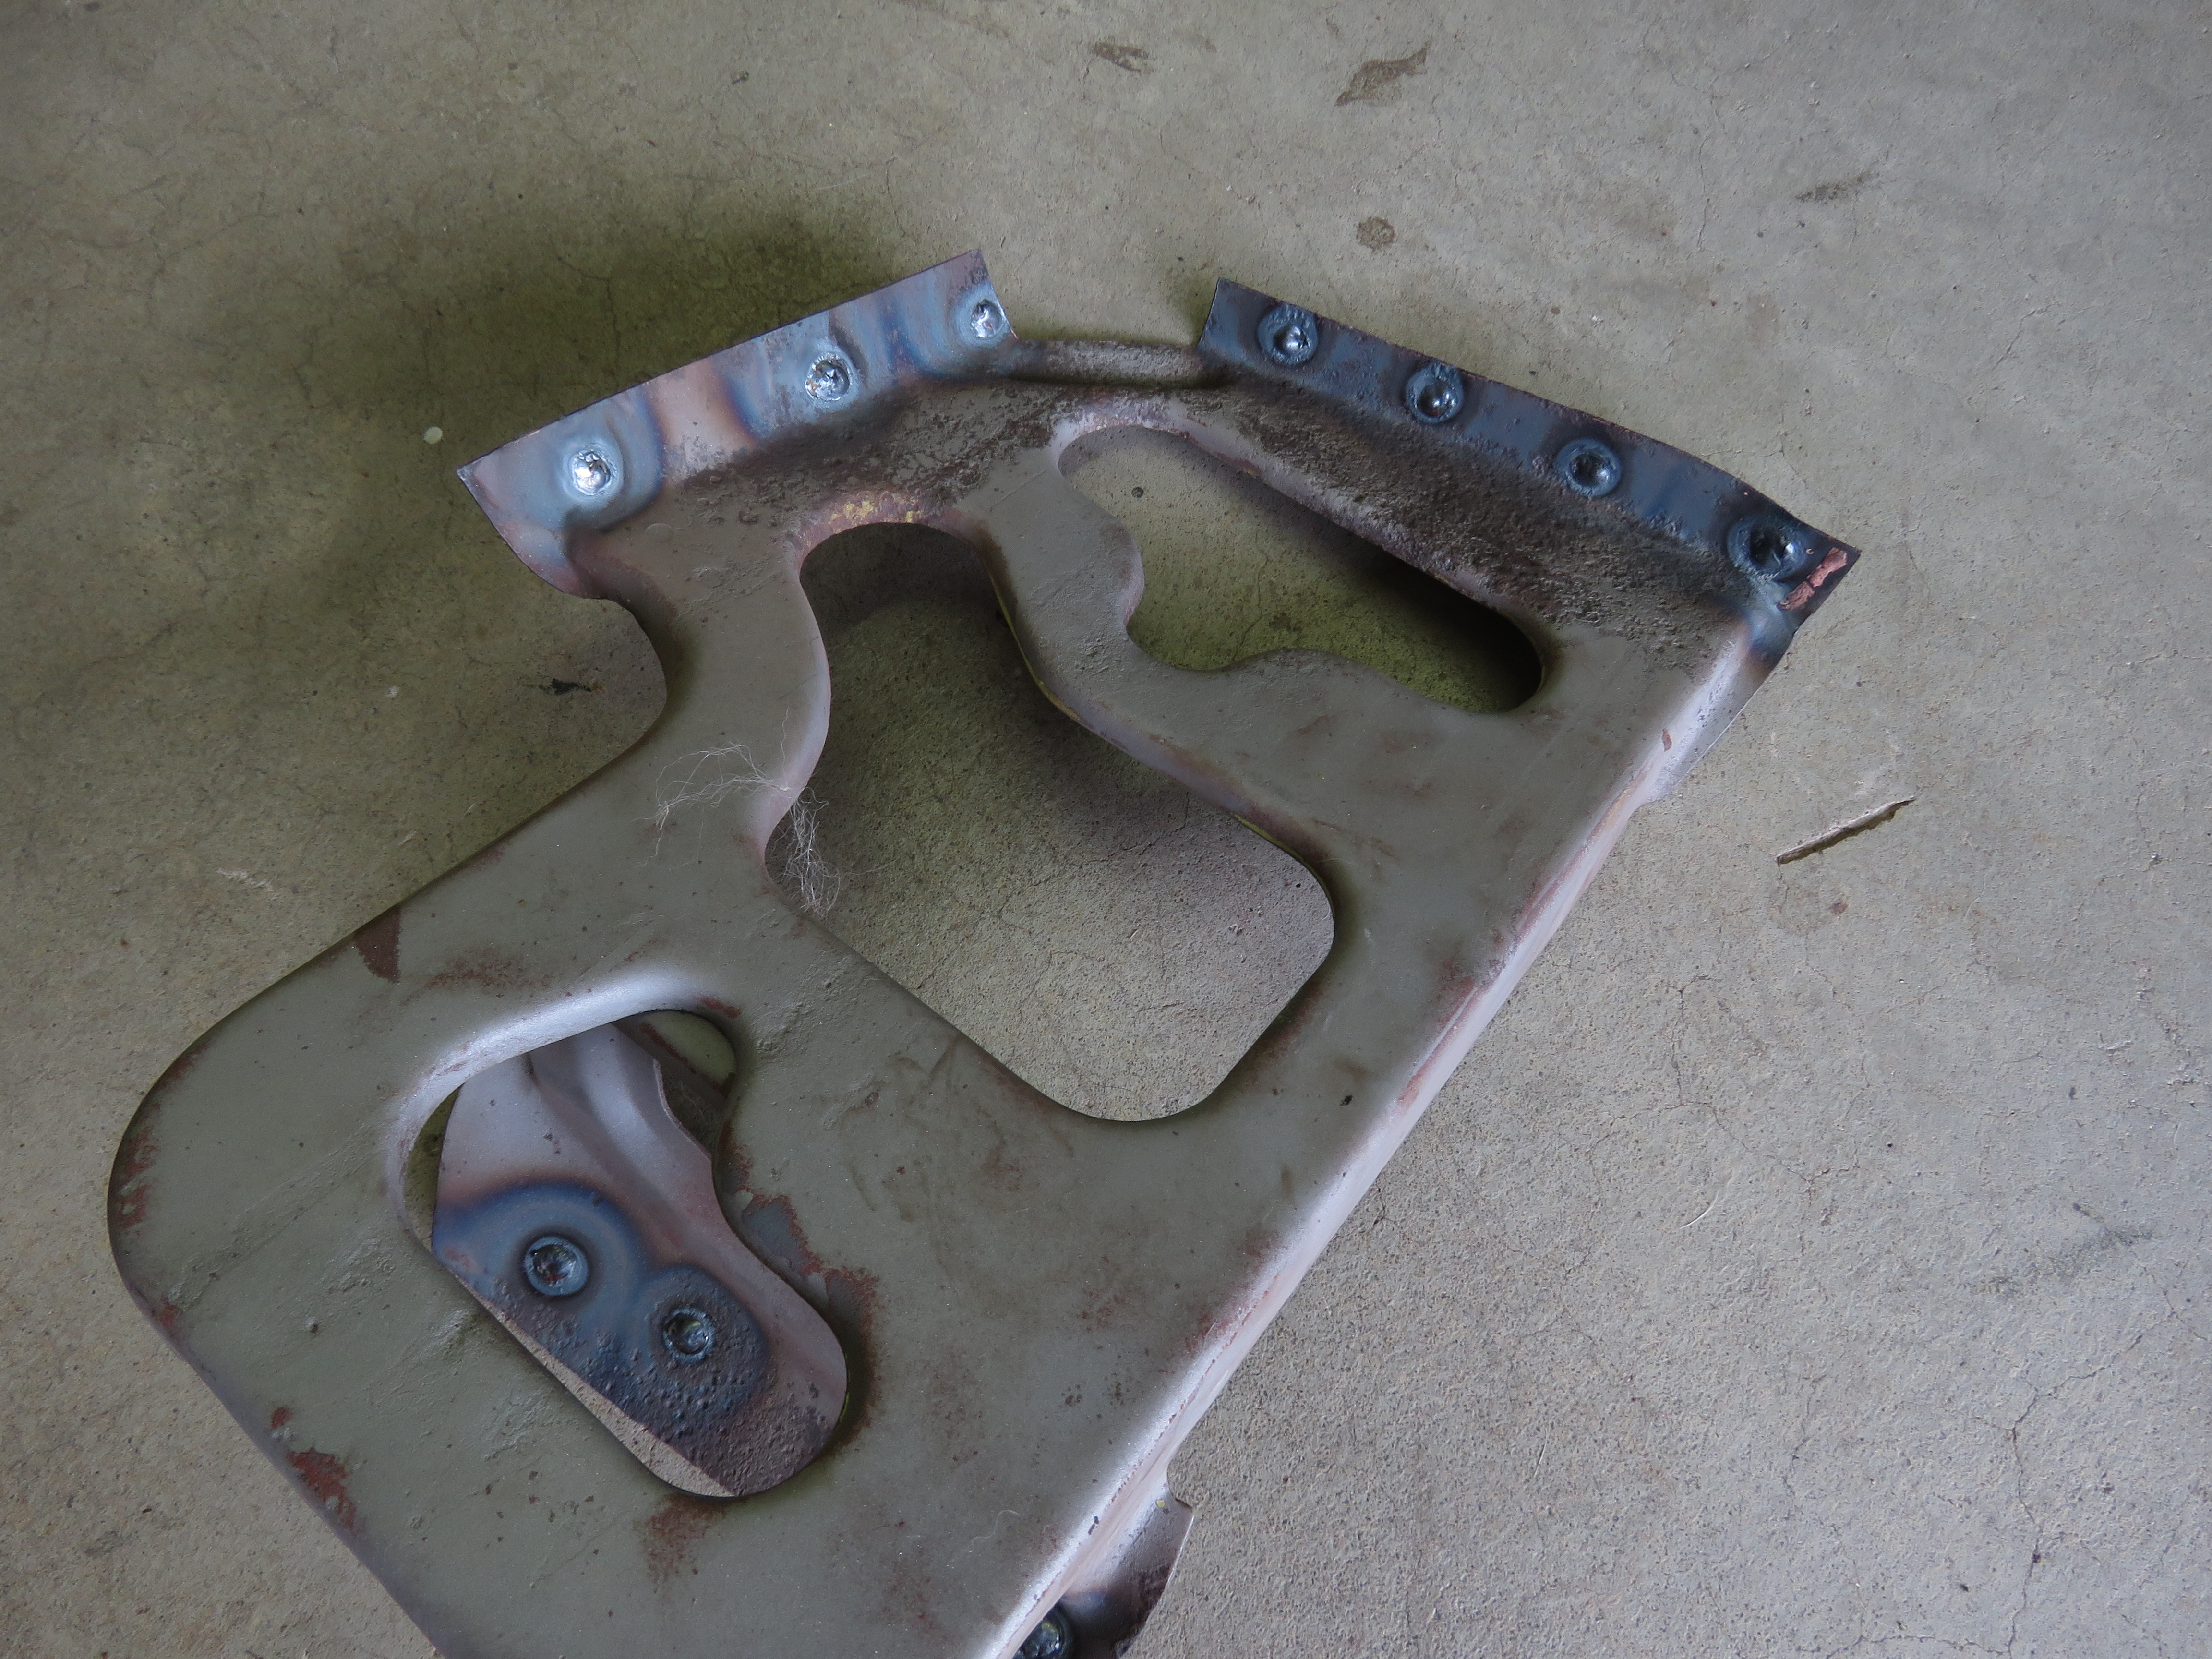
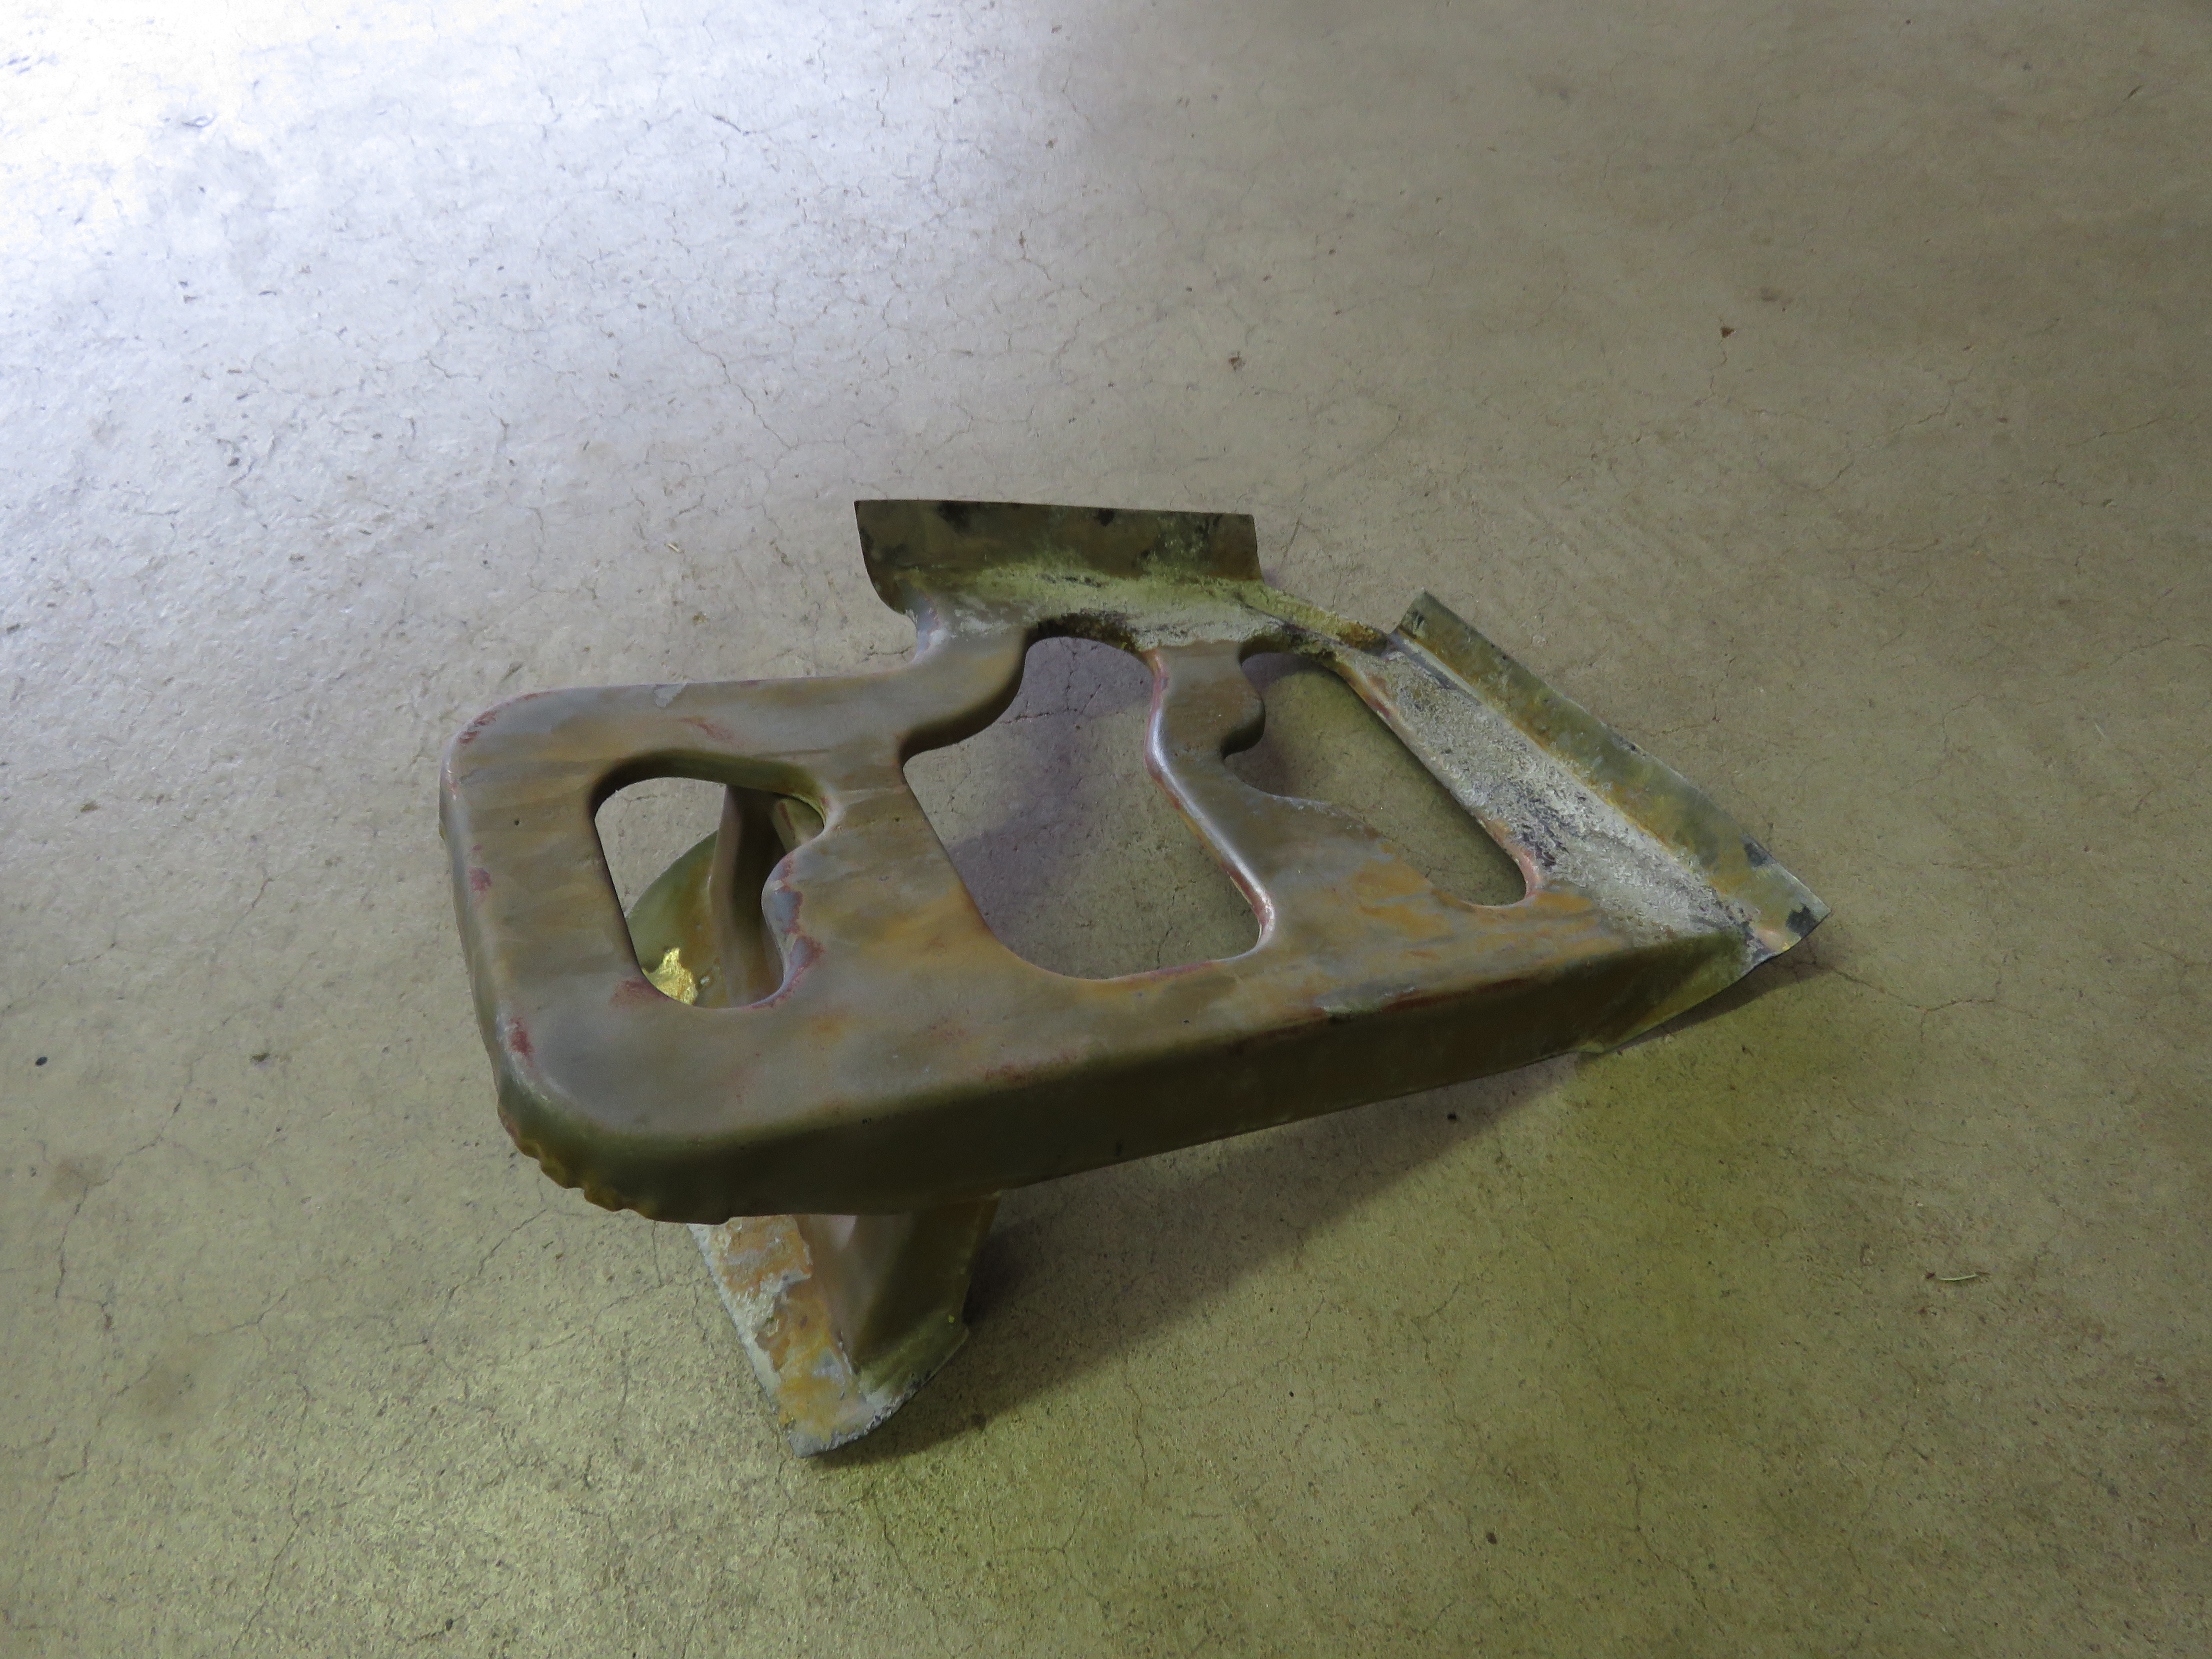
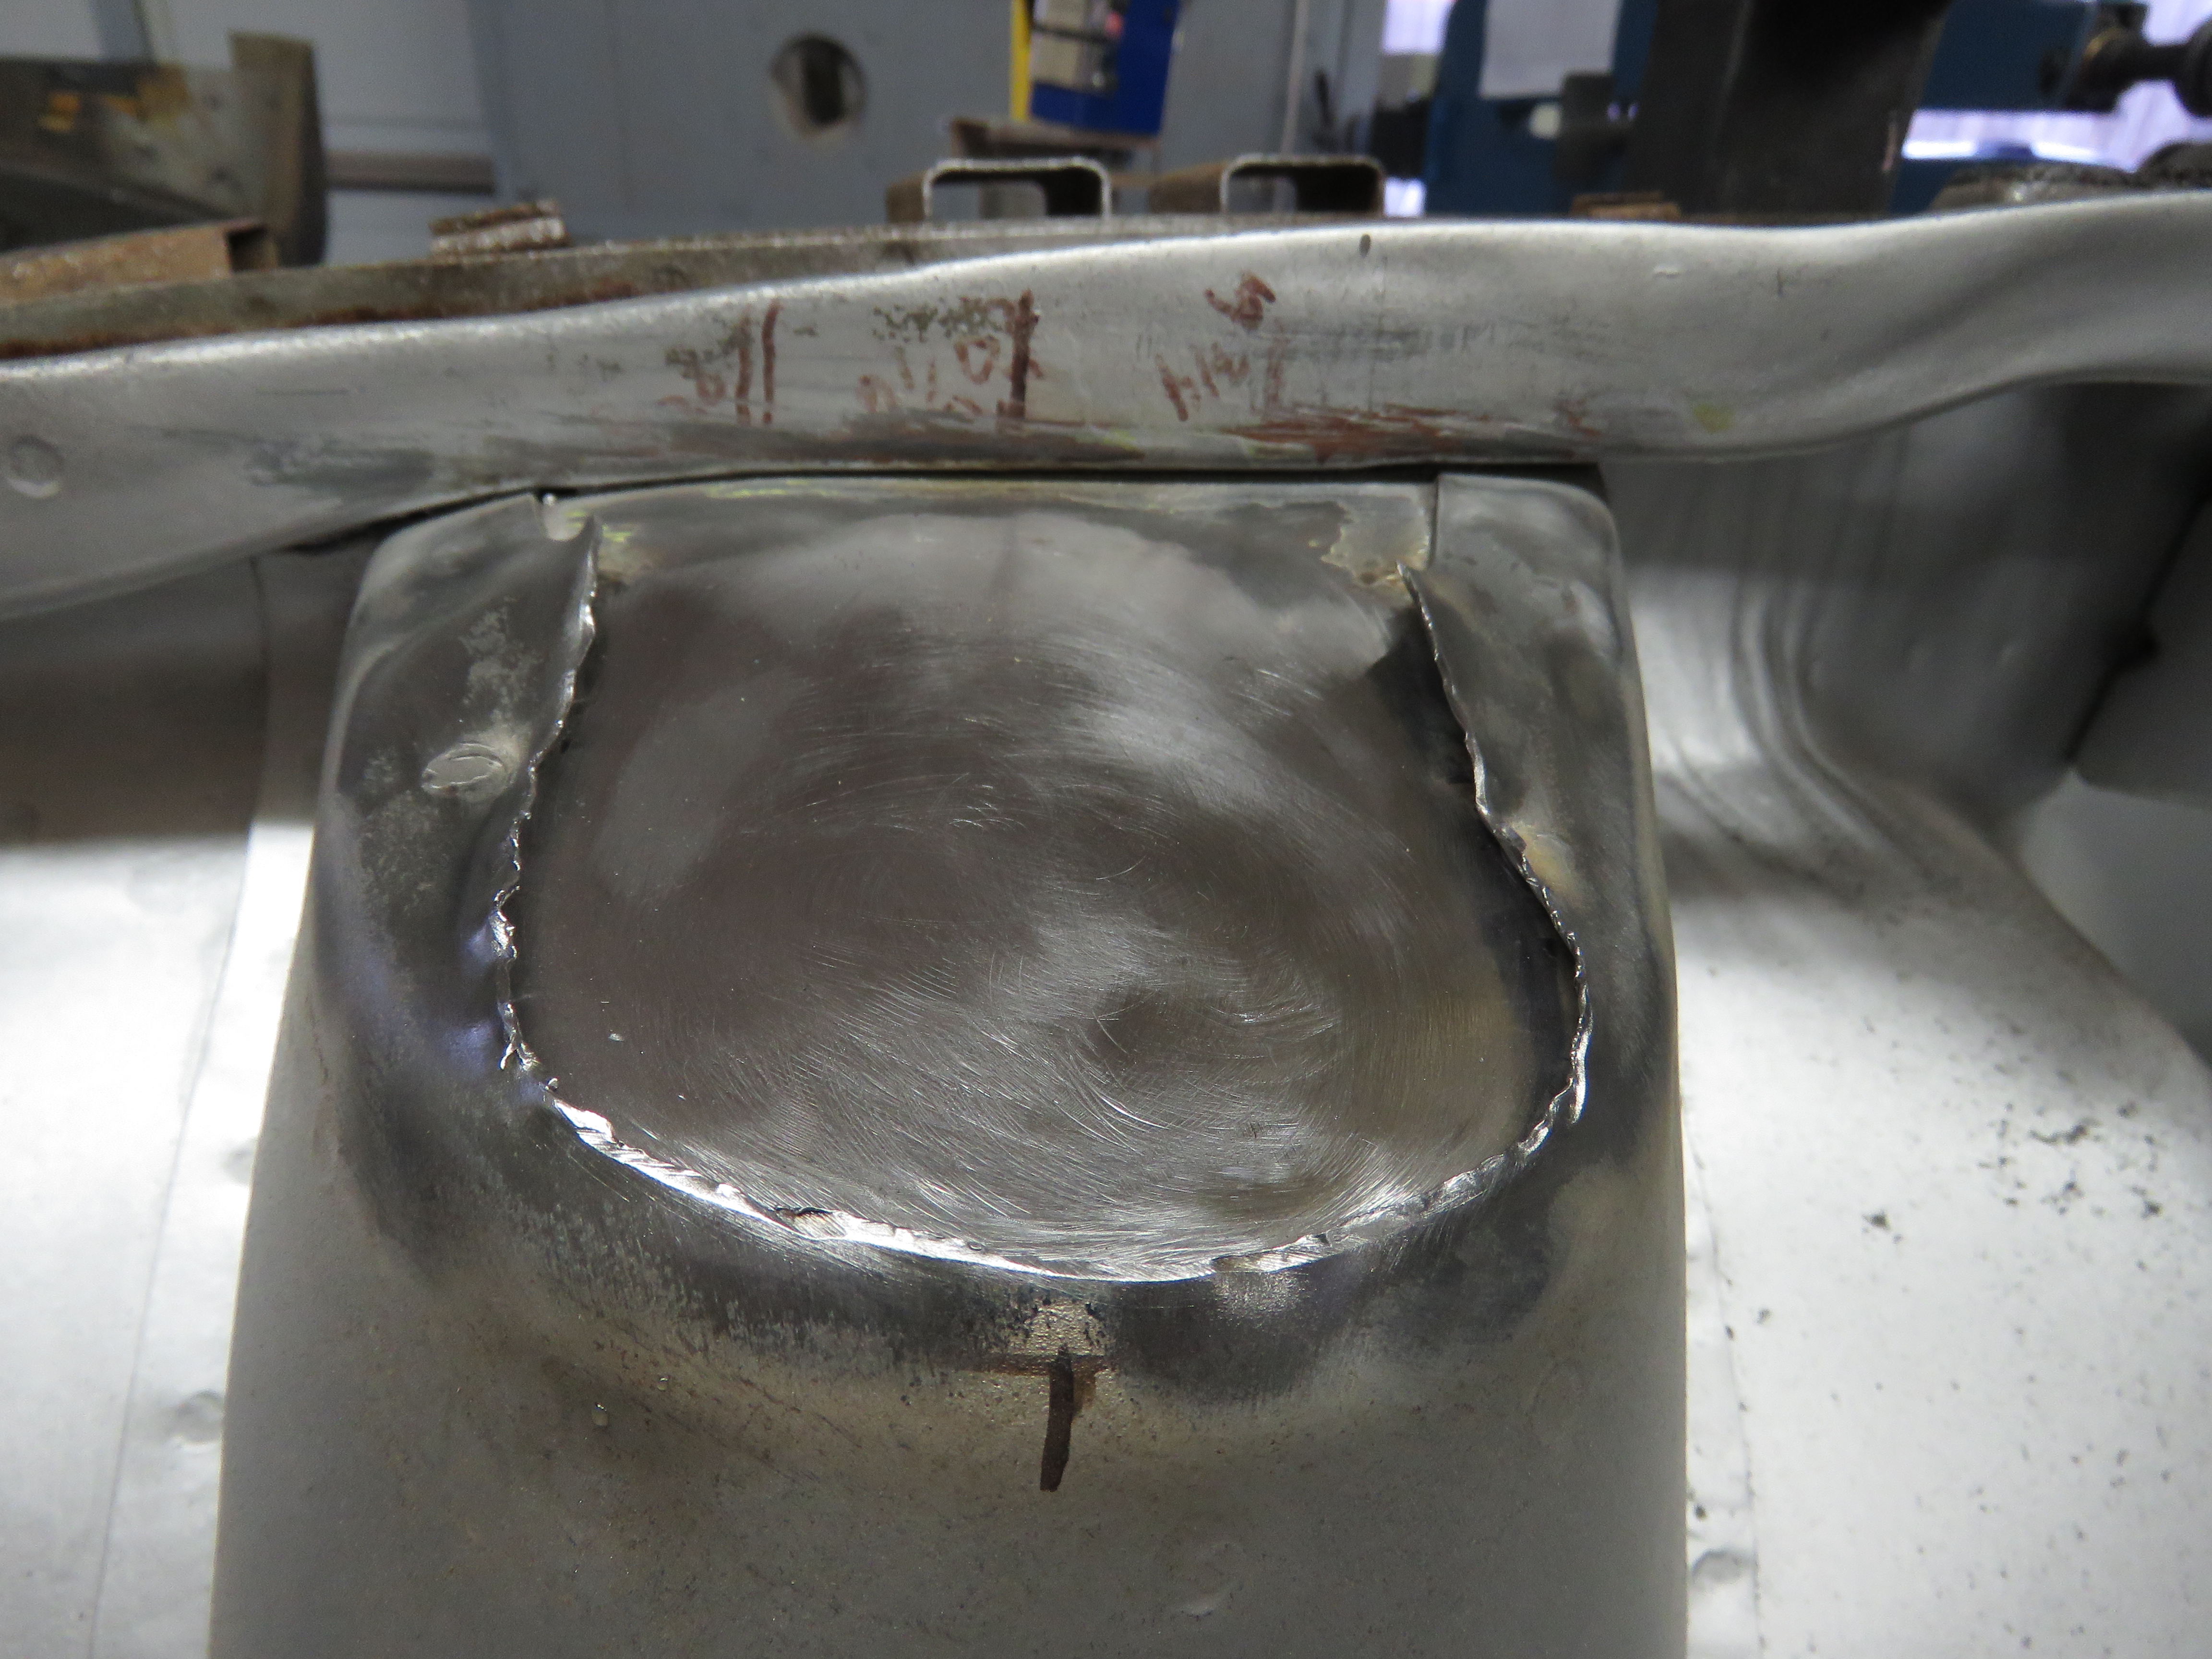
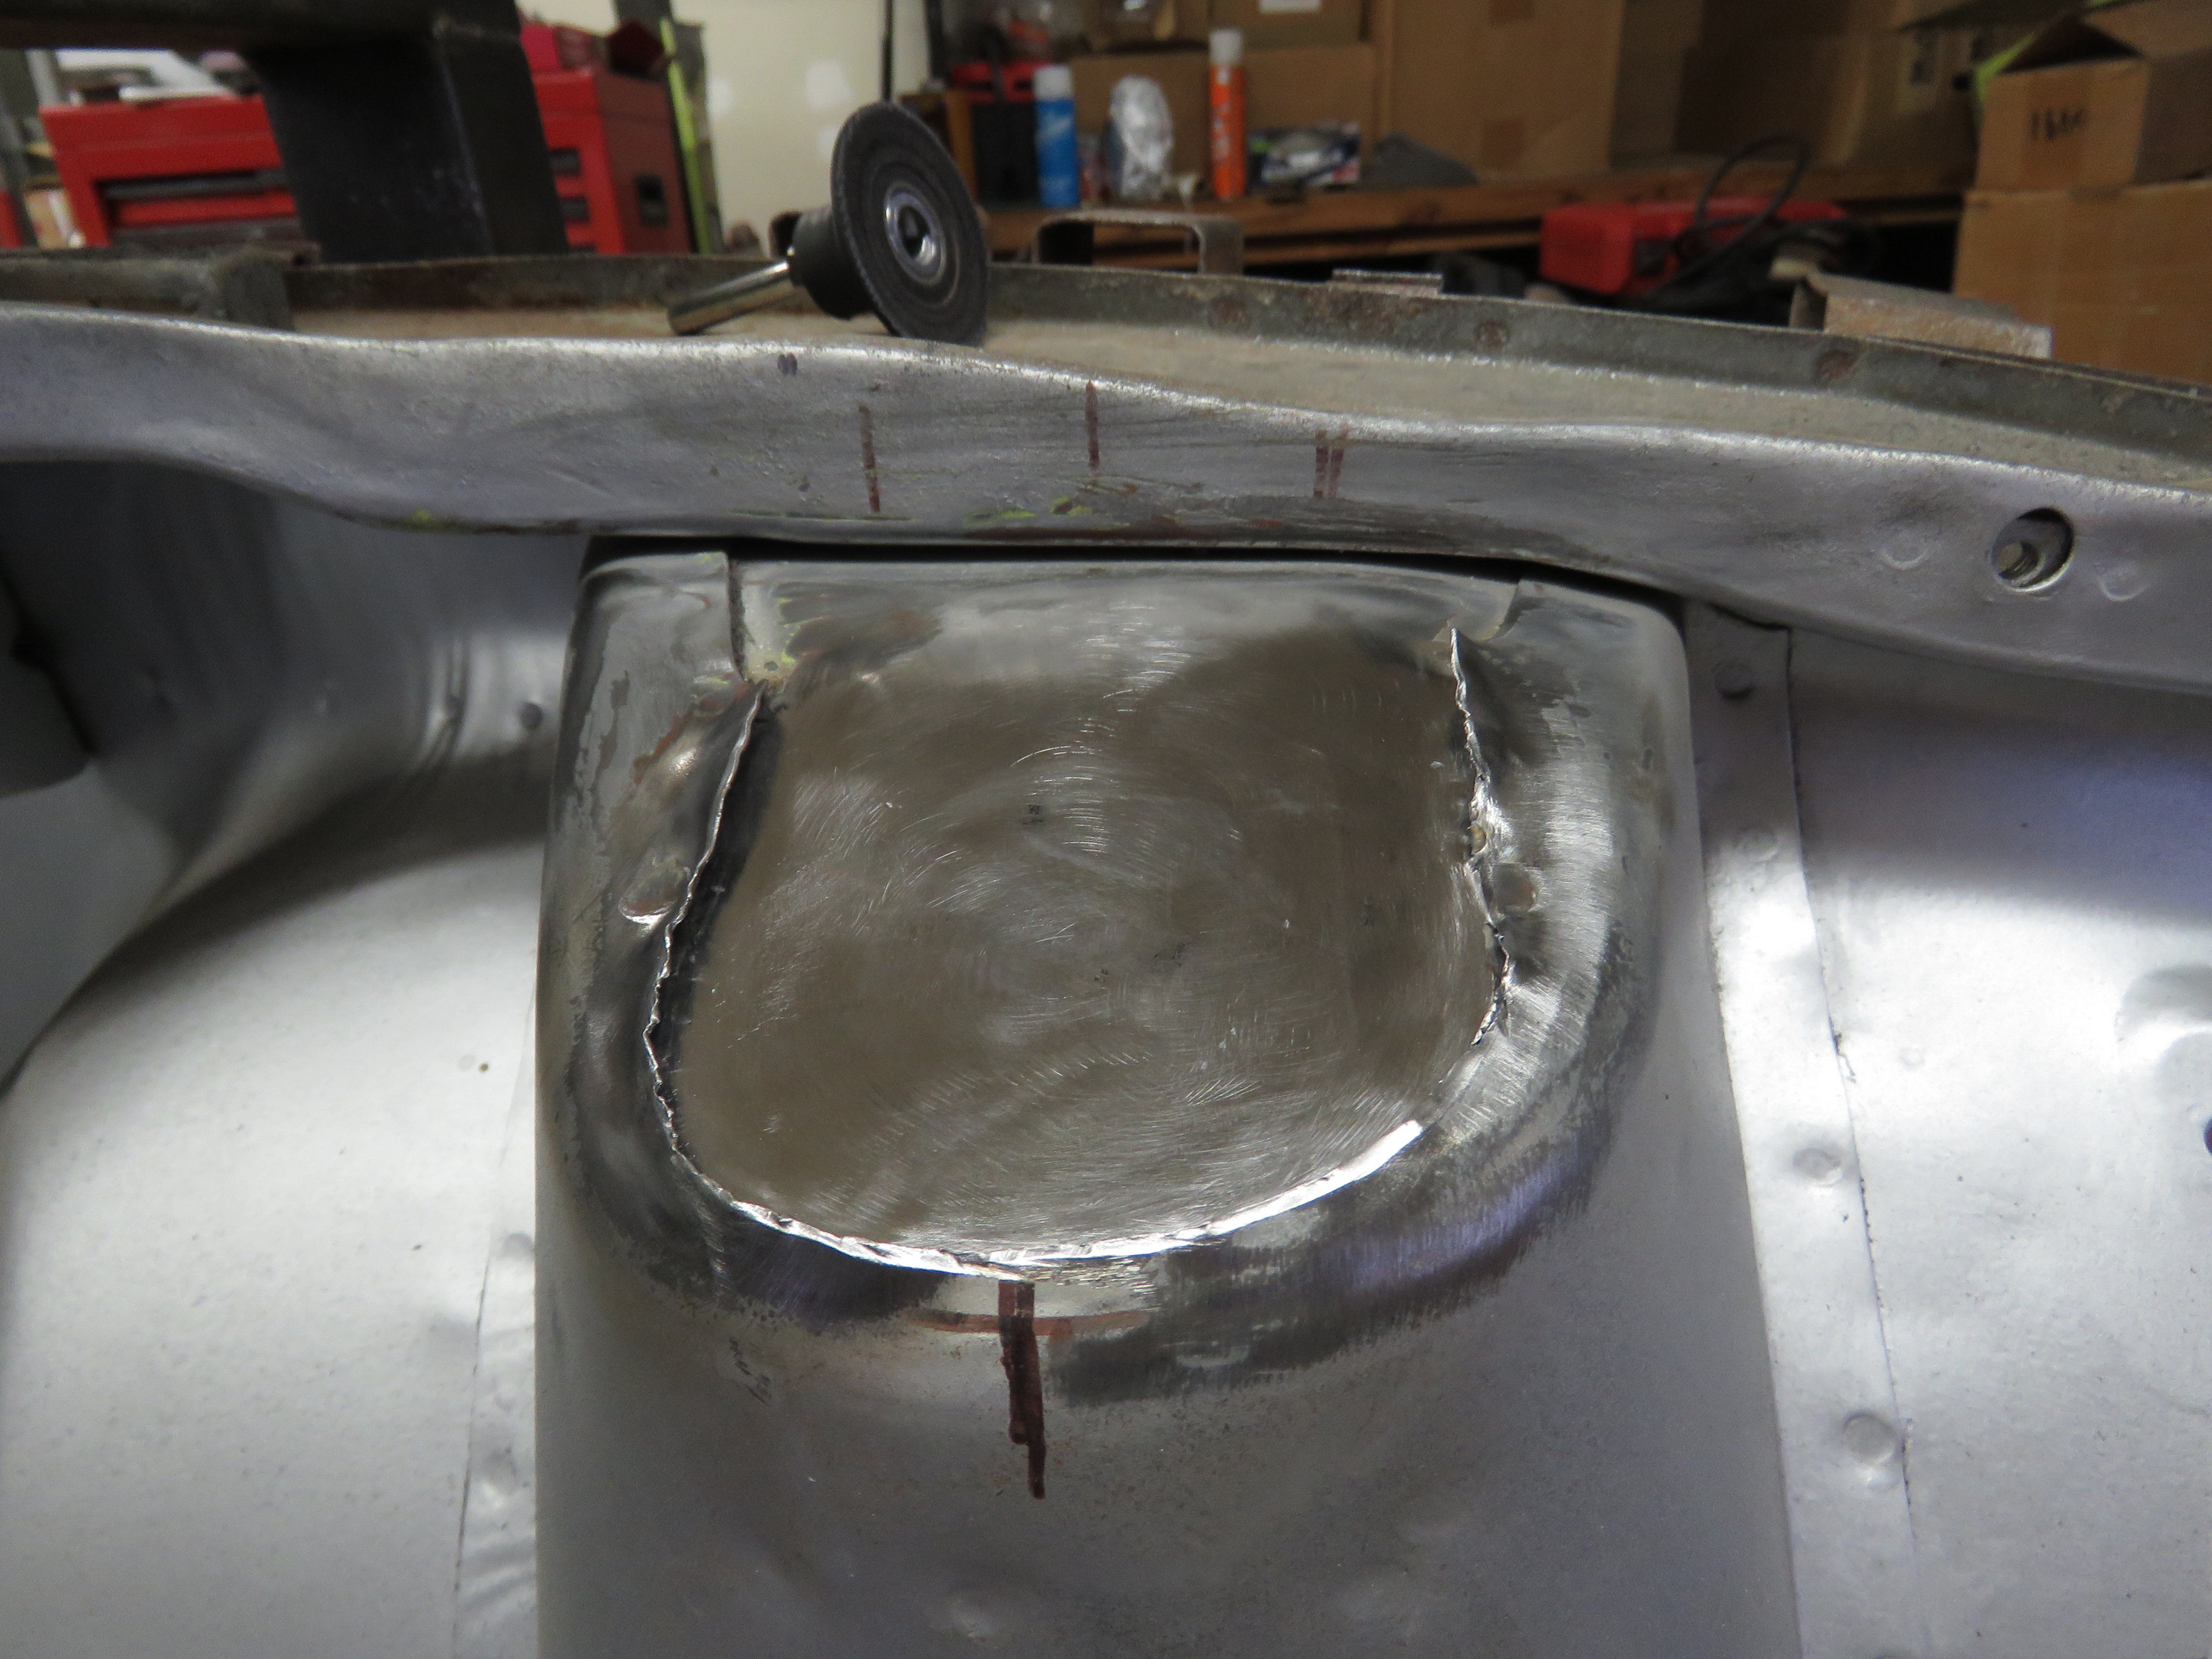
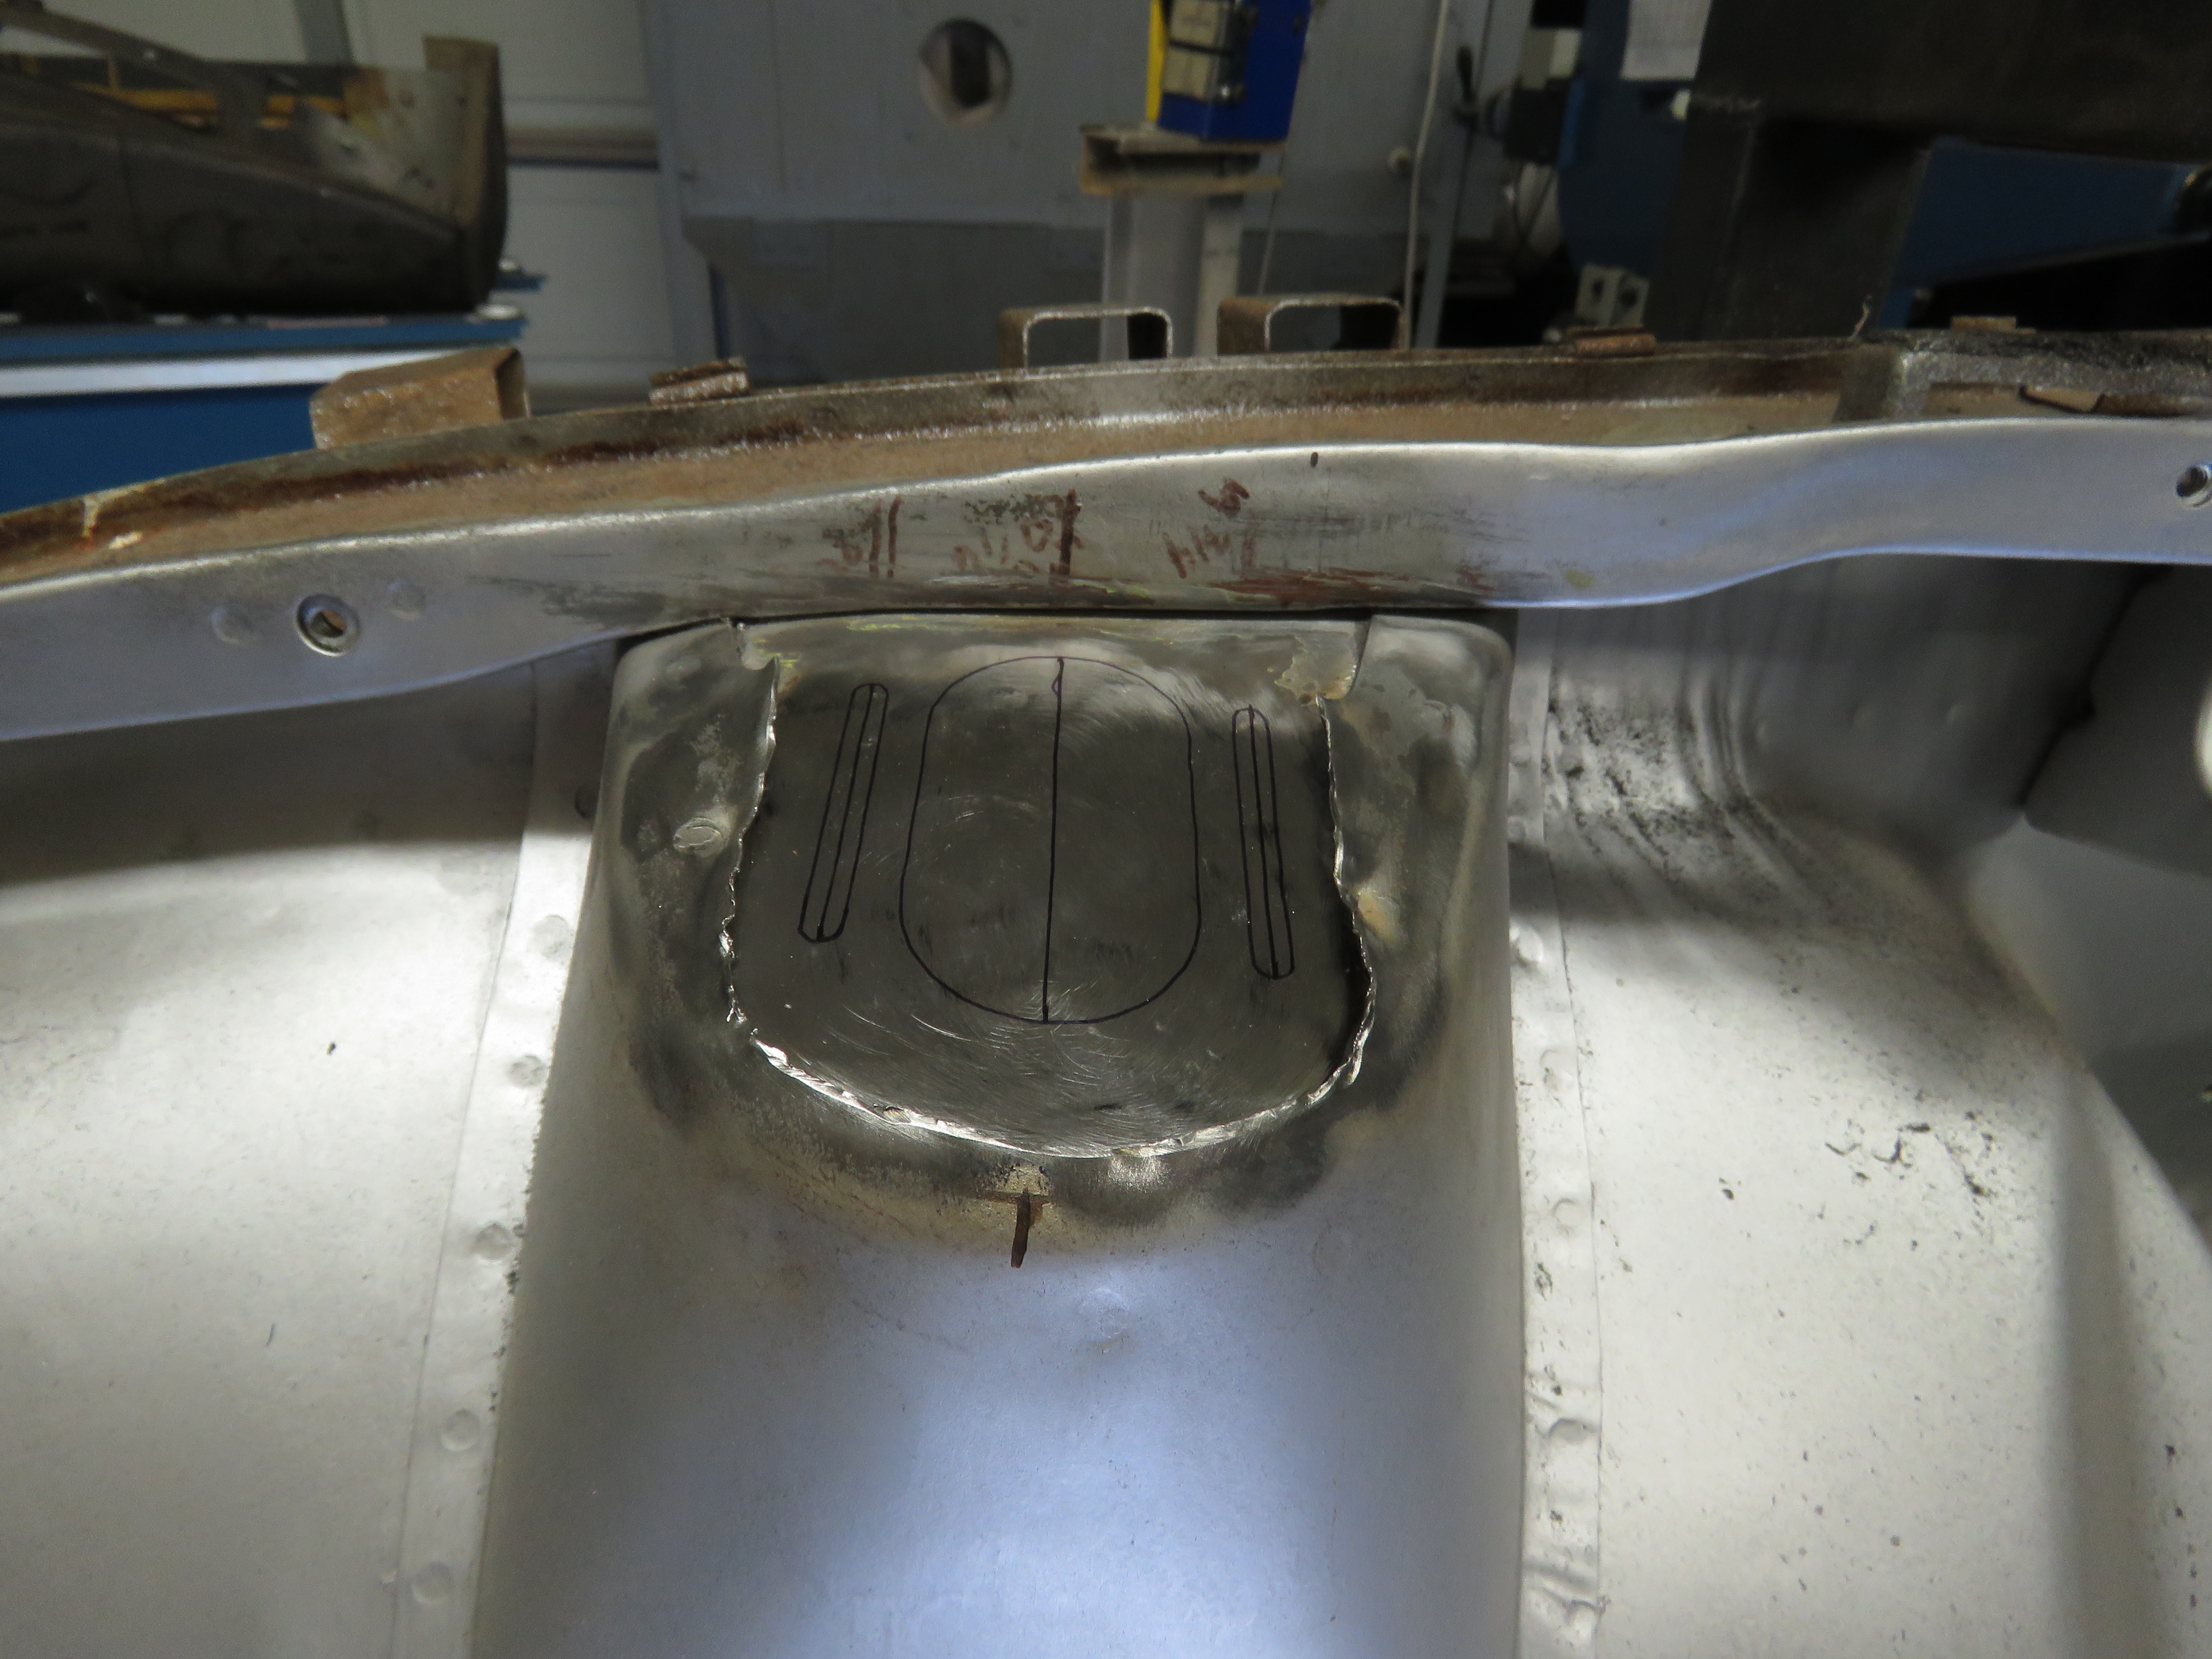
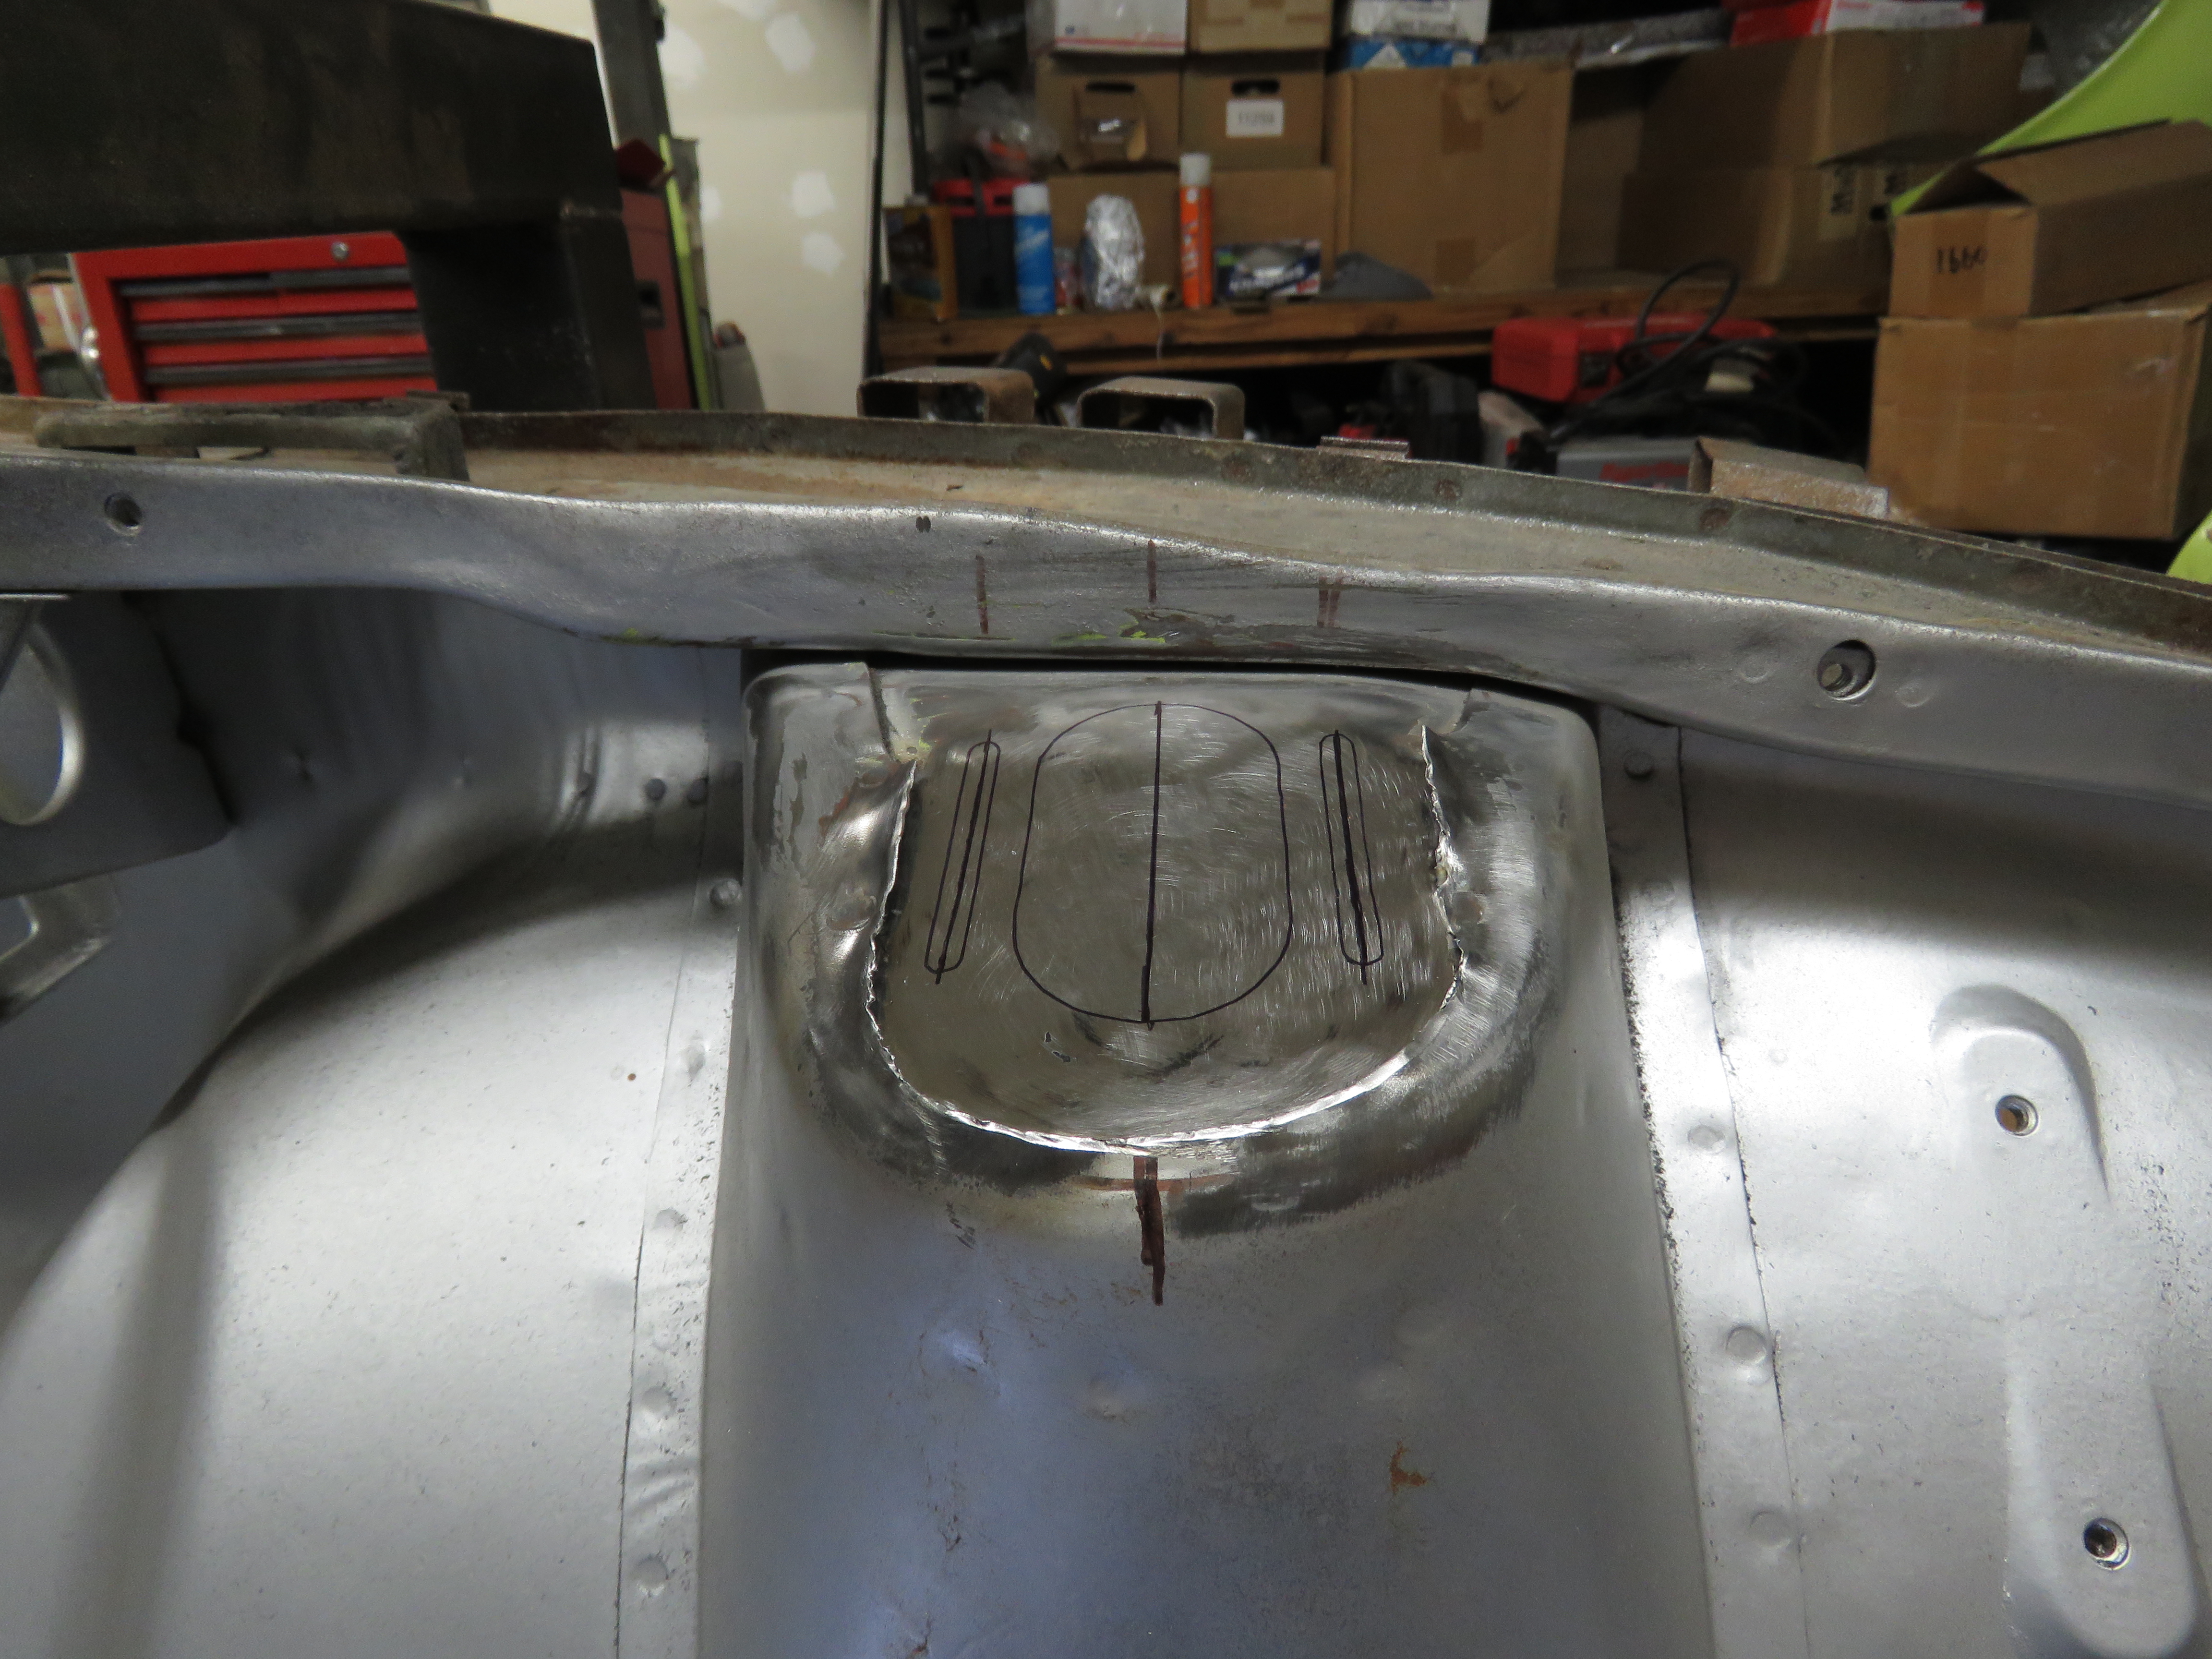
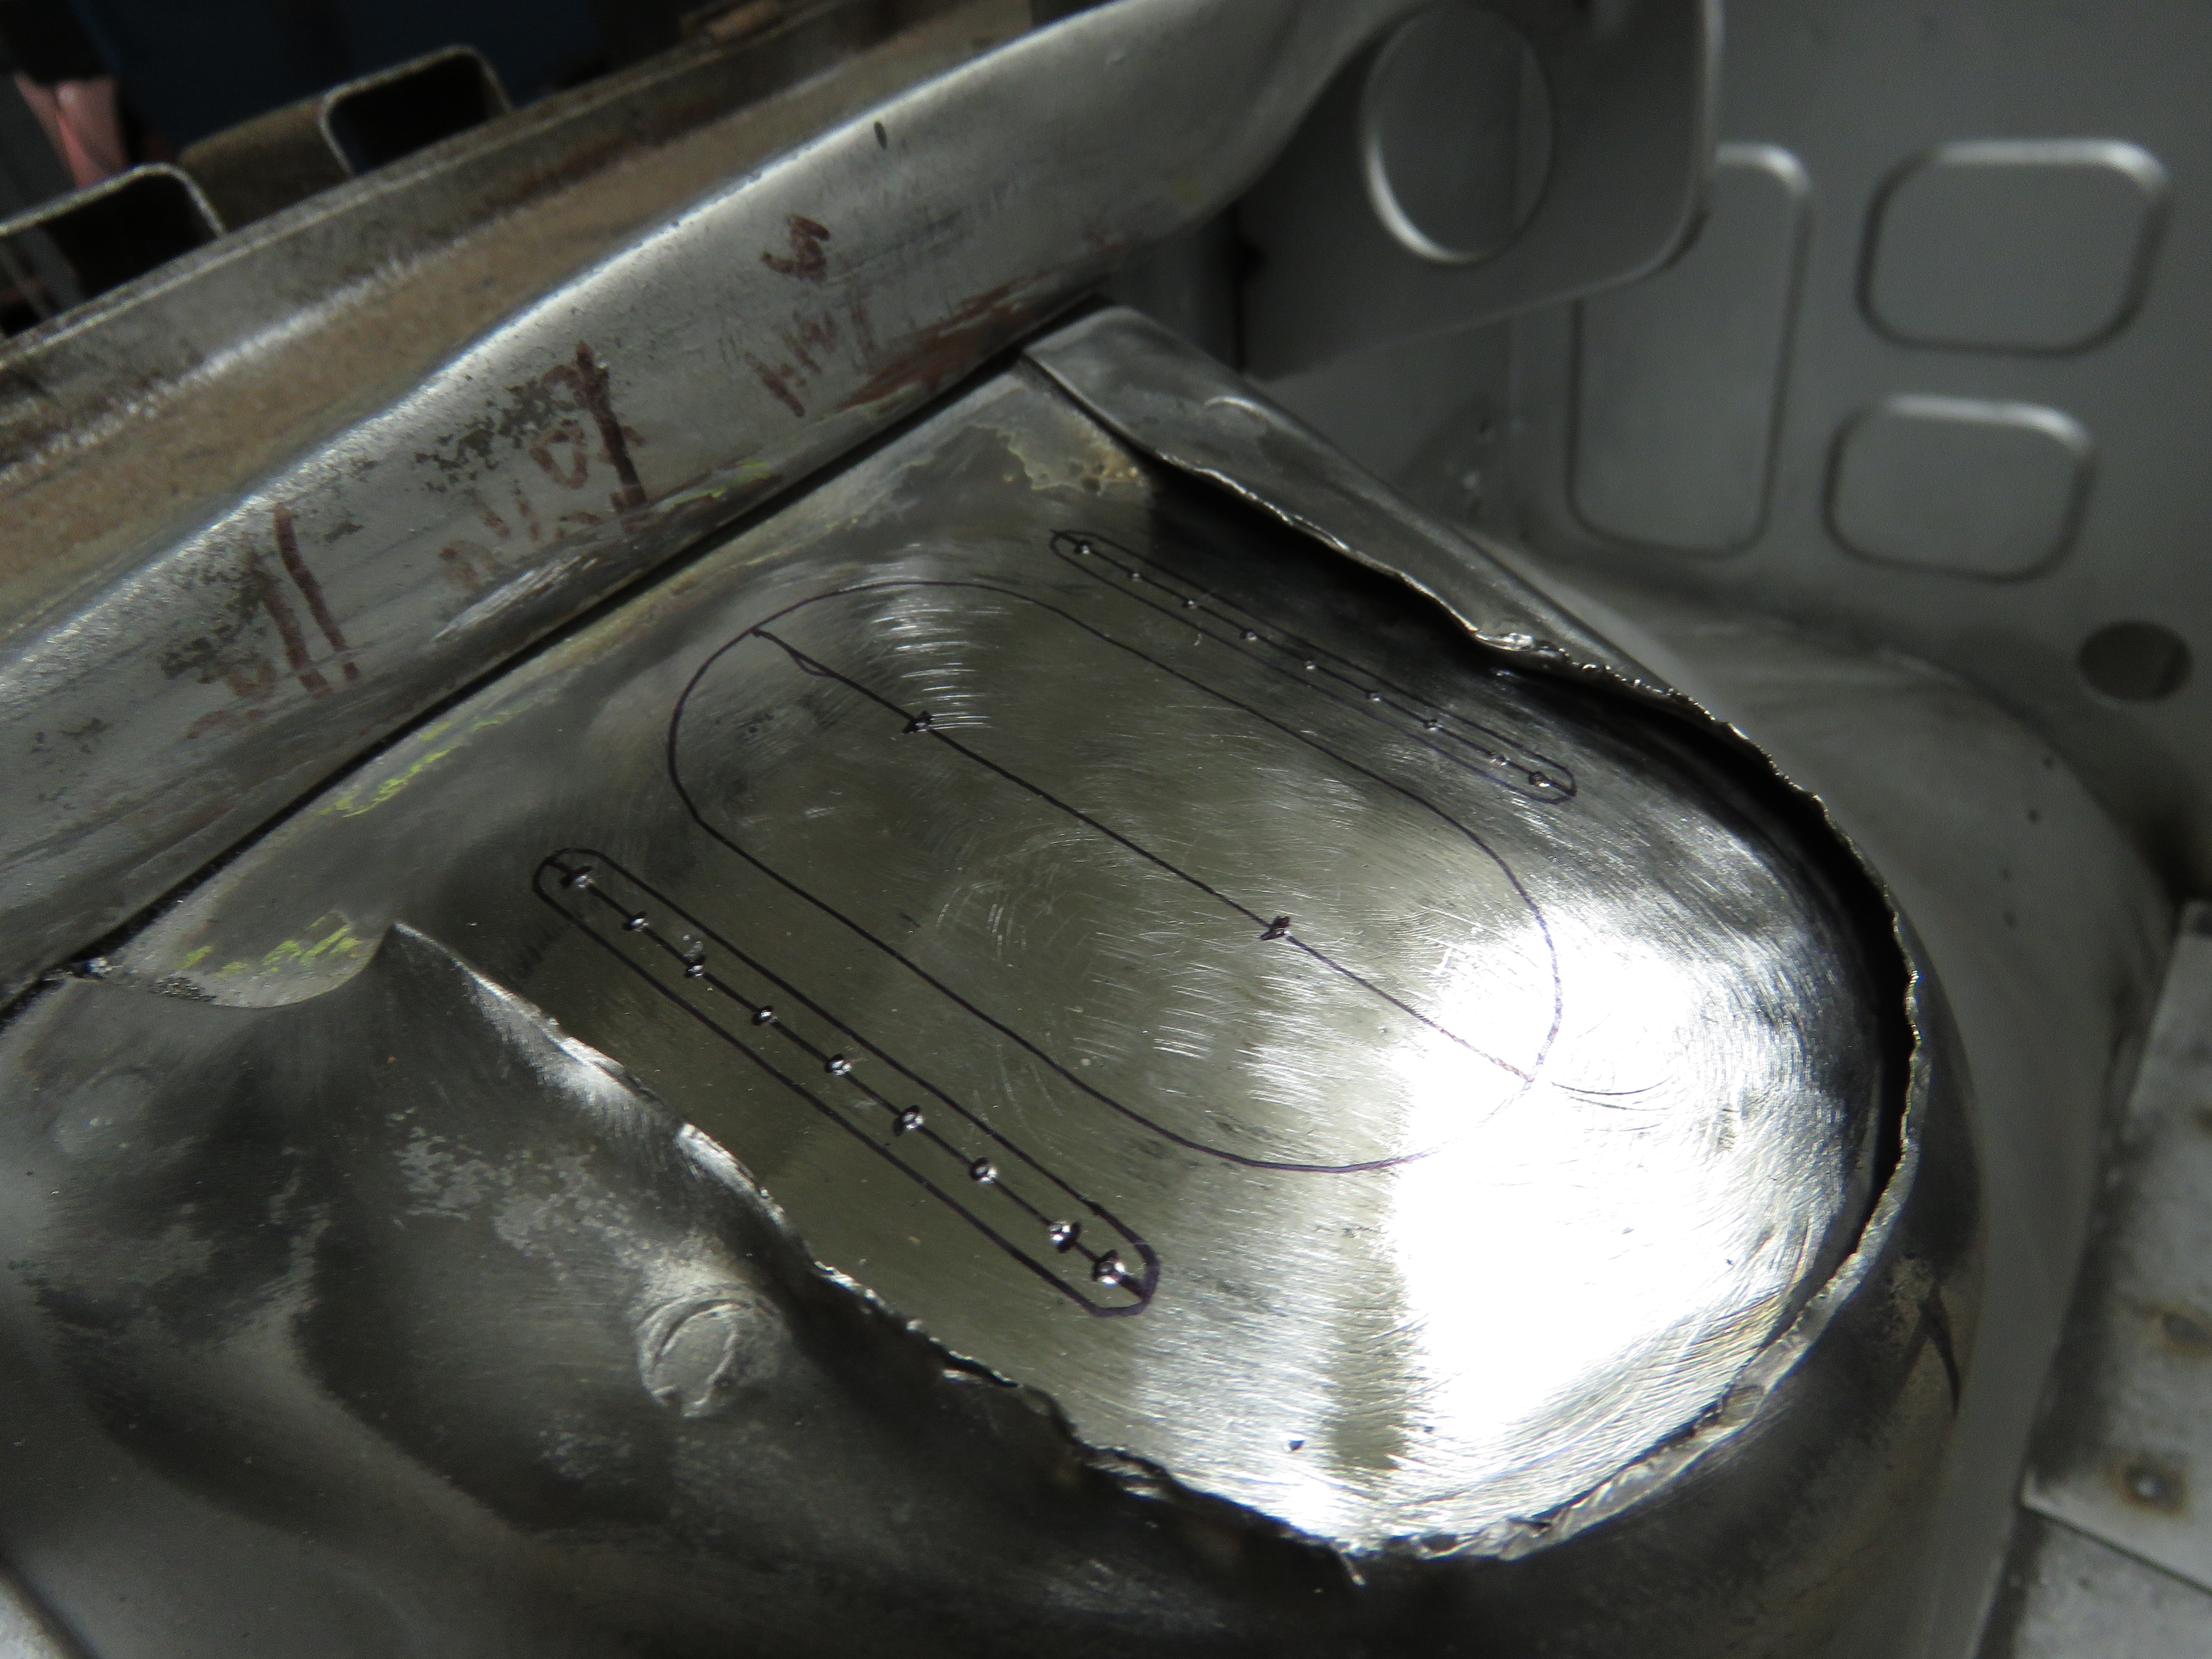
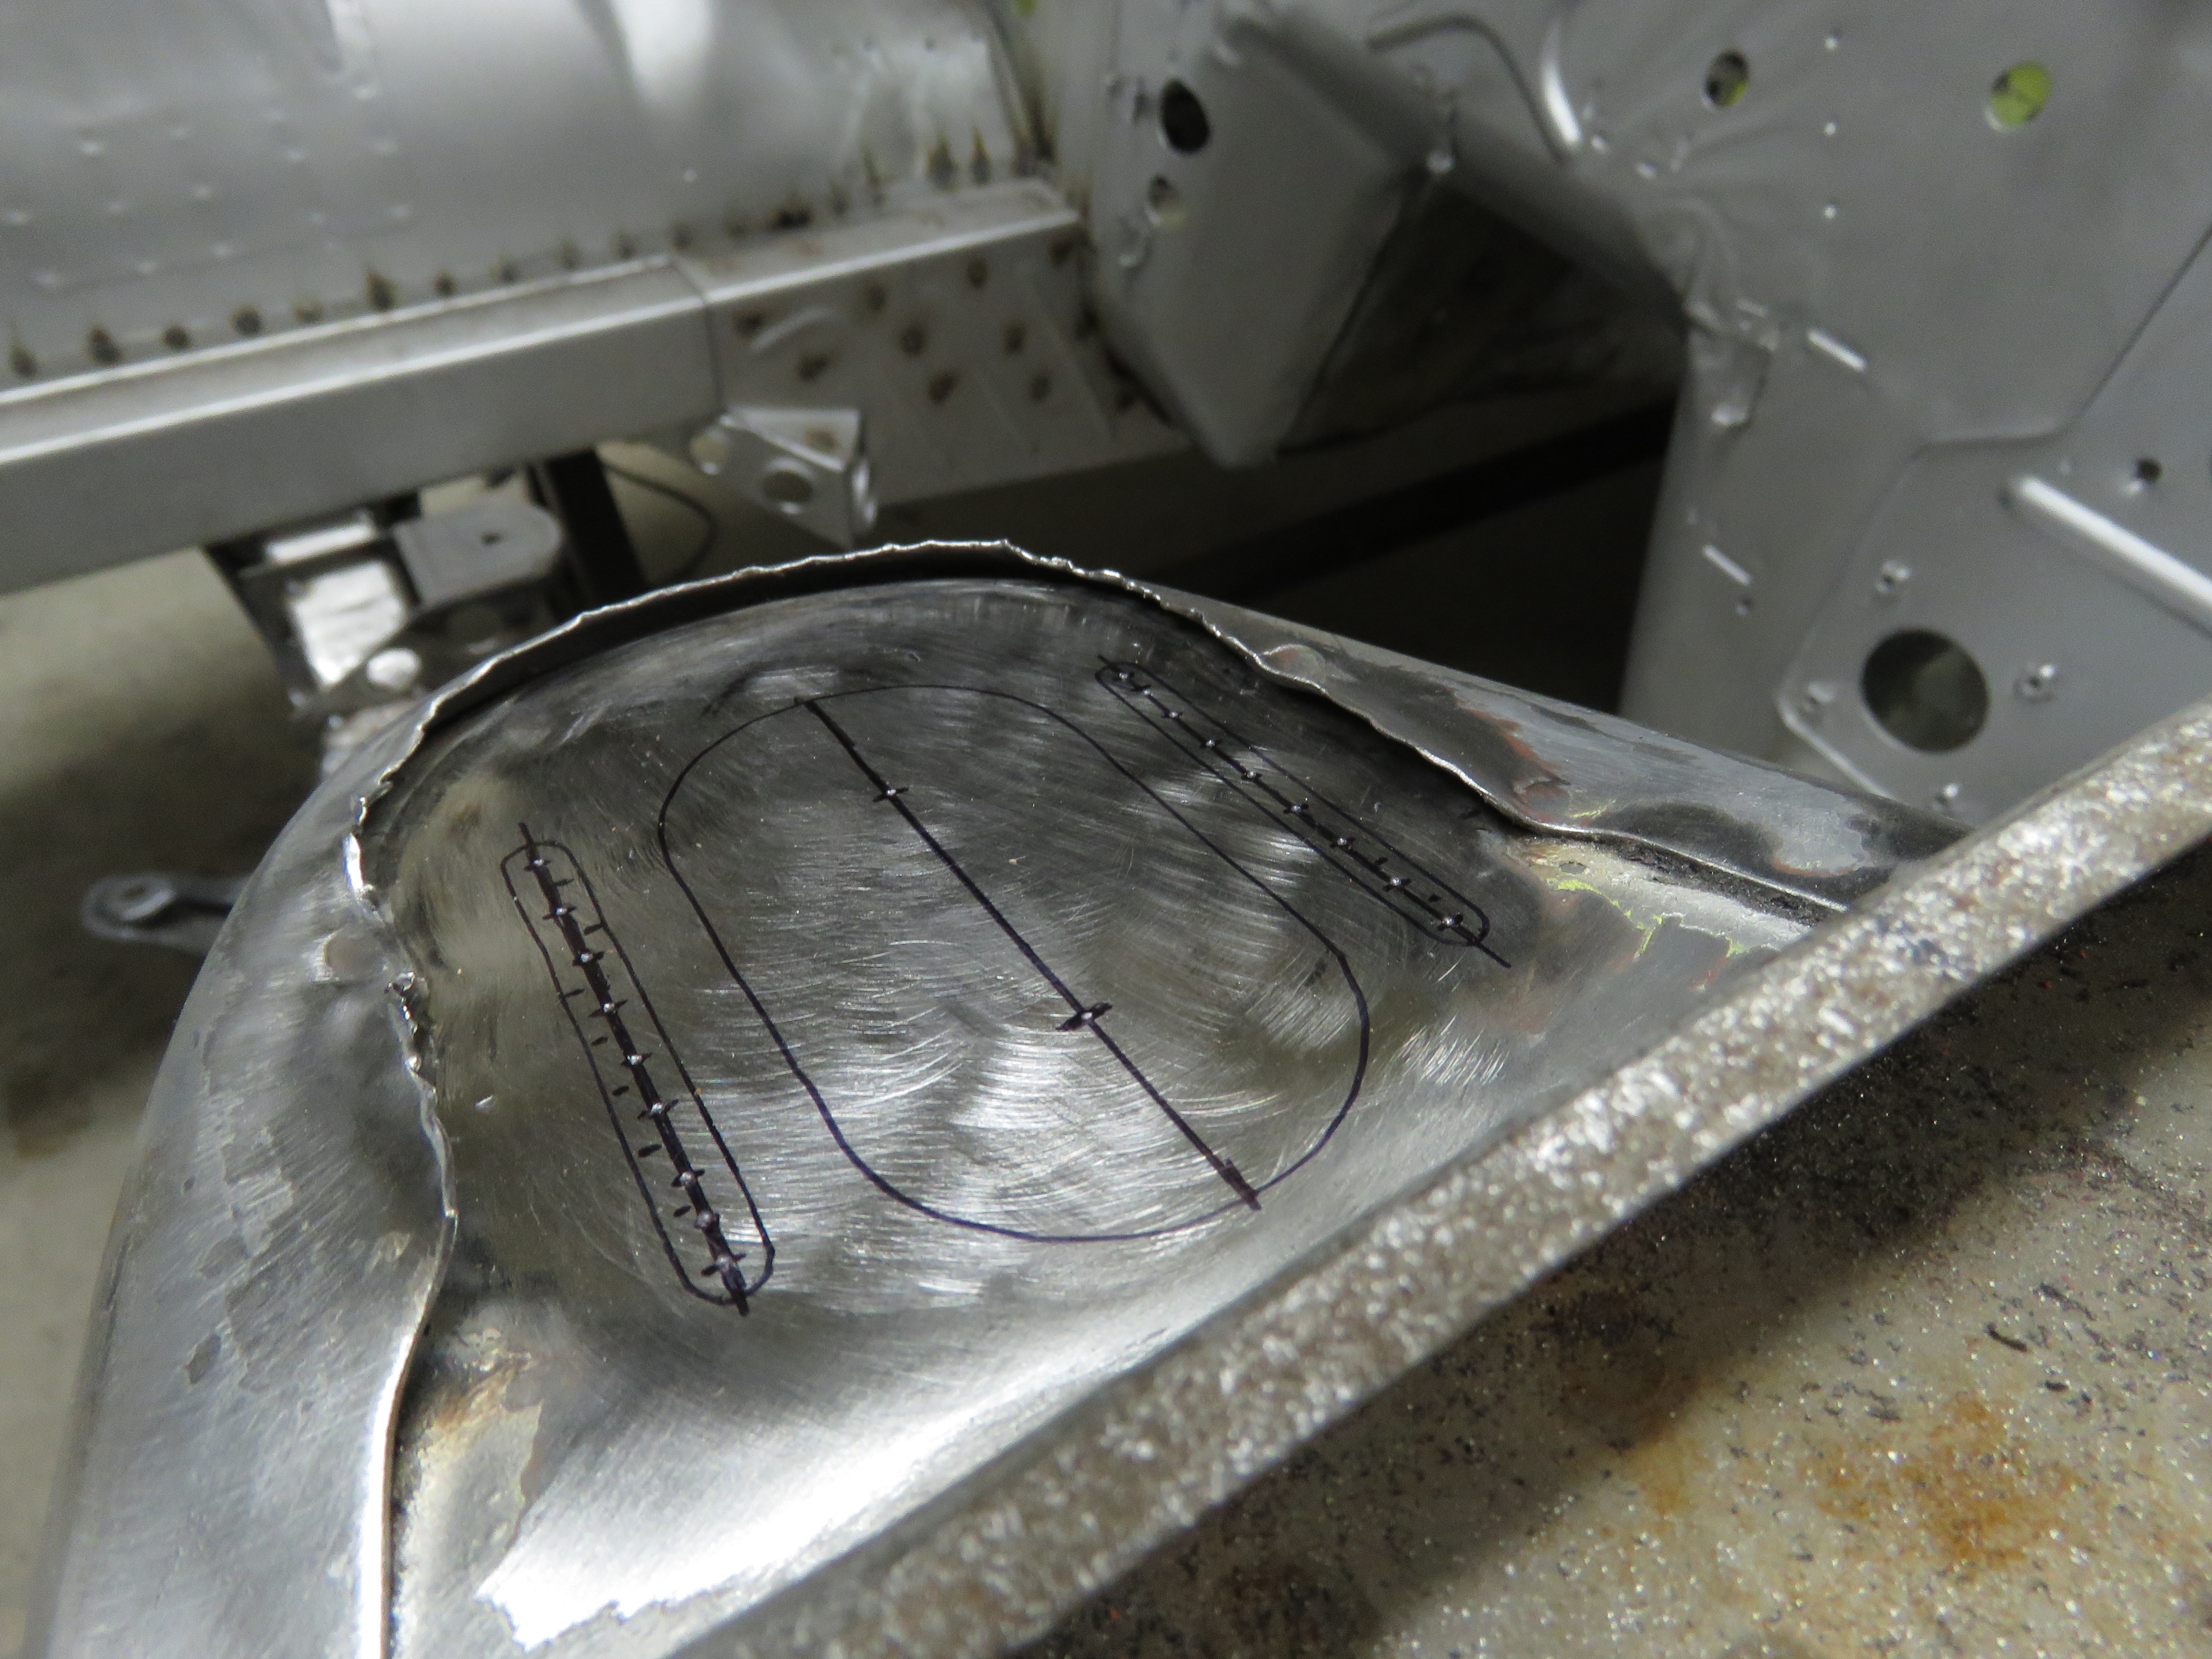
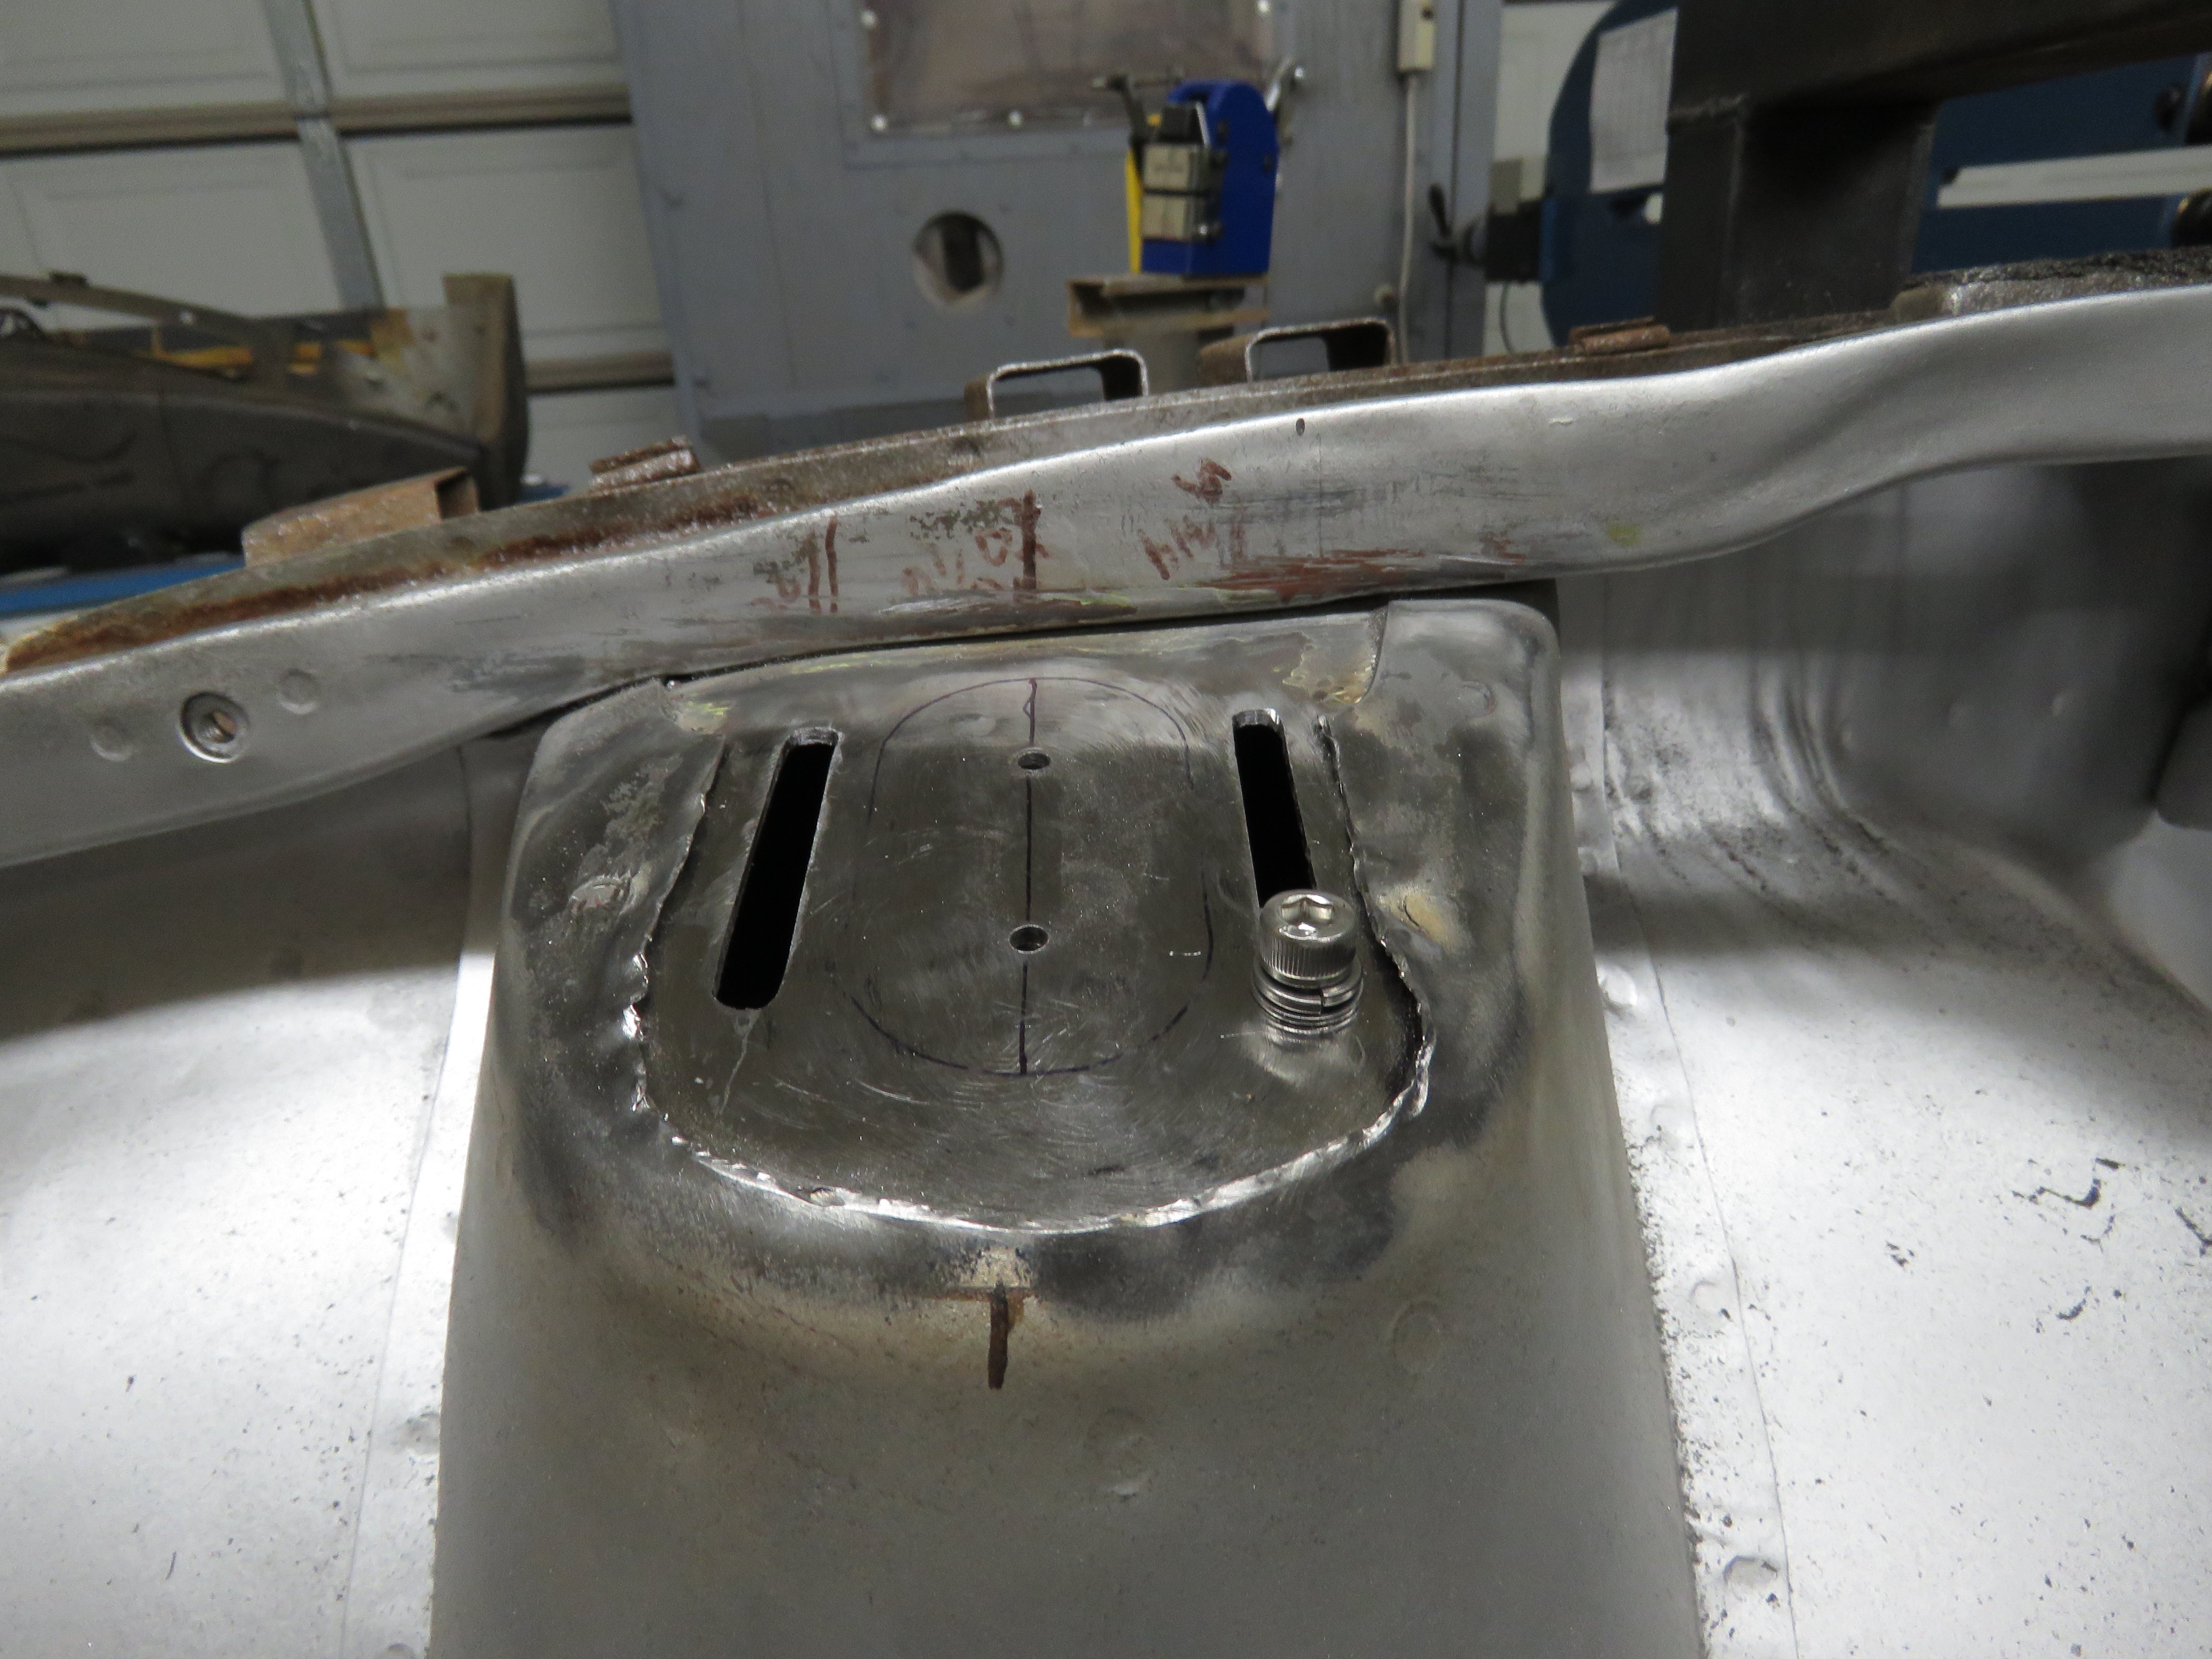
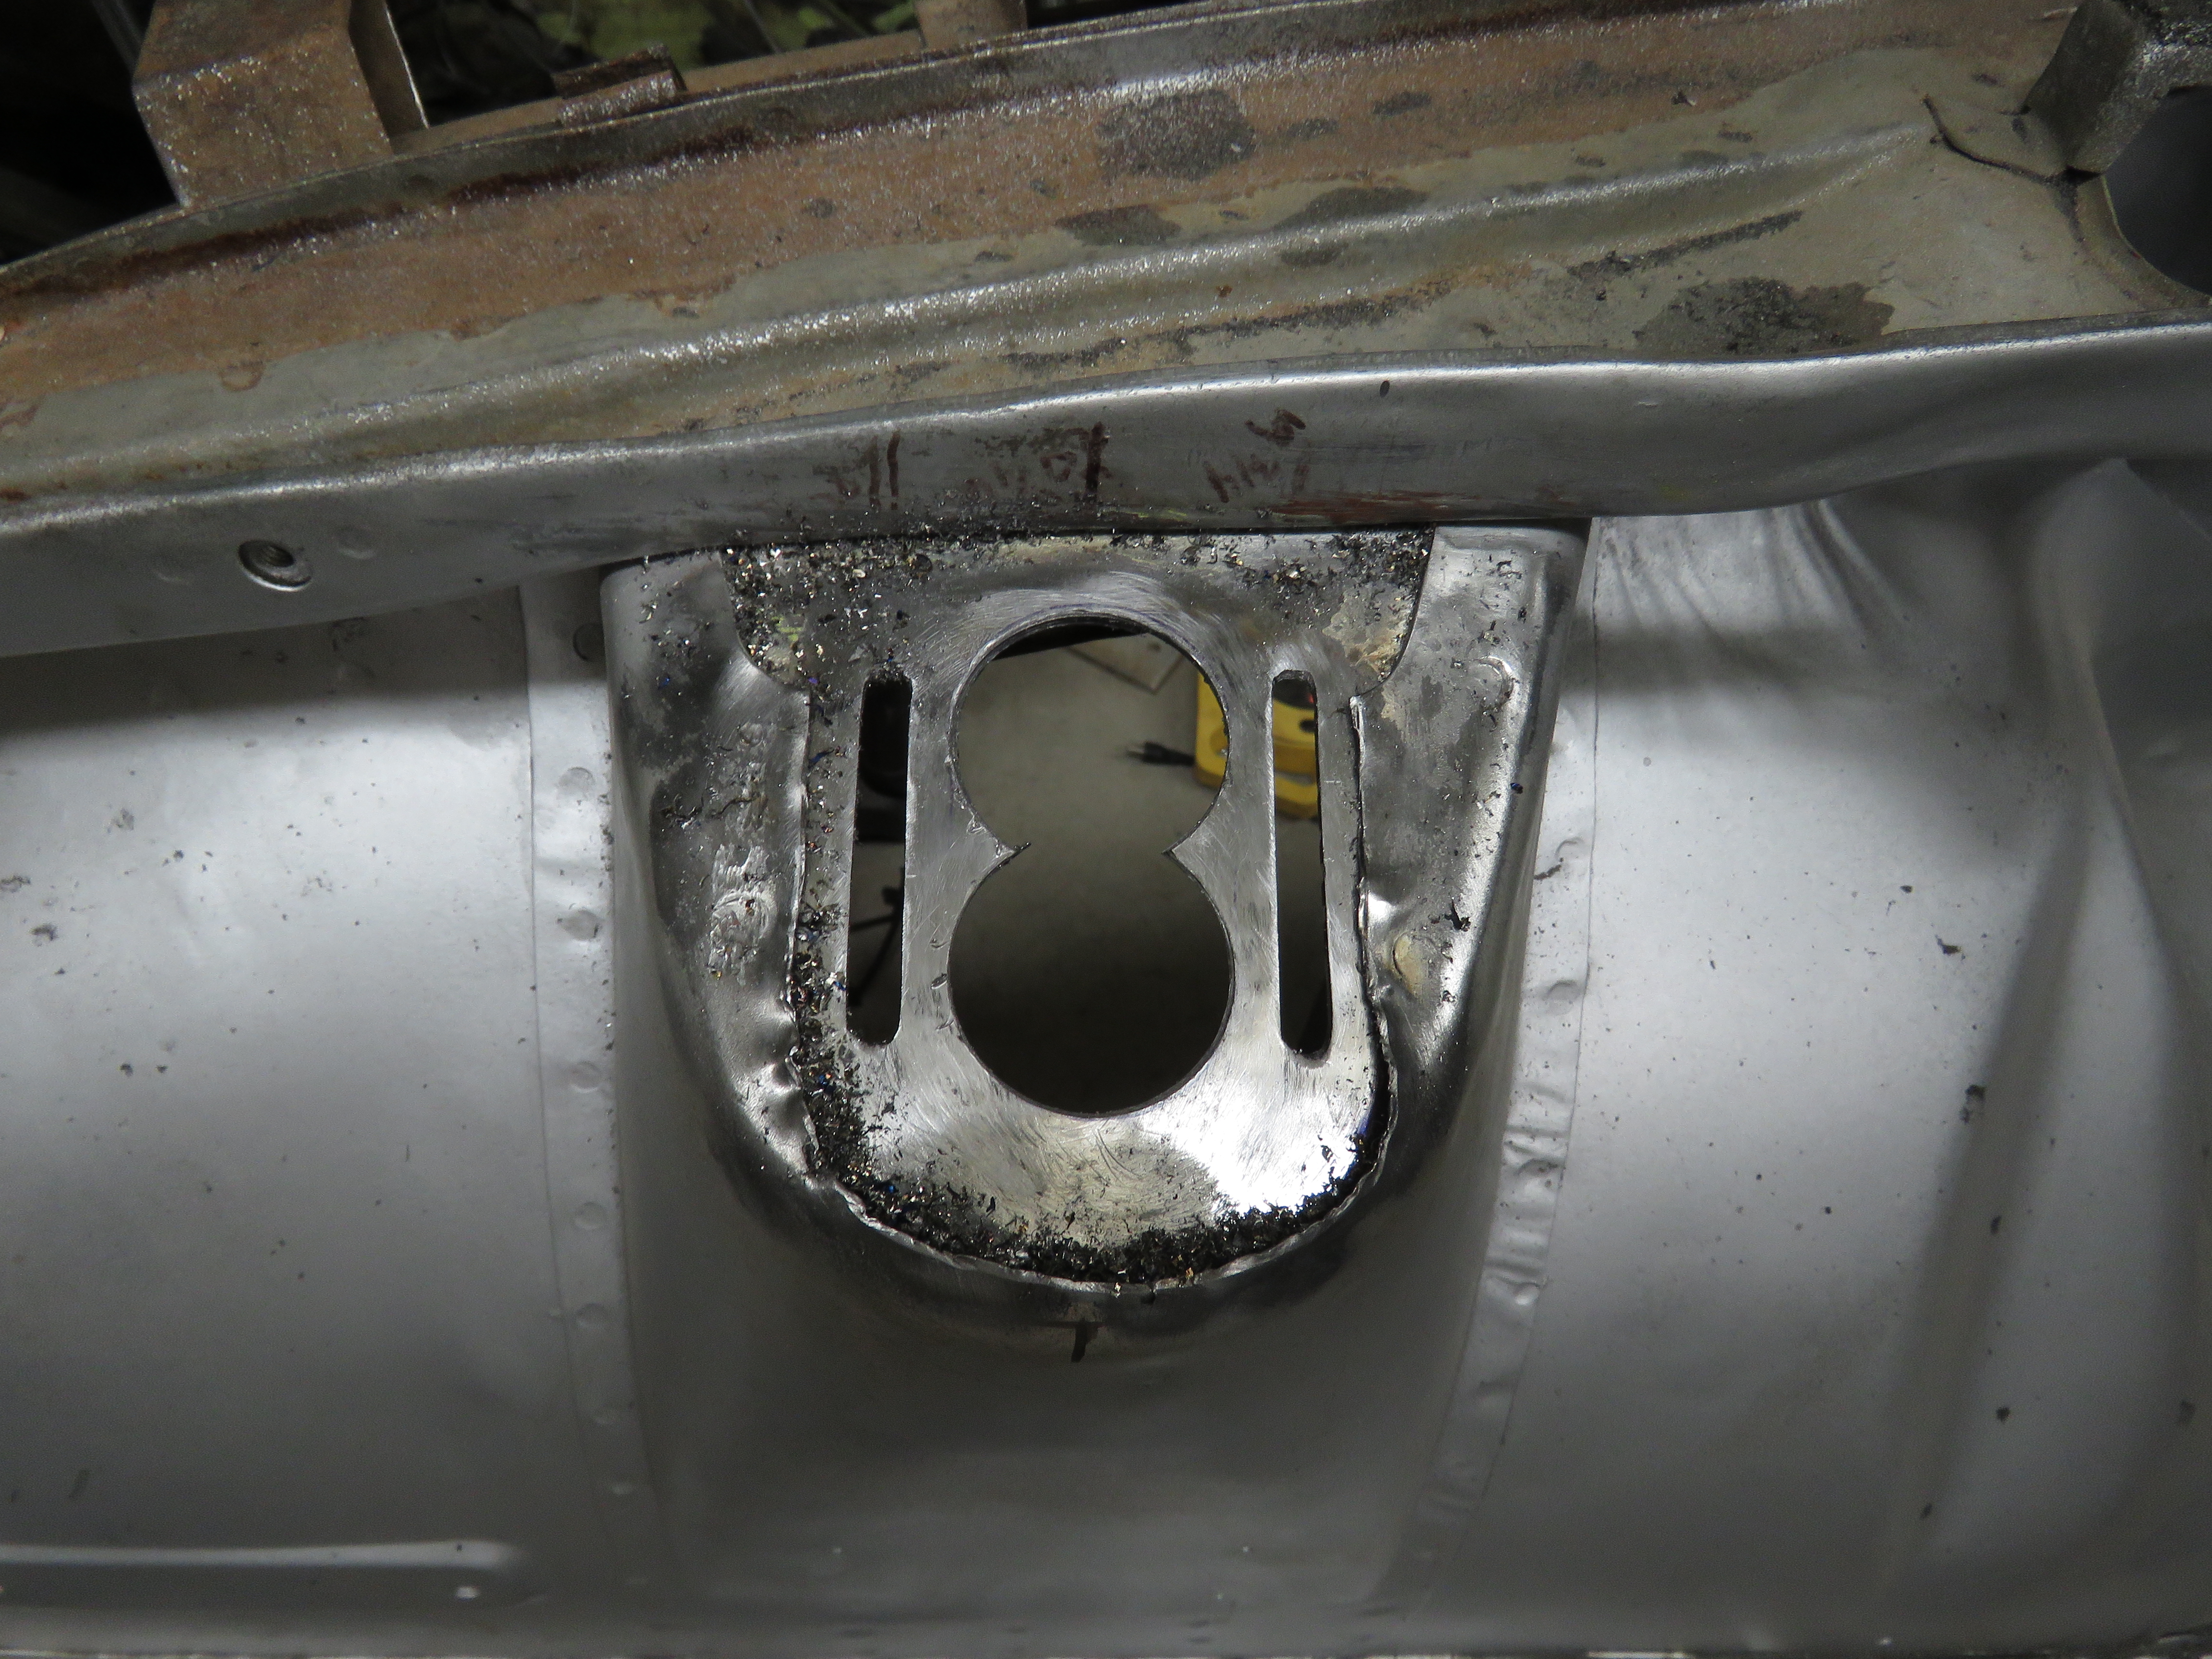
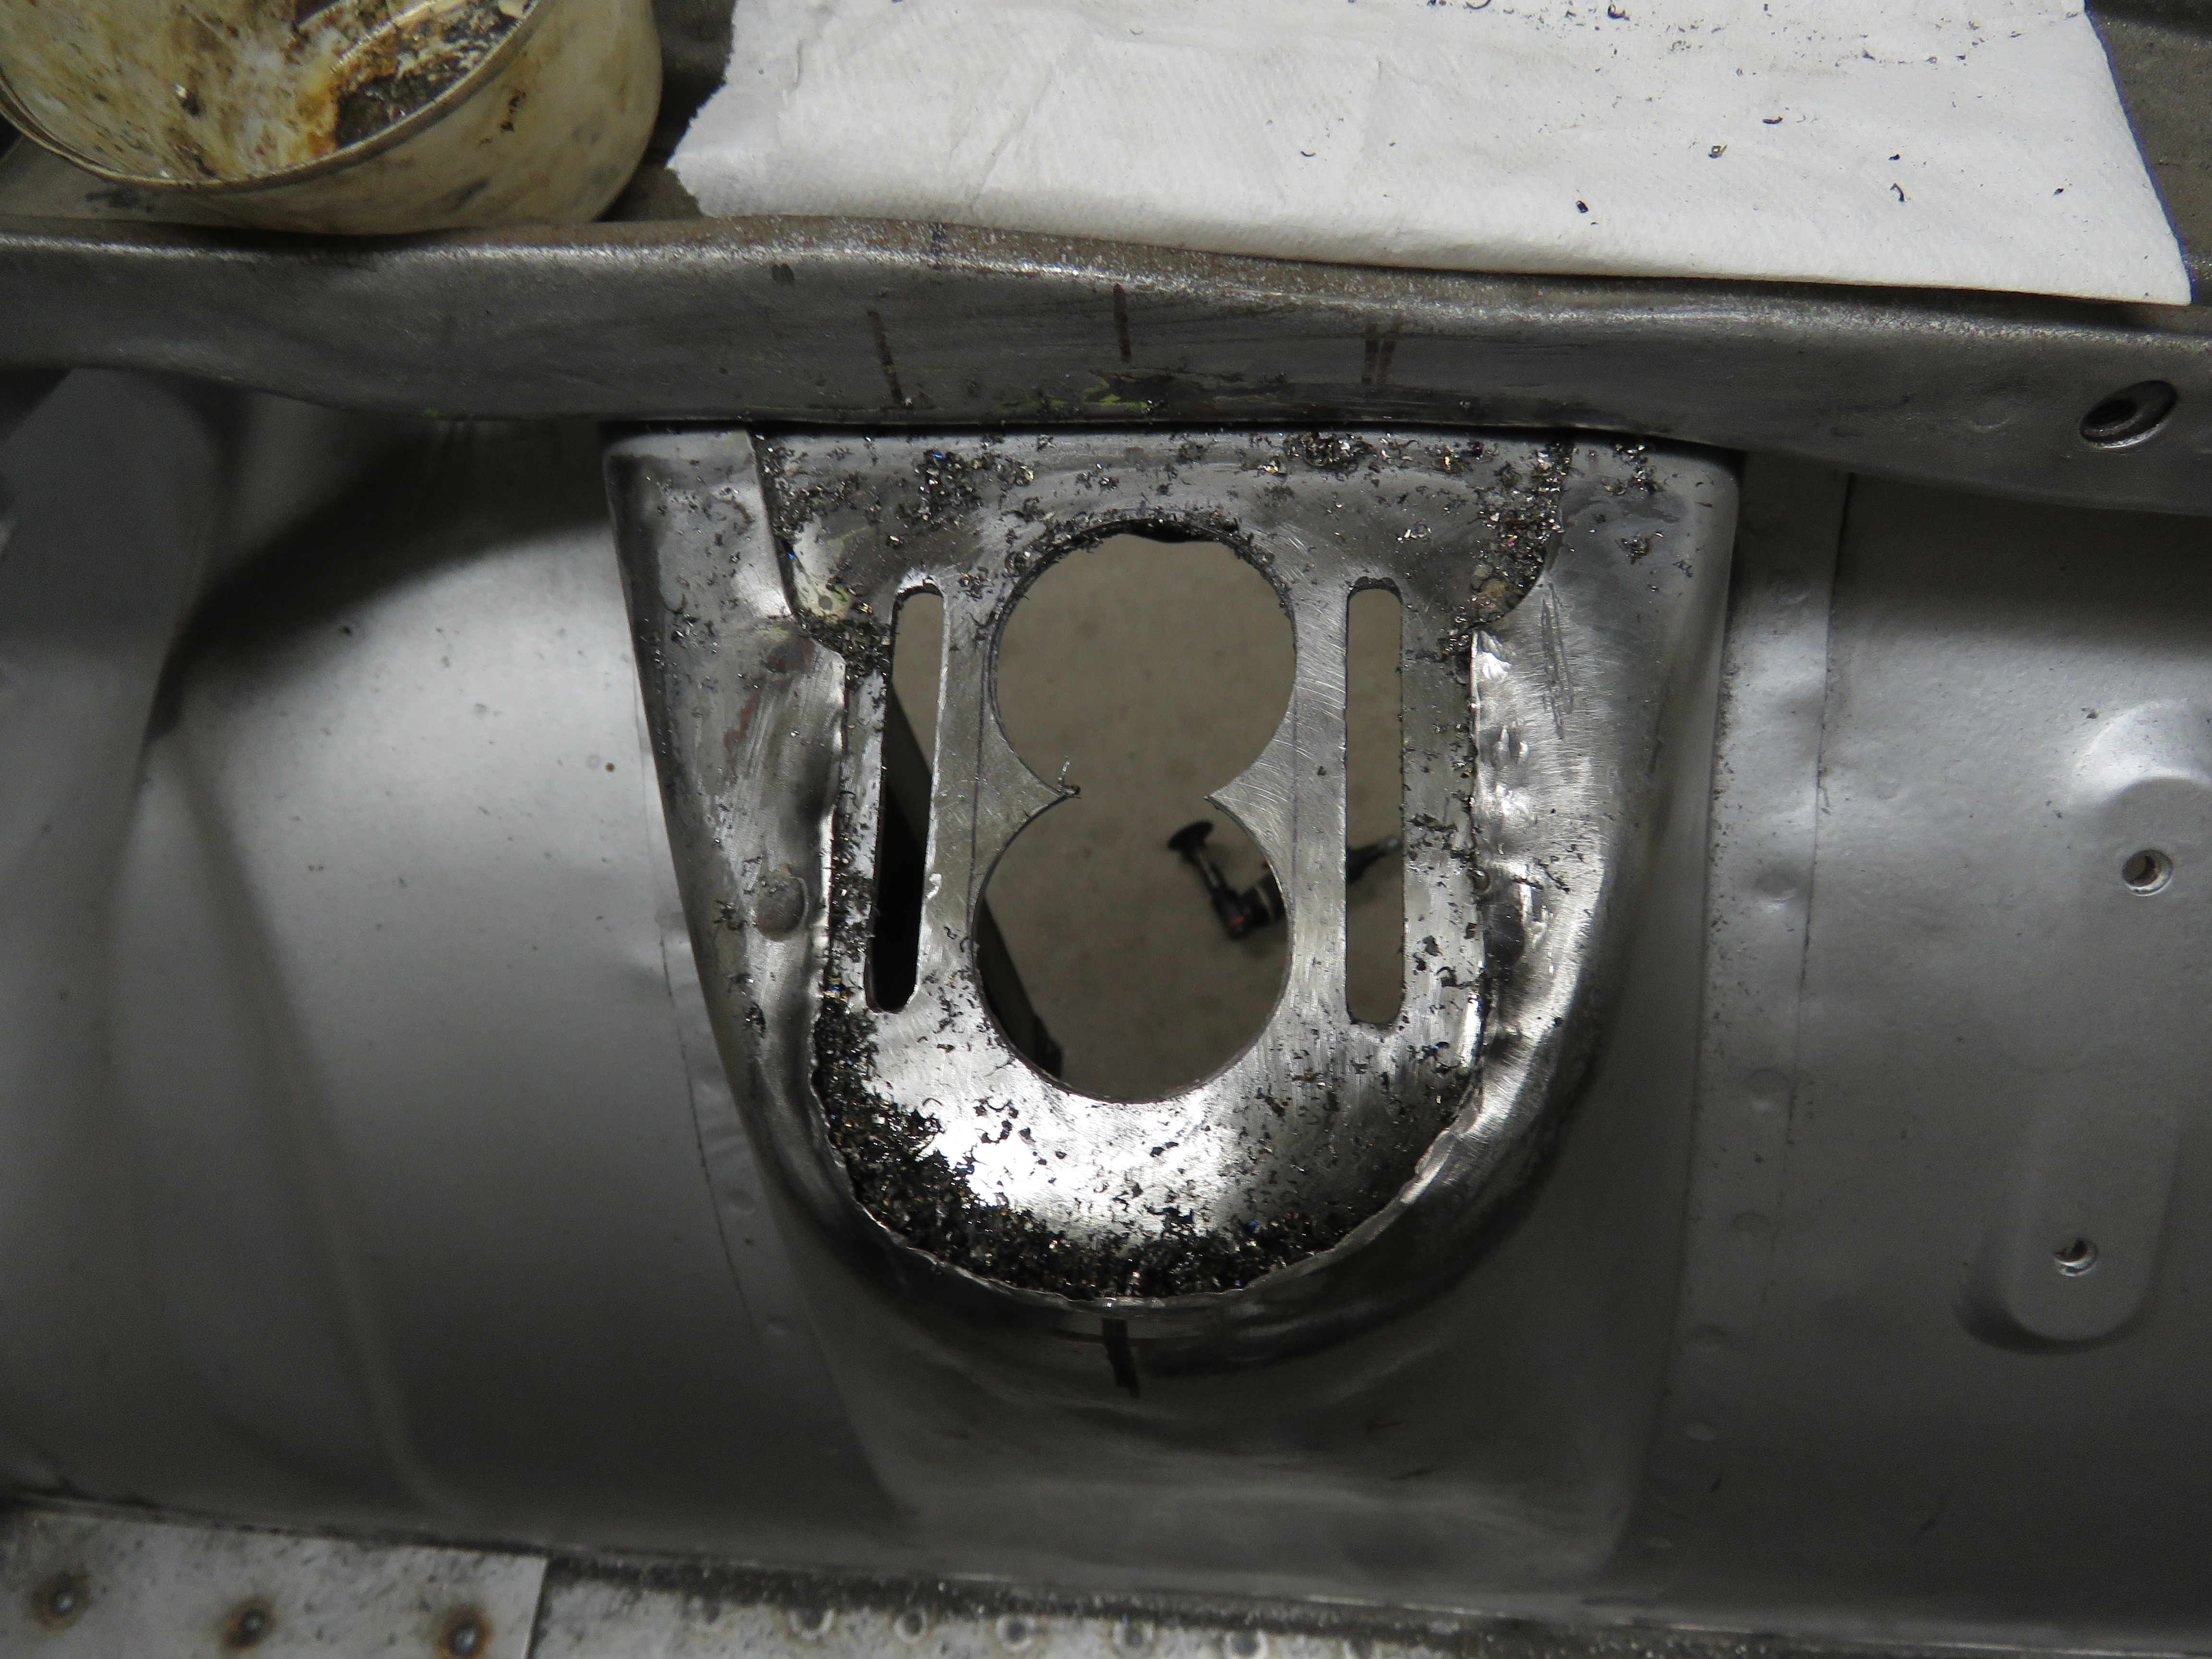
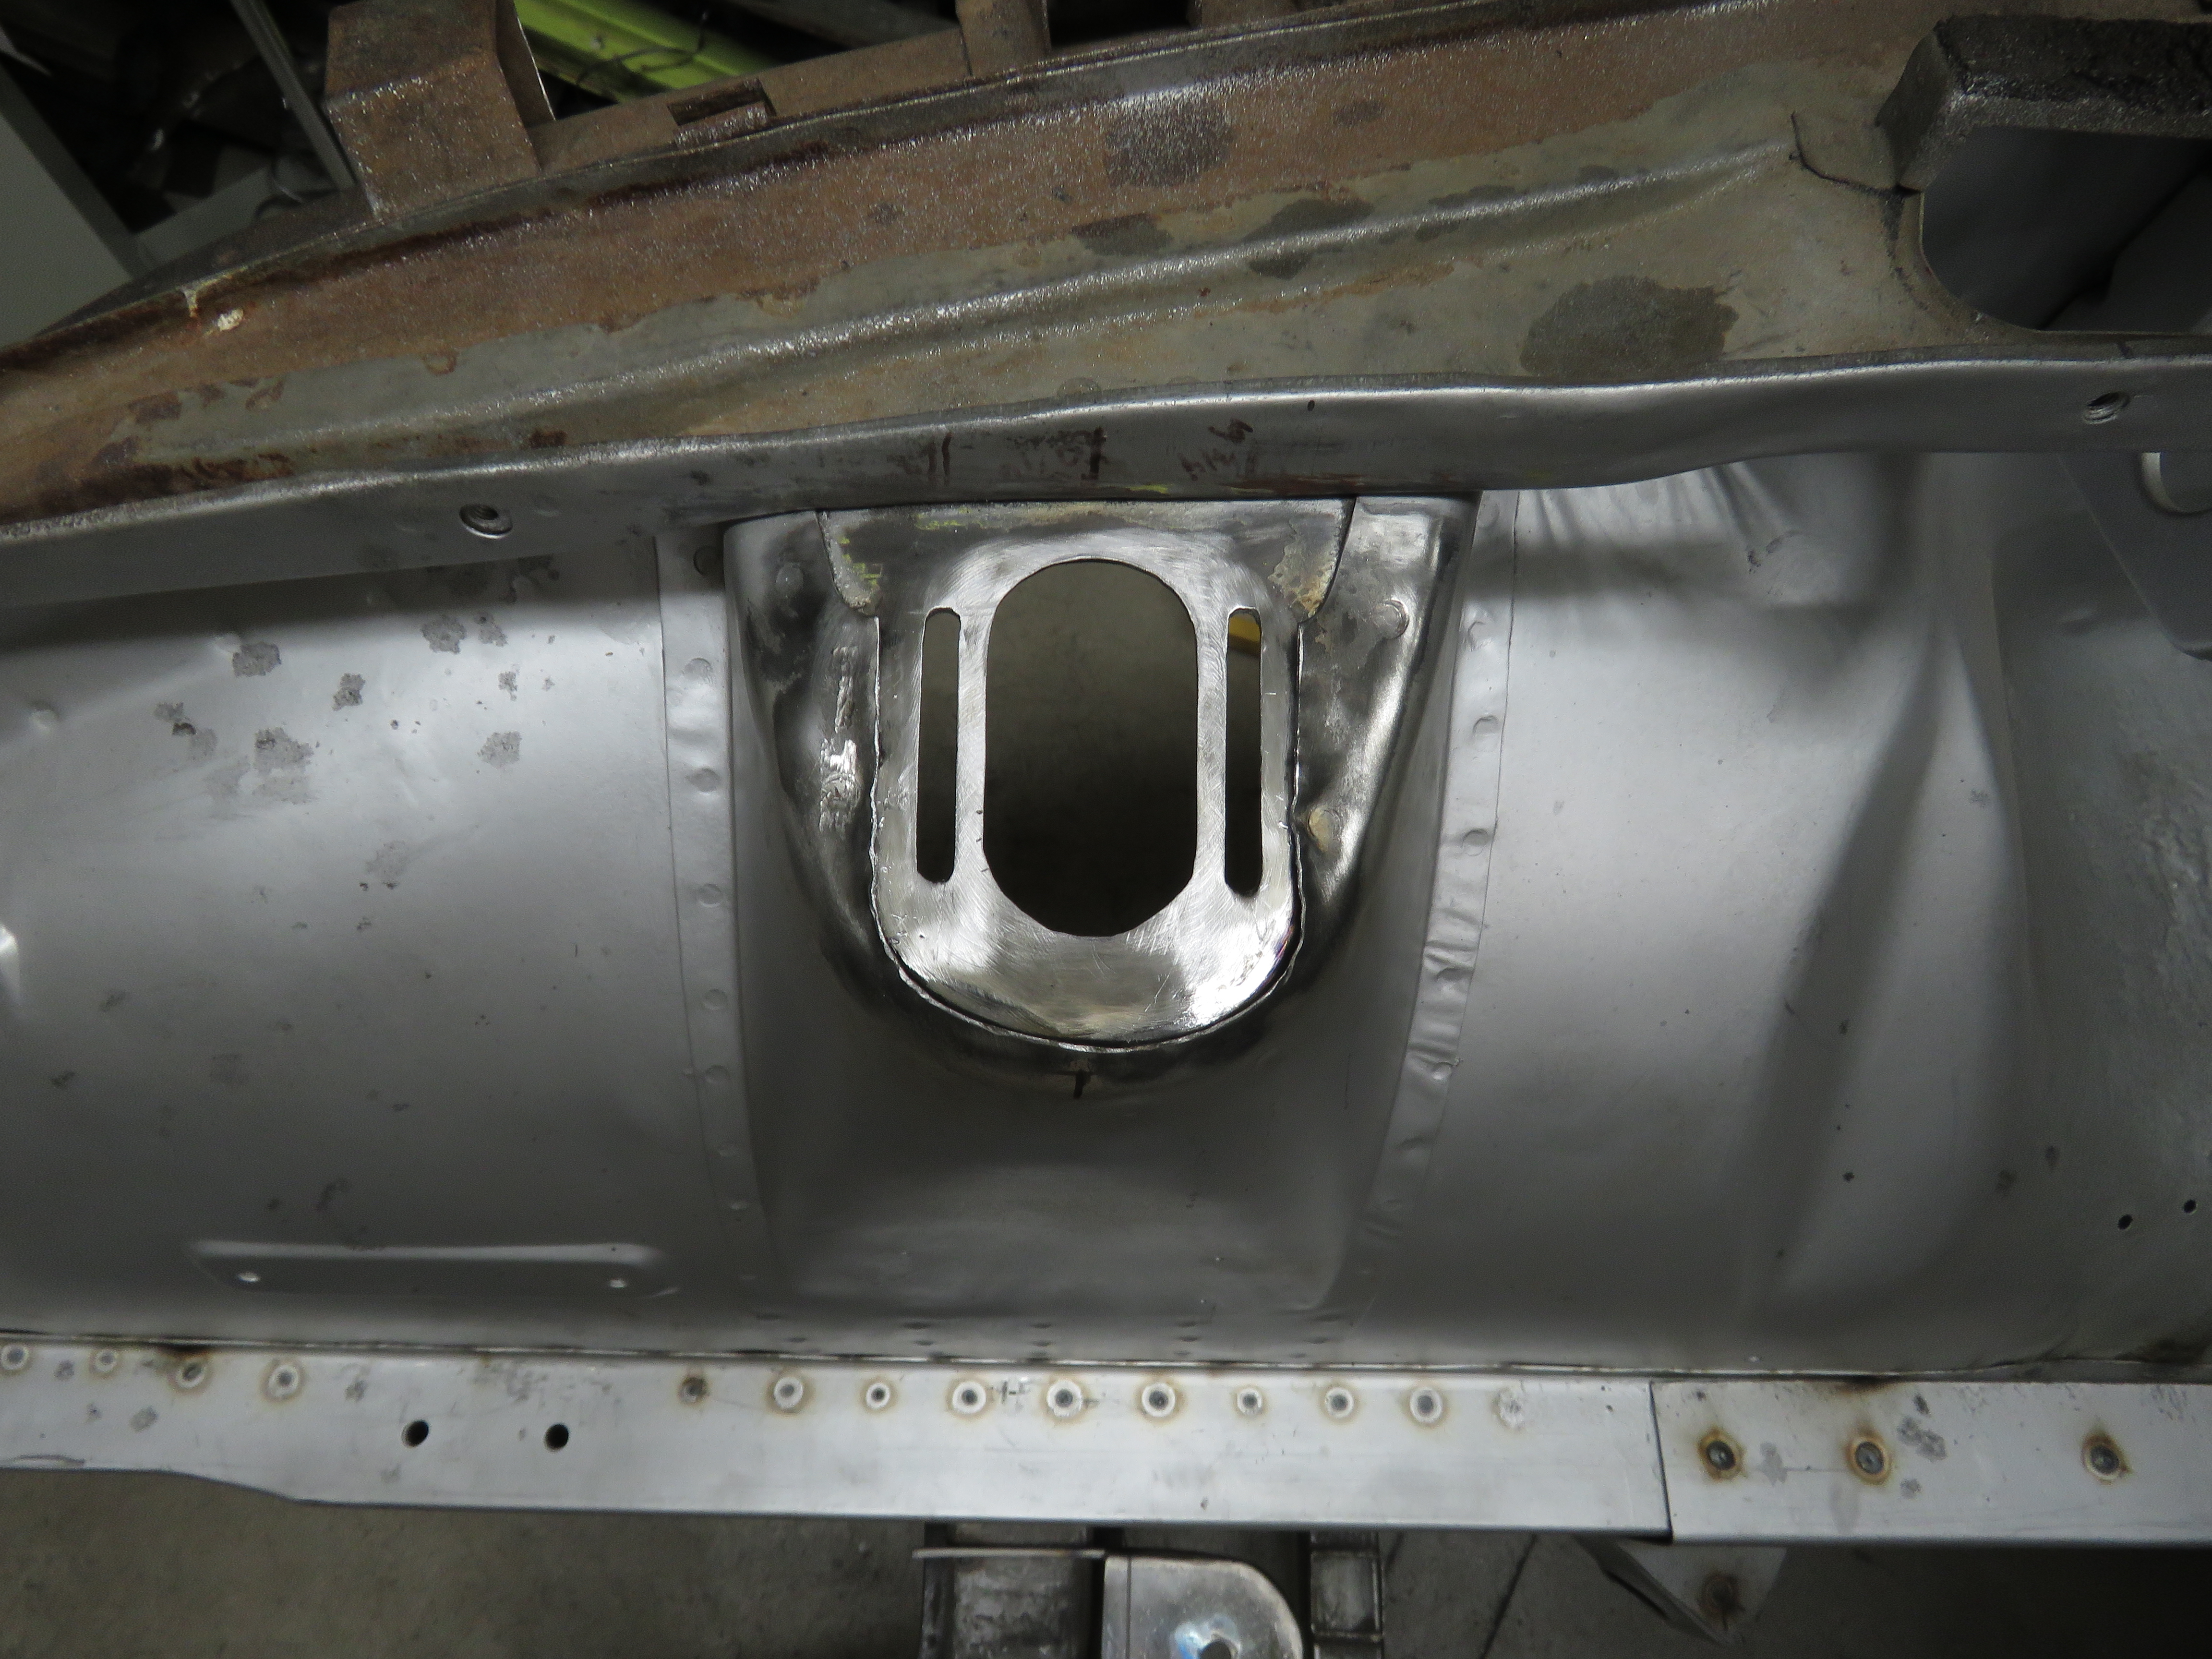
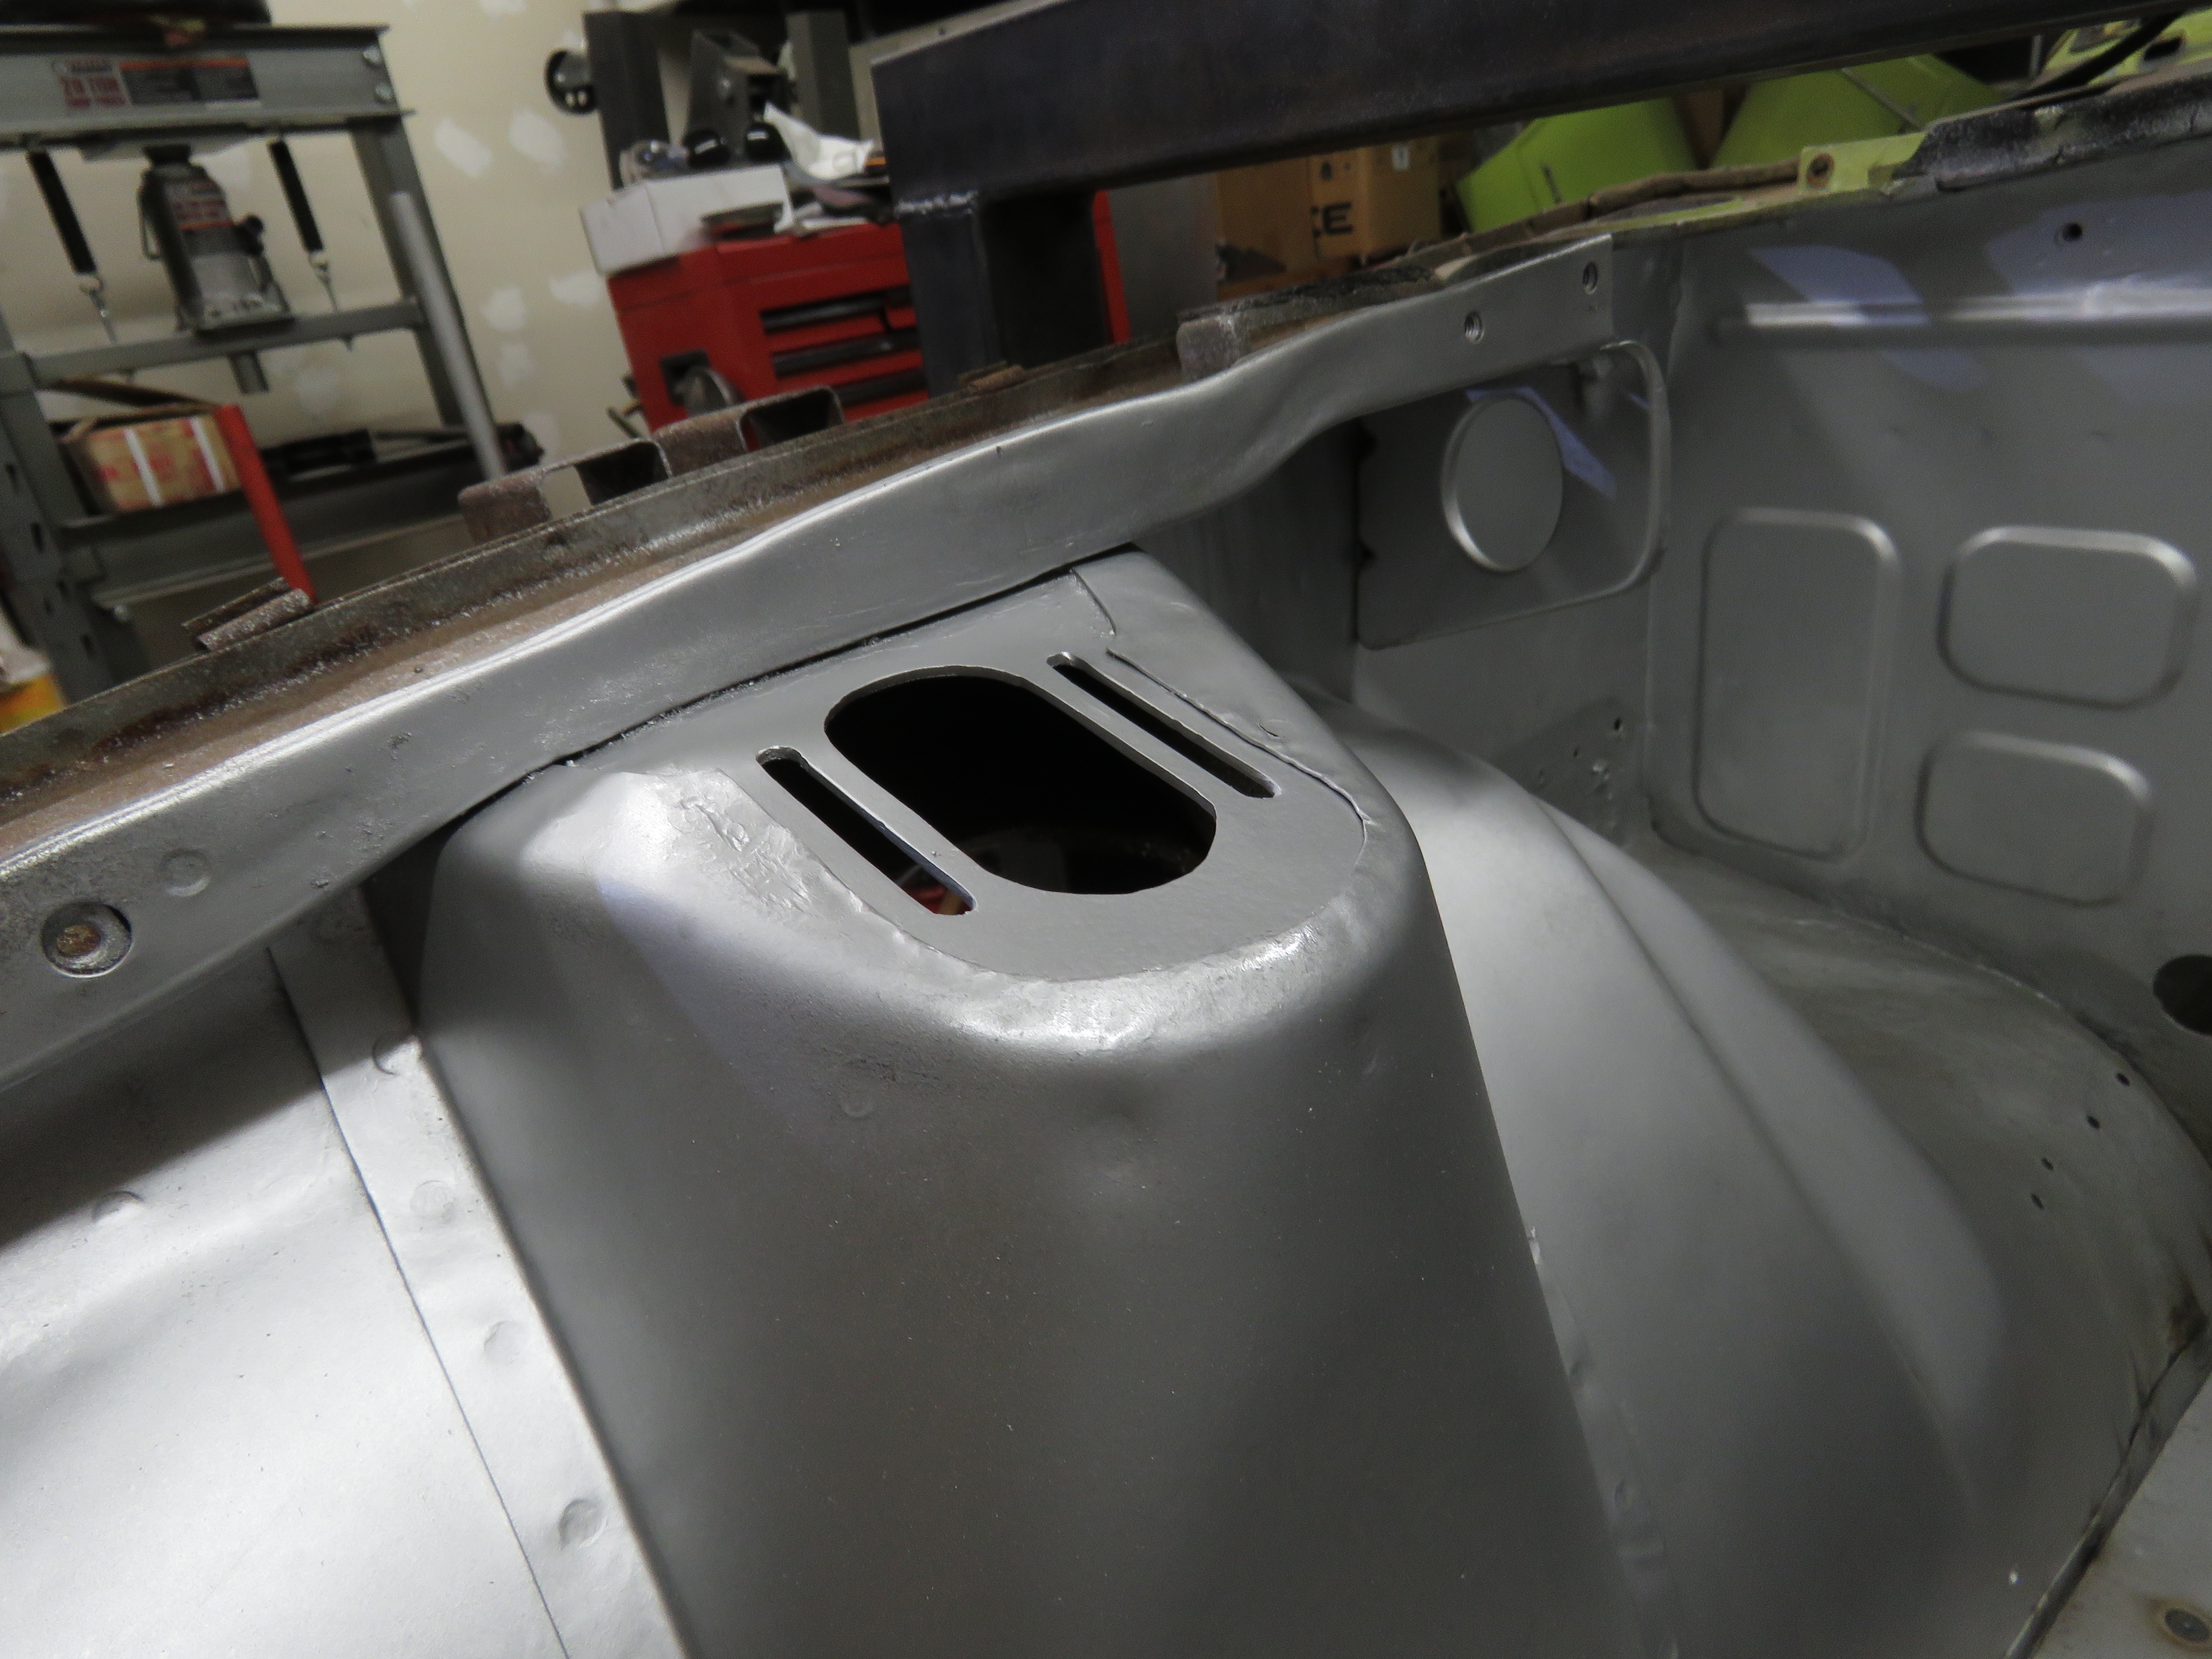
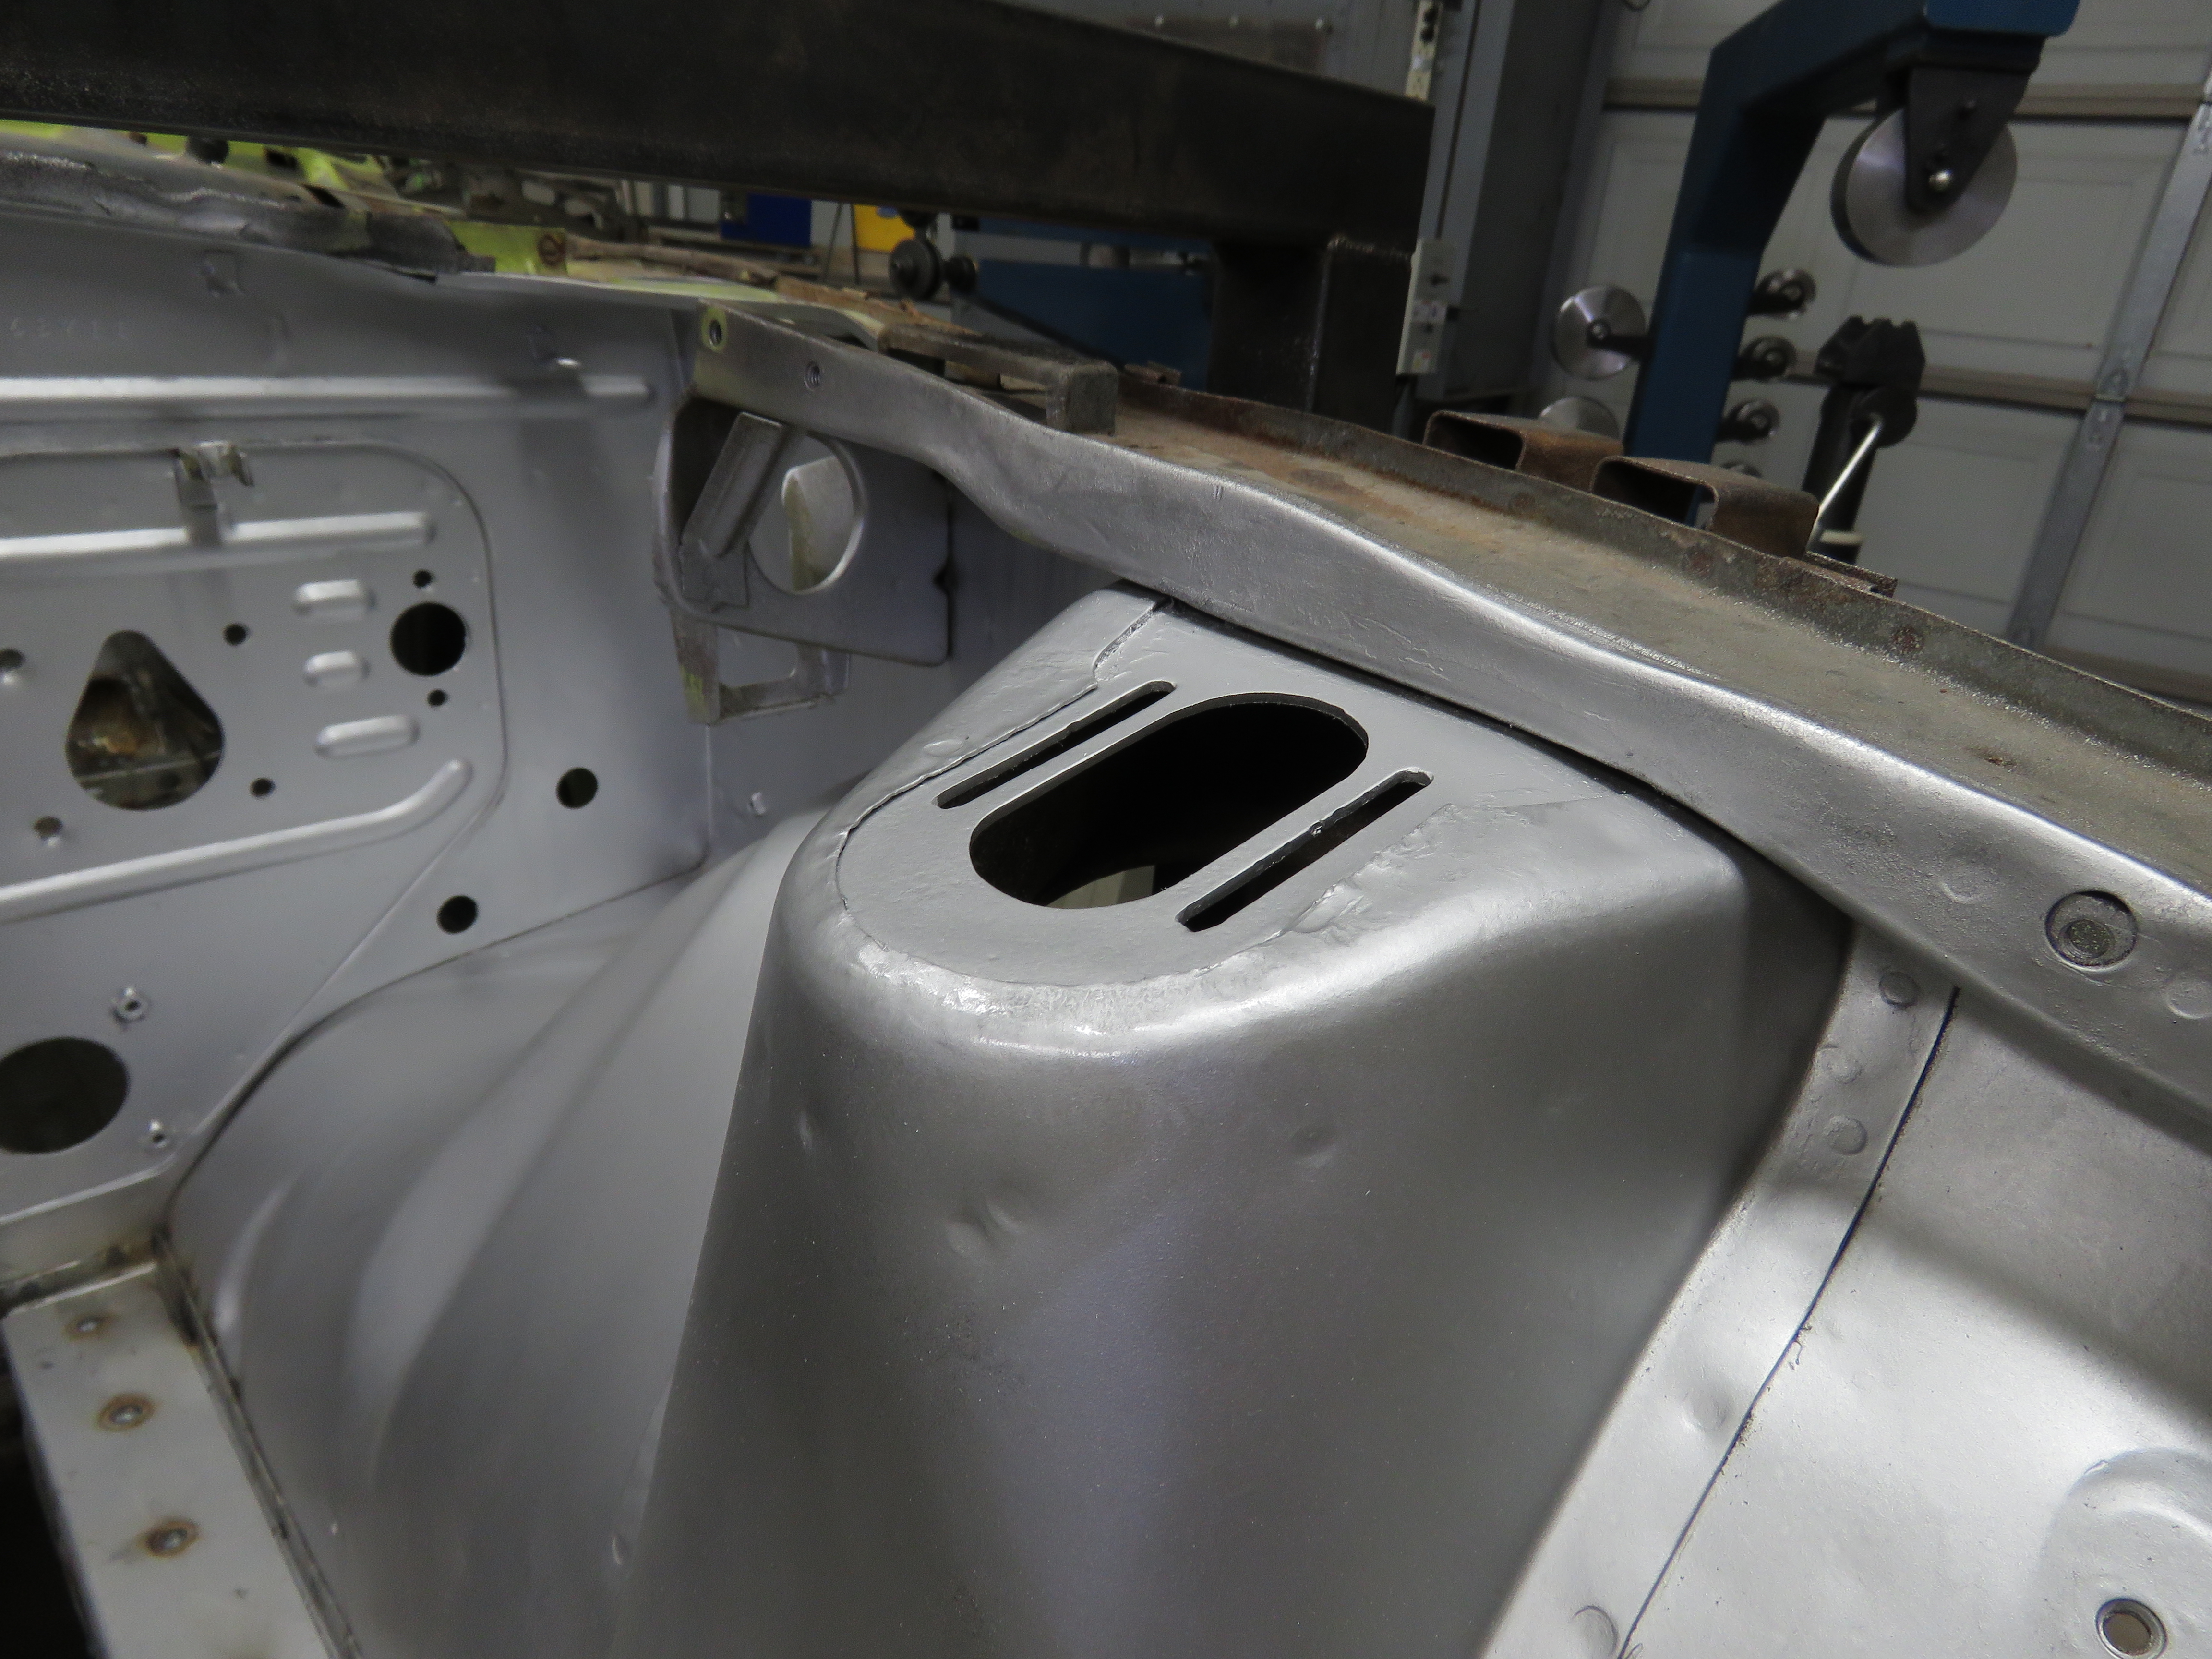
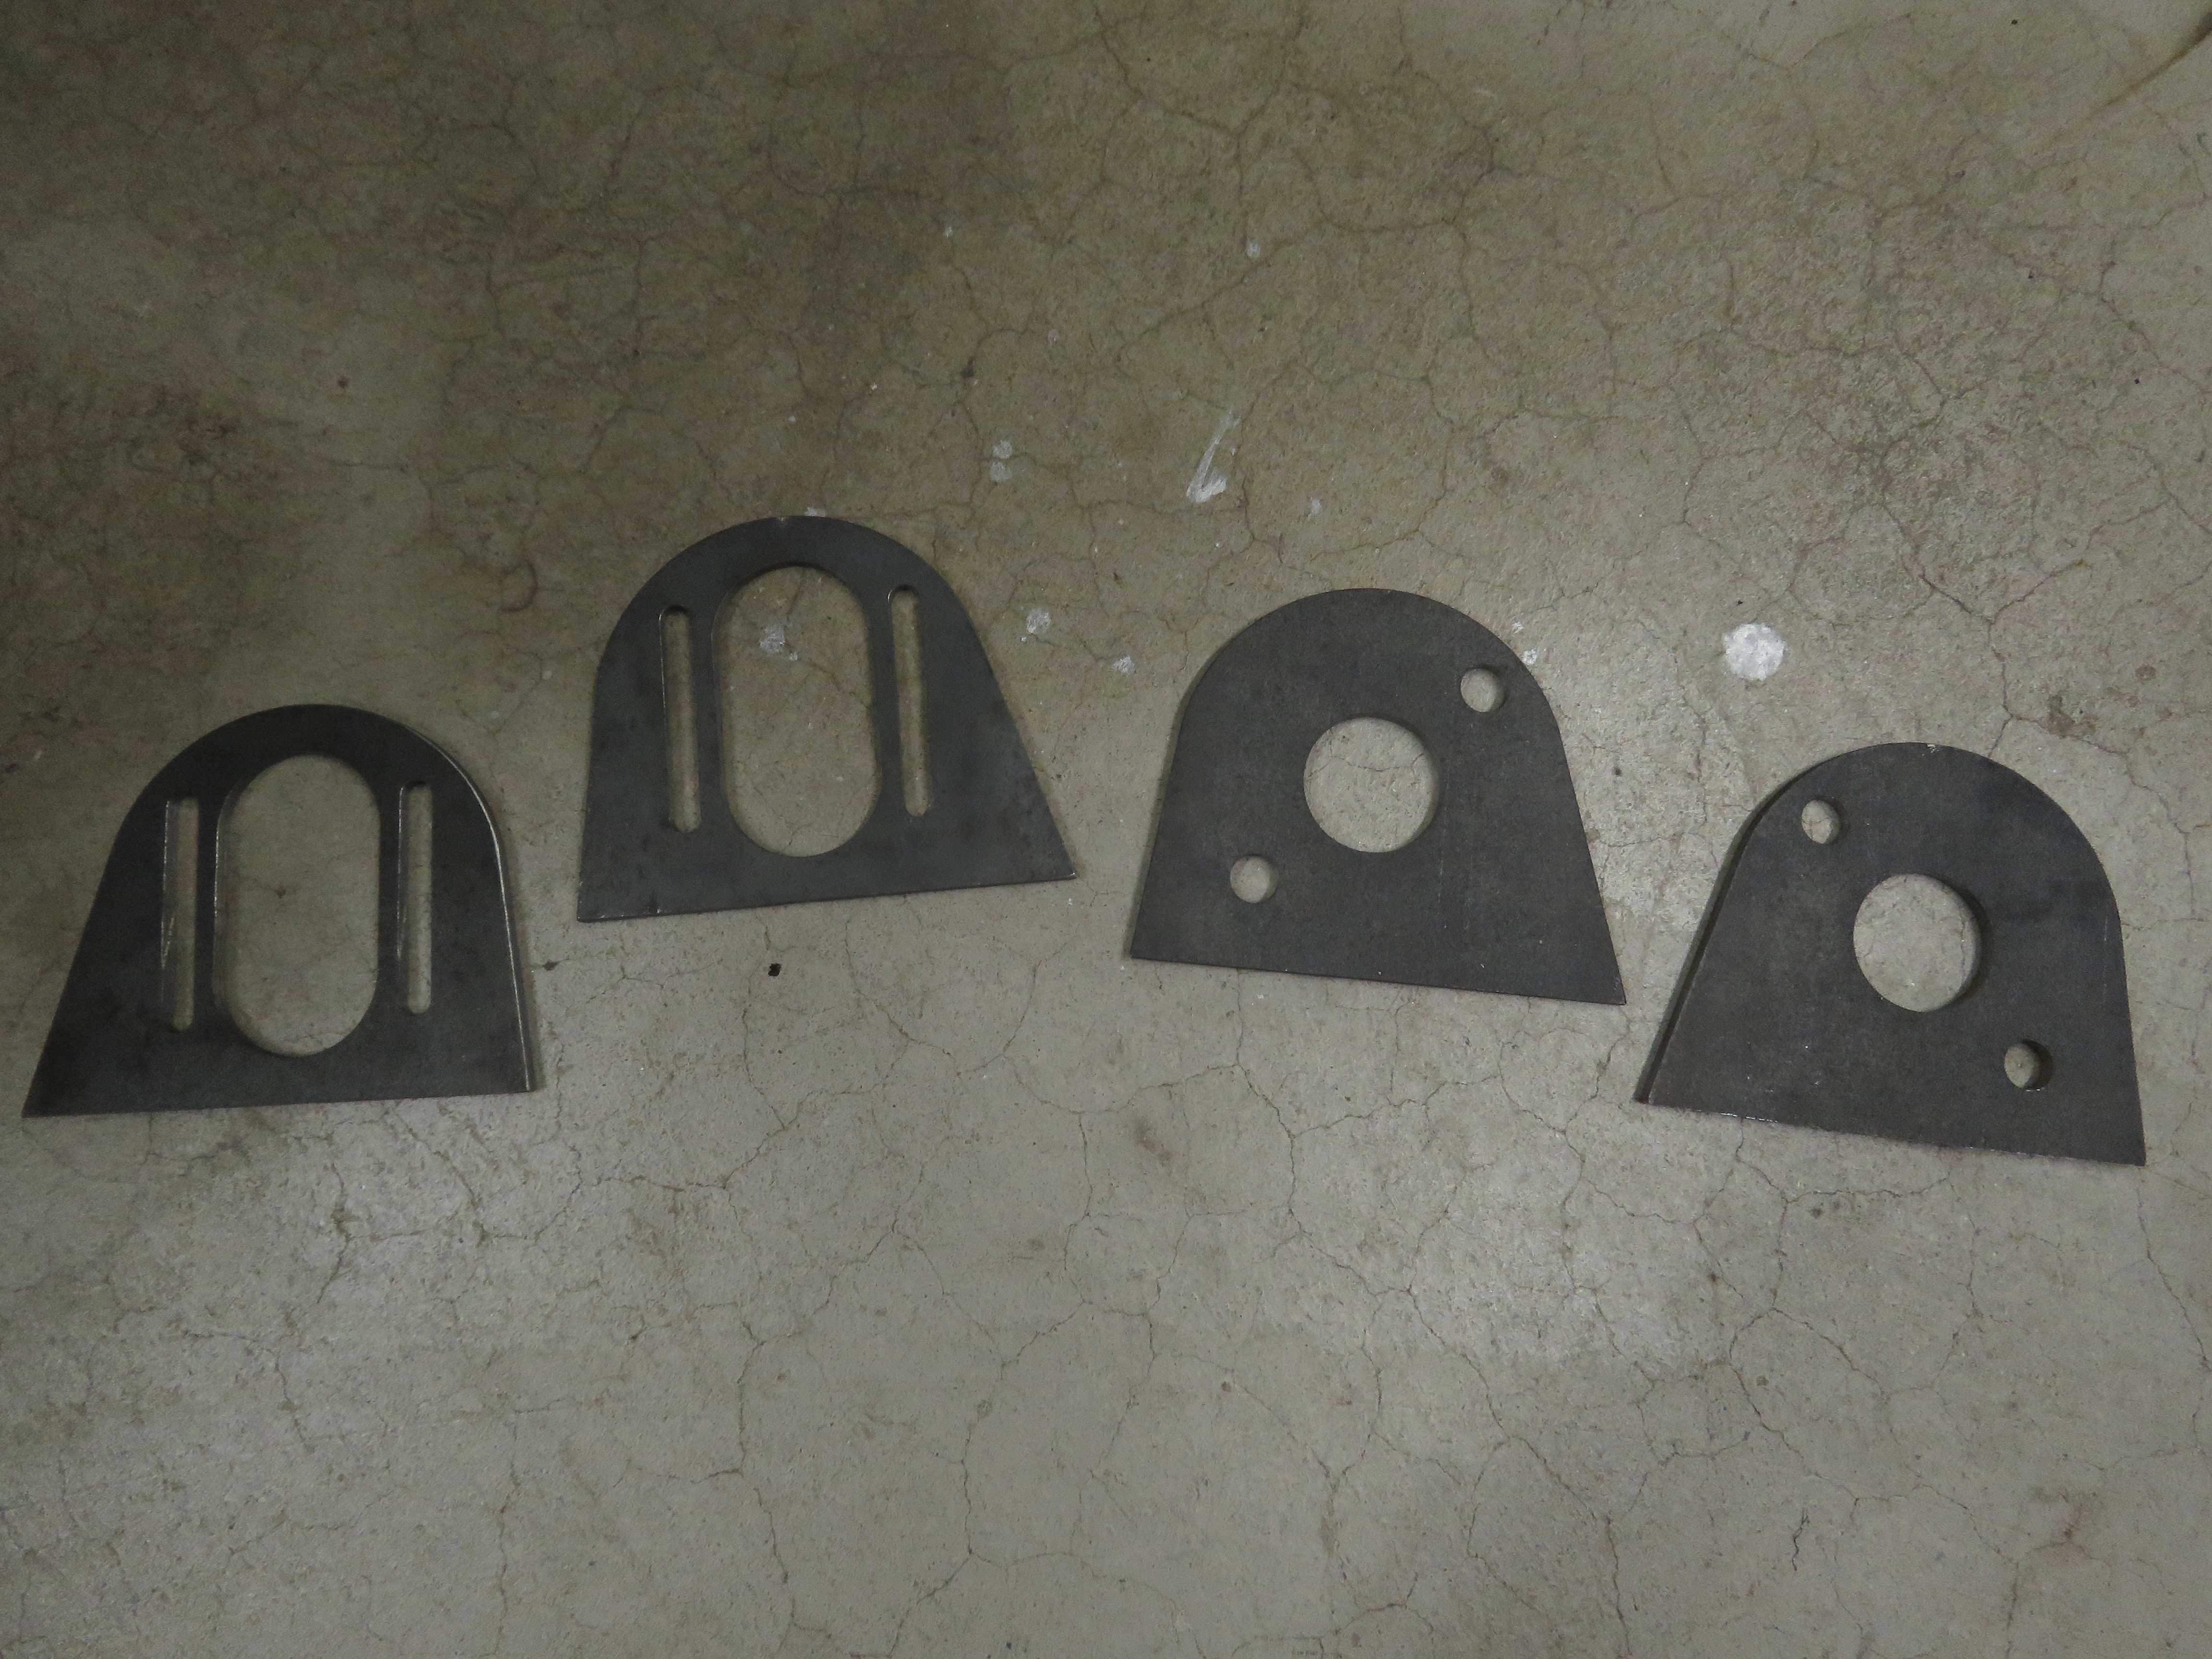
Thanks Robert. Hopefully your situation wont be as bad as we are thinking. It really is a lot of work repairing the rockers. I should be around when time comes if you do indeed need inner rockers. So I am thinking about offering Seat brackets, floor pans and maybe floor rails along with my inner rocker panels. As of now, I am wanting to offer seat brackets first. Pictures below are what the seat brackets will most likely look like. The pictures are from my 240z. I am not sure on price yet. These will be made from 16g CRS. which is a tad bit thicker than stock or same thickness. I may offer the first set of seat brackets to someone for a killer deal just because I need to know how well the fitment is as I dont know anyone local or have another 240z to test fit and my car is already installed. PM if you are interested in this offer. Below are pictures of what the Floor pans will kind of look like. Above are some pictures as well. I want to first get the tunnel side of the pans figured out. These will be made from 20g CRS which is the same thickness as stock. 18G is to thick to match up with the stock thickness of the tunnel. The pans will also have the stepped lip on the front and rear just like factory. I also need to figure out the little indention/pocket on the side towards the rocker panels. Not sure what it is but seems like the it came factory with it. Let me know if this would be wanted products. Thanks, Prospect-D https://bwpeck8.wixsite.com/prospect-d


-
Update: Made a quick little mickey mouse ghetto free website. You can also get a hold of me there too. https://bwpeck8.wixsite.com/prospect-d
-
Thanks Right on!!
-
jayem_bo Your Driver side set is pretty much ready, just need to give it a light coat of primer, however it is way to cold outside for me to coat it right now. Oh yeah, also need to make the seatbelt plate too.


-
I think your dash came out pretty good. You ever thought about adding on to the dash, like another gauge pod or anything else. What about wrapping in a black suede? I guess that would require stitching as well. Also not sure how well it would hold up over the years.
-
I almost forgot how much work was involved when doing these types of repairs until I look at your thread to remind me. Now I get to be the one to say man you are nuts and brave to tackle on a project like this. Good to see that your making progress on it. I've been so busy with work for awhile I dont have the motivation to get things done with my project. Keep it up!!
-
Messaged replied. Thanks and let me know when your ready. In the future anyone reading this post and is interested in buying a set, the best way to contact me is by email: djepy0n@hotmail.com, I dont get on the forums all the time so the quickest way to get a hold of me is by email.
-
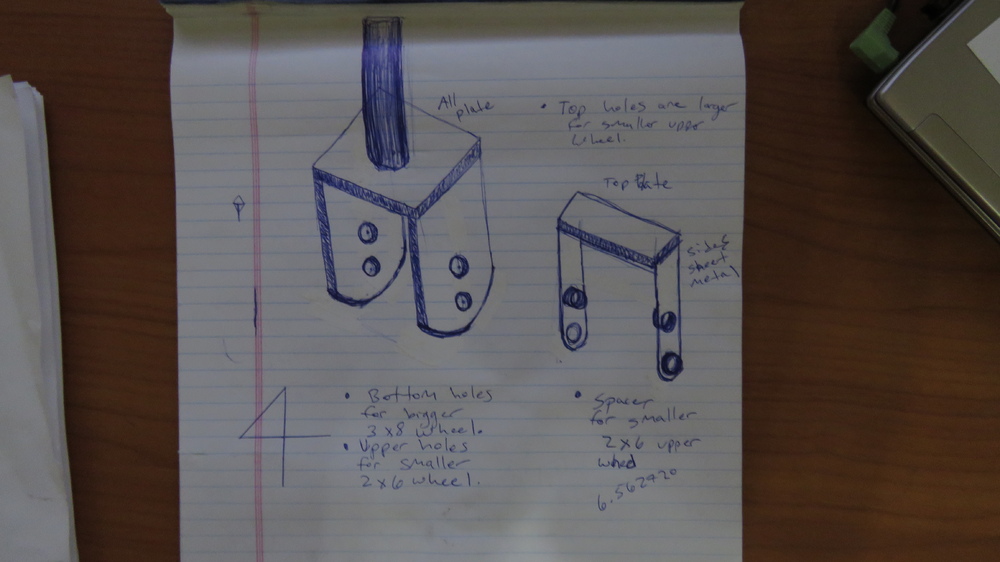
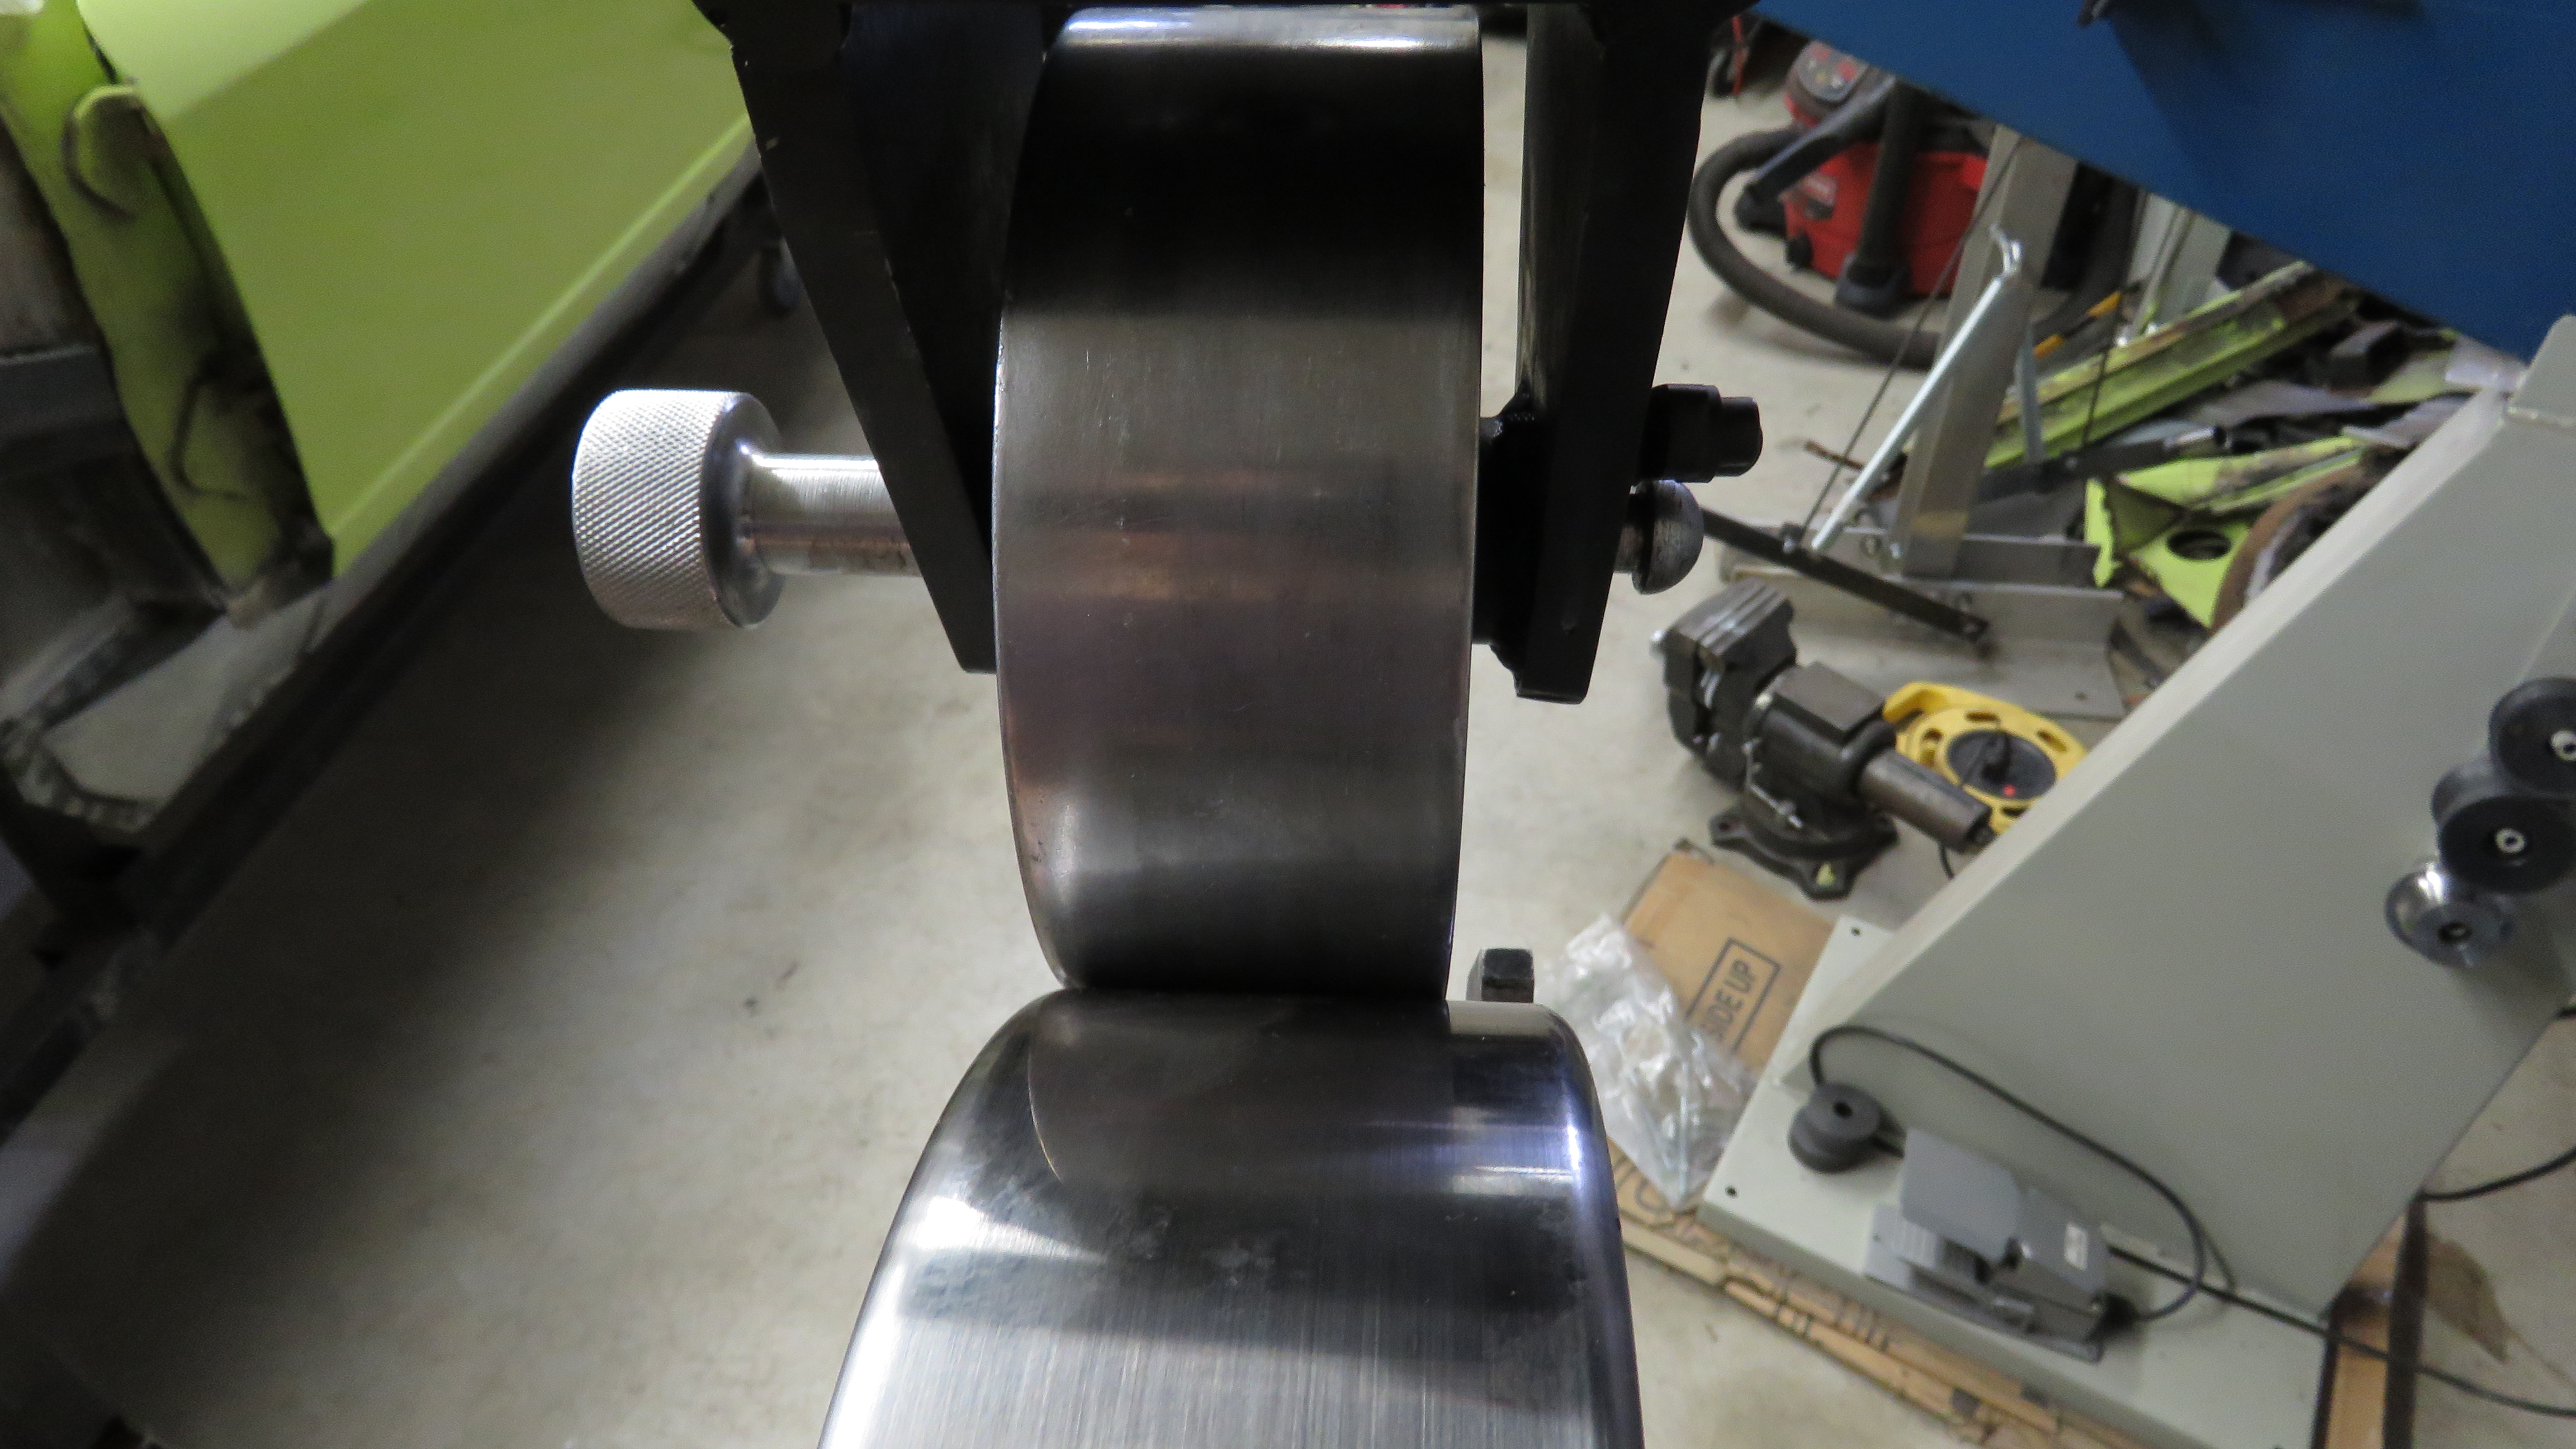
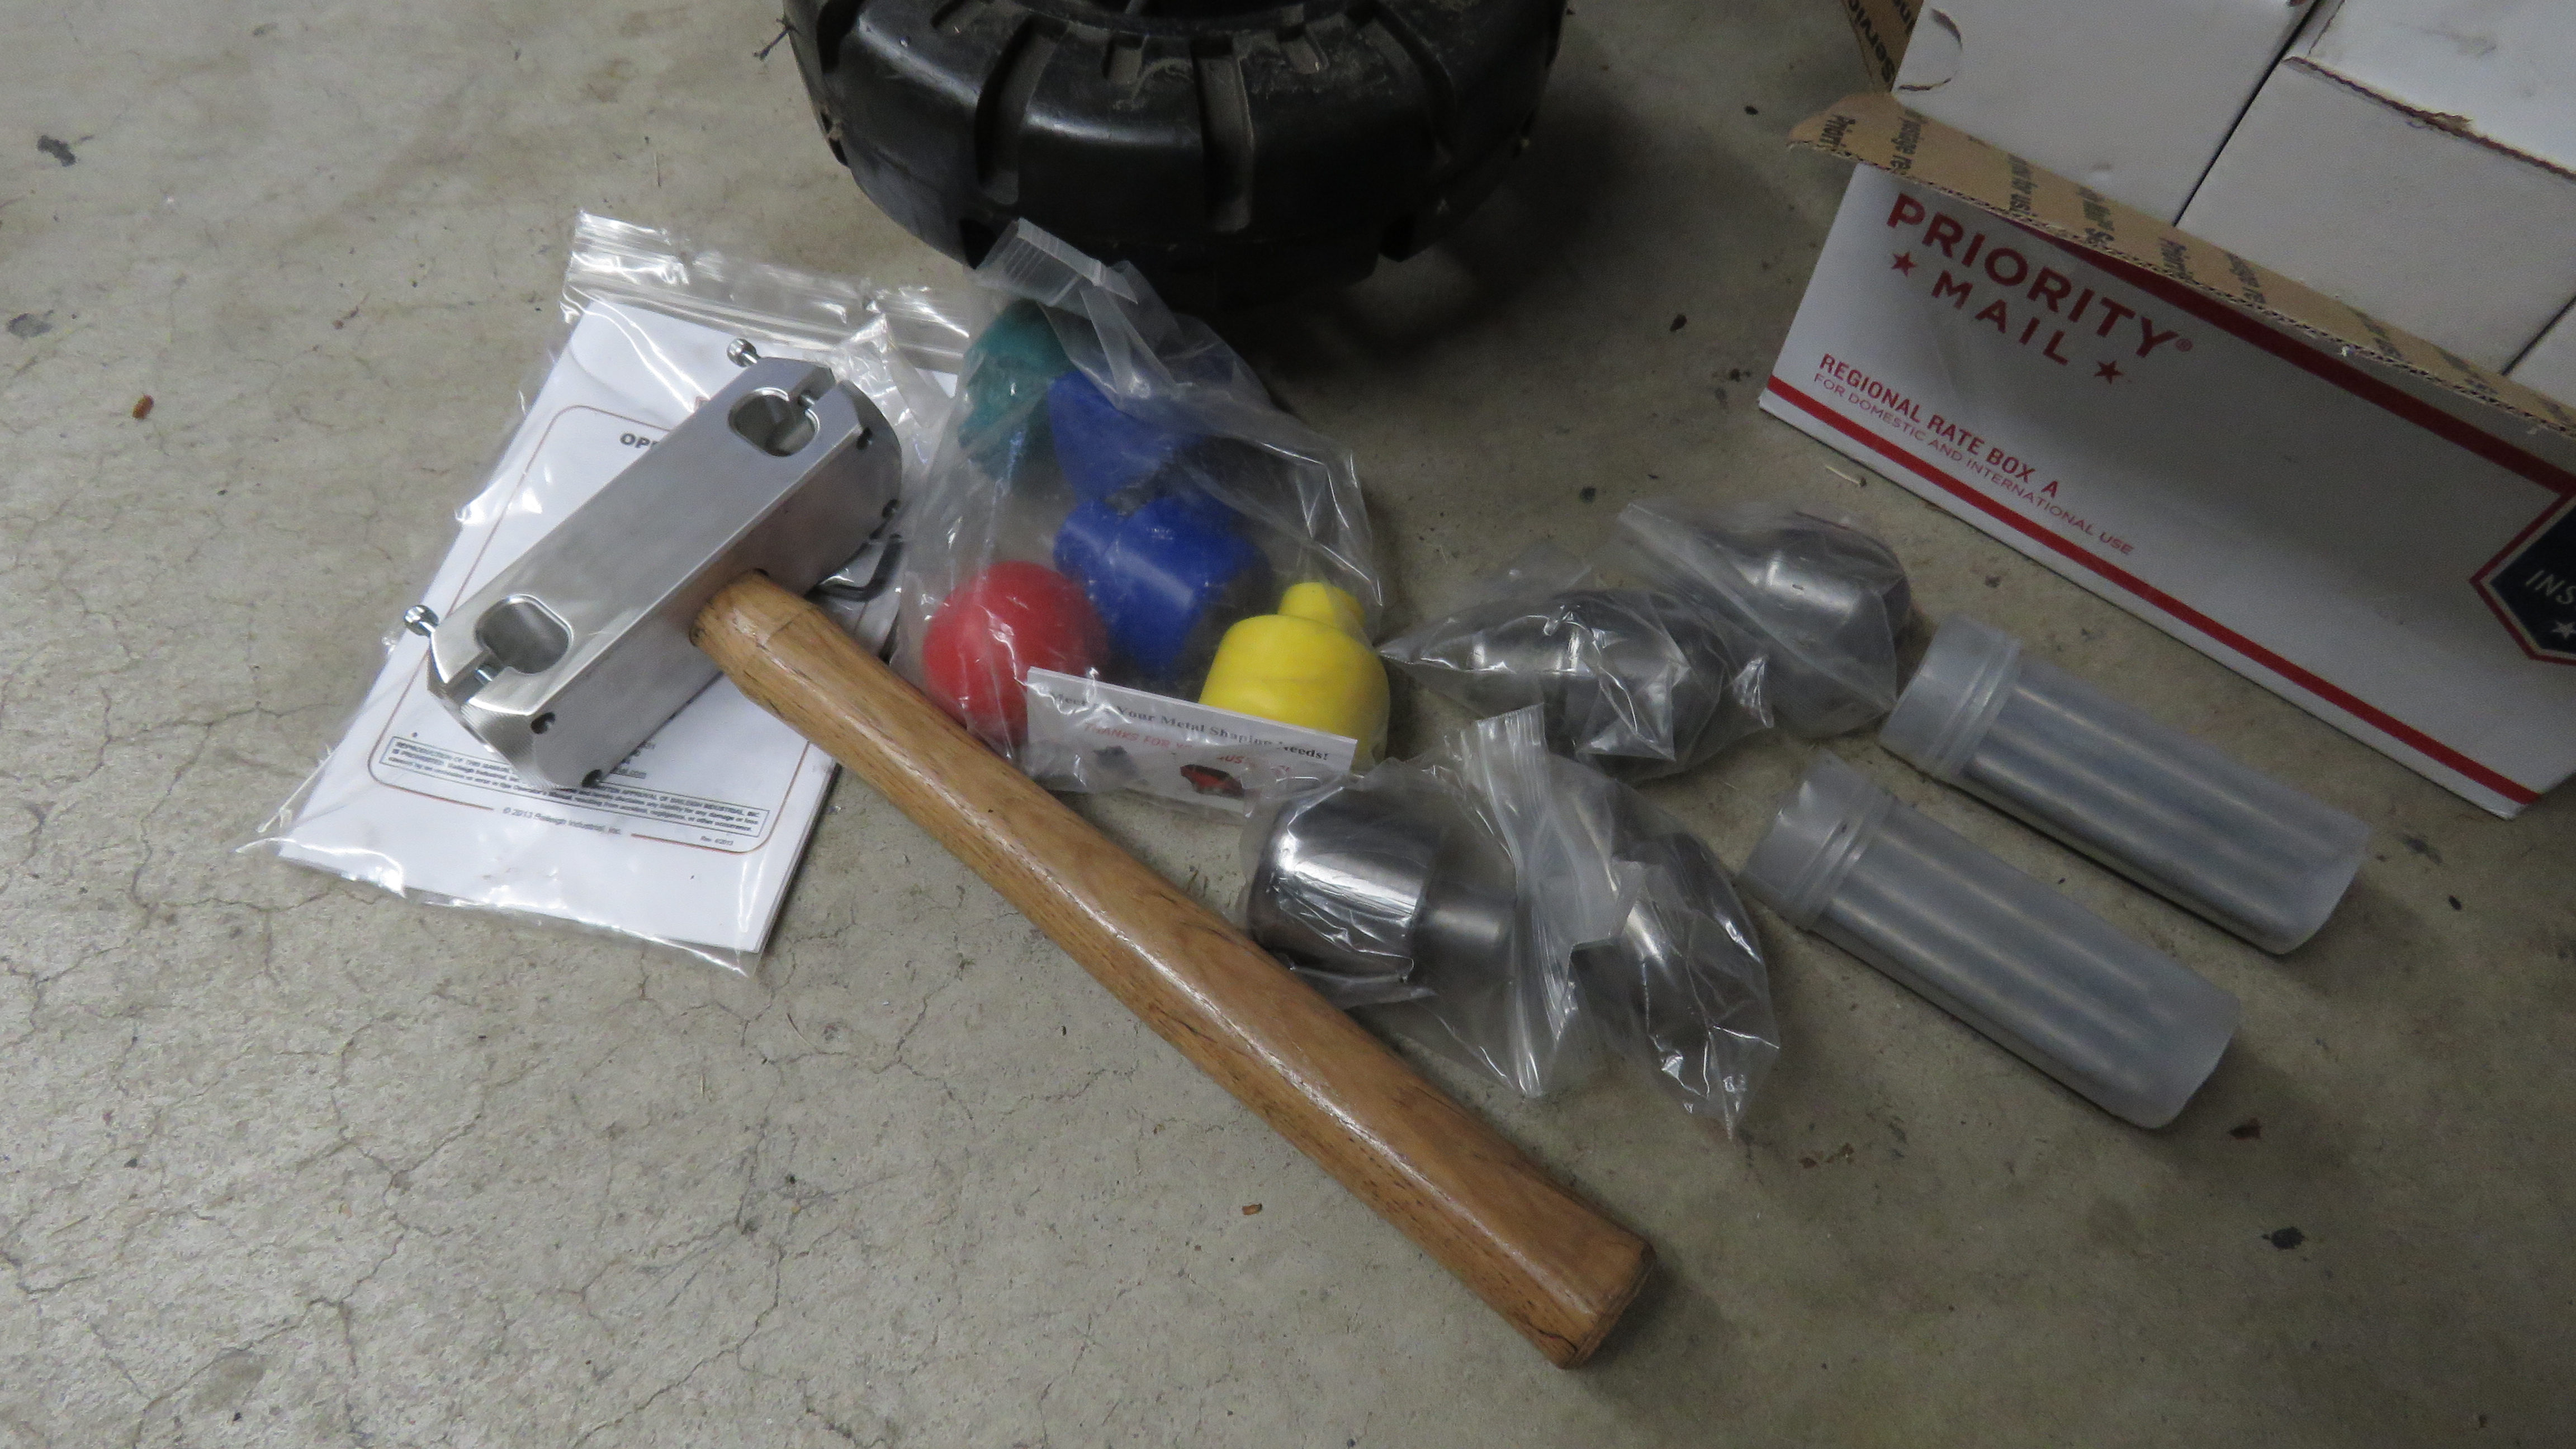
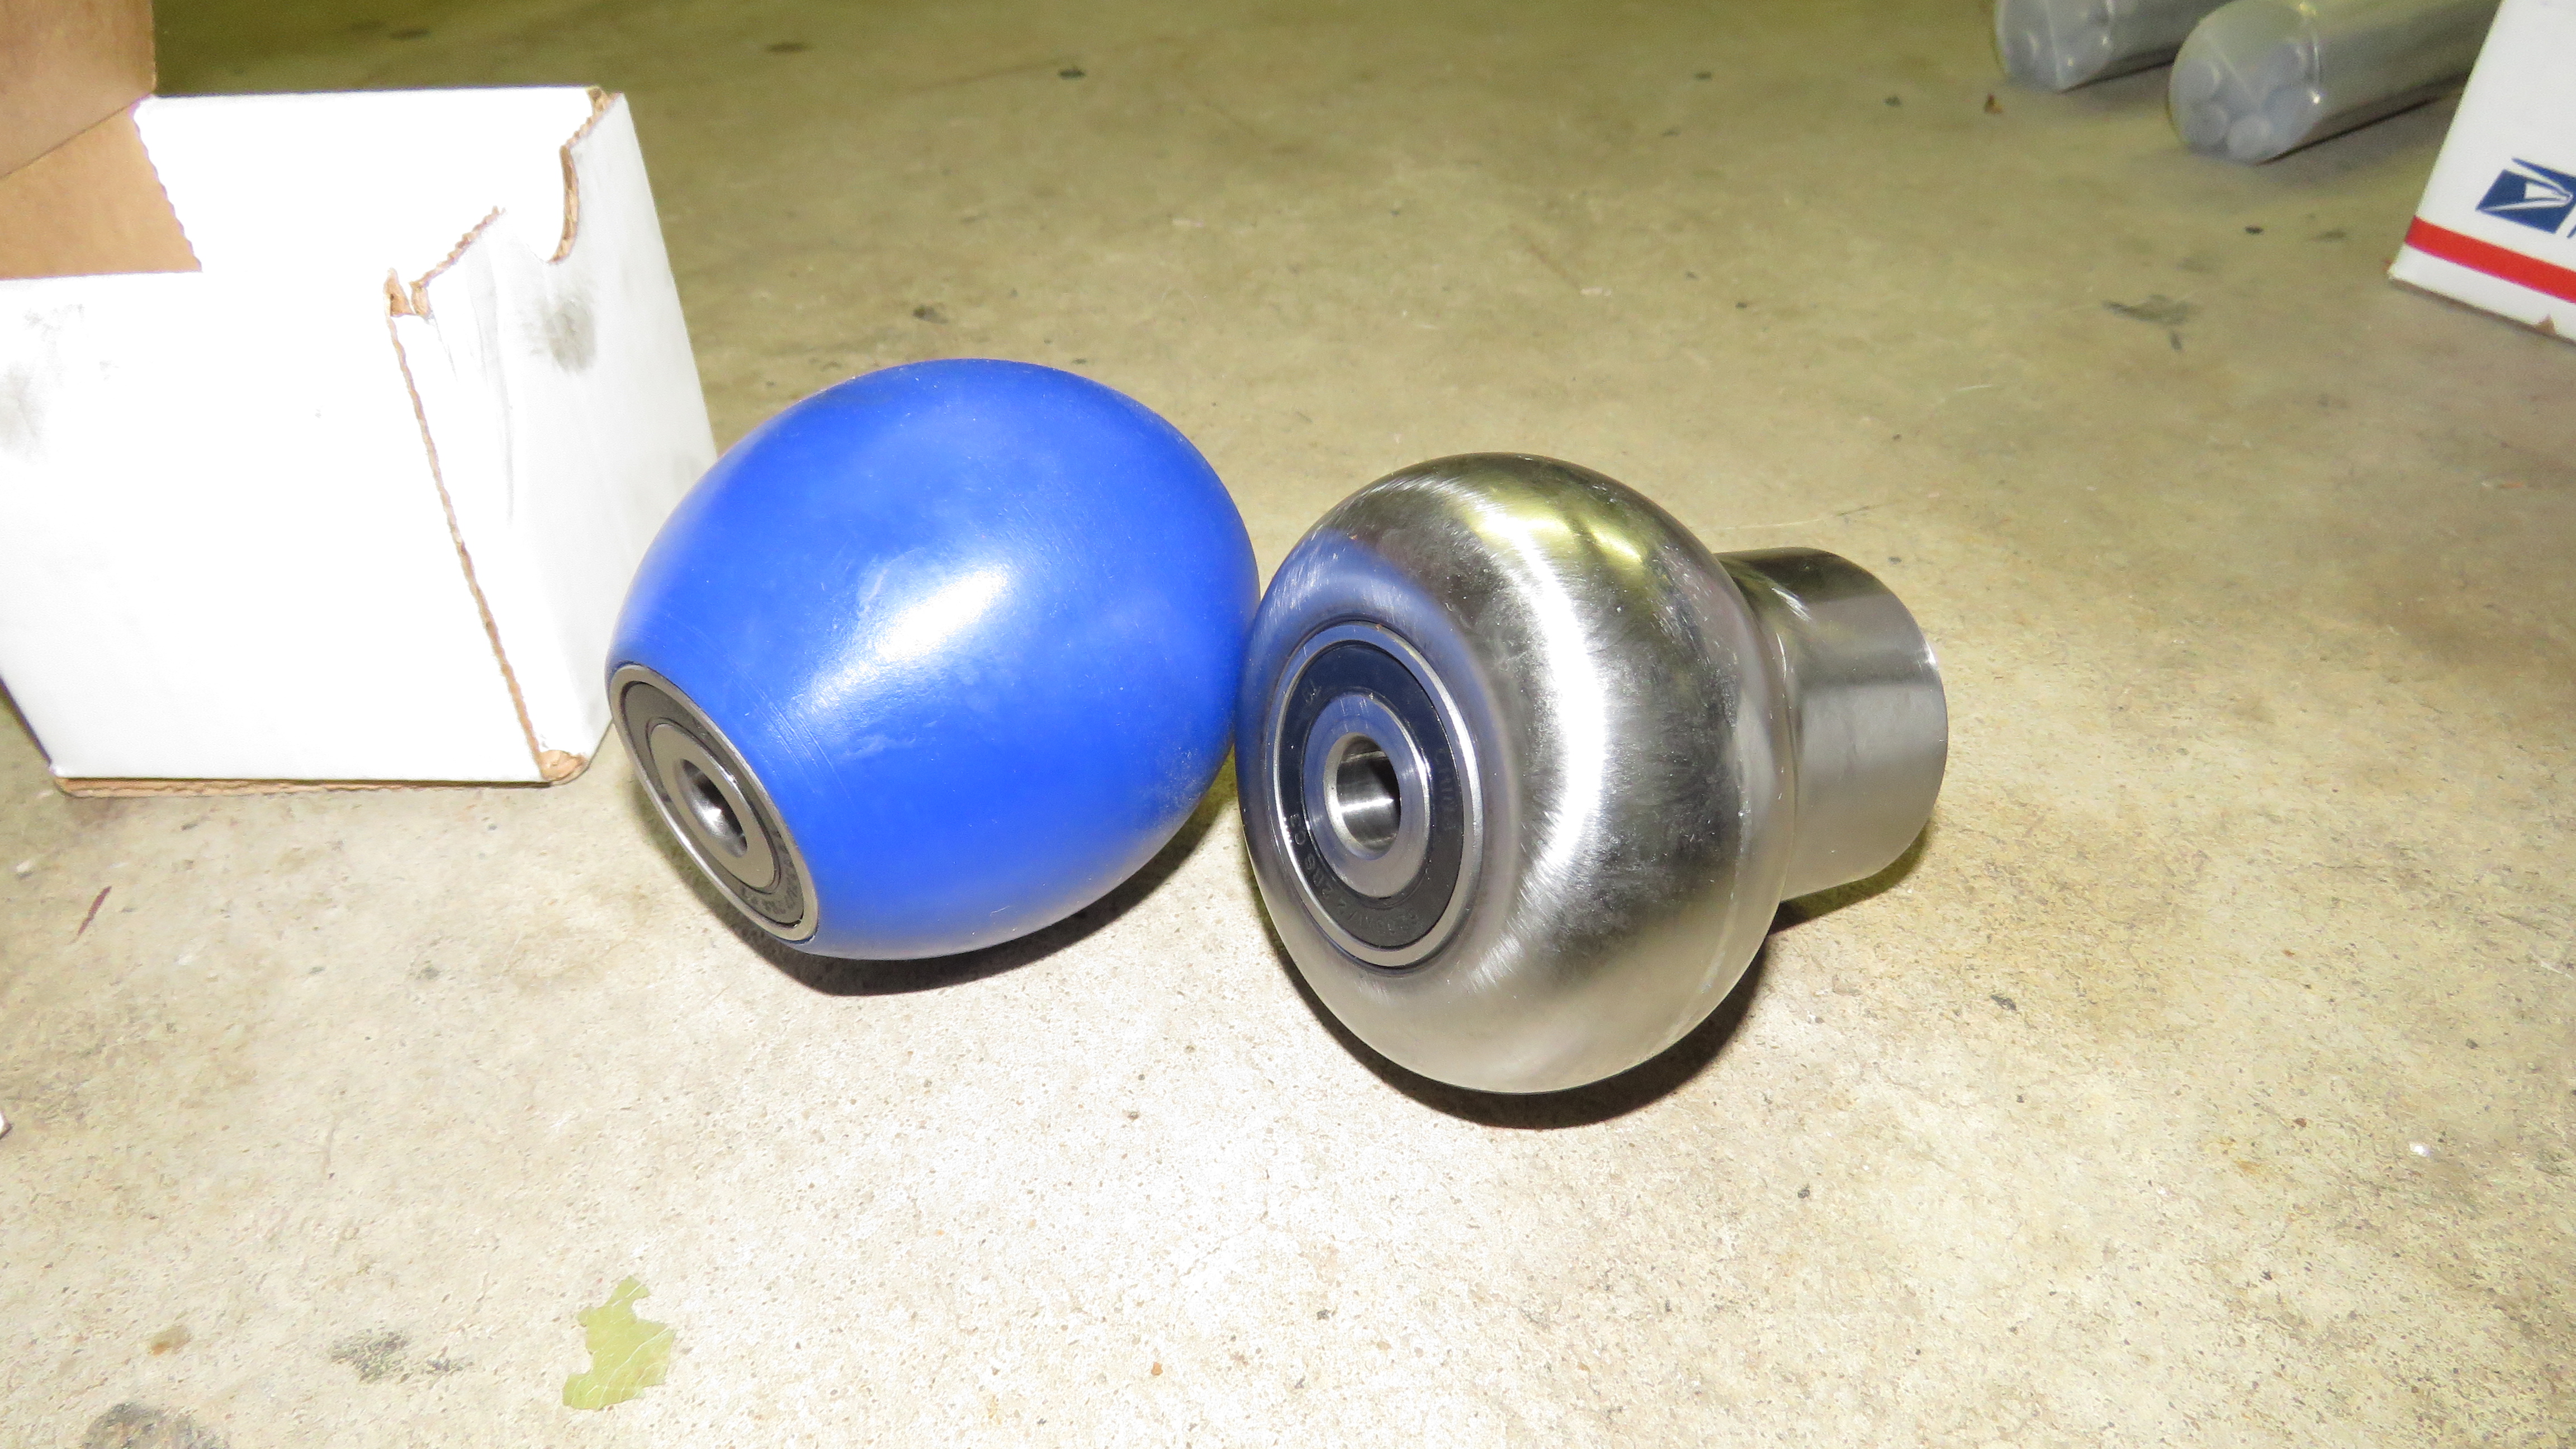
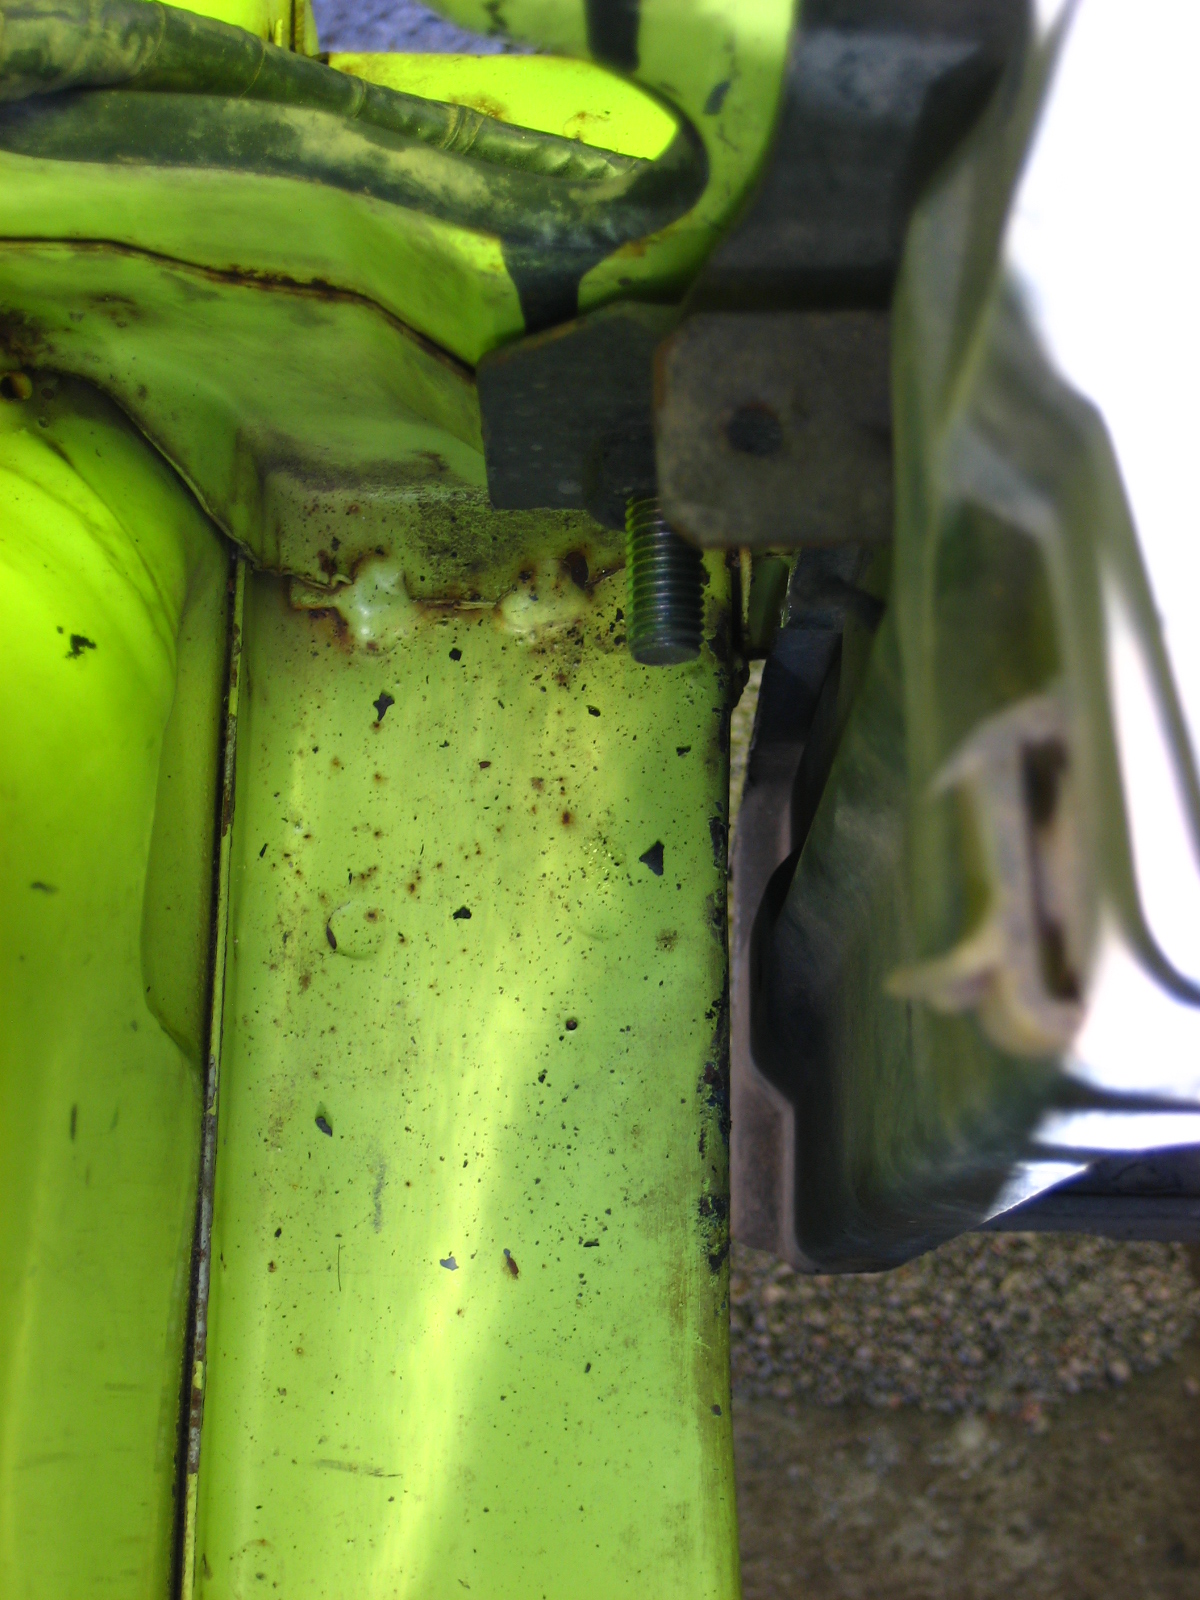
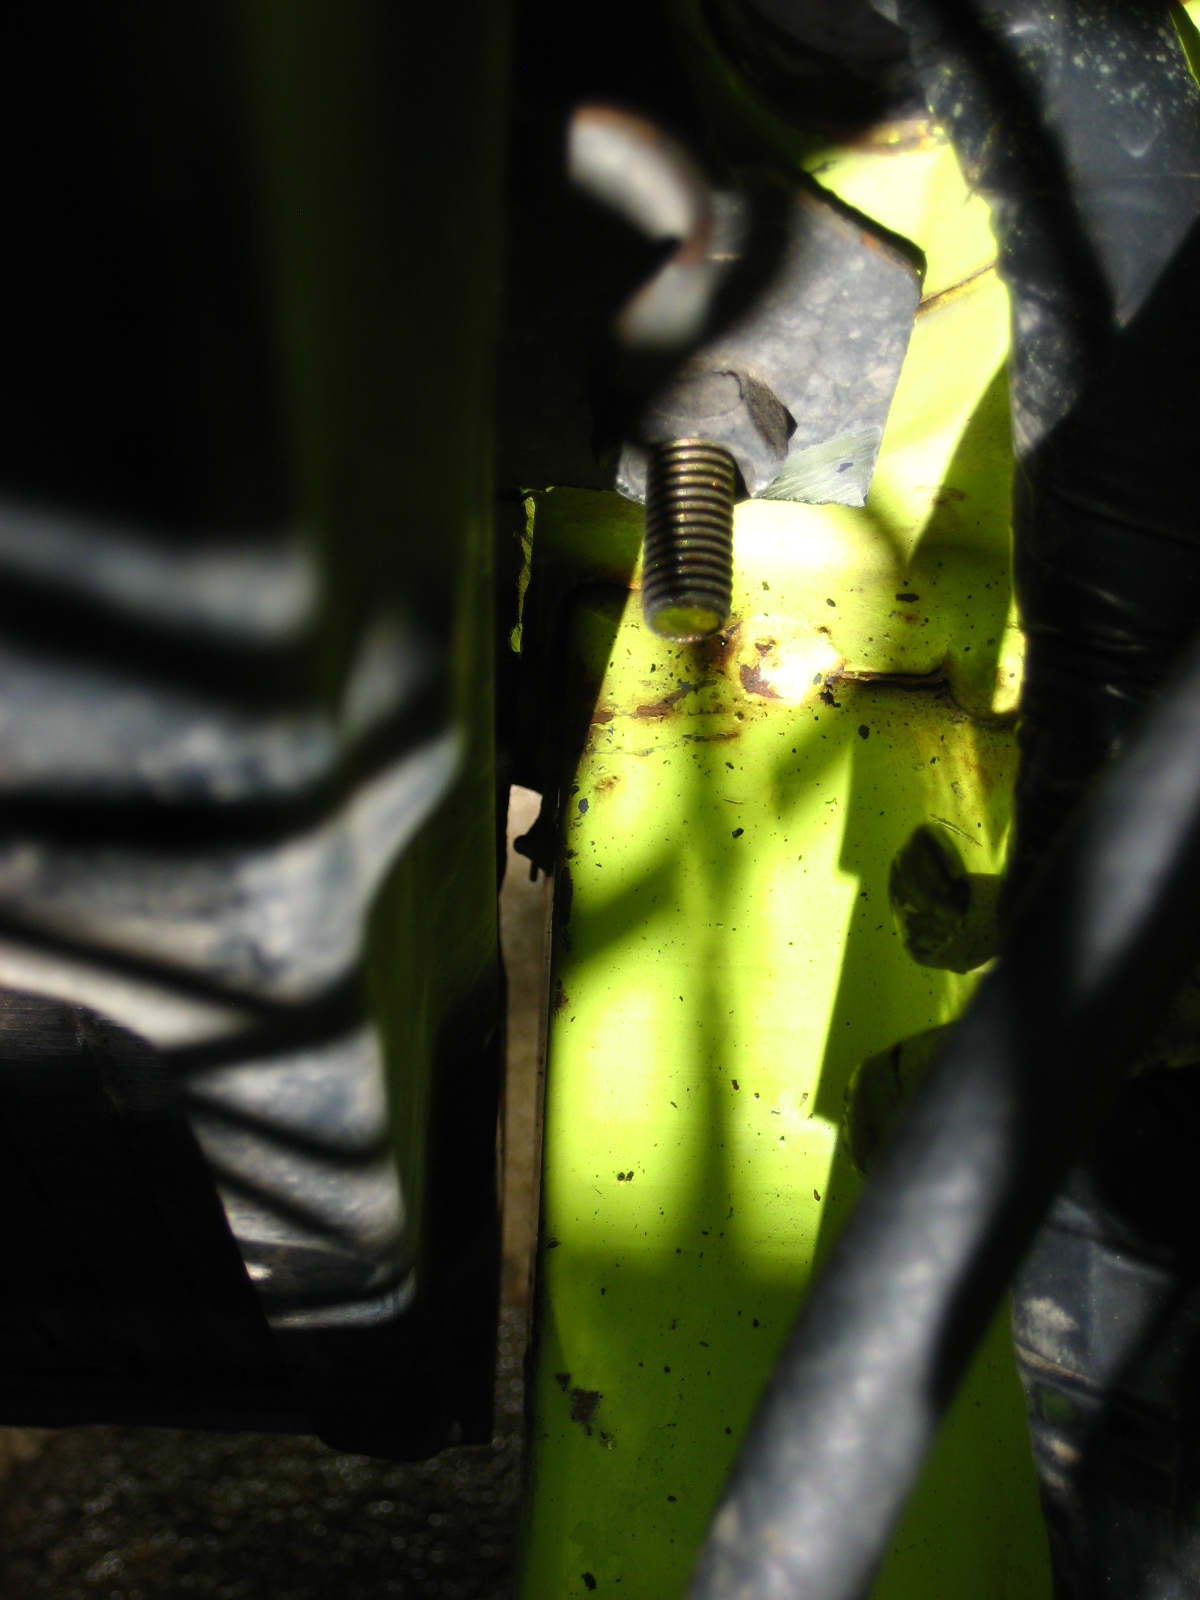
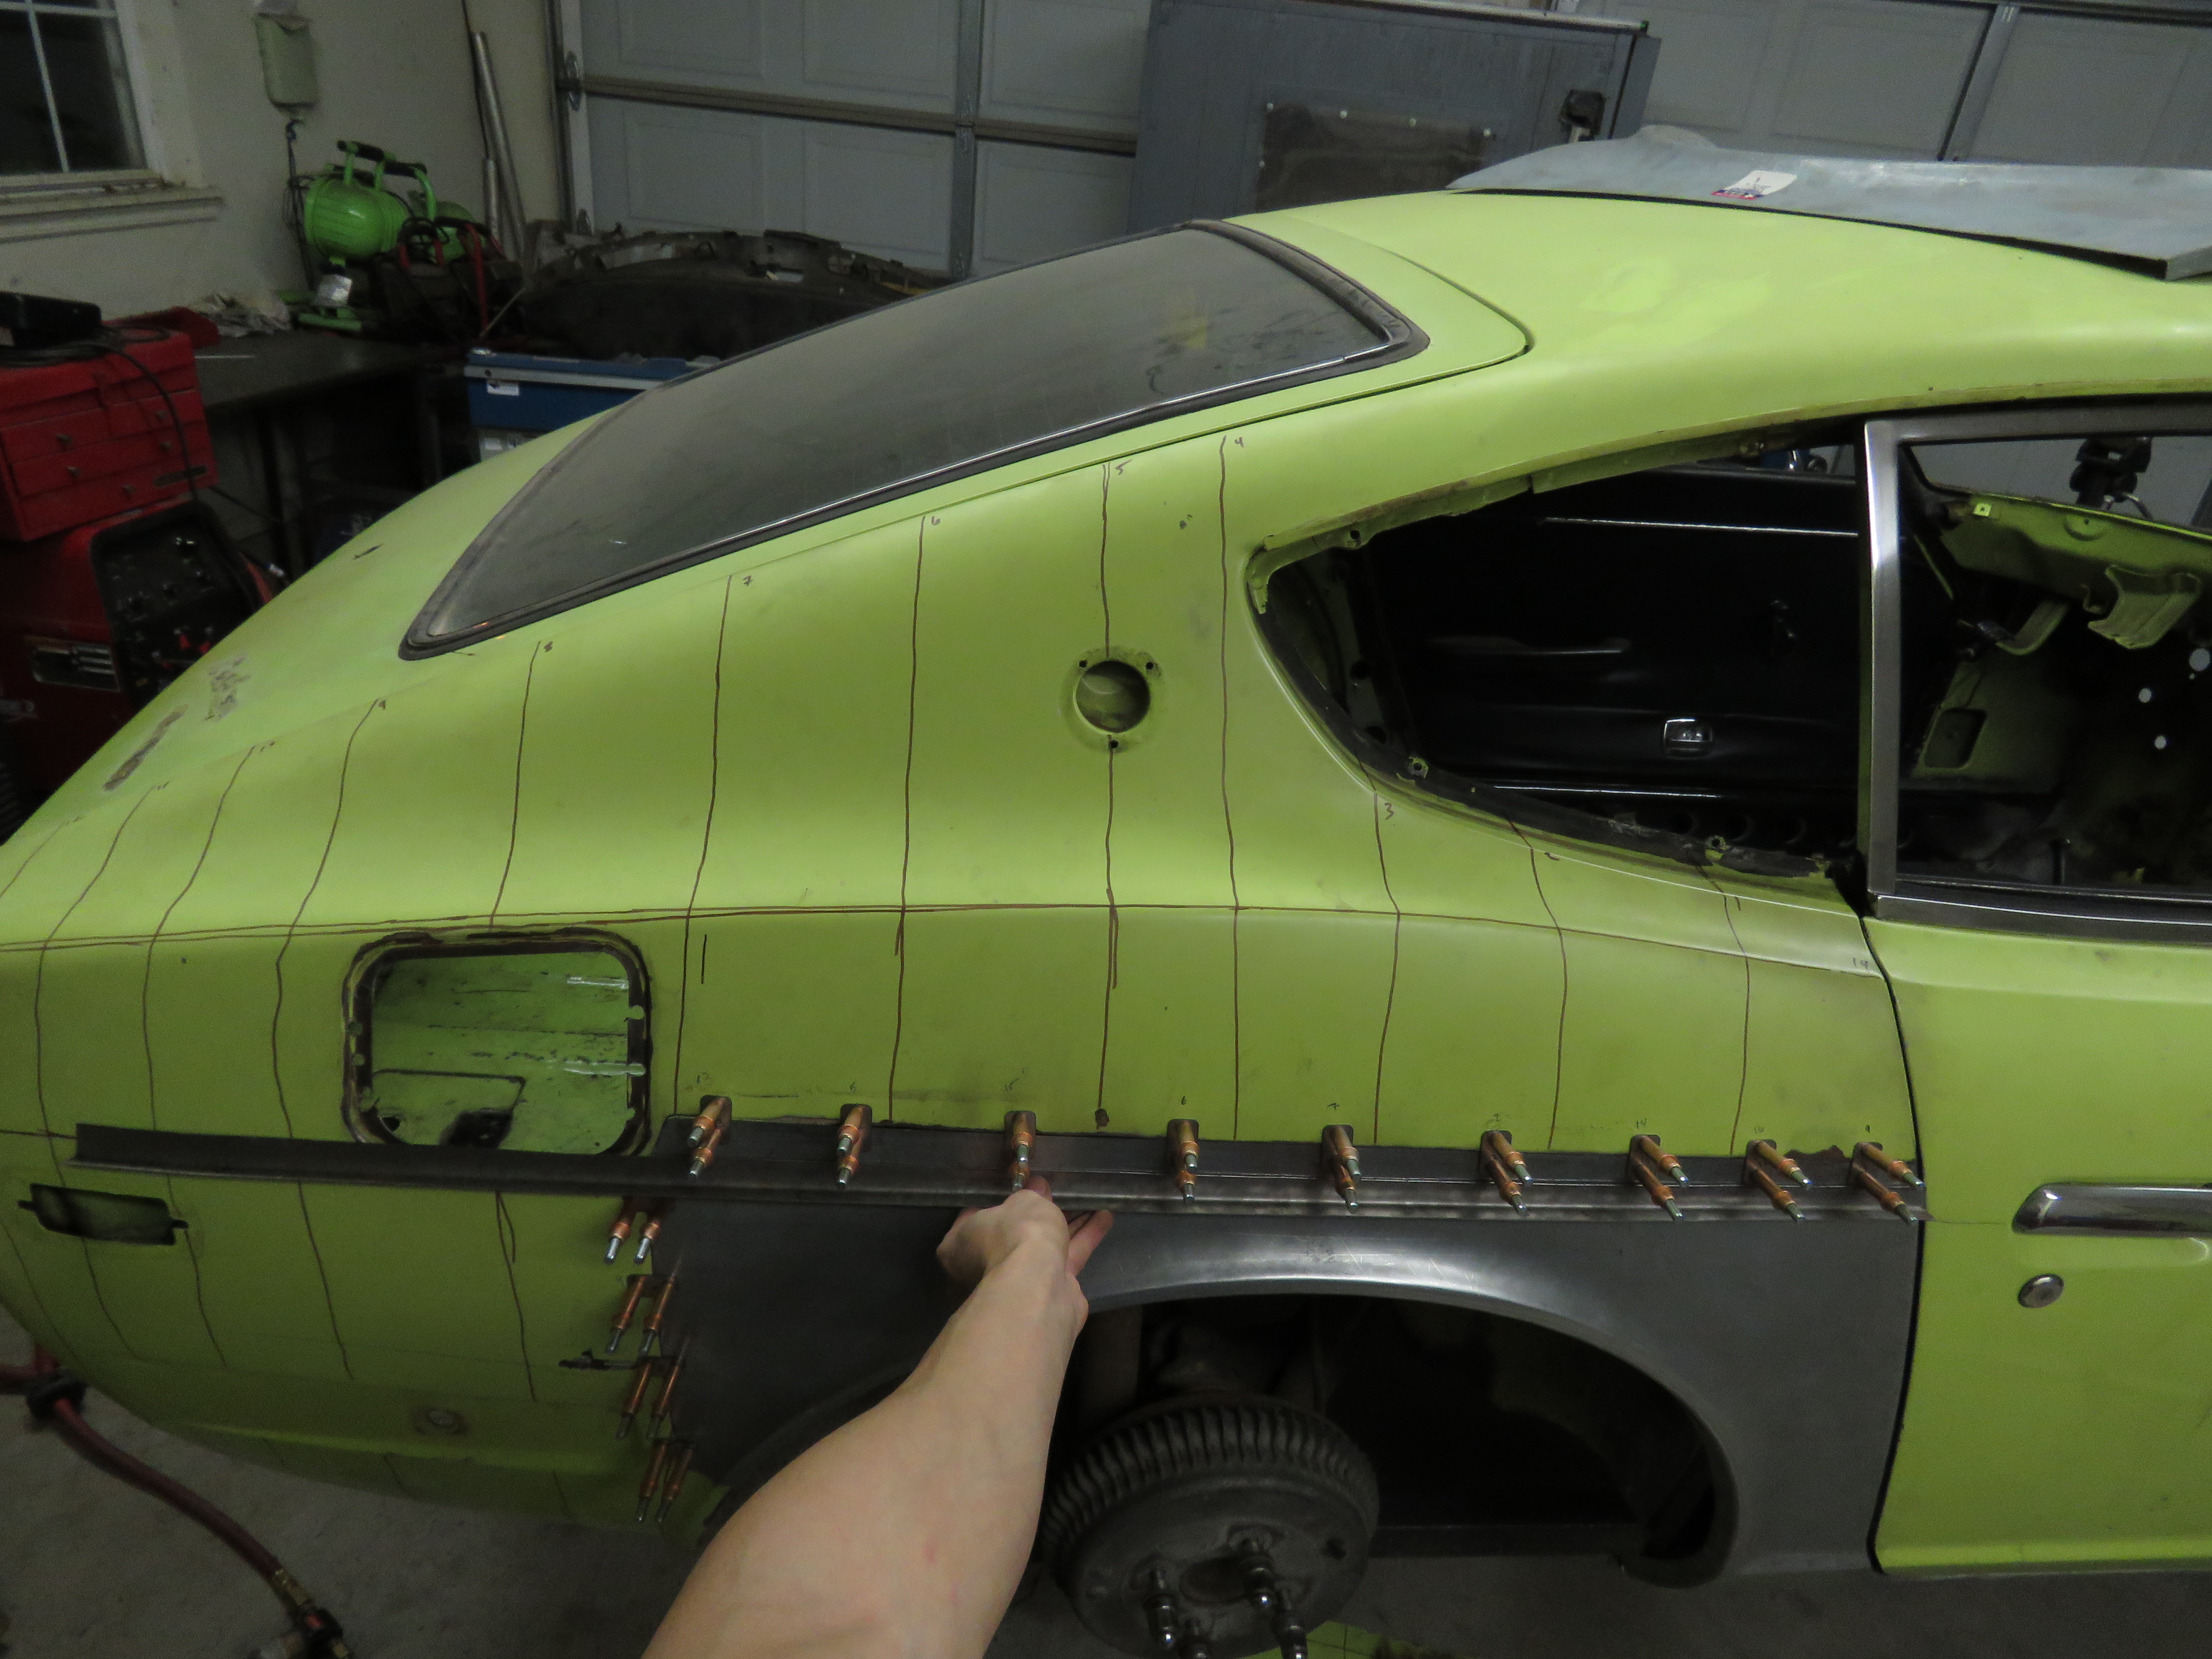
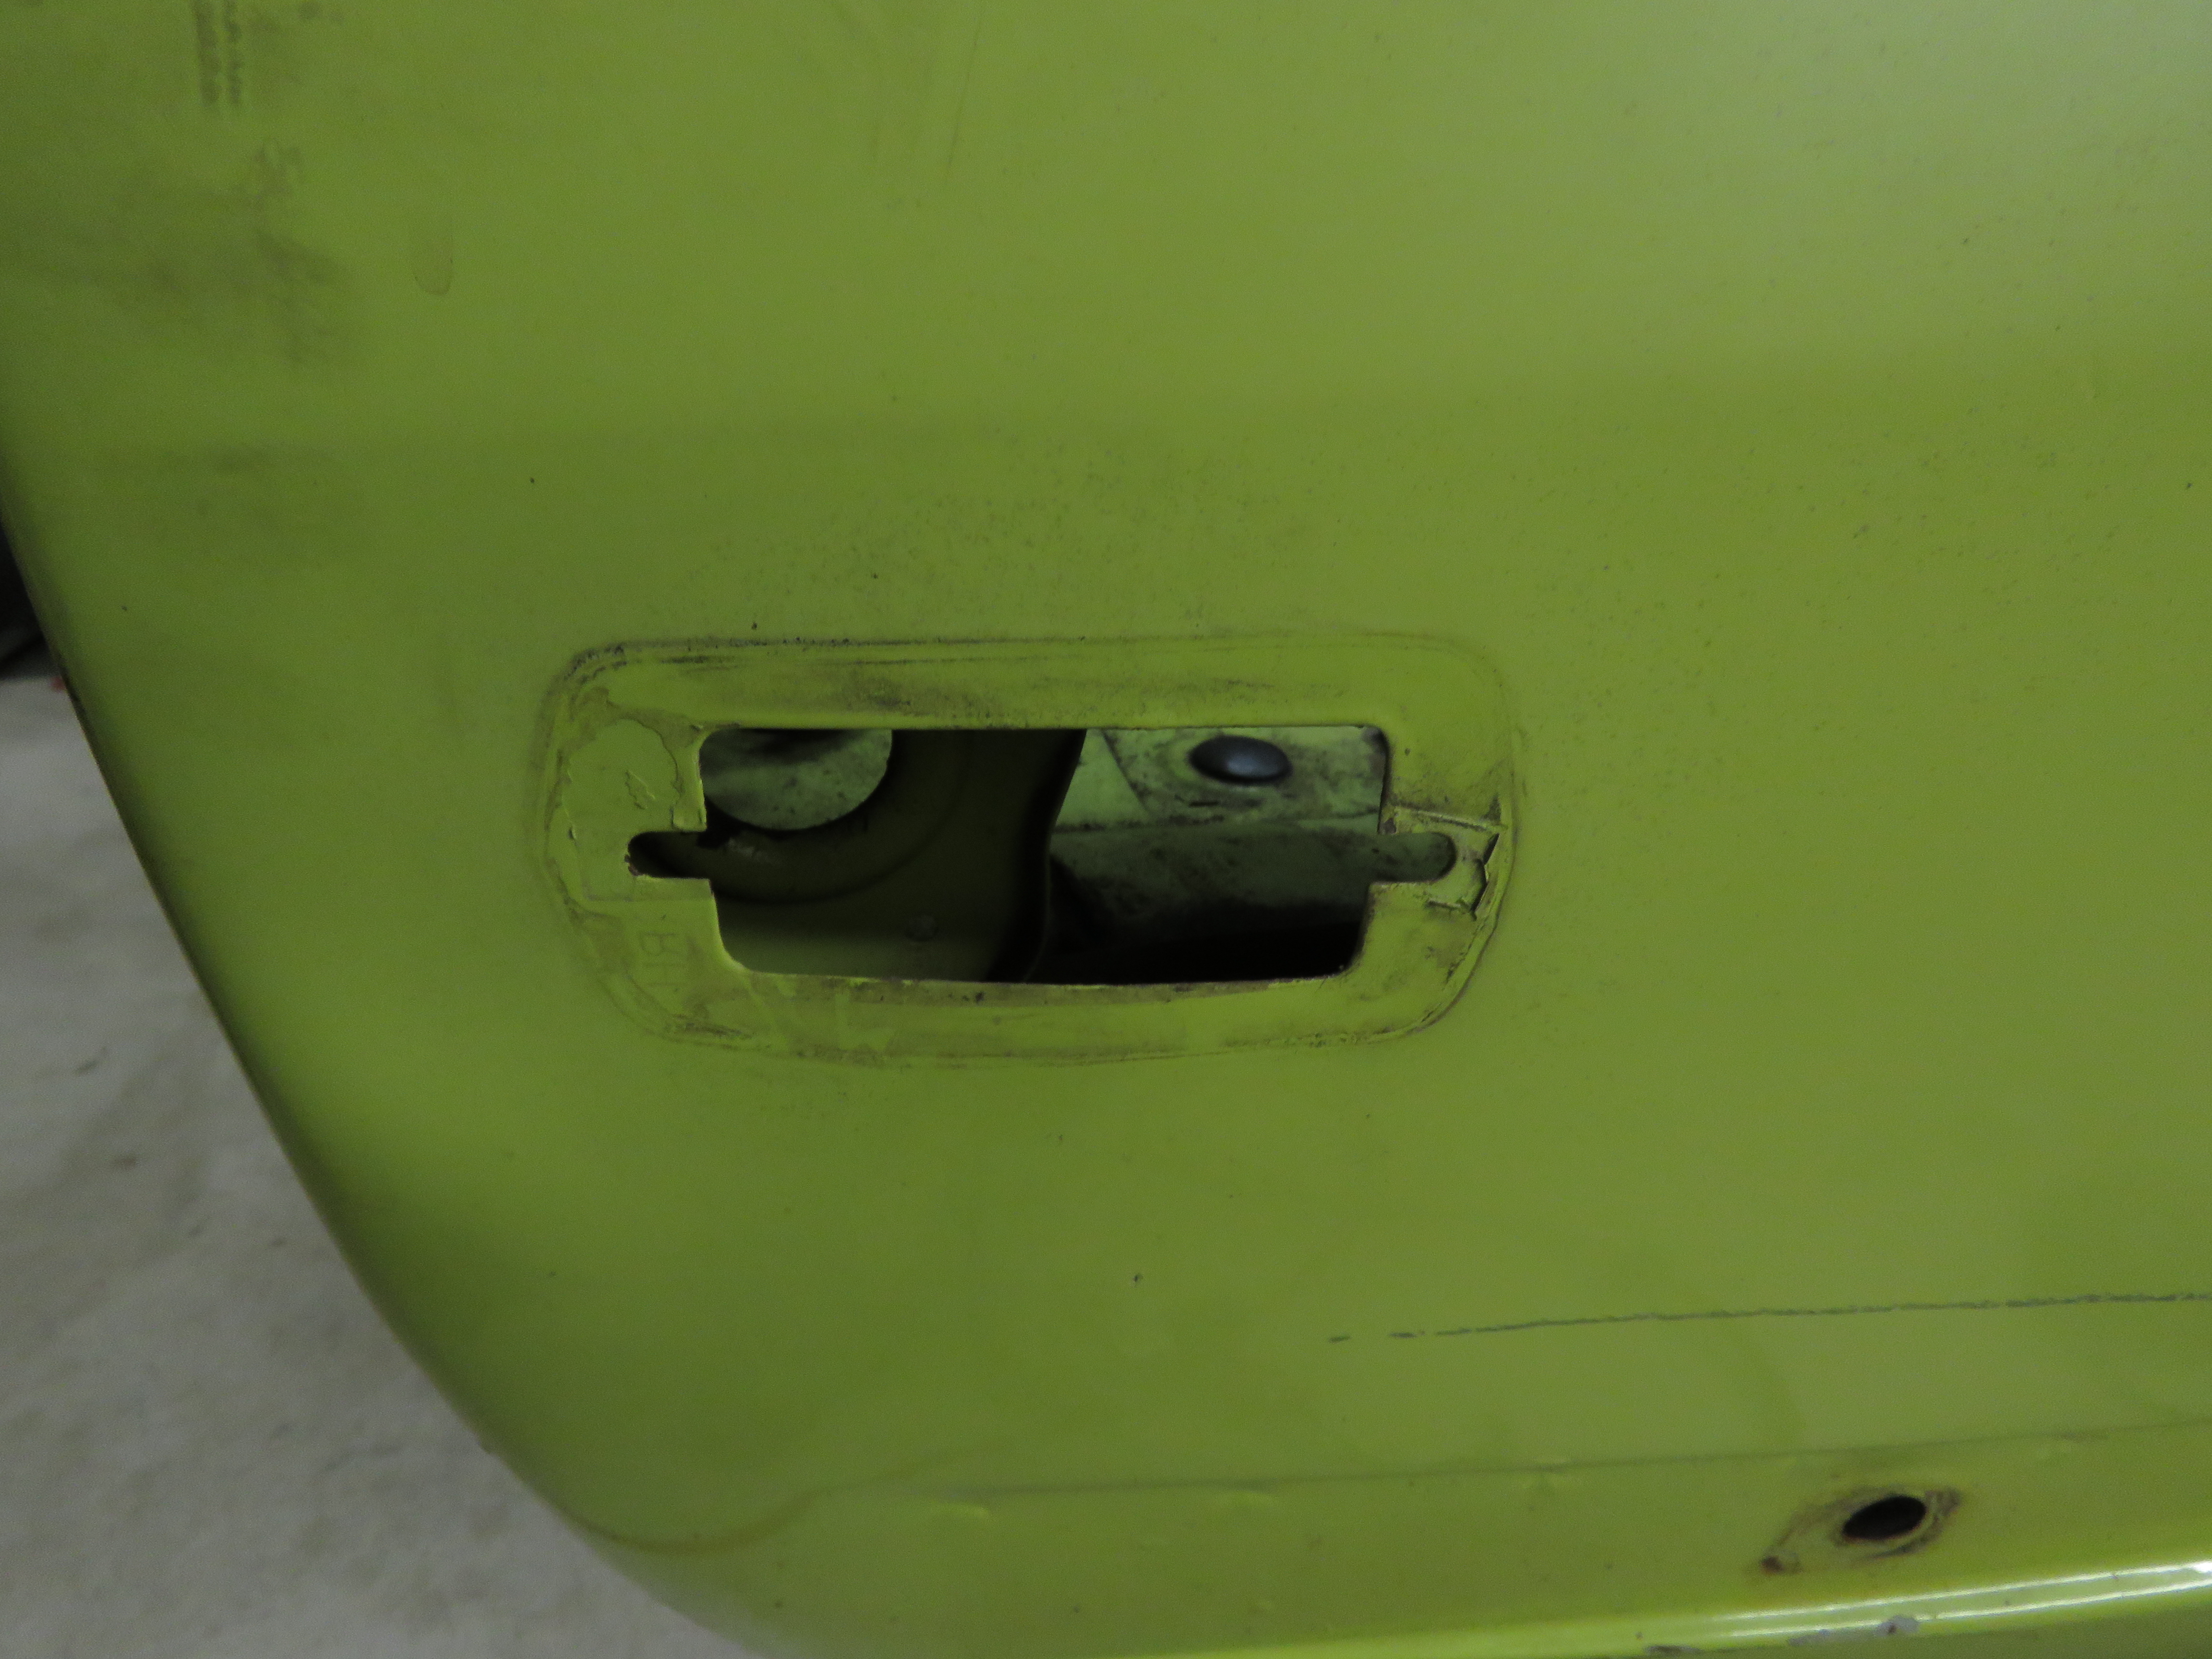
Yeah id have to agree with you, however I want to feel like I am getting my monies worth out of the stuff I had bought, hehe. Only the replacement parts that didnt fit well I remade. Currently trying to get the new upper wheel I bought to work with my english wheel frame, Looks like ill have to remake a new upper wheel mount plates. Will have a cnc shop make the plates for me though, to get the best precise fitment. This is what the new Hoosier Profiles Inc upper wheel looks like and comparison to the upper wheel that came with the Baileigh English wheel kit. The new upper wheel and lower specialty anvils I bought are hardened. Quick sketch of how I think the upper wheel mounting plates will look like. Want to be able to use both wheels. The smaller wheel will require a spacer. Also bought a sheet metal beating hammer with attachments. Some specialty lower anvils, a pic showing an example of what some of them look like. I need some help/confirmation. Need to know if the front part of the quarter panels where my finger is pointing in the picture is supposed to be flush/flat along with the door or is it supposed to flare outwards?


 Thats crazy!! I wouldnt move that car one bit, leave it where it is.
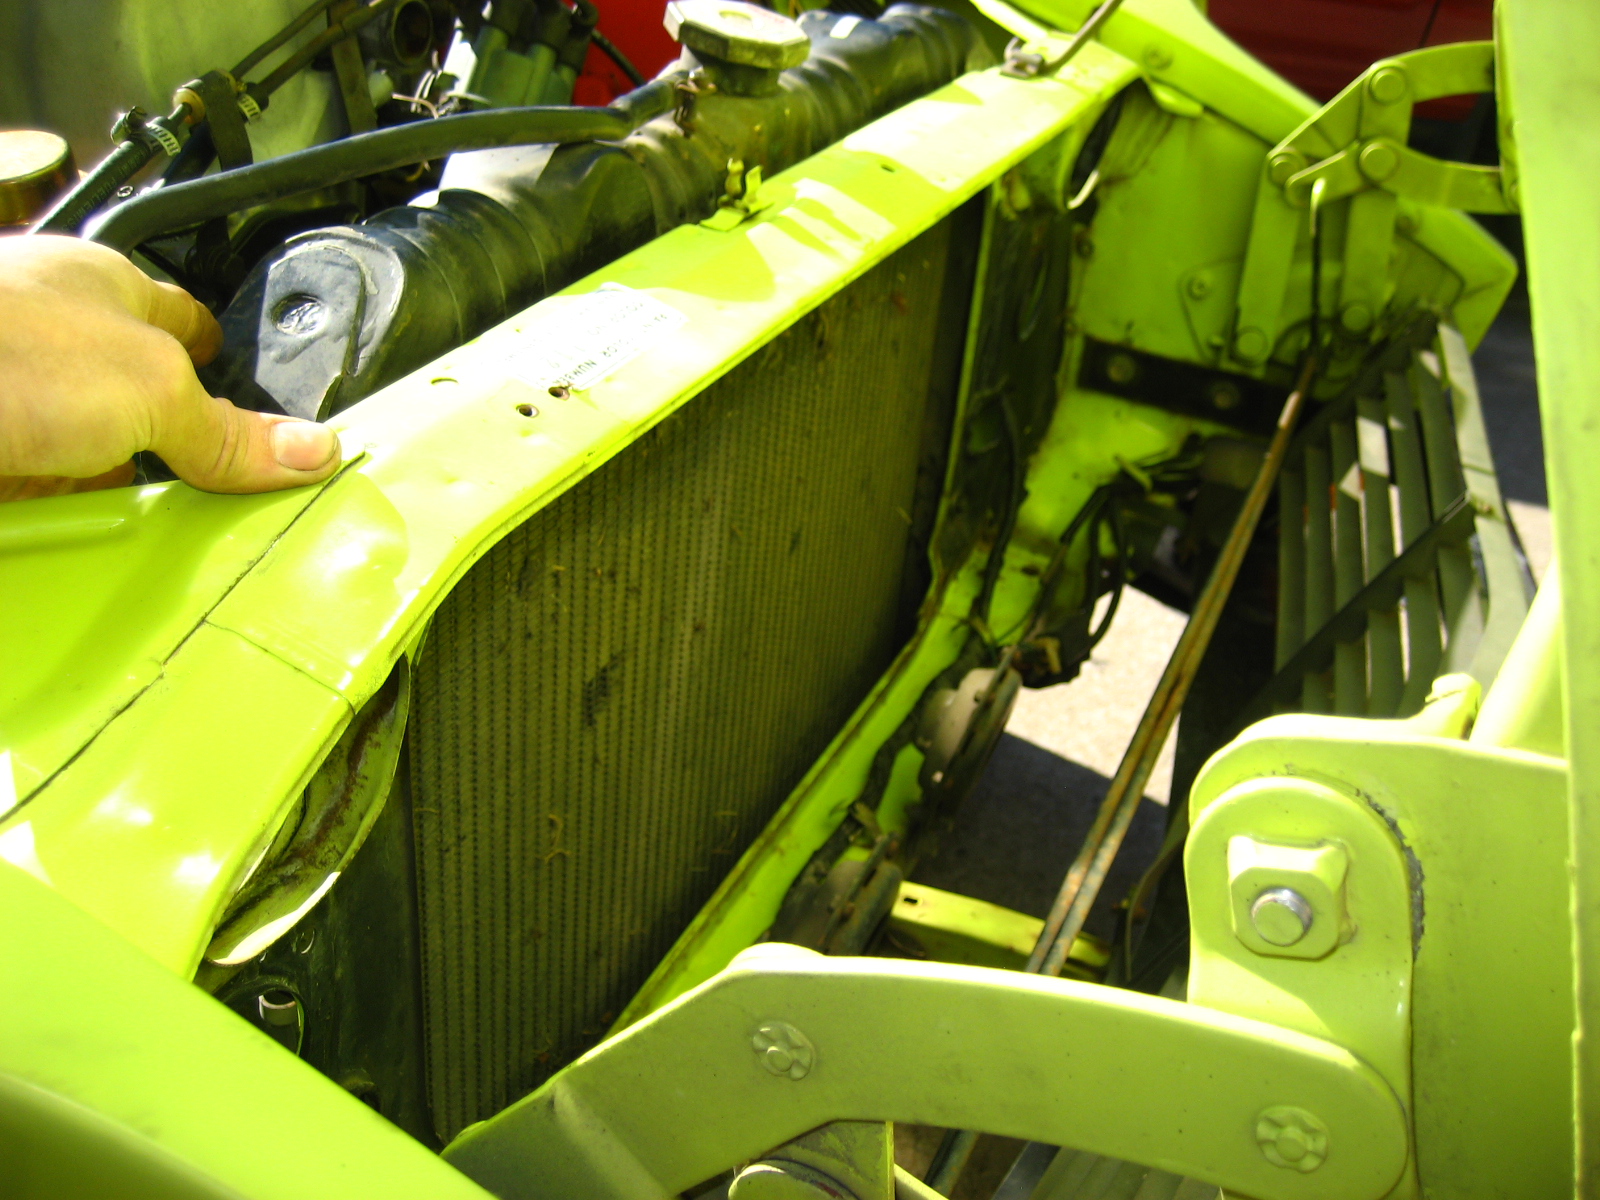
Should be safe using a 240z rad as it isnt as tall and will allow for the bottom to hide behind the lower rad support and still have plenty room on top to clear the hood. Reason I went with the zx radiator, I needed something cheap and in the moment, It was the only good conditioned z radiator at a local salvage yard that somewhat fit and worked for the time being. Im not sure but, are the 280z's bottom radiator supports lower than the 240z's?
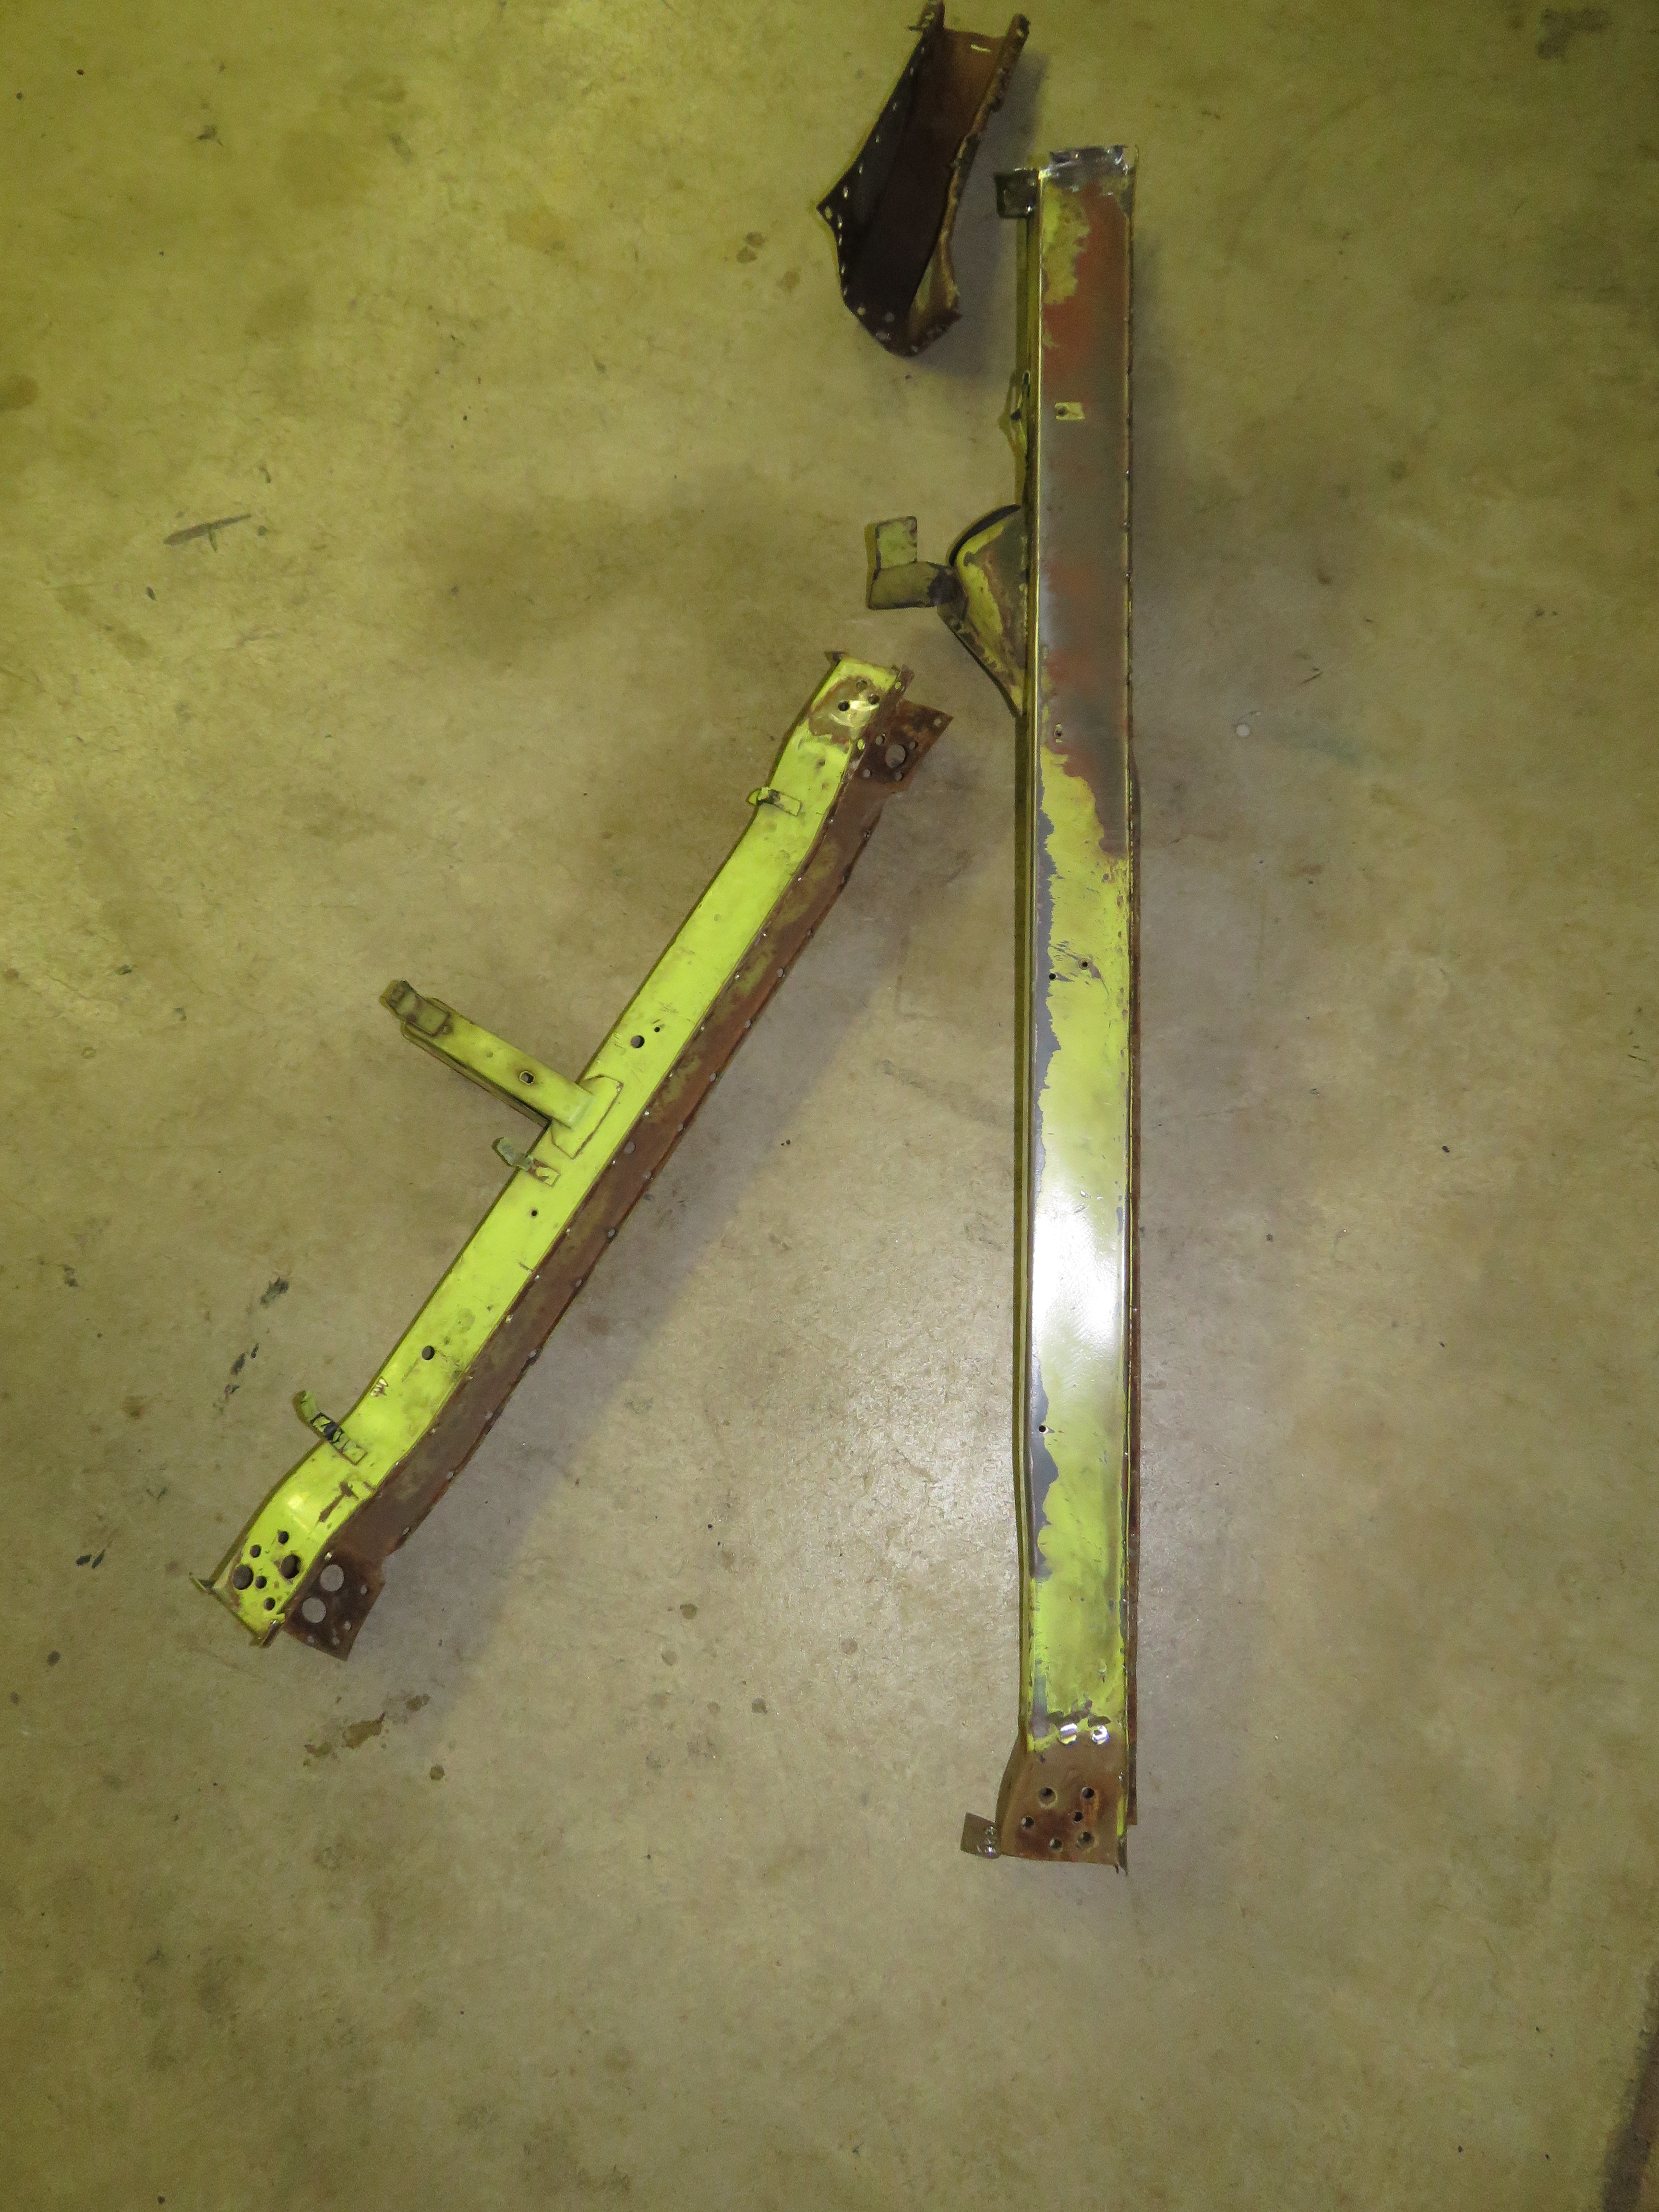
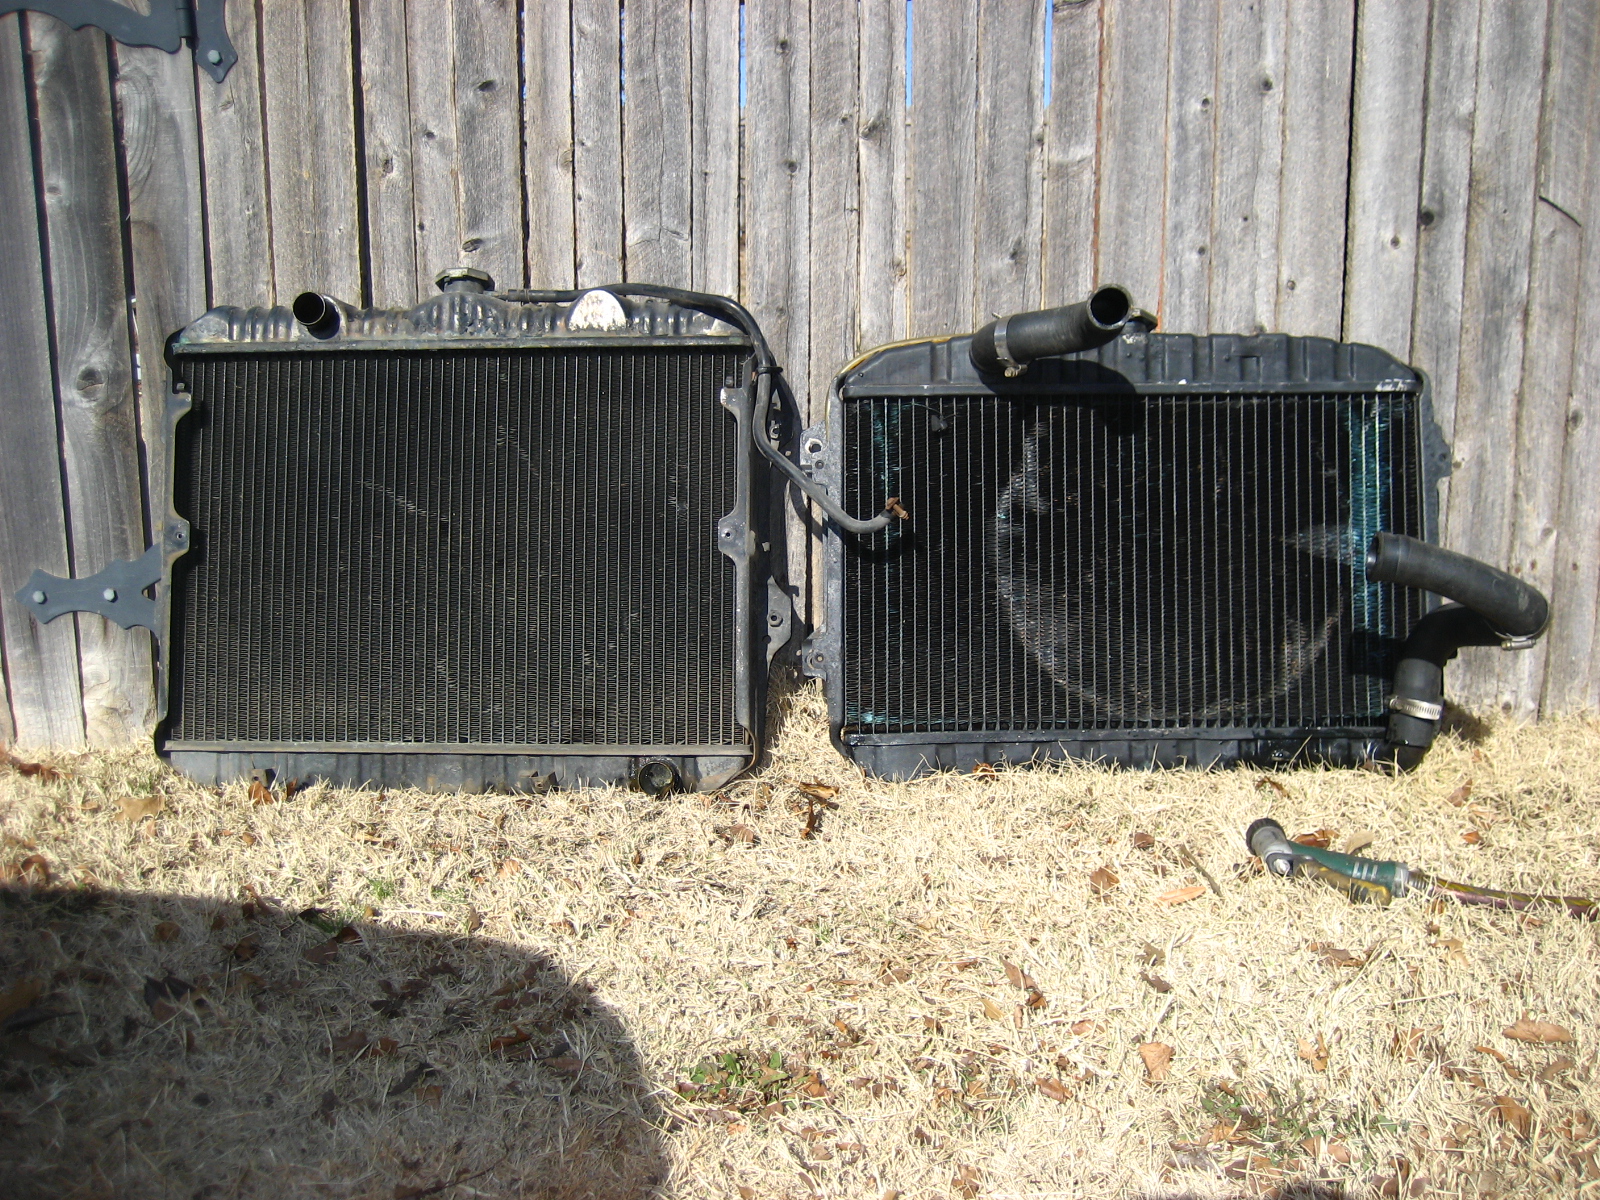
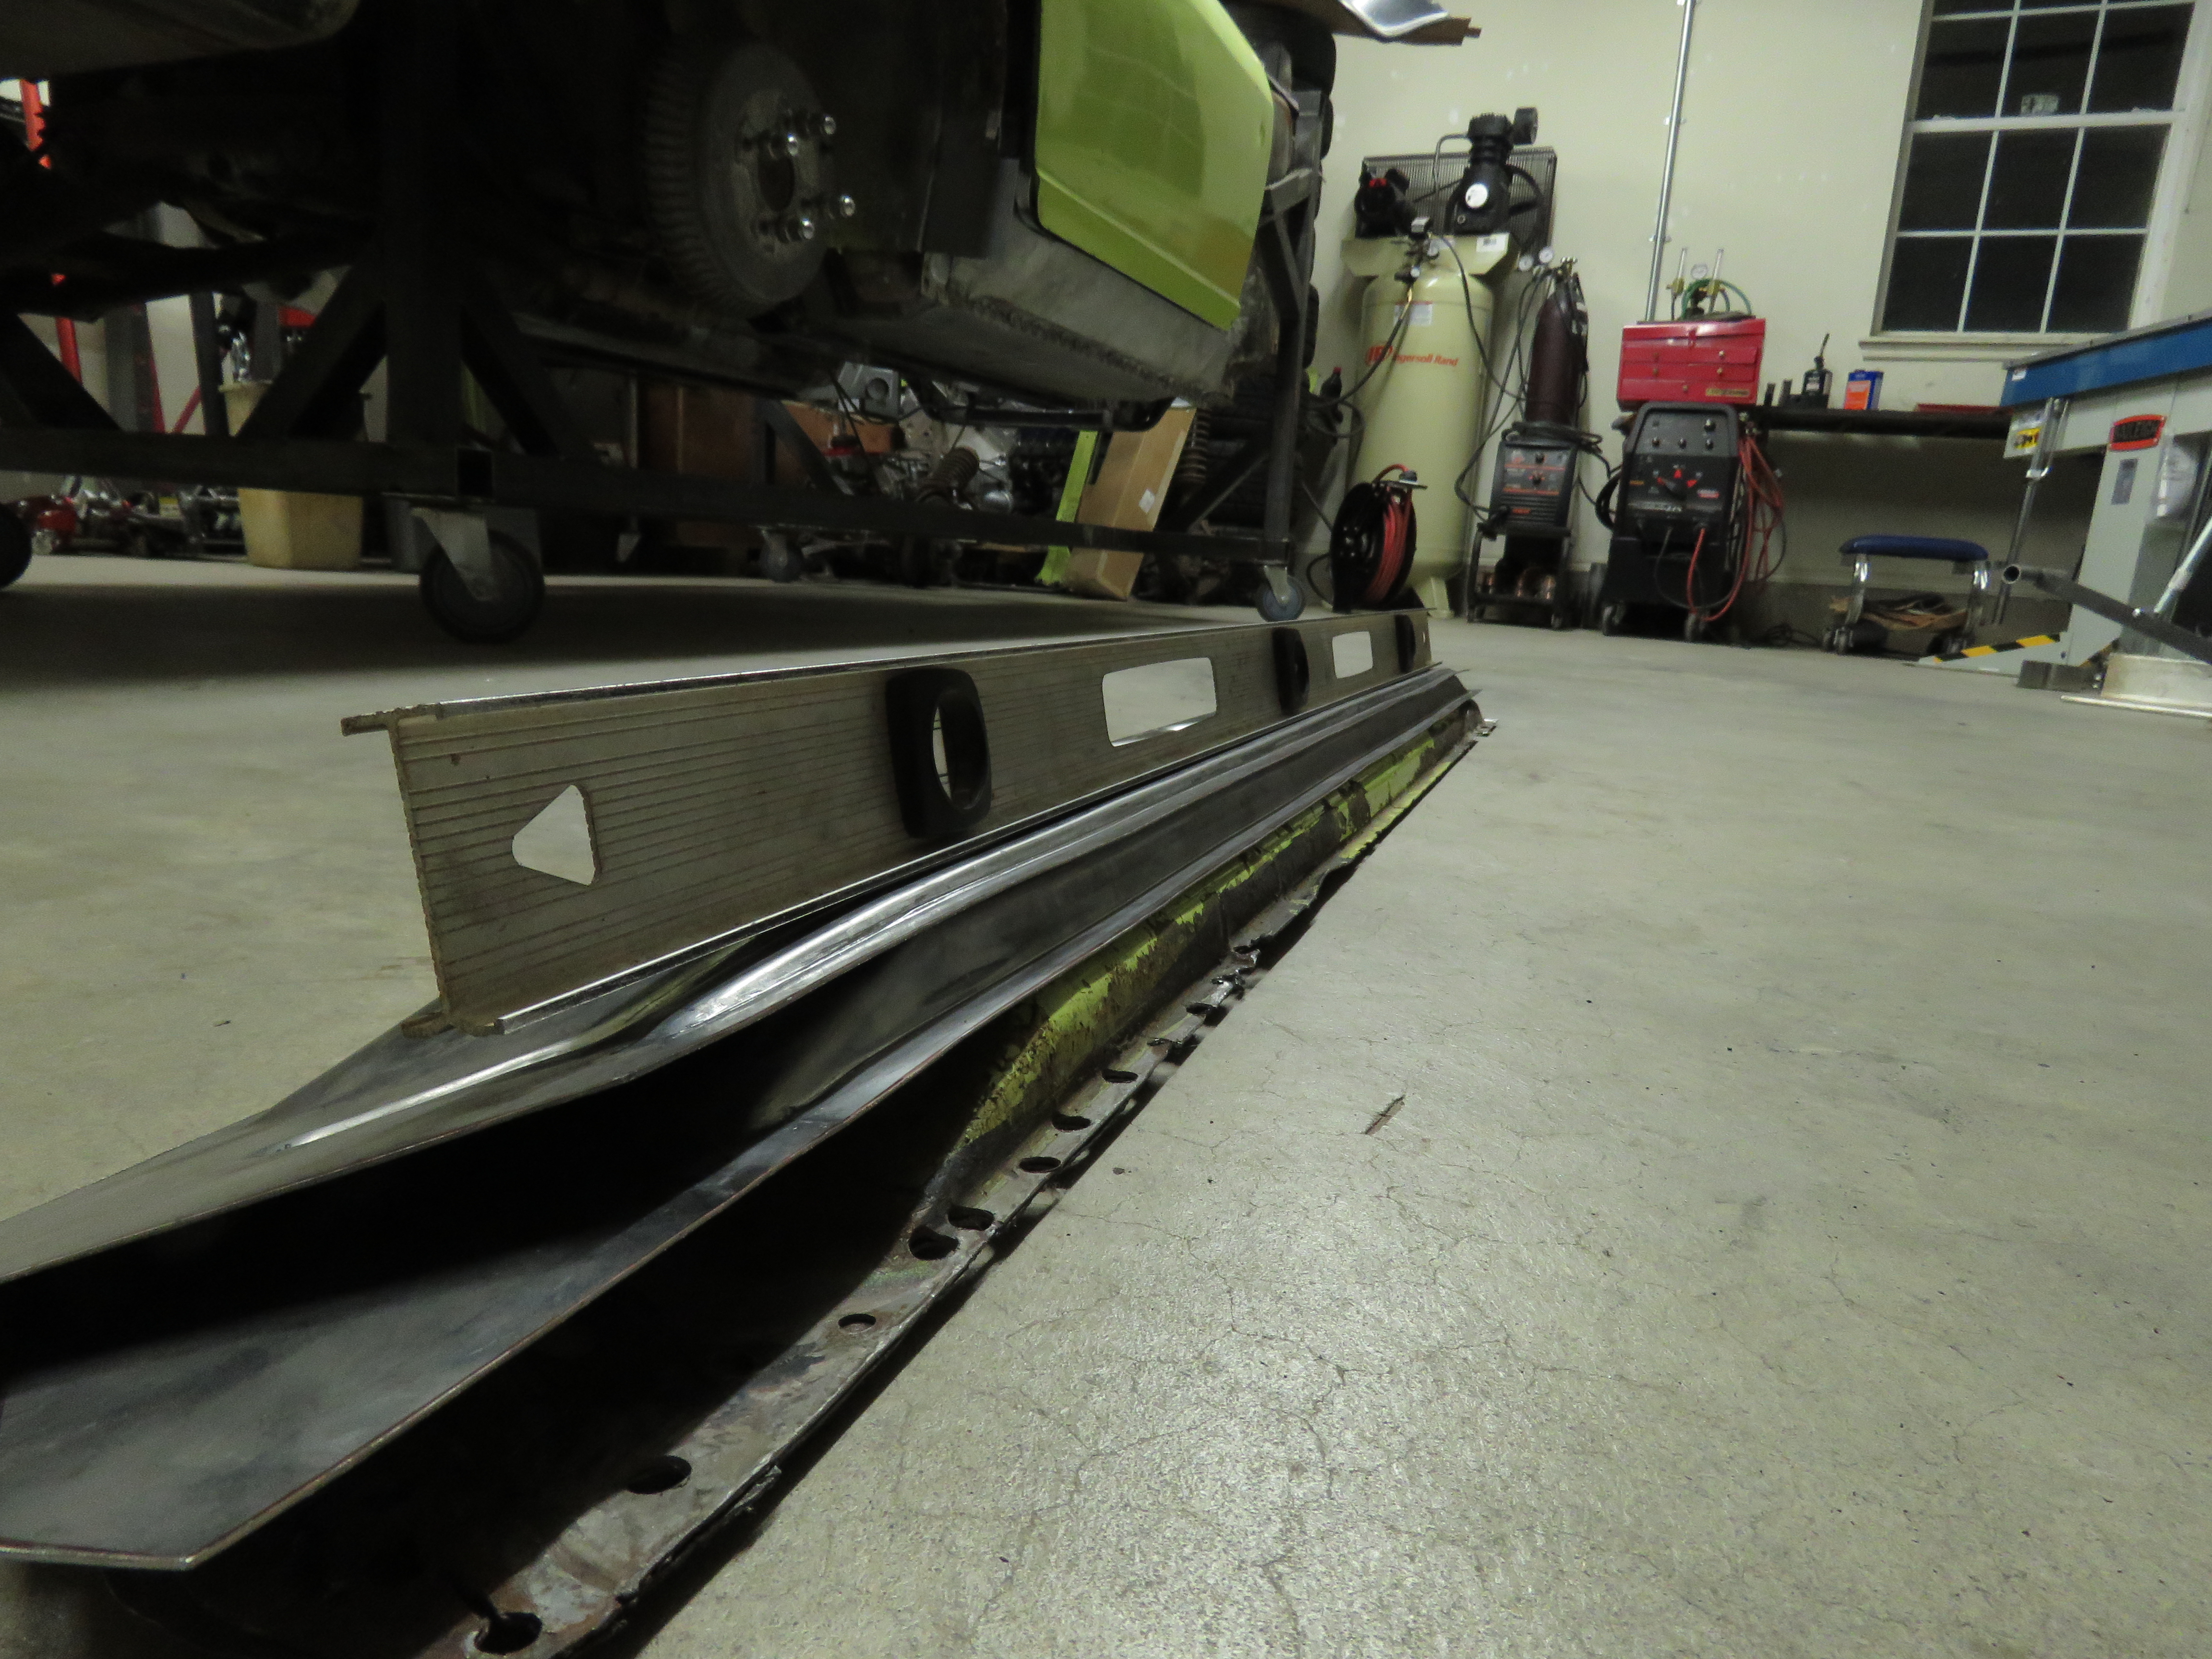
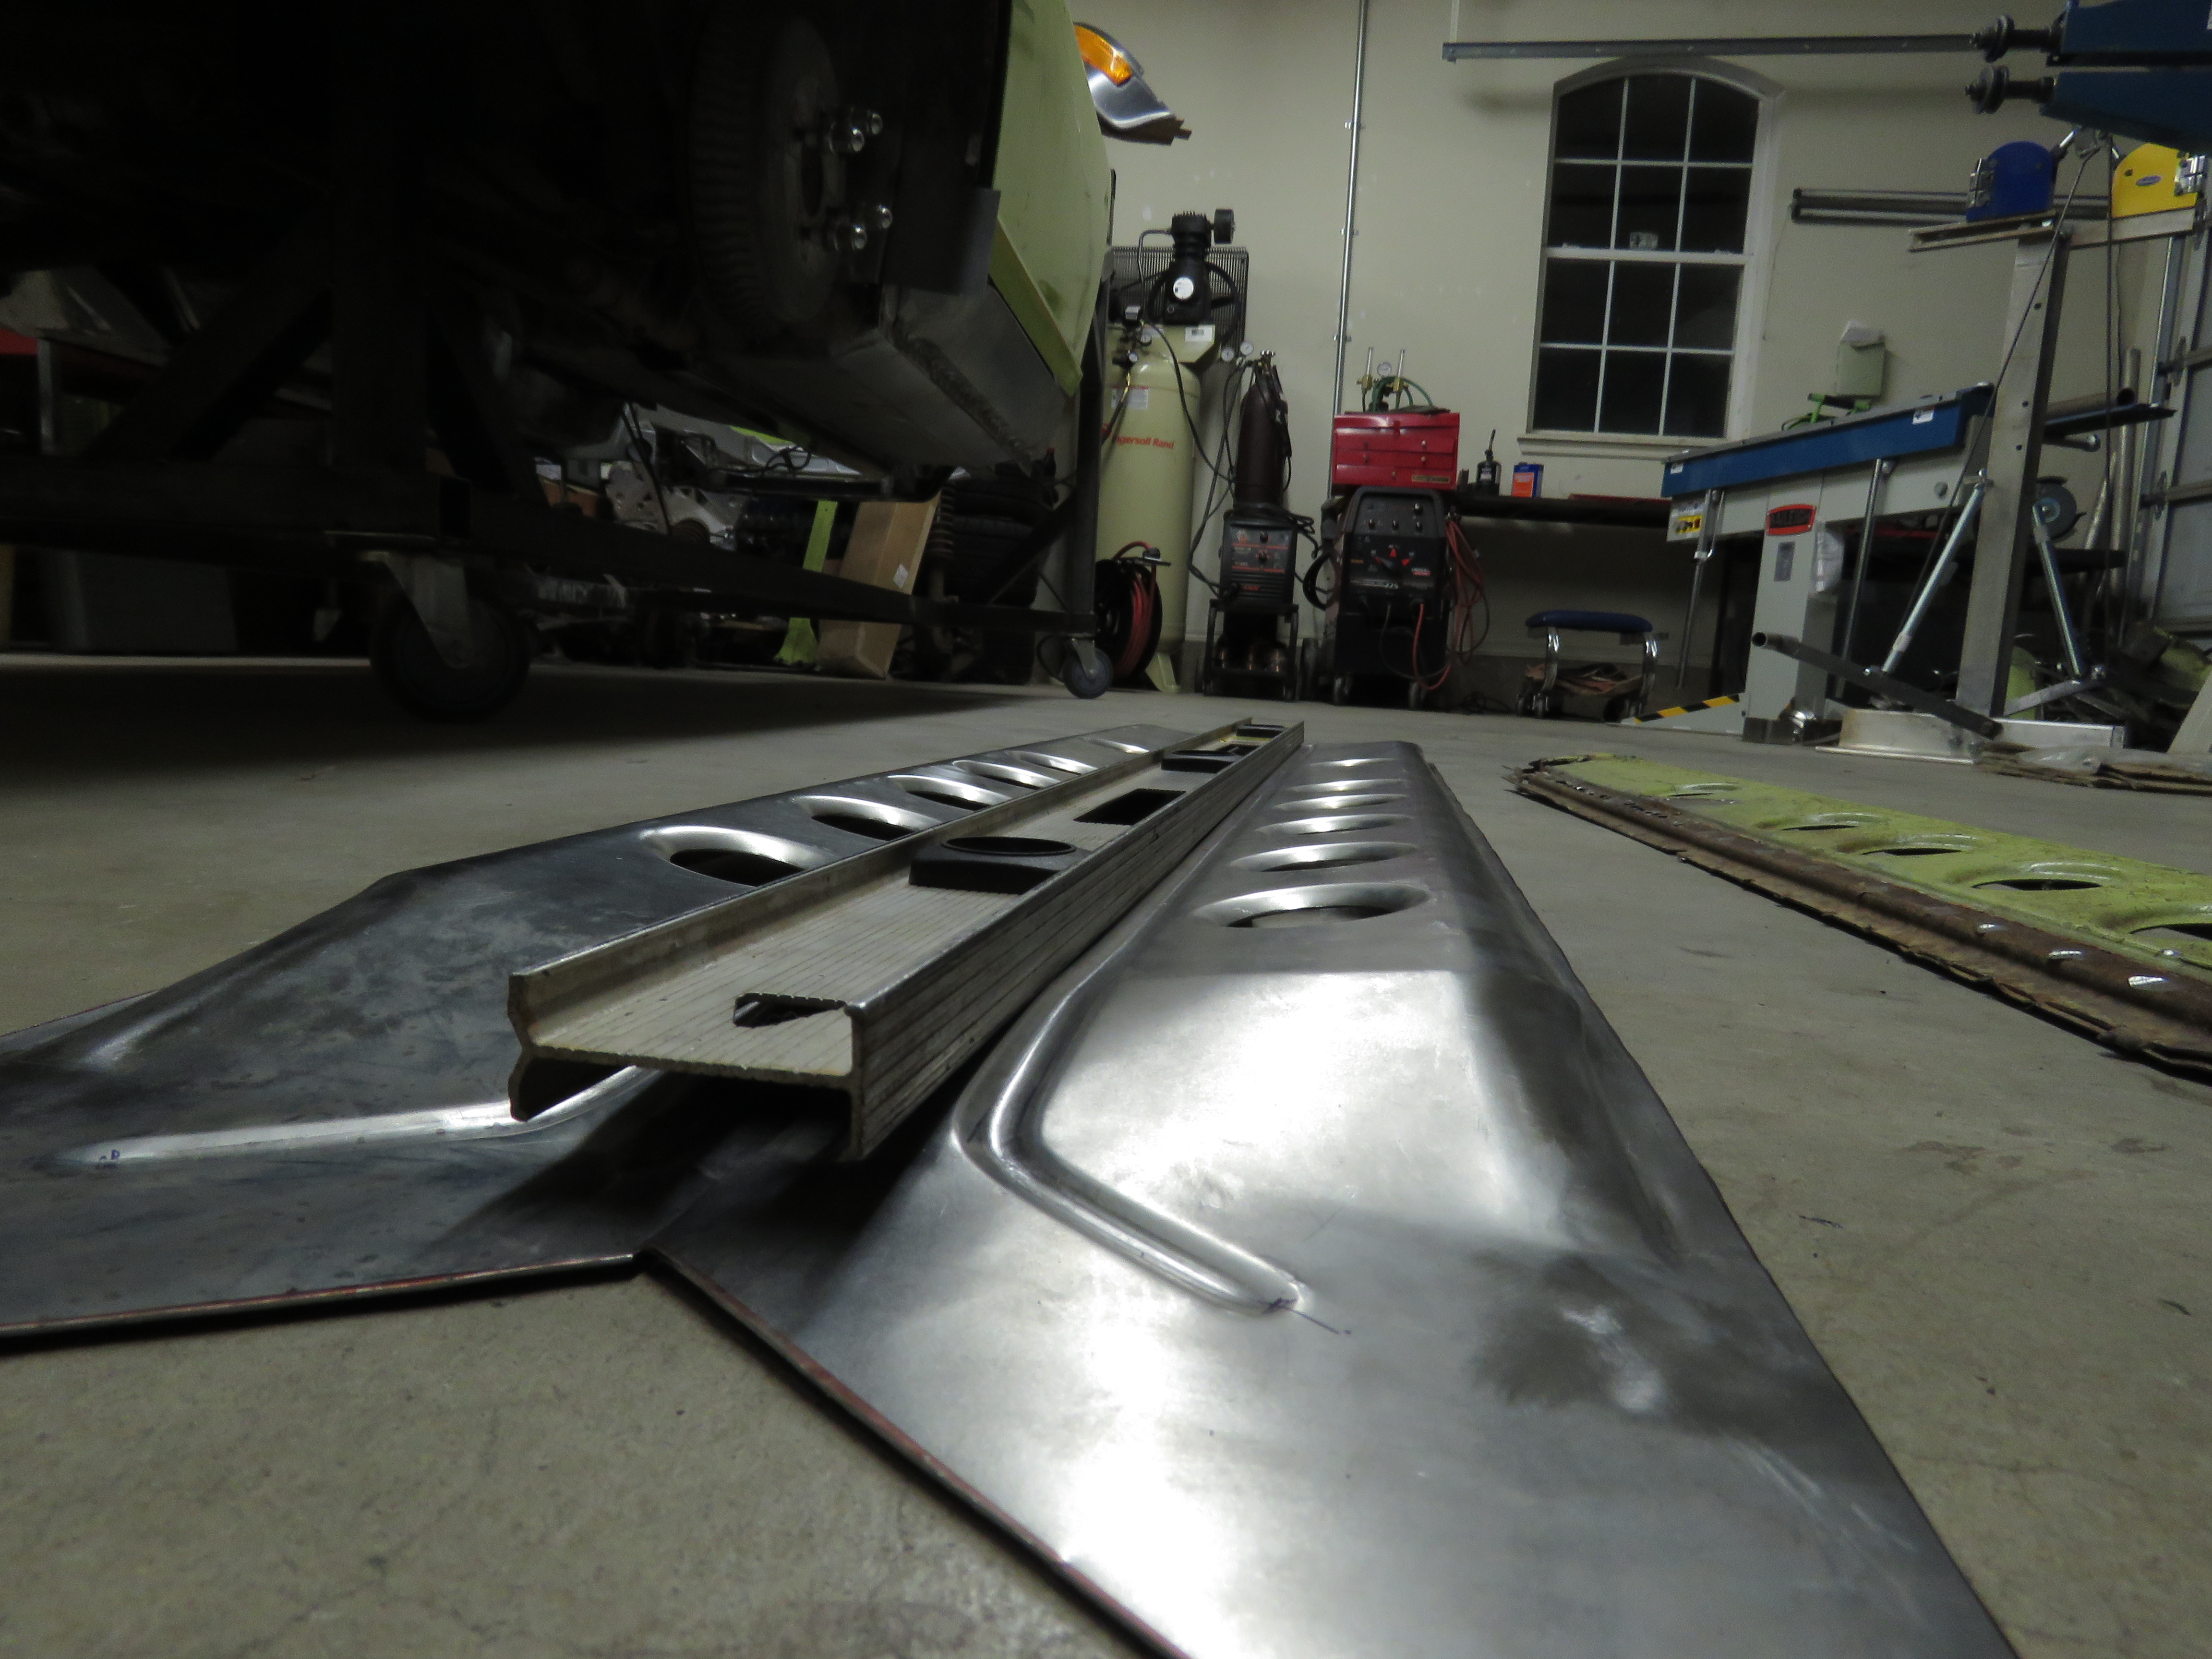
You still planning on using a narrower radiator or fix the frame rail up front? The 240z rails also notch in about the same. Picture of my 240z Frame rail removed from the car. kind of hard to see the indention at the front for the radiator clearance. A while back I swapped the stock 240z rad for a 280zx N/A (year unknown) and the length was pretty close to same. Comparasion, 280zx left, 240z right. Clearance on each side of the frame rails. Cleared the hood. Hanged down a little, but wasnt bad at all. Not sure if any of this information helps or not. You may have to notch the frame rail up front though, to fit in the radiator support. Or maybe not, I dont have your replacement rail to really determine that. If you can get away without notching it, I would just find a aftermarket rad that will fit, like your were doing.
Thats crazy!! I wouldnt move that car one bit, leave it where it is.
Should be safe using a 240z rad as it isnt as tall and will allow for the bottom to hide behind the lower rad support and still have plenty room on top to clear the hood. Reason I went with the zx radiator, I needed something cheap and in the moment, It was the only good conditioned z radiator at a local salvage yard that somewhat fit and worked for the time being. Im not sure but, are the 280z's bottom radiator supports lower than the 240z's?
You still planning on using a narrower radiator or fix the frame rail up front? The 240z rails also notch in about the same. Picture of my 240z Frame rail removed from the car. kind of hard to see the indention at the front for the radiator clearance. A while back I swapped the stock 240z rad for a 280zx N/A (year unknown) and the length was pretty close to same. Comparasion, 280zx left, 240z right. Clearance on each side of the frame rails. Cleared the hood. Hanged down a little, but wasnt bad at all. Not sure if any of this information helps or not. You may have to notch the frame rail up front though, to fit in the radiator support. Or maybe not, I dont have your replacement rail to really determine that. If you can get away without notching it, I would just find a aftermarket rad that will fit, like your were doing.


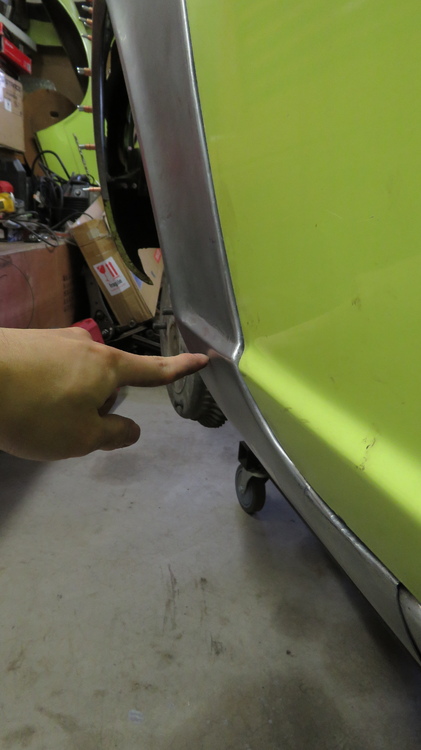
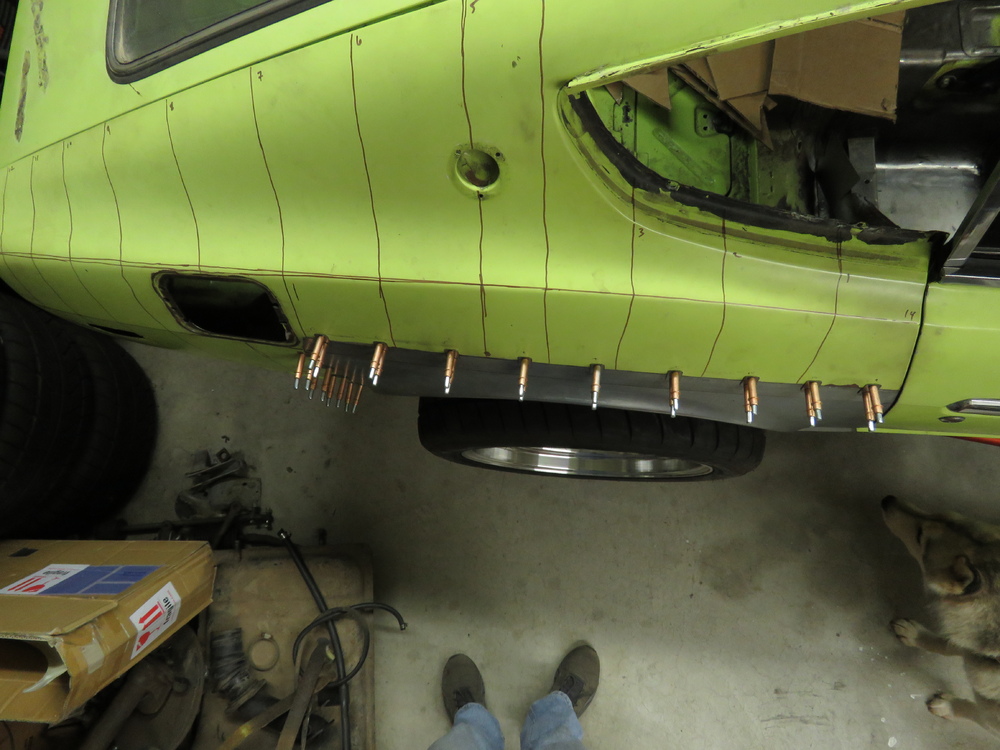
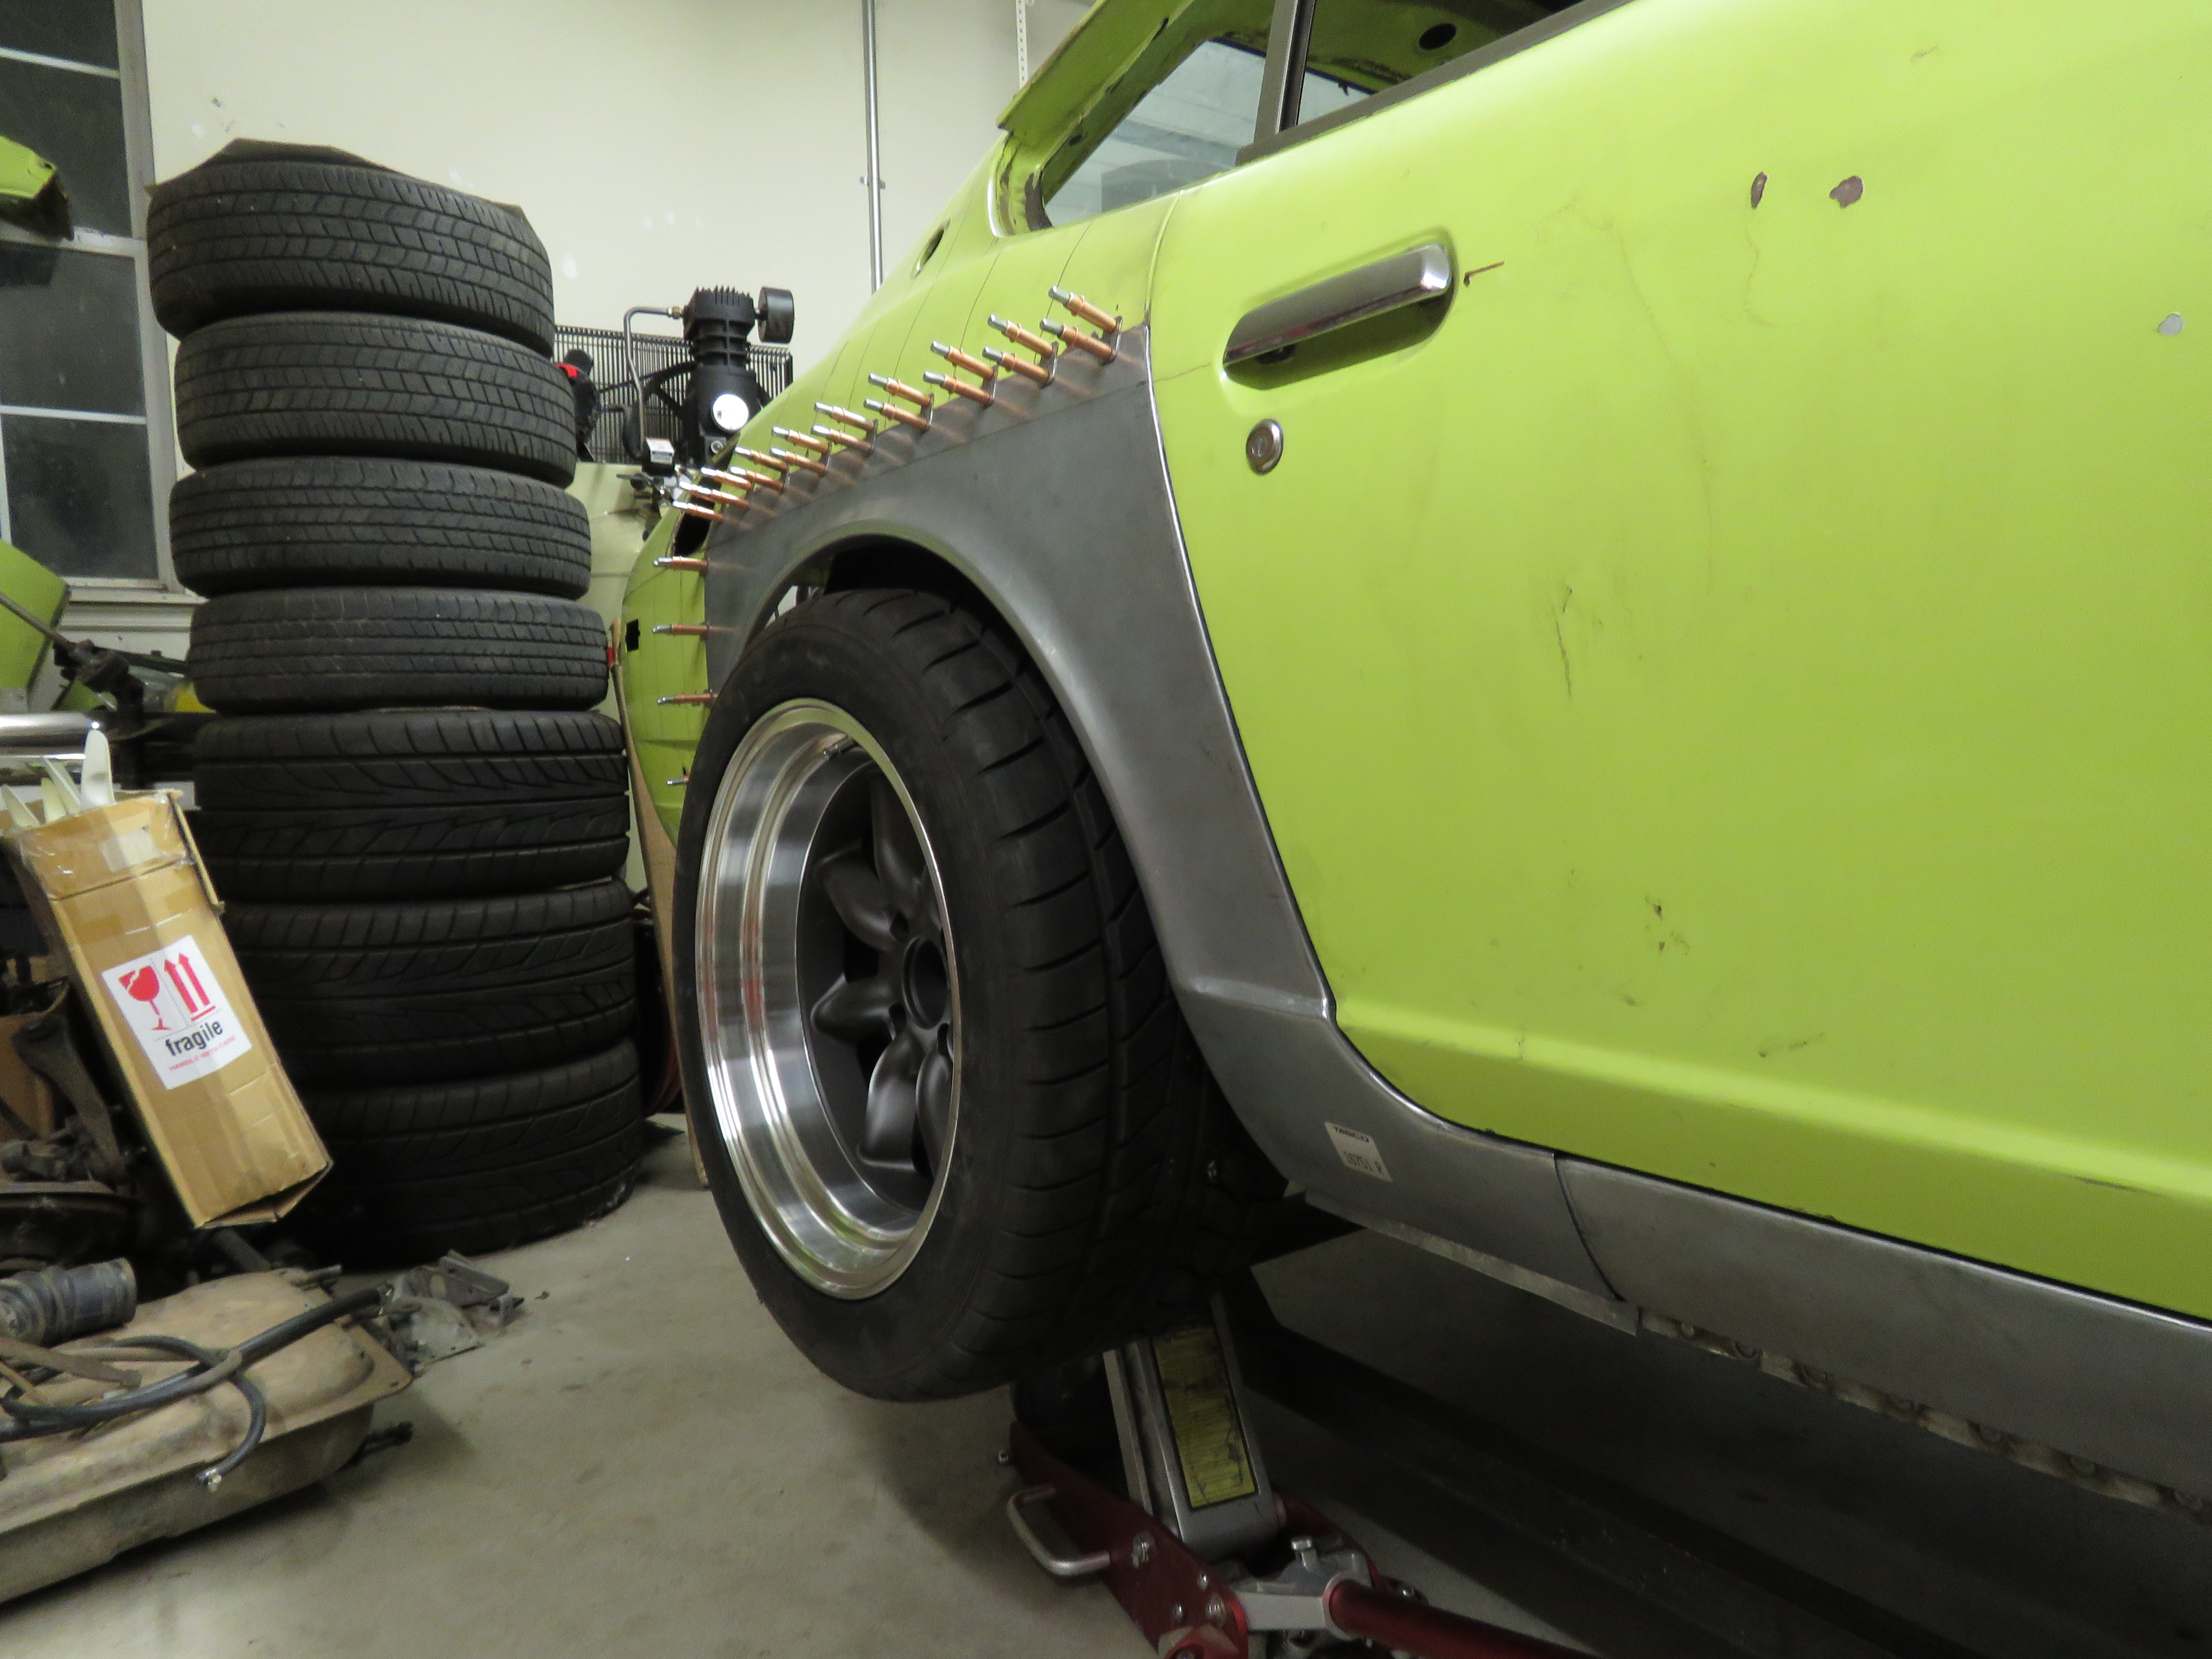
 The wheel arch will be cut out after I get the panel welded in. Yeah the crease in the body line does fade away a bit at the peak of the arch, but since this area will be cut out/covered for the flare it wont matter in my situation. Good eye
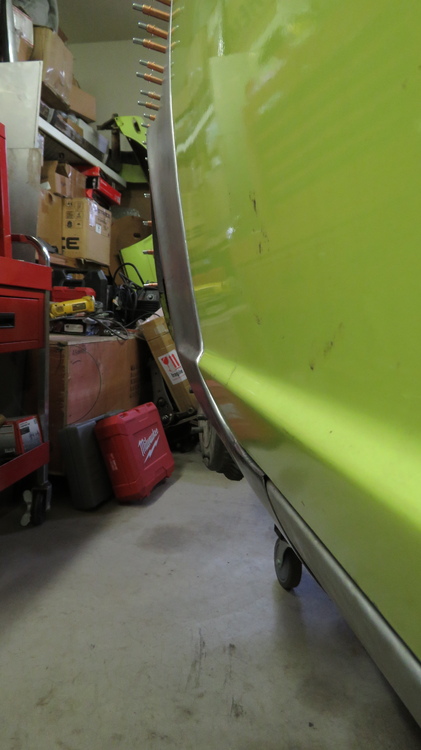
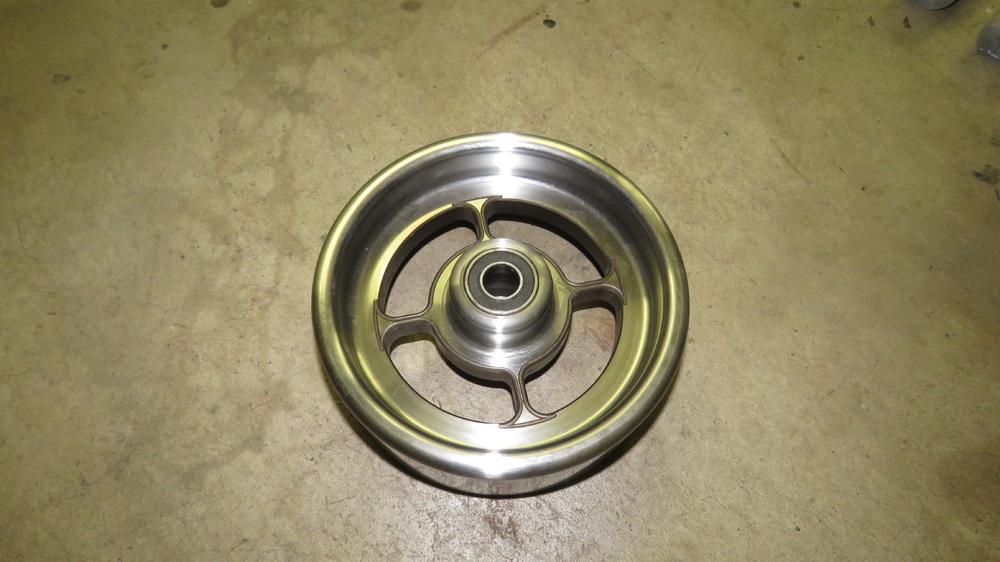
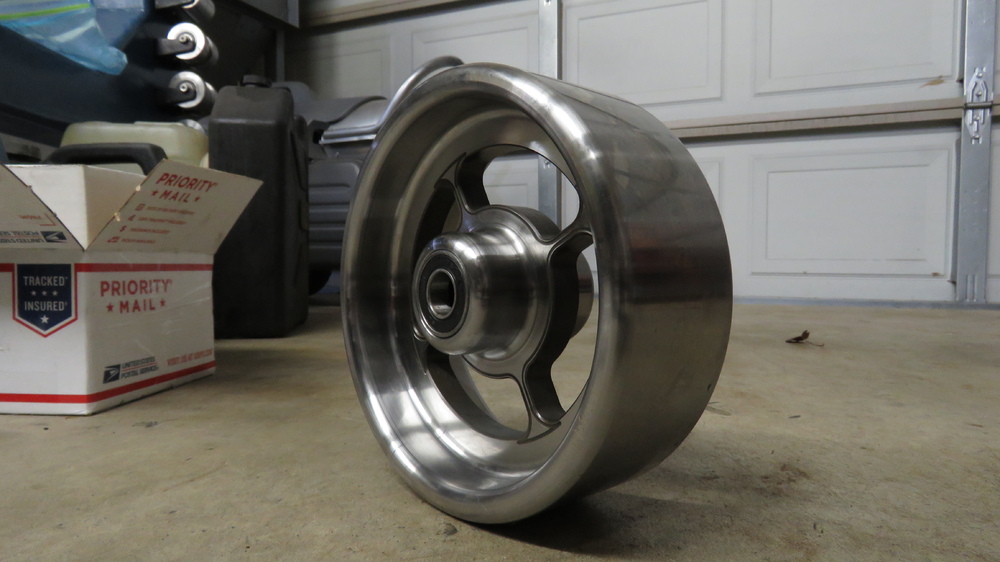
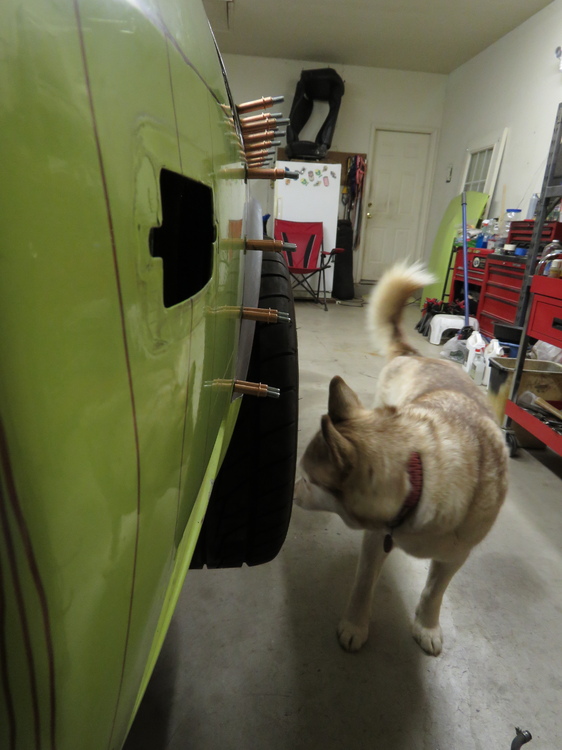
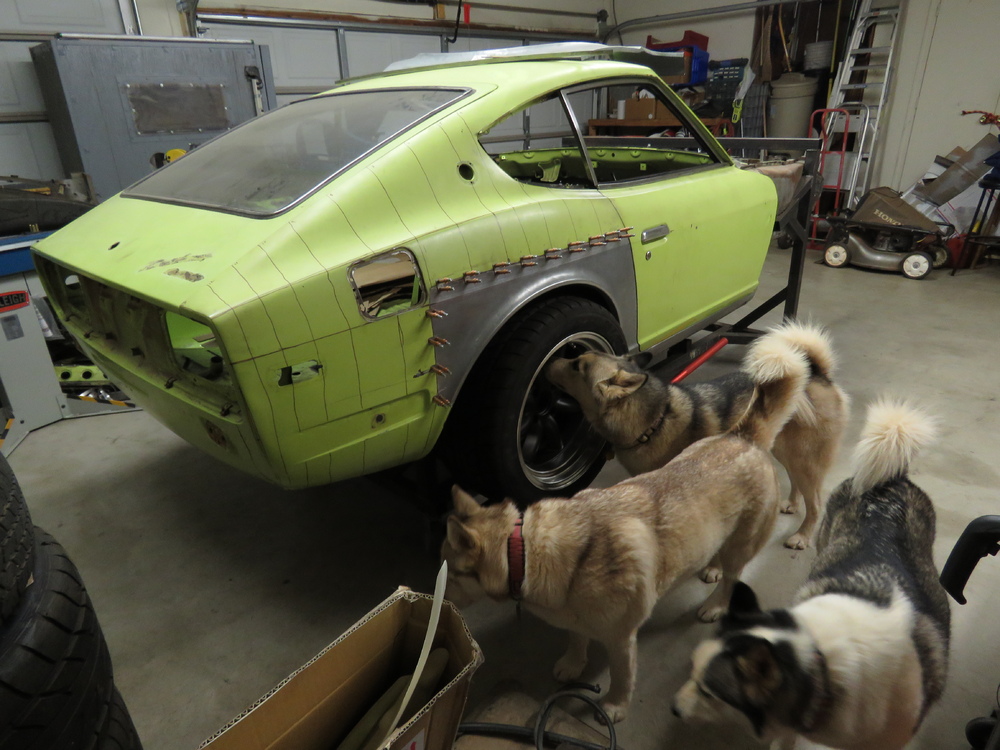
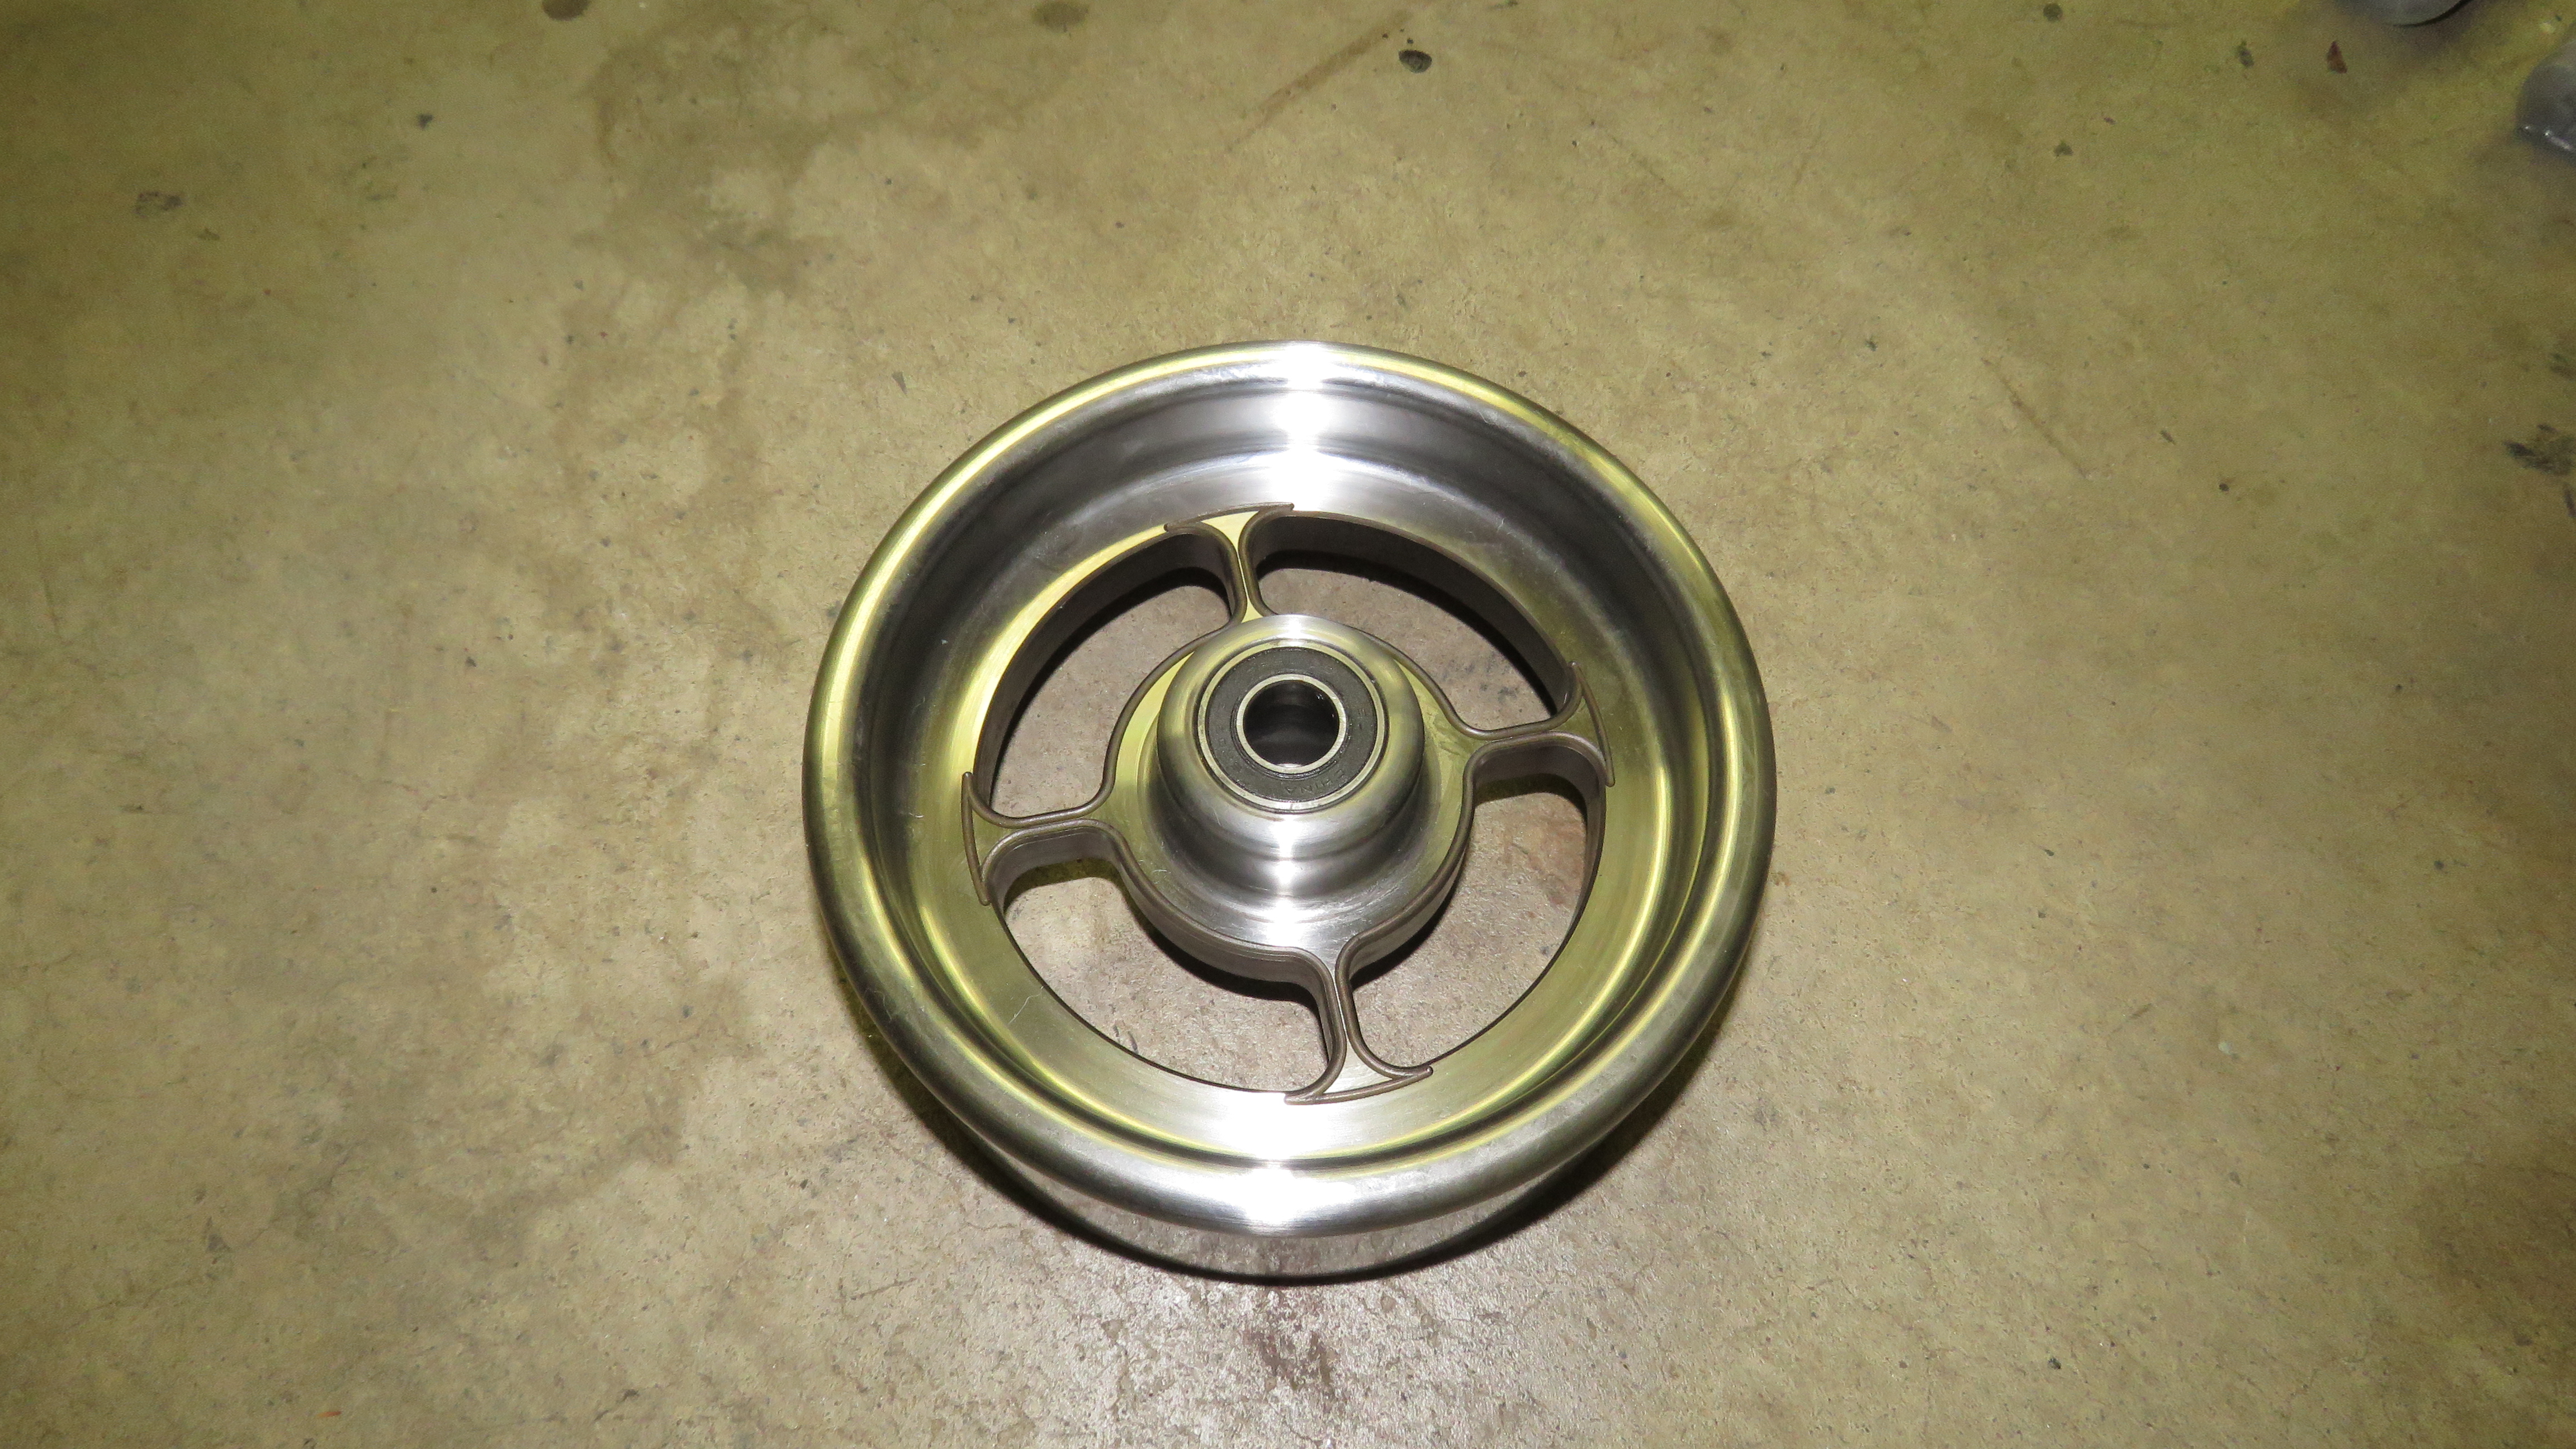
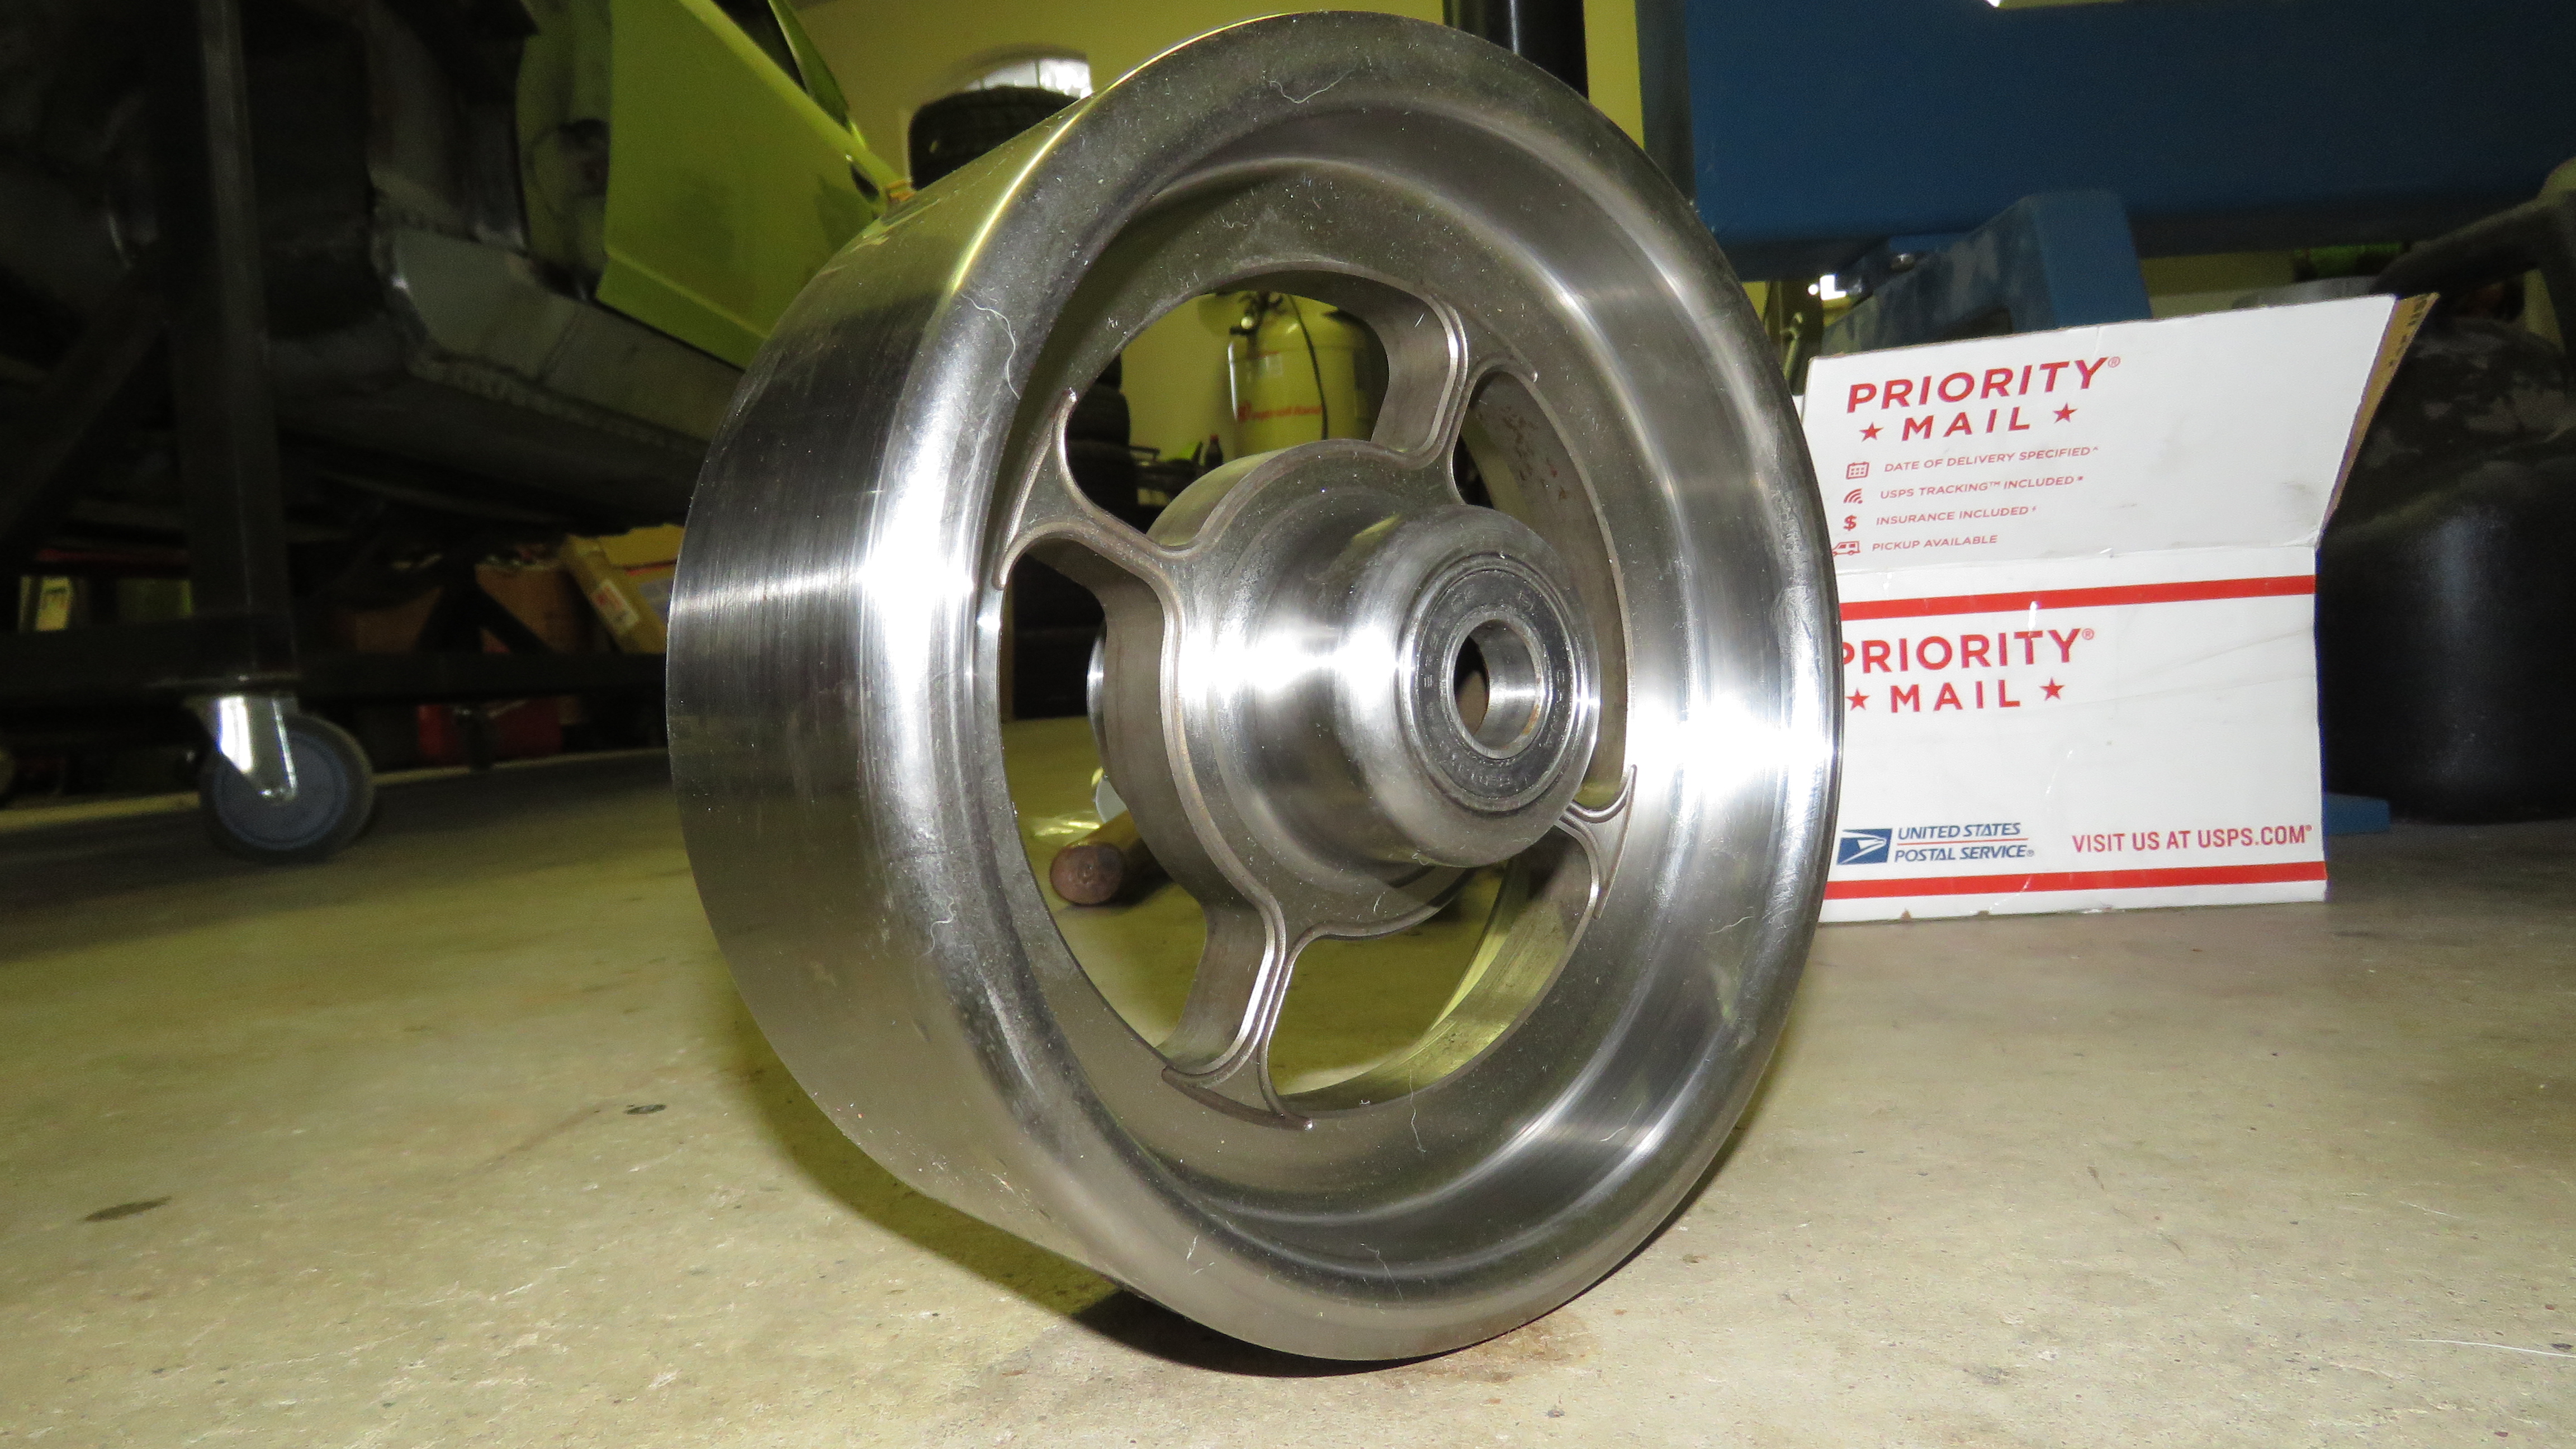
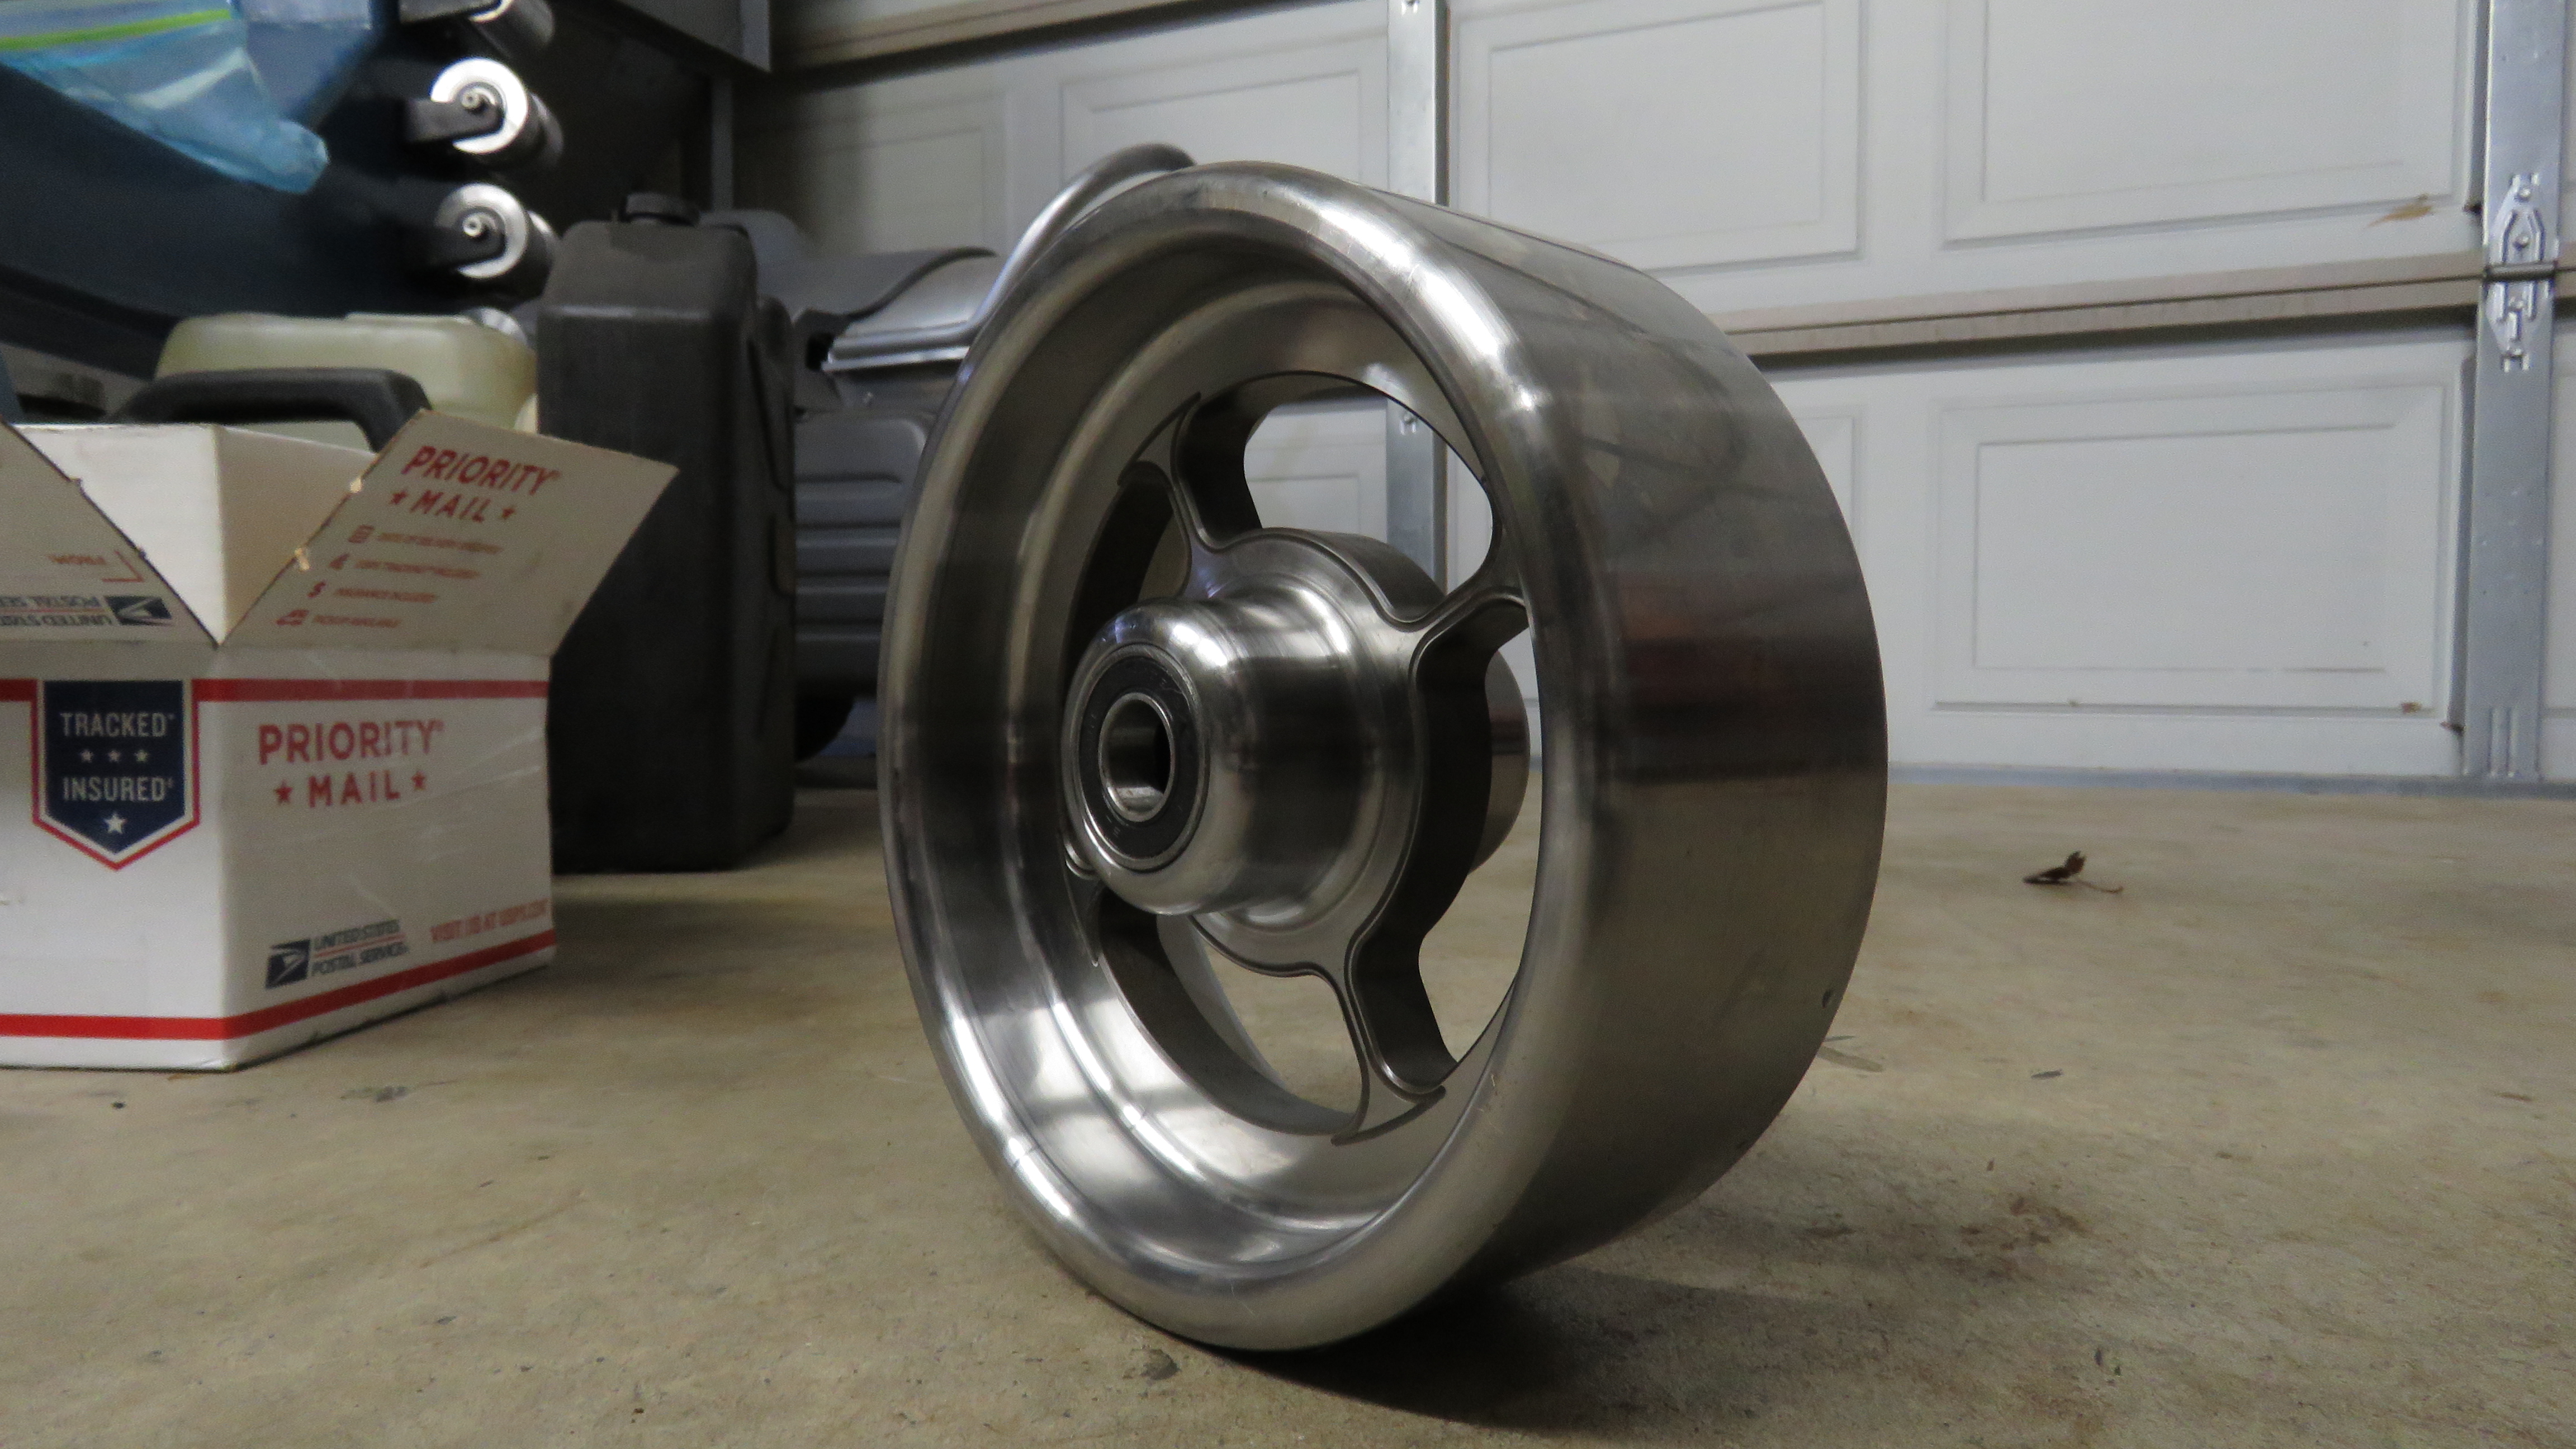
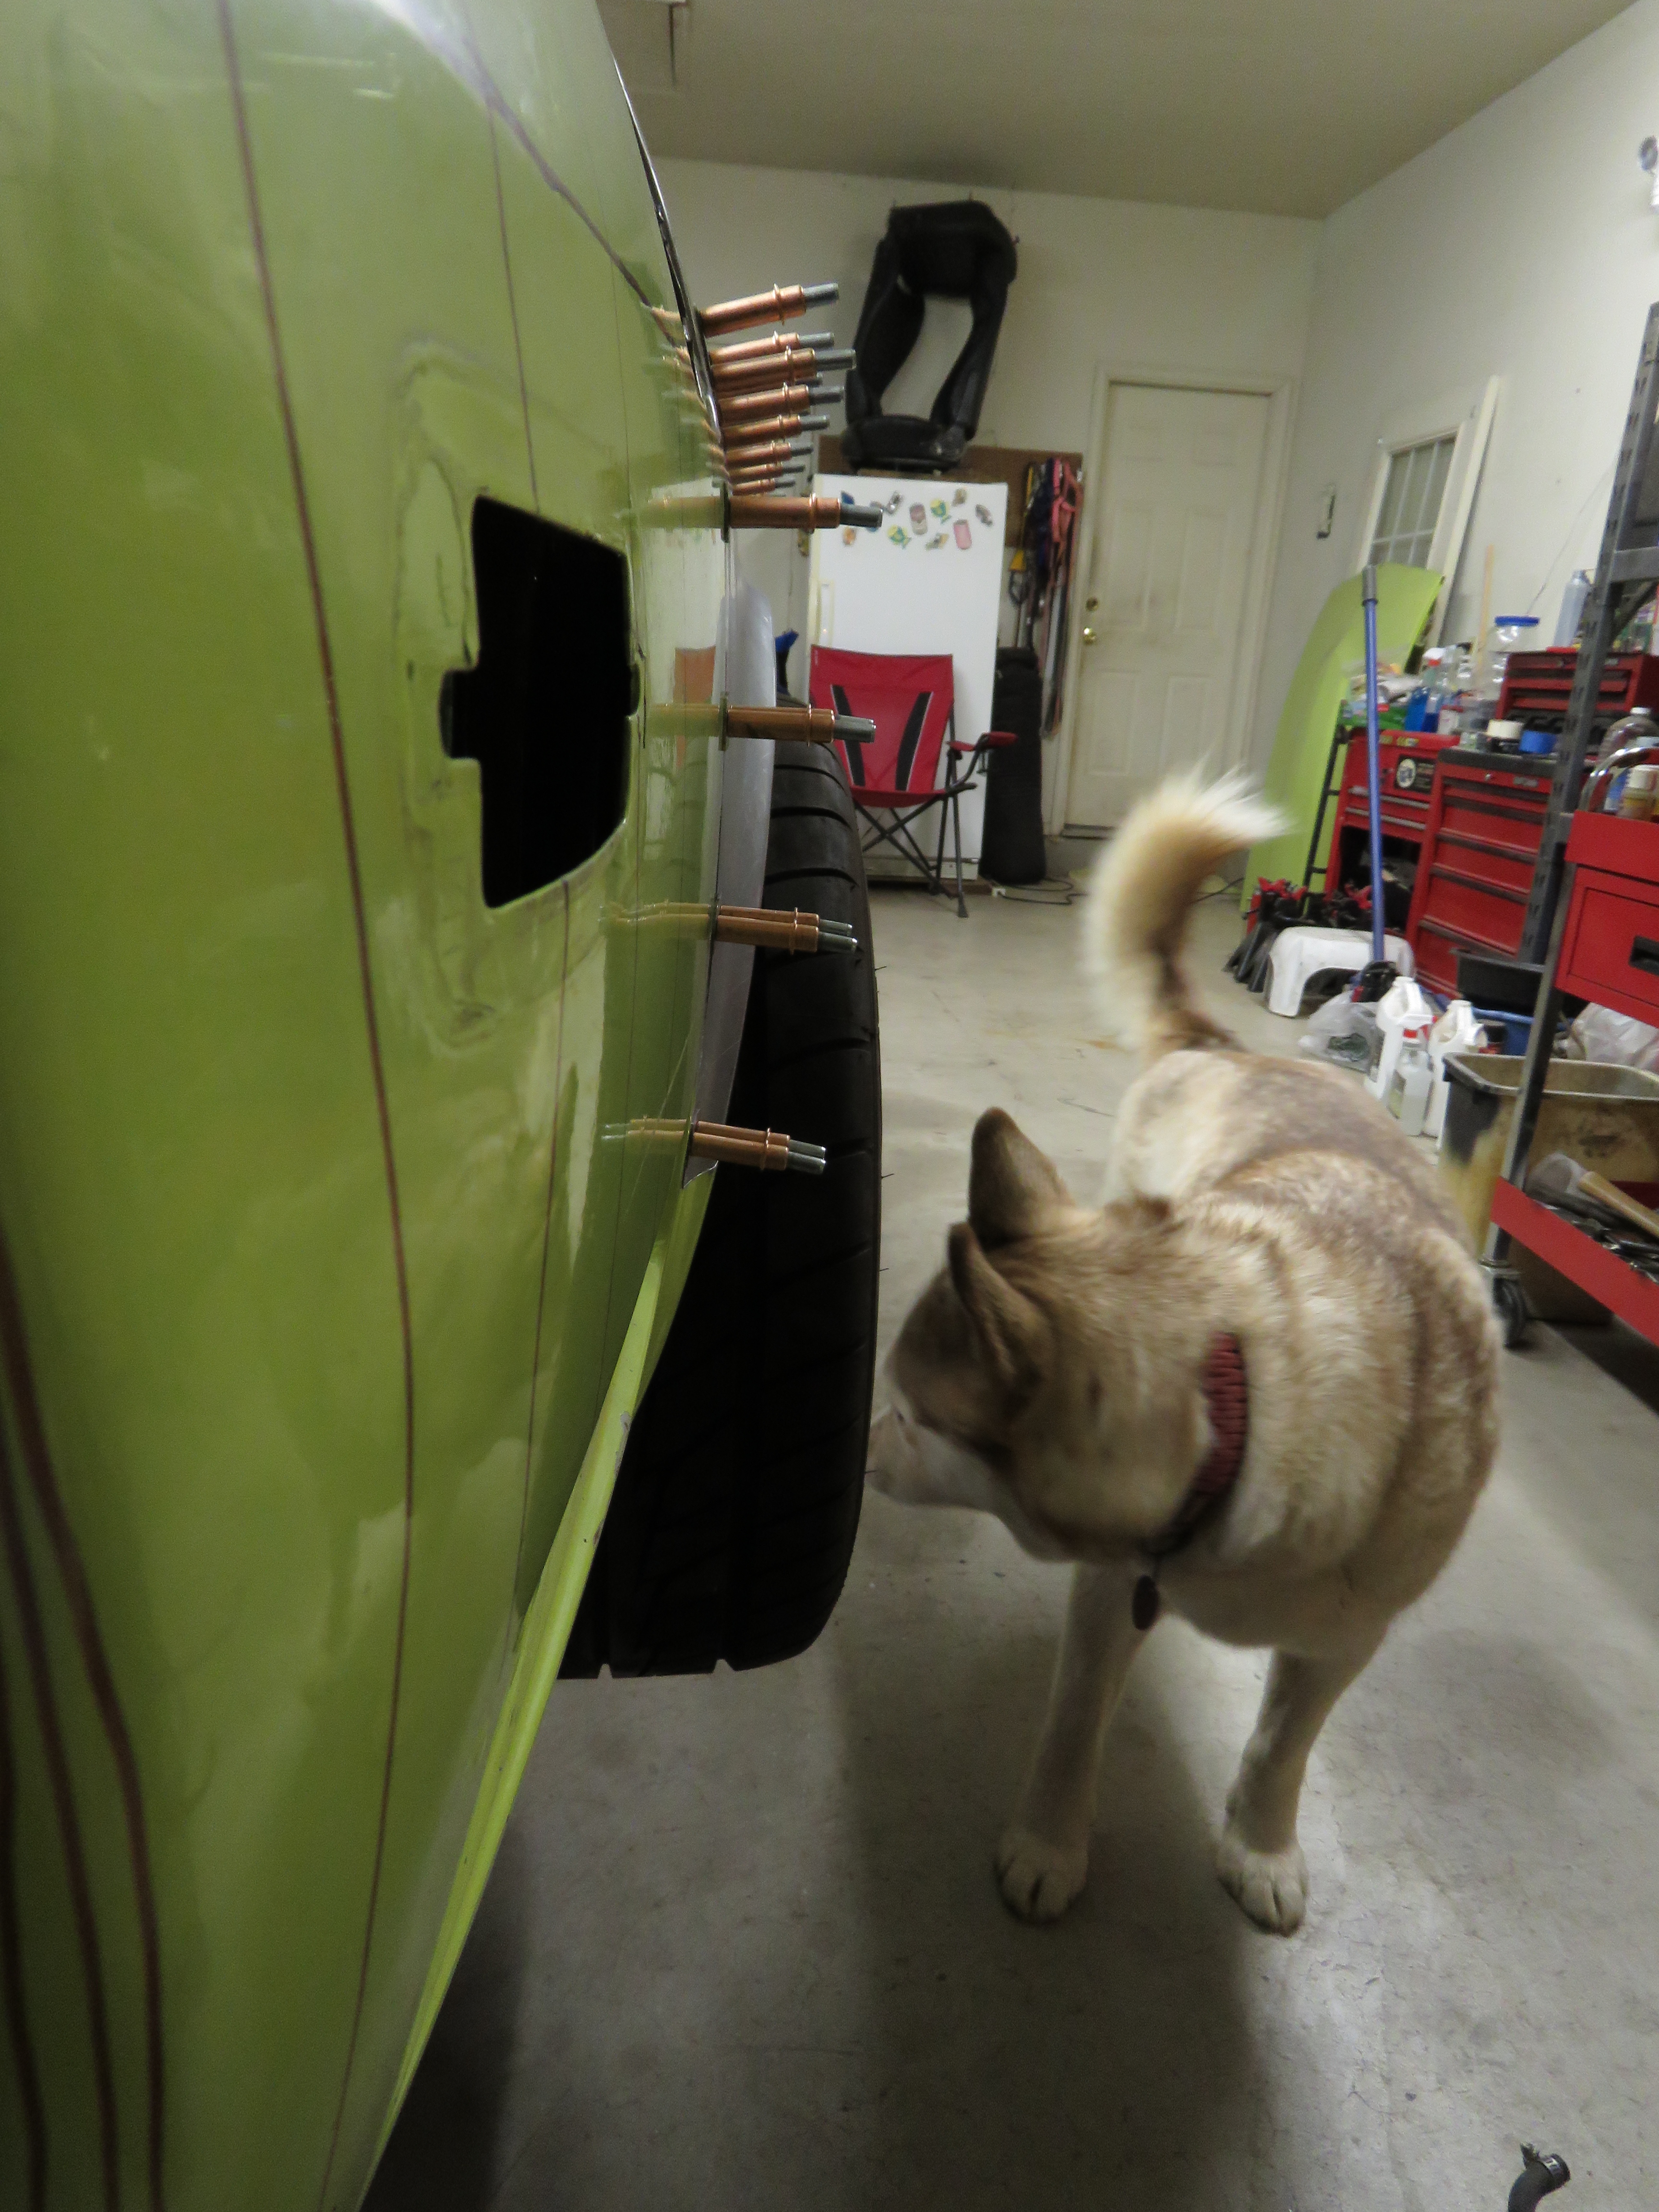
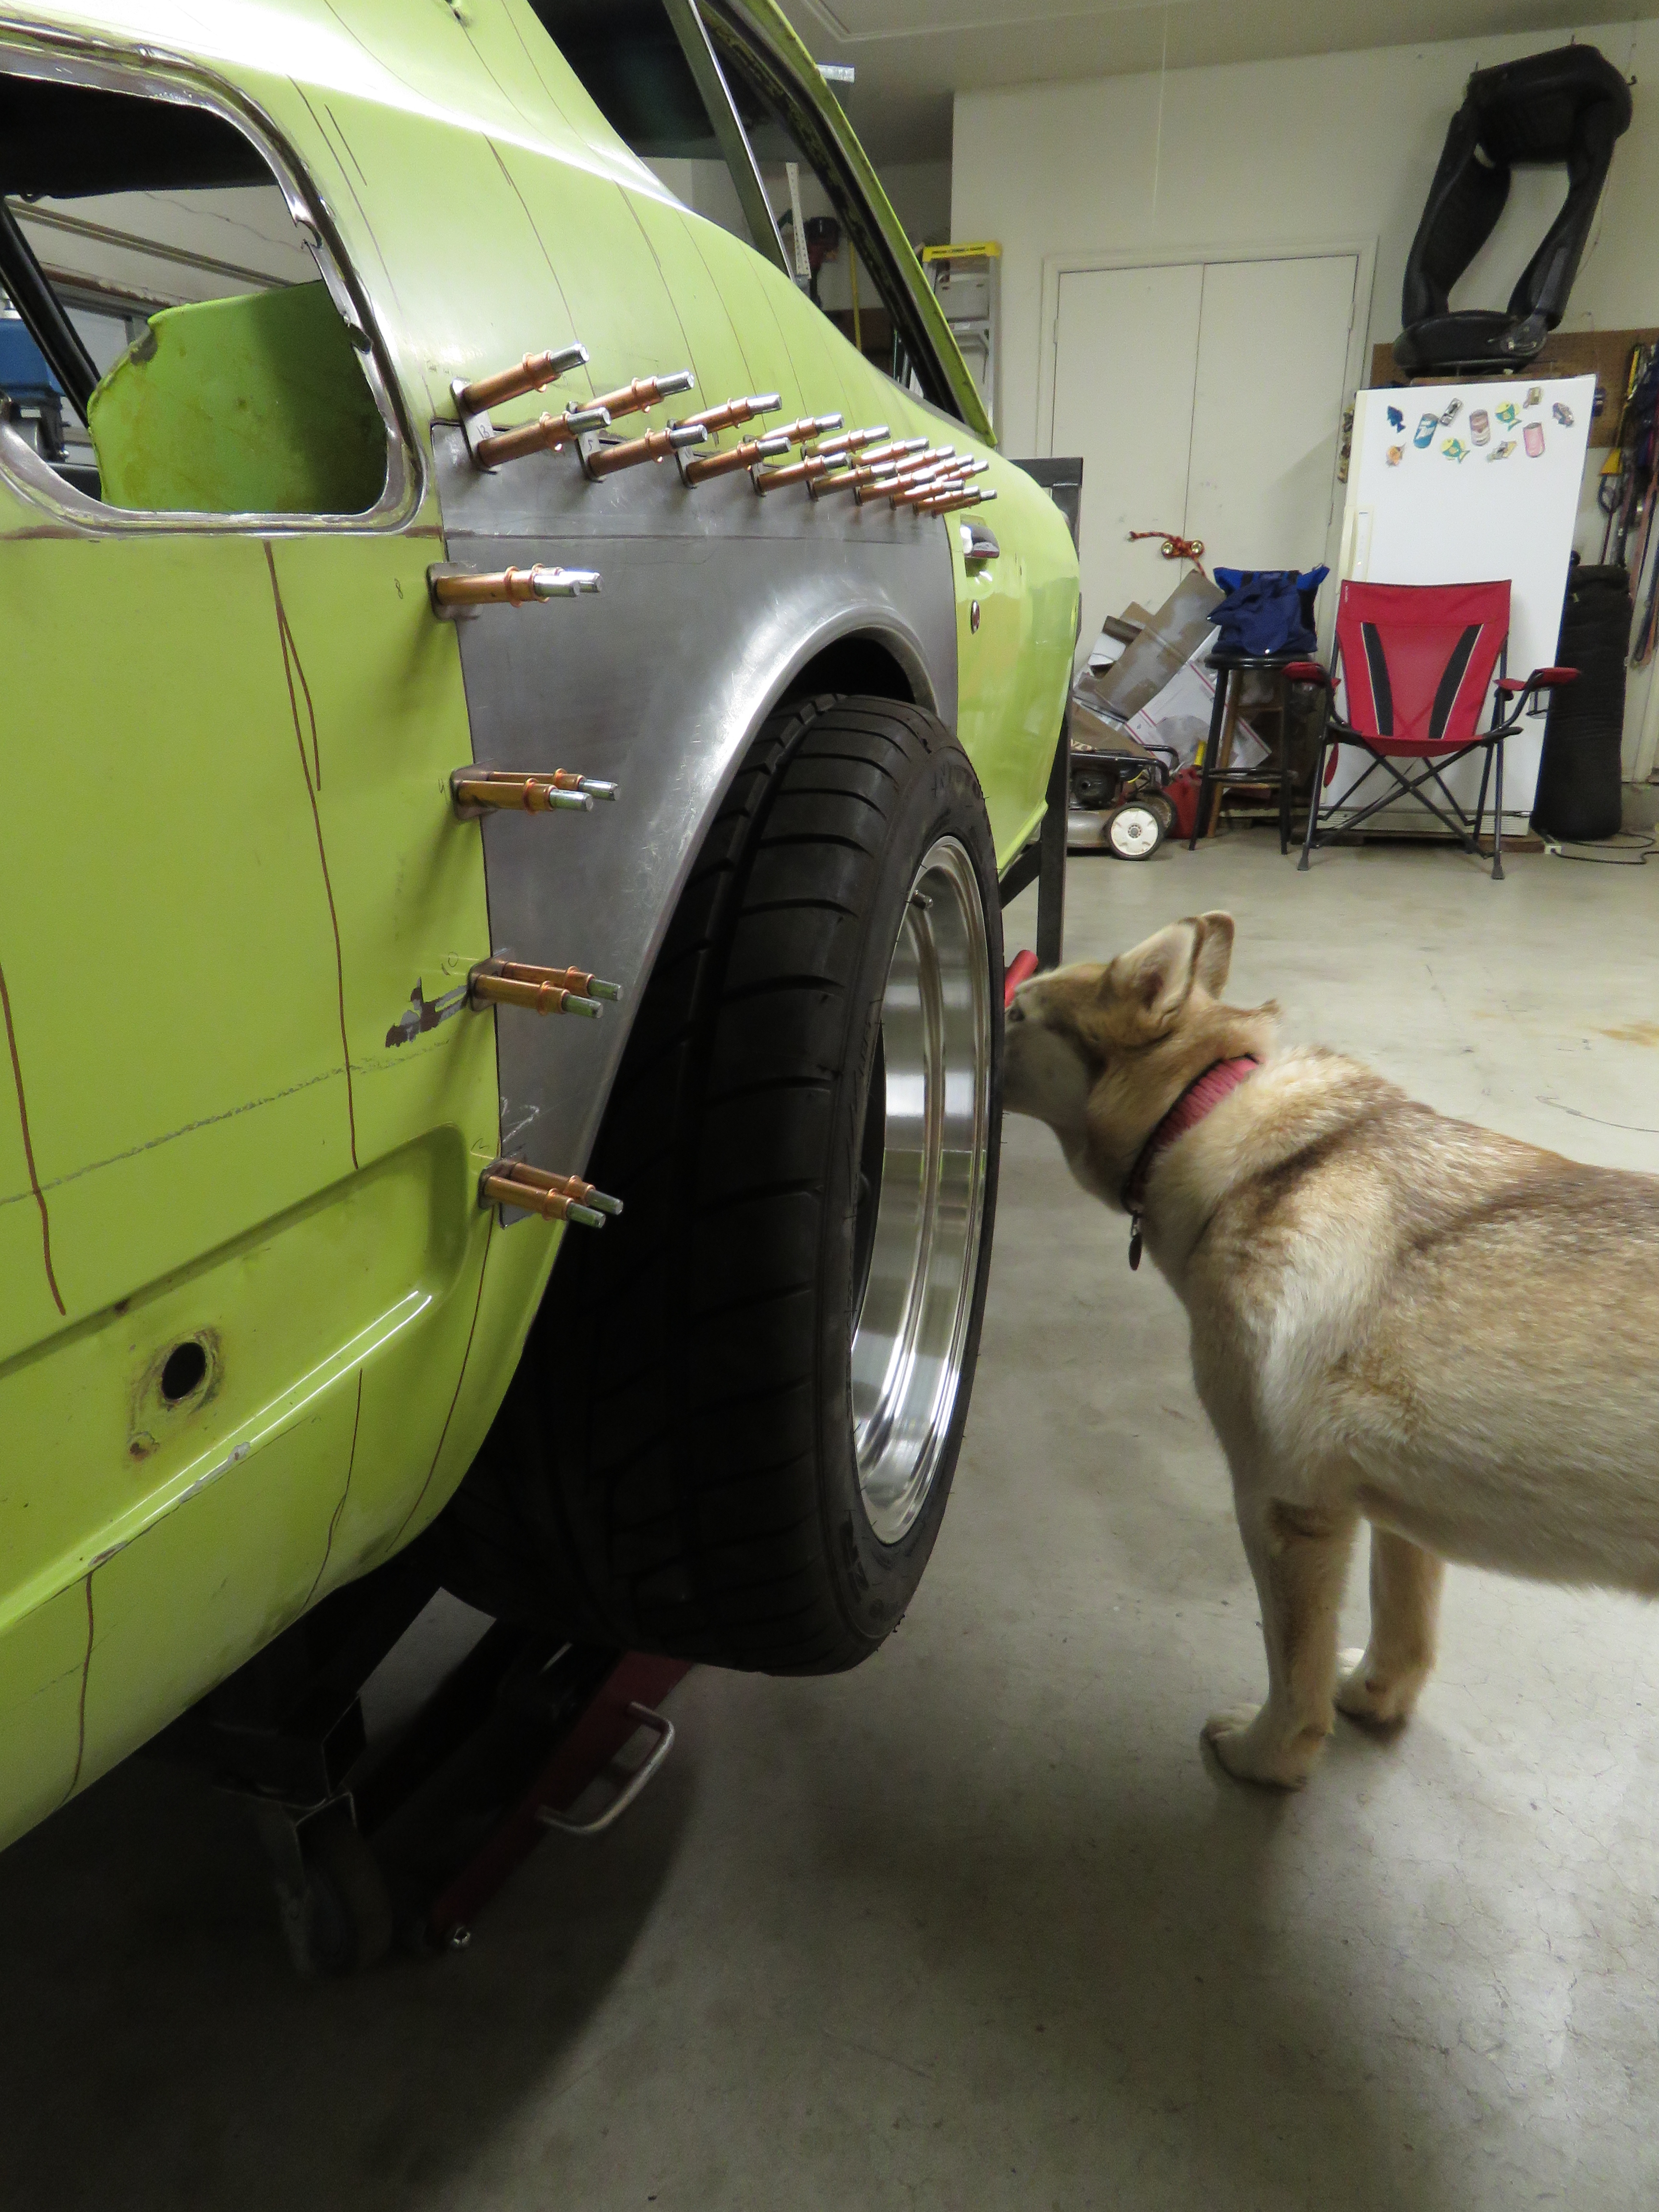
Thanks I was curious to see what the wheels I will be using look like before getting some sleep. Dogs keep getting in the way.
The wheel arch will be cut out after I get the panel welded in. Yeah the crease in the body line does fade away a bit at the peak of the arch, but since this area will be cut out/covered for the flare it wont matter in my situation. Good eye
Thanks I was curious to see what the wheels I will be using look like before getting some sleep. Dogs keep getting in the way.


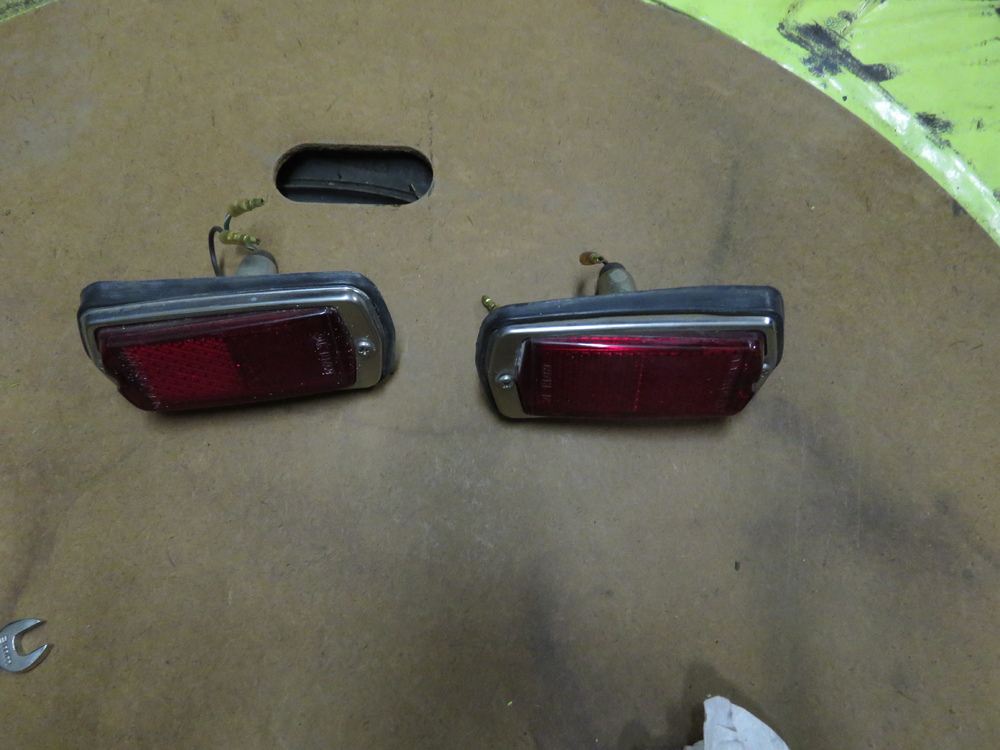
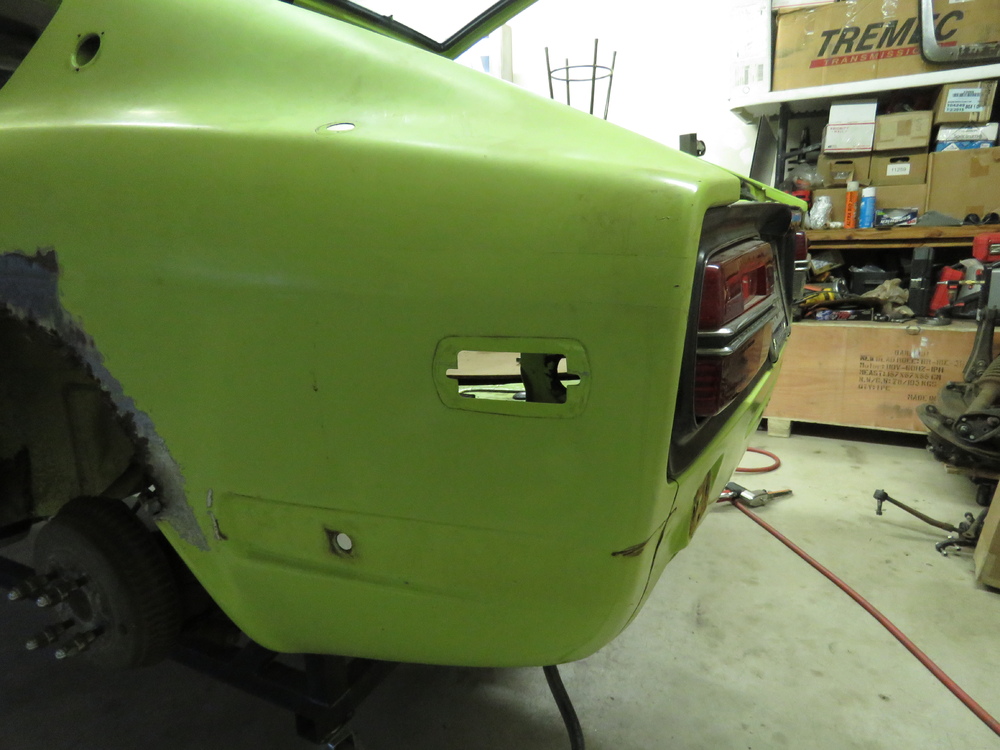
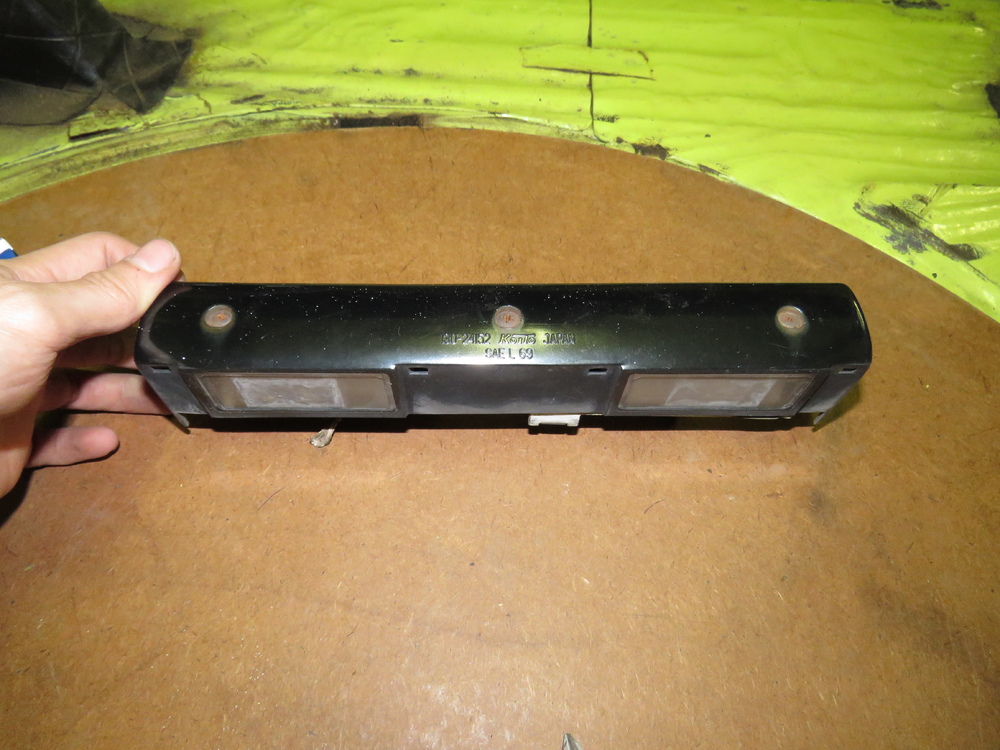
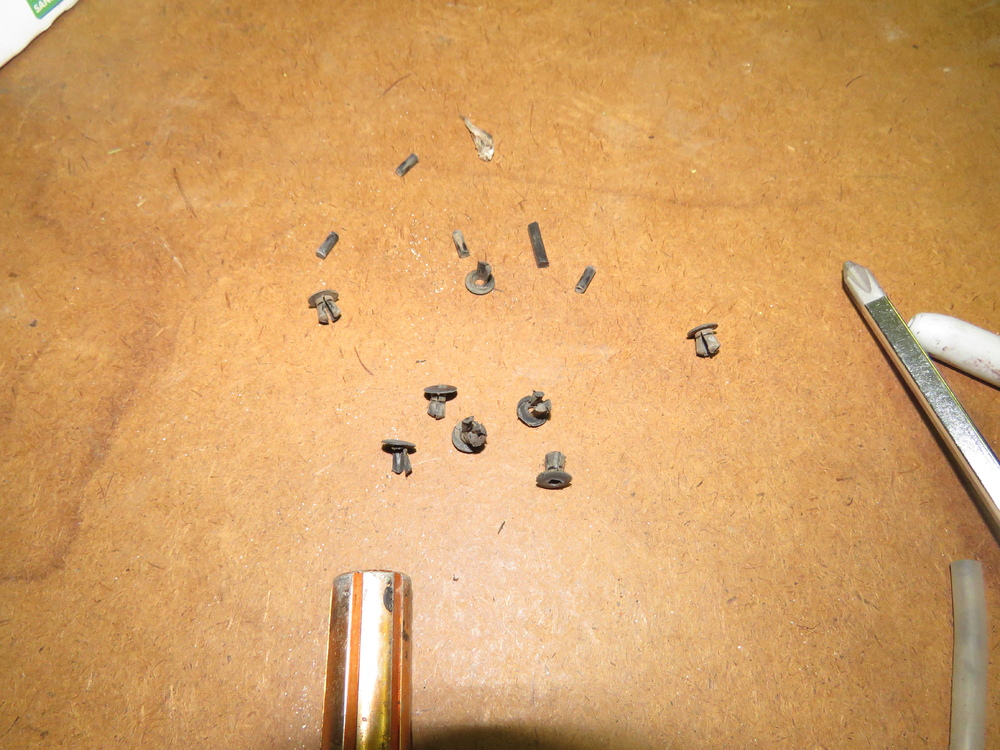
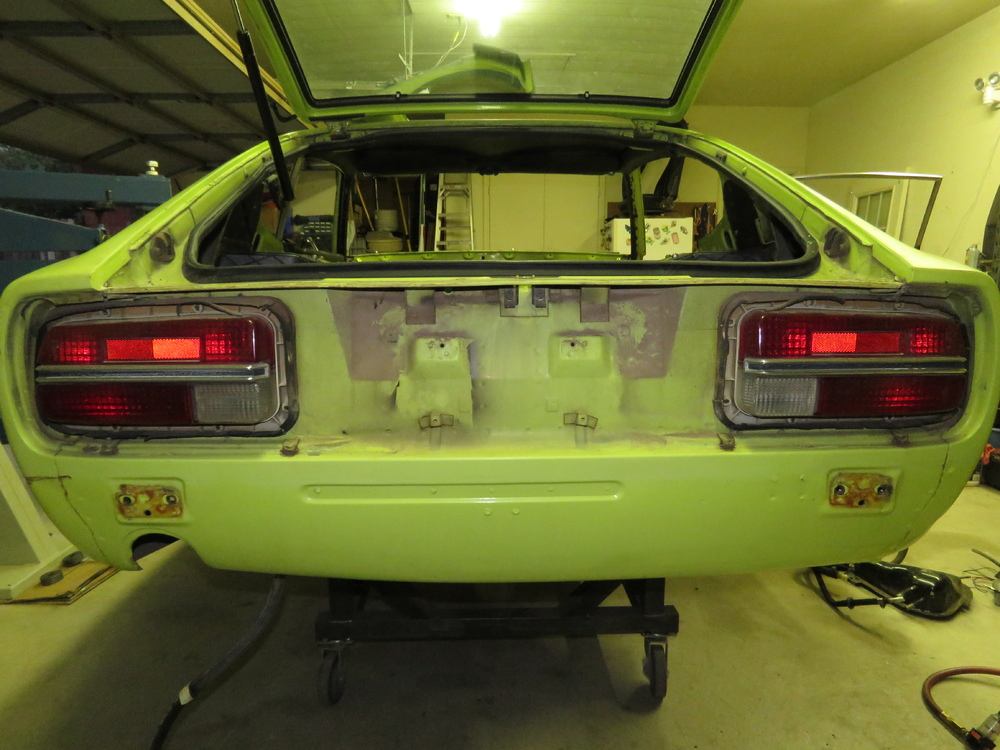
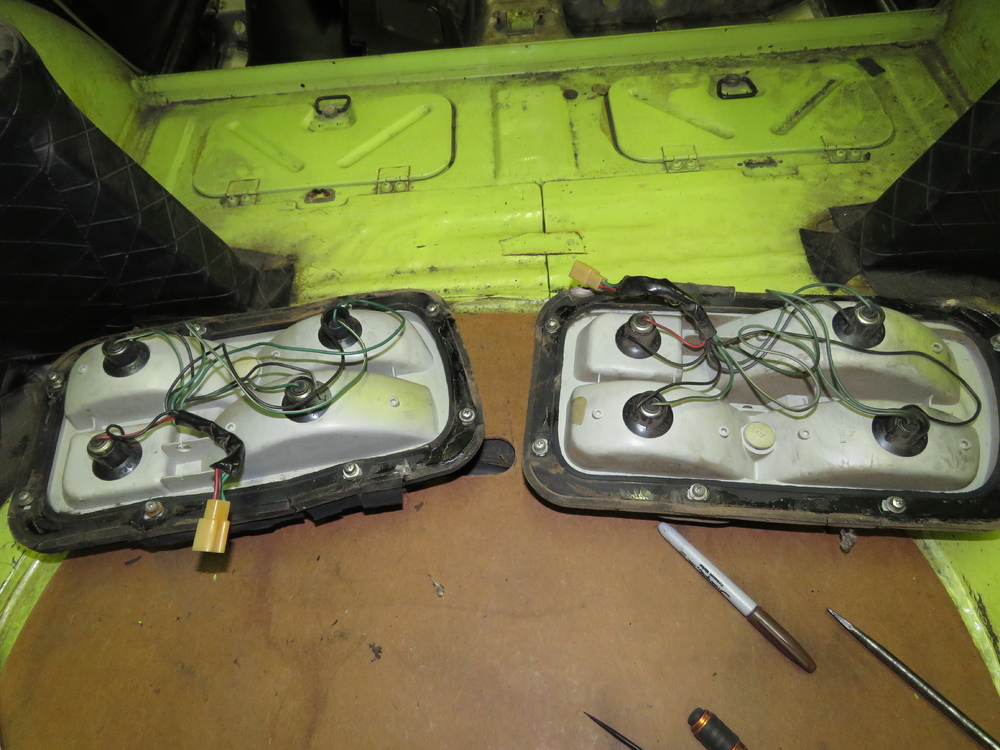
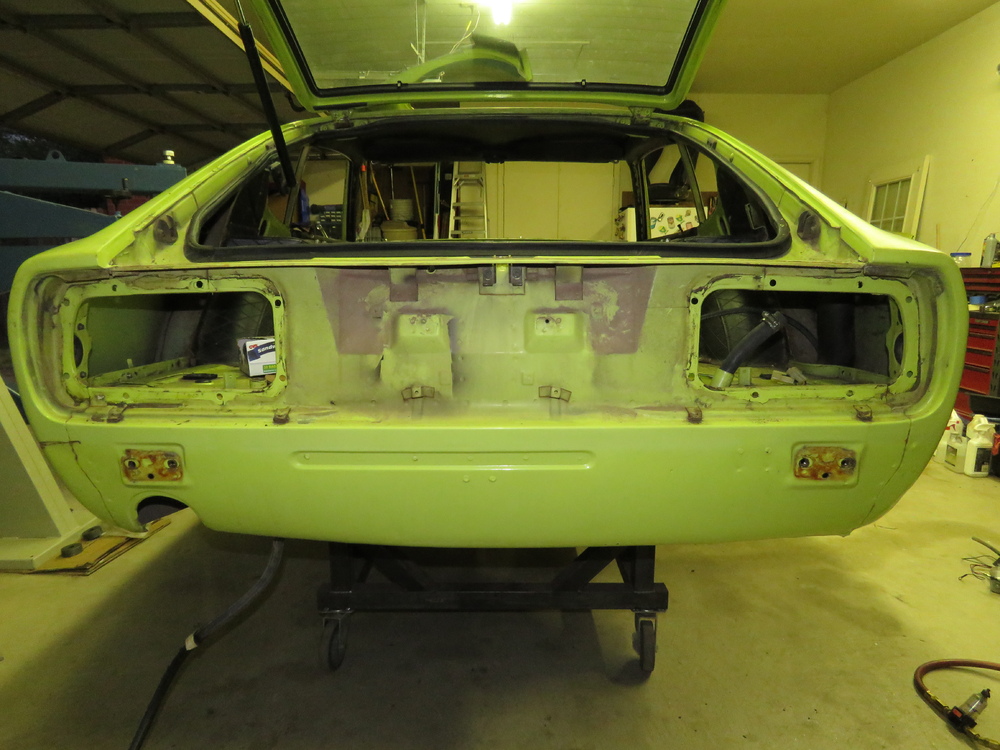
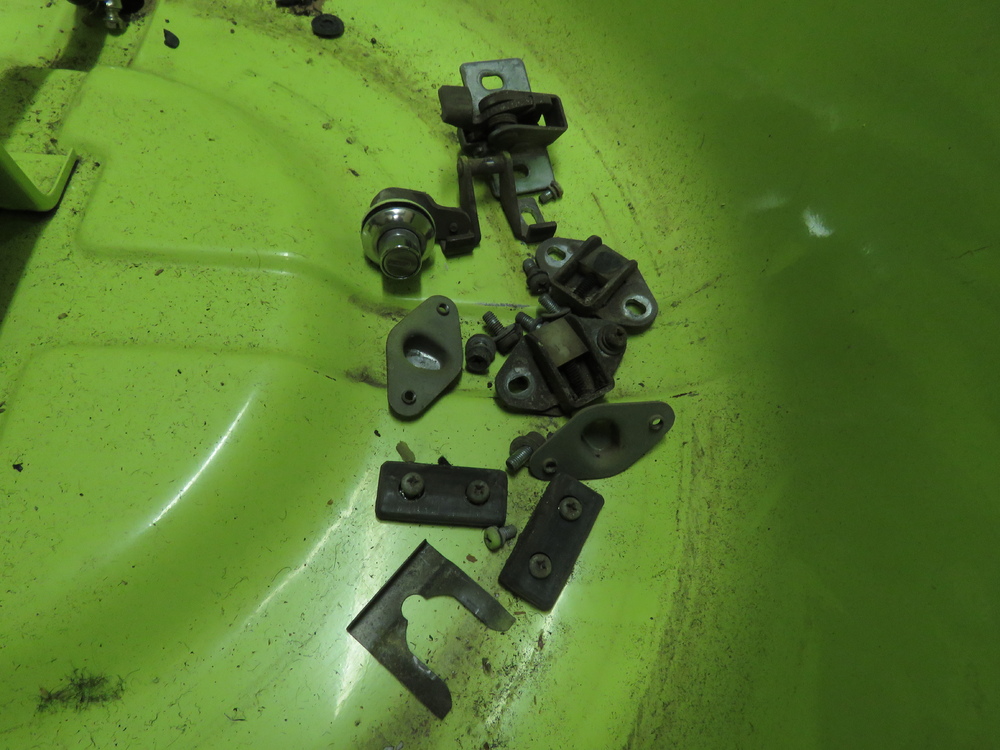
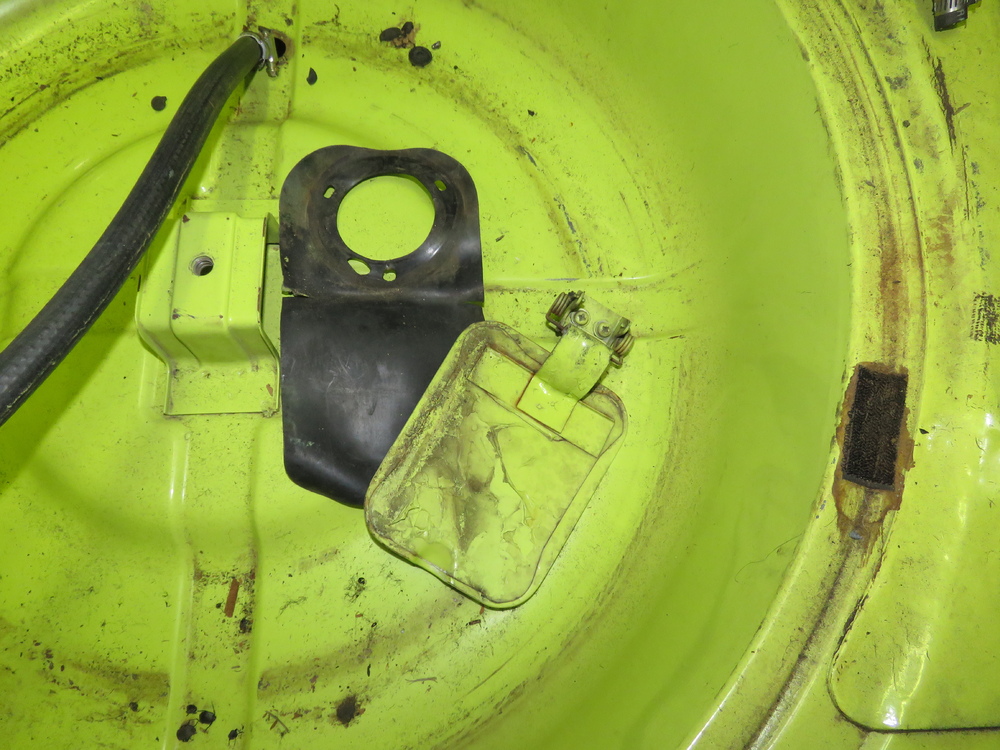
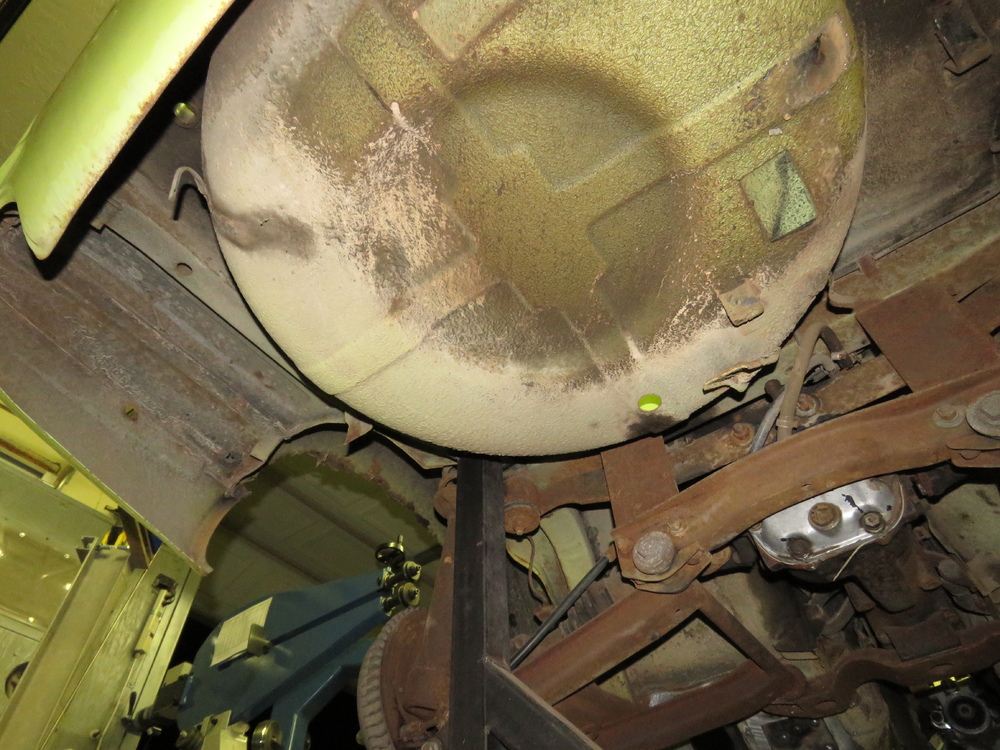
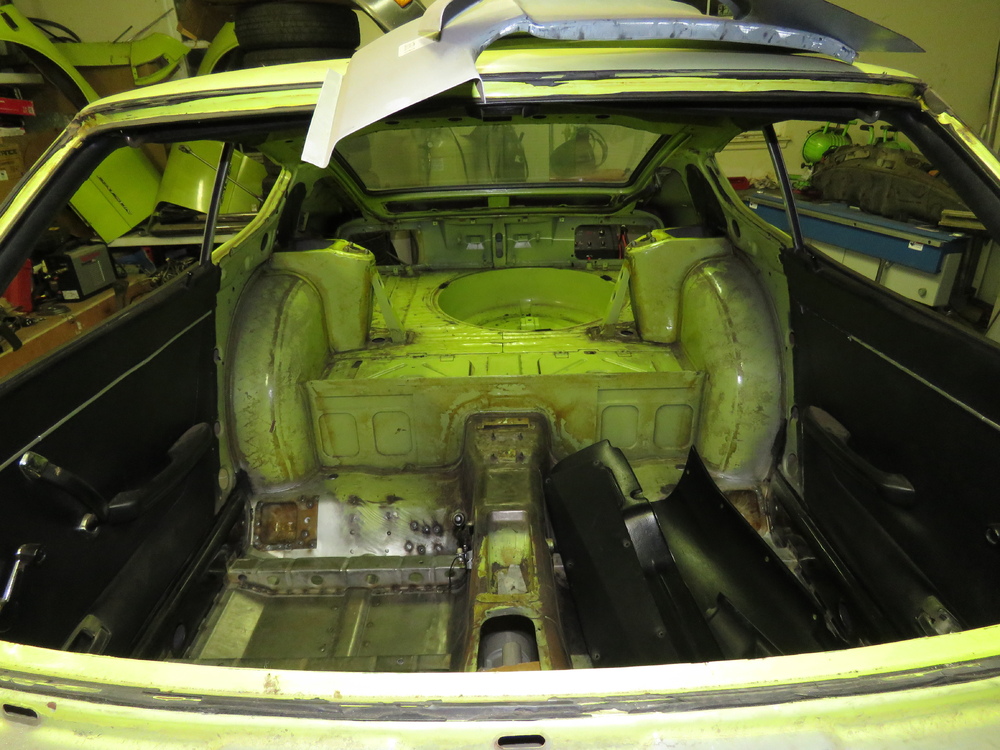
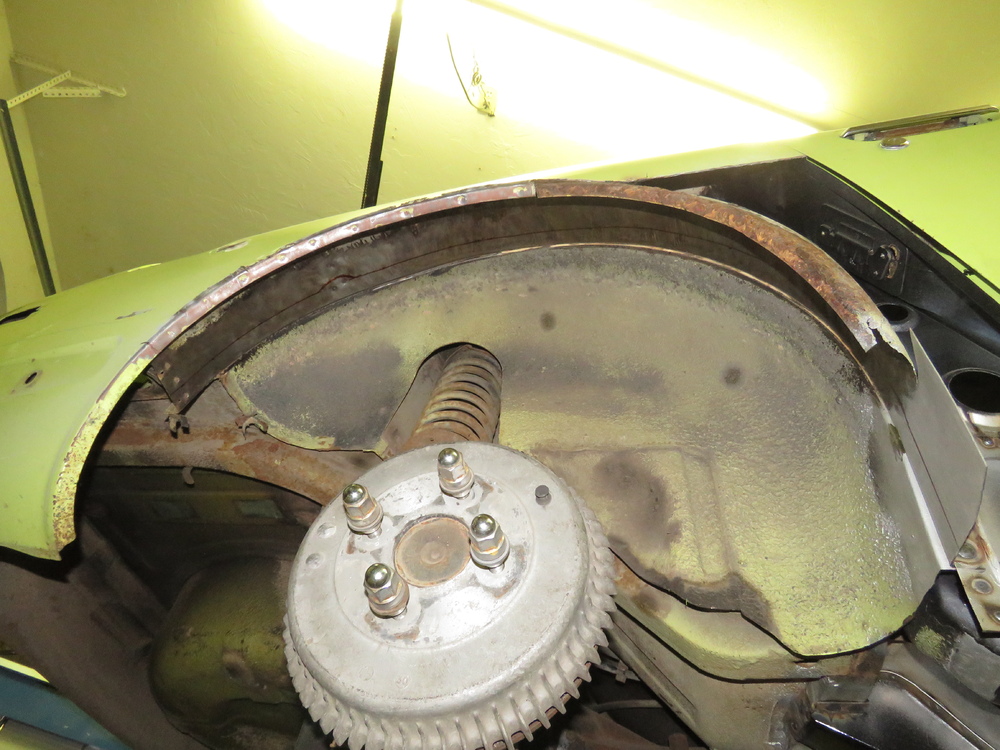
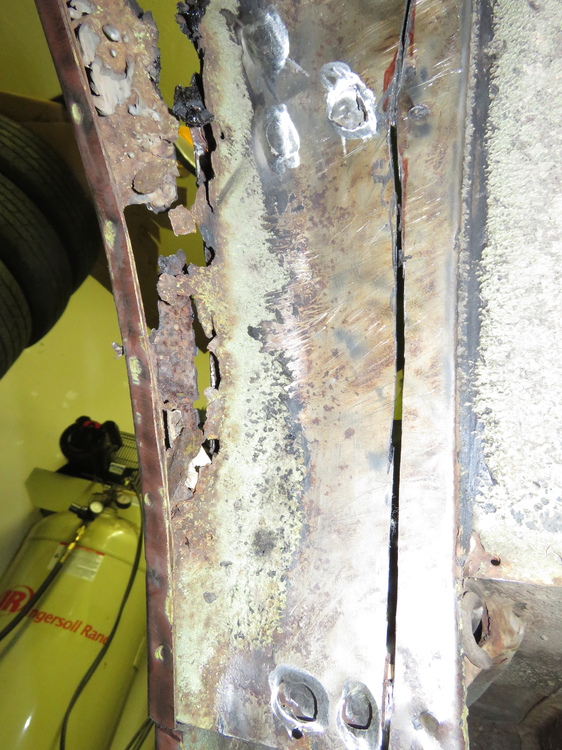
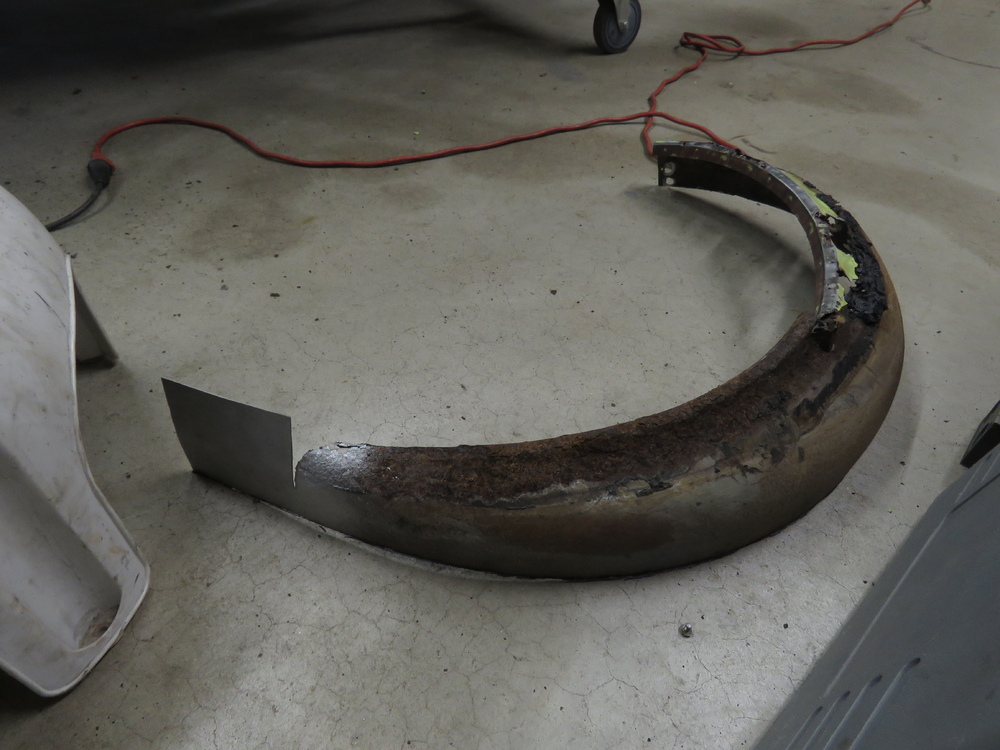
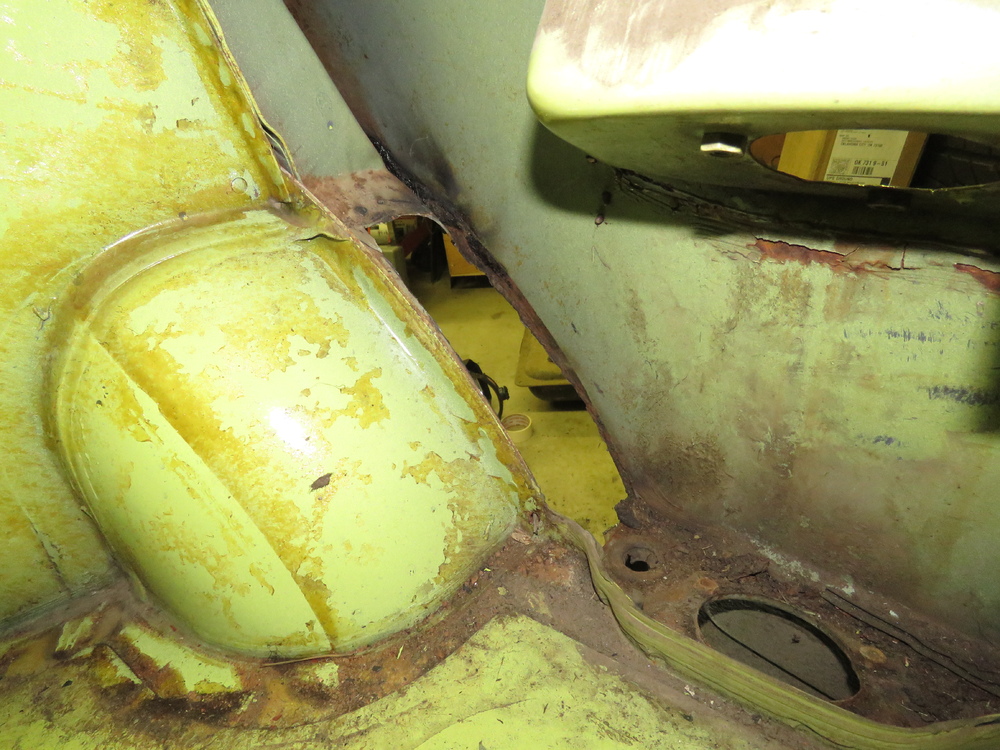
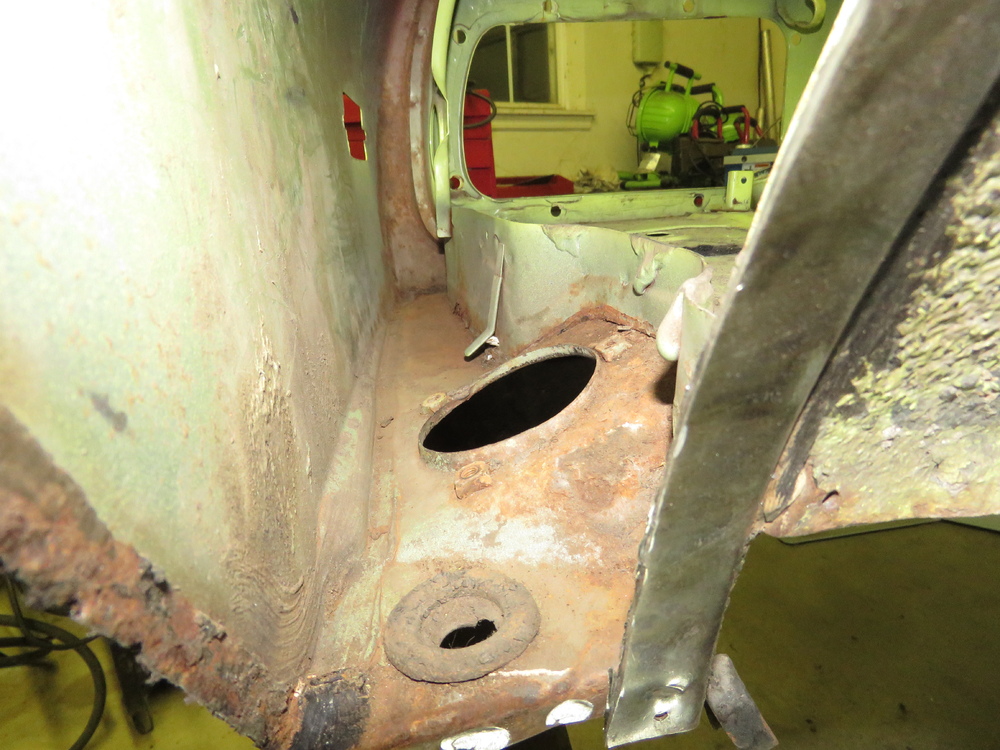
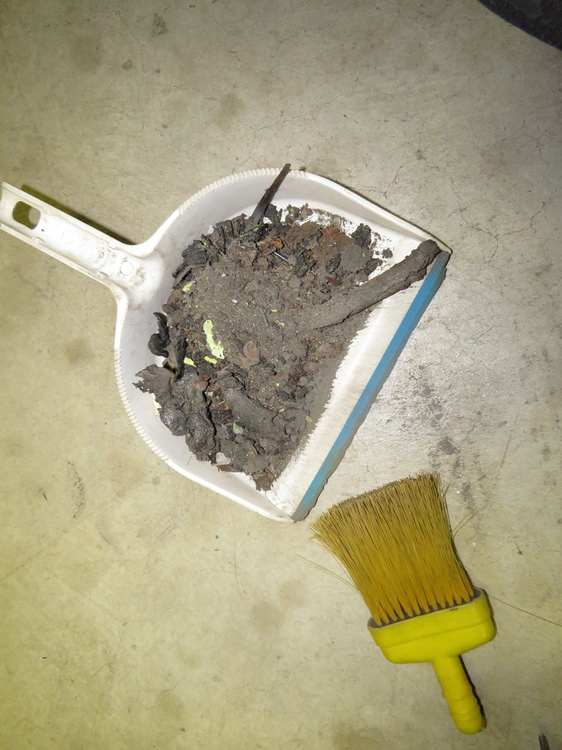
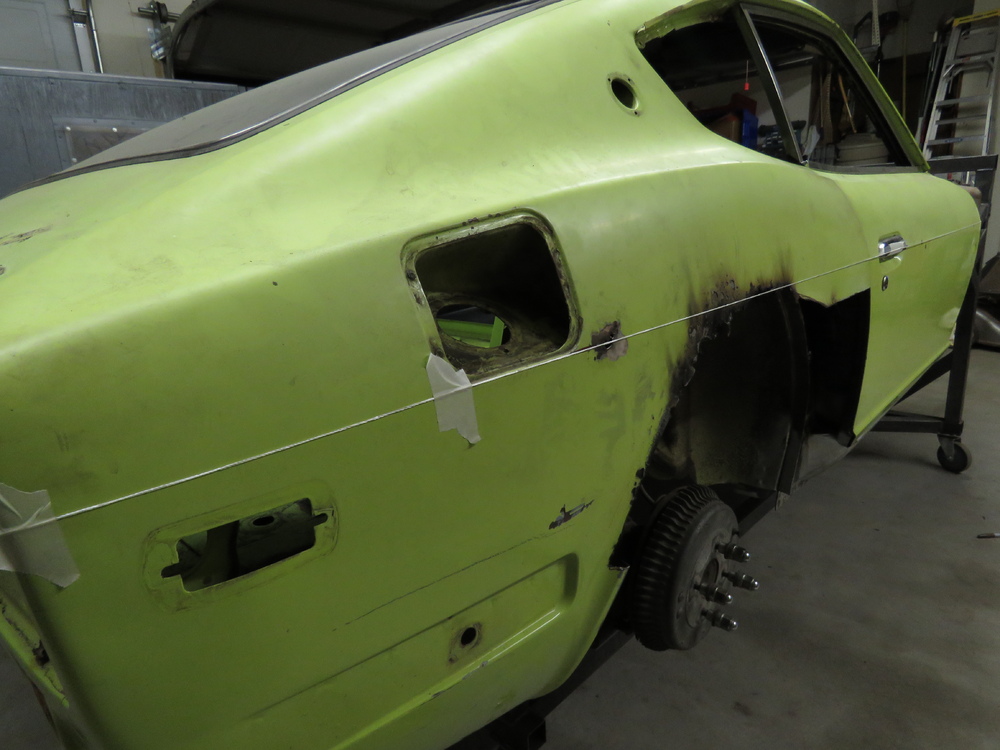
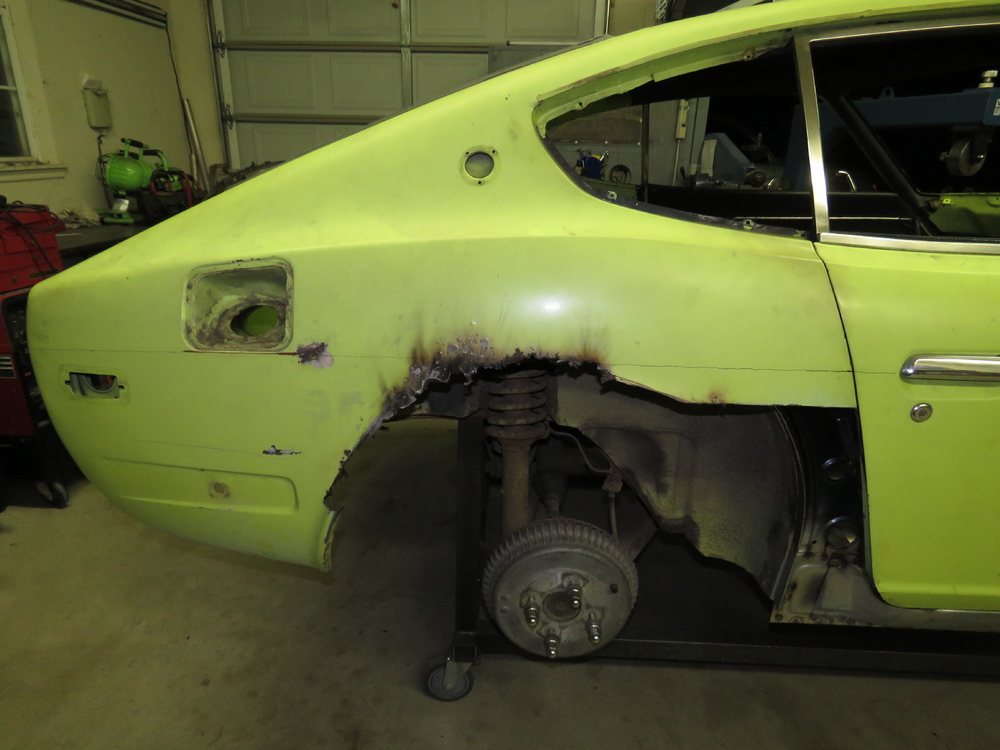
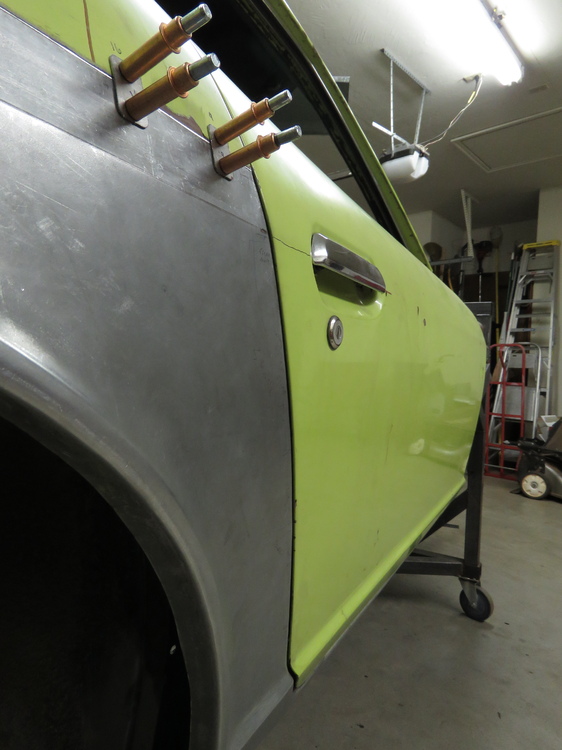
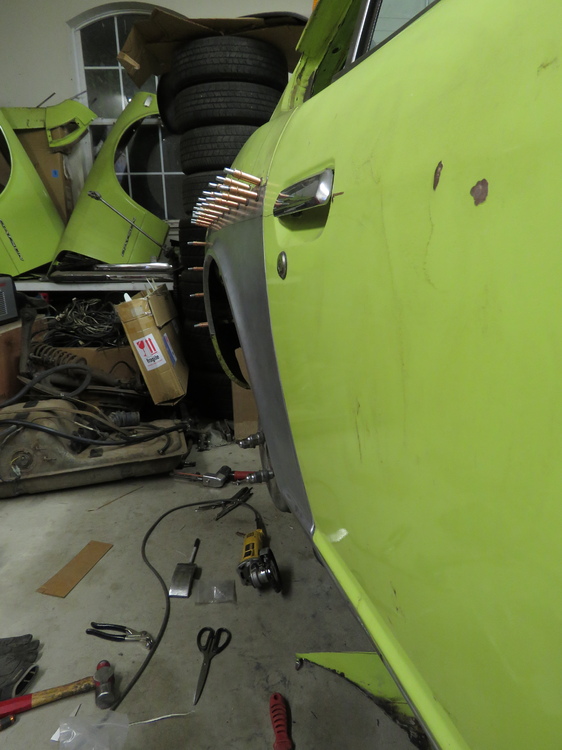
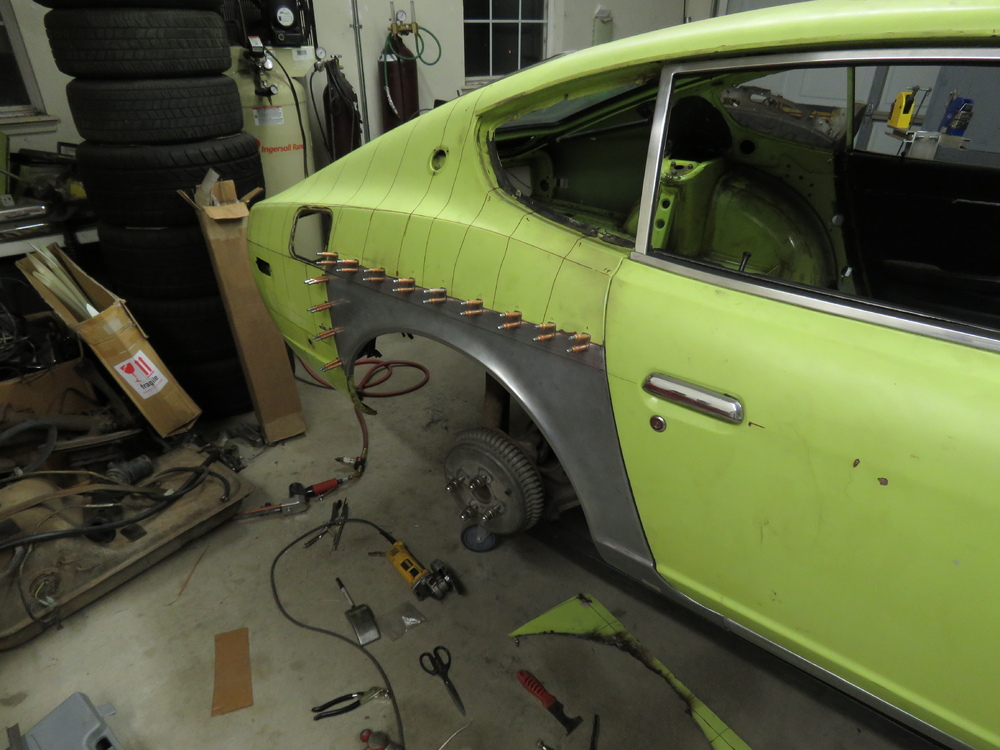
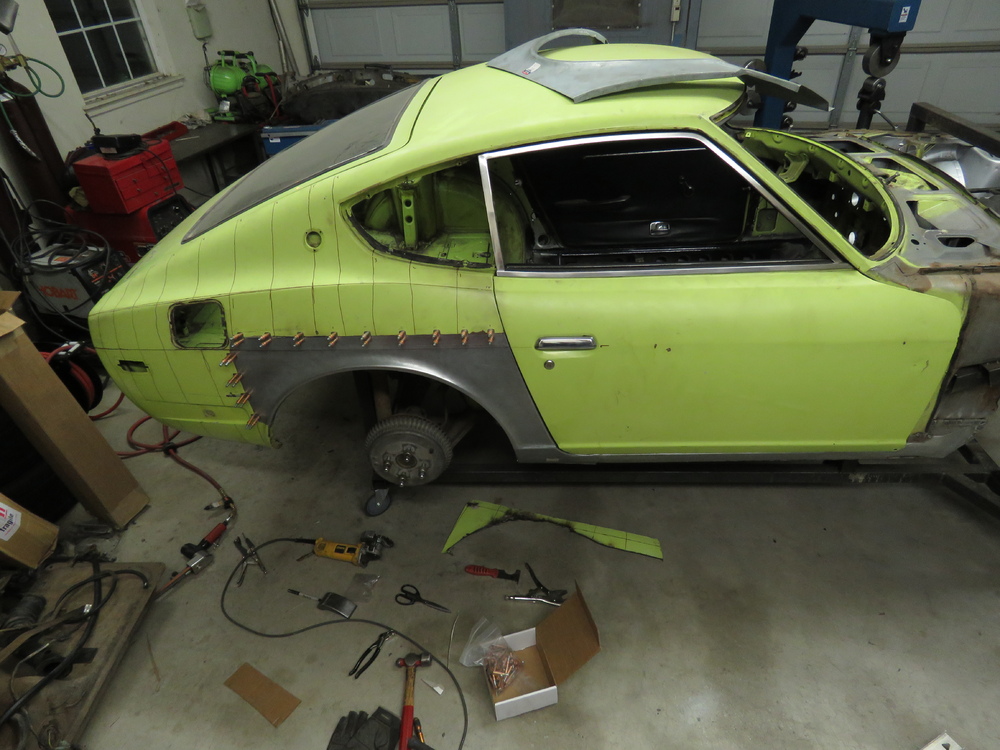
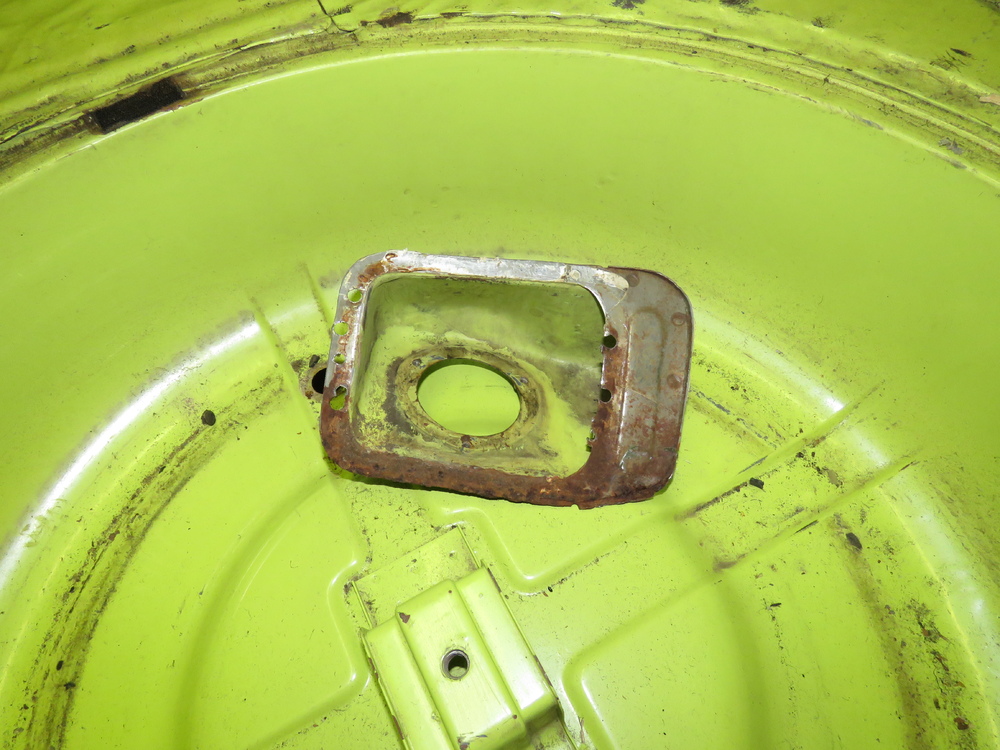
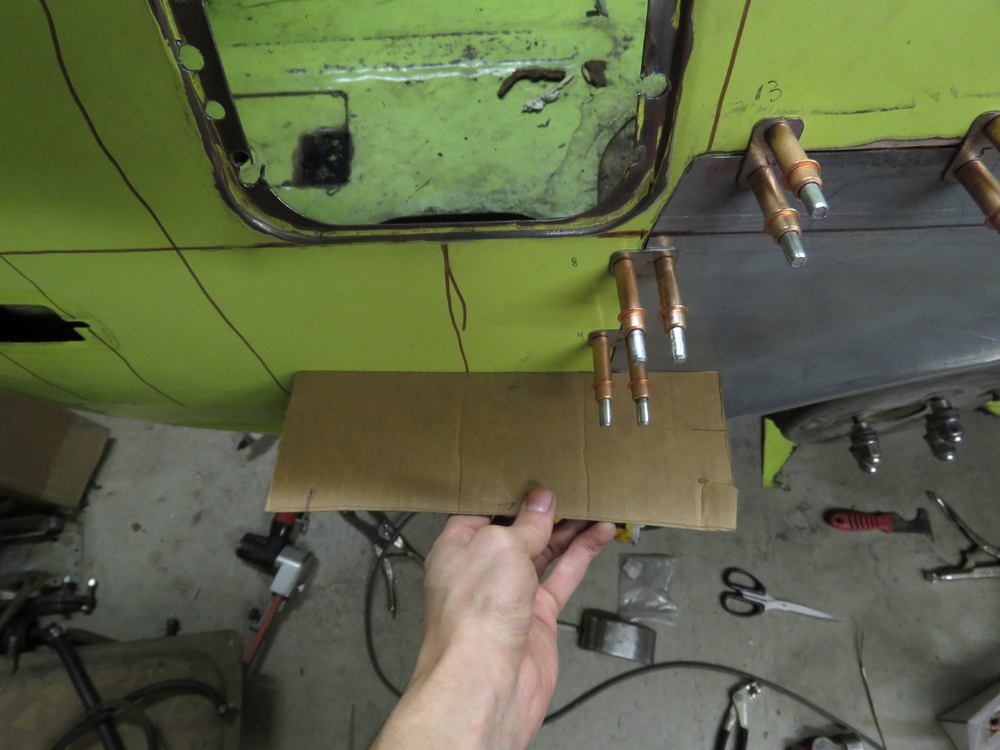
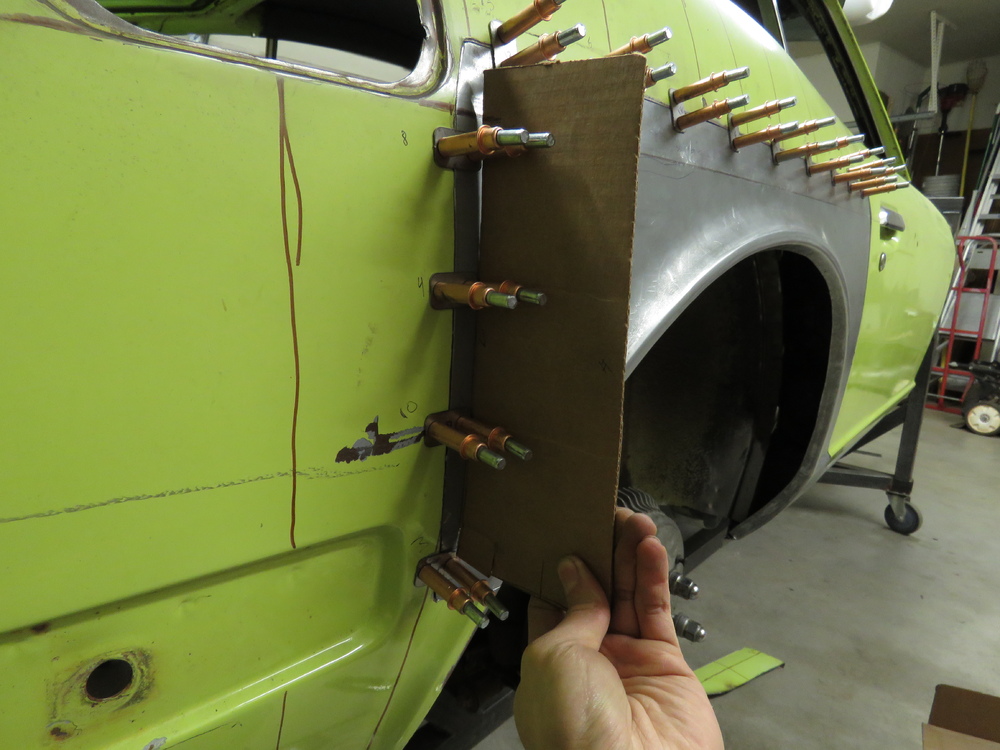
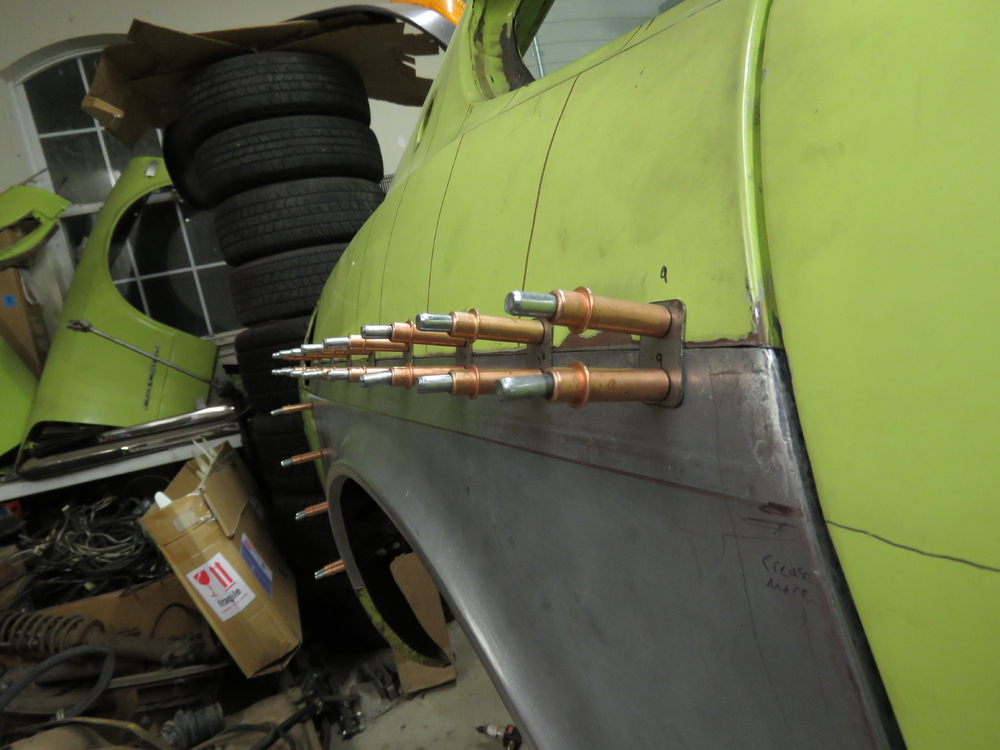
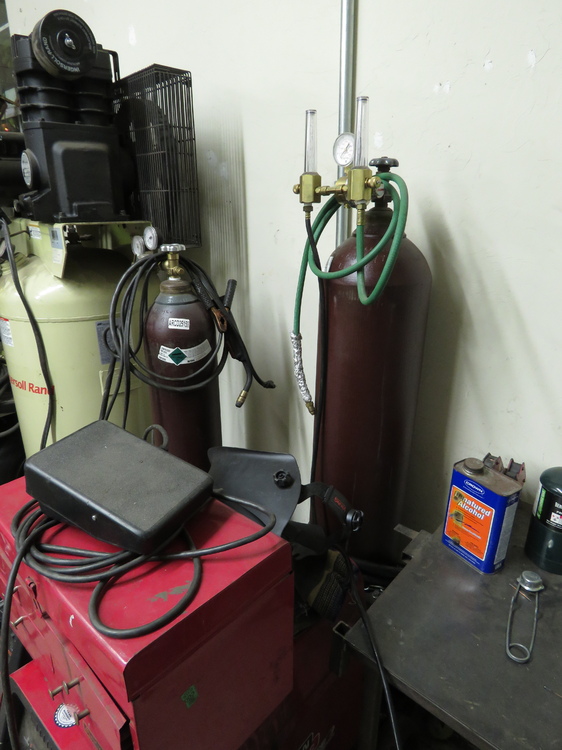
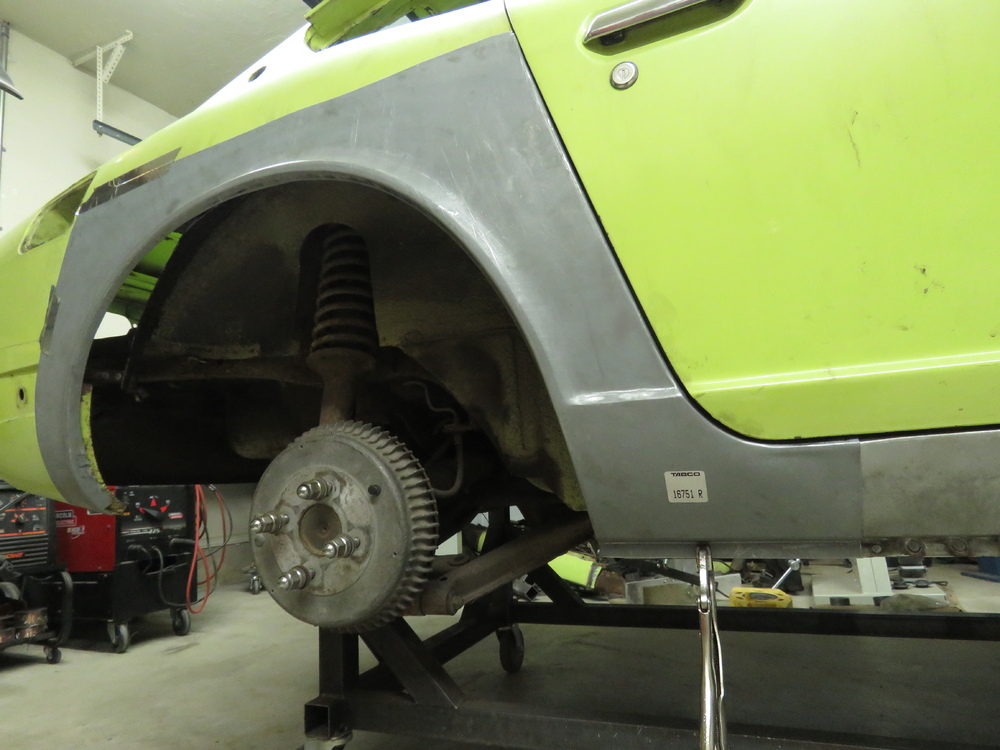
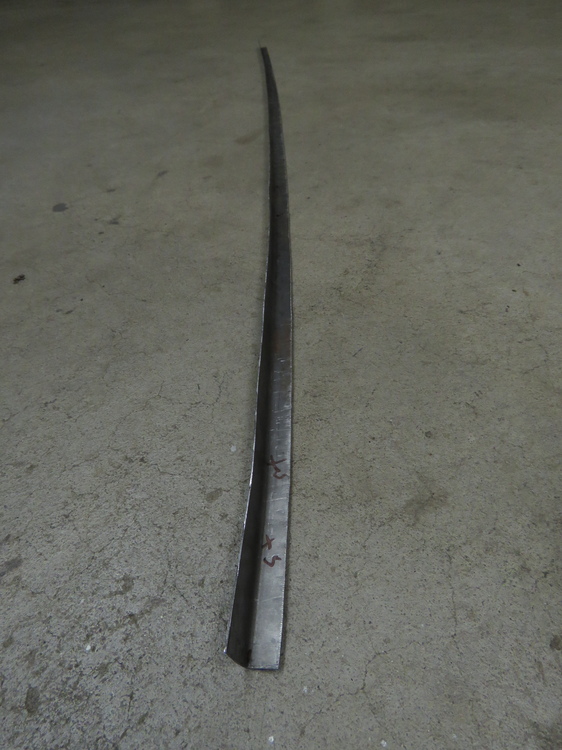
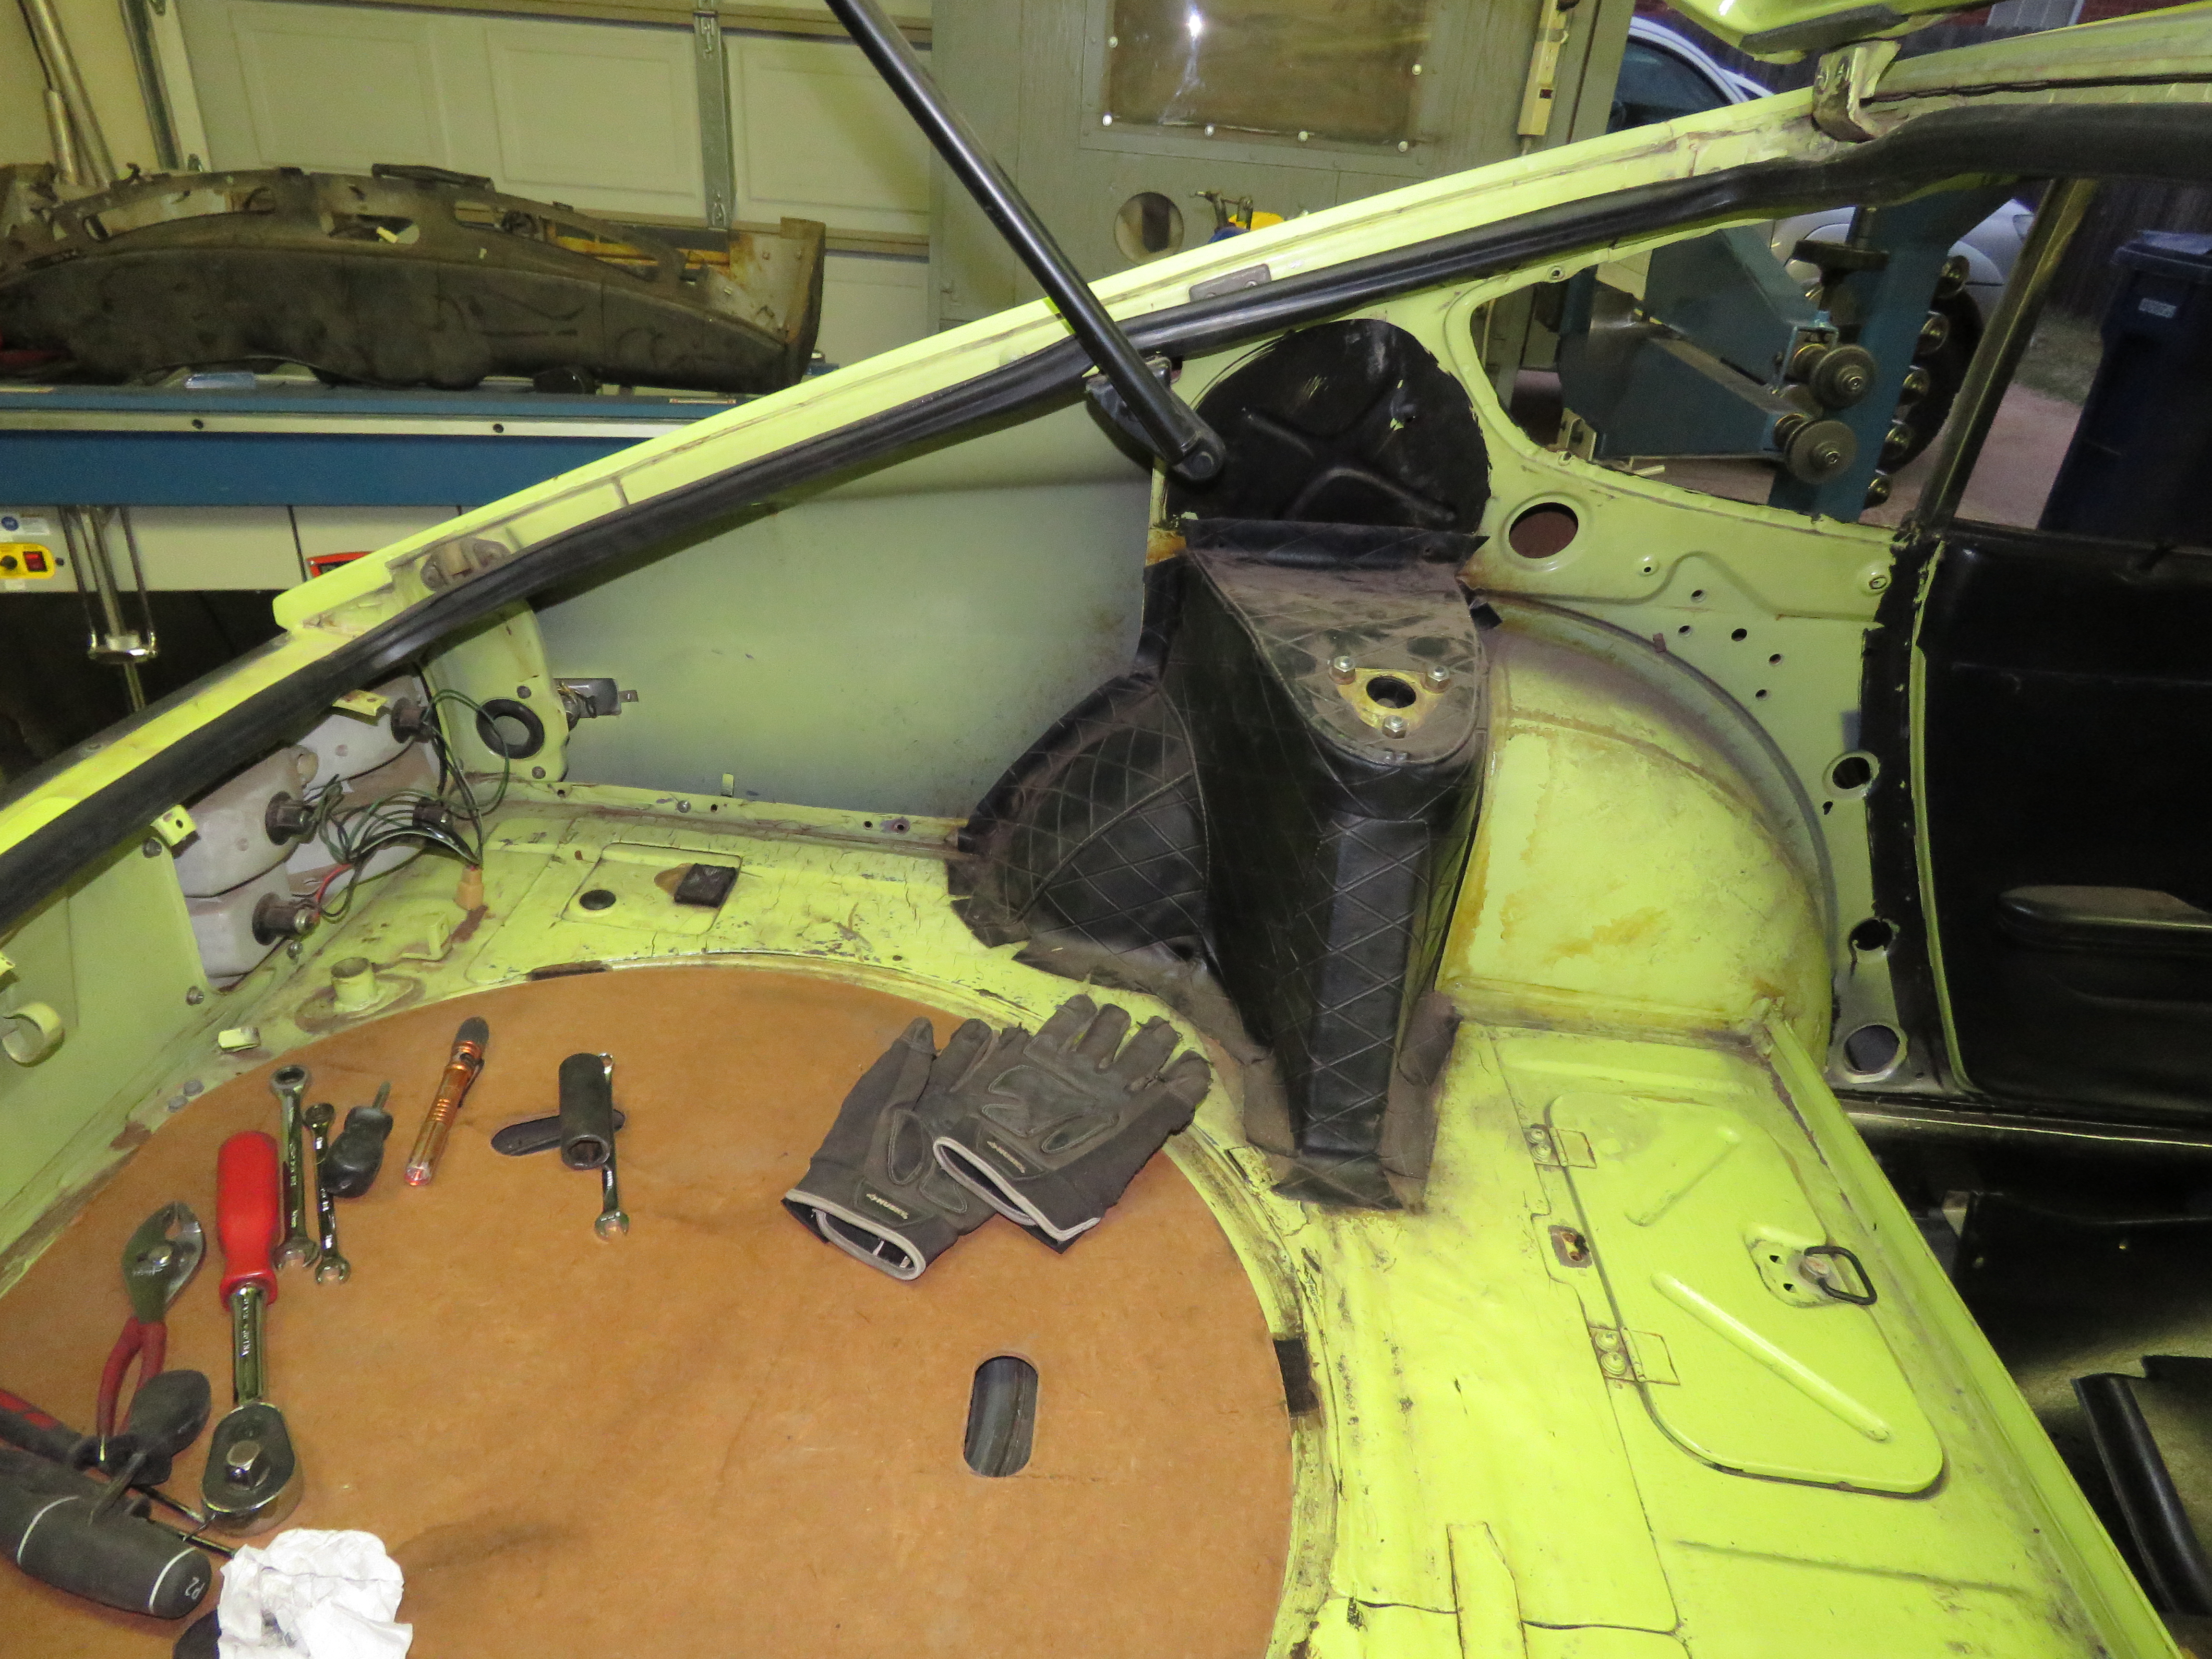
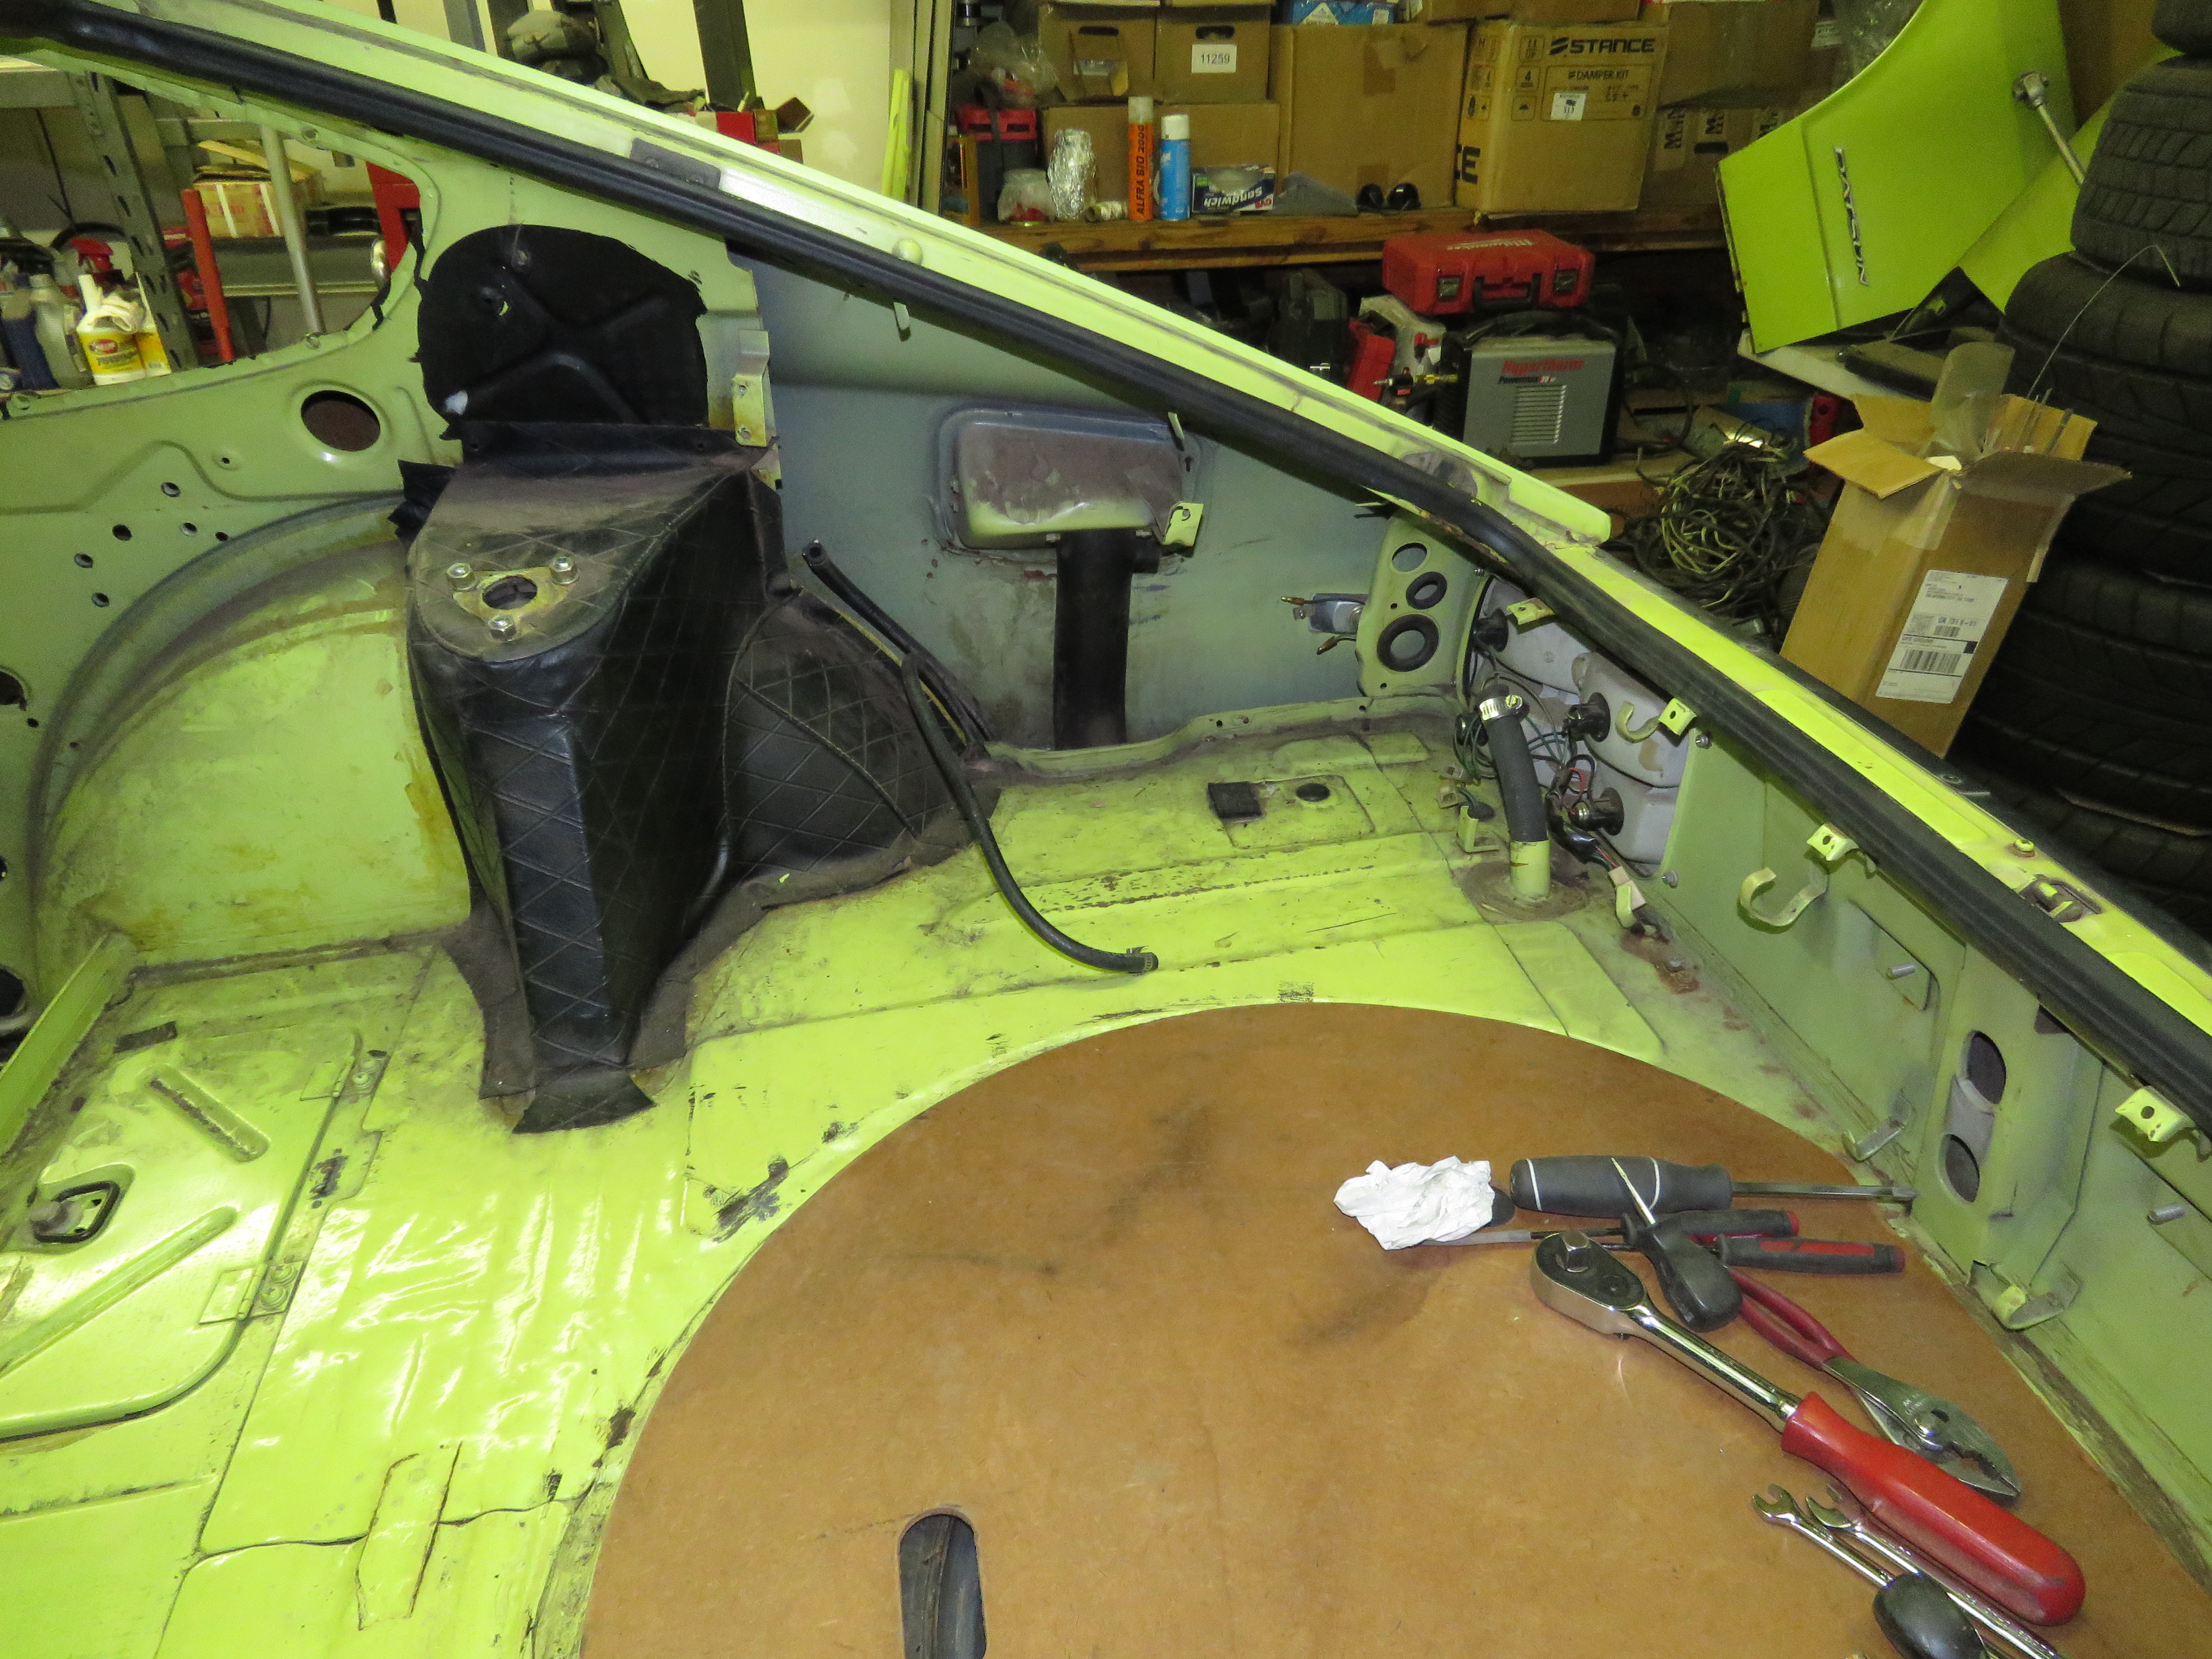
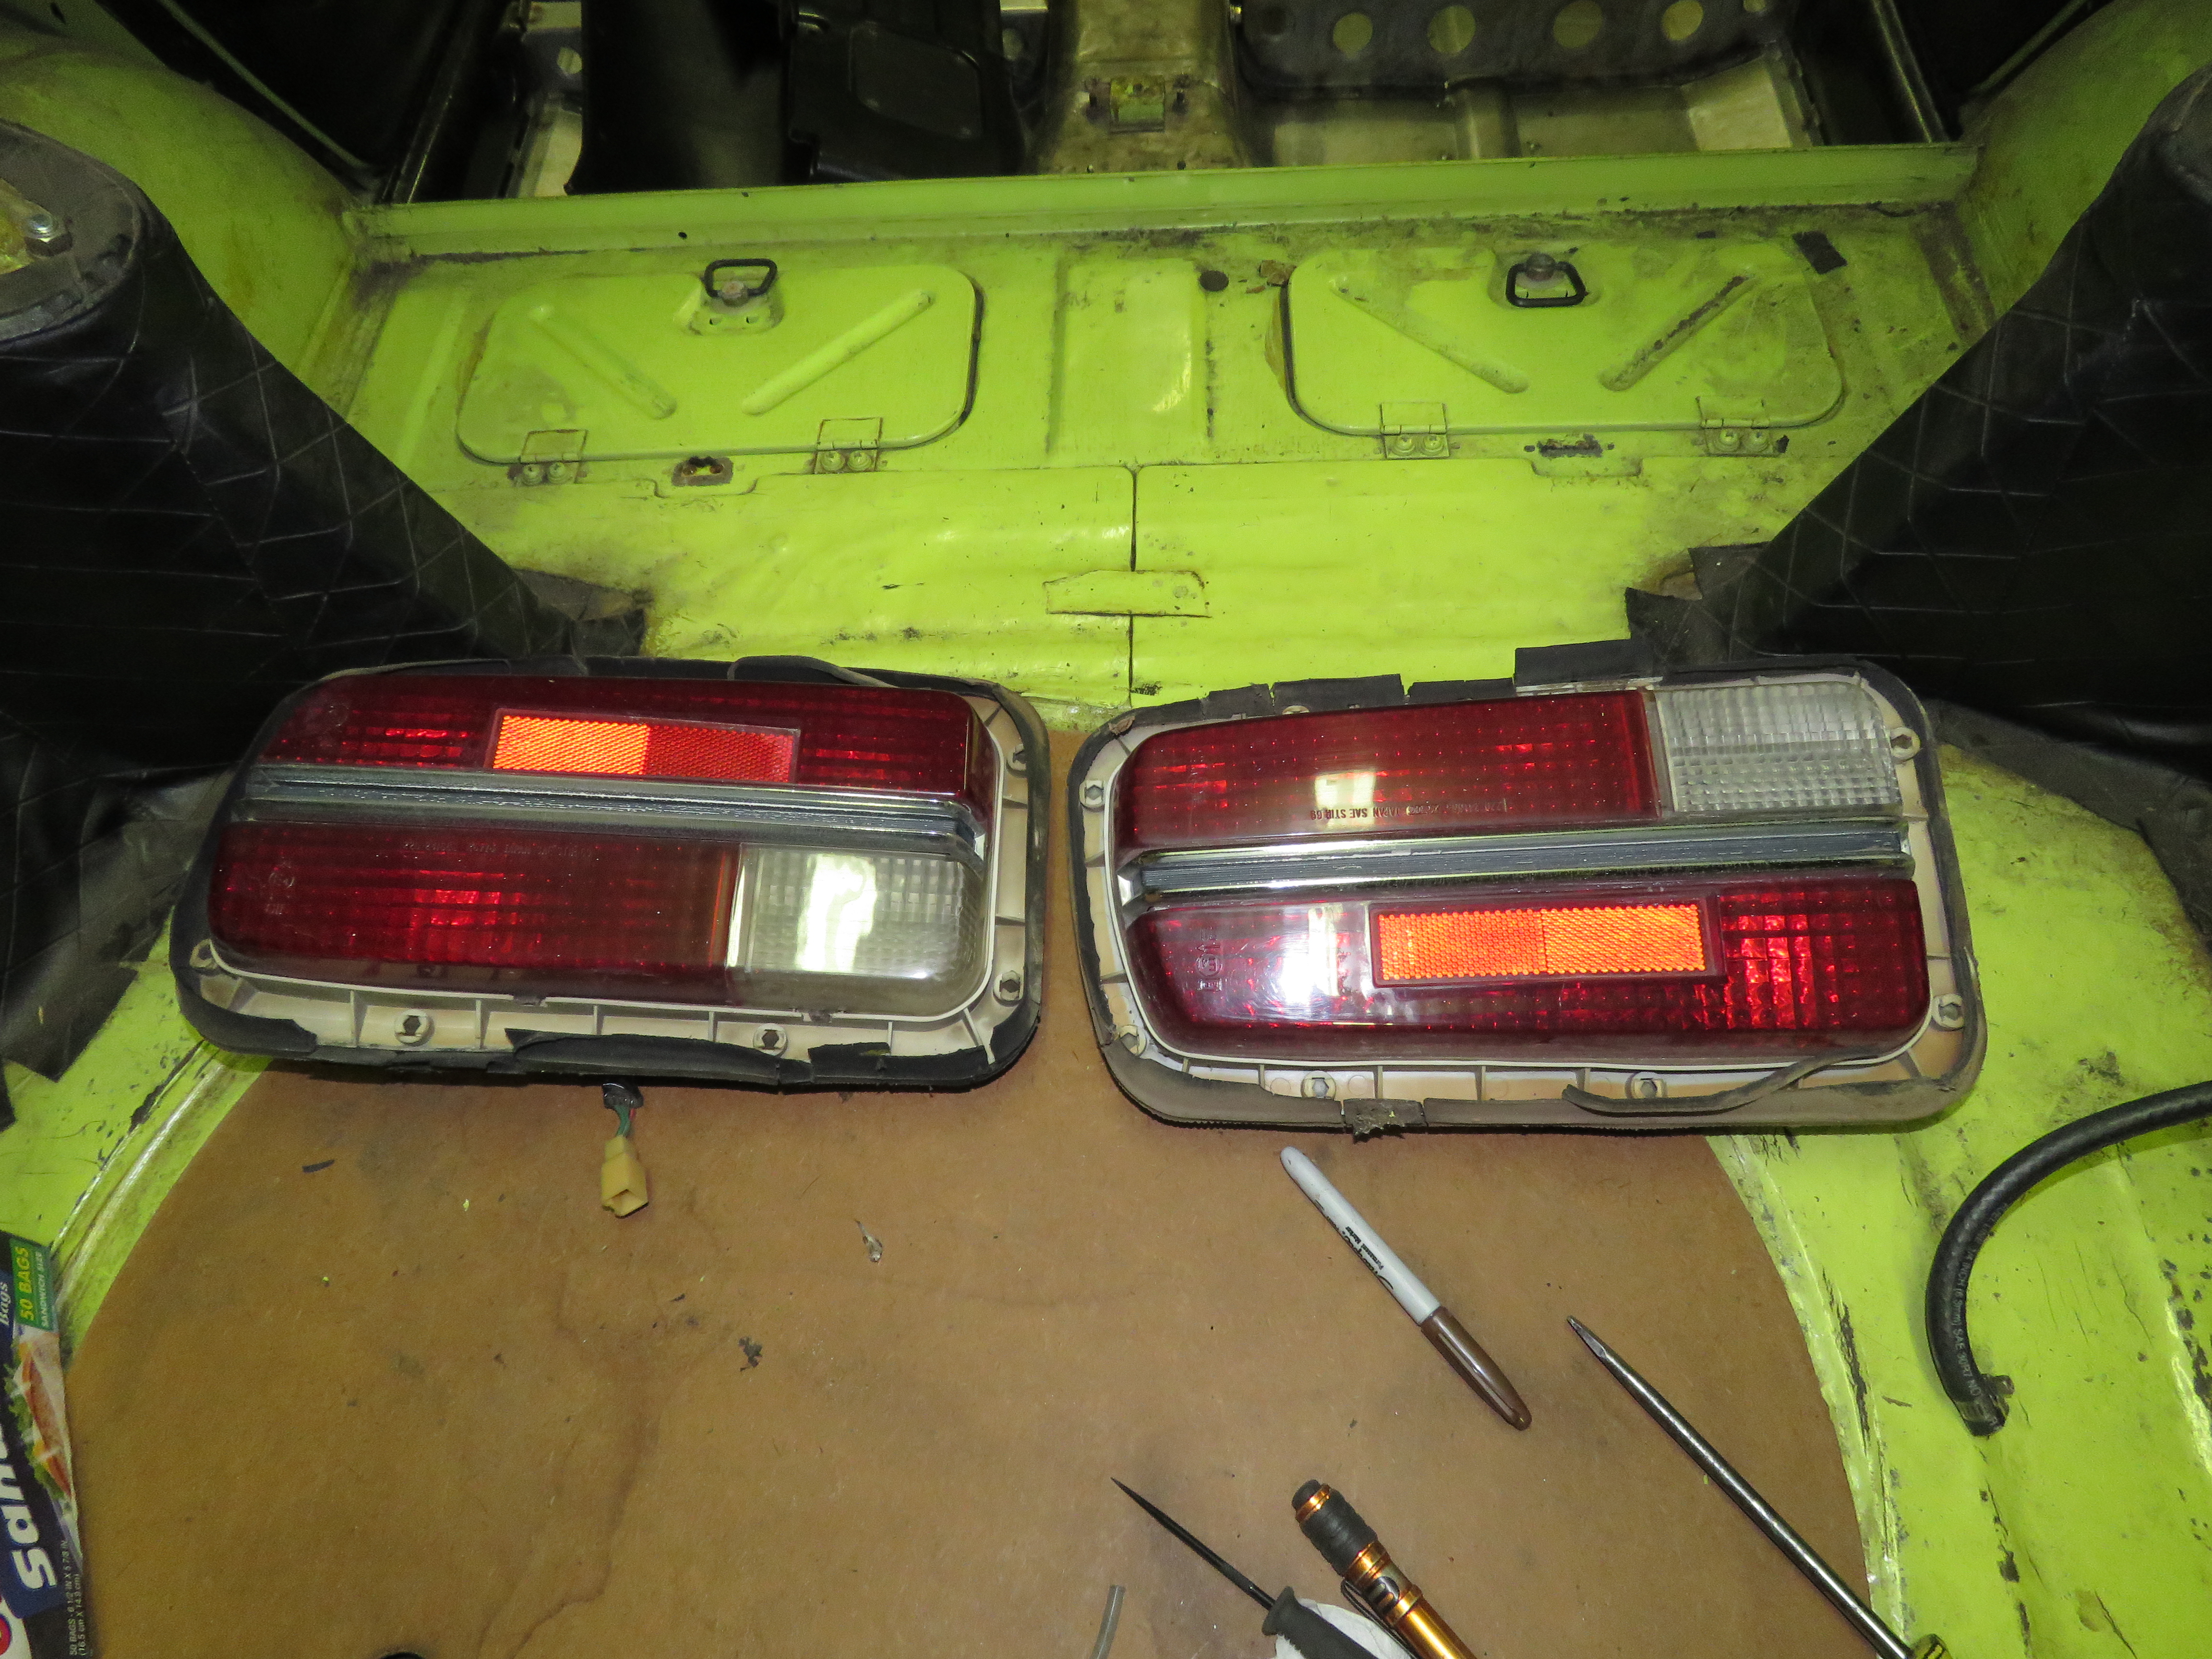
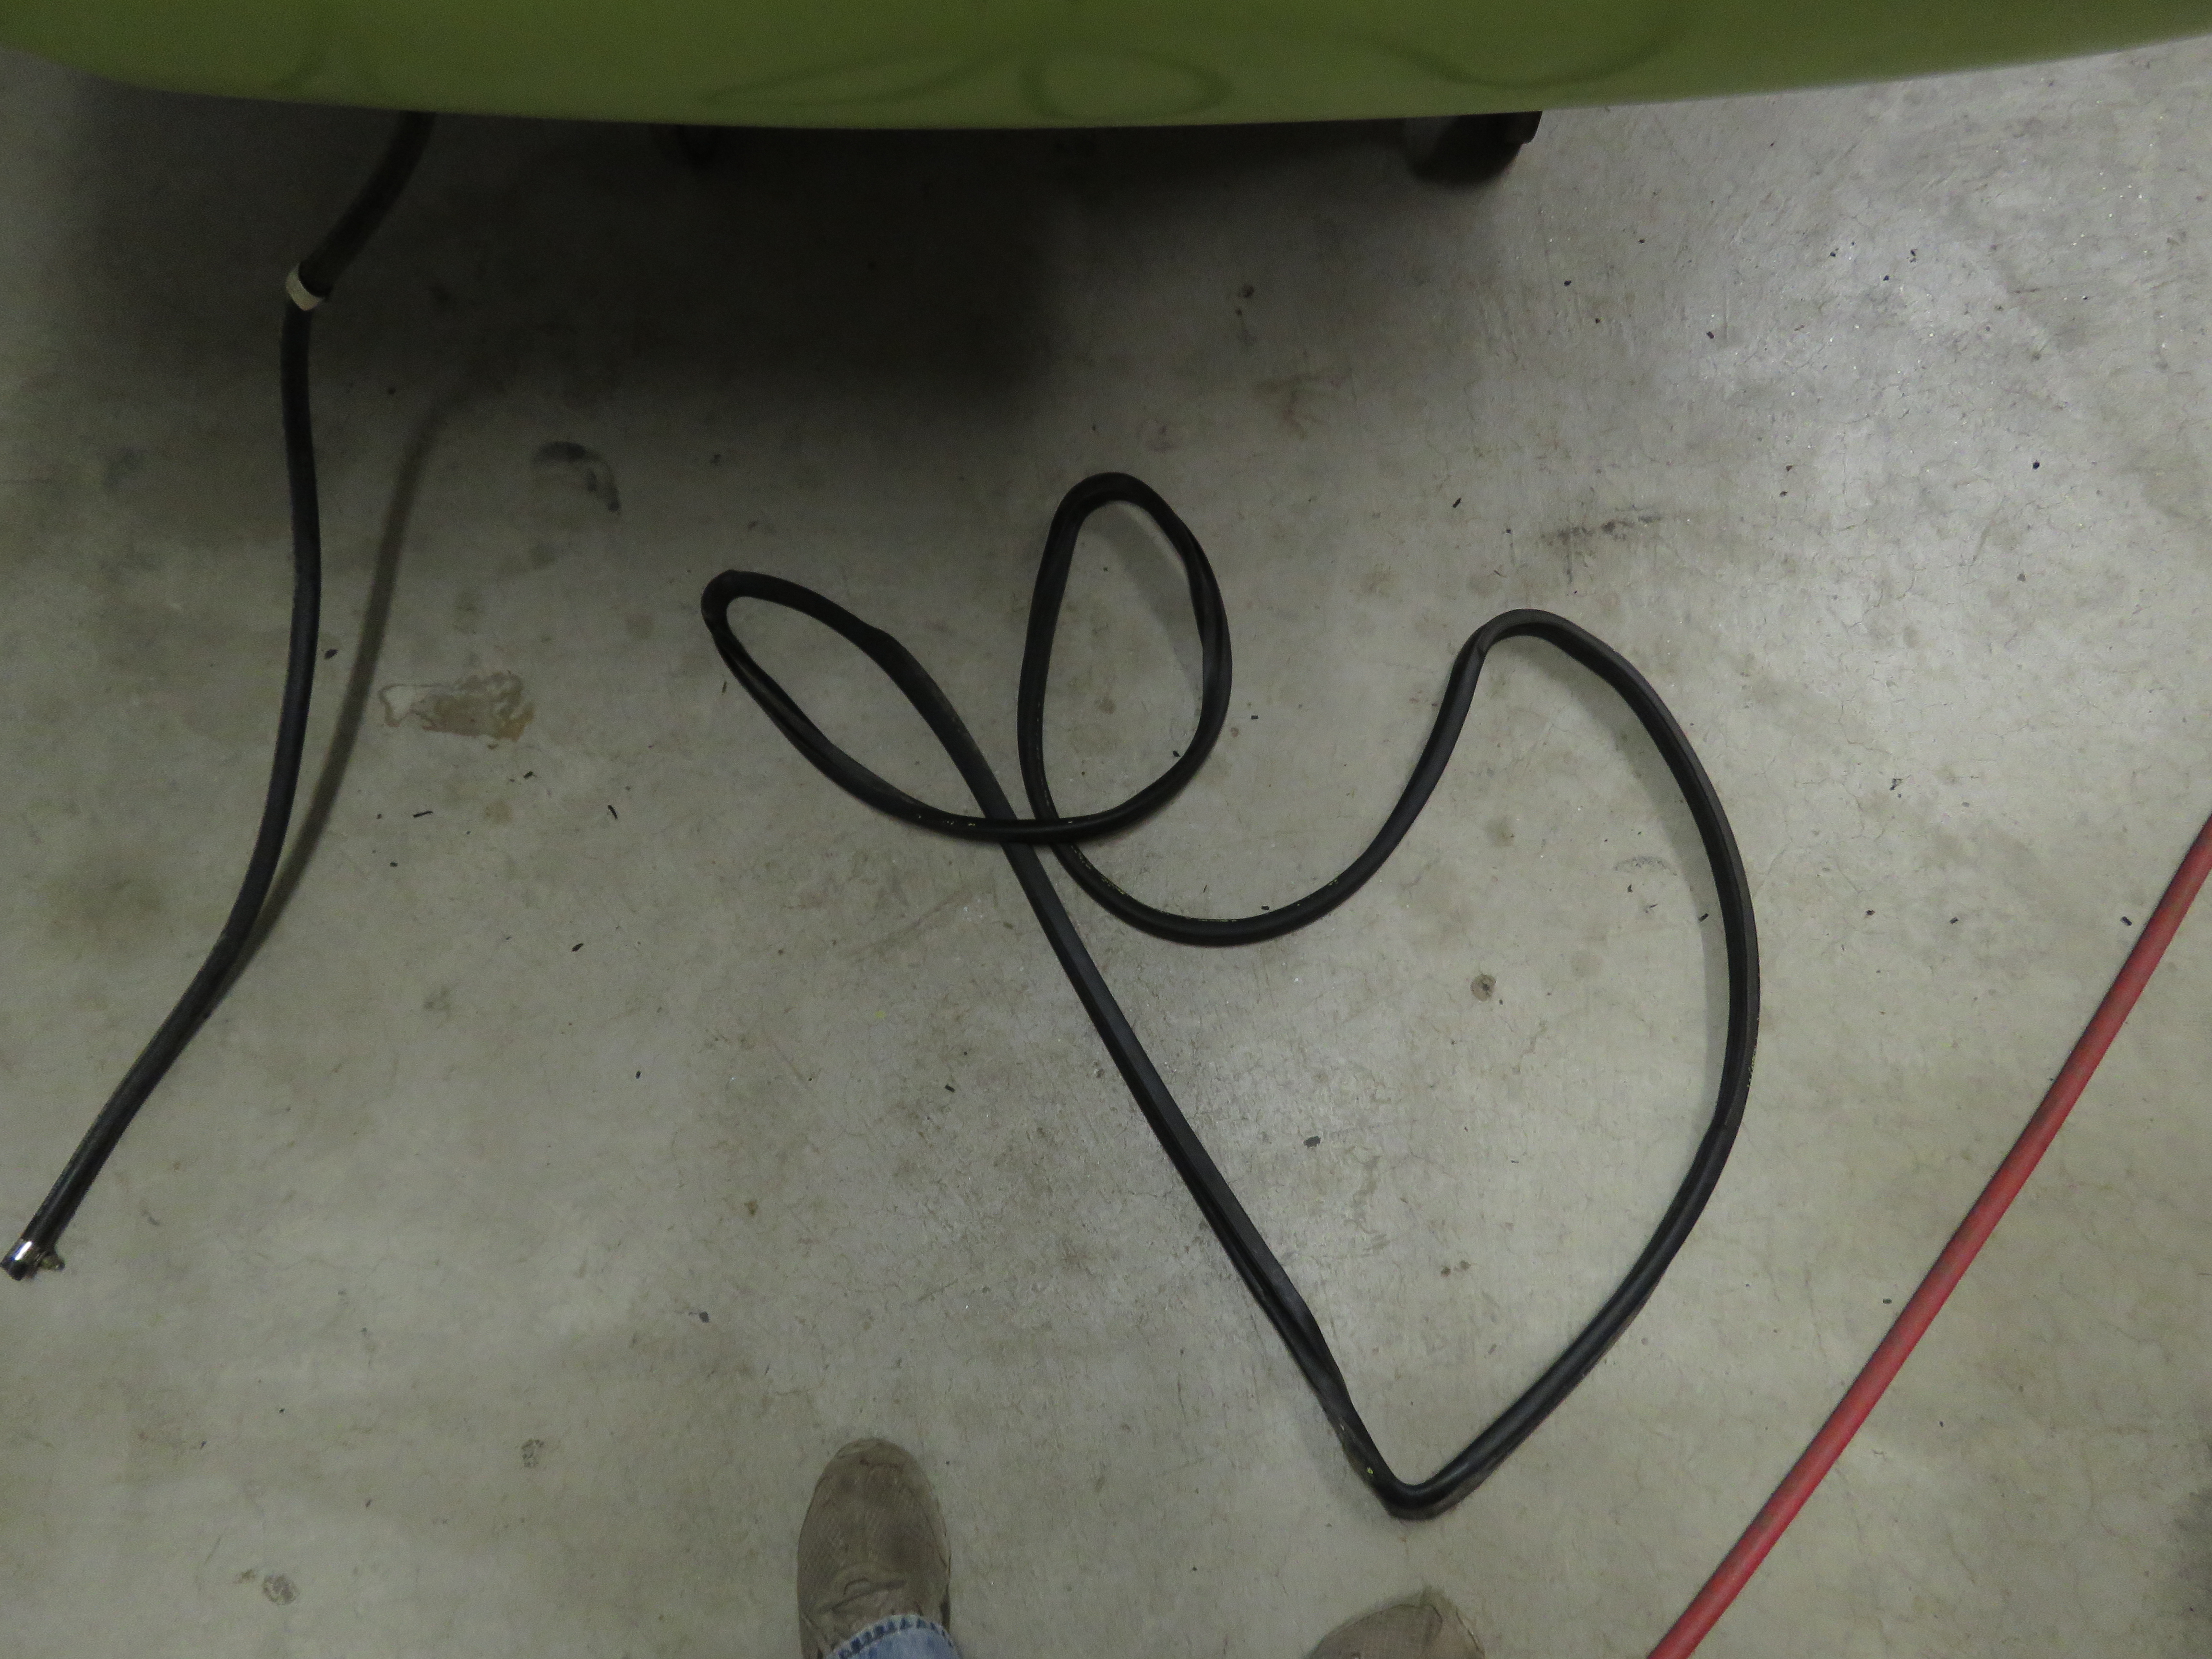
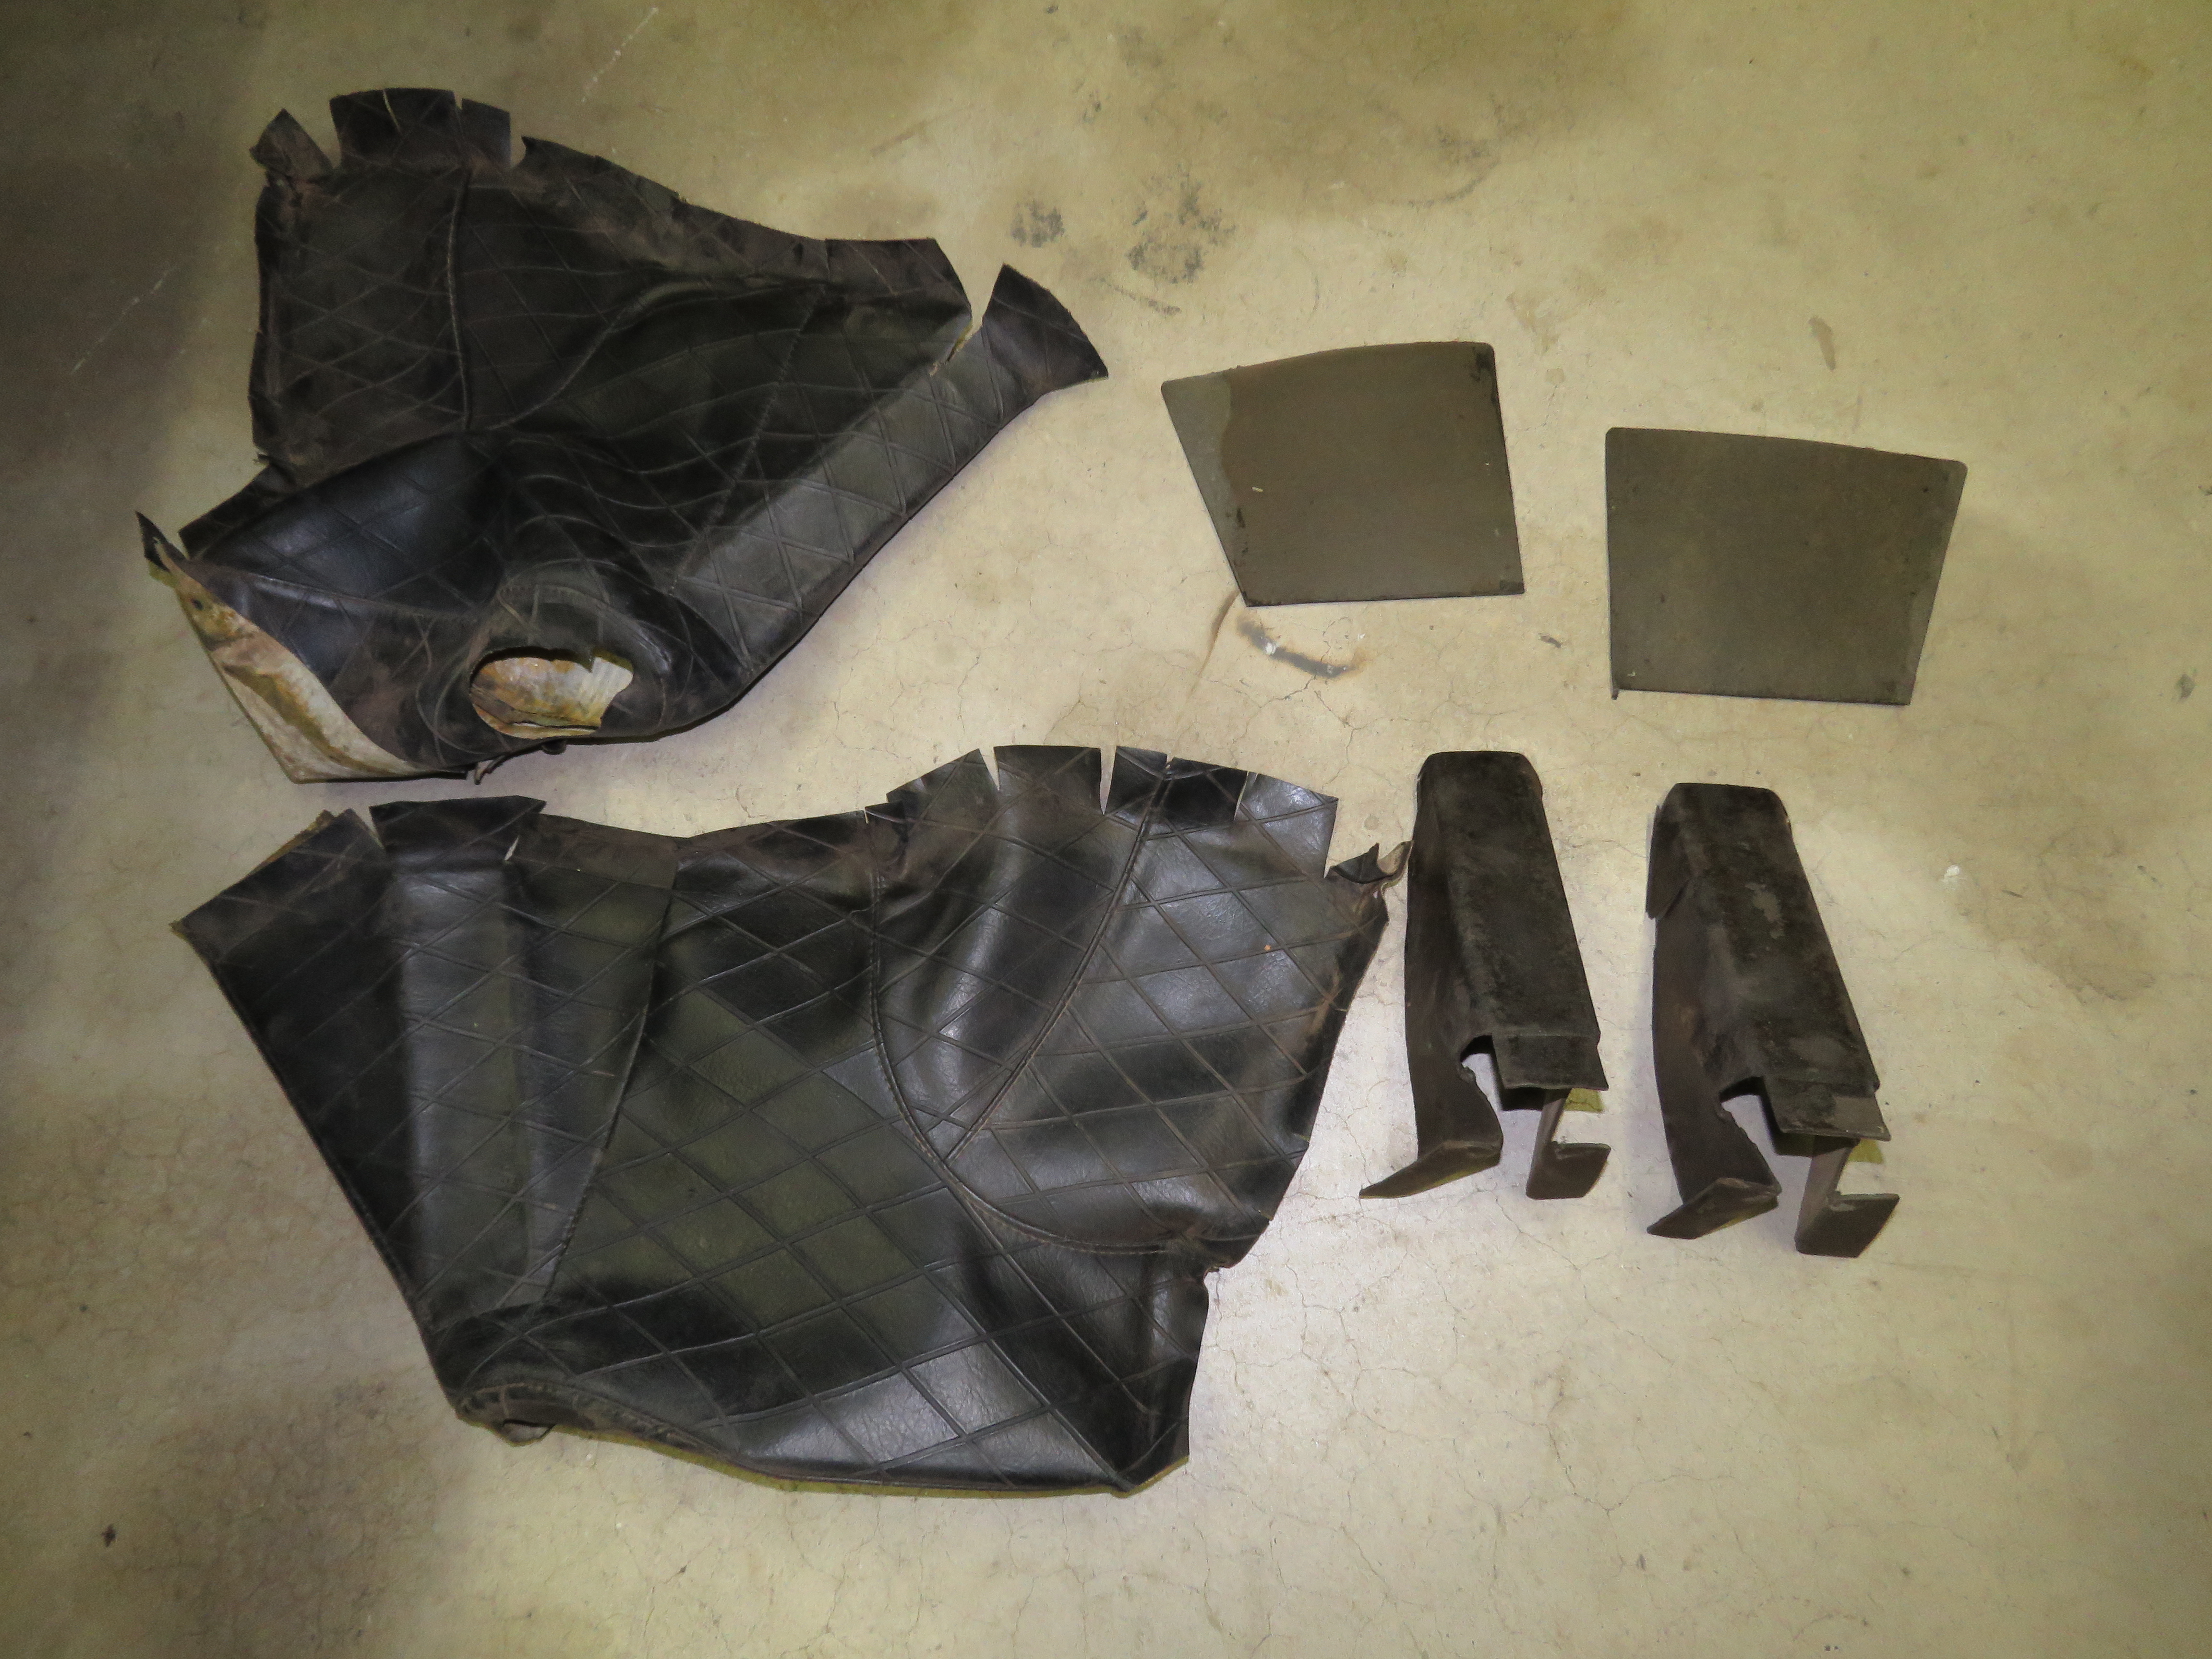
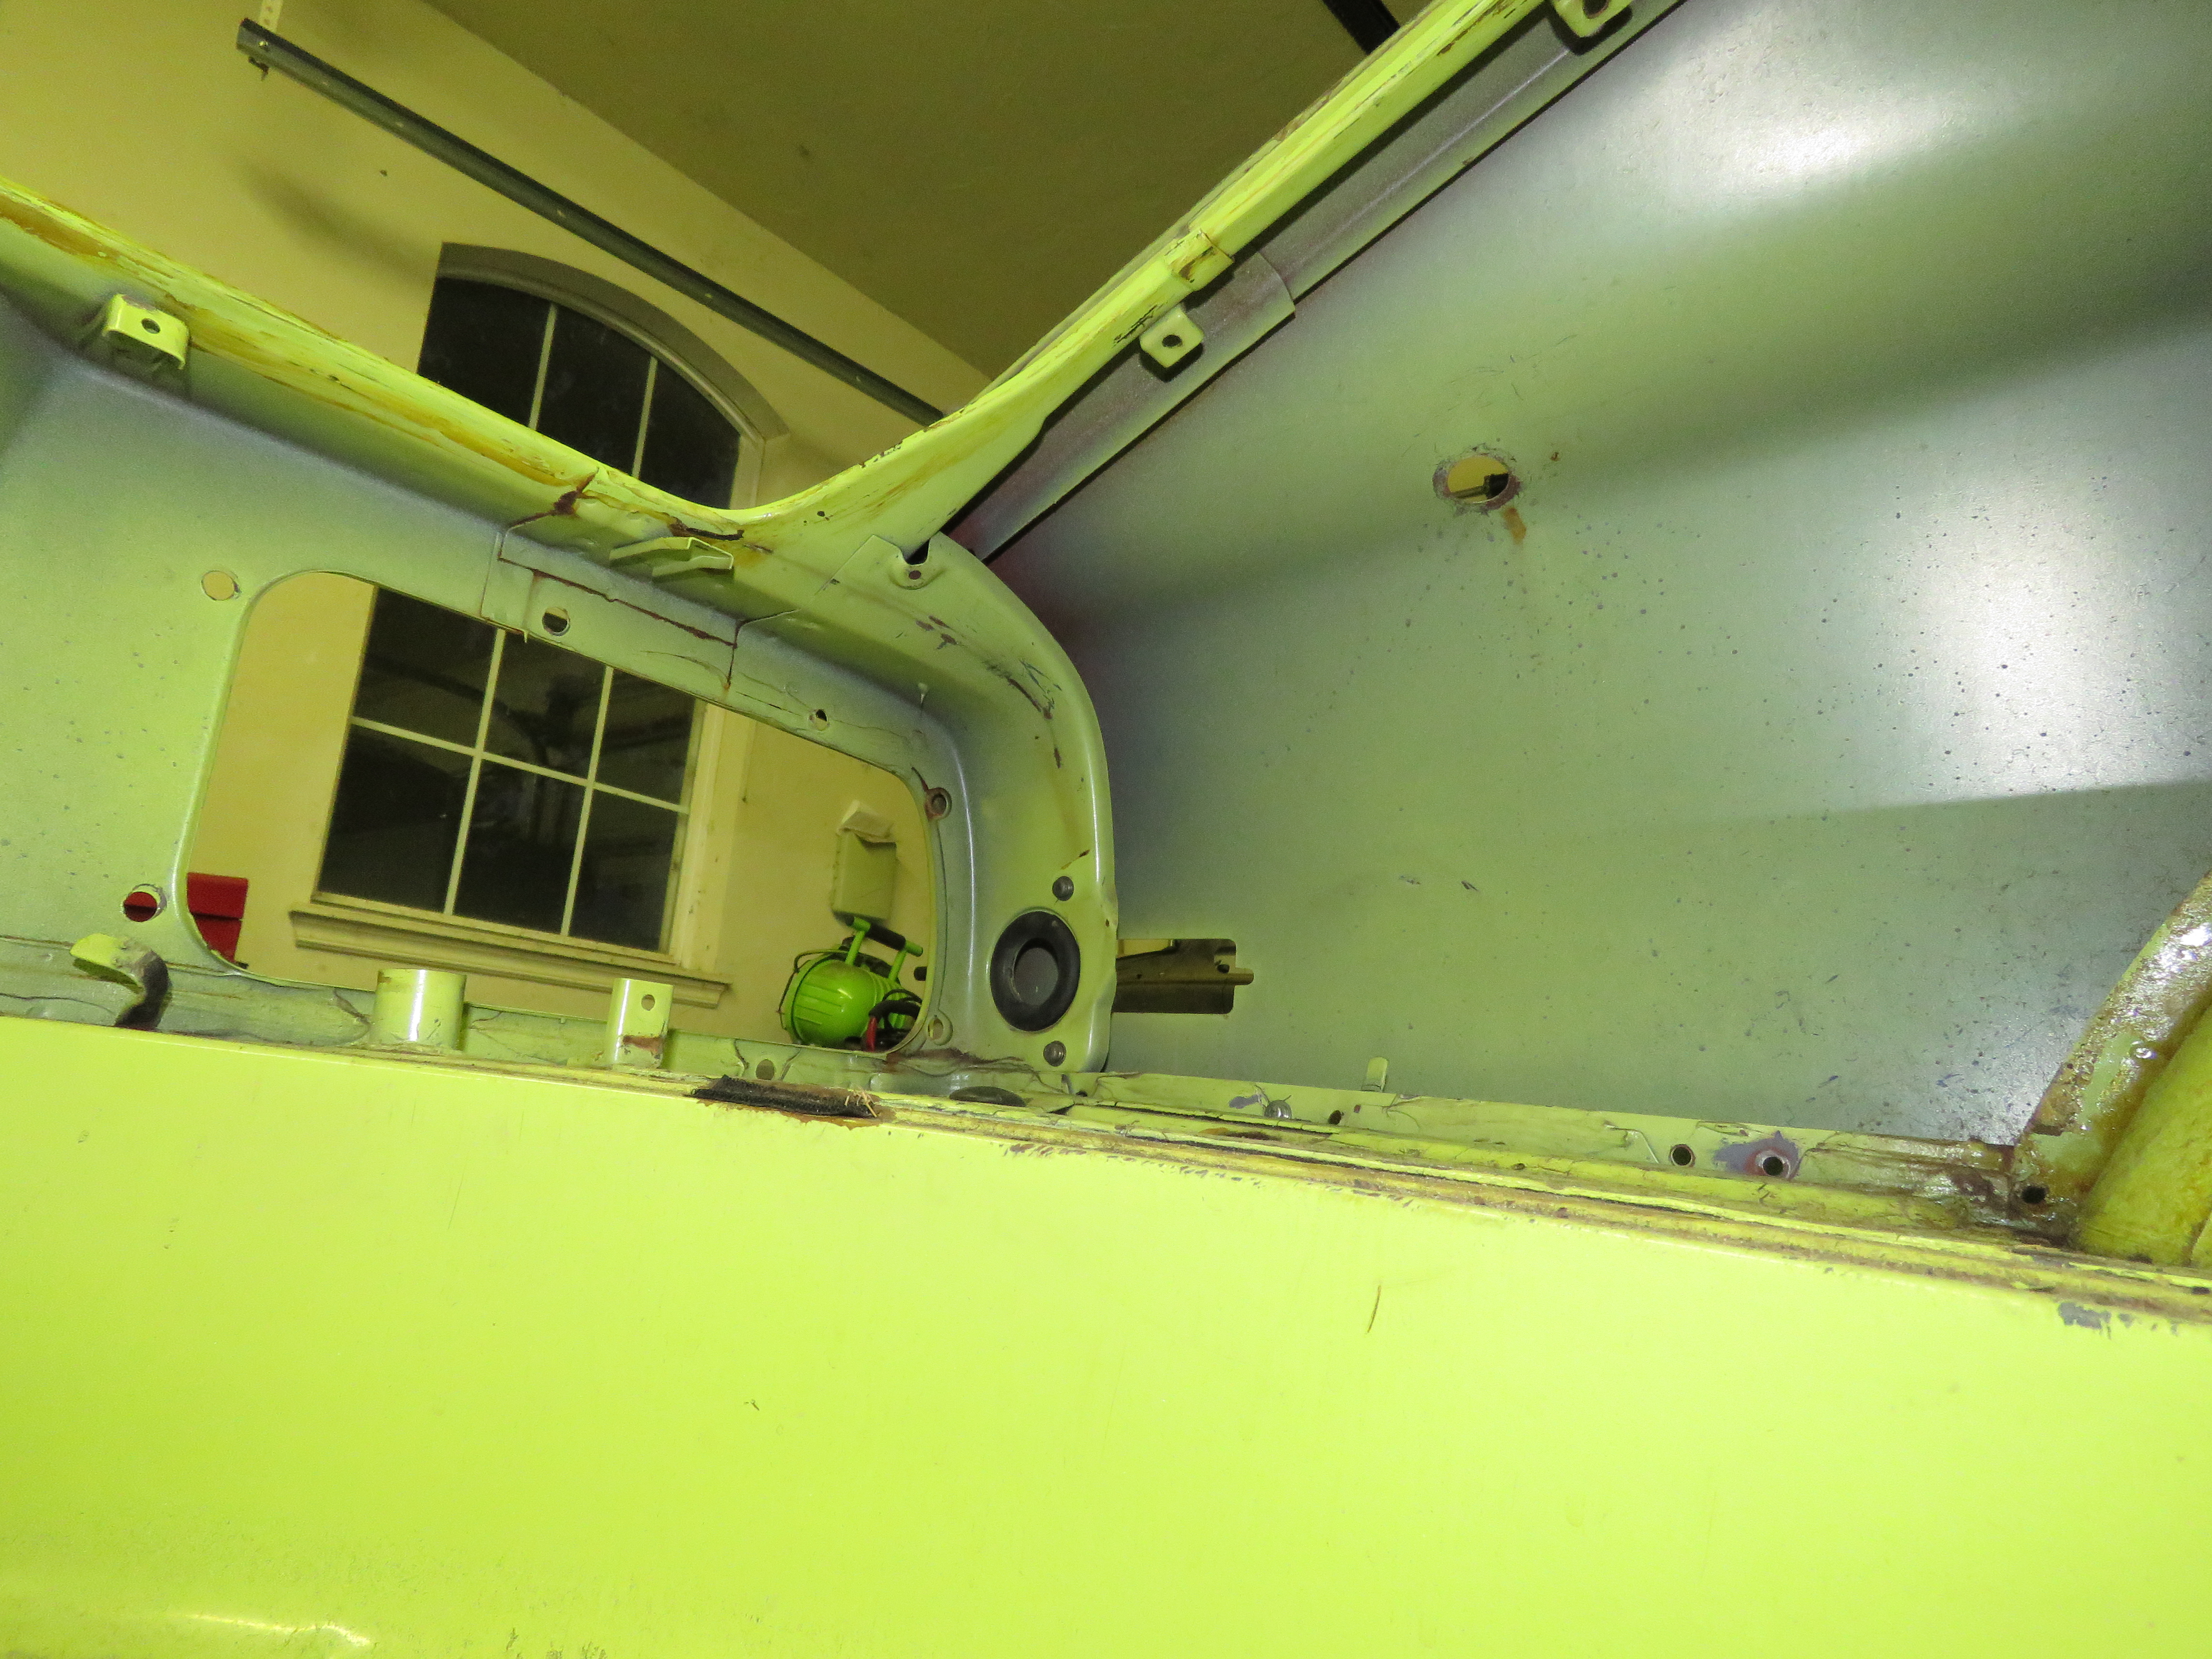
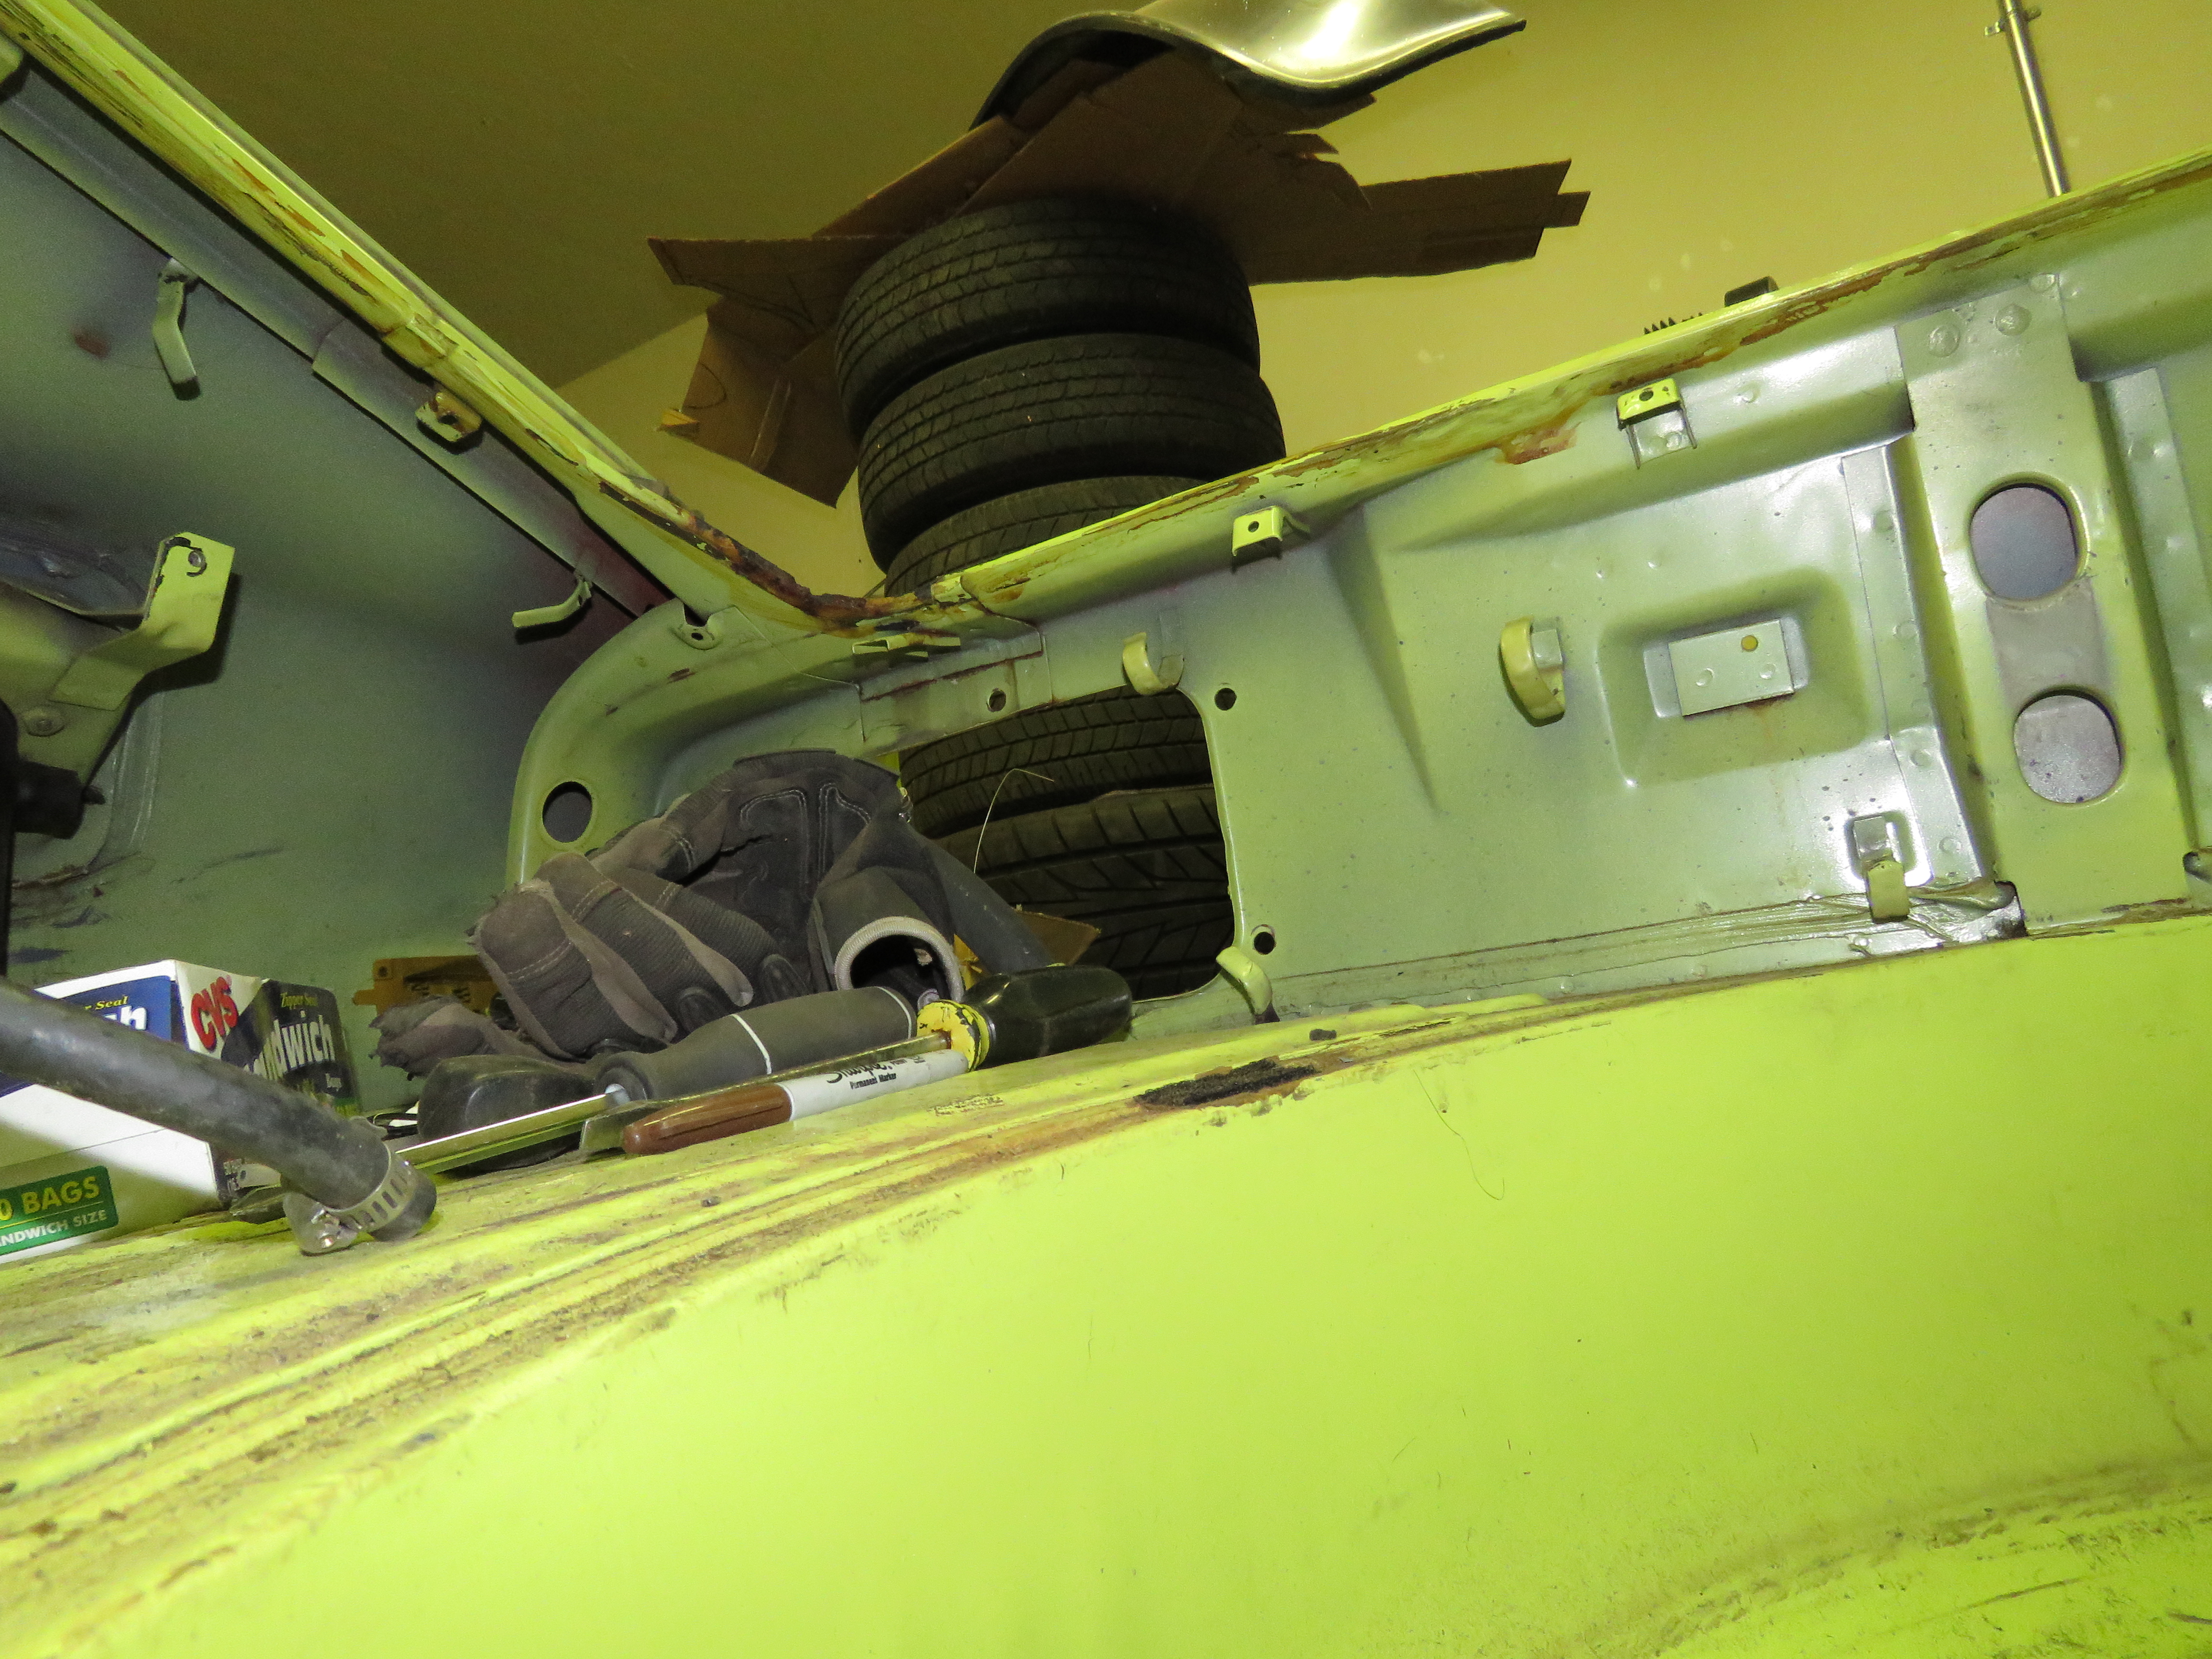
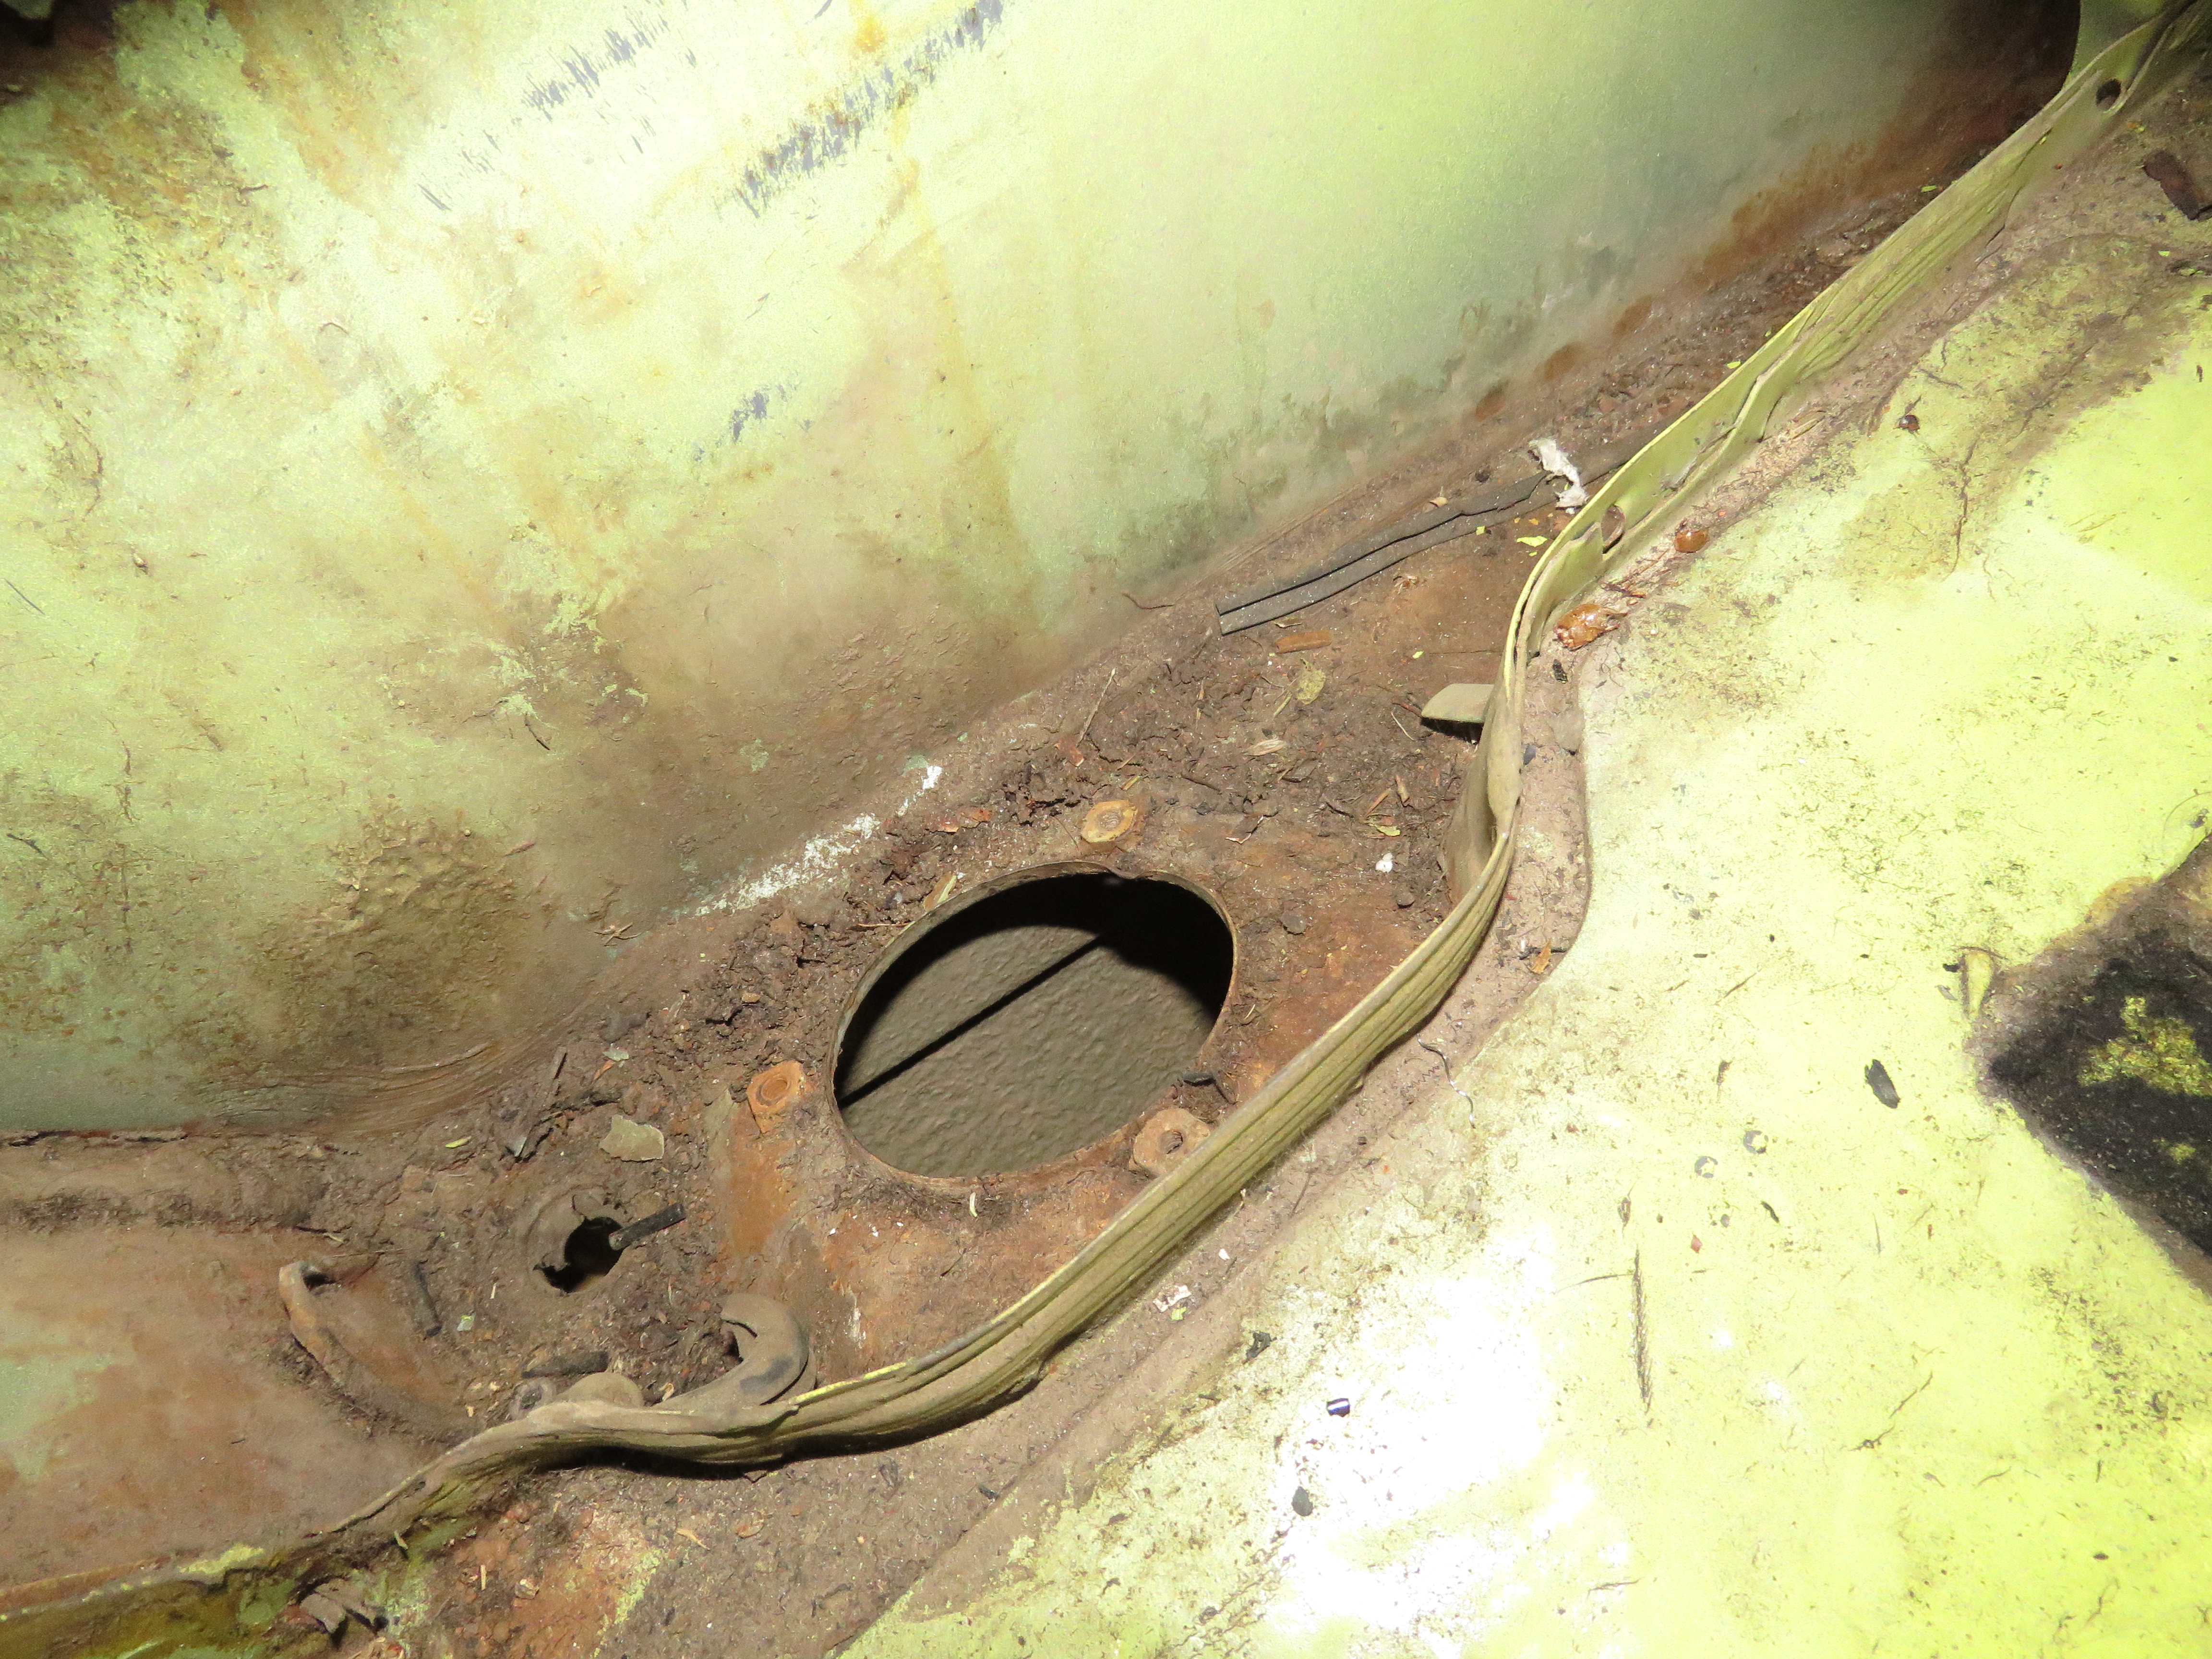
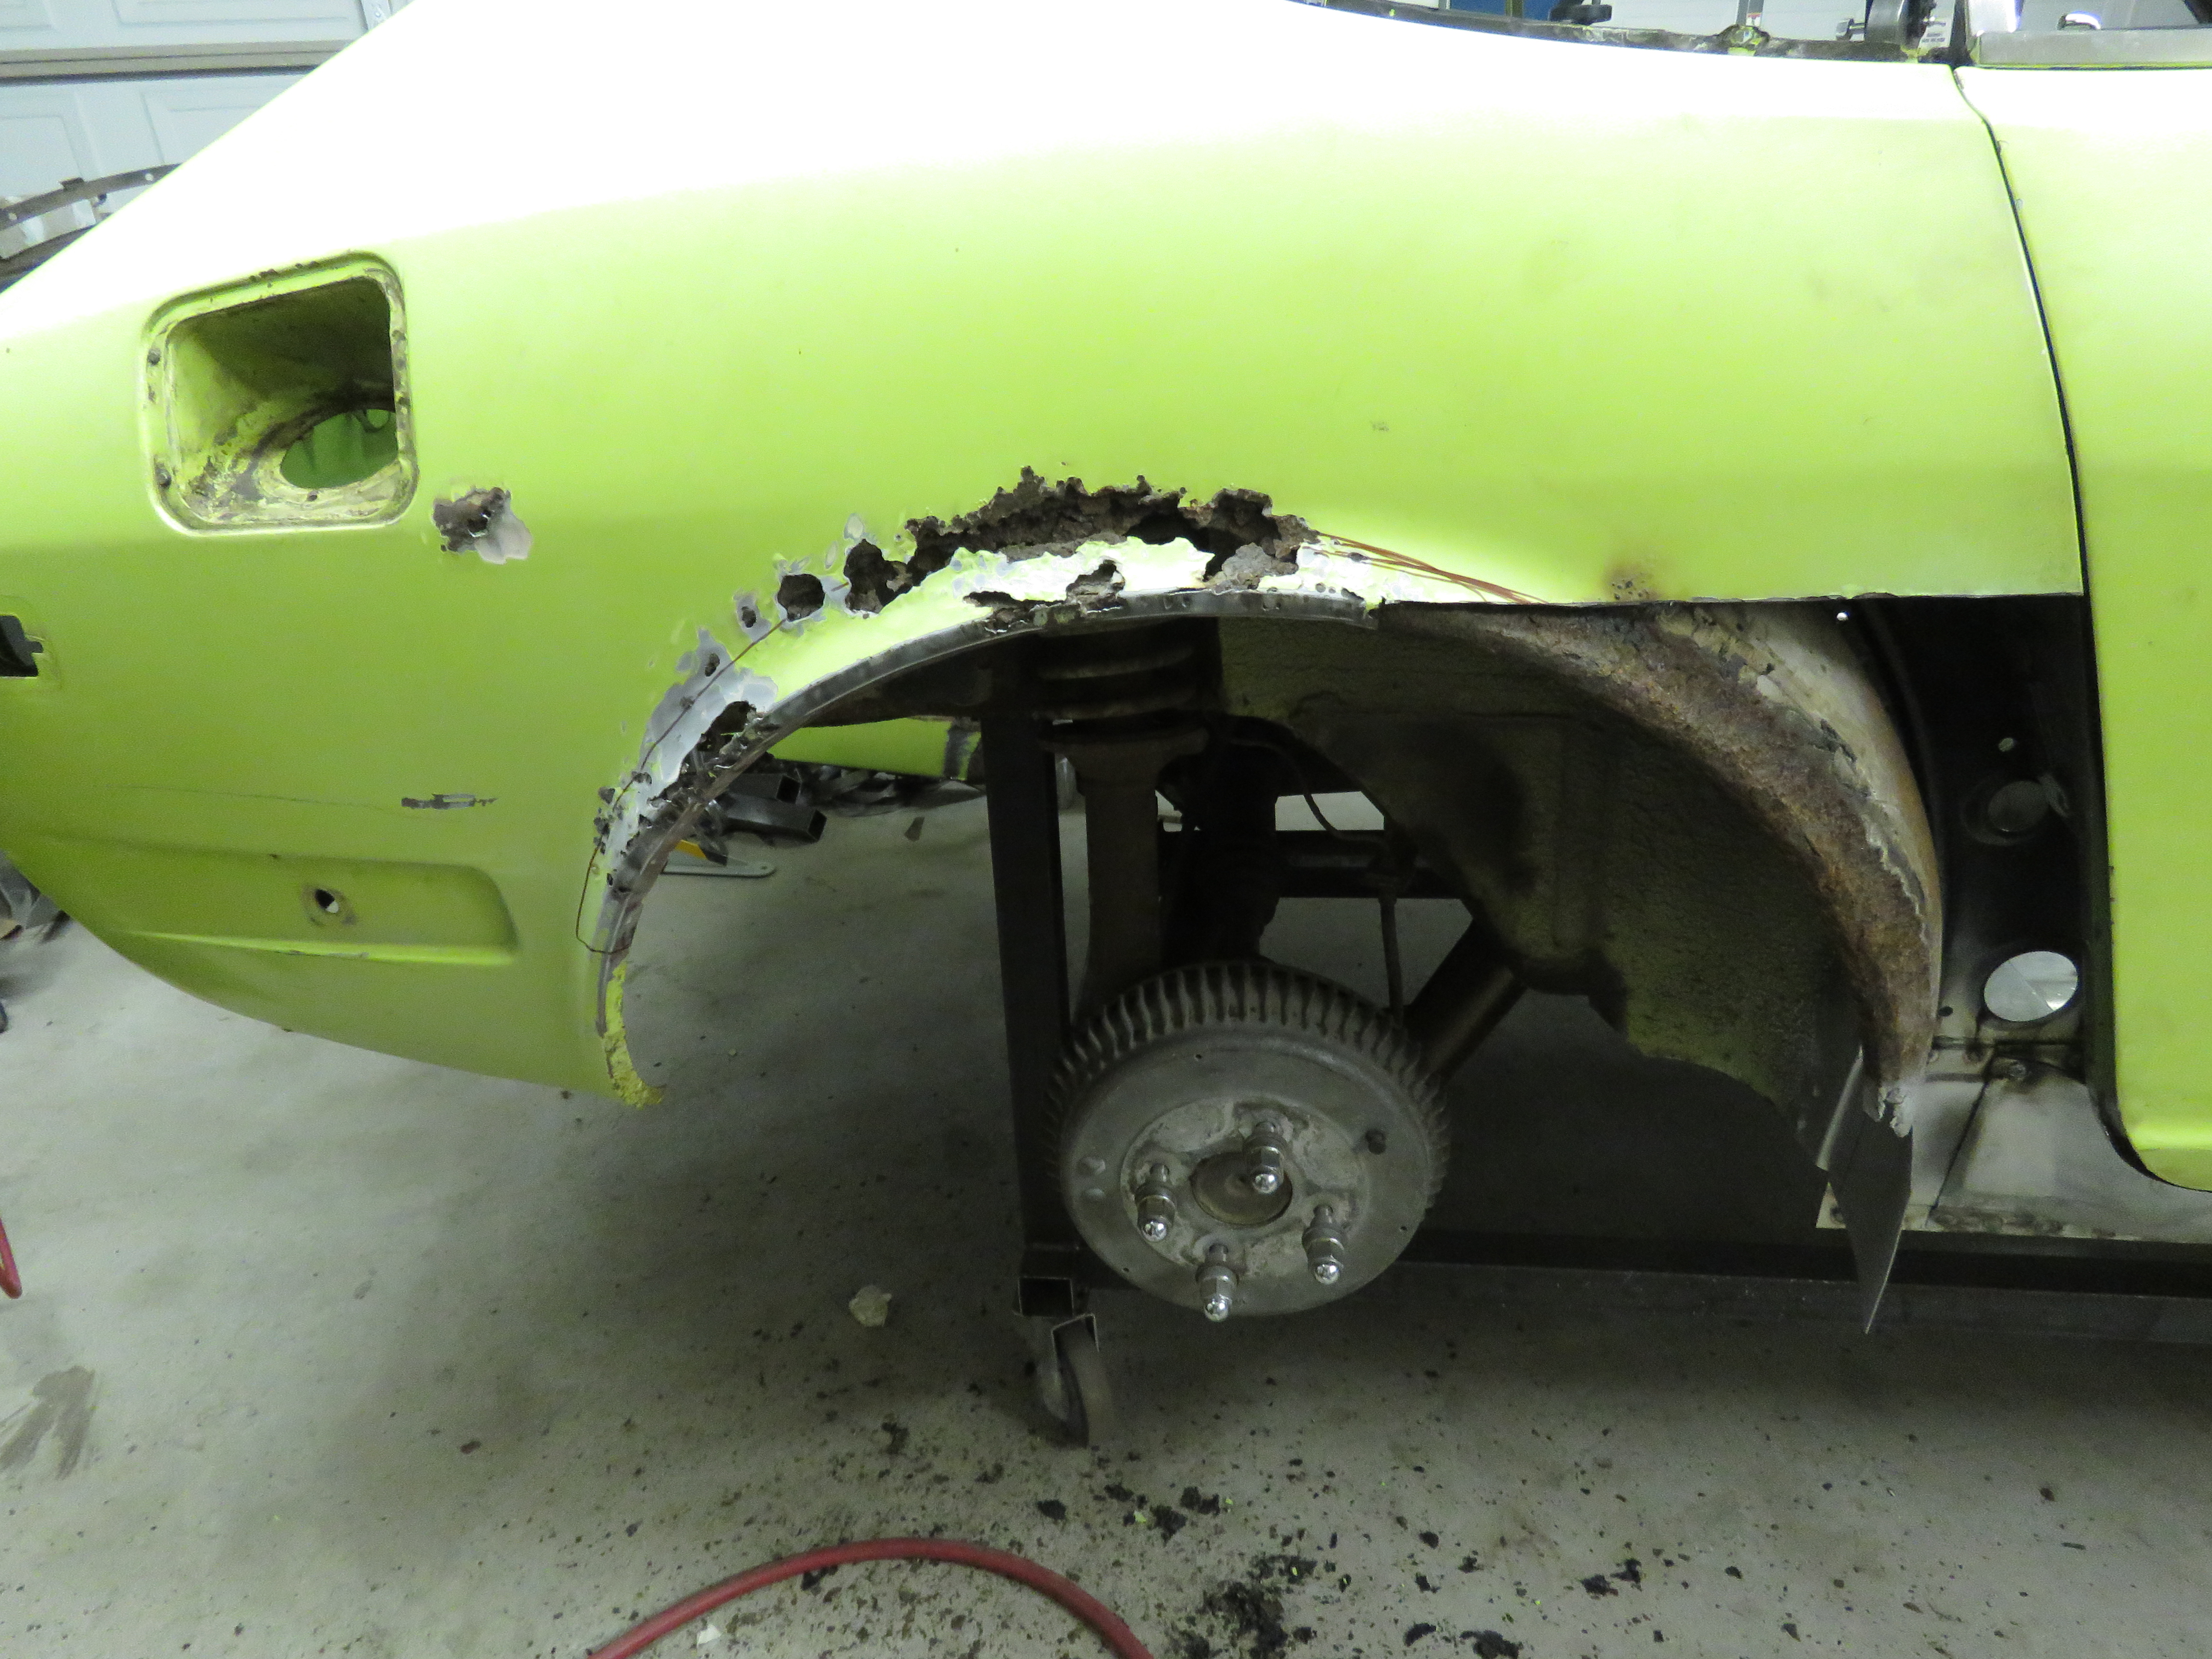
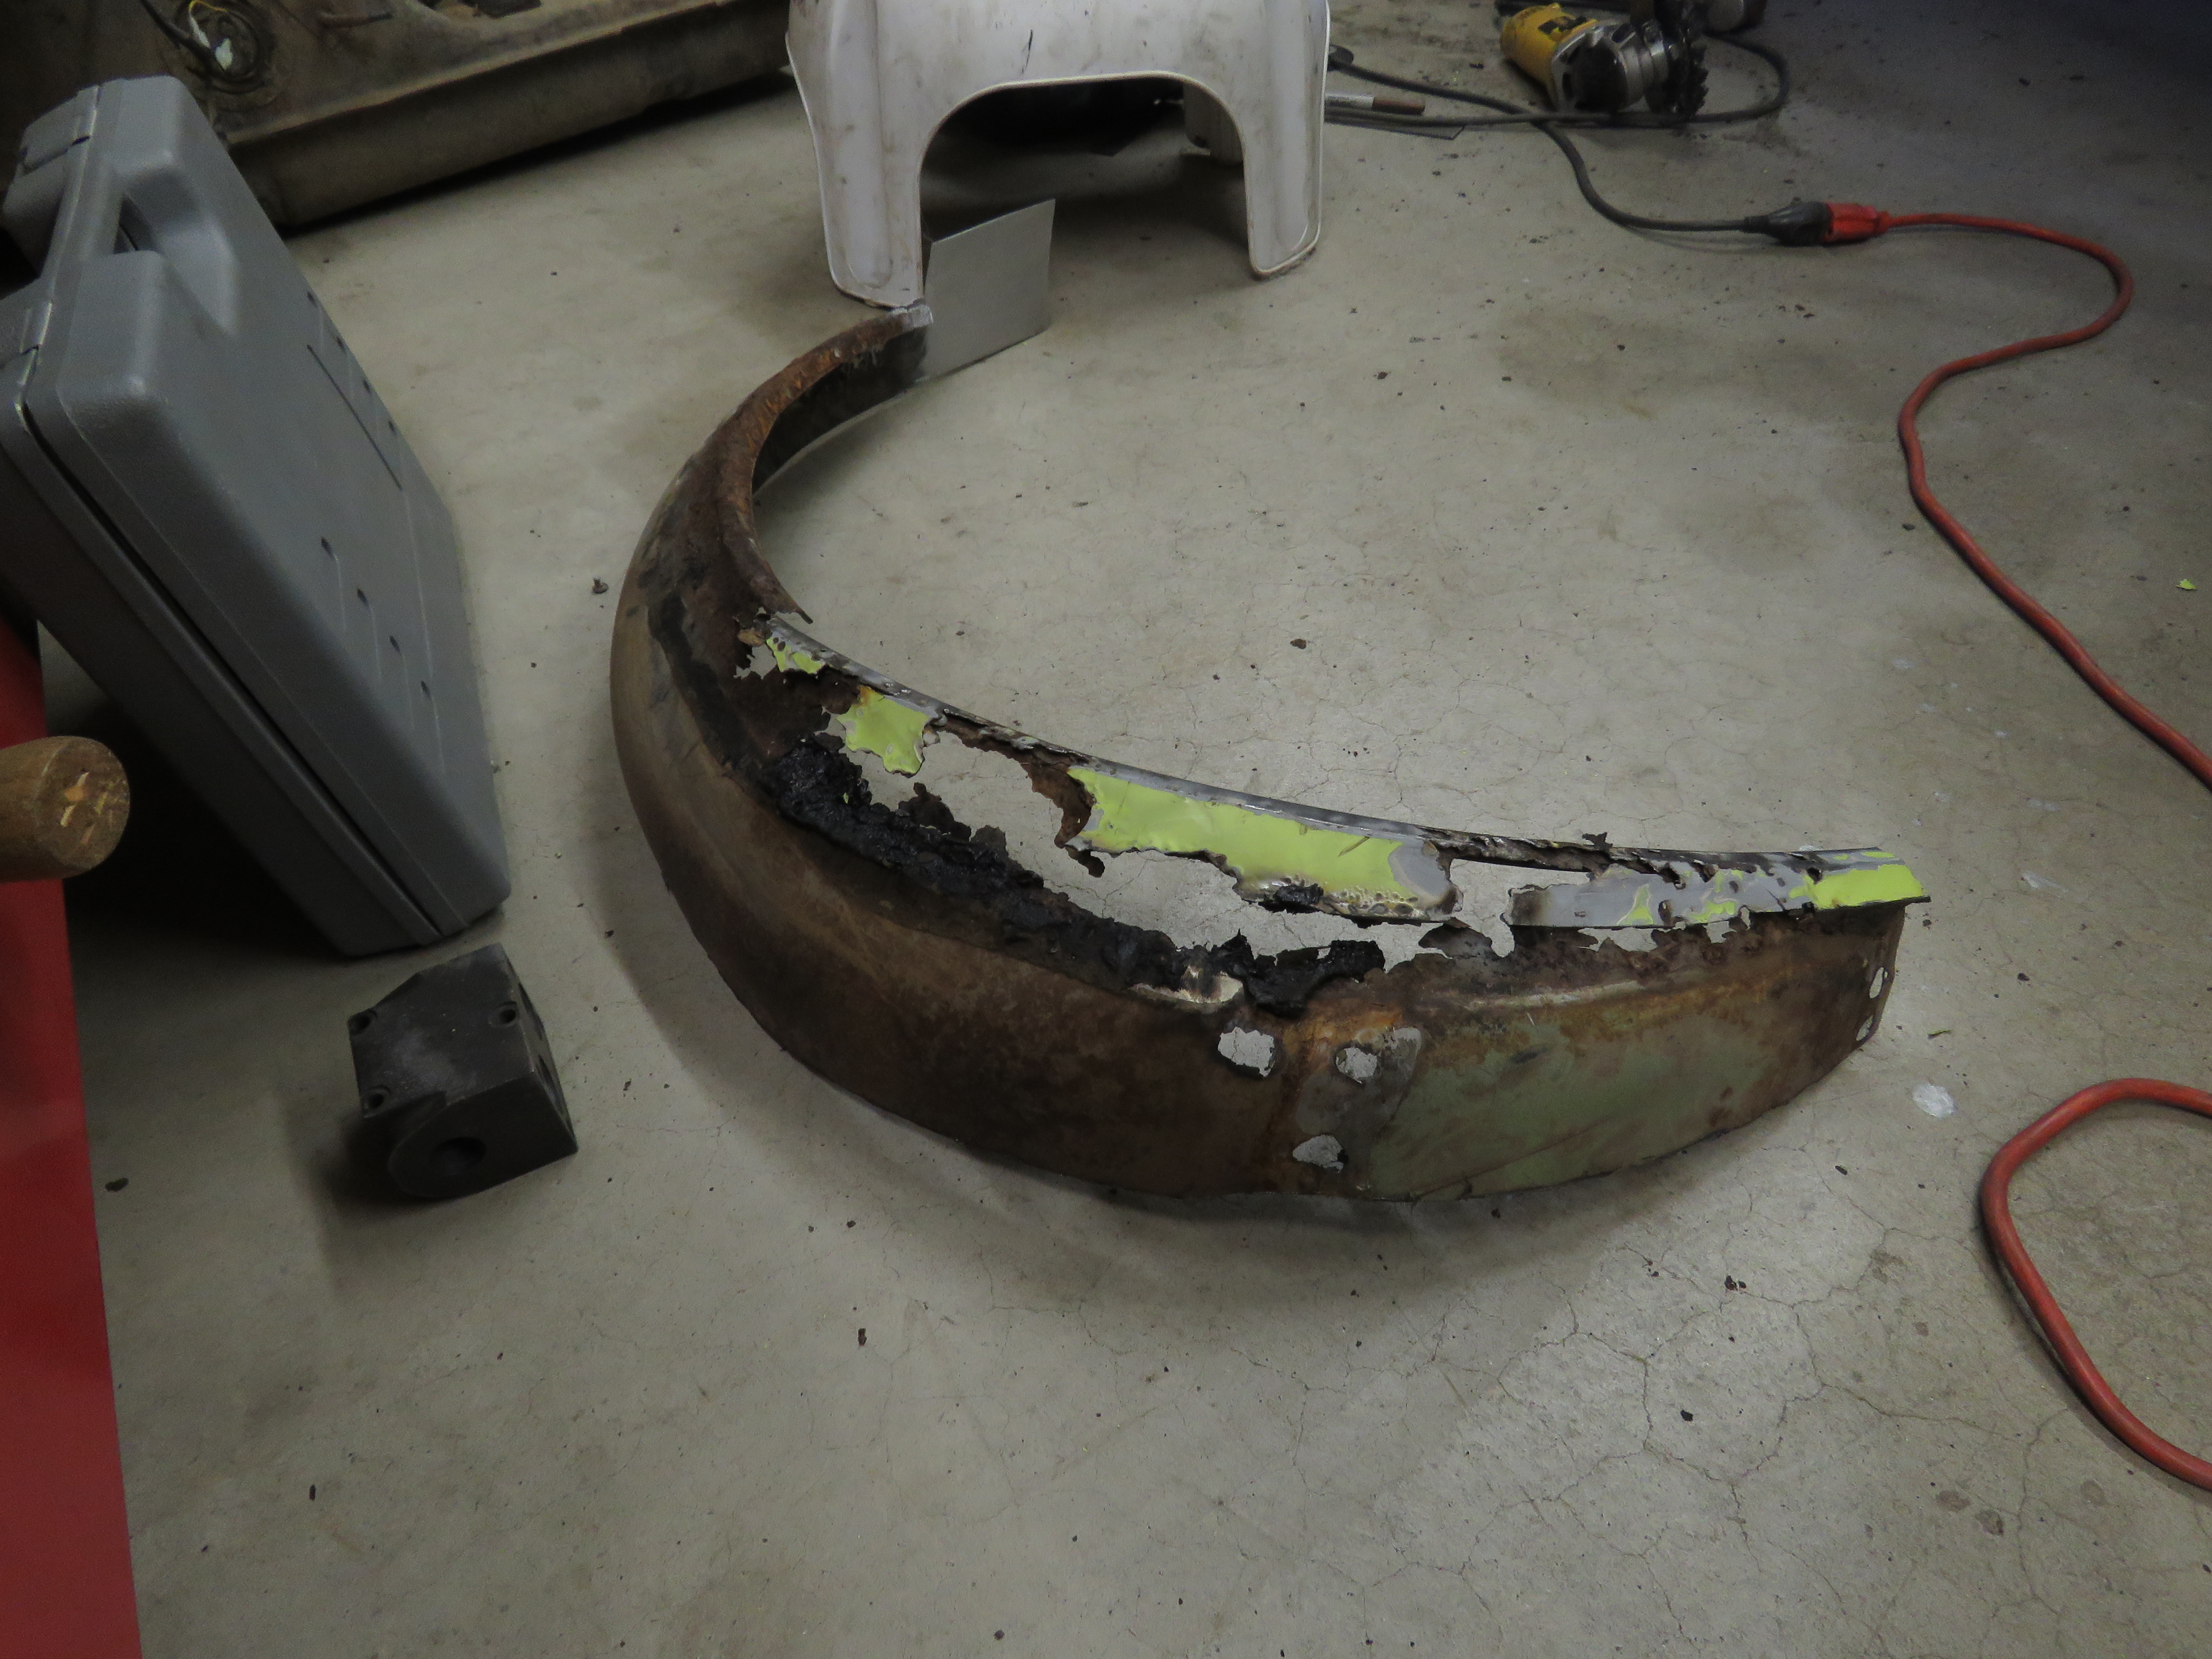
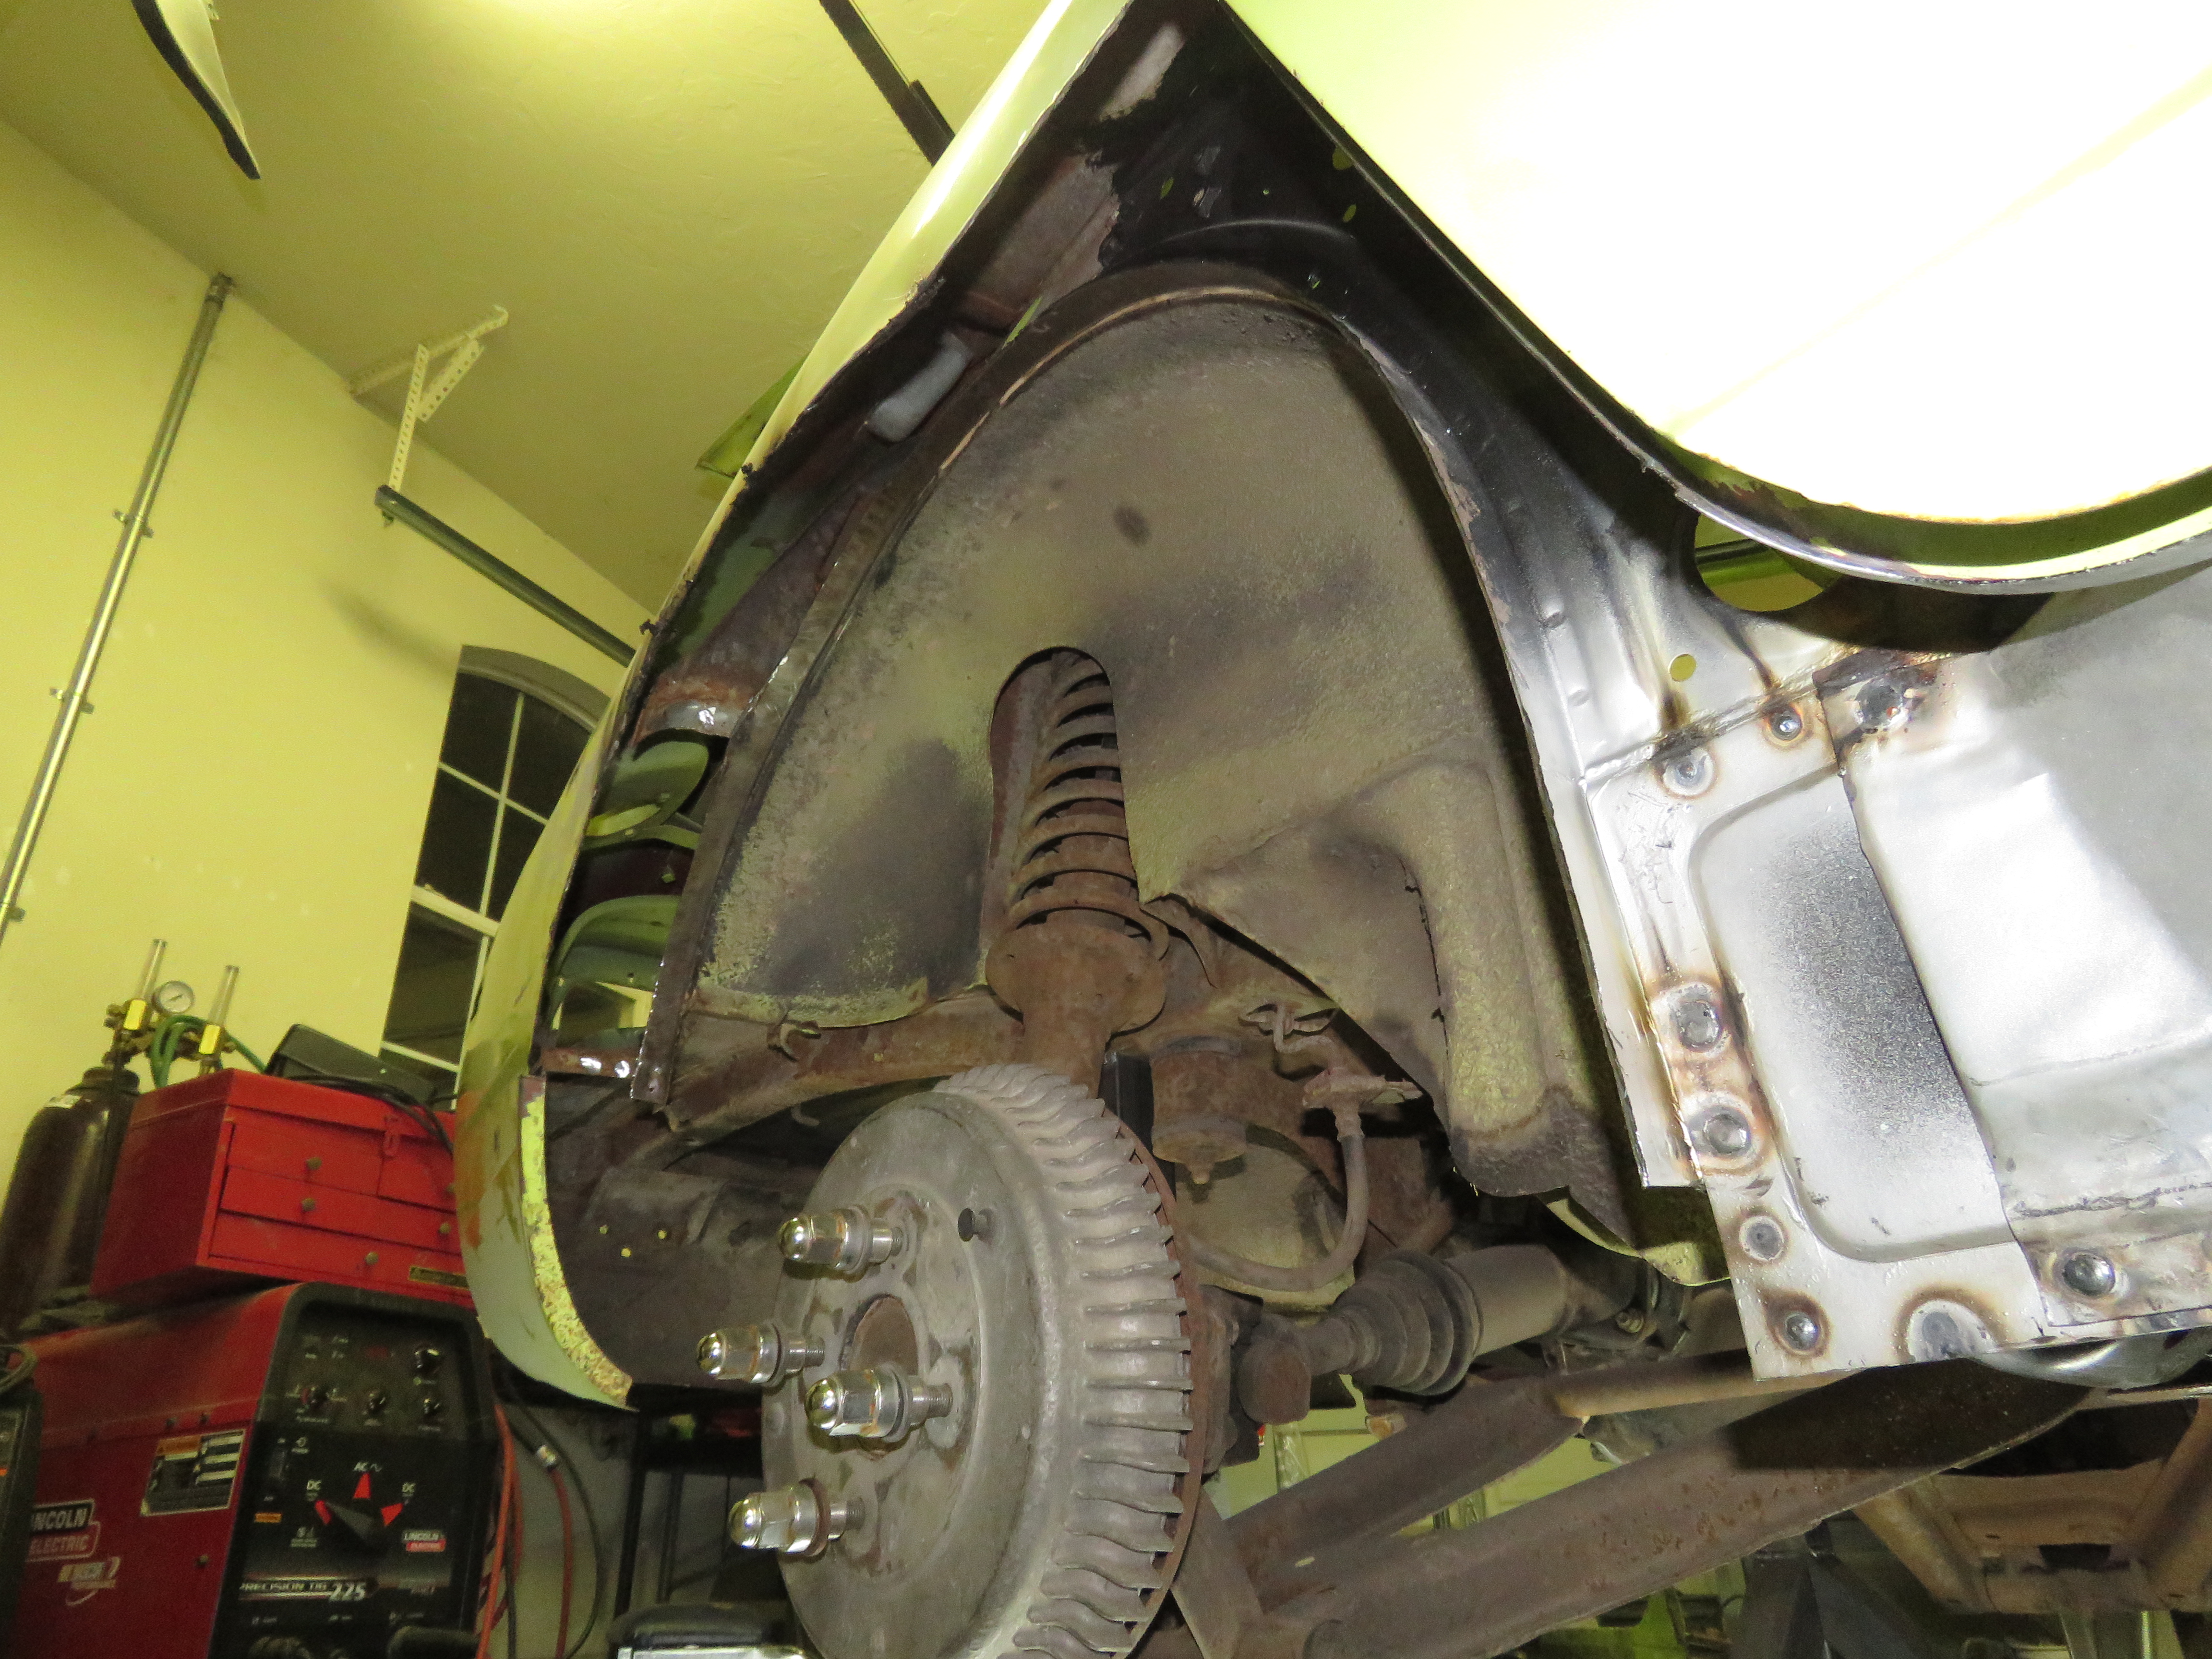
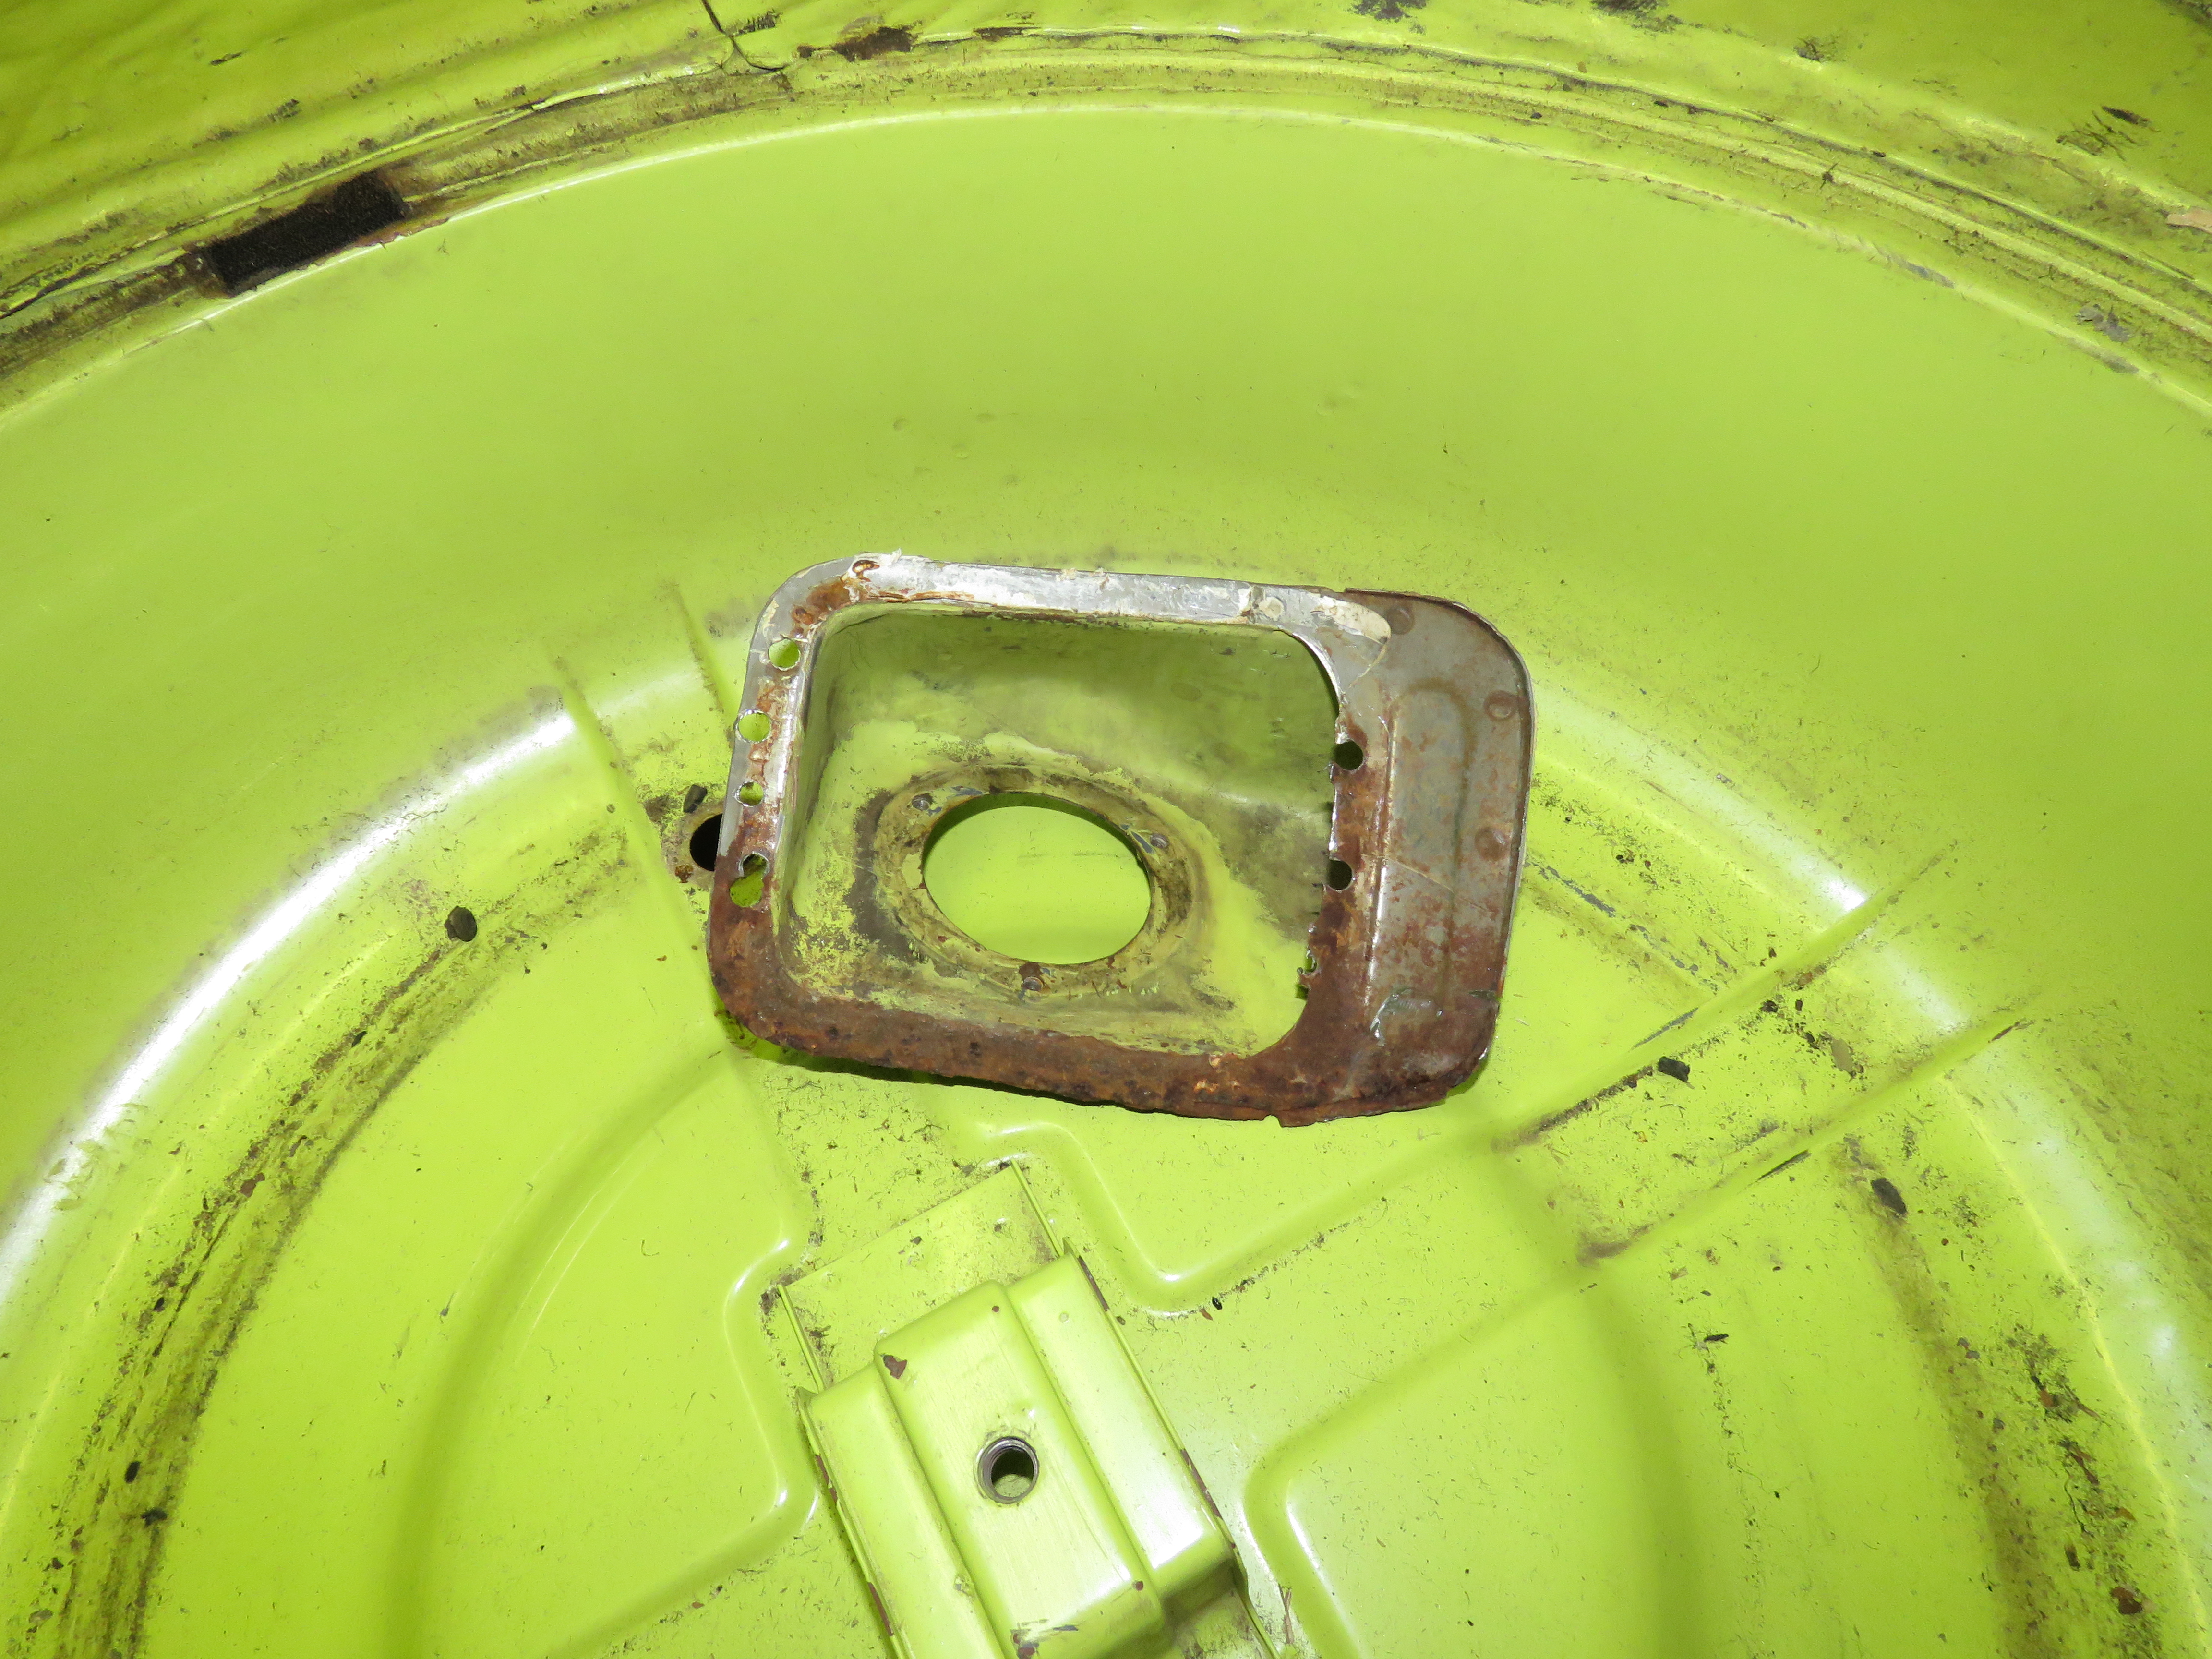
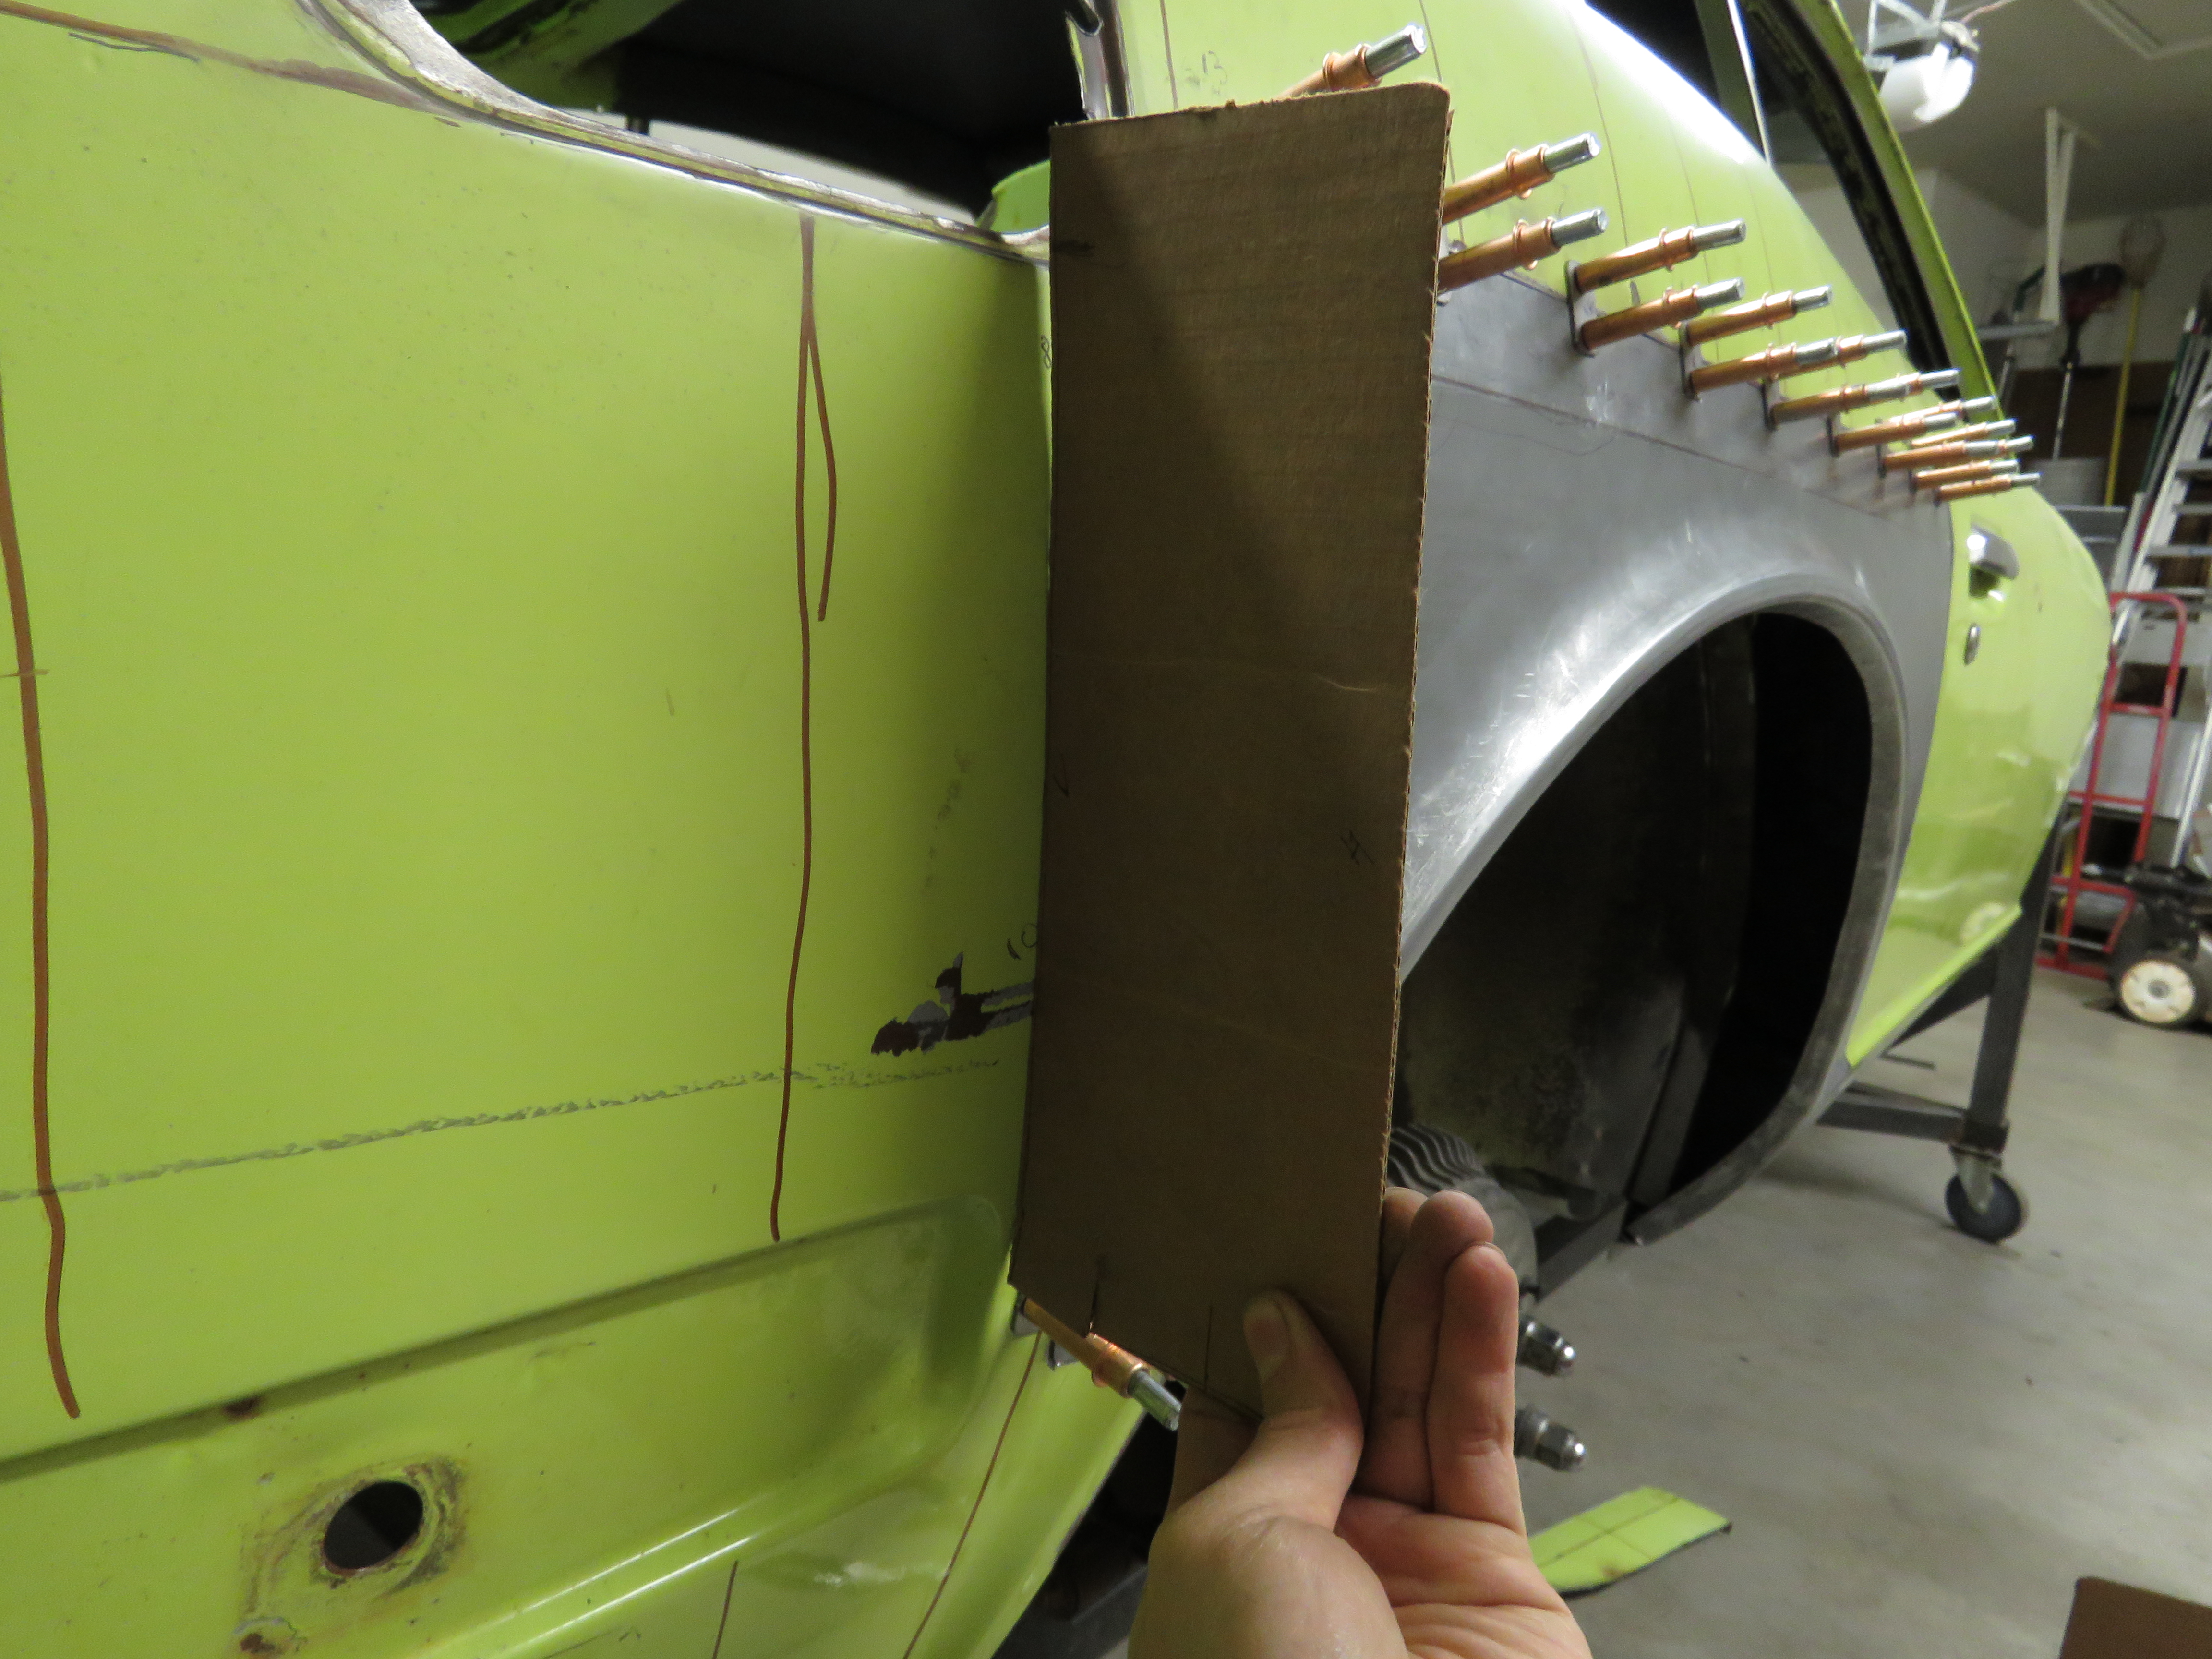
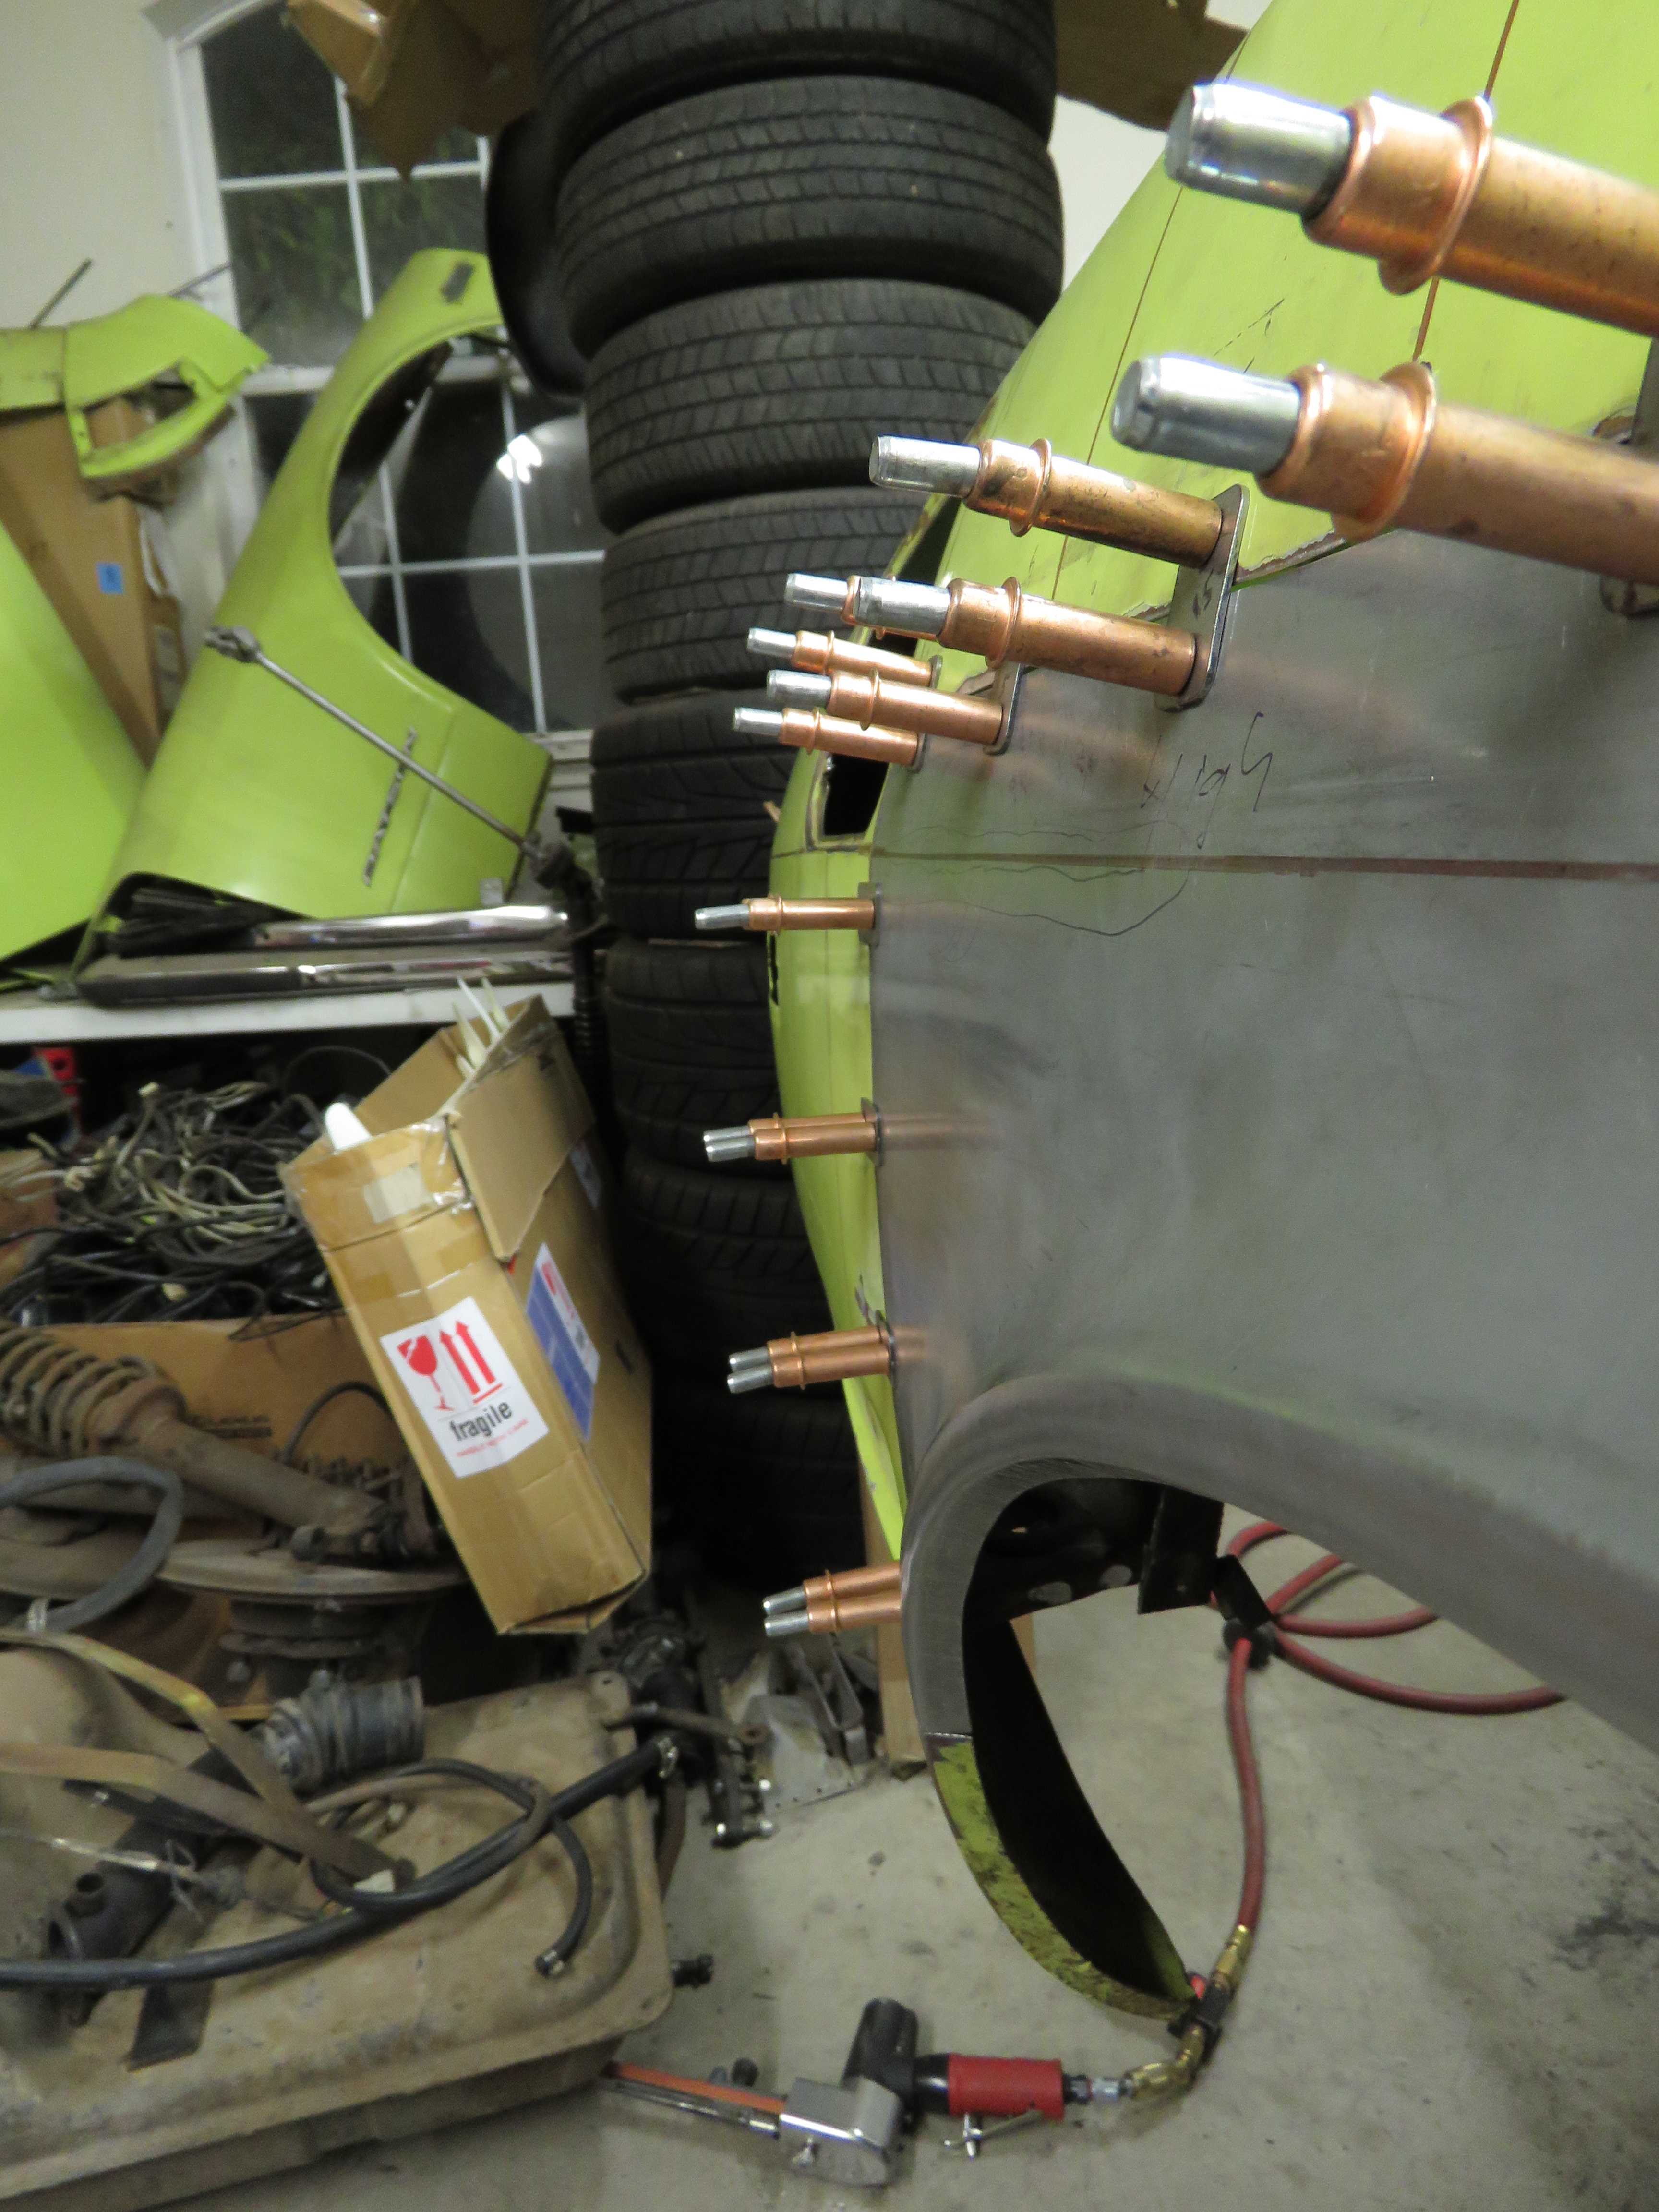
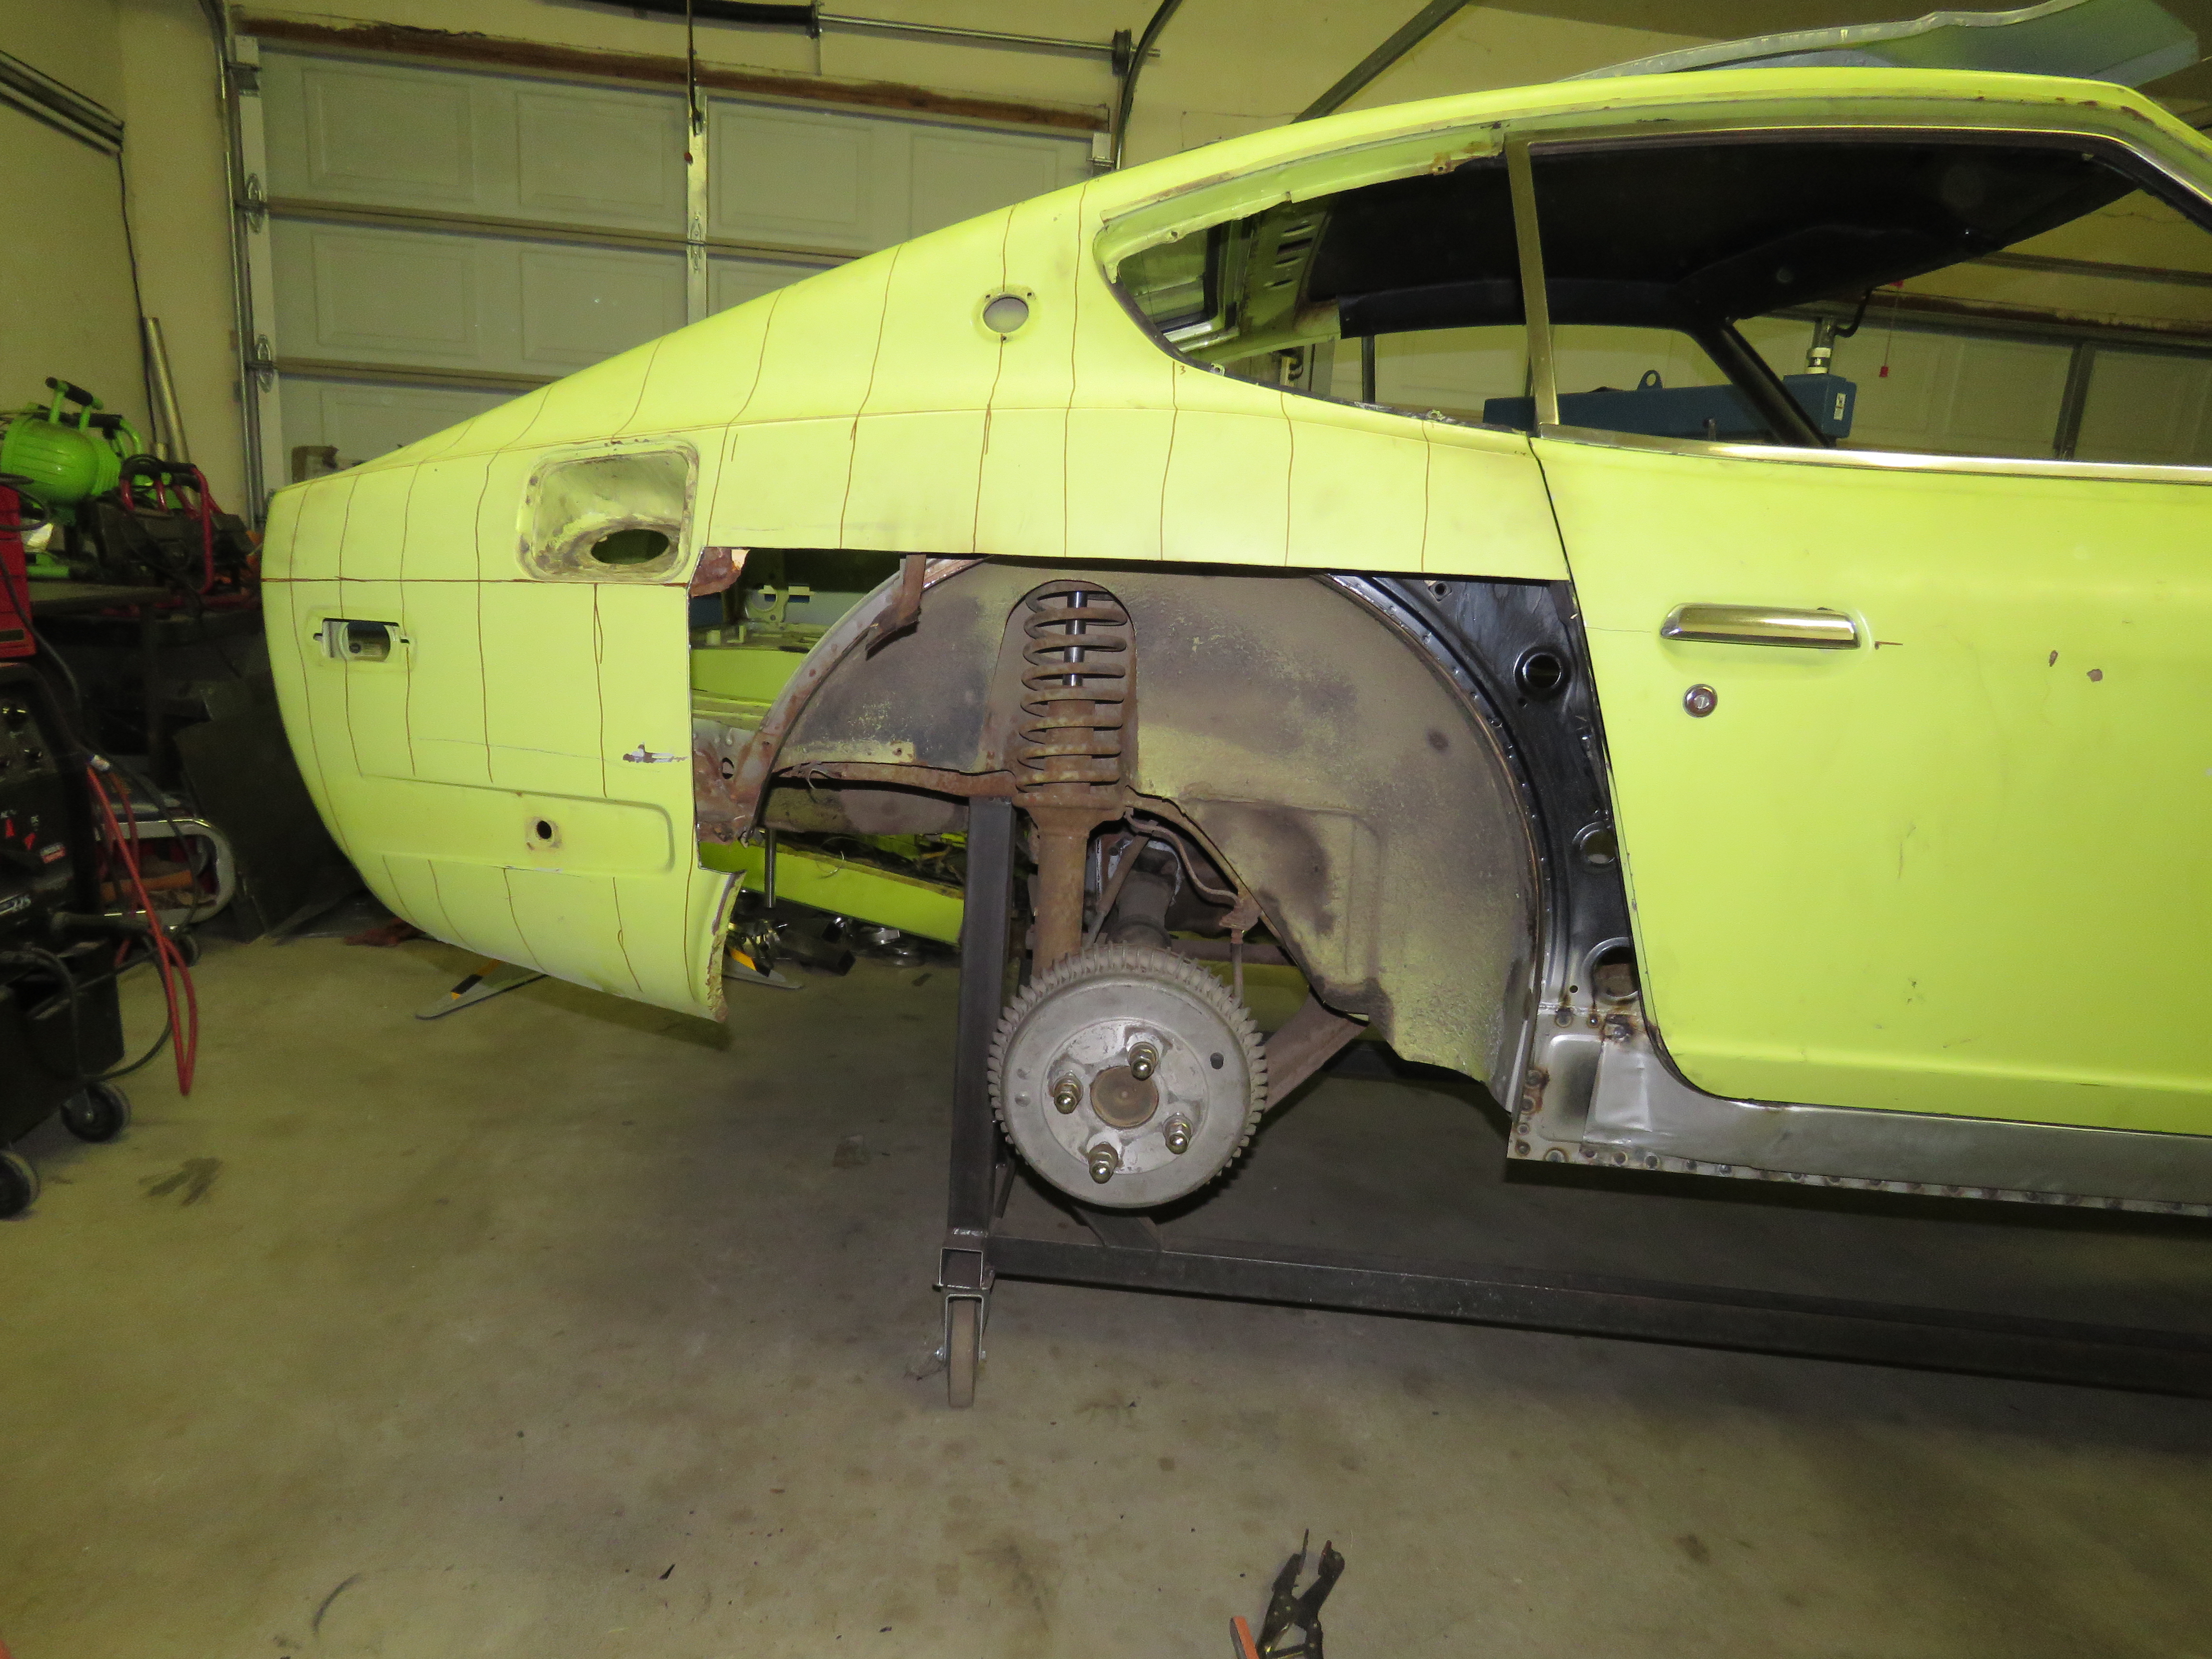
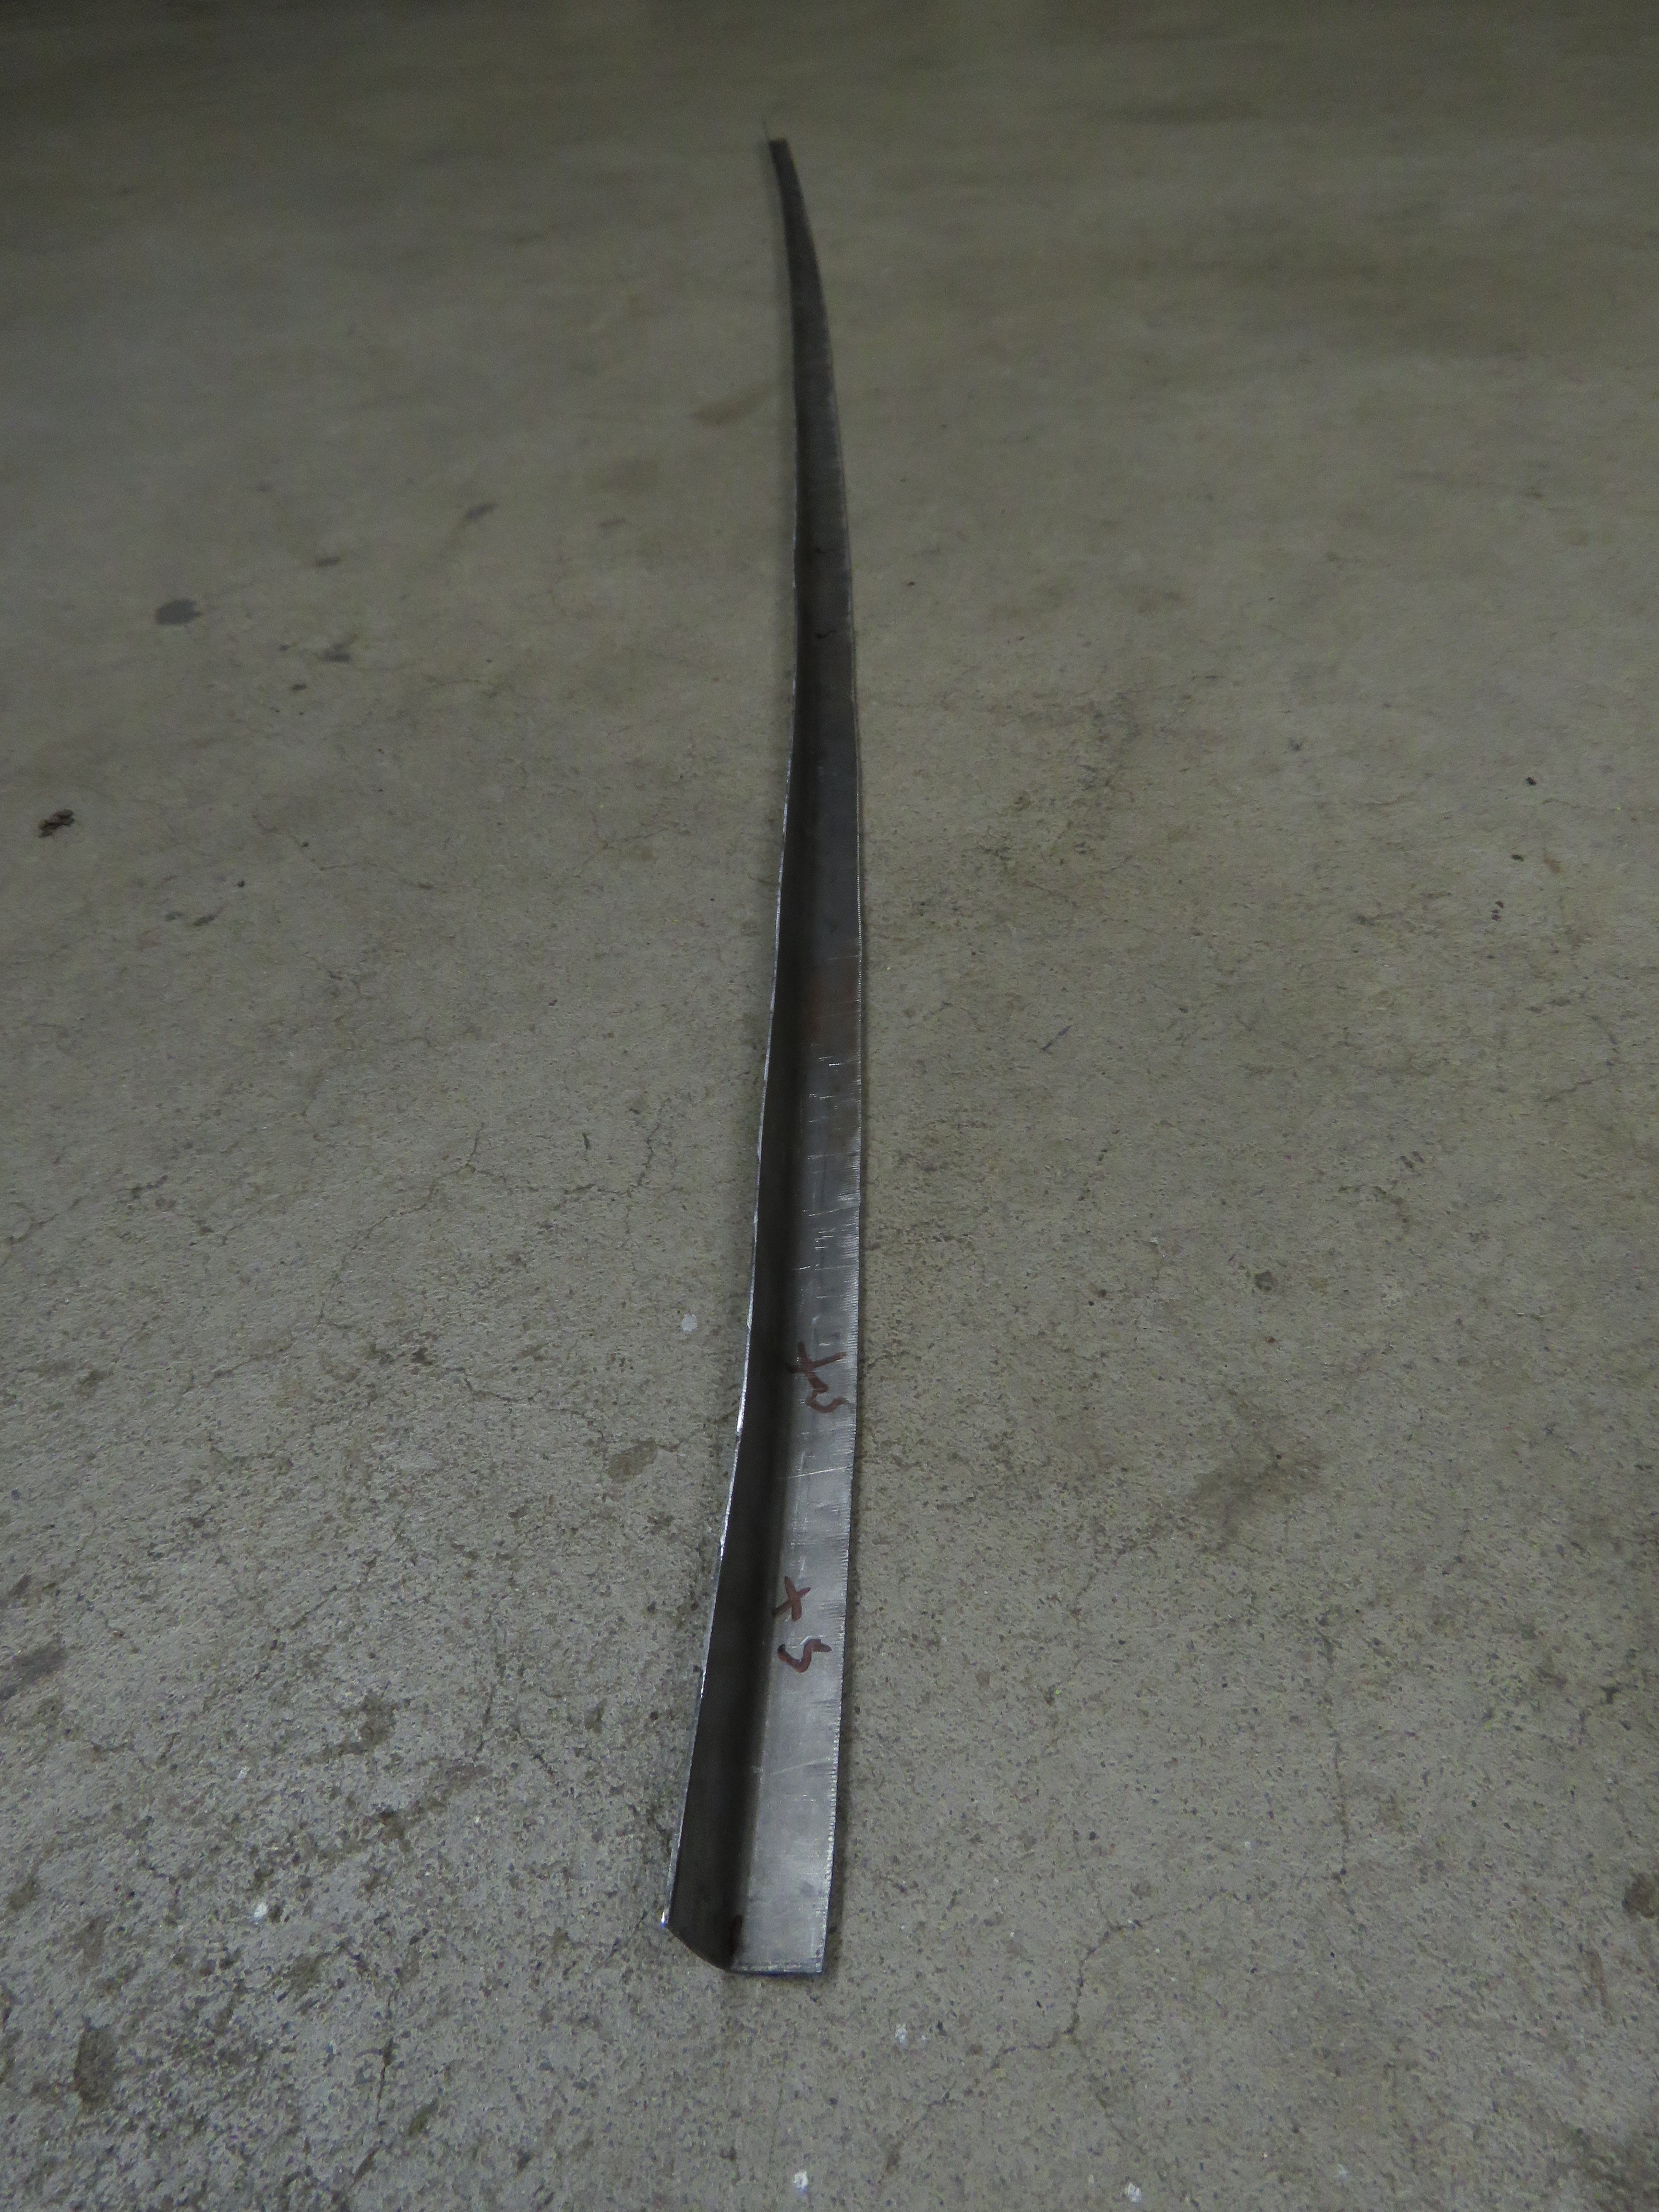
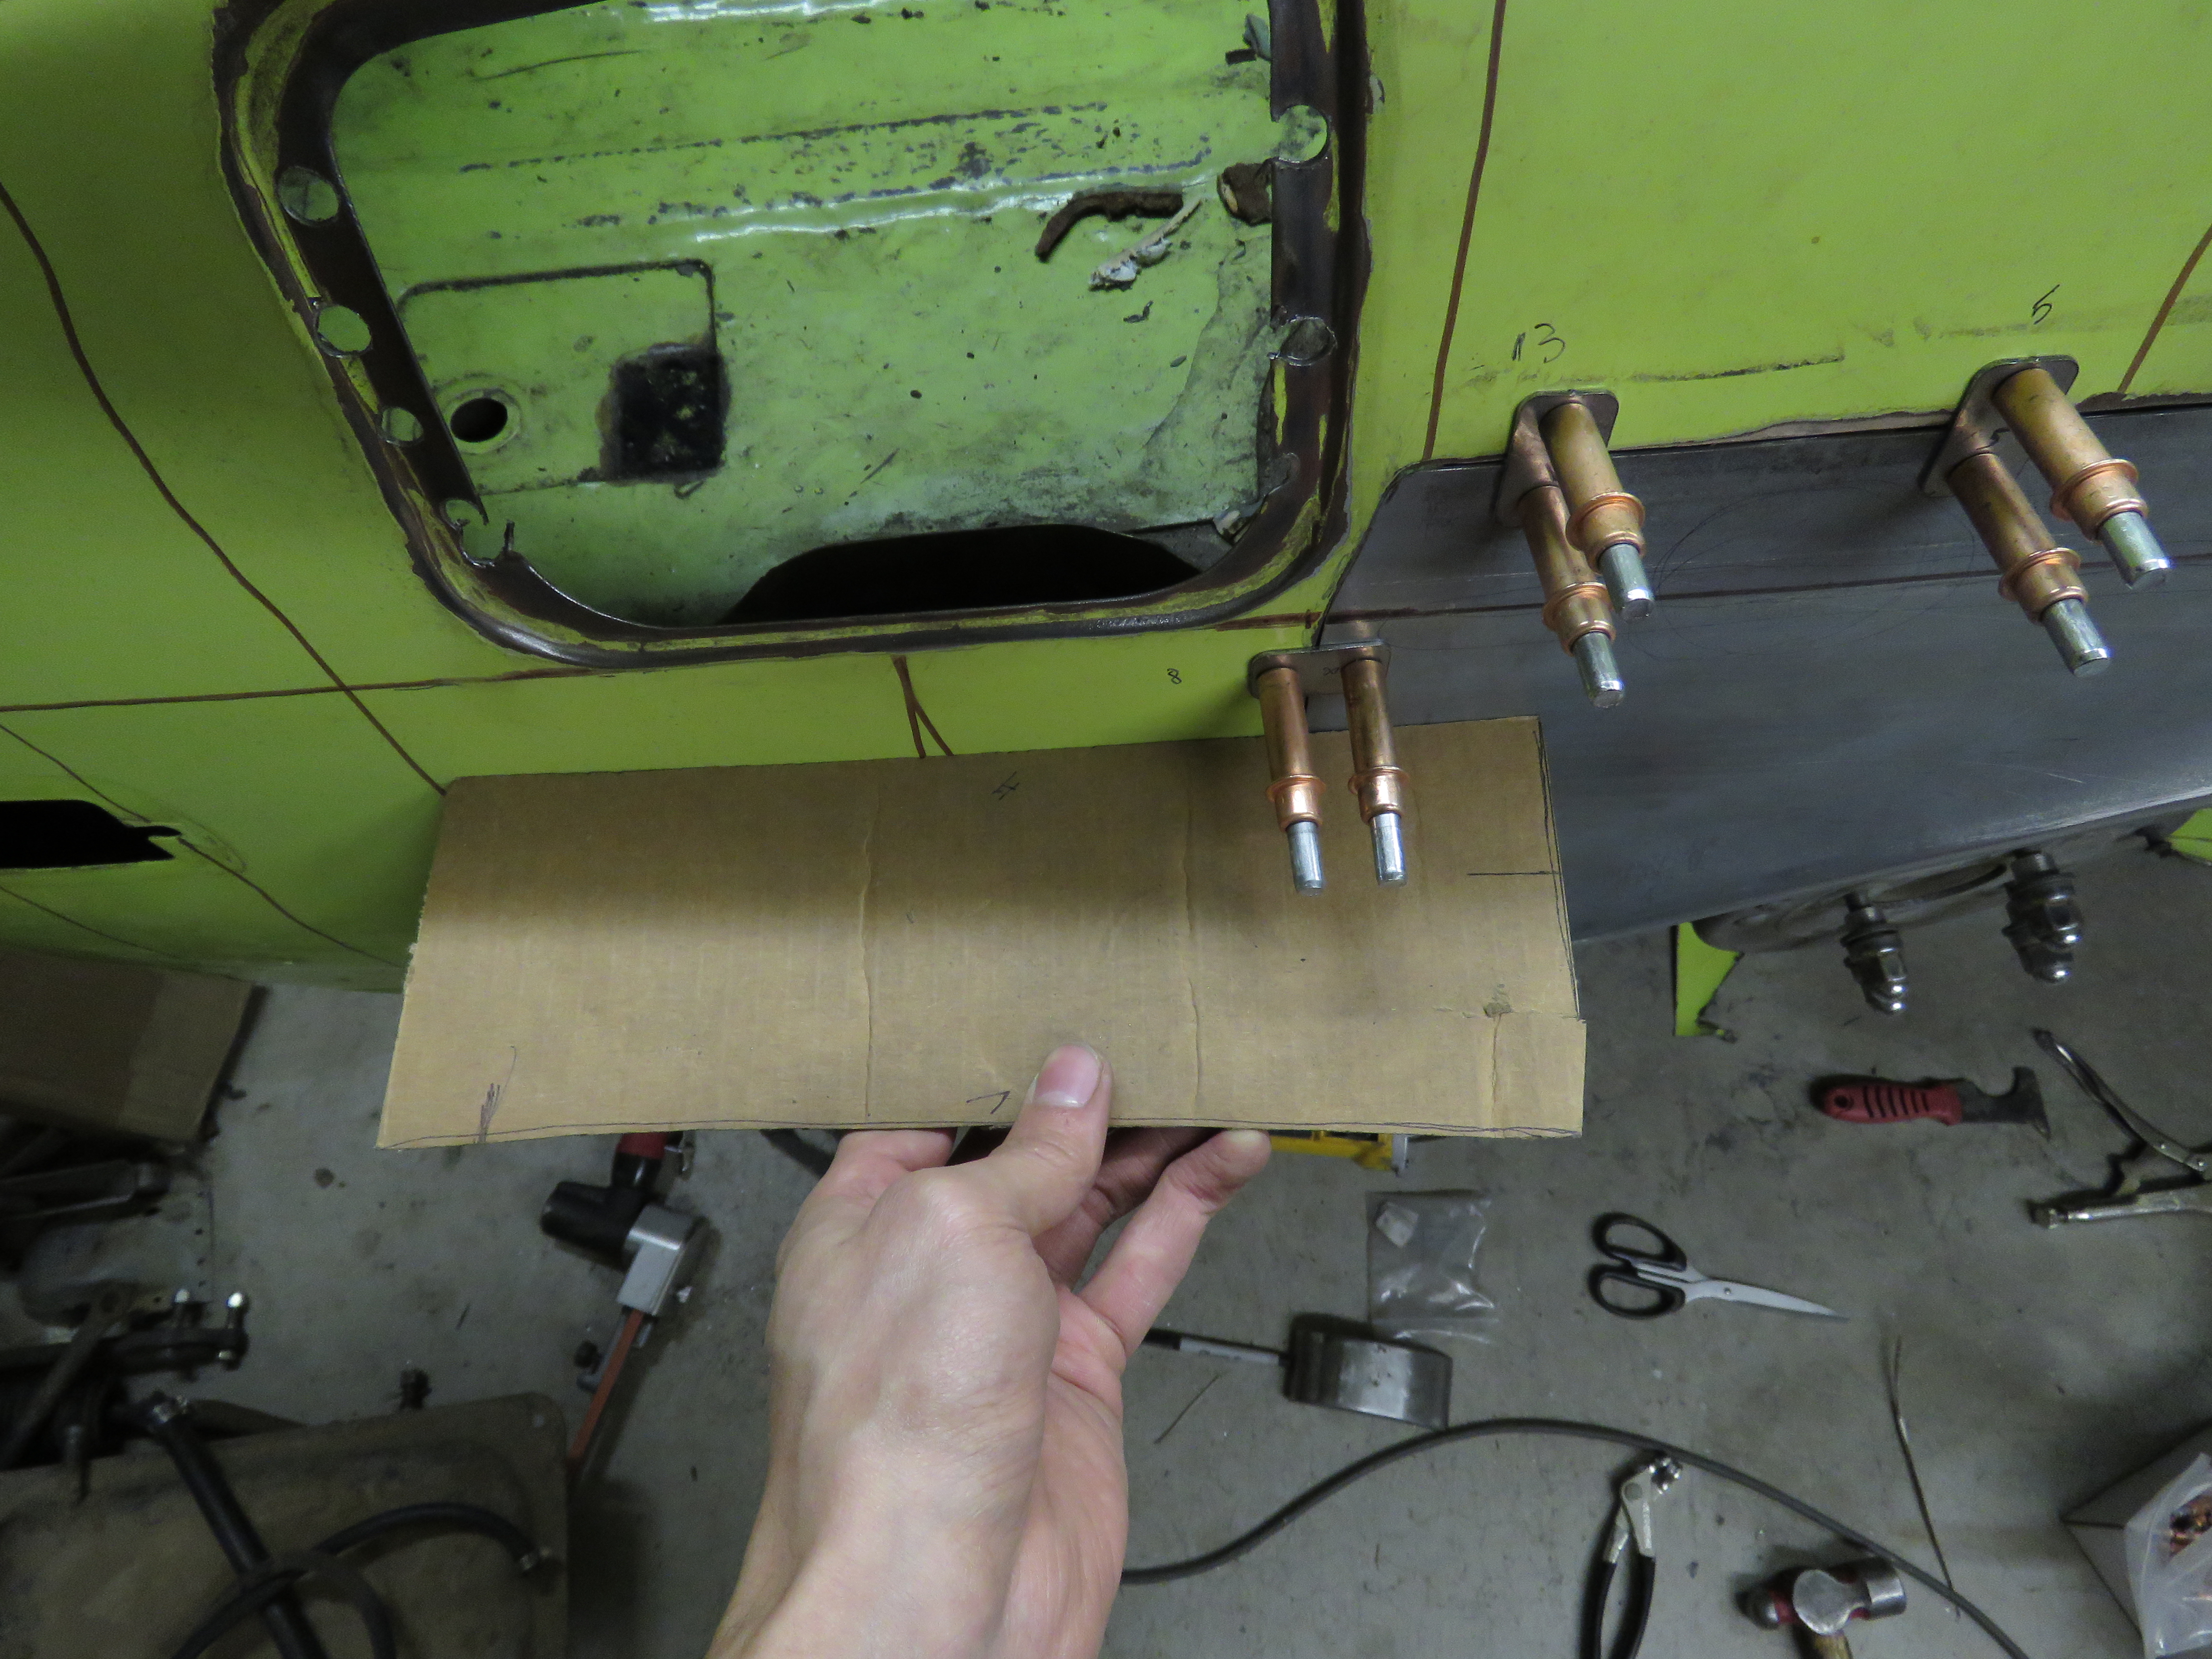
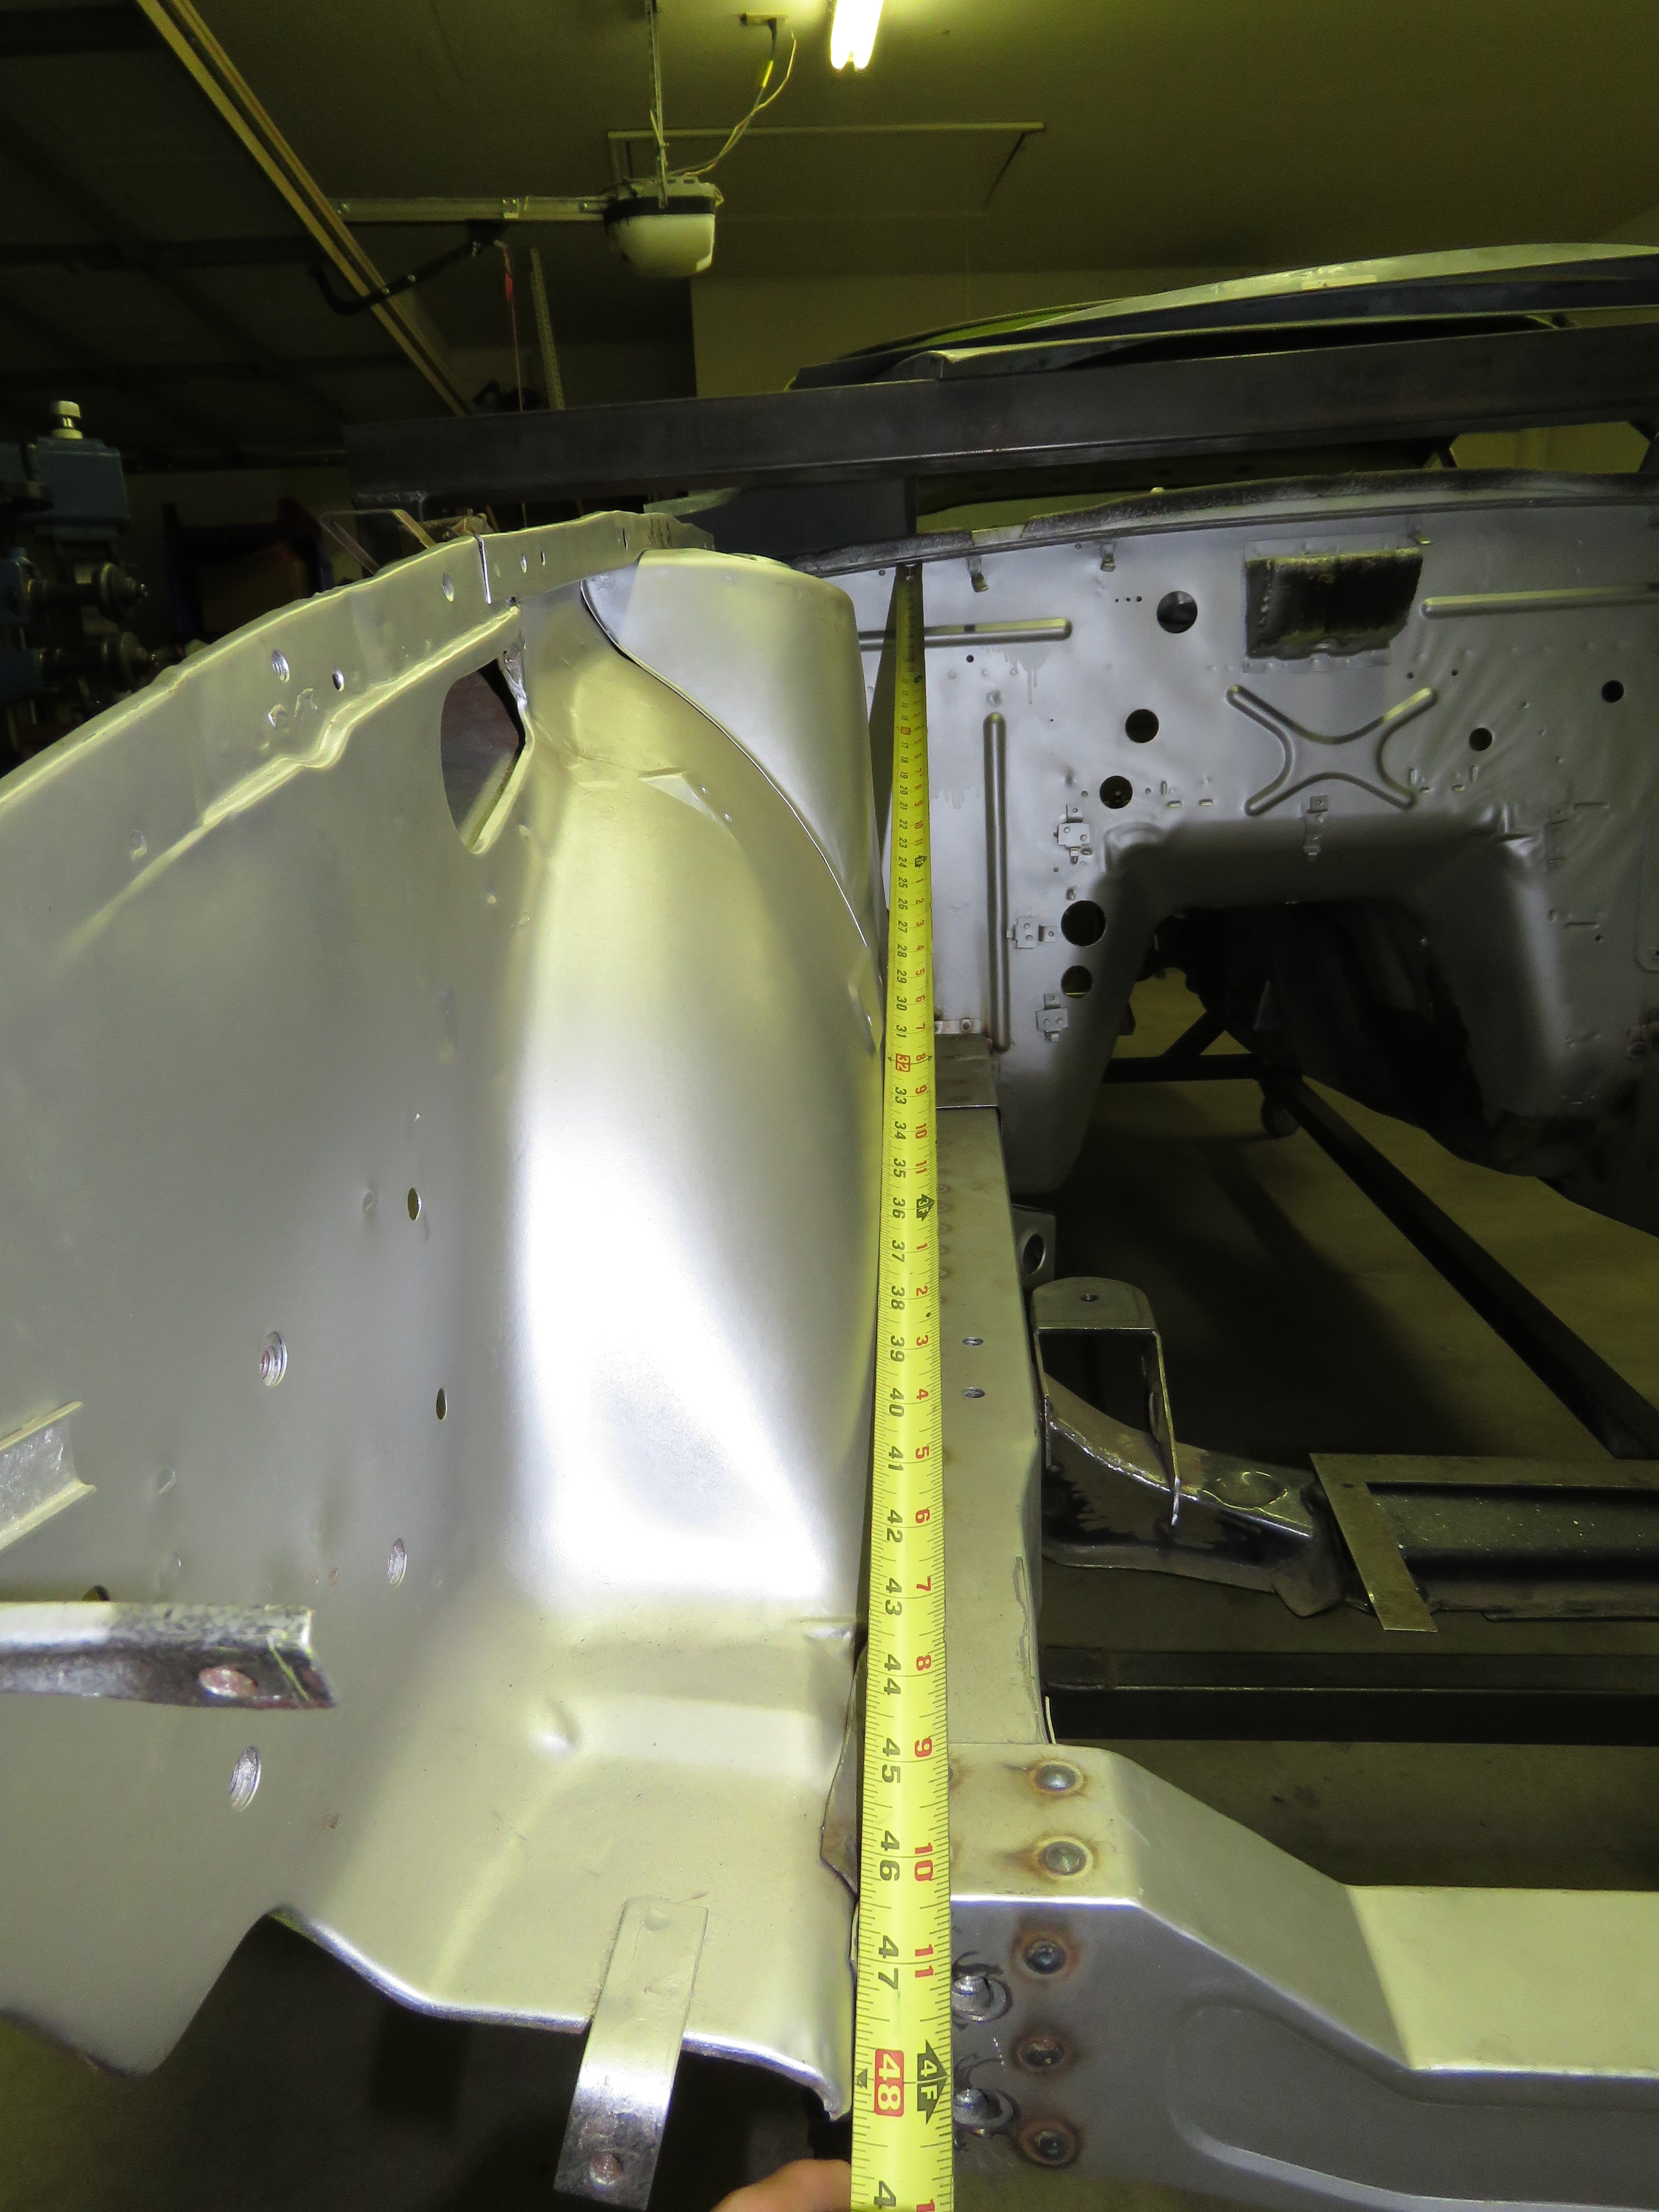
 Thanks Guys, guess I will post up LS1 related things with my project when it comes to it then. Small update with lots of pictures. The battery tray welded in. For now, not much else to do with the front of the car, rust repair wise. Cleared out the back half of the cars interior, took everything out. Had a hell of time removing the antenna motor. Finally decided that the bracket had to come off. Had to remove a small bolt on the bottom, wasnt easy. Everything else pictured below came out alright. Surprised how unrusty the back of this car is except for the wheel well areas. Also, I should had removed and drained the fuel tank before doing any work to the car, now that I think it of it, there were so many instances of the car catching on fire. Started work on the rear passenger side quarter panel. Though I needed to cut out the inner well. I left an inch of material to give me something to weld on to. Also made sure I took good care of the passenger side inner wheel arch because I needed a template to work off from. The driver side is hacked up. You know there is a reason why professional car restorers and fabricators hate low life cheap loosers who bondo over rusted metal and want to beat the living sh*t out of them. loosely test fitted it to get an idea of what im working with. Also wanted to see what my fiberglass fender flares look like. These are the Marugen Shoukai flares, supposedly to be once of the best fitted flares on the market. Seem to fit good. Will need to rotate the flare clockwise from the pictures show. Thought about make my own wide flares and even been thinking about remaking the who quarter panel. But for this car I wont, I really do like the look of these flares. I'll save making my own for another car. But I still want to try to recreate the whole rear quarter panel, will be good practice and experience, which is why you start to see a bunch of lines drawn on the car. Just giving myself a visual of how a metal or wooden buck may consist of. Trying to find the crease line that runs the length of the car using string. Used my bead roller to indent the hardly noticed crease in the Tabco panel. crease line marked on the car. Metal removed. Panel all trimmed and fitted. Had to do a lot of modifying to get it to blend in with its surroundings. Did a bunch of shrinking, stretching and some wheeling. Probably not the best seams to lay a weld, but need to cover the rusted area near the fuel filler cap. Wanted to weld just above or below the crease from the original panel but was unable to. Made a cardboard template and metal template on the contour of the rear quarter panel in some areas both vertically and horizontally to check that the new panel blends in. I will be relocating the fuel filler cap somewhere else, stay tuned for that, have a slick and cool idea Ive seen. Stock one removed. So earlier today I had to refill my argon cylinder. Well the guy at my local Airgas said they didnt have my size cylinder (125cf) in stock to swap out, so he said I will hook you up. Ended up giving me a 300 series argon cylinder and charged me the price for a refill of a 125 cylinder. Since I had originally out right purchased the 125 cylinder in the past and not lease/rented, I get to keep the 300 size cylinder. Told me if you want you can downgrade to the 125 cylinder or just keep the 300 for now on. Thing is huge. Thats all for now, stay tuned!
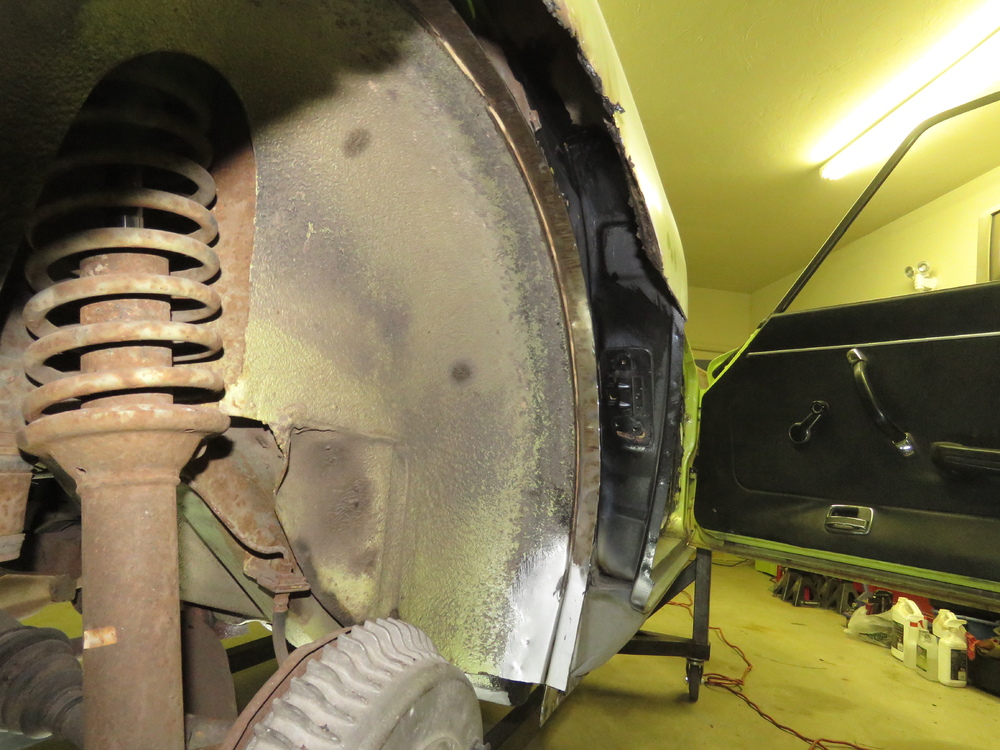
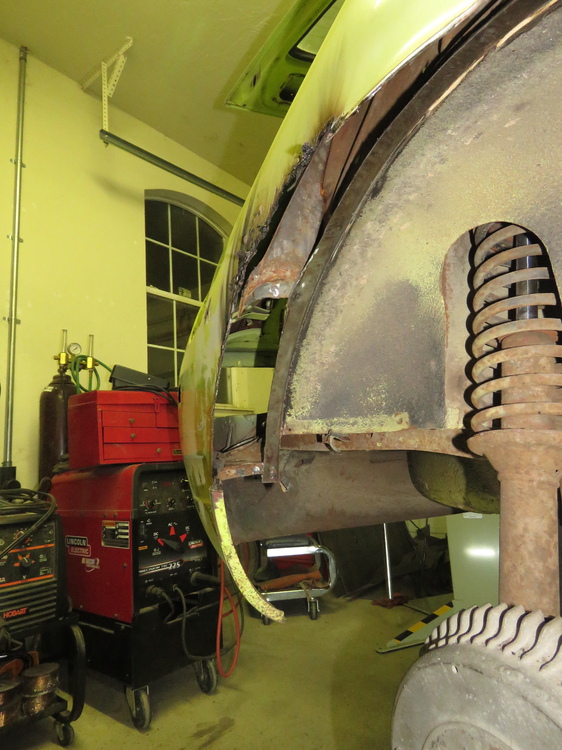
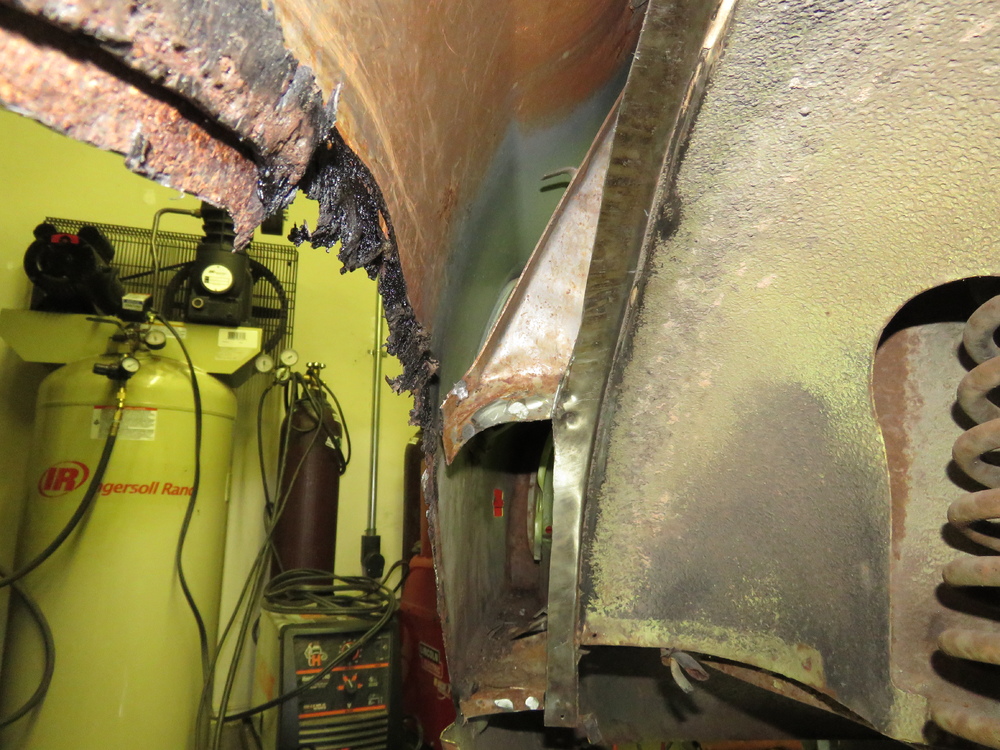
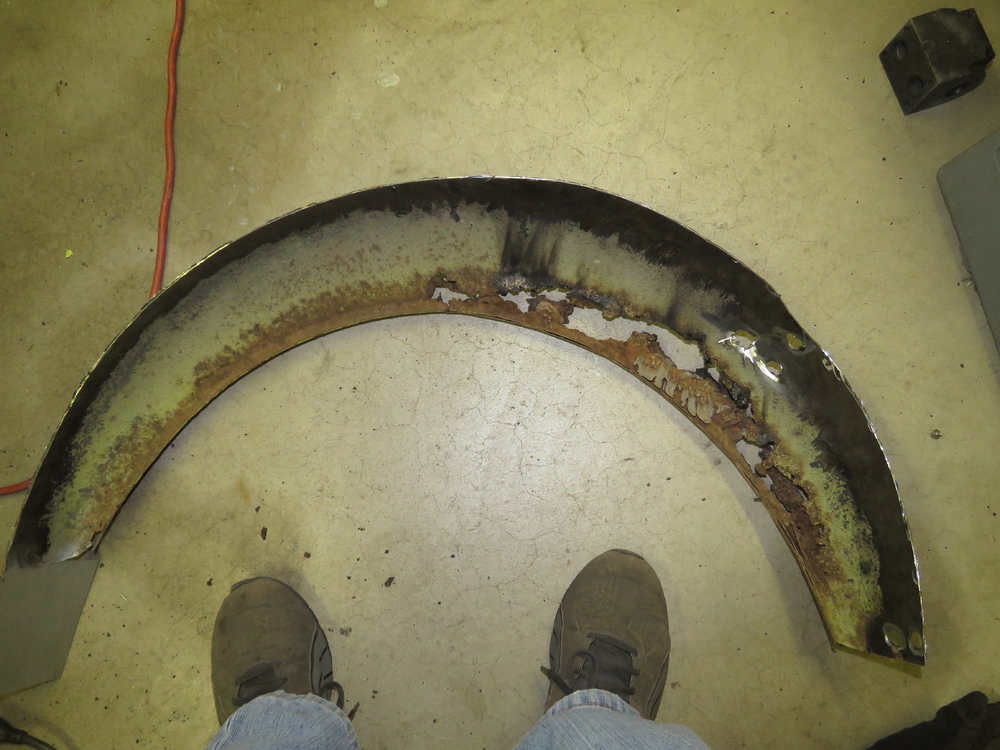
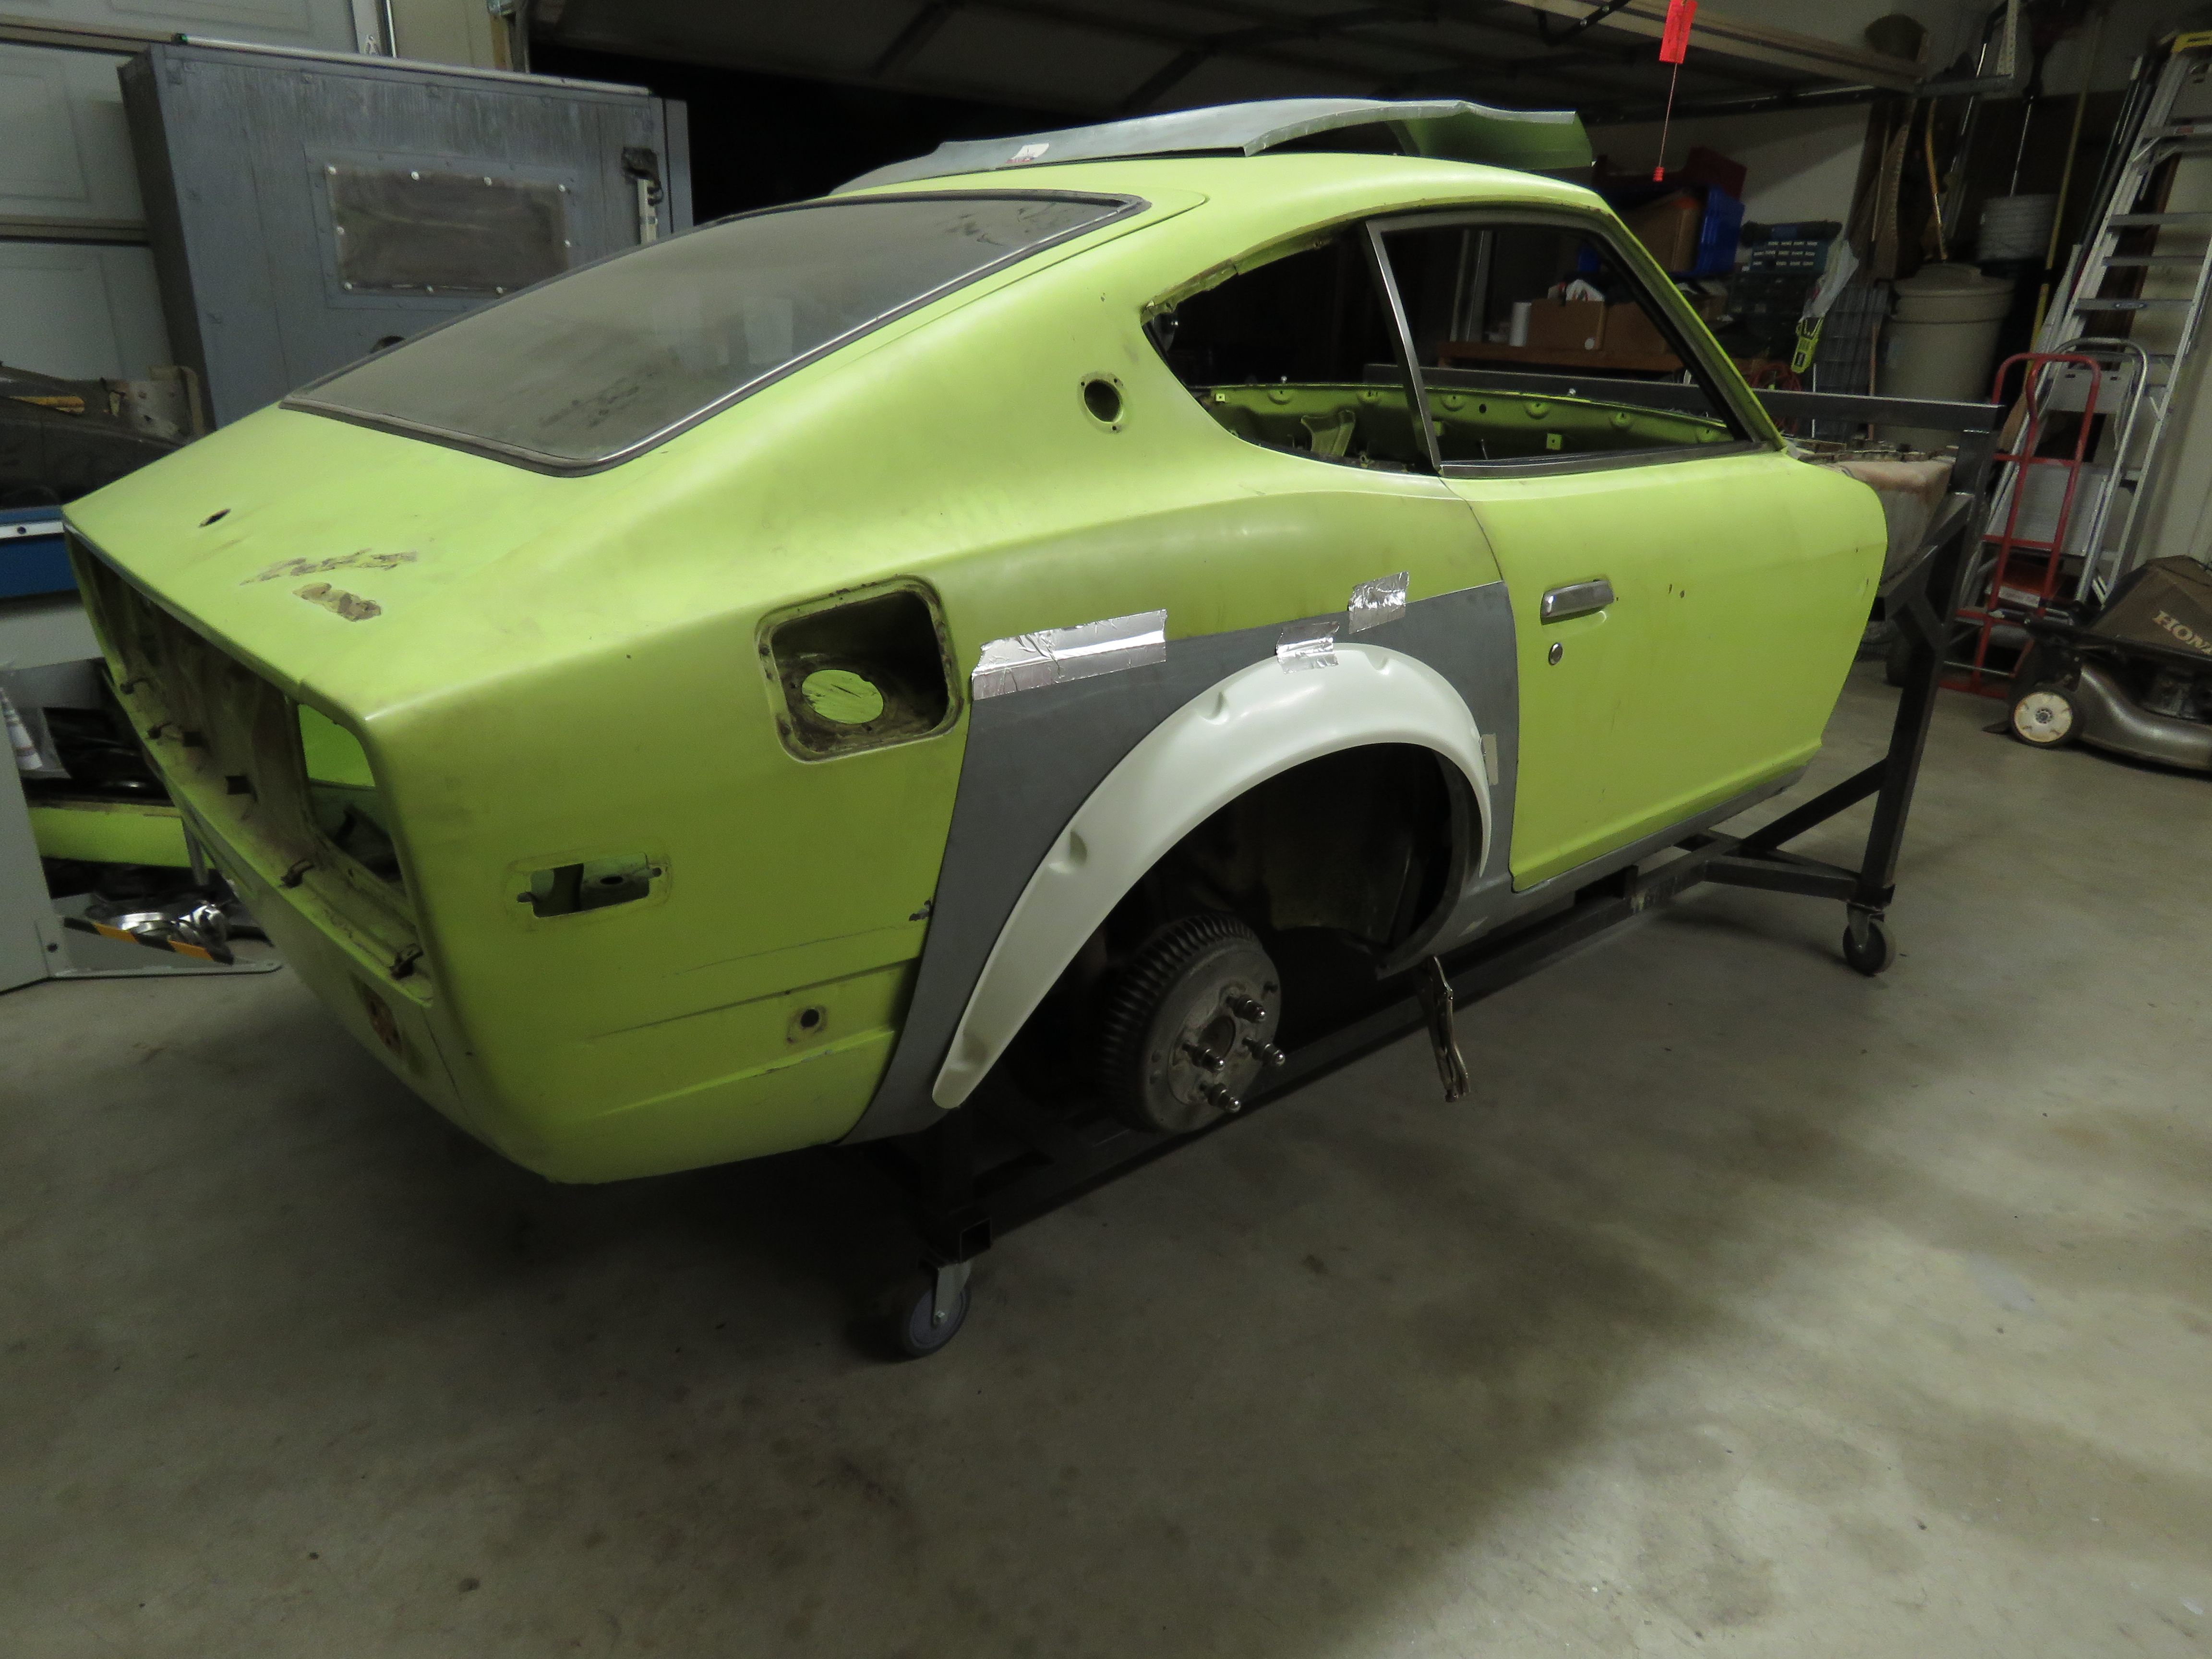
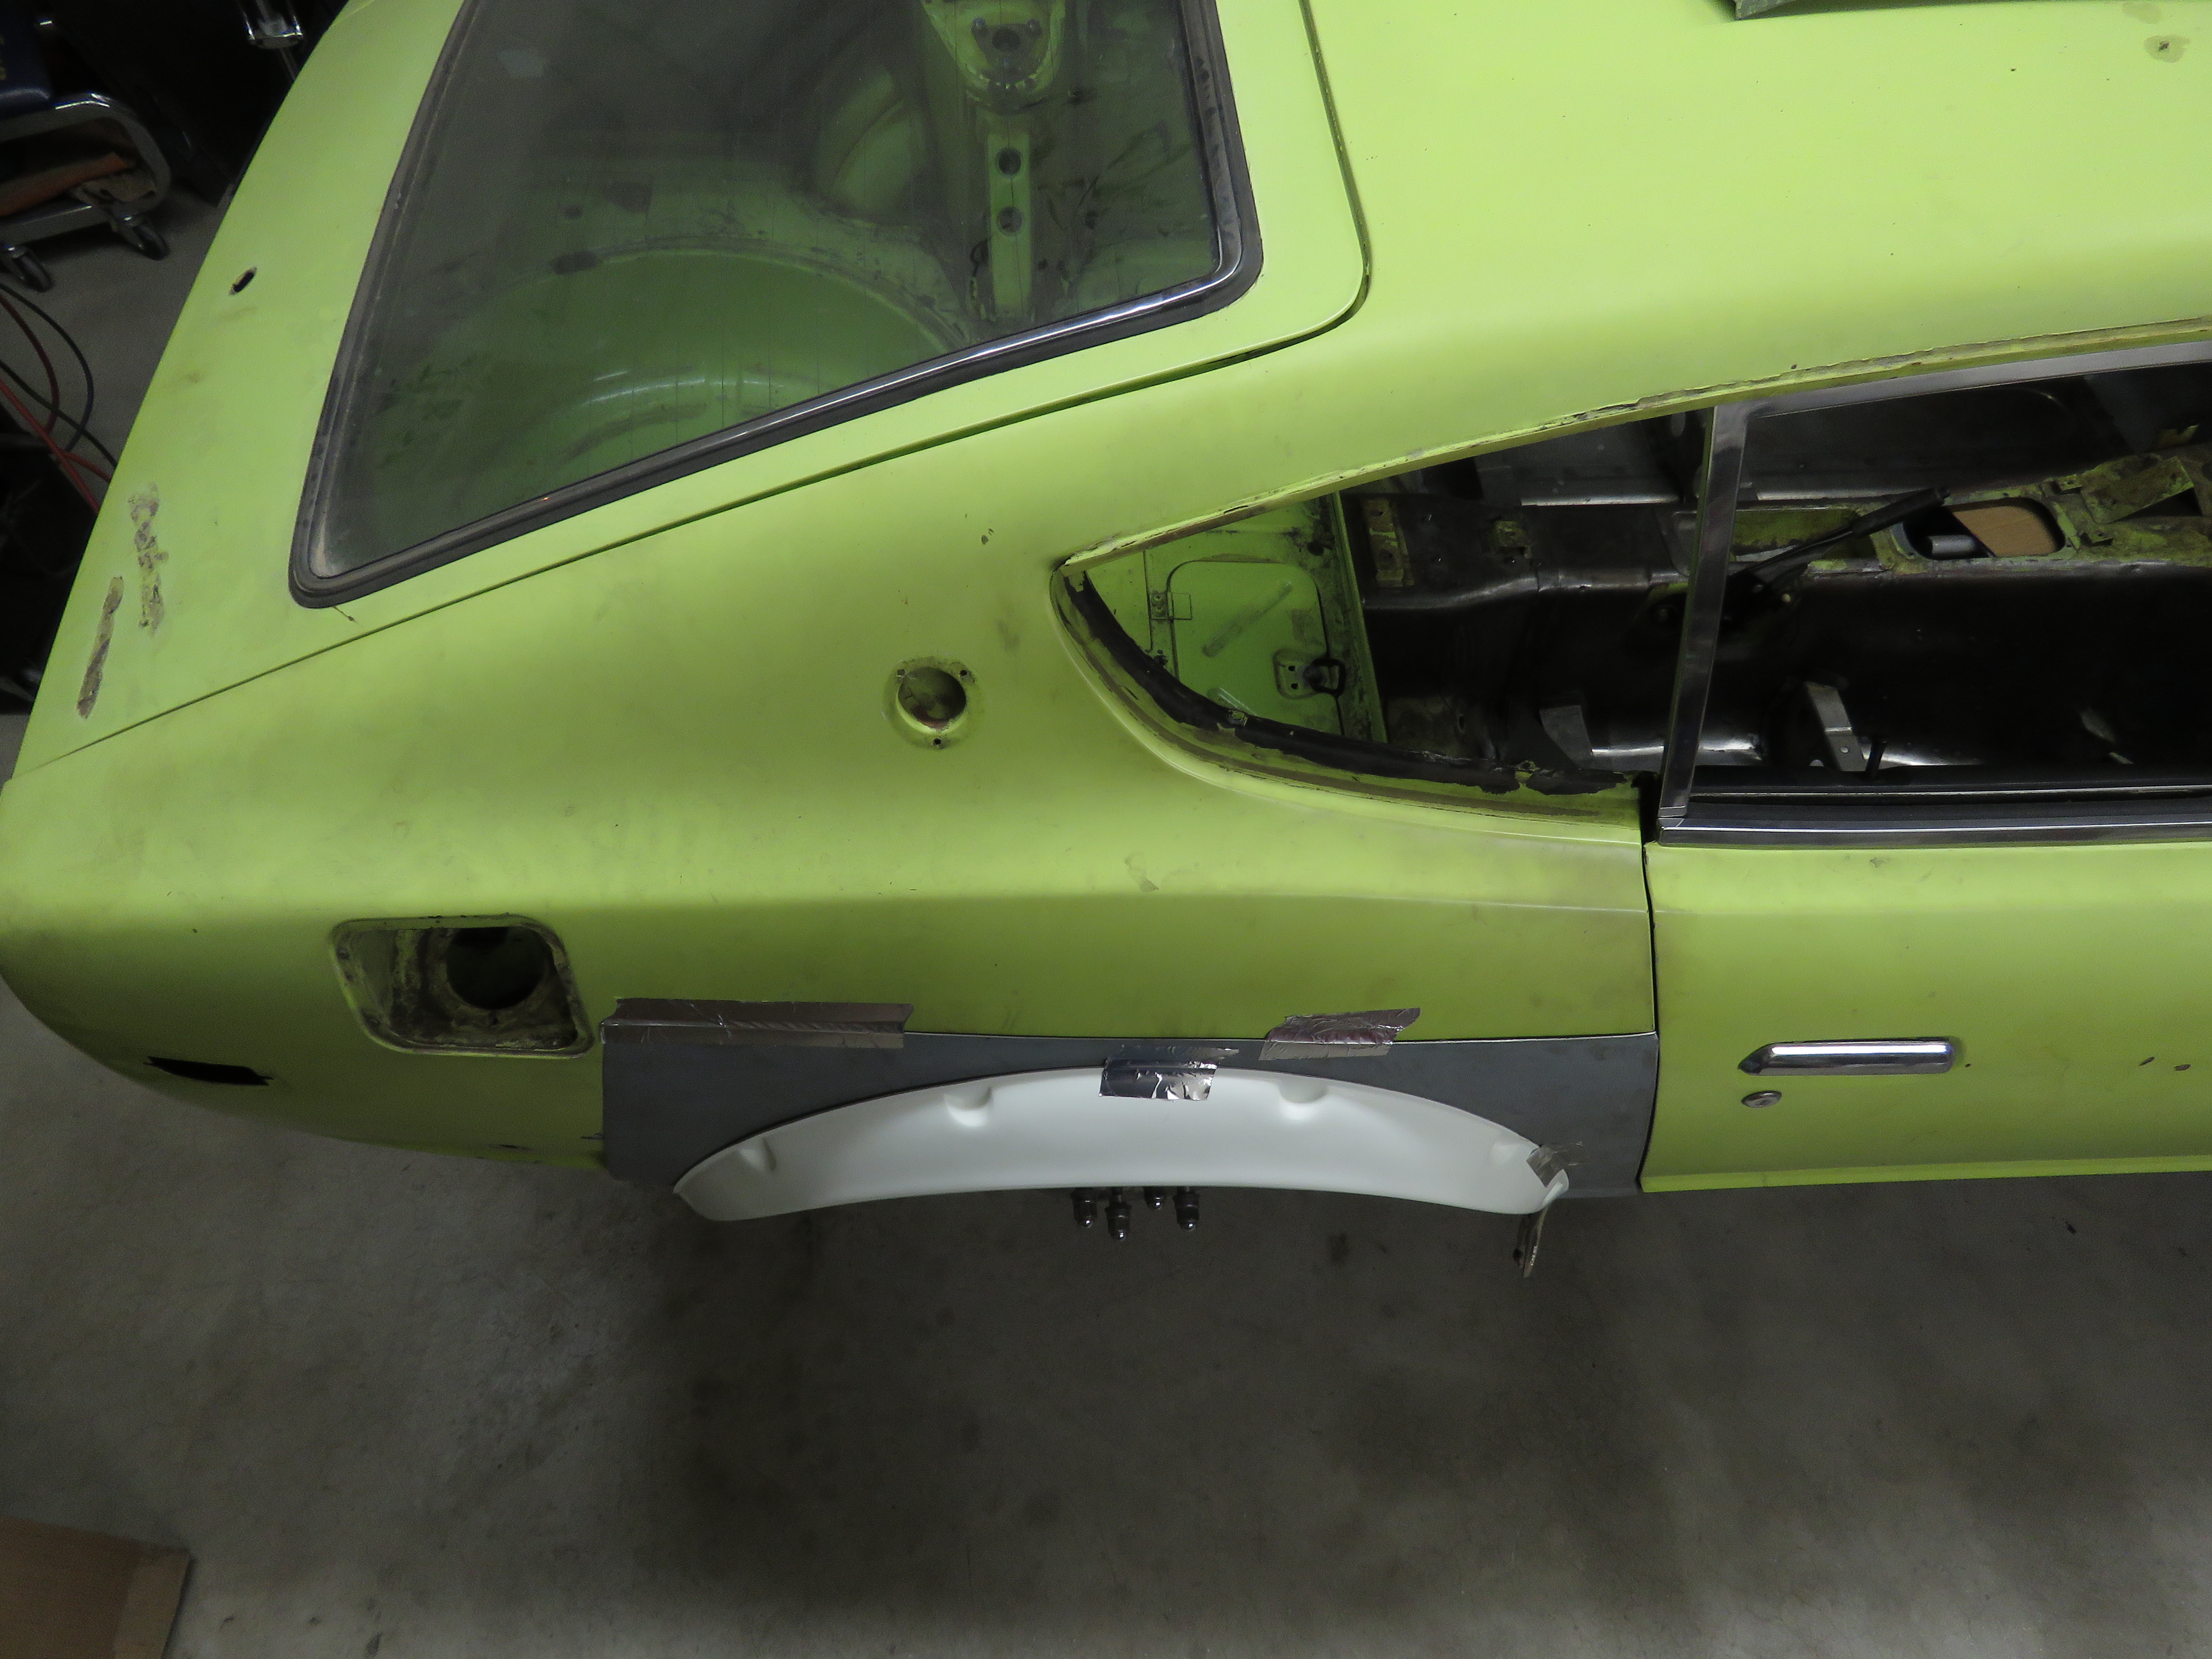
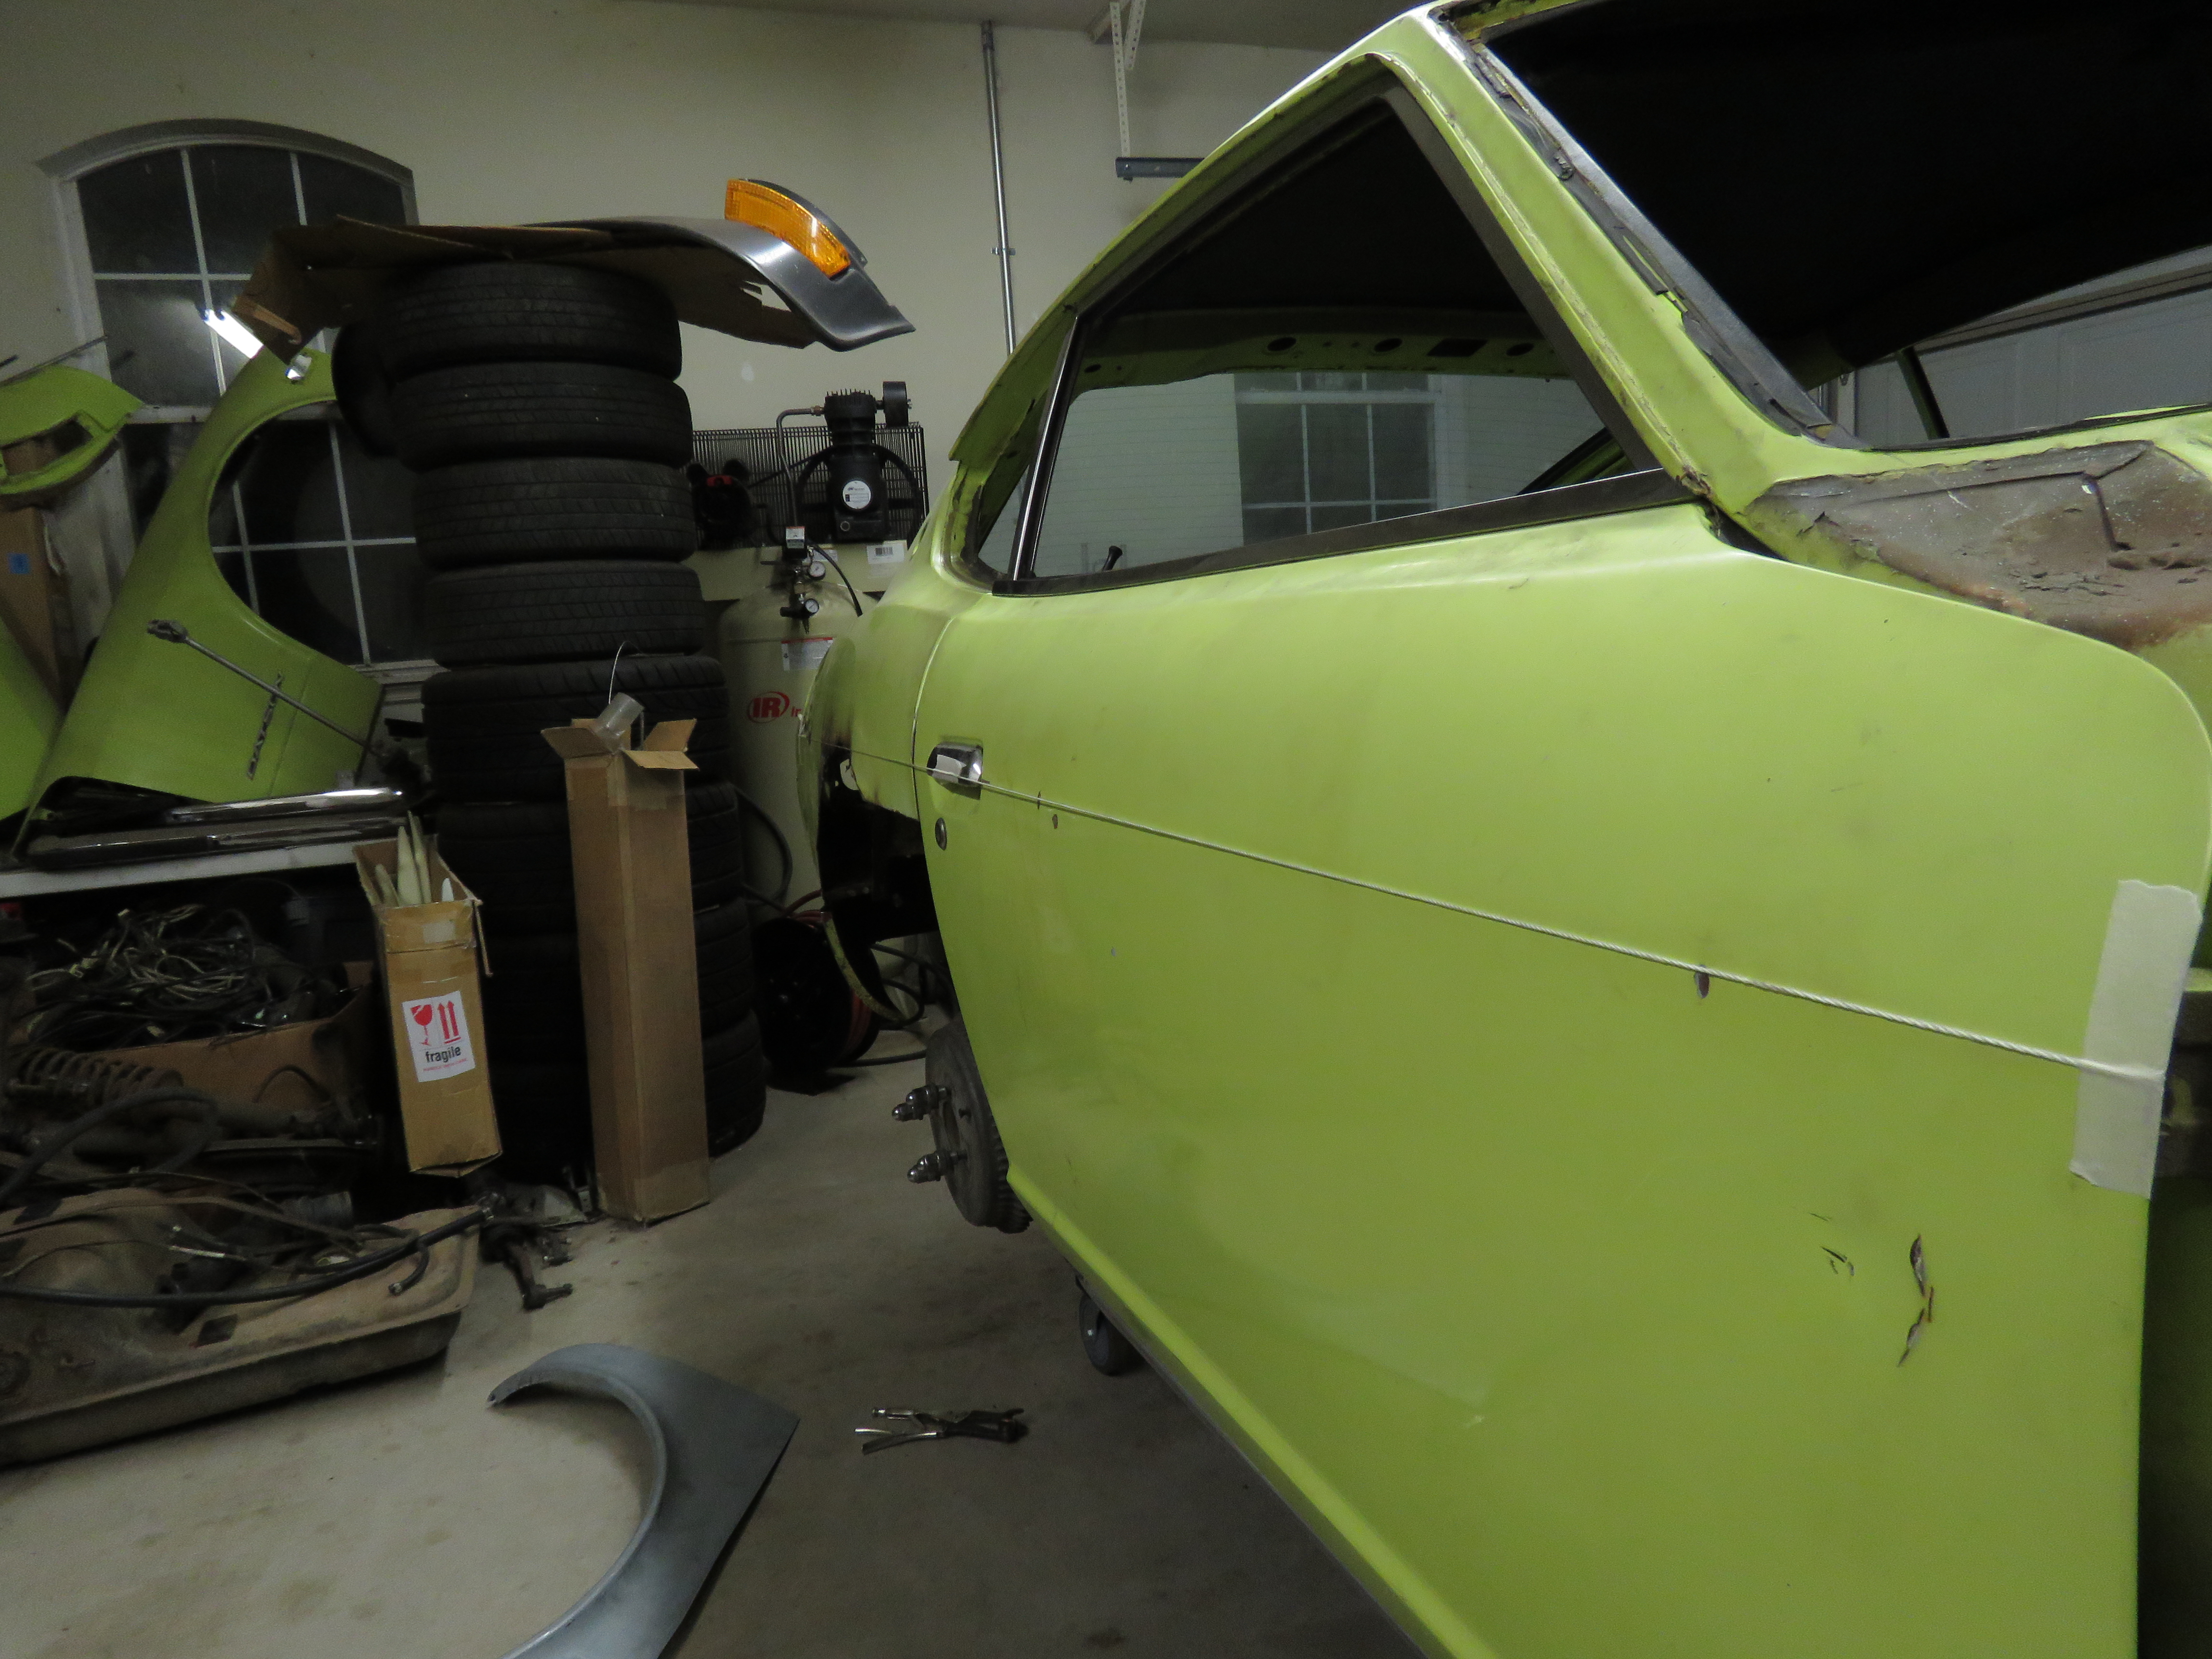
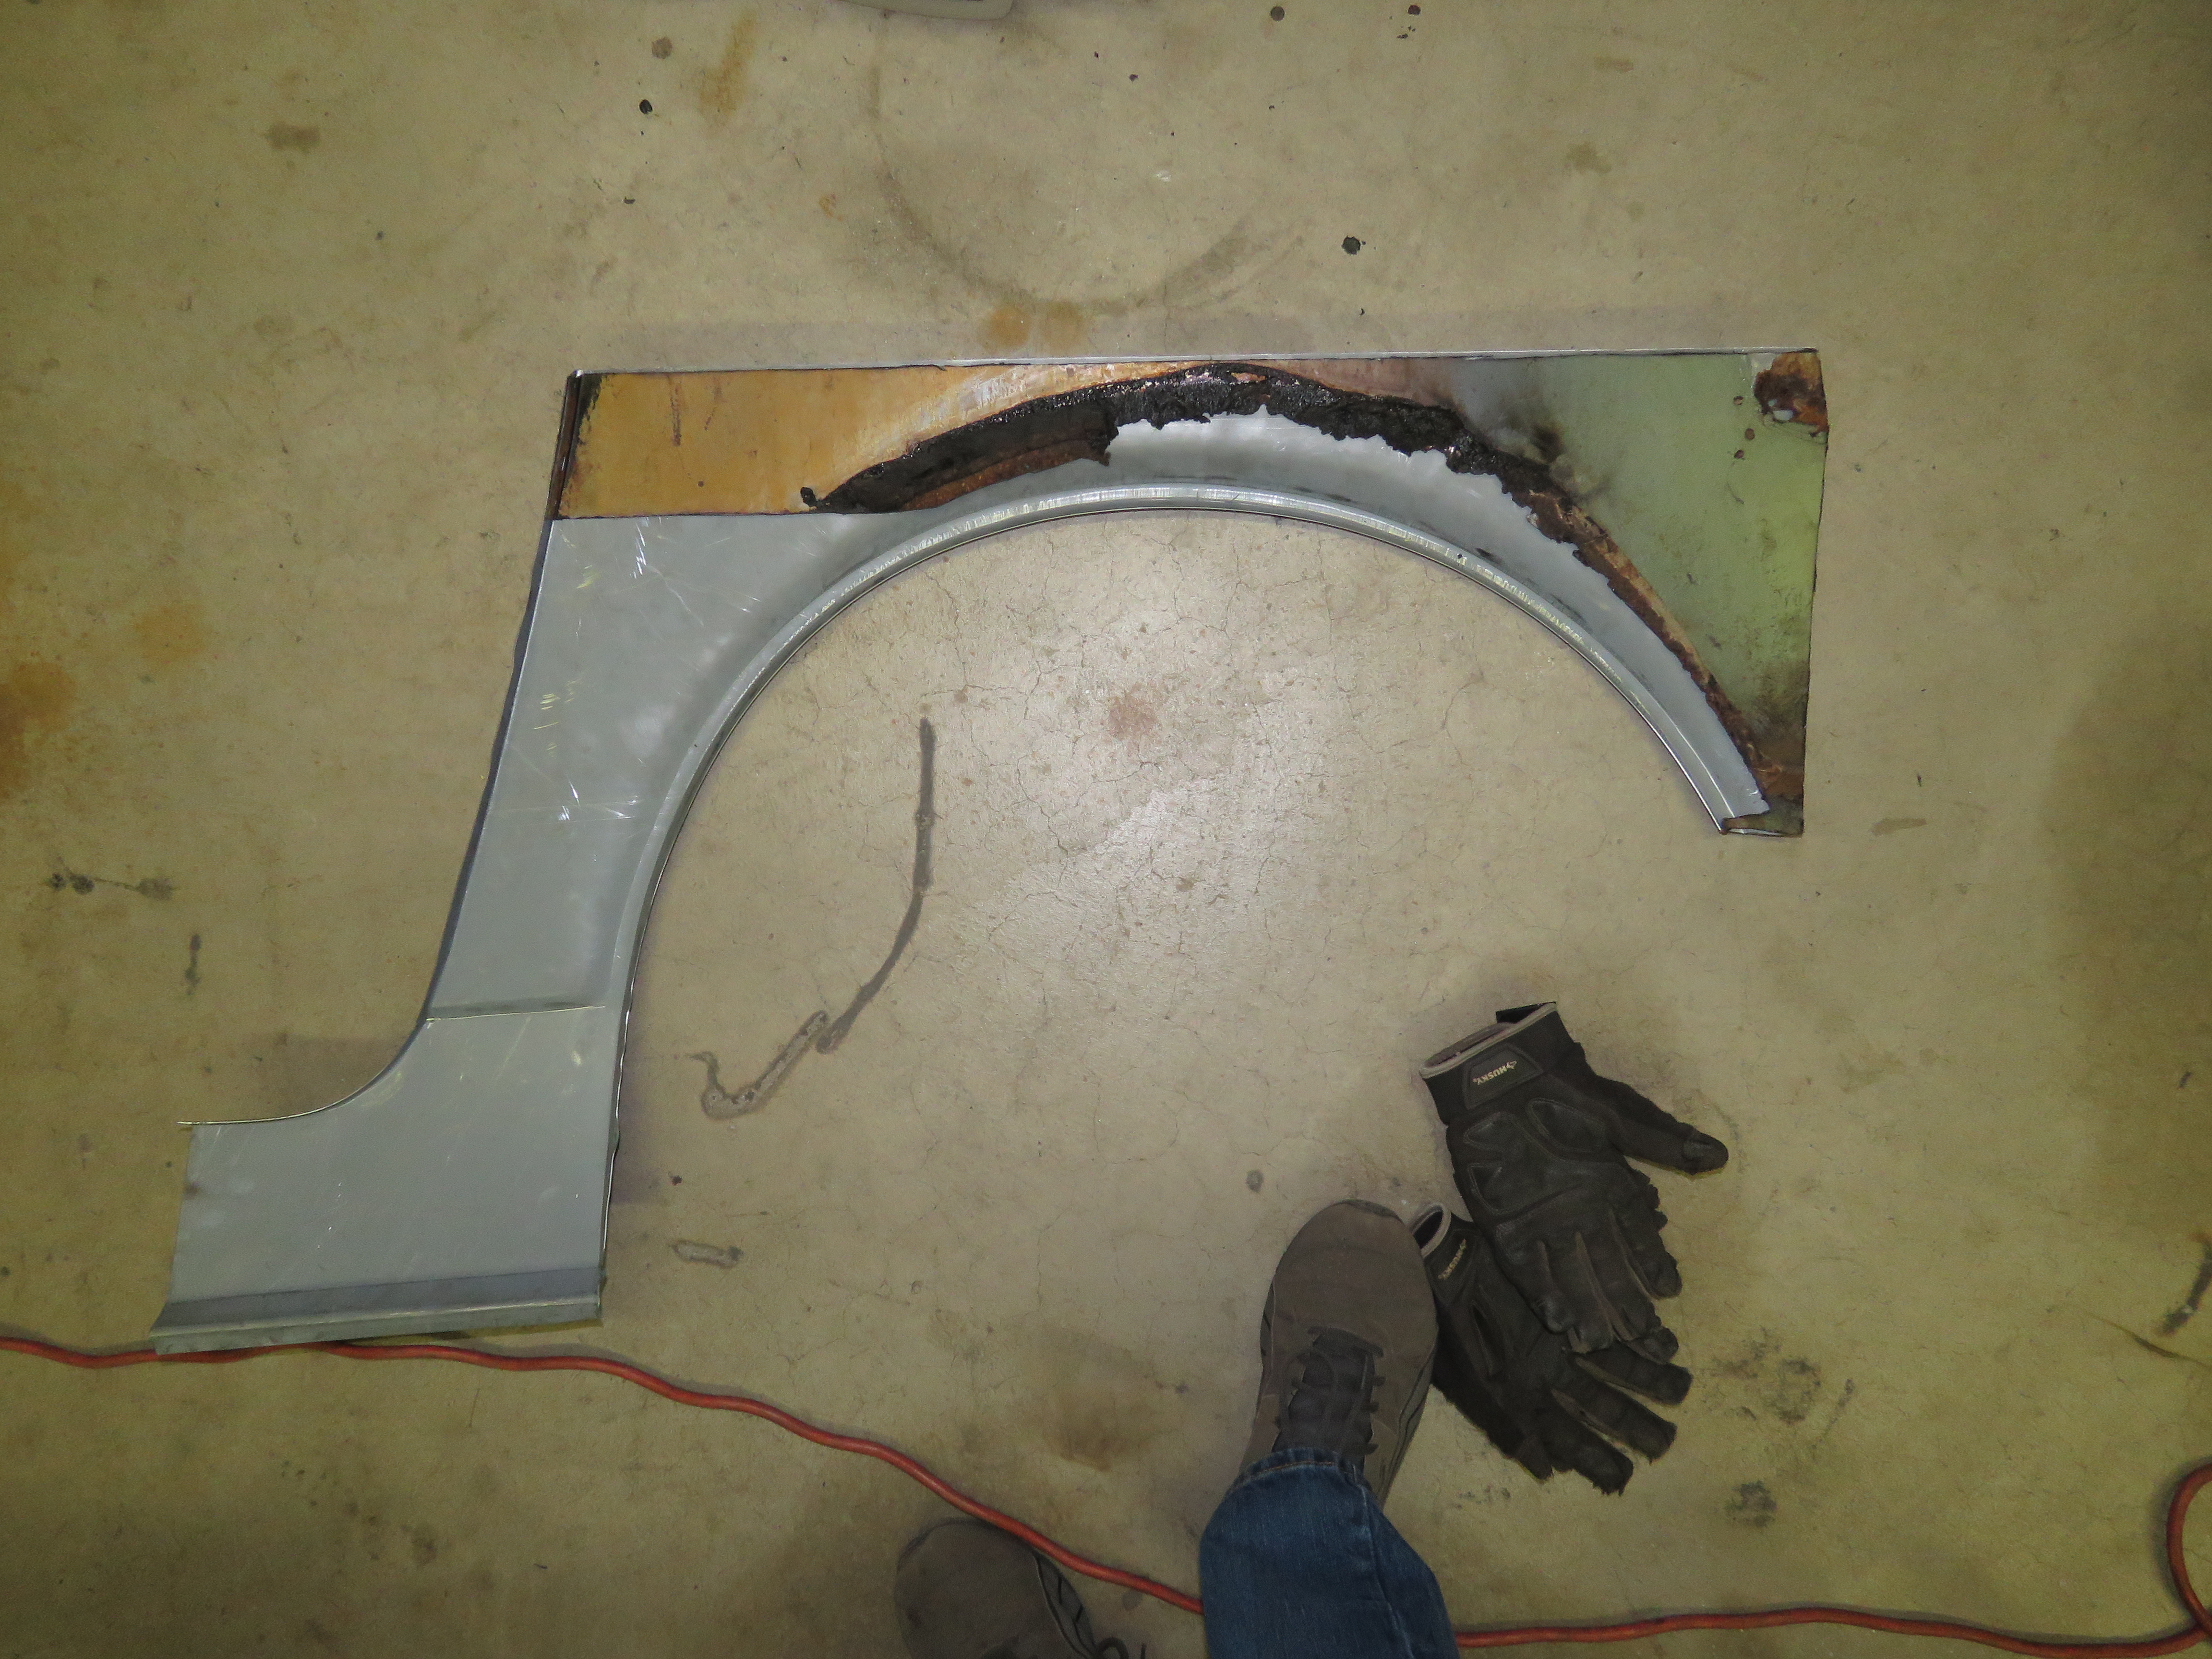
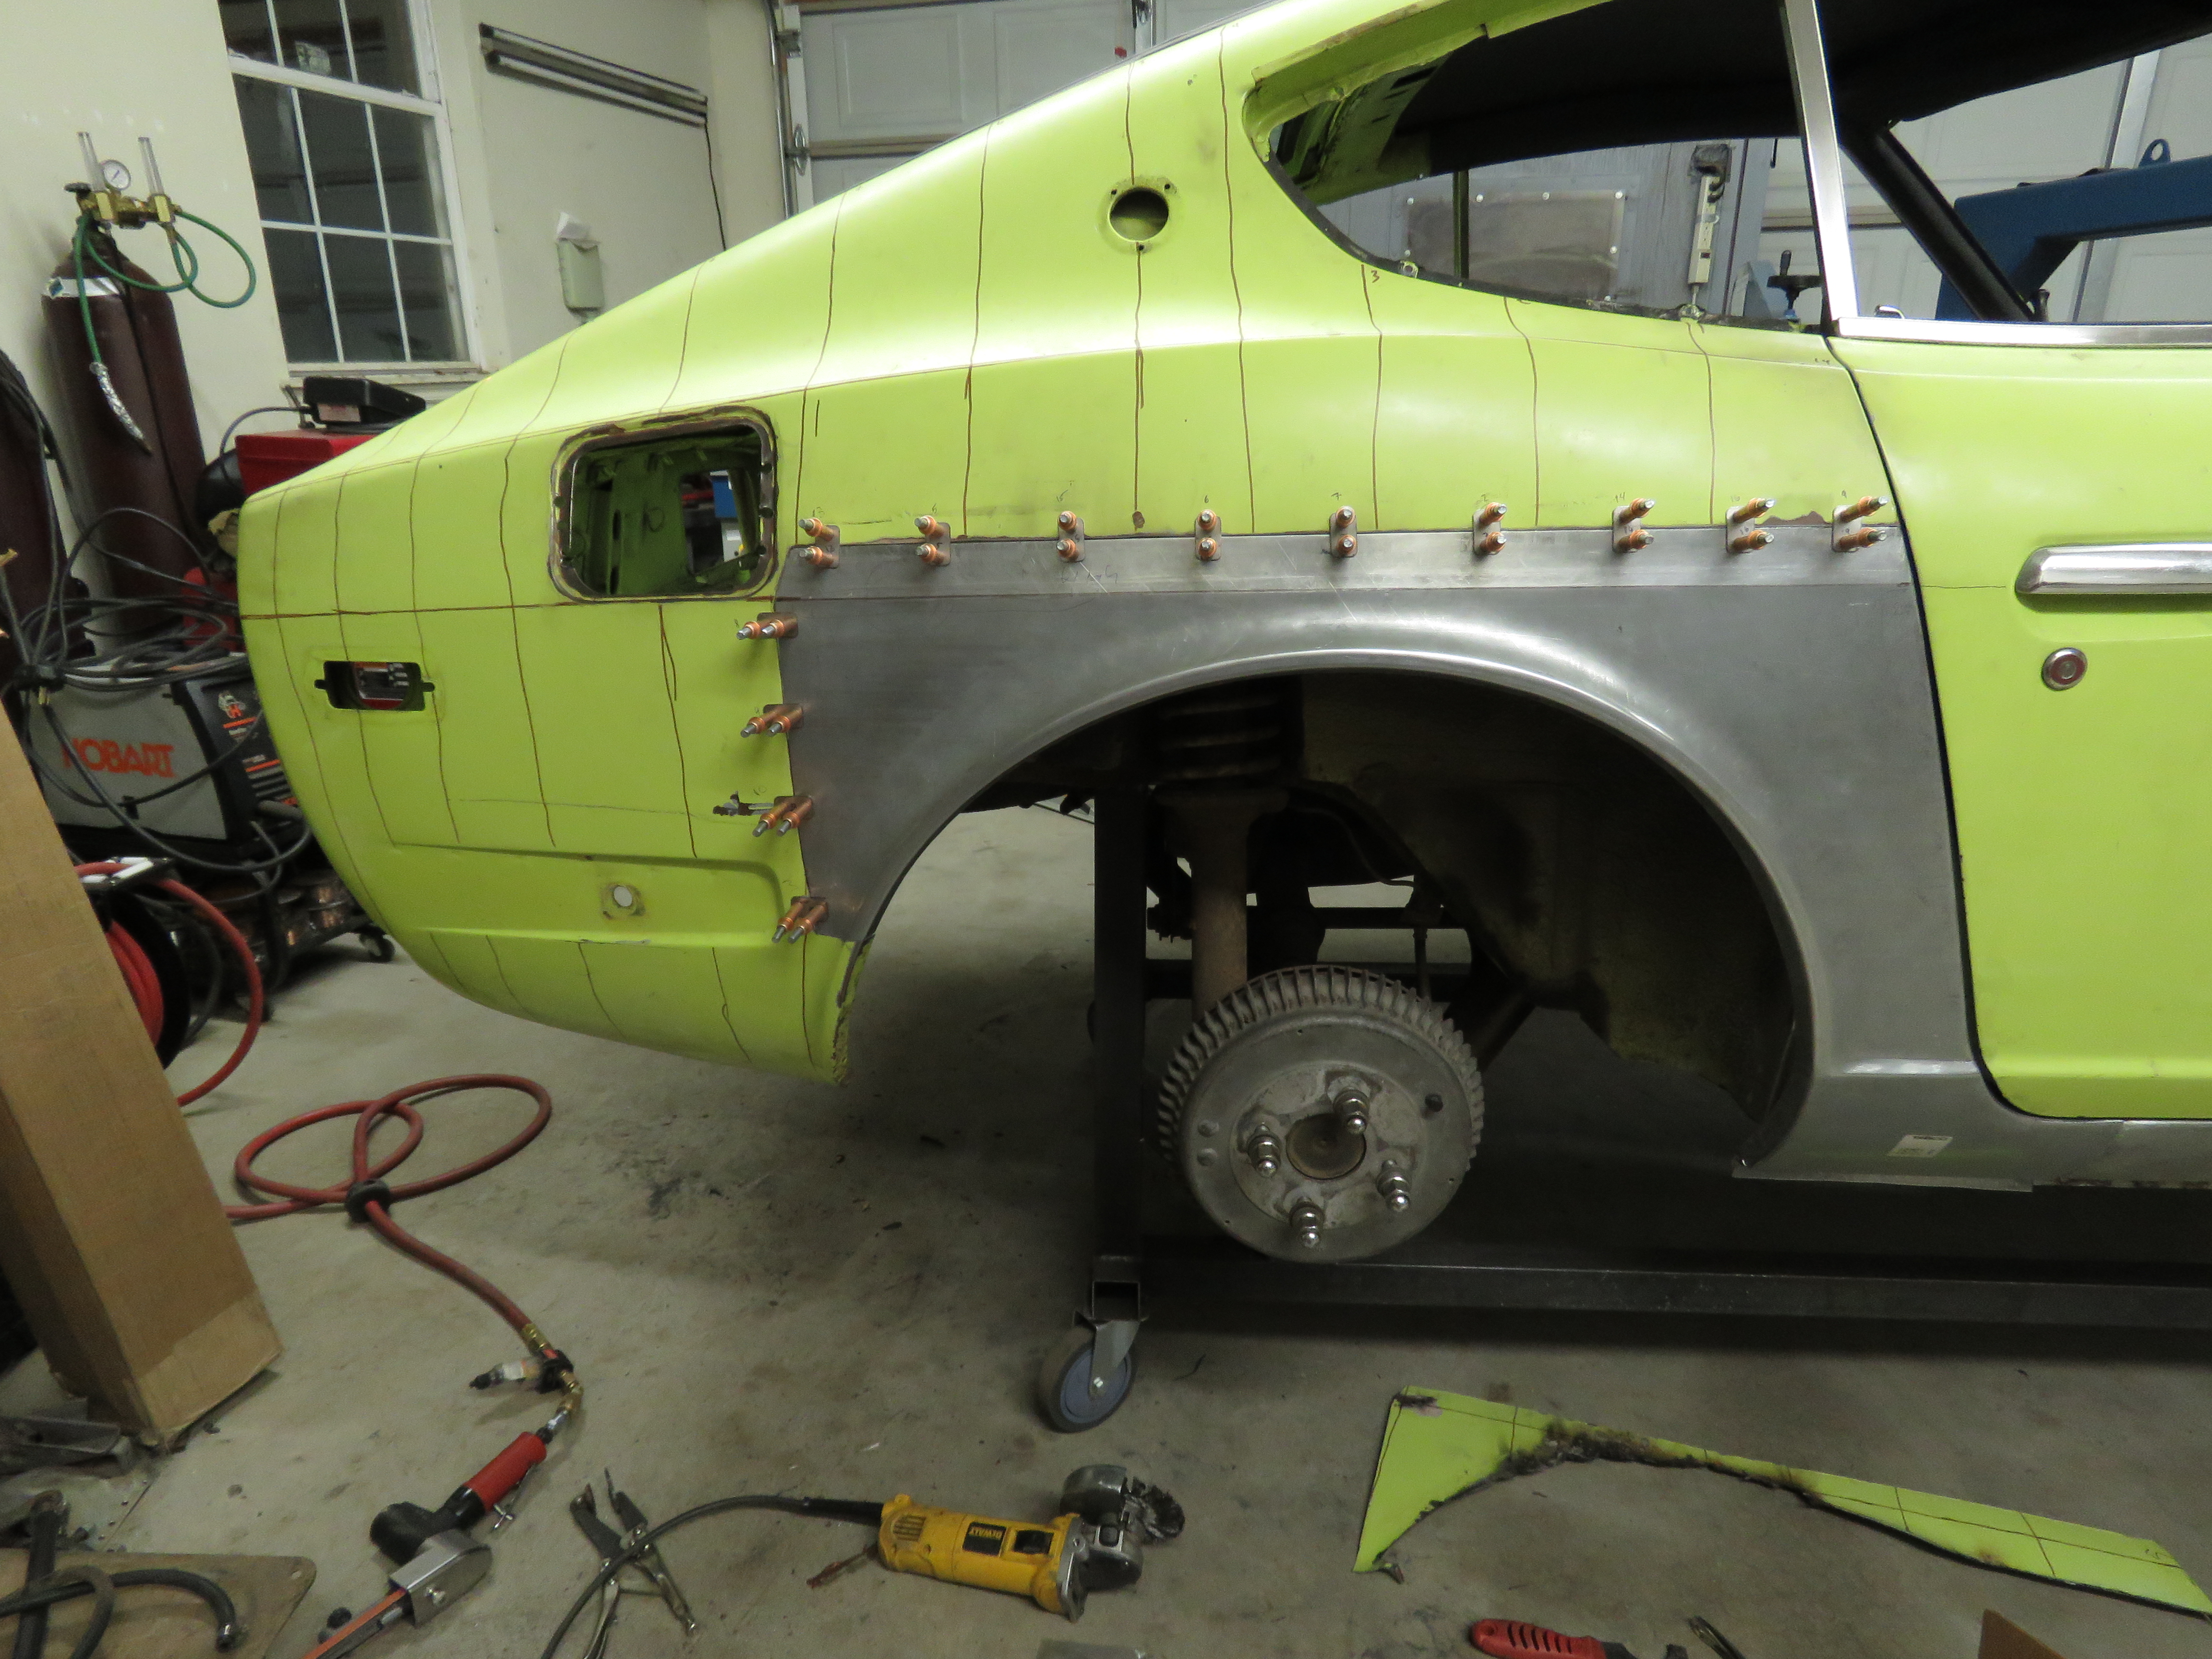
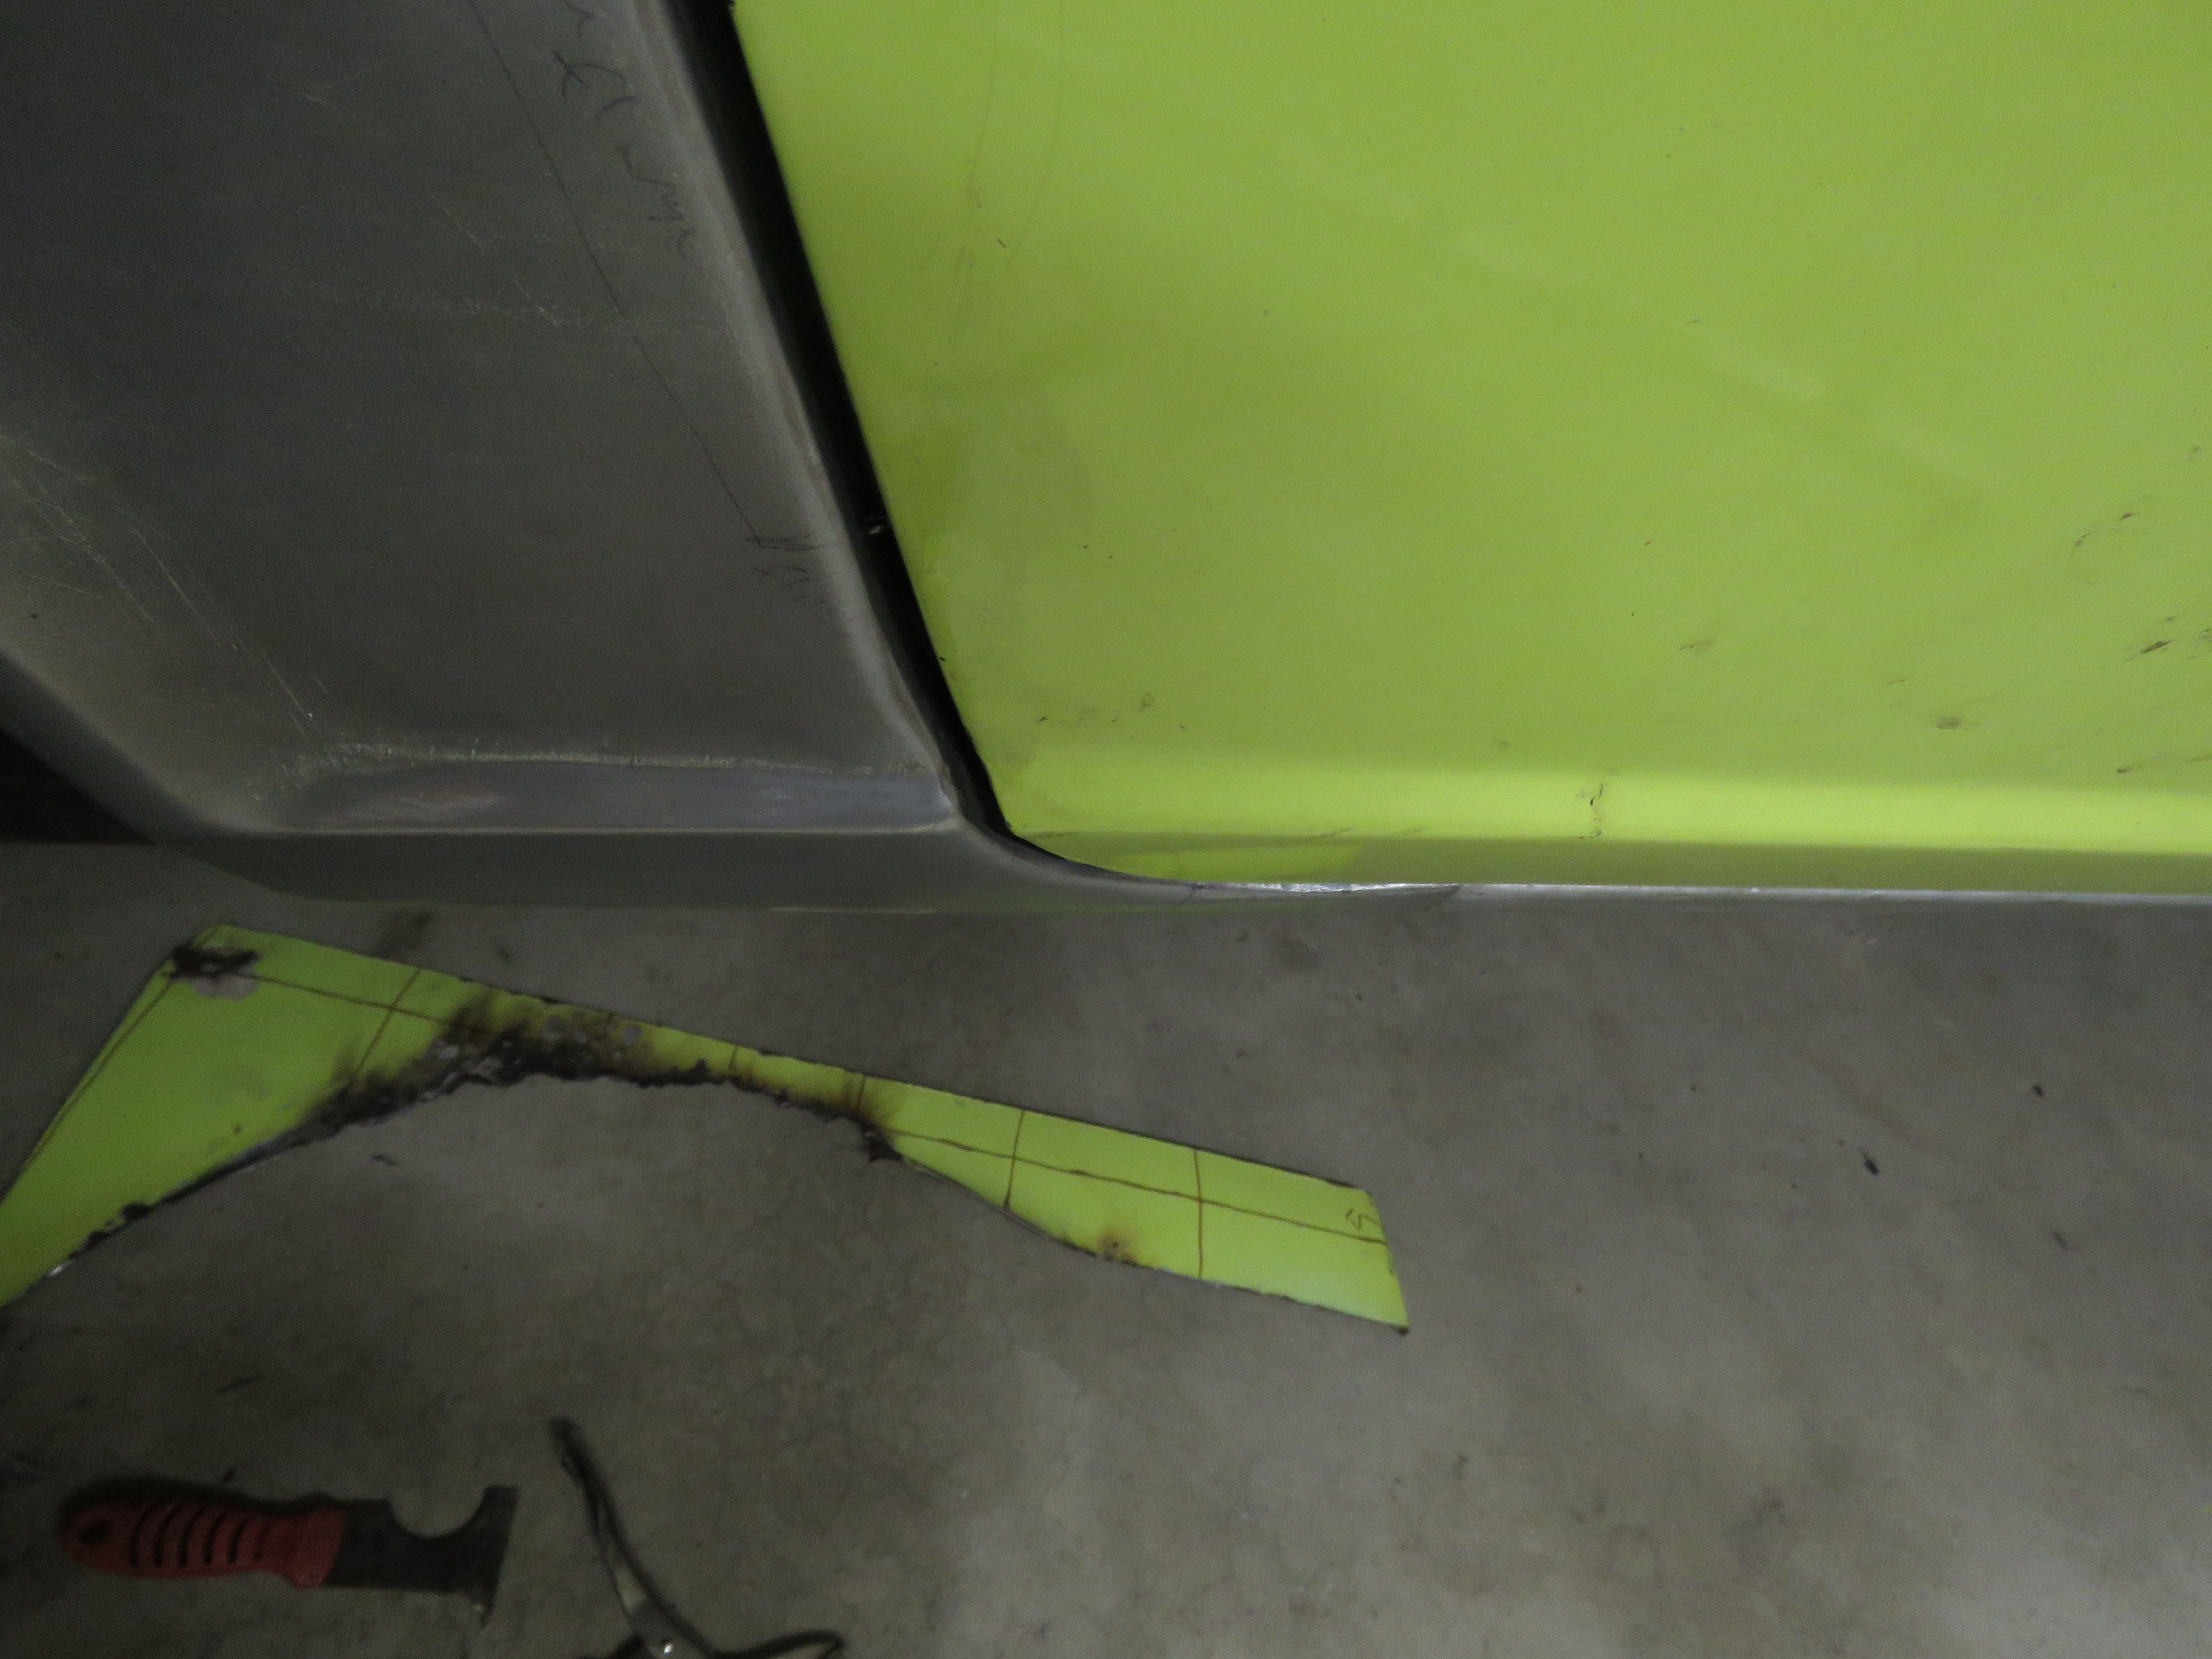
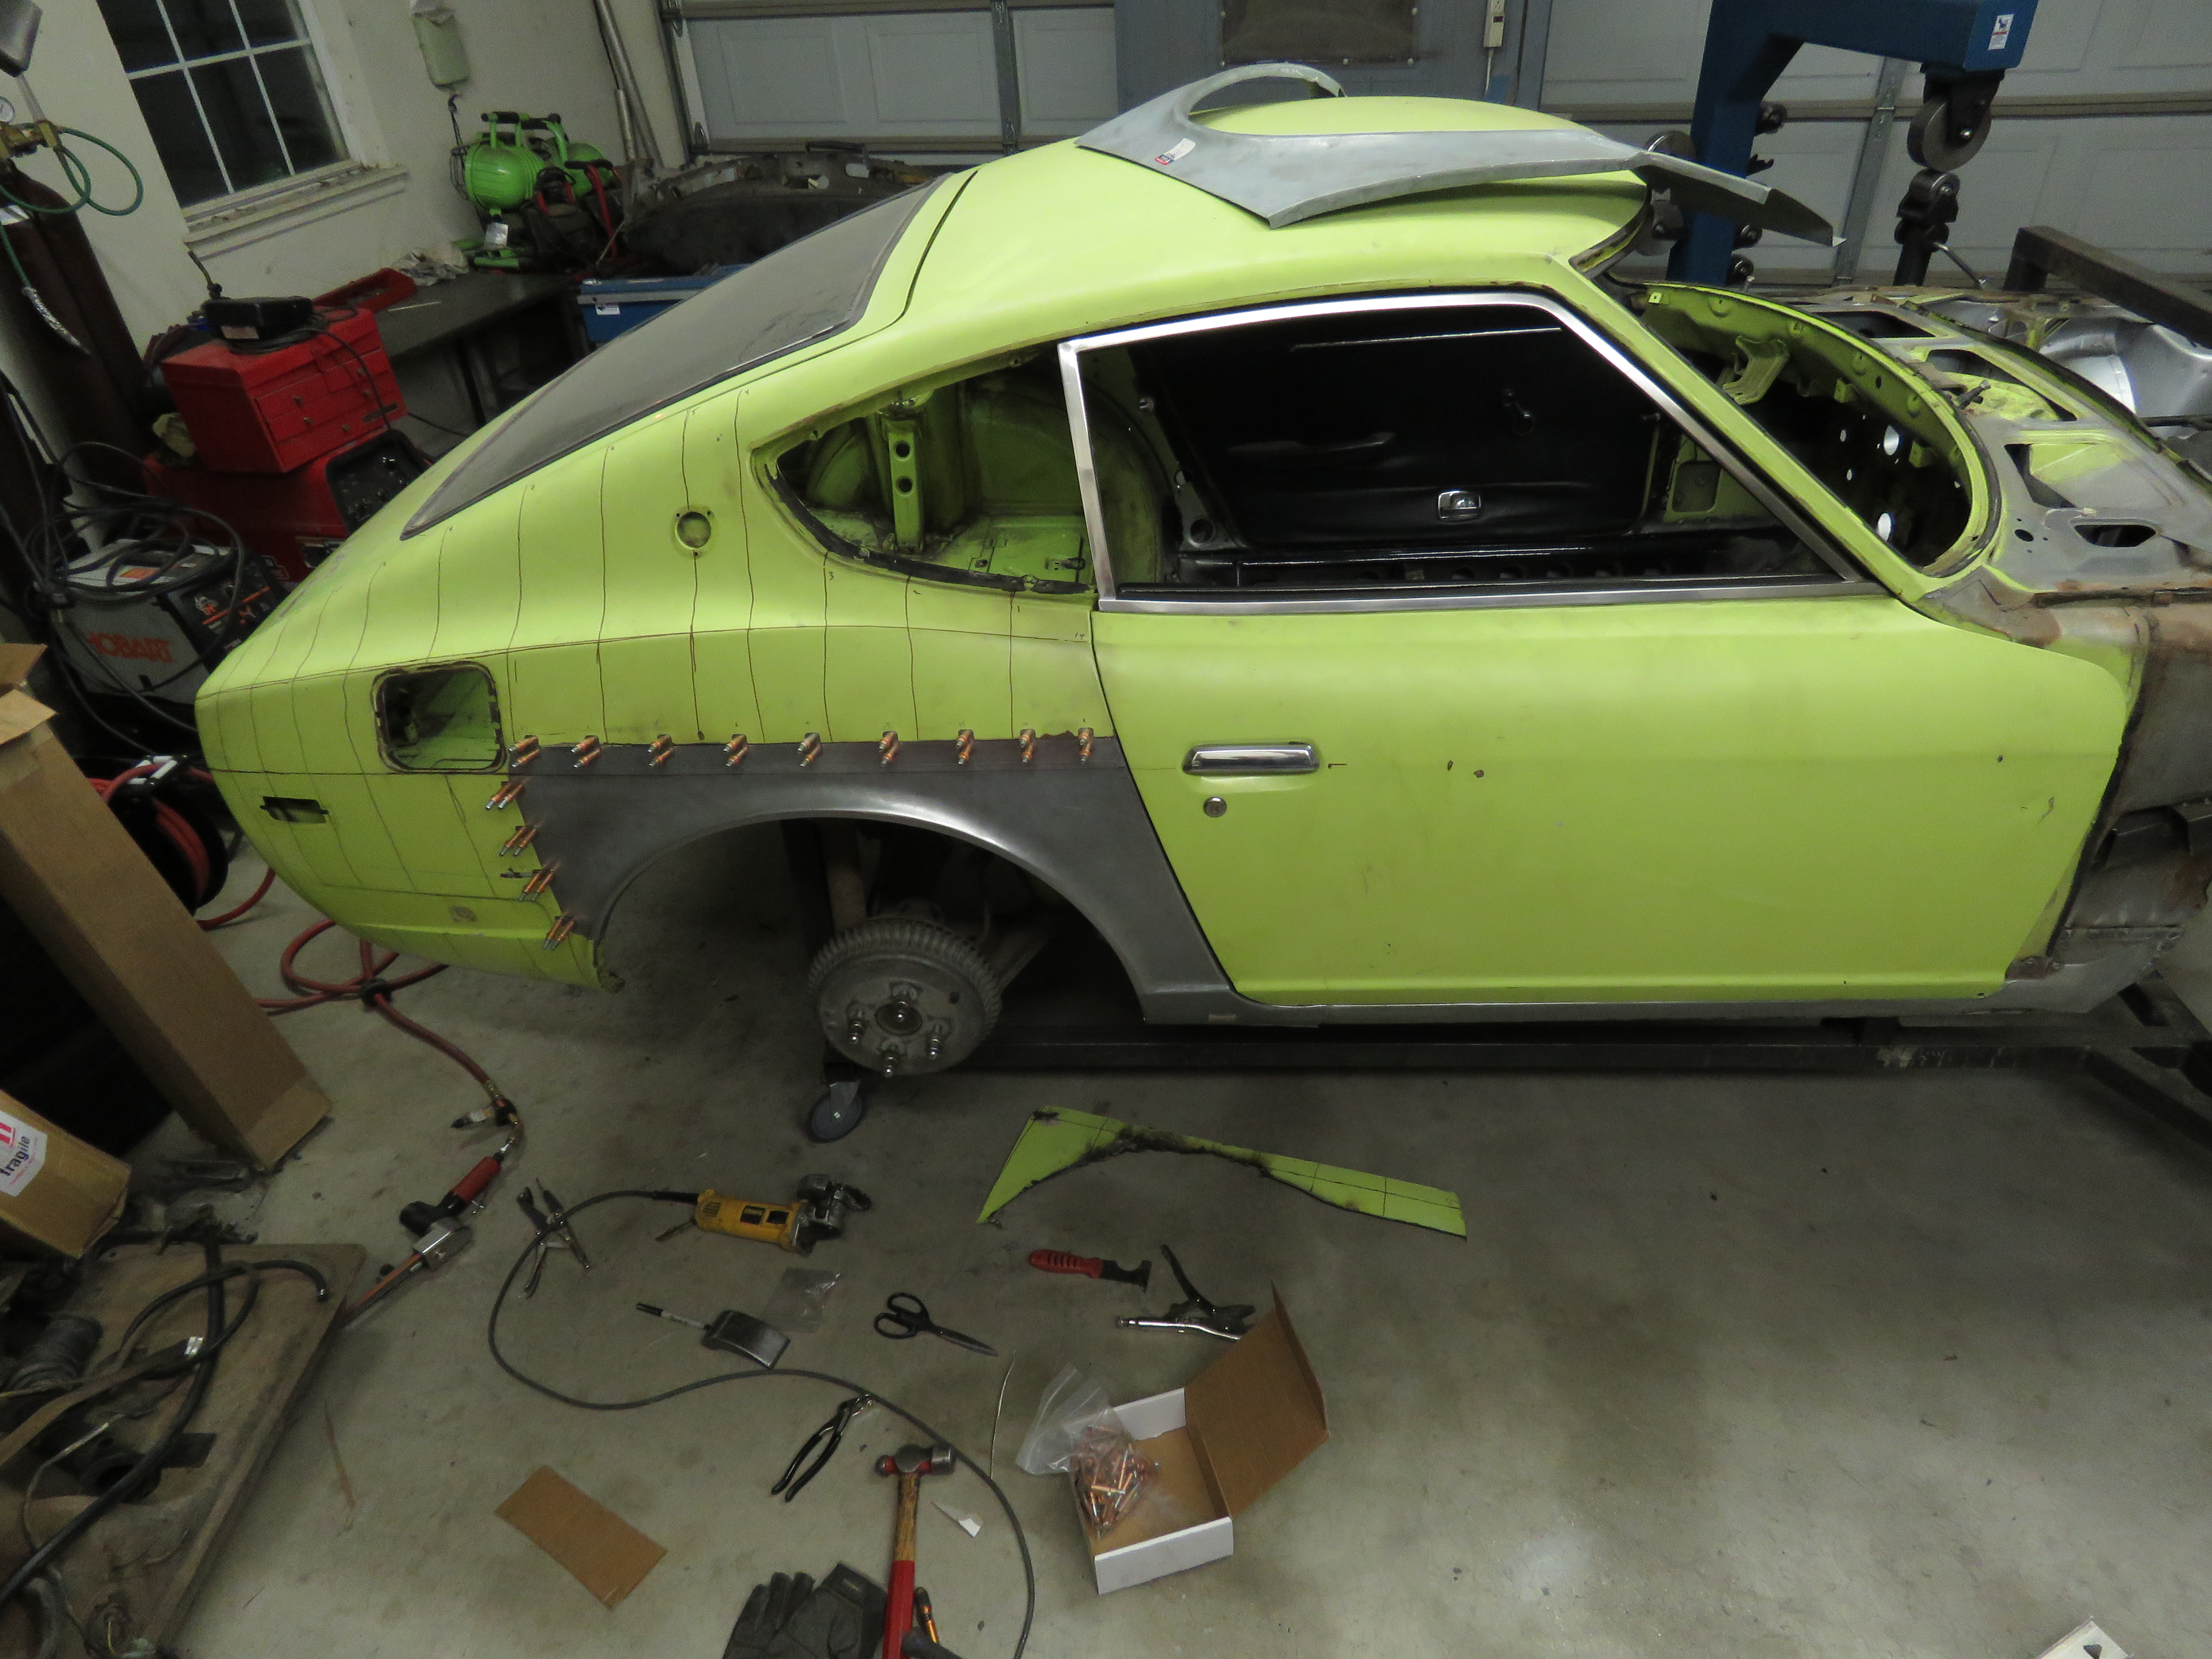


 Car is so CLEAN, love it when clean shiny new parts start to come together.
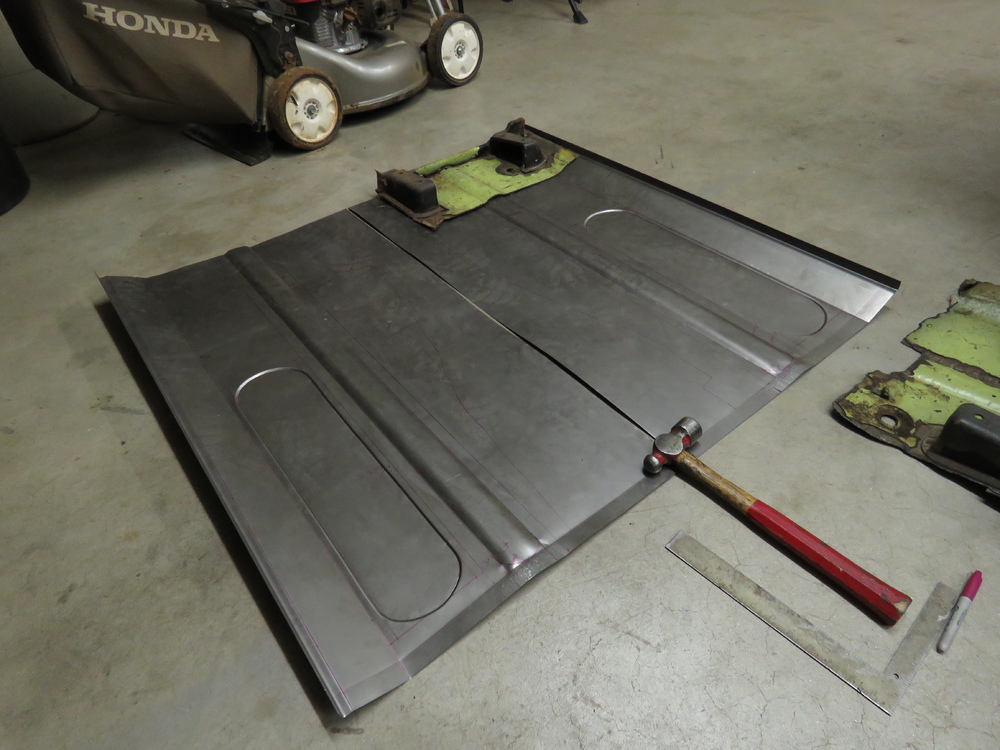
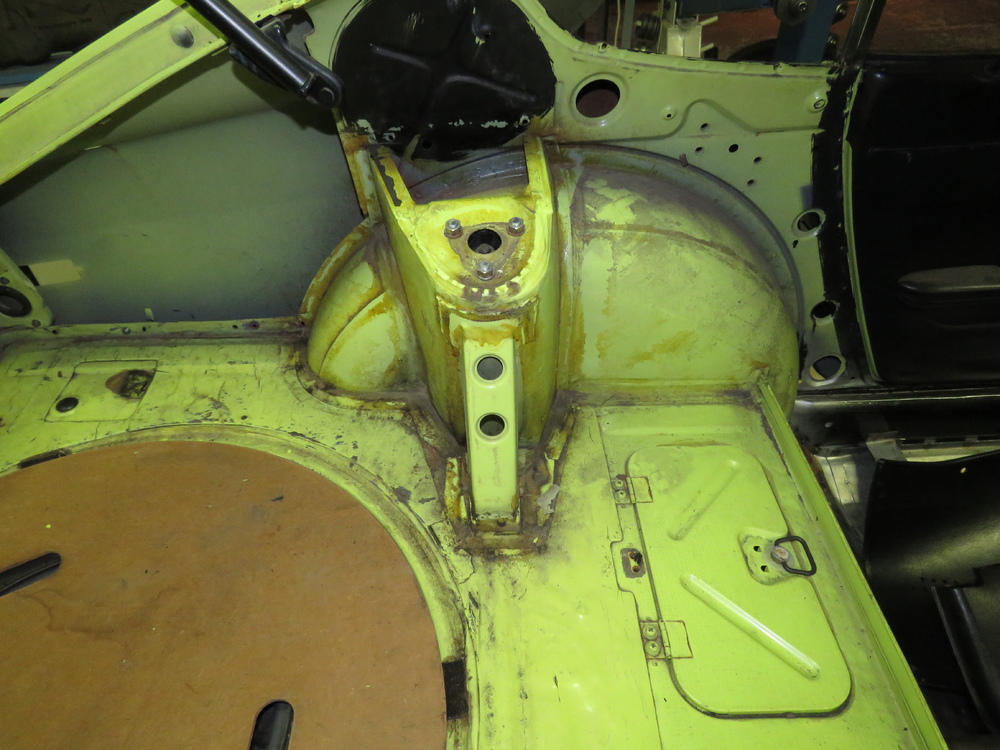
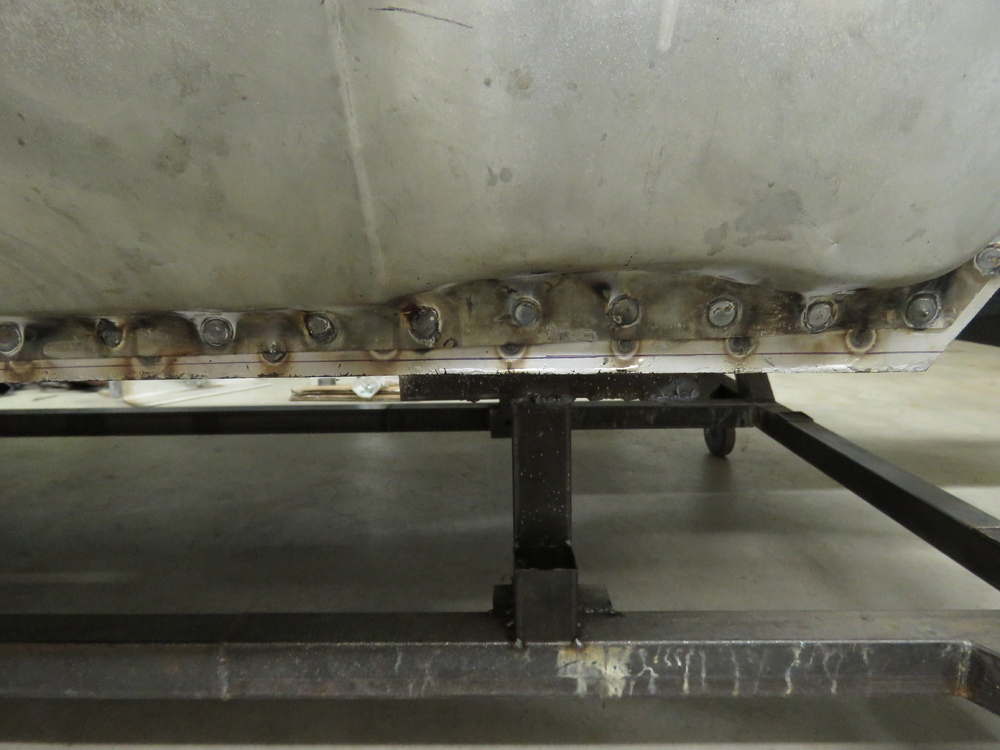
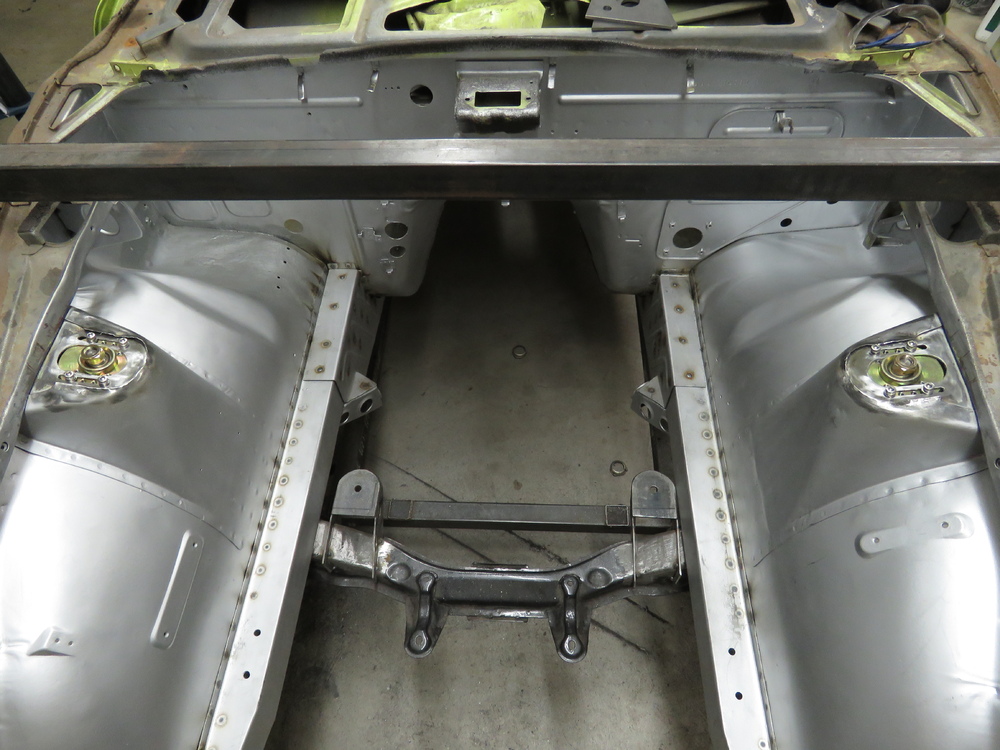
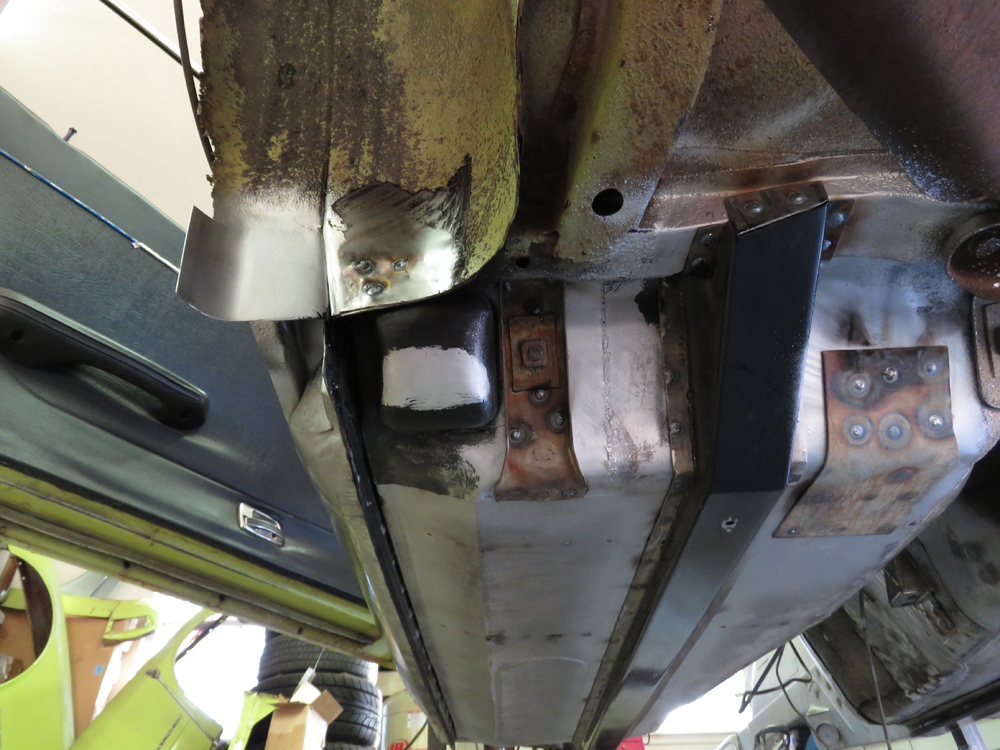
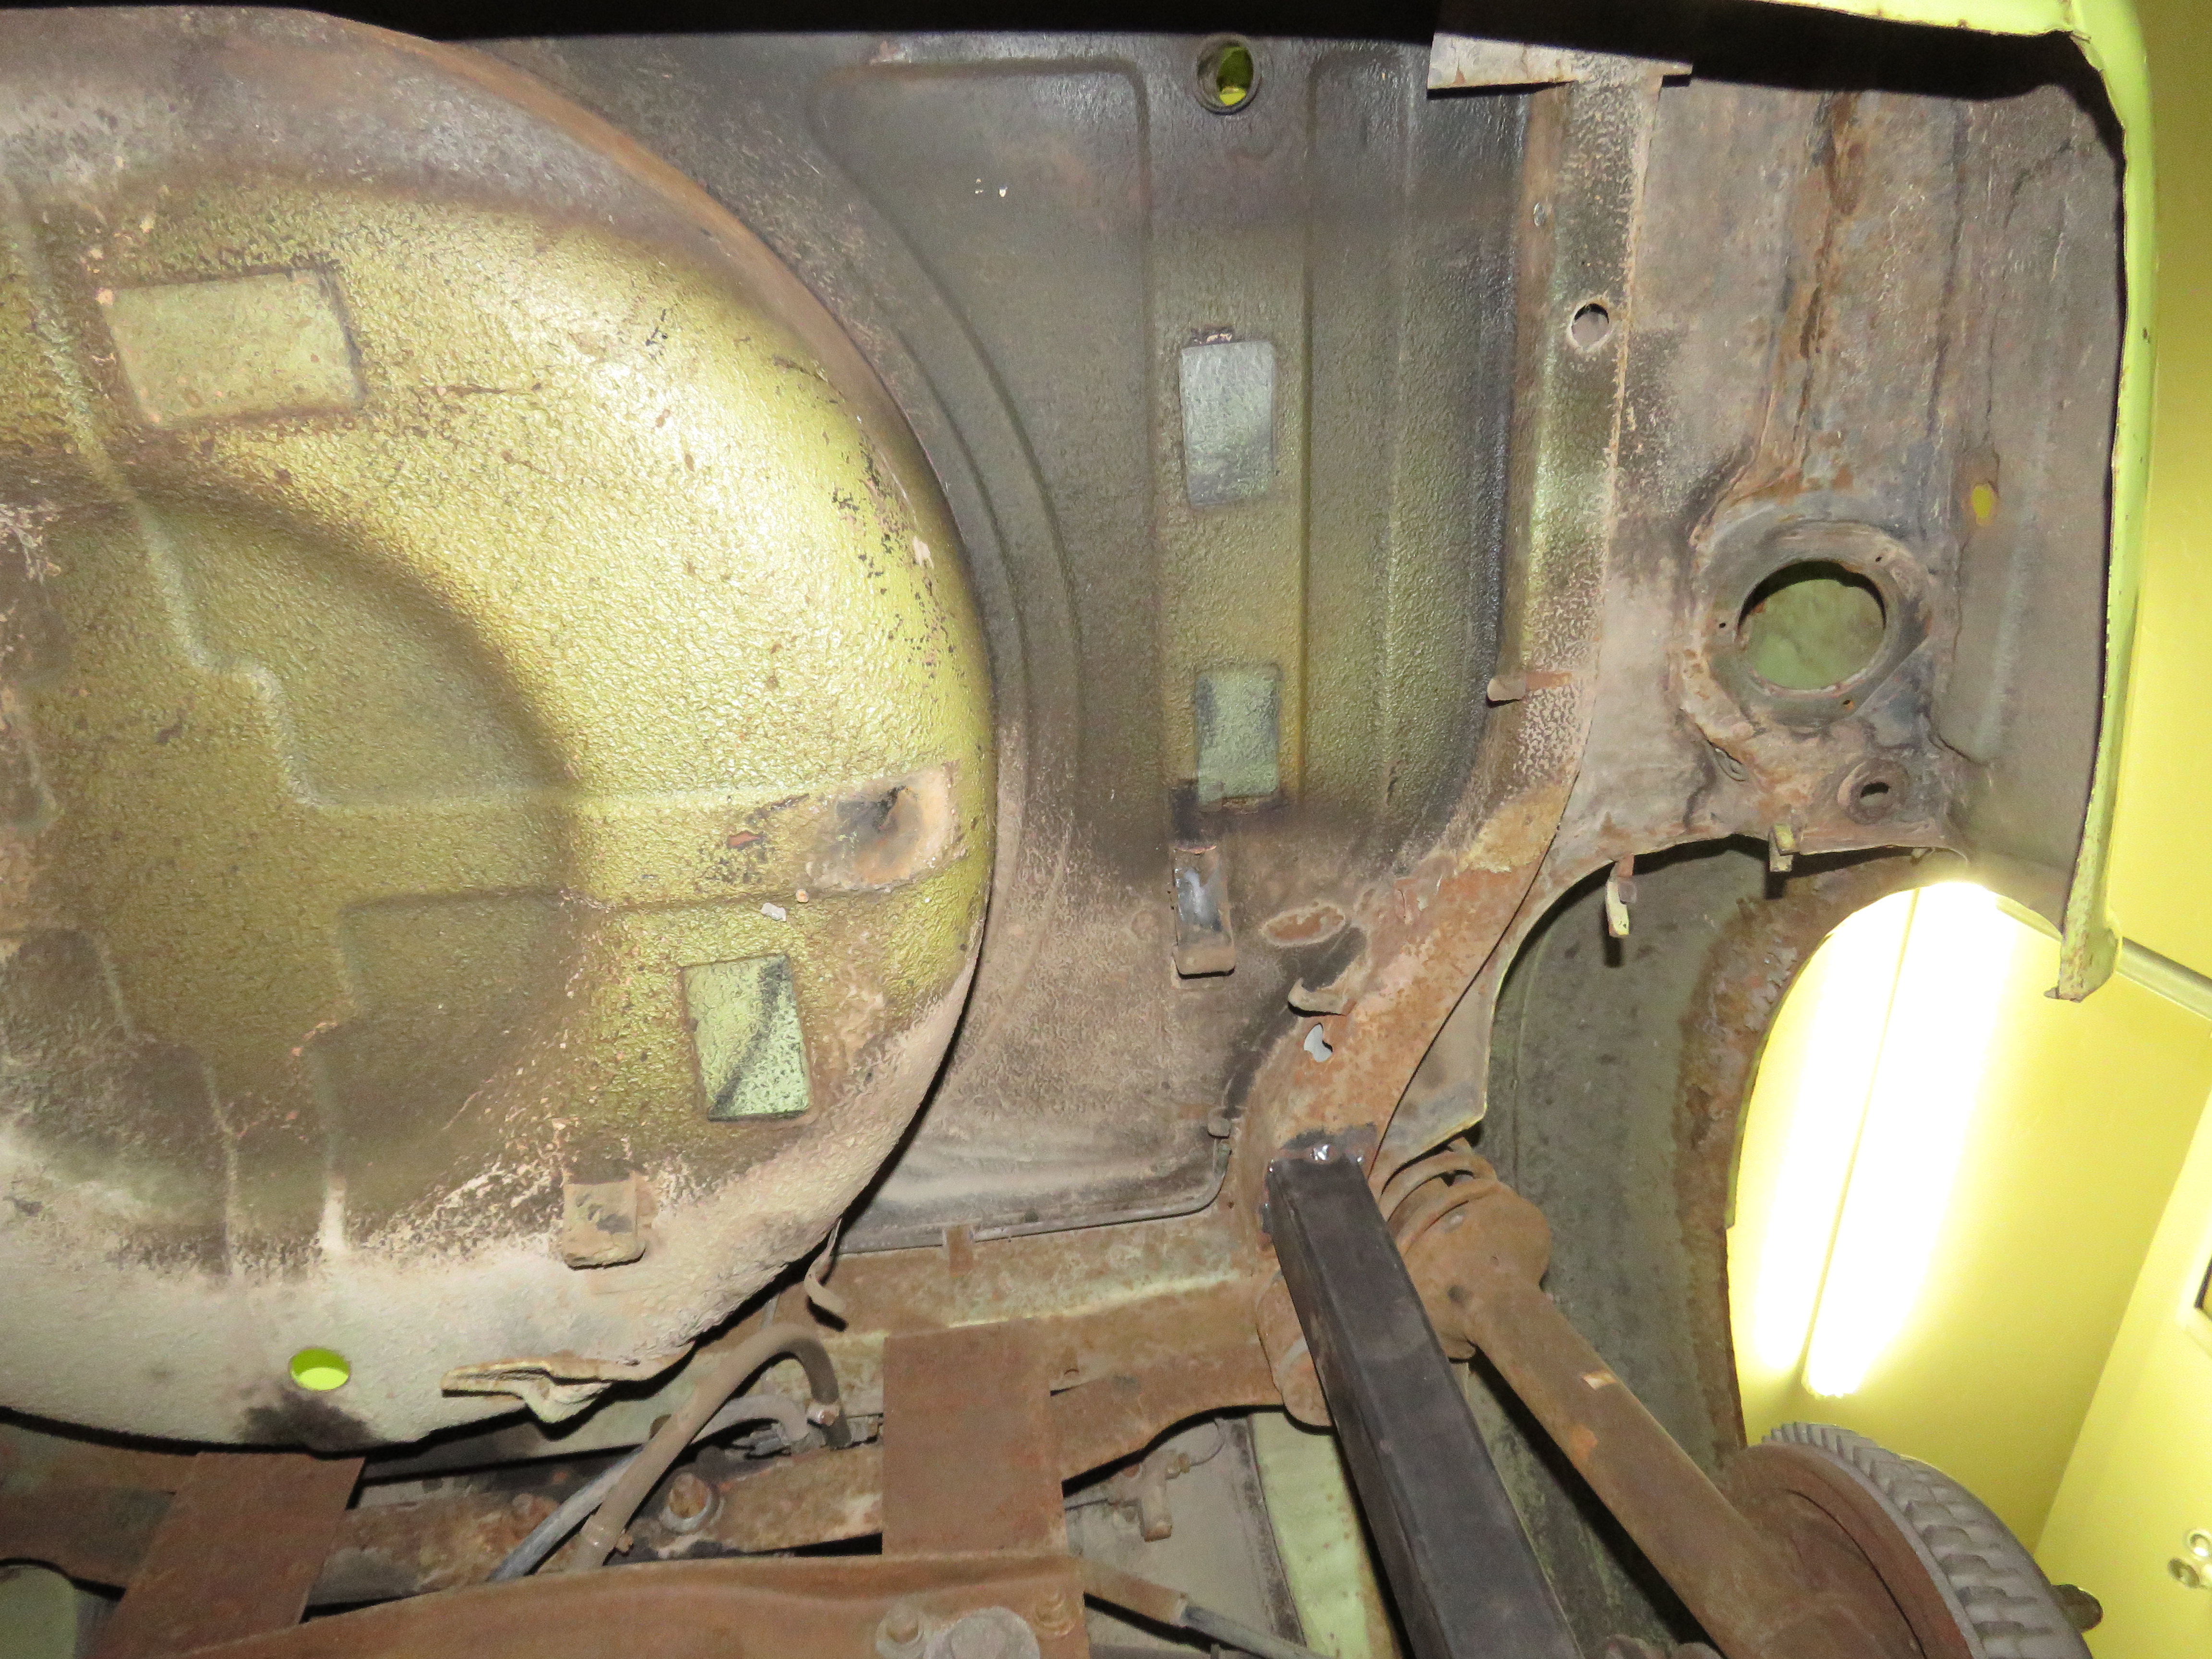
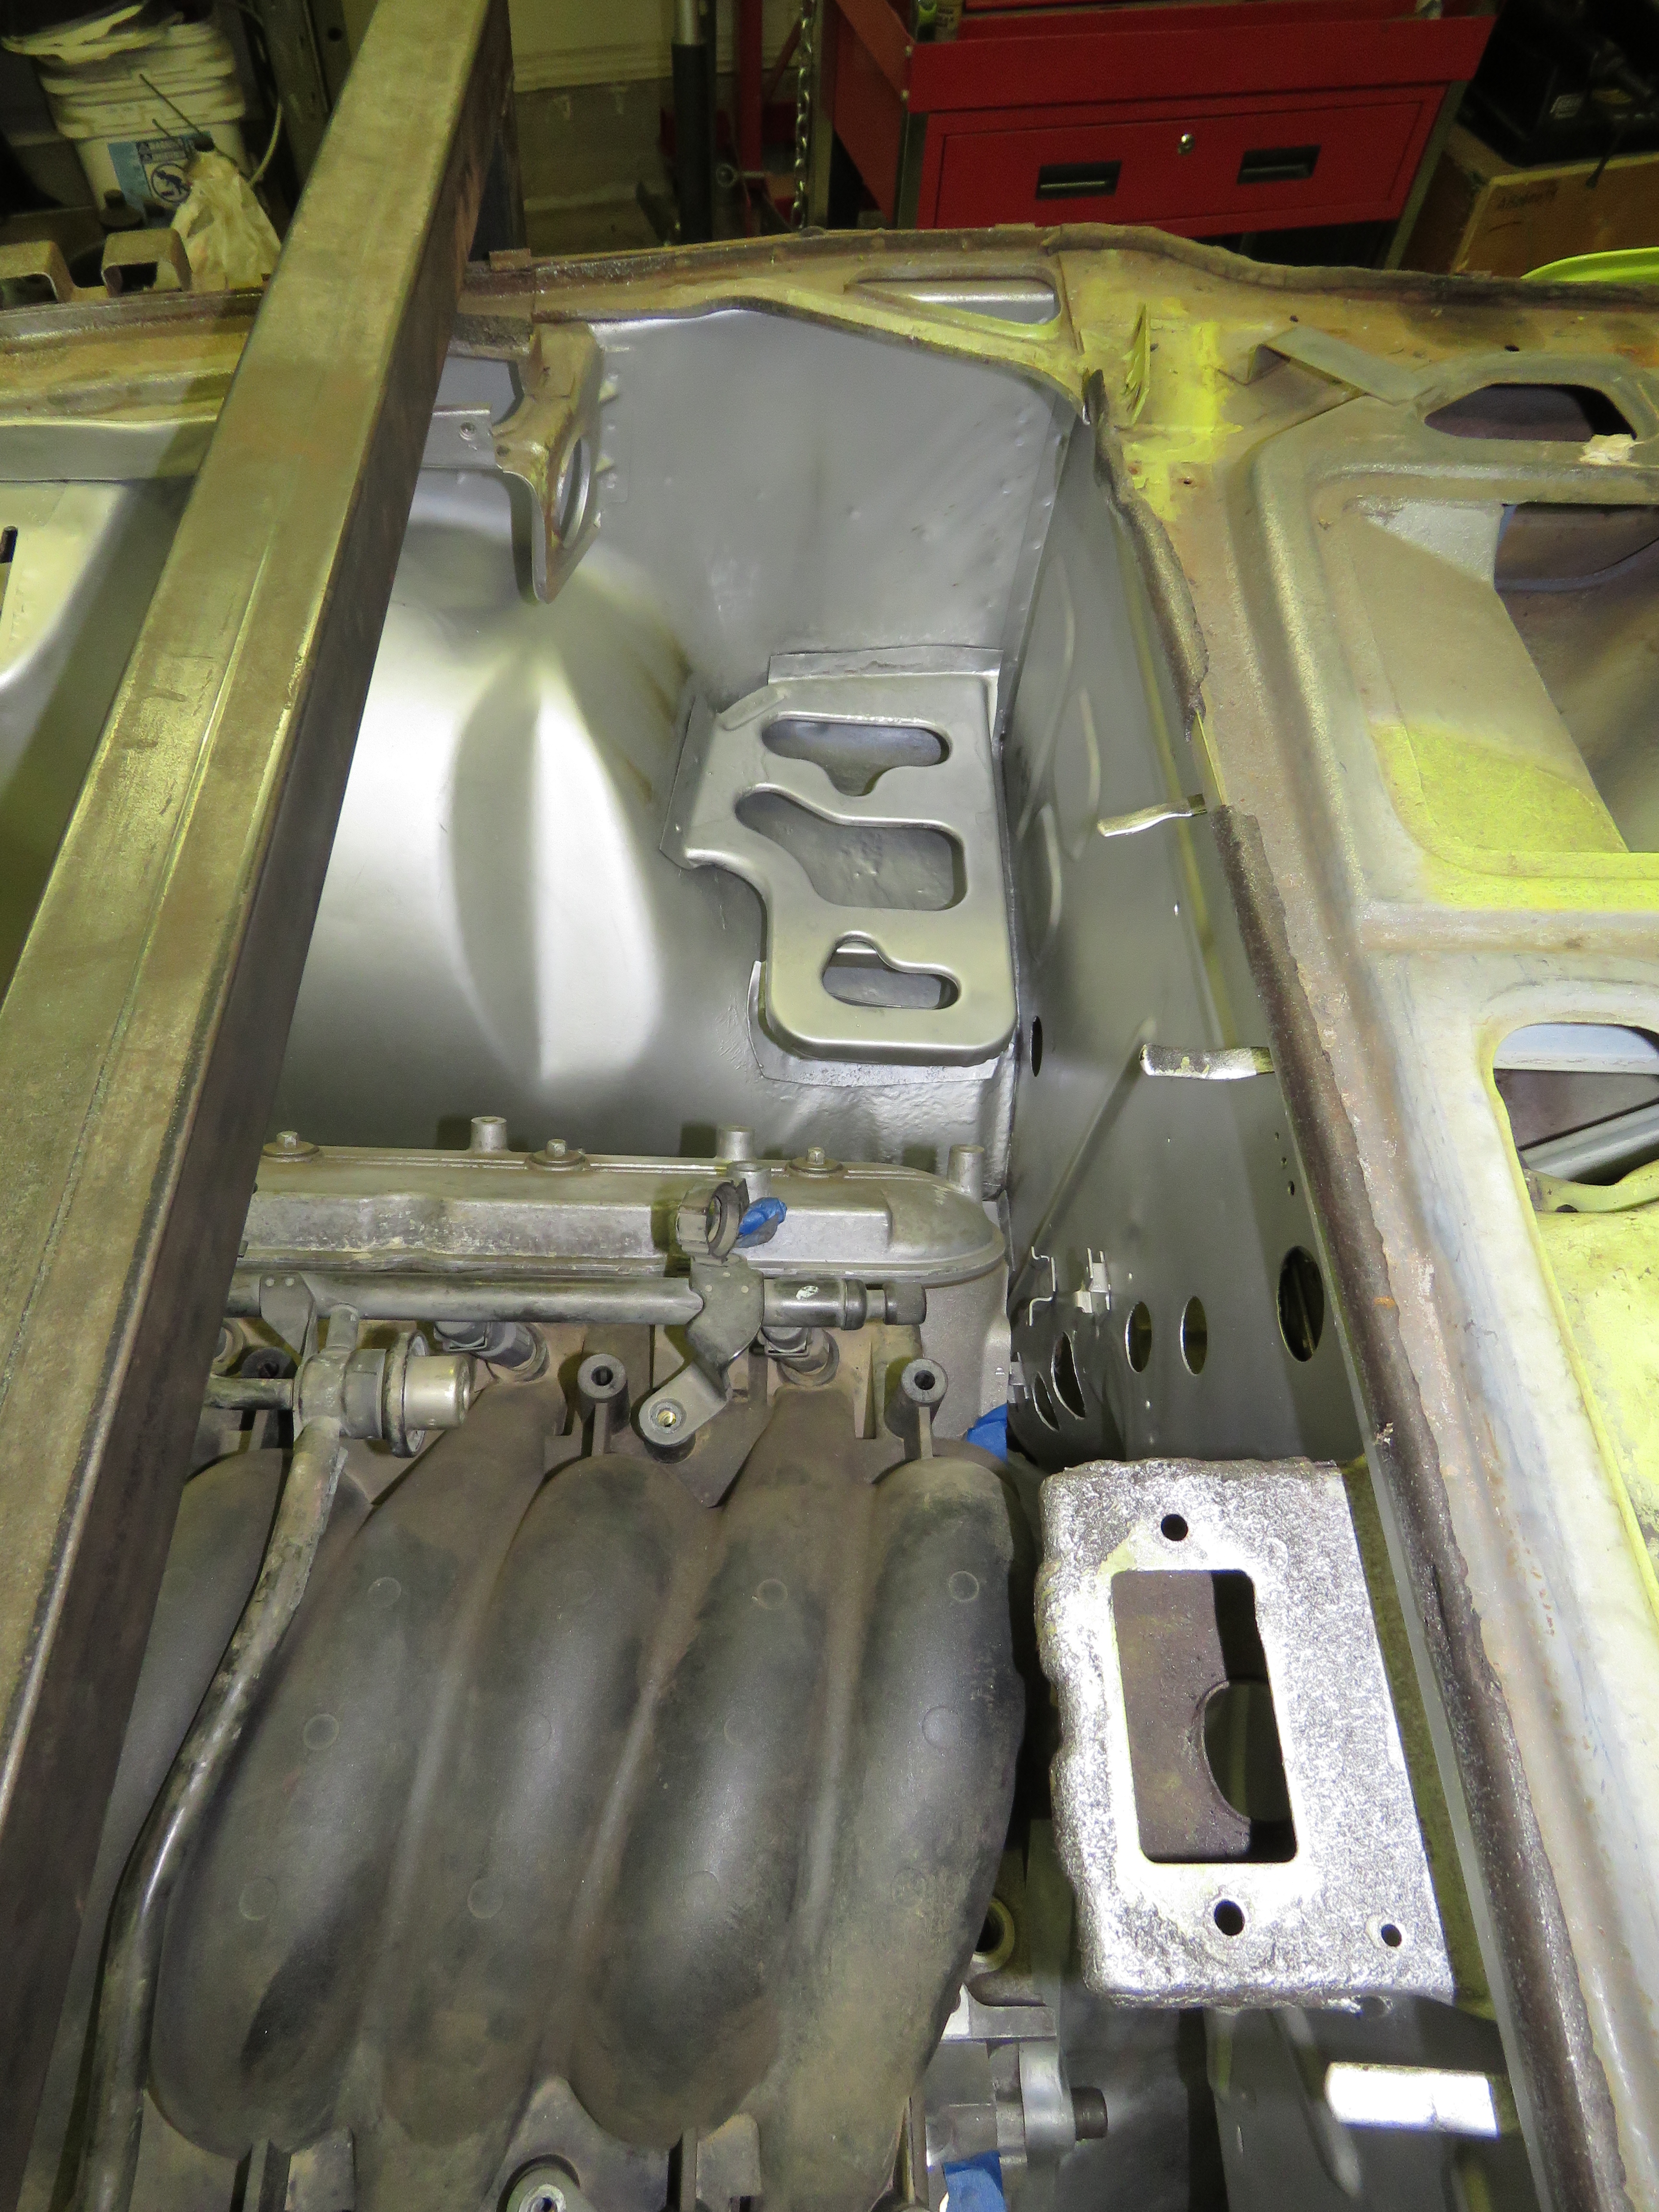
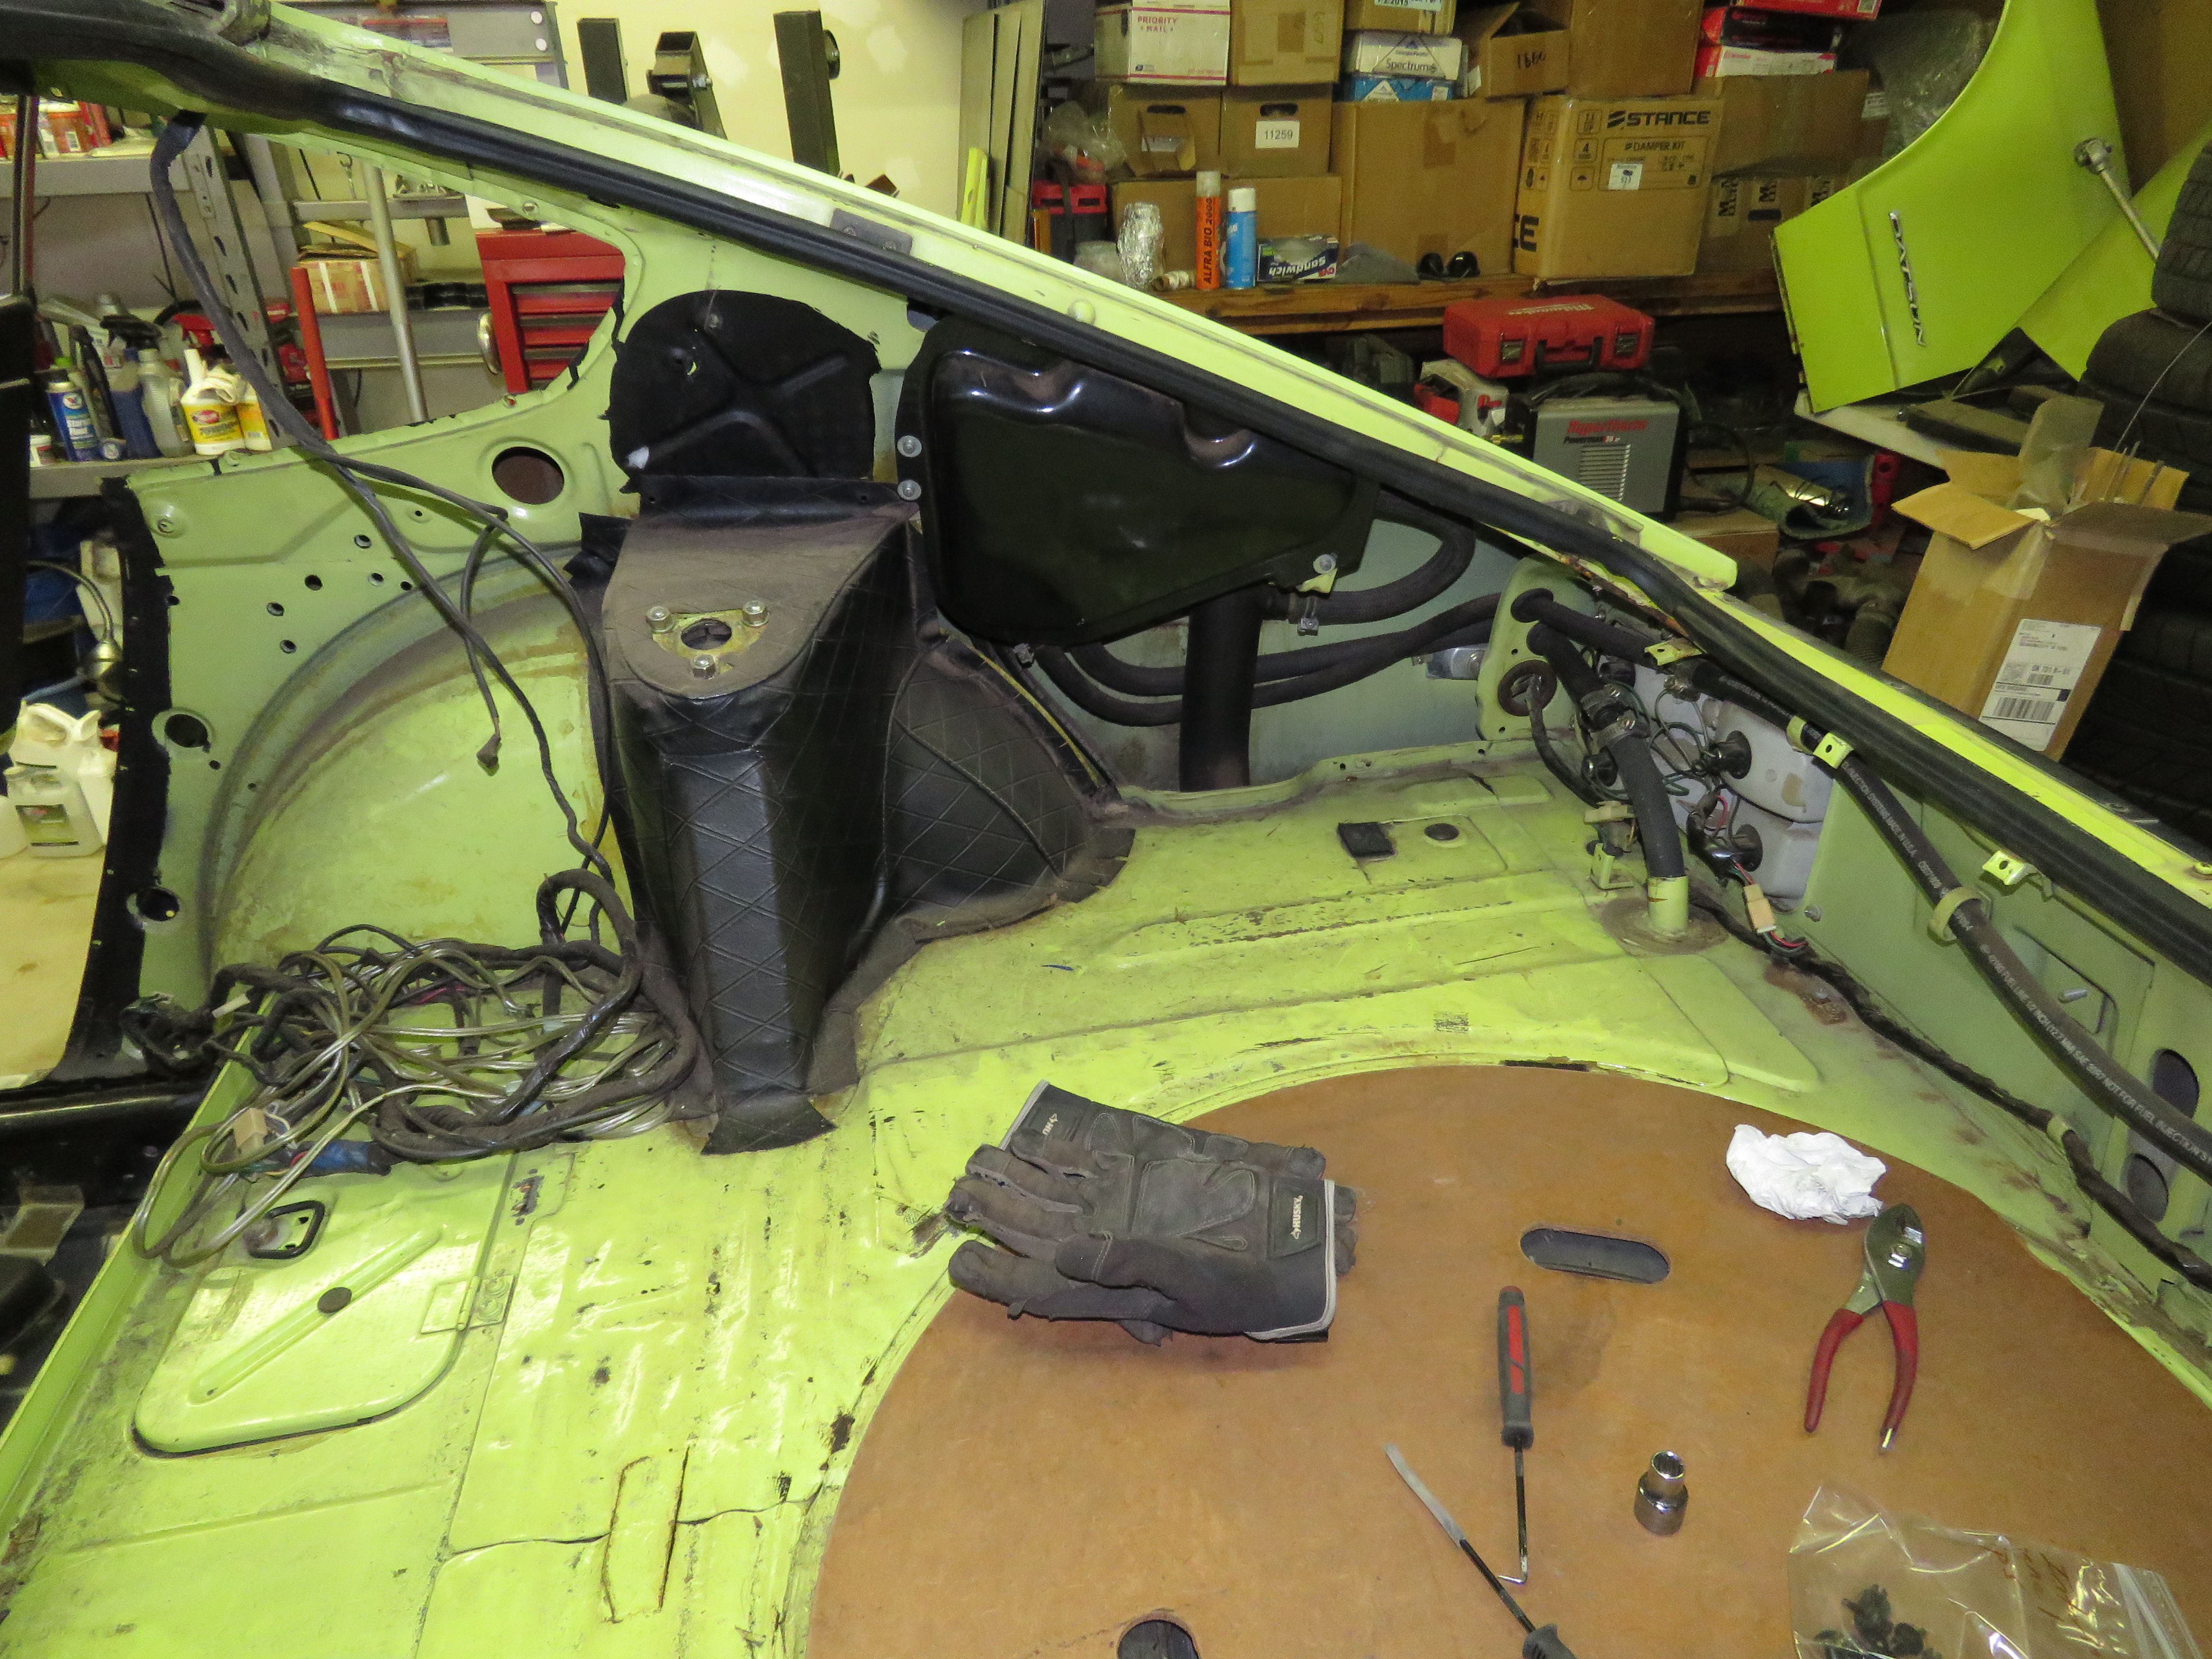
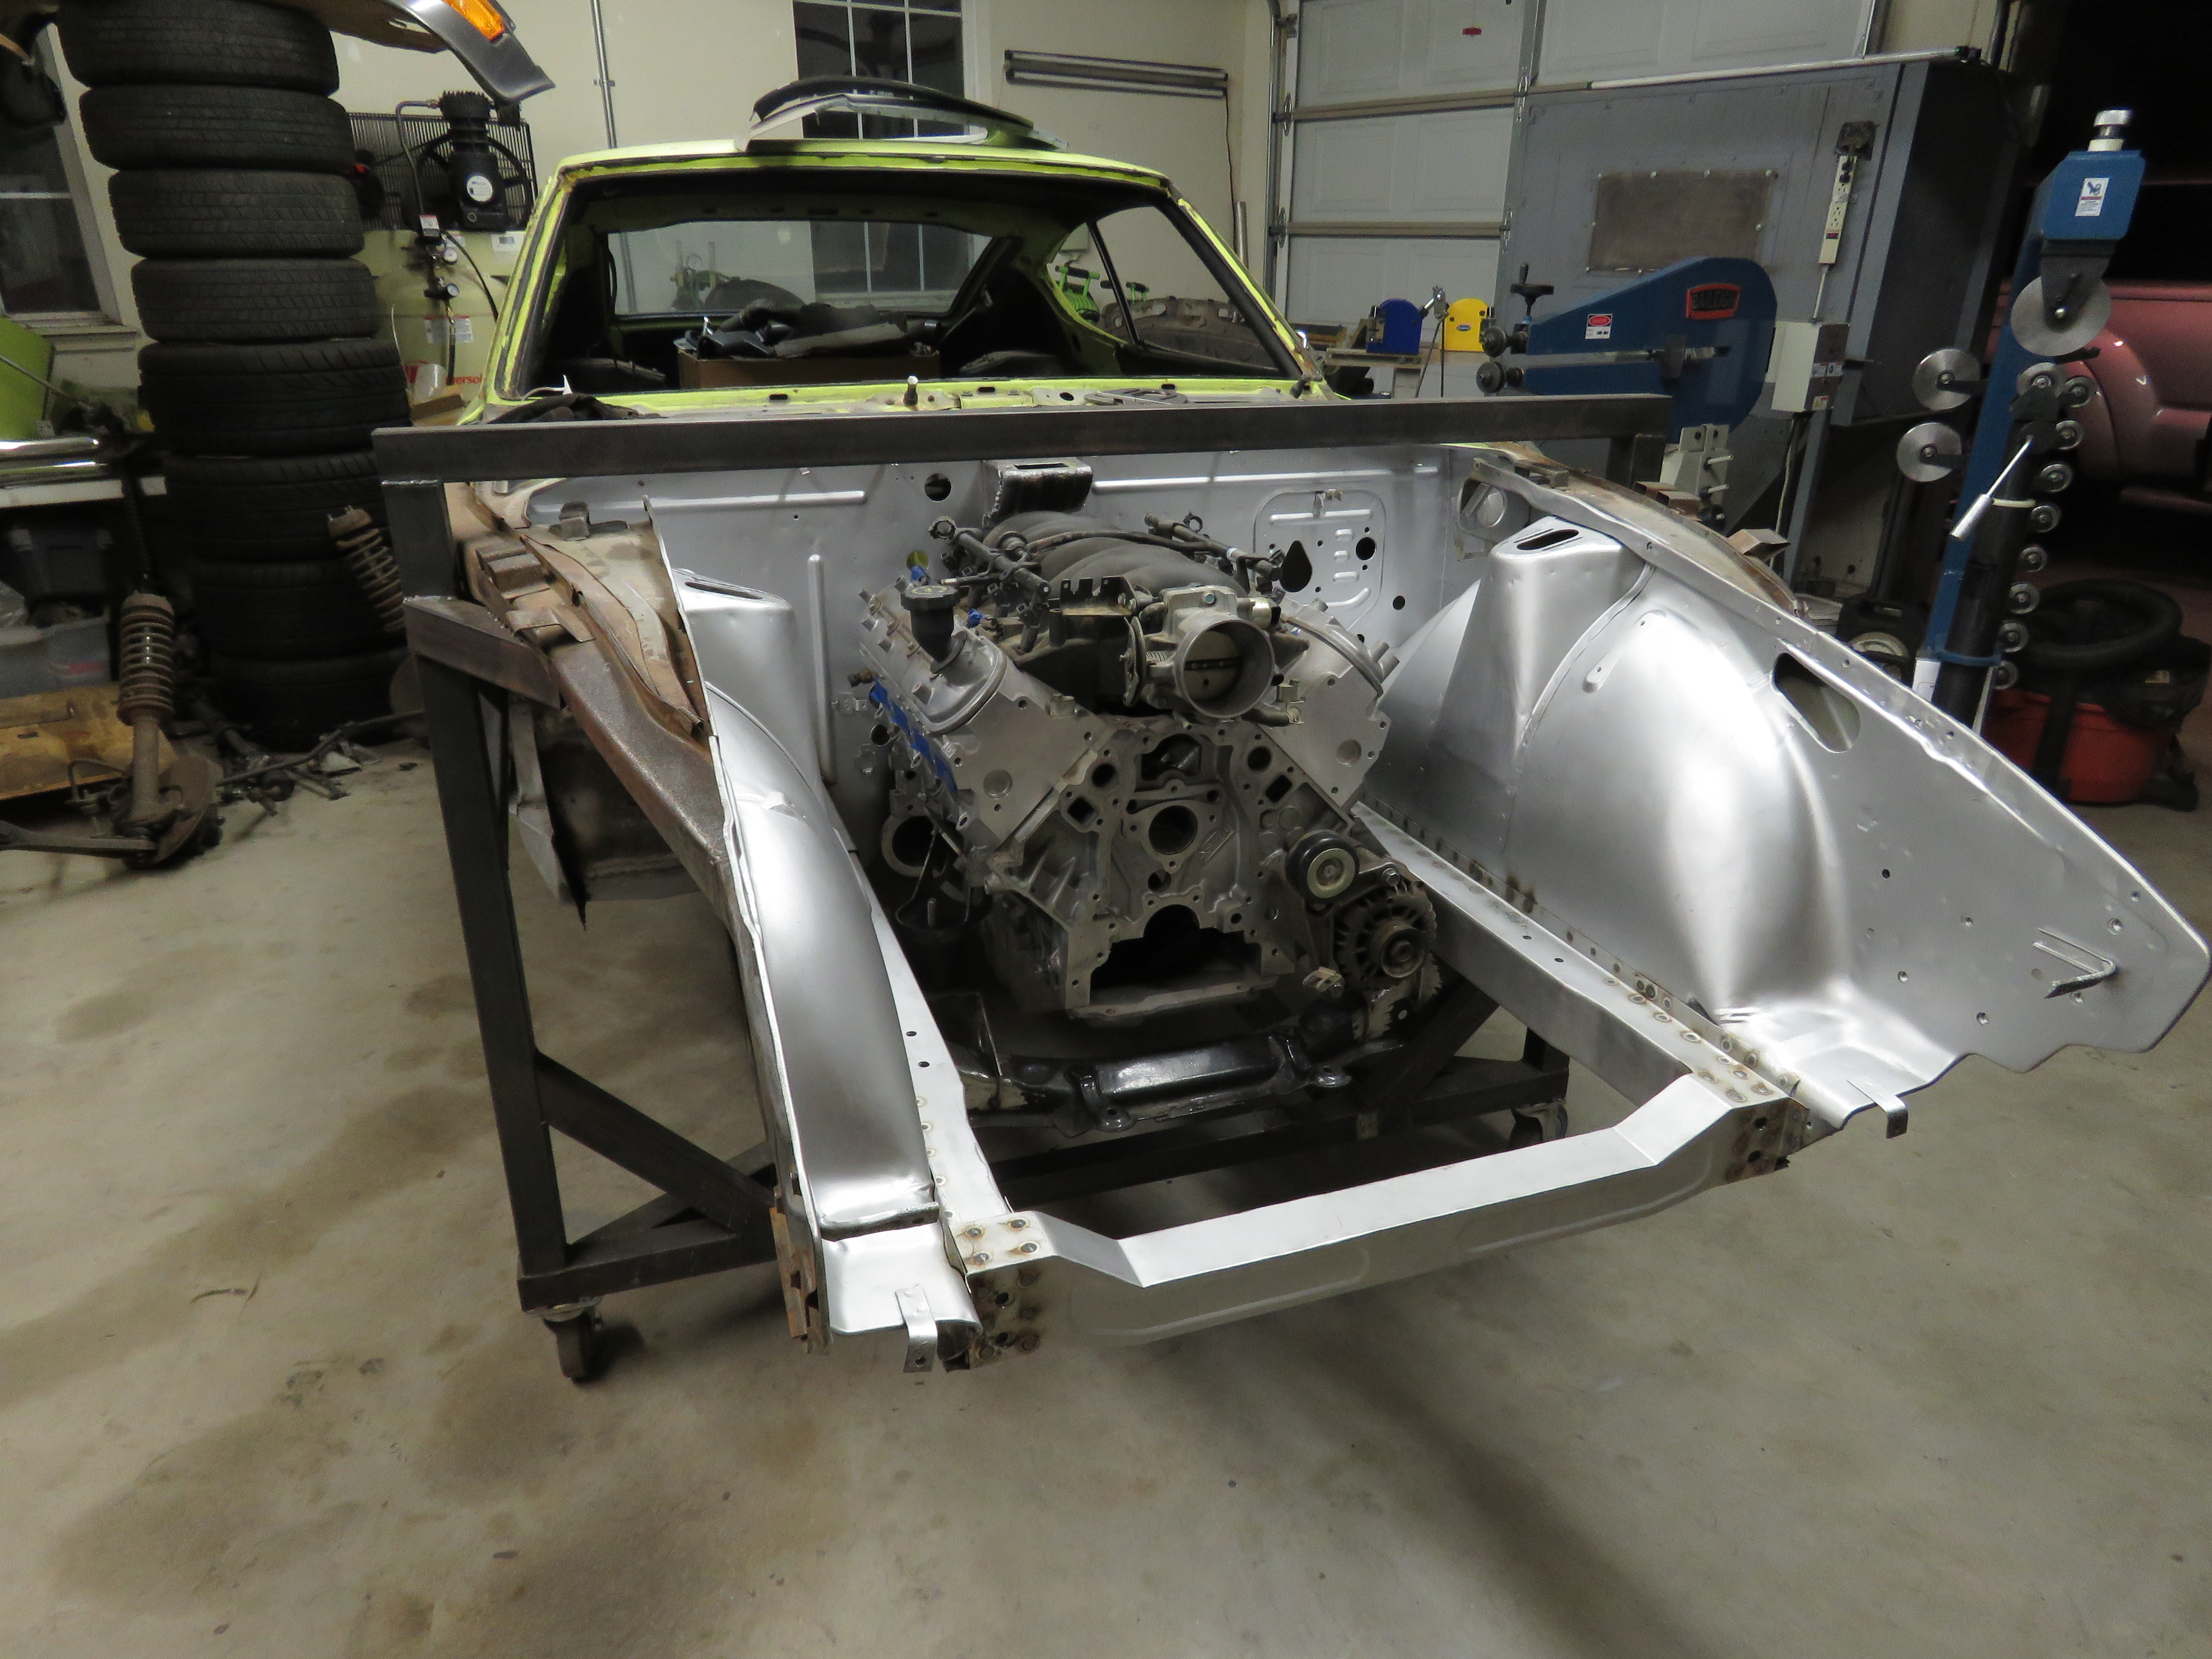
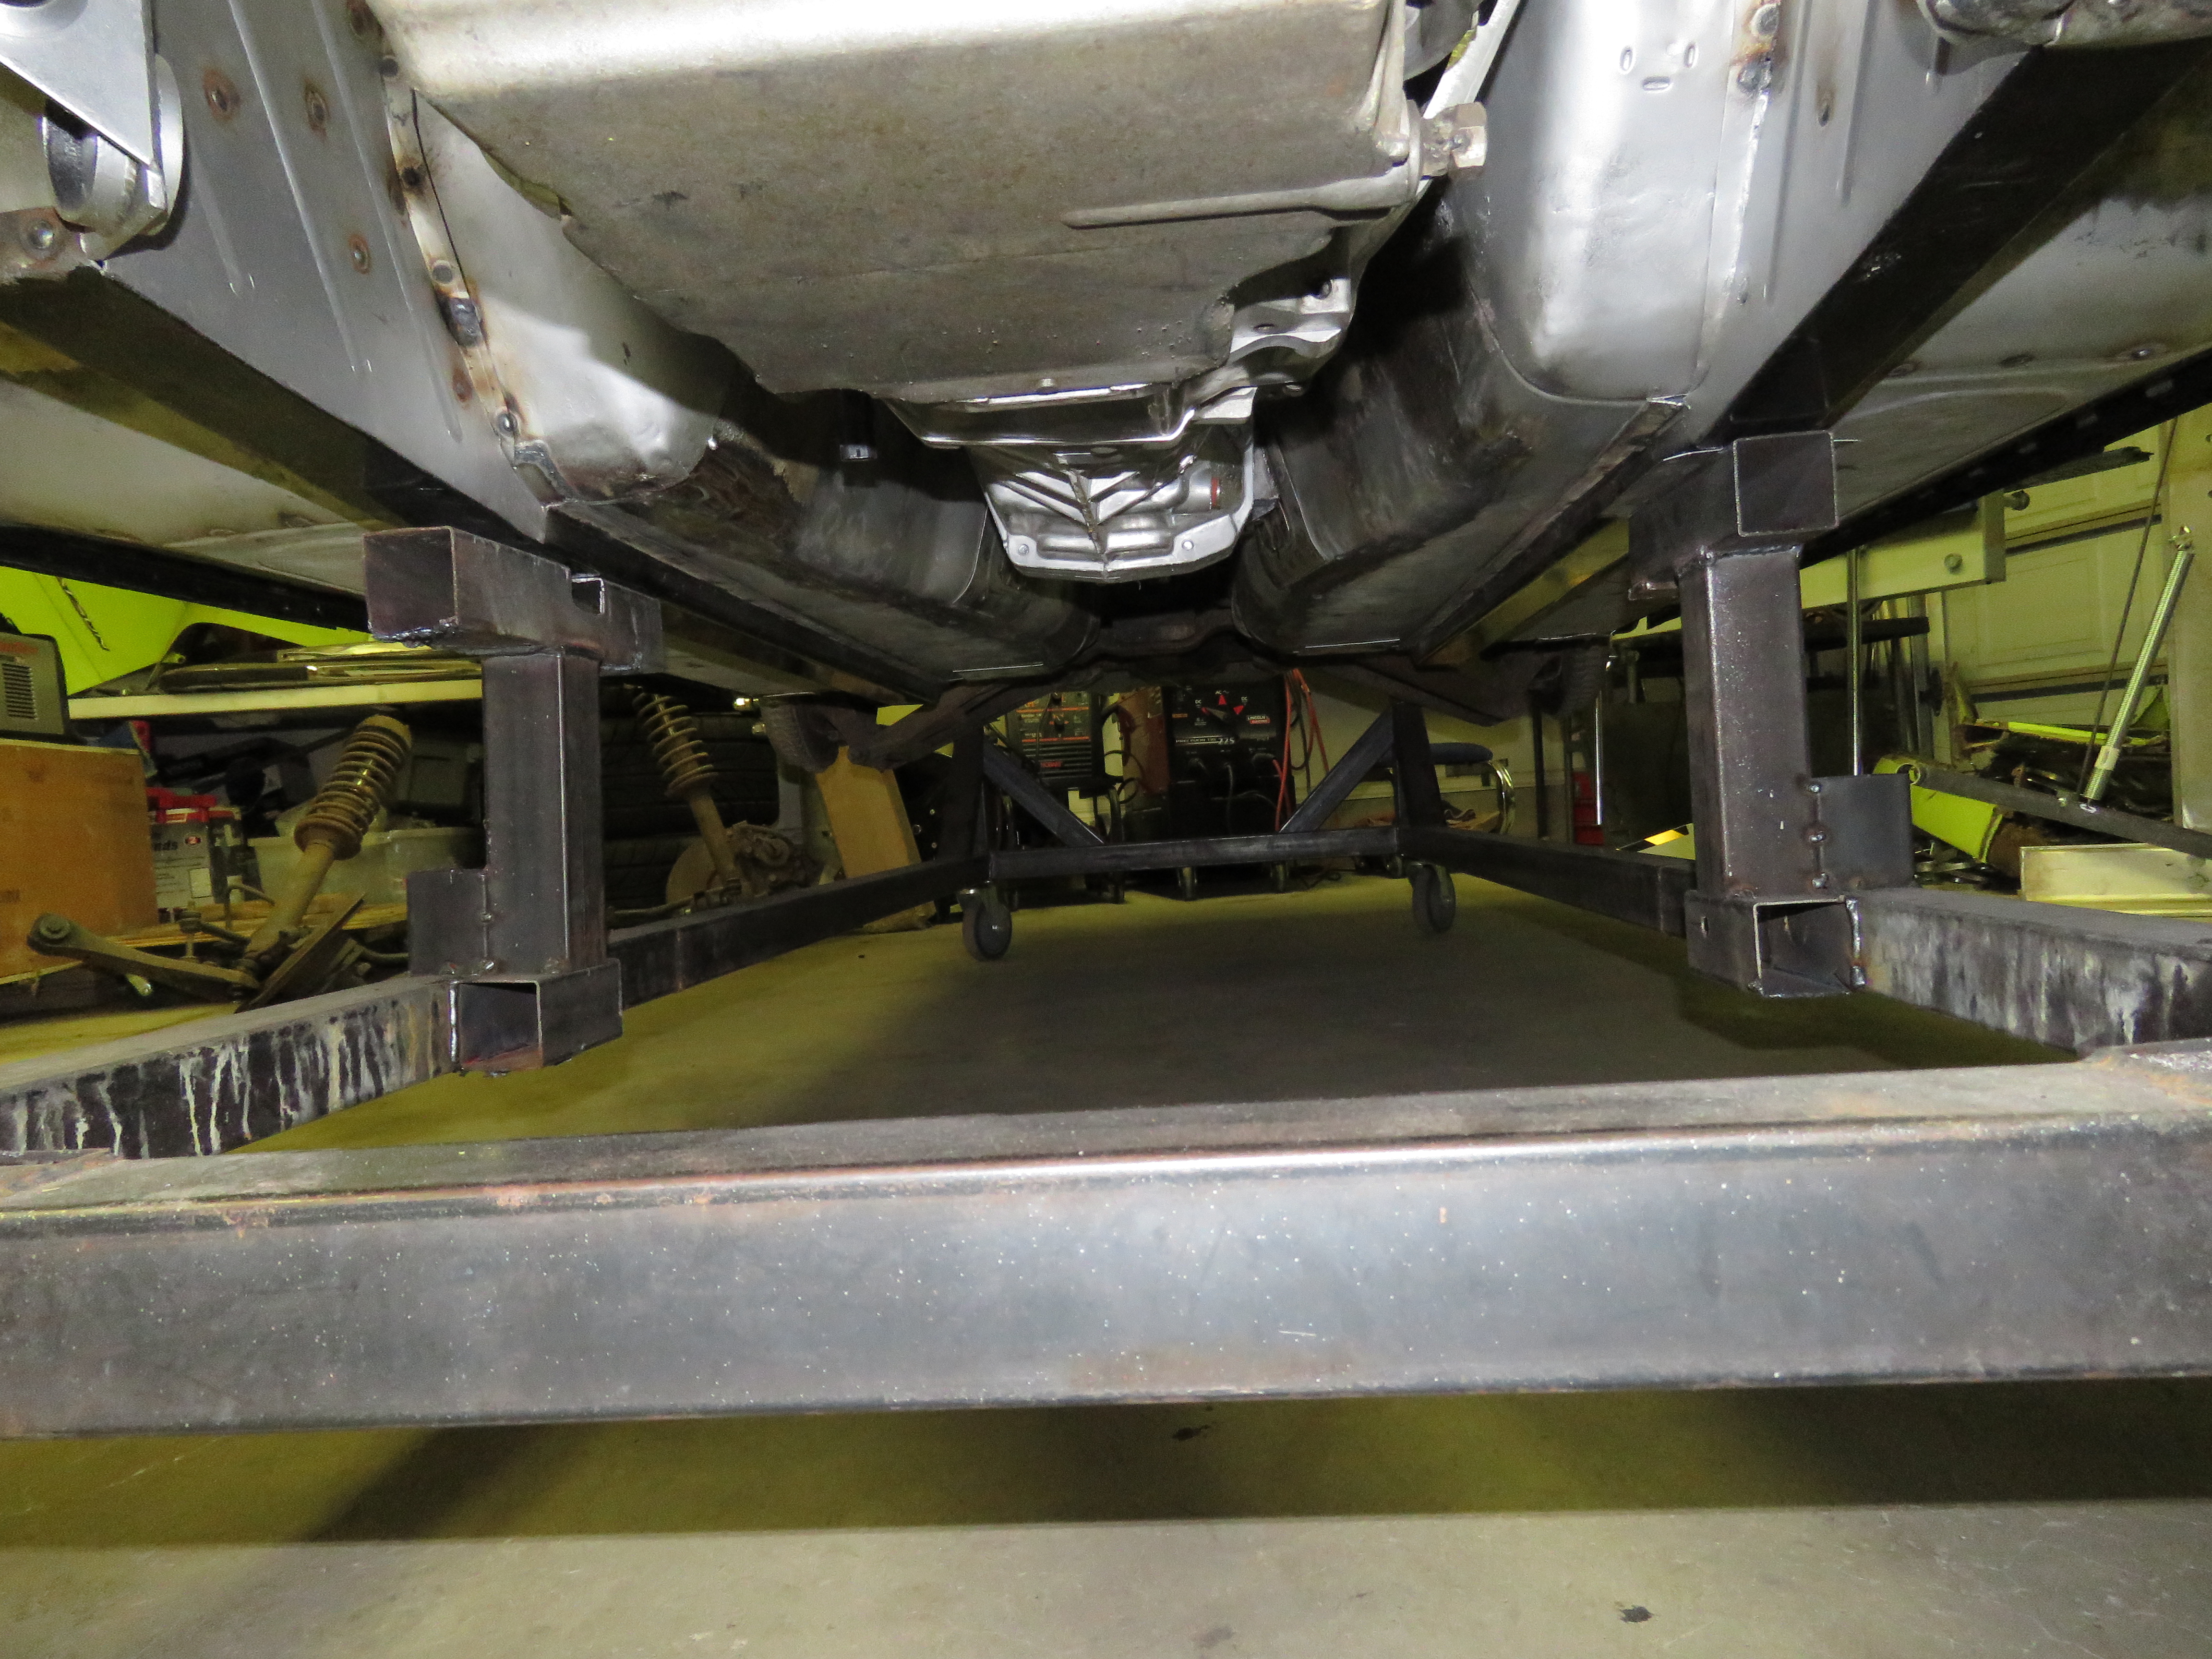
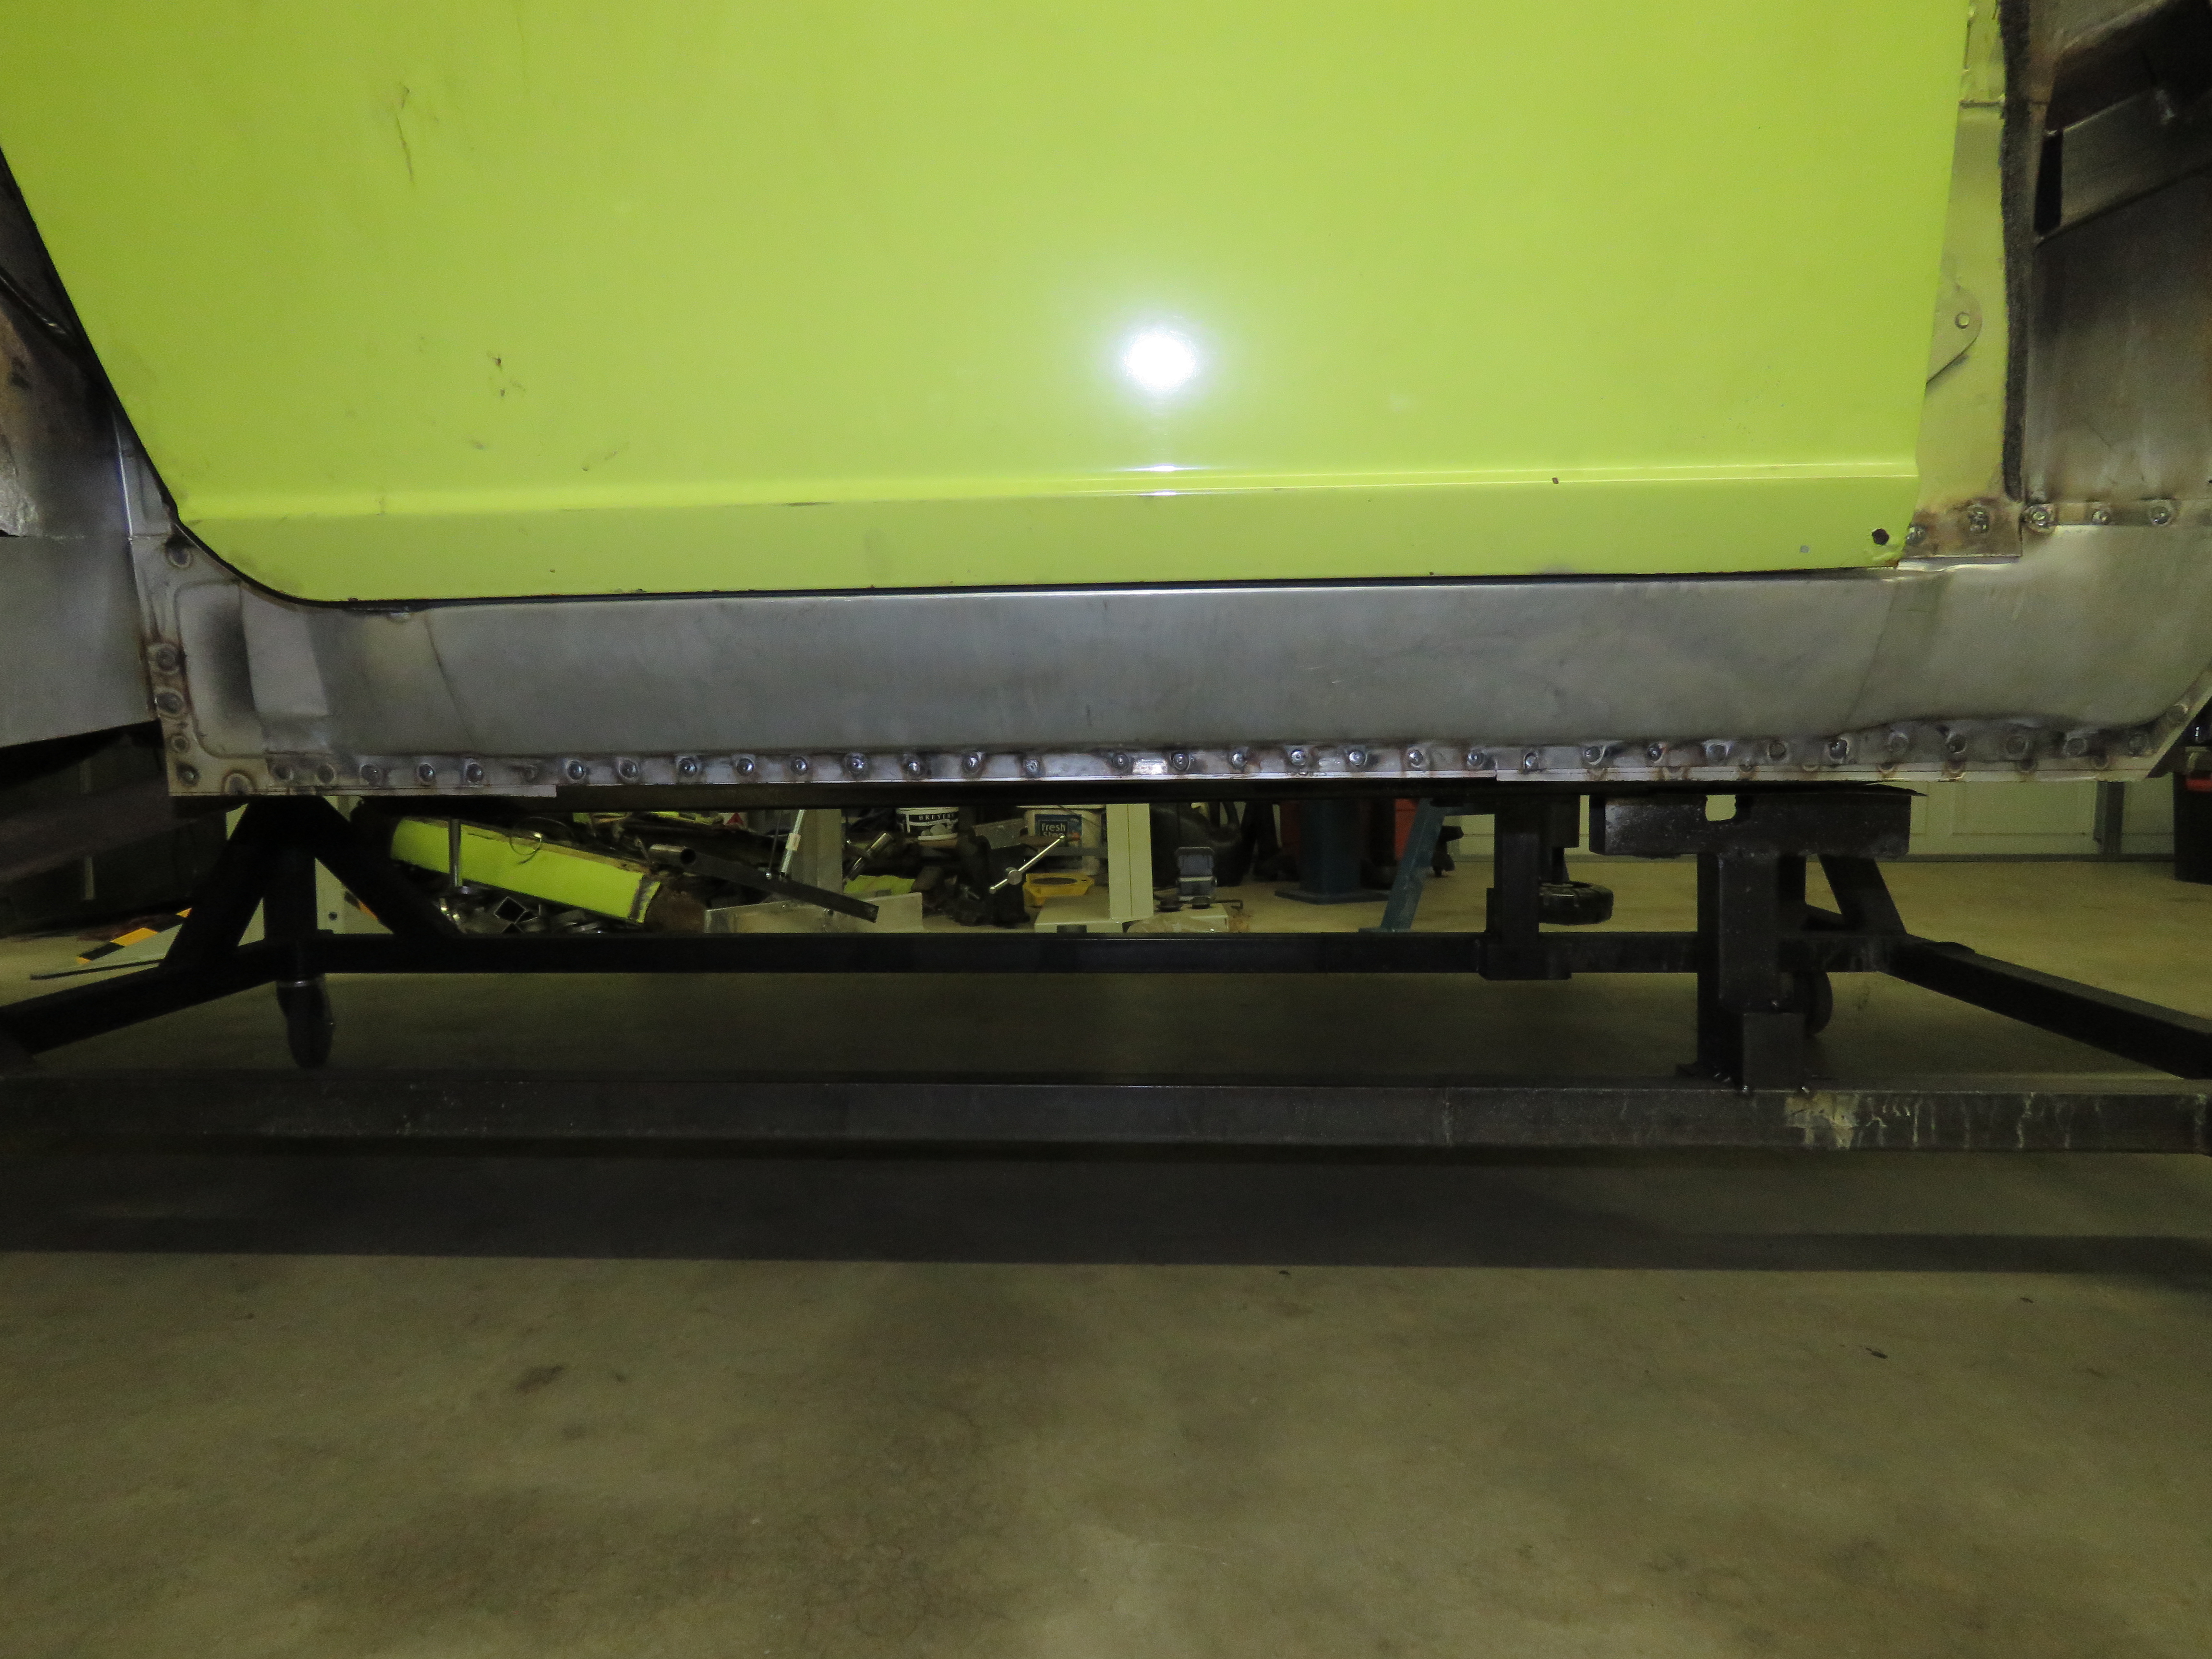
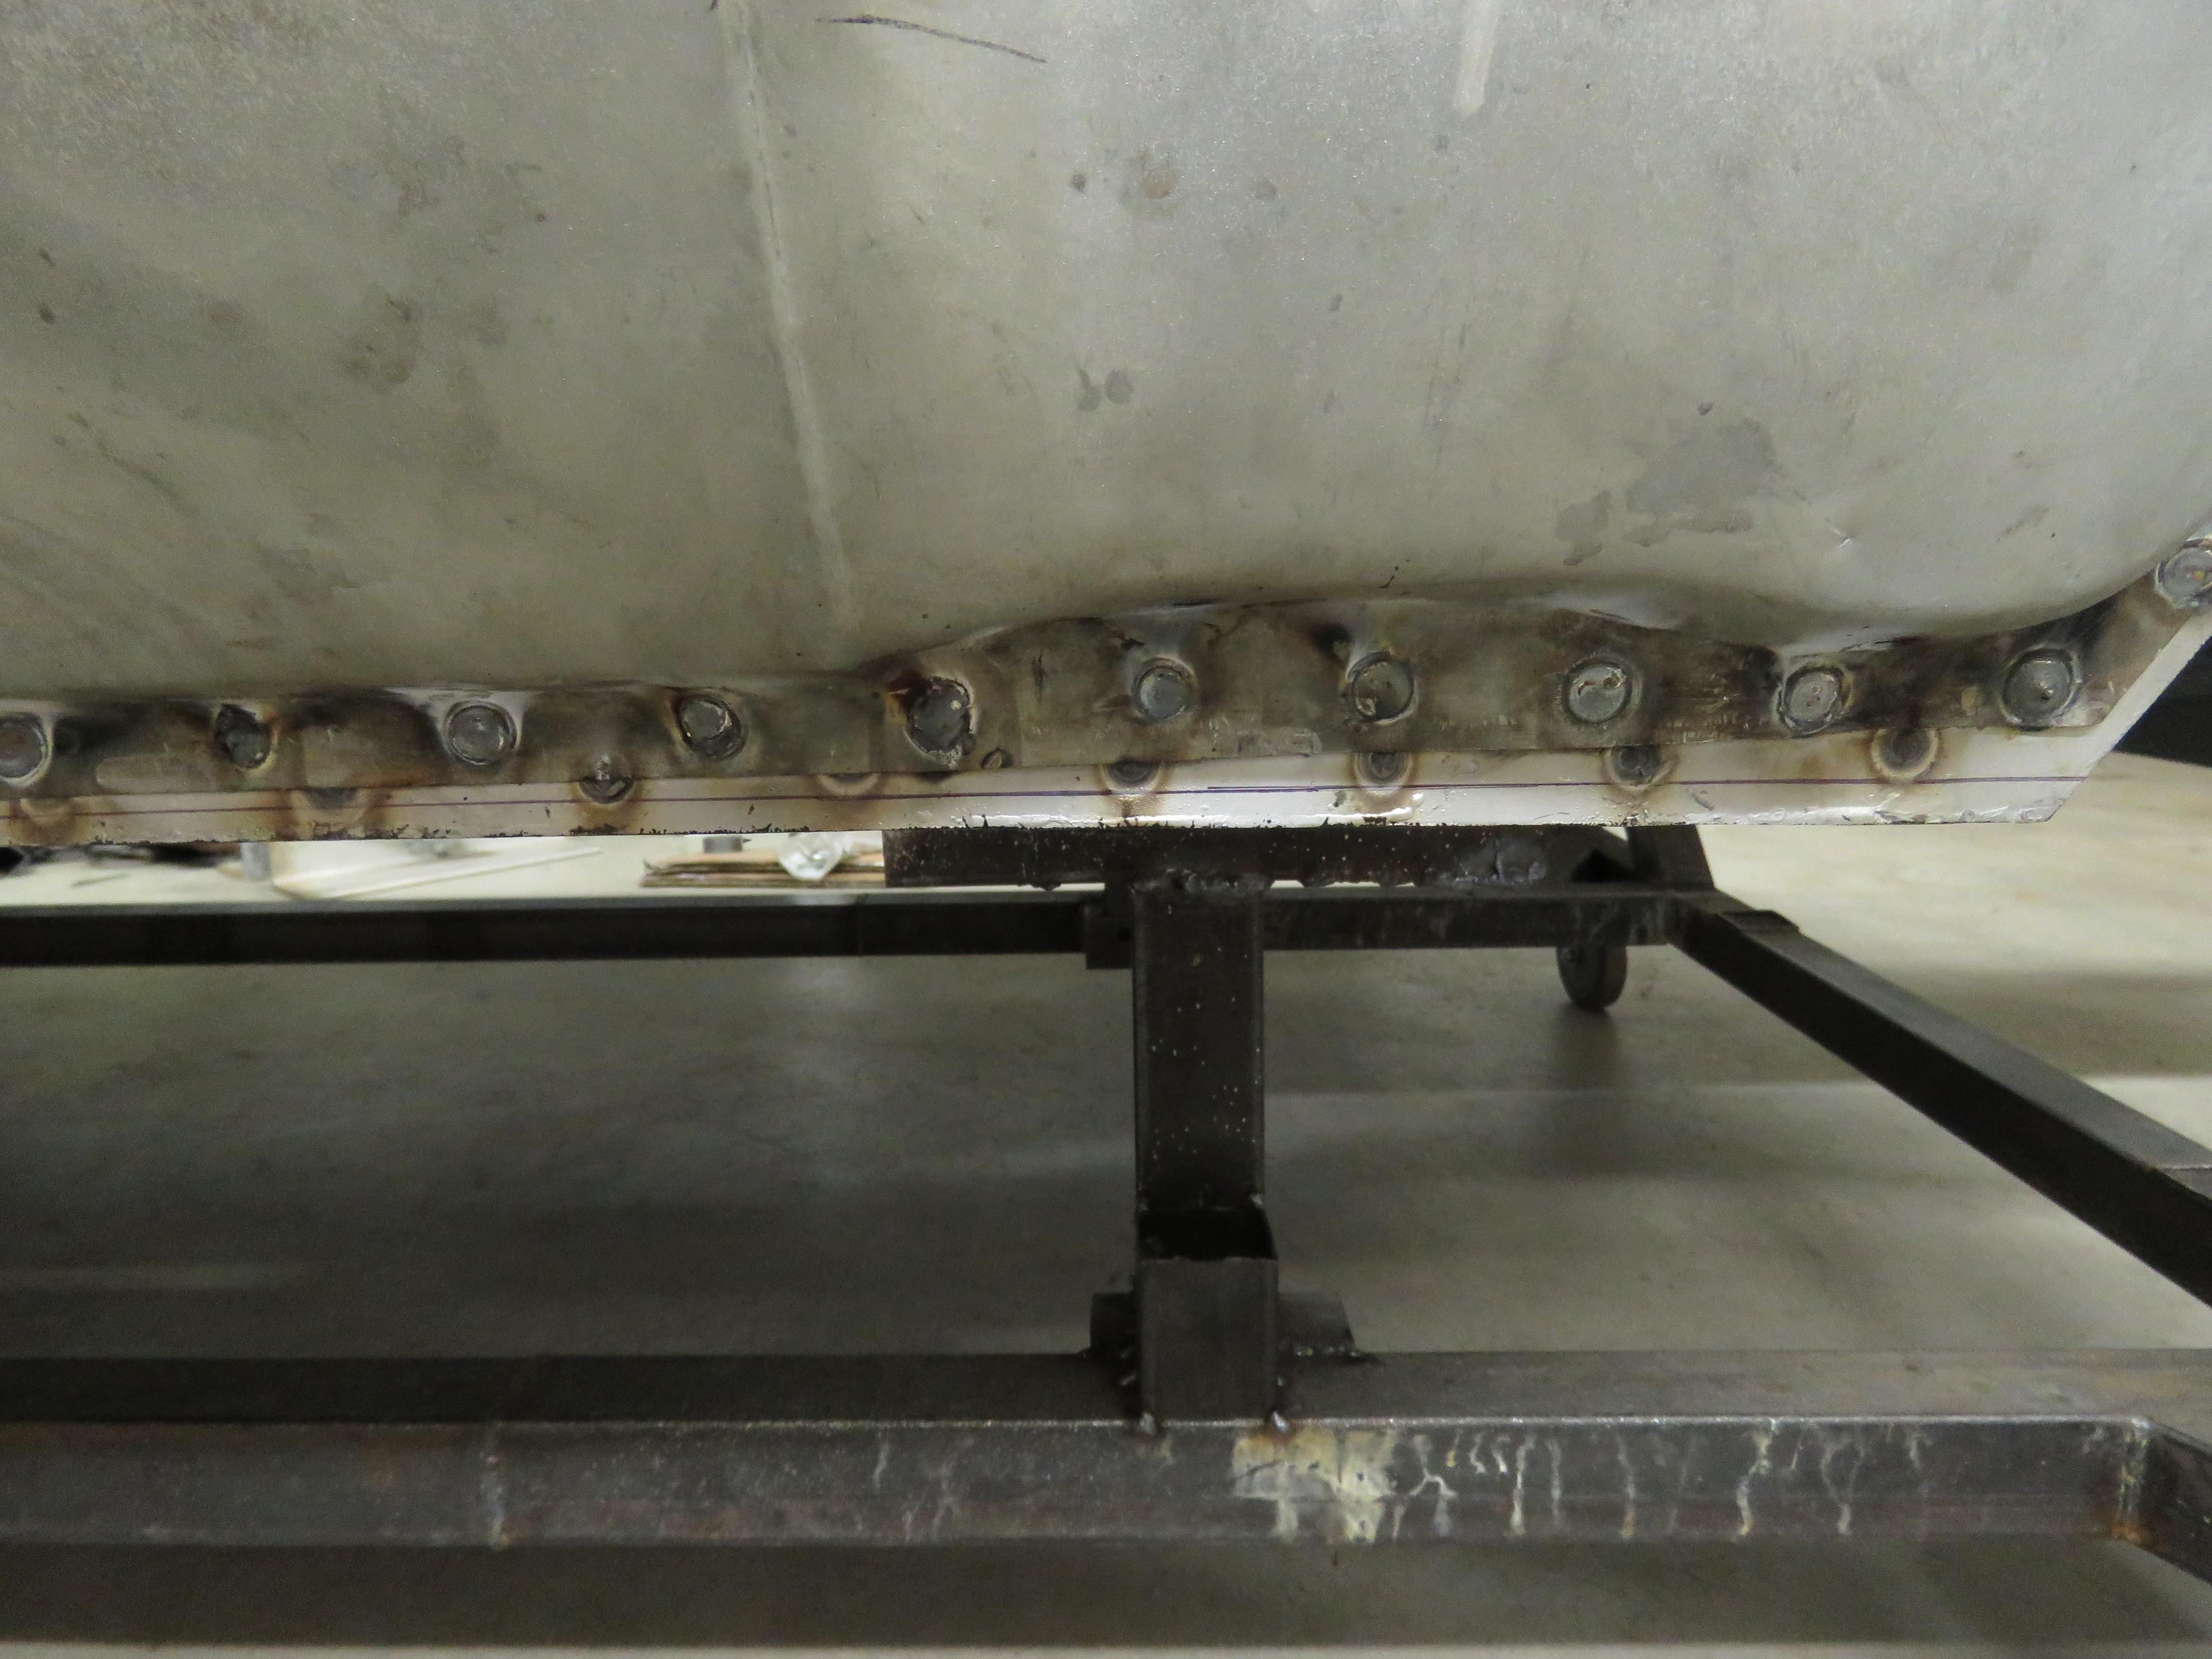
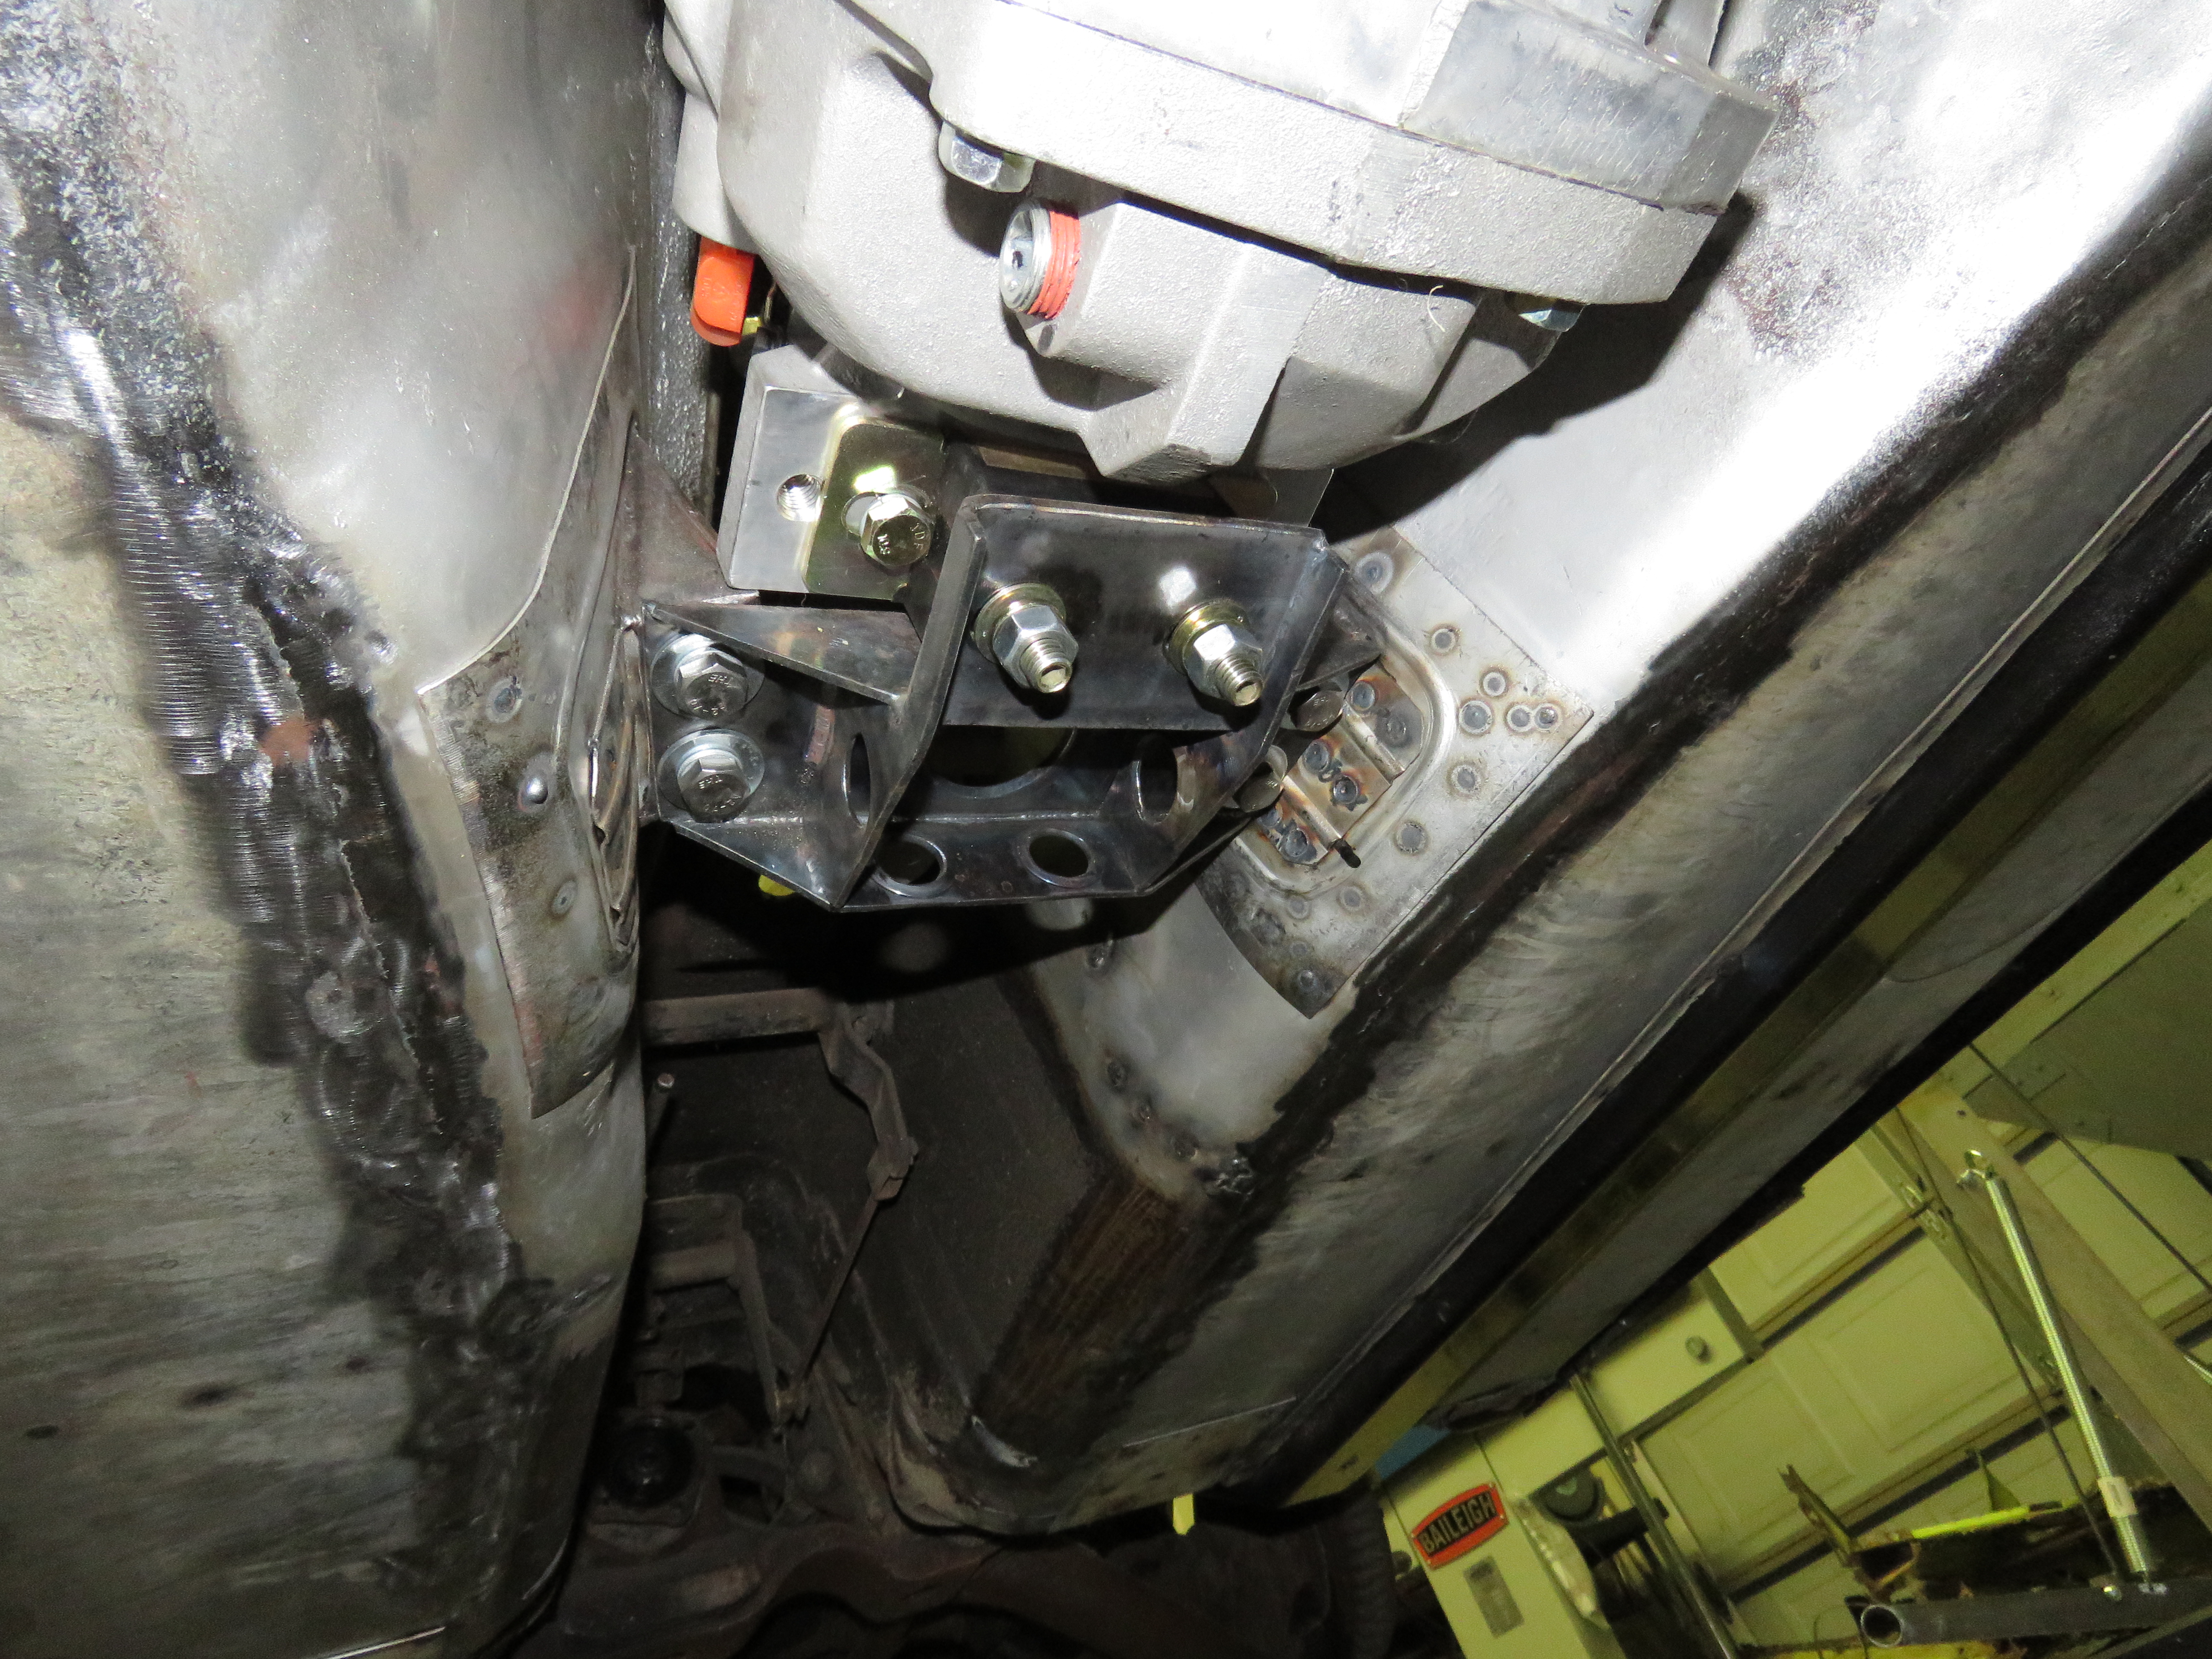
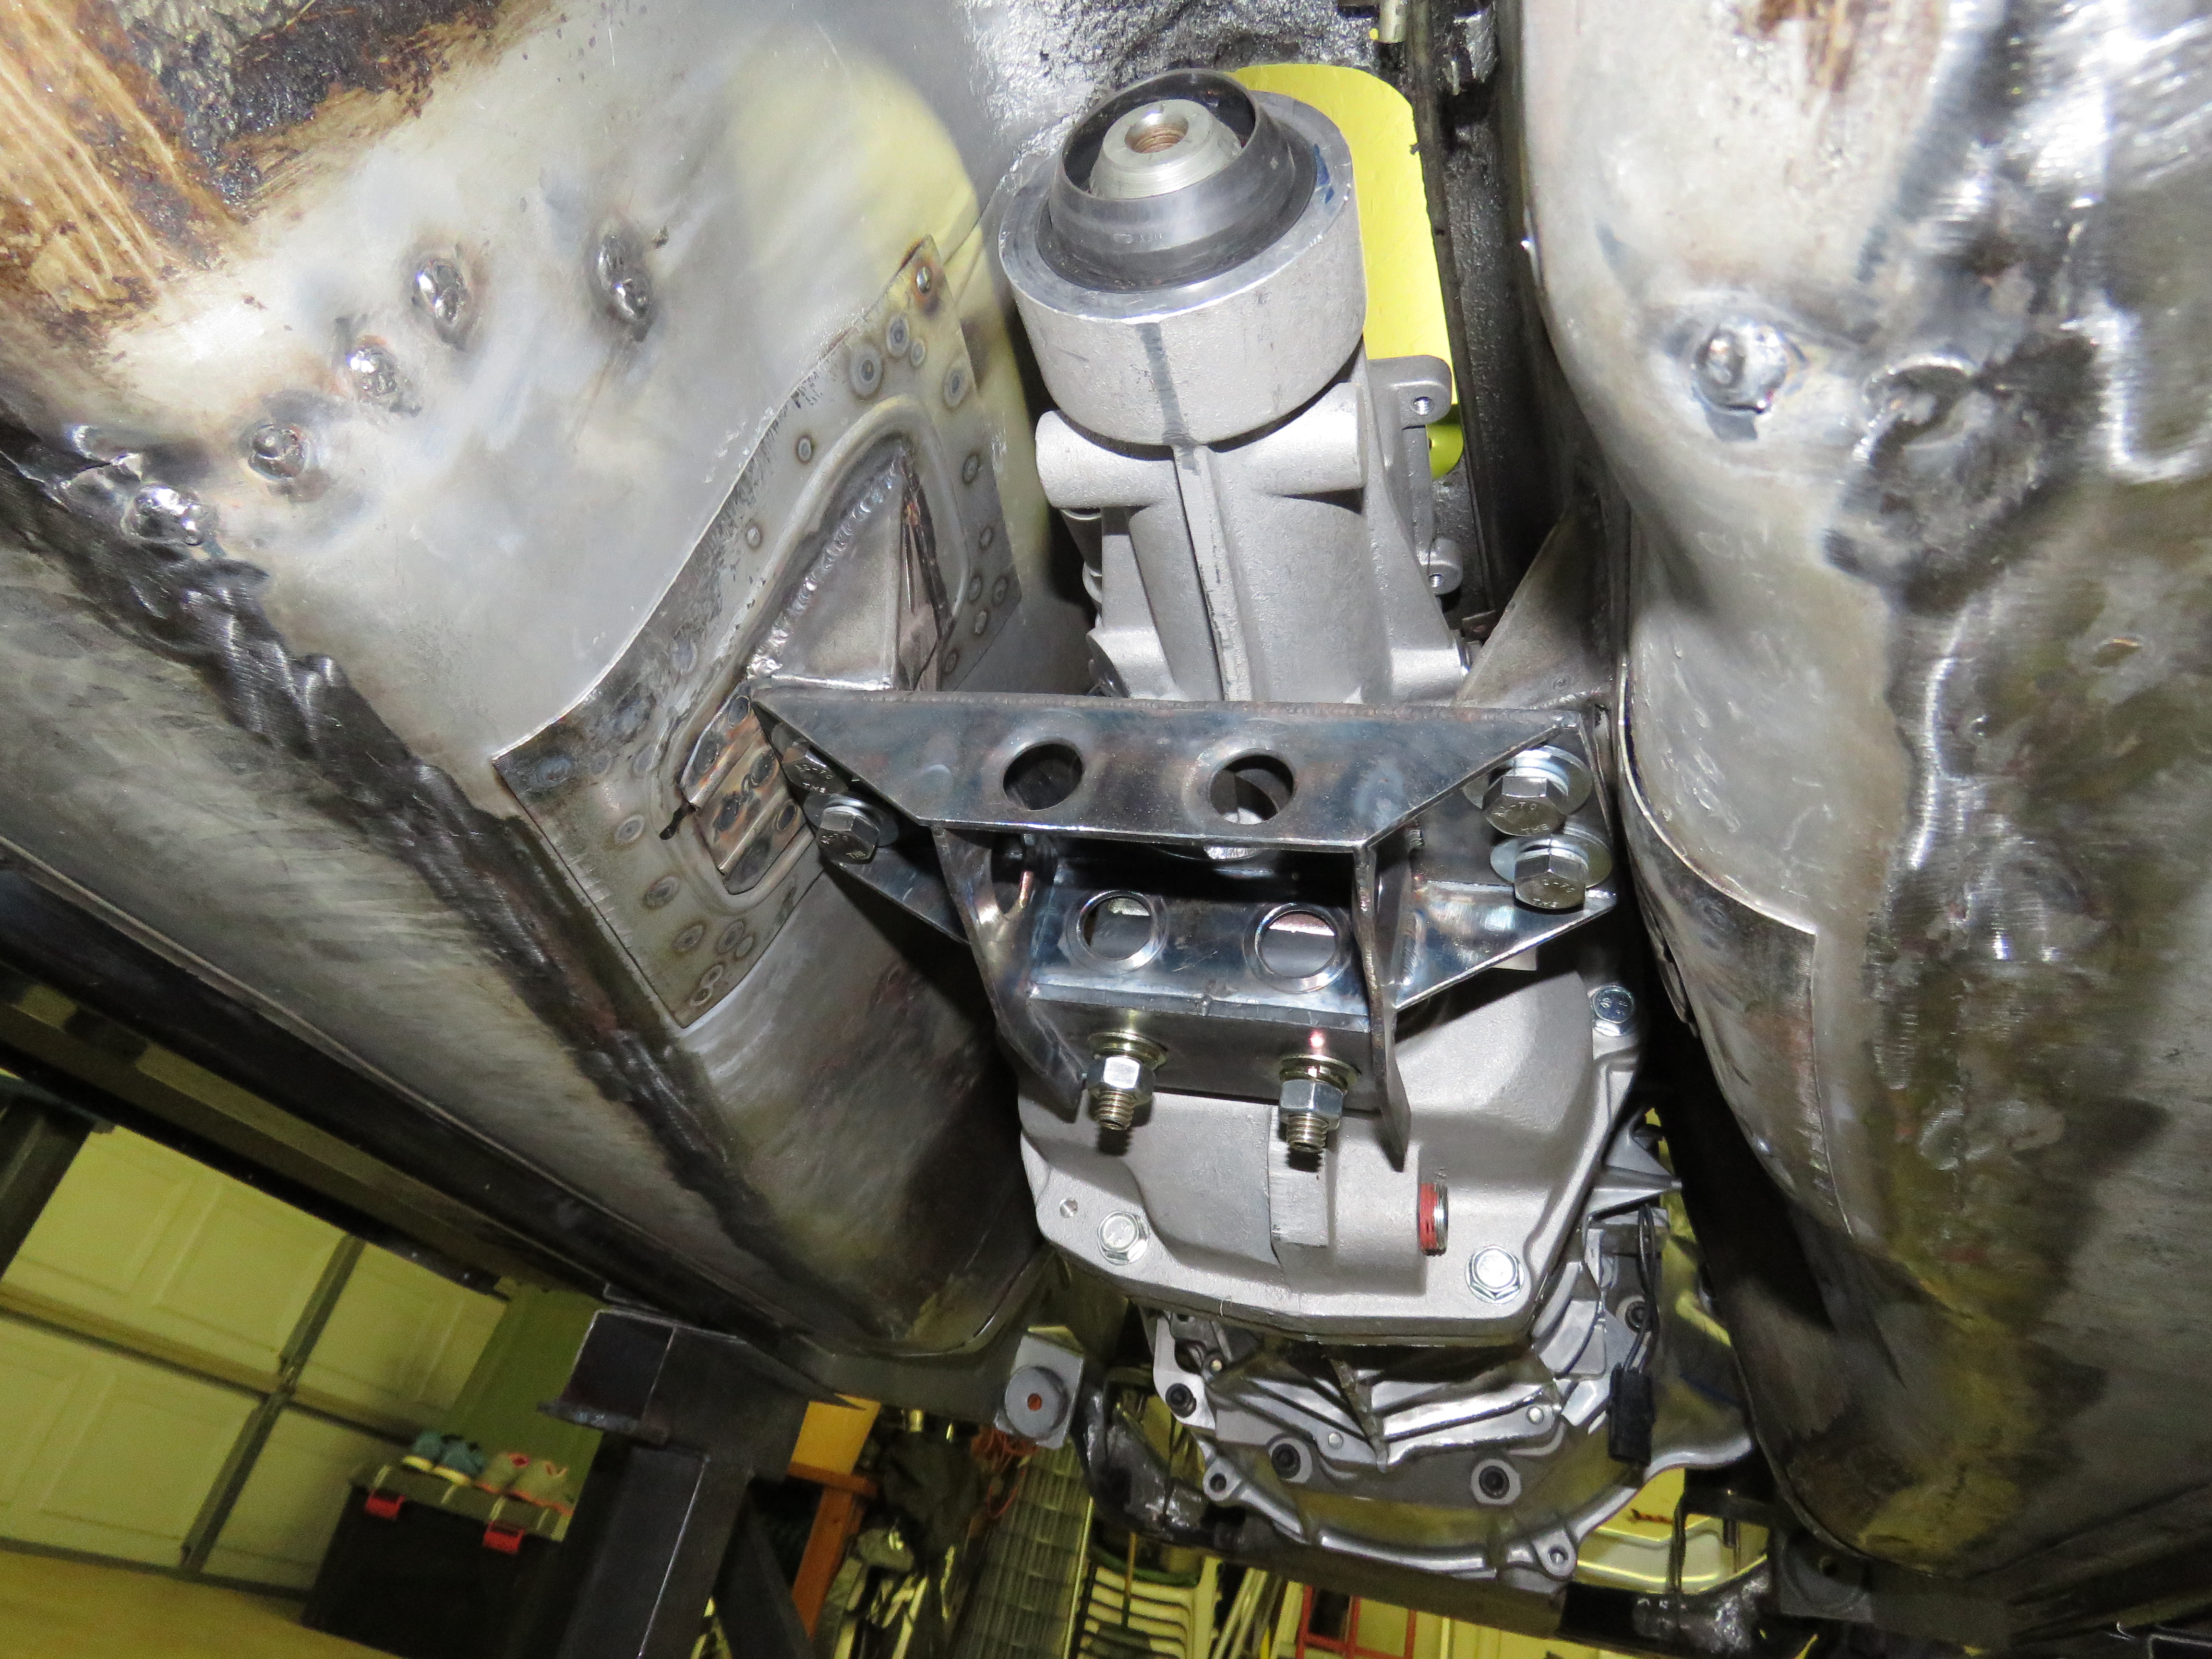
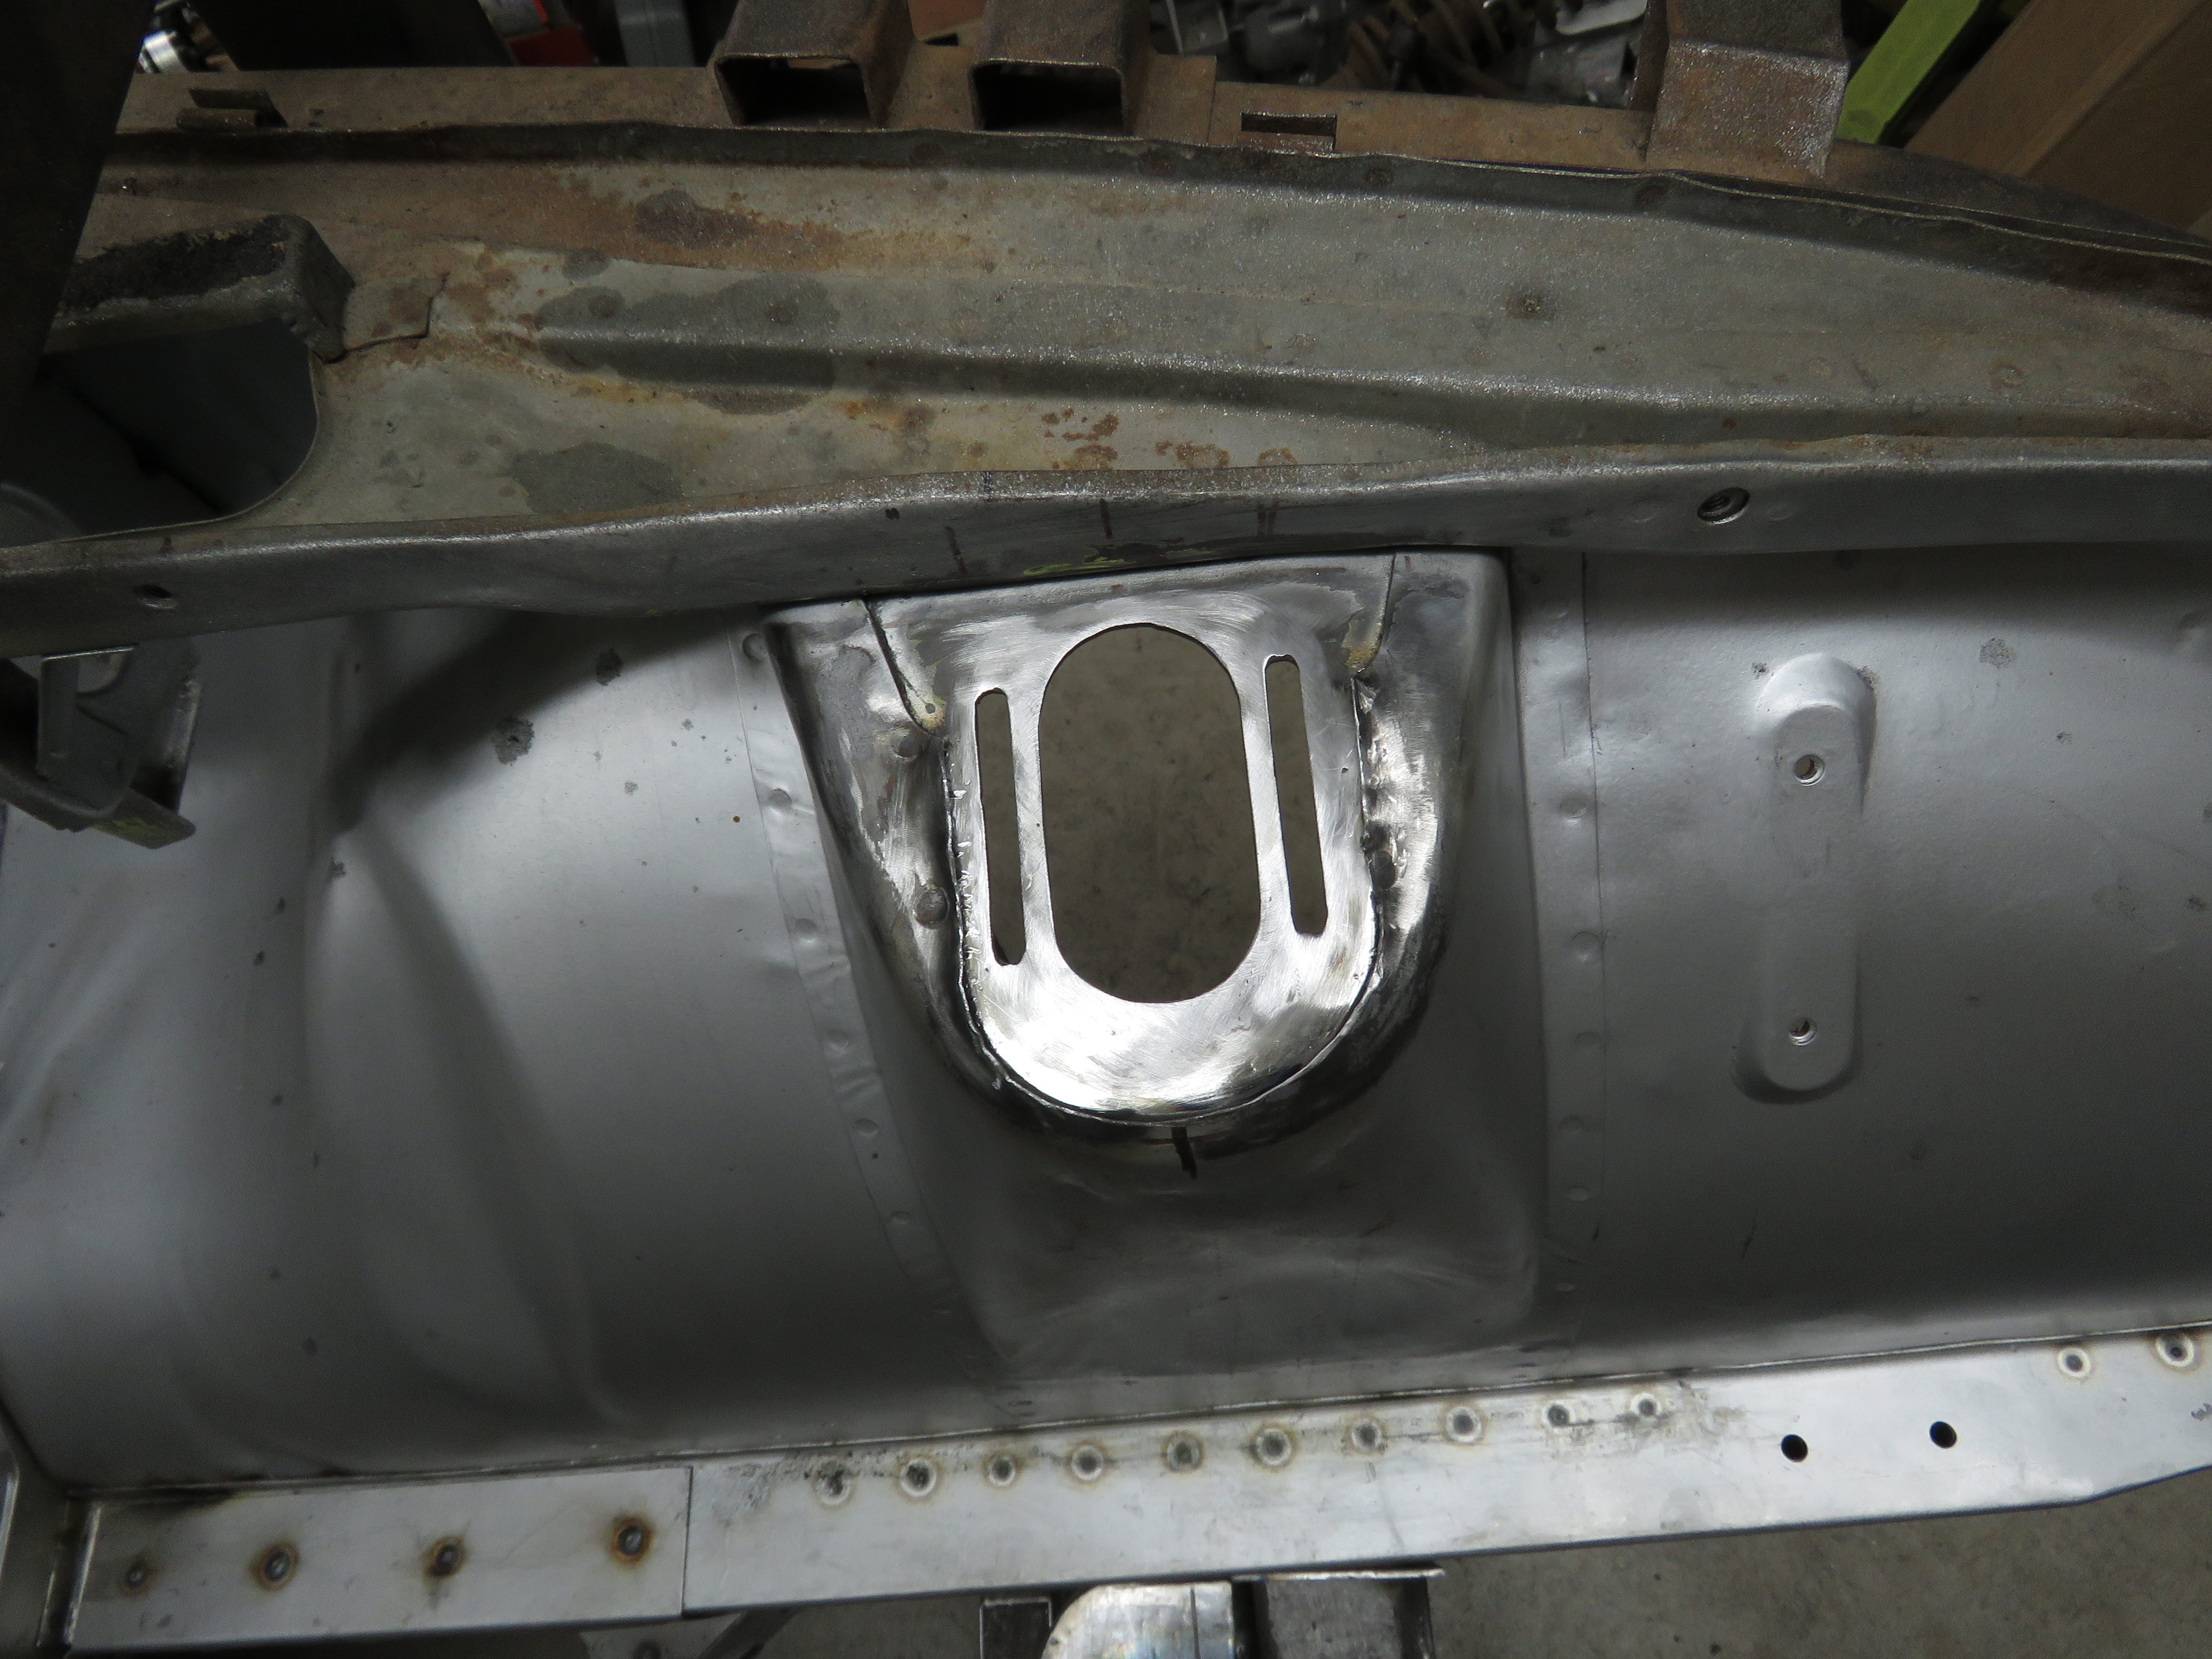
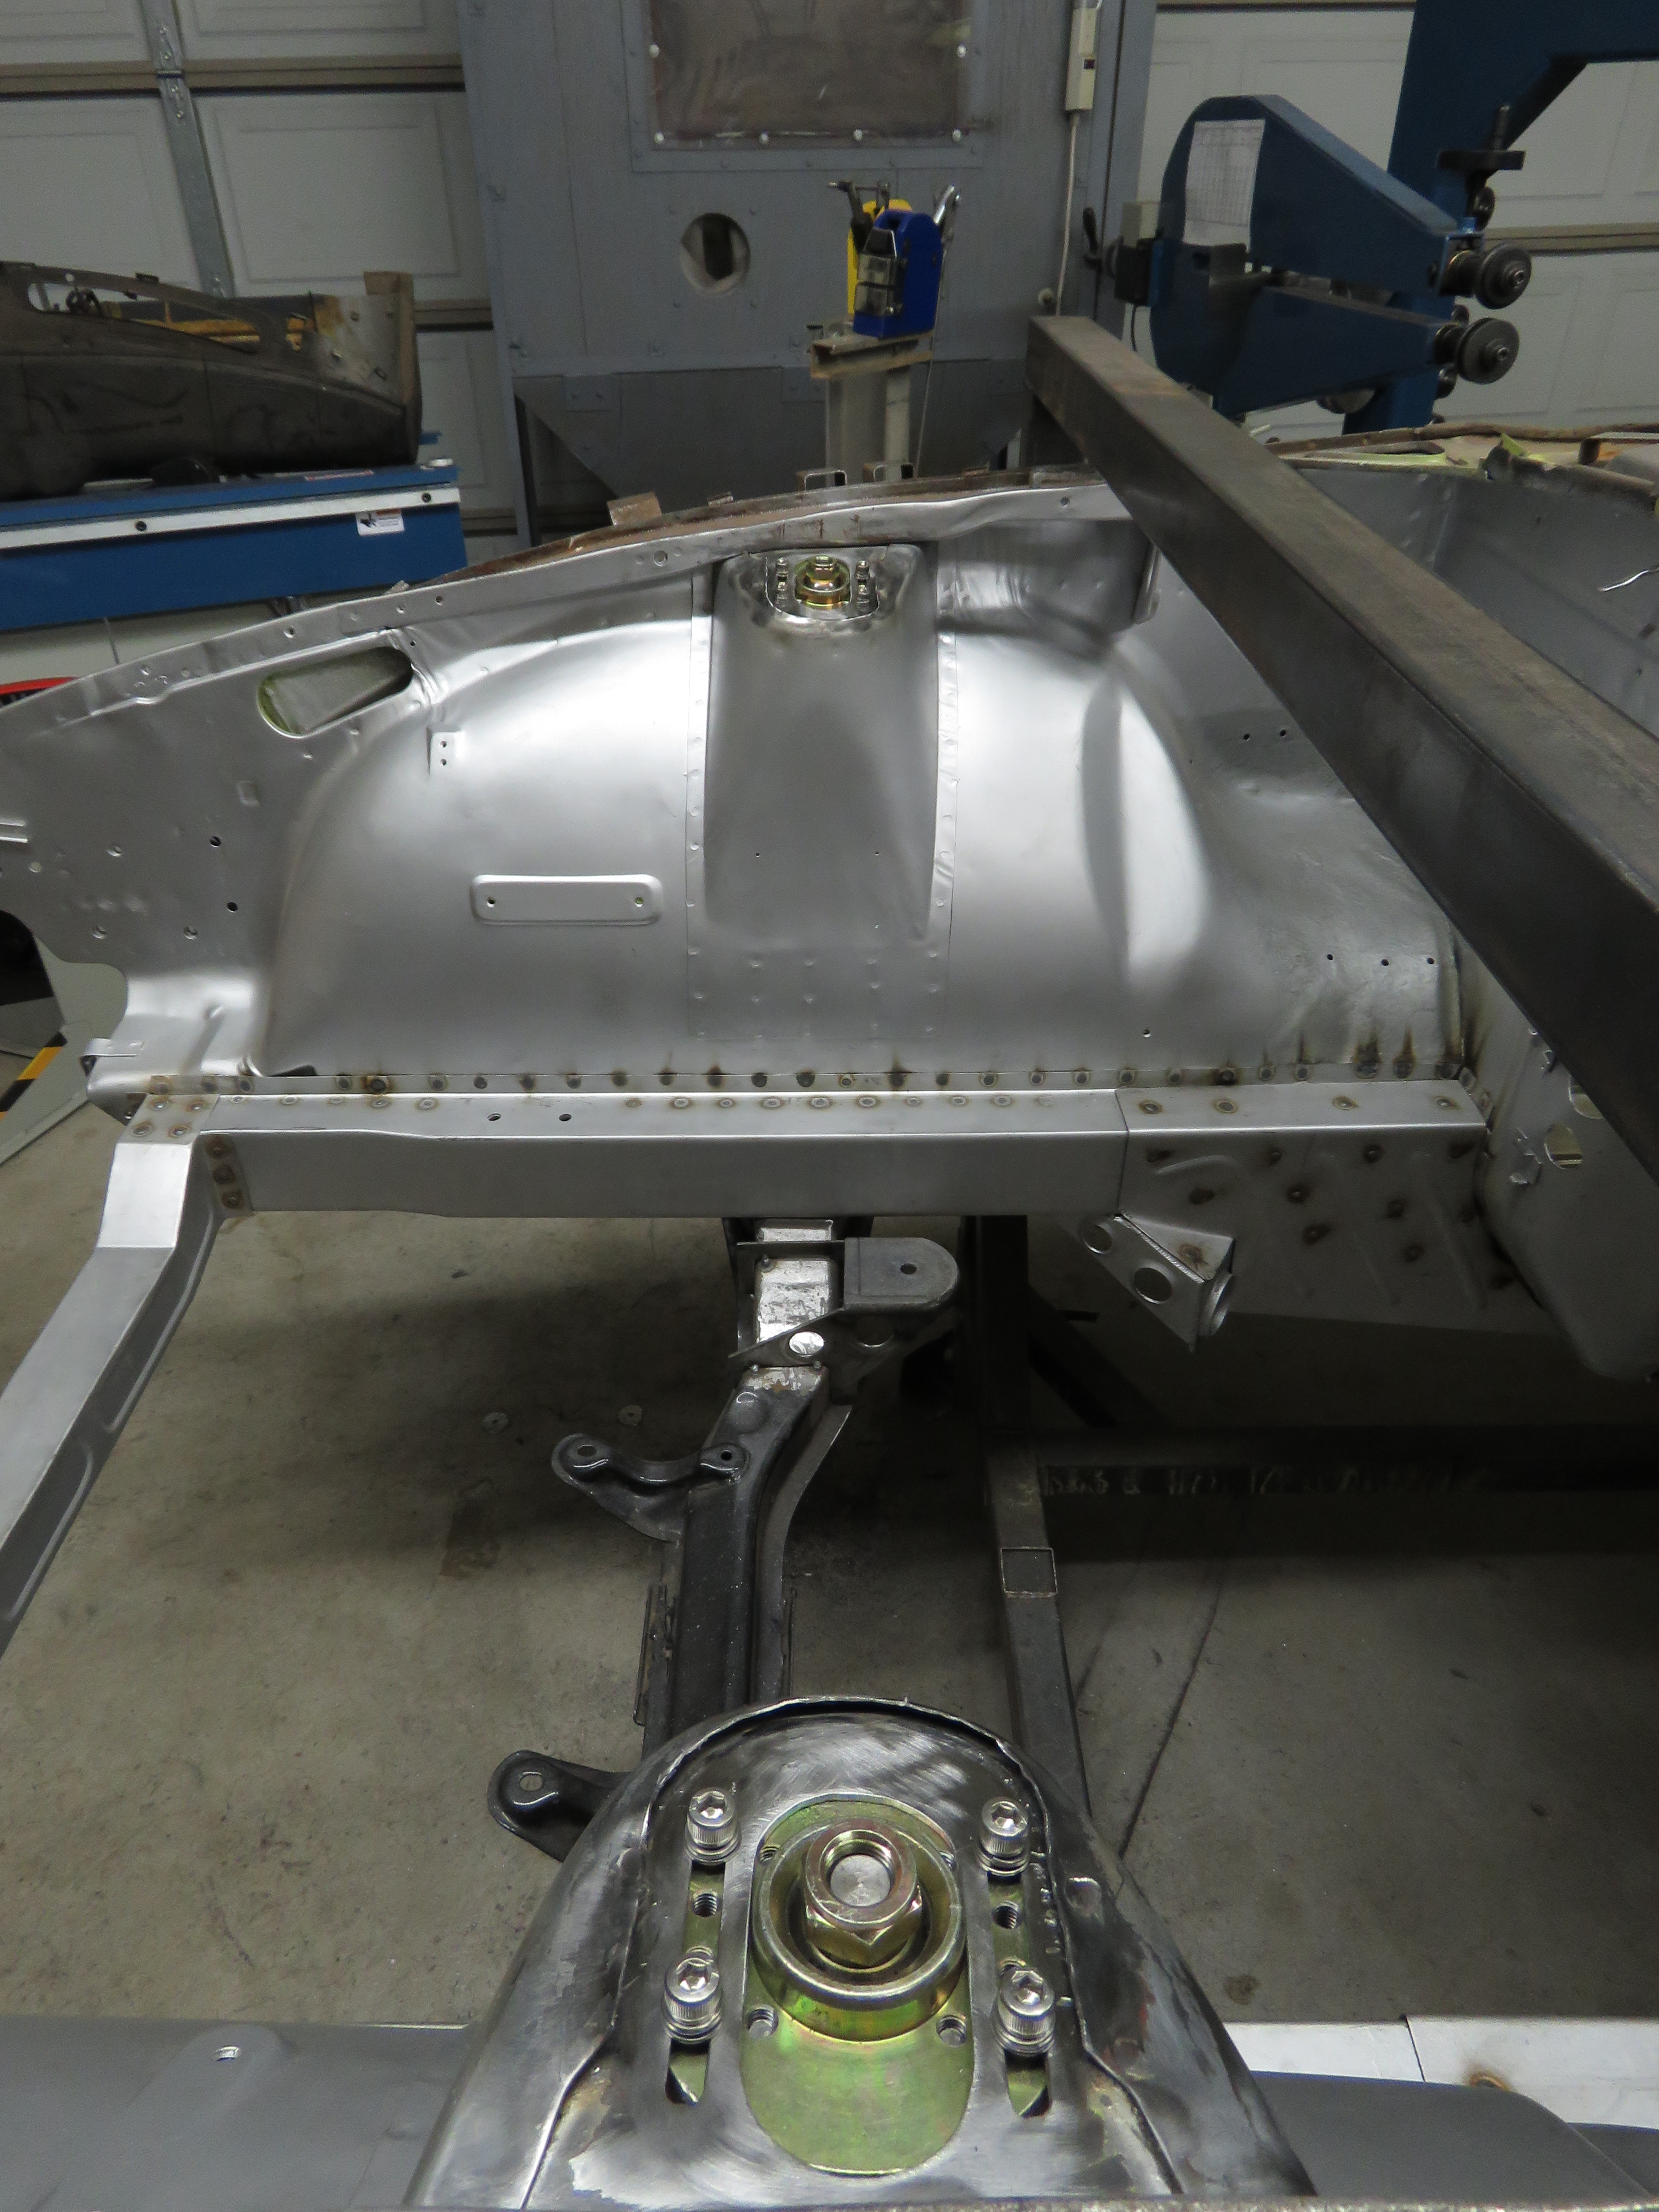
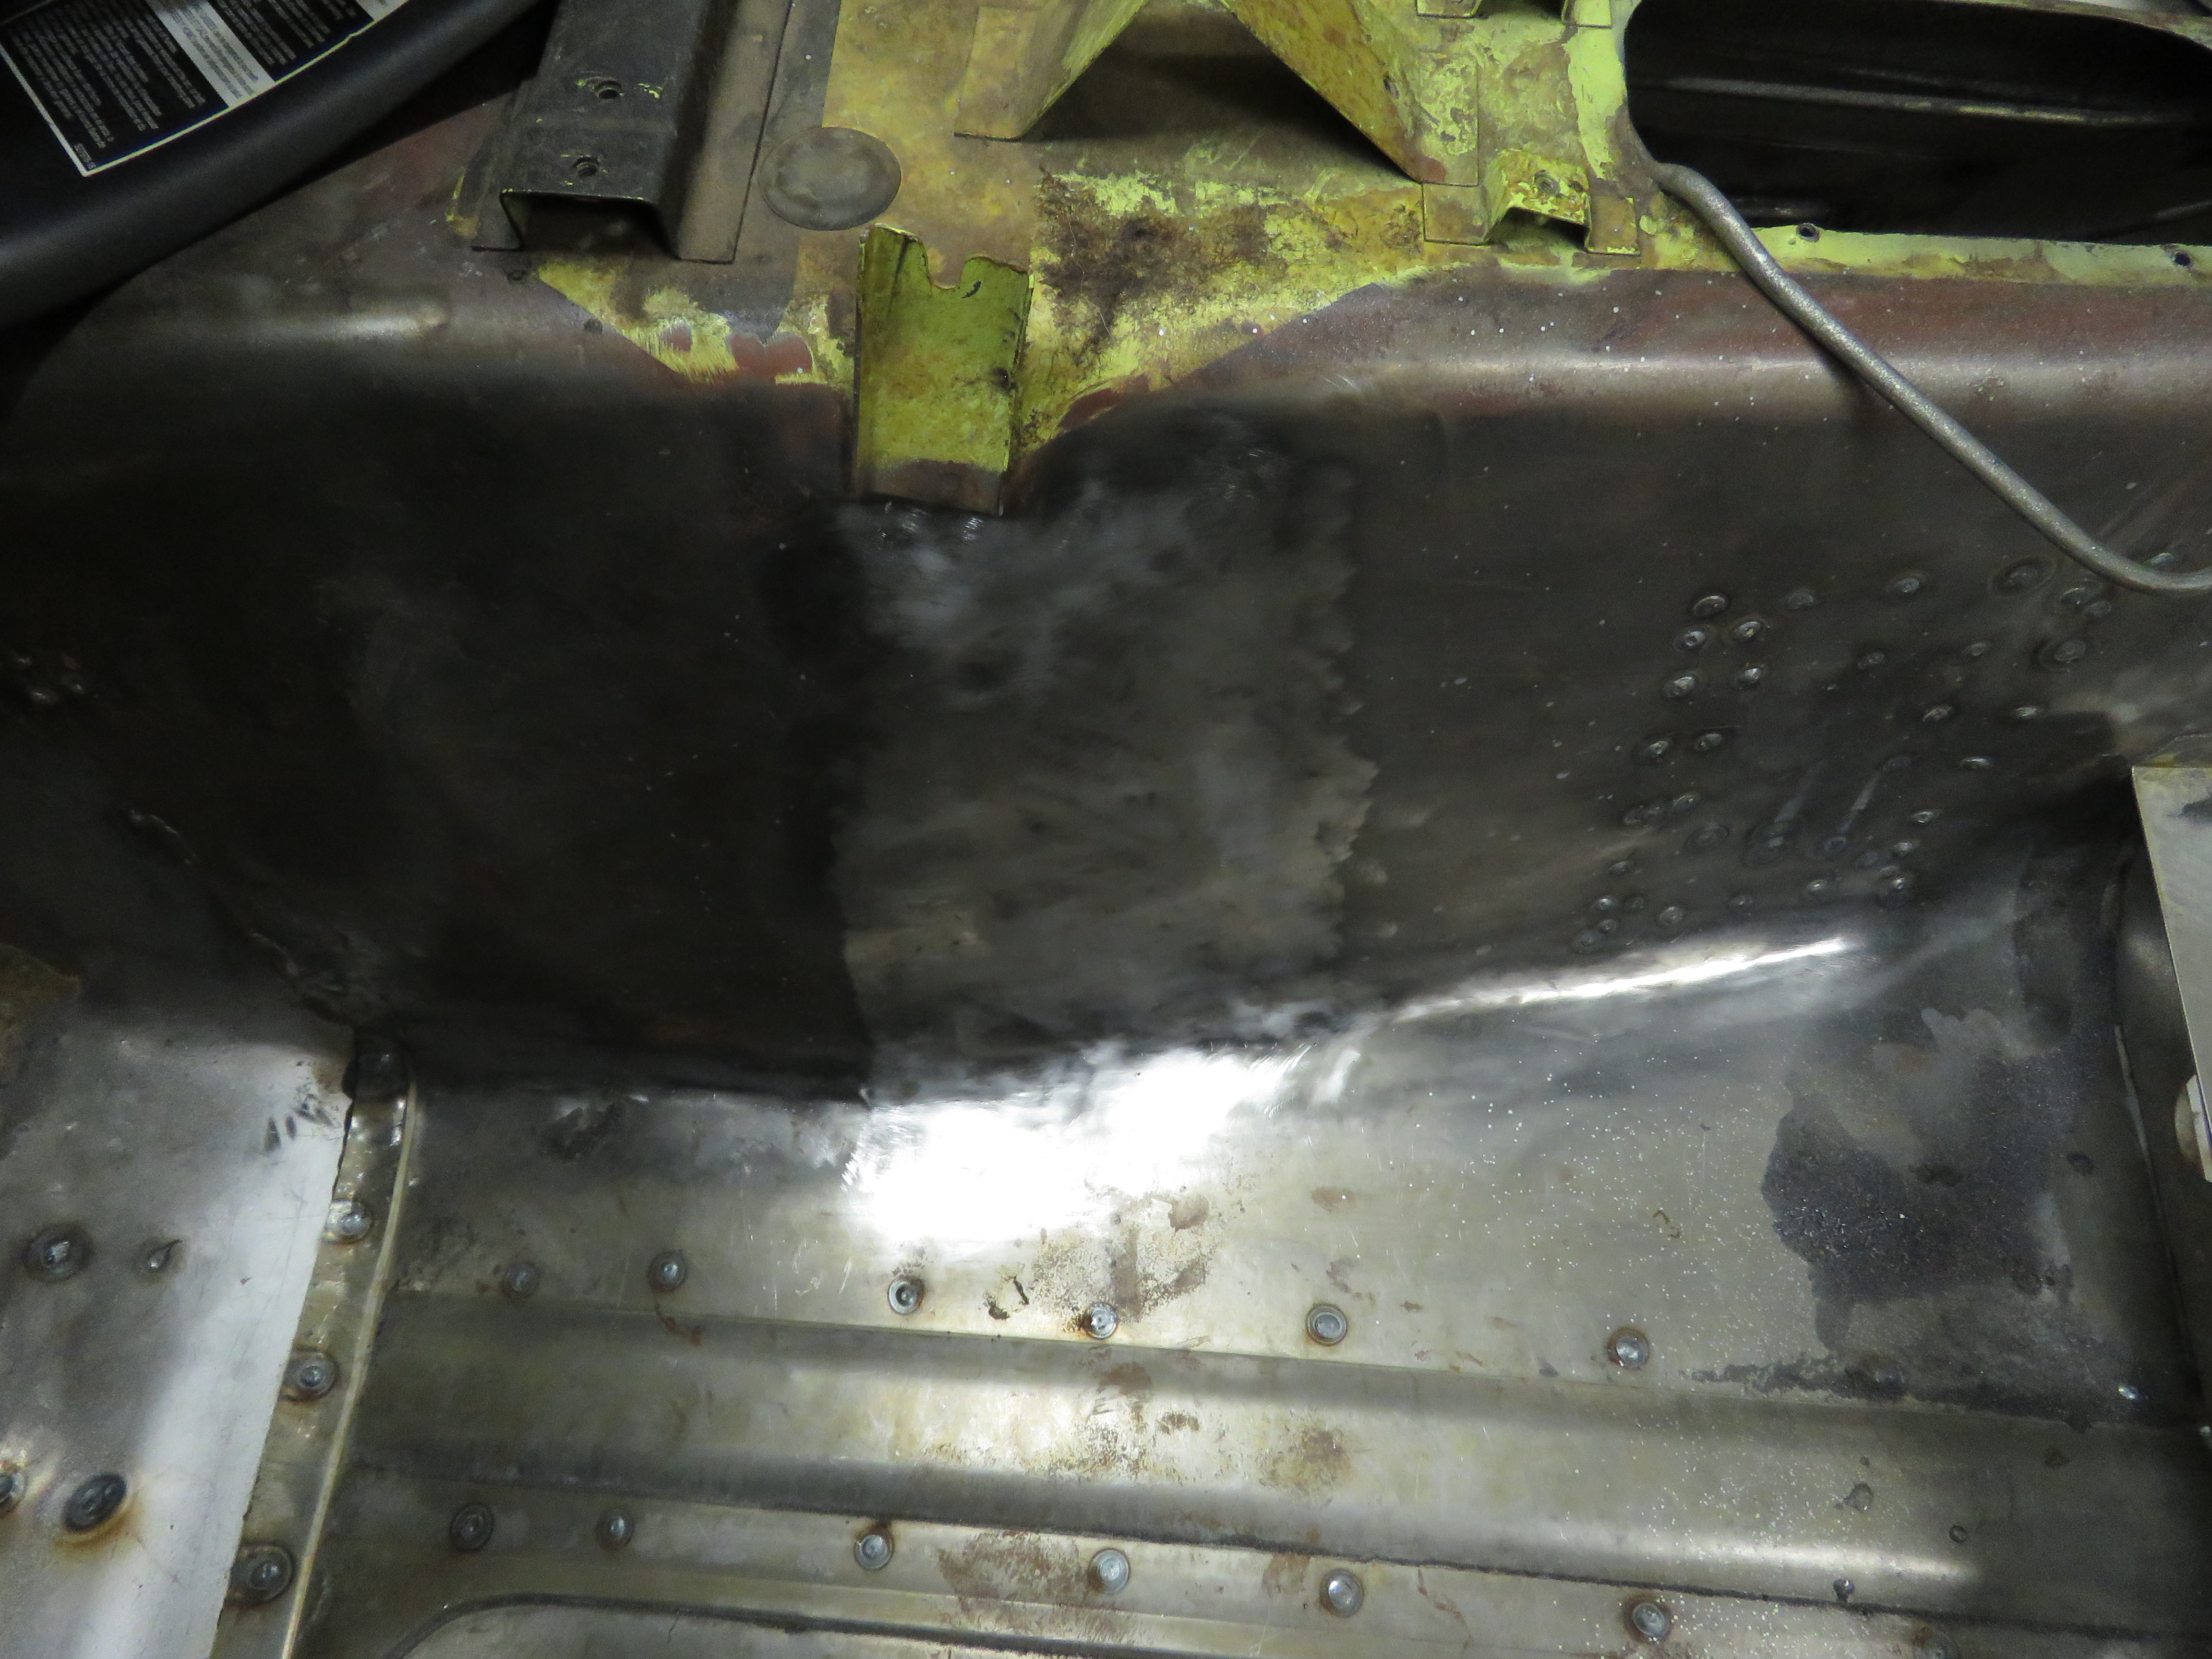
Thank you sir. You guys have me worried, which is good, gives me a chance to improve. You are right that all three elongated holes did compromise the strength, the weak spot is actually the metal in between the bolt holes and the middle main hole. After thinking about it all day, deciding I will make a set of weldable camber plates and layer it on top of the existing plate. Will wait and do this later when Im ready to work on the strut bar mounts. Nothing wrong with beefing things up if you are in doubt for piece of mind. Last thing I want is for my car to fall apart when its all finished. Thanks and glad you enjoyed viewing this thread. Didnt do much today on the car, just some miscellaneous things need to catch up on. Welded the holes shut on the battery tray and sanded smooth. Then sprayed it with some POR15 degreaser and prep n ready. After drying, coated the bottom side with POR15 chassis black rust preventative paint. For the heavily pitted areas, coated with Silver paint (has the metal filler in it). Havent welded it yet, will tomorrow, though will need to sand down the paint in the areas being welded and coat with weldable primer. Trimmed the passenger side rockers on the bottom. Before trimming with line marked. Trimmed Extras: non 240z related... Decided to put the engine and trans back in the car to free up some space in the garage, needed to do this anyways for when its time to work on the radiator support and strut bar. This probably disgusts a lot of you seeing another engine other than the L24 in the 240z as well being another typical LS1 build. But here is a little quickie of some pictures regarding the LS1, I wont post any more pictures of this part of my project since this thread isnt about the ls1, unless you guys dont care. However being it that this is wrong material for the thread topic section too. Picture of the engine. It actually sets about a quarter of an inch to the passenger side. Transmission isnt hanging down past the floor rails, also added those supports you see on the dolly to the floor rail to help with supporting the weight of the engine and trans. Thinking about lowering the transmission a little bit, but will wait until I get the rear differential mounted and see how the drive shaft aligns (angle wise). Here are what the engine and transmission mounts look like. Will be working on more misc. things before starting on the rear quarter panels.
Car is so CLEAN, love it when clean shiny new parts start to come together.
Thank you sir. You guys have me worried, which is good, gives me a chance to improve. You are right that all three elongated holes did compromise the strength, the weak spot is actually the metal in between the bolt holes and the middle main hole. After thinking about it all day, deciding I will make a set of weldable camber plates and layer it on top of the existing plate. Will wait and do this later when Im ready to work on the strut bar mounts. Nothing wrong with beefing things up if you are in doubt for piece of mind. Last thing I want is for my car to fall apart when its all finished. Thanks and glad you enjoyed viewing this thread. Didnt do much today on the car, just some miscellaneous things need to catch up on. Welded the holes shut on the battery tray and sanded smooth. Then sprayed it with some POR15 degreaser and prep n ready. After drying, coated the bottom side with POR15 chassis black rust preventative paint. For the heavily pitted areas, coated with Silver paint (has the metal filler in it). Havent welded it yet, will tomorrow, though will need to sand down the paint in the areas being welded and coat with weldable primer. Trimmed the passenger side rockers on the bottom. Before trimming with line marked. Trimmed Extras: non 240z related... Decided to put the engine and trans back in the car to free up some space in the garage, needed to do this anyways for when its time to work on the radiator support and strut bar. This probably disgusts a lot of you seeing another engine other than the L24 in the 240z as well being another typical LS1 build. But here is a little quickie of some pictures regarding the LS1, I wont post any more pictures of this part of my project since this thread isnt about the ls1, unless you guys dont care. However being it that this is wrong material for the thread topic section too. Picture of the engine. It actually sets about a quarter of an inch to the passenger side. Transmission isnt hanging down past the floor rails, also added those supports you see on the dolly to the floor rail to help with supporting the weight of the engine and trans. Thinking about lowering the transmission a little bit, but will wait until I get the rear differential mounted and see how the drive shaft aligns (angle wise). Here are what the engine and transmission mounts look like. Will be working on more misc. things before starting on the rear quarter panels.


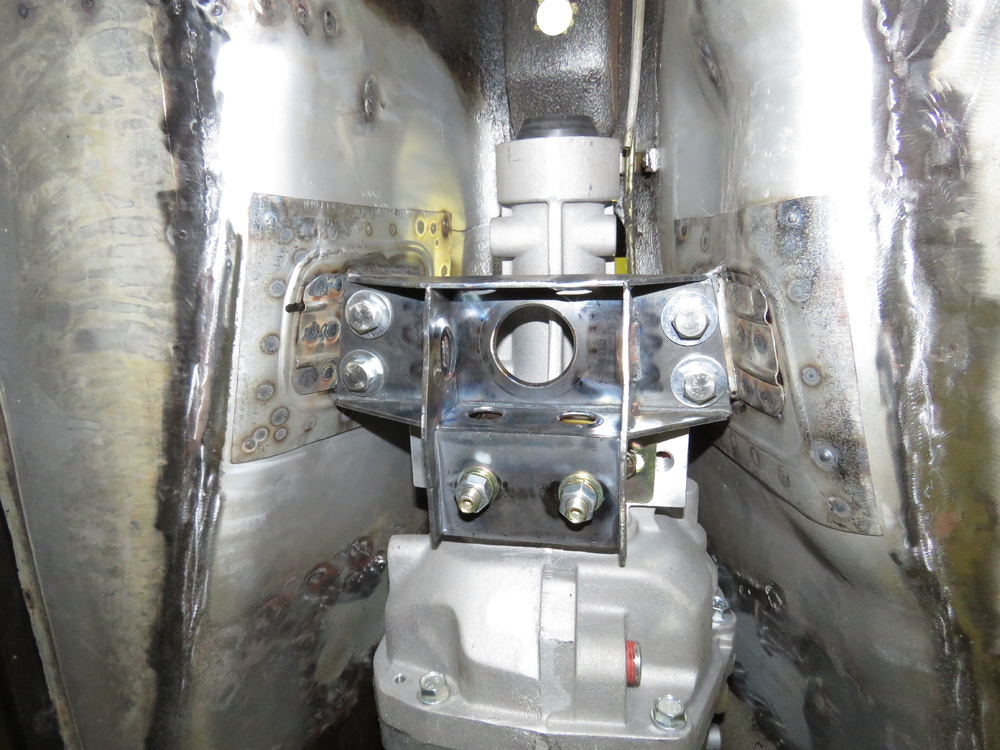


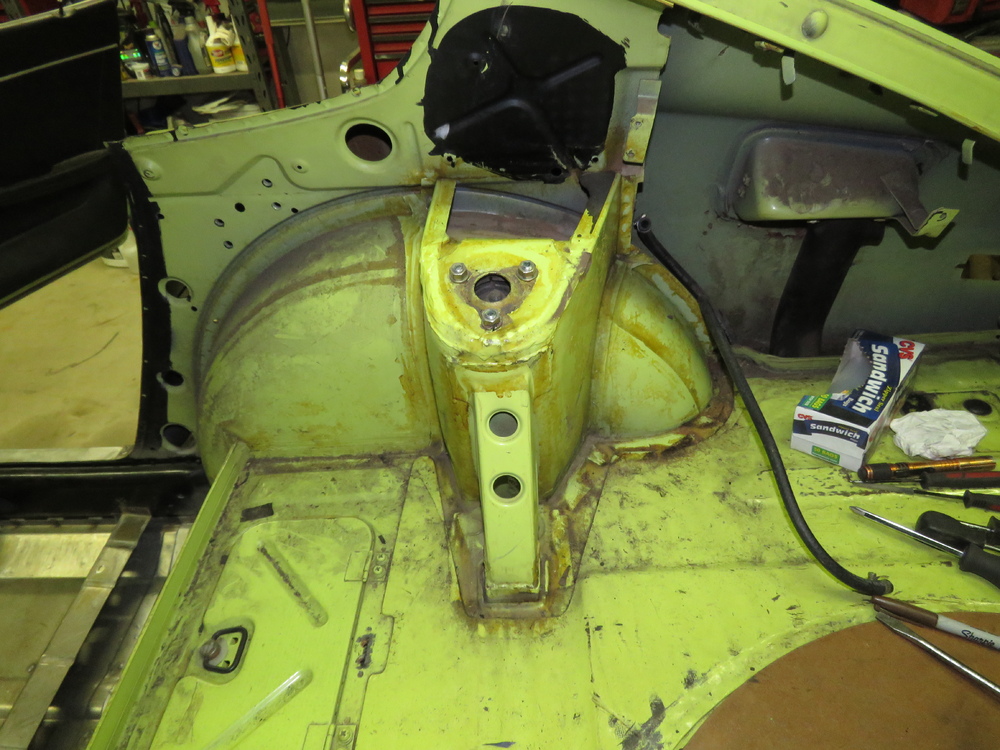
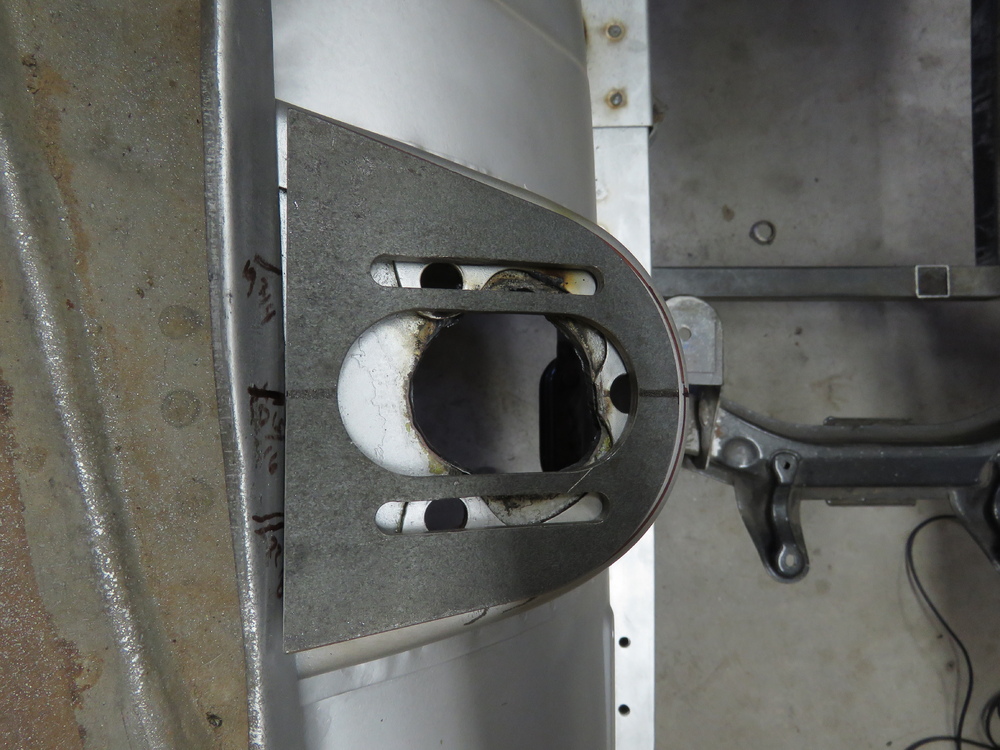
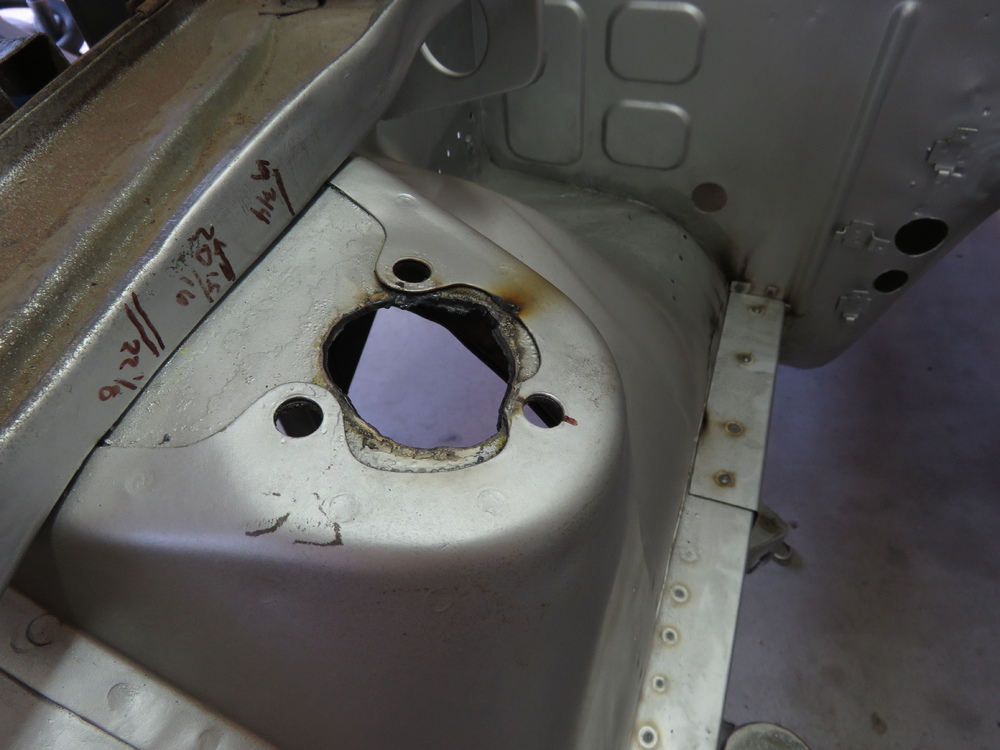
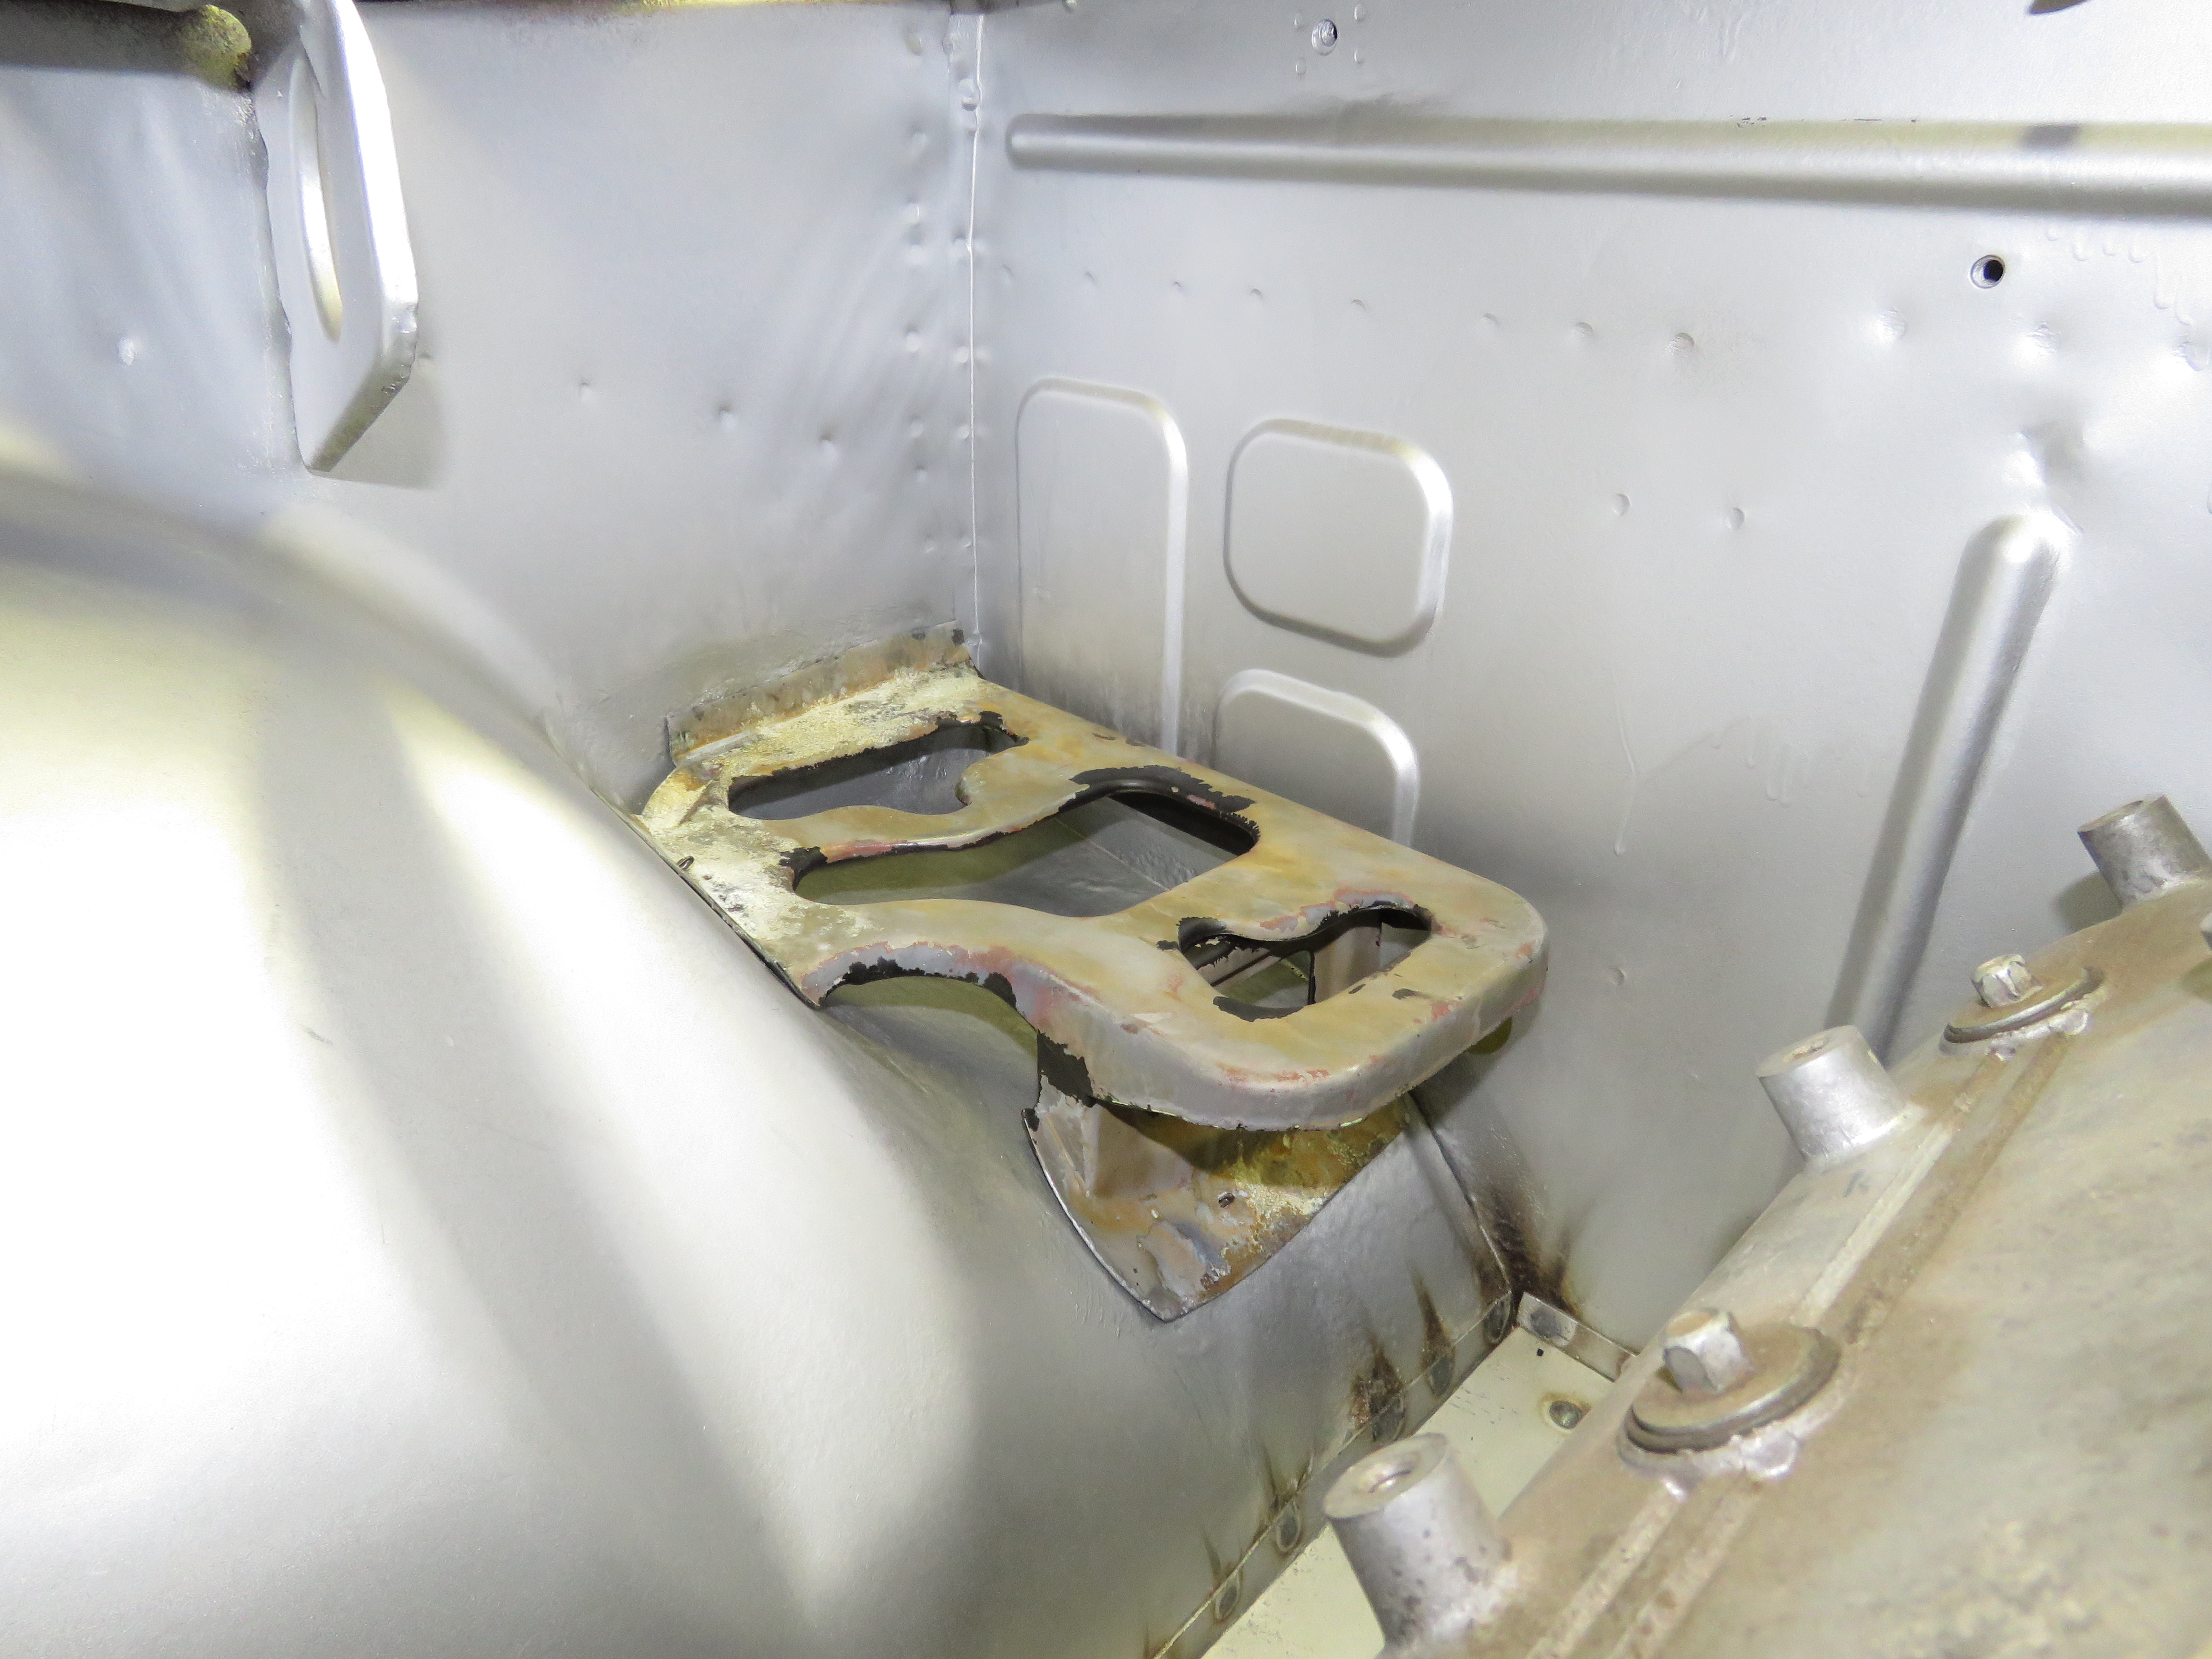
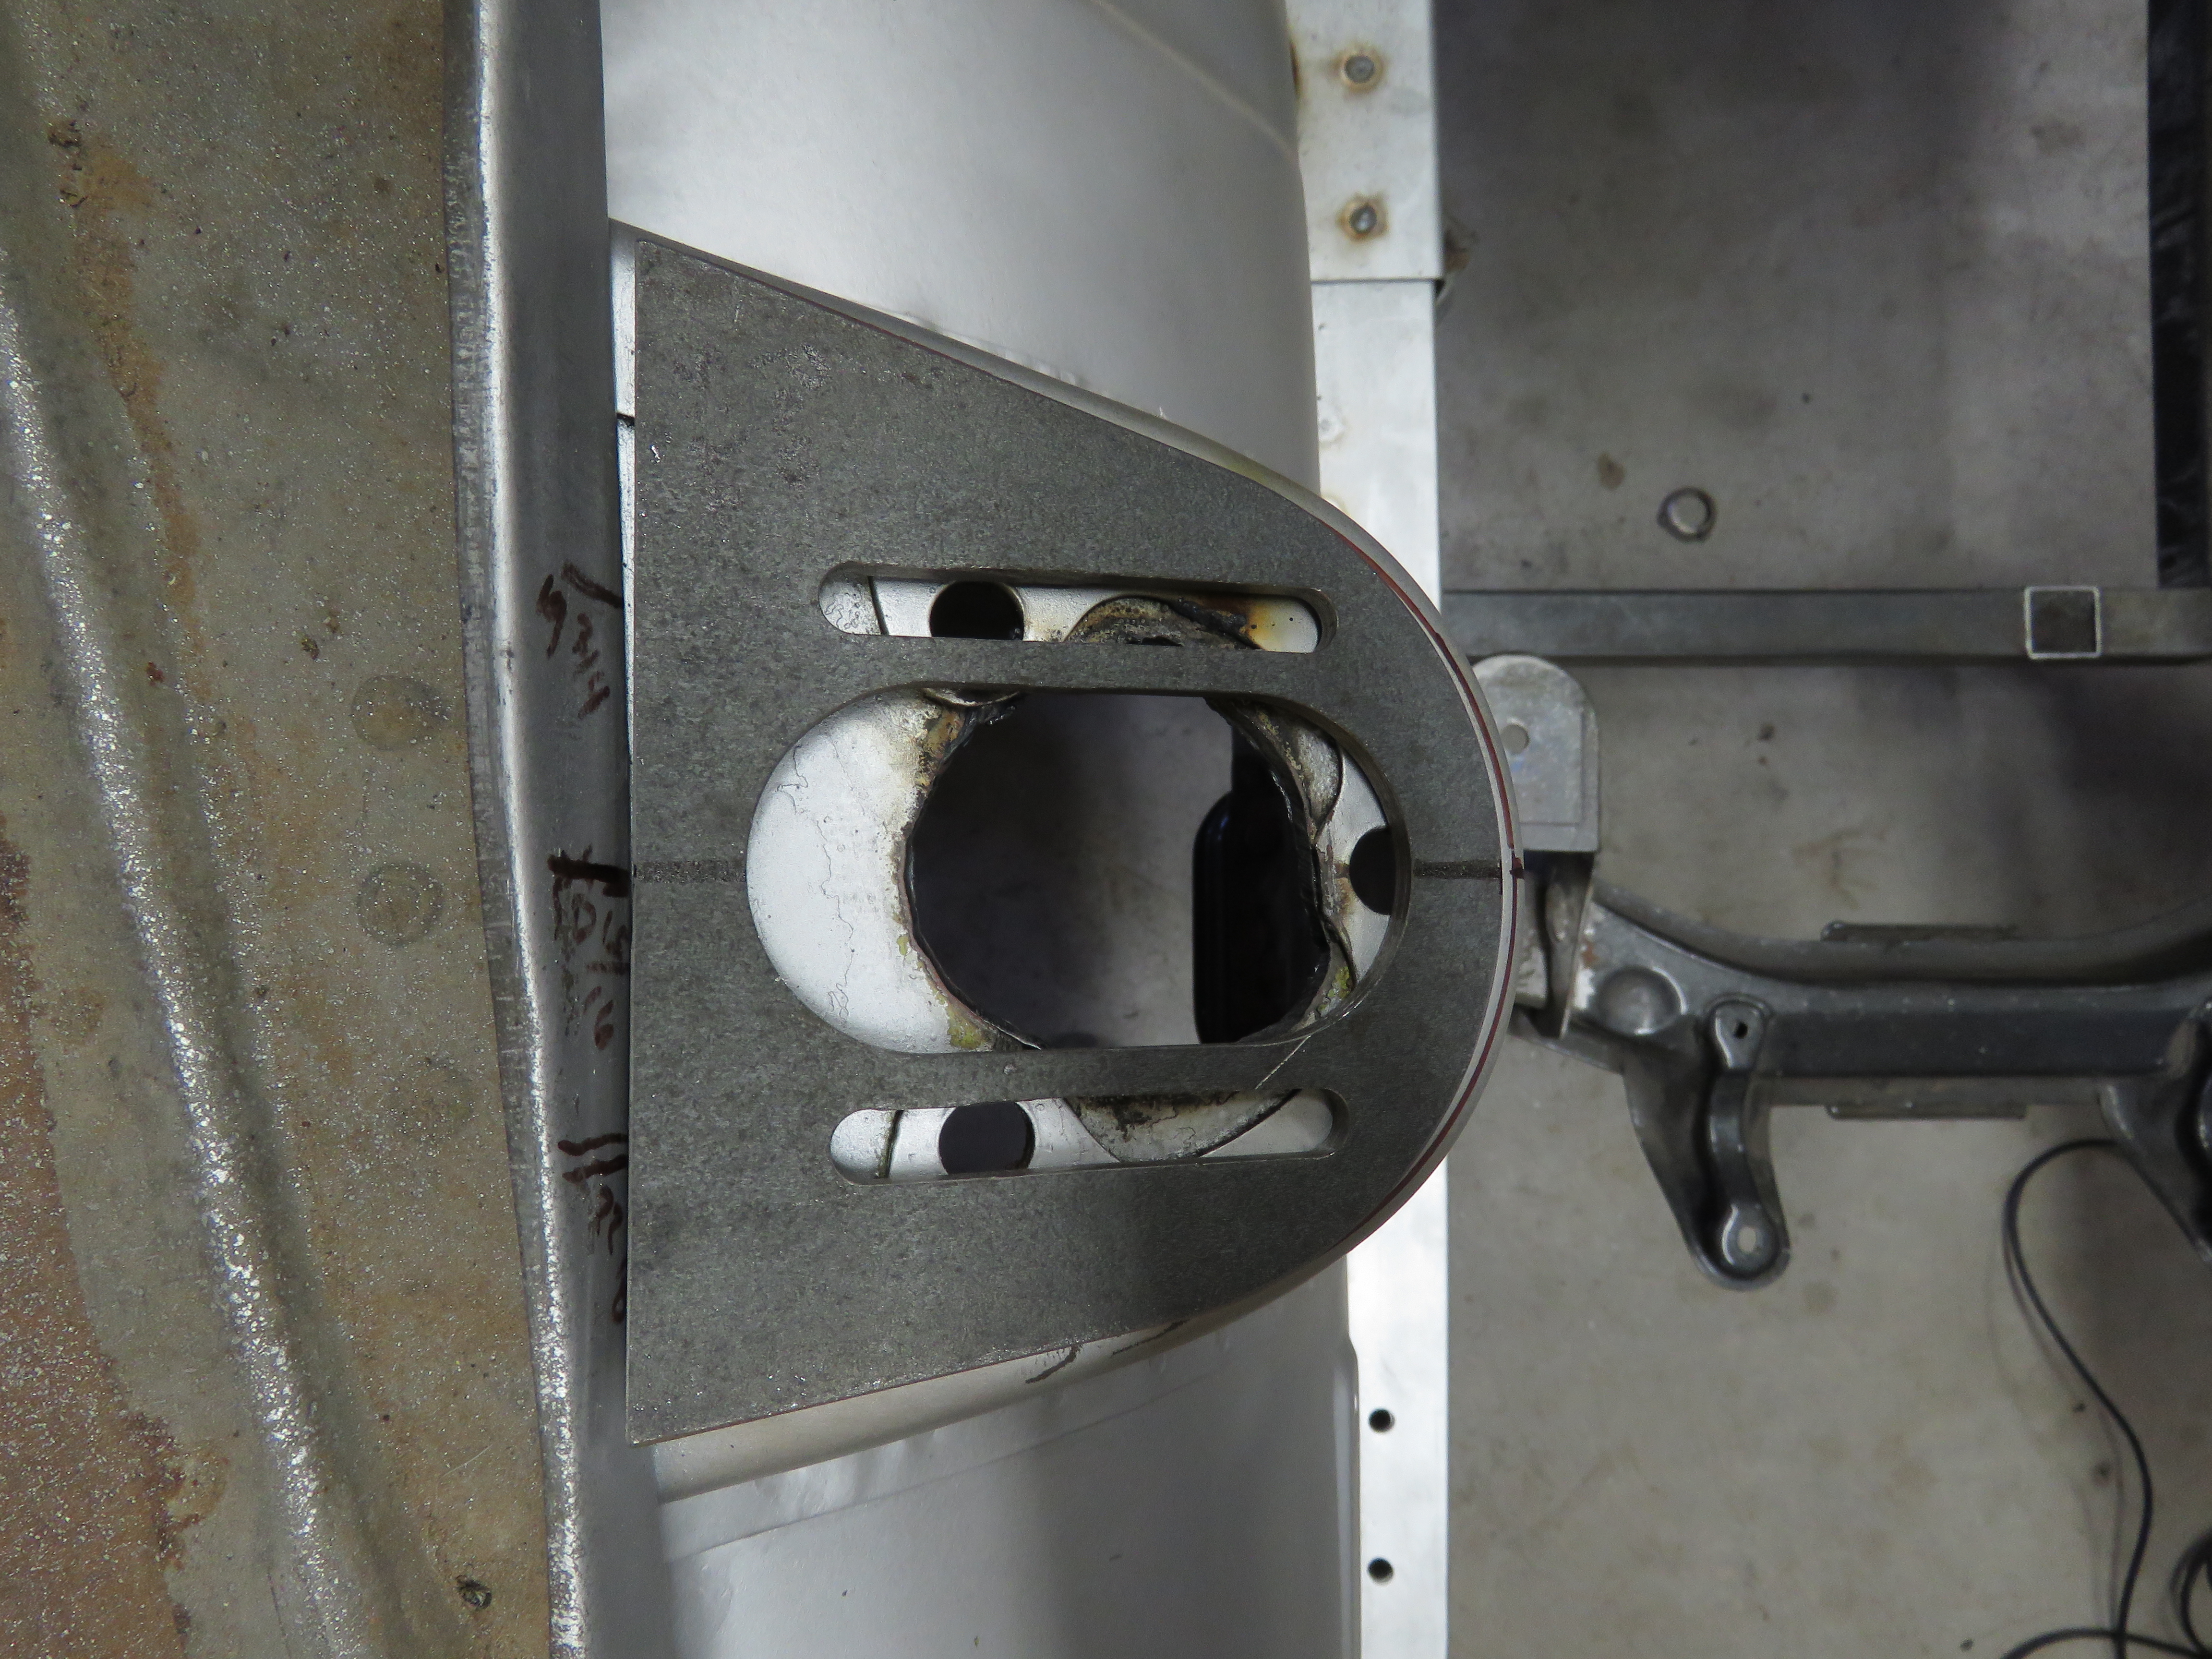
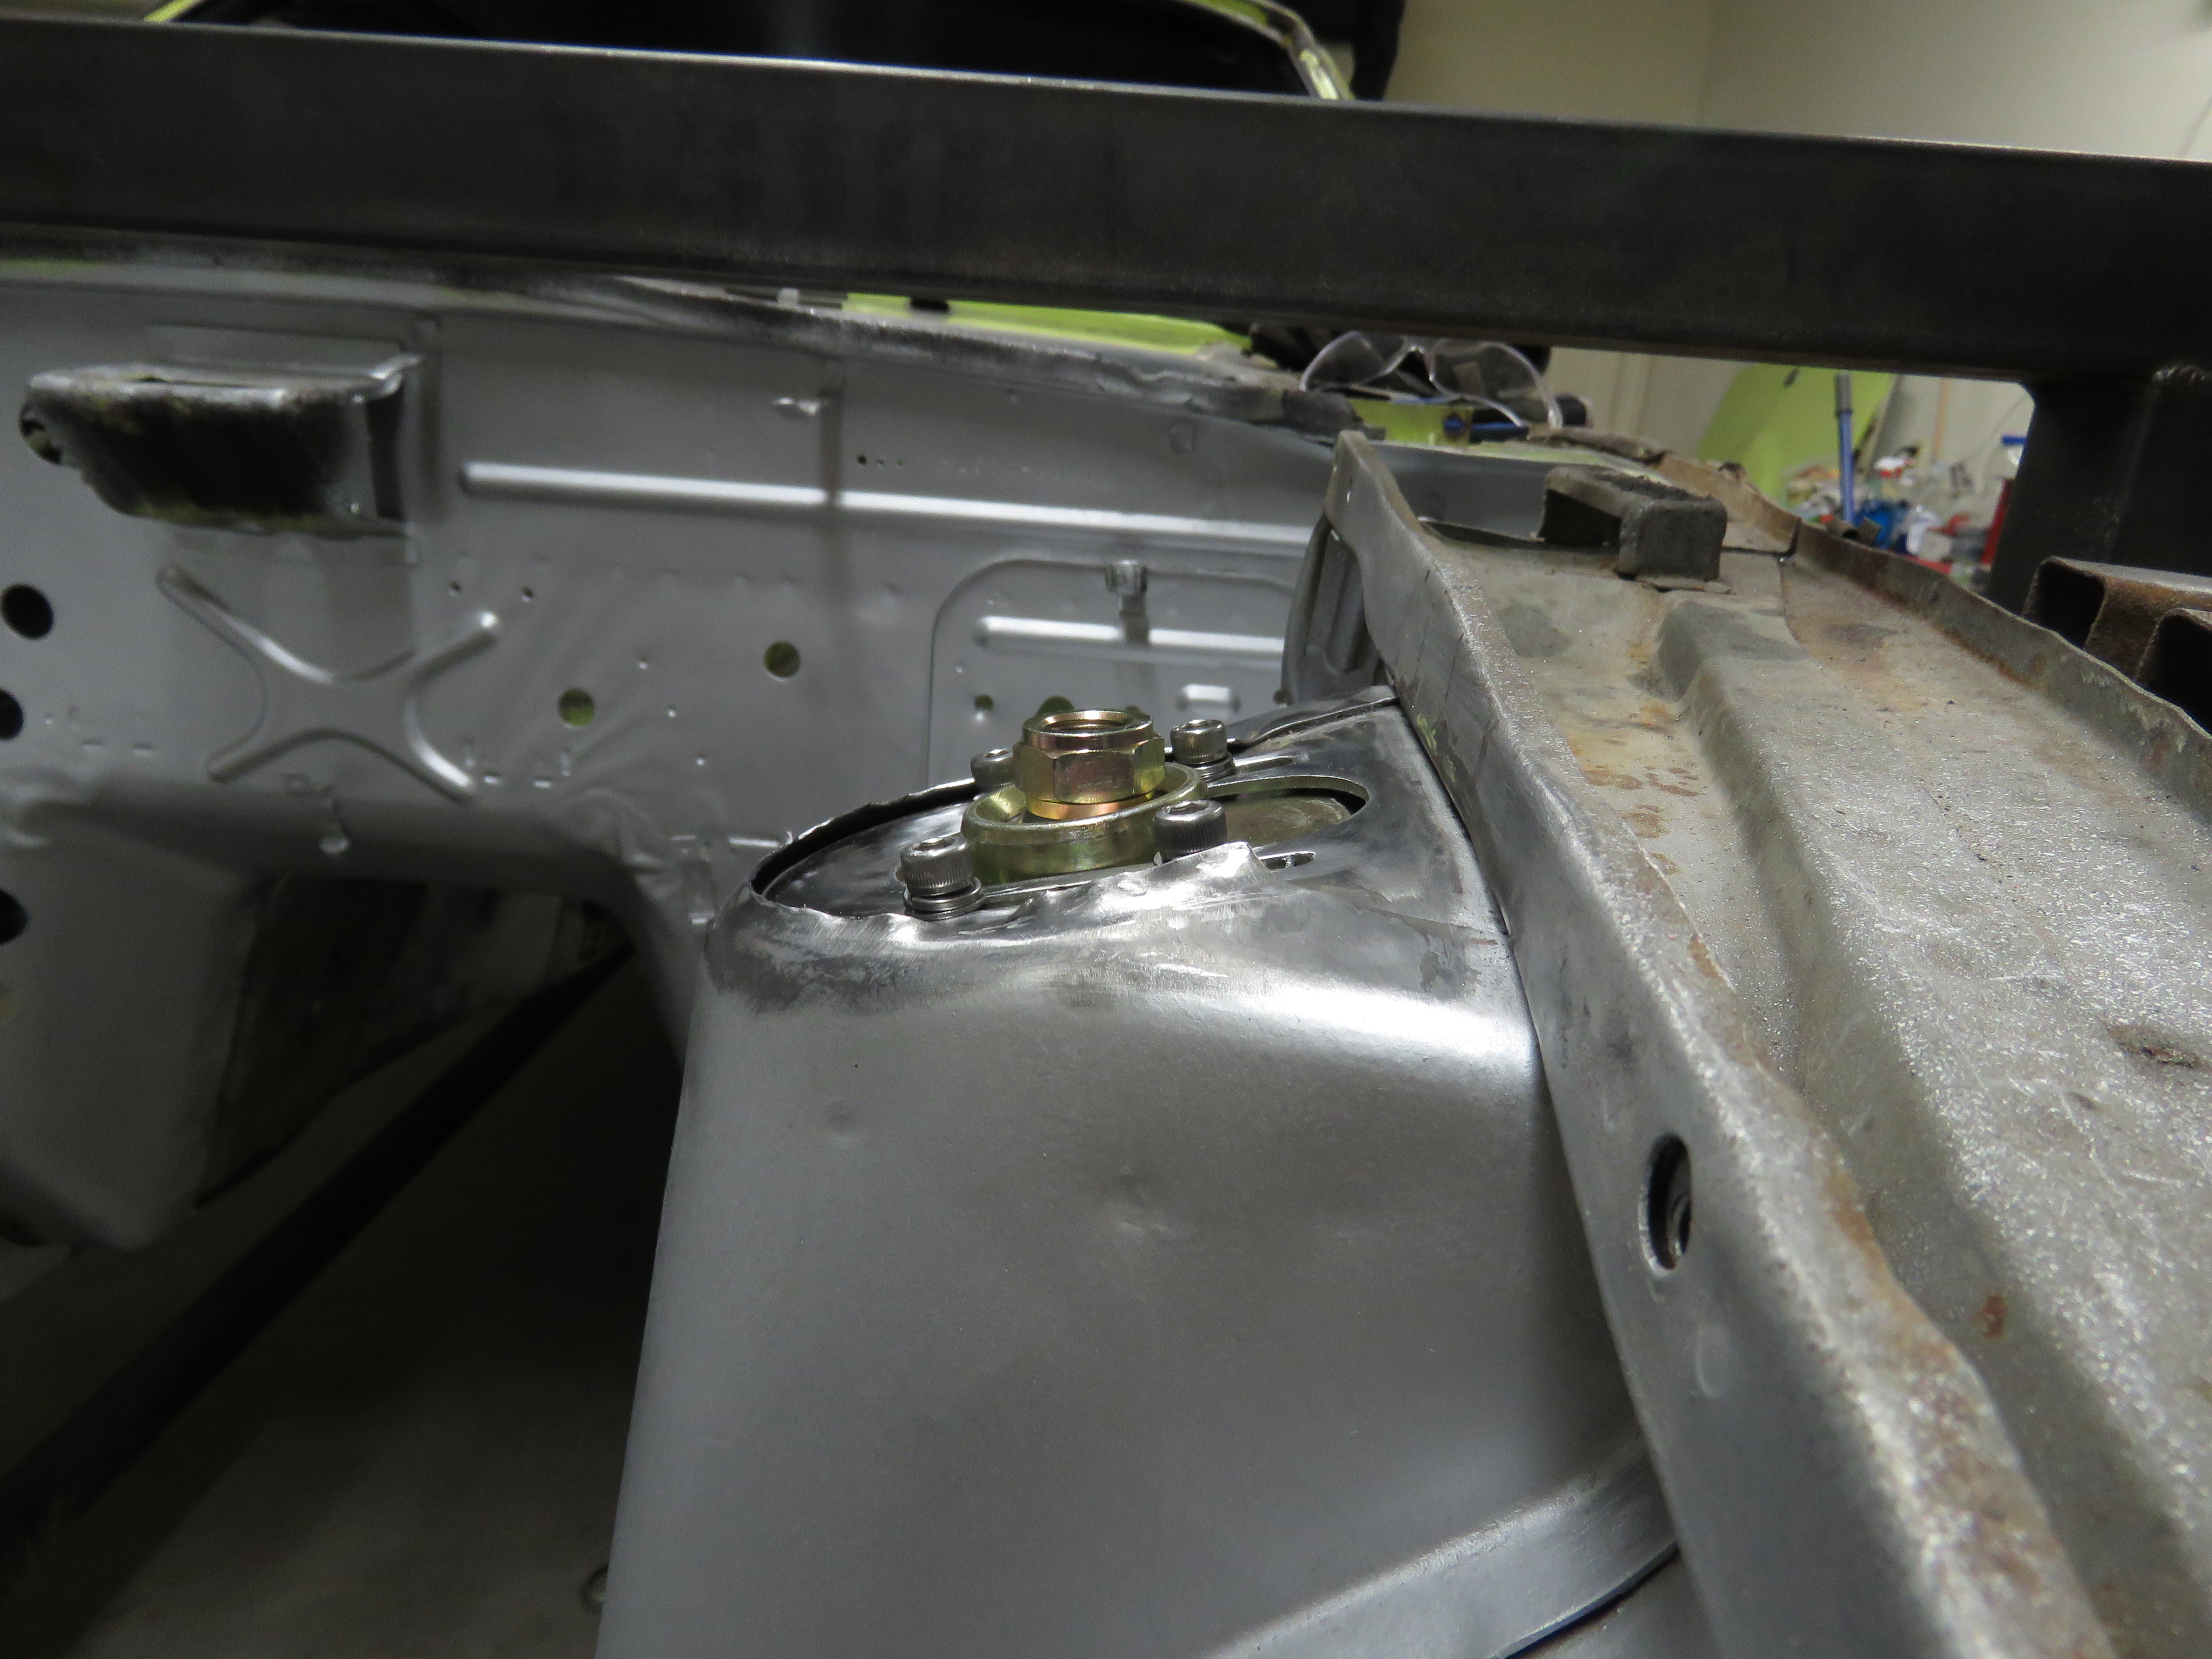
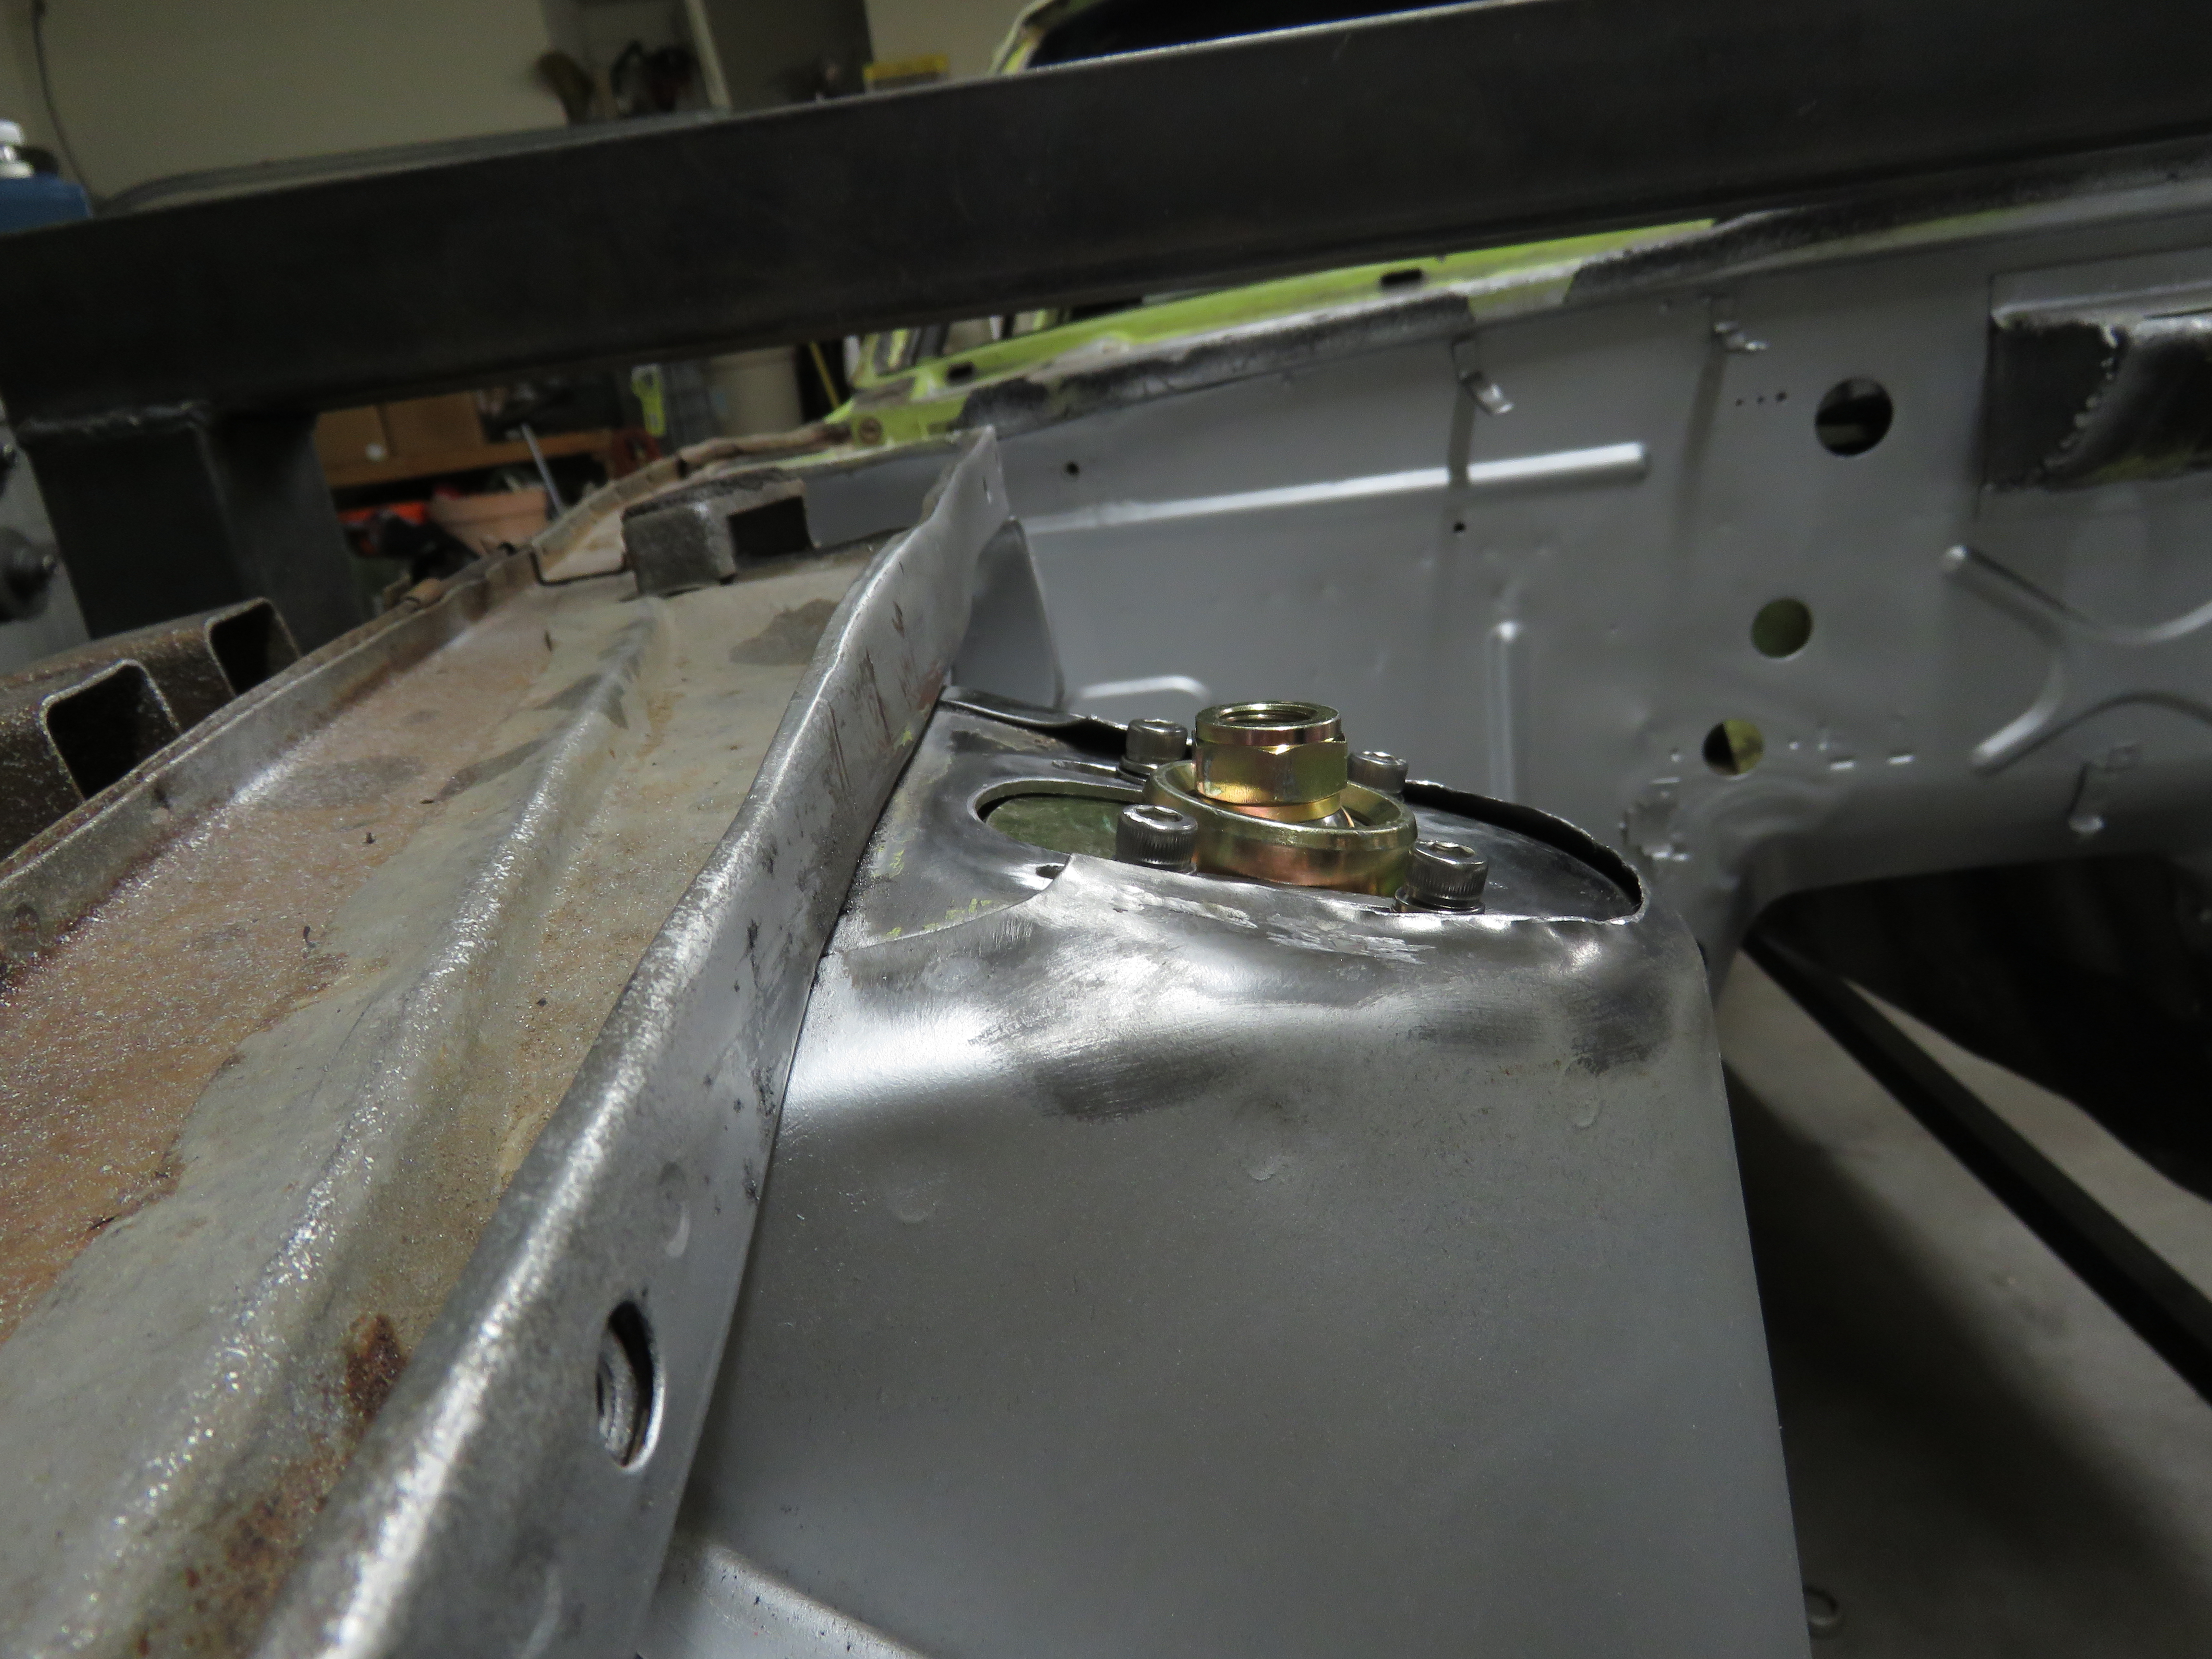
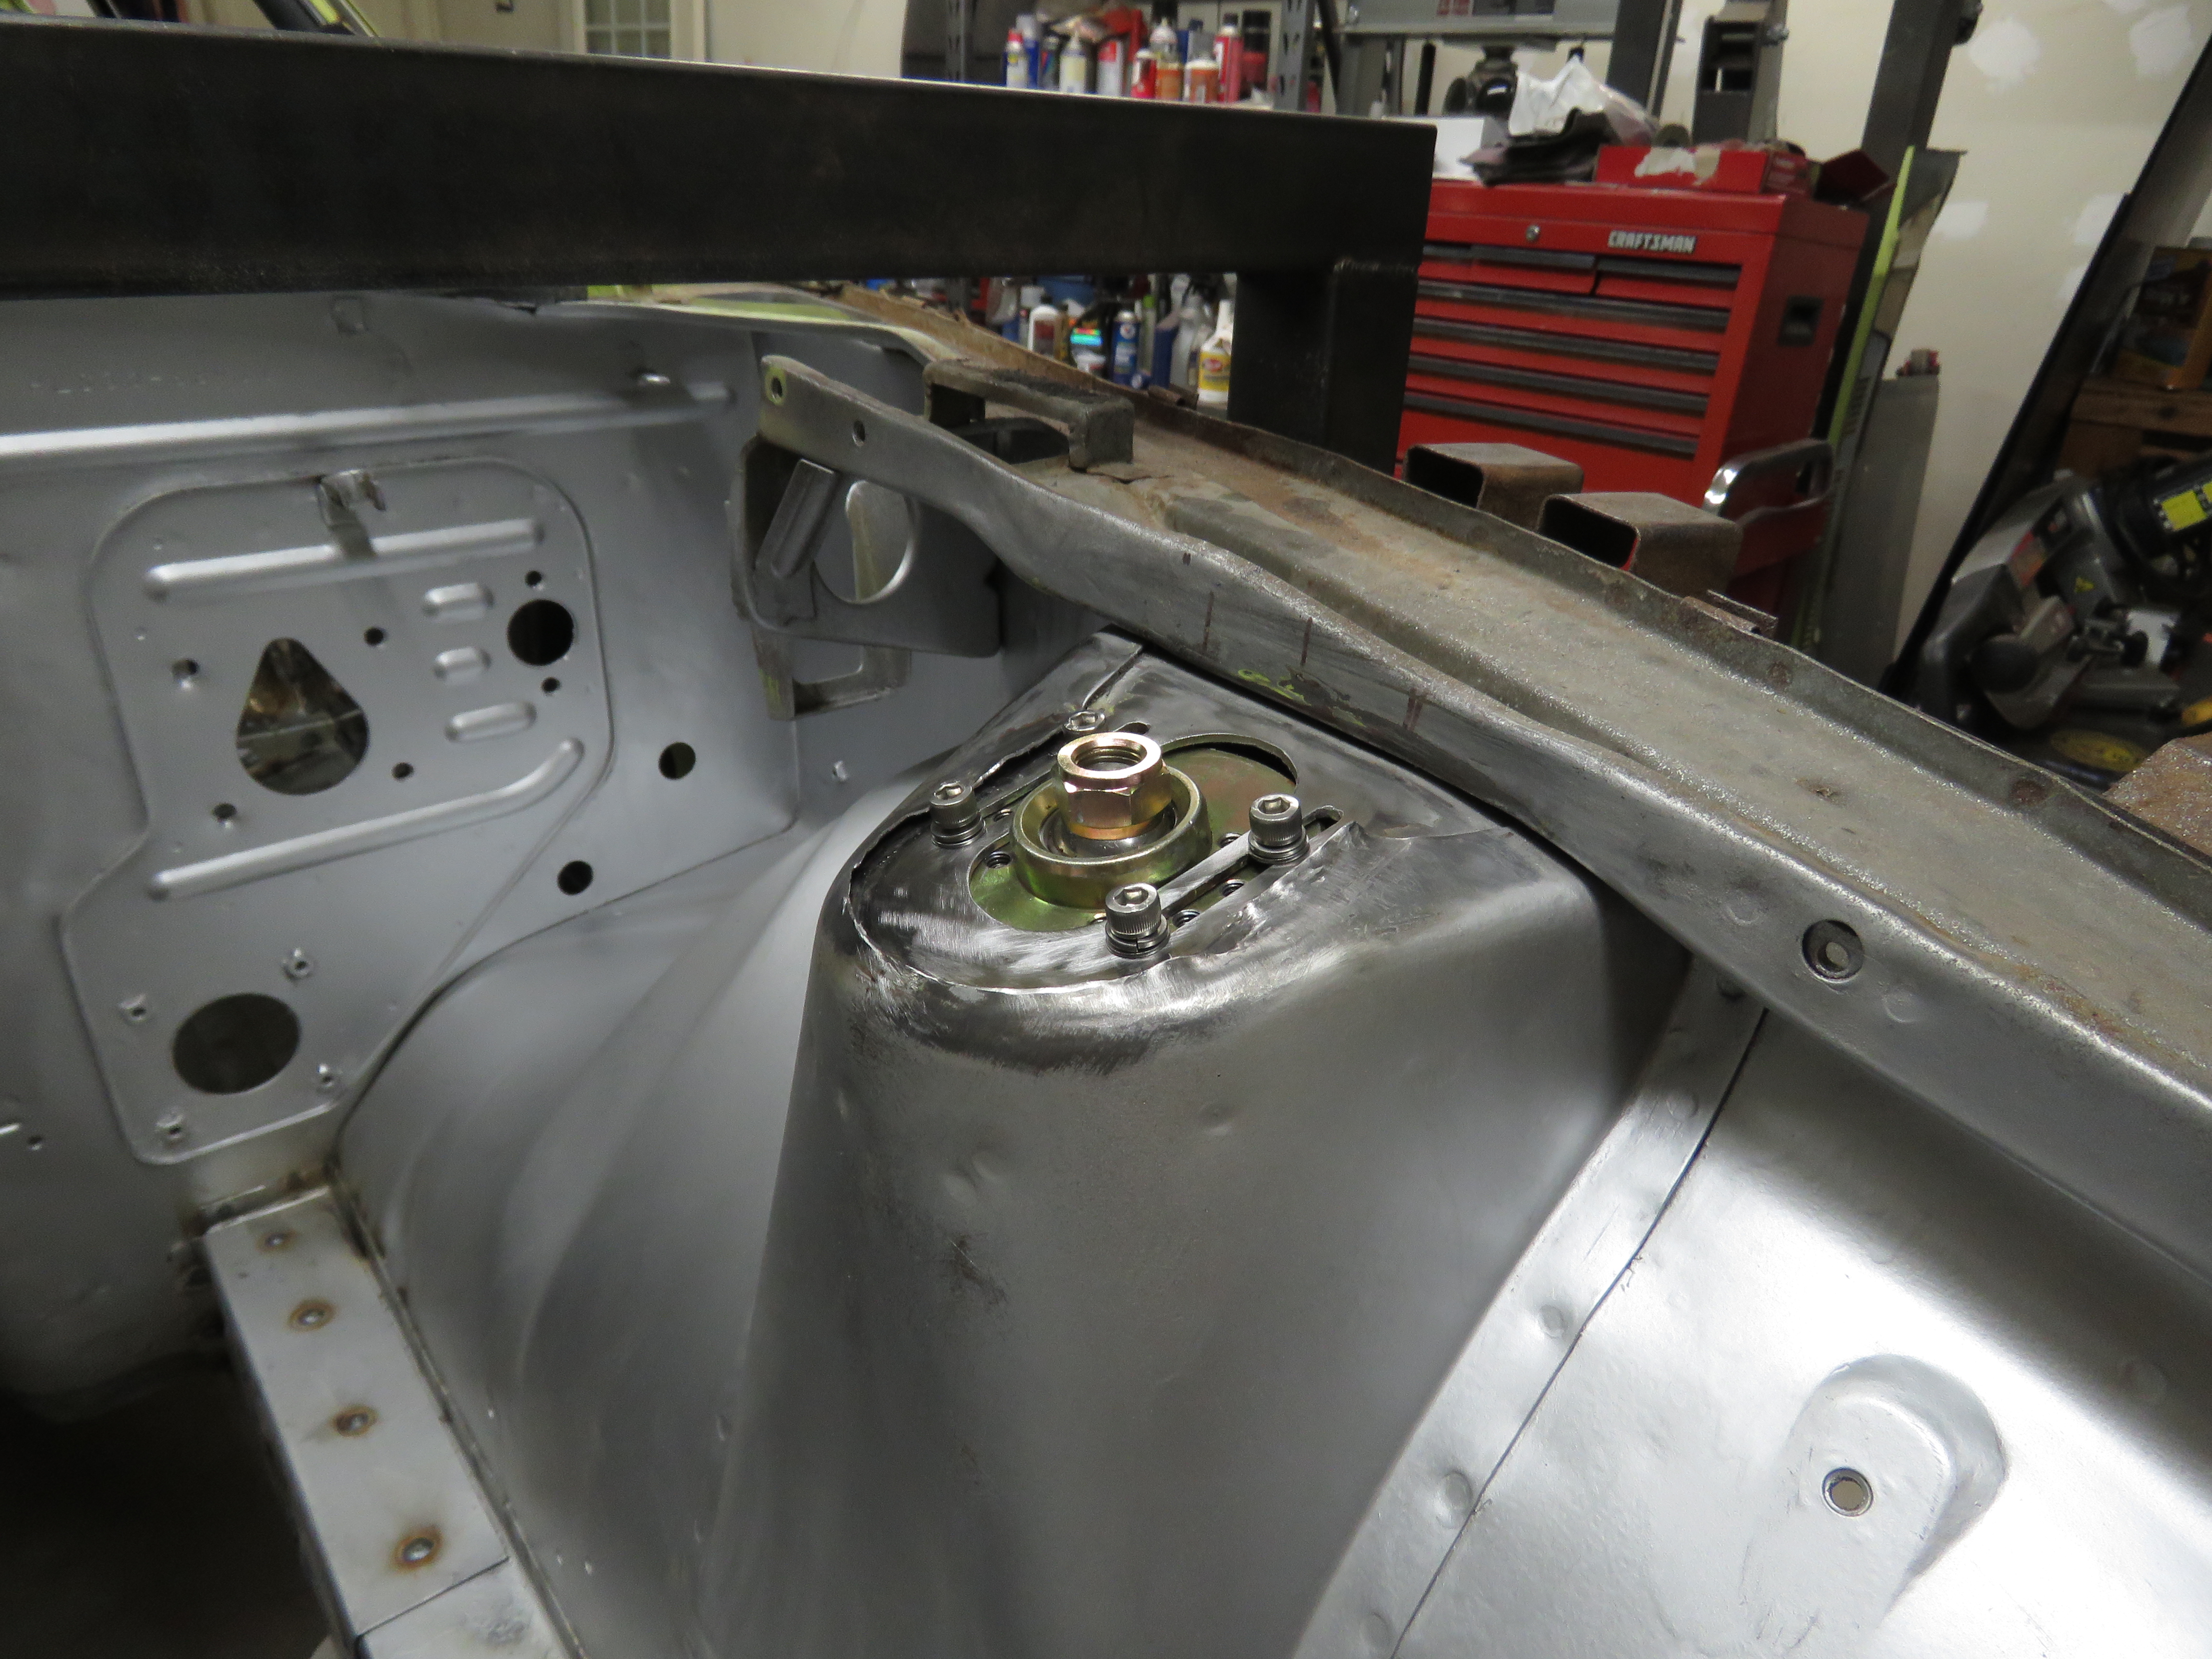
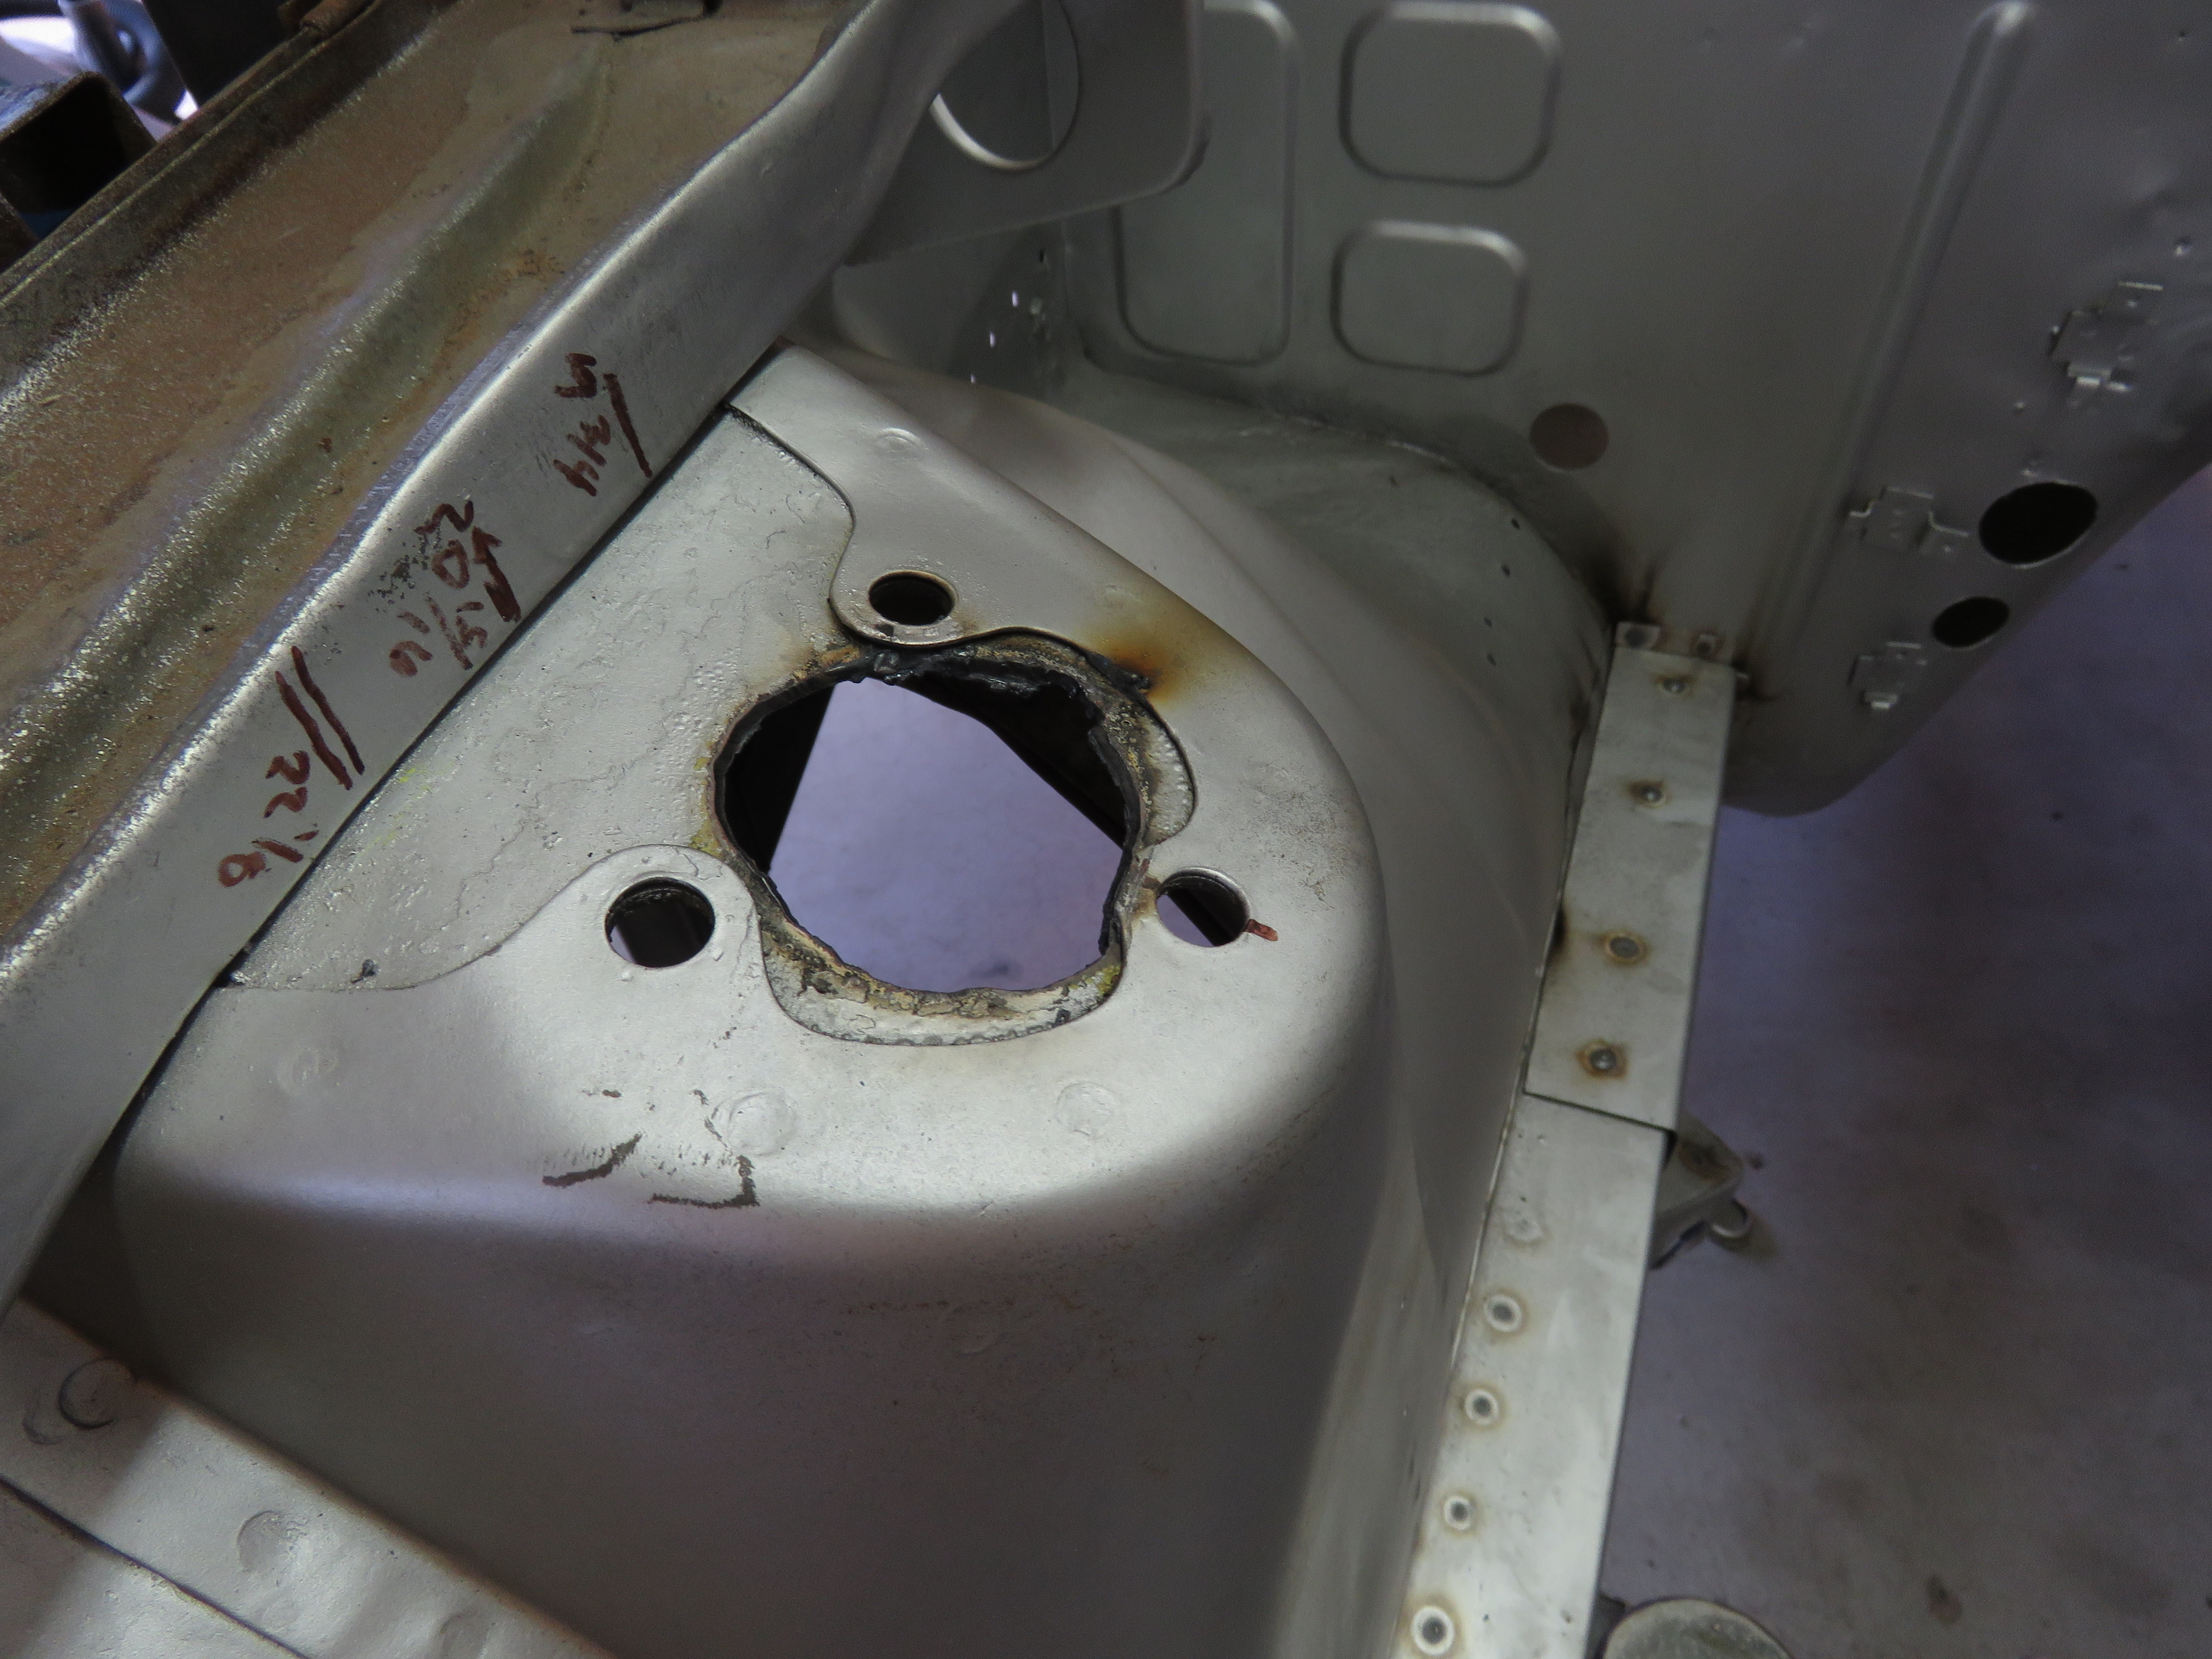
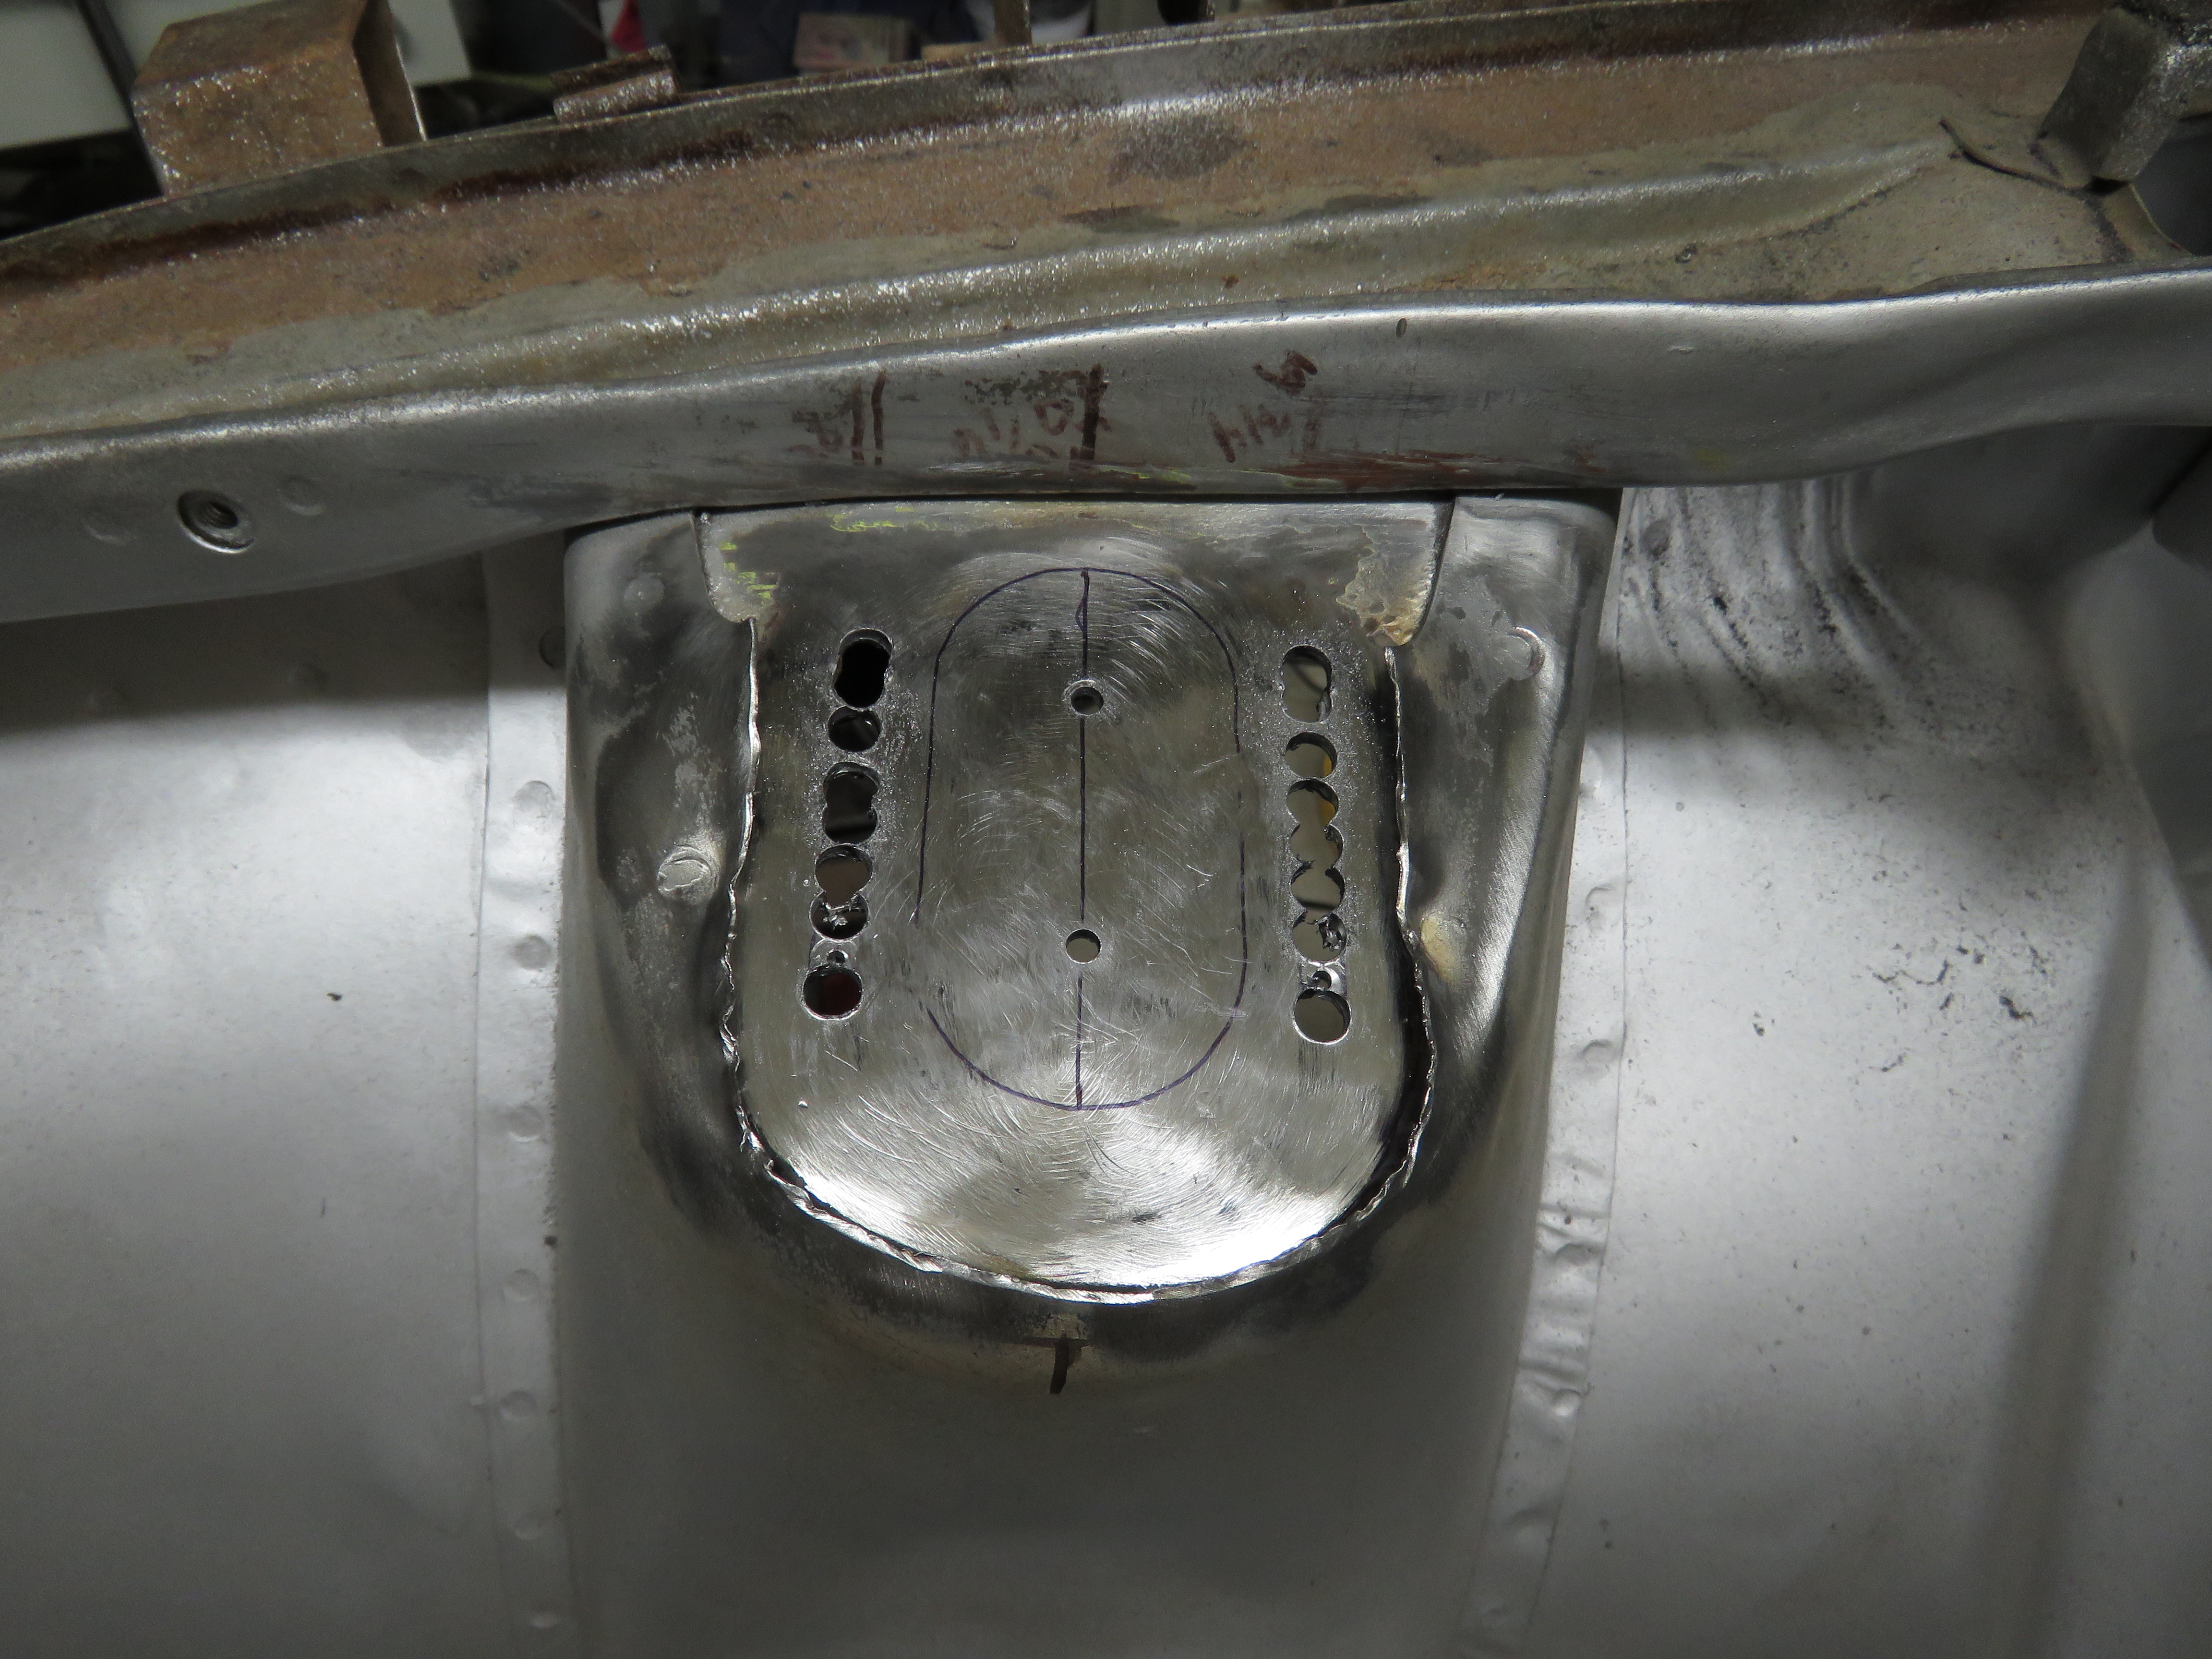
 Thanks and thanks for looking out with your concern, great to have input. There is about a half inch lip left of the 20g sheetmetal at the thinnest area, which is enough for some spot welds. honestly, the material I did removed, there where only like 2 spots welds on both sides that I had to sand away. the thick top plate is spot welded all around the sheet metal tower and on the top back side (where the frame for the air vent is) pretty good too. I thought about skinning the plate out of 20g and welding it to the existing lip, then spot welding it to the plate. which wouldnt be a bad idea. Just would like to wait till i get the mounts figured out first for the strut braces because id prefer to weld the majority of the mounts directly to the plate.
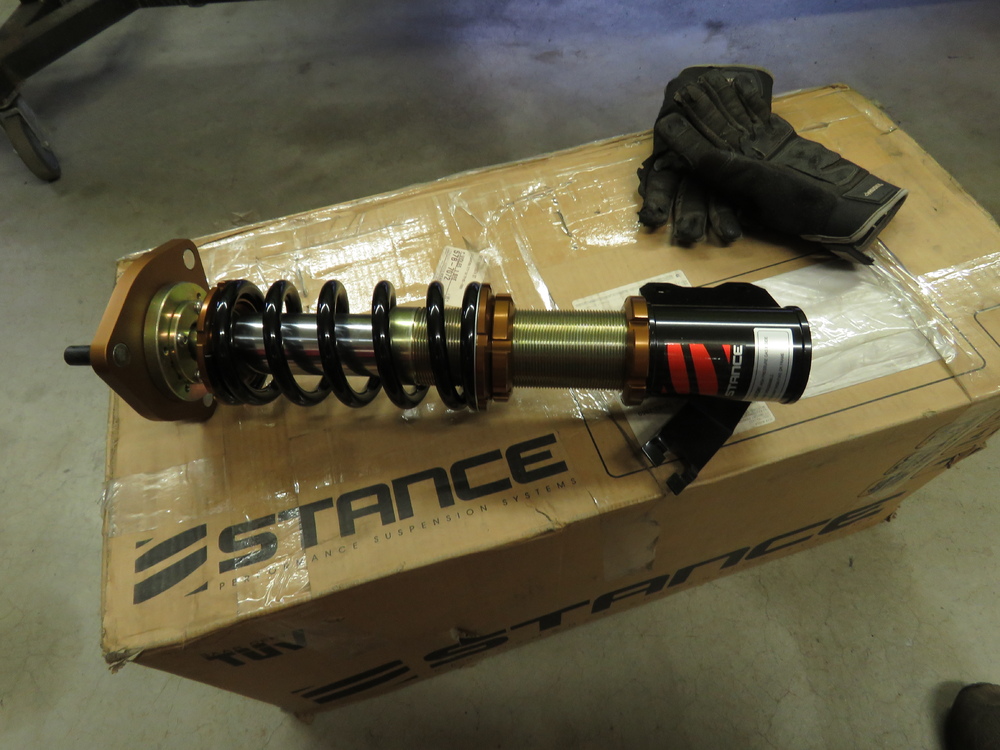
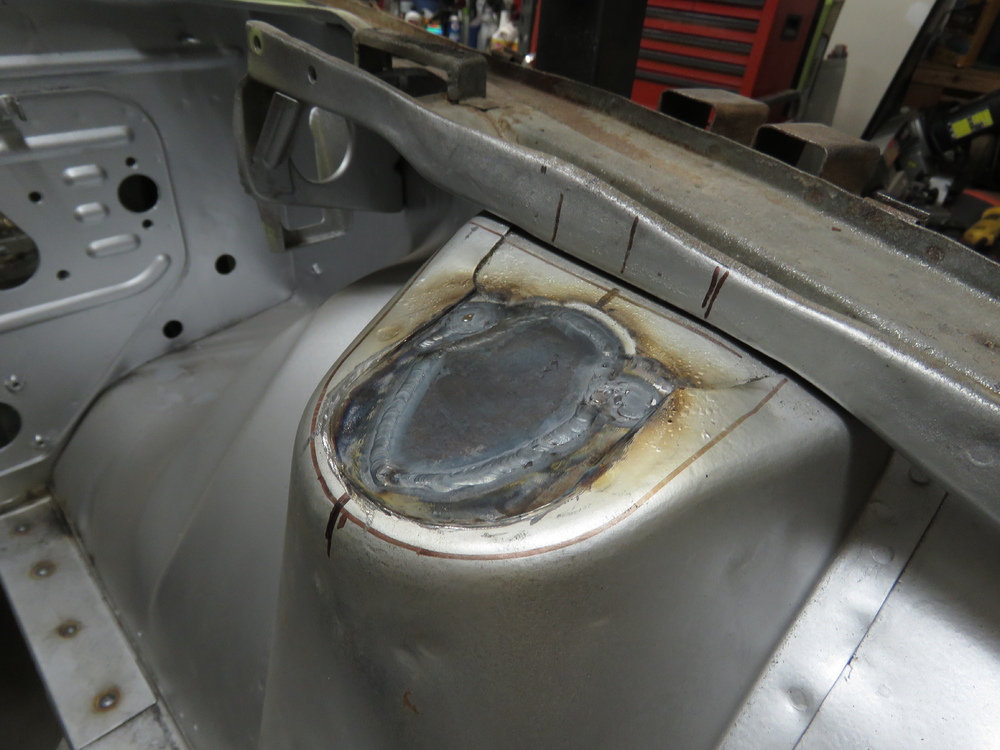
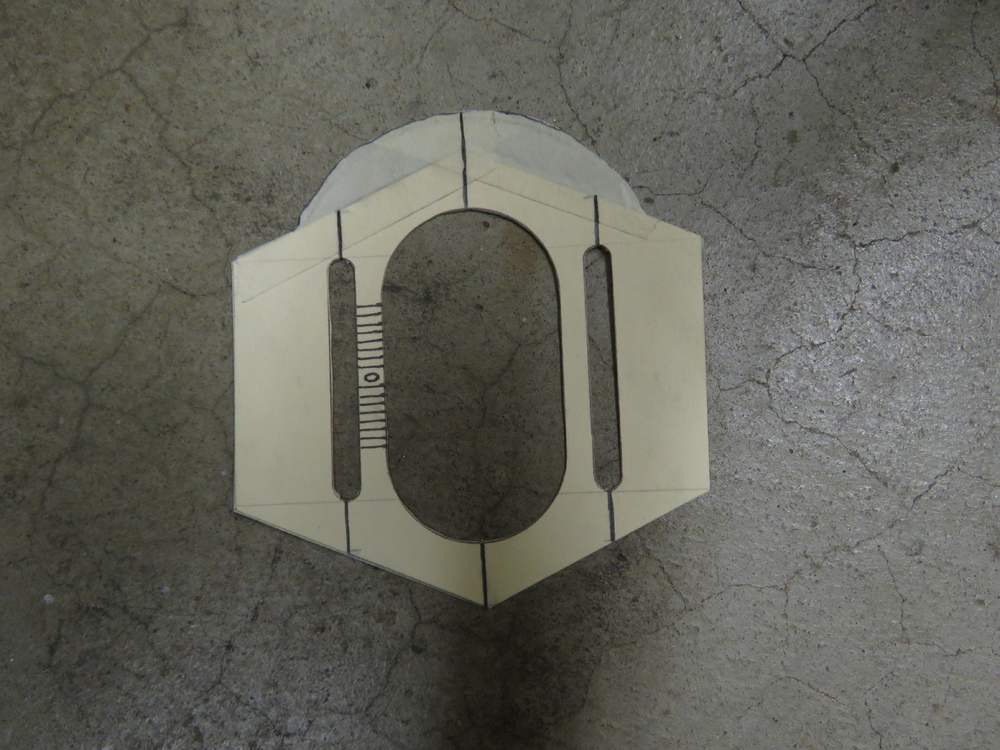
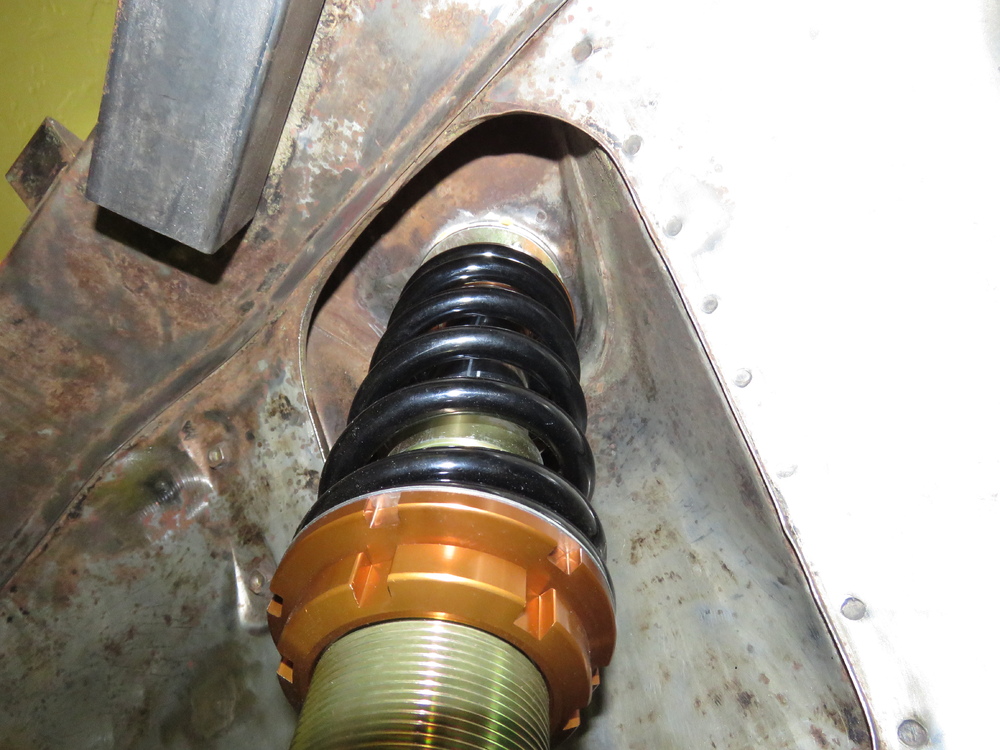
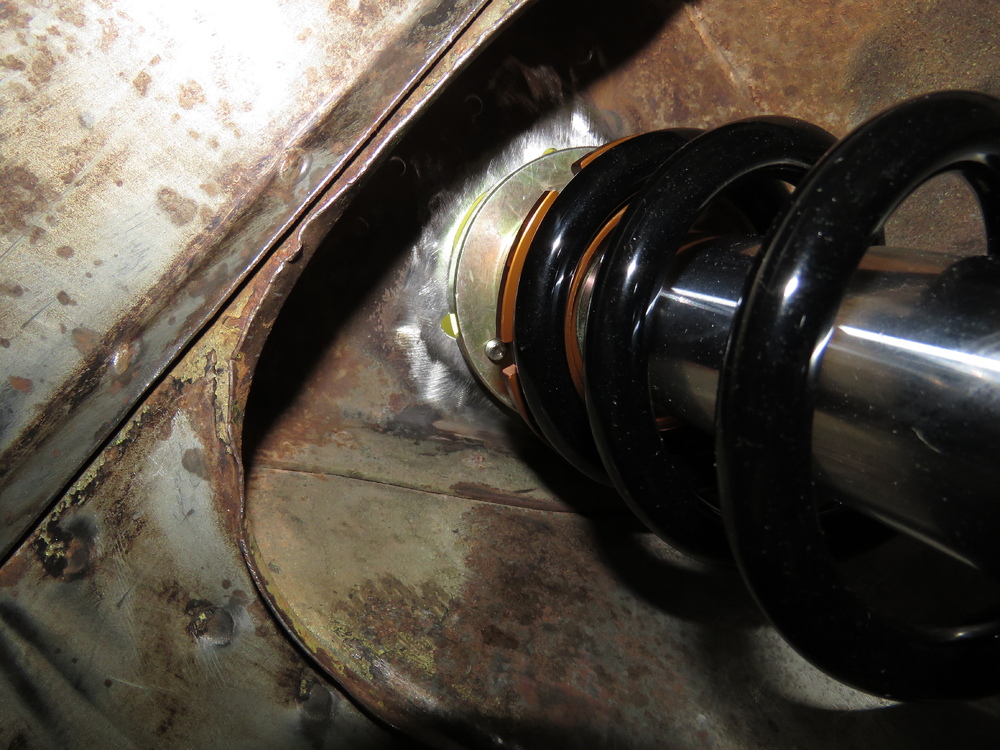
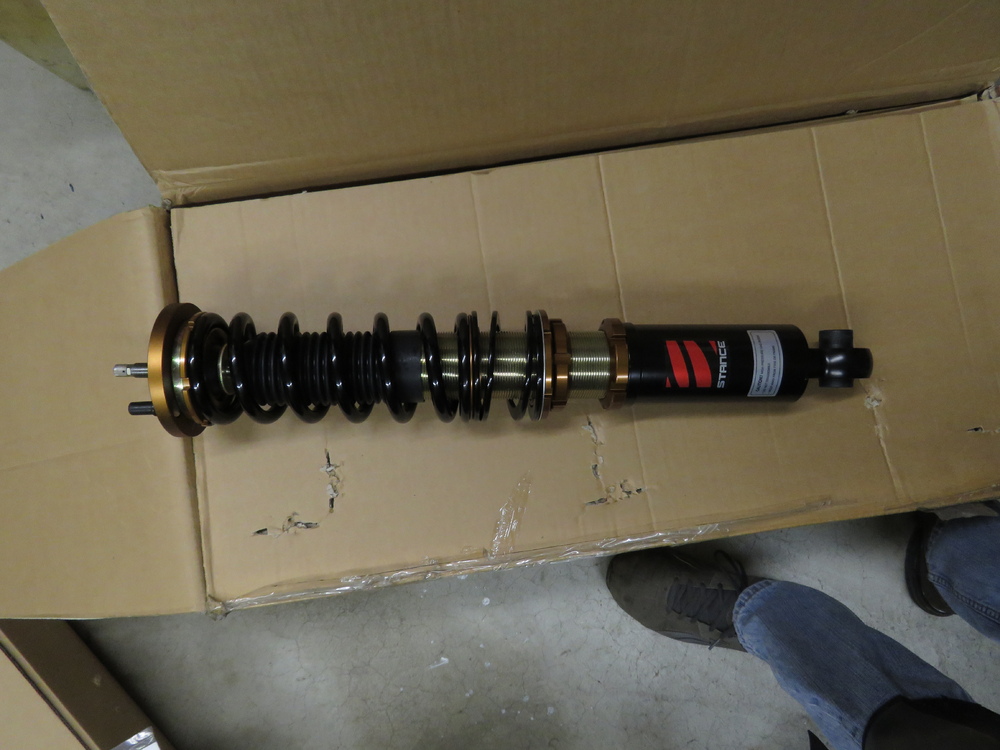
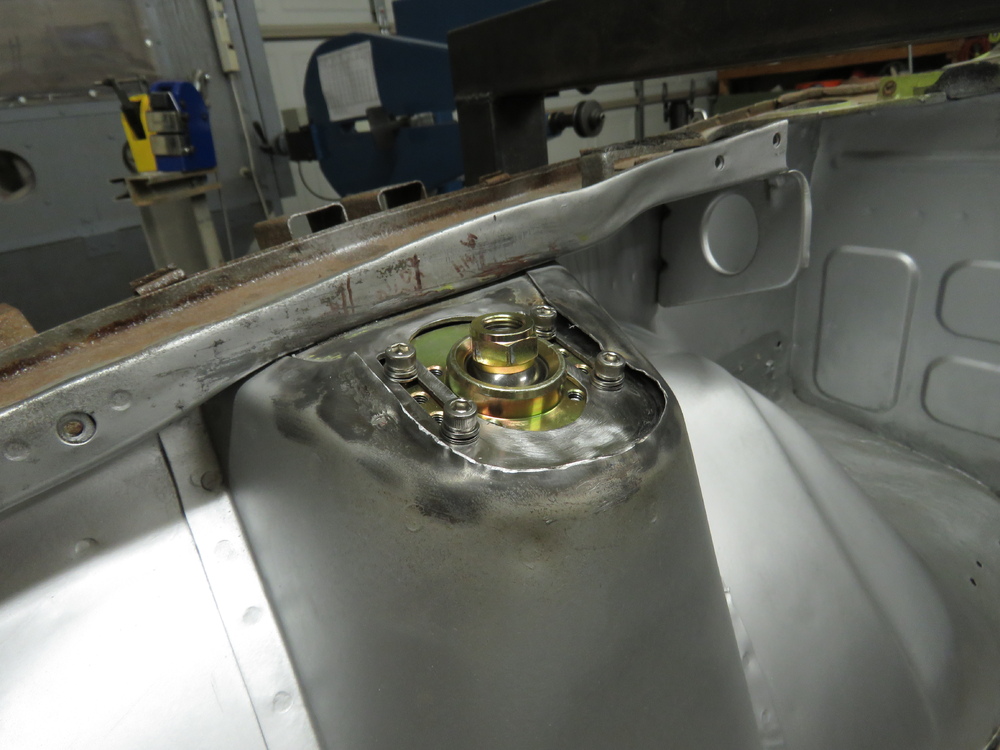
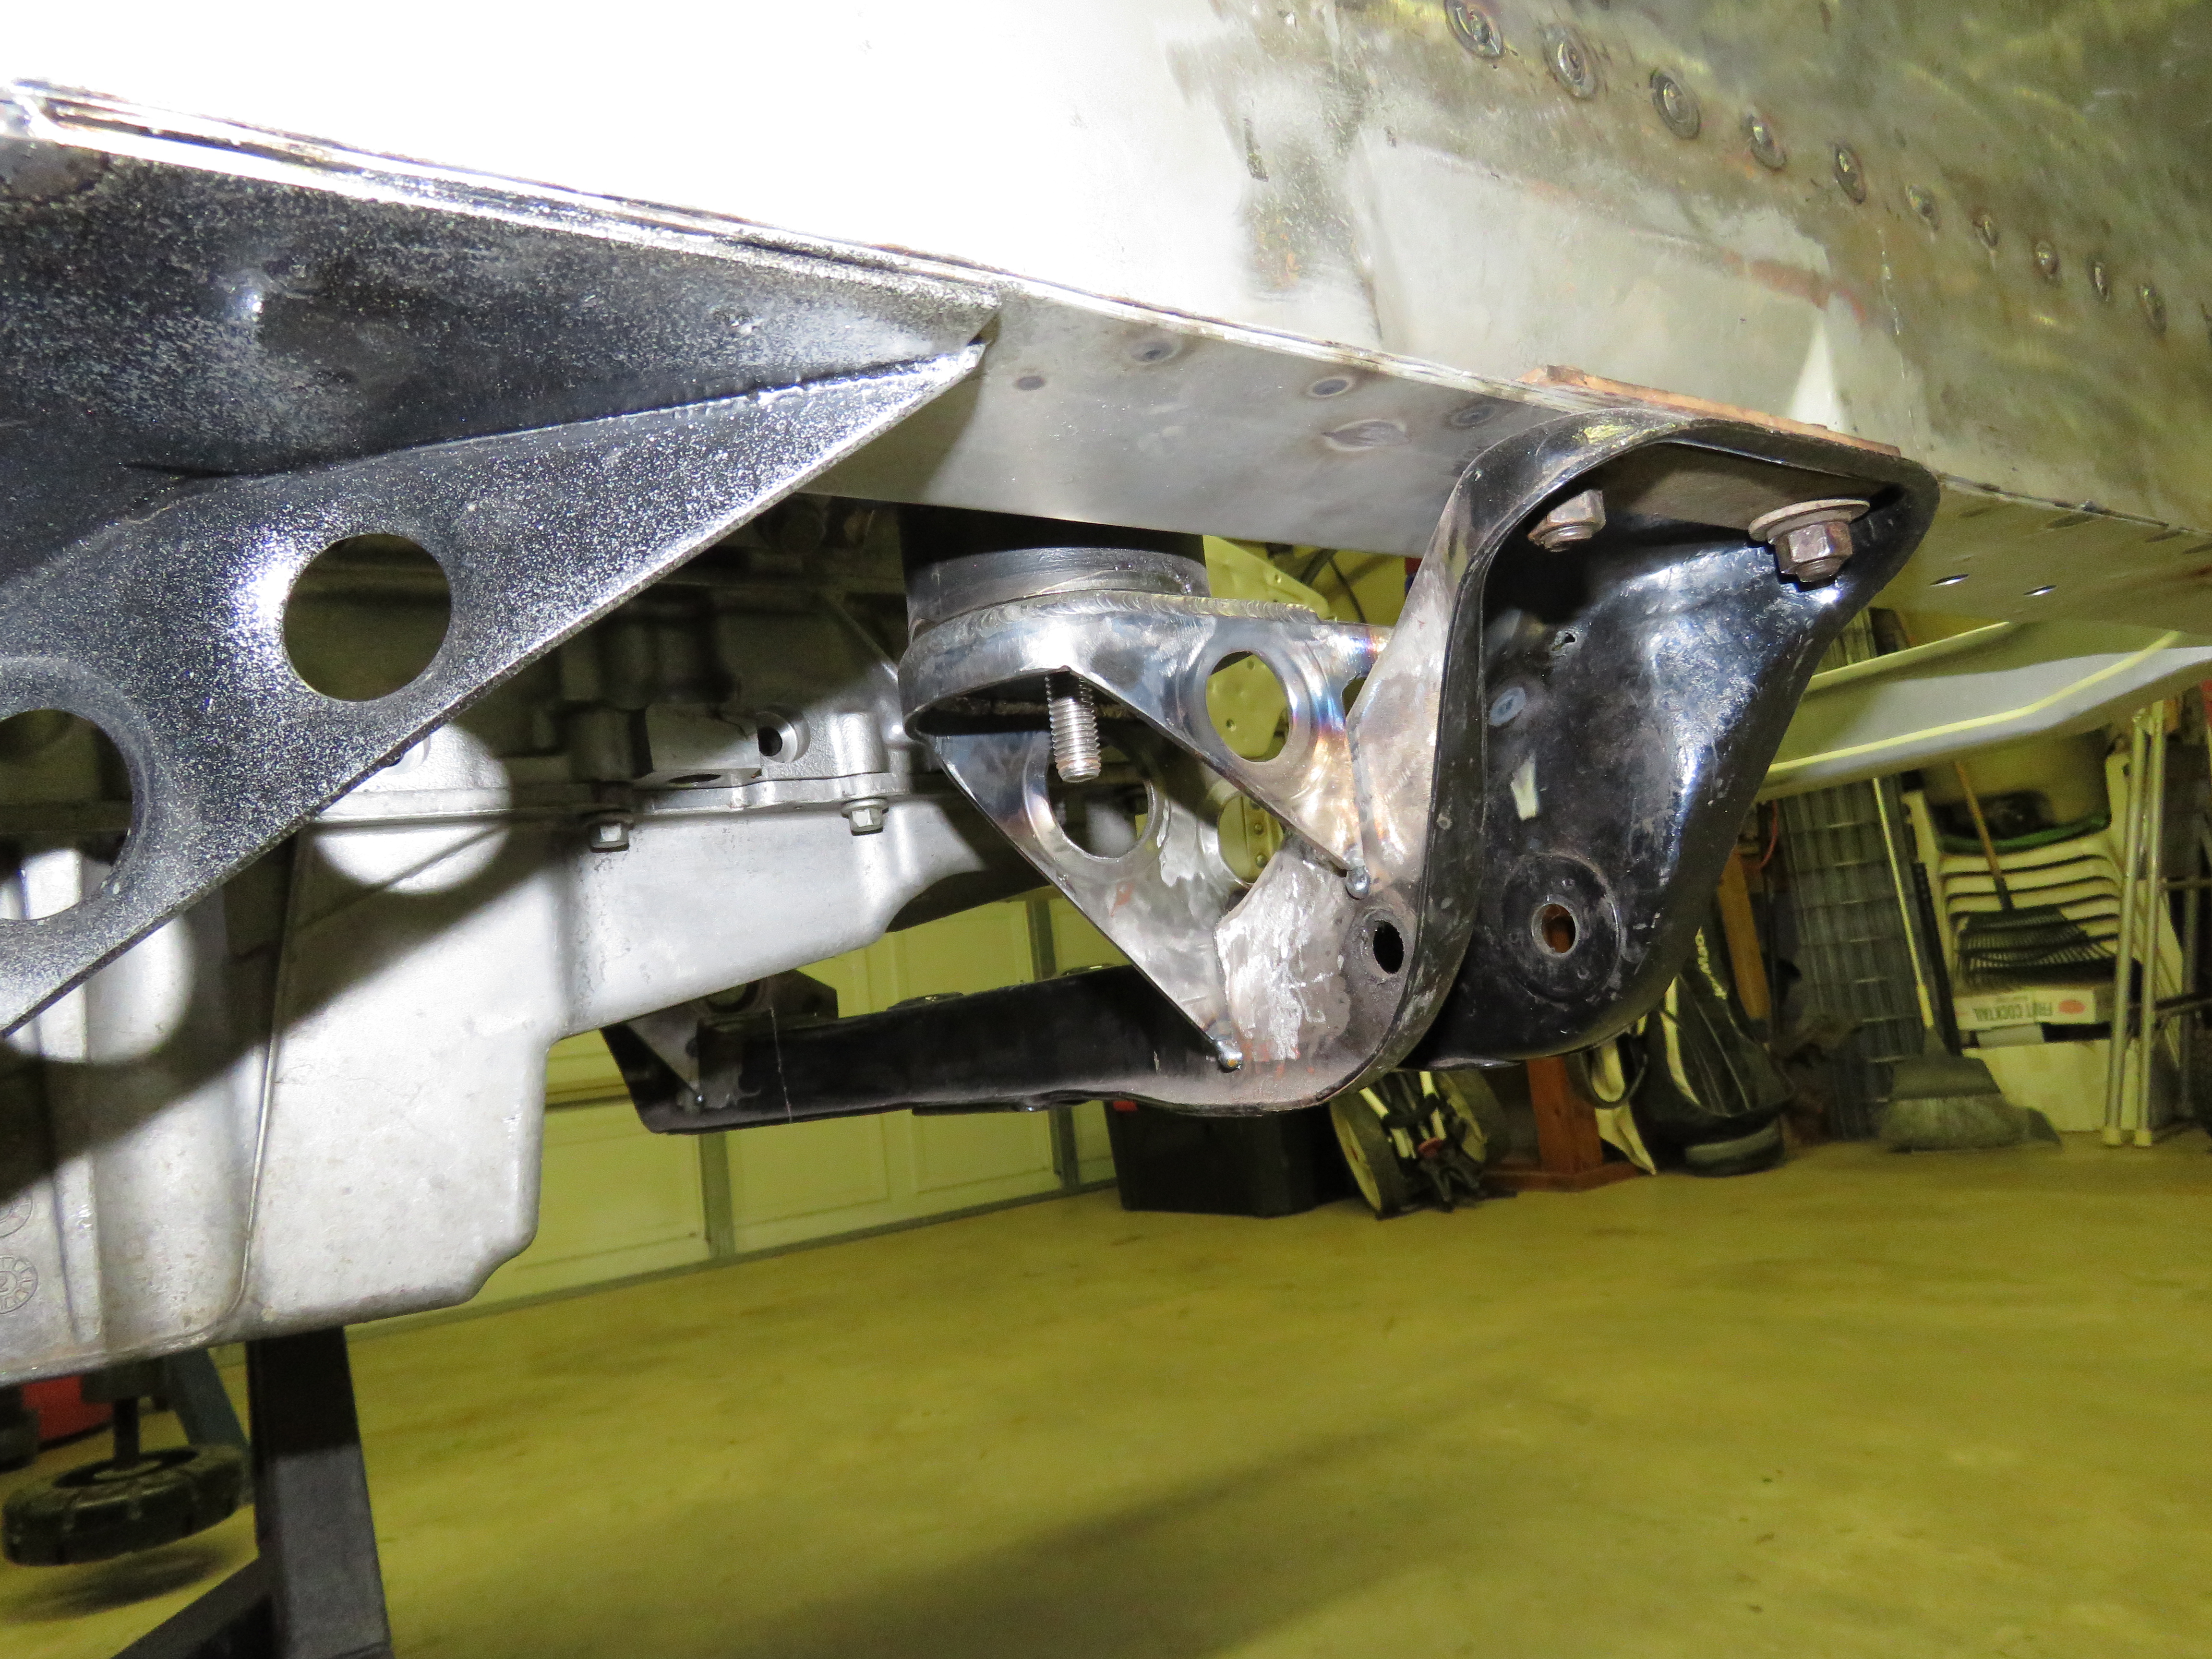
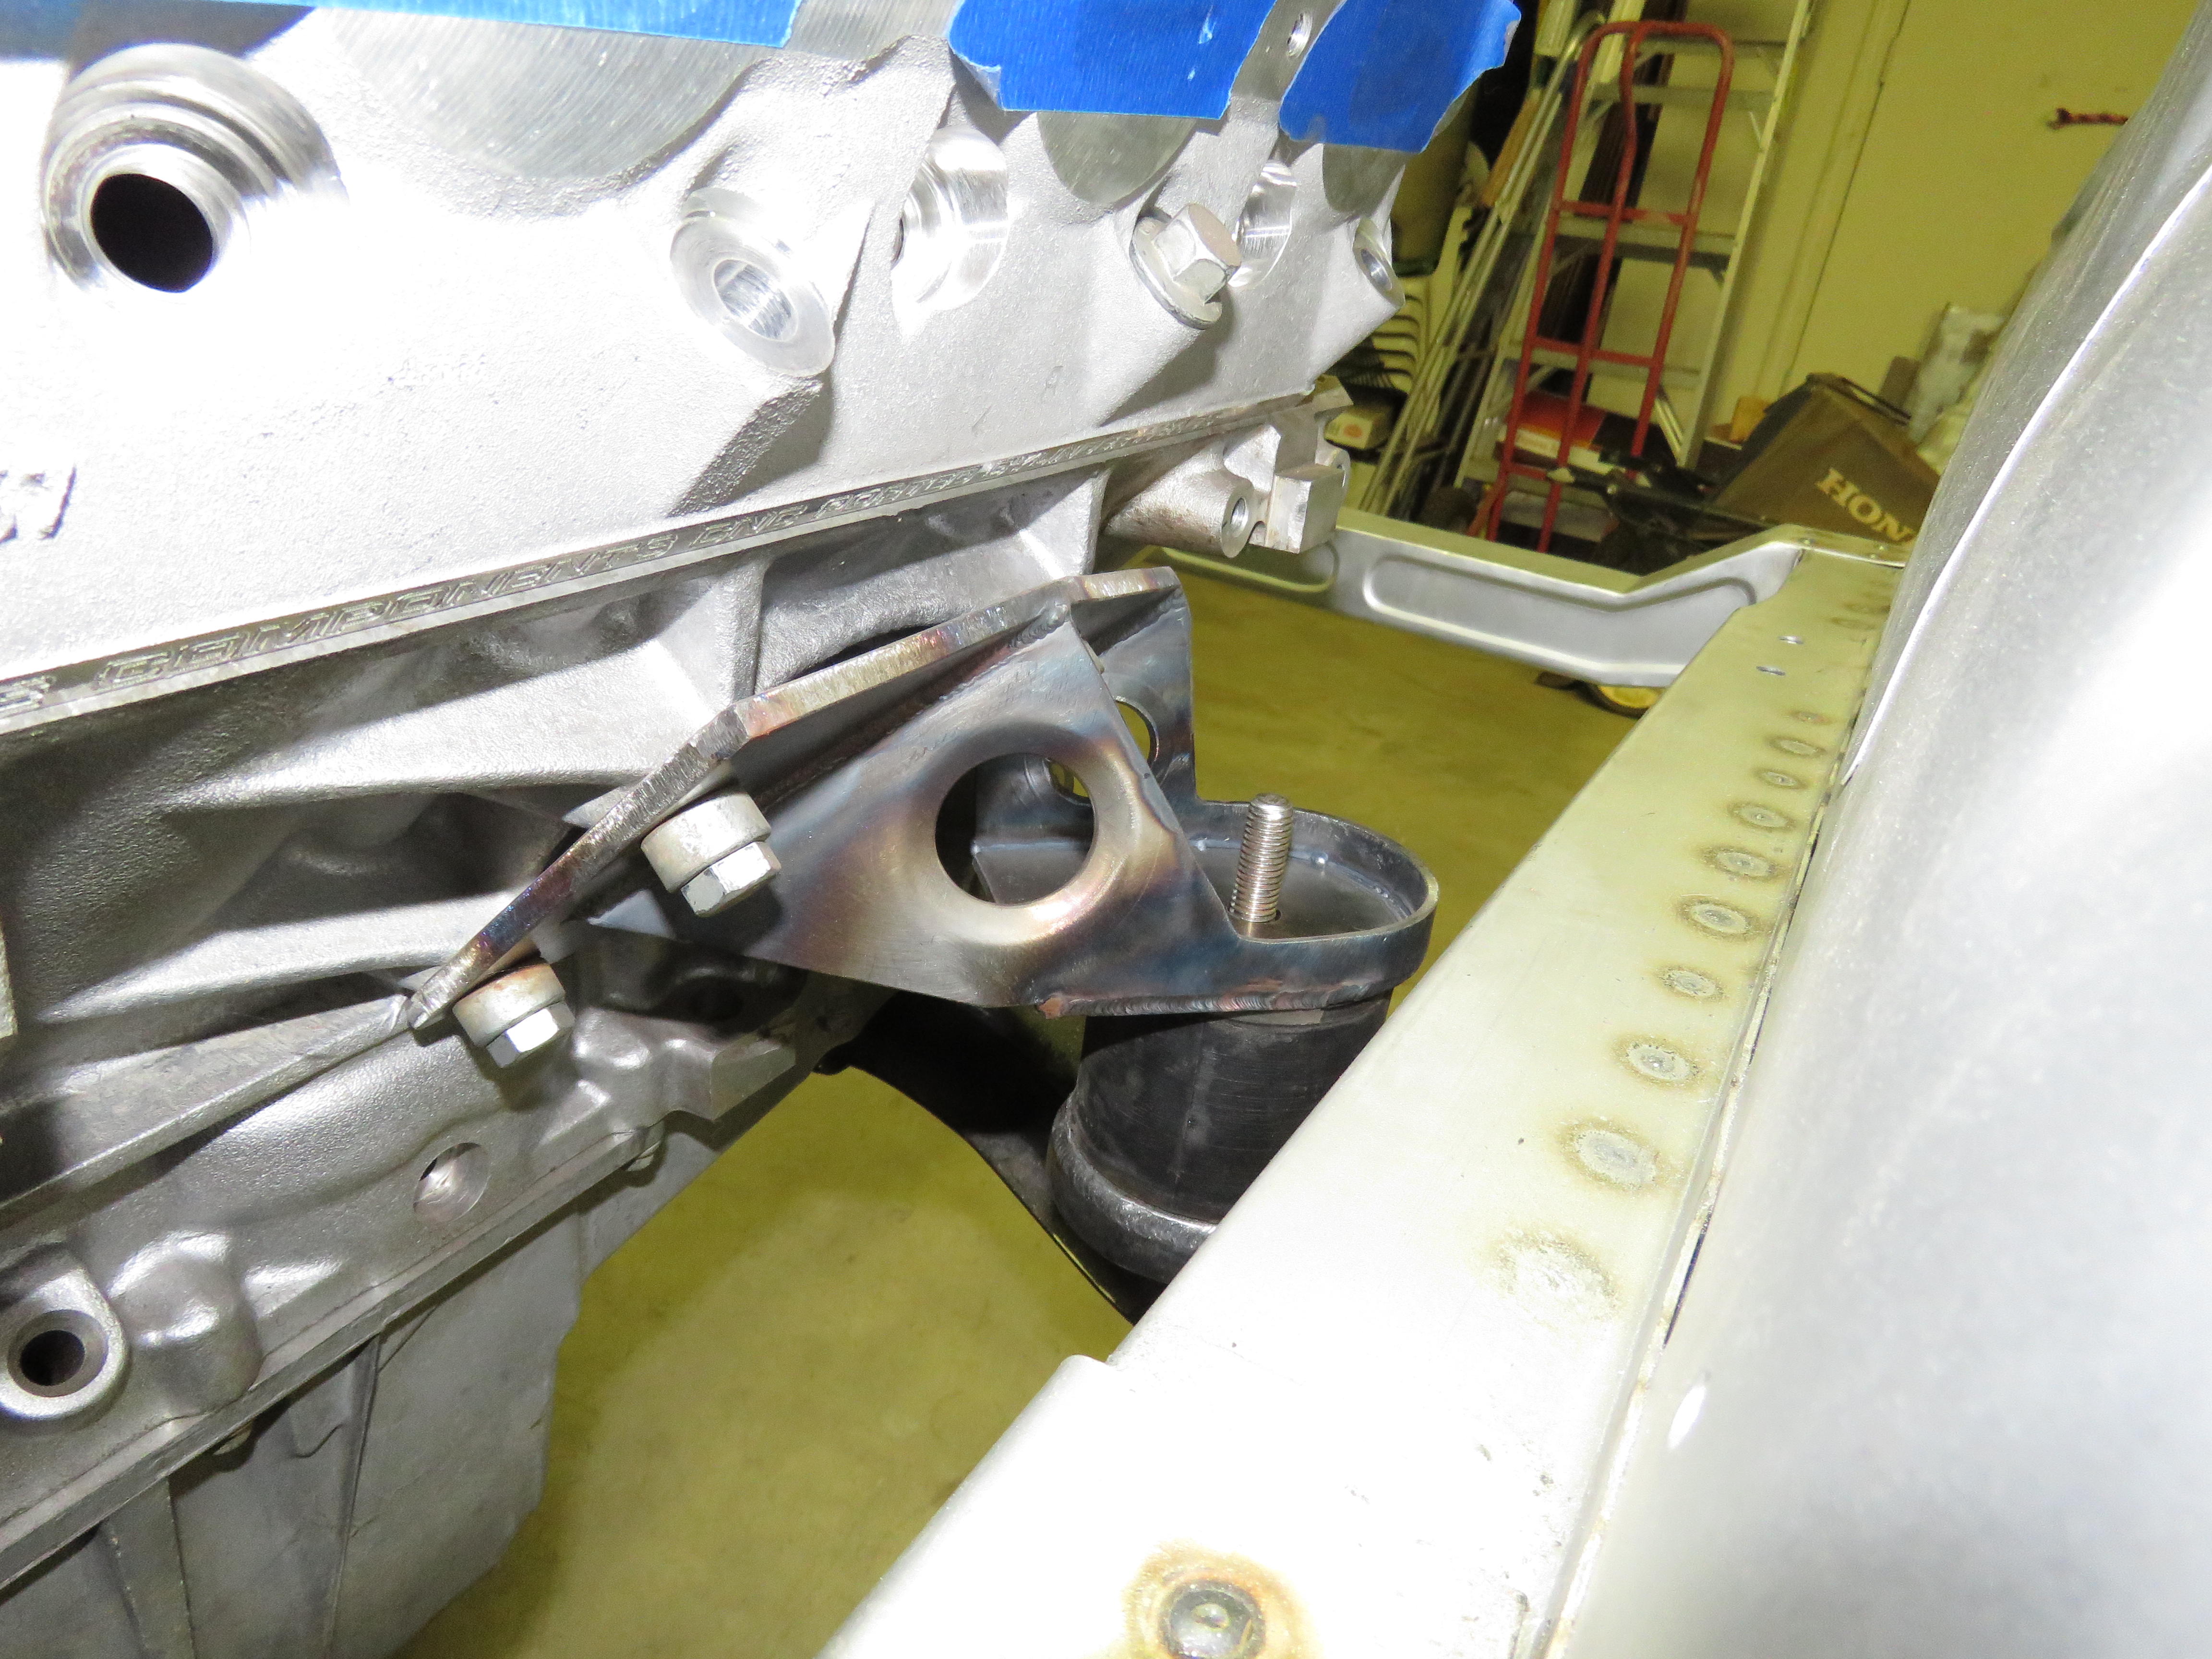
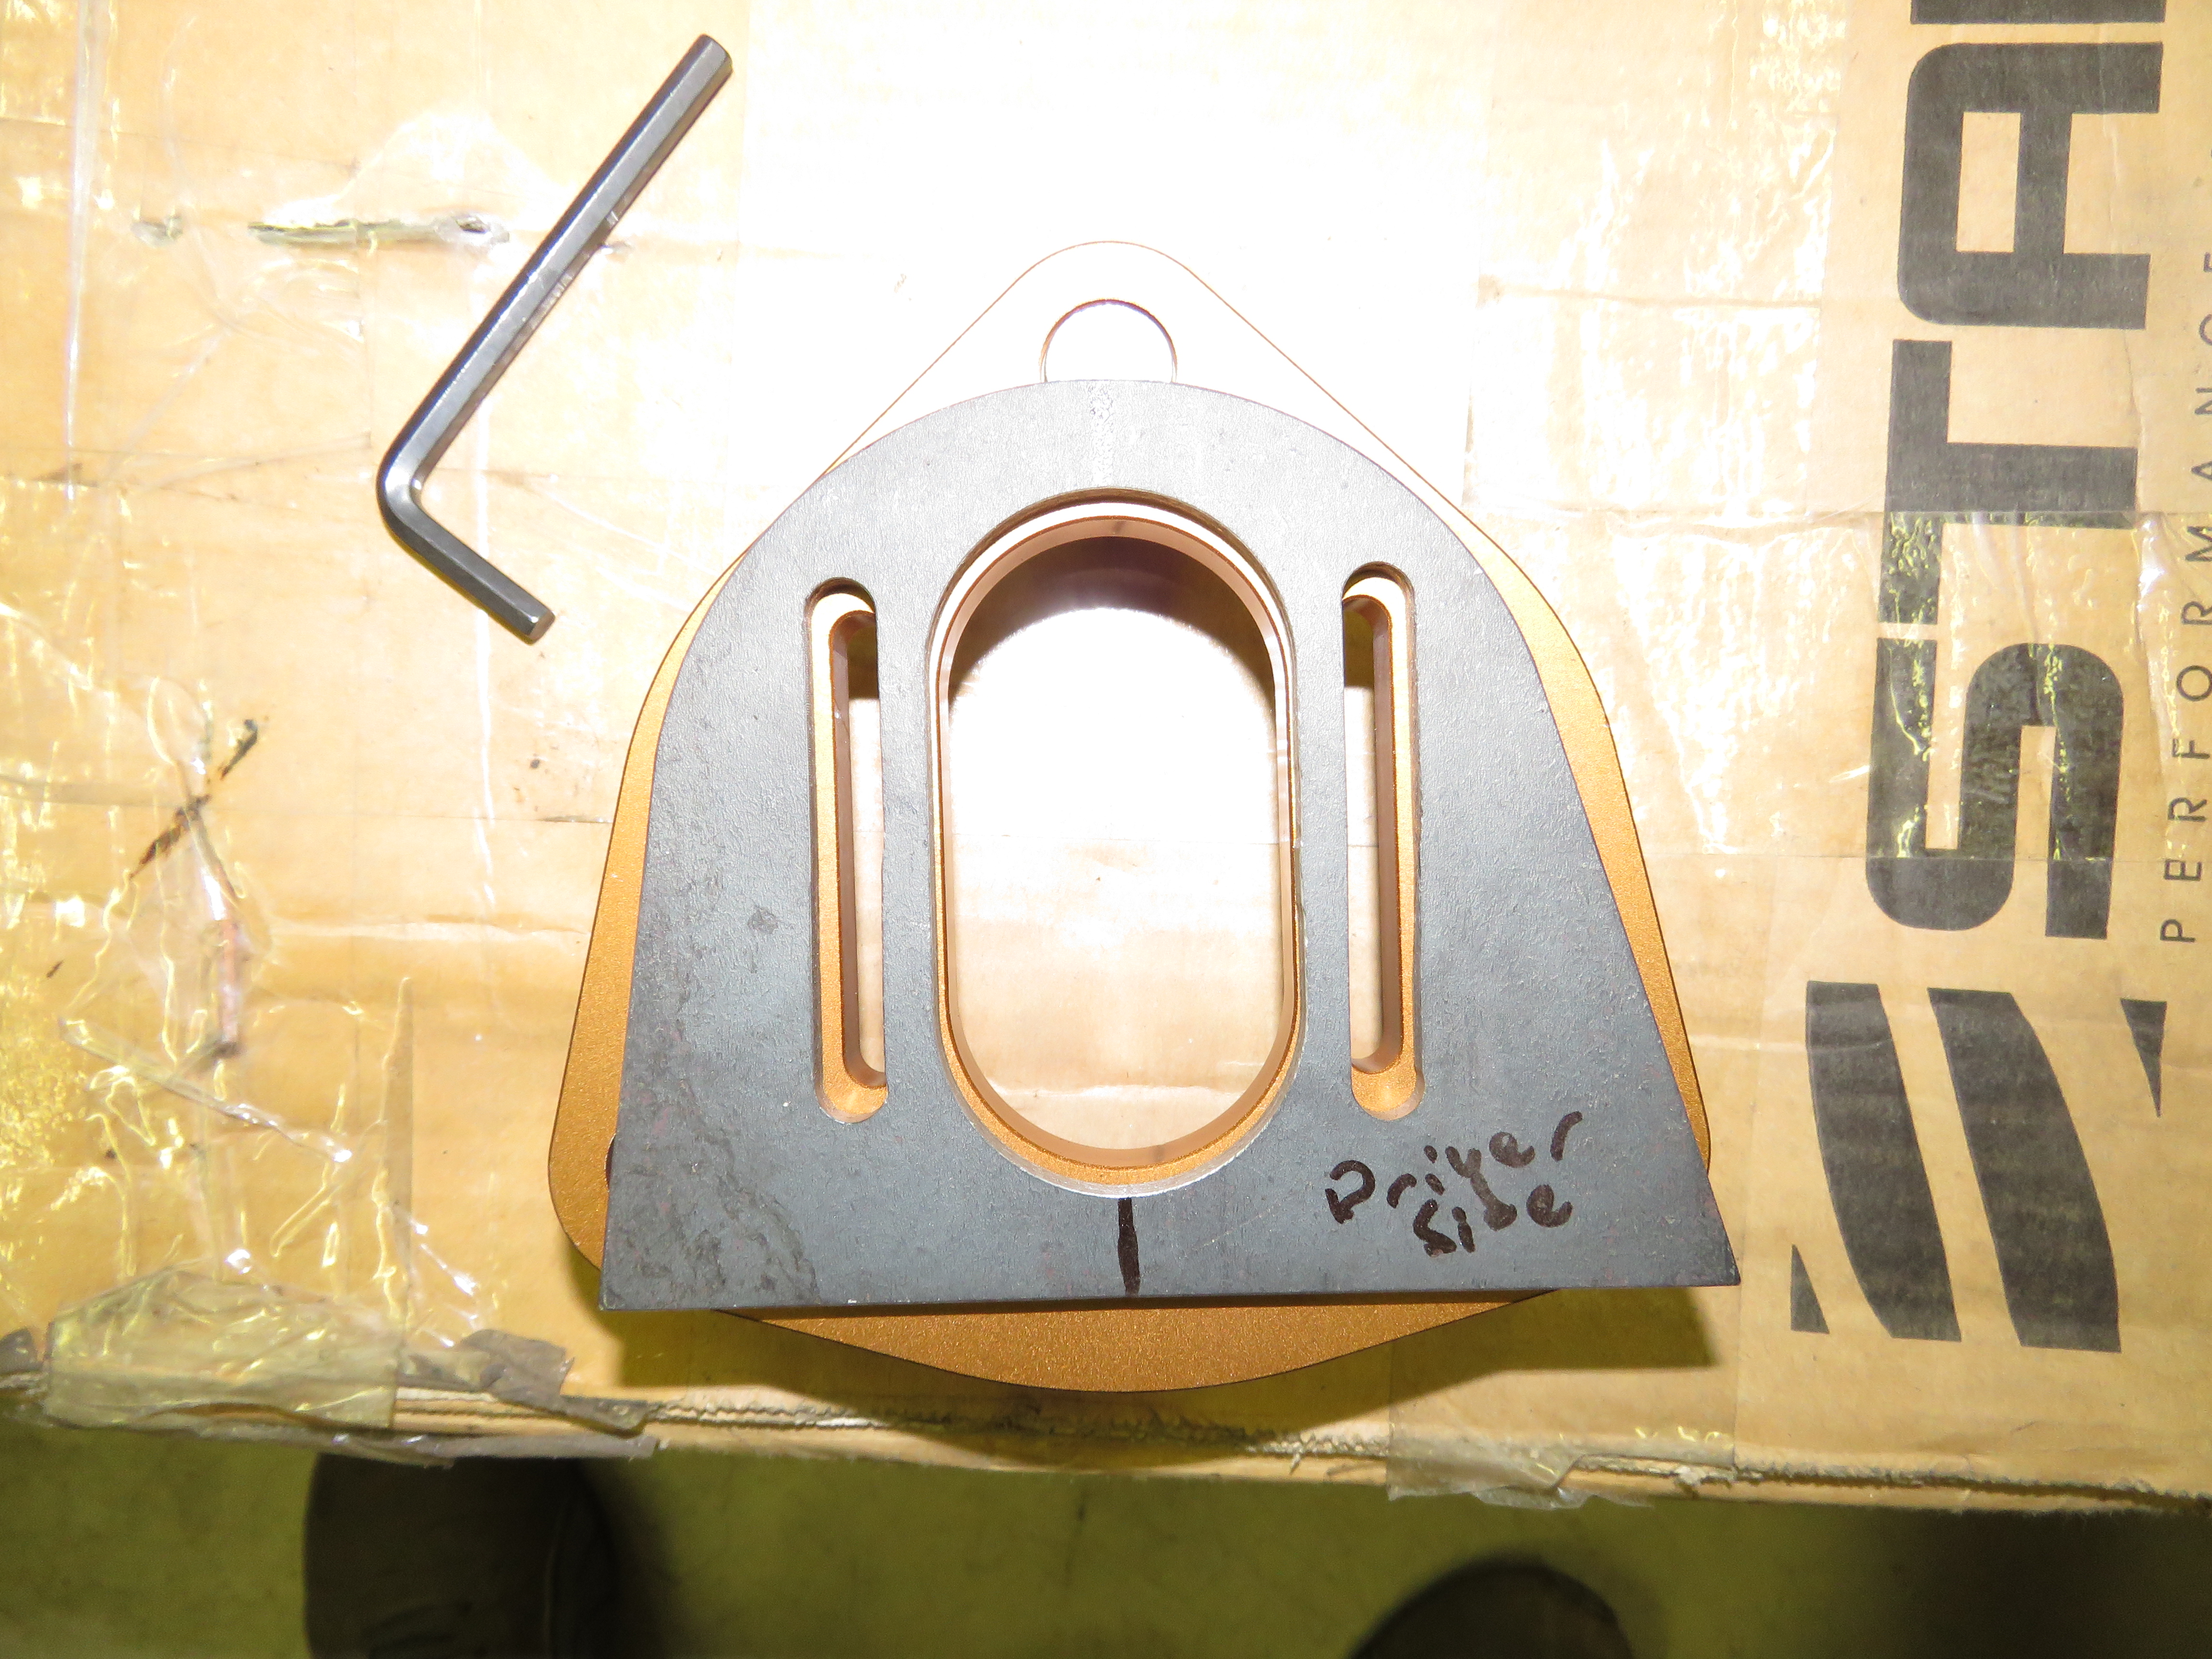
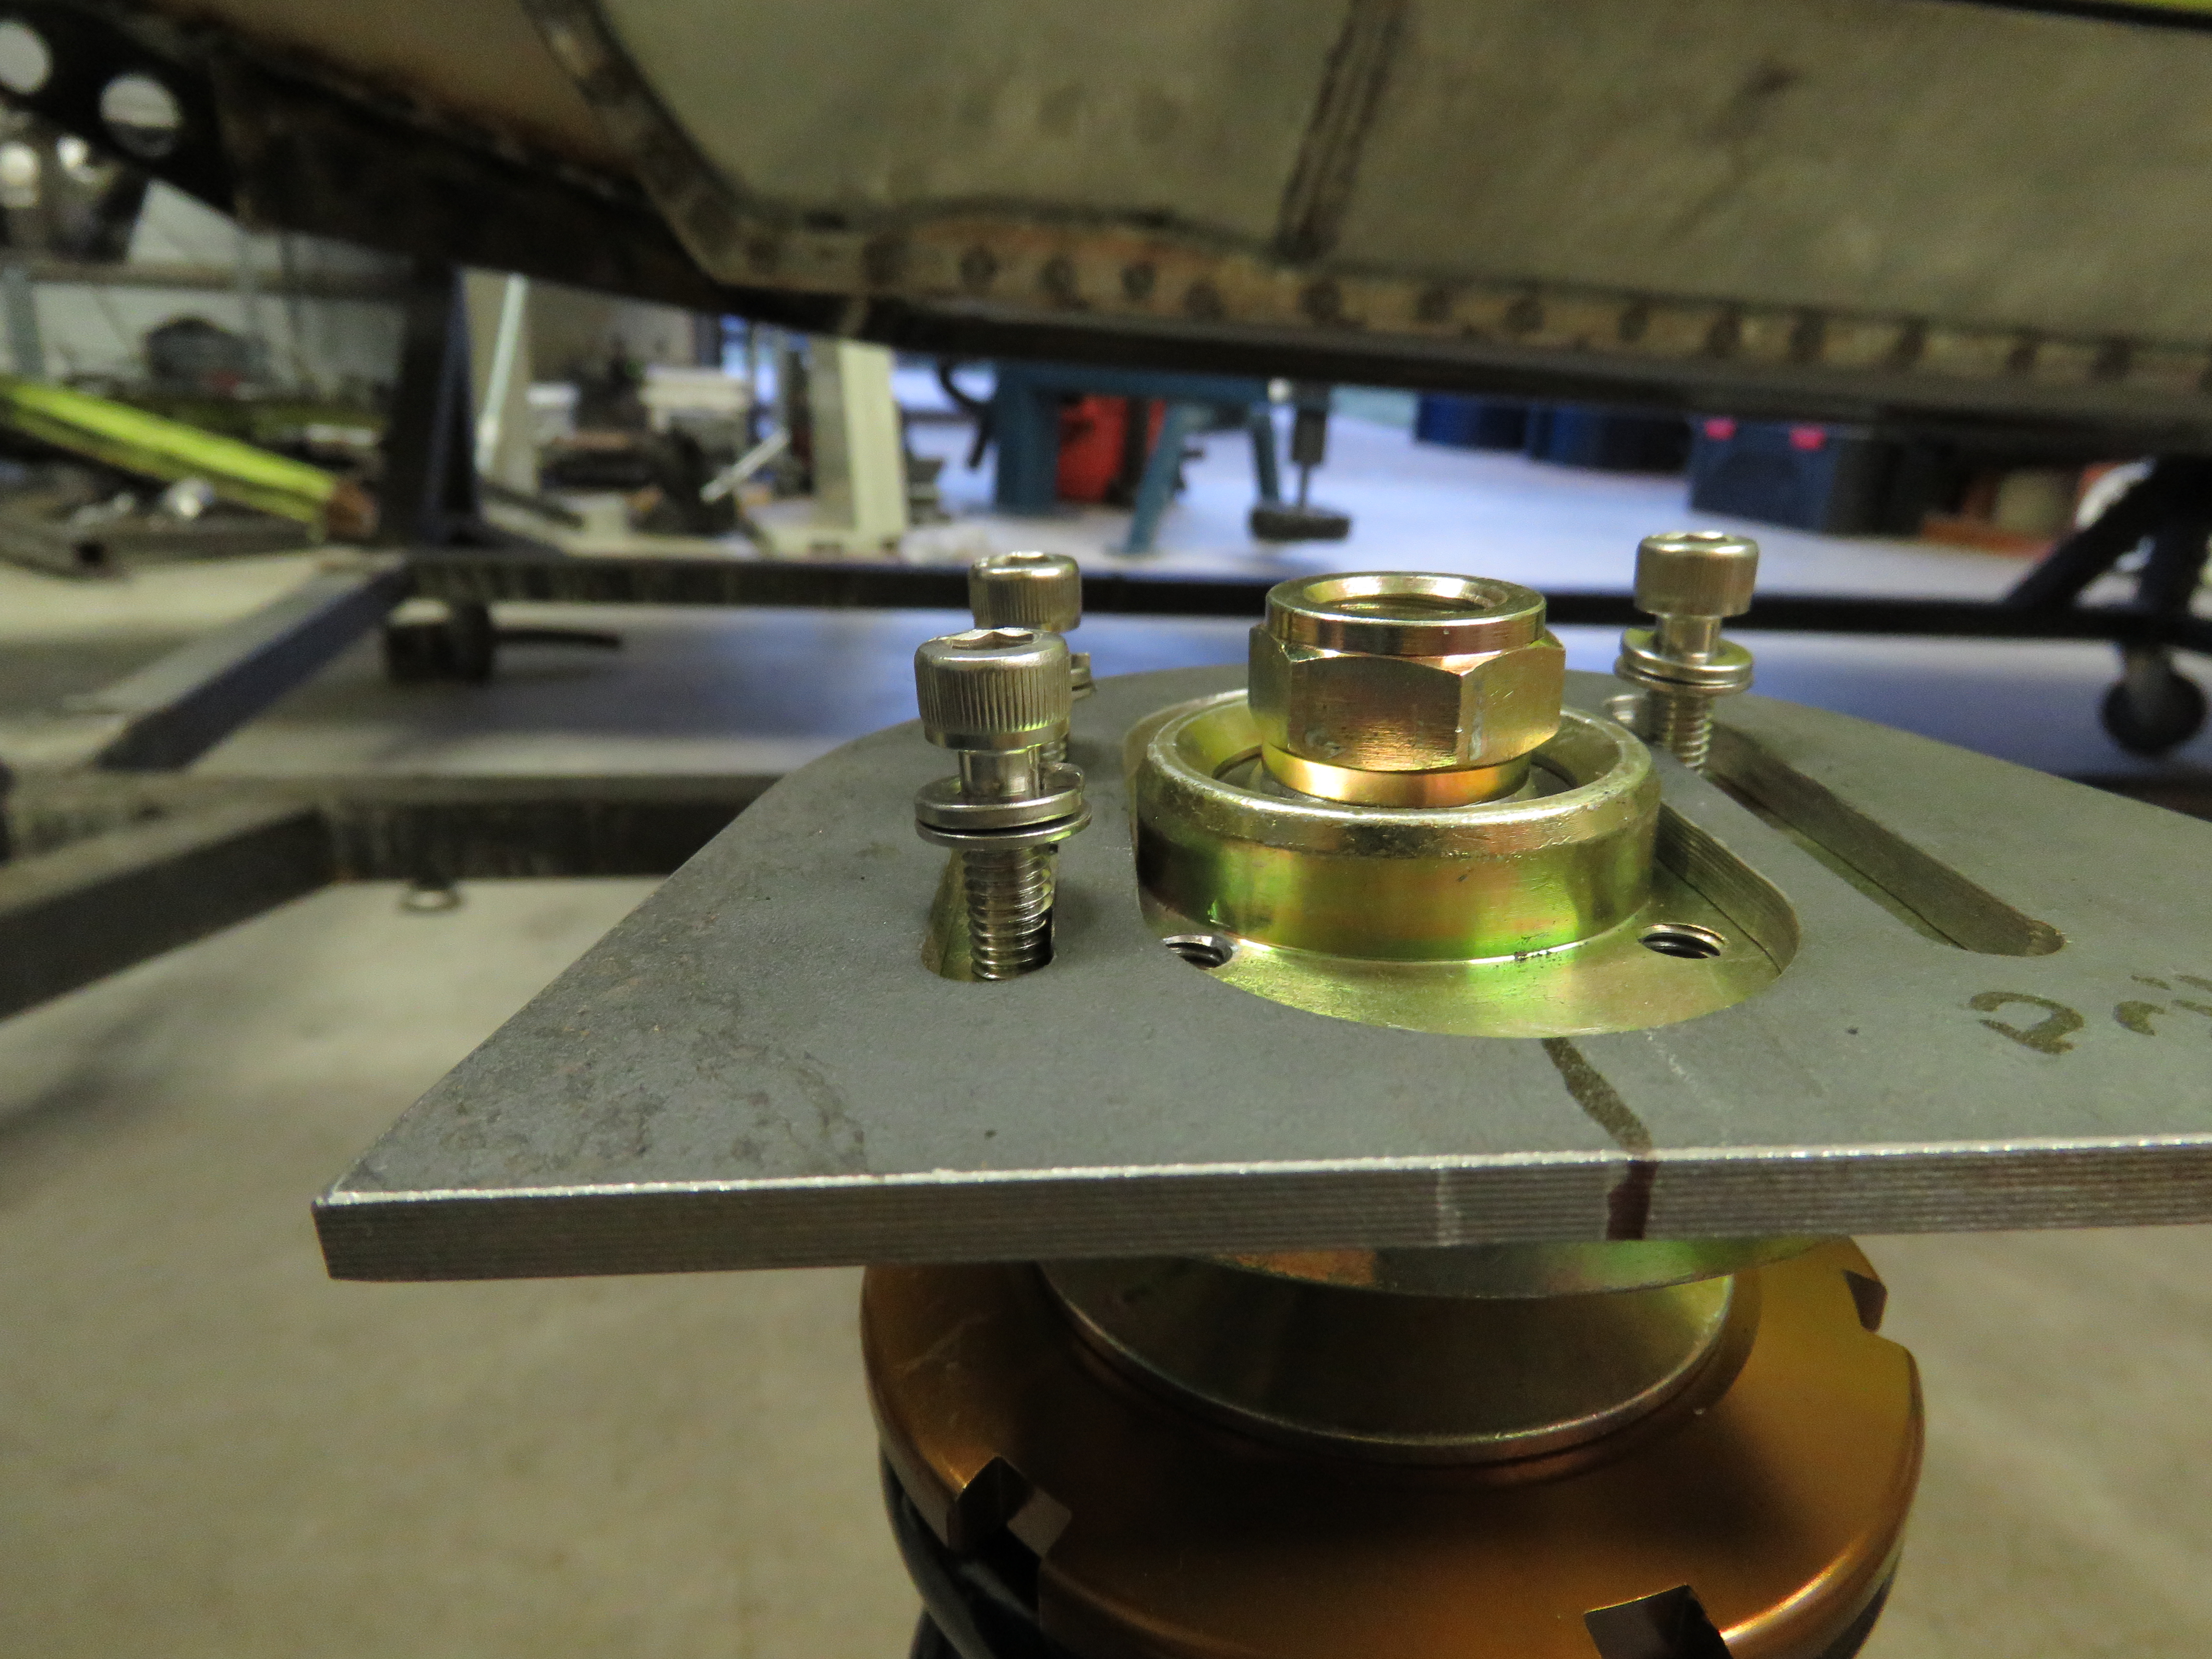
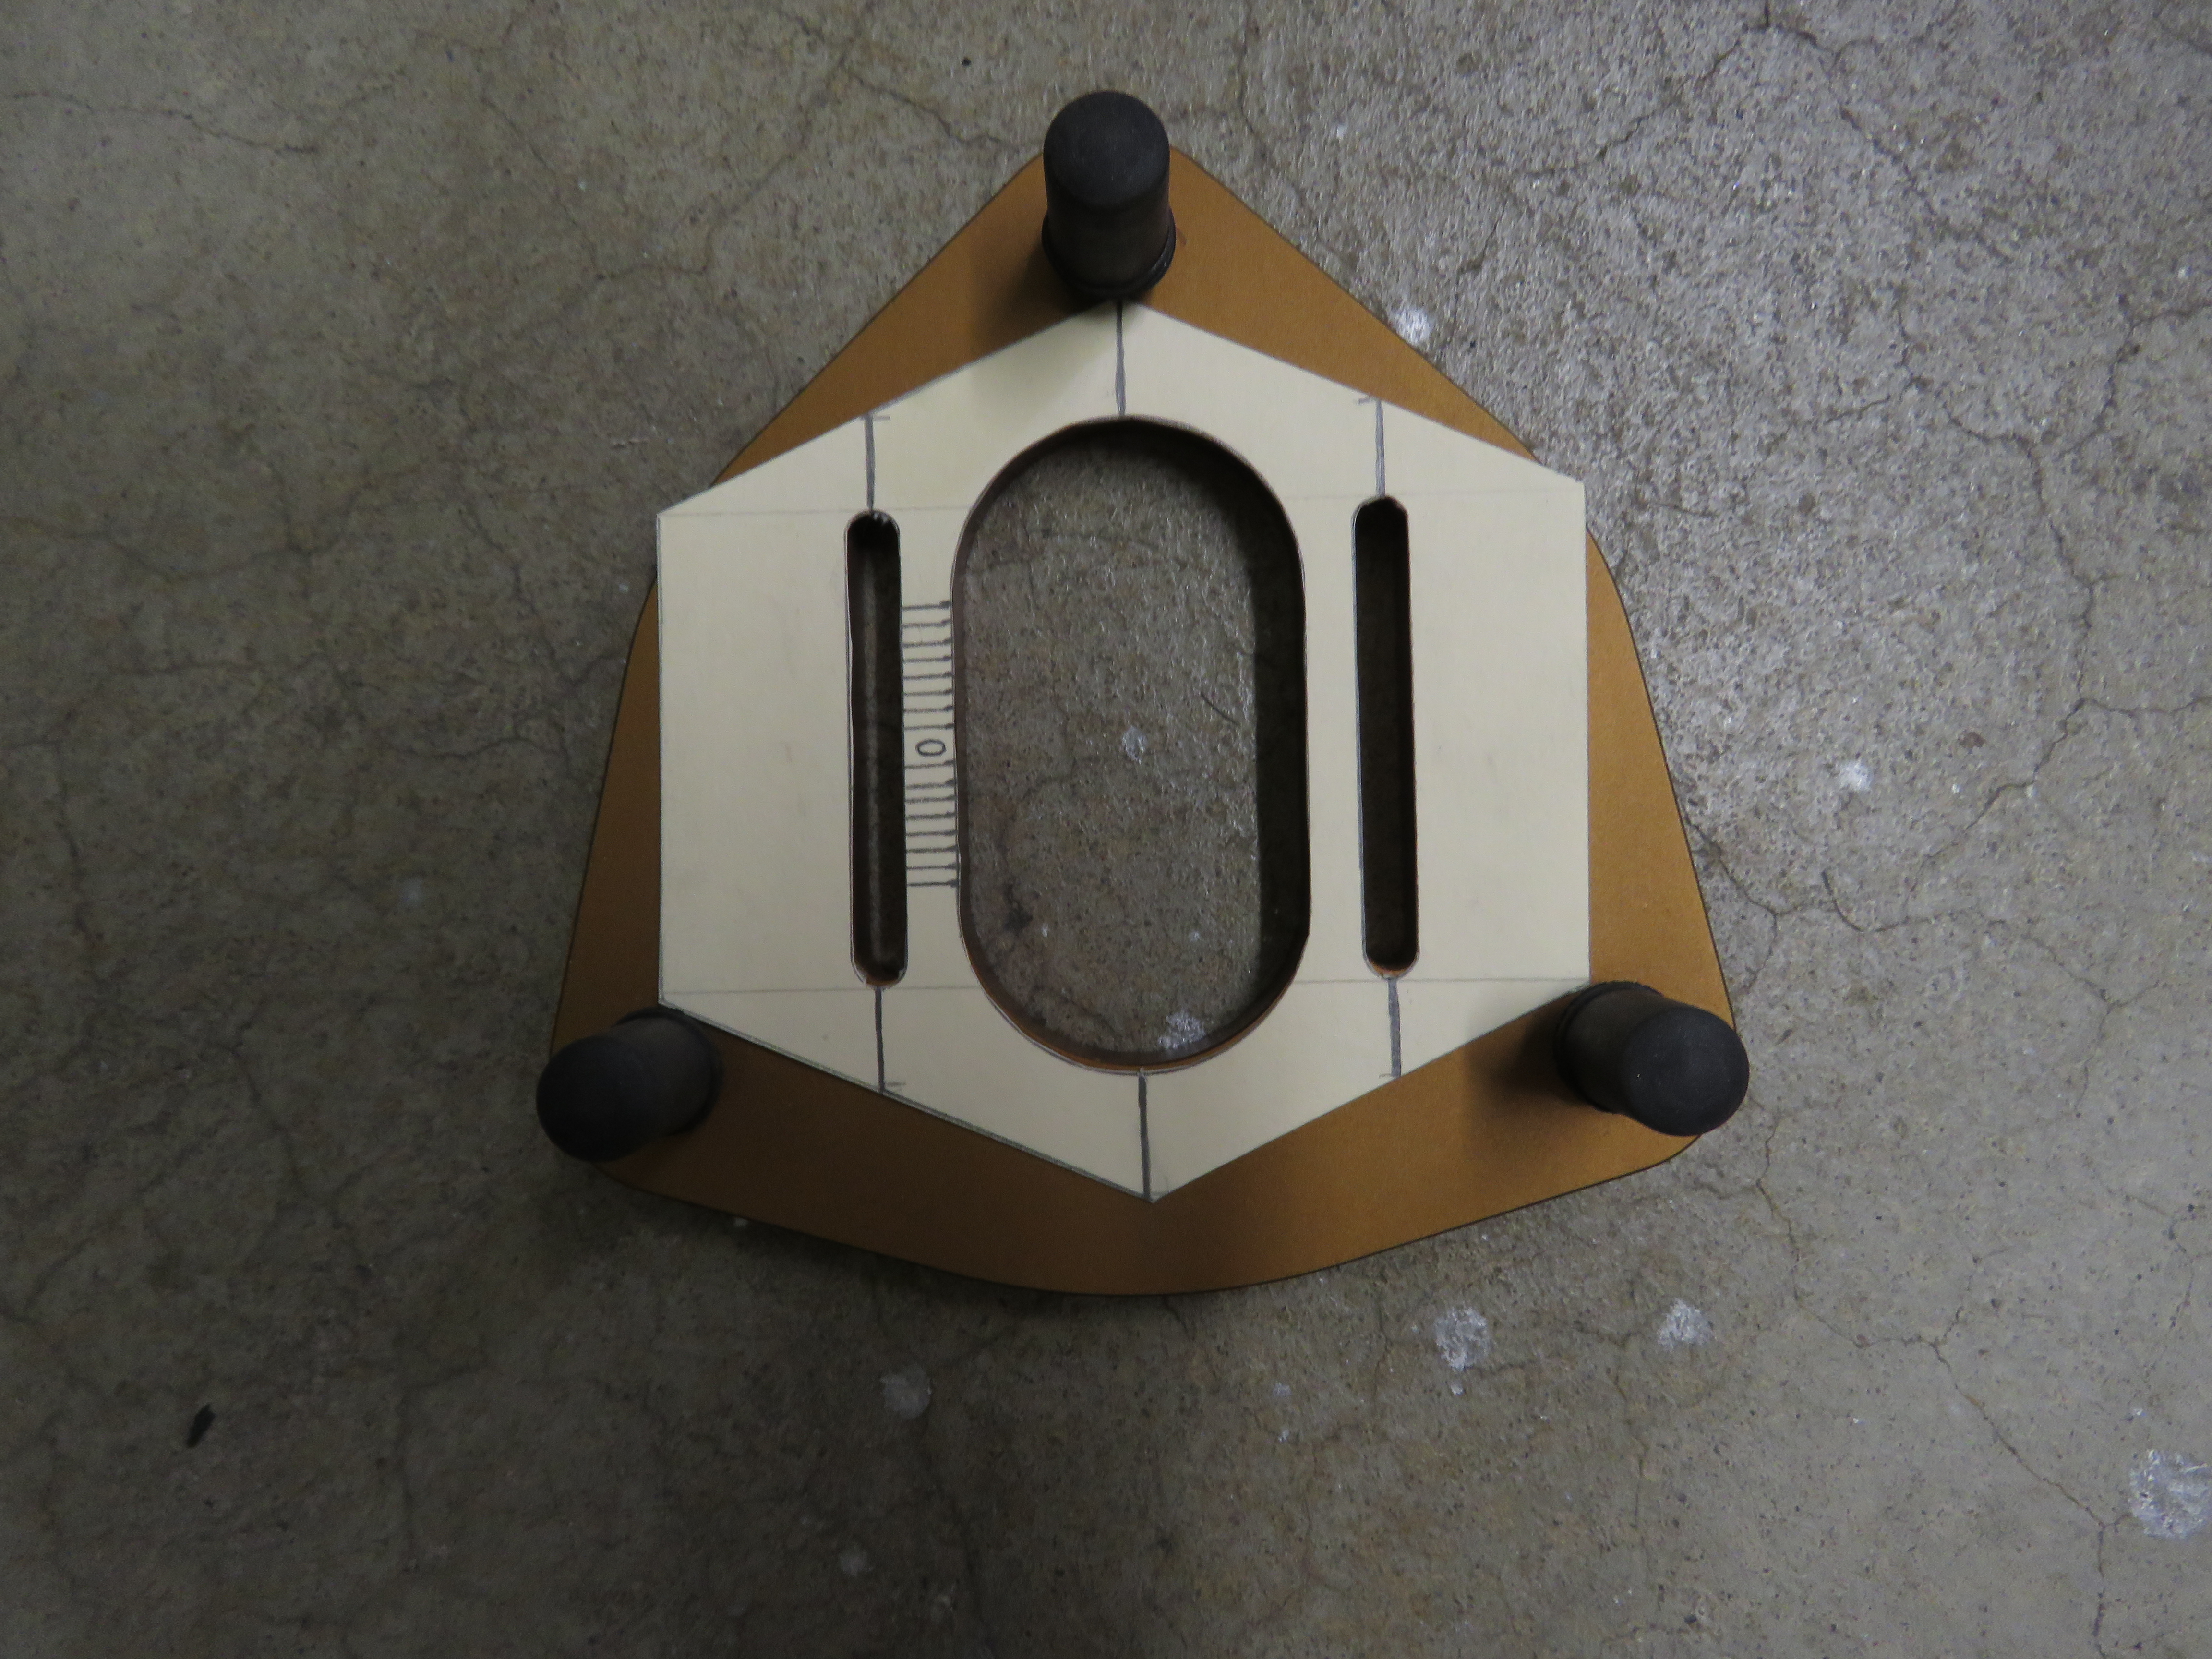
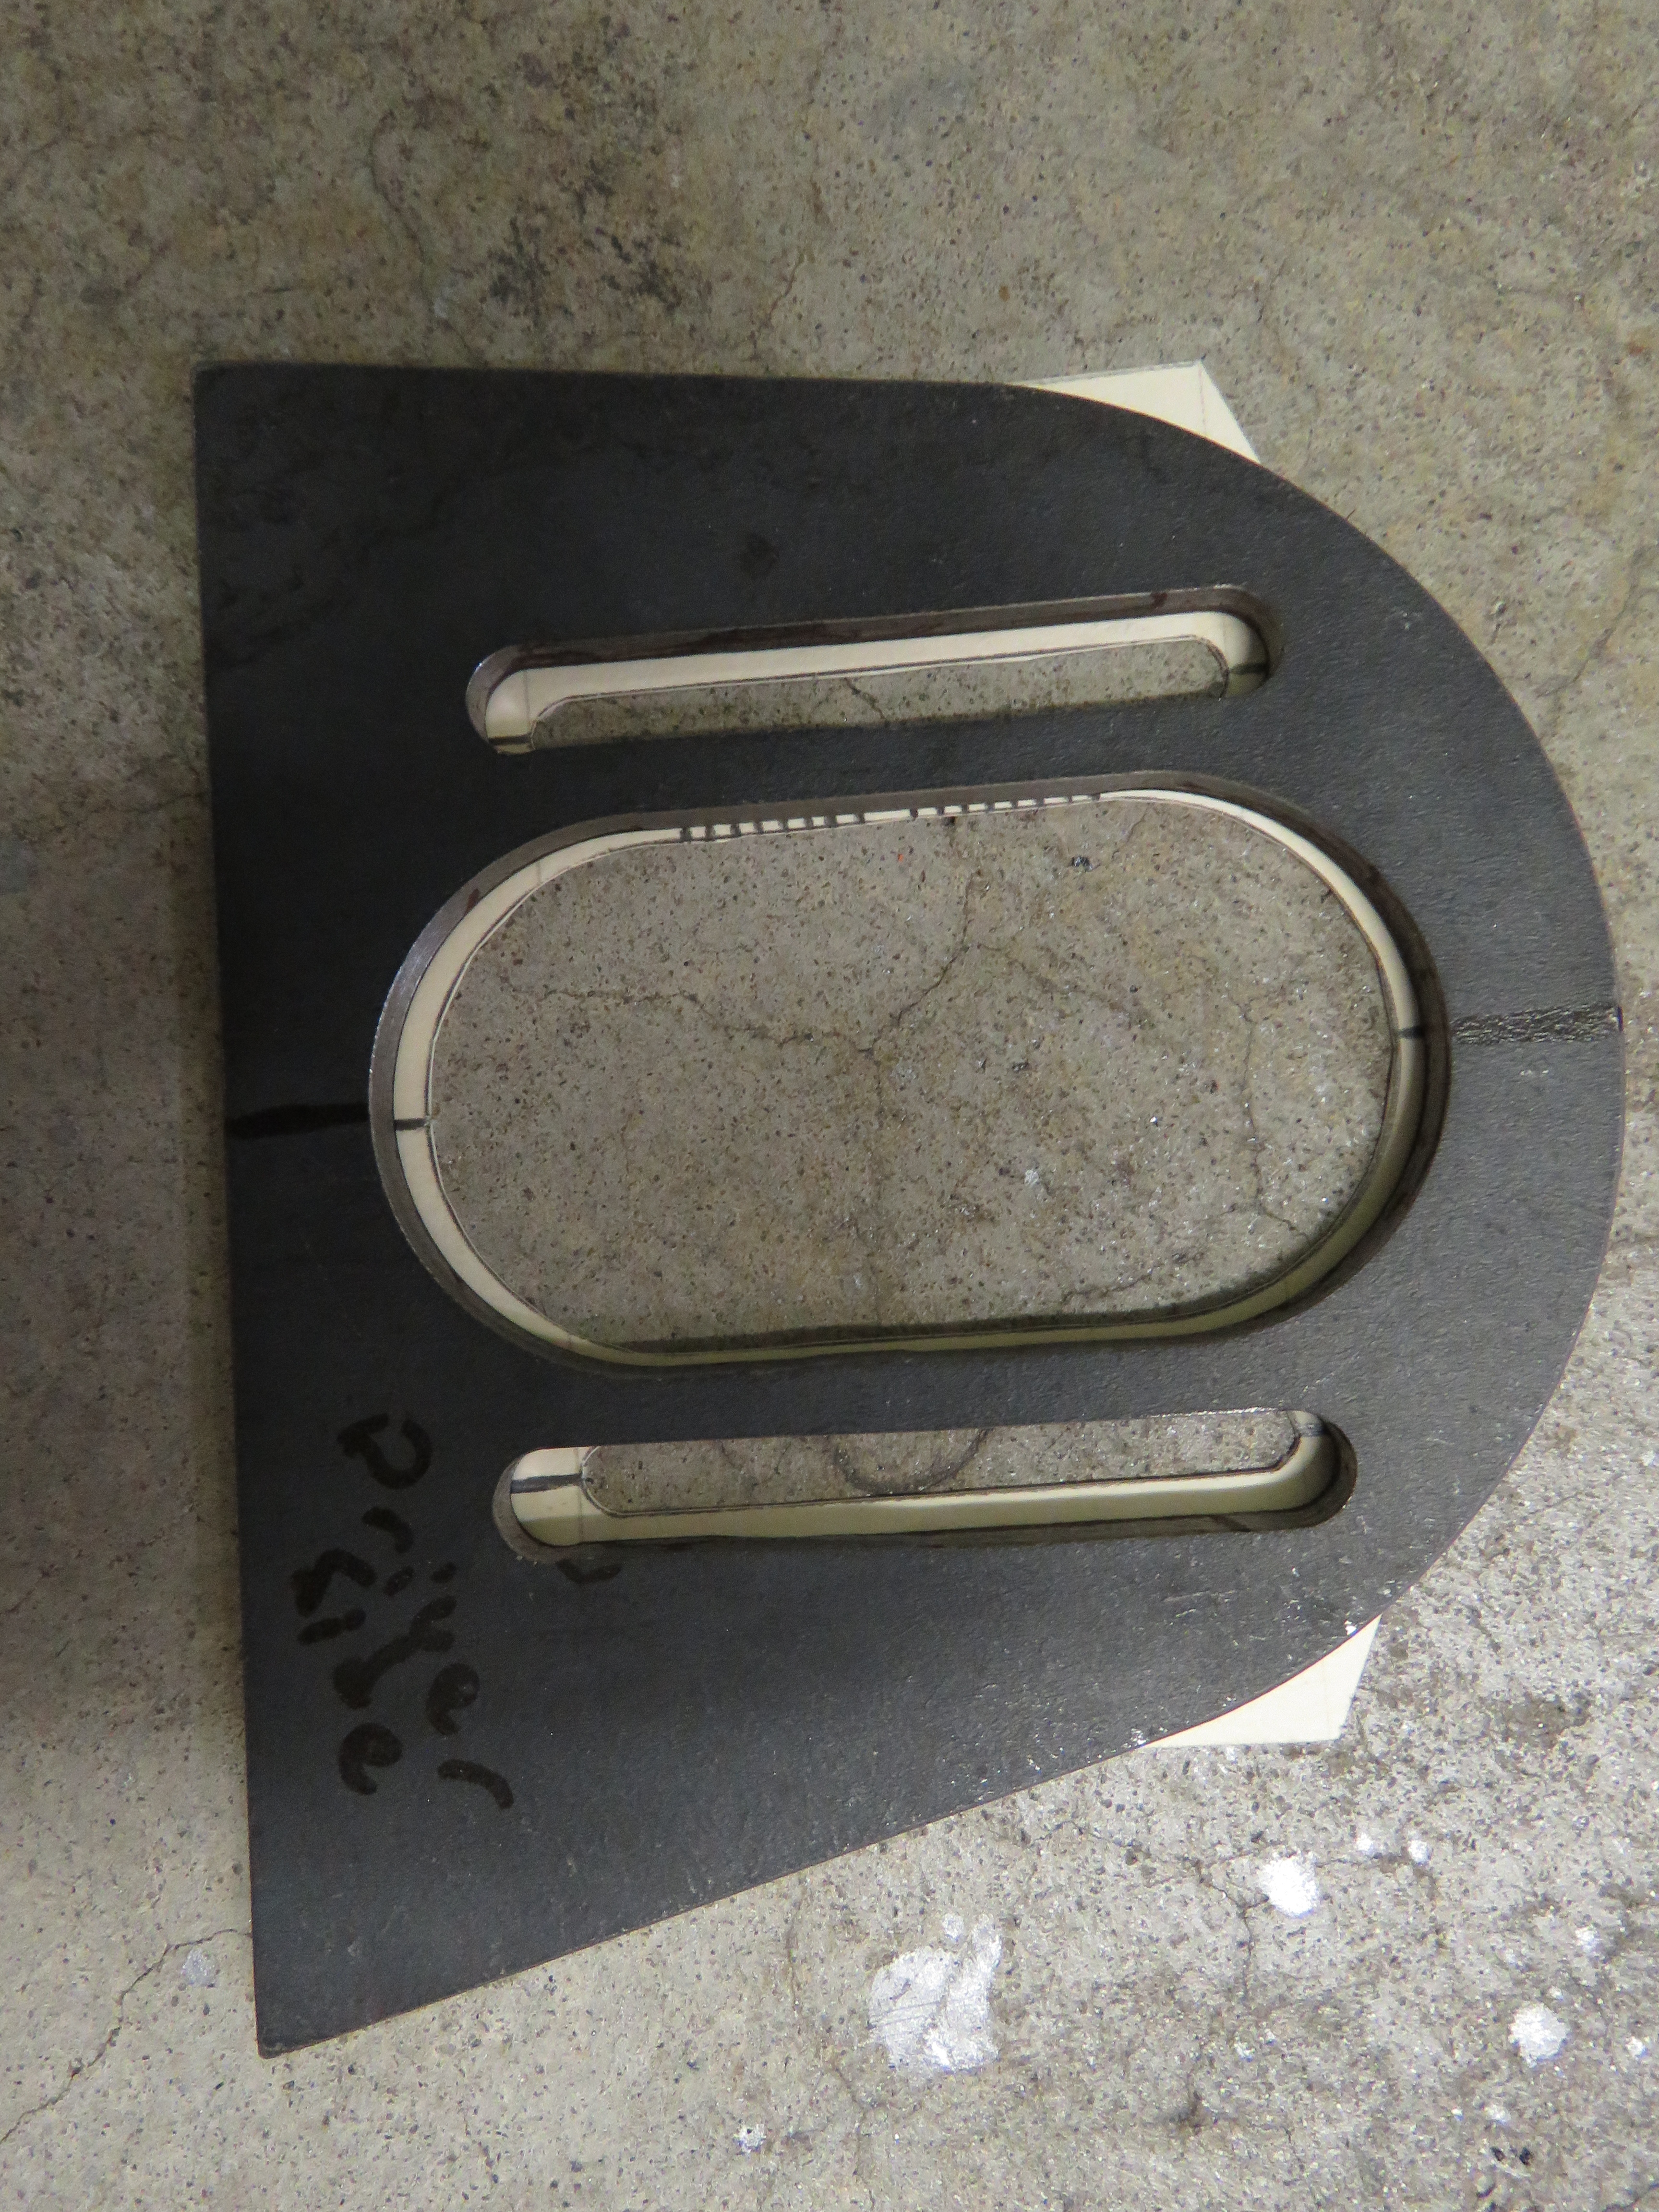
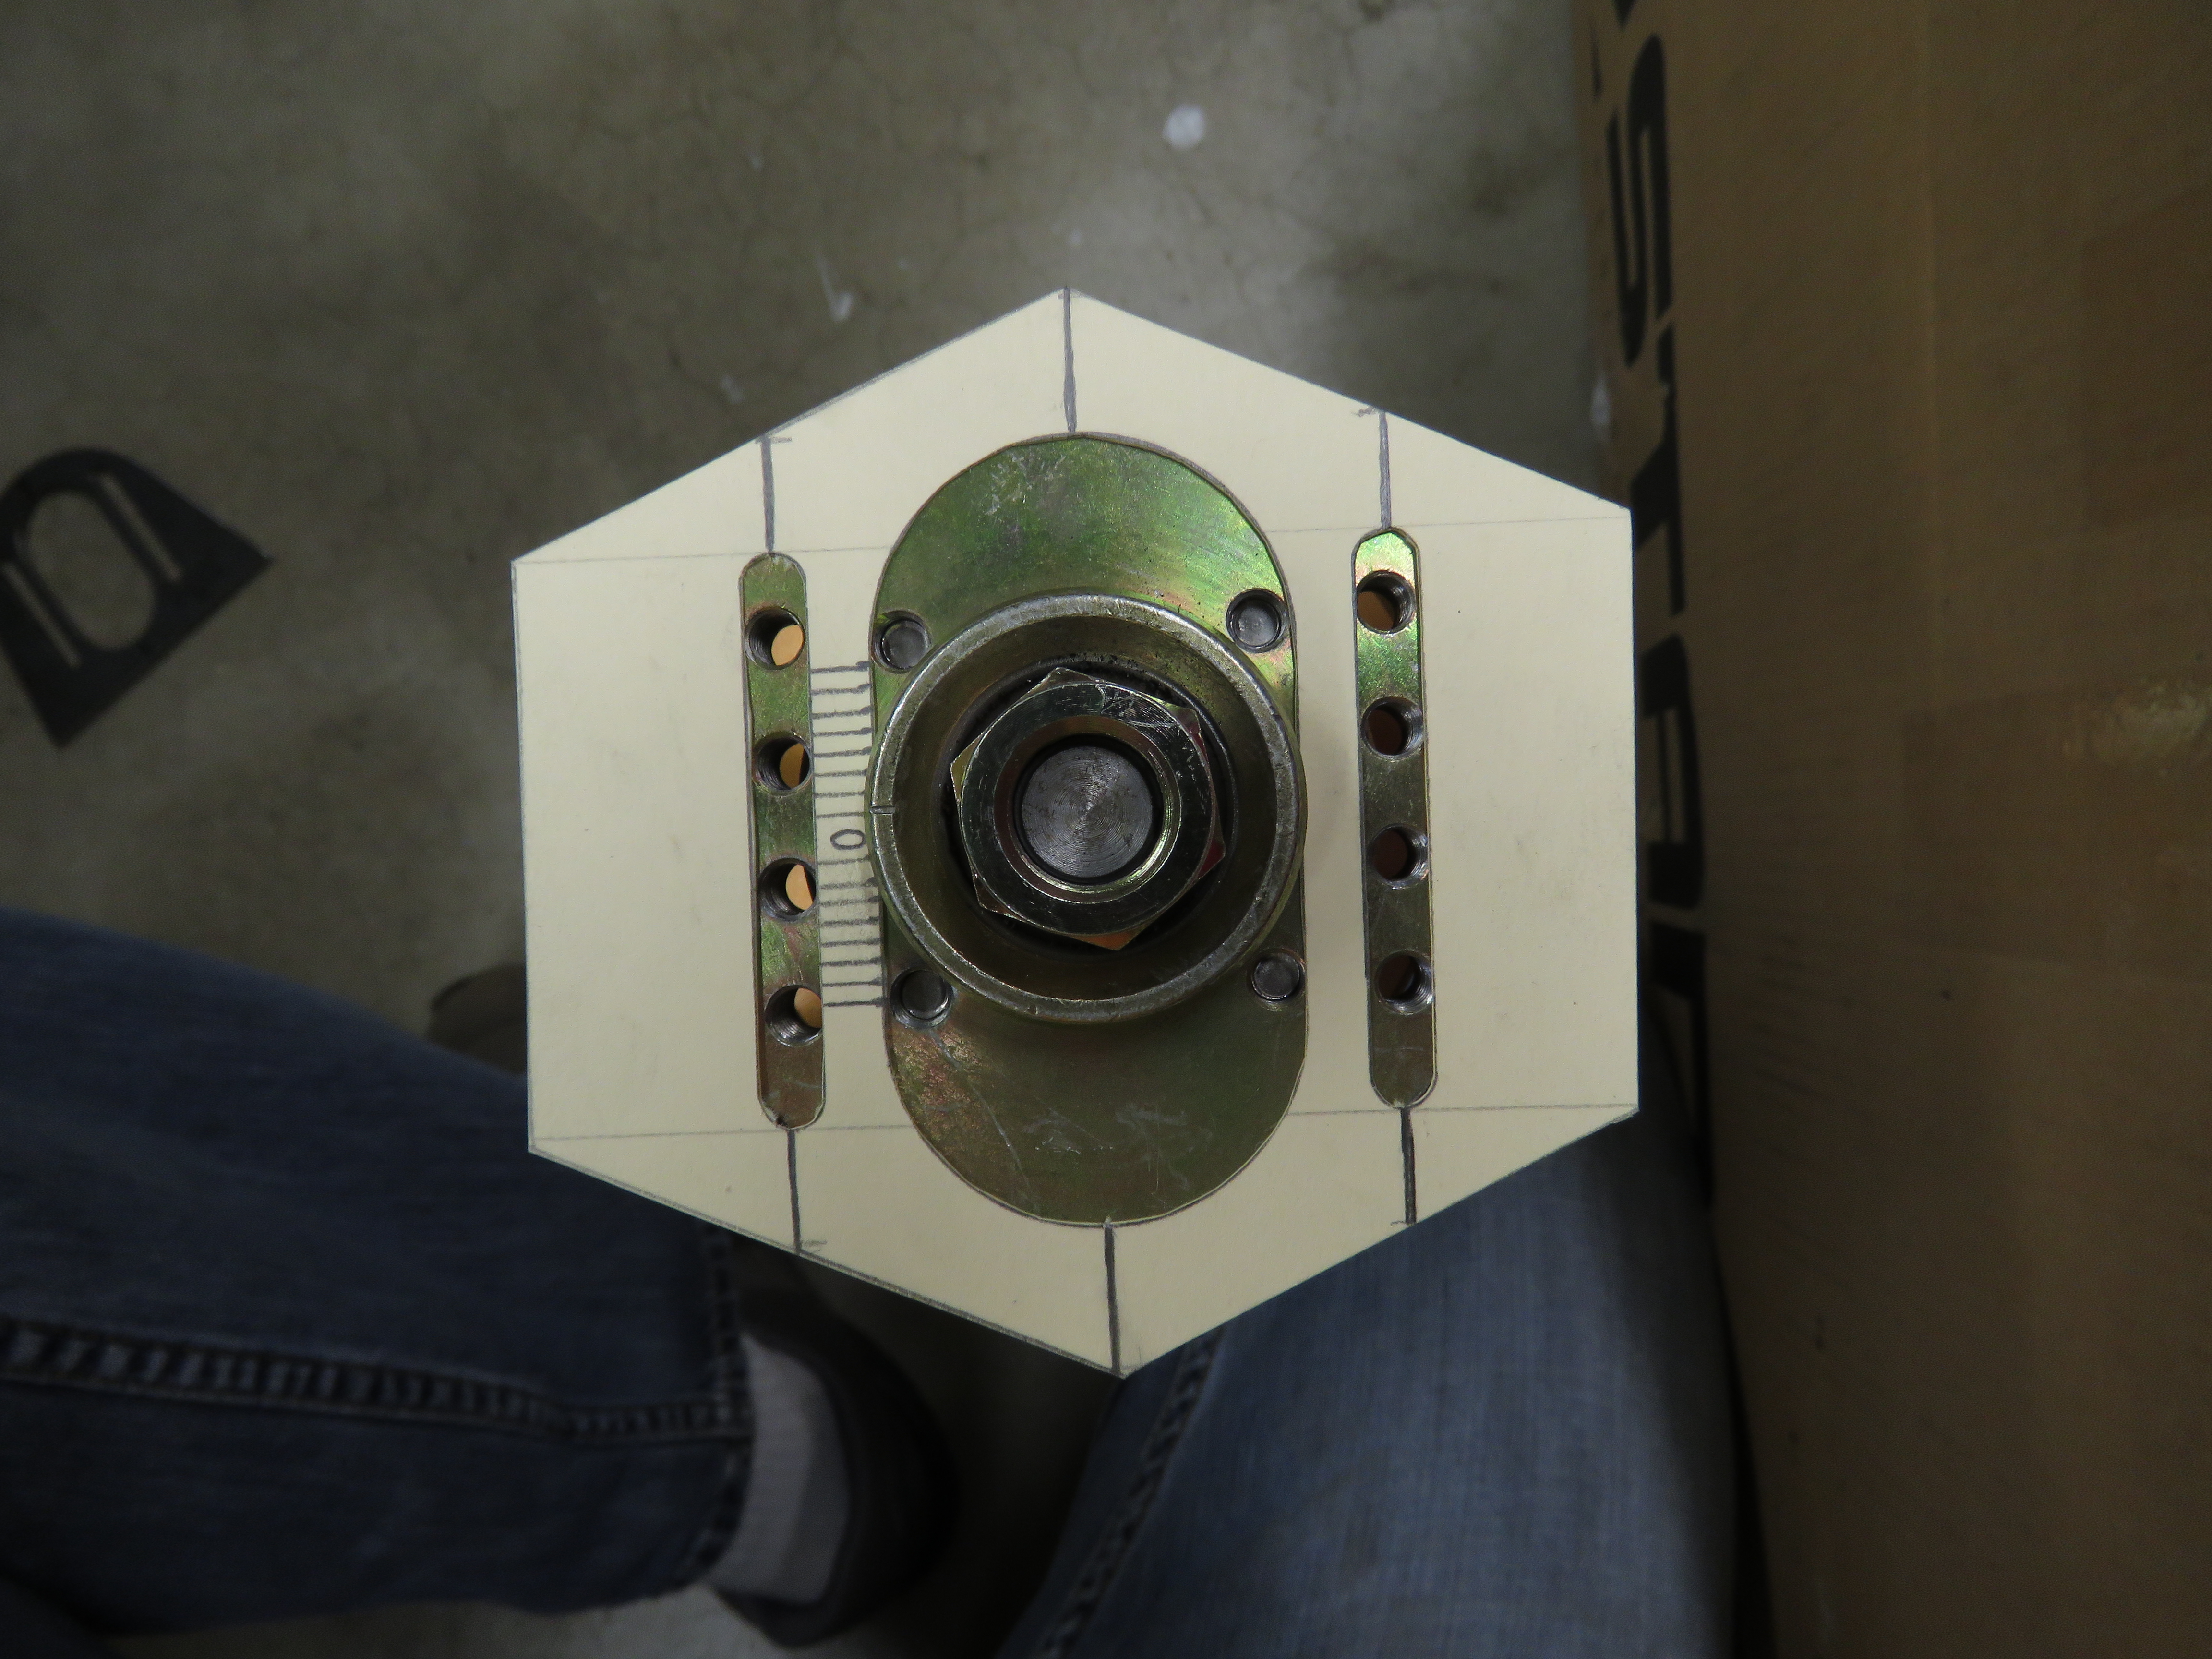
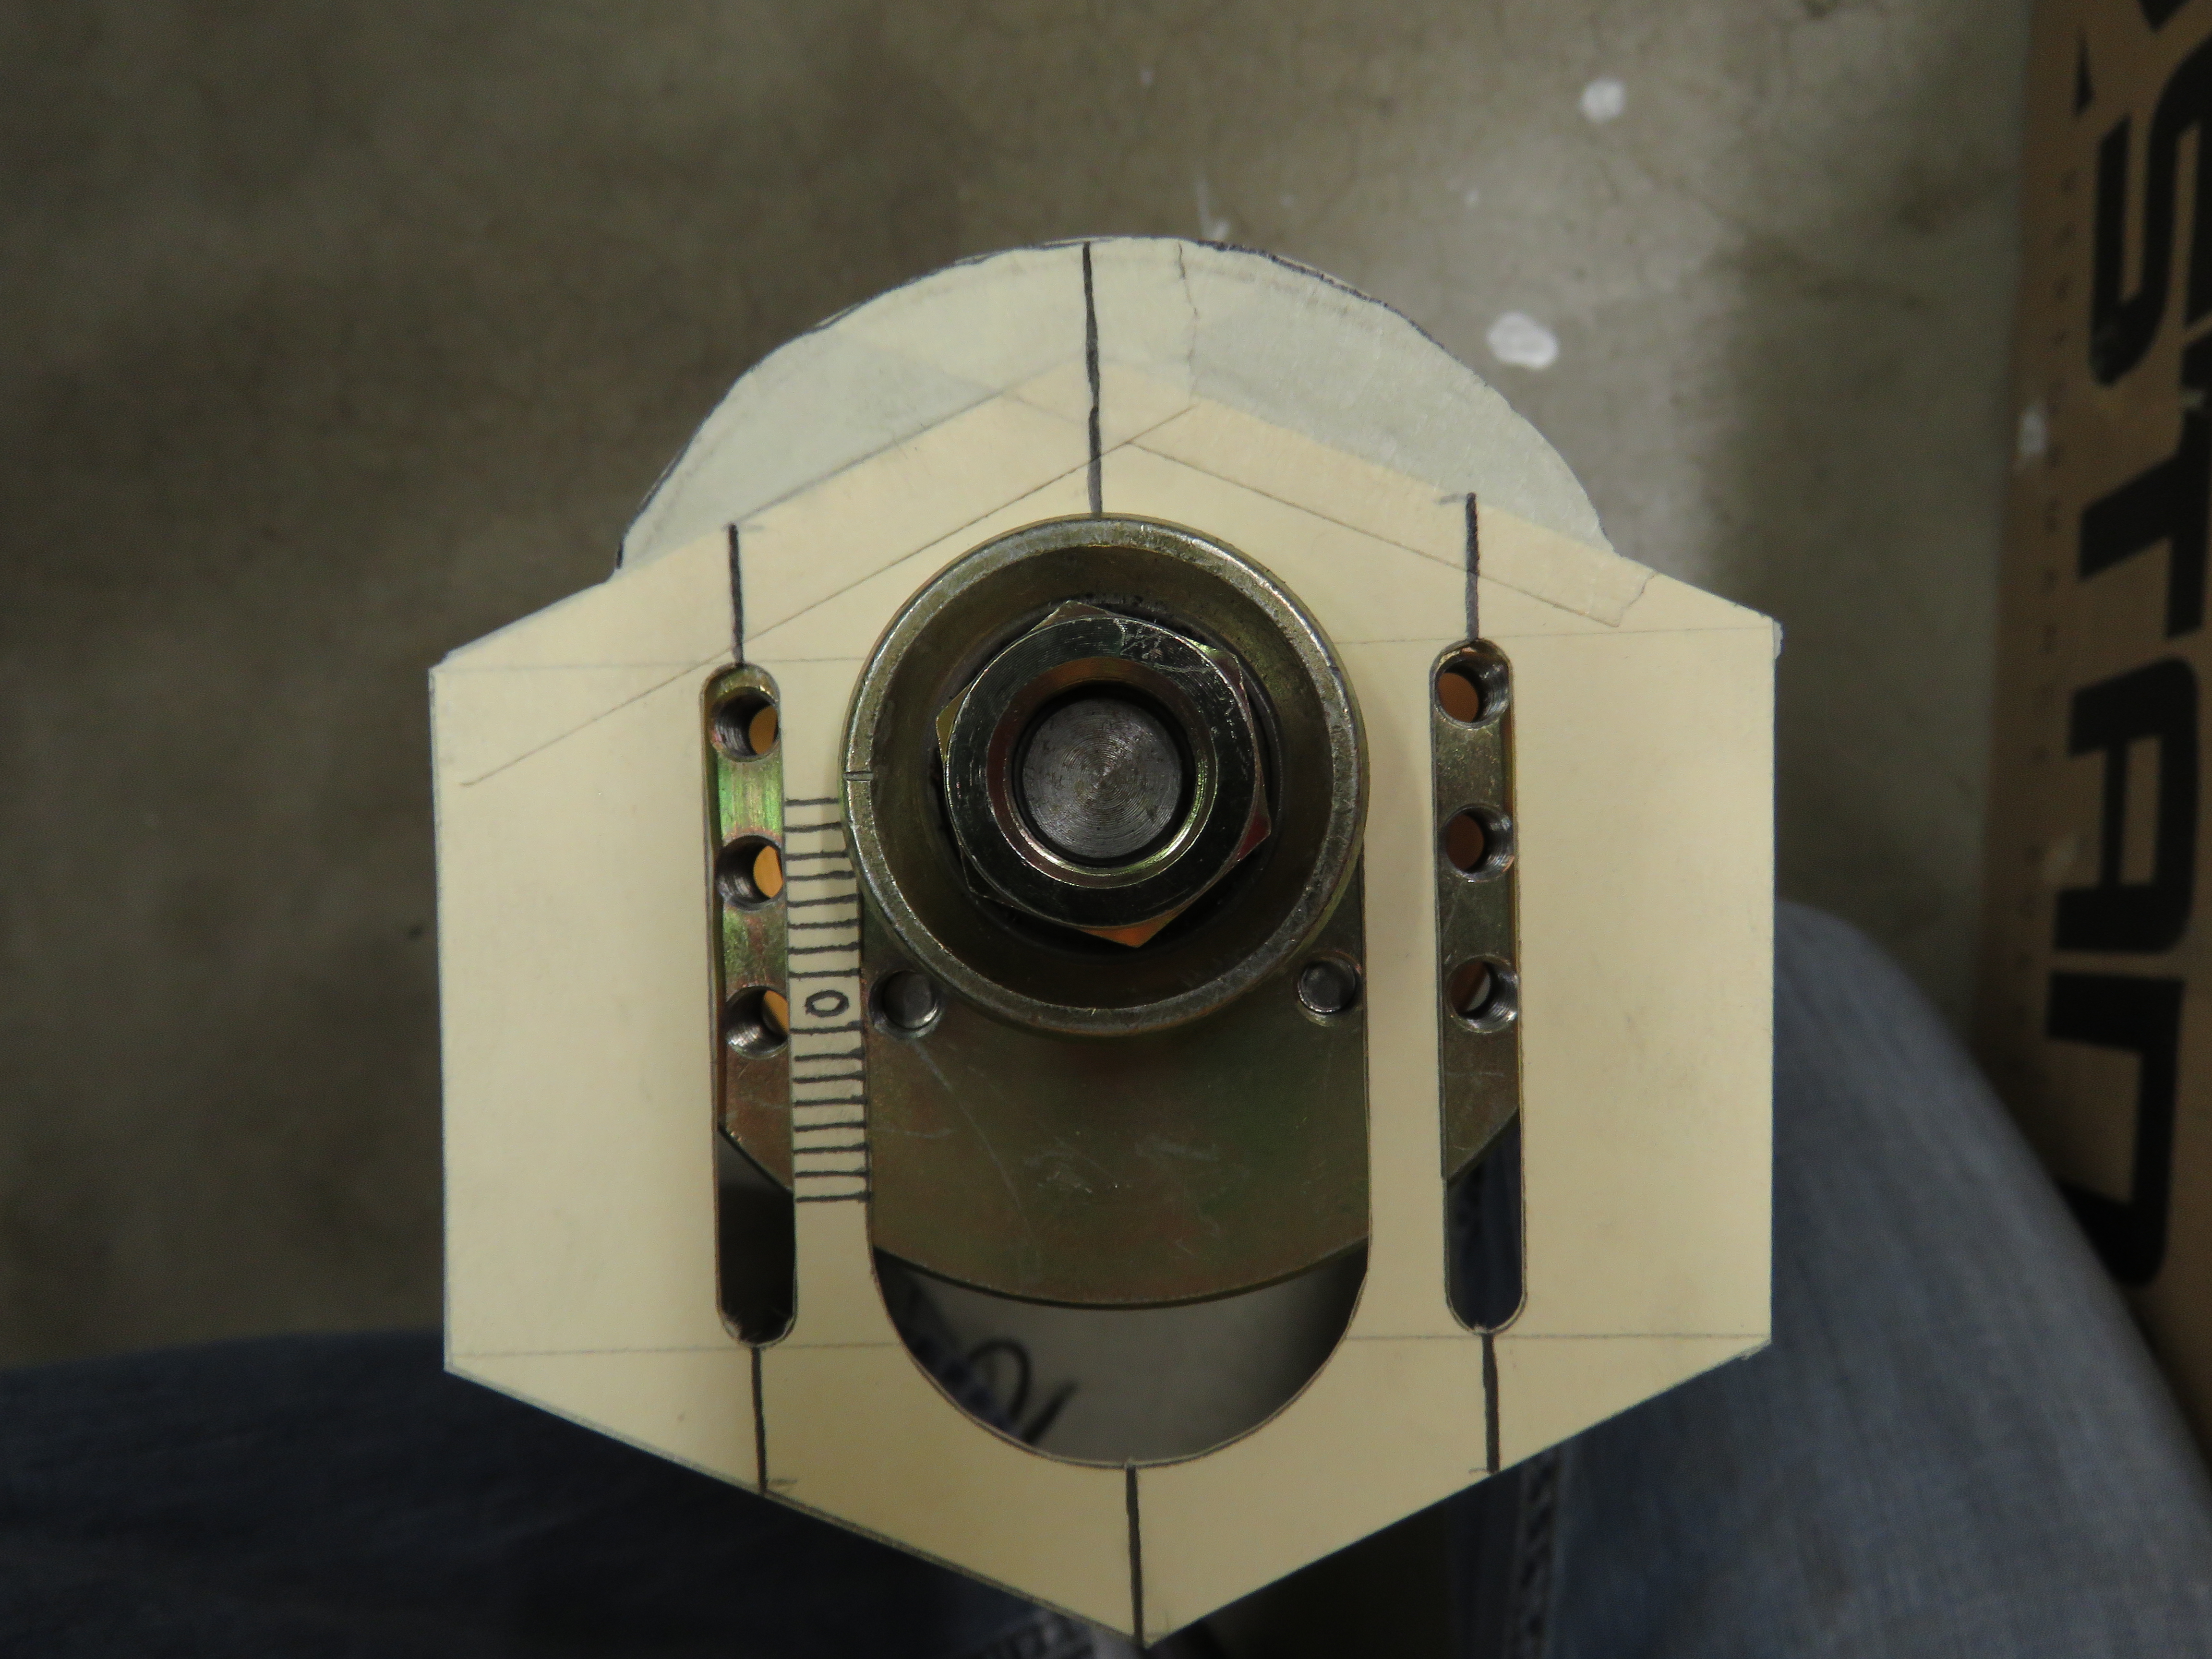
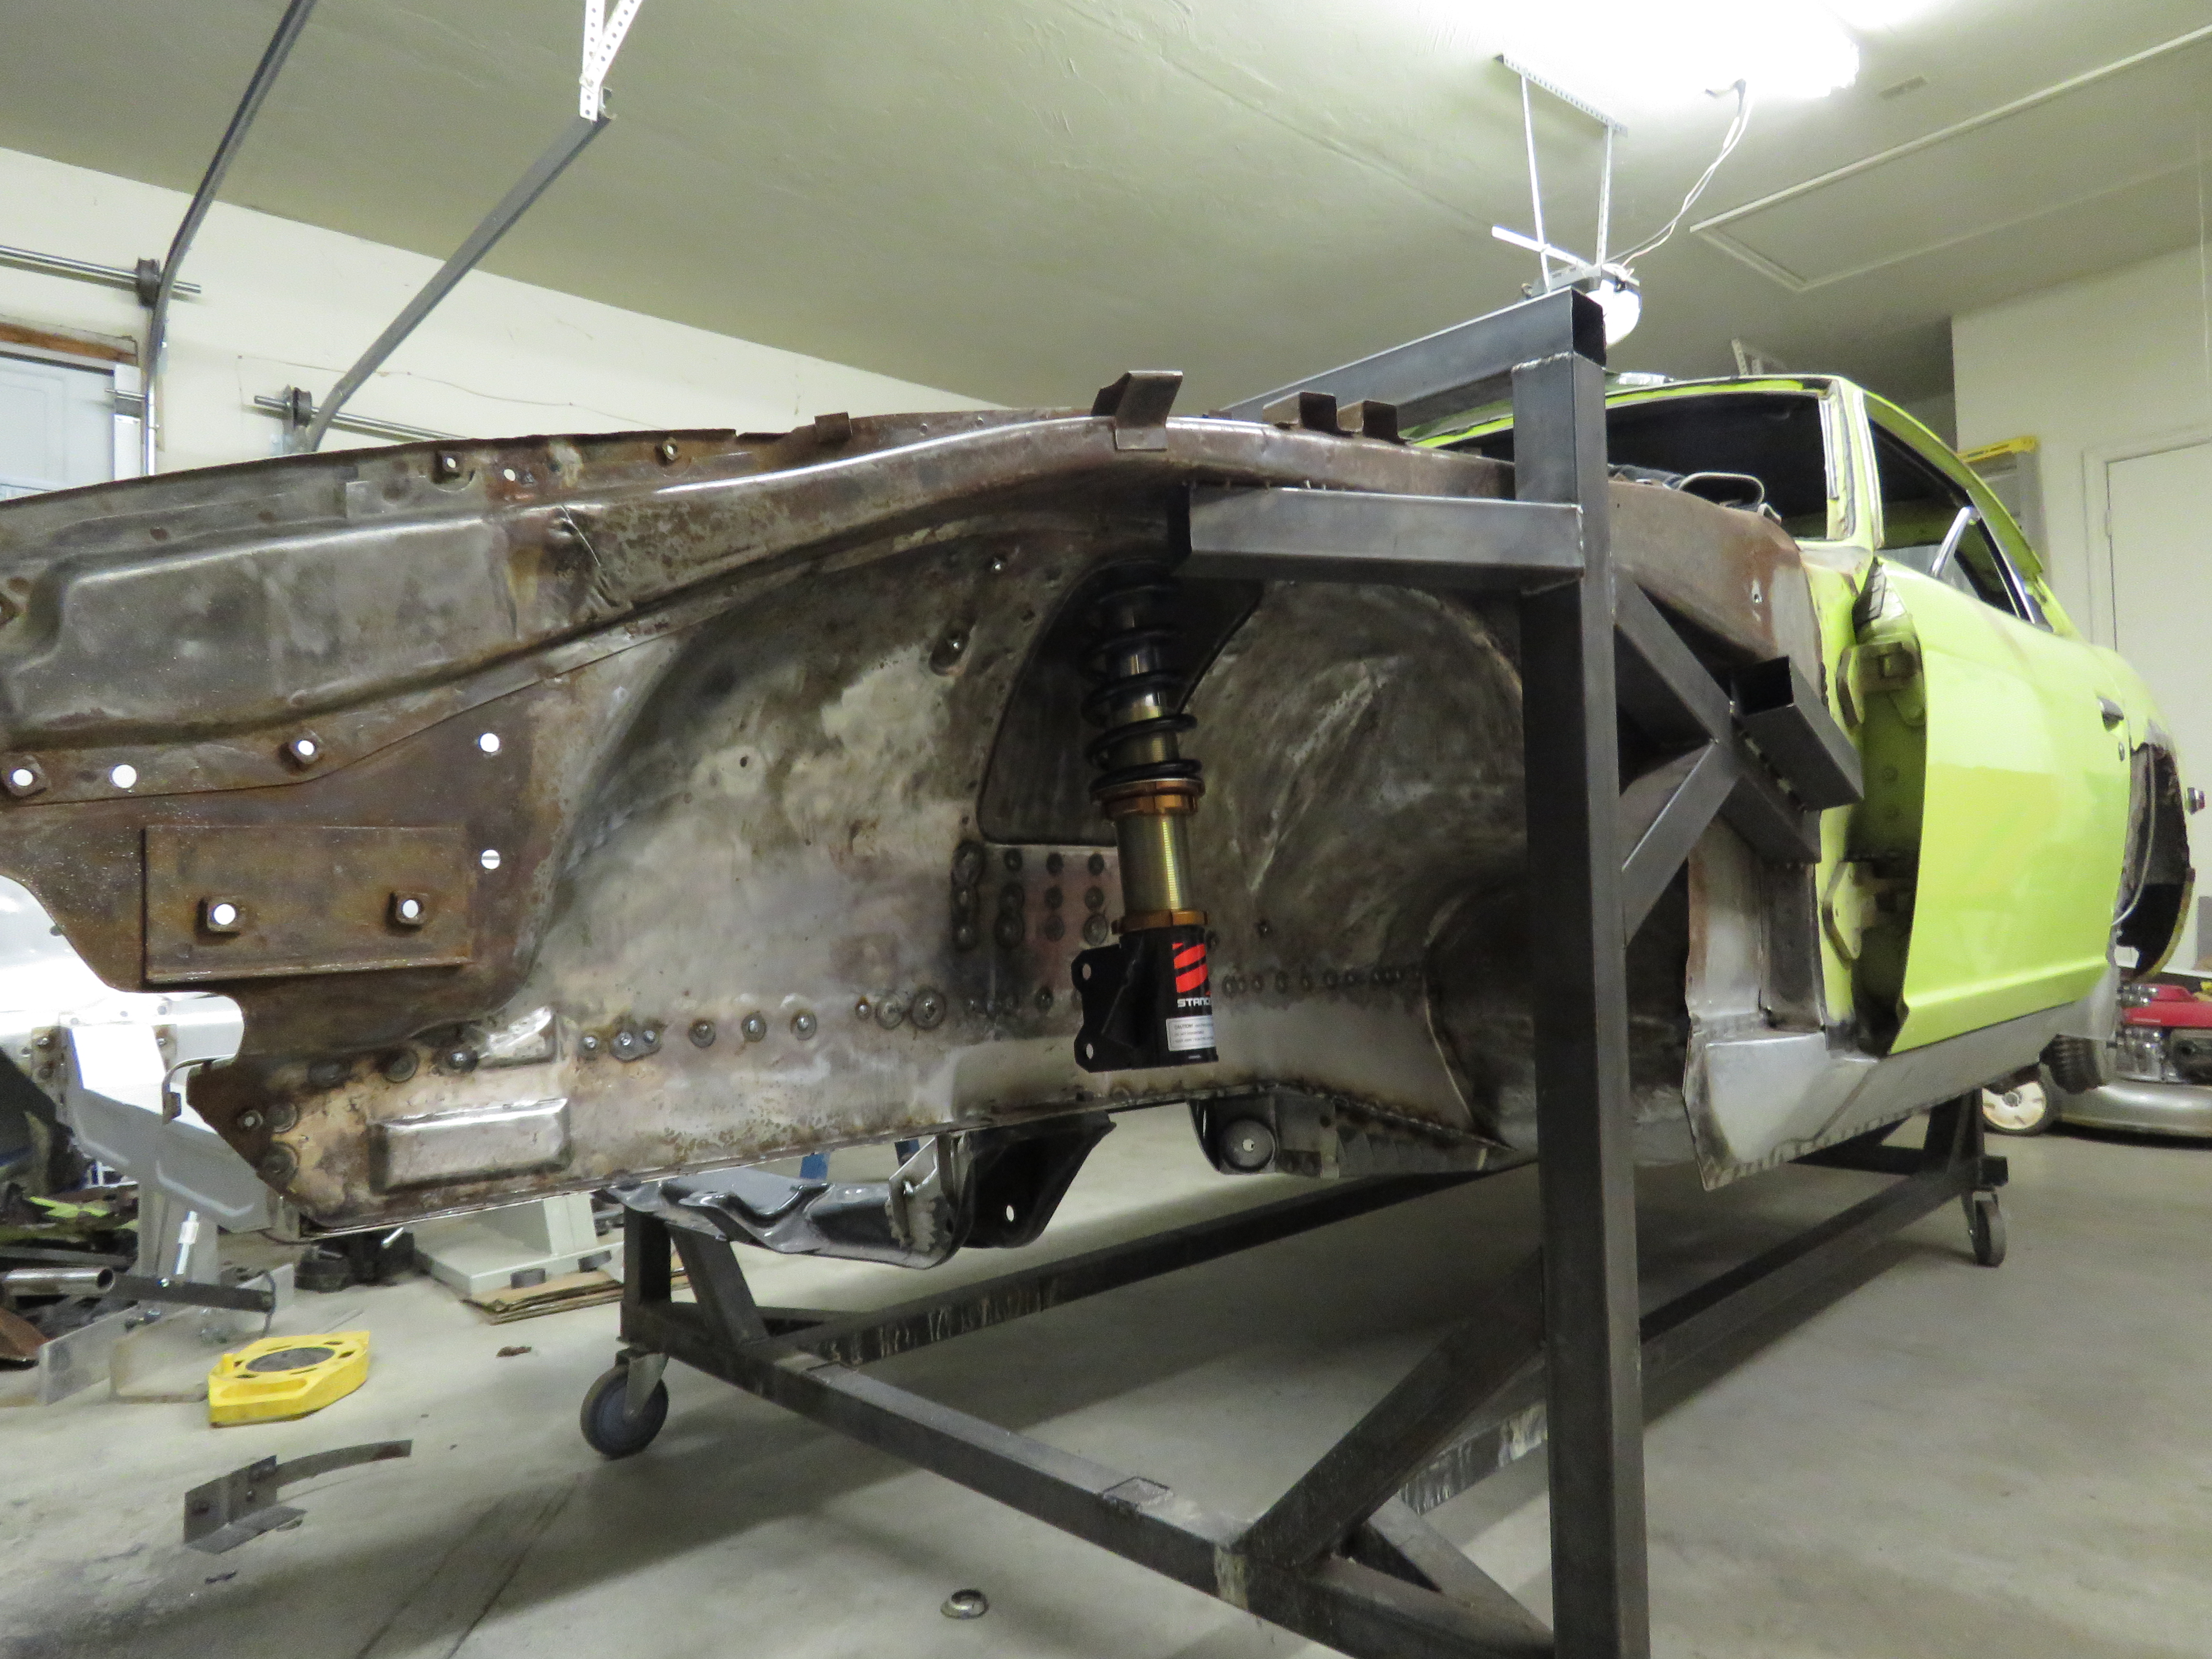
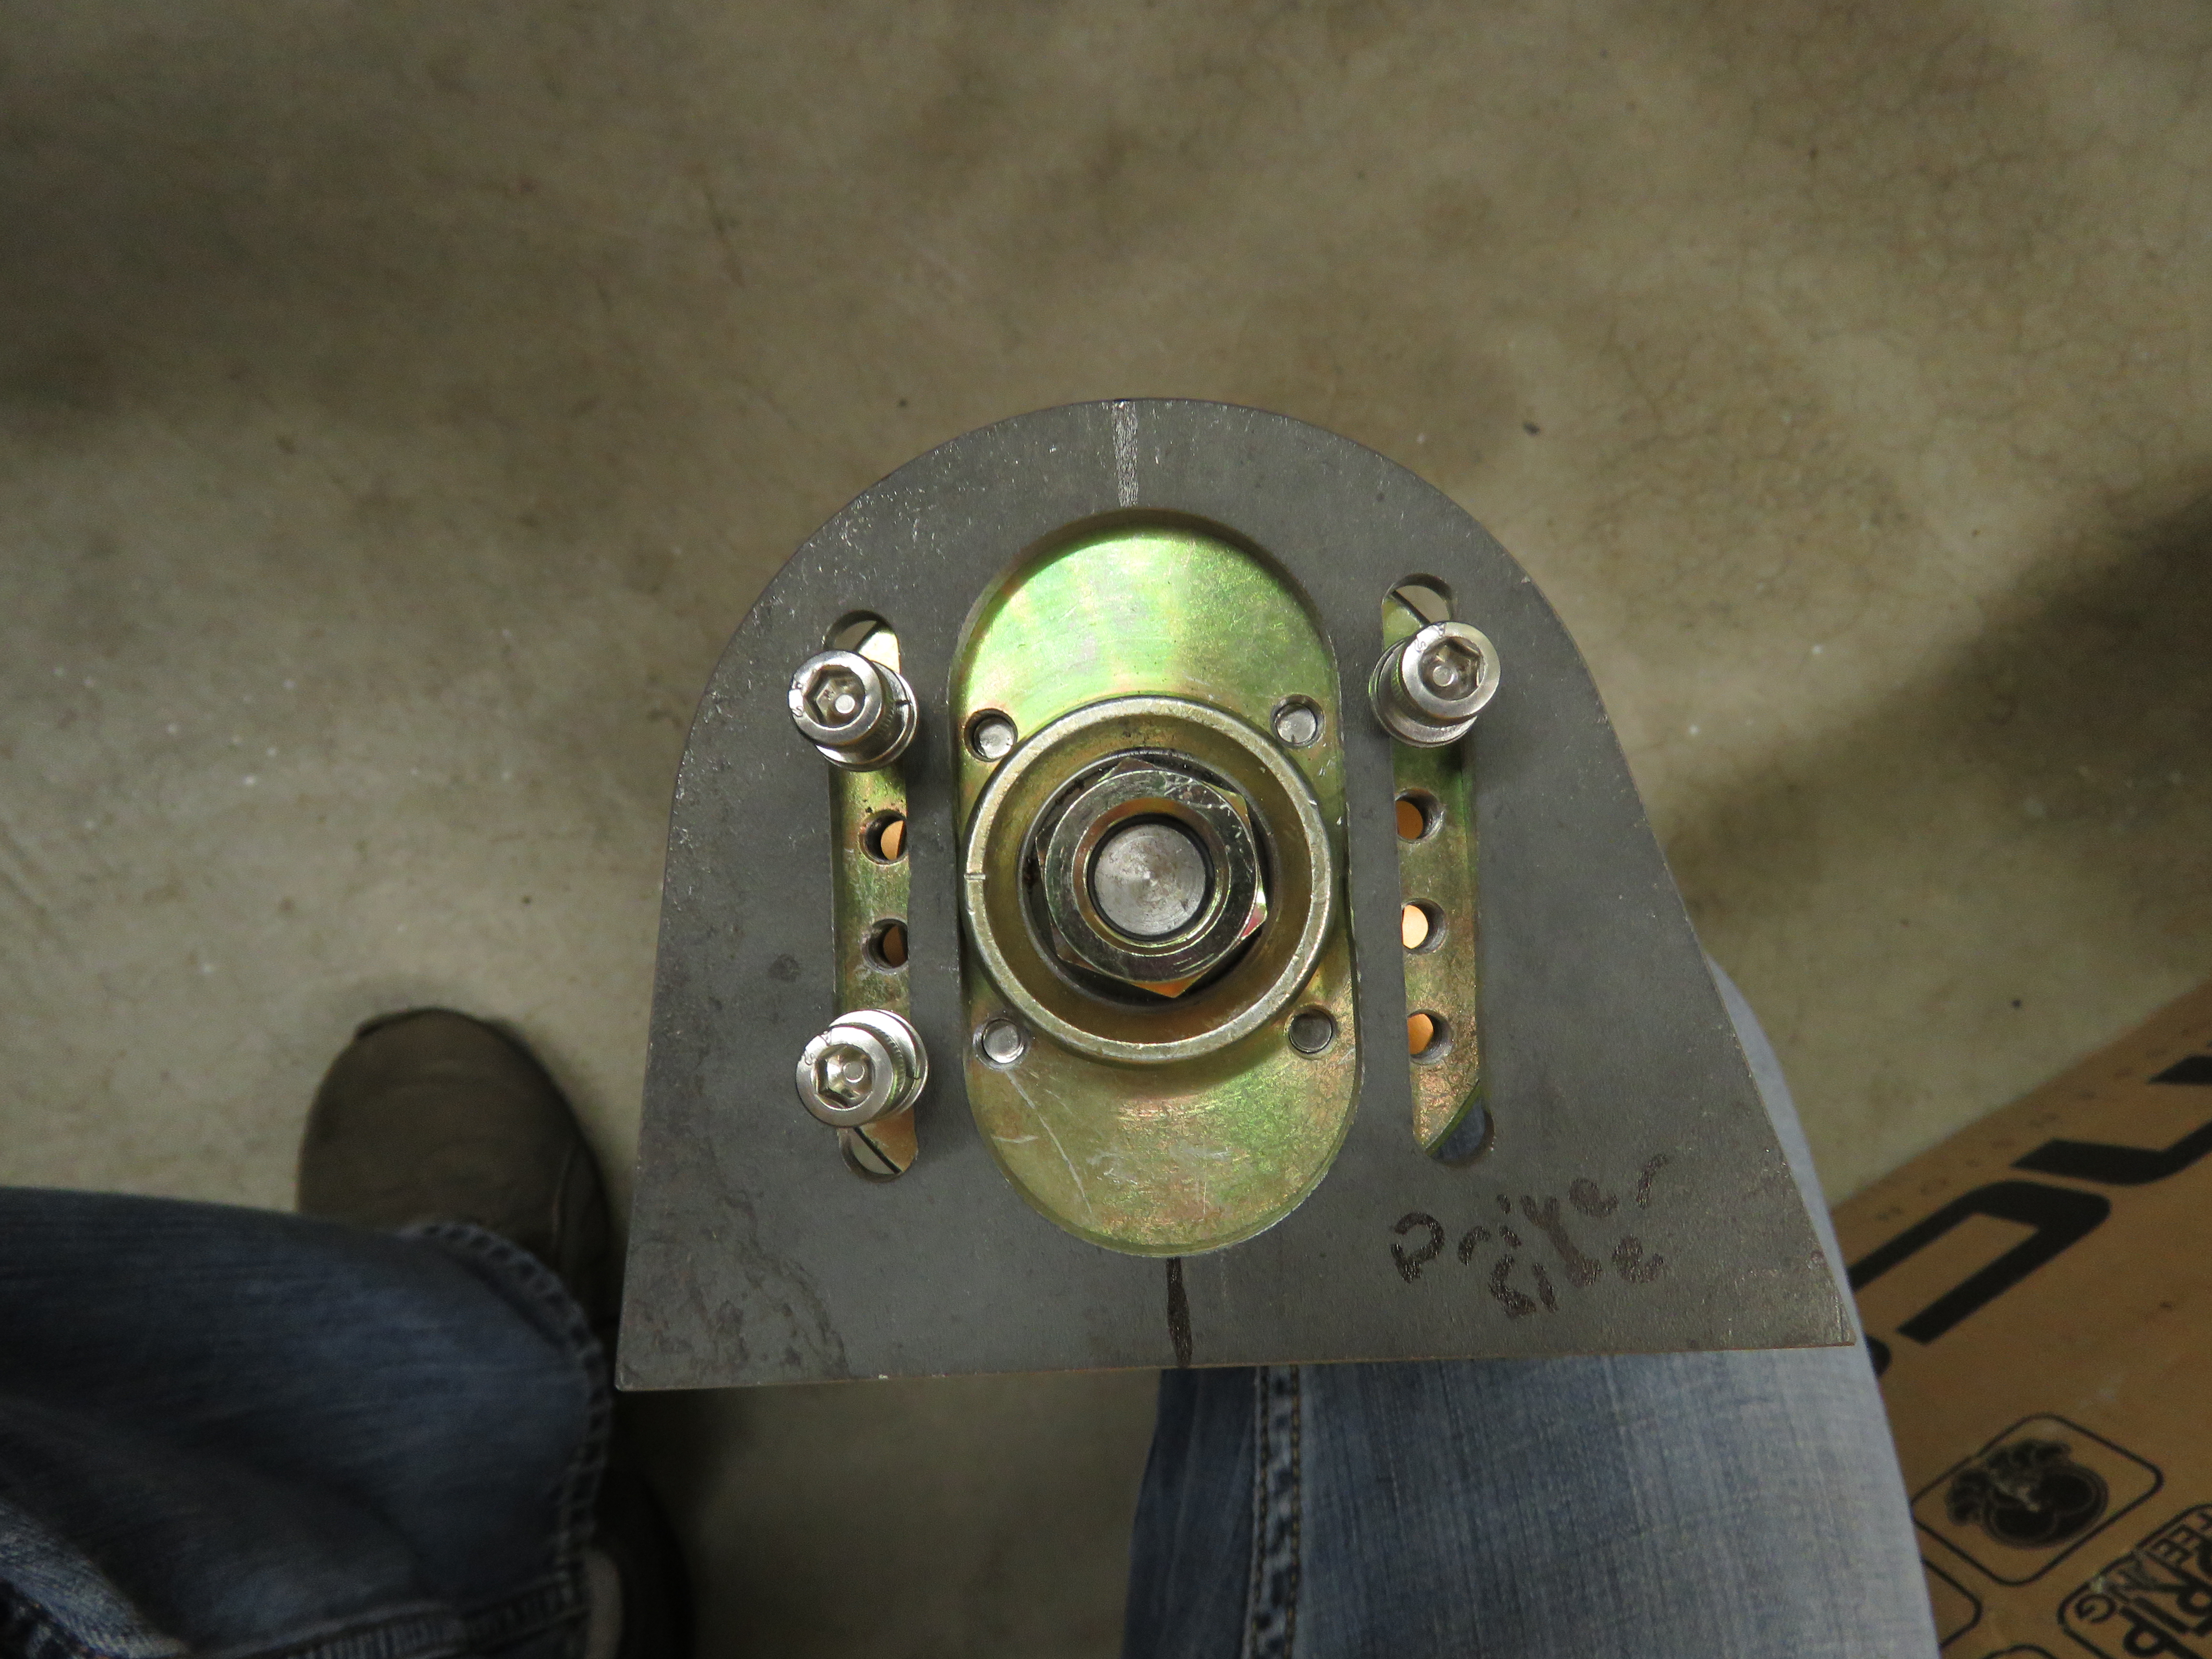
Keep posting updates in your thread, I really enjoy looking at other peoples process and ideas, Its how I got started. Great to share around. There are times where I dont post updates on purpose because with all the pictures I have, I feel like others get annoyed when they keep seeing my thread pop up, haha. Than you sir. Well finally got the camber plates dealt with, however its not what you would of thought... Started with cutting out the bulge in the strut tower top plate using my plasma cutter. Another look at the camber plates I had bought from ZCCJDM.com on the strut tower. Discovered that they dont fit my Stance Coilovers. Reason I think is because these are probably for the Megan coilovers. Comparison picture of the camber plate to the stance camber plate. As you can see the bolt holes dont align, and the main center hole is to big on the ZCCJDM camber plate. The forth bolt wont go in, I can force it, but shouldnt ever have to force a bolt in. So I decided to ditch them as I didnt like the fitment, too tight and loose in areas. Also bothered me that the preferred method of welding these plates on is to weld them on top of the sheet metal of the tower wall/cover and not directly onto the stock upper plate as this is thicker and more structurally sound. But I guess that method was proven buy numerous of Datsuns to work. Plus I wanted a factory look for some reason. Here is how I did it. Keep in mind that I will later on be adding in strut bar mounts. Havent thought about how I will do it, will need my LS1 engine in place to see how much room to work with, but hopefully after I get the strut bar mounts welded in, the camber plates will much stronger and more connected with its surroundings. Played around with the idea of trying to make the stock top strut tower plate to work with out having to do a lot of work. Bad Idea, haha. ended up just welding a plate in to close up the holes and start with a fresh canvas. Got to do things right otherwise you will get a crappy result. Holes closed up with tig welding plates in of similar thickness as the stock plate. Made damn sure I got penetration all the way through, purposely gave my welds loads of filler rod. Sanded down. Made a template from the Stance coilover camber plate. Comparison to the ZCCJDM plate. Template test fitted on coilover. Though for full adjustment locked all the way positive and negative, added some tape on and cut it out, this will make sure I dont place the template too far in/forward on the tower considering the limited room to work with underneath the strut tower. Lines marked. Since I dont have the proper bits/tungsten carbide bits or whatever to make life easier in making an elongated straight hole, I opted for the drilling of multiple holes and then used a cut off wheel on my air dremel tool to blended in the holes. Centers punched in for drilling. Checking the alignment one last time, always good to check constantly. Started with drilling the bolt holes first. Holes blended in. Probably would of been cleaner with a thinner/smaller cut off wheel. Oh well, it works. Then off to work on the middle hole. Used a 1 1/2' hole saw. used my air belt sander (one of my favorite most used air tools) to blend them together. Coilovers test fitted. Finally coated with paint (for temporary purposes) and hammered down the lip of the tower wall cover or whatever you call it. Will need to spot/plug weld the lips later on, but will wait till I get the struct brace mounts figured out. Doesnt look like much of a noticeable change from stock... Thats it for now, stay tuned!! Forgot about this picture. This is what the rear coilover looks like.
Thanks and thanks for looking out with your concern, great to have input. There is about a half inch lip left of the 20g sheetmetal at the thinnest area, which is enough for some spot welds. honestly, the material I did removed, there where only like 2 spots welds on both sides that I had to sand away. the thick top plate is spot welded all around the sheet metal tower and on the top back side (where the frame for the air vent is) pretty good too. I thought about skinning the plate out of 20g and welding it to the existing lip, then spot welding it to the plate. which wouldnt be a bad idea. Just would like to wait till i get the mounts figured out first for the strut braces because id prefer to weld the majority of the mounts directly to the plate.
Keep posting updates in your thread, I really enjoy looking at other peoples process and ideas, Its how I got started. Great to share around. There are times where I dont post updates on purpose because with all the pictures I have, I feel like others get annoyed when they keep seeing my thread pop up, haha. Than you sir. Well finally got the camber plates dealt with, however its not what you would of thought... Started with cutting out the bulge in the strut tower top plate using my plasma cutter. Another look at the camber plates I had bought from ZCCJDM.com on the strut tower. Discovered that they dont fit my Stance Coilovers. Reason I think is because these are probably for the Megan coilovers. Comparison picture of the camber plate to the stance camber plate. As you can see the bolt holes dont align, and the main center hole is to big on the ZCCJDM camber plate. The forth bolt wont go in, I can force it, but shouldnt ever have to force a bolt in. So I decided to ditch them as I didnt like the fitment, too tight and loose in areas. Also bothered me that the preferred method of welding these plates on is to weld them on top of the sheet metal of the tower wall/cover and not directly onto the stock upper plate as this is thicker and more structurally sound. But I guess that method was proven buy numerous of Datsuns to work. Plus I wanted a factory look for some reason. Here is how I did it. Keep in mind that I will later on be adding in strut bar mounts. Havent thought about how I will do it, will need my LS1 engine in place to see how much room to work with, but hopefully after I get the strut bar mounts welded in, the camber plates will much stronger and more connected with its surroundings. Played around with the idea of trying to make the stock top strut tower plate to work with out having to do a lot of work. Bad Idea, haha. ended up just welding a plate in to close up the holes and start with a fresh canvas. Got to do things right otherwise you will get a crappy result. Holes closed up with tig welding plates in of similar thickness as the stock plate. Made damn sure I got penetration all the way through, purposely gave my welds loads of filler rod. Sanded down. Made a template from the Stance coilover camber plate. Comparison to the ZCCJDM plate. Template test fitted on coilover. Though for full adjustment locked all the way positive and negative, added some tape on and cut it out, this will make sure I dont place the template too far in/forward on the tower considering the limited room to work with underneath the strut tower. Lines marked. Since I dont have the proper bits/tungsten carbide bits or whatever to make life easier in making an elongated straight hole, I opted for the drilling of multiple holes and then used a cut off wheel on my air dremel tool to blended in the holes. Centers punched in for drilling. Checking the alignment one last time, always good to check constantly. Started with drilling the bolt holes first. Holes blended in. Probably would of been cleaner with a thinner/smaller cut off wheel. Oh well, it works. Then off to work on the middle hole. Used a 1 1/2' hole saw. used my air belt sander (one of my favorite most used air tools) to blend them together. Coilovers test fitted. Finally coated with paint (for temporary purposes) and hammered down the lip of the tower wall cover or whatever you call it. Will need to spot/plug weld the lips later on, but will wait till I get the struct brace mounts figured out. Doesnt look like much of a noticeable change from stock... Thats it for now, stay tuned!! Forgot about this picture. This is what the rear coilover looks like.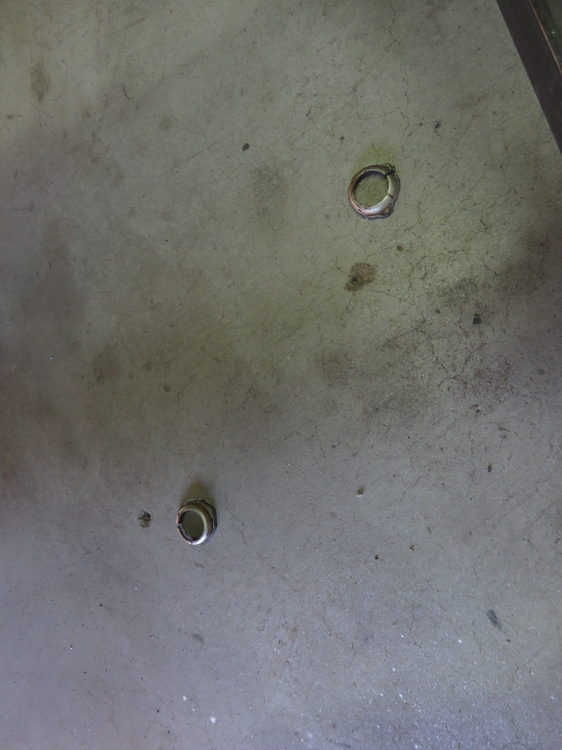
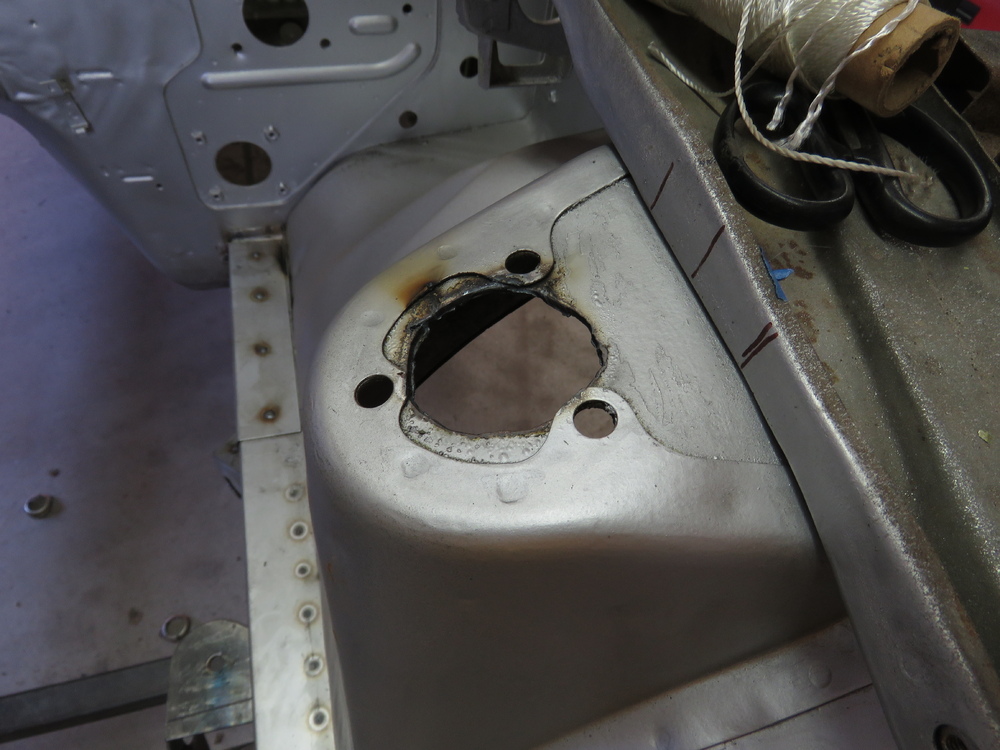
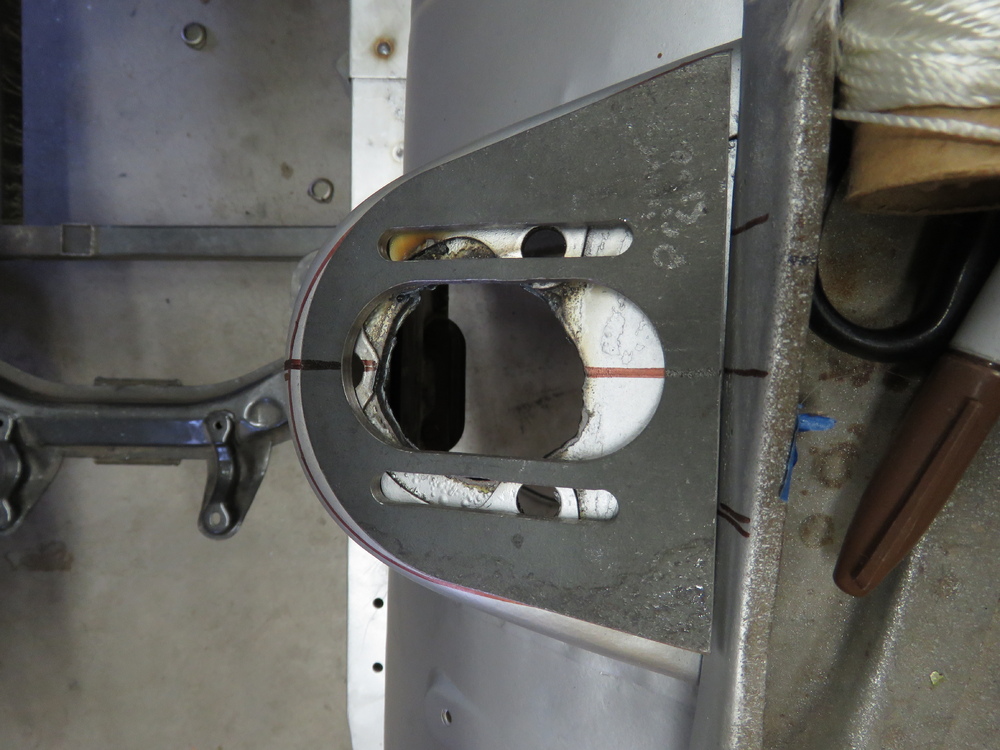


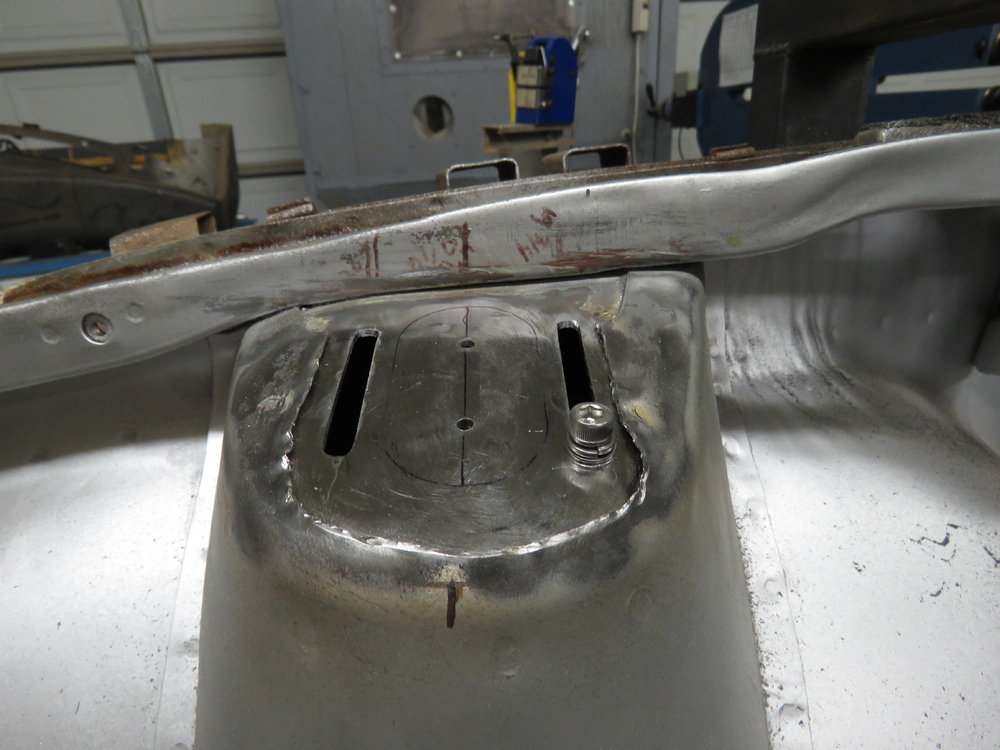
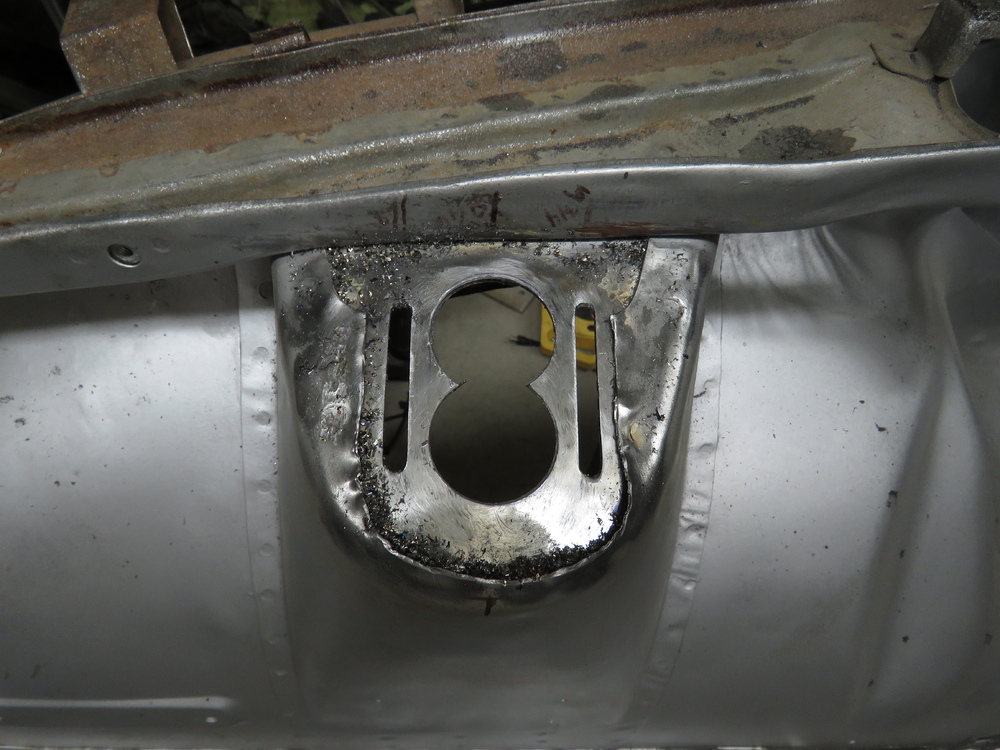


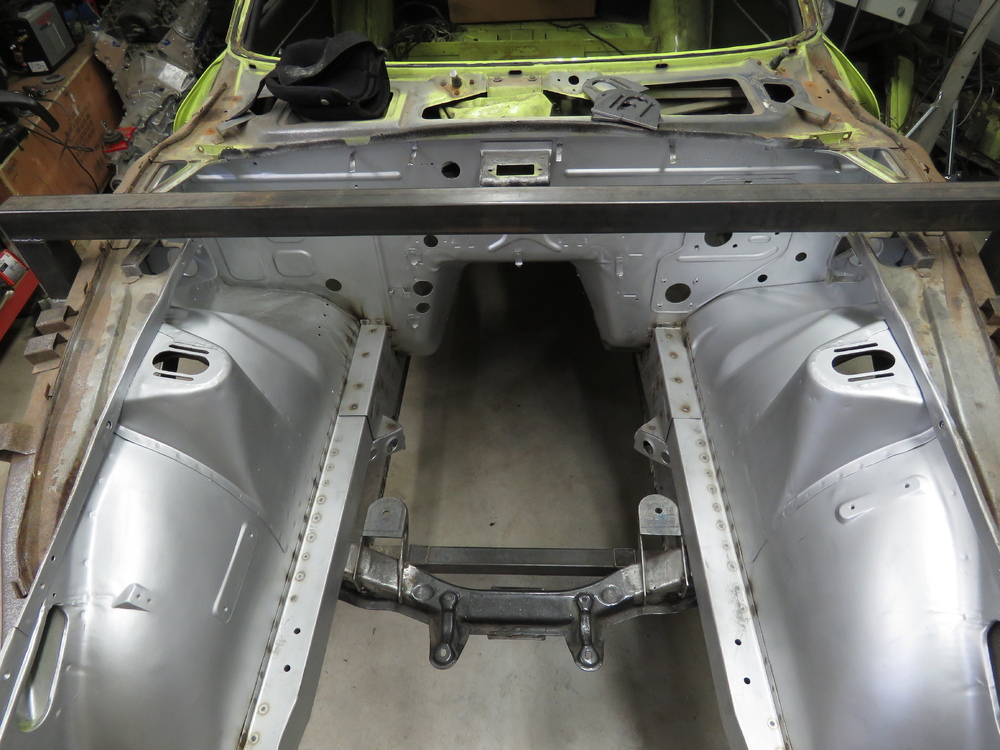


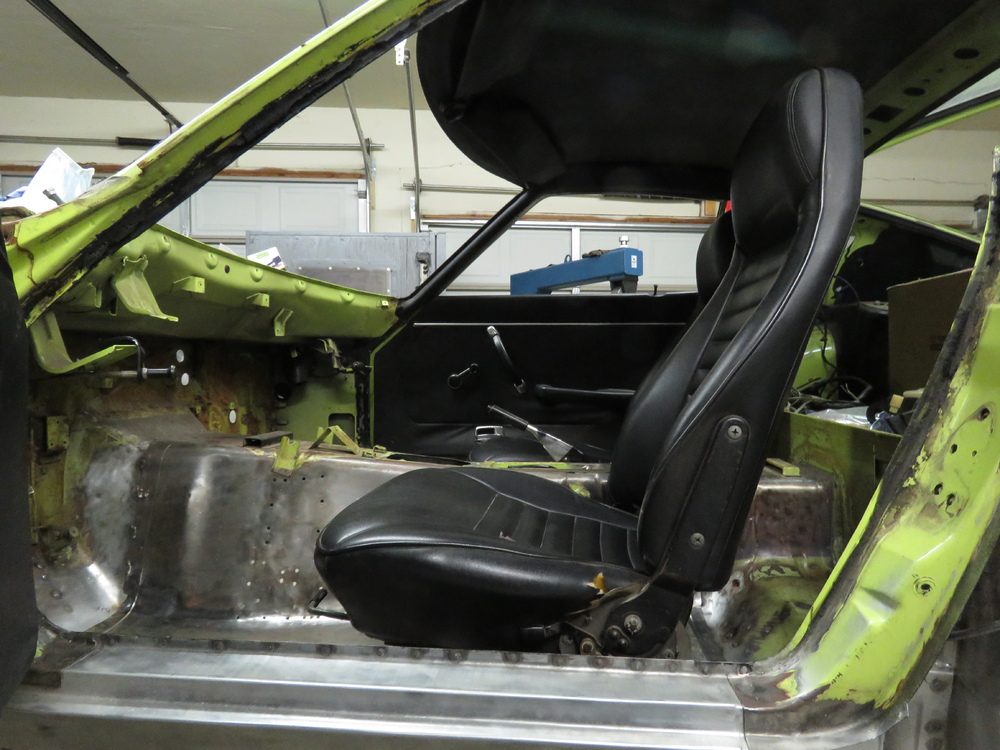
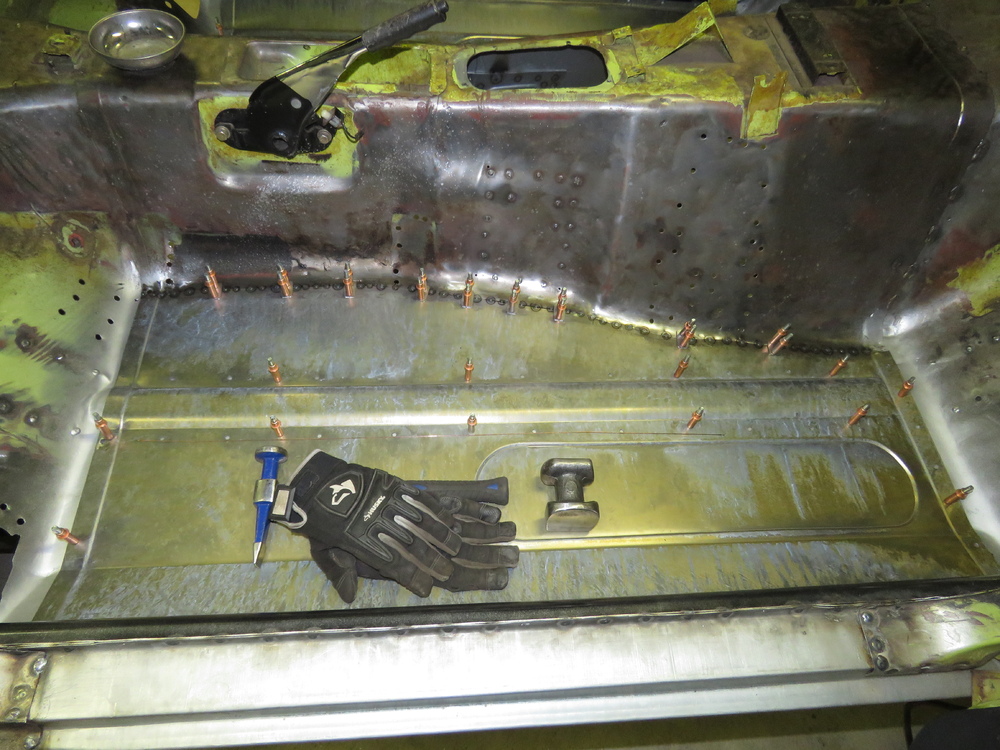
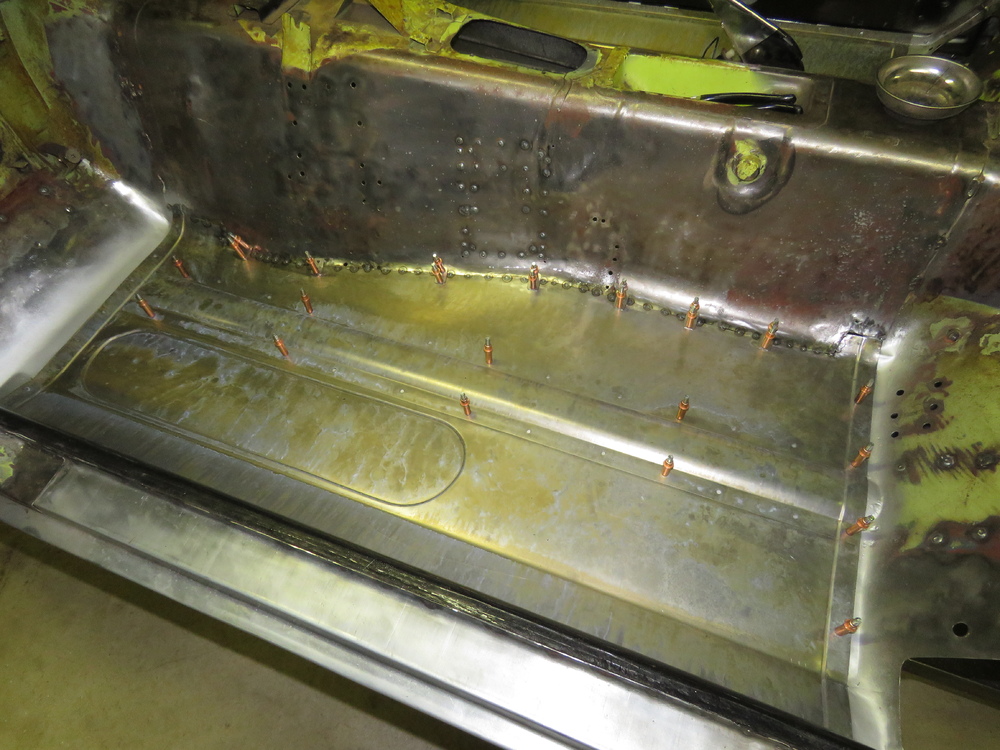
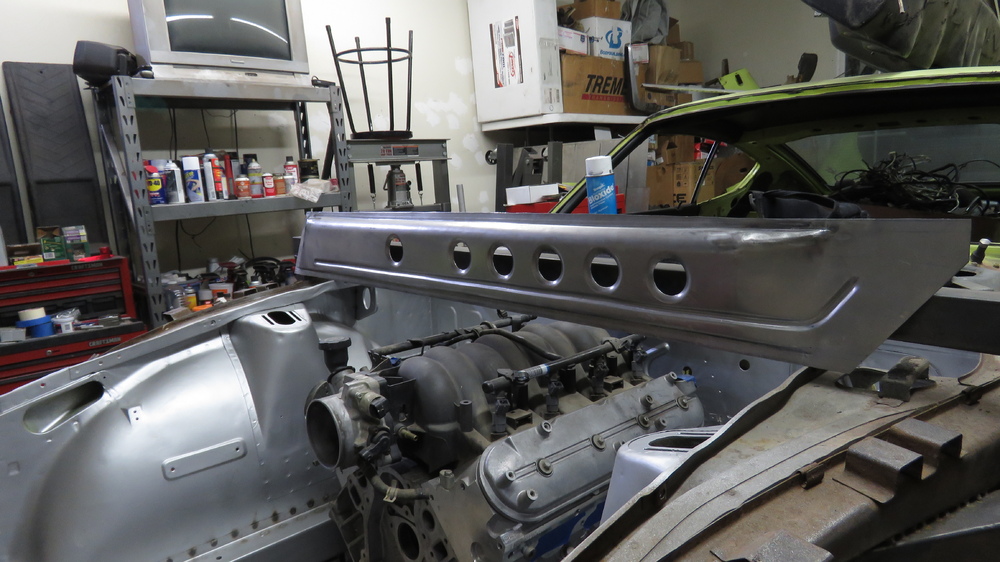
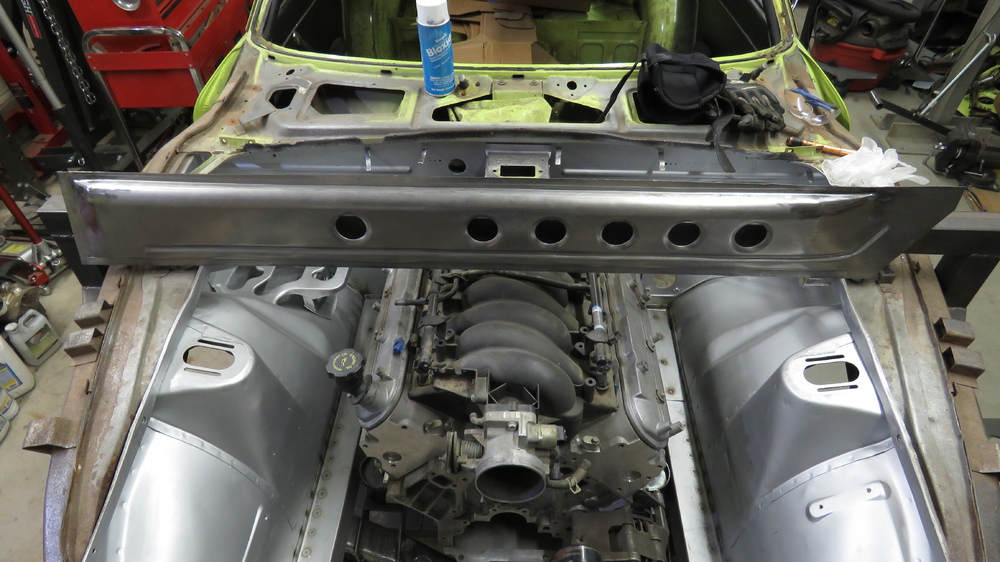
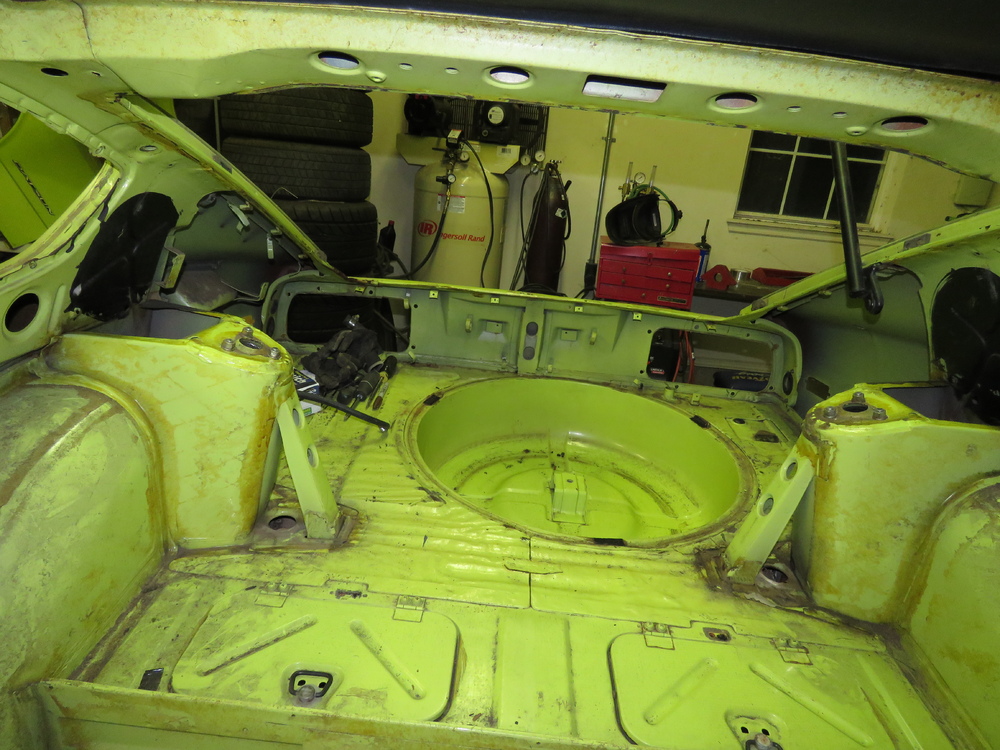
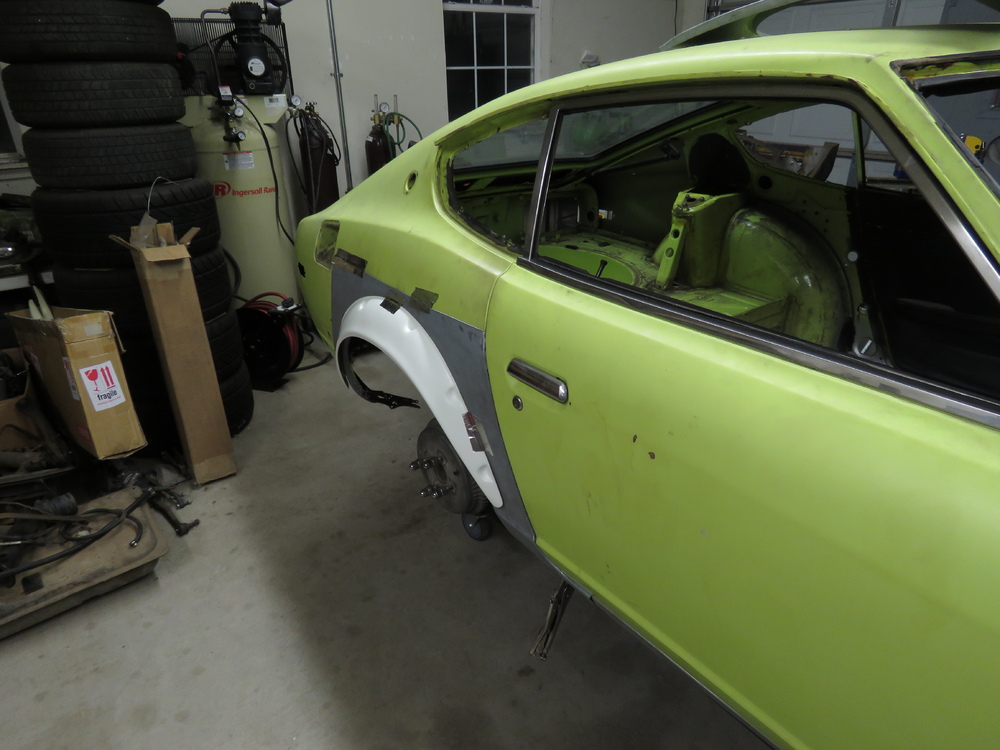
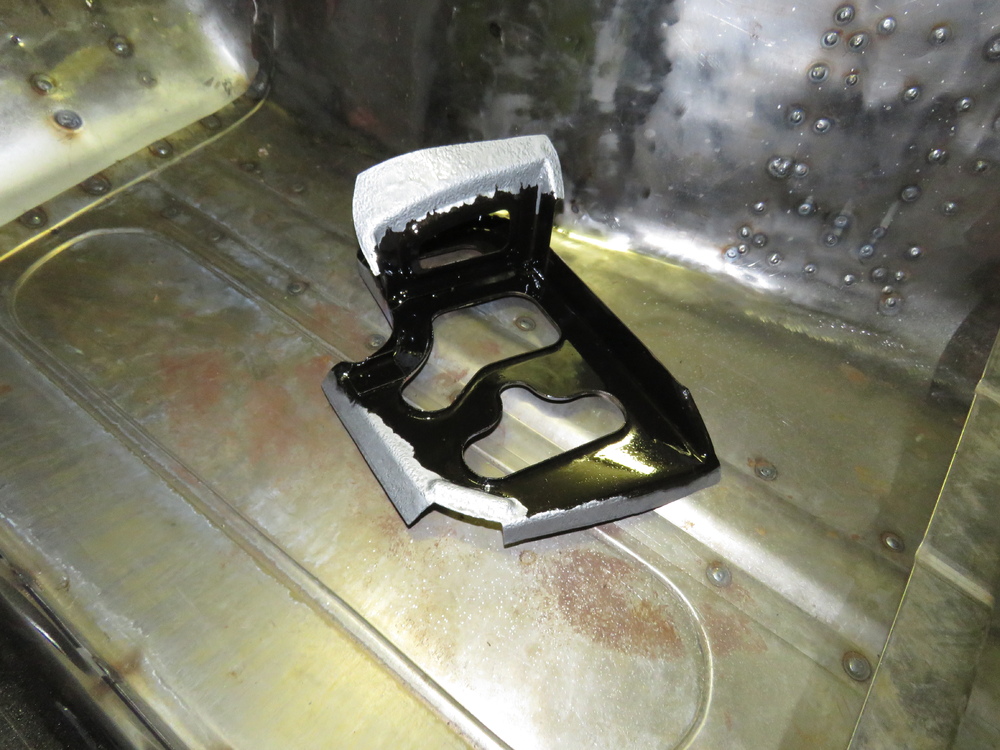
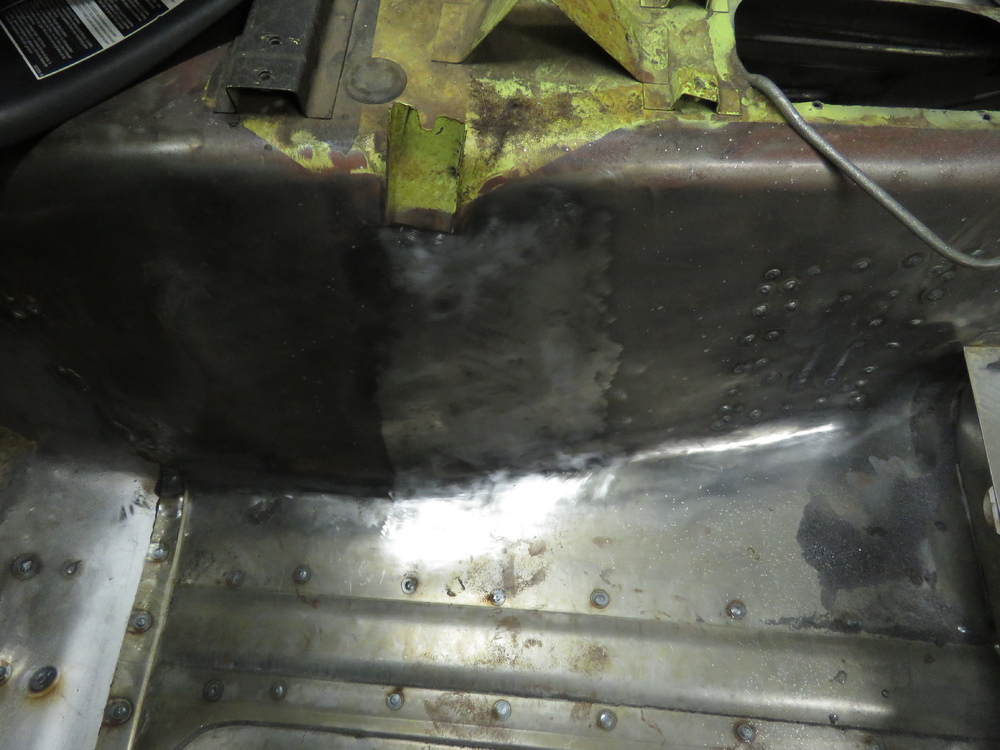
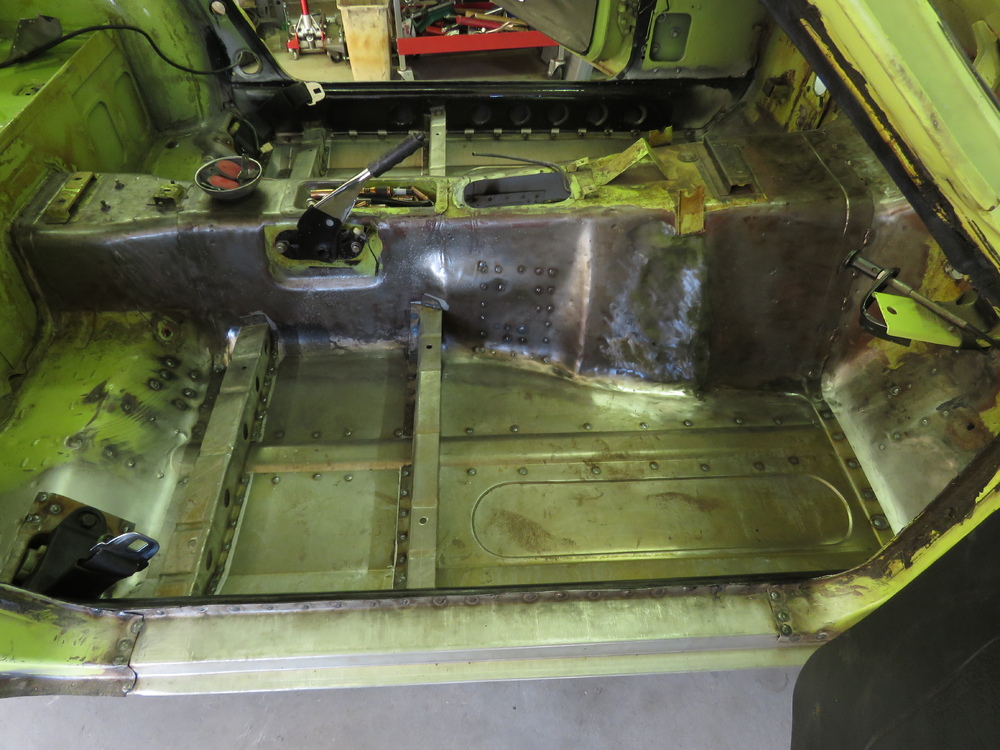
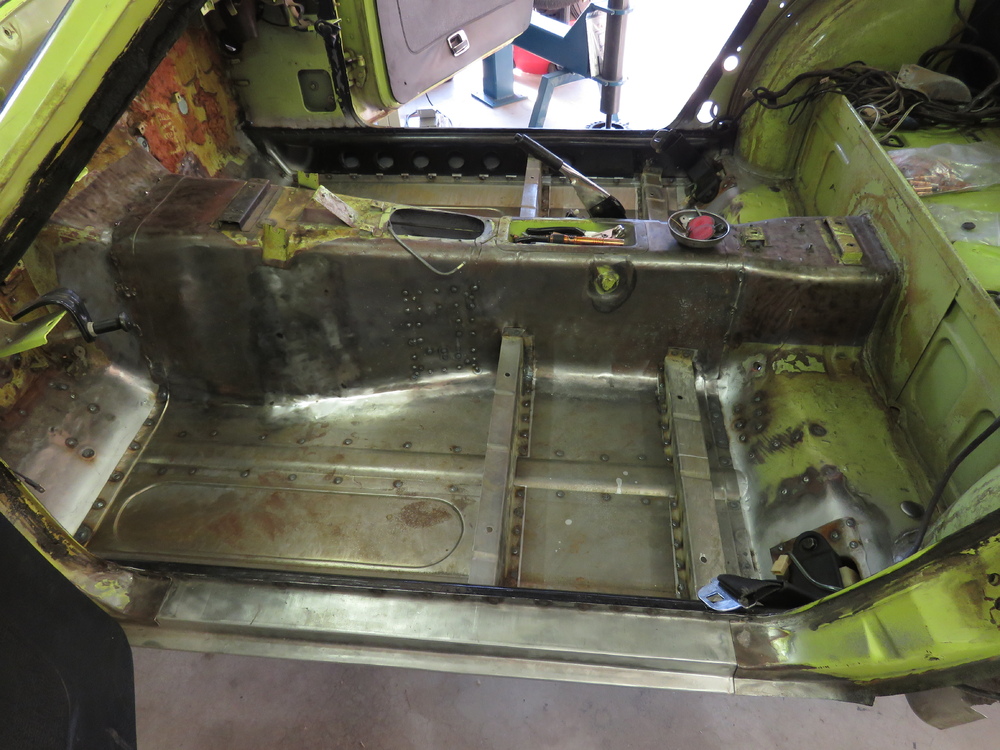
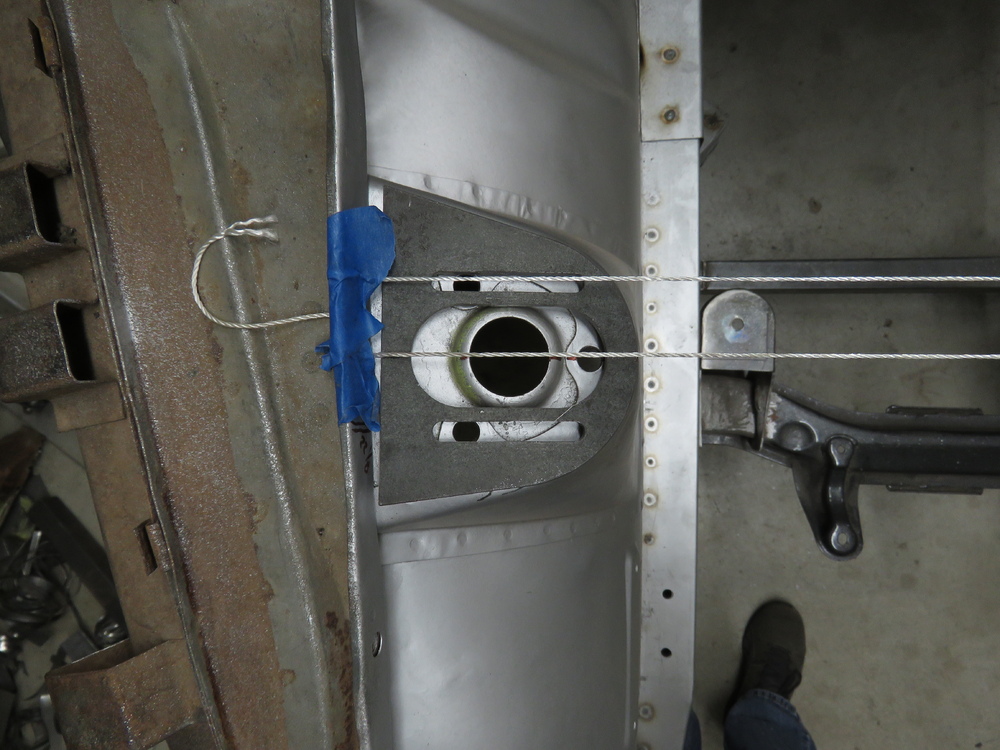
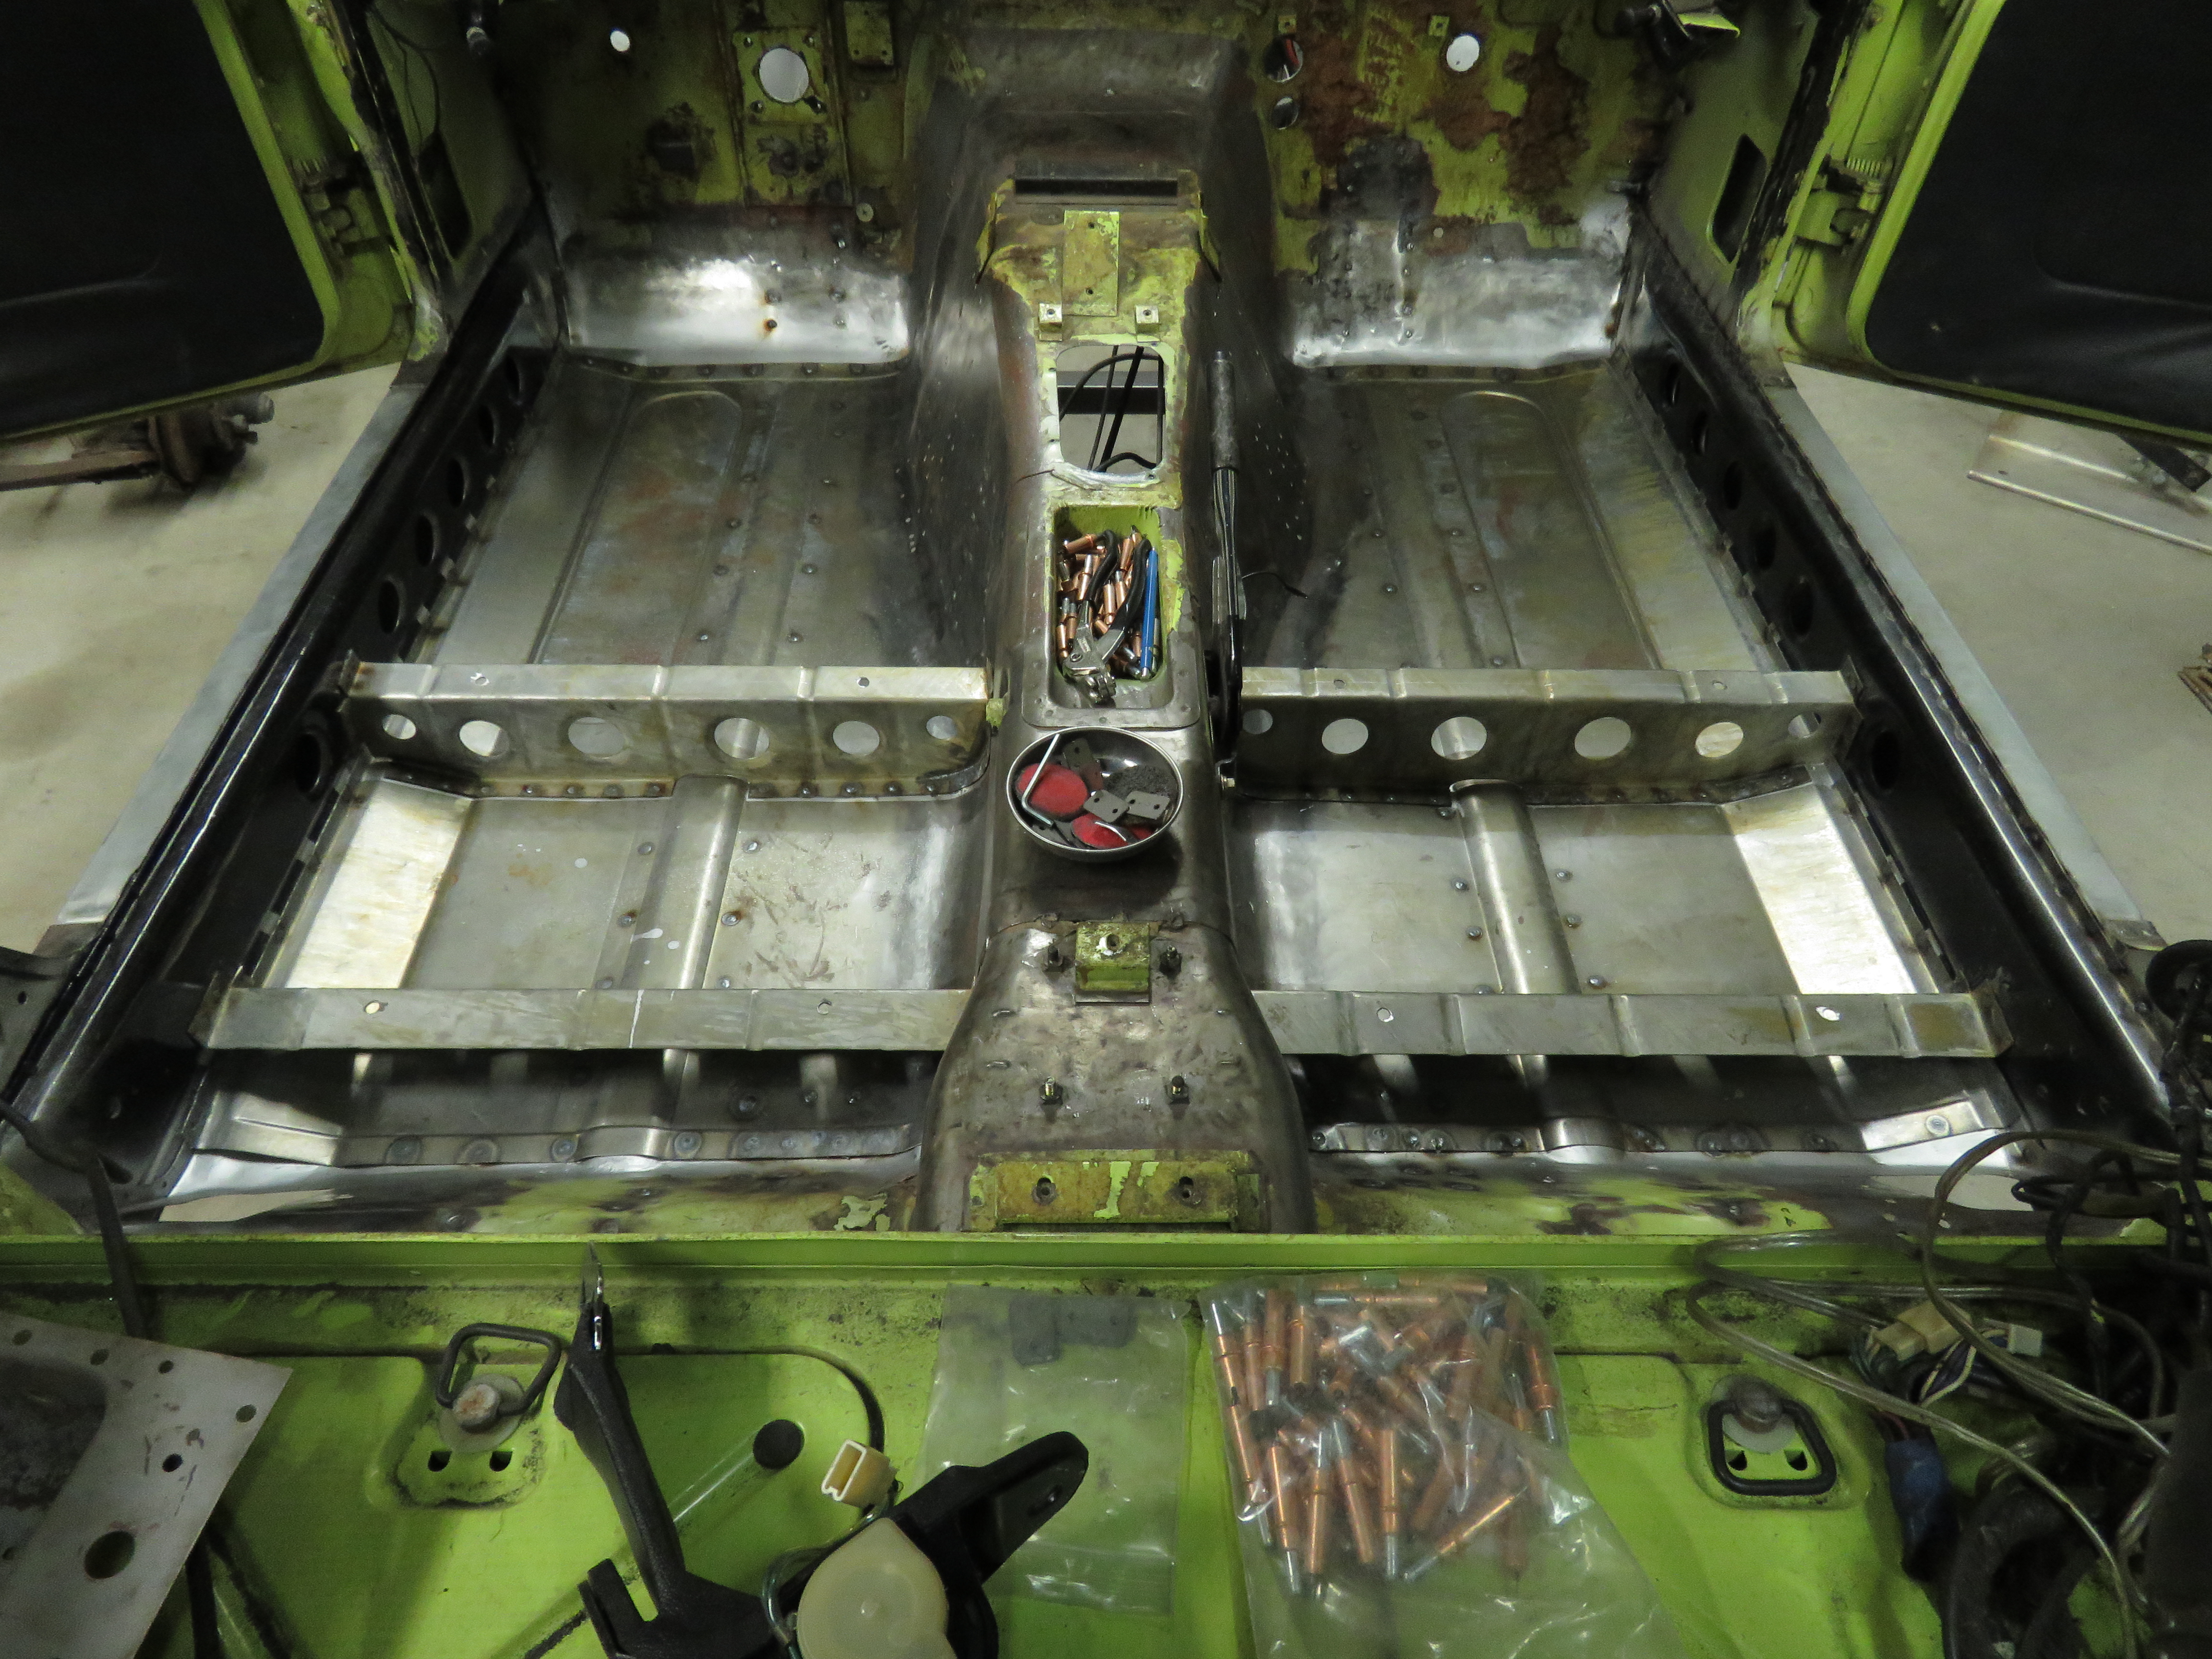
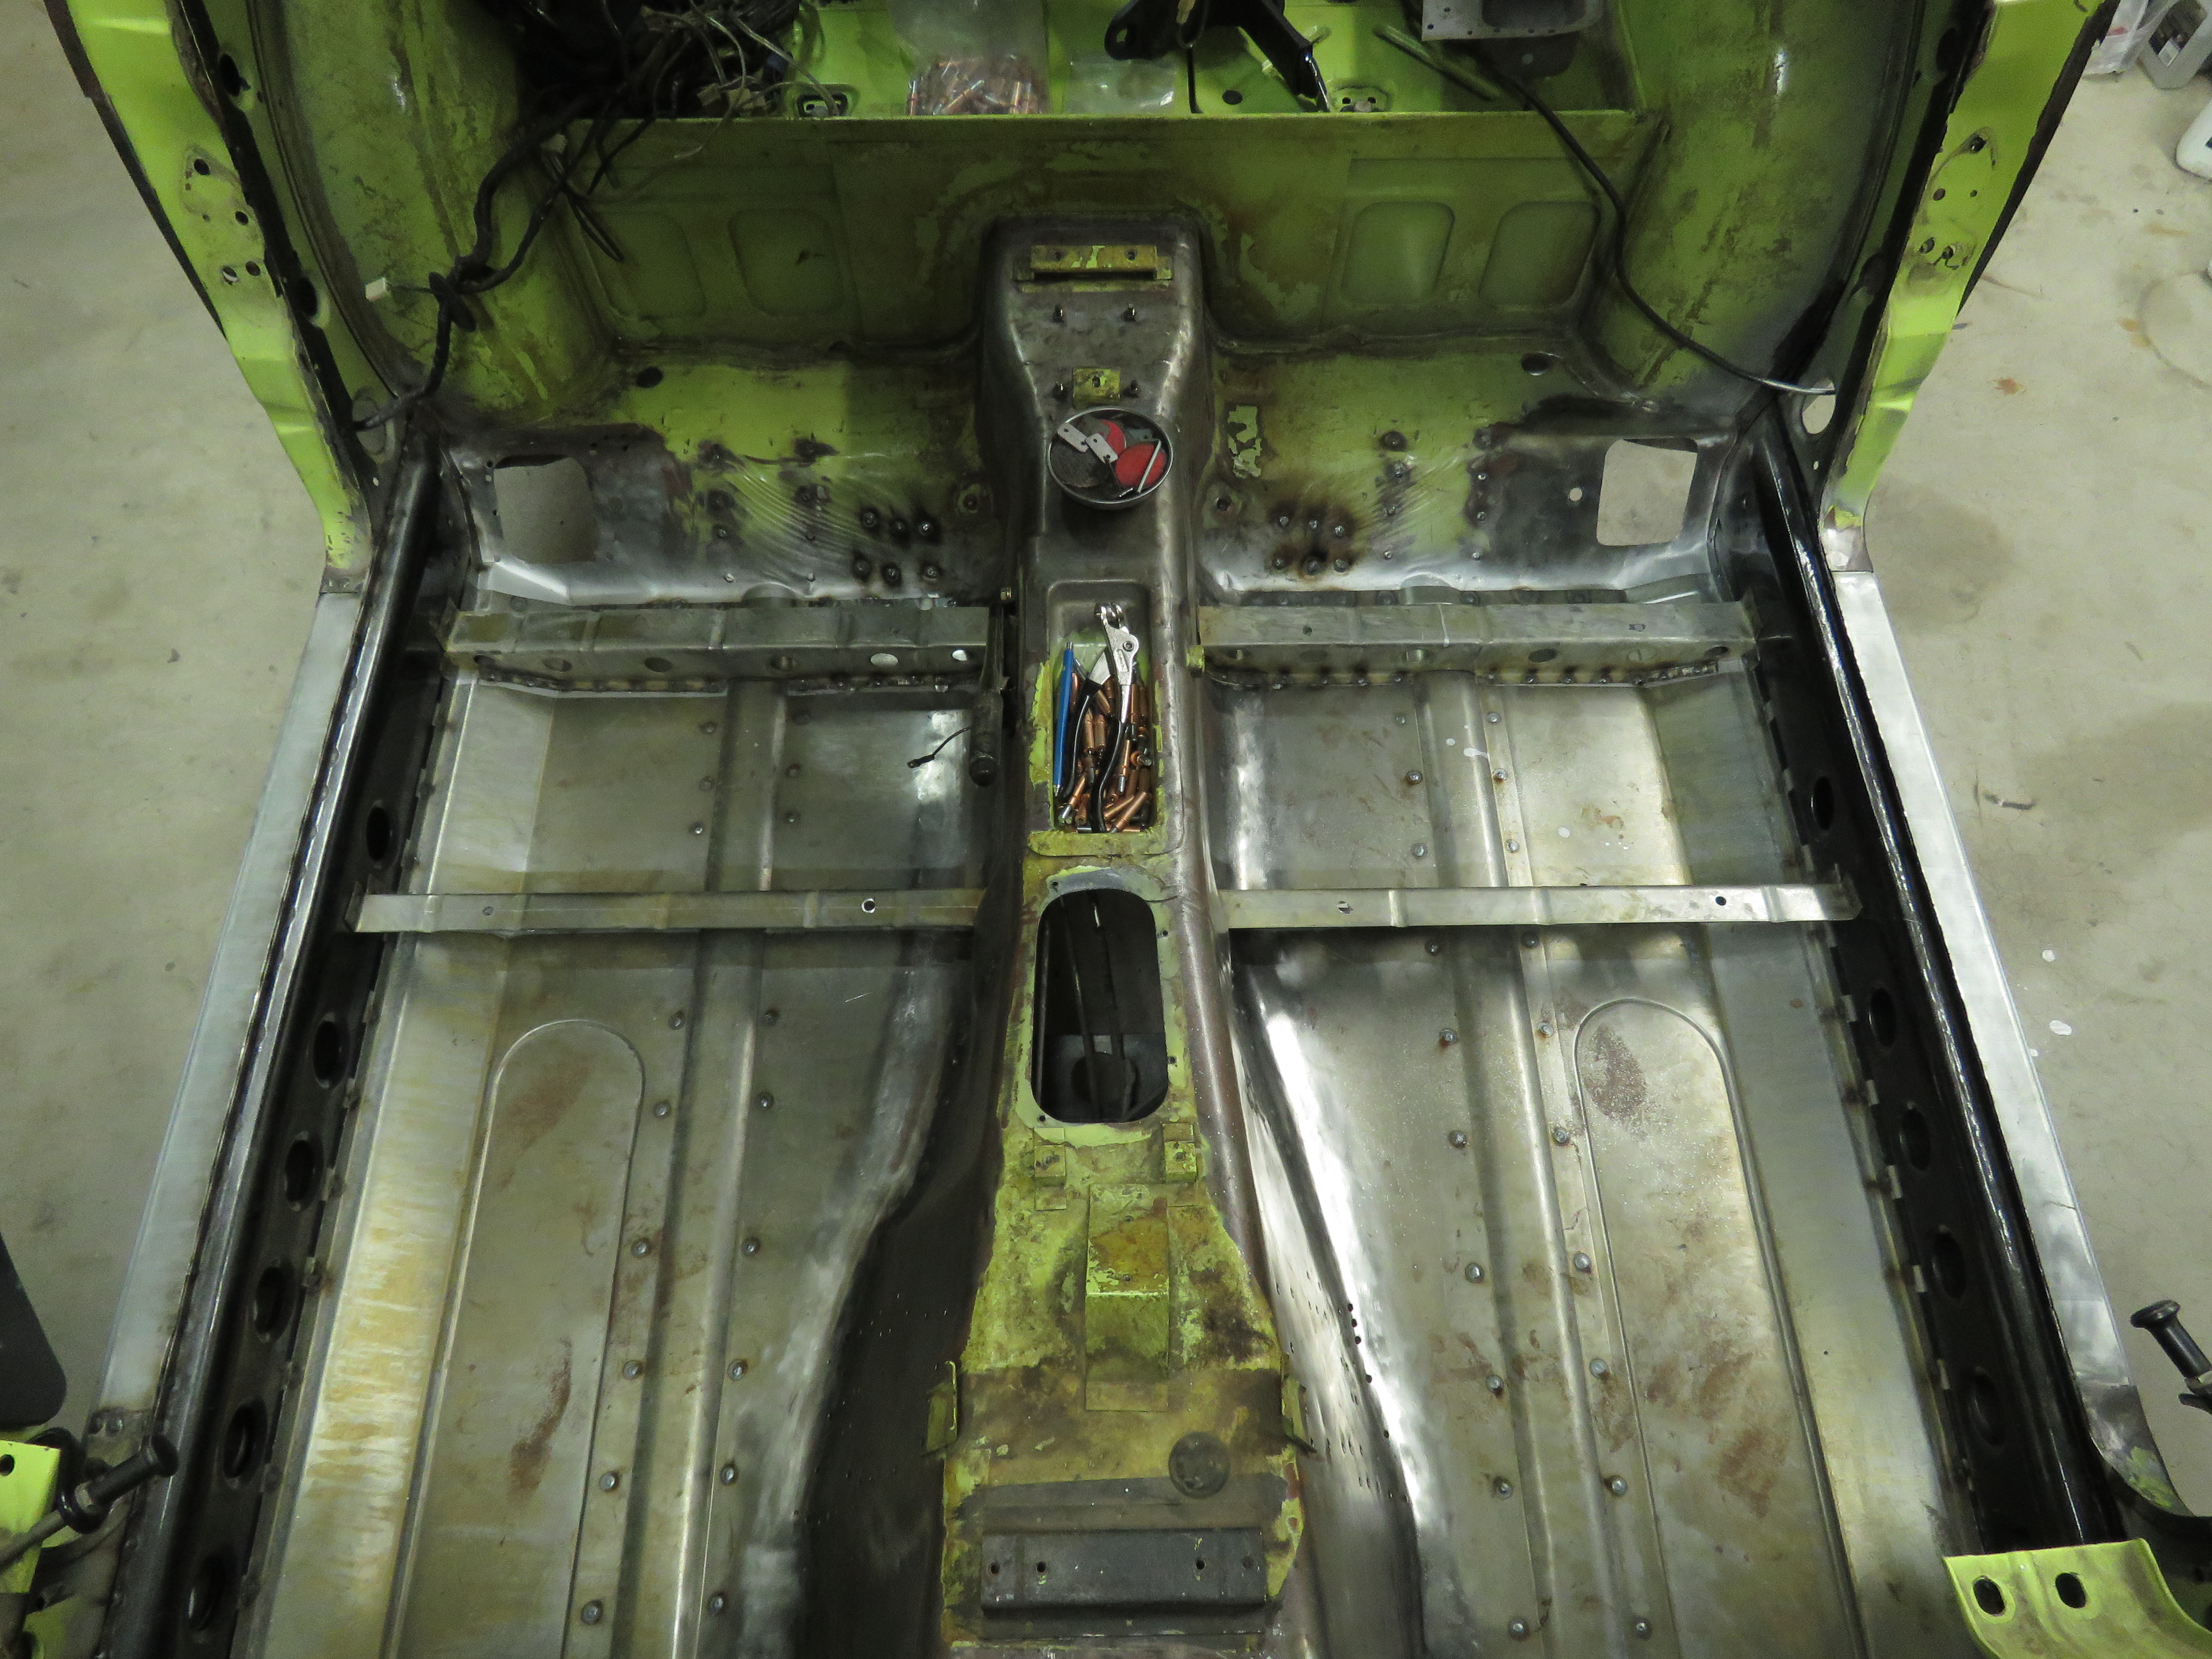
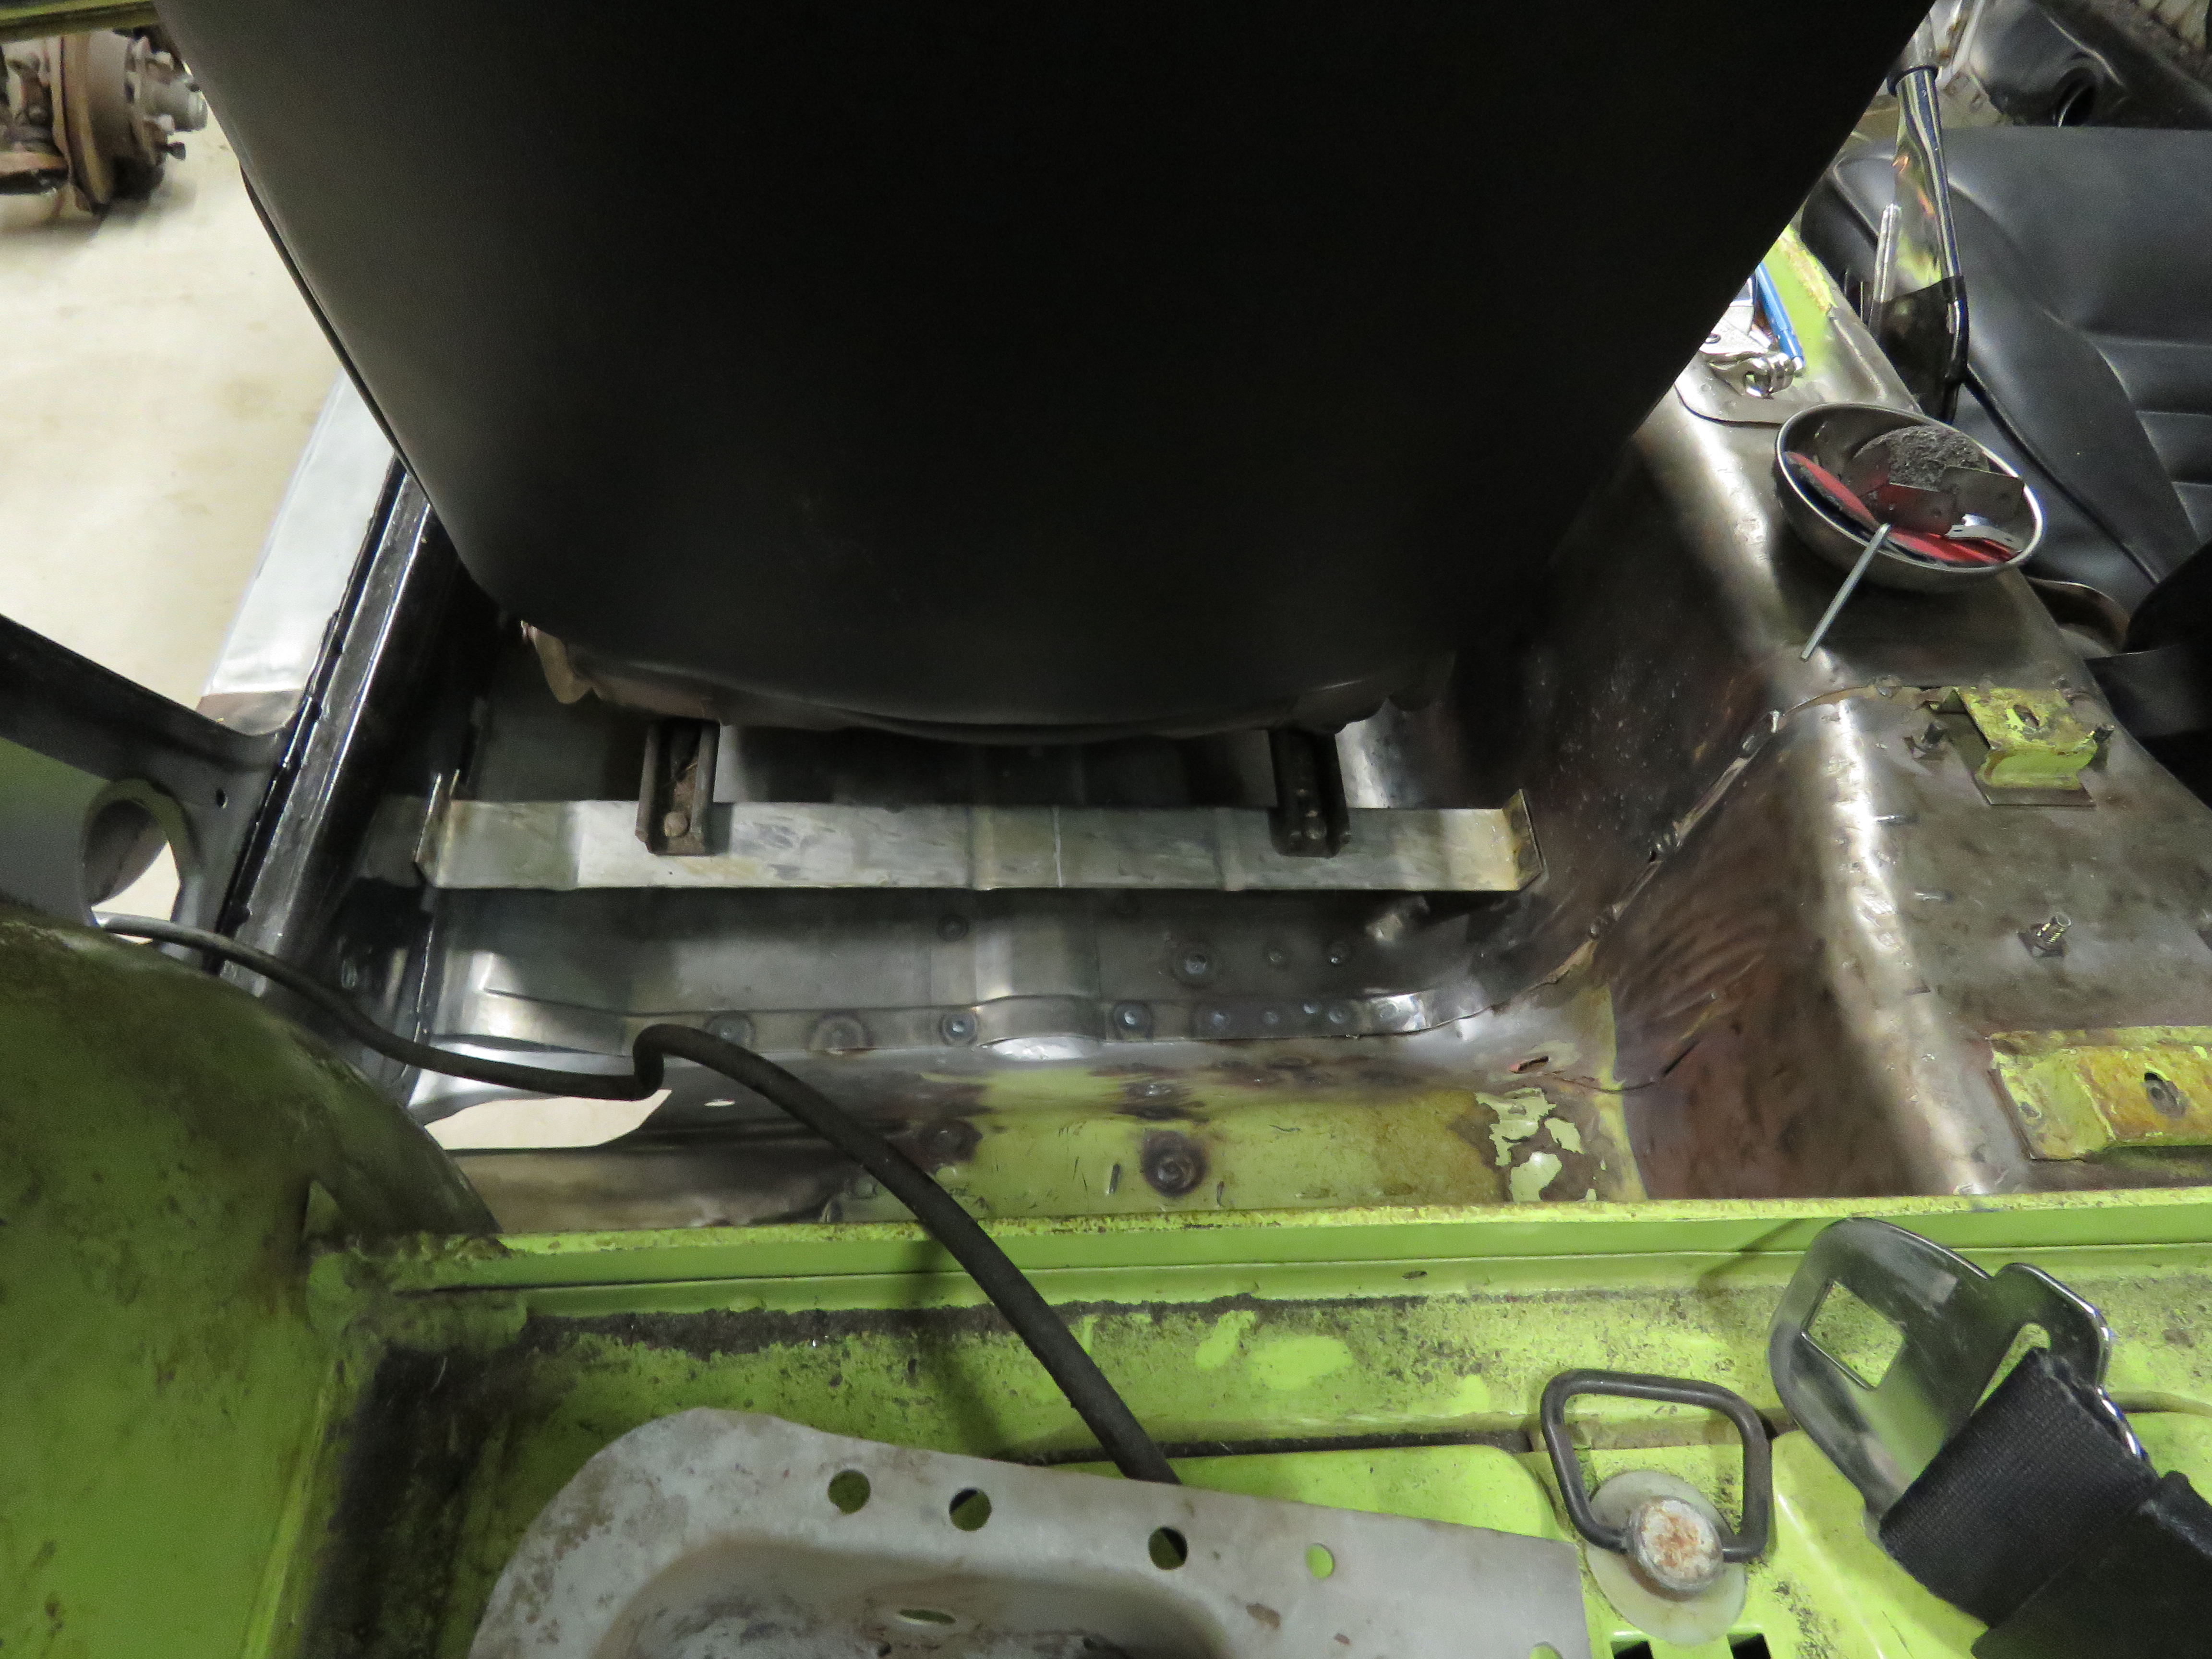
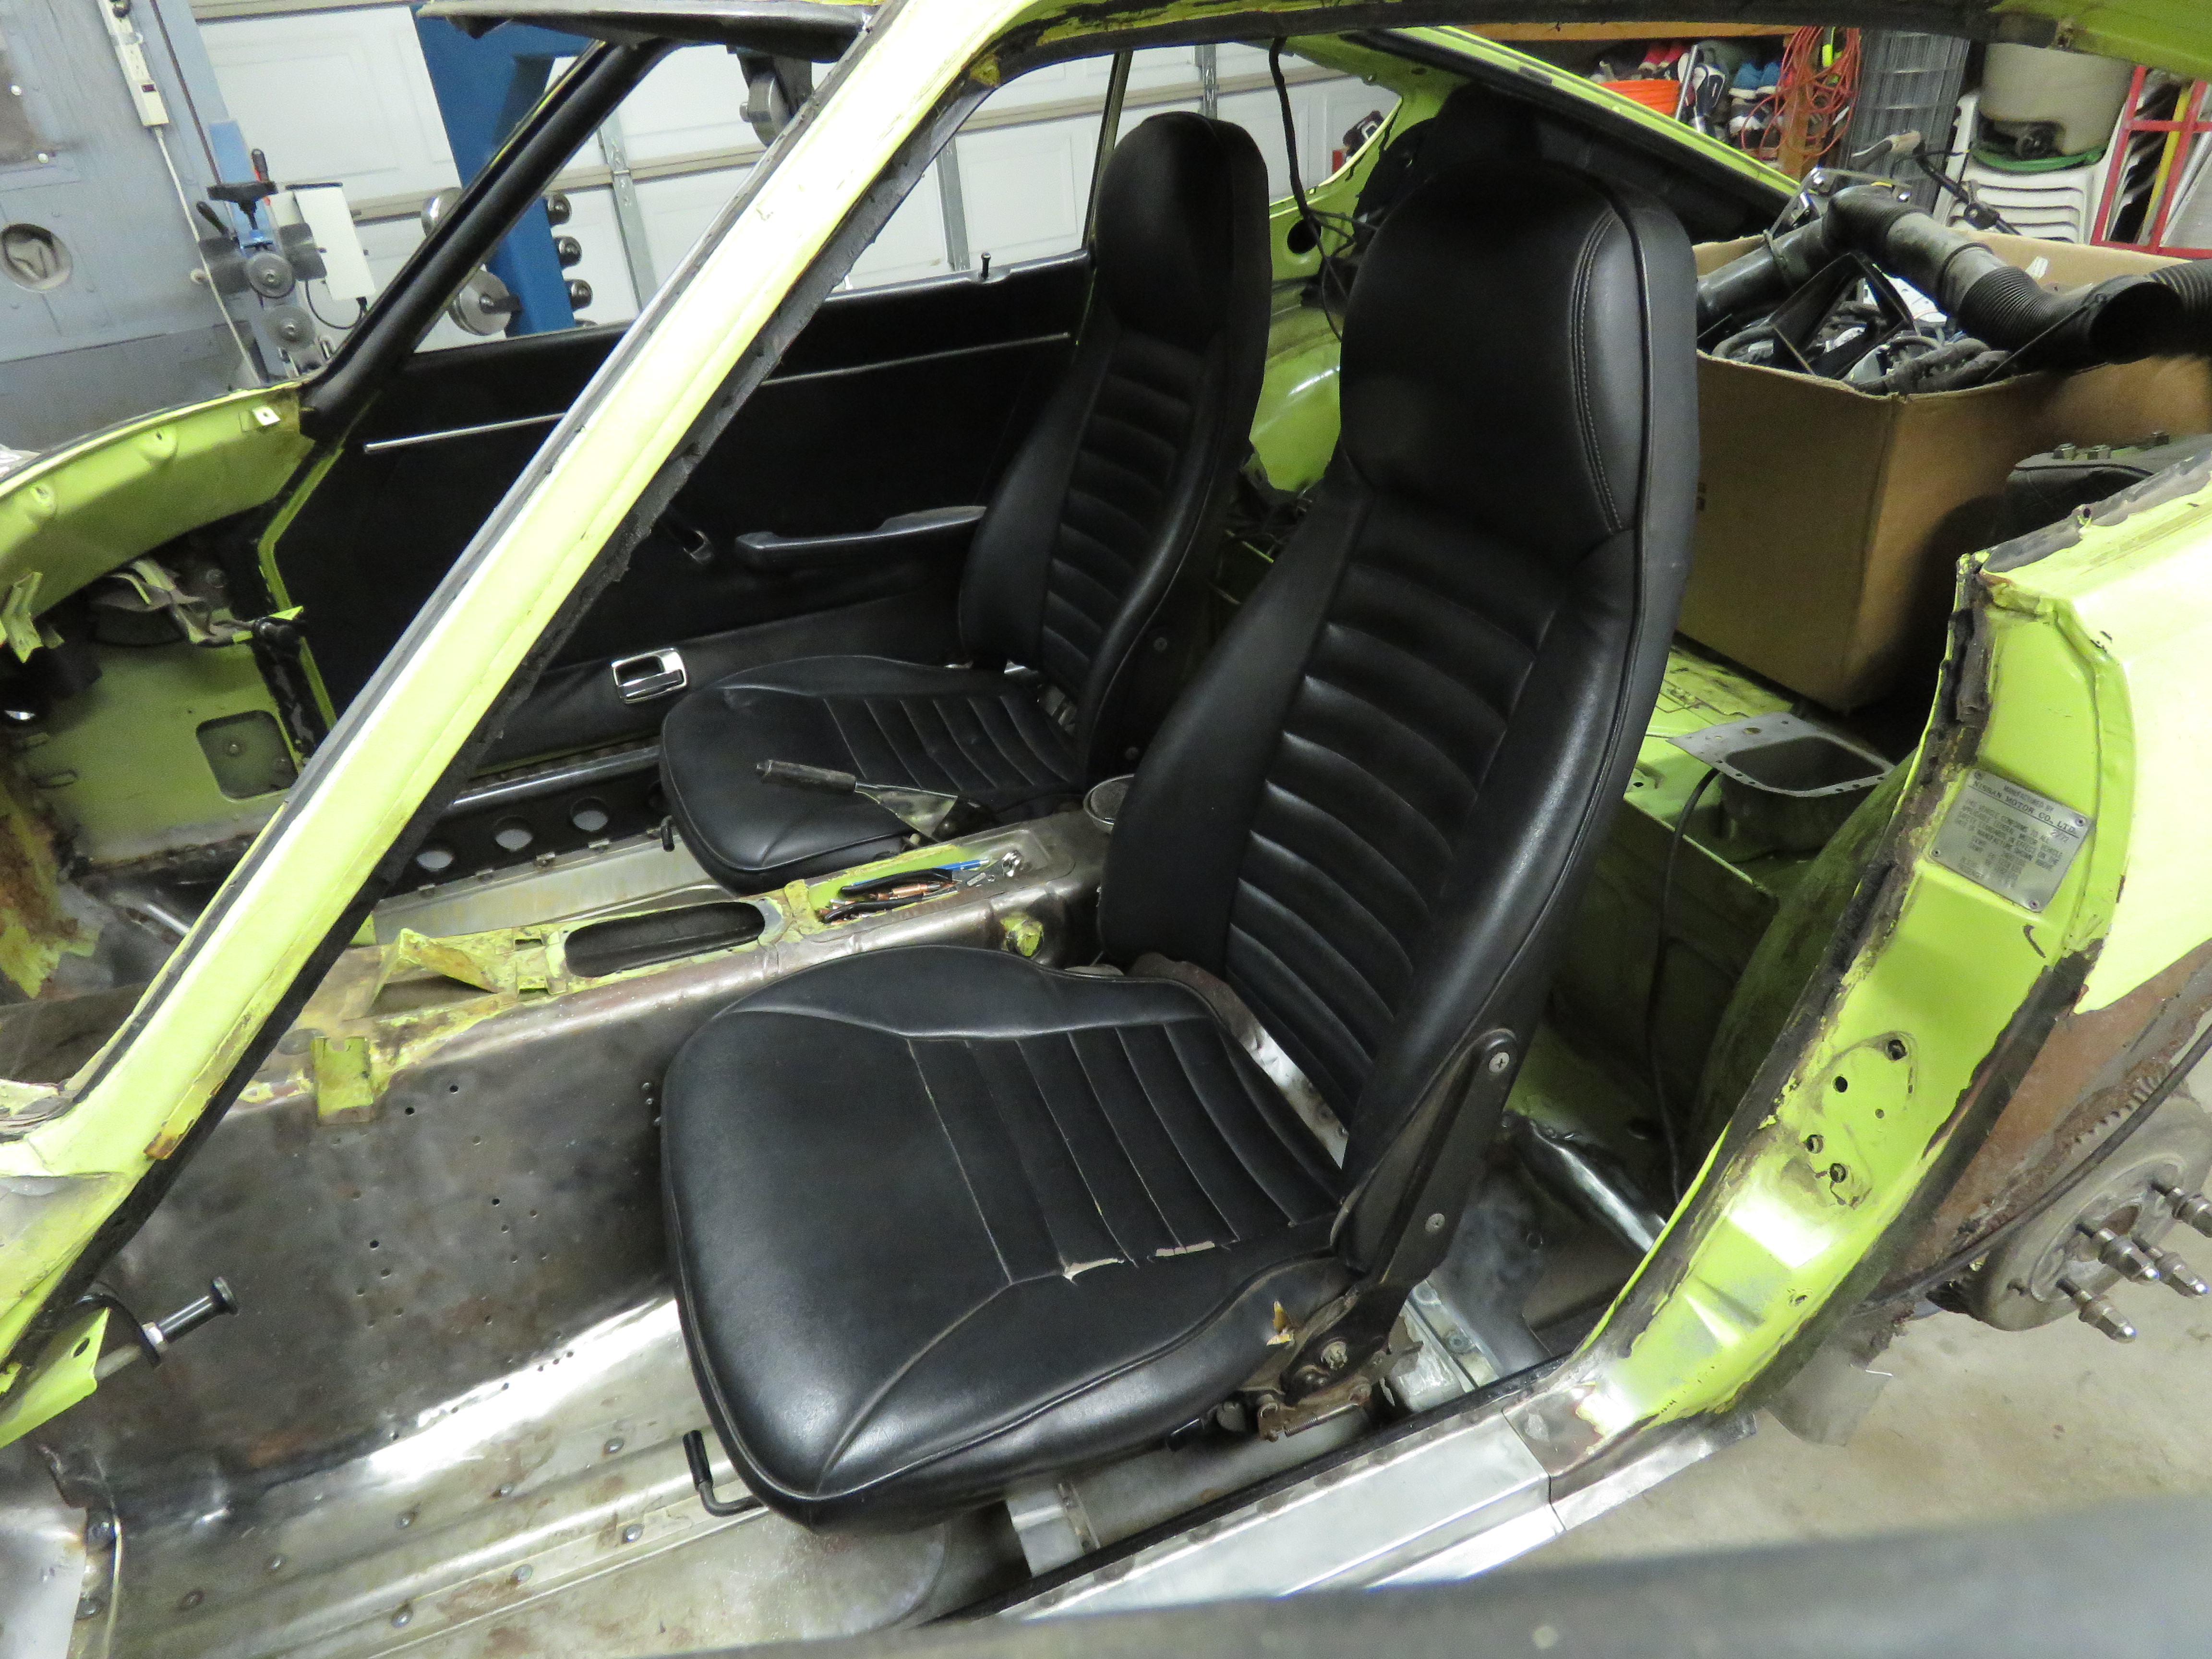
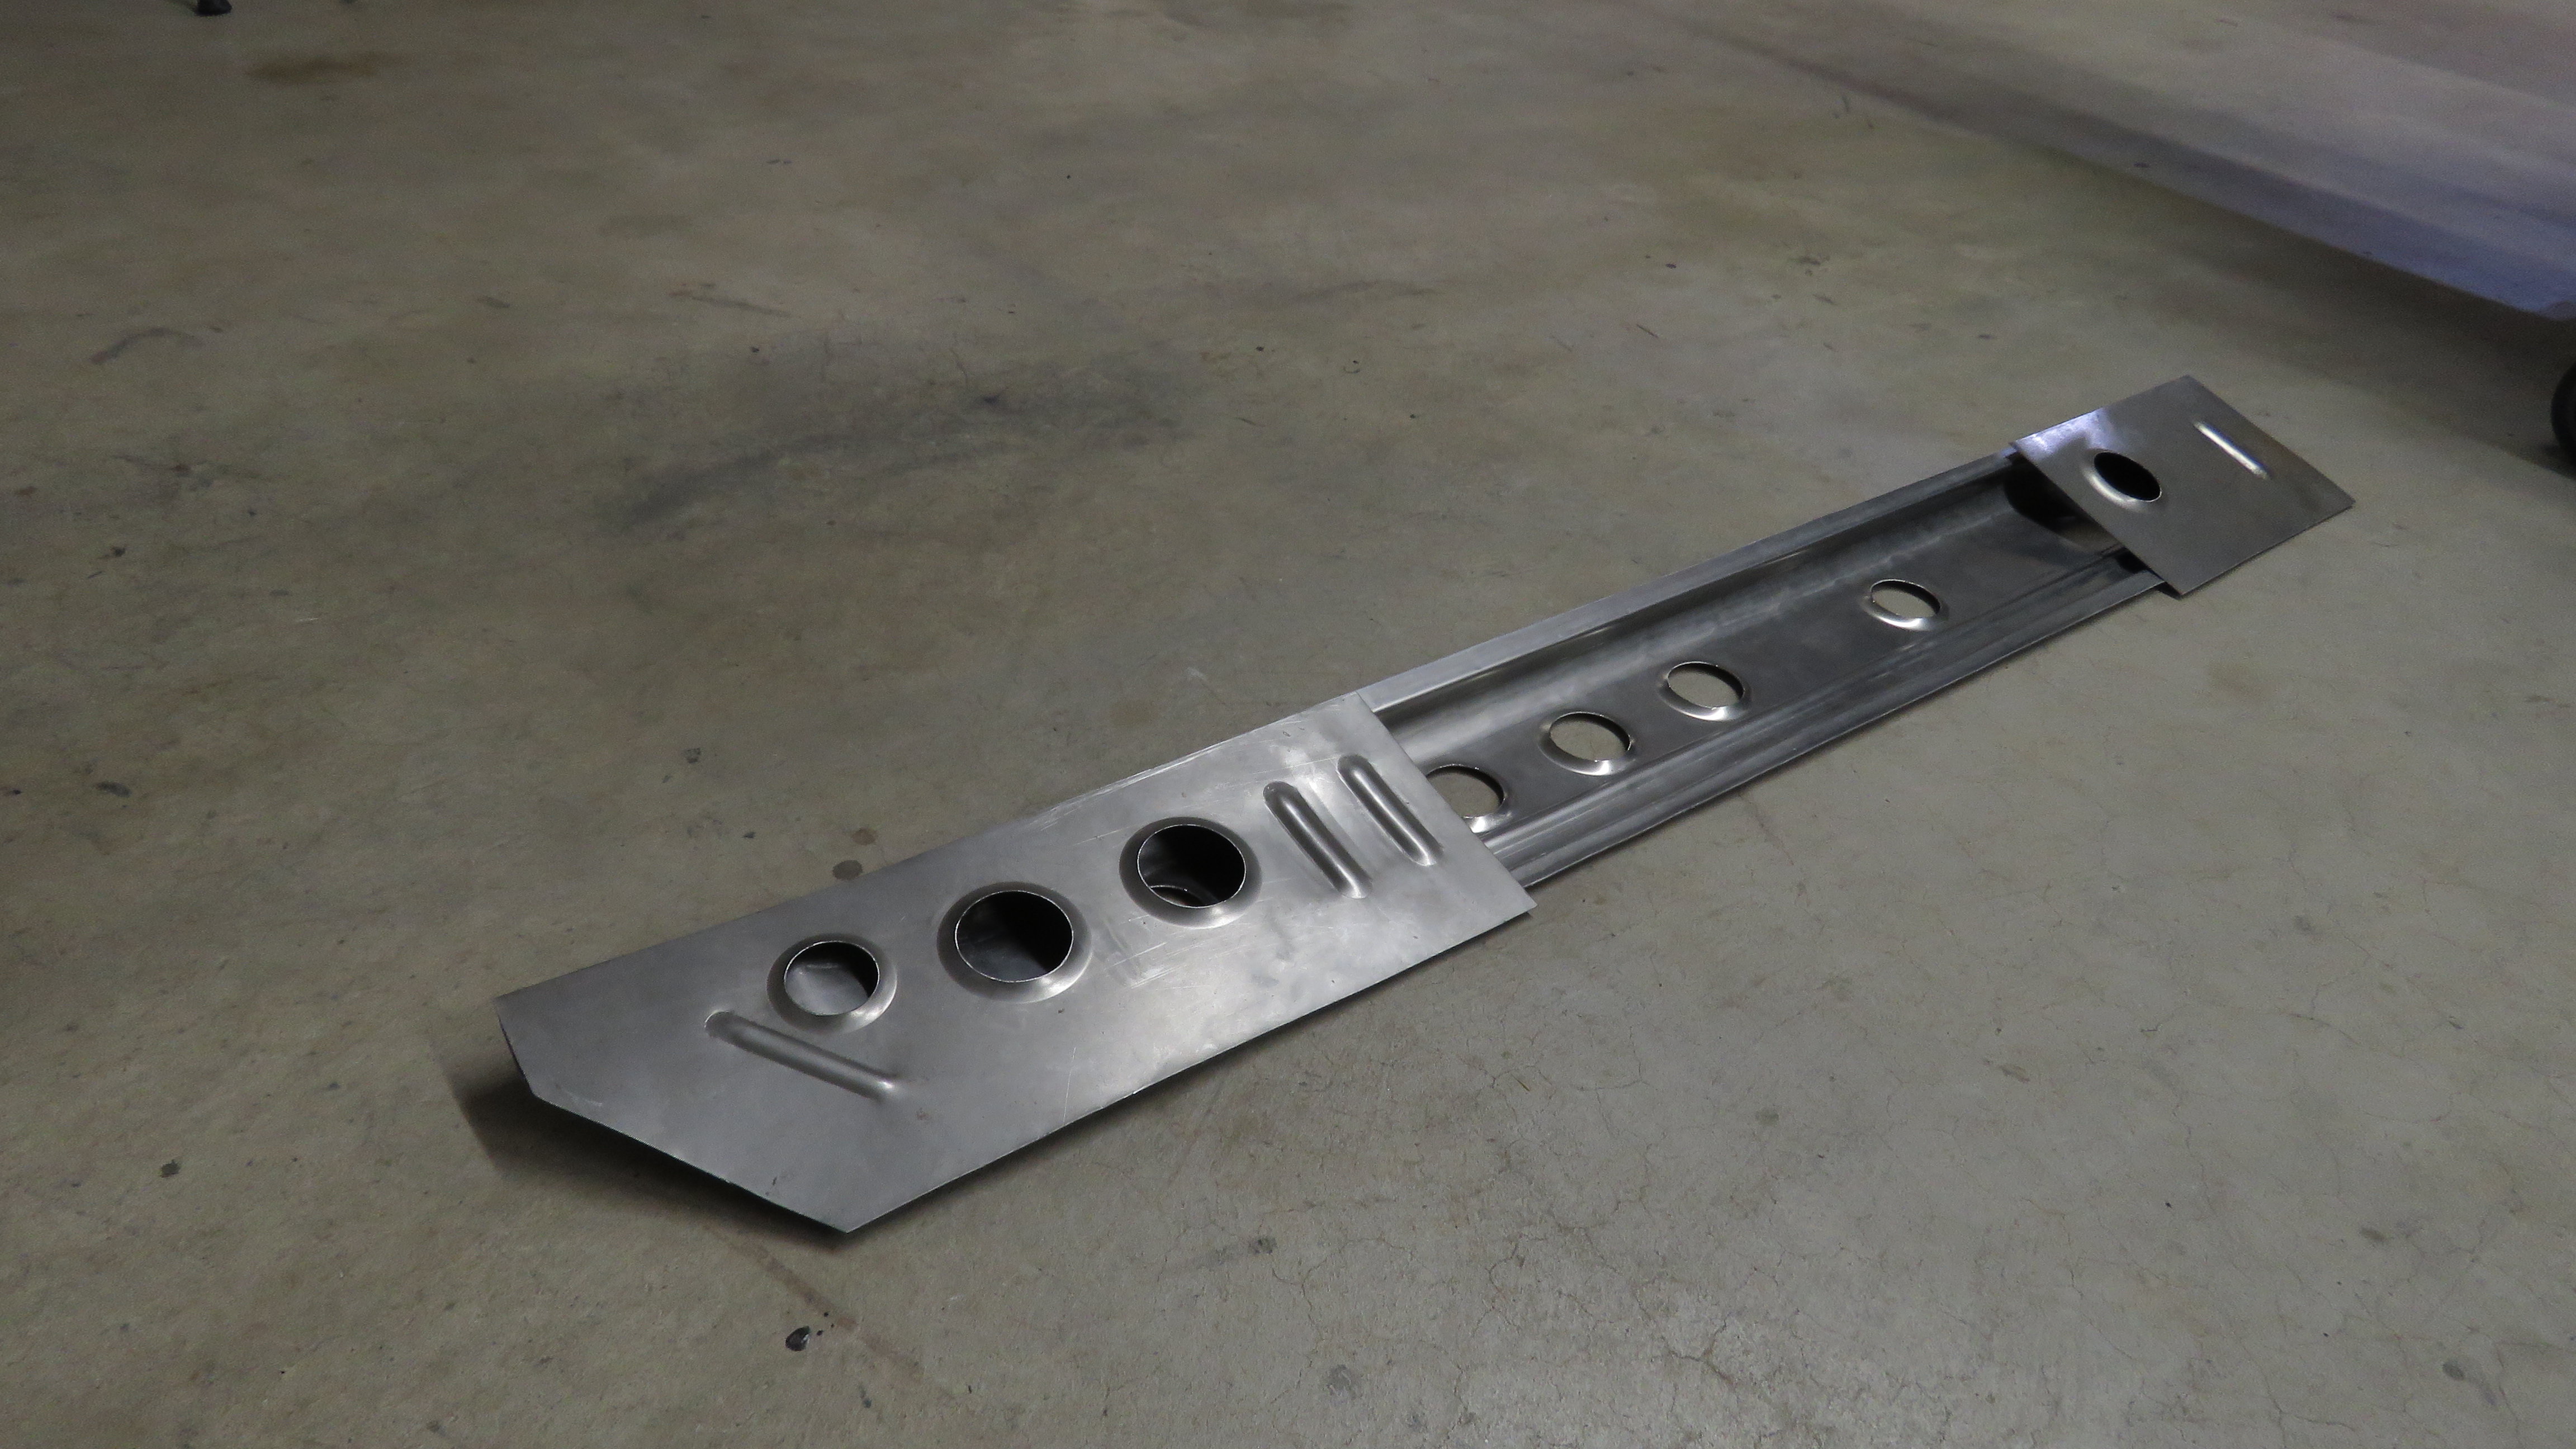
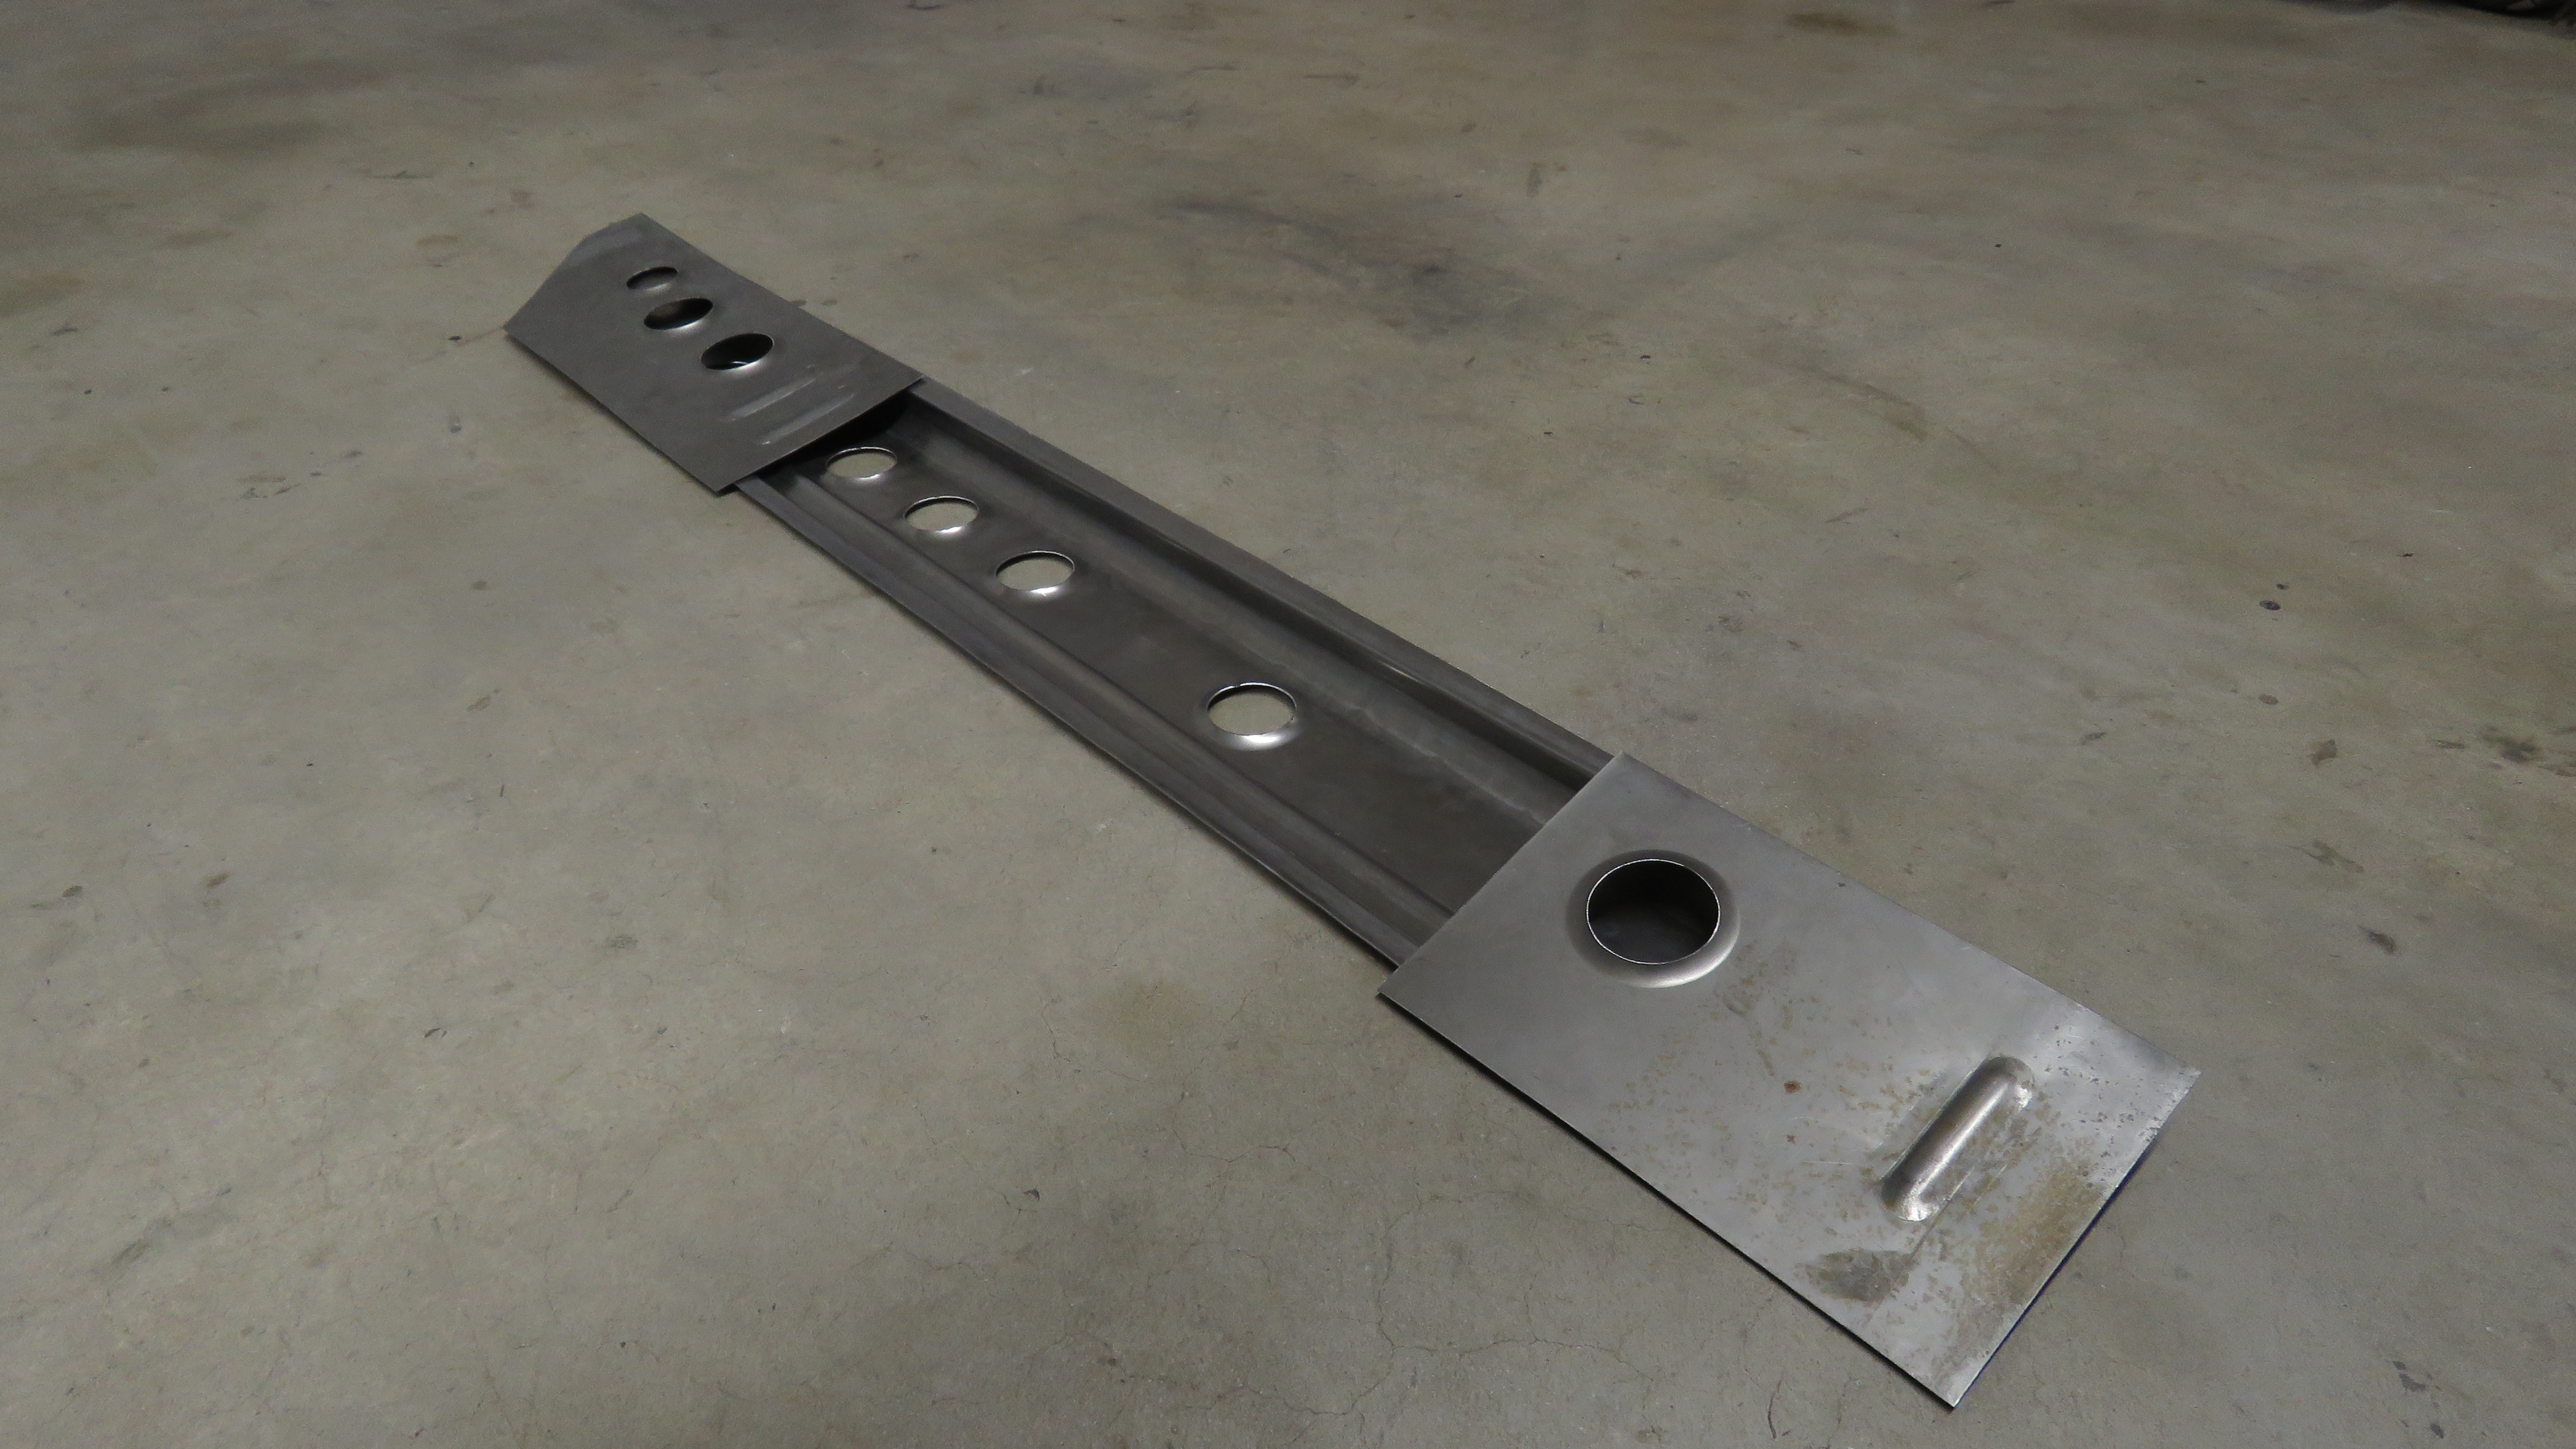
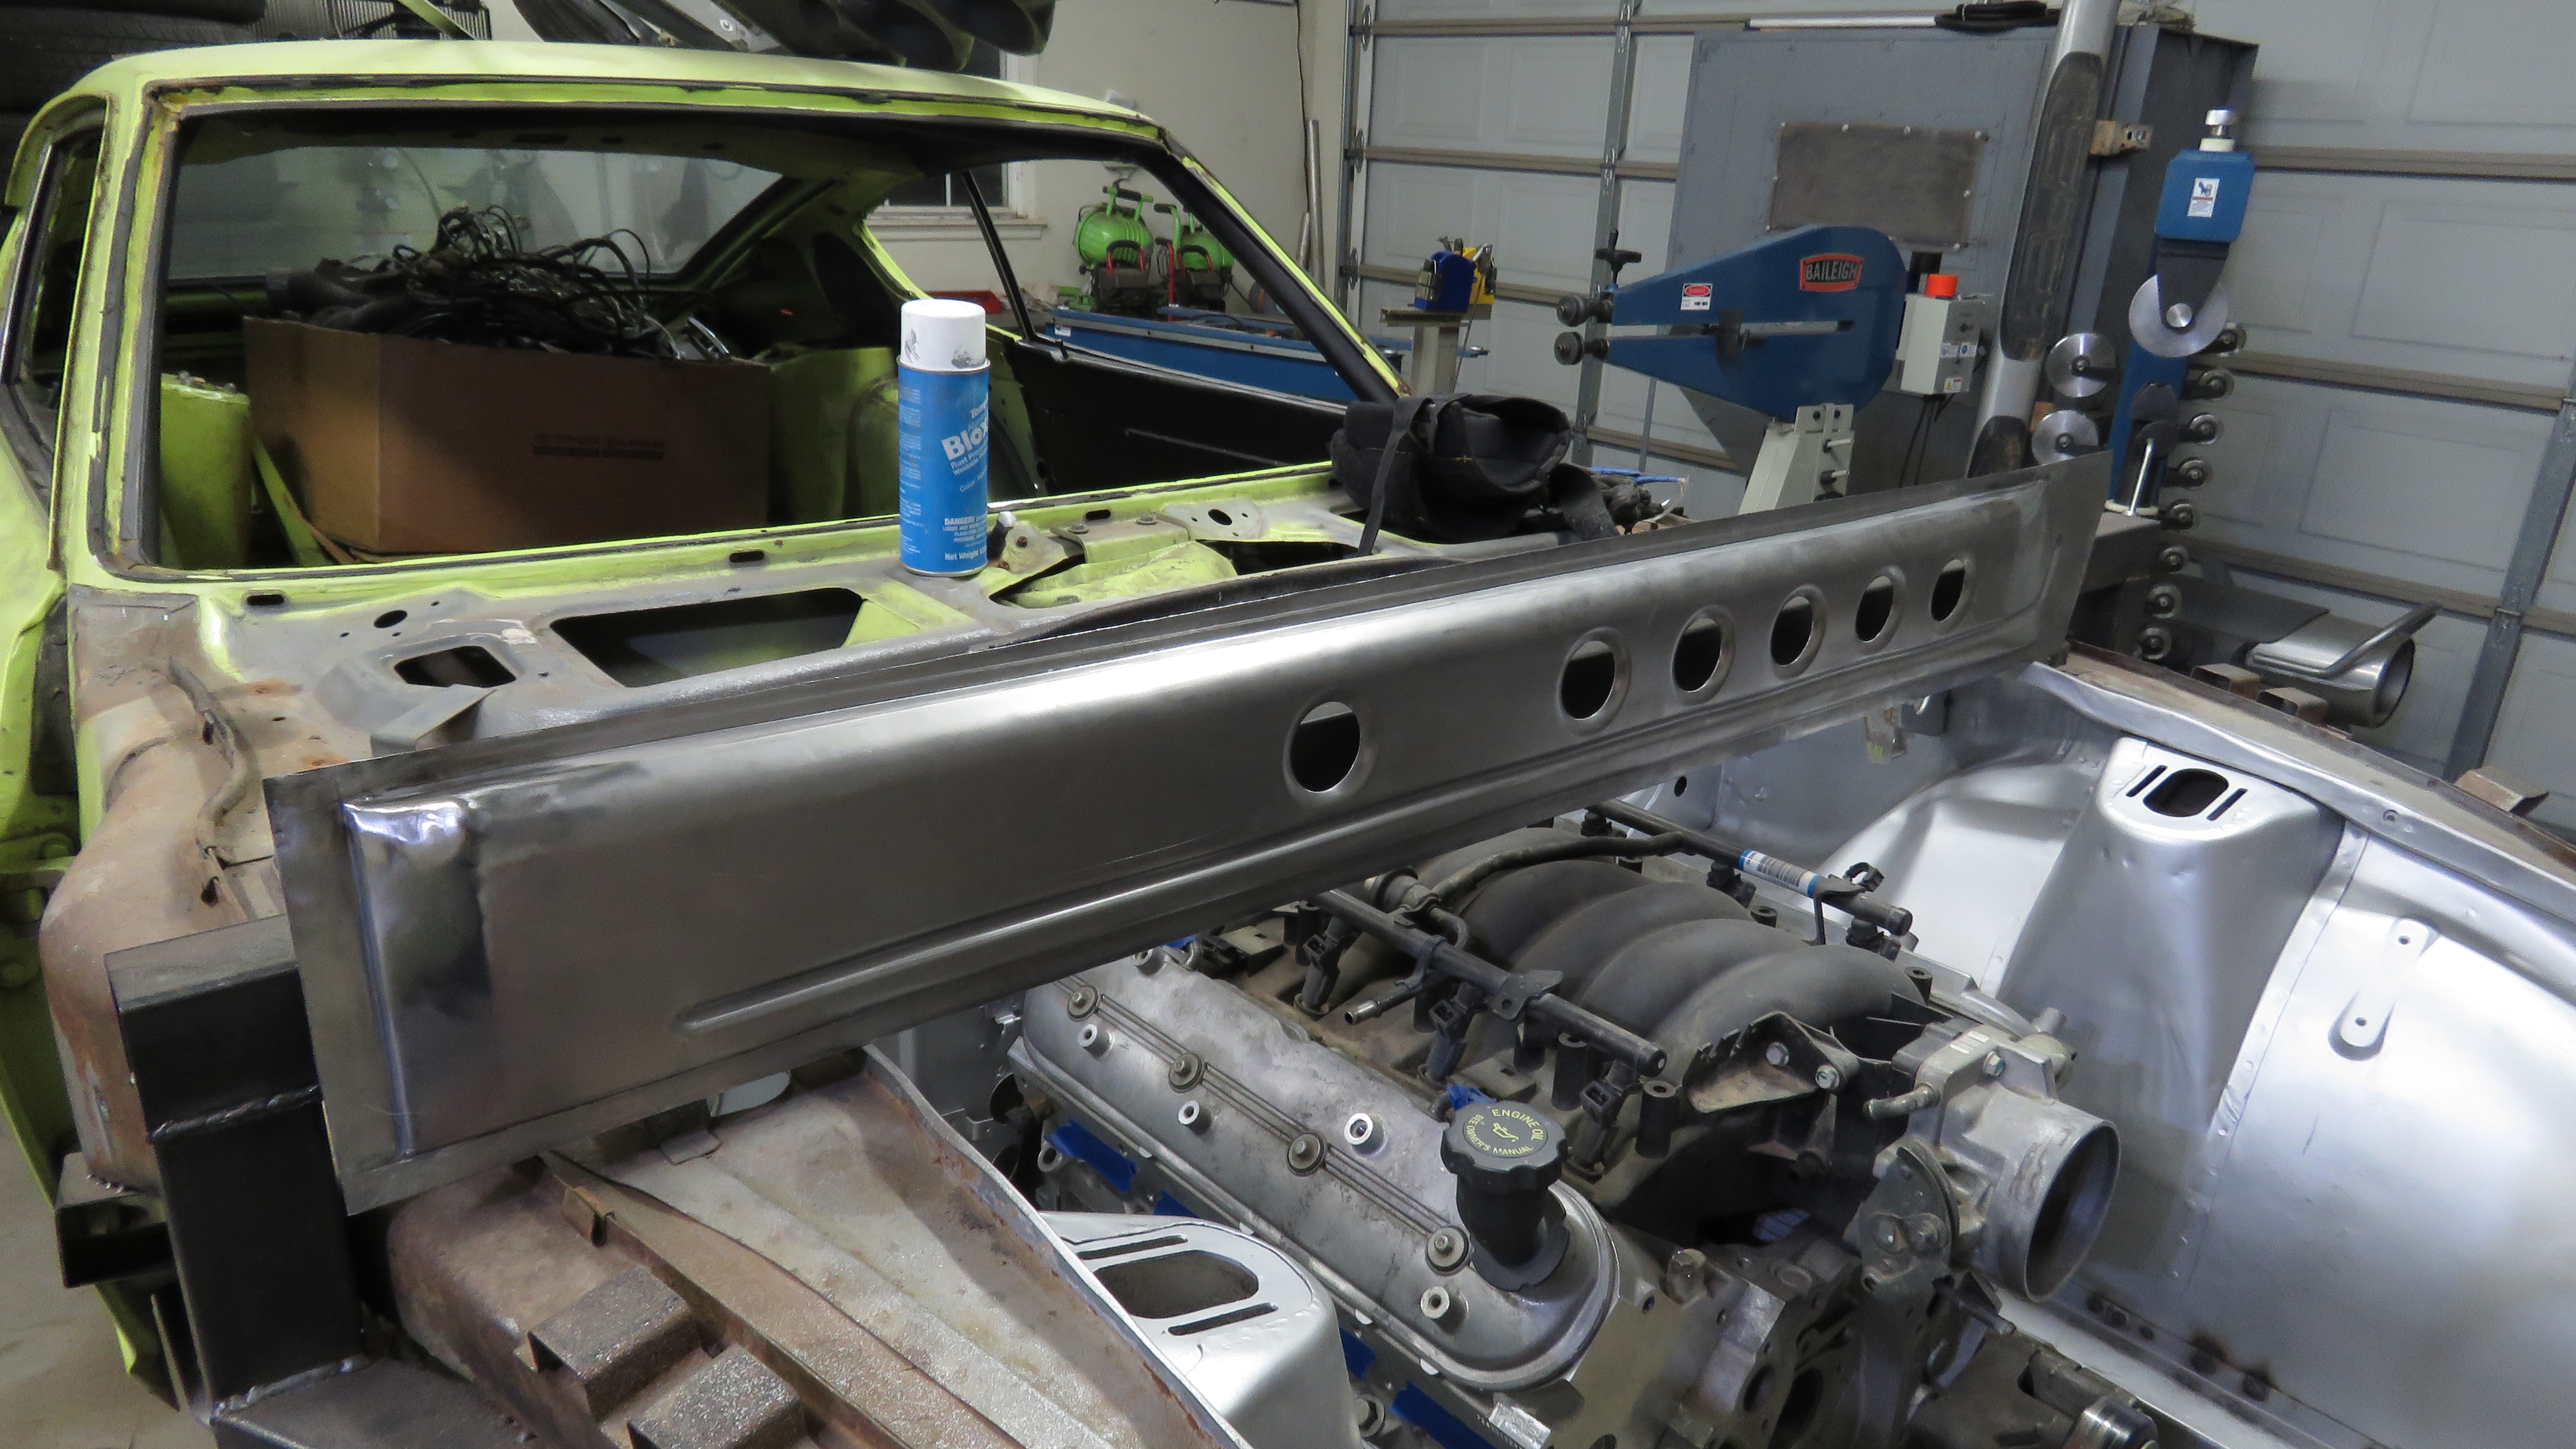
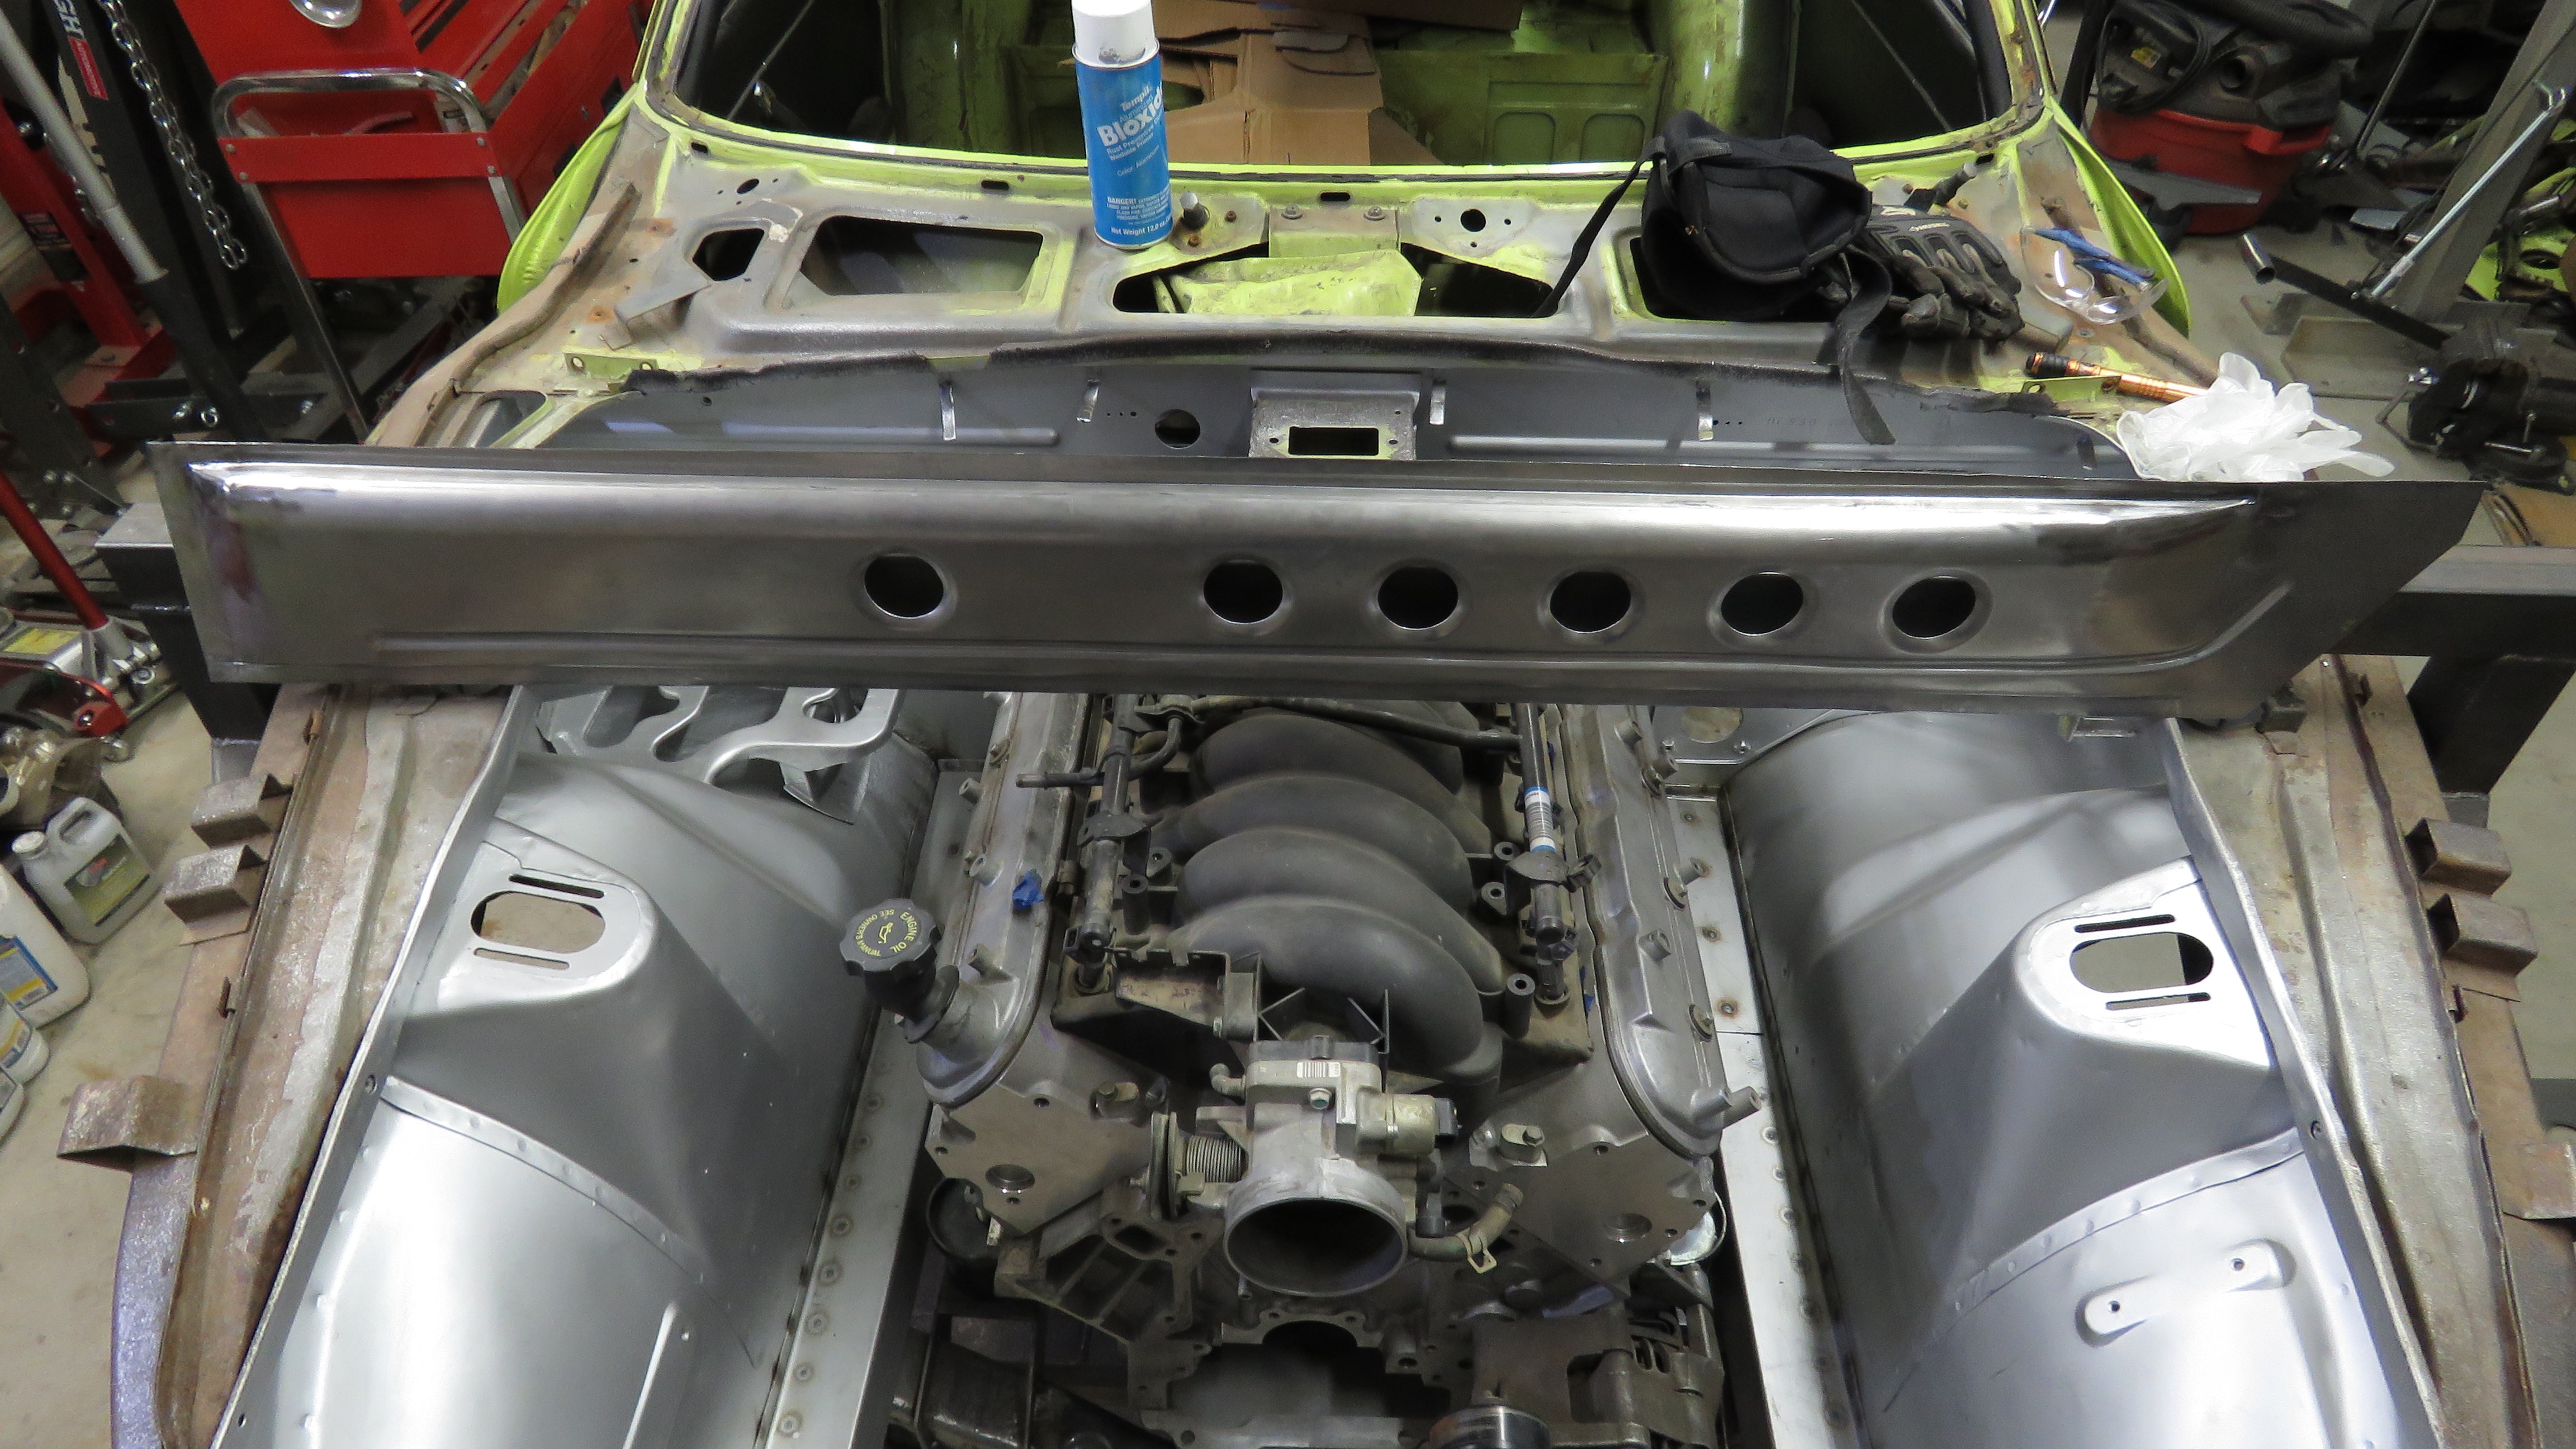
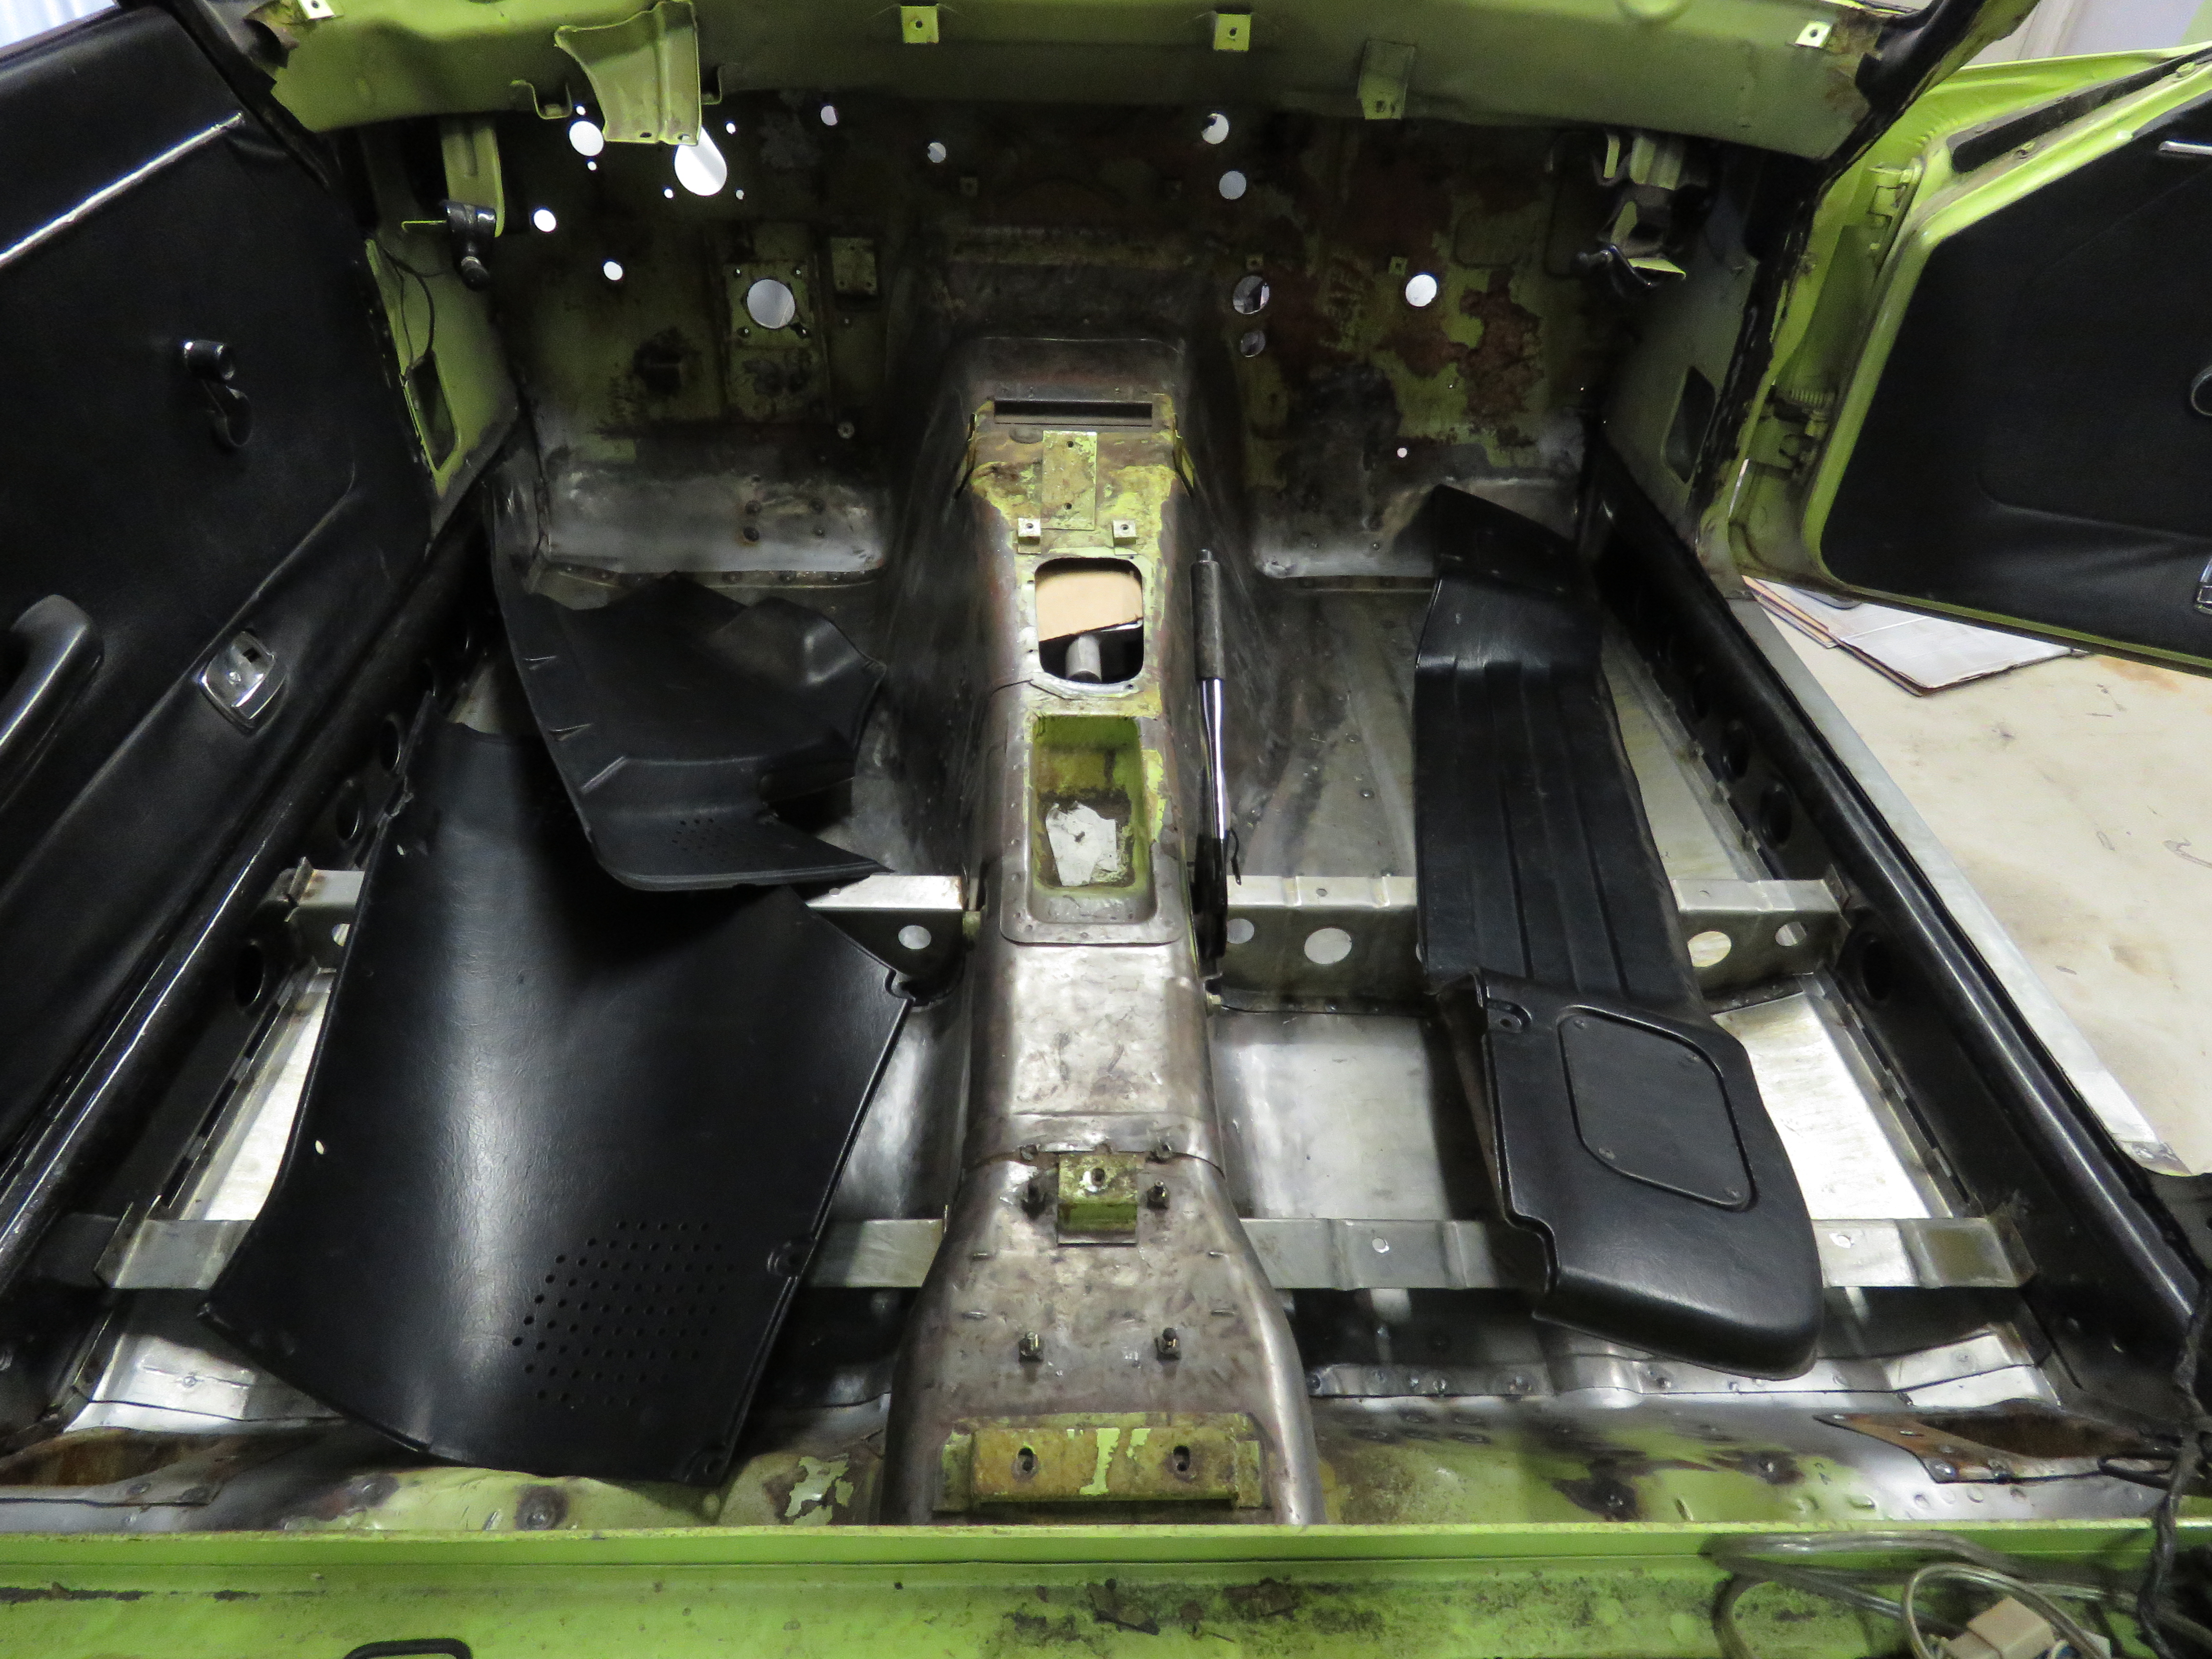
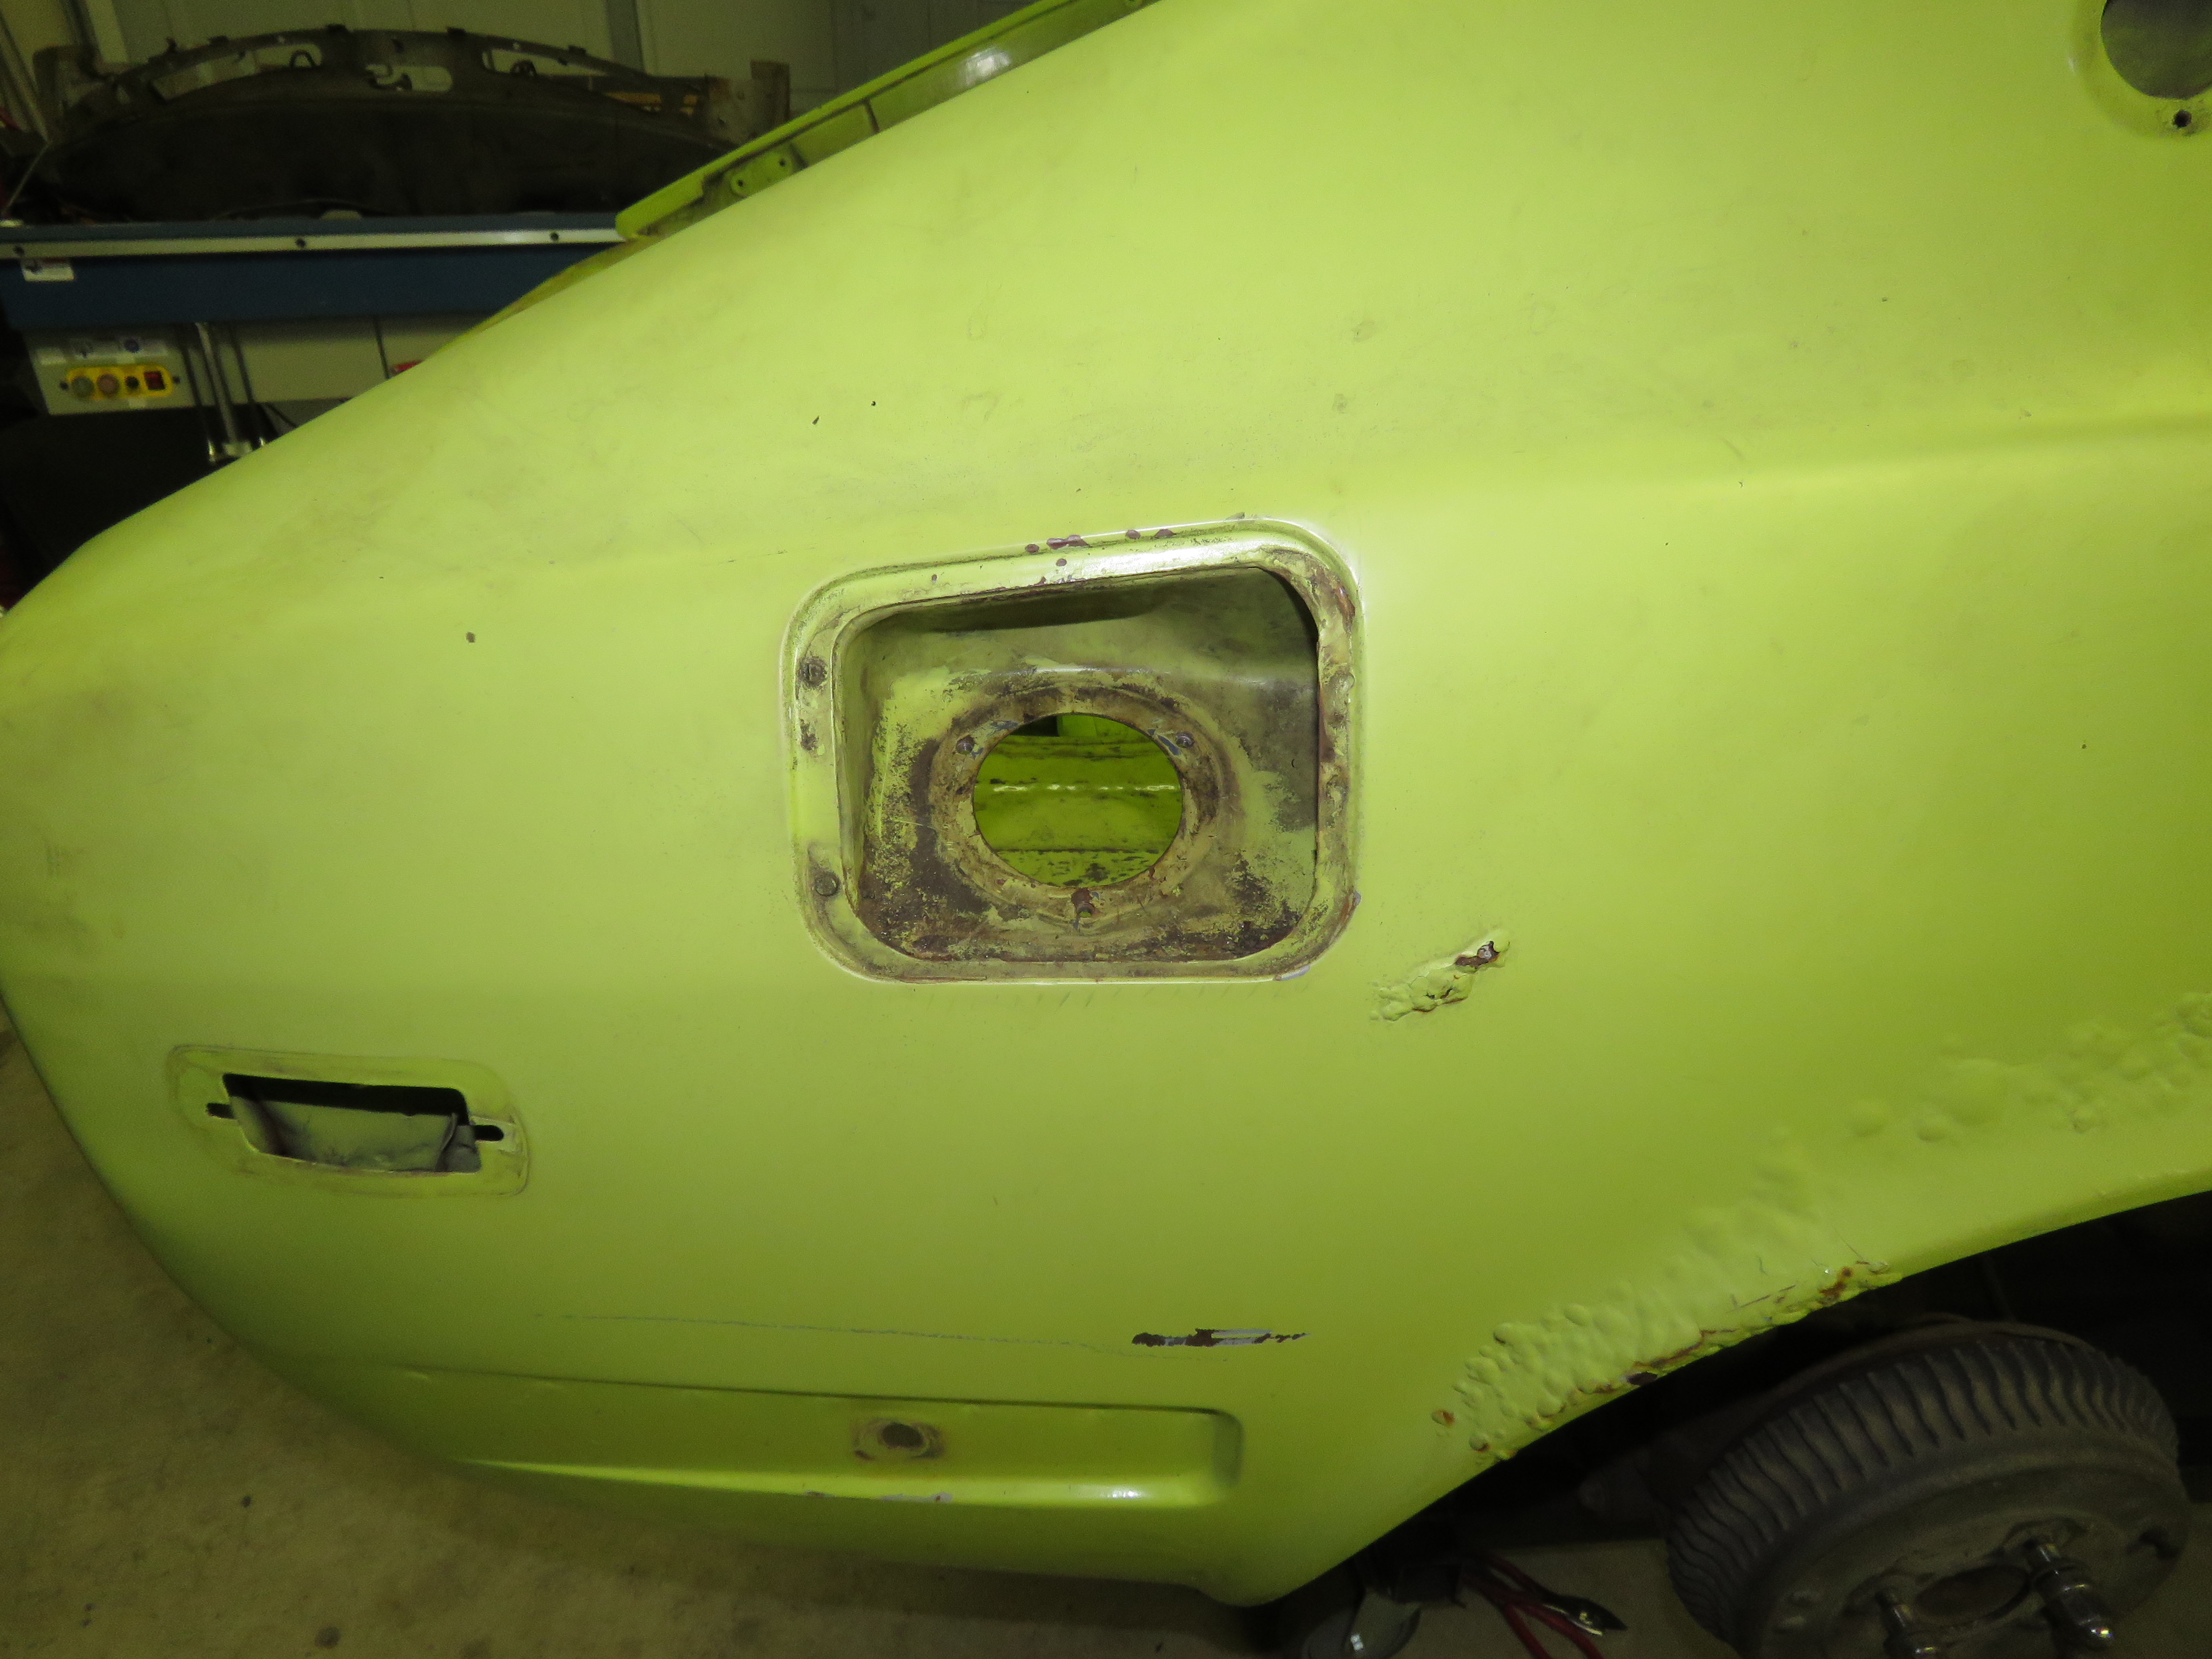
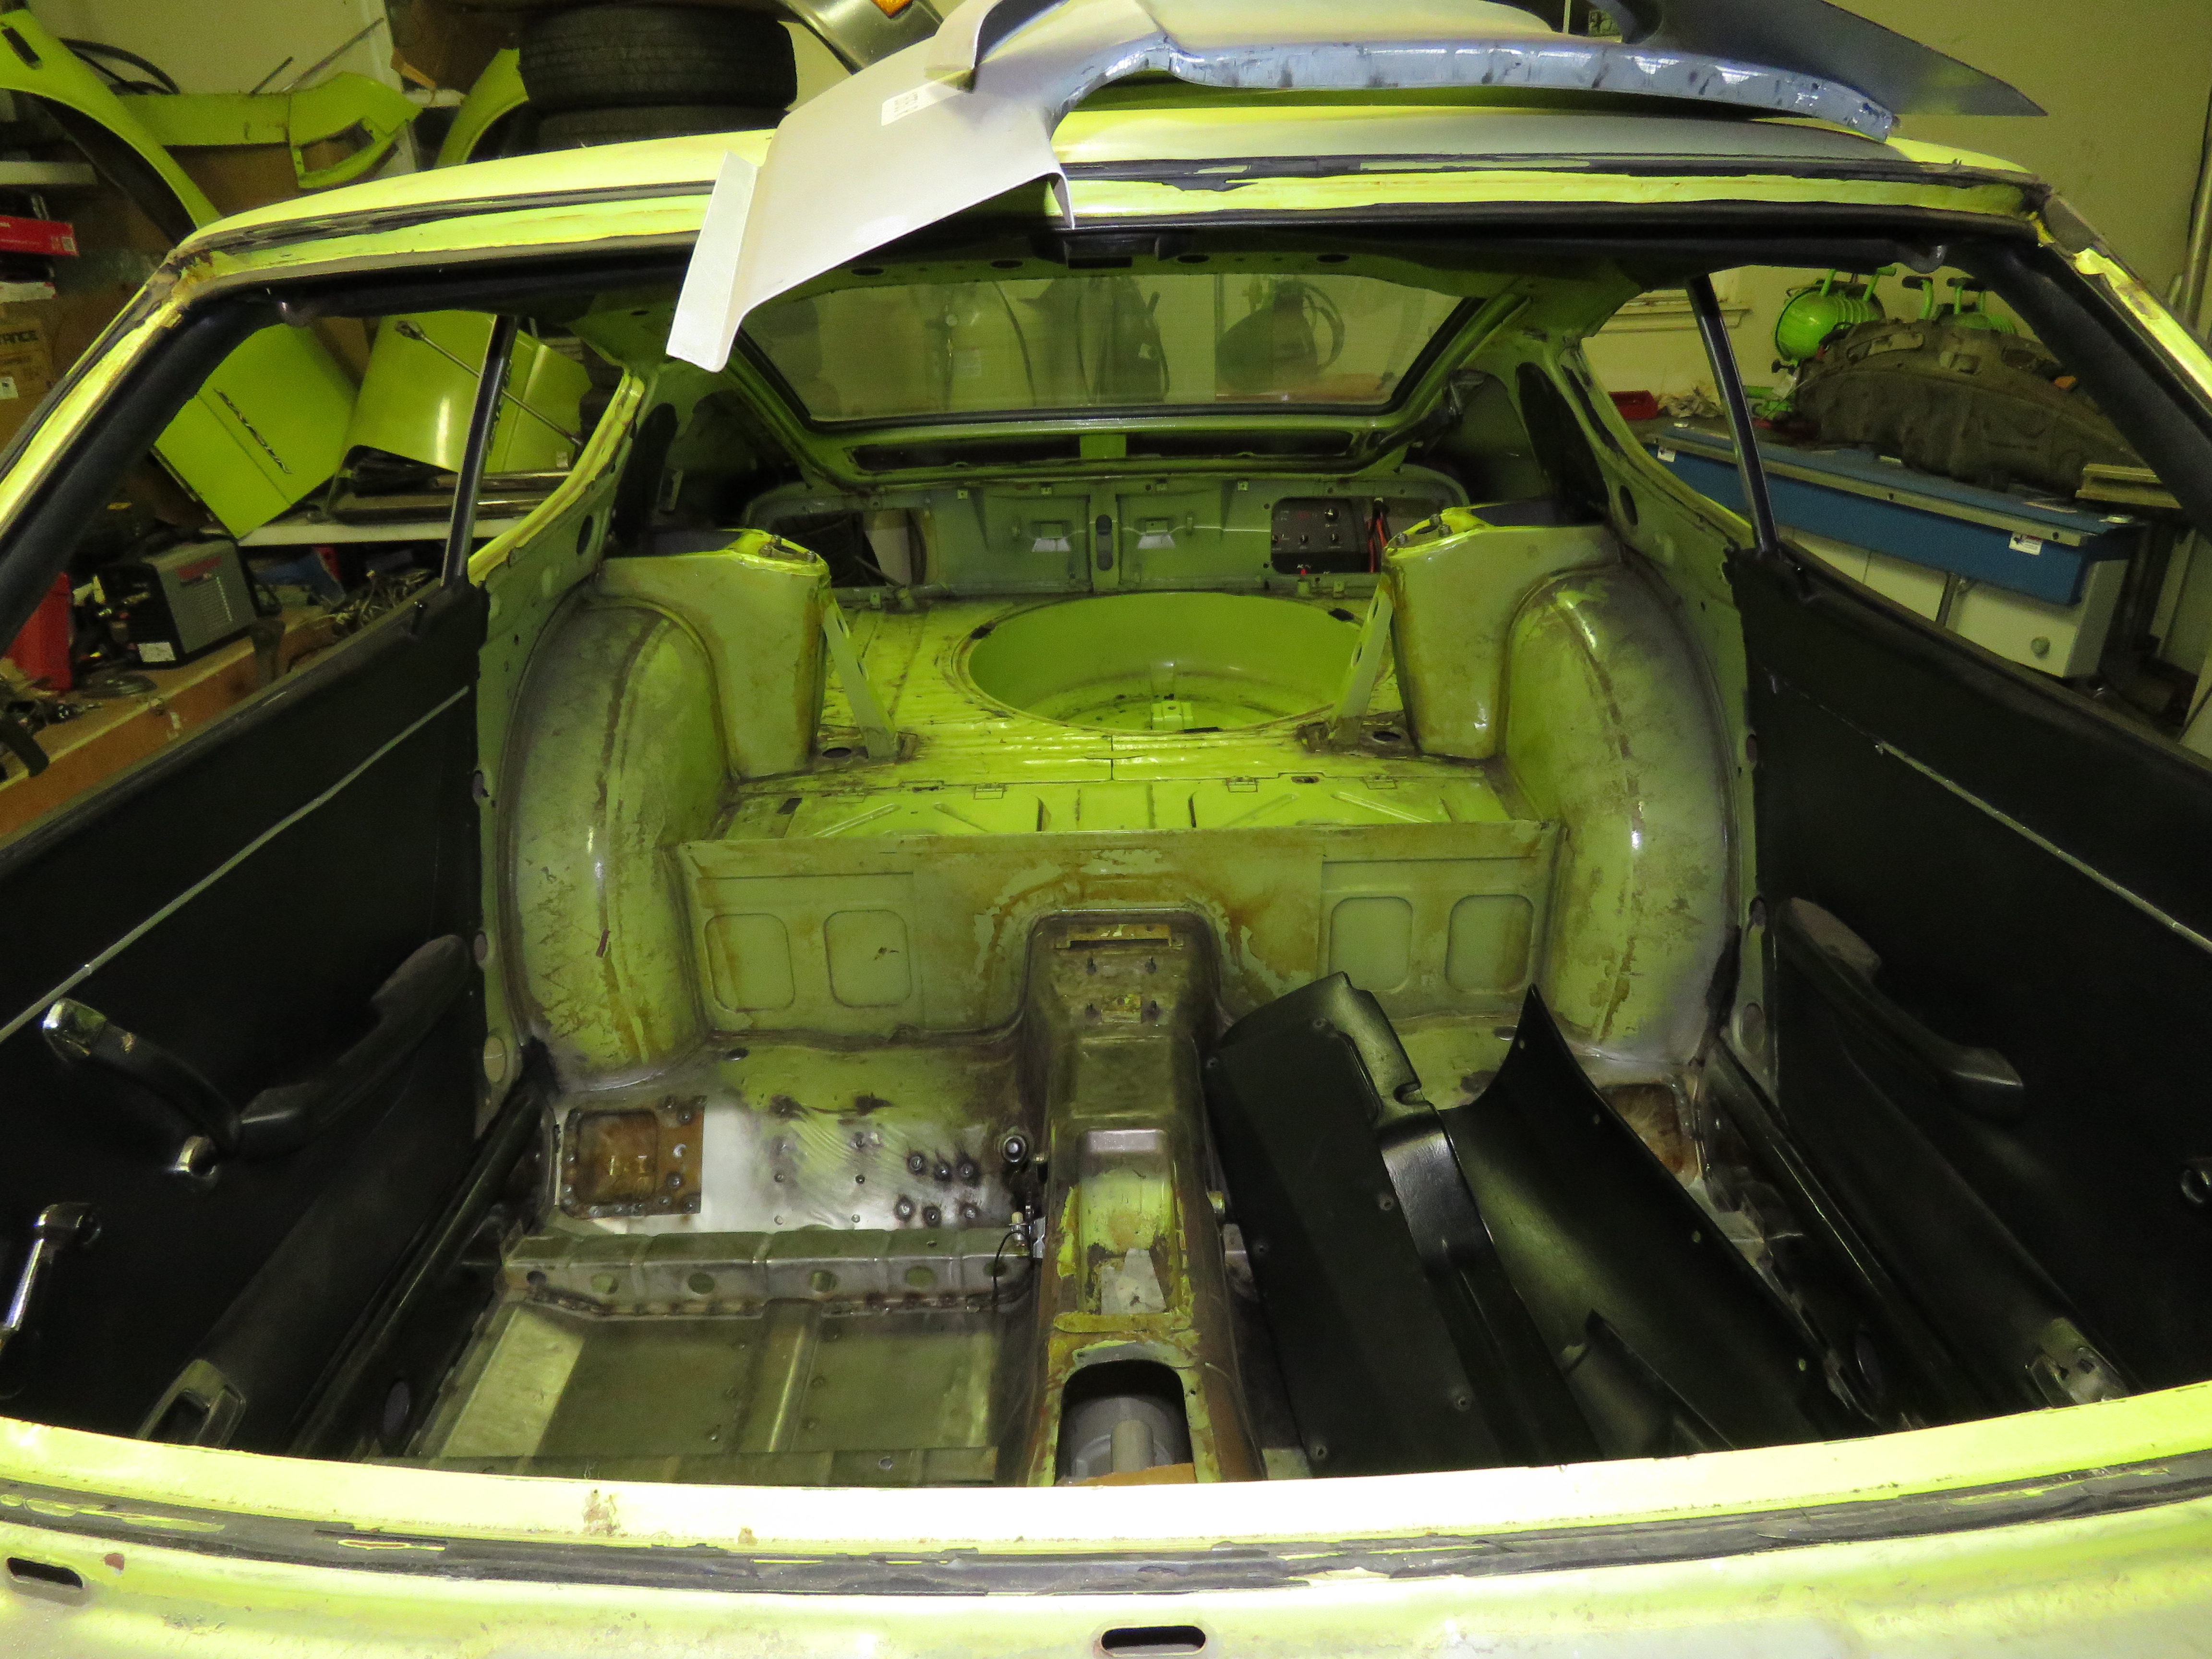
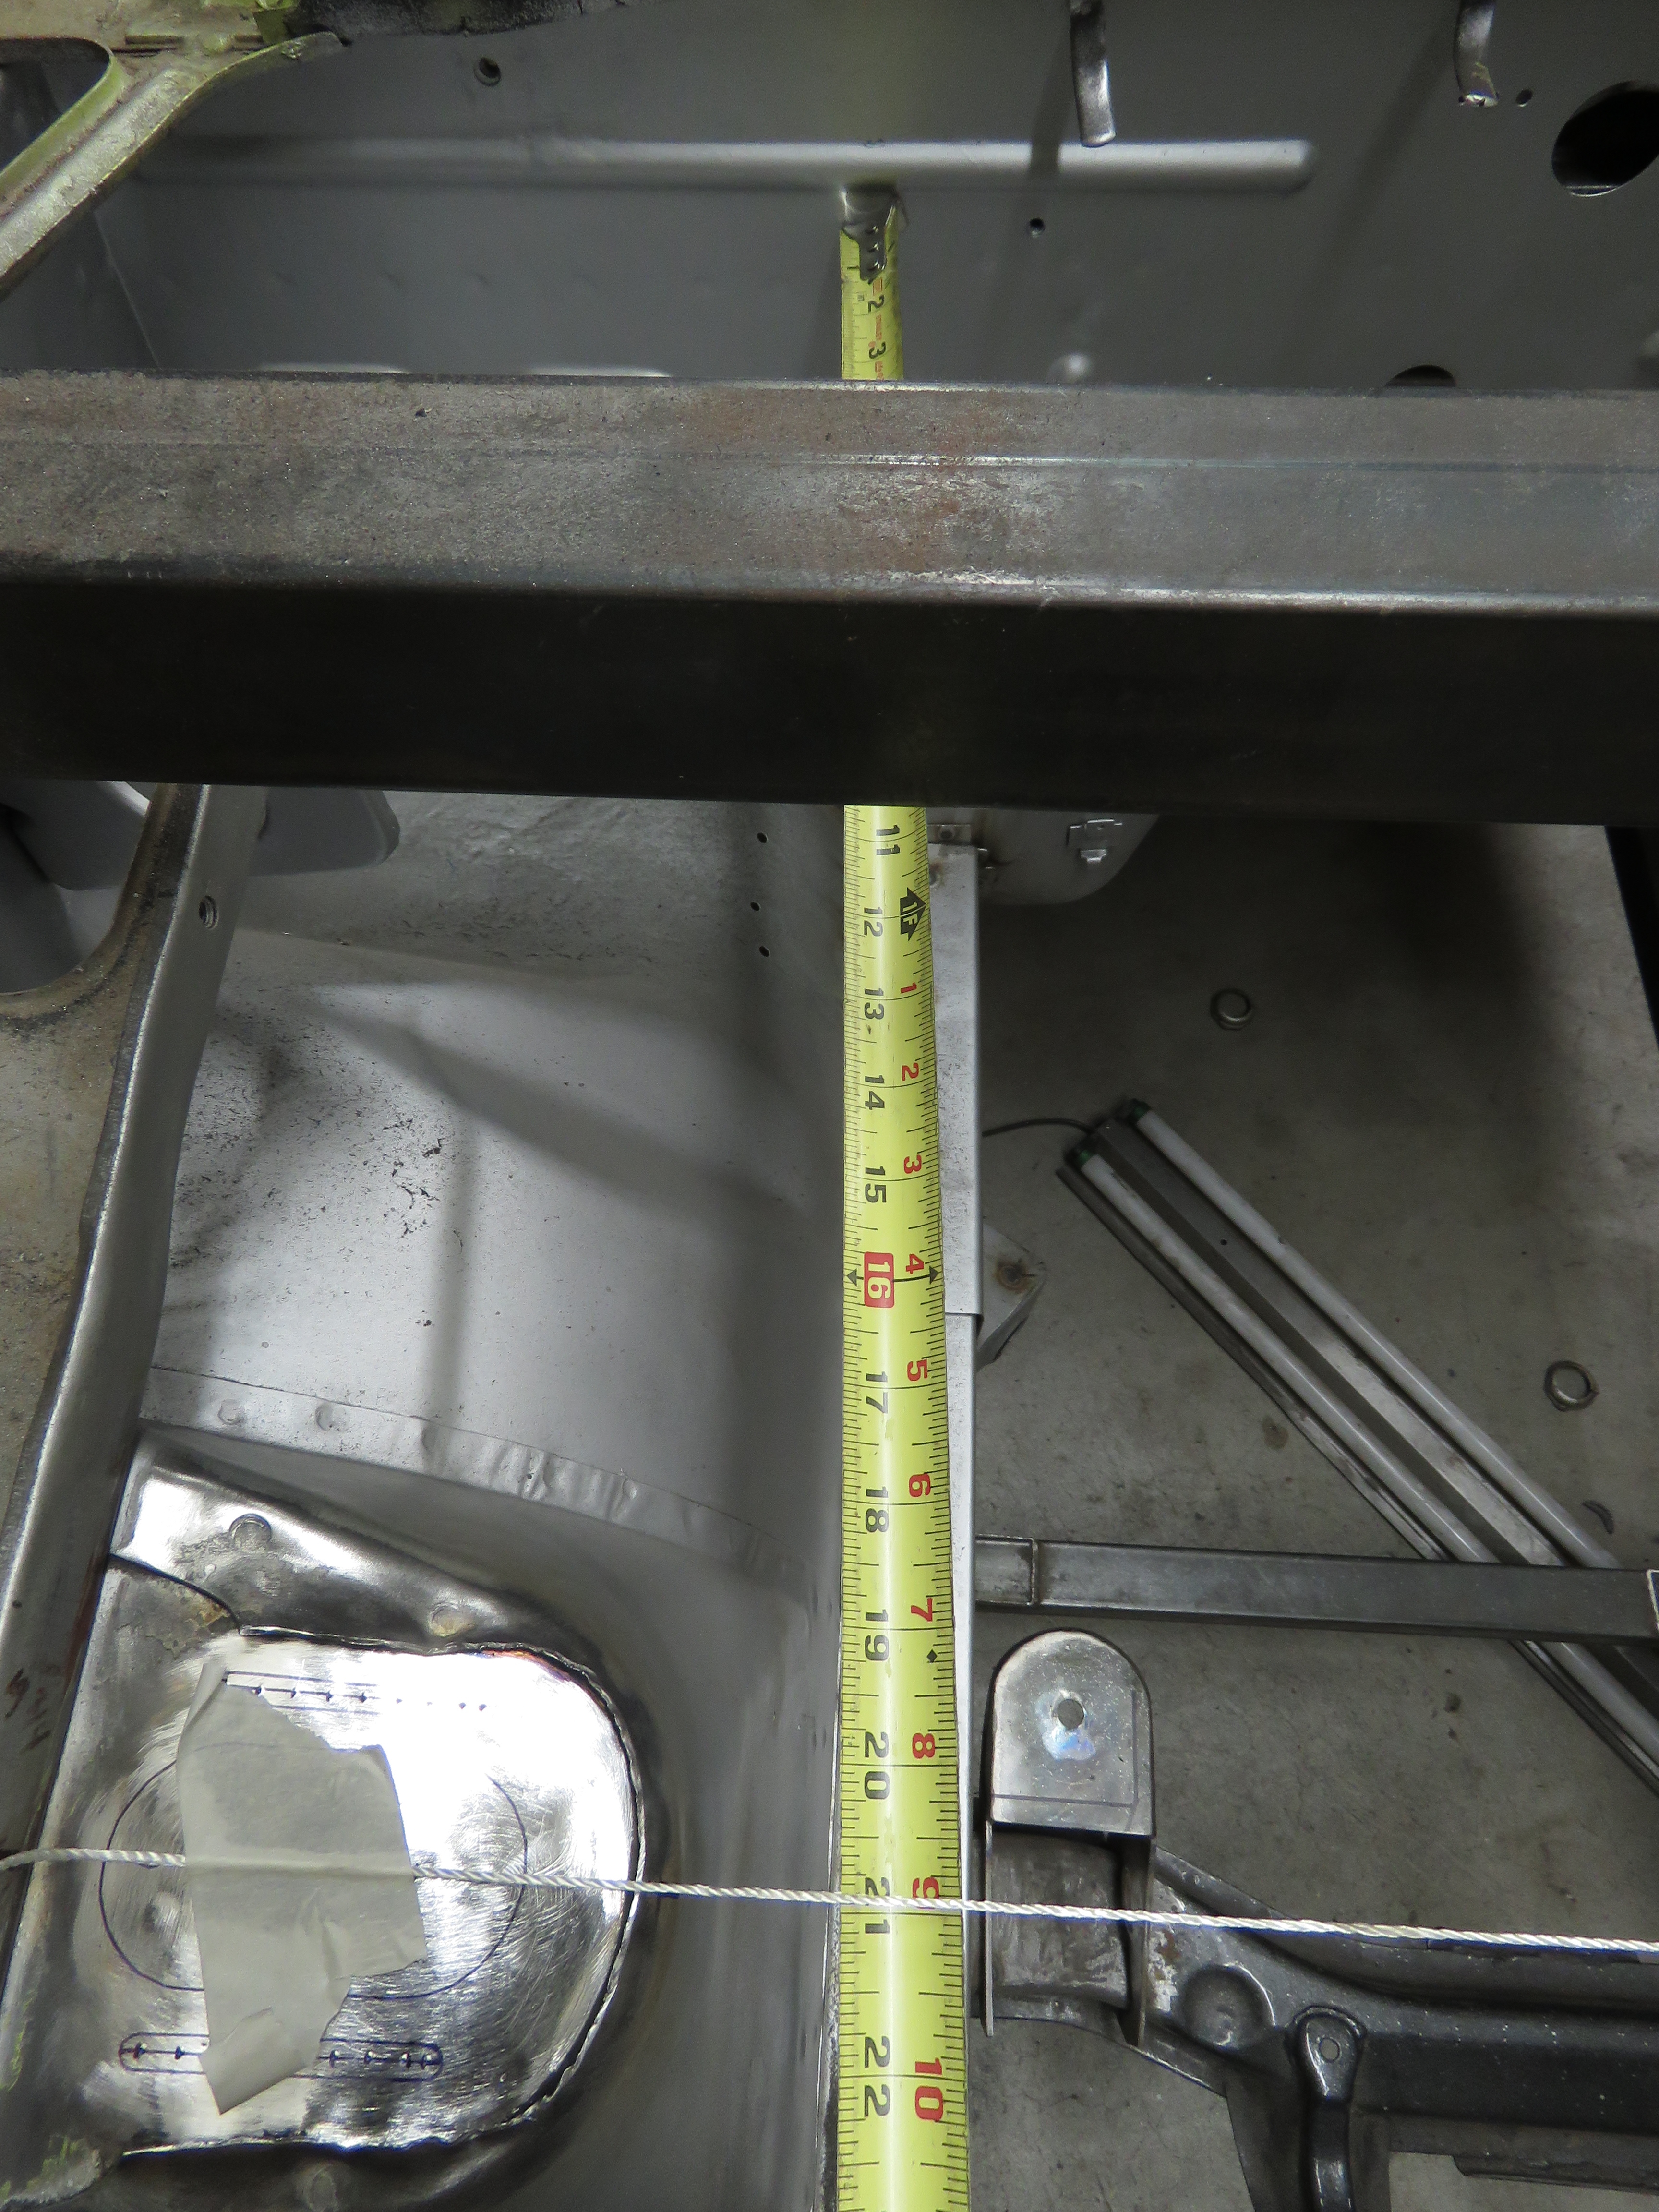
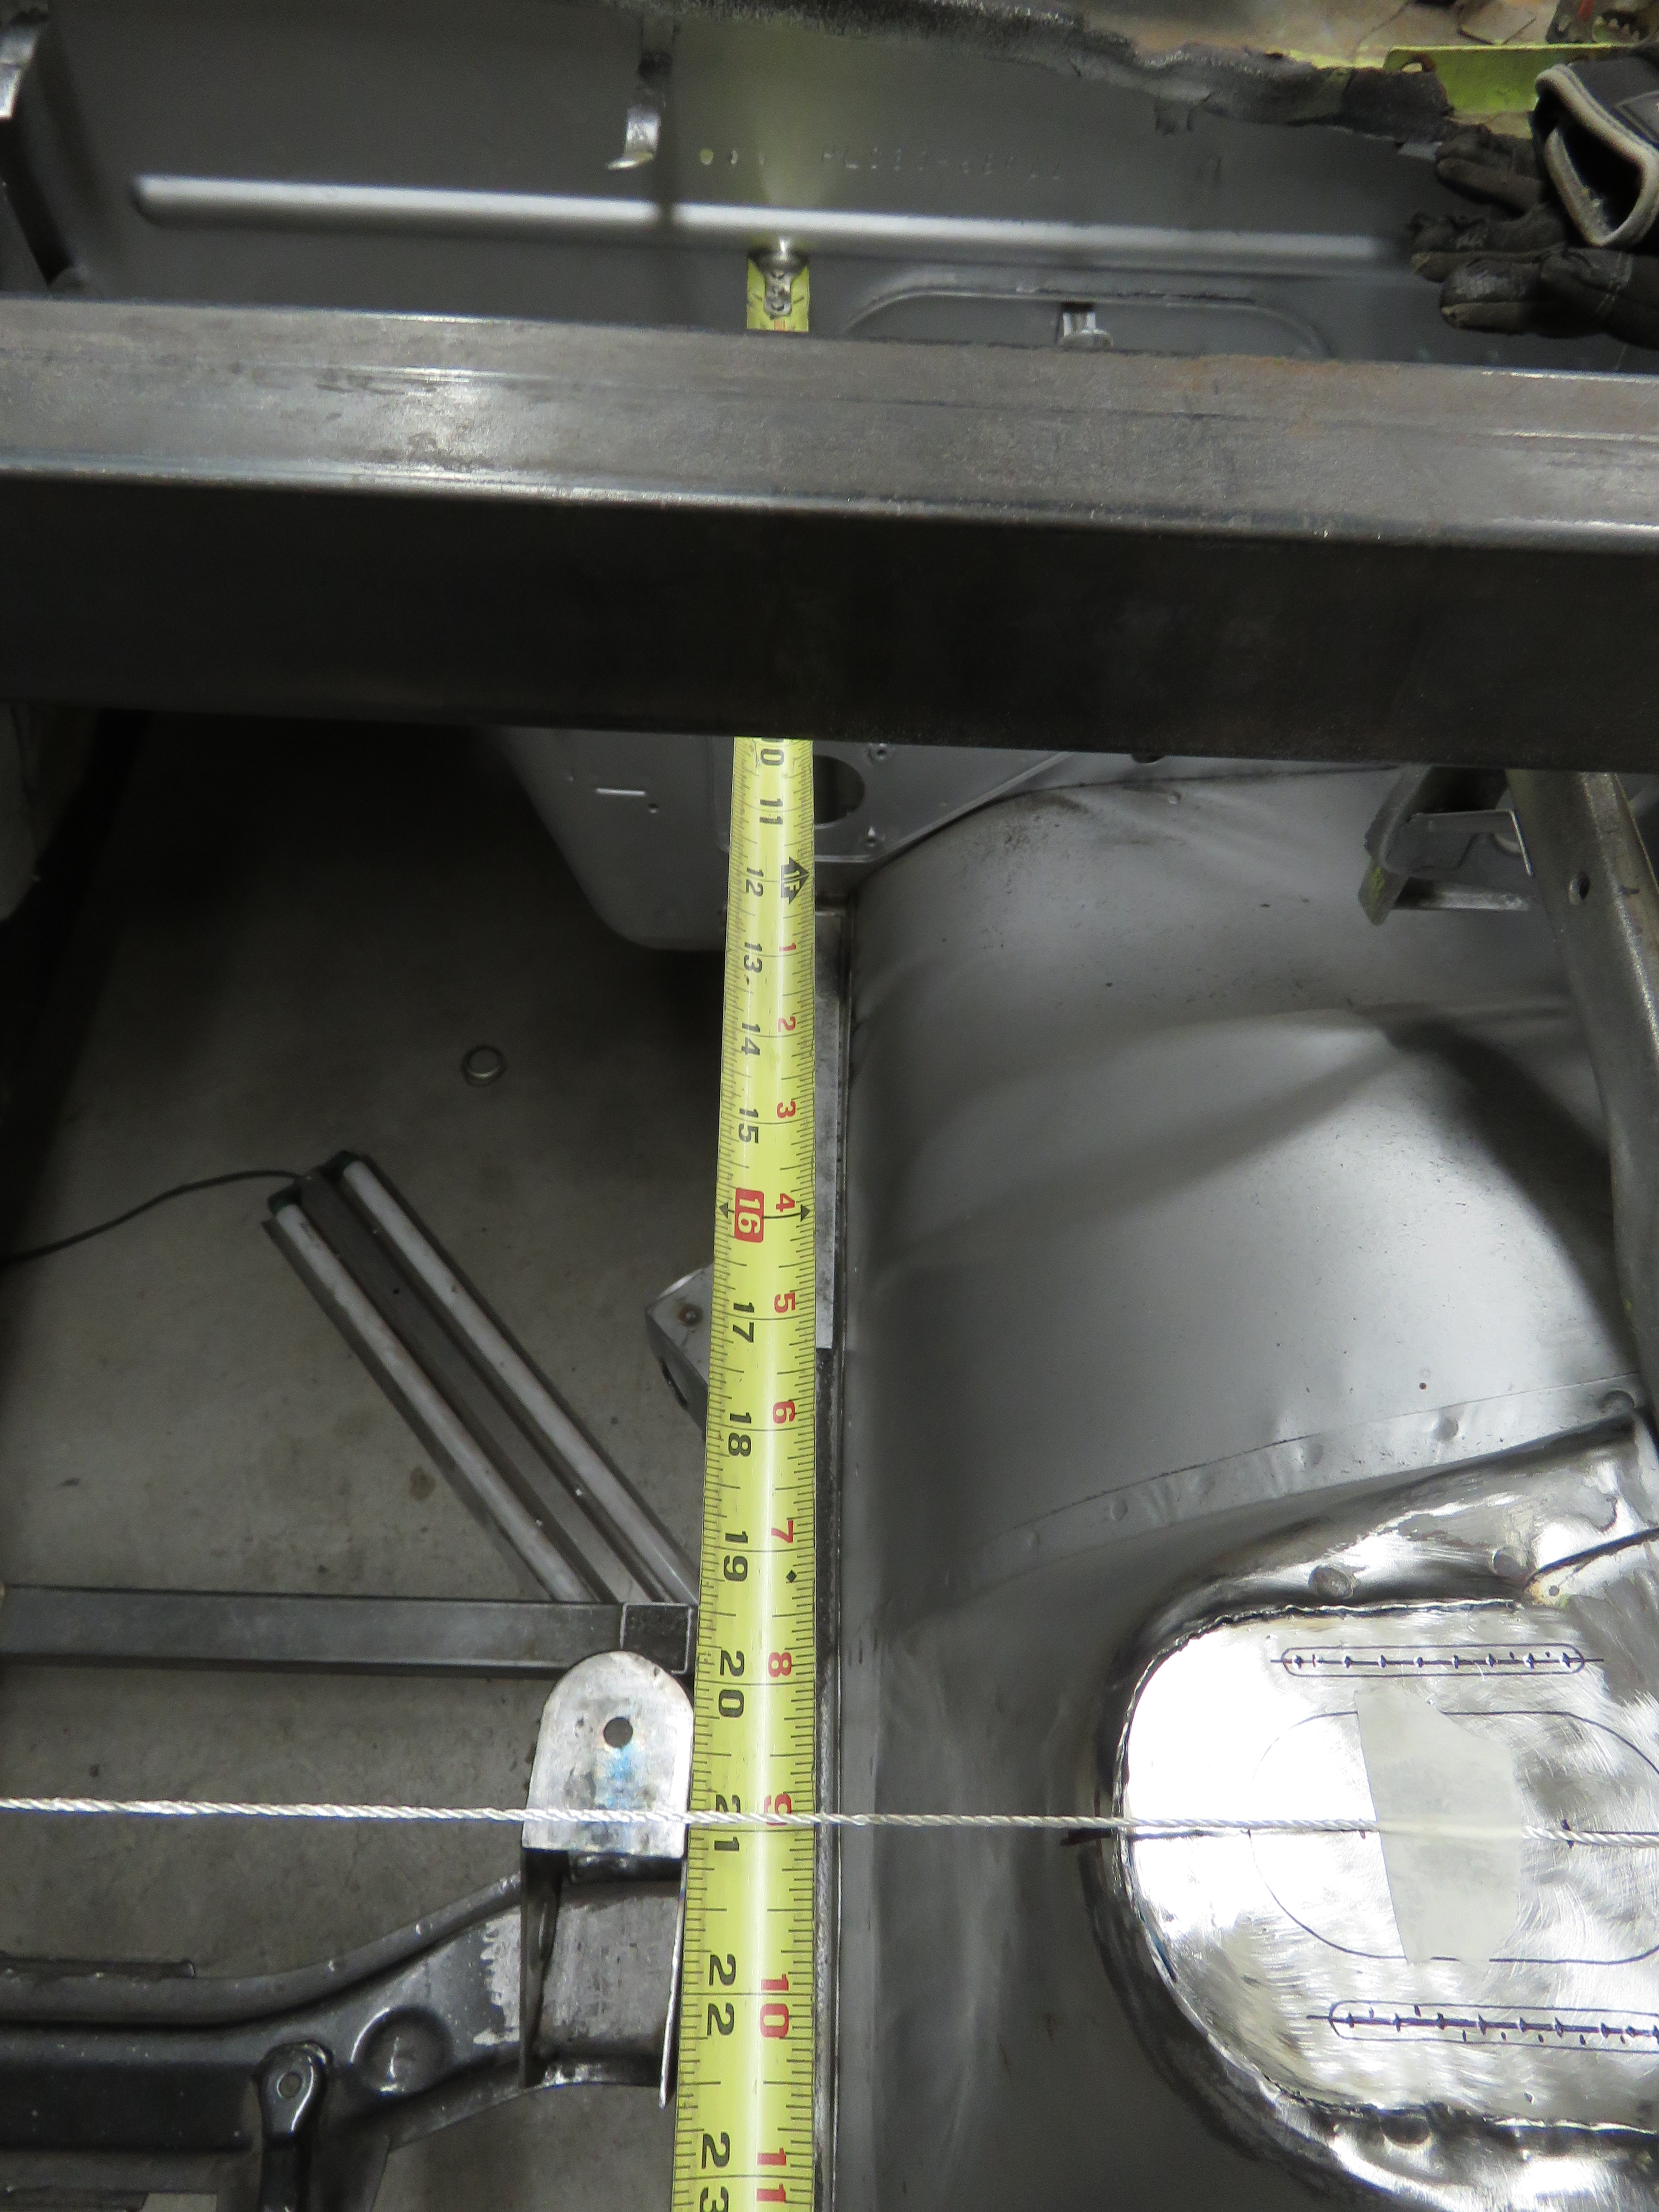
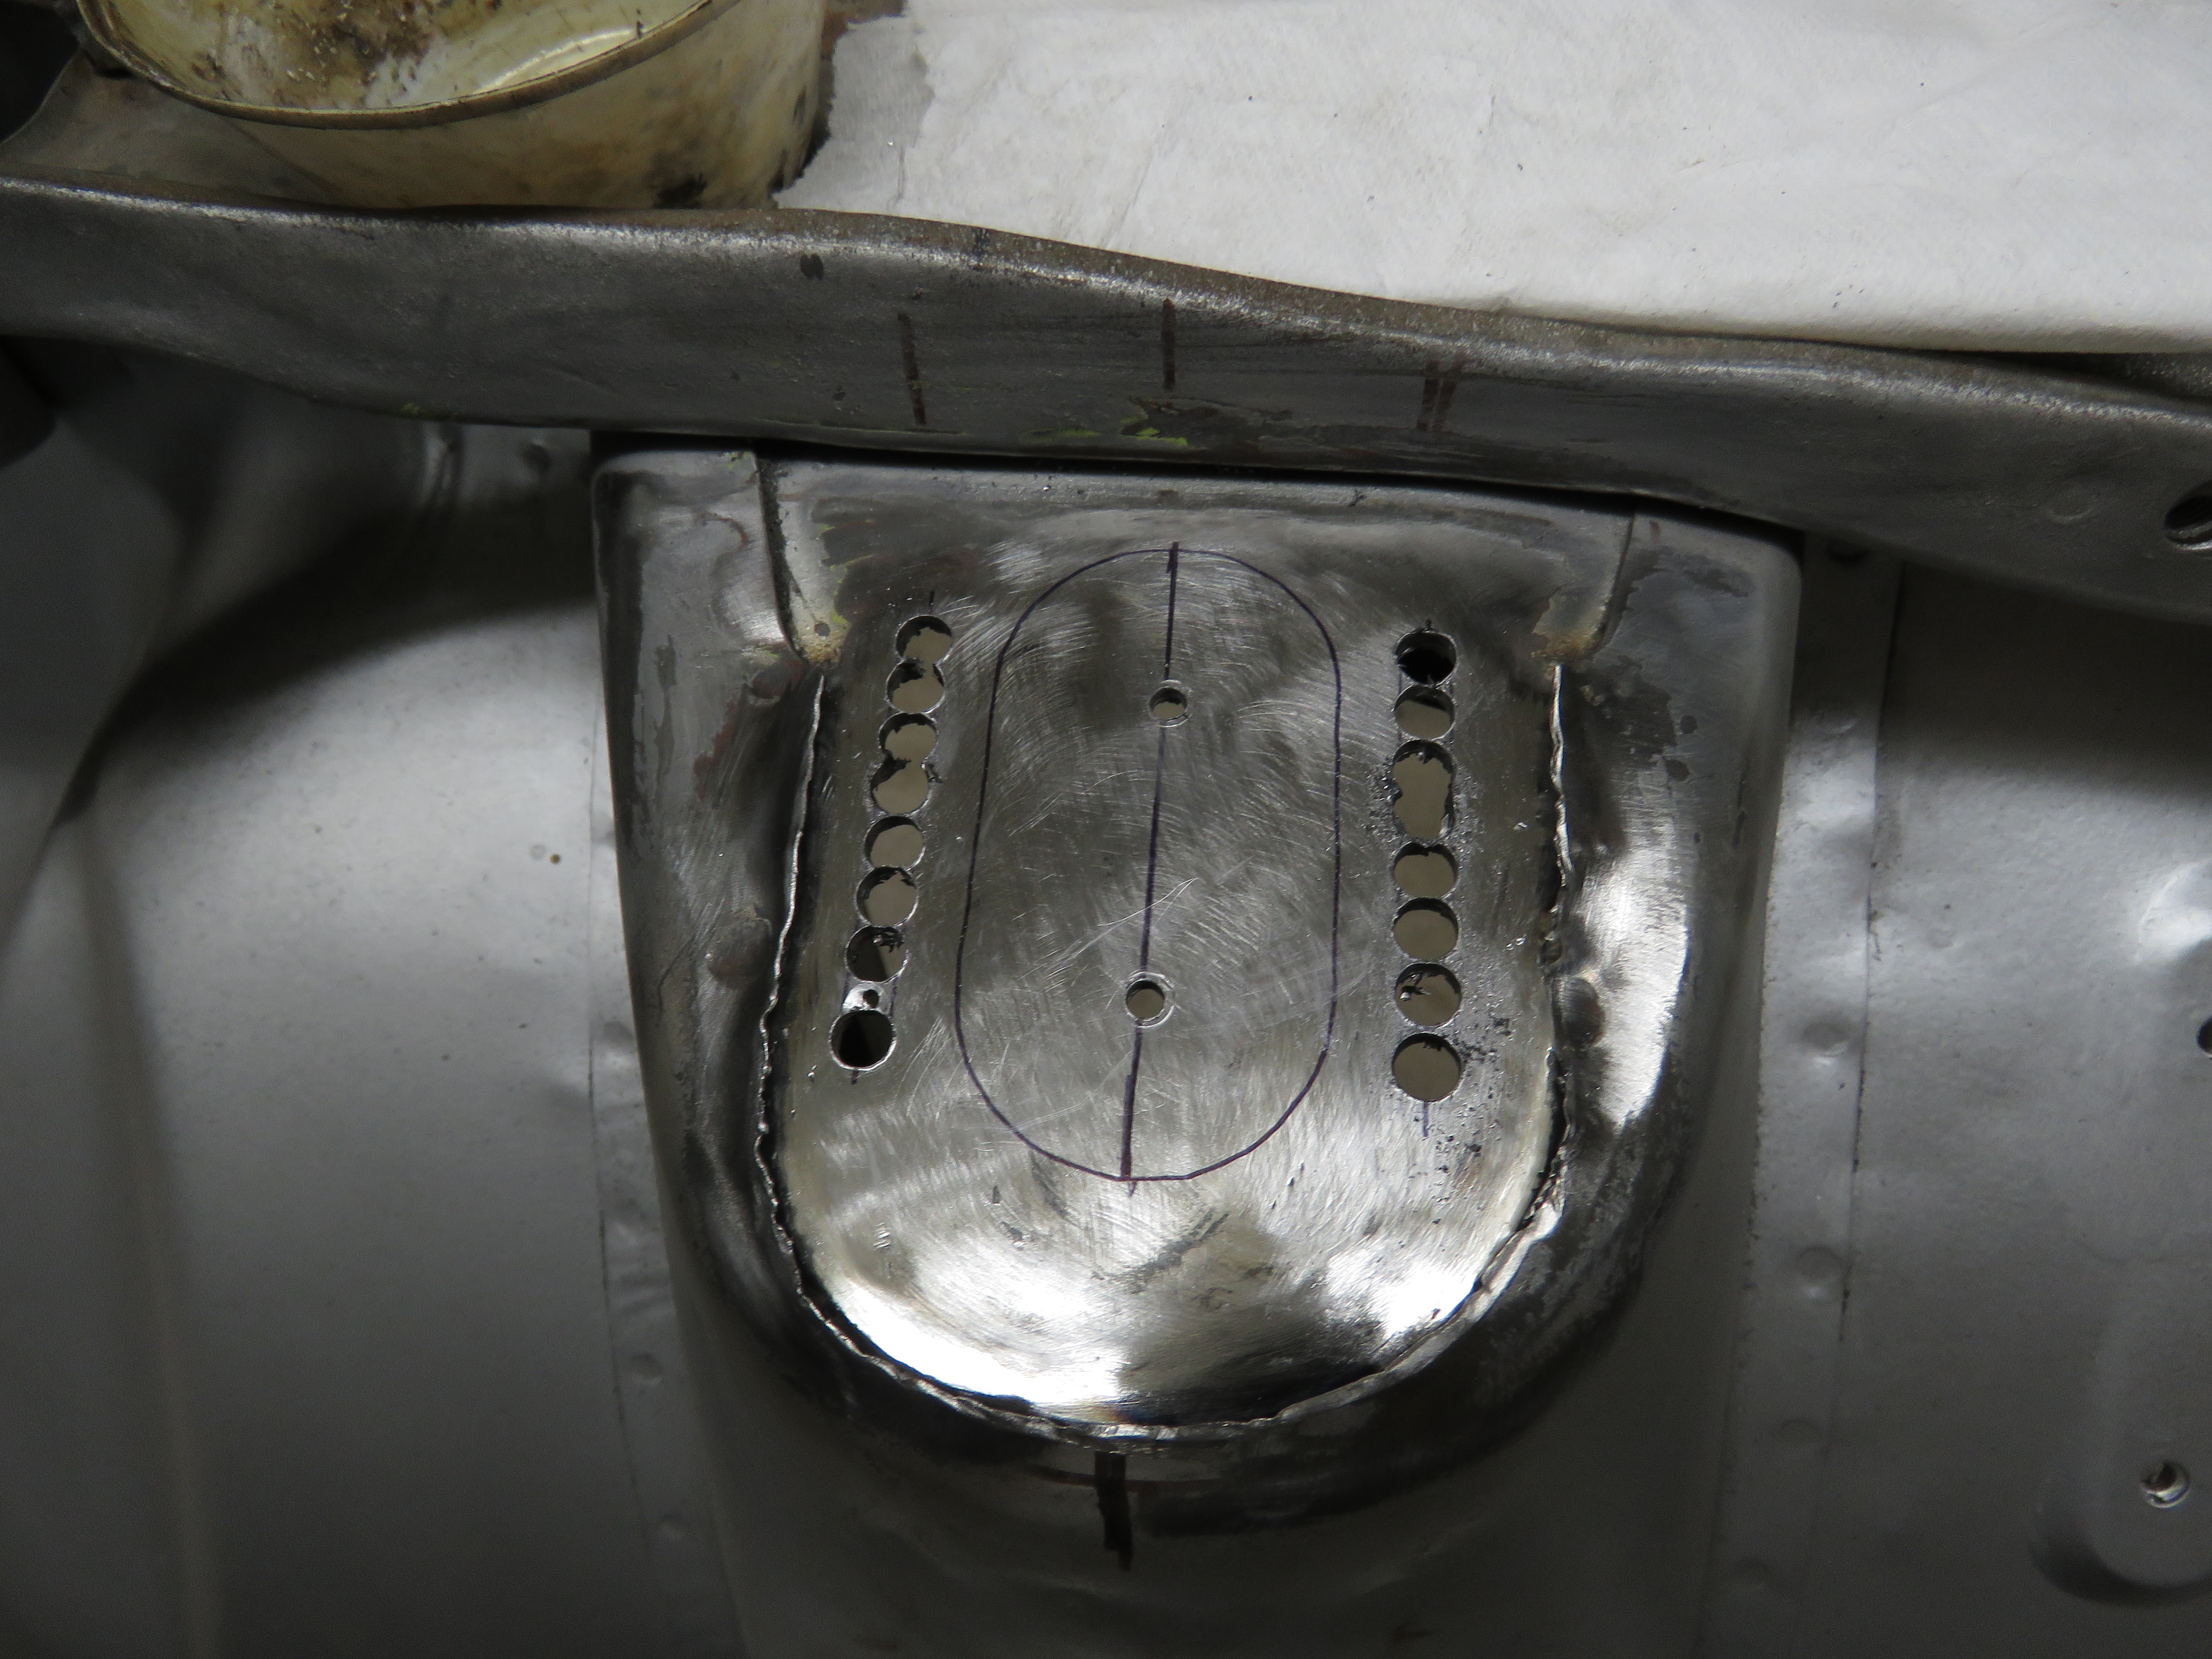
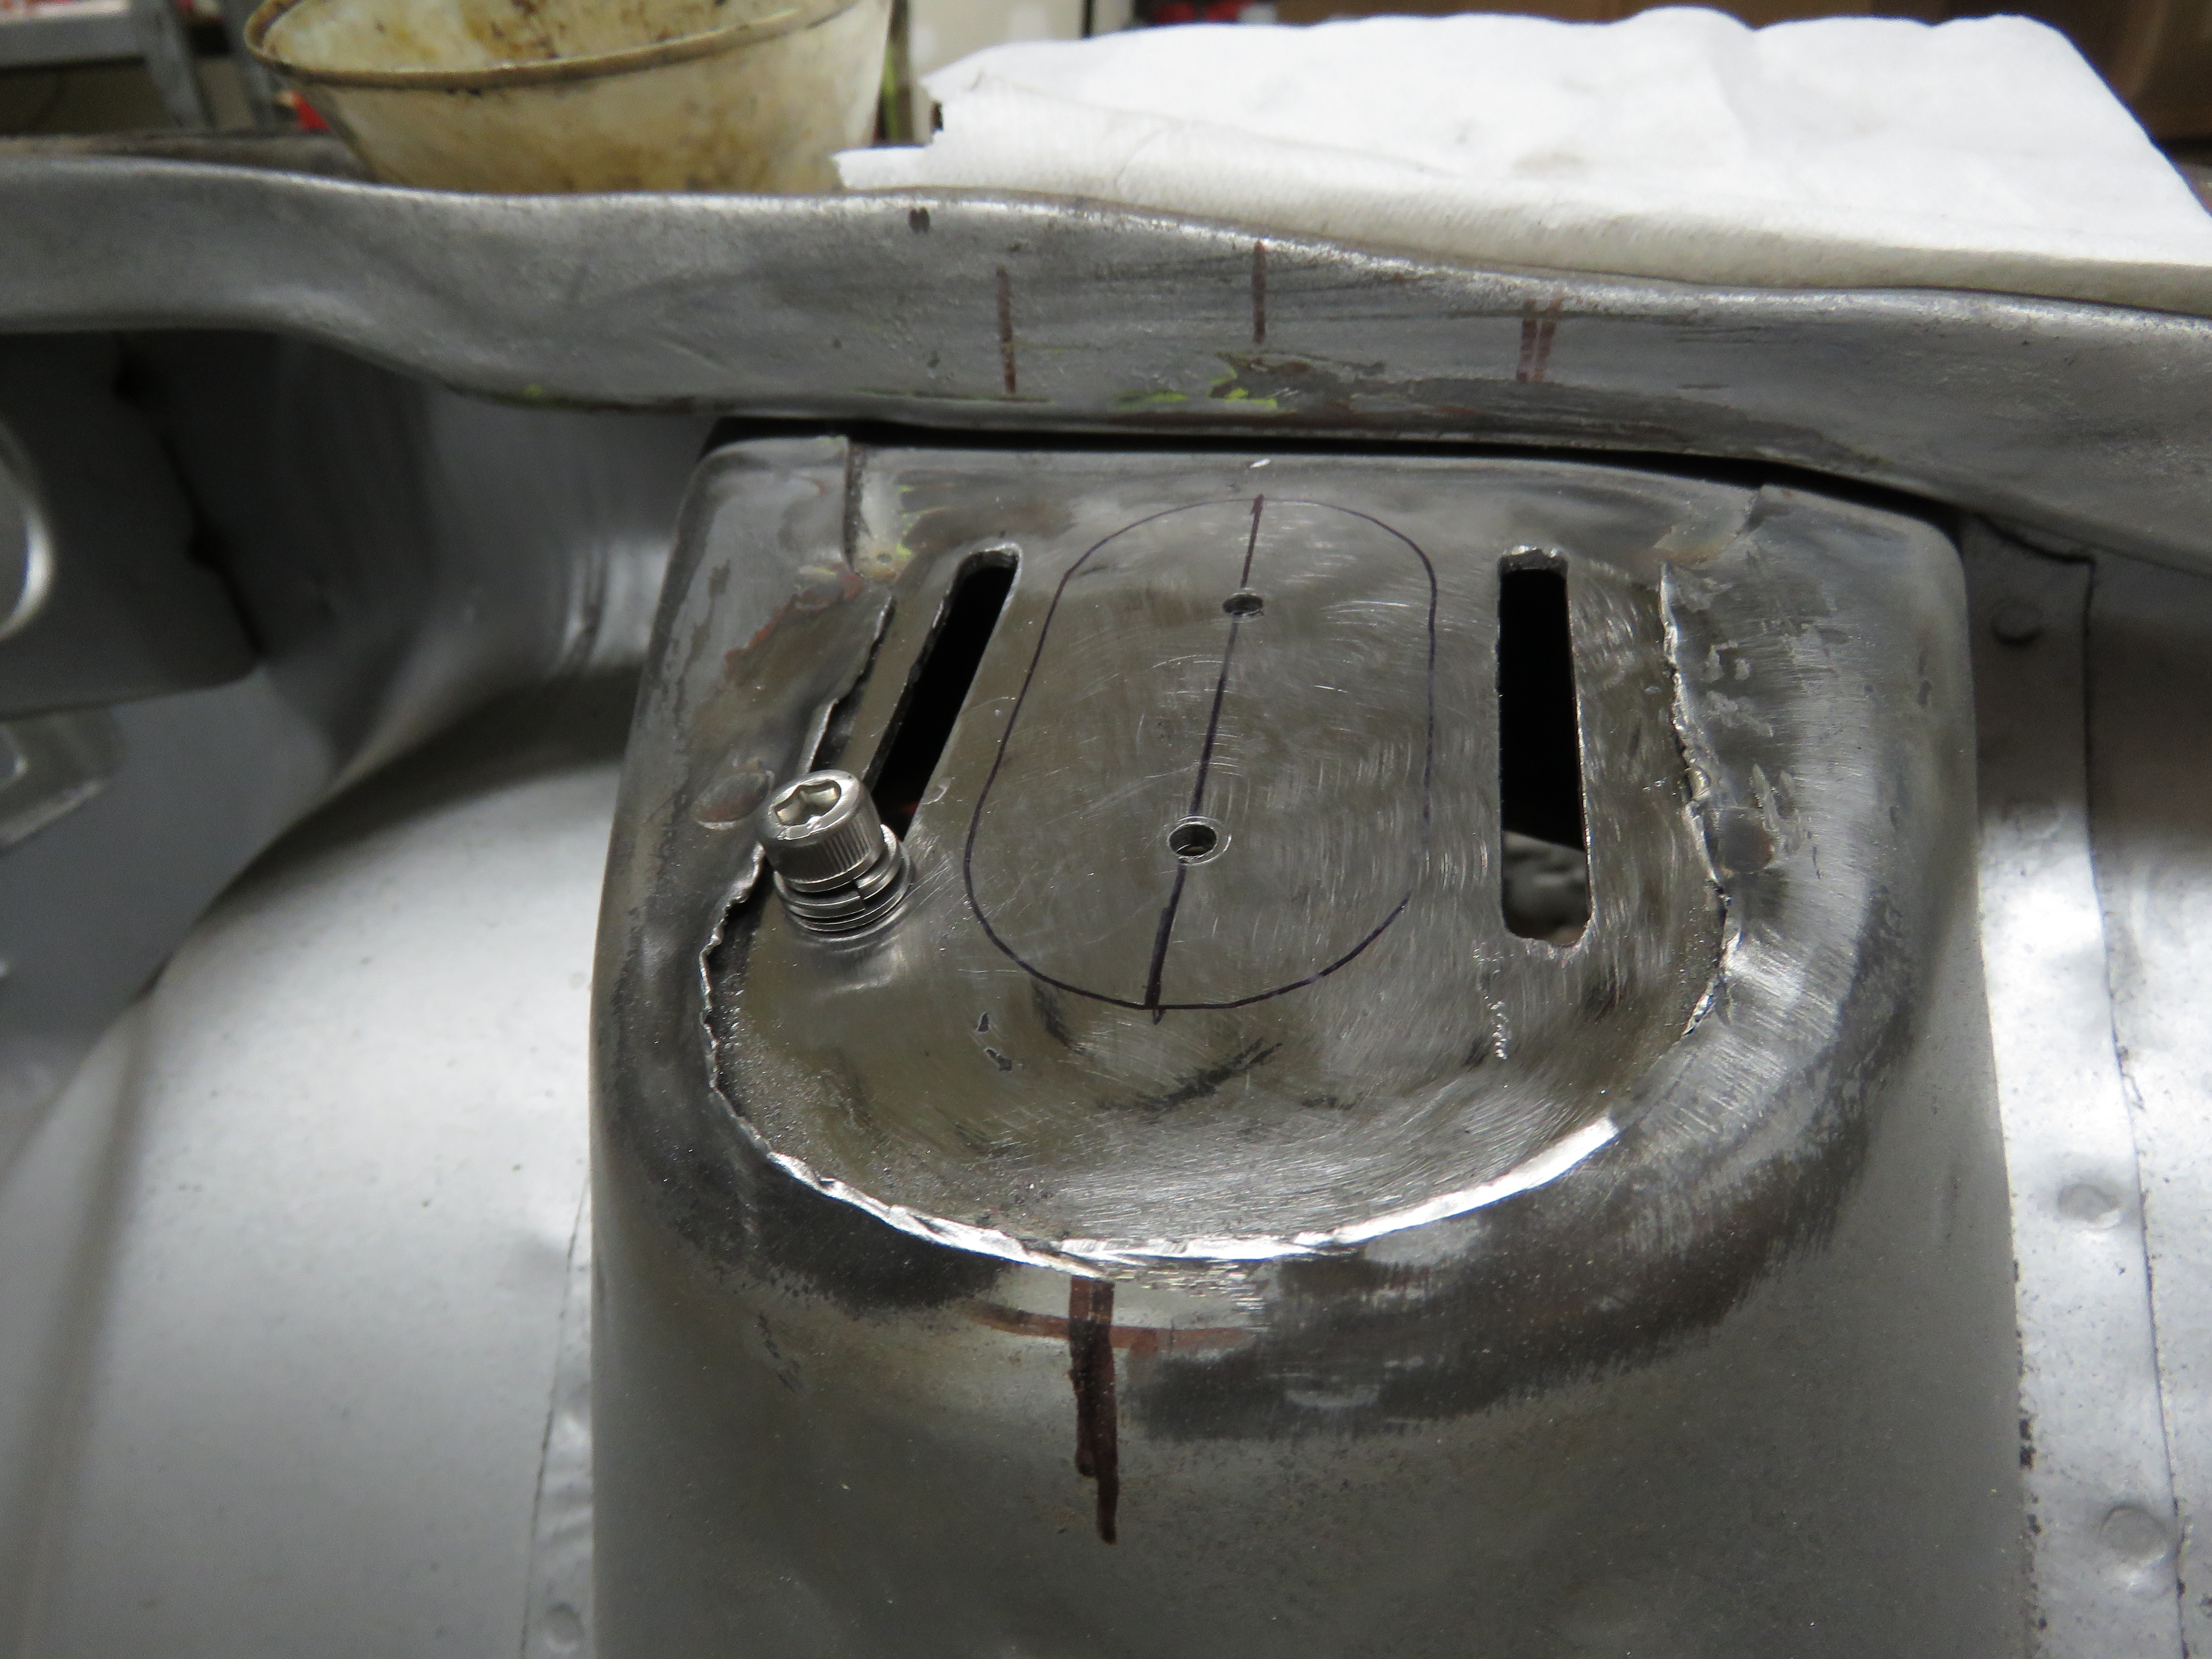
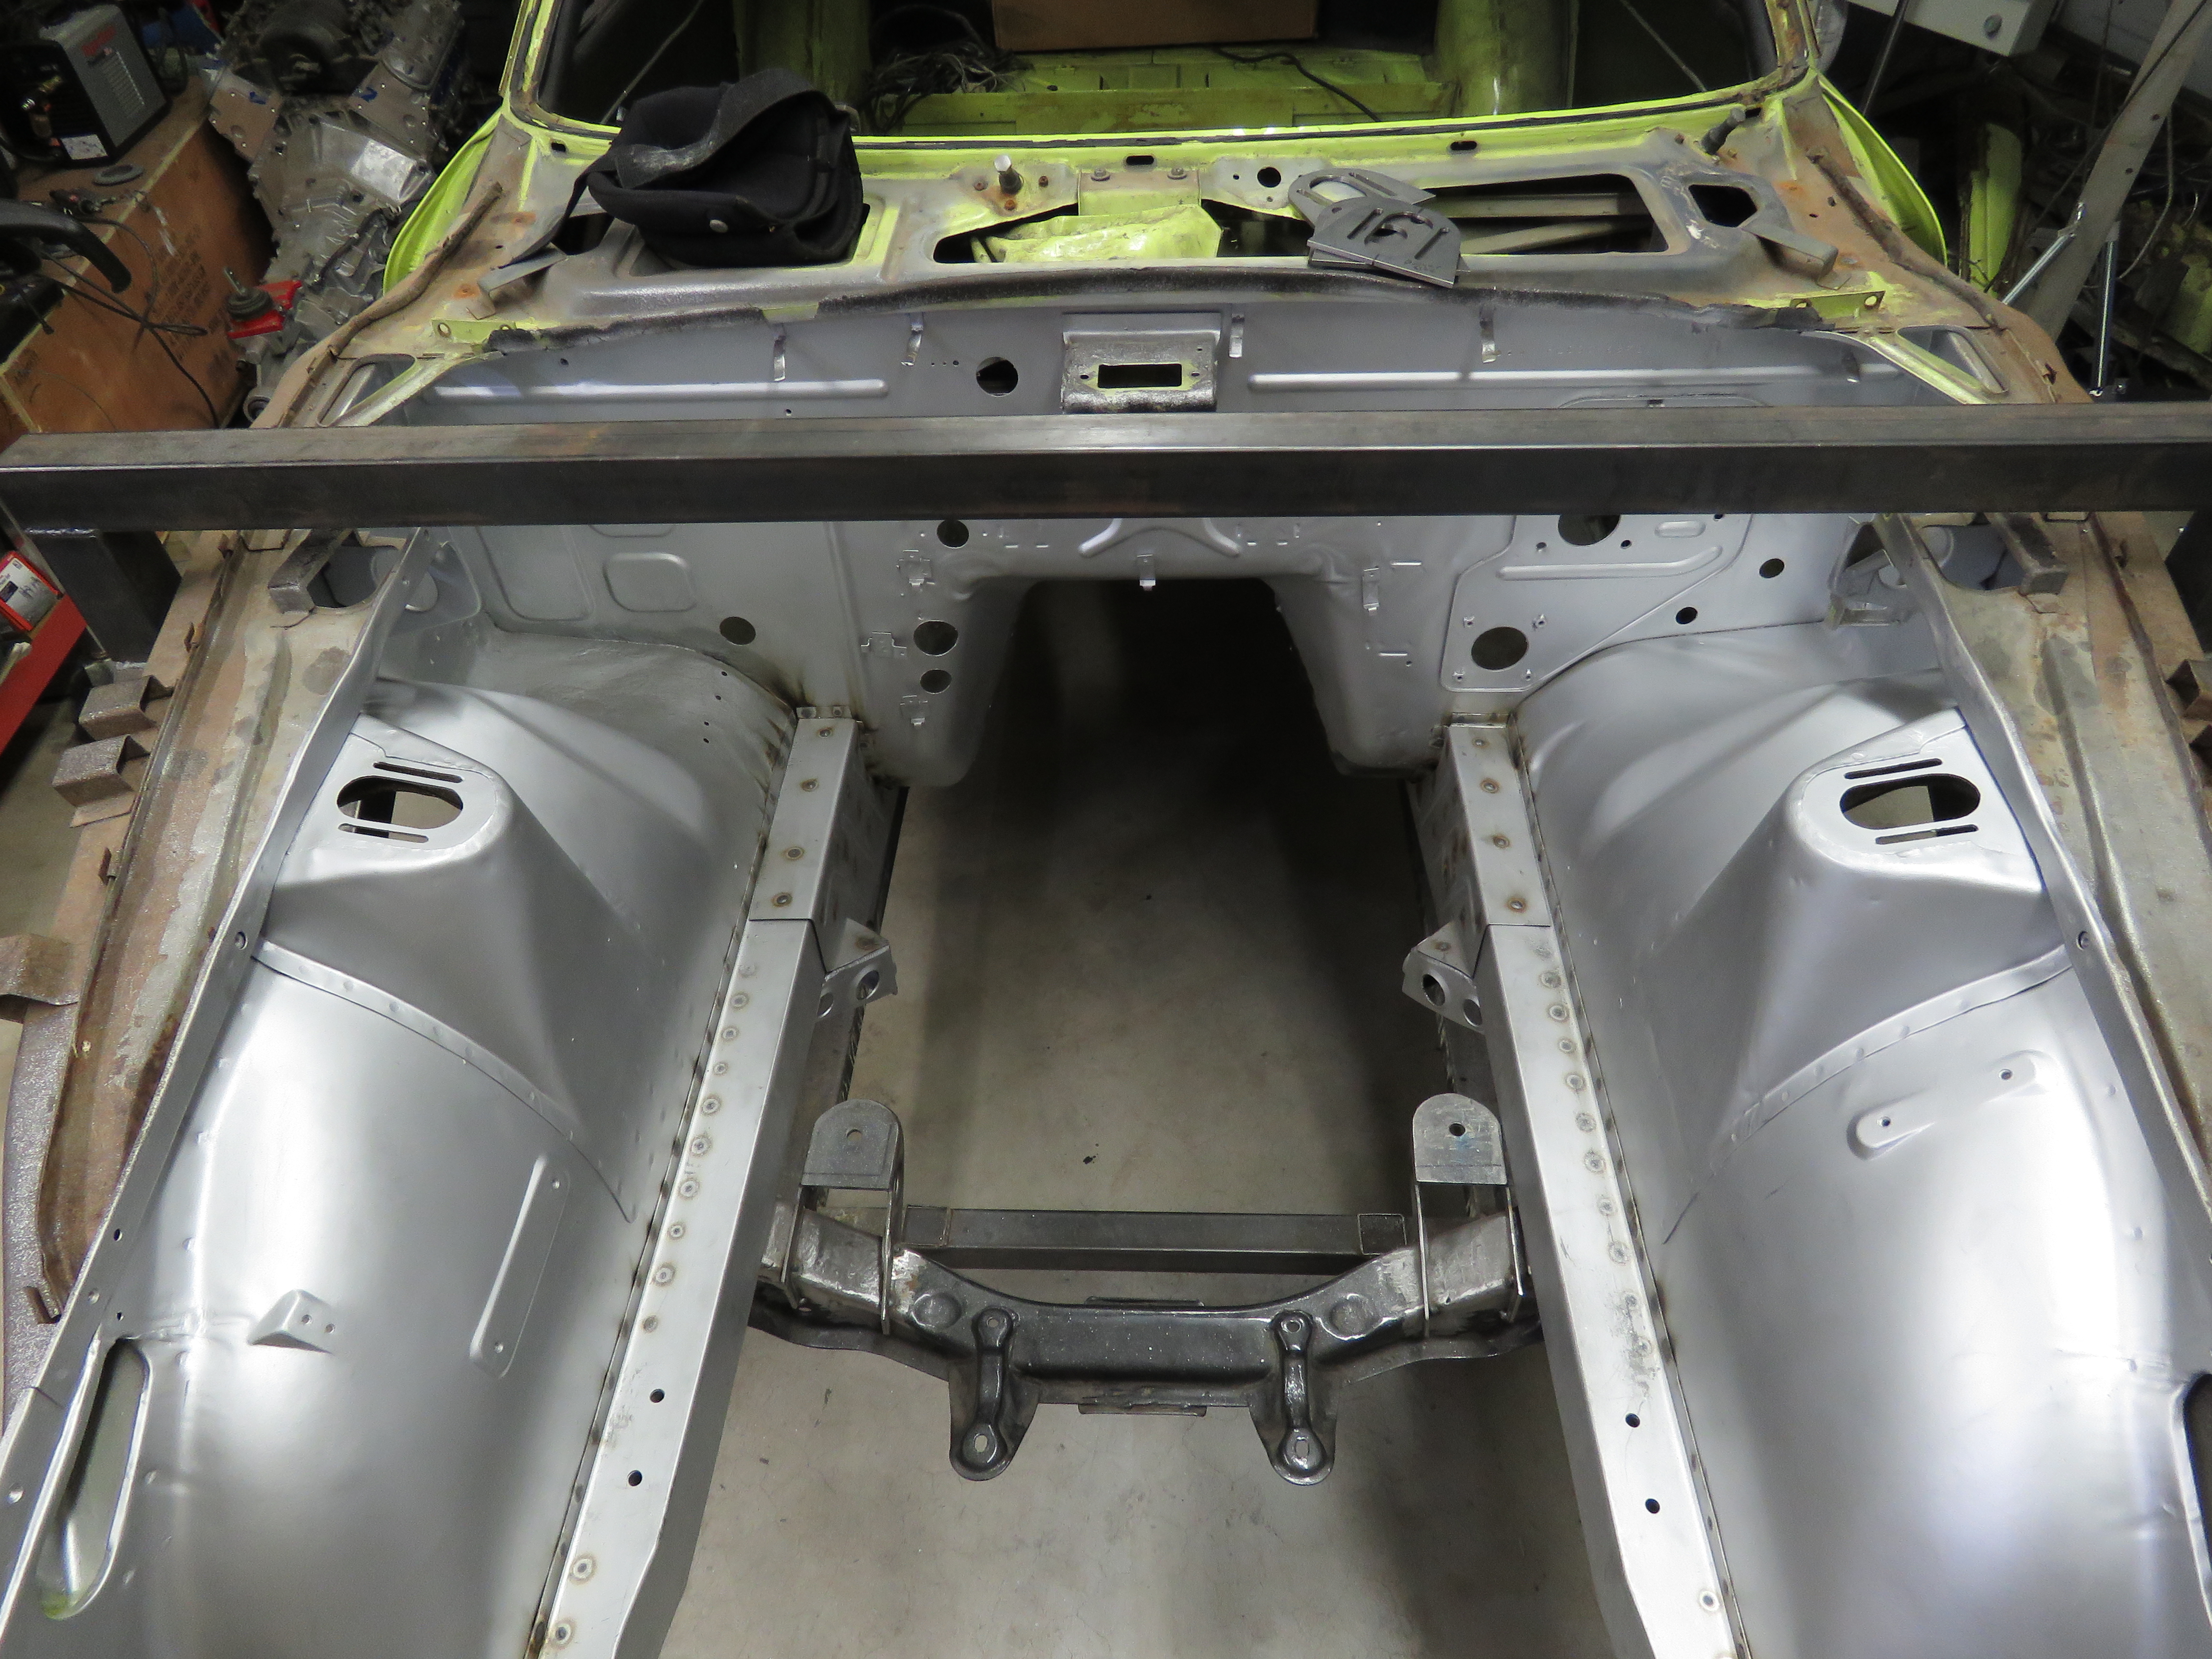
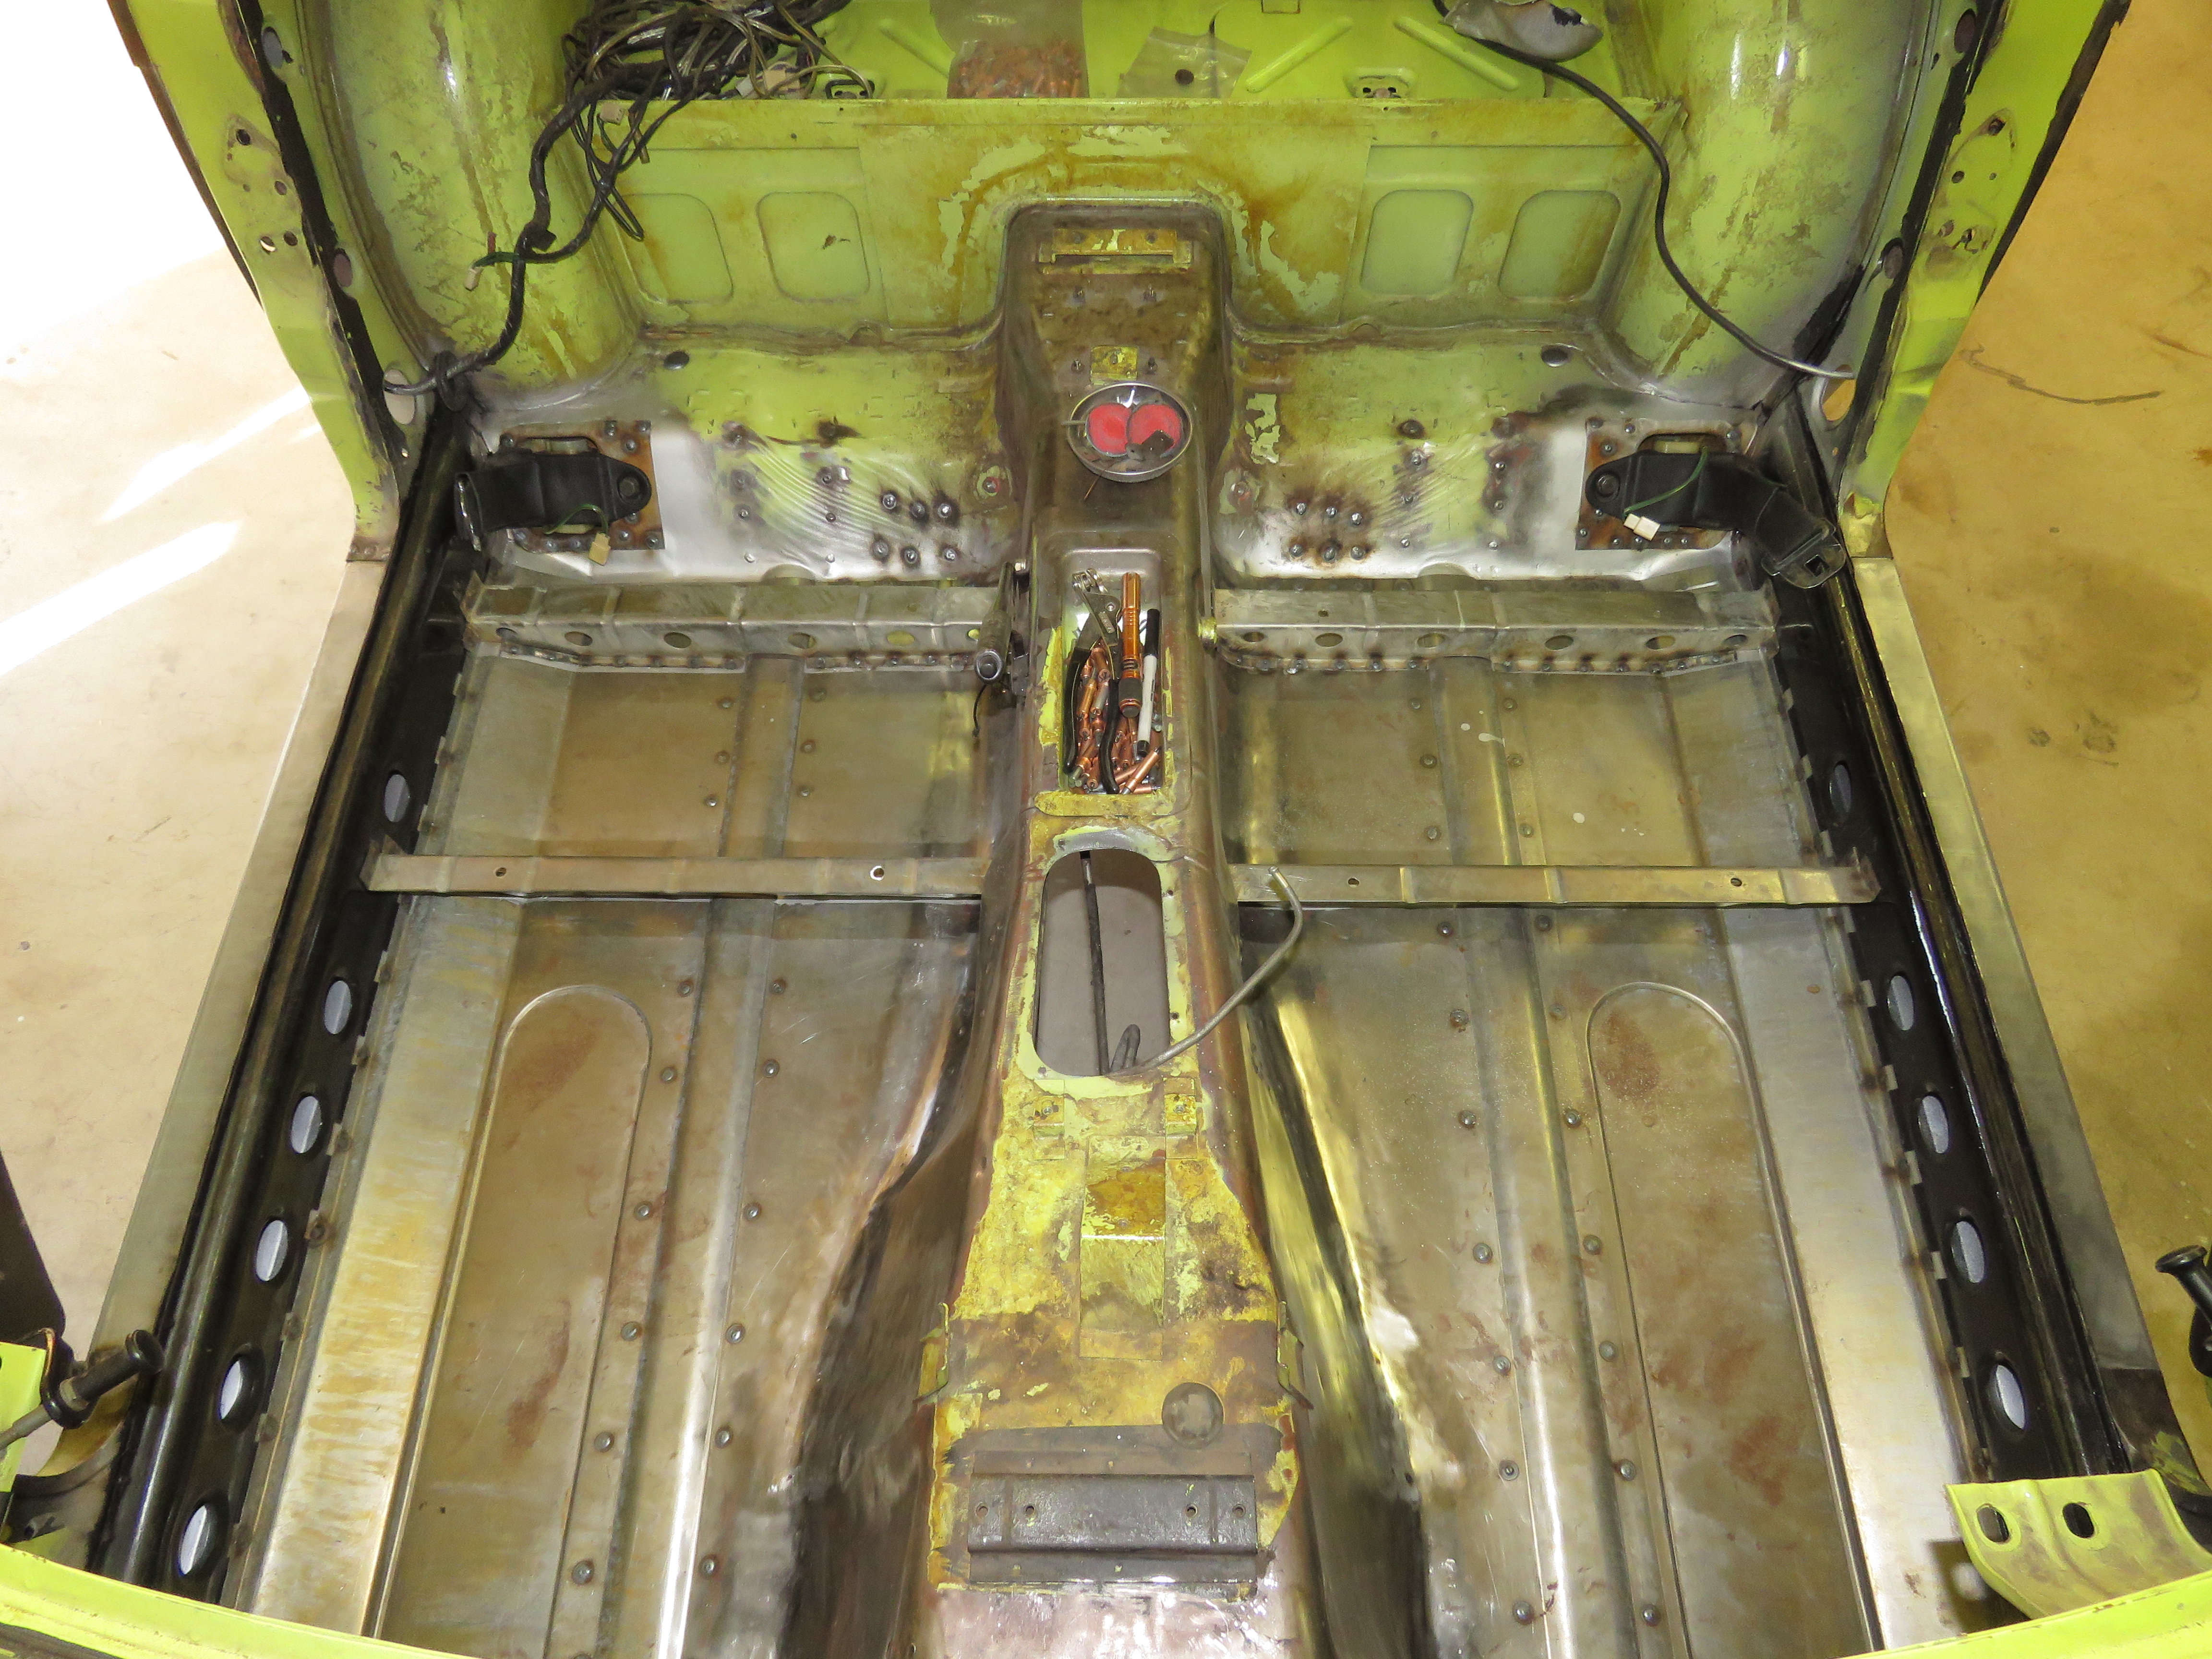
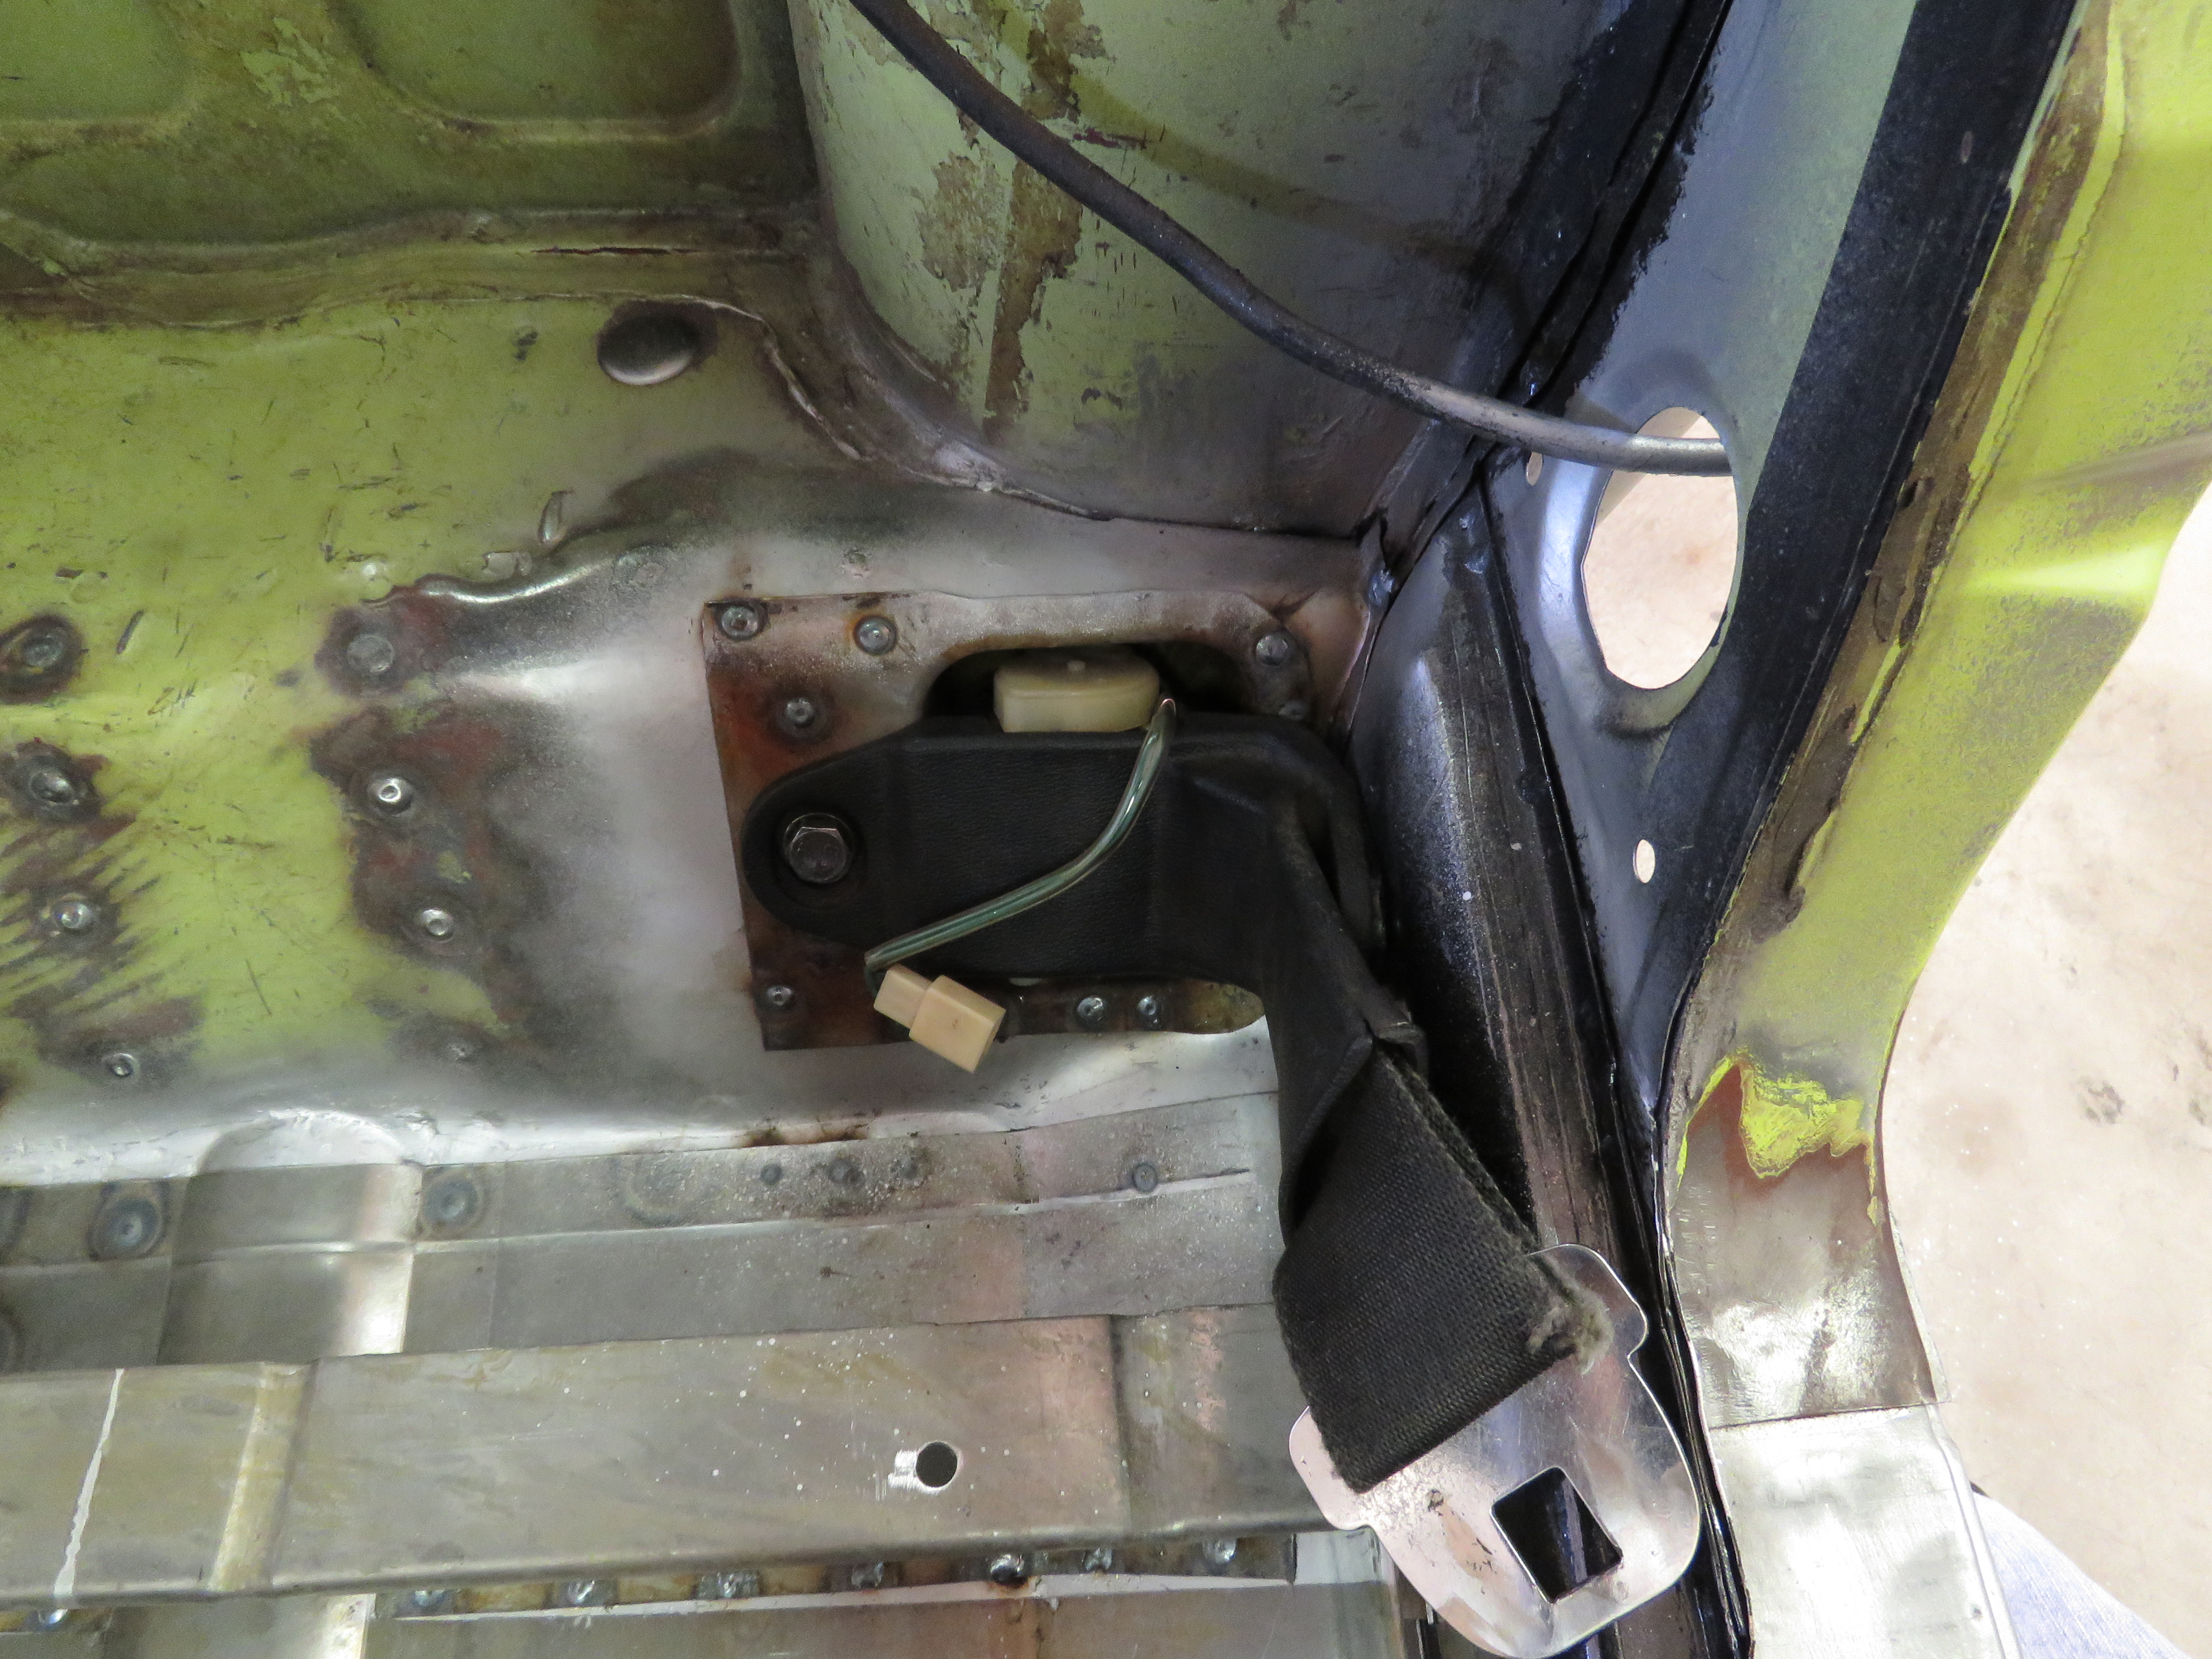
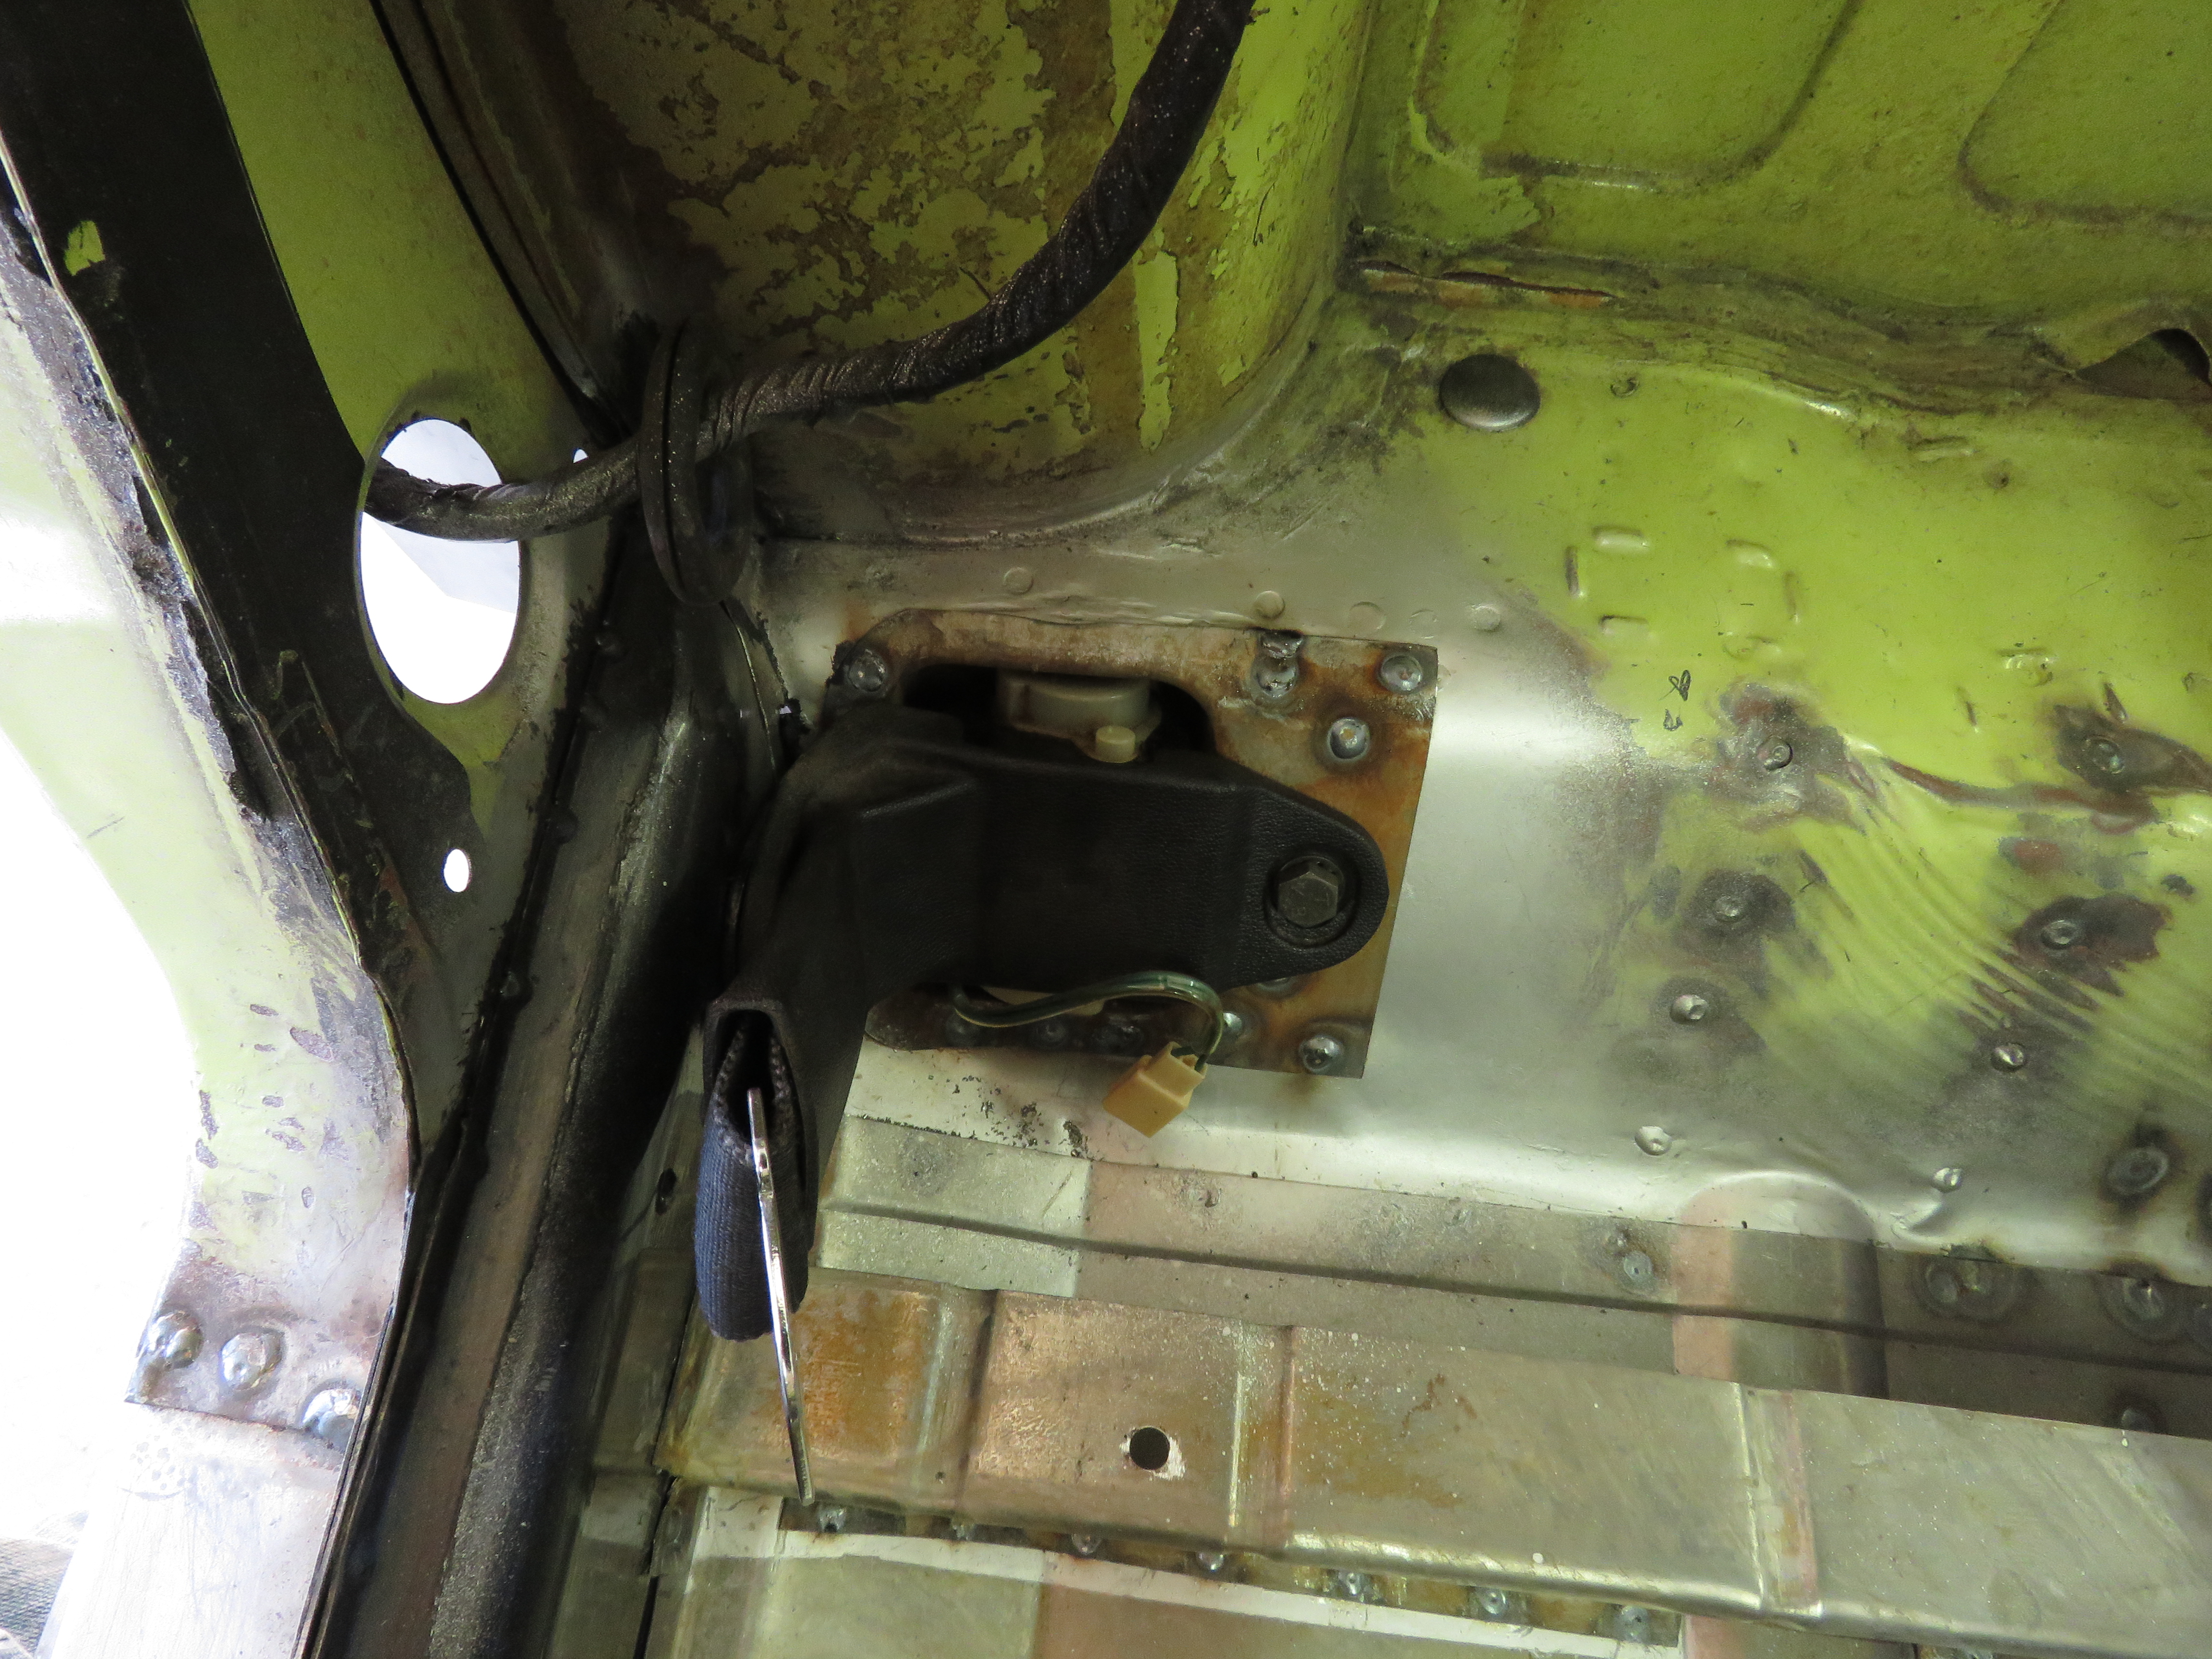
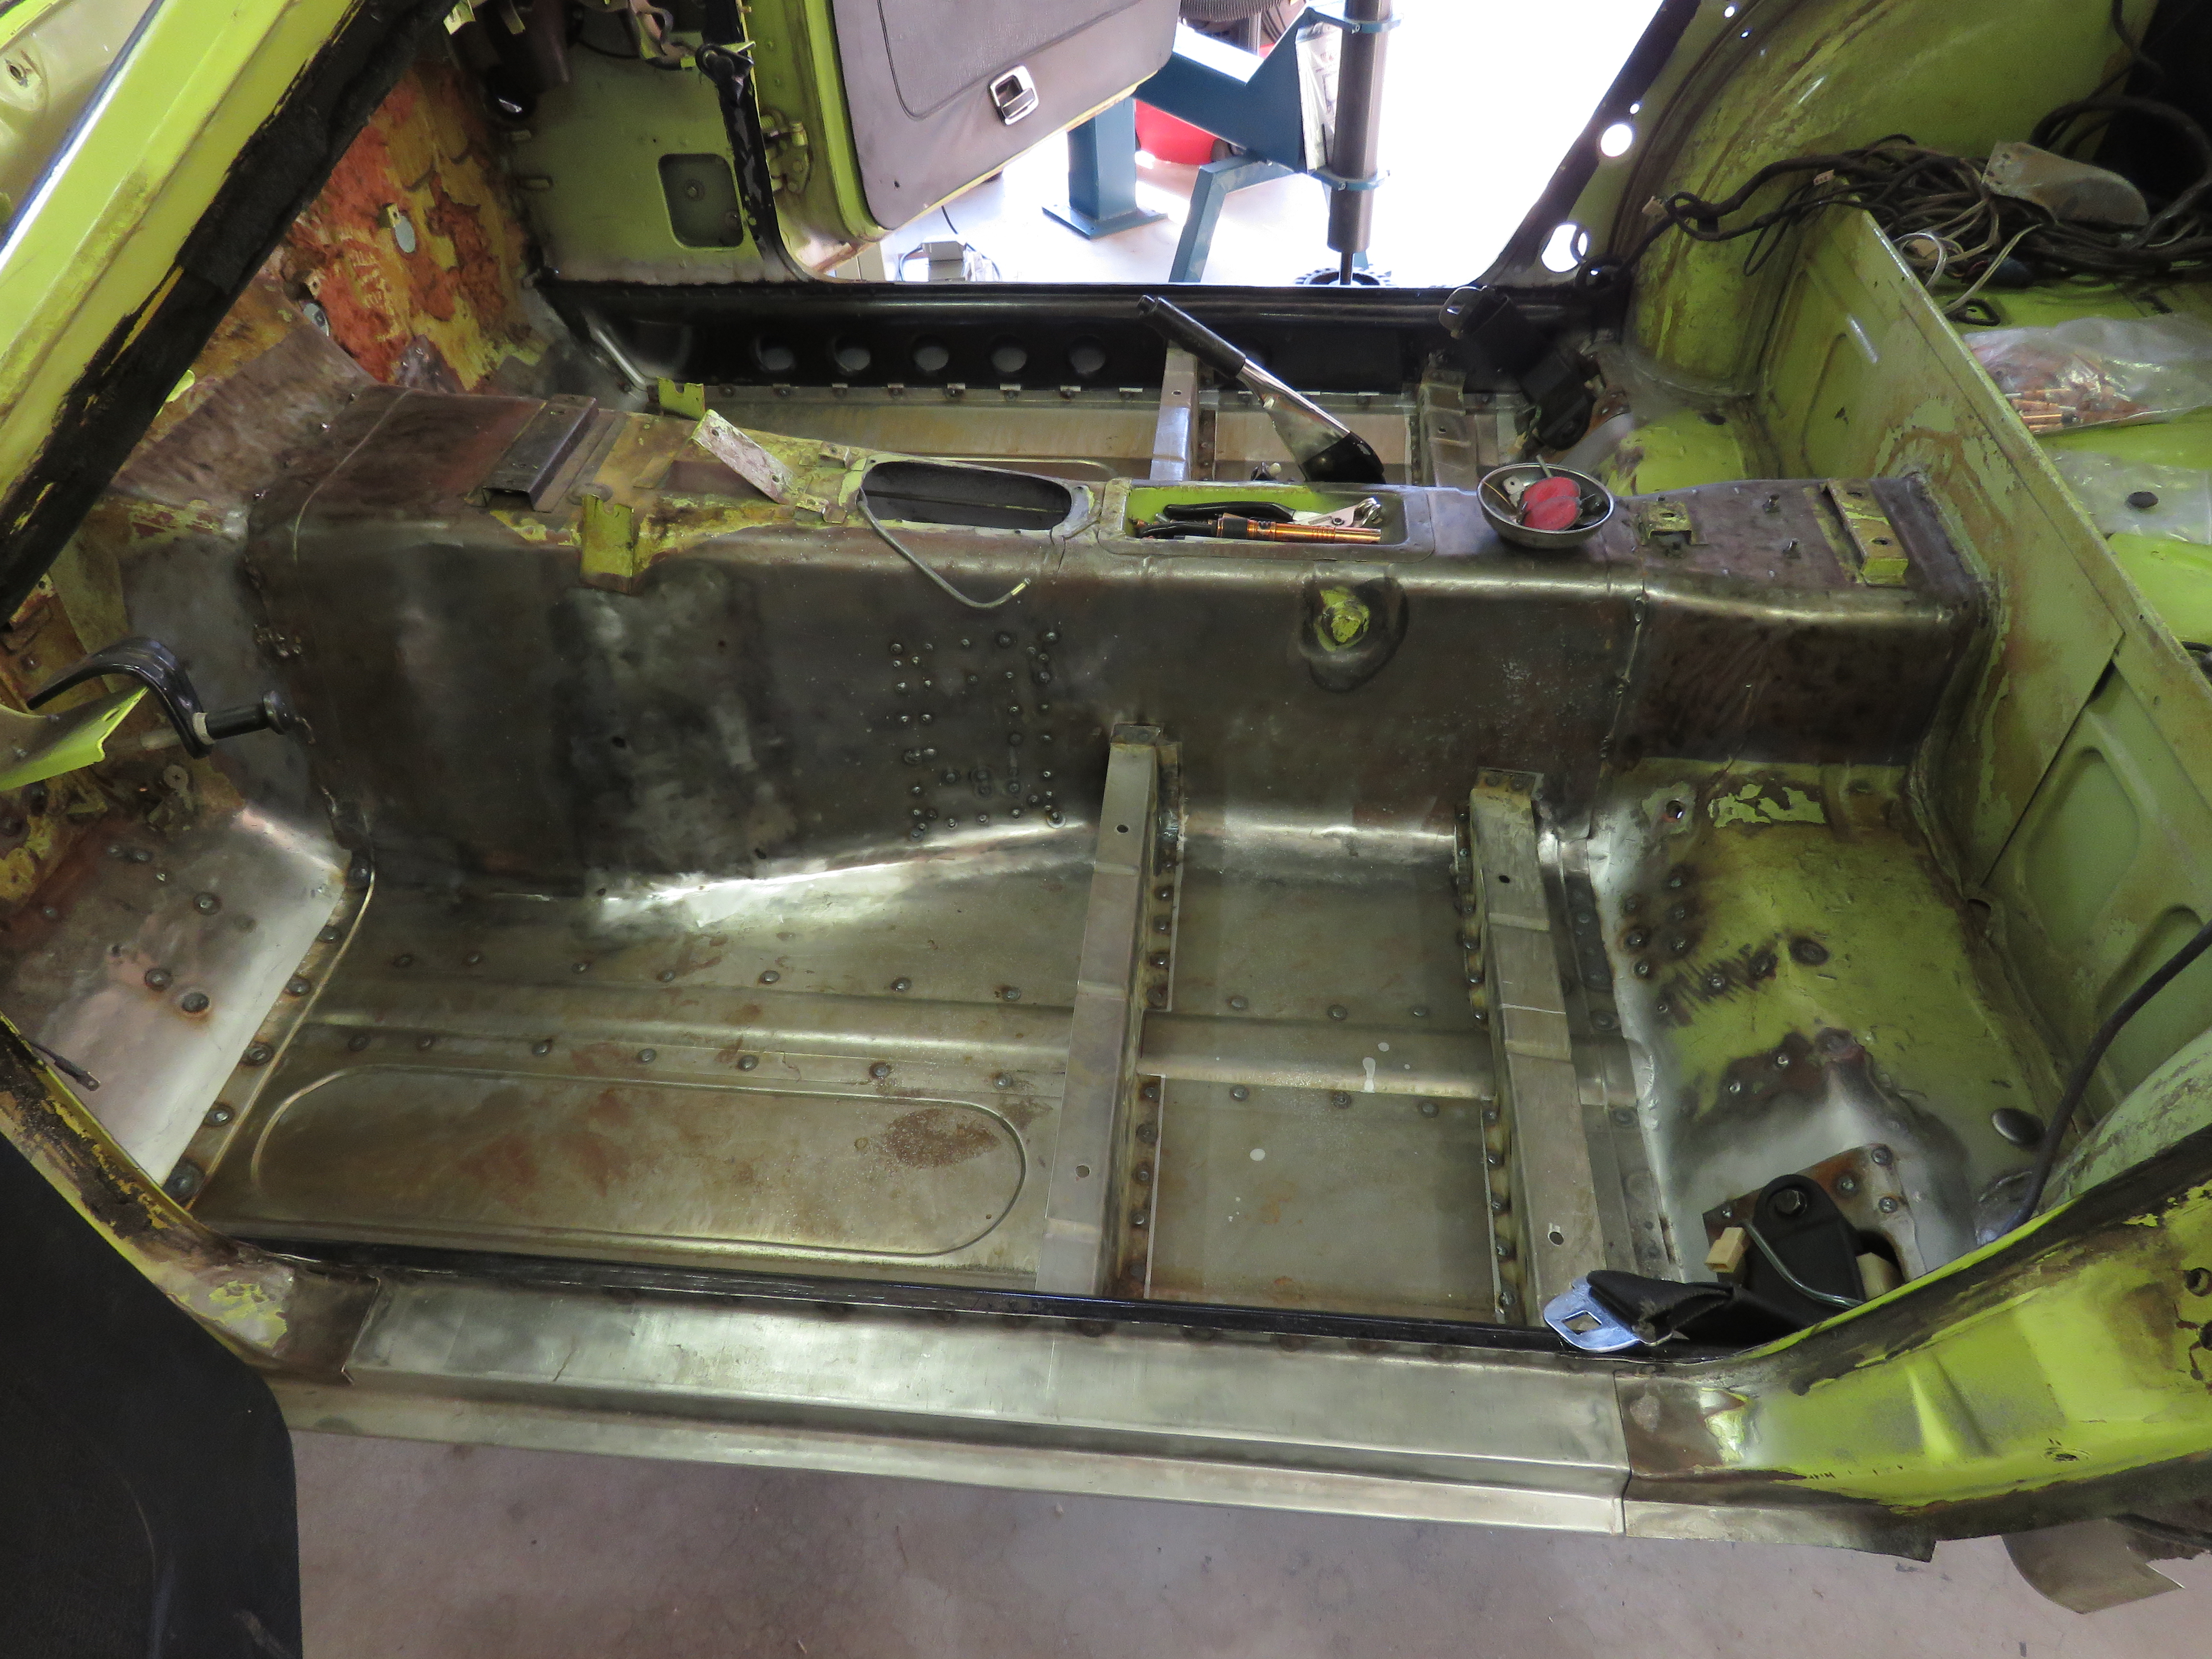
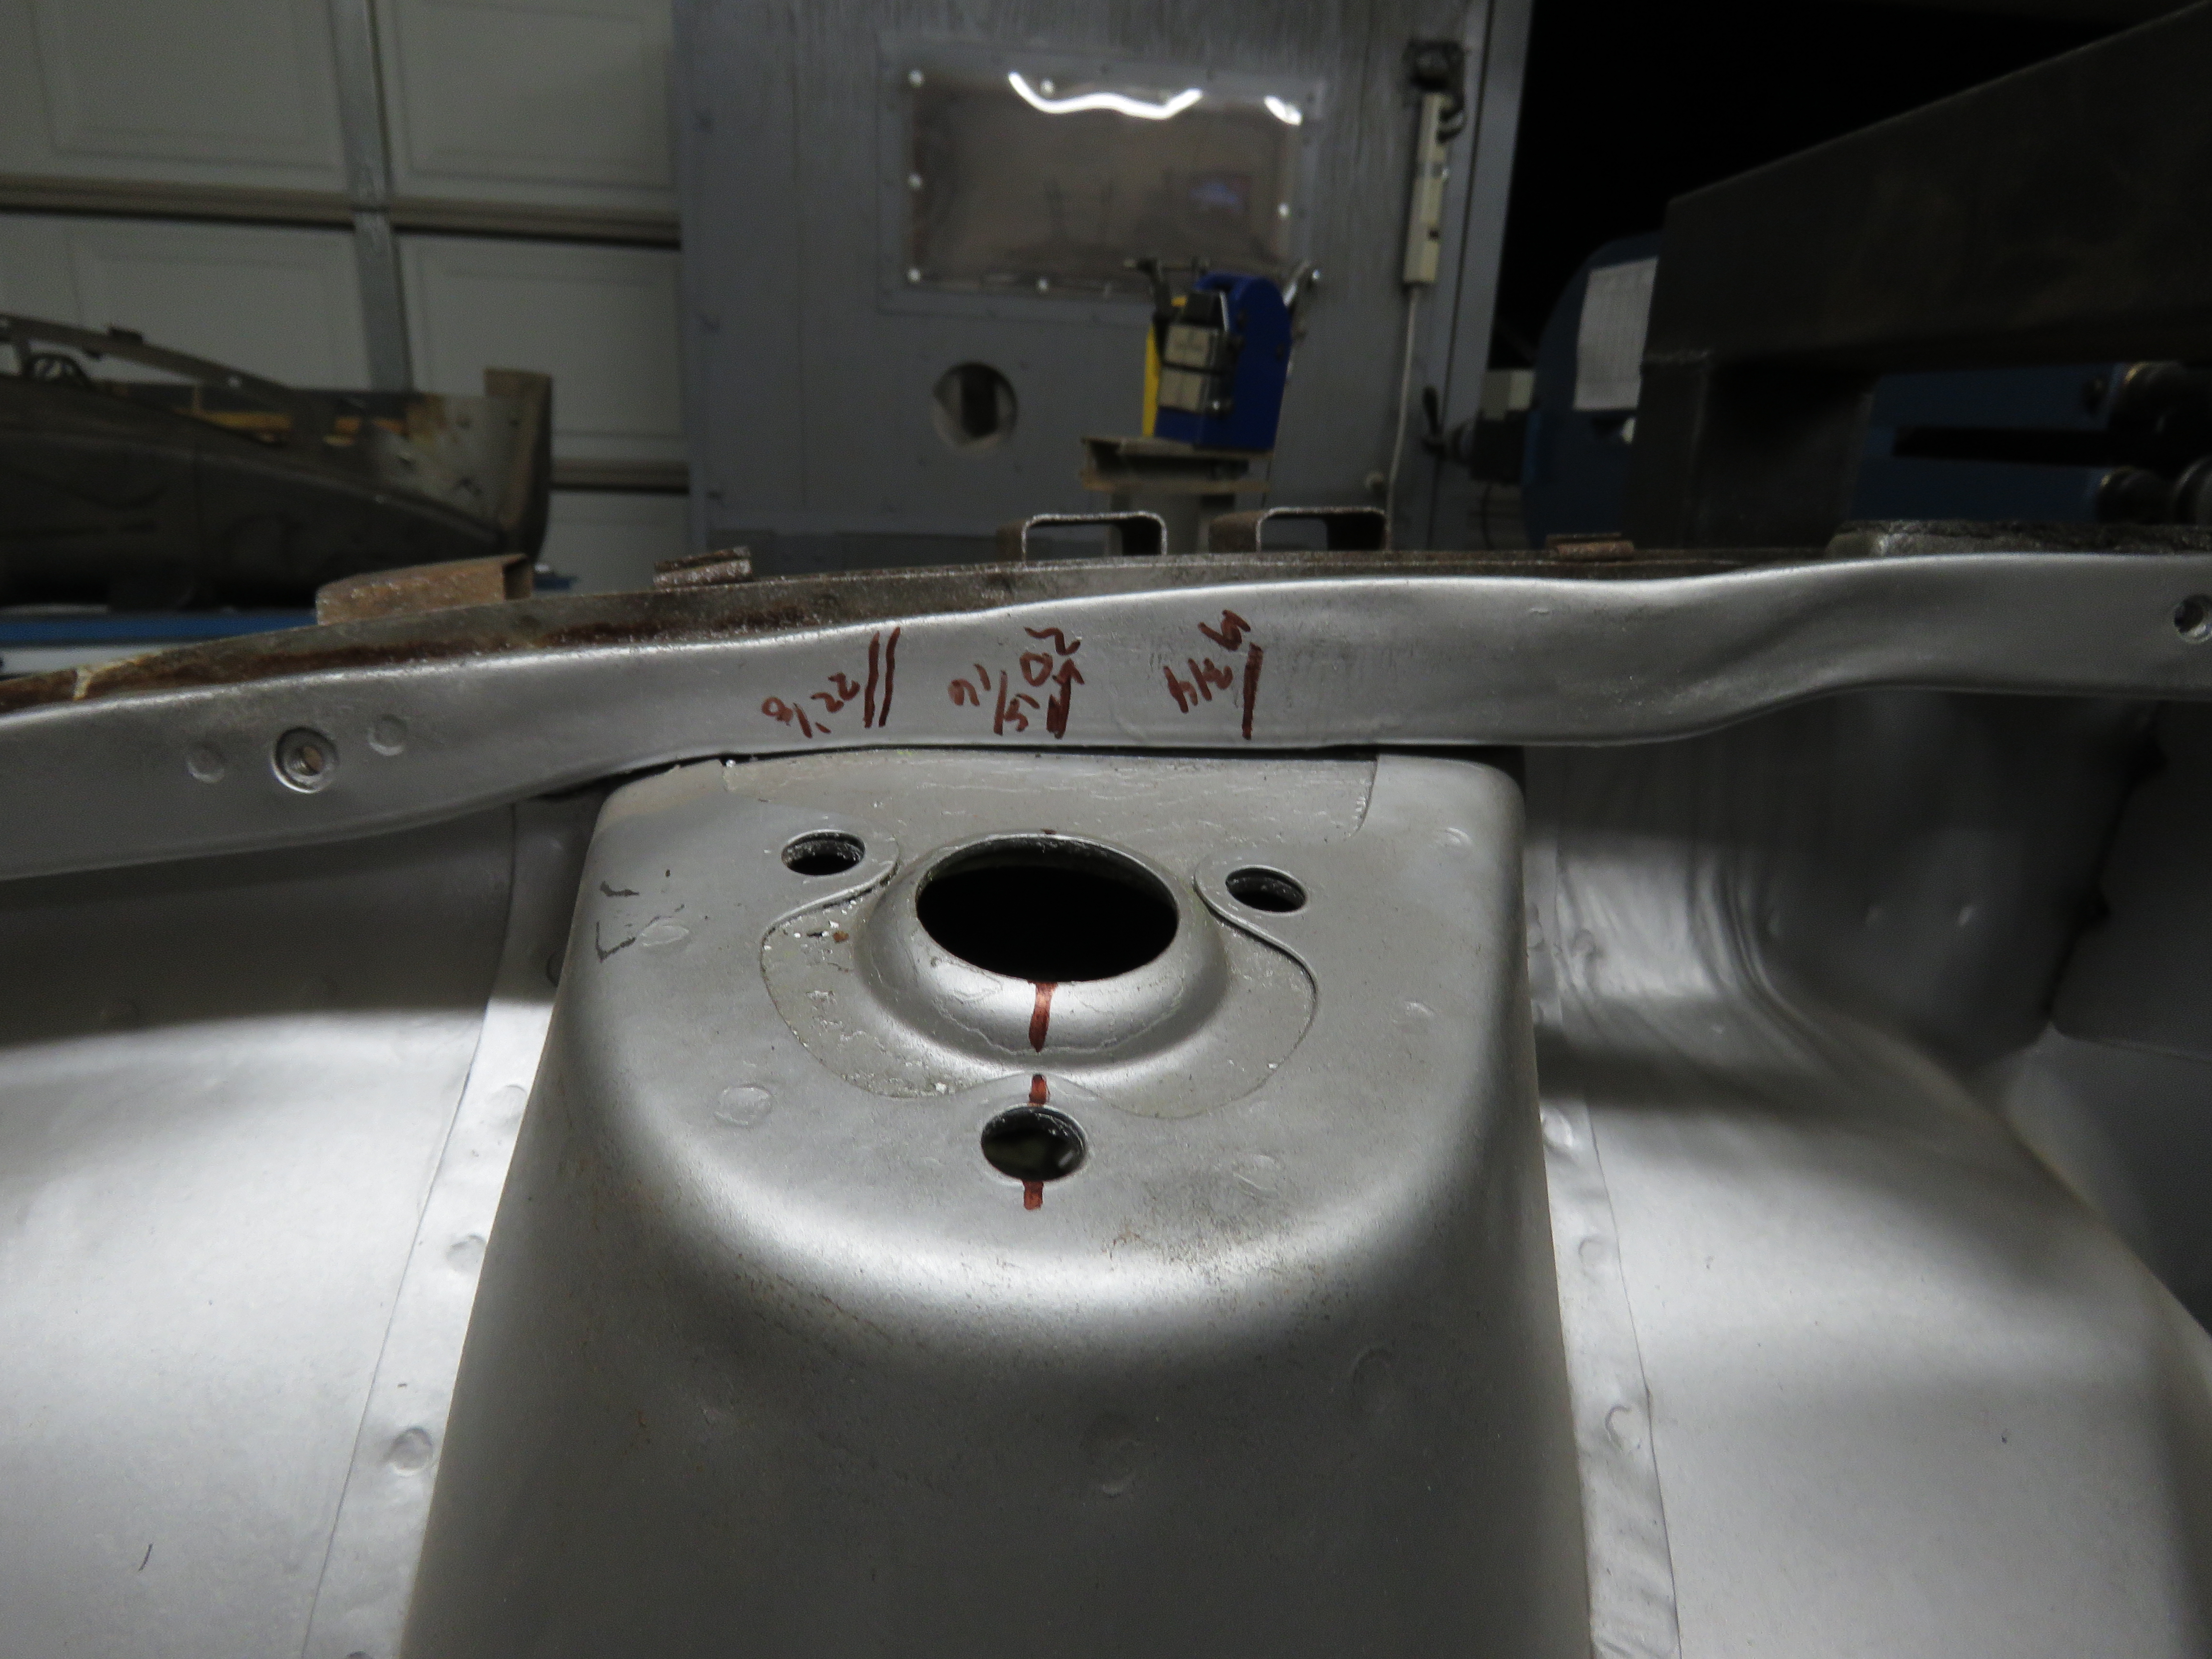
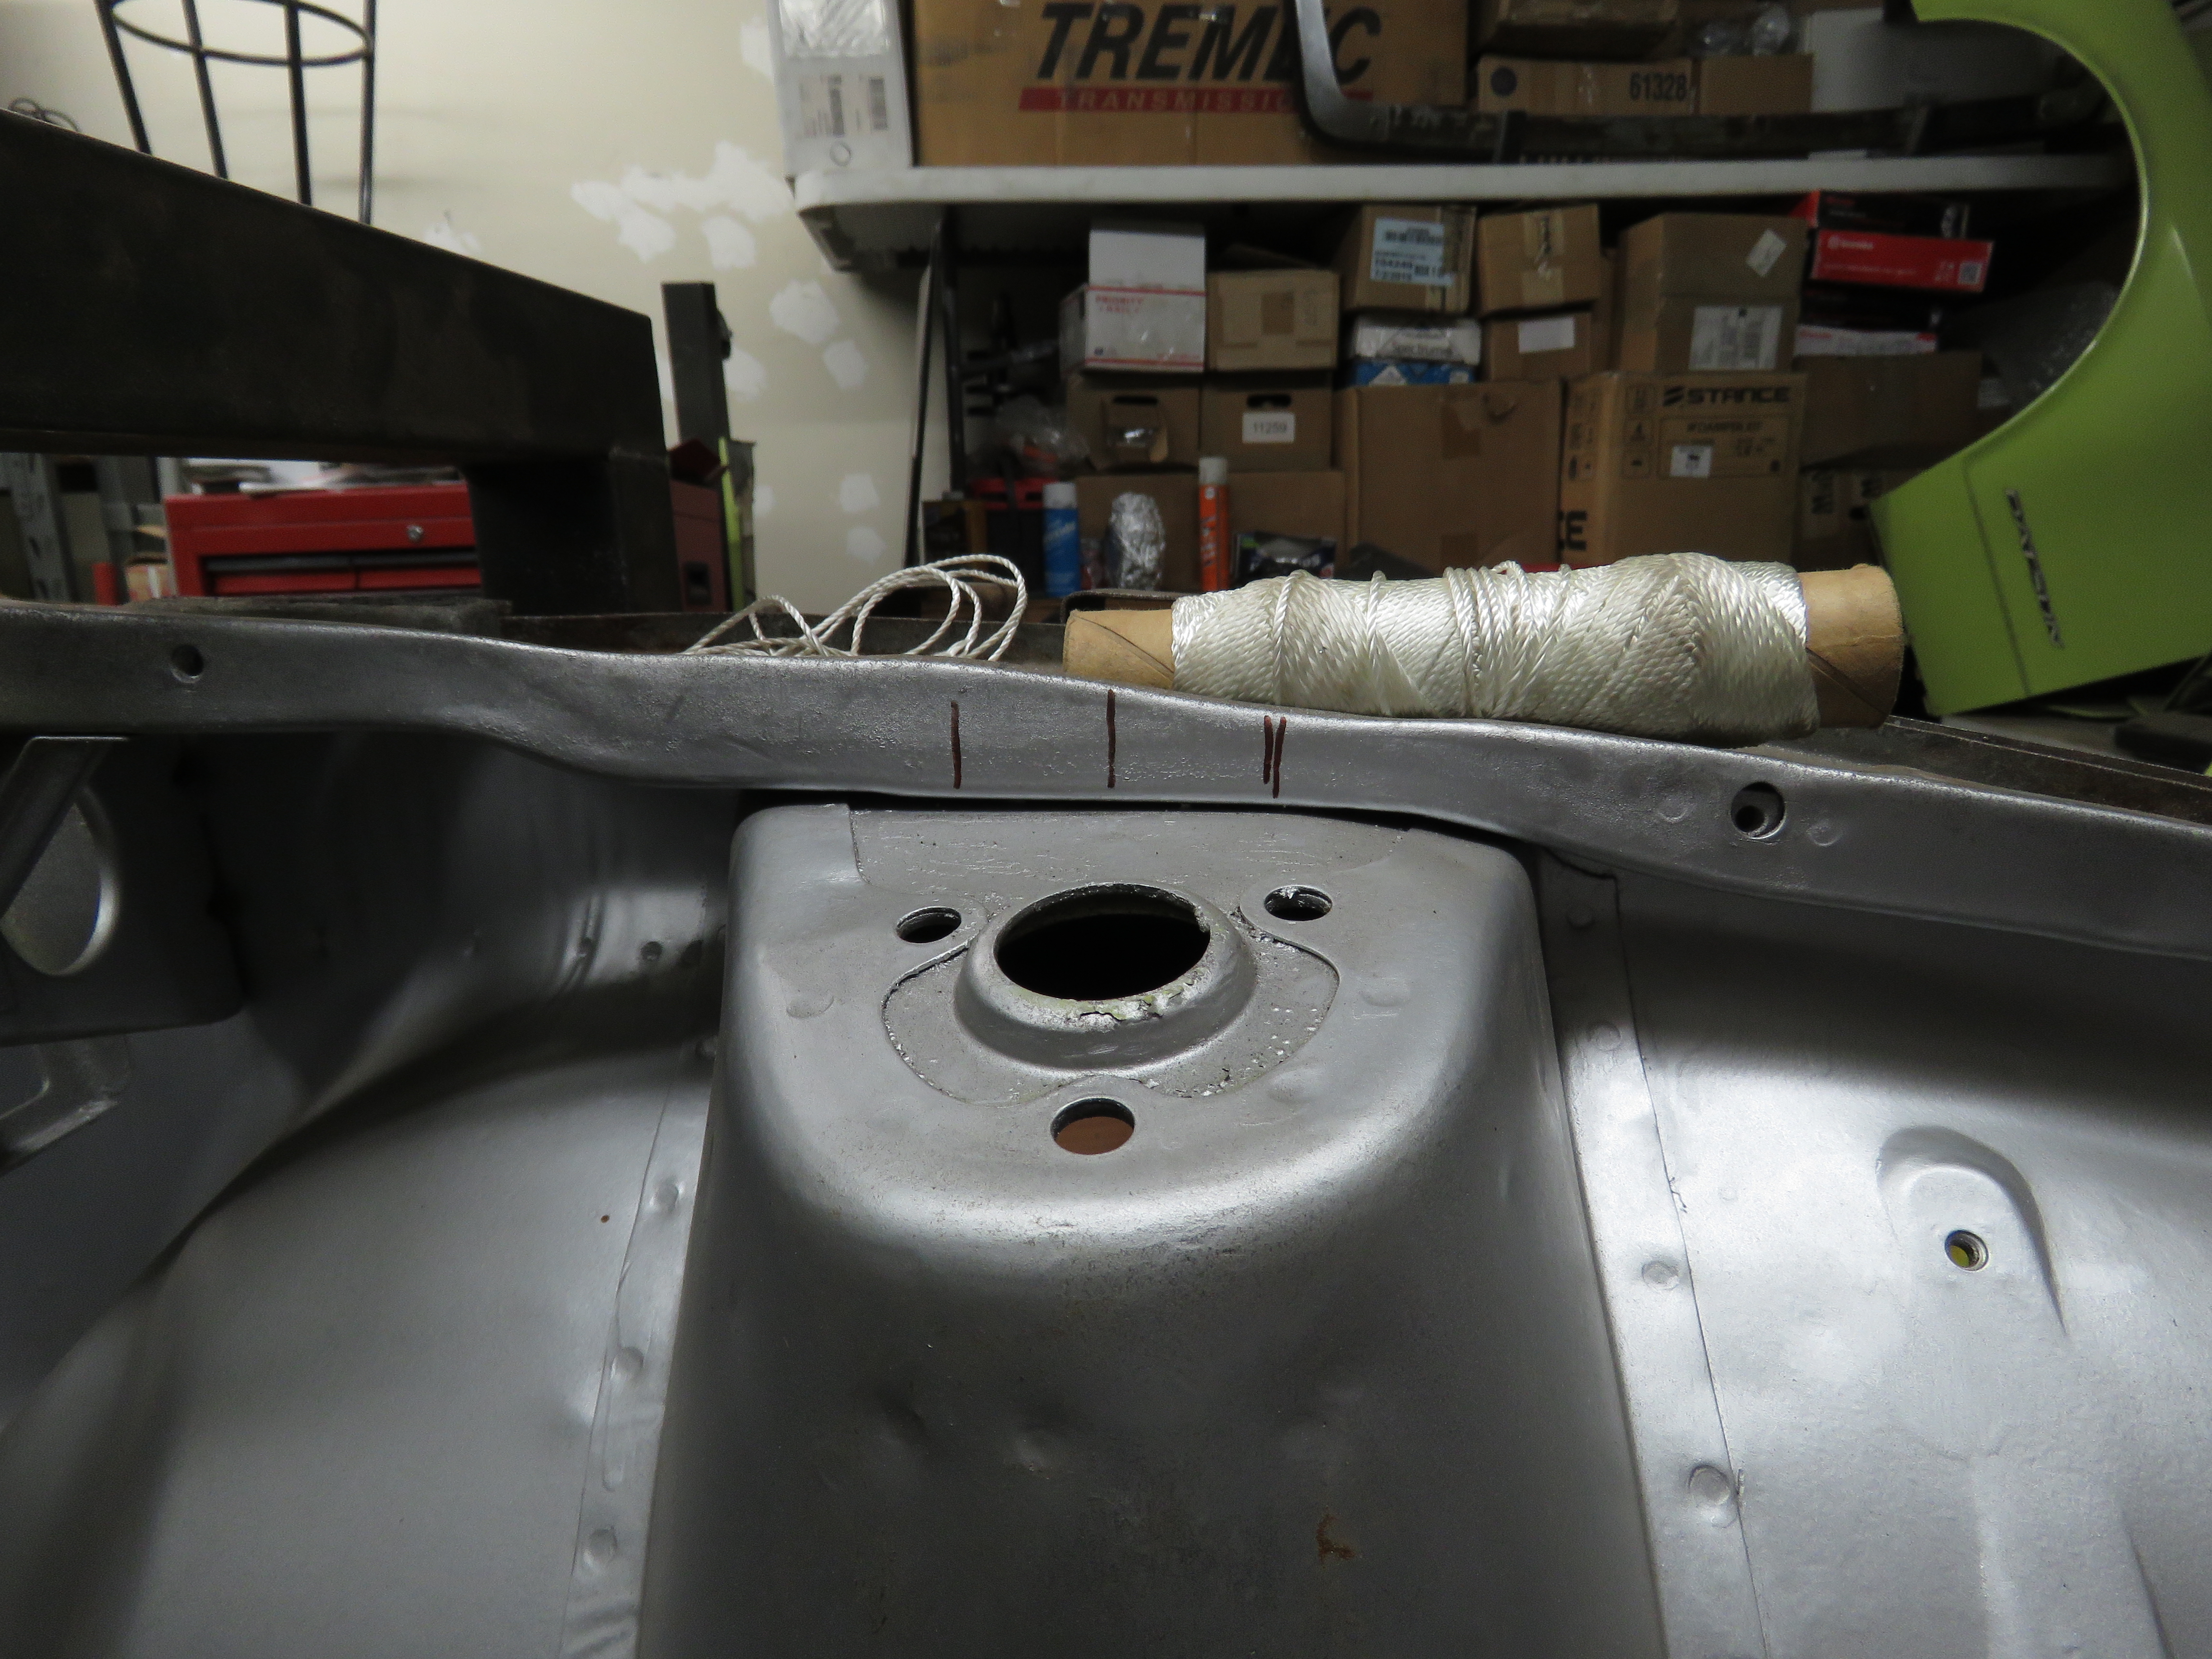
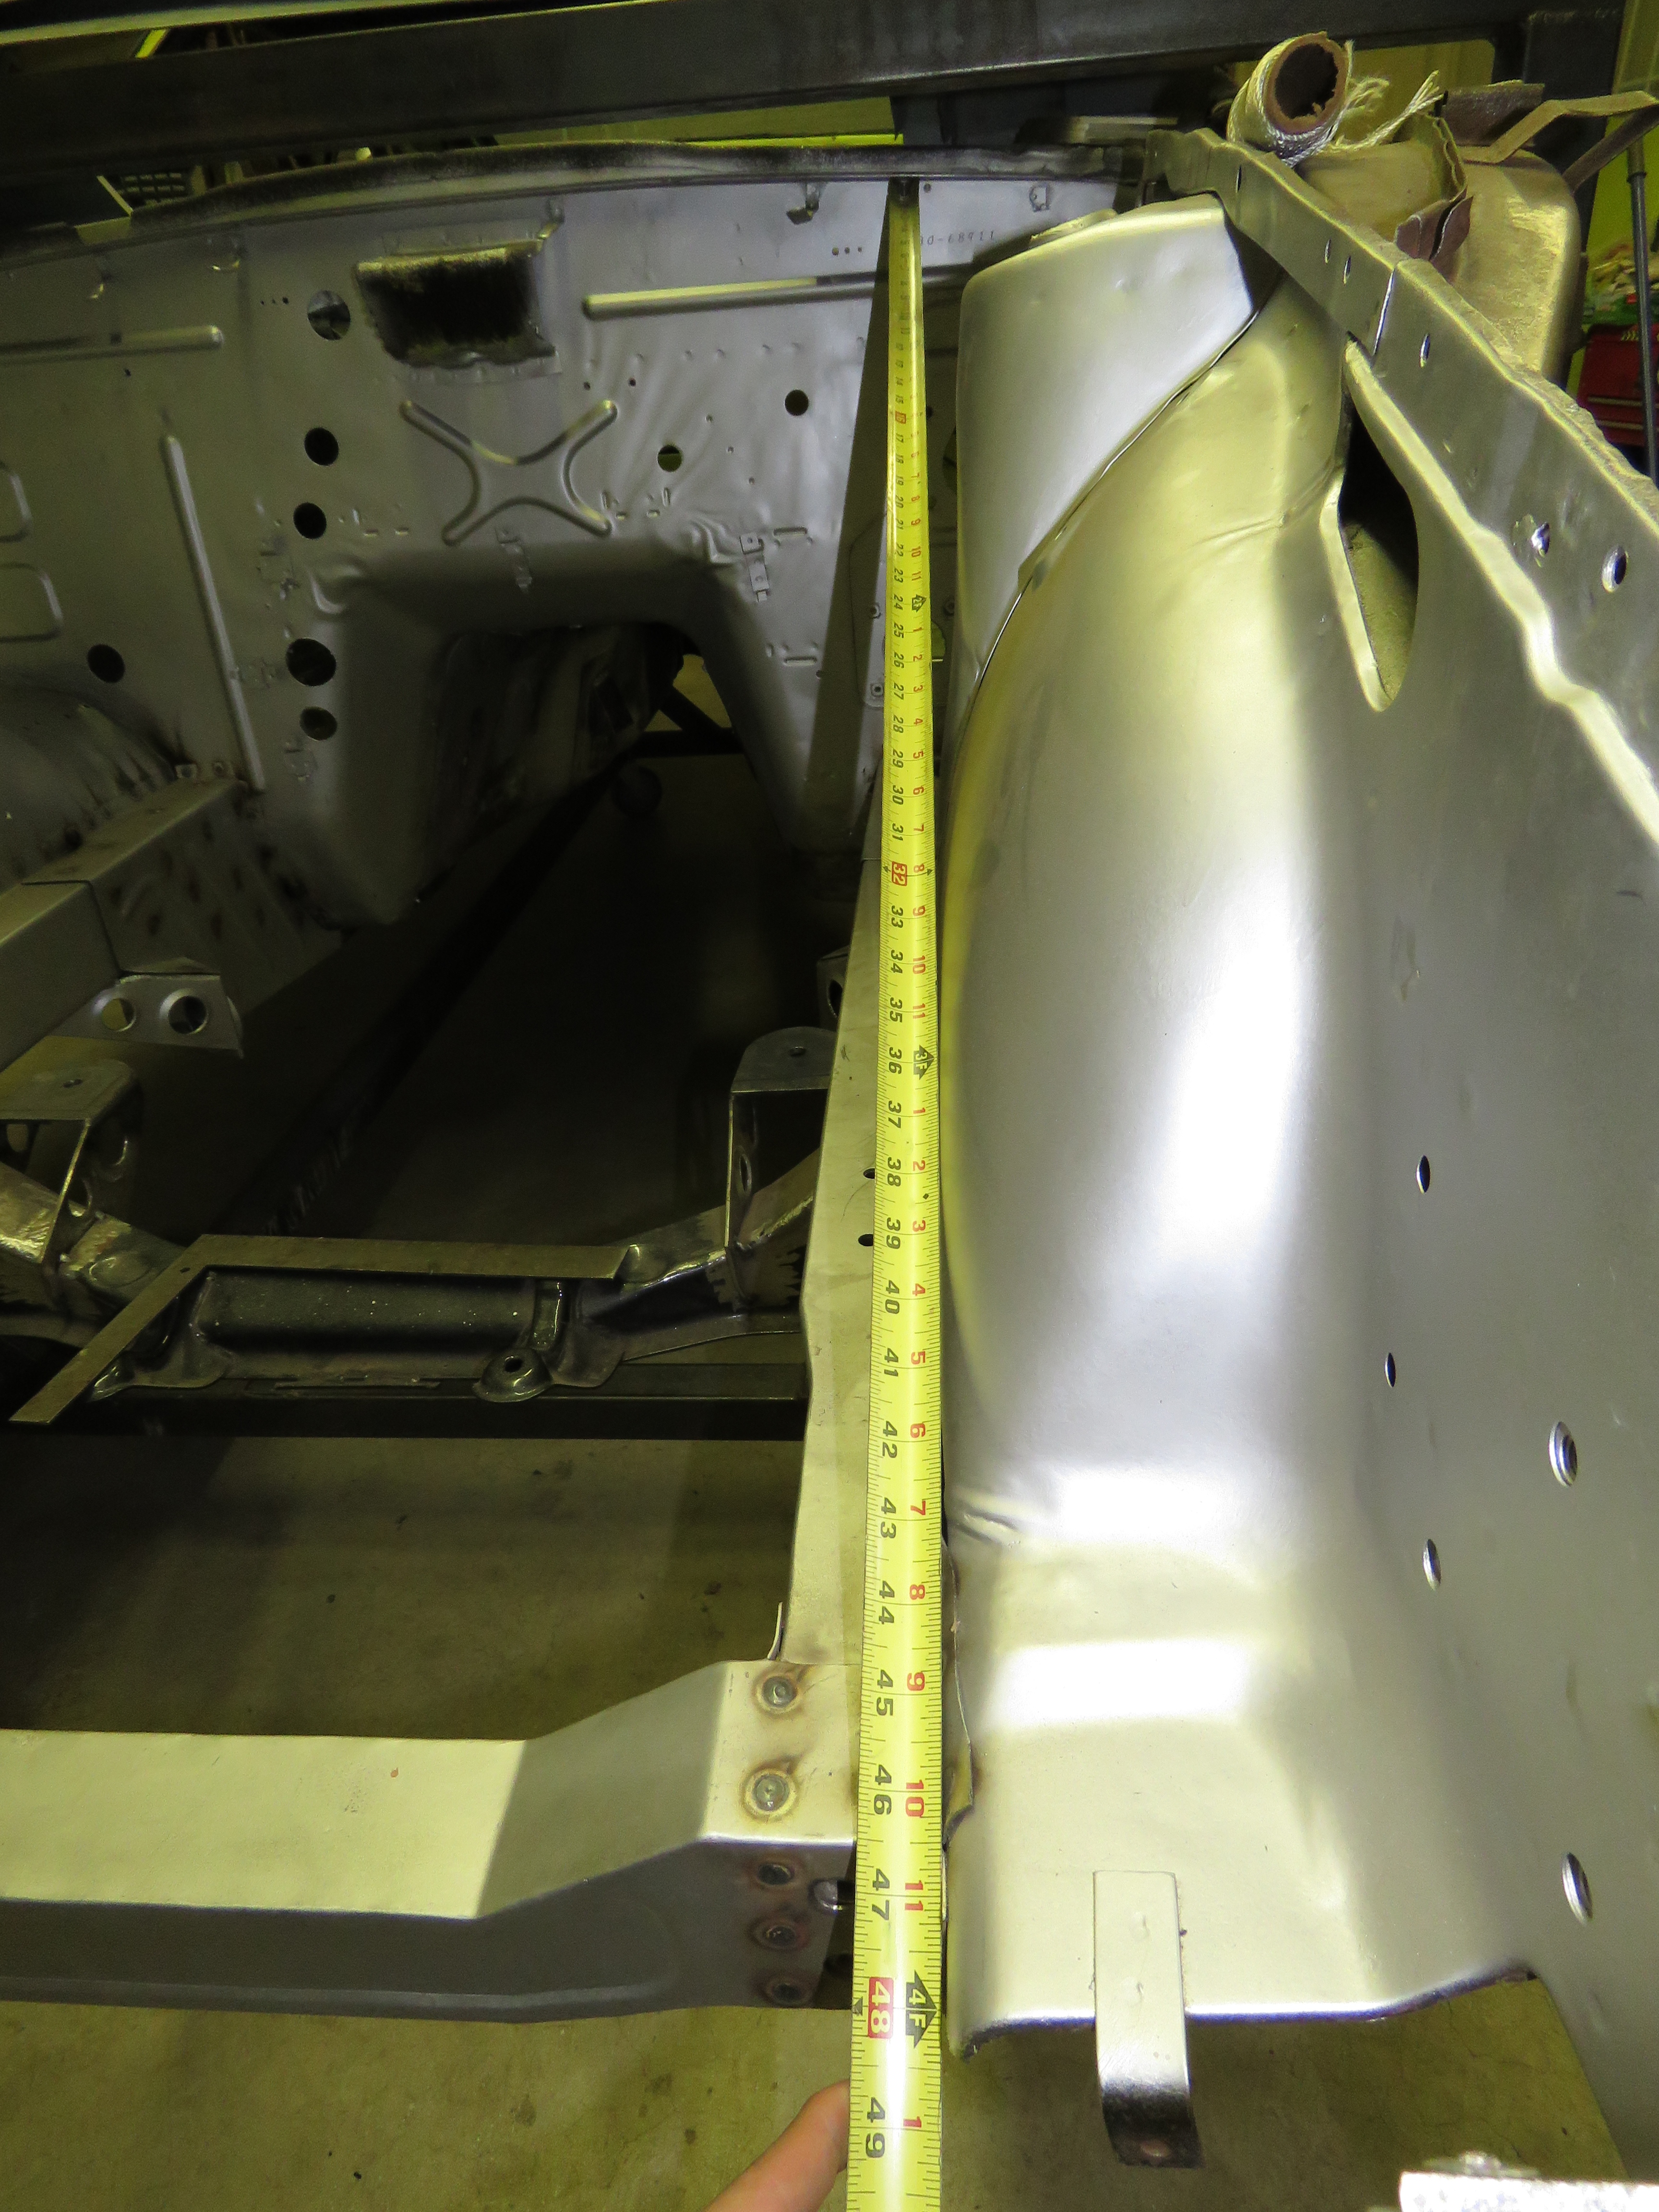
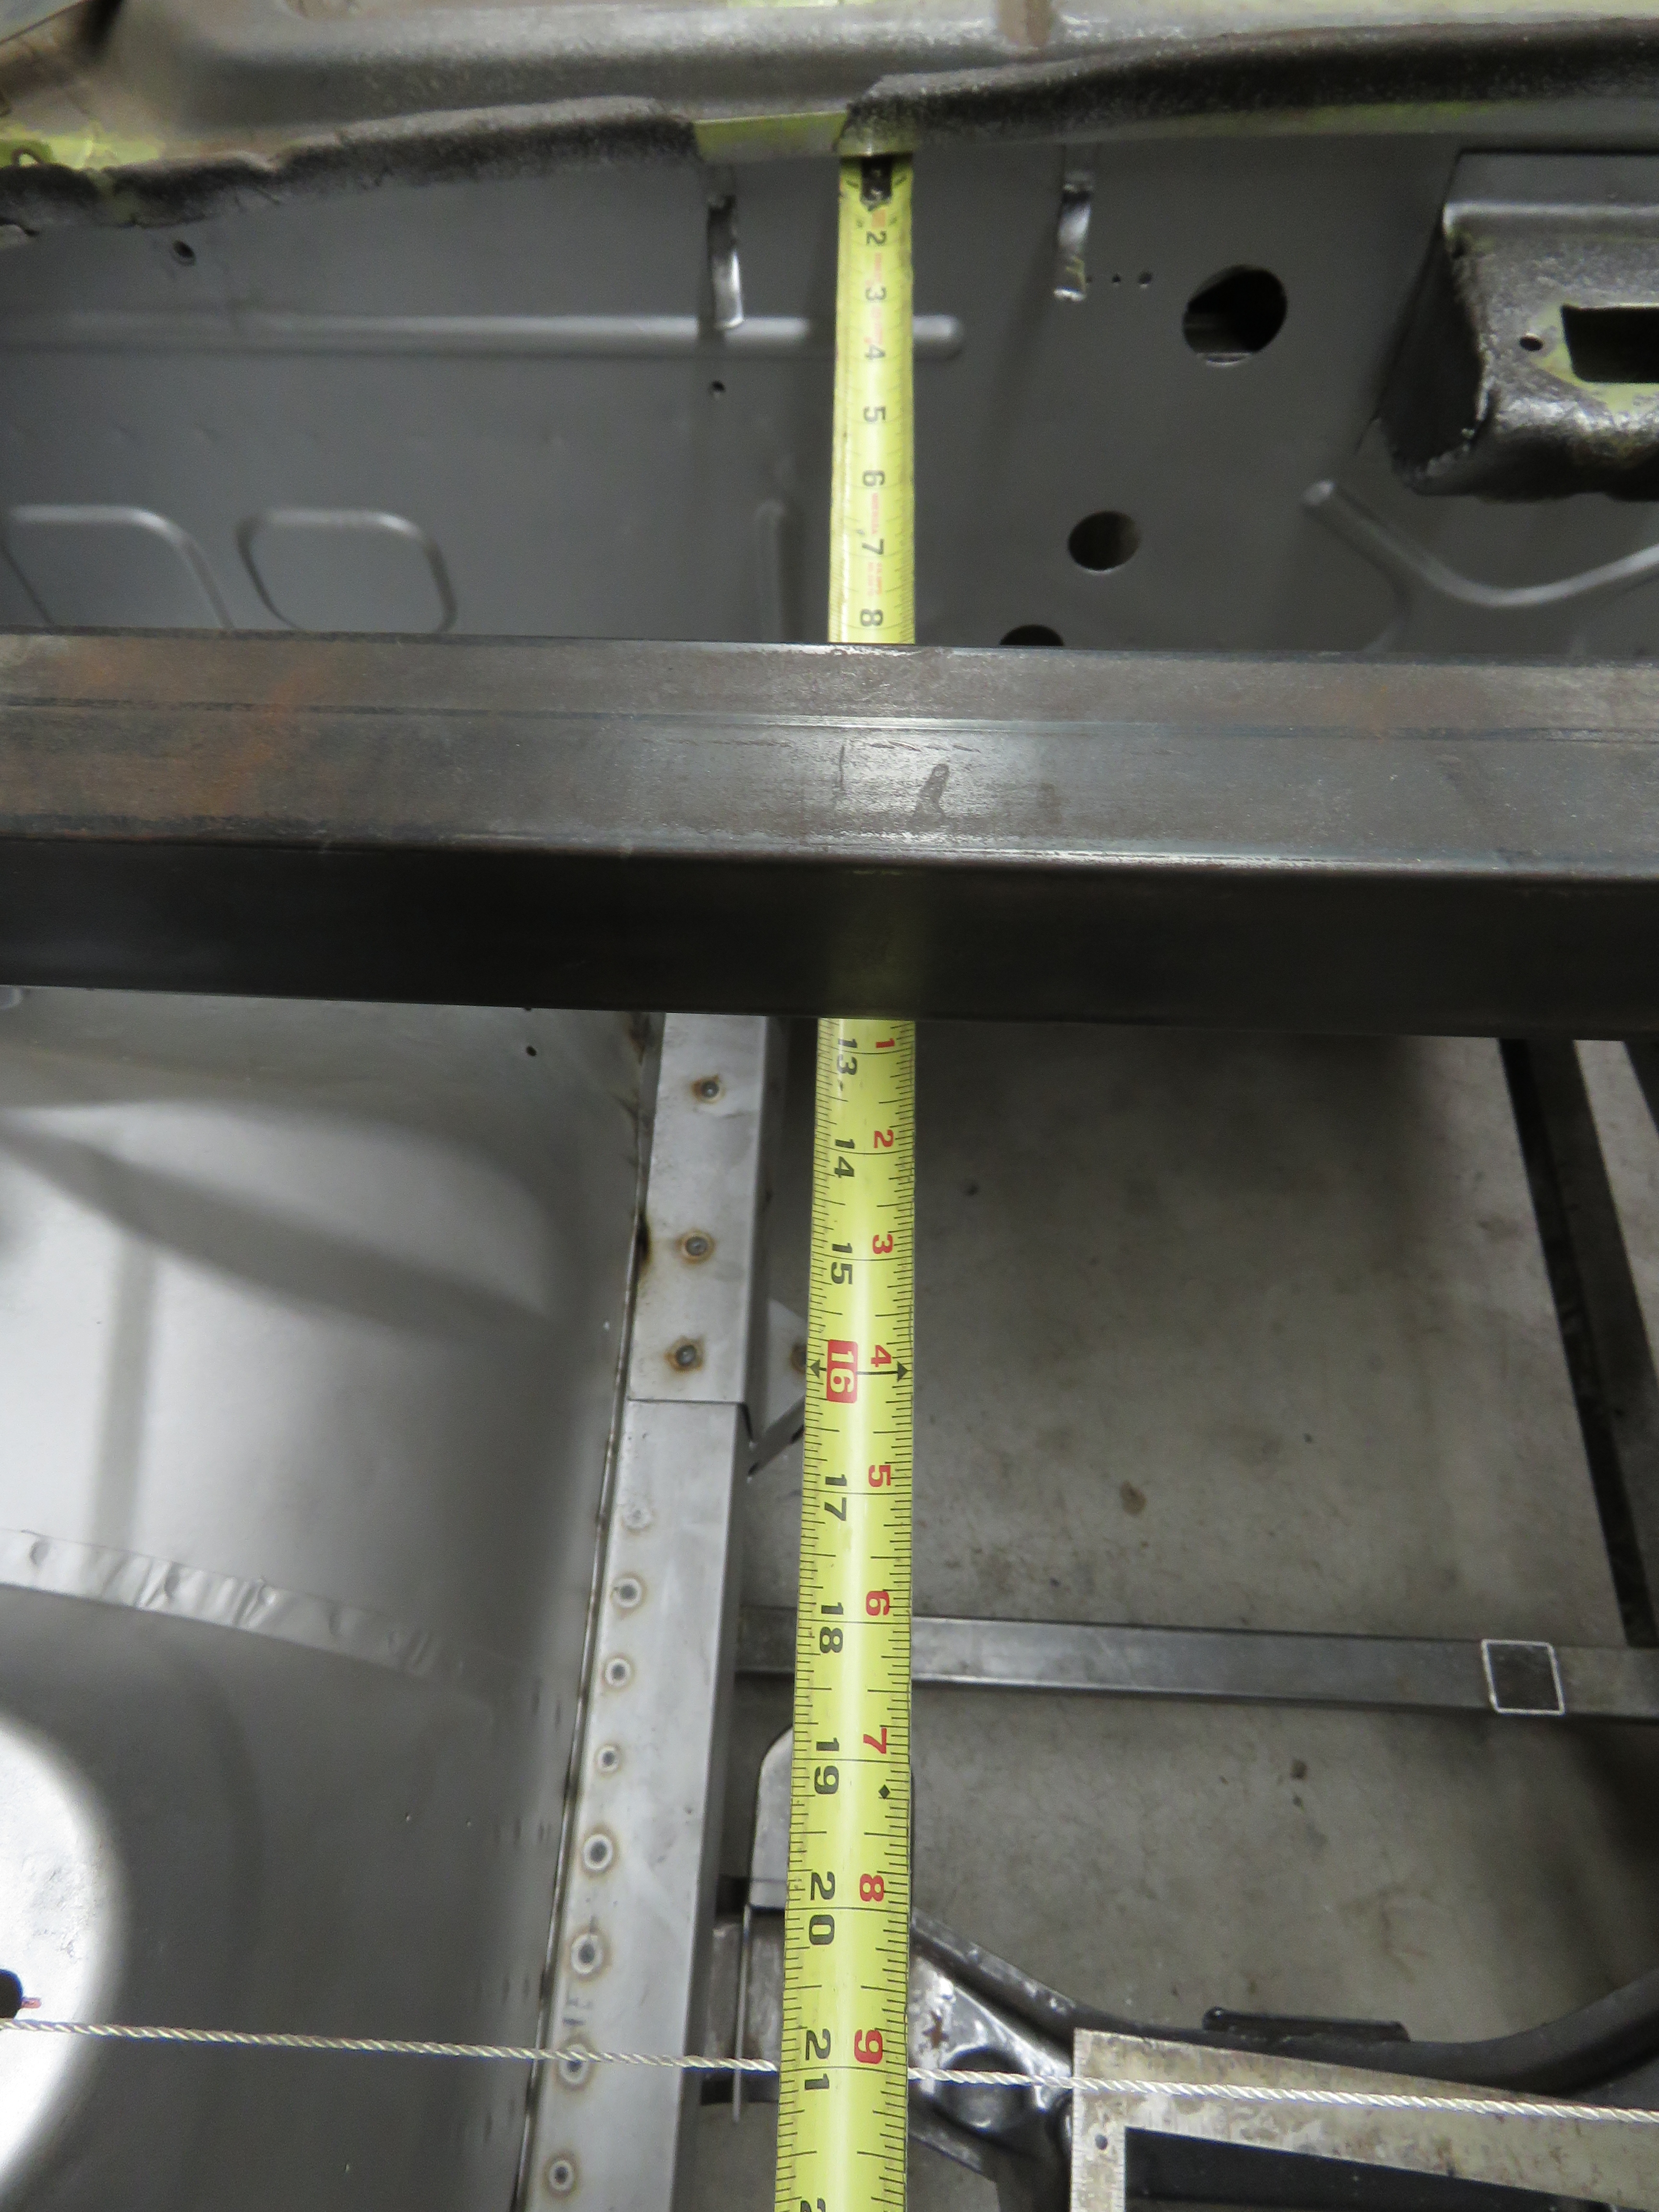
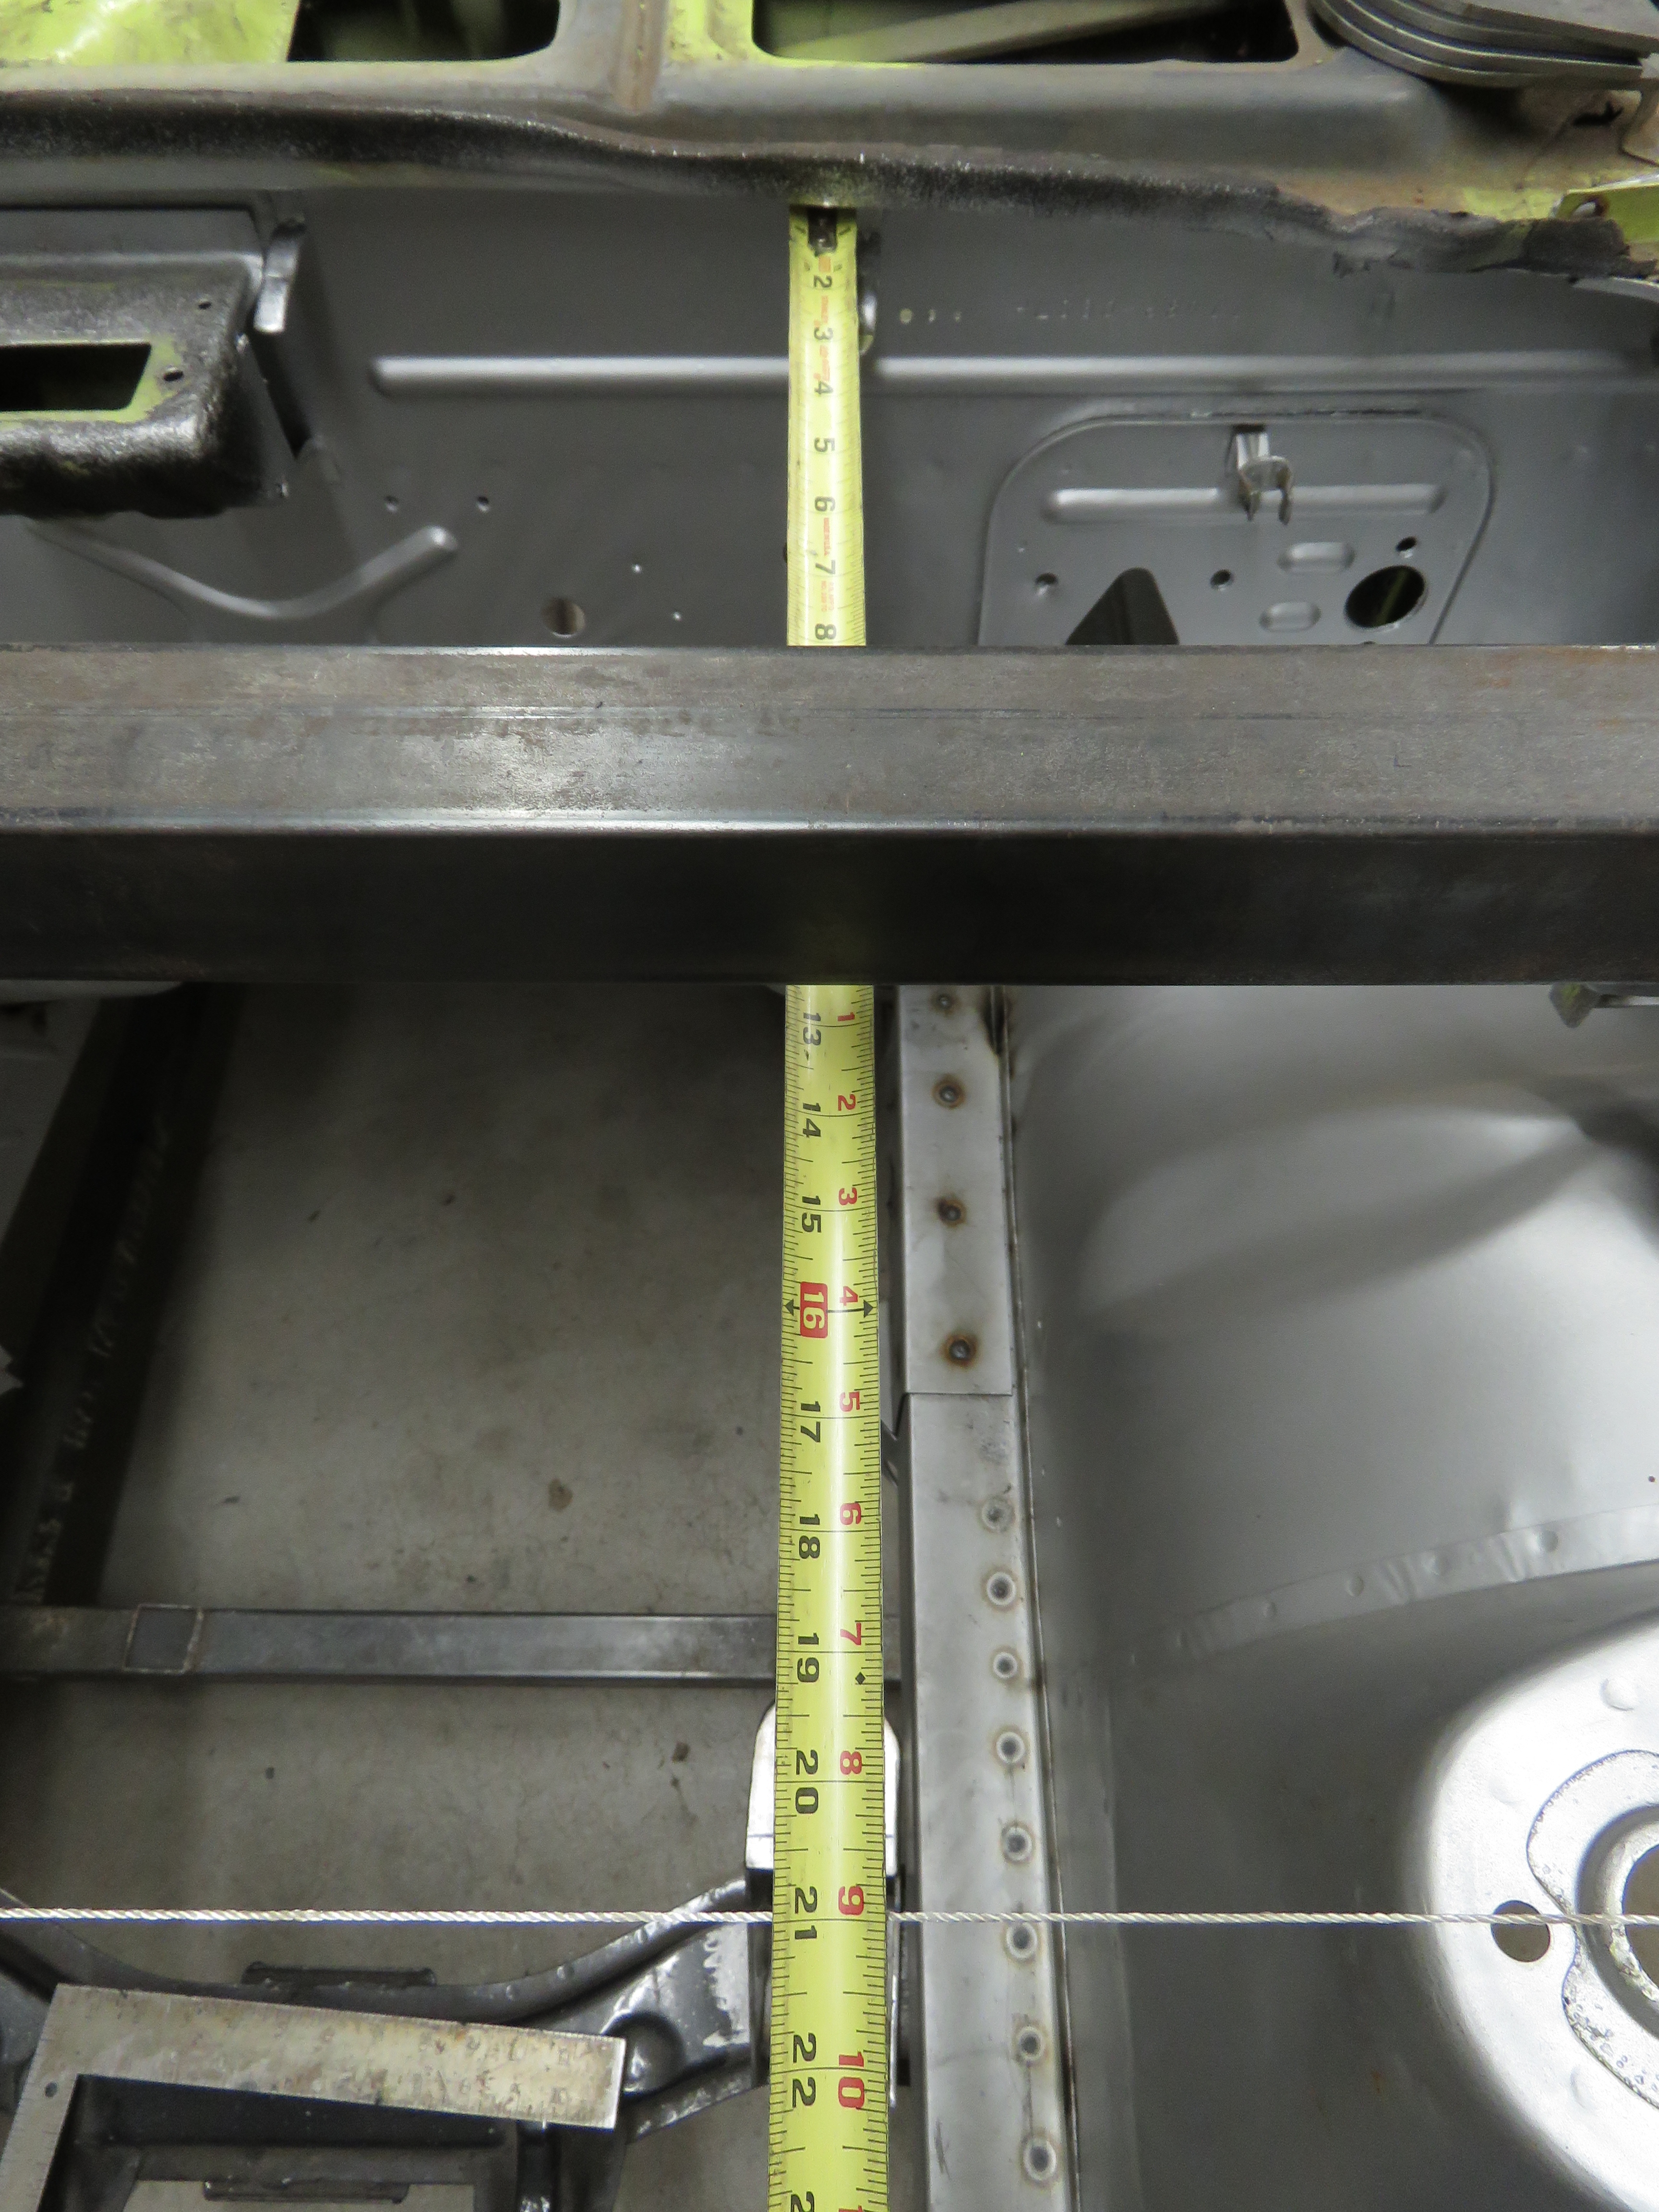
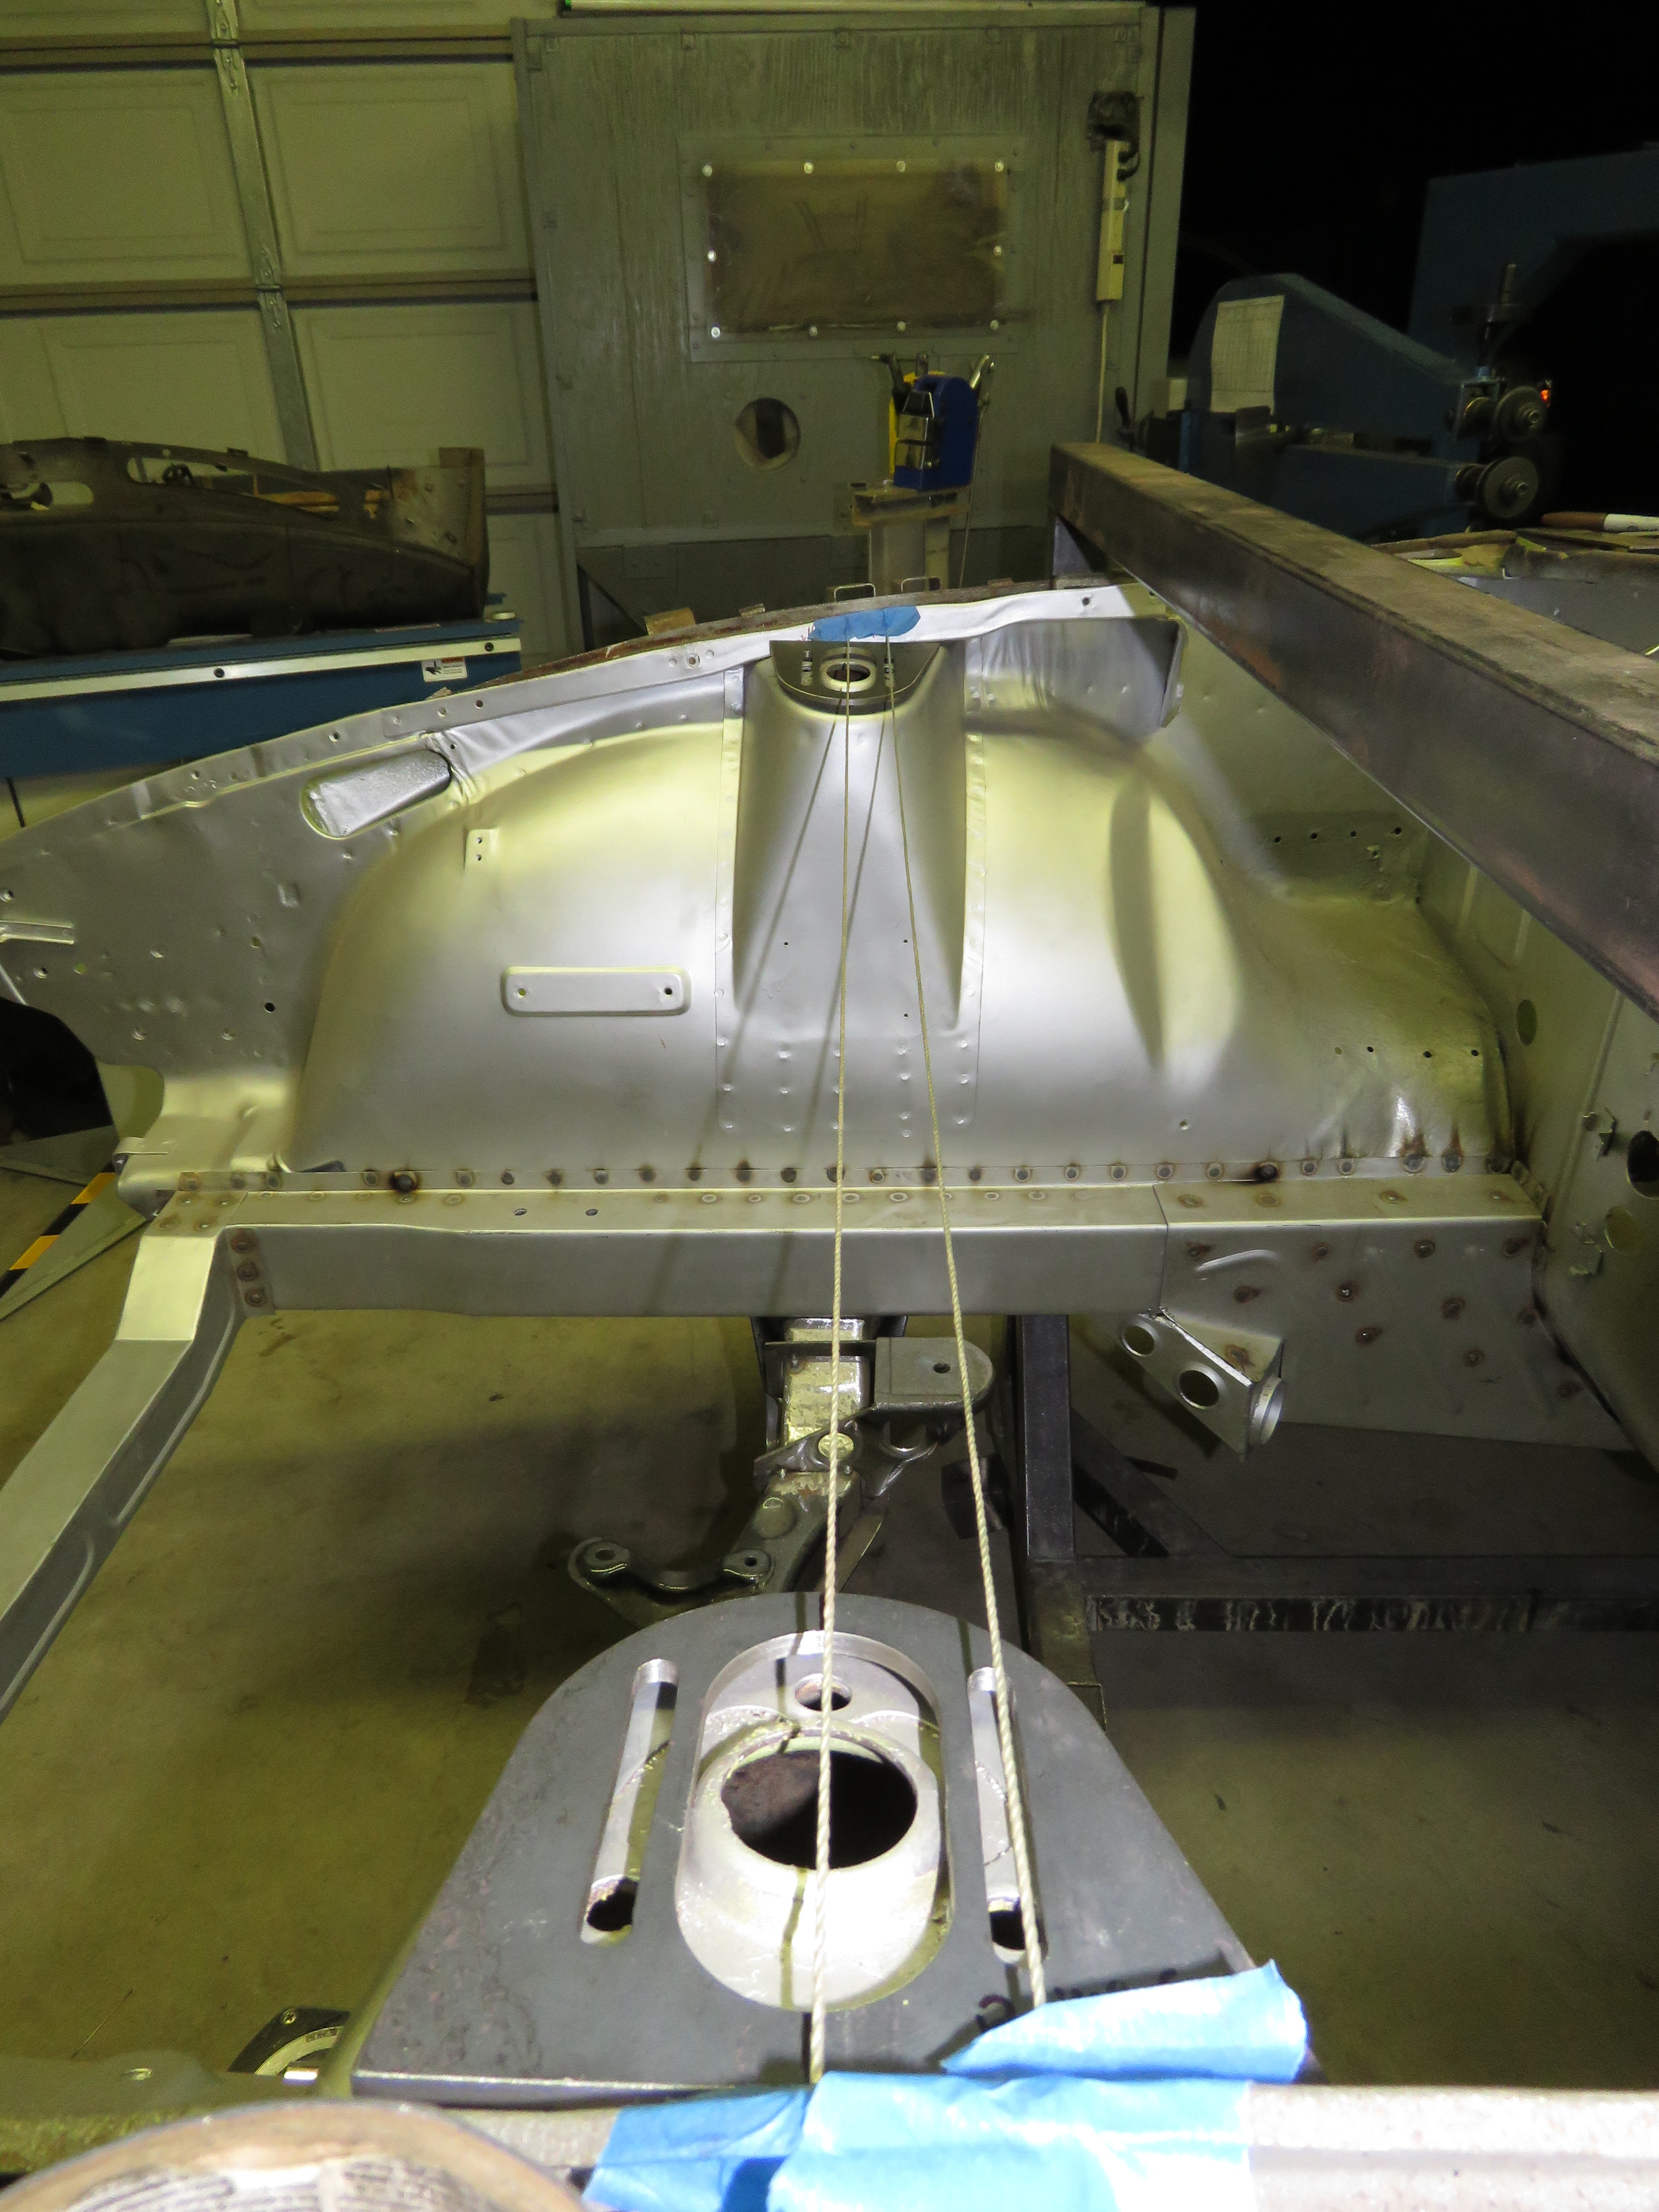
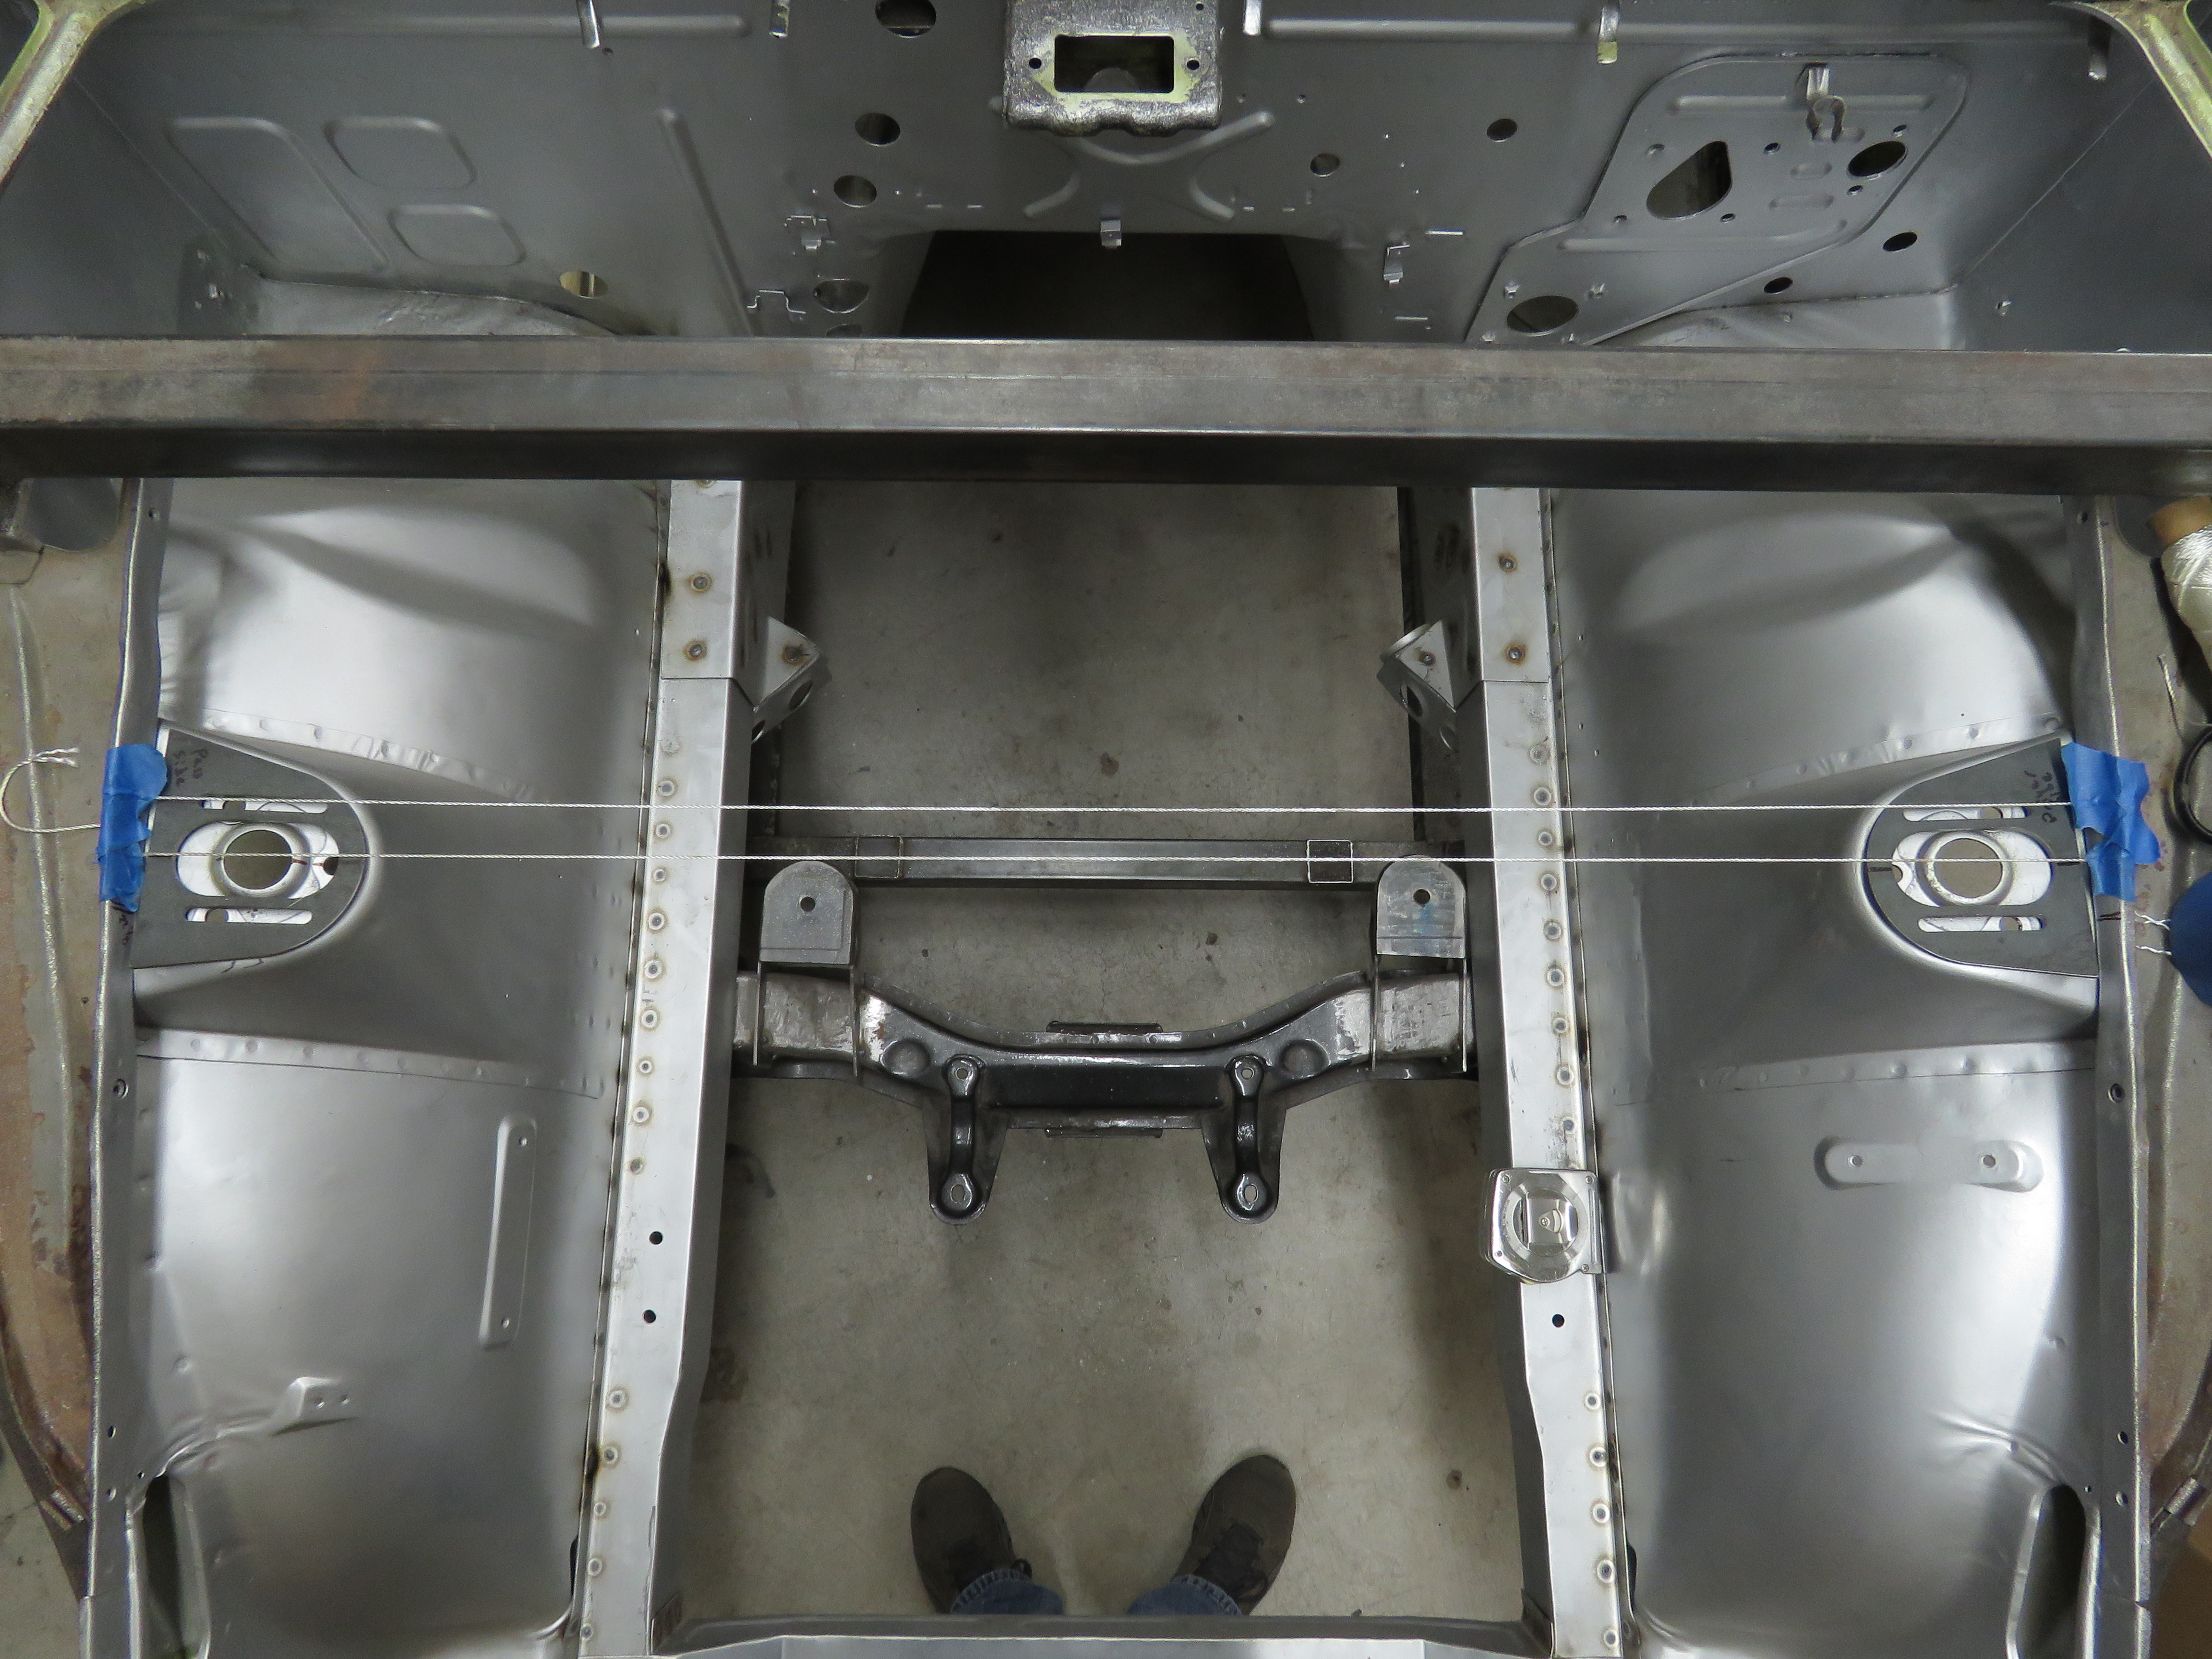
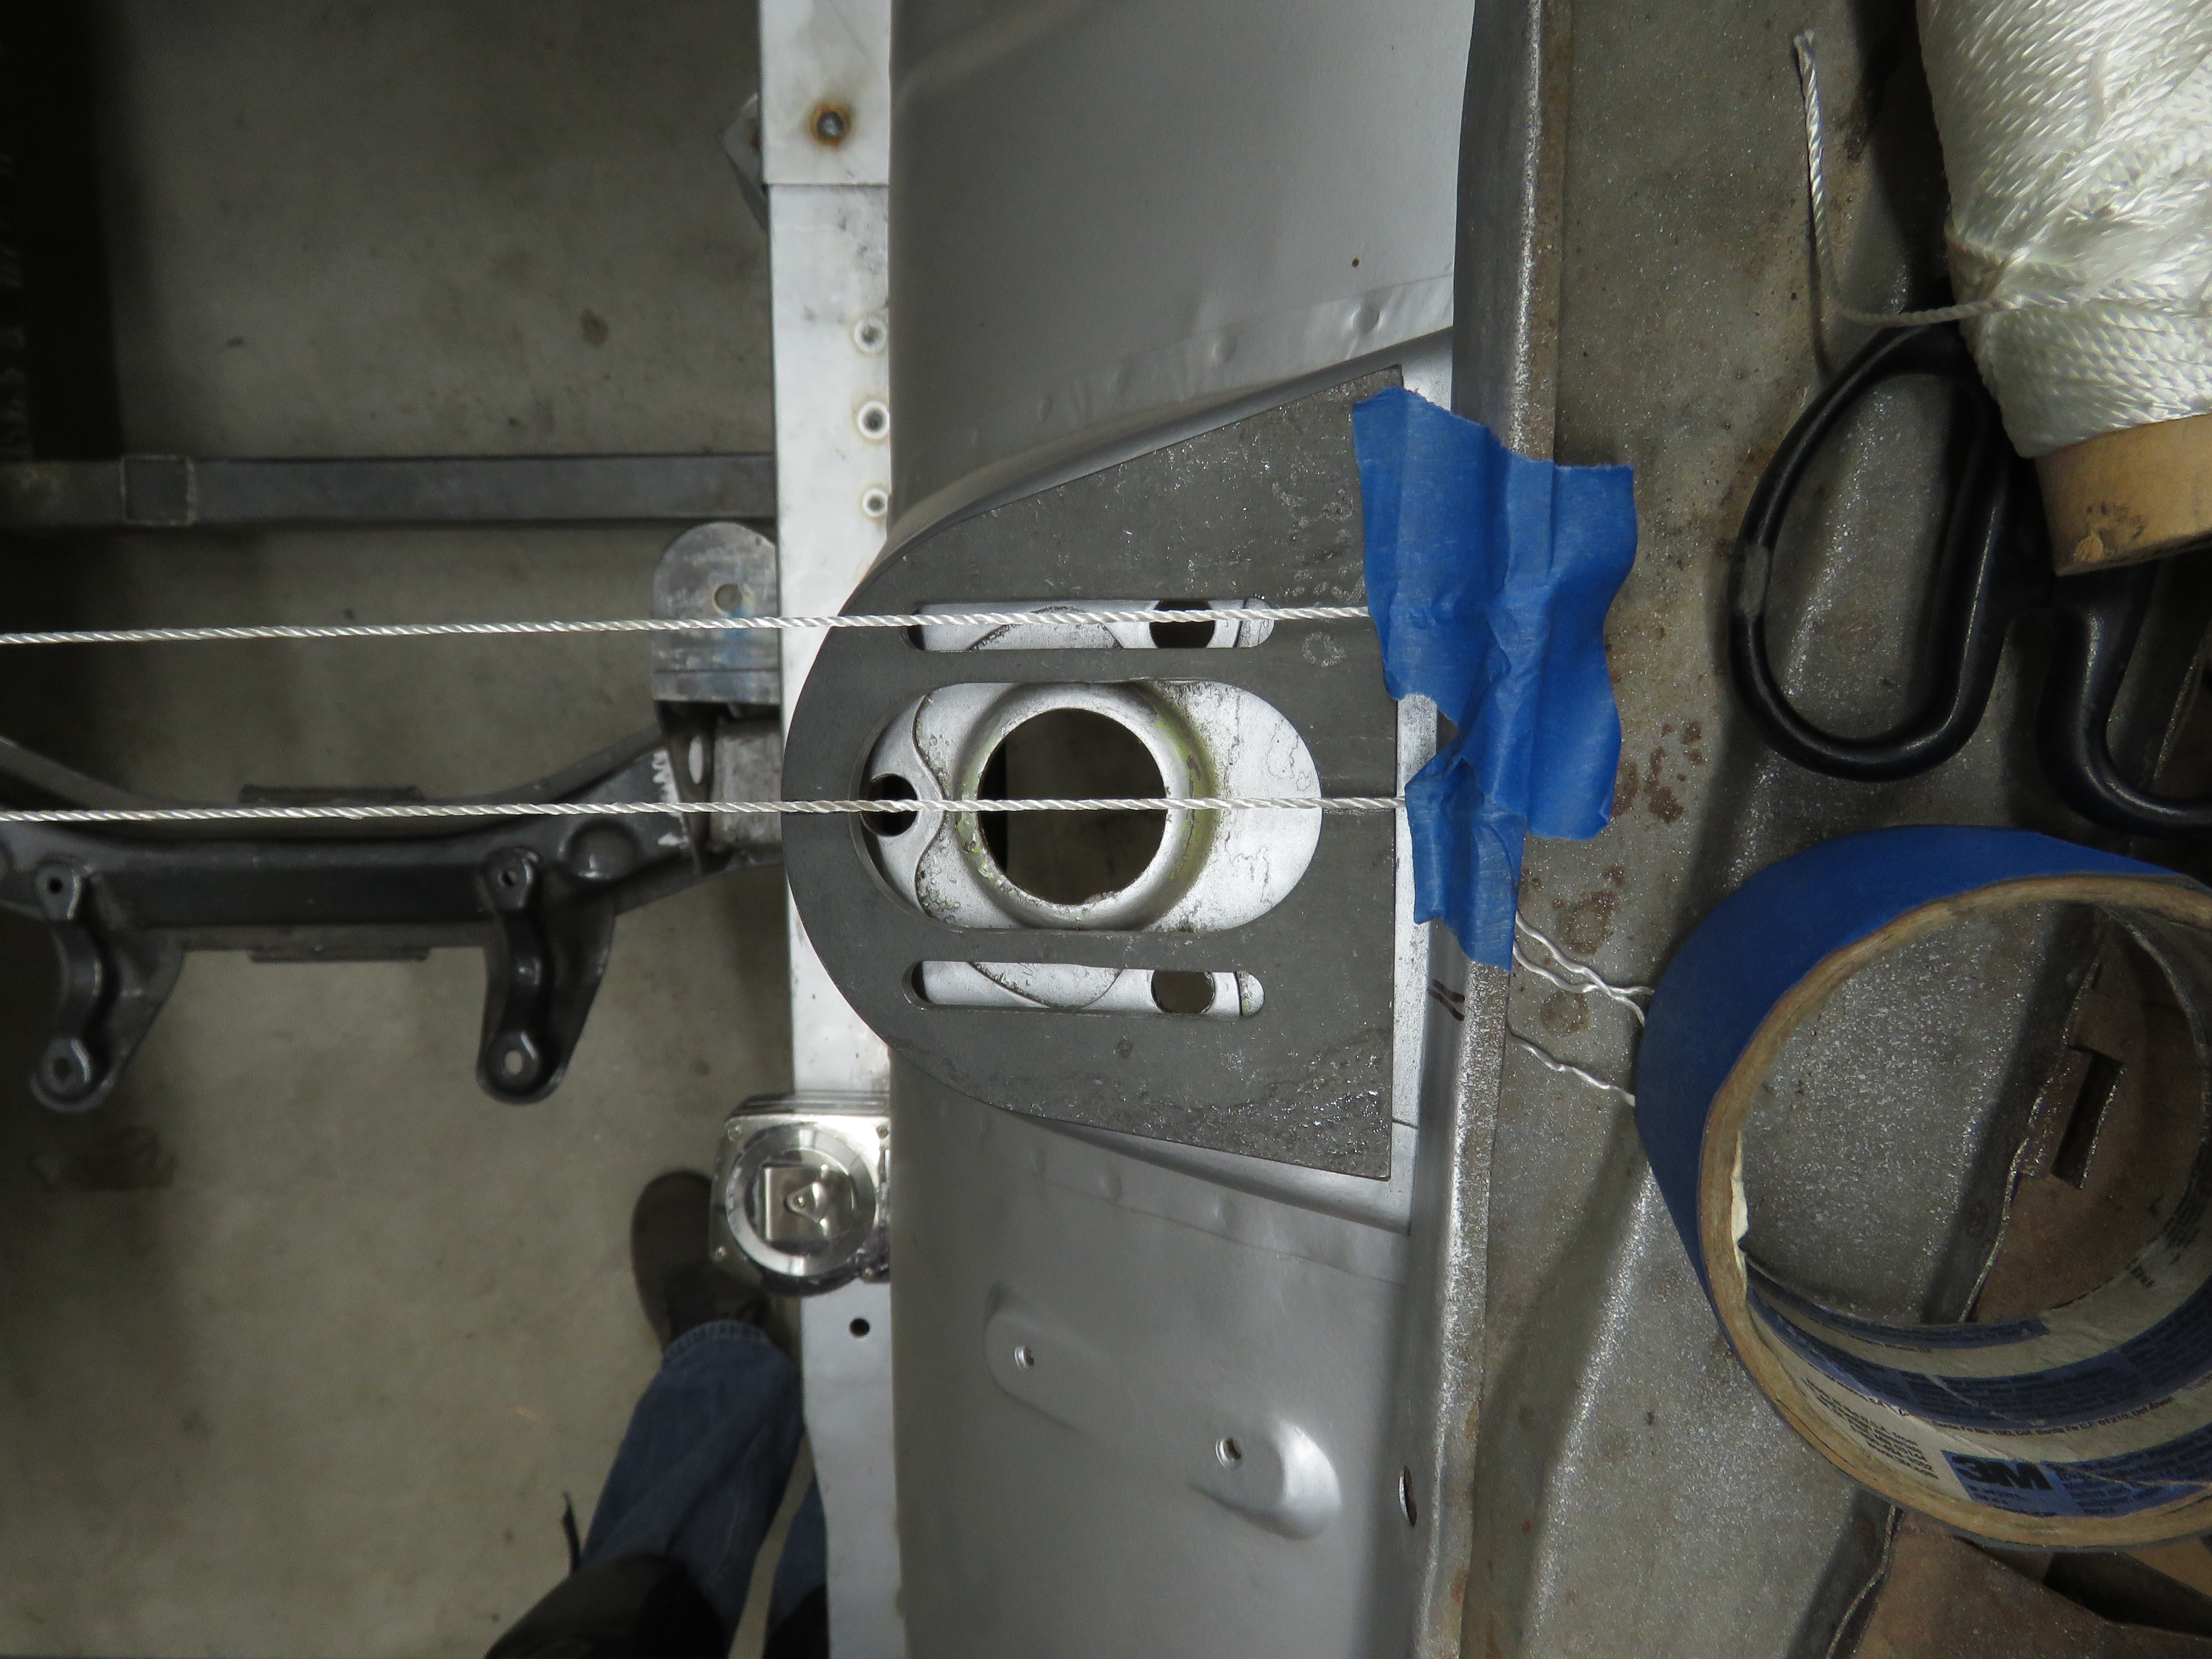
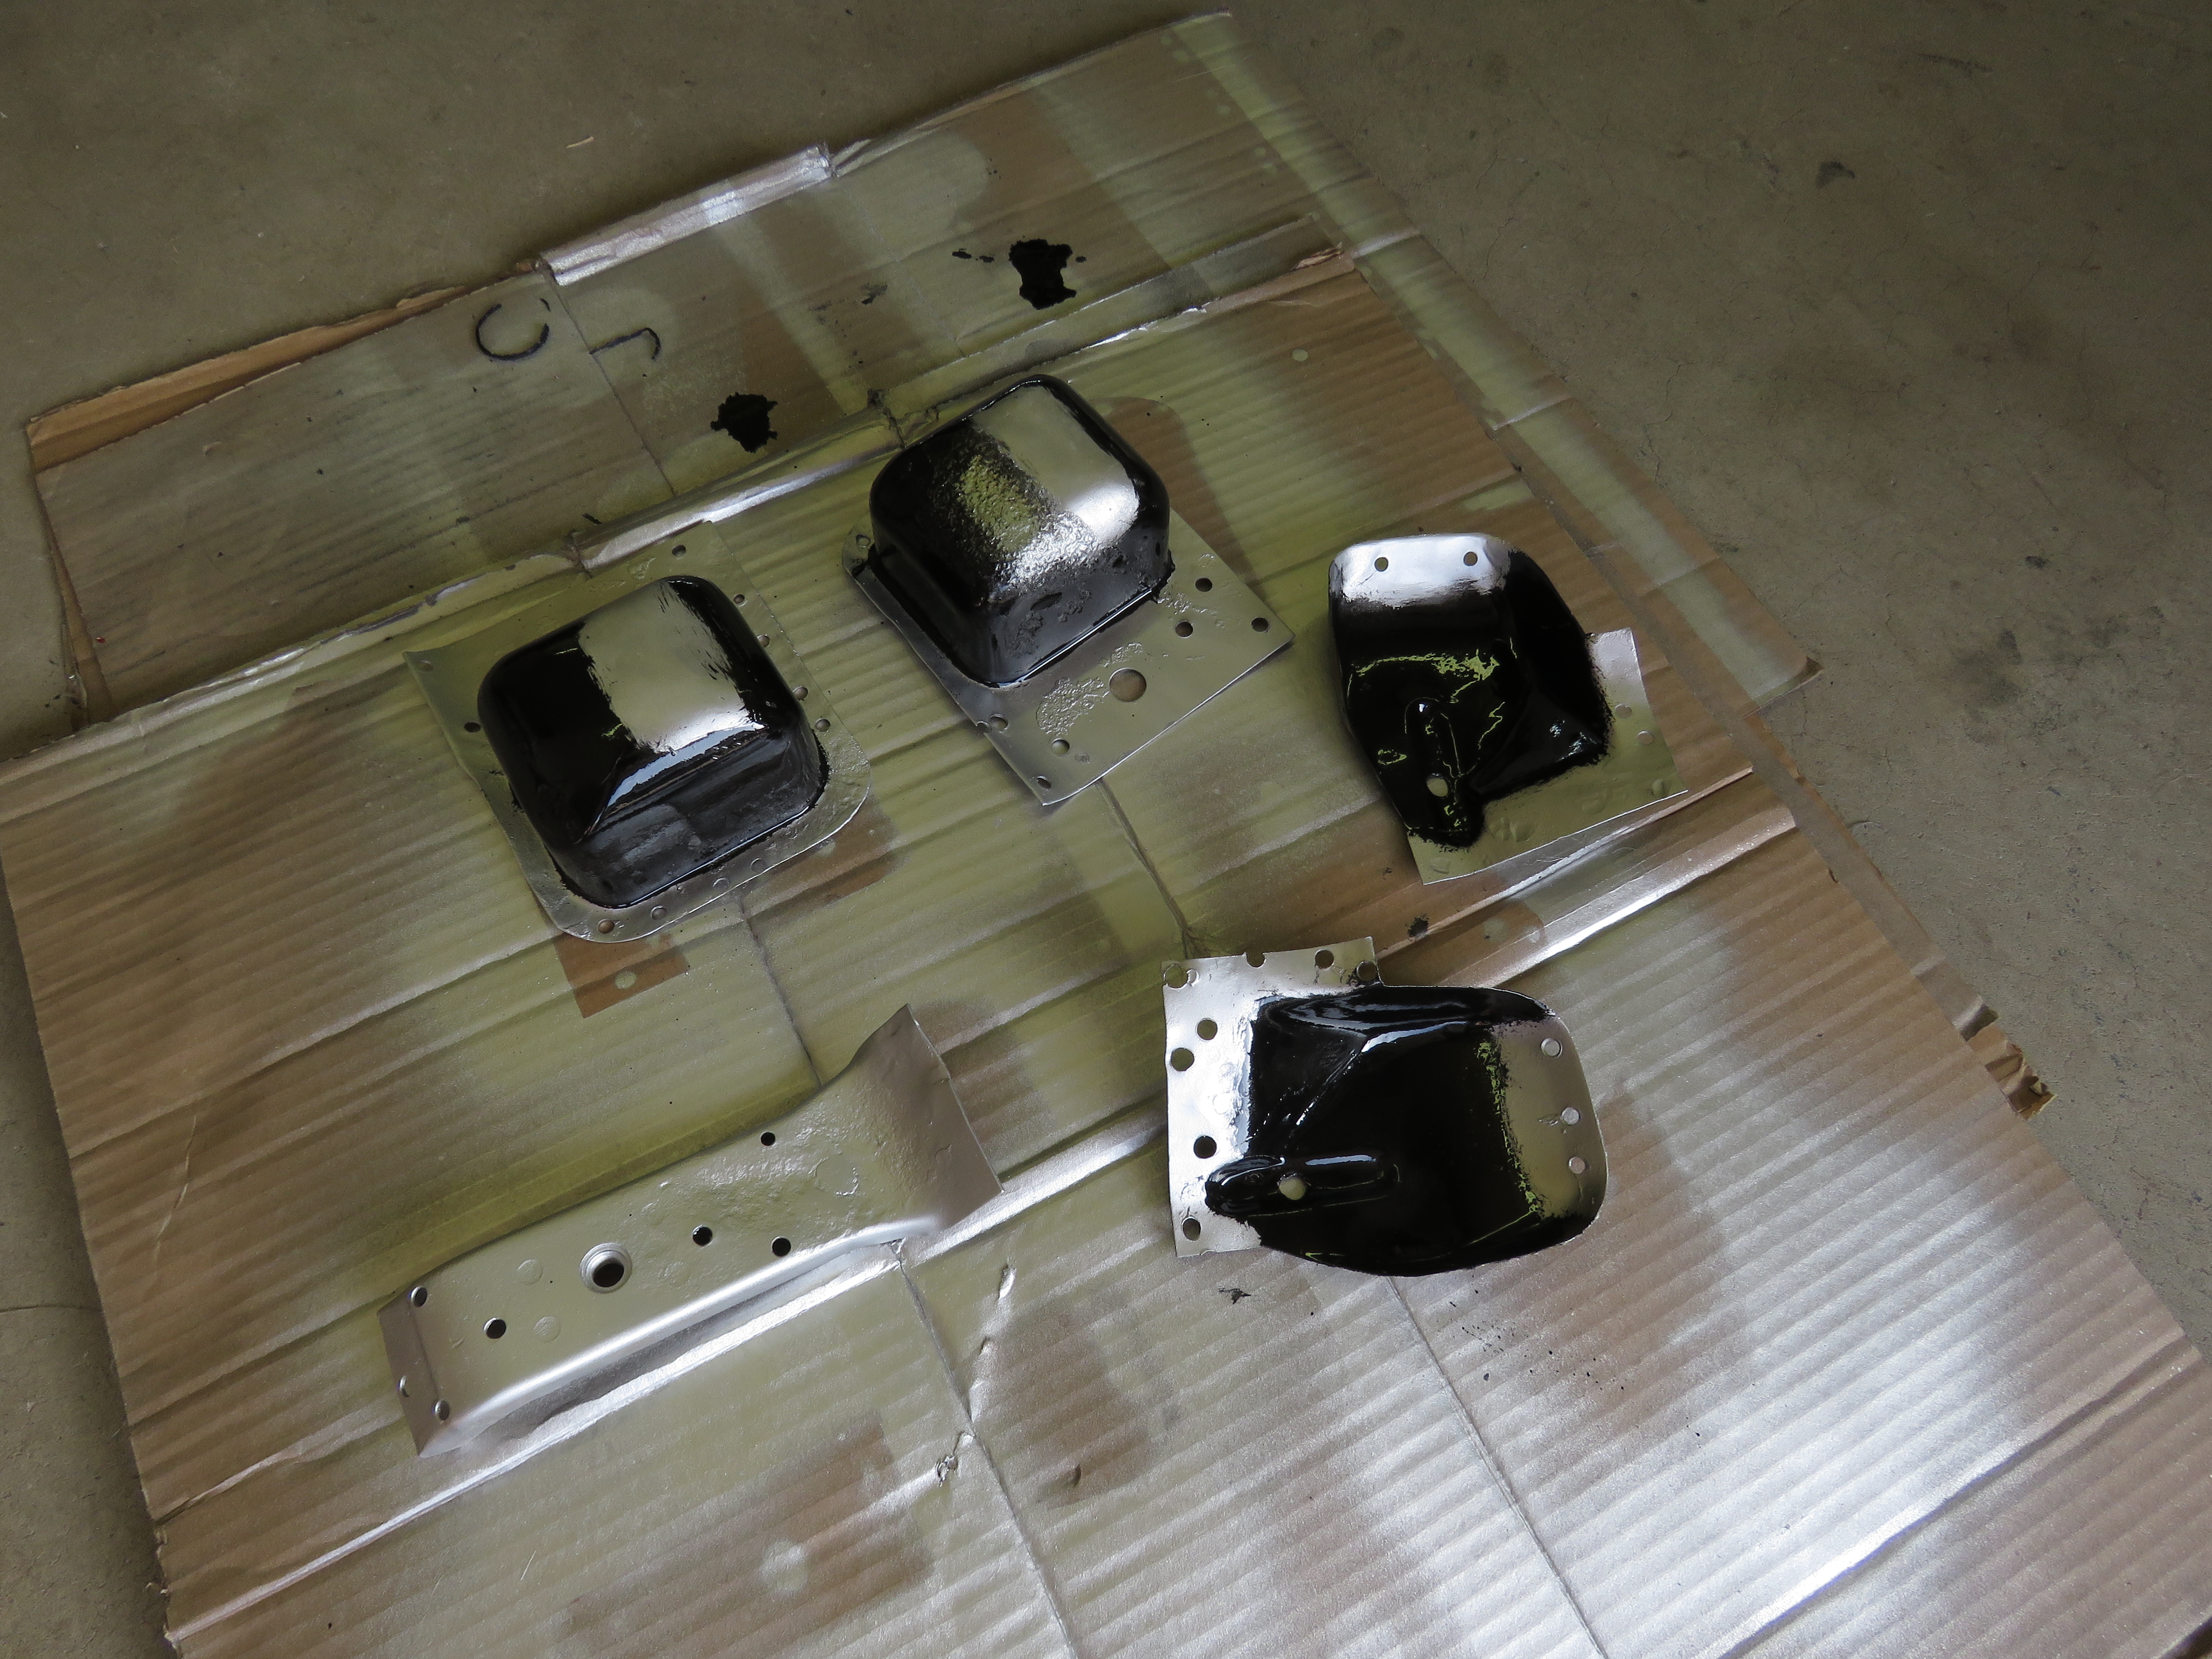
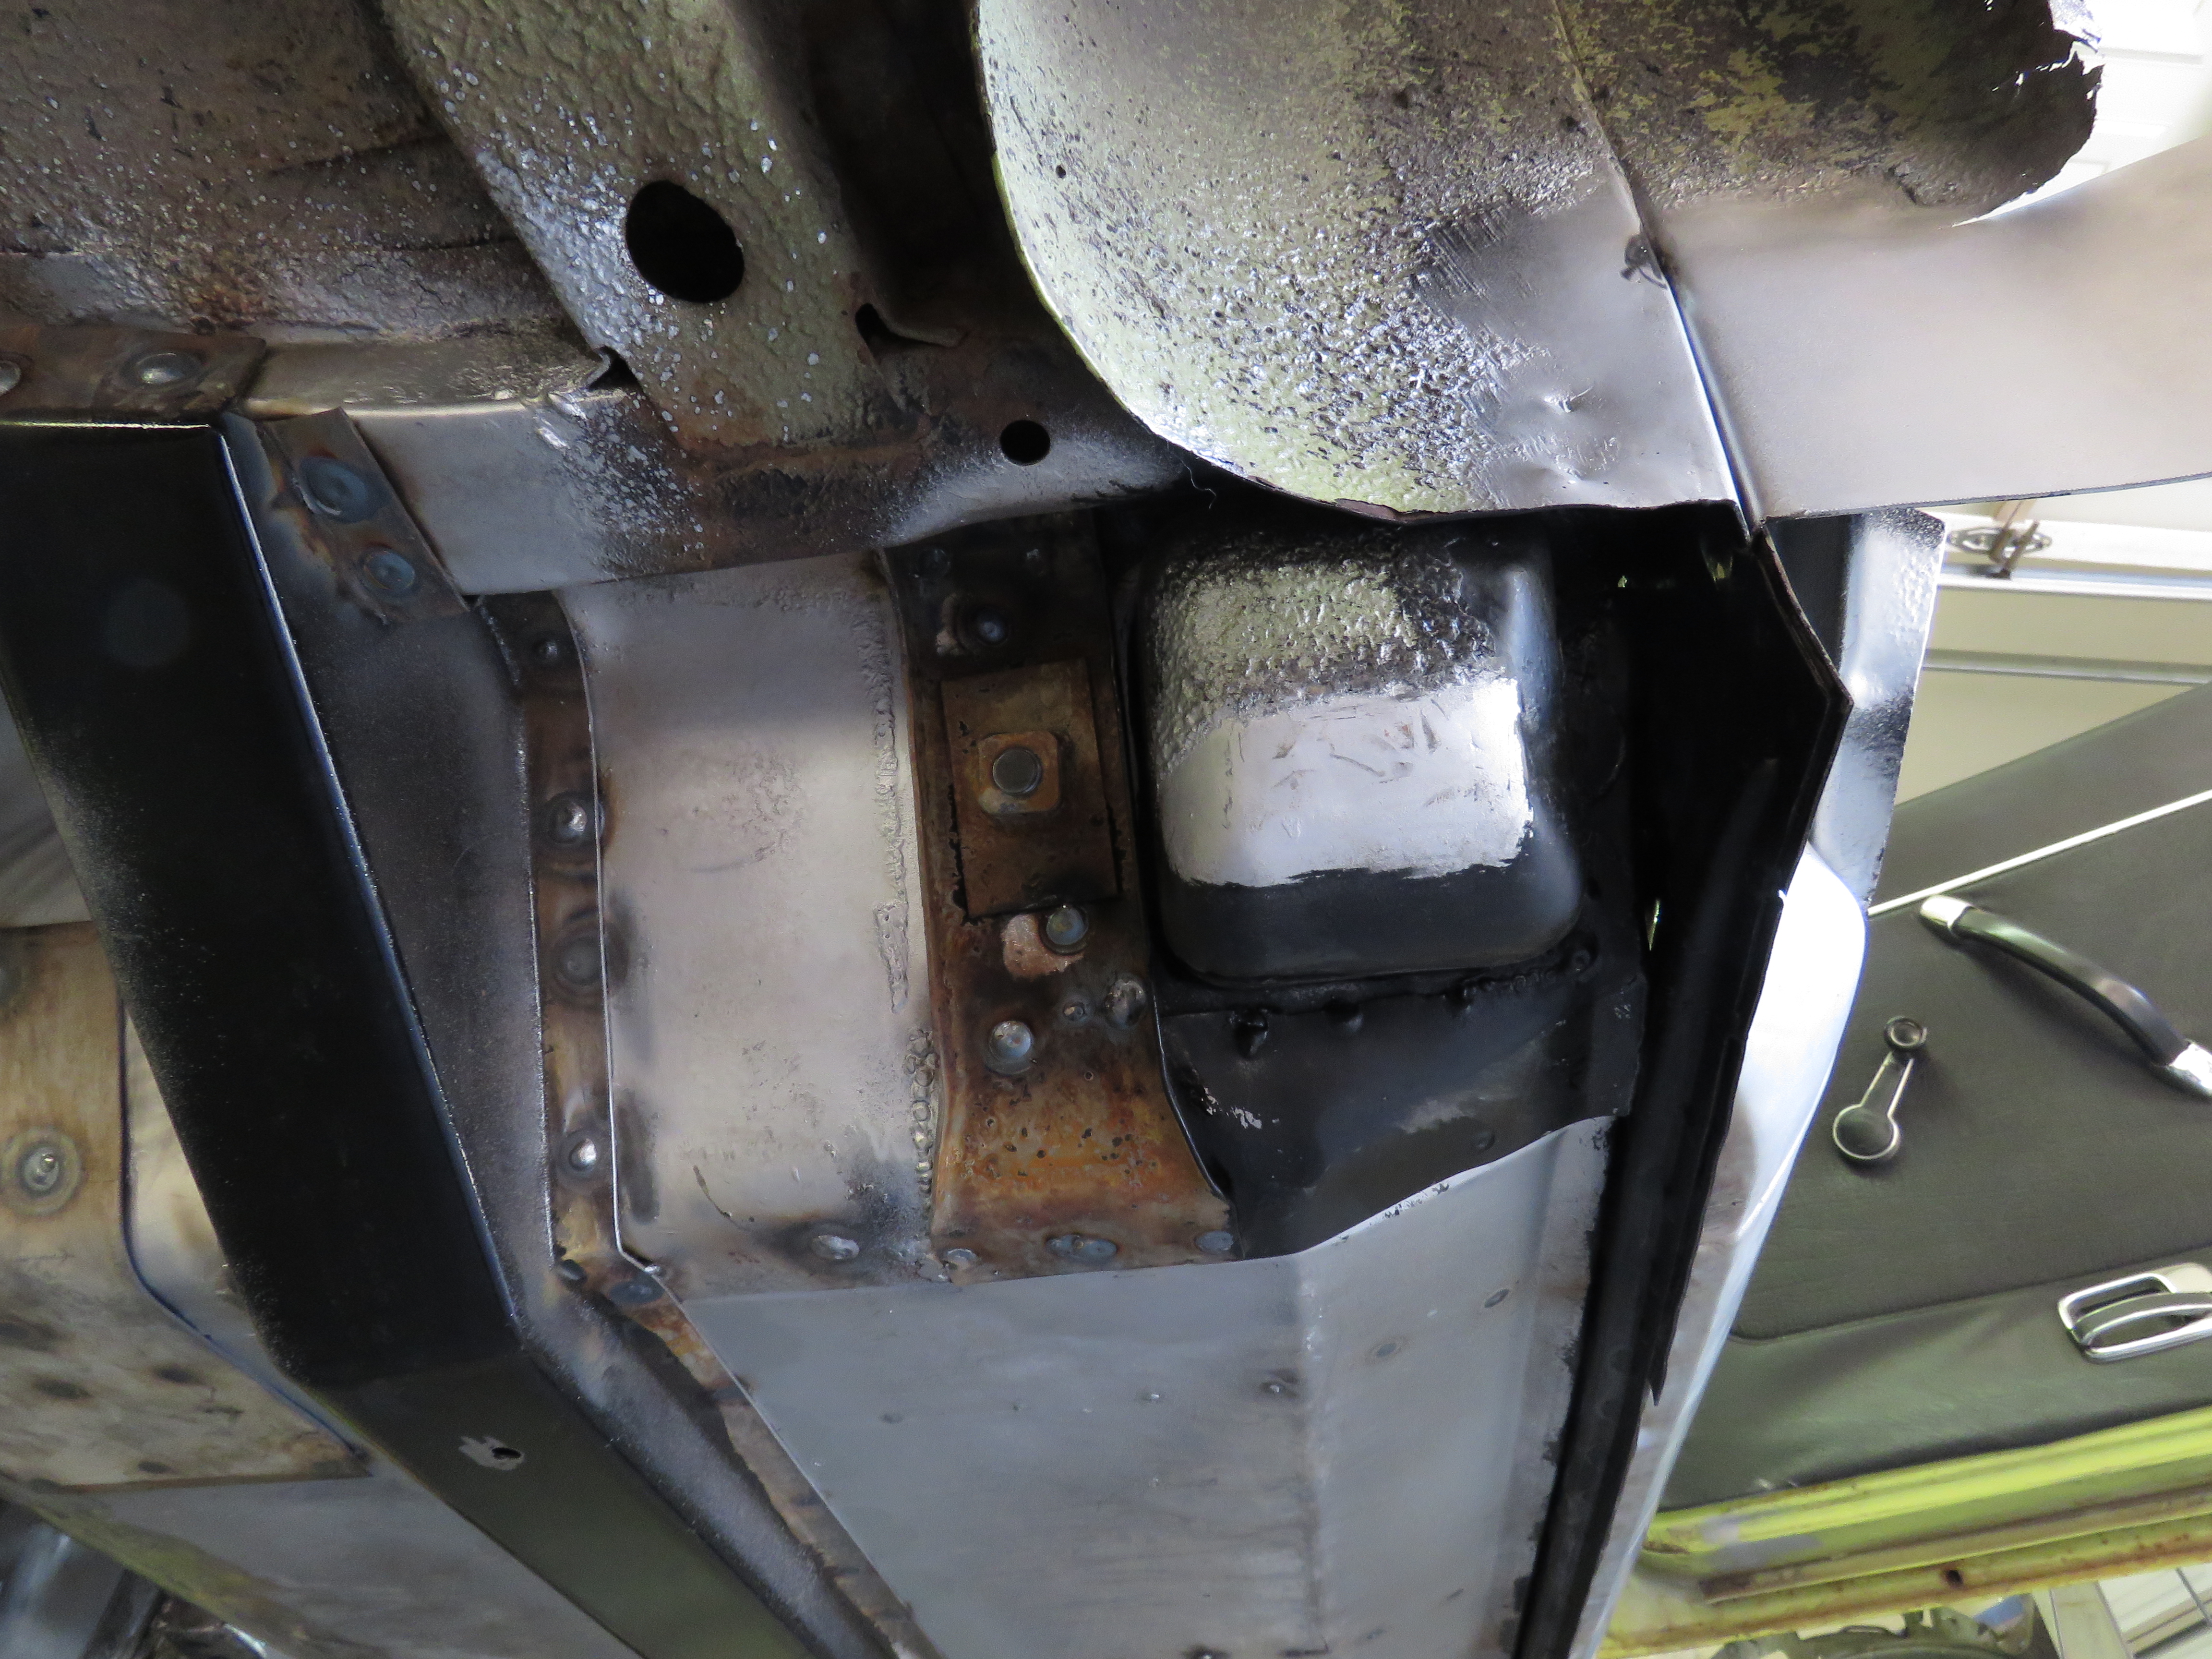
 Thanks guys for the comments. Hehe yeah I suspect a lot of you are older than me, I am 28 years old. Goal is to get this car finished before I turn 30, will only happen if I stop being lazy. Once I get all the body work finished and some more of the custom fab work completed for the LS1 swap, everything else will go fairly quickly hopefully. Yeah hopefully Charlie will like the panels I made for him. he wont get them till next Monday. I will go with a different color than the factory lime green (I think thats the original color name). Had some friends here locally tell me to keep it same color, but I am just not feeling it. As of right now, I have no idea what color I will want. Small update to show. Just glad the interior is all finished. Now to work on the rear of the car. Filled in any rusted holes and sanded down on these parts pictured below. Coated those parts I sandblasted for the seat belt mechanisms. Parts welded on. Gonna hold off on welding the tie in plates for the seat belt mechanism housing (not sure what their called) because I have plans to make some jack support braces later on. The rear jack stand points will be in this area somewhere. Havent planned it out yet in details but will. Besides the tie in plates dont fit that great for some reason, most likely since everything I made wasnt an exact OE fit in order for the seat belt mechanism housing tie plates to fit perfectly. Finally welded in all those holes shut and sanded down from when I removed the original transmission tunnel mounts. Had to make my own and move them back a little ways for the T56 magnum trans for the LS1. Well thats it for the interior, at least for now anyways. Rear Tabco quater panel replacements. Though before I work on that, I want to get the front camber plates installed. Took me forever to figure out where I had placed them in this mess. Found them.. Get alignments made for when its time to weld the camber plates. Wanted to make sure first that the fire wall was same distance on each side, I just choose two points on the front end of the car. Marks measured and scribed. Rough mock up to see how it looks. Thats it for now, stay tuned!
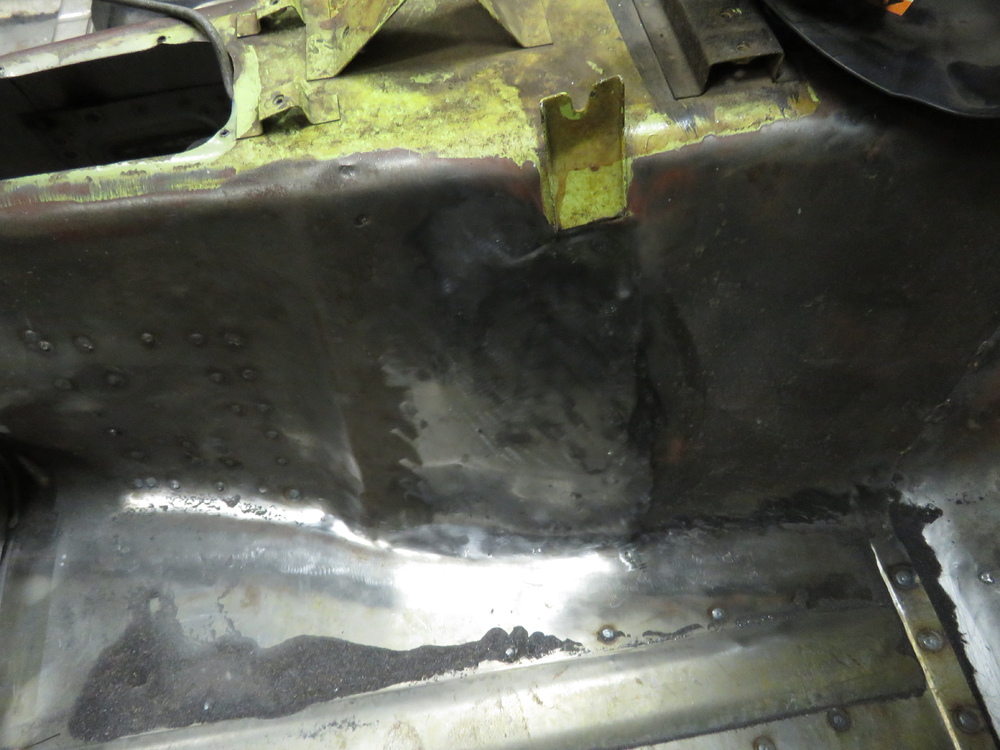


 I applause your commitment, seemed like your method of getting the floors to fit worked out really well, looks great and seems like it worked out well for you. I never knew how much more structurally the 280z was compared to the 240z. I hear people talk about it here and there, but never actually seen anything until I looked through your thread. Then again, Ive only owned one datsun thus far in my life.
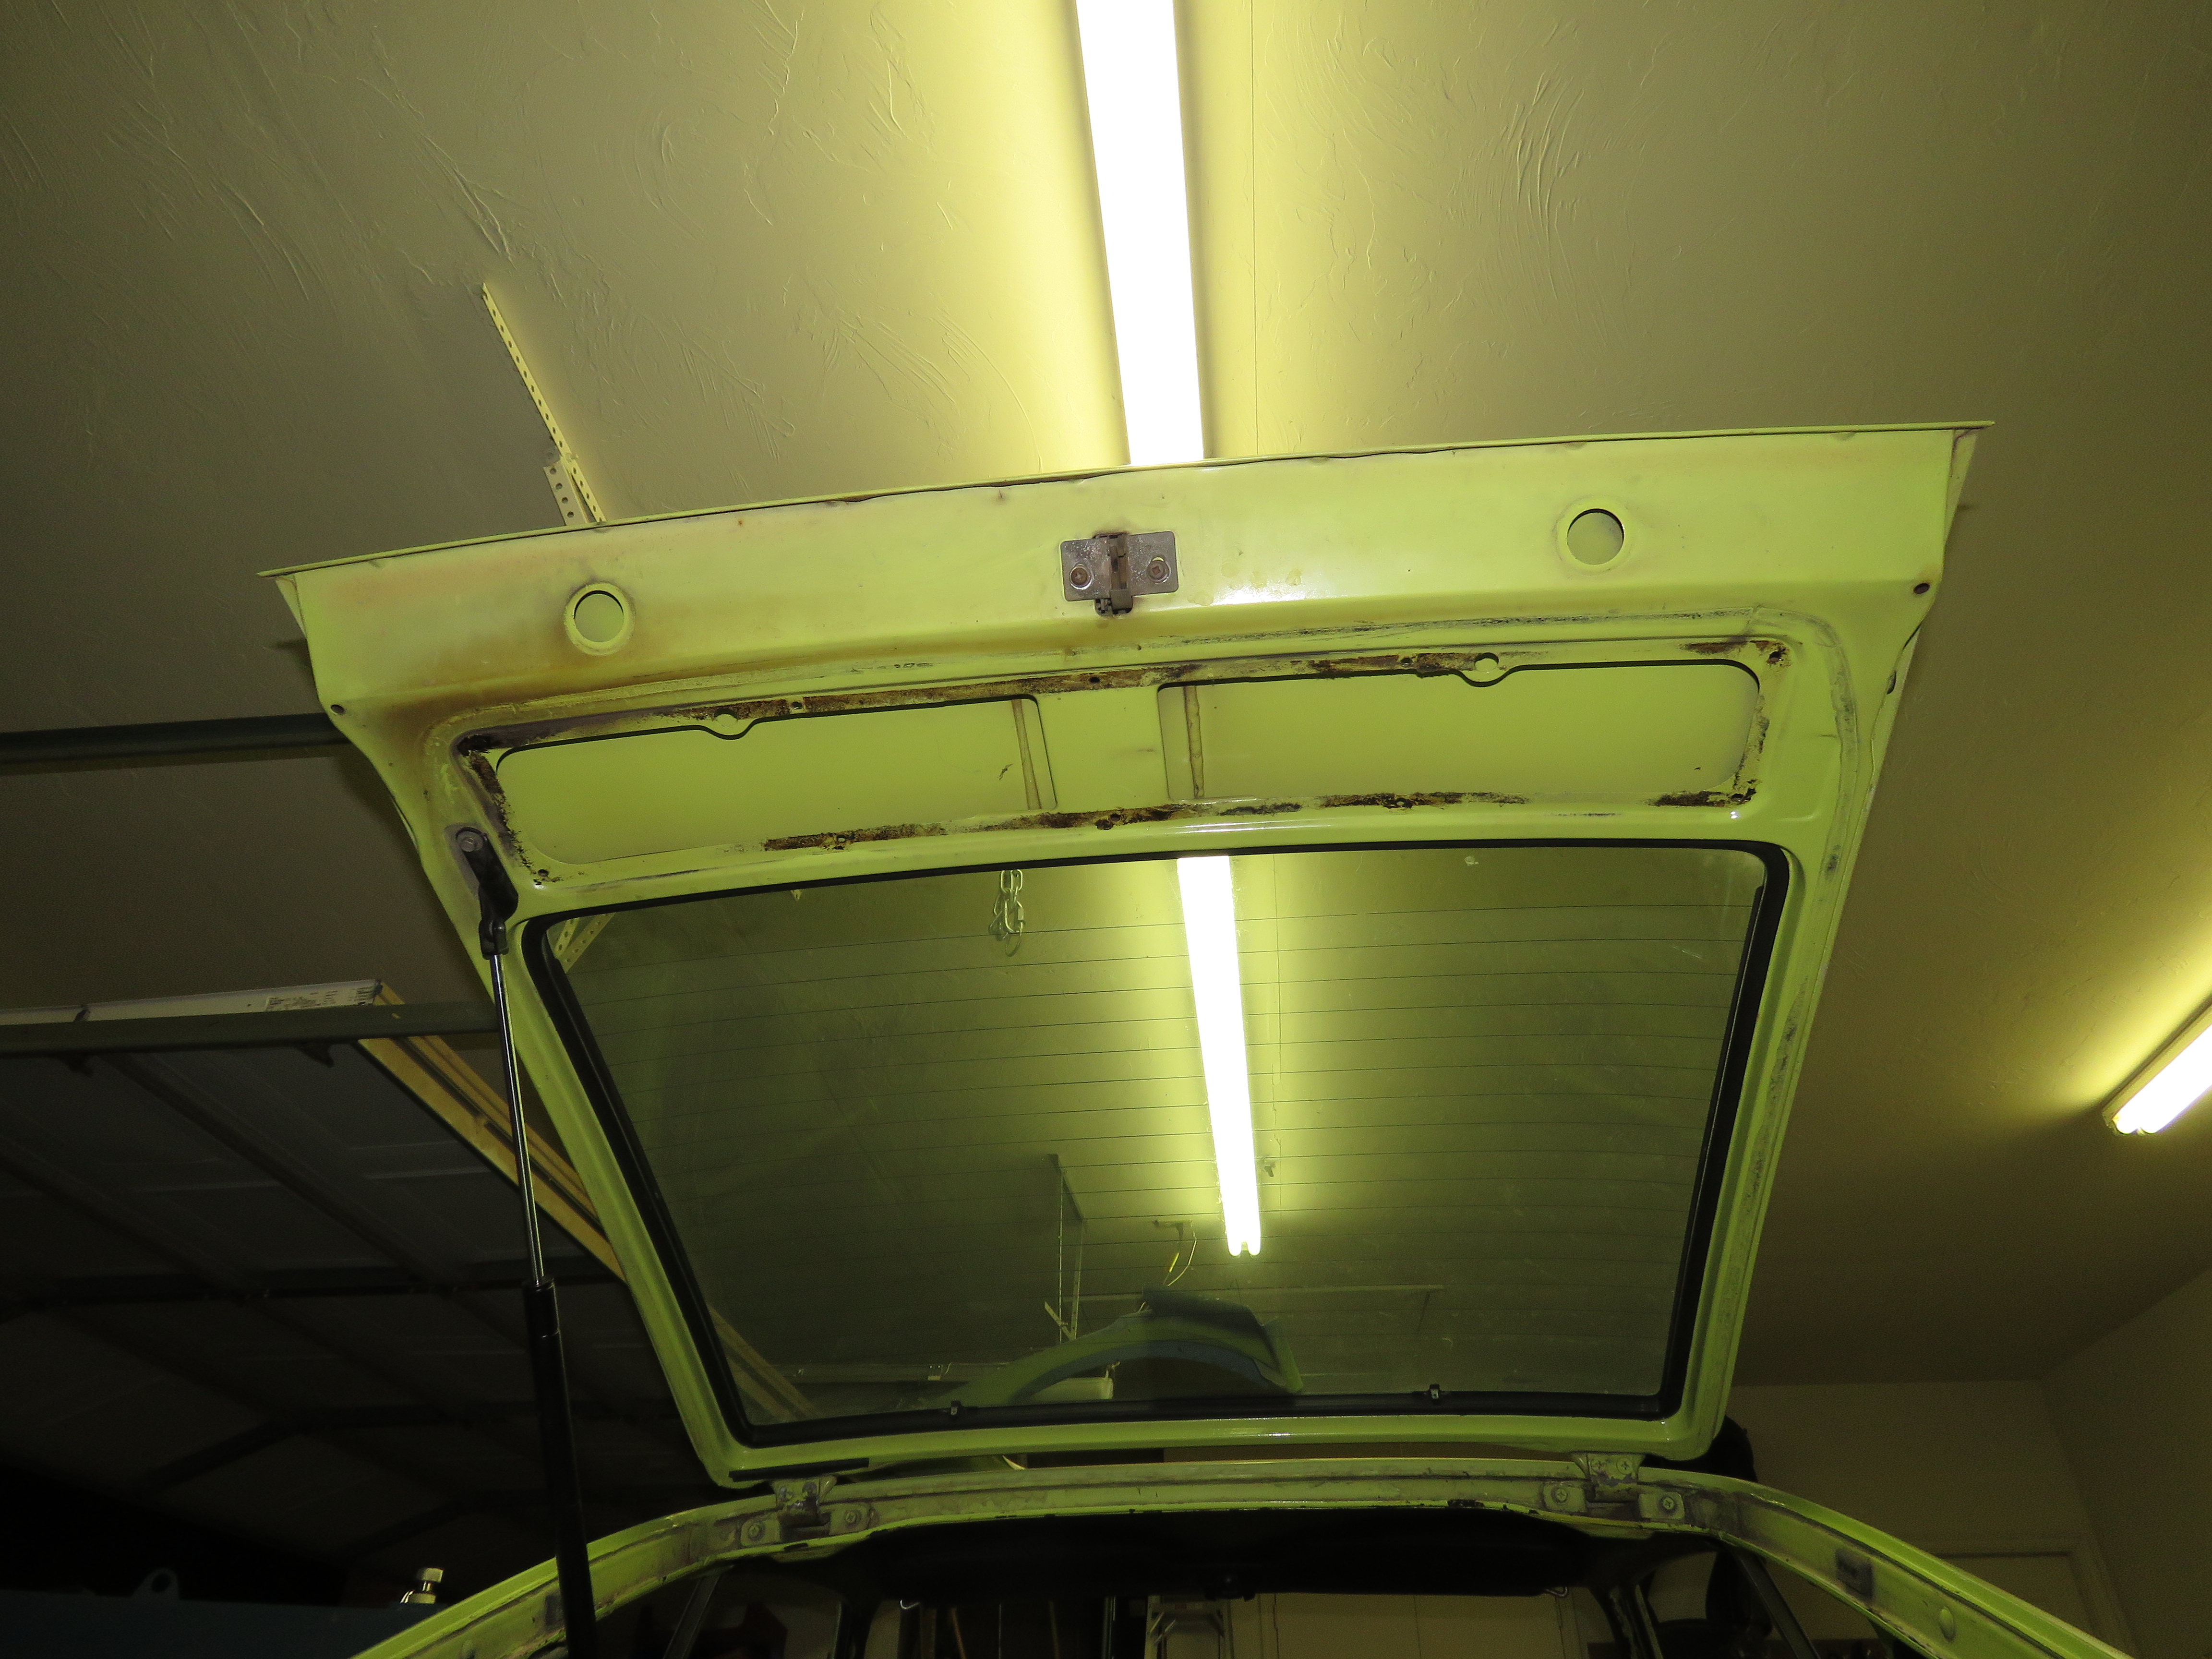
Your extremely lucky if that is all the rust there is on that Z. I too suffer a little of rust around the windshield frame area. Thats a nice looking rear cage section too.
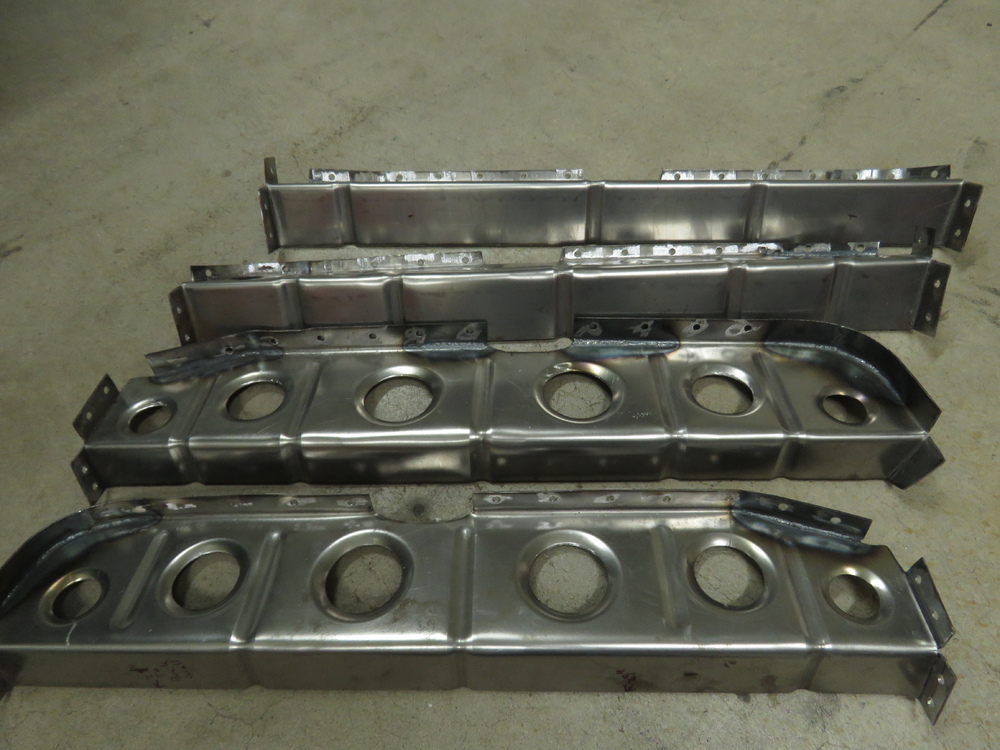
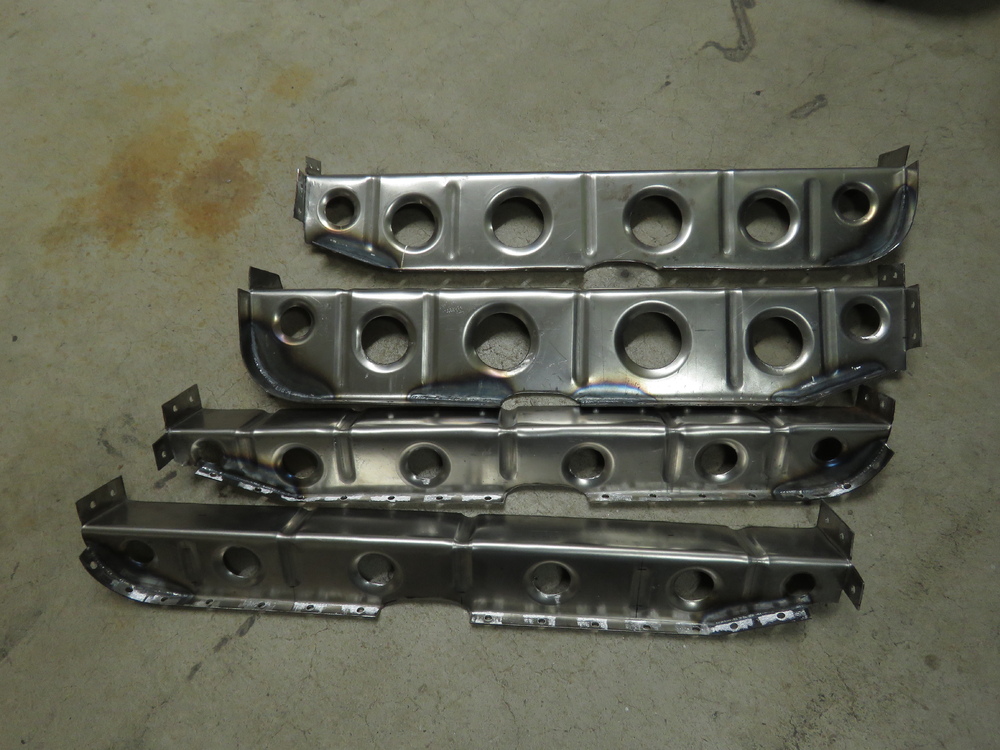
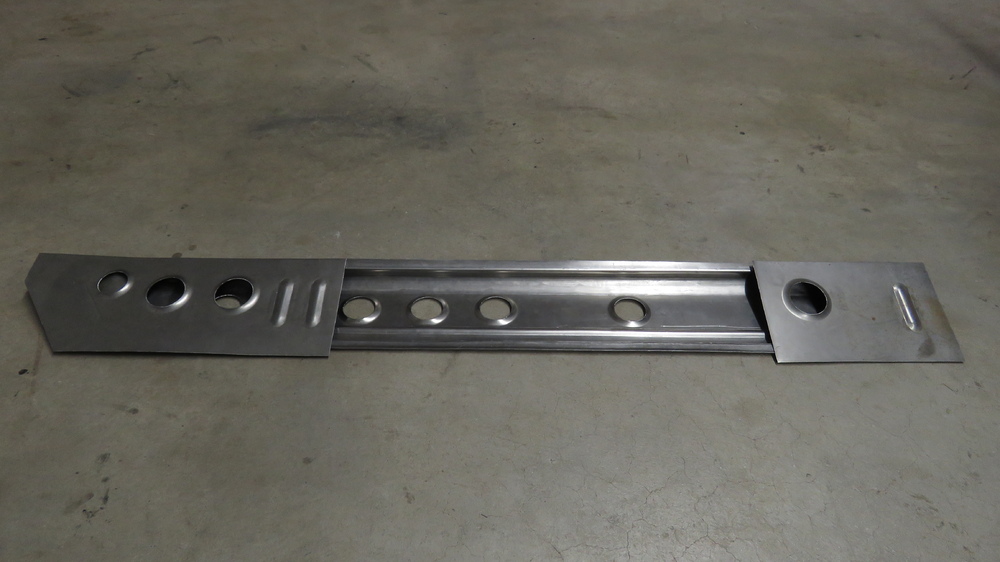
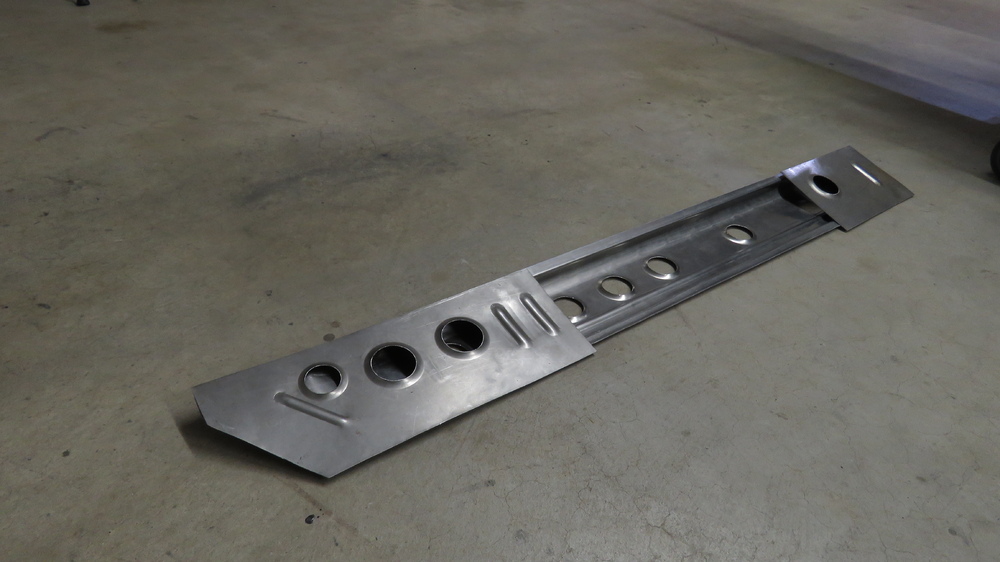
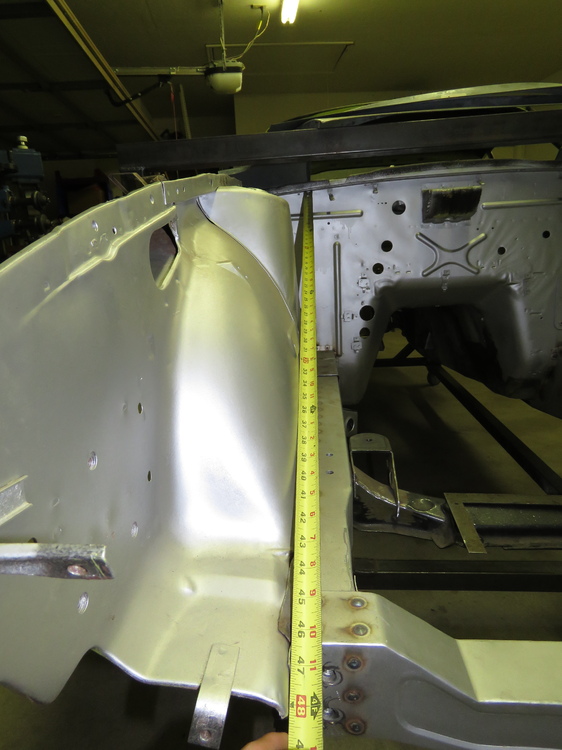
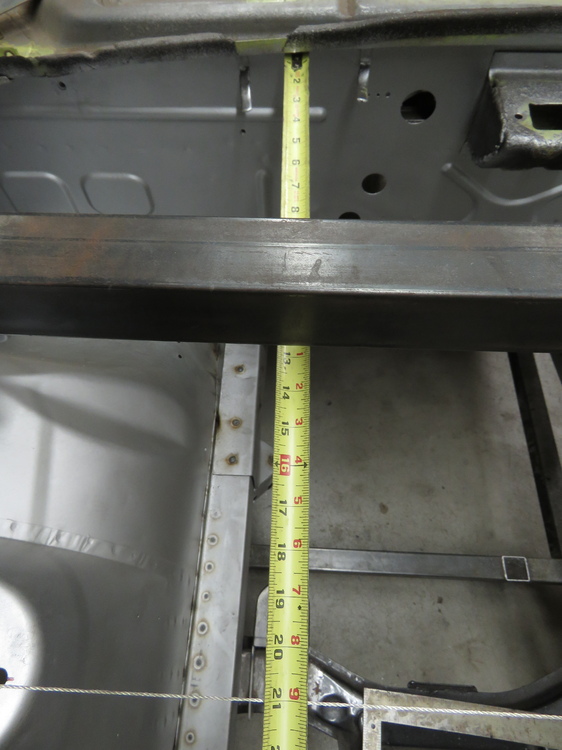
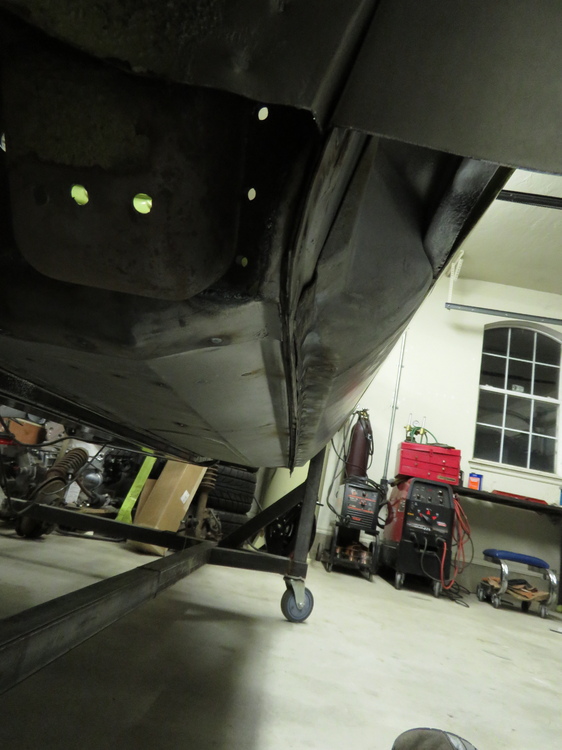
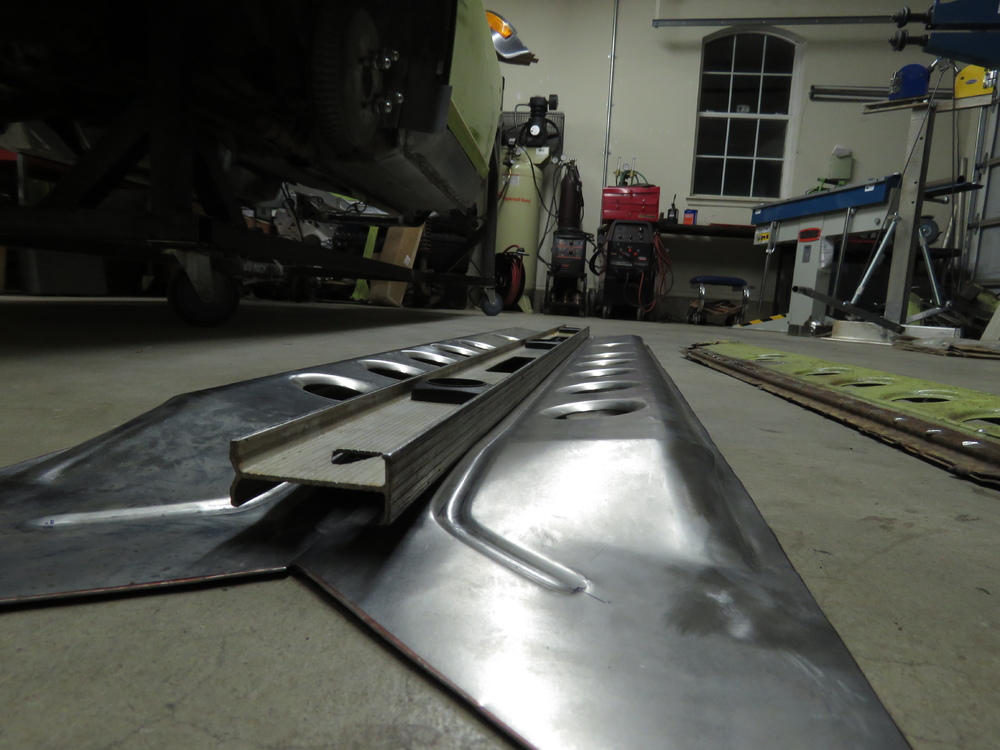
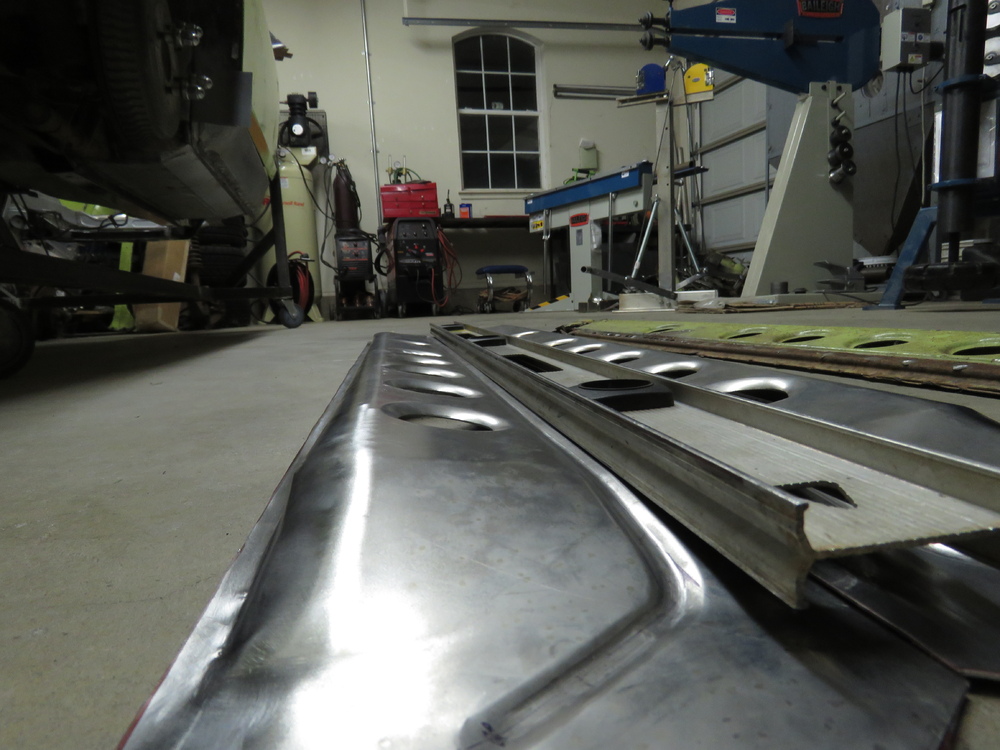
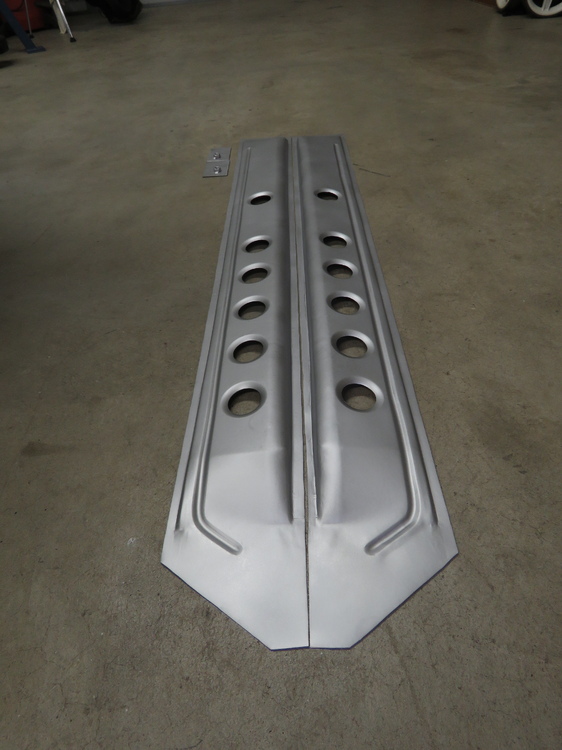
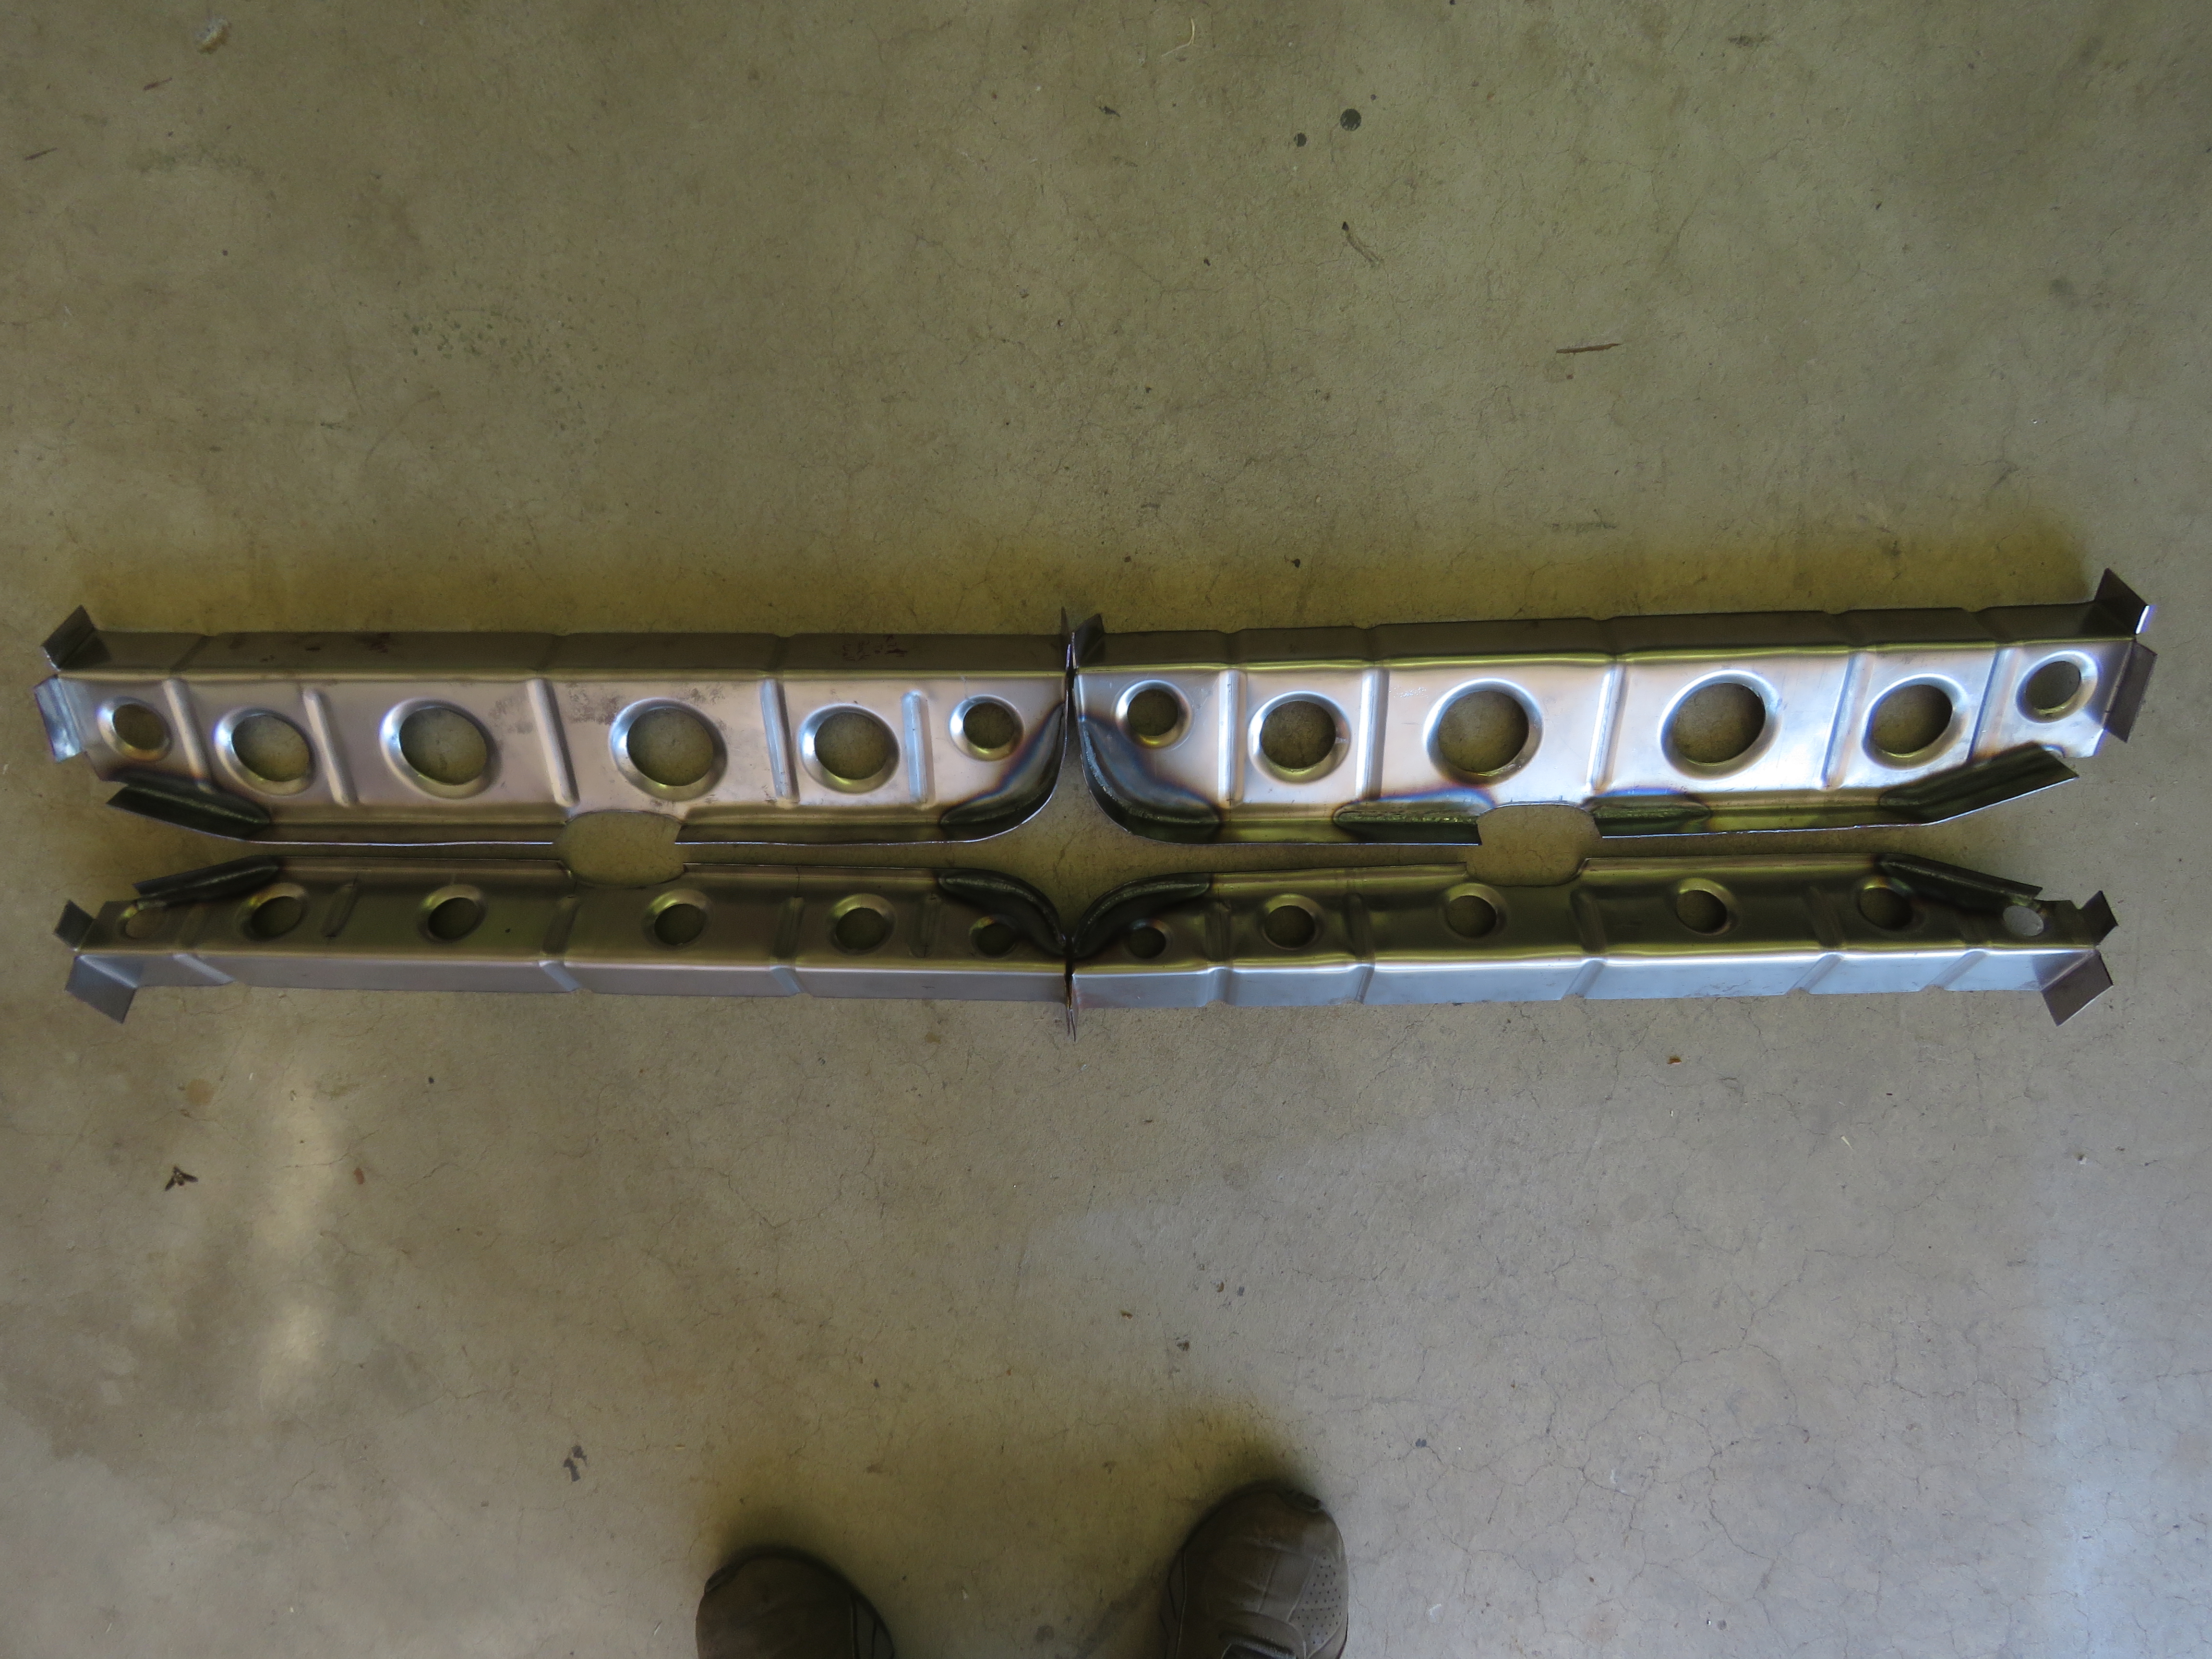
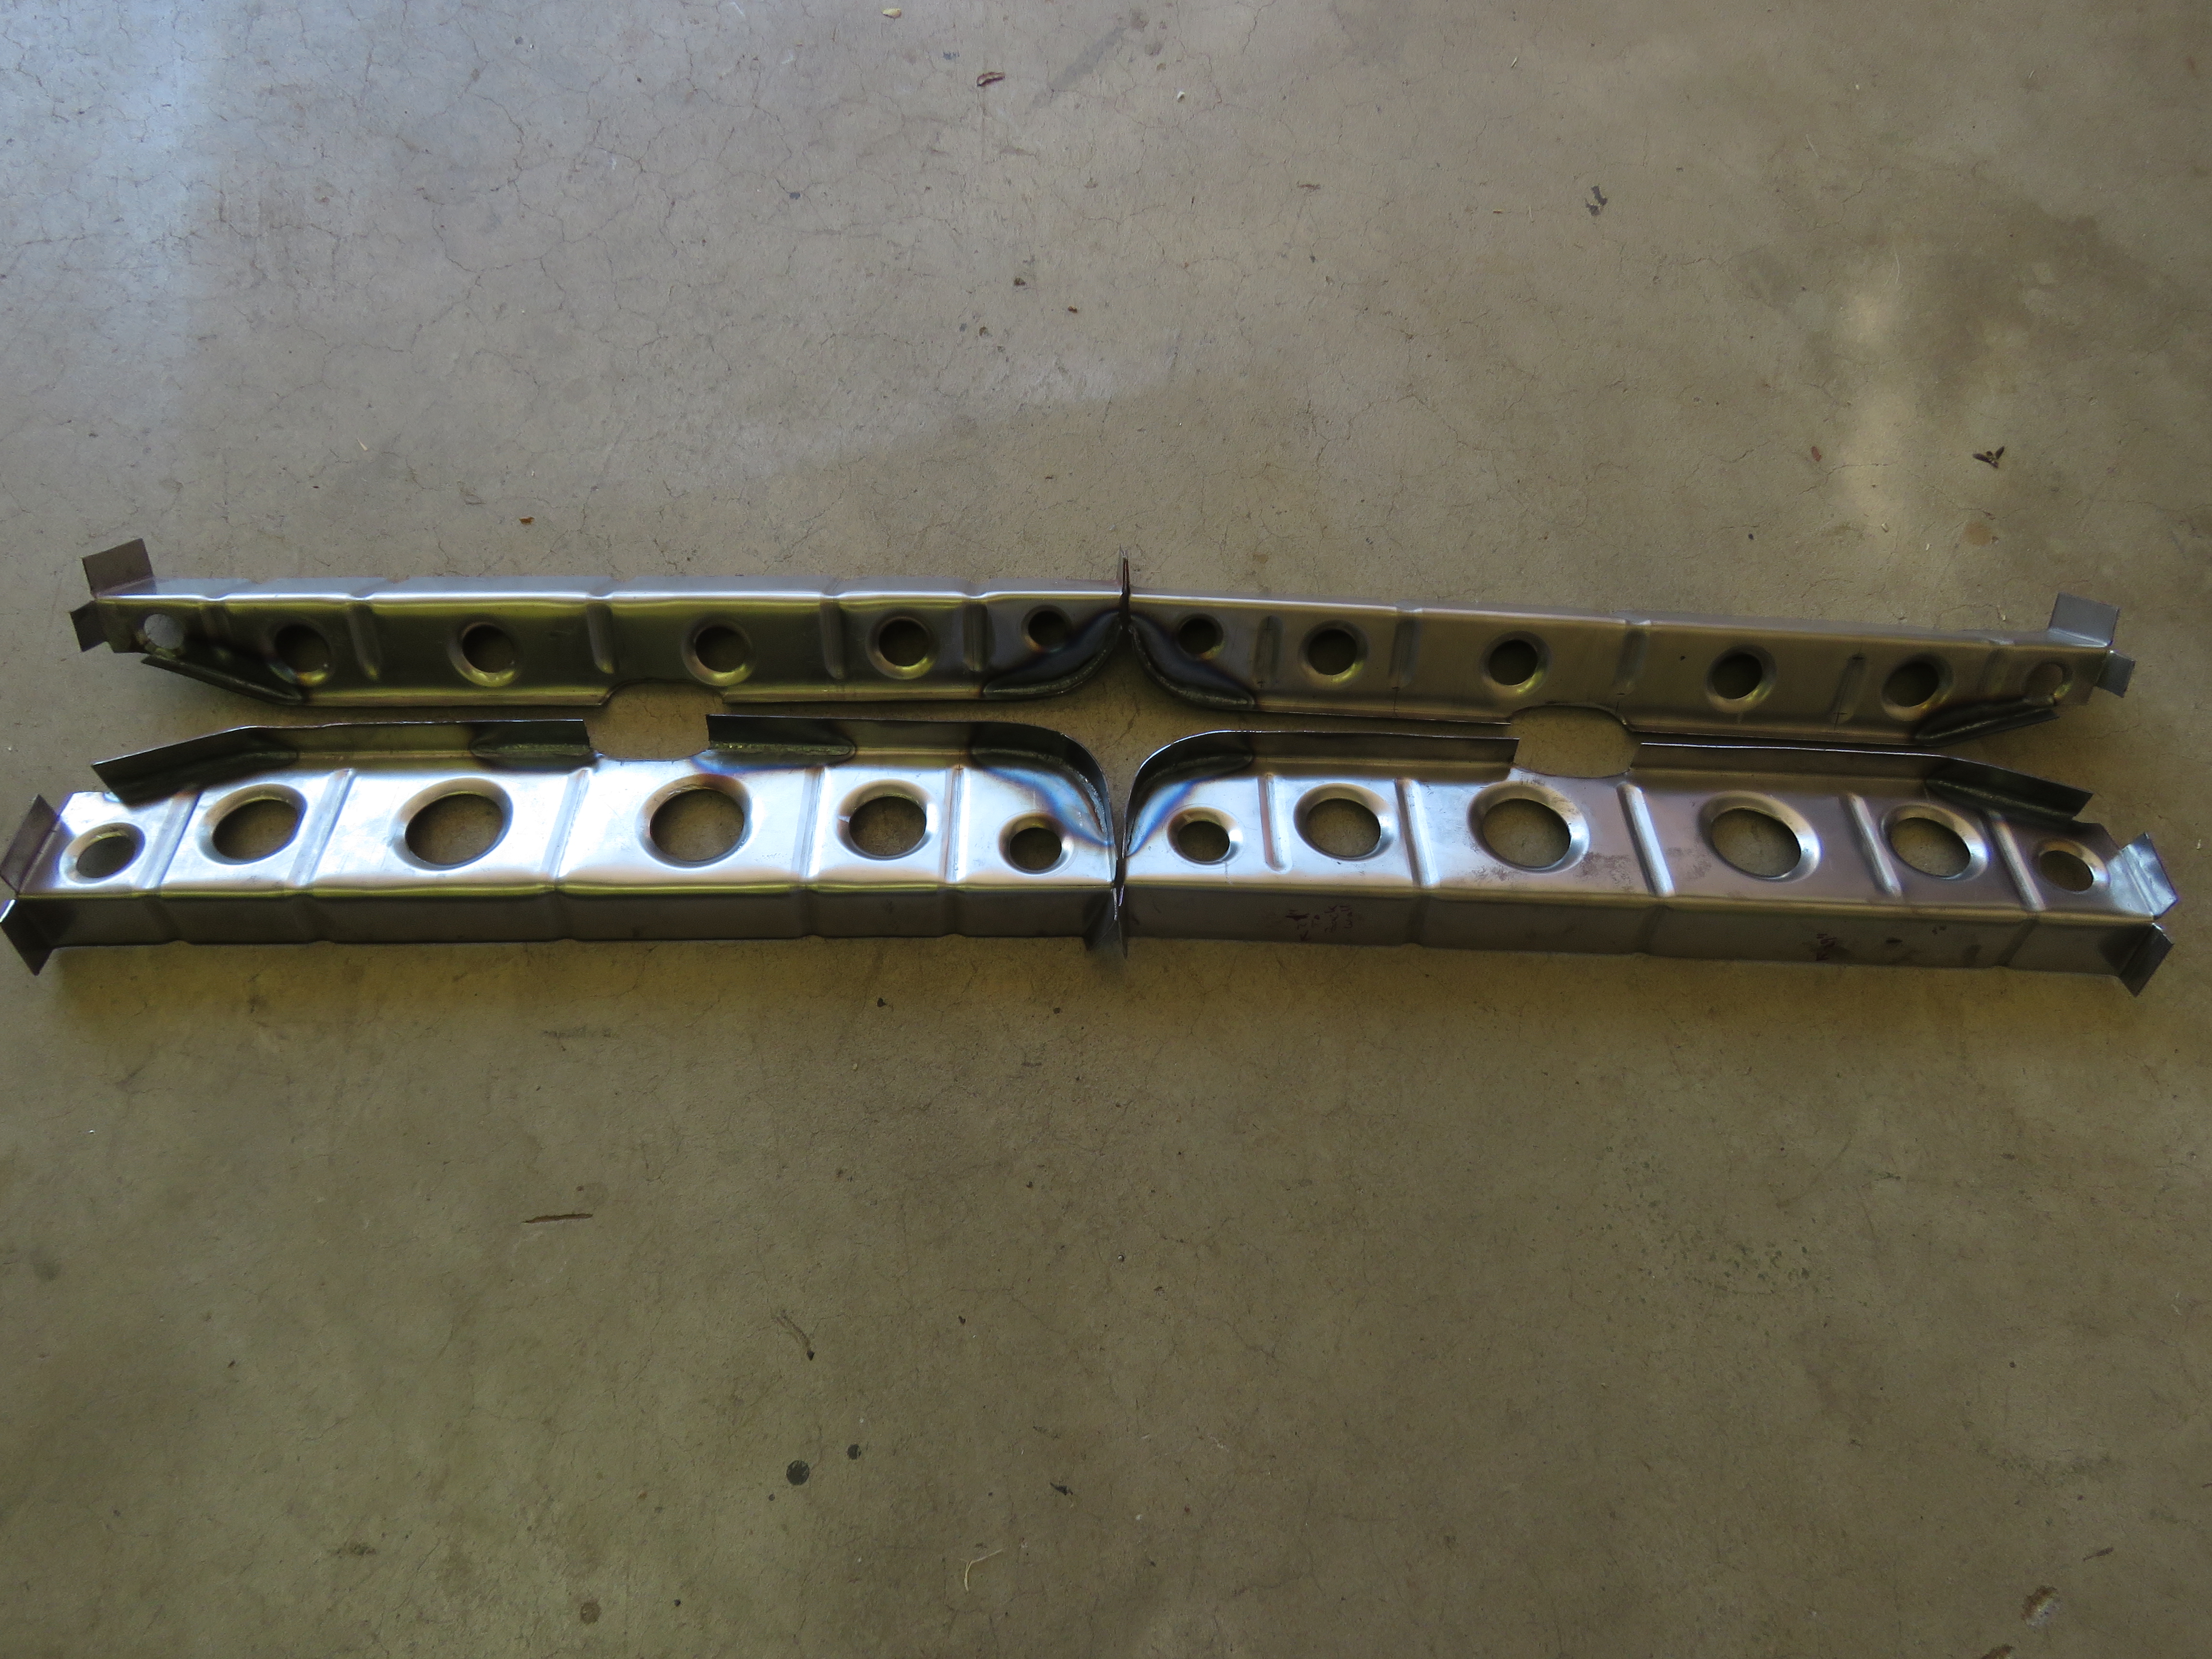
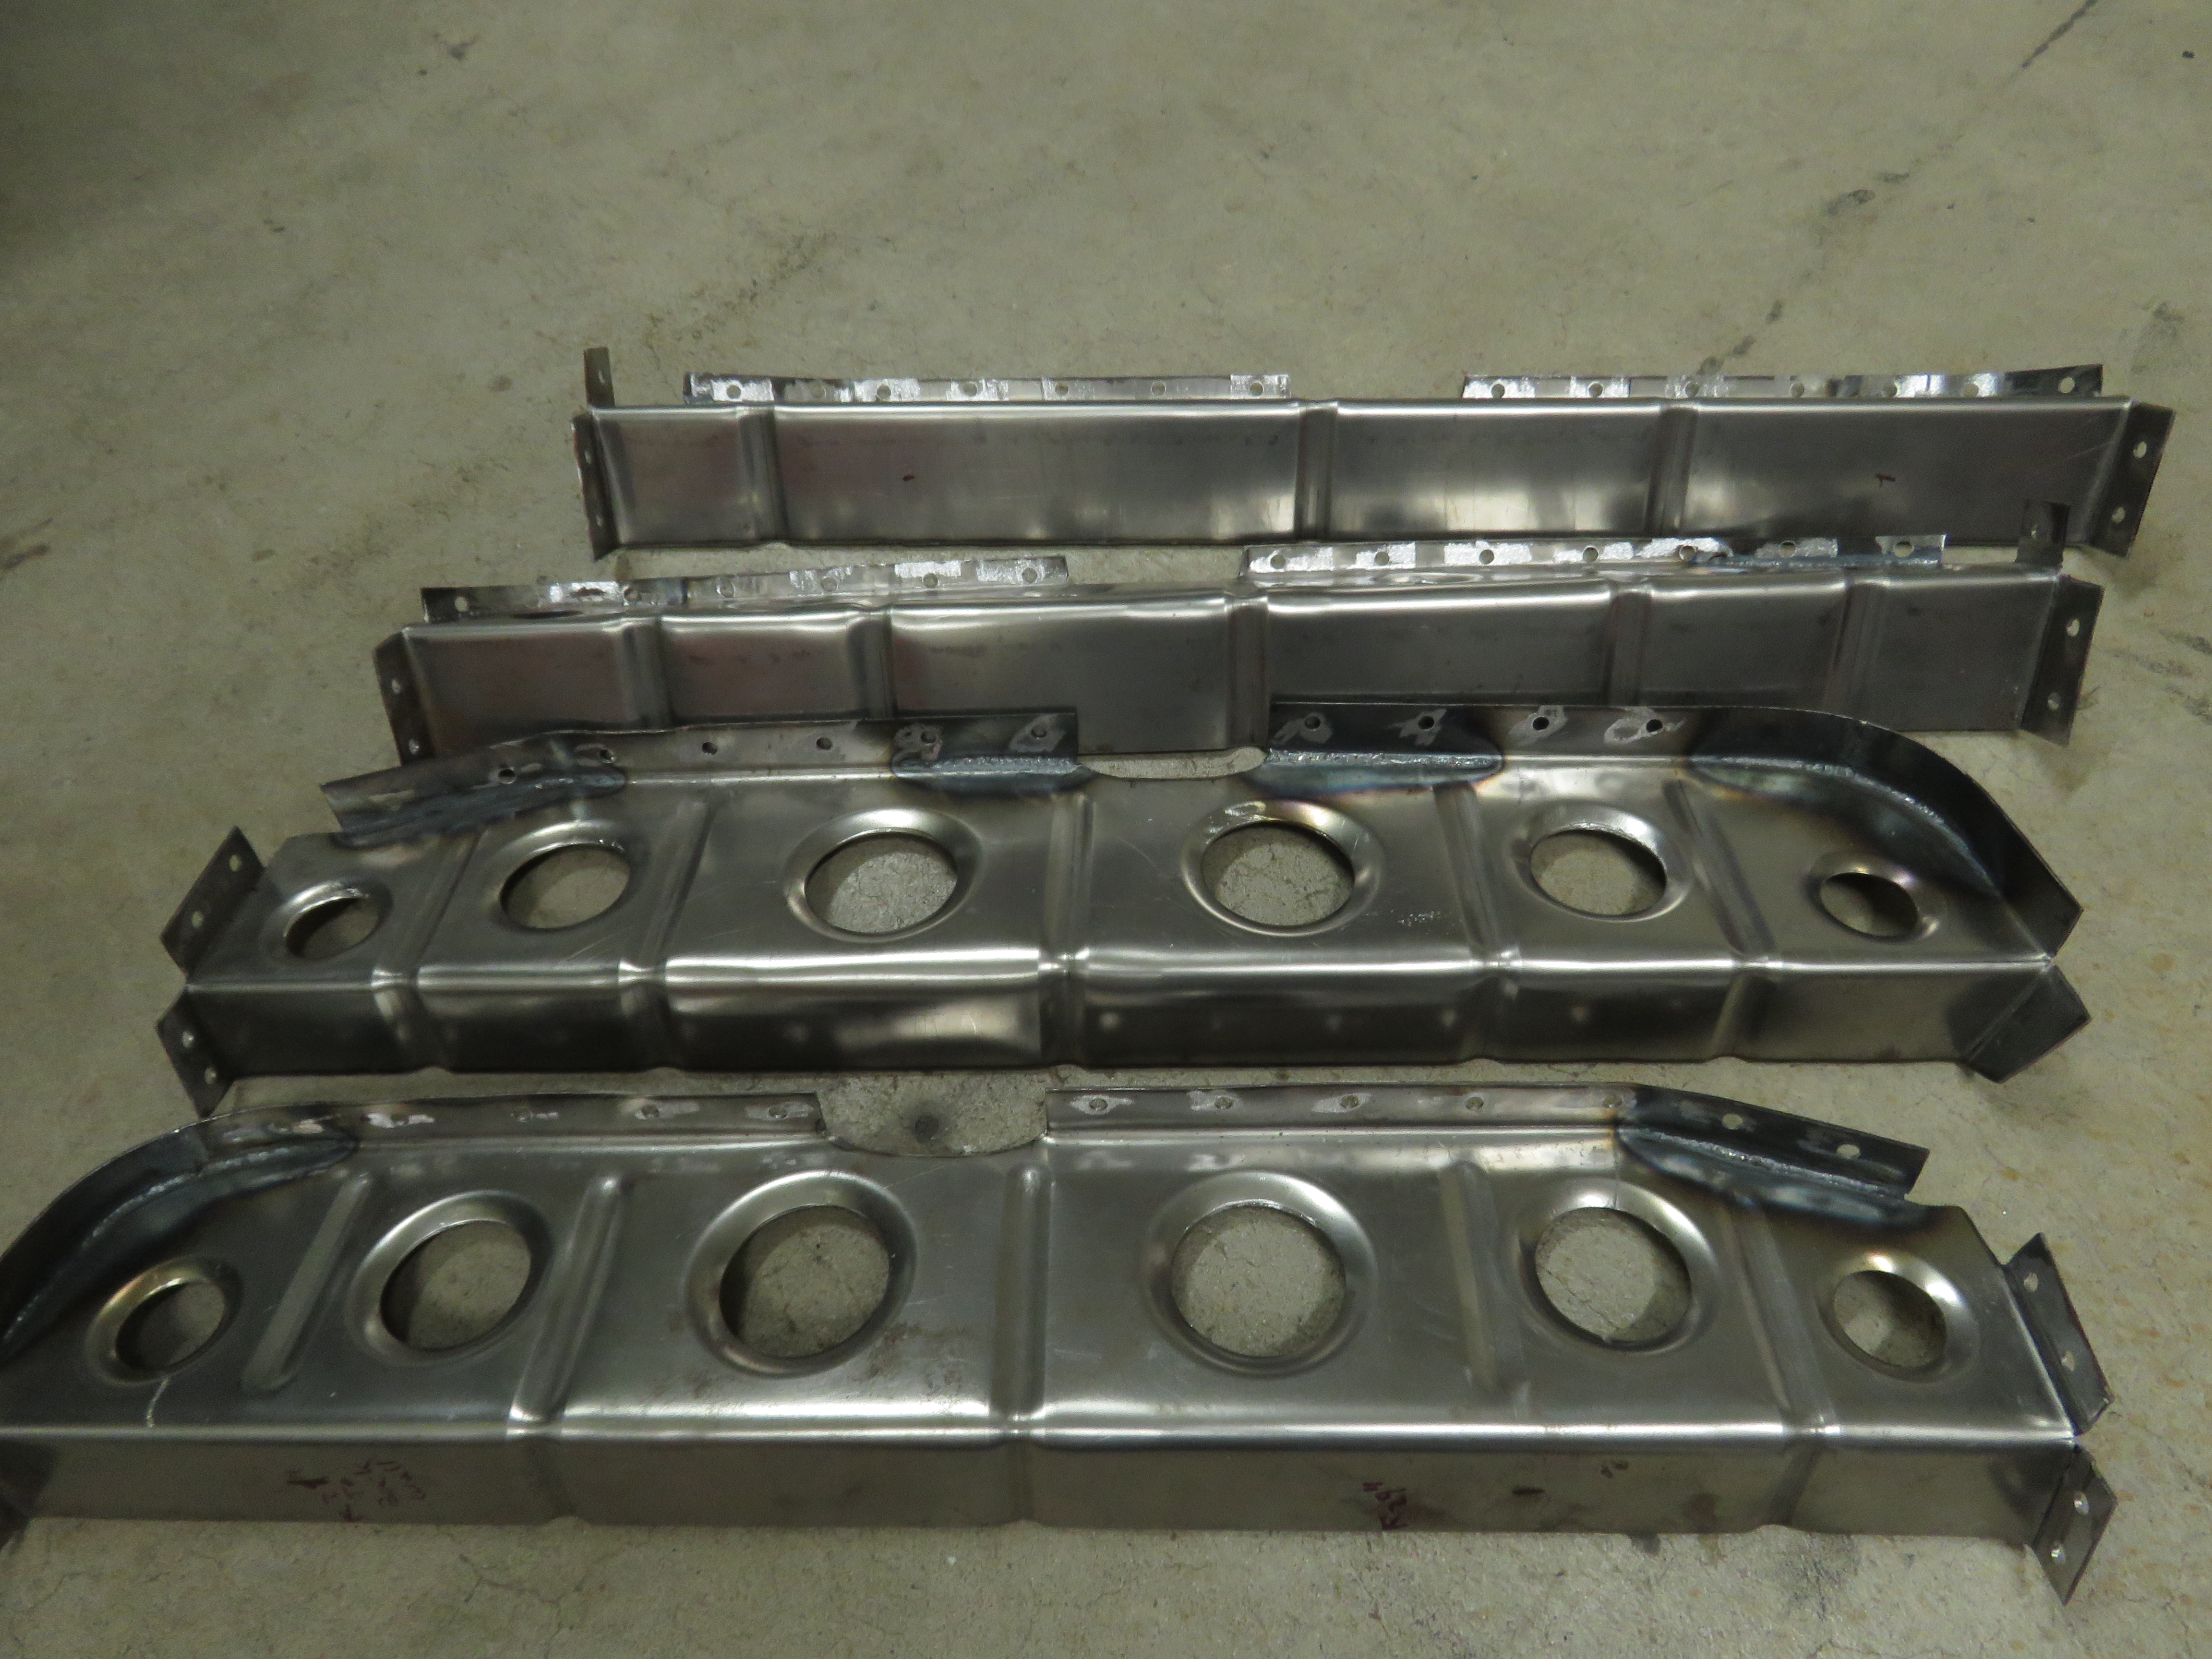
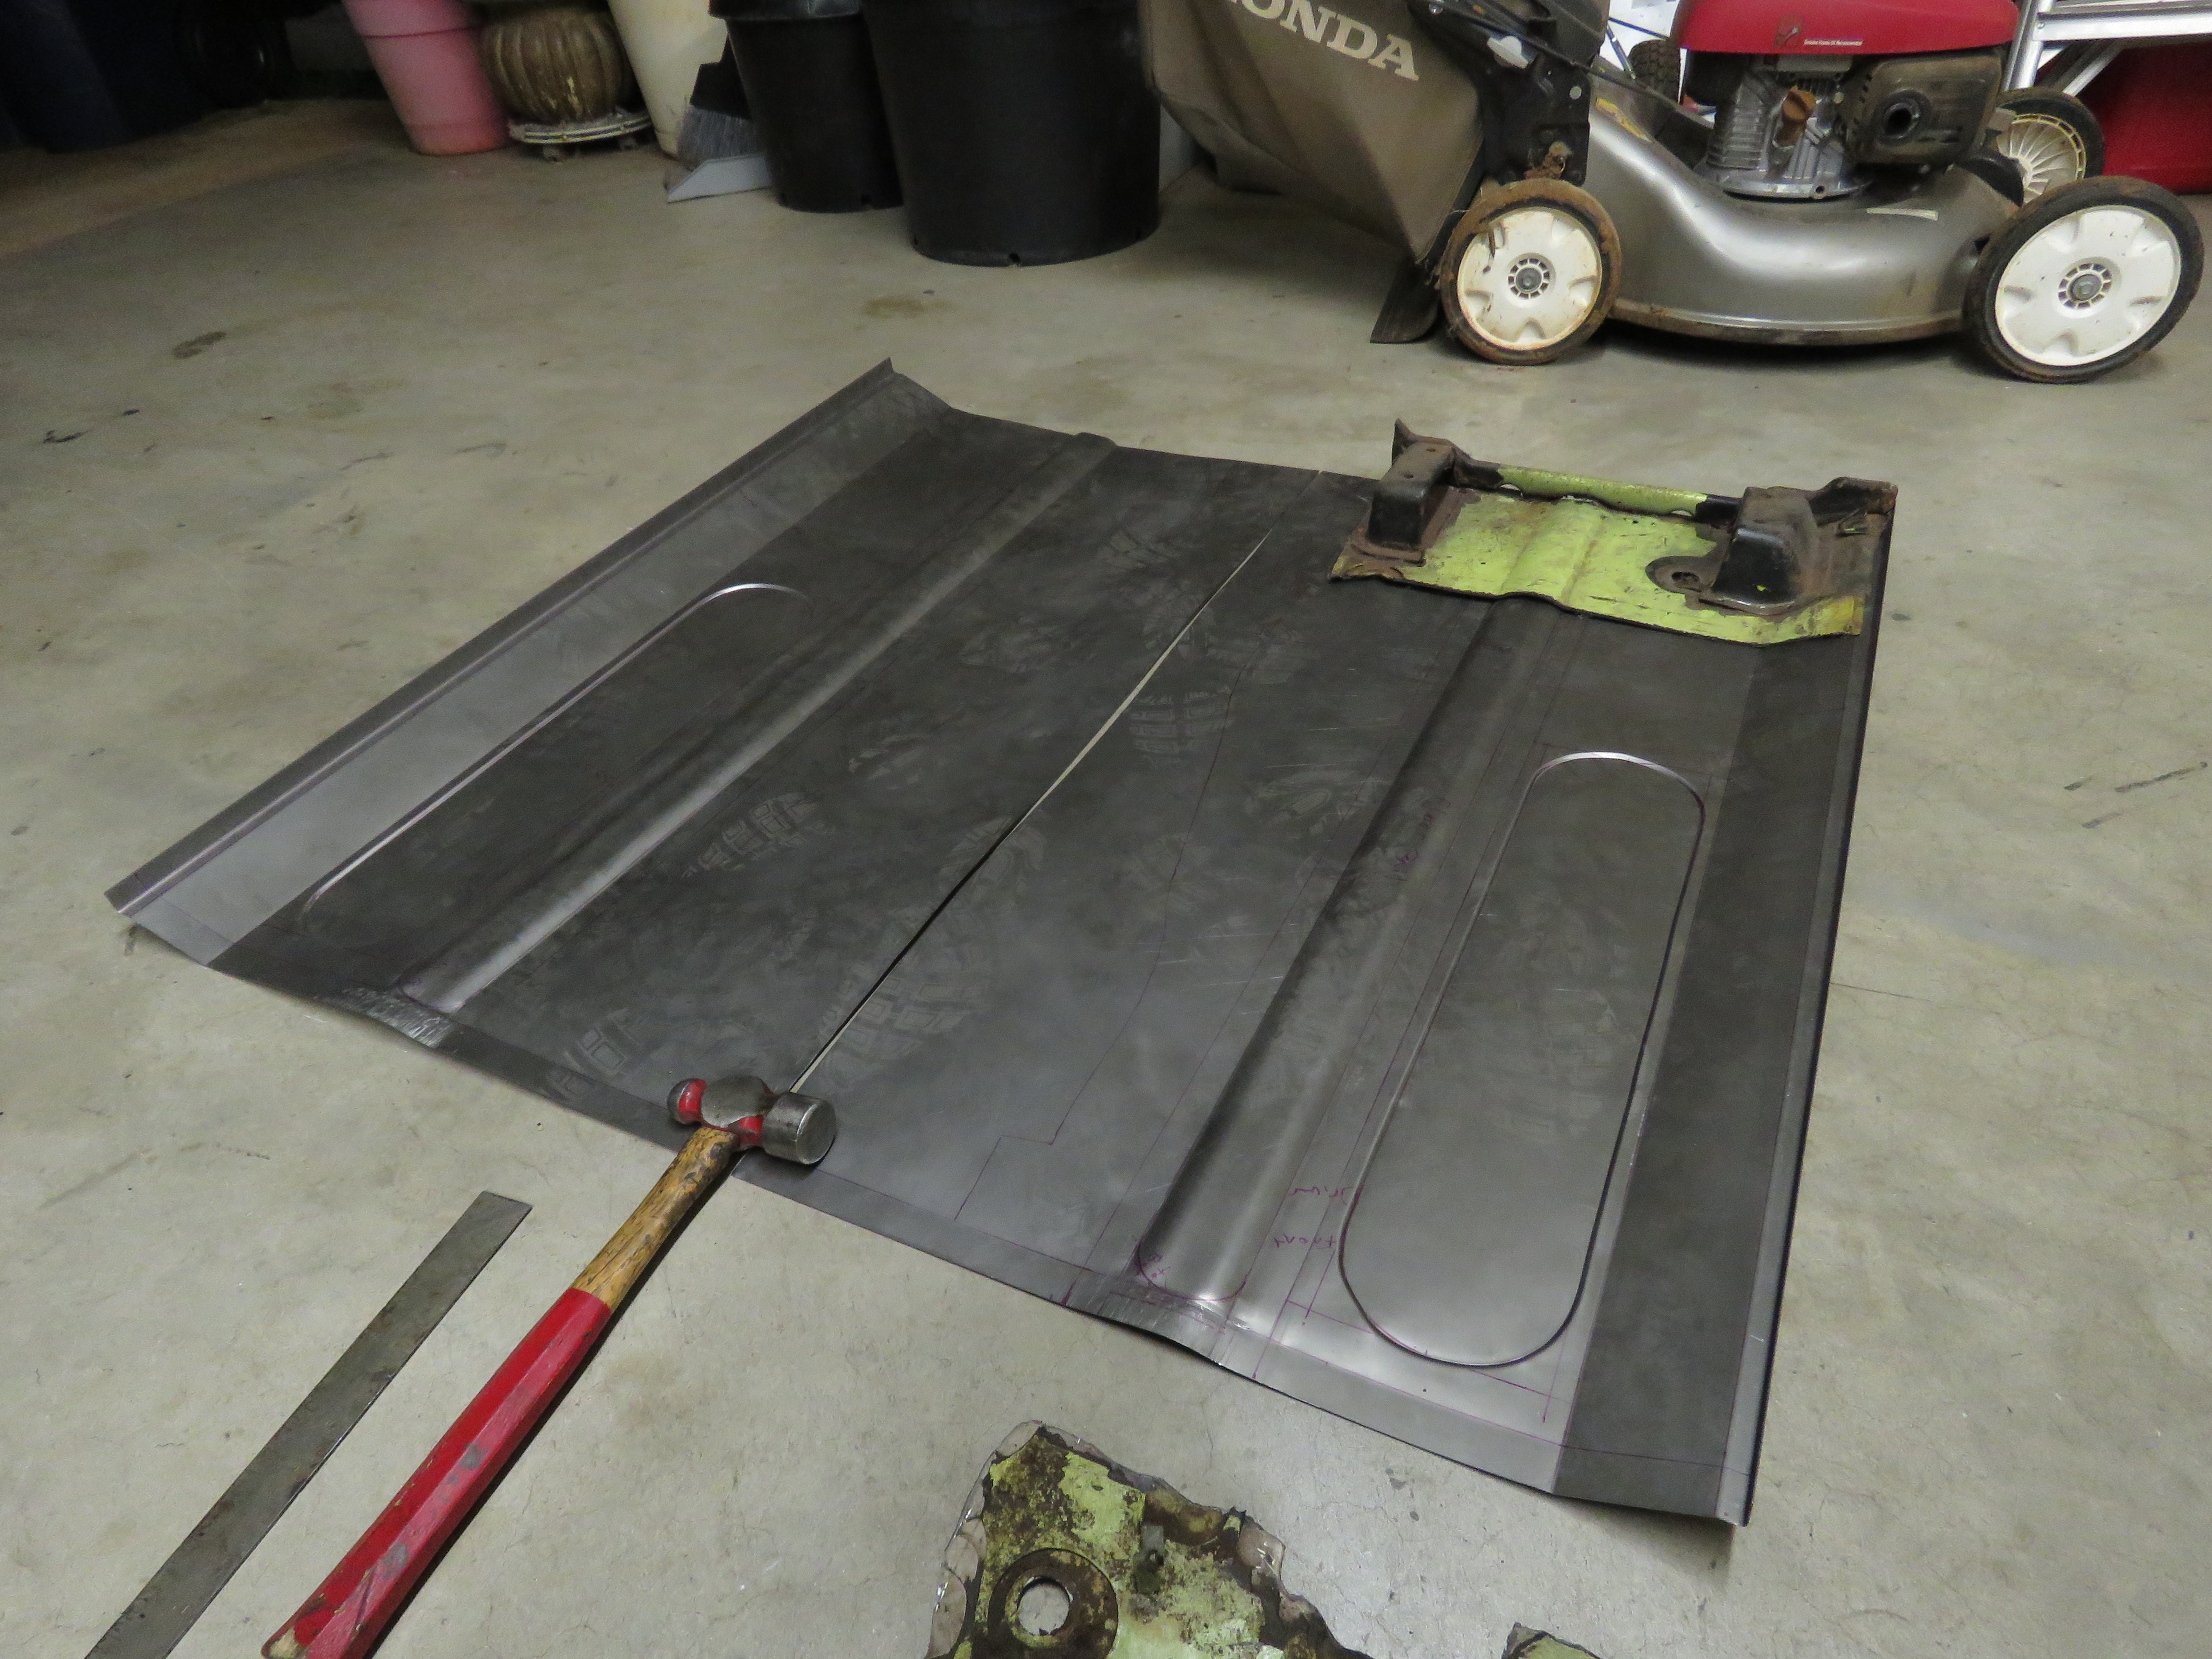
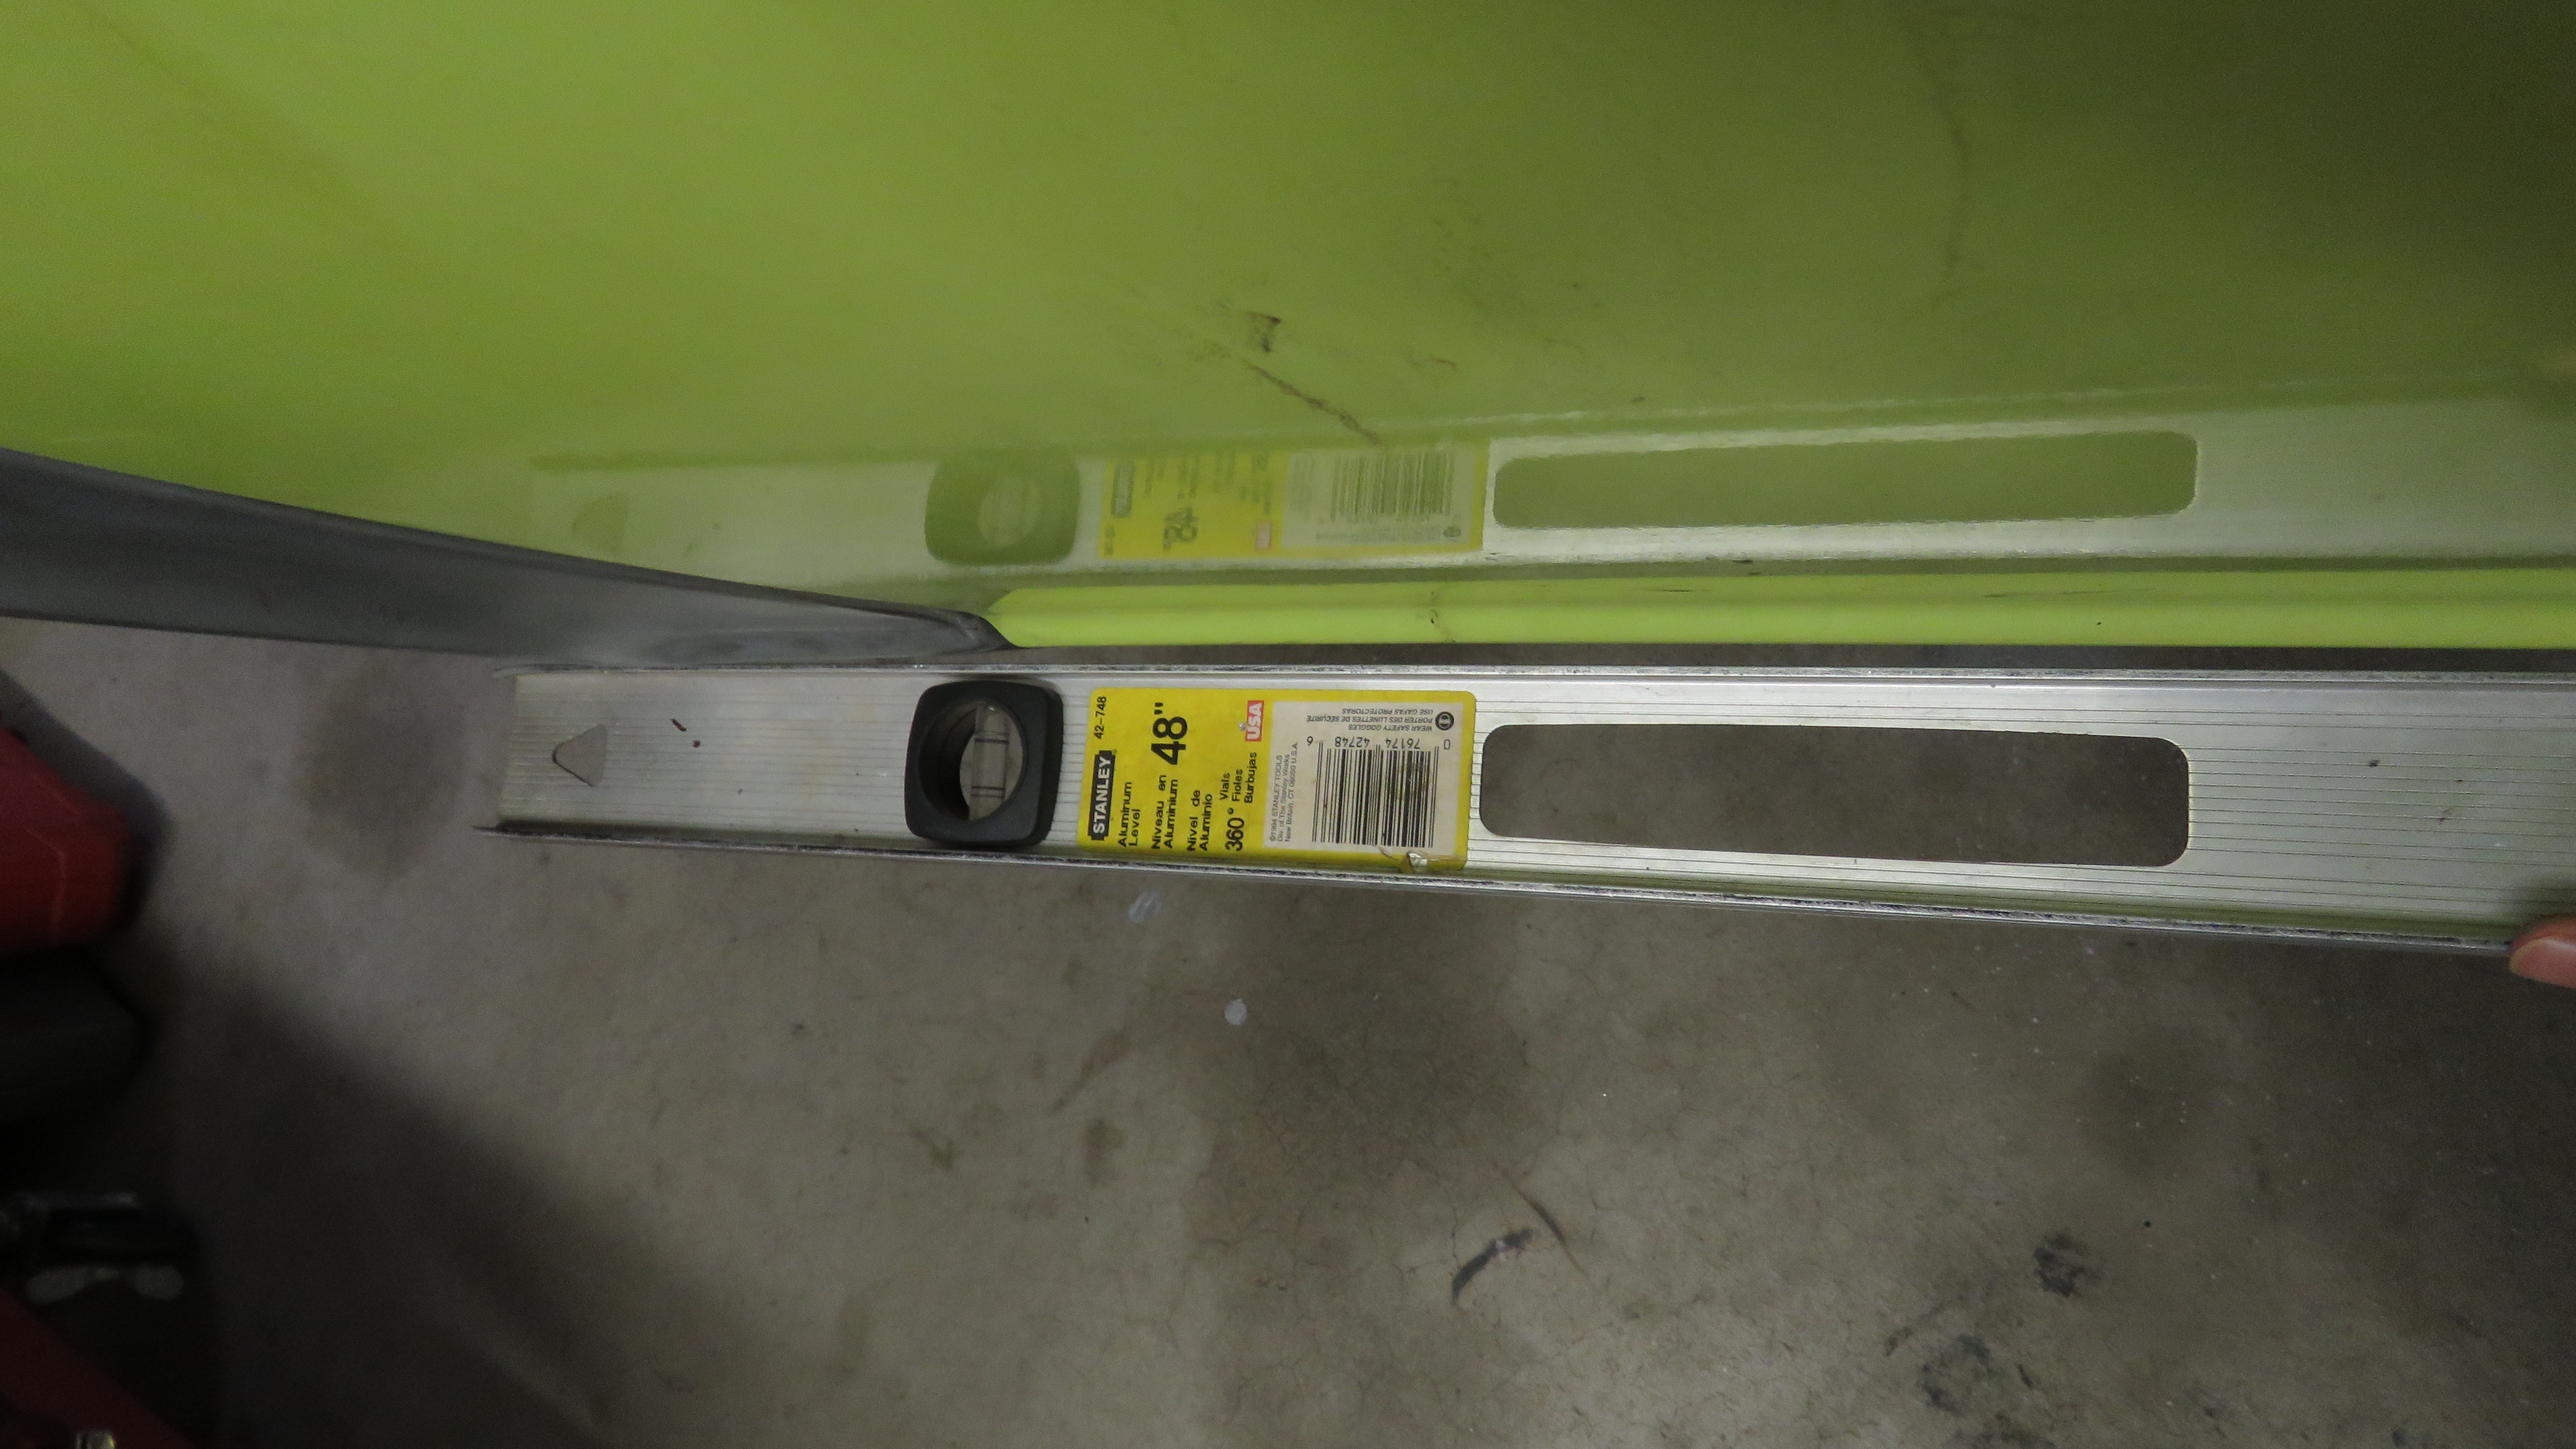
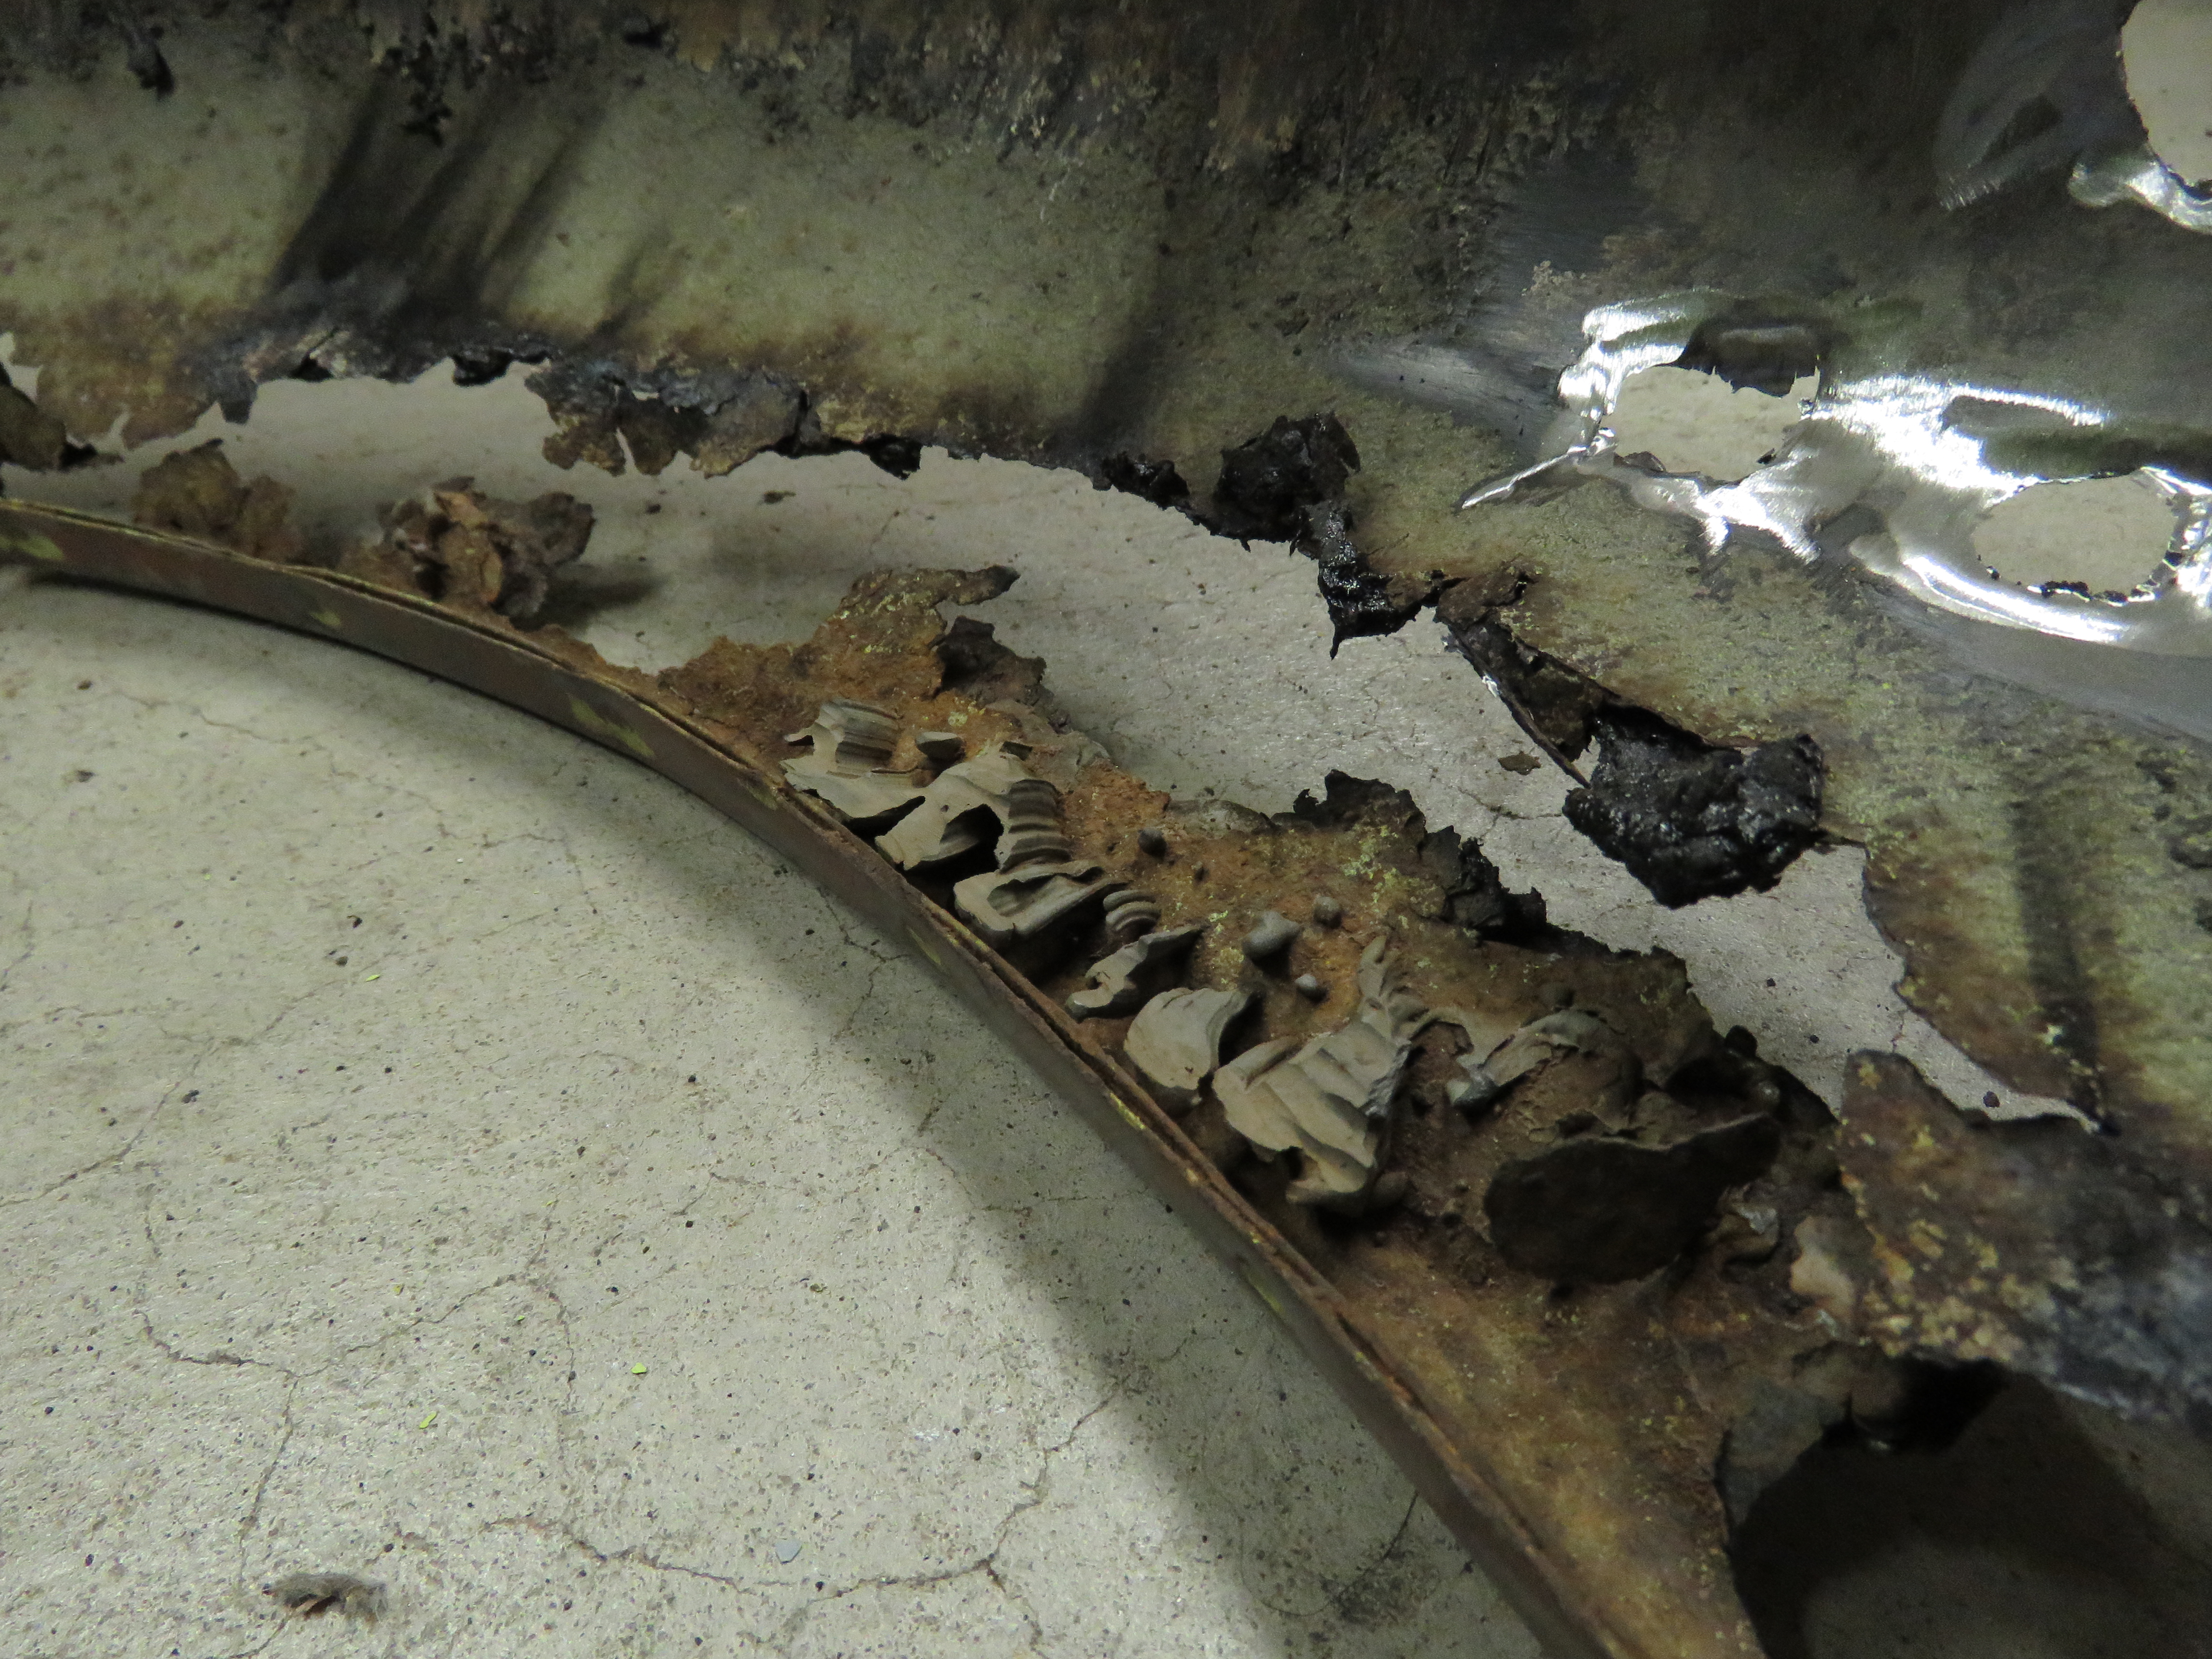
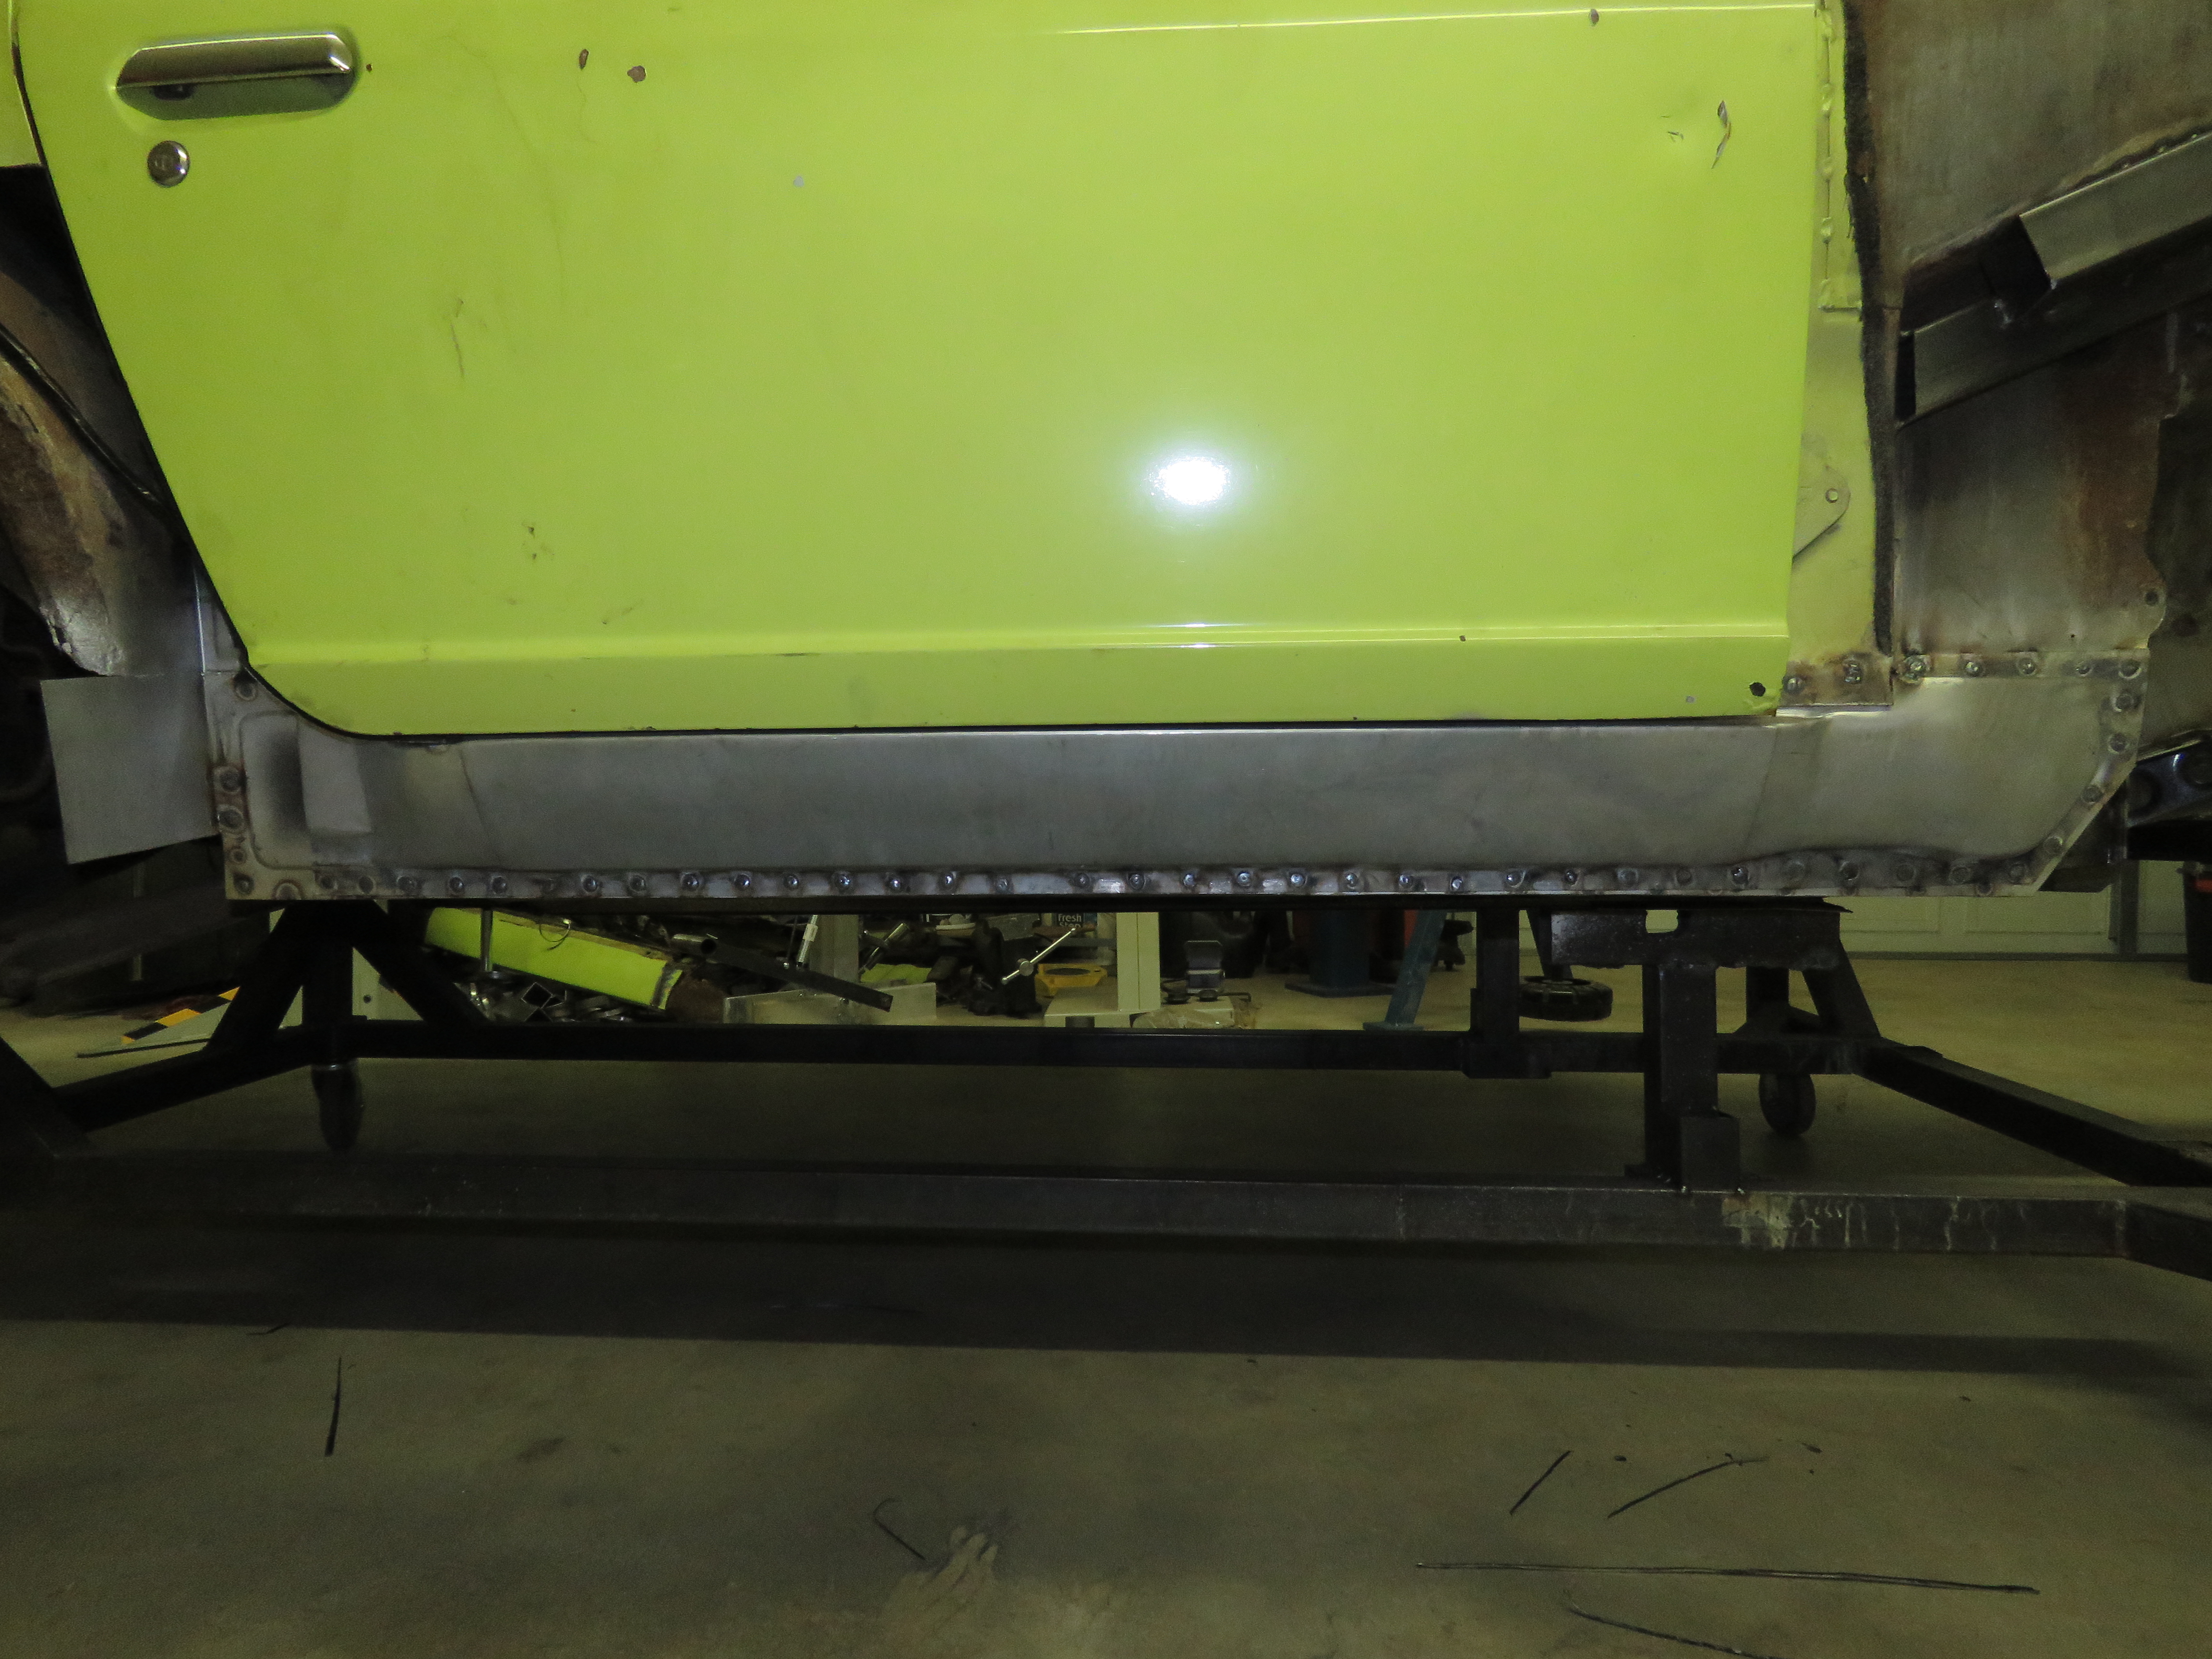
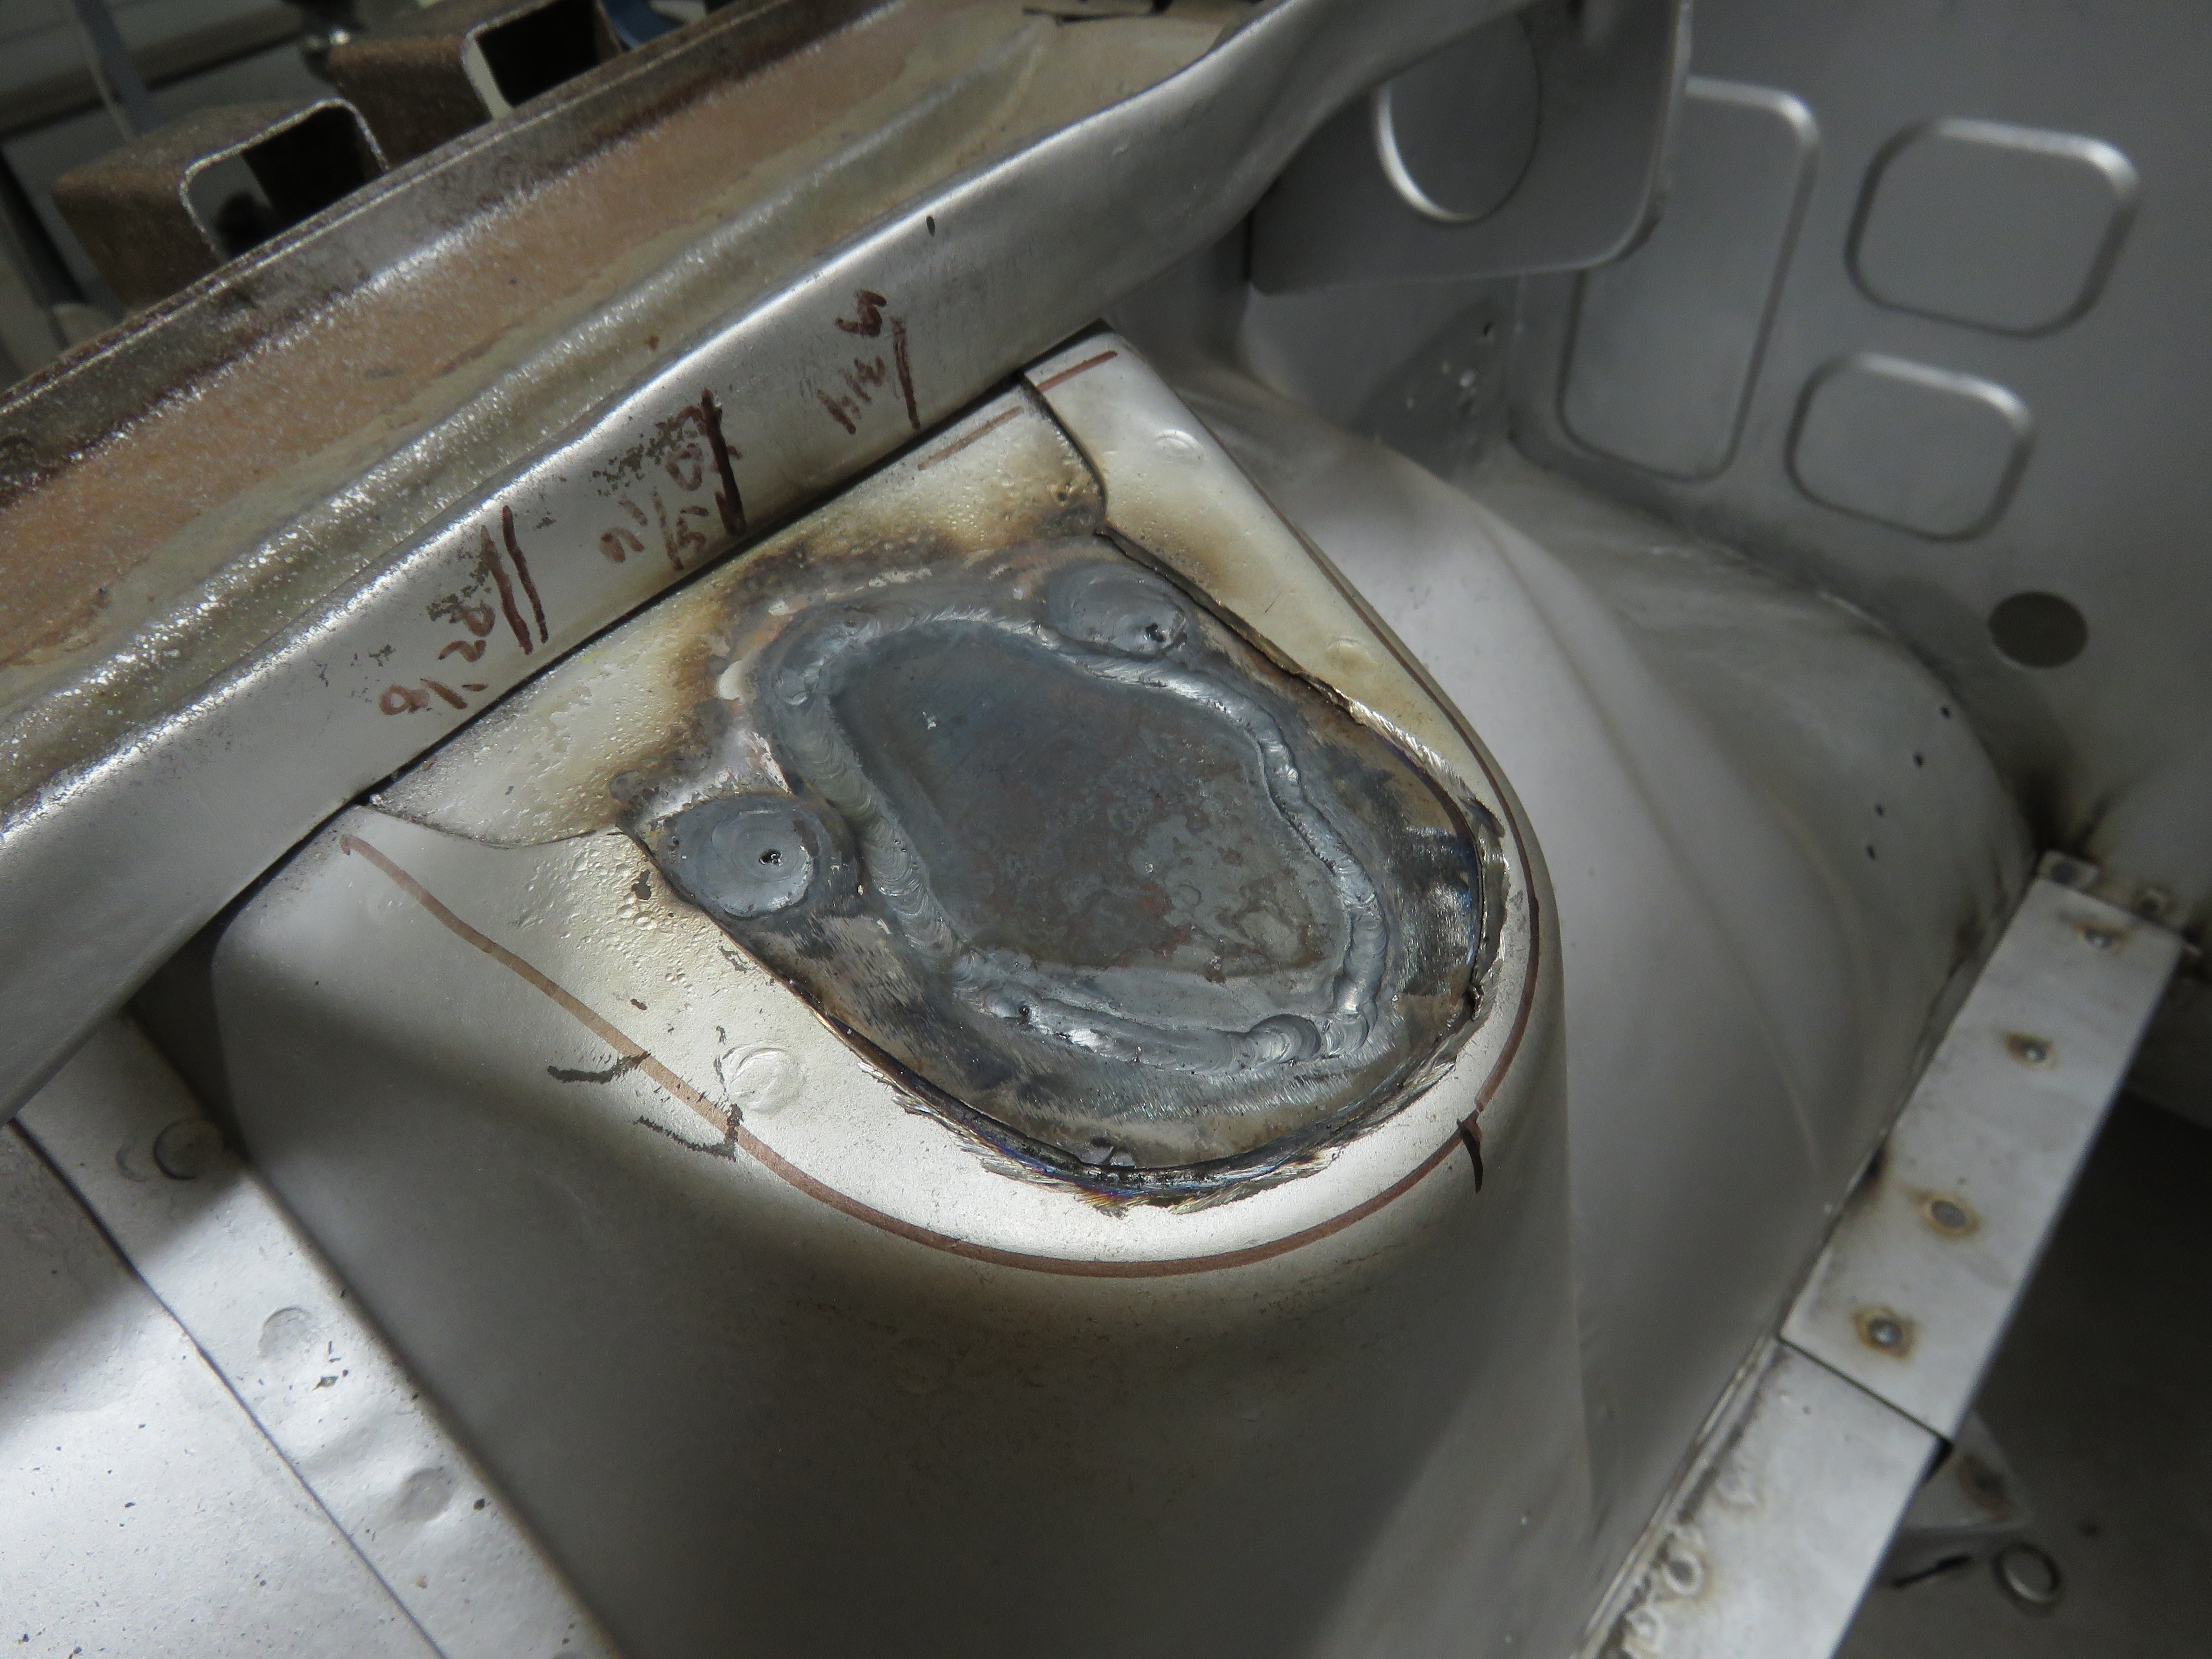
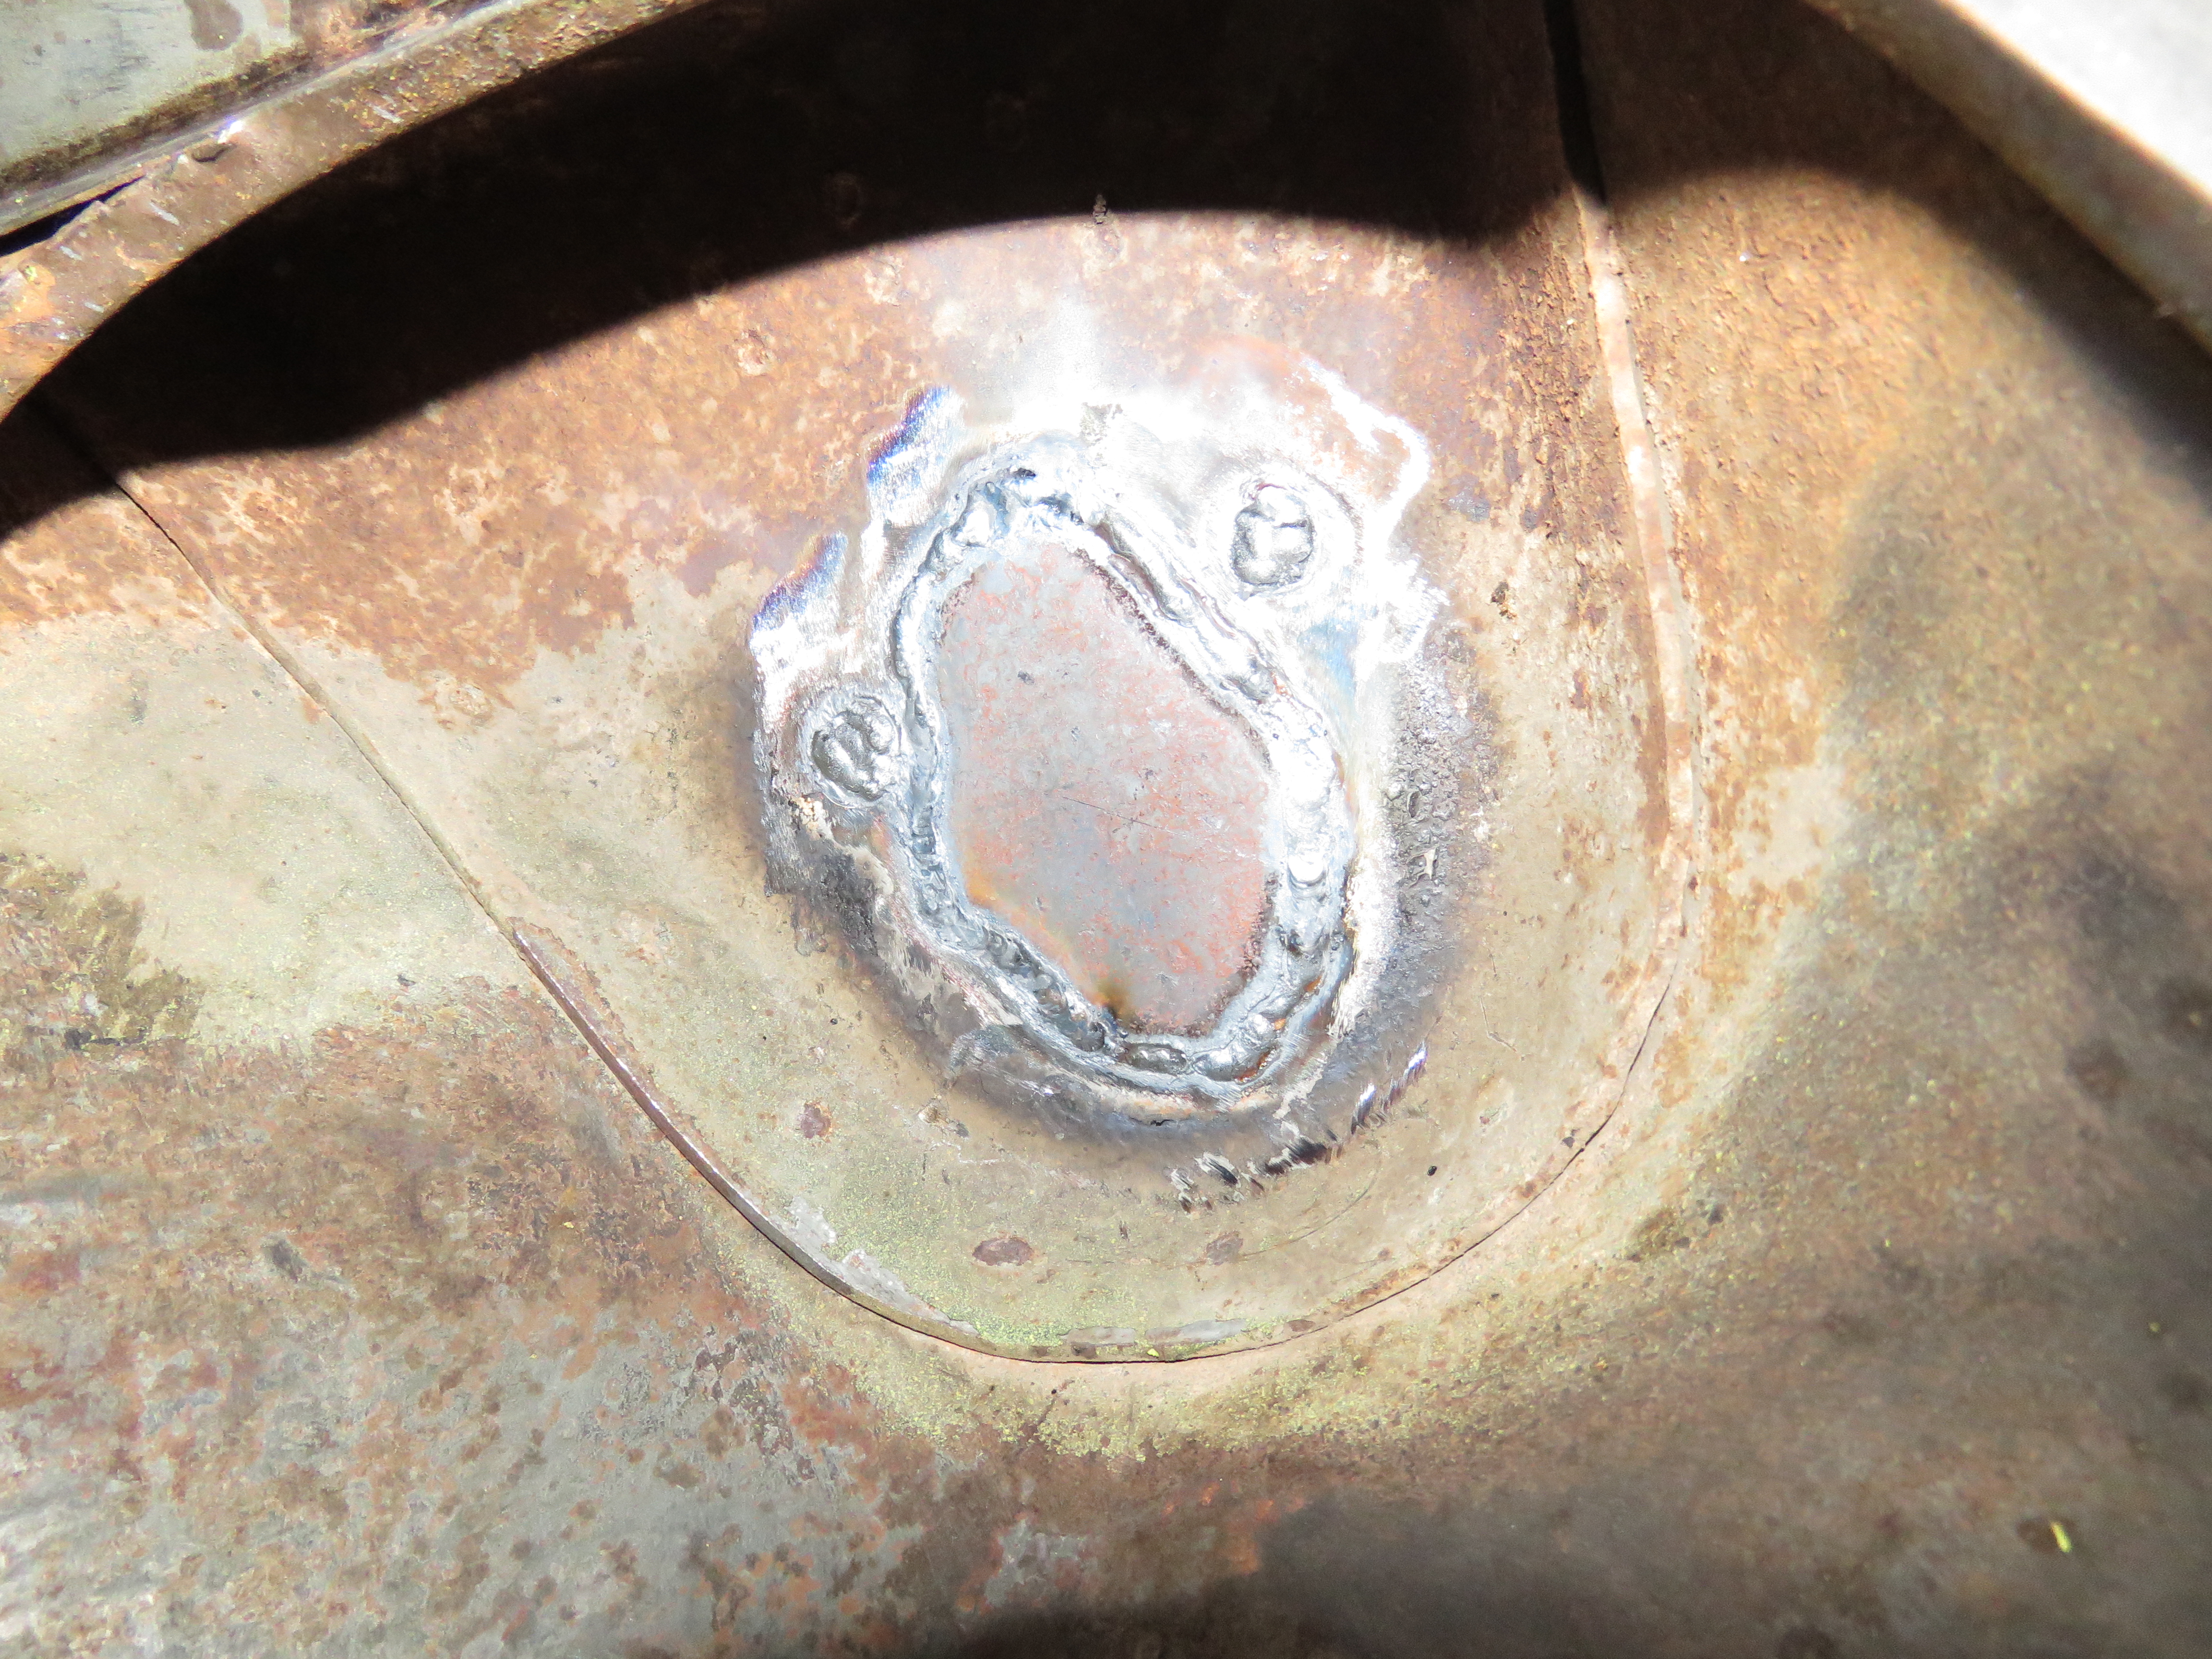
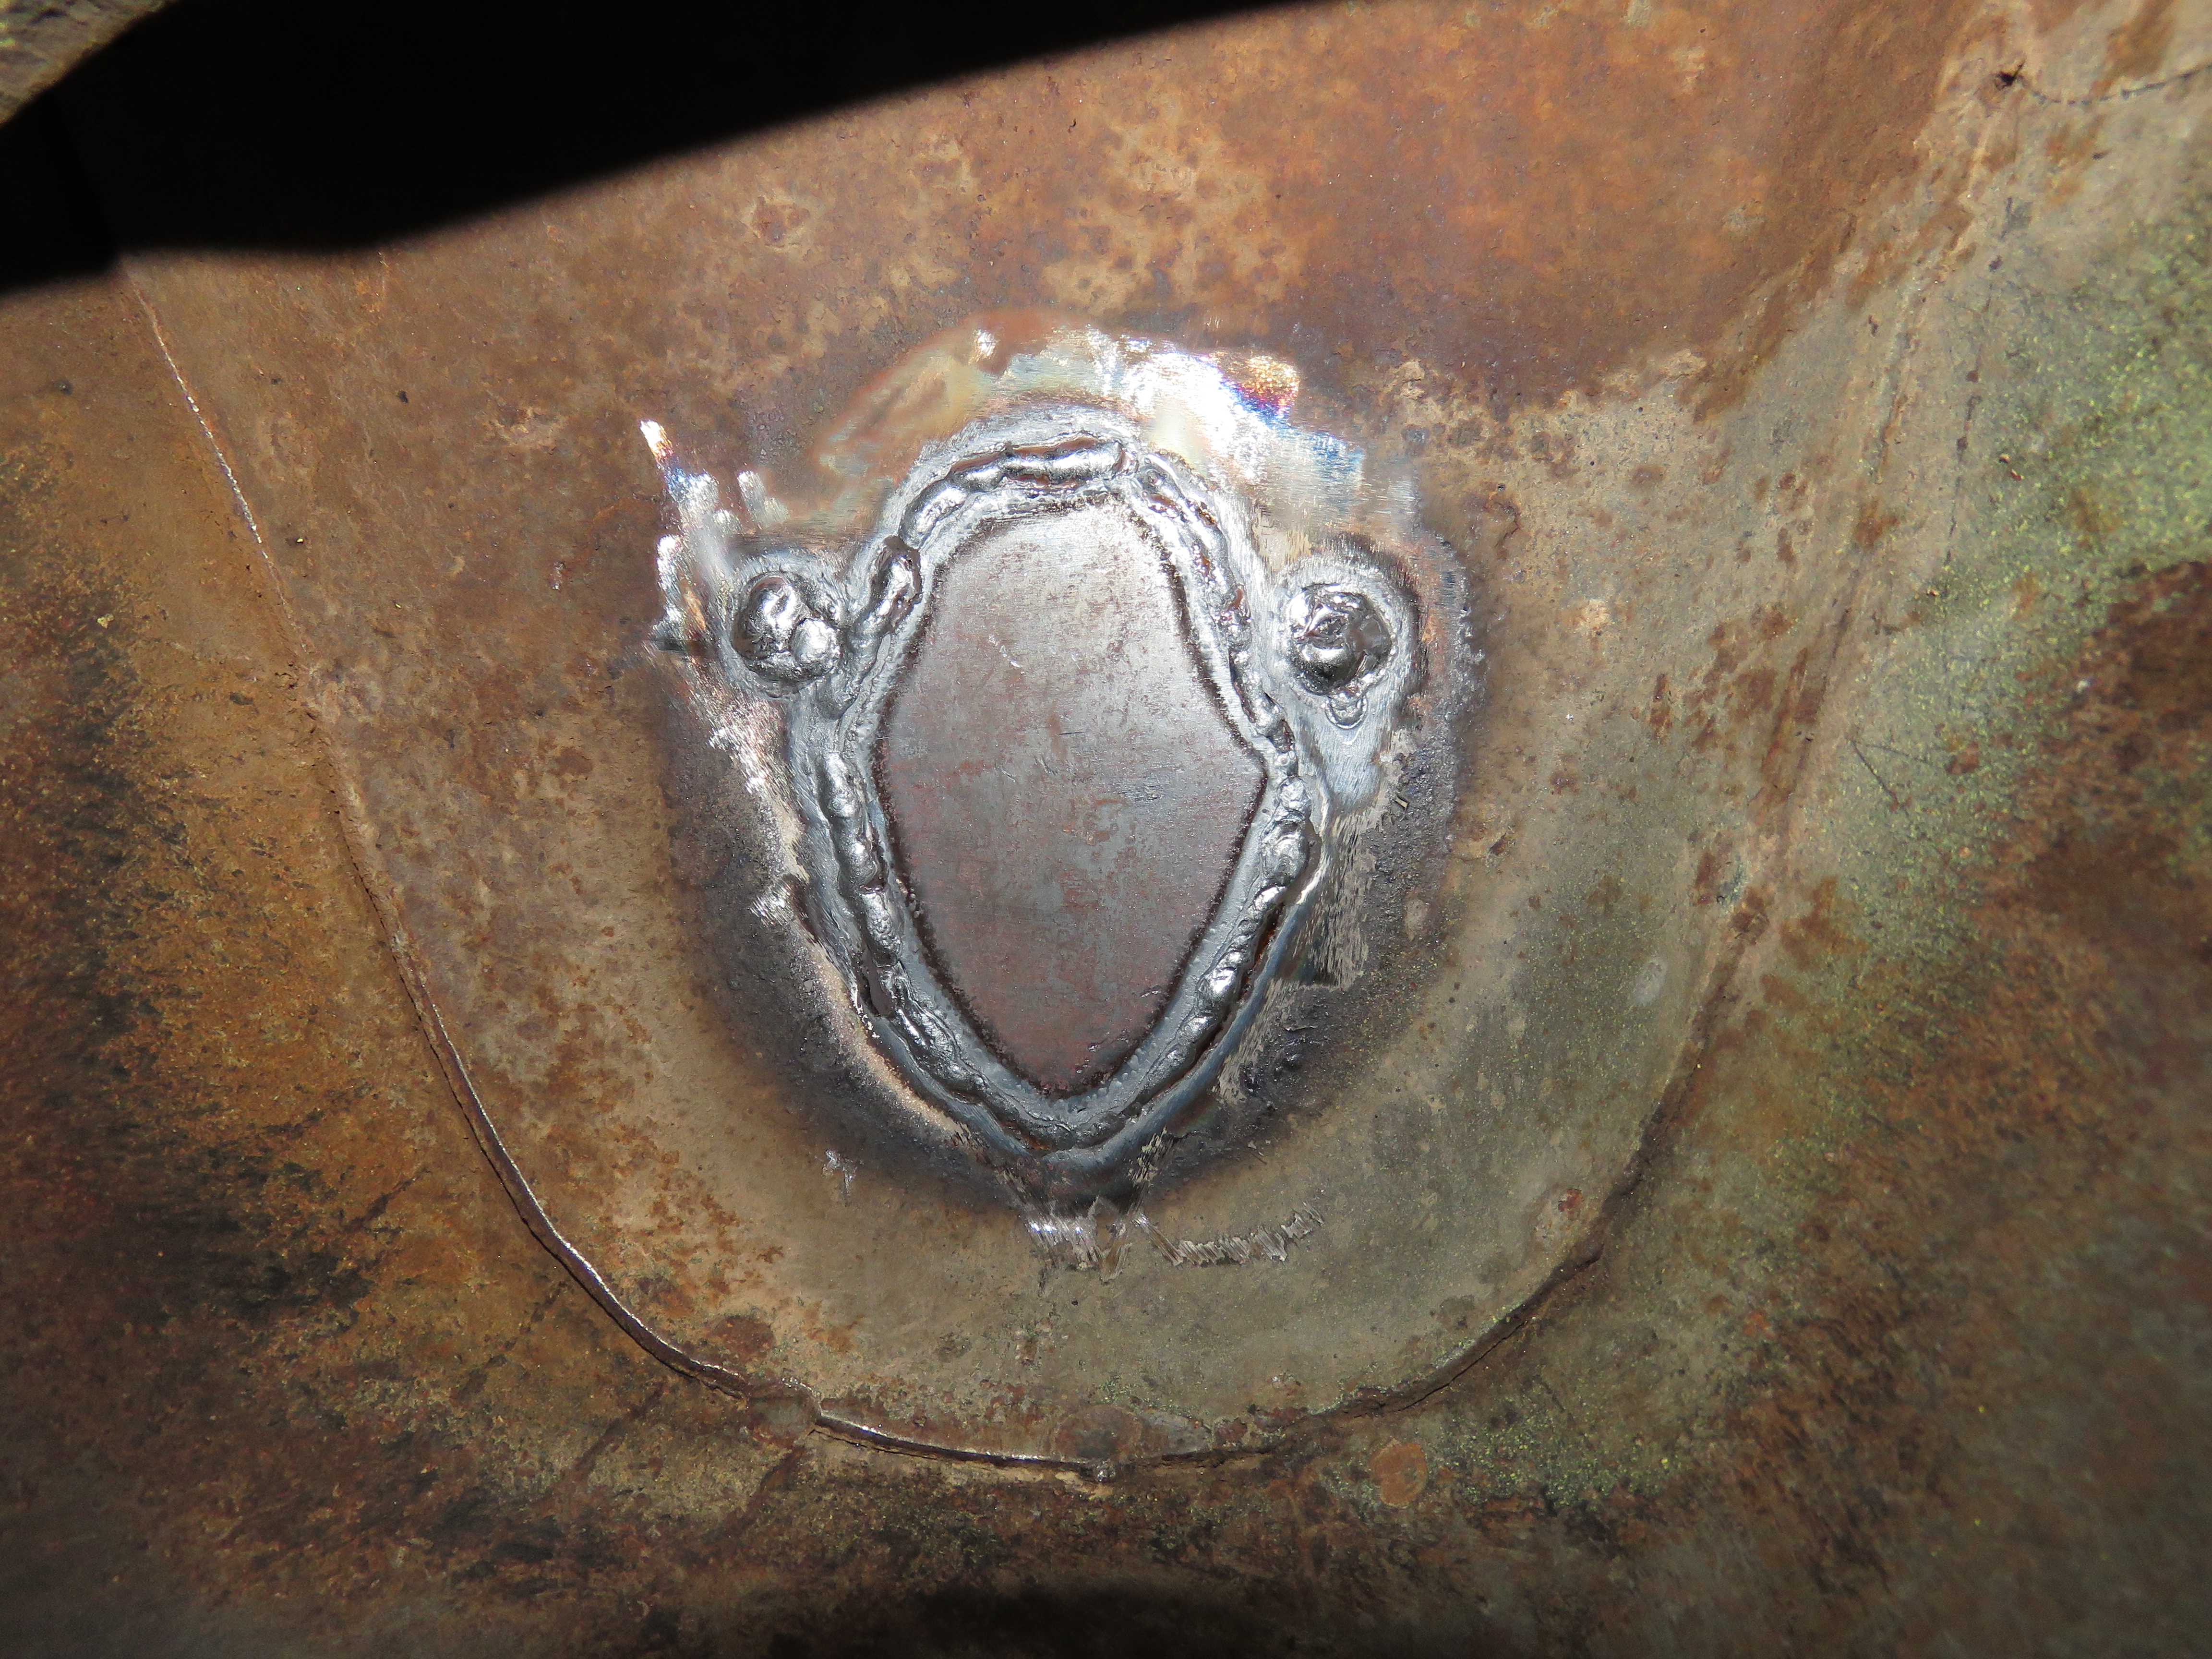
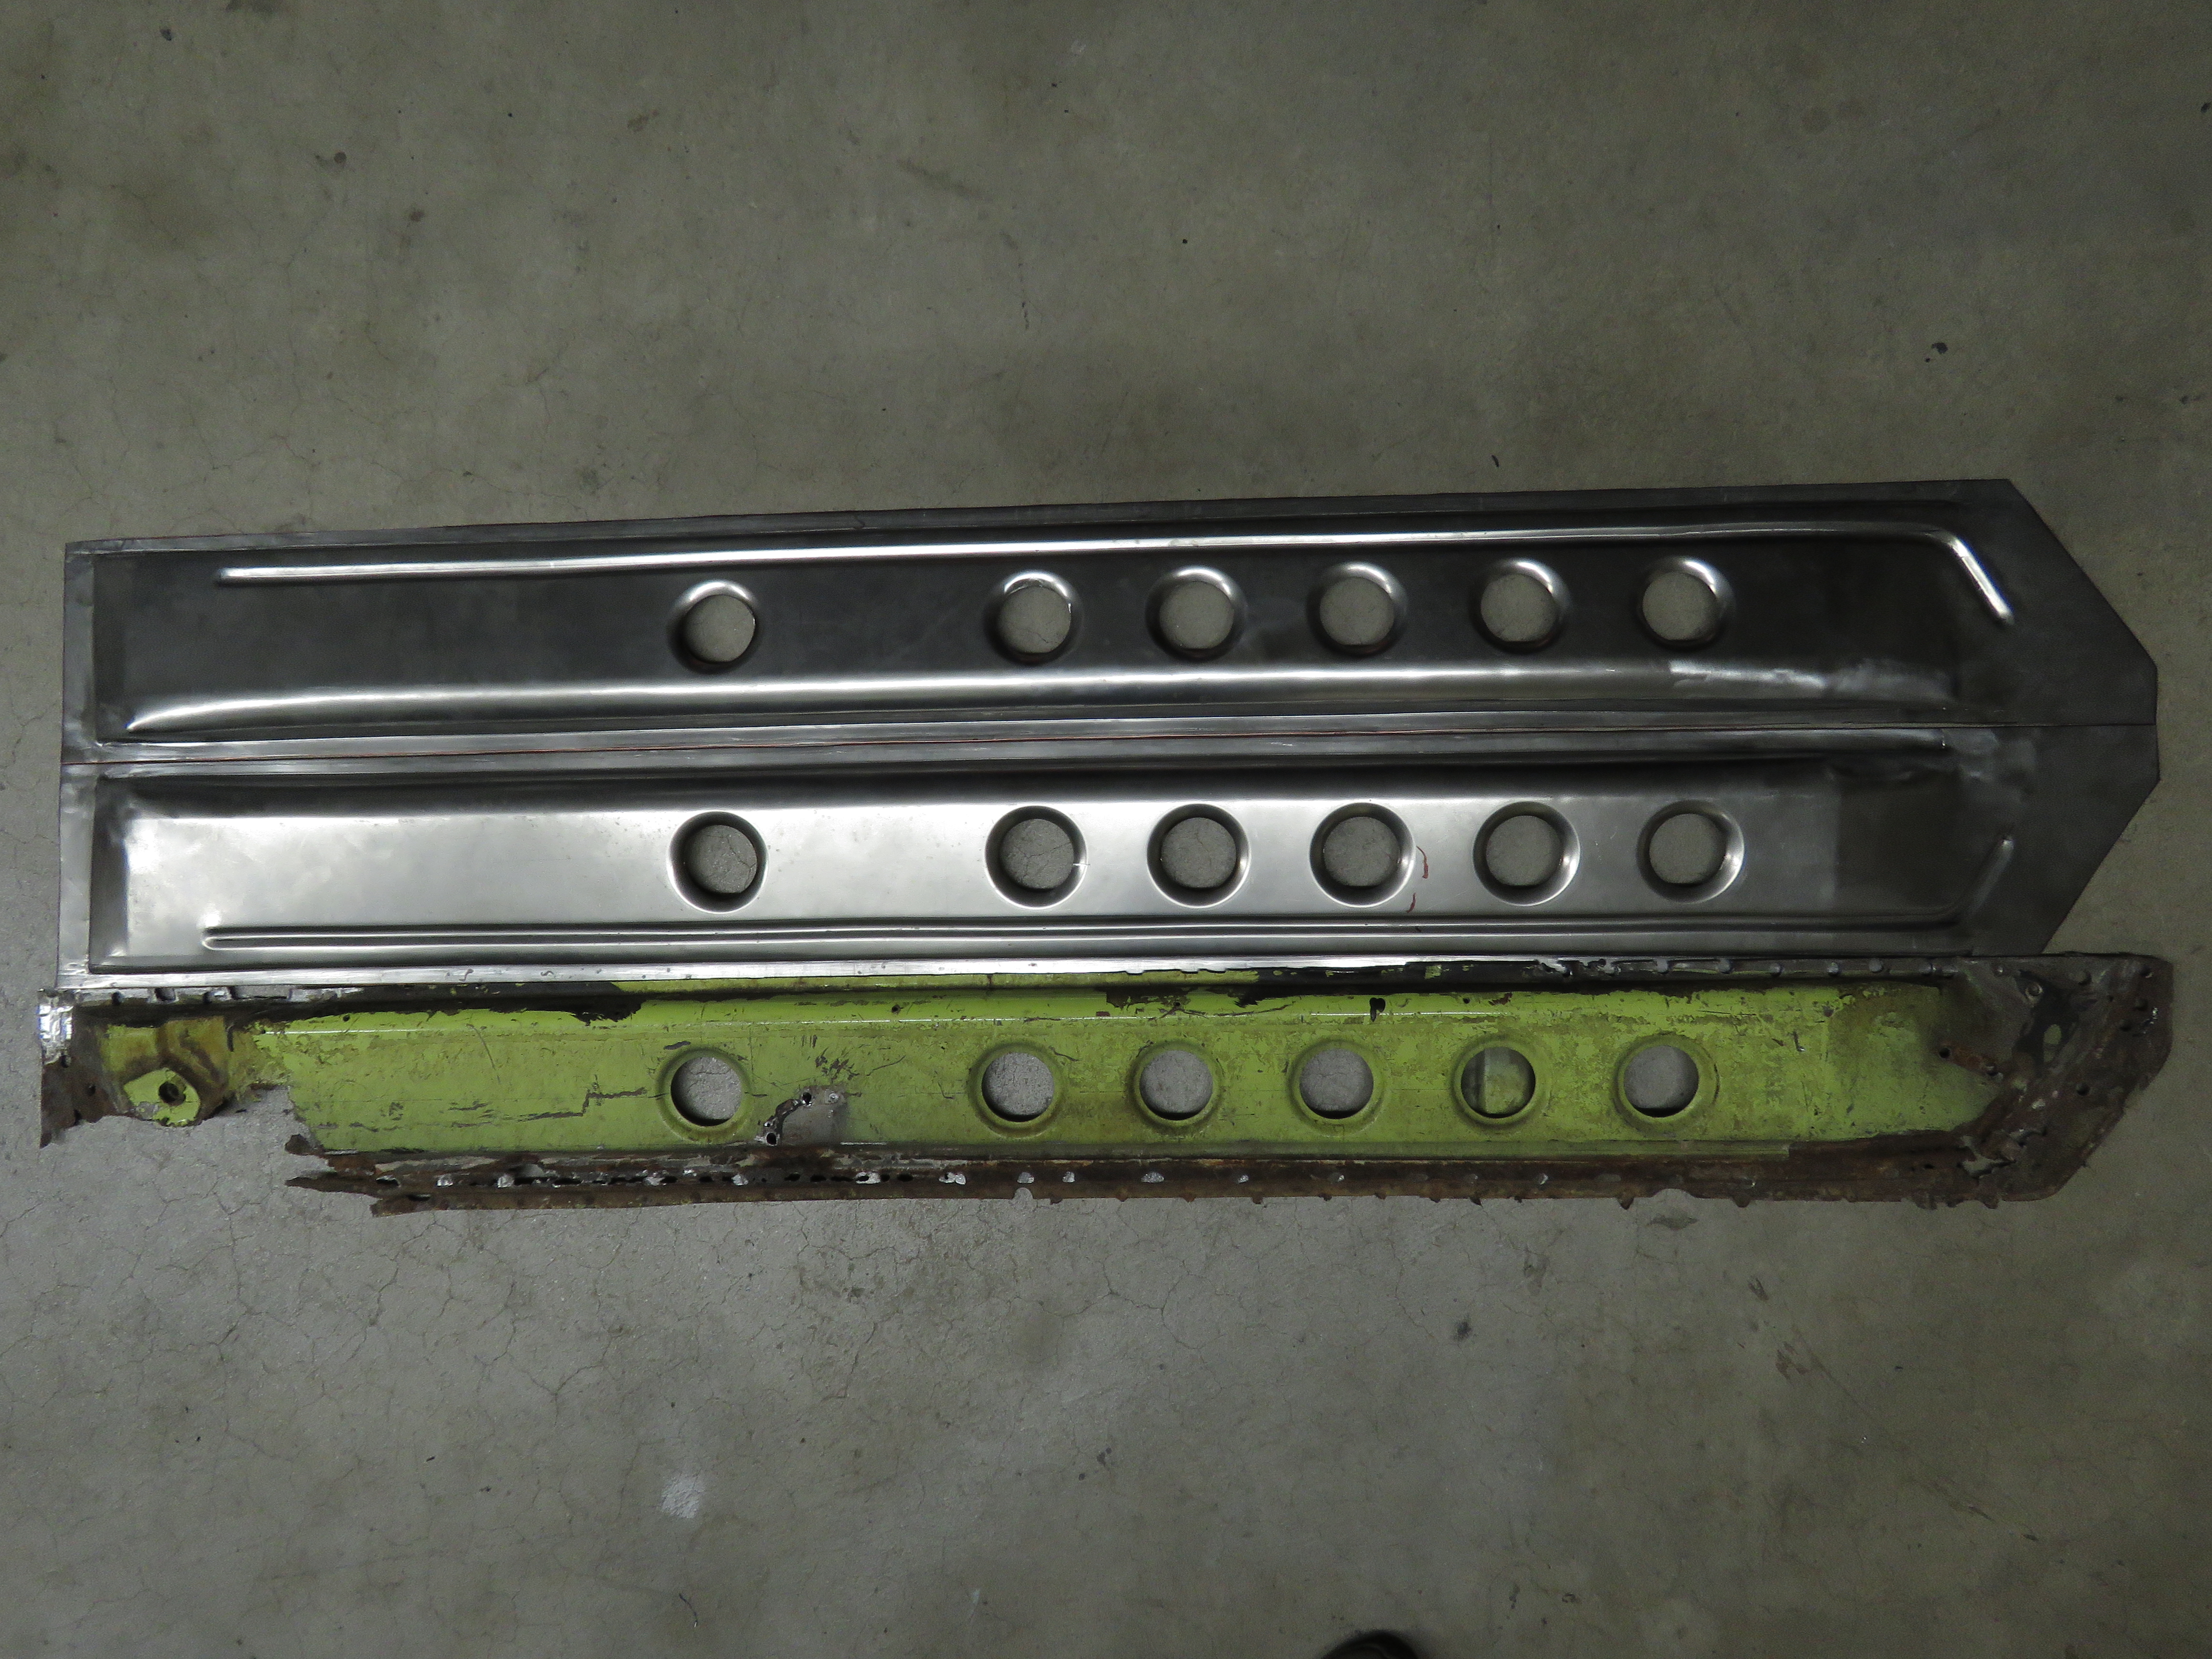
Haha, I have my fair share of UH OH's such as the one pictured below. The first set of Interior rocker panels I made which were for my car, you can see in the picture below that the bottom of it has a bow. Though it has a bow in it, Everything still aligned up, the only fitment issue I had was with my floor pans, had to put a curve in it at the flange end that gets welded to the rocker panel in this area. Oh well I guess, part of learning. Was working on making a set of 240z Interior rocker panels yesterday and finished tonight for Charlie at Zedd Findings. You can see in the pictures below, that the bottom of it is straight like its supposed too, unlike the one pictured above. Before painted comparison picture. After a light coat of Rust preventative Weldable Primer.
I applause your commitment, seemed like your method of getting the floors to fit worked out really well, looks great and seems like it worked out well for you. I never knew how much more structurally the 280z was compared to the 240z. I hear people talk about it here and there, but never actually seen anything until I looked through your thread. Then again, Ive only owned one datsun thus far in my life.
Your extremely lucky if that is all the rust there is on that Z. I too suffer a little of rust around the windshield frame area. Thats a nice looking rear cage section too.
Haha, I have my fair share of UH OH's such as the one pictured below. The first set of Interior rocker panels I made which were for my car, you can see in the picture below that the bottom of it has a bow. Though it has a bow in it, Everything still aligned up, the only fitment issue I had was with my floor pans, had to put a curve in it at the flange end that gets welded to the rocker panel in this area. Oh well I guess, part of learning. Was working on making a set of 240z Interior rocker panels yesterday and finished tonight for Charlie at Zedd Findings. You can see in the pictures below, that the bottom of it is straight like its supposed too, unlike the one pictured above. Before painted comparison picture. After a light coat of Rust preventative Weldable Primer.


Important Information
By using this site, you agree to our Privacy Policy and Guidelines. We have placed cookies on your device to help make this website better. You can adjust your cookie settings, otherwise we'll assume you're okay to continue.