disepyon
Free Member
-
Joined
-
Last visited
Everything posted by disepyon
-
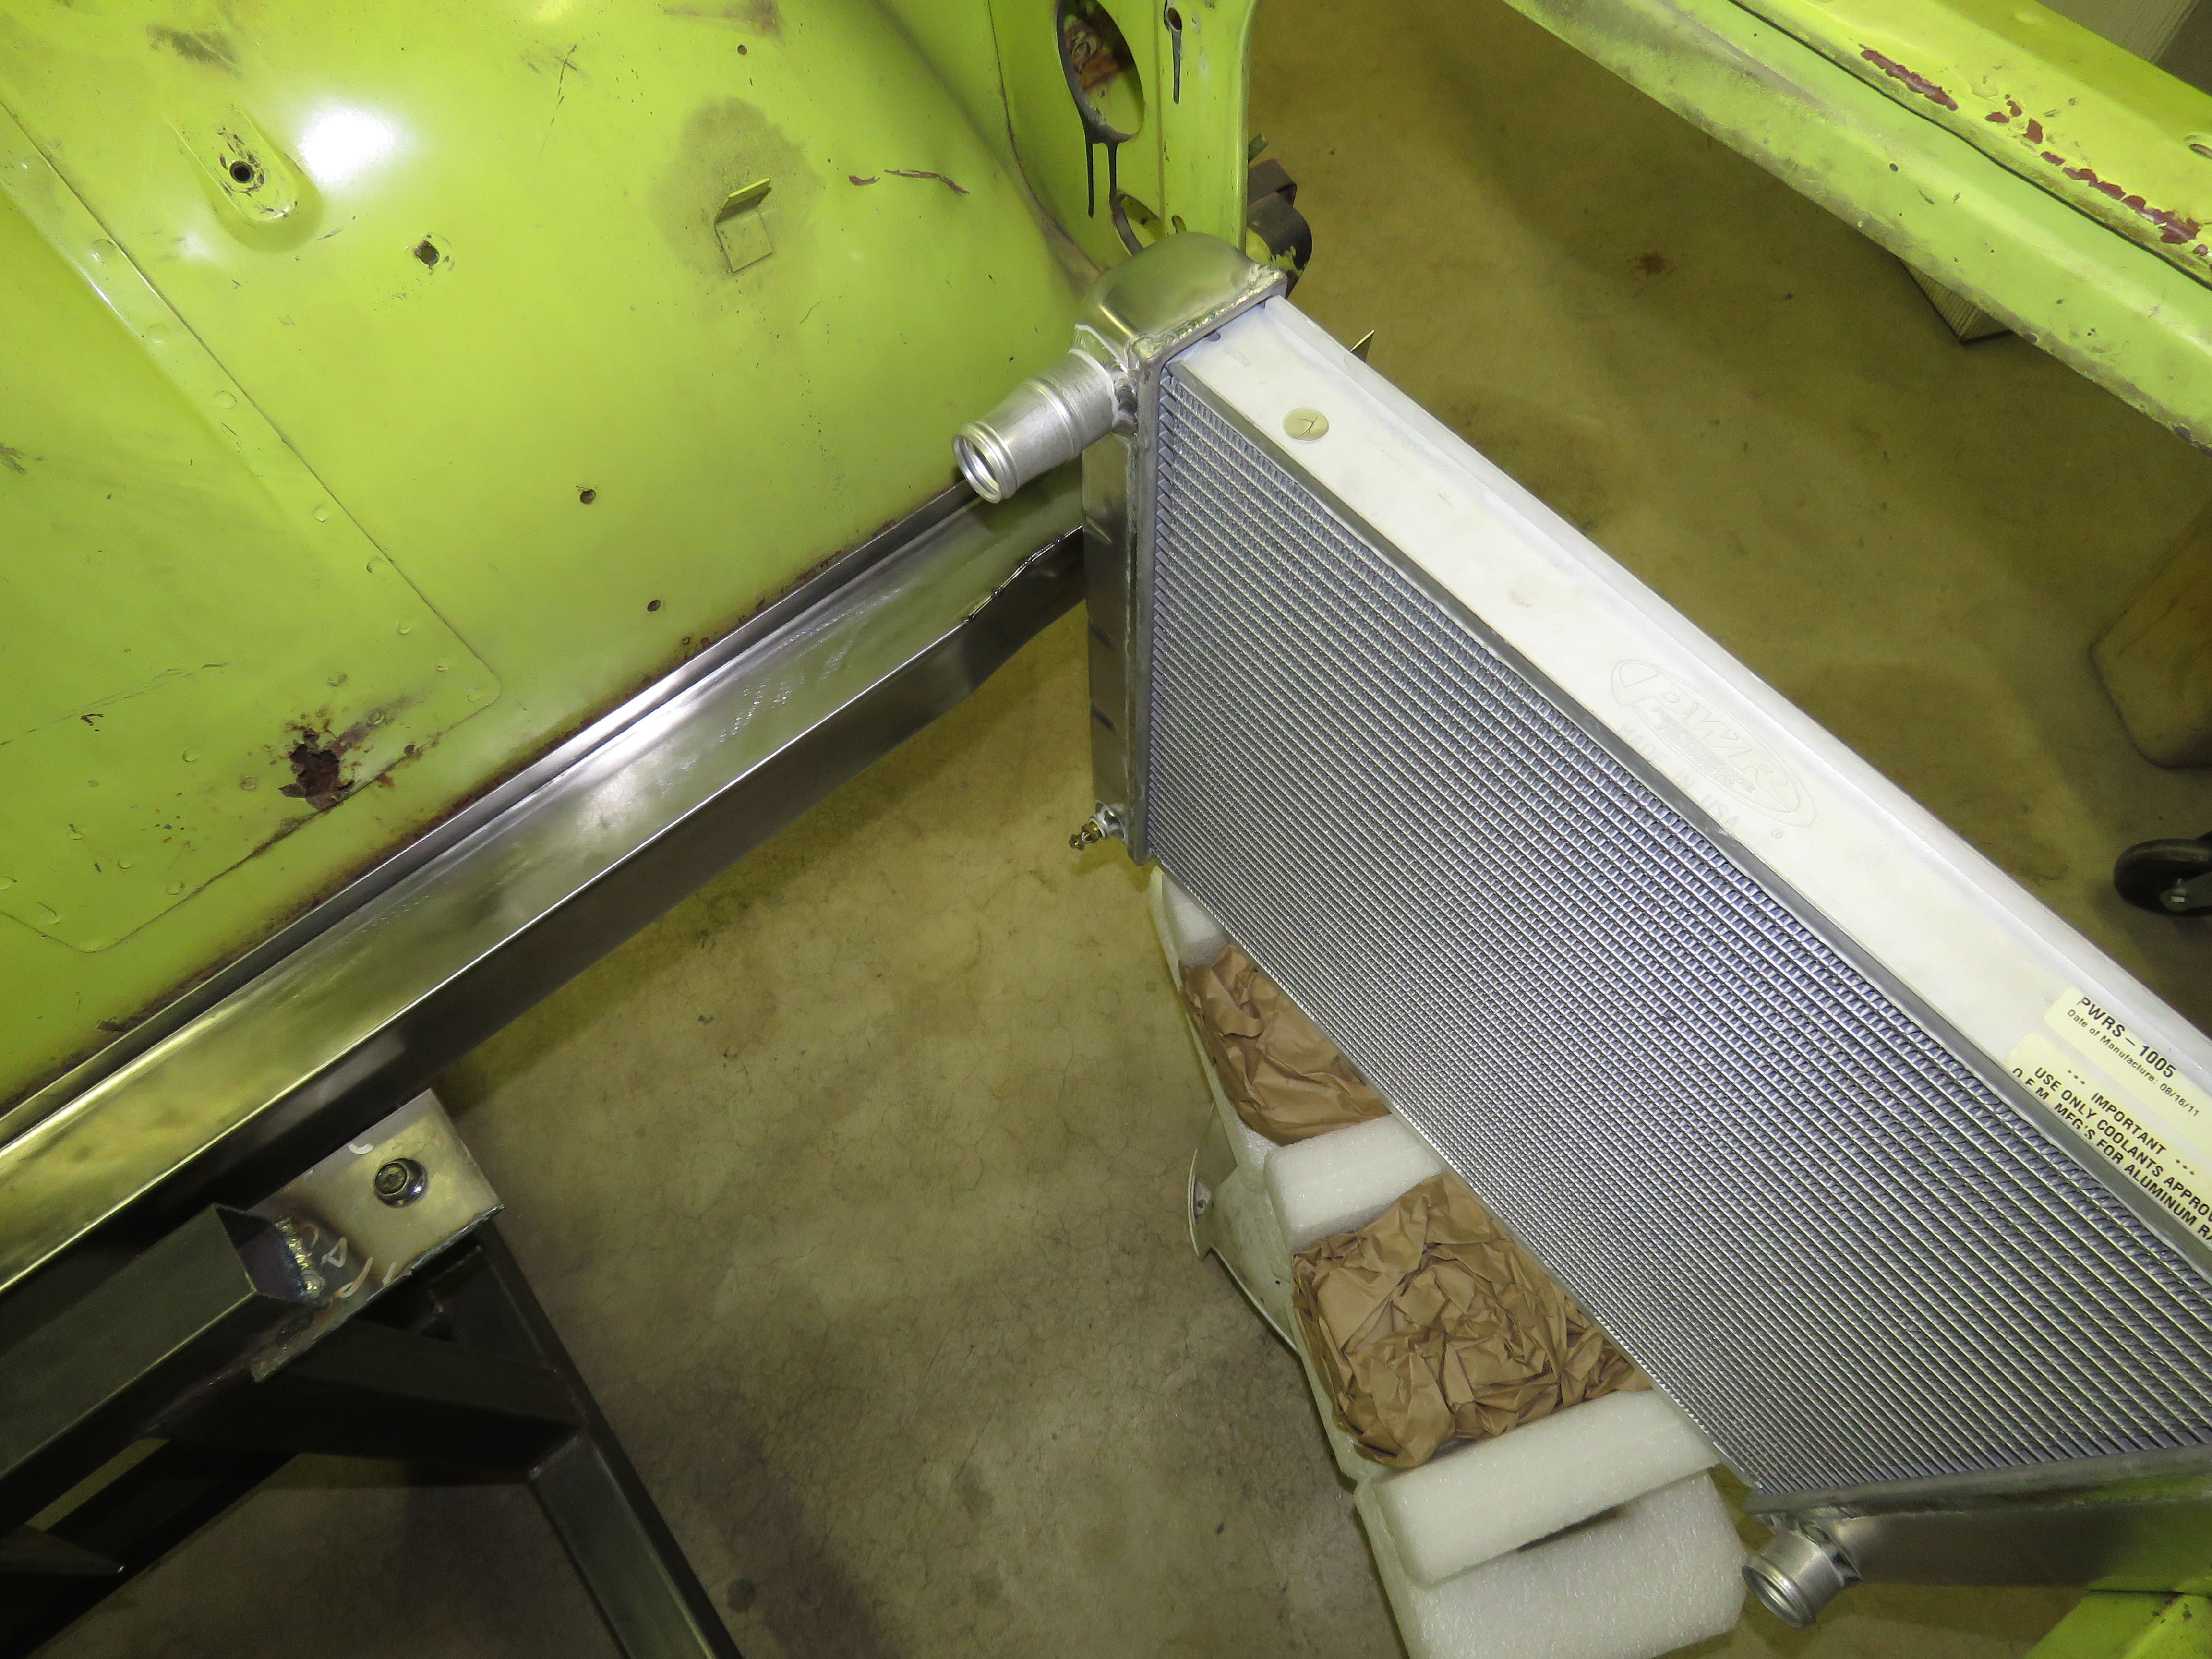
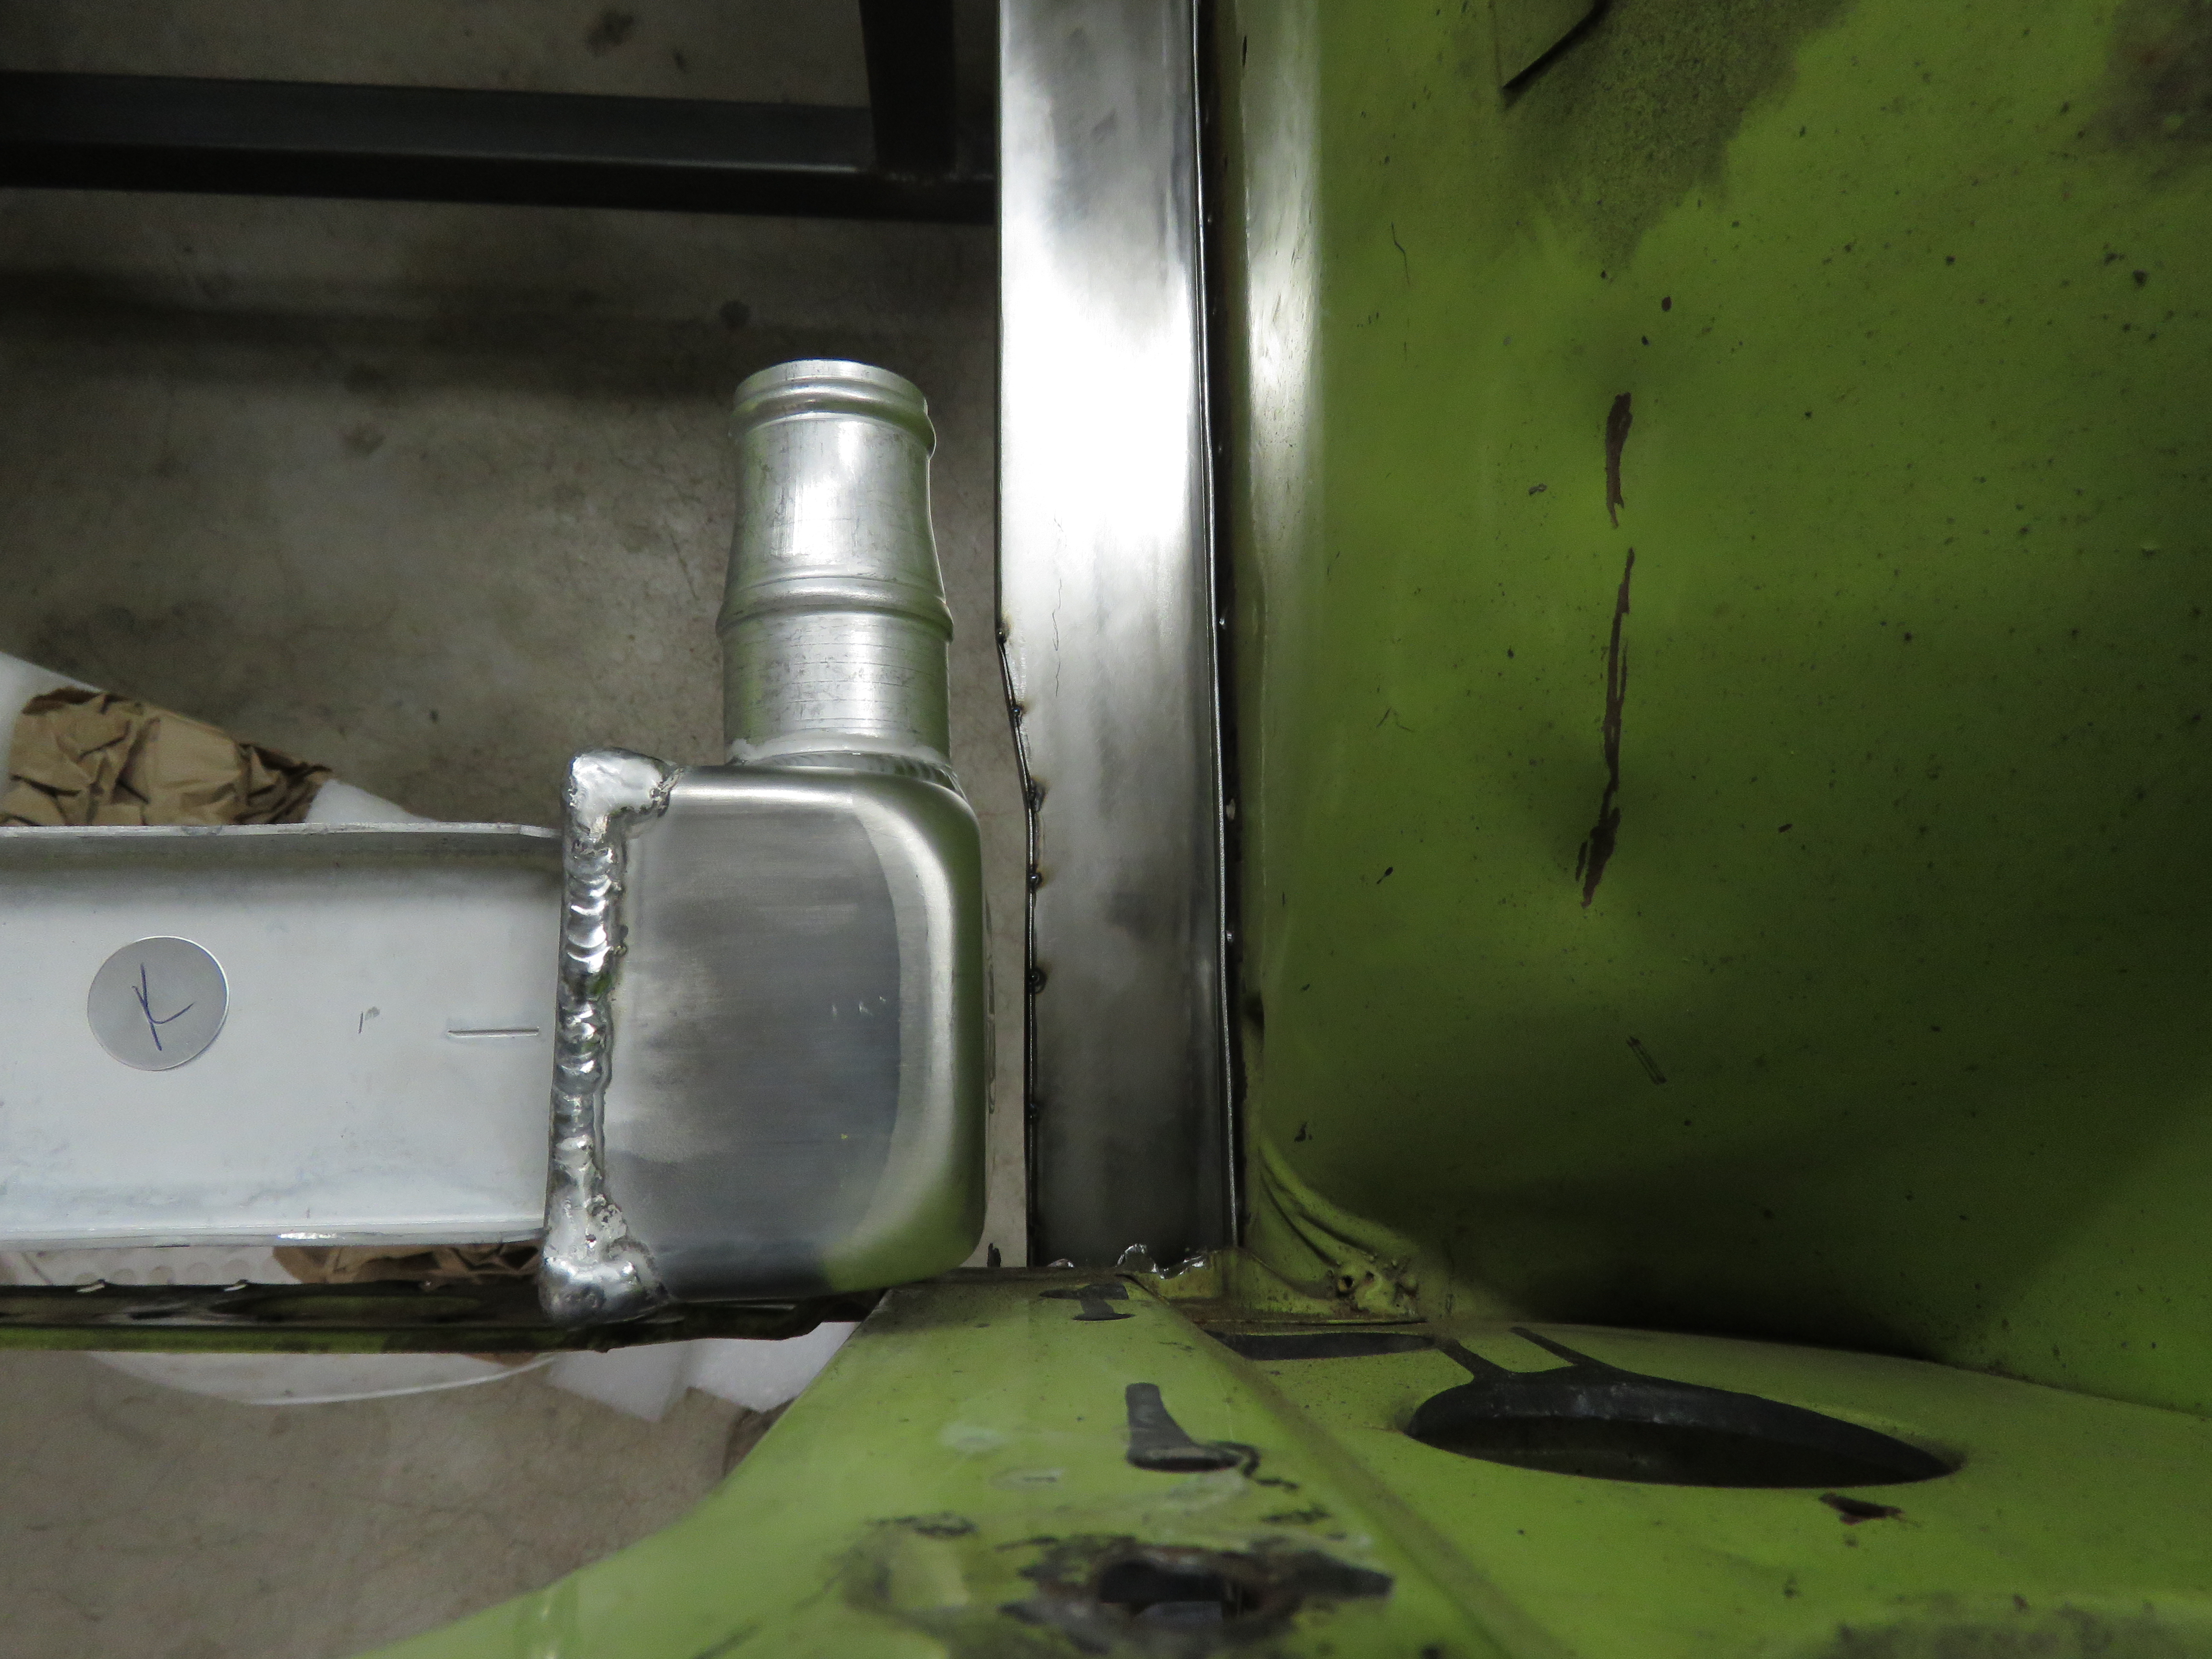
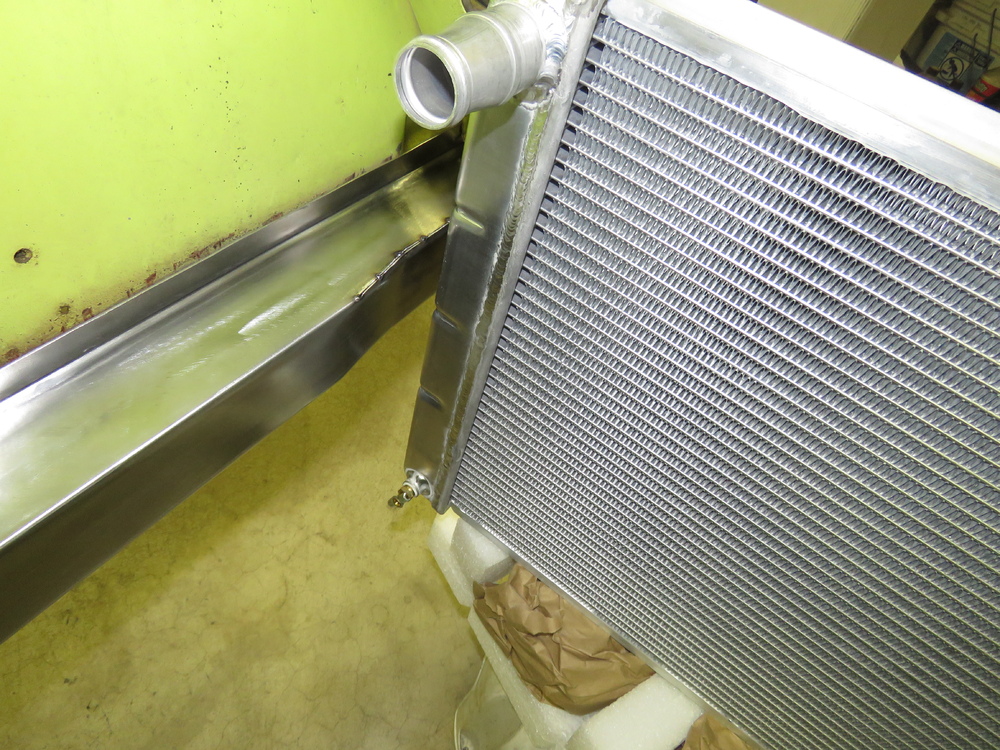
I would have never thought so much customization would be needed to fit an inline 6 M Motor, considering these cars came with inline 6's. Lots of great ideas in here and work. Your progress with your build makes me feel like huge slacker with my project, haha. I hate it when things come up like your rad hose problem and there isnt any way around it. Just eyeballing your pics, looks like your front wheel at full turn lock will clear the radiator hose area. Interested to see this thing done and running. I wanted to do an inline six upgrade form the L6 engine, but at the time I didnt have much money, so I opted for the cheap LS1.
-
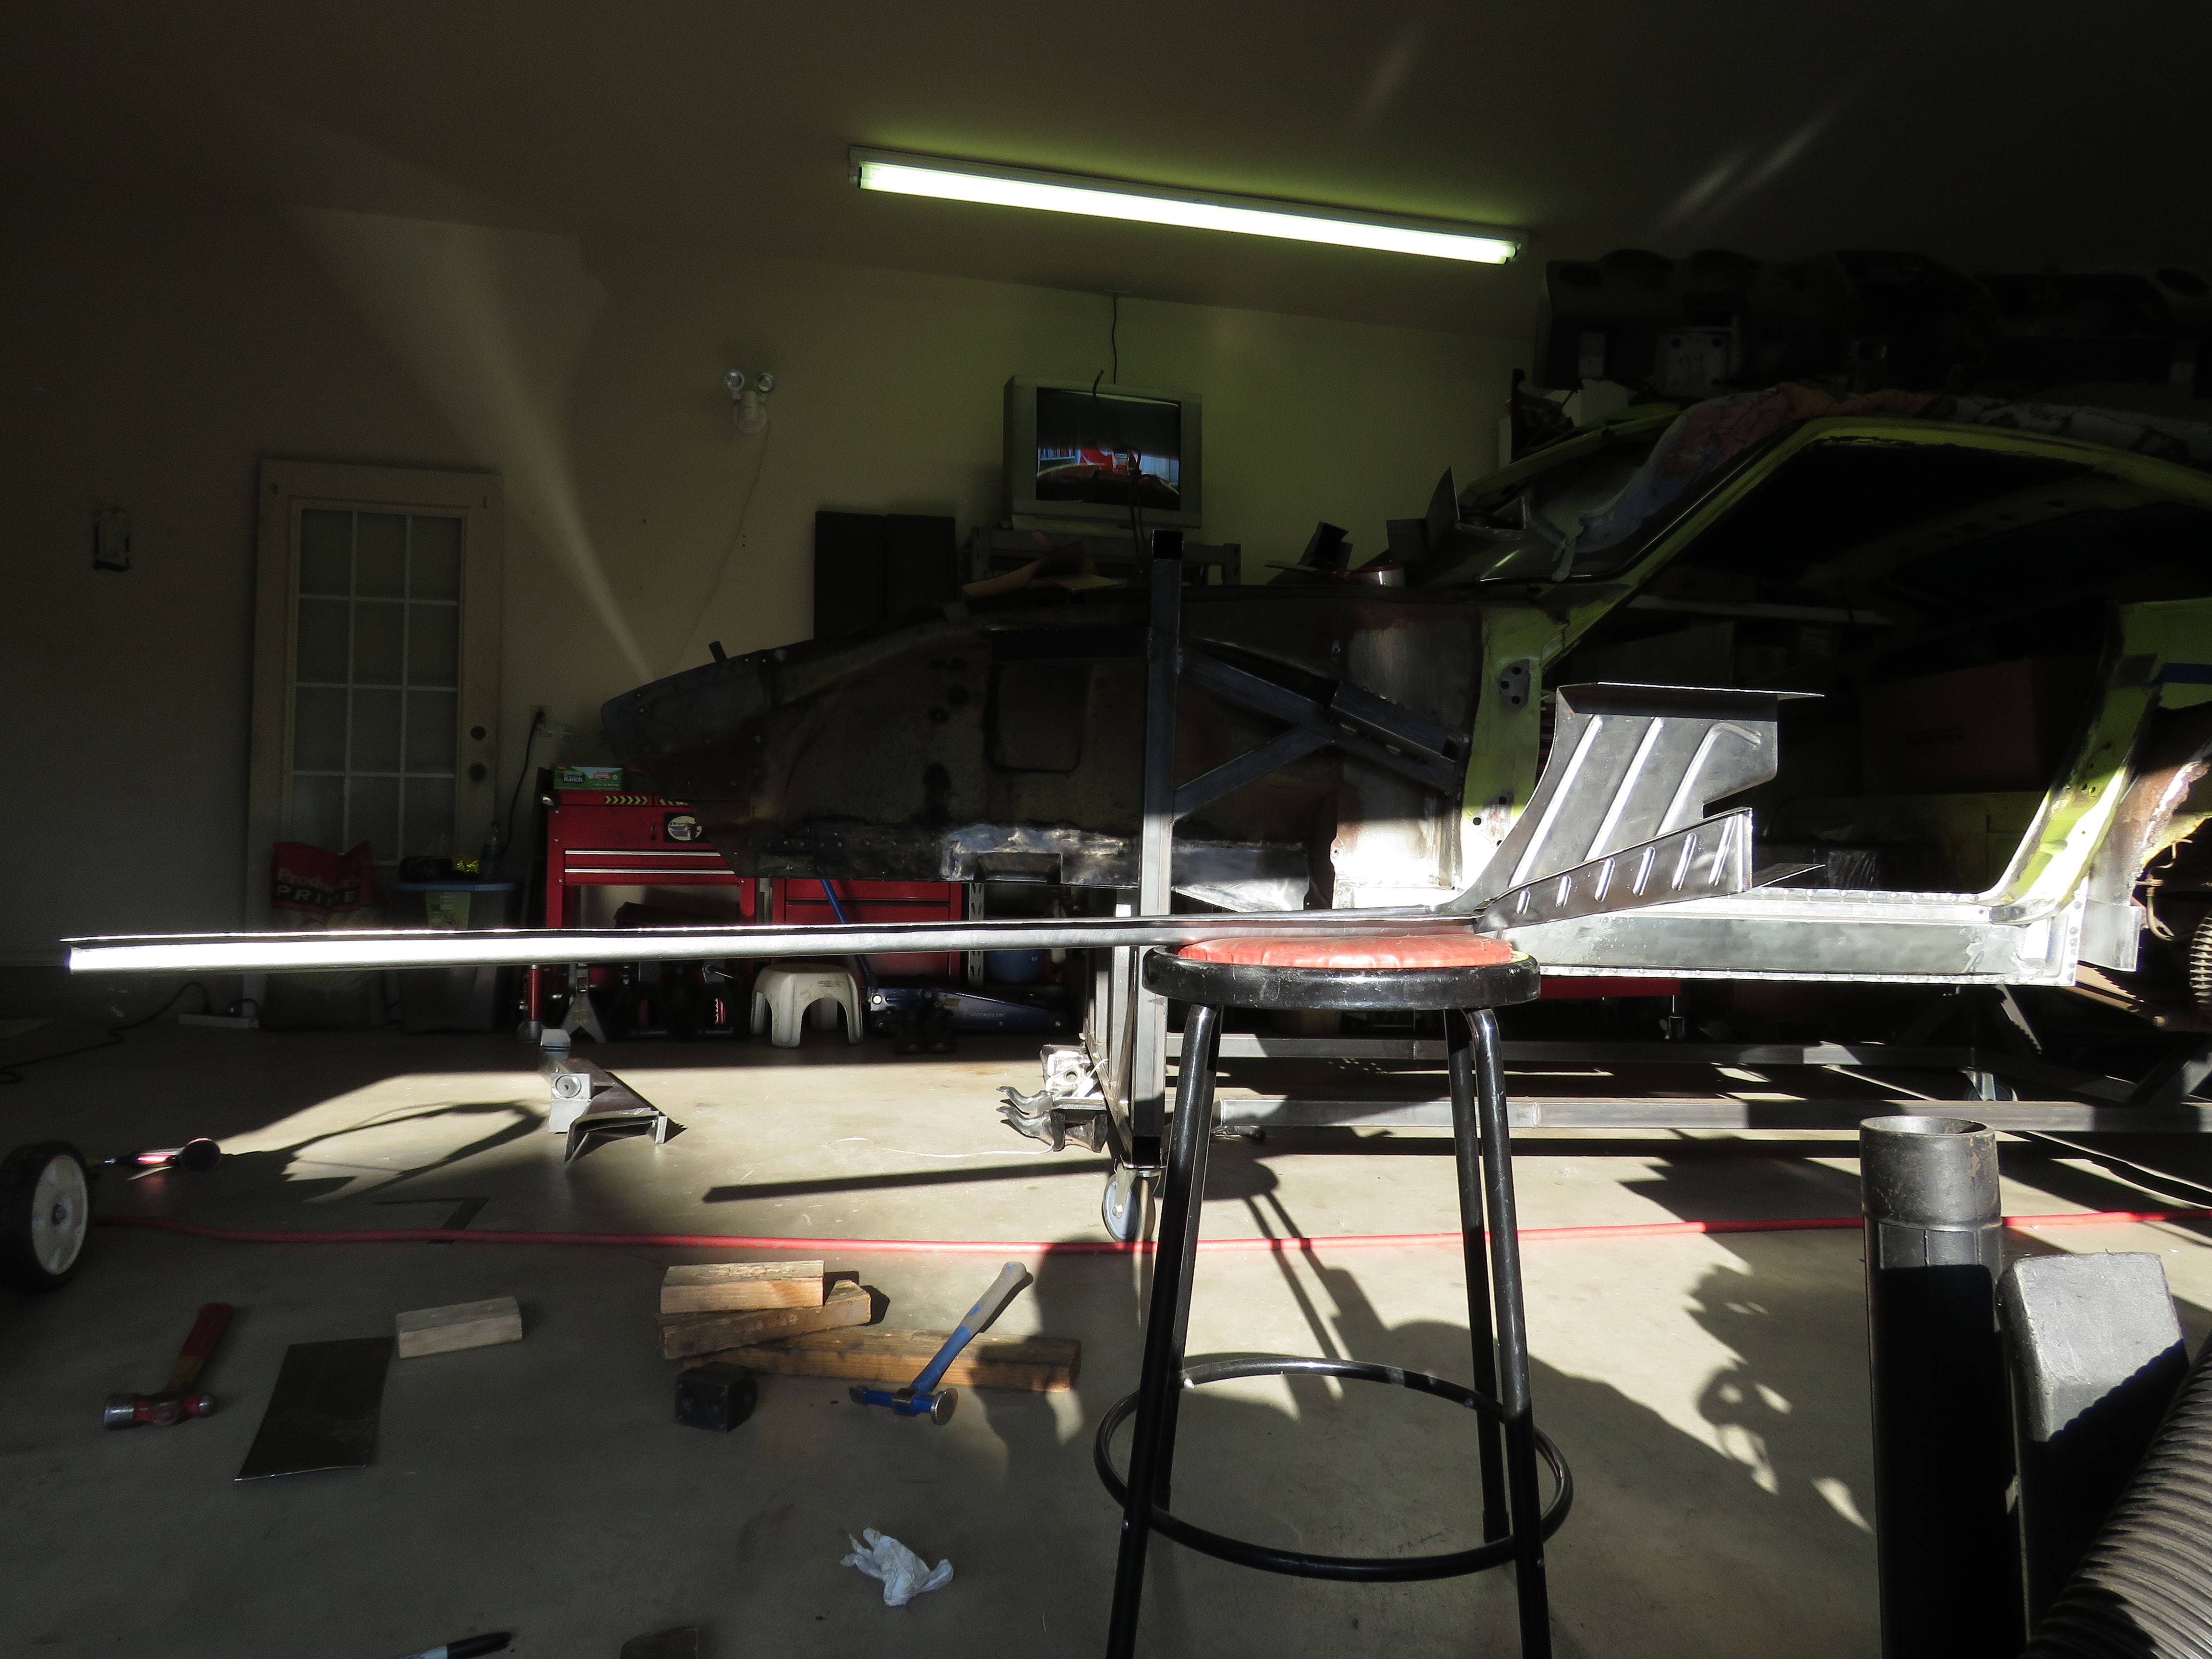
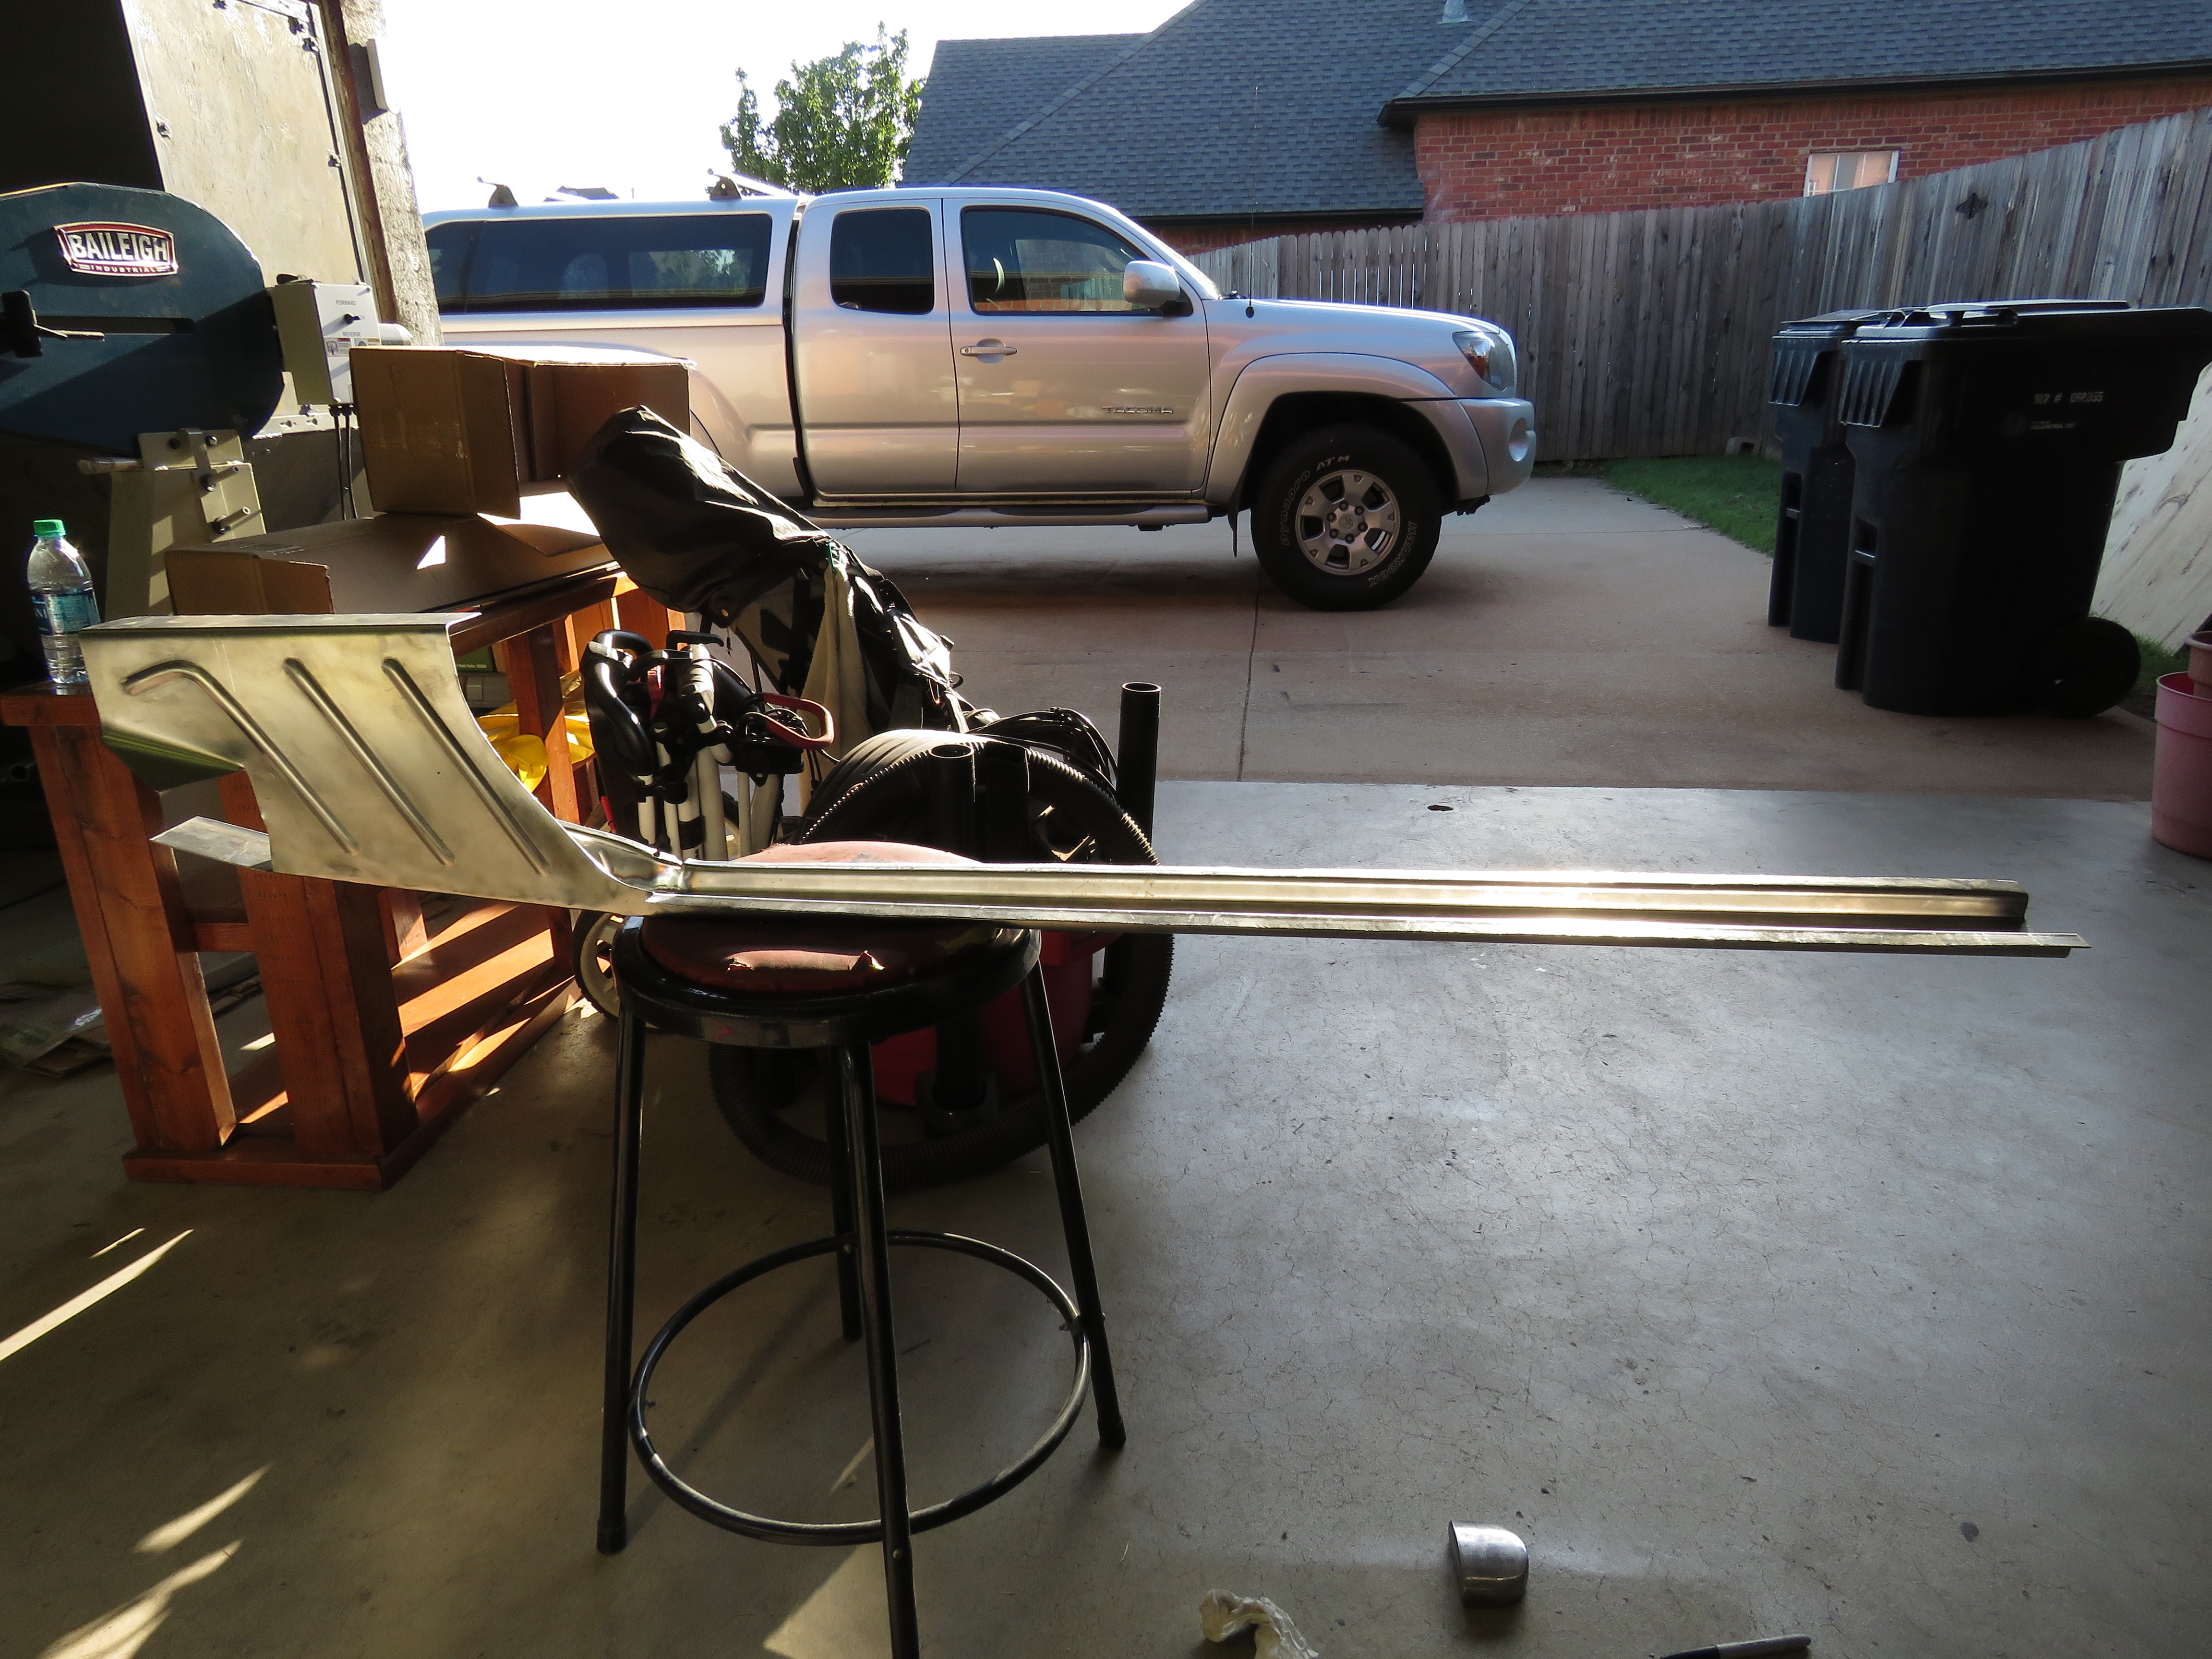
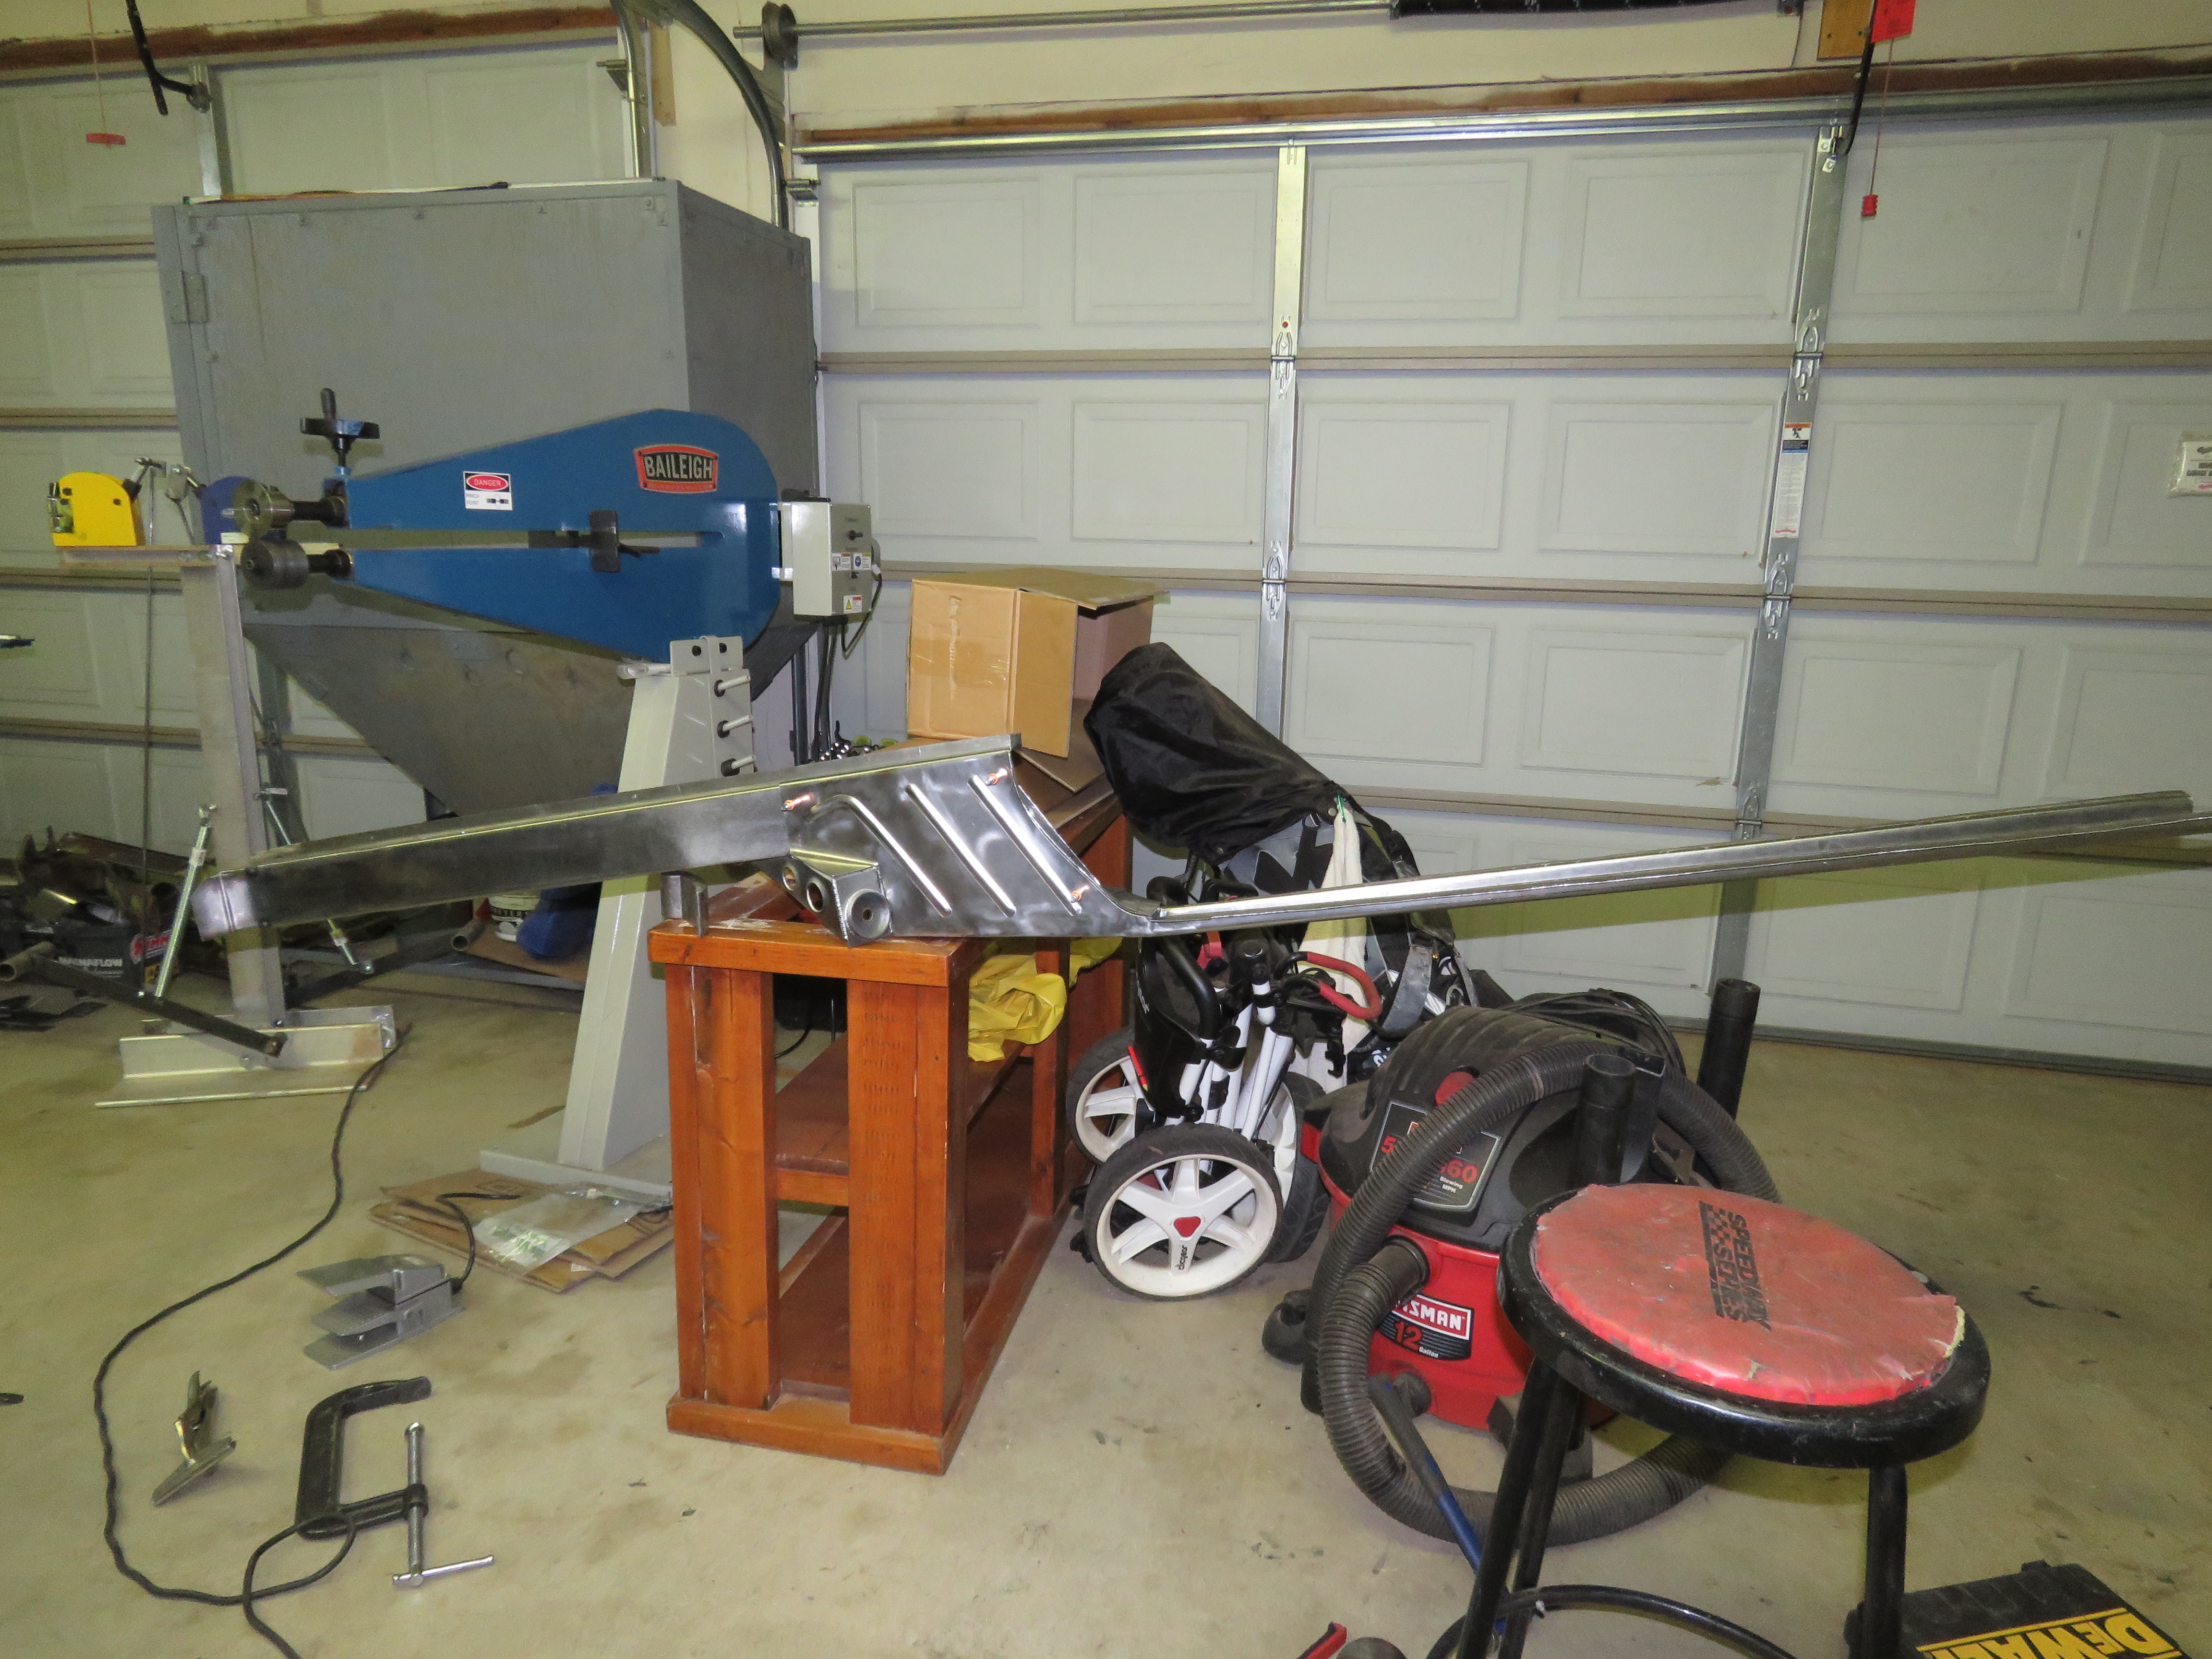
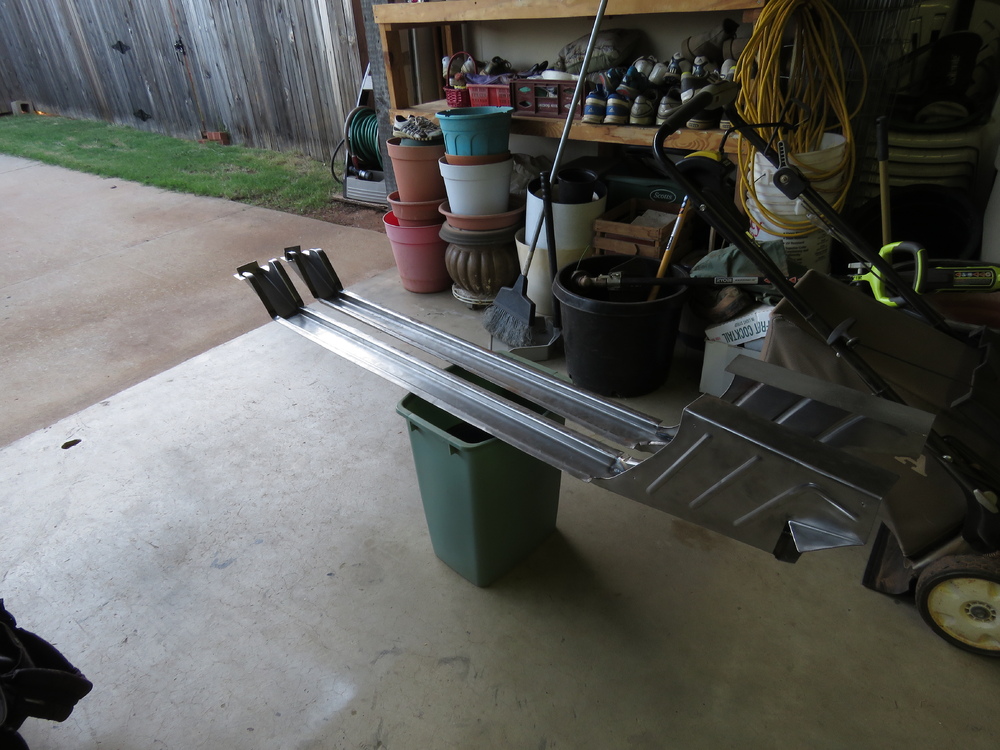
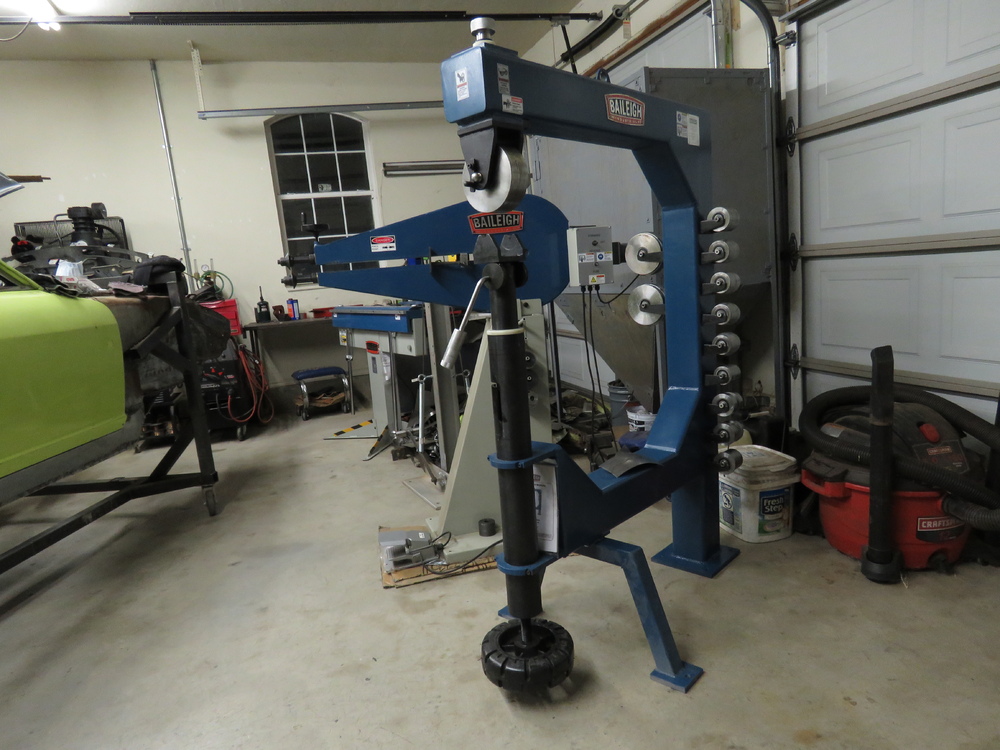
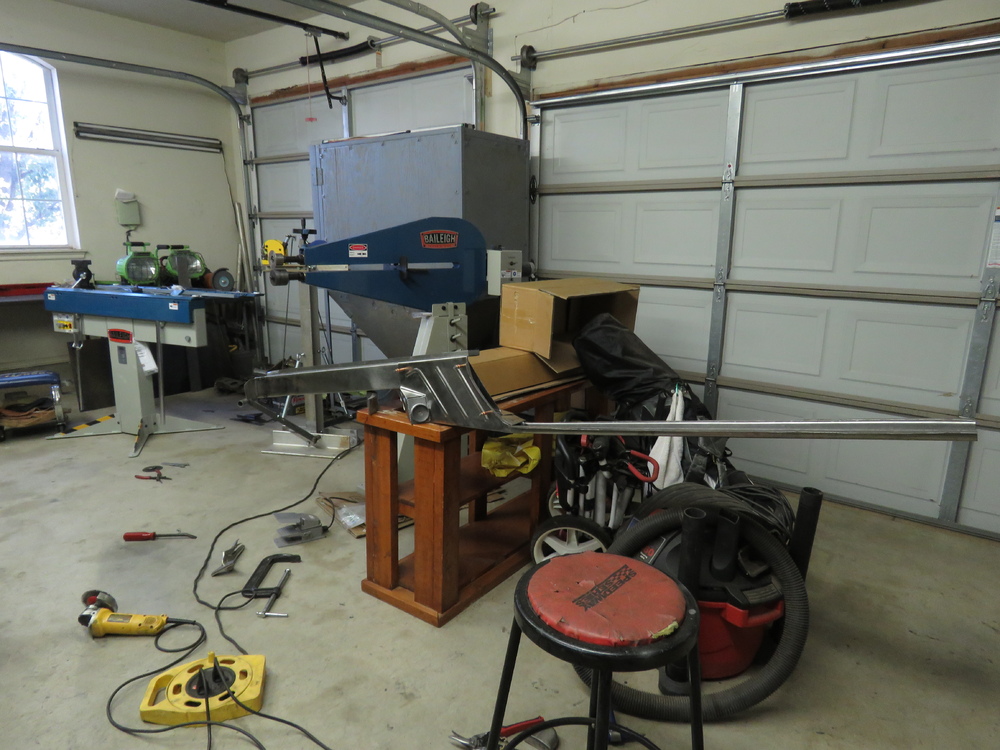
Thanks. My biggest complaint is the upper wheel is off centered to the lower anvil, looks to be a lot of work to get it centered with the design they have. The upper wheel didnt set perfectly flat/flush to the lower anvils, I tried my best to correct this with some work on the anvil cradle. there is a lot of free play in the upper wheel and anvil support. The jack for the lower anvil support has wiggle room where the slits are for the two positions are for the lower support, hard to explain. The upper wheel is thinner (2" wide) than the lower anvils (3" wide), makes no sense to me and never ever seen this before on an english wheel online, in fact their online description is misleading on this part. Really the only good thing out of it is a decent set of lower anvils and the frame. I put an order in from Hoosier Profiles Inc. (http://www.hoosierprofiles.com/) for a 8"x3" upper wheel and a bunch of specialty lower anvils. Waiting on those to arrive. I will have to modify the Baileigh wheel to accept the bigger 8x3 wheel. The lower anvils from Hoosier will work since they are the same dimension as the anvils that it came with. As far as what brand to get, I dont actually really know as I never used any other brand, but I hear a lot of great things from Metal Ace, Ron Covell uses them. You can also take a look at Mittler brothers brand, hear good things from them. Honestly though, for the price of the brands I mentioned, you better off buying a kit from Hoosier Profiles Inc. and making your own frame. Look on metalmeet forum and there isnt a single compliant on Hoosier. I should had gone that route, but because I had such good experience with the other Baileigh tools, I figure what can go wrong with their English Wheel... Thanks Mike, hope this becomes useful for others.
-
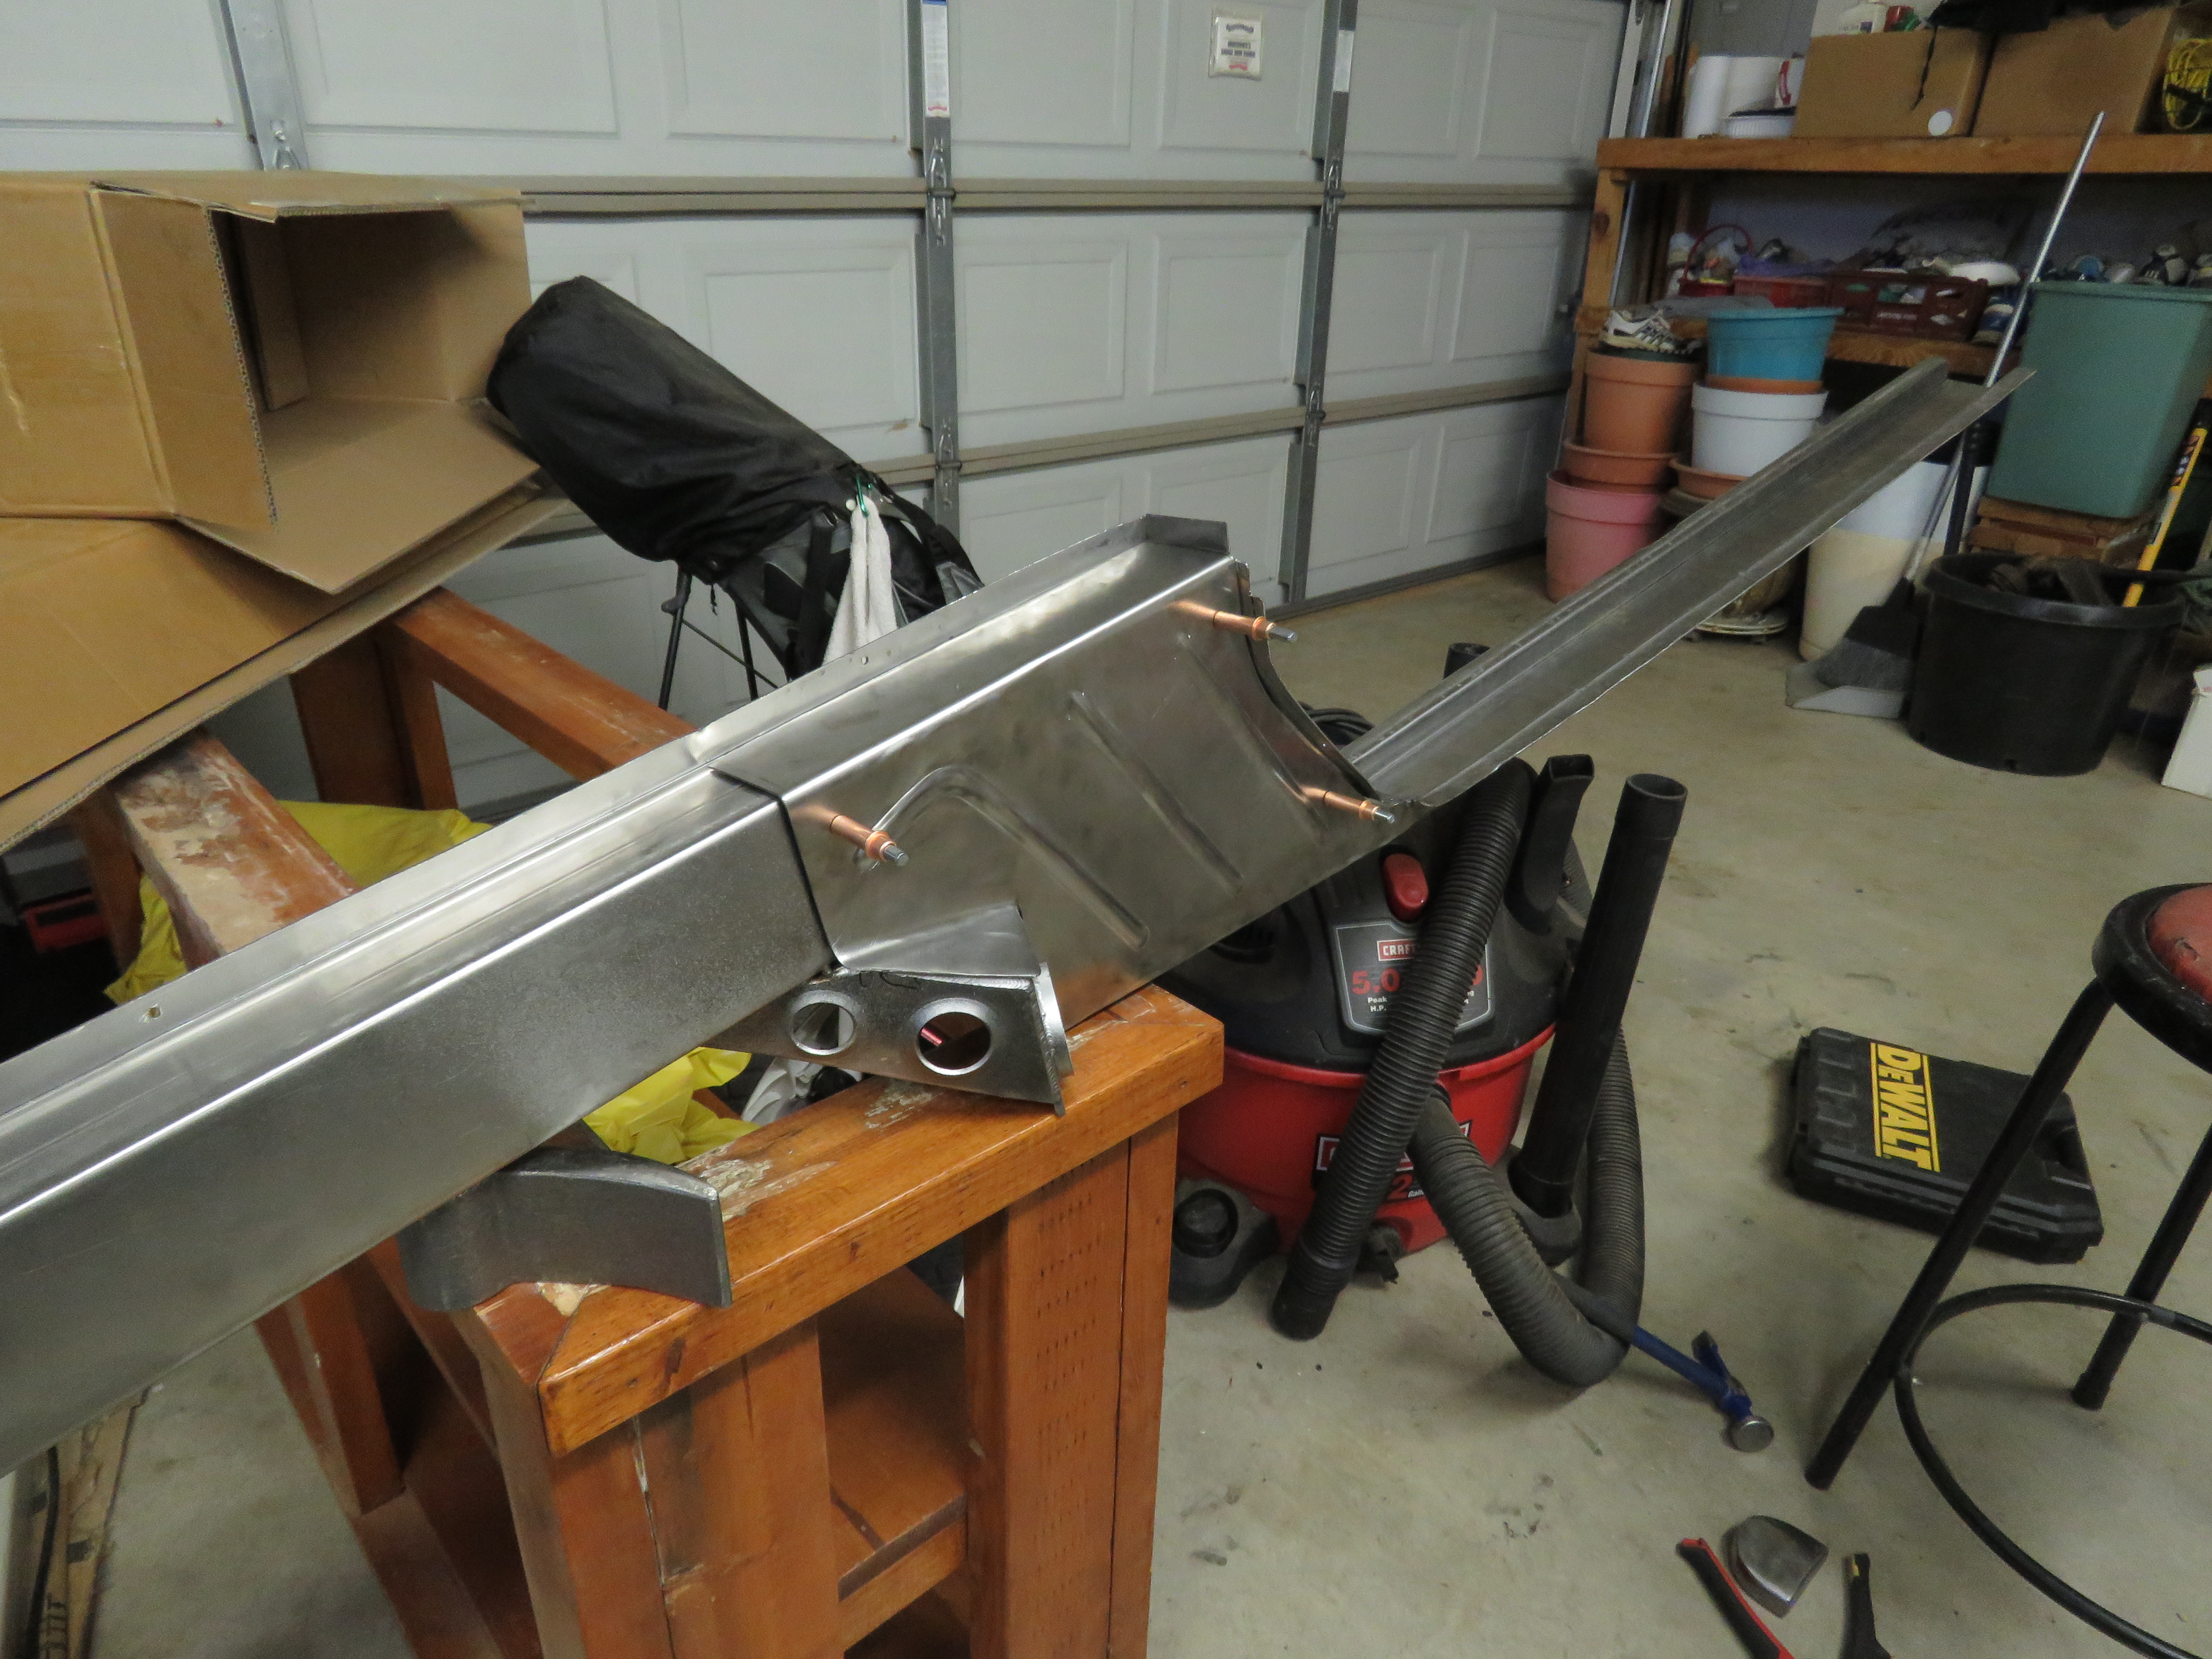
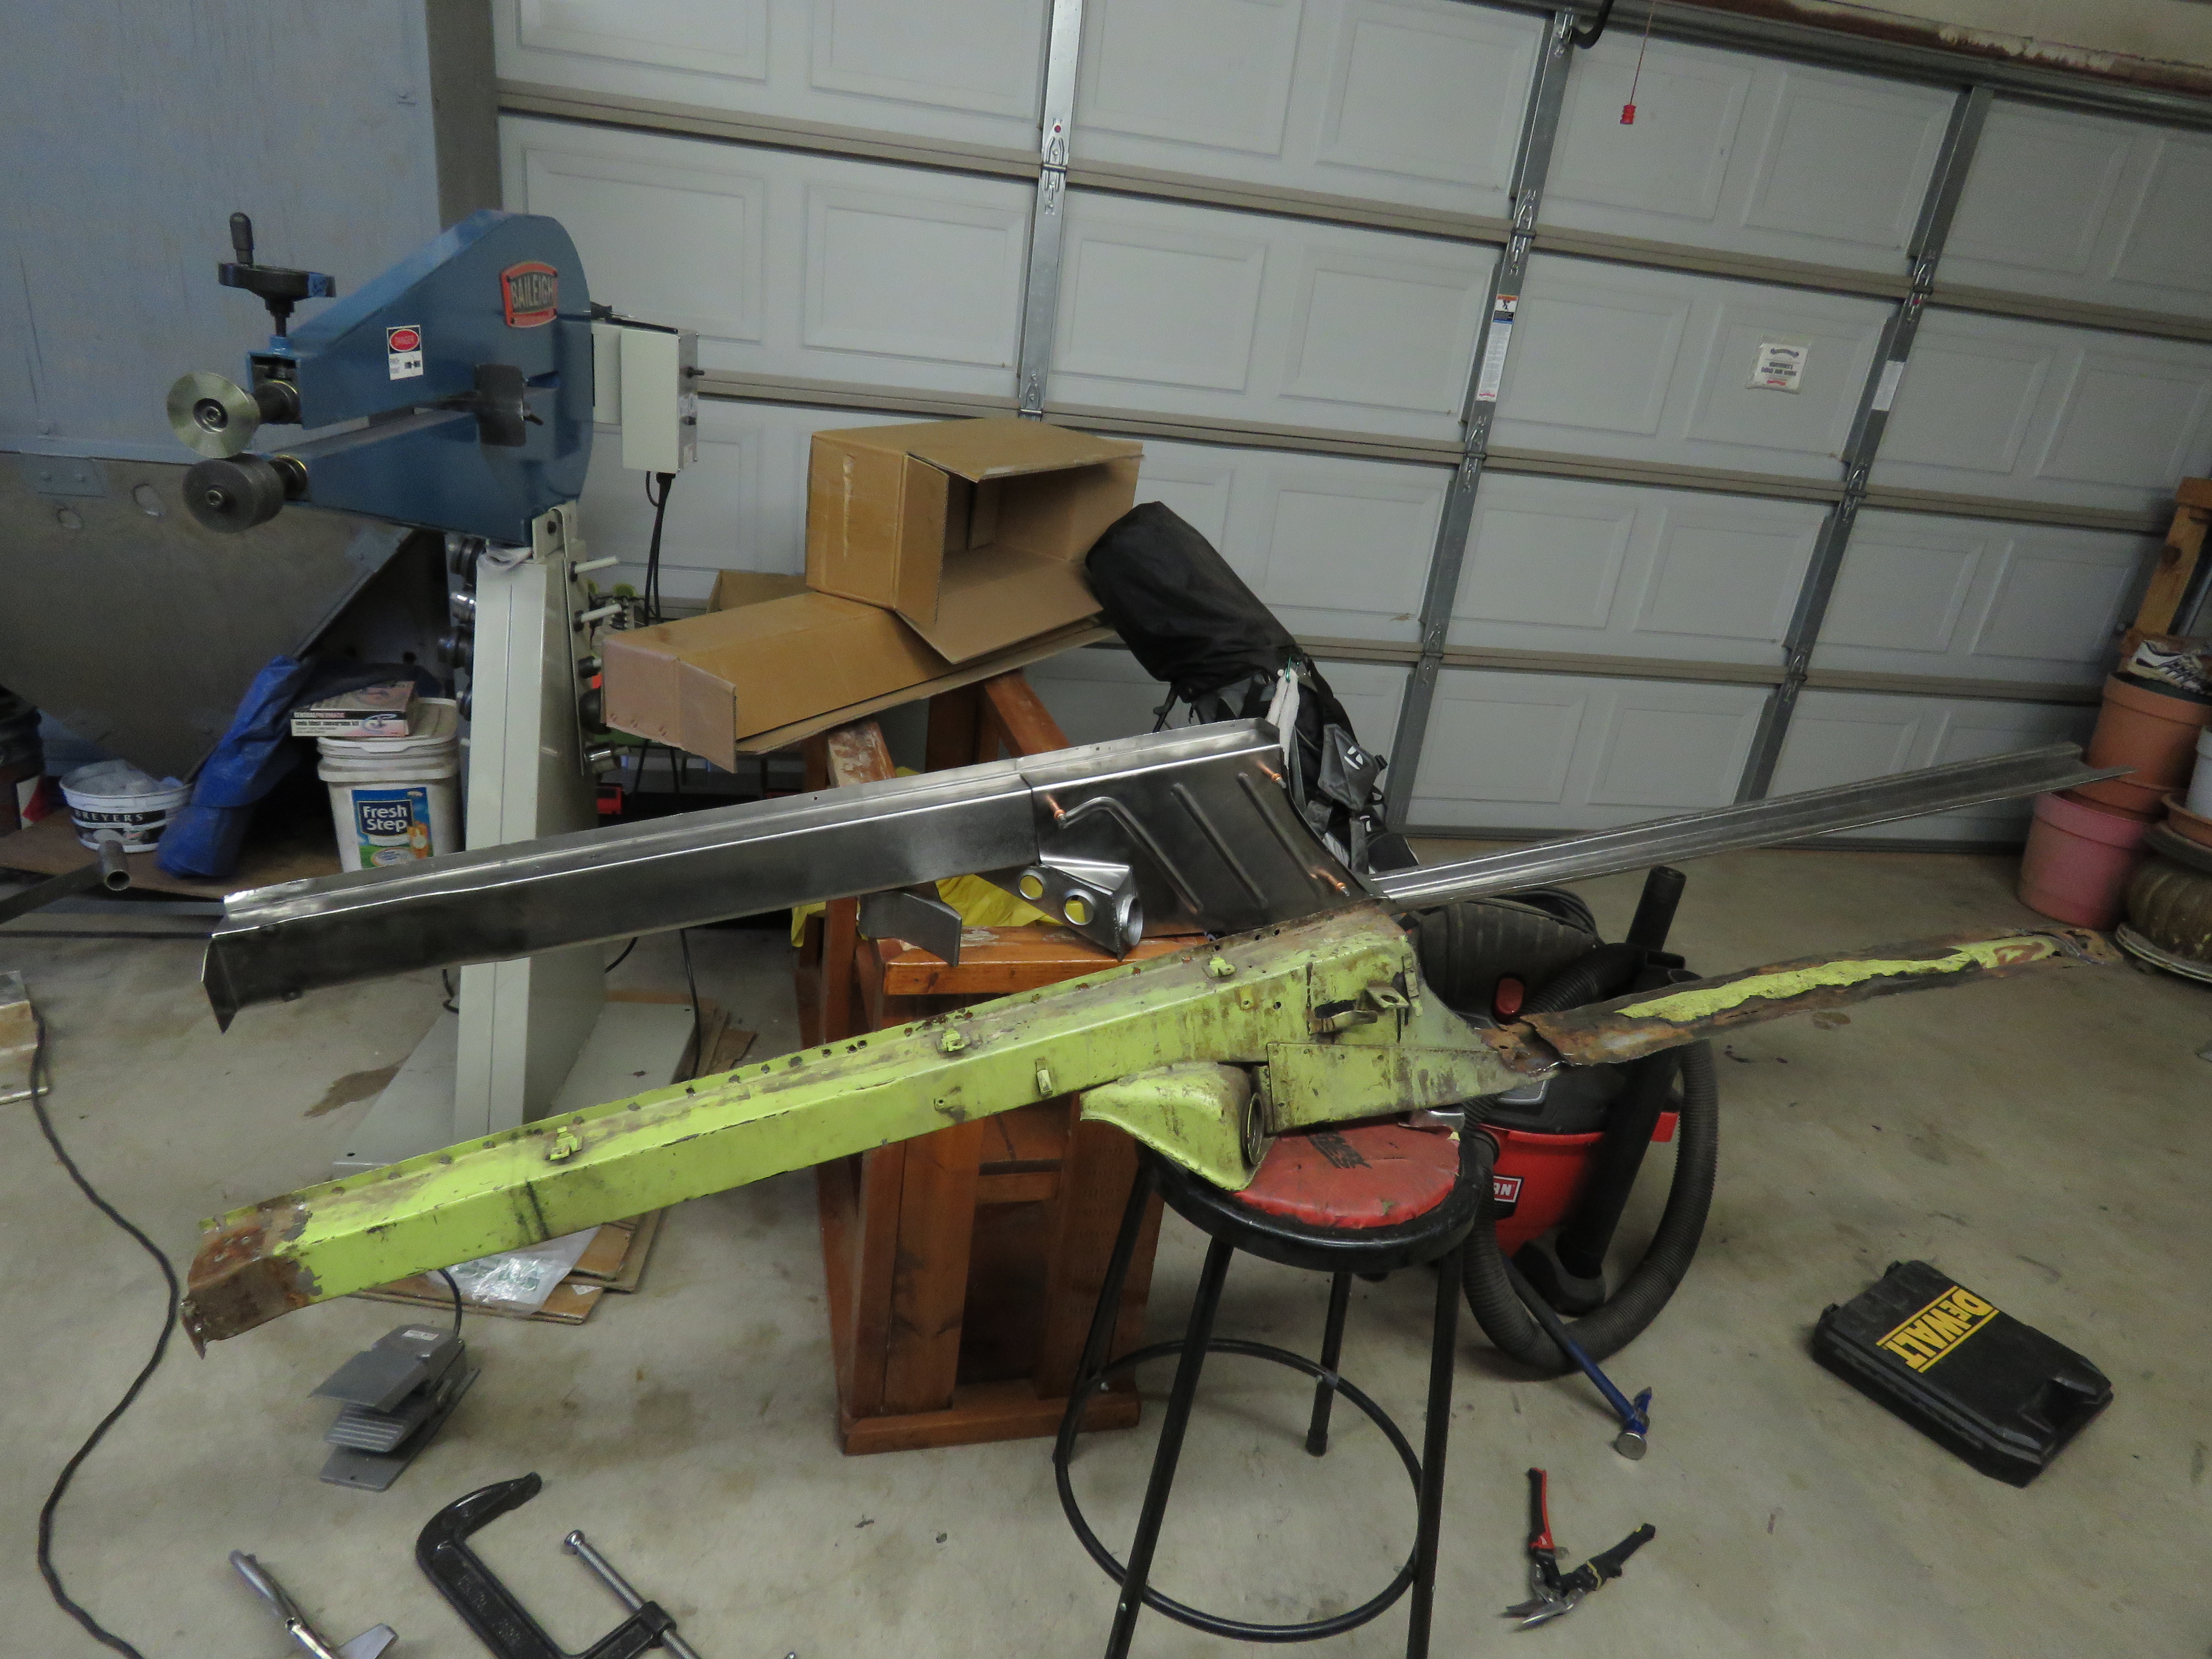
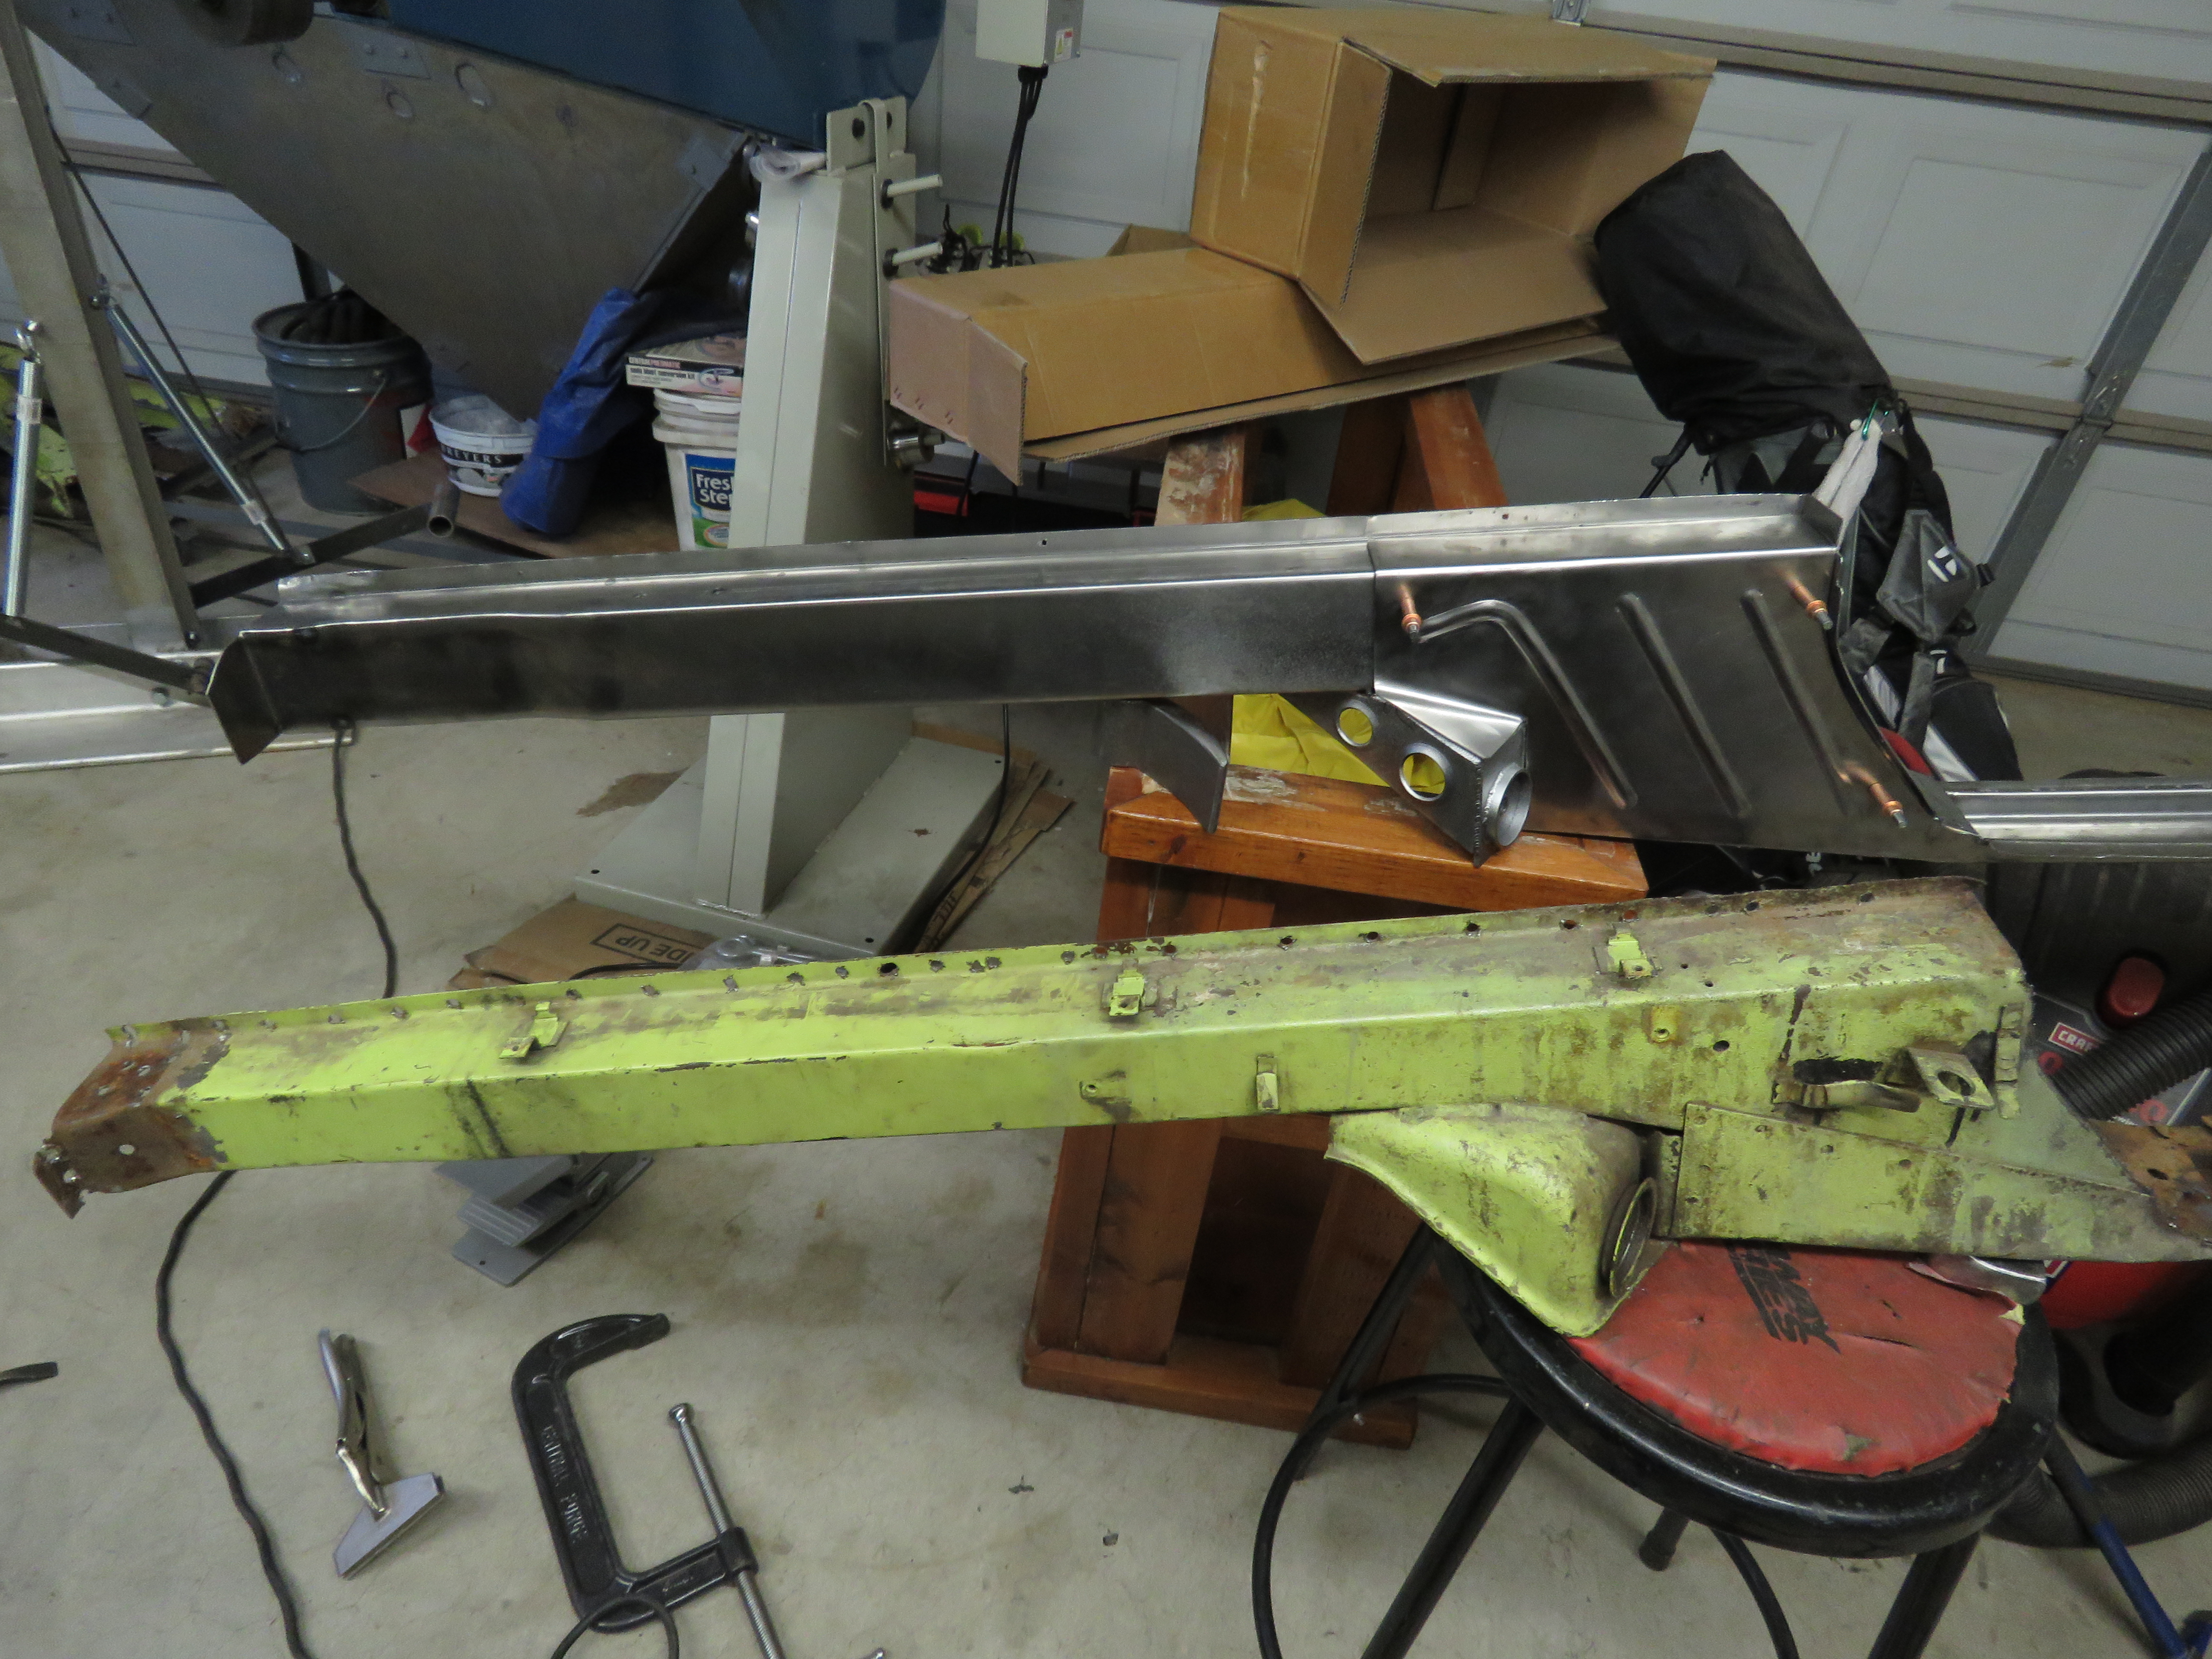
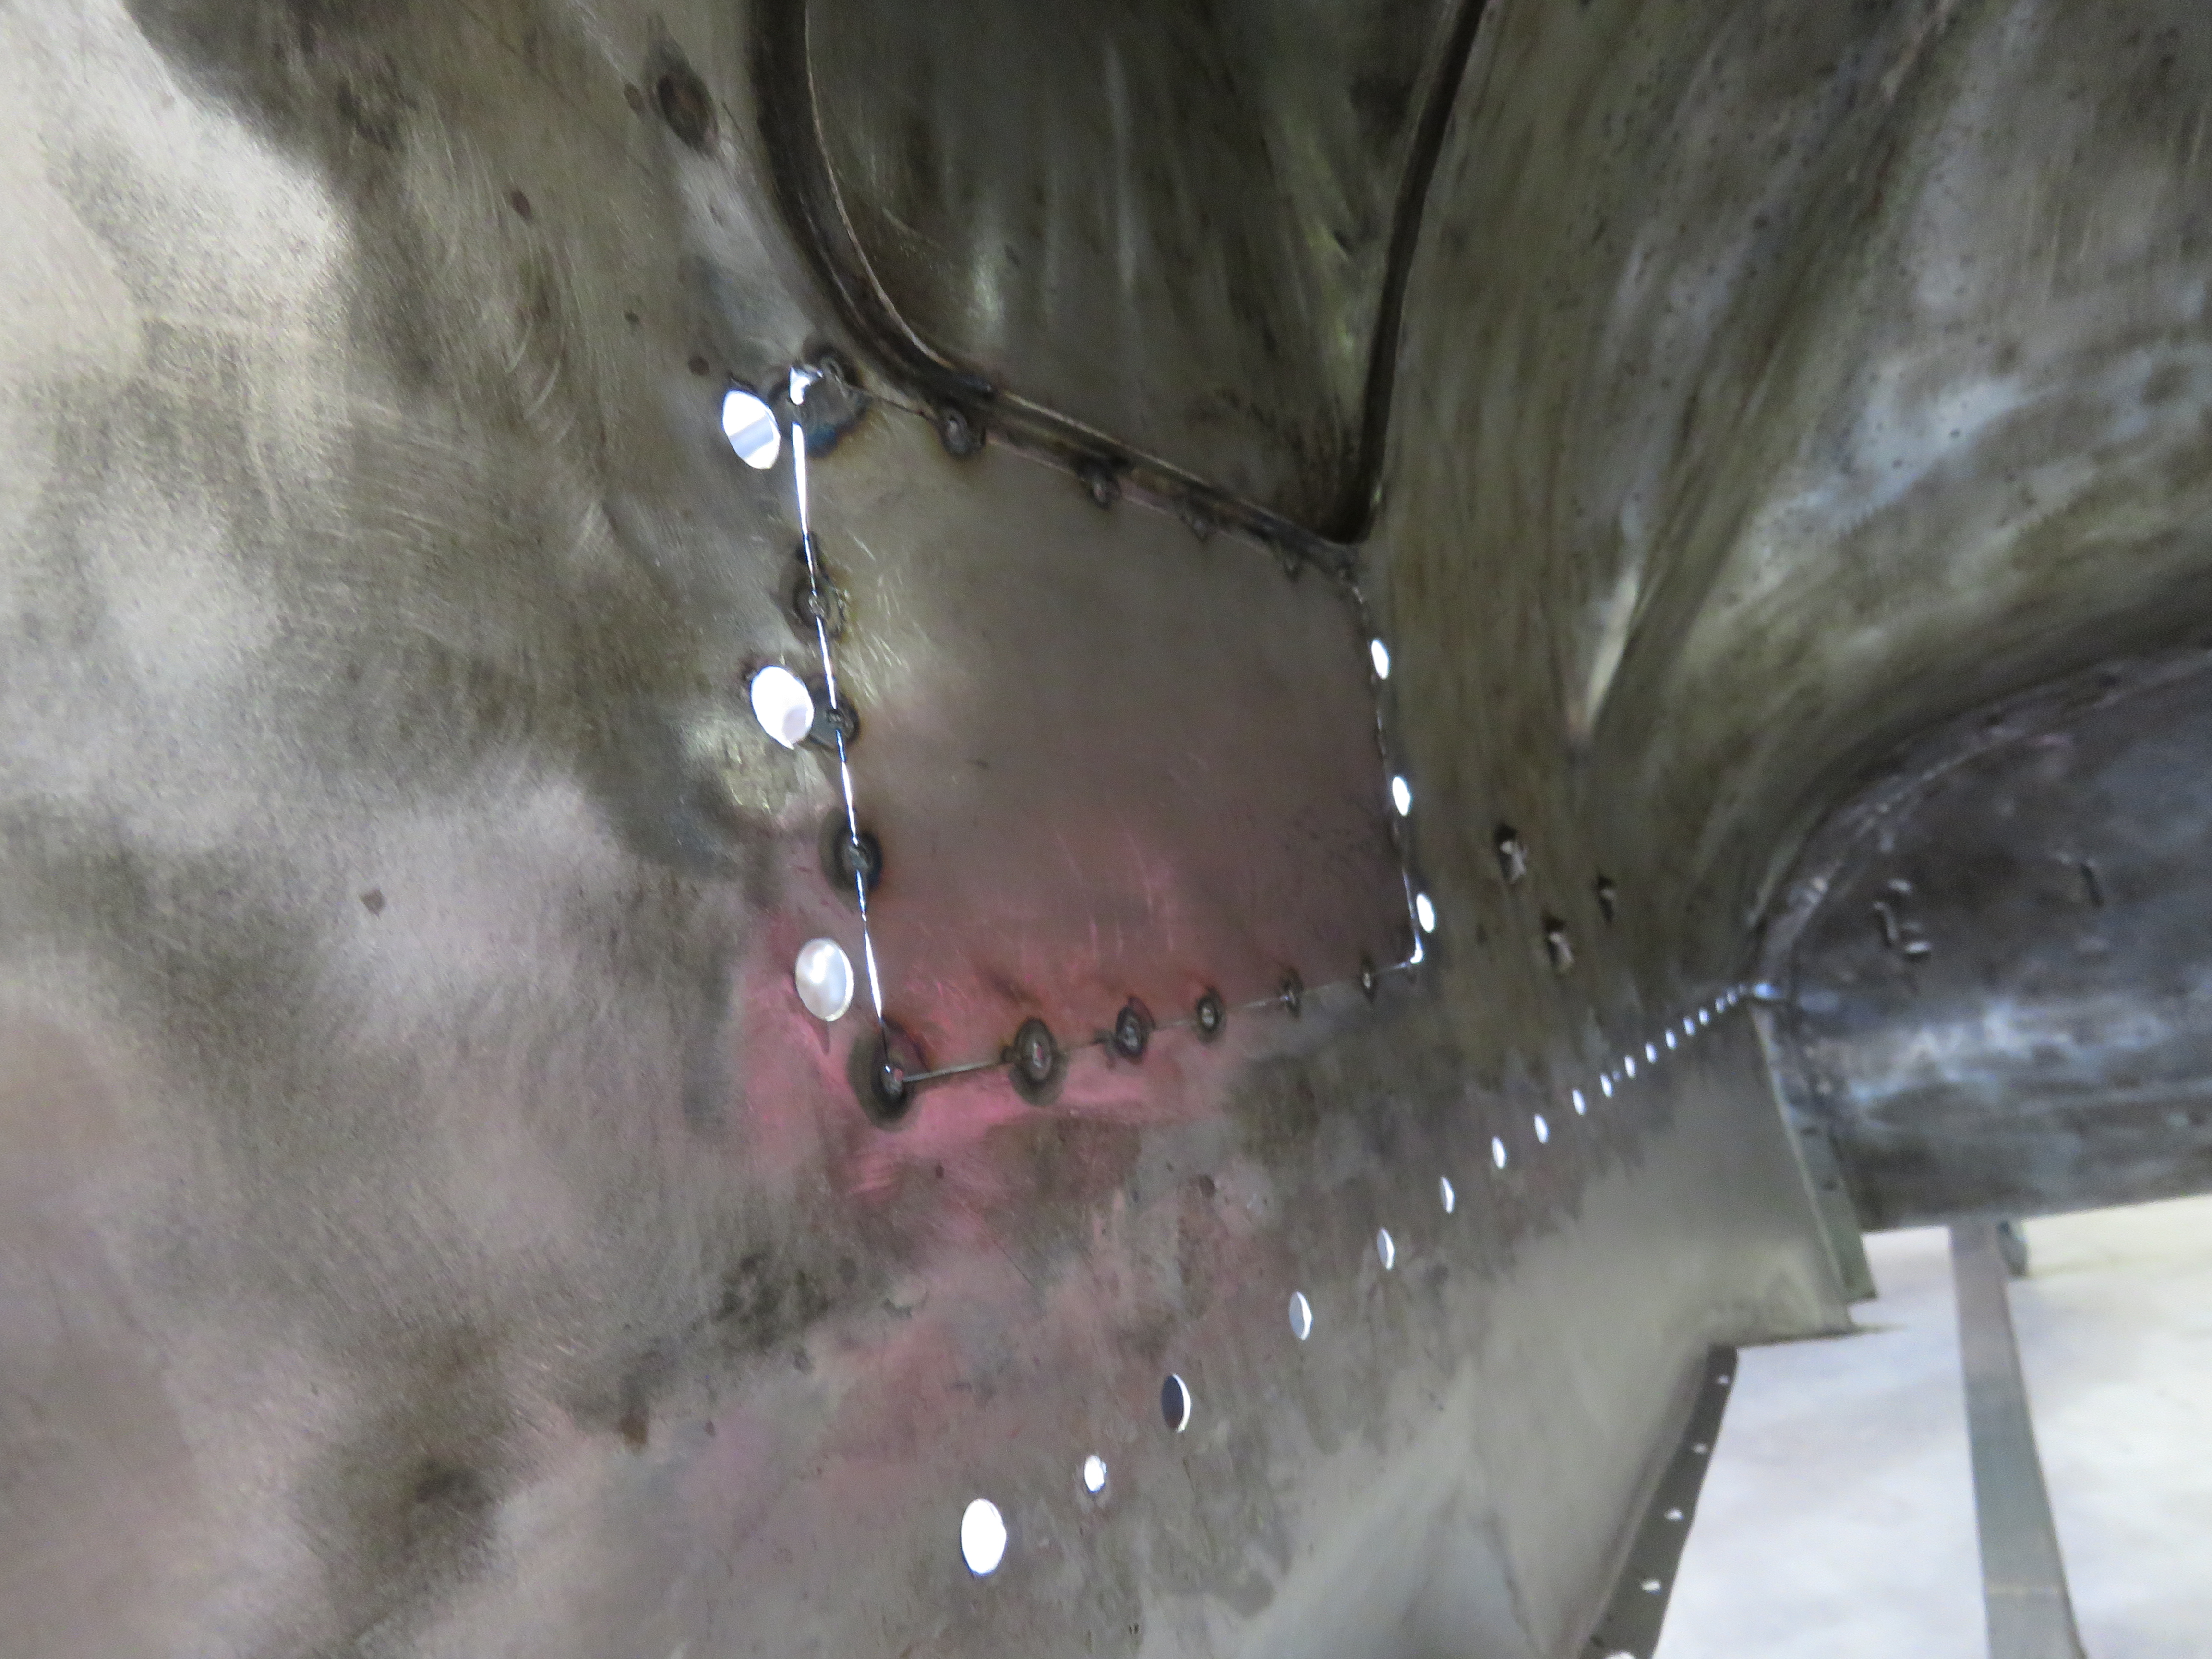
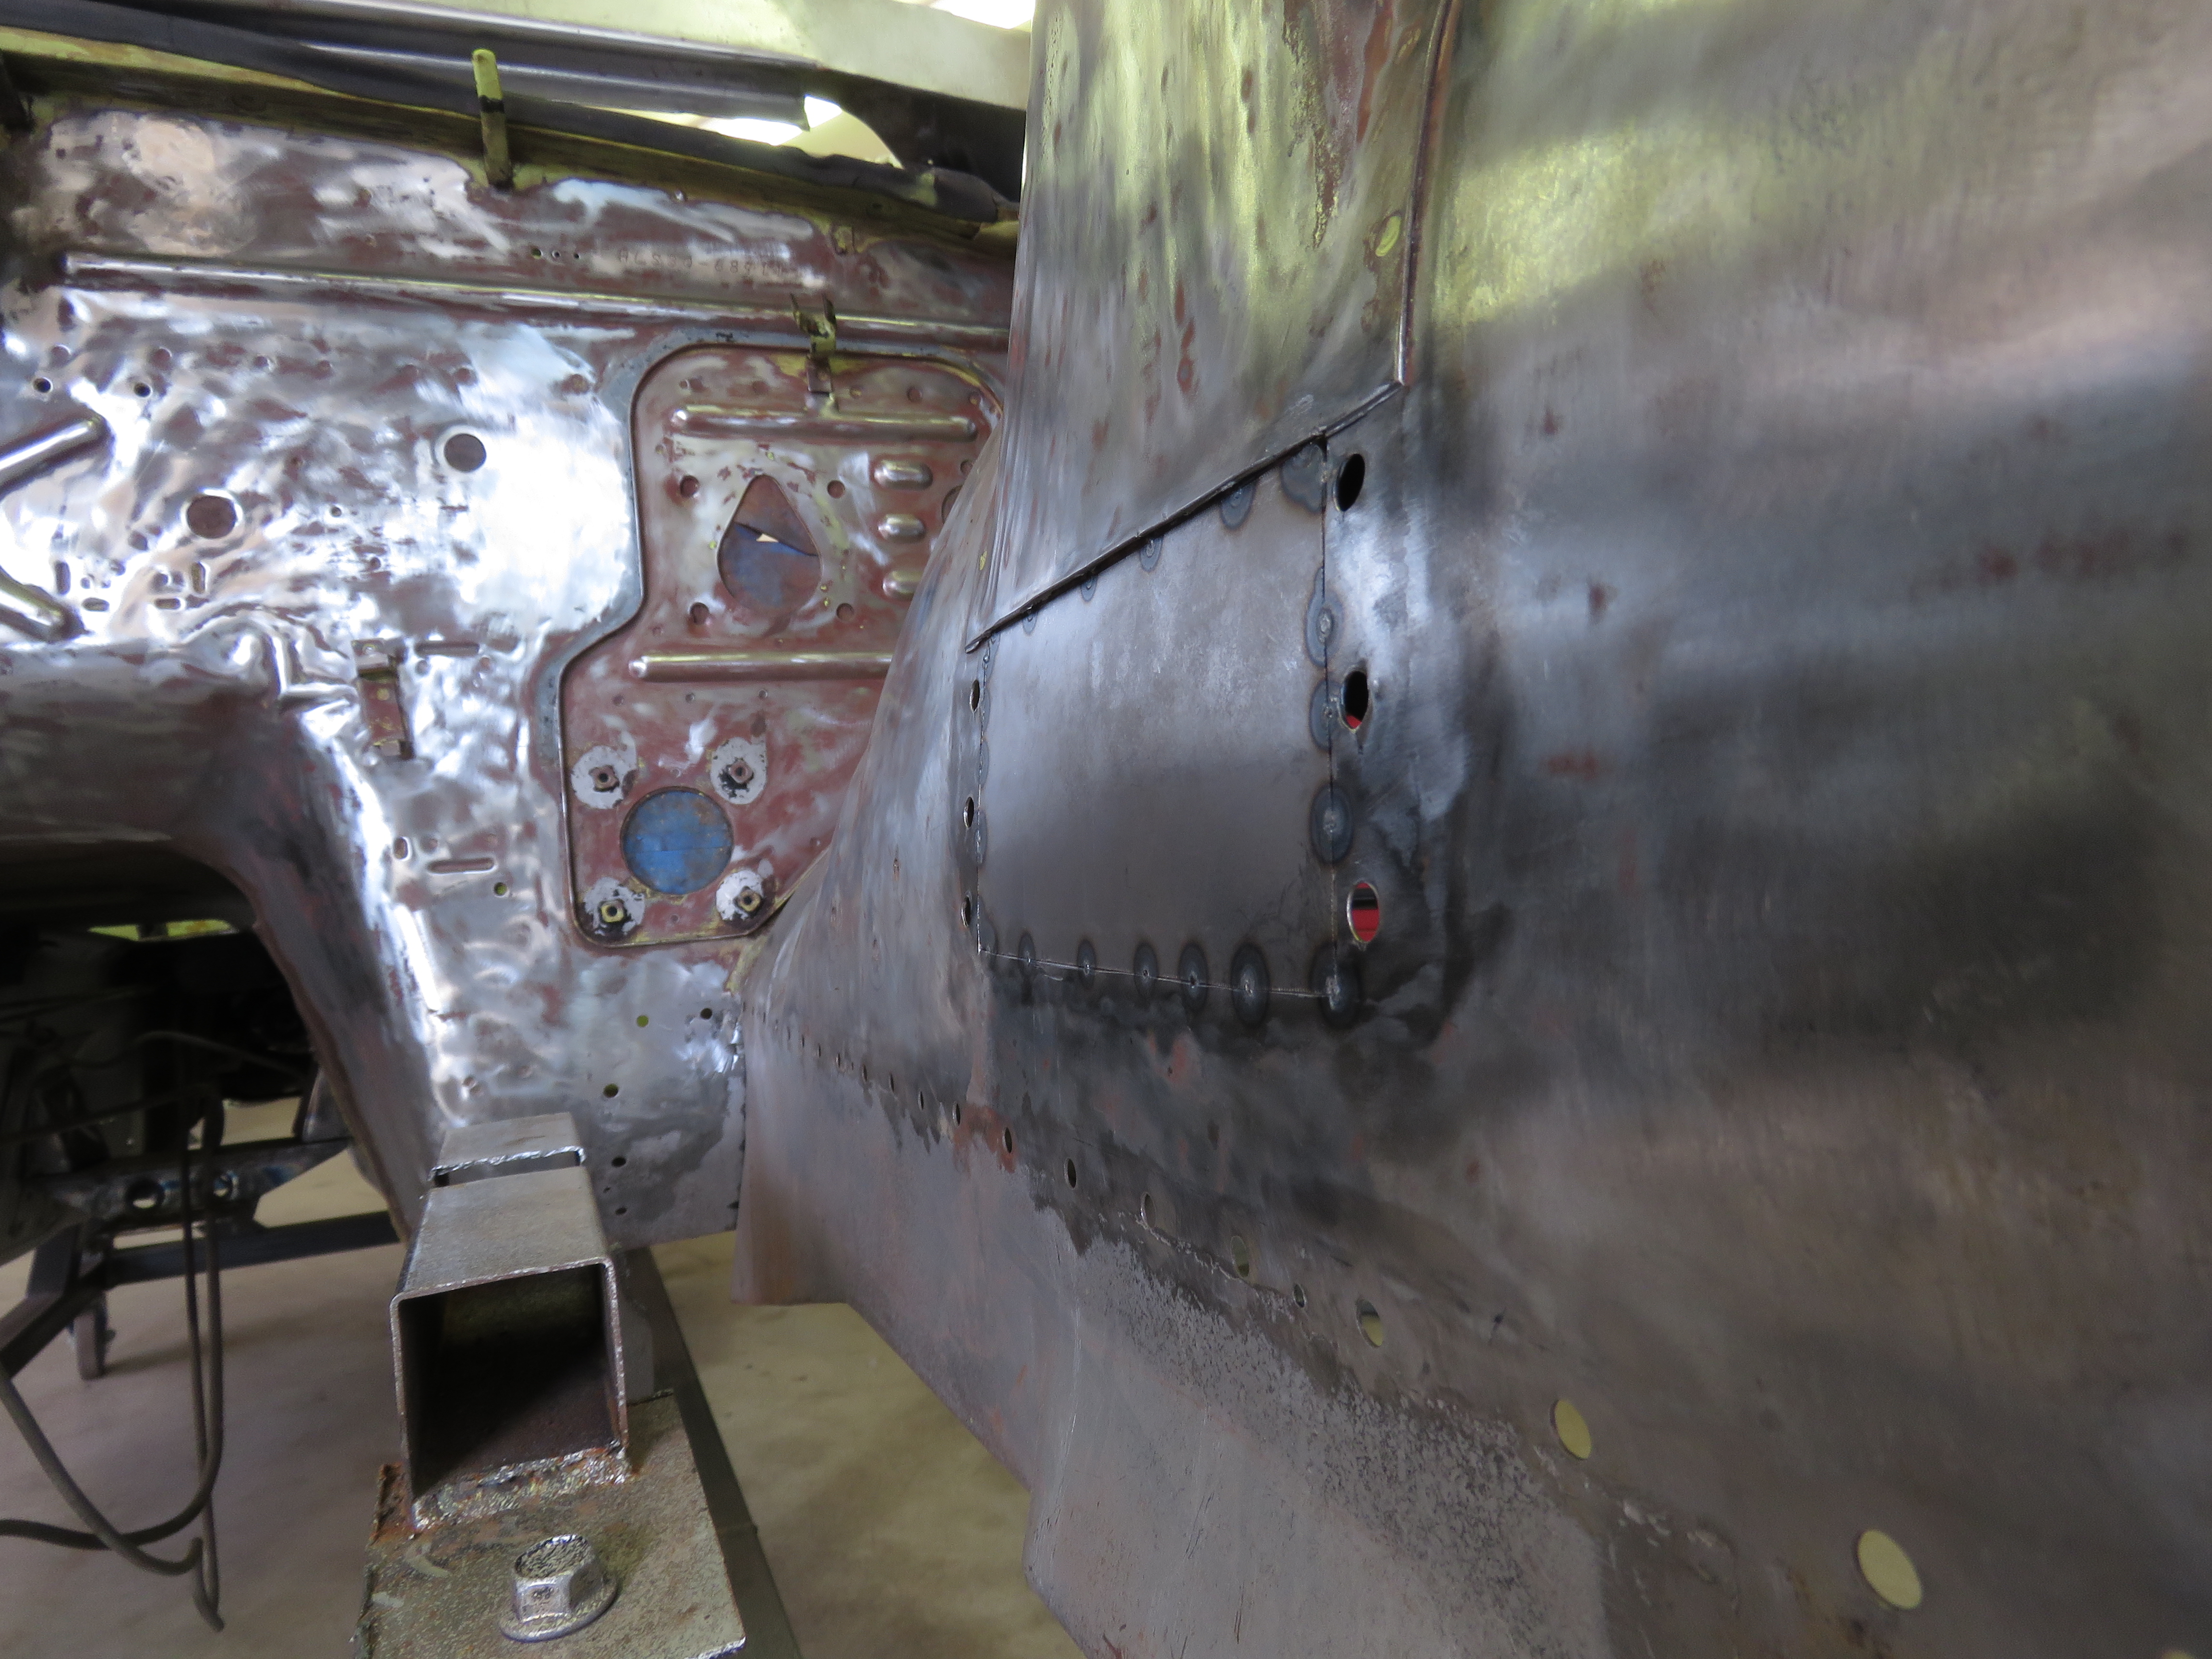
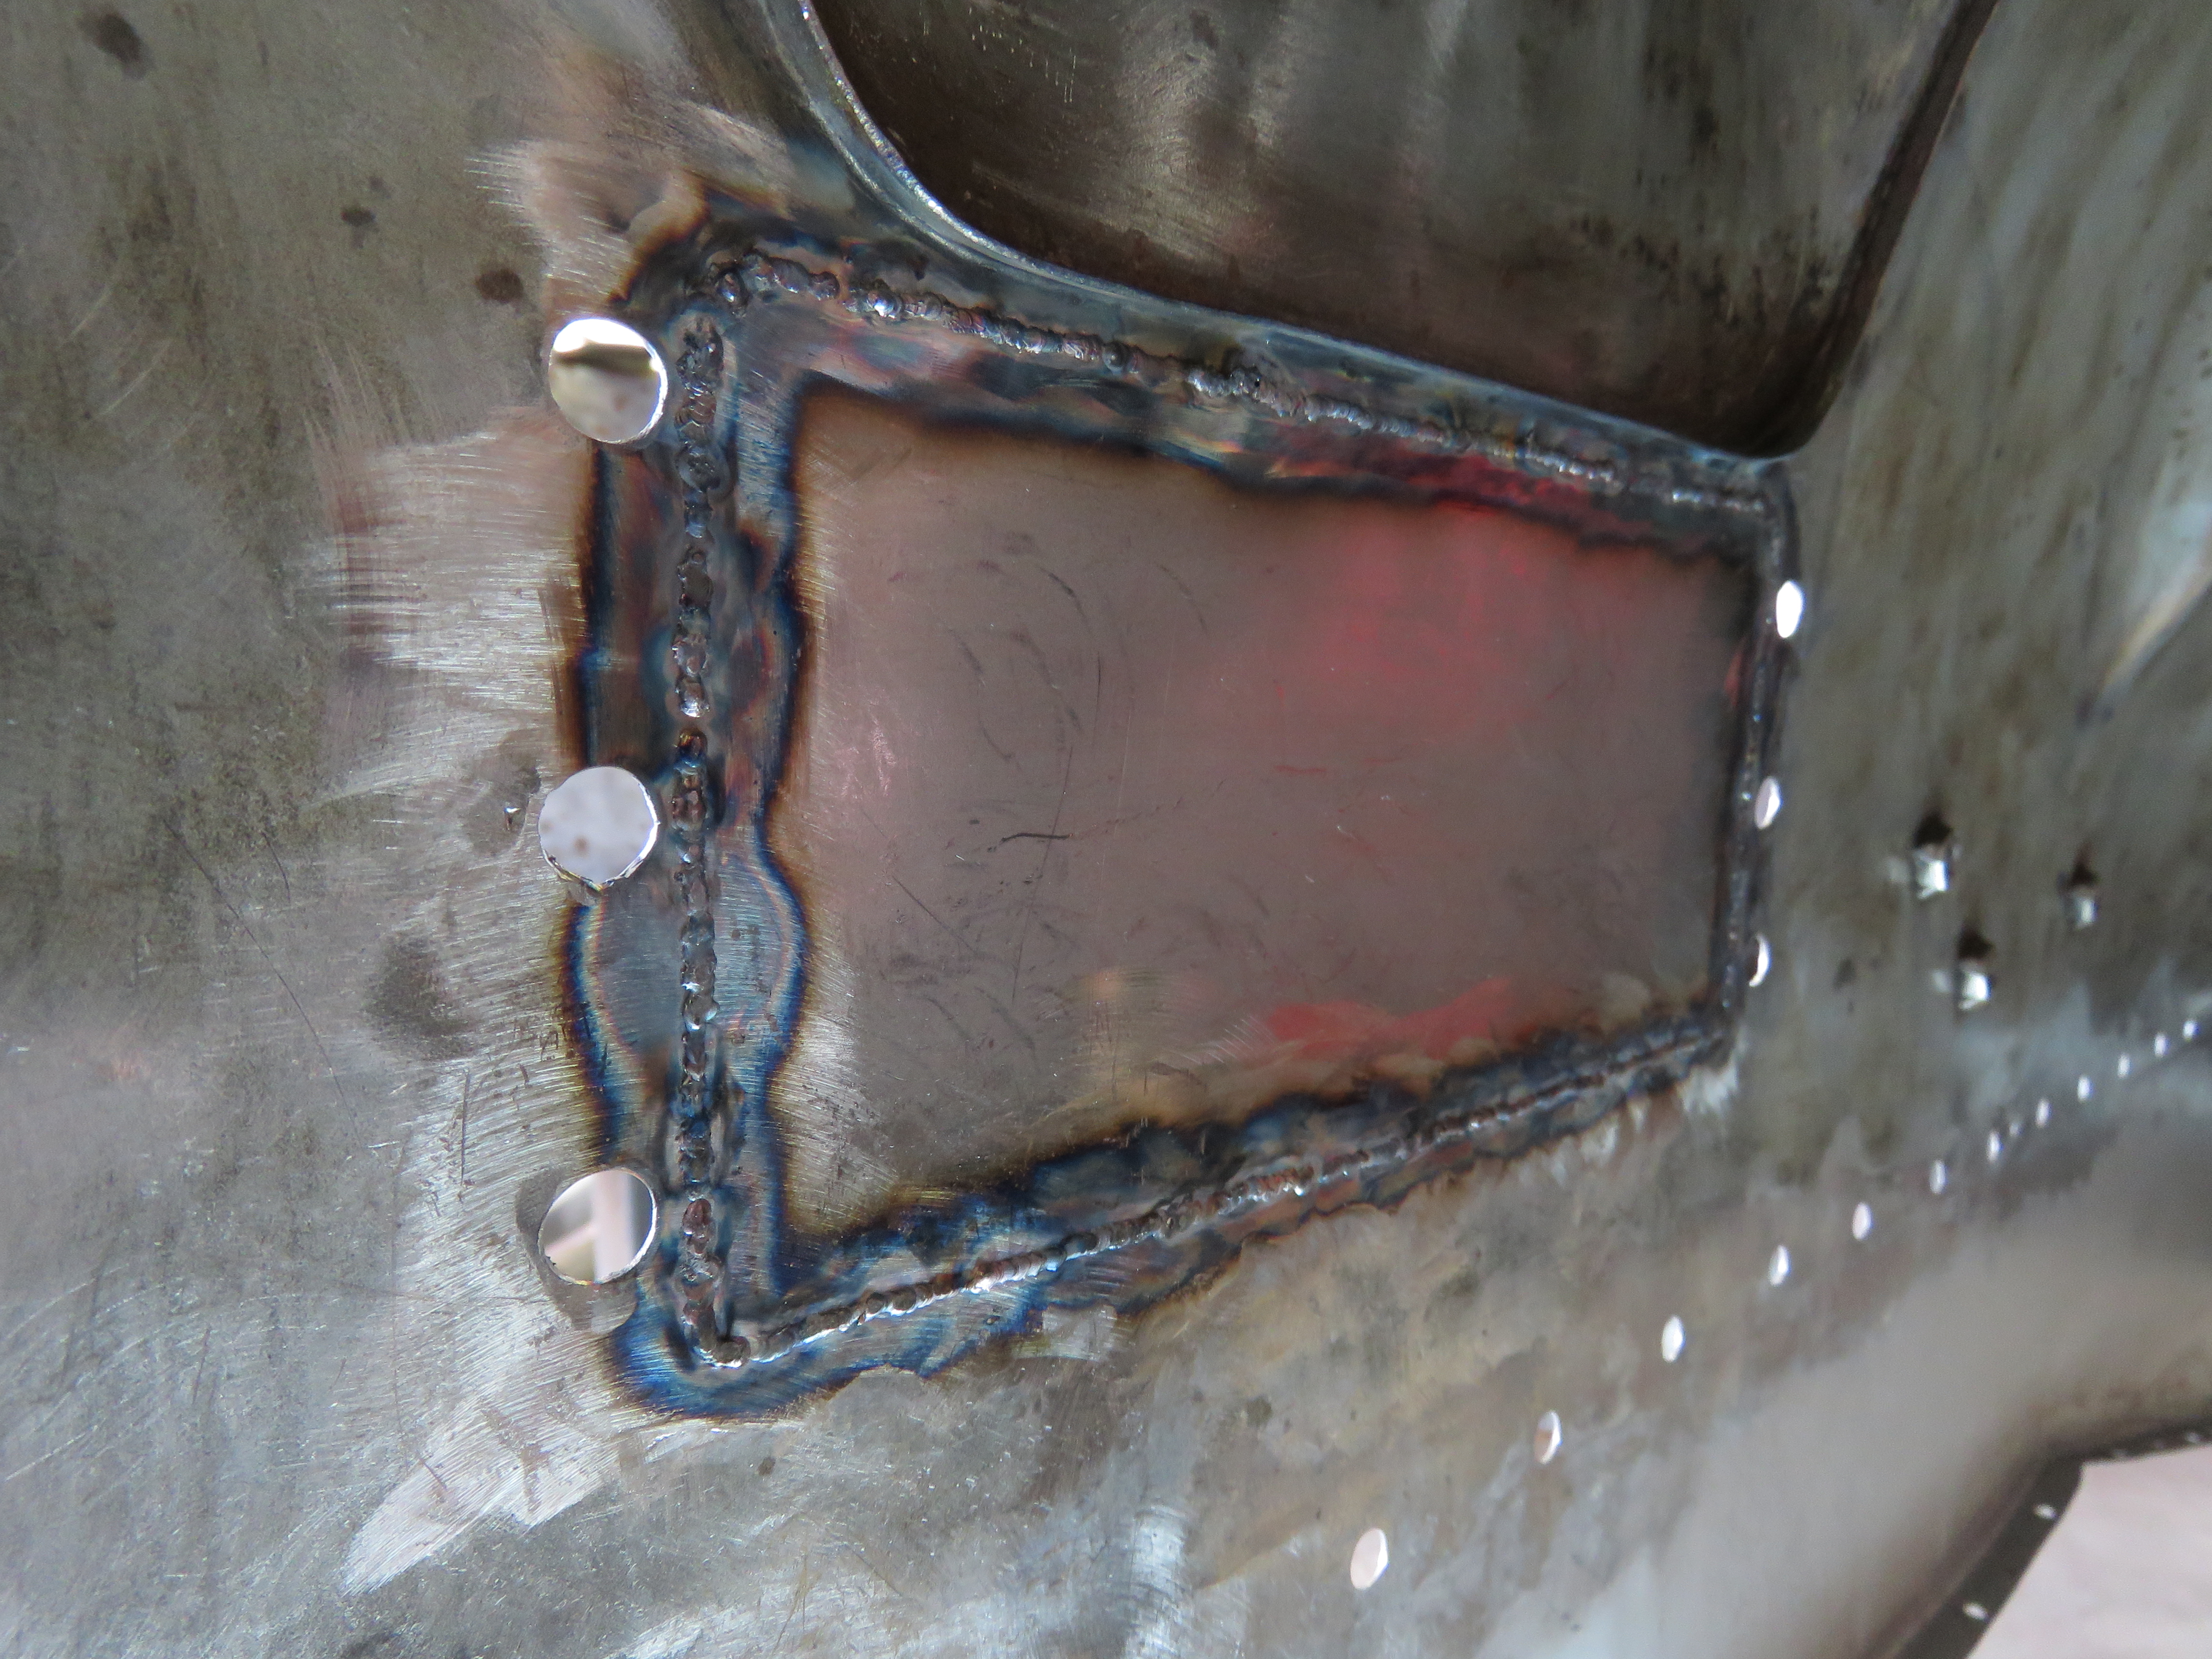
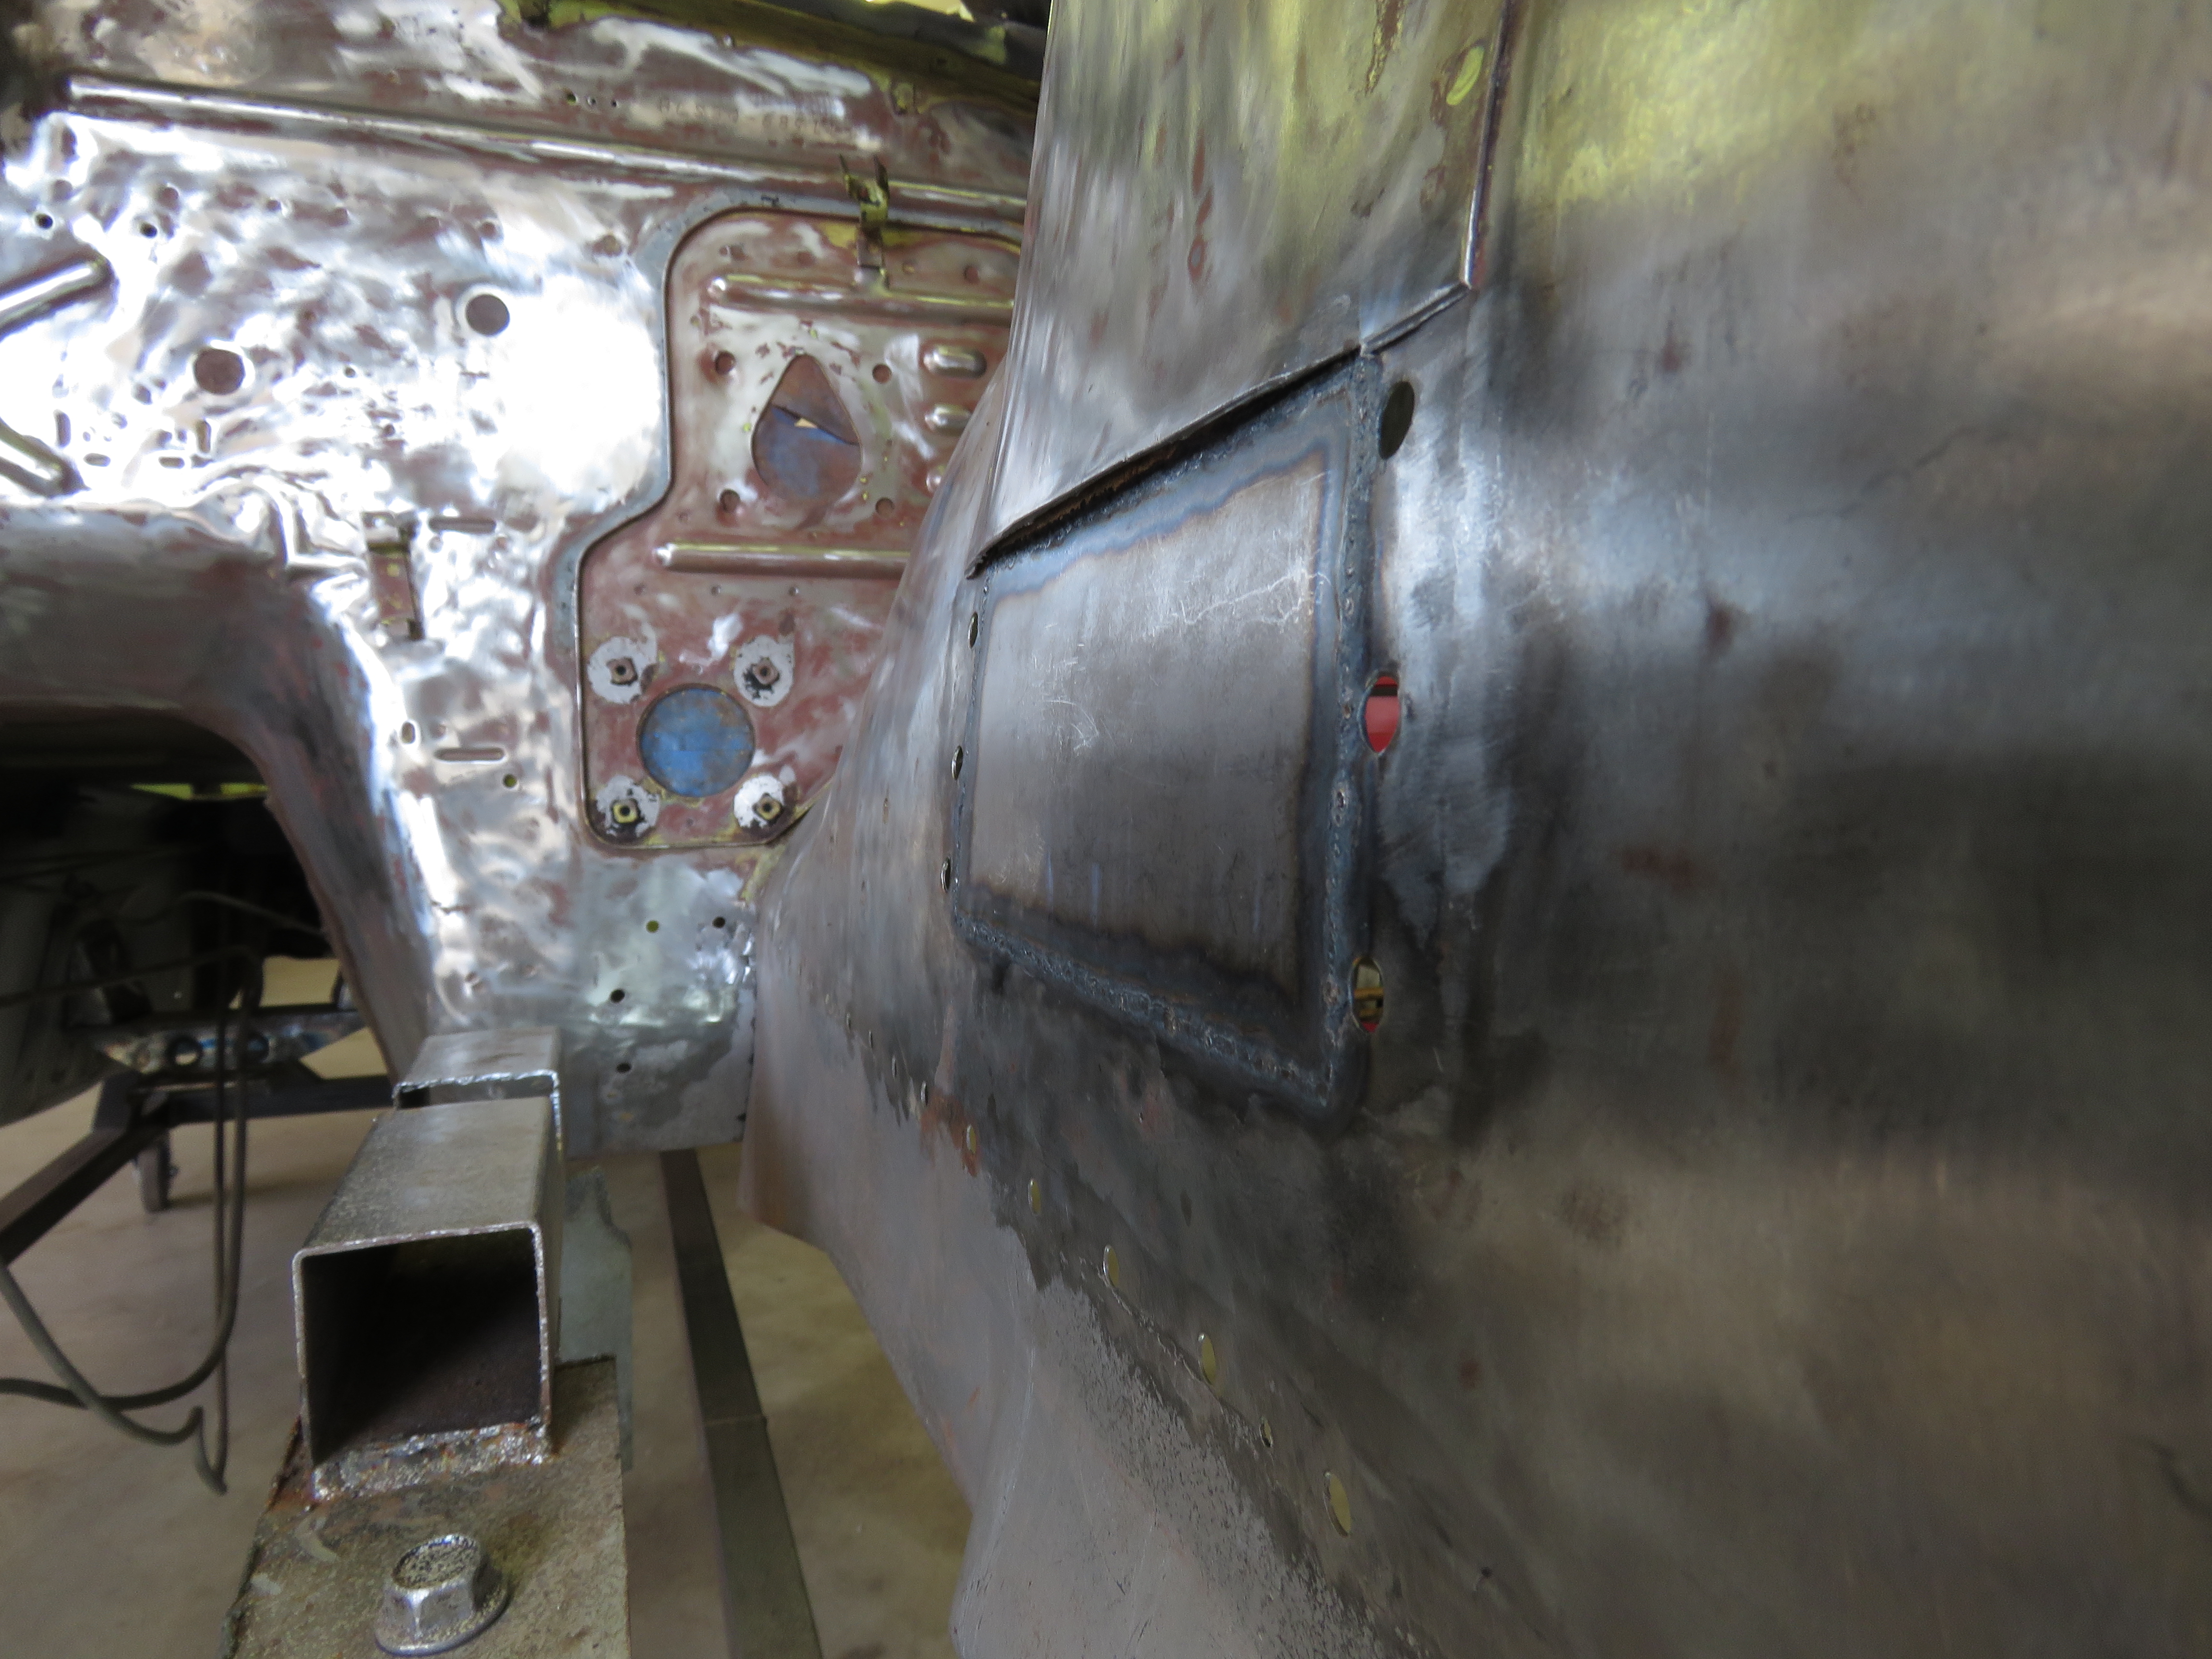
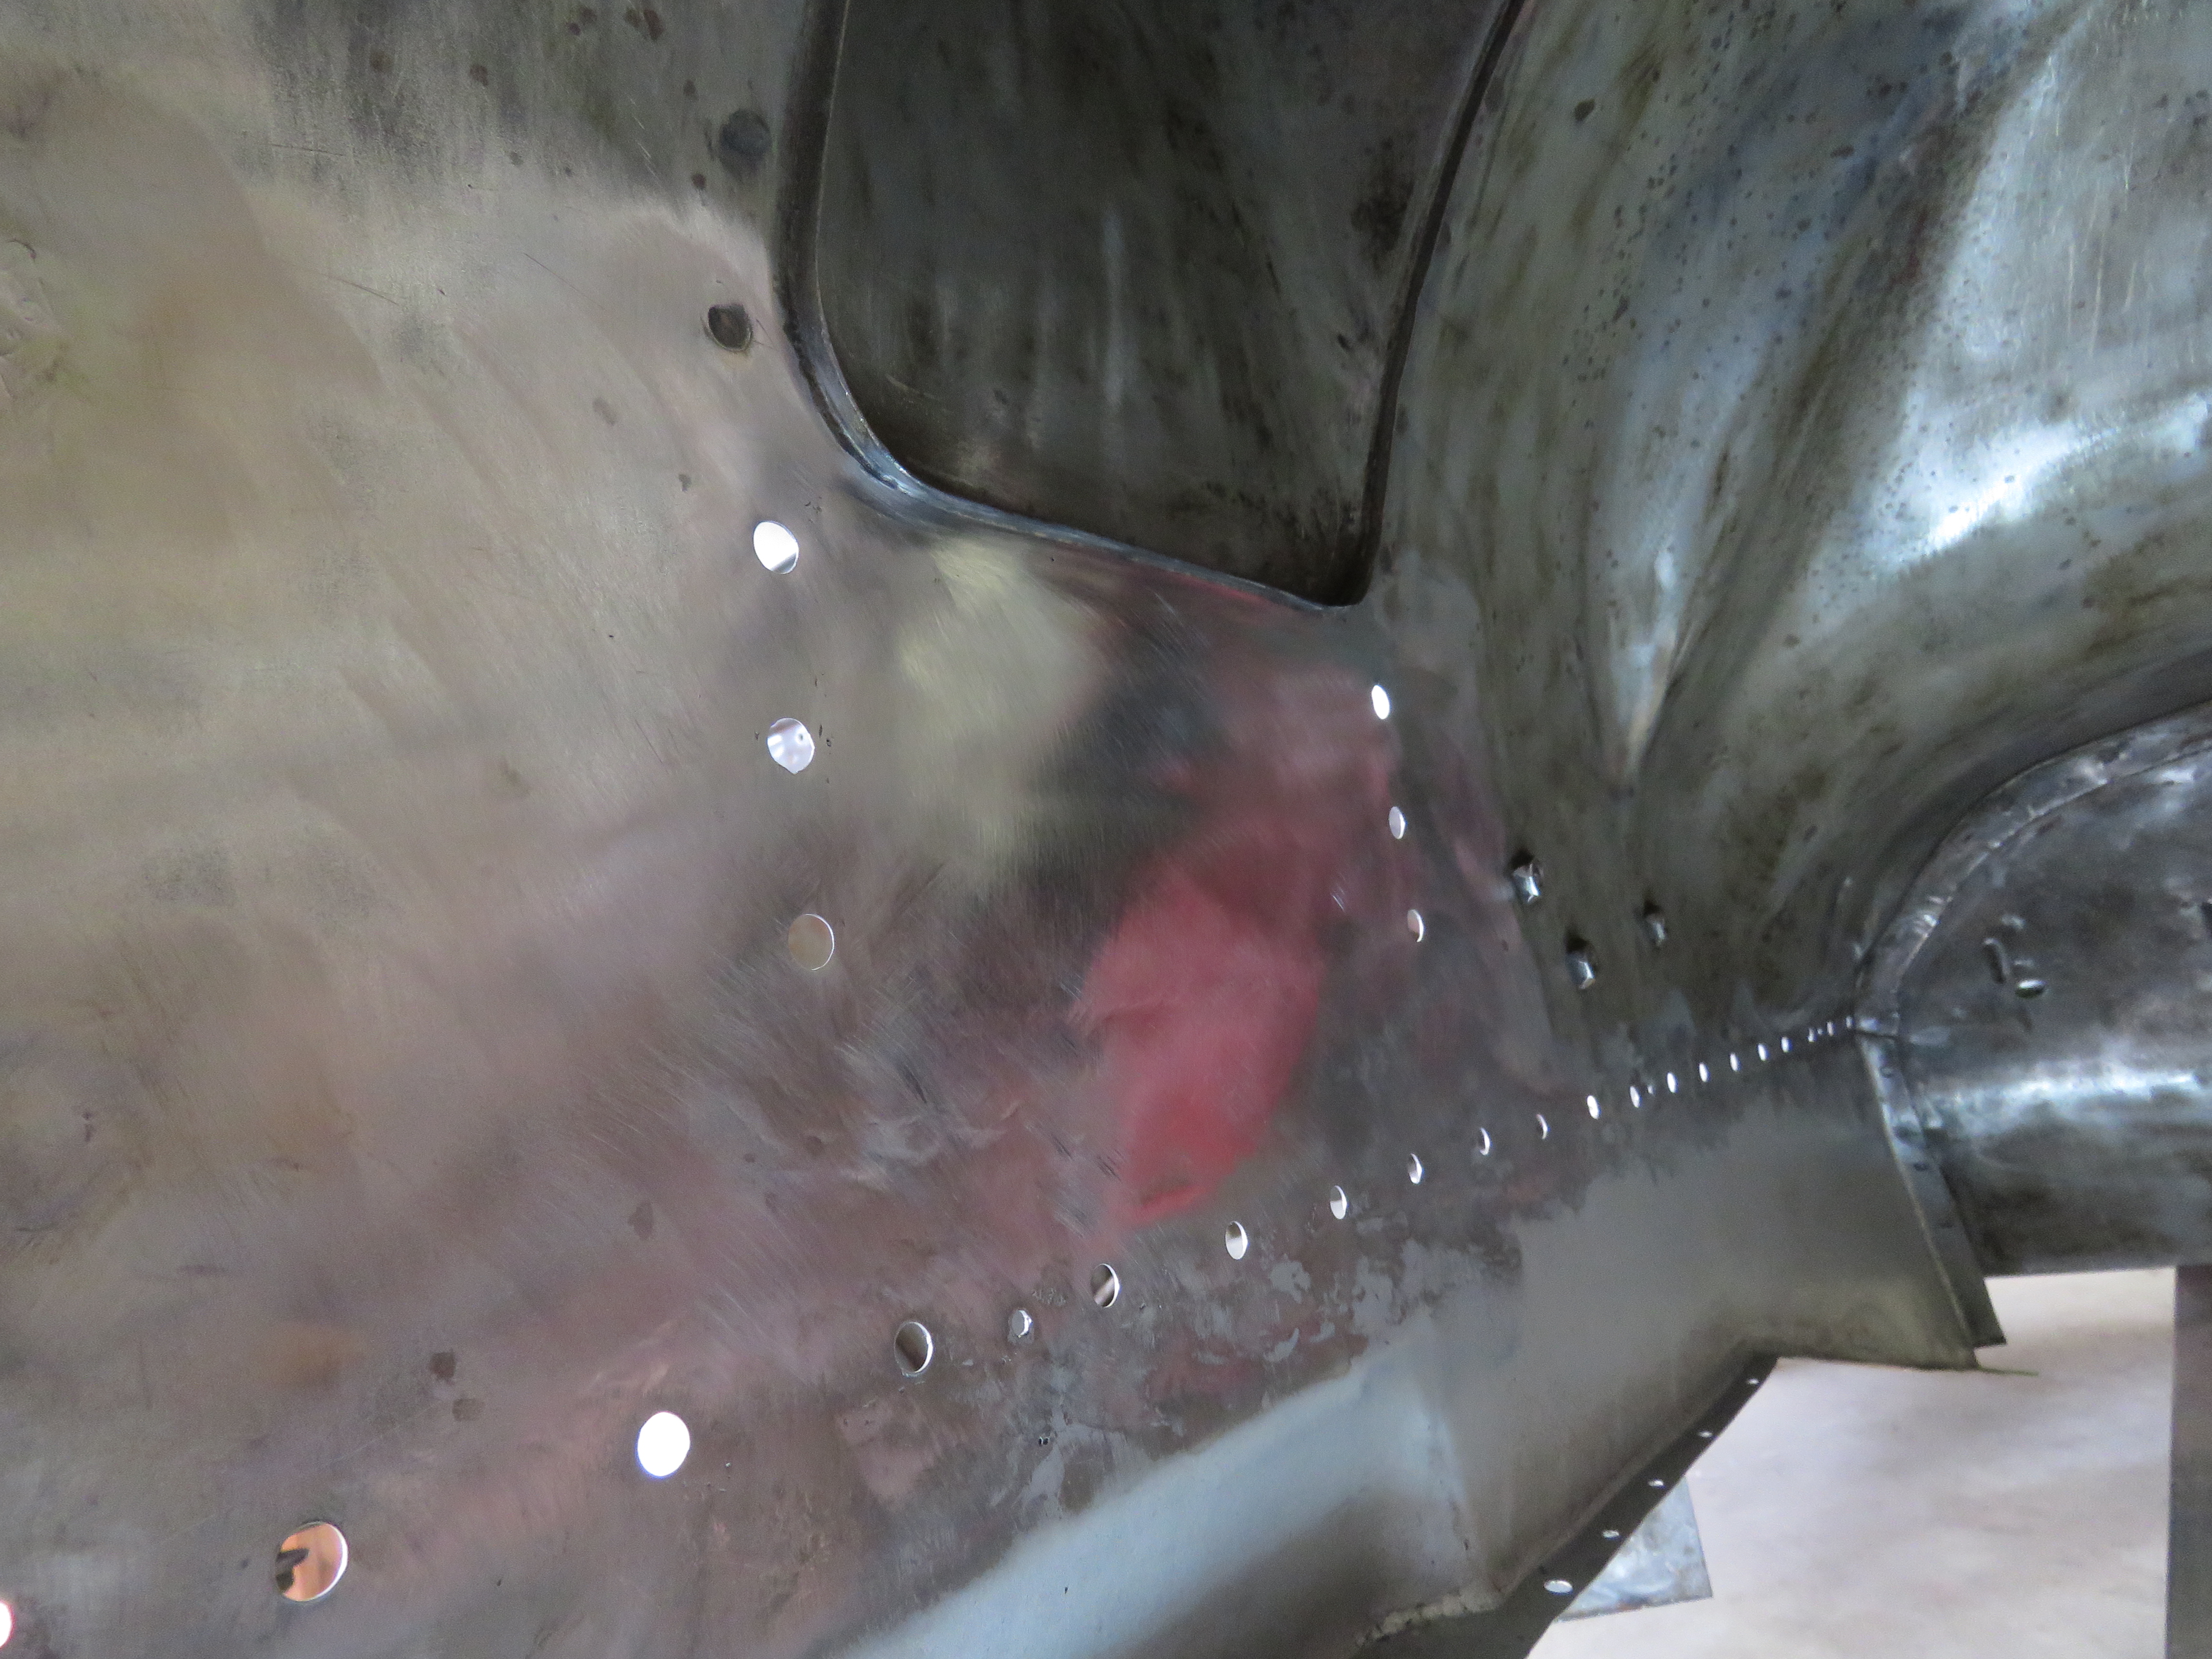
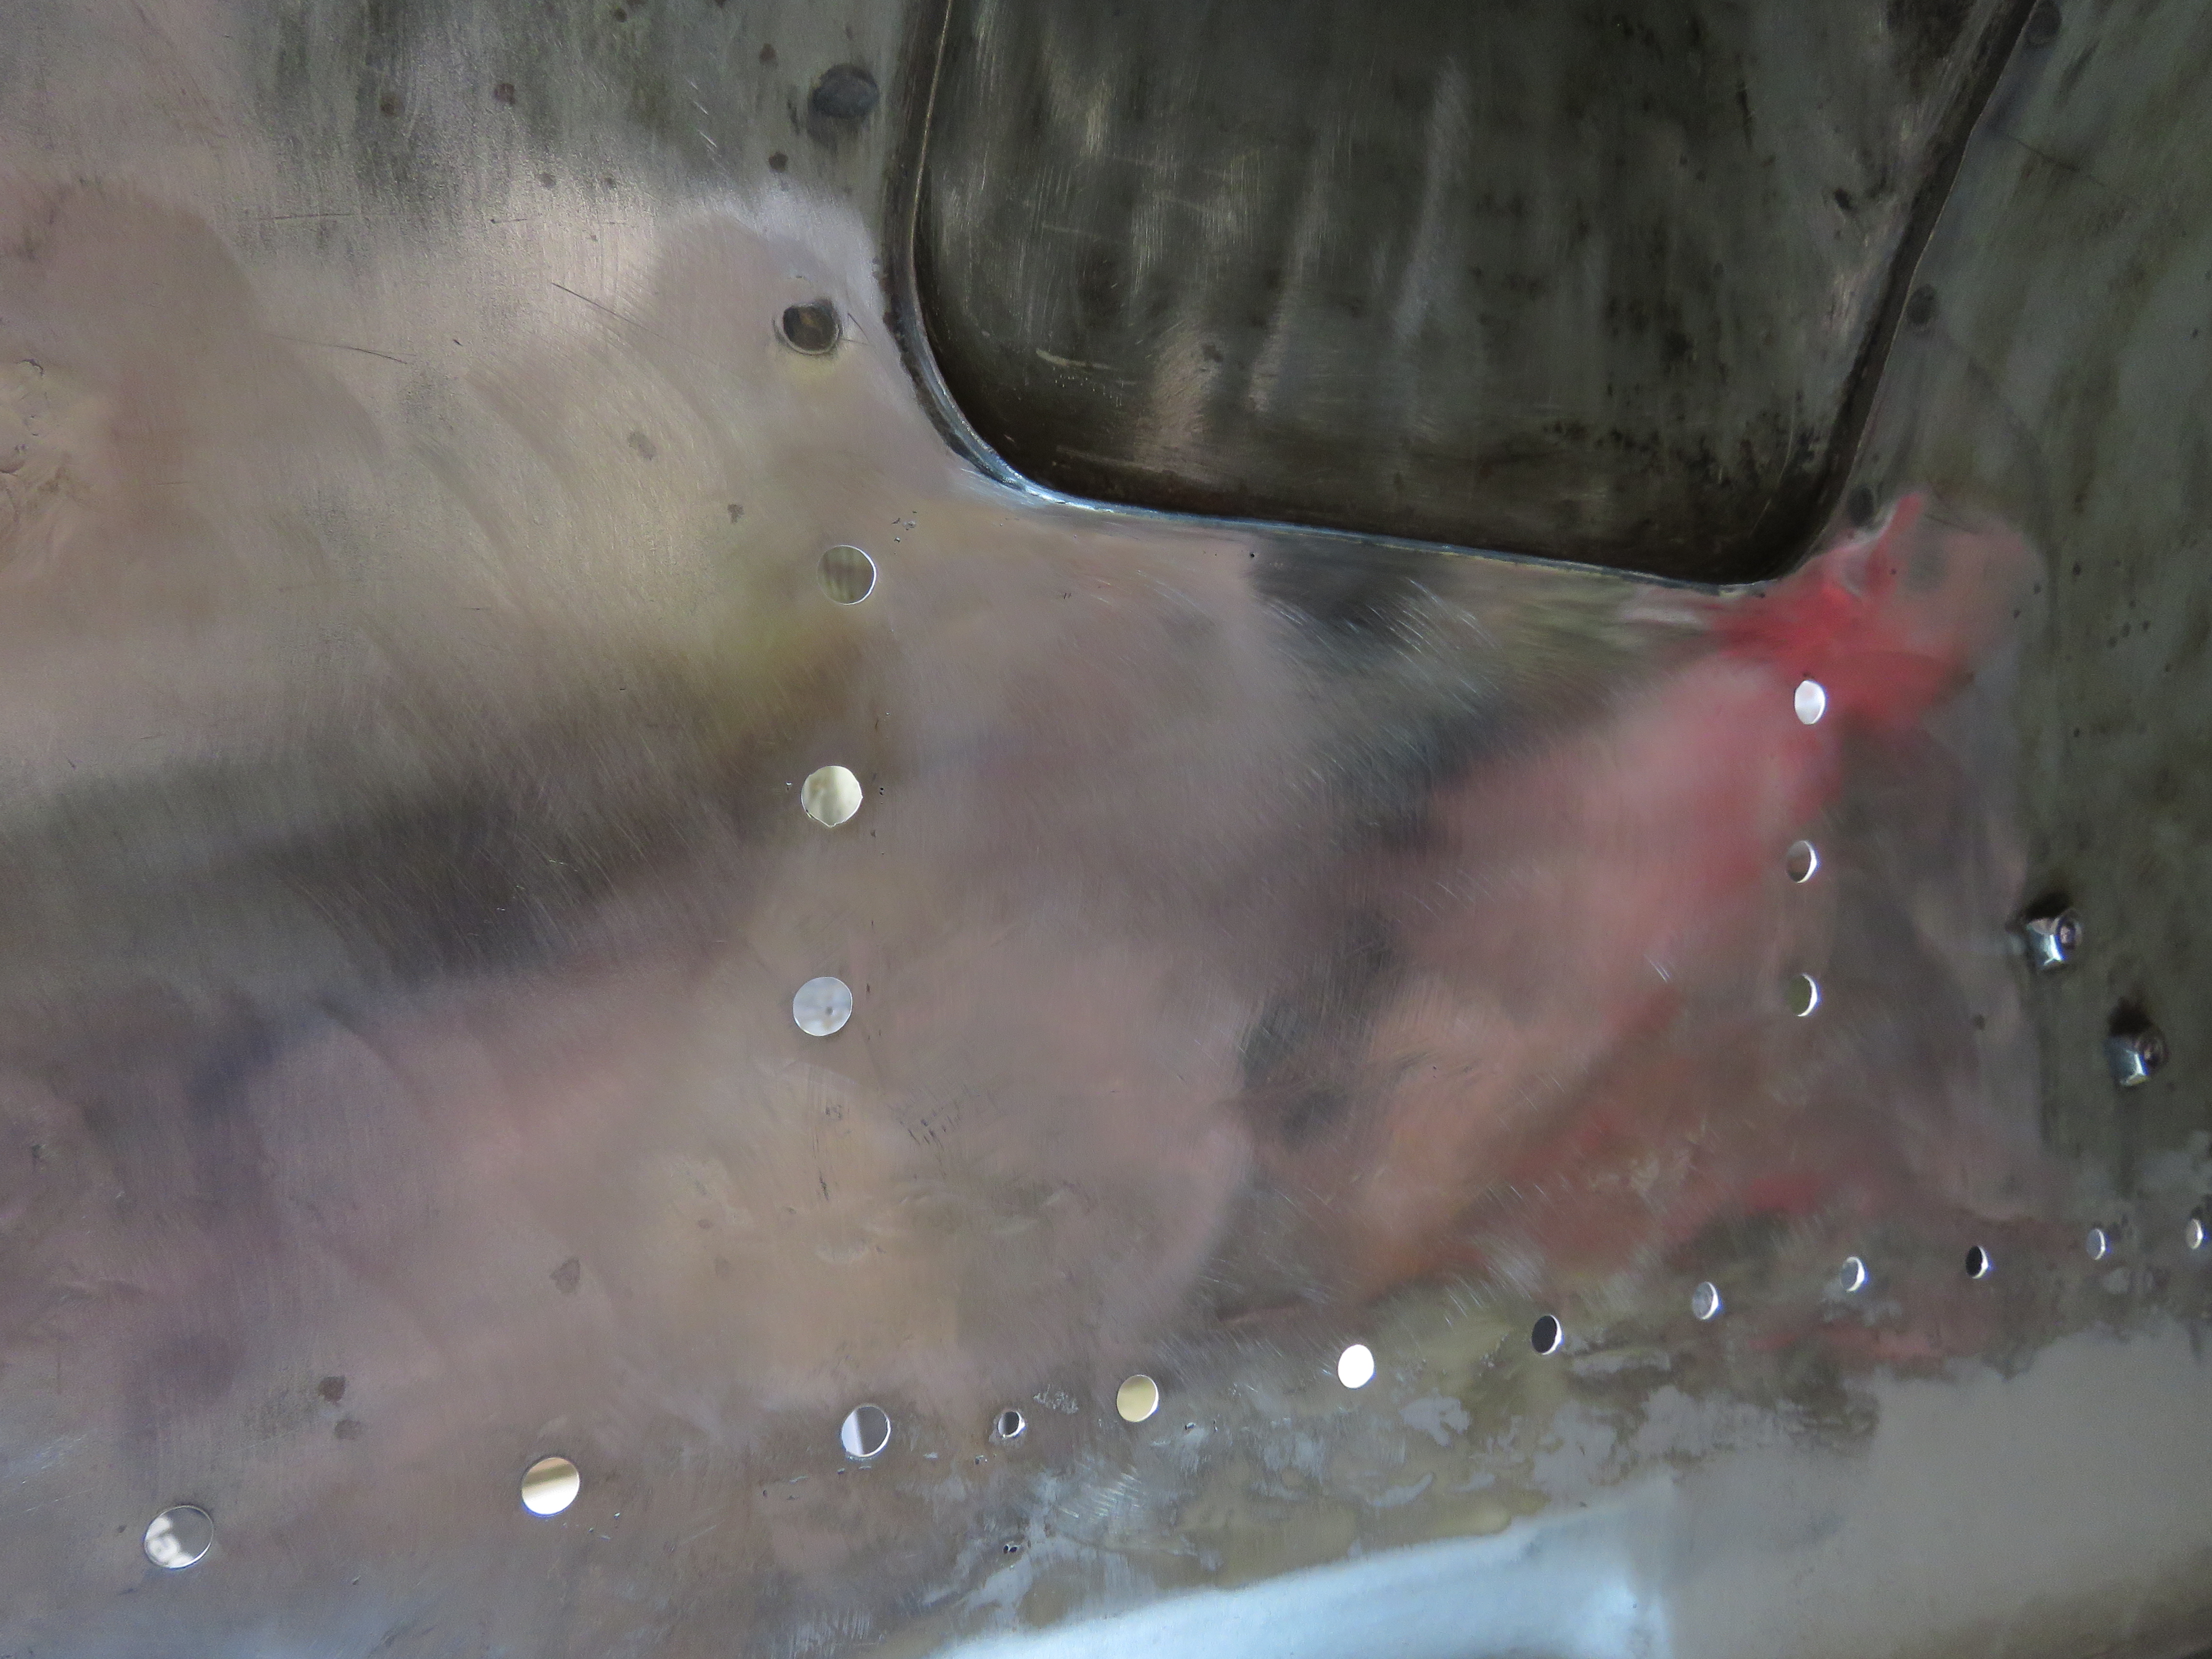
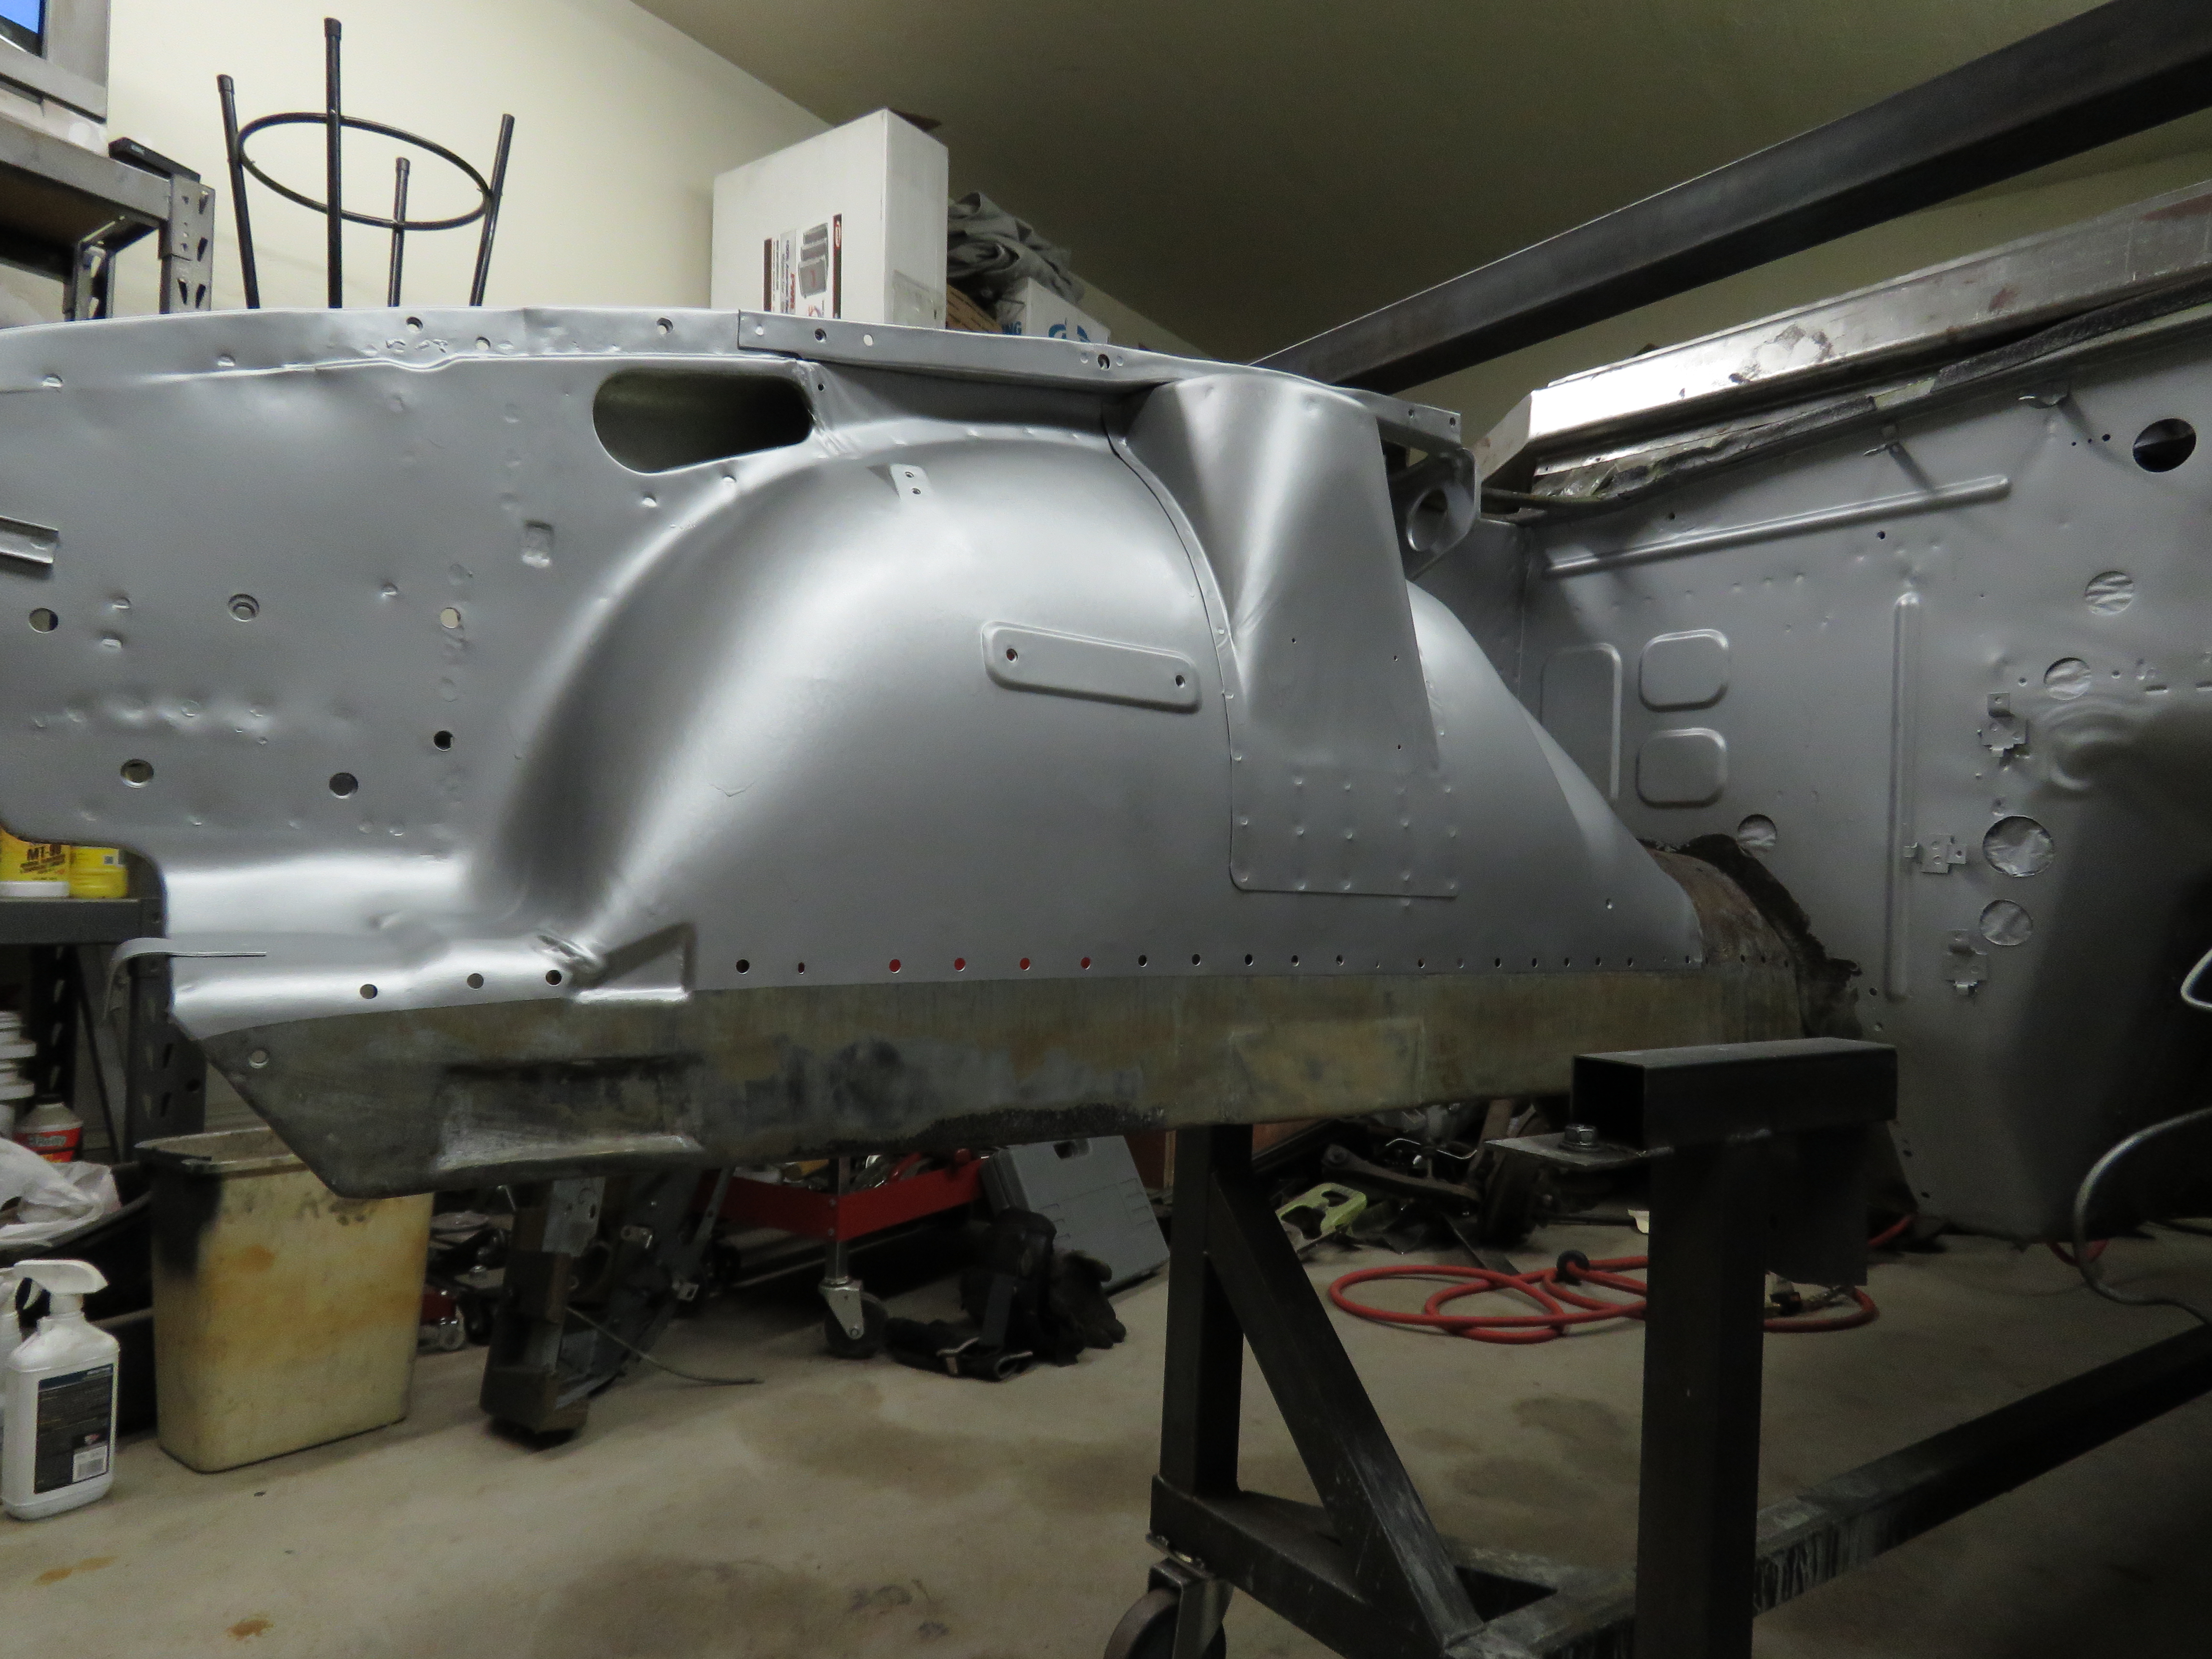
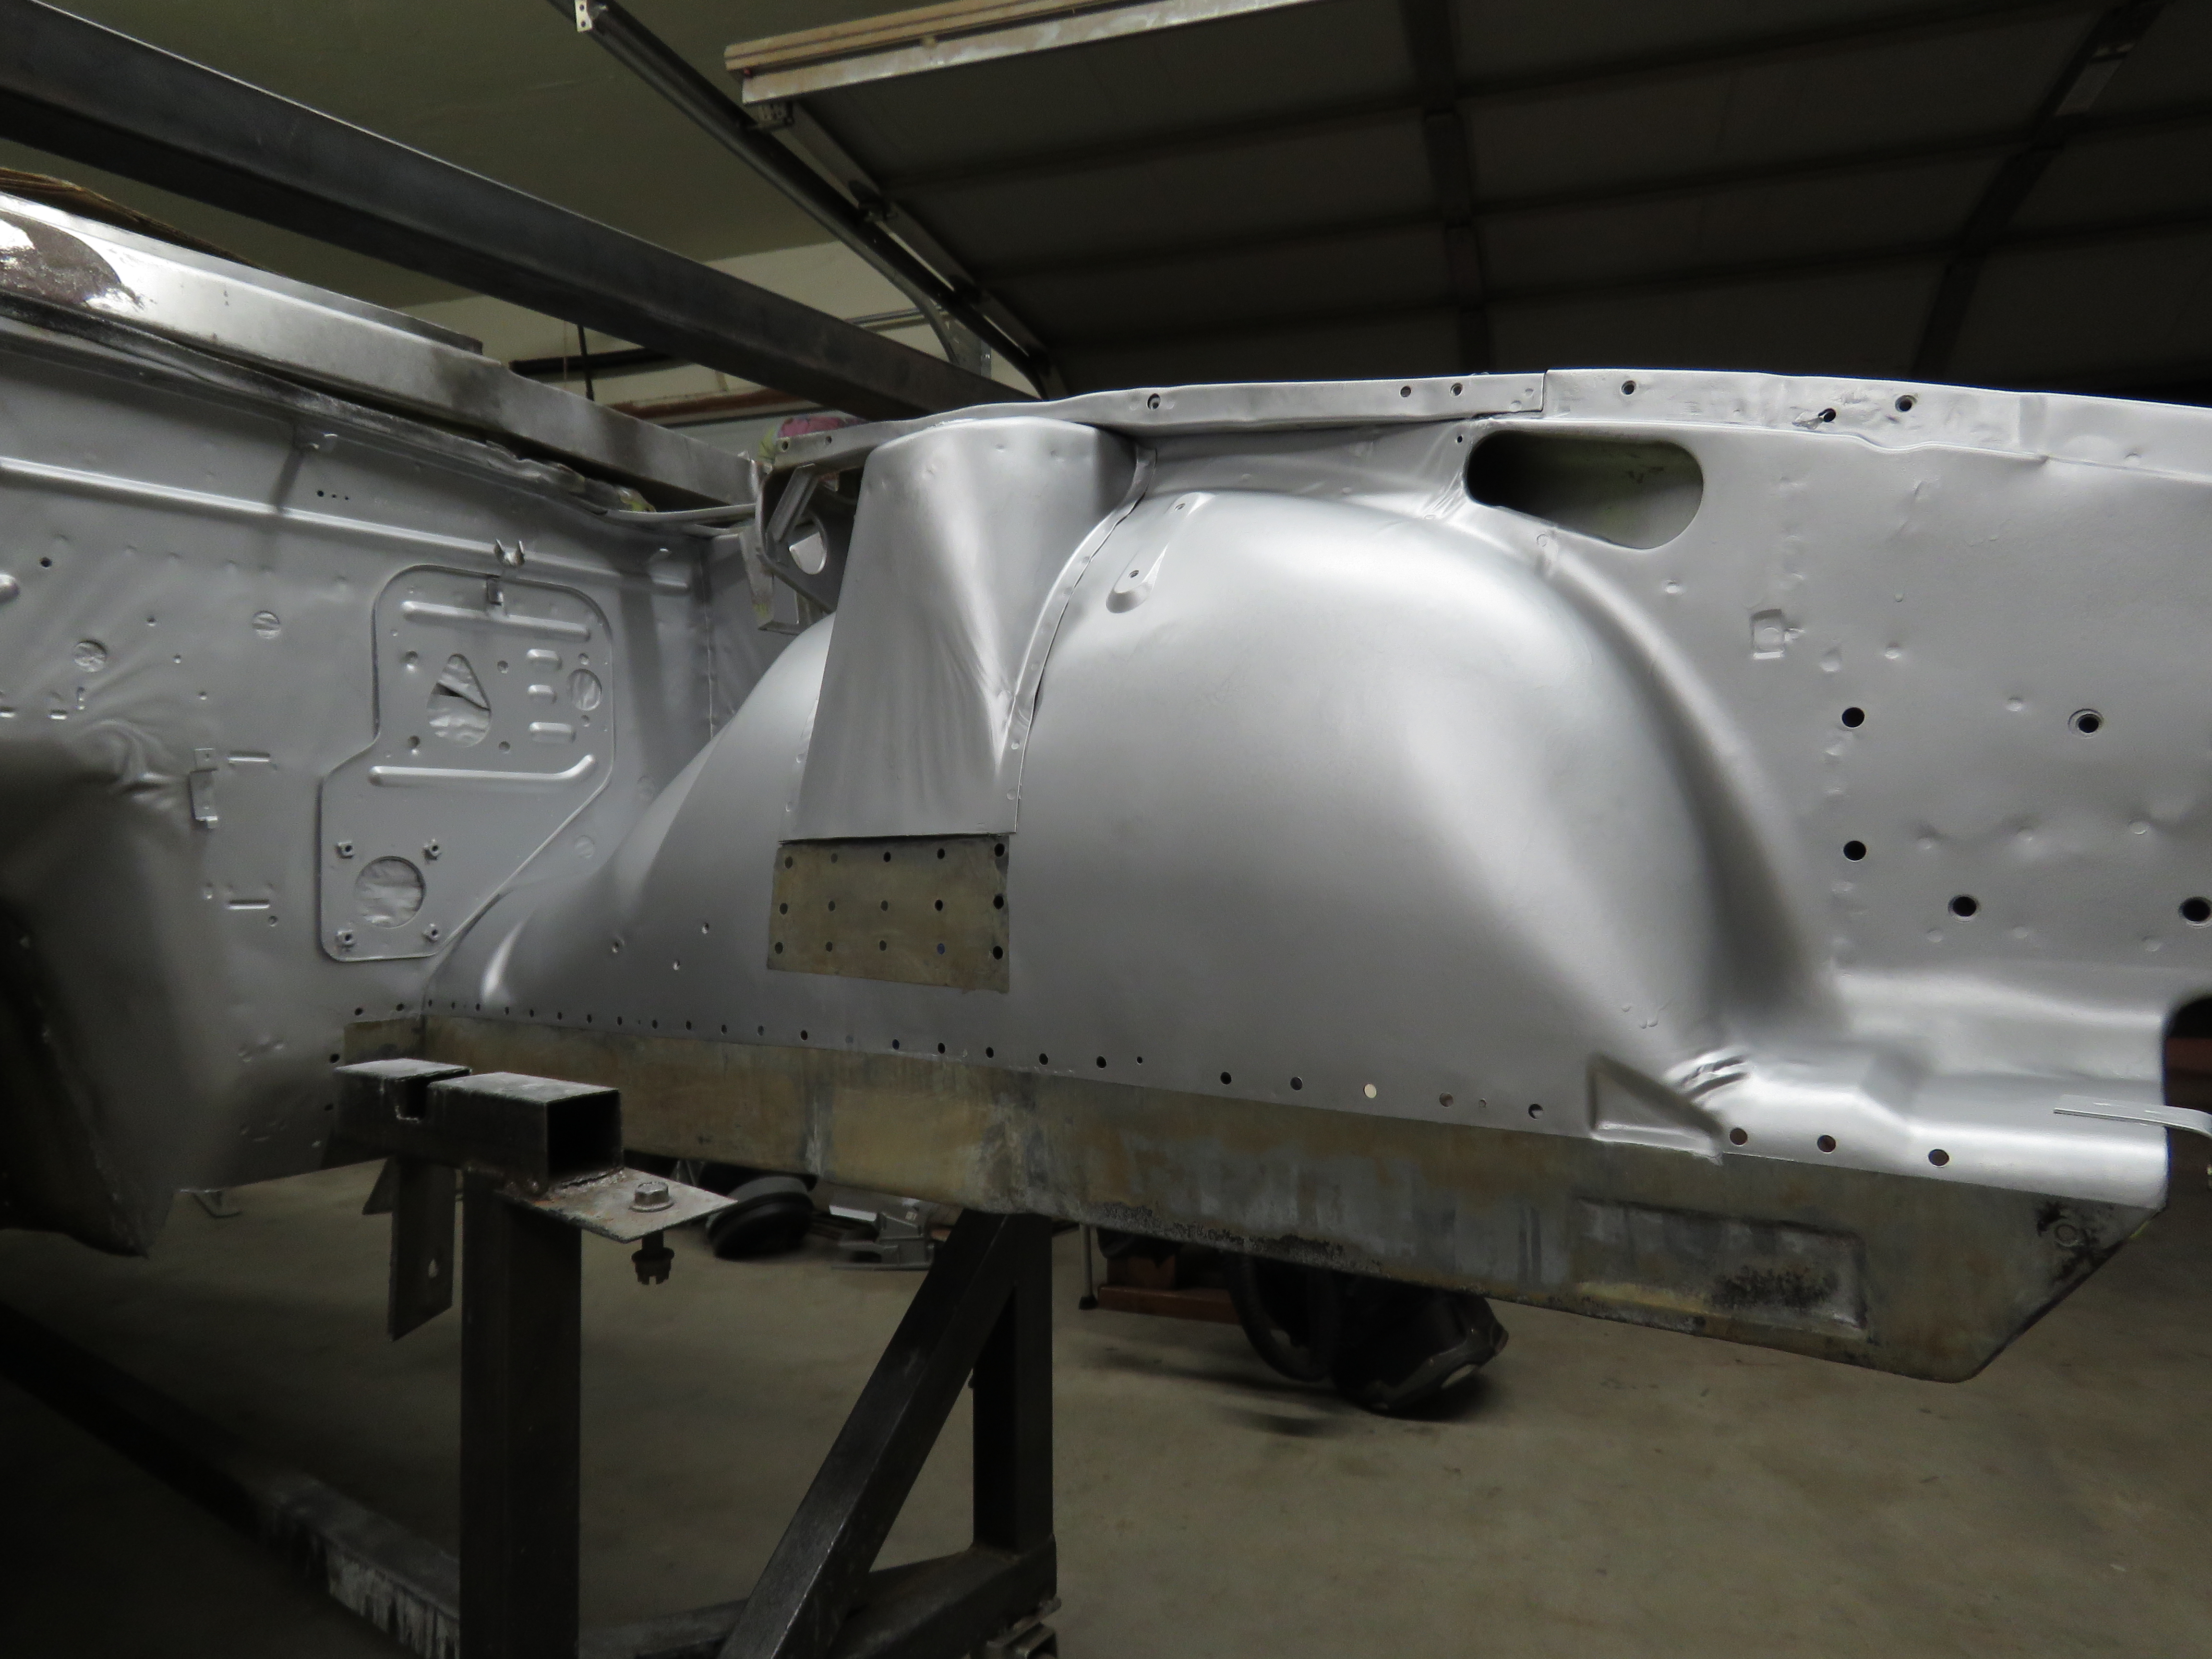
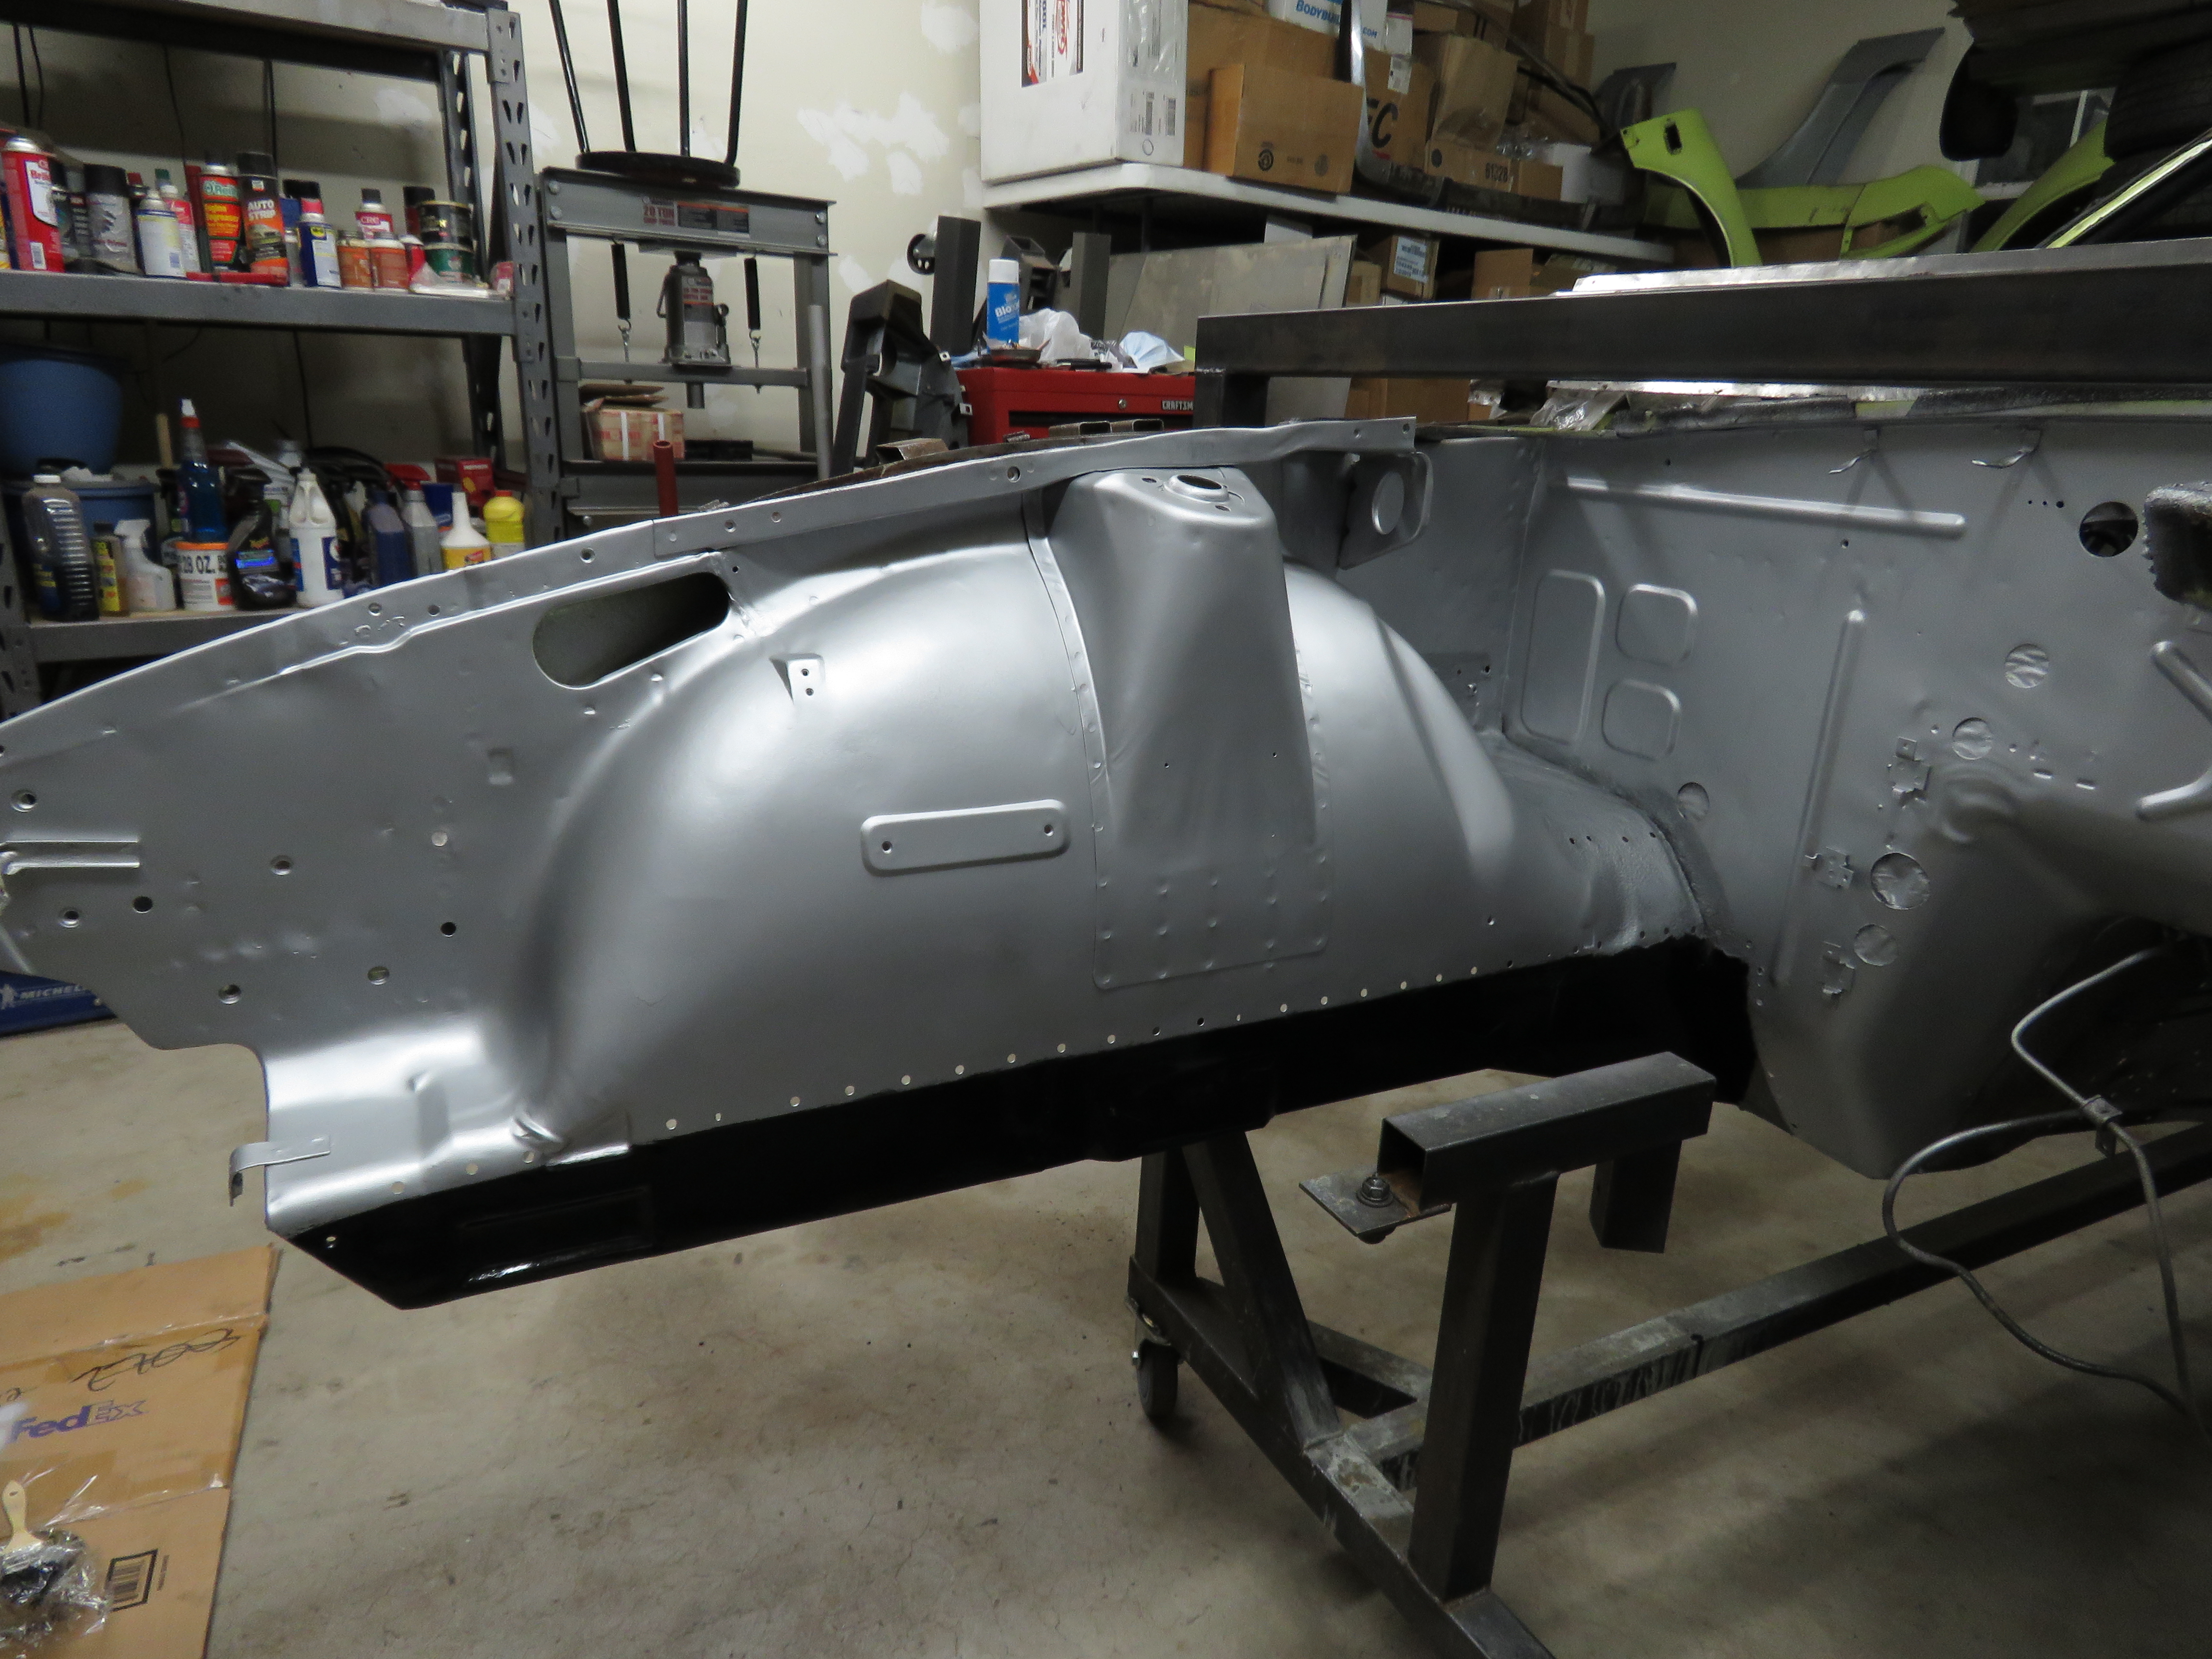
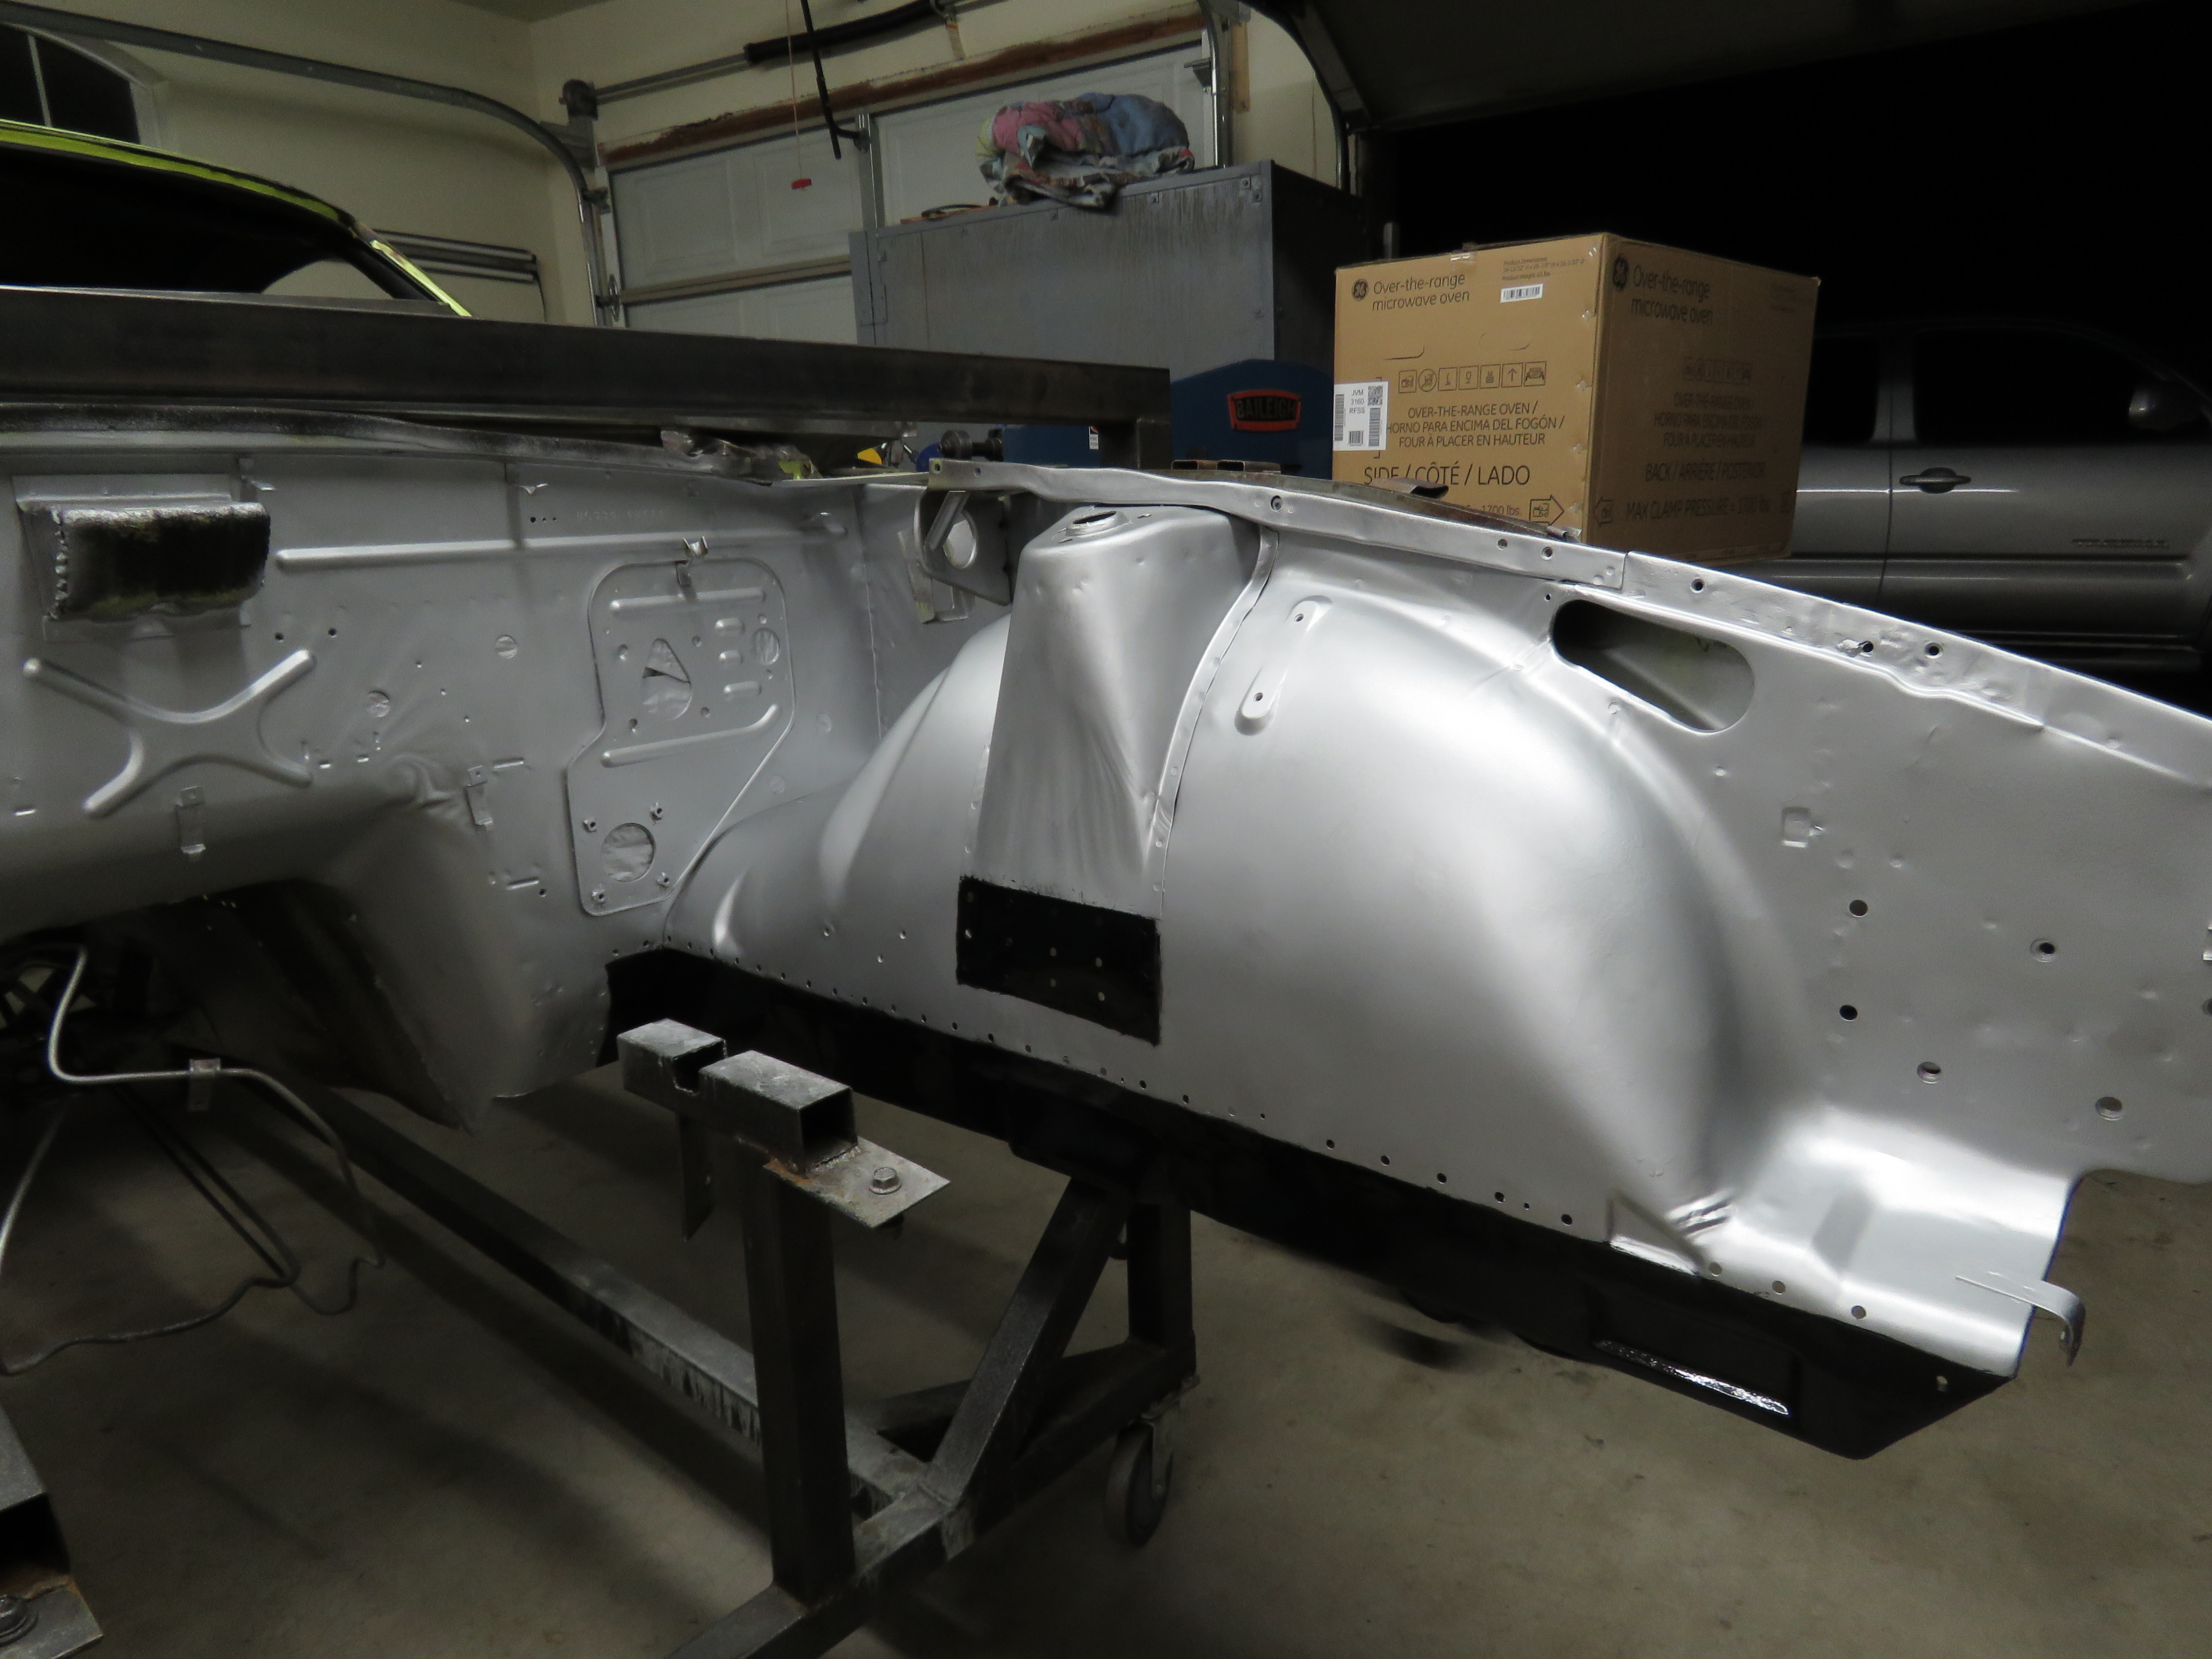
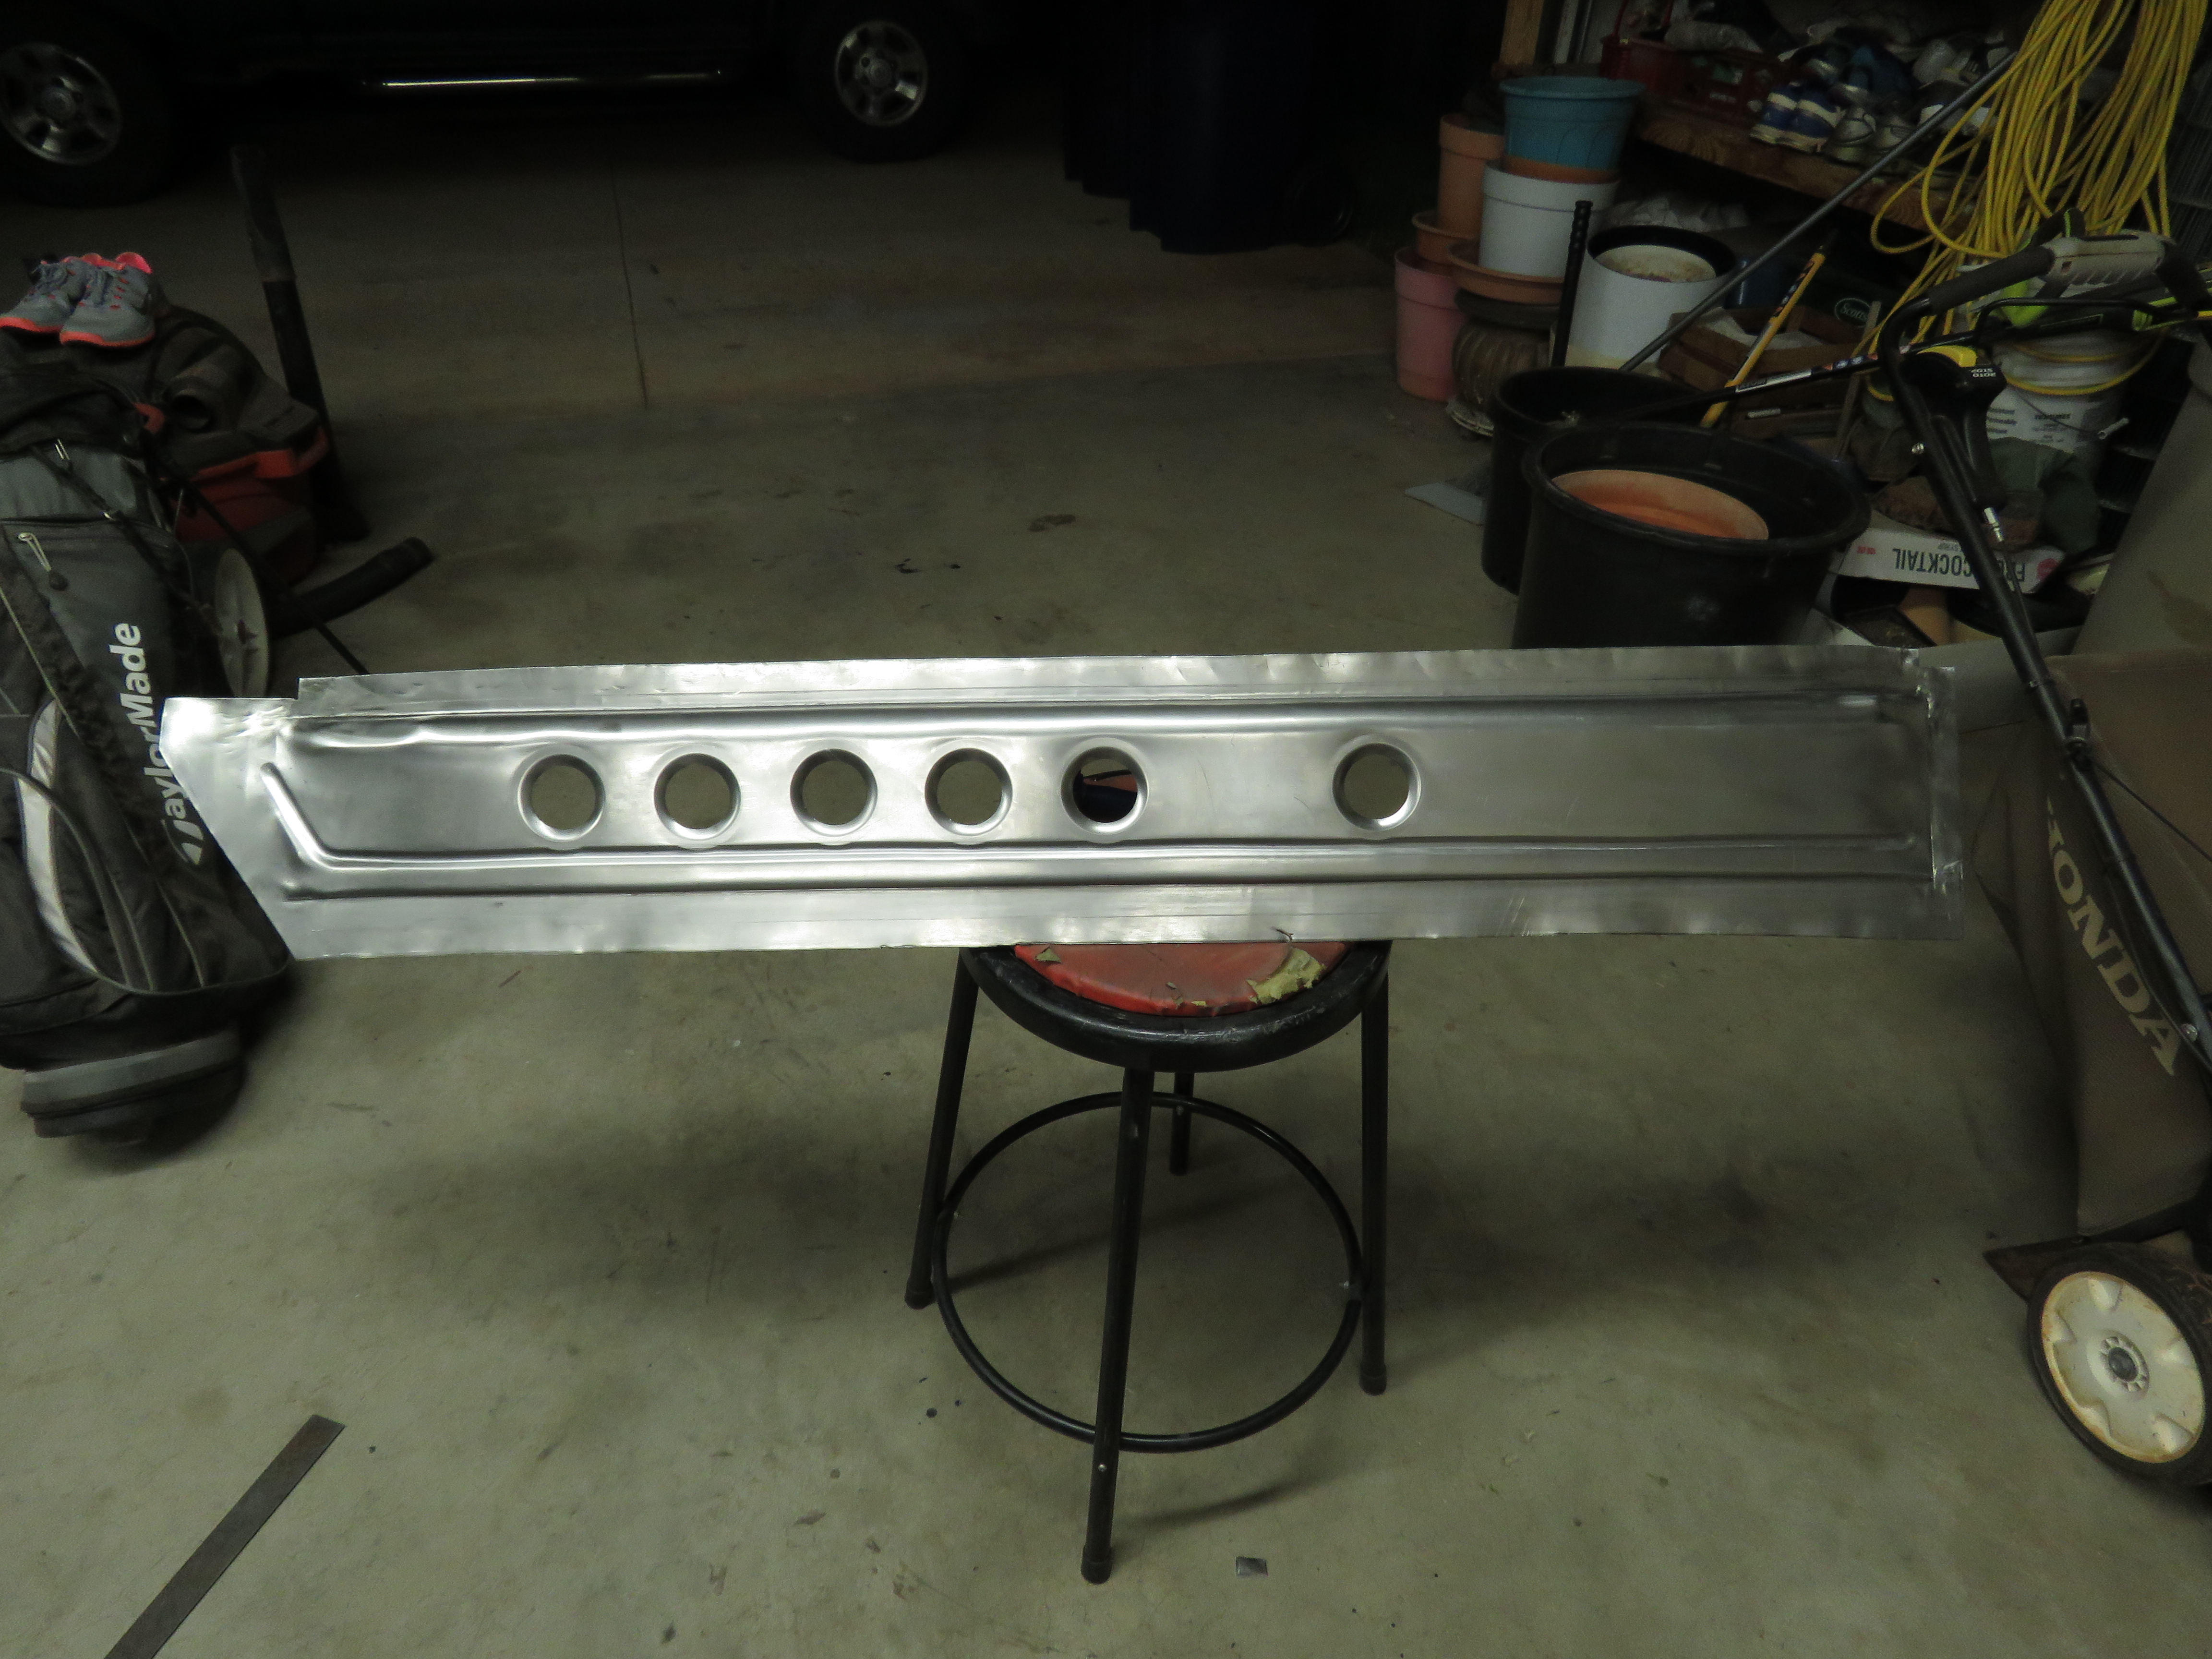
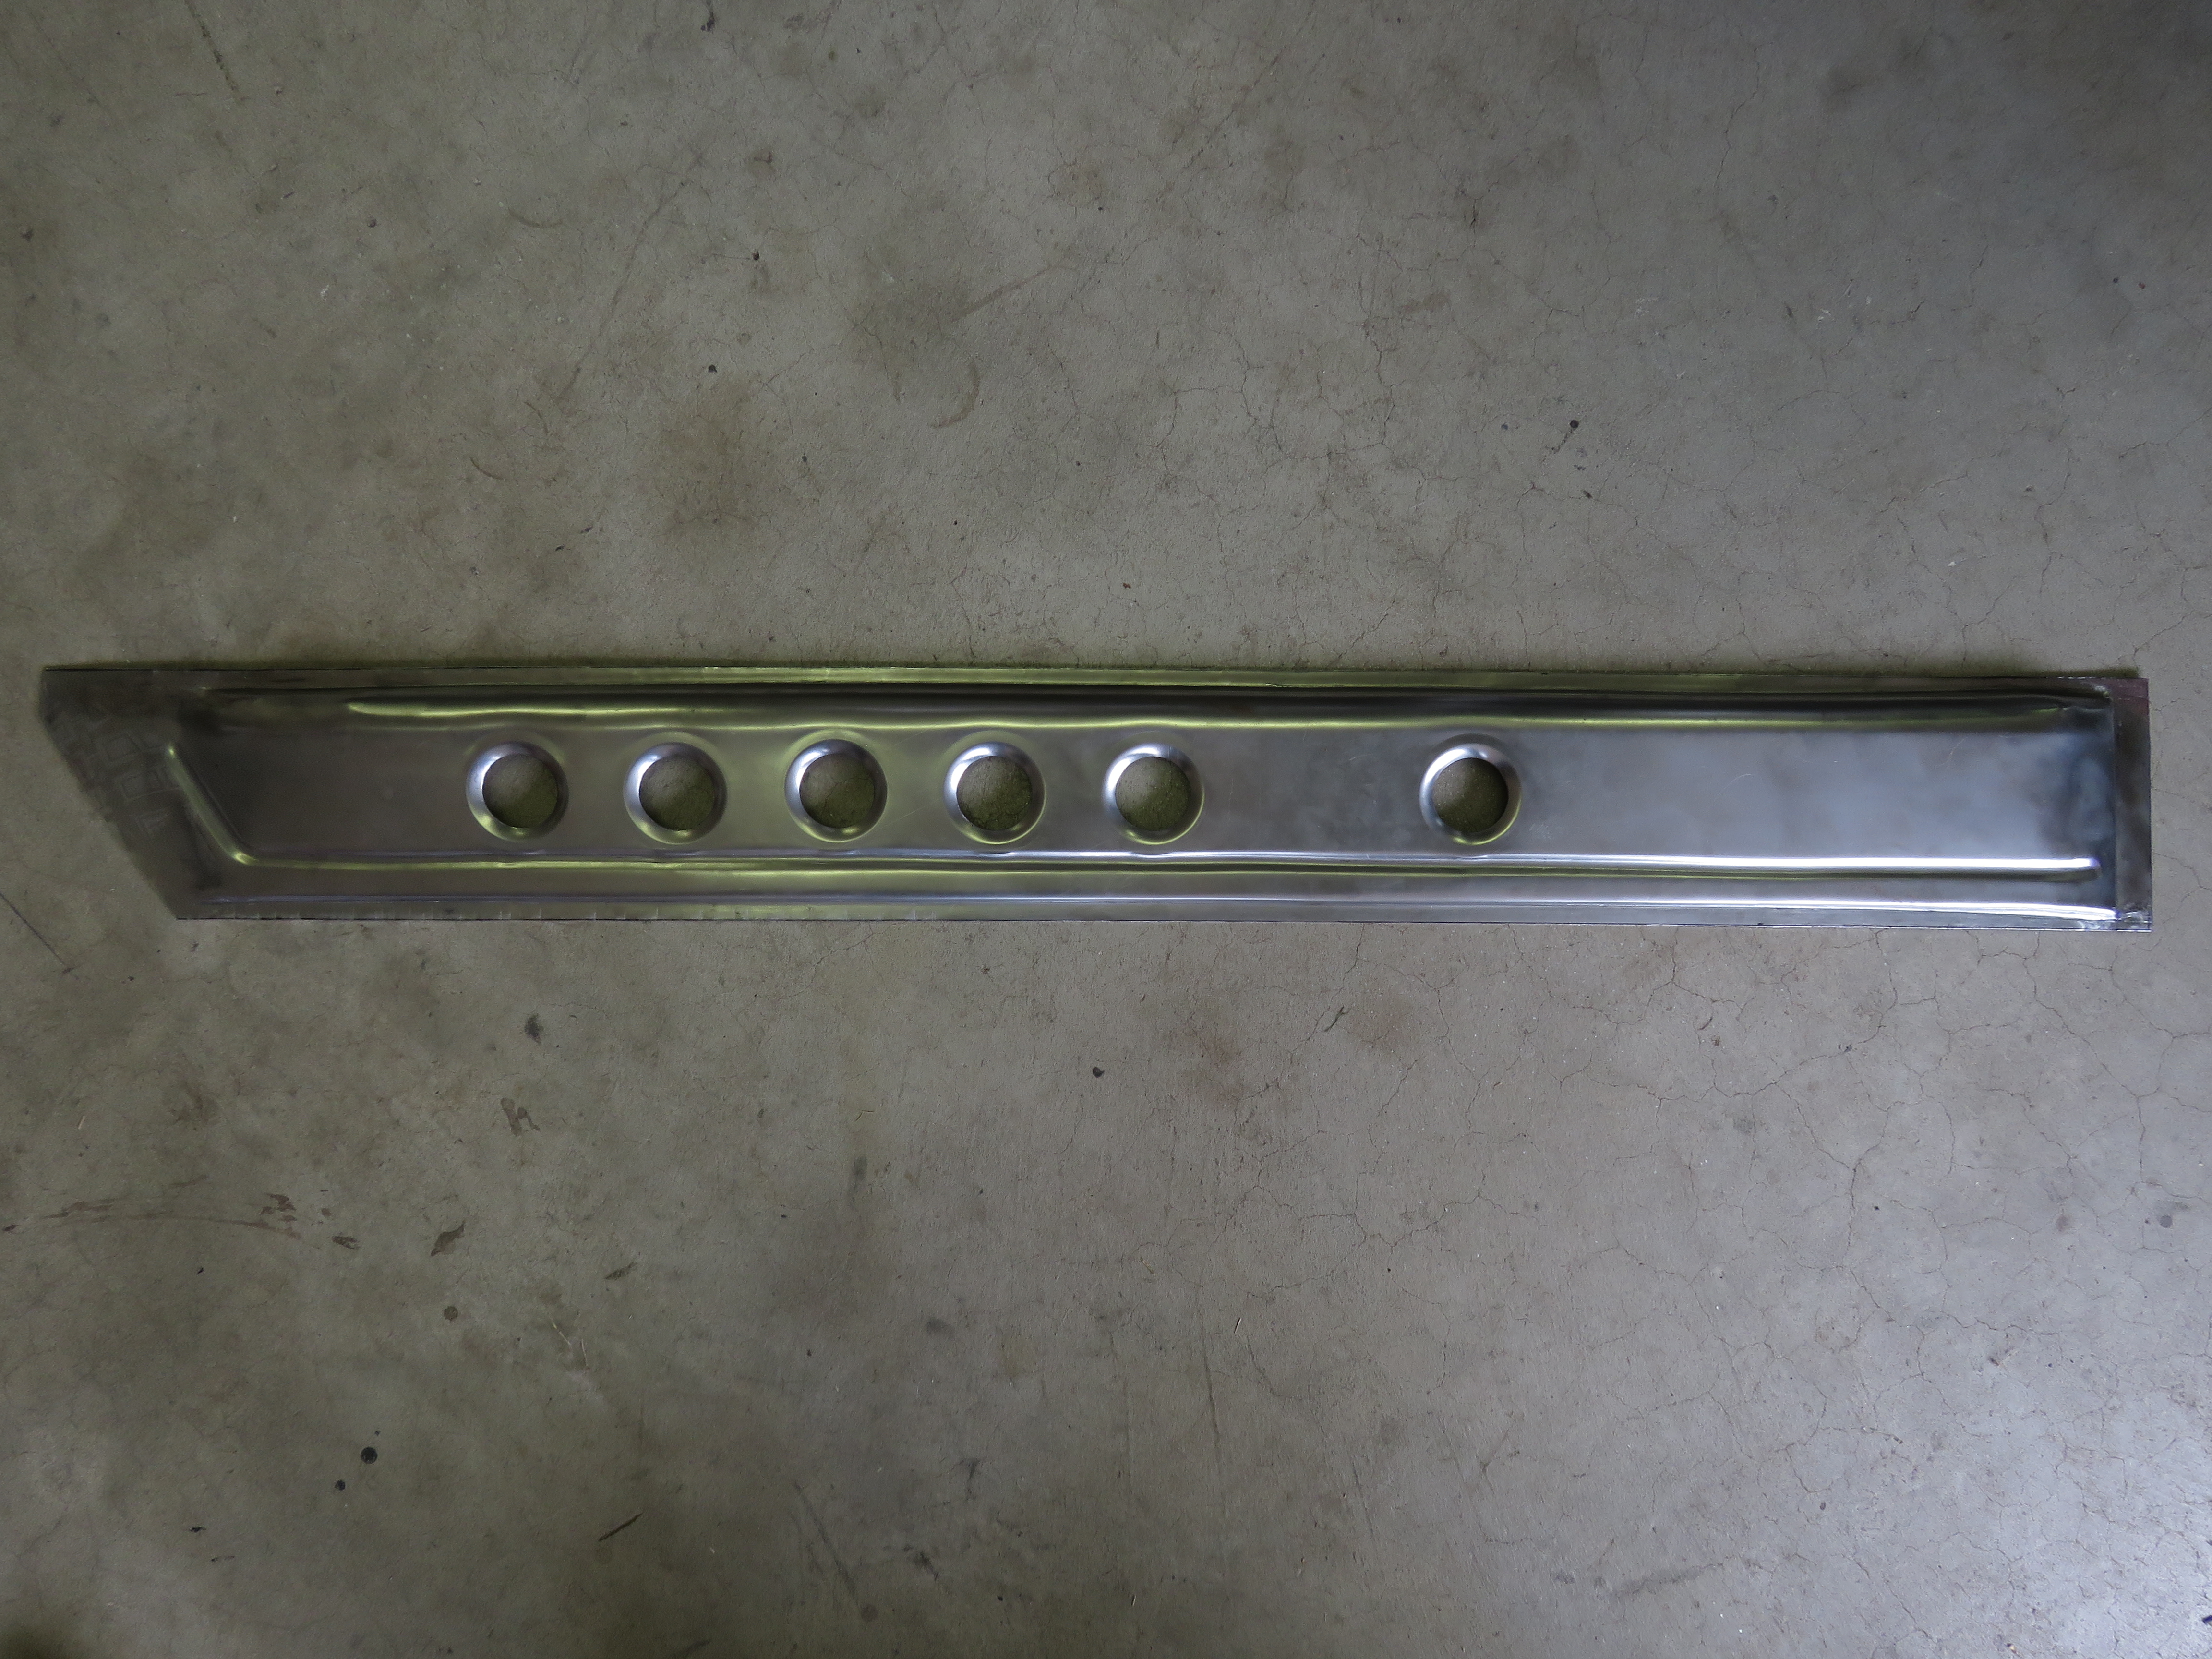
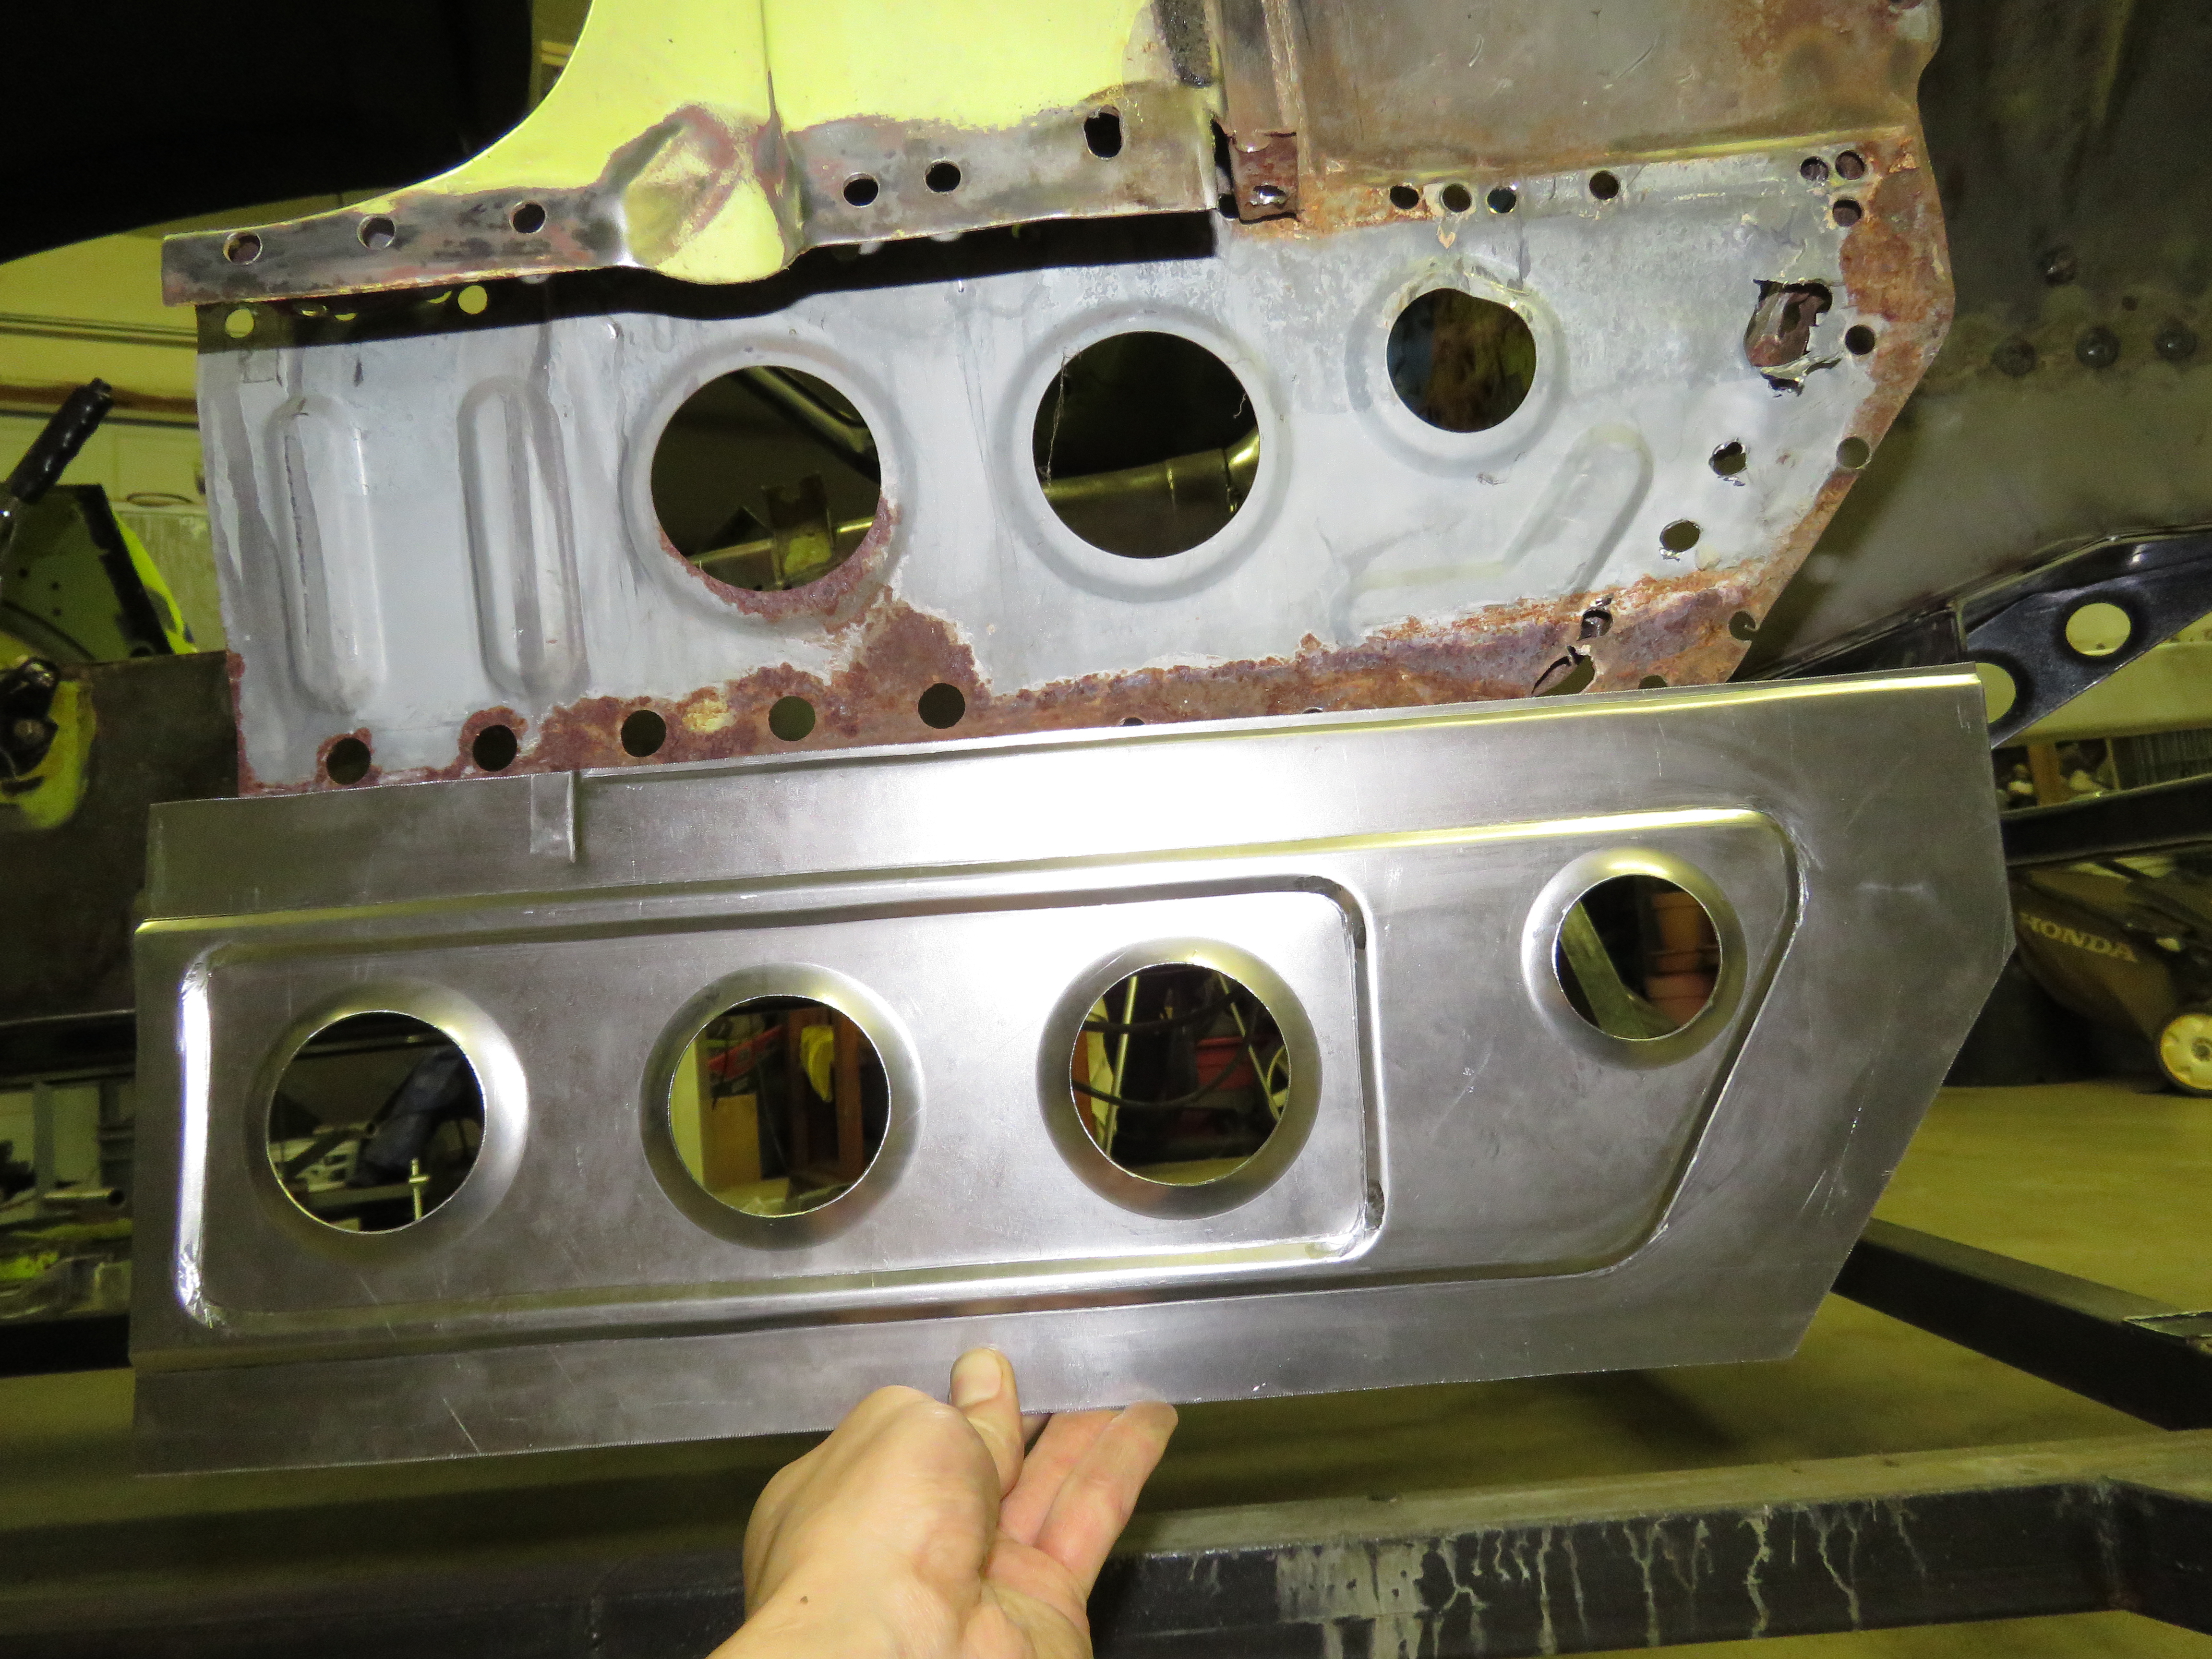
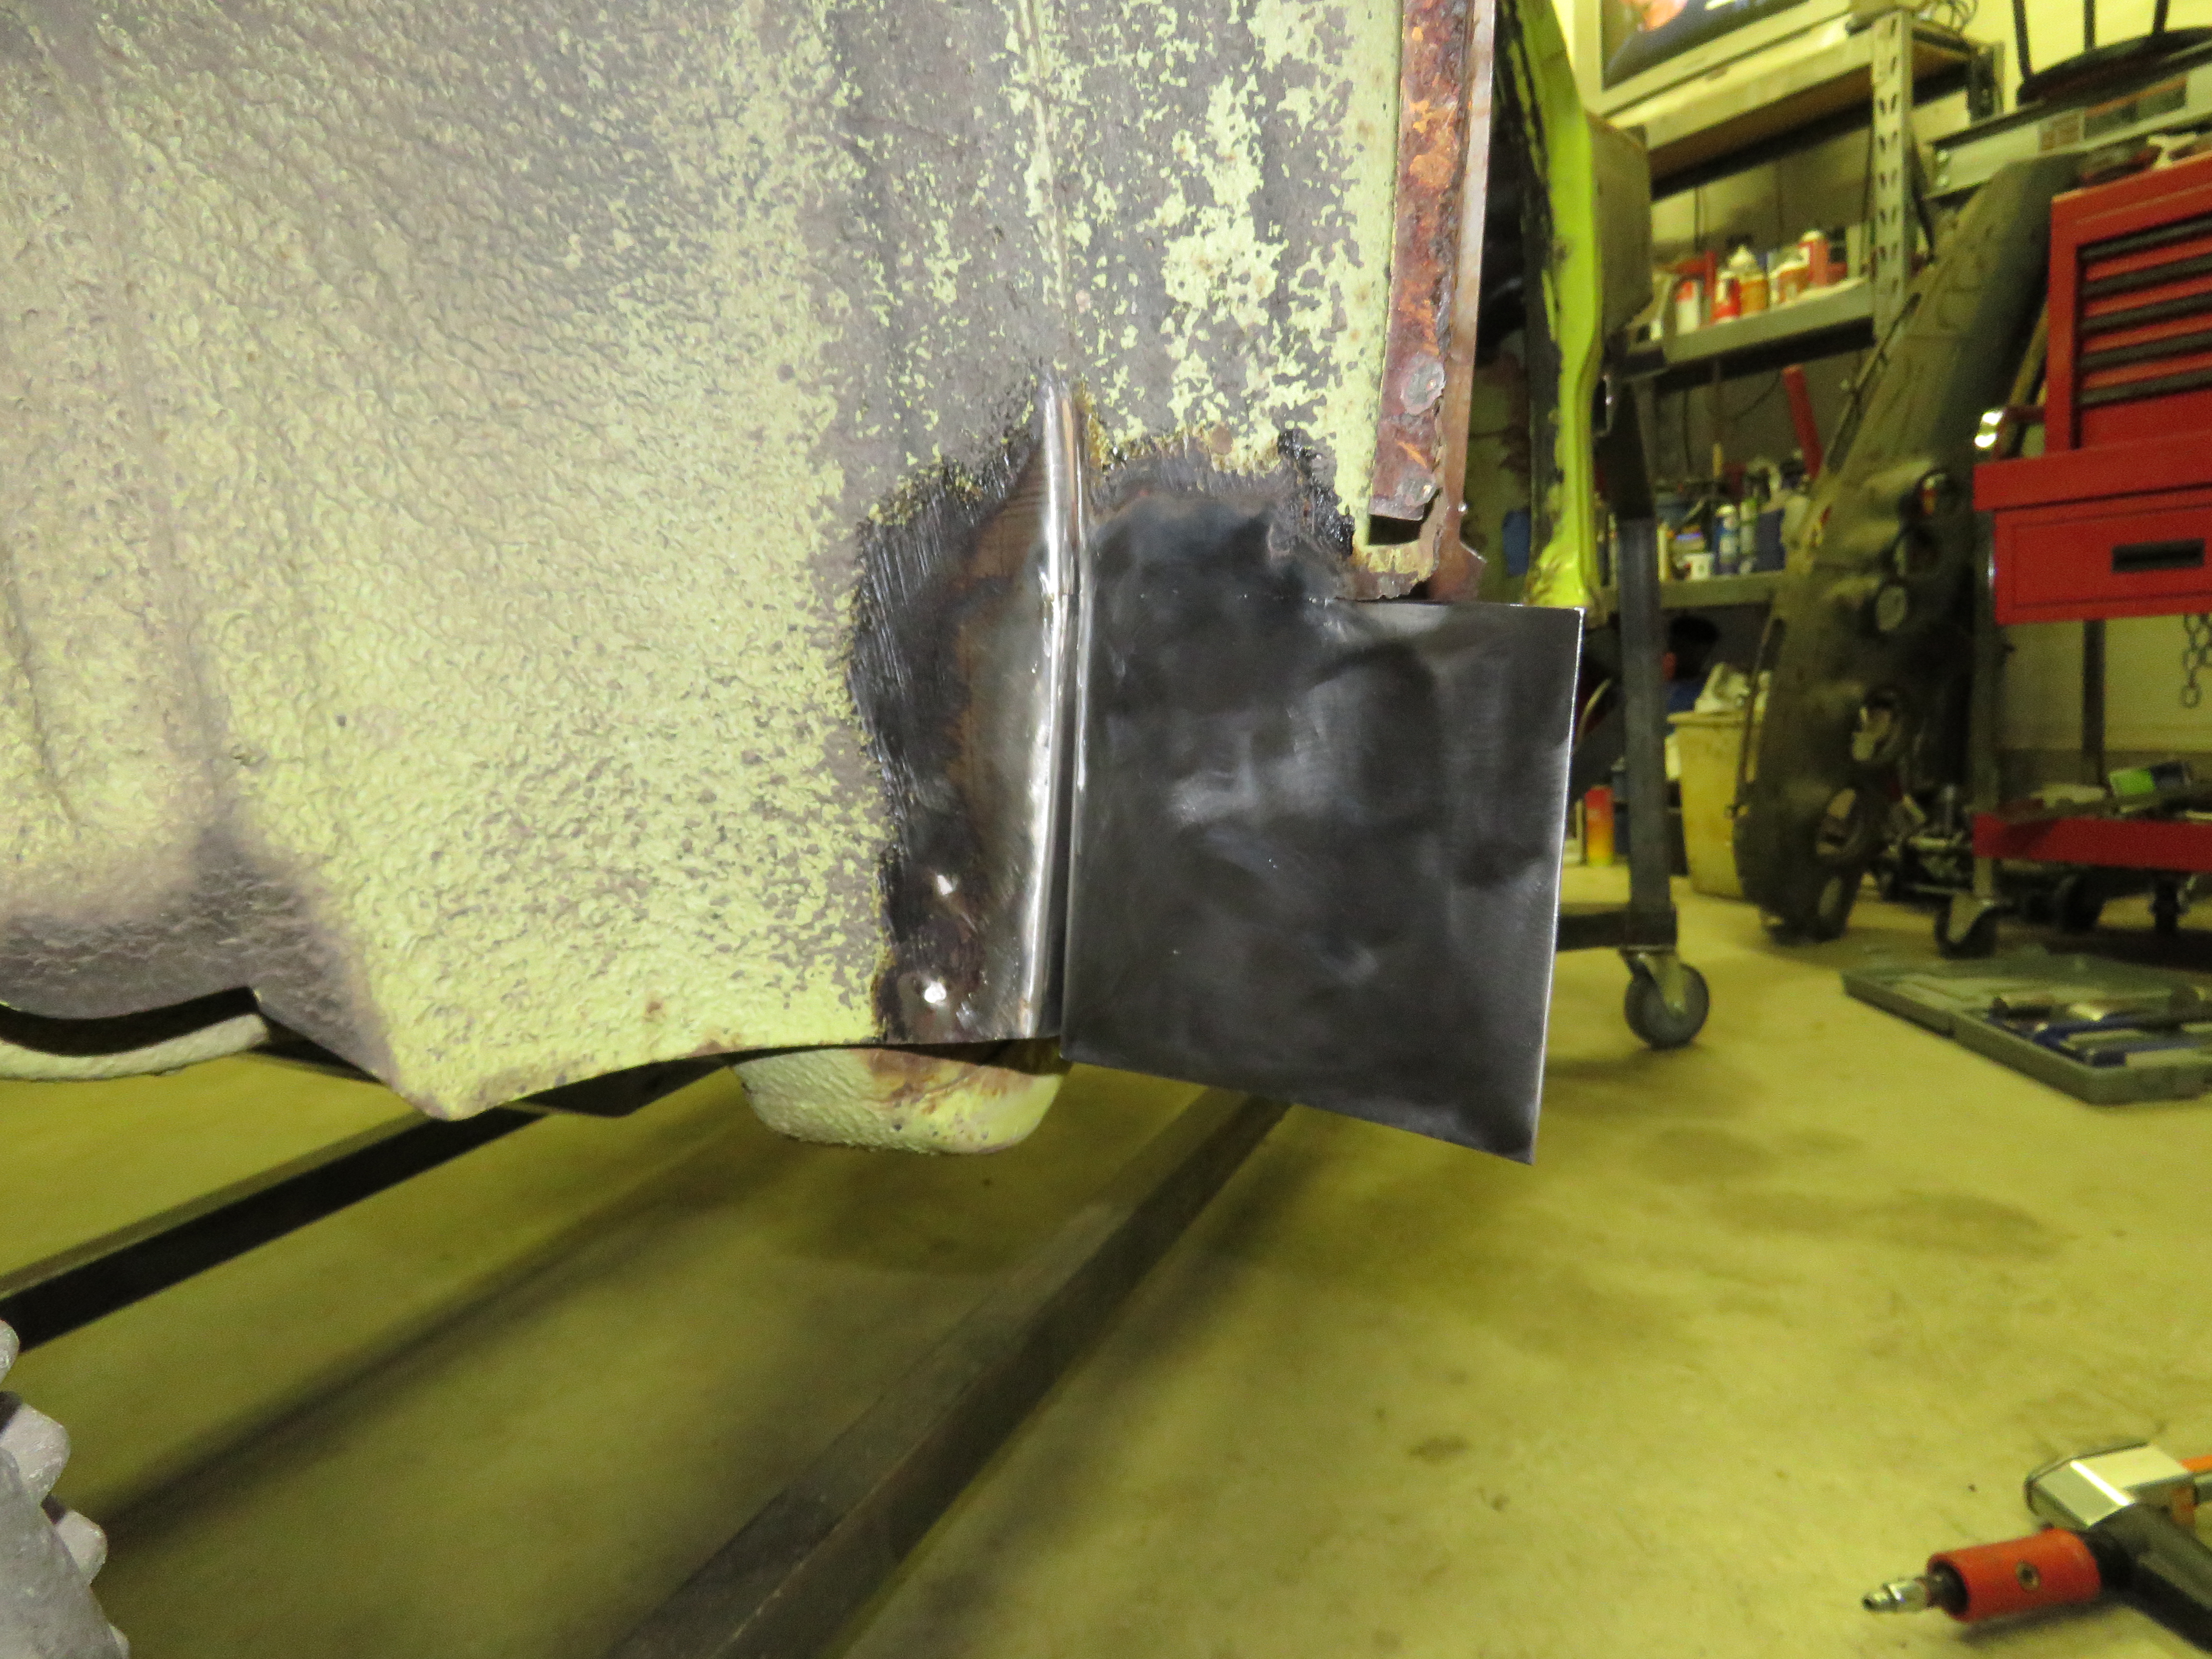
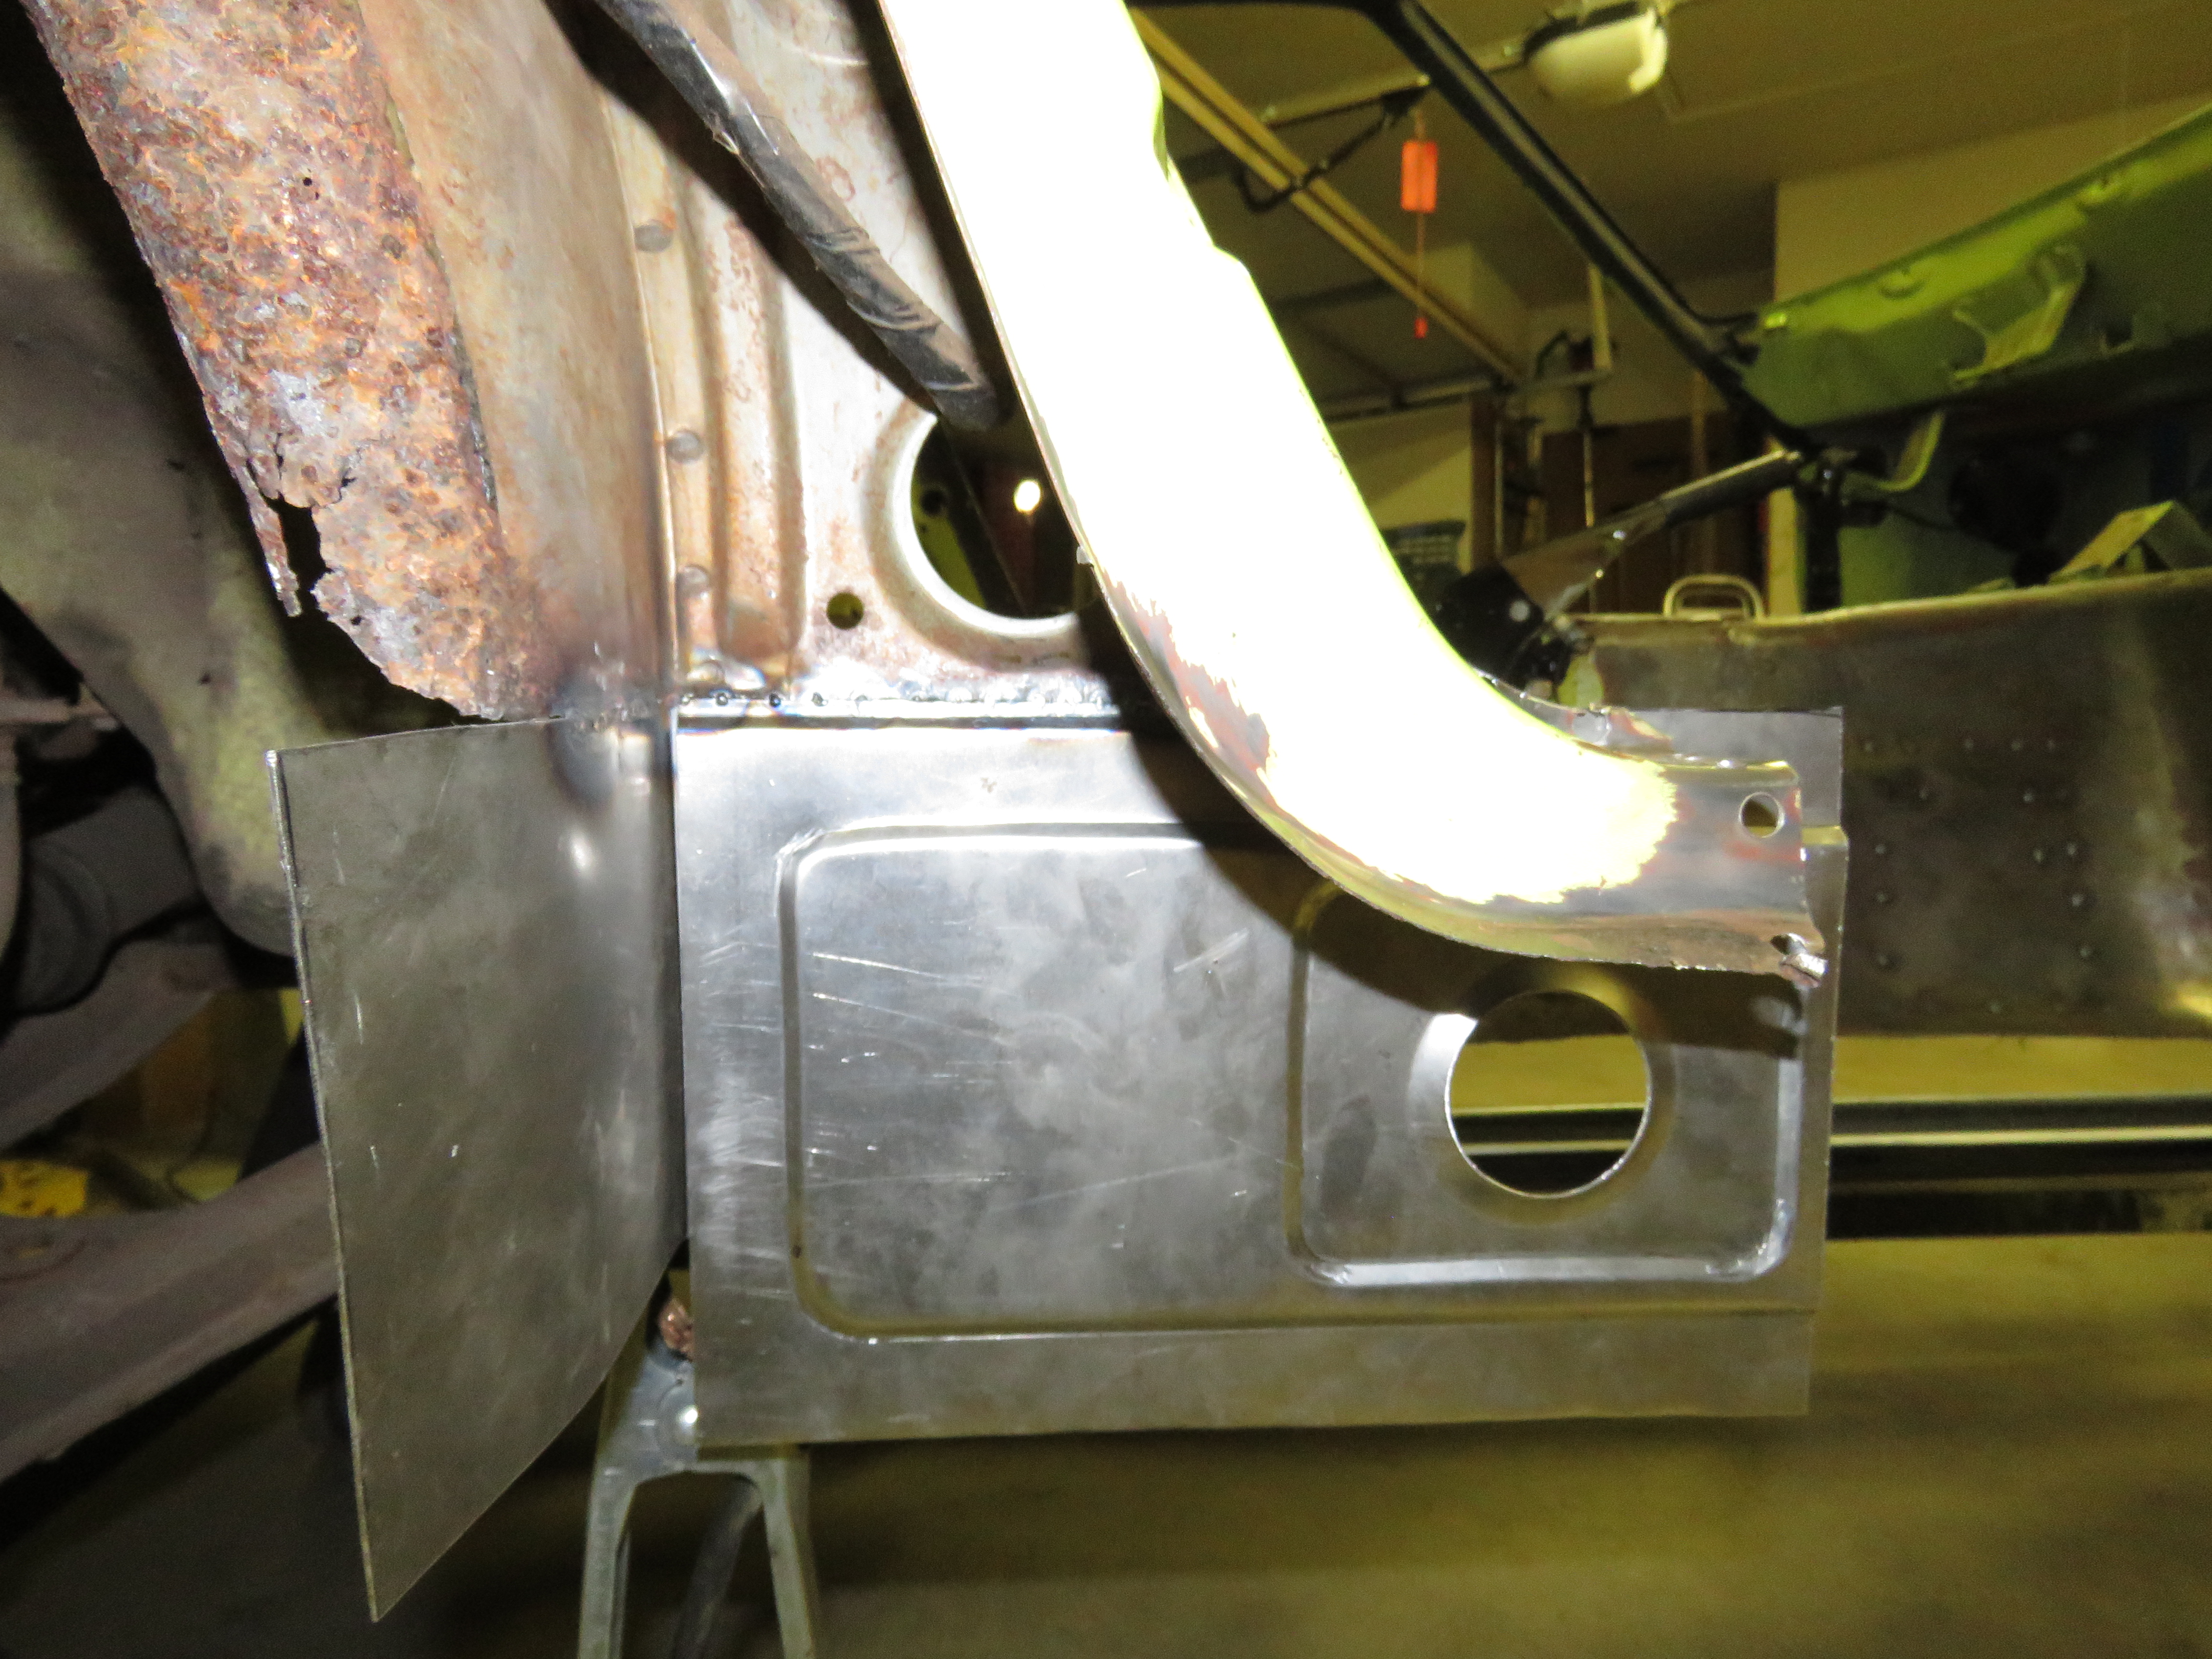
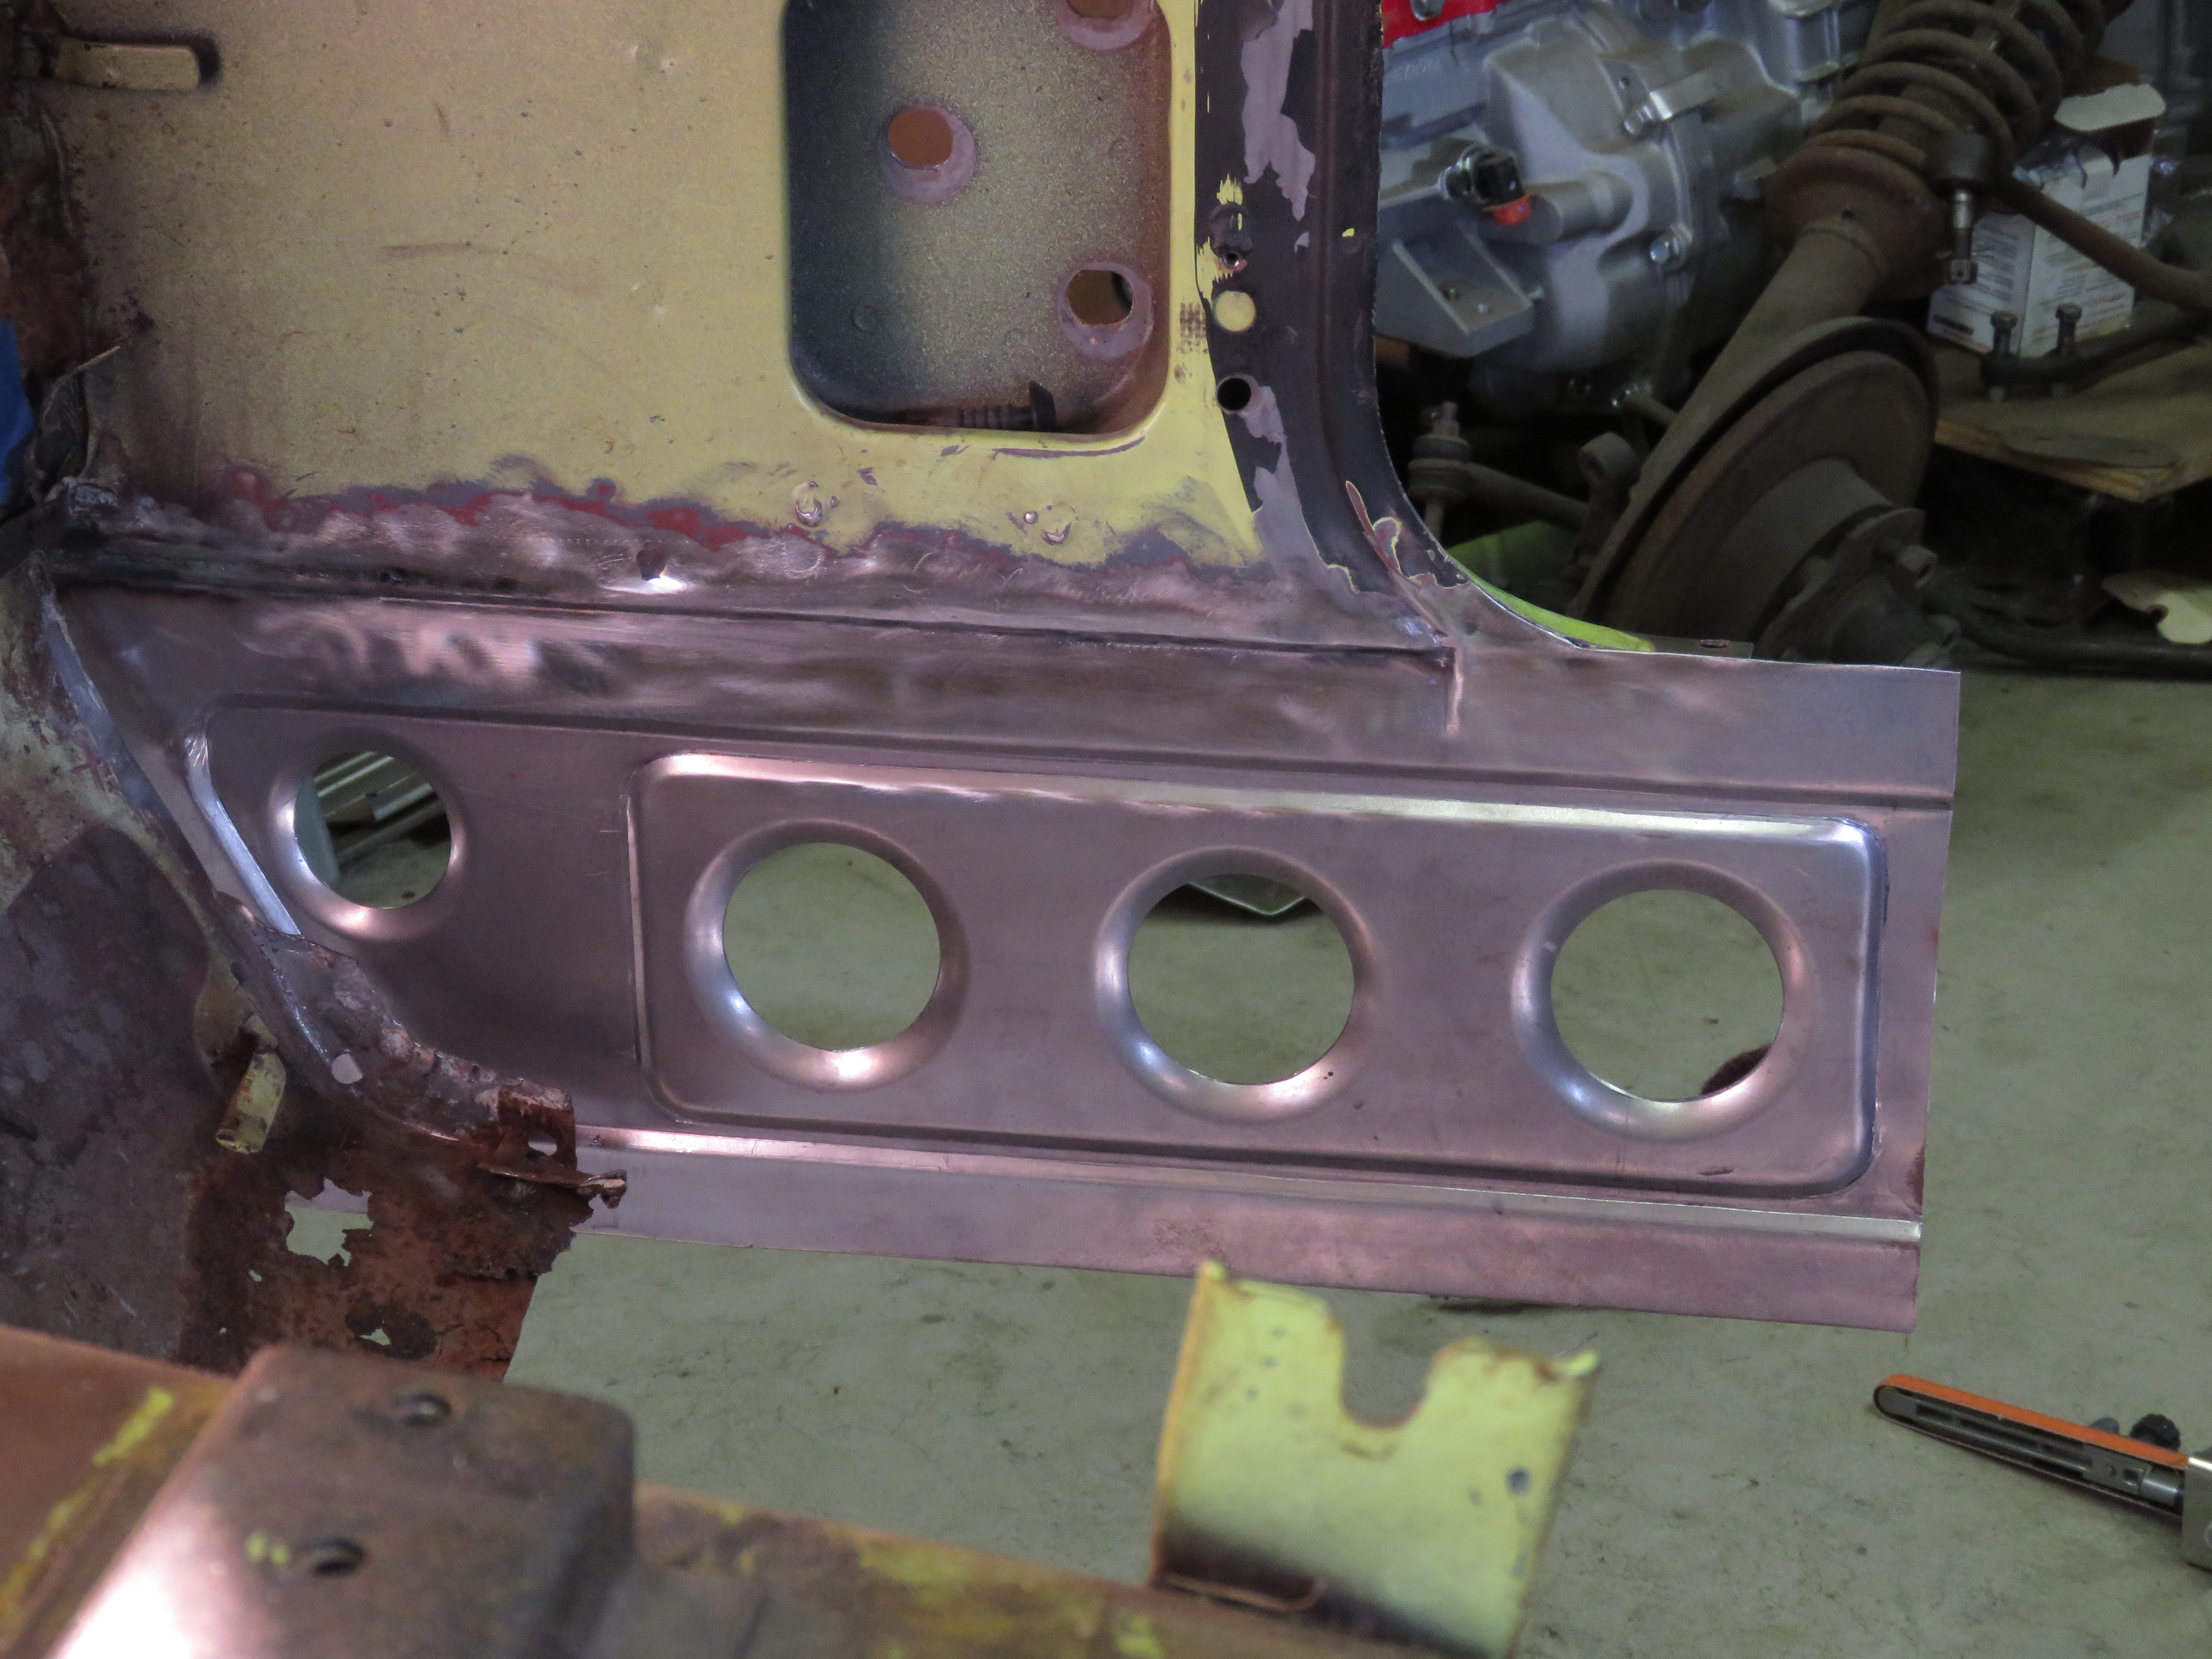
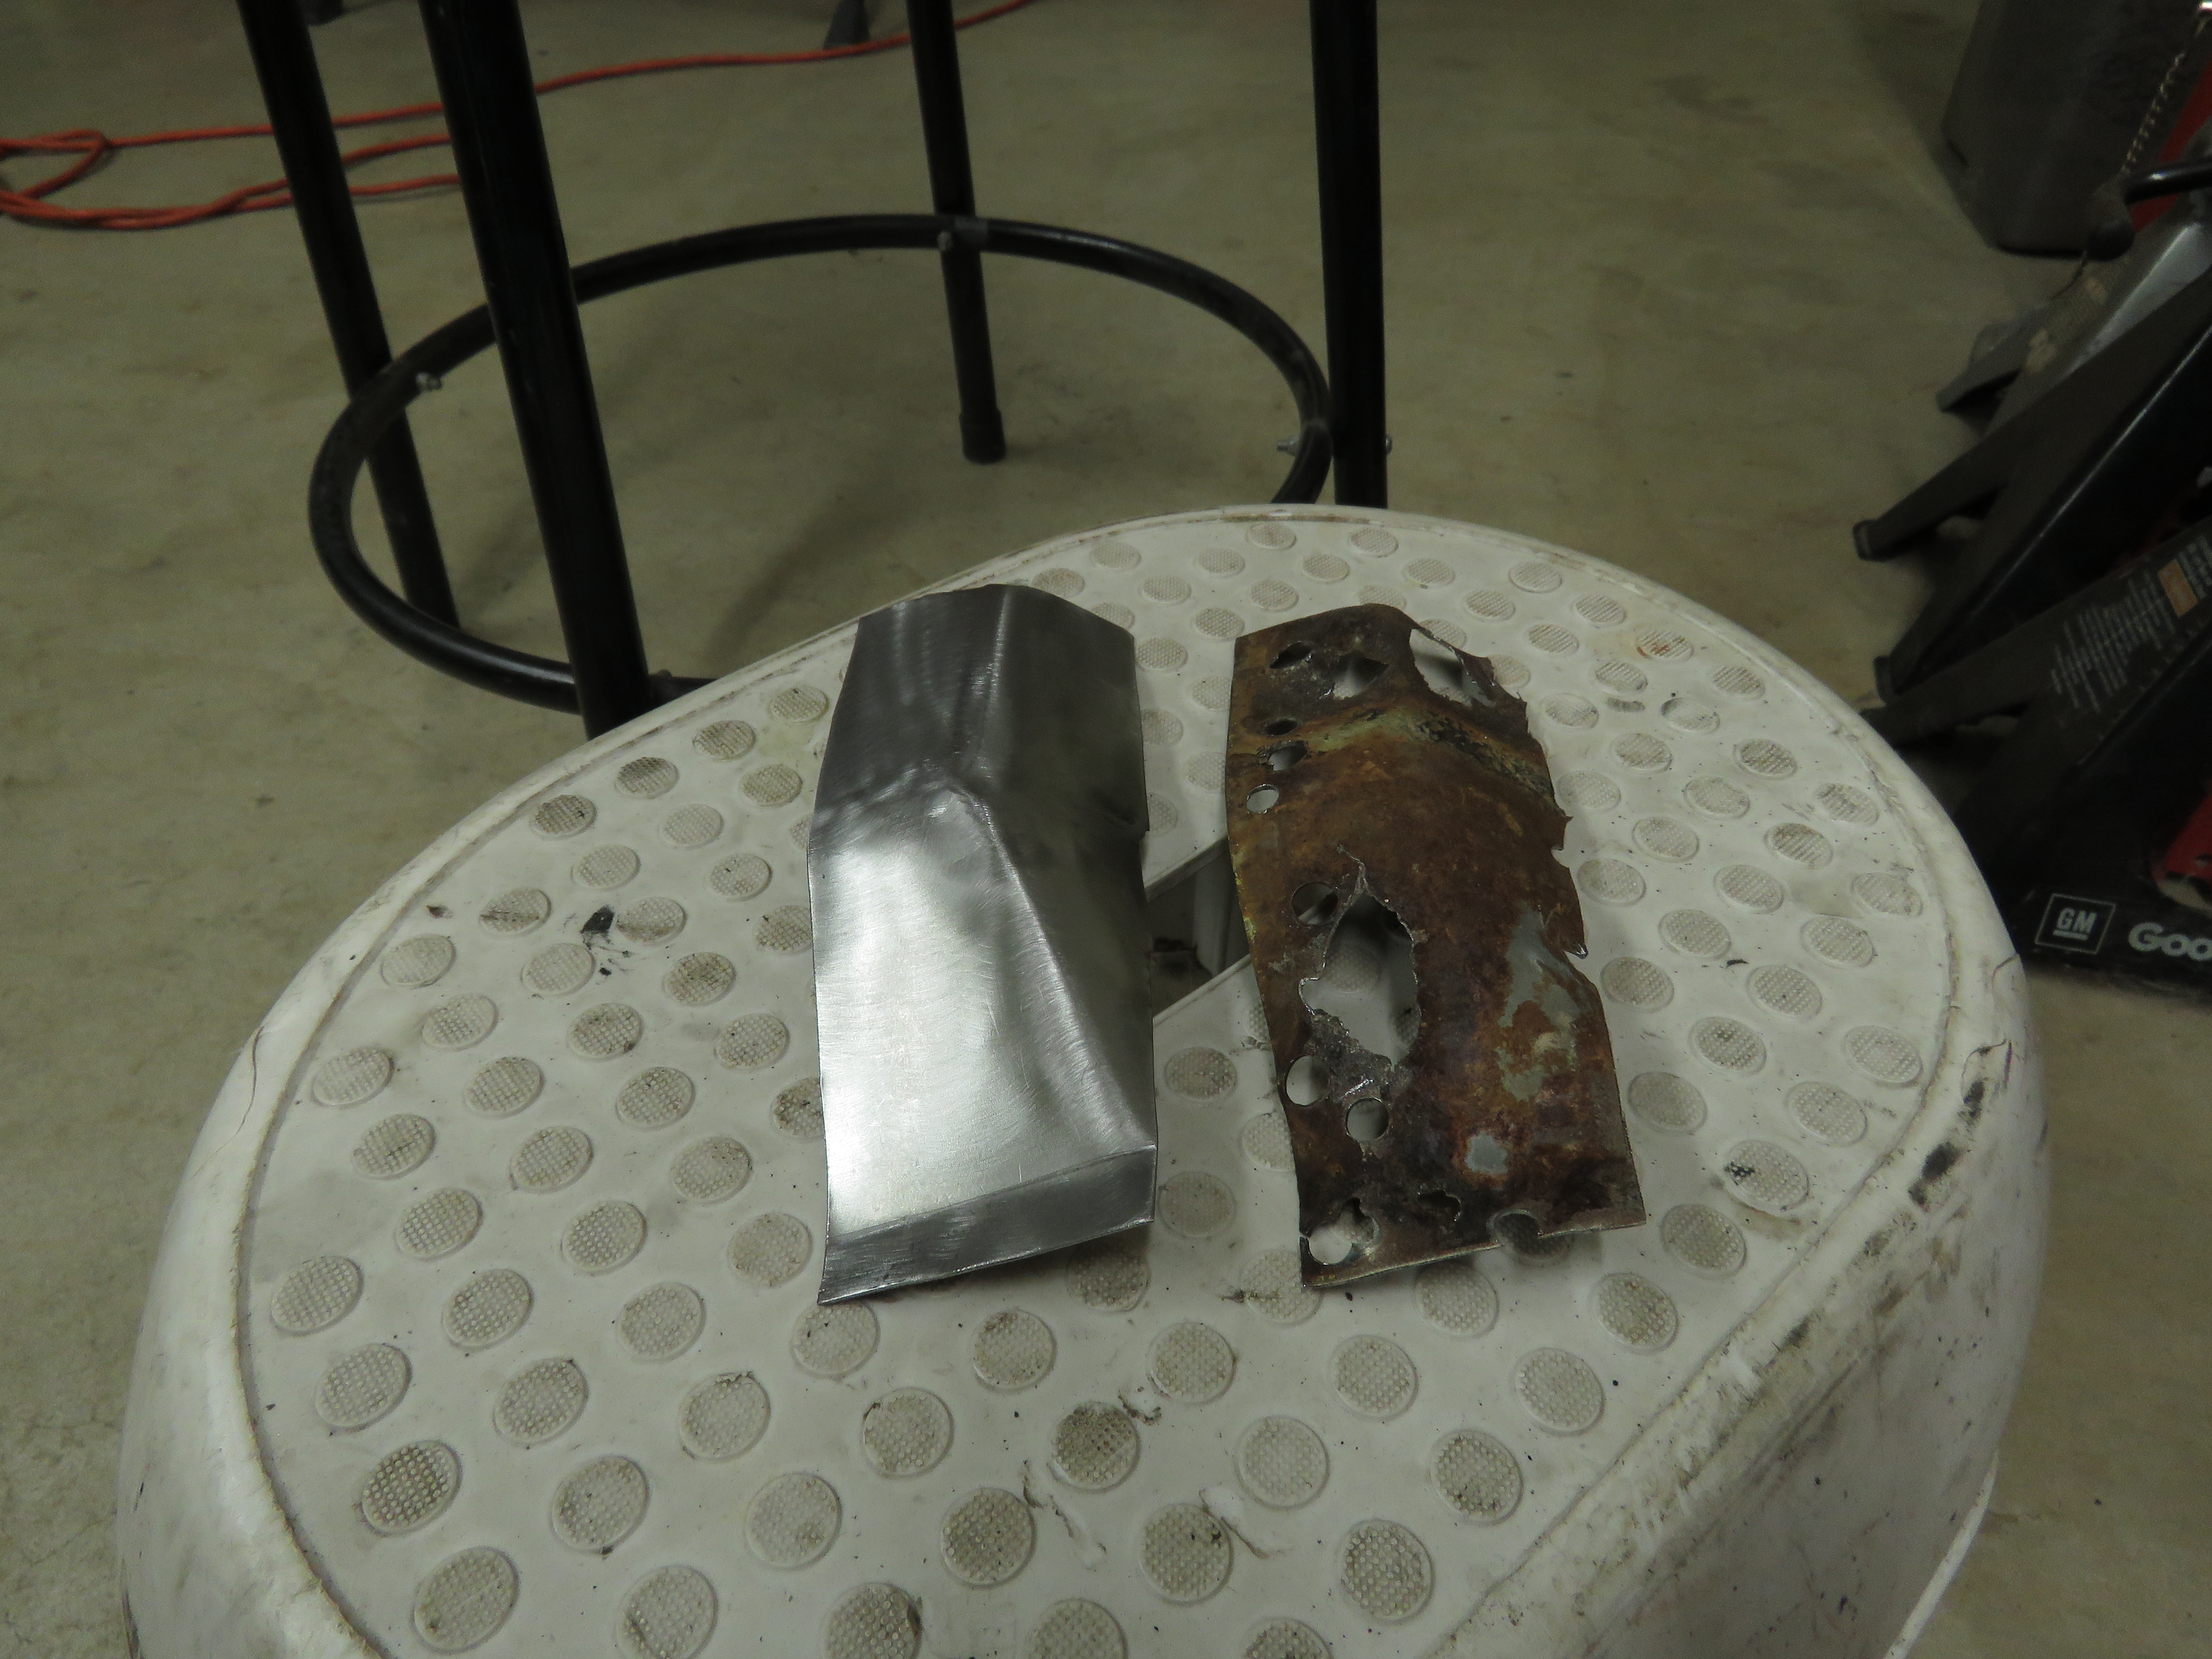
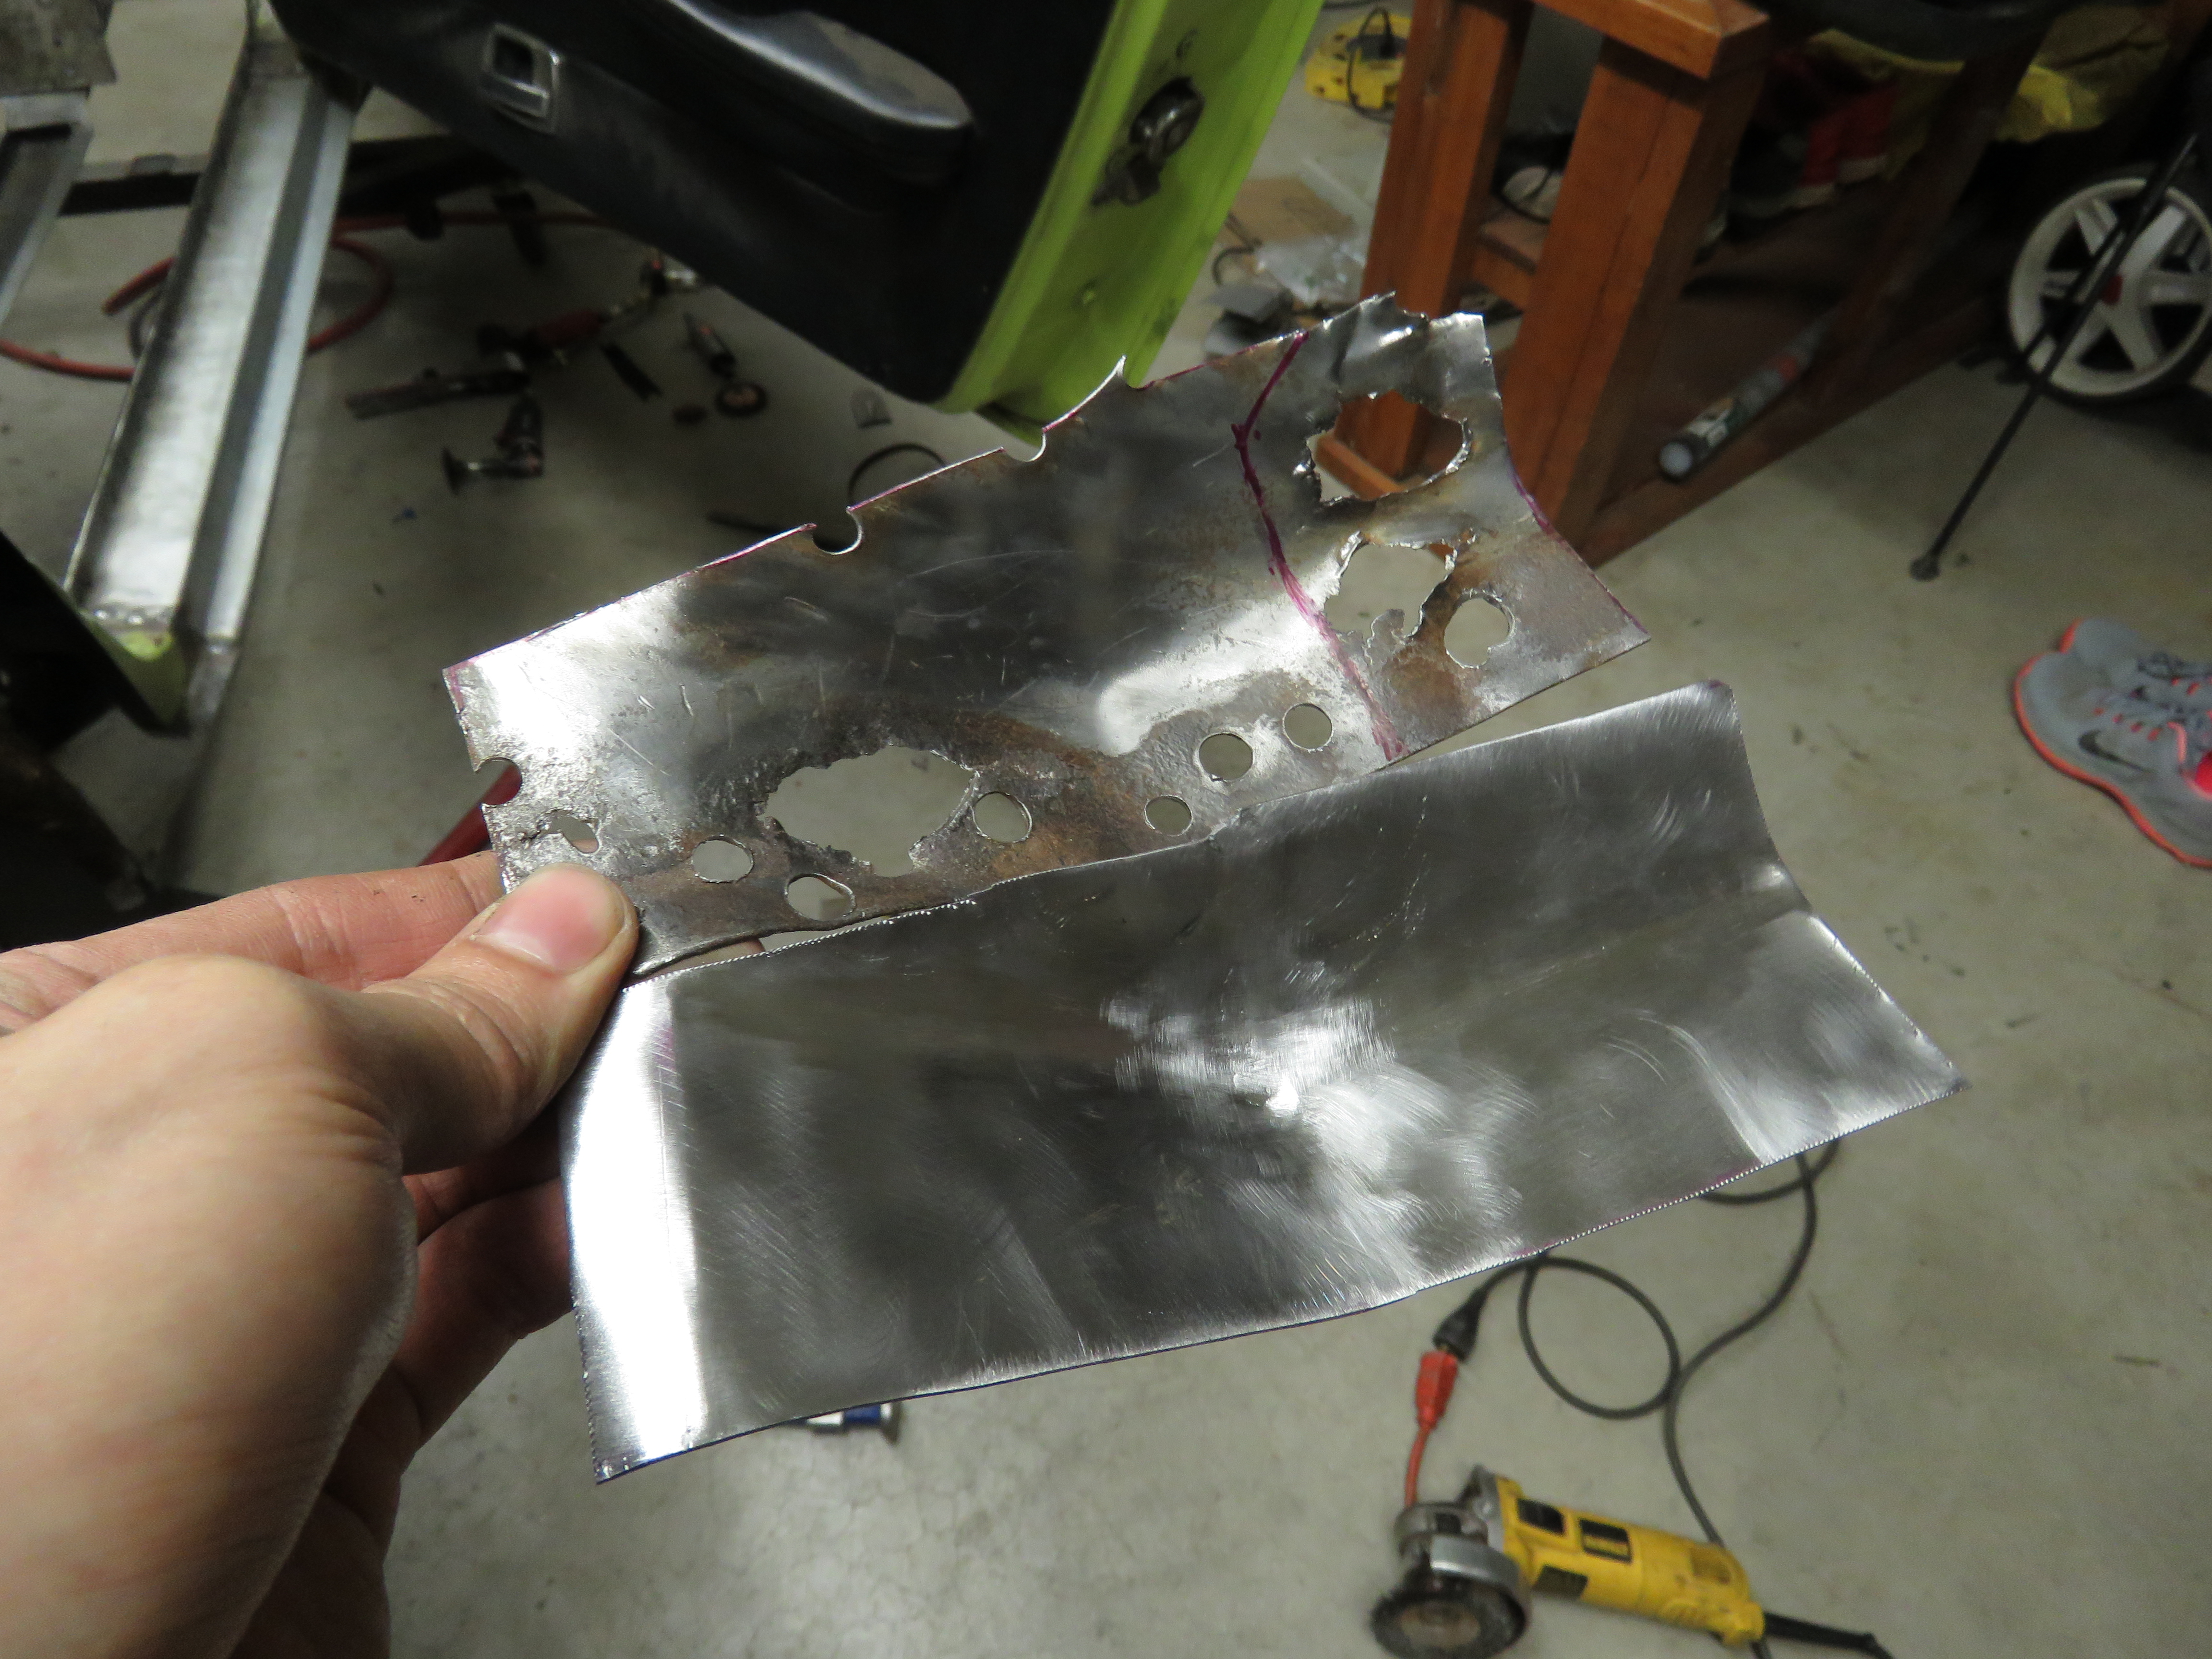
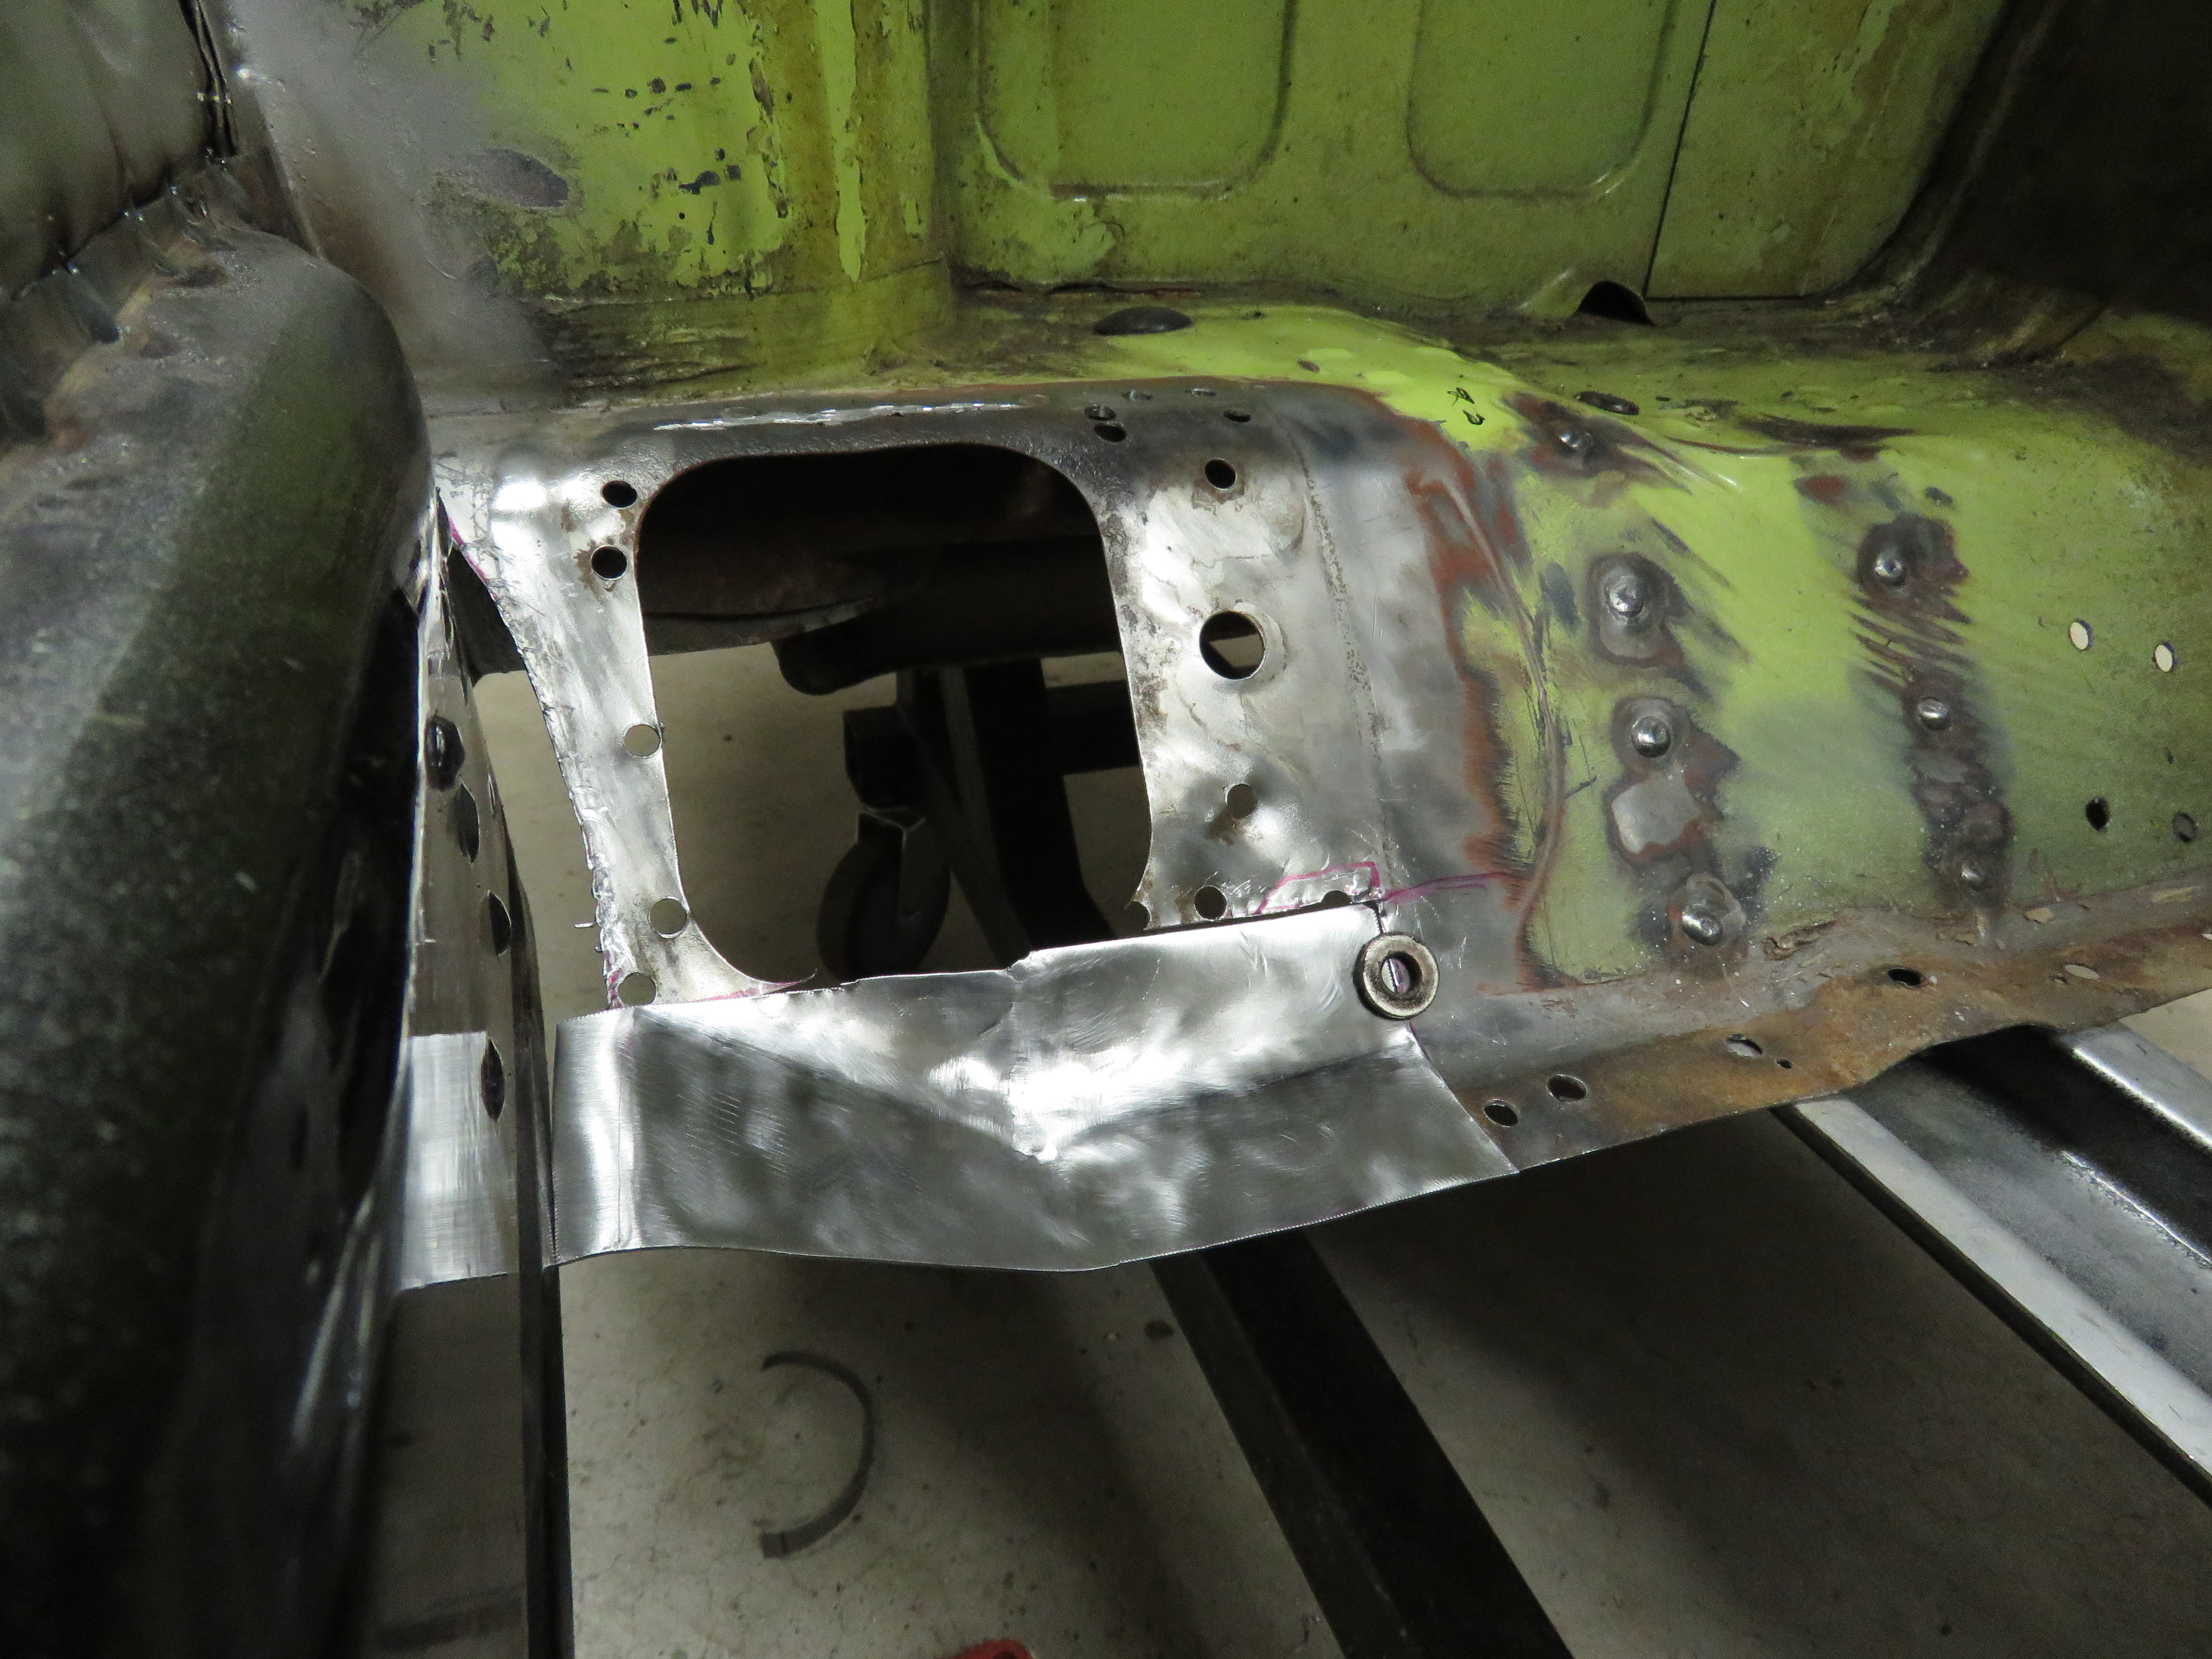
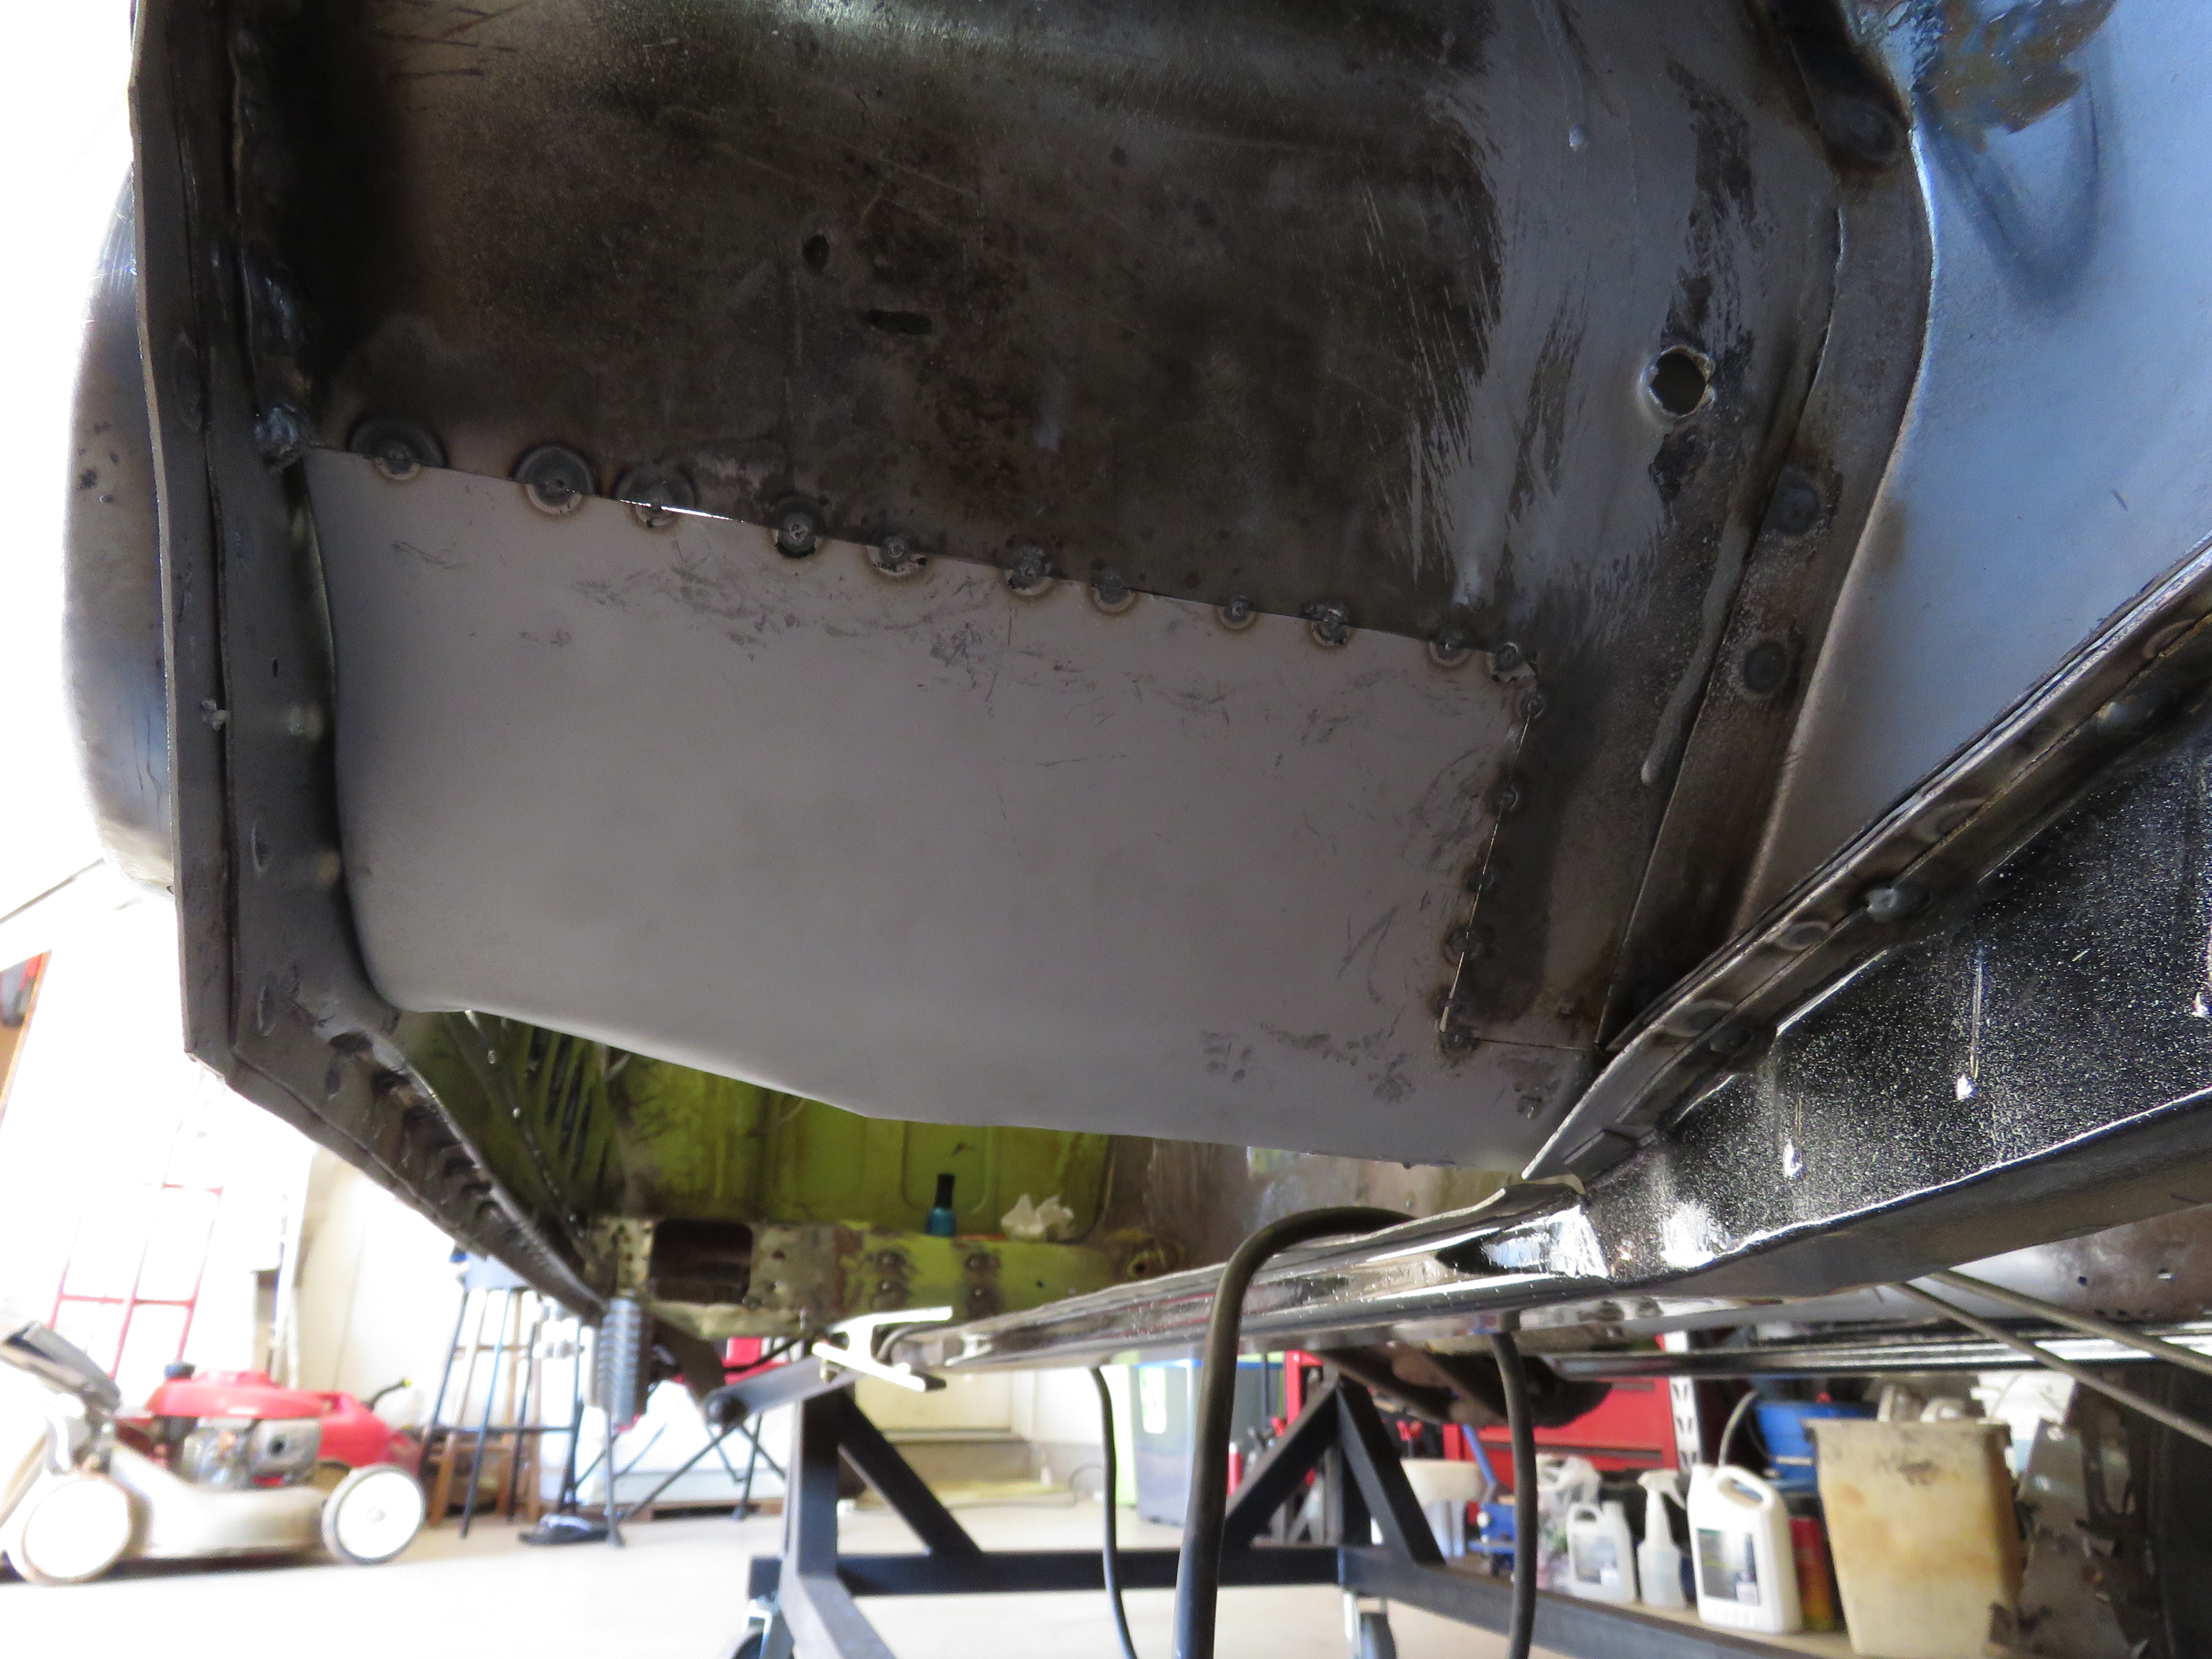
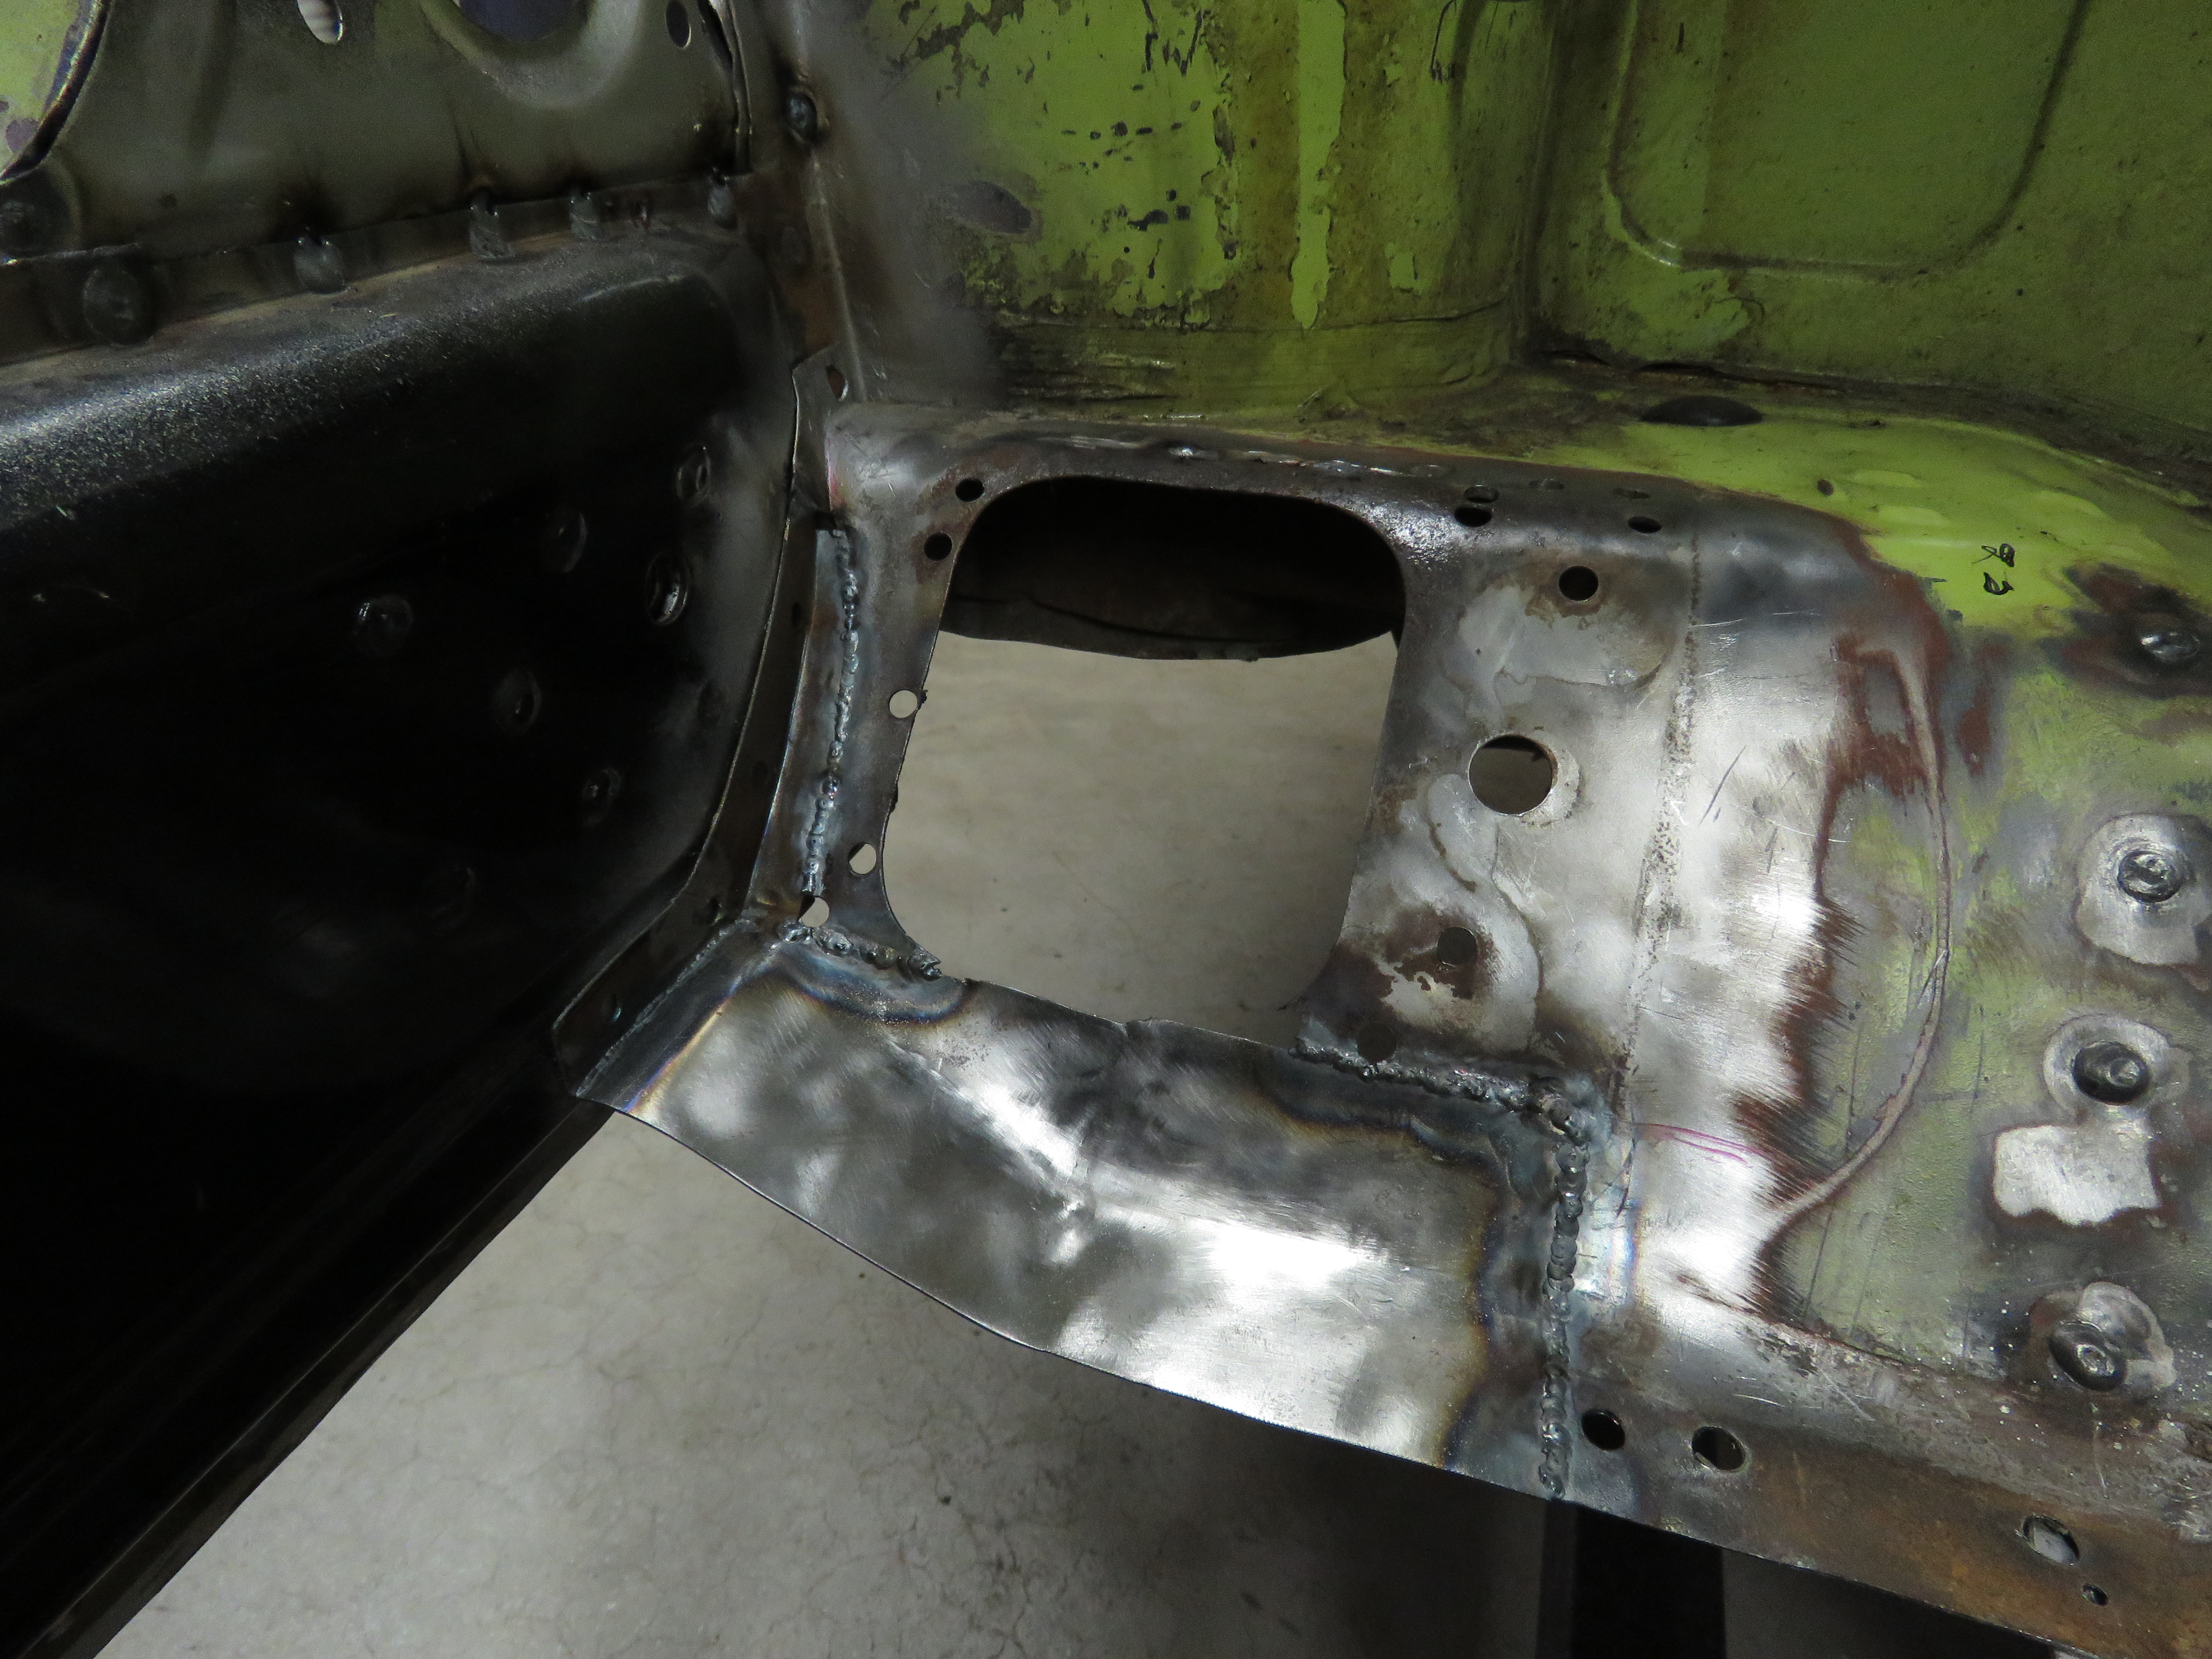
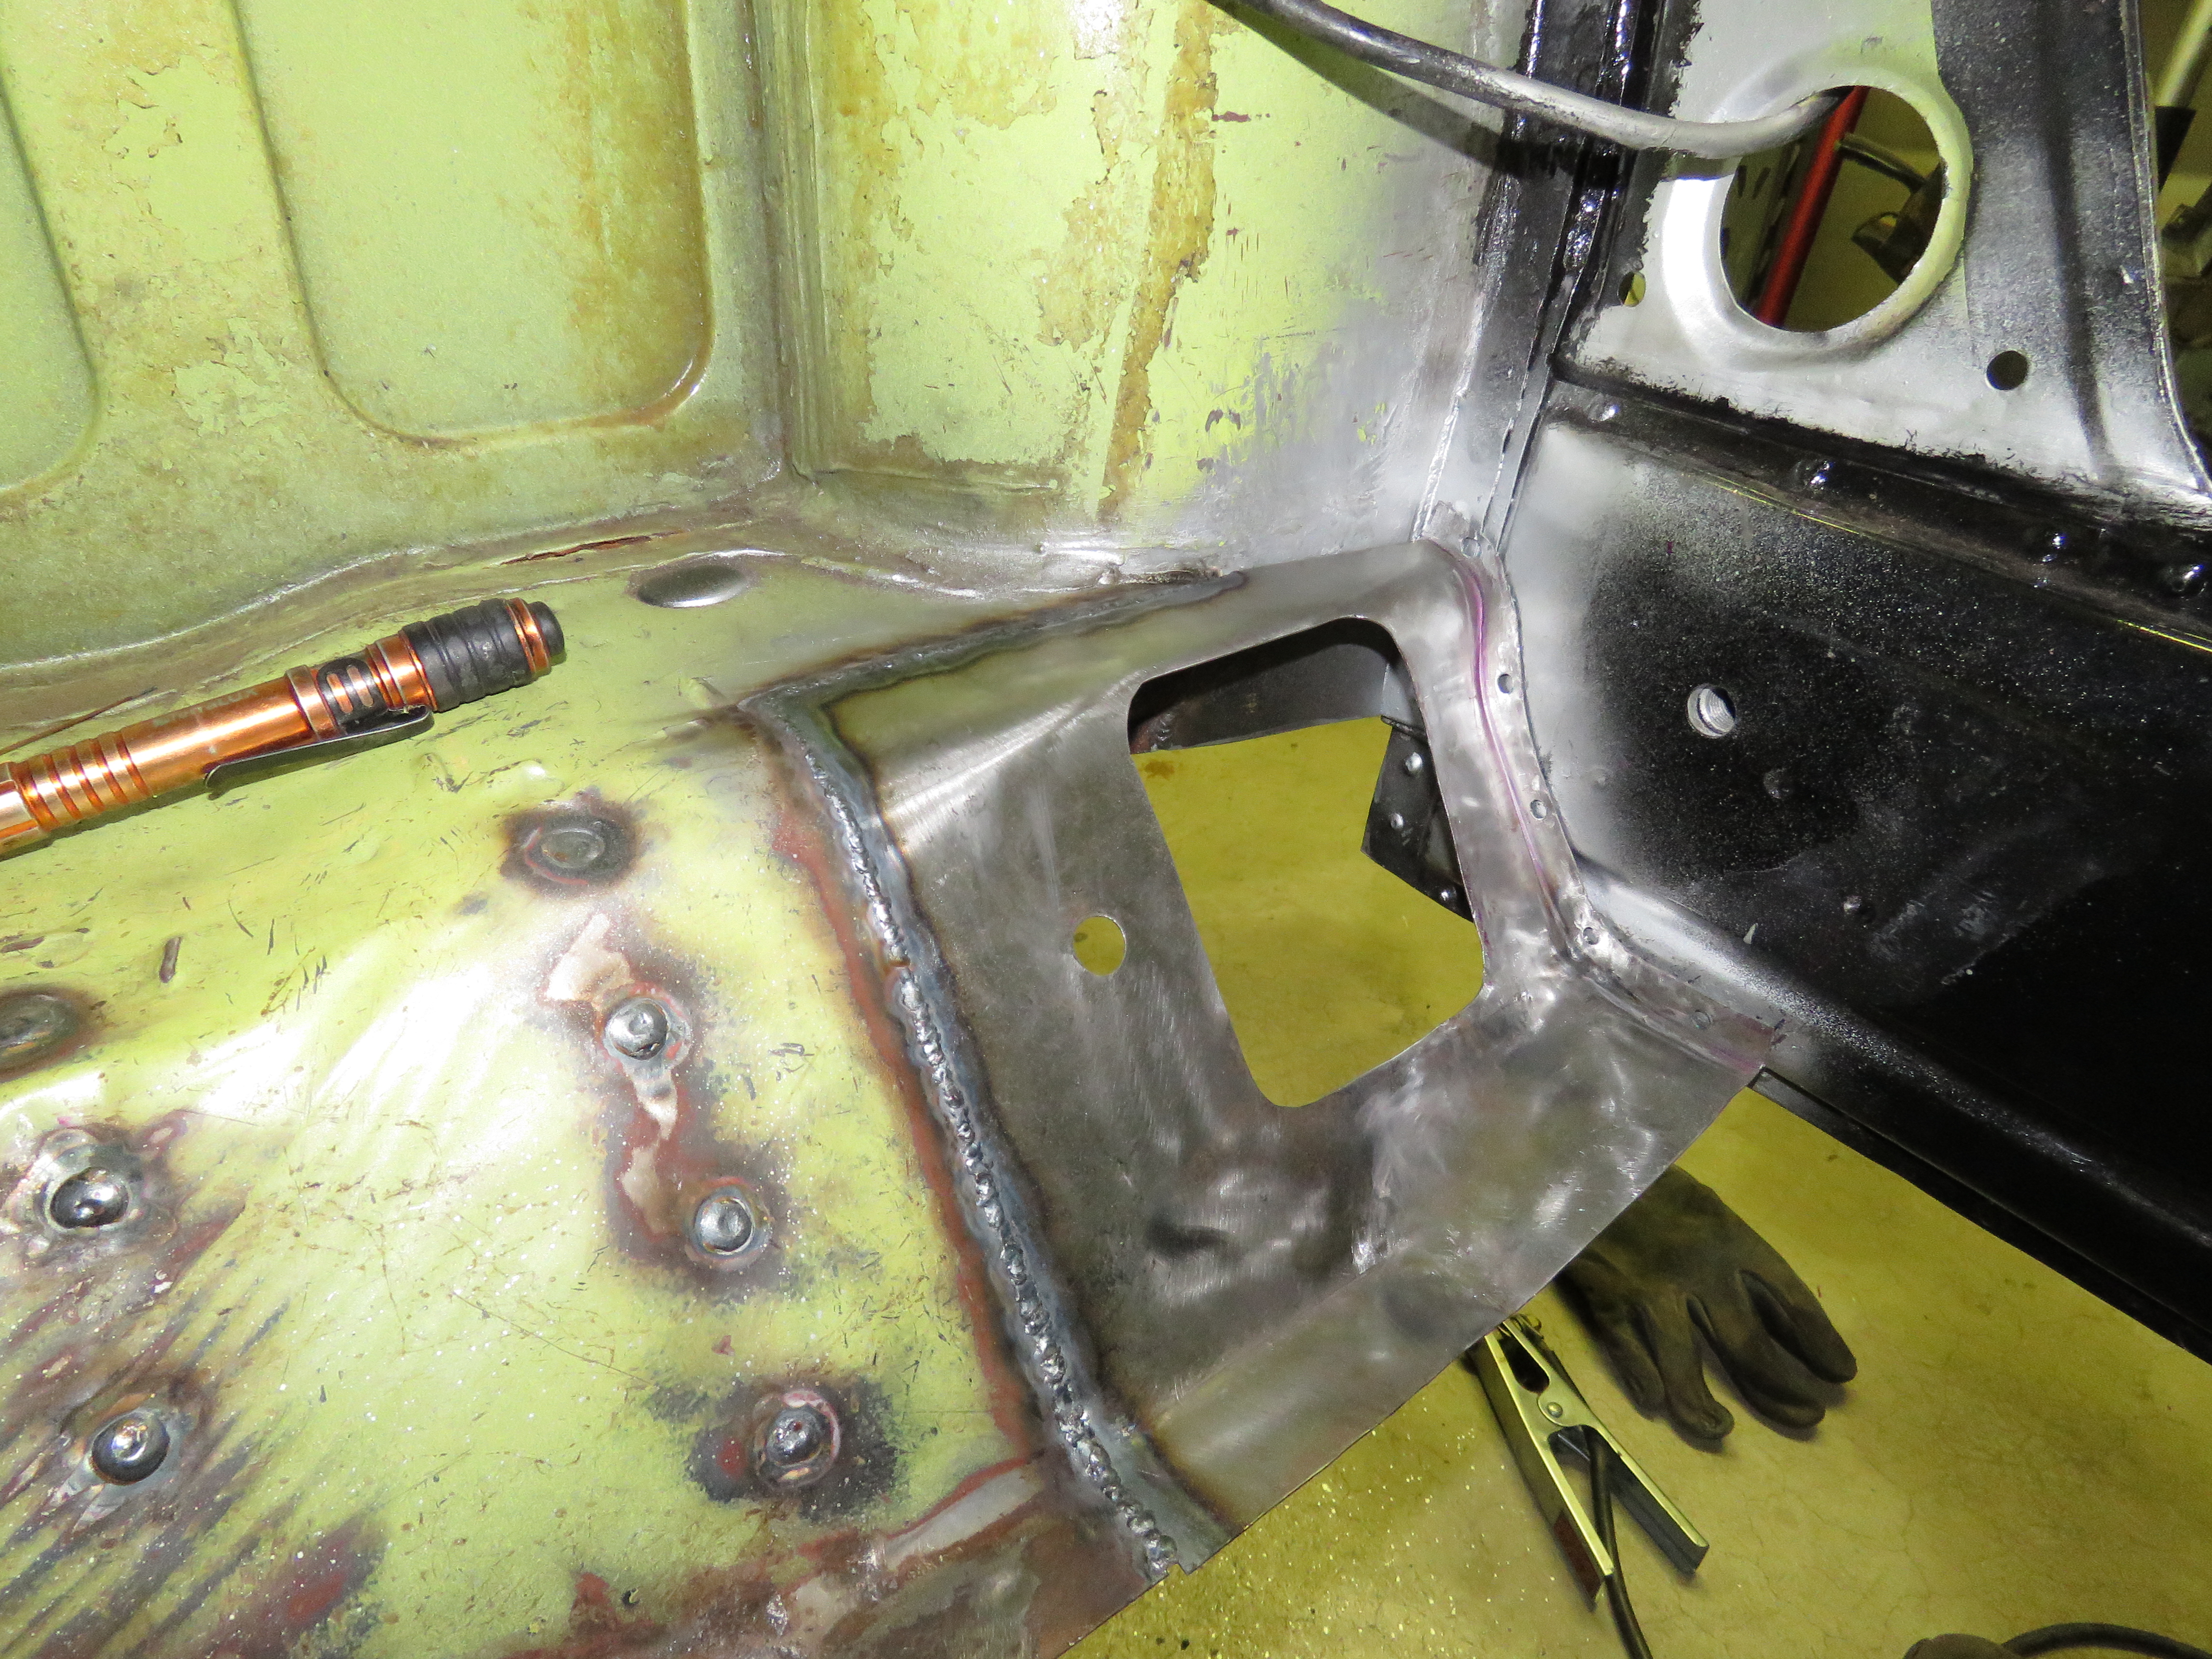
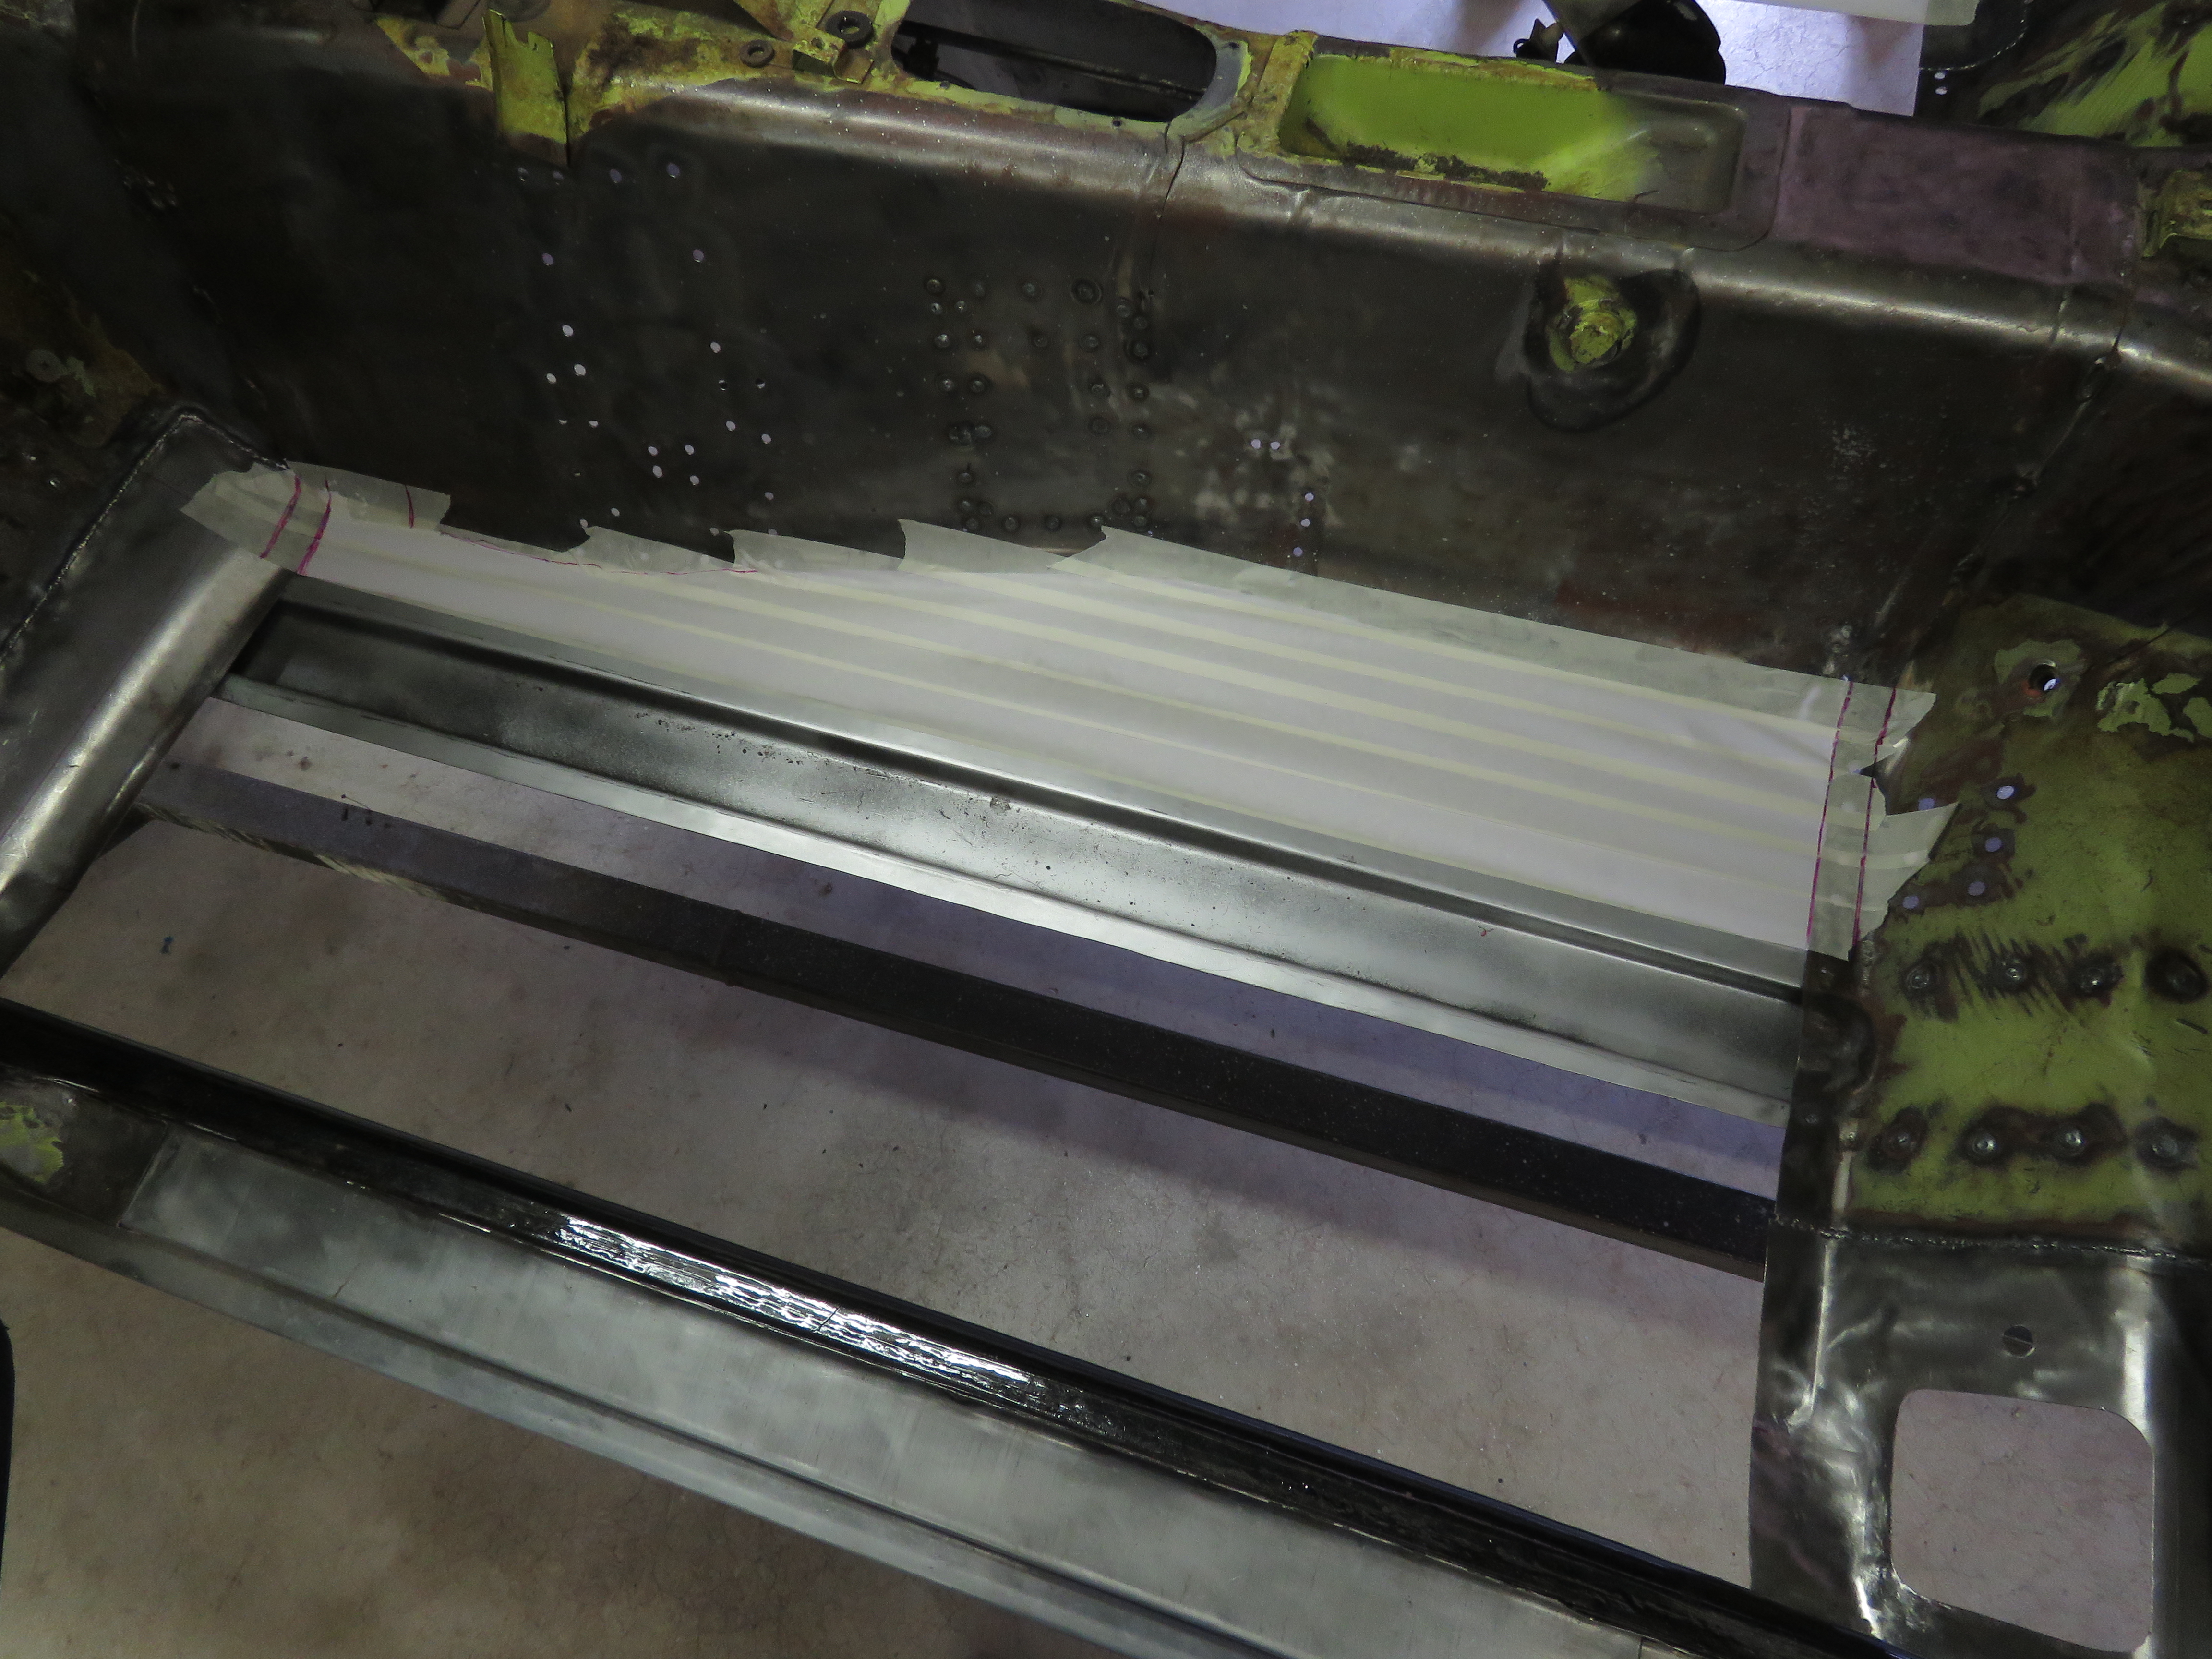
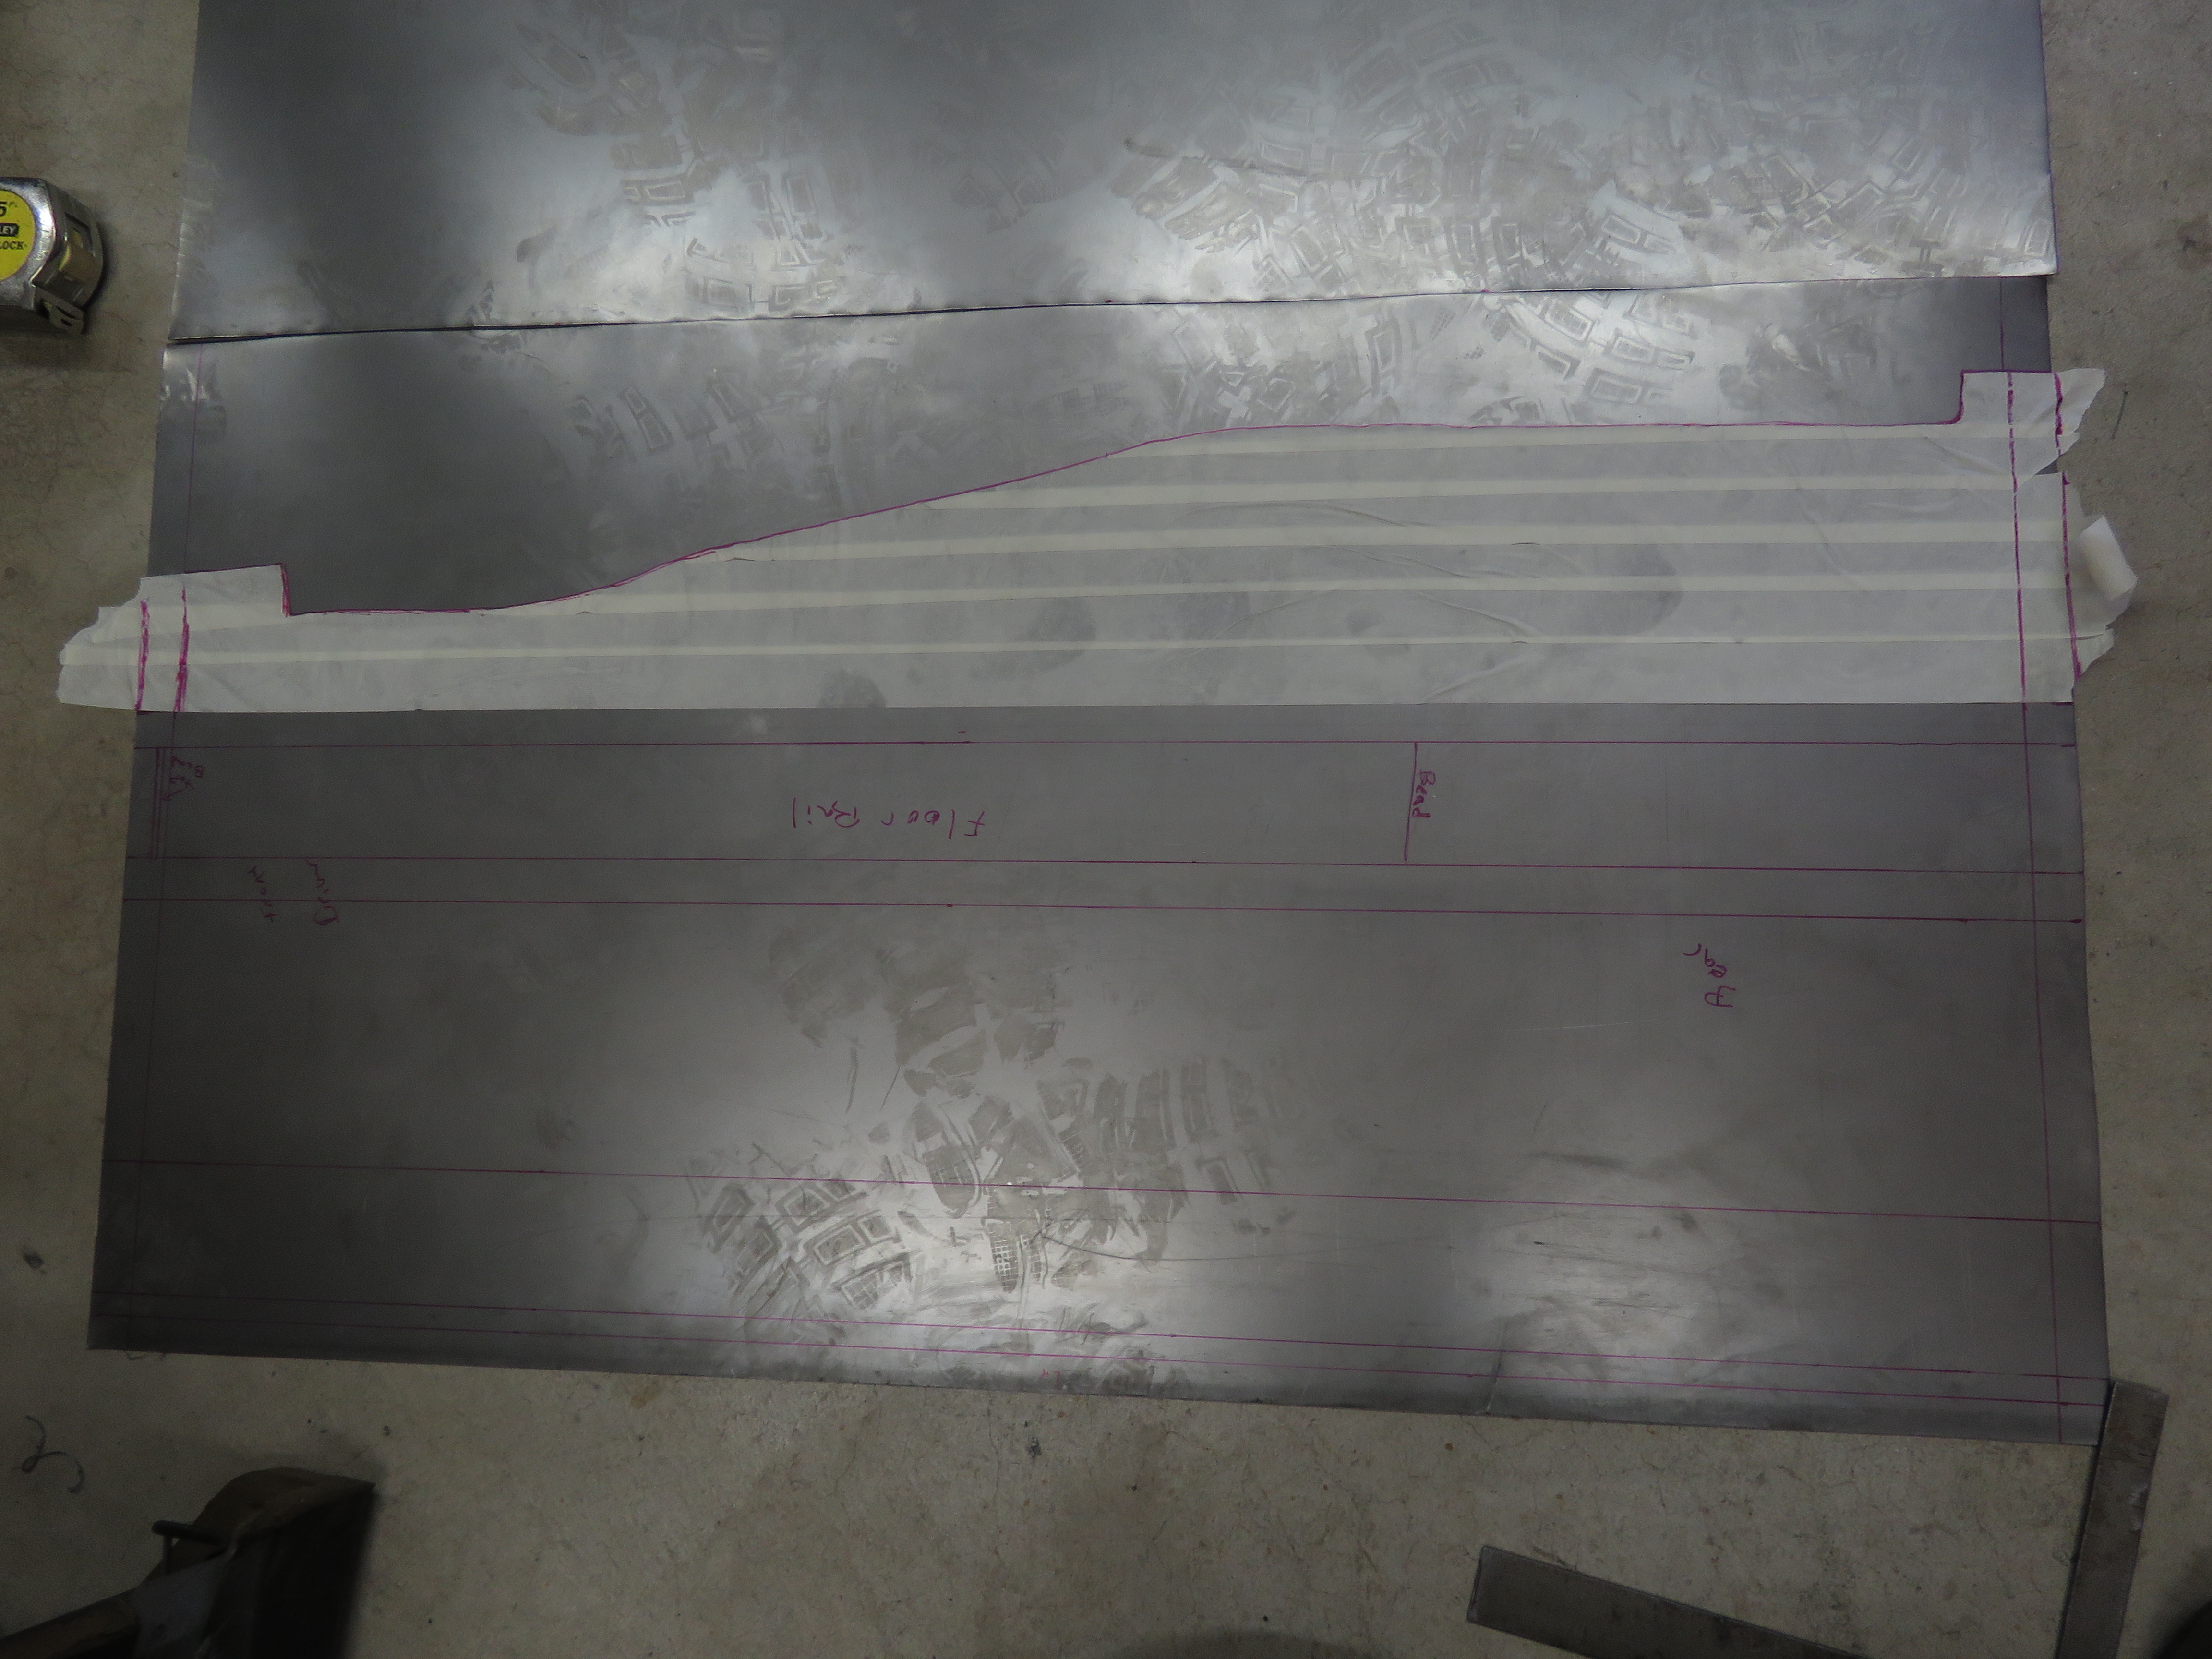
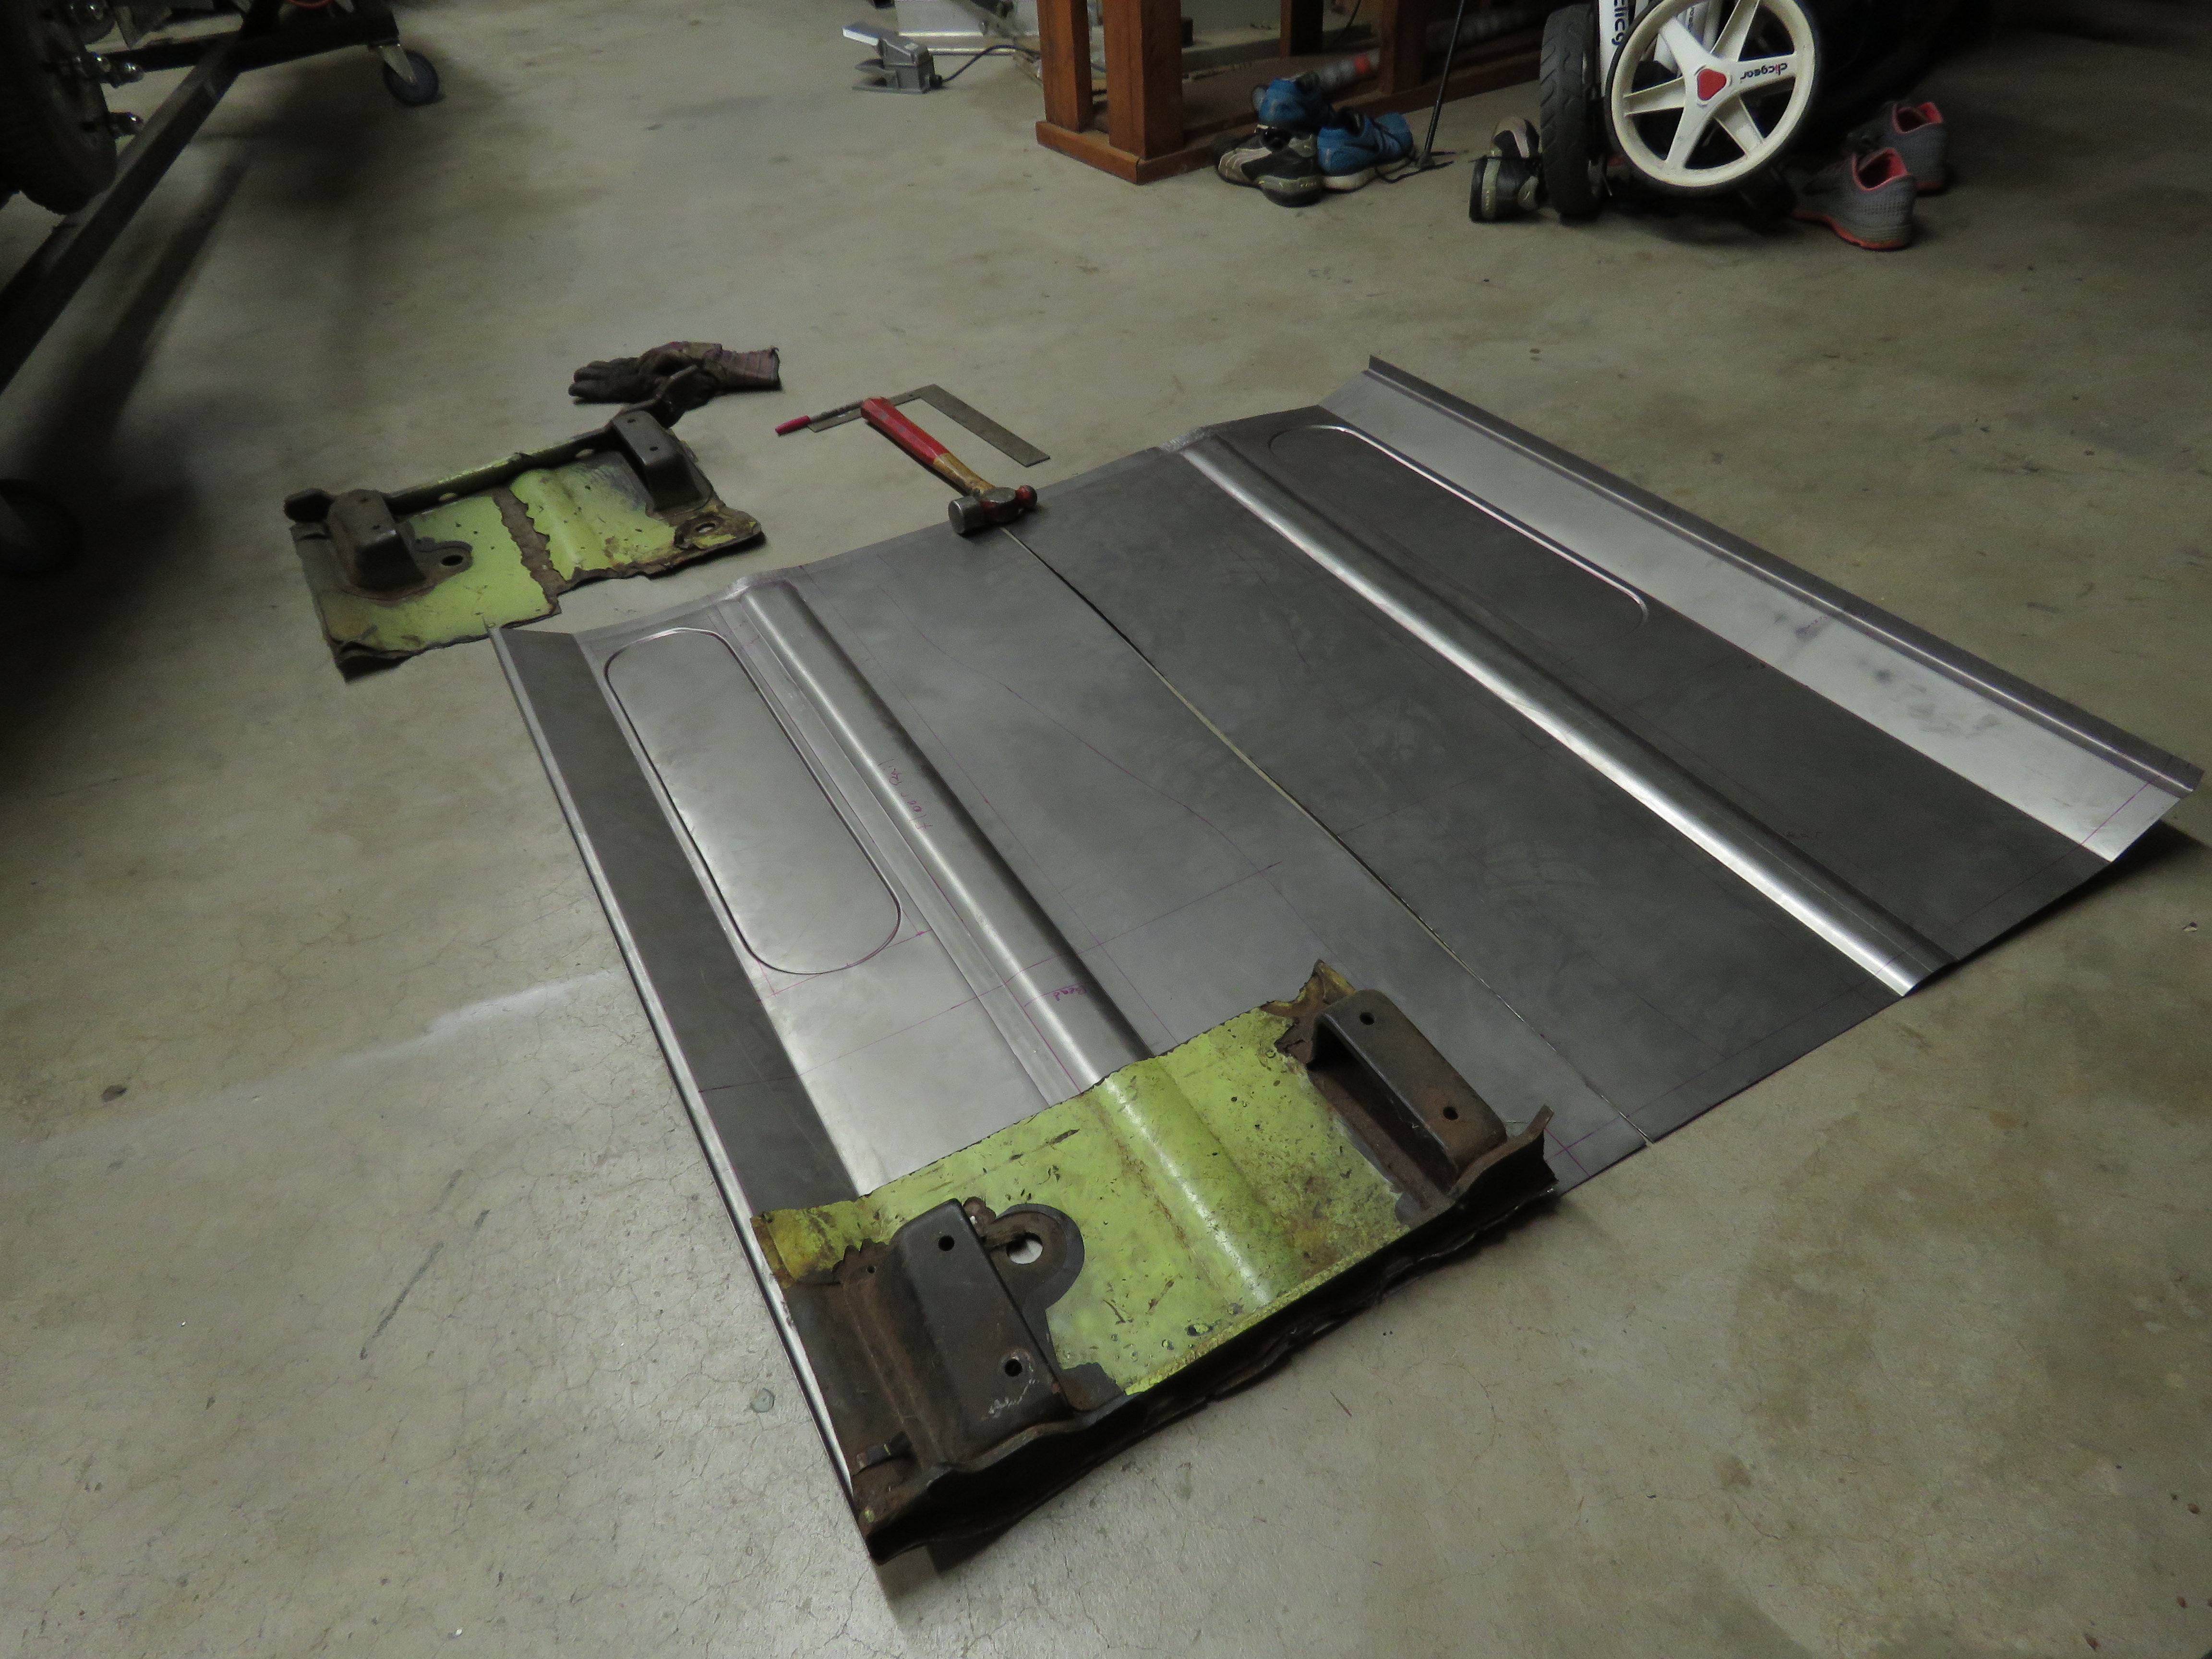
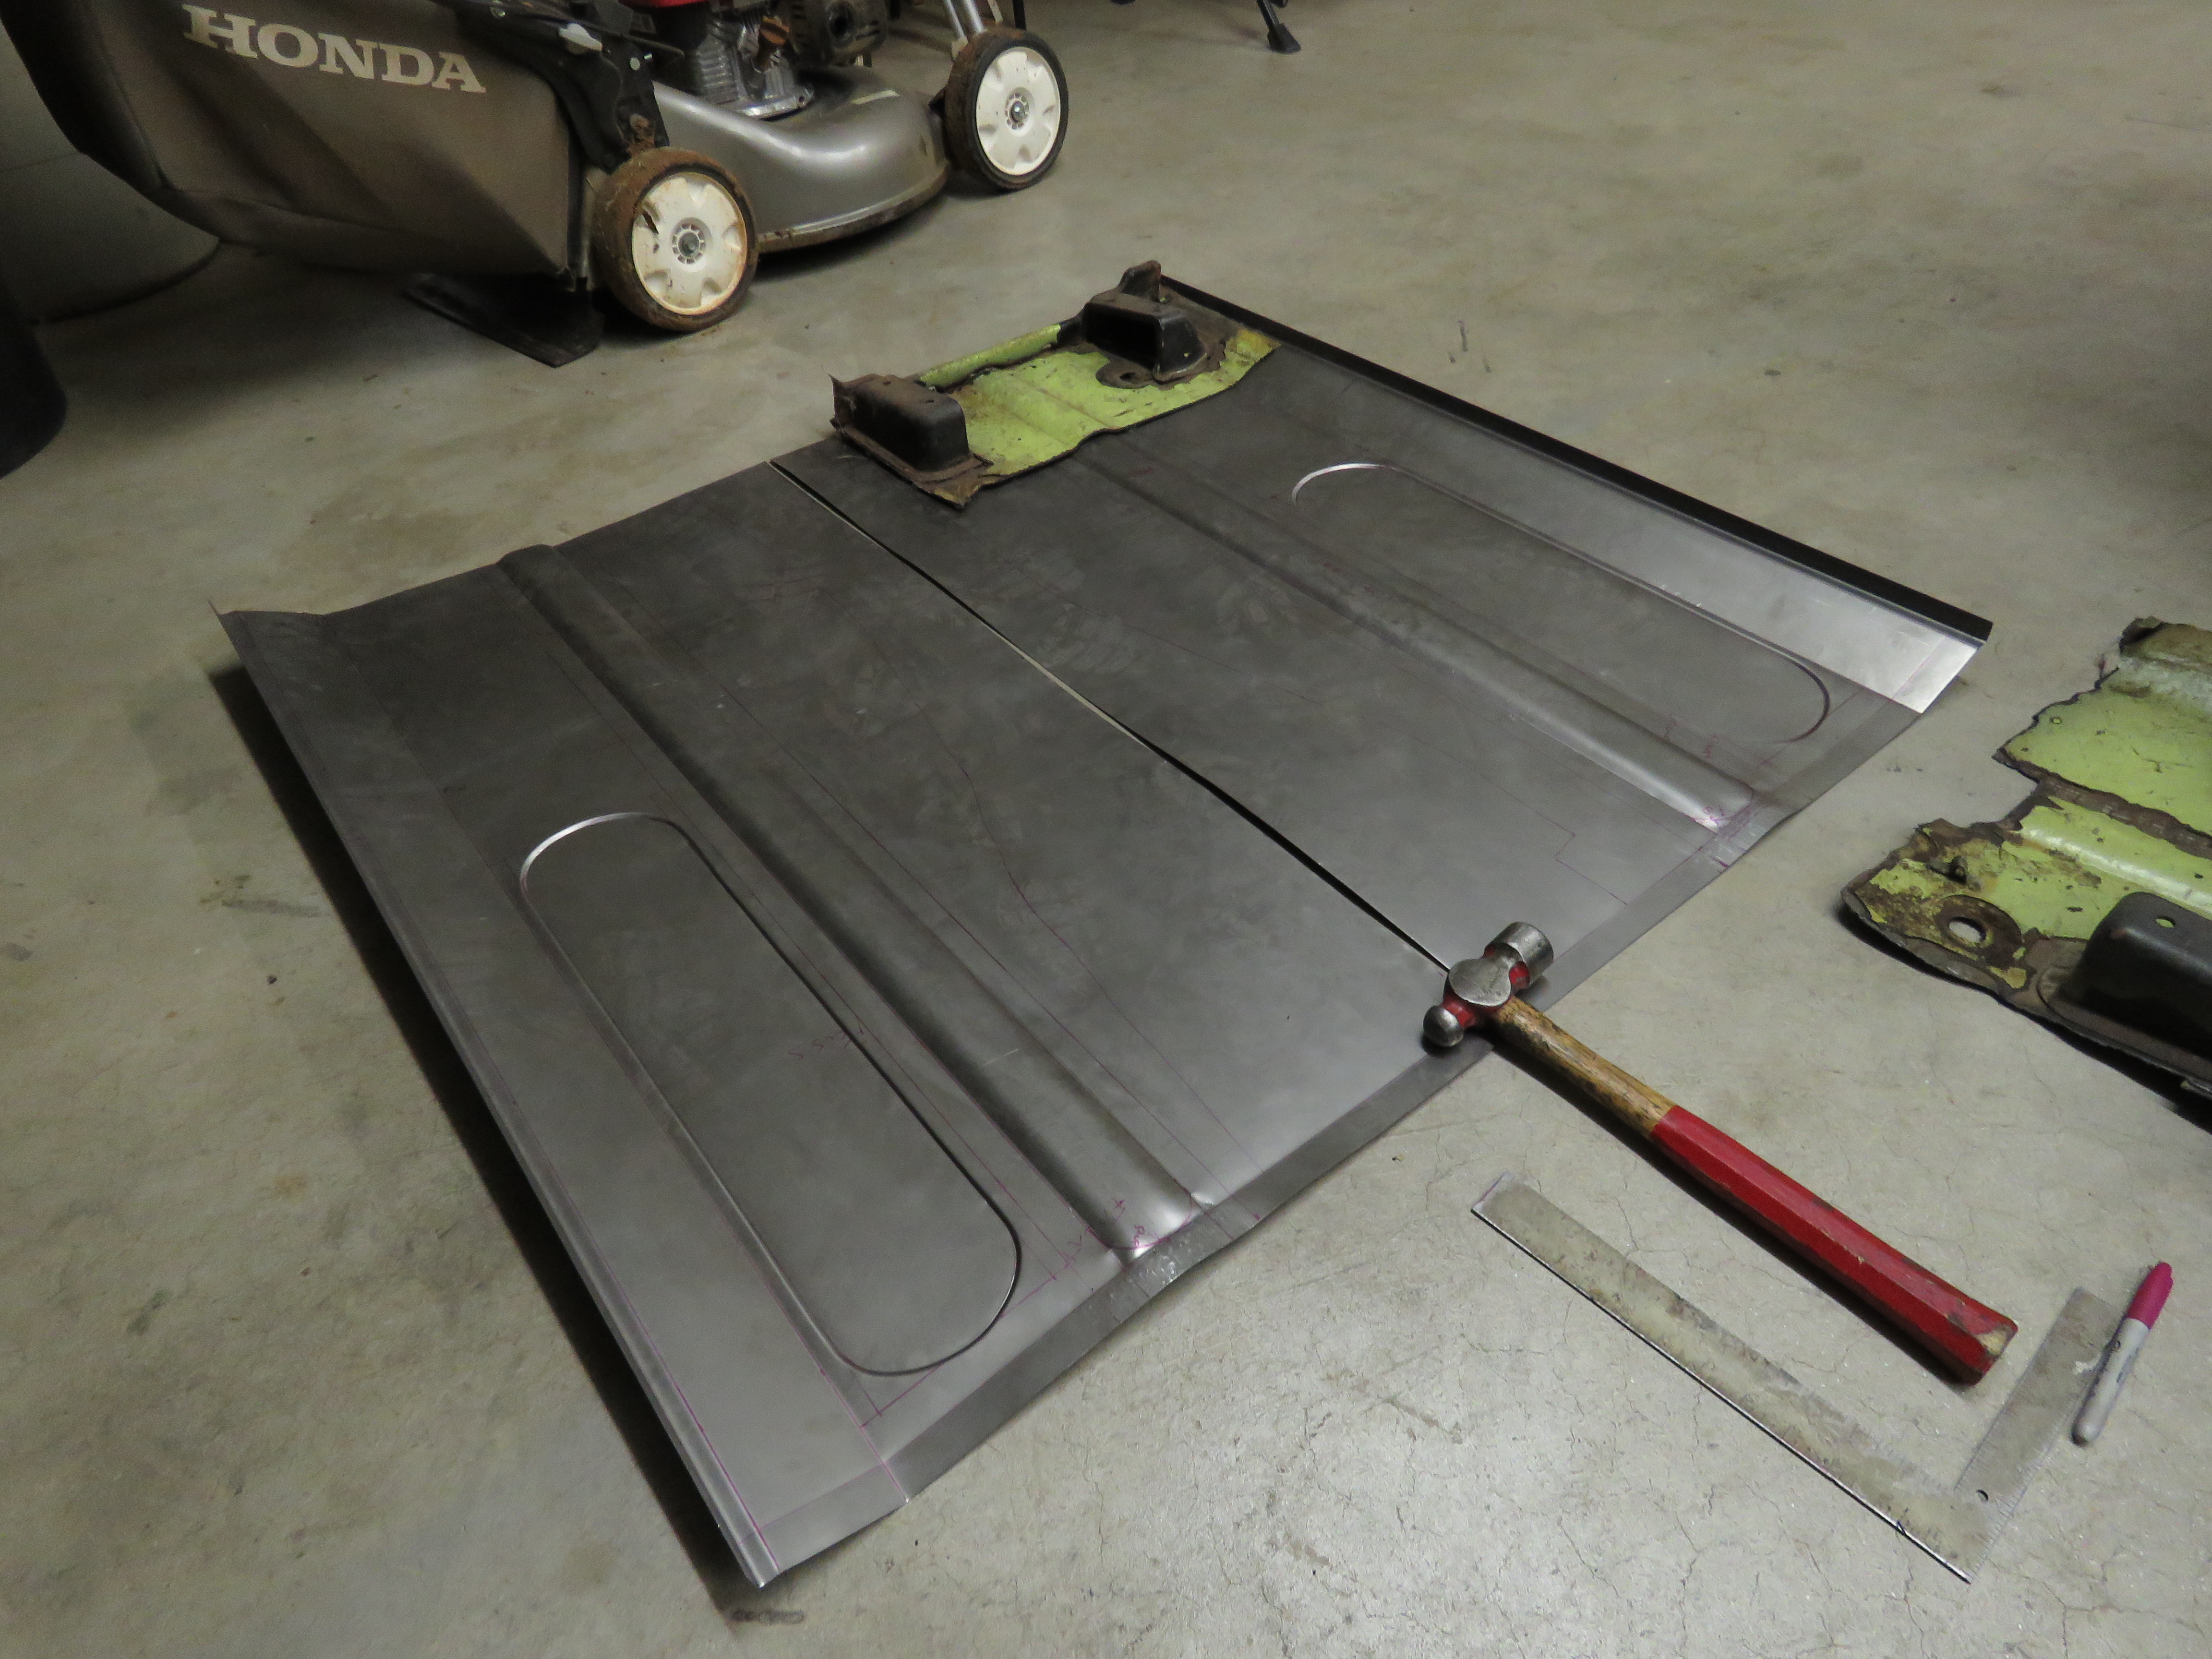
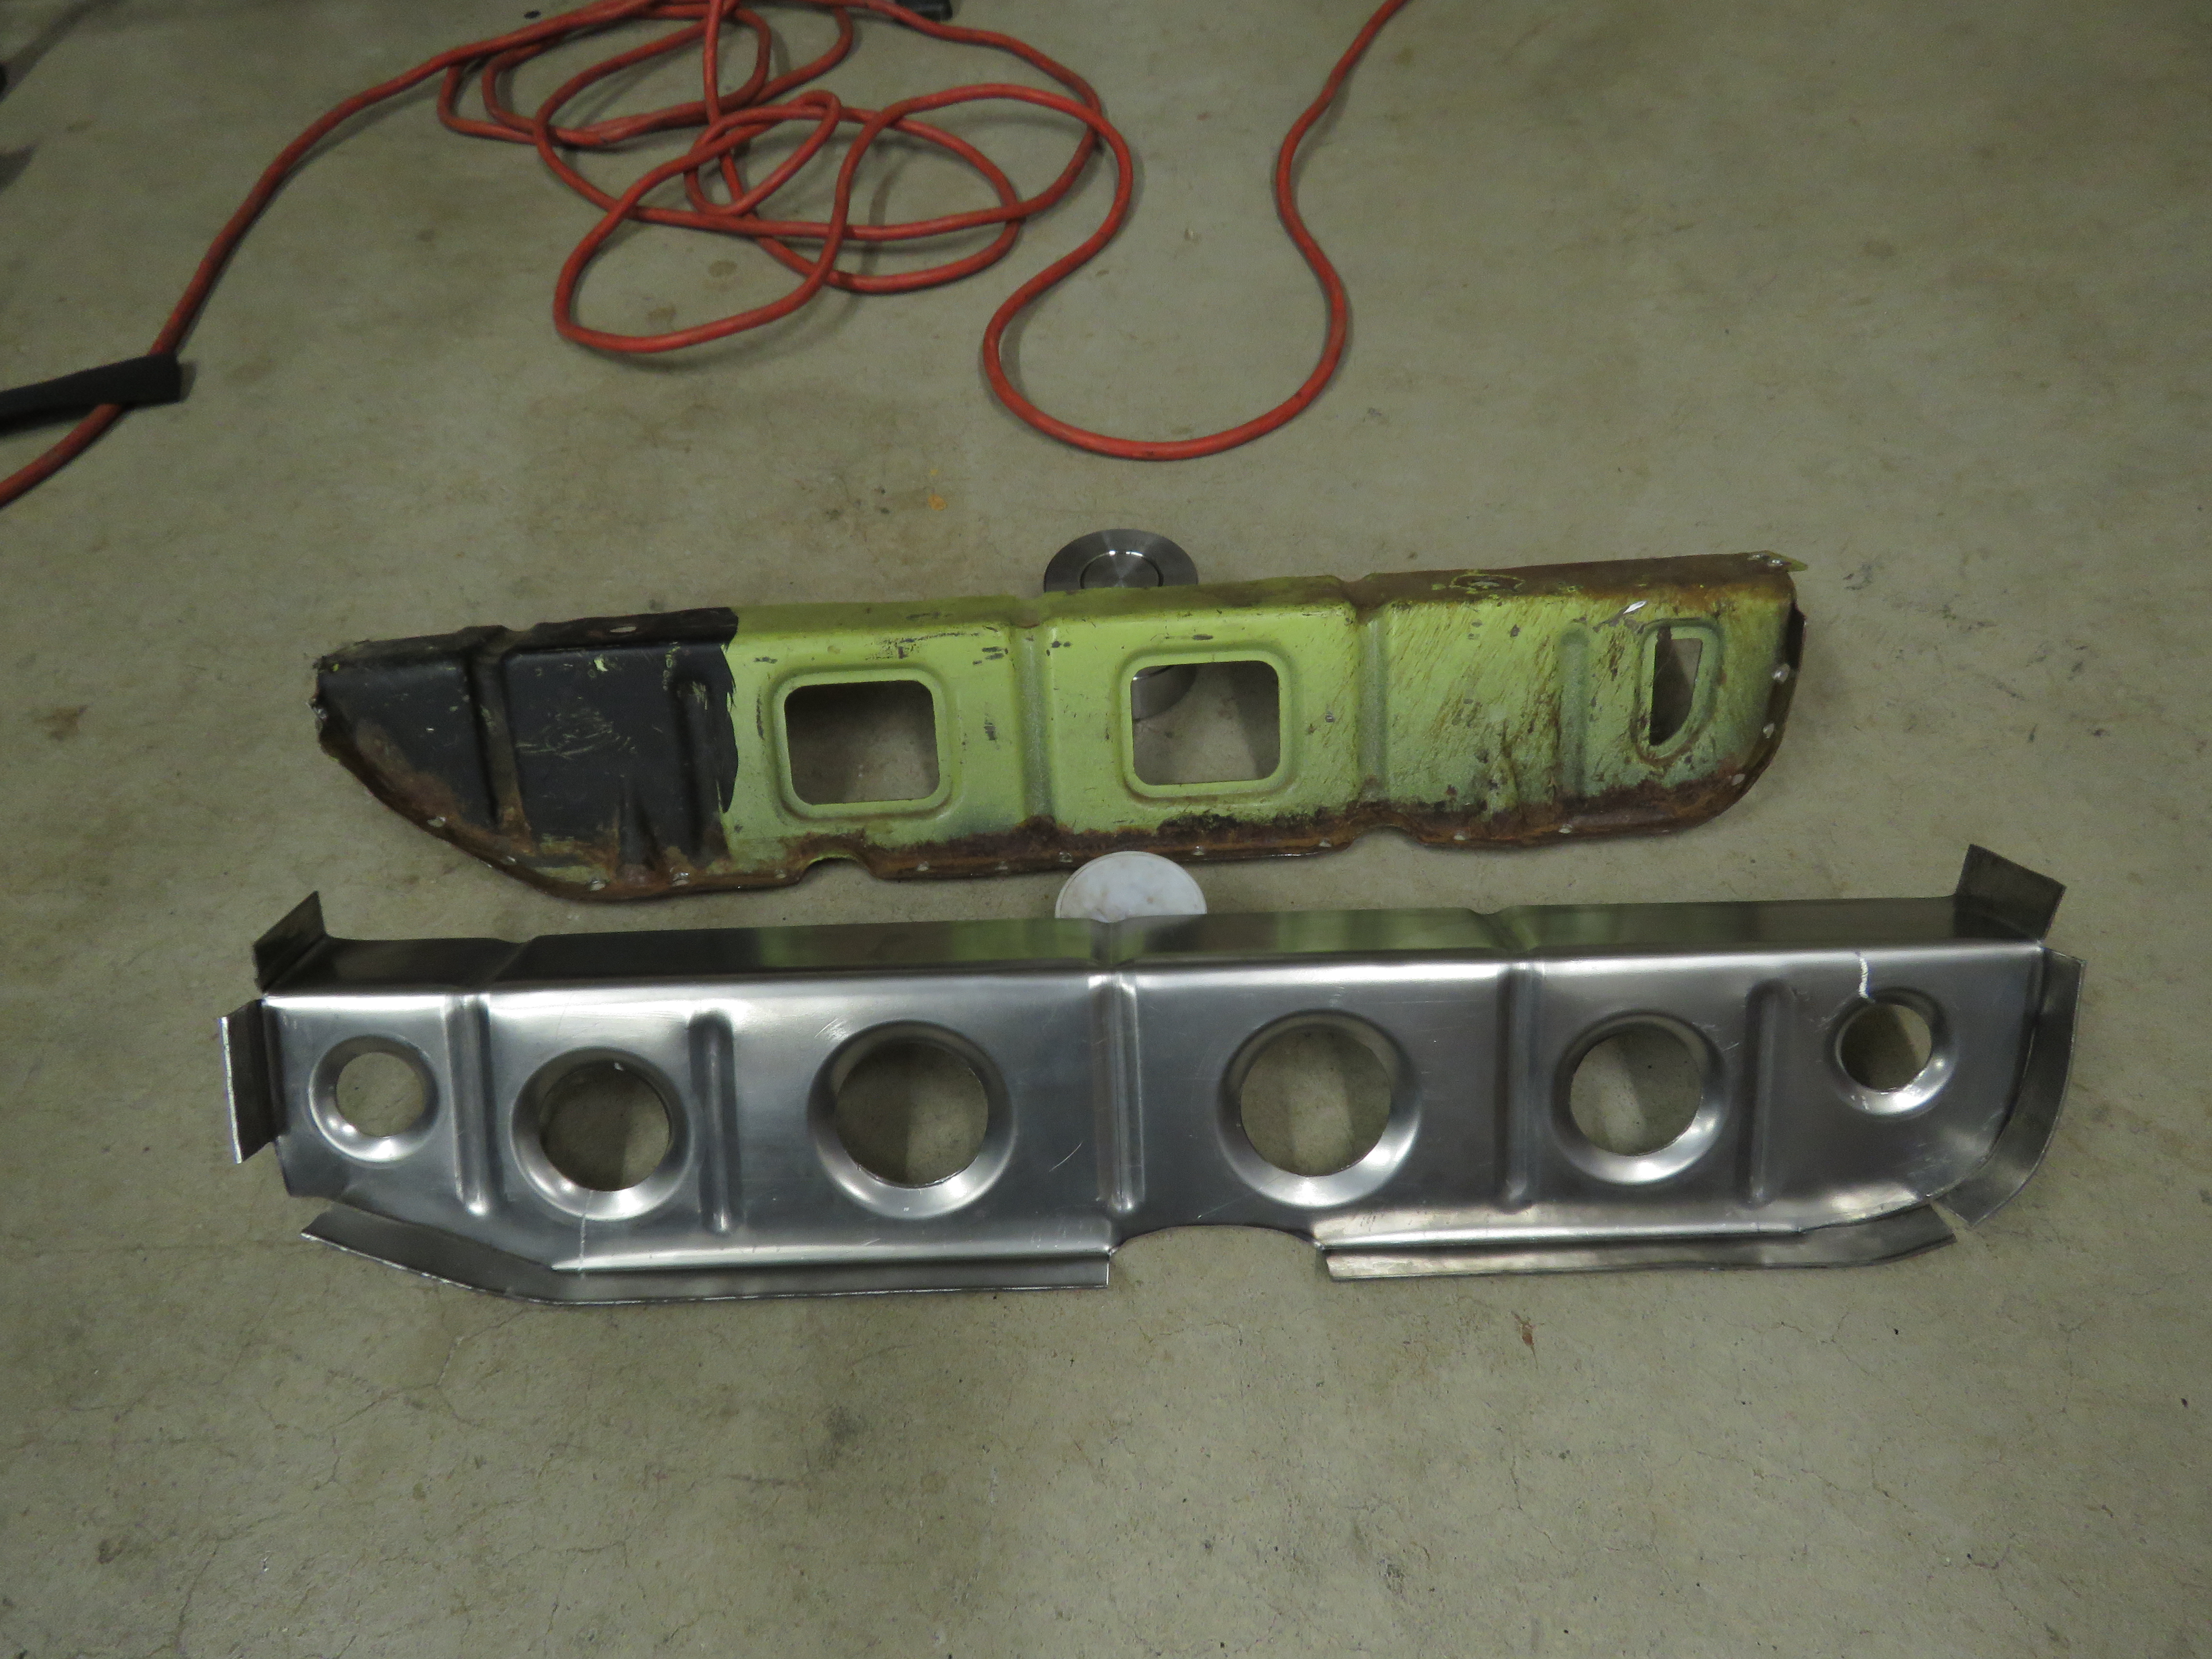
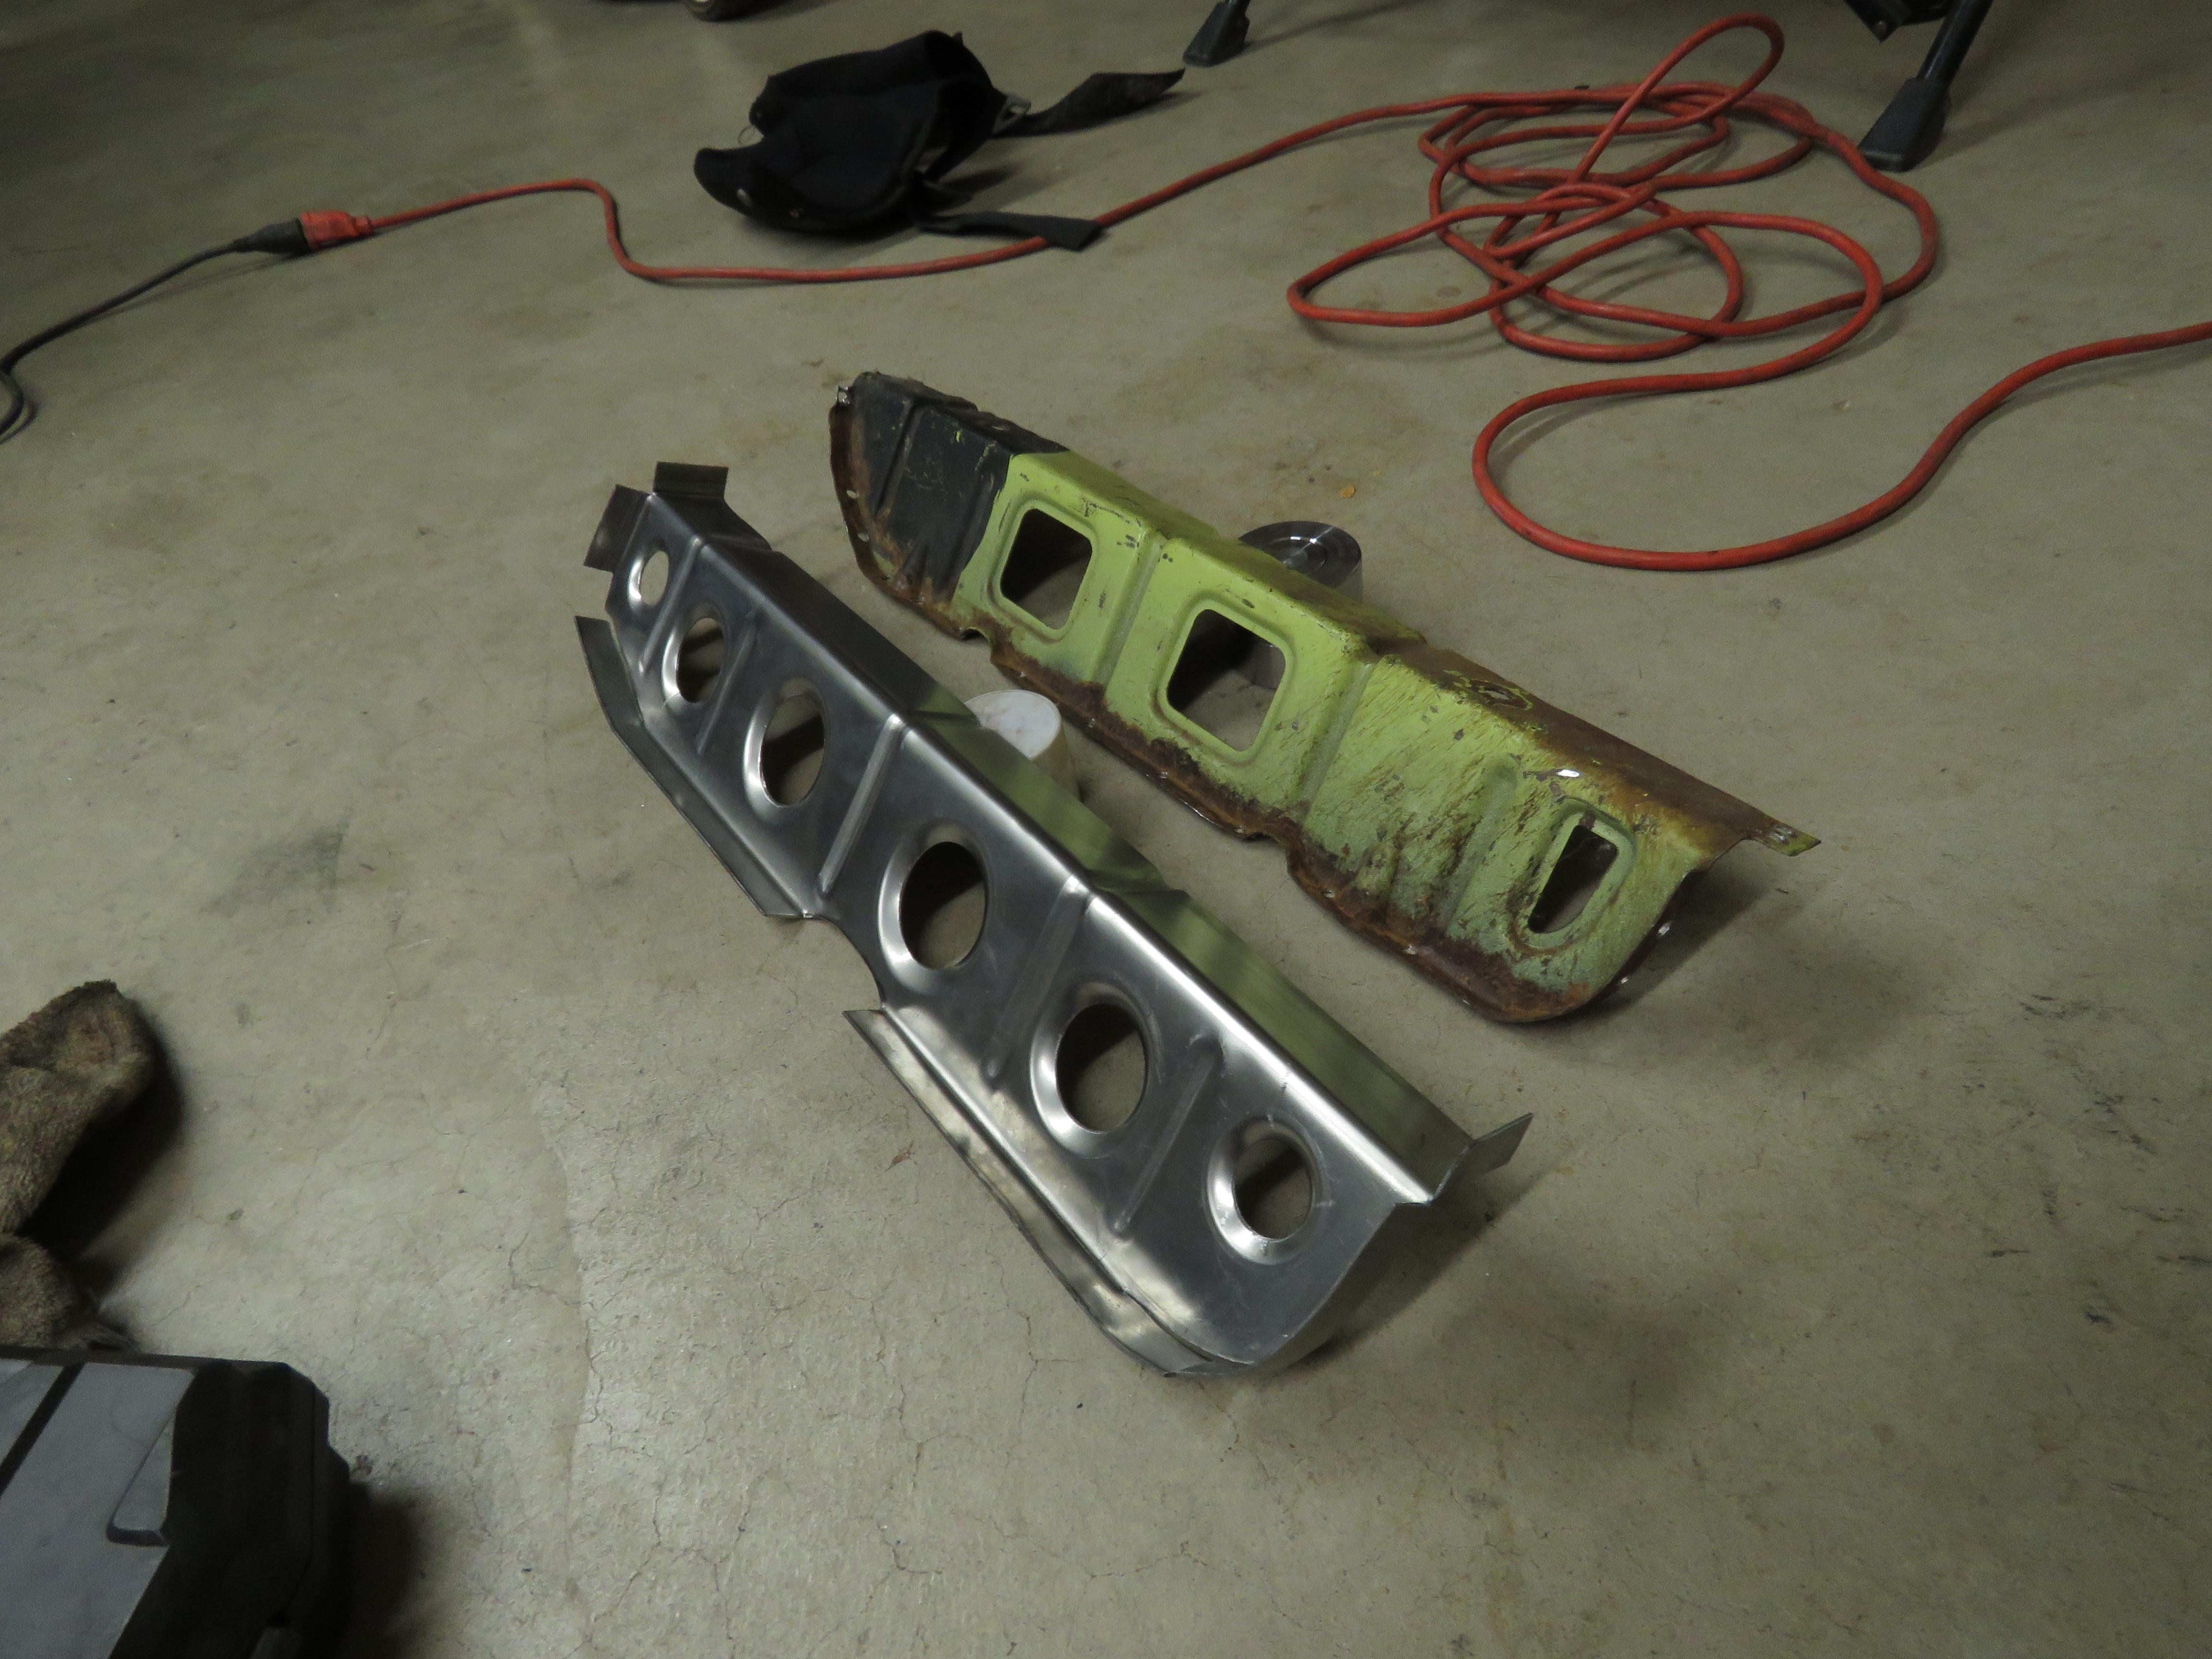
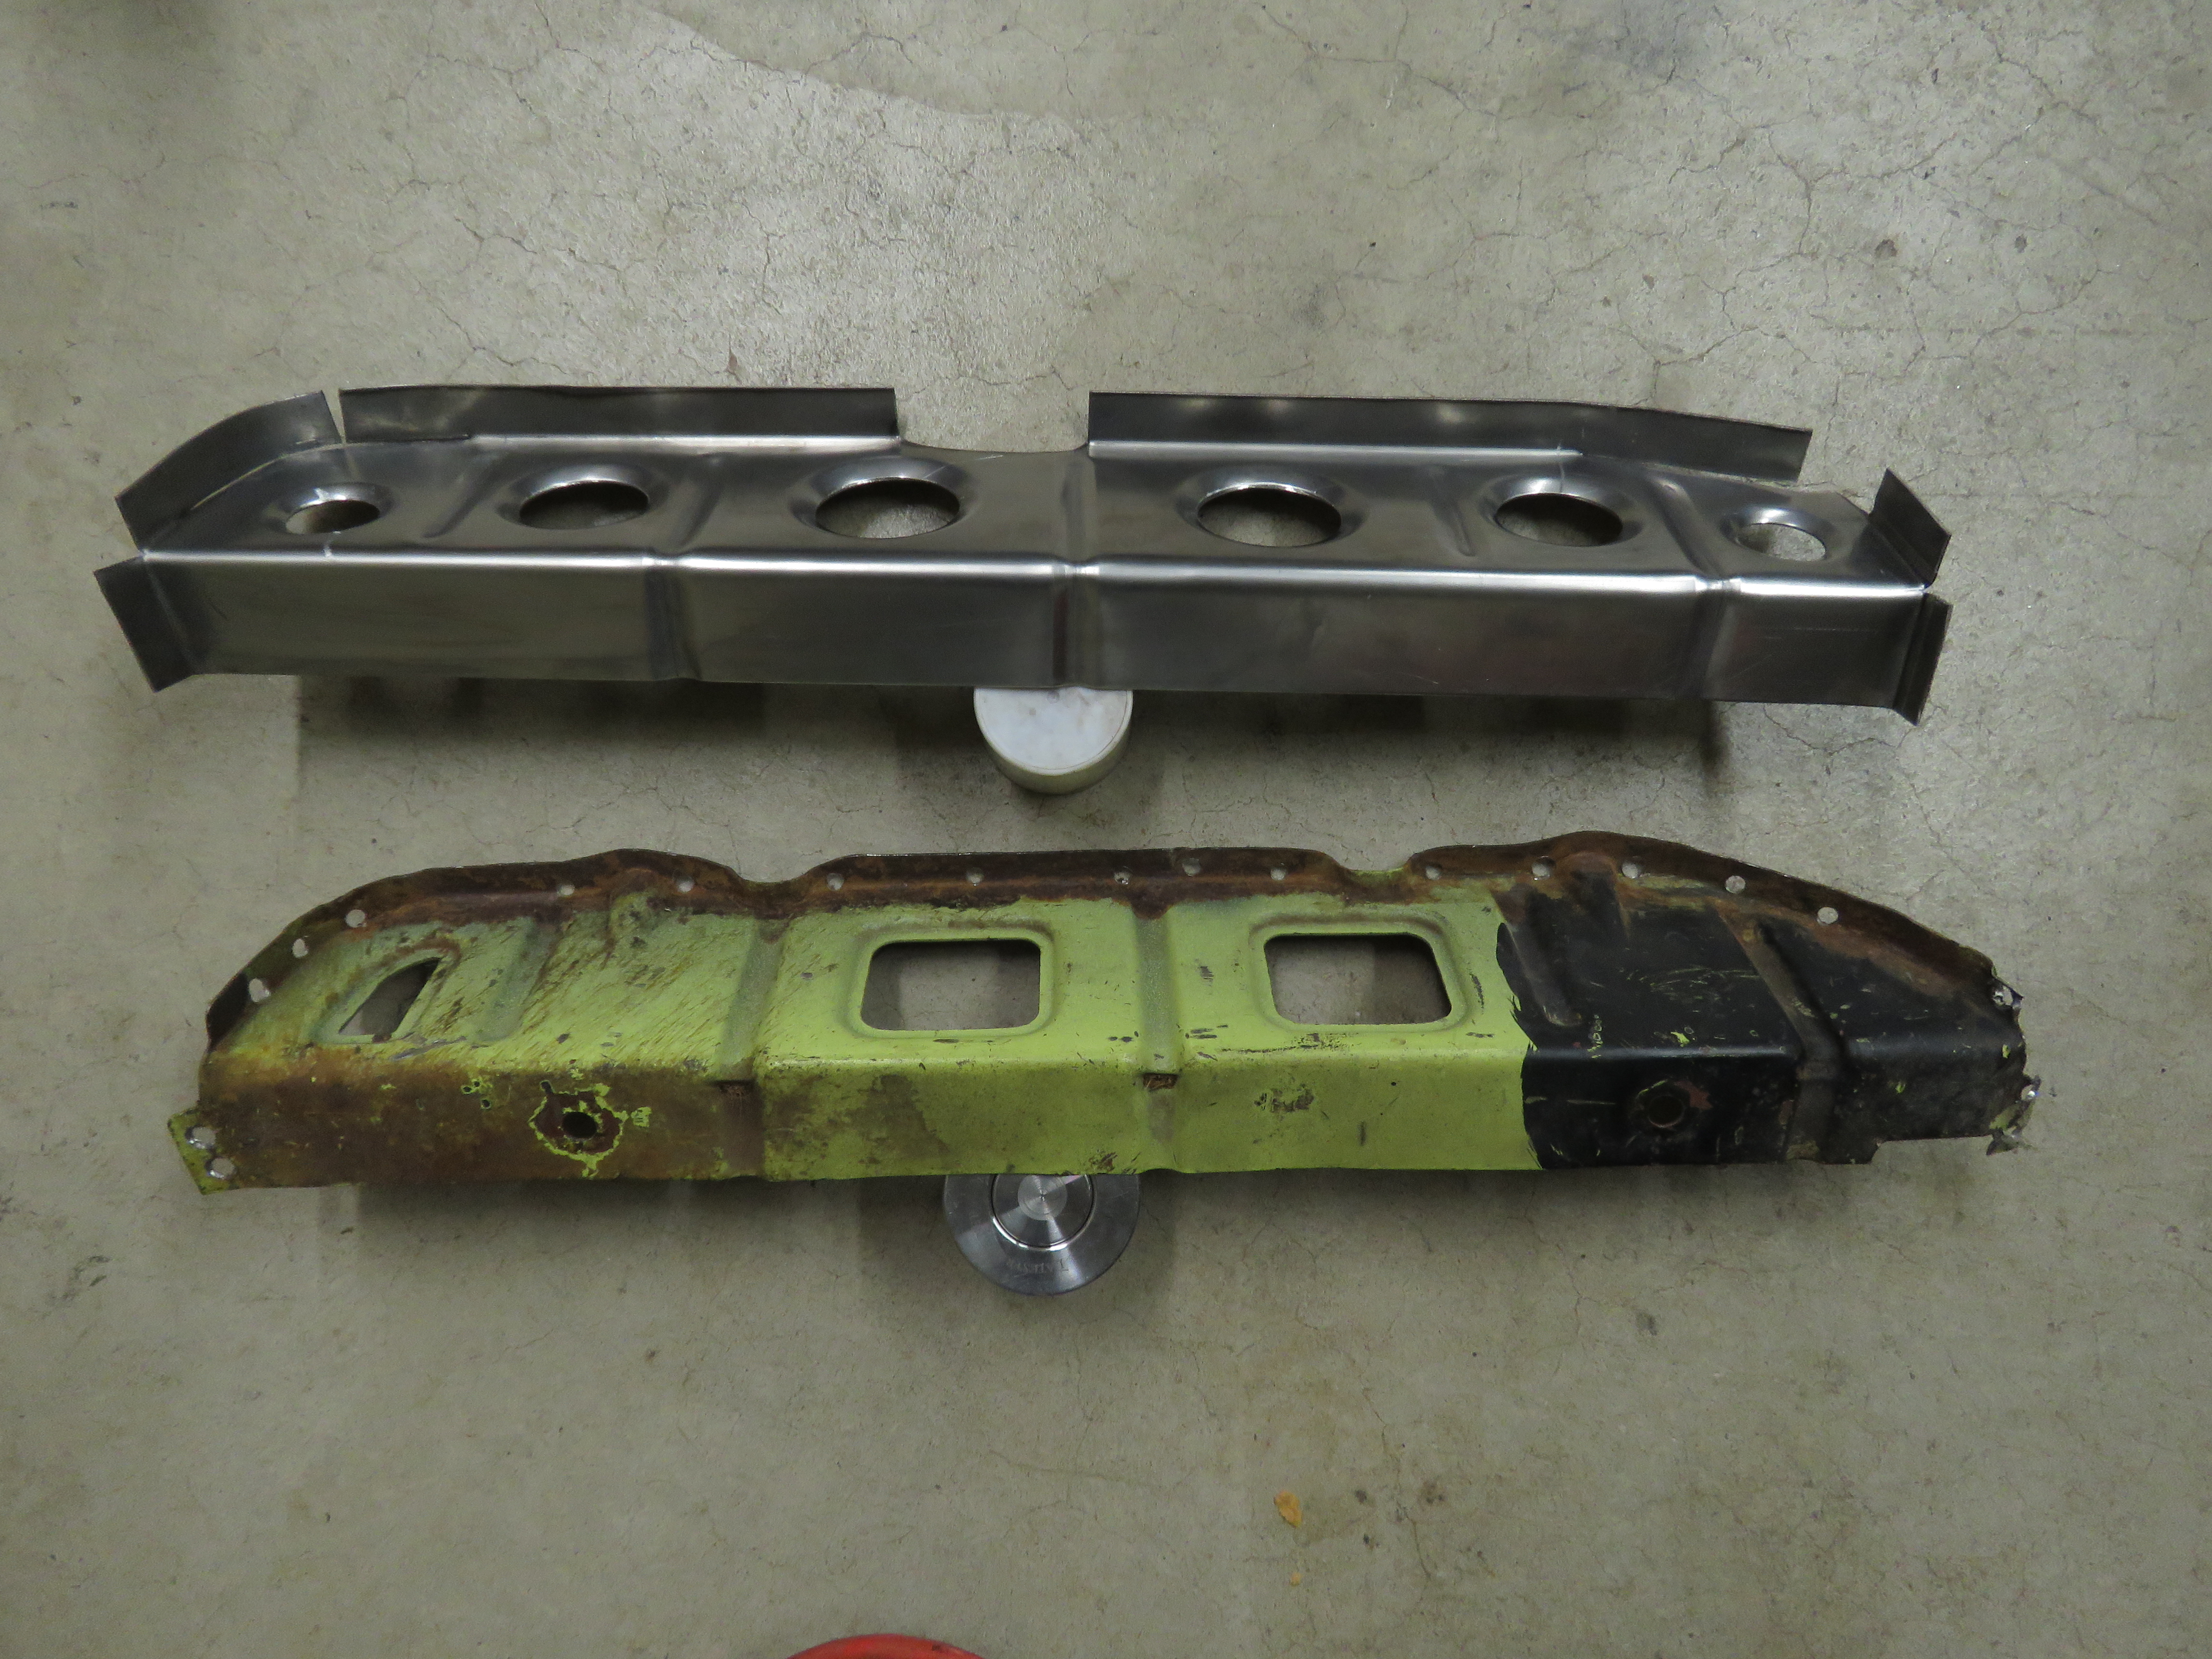
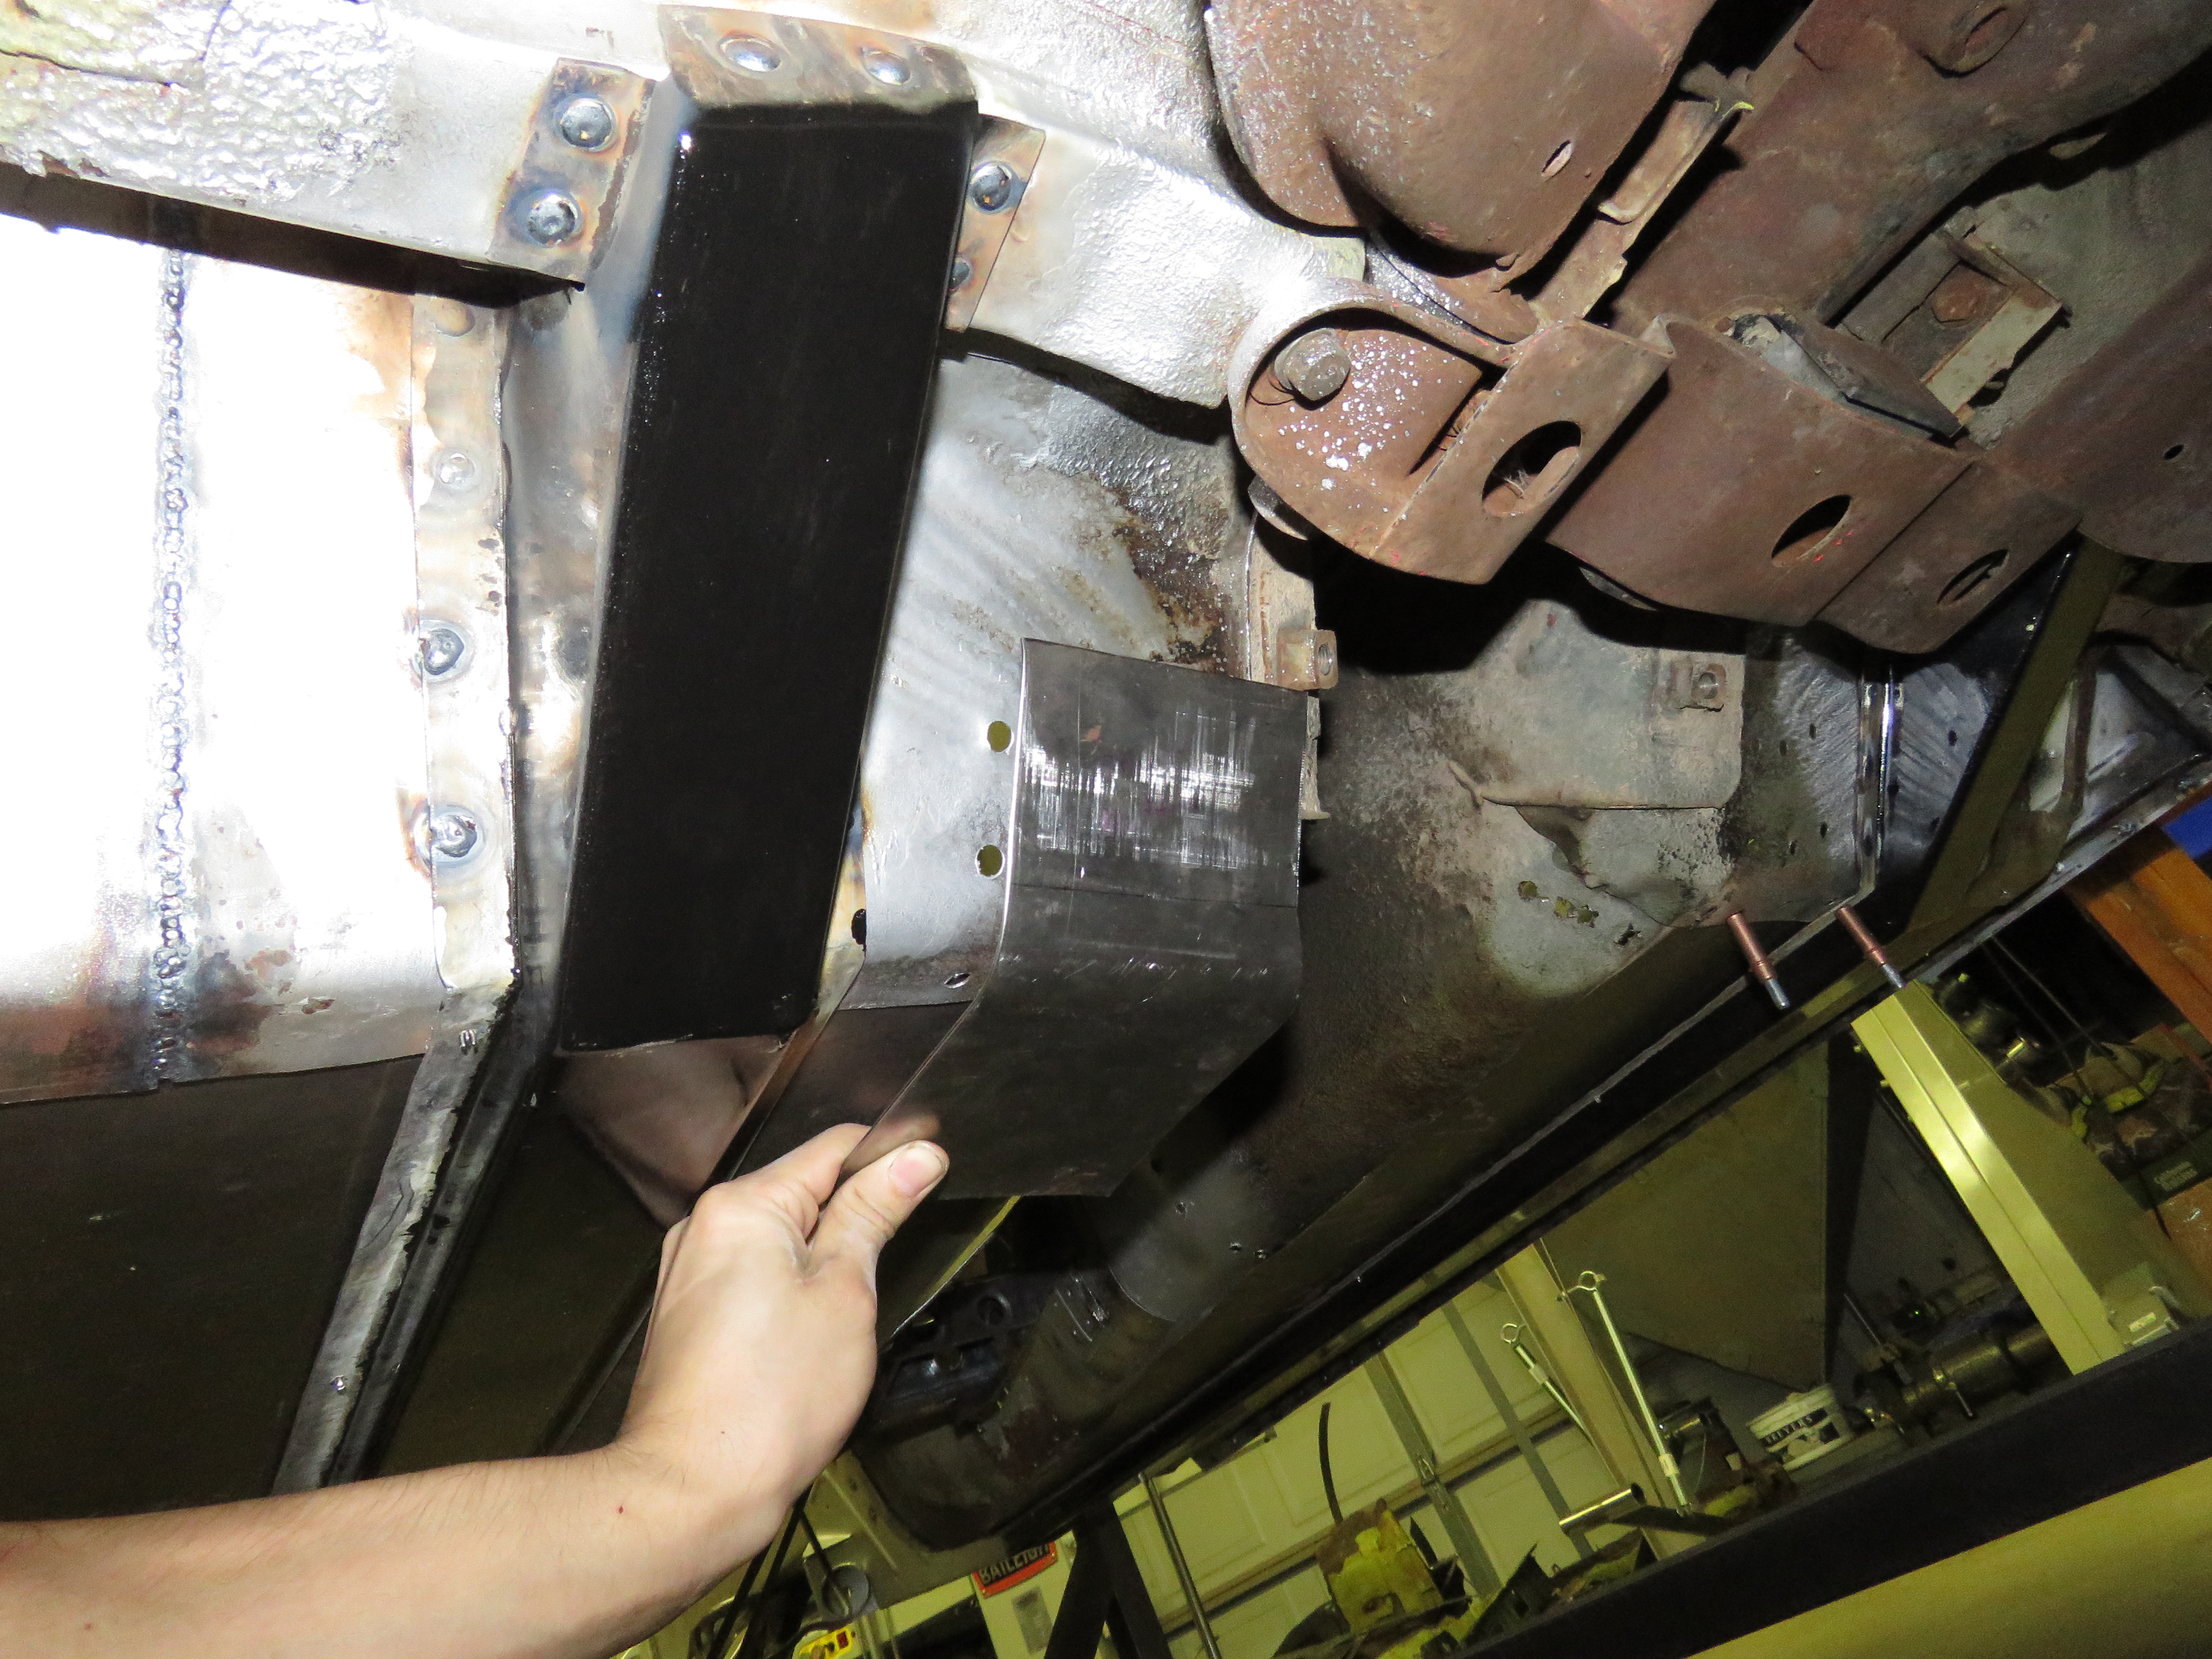
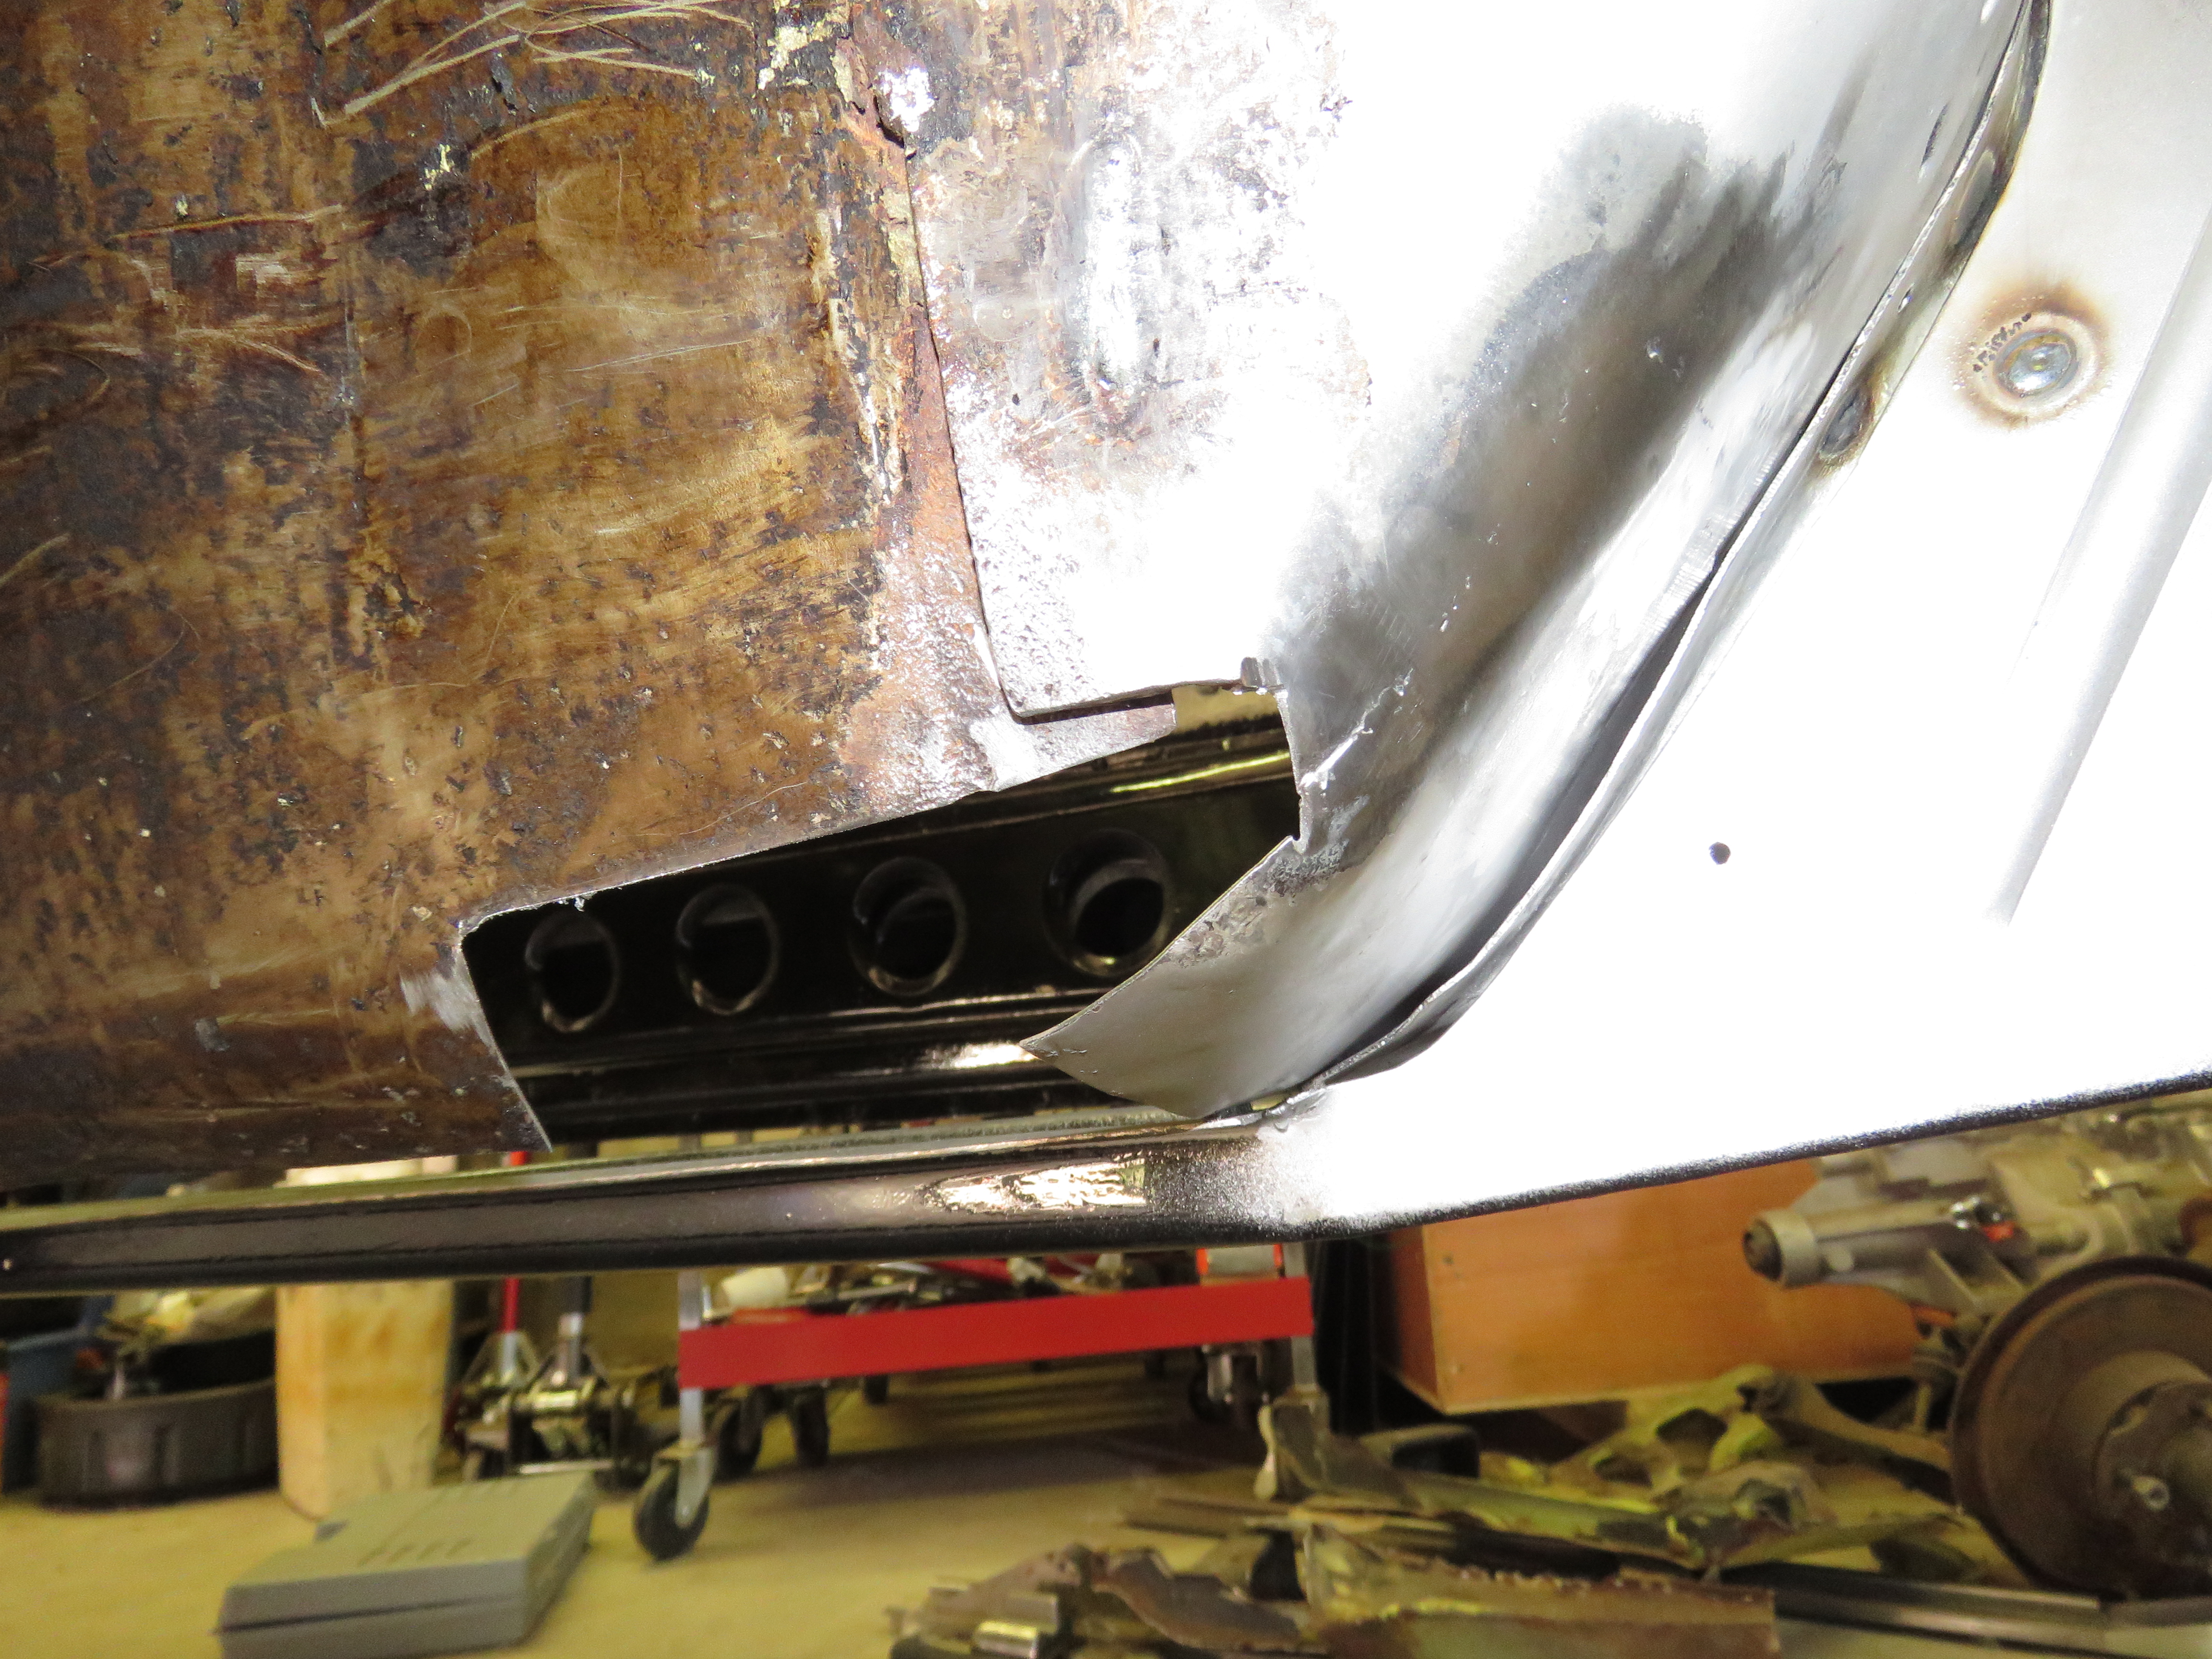
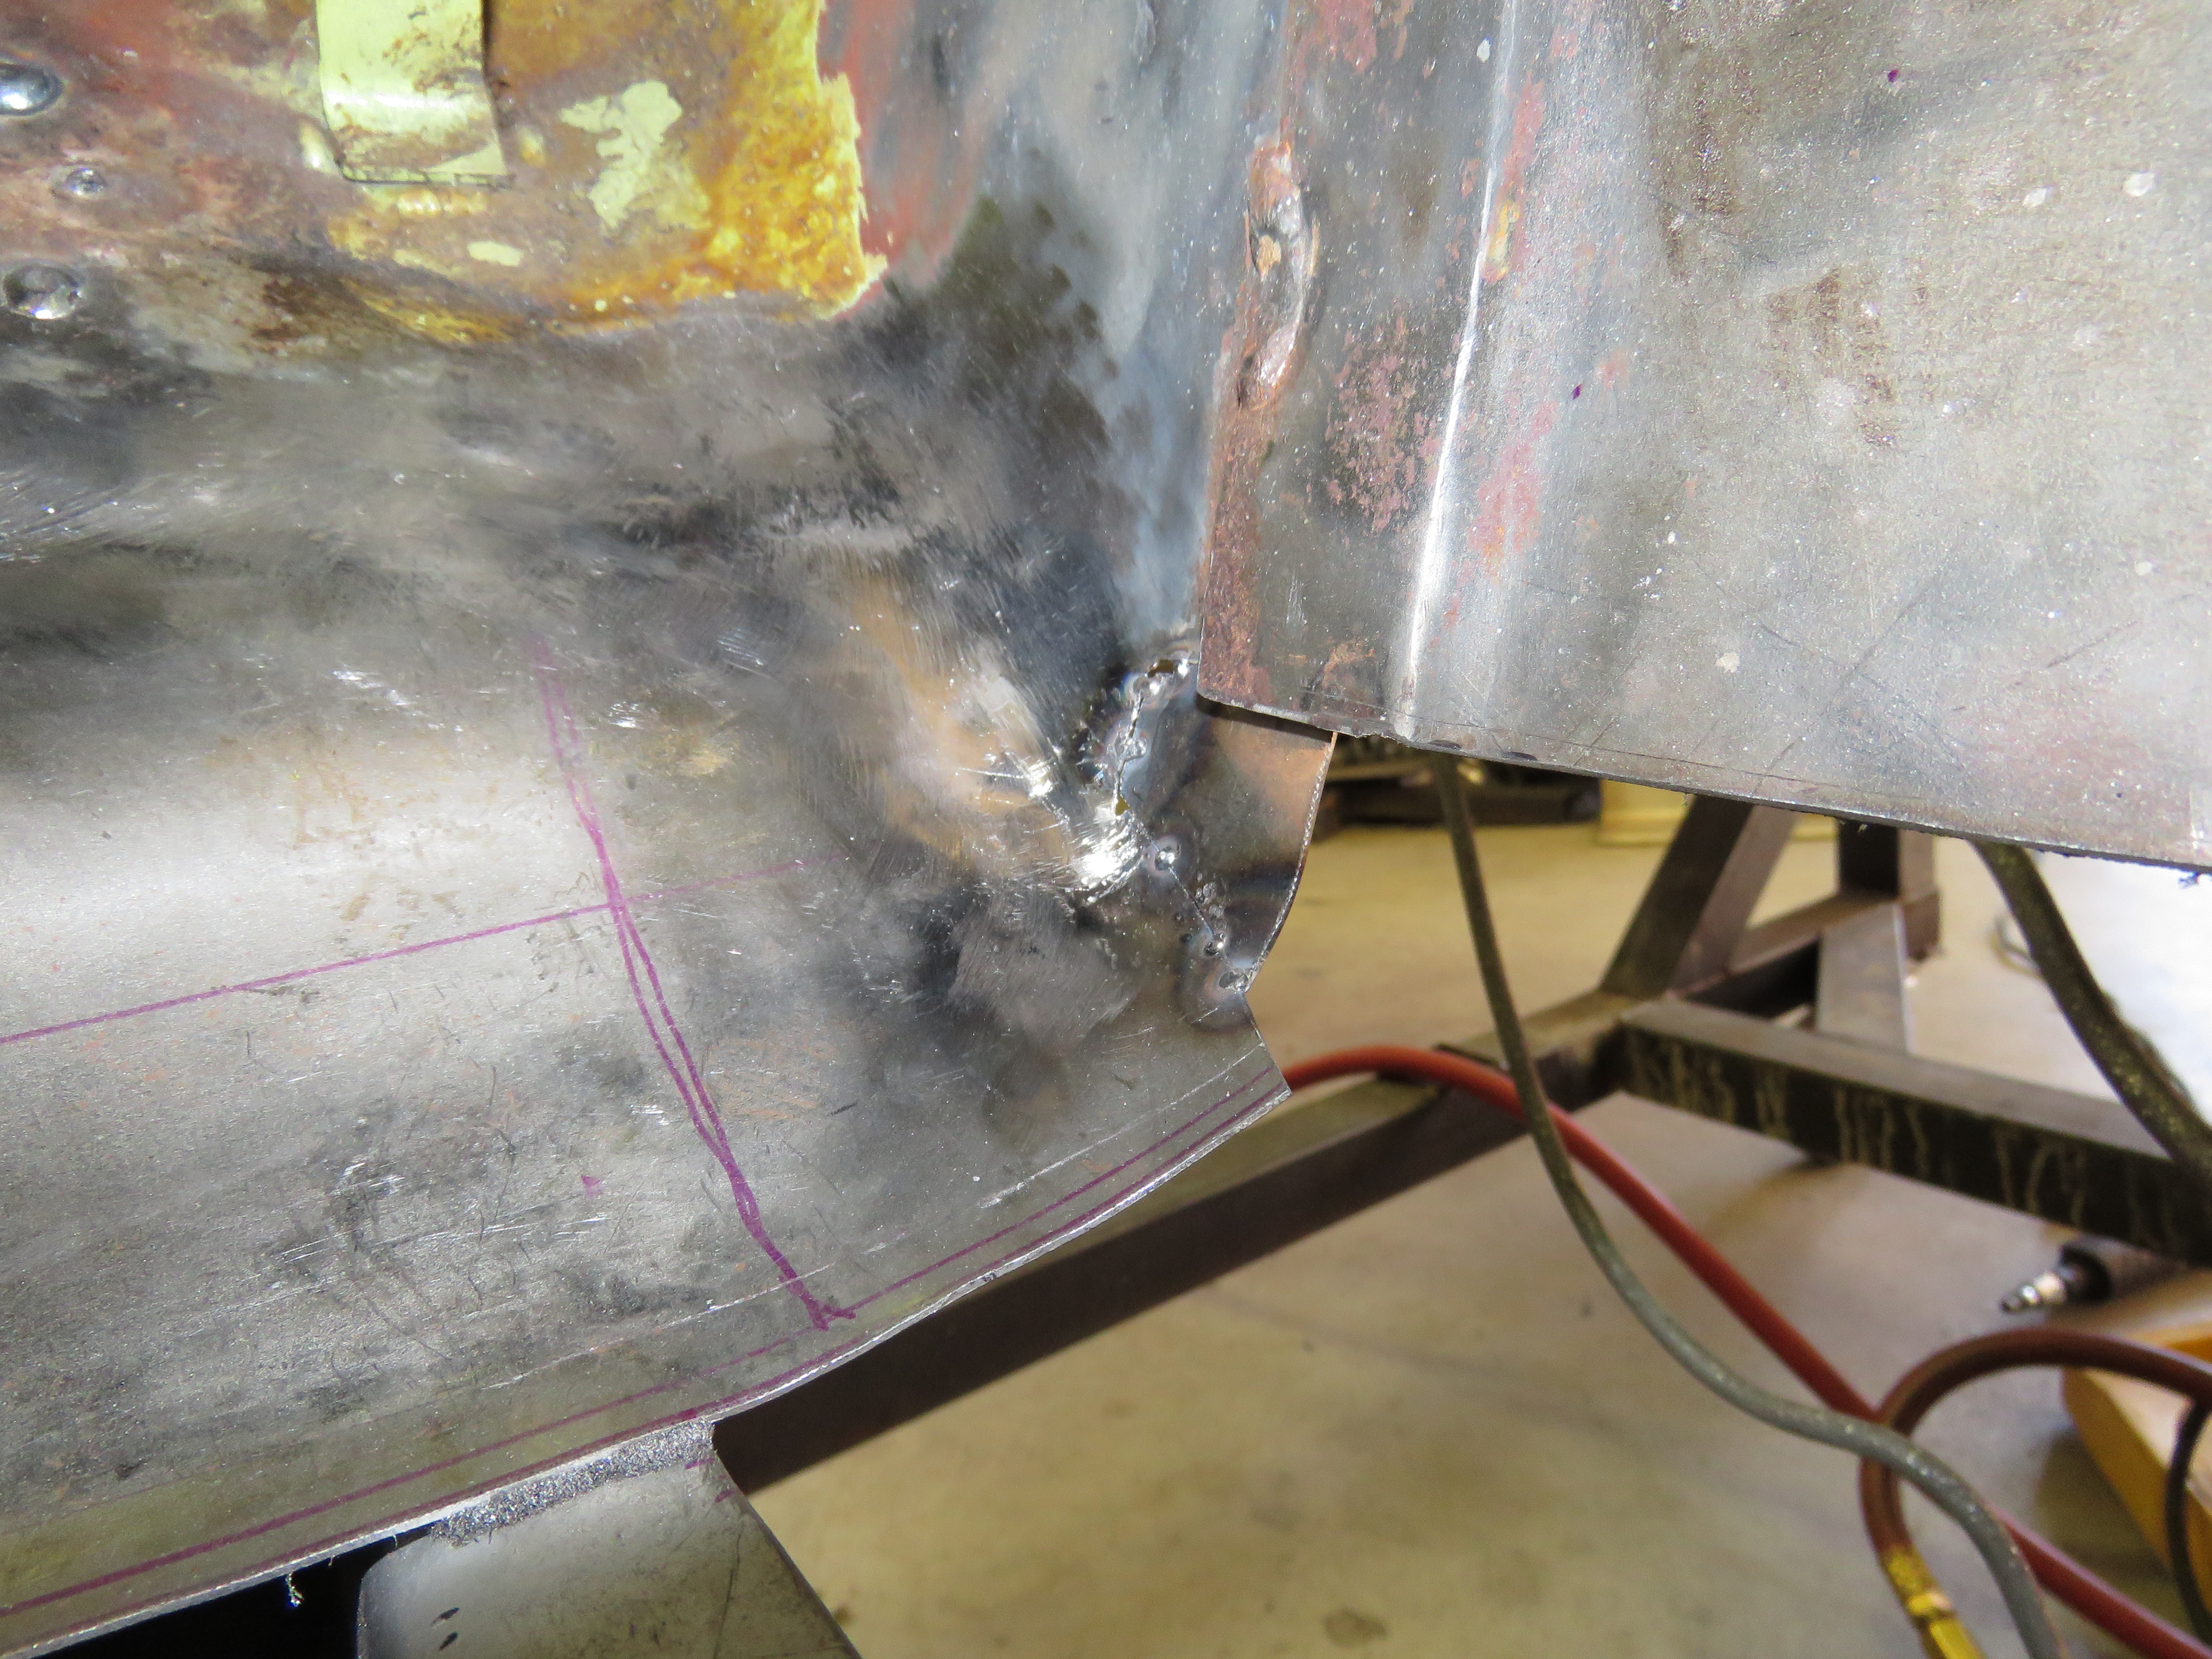
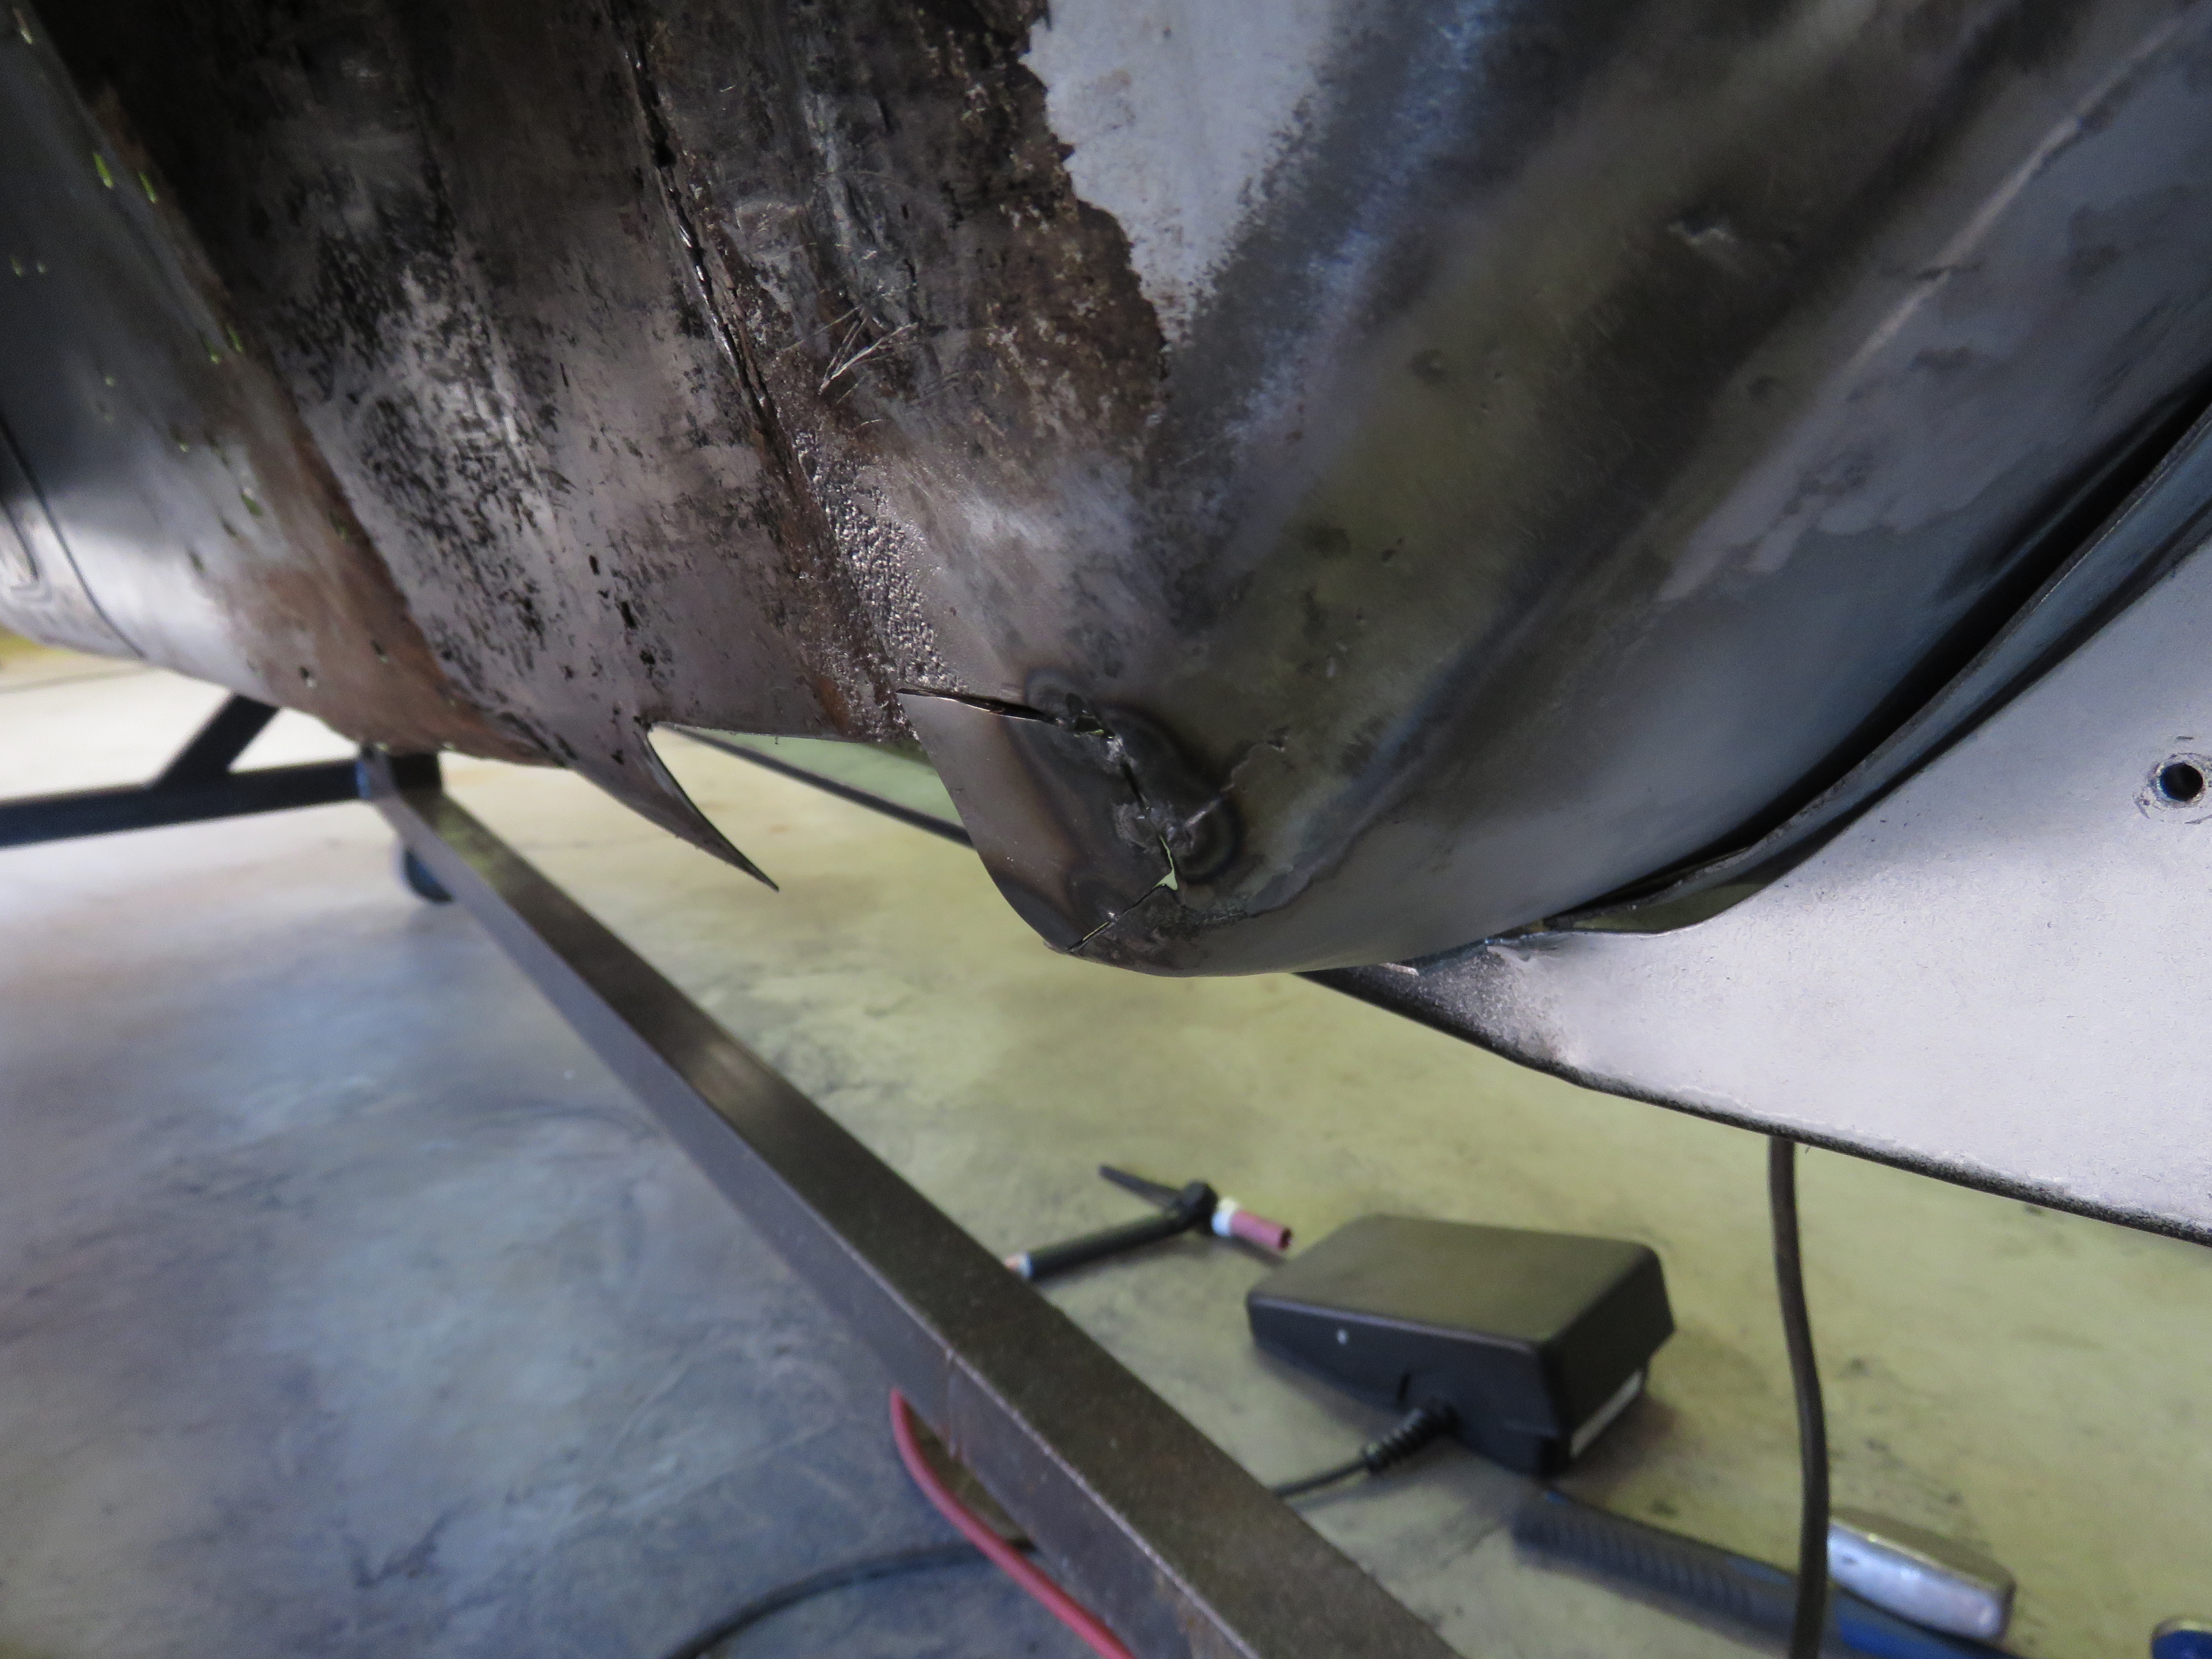
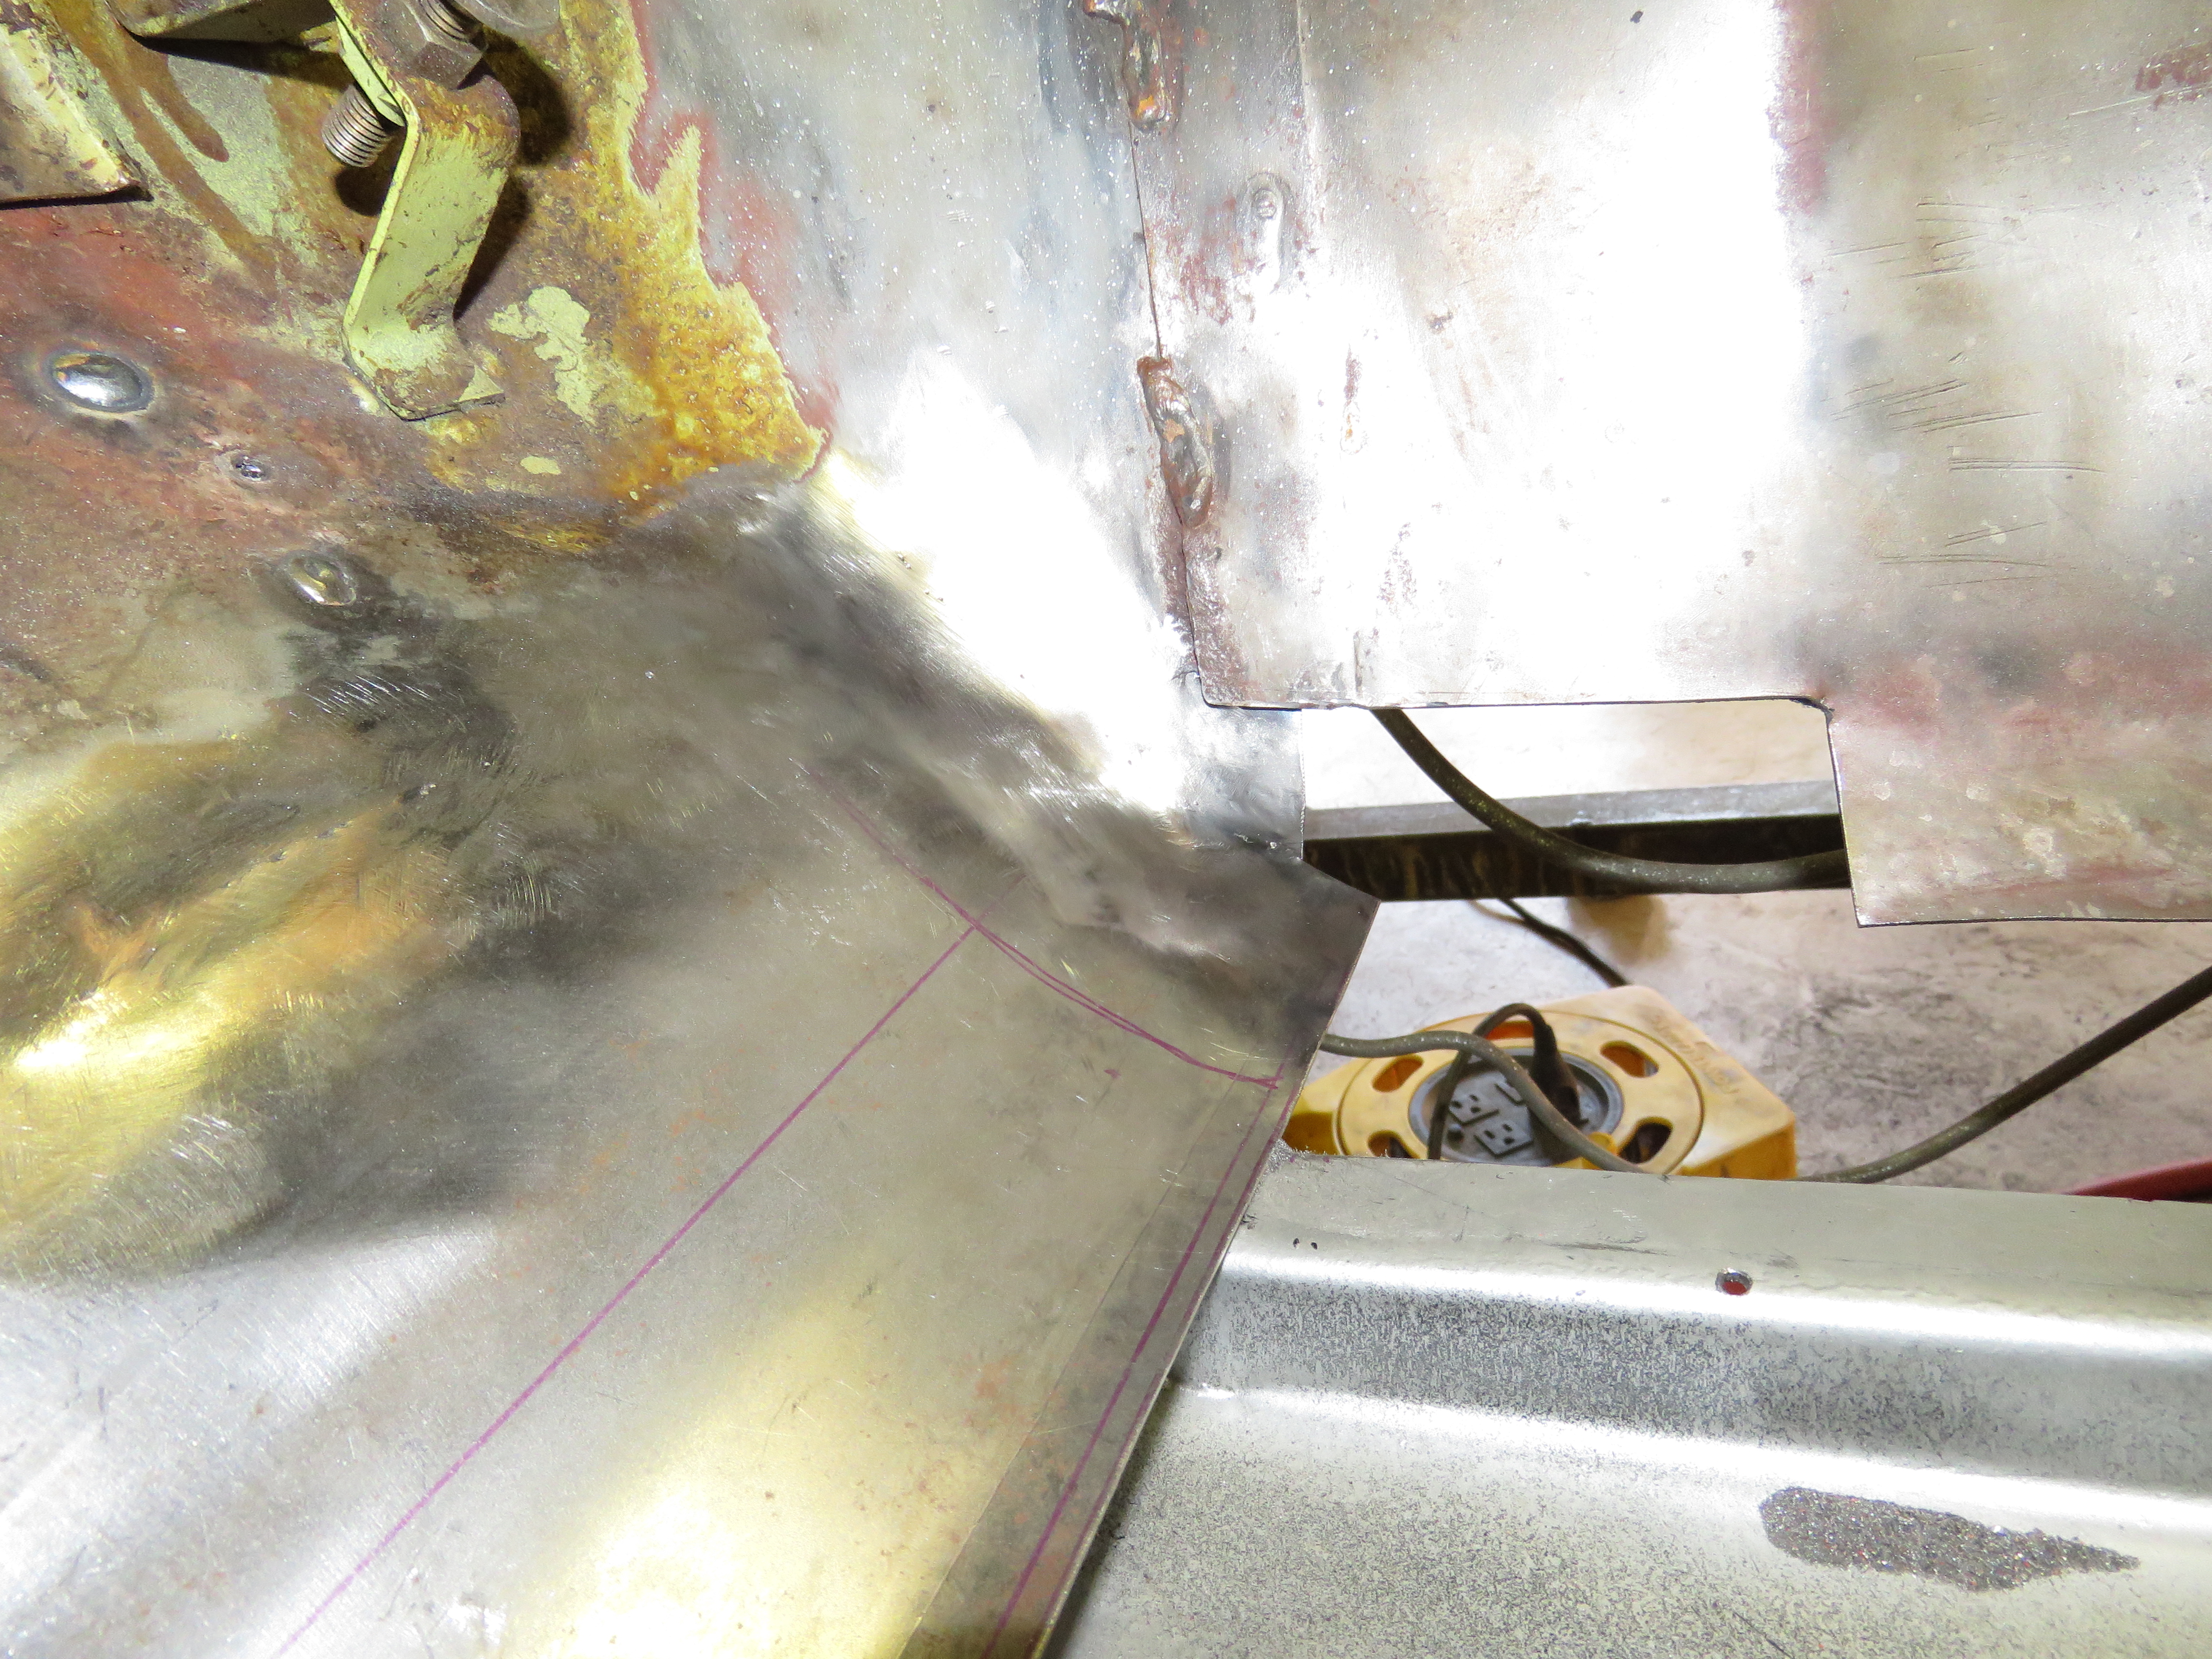
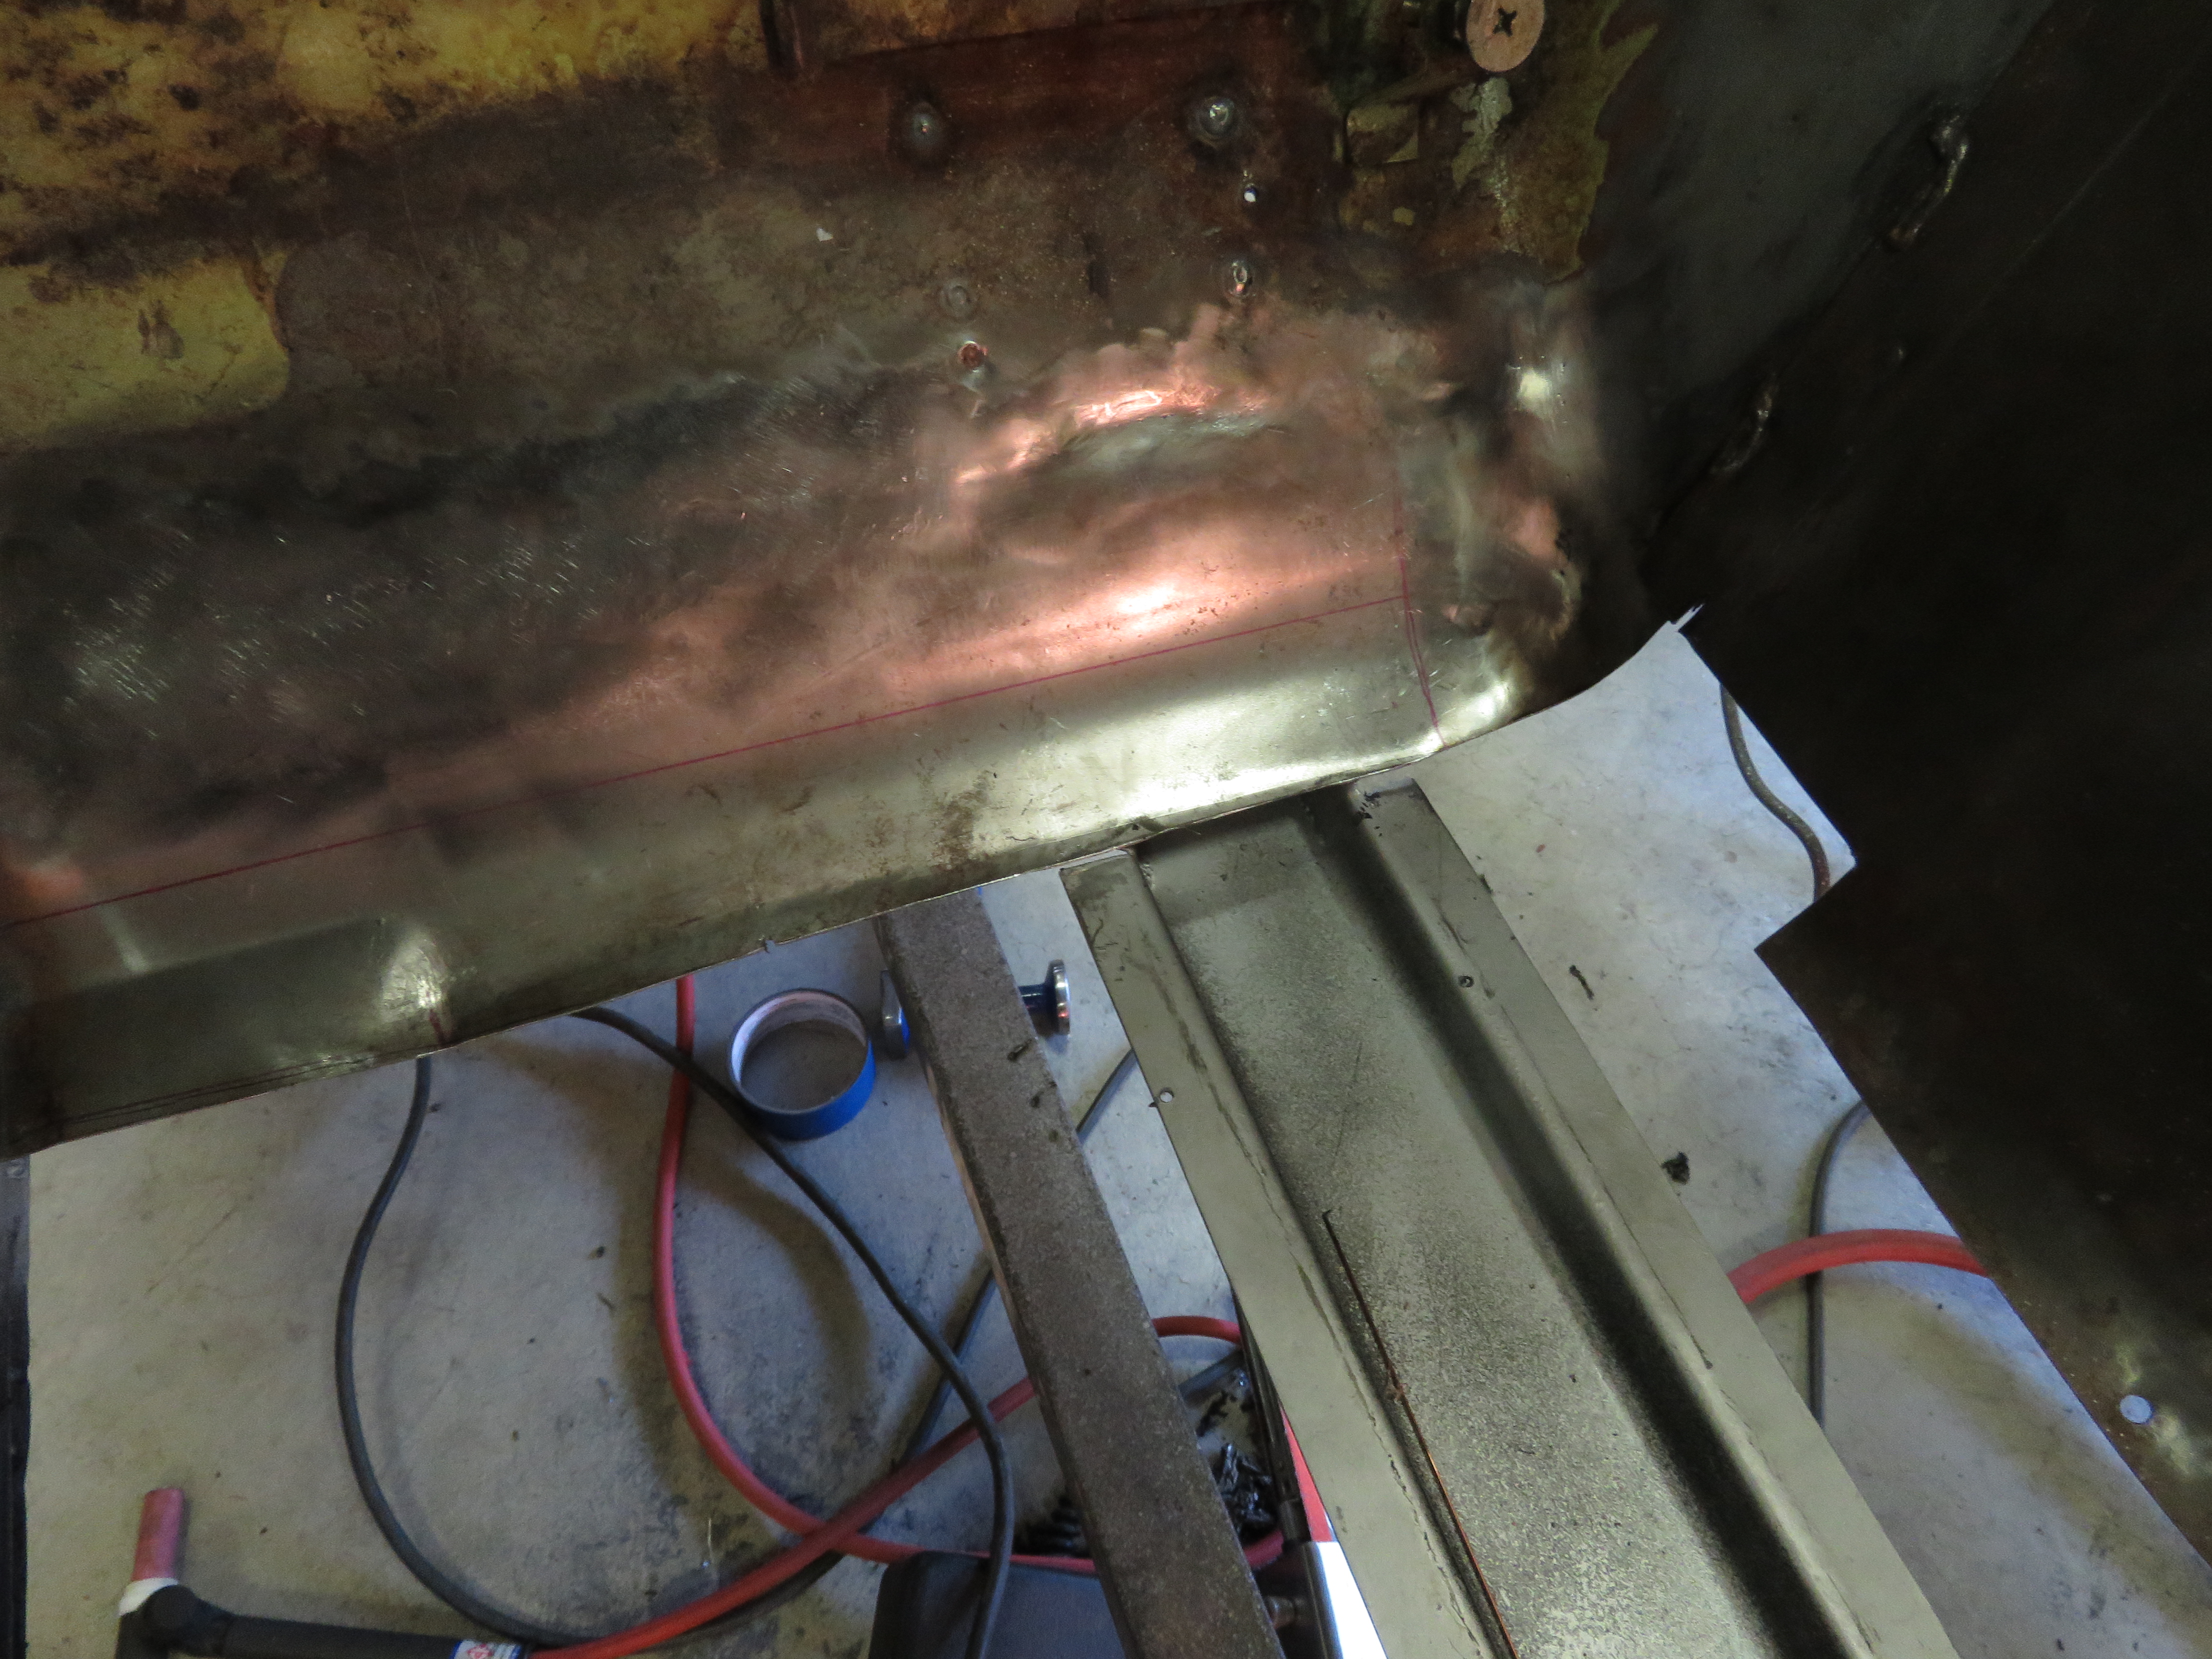
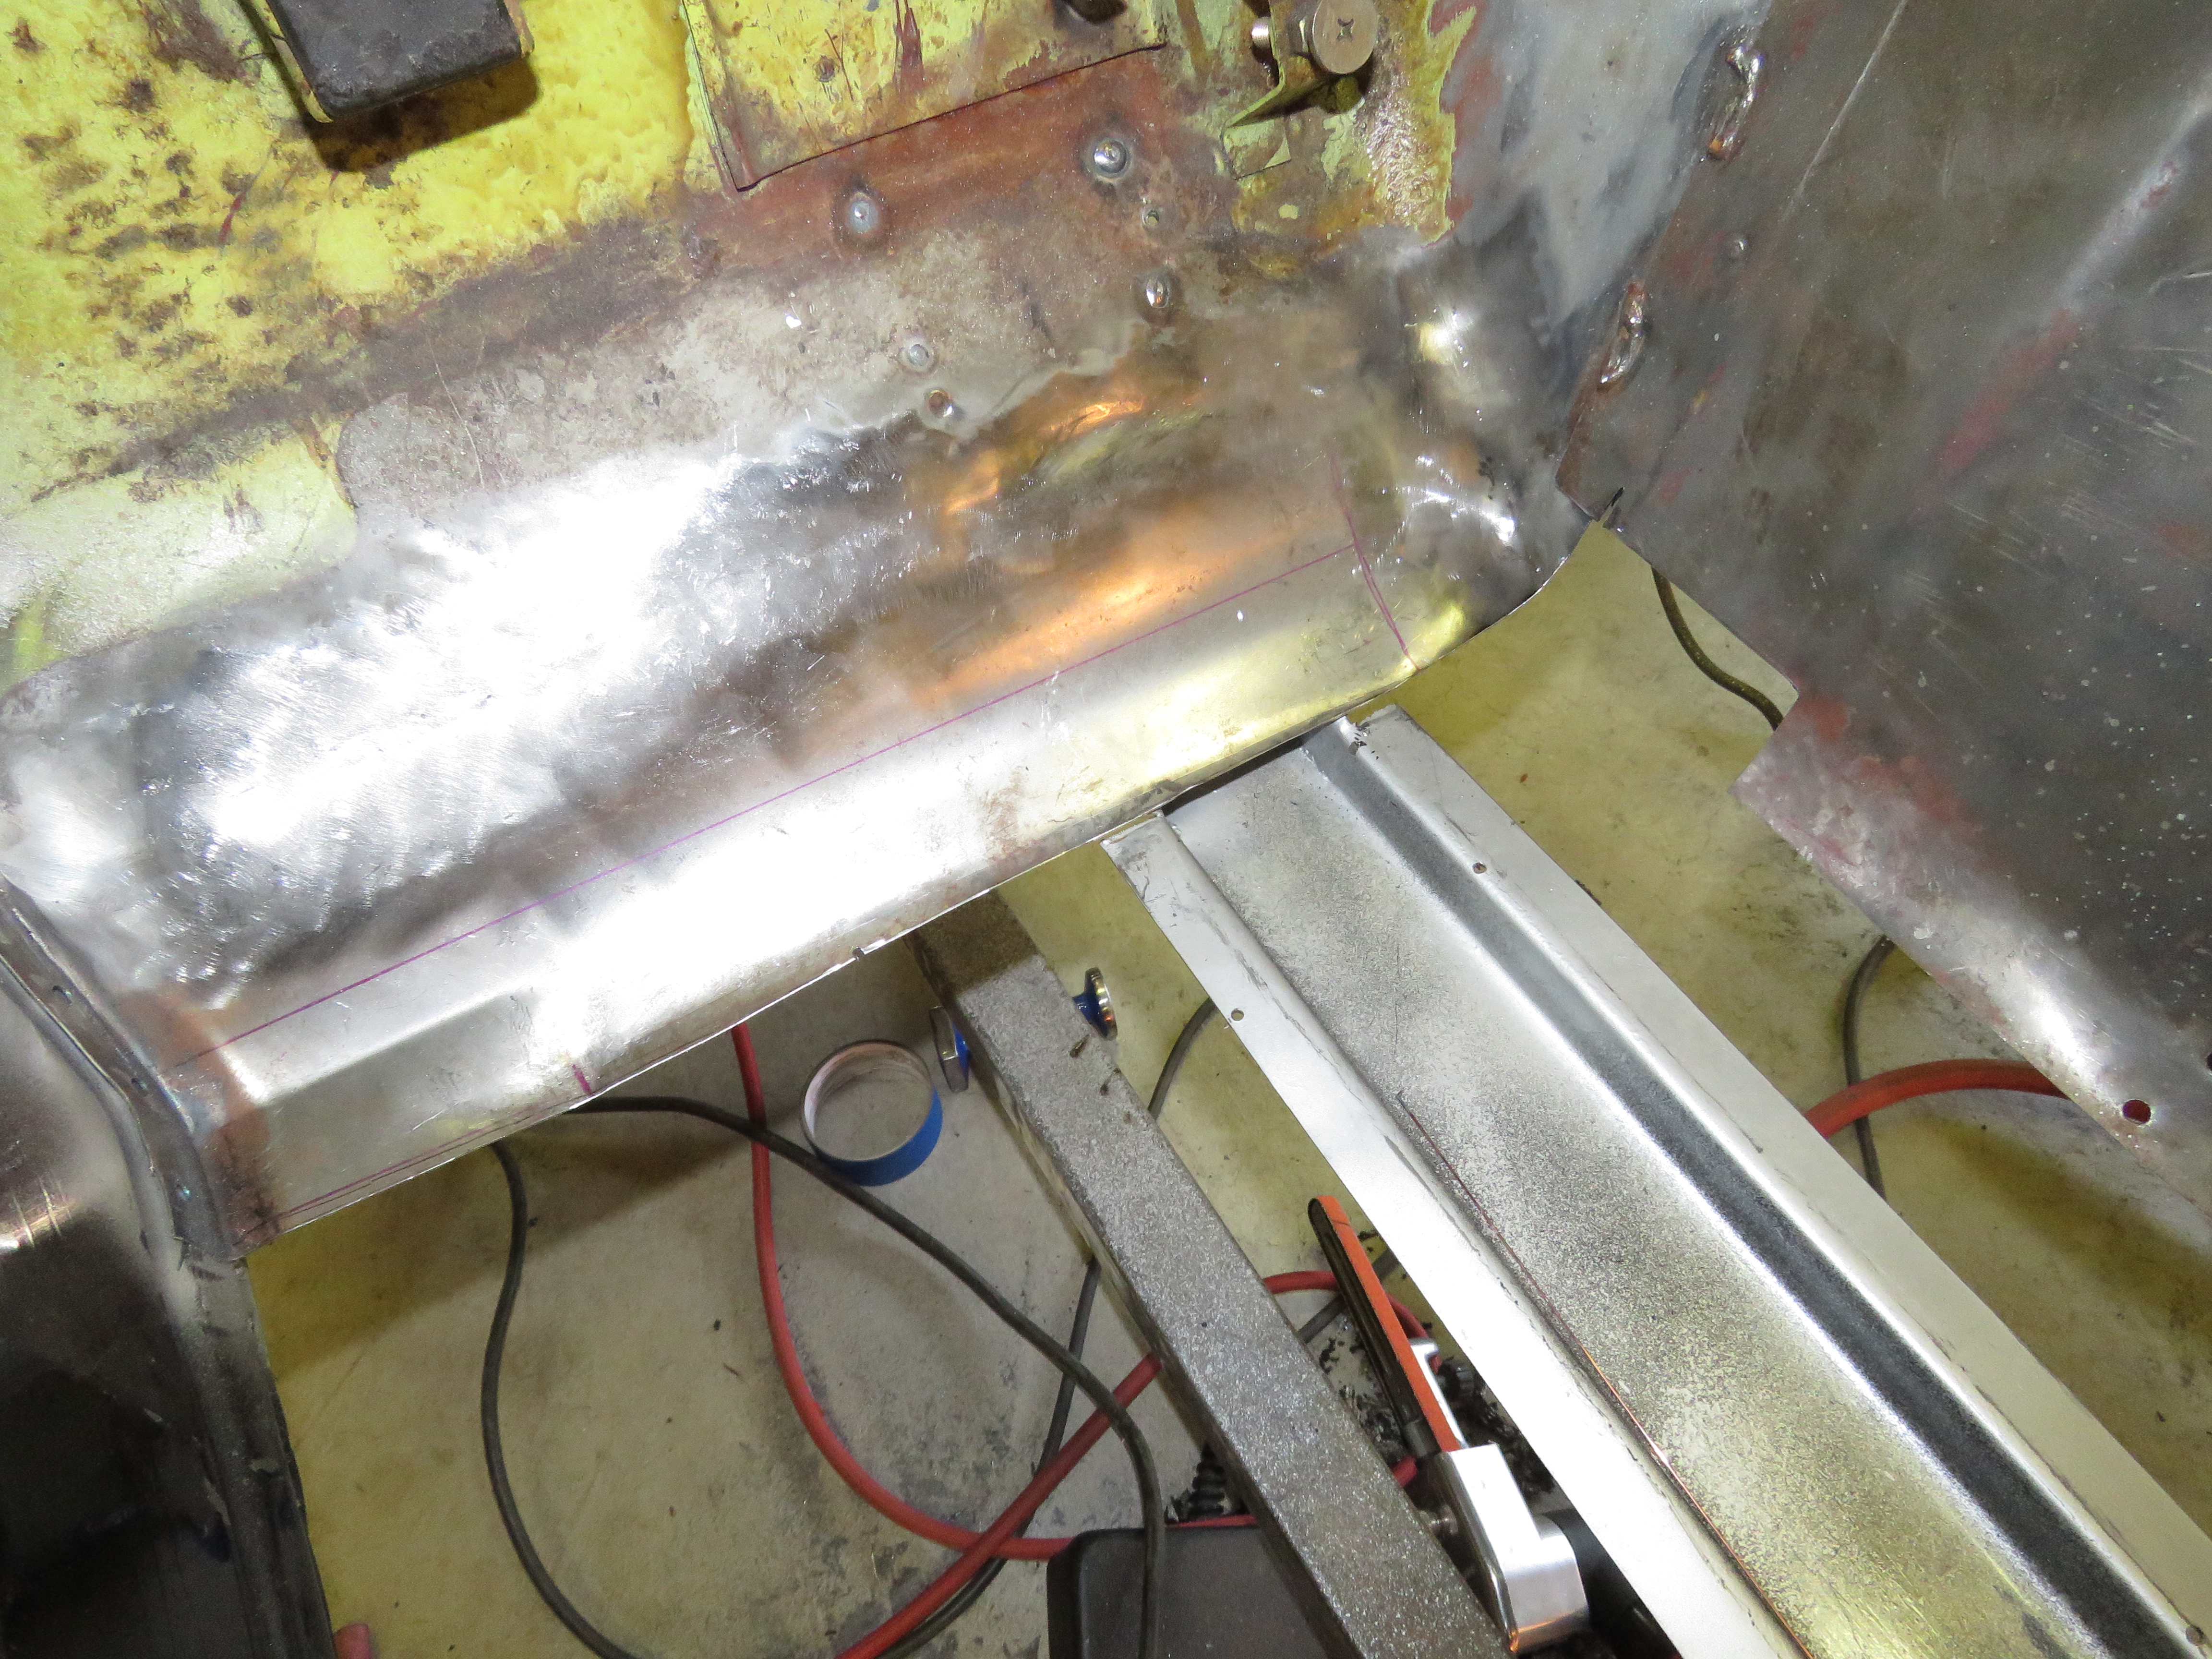
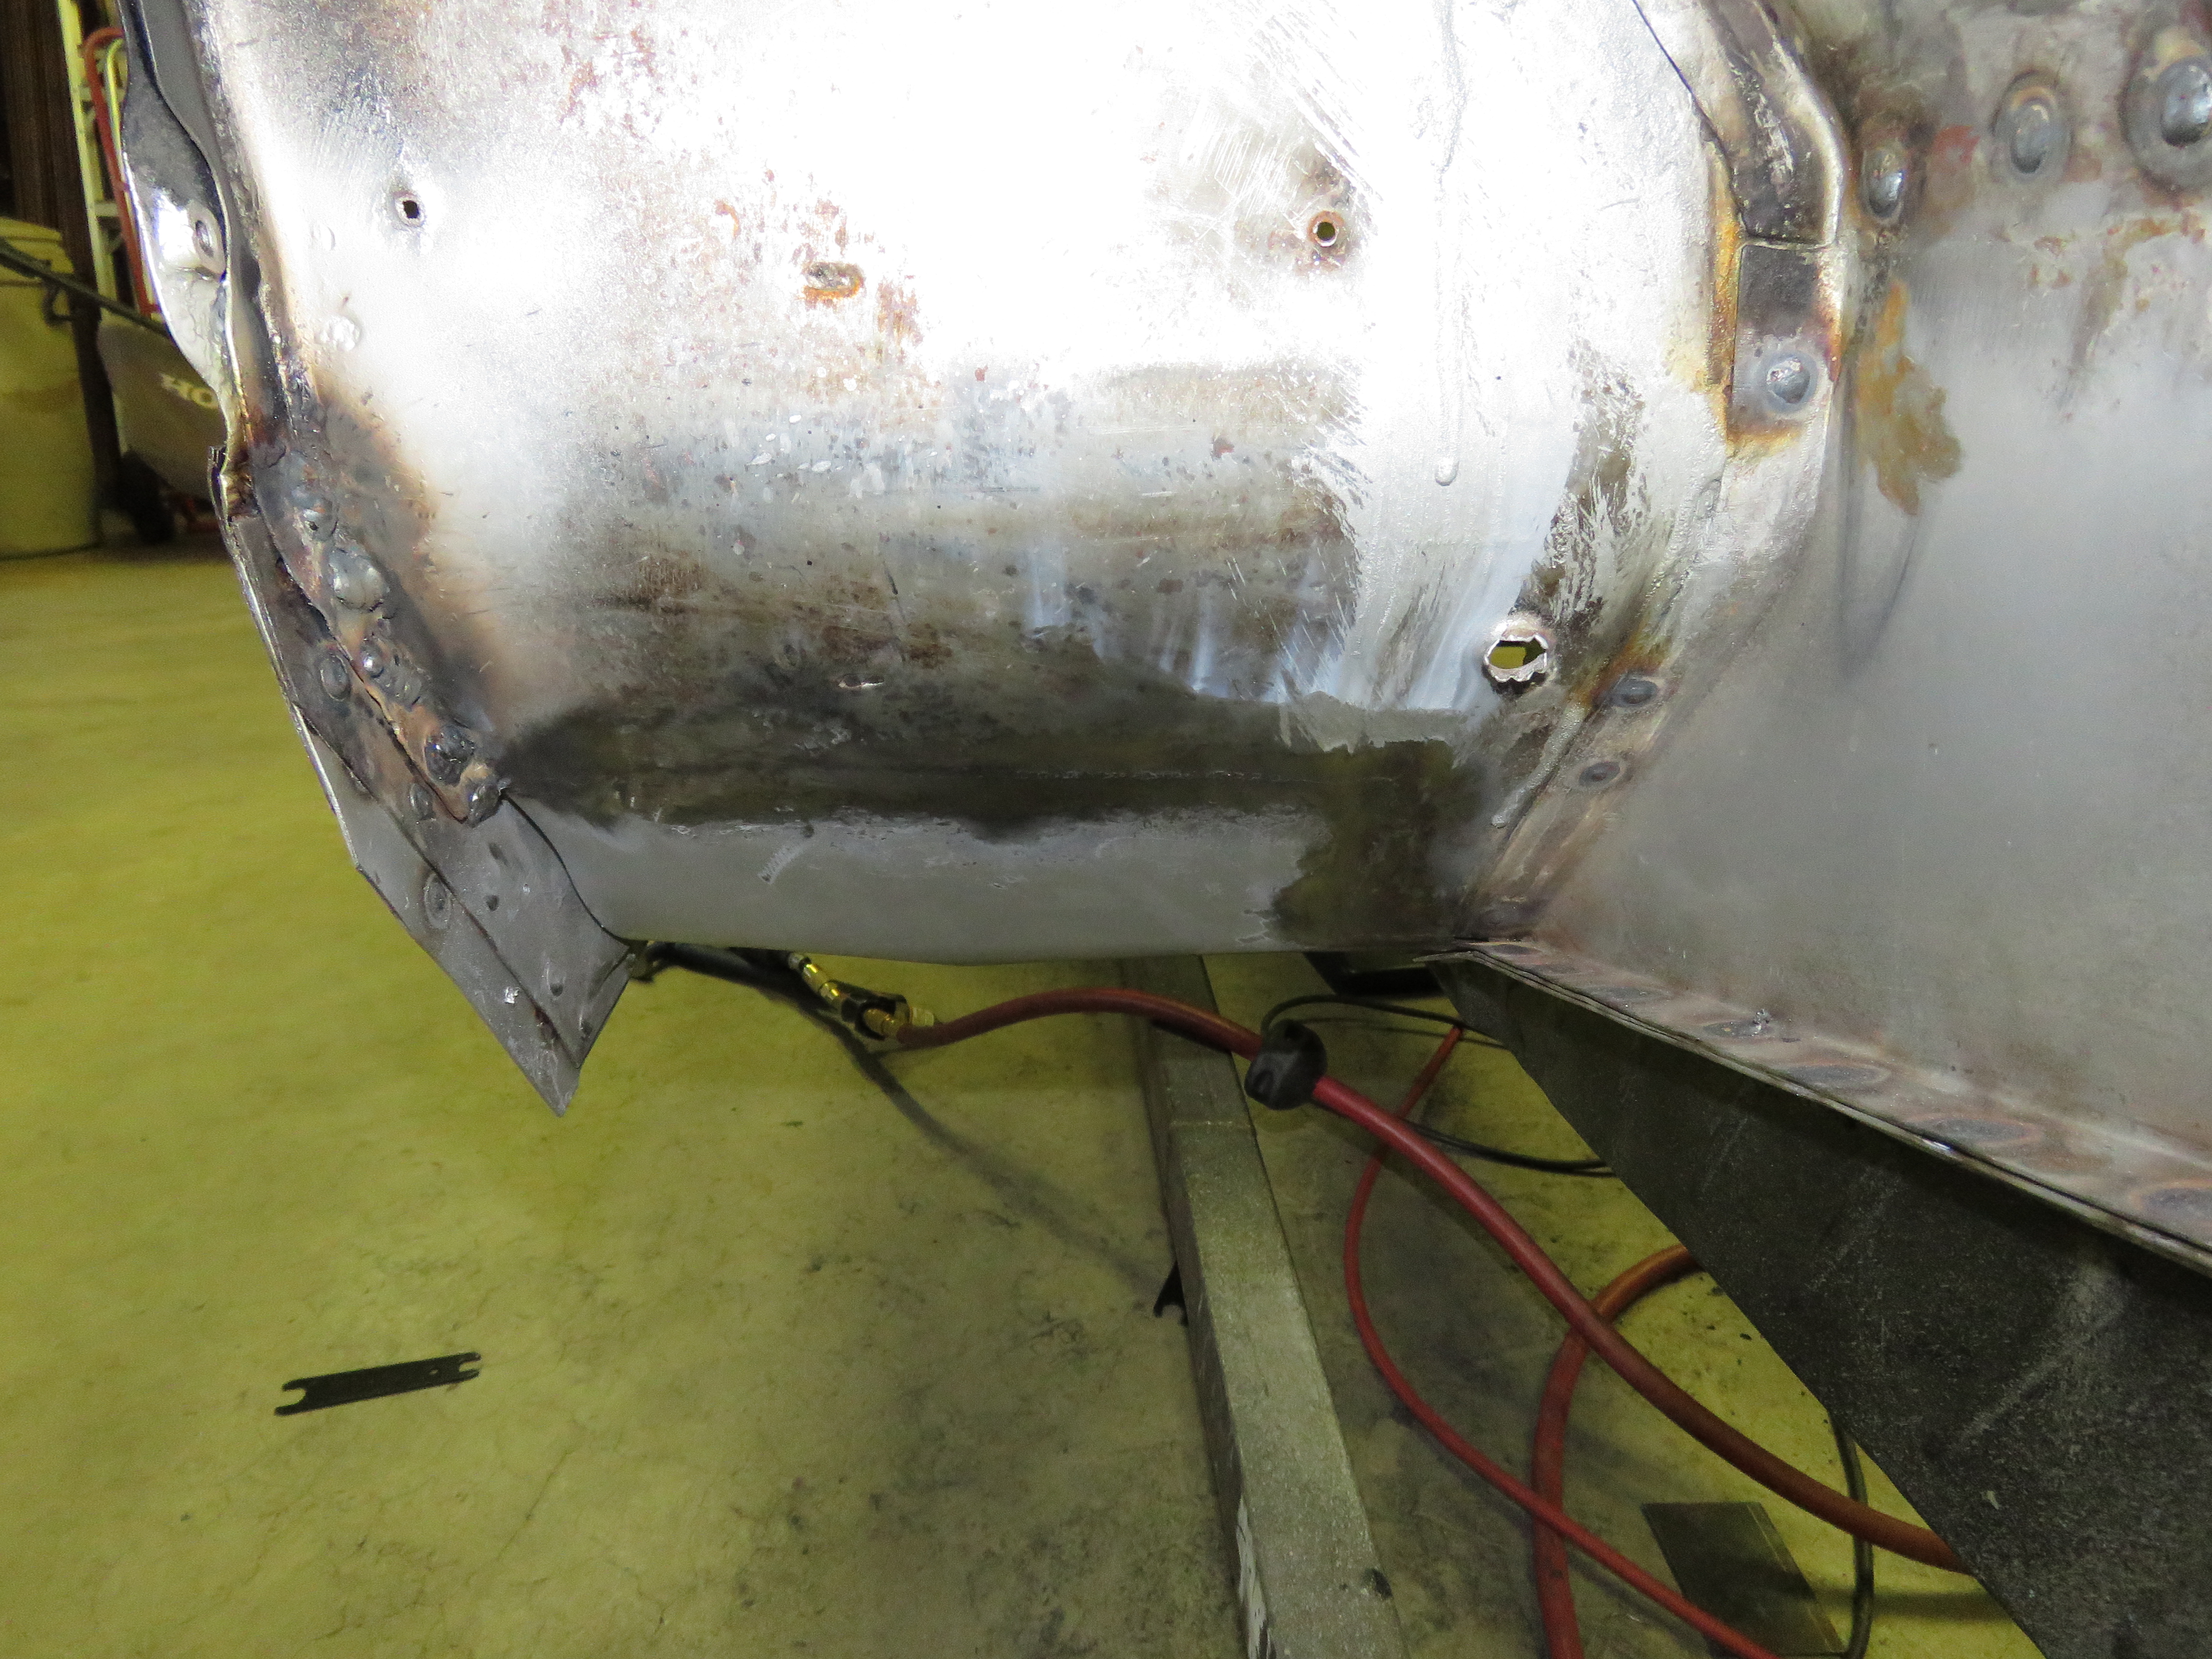
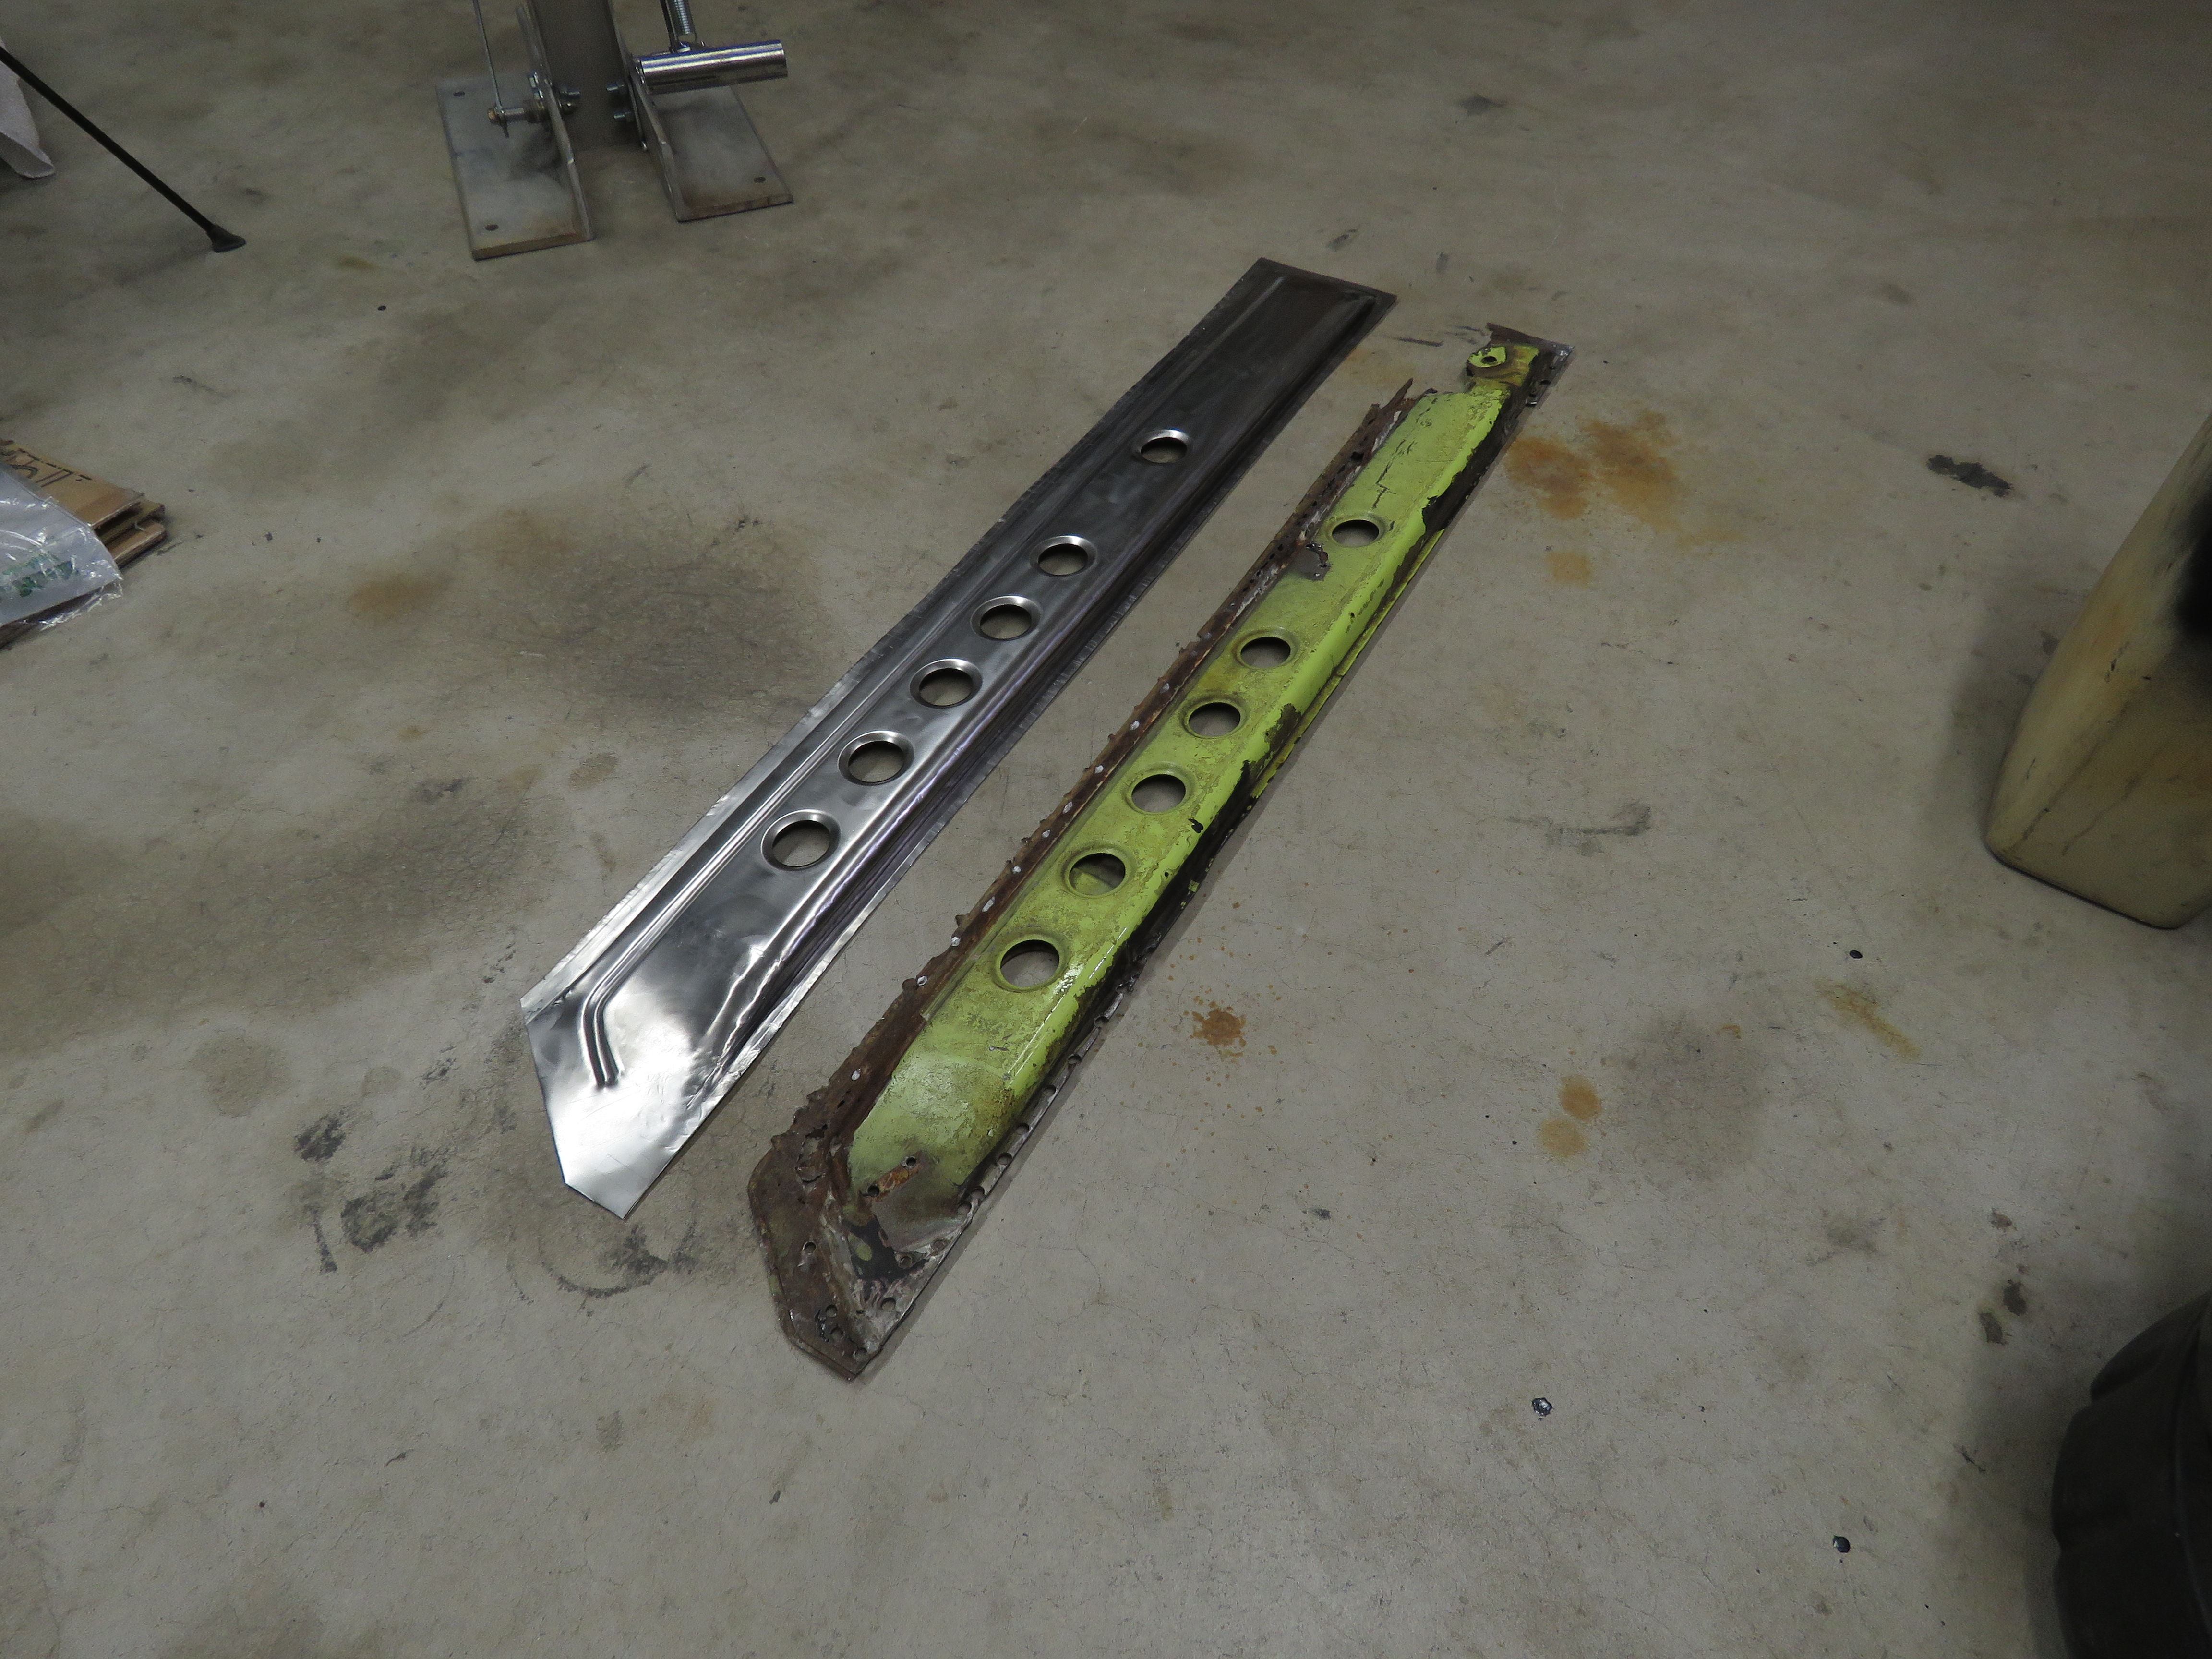
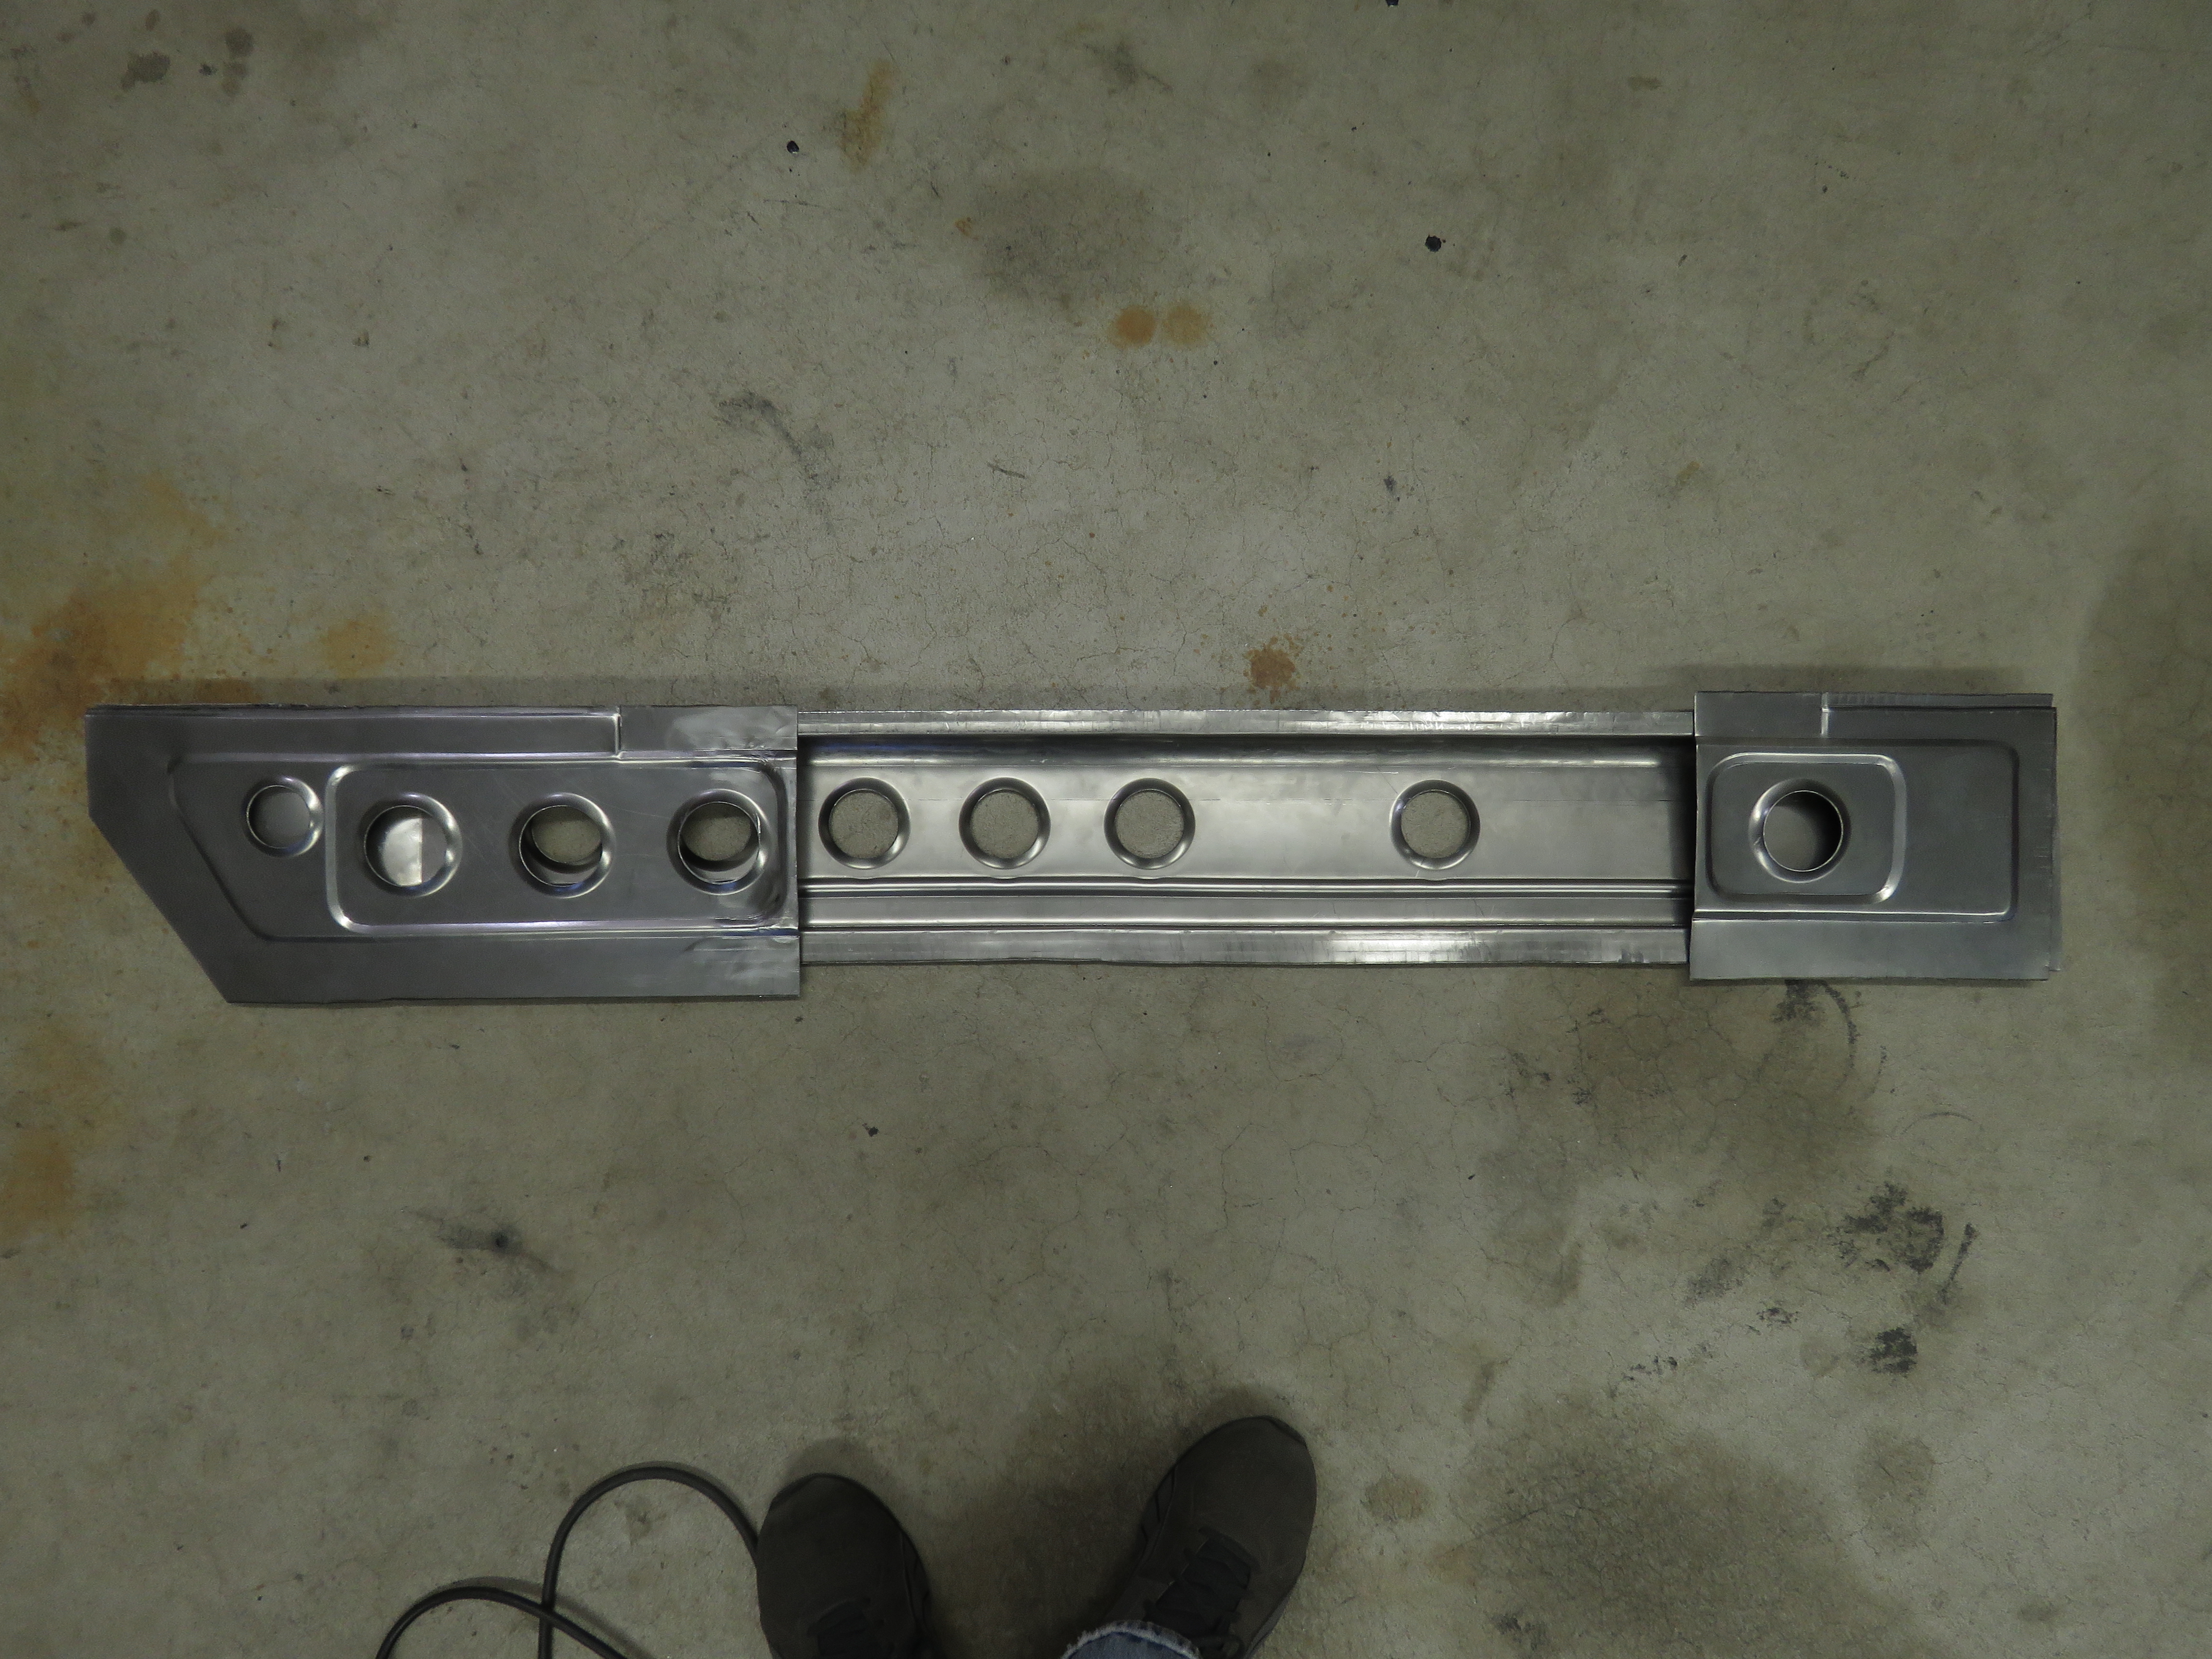
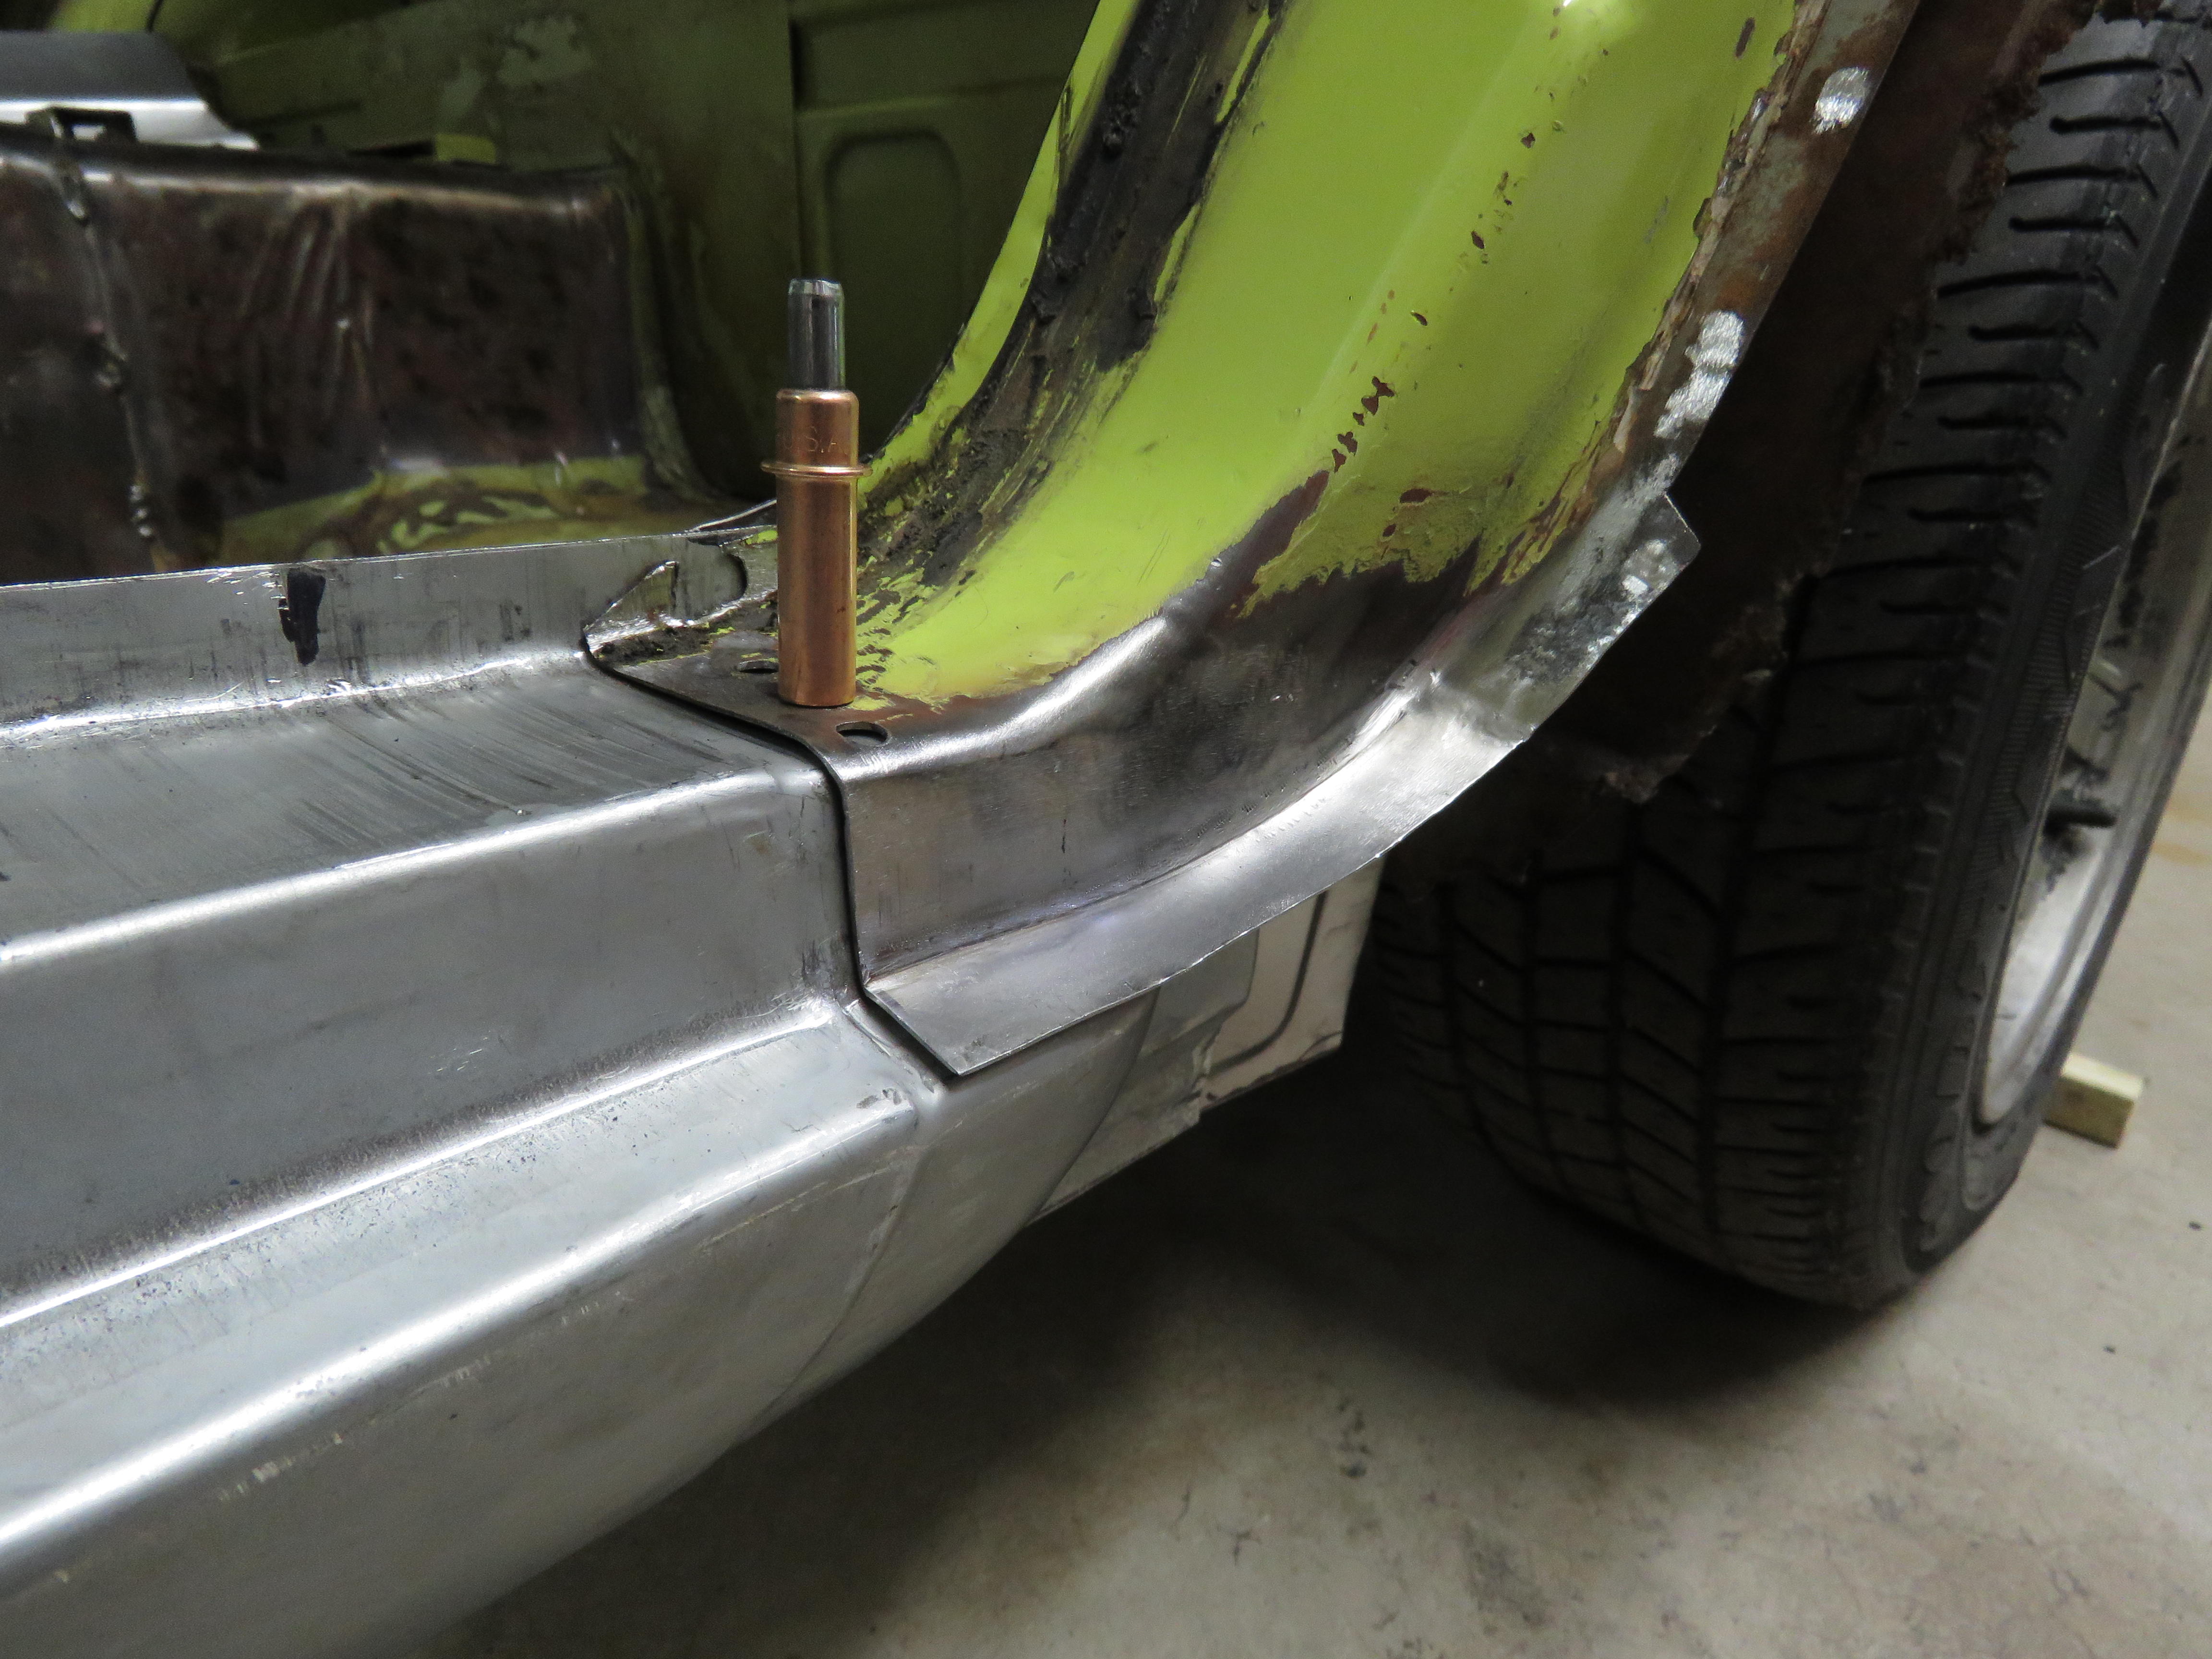
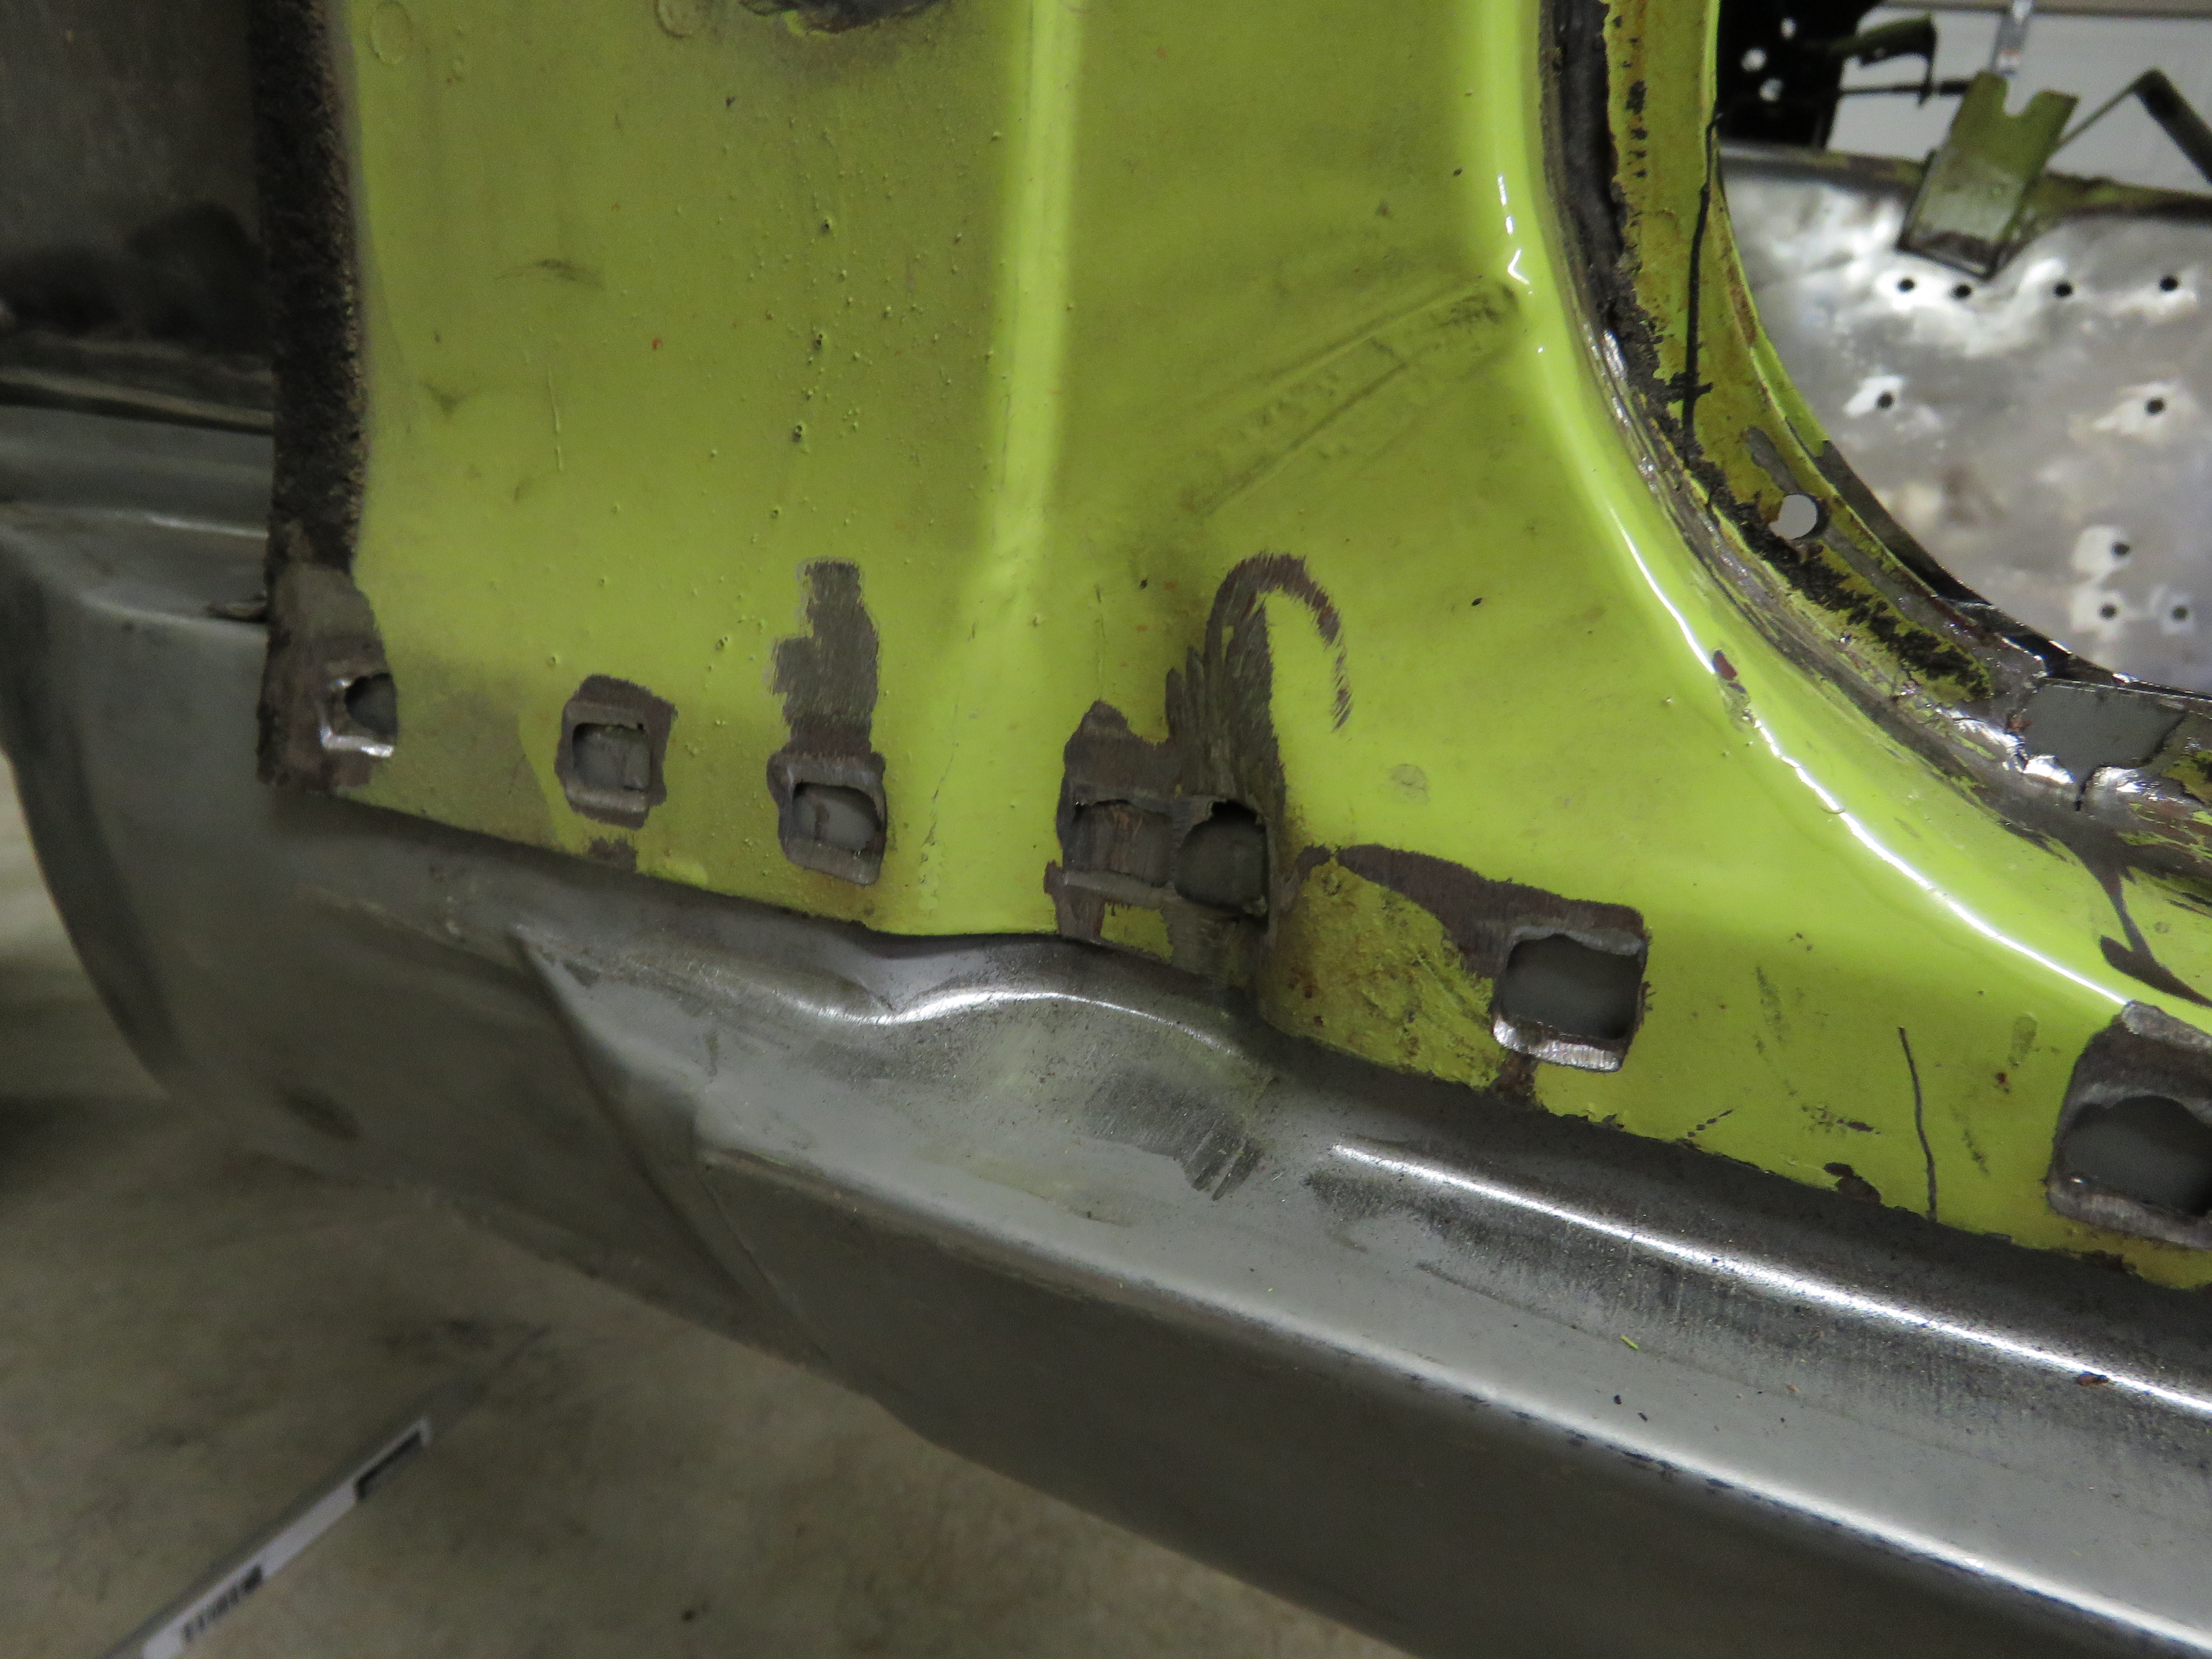
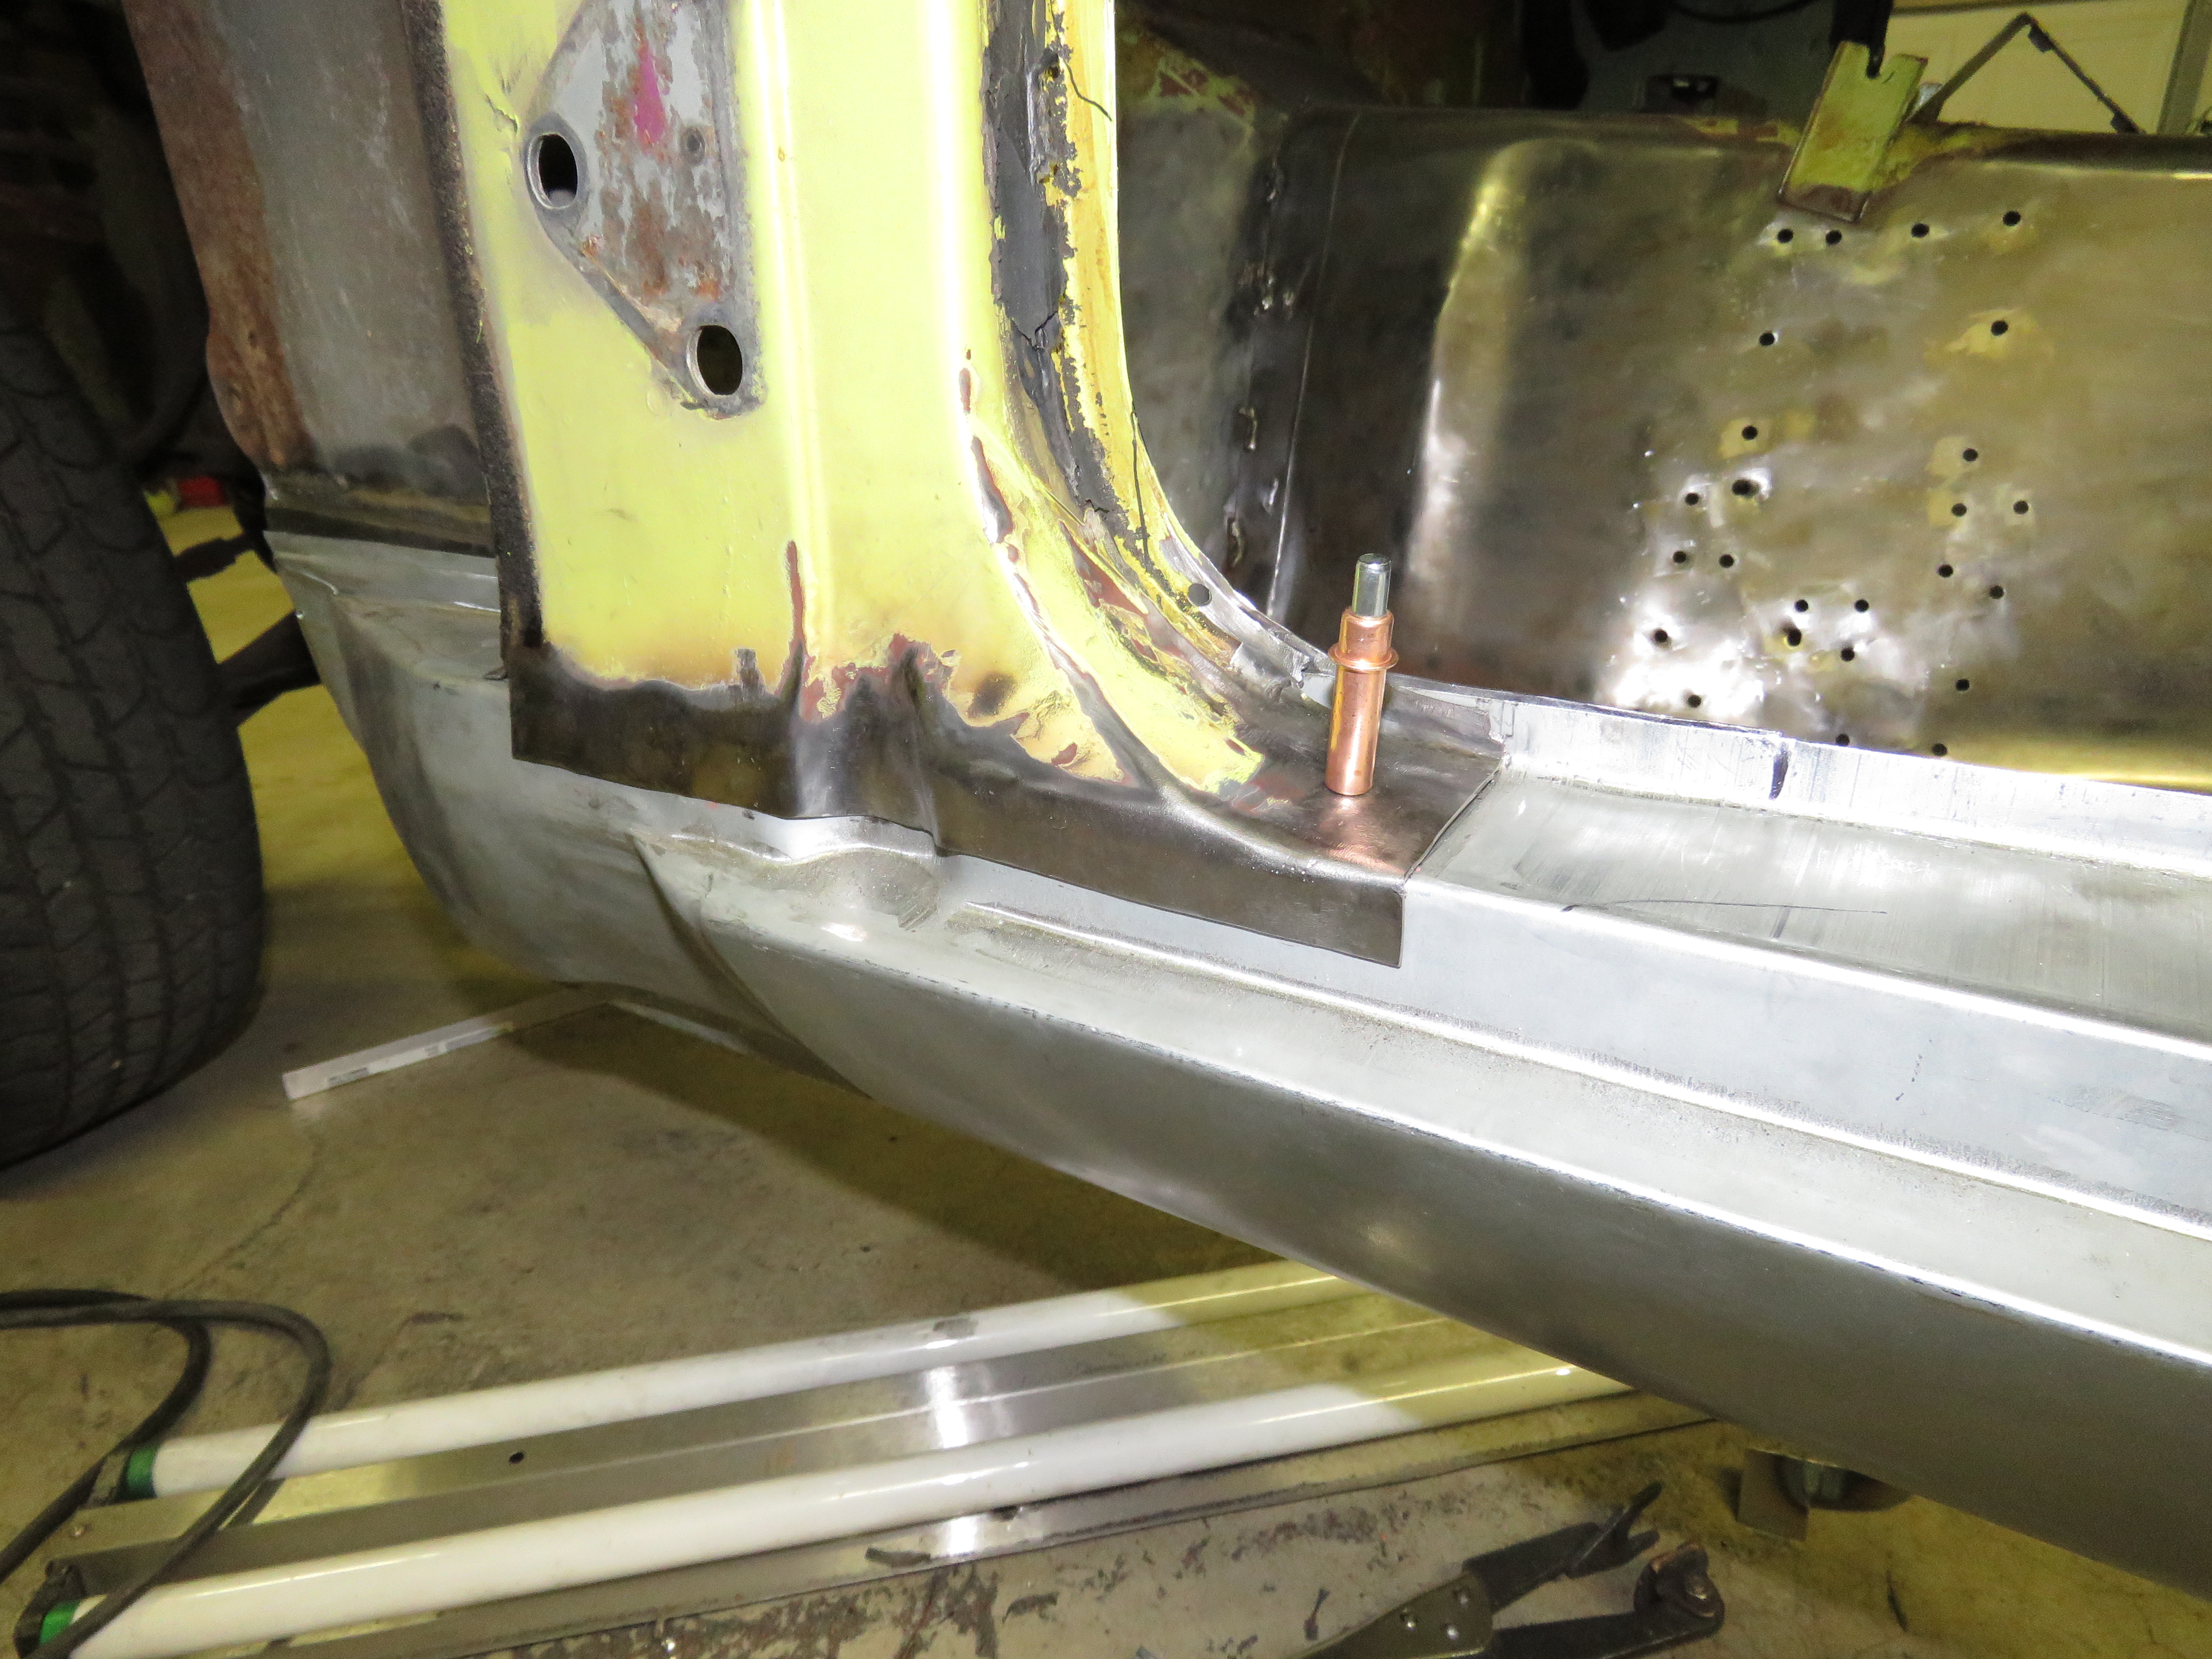
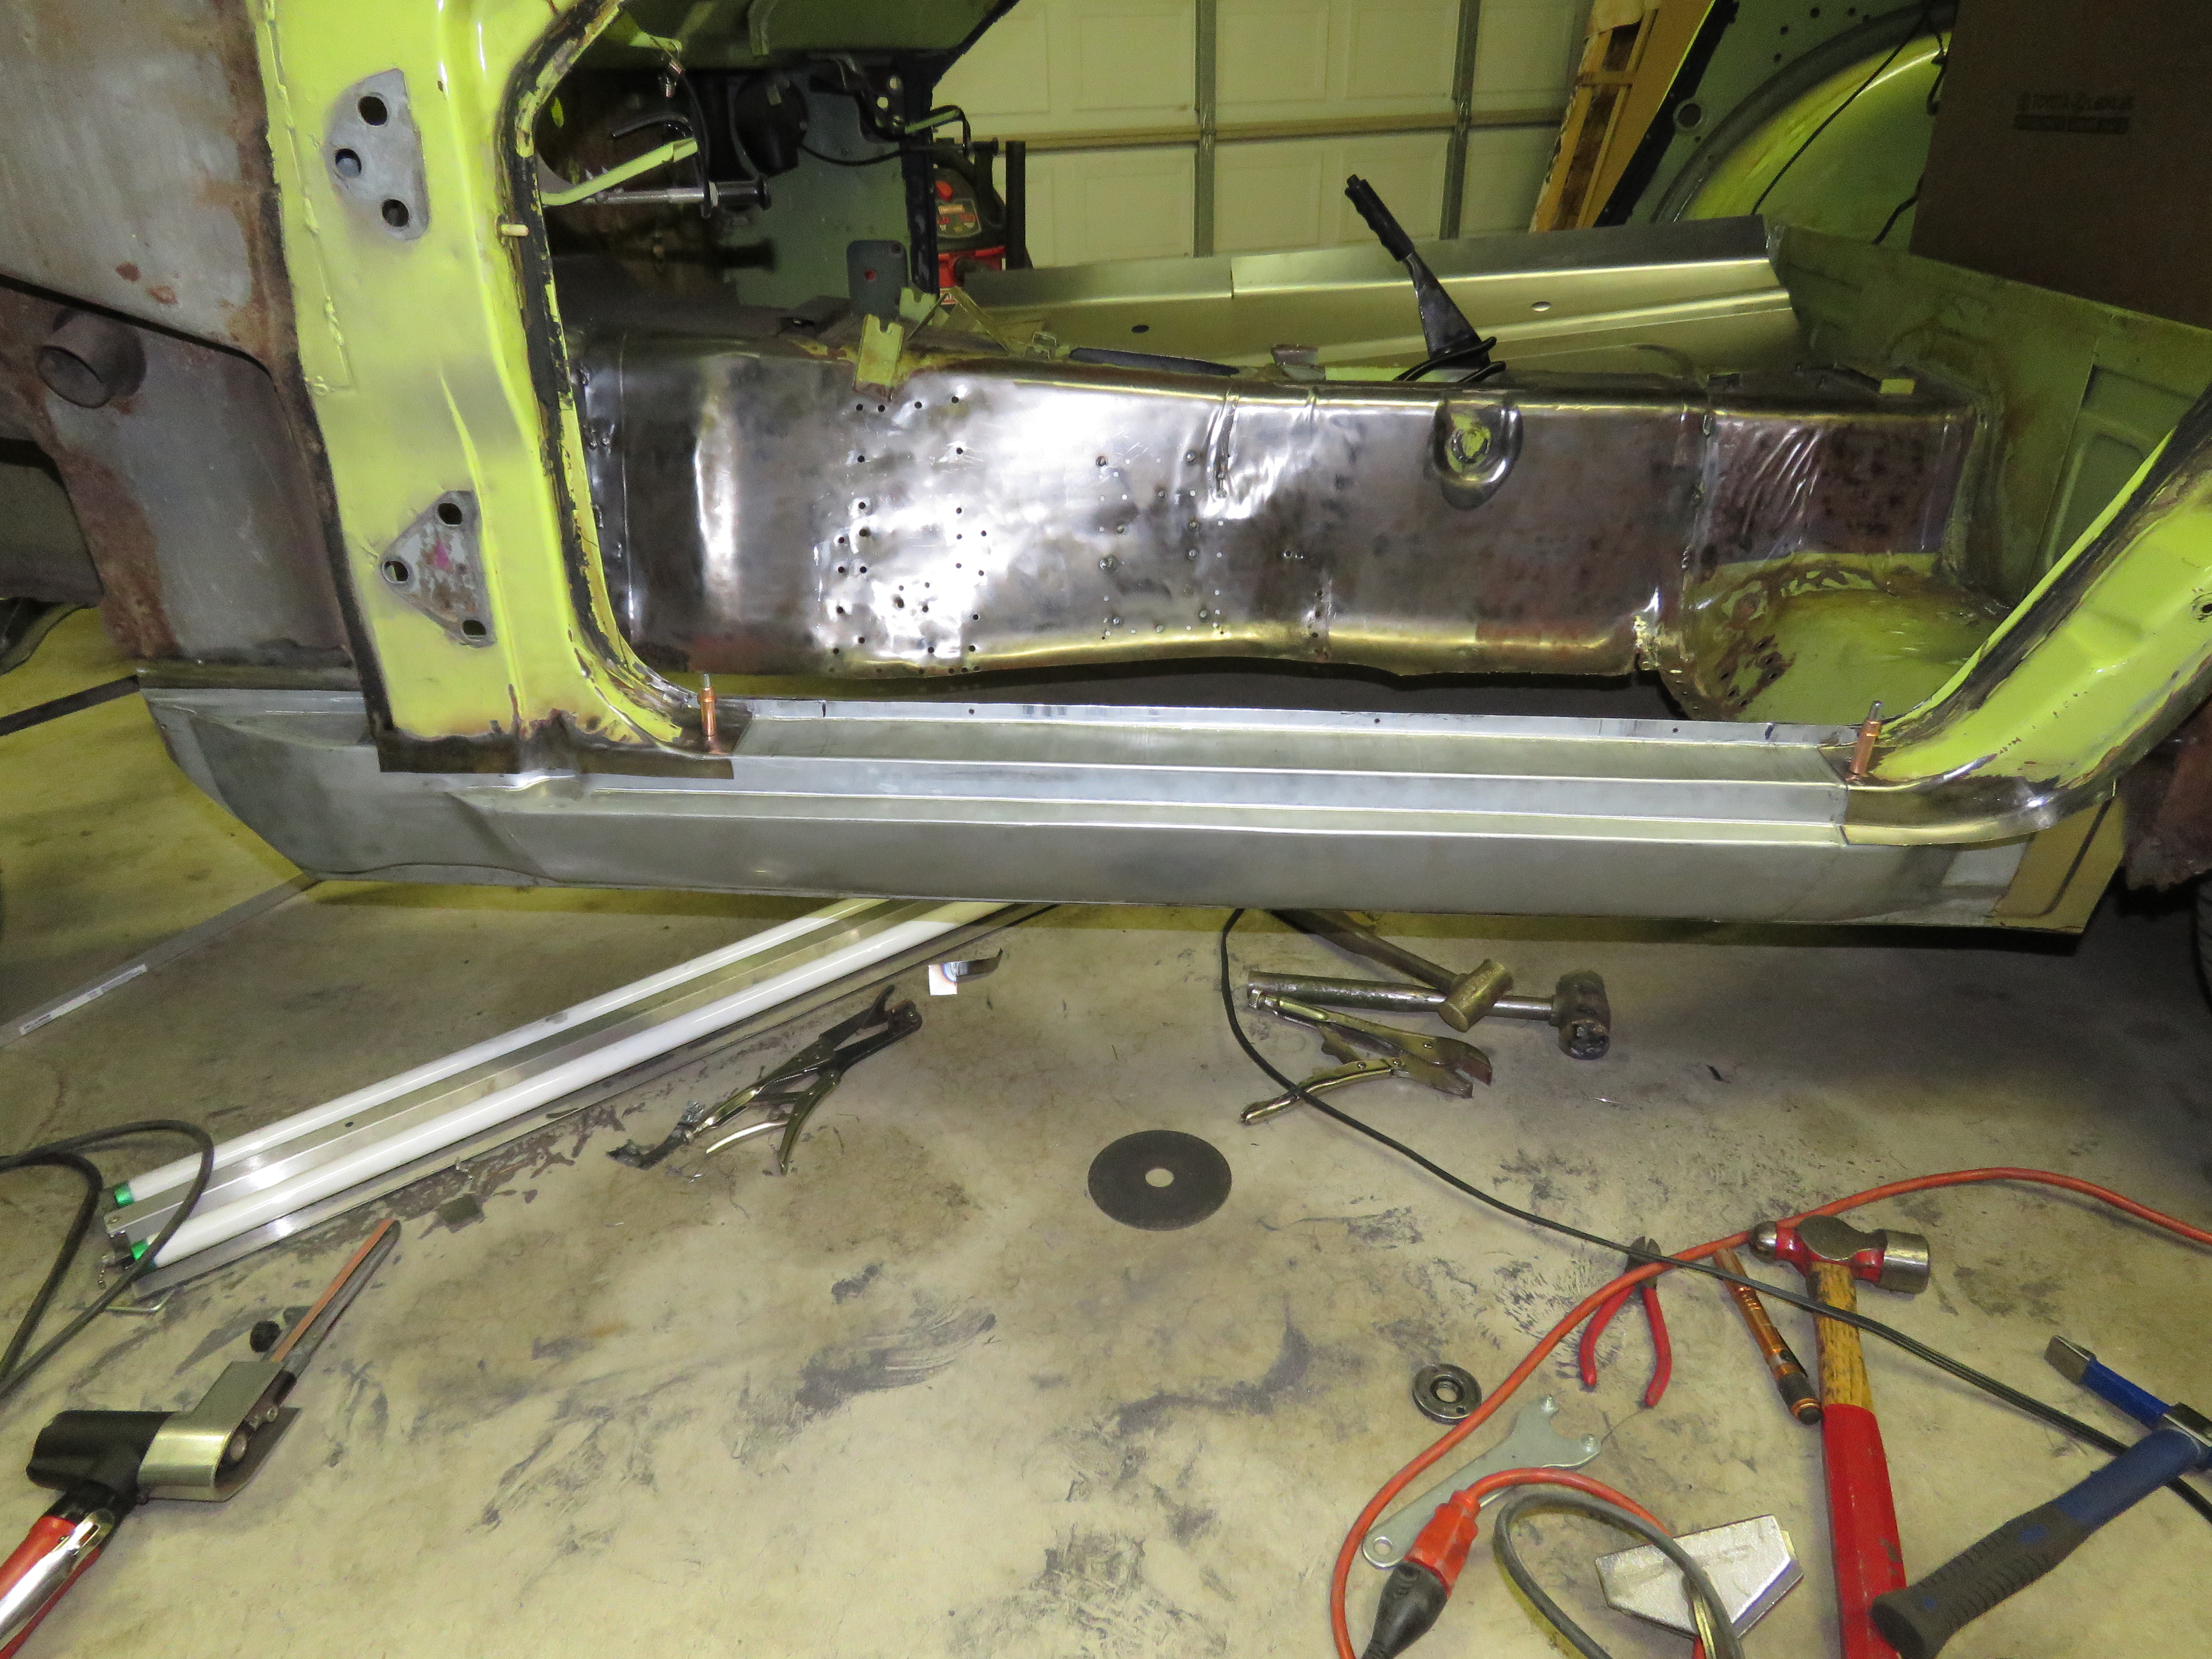
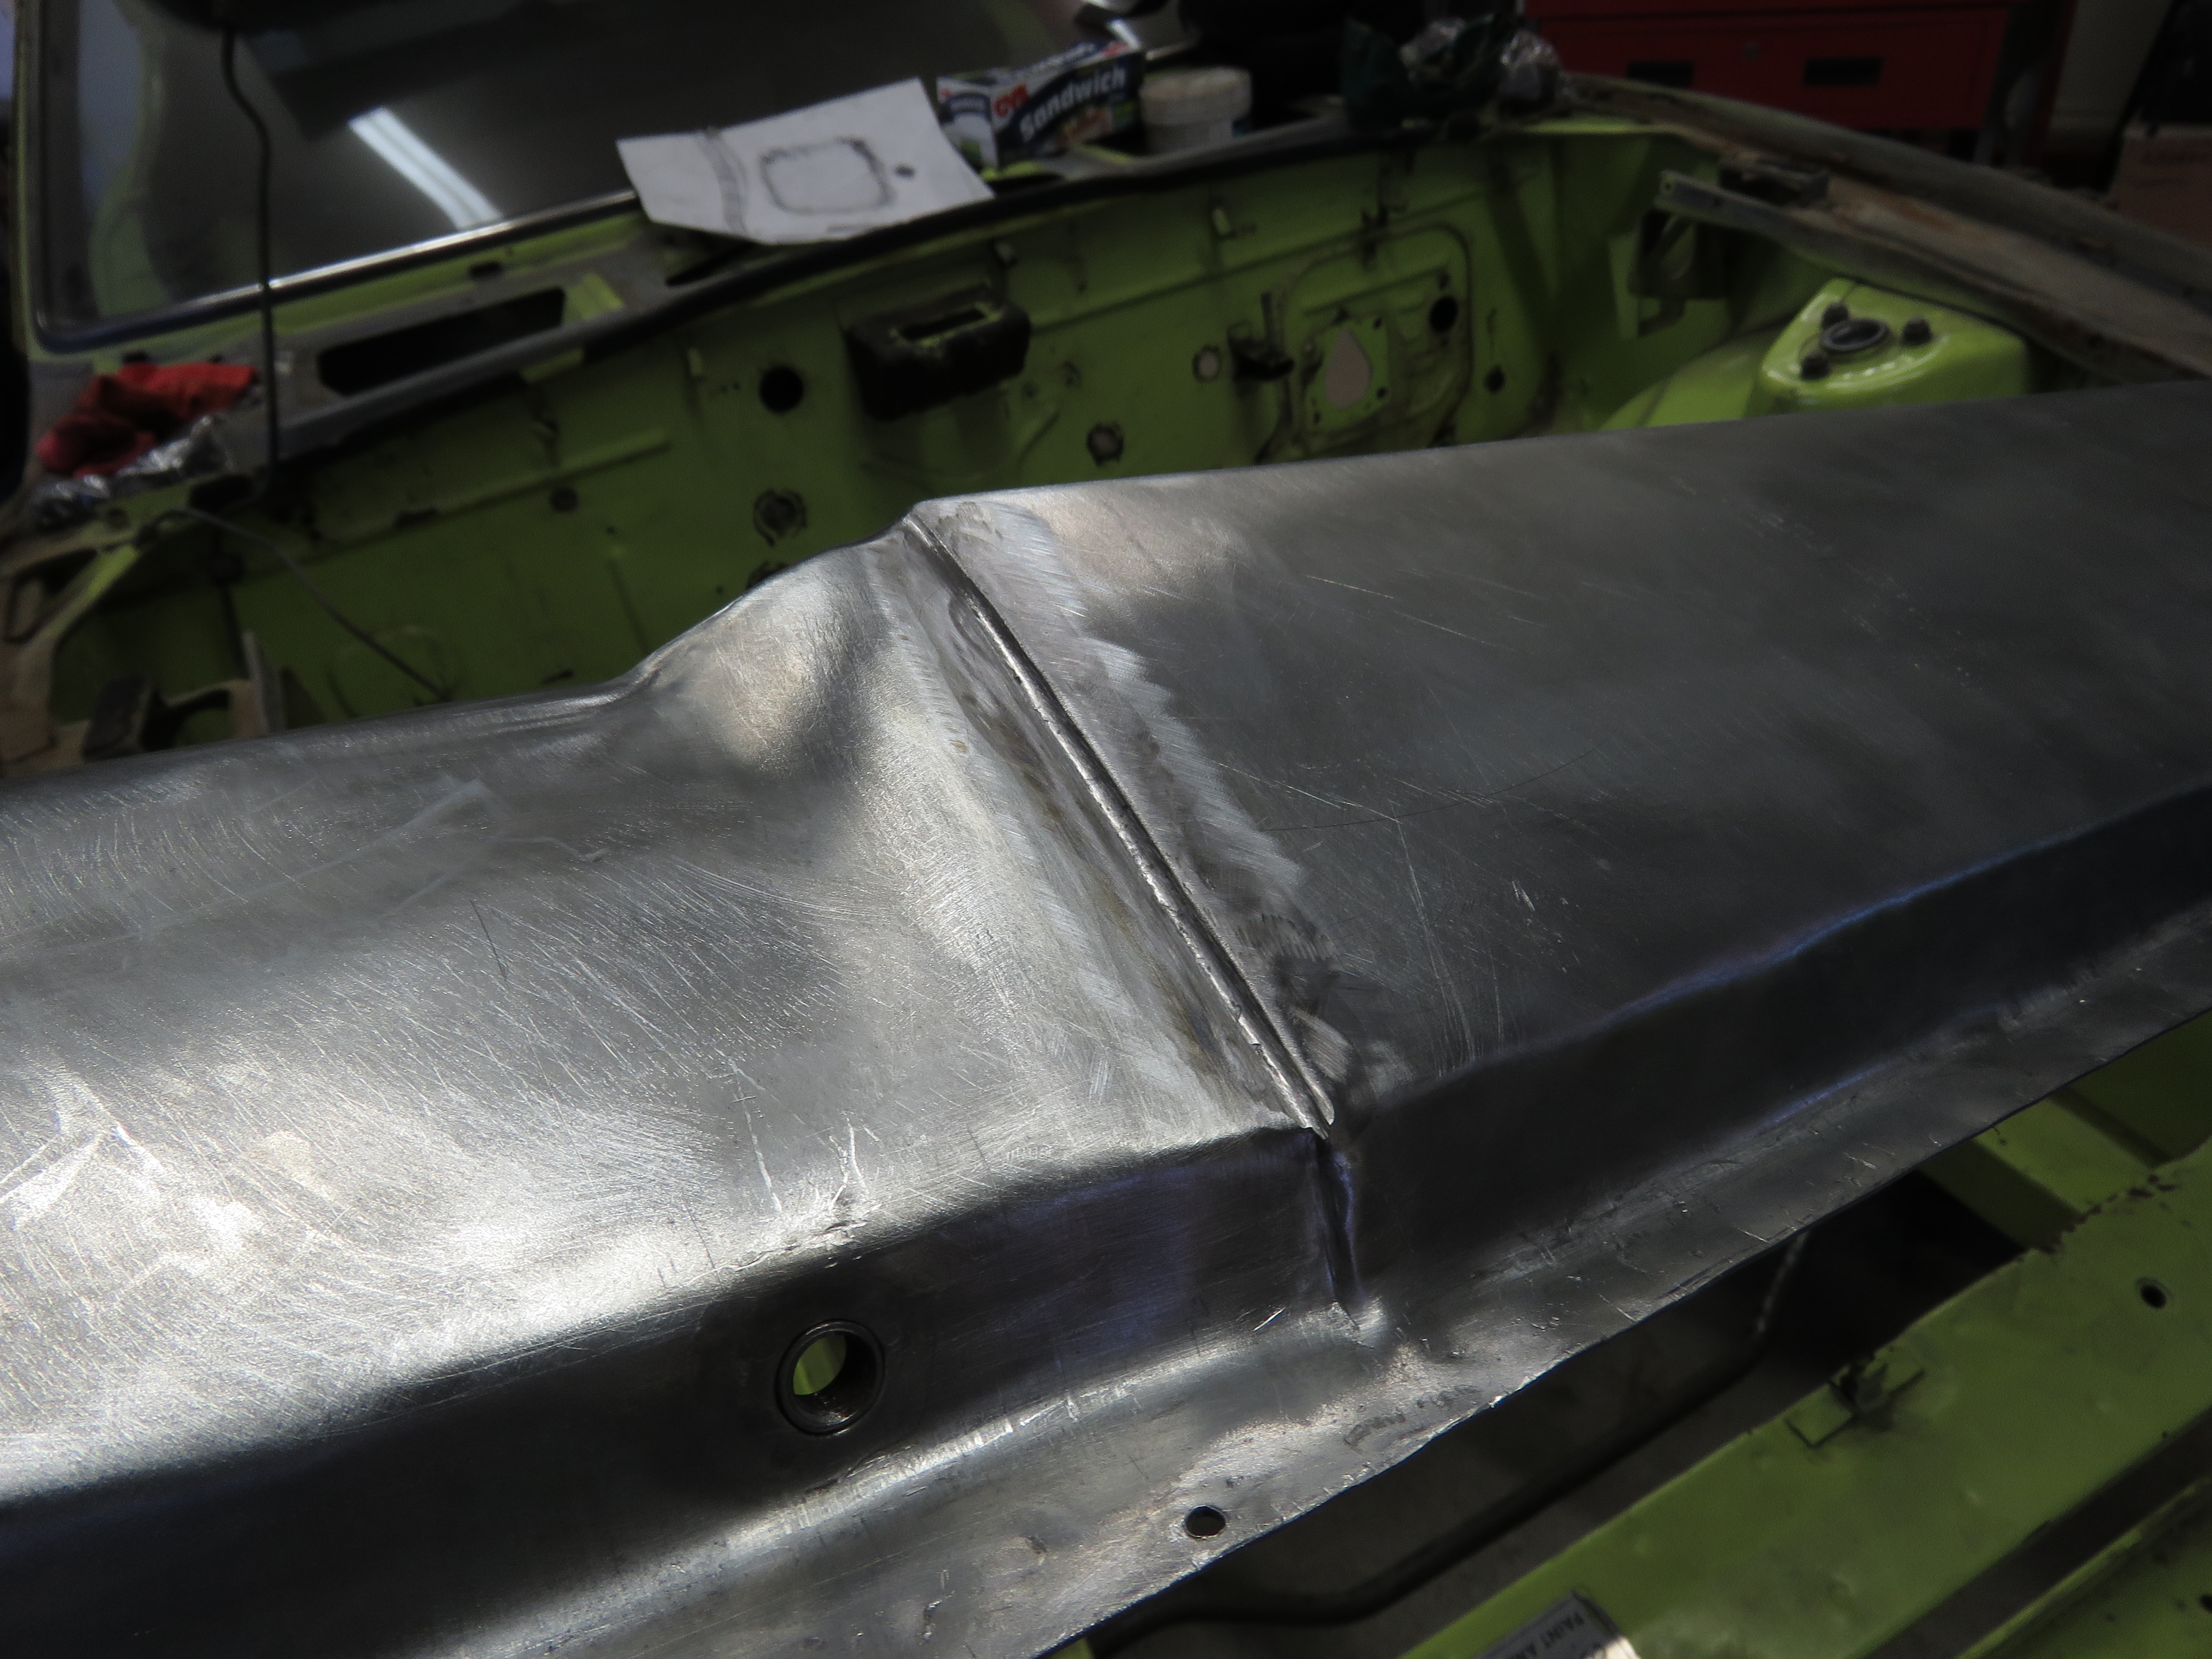
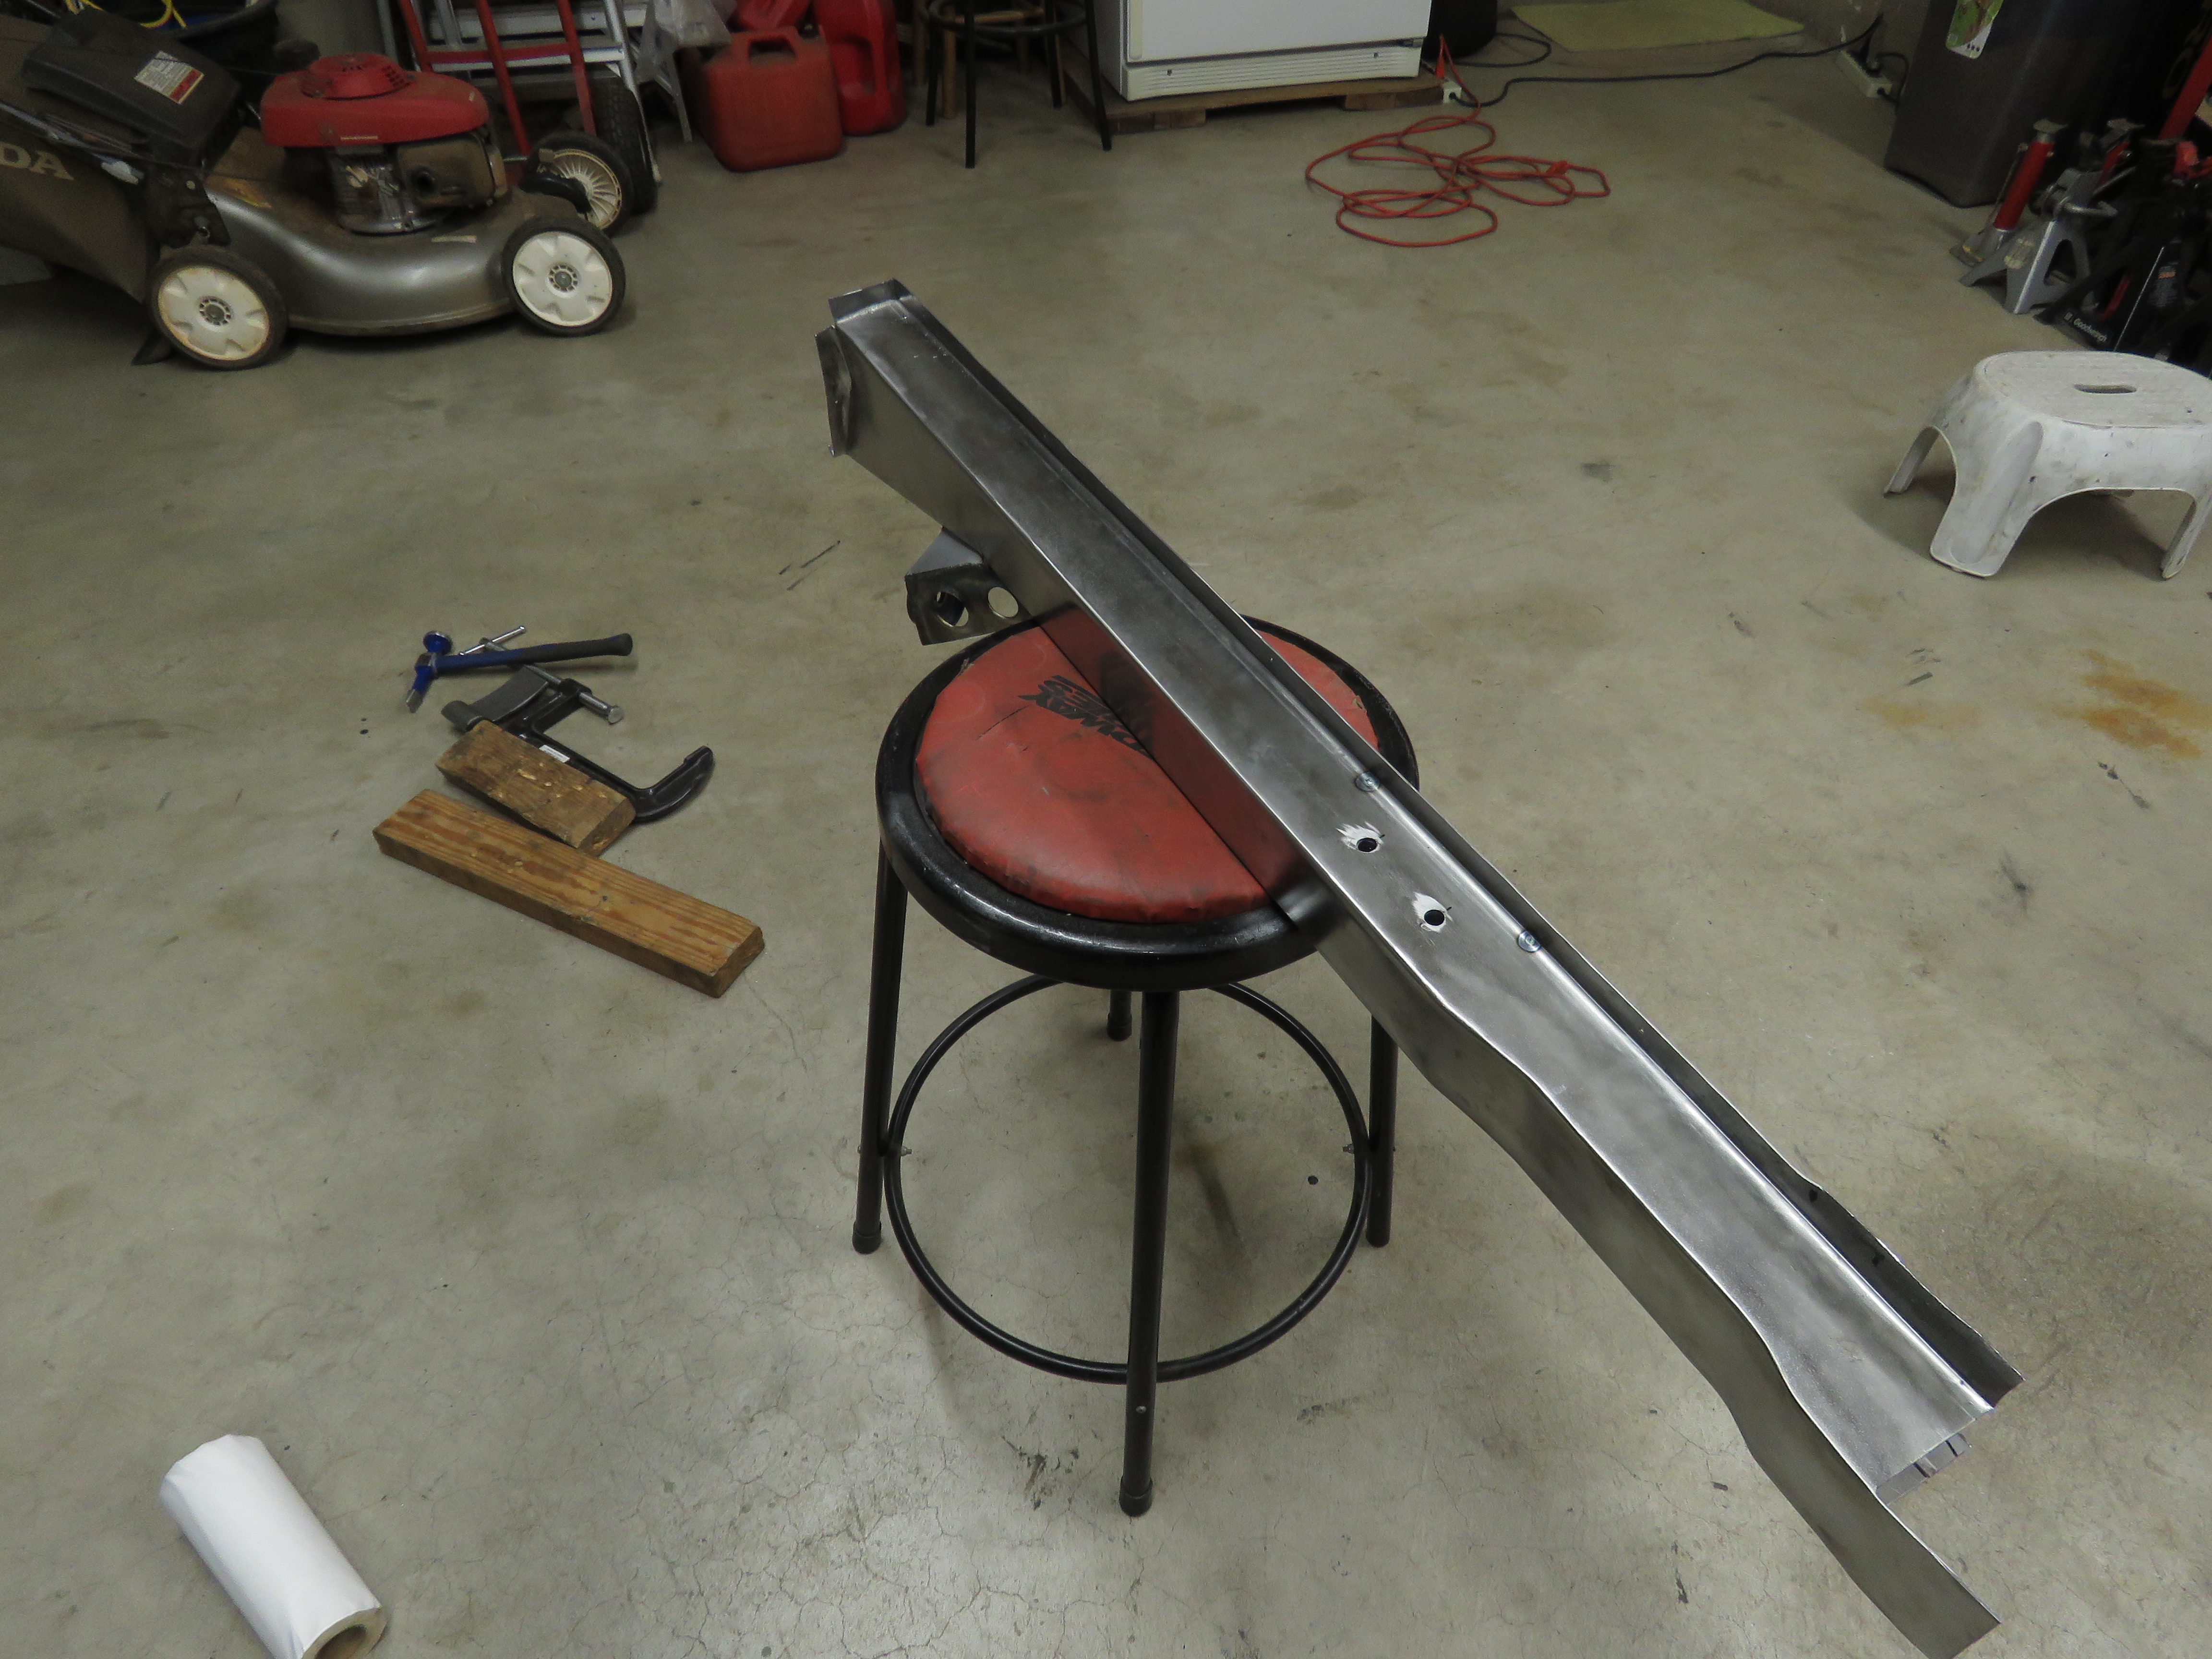
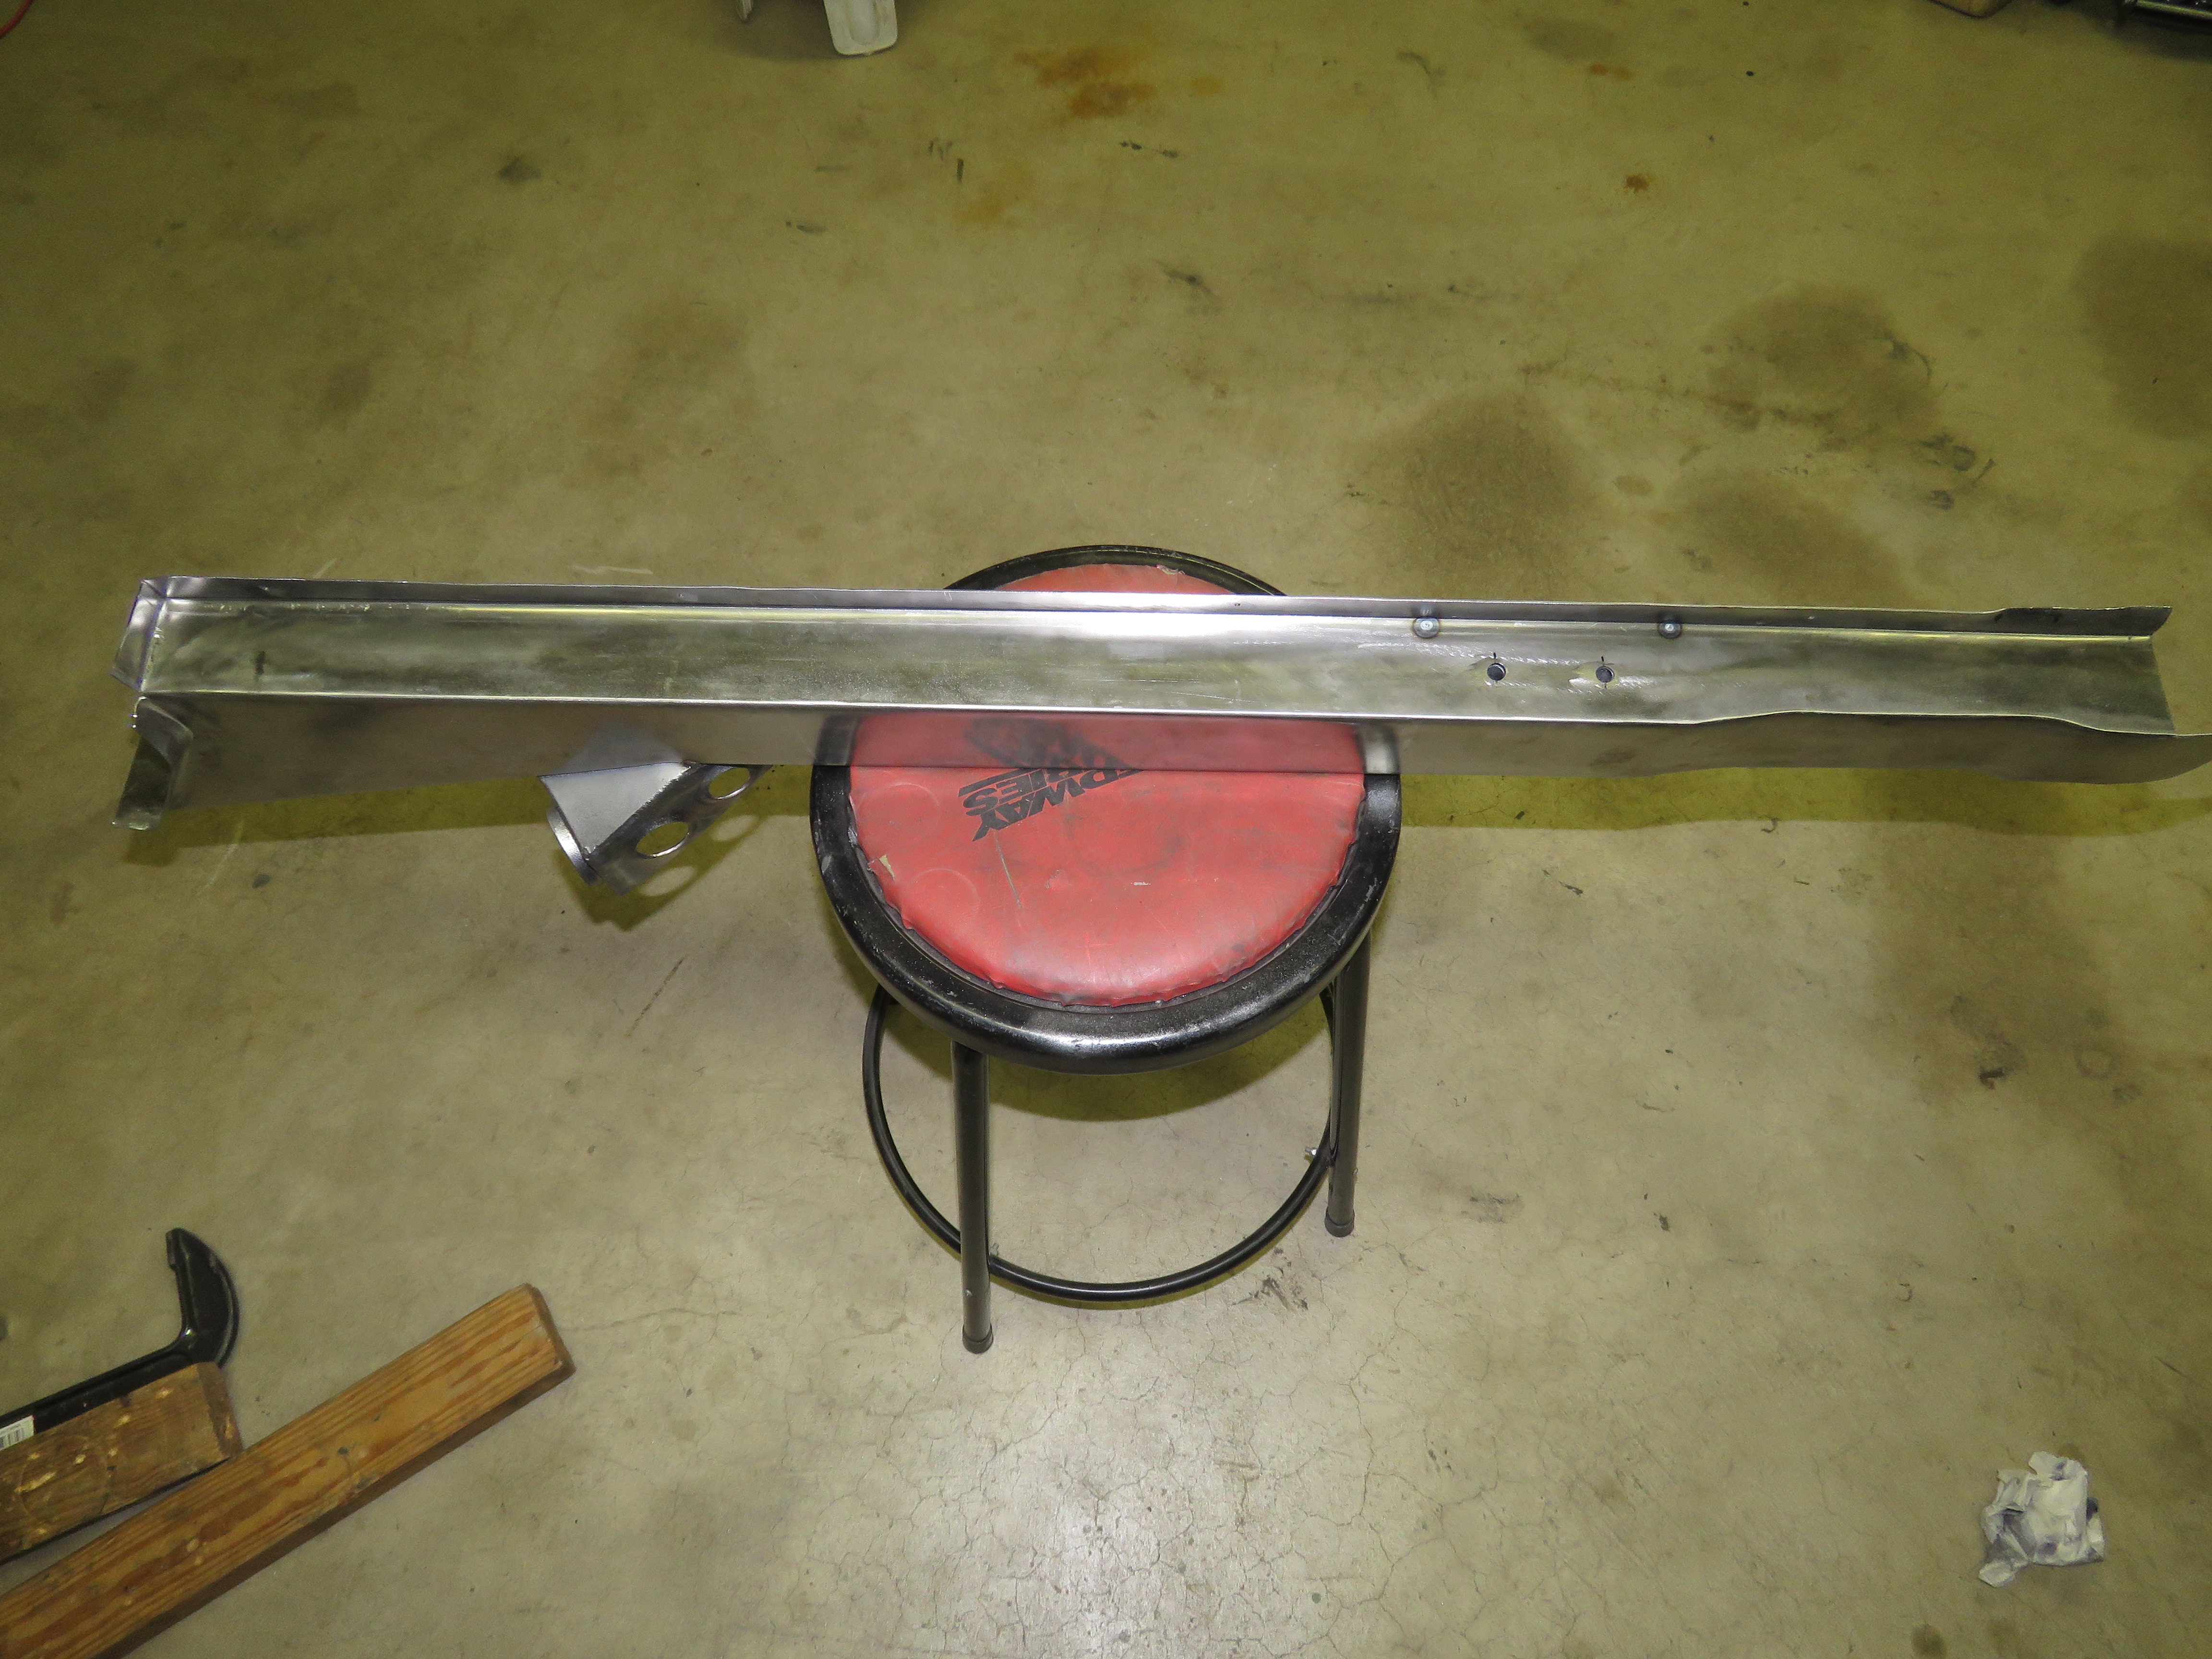
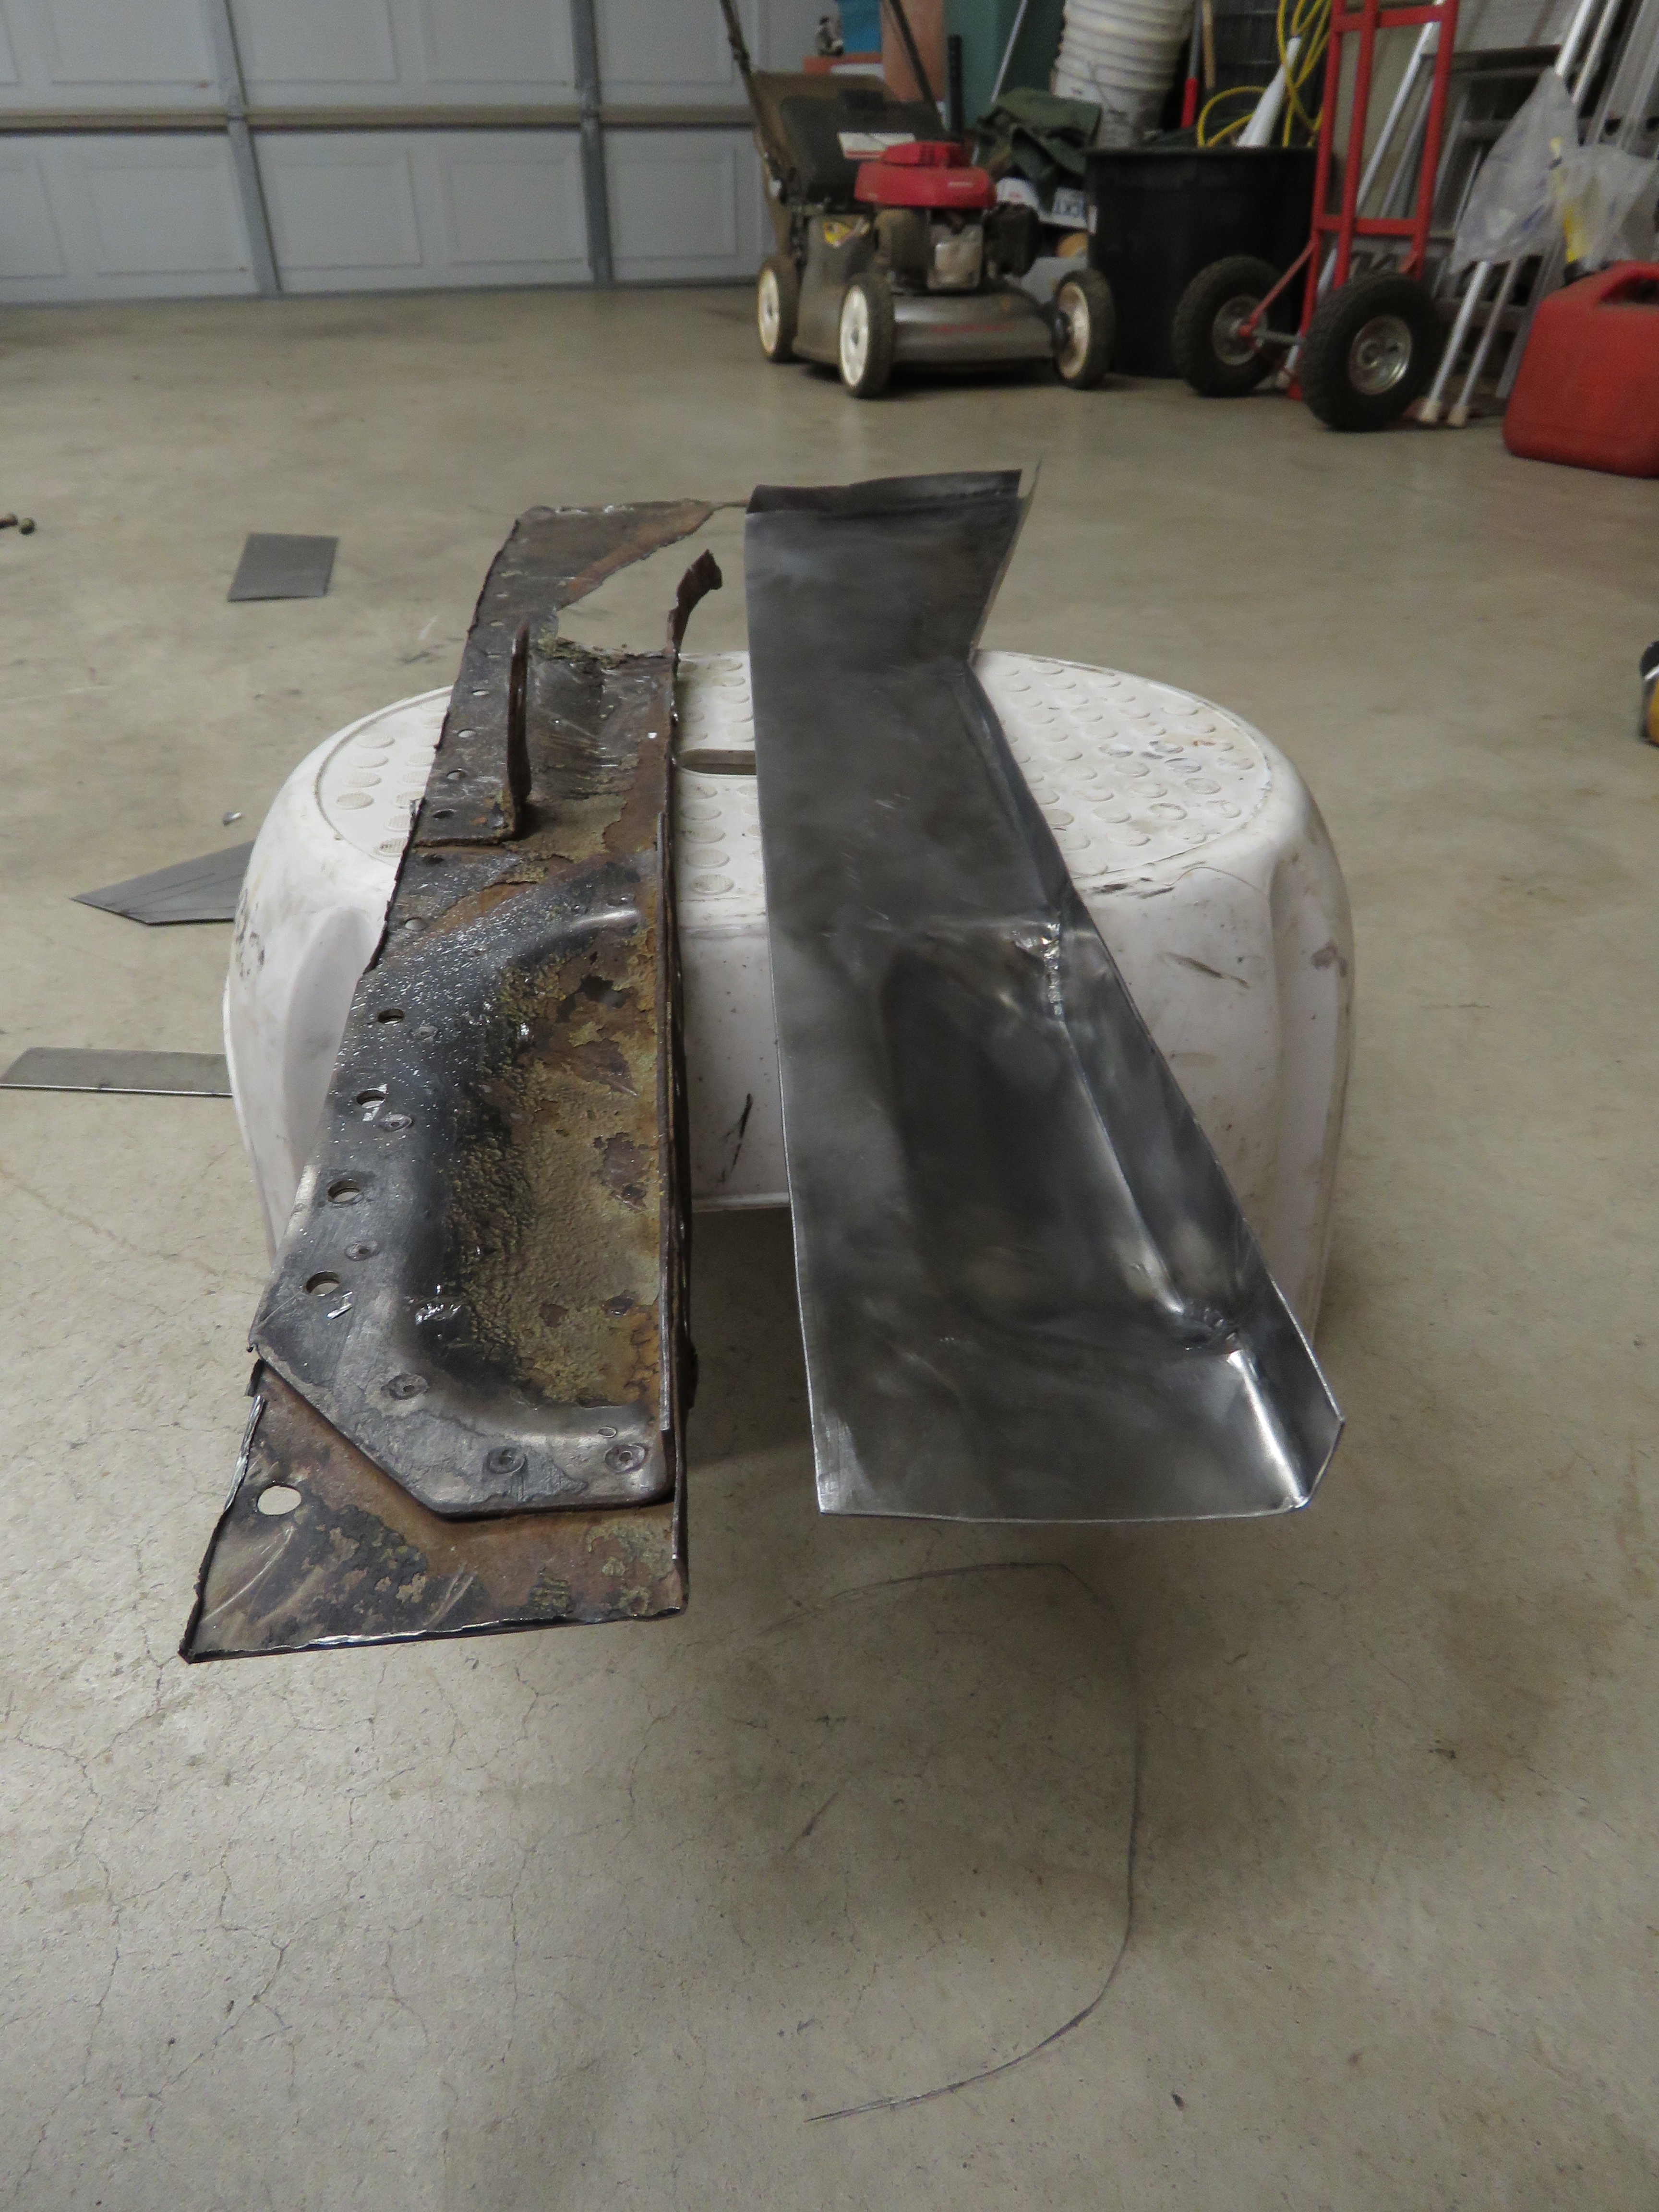
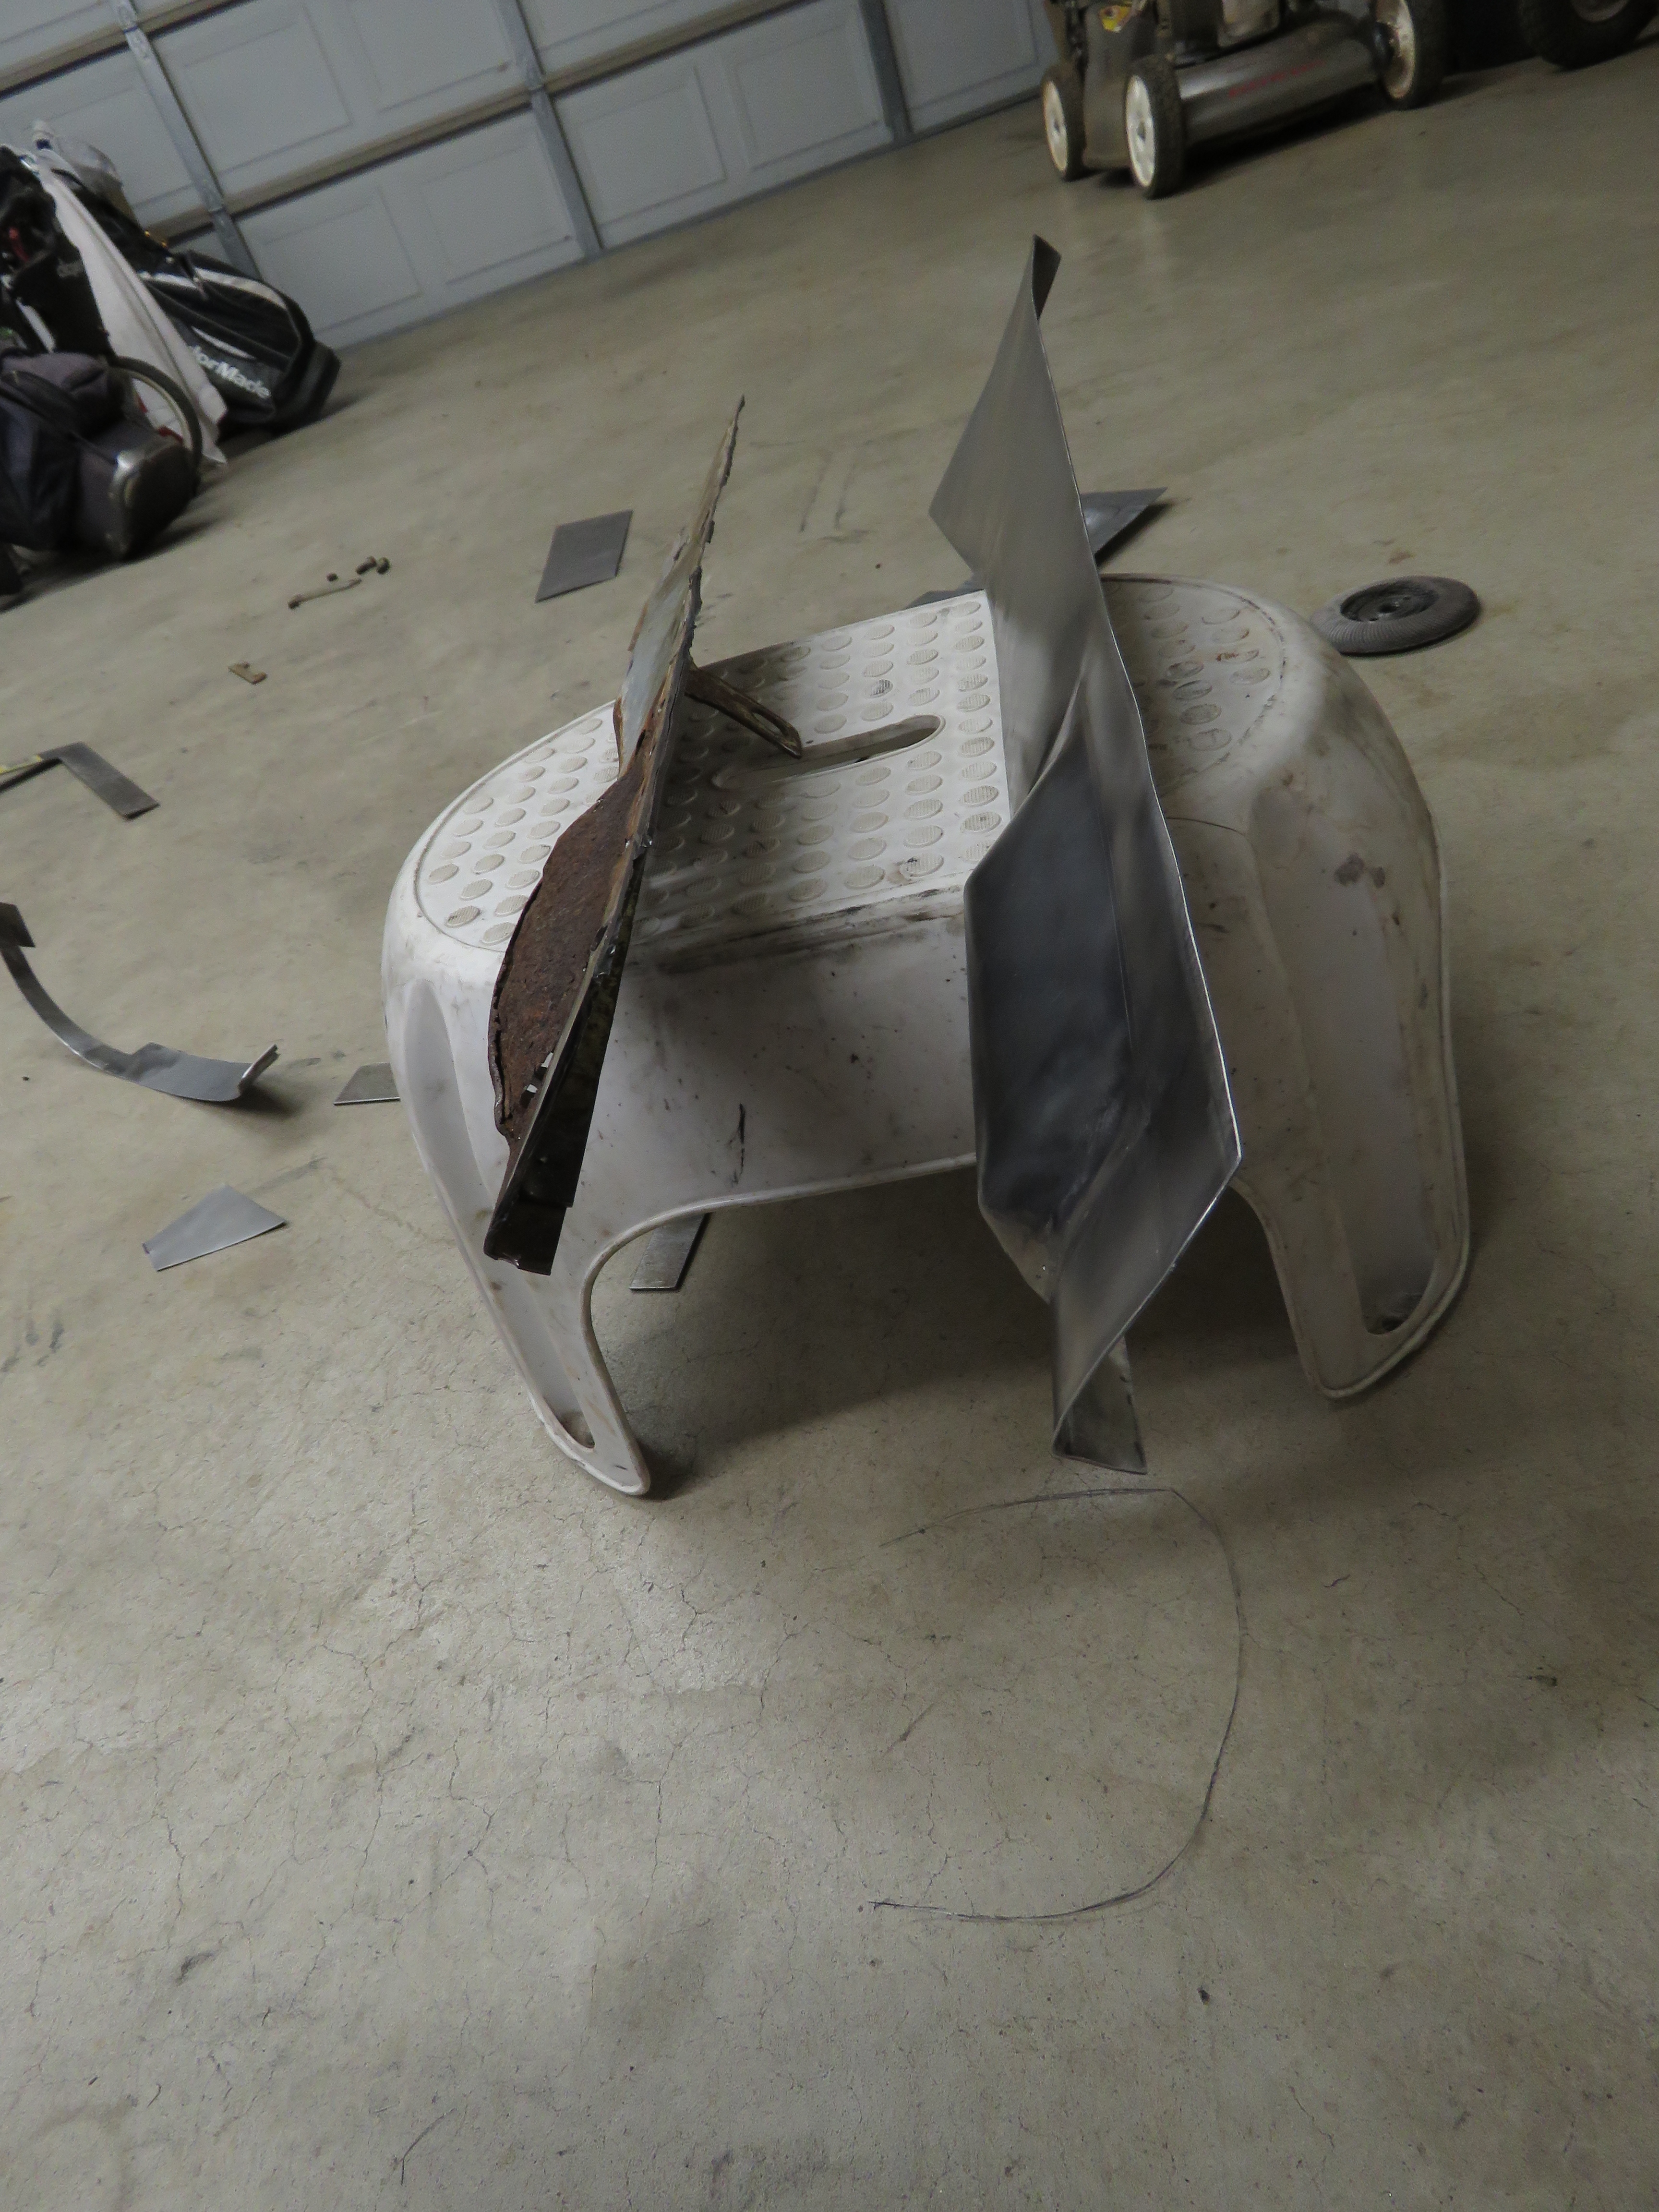
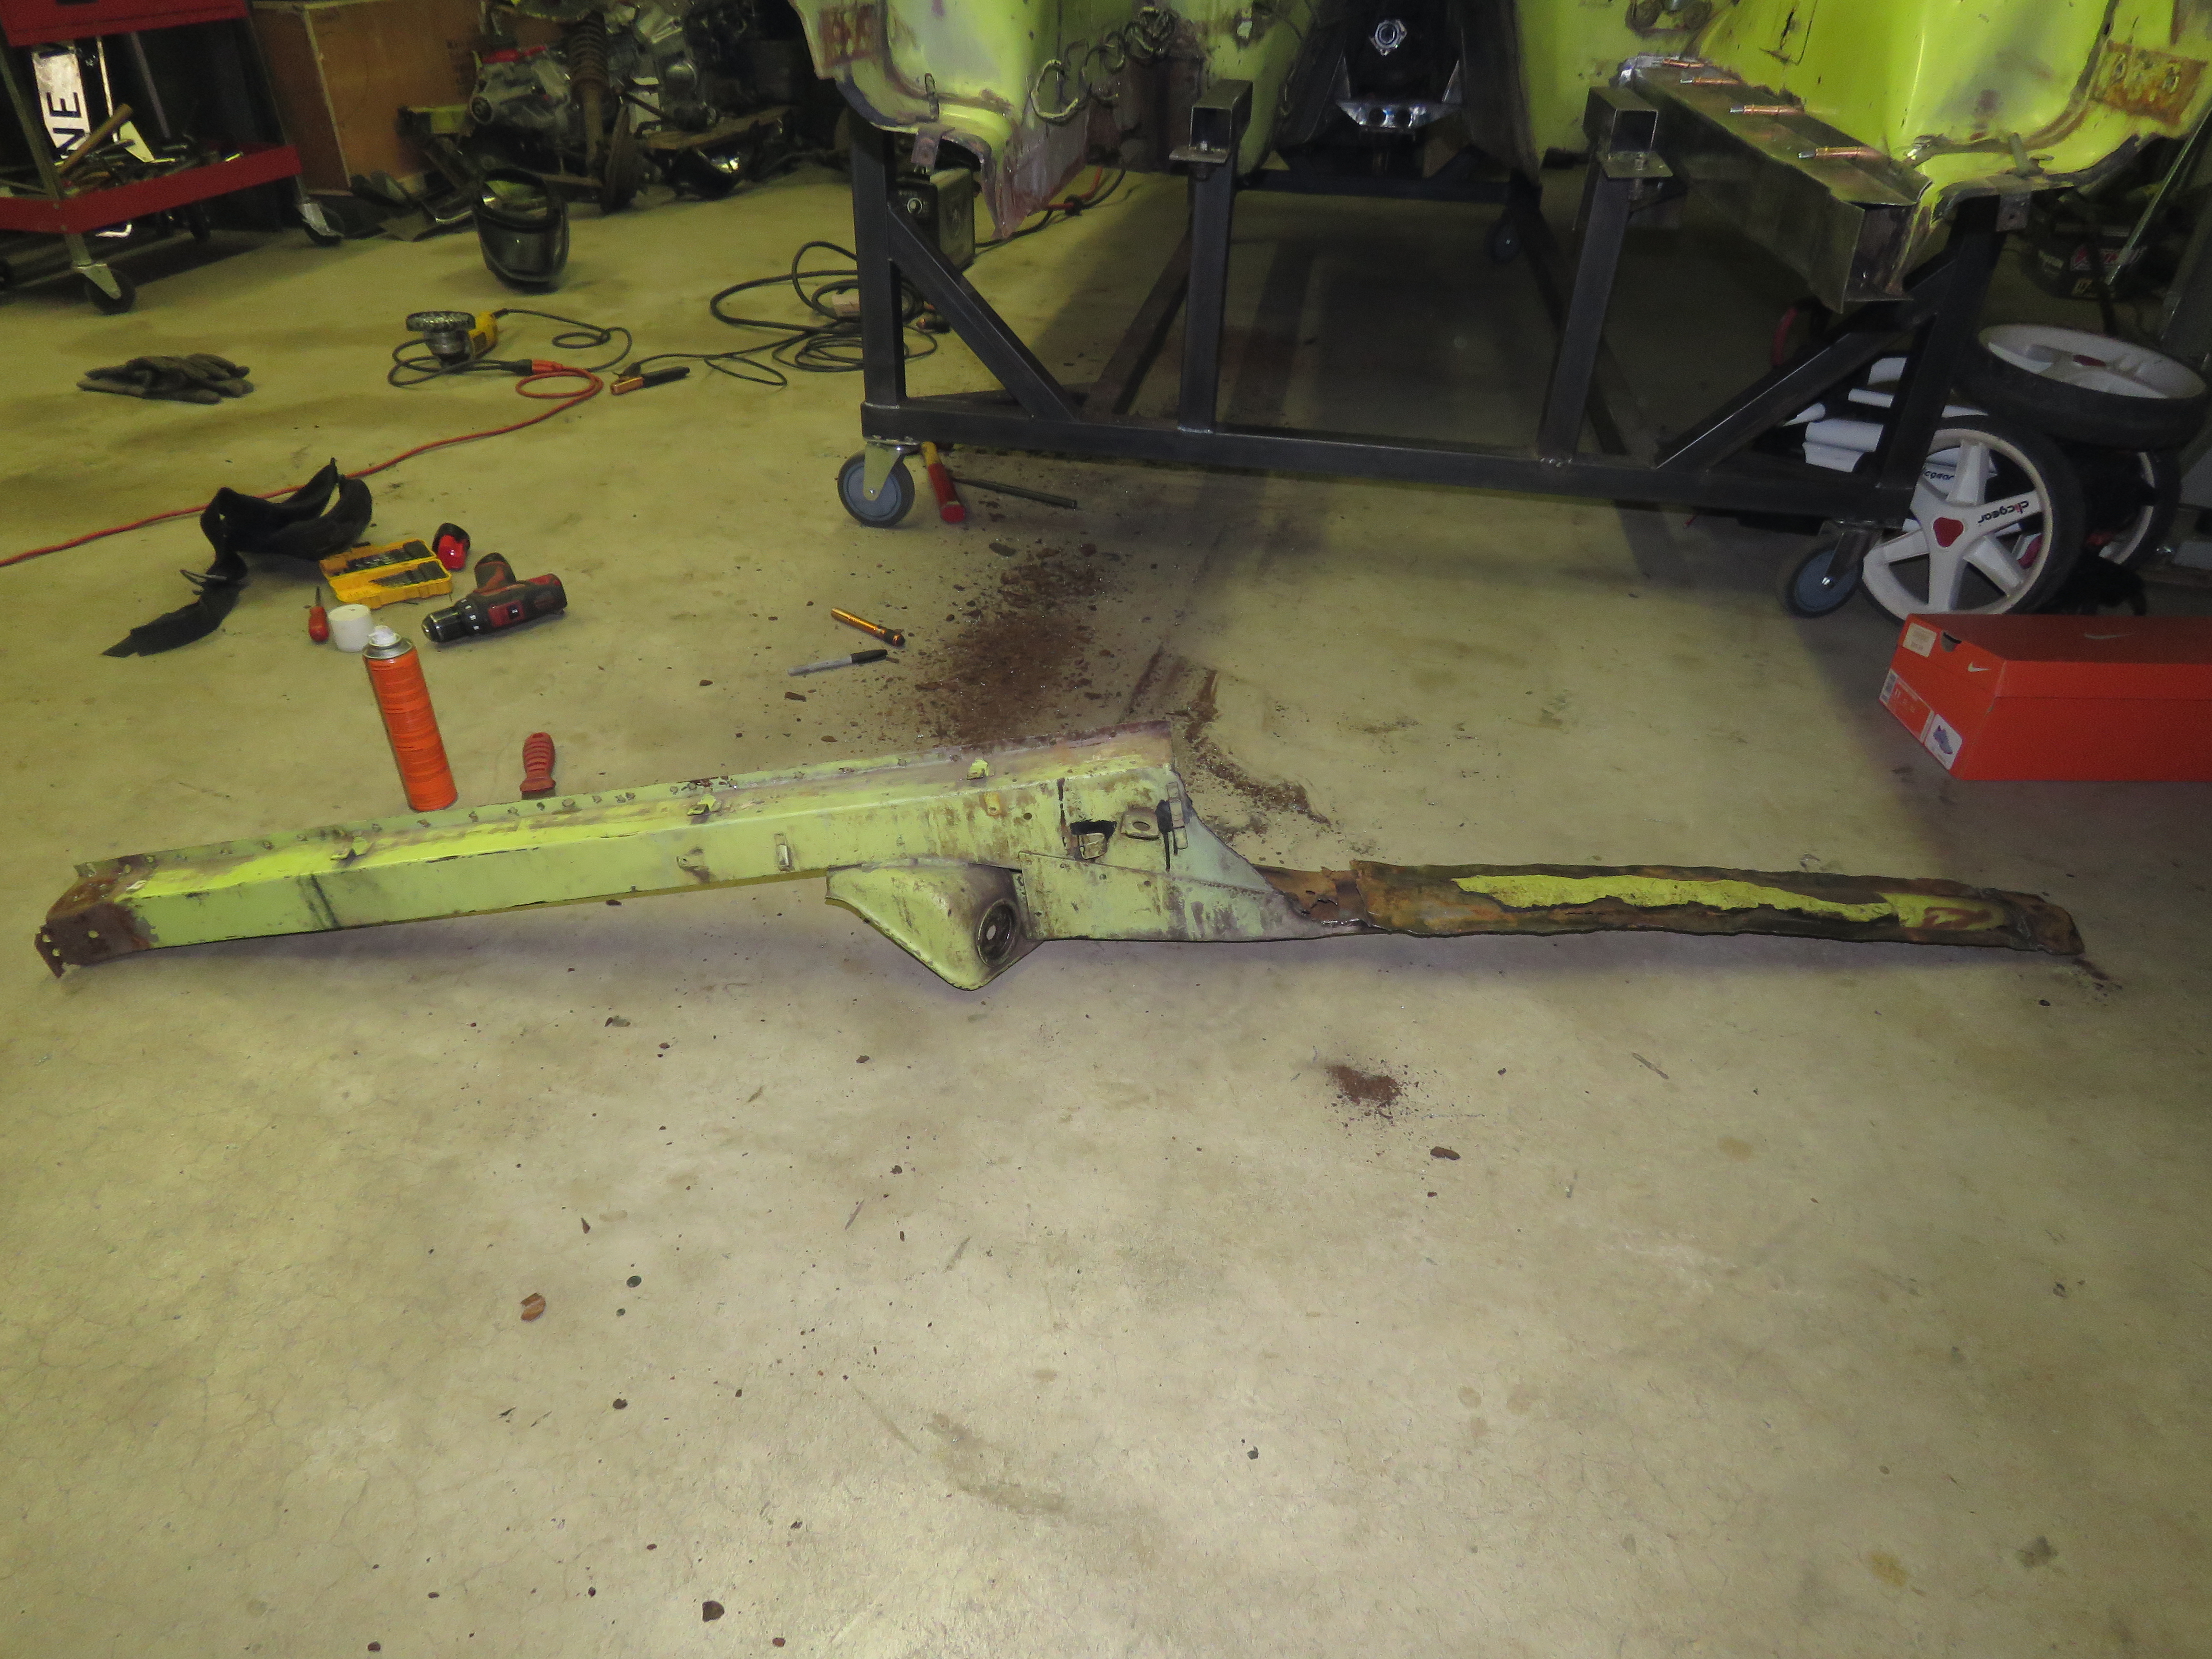
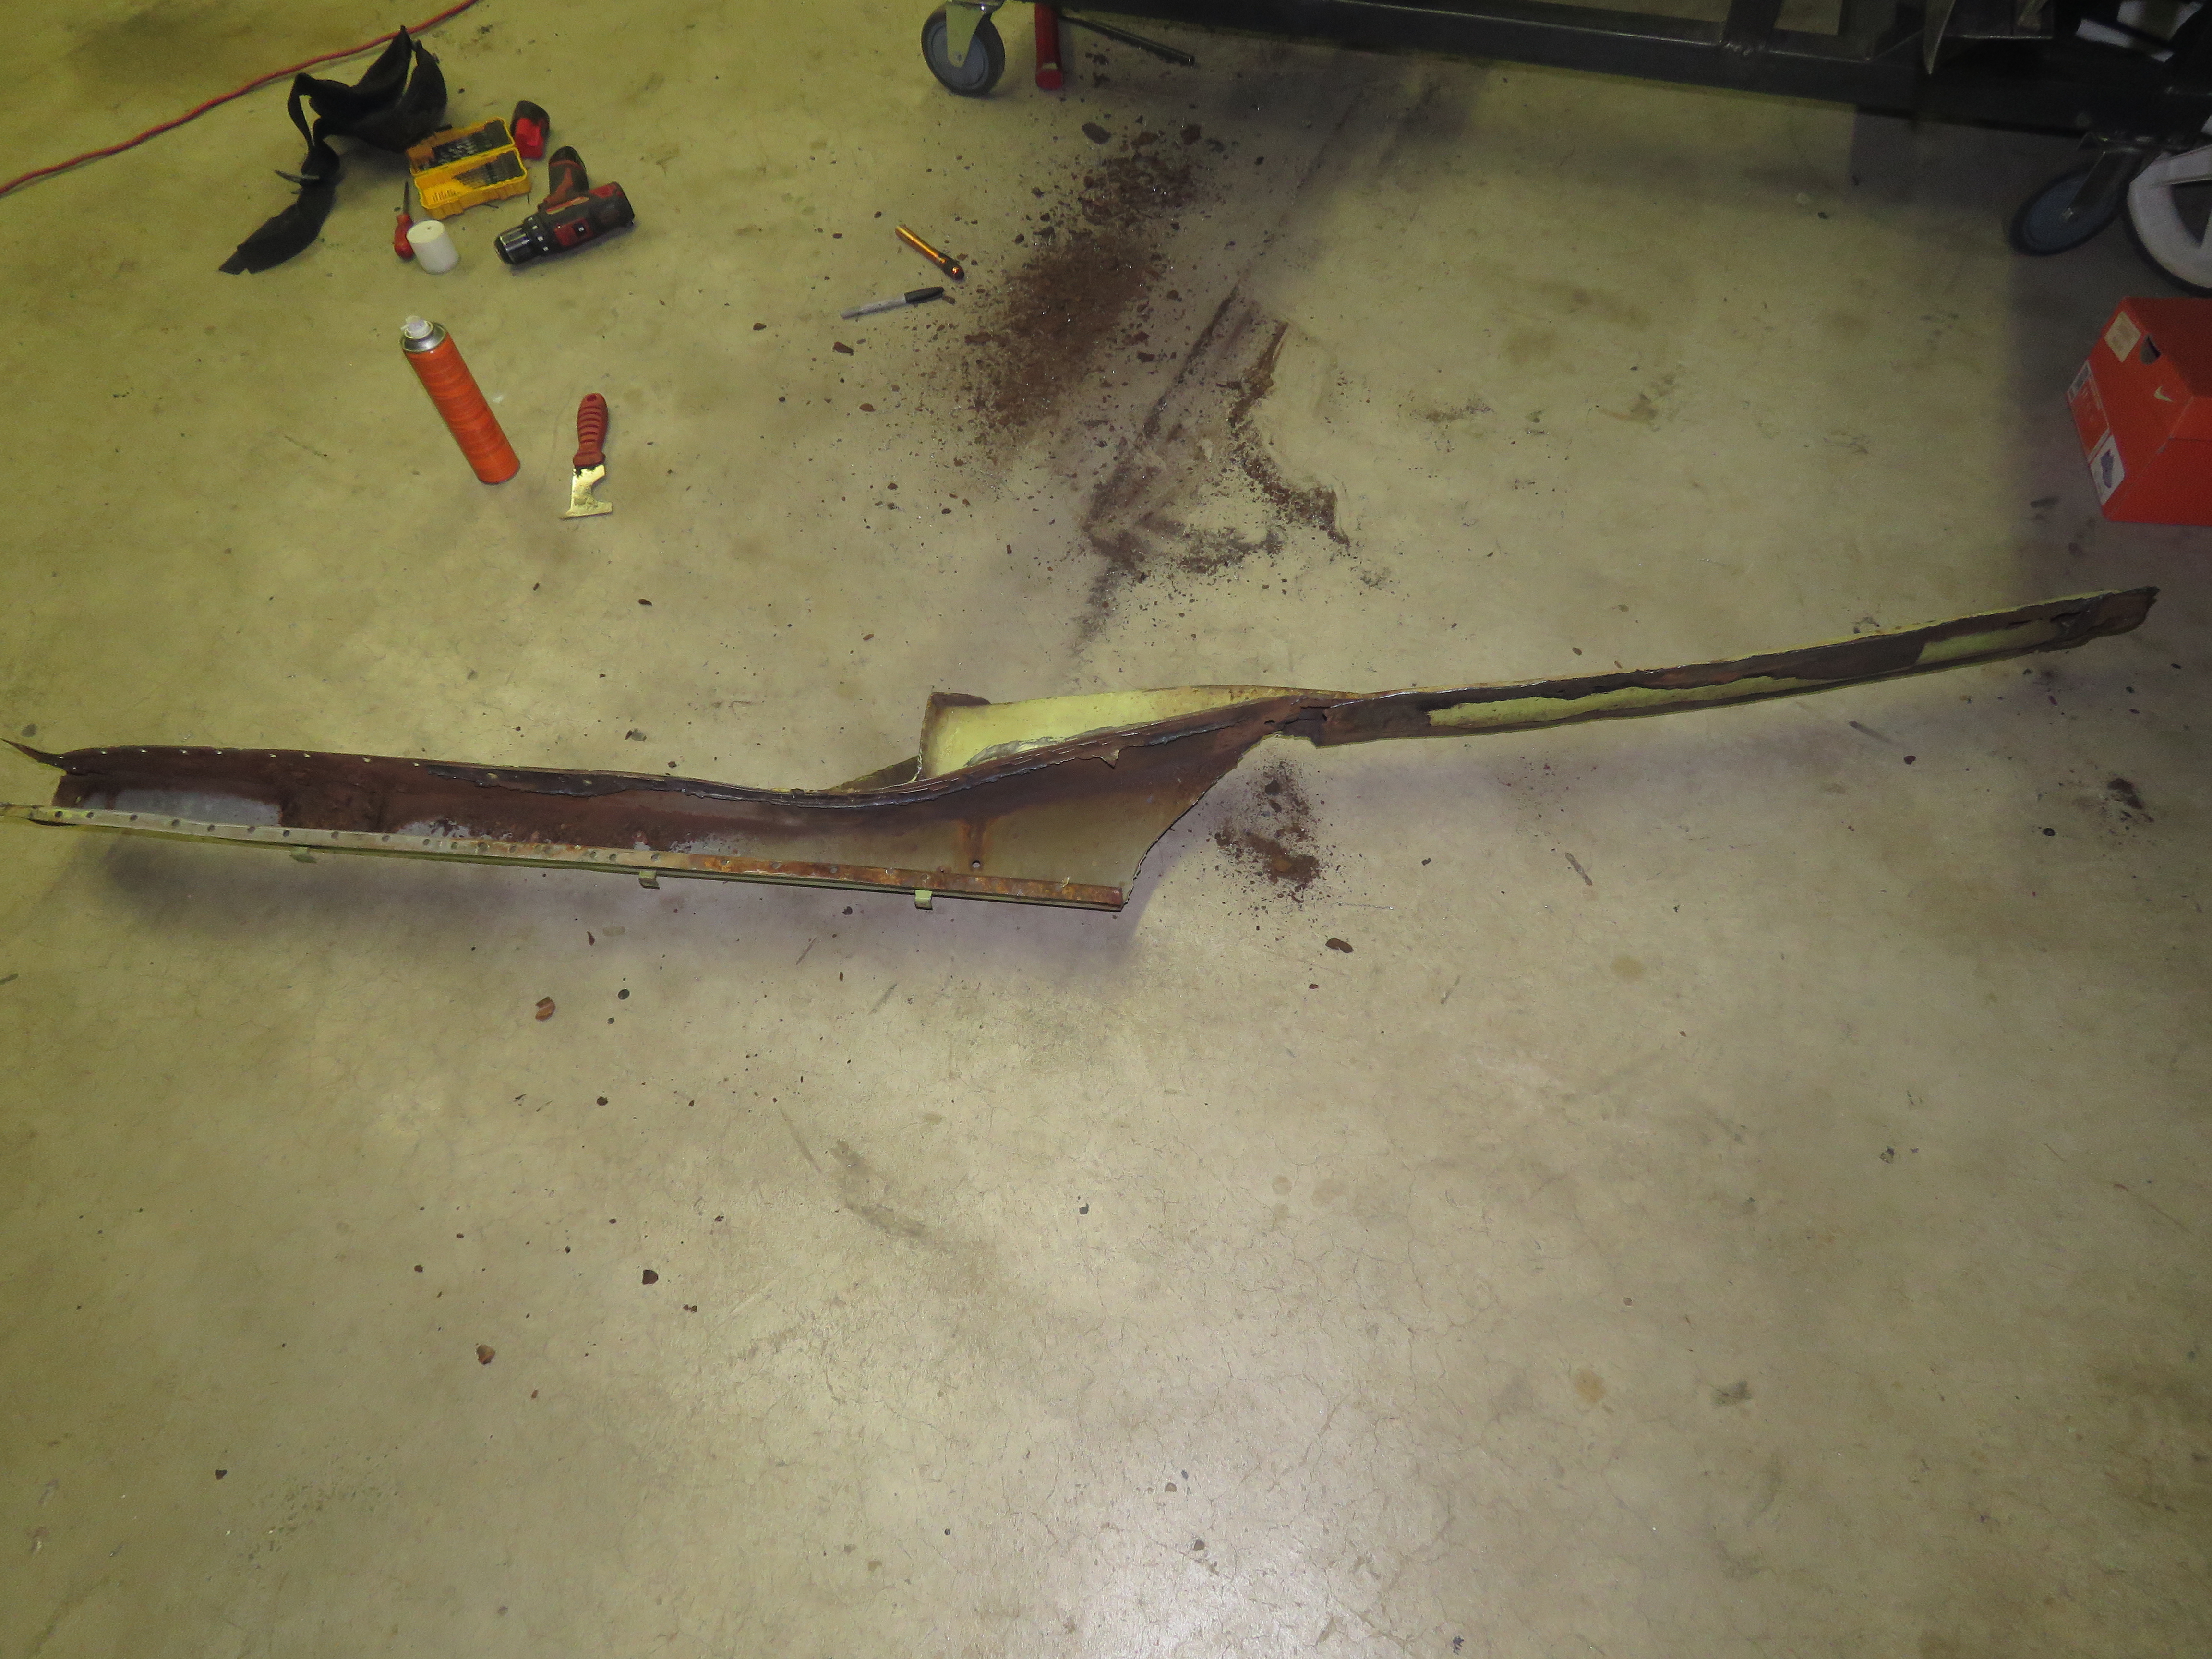
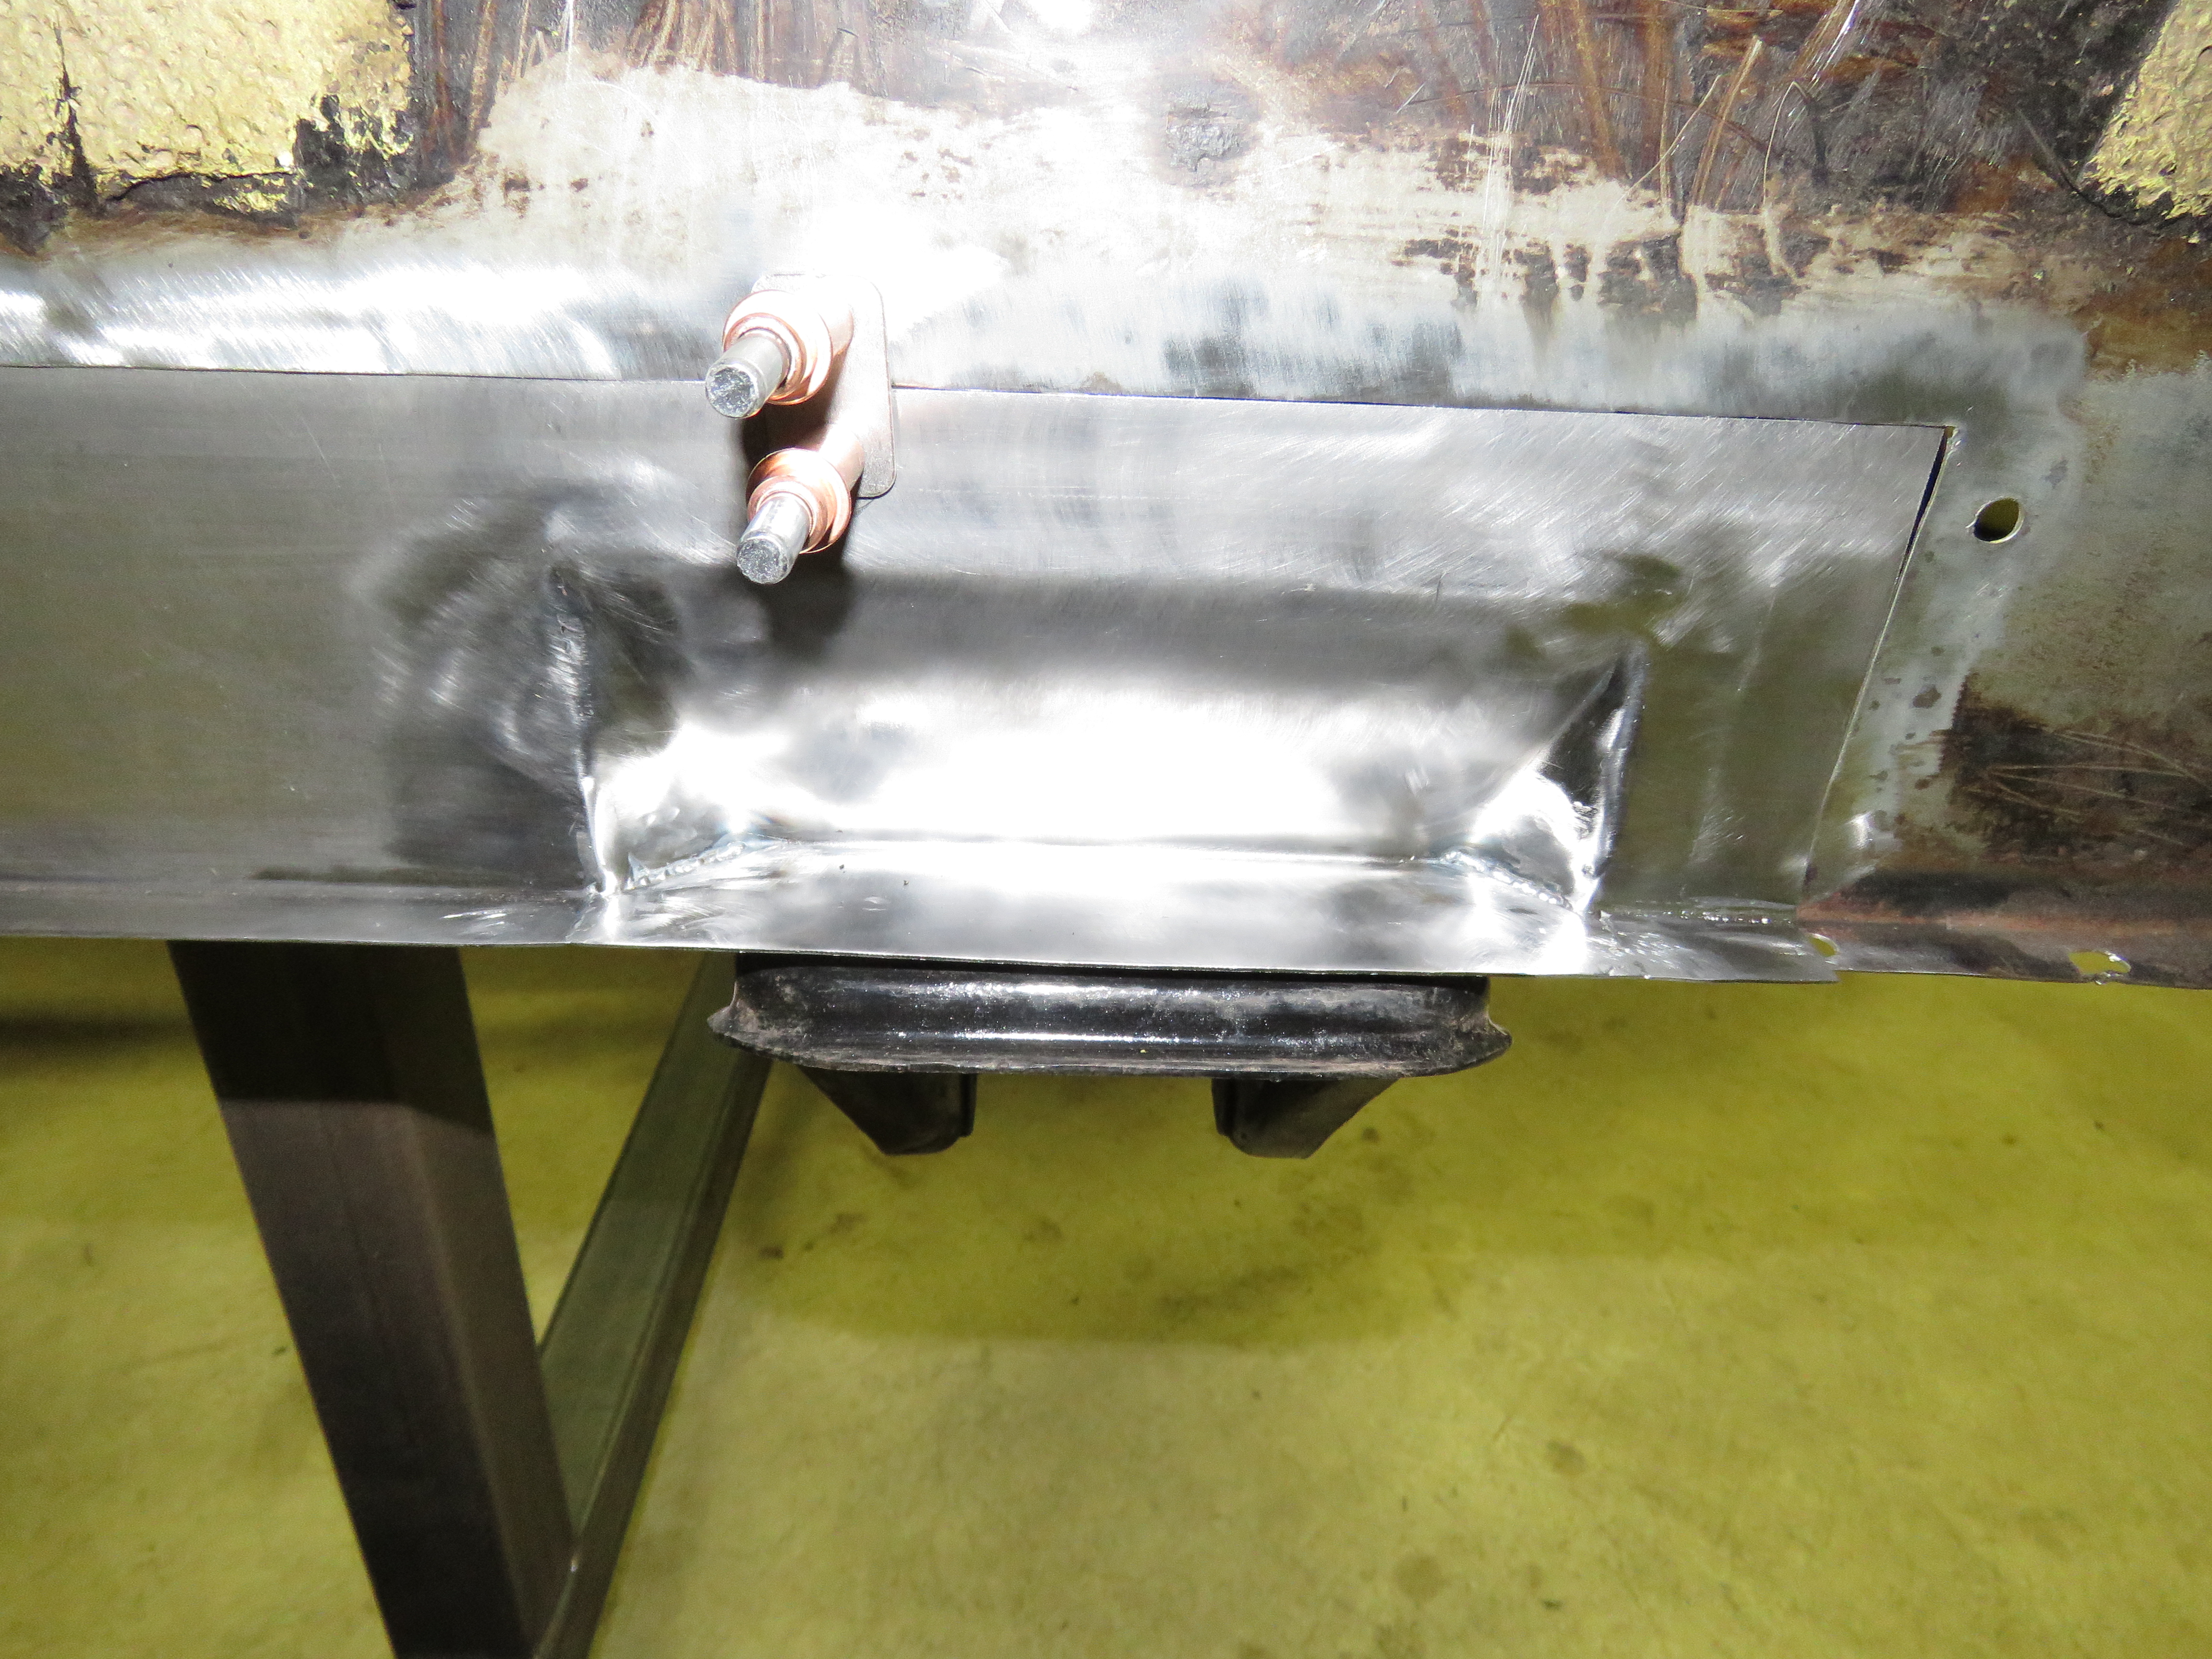
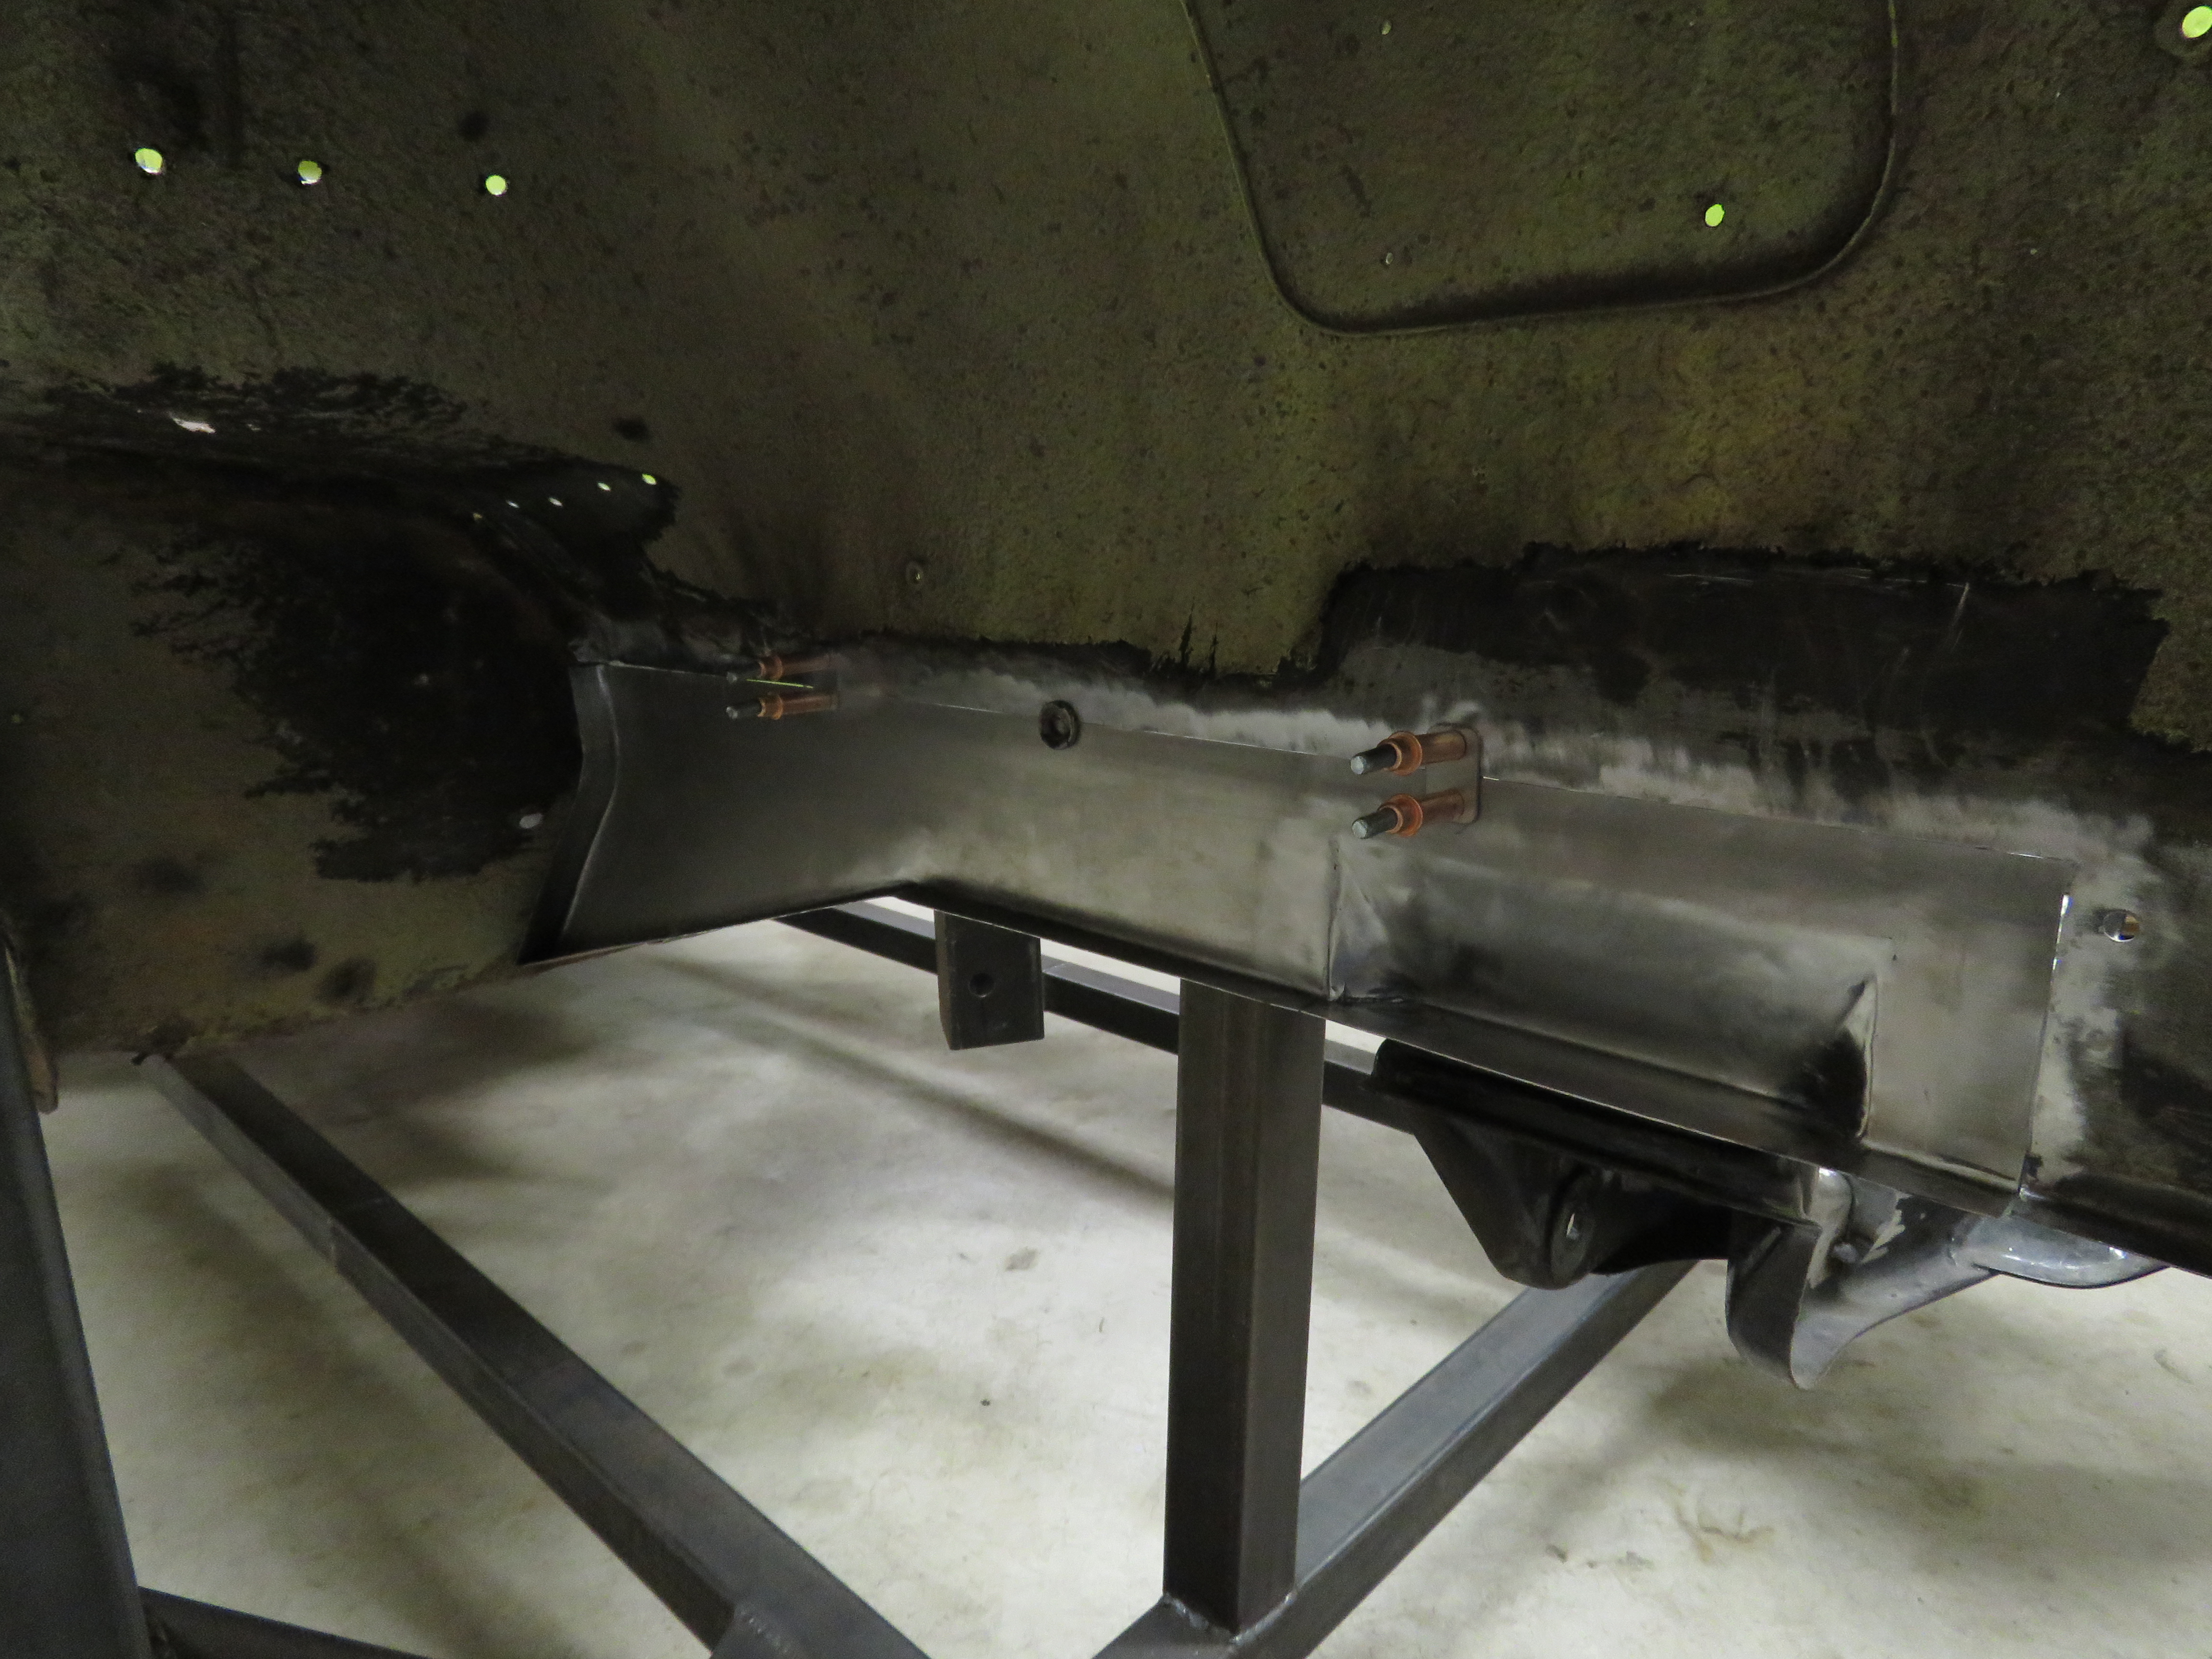
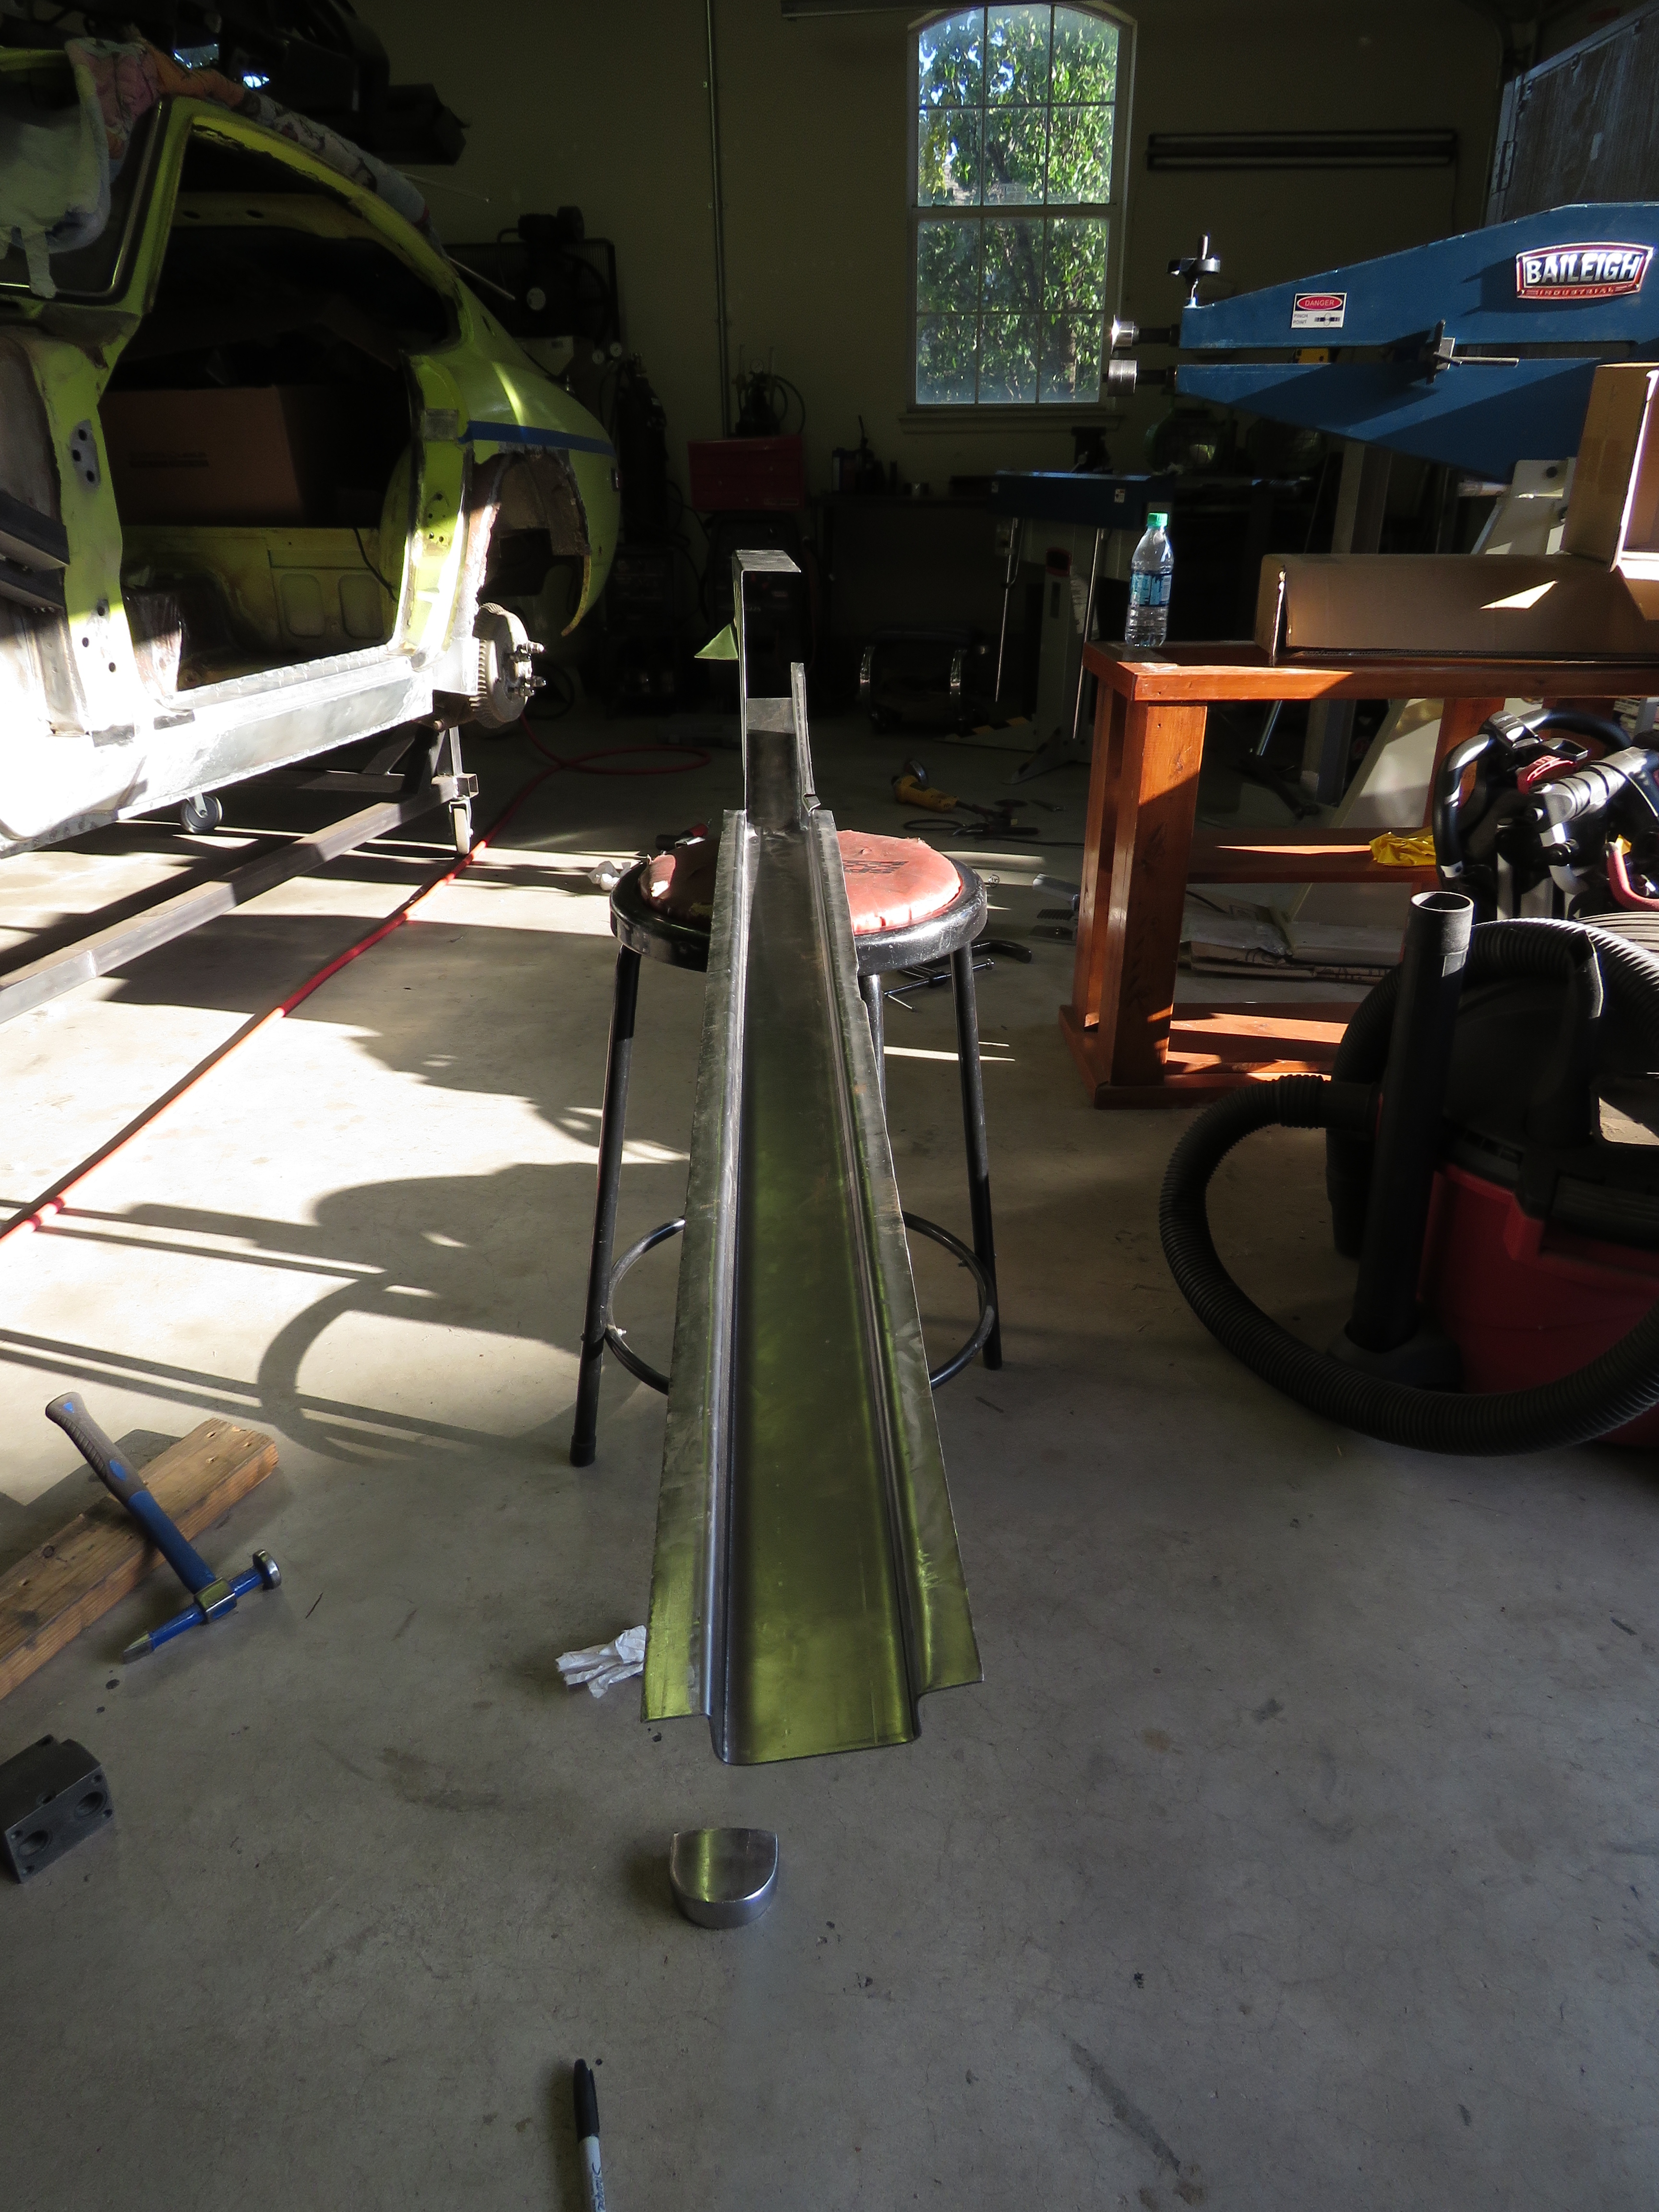
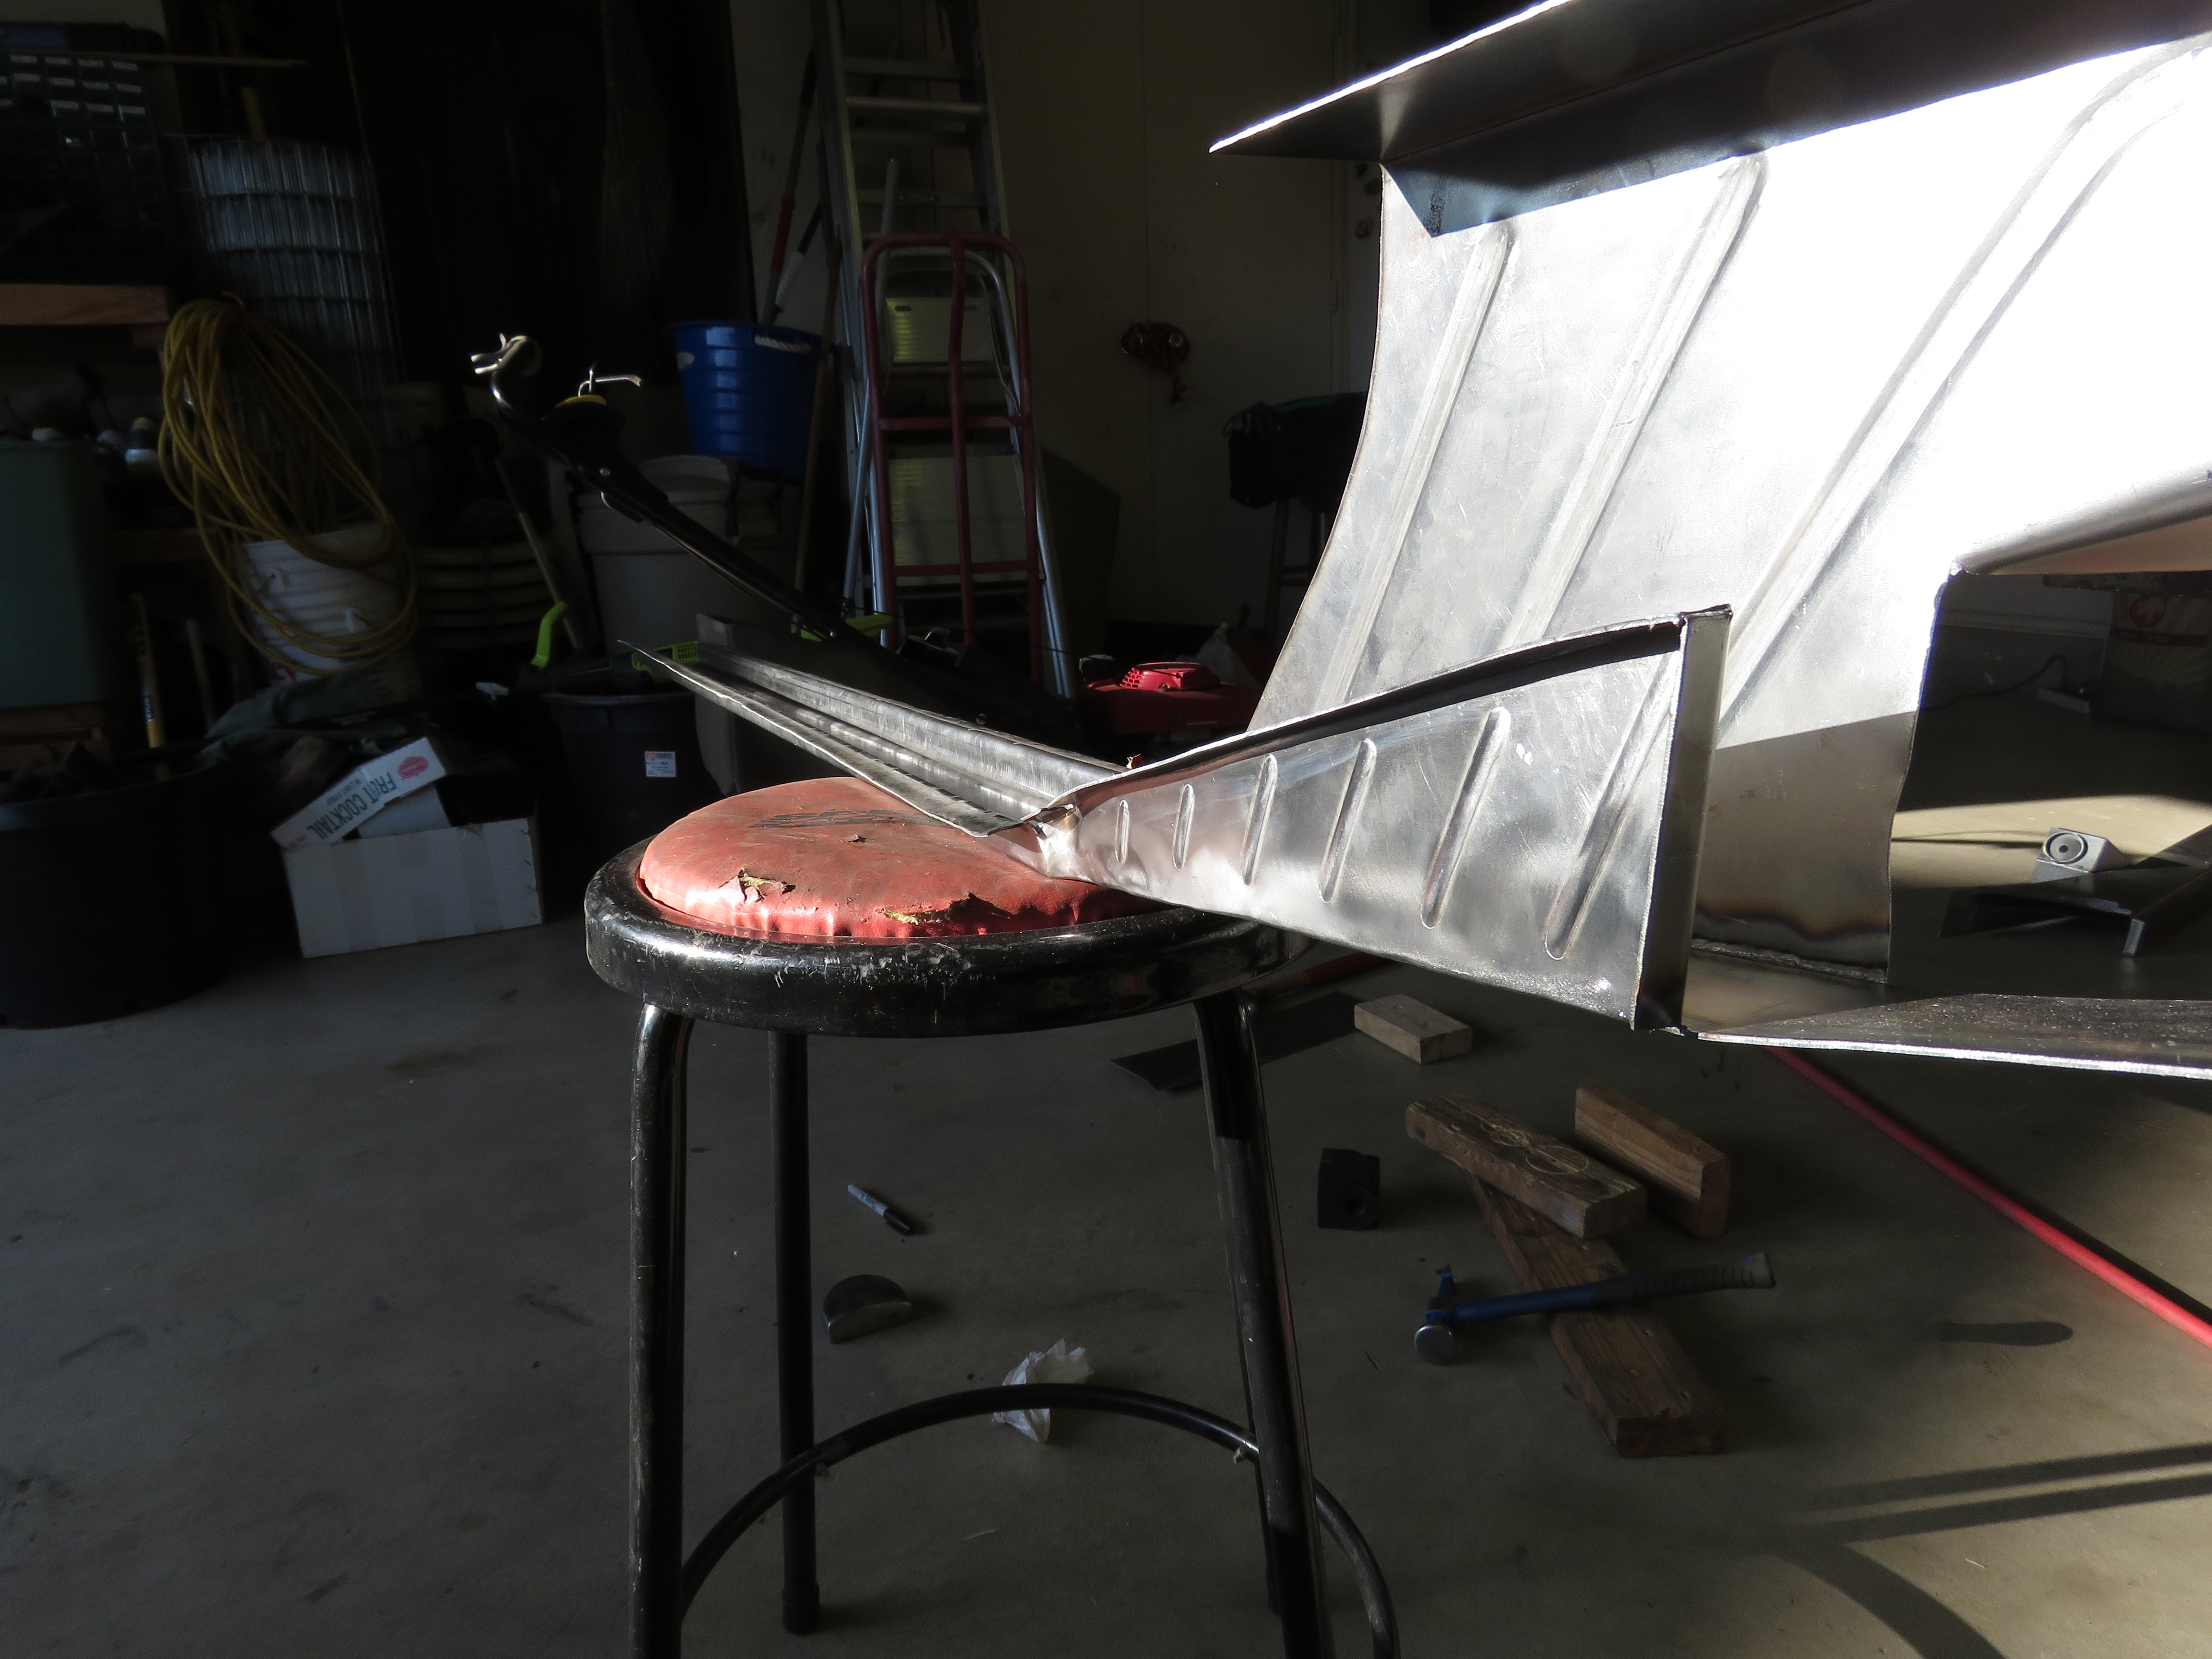
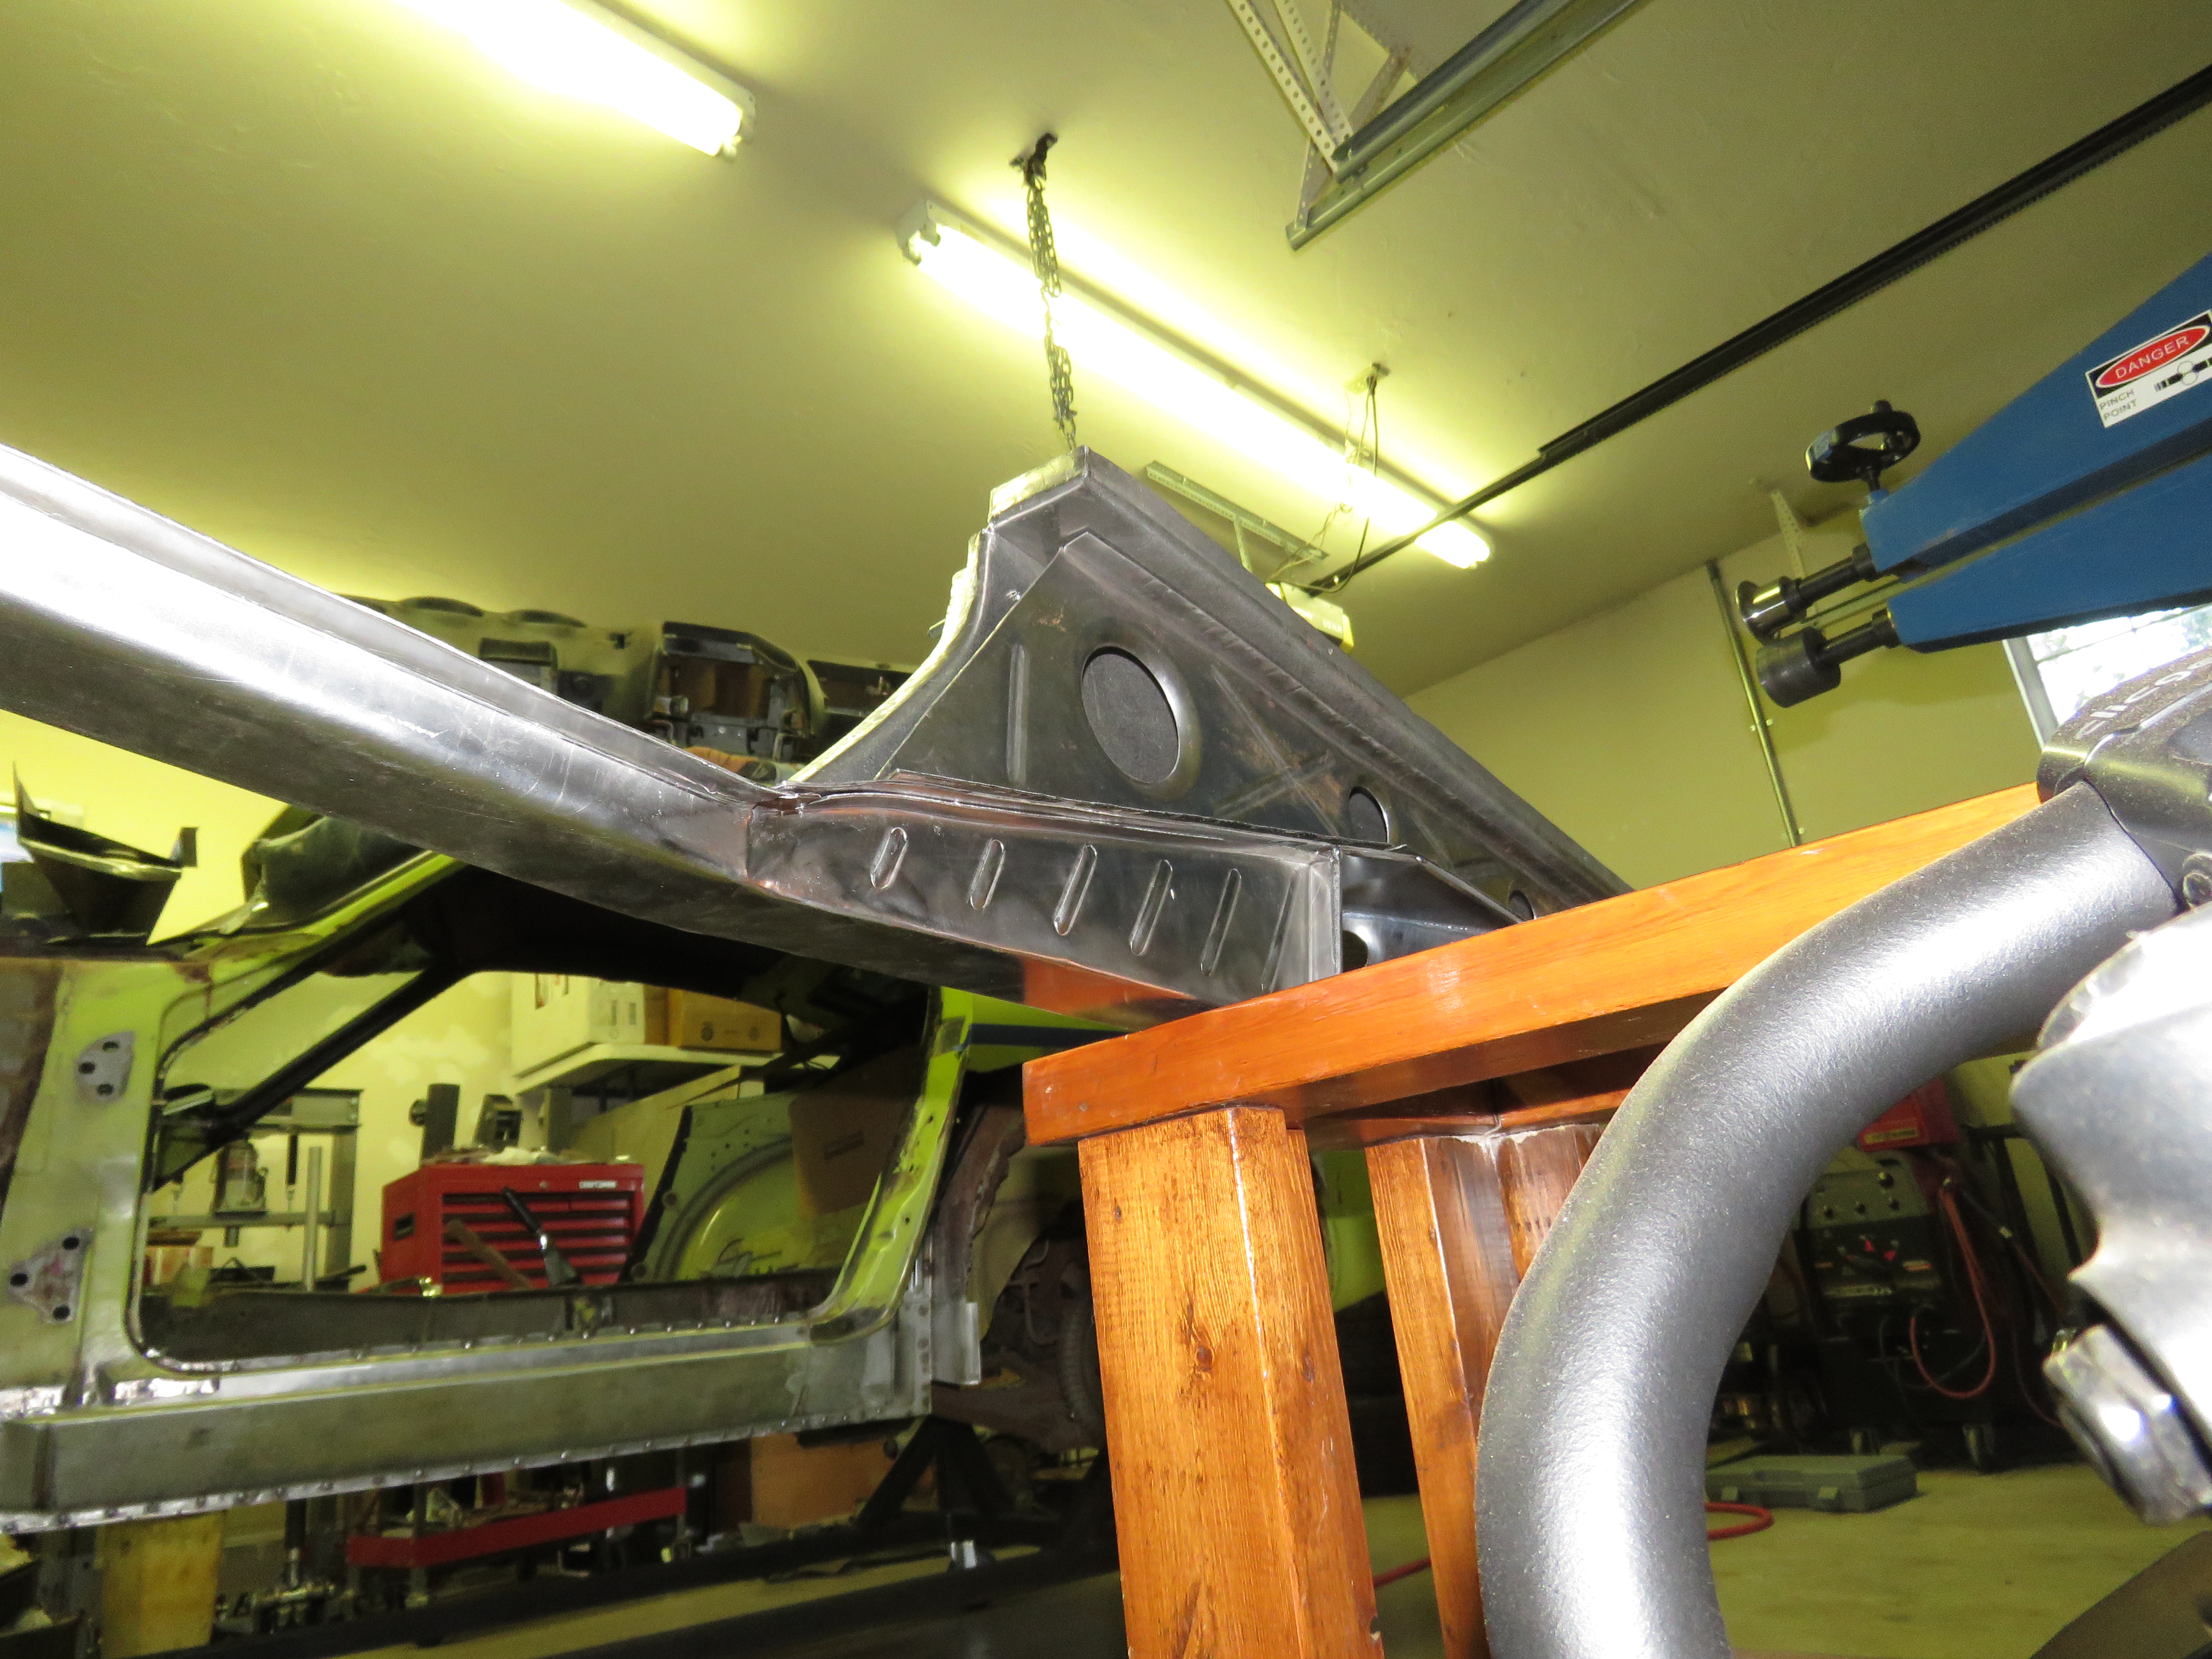
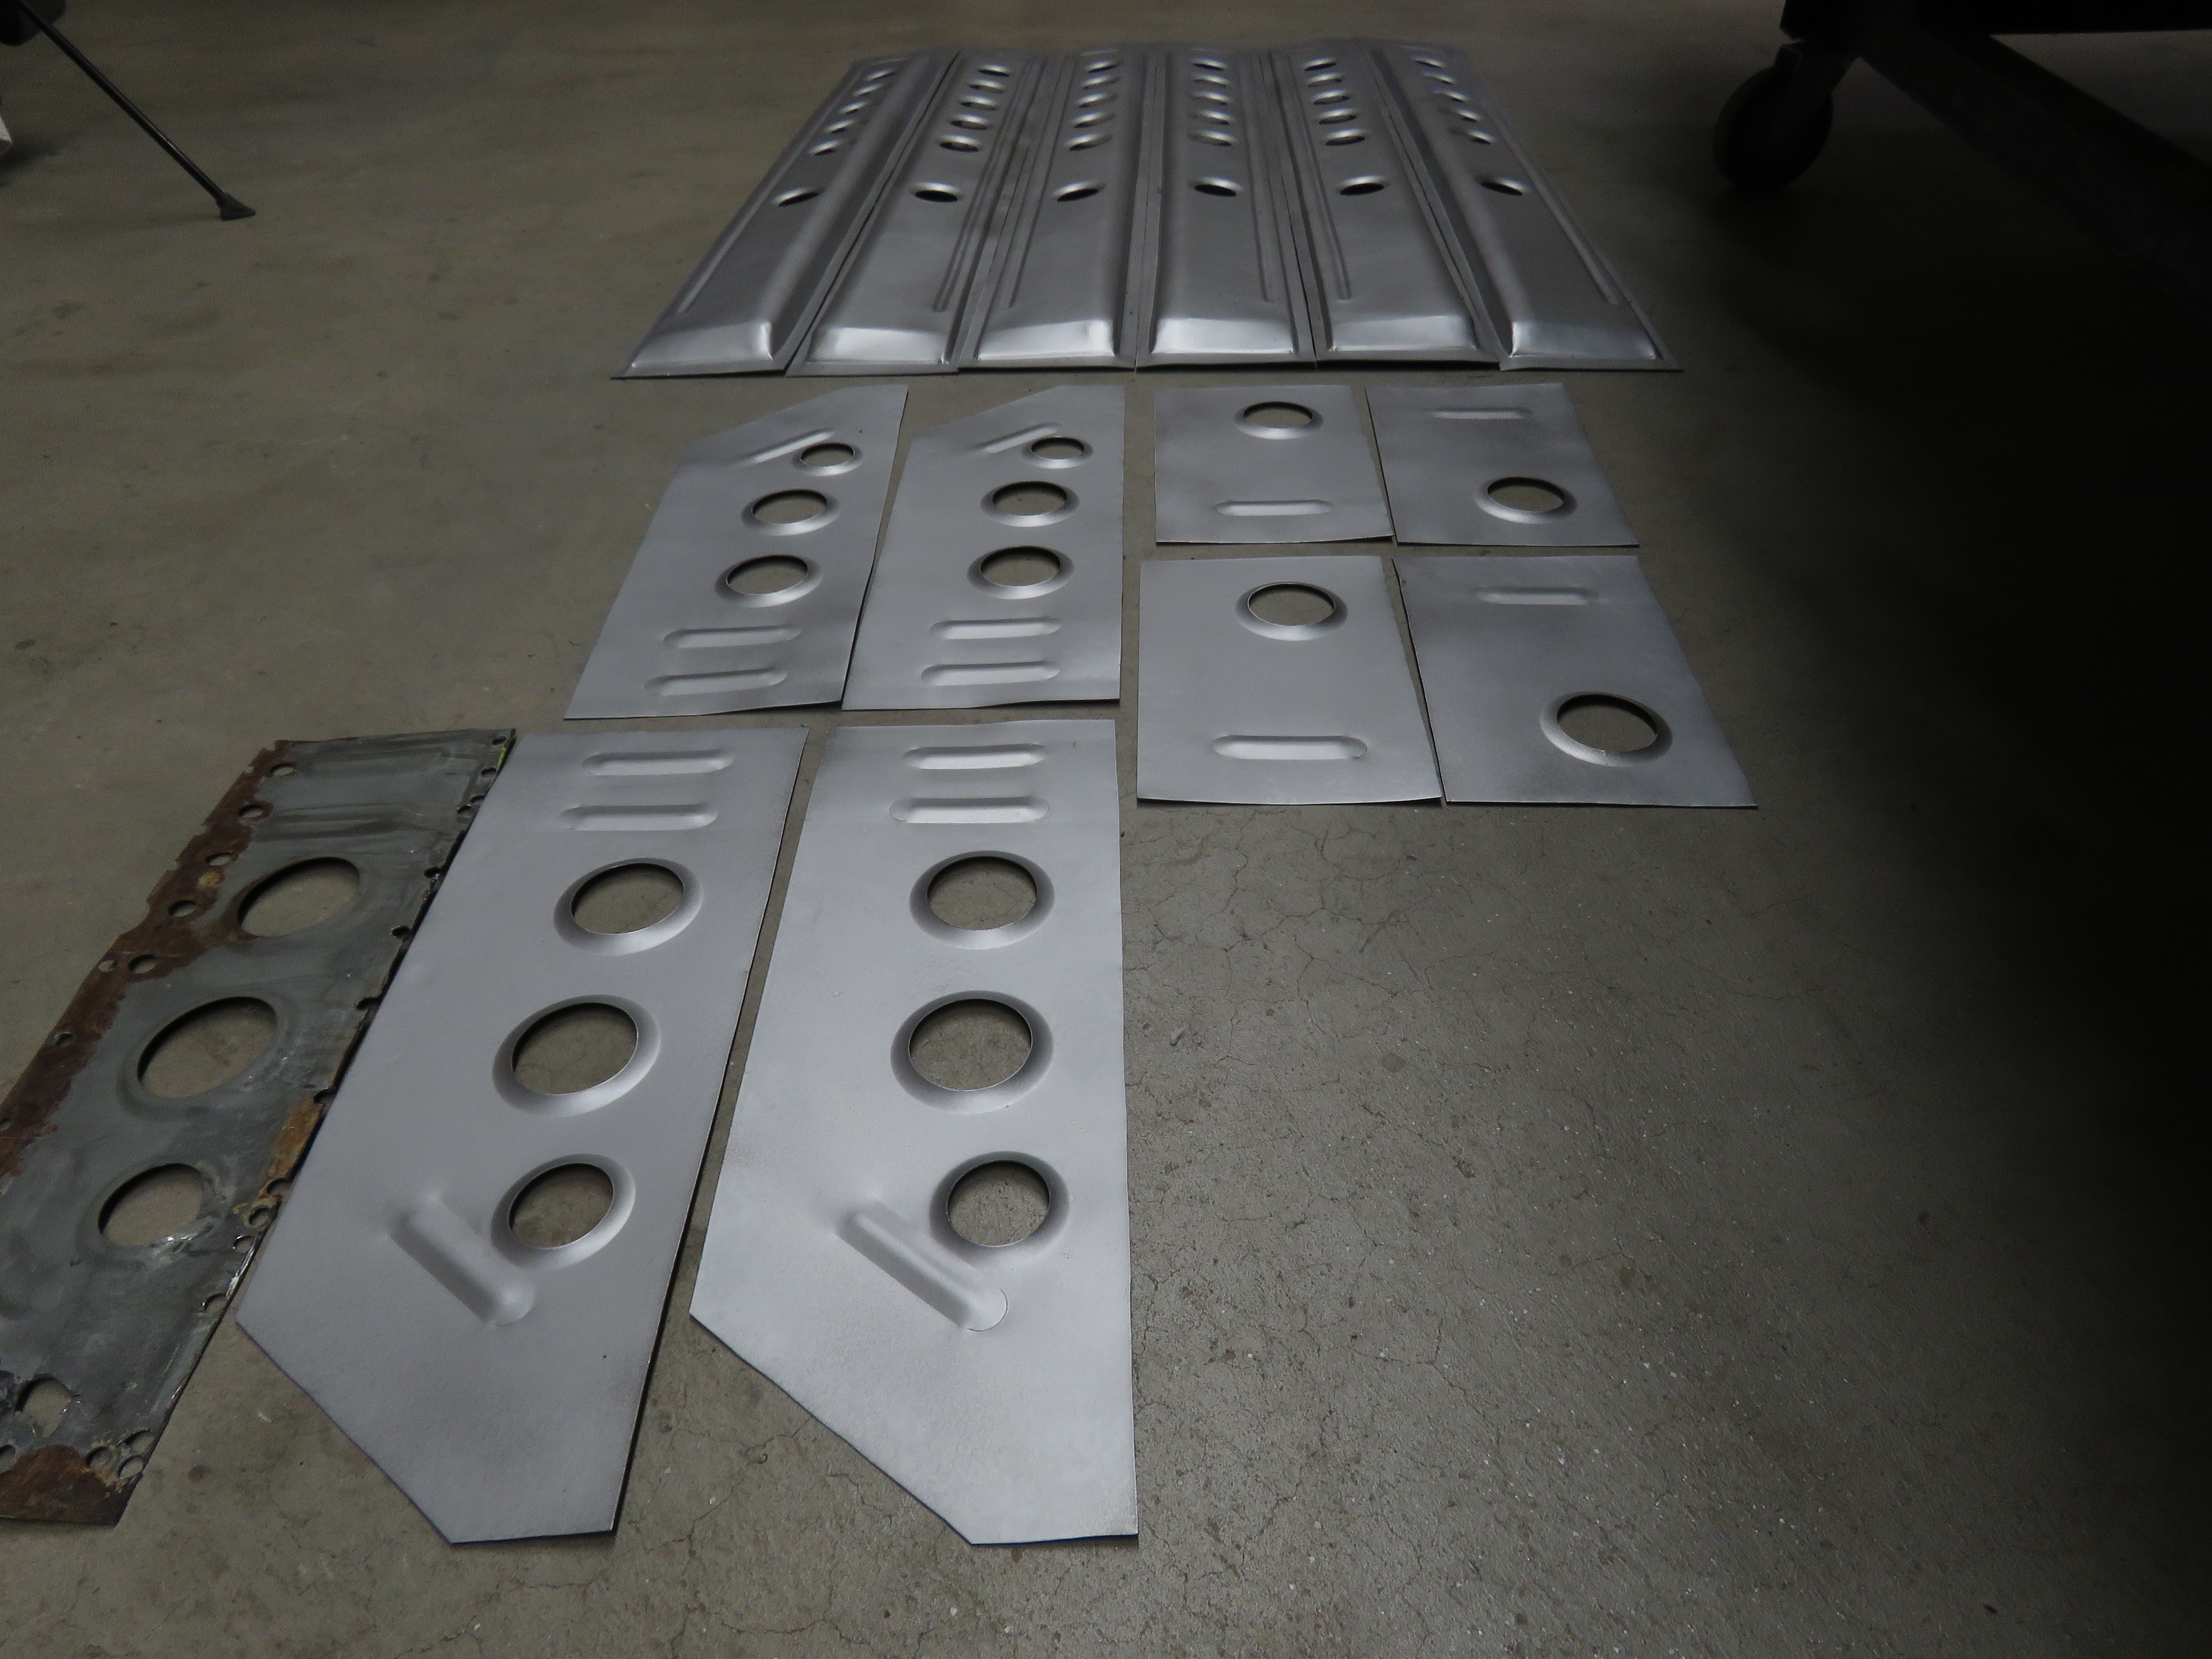
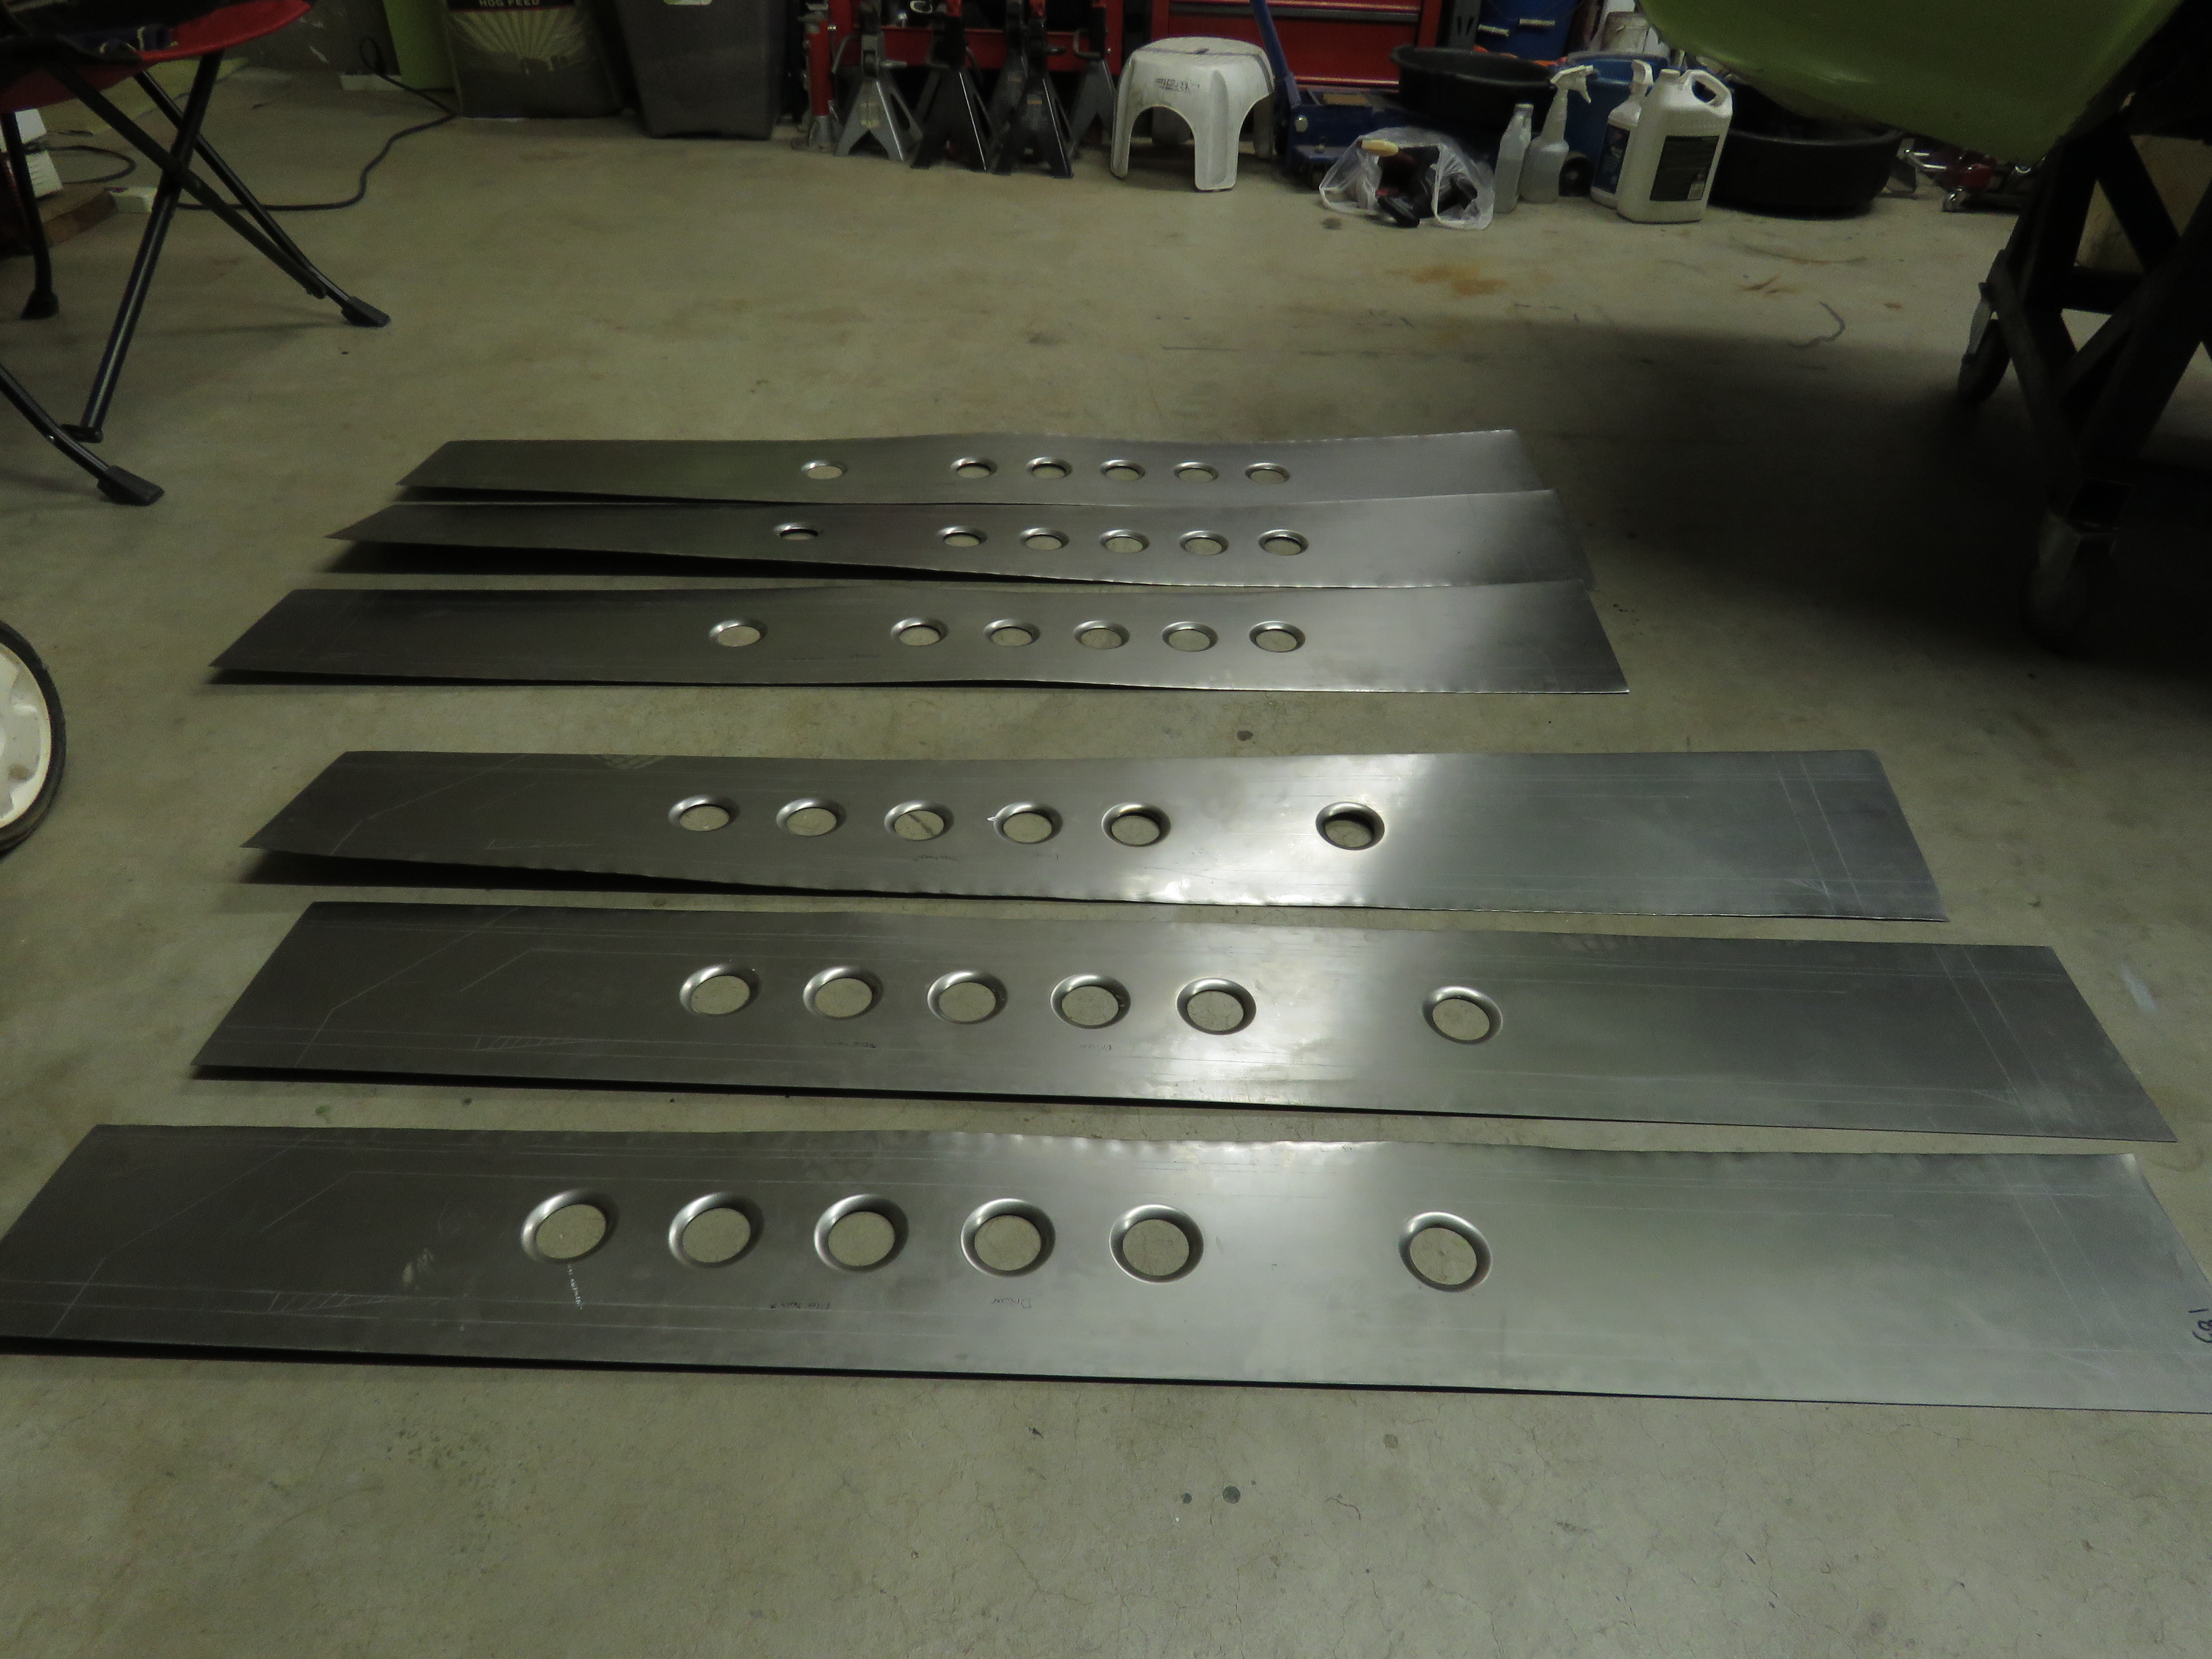
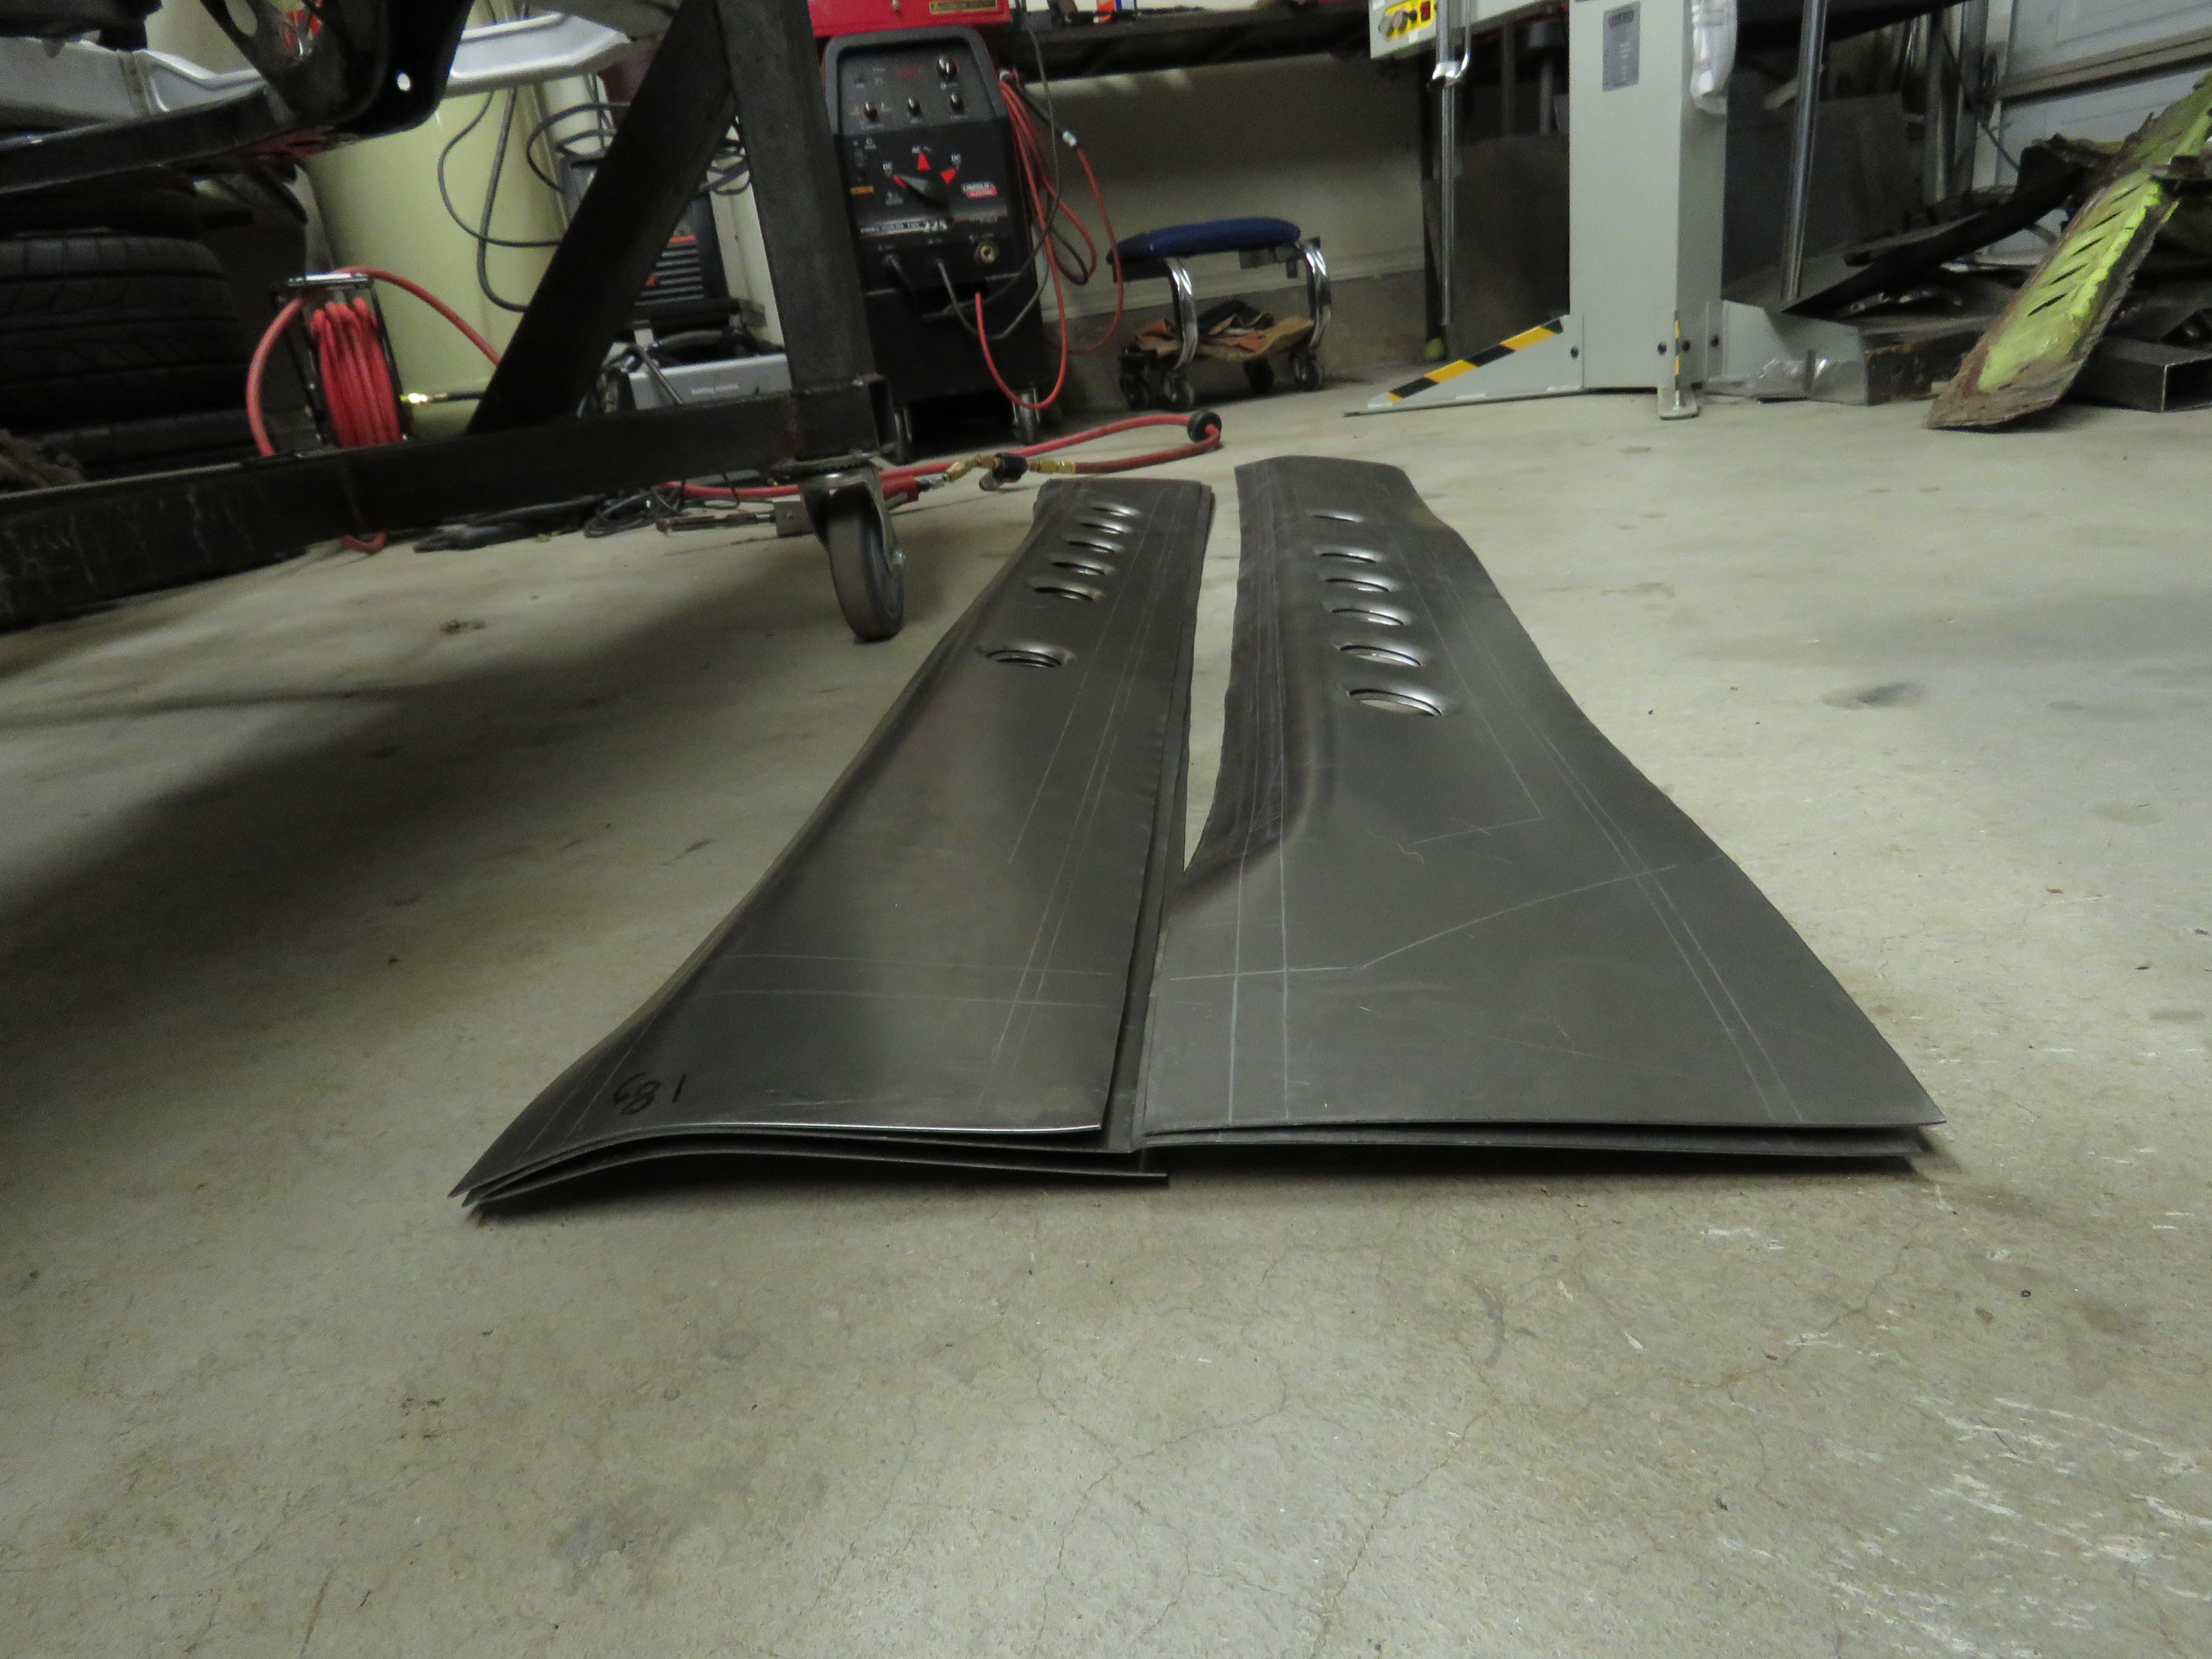
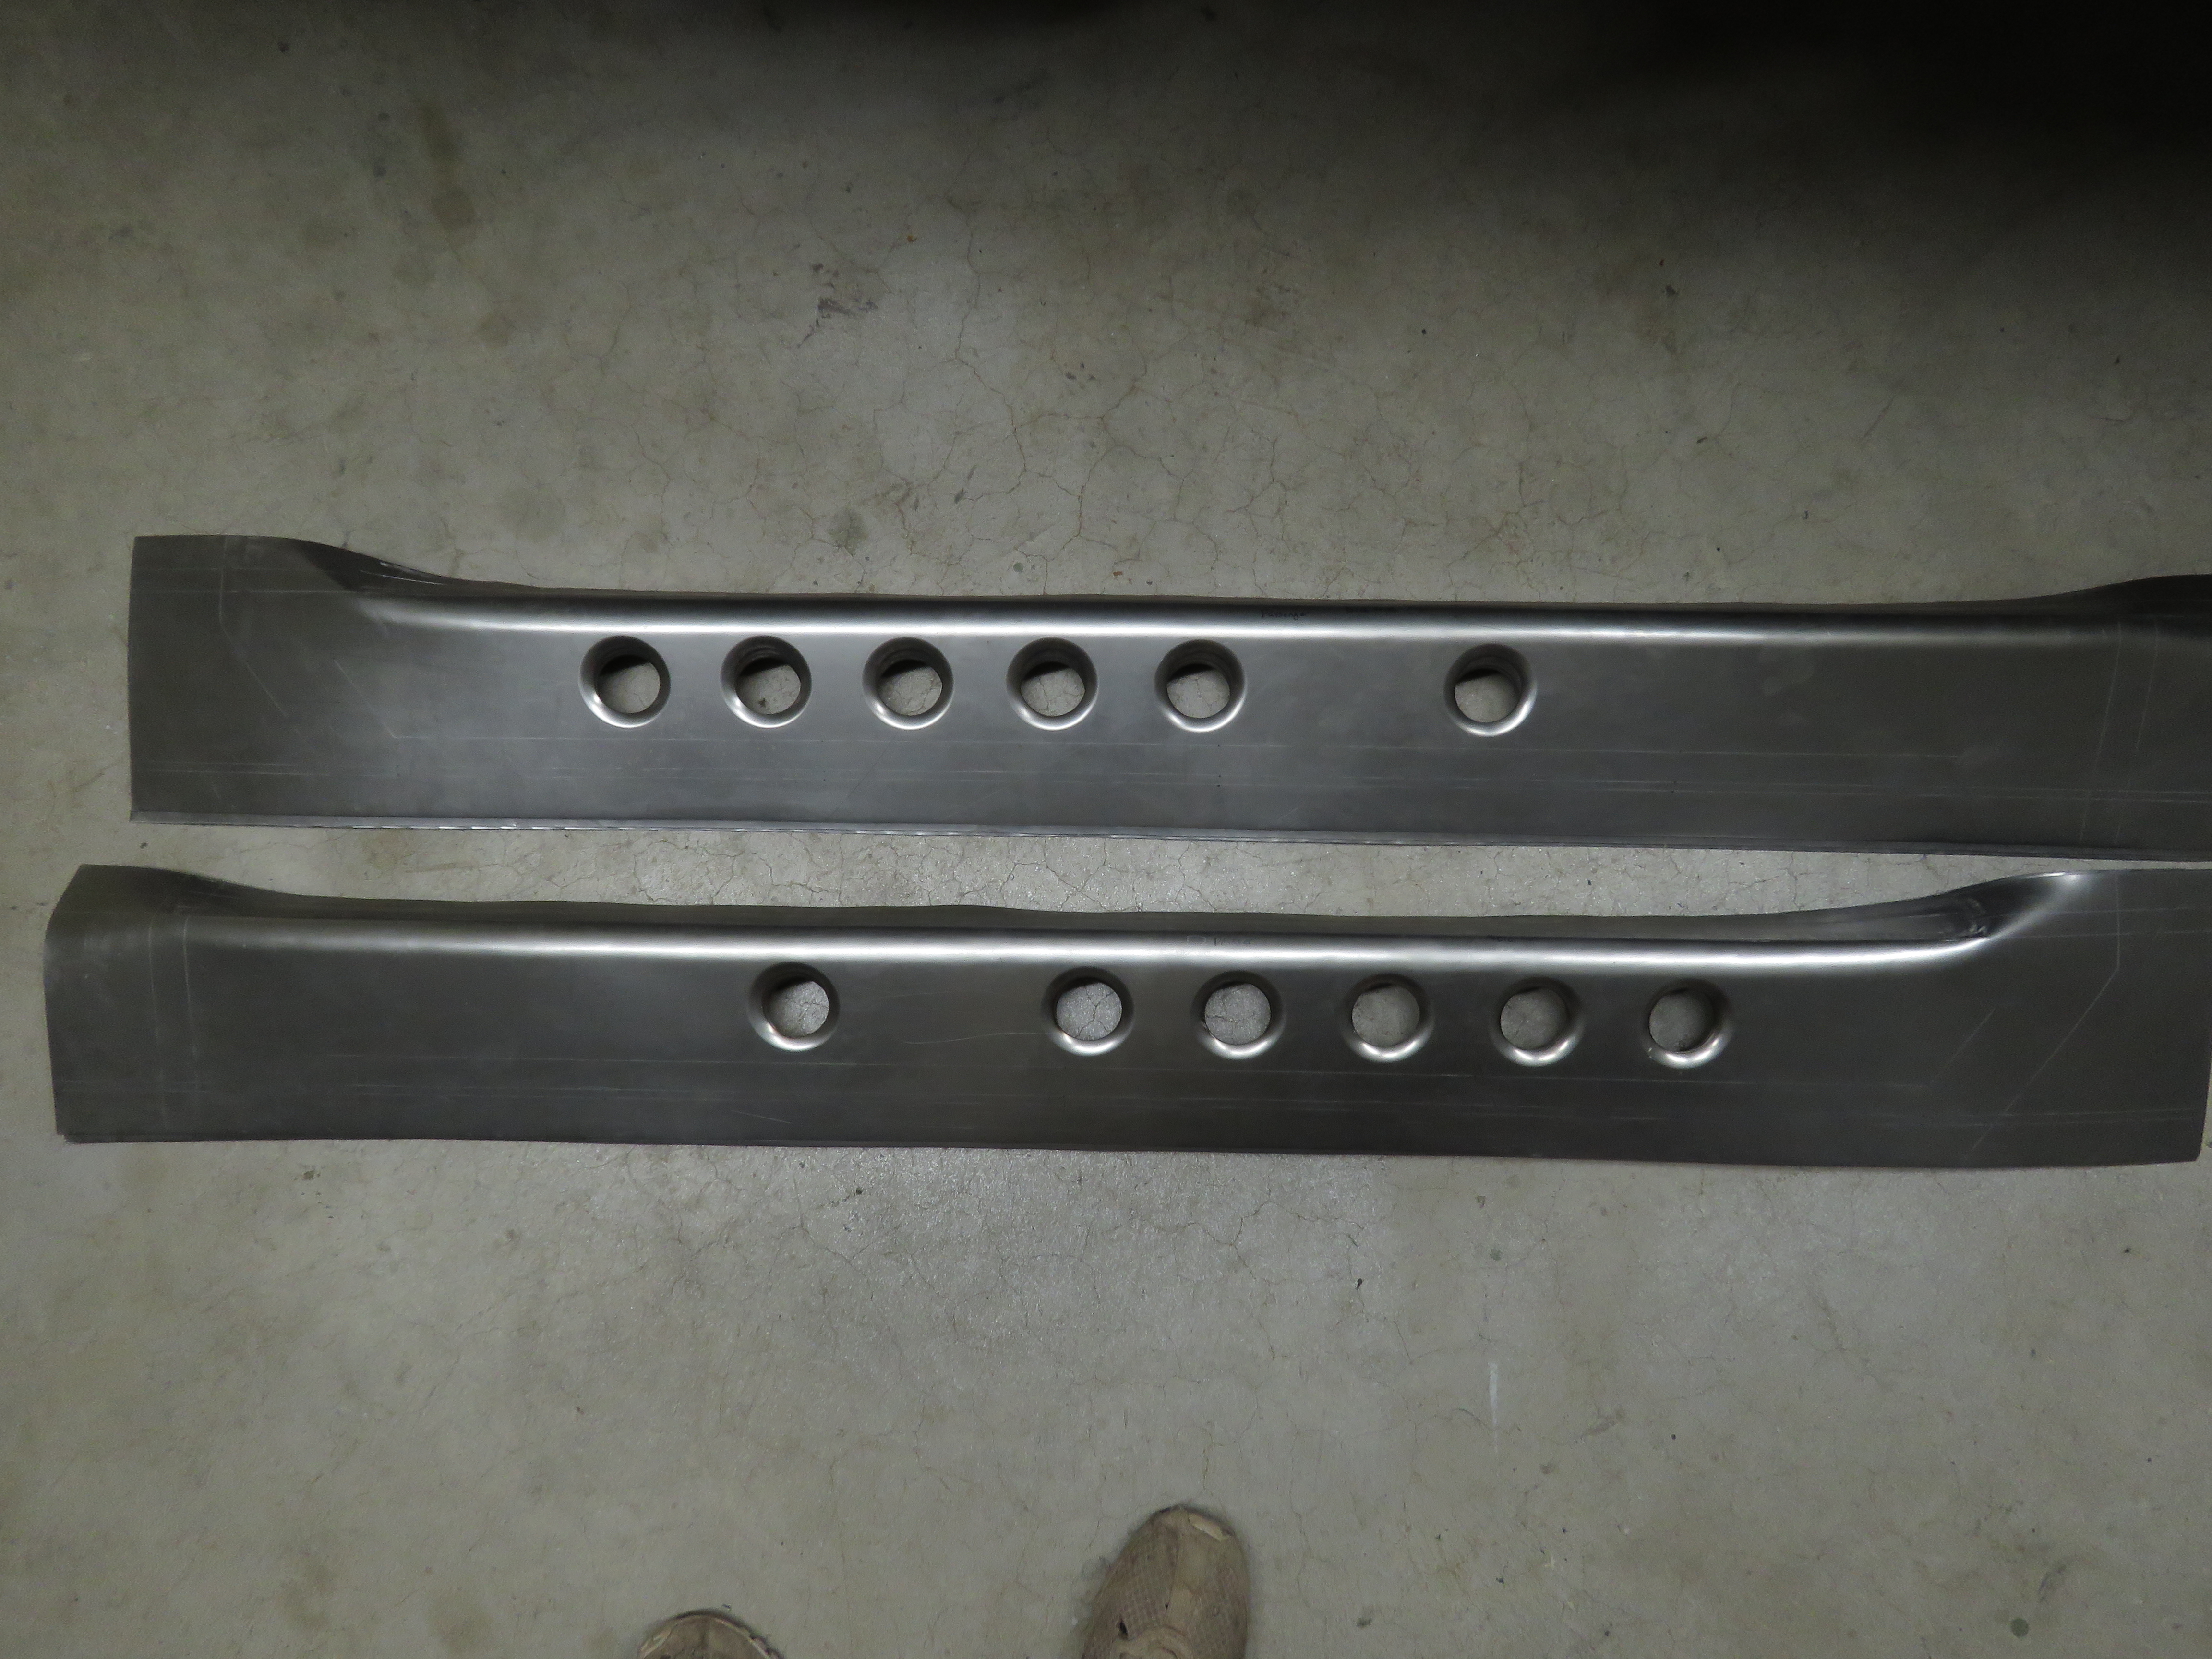
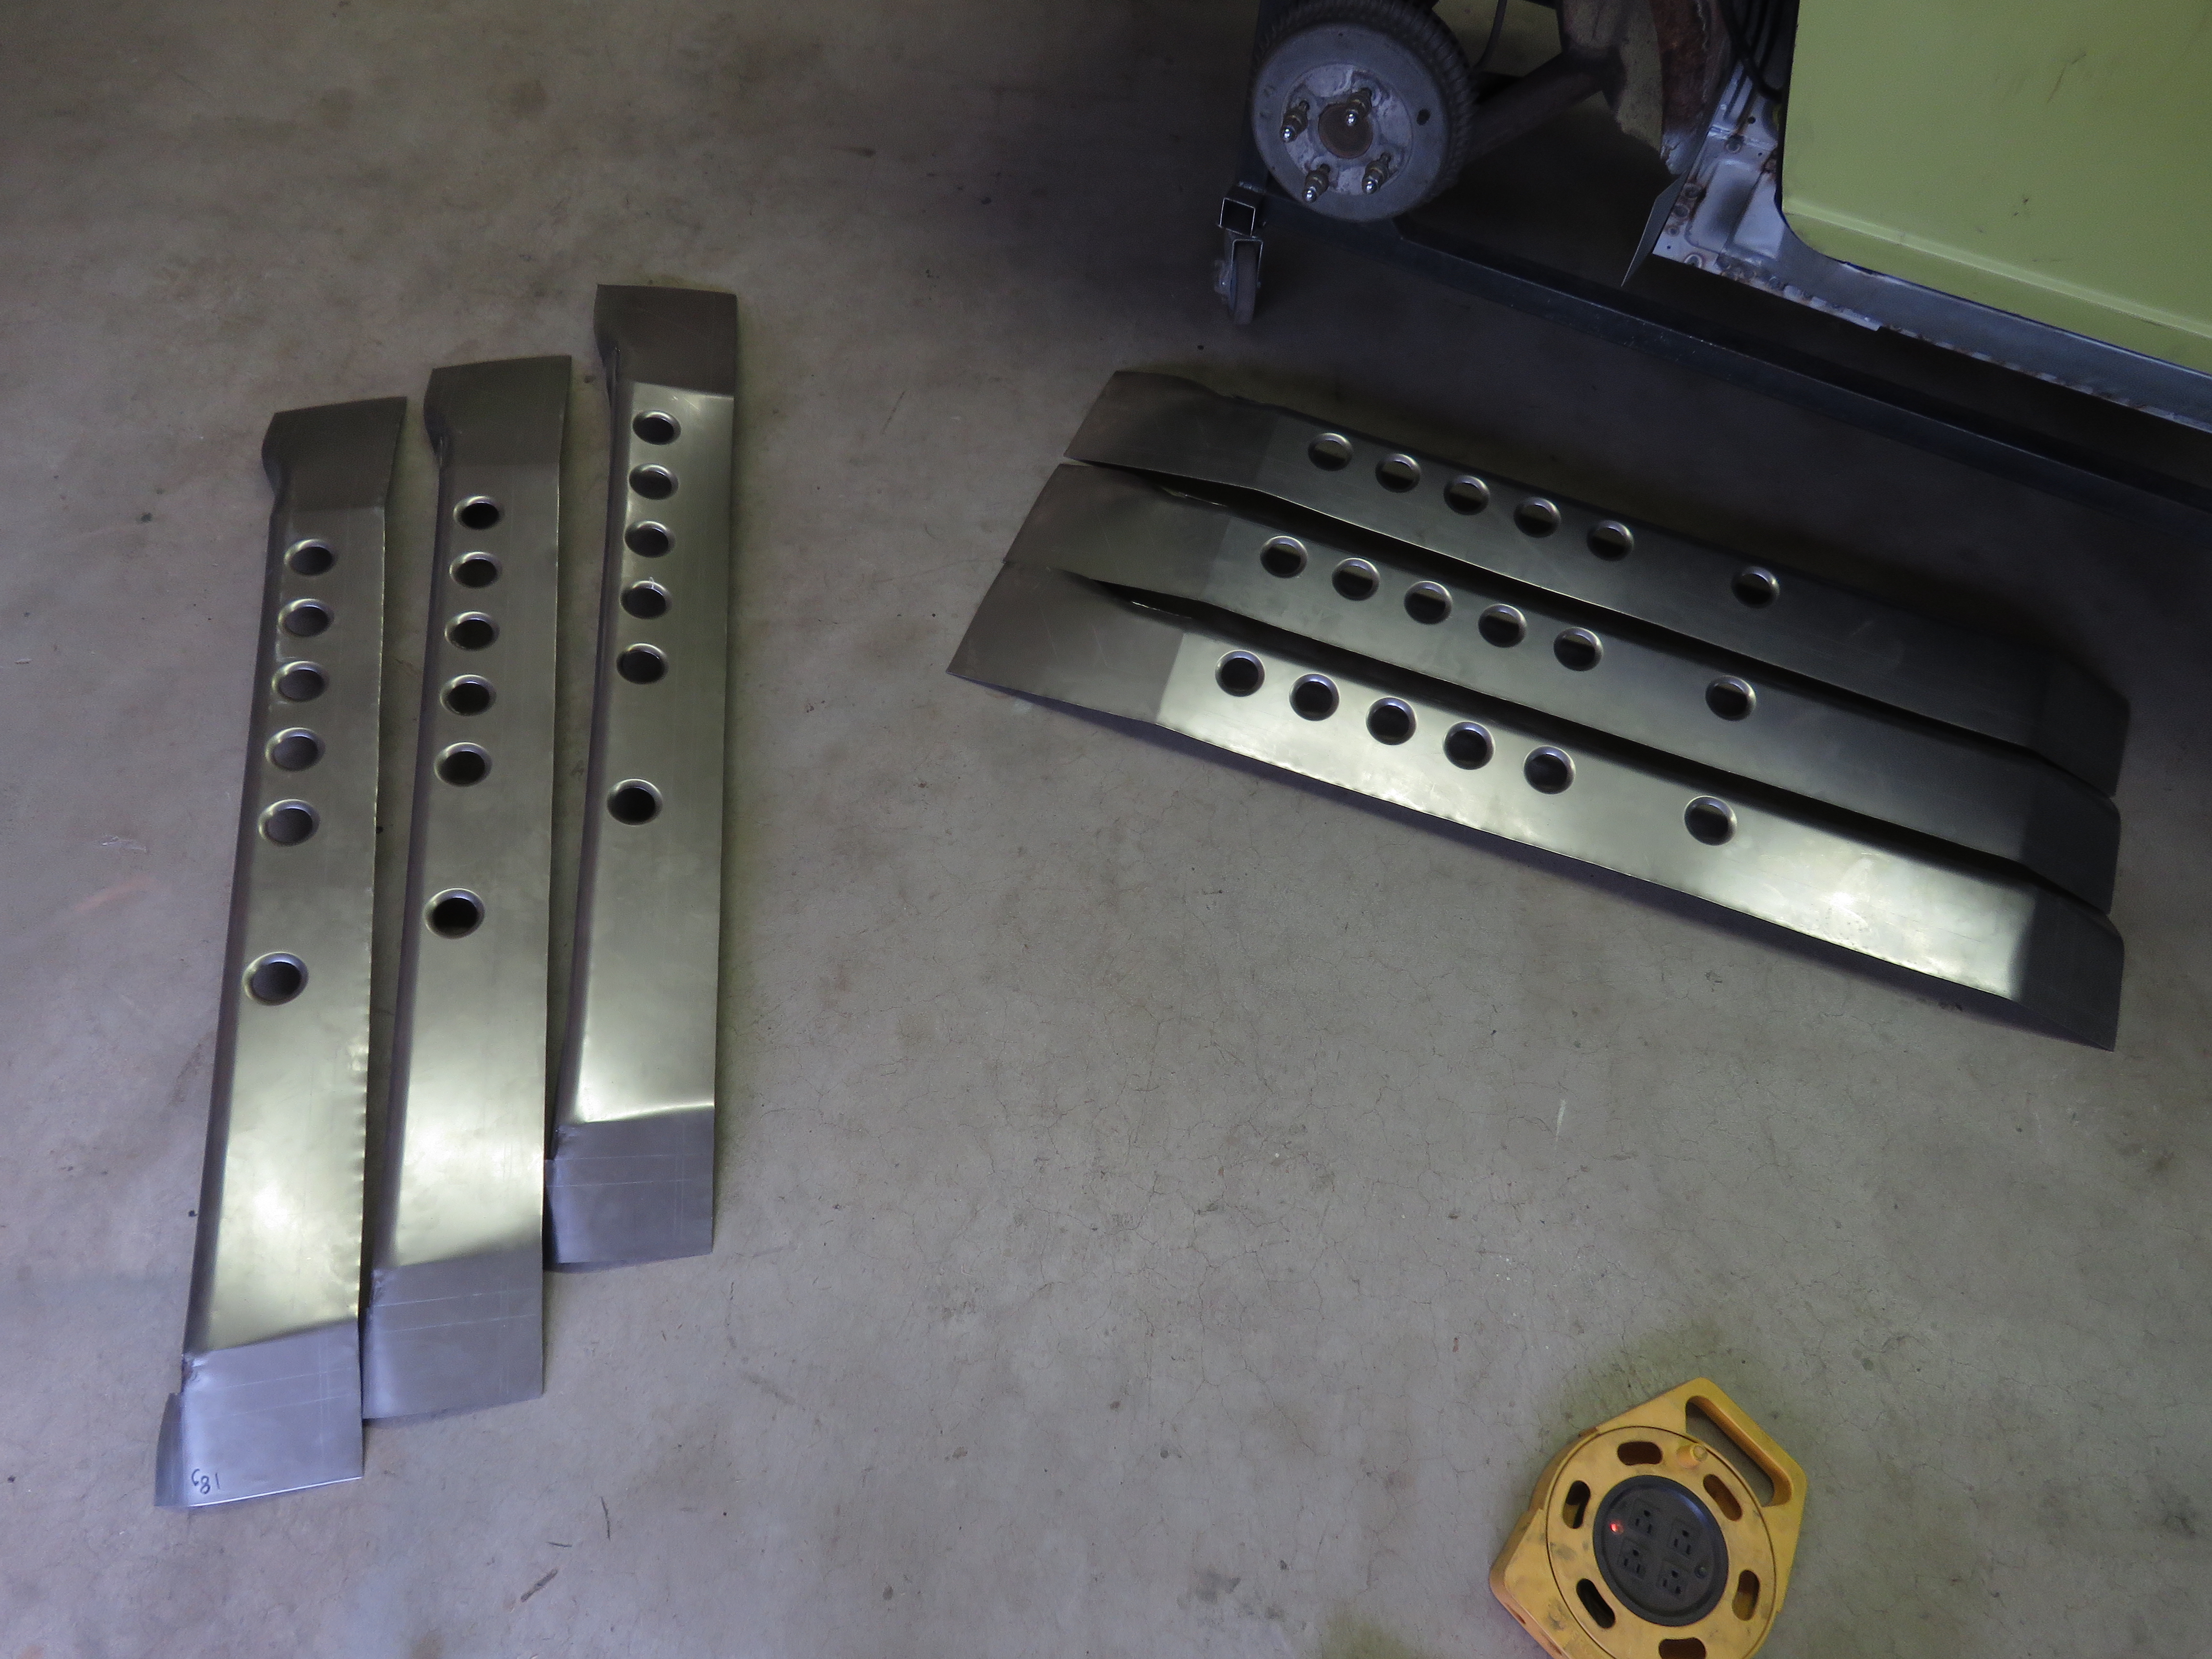
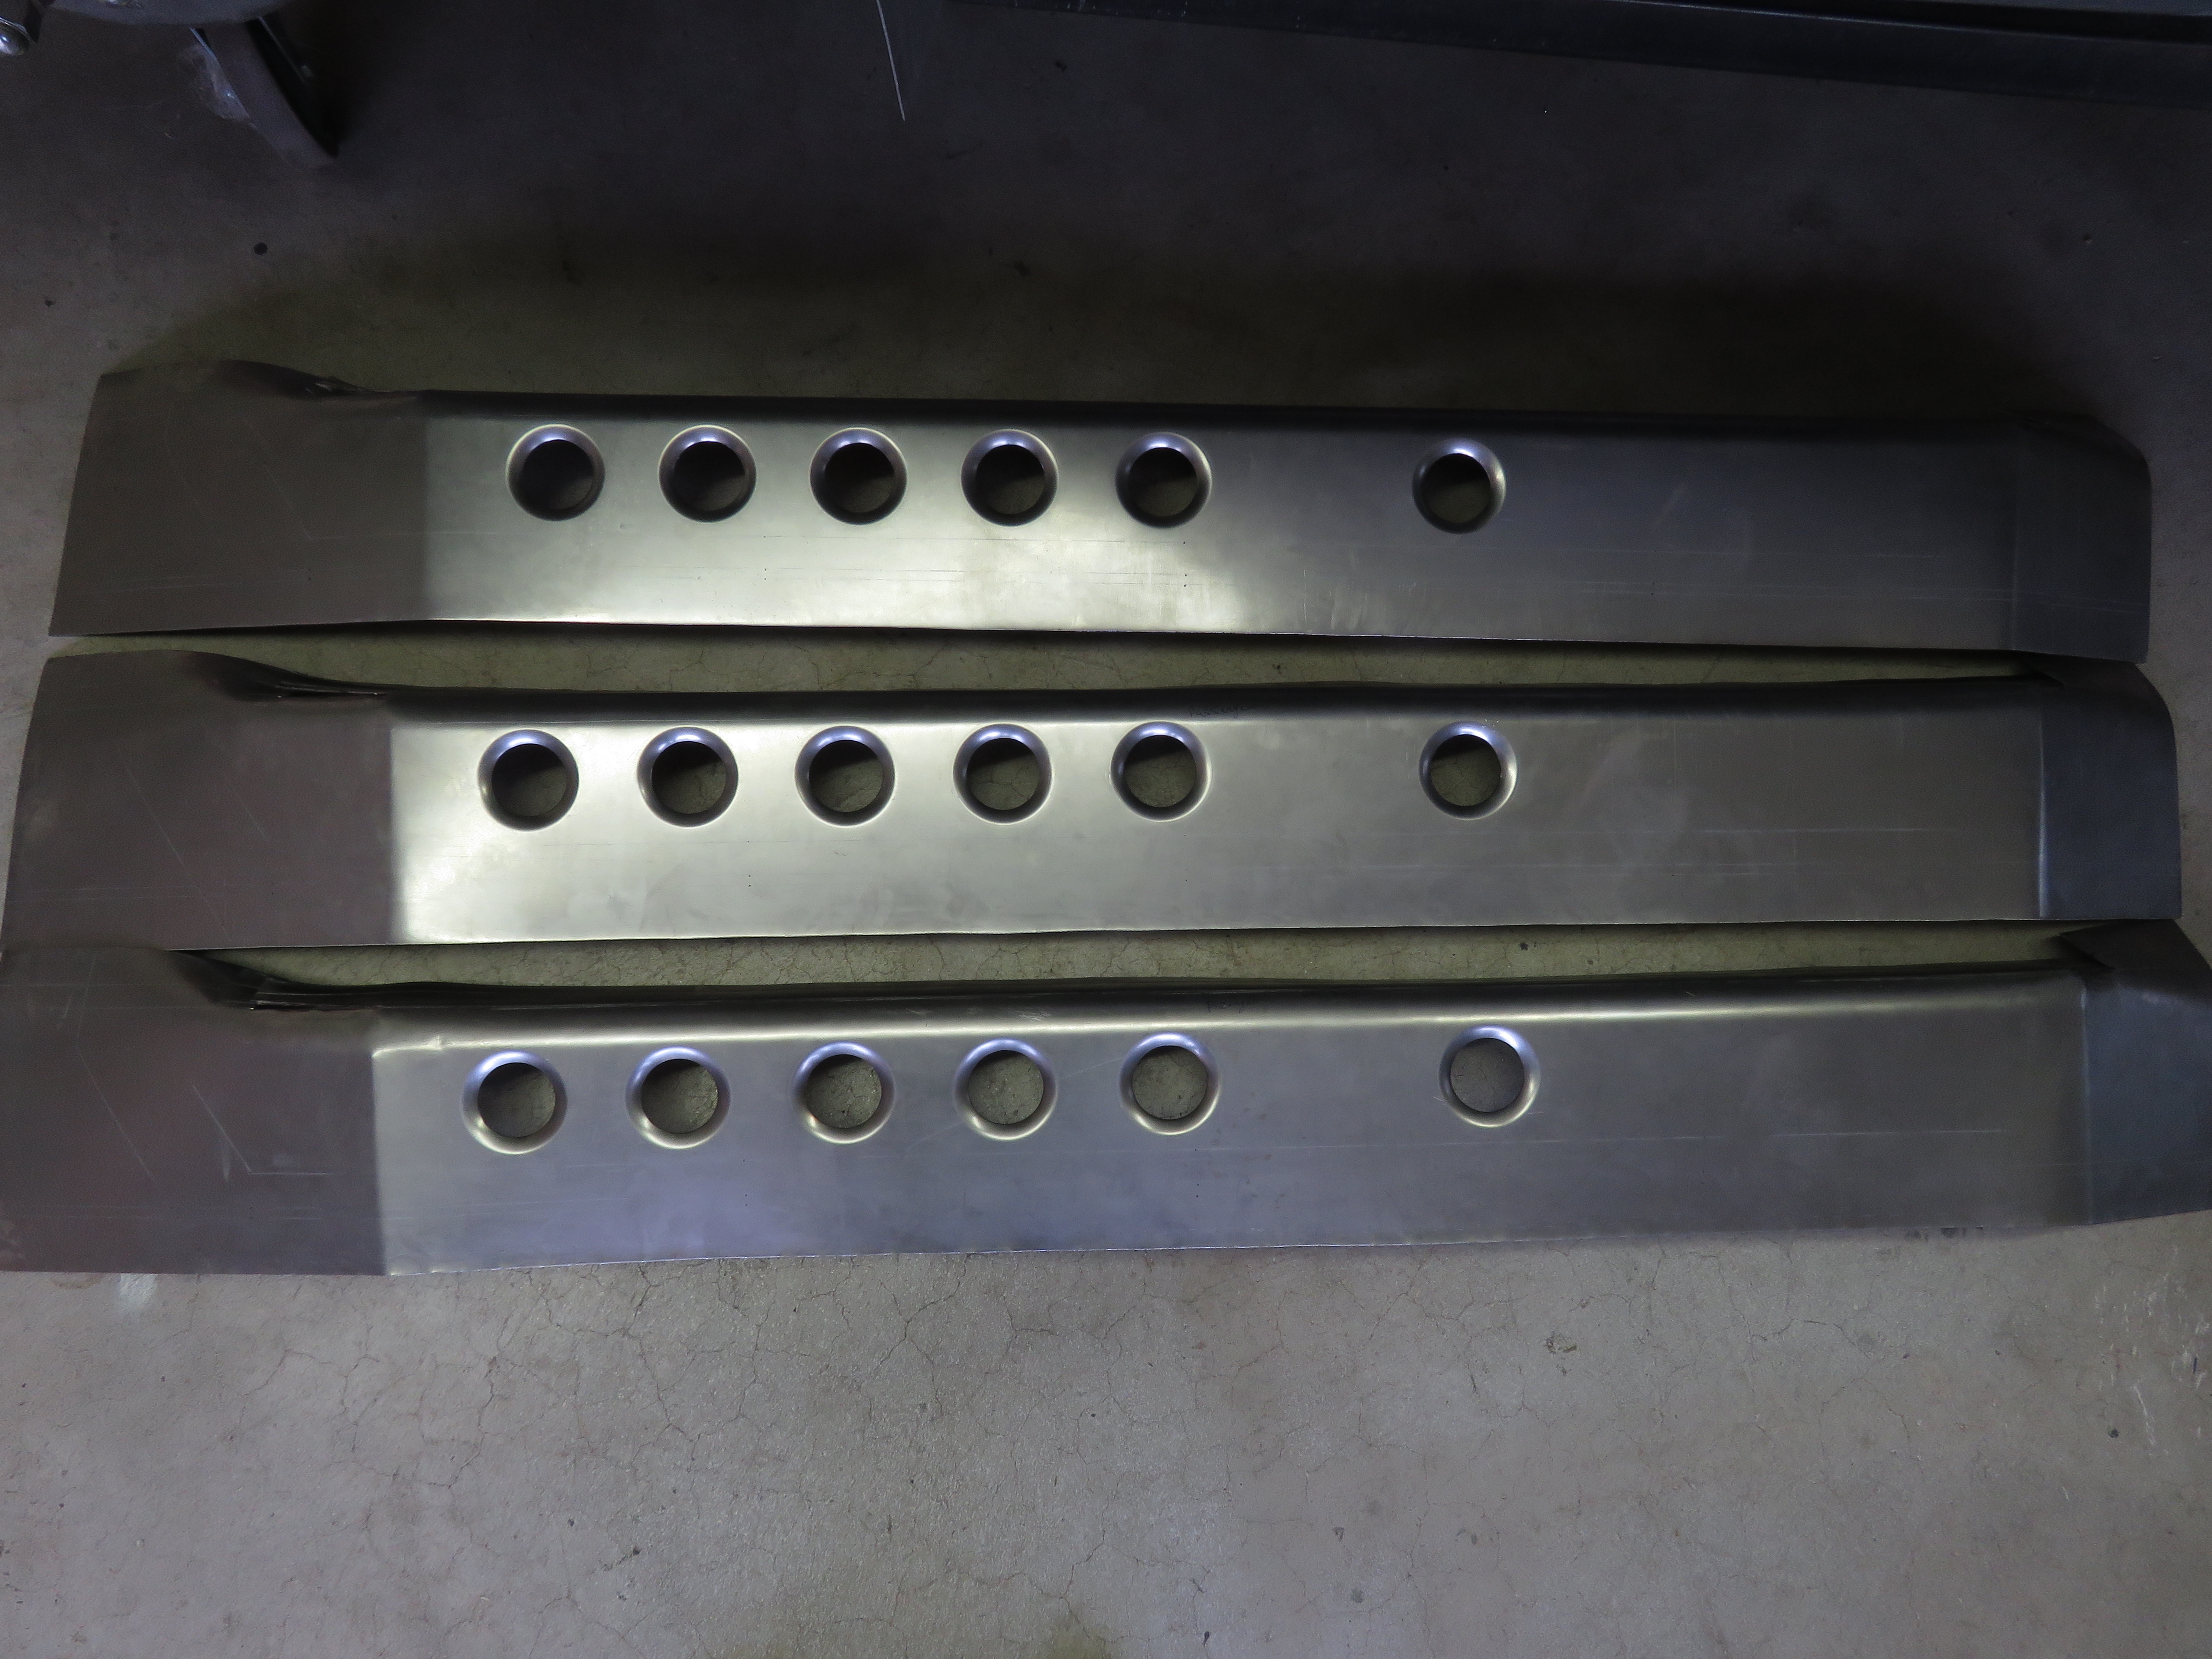
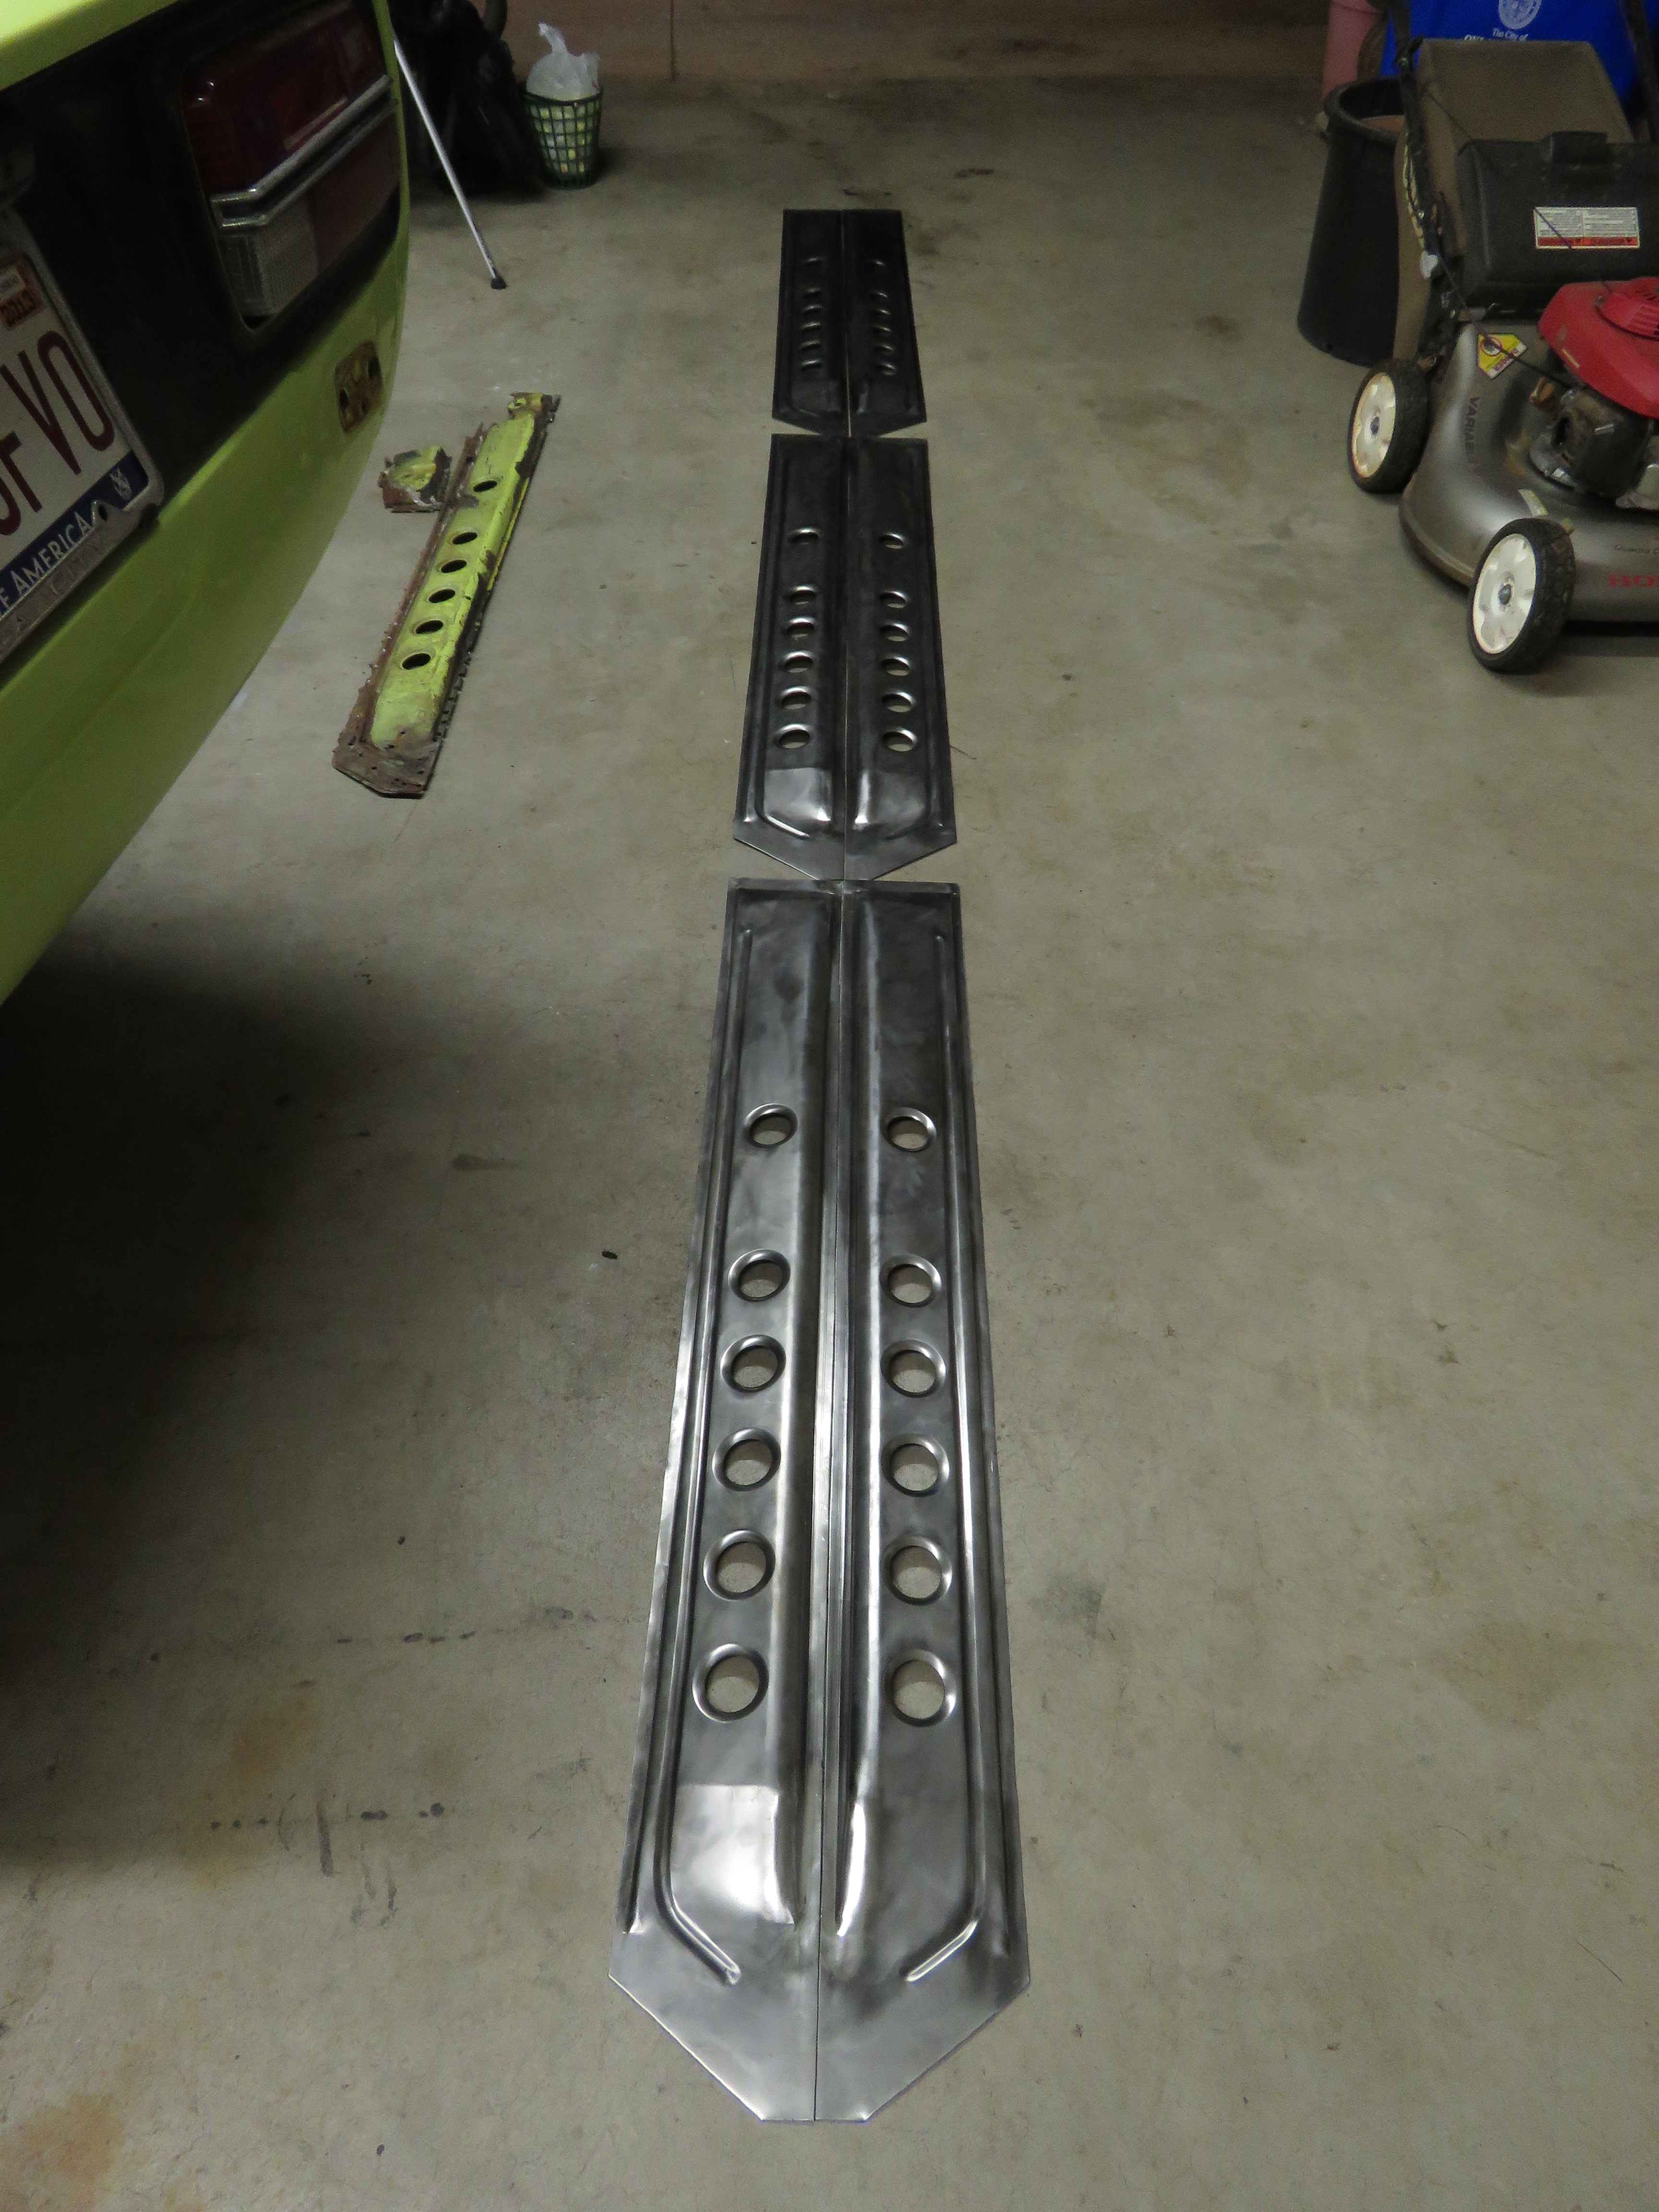
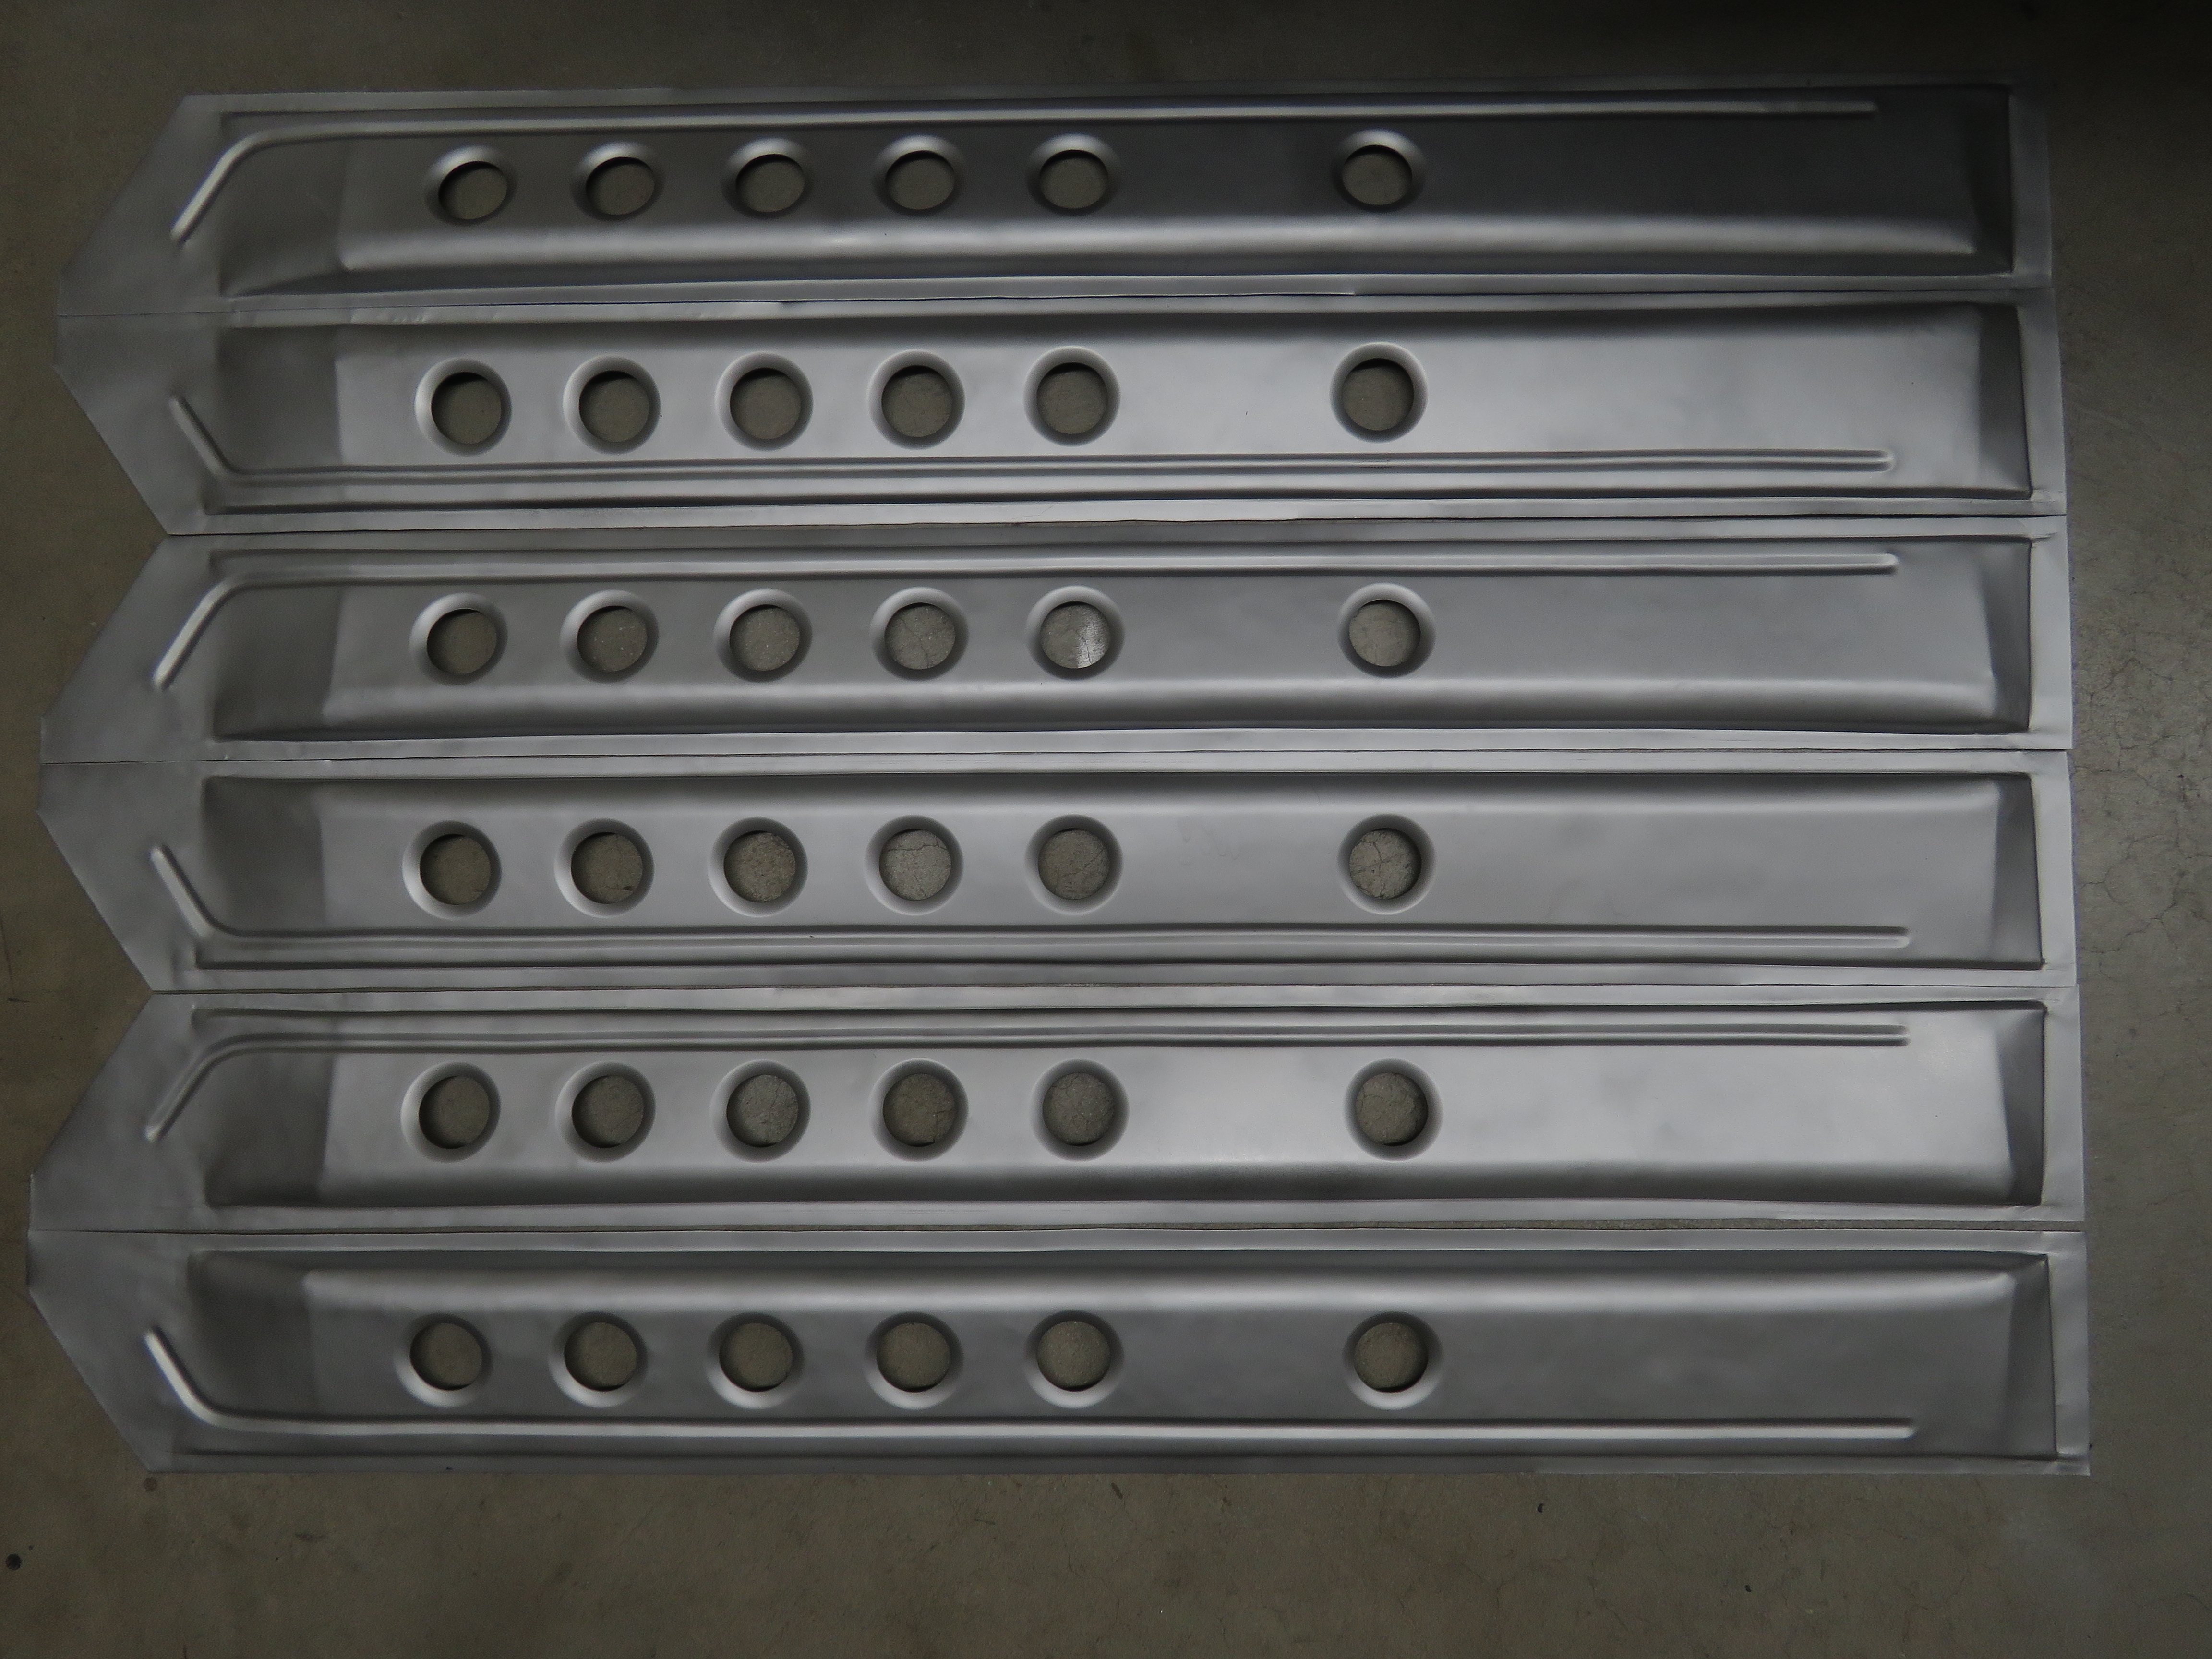
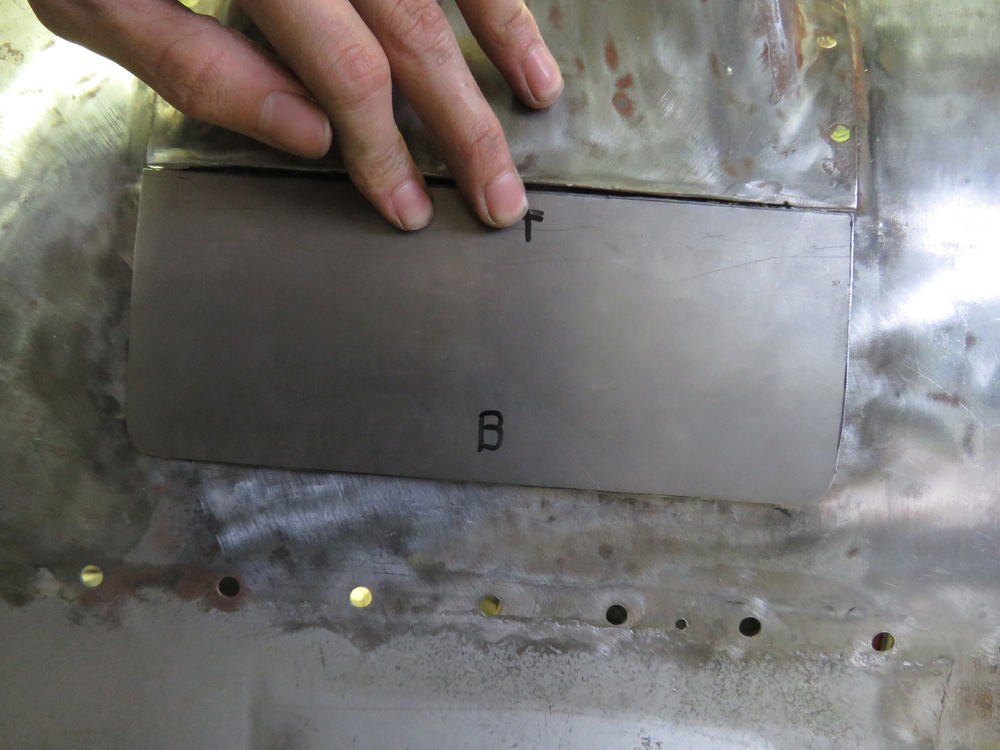
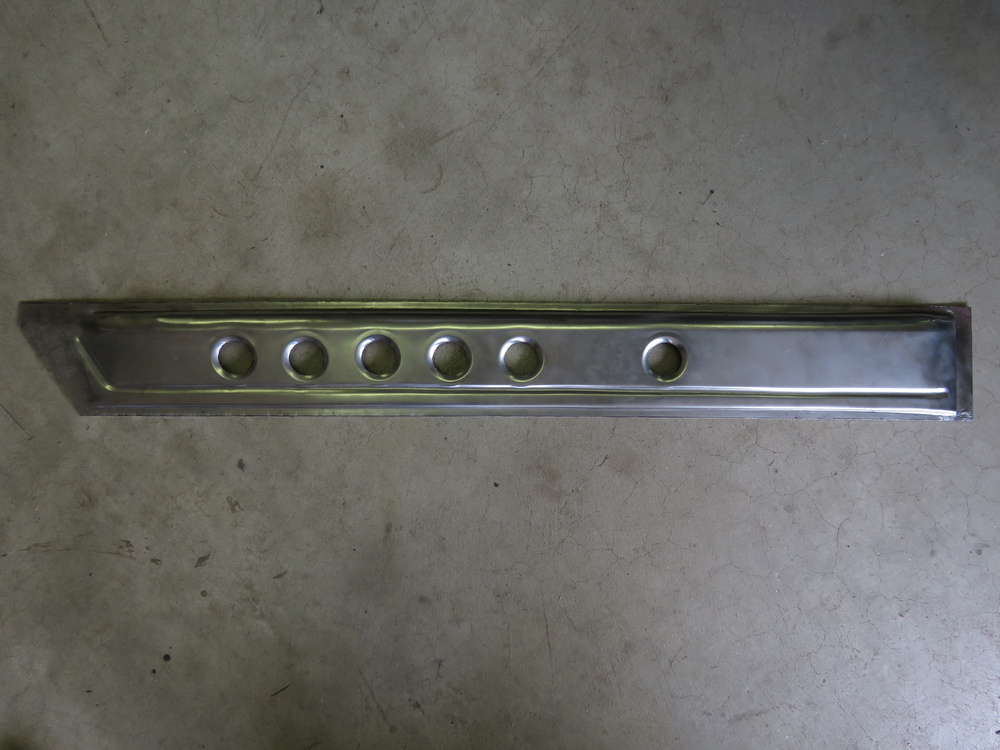
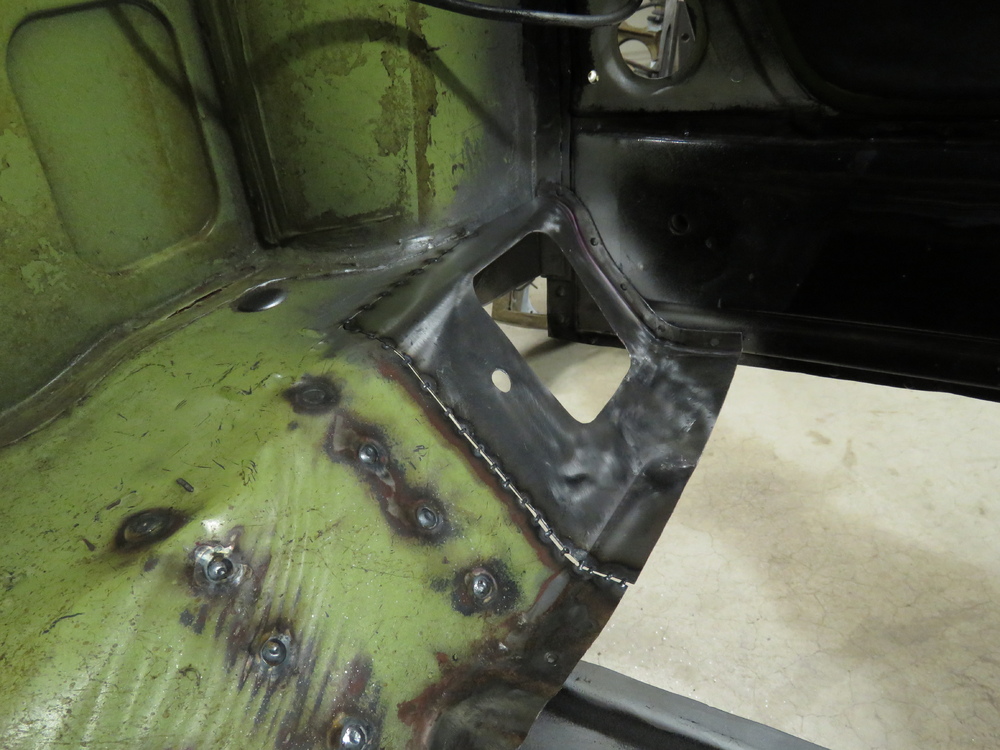
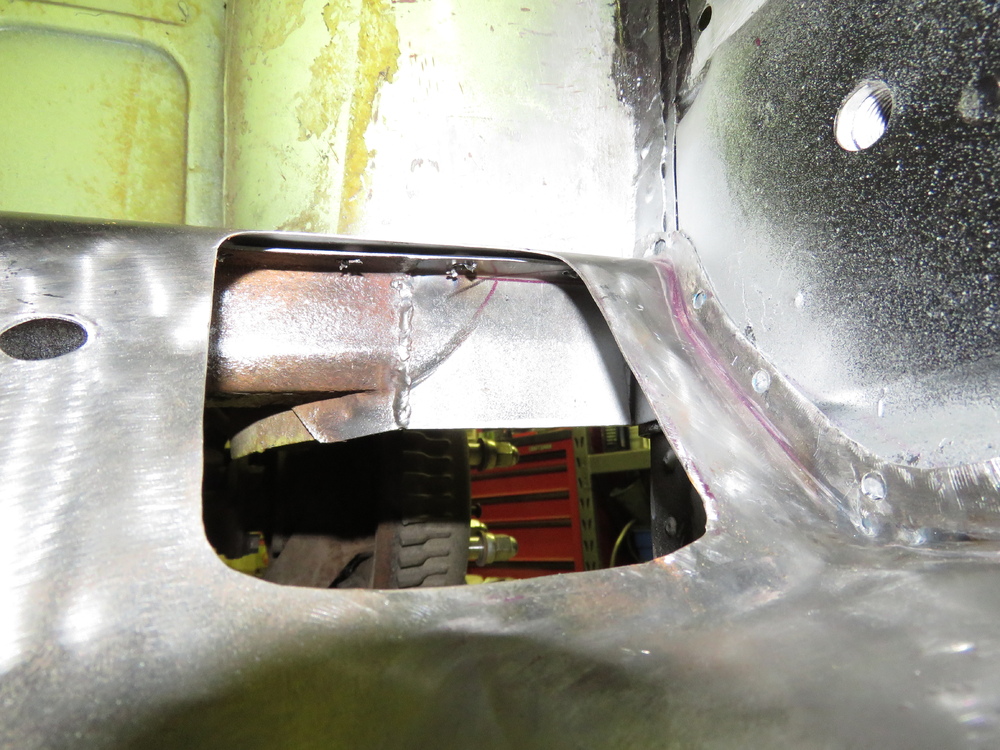
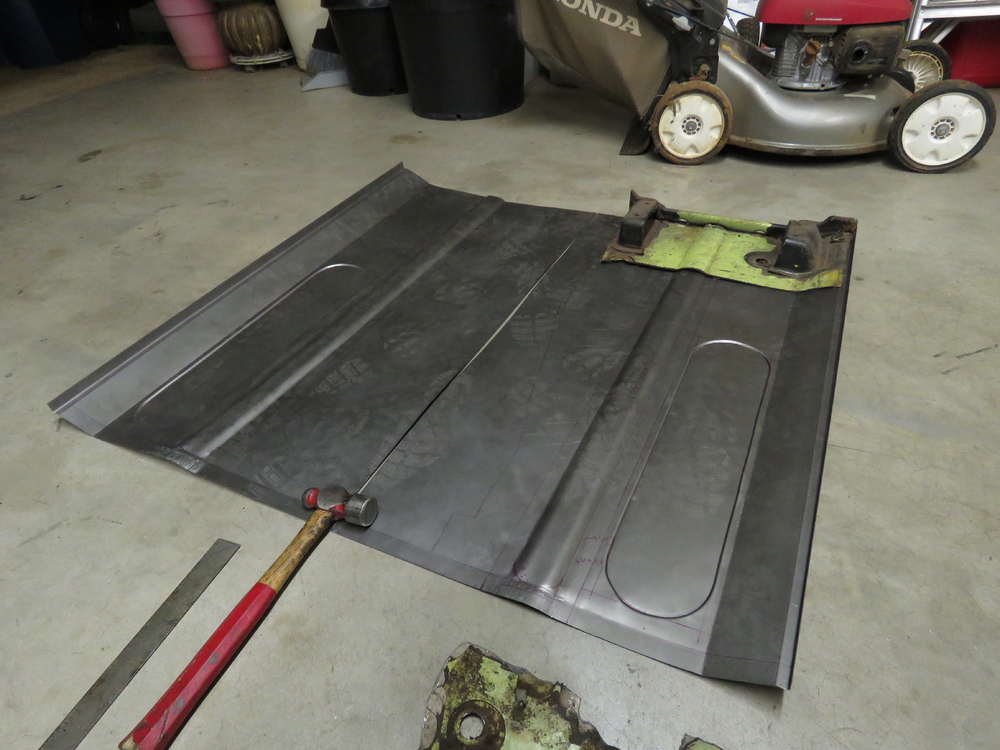
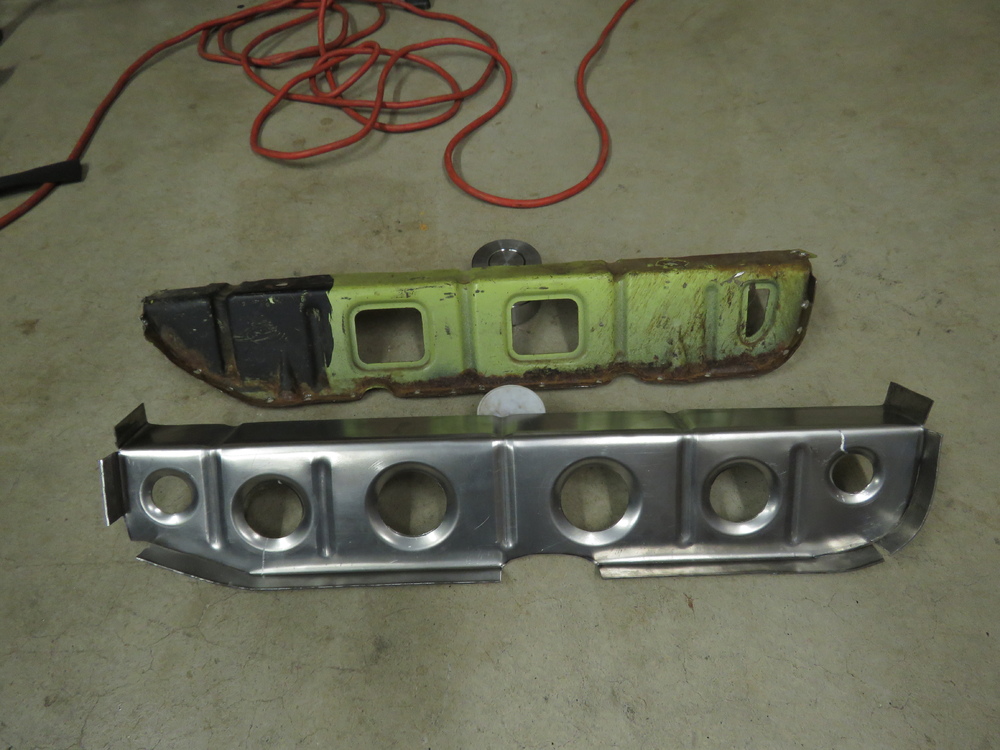
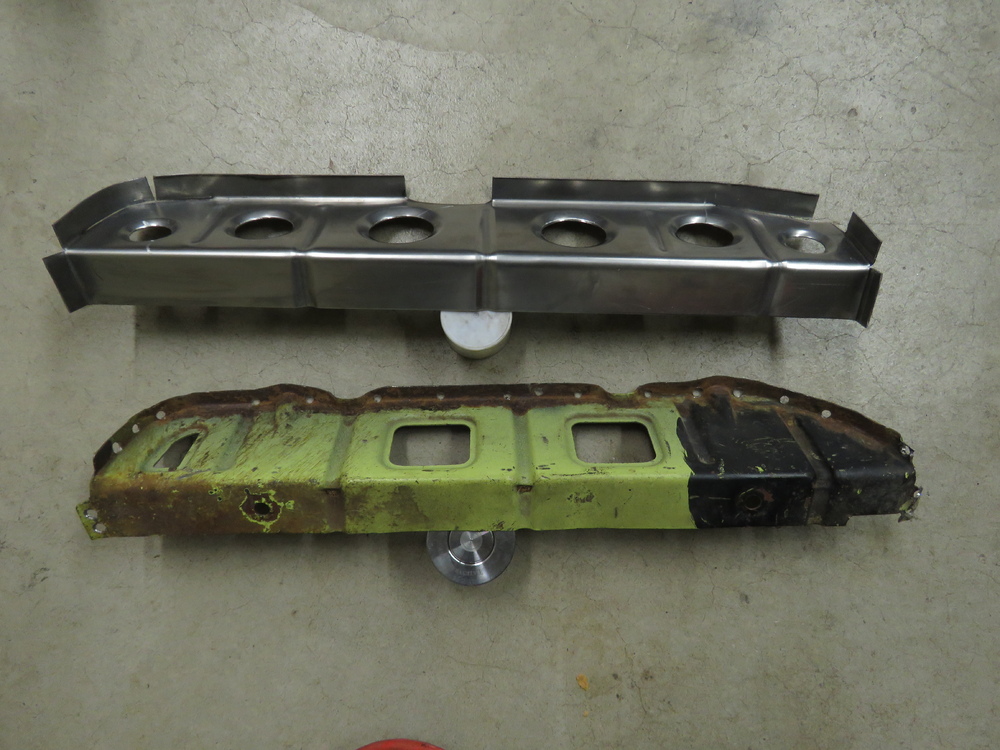
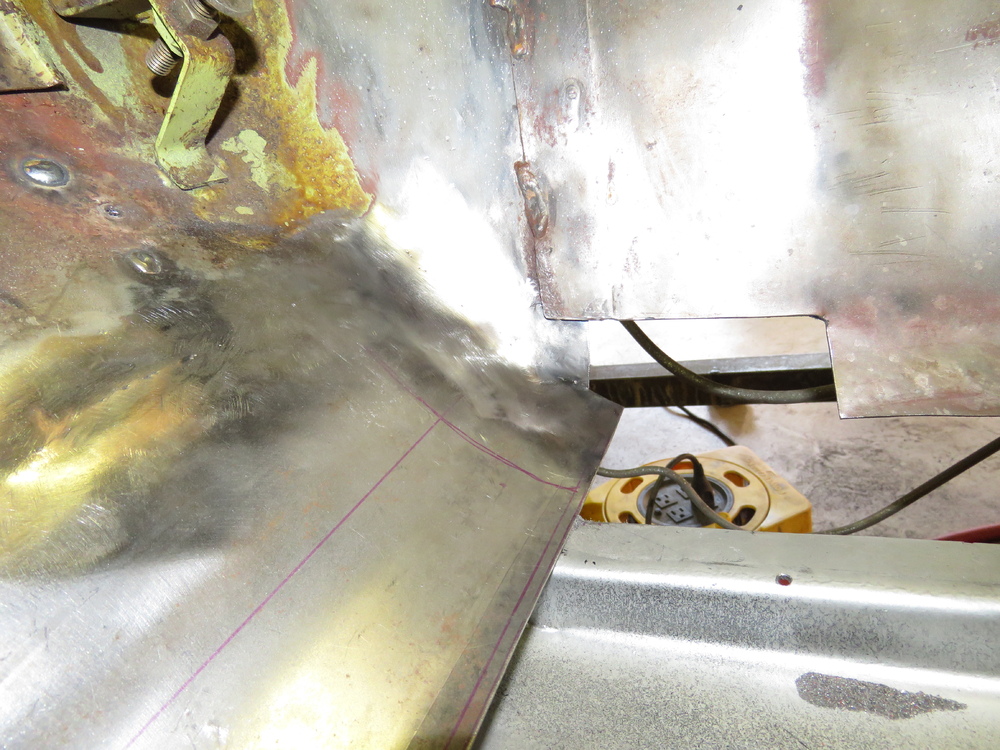
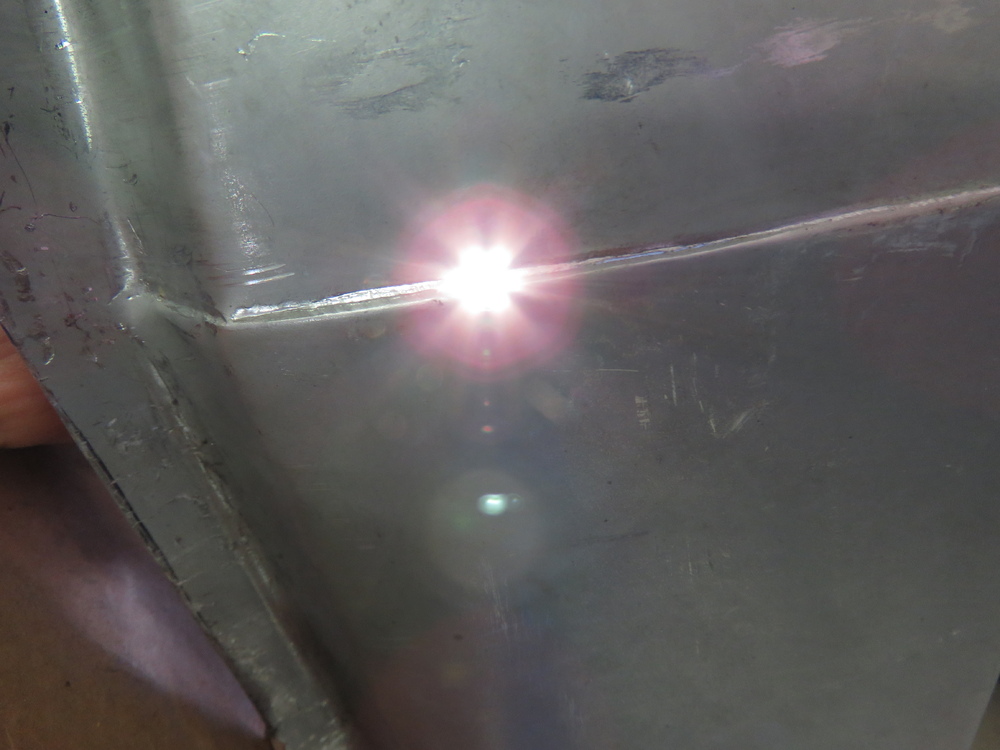
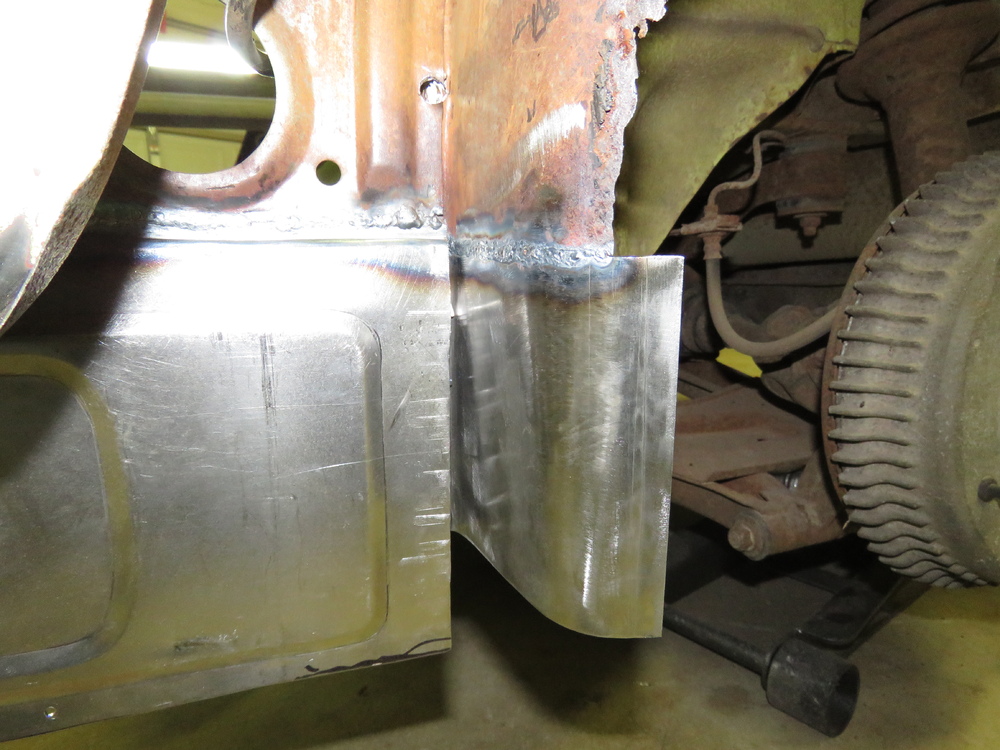
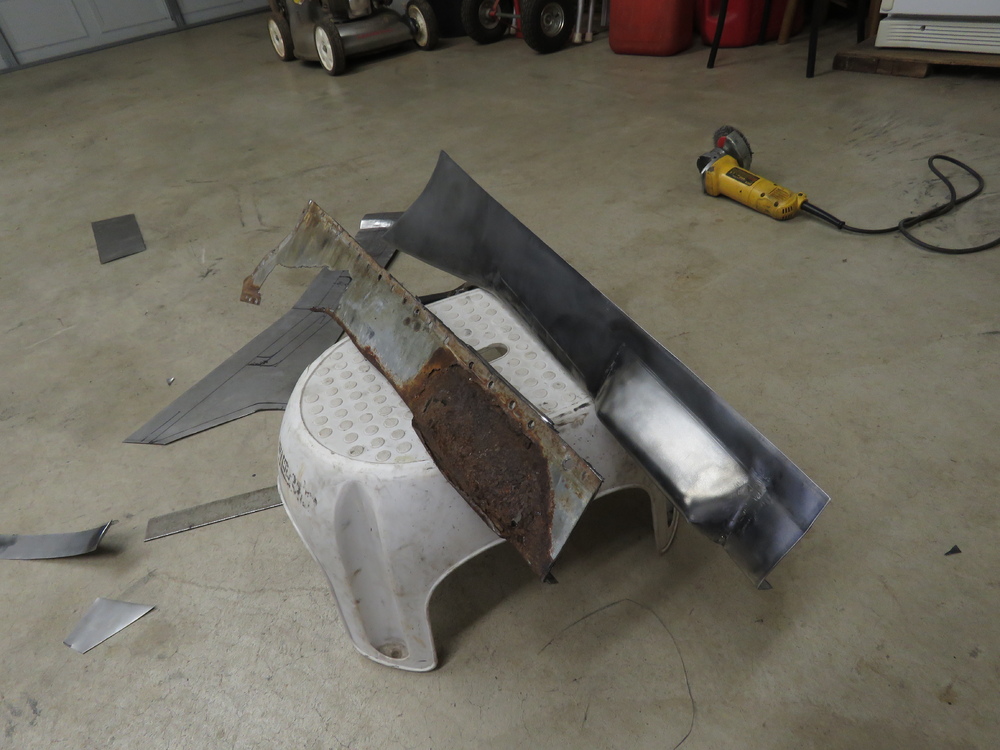
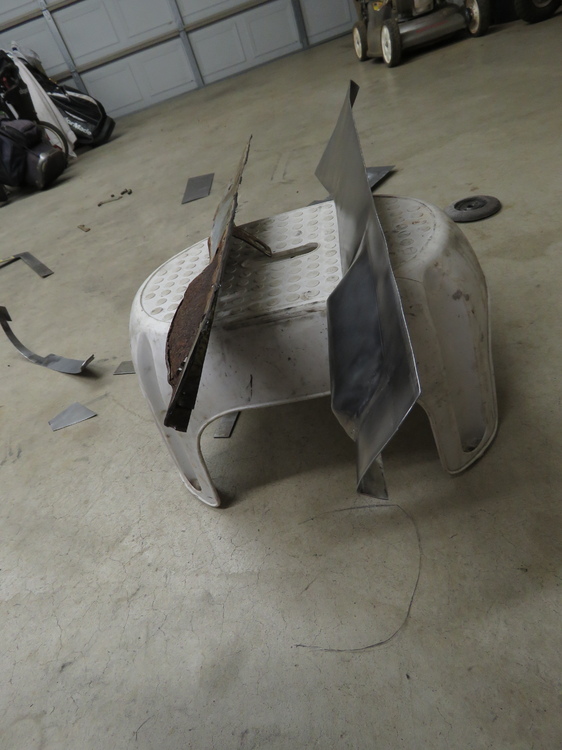
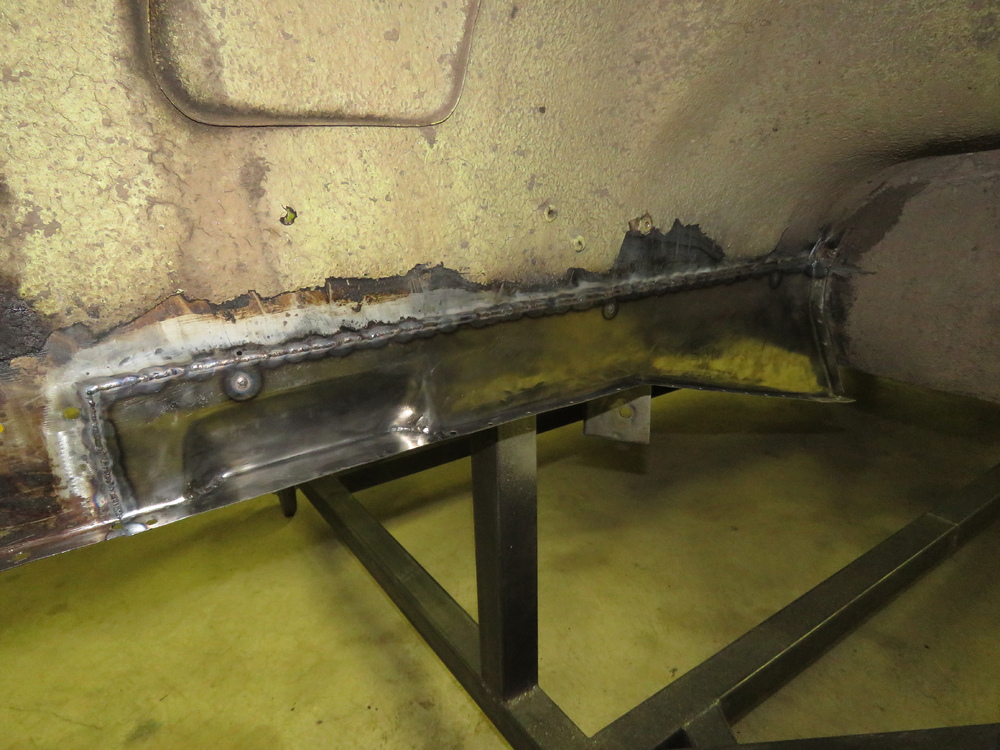
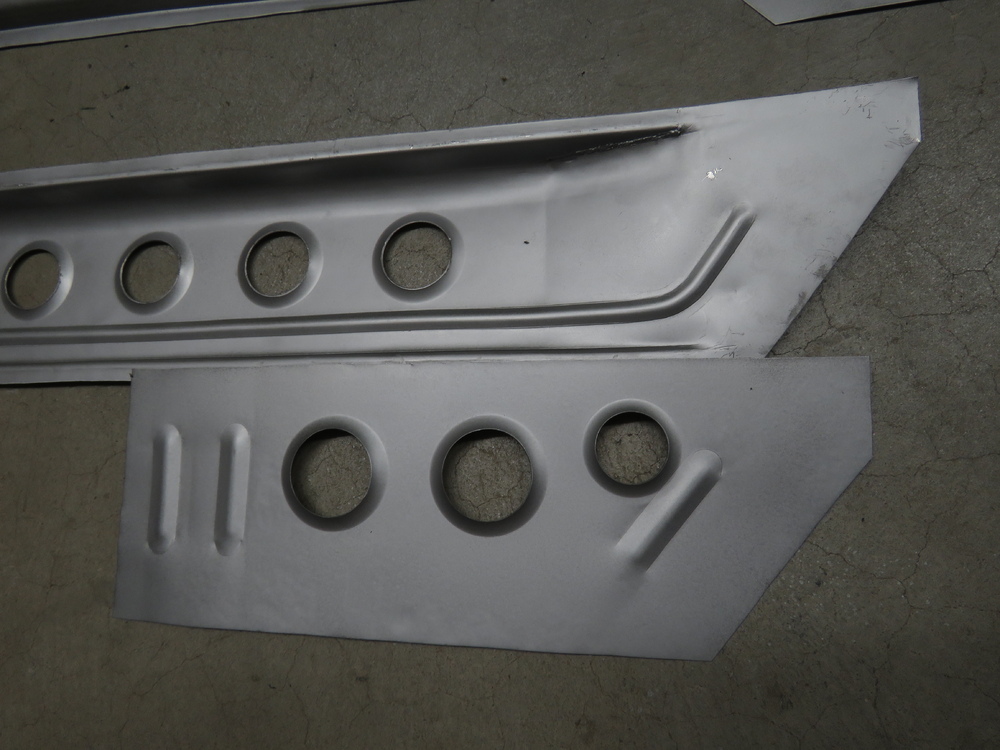
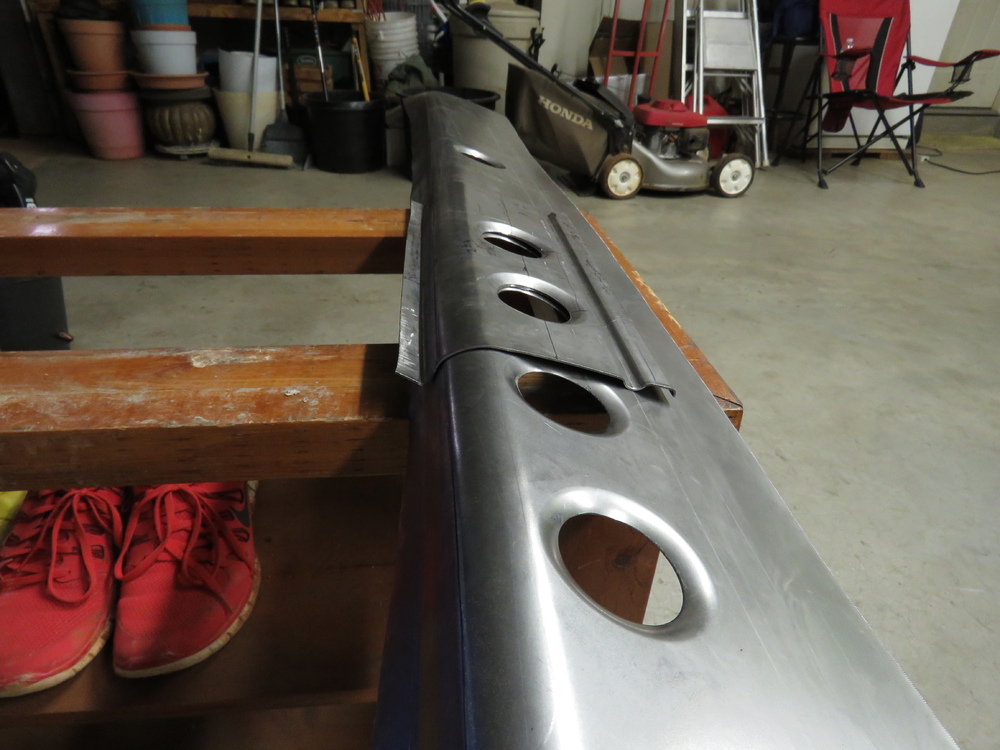
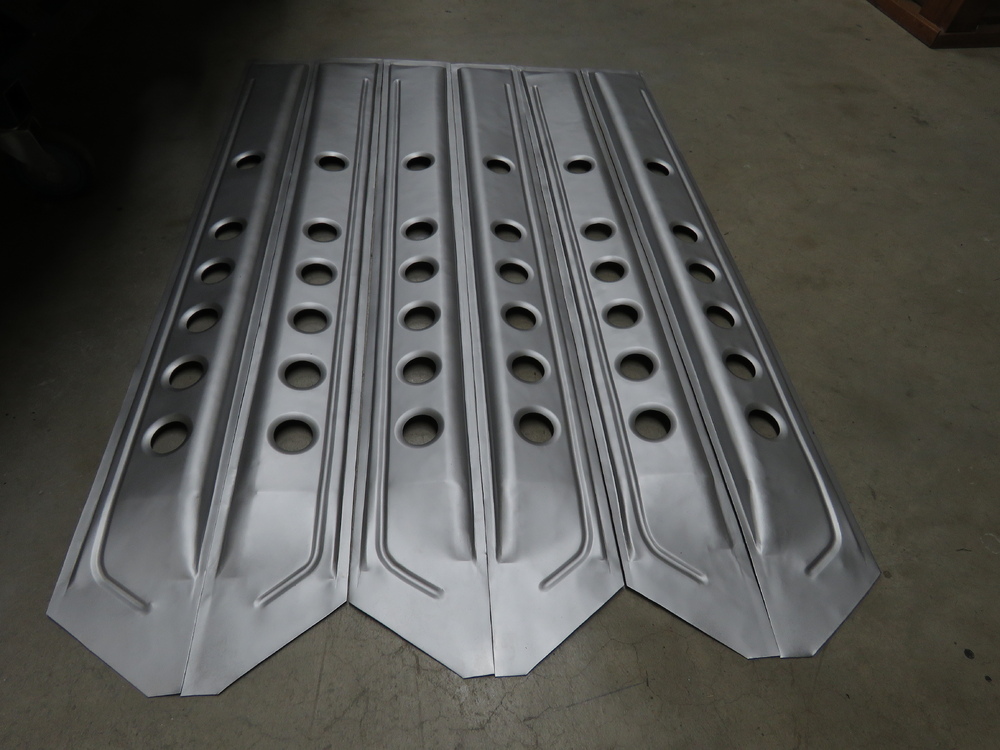
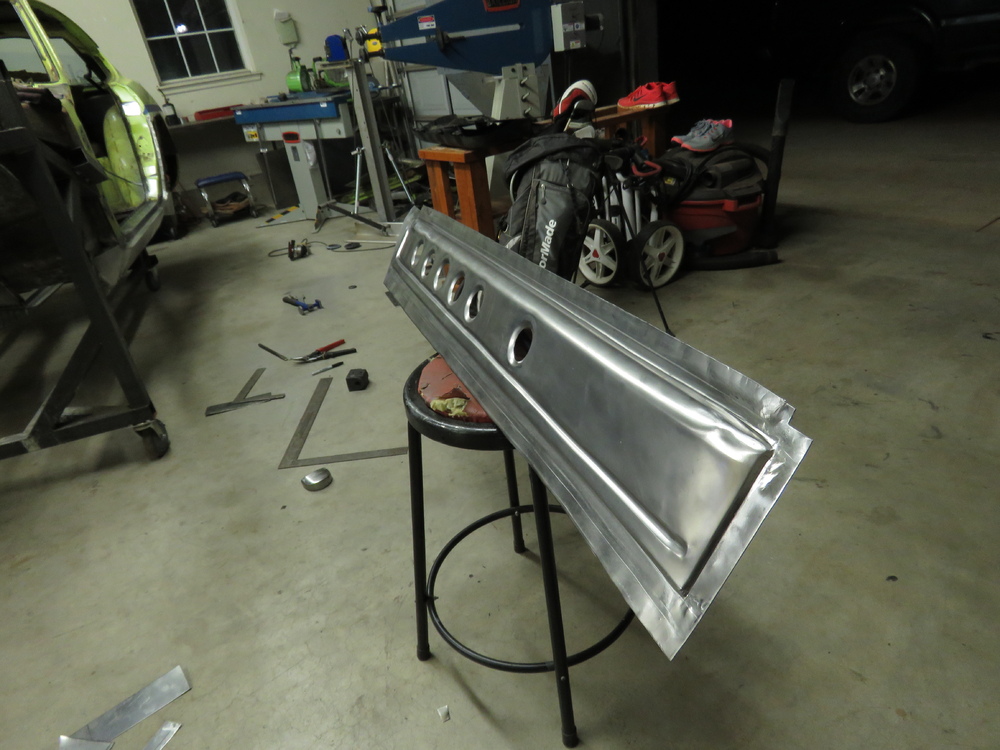
Made a quick guide. This was how I did it. Took the easy way out by cutting and welding, didnt want to fiddle around forever. Probably better ways of doing it, feel free to chime in anyone, Id like to learn other ways too. Depending on how original you want to make it to the stock piece, you could probably make a male and female mold out of wood (hard wood of some sort)/maybe cement, or other hard materials able to carve into and using a press, press the sheet metal into shape. Could also hammer it into shape and use an english wheel to smooth out the hammer indentions, which I didnt have at the time. Though My english wheel experience and knowledge is still at beginner level. Hope this helps, let me know what else is needed.

-
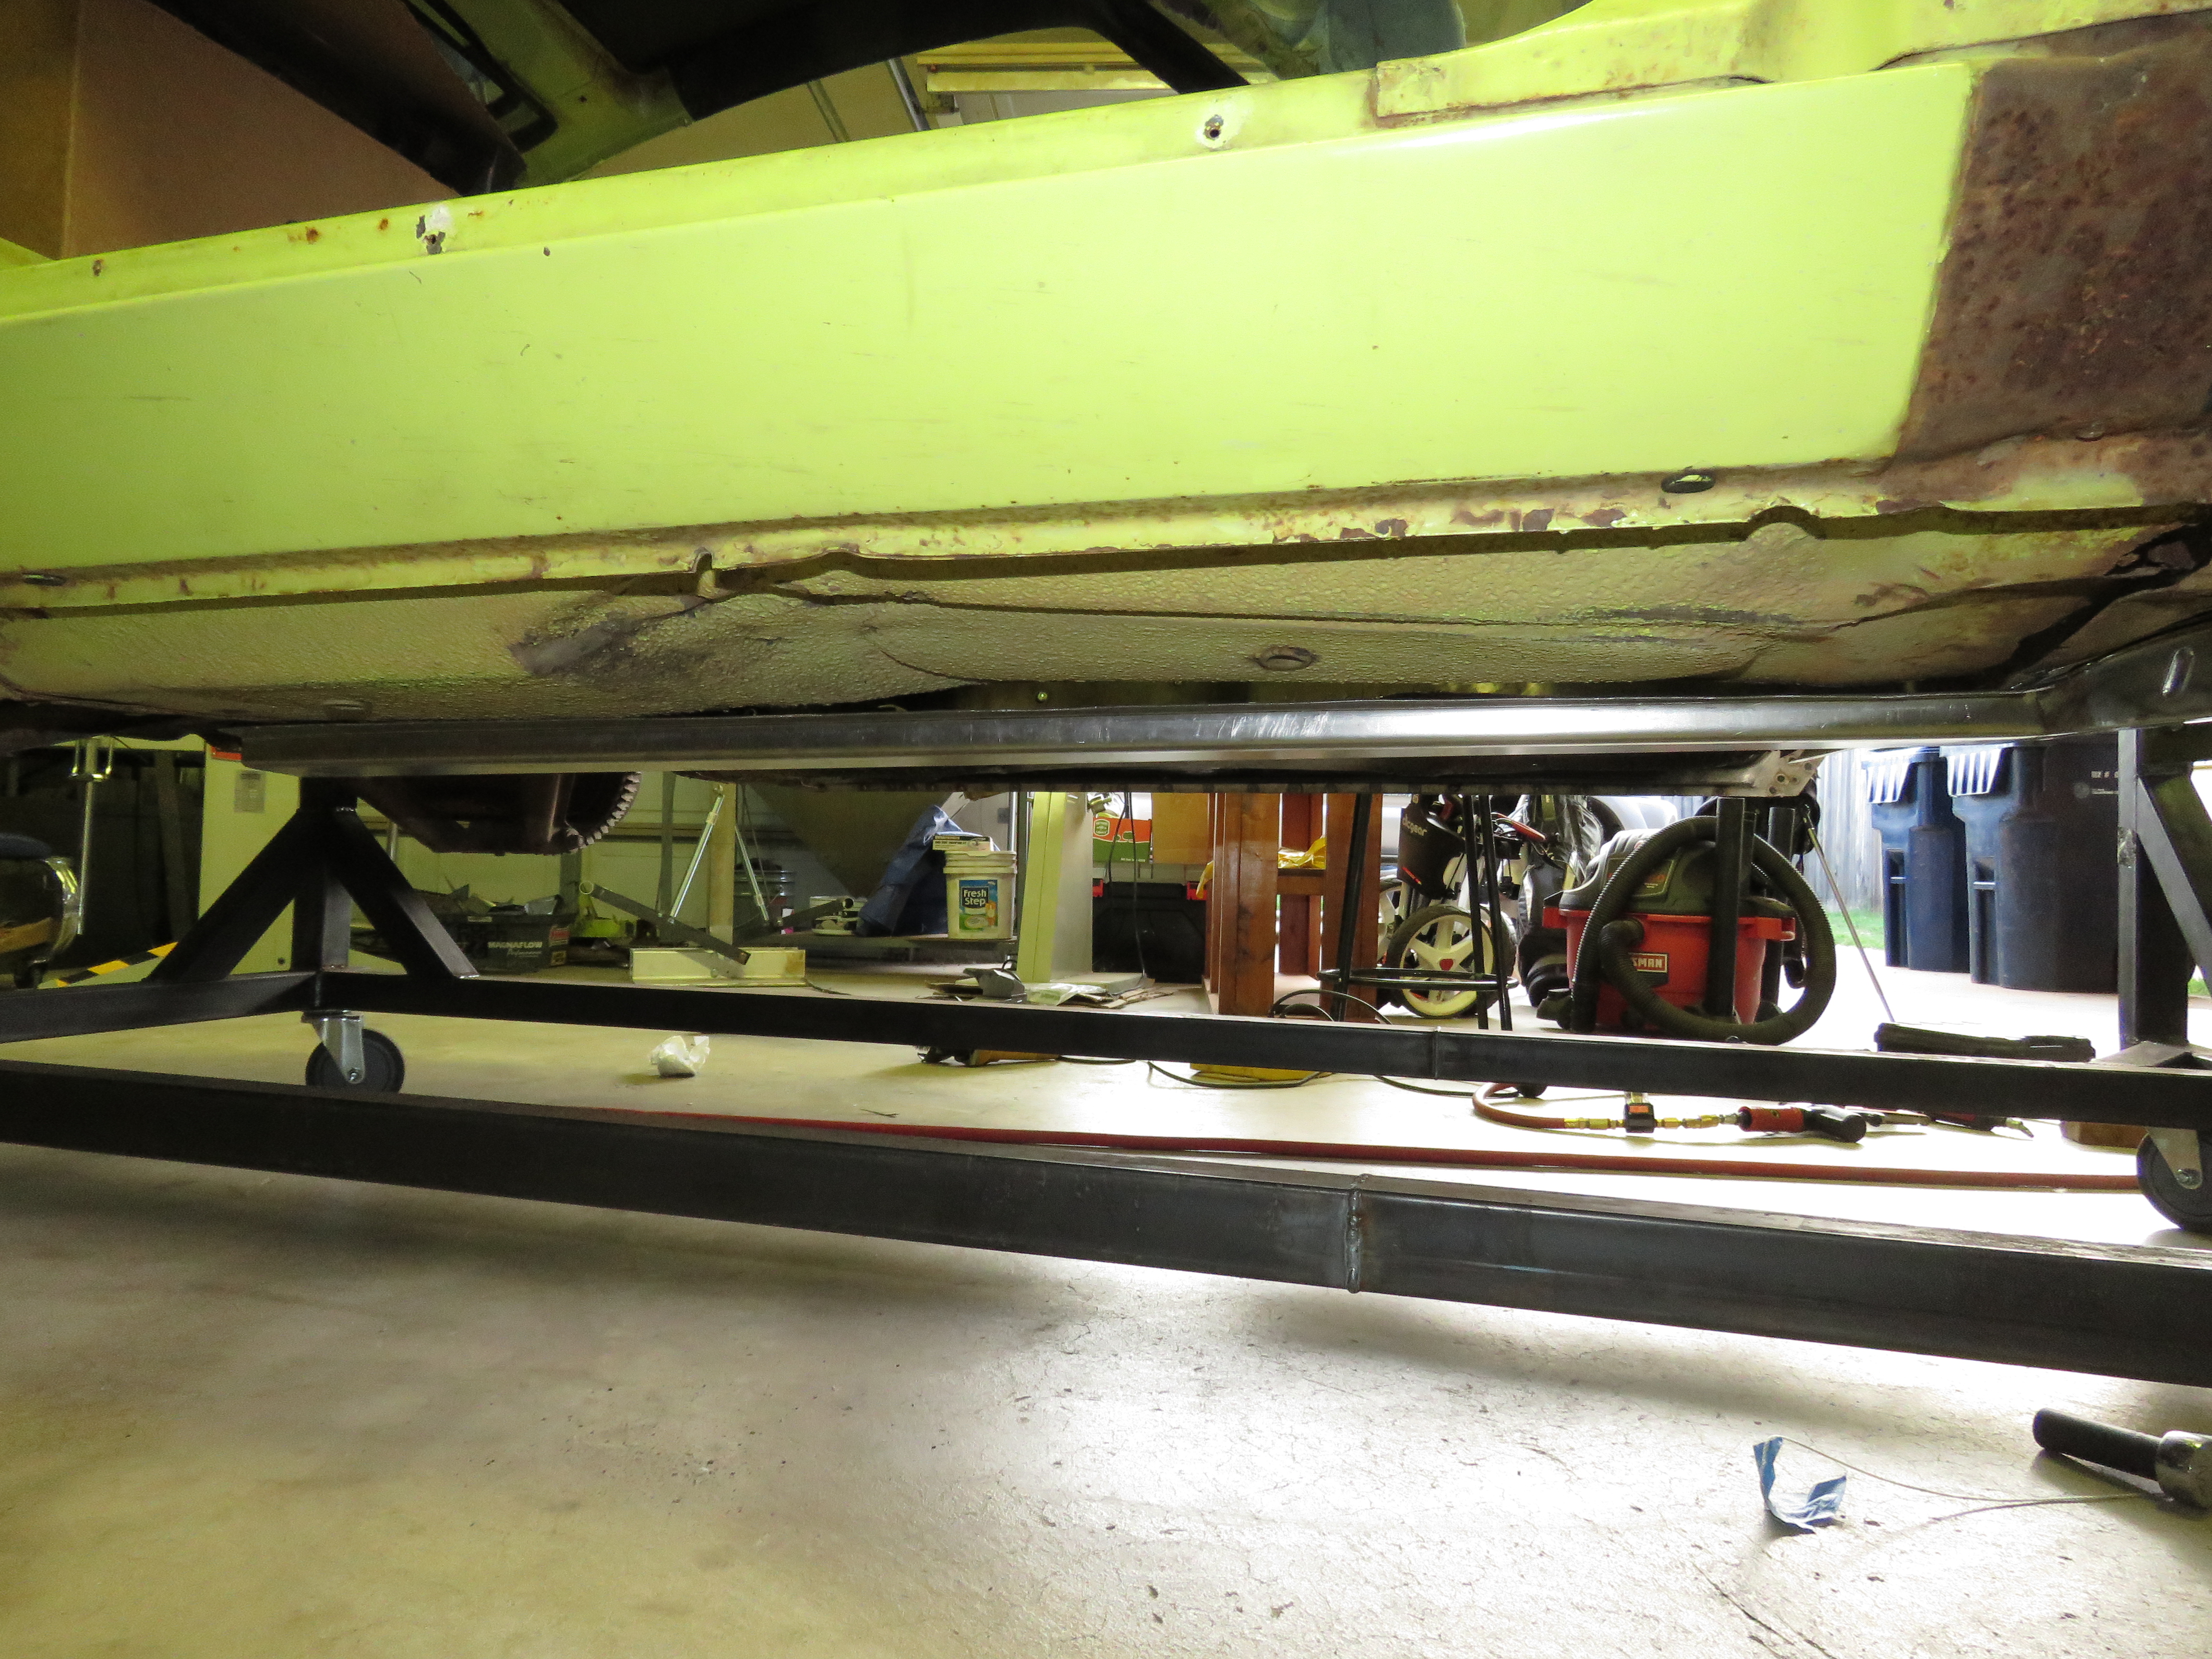
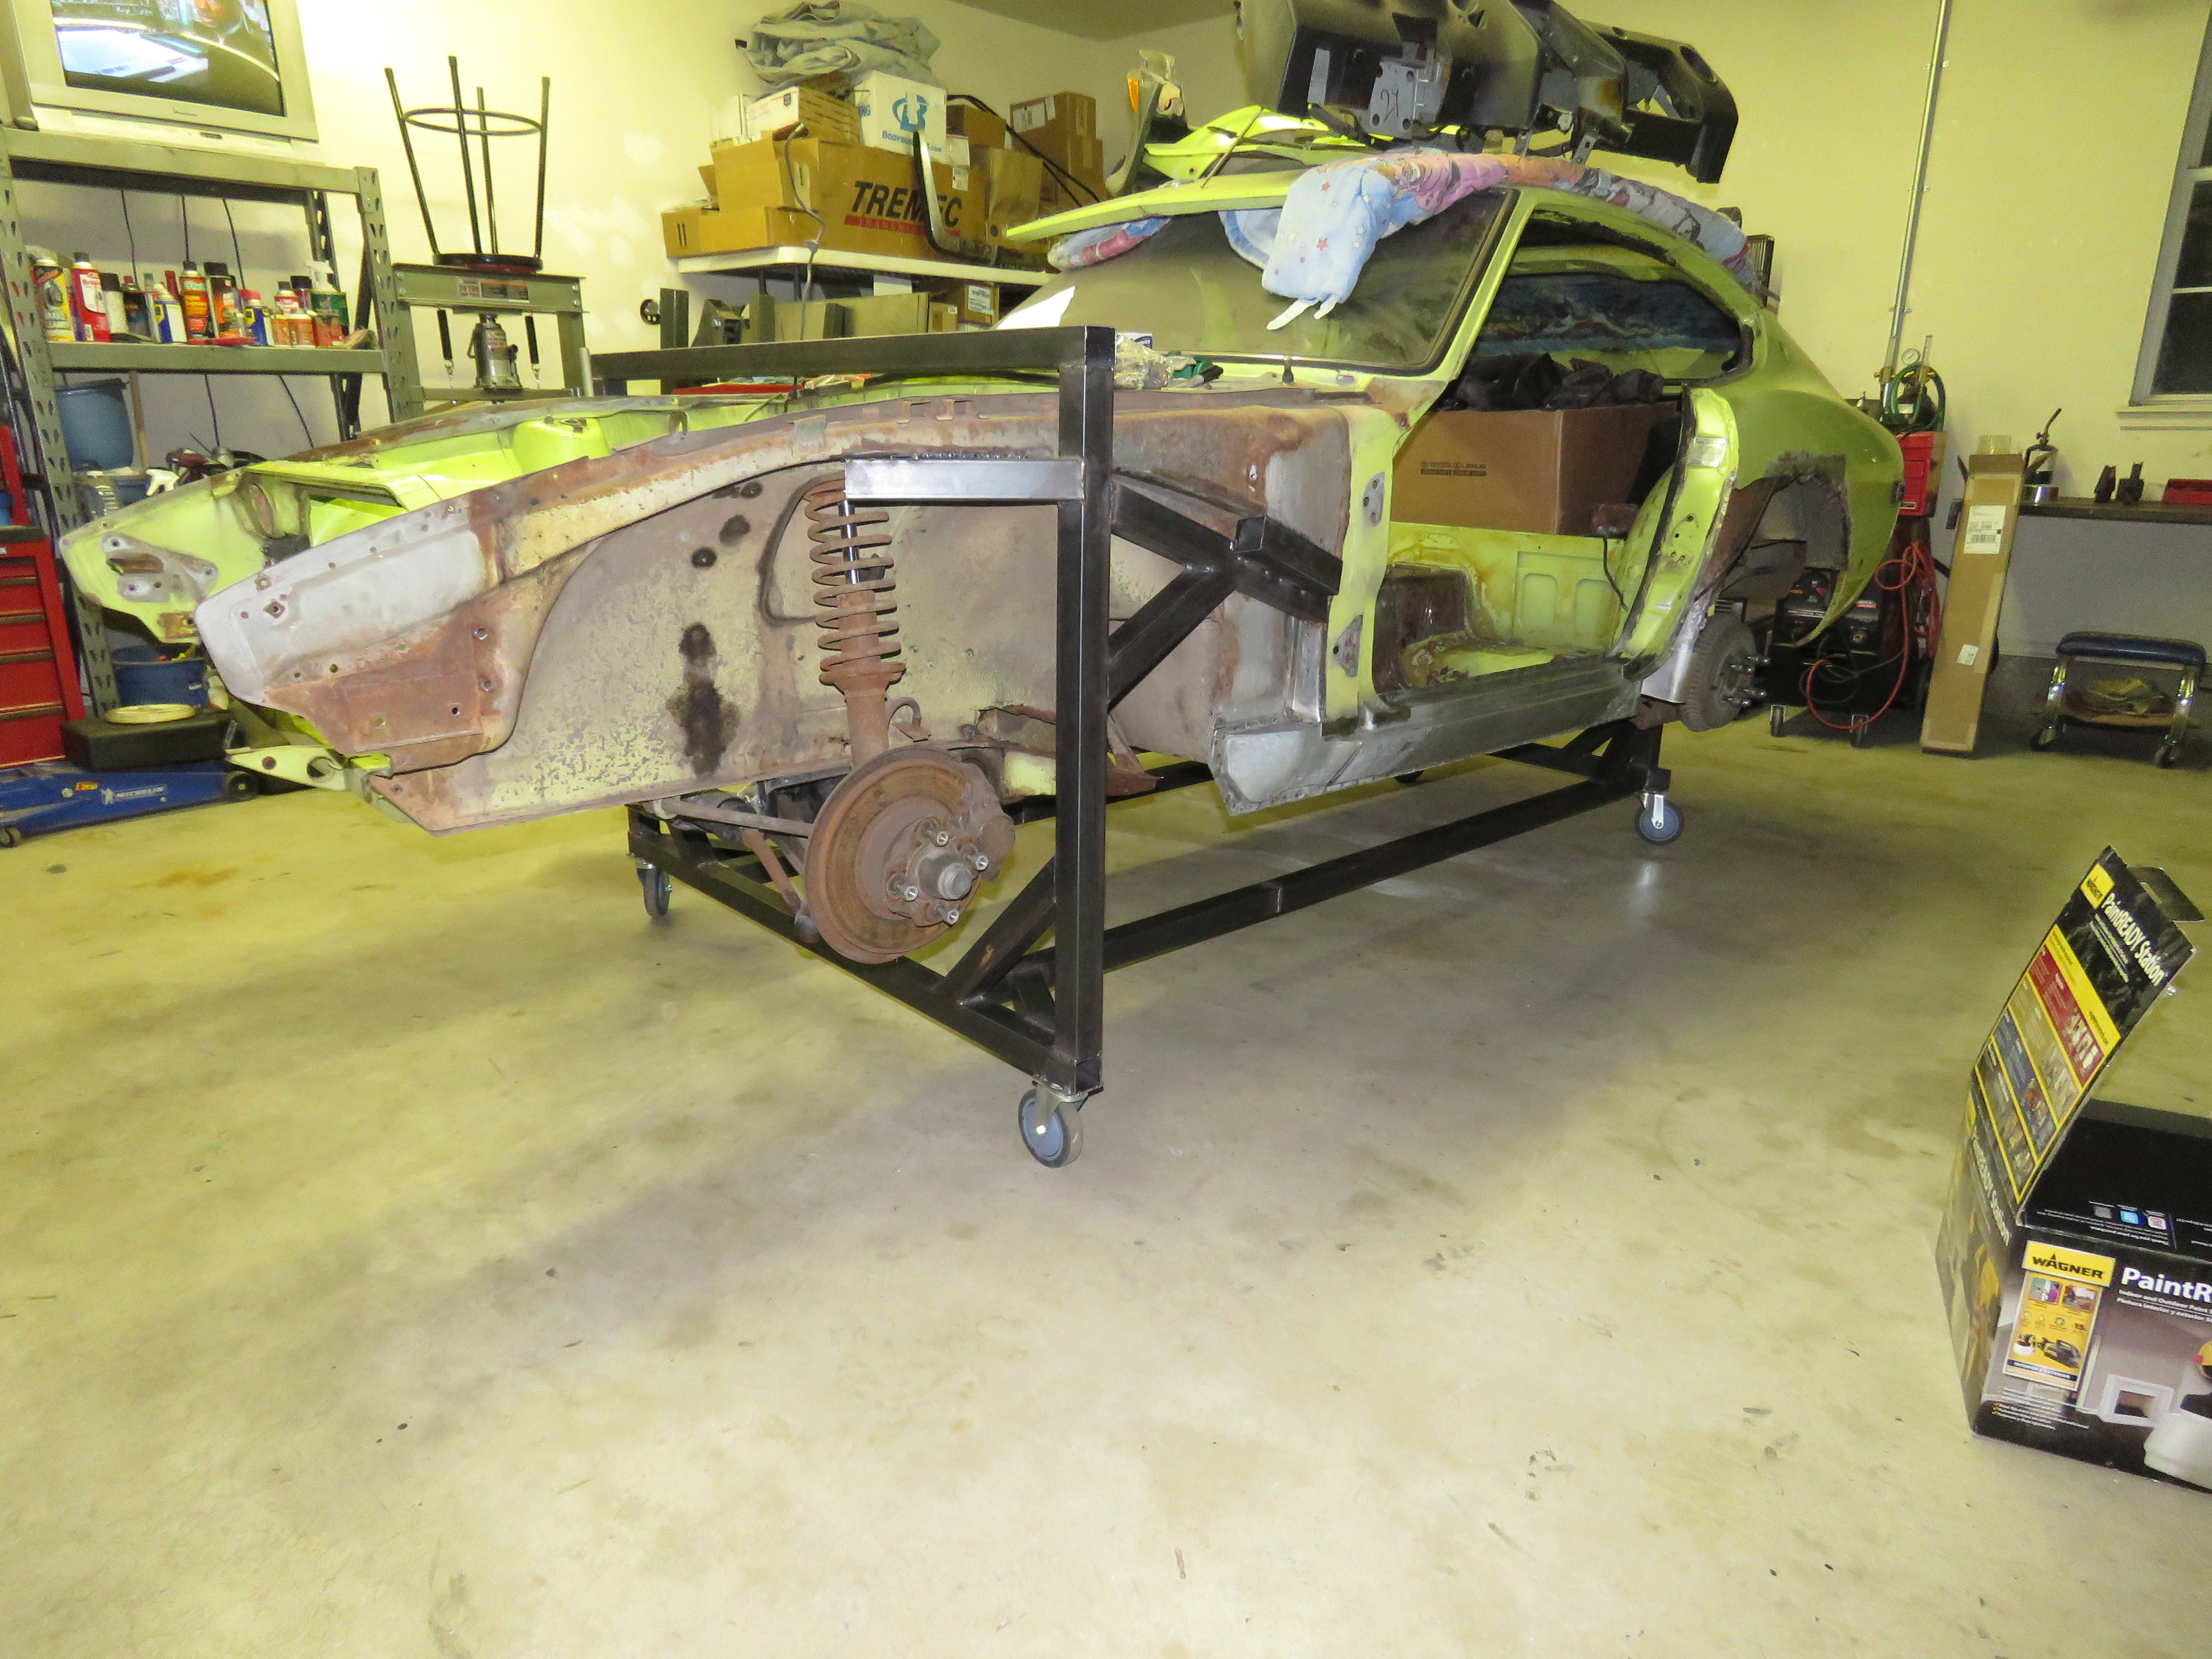
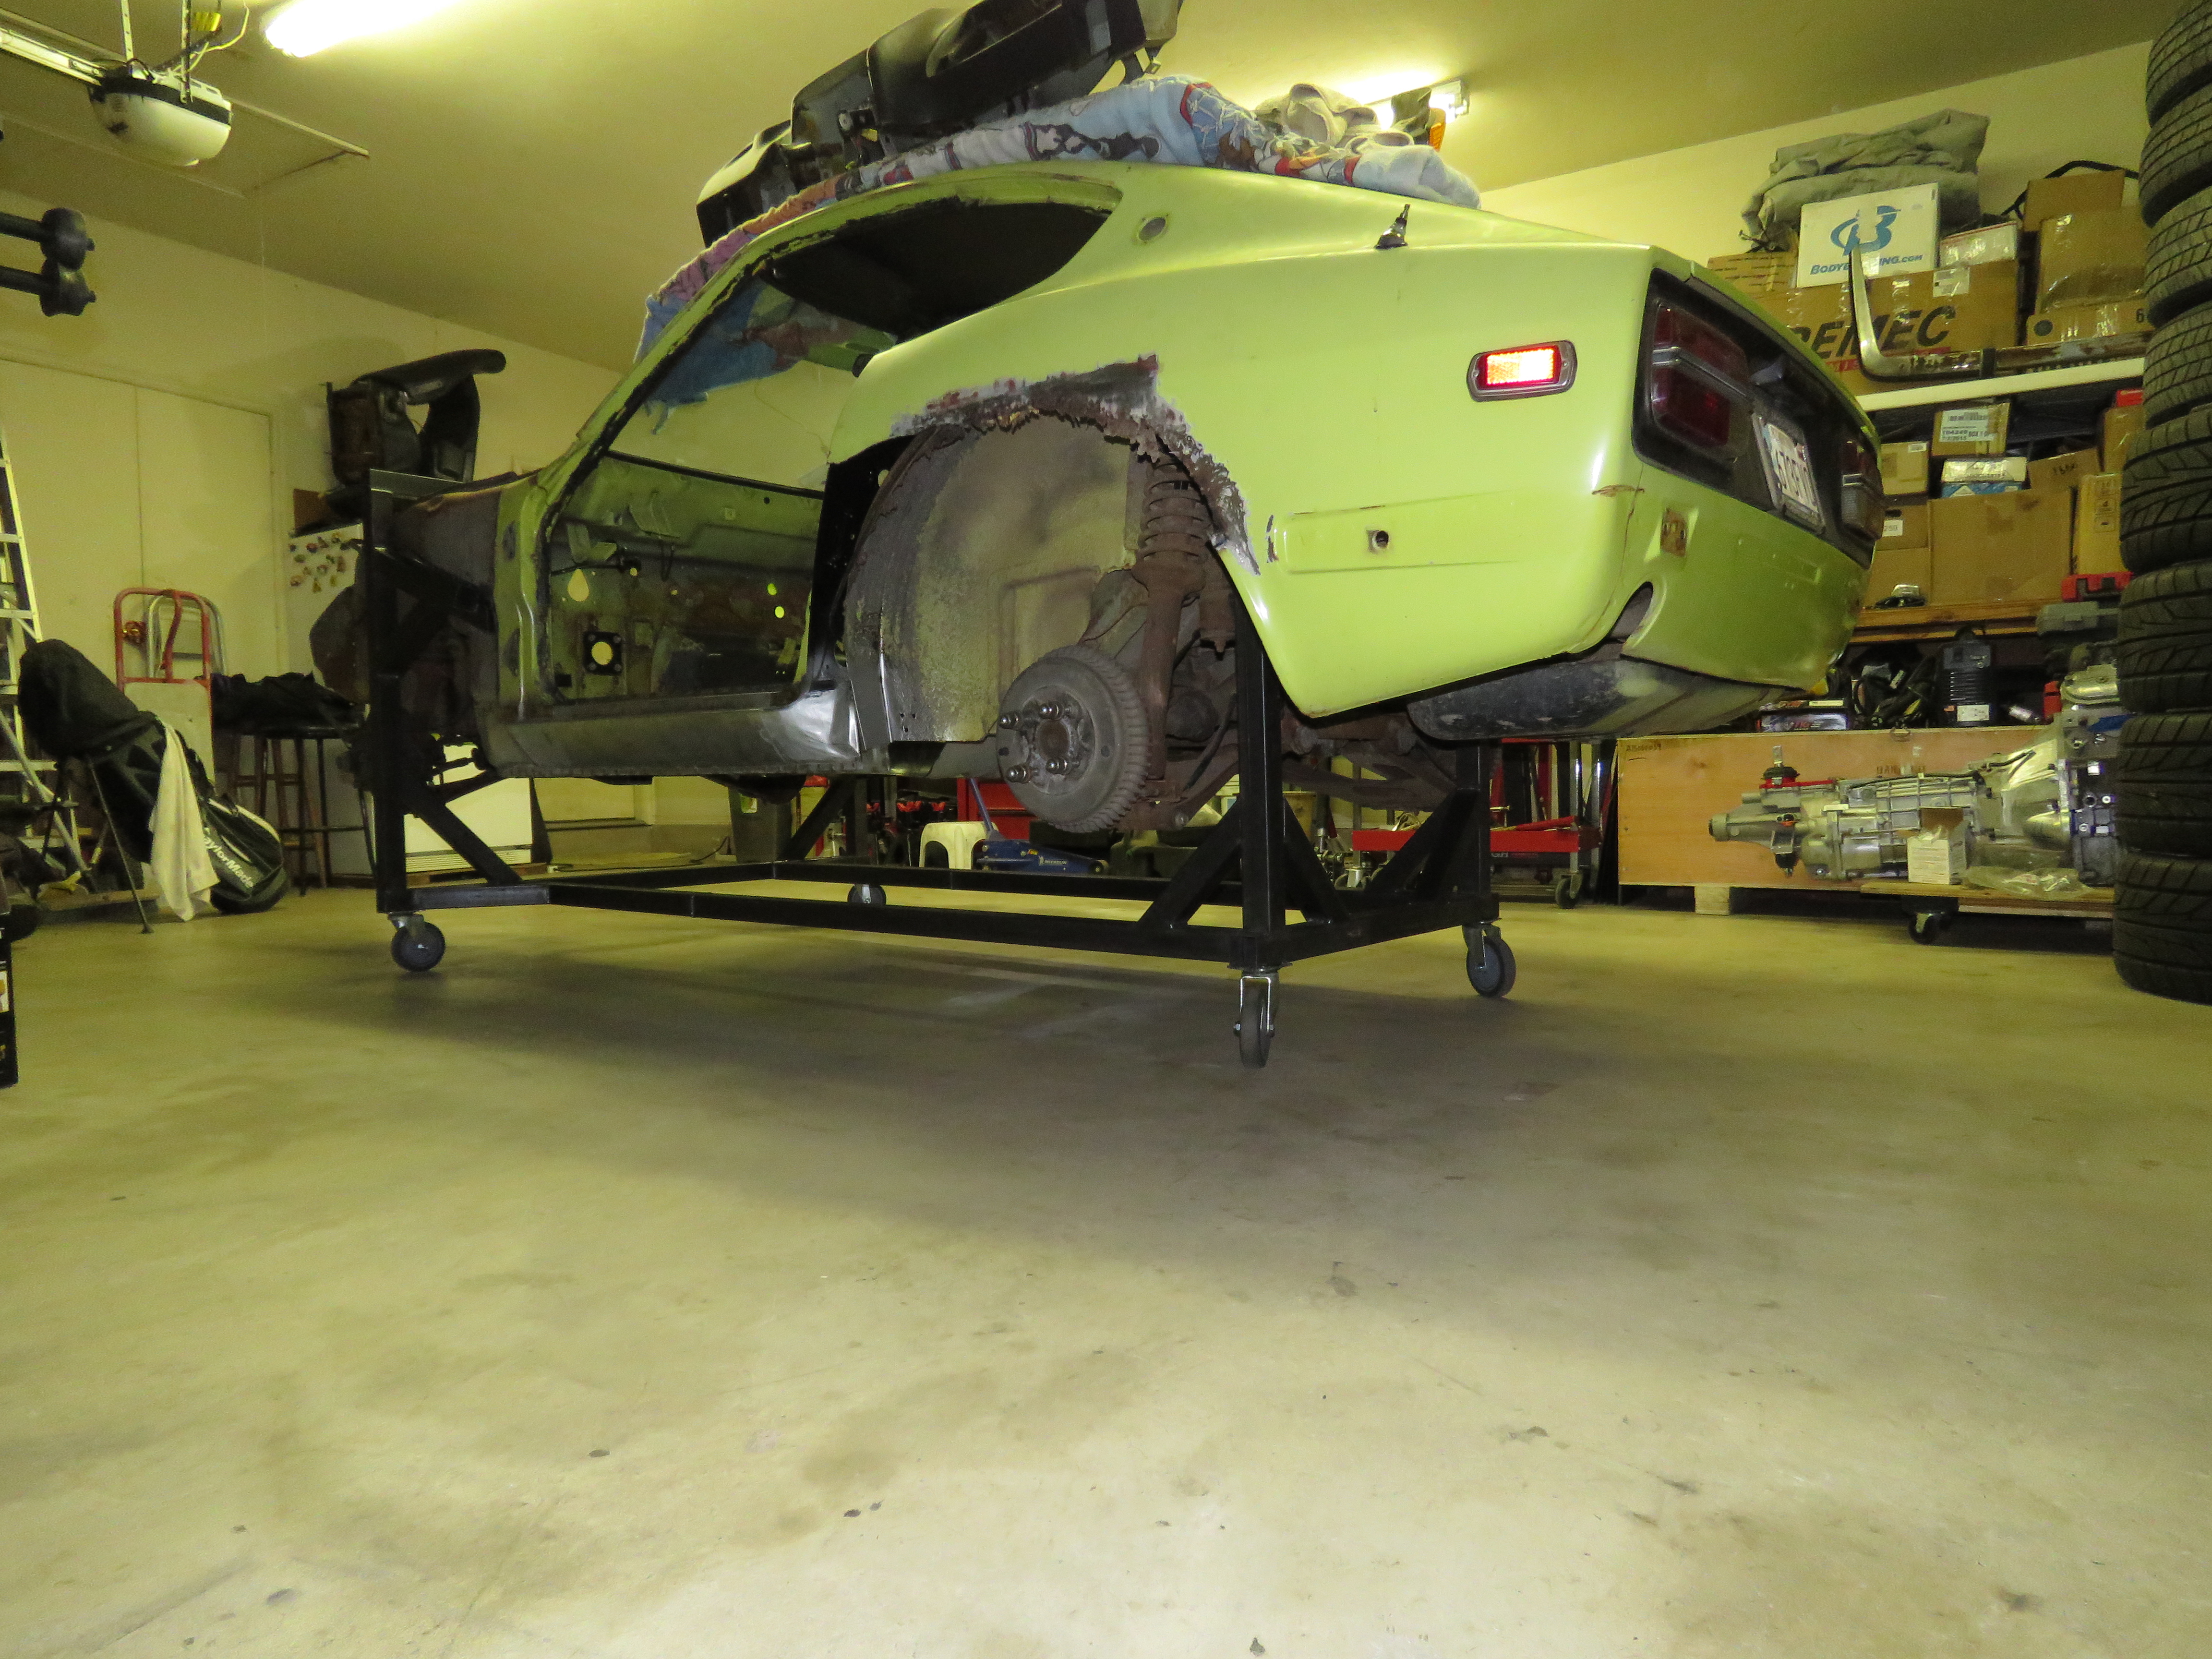
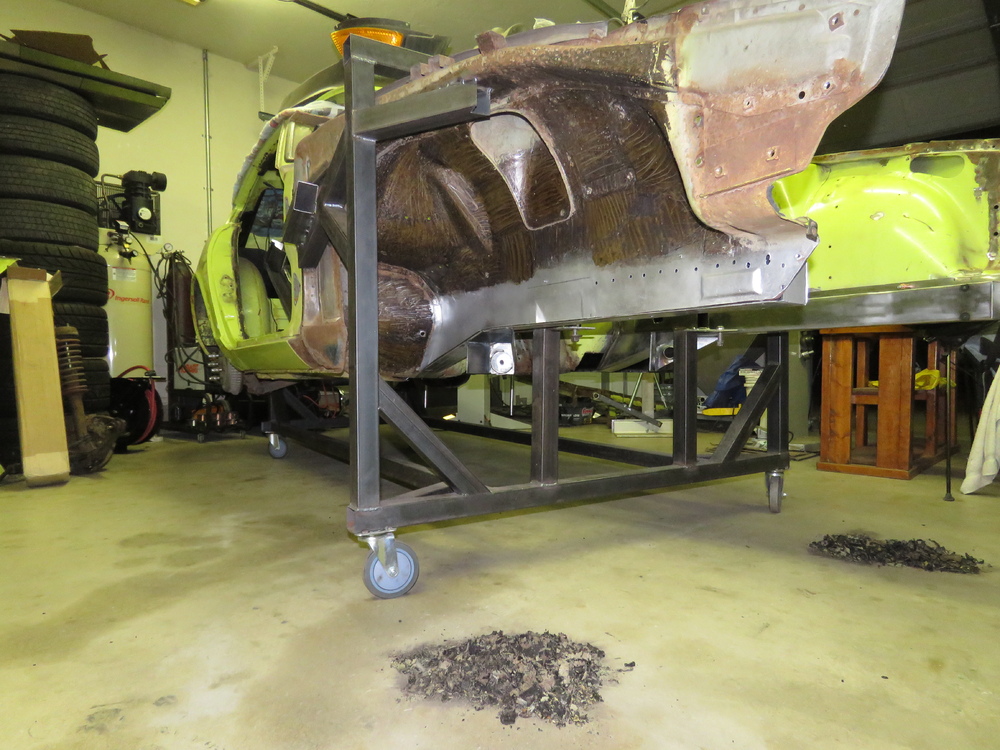
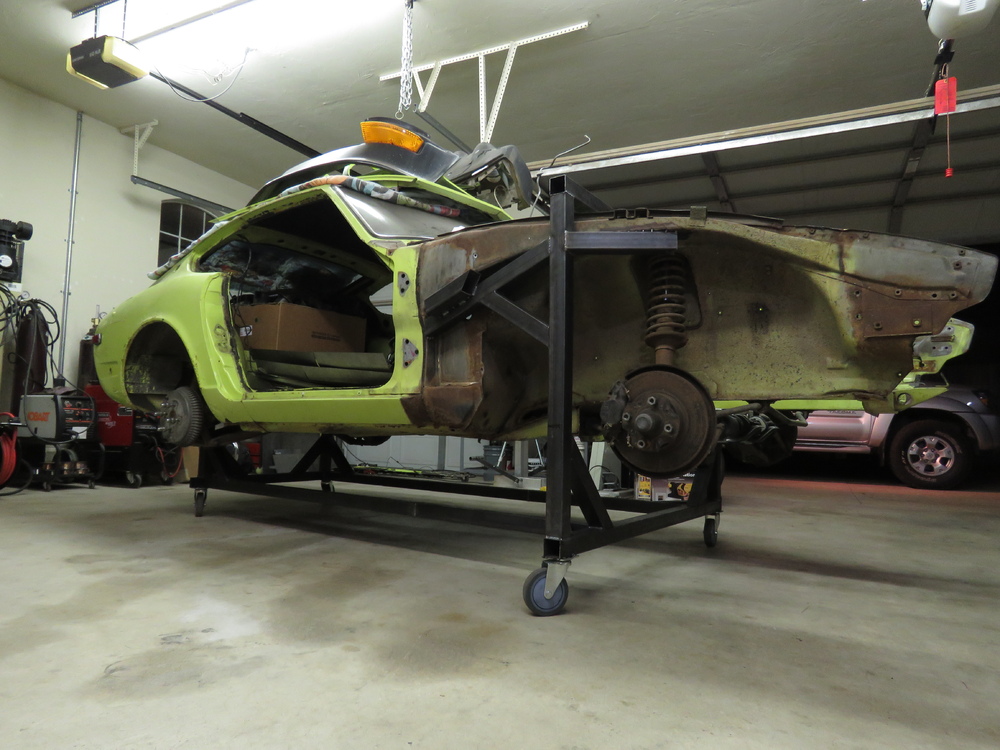
Lots of nice designs. I never worked on a car on a rotisserie. My main reason was I needed to work on the frame. Though I wish Id have one, would make working underneath the car easier. Maybe I will use one on my next project if it needs it.
-
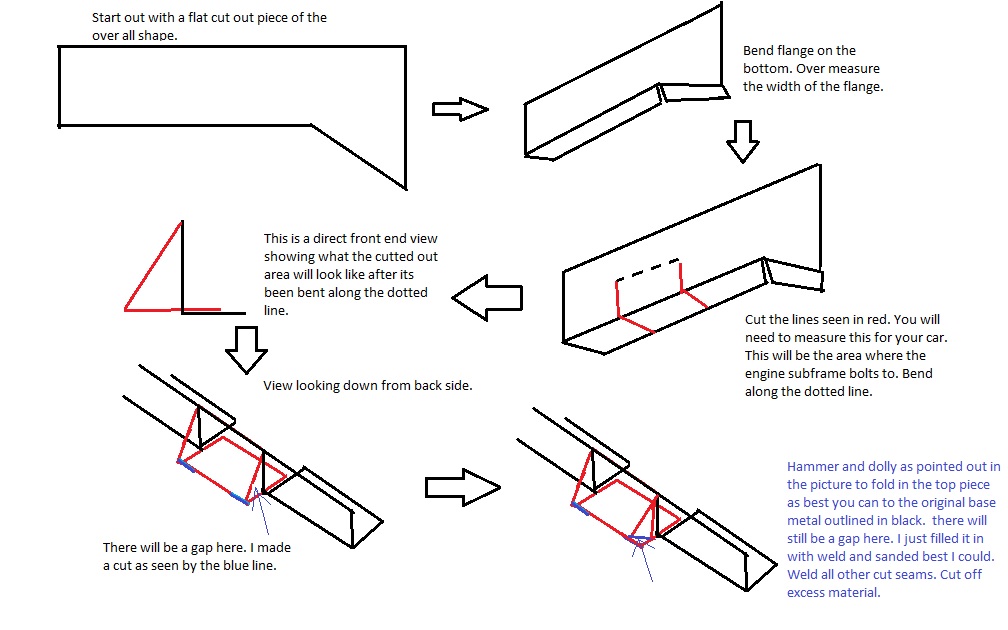
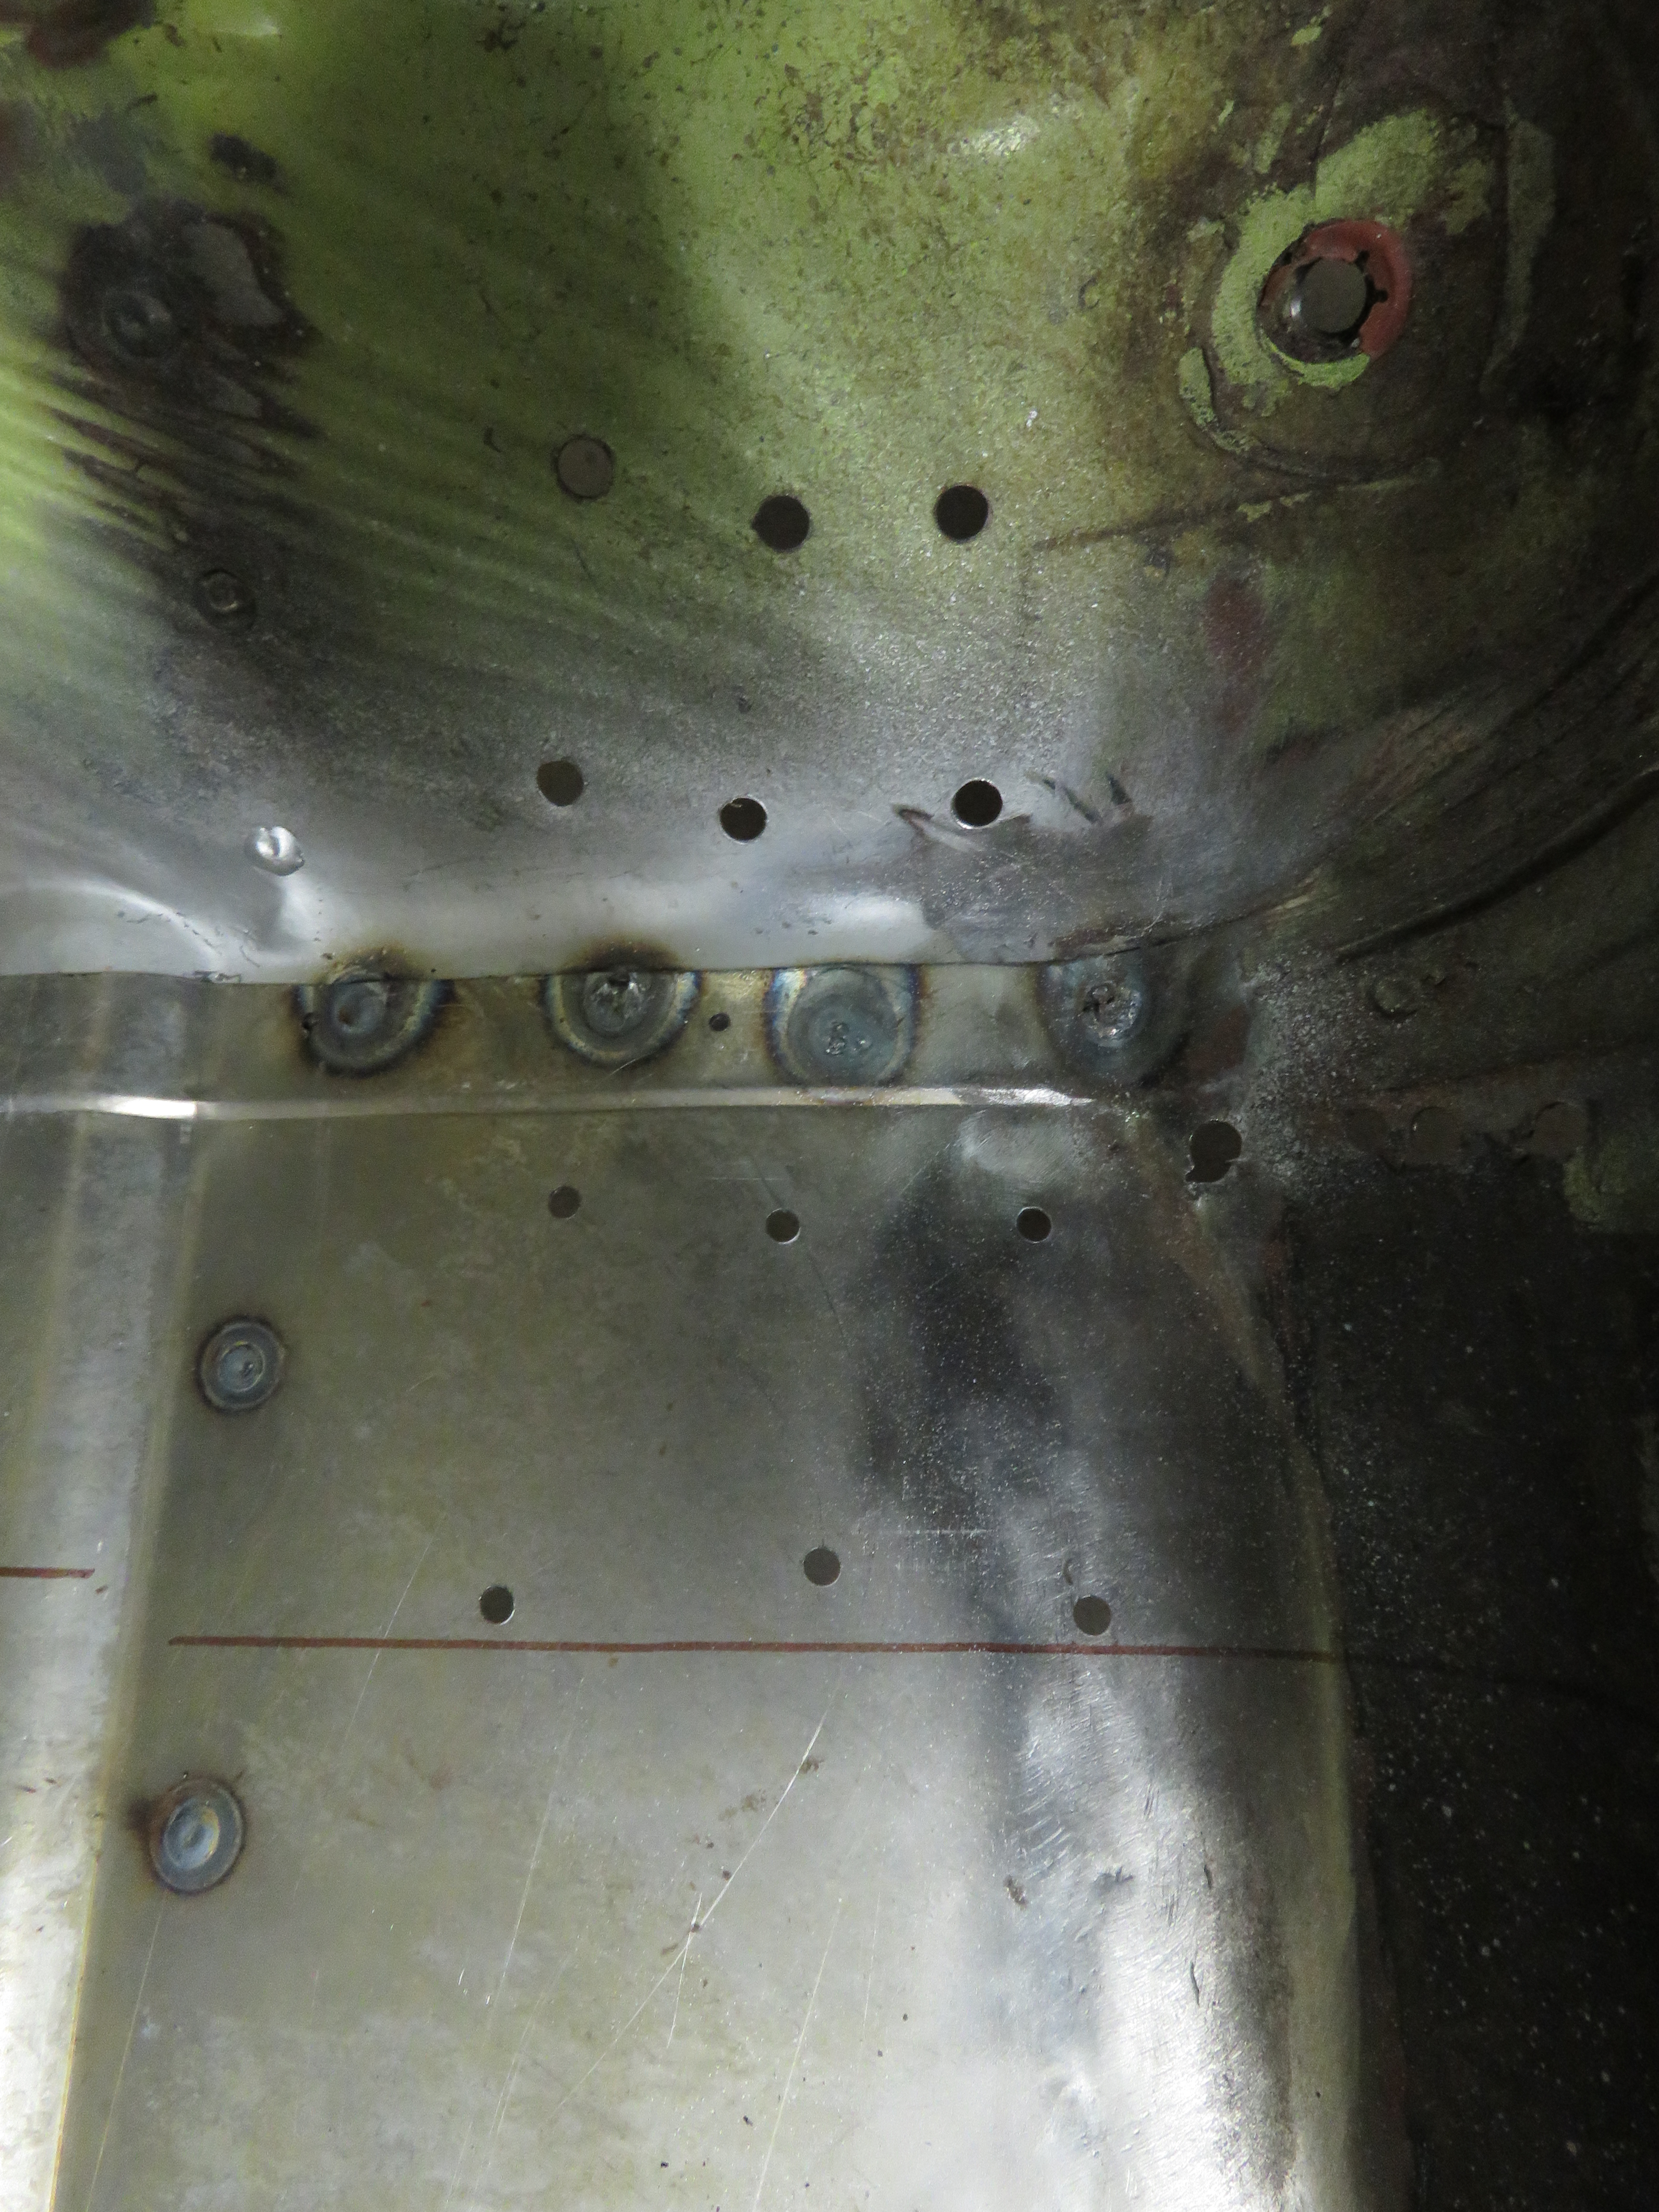
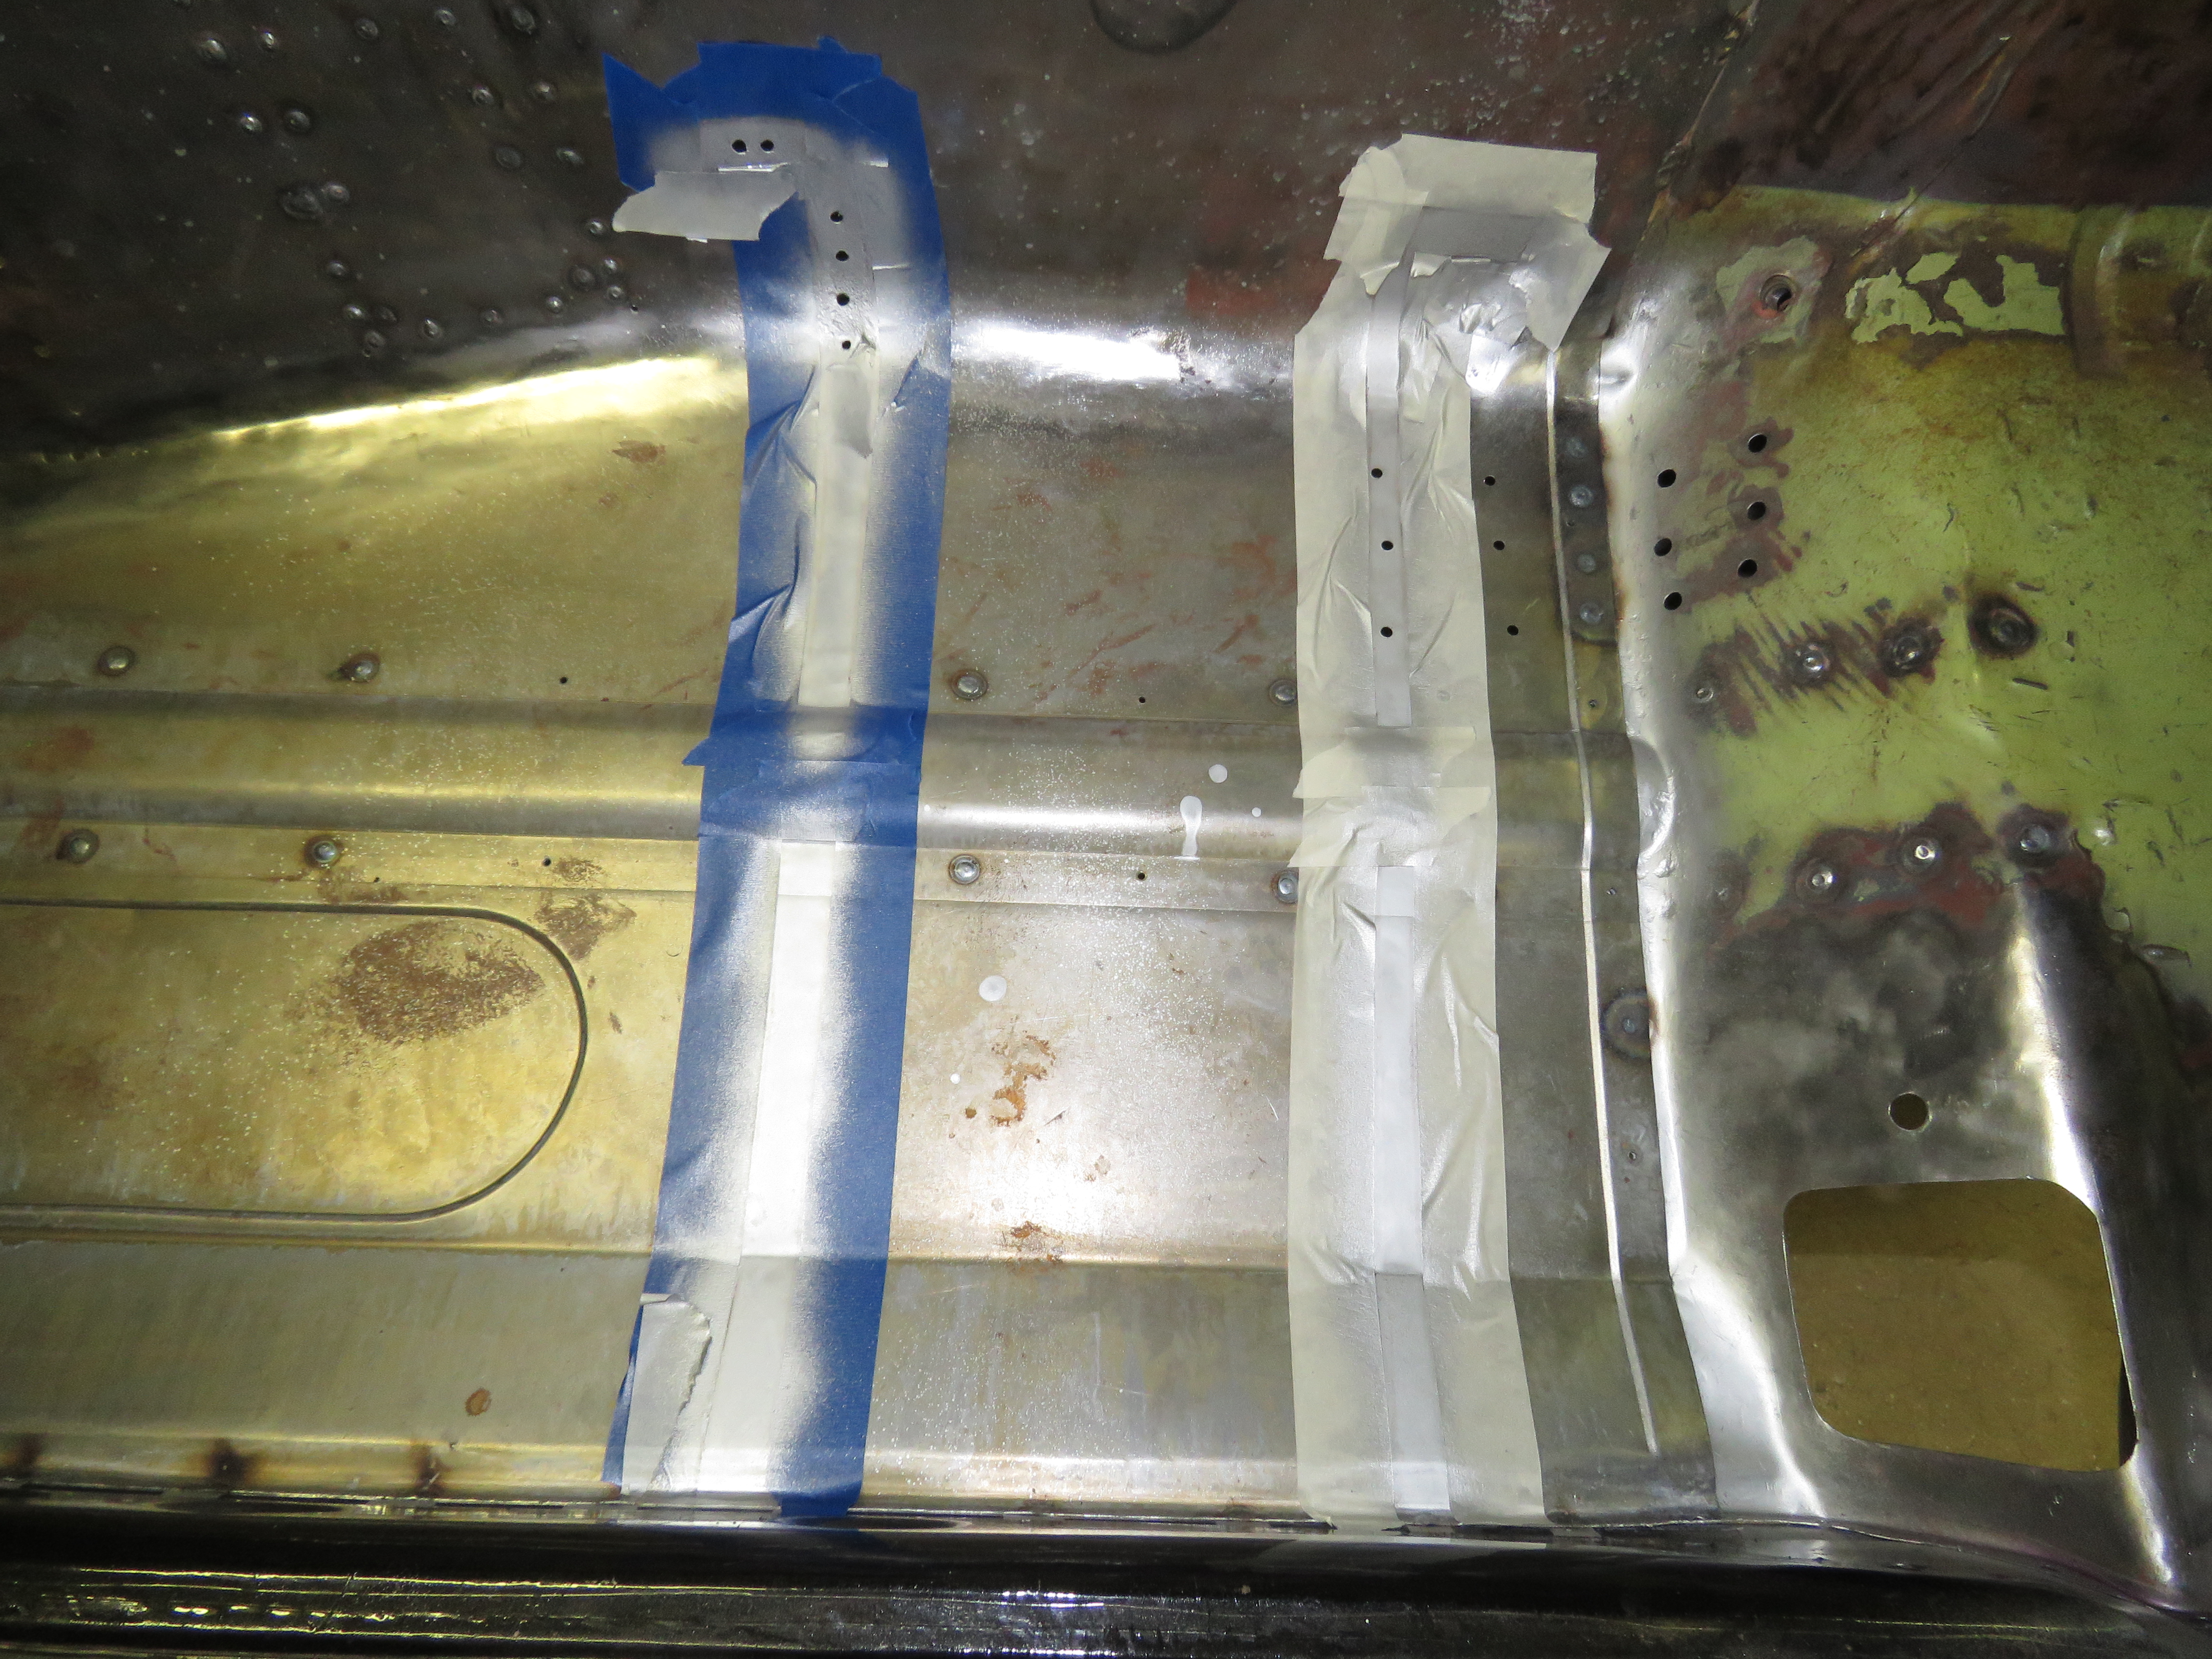
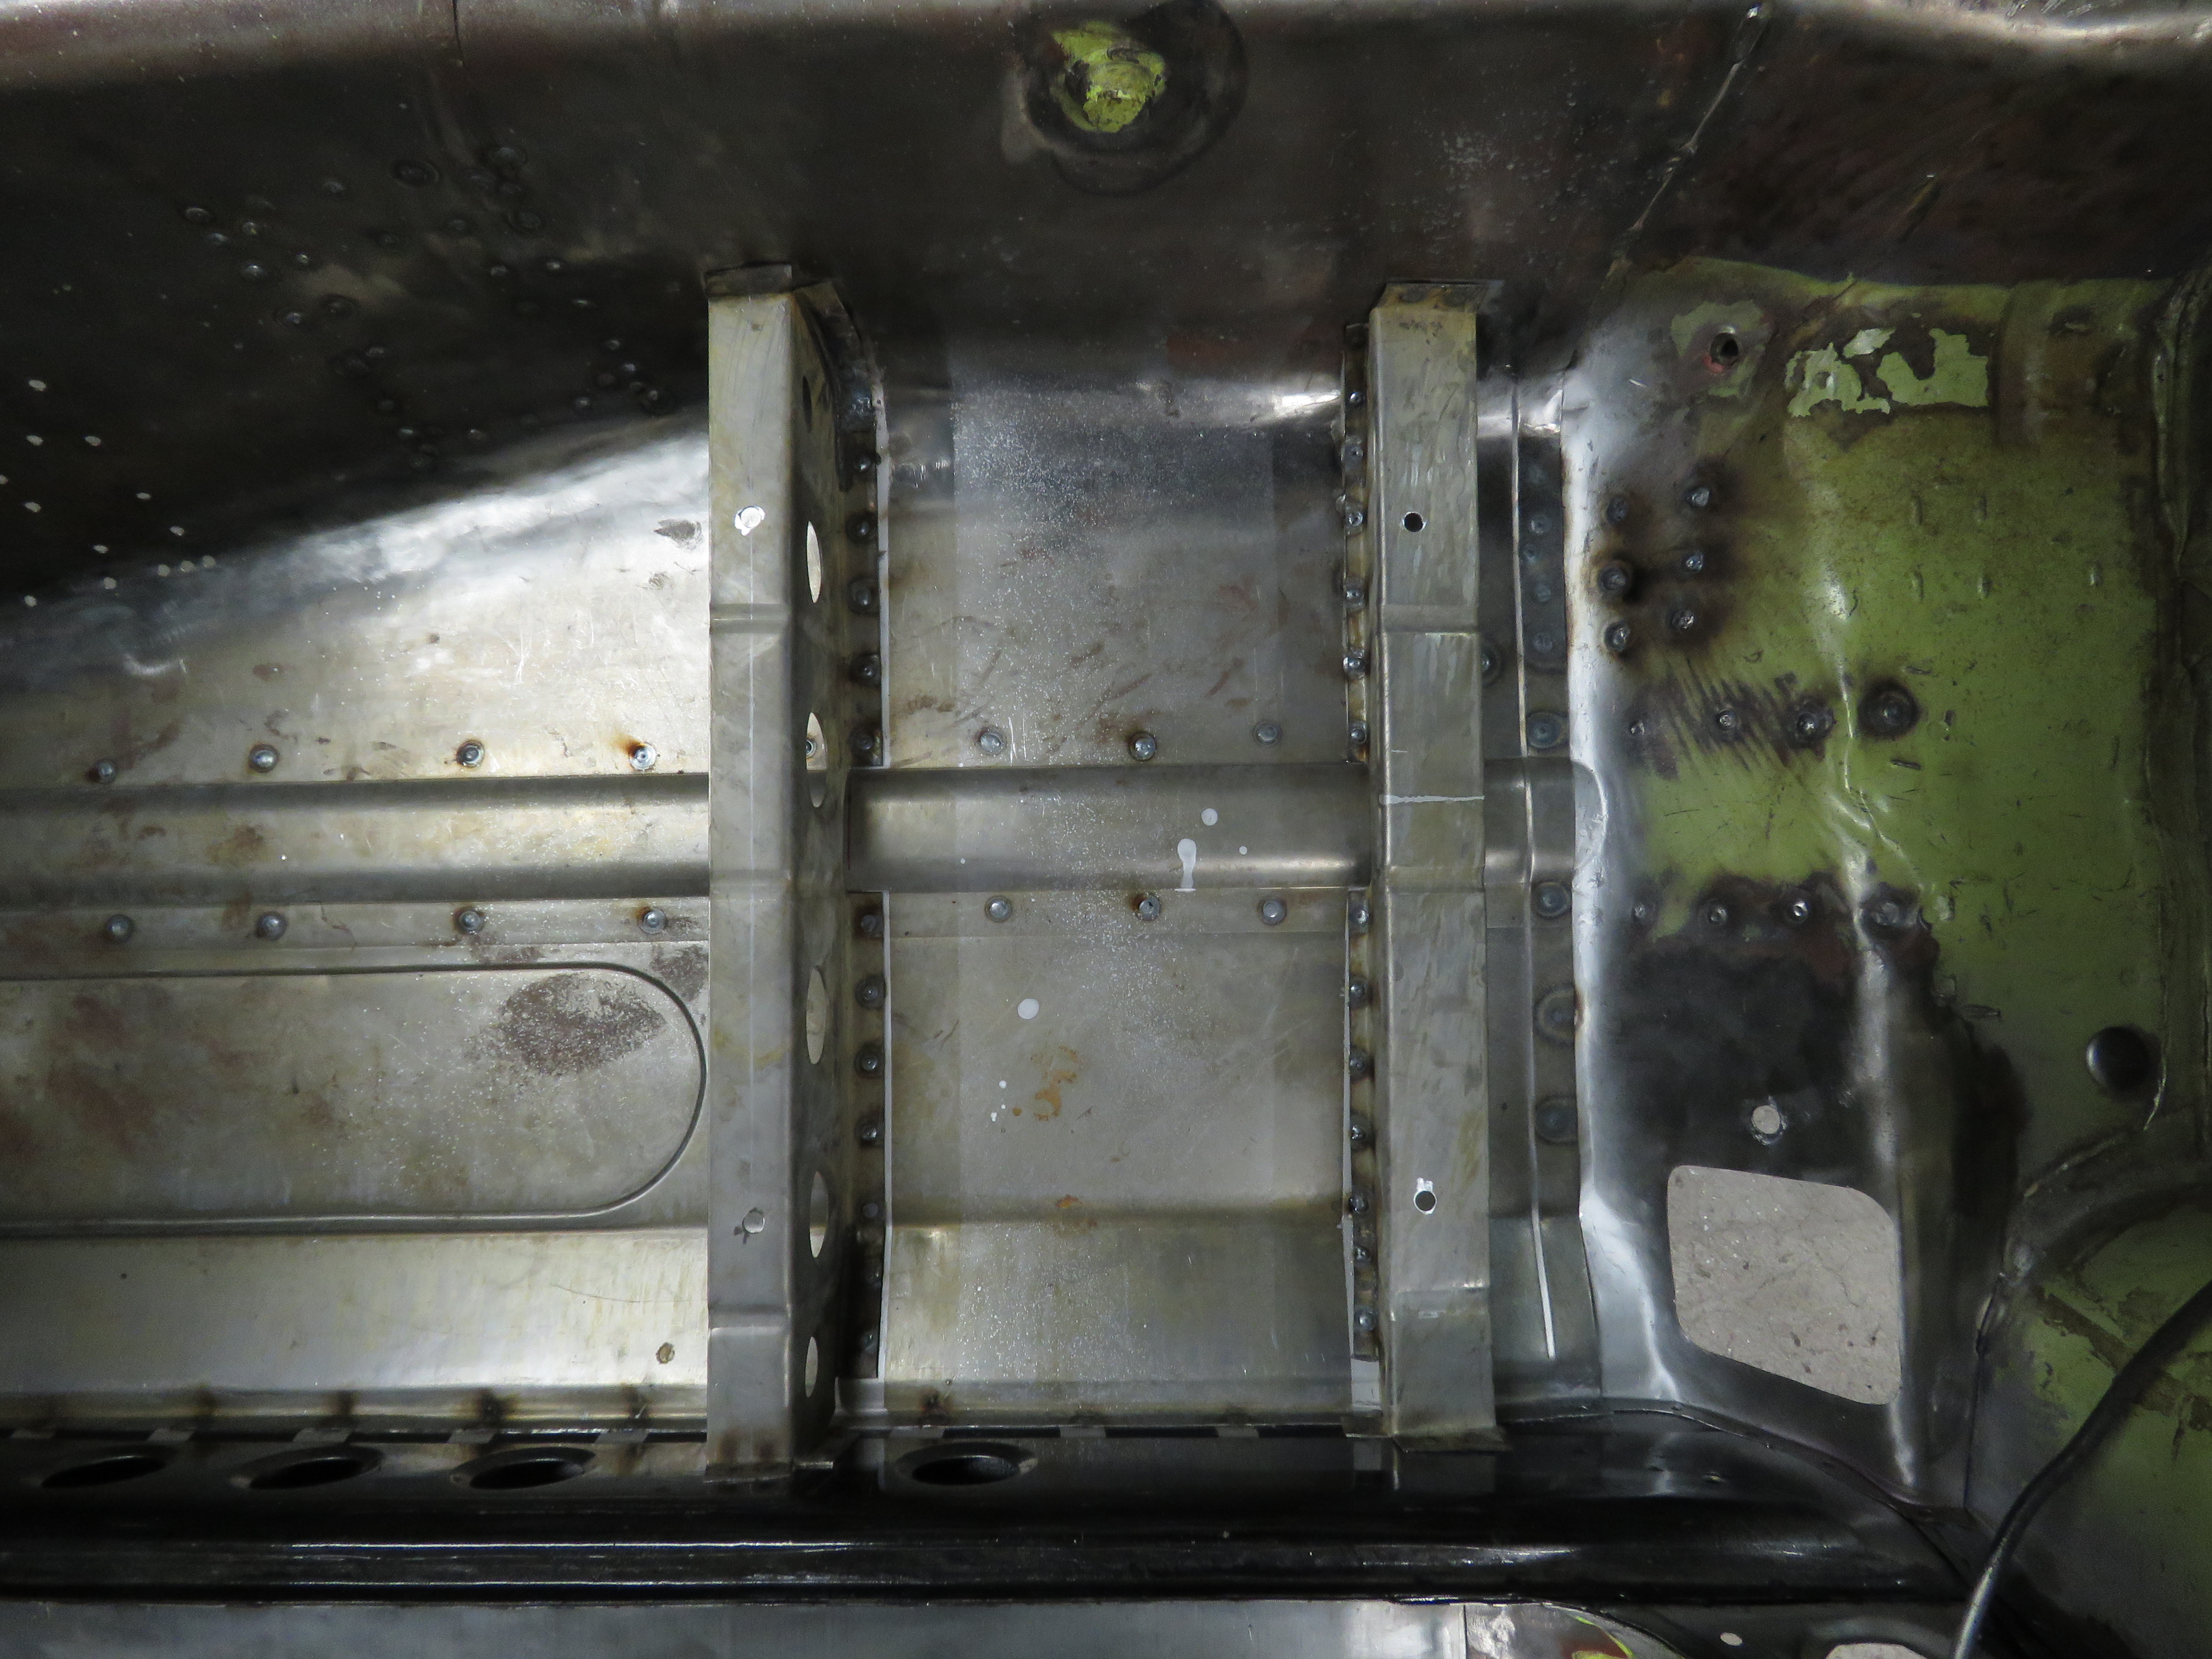
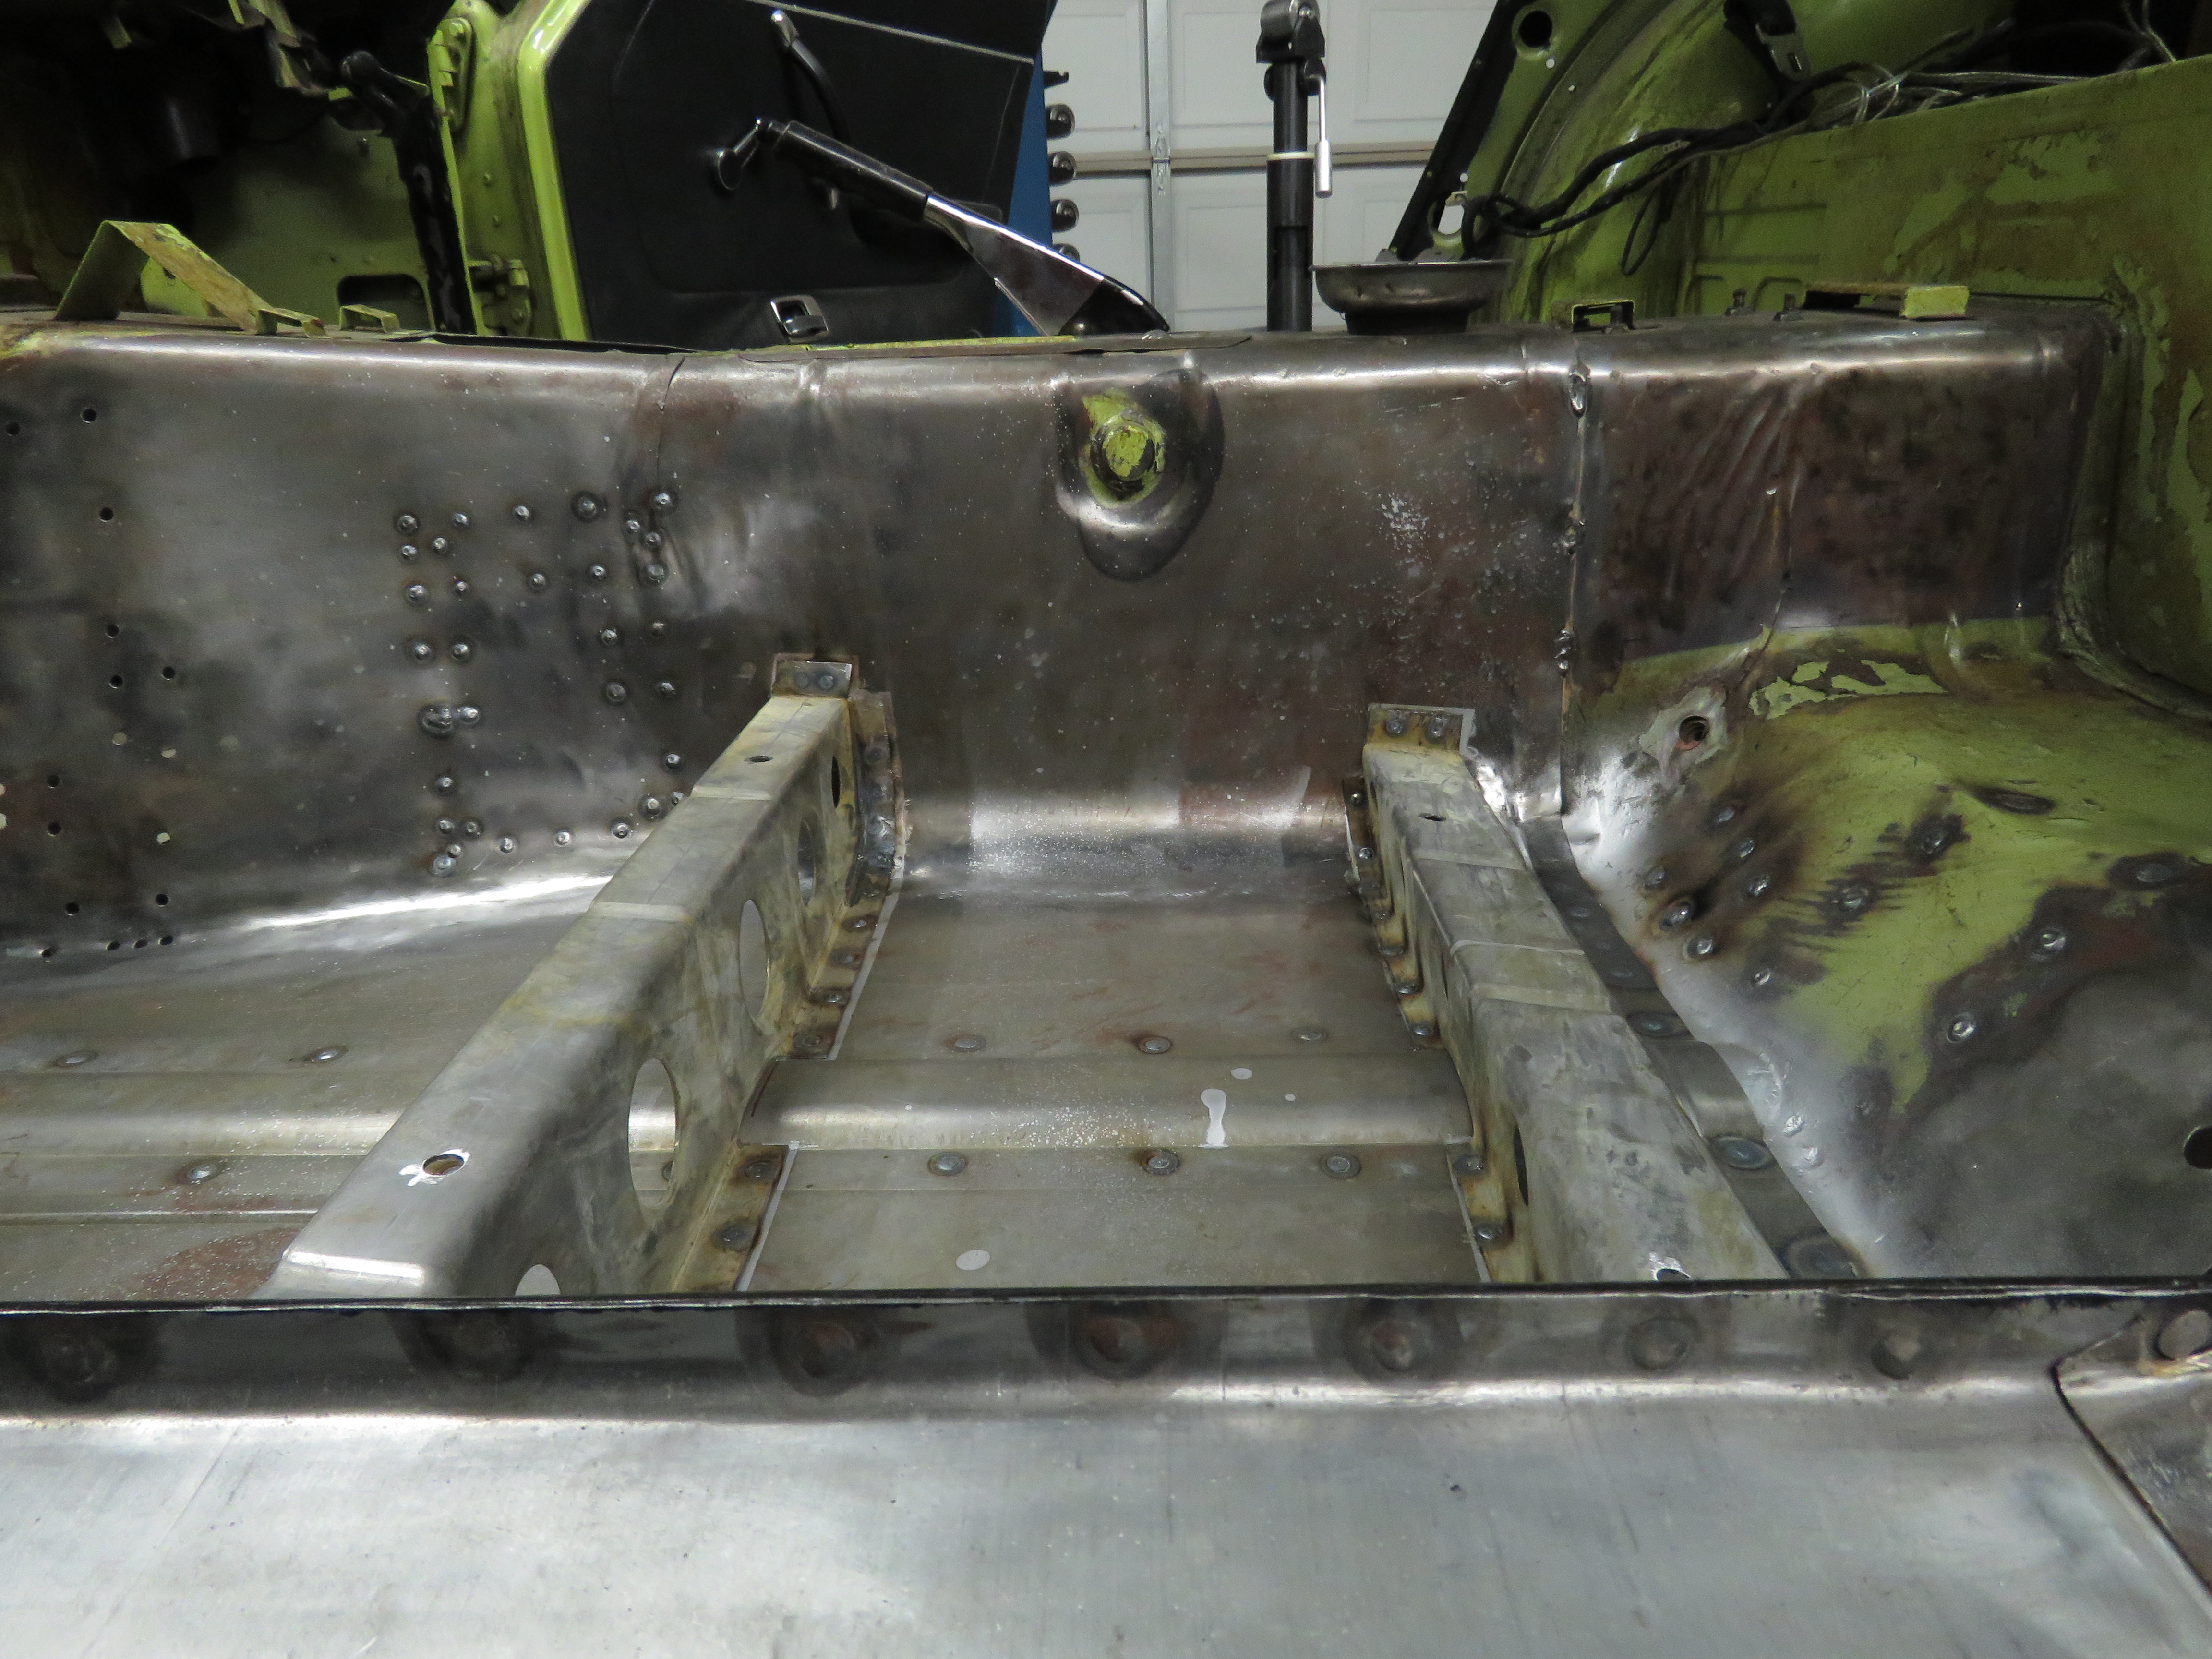
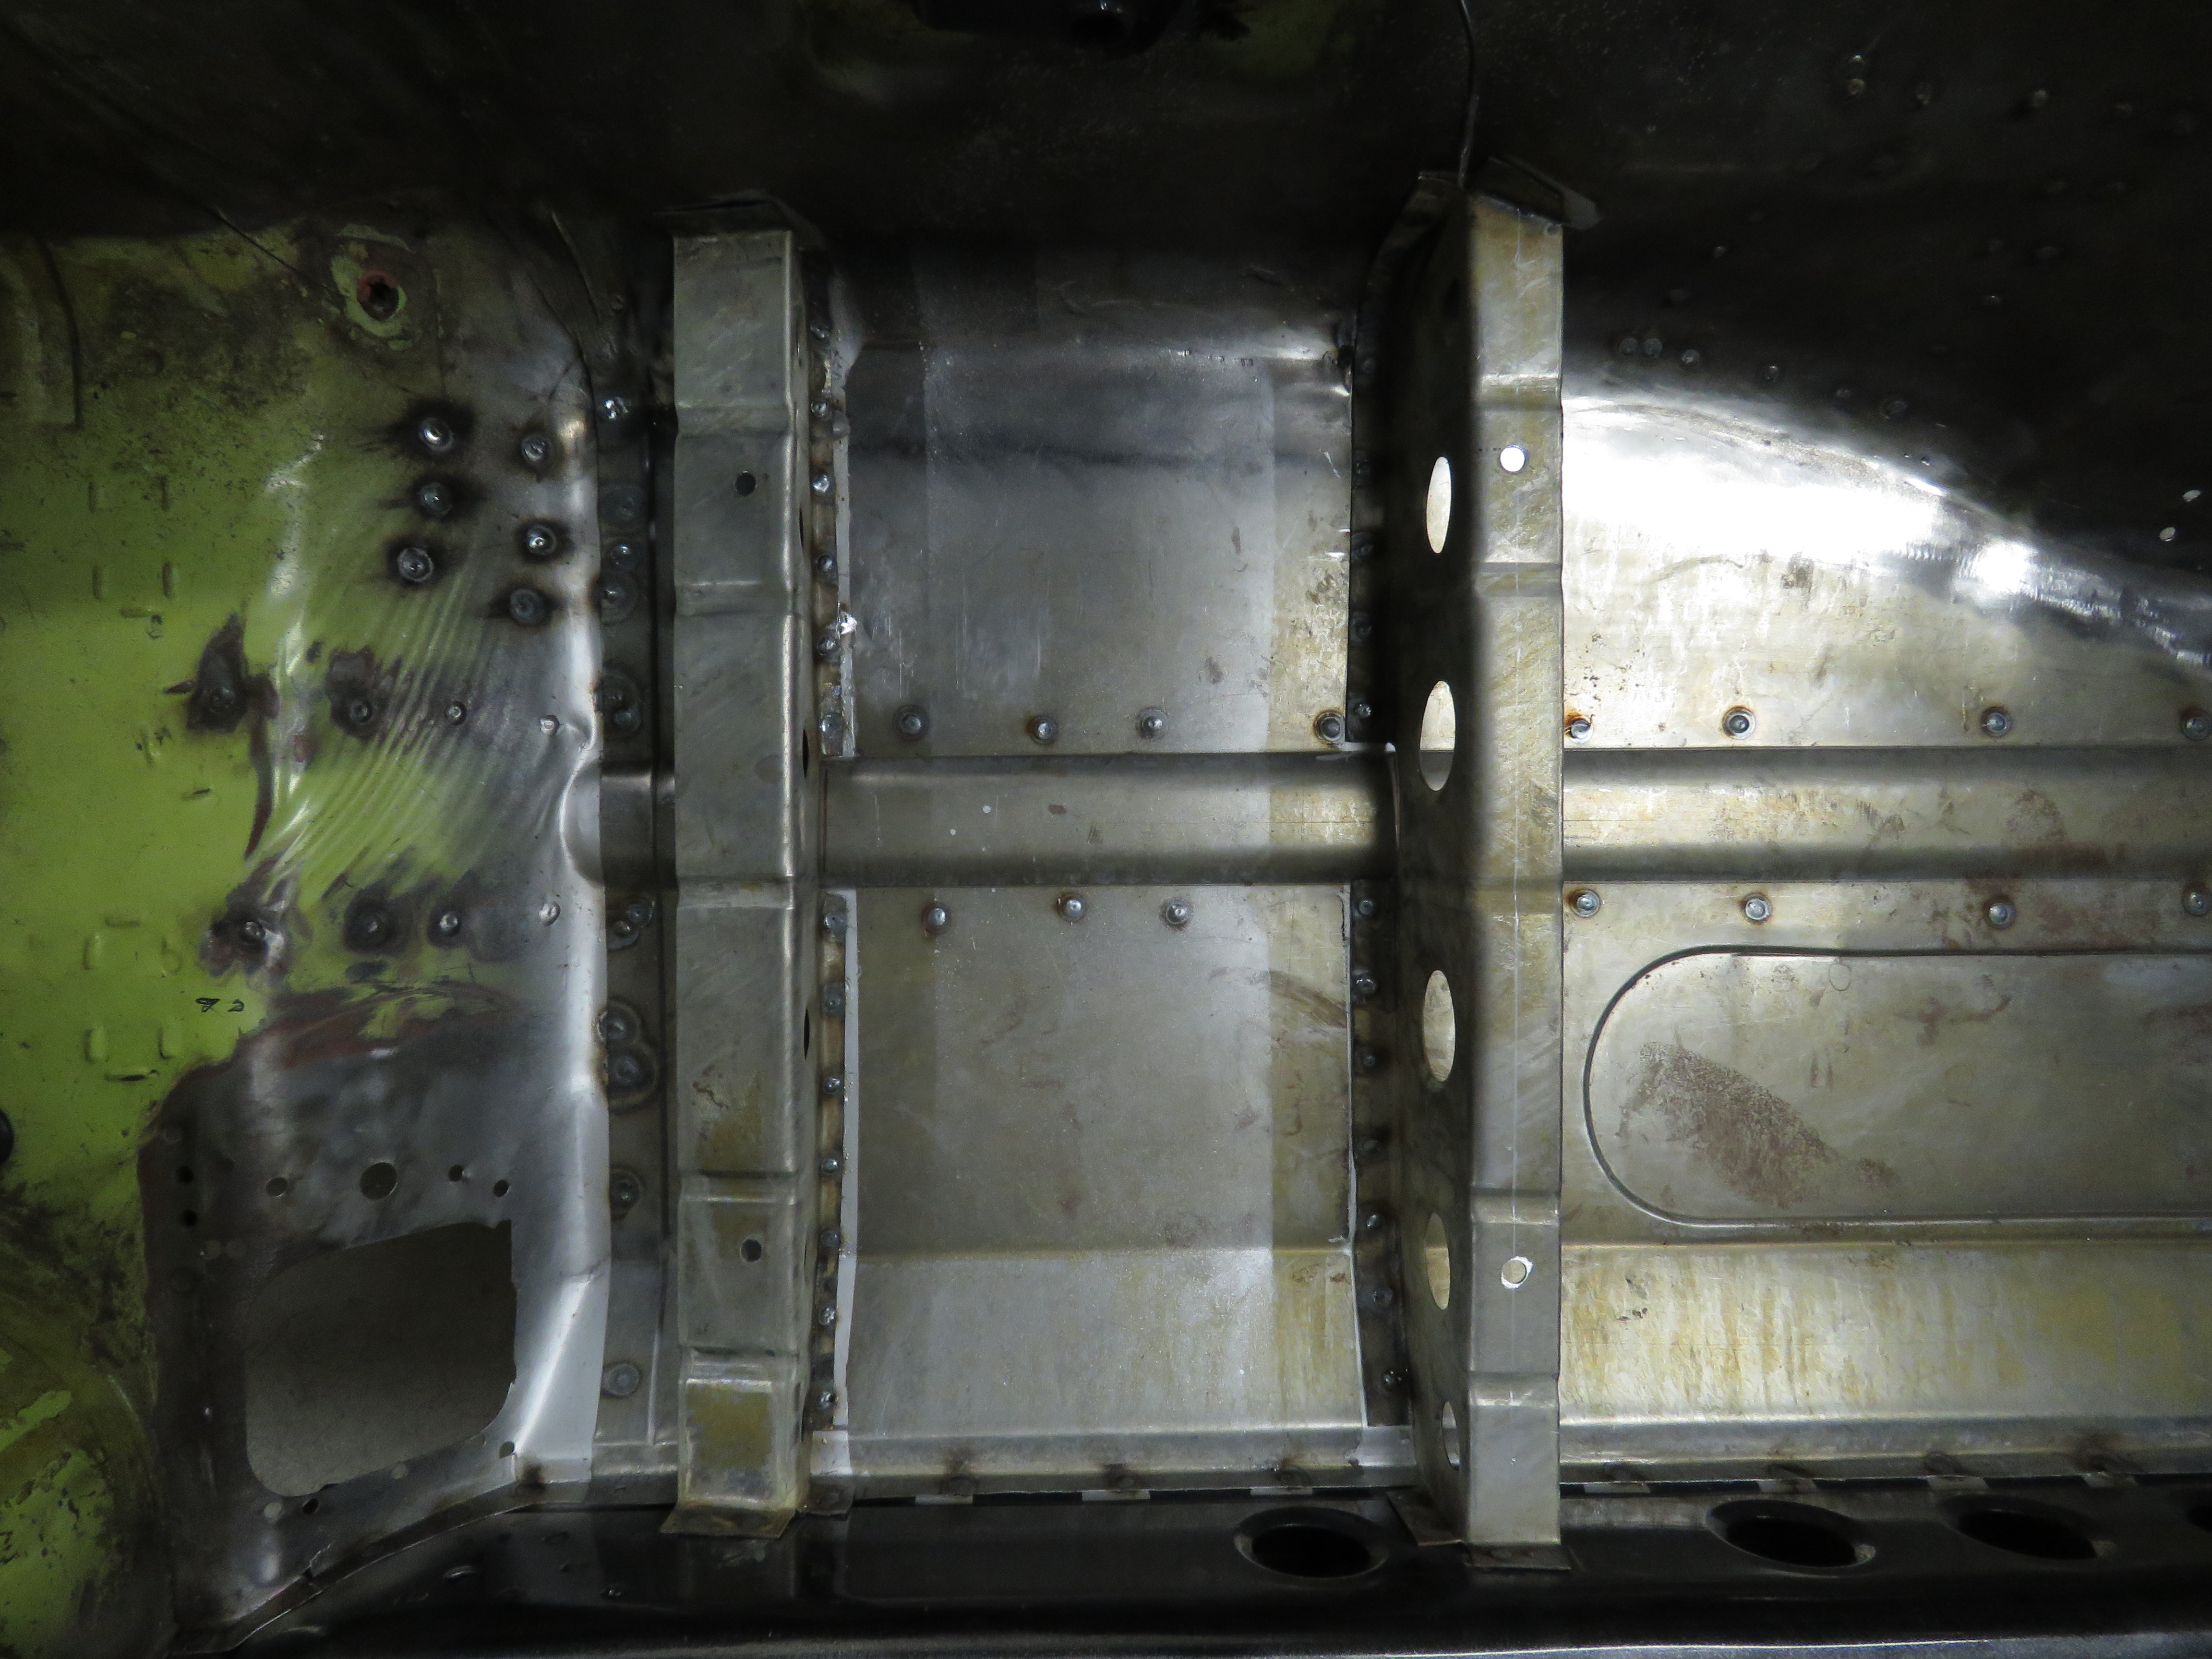
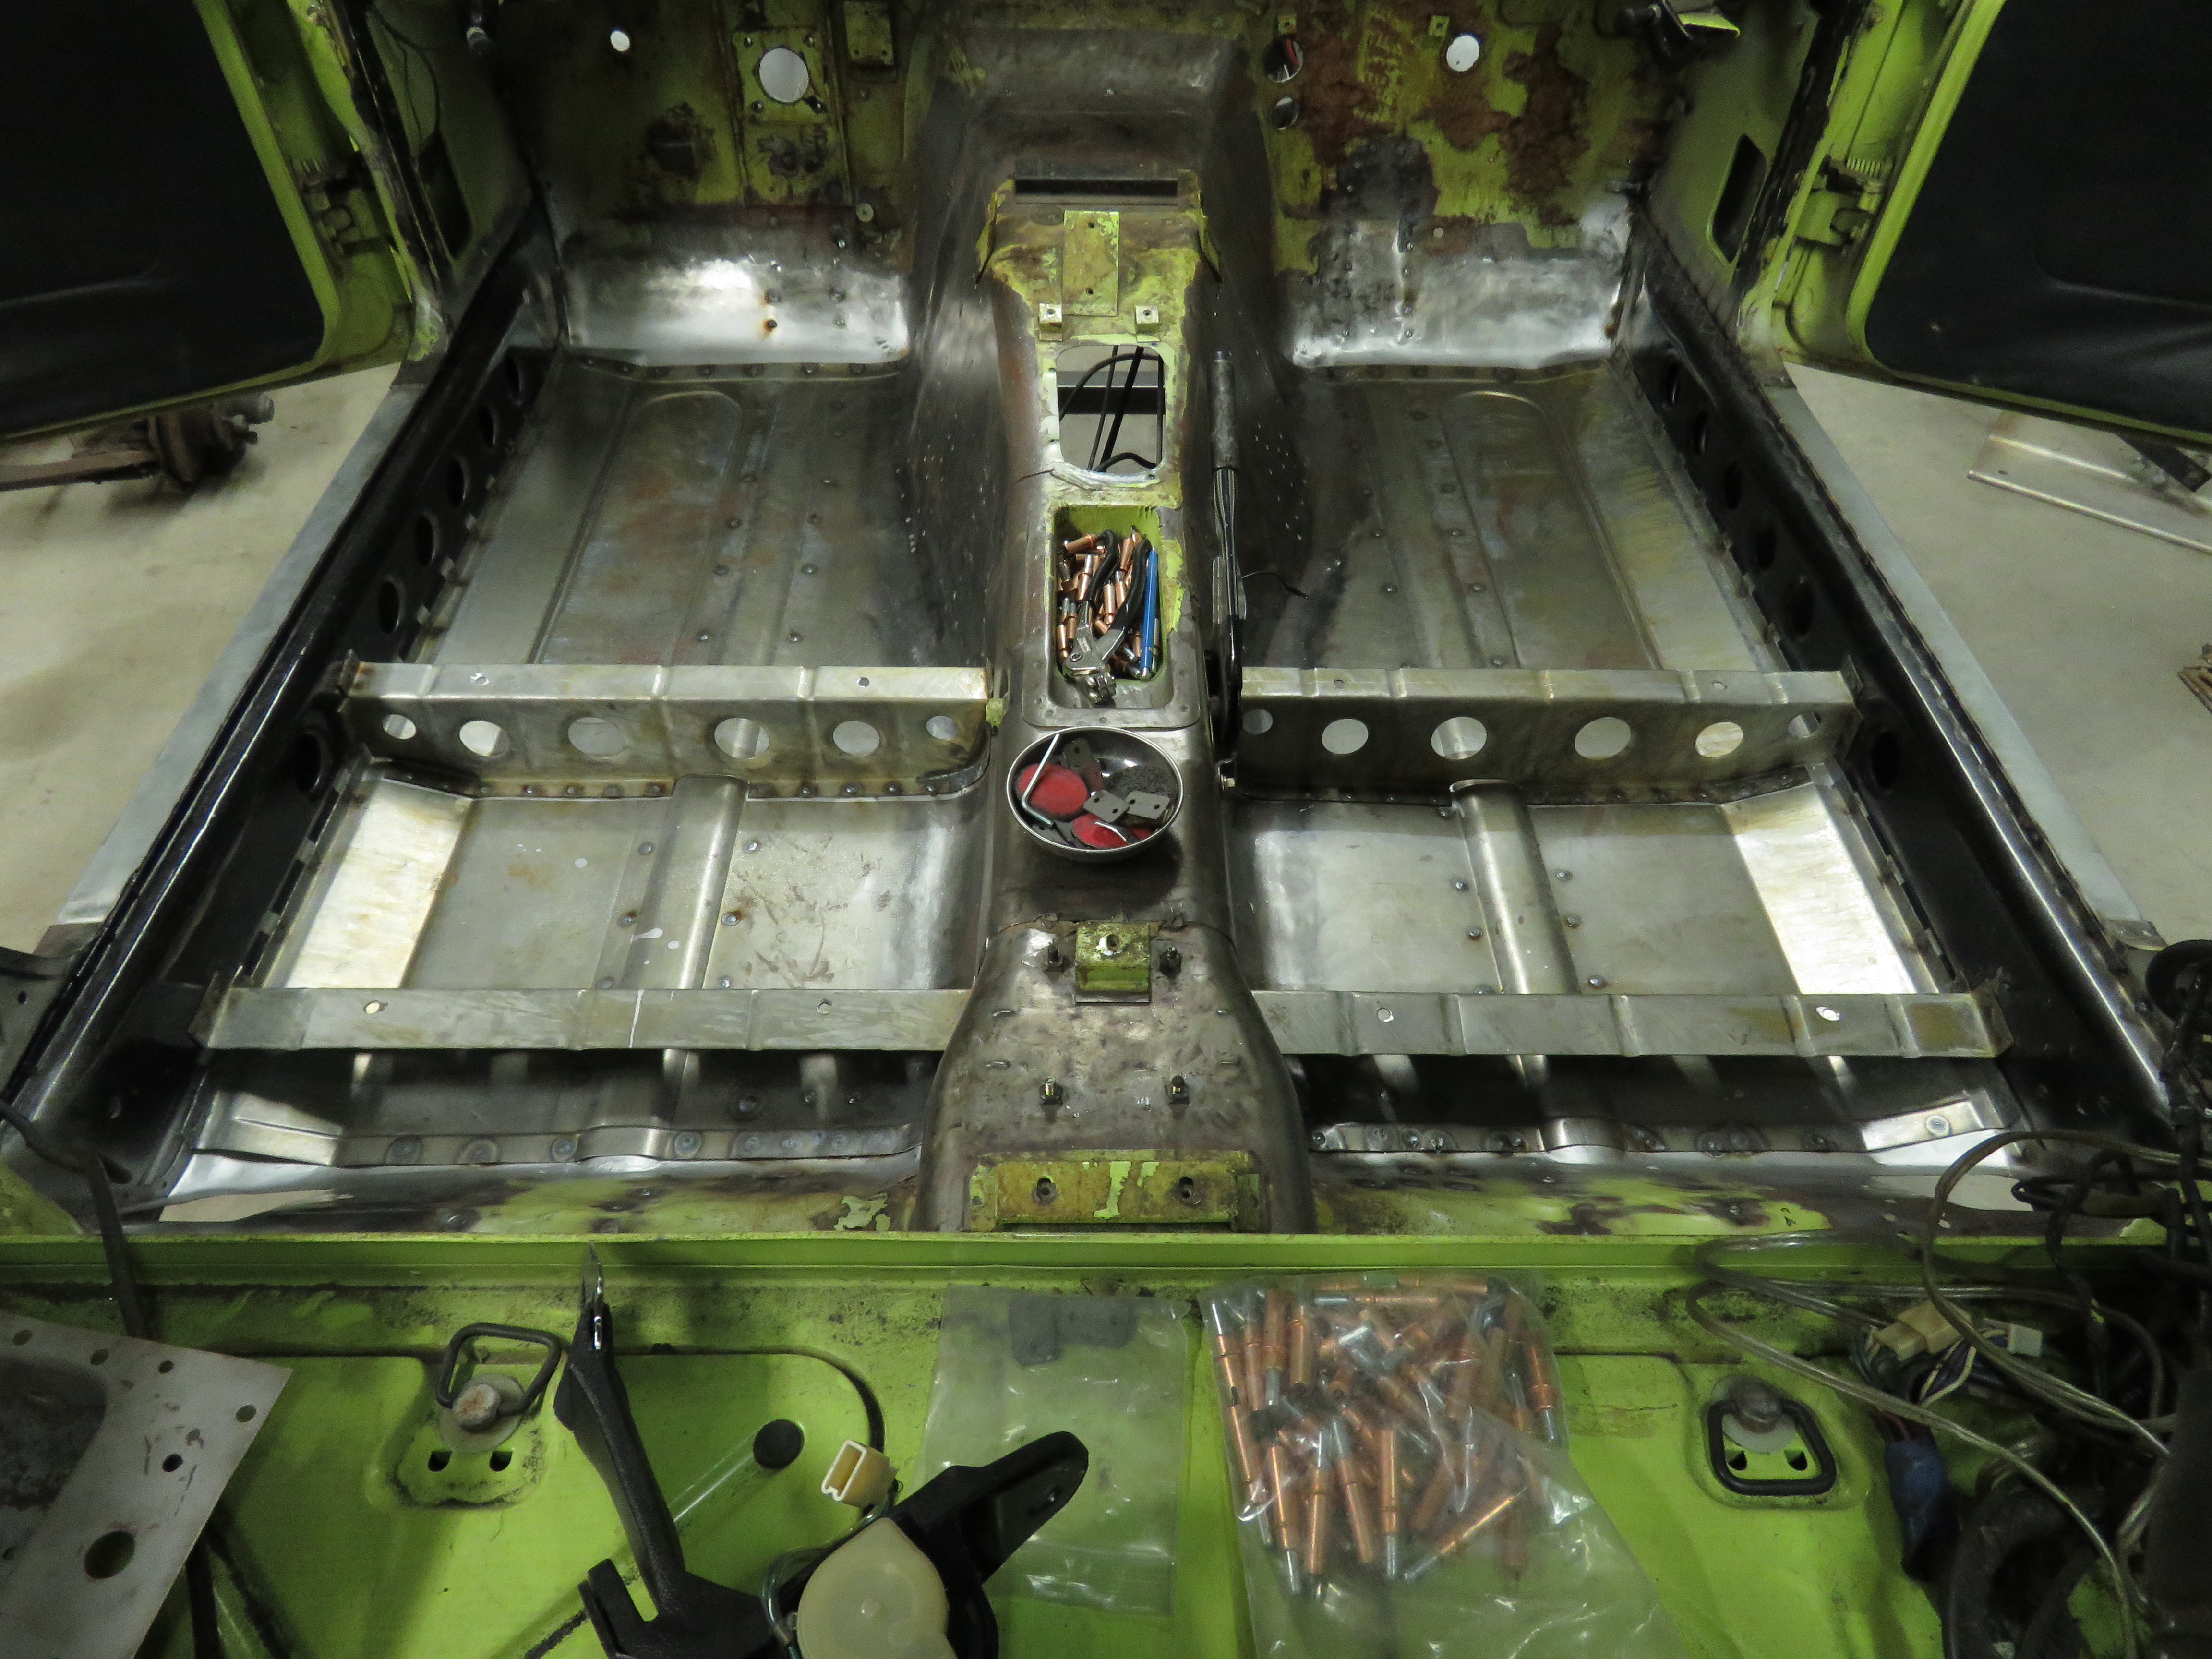
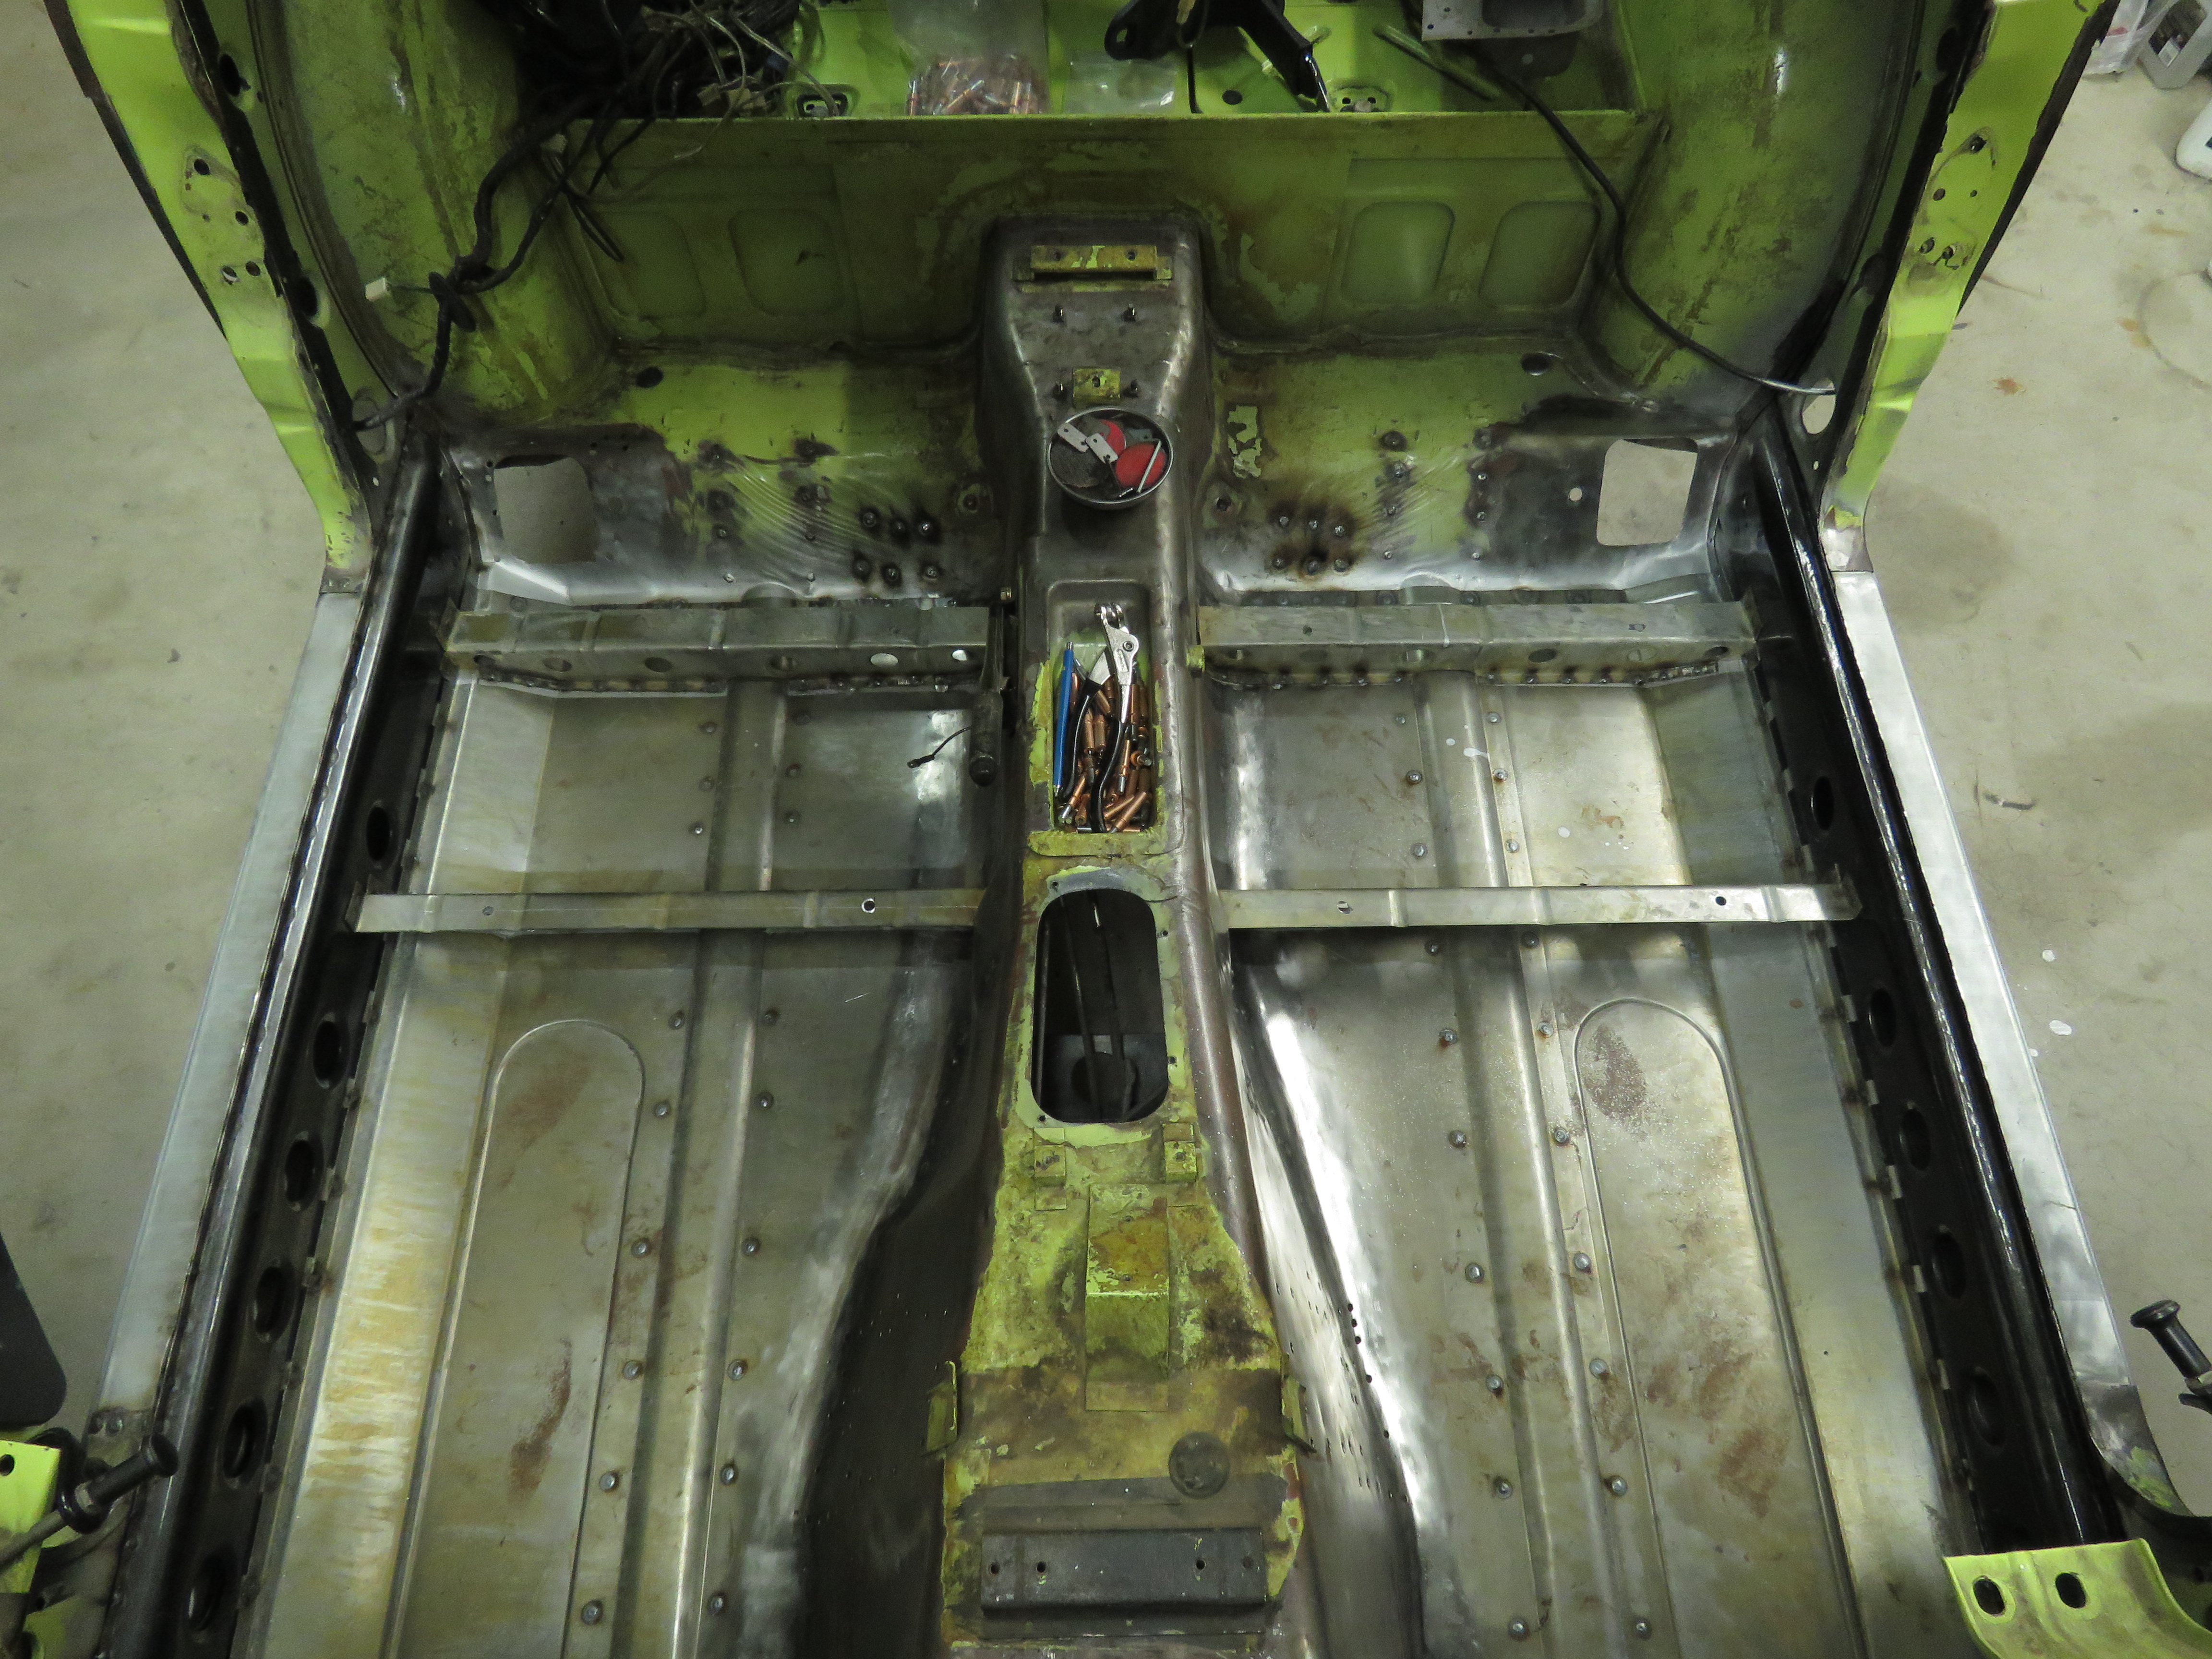
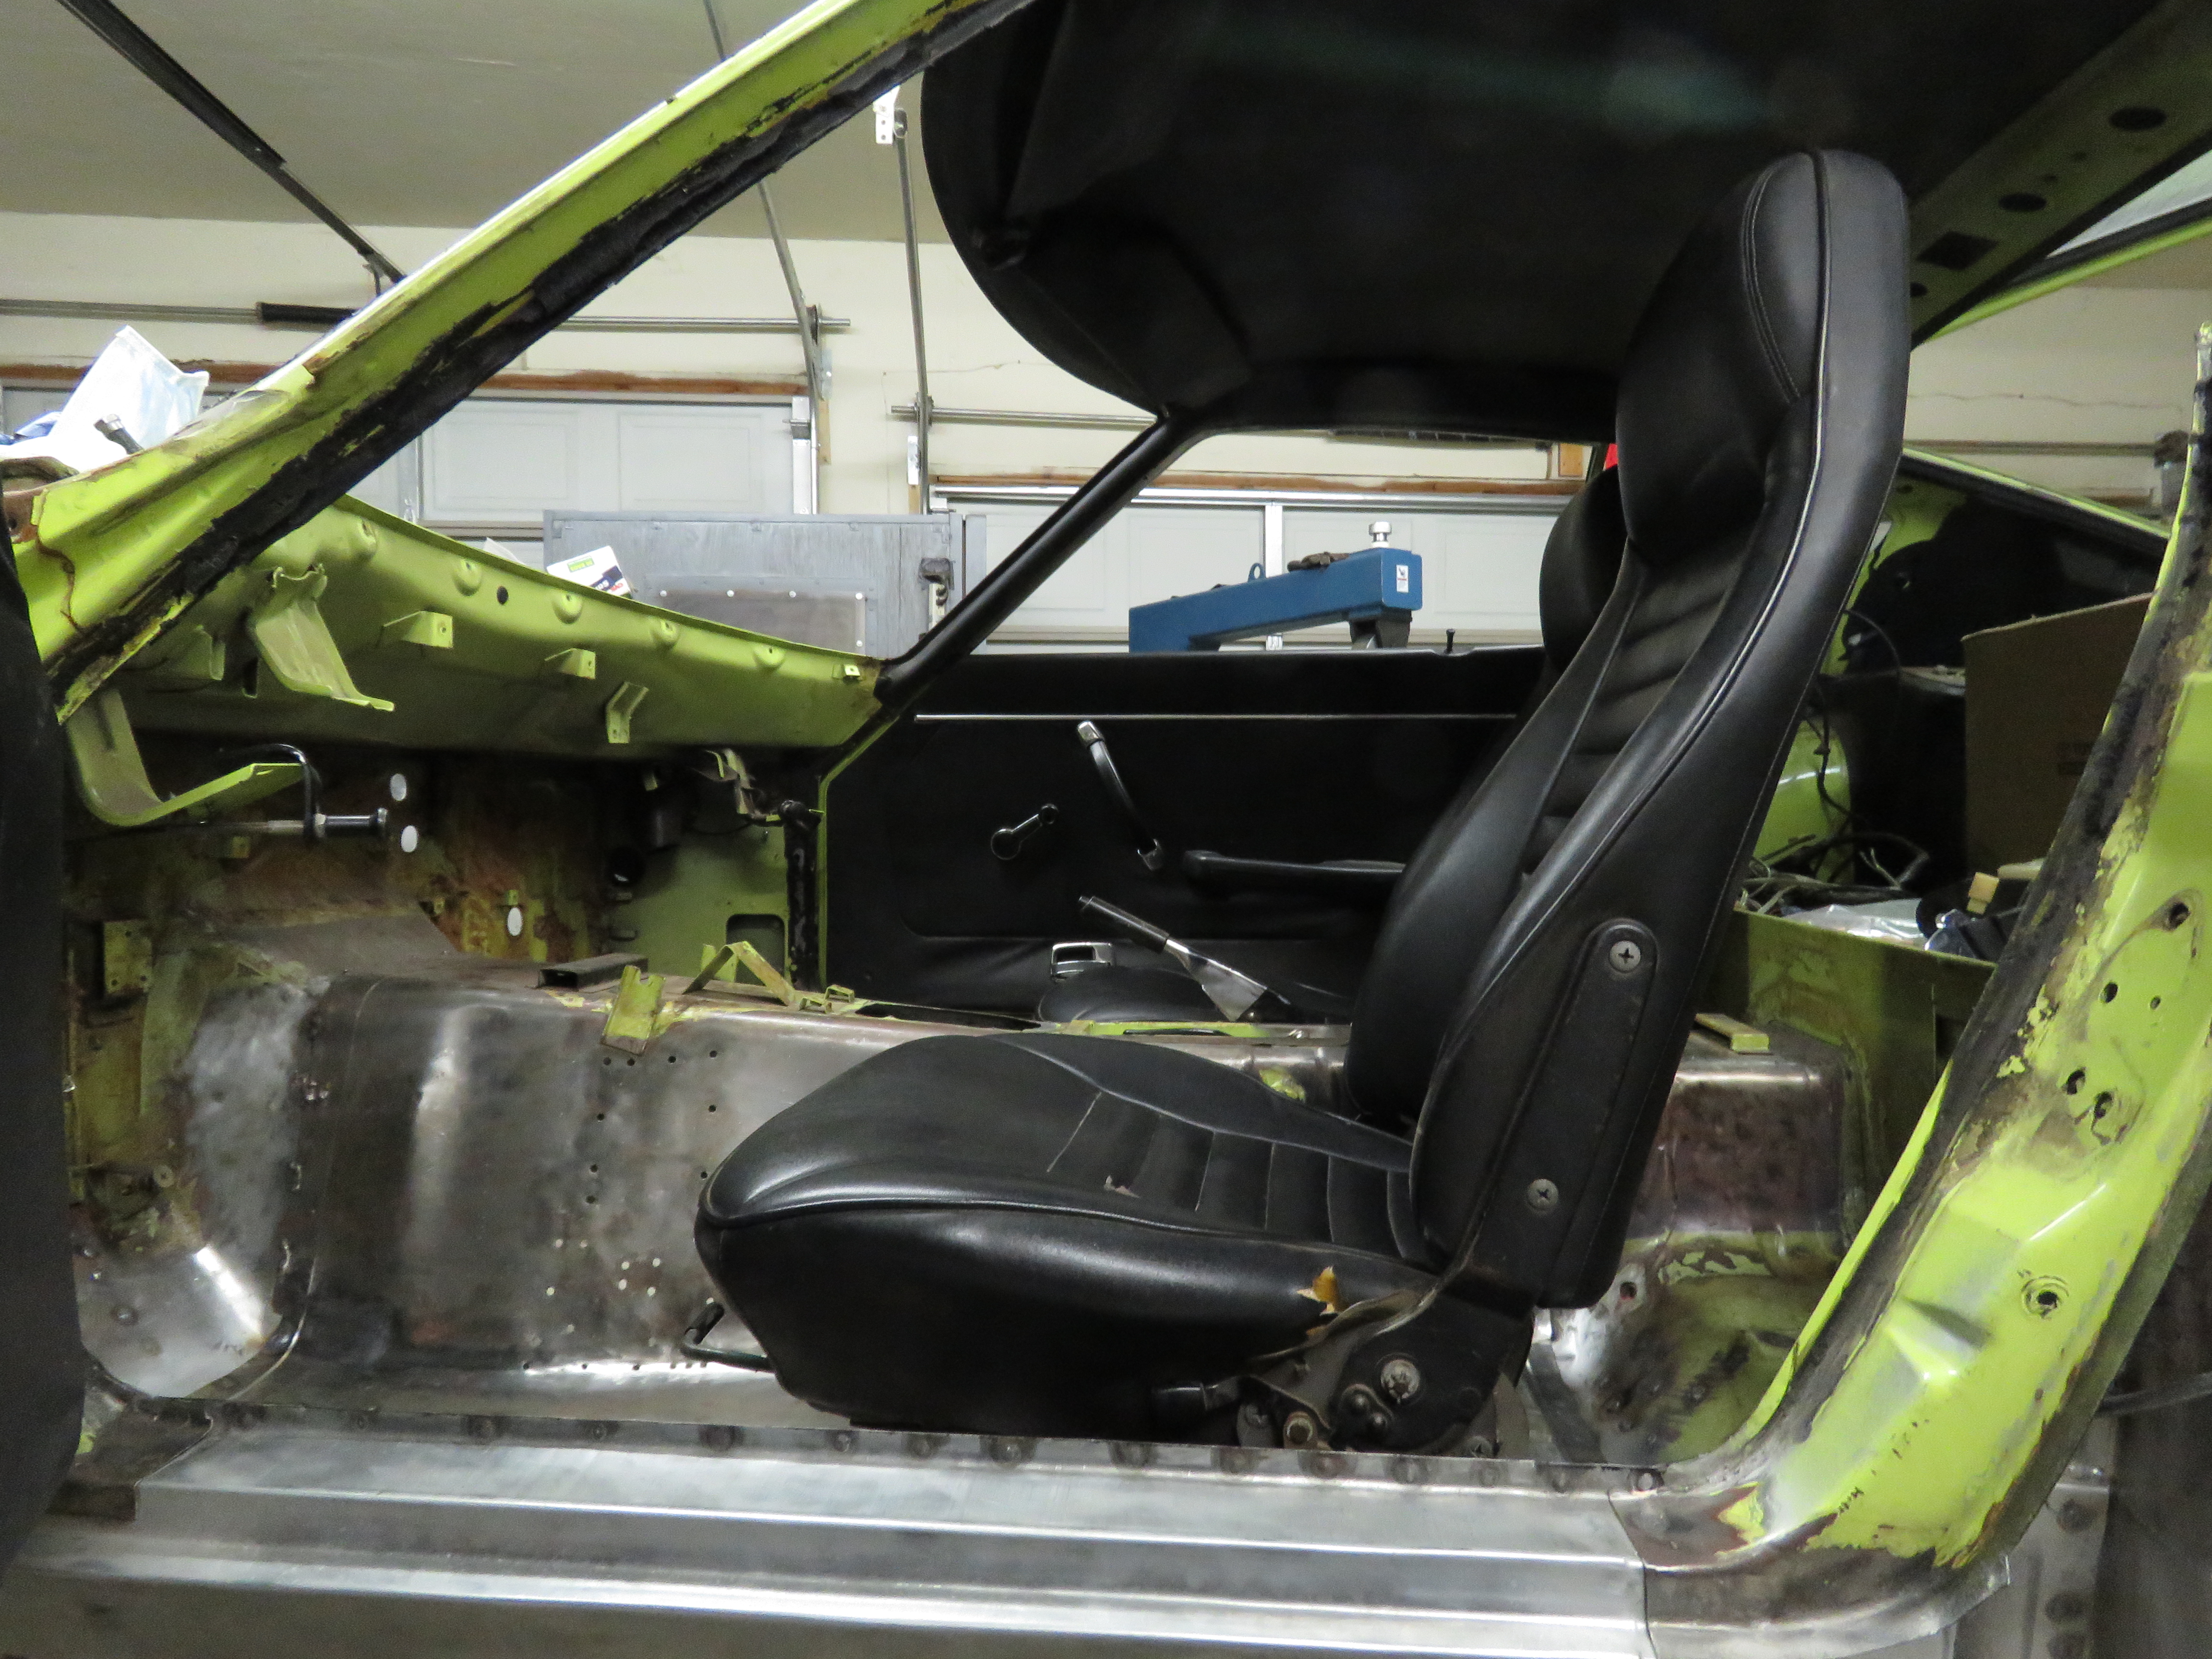
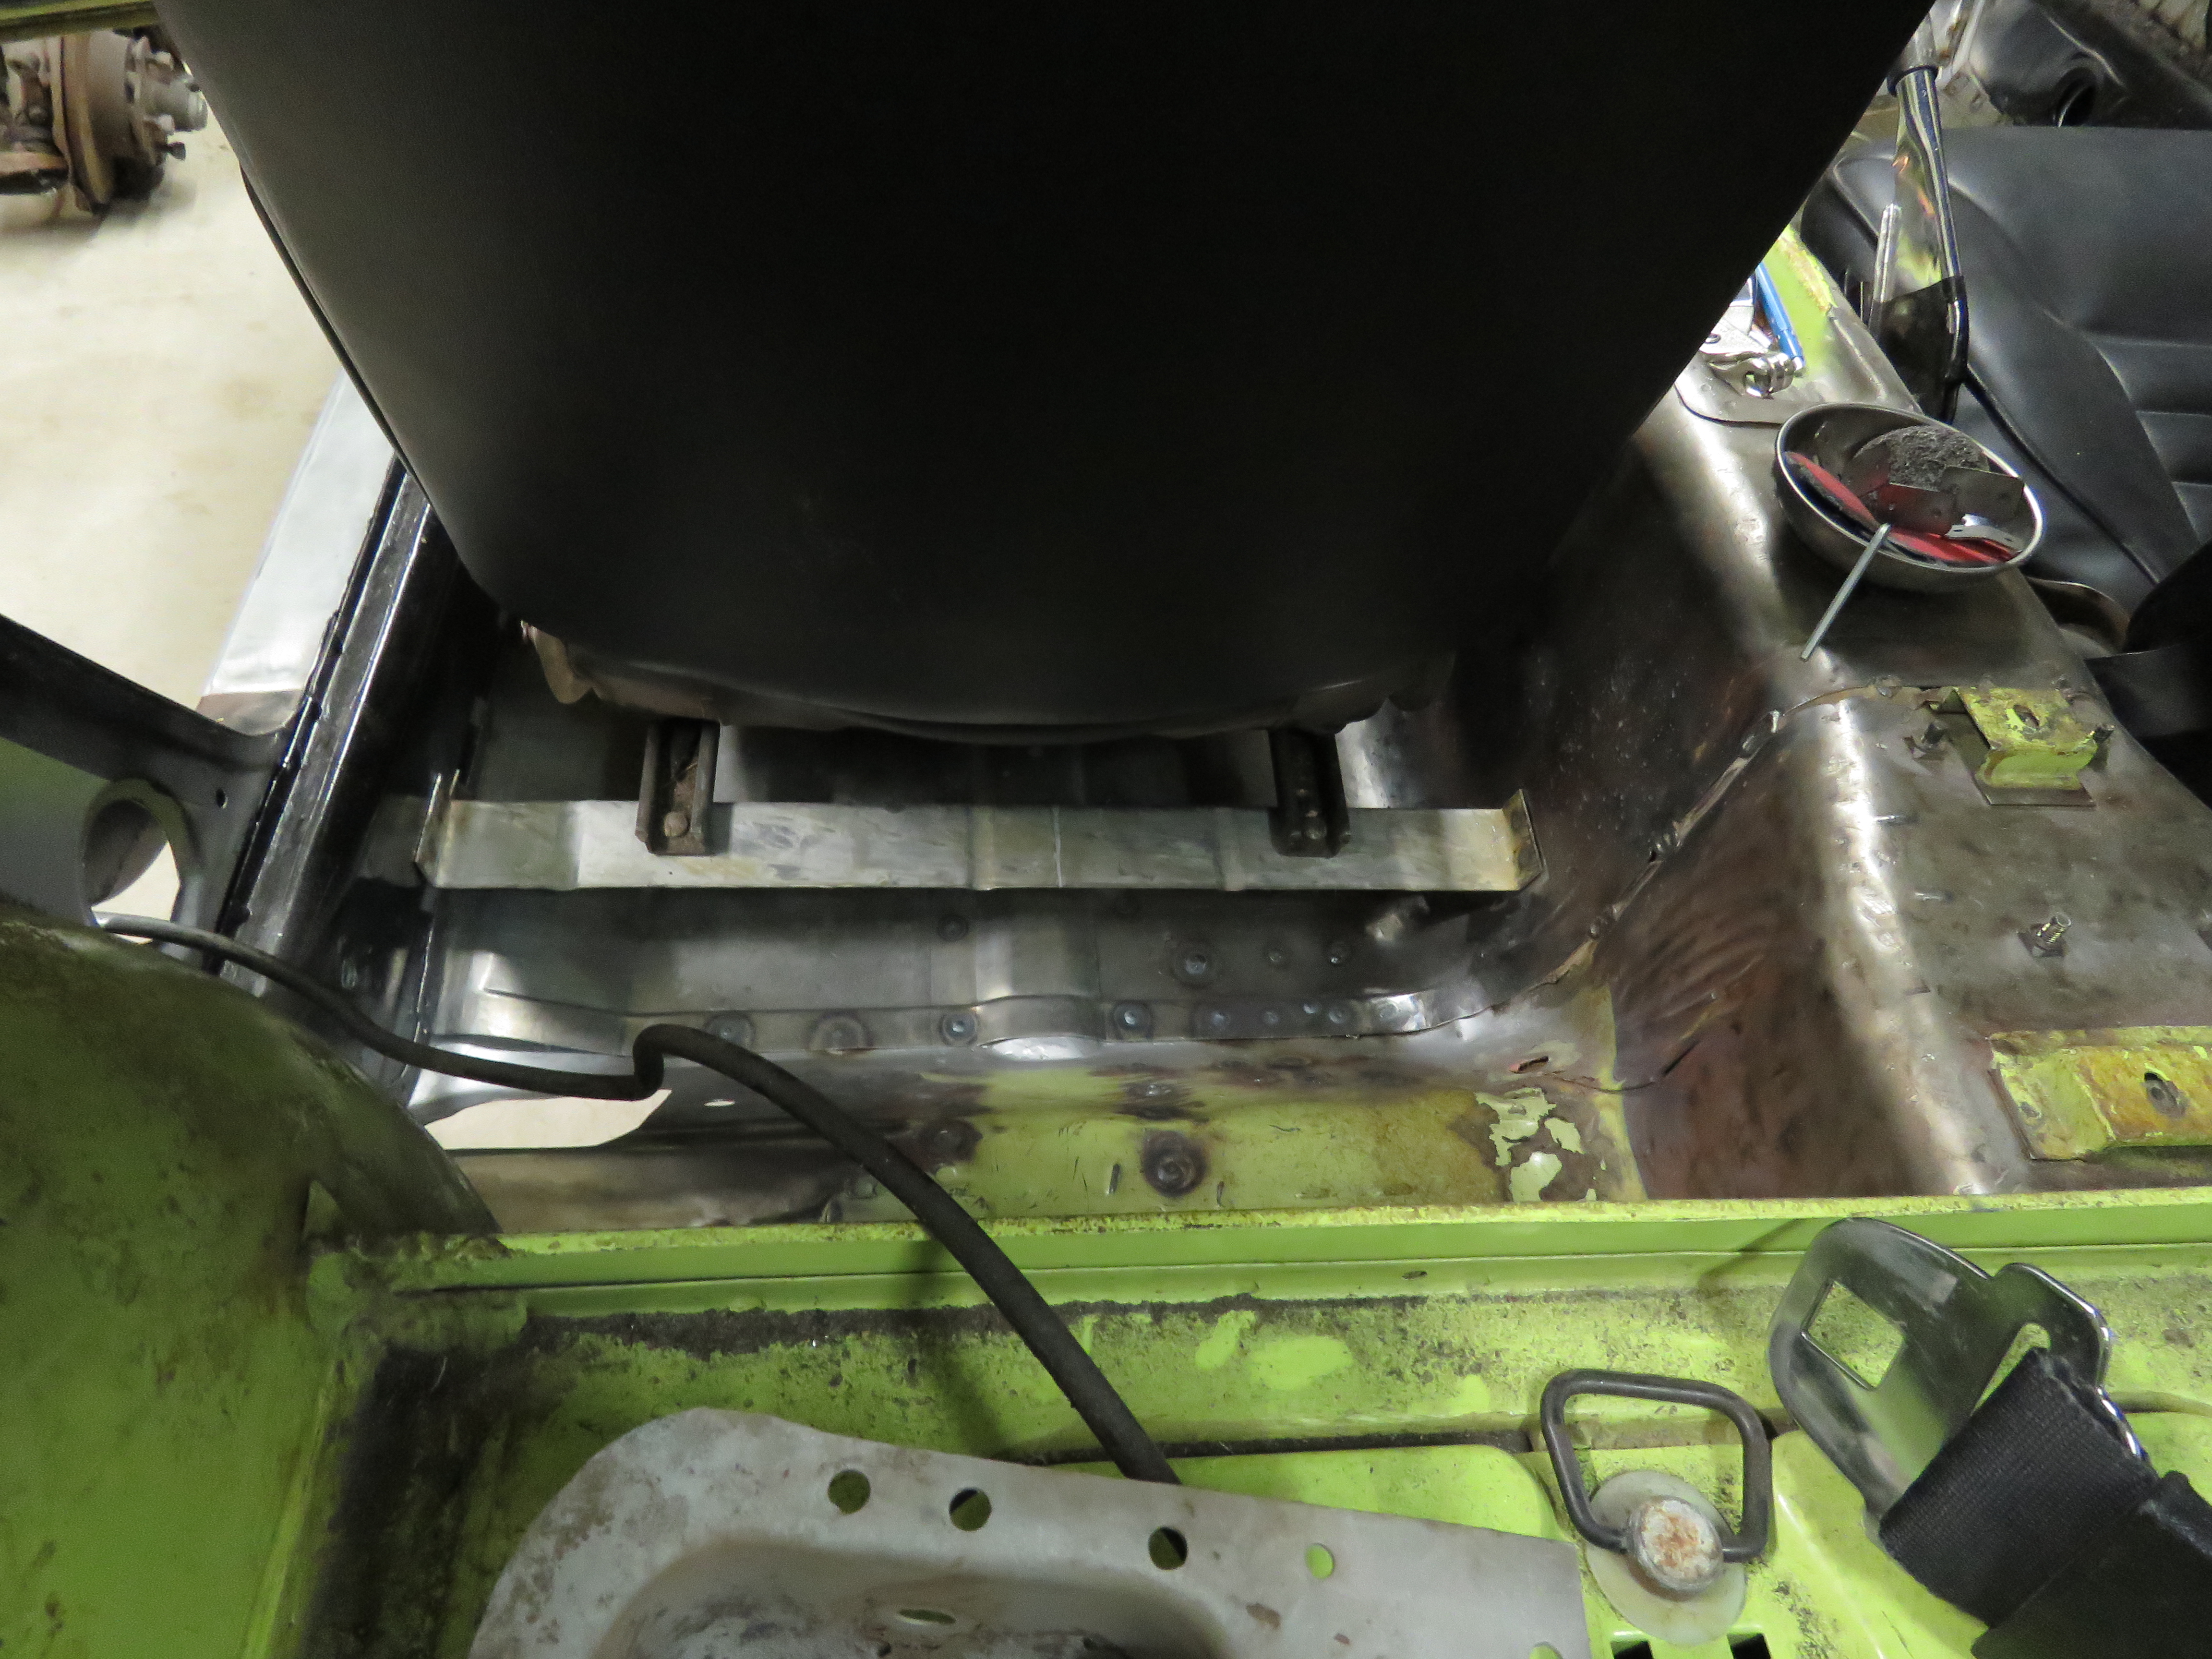
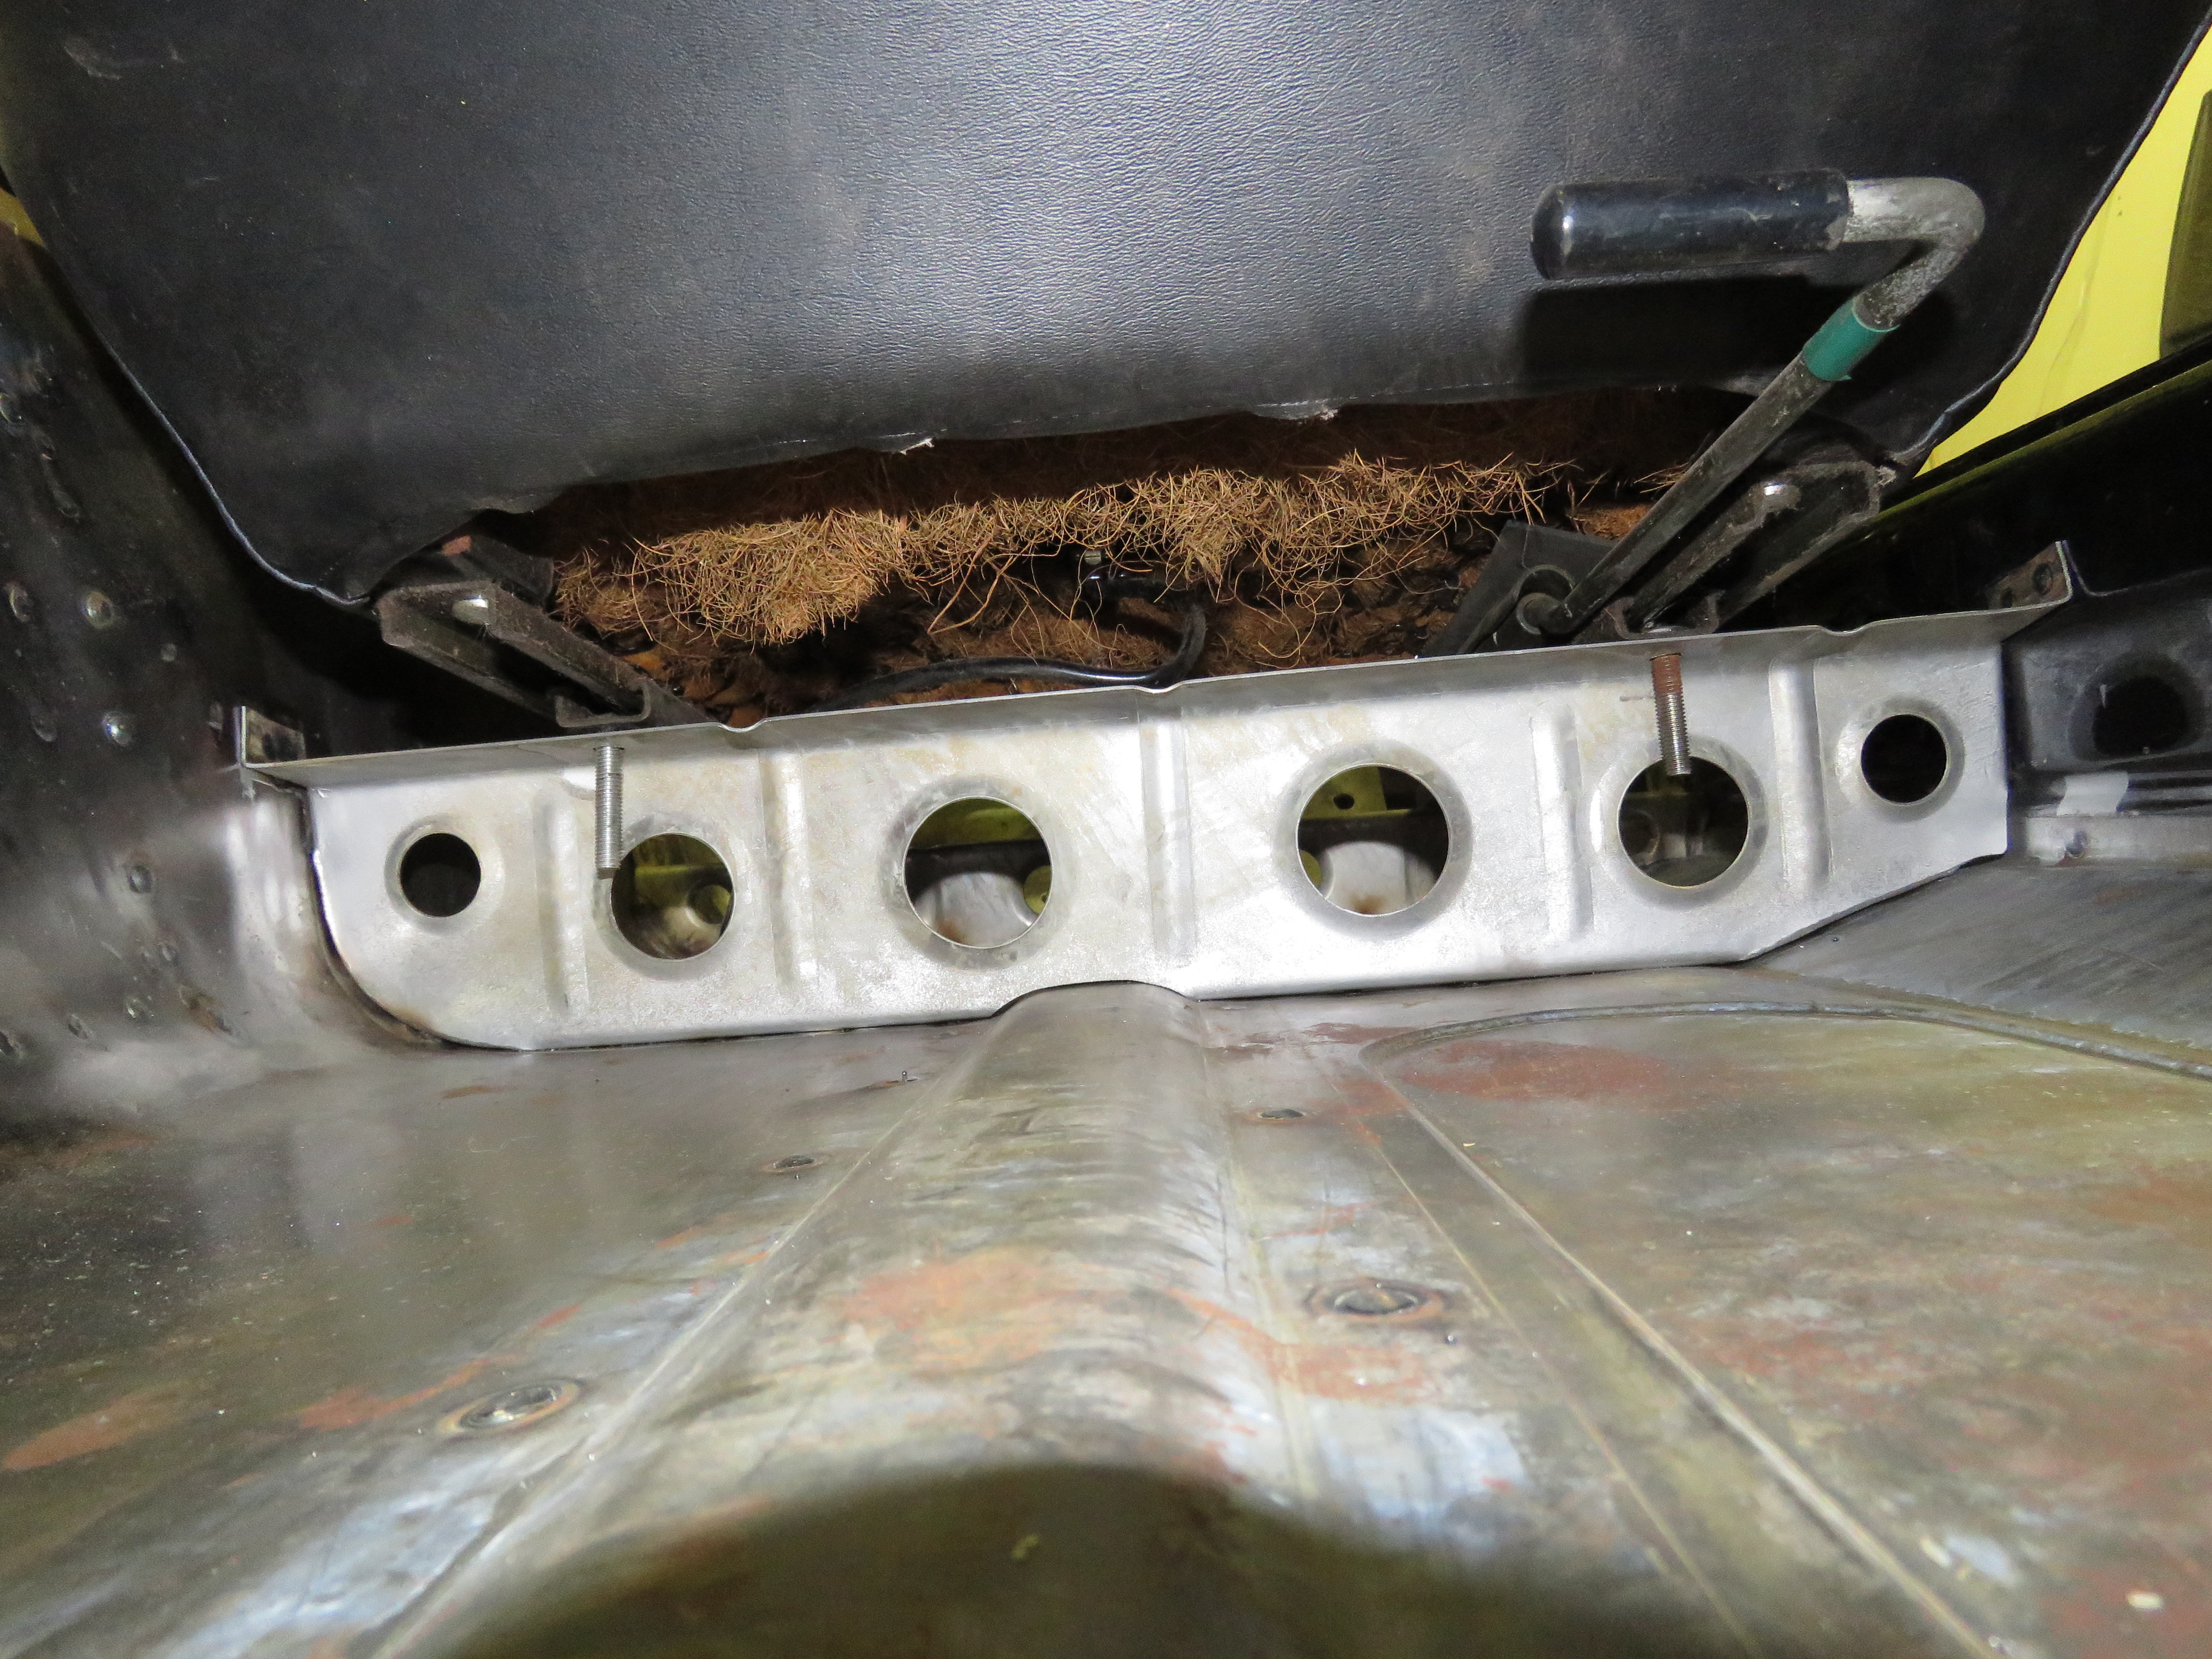
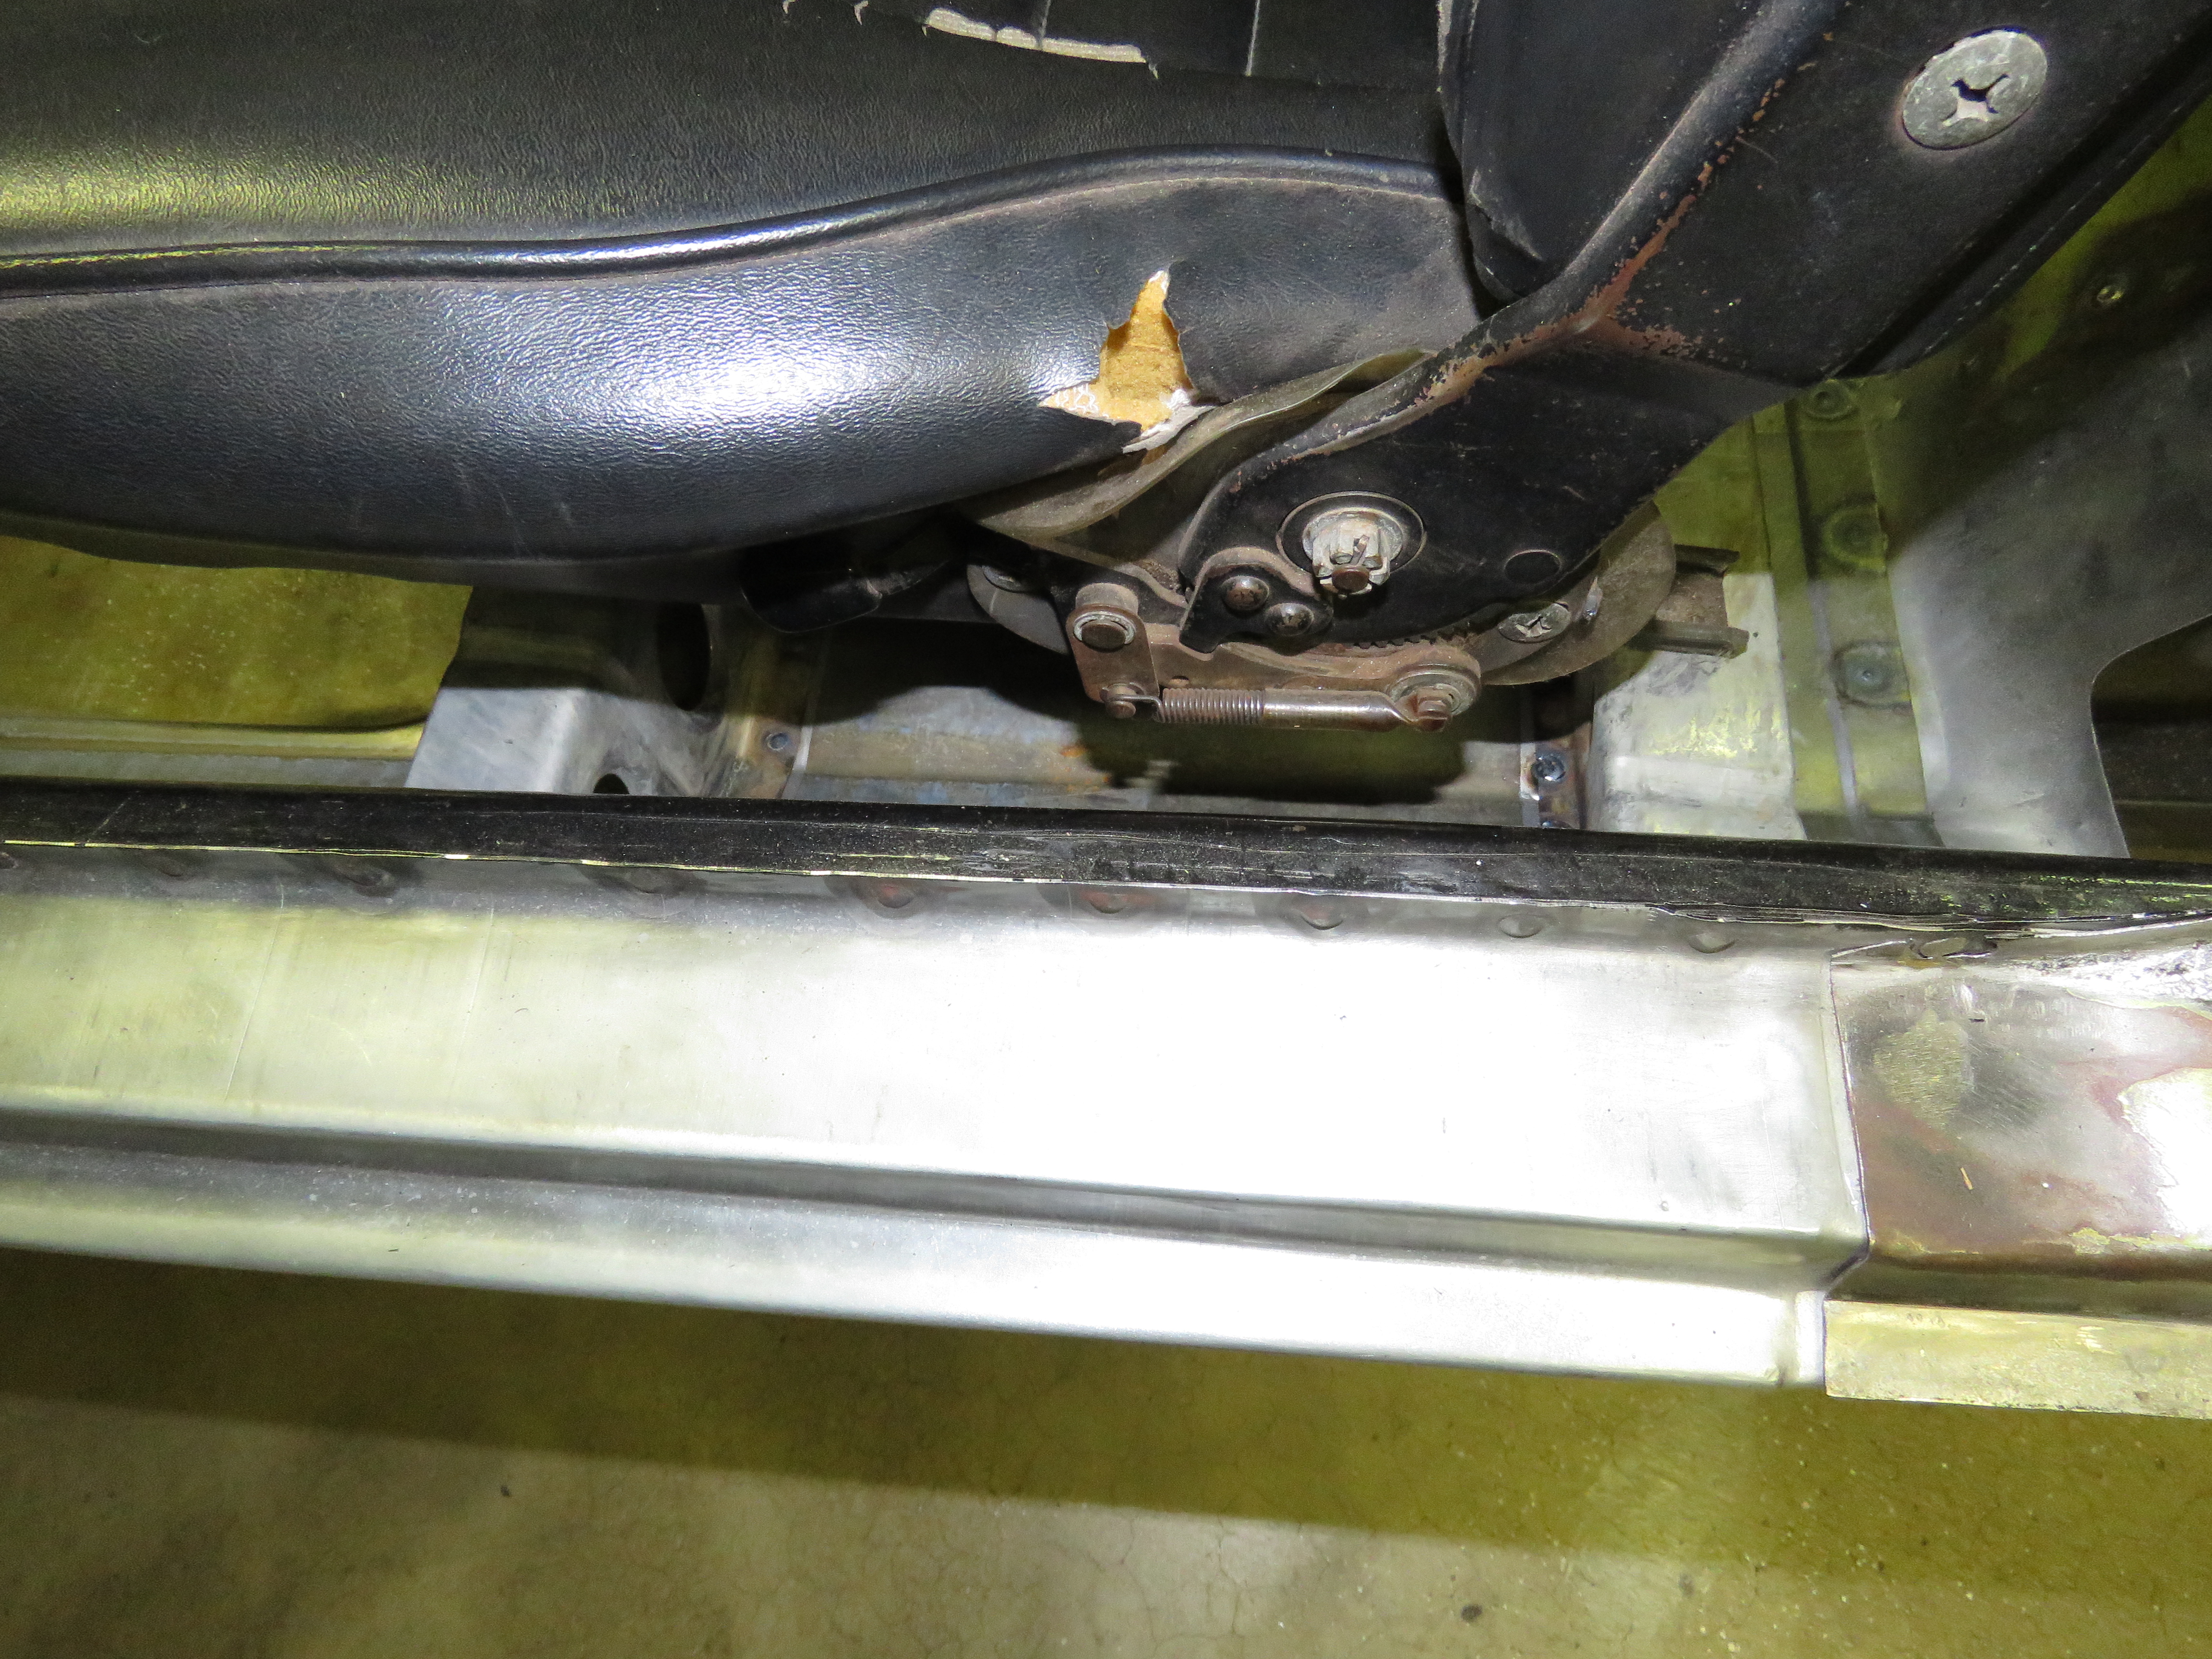
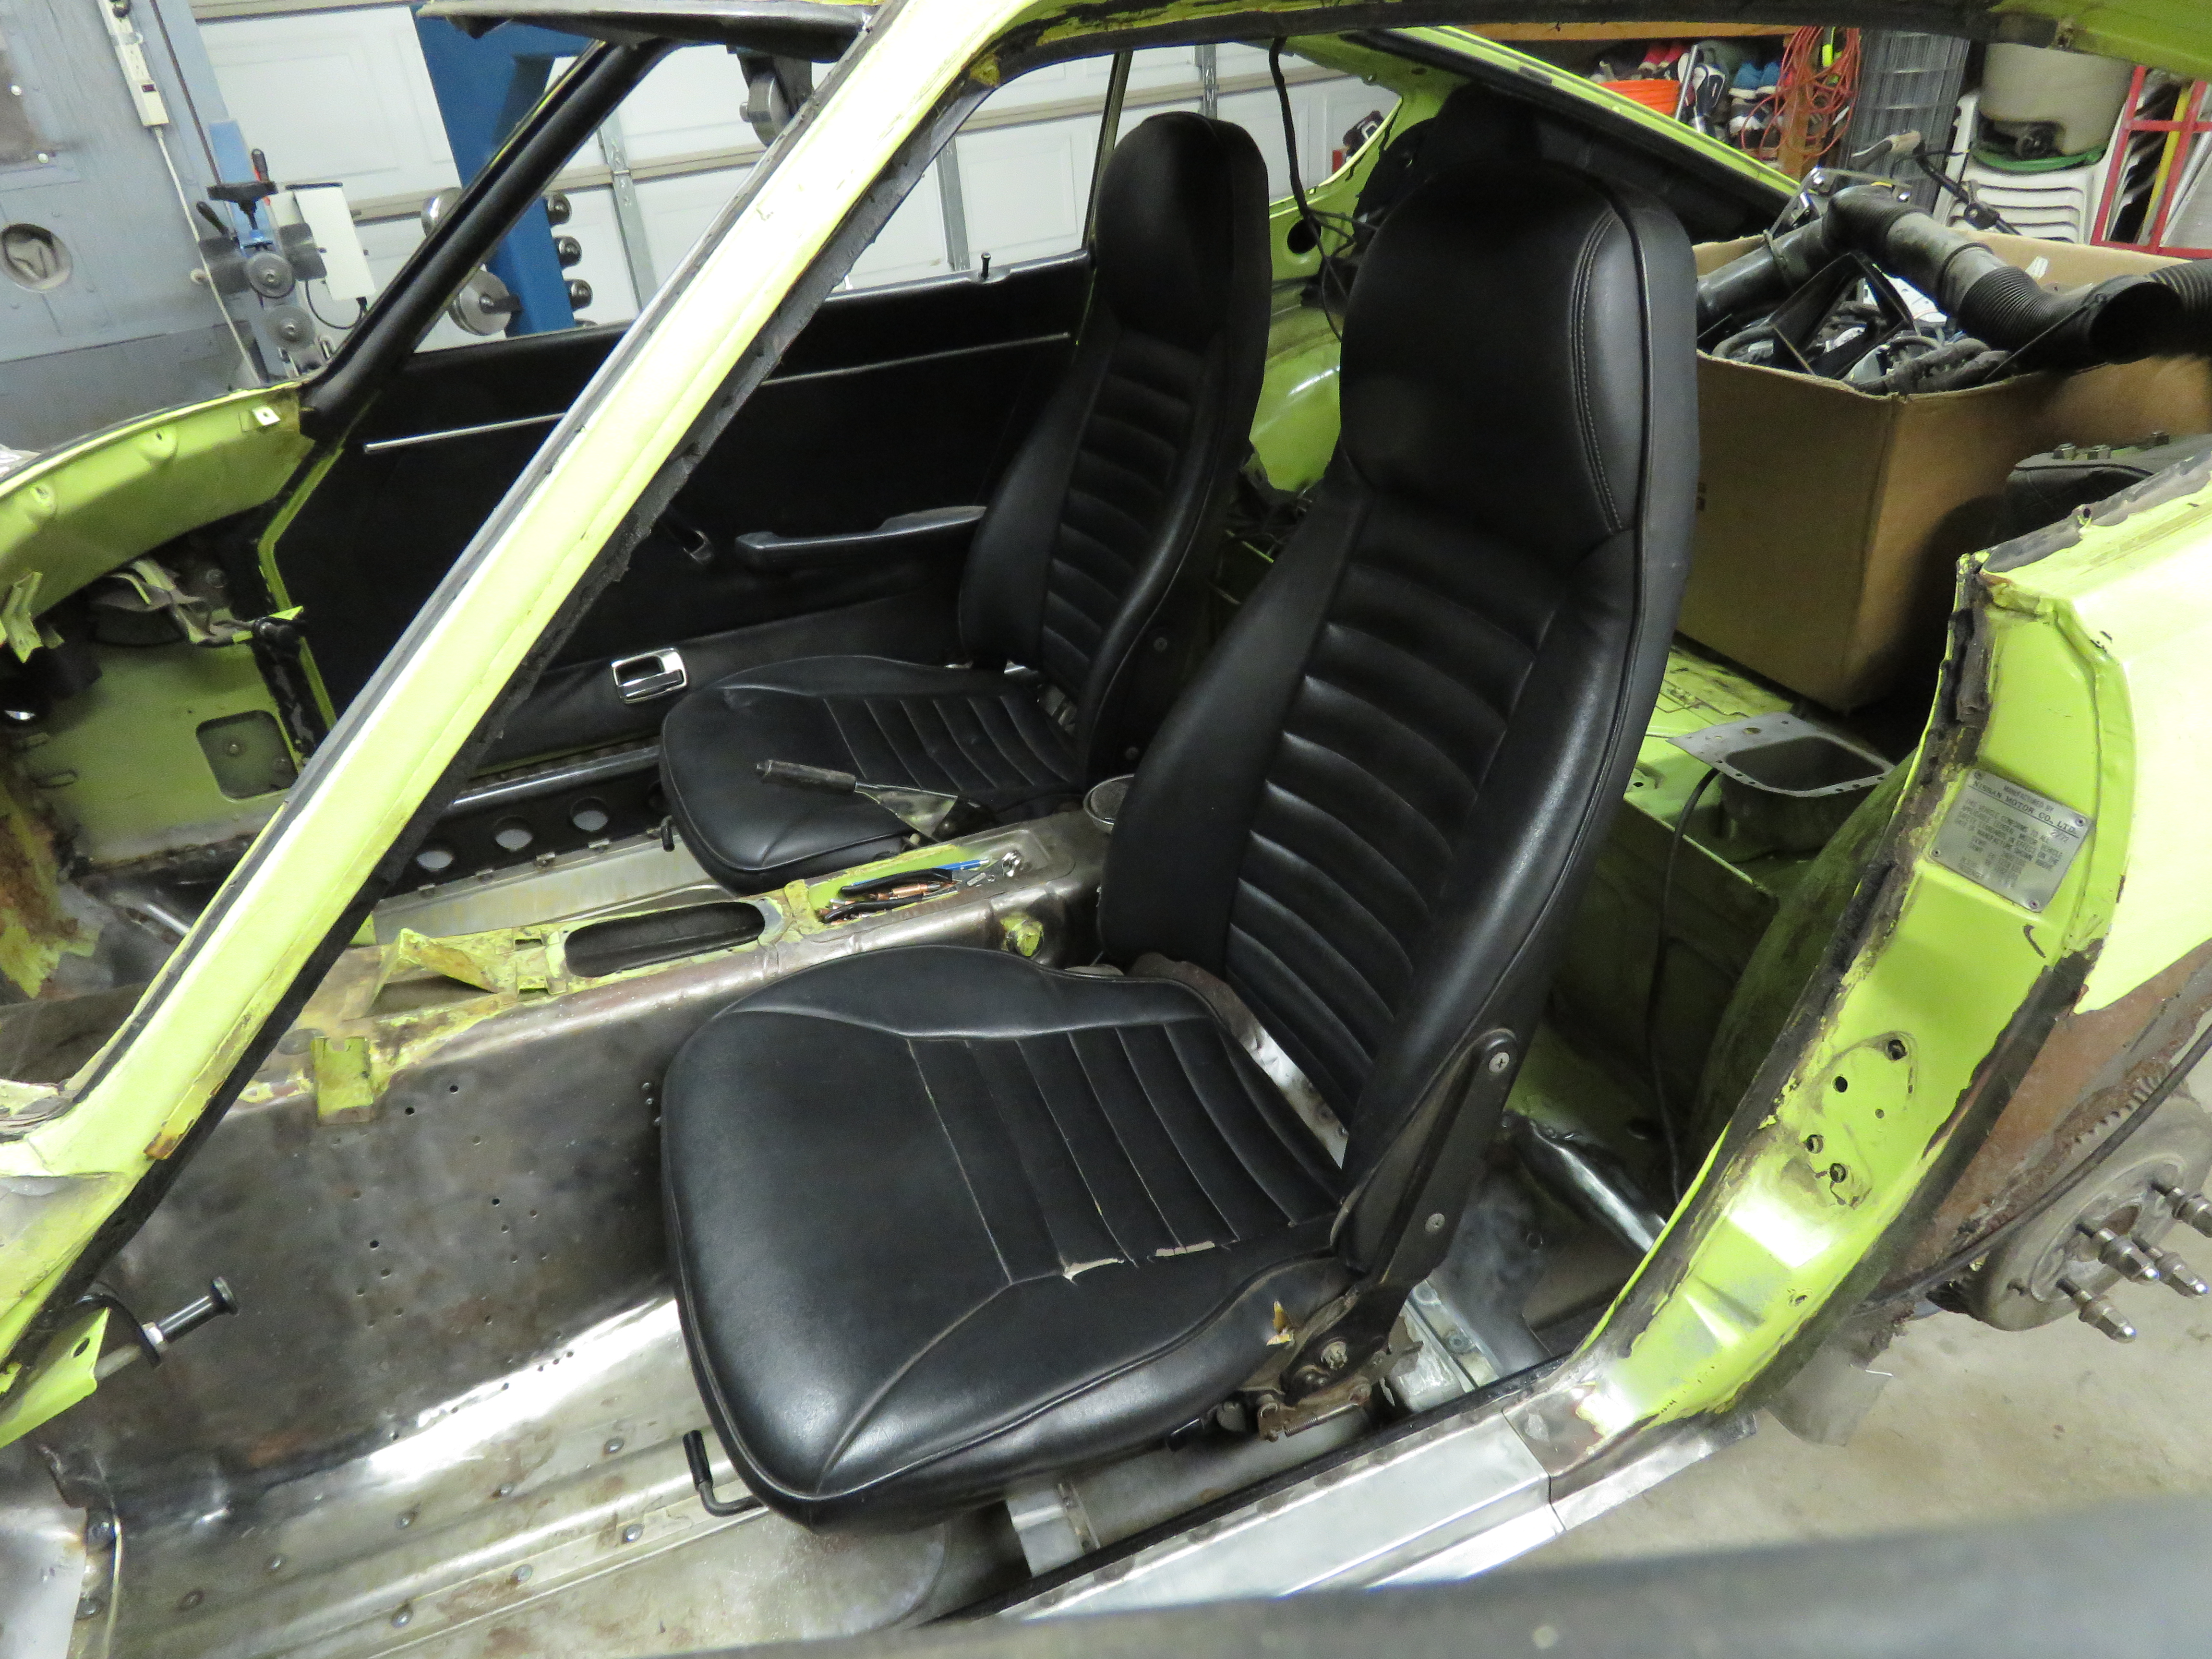
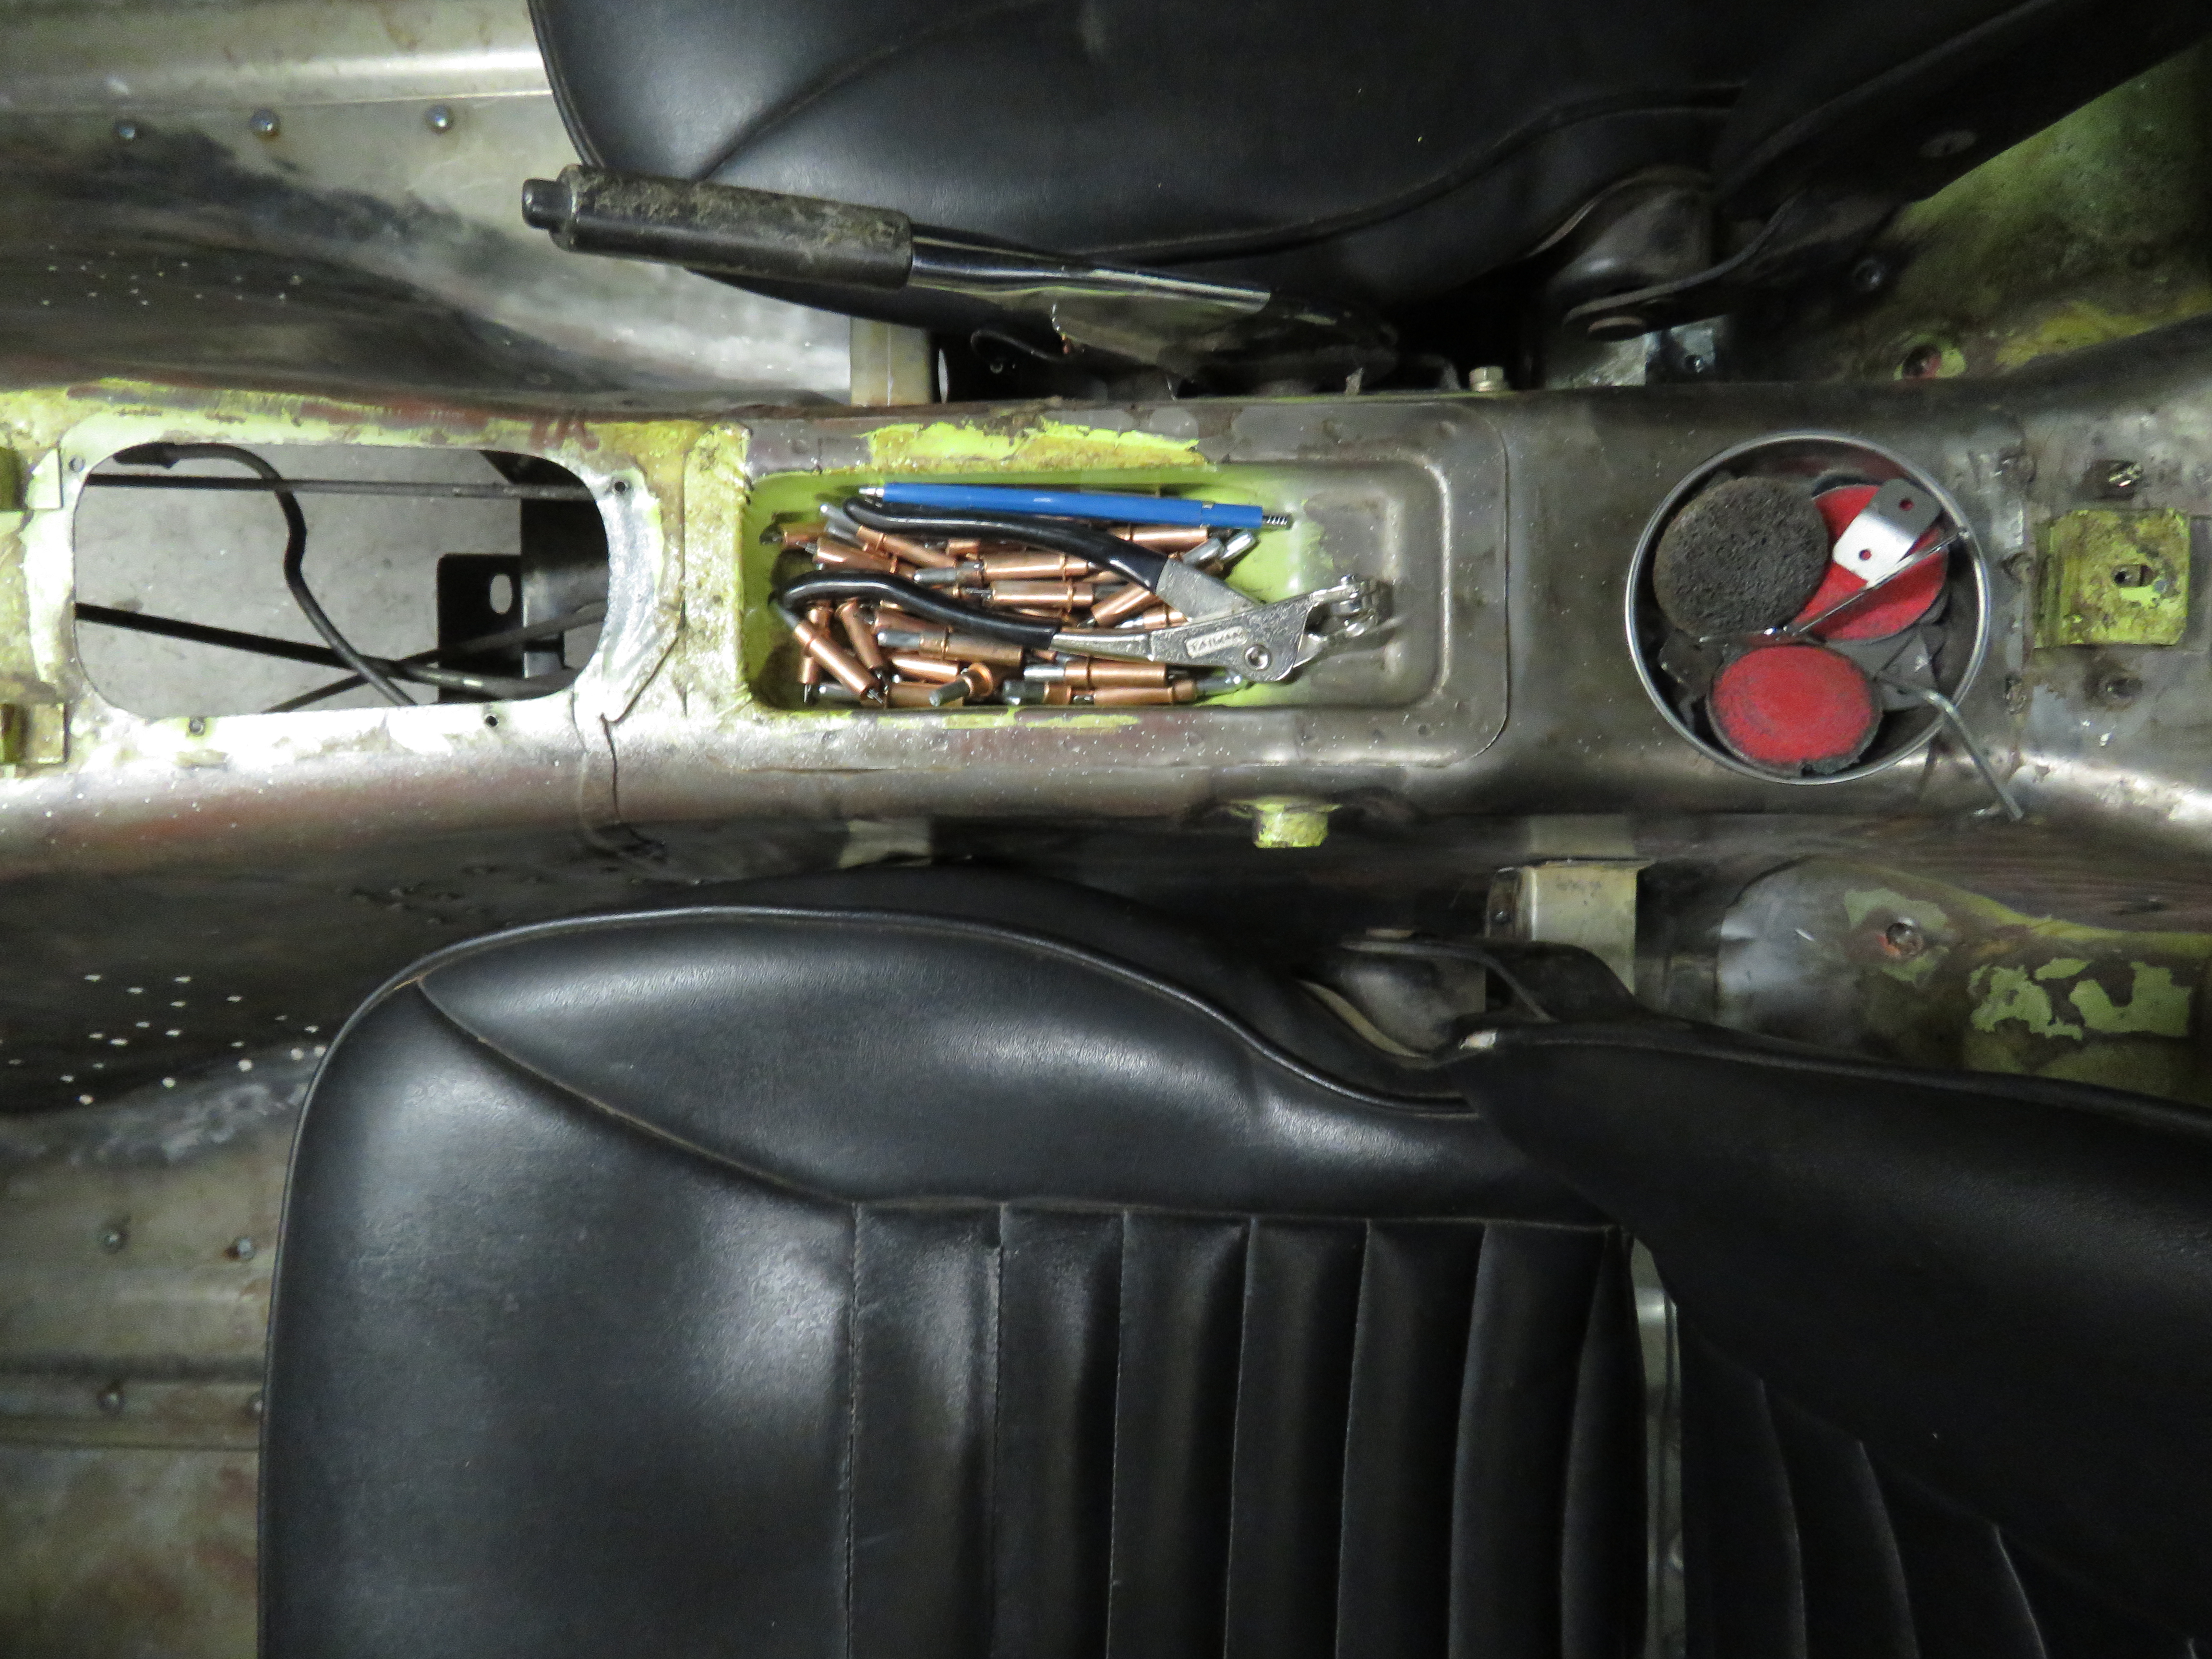
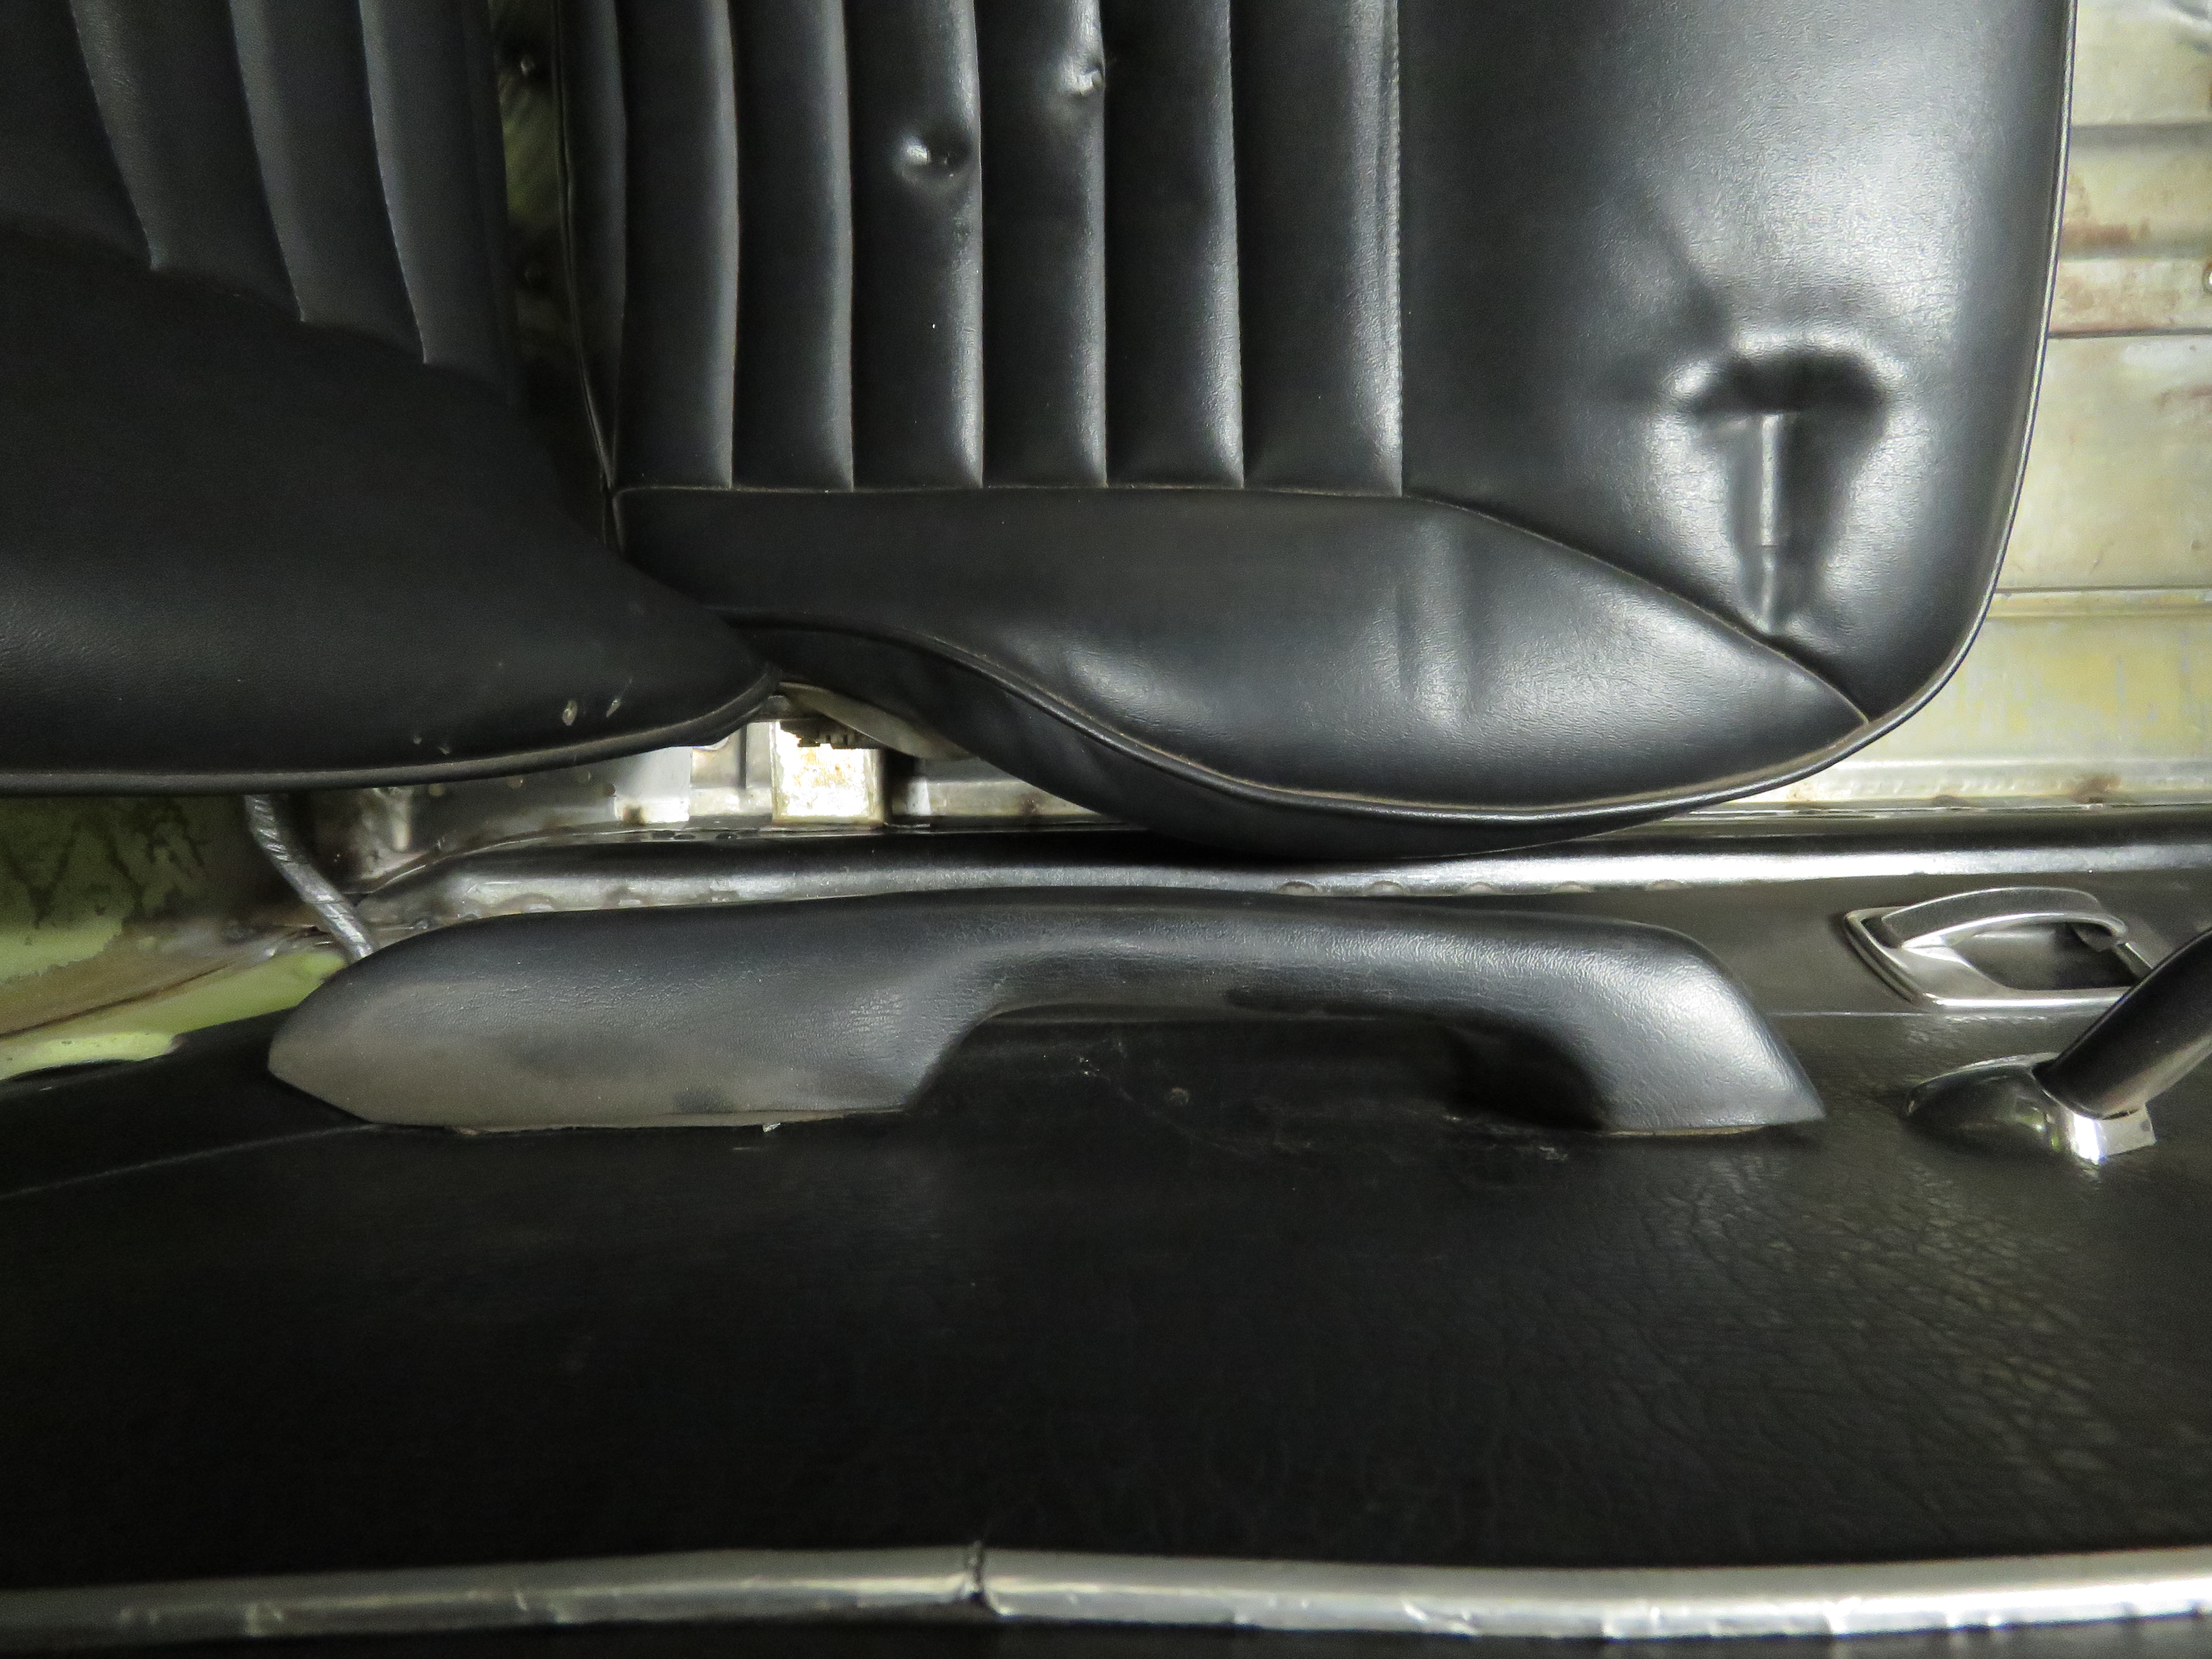
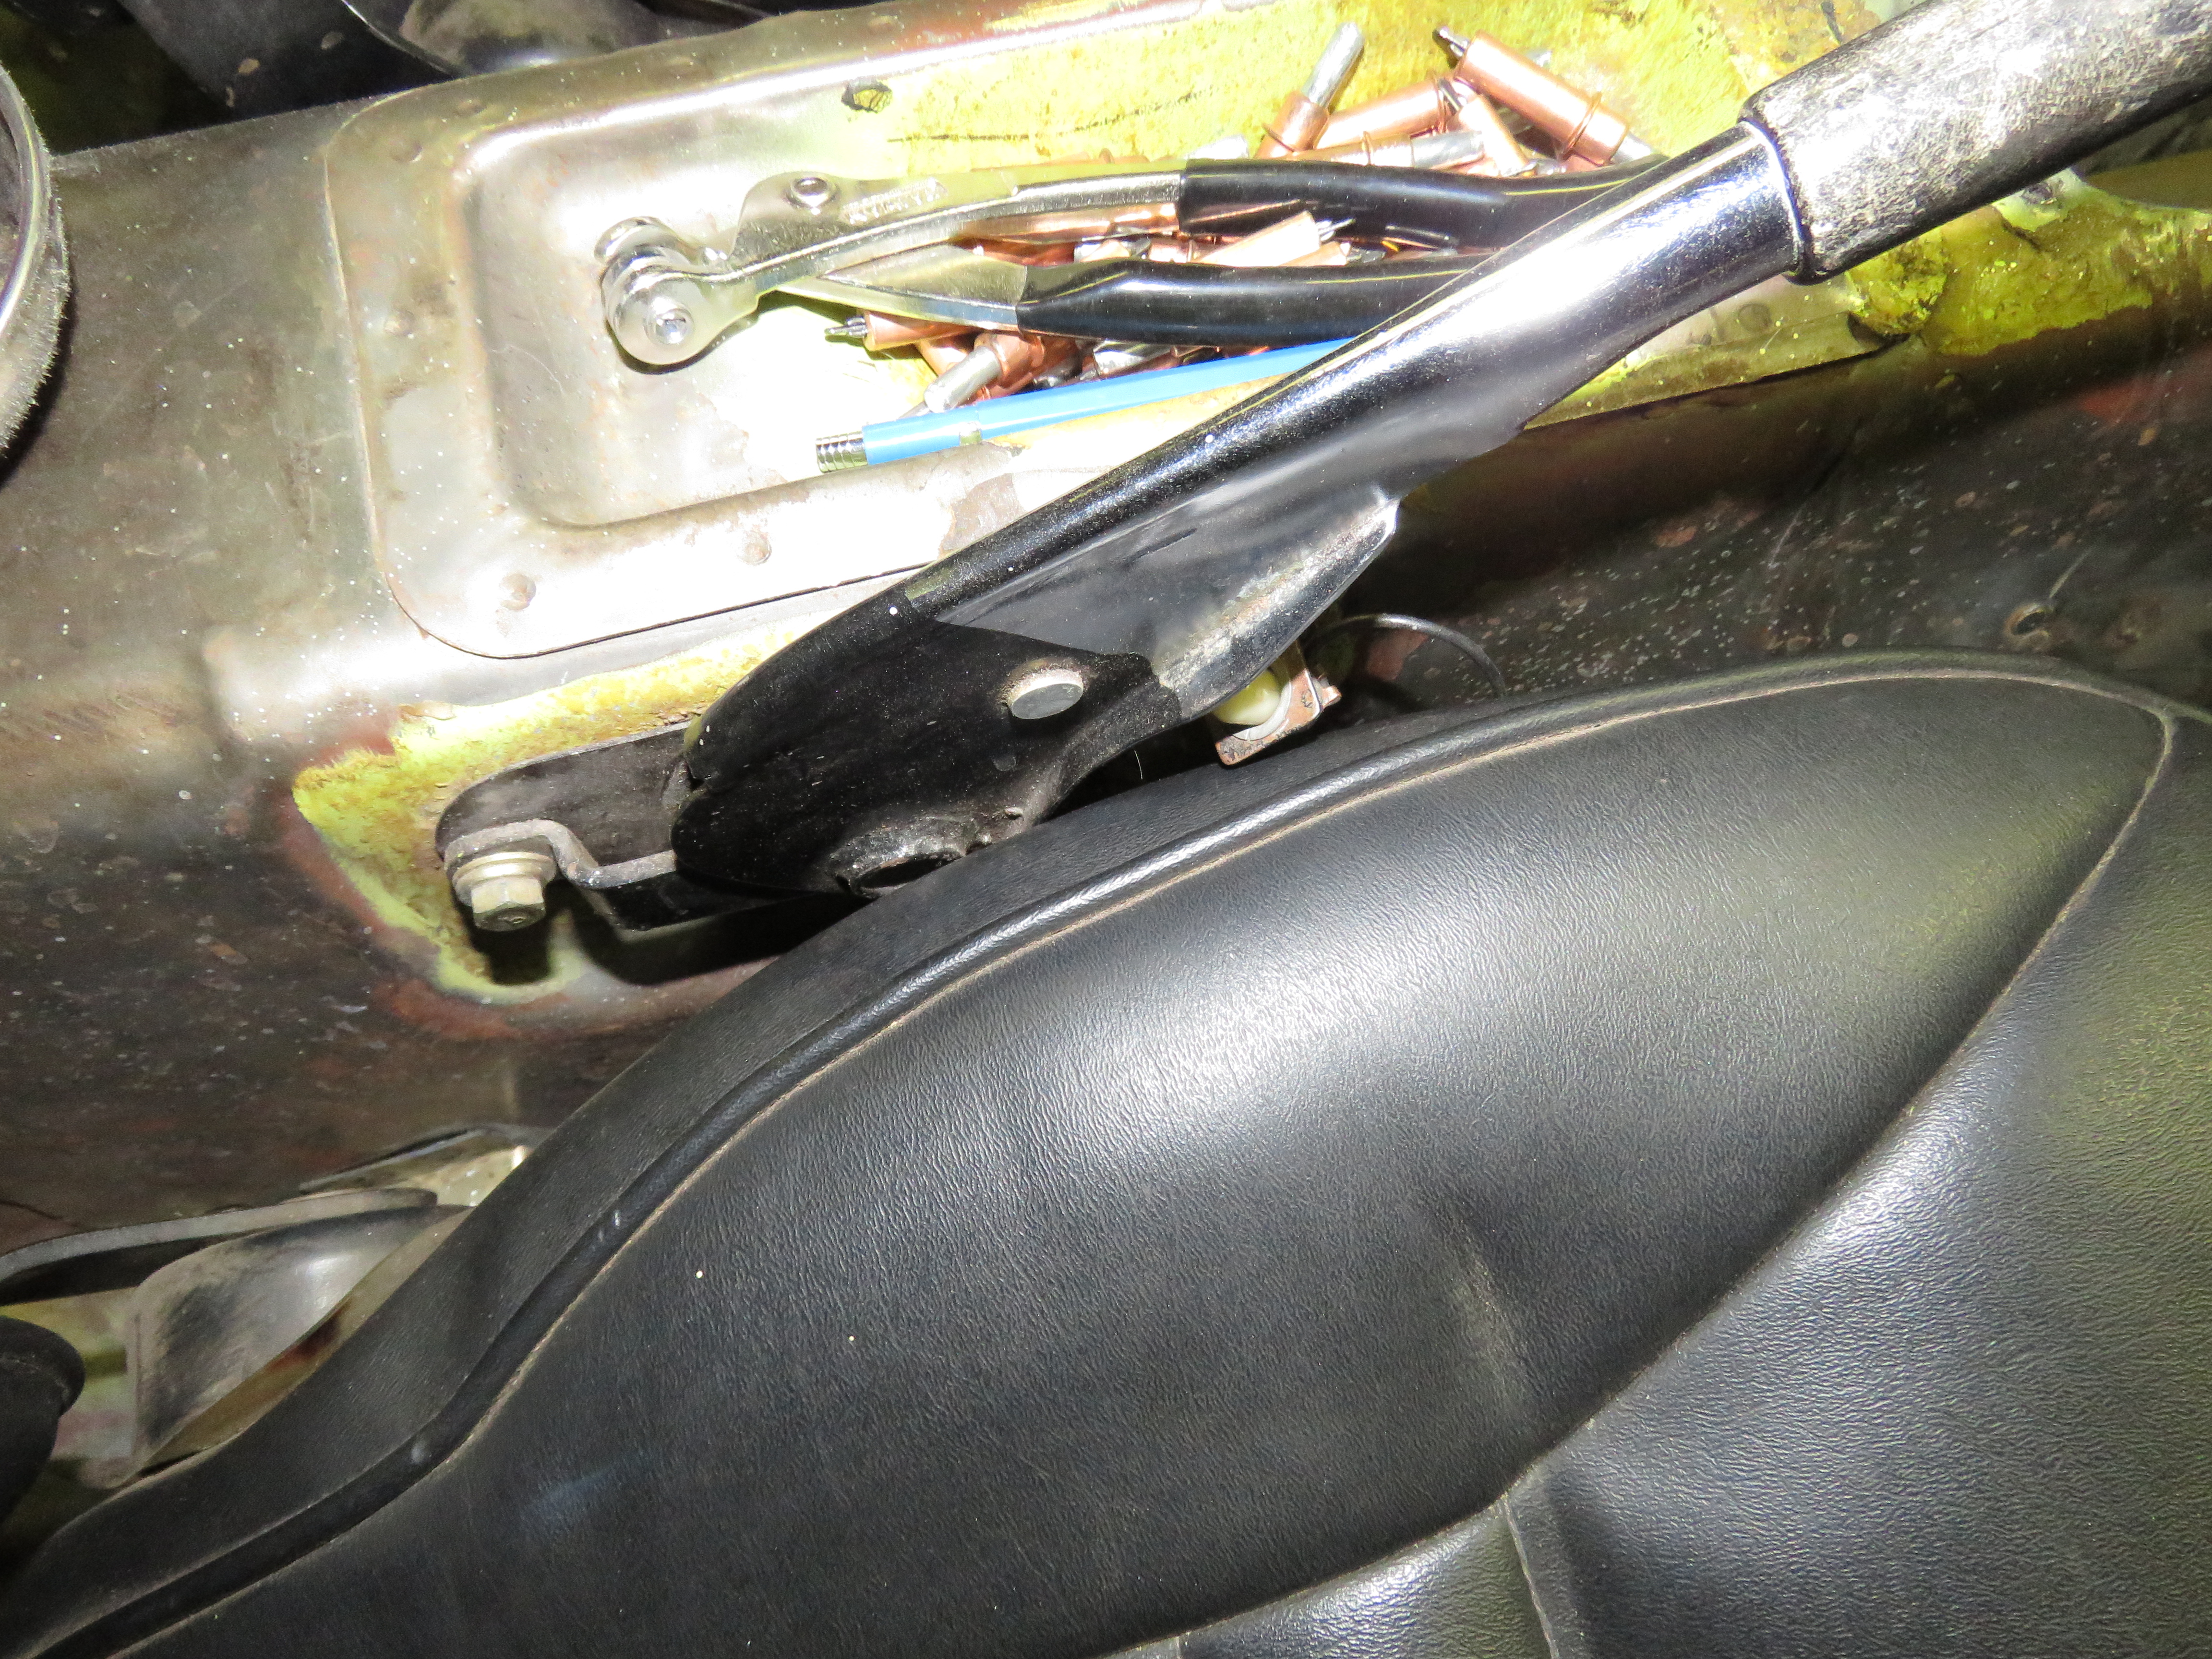
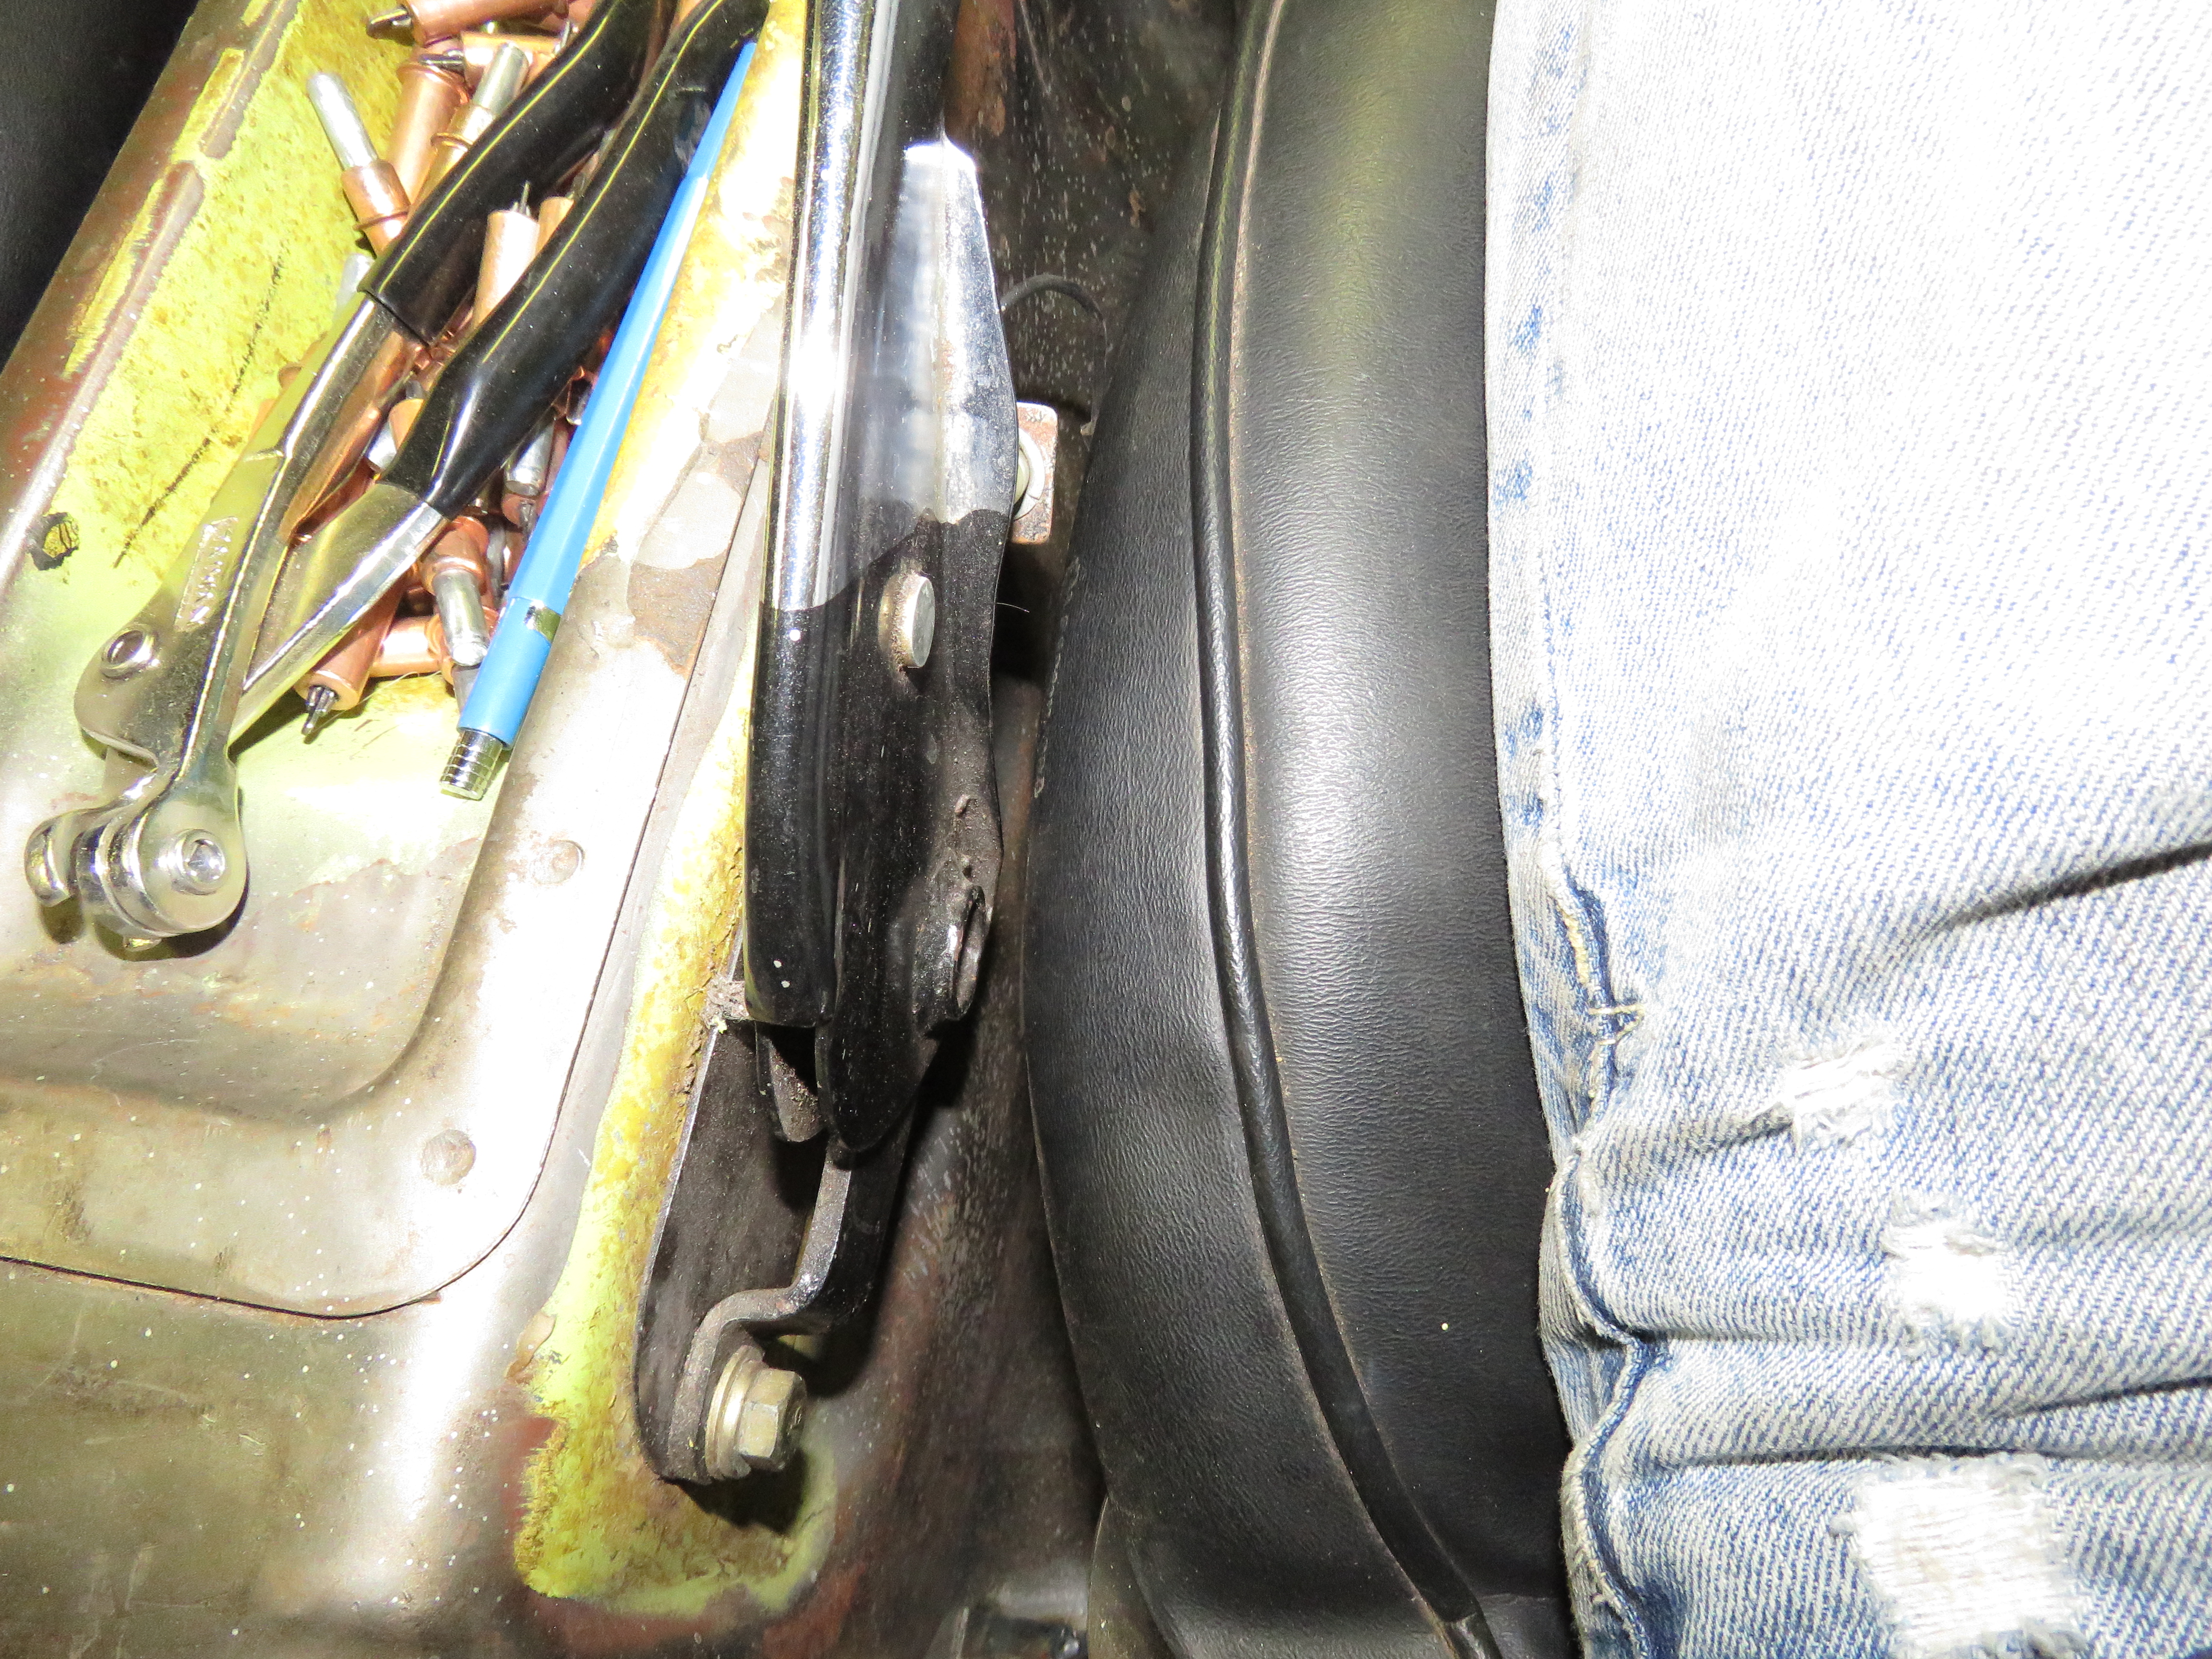
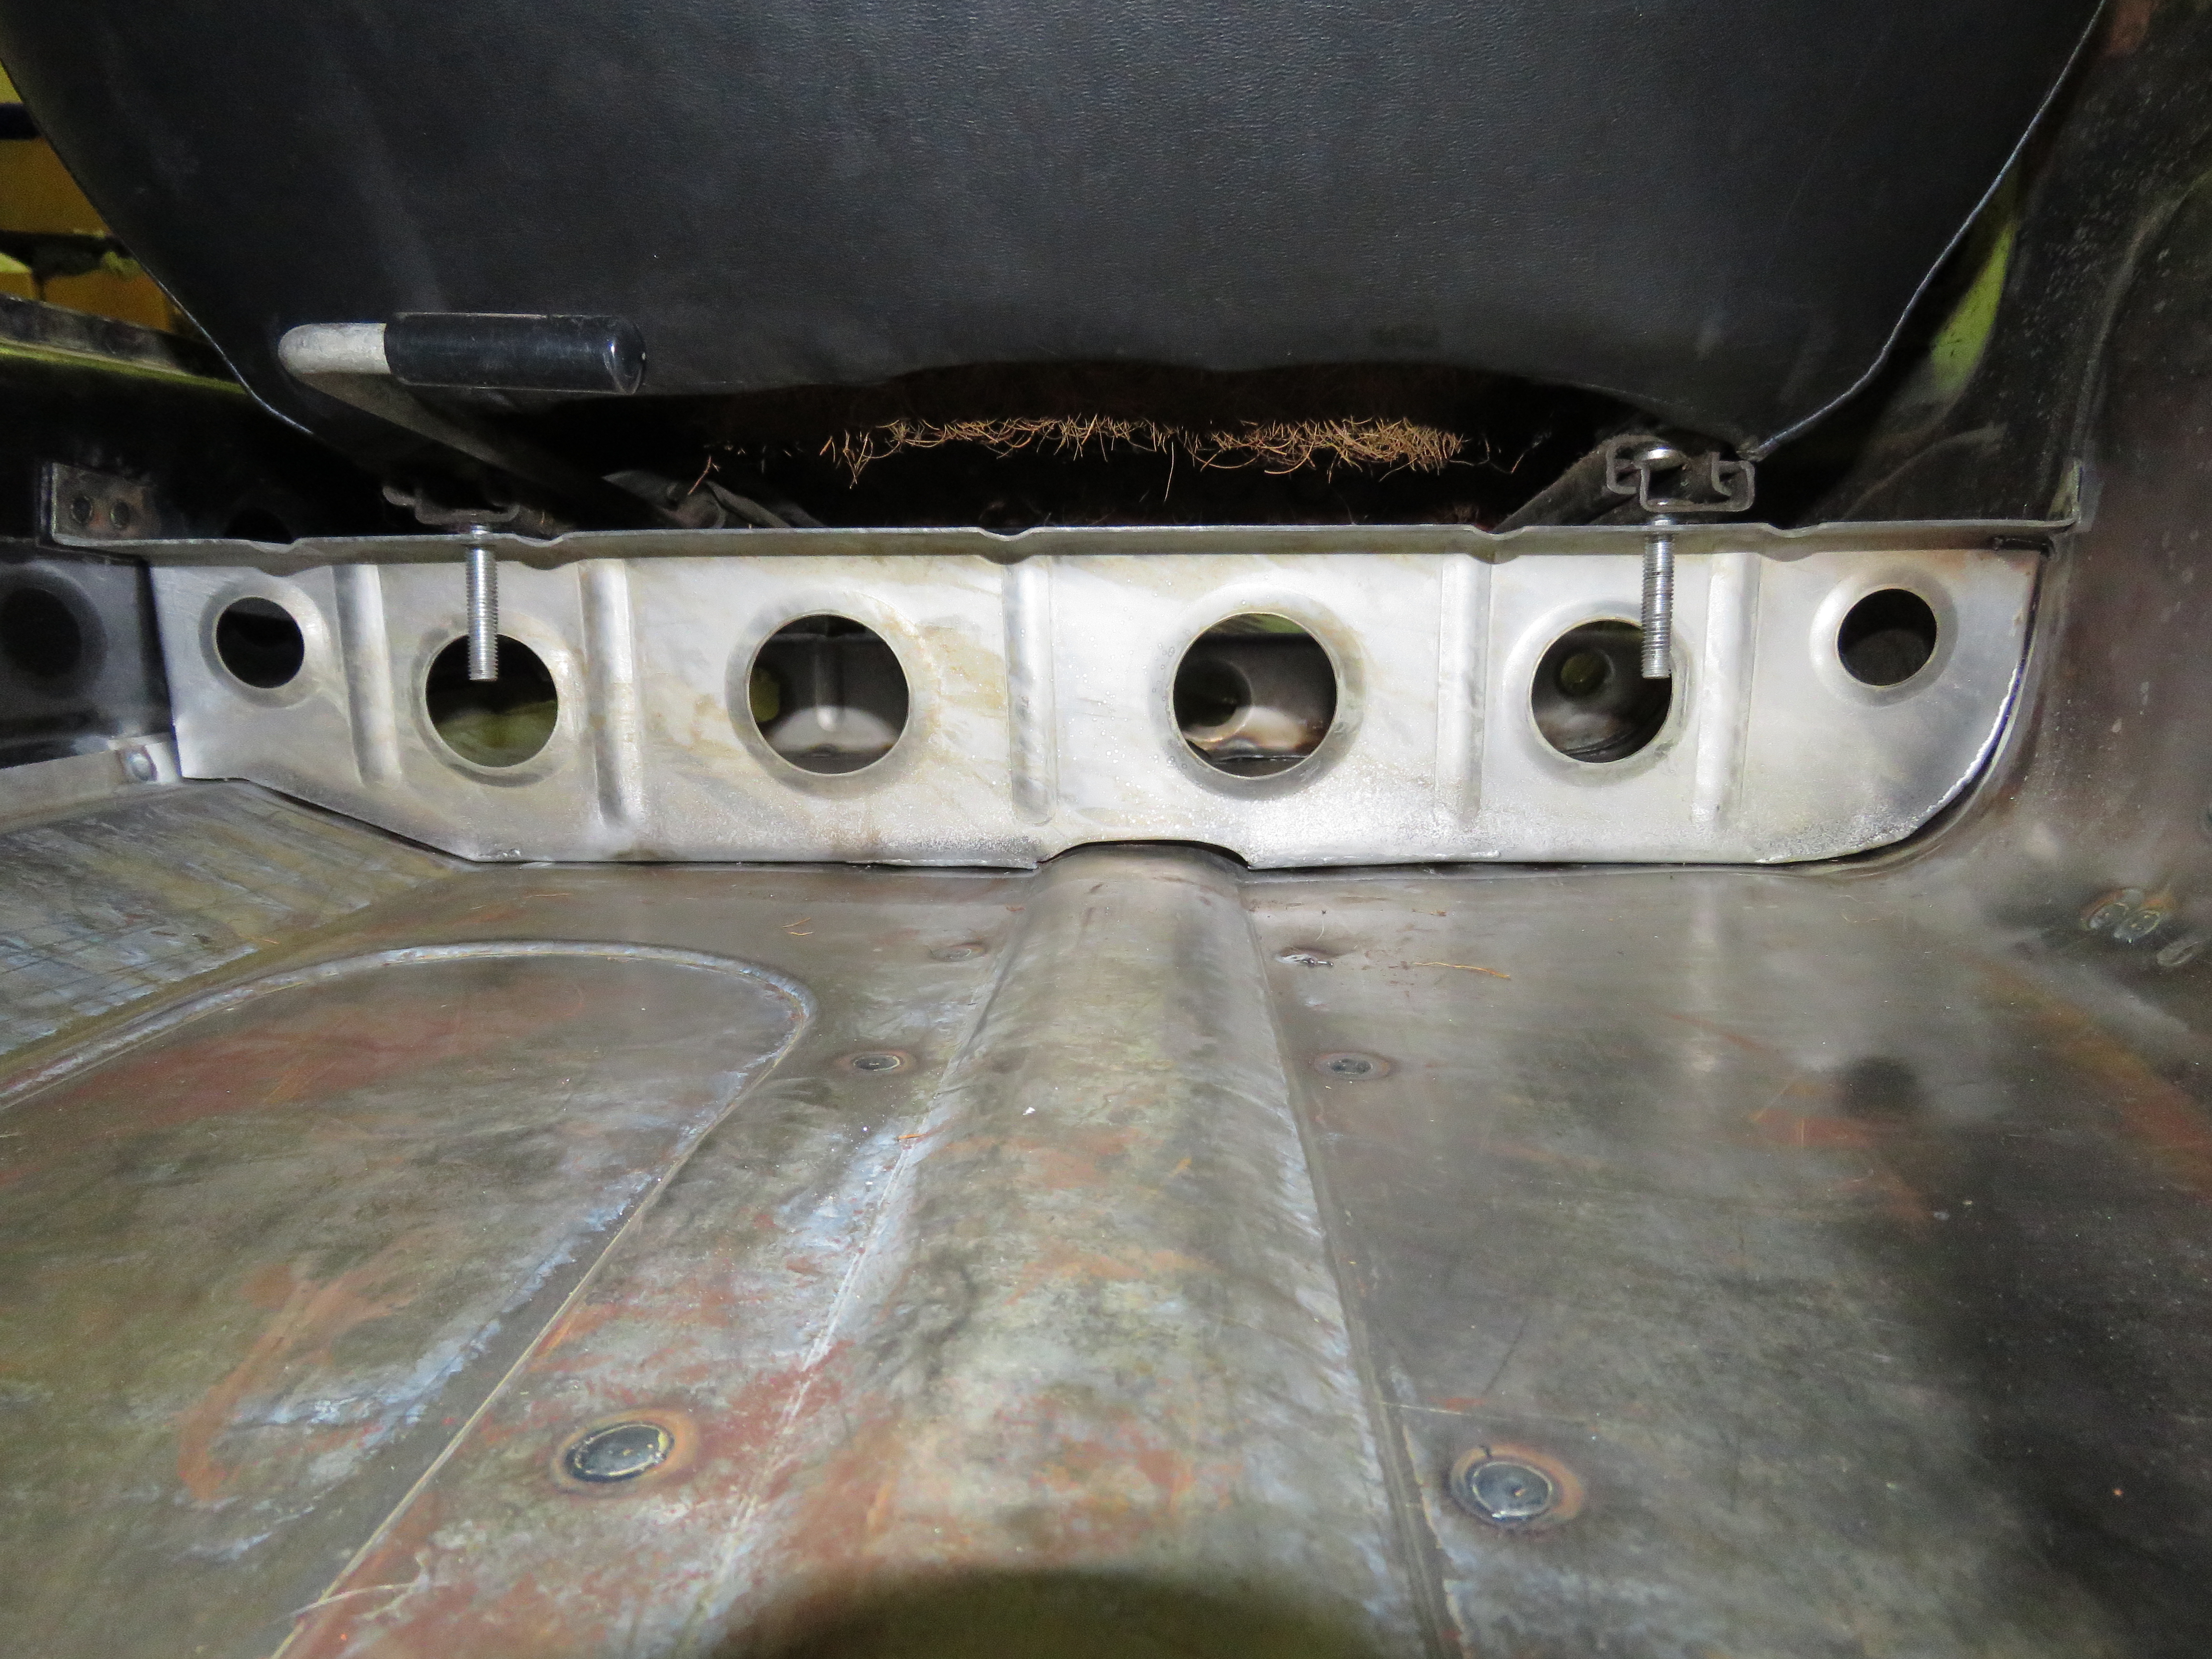
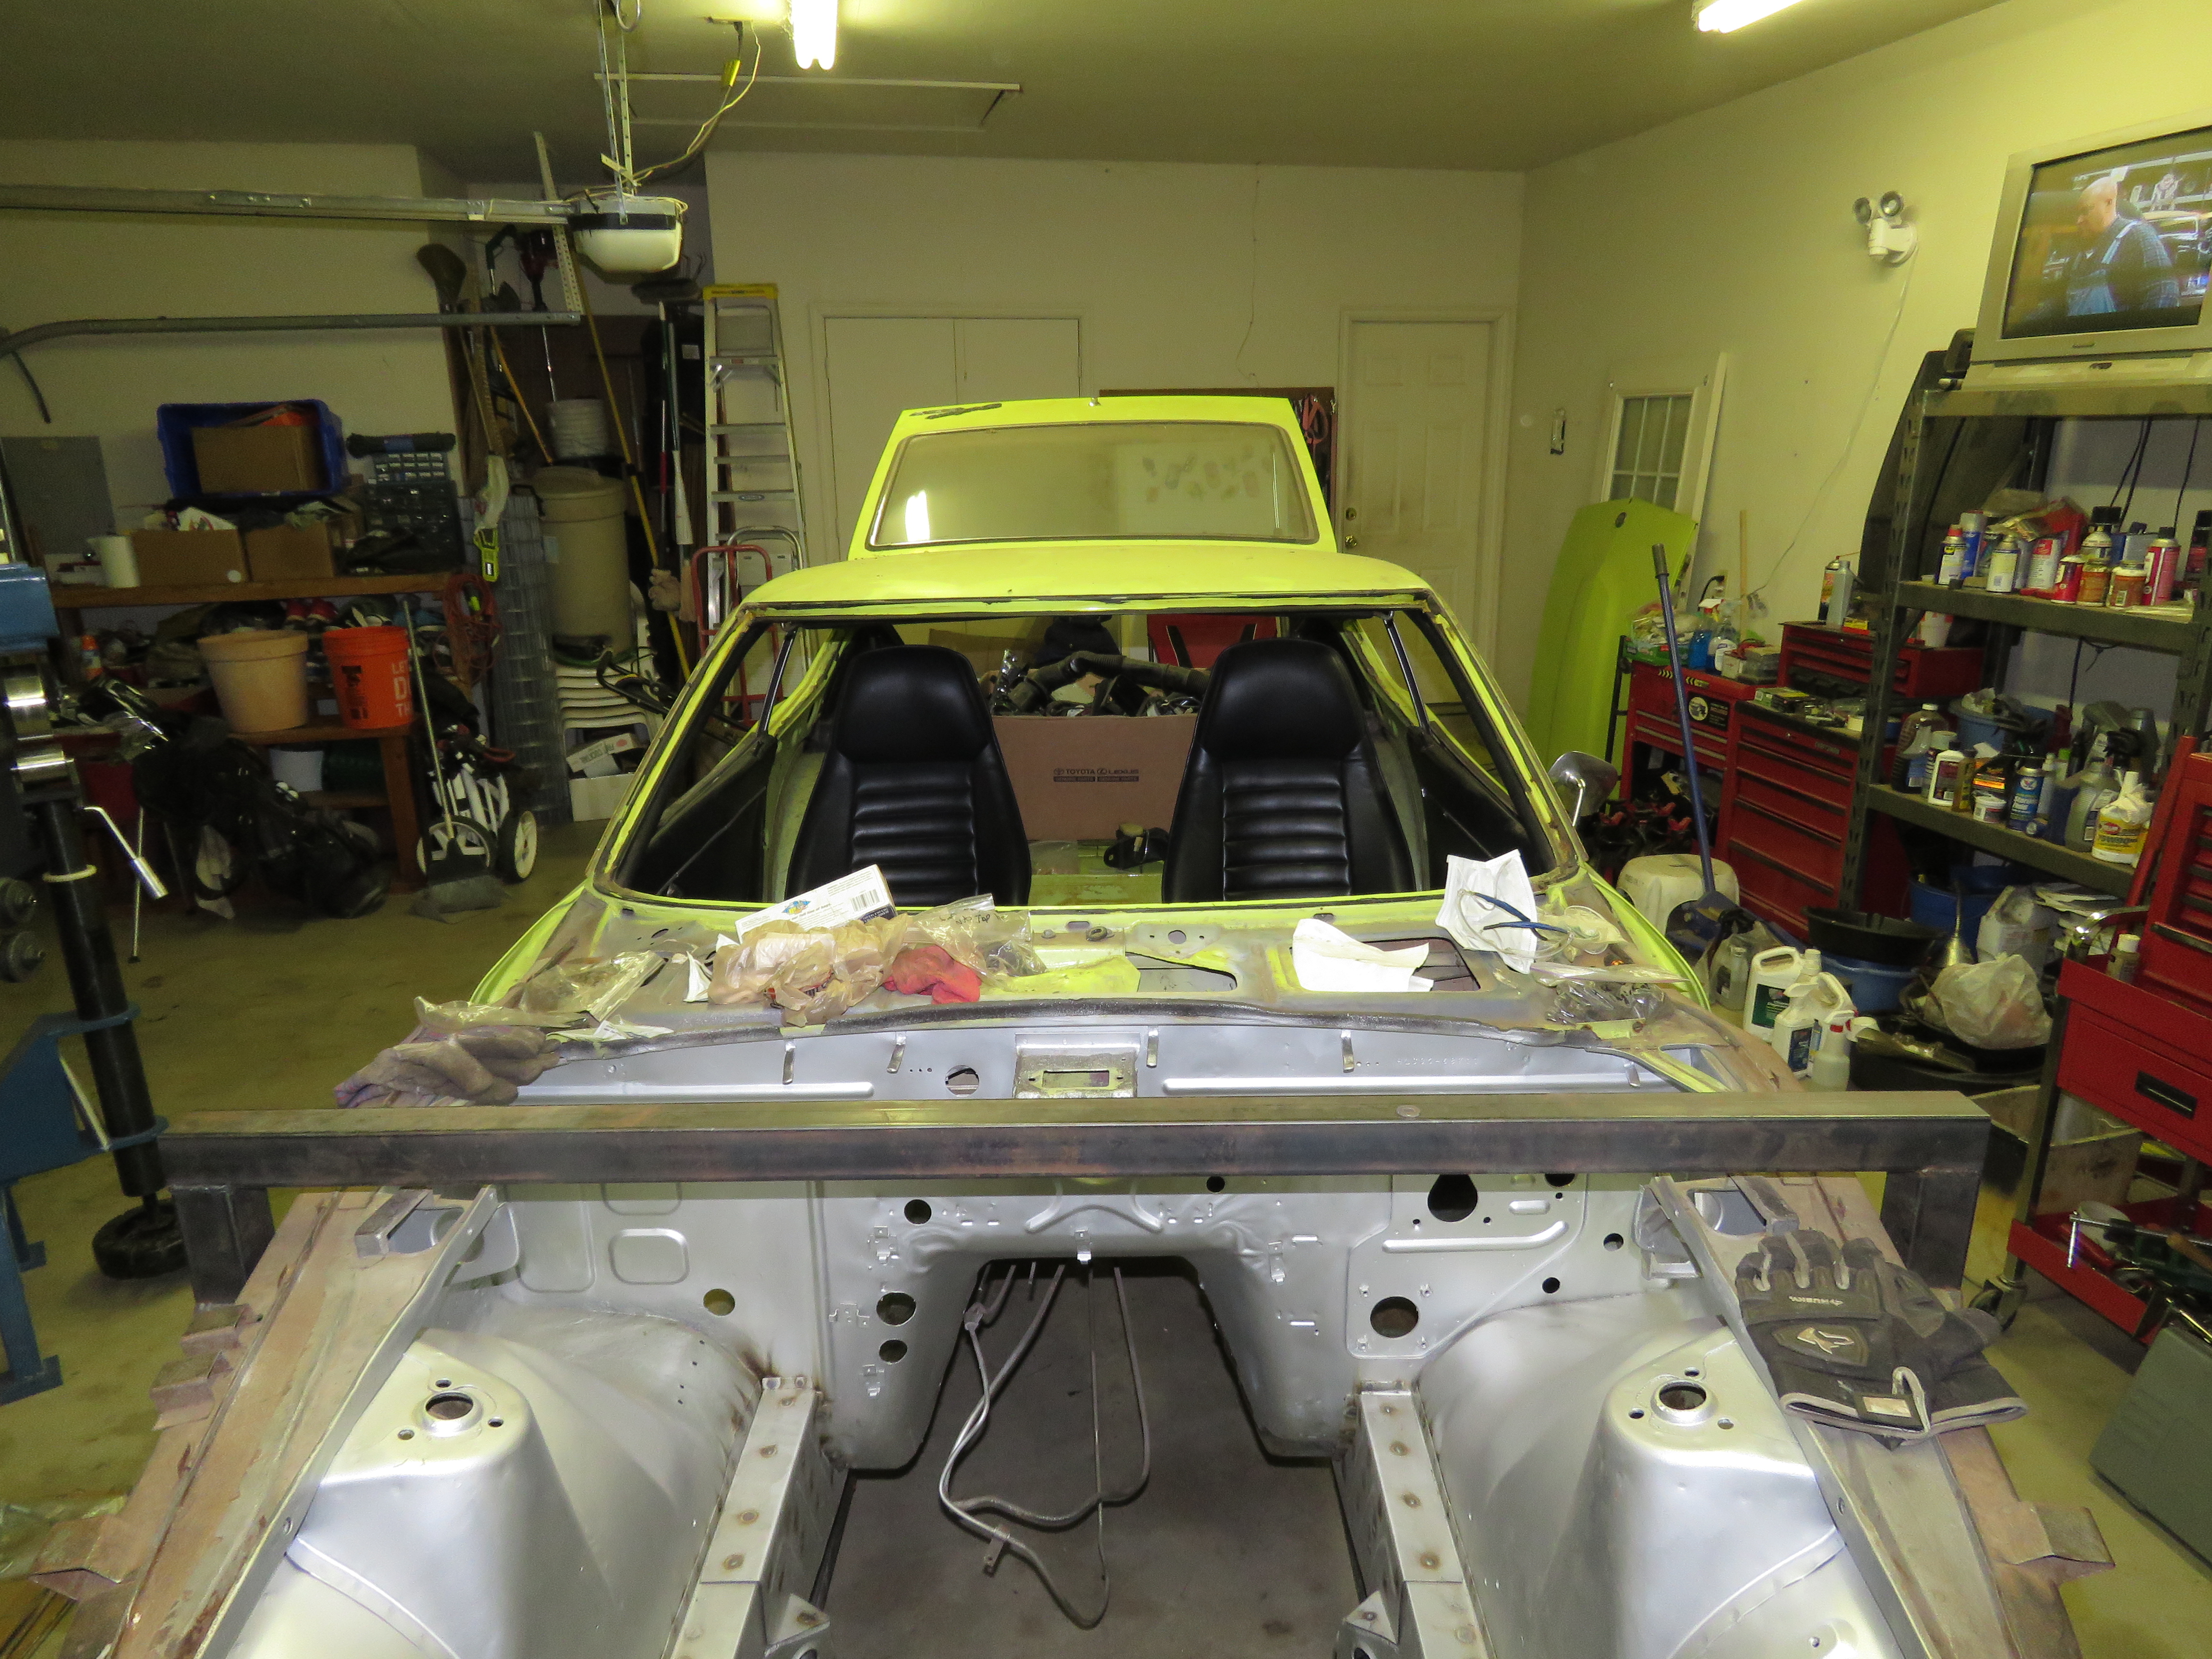
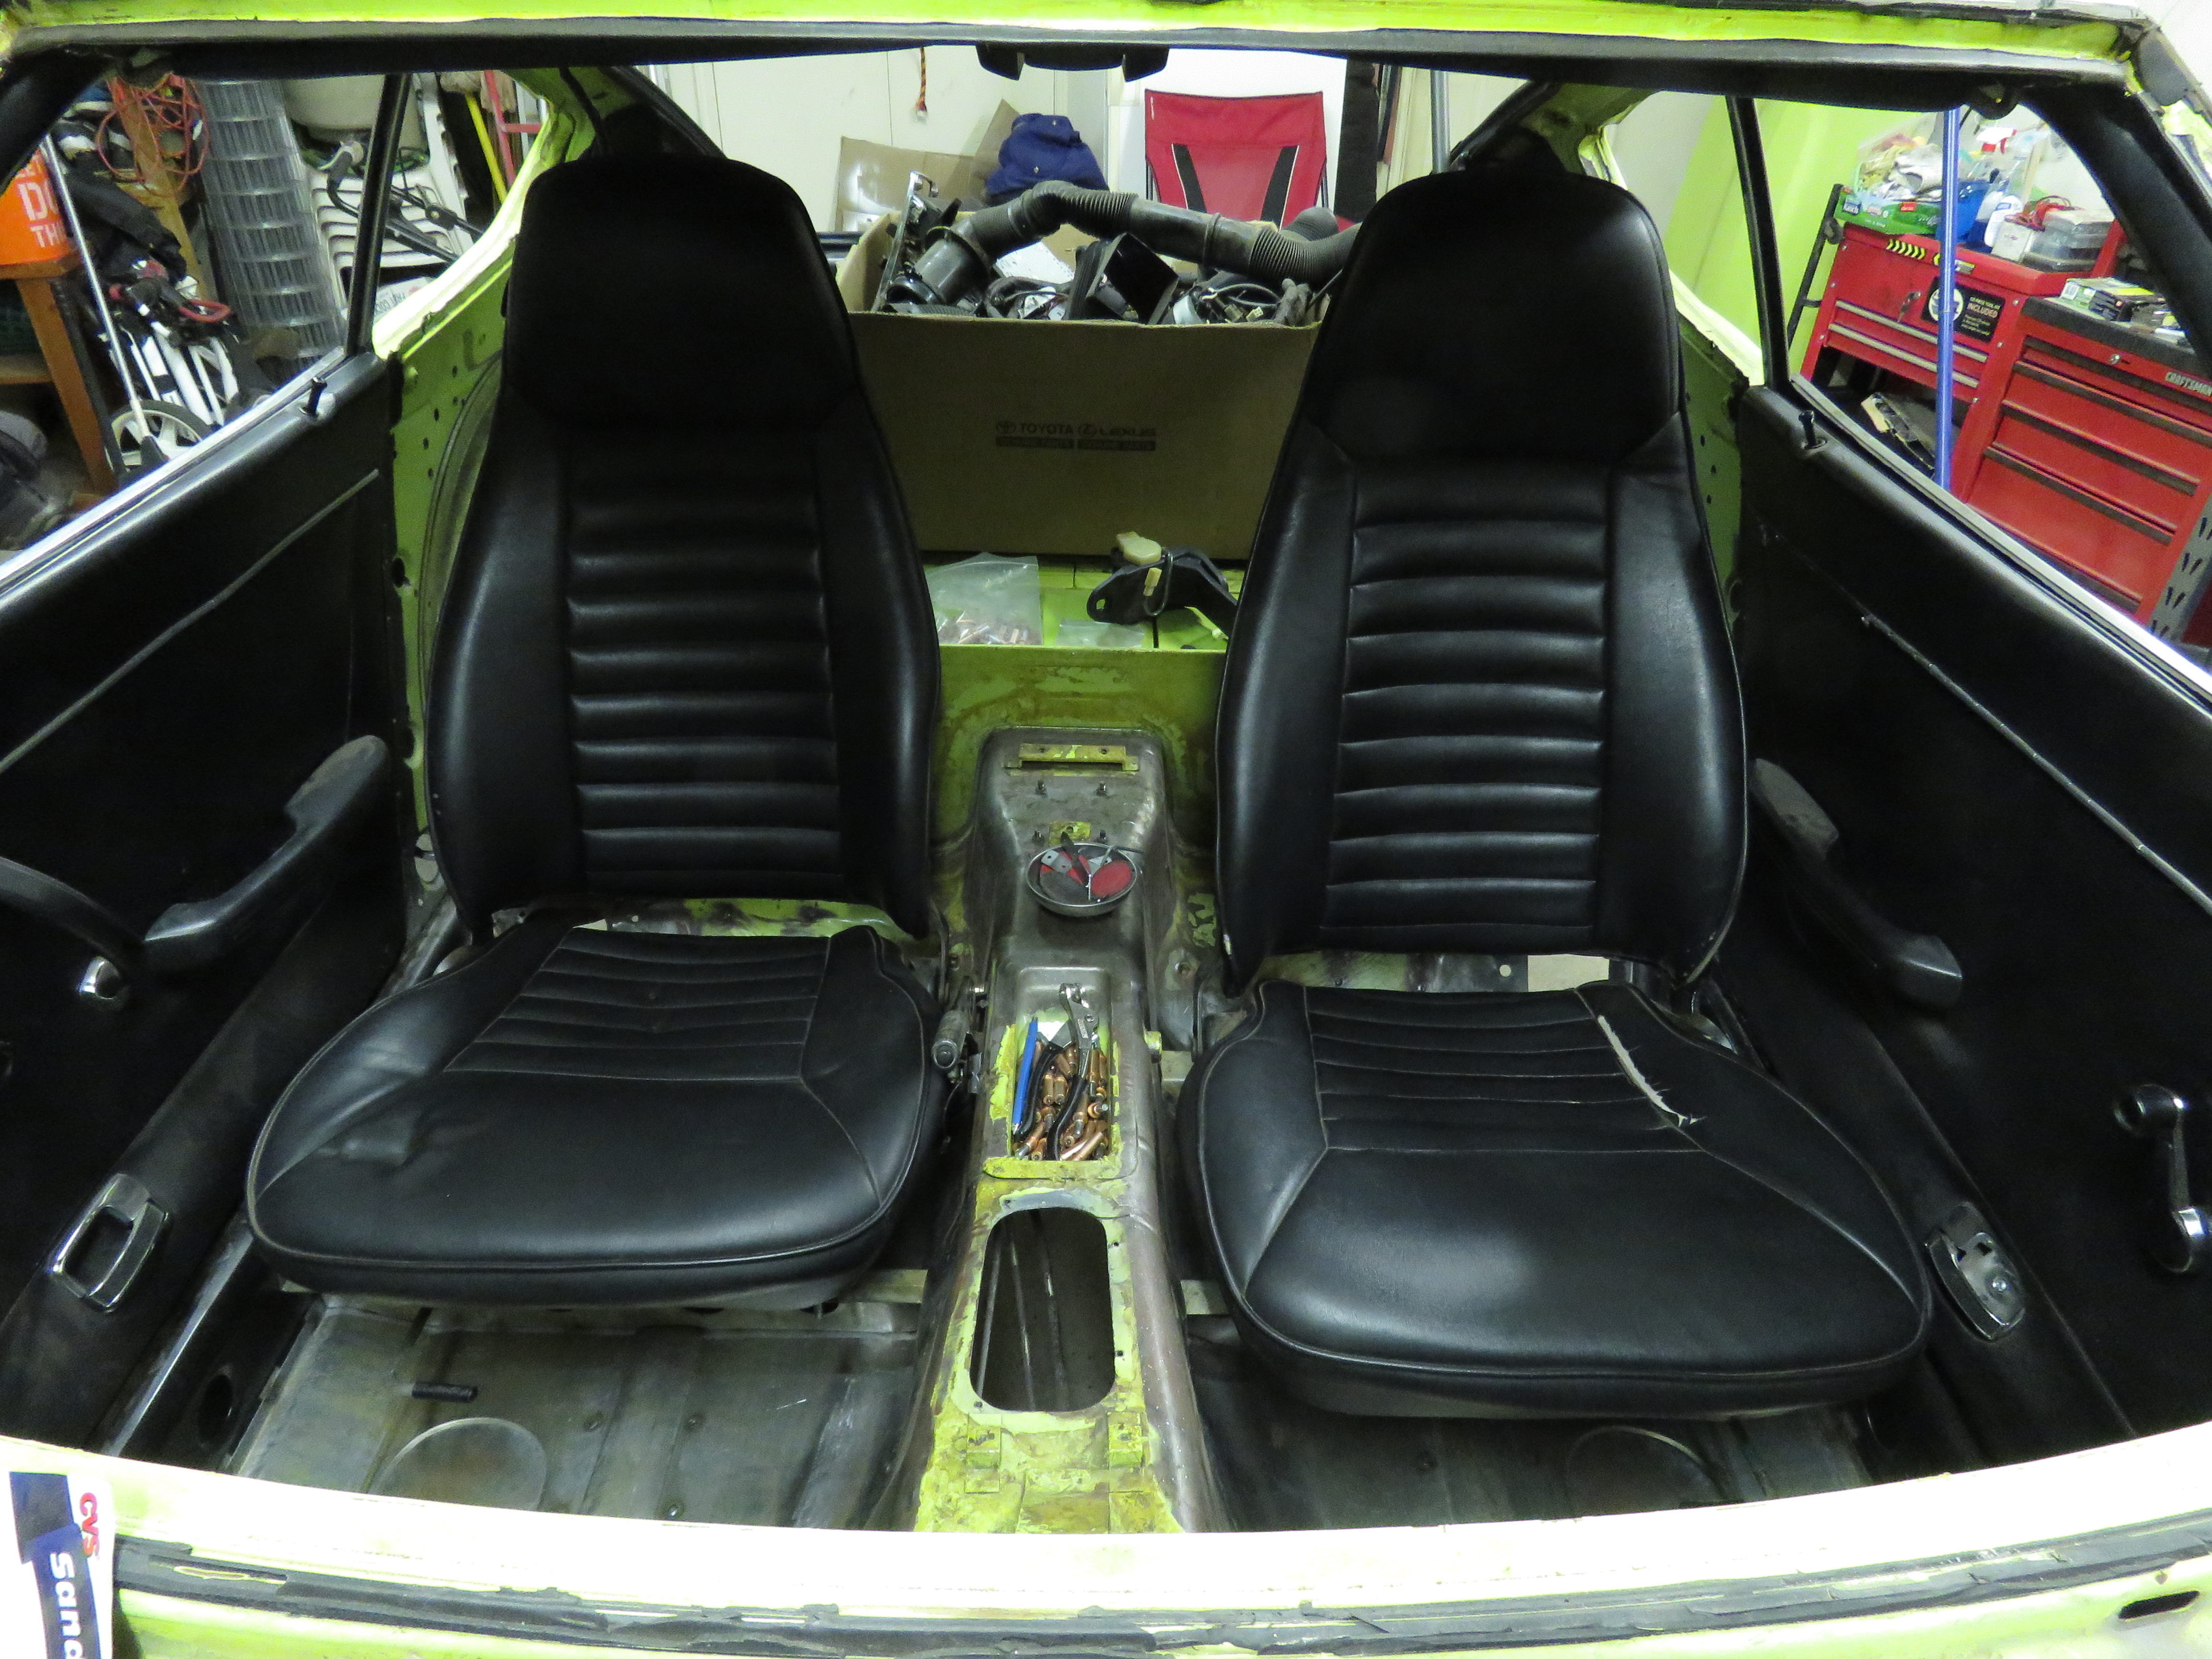
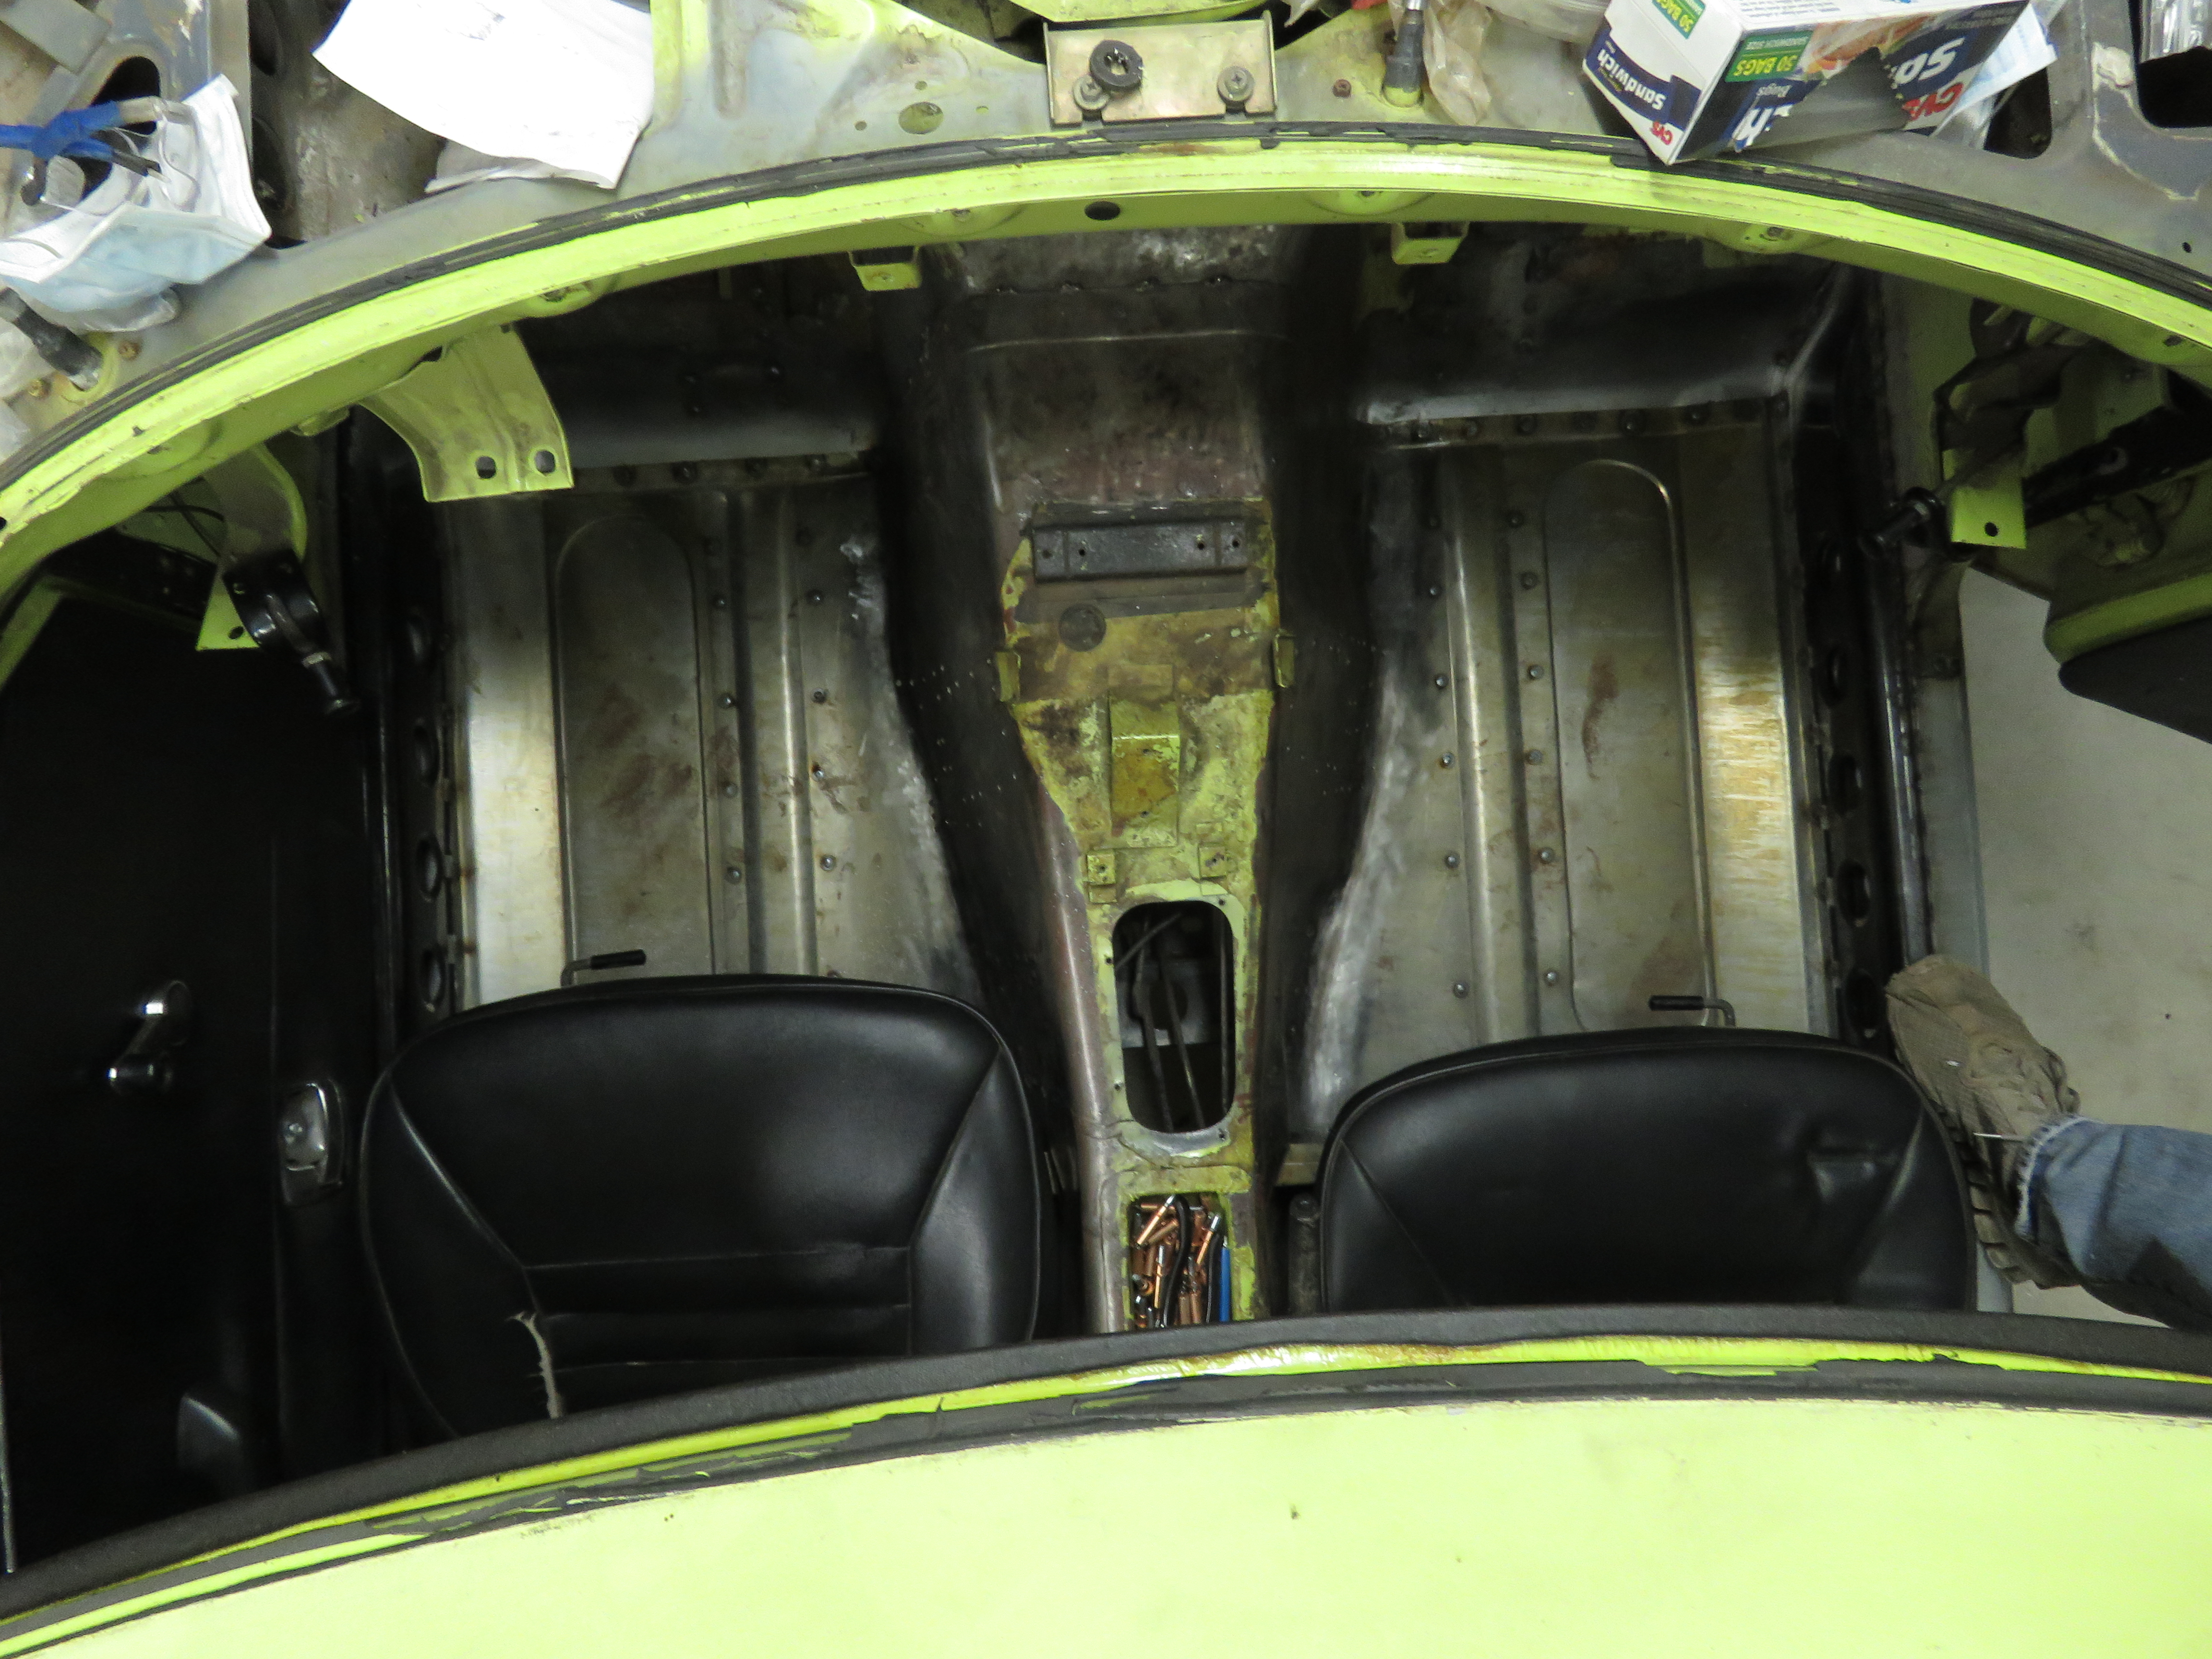
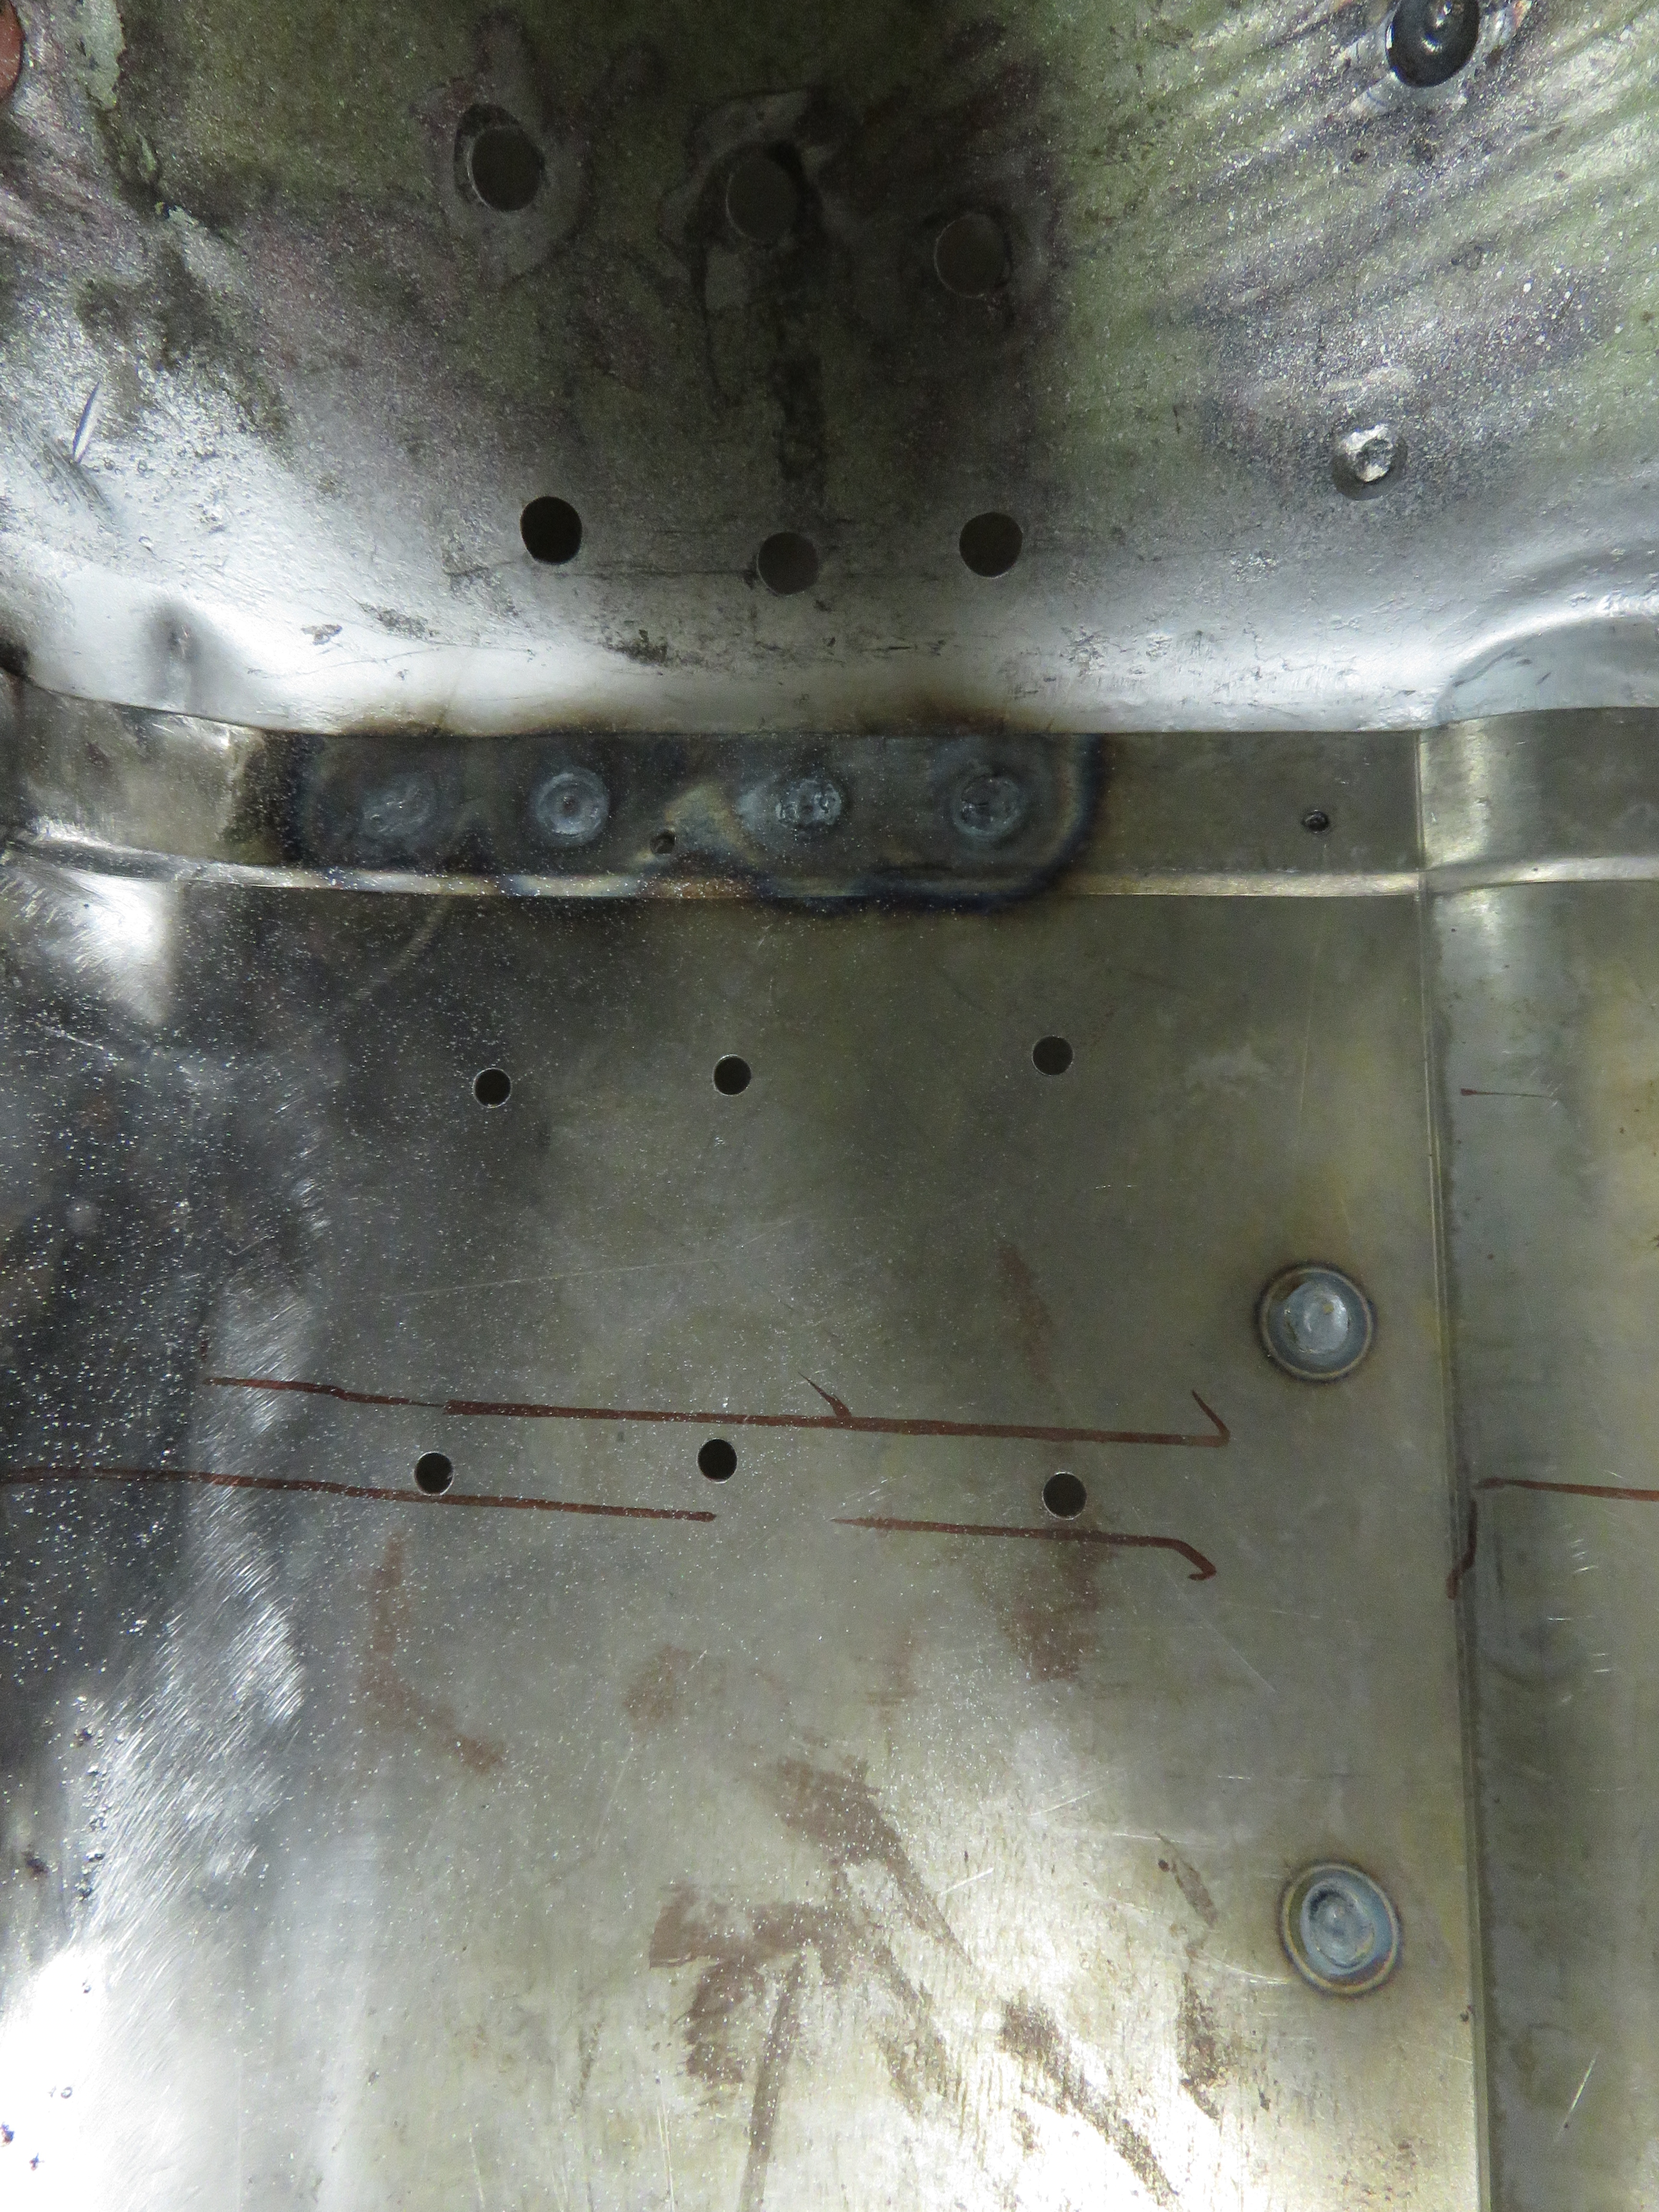
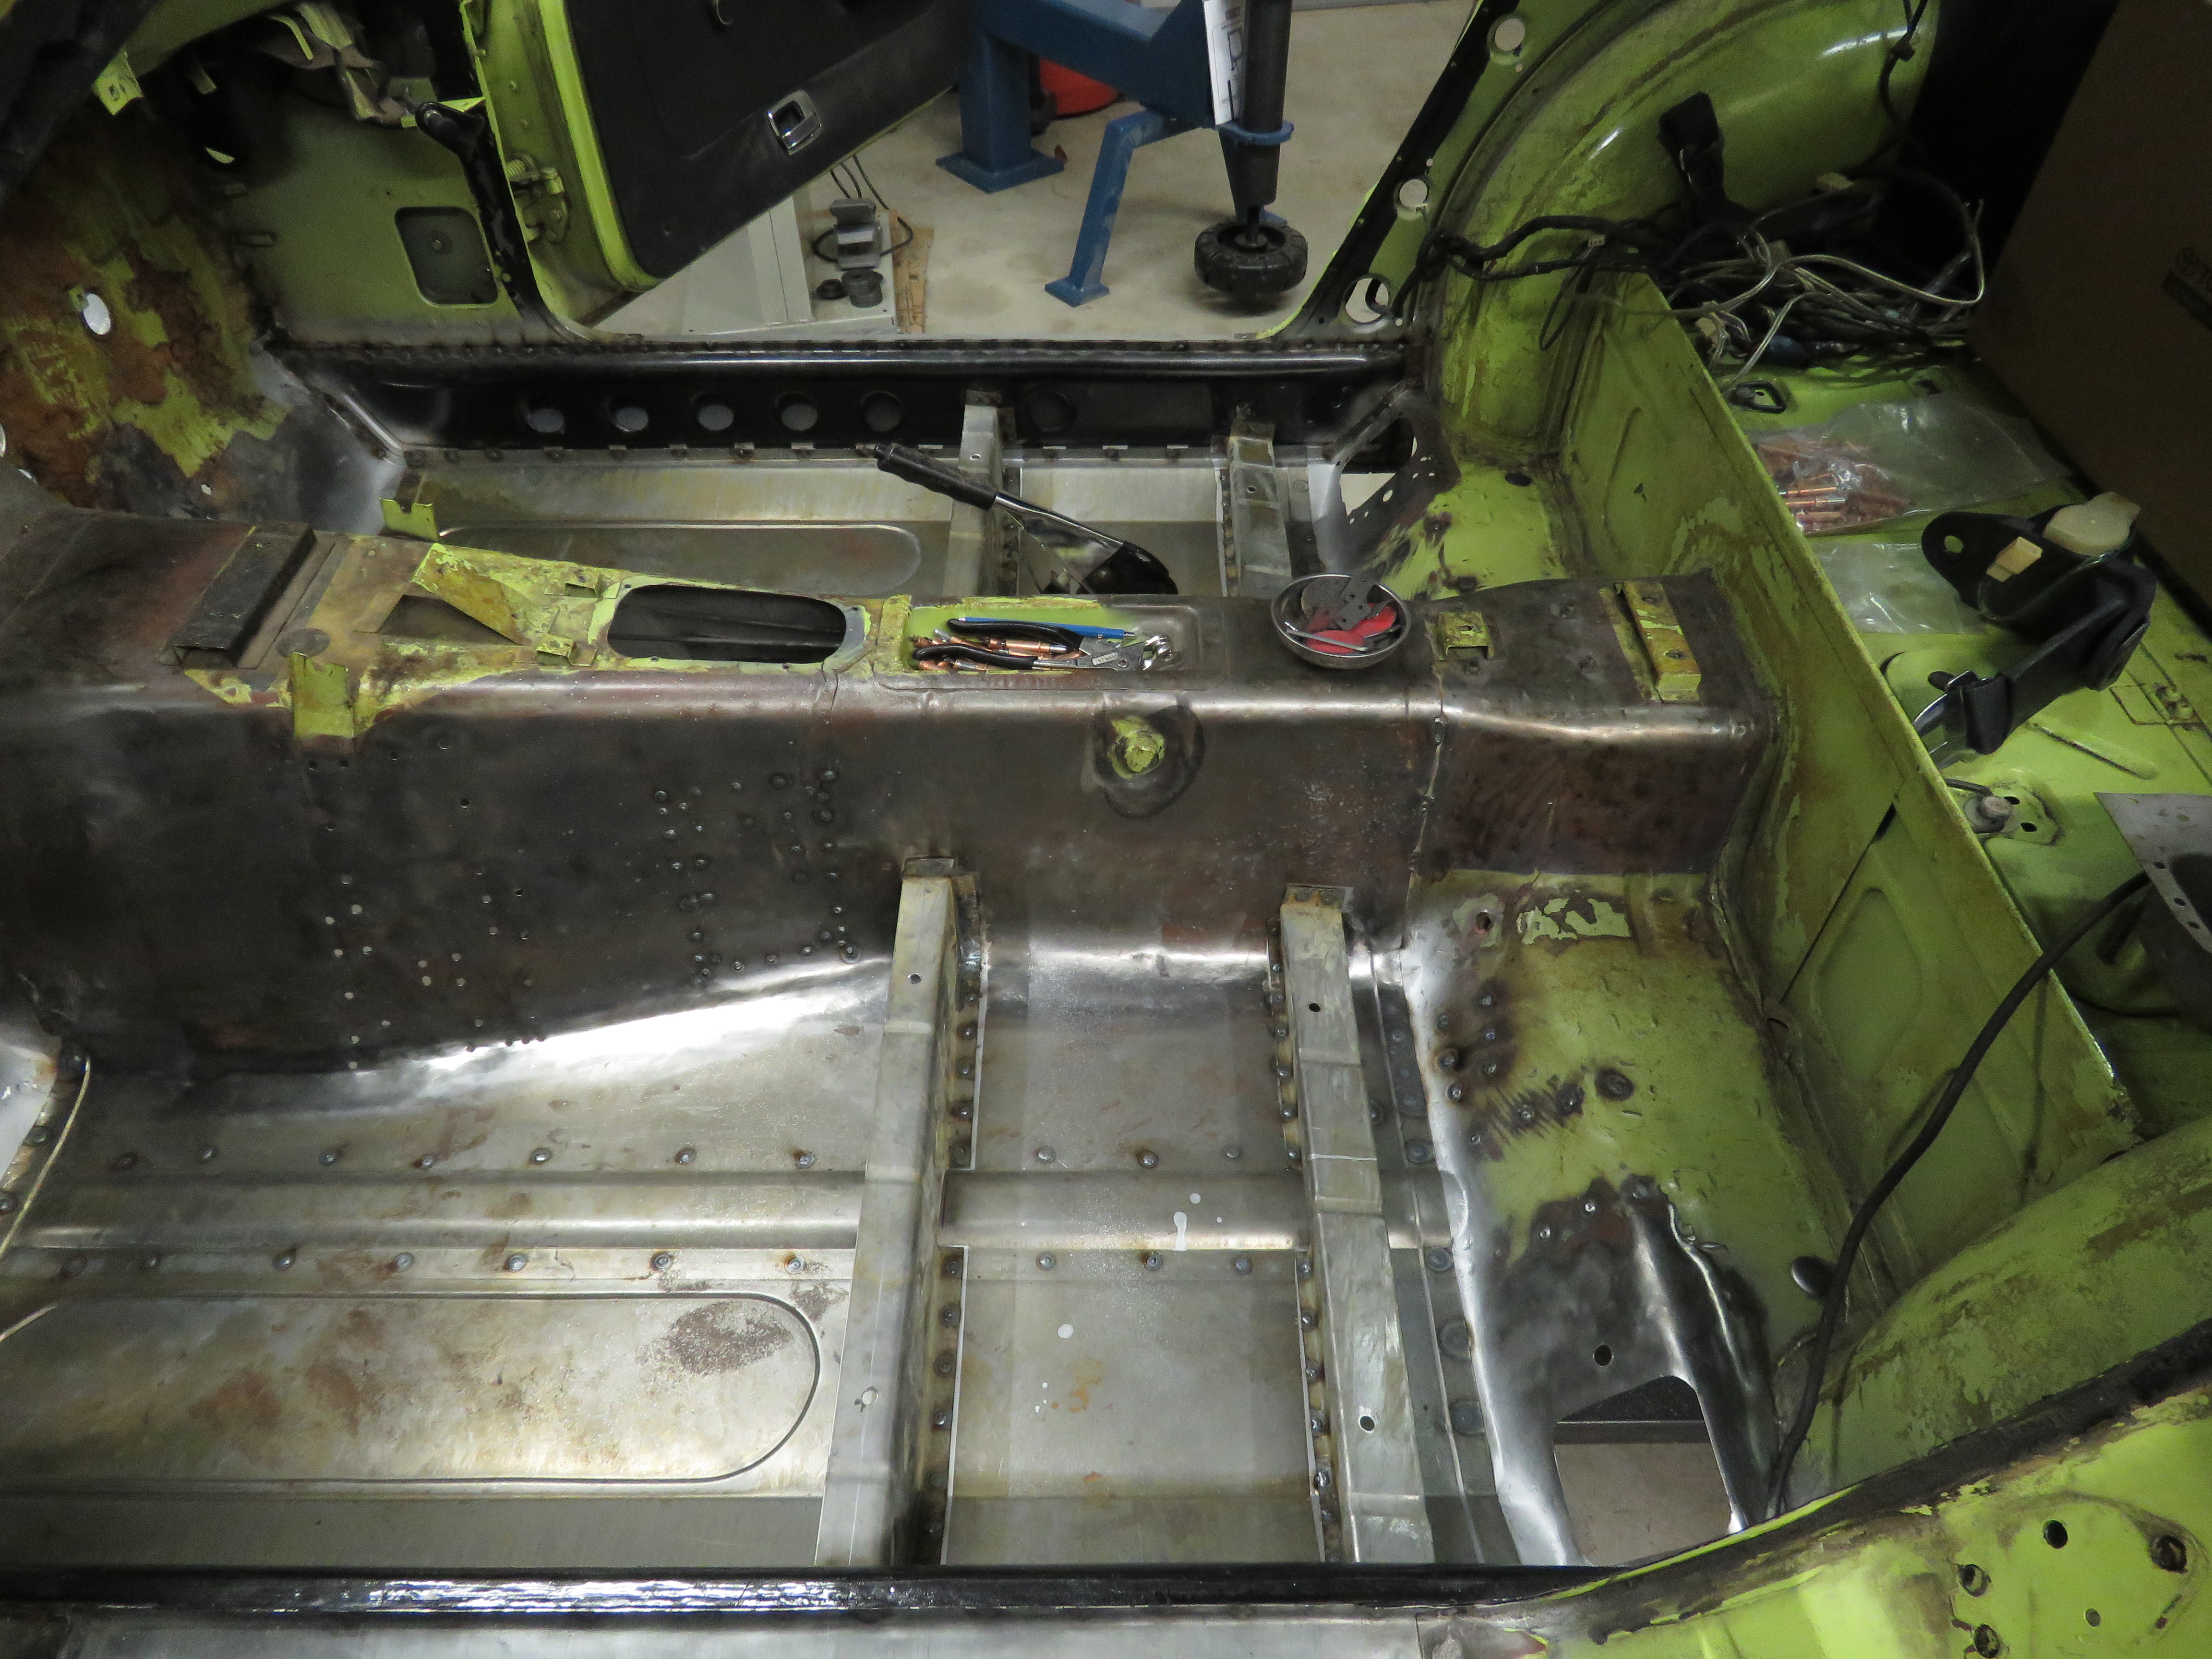
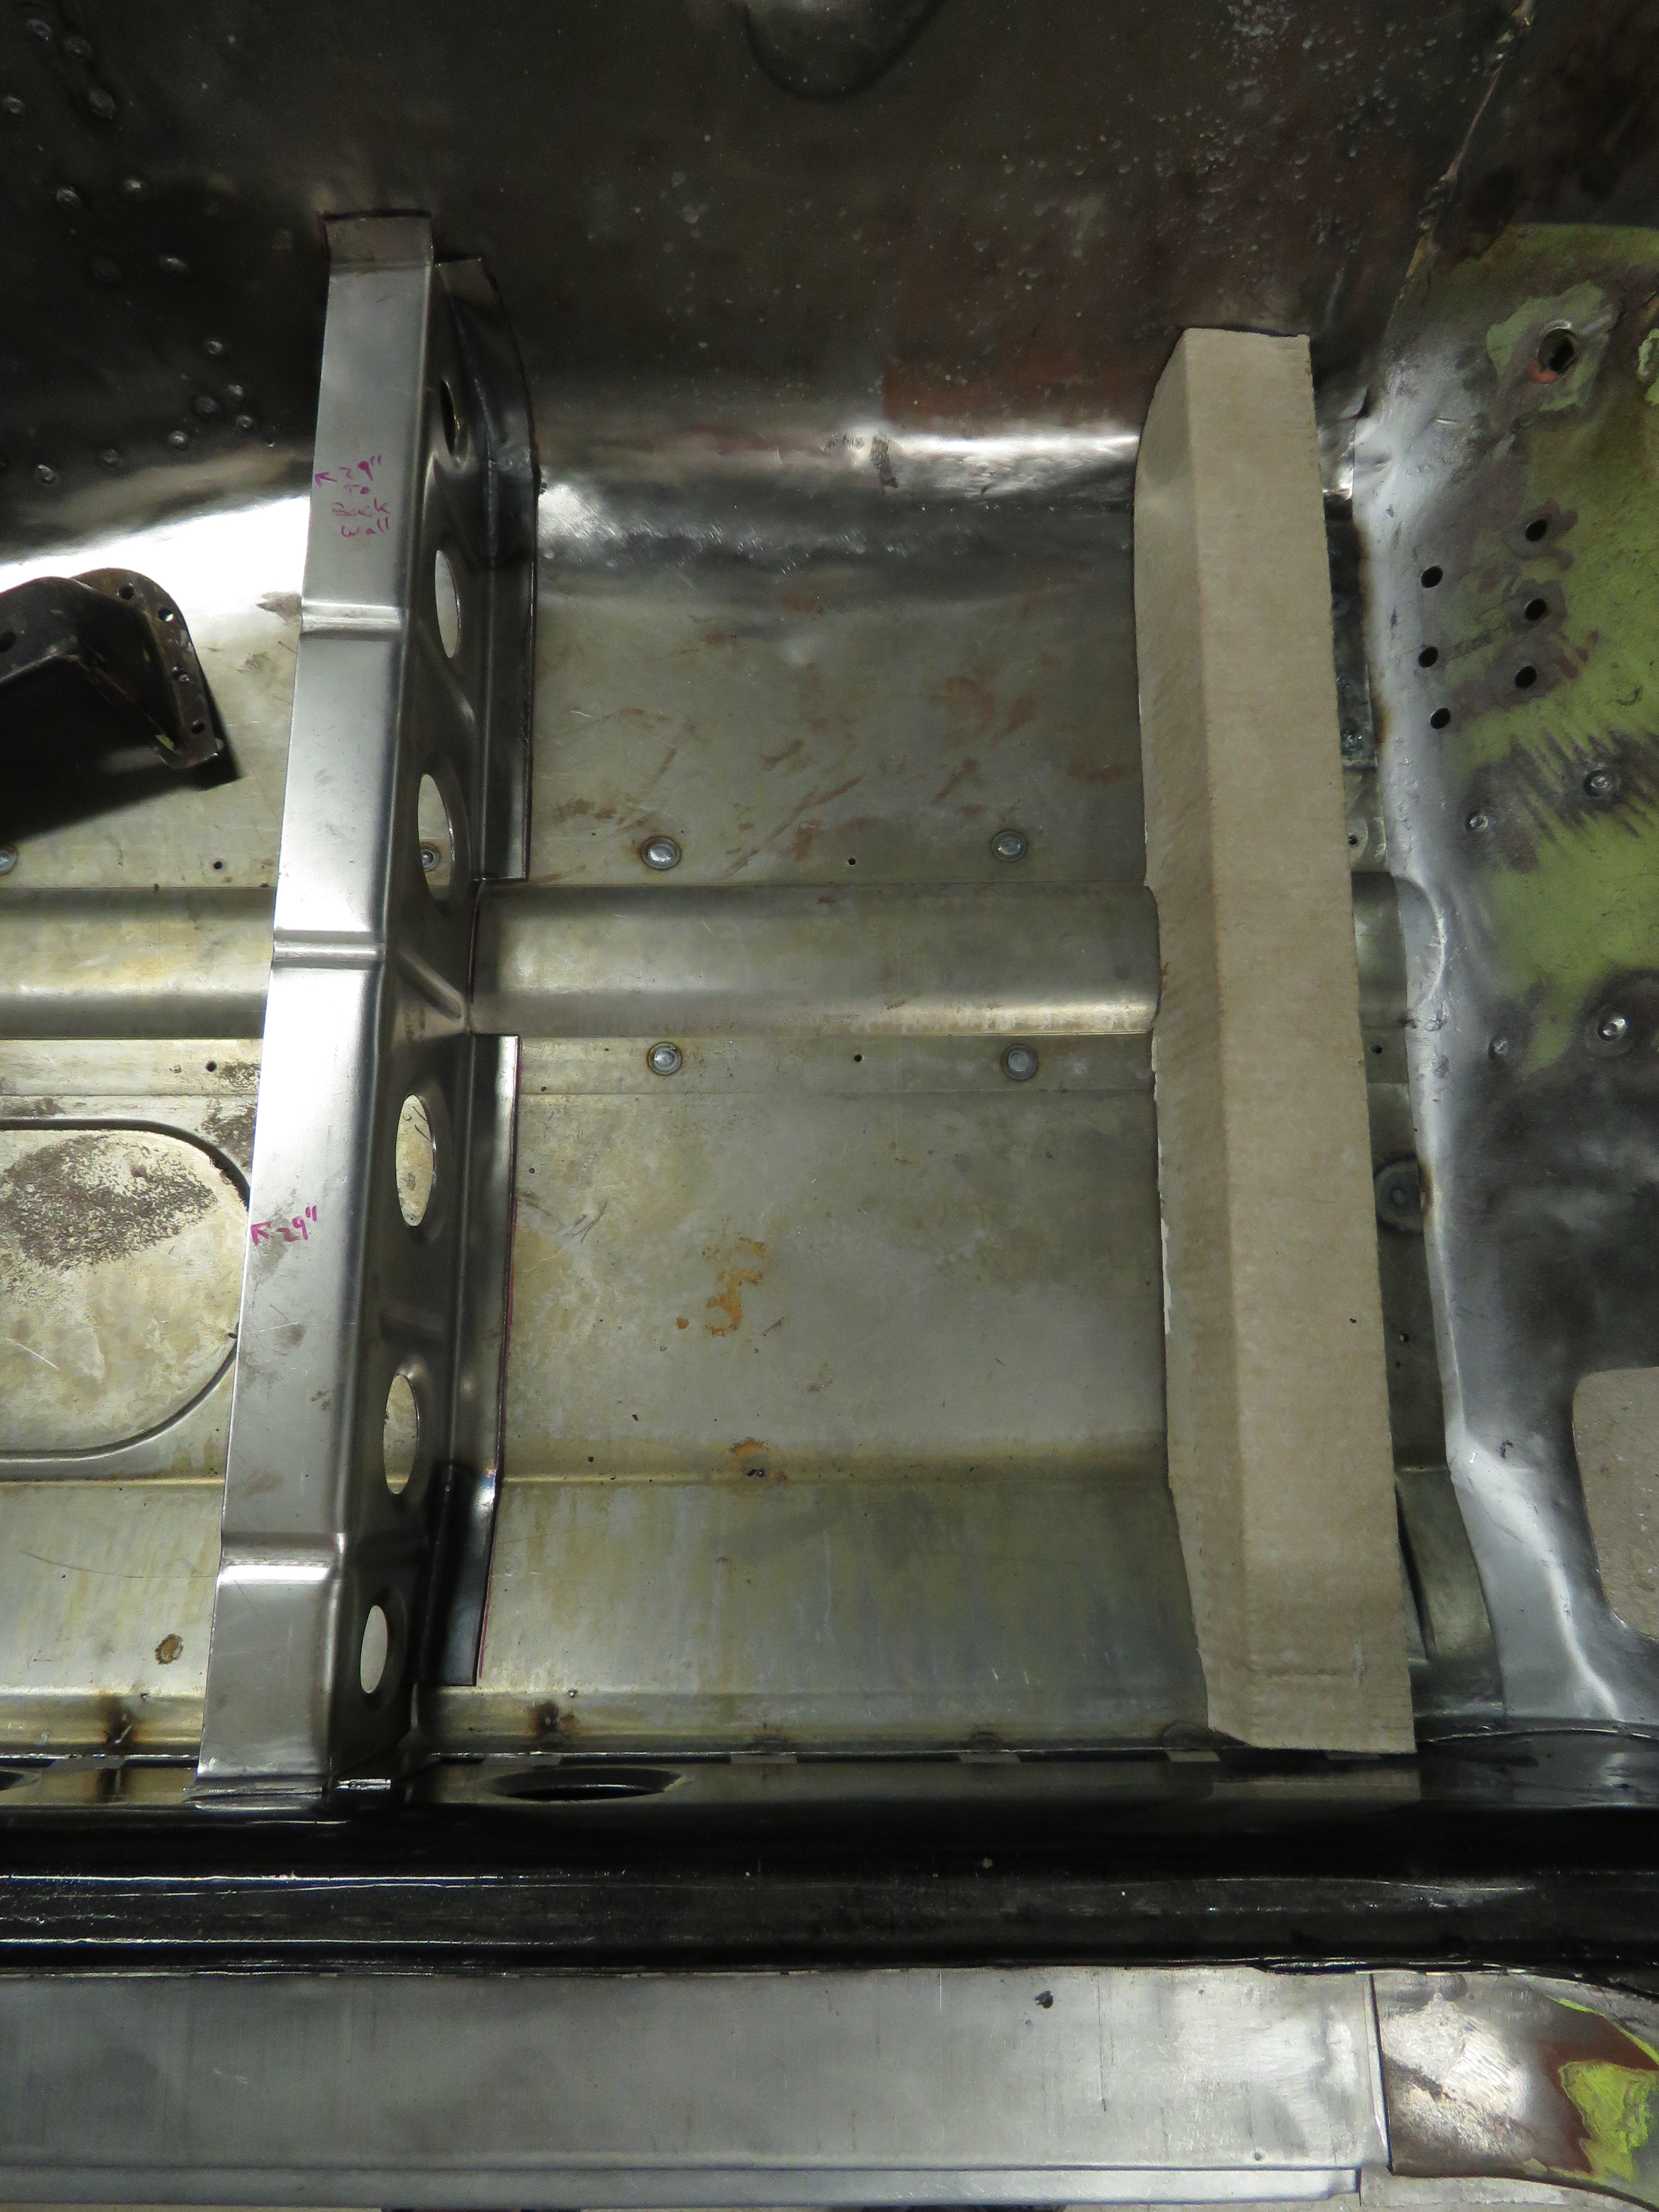
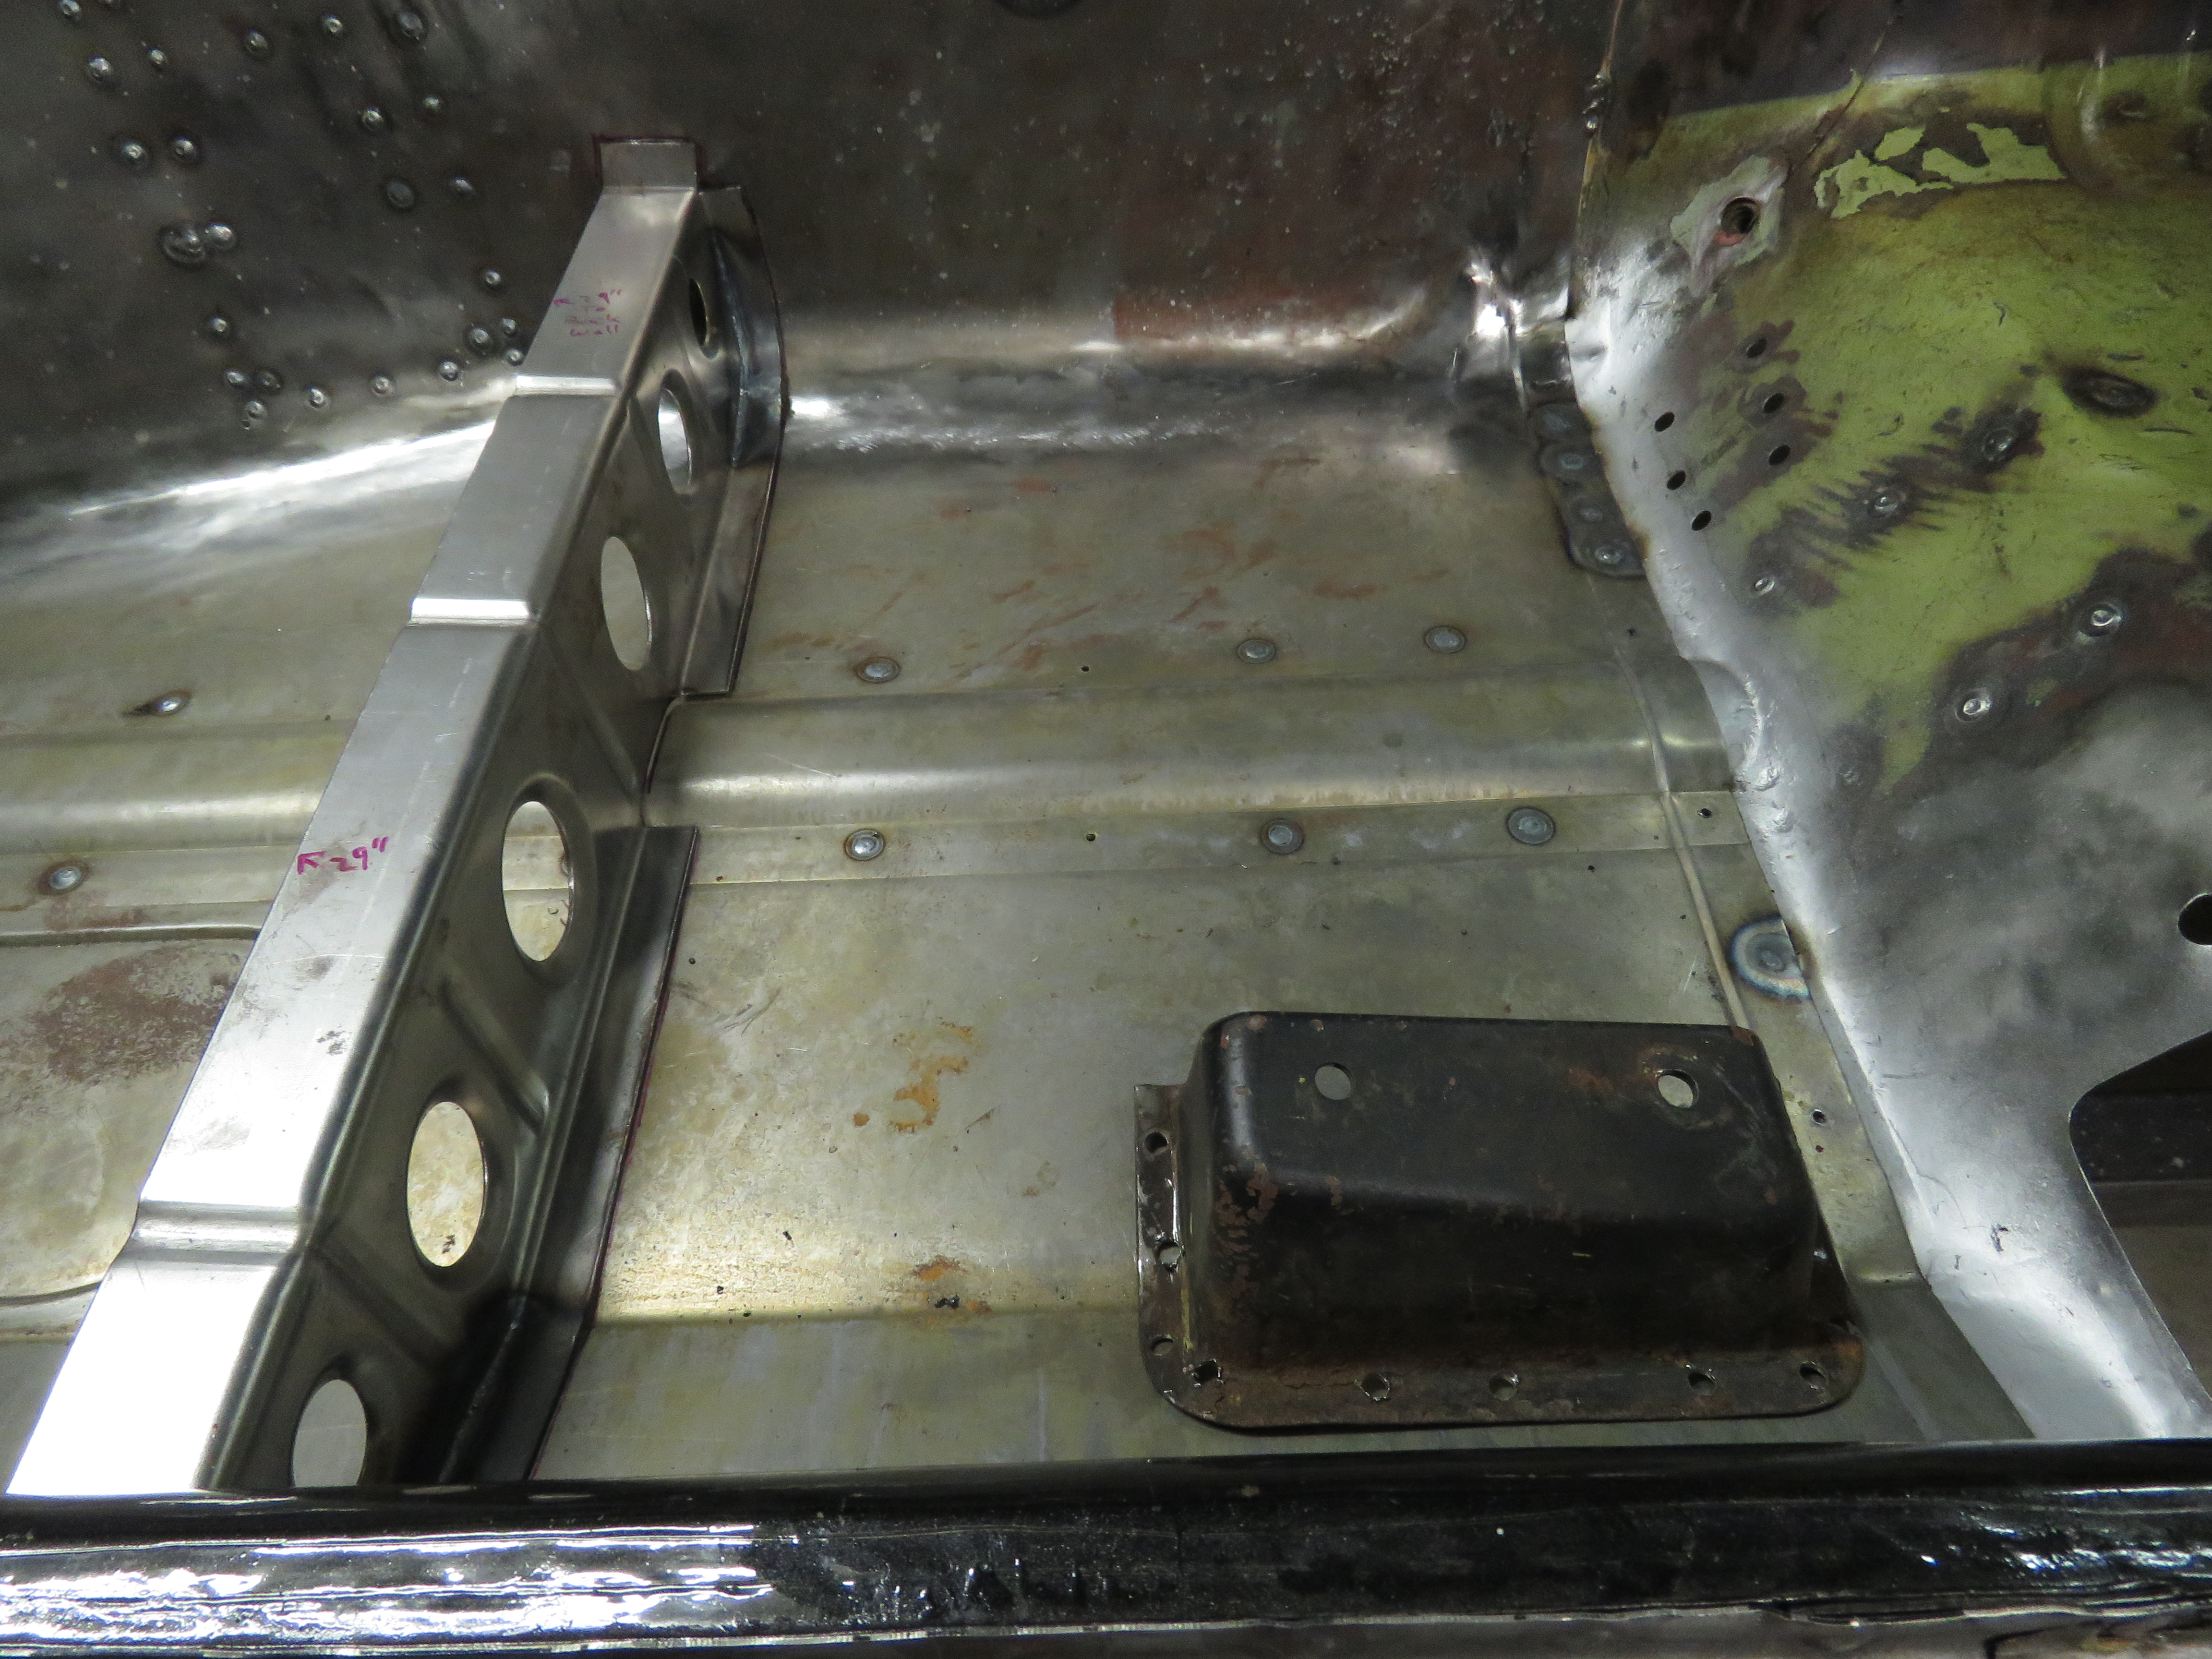
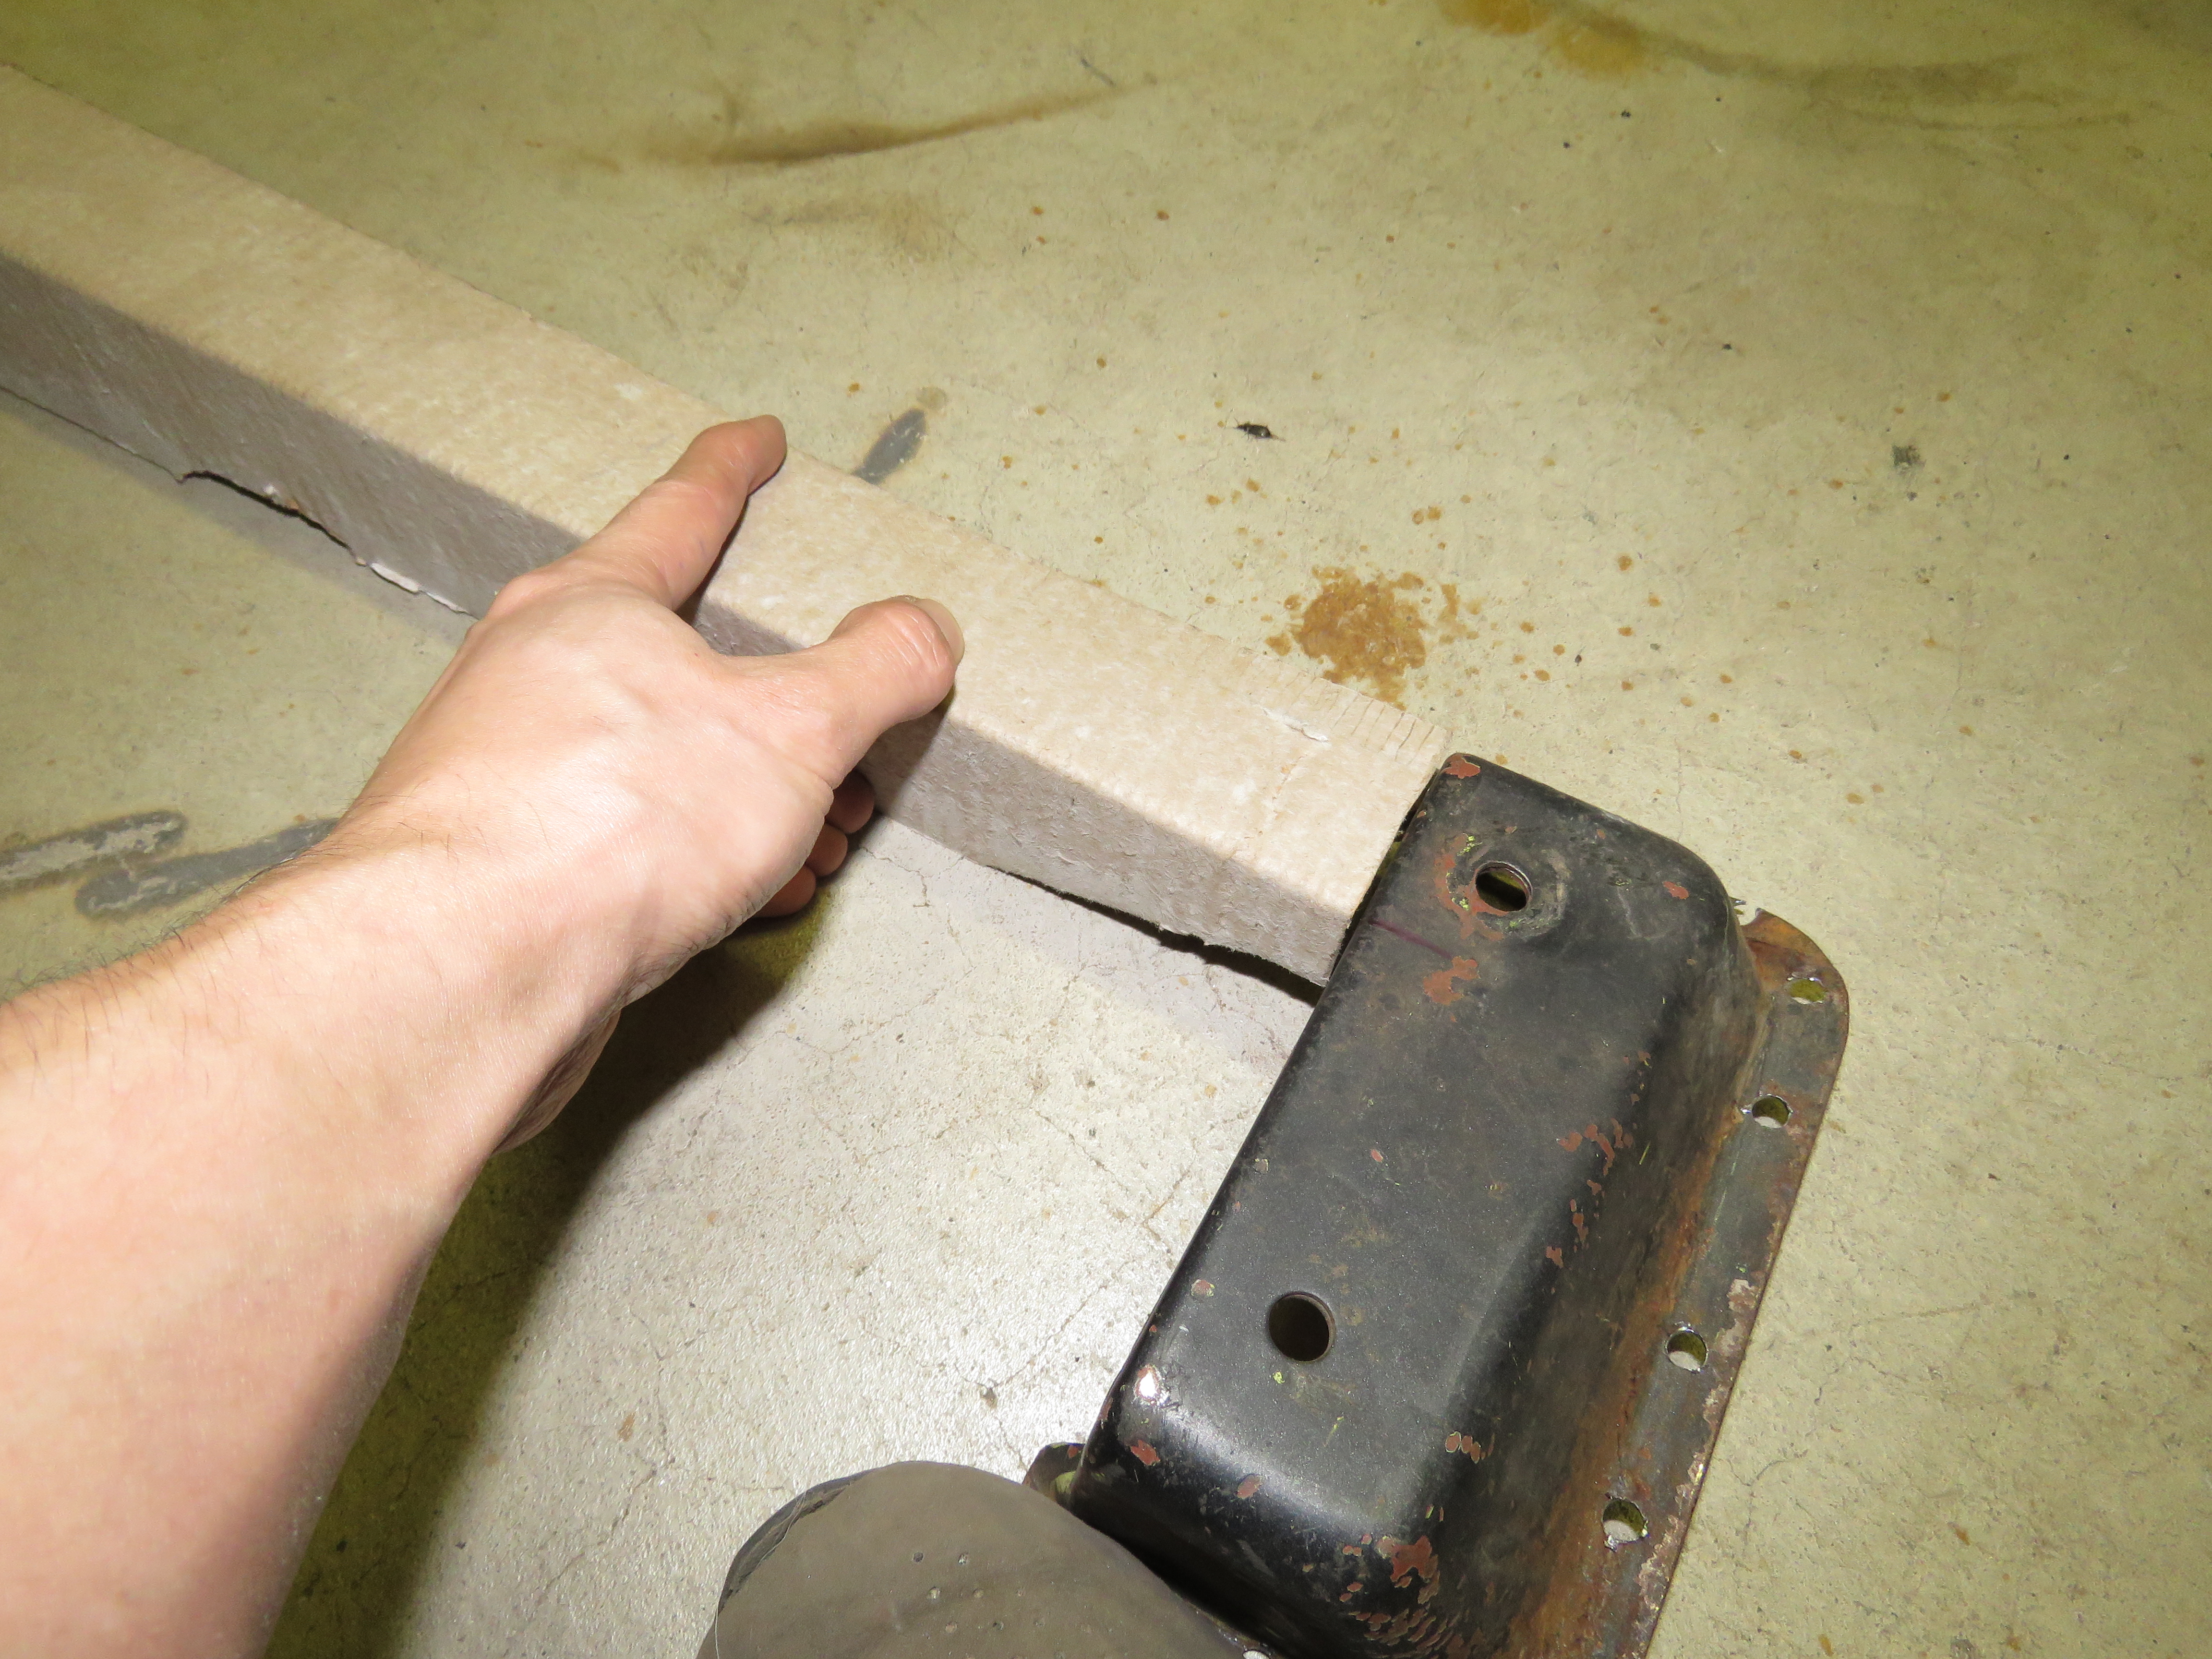
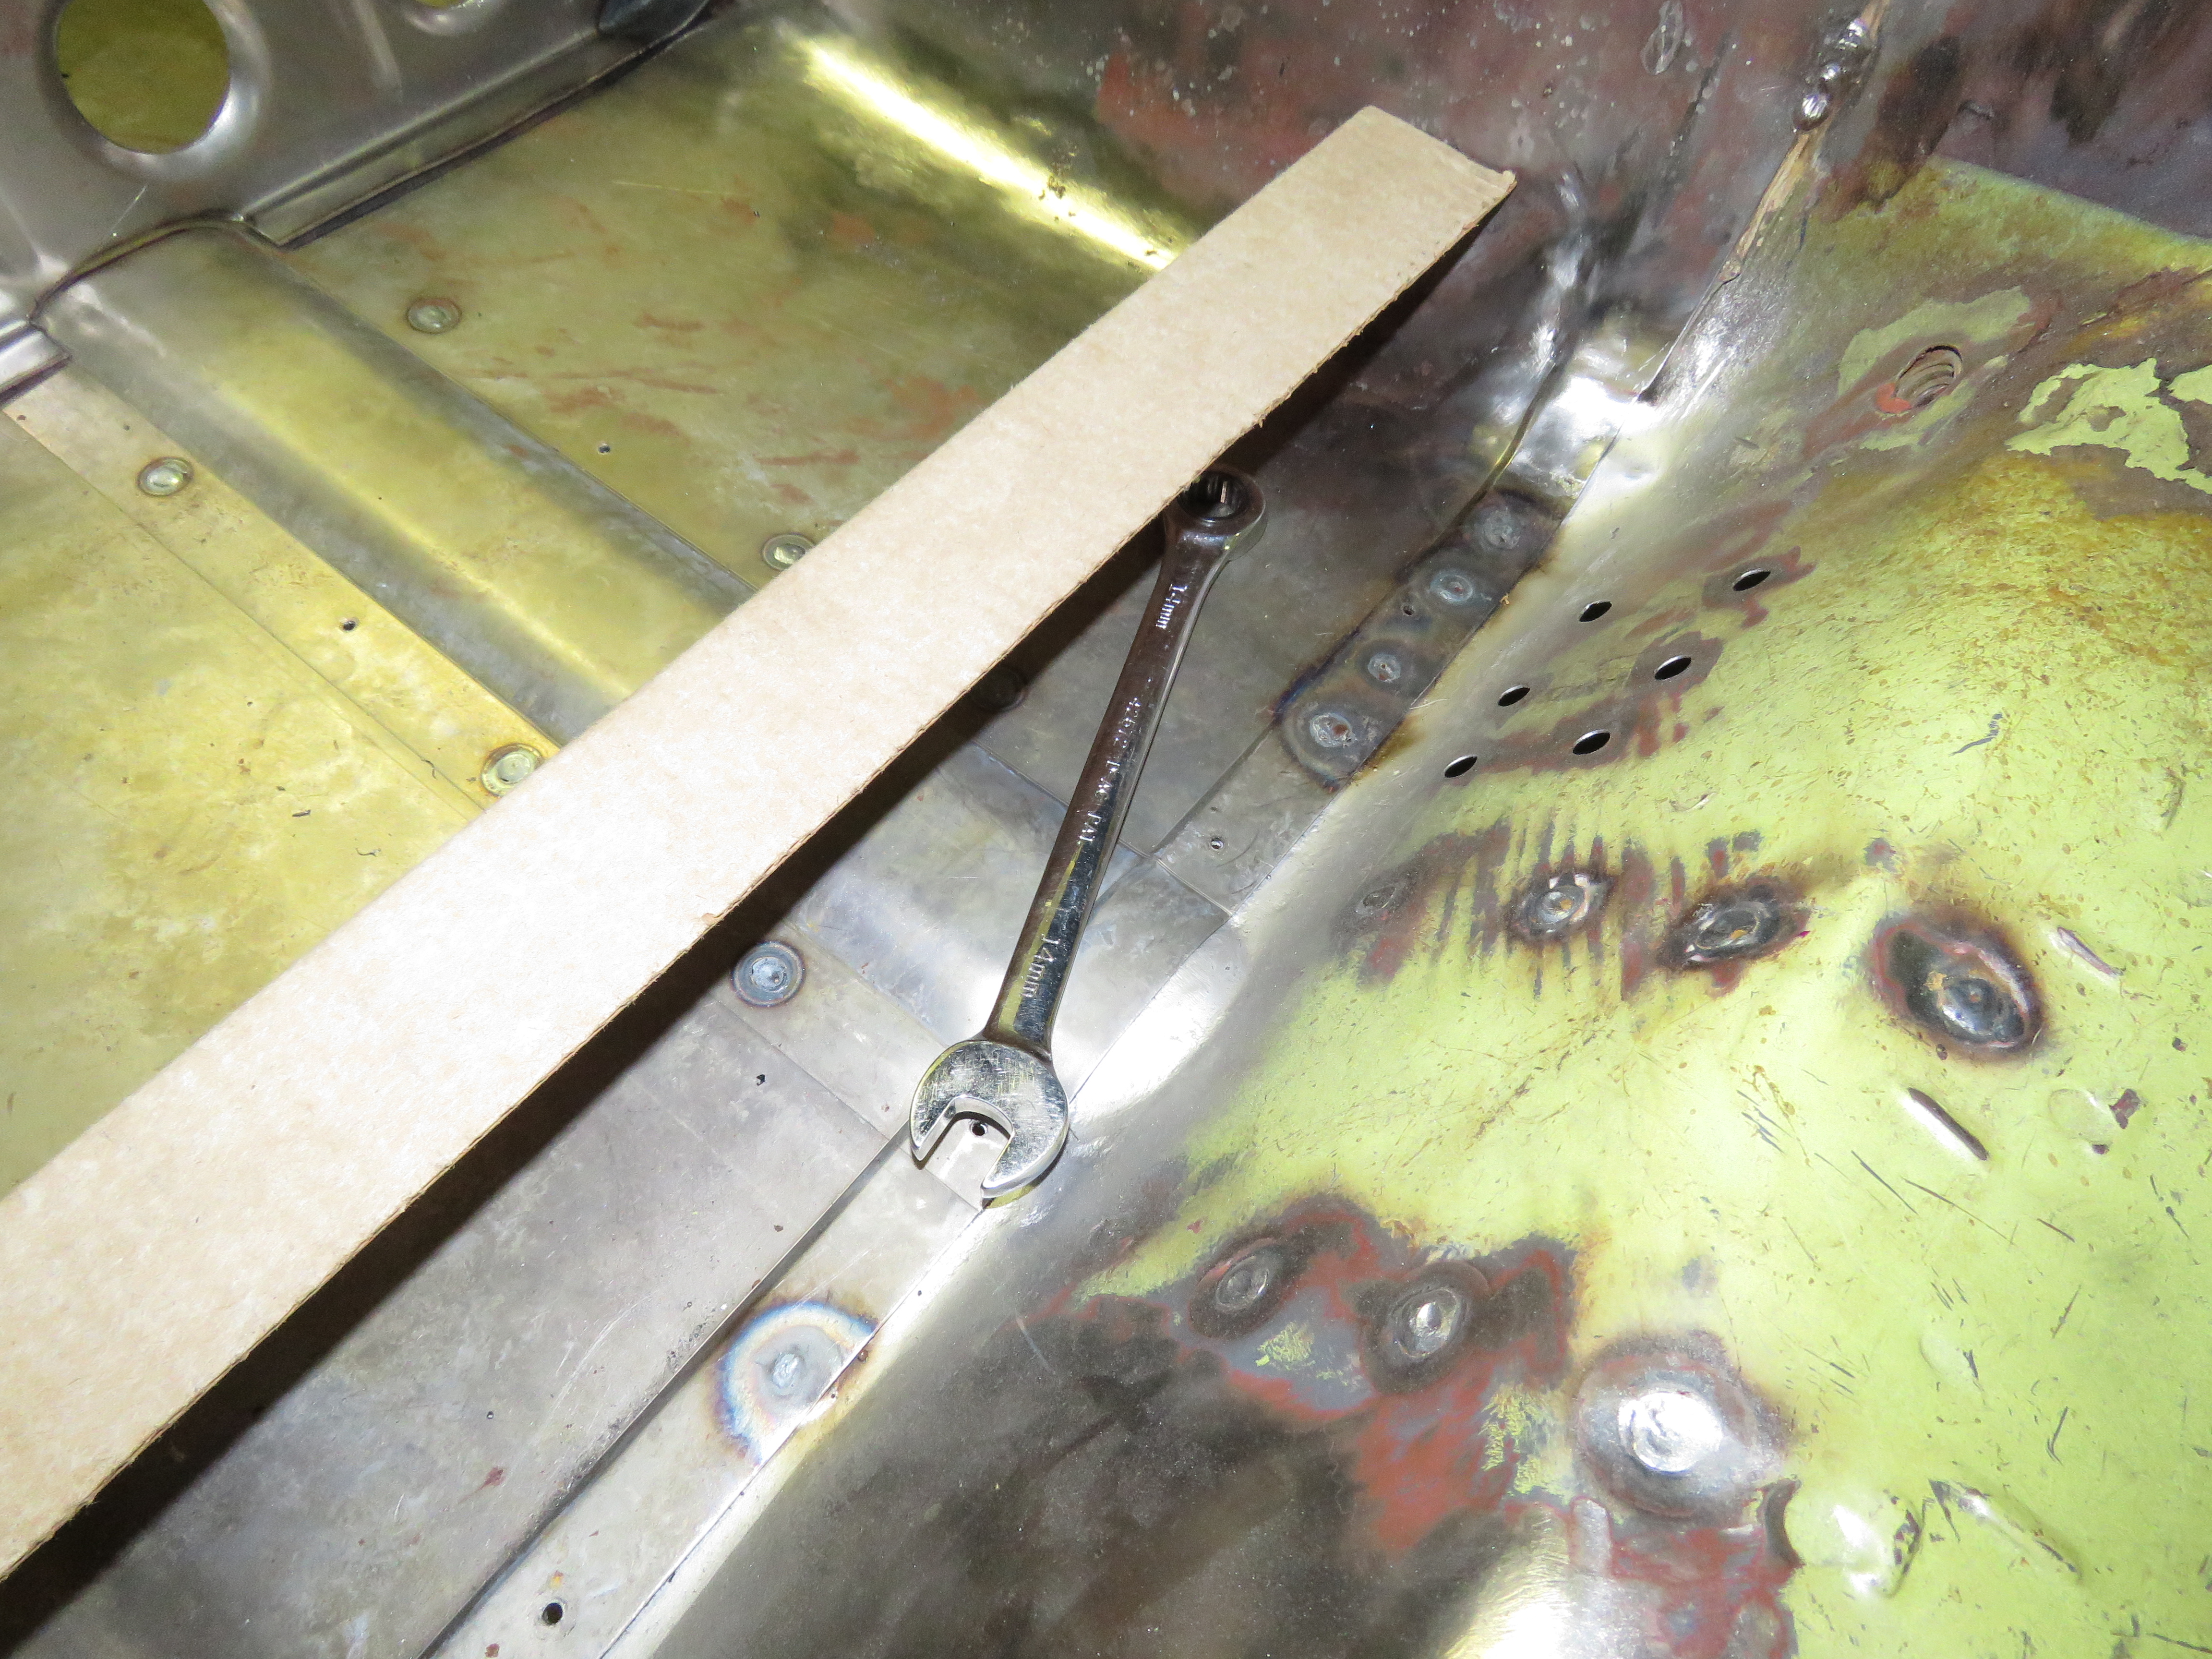
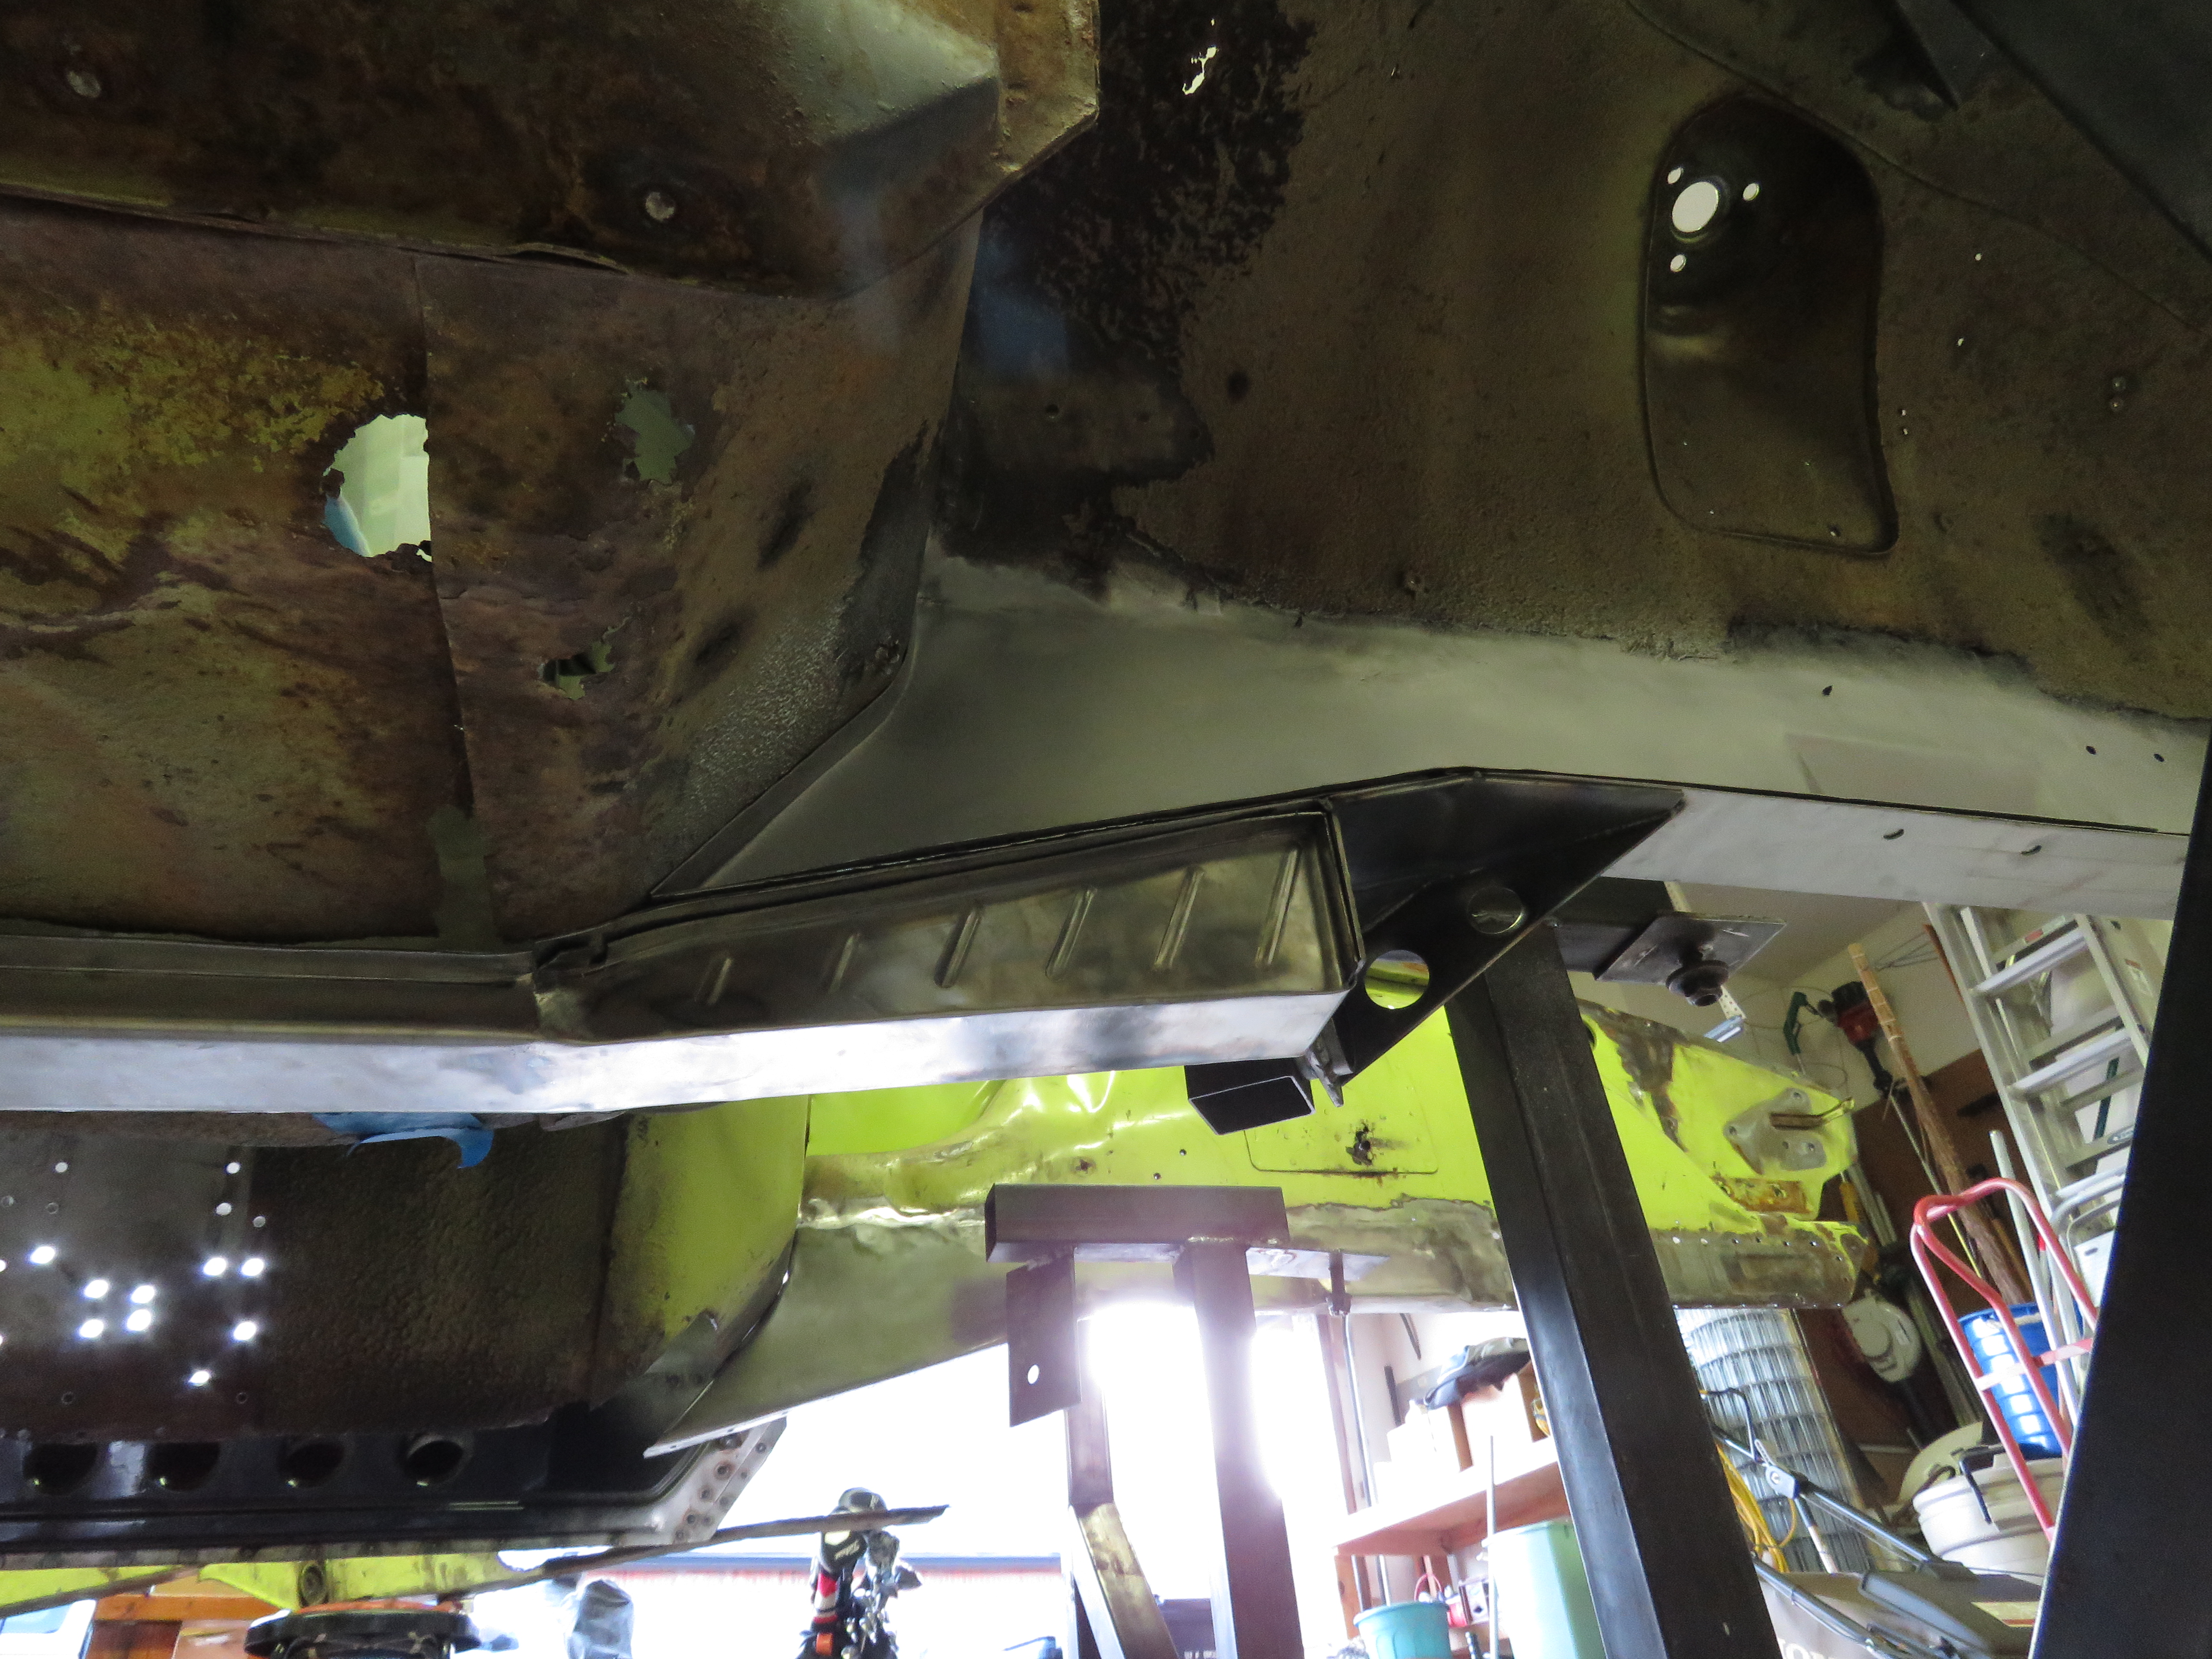
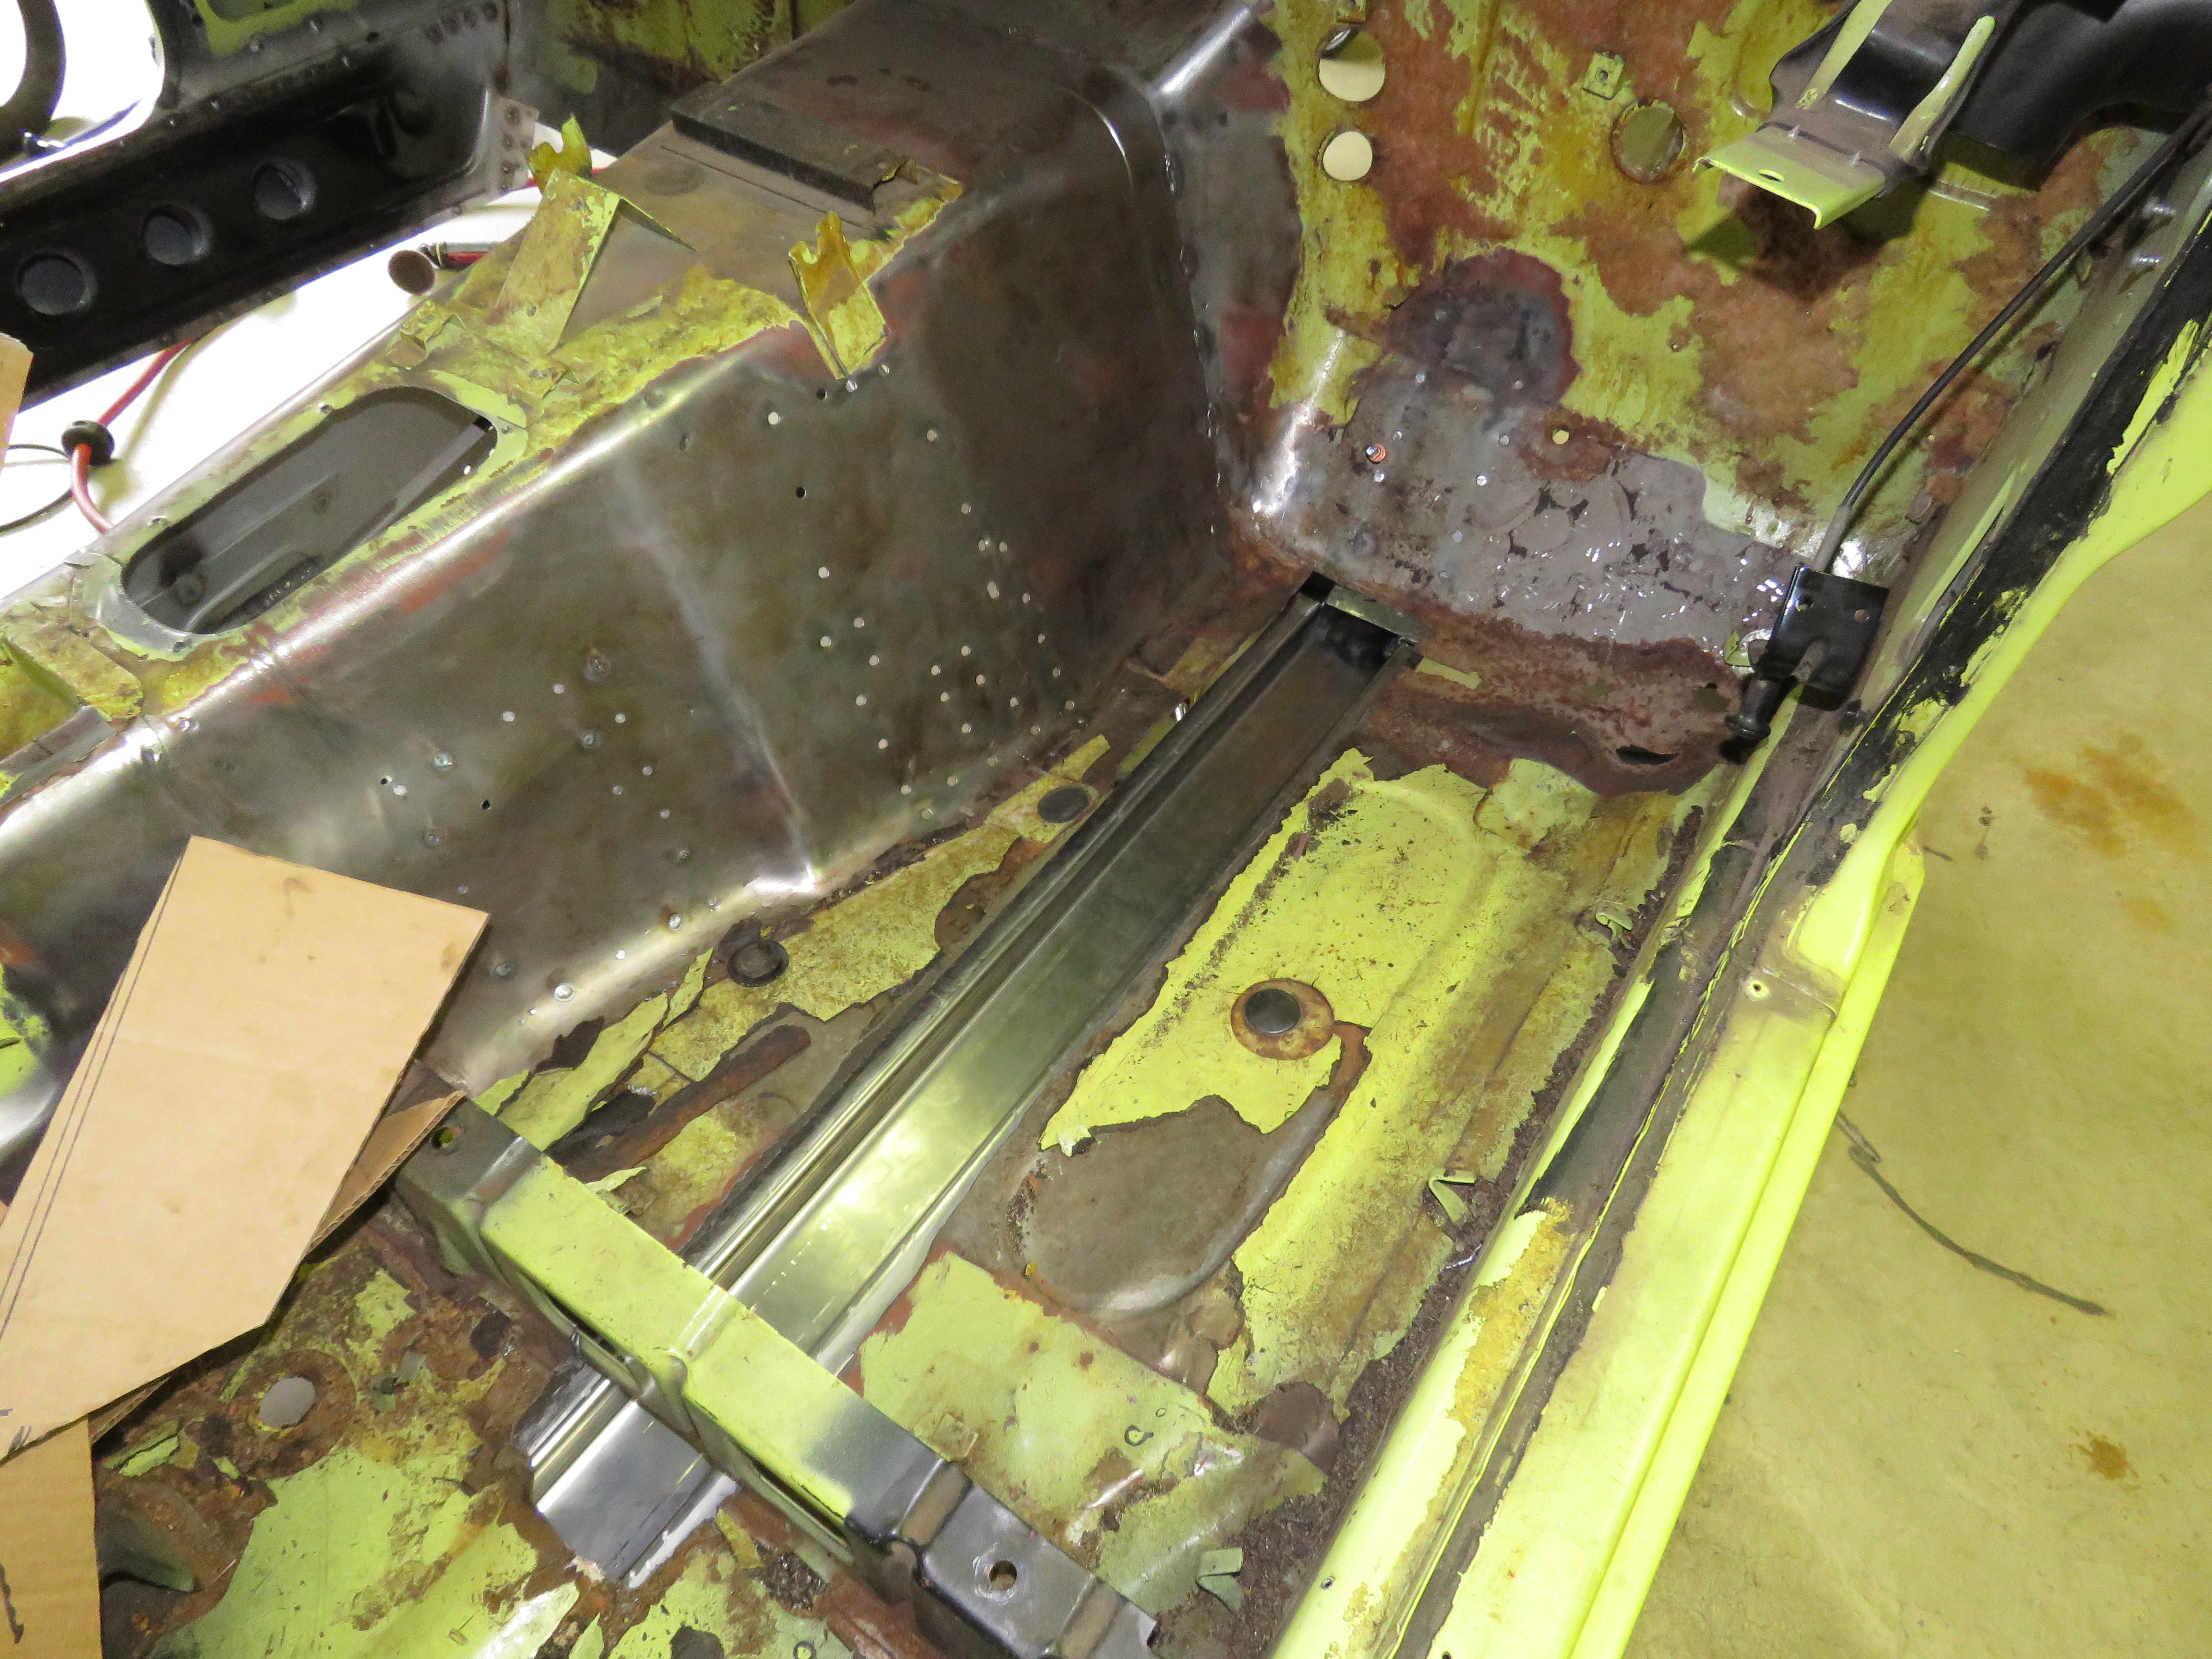
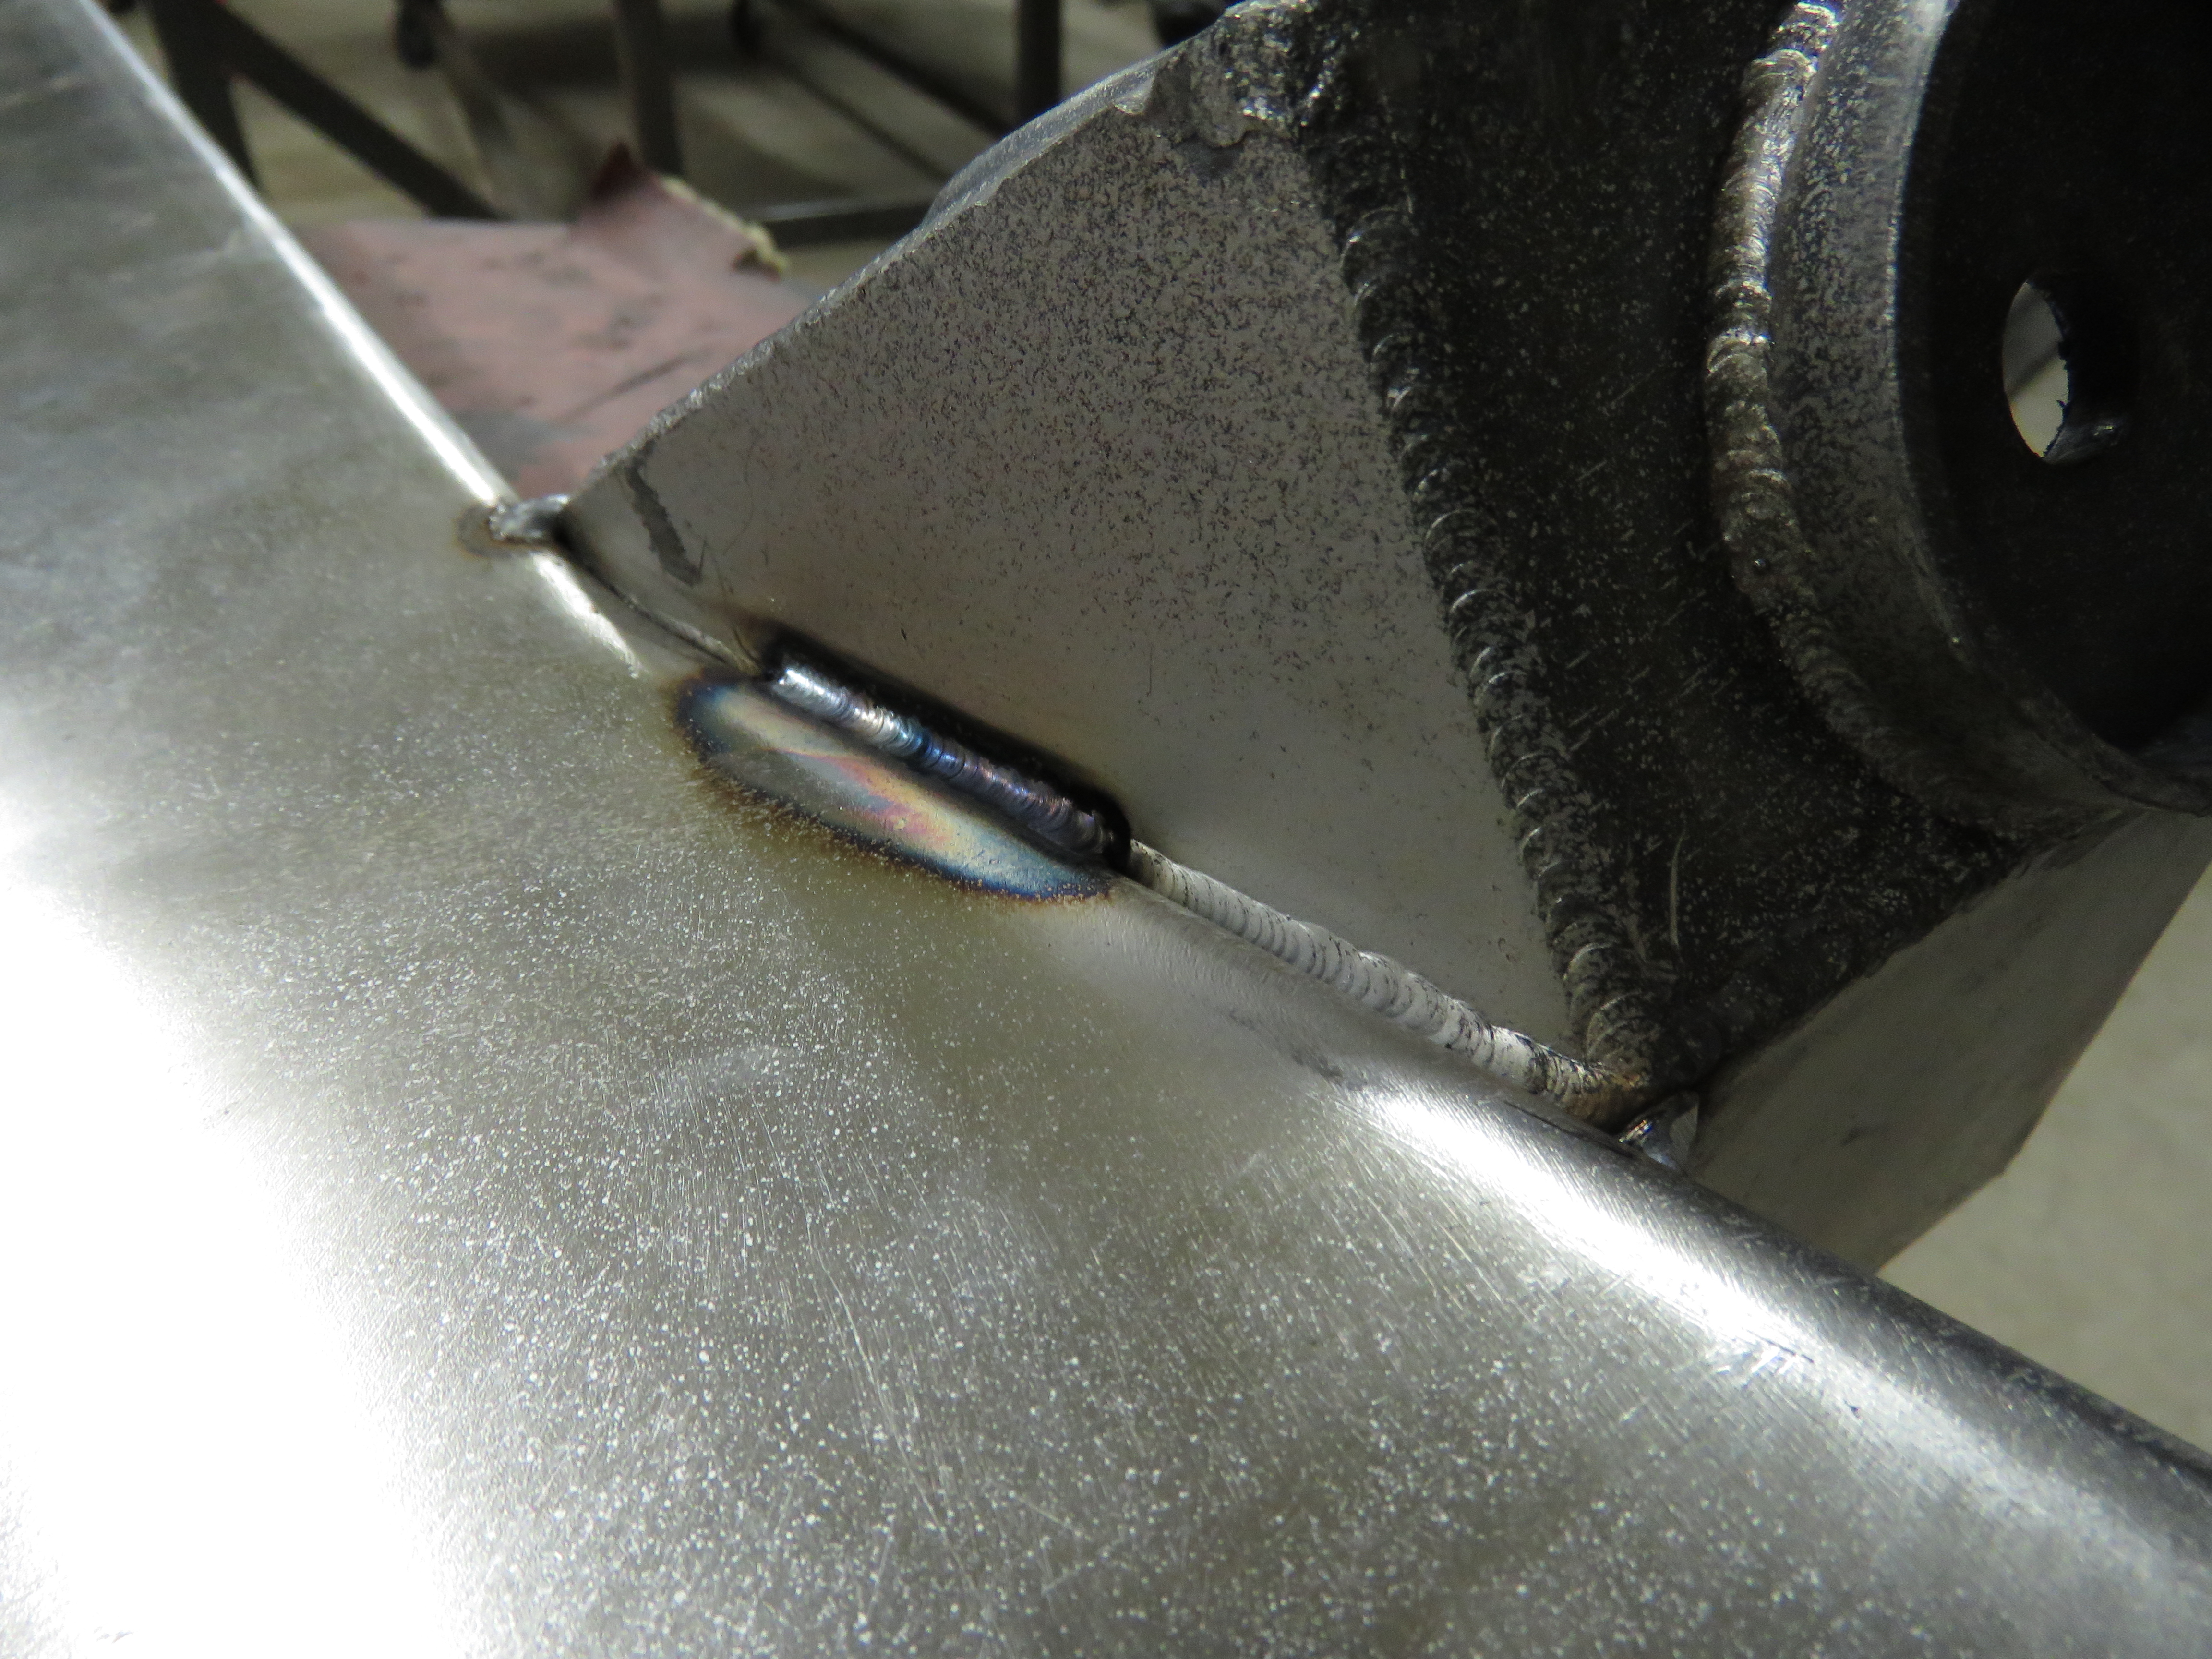
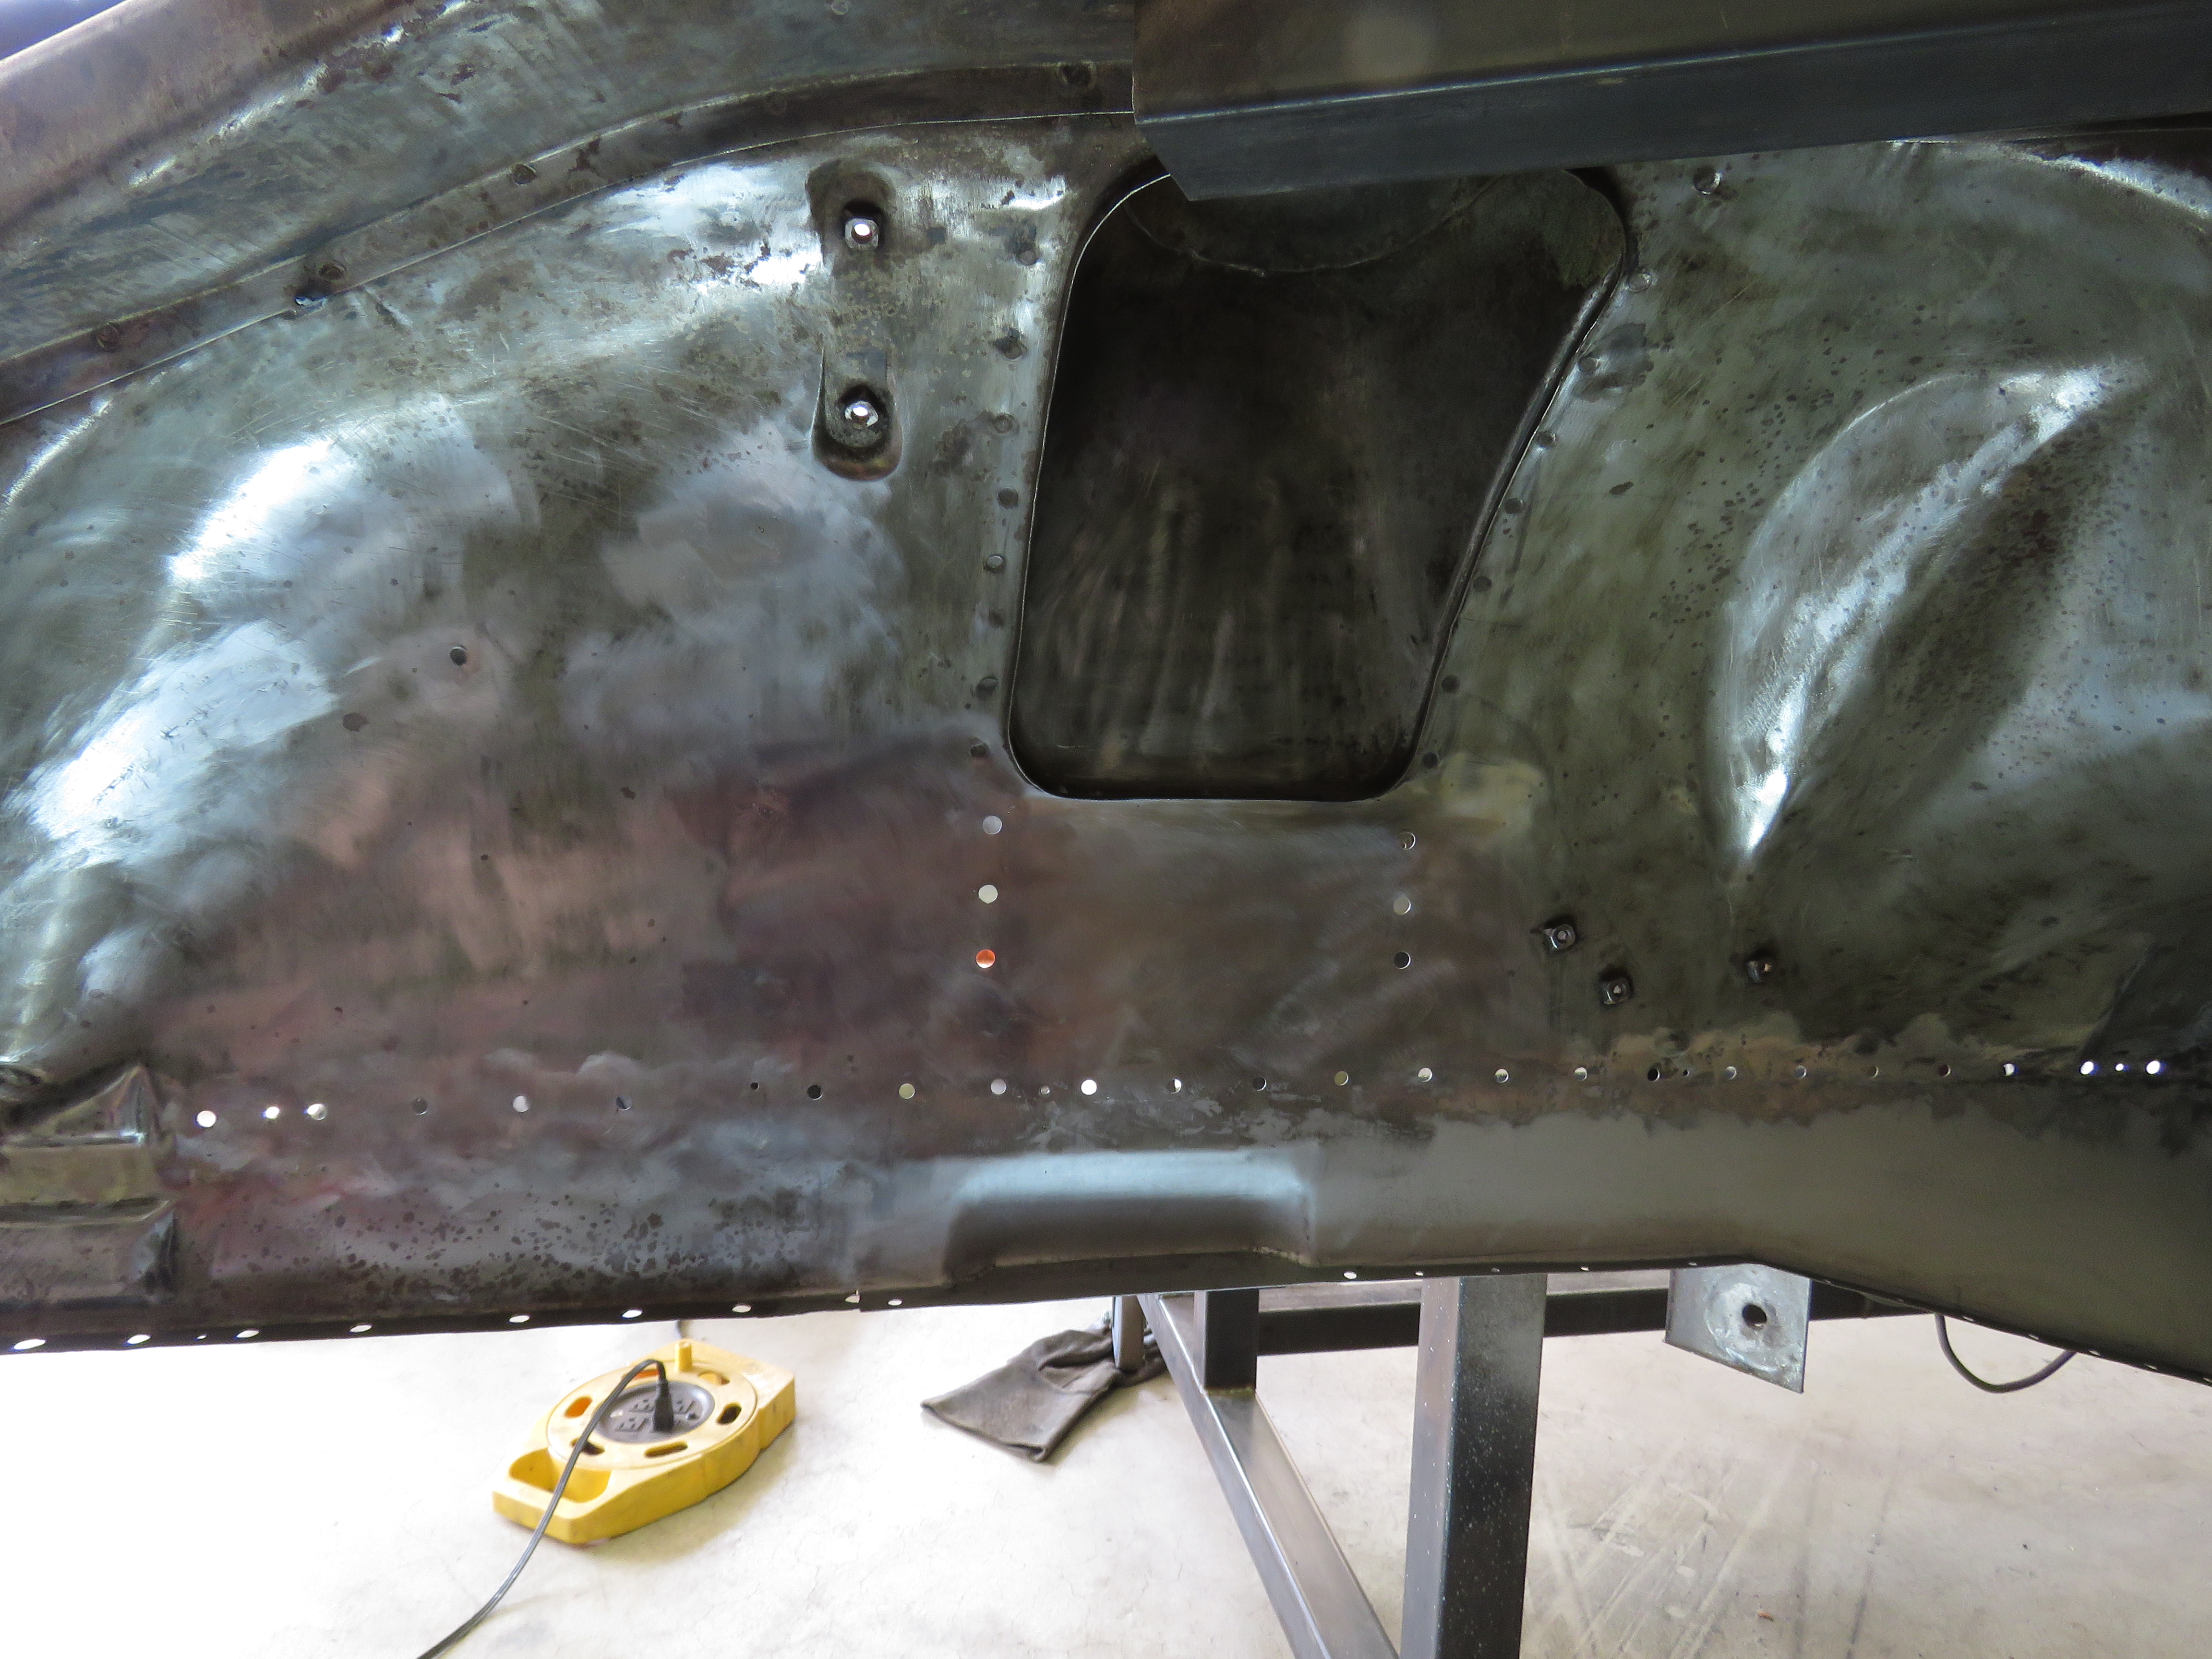
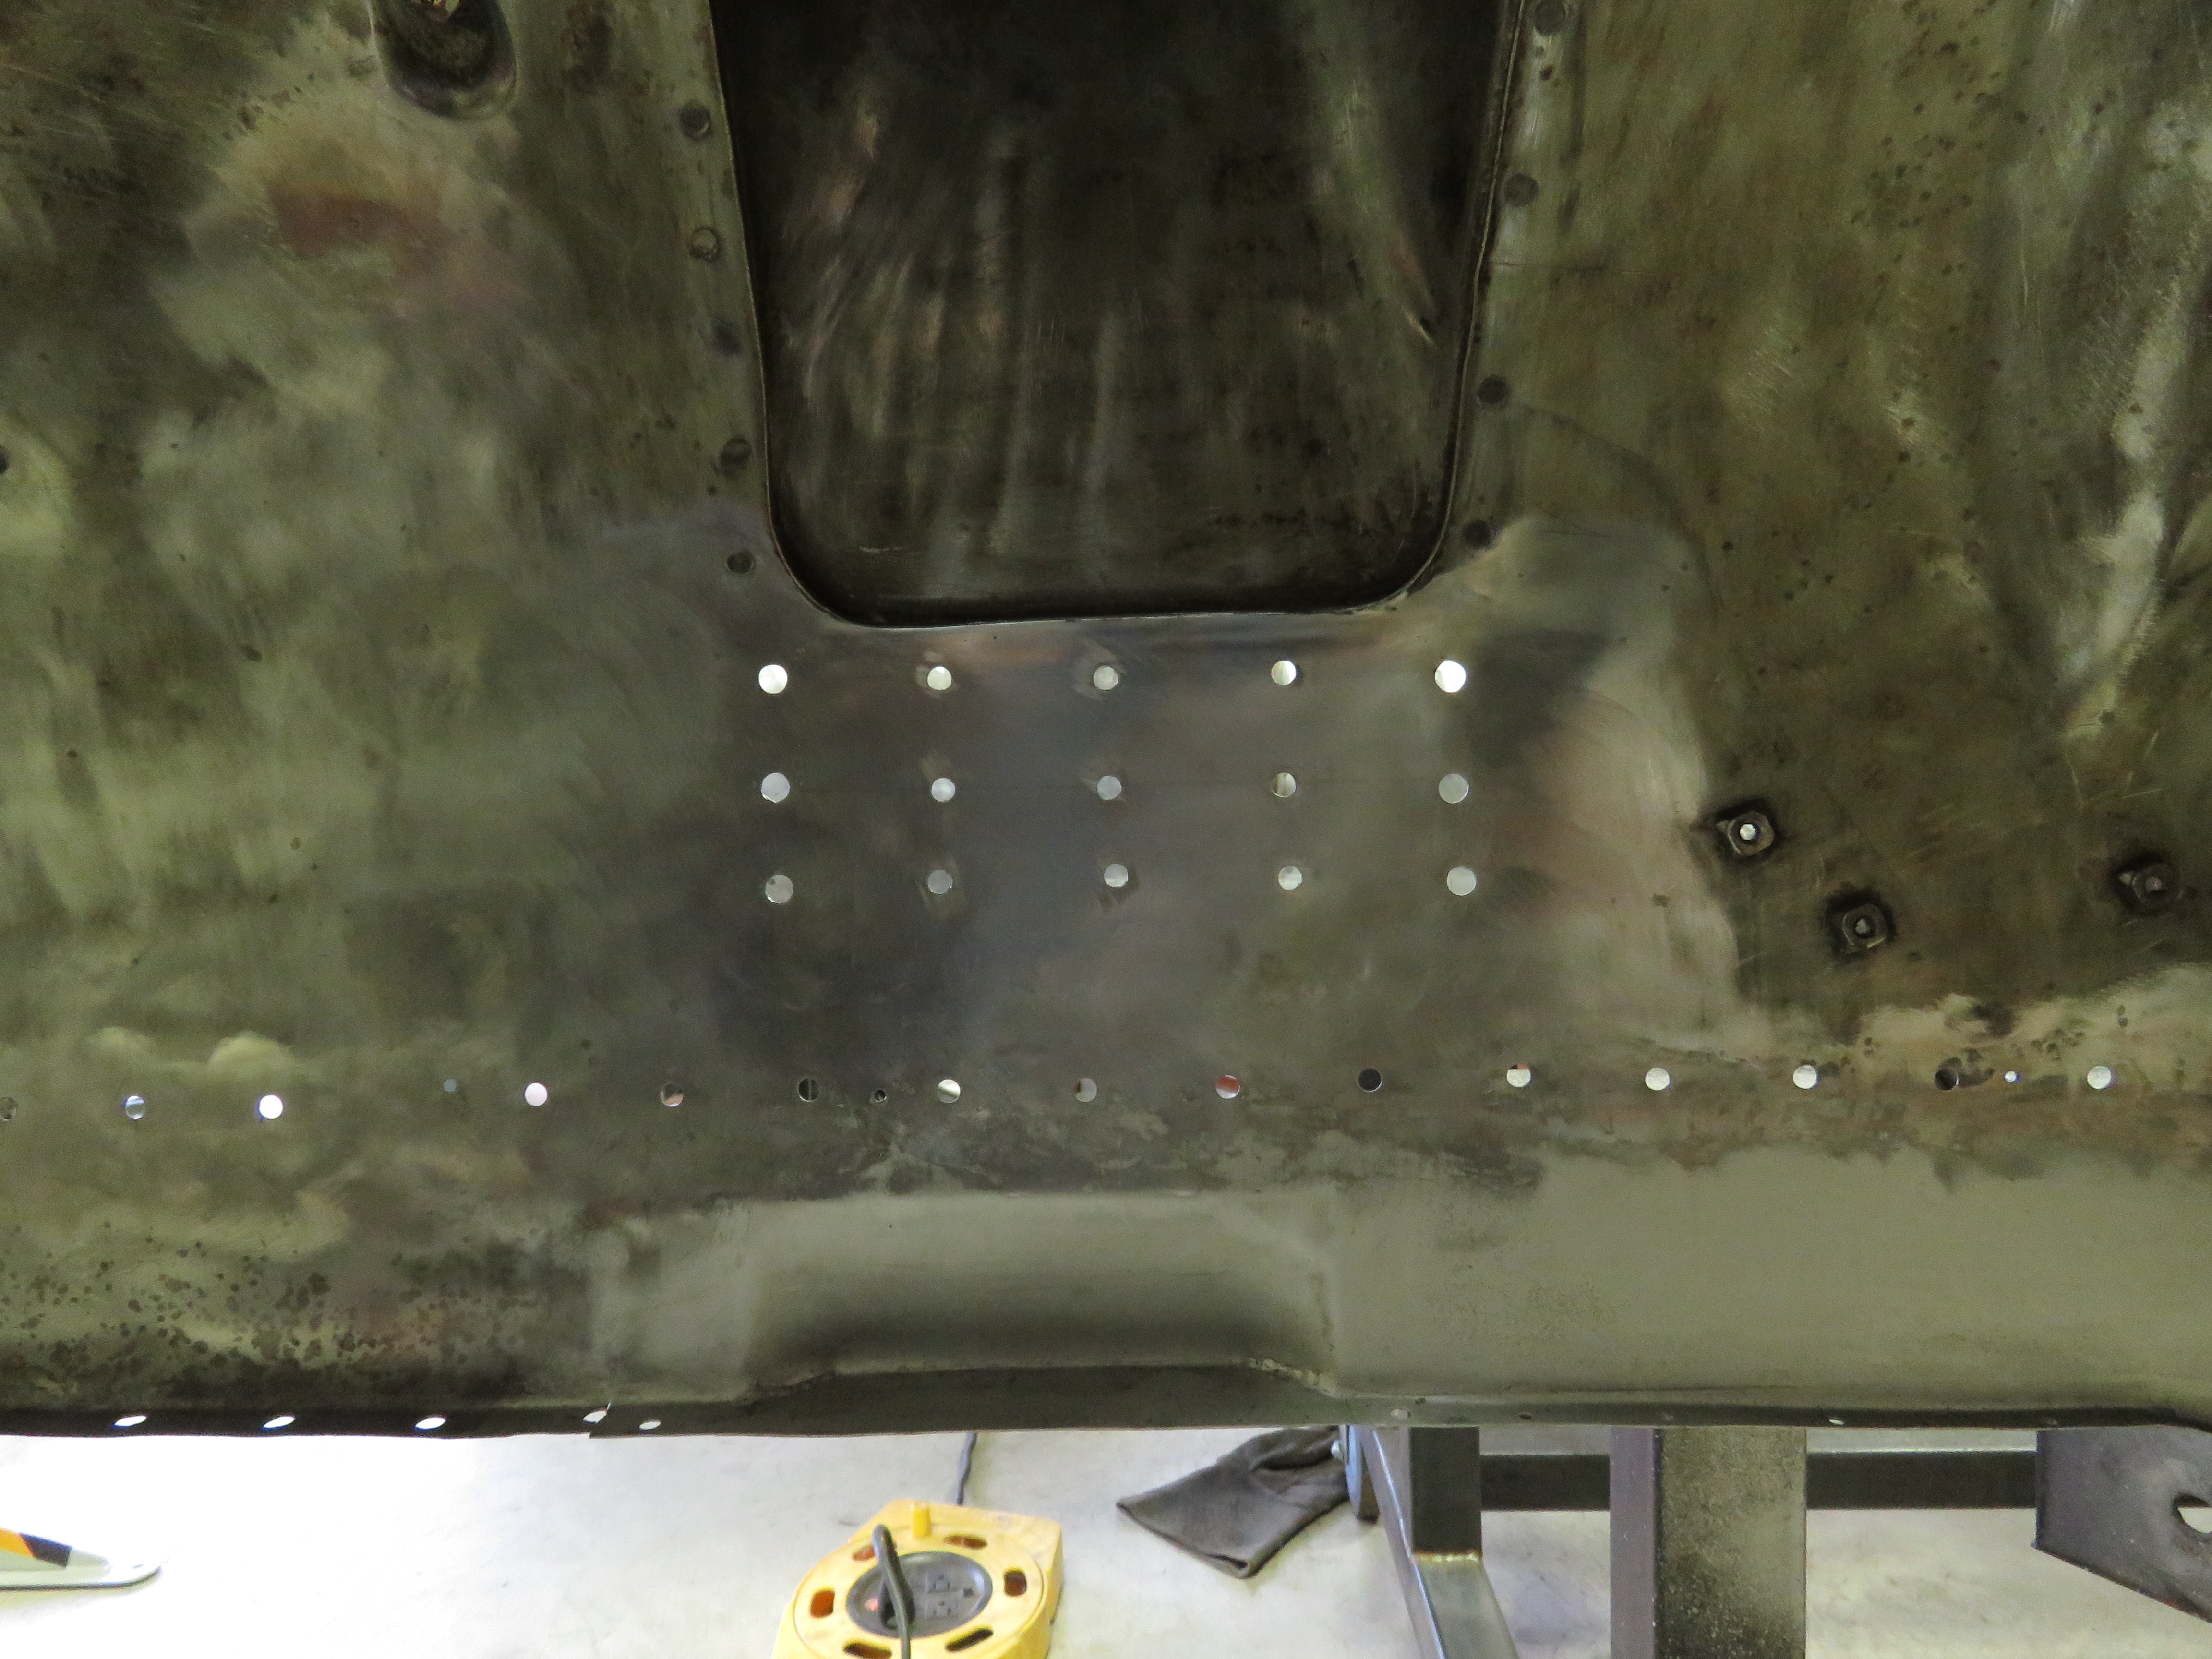
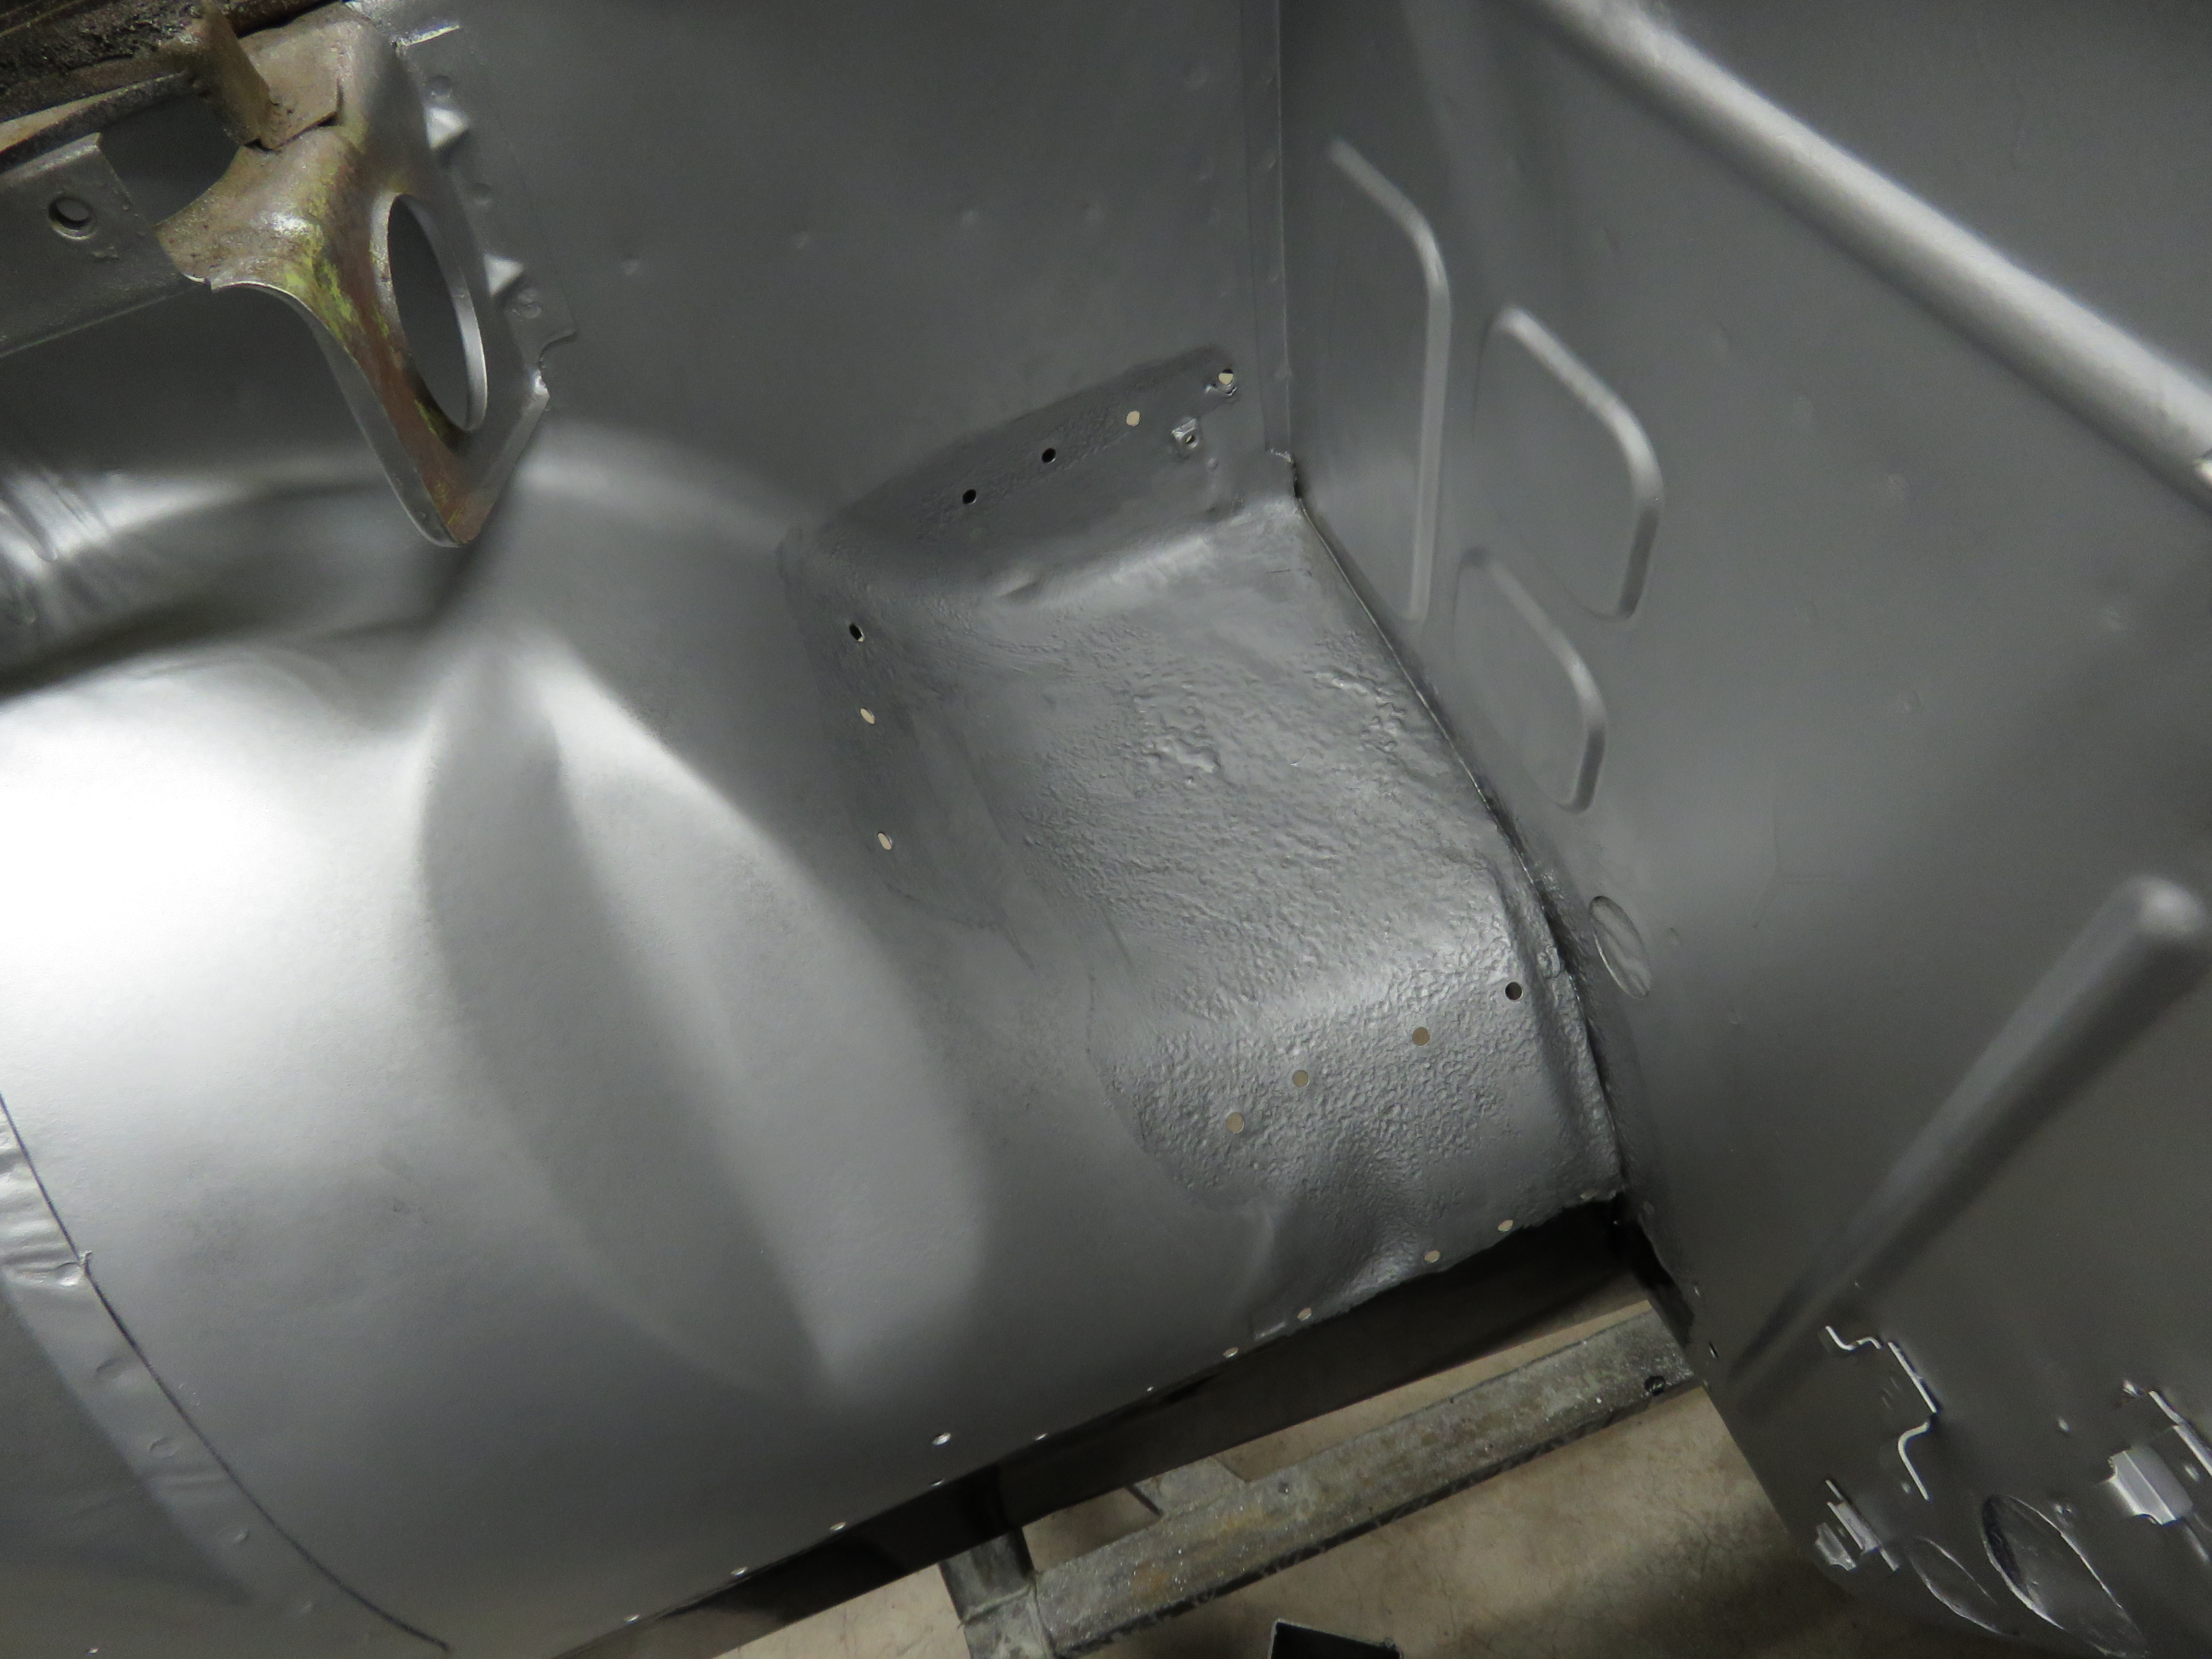
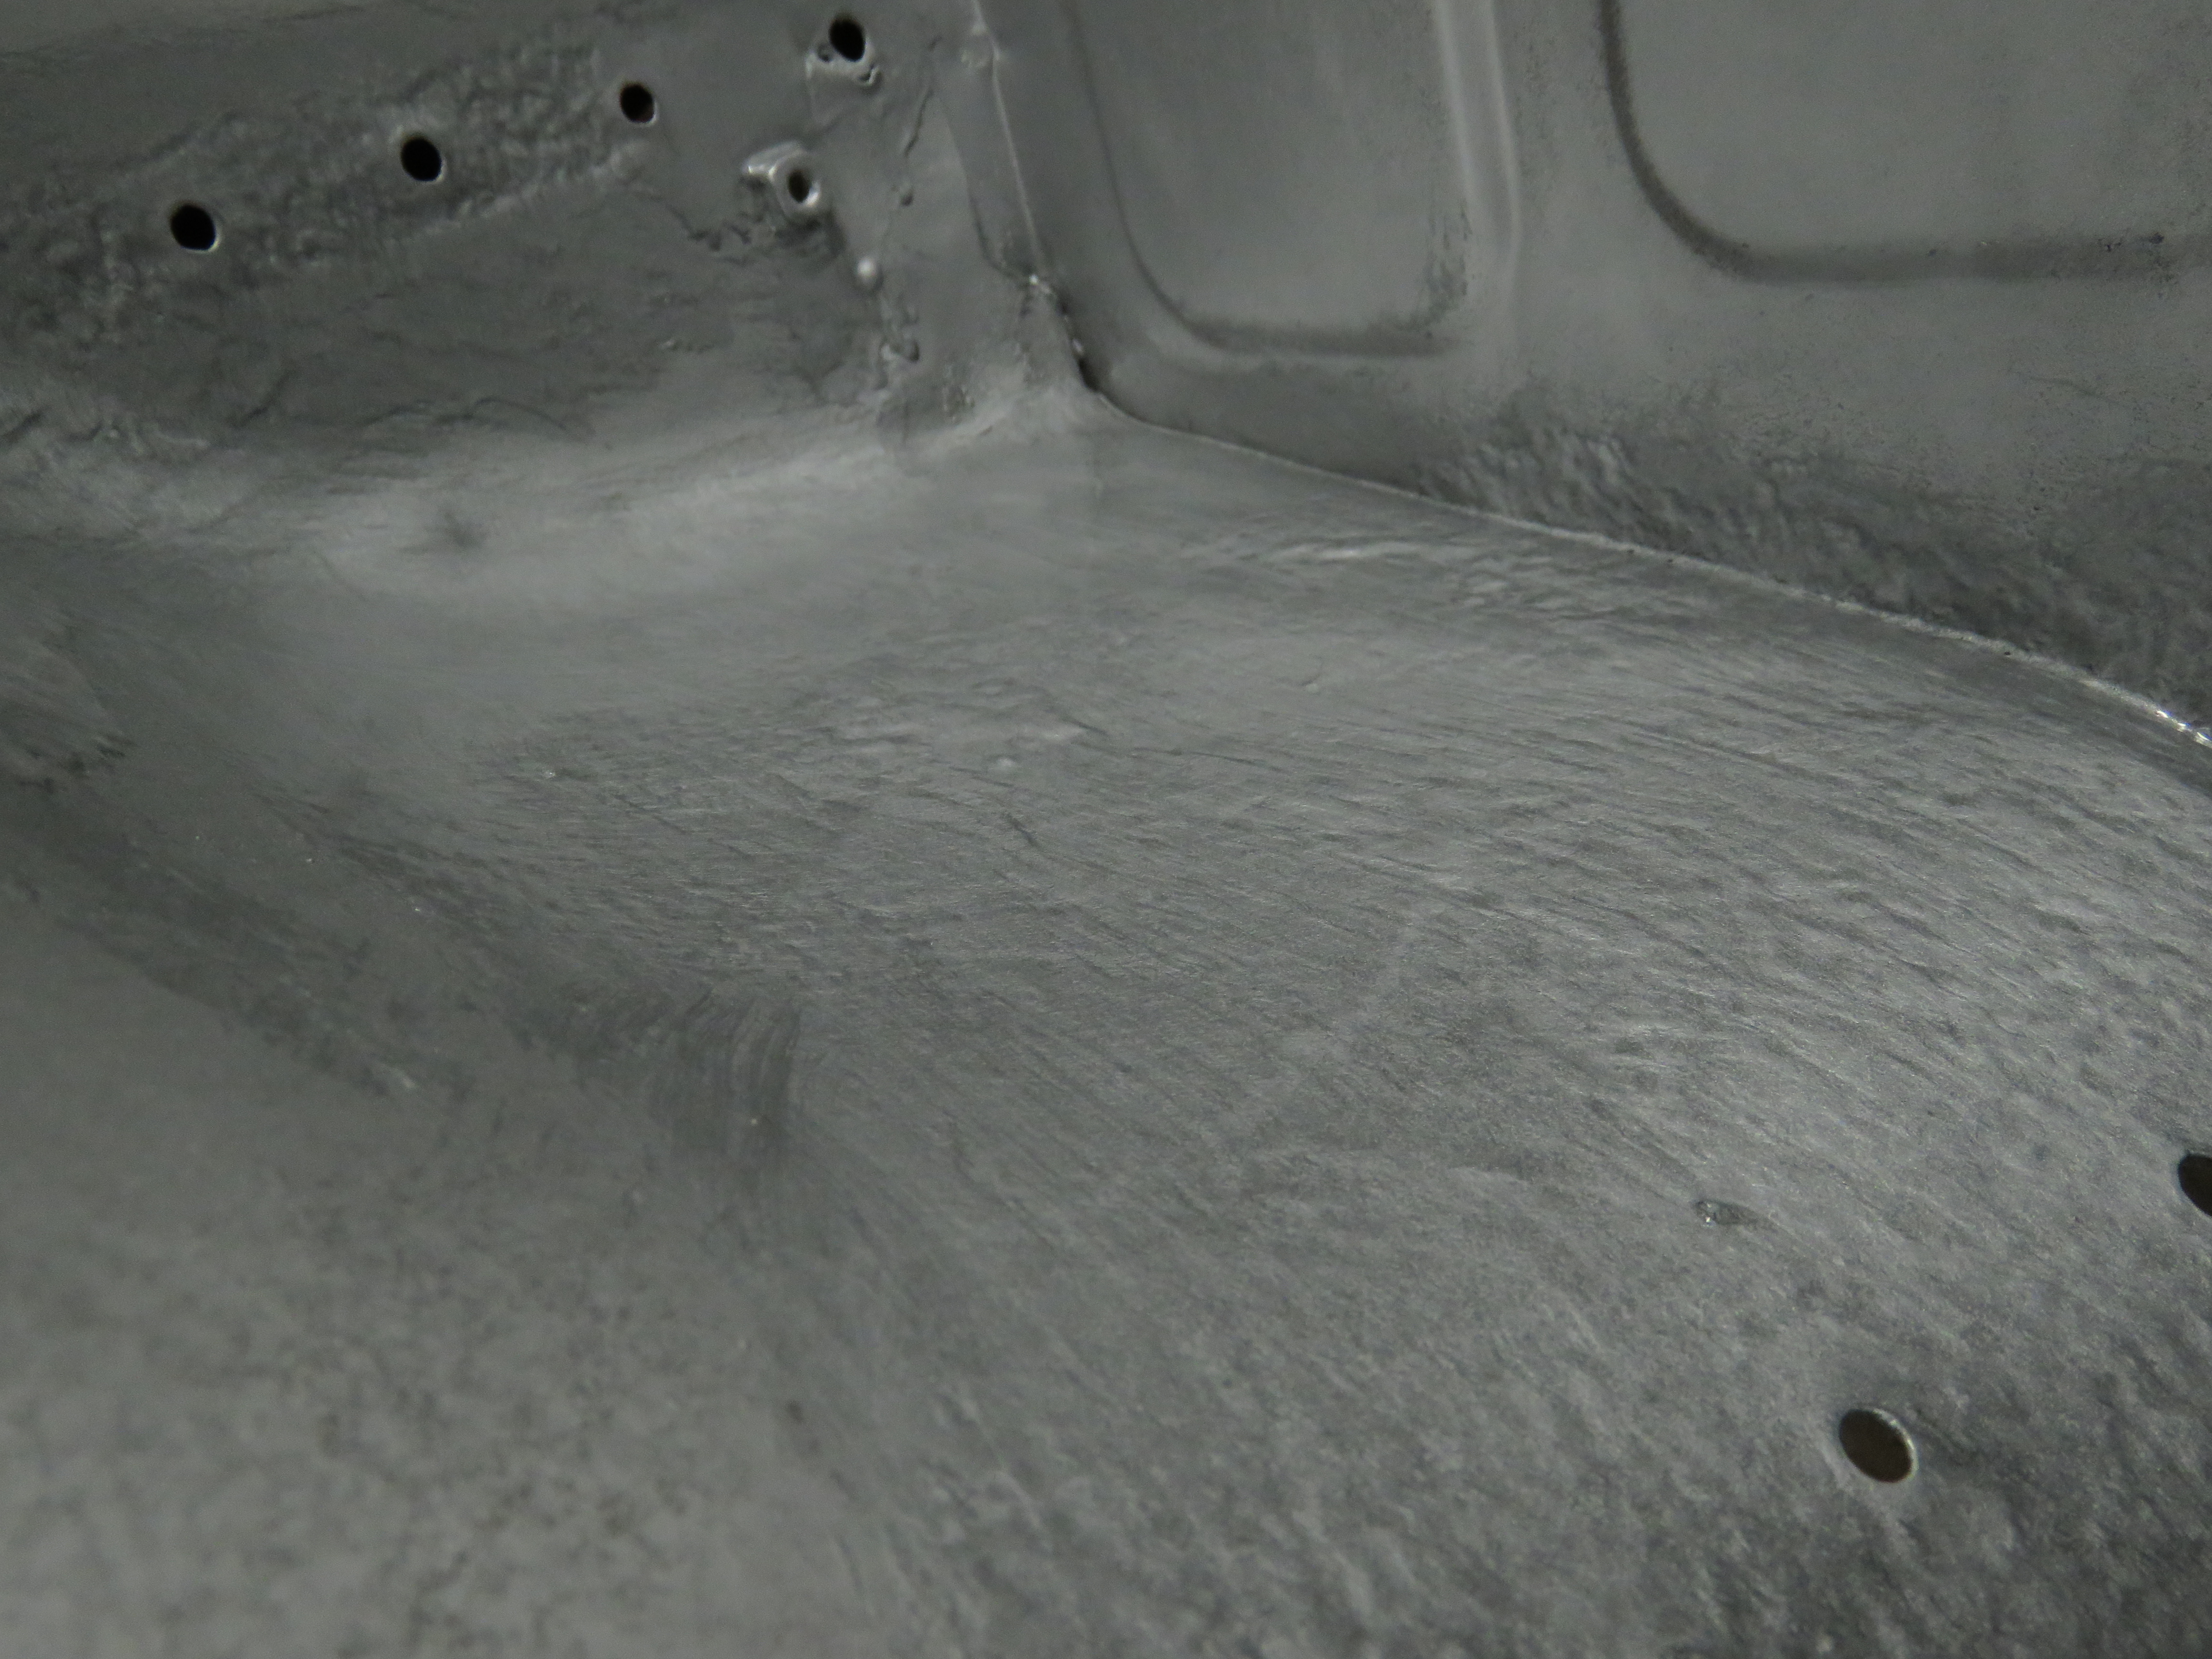
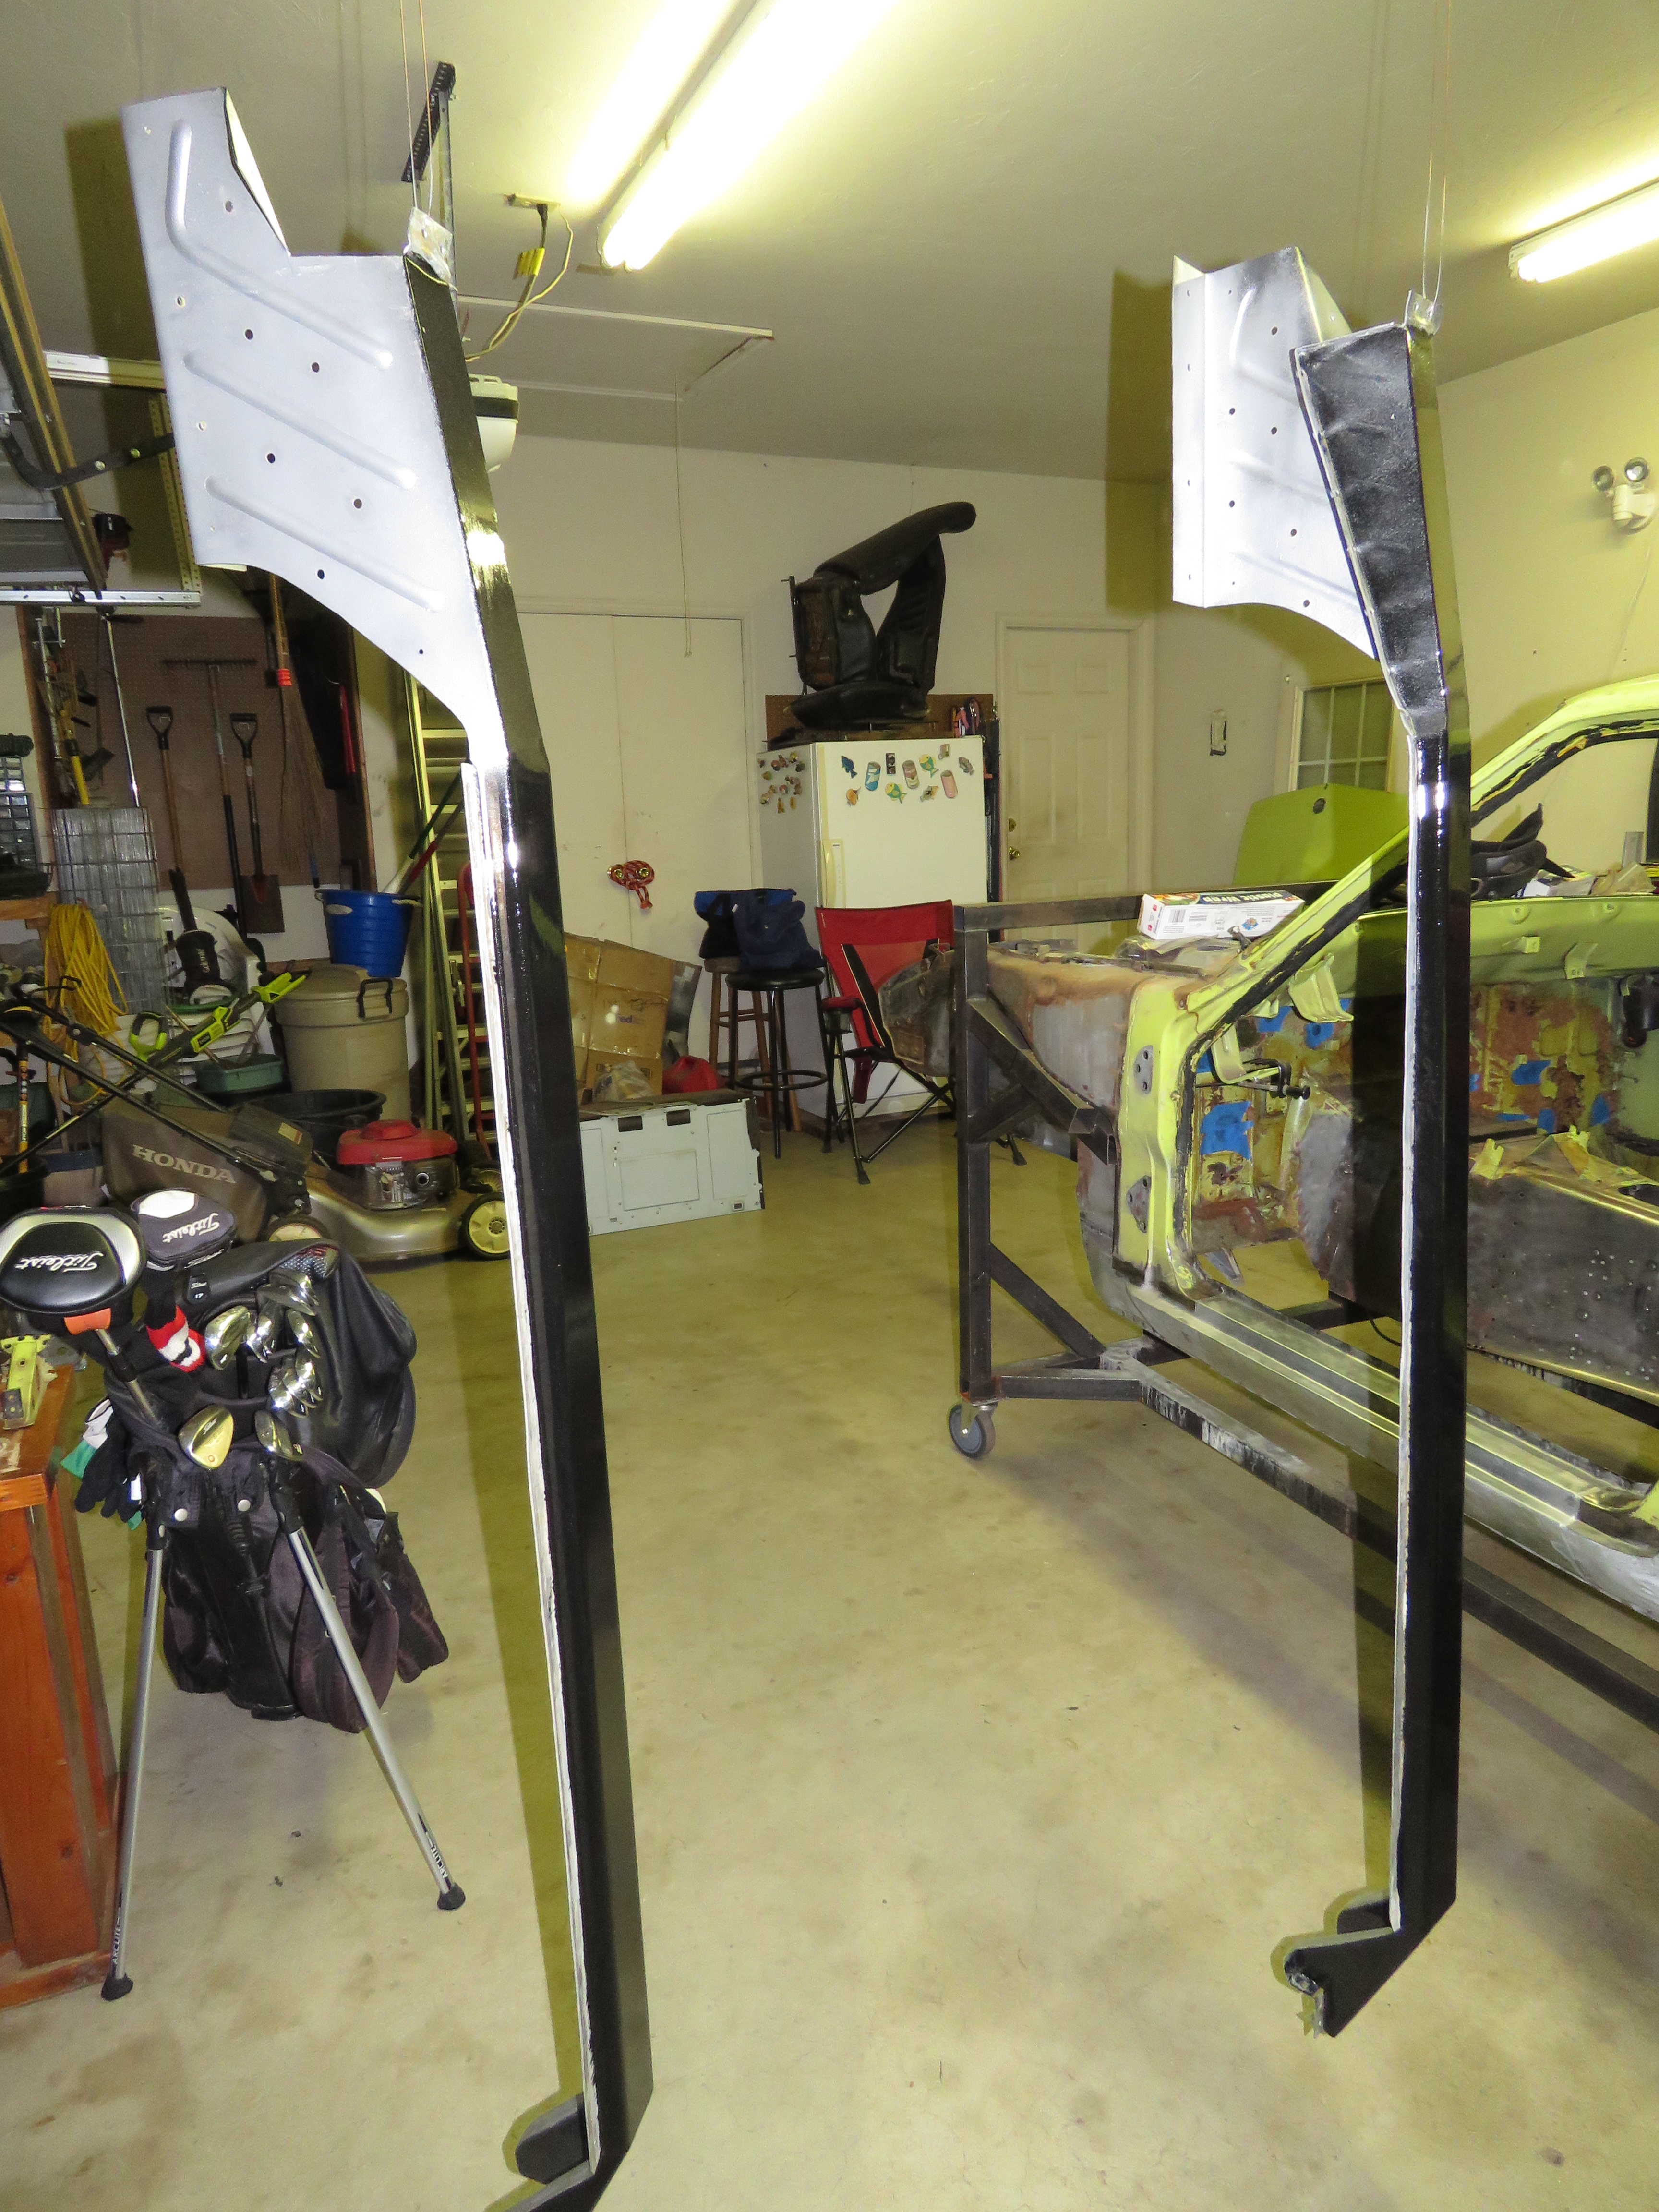
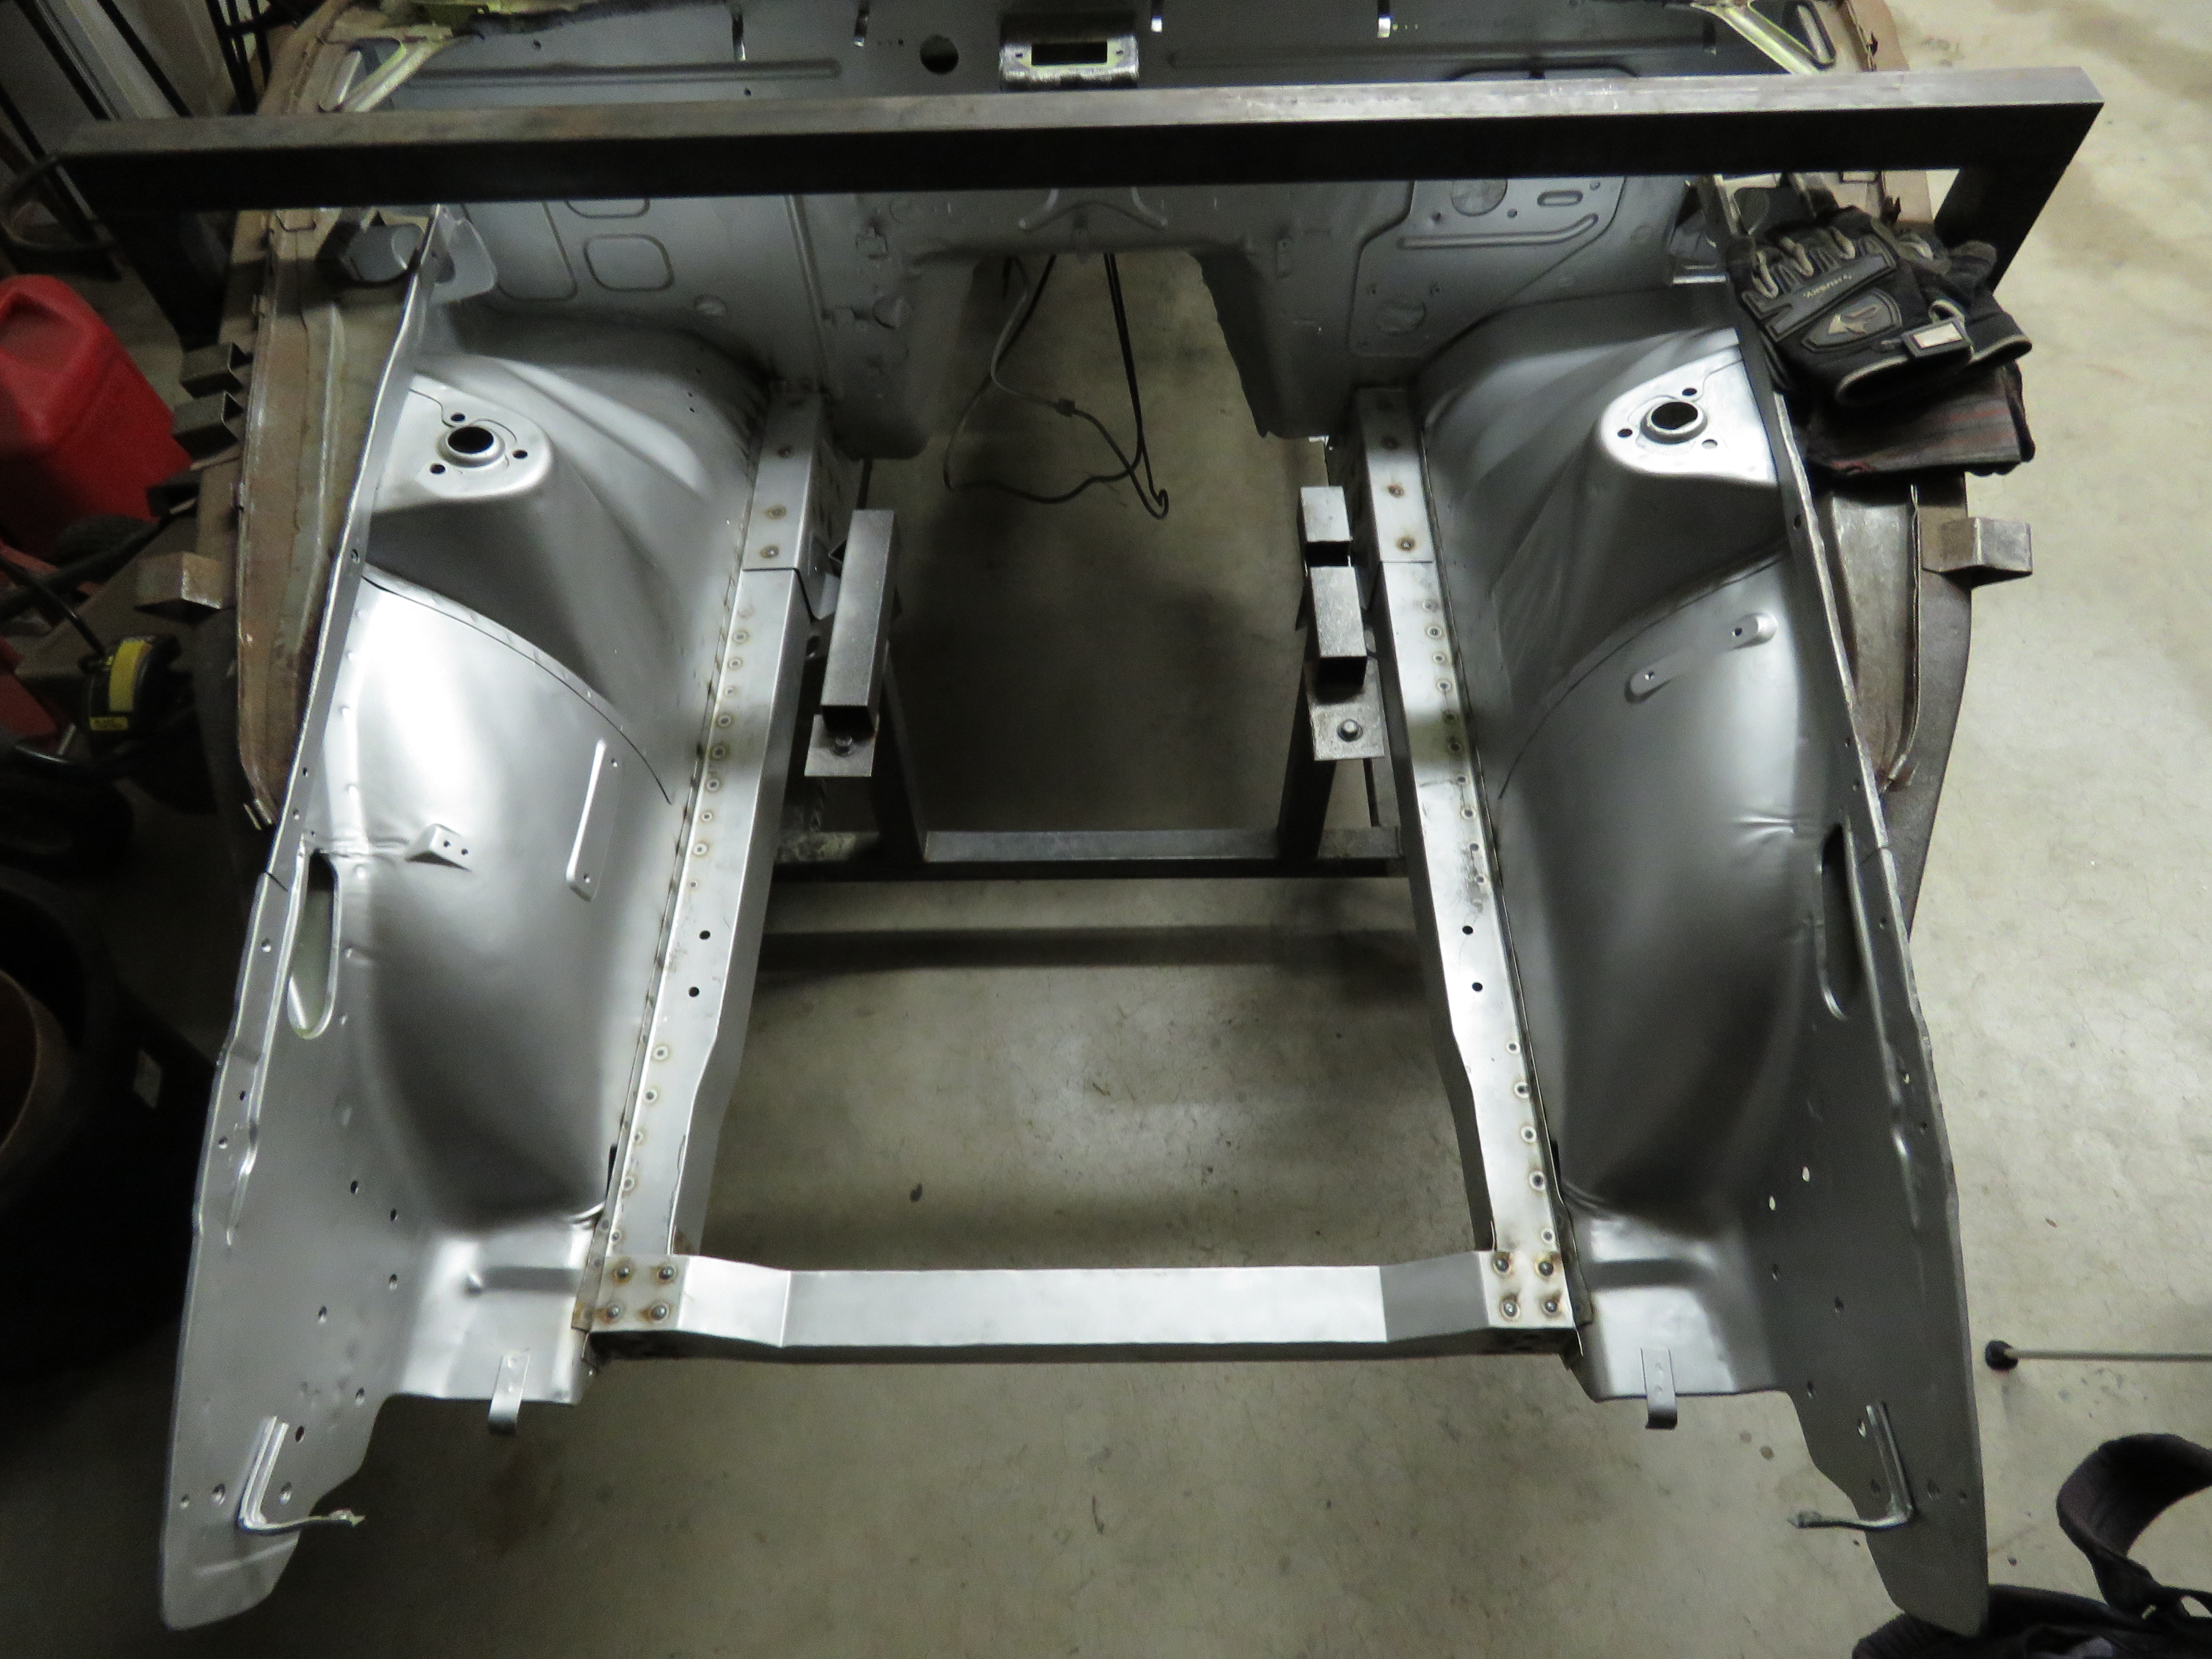
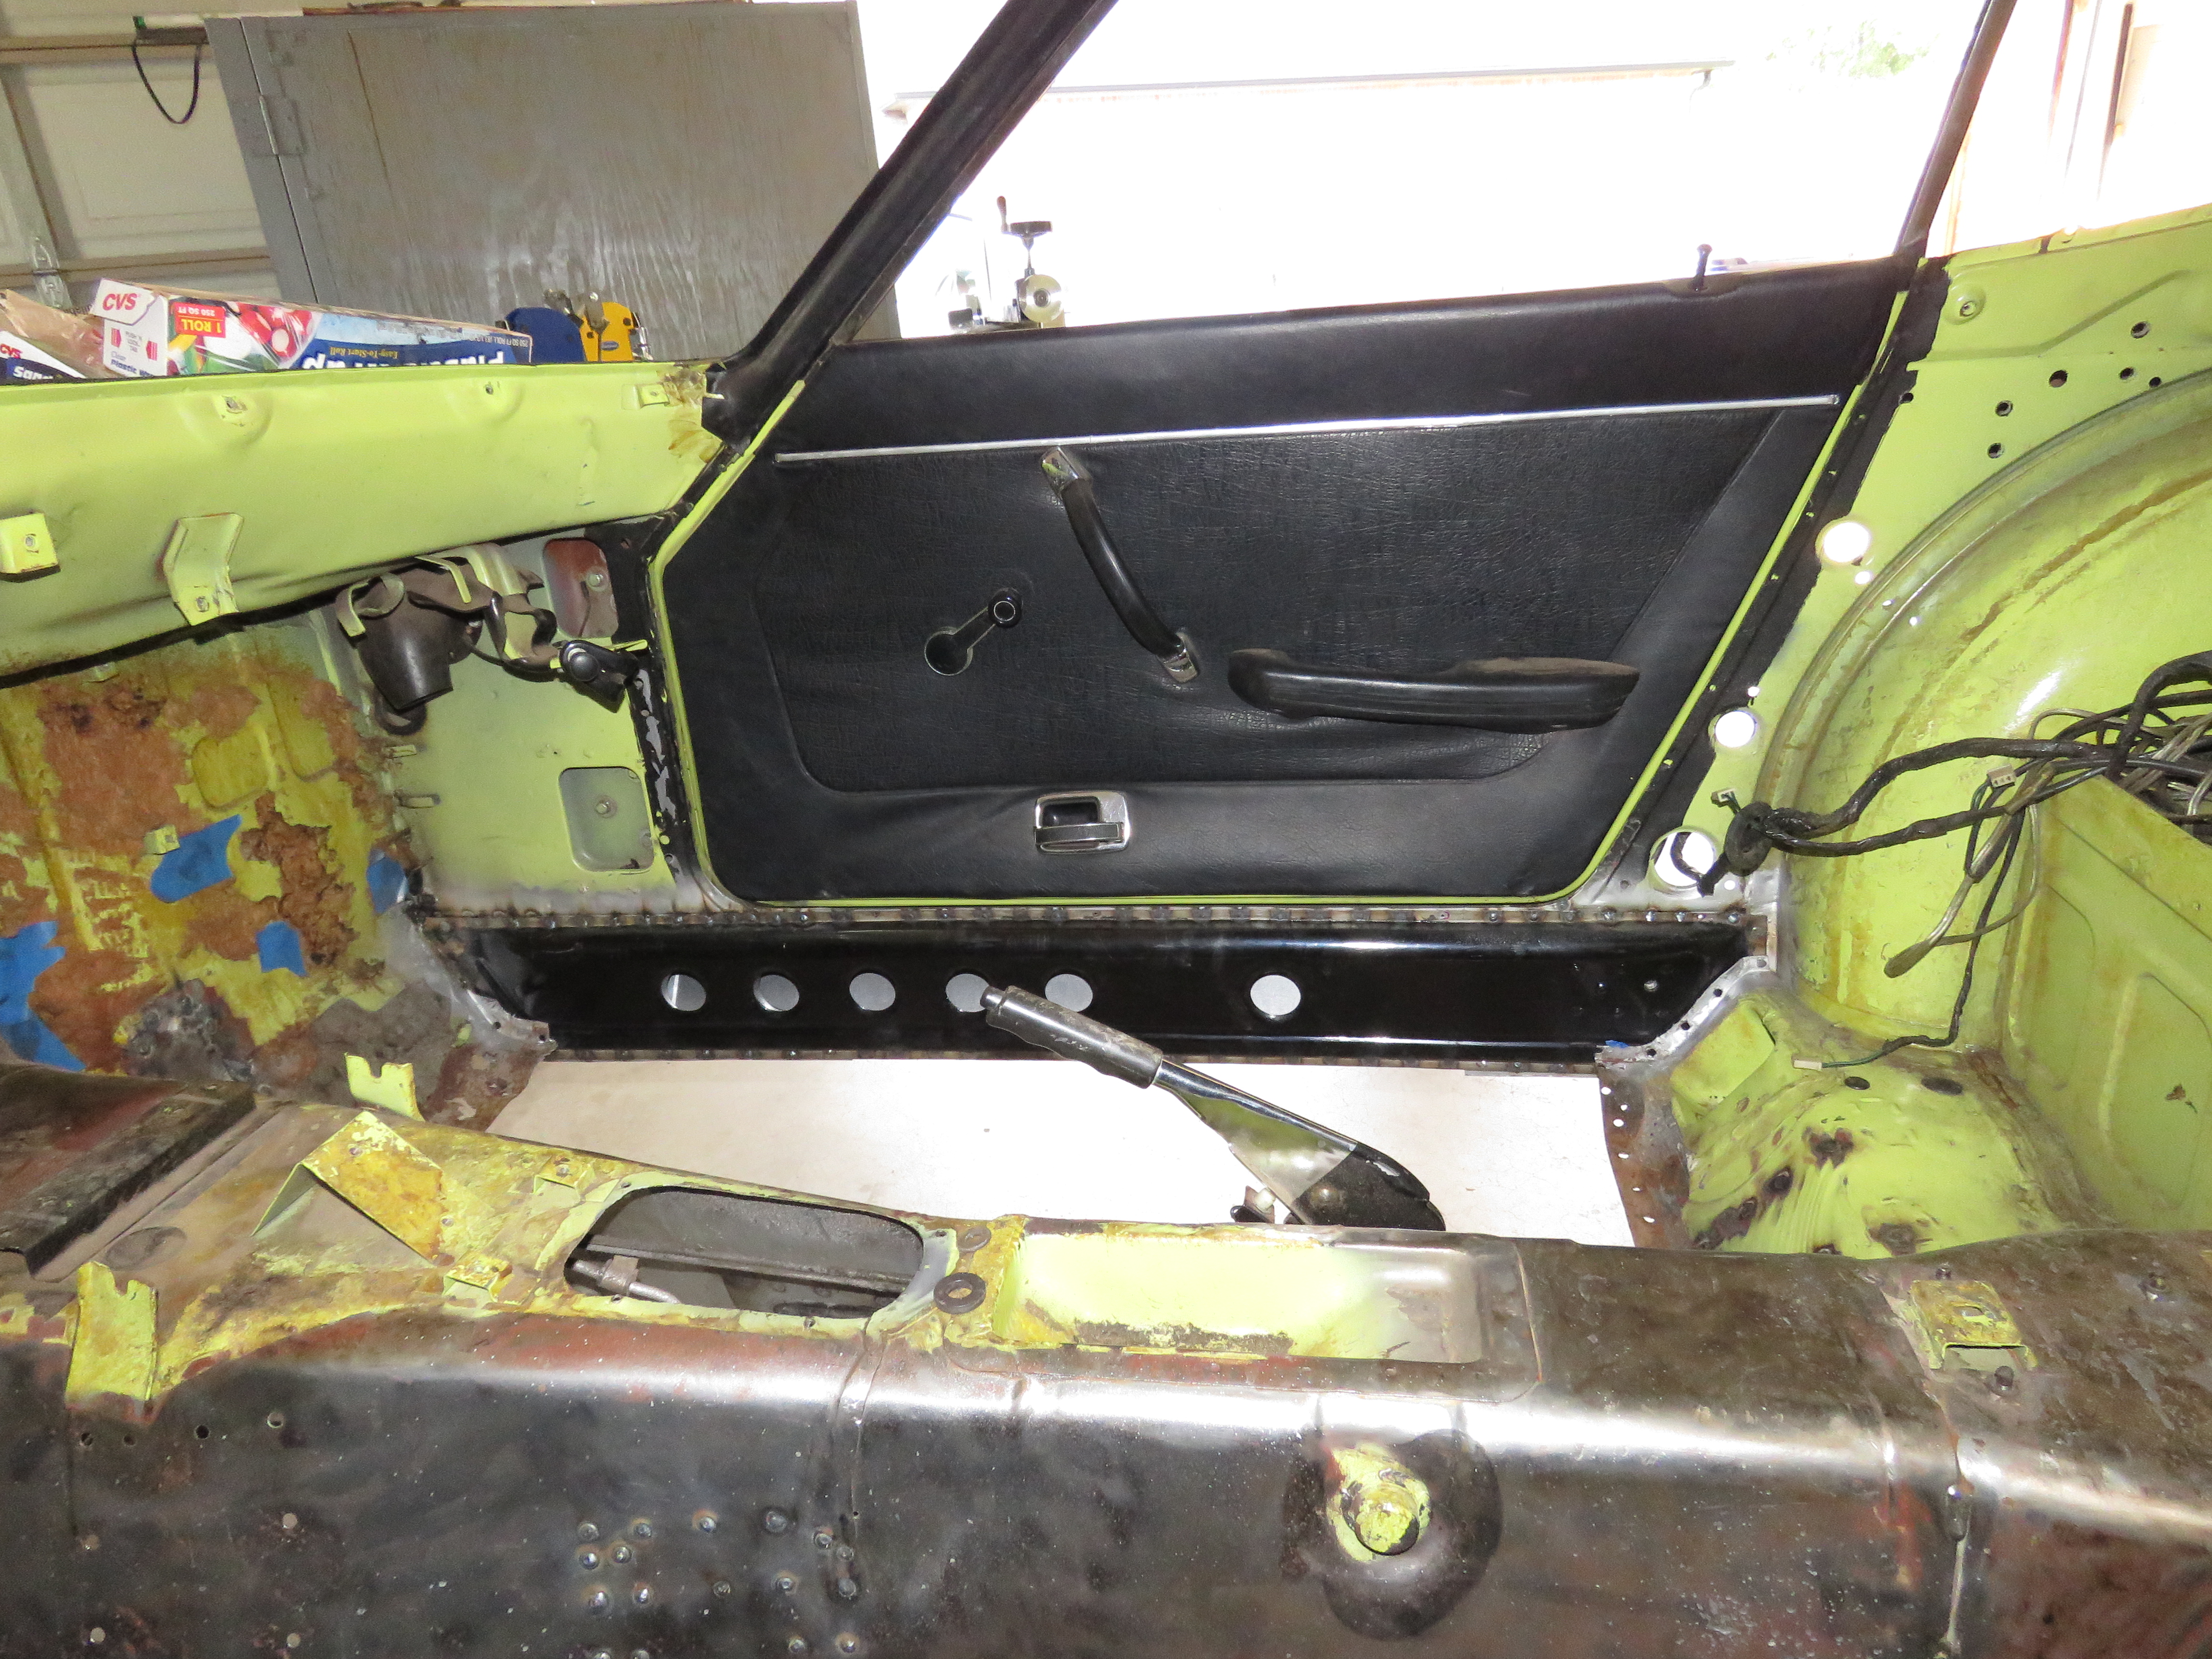
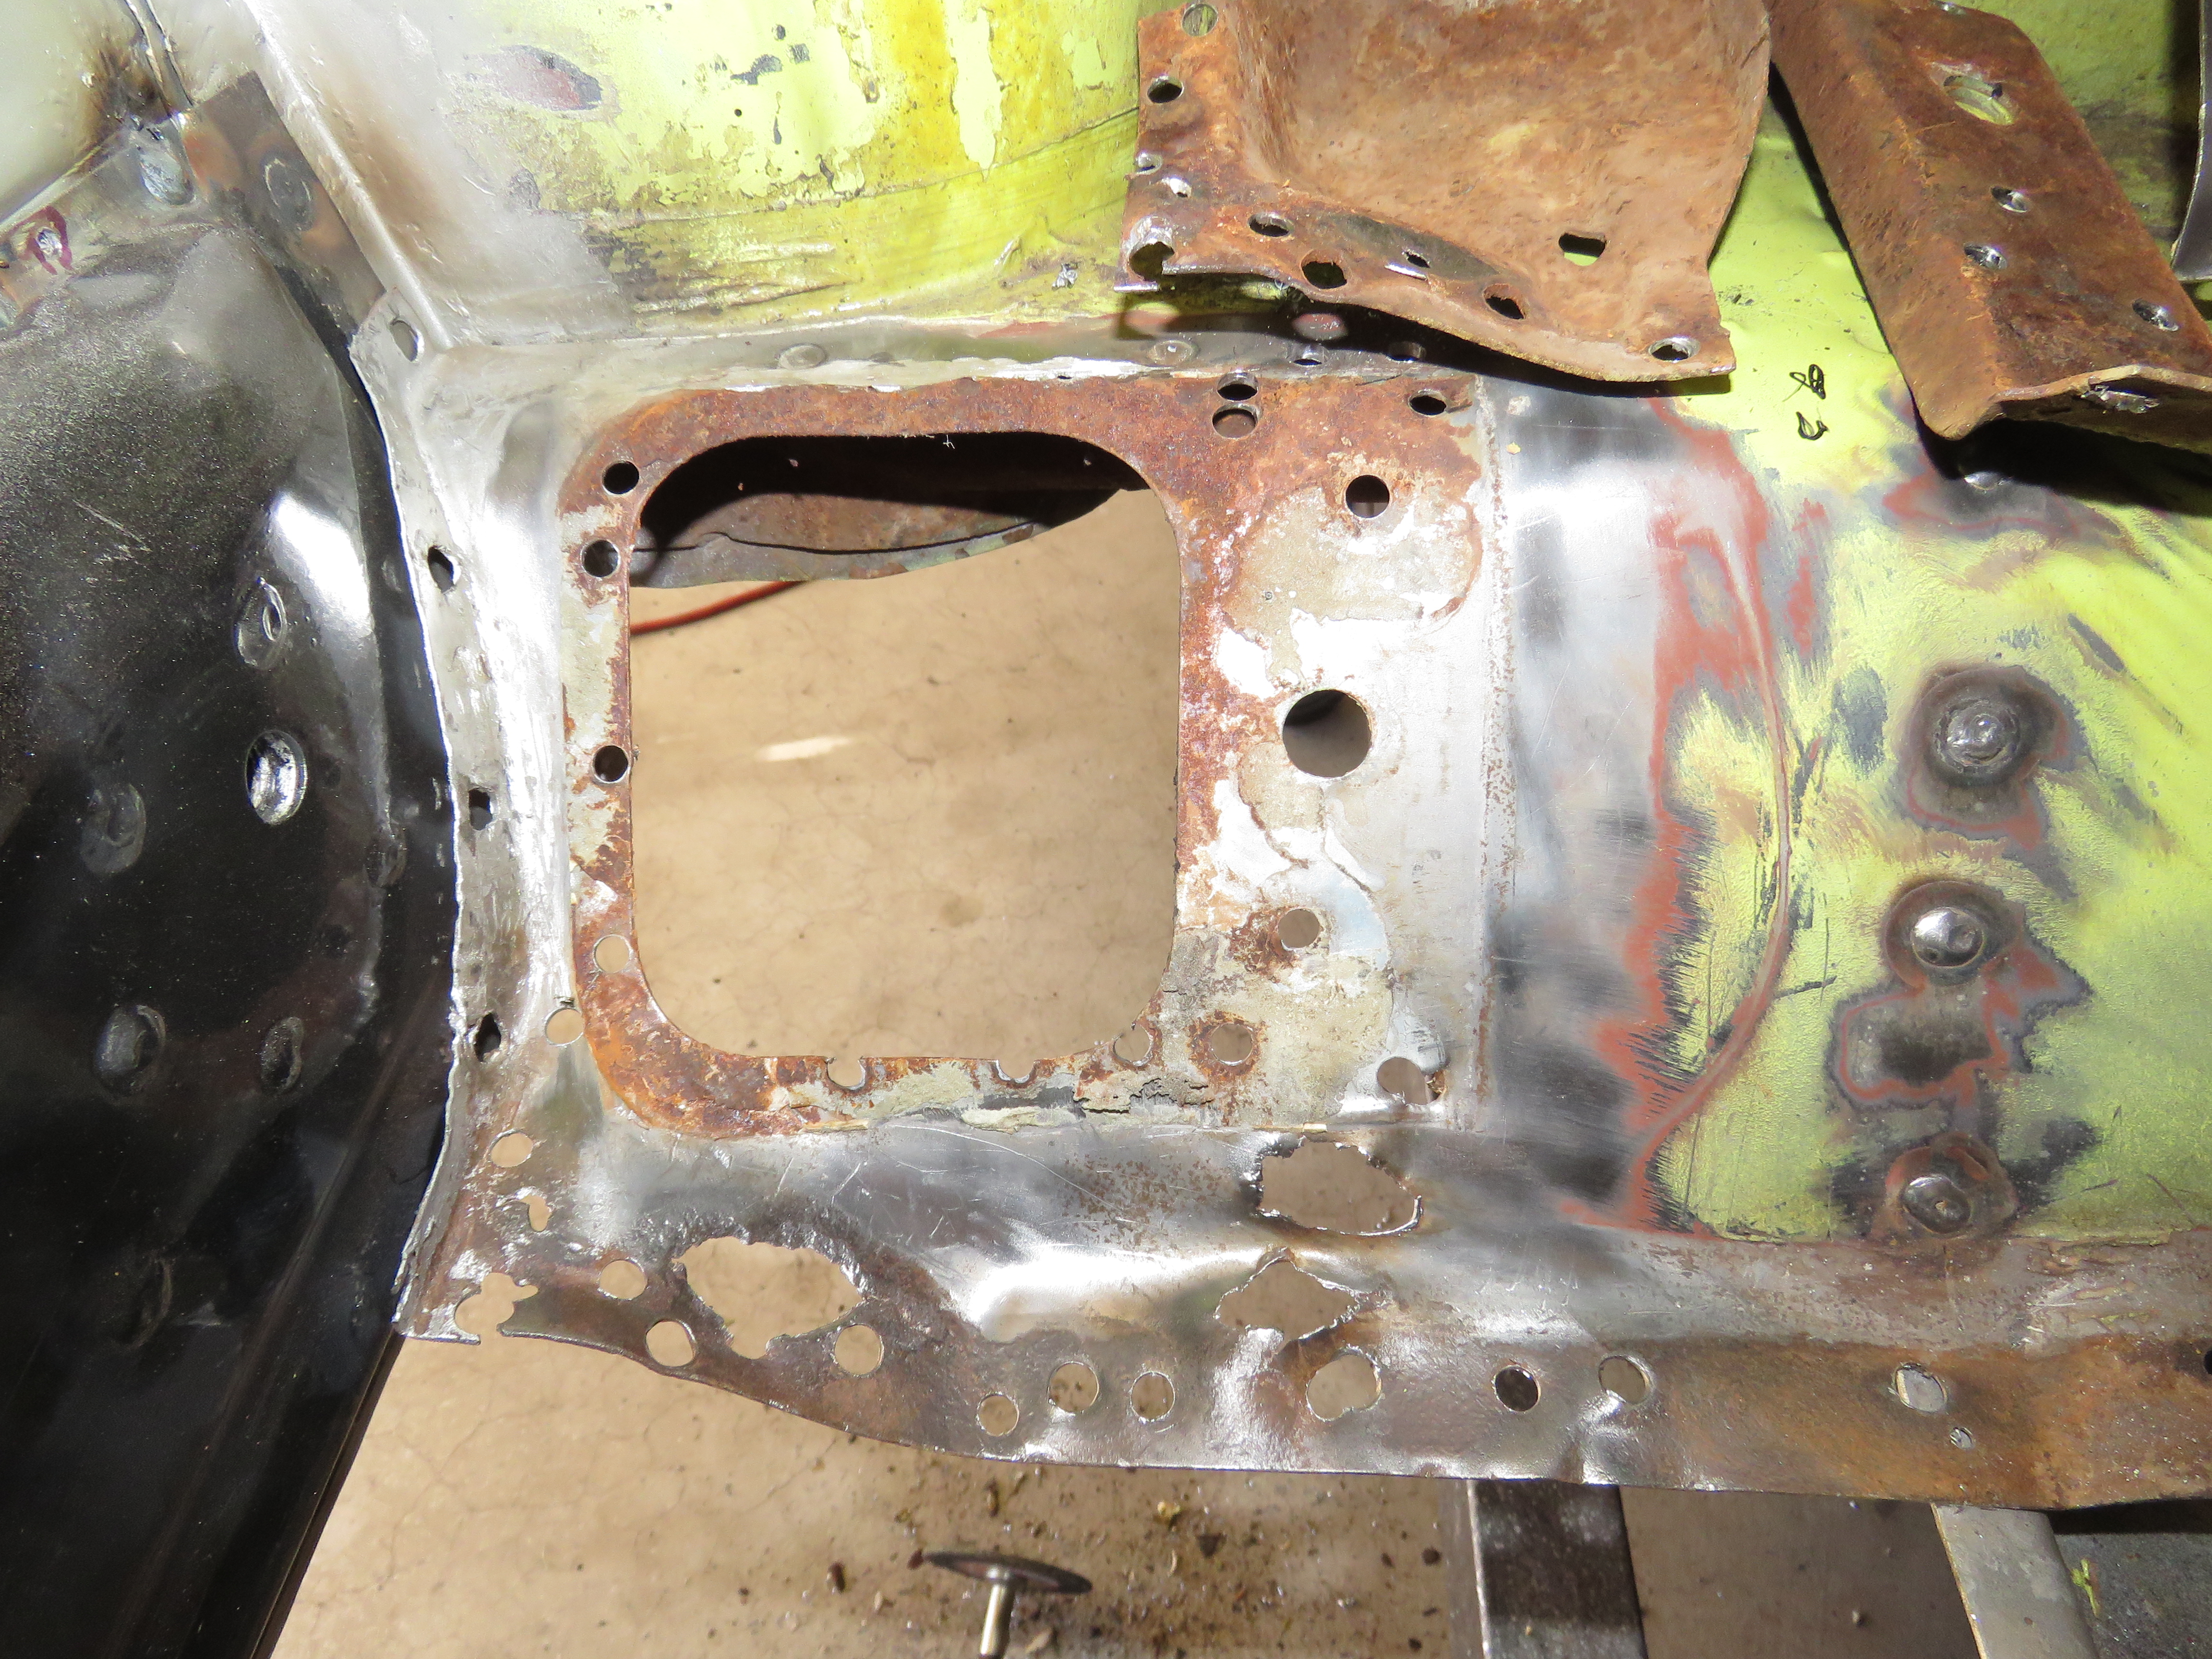
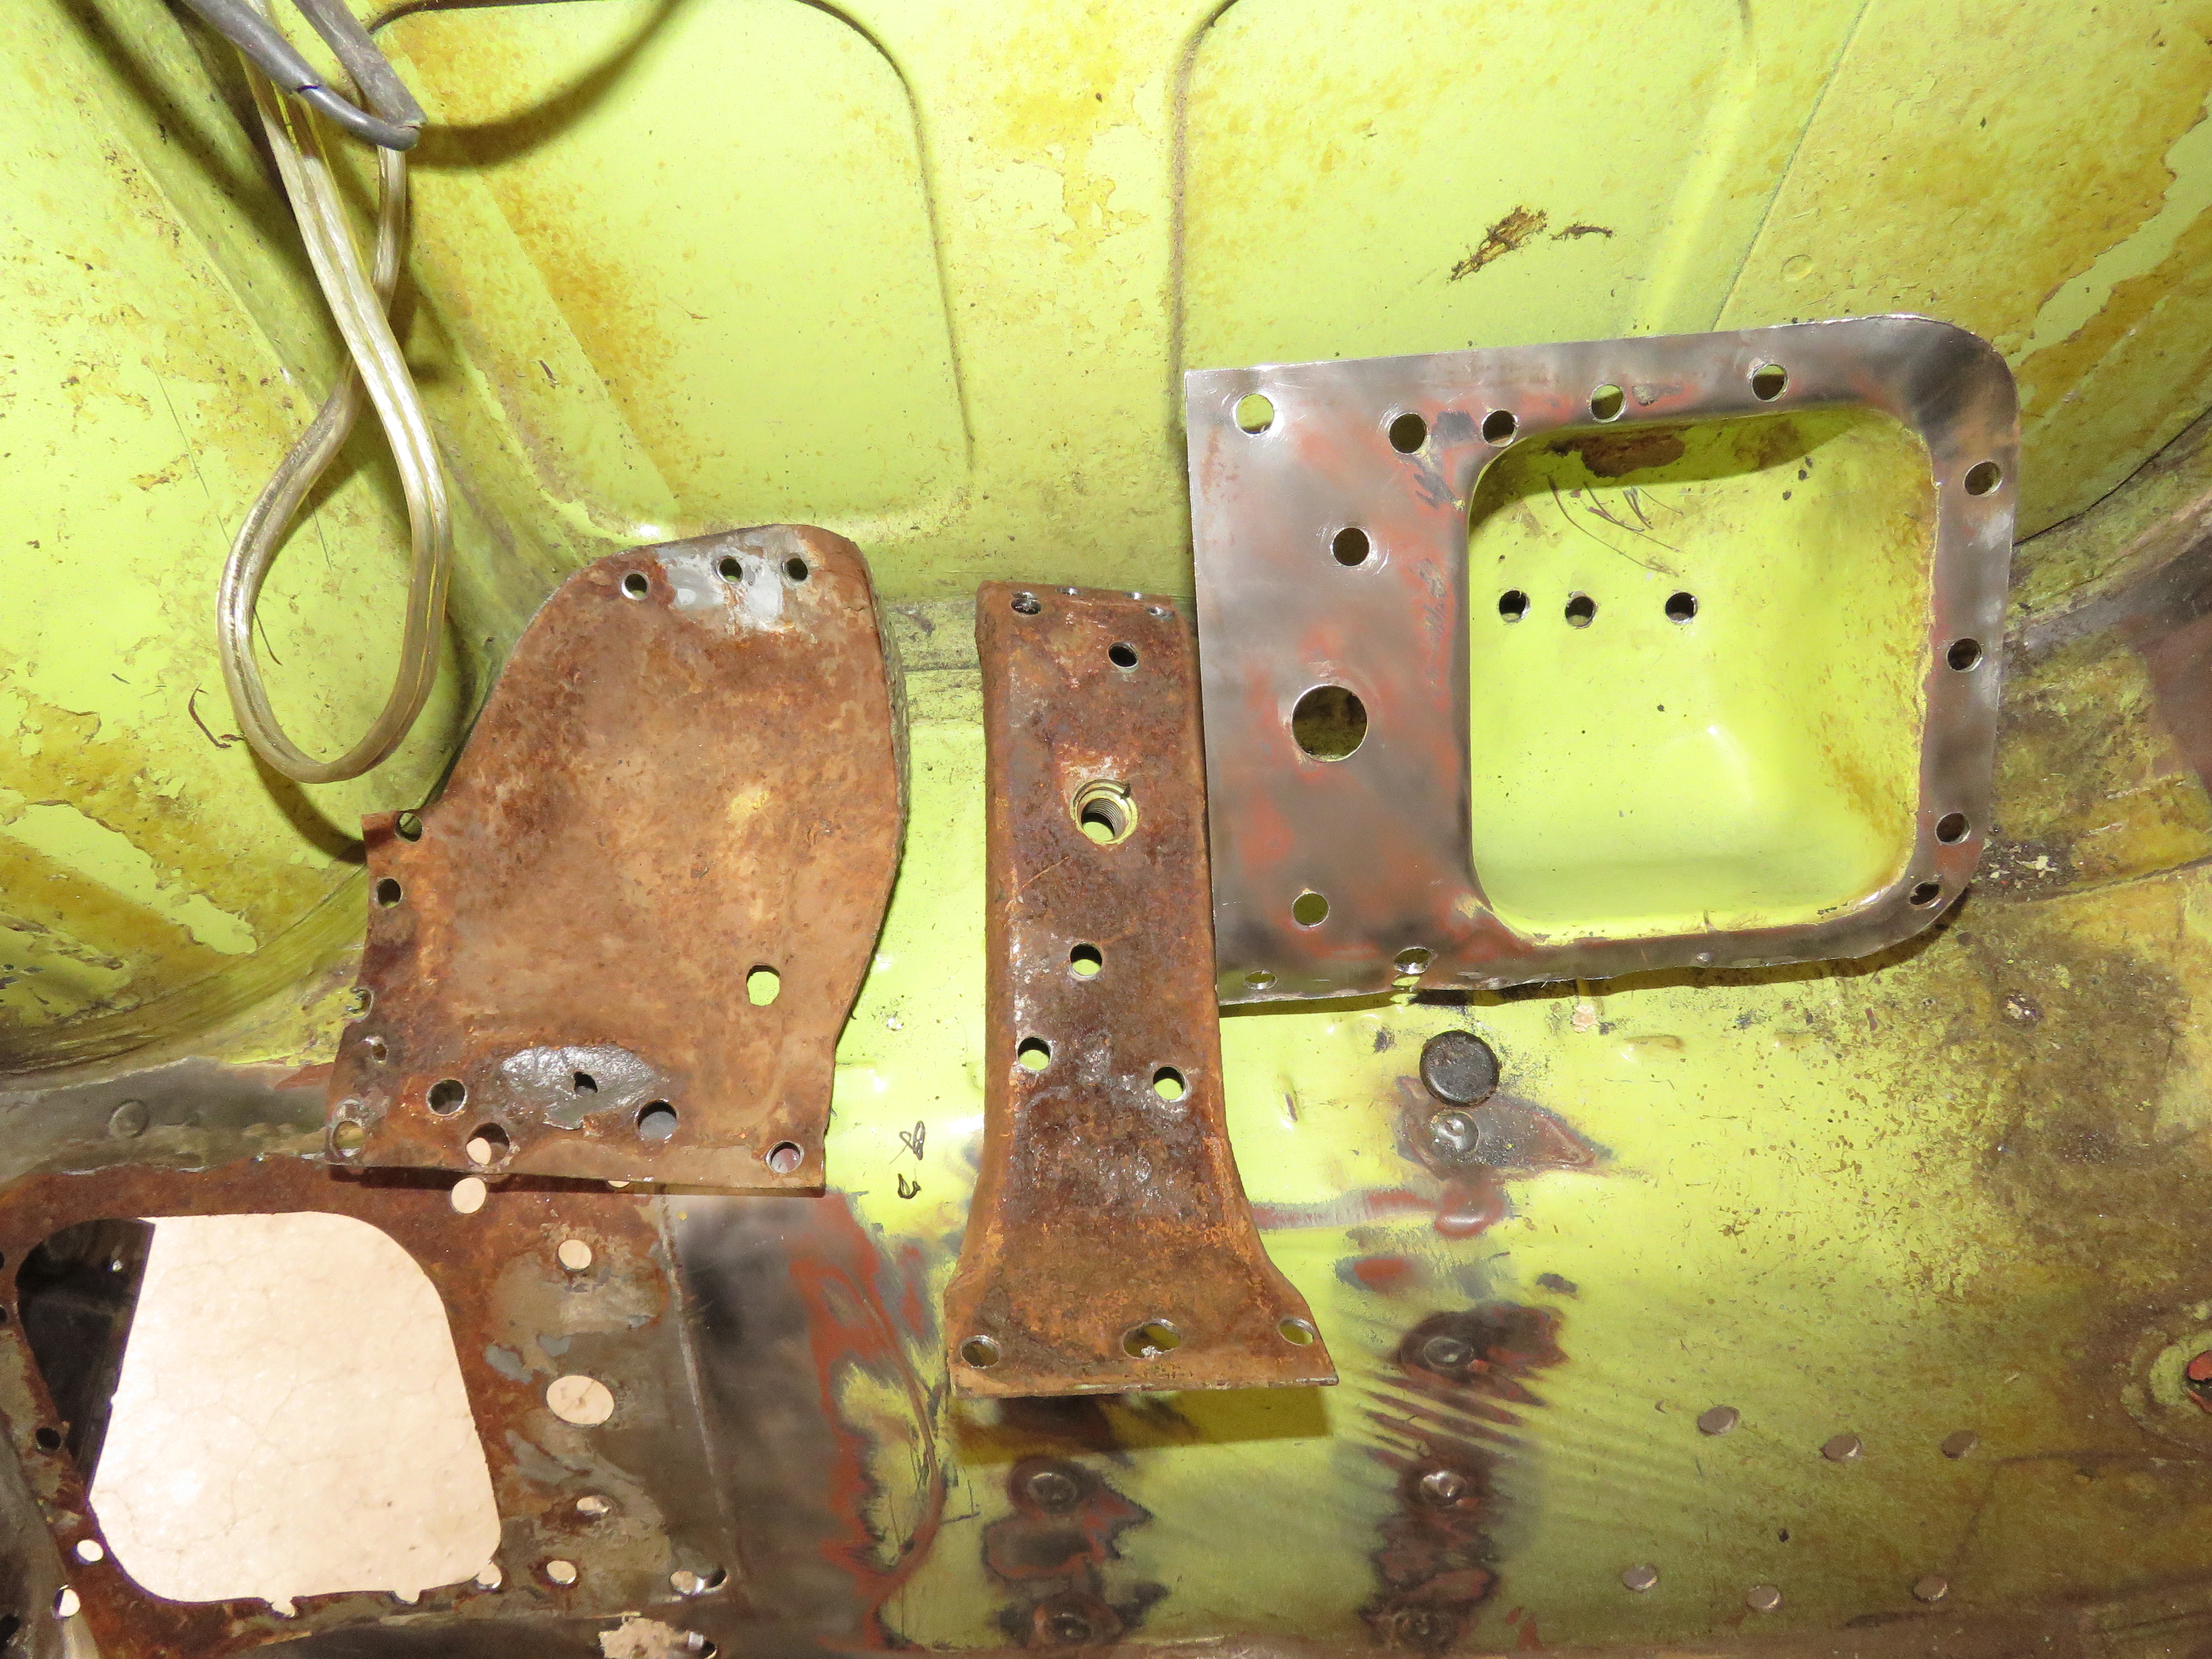
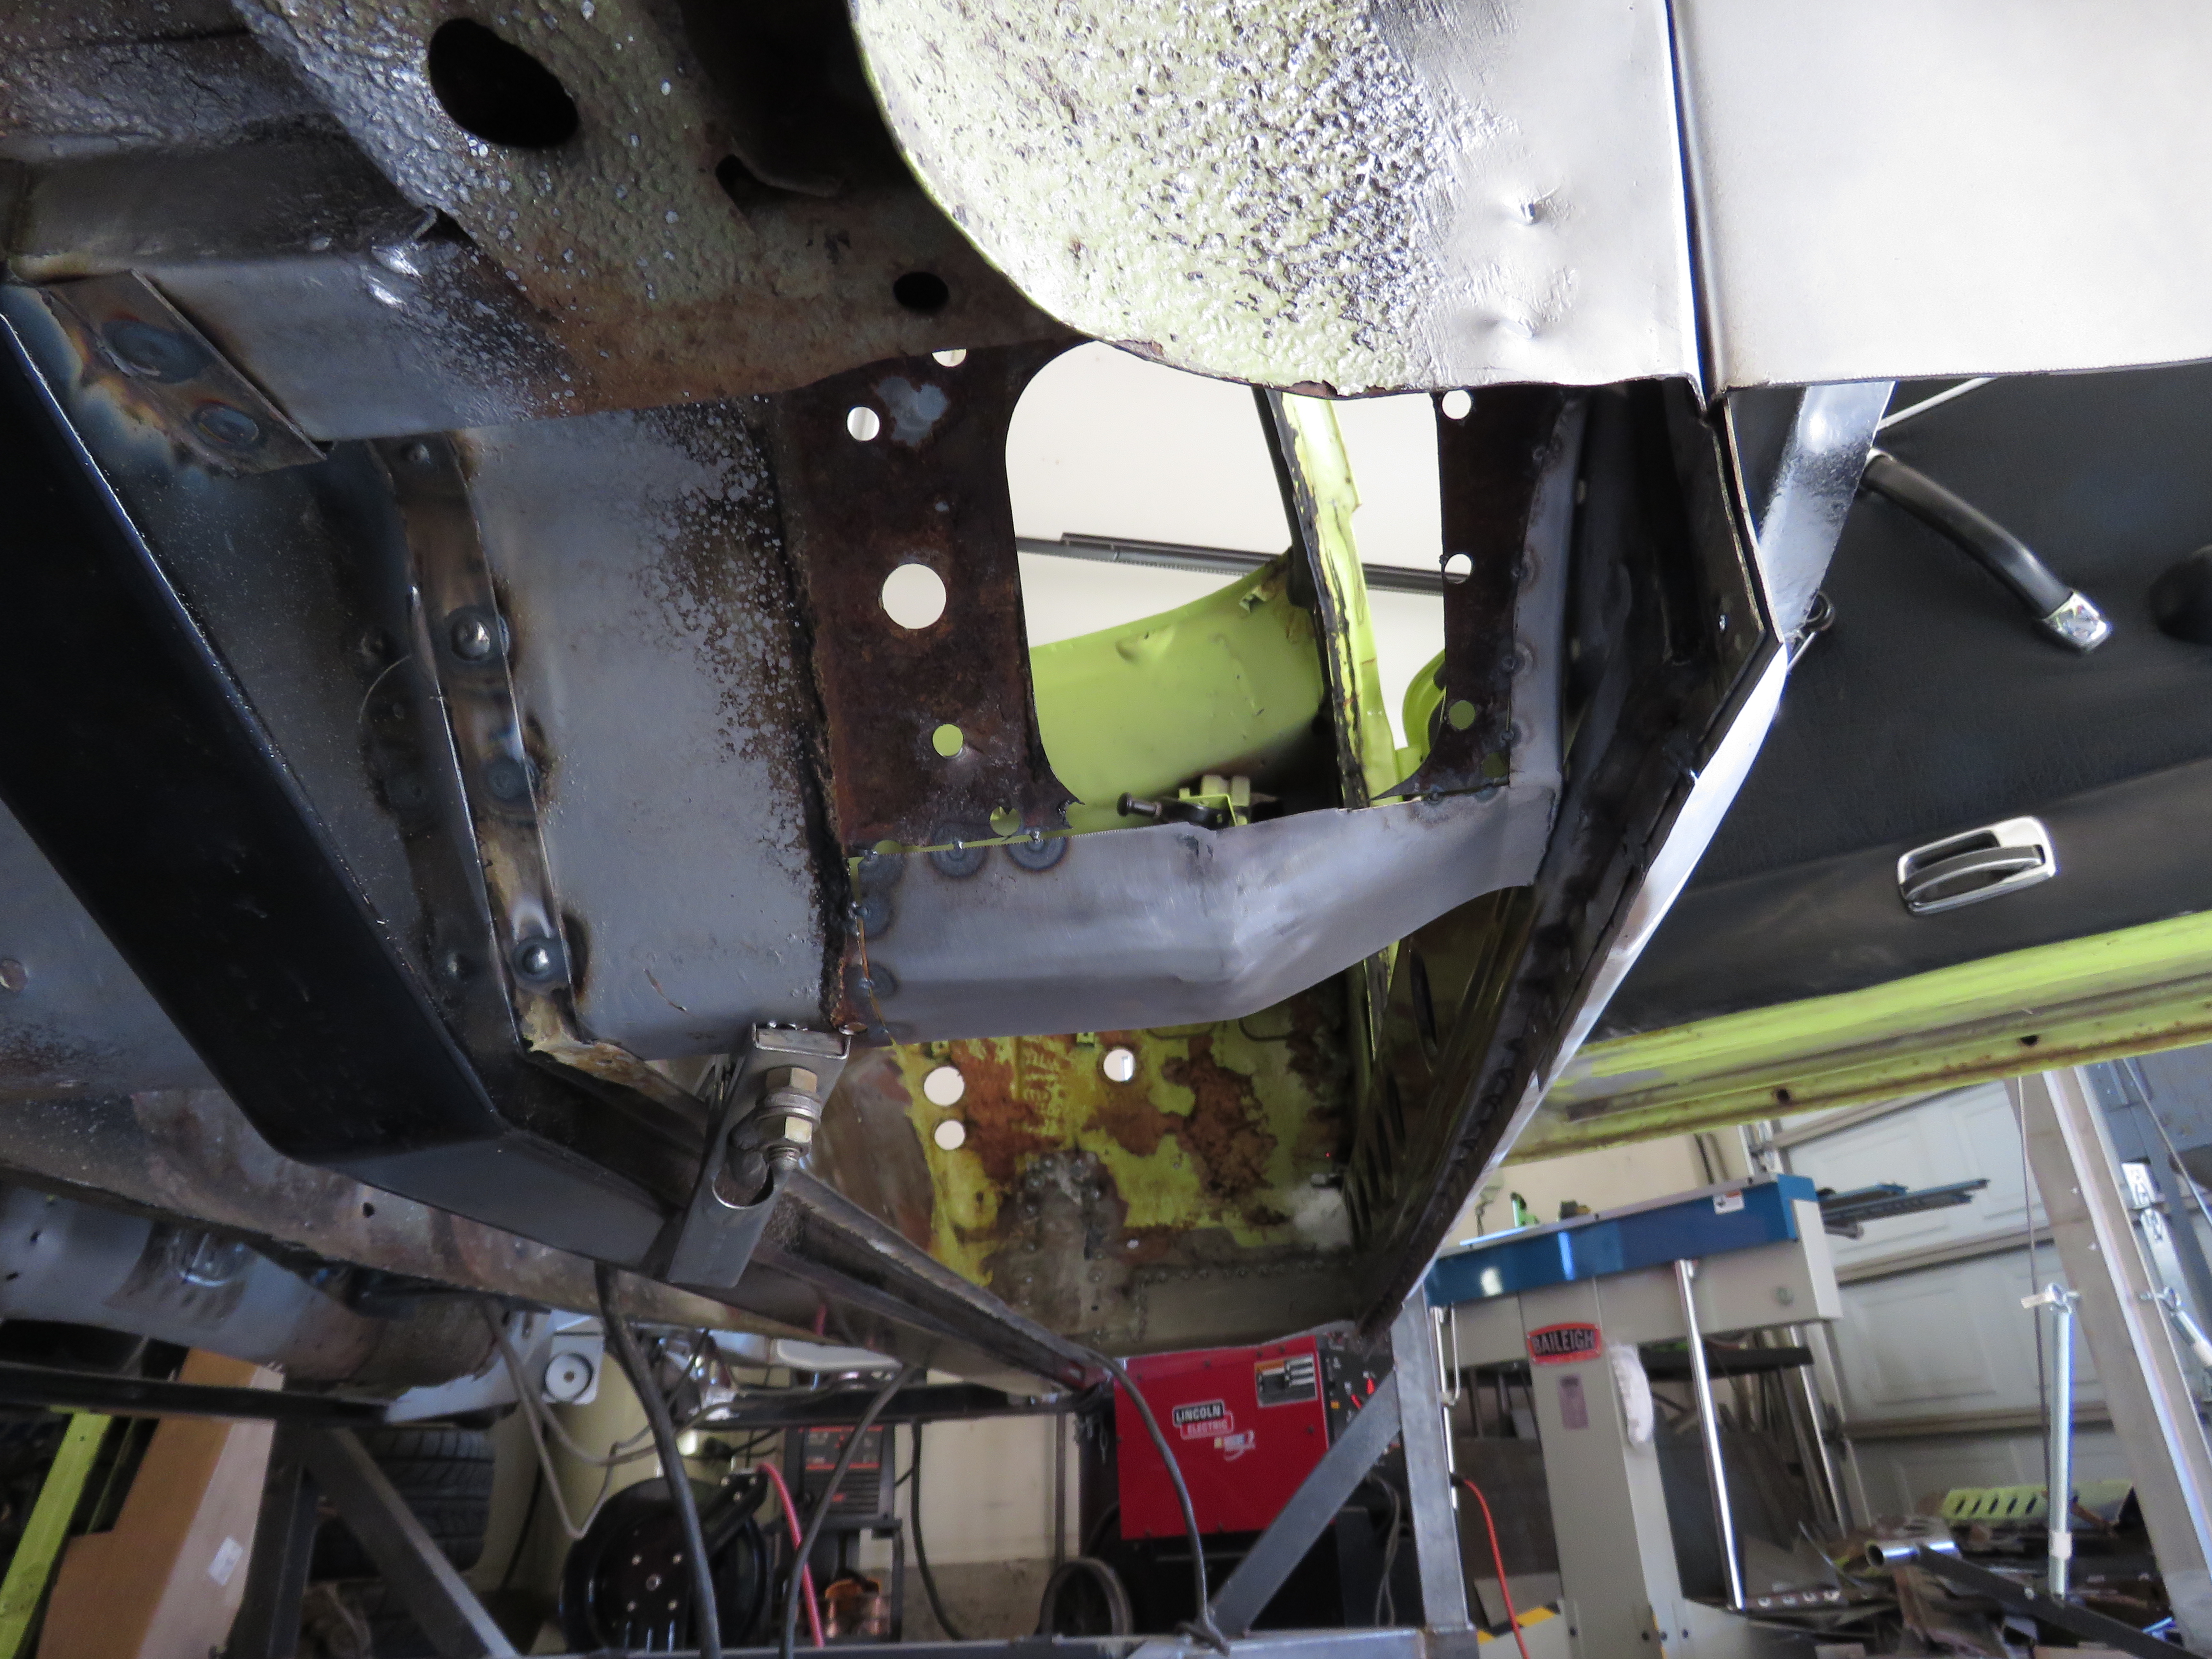
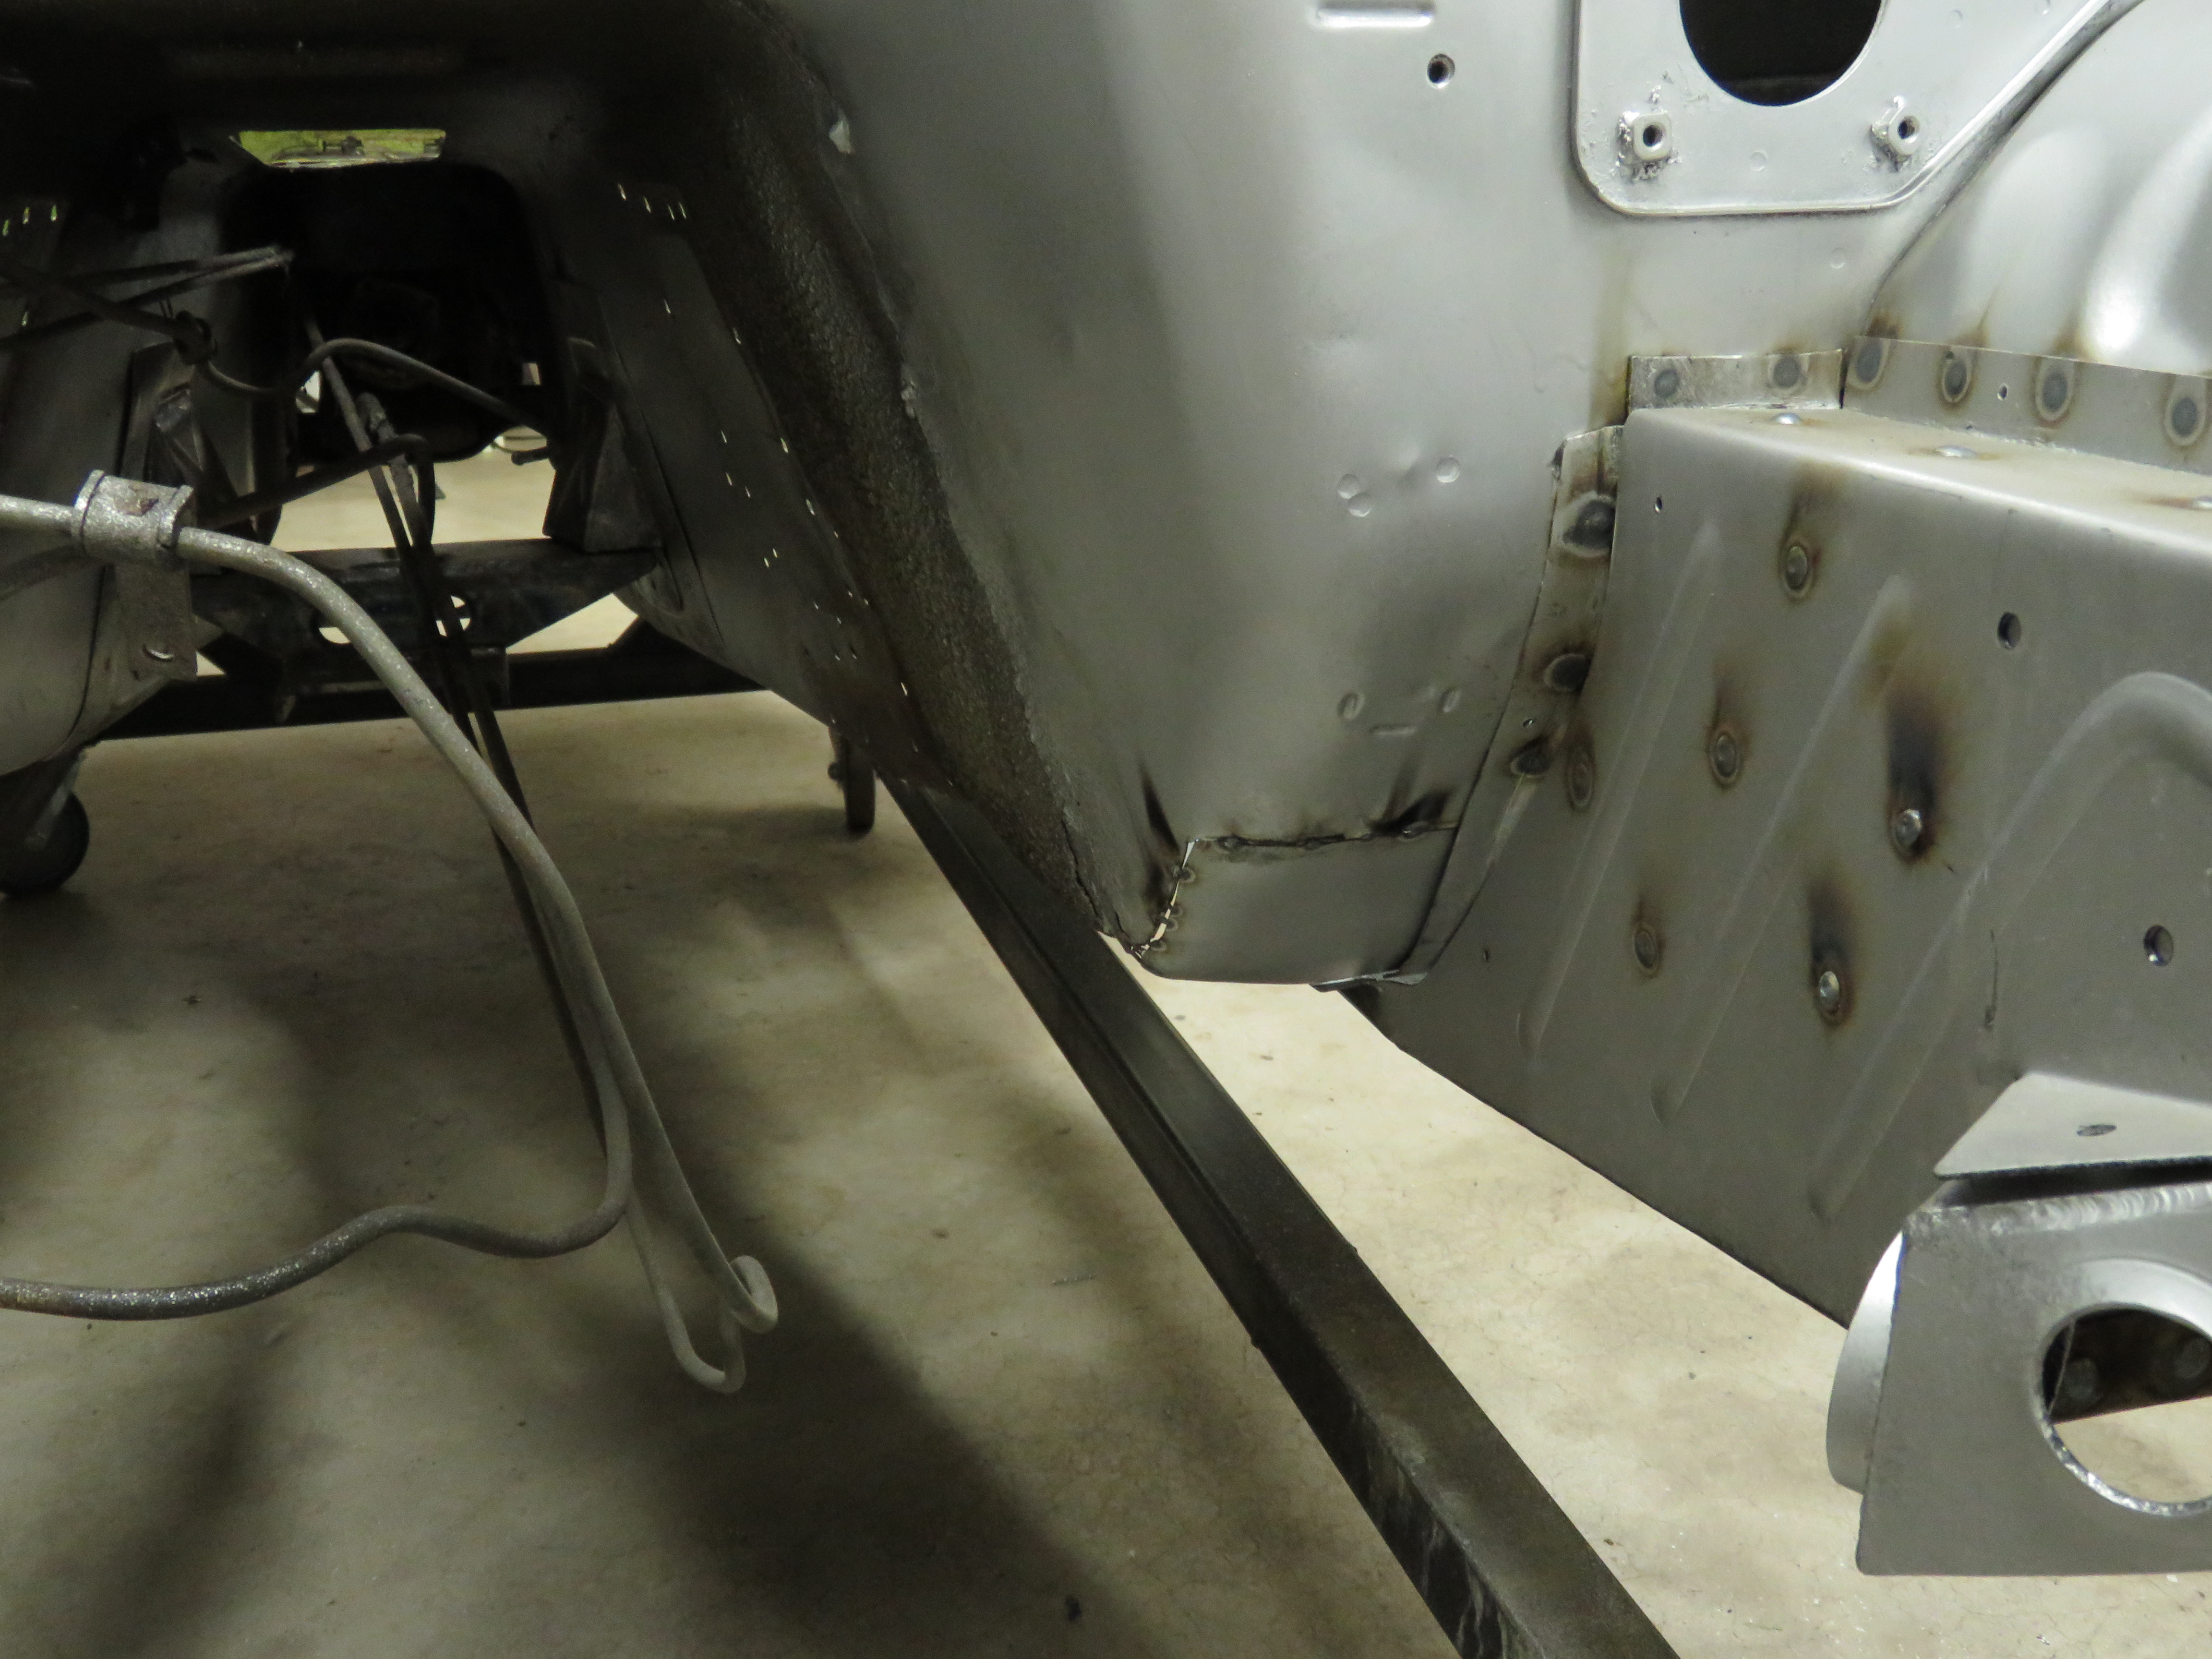
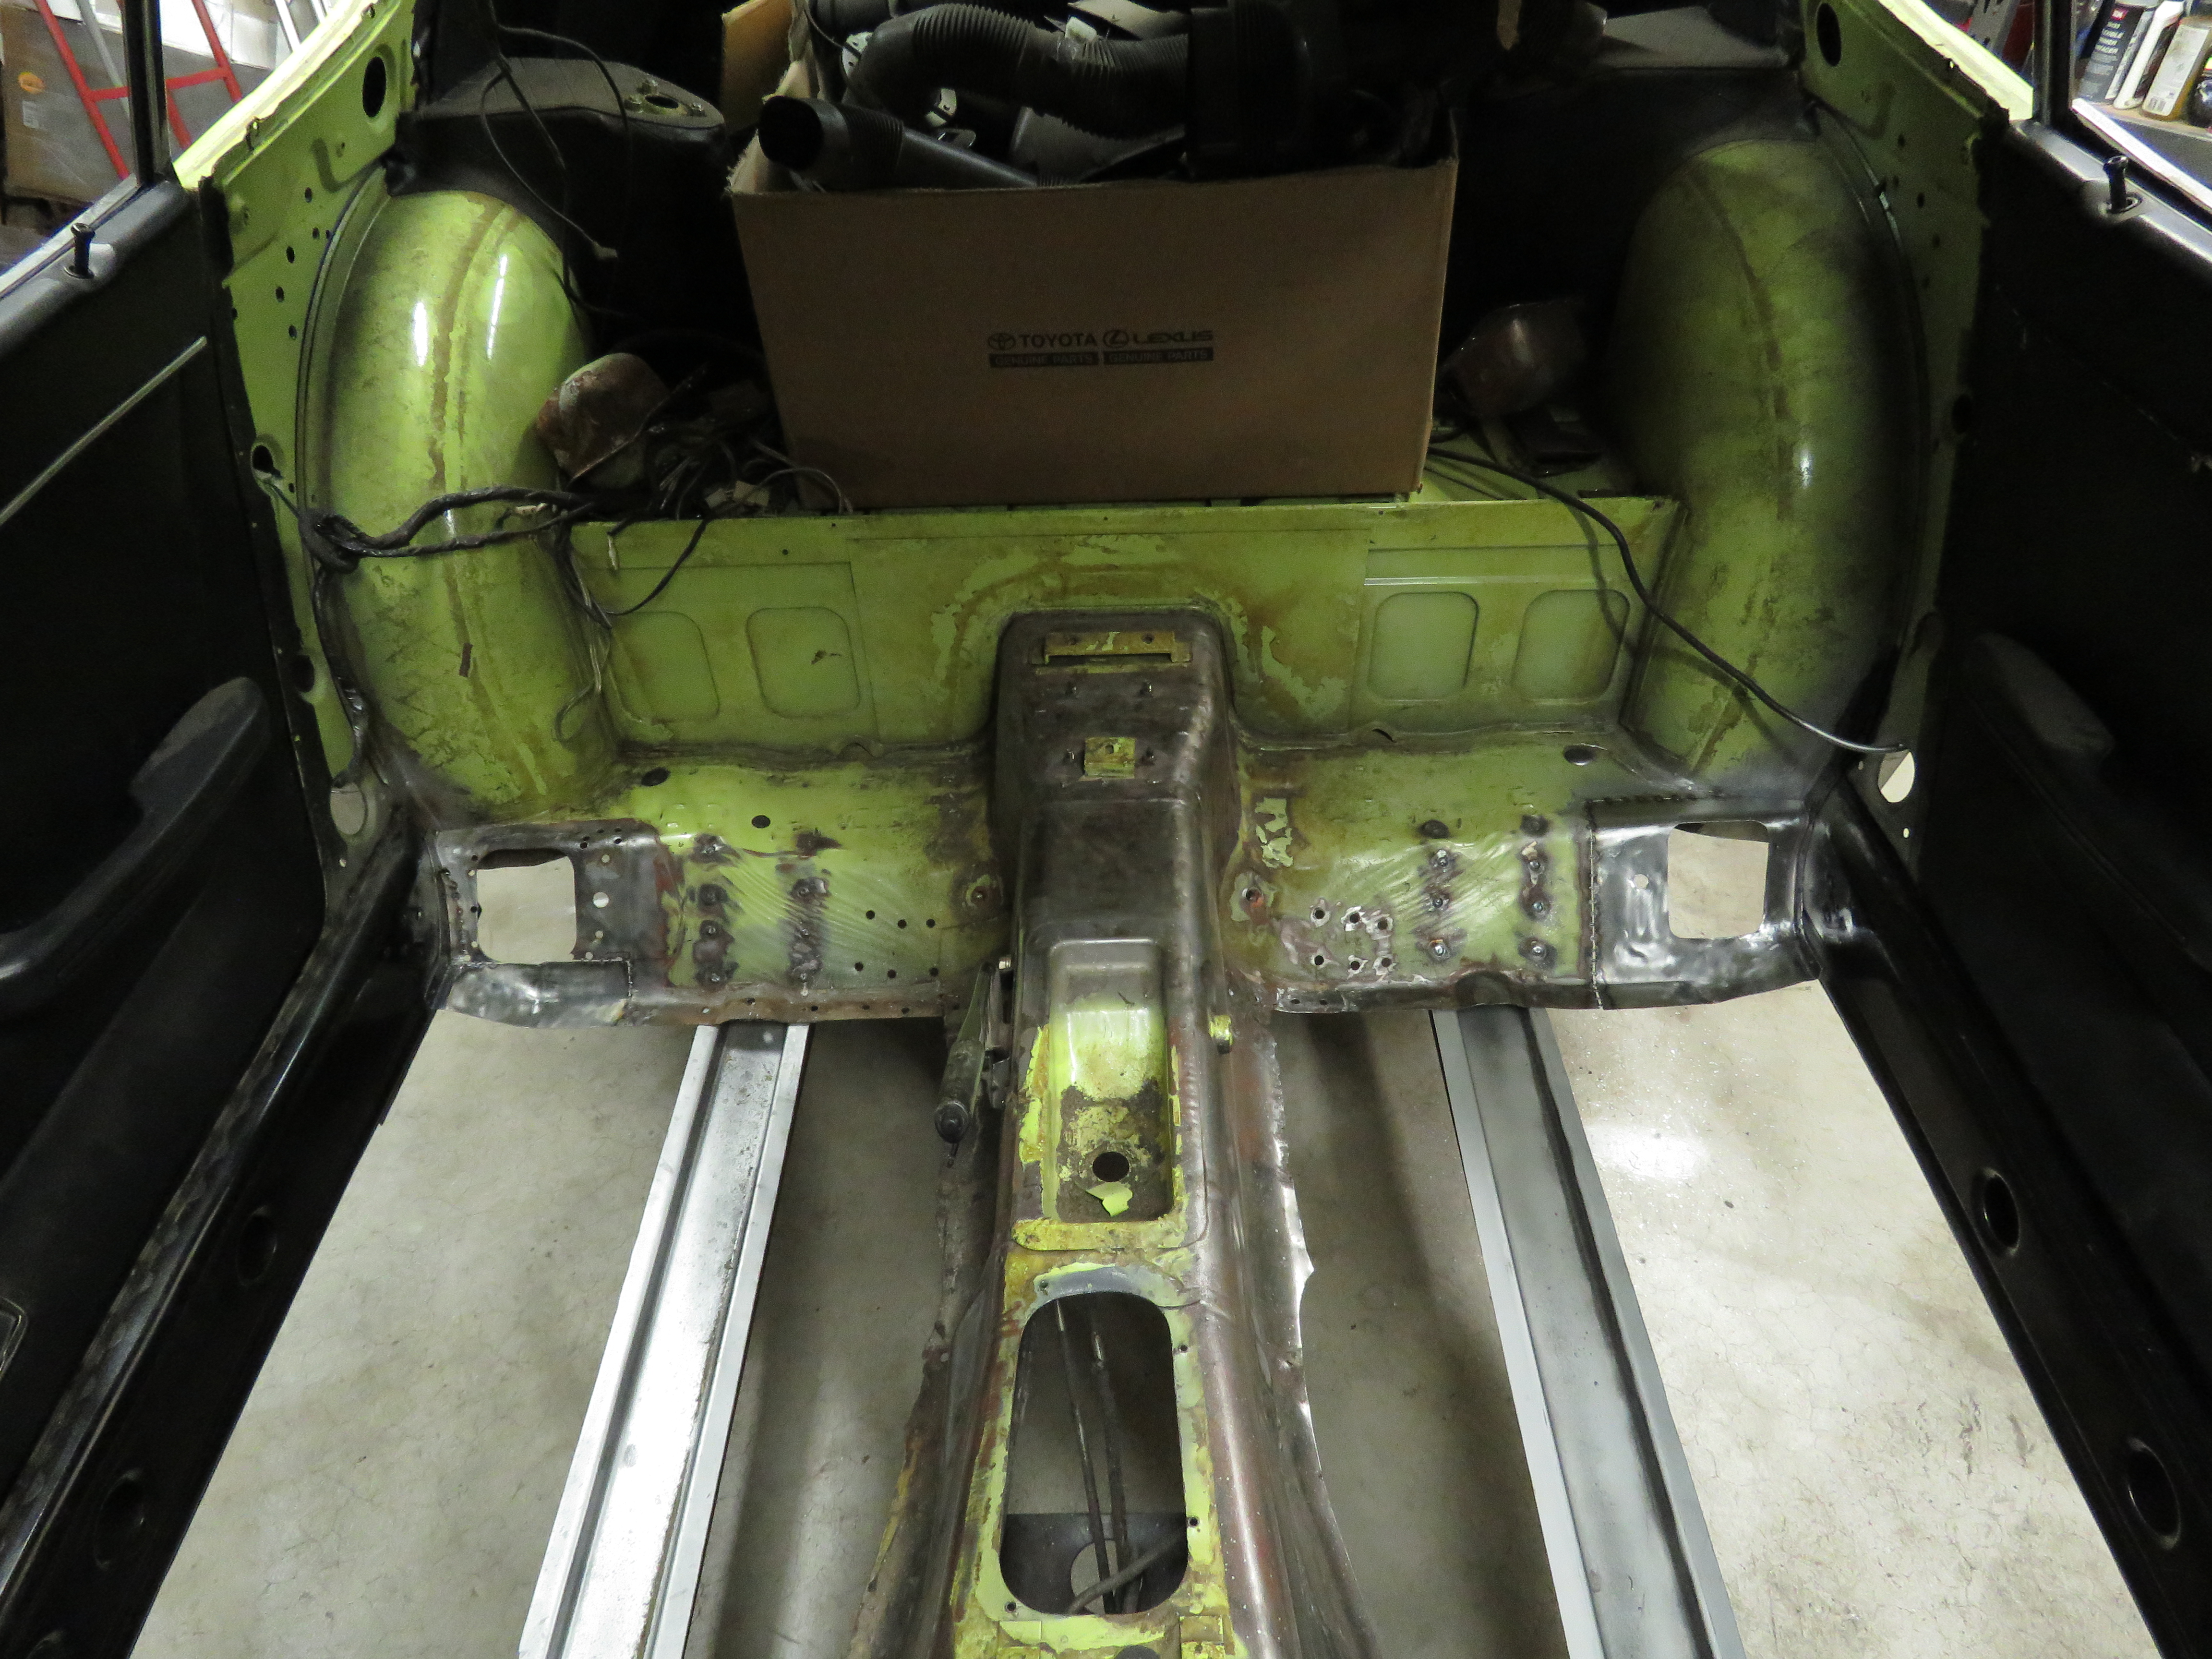
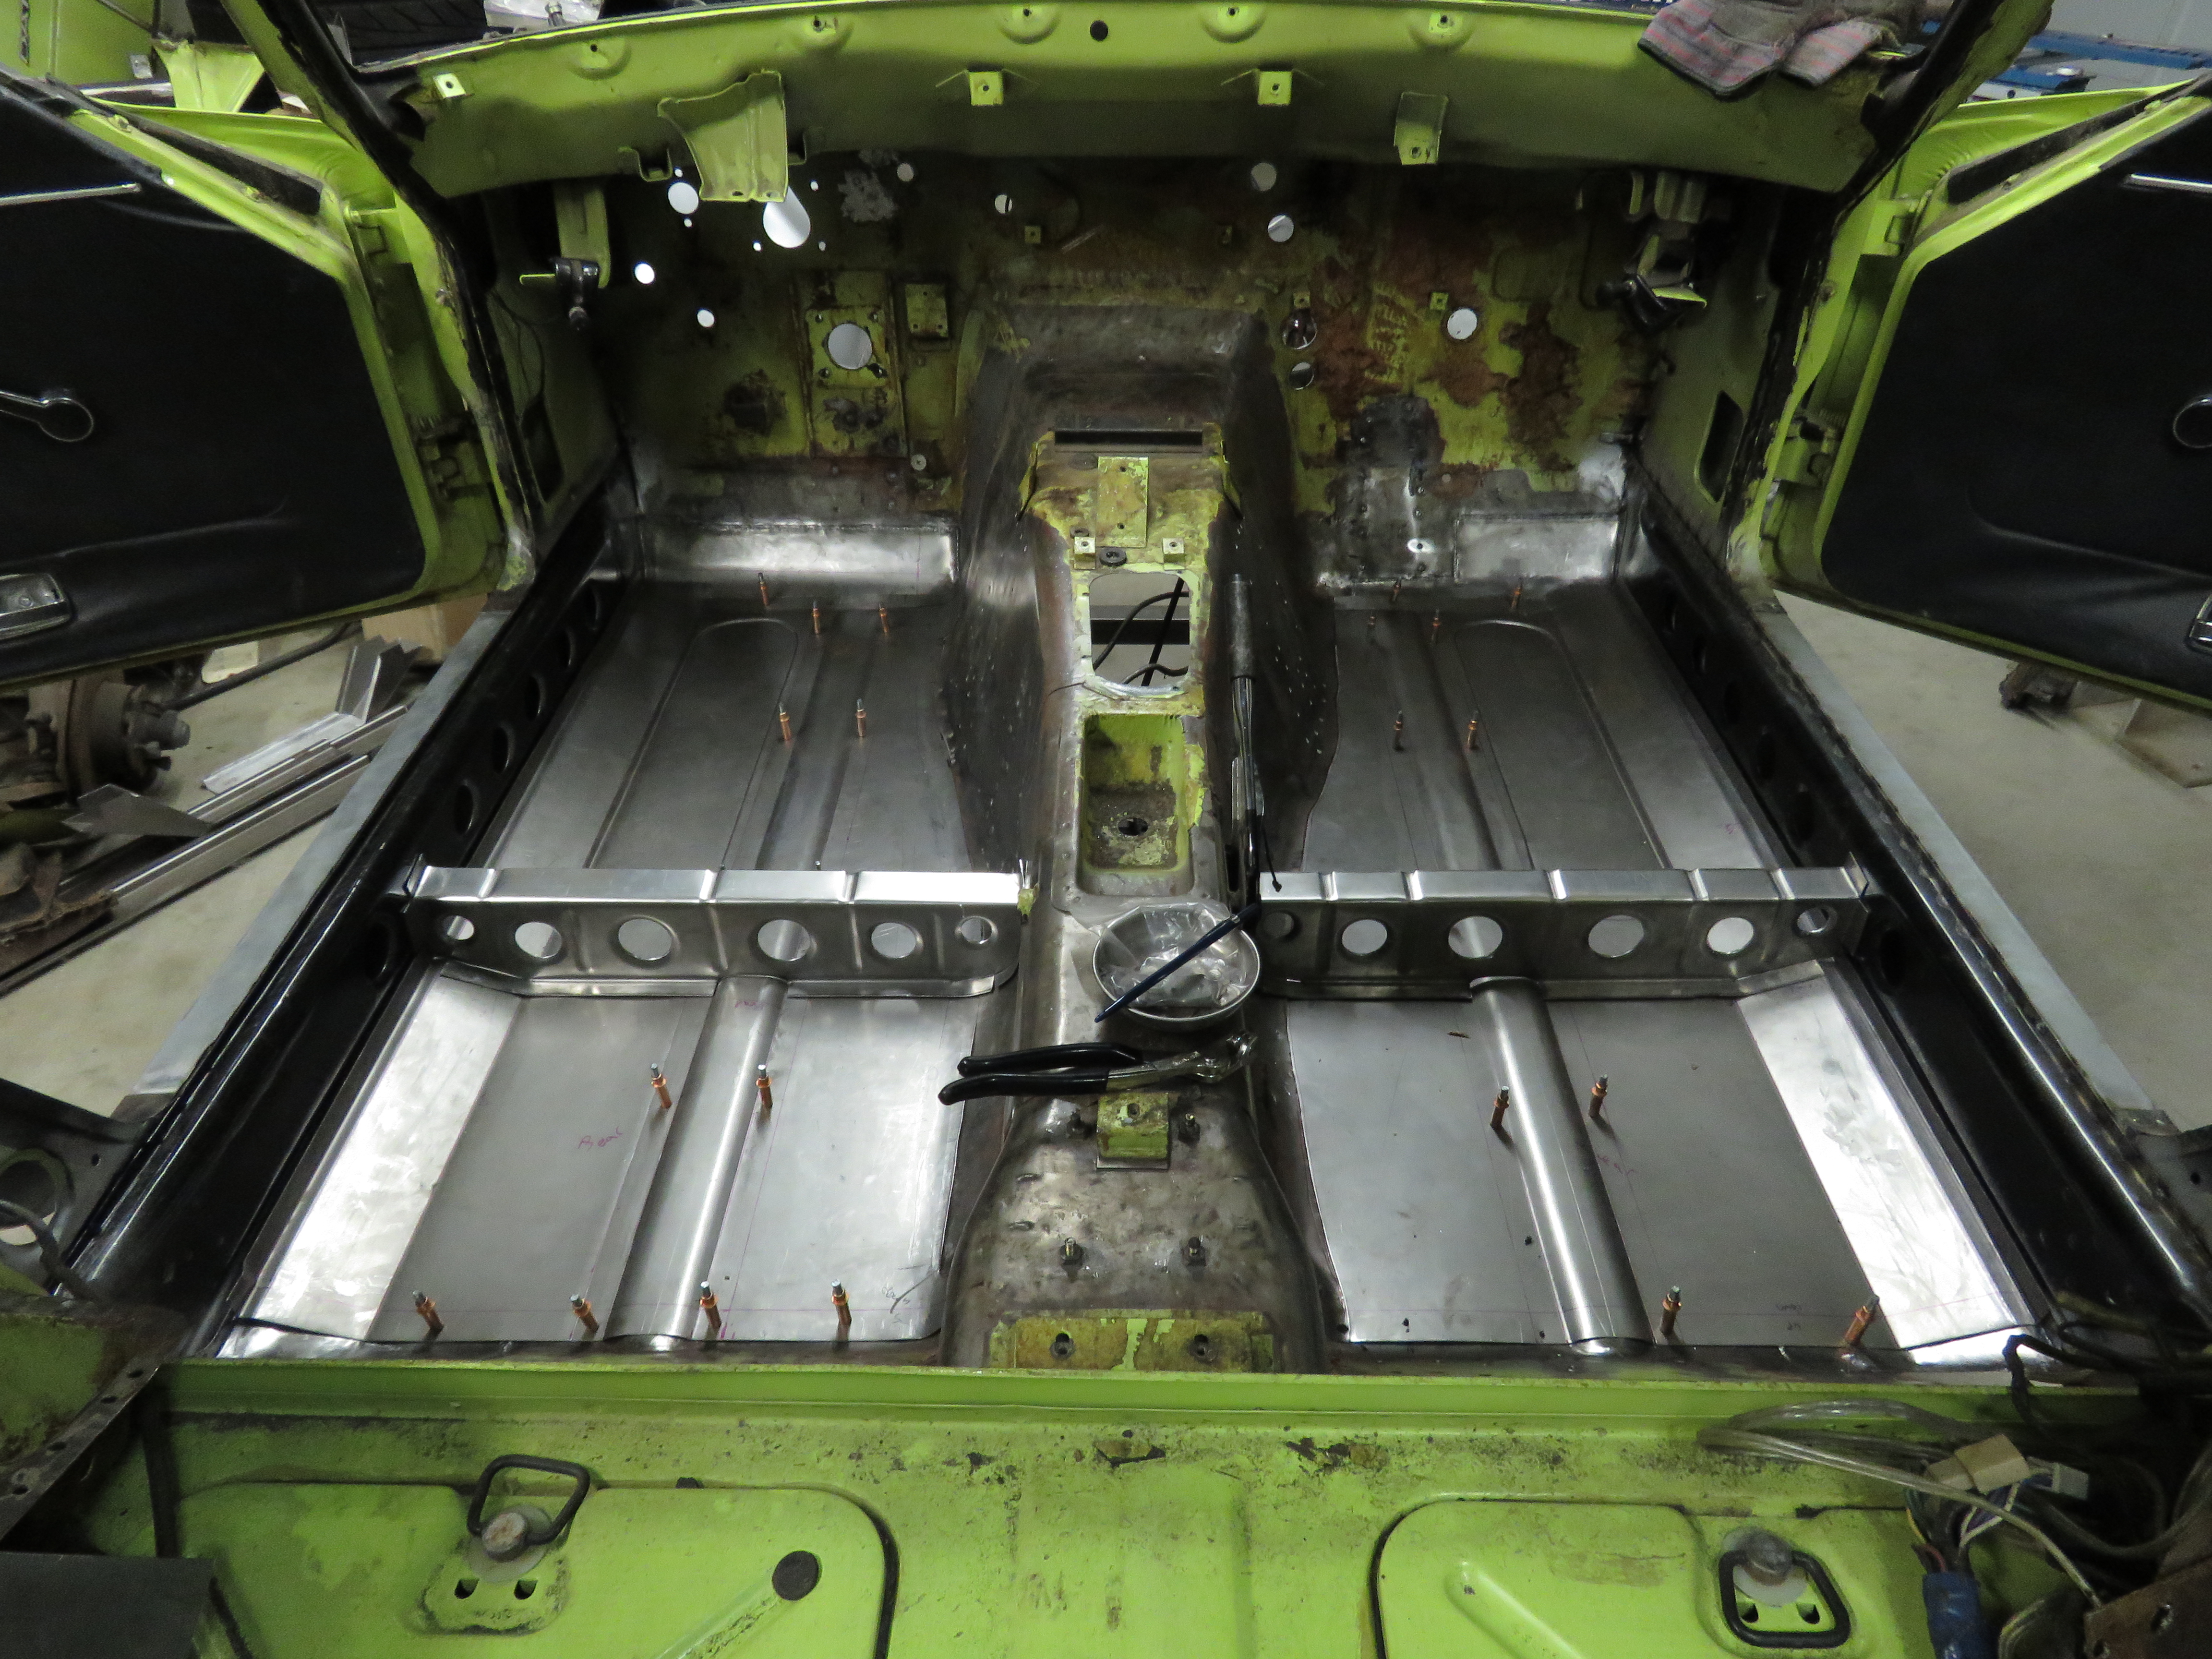
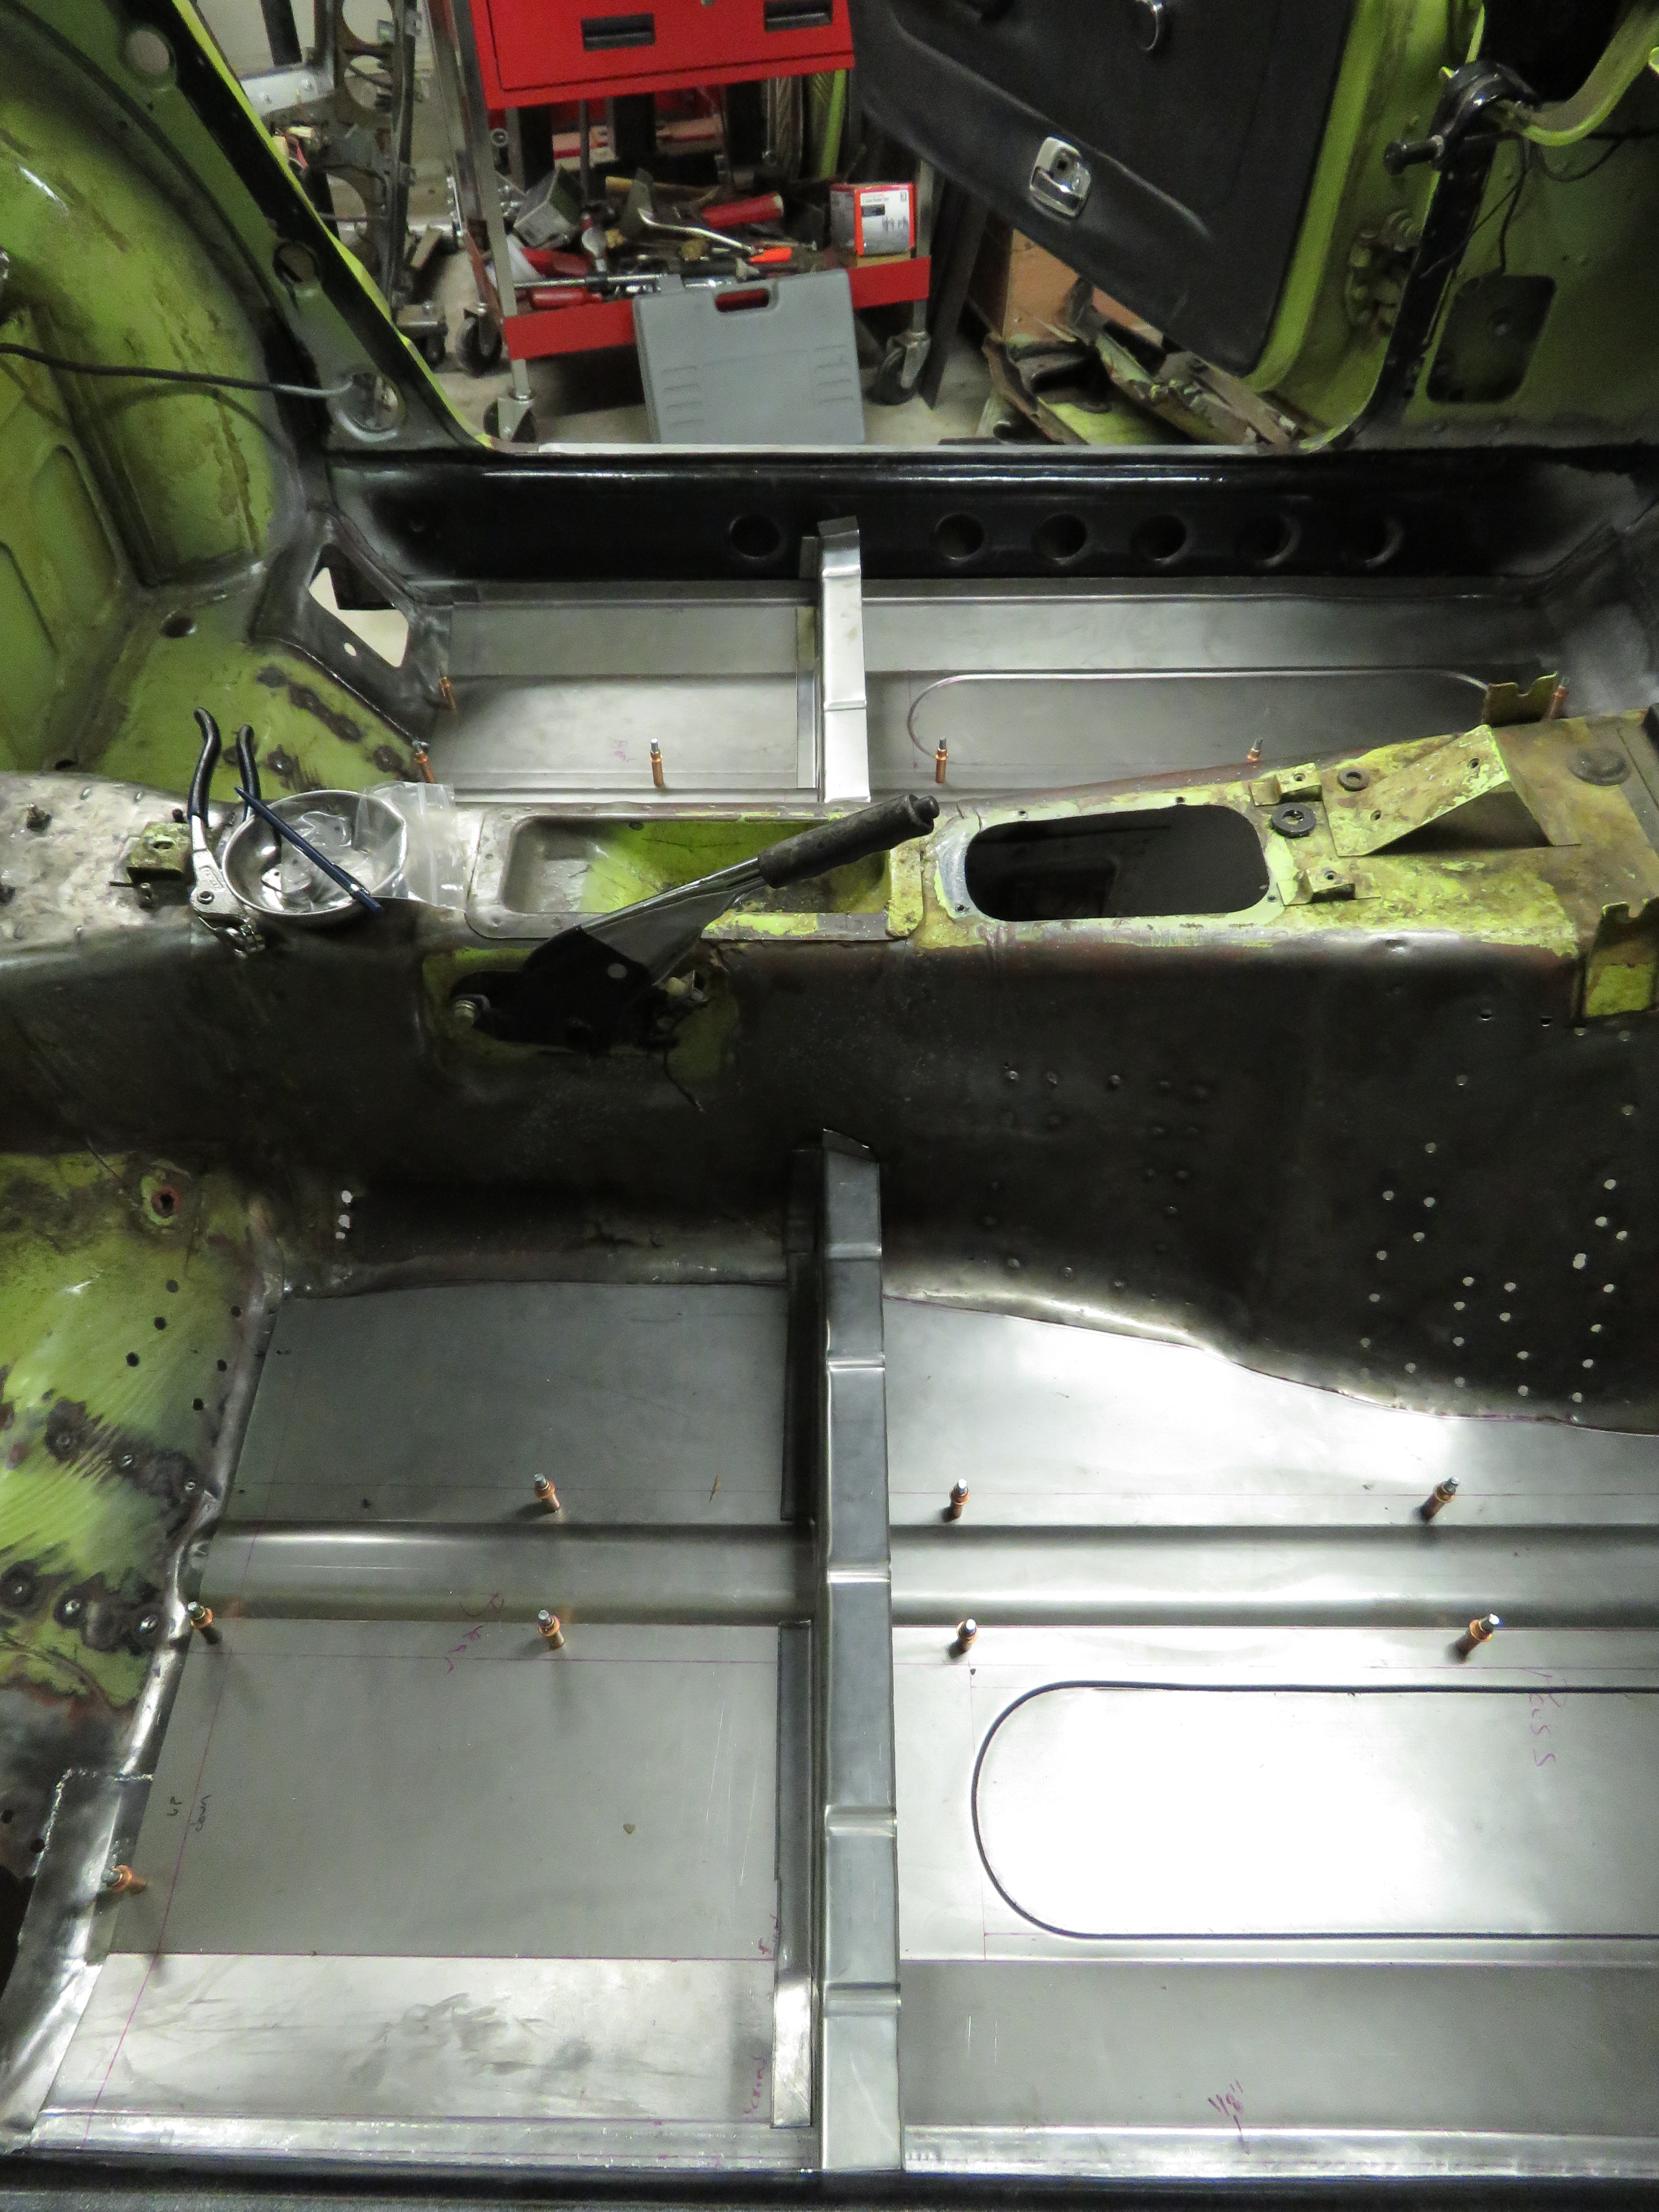
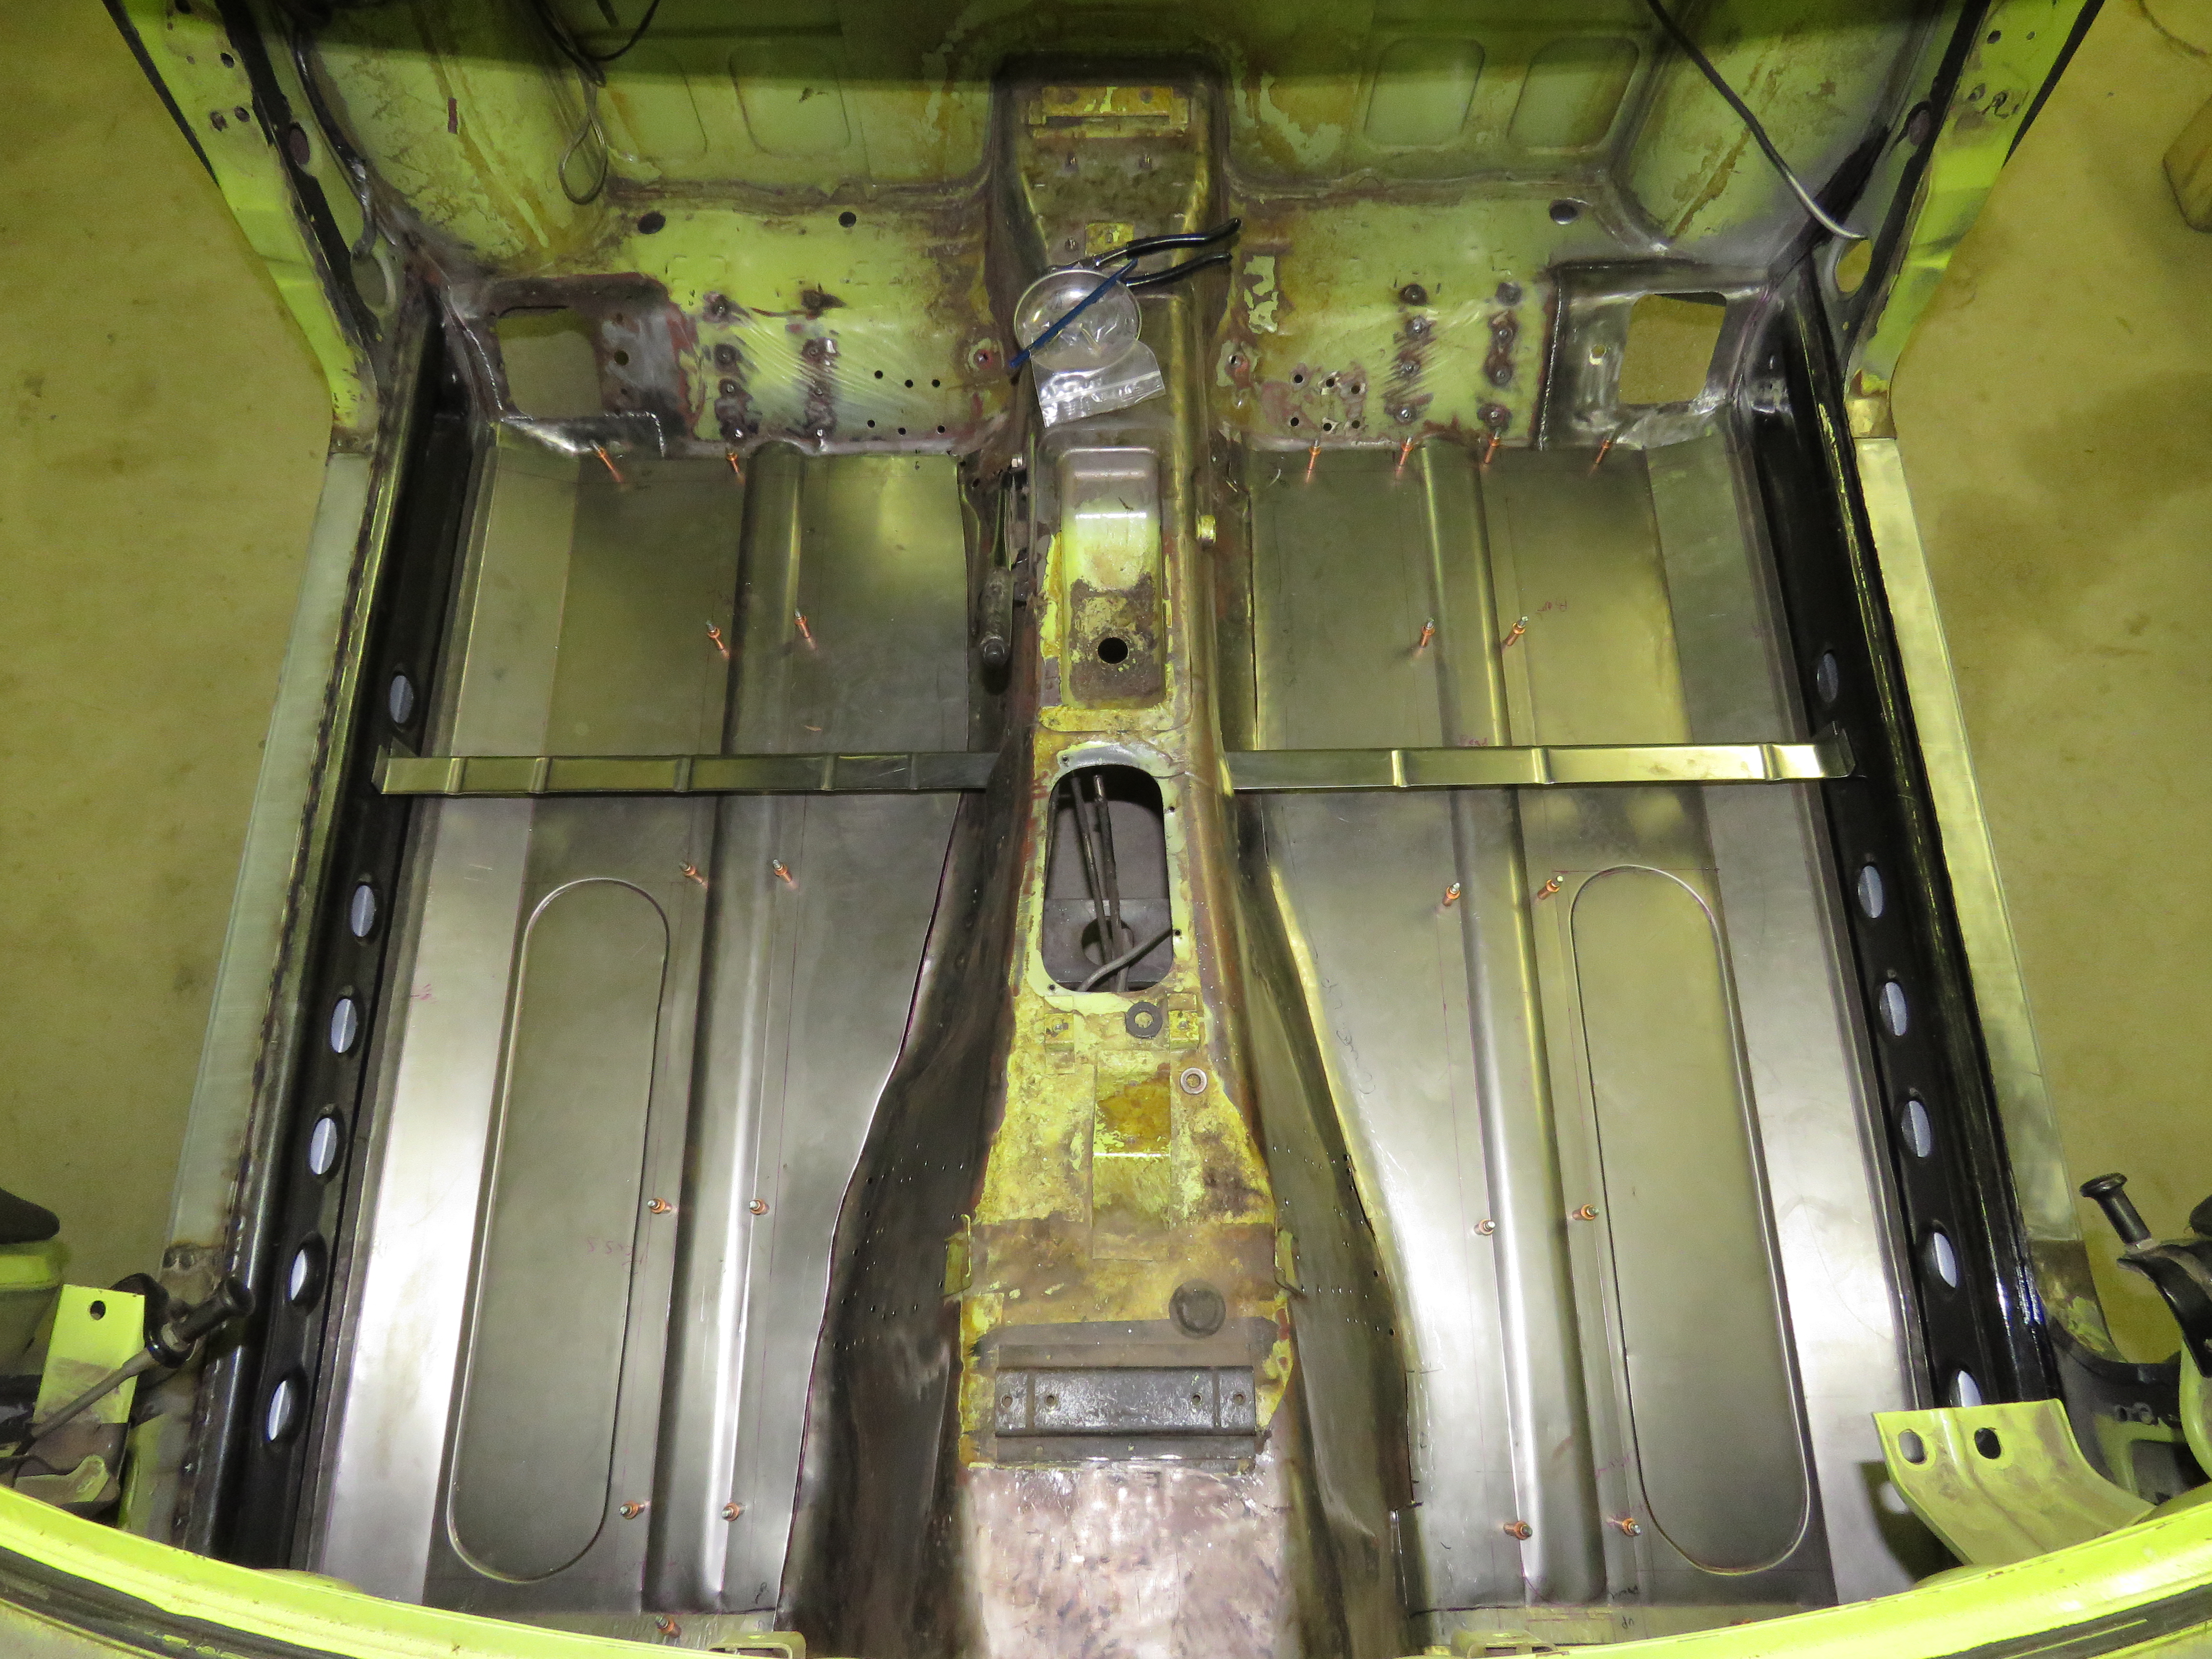
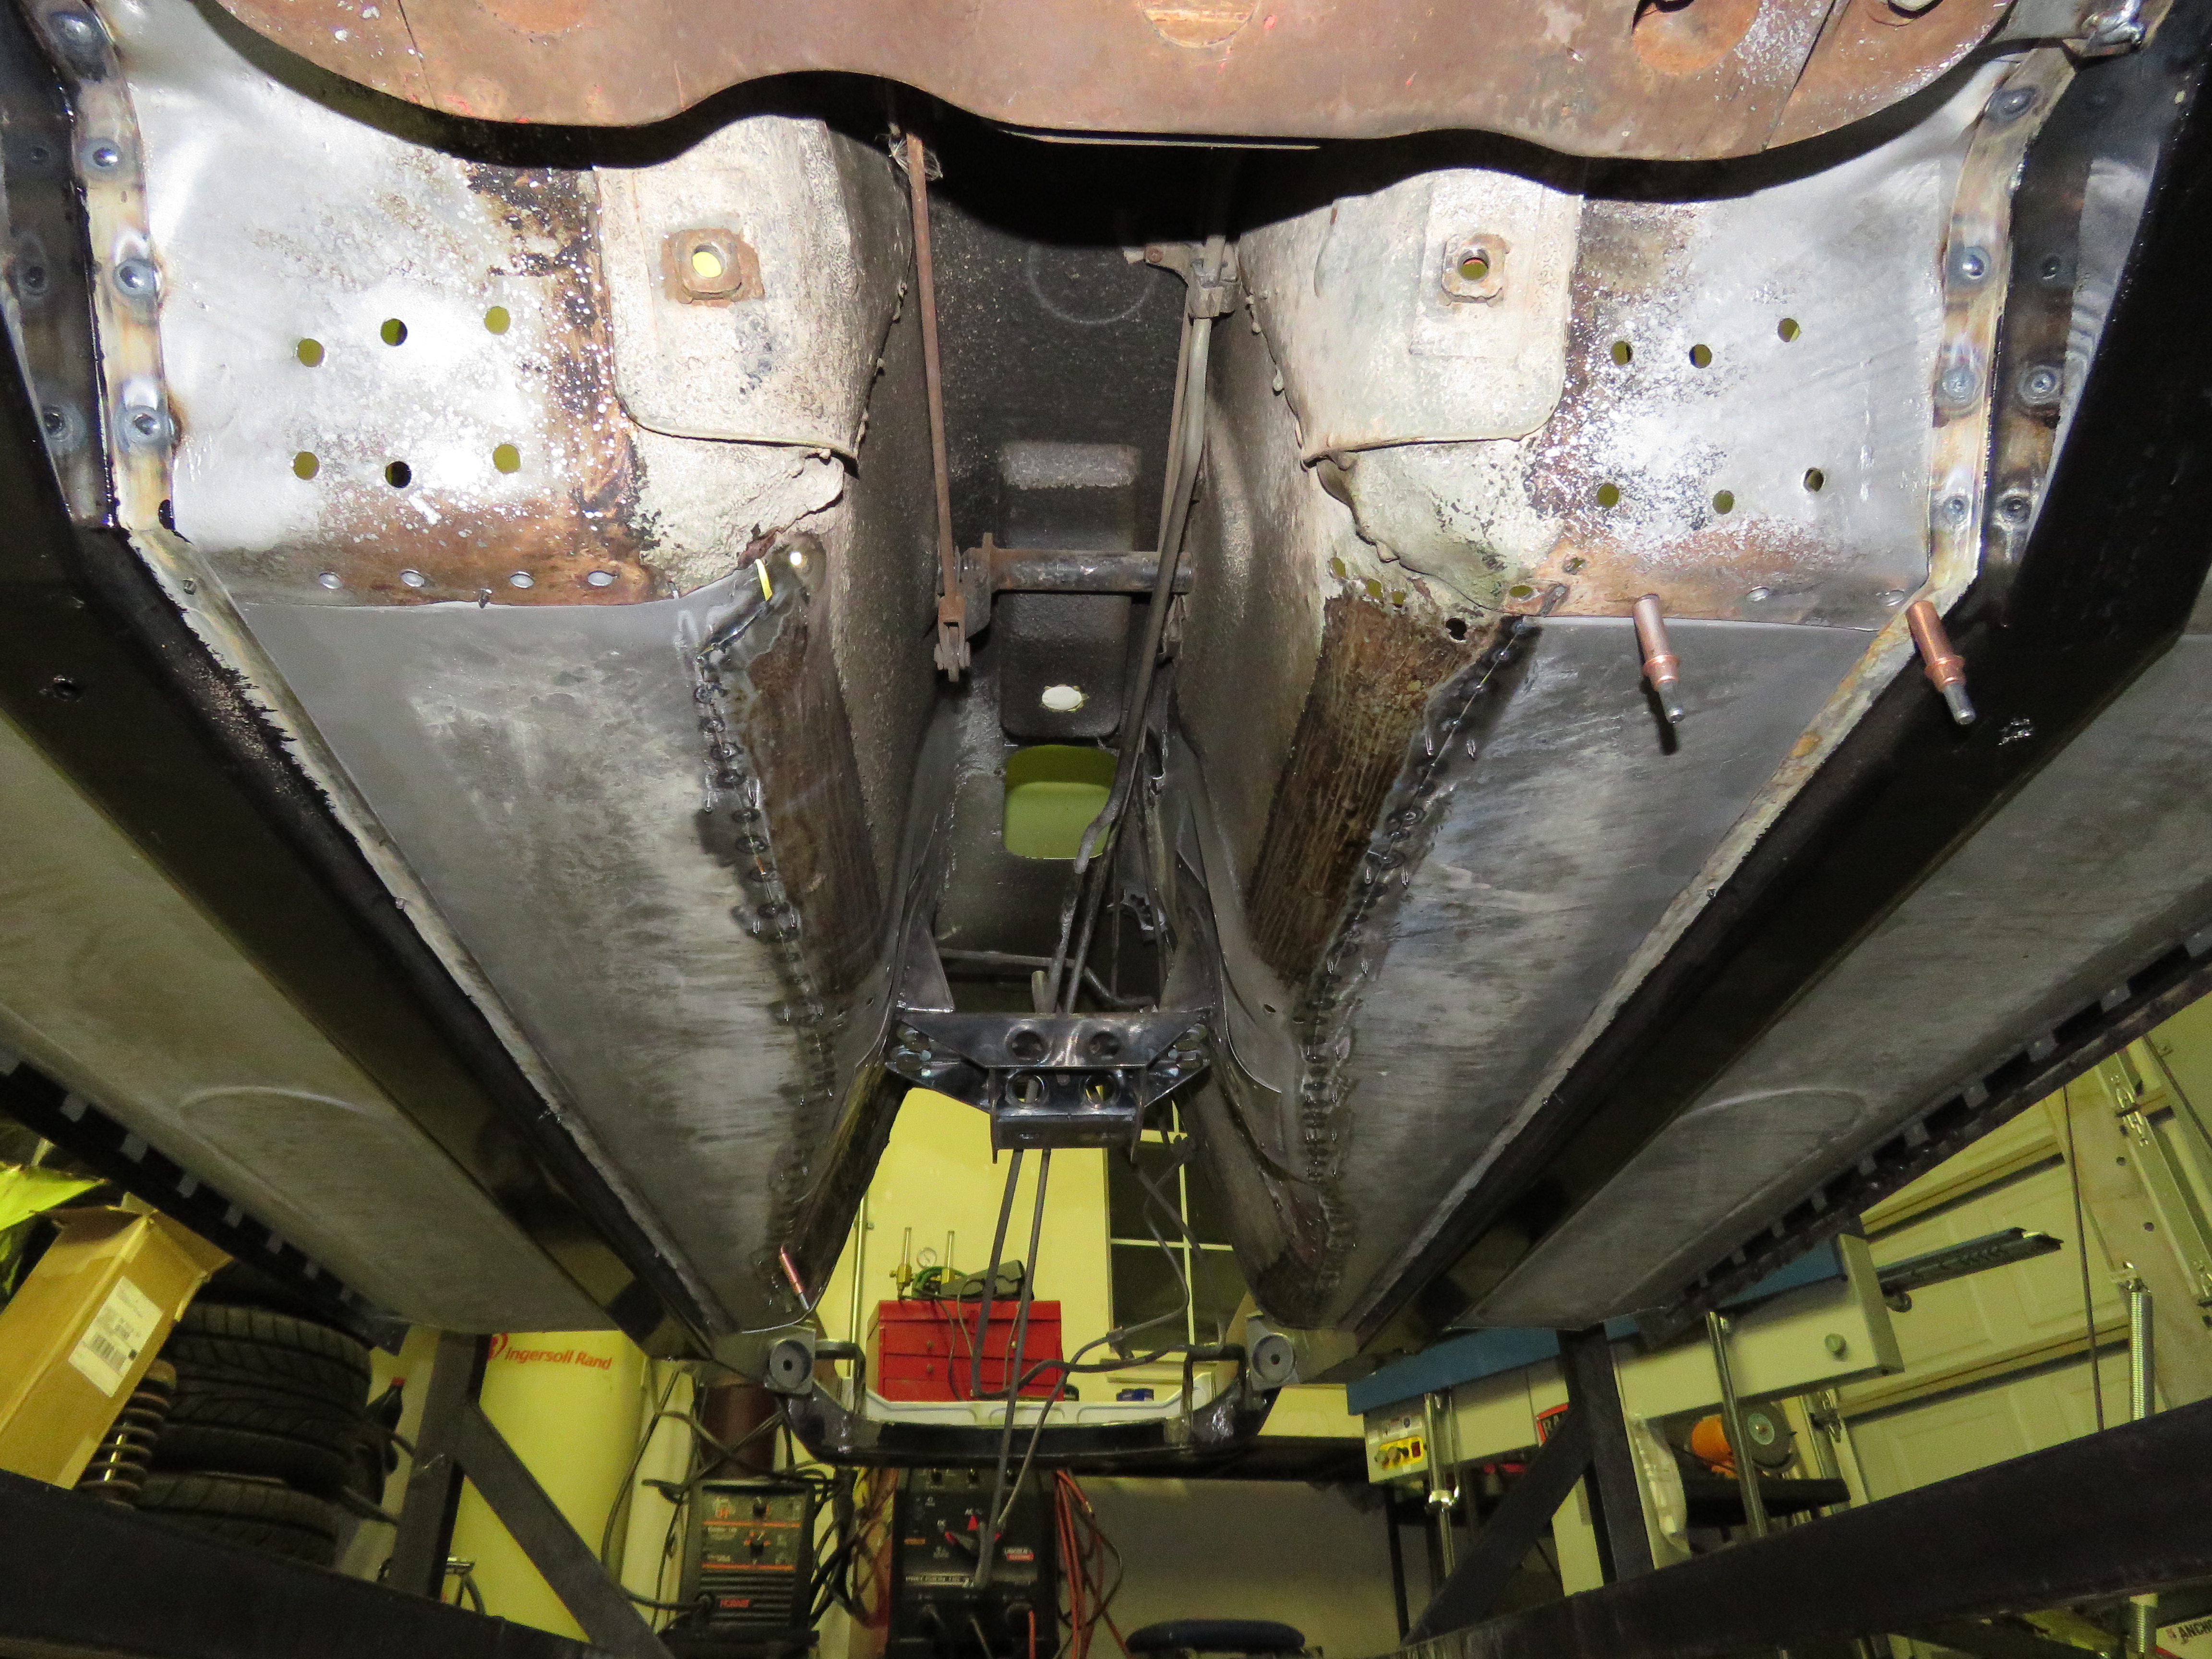
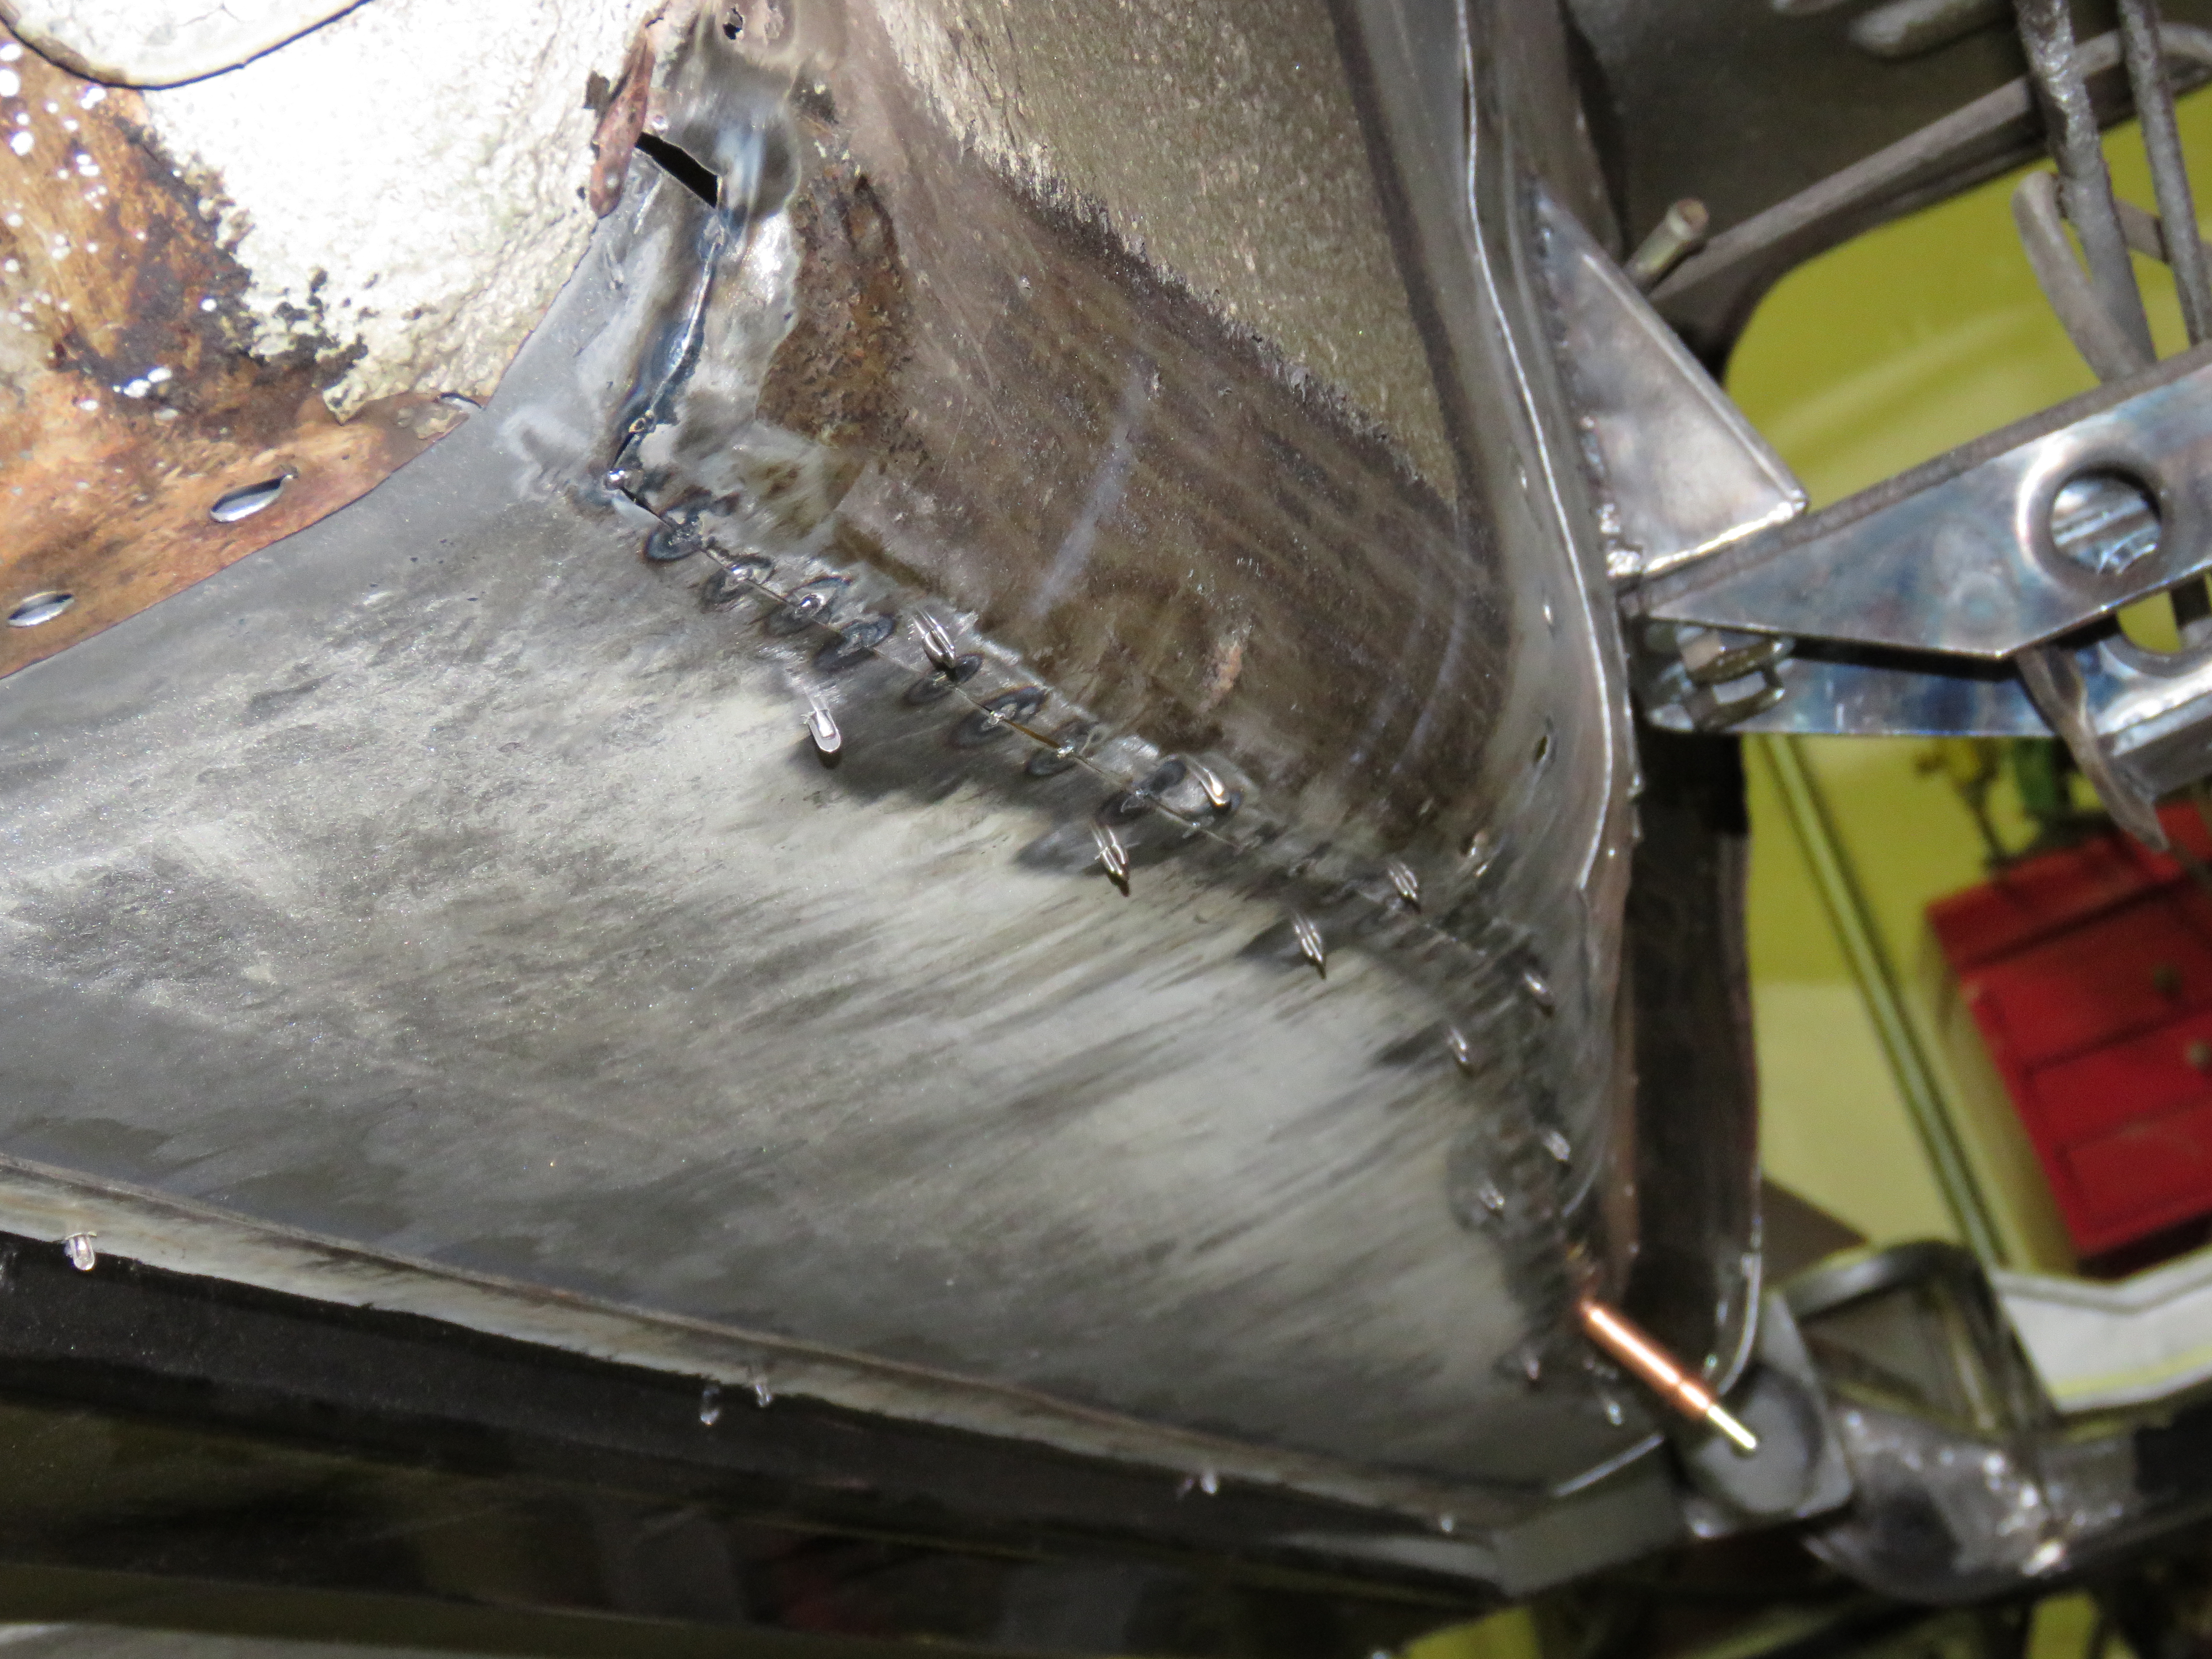
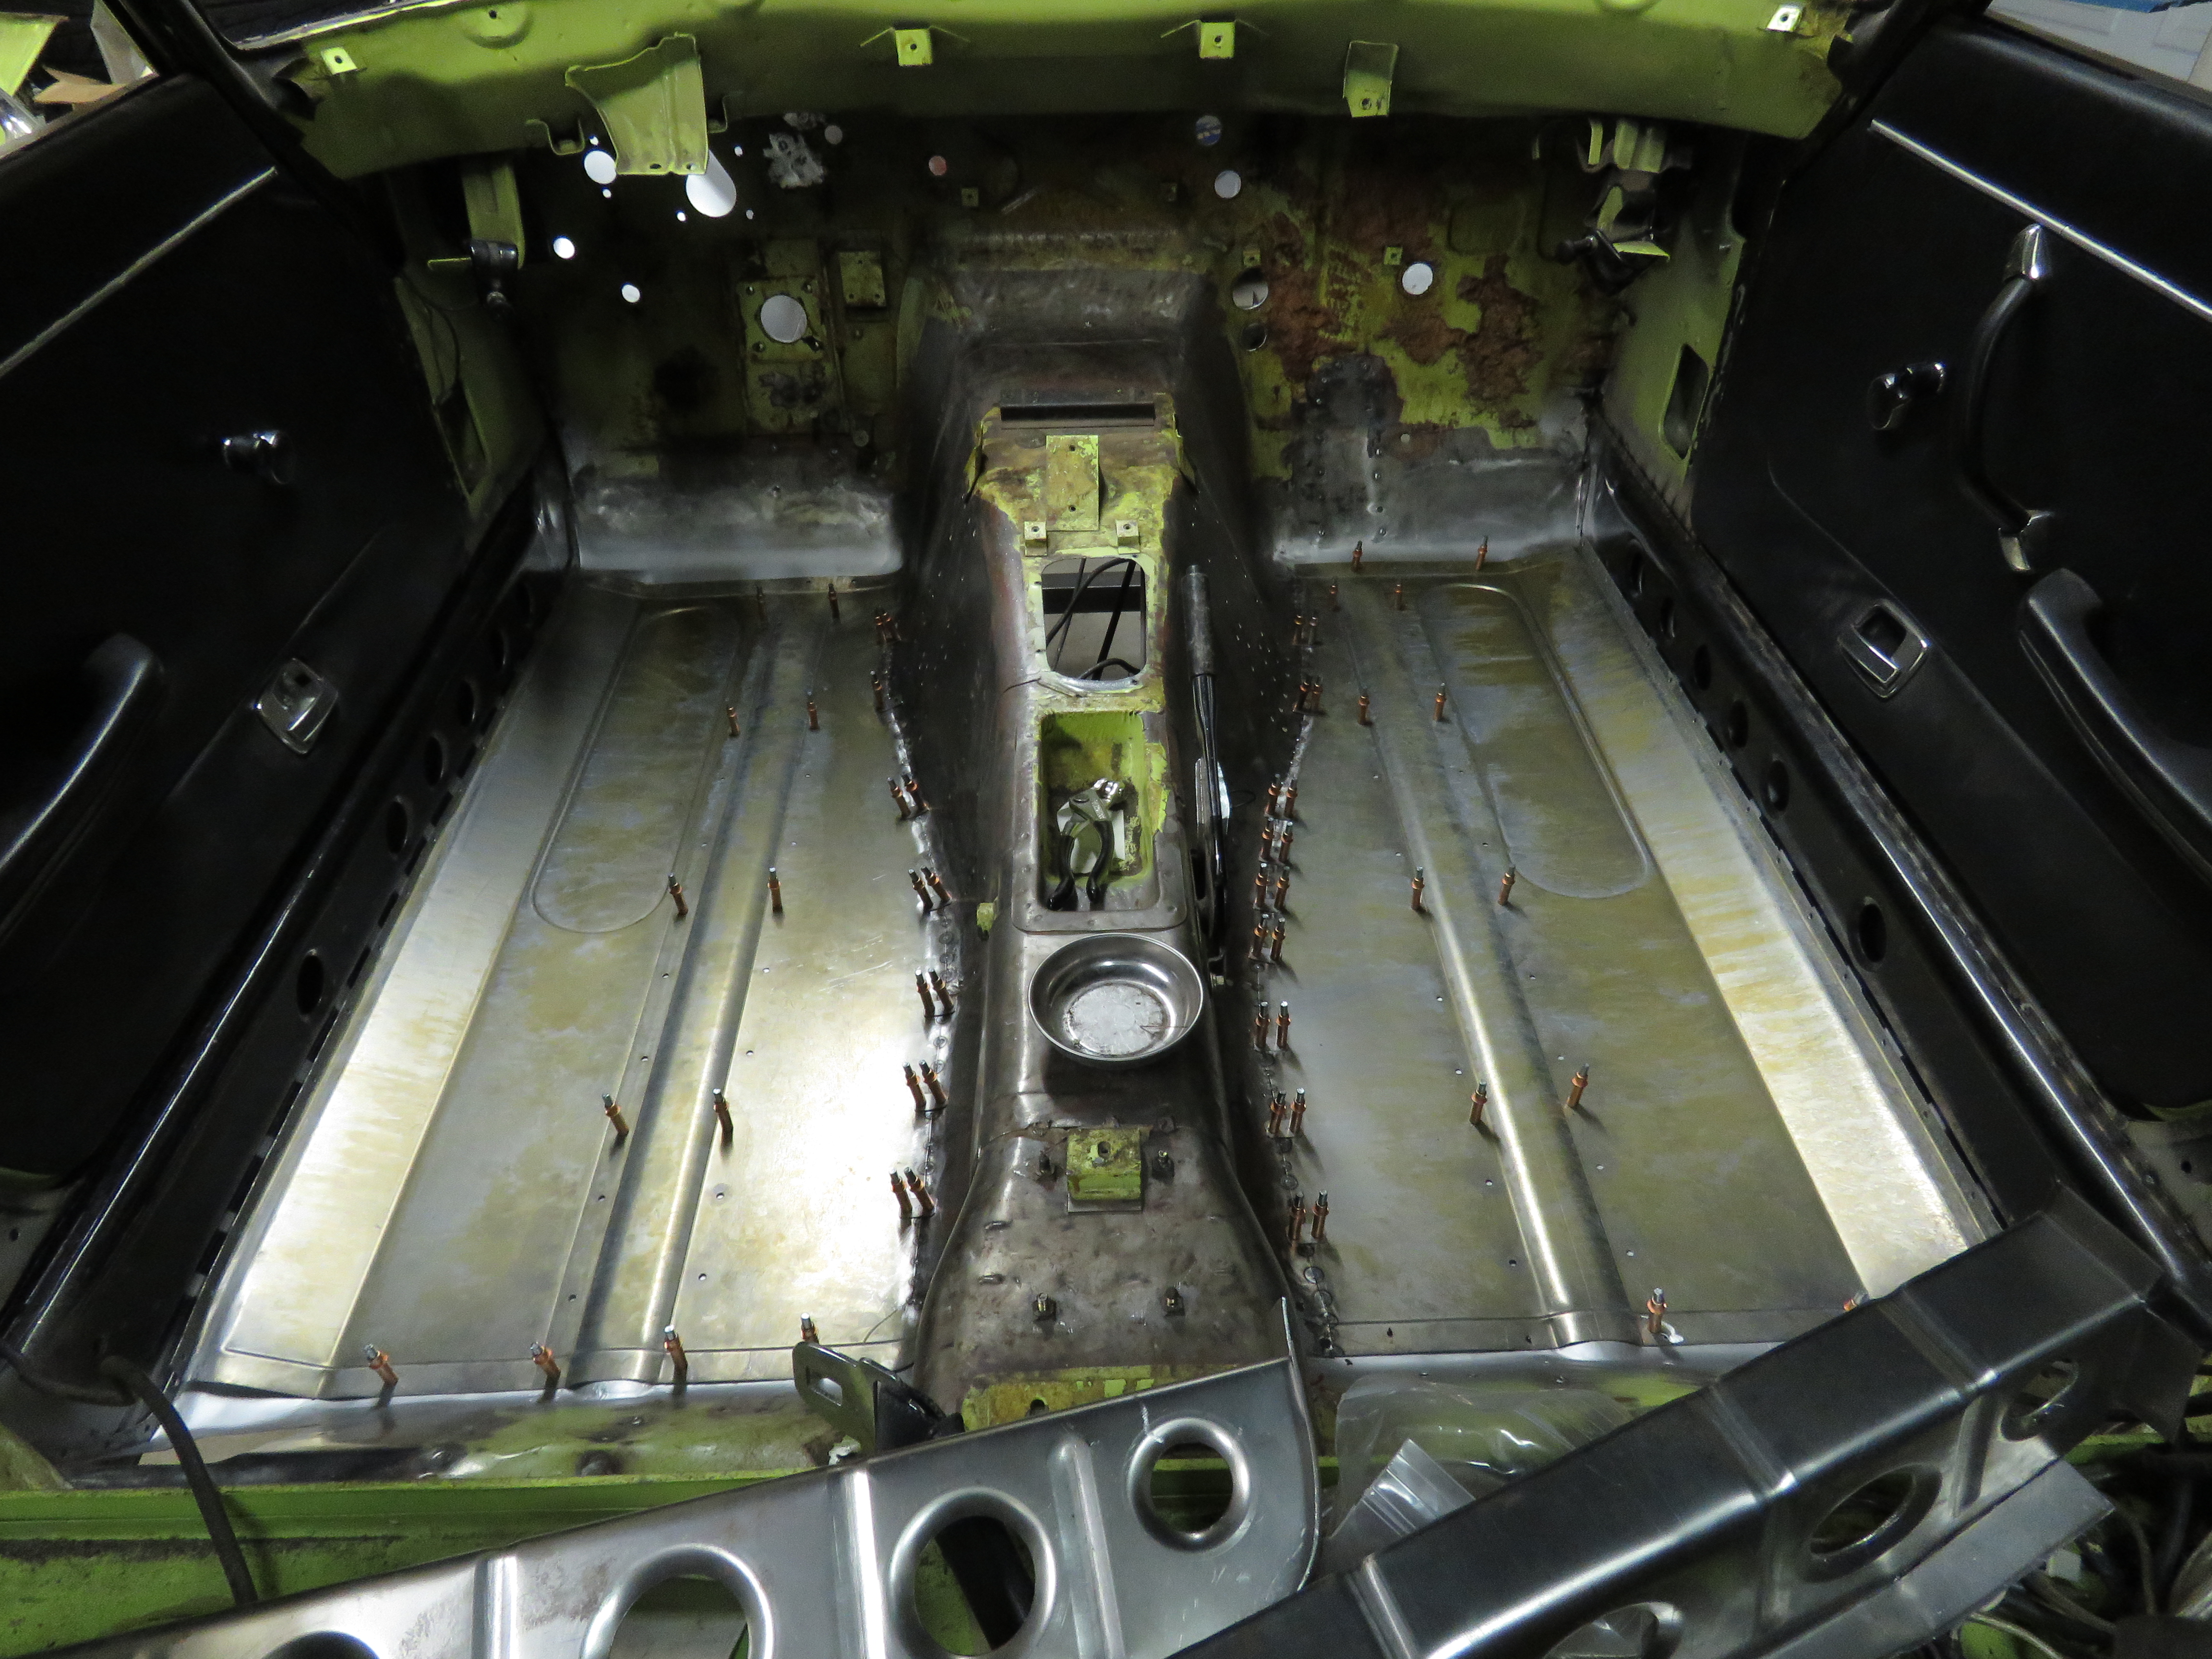
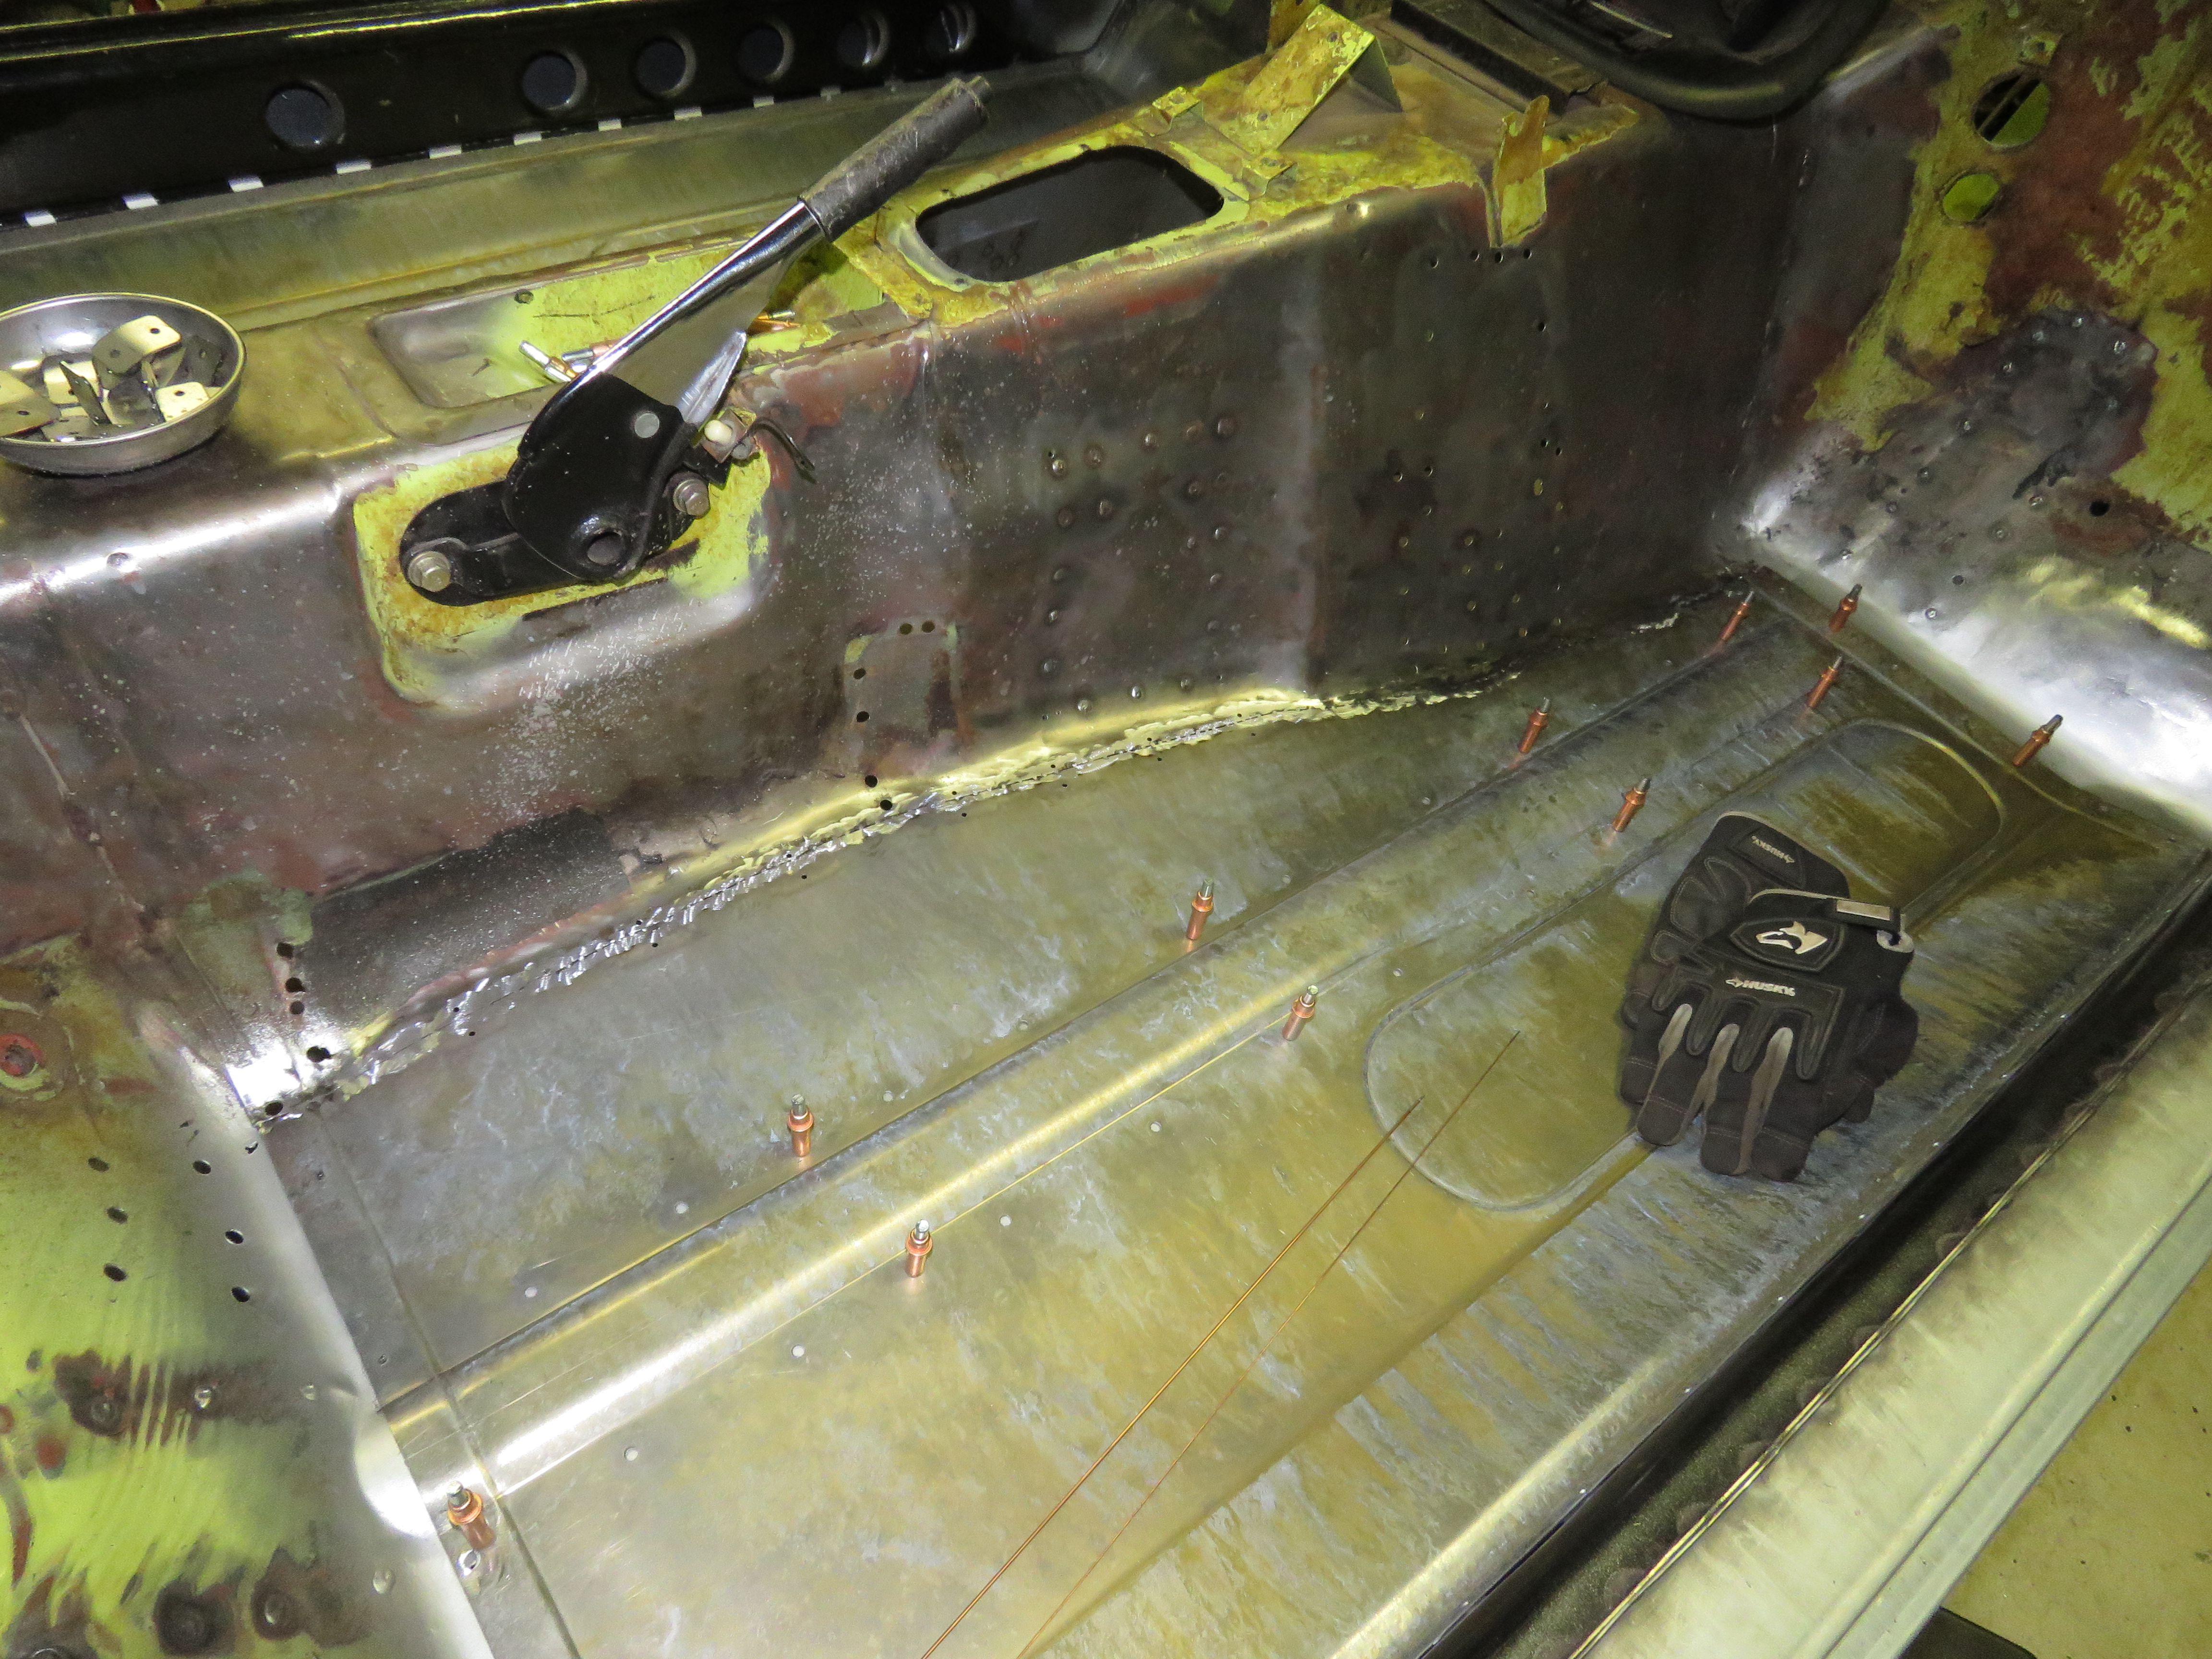
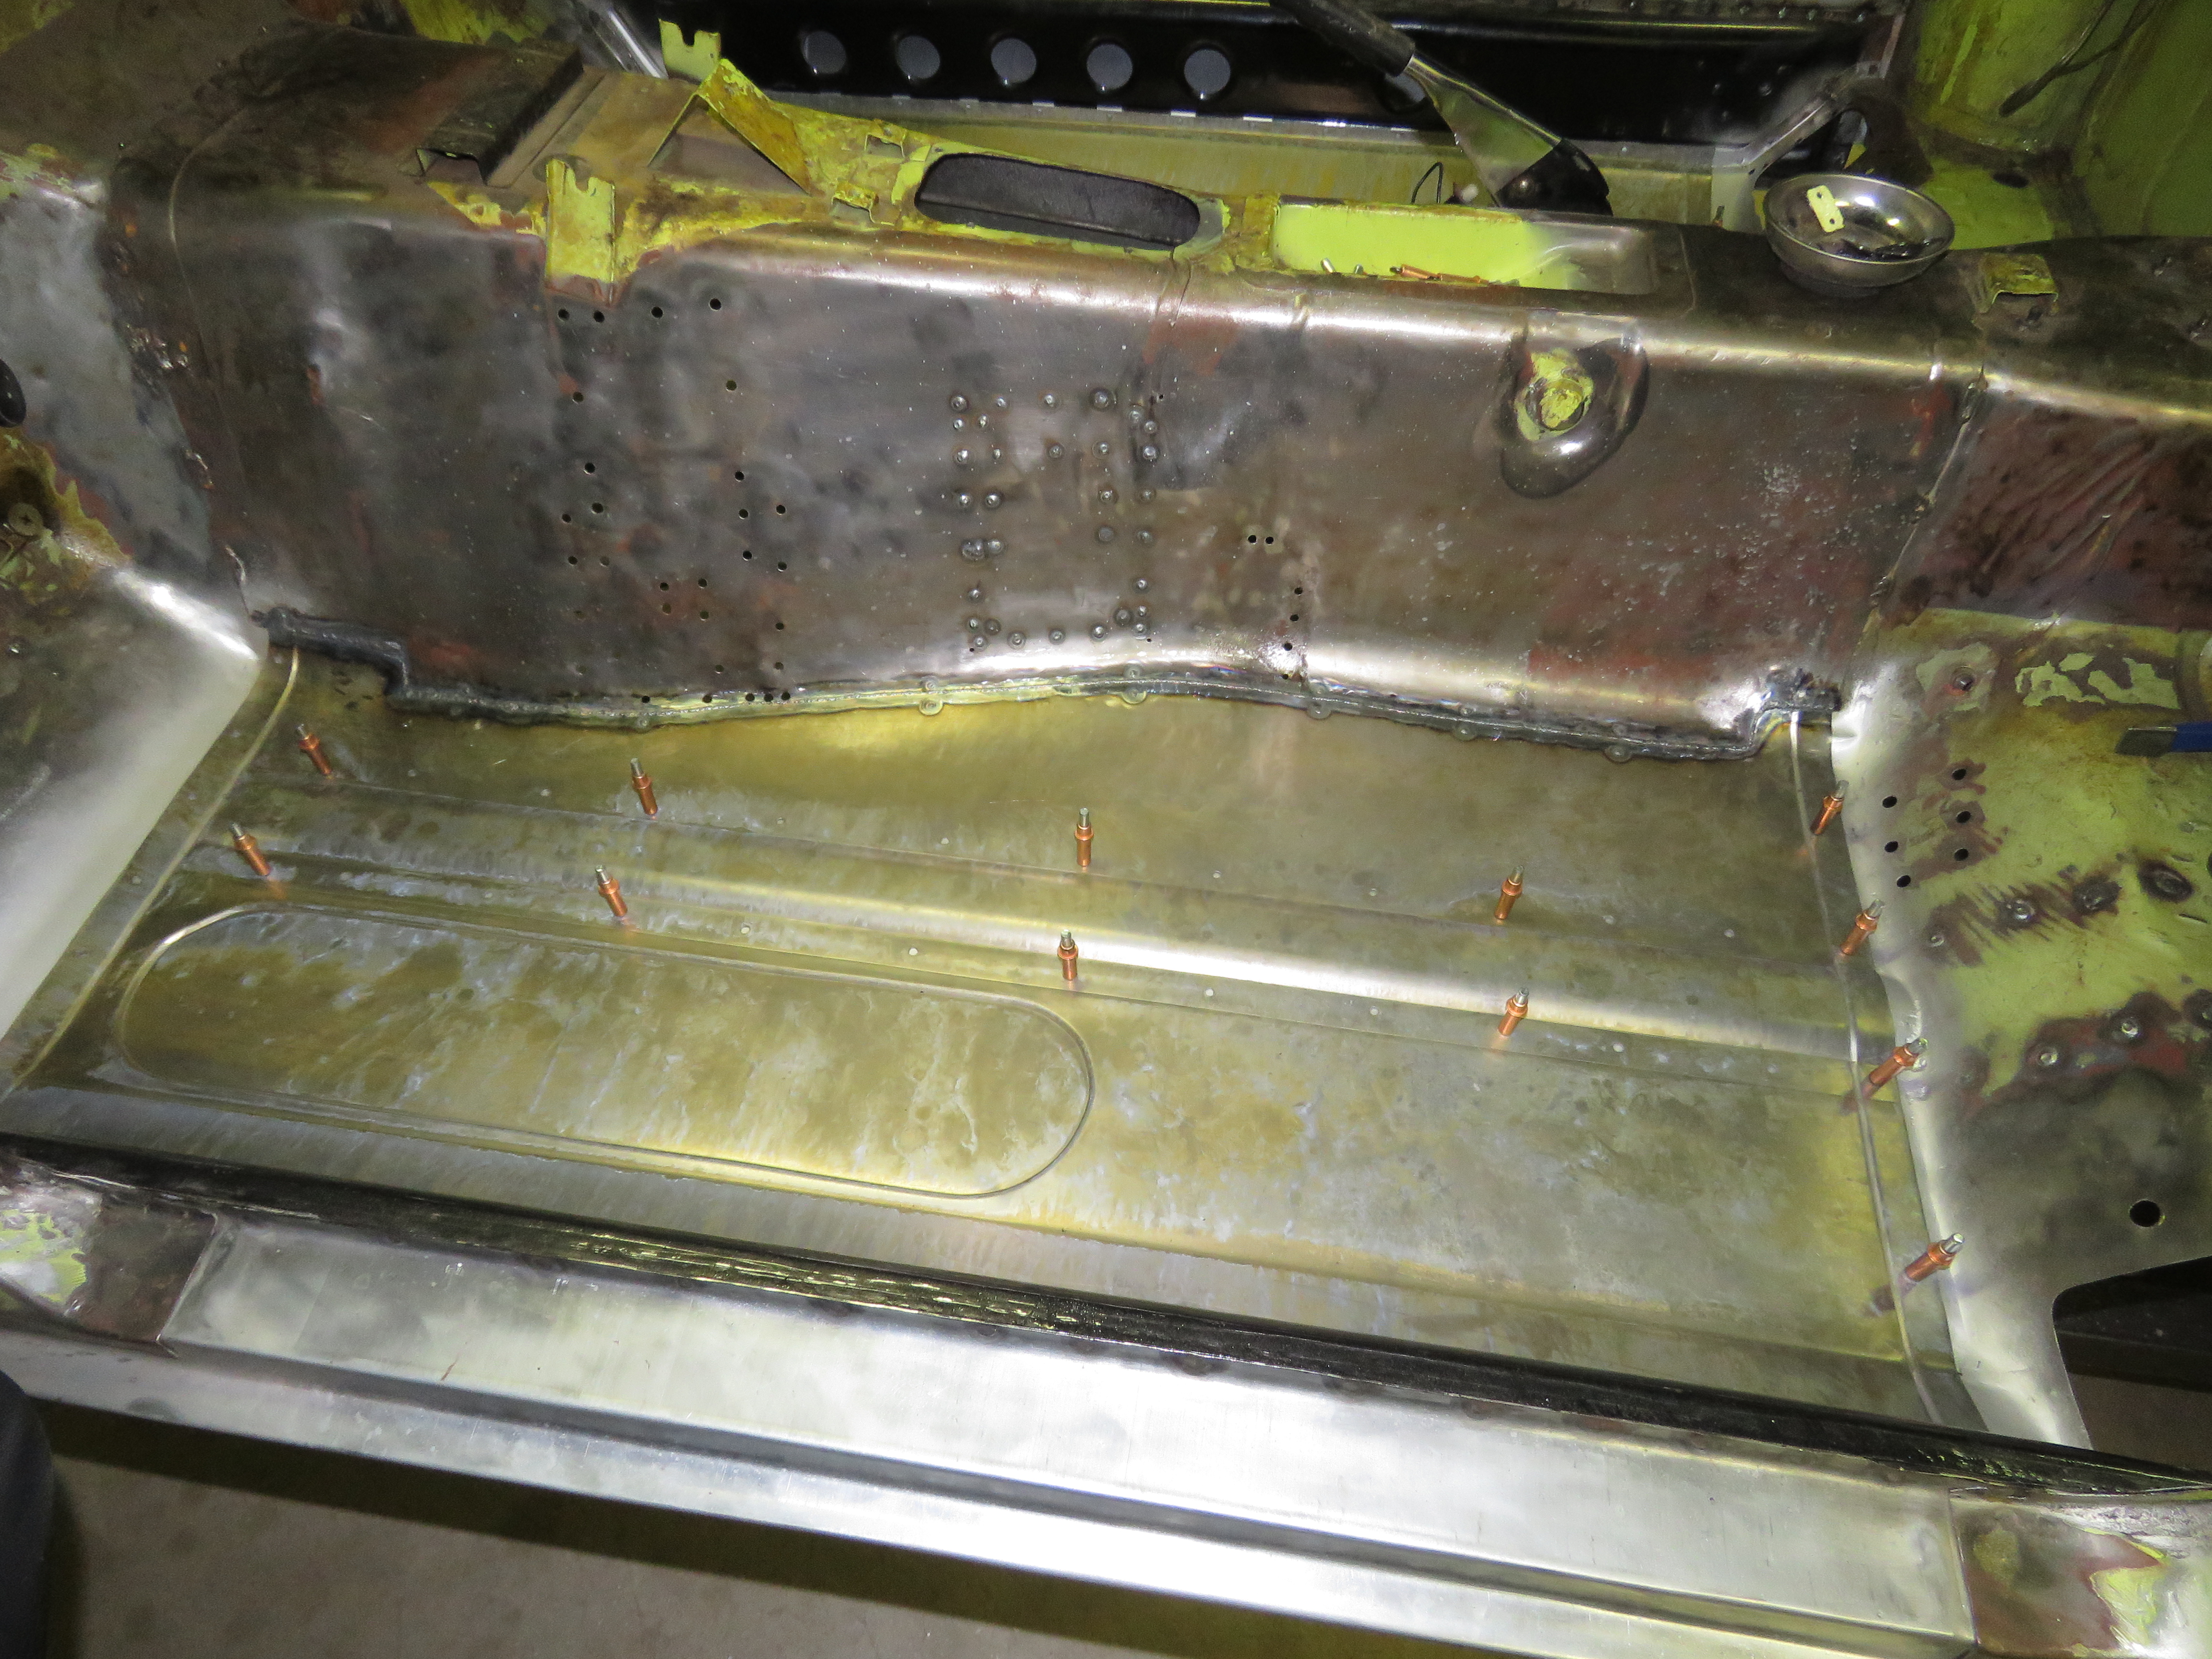
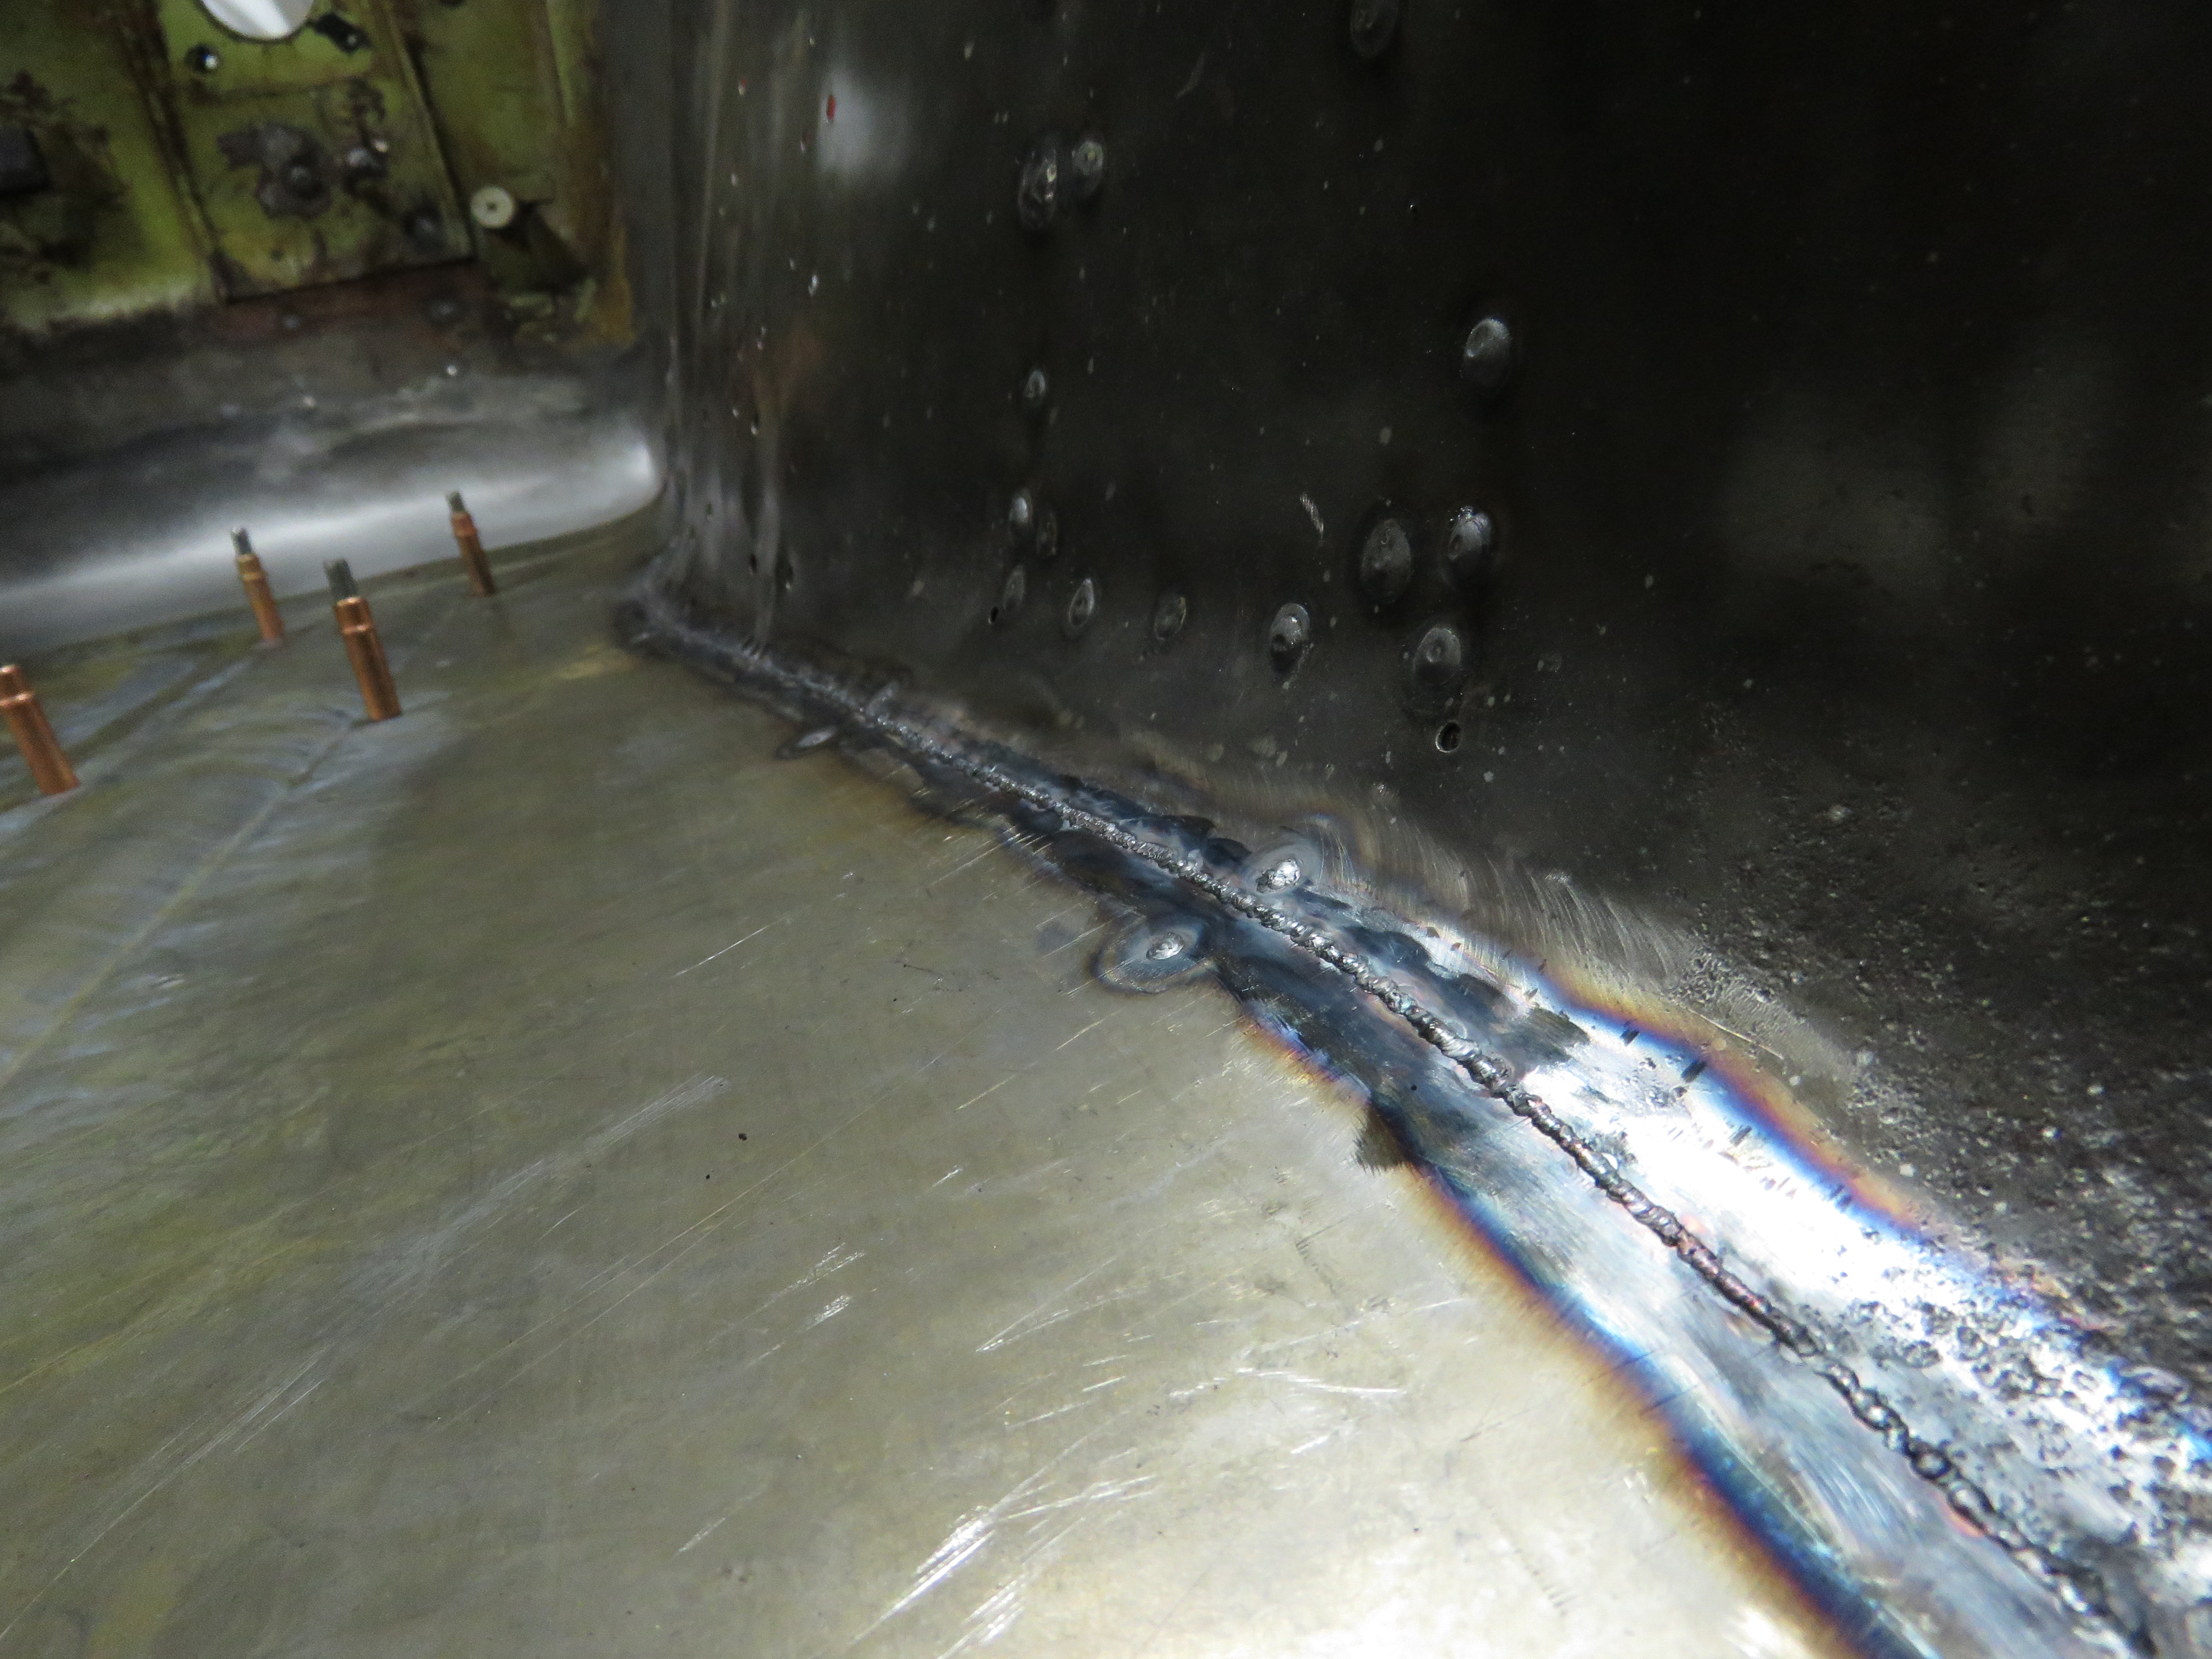
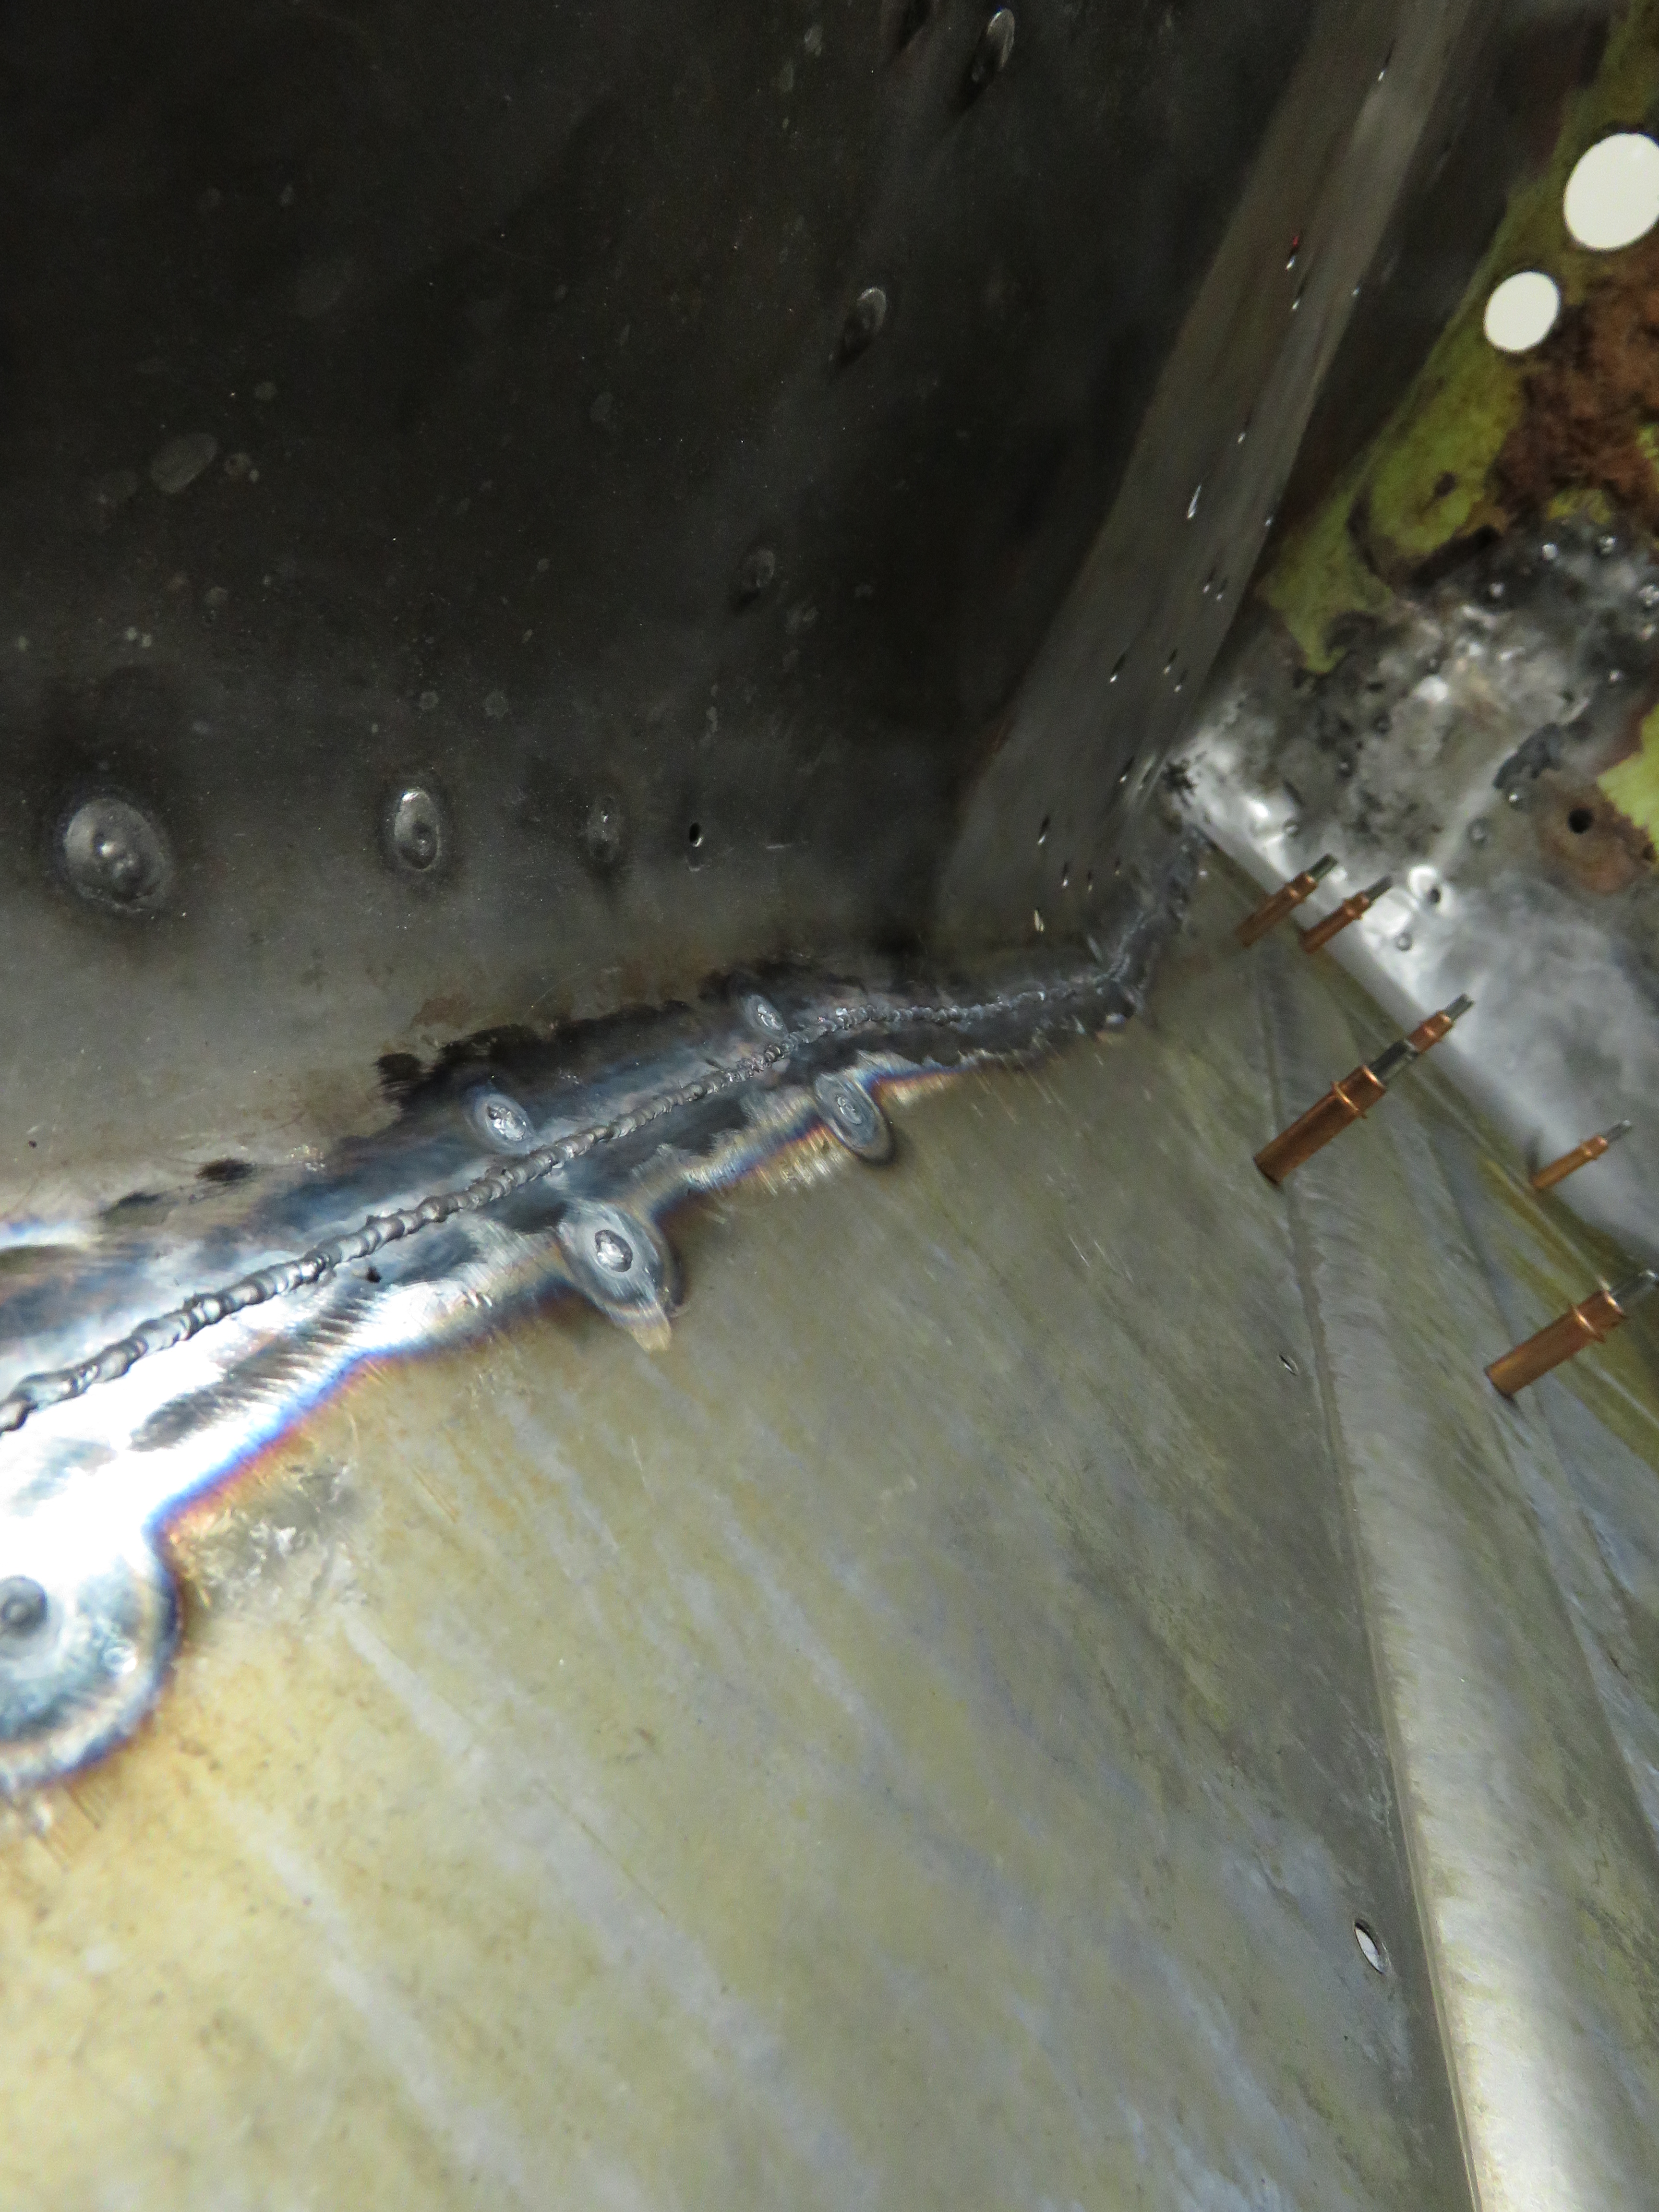
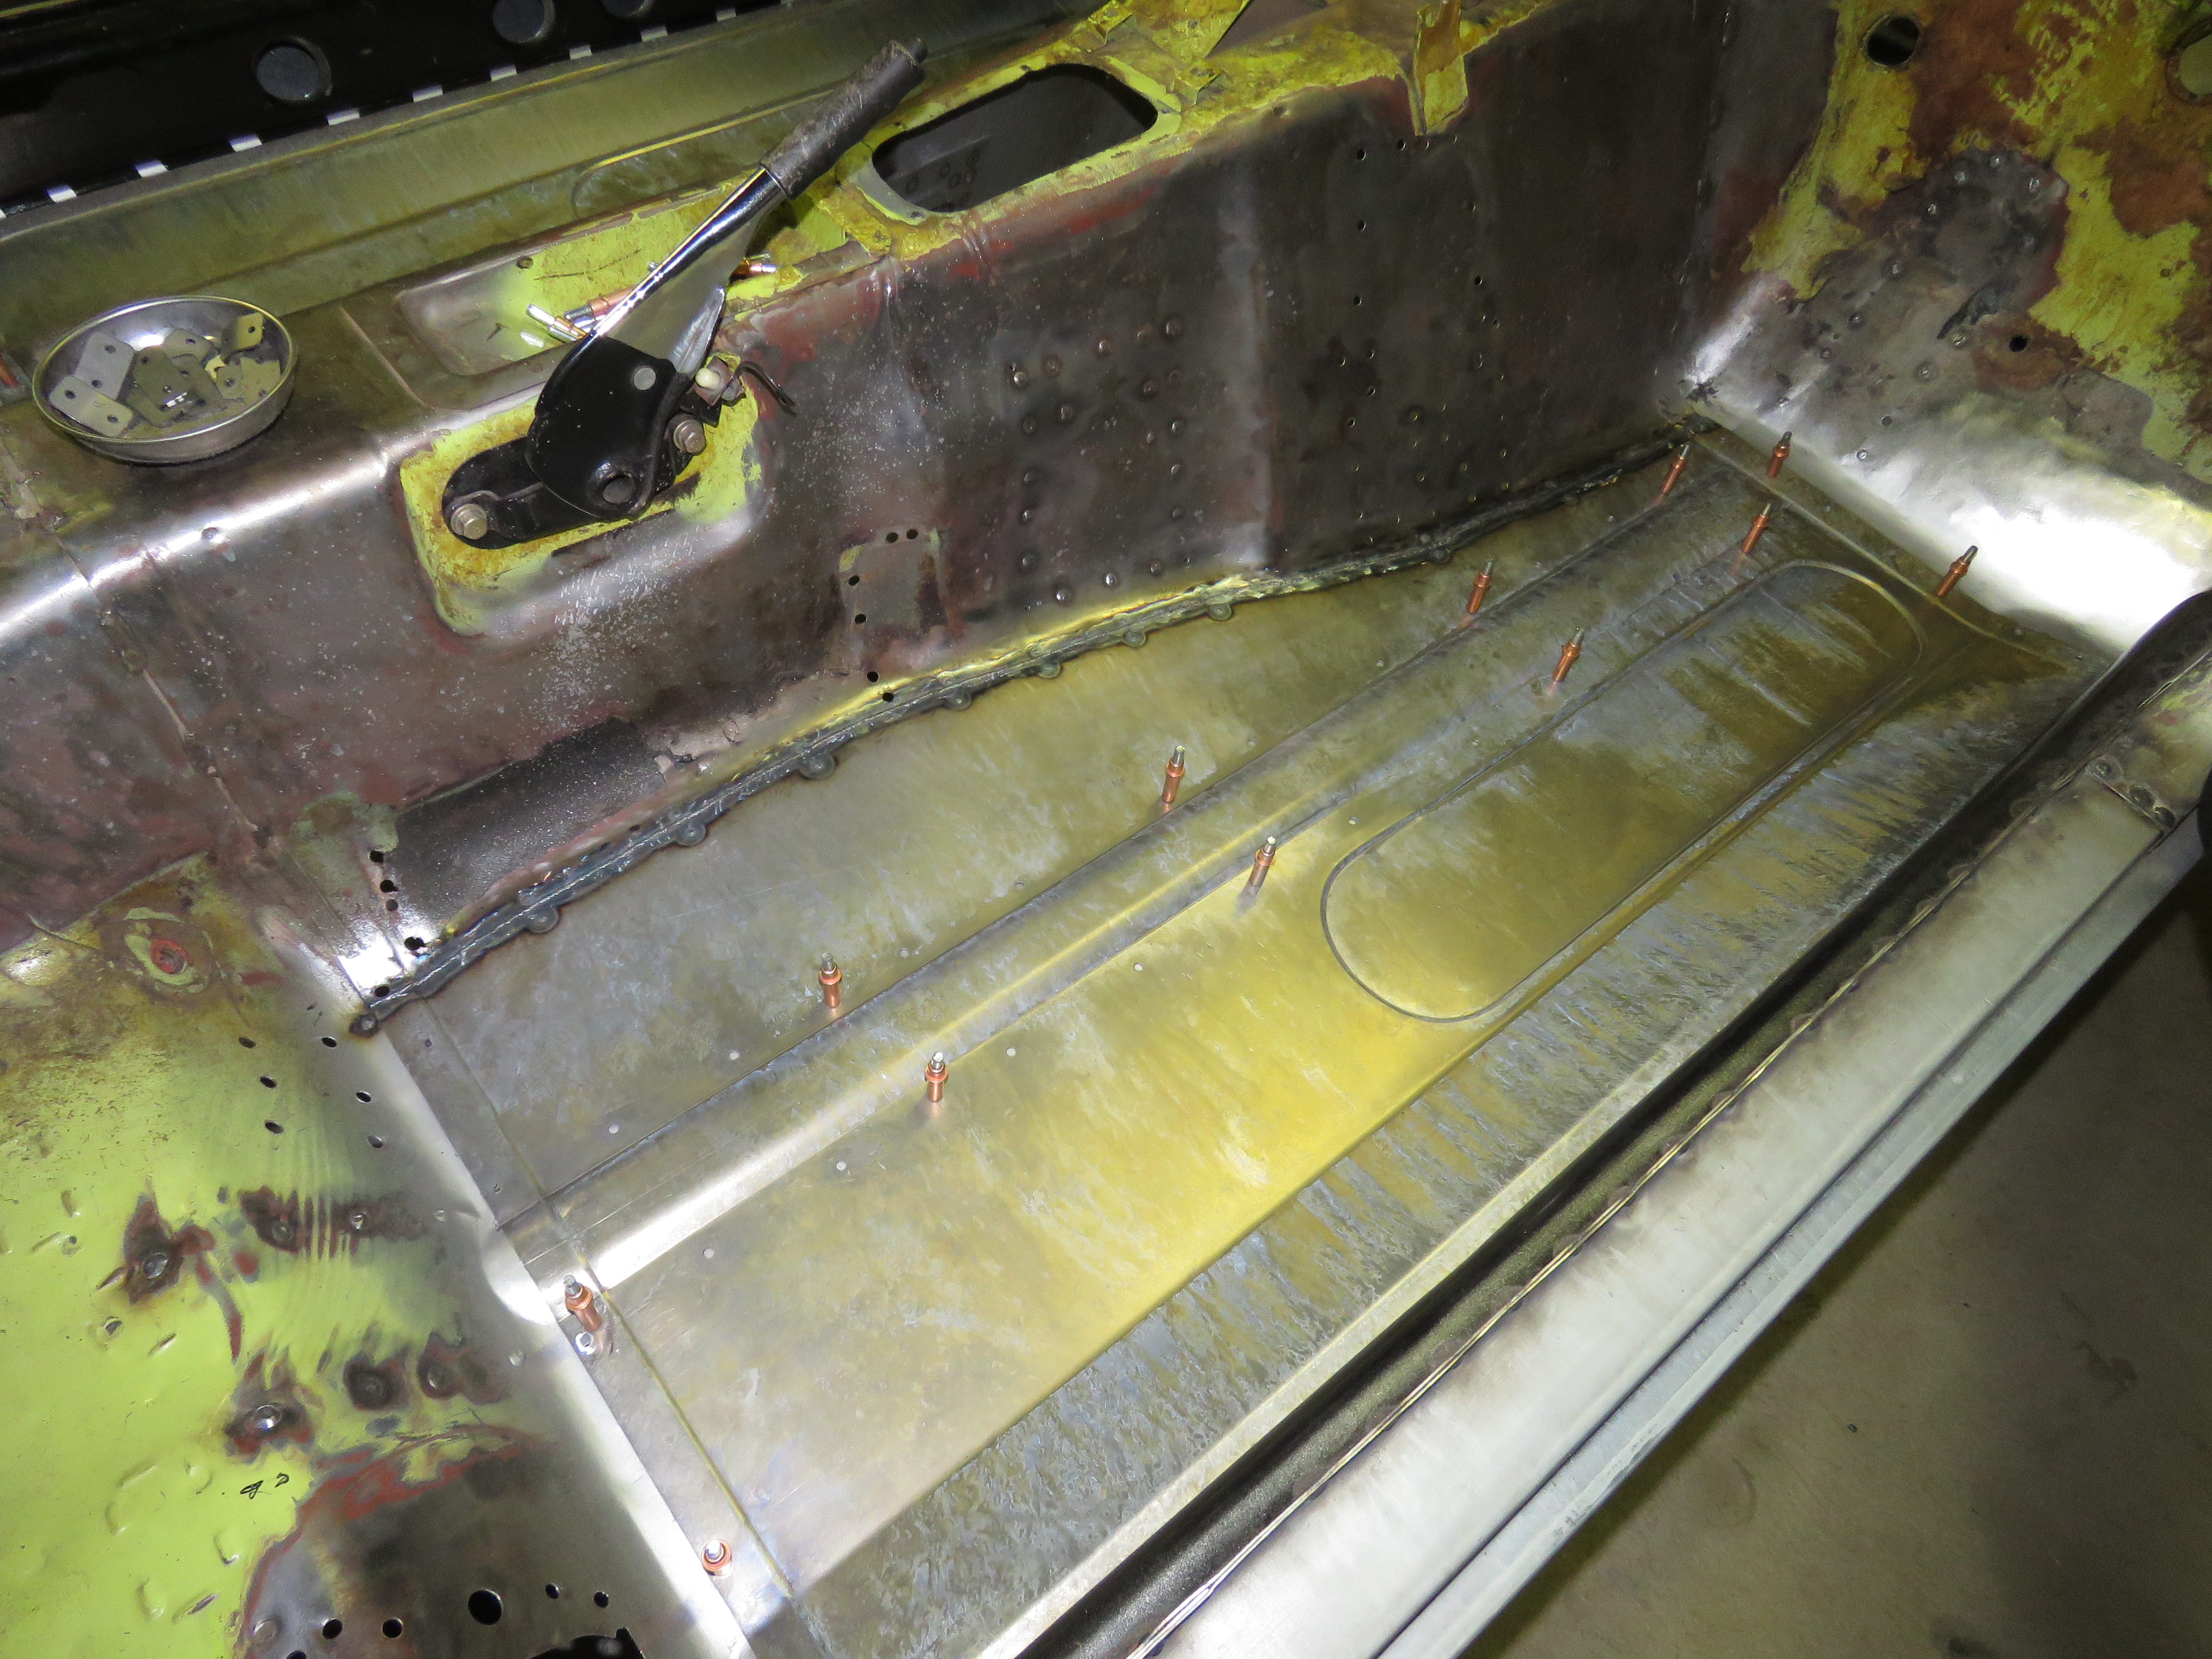
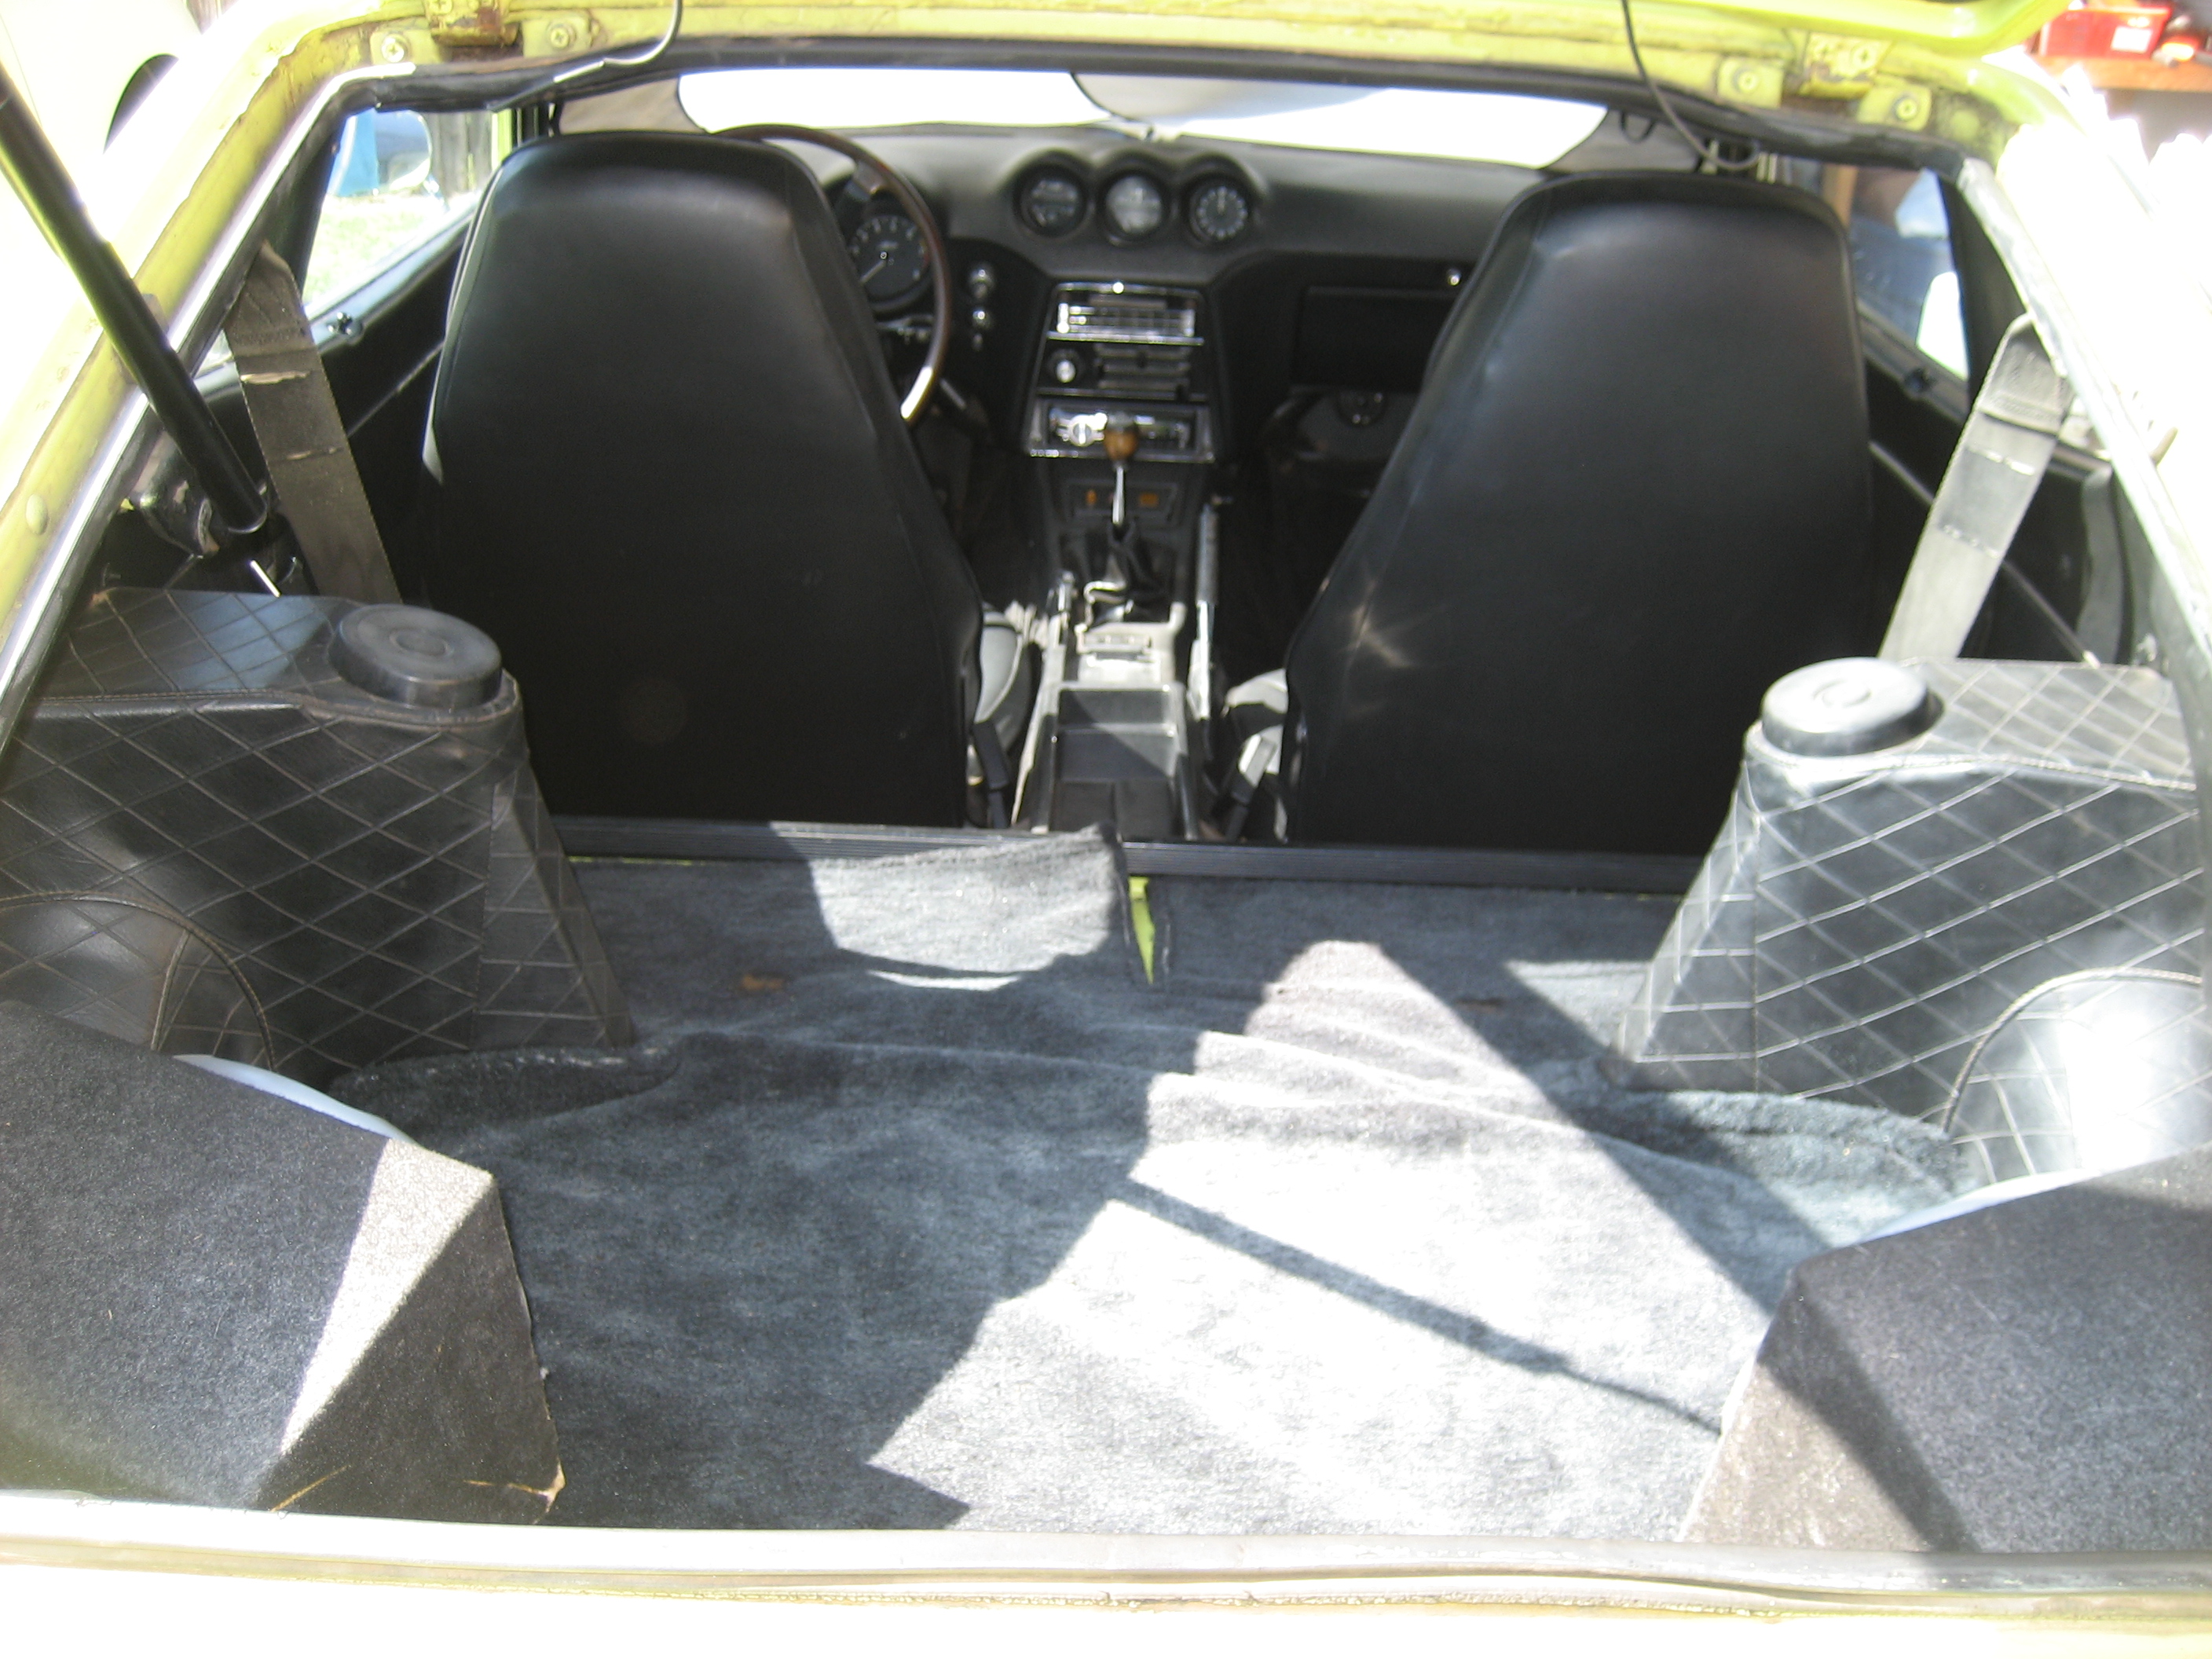
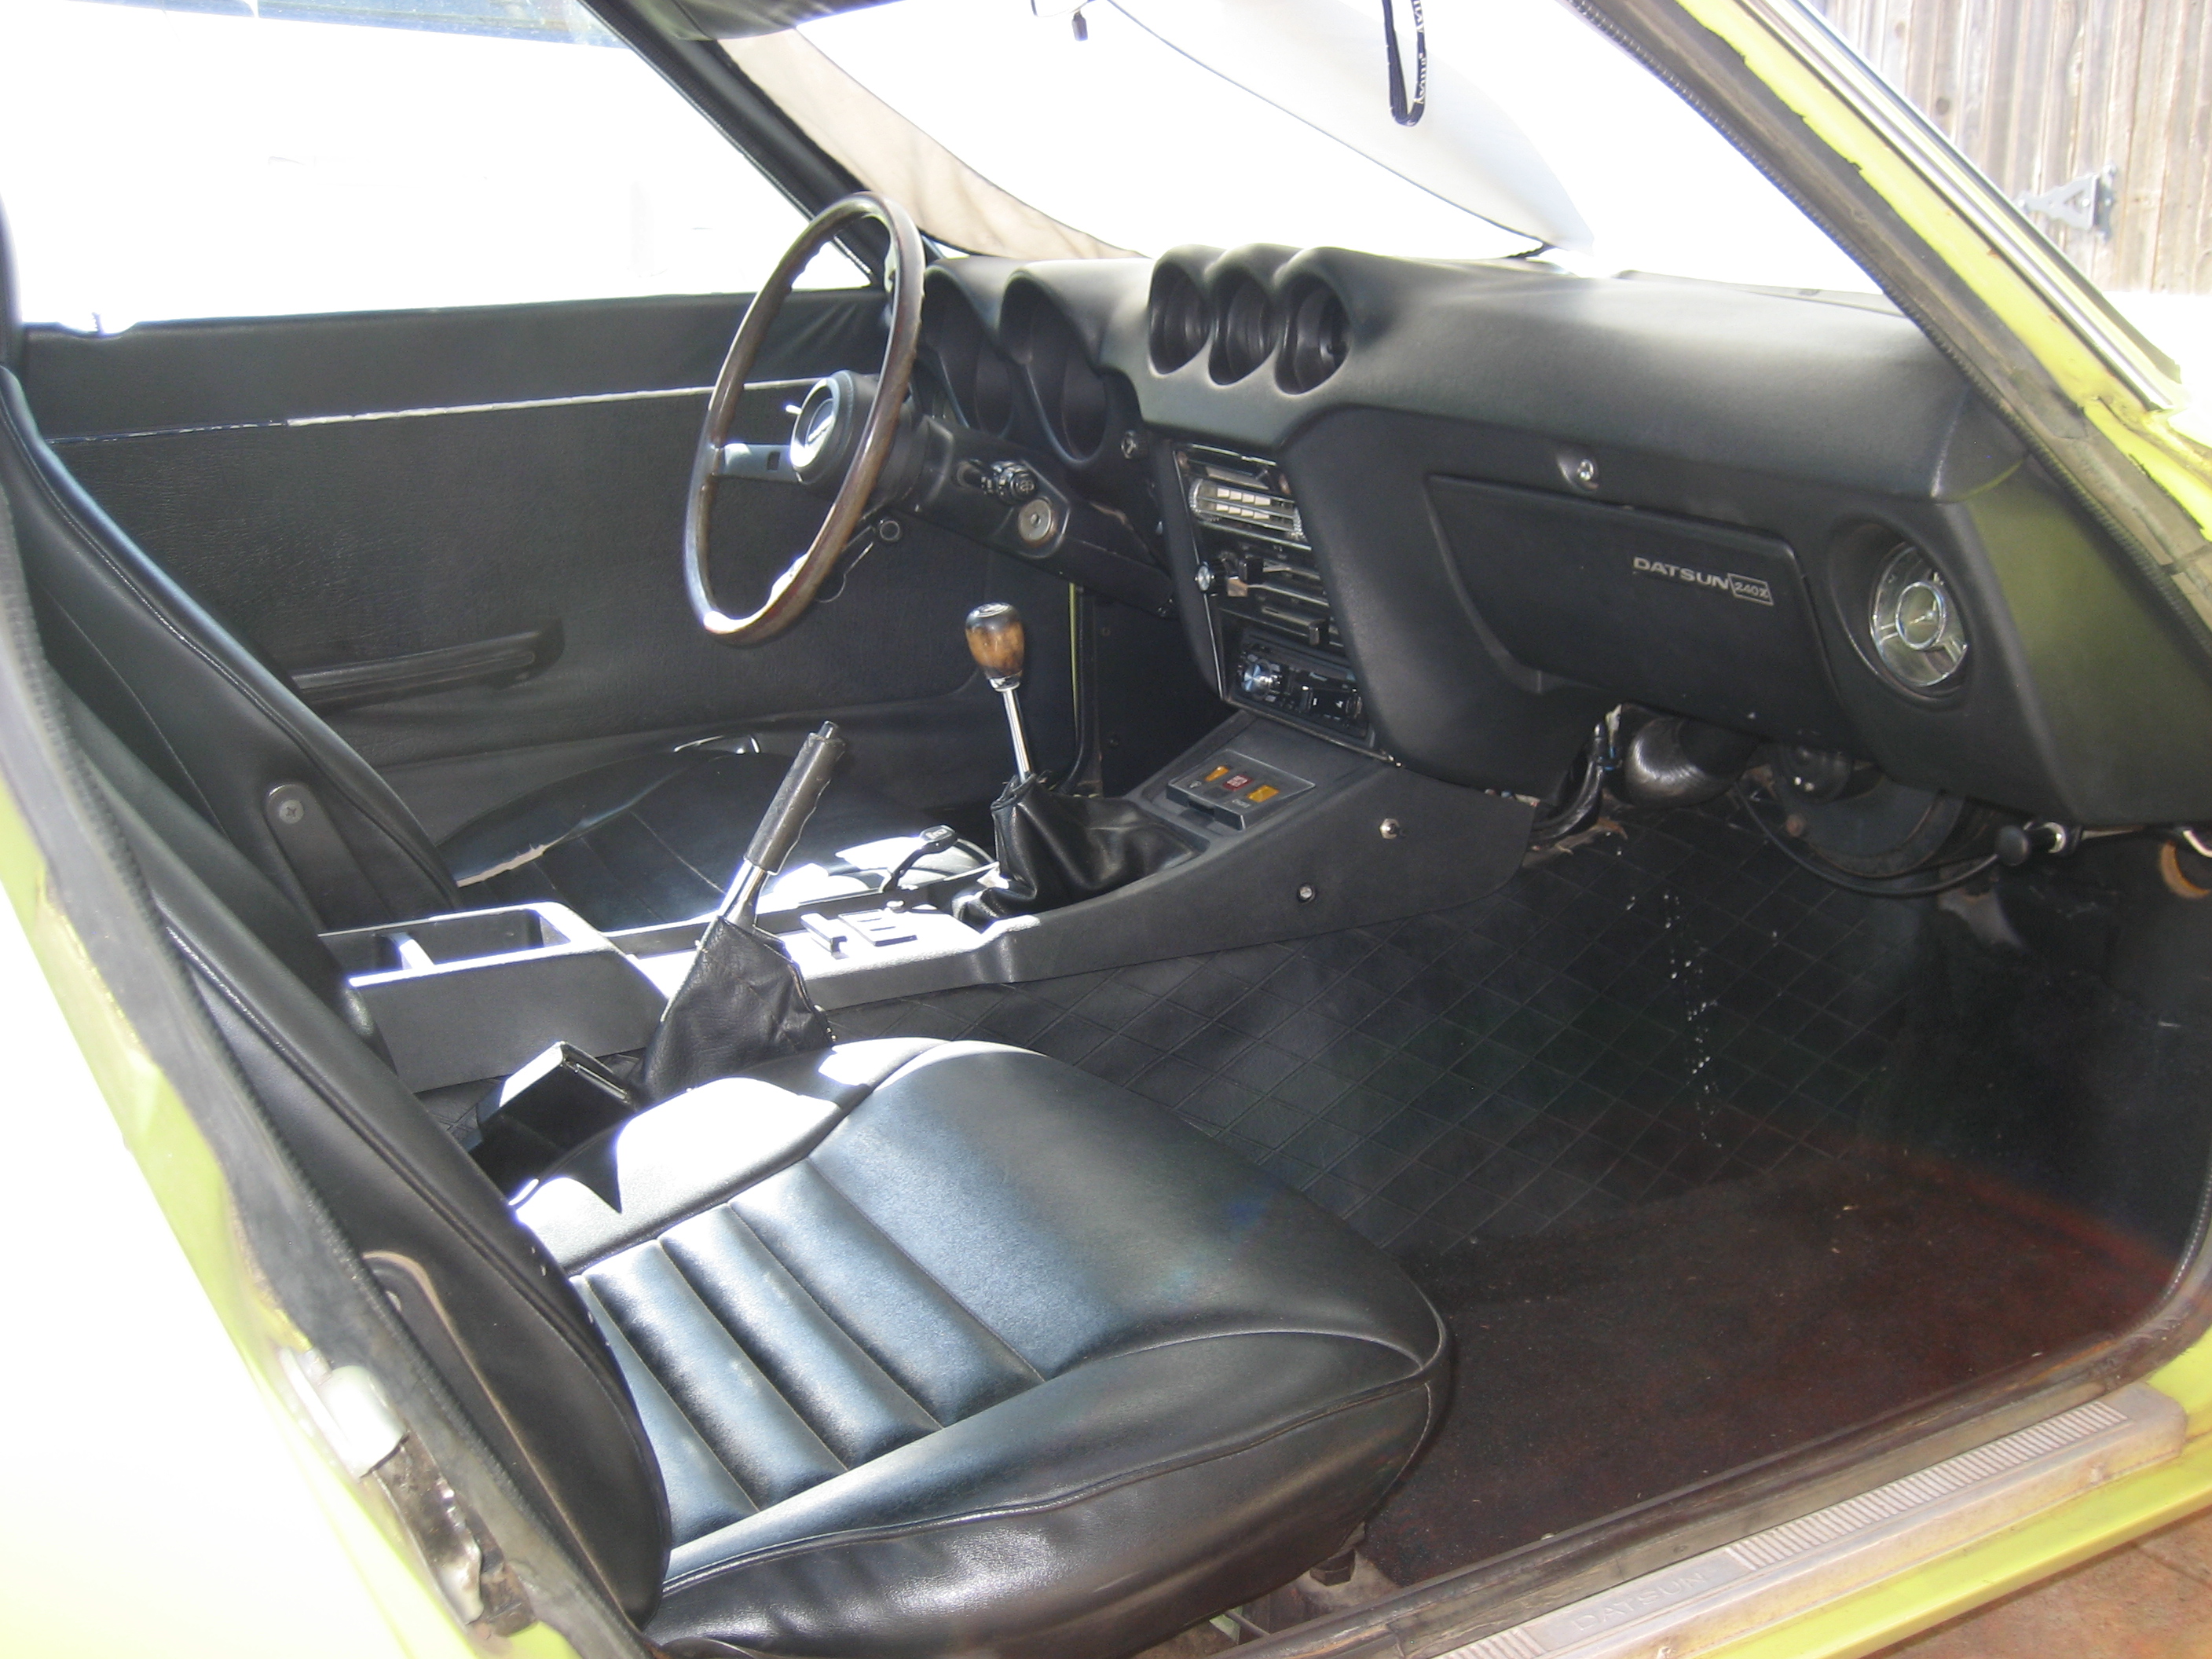
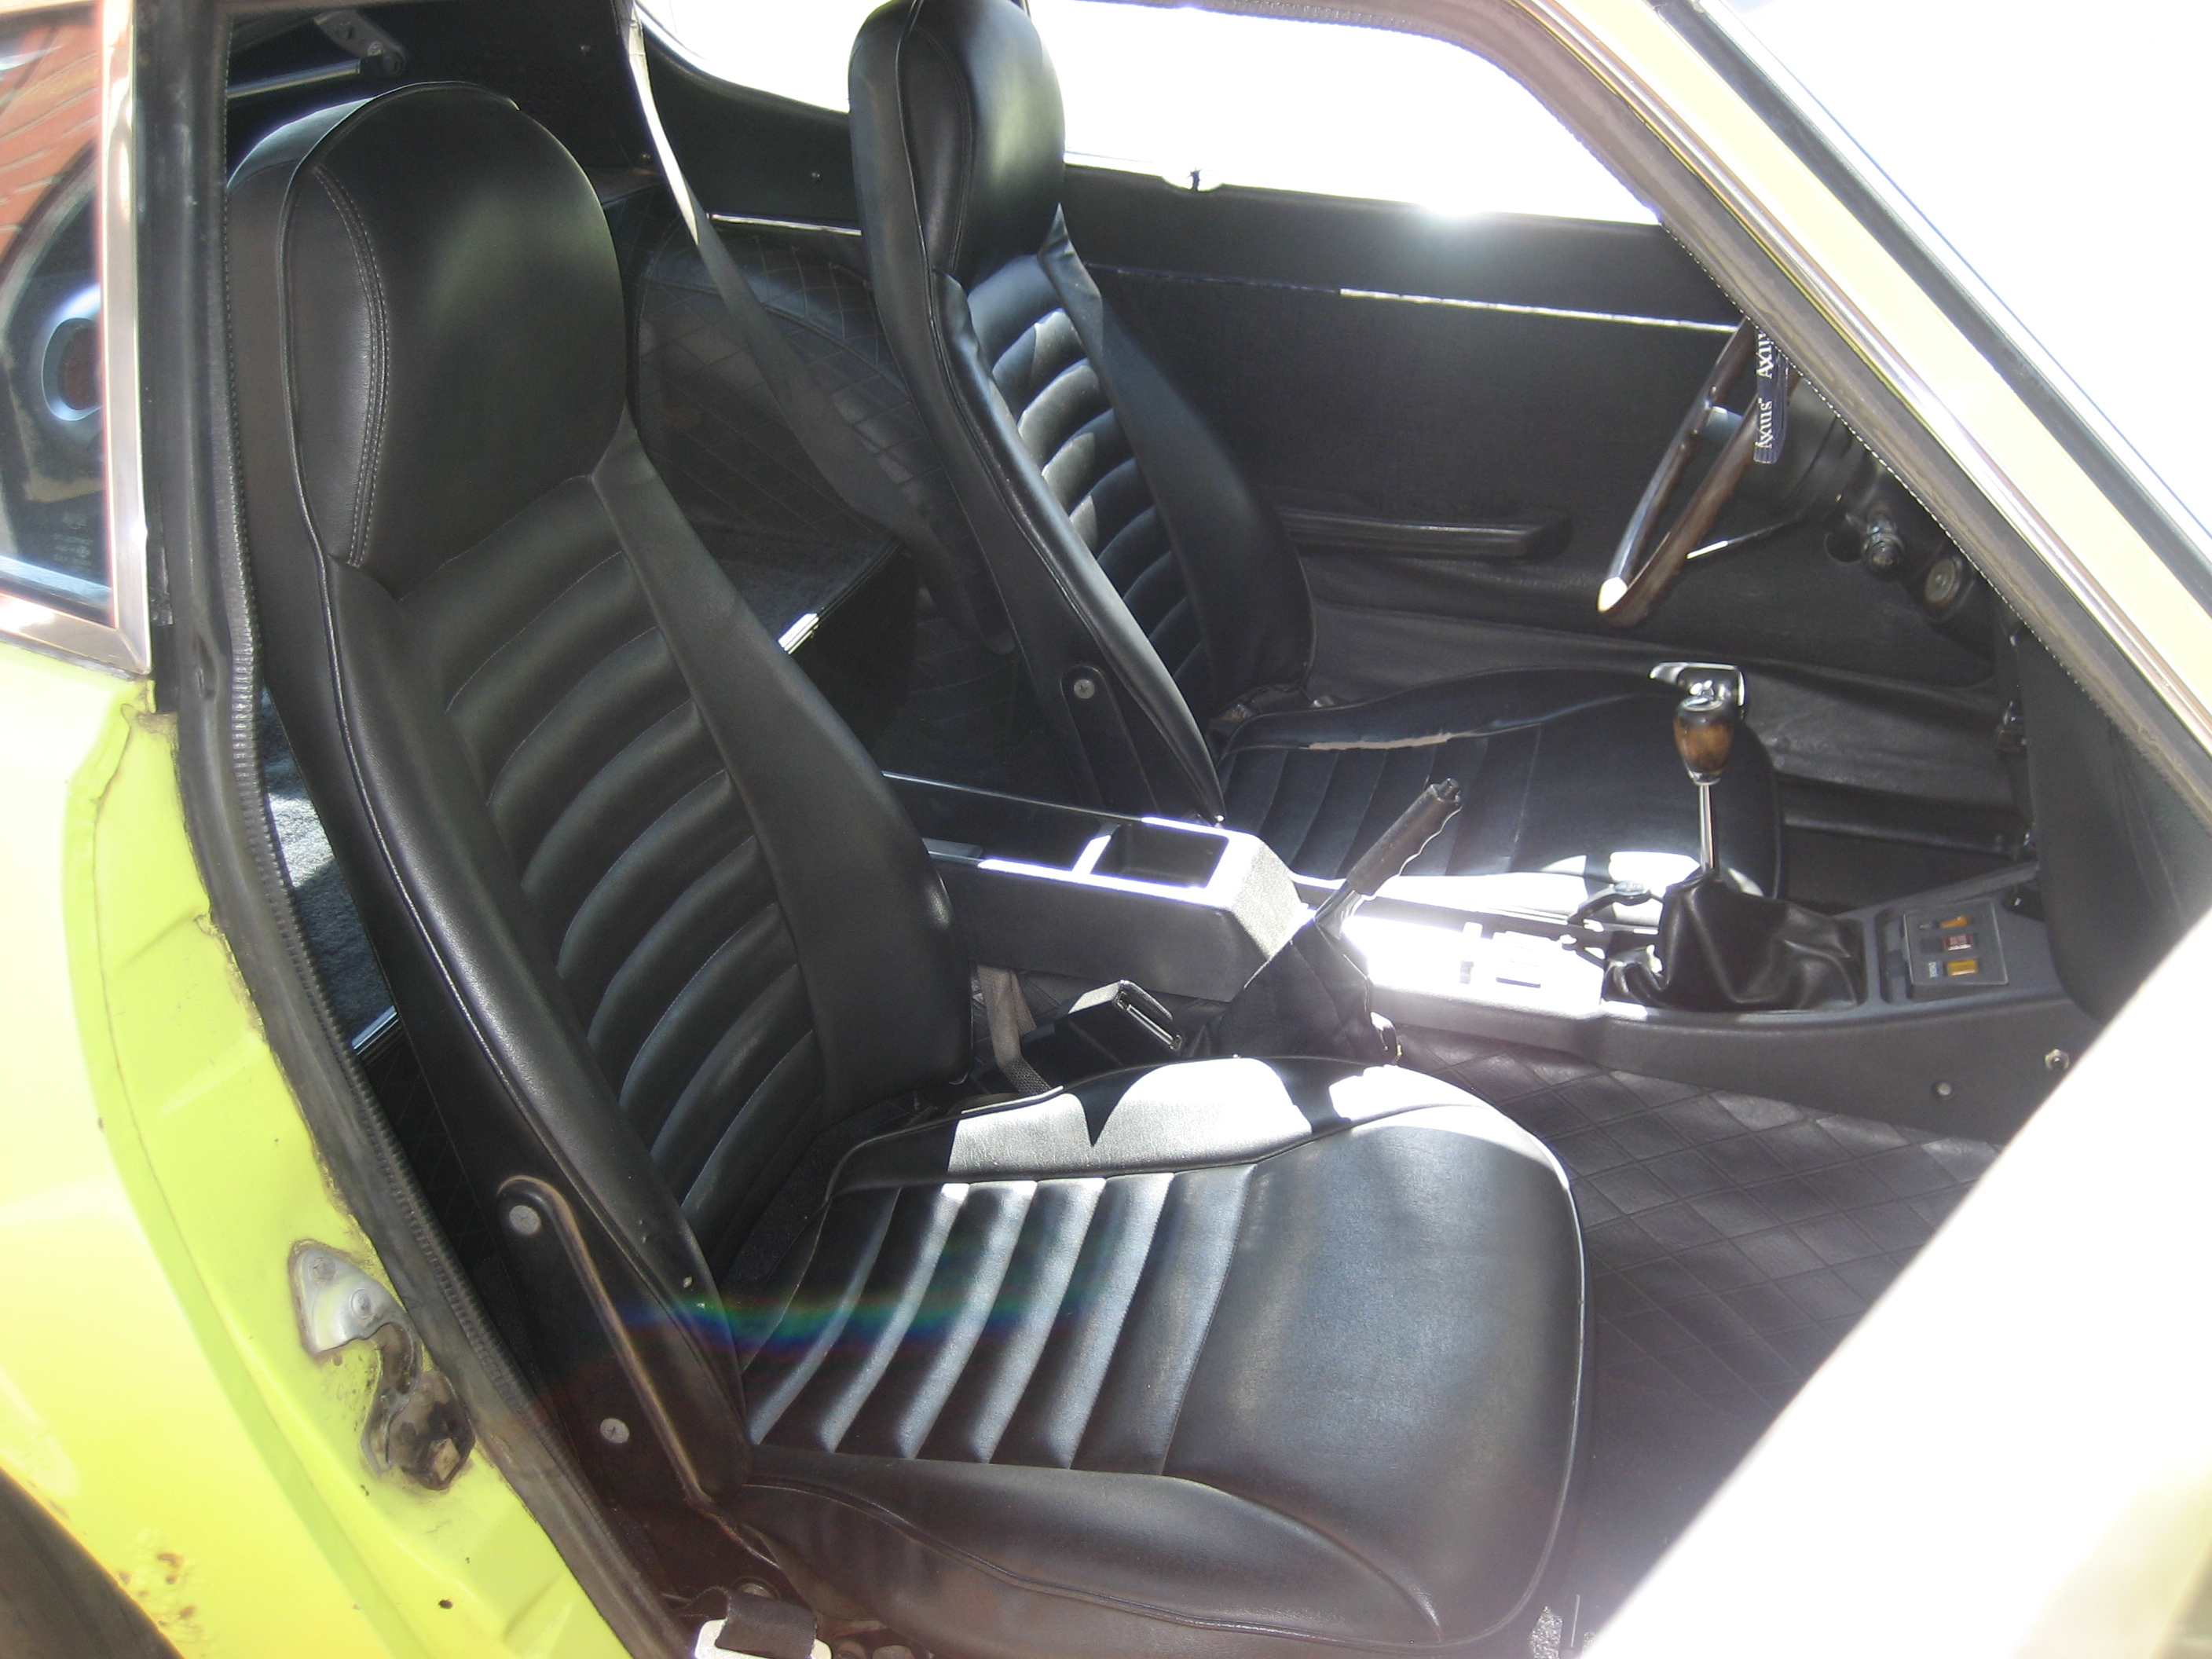
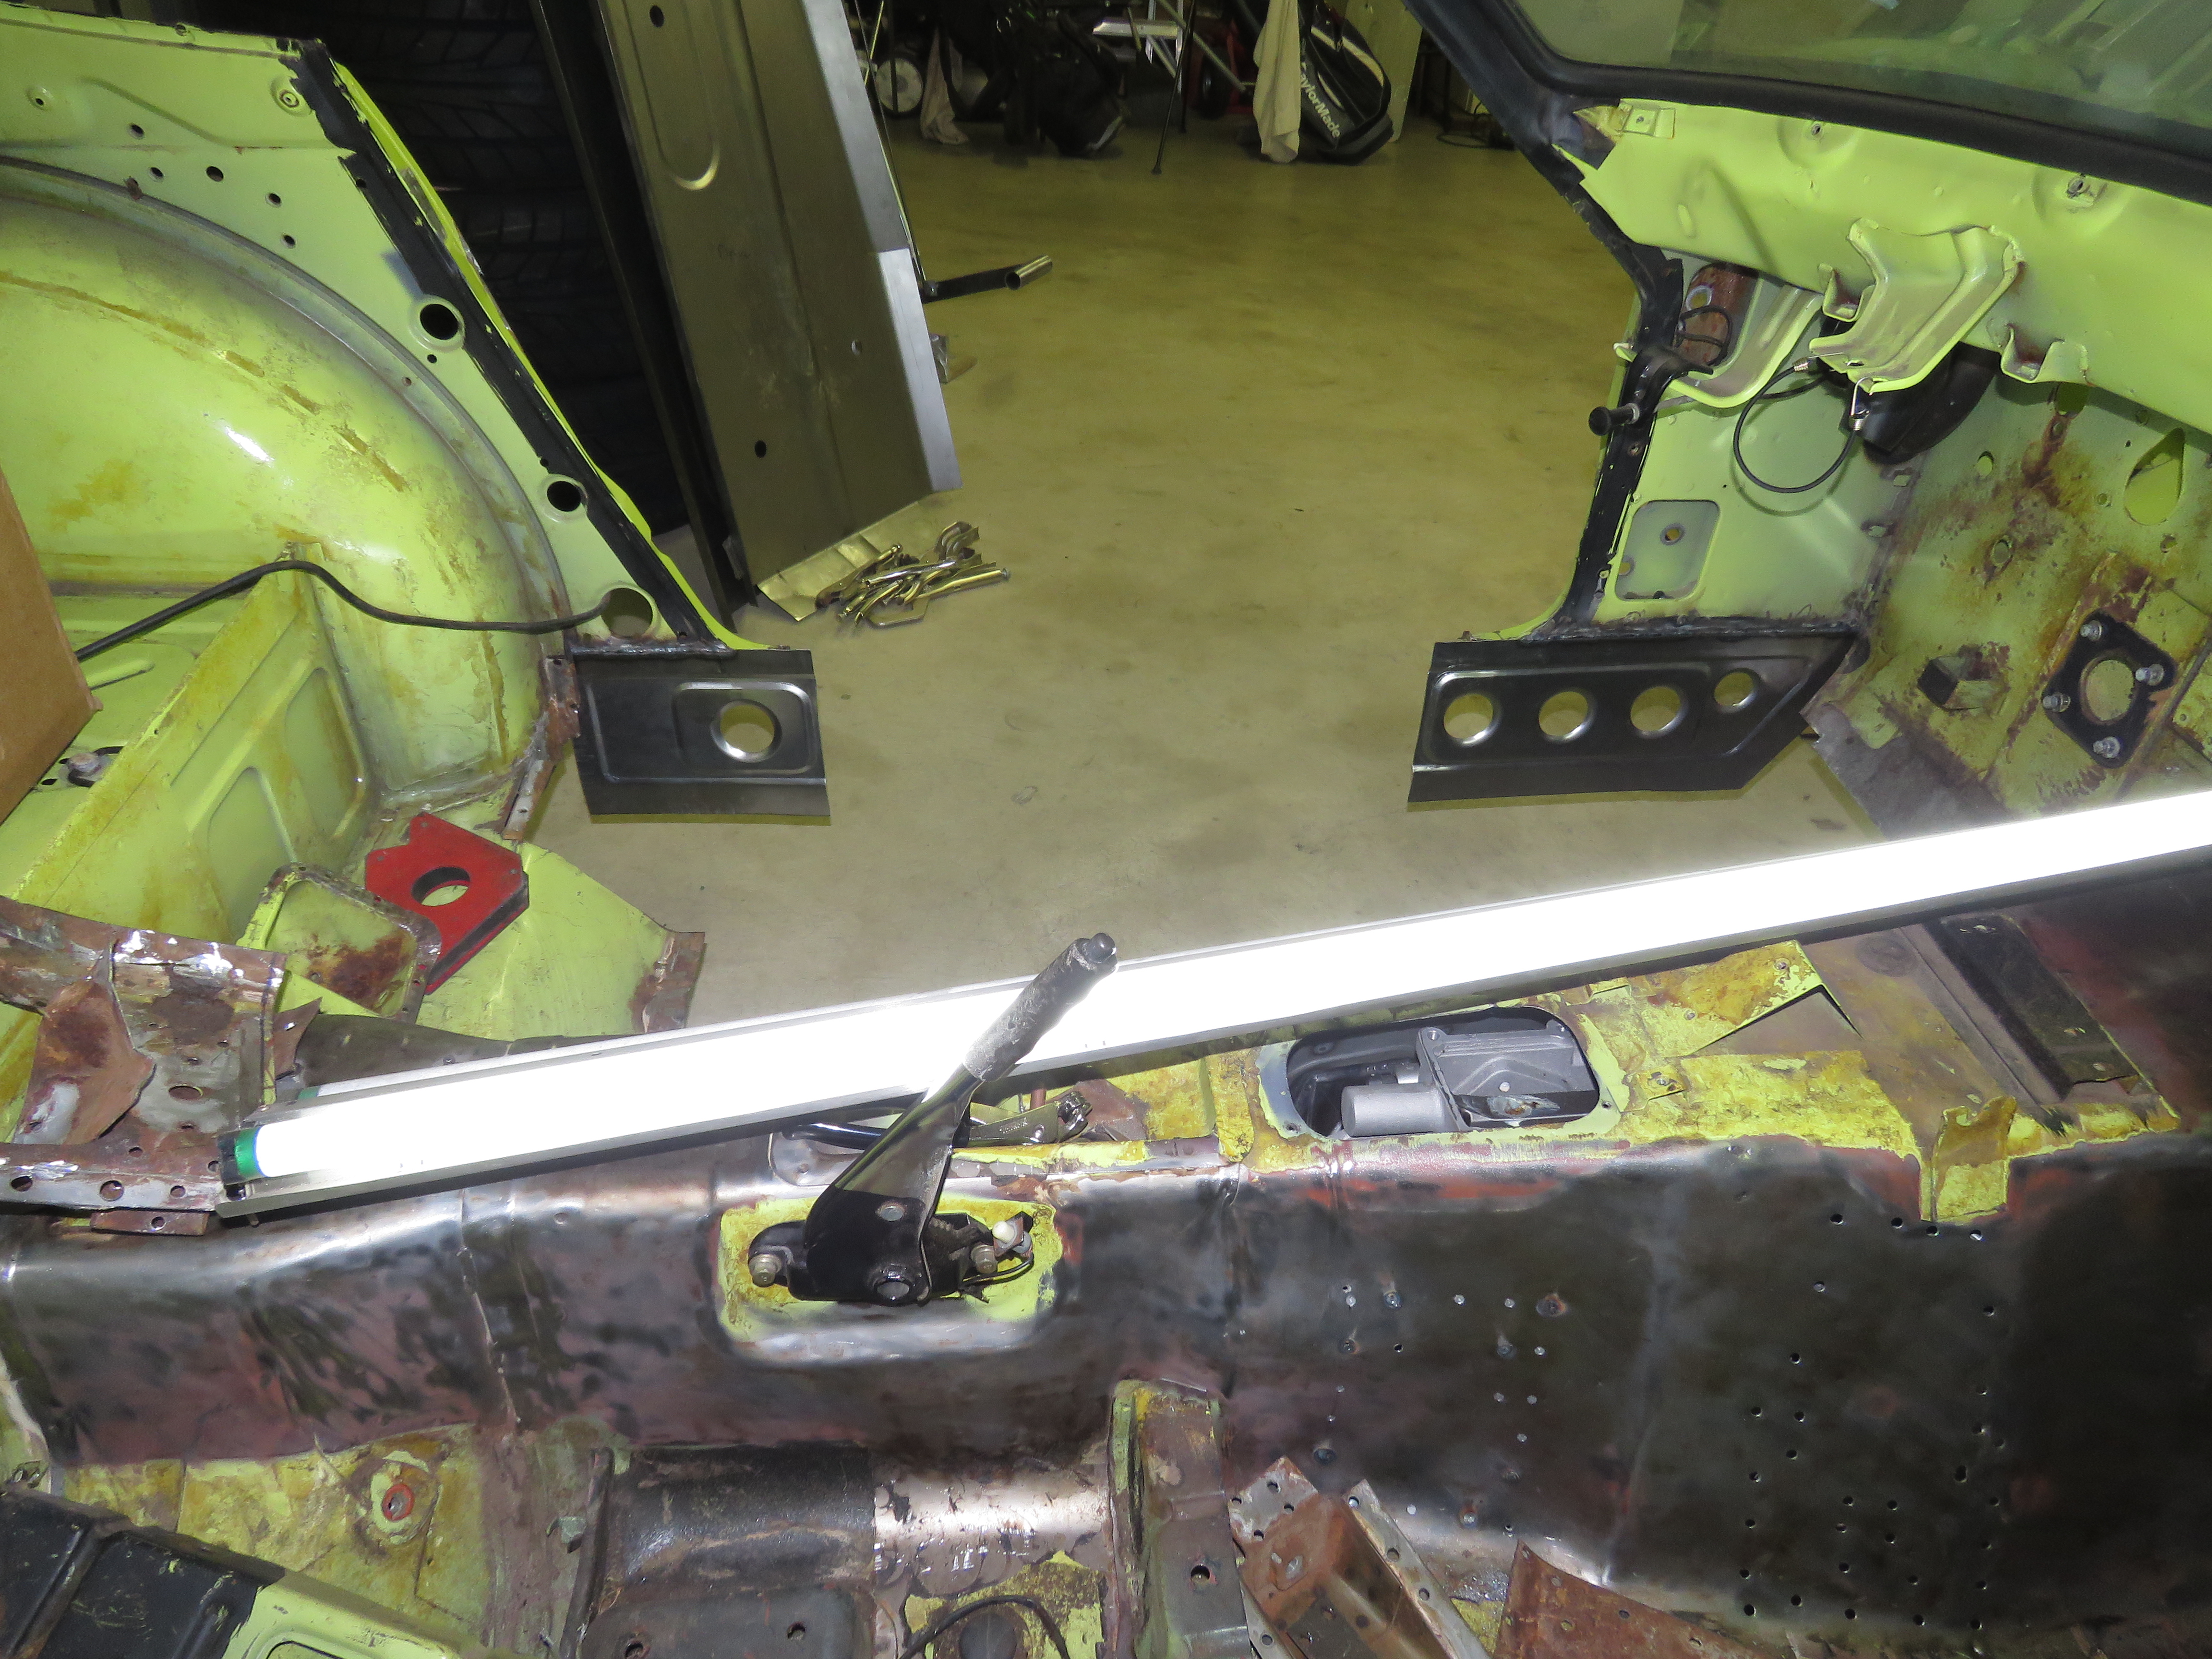
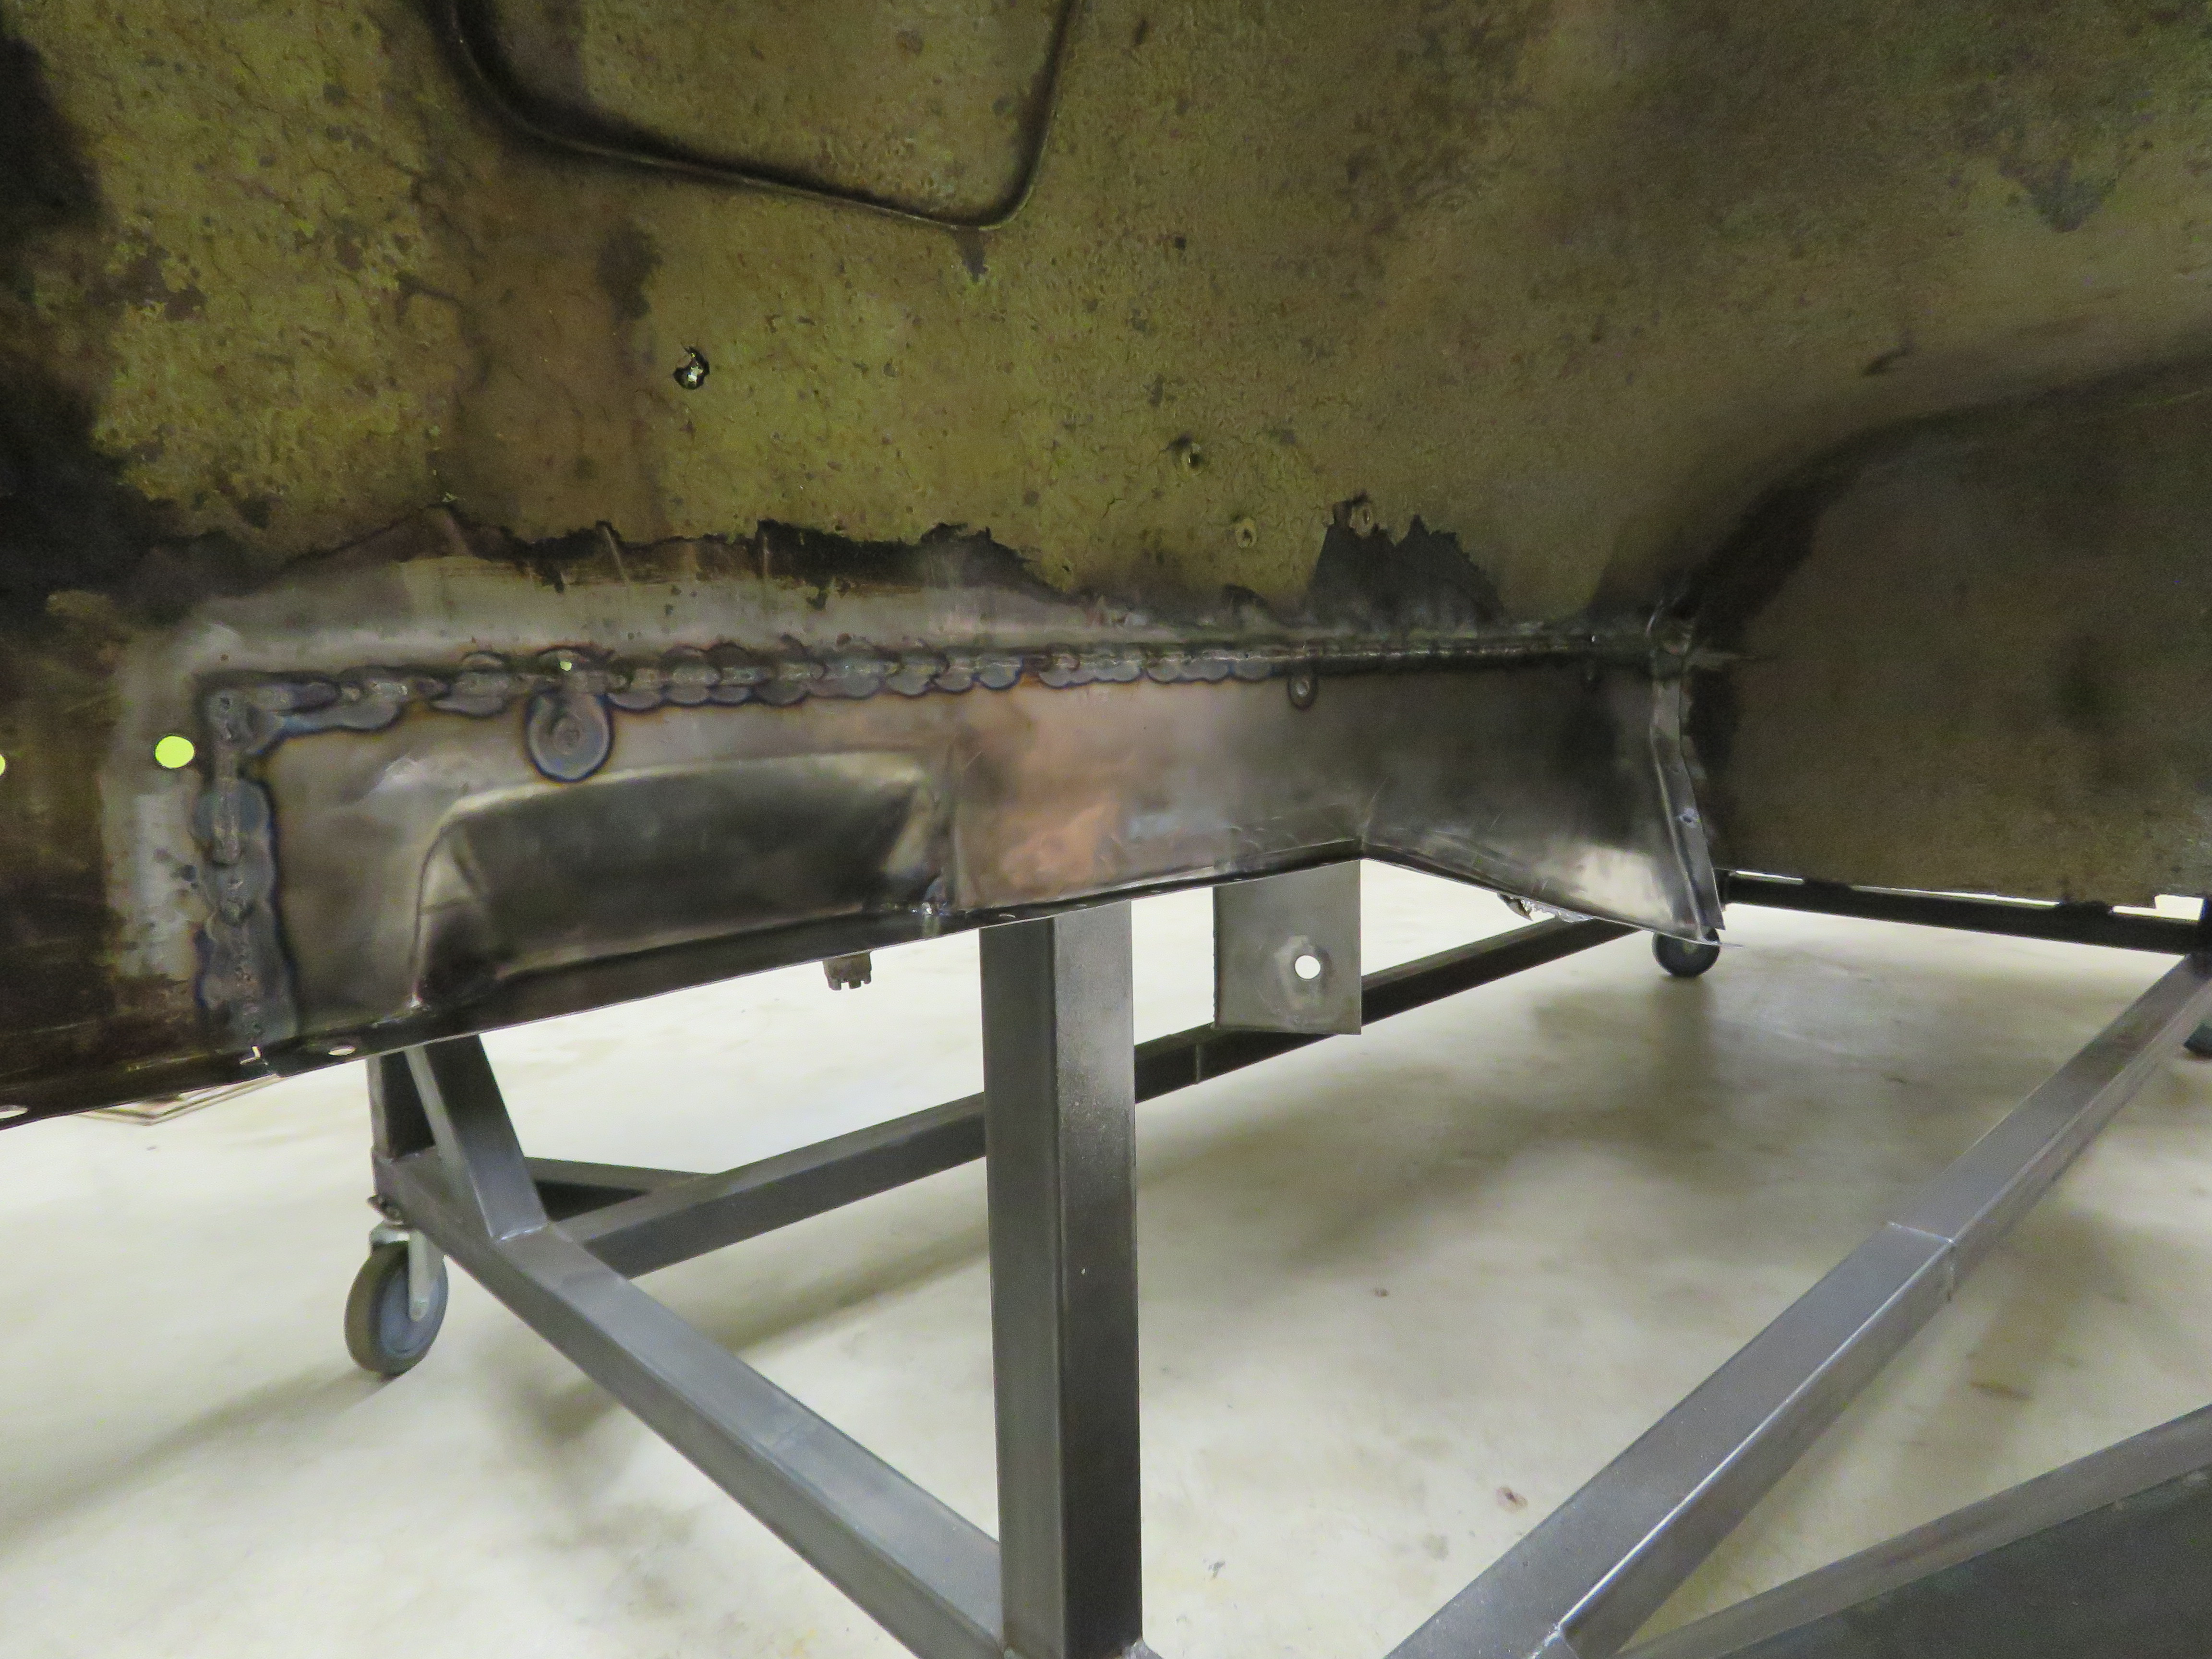
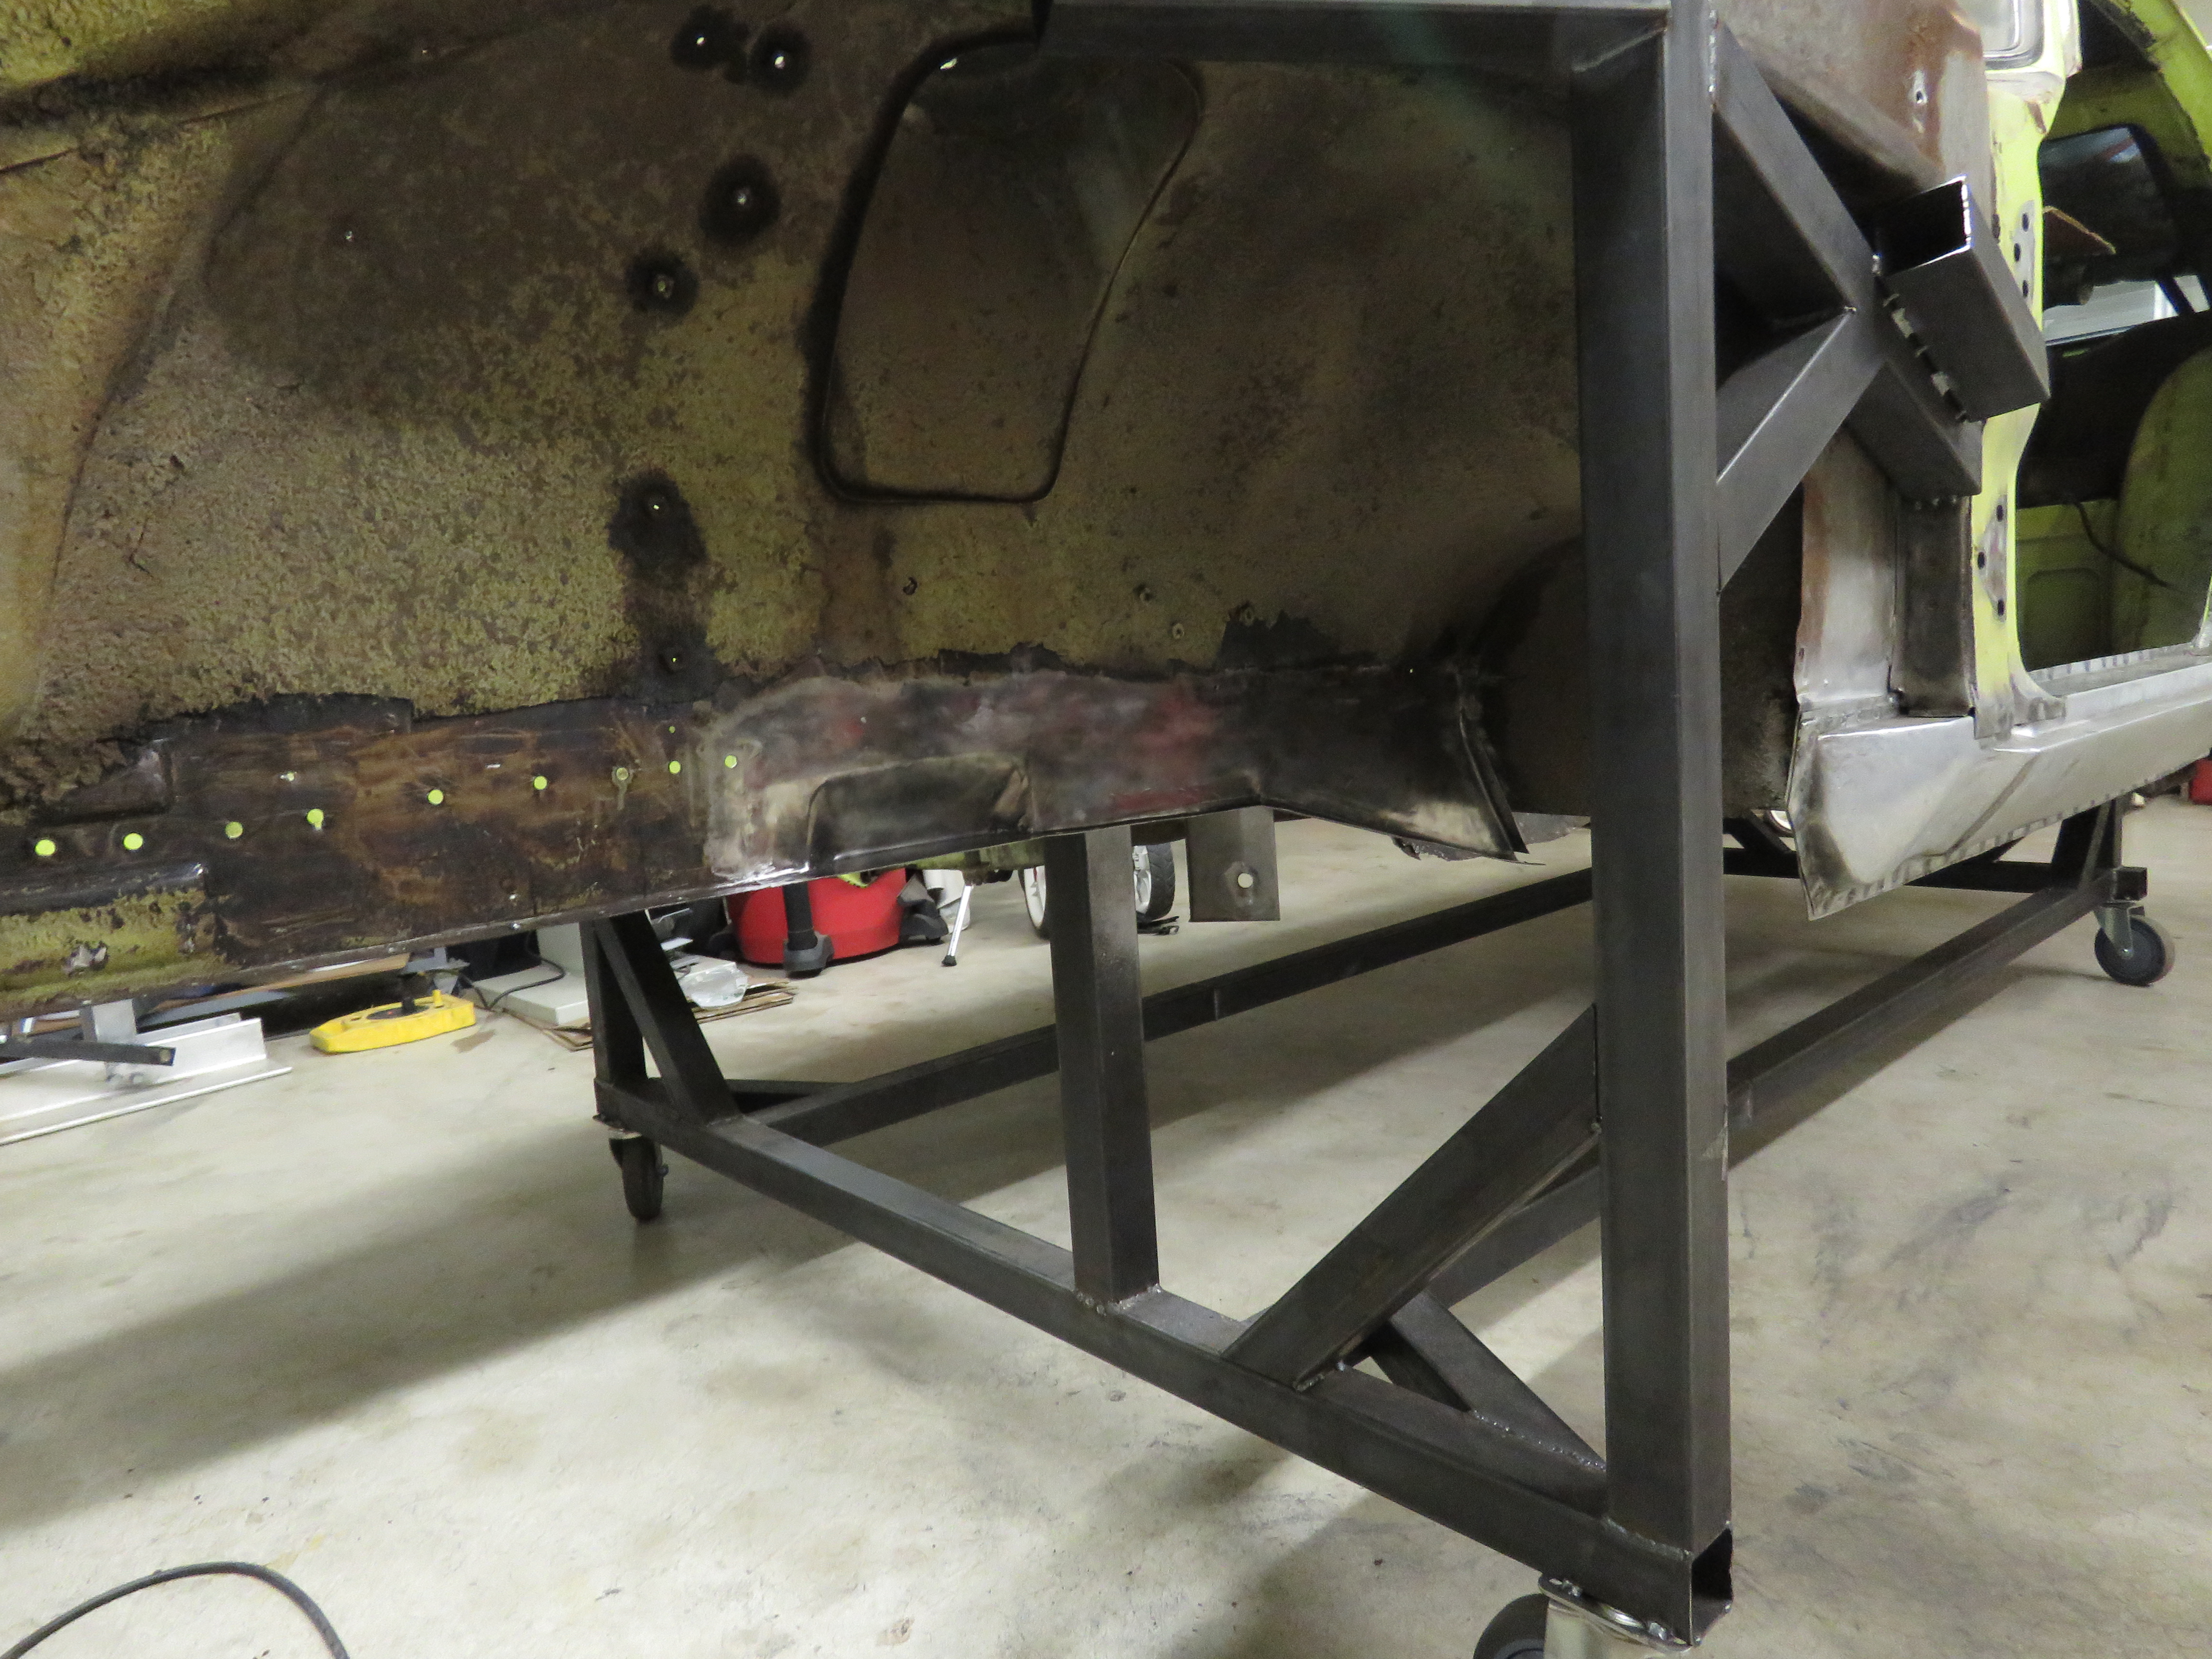
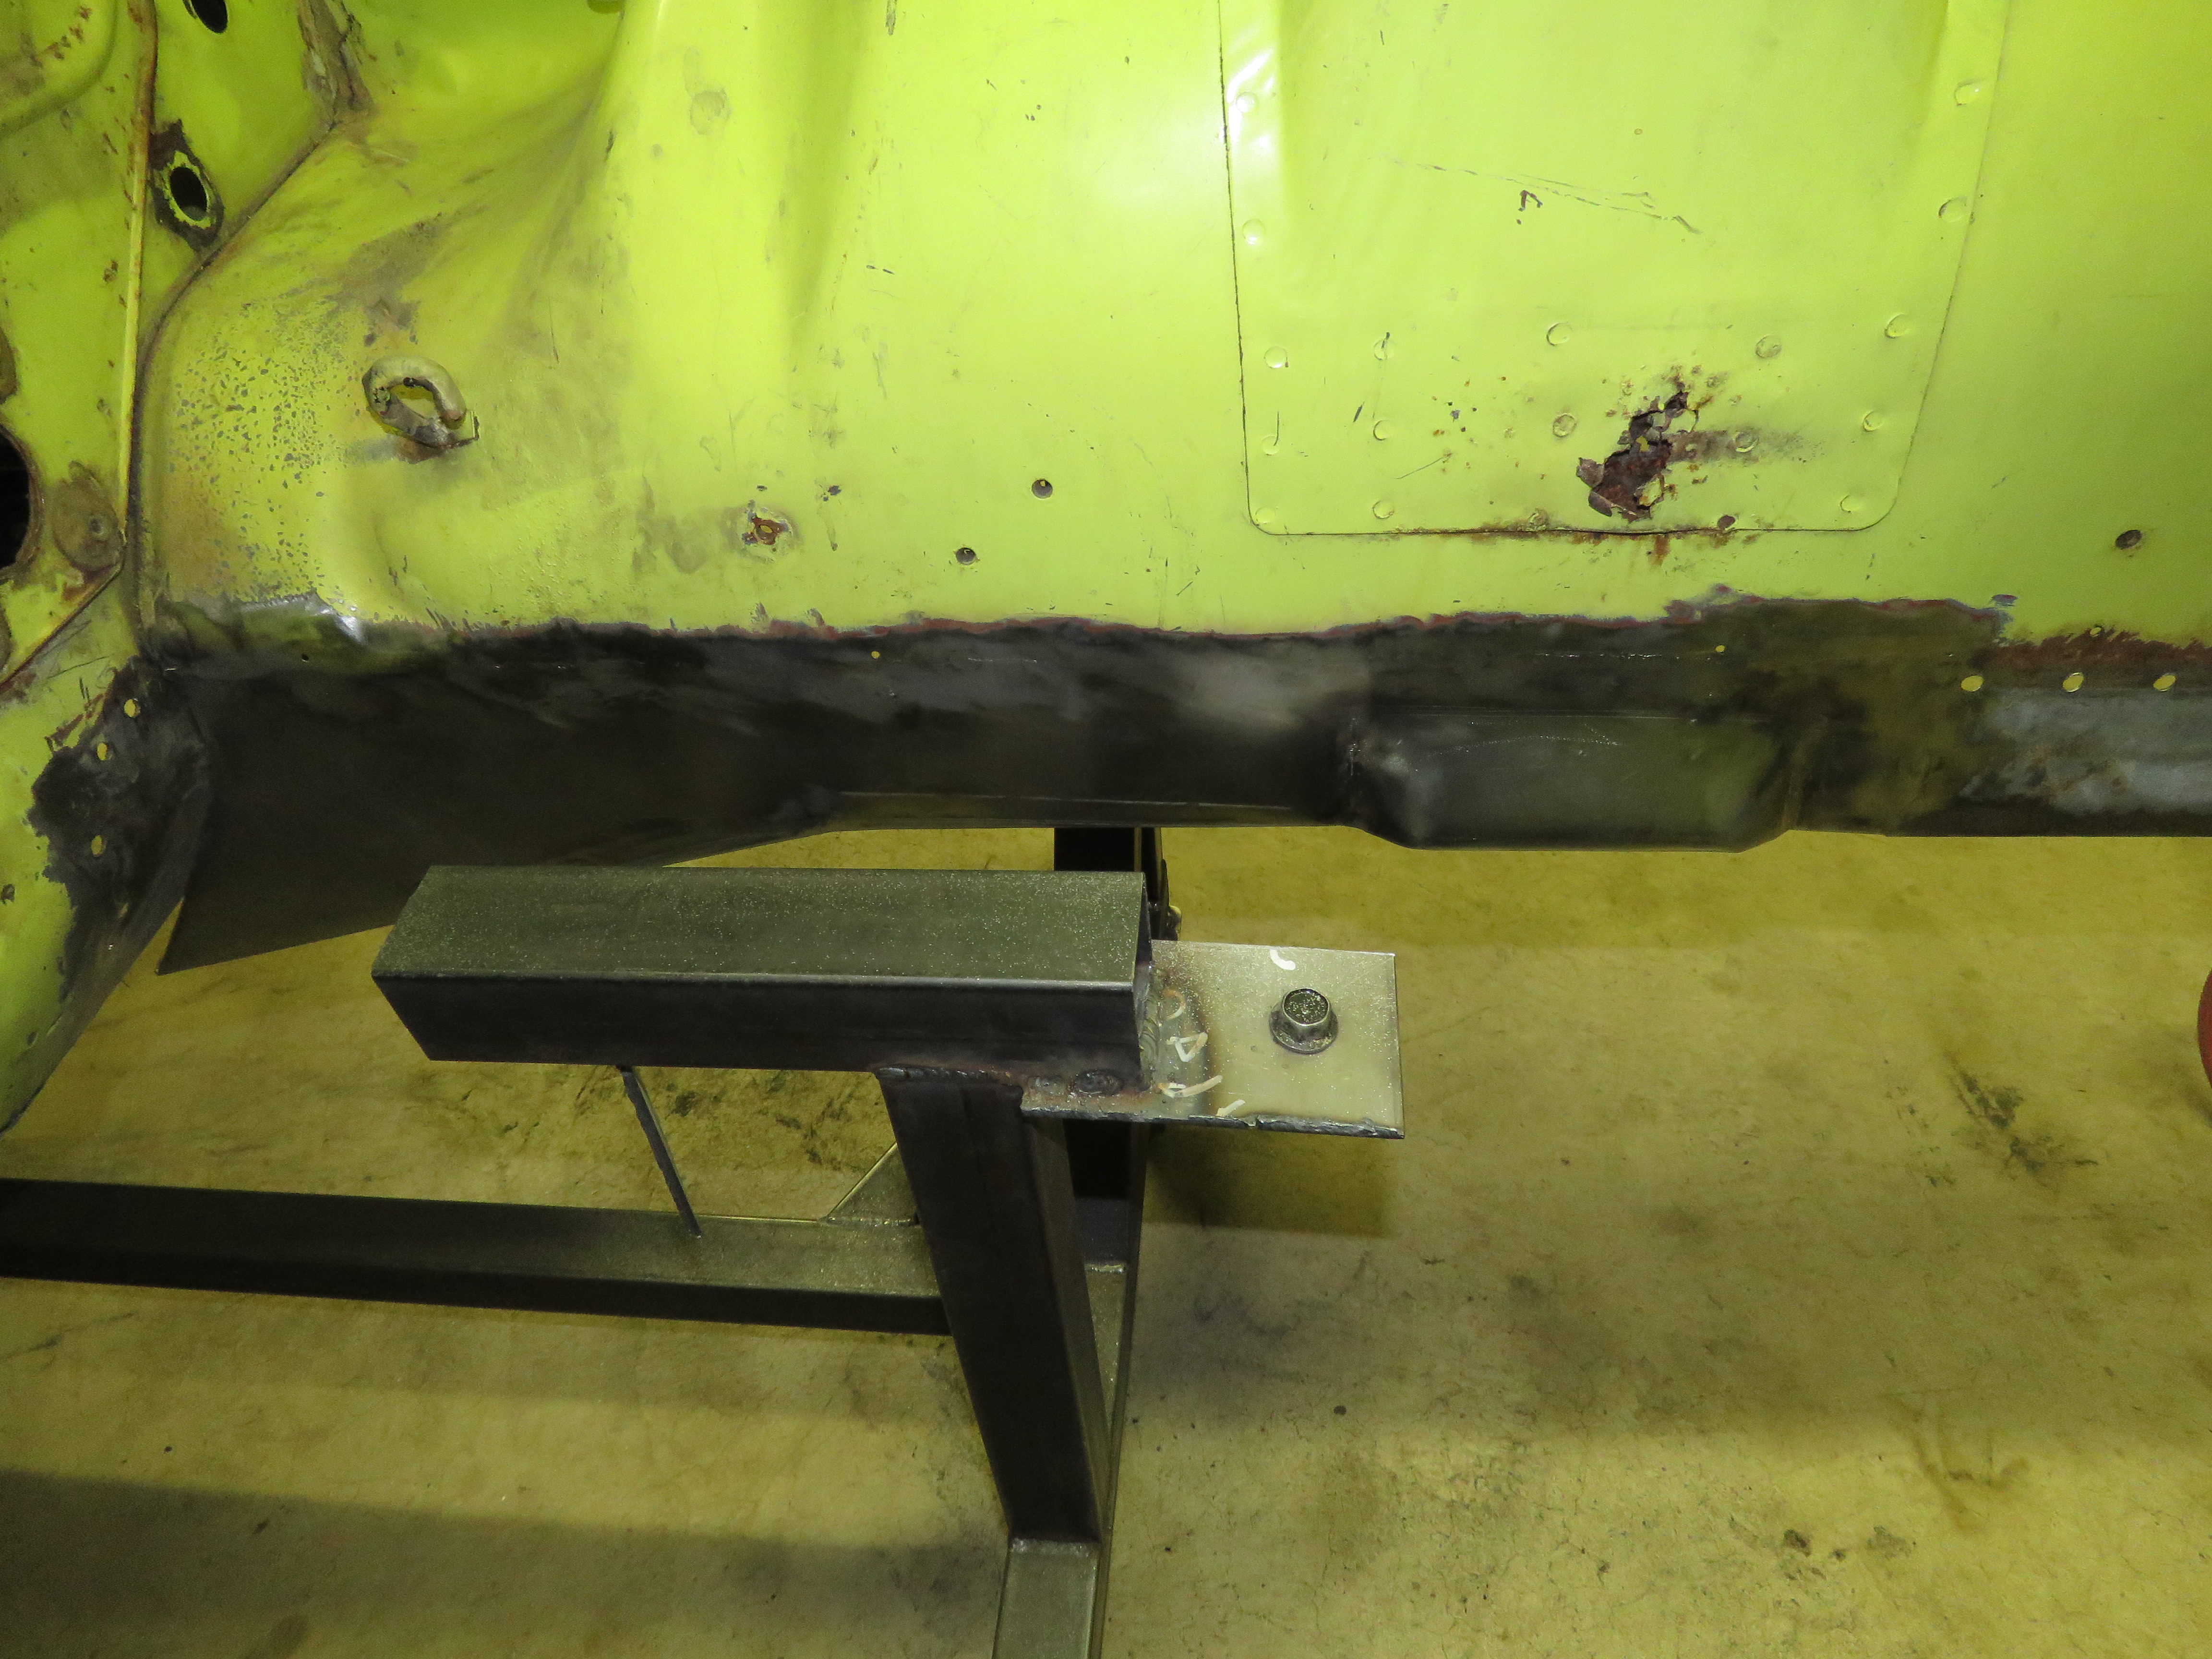
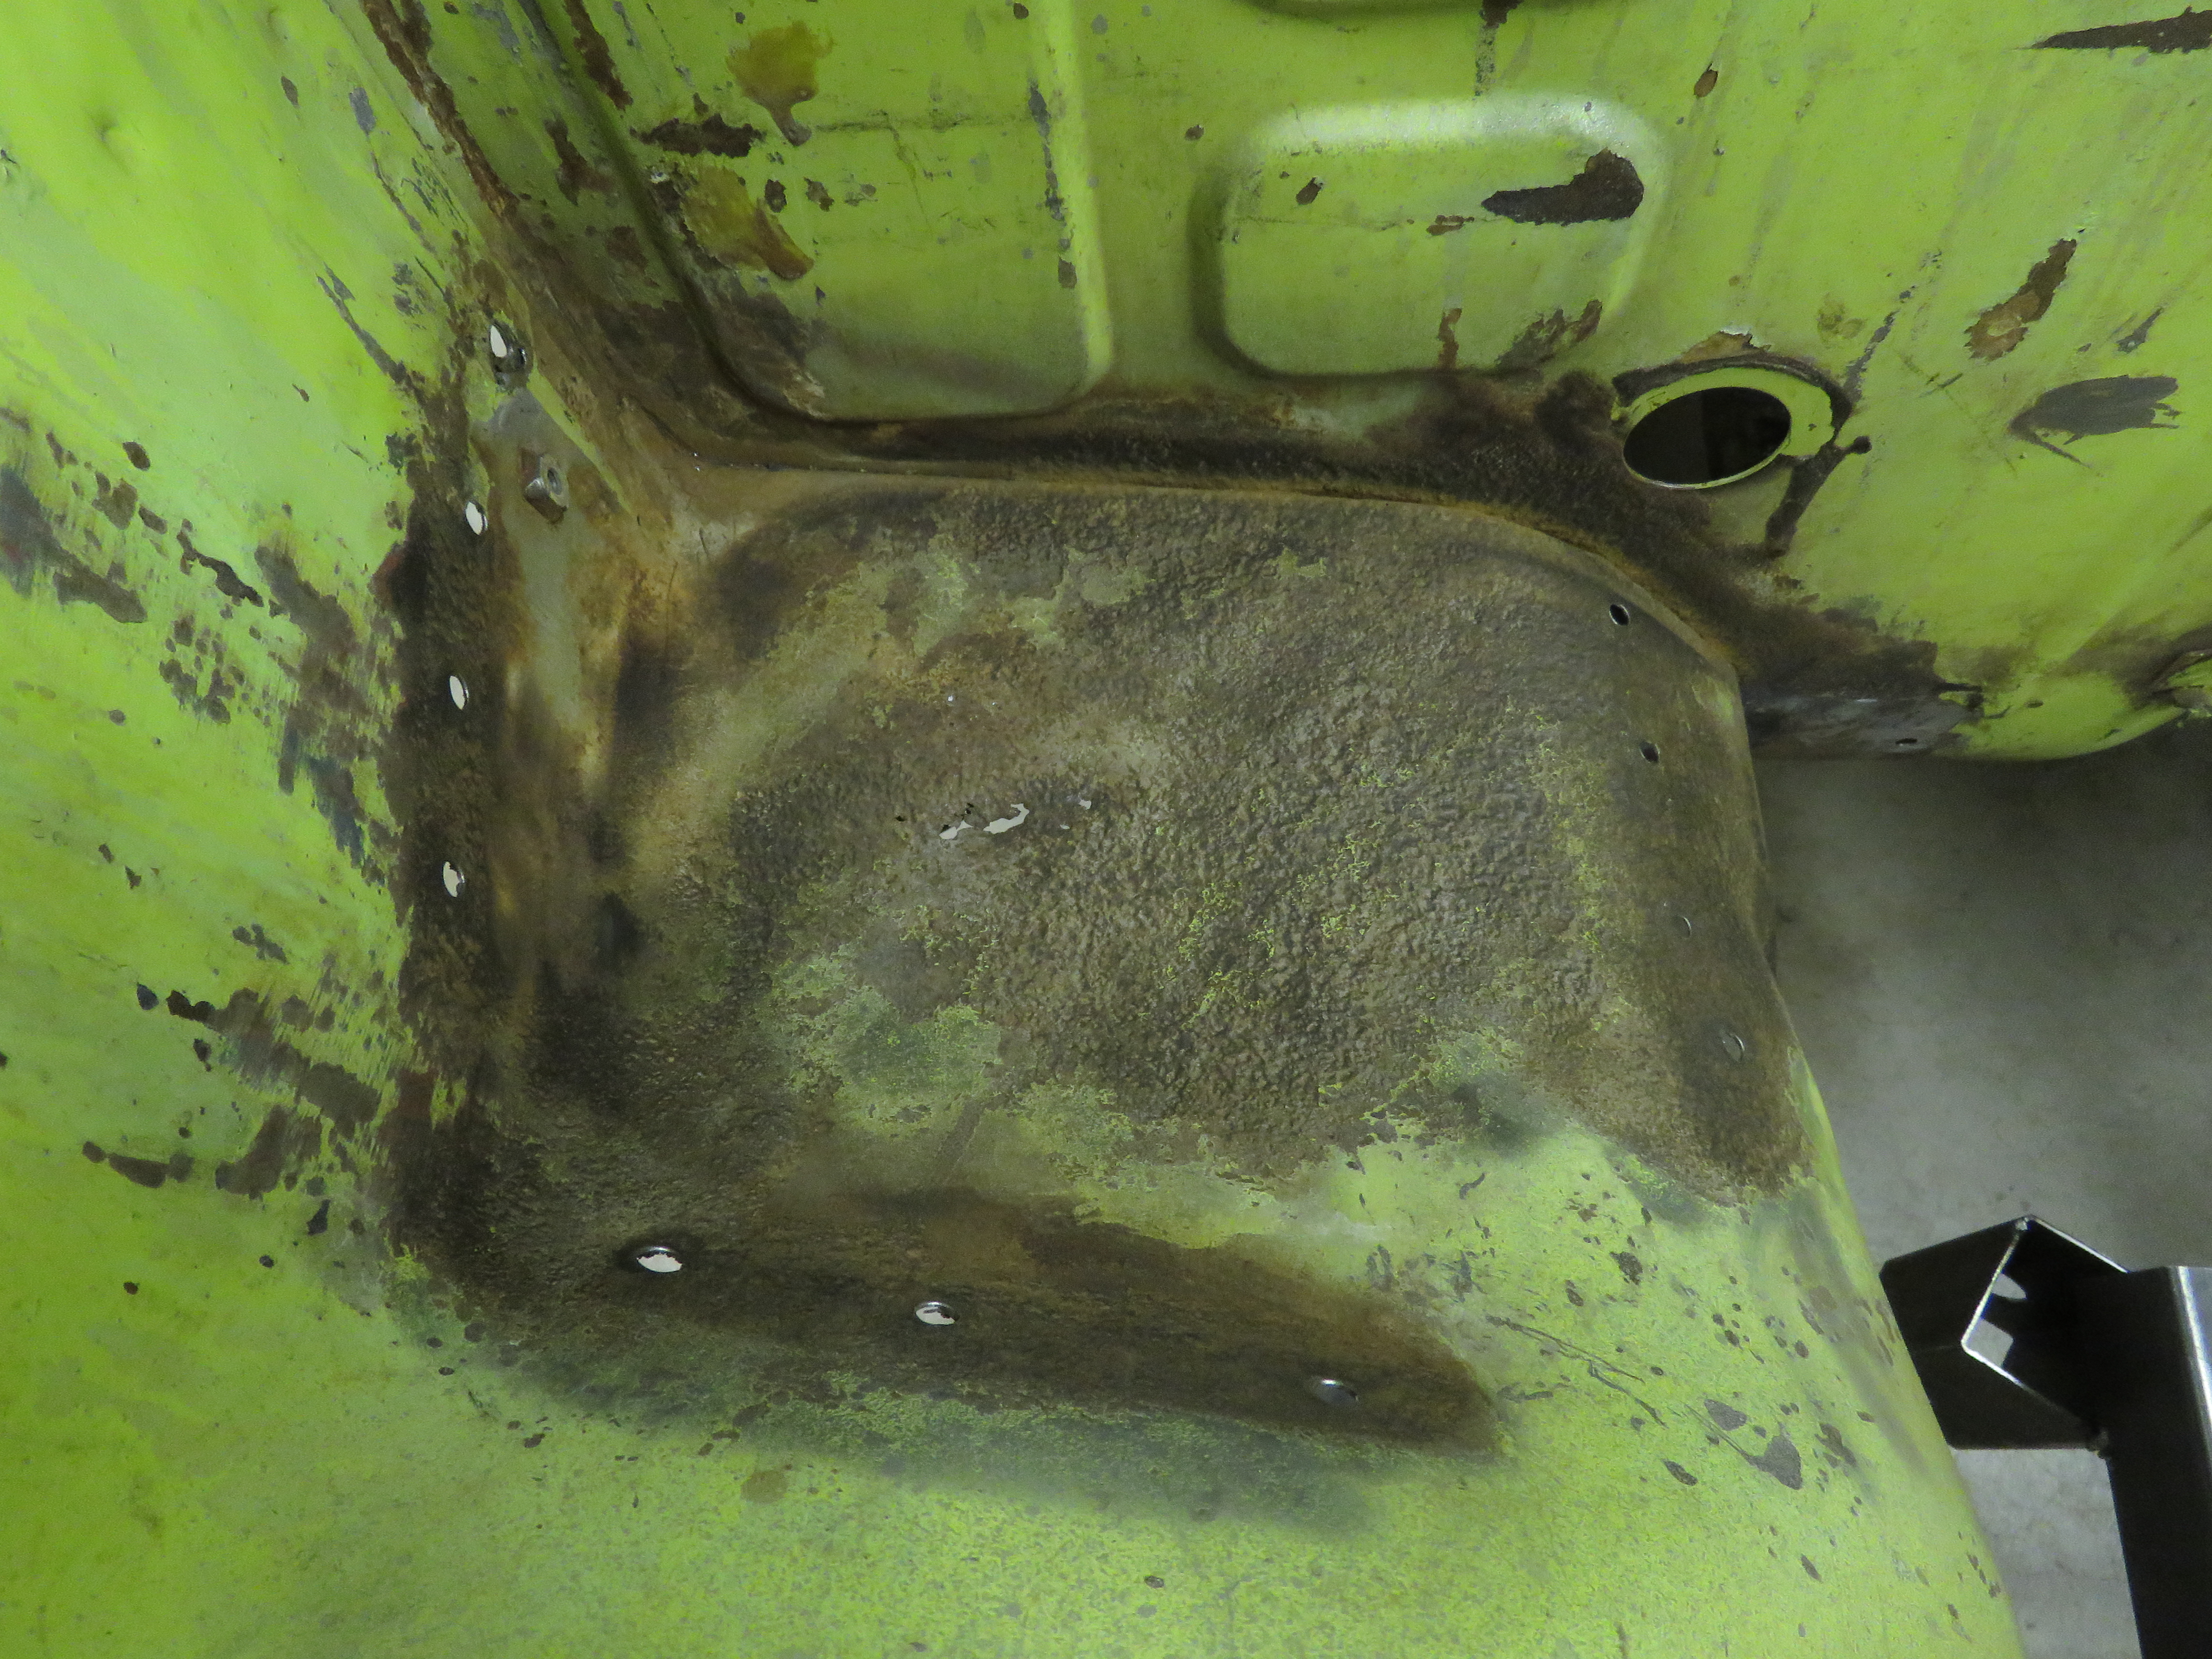
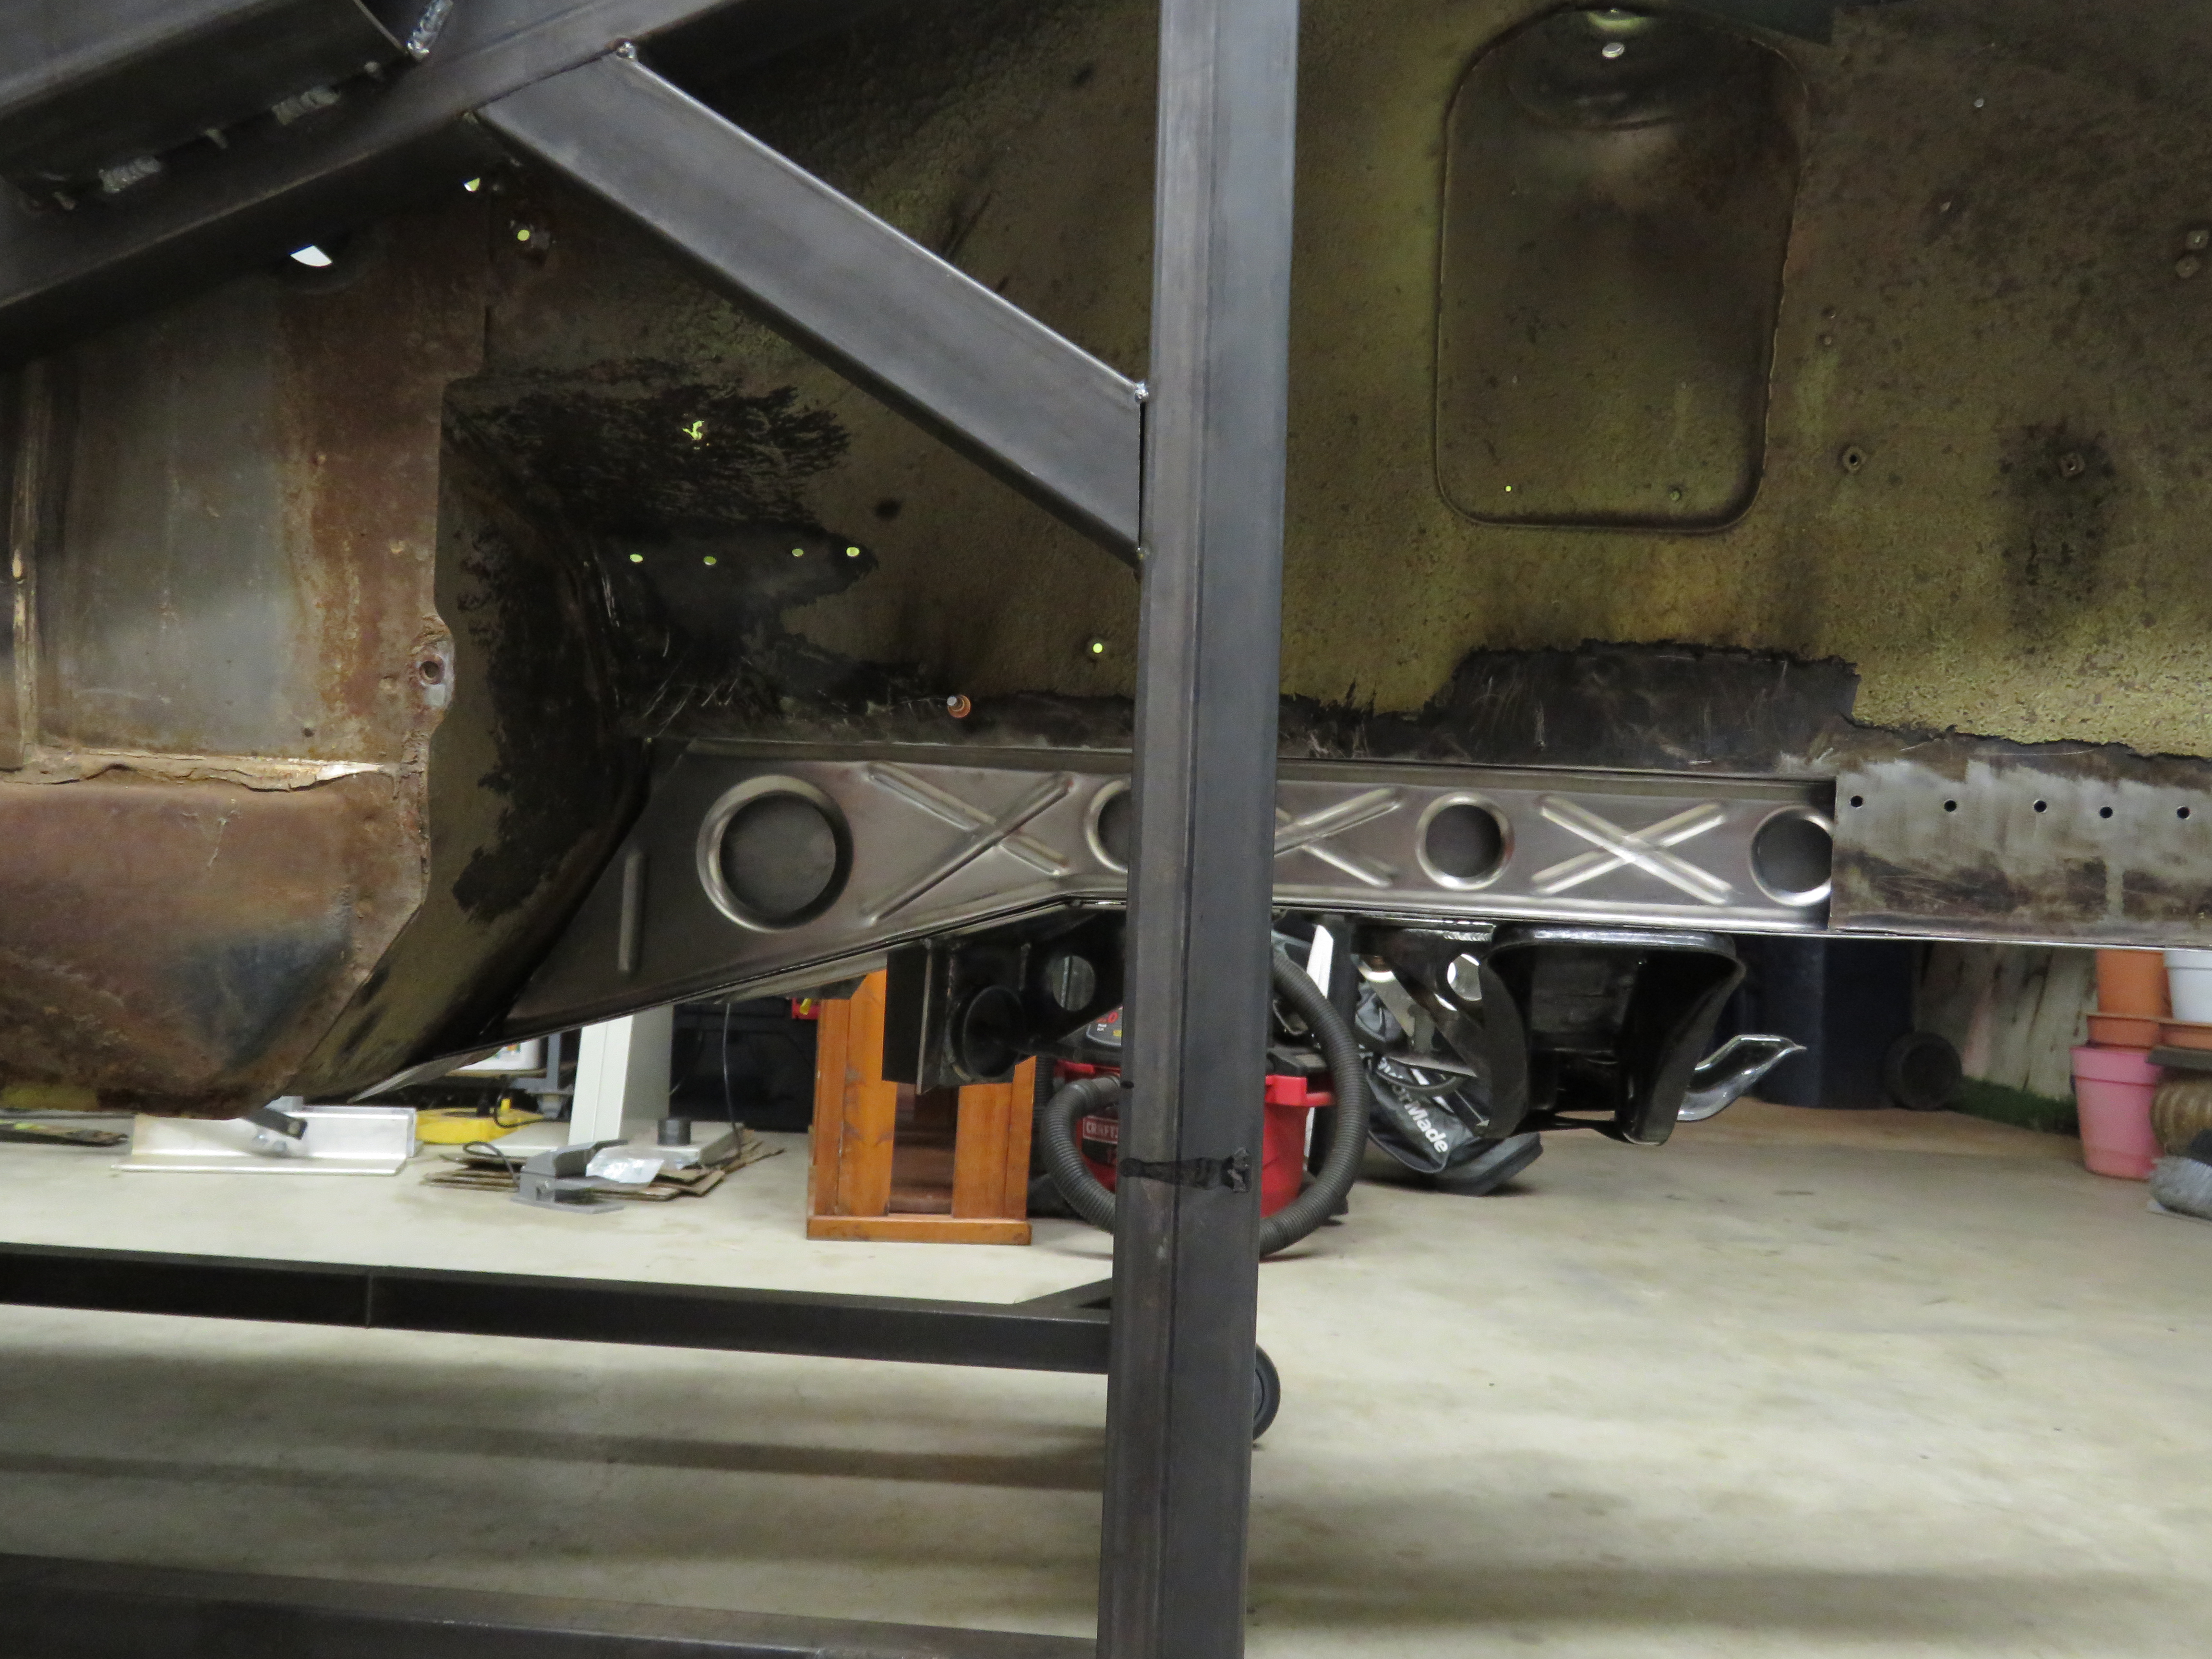
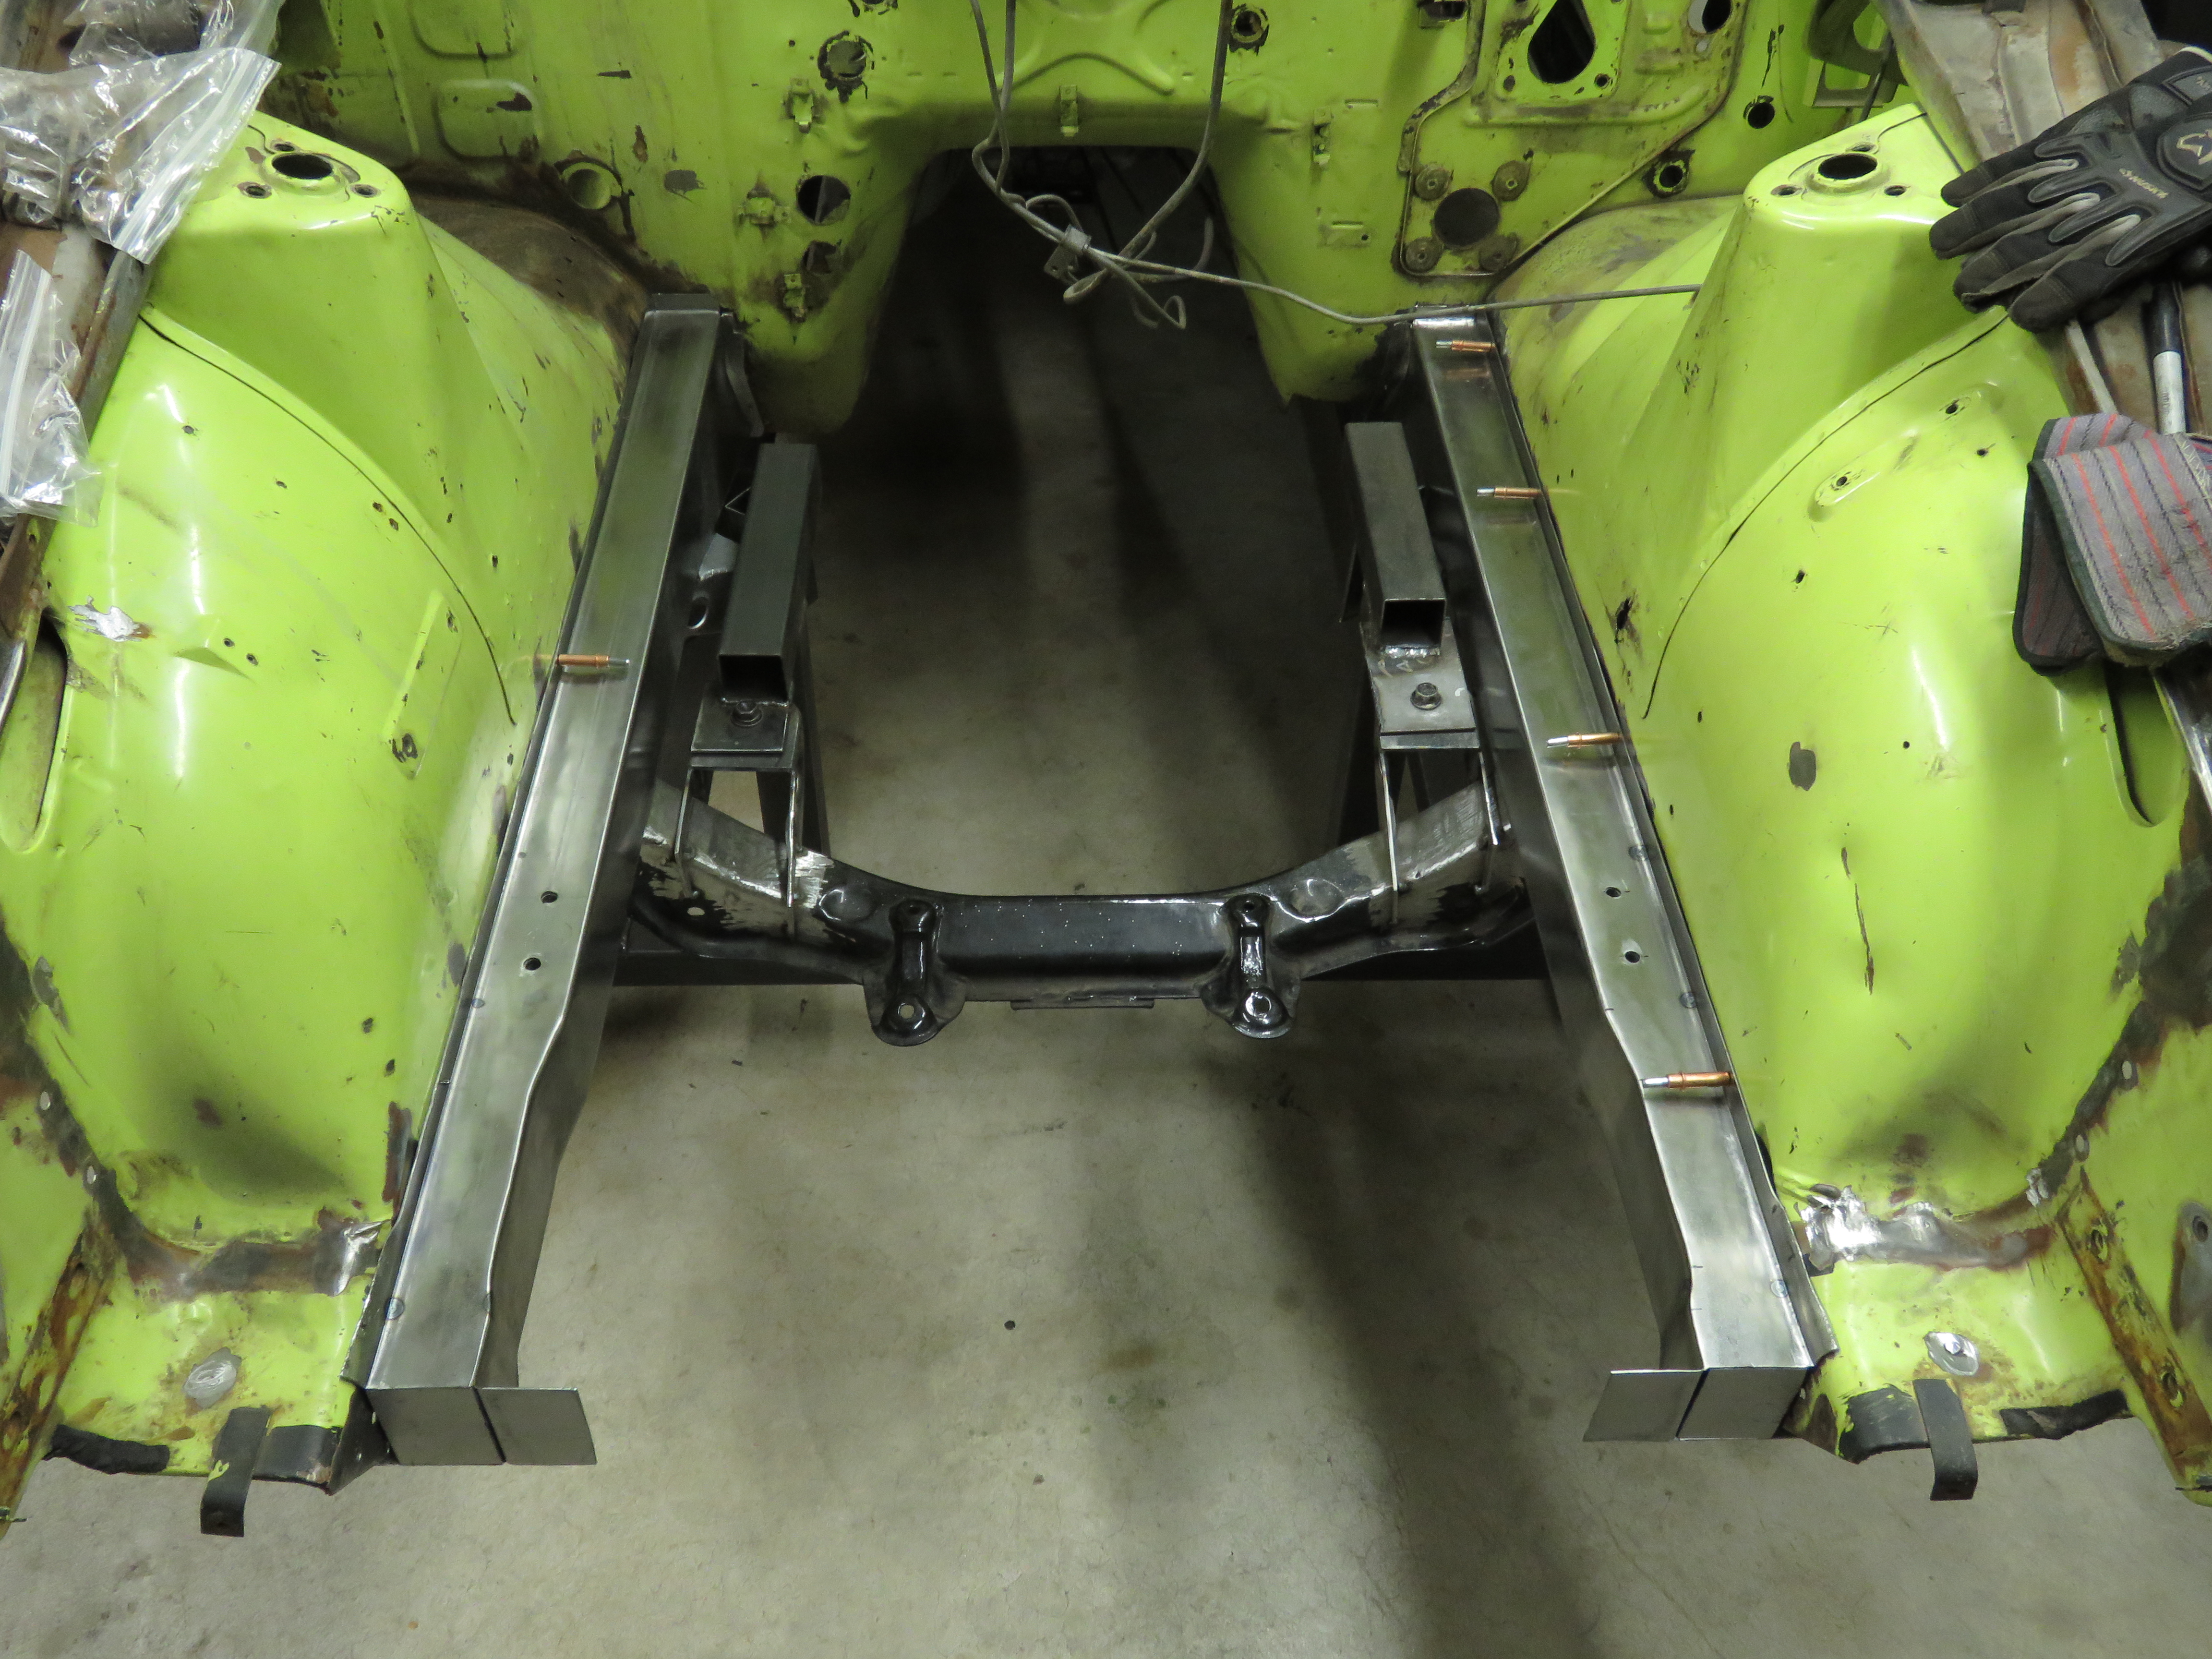
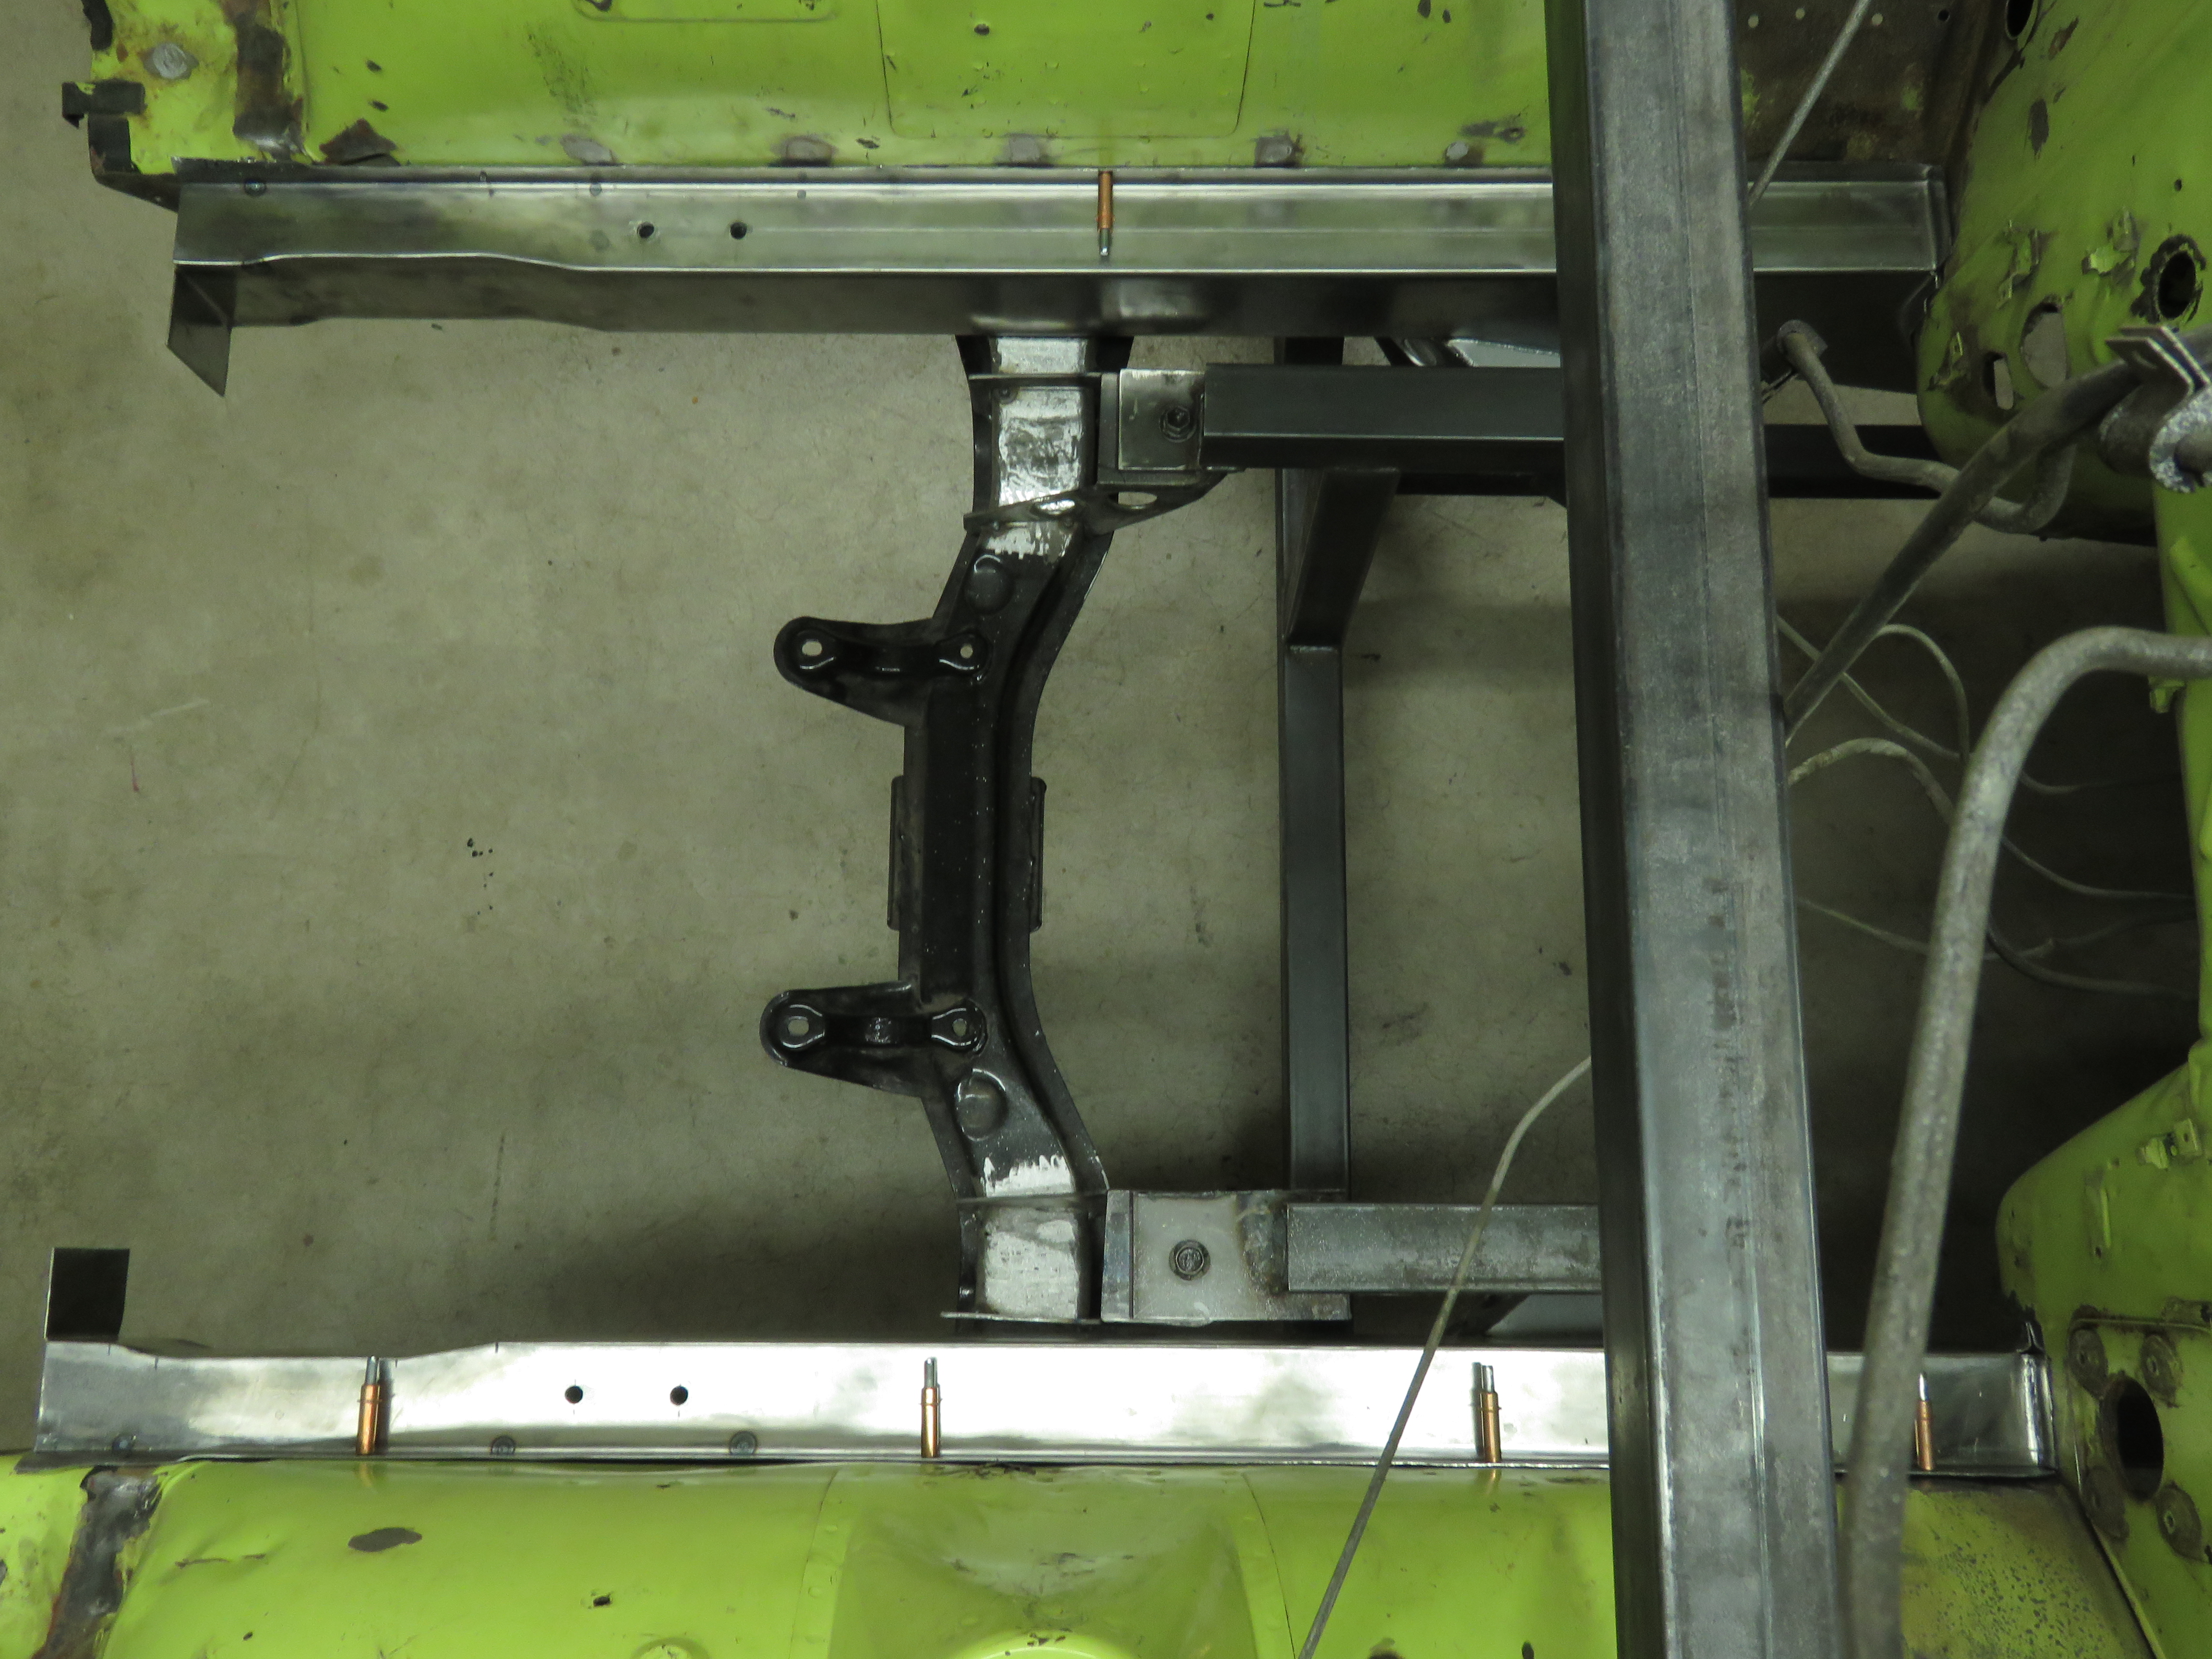
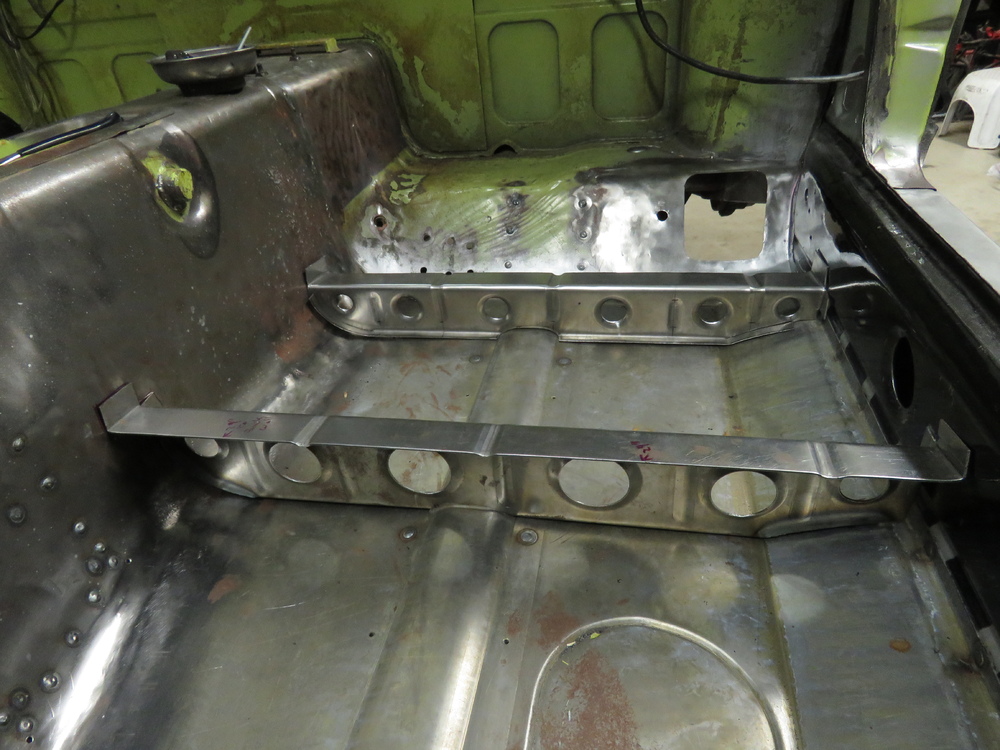
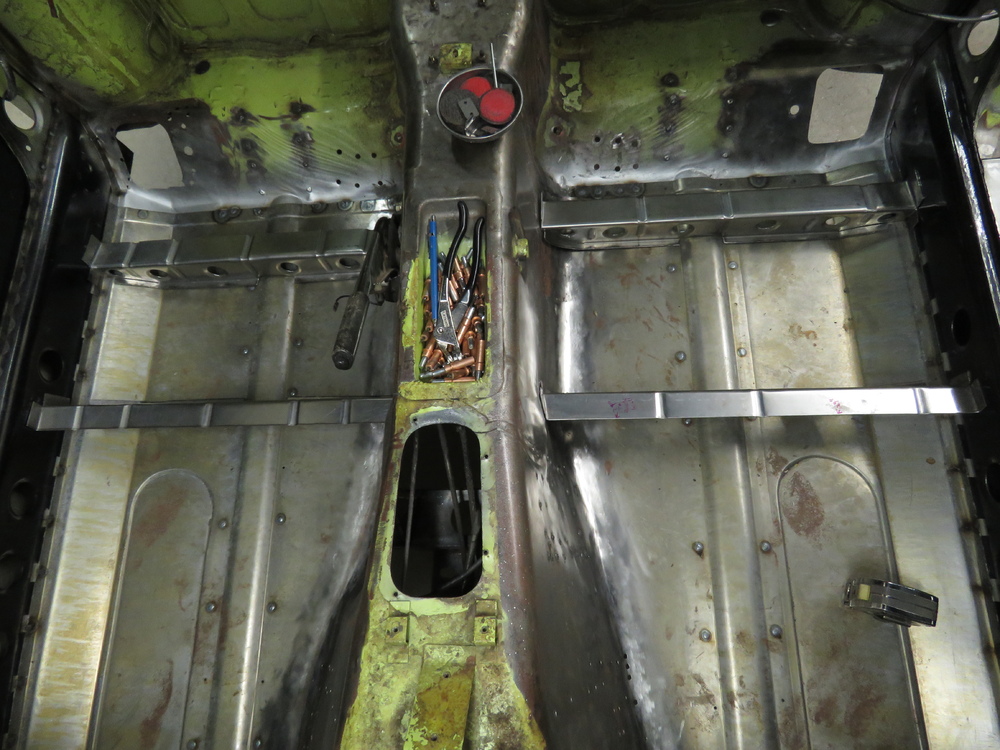
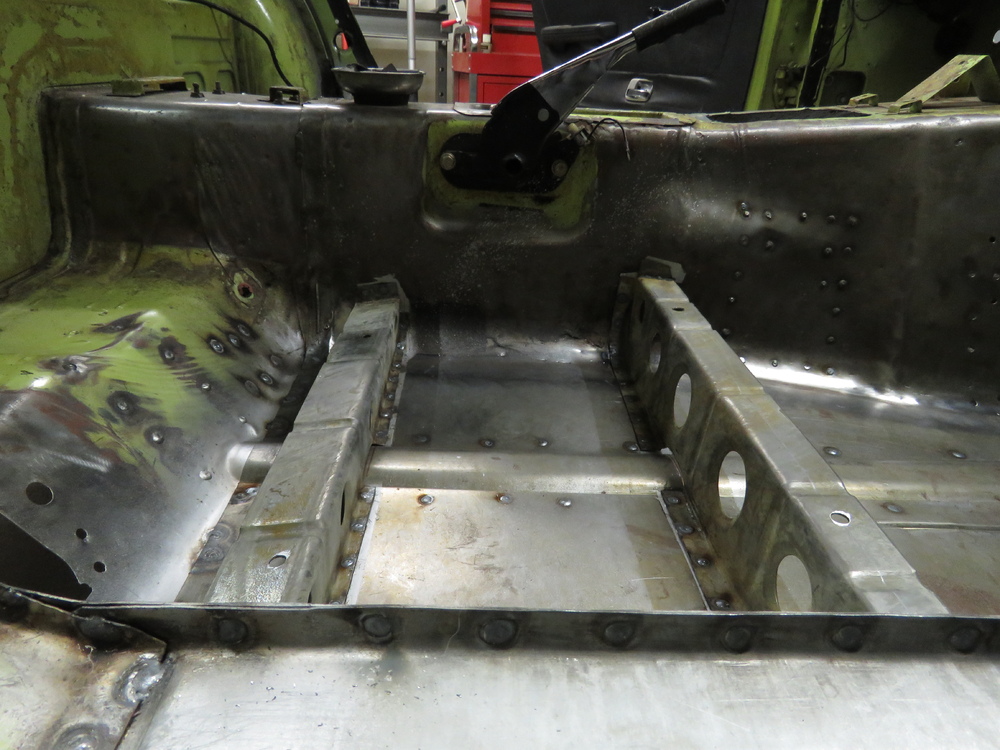
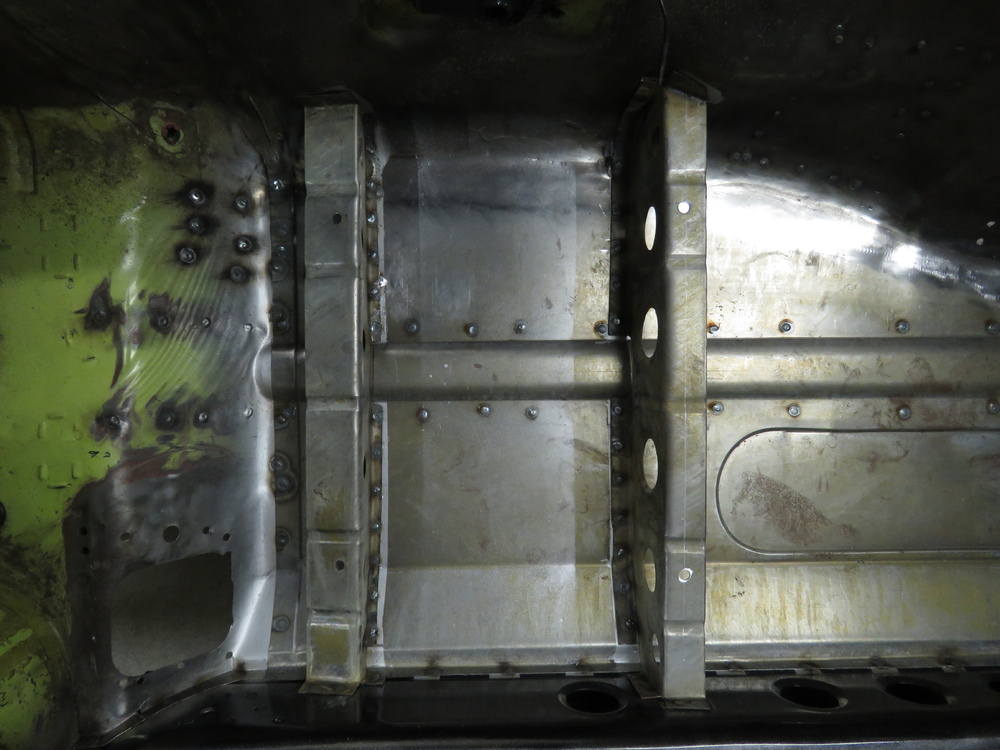
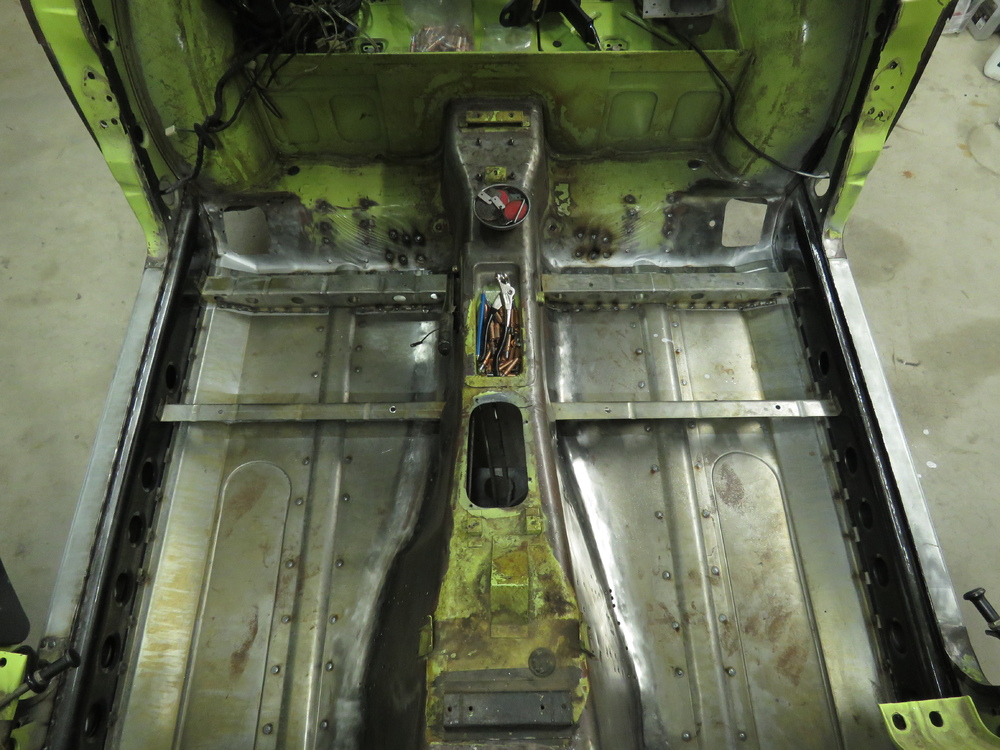
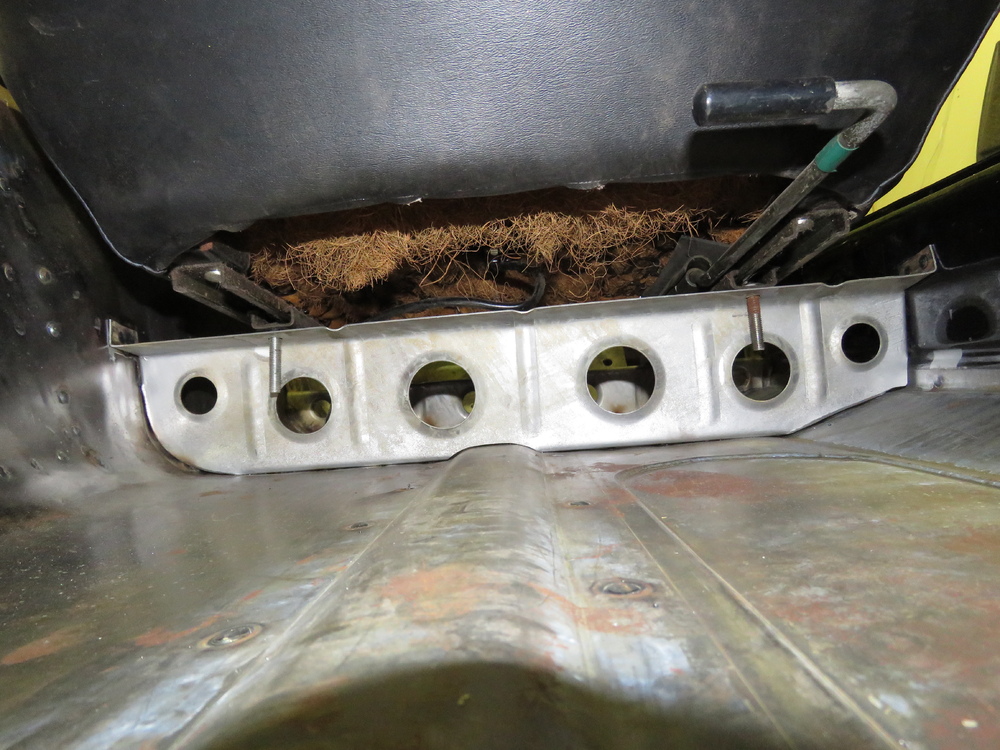
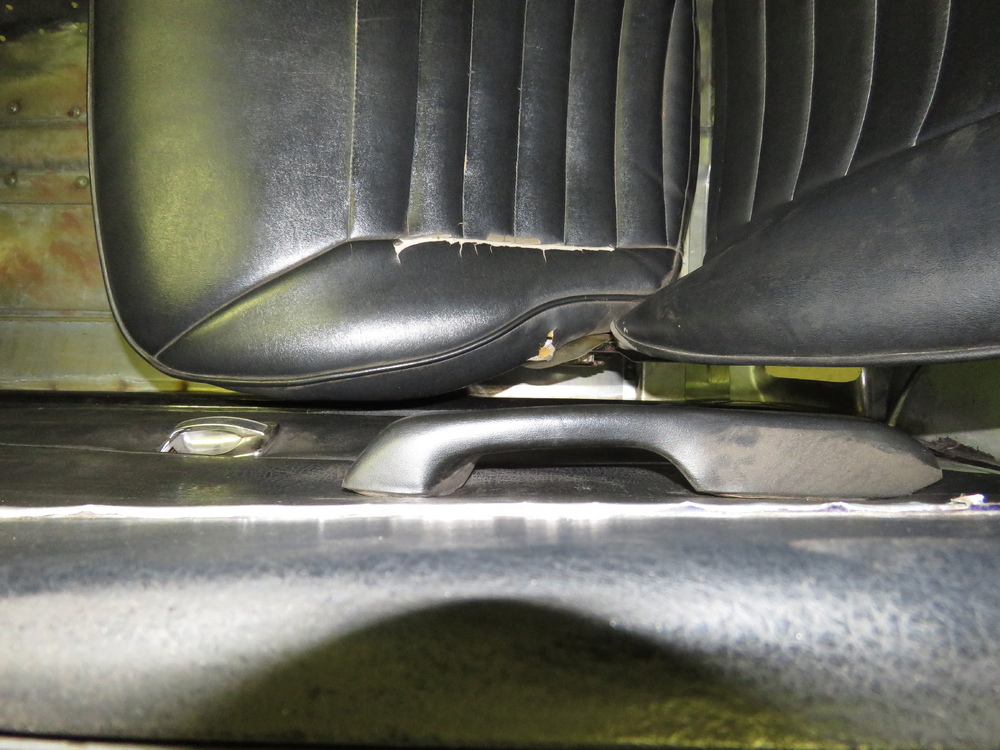
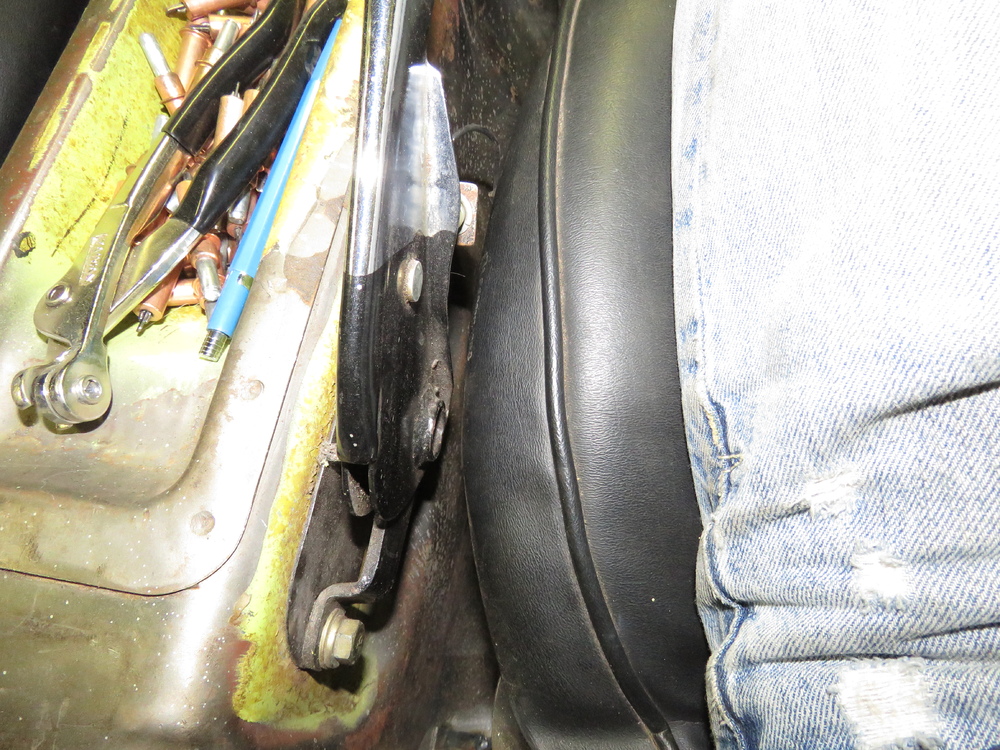
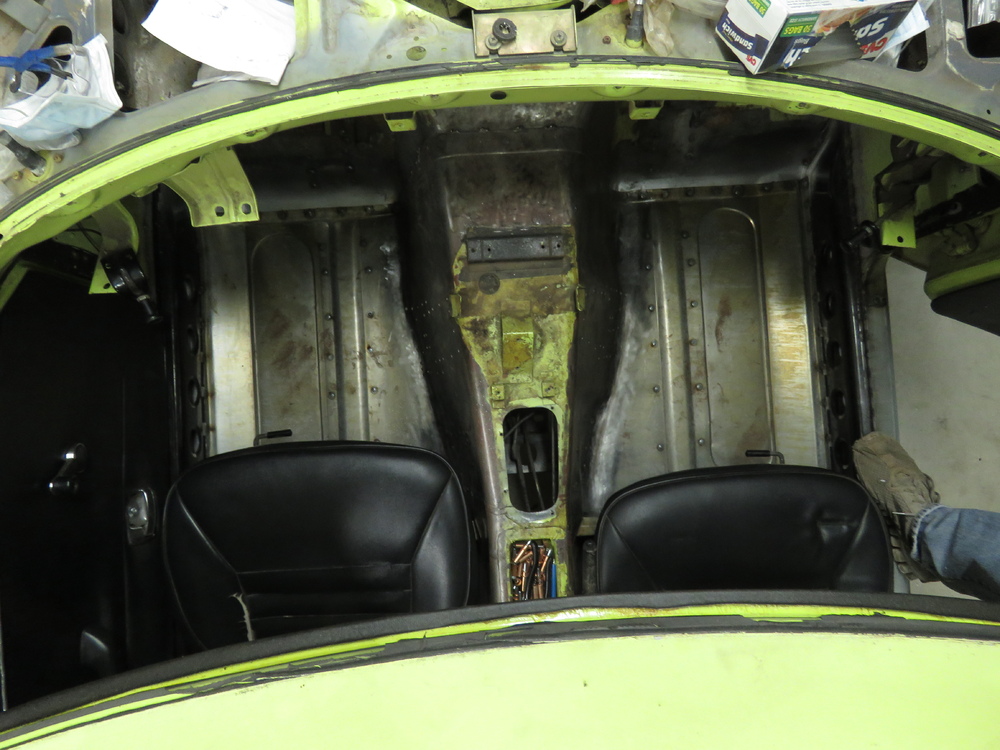
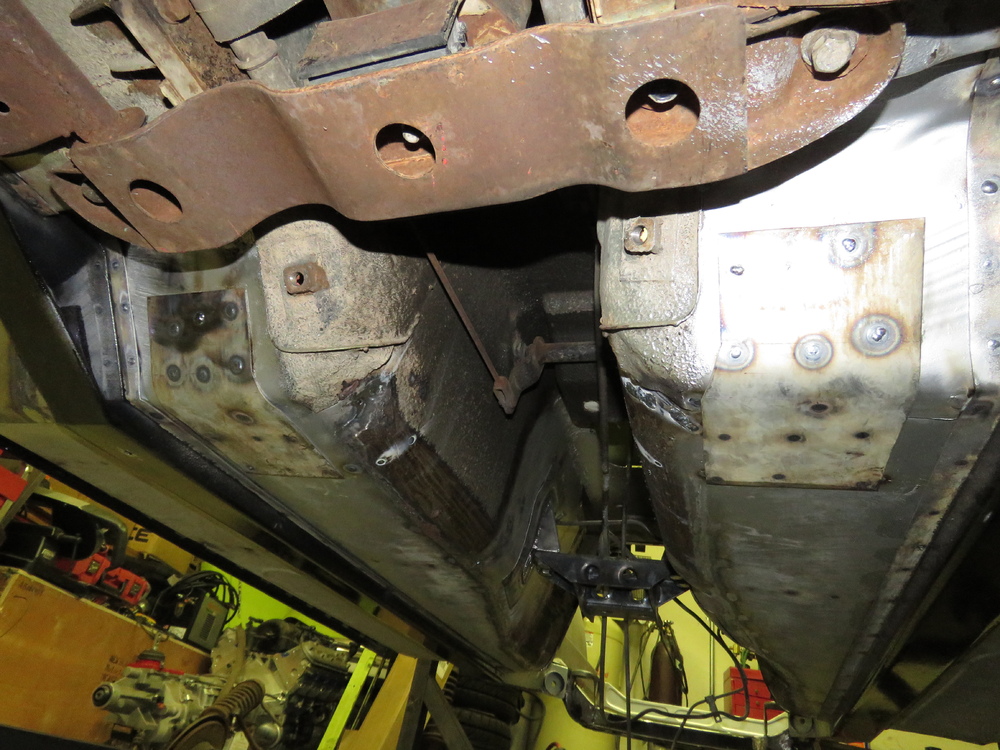
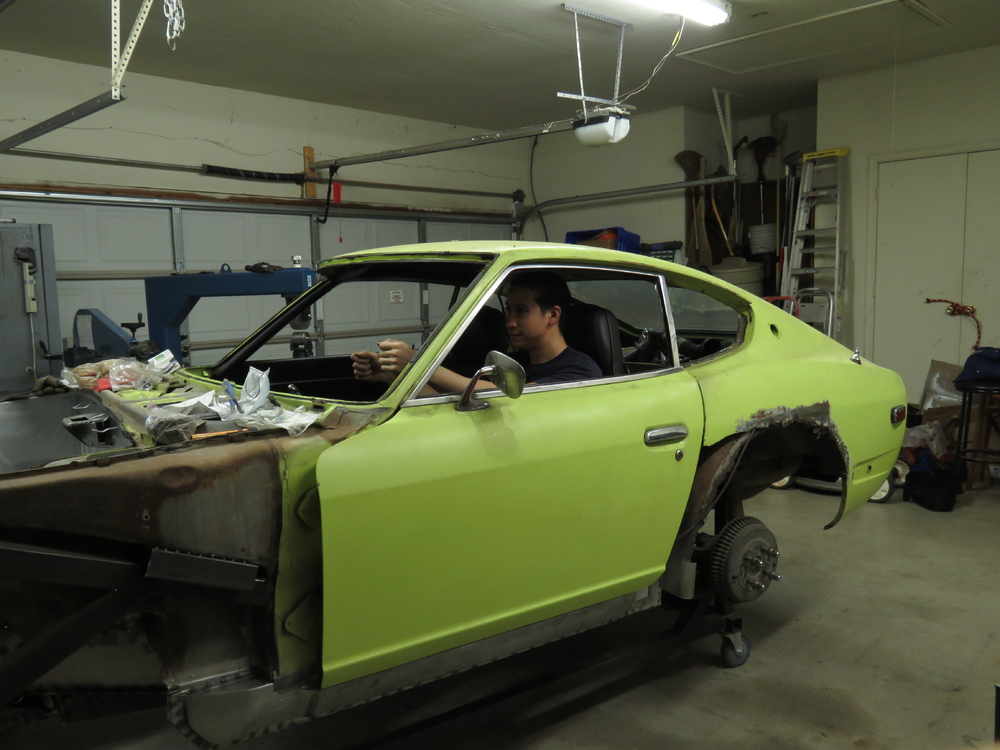
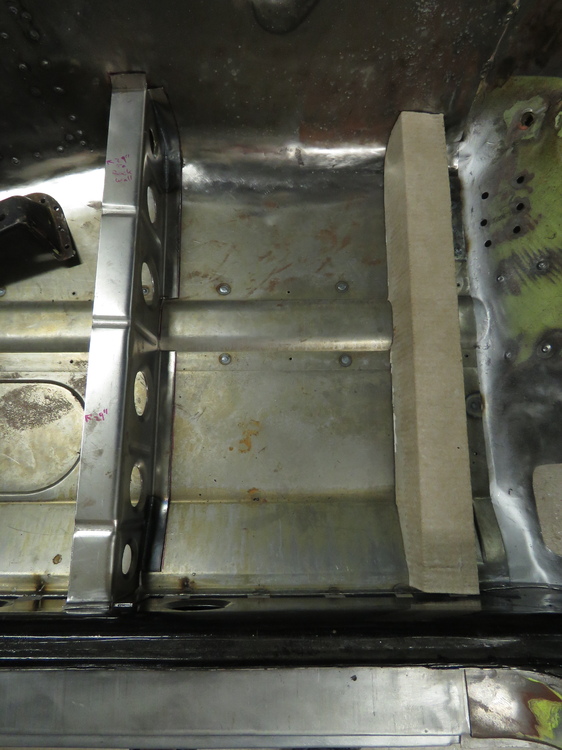
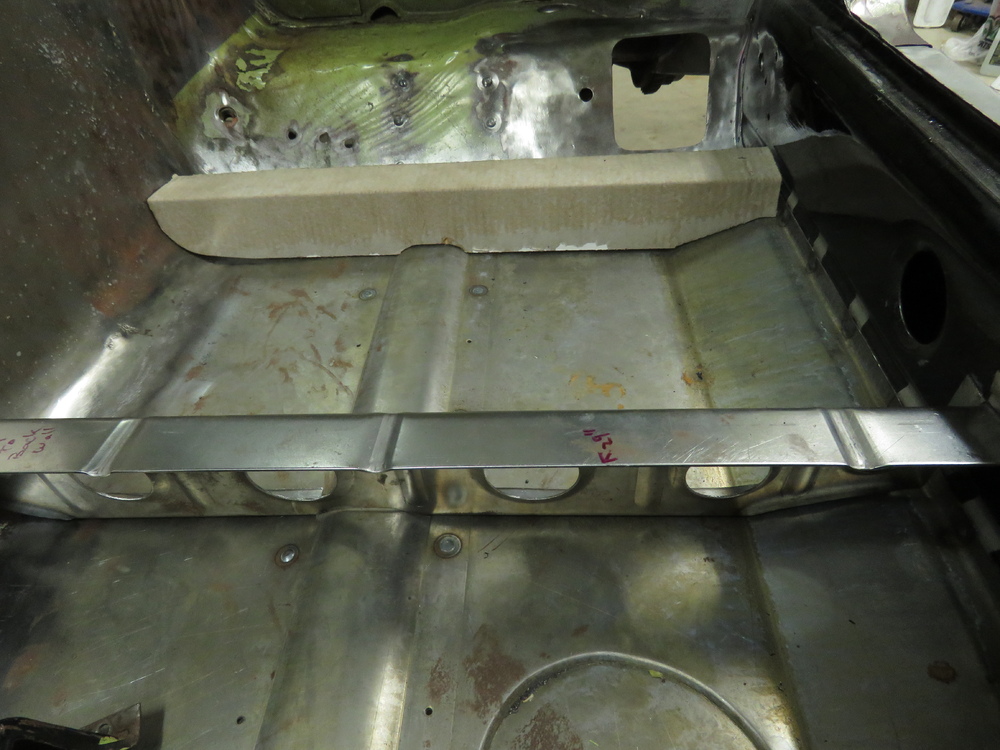
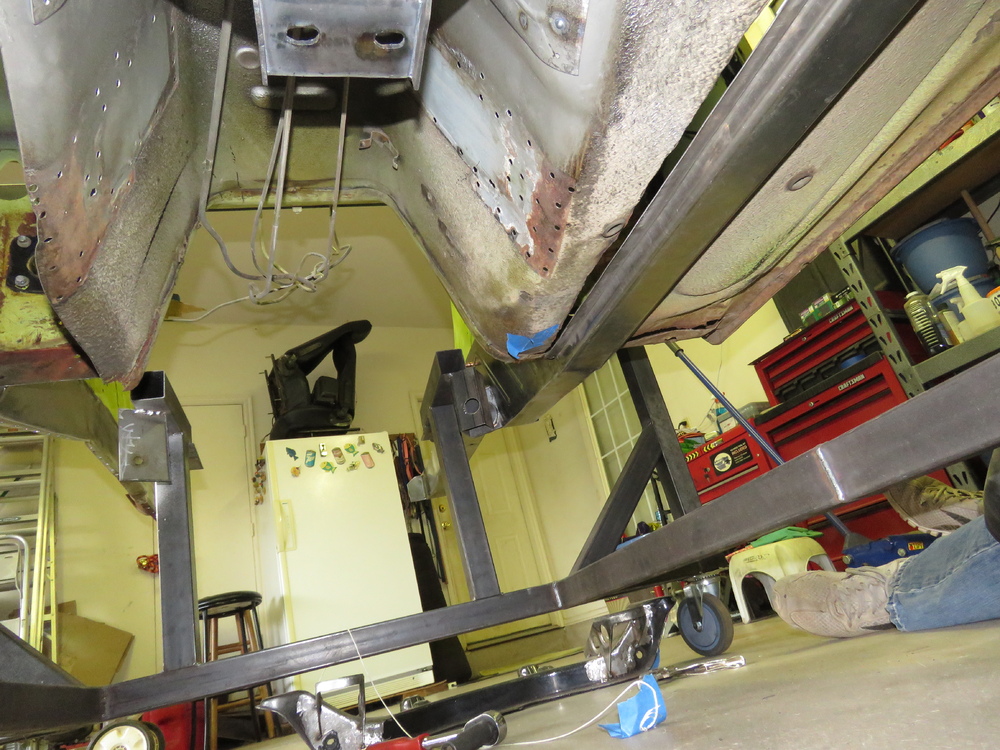
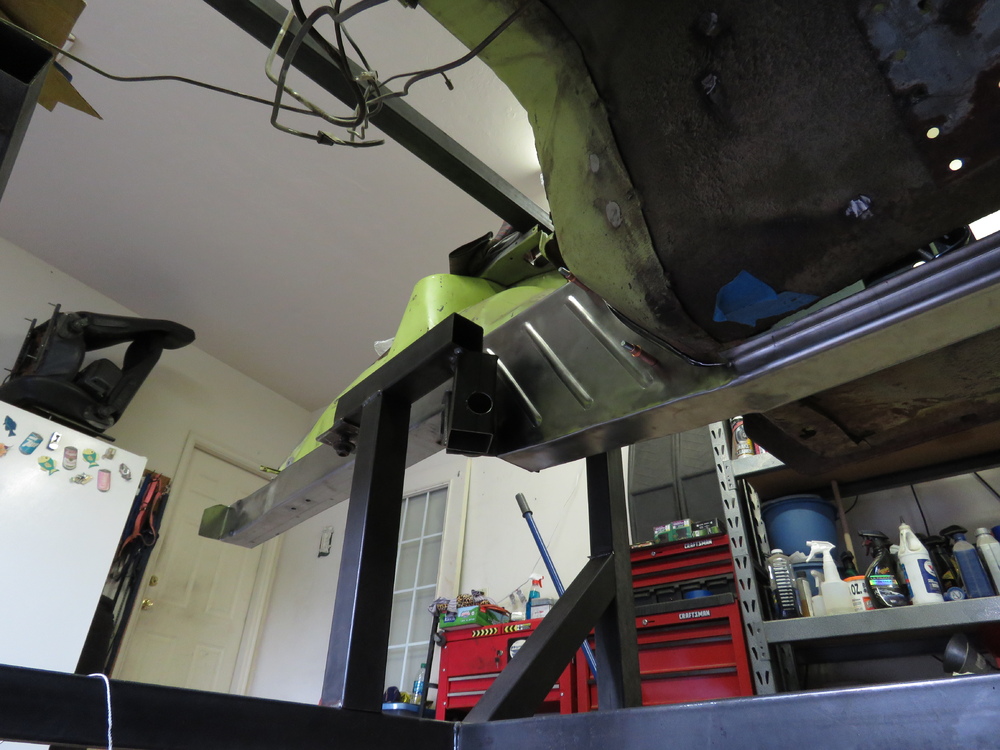
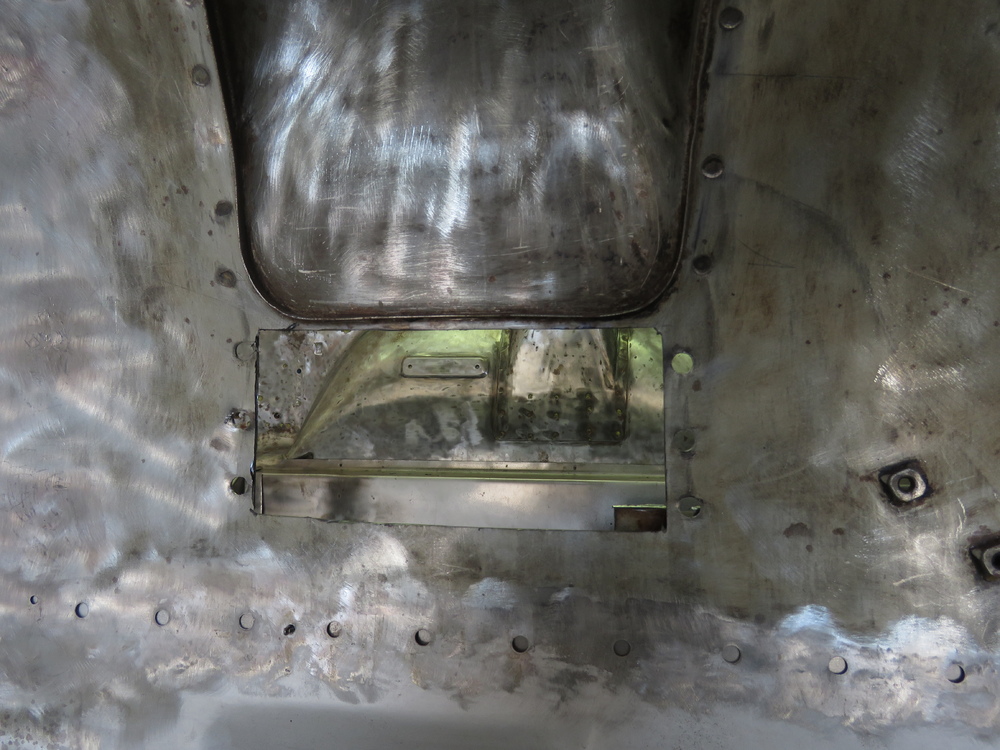
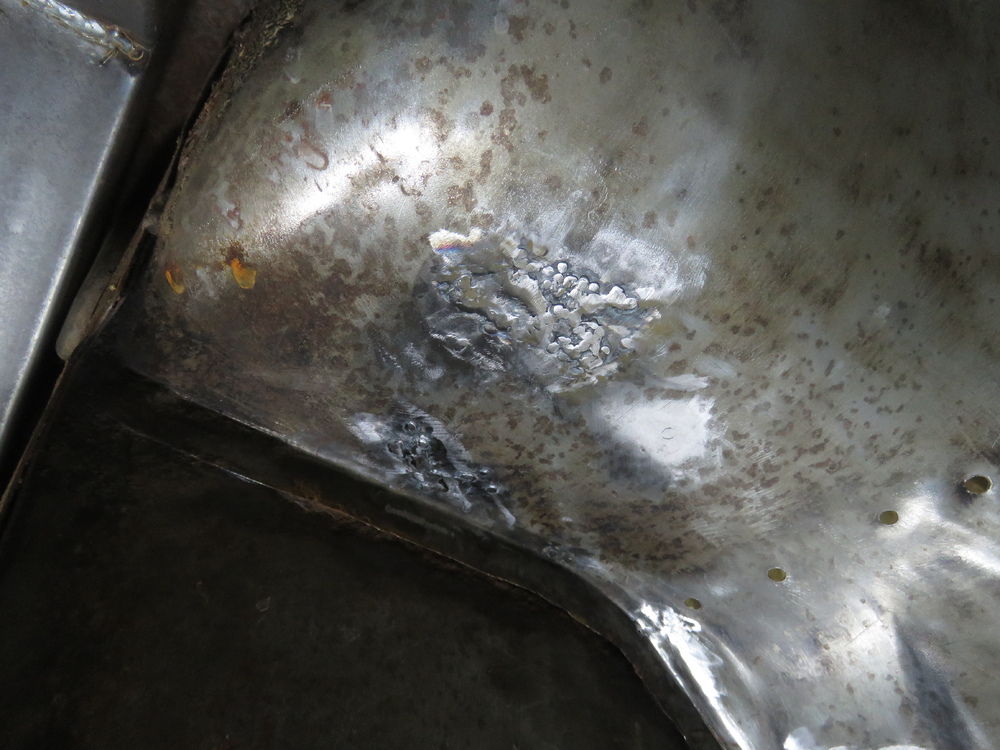
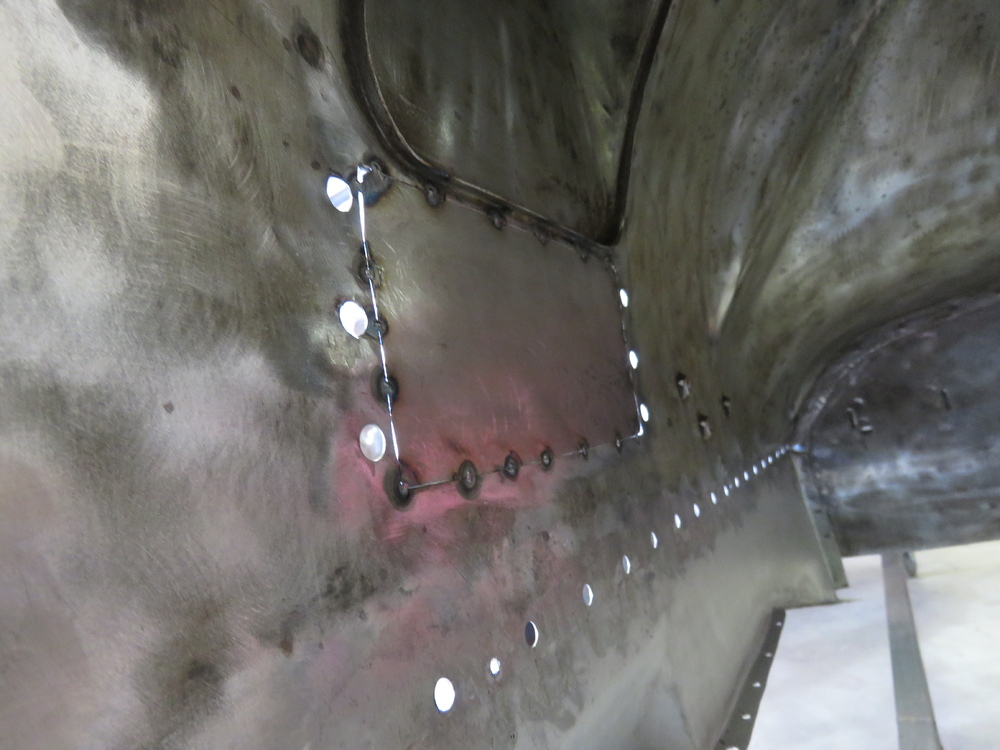
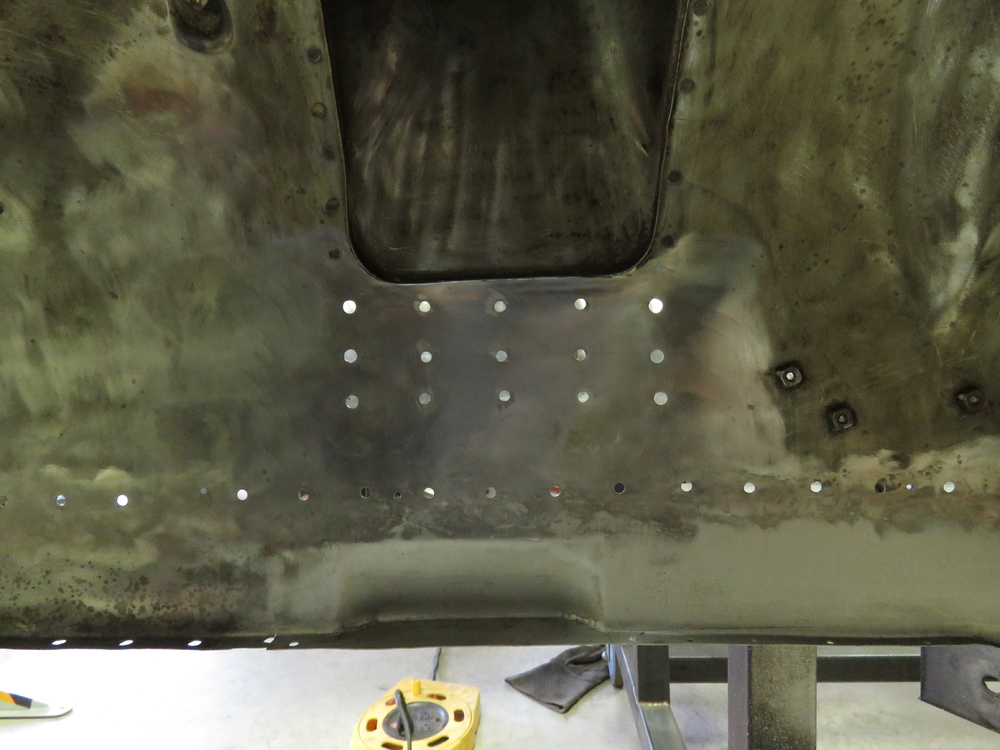
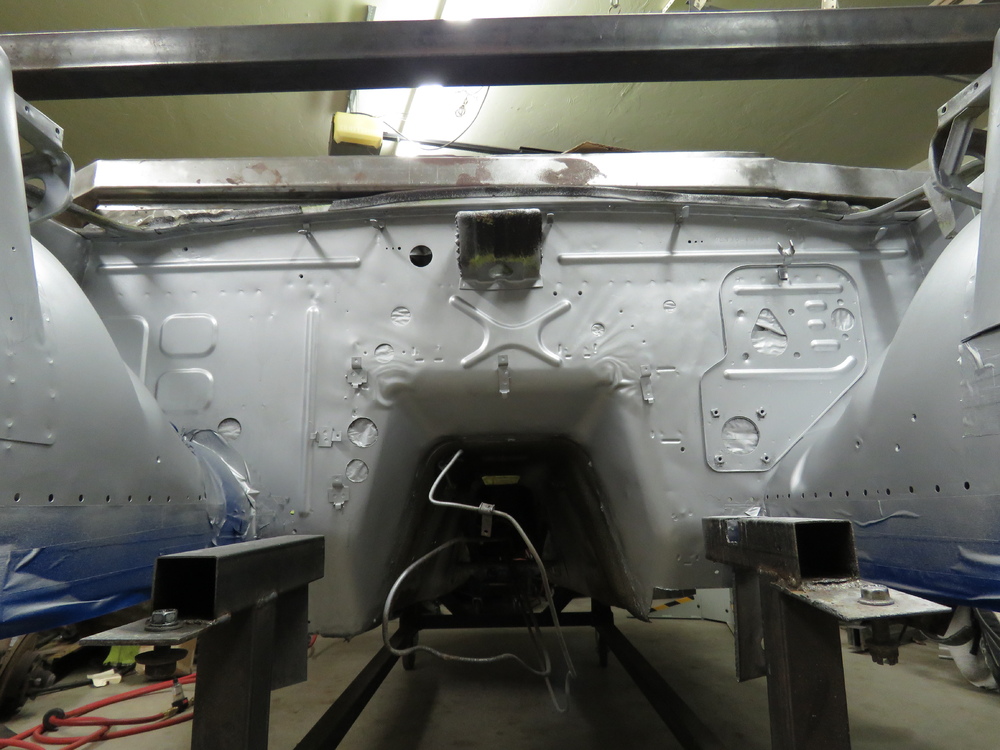
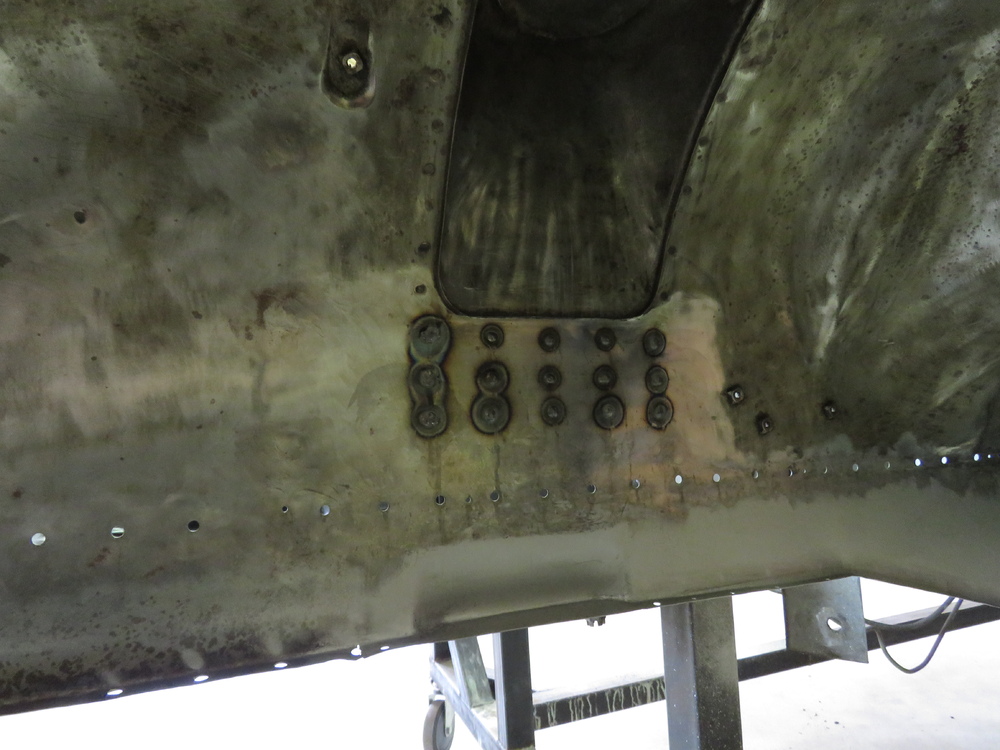
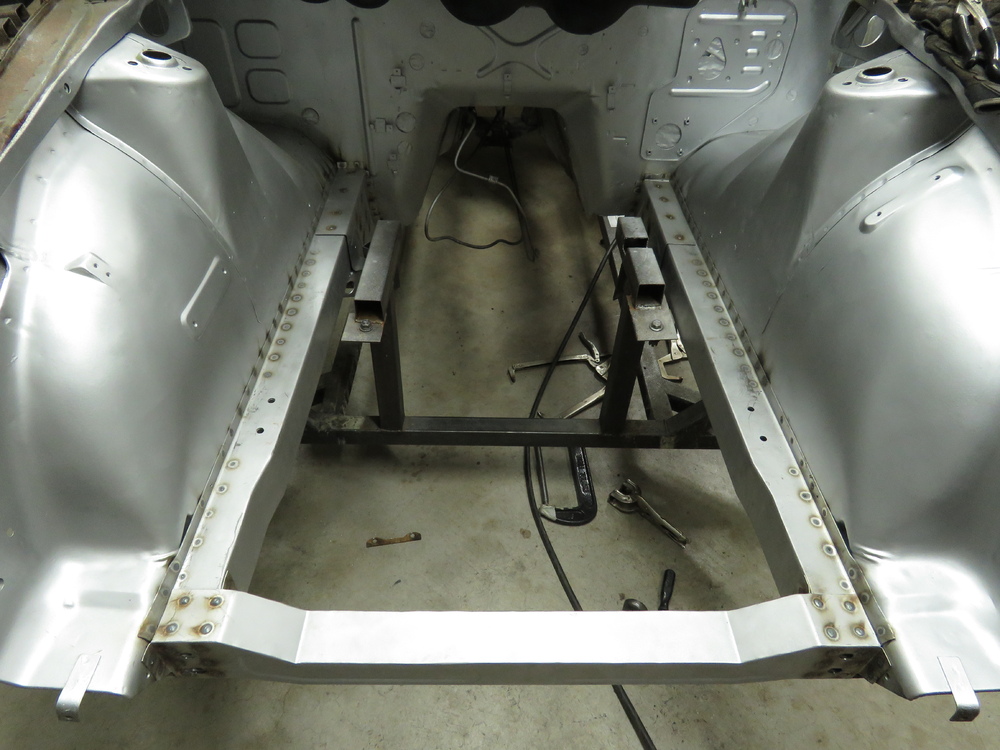
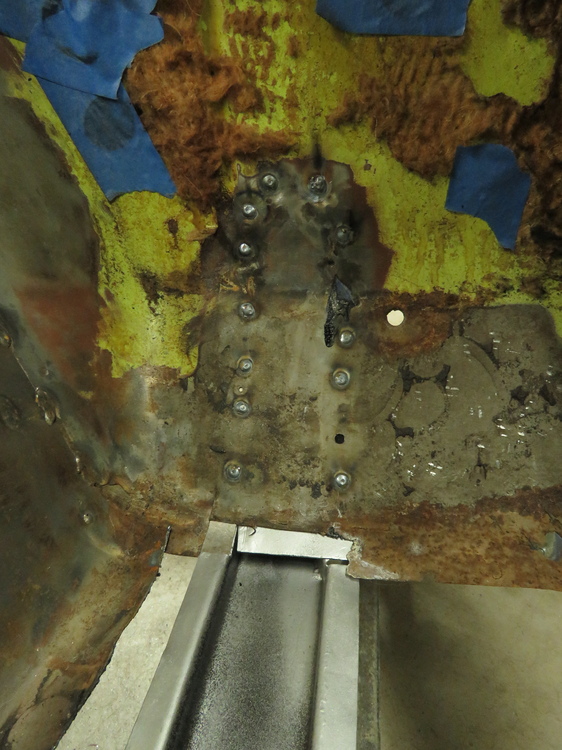
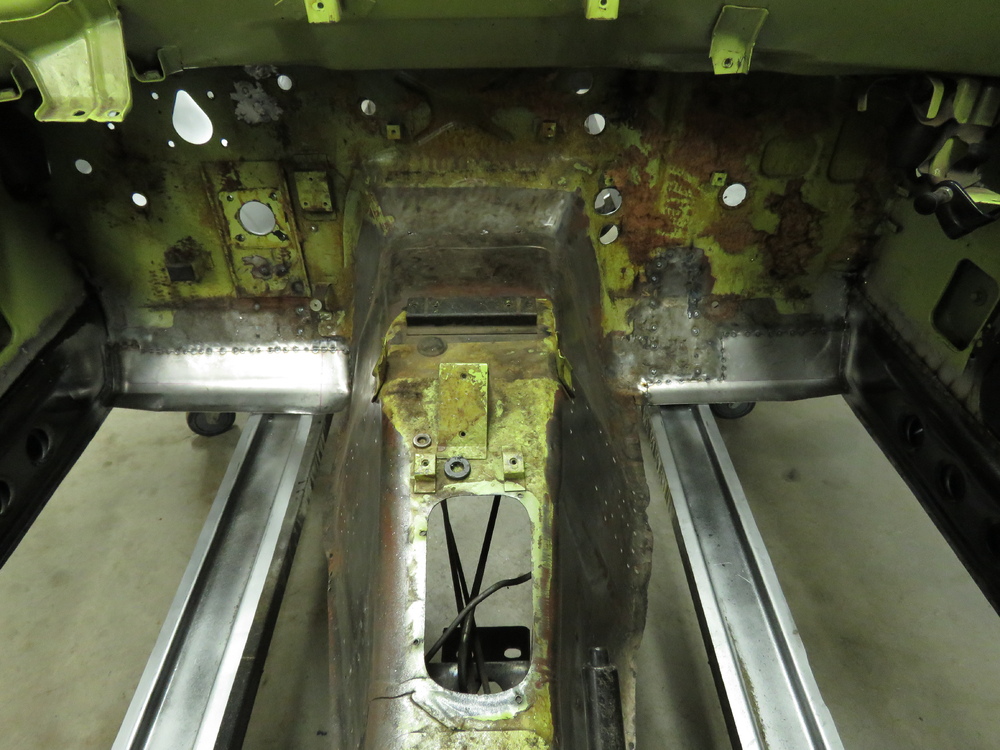
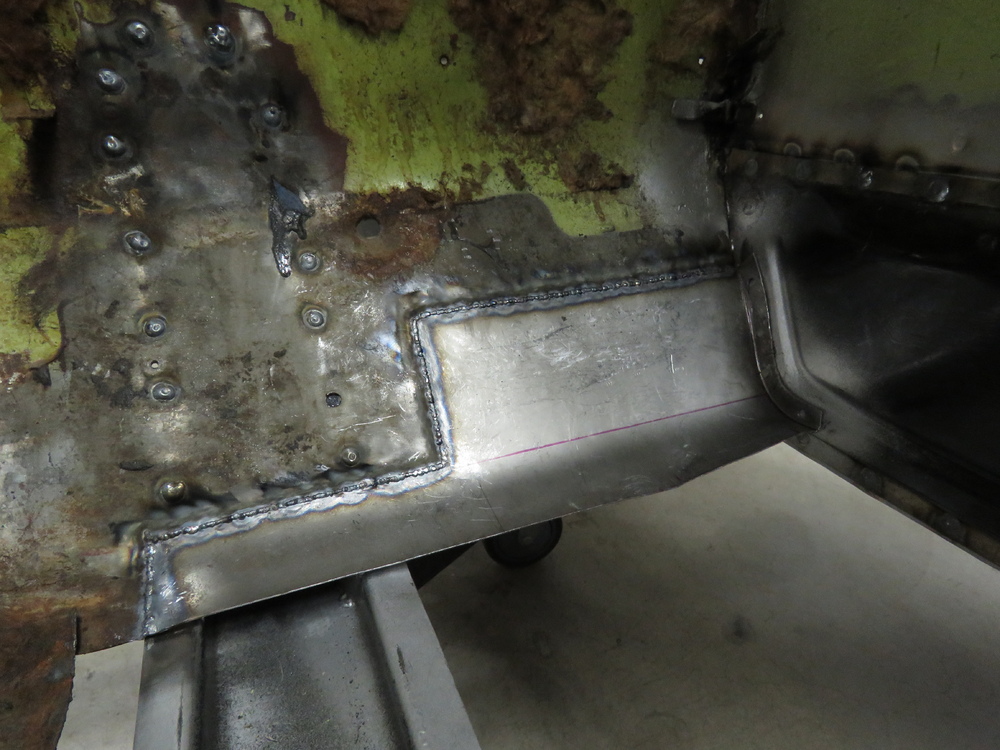
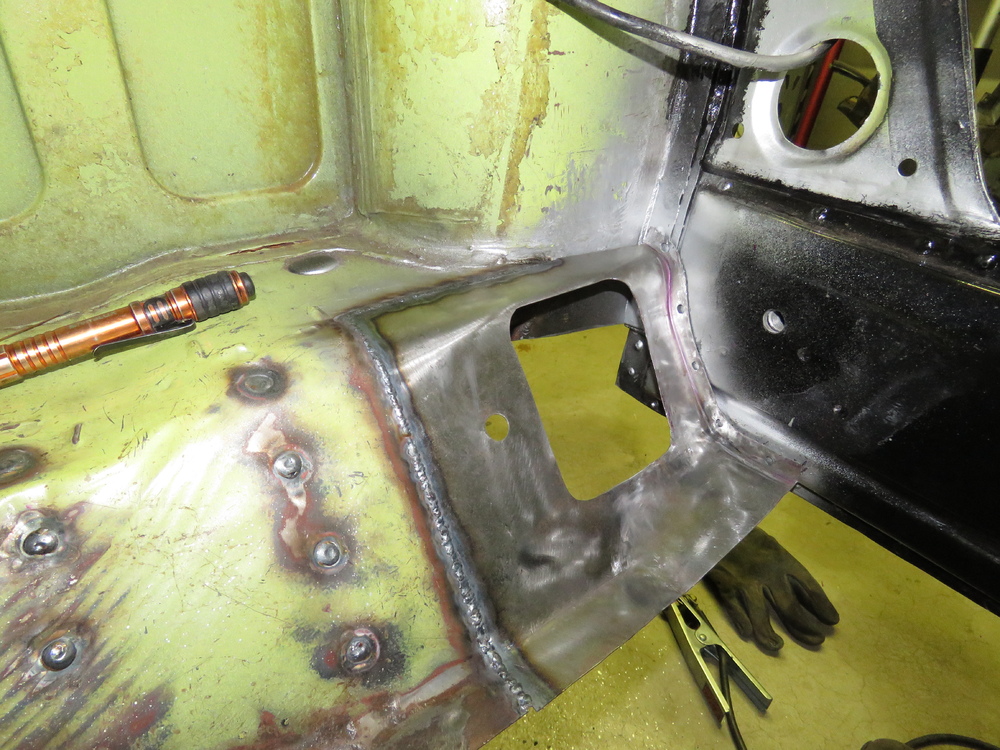
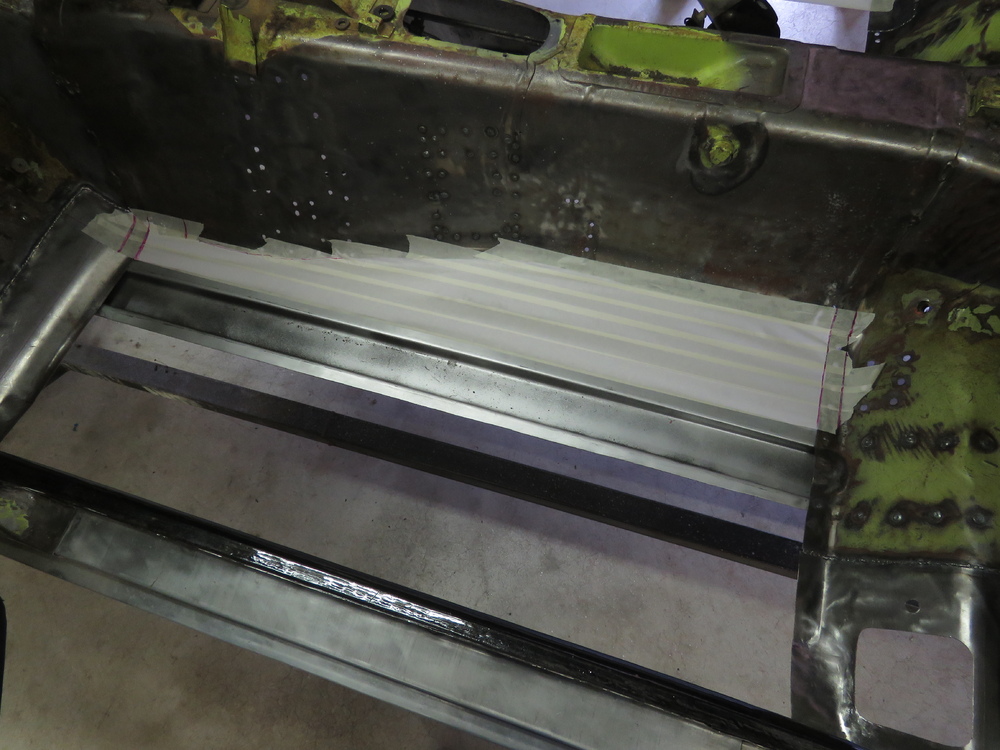
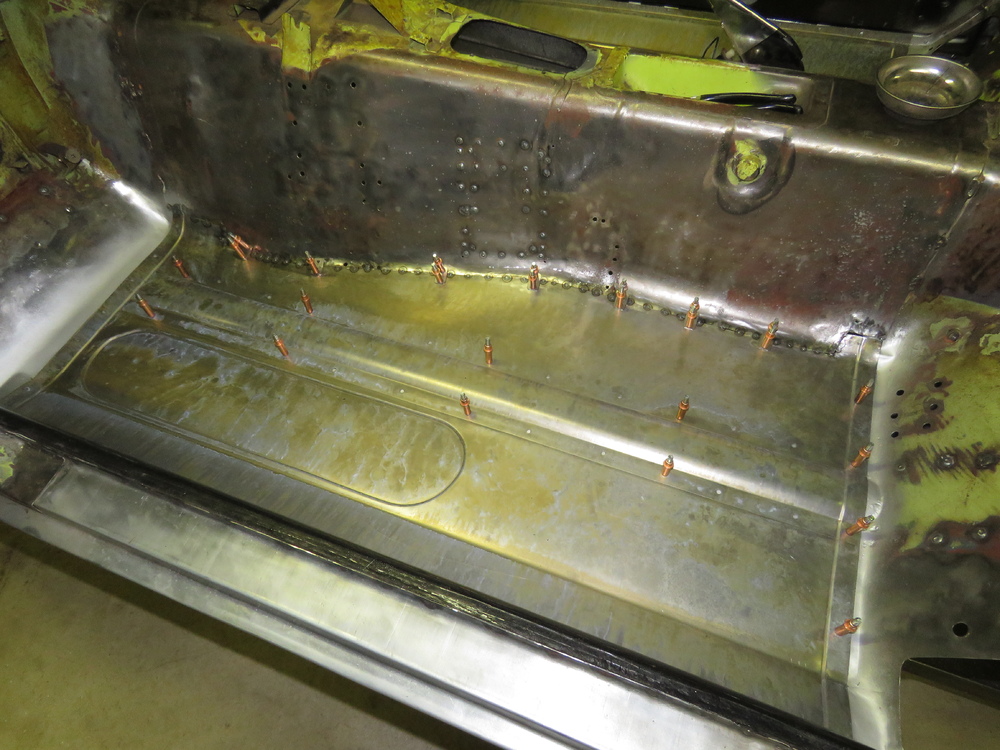
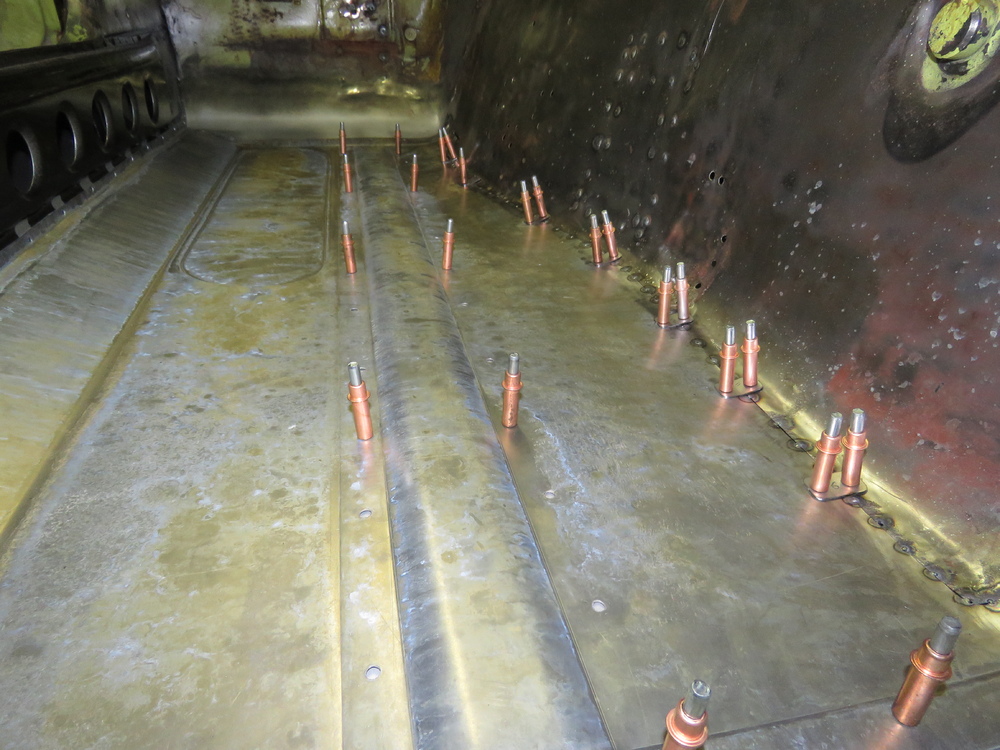
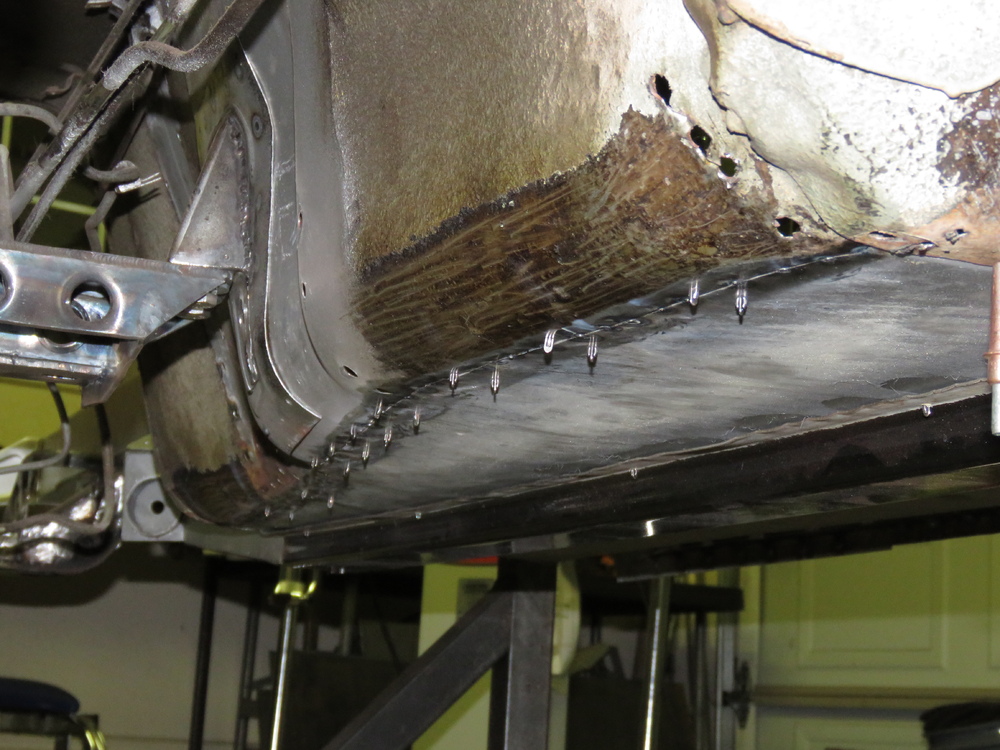
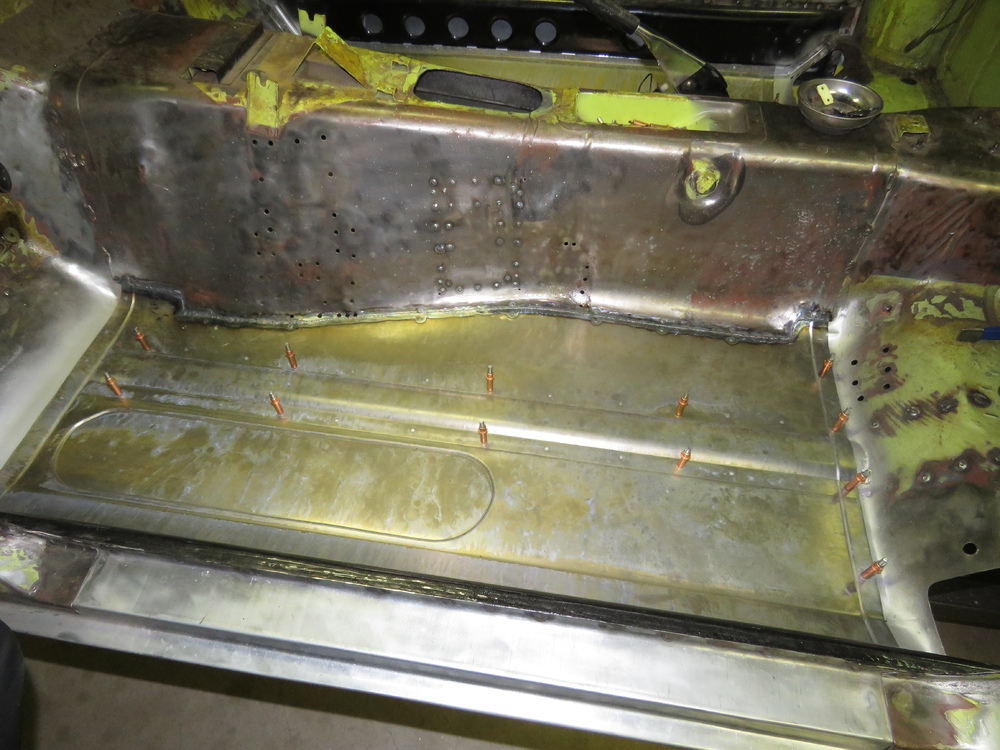
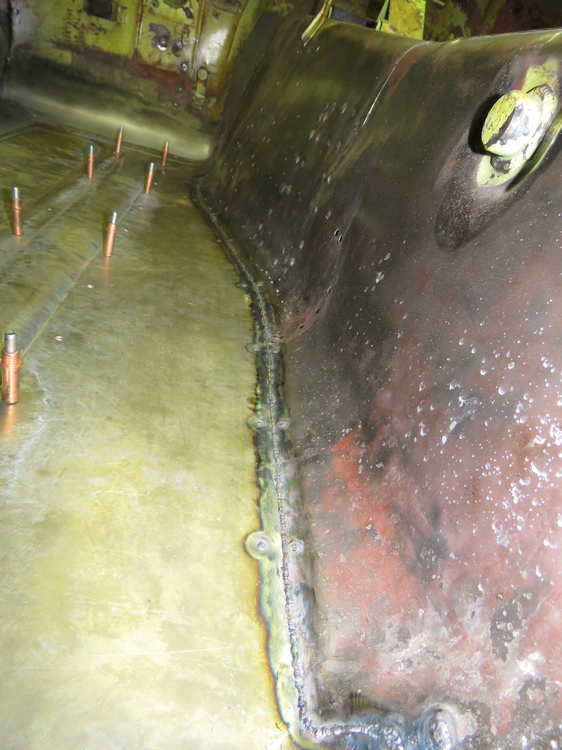
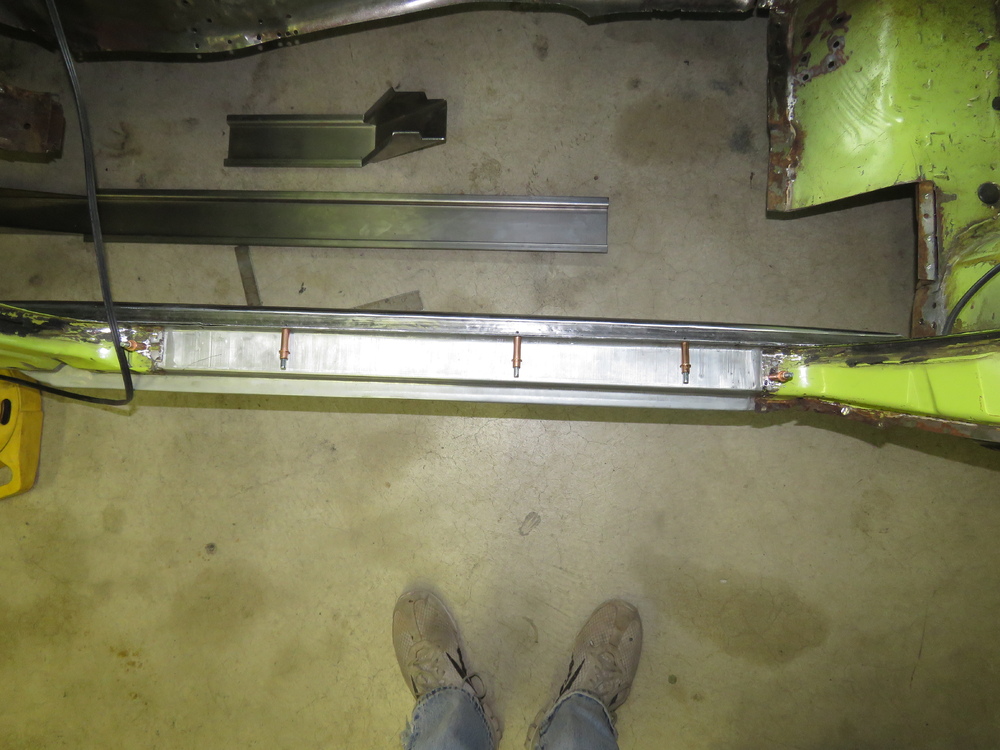
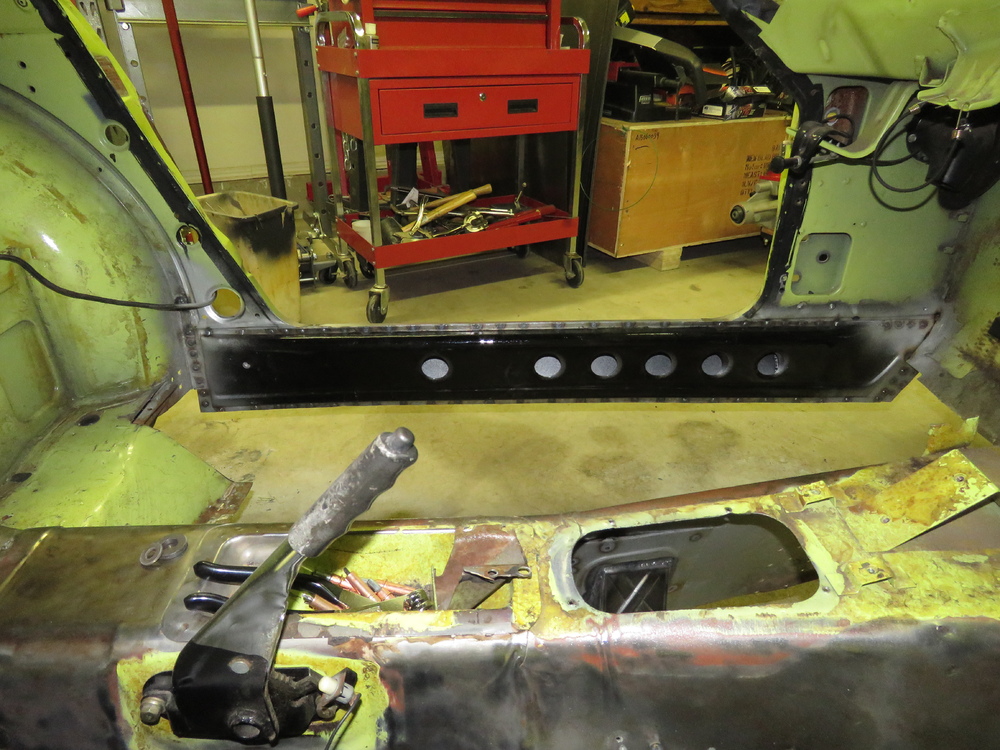
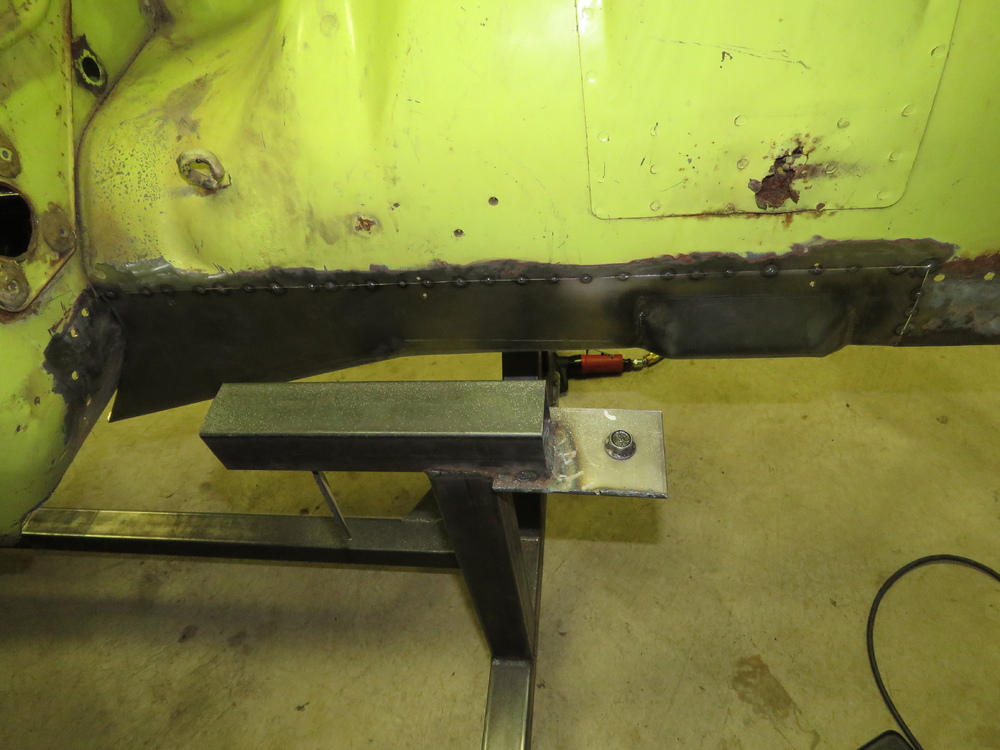
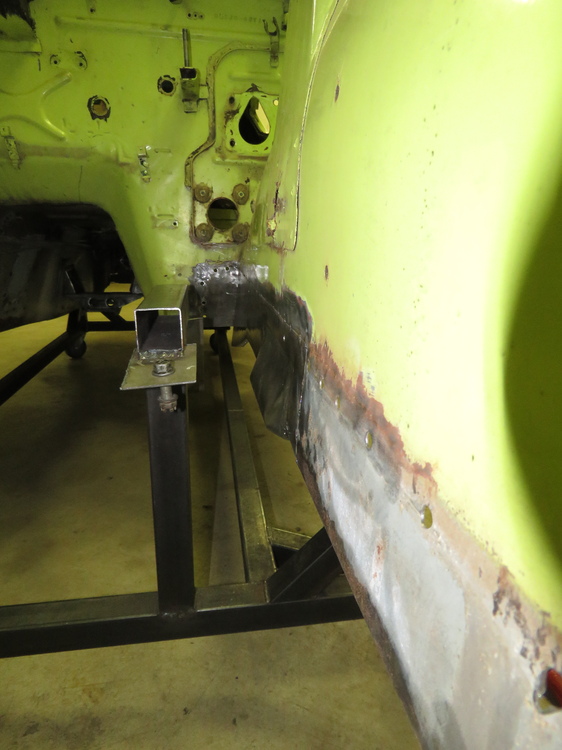
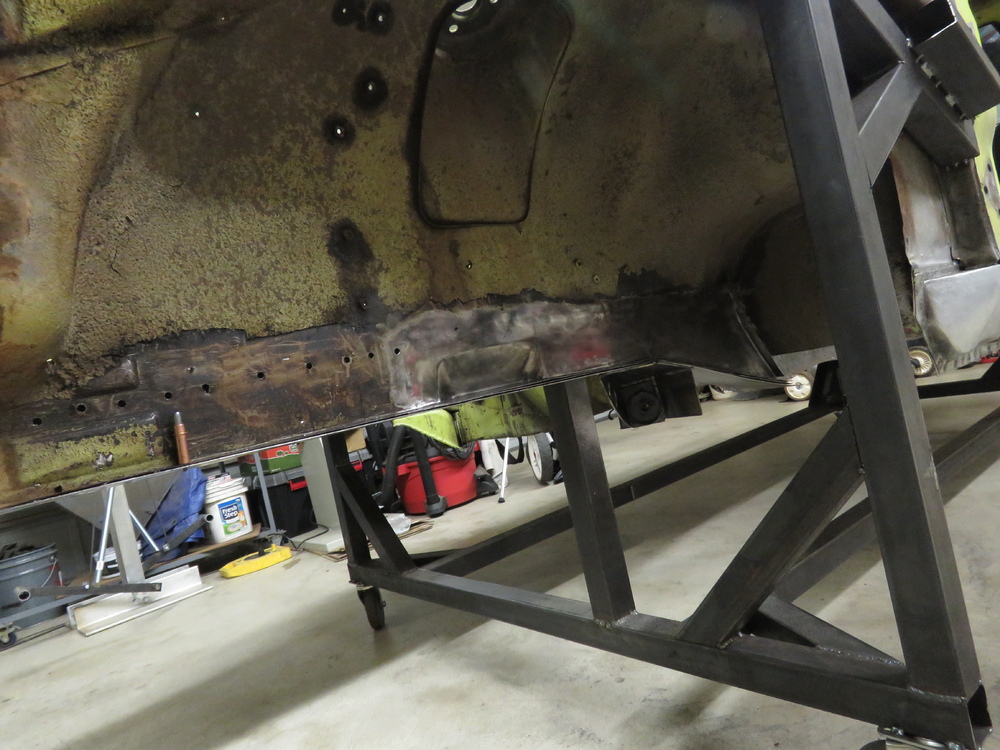
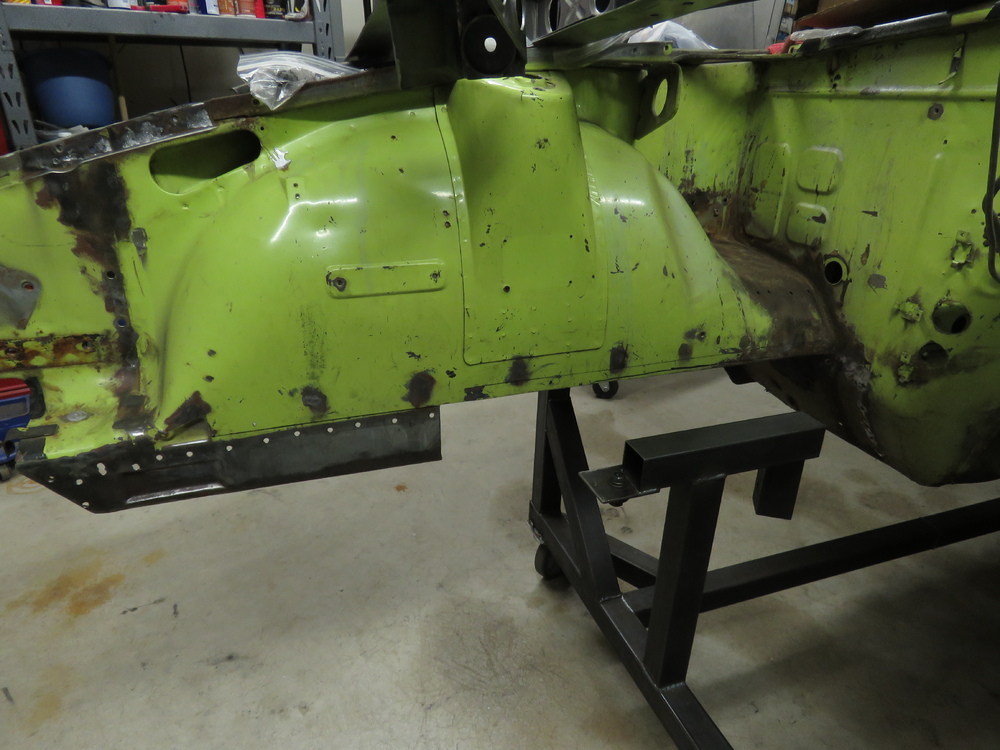
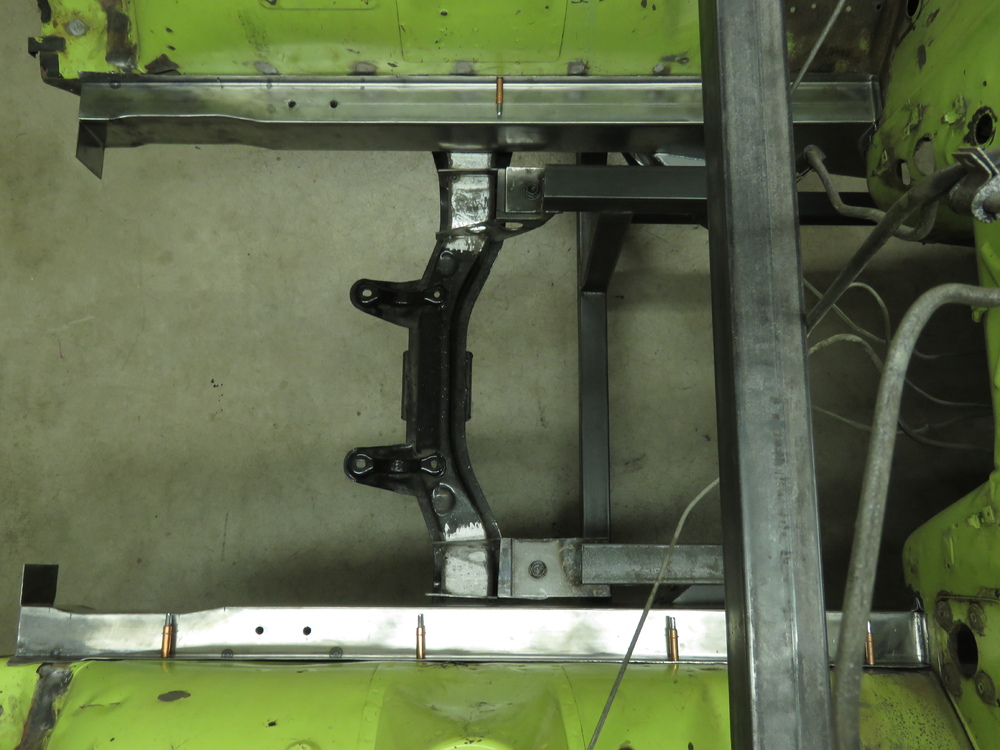
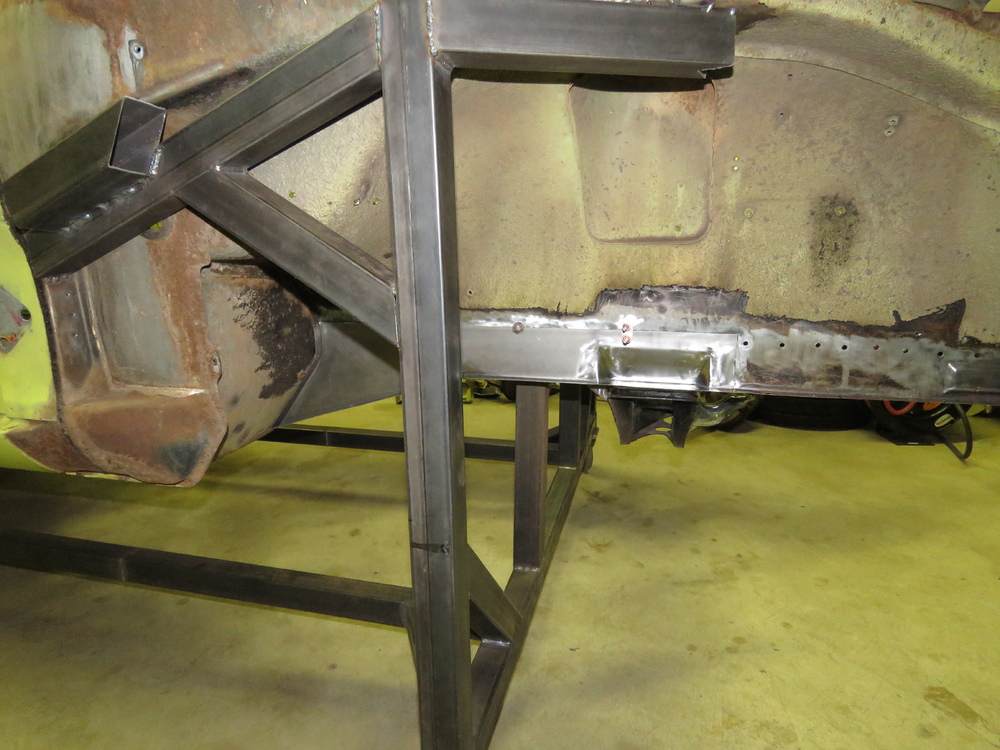
Rear seat brackets made and both front and rear brackets welded in. Loosely fitted in place to give you an idea of how they will look. Front and rear brackets close up comparison. Holes drilled for welding. Decided this would be a good time to install the tie in plate underneath the floors close to the tunnel side. Holes drilled in the floors. Painted the flanges and area of the floors with weldable rust preventative primer. Also sprayed the seat brackets and tie in plates with POR15 degreaser and prep and ready to prepare it for paint. Seat brackets welded in. Seats test fitted. Passenger seat slightly touches the ebrake. however once somebody is seated, the cushion on the side collapses in a way to distance itself away from the ebrake. Tie in plates welded in. Me wishing my car was done and driving, hehe. Thats all for now. Bout time I actually start working on the parts I sandblasted.


-
Exactly my problem with the windows down. Hated it during the summer because it was either, keep windows up and endure the heat while driving (no A/C) or have windows down and smell like I just got done mowing the yard.
-
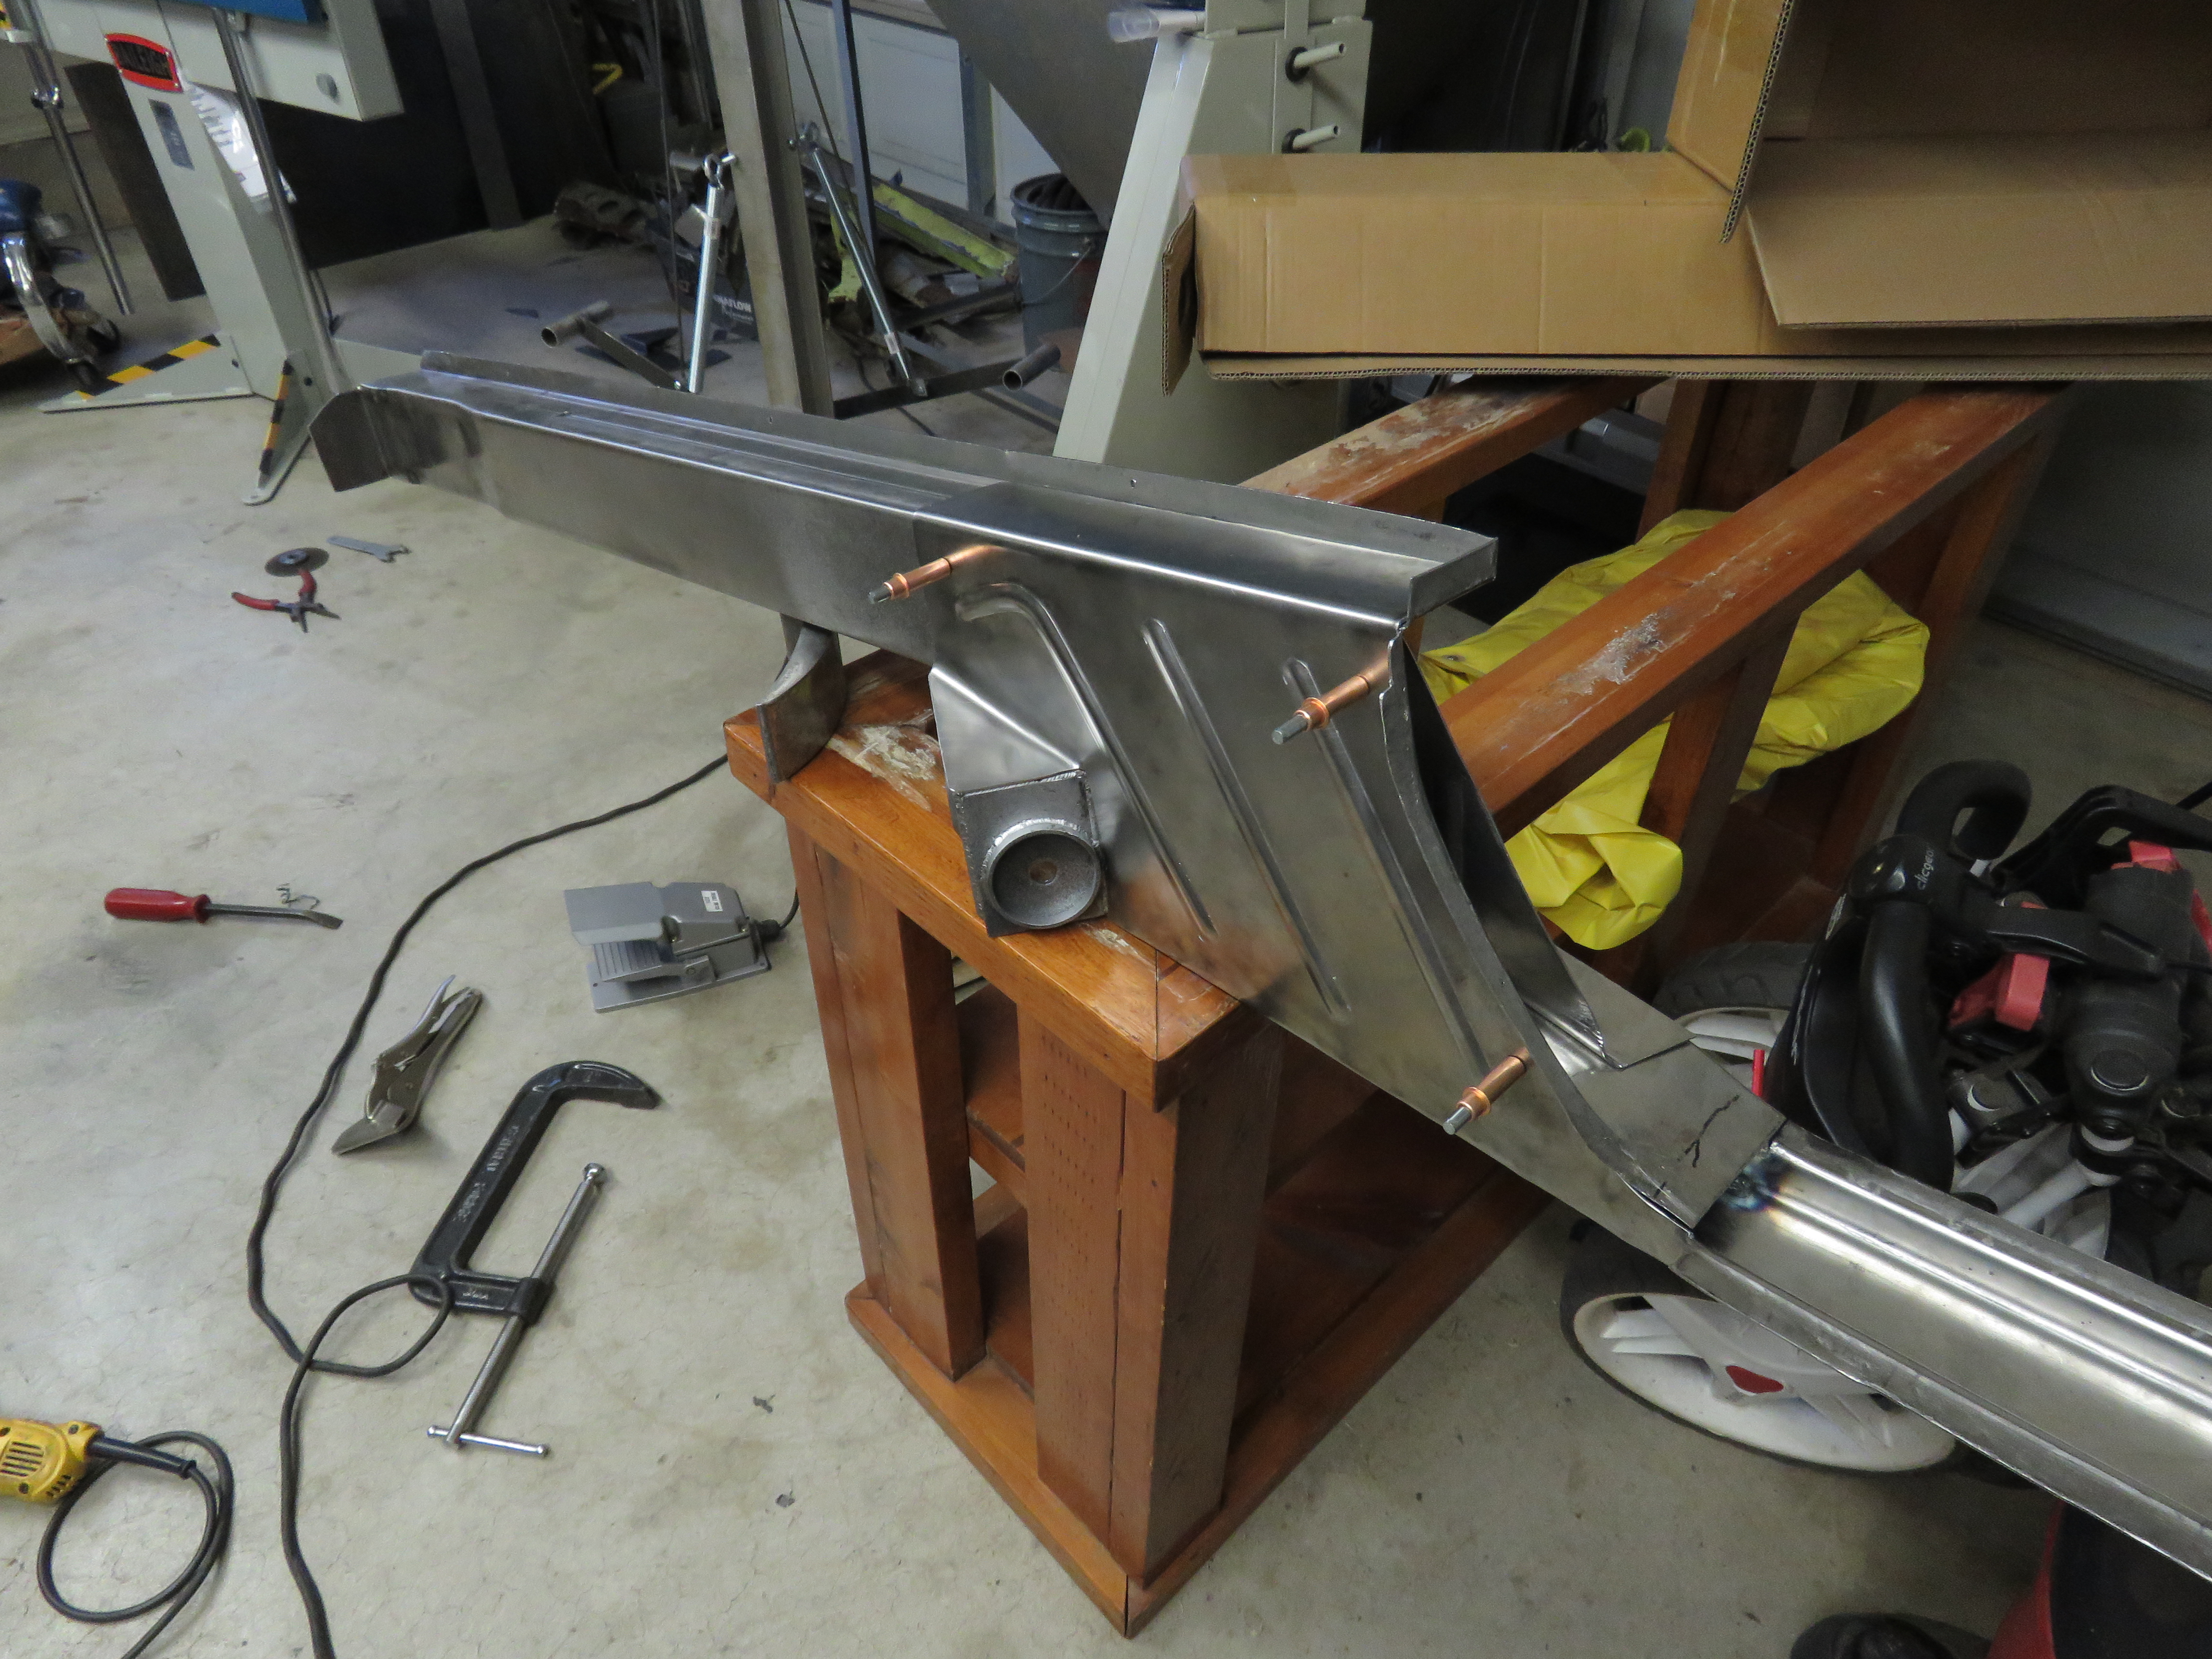
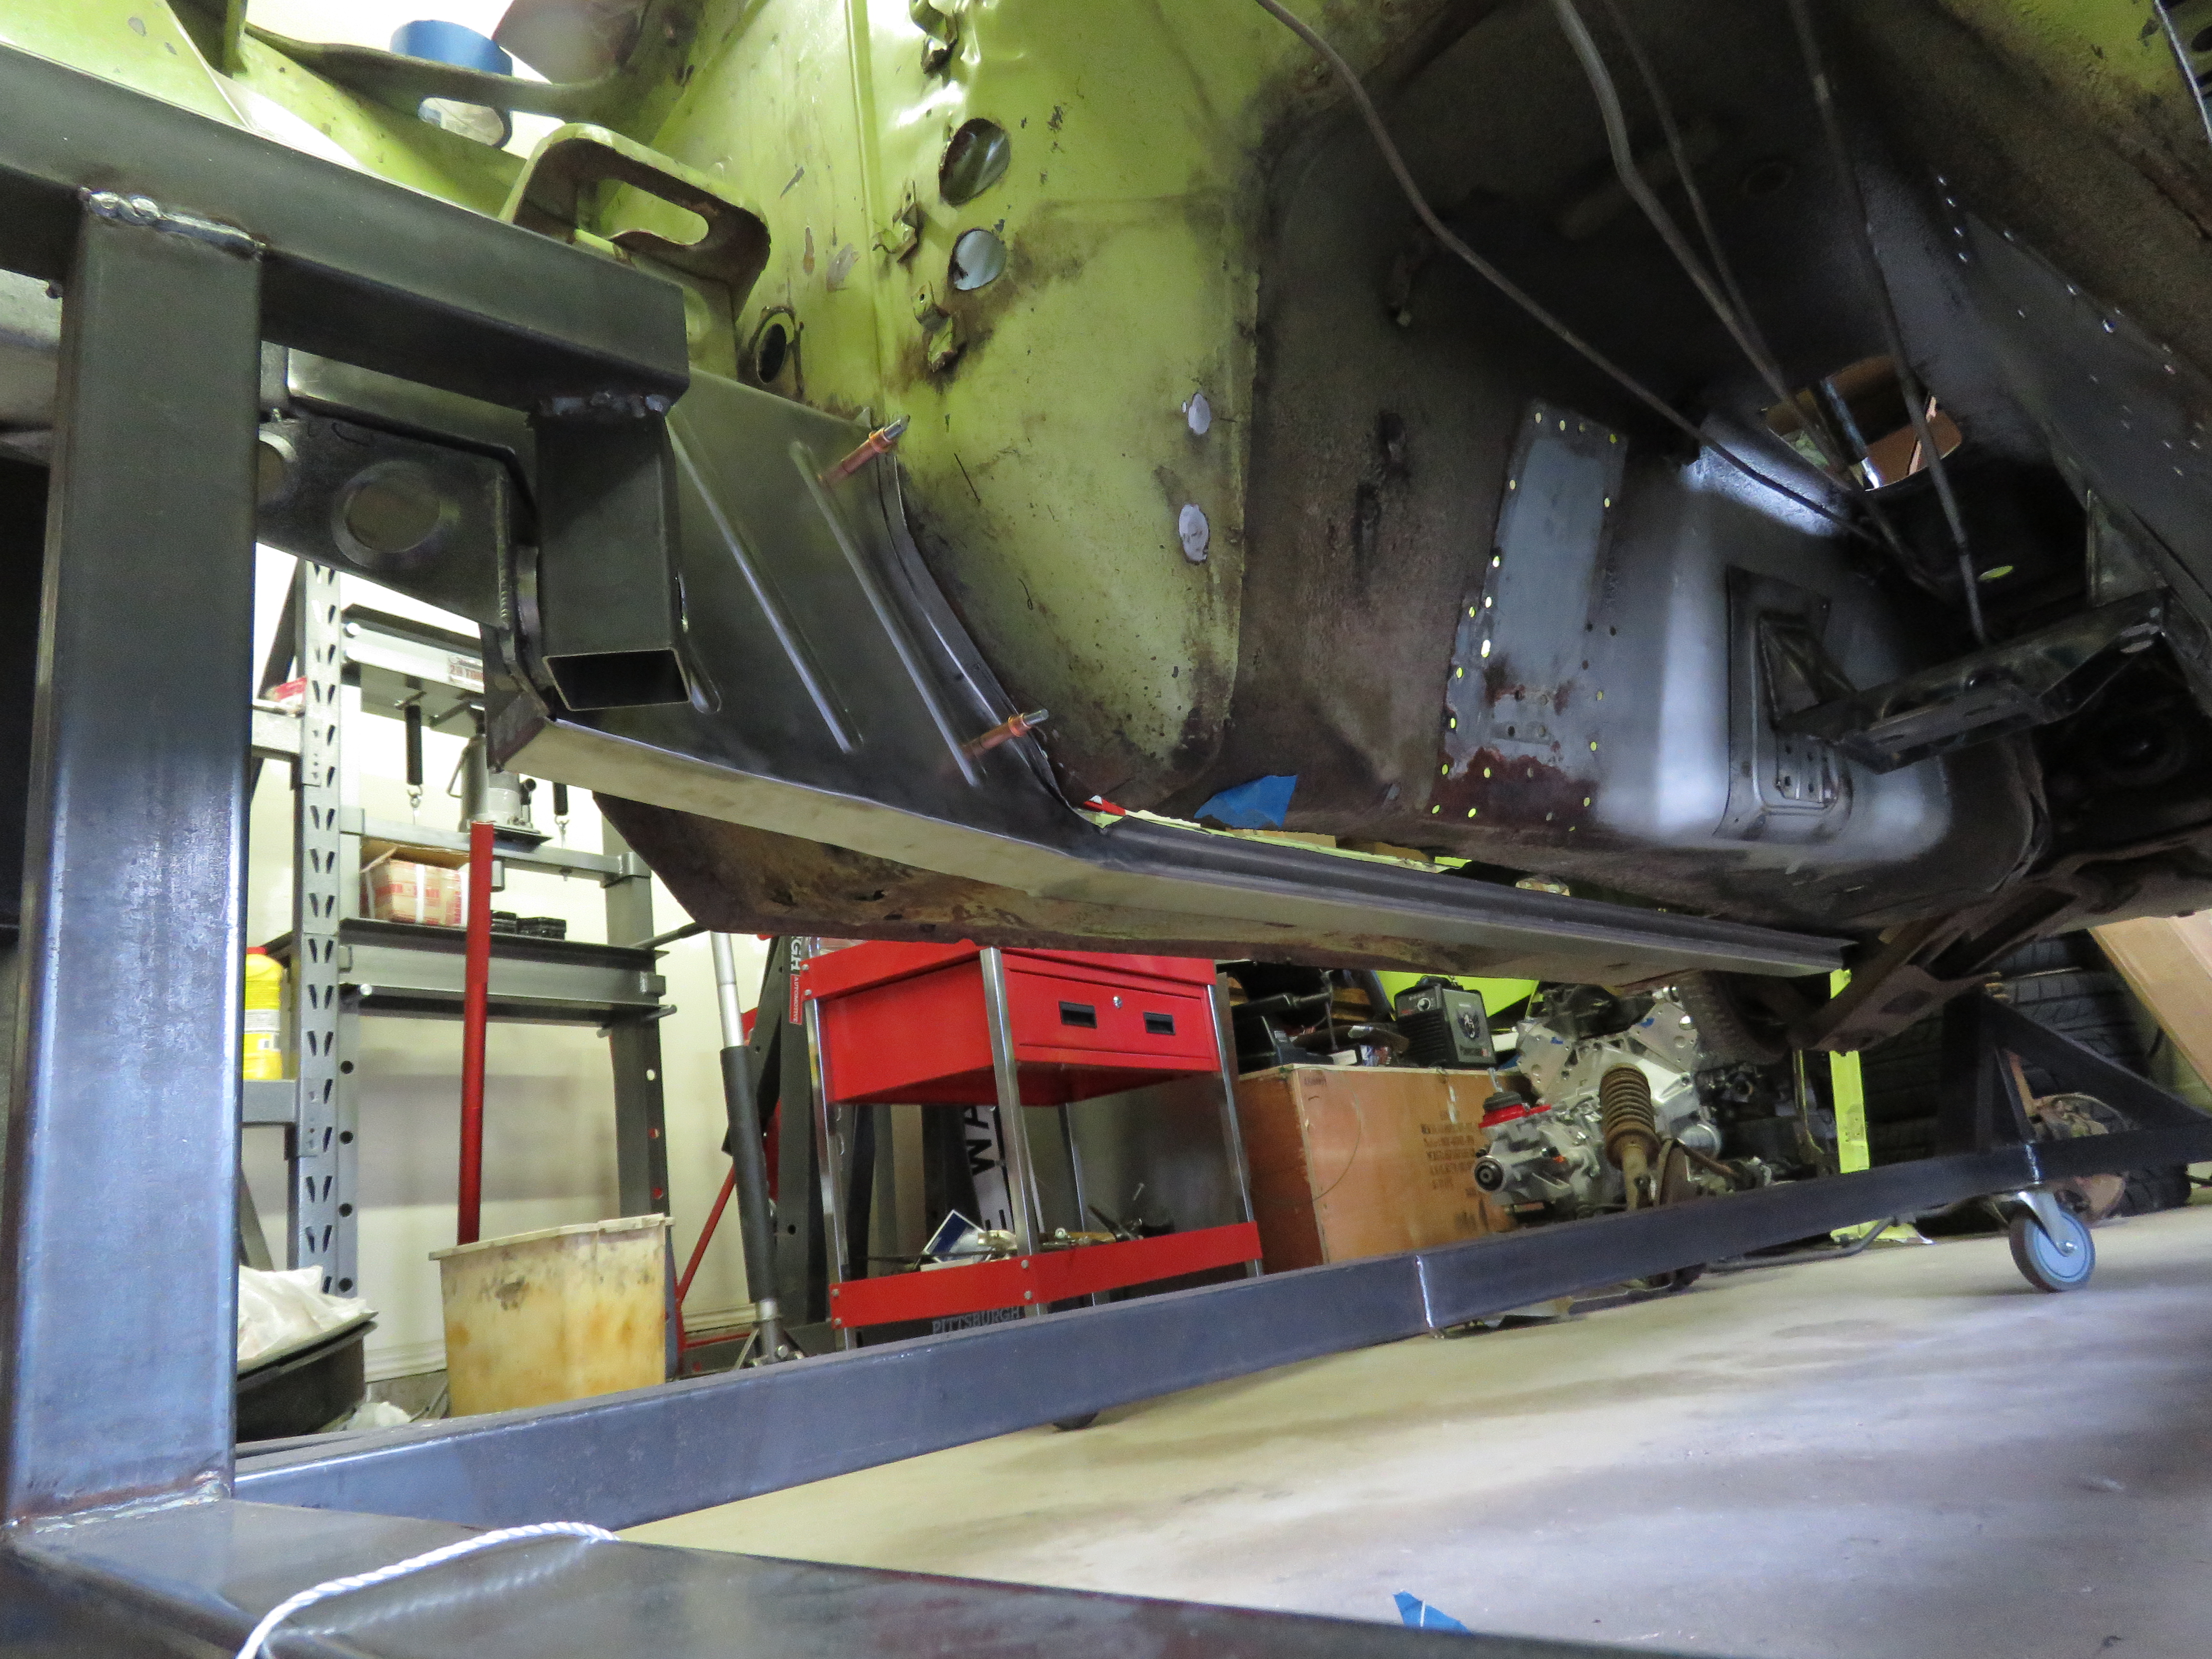
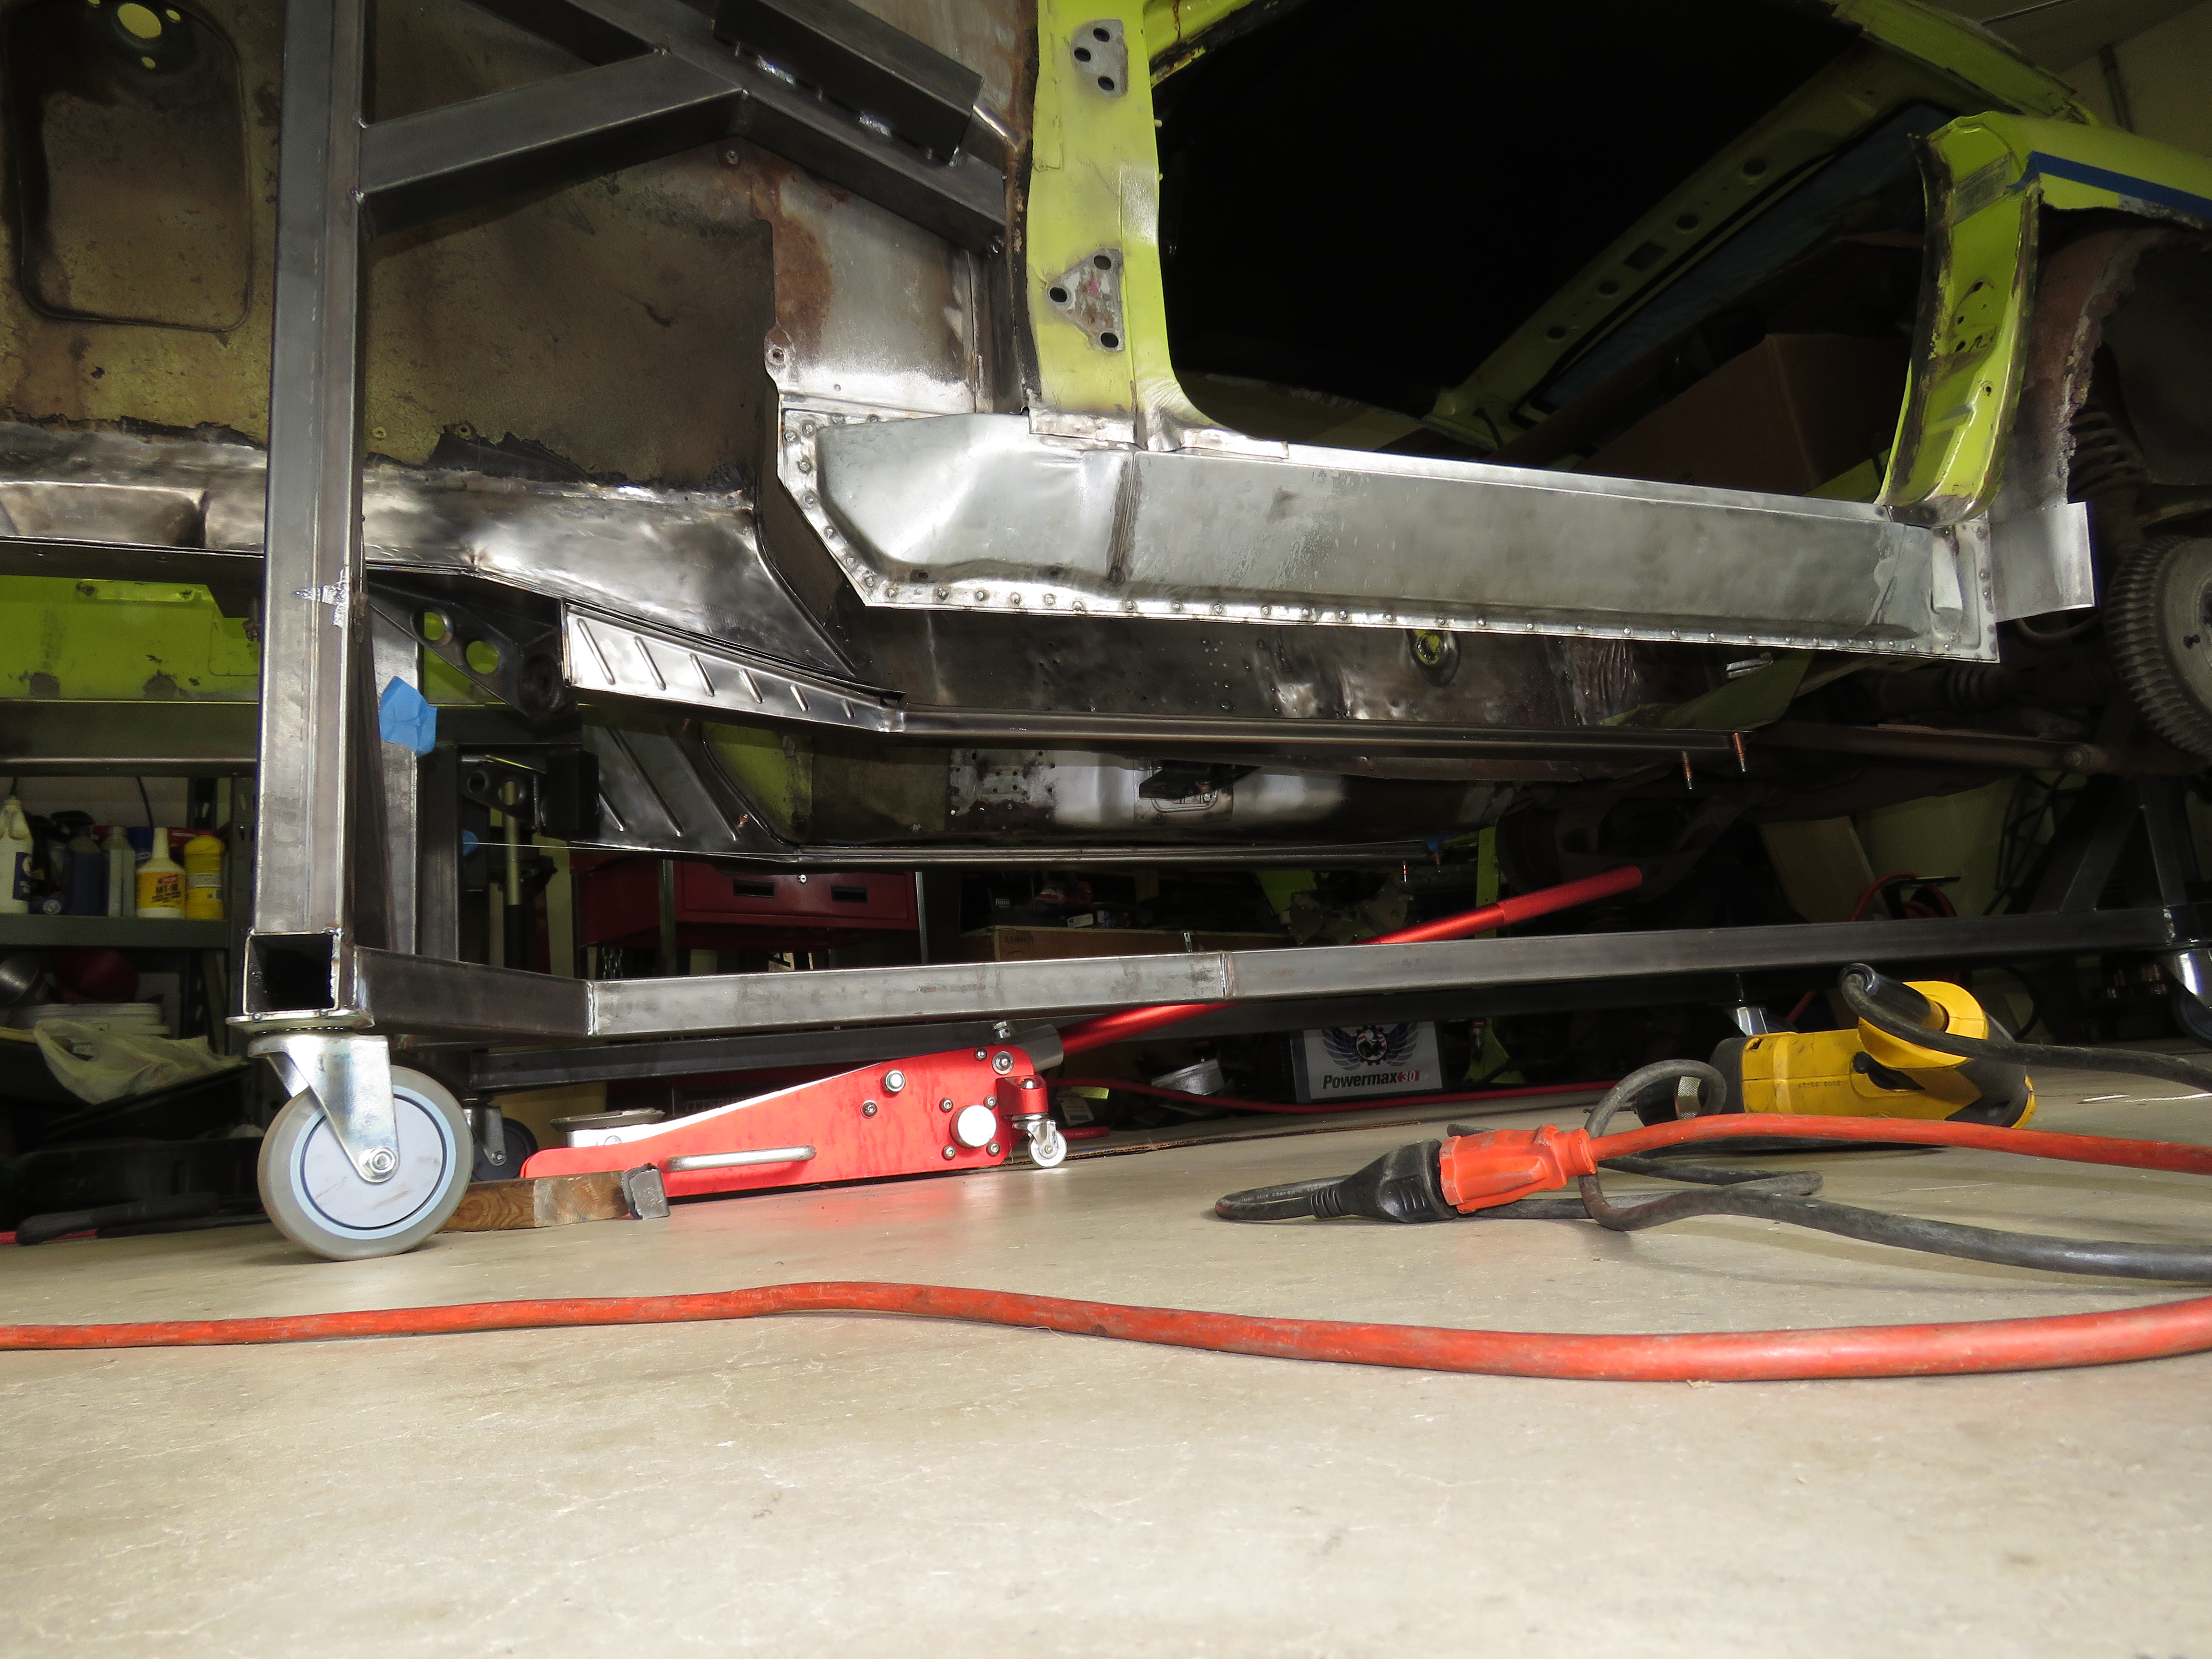
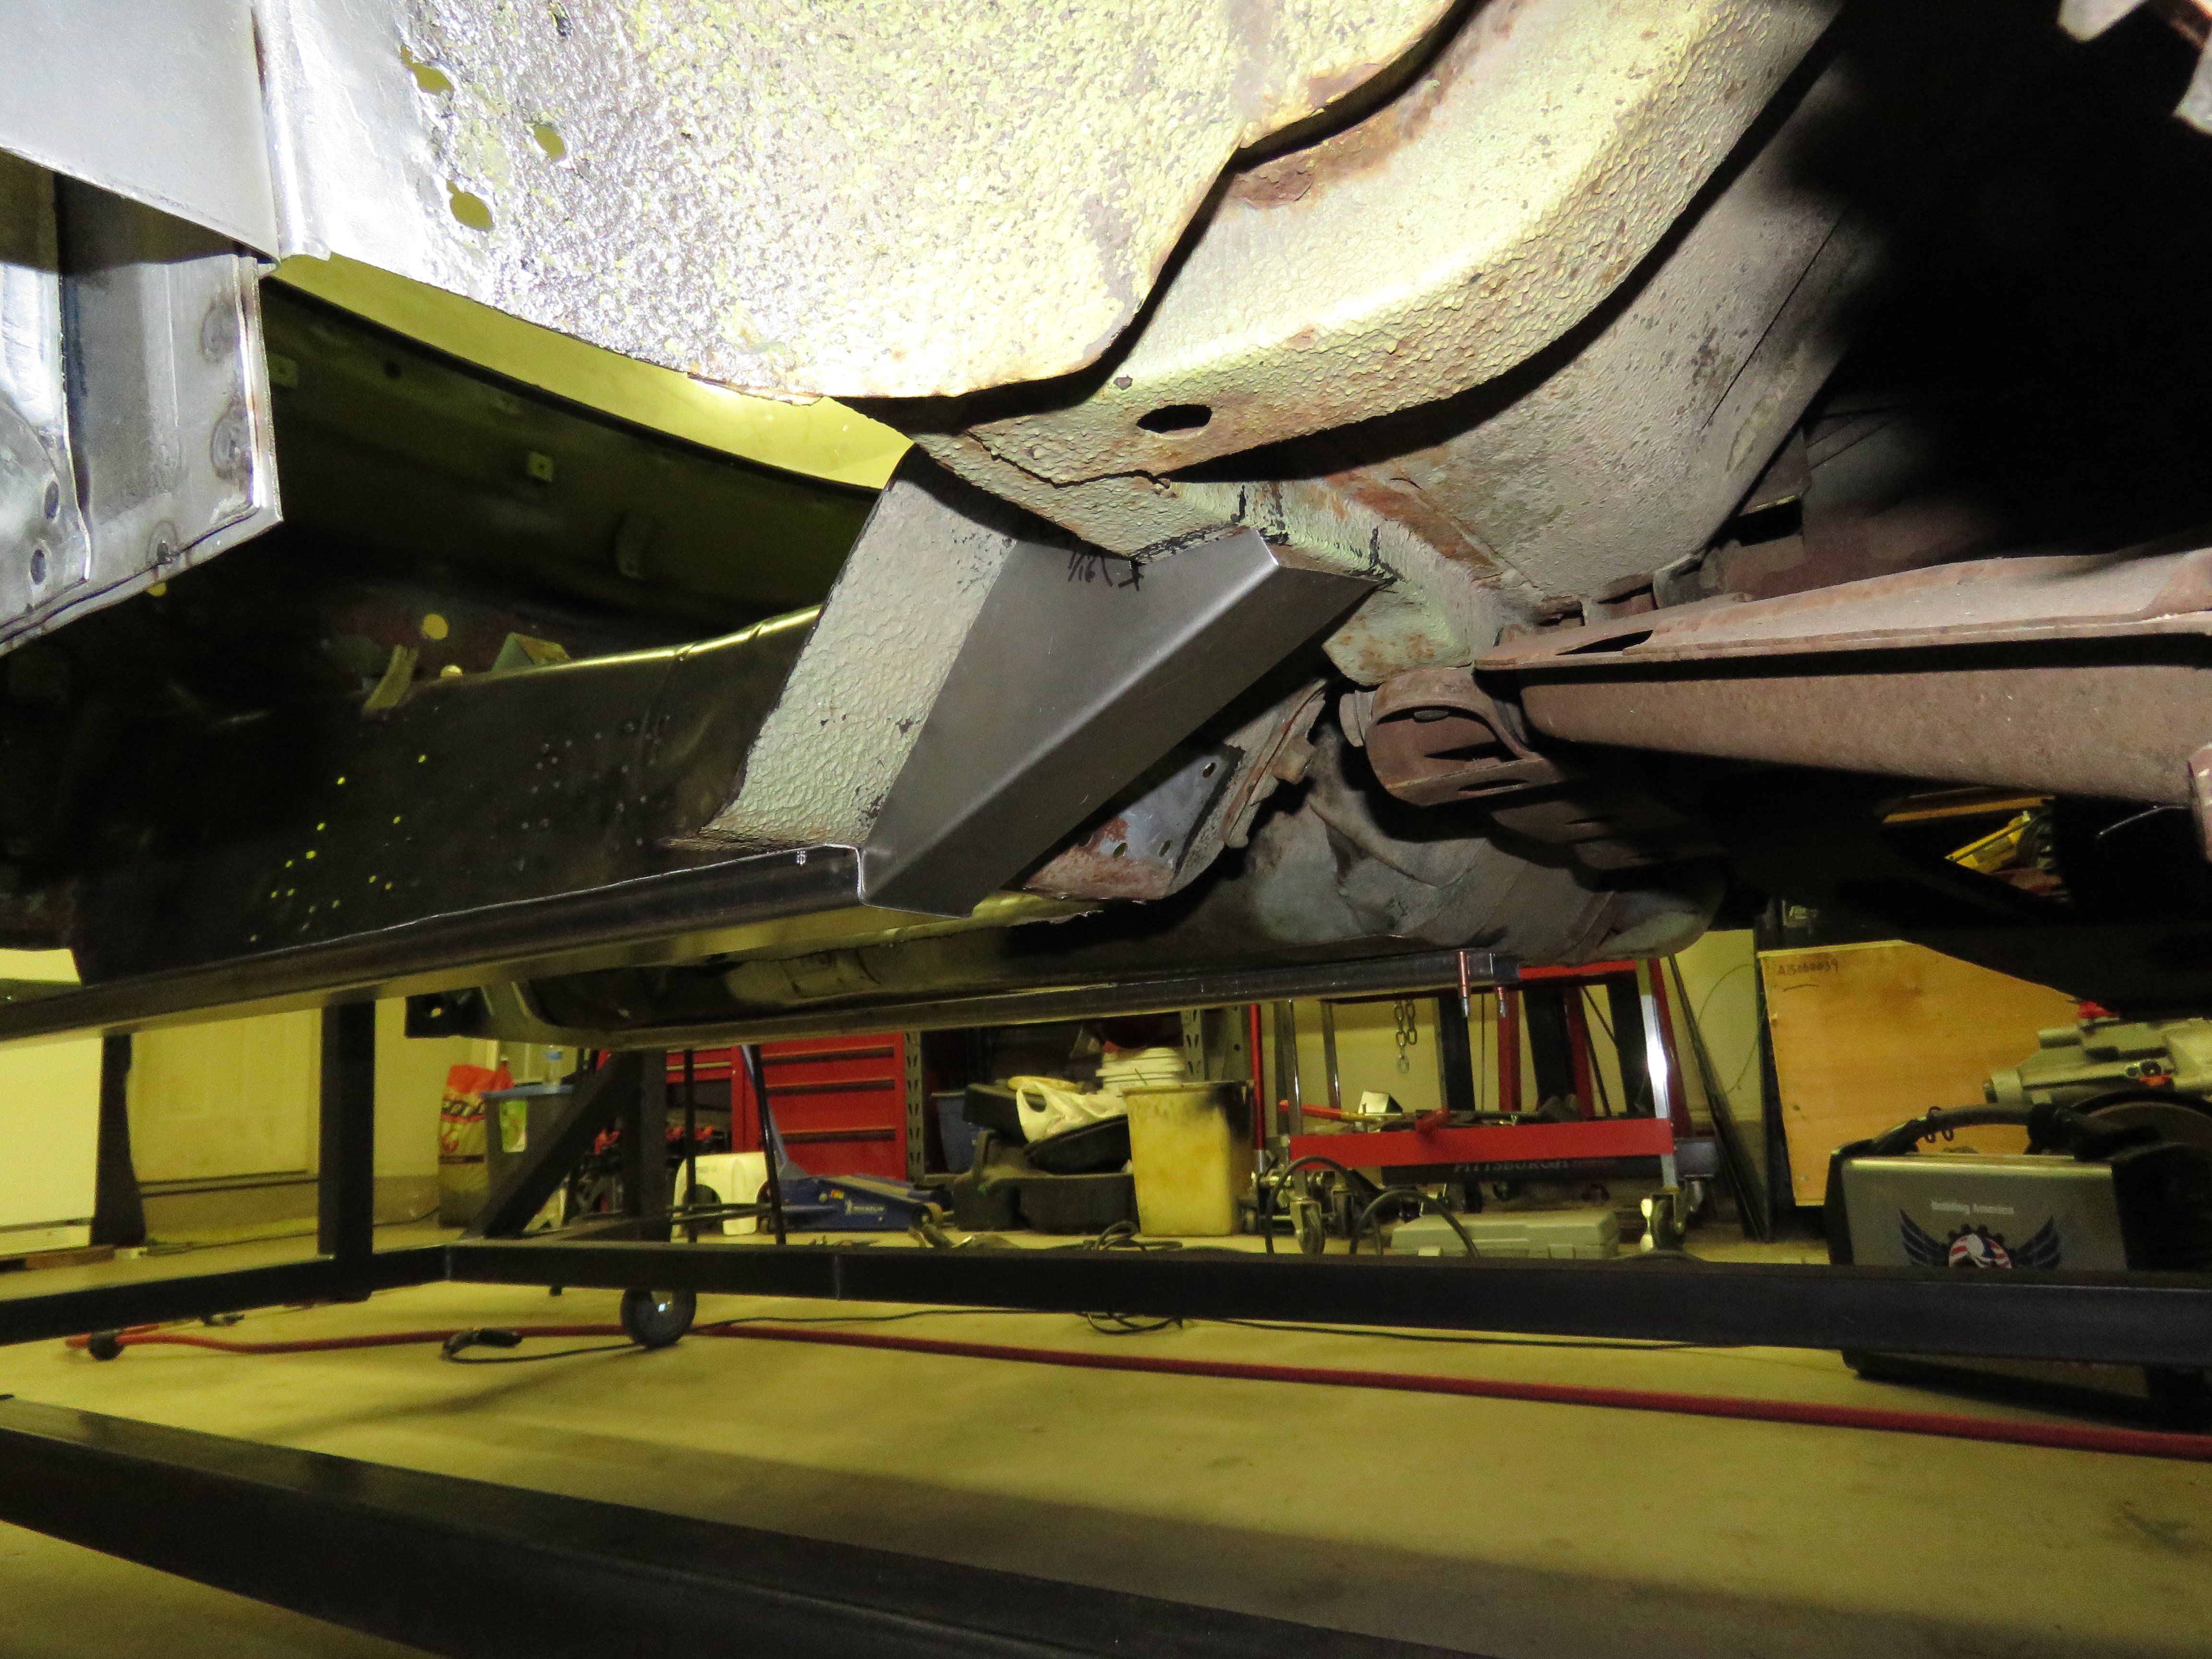
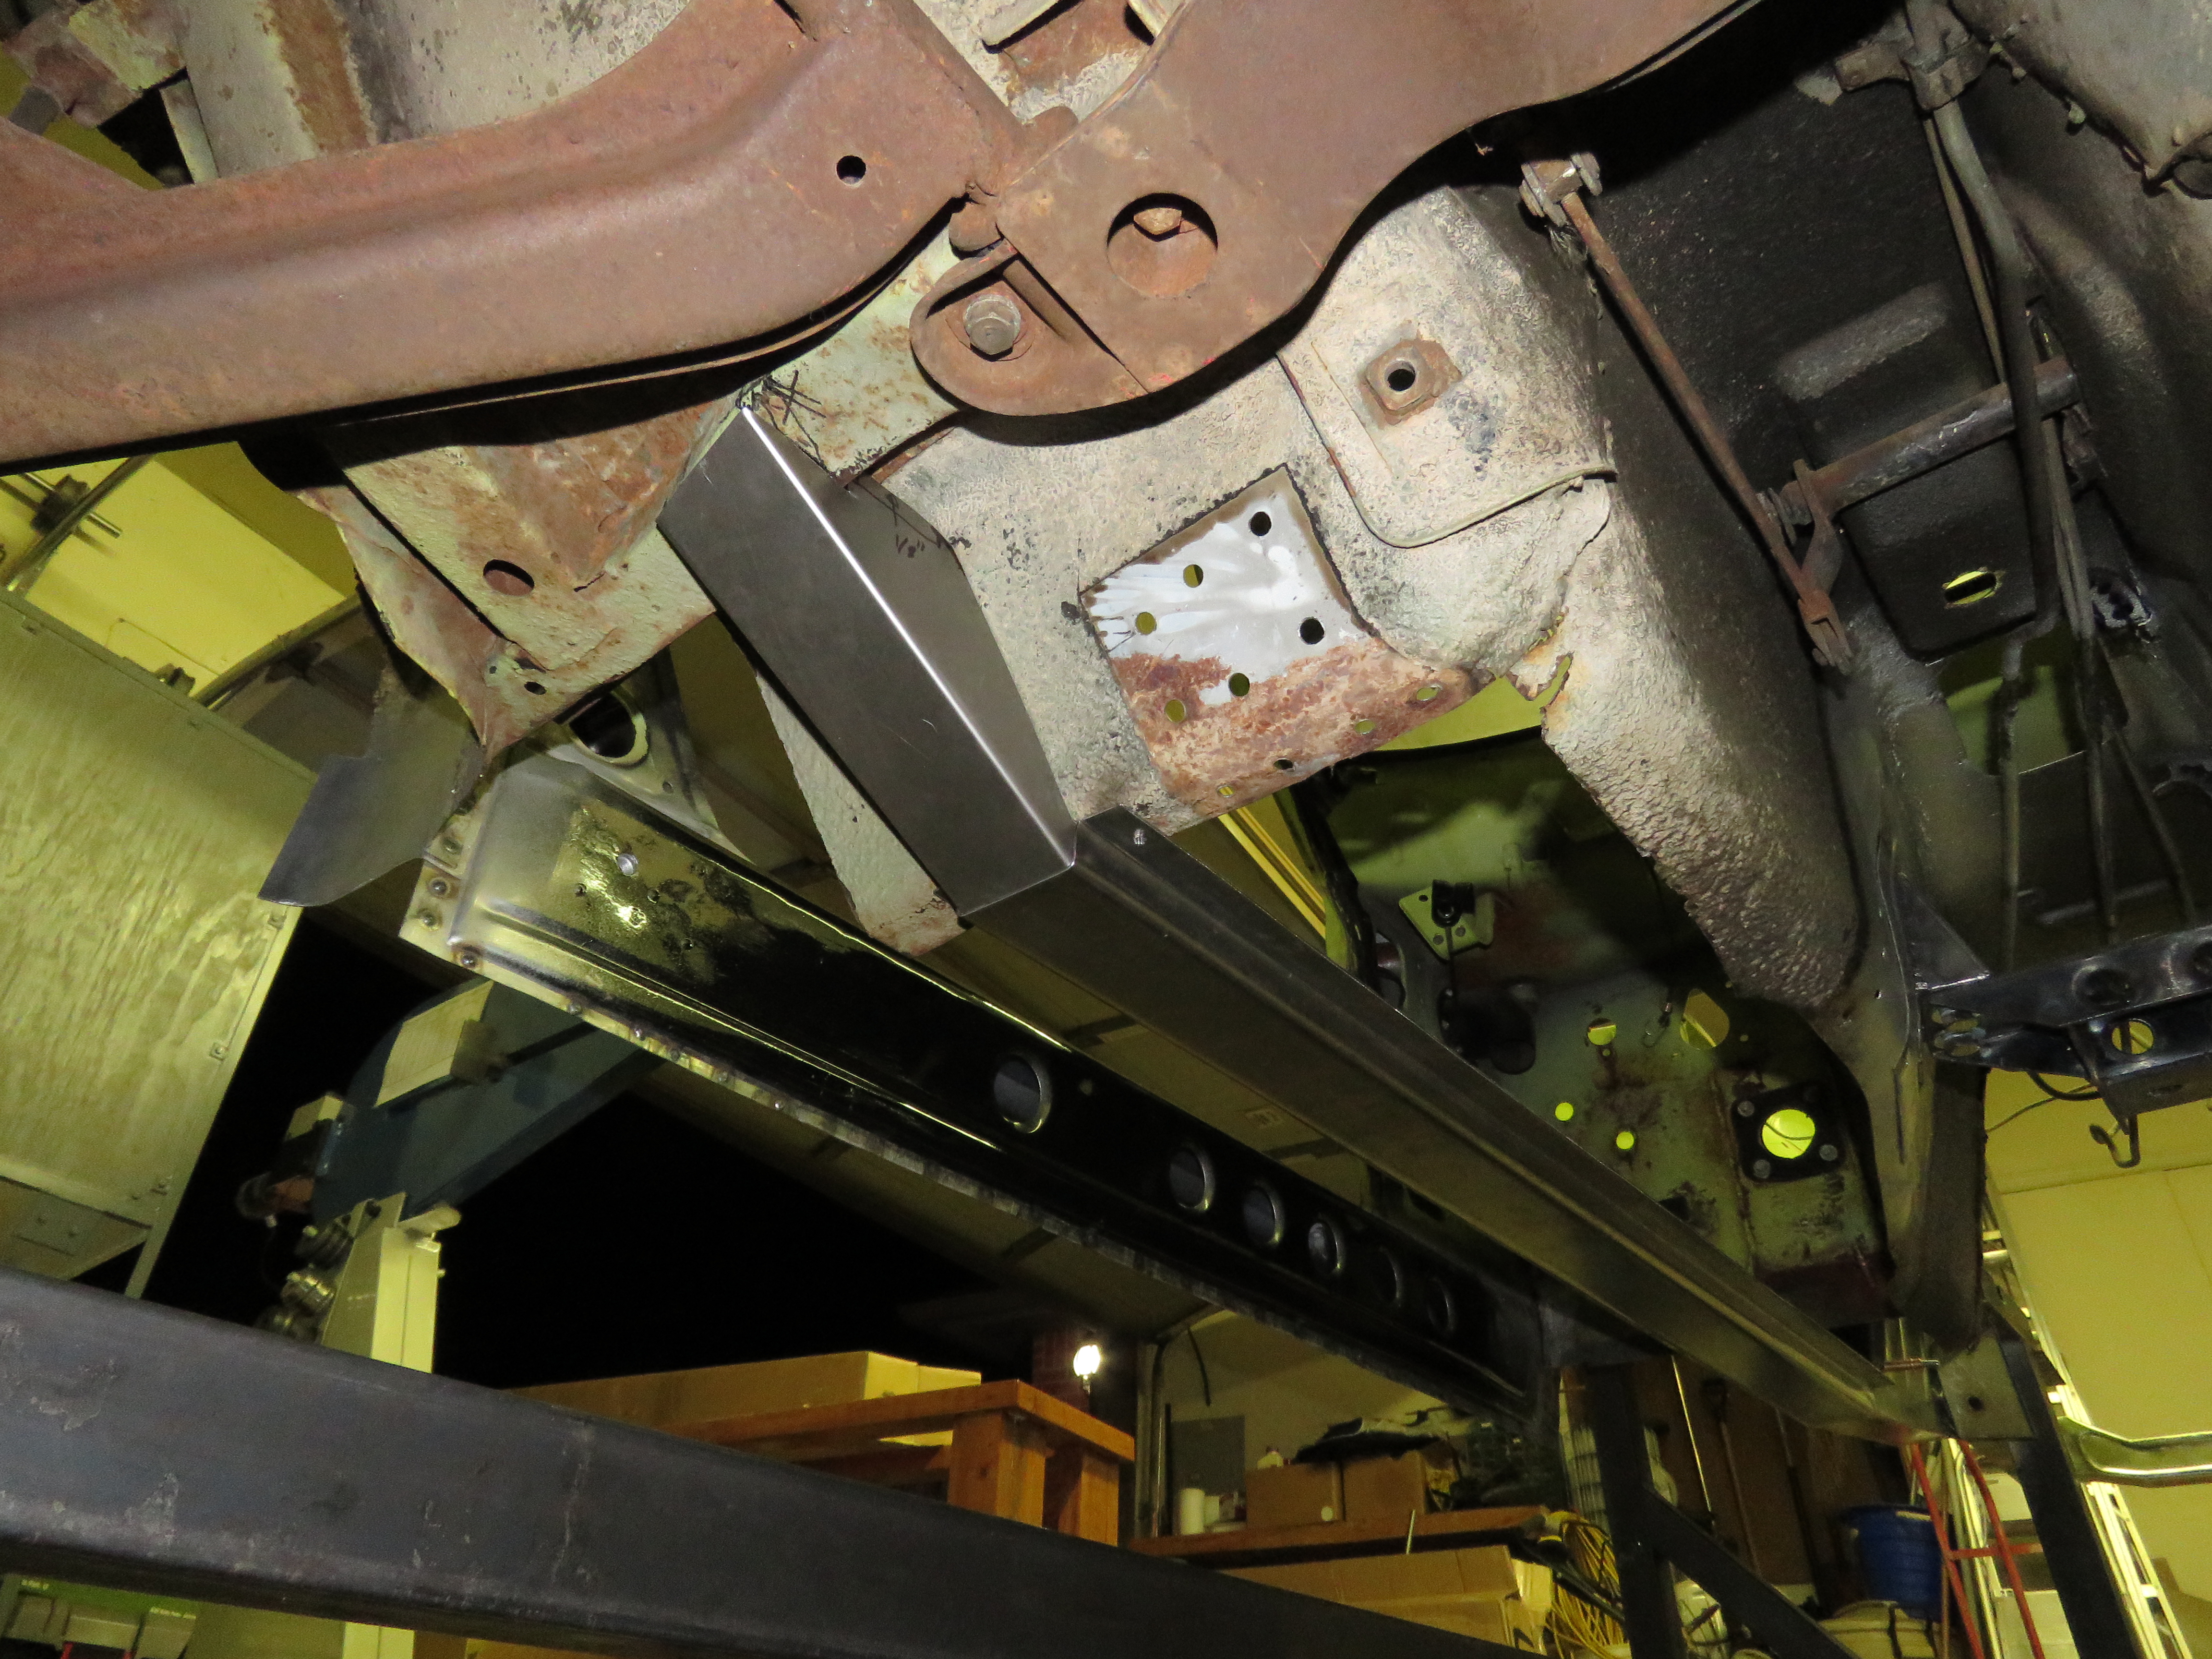
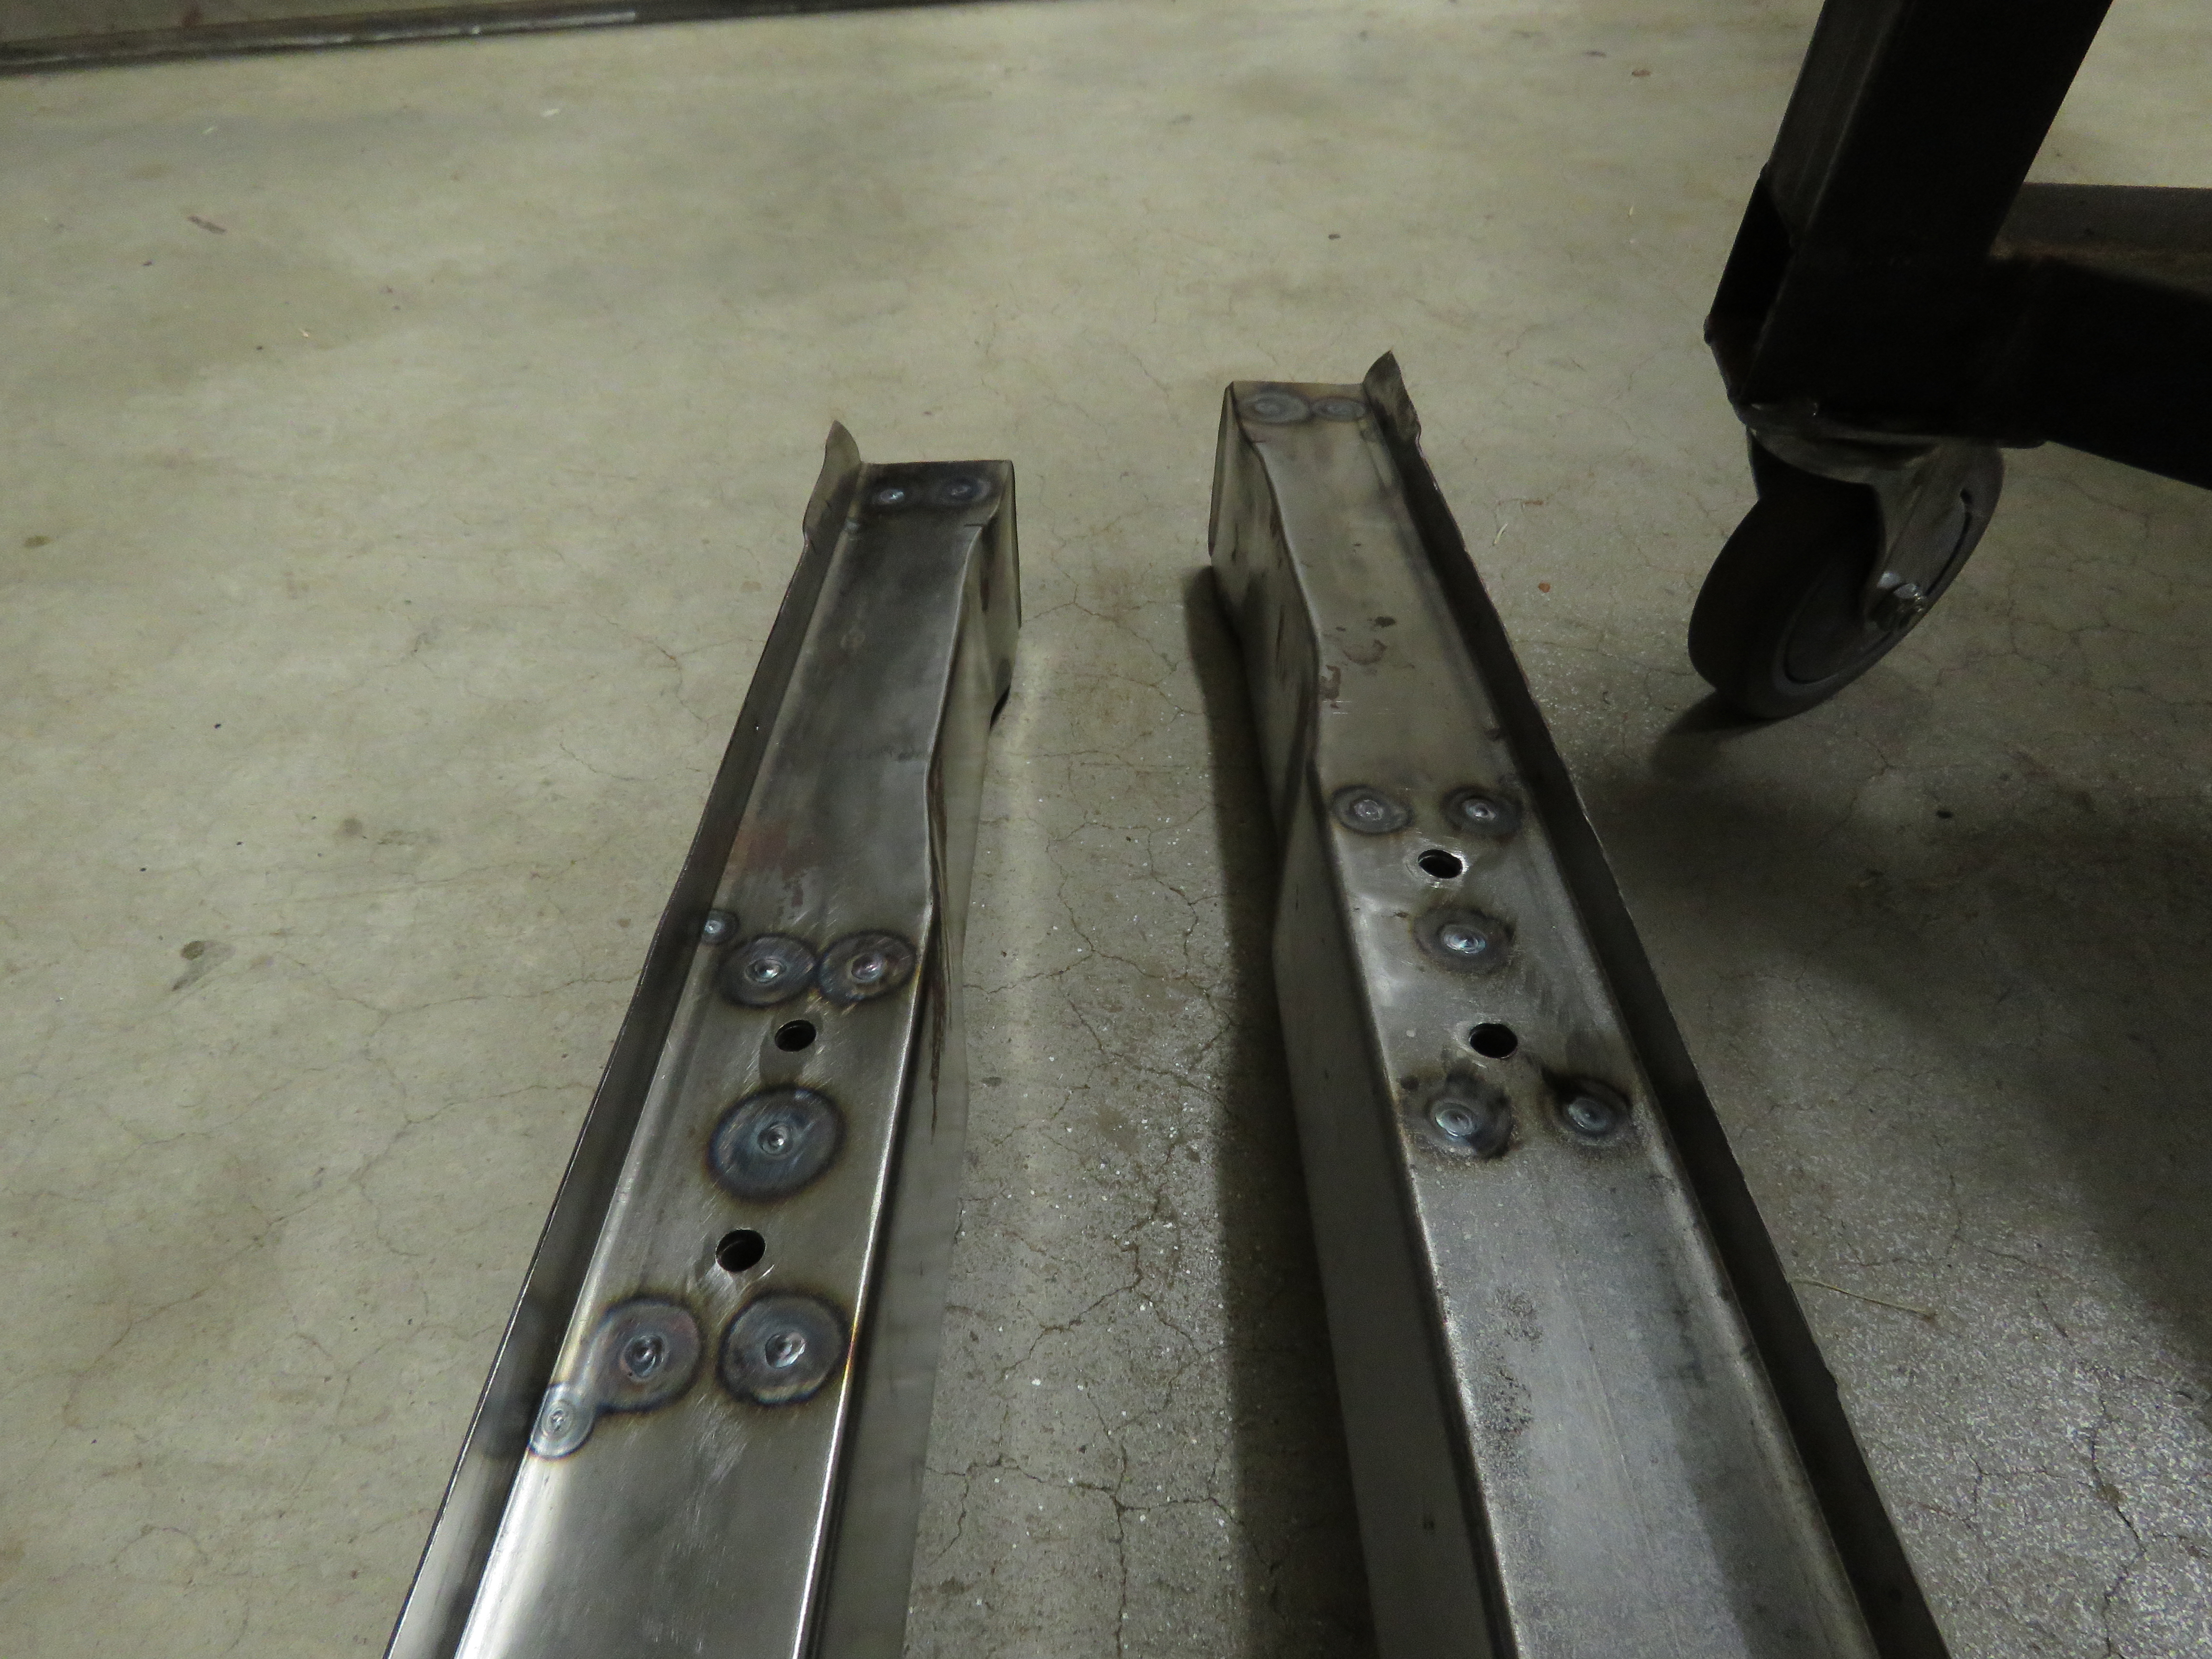
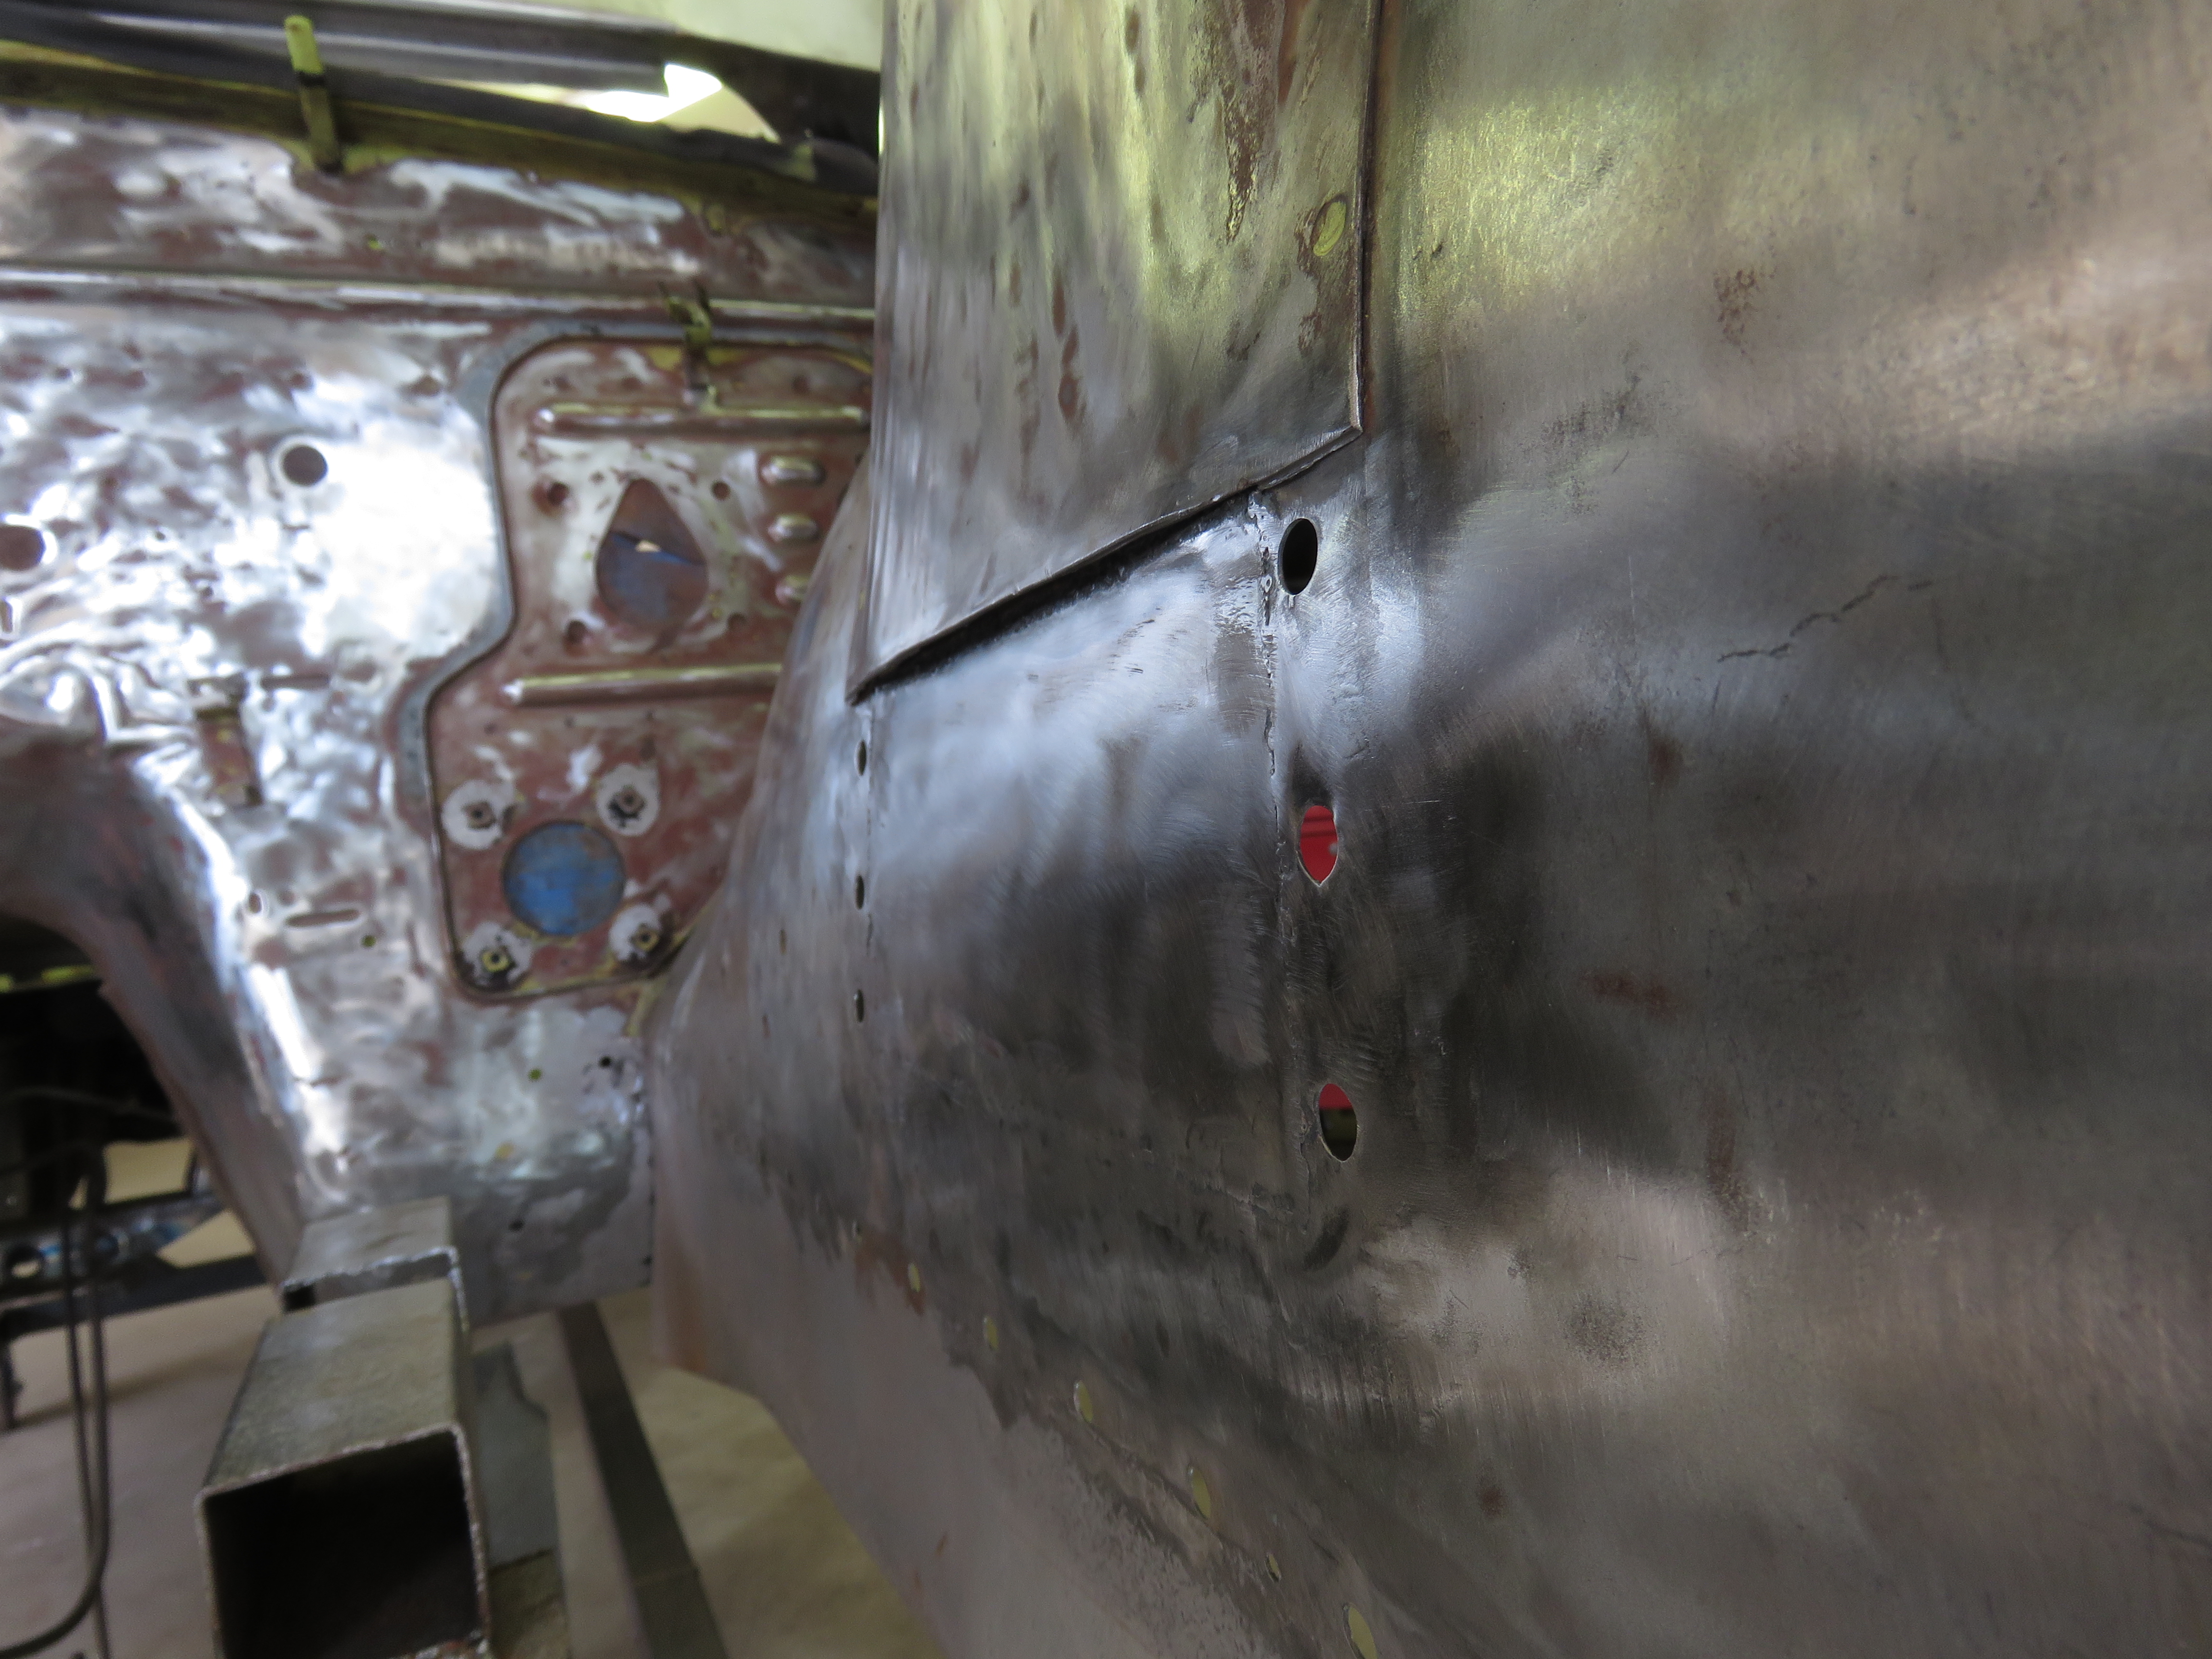
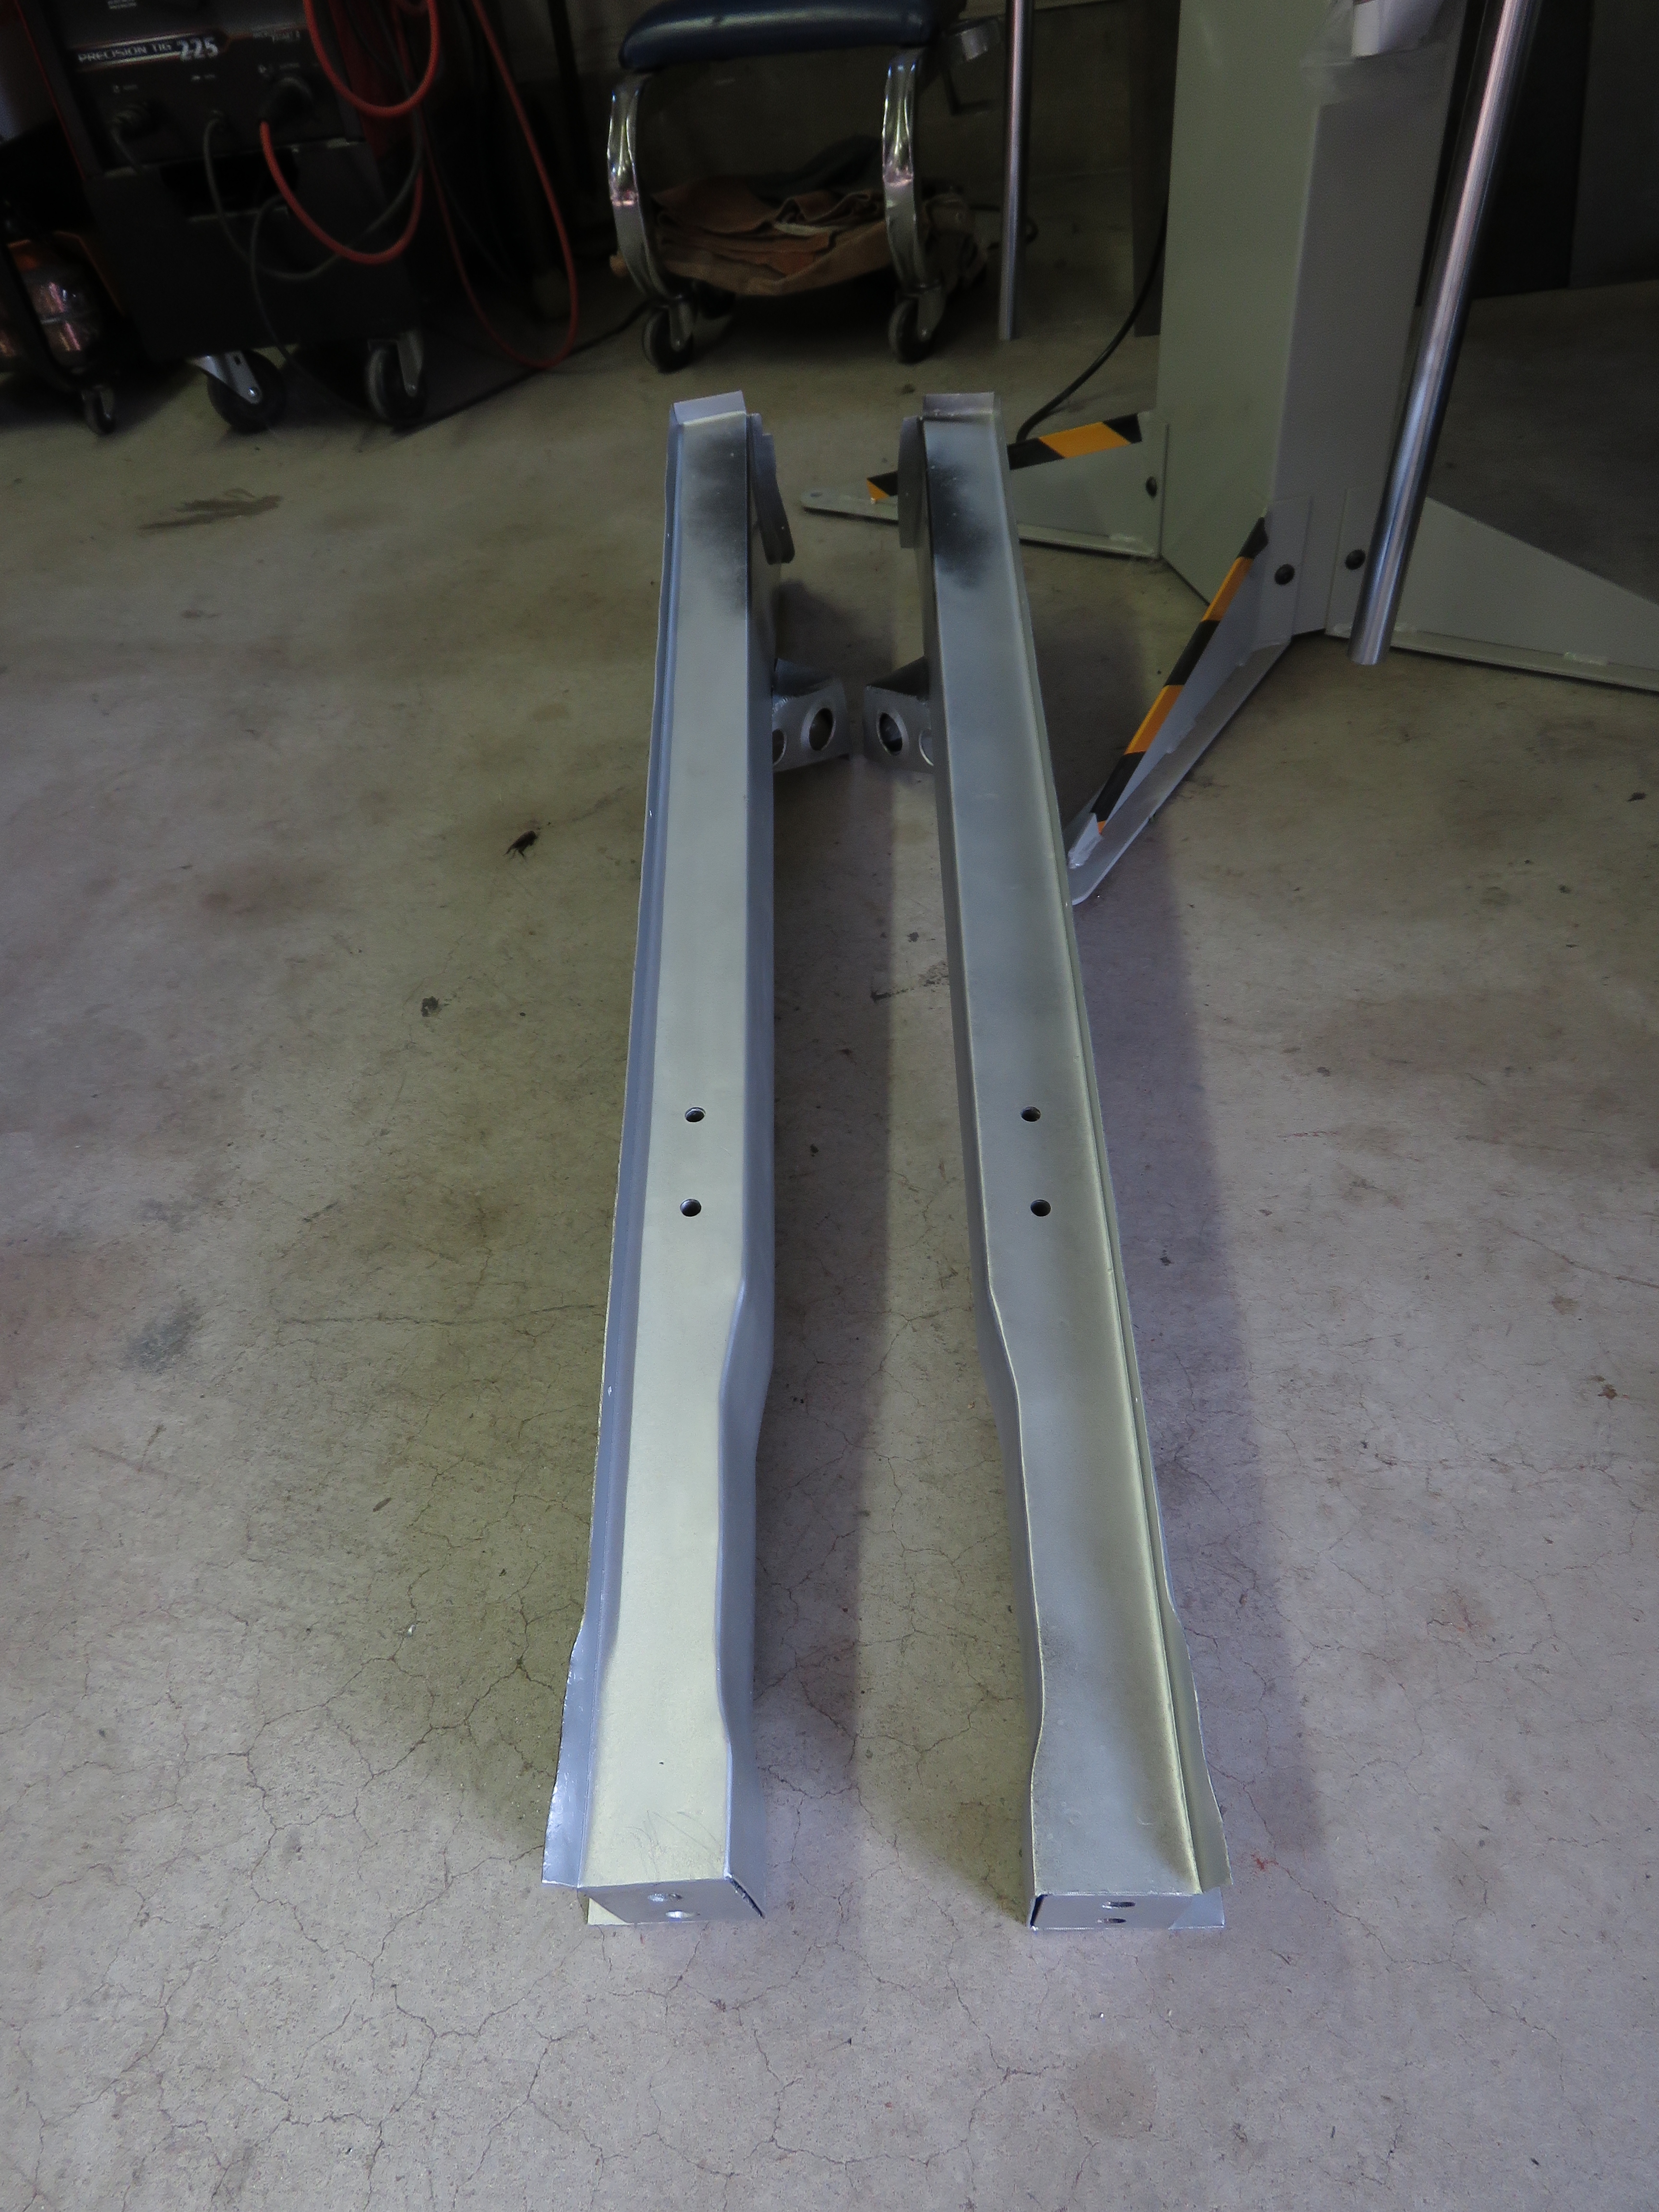
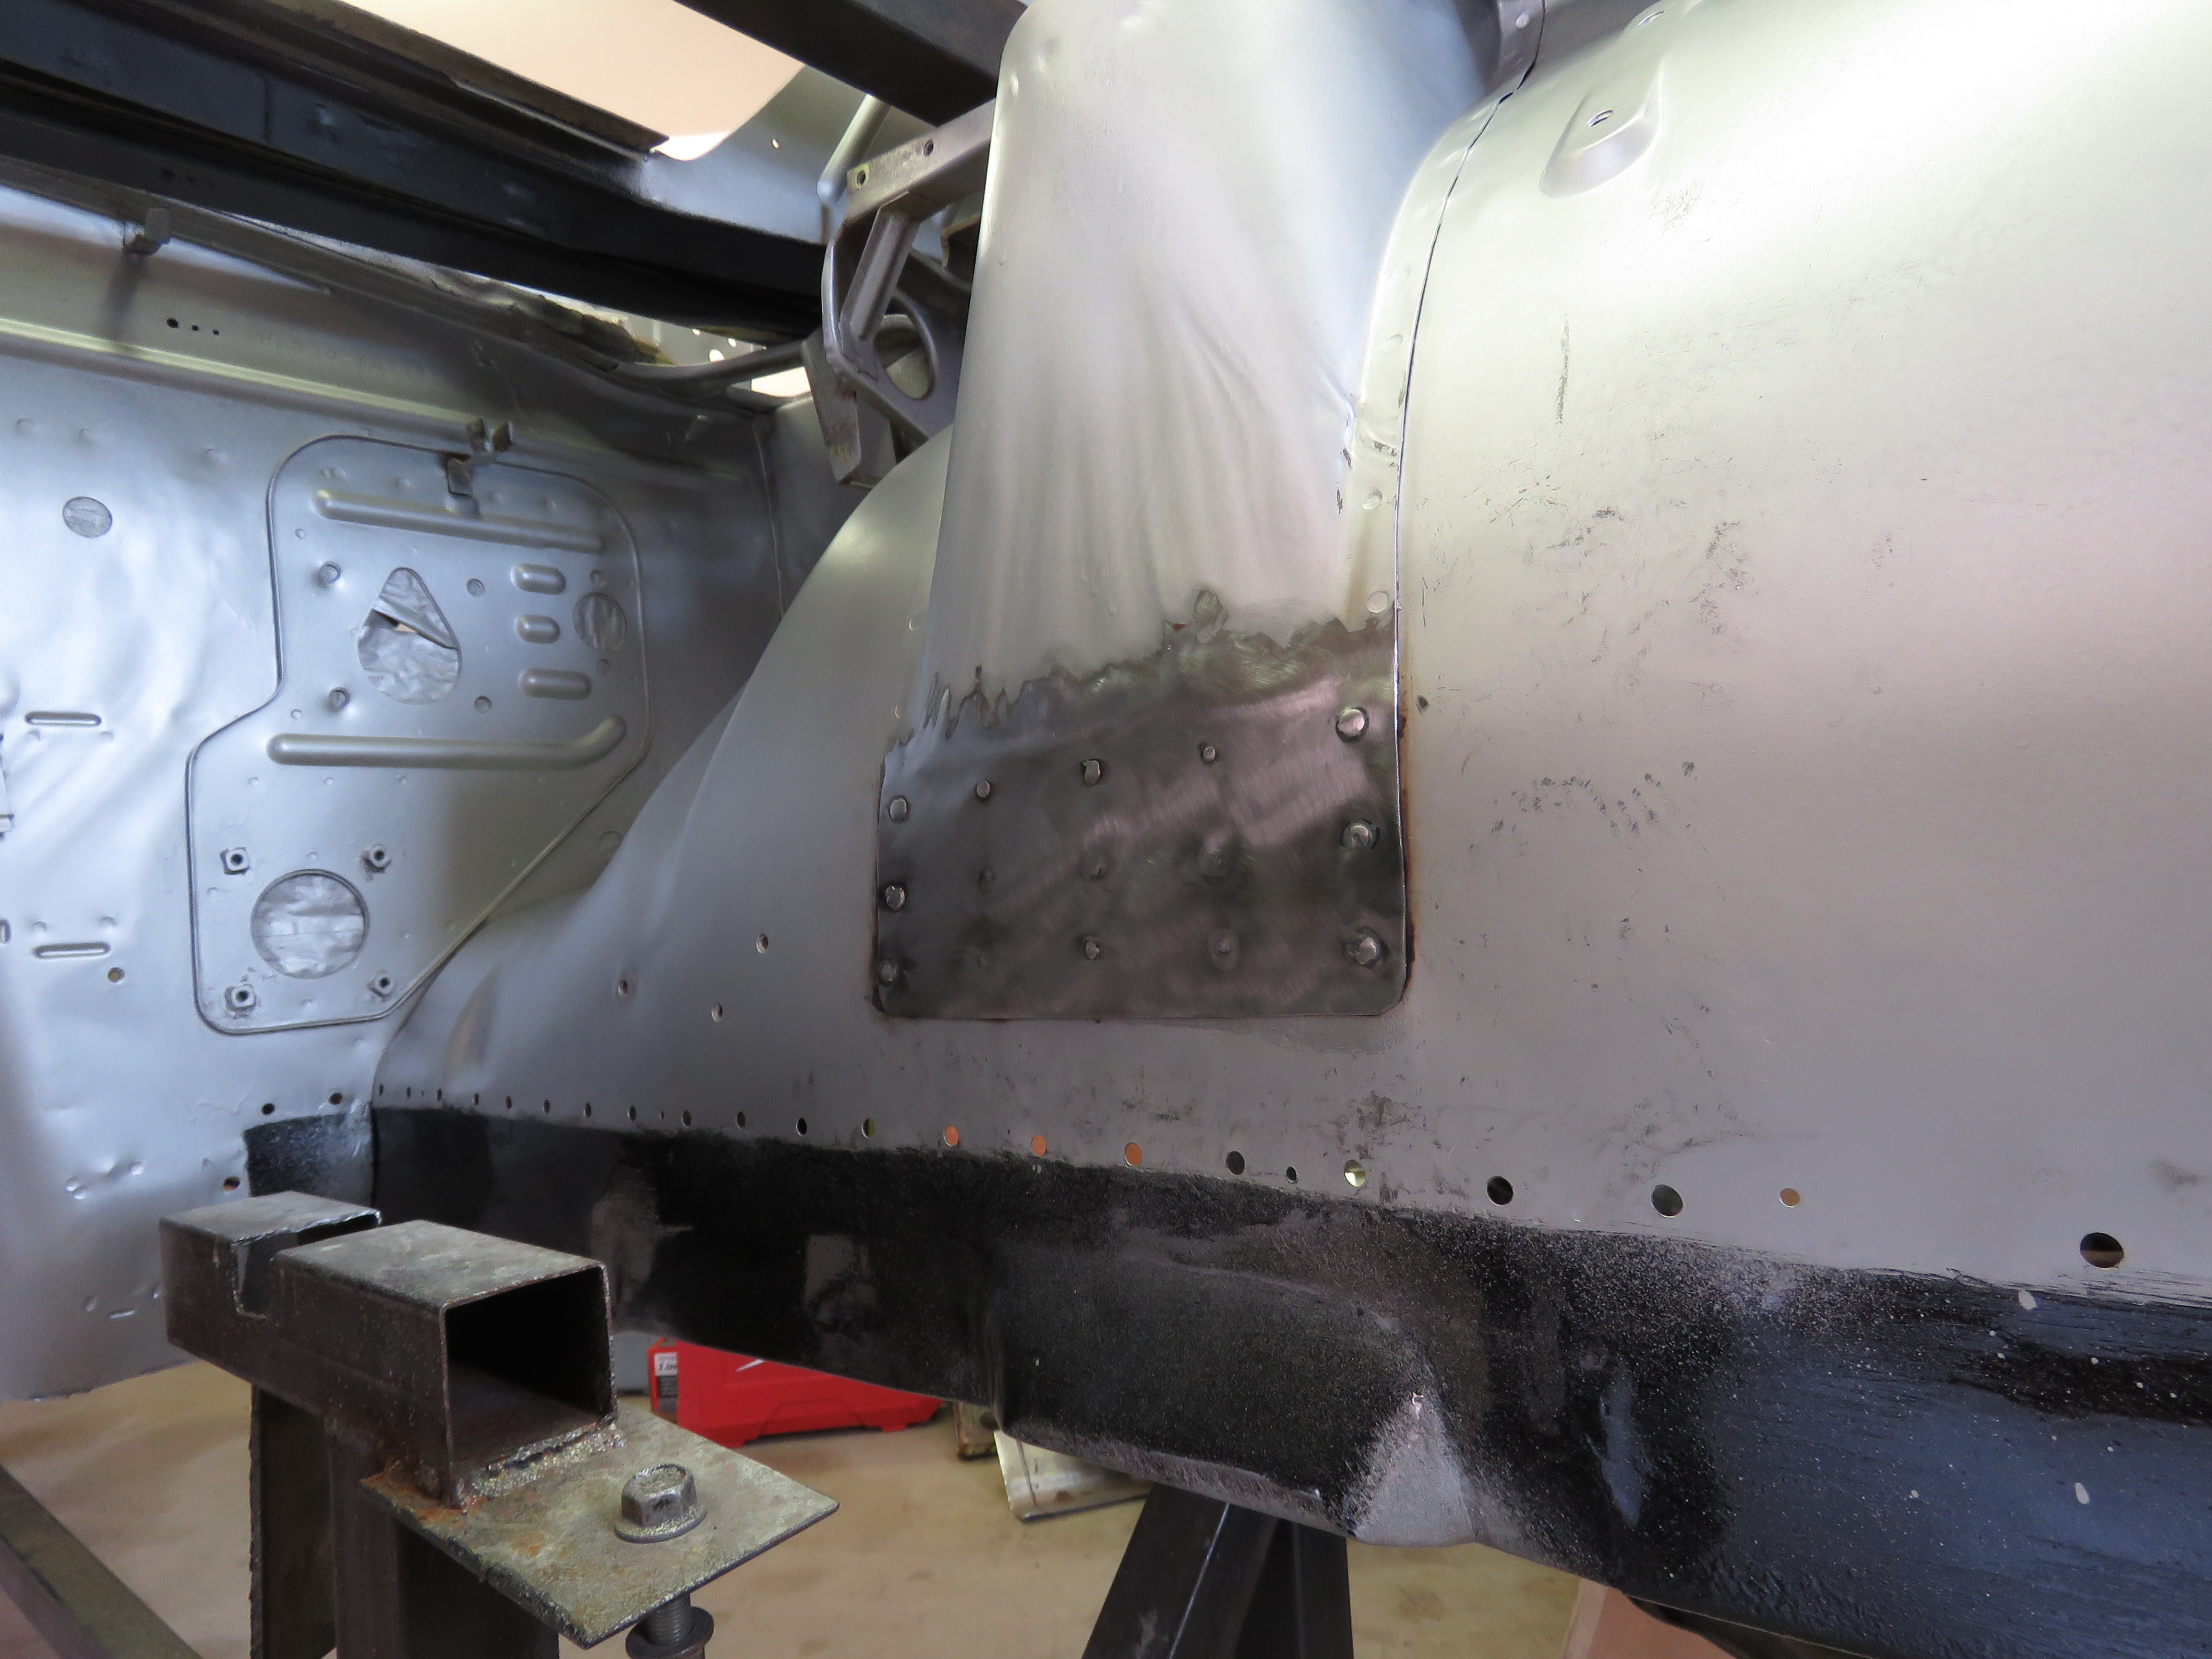
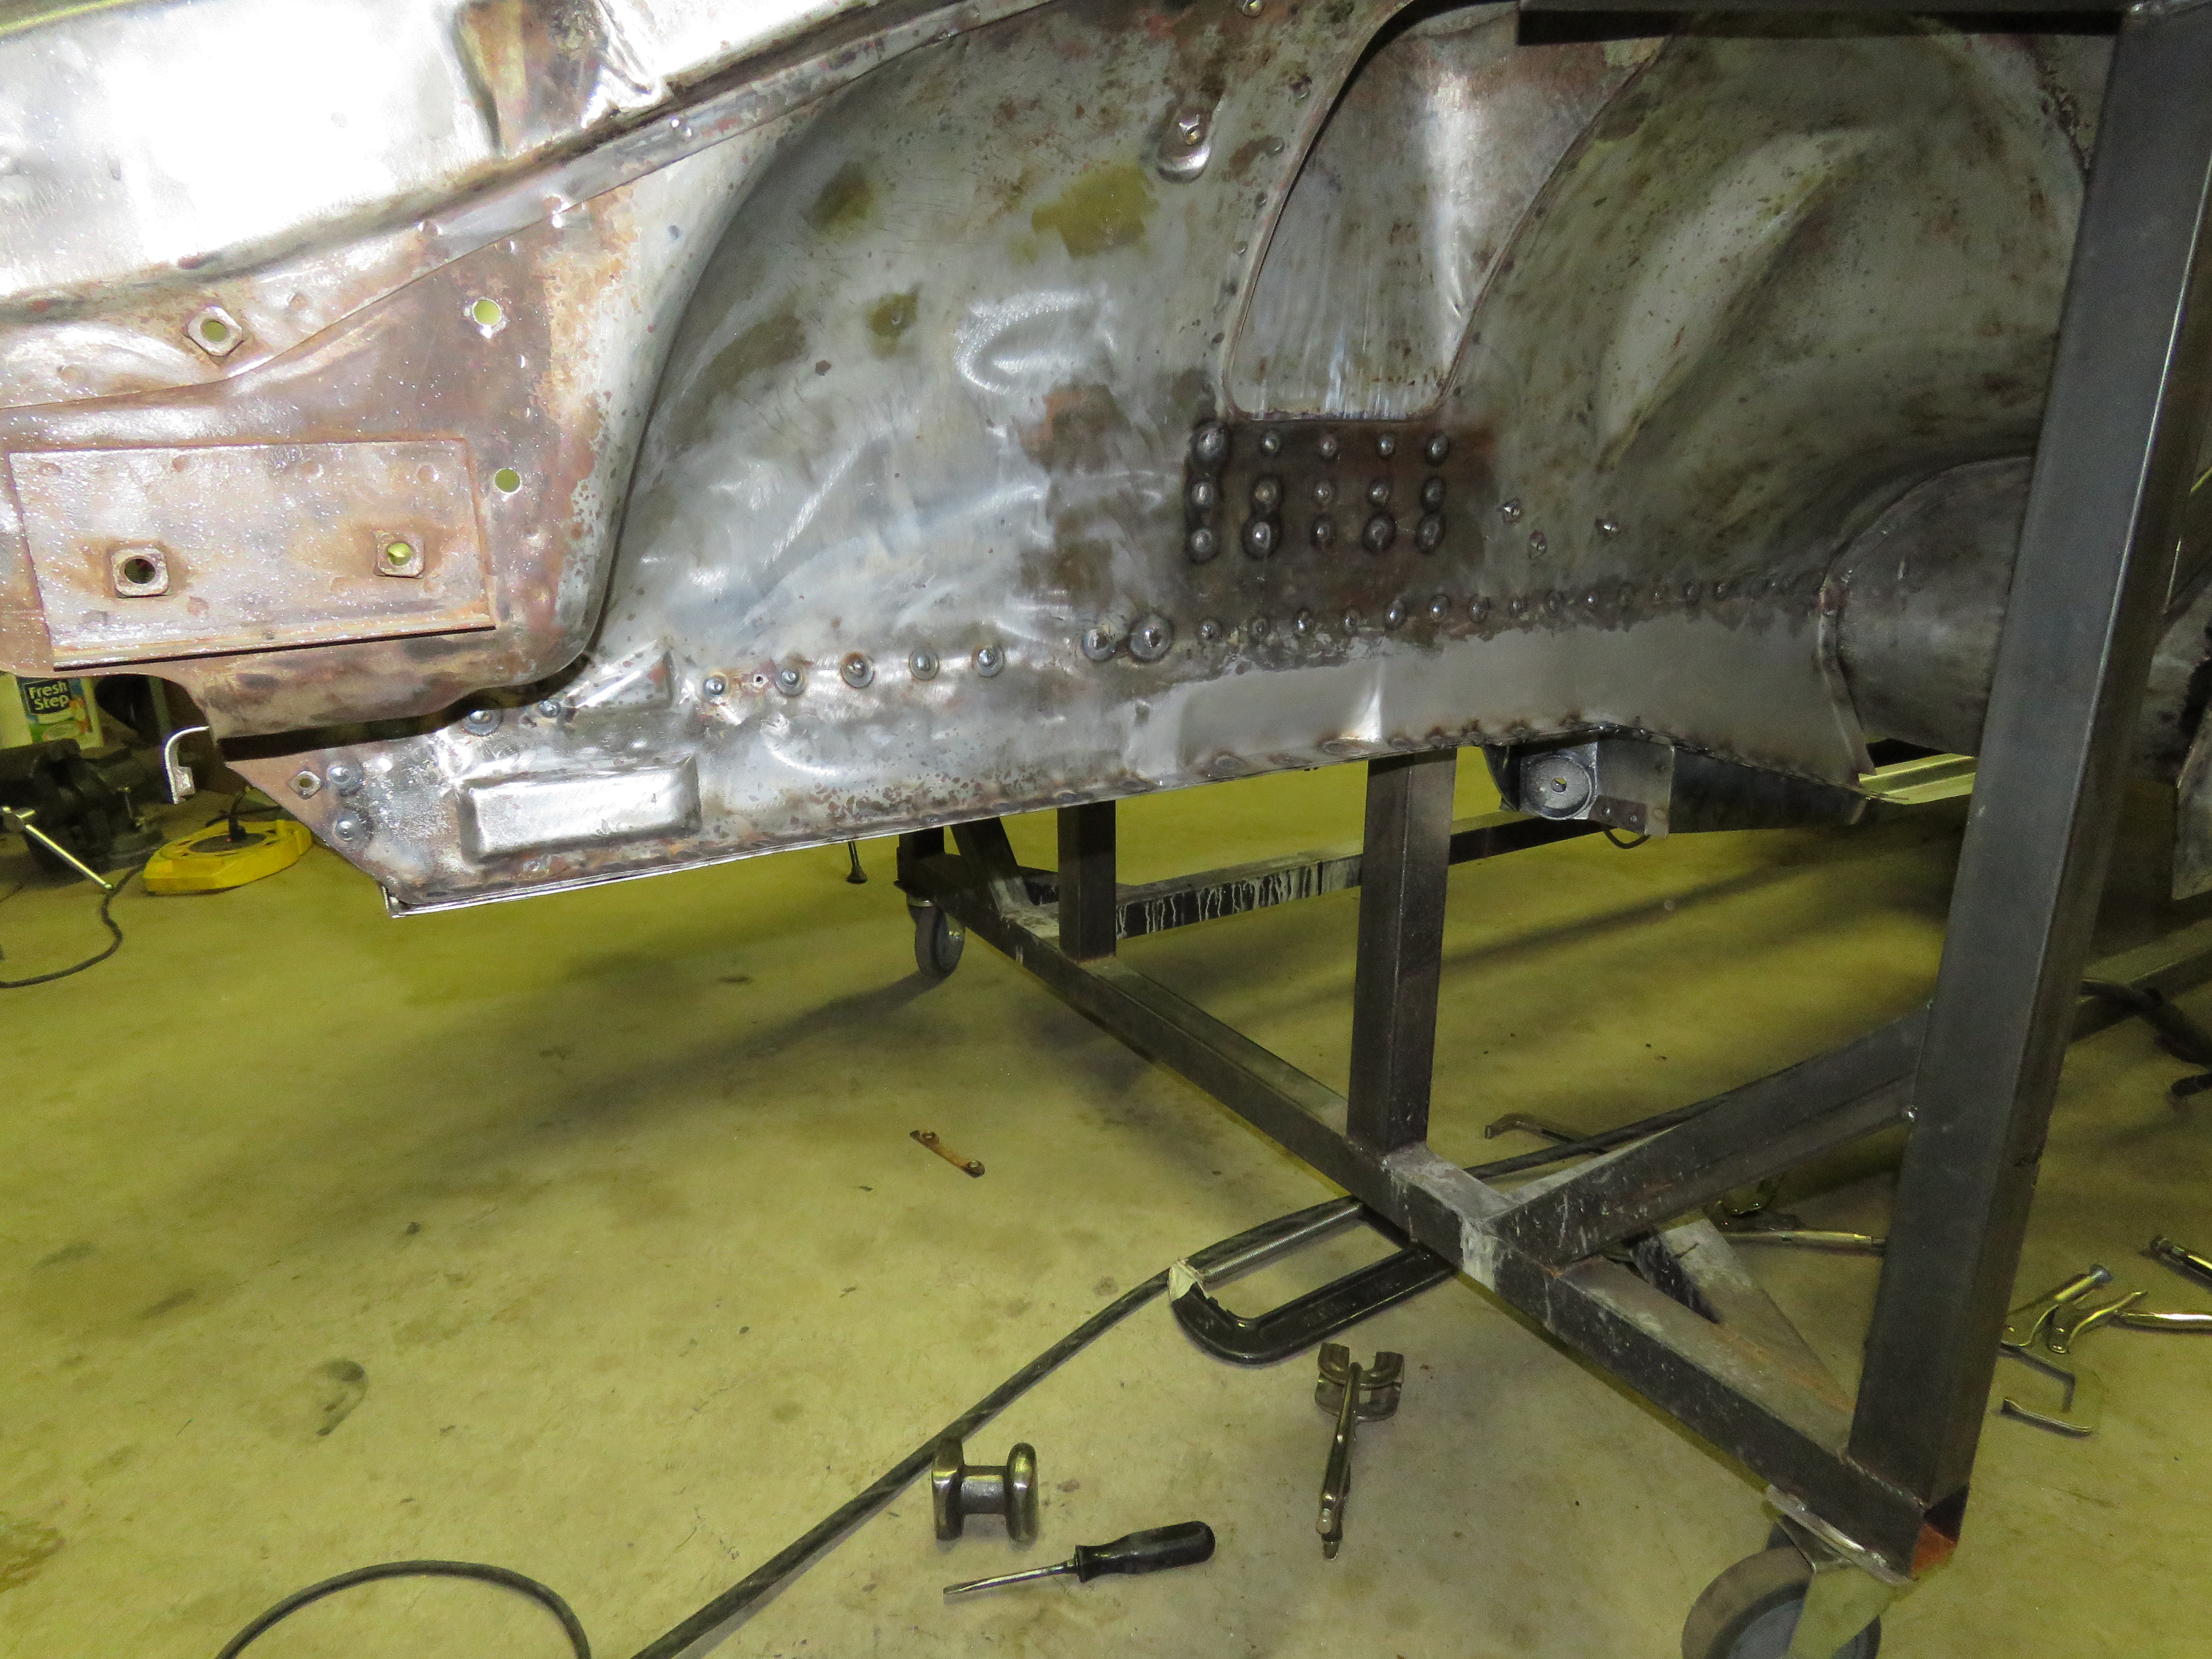
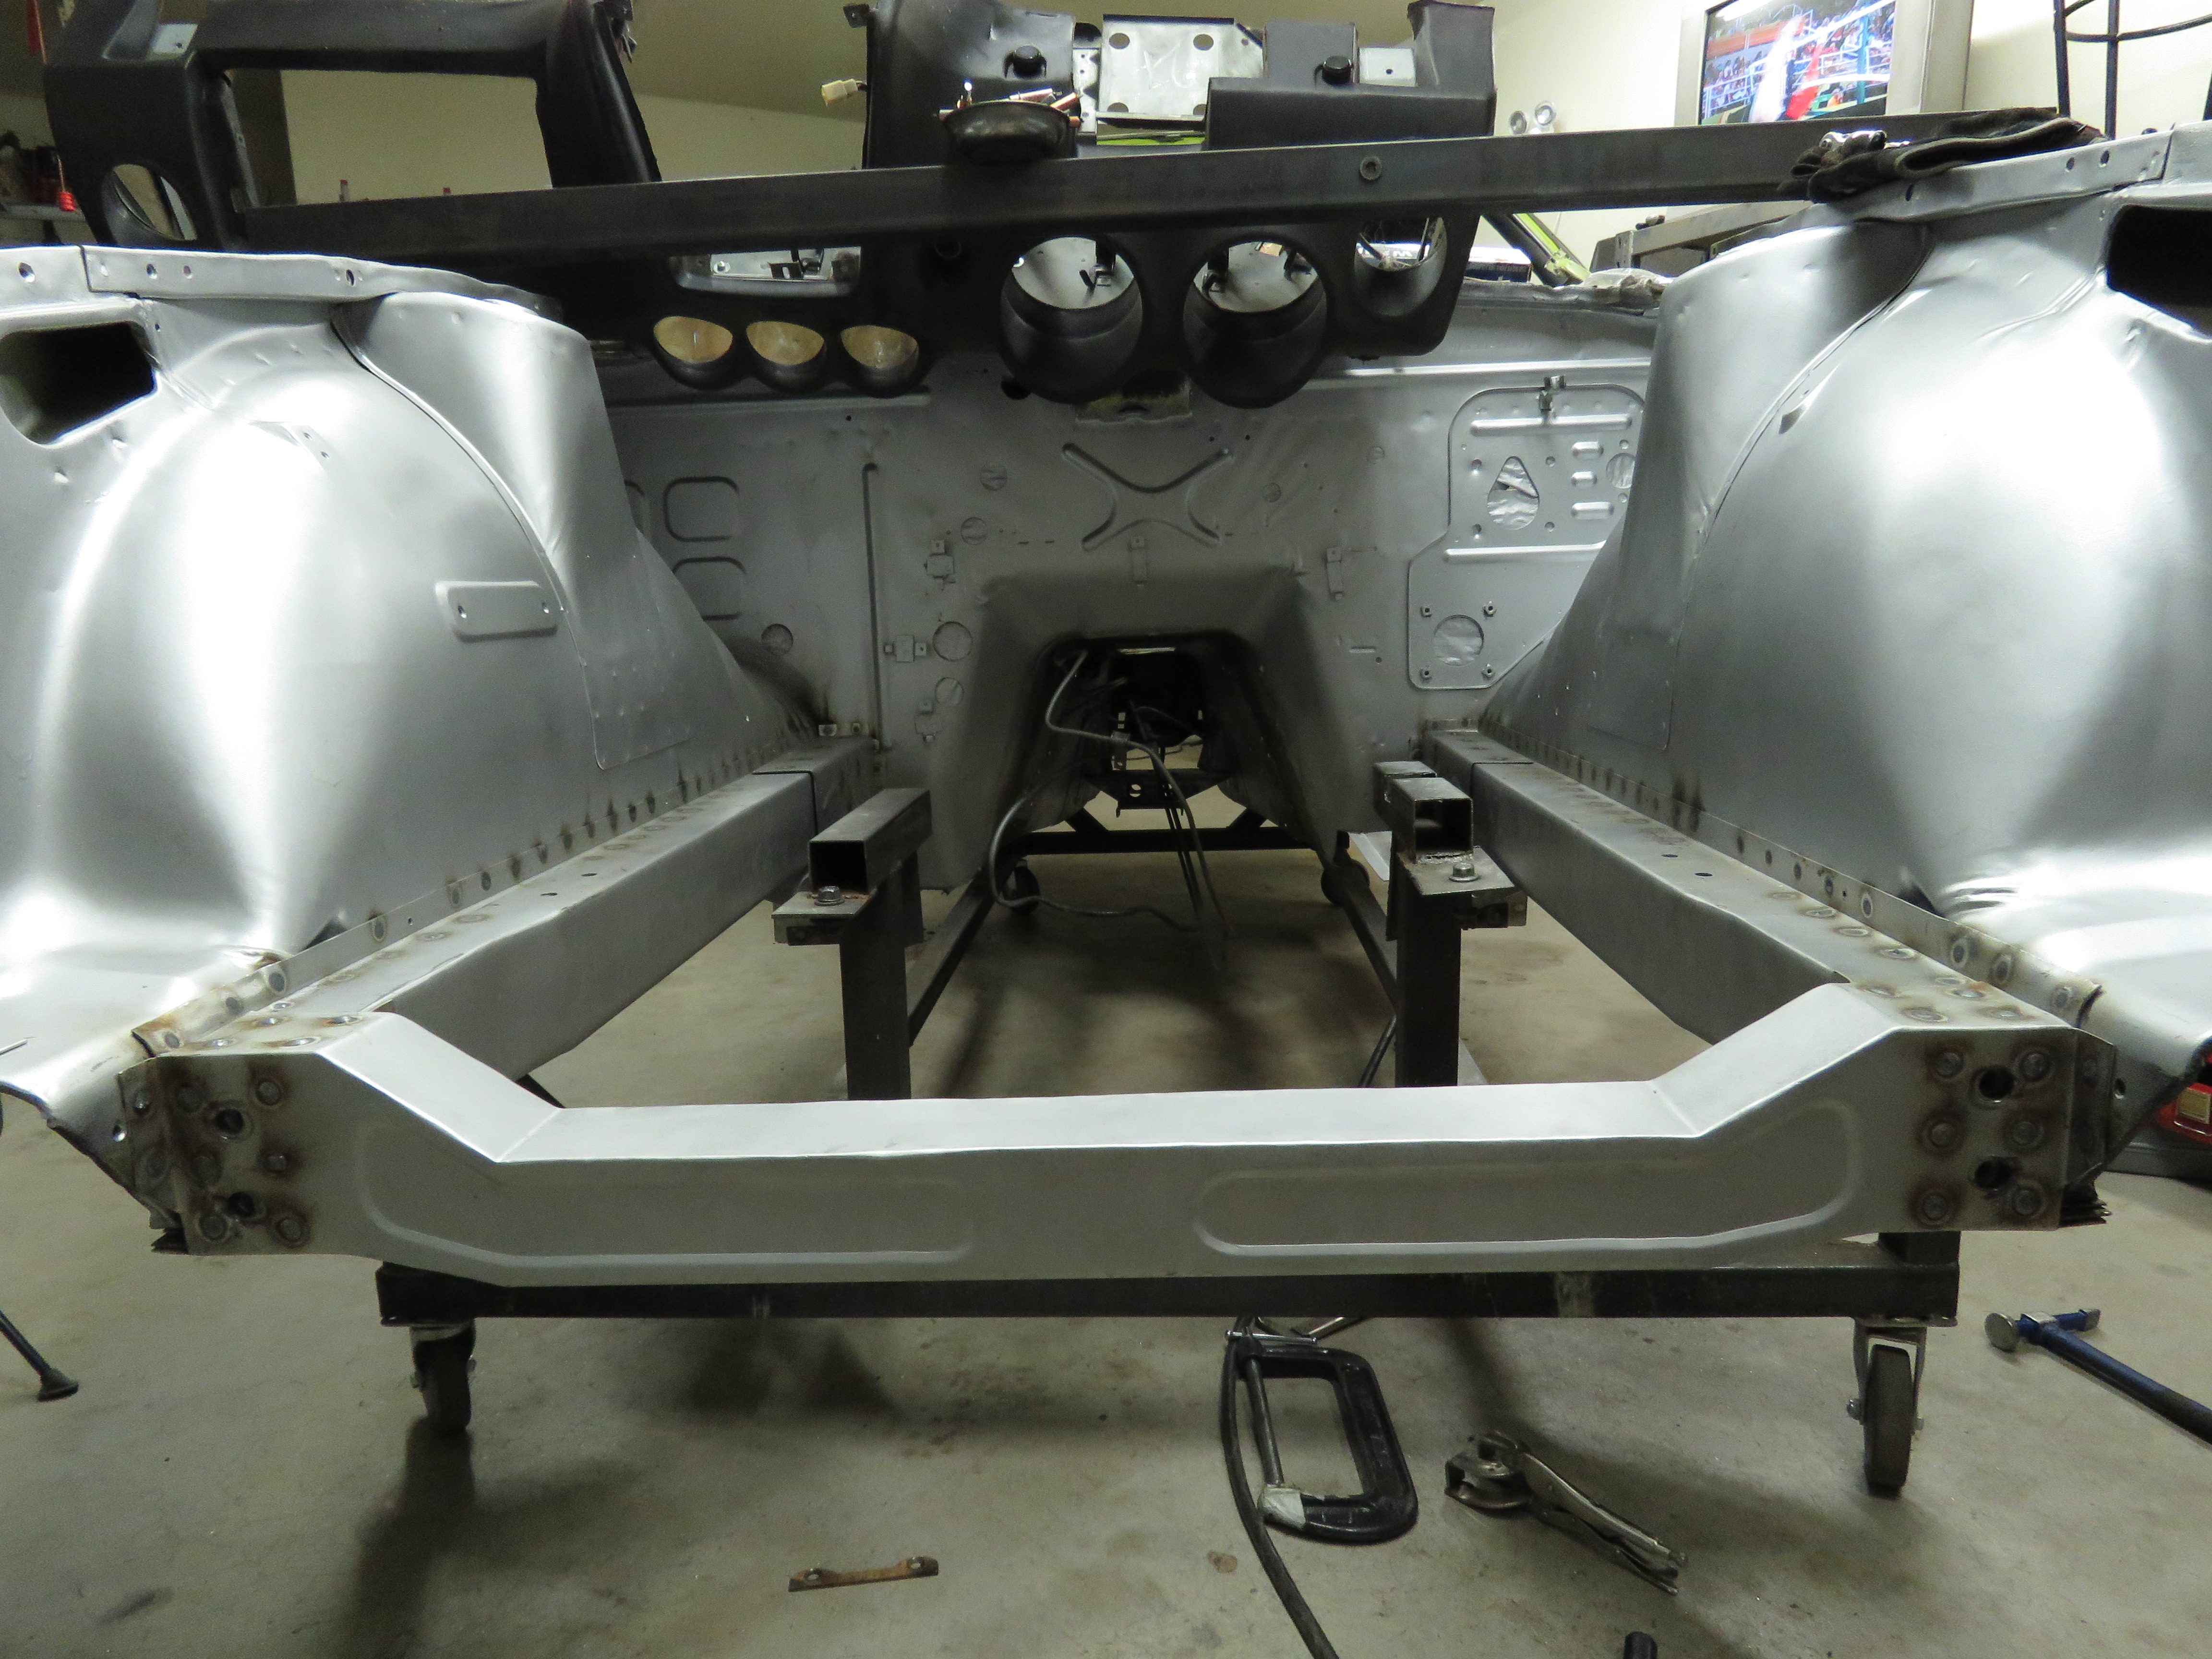
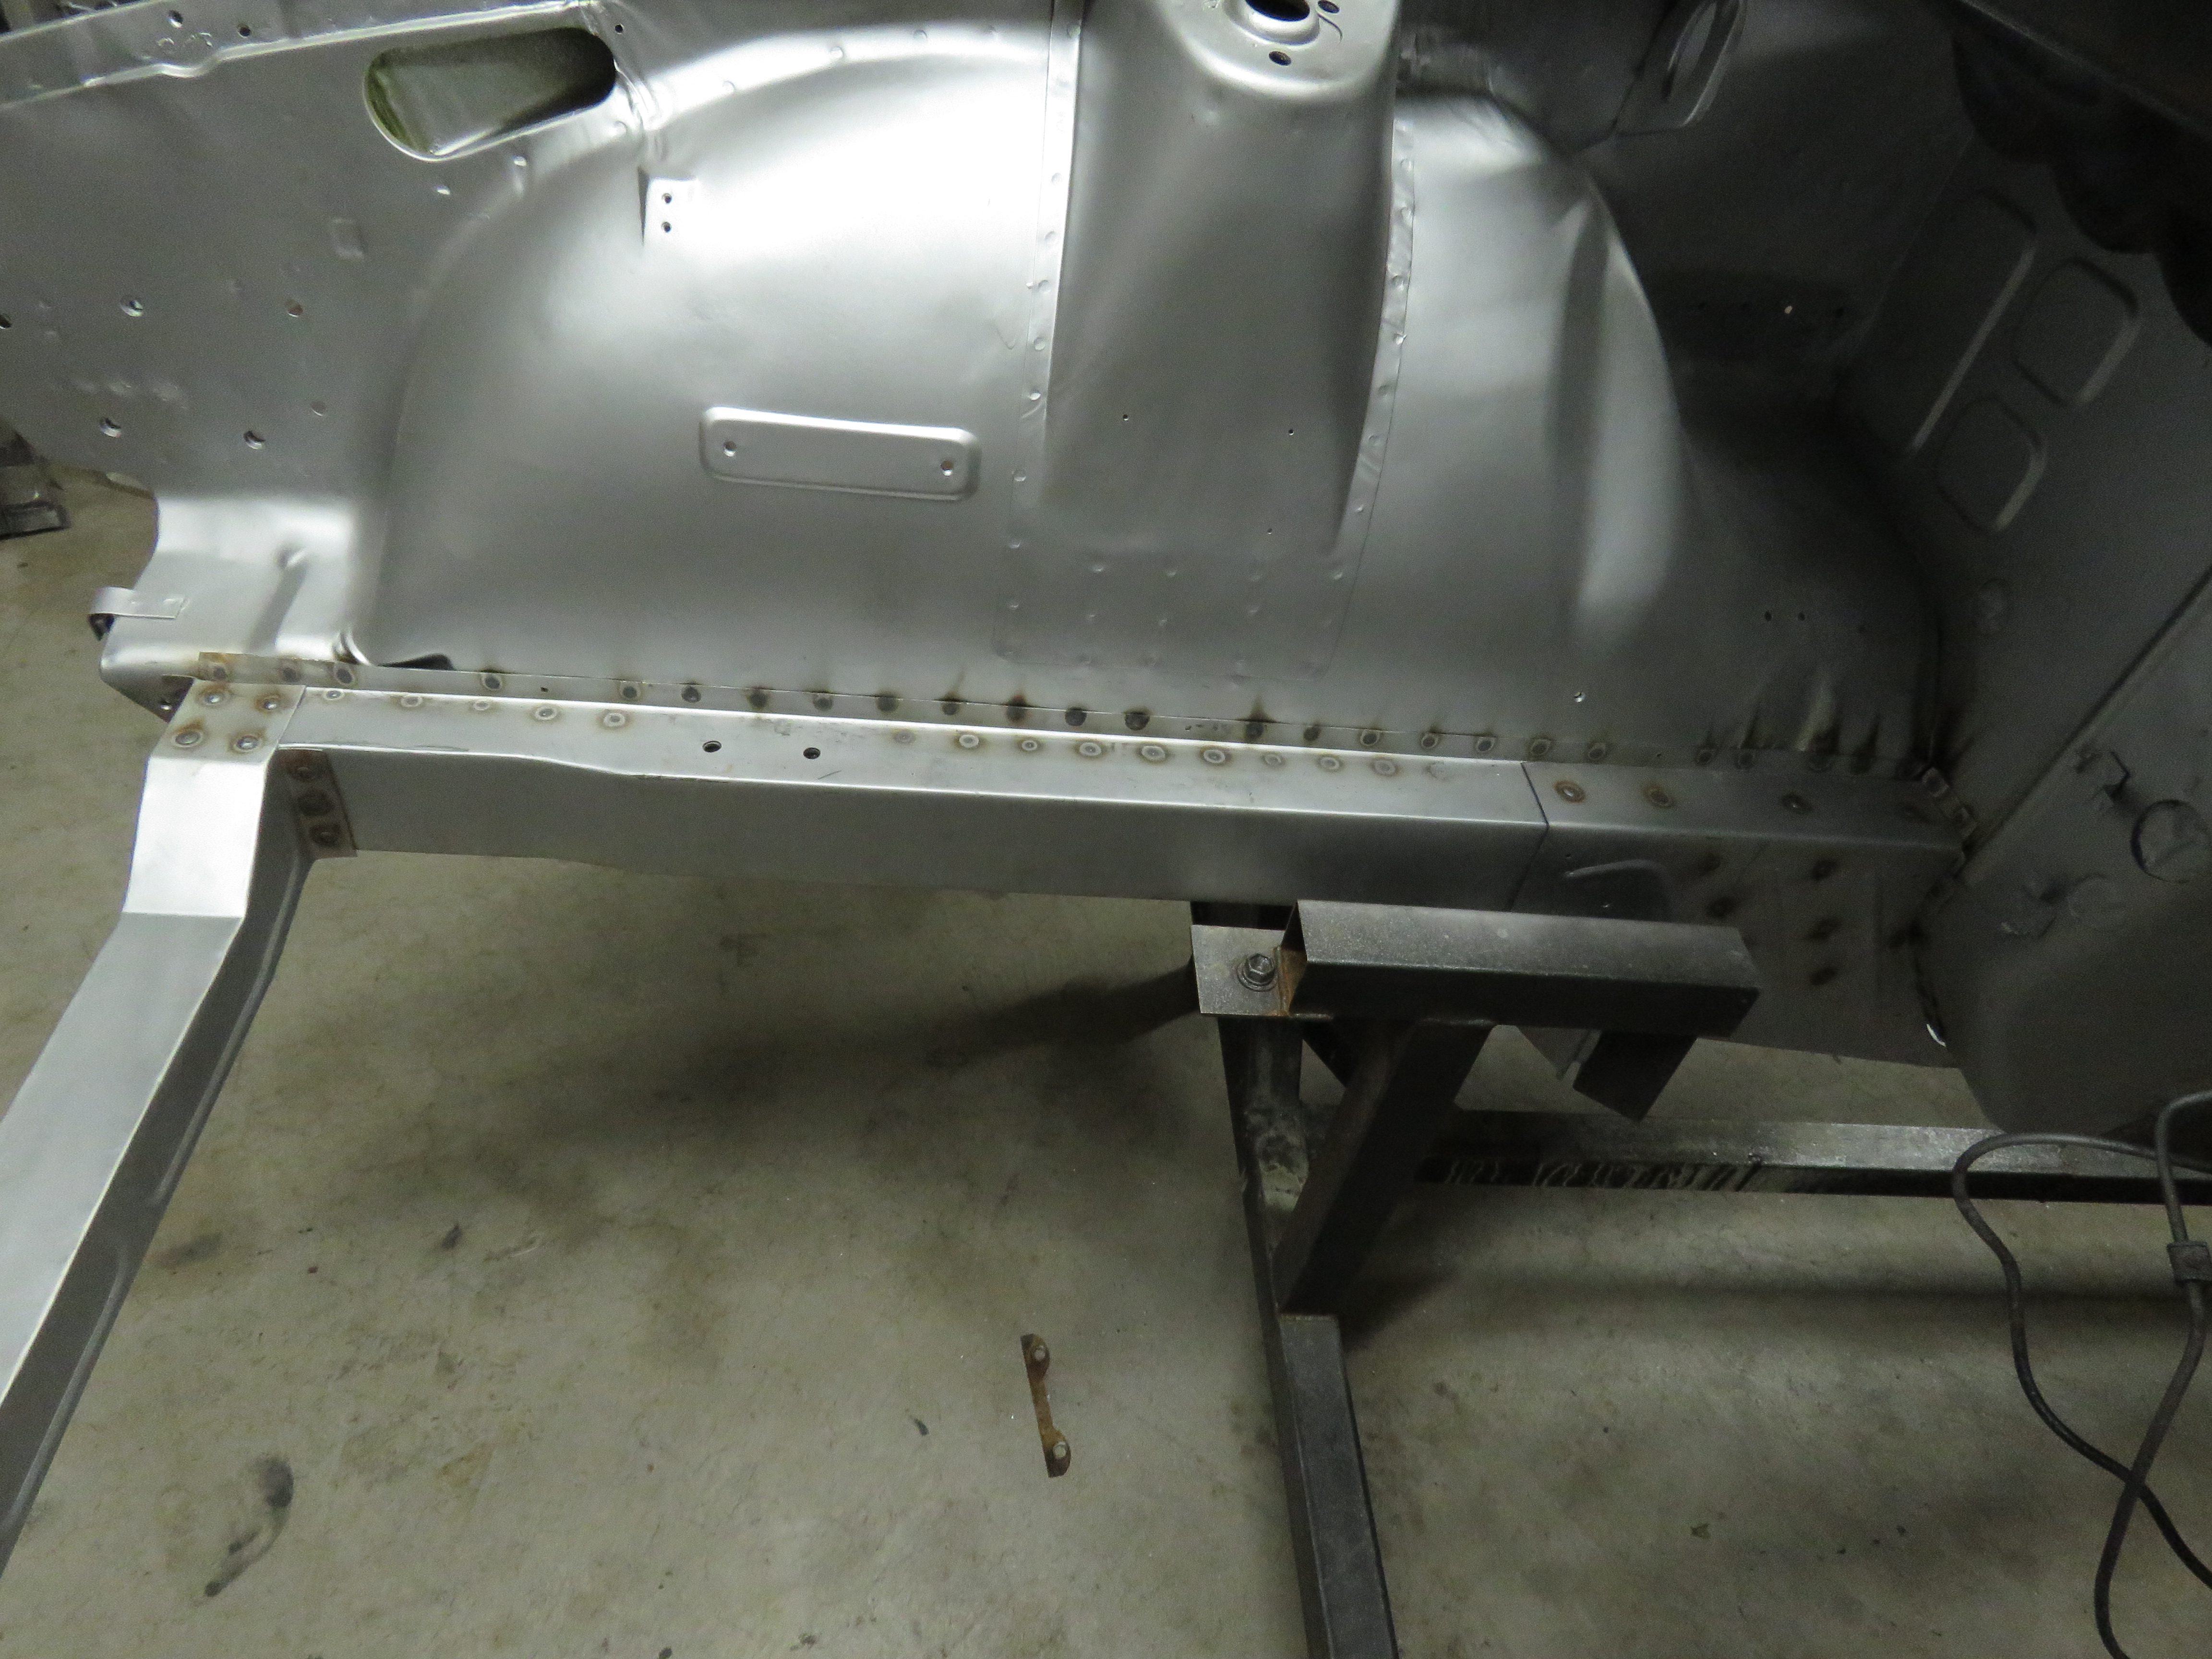
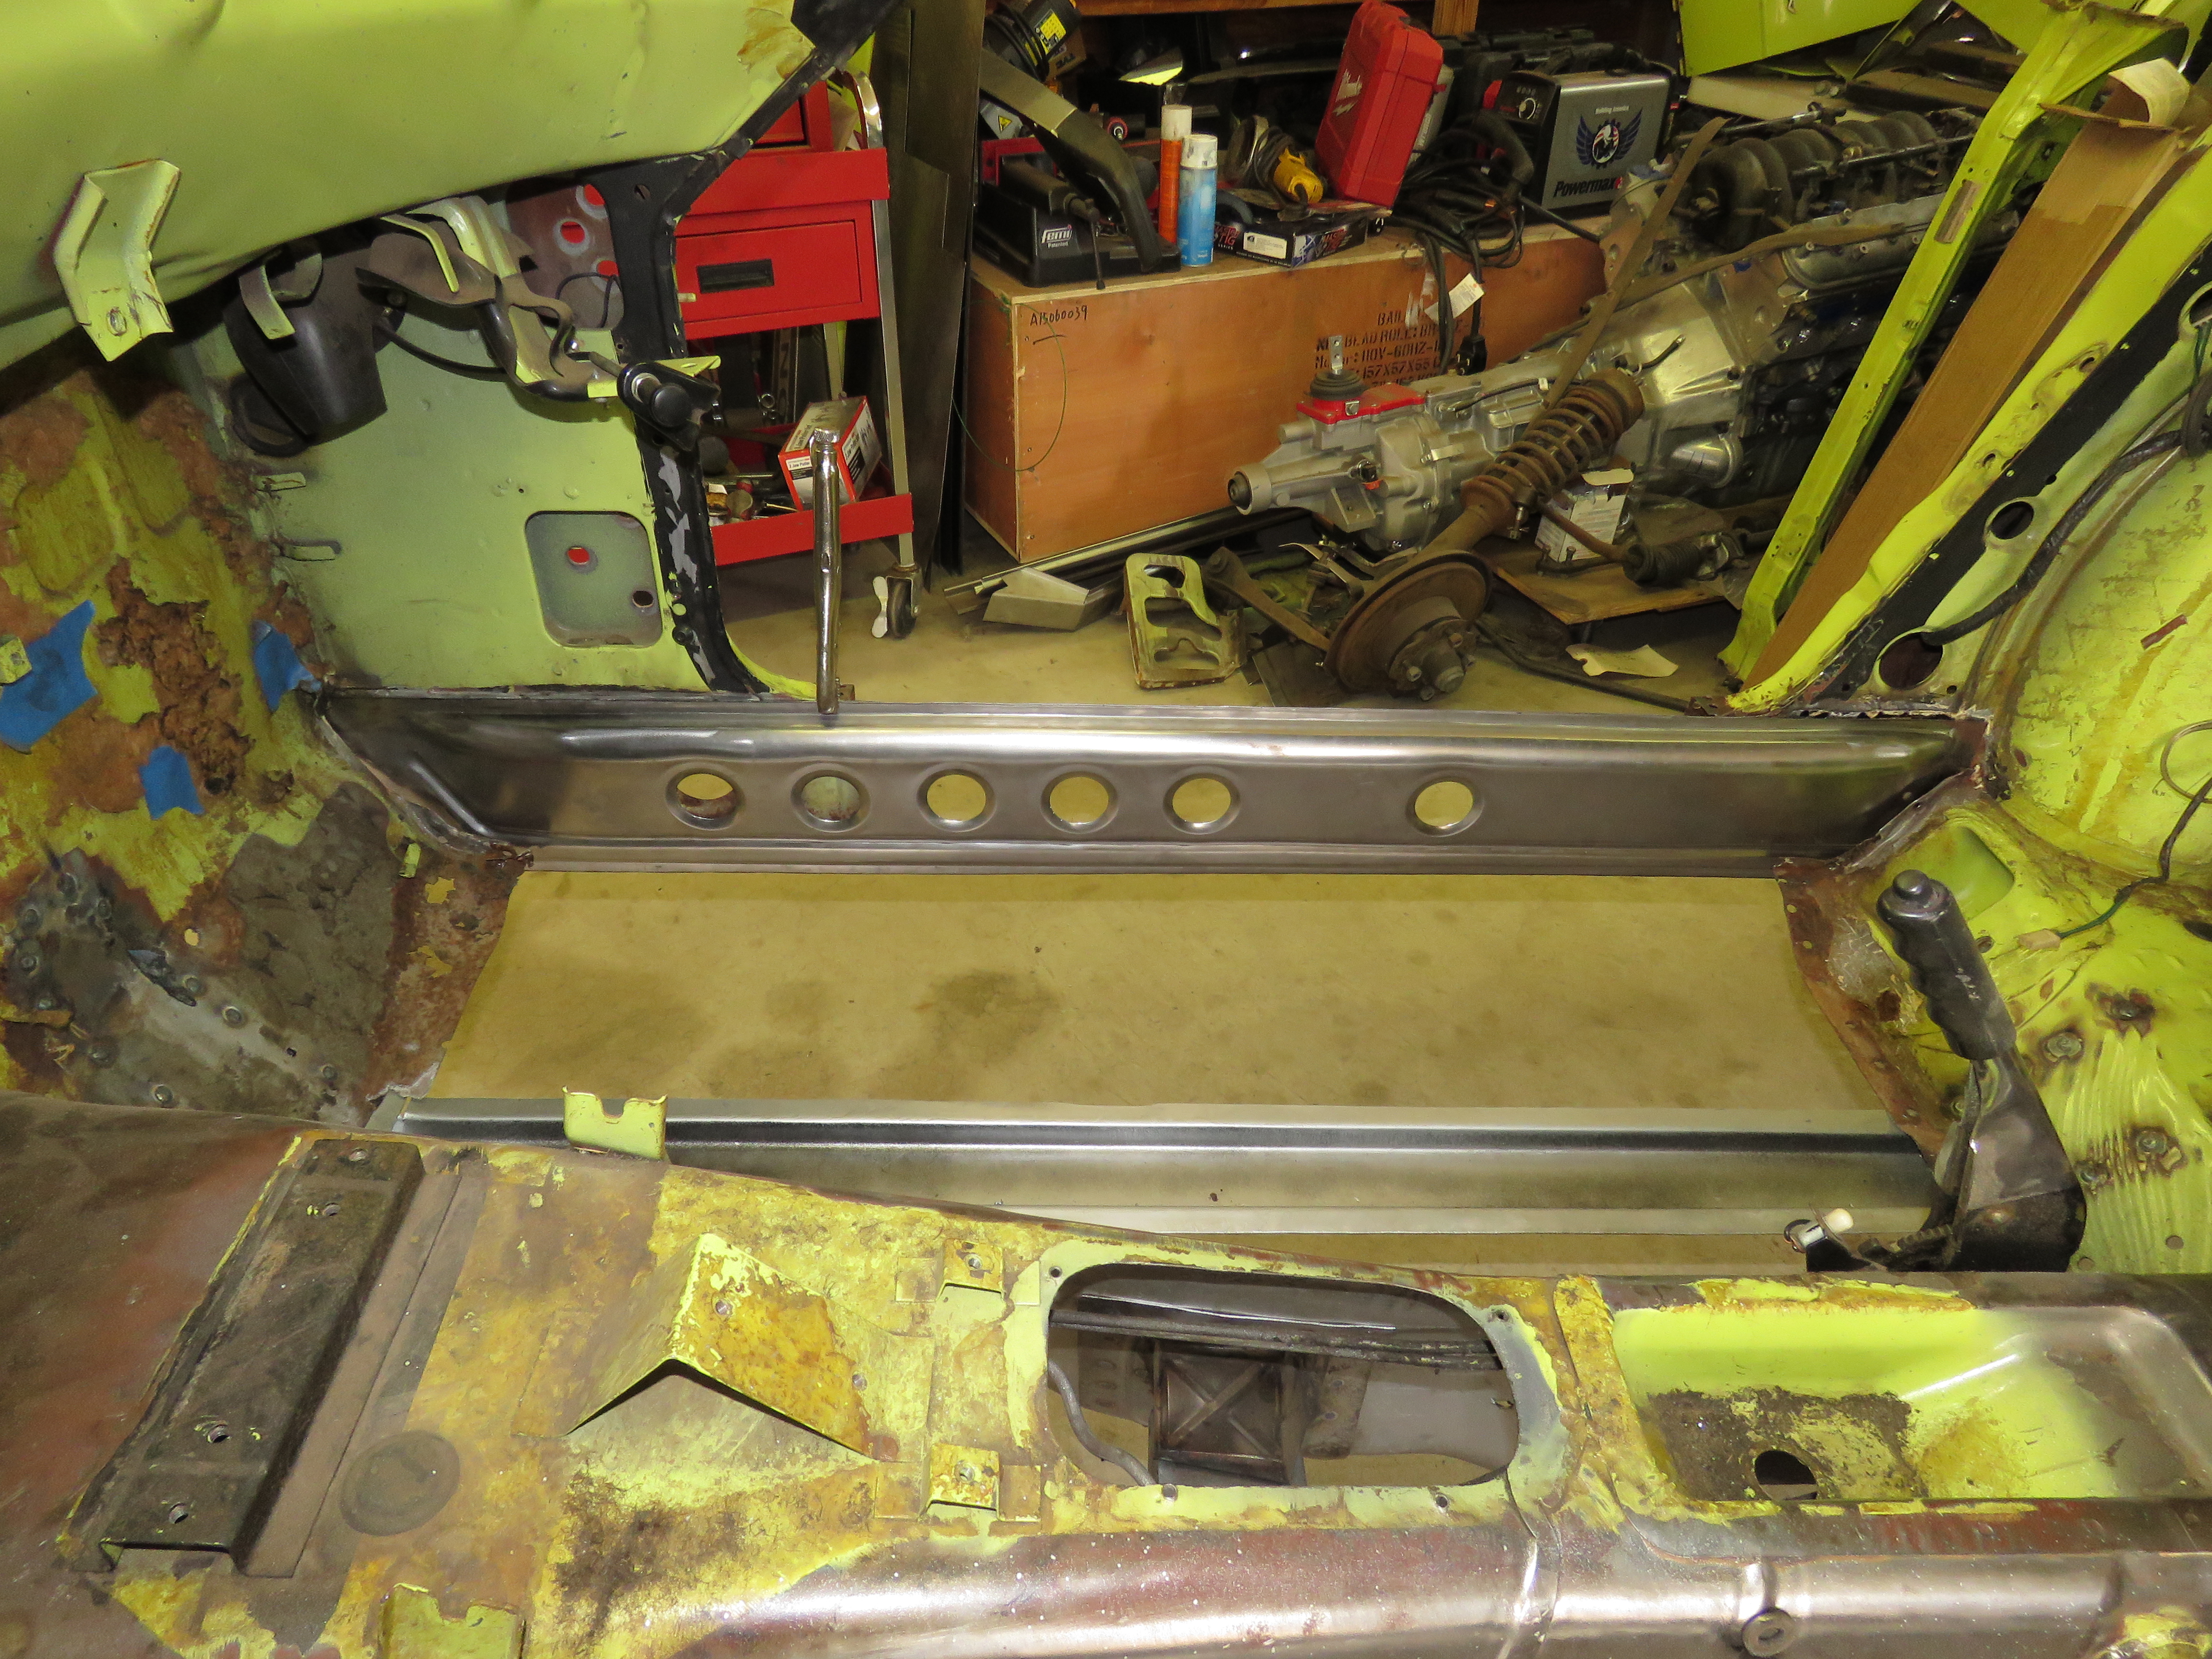
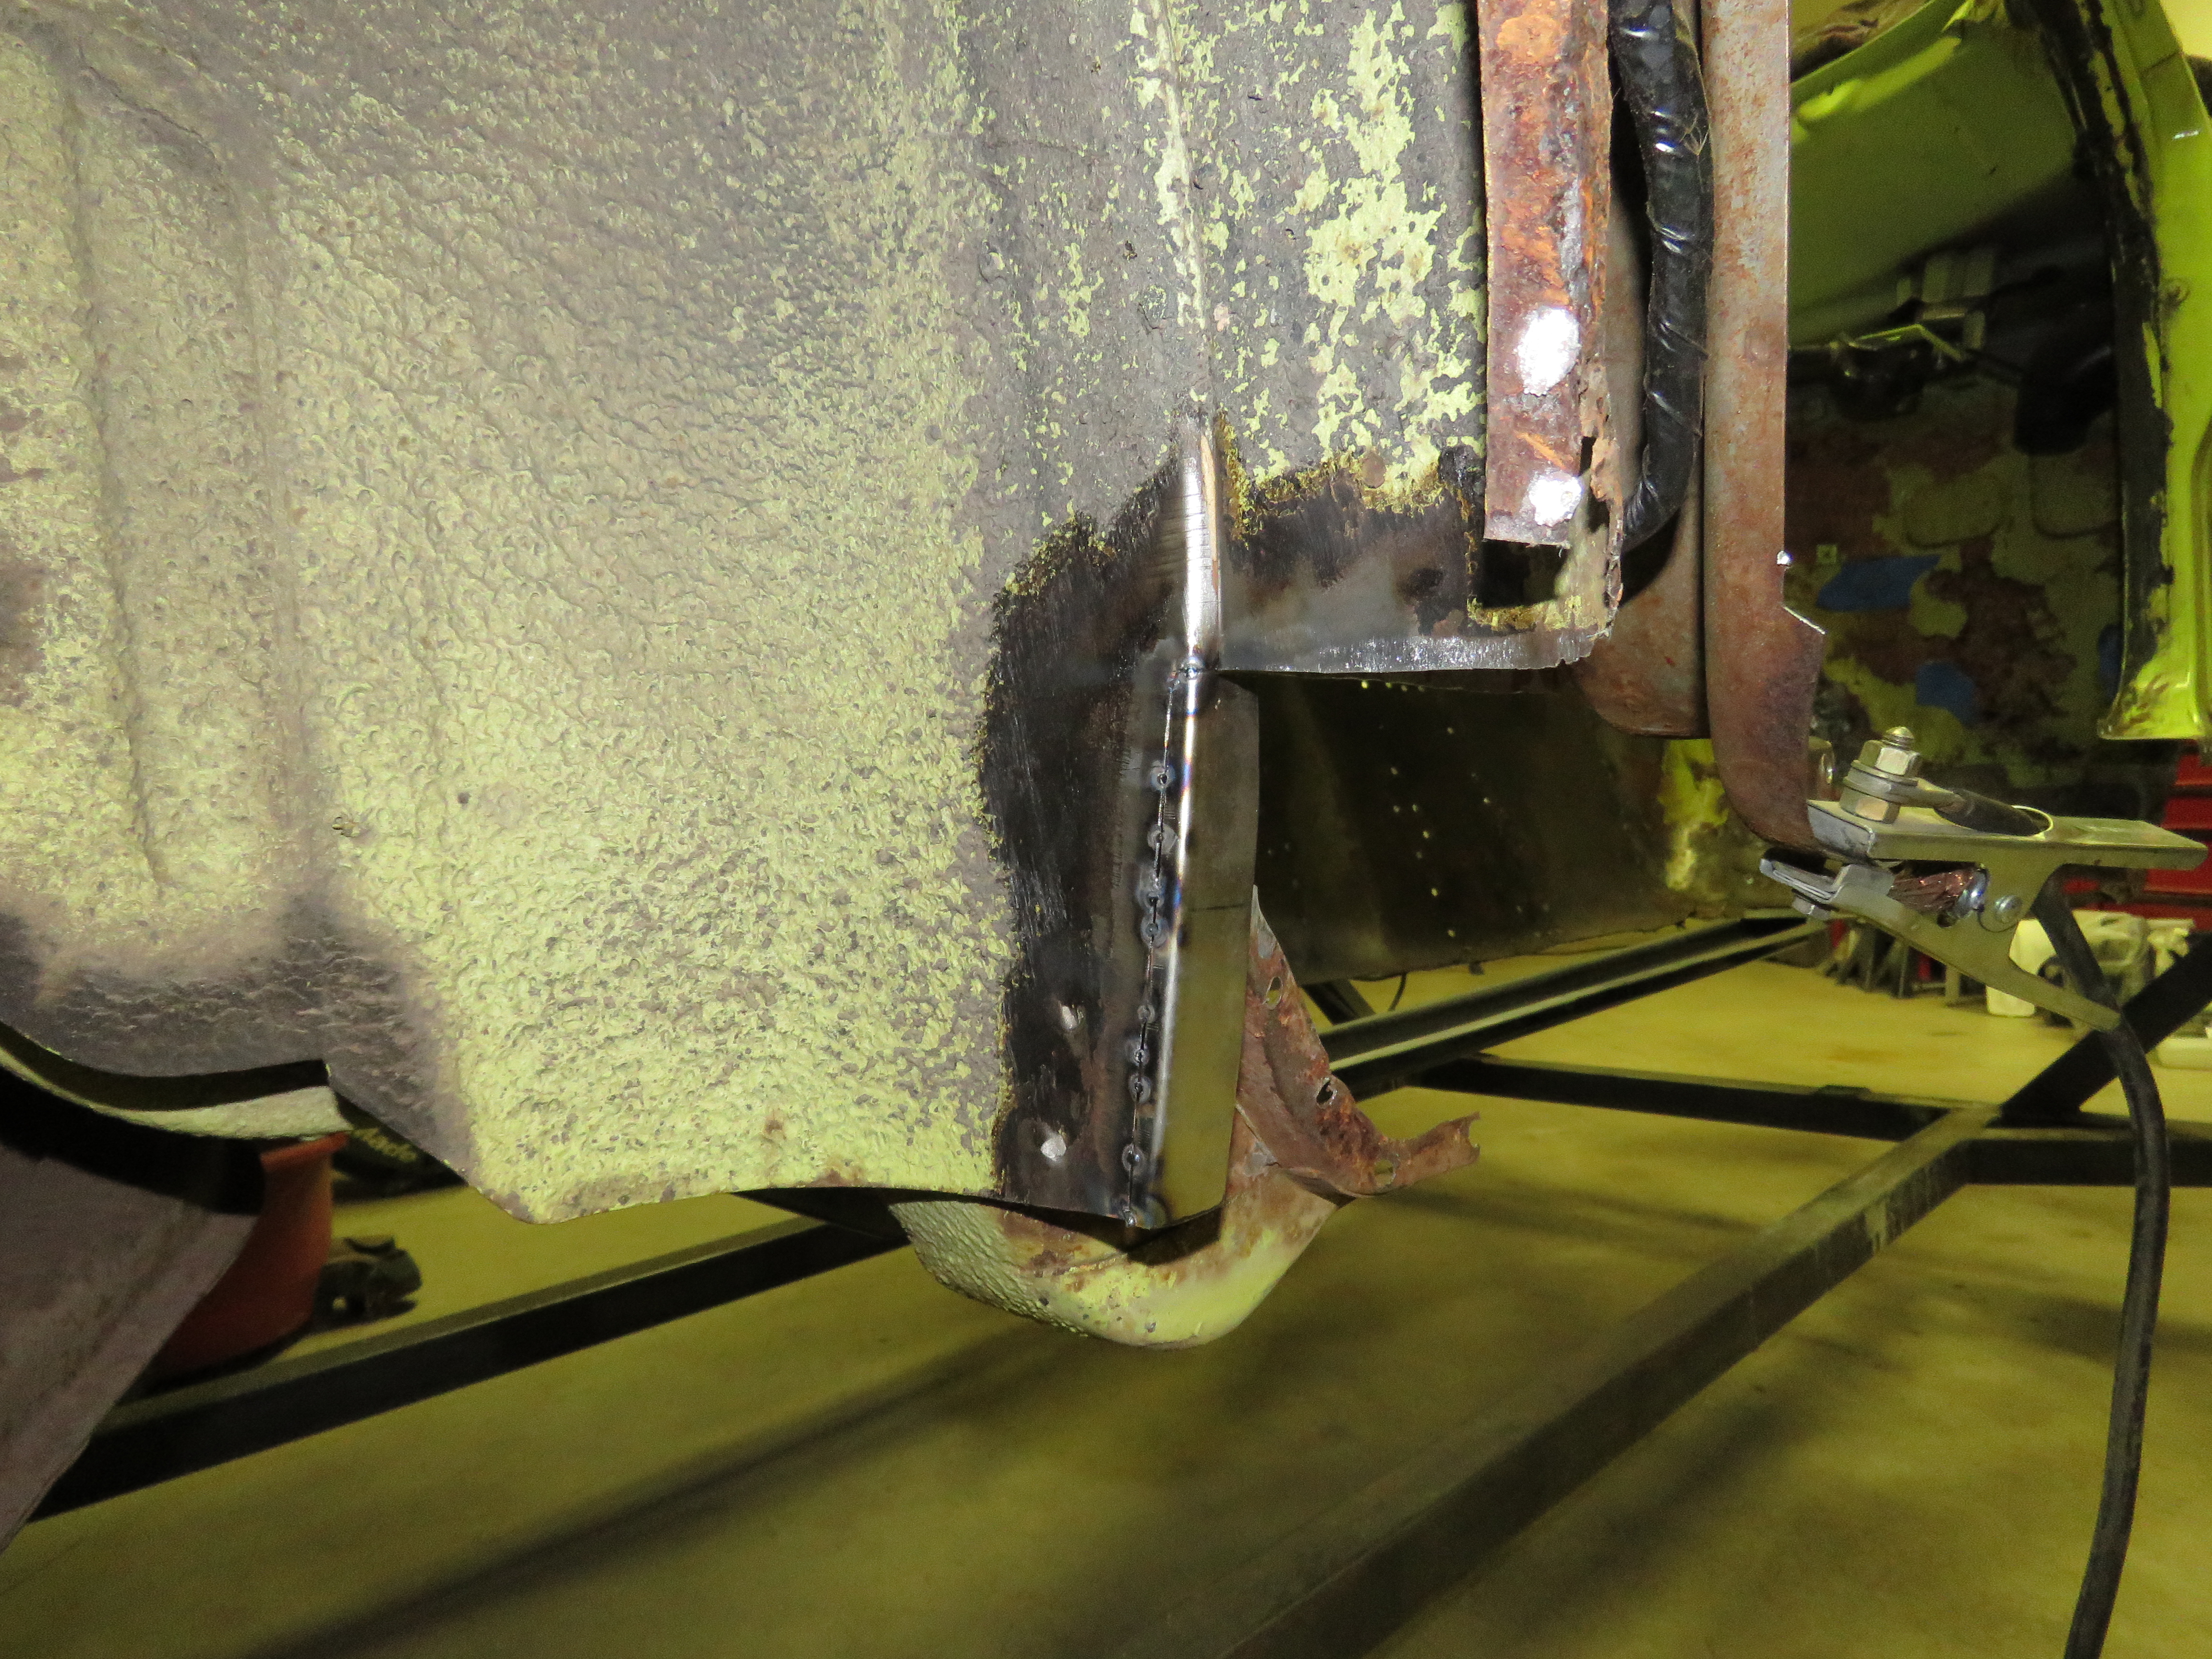
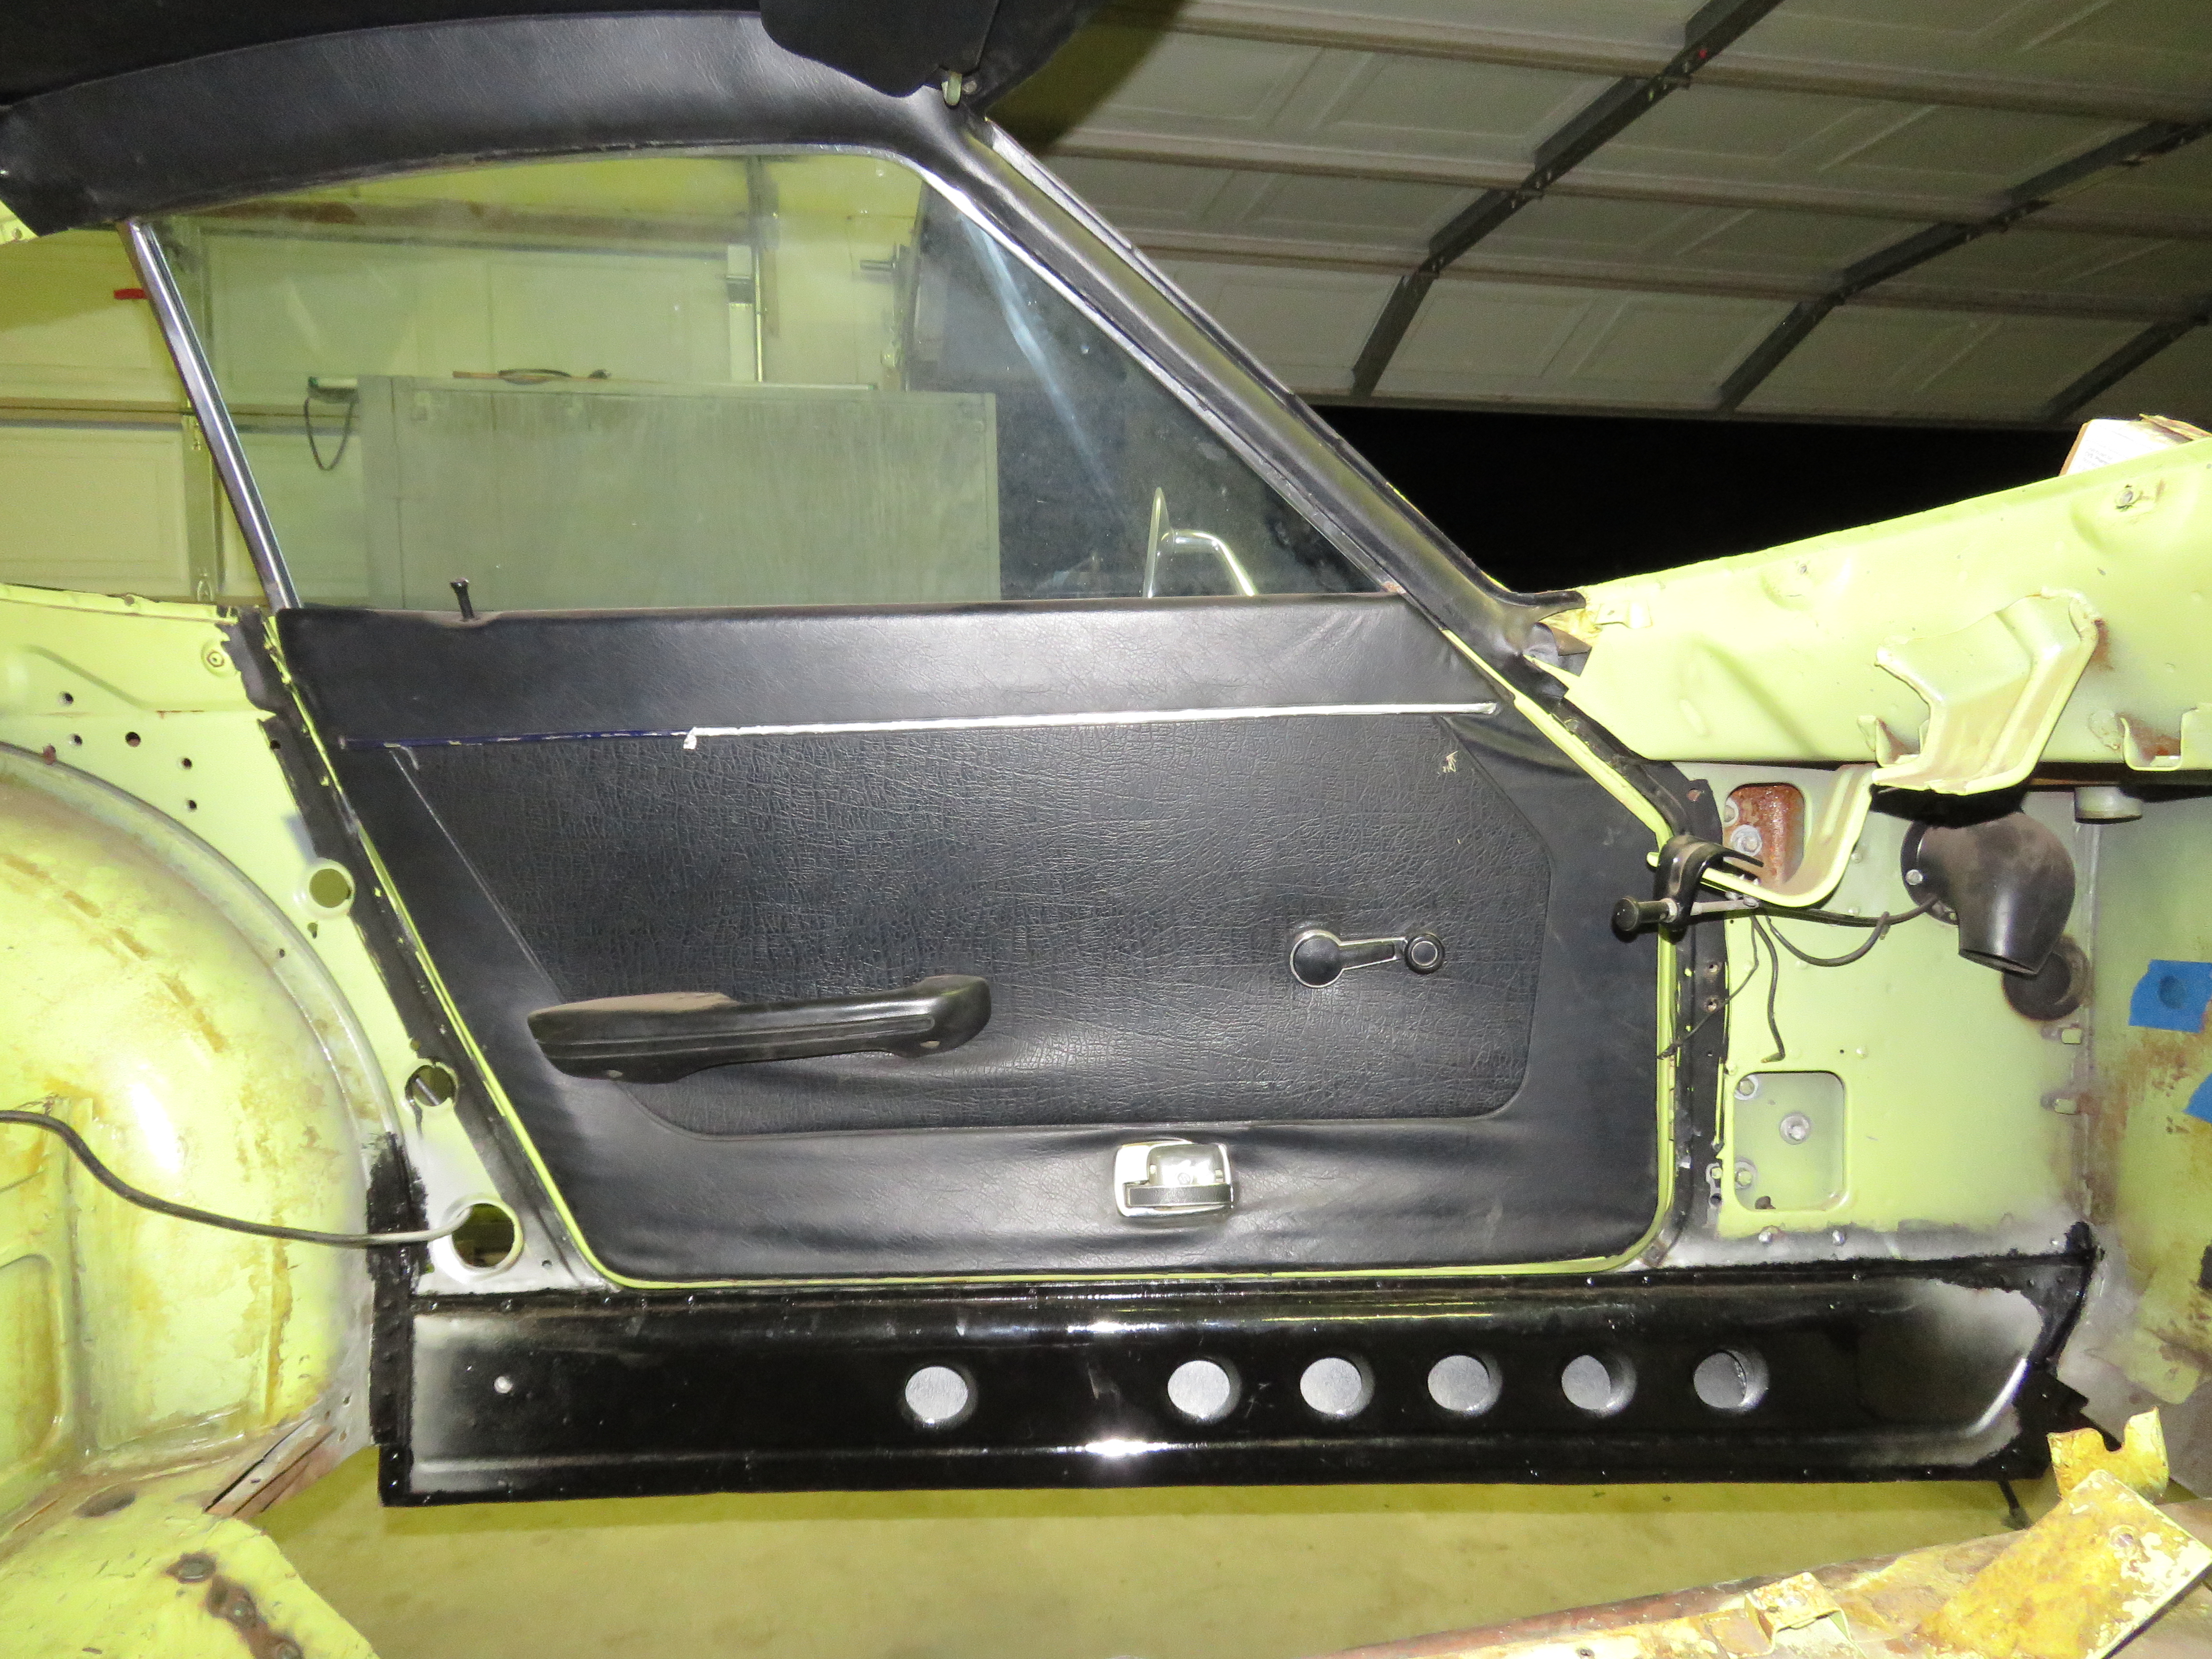
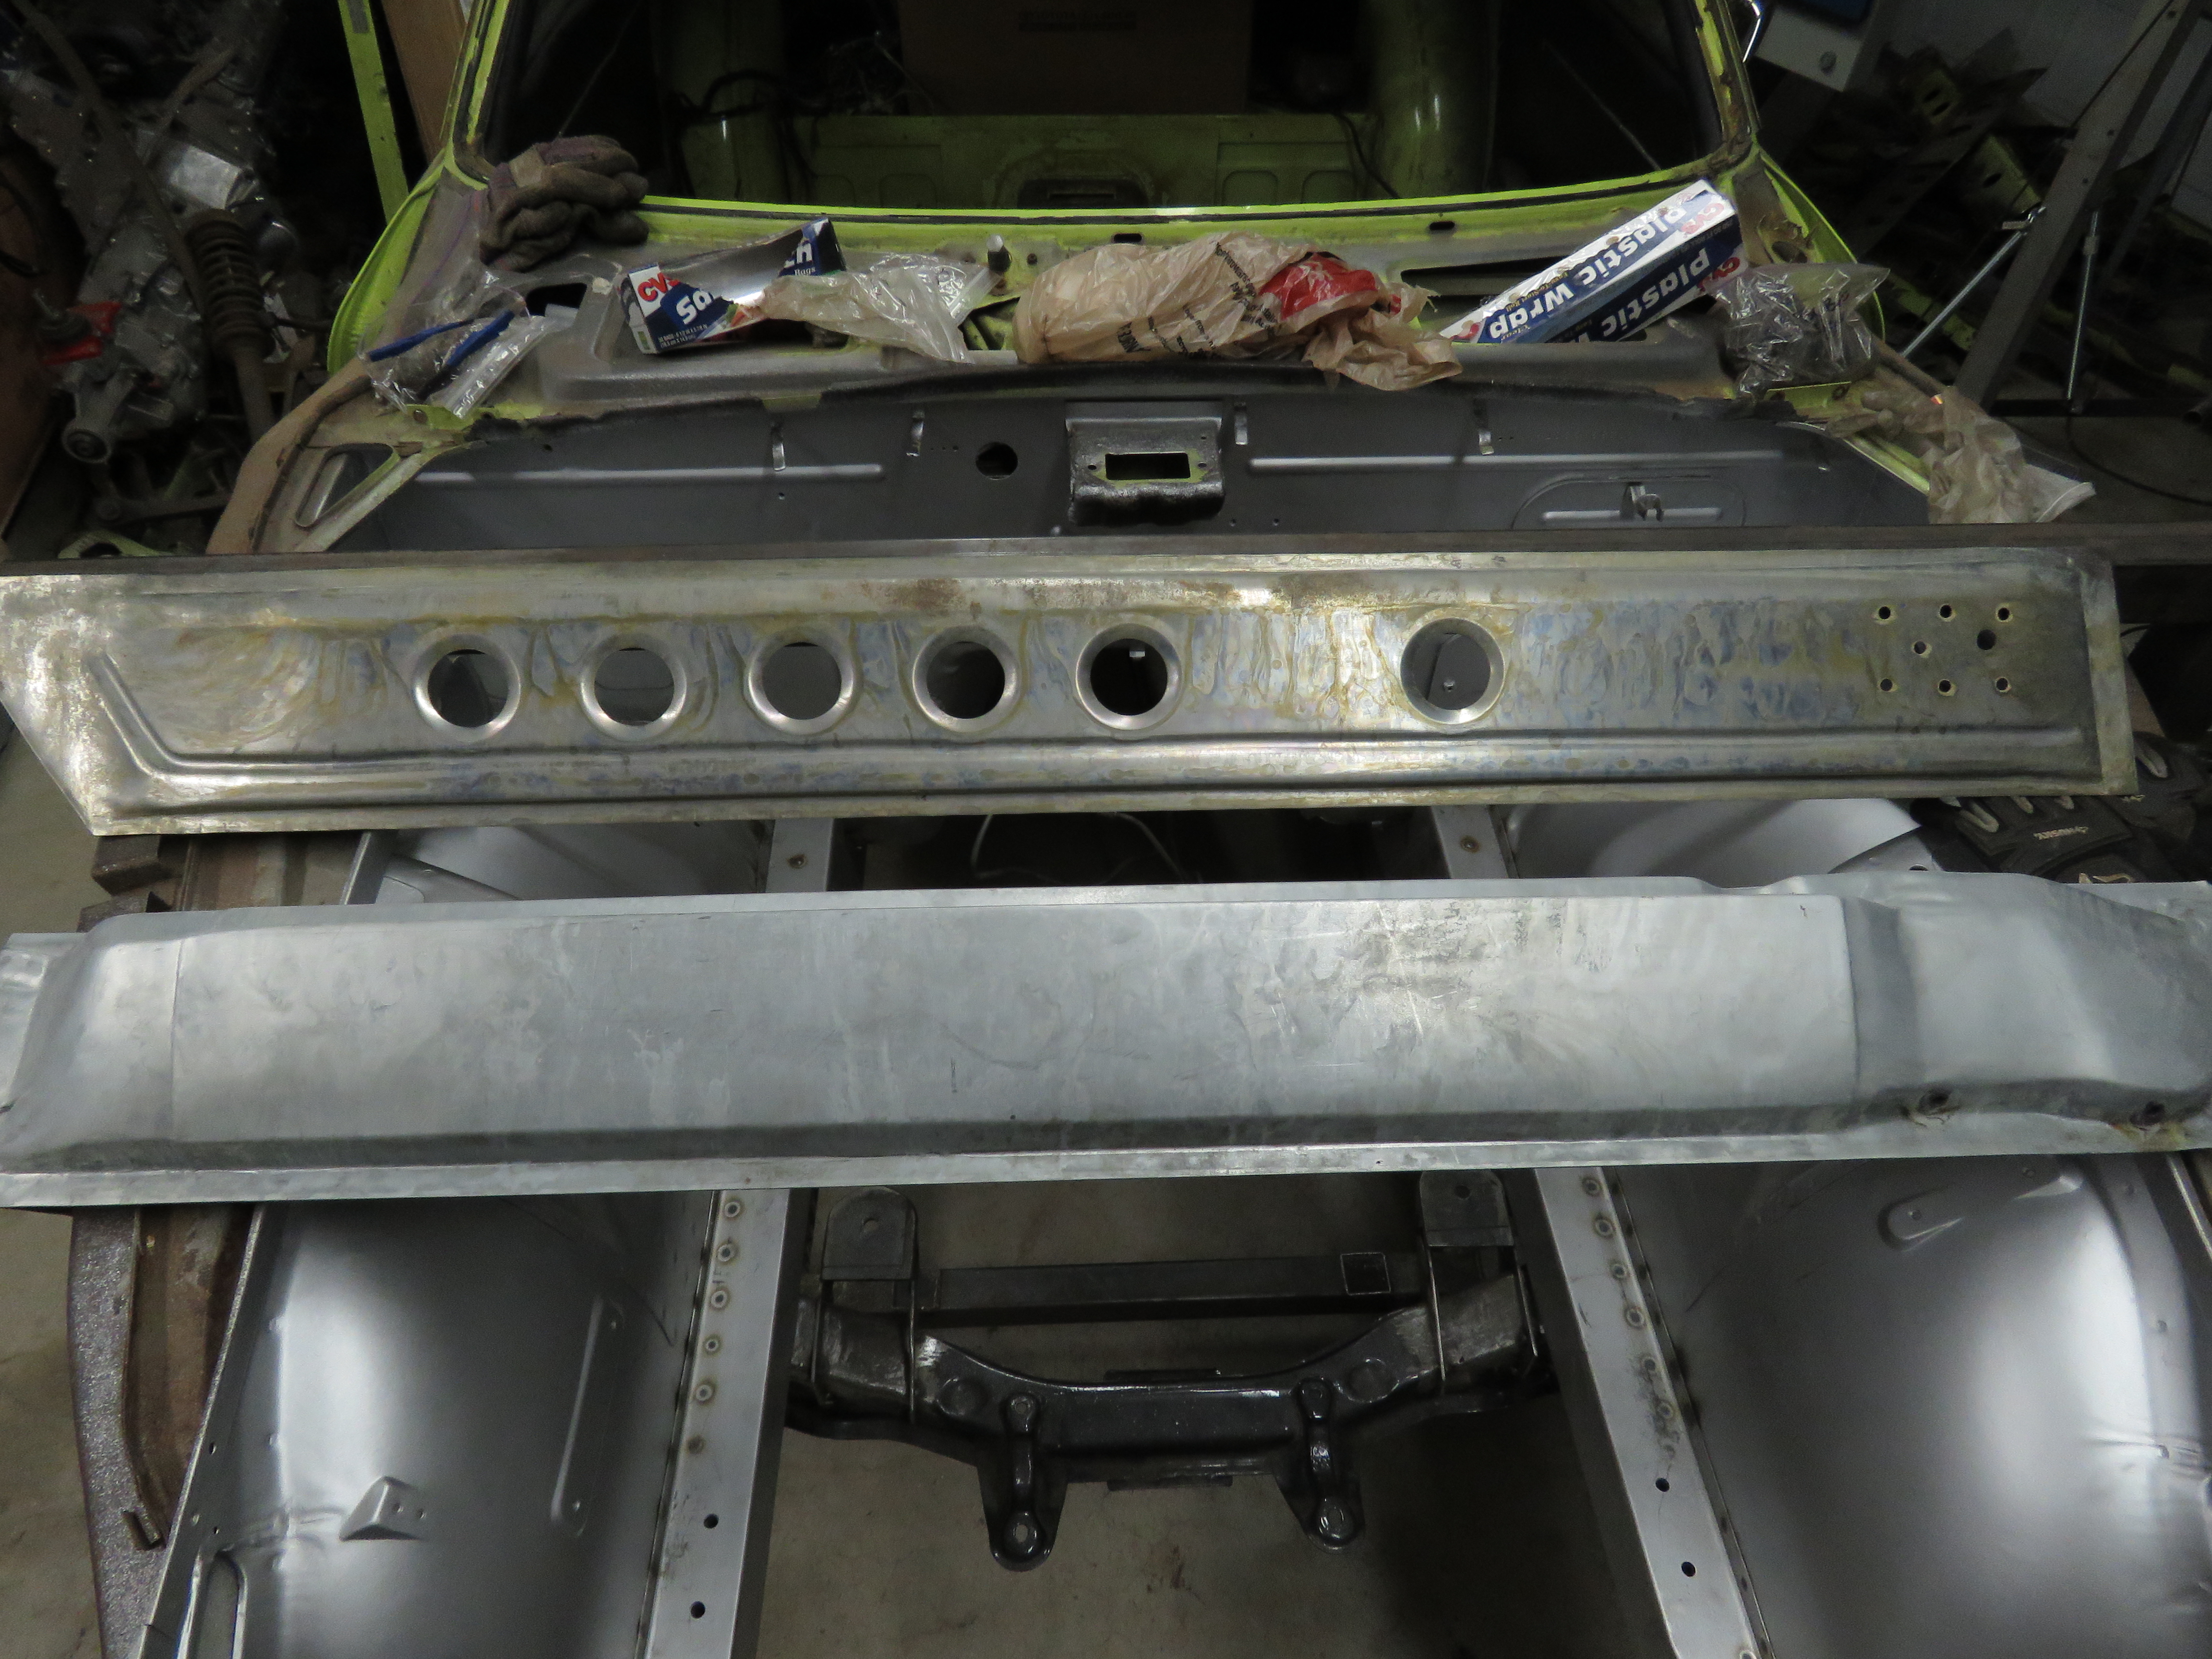
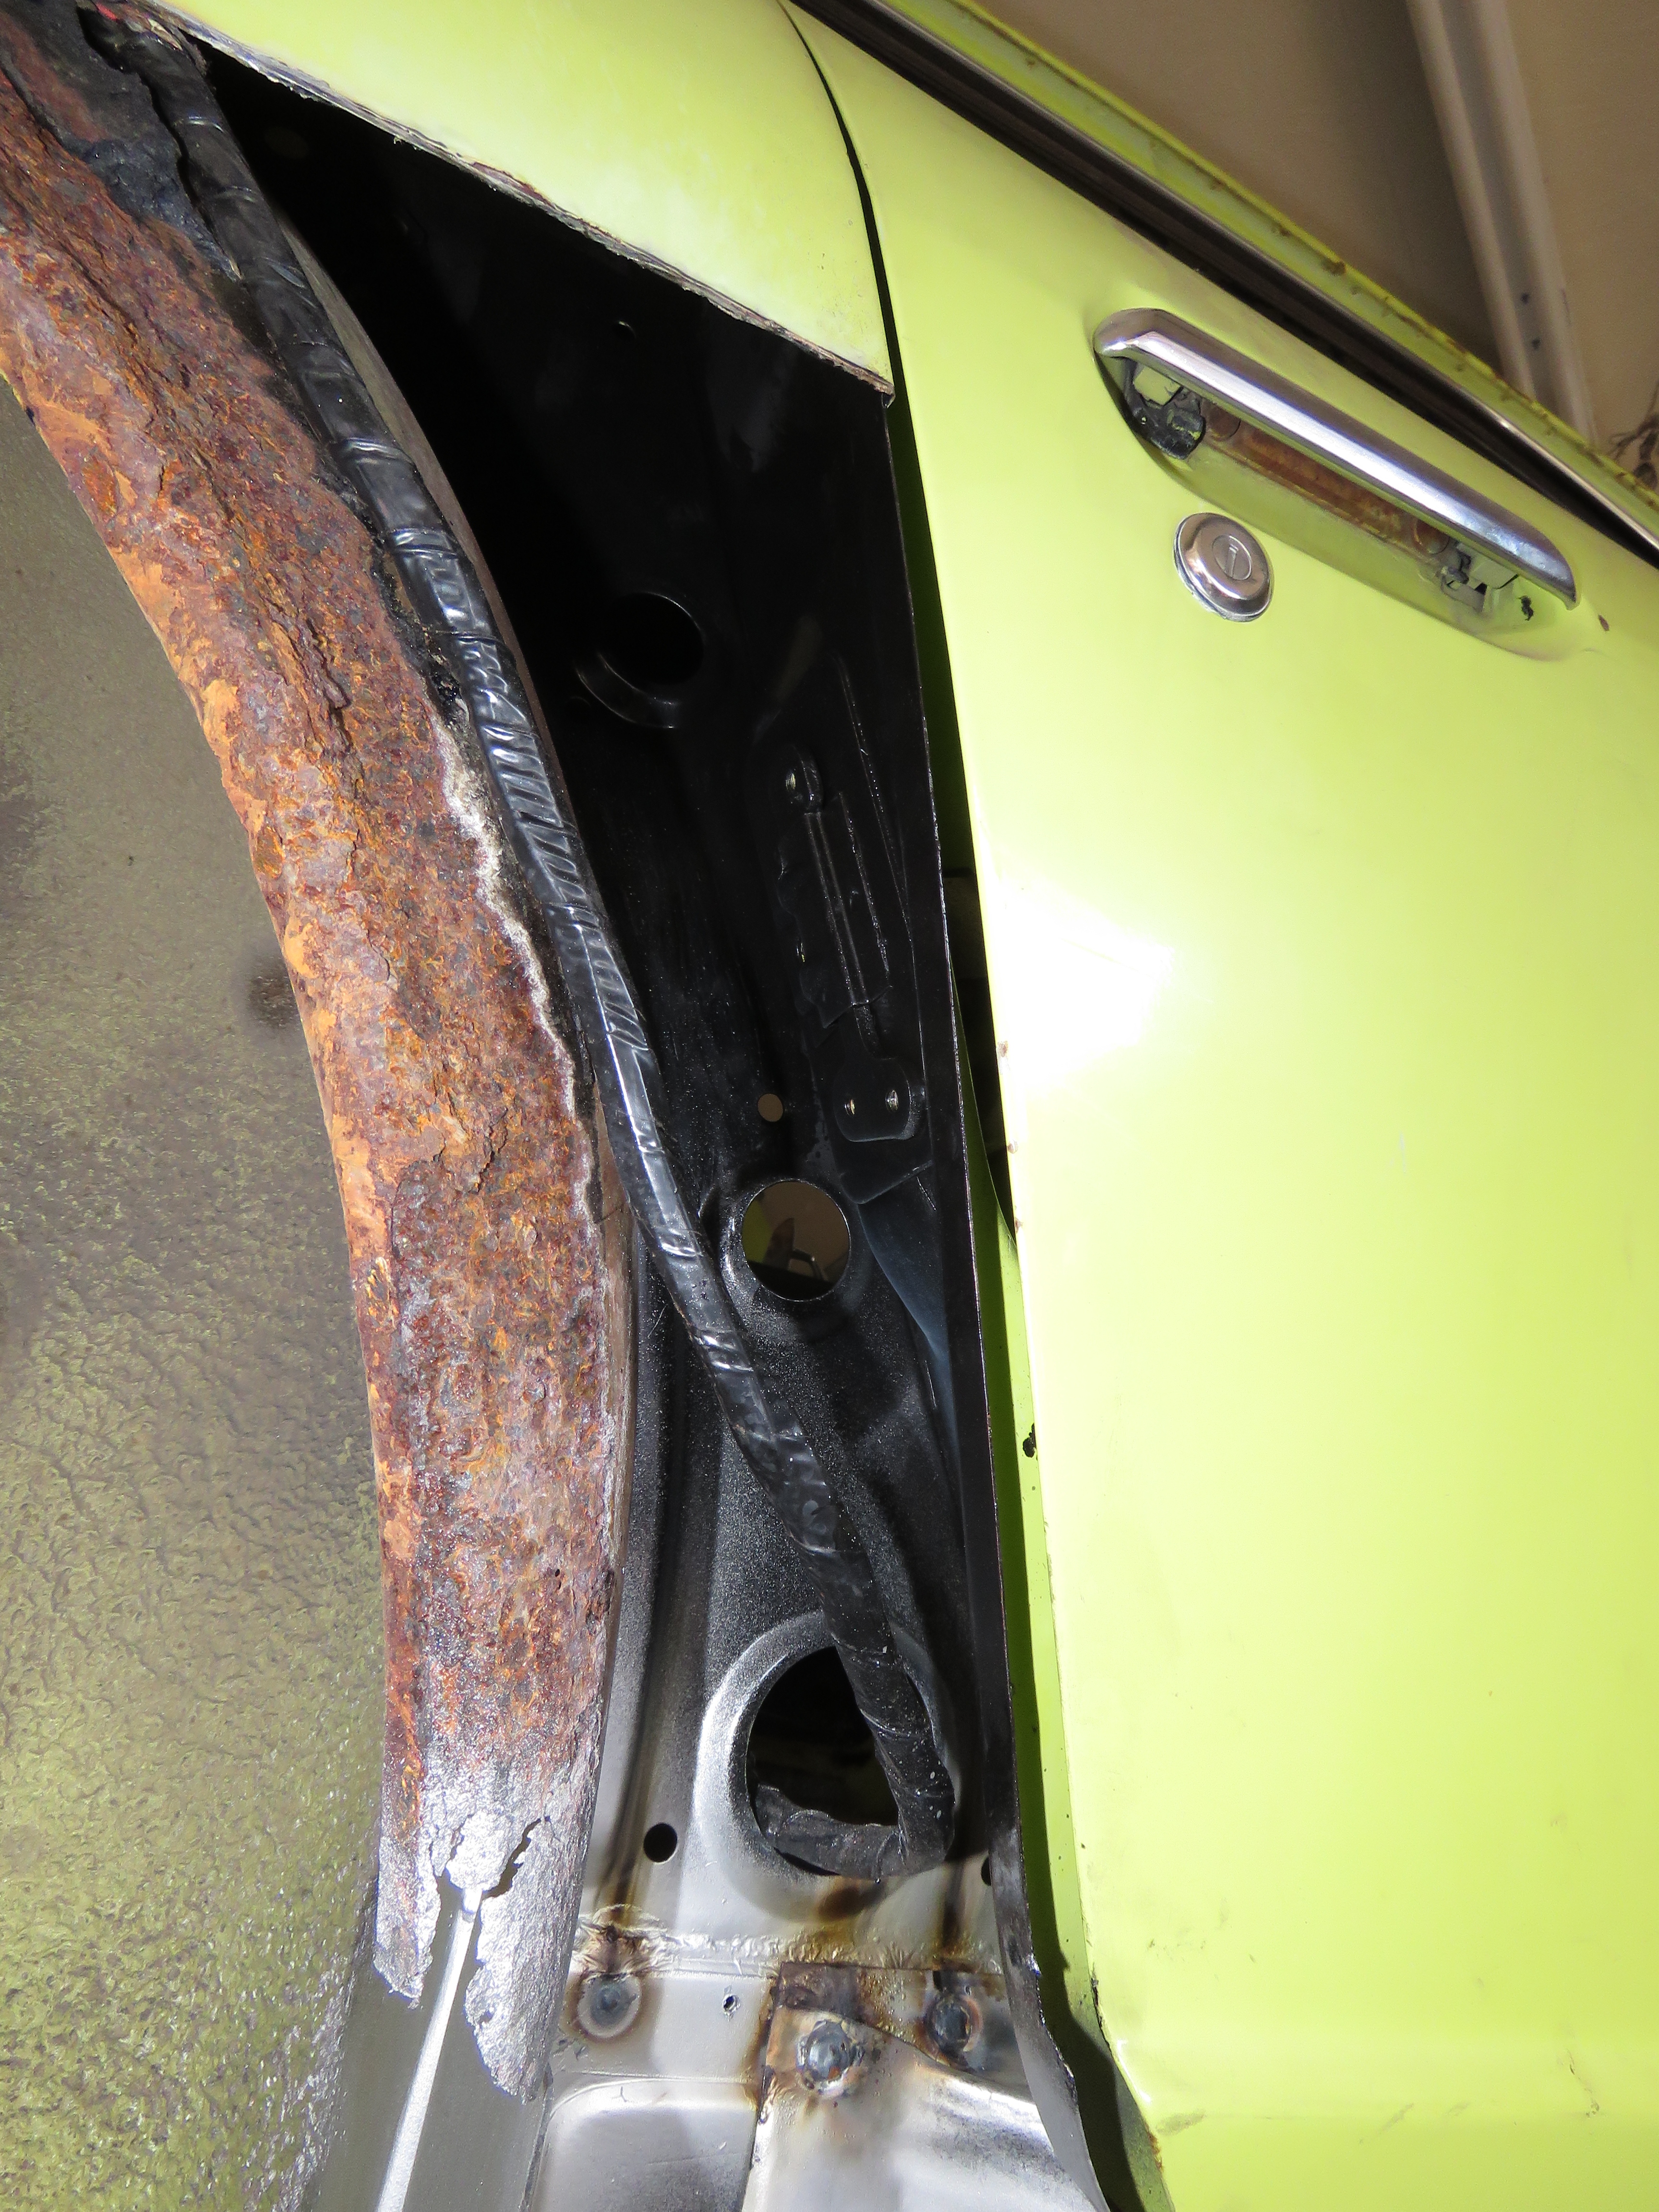
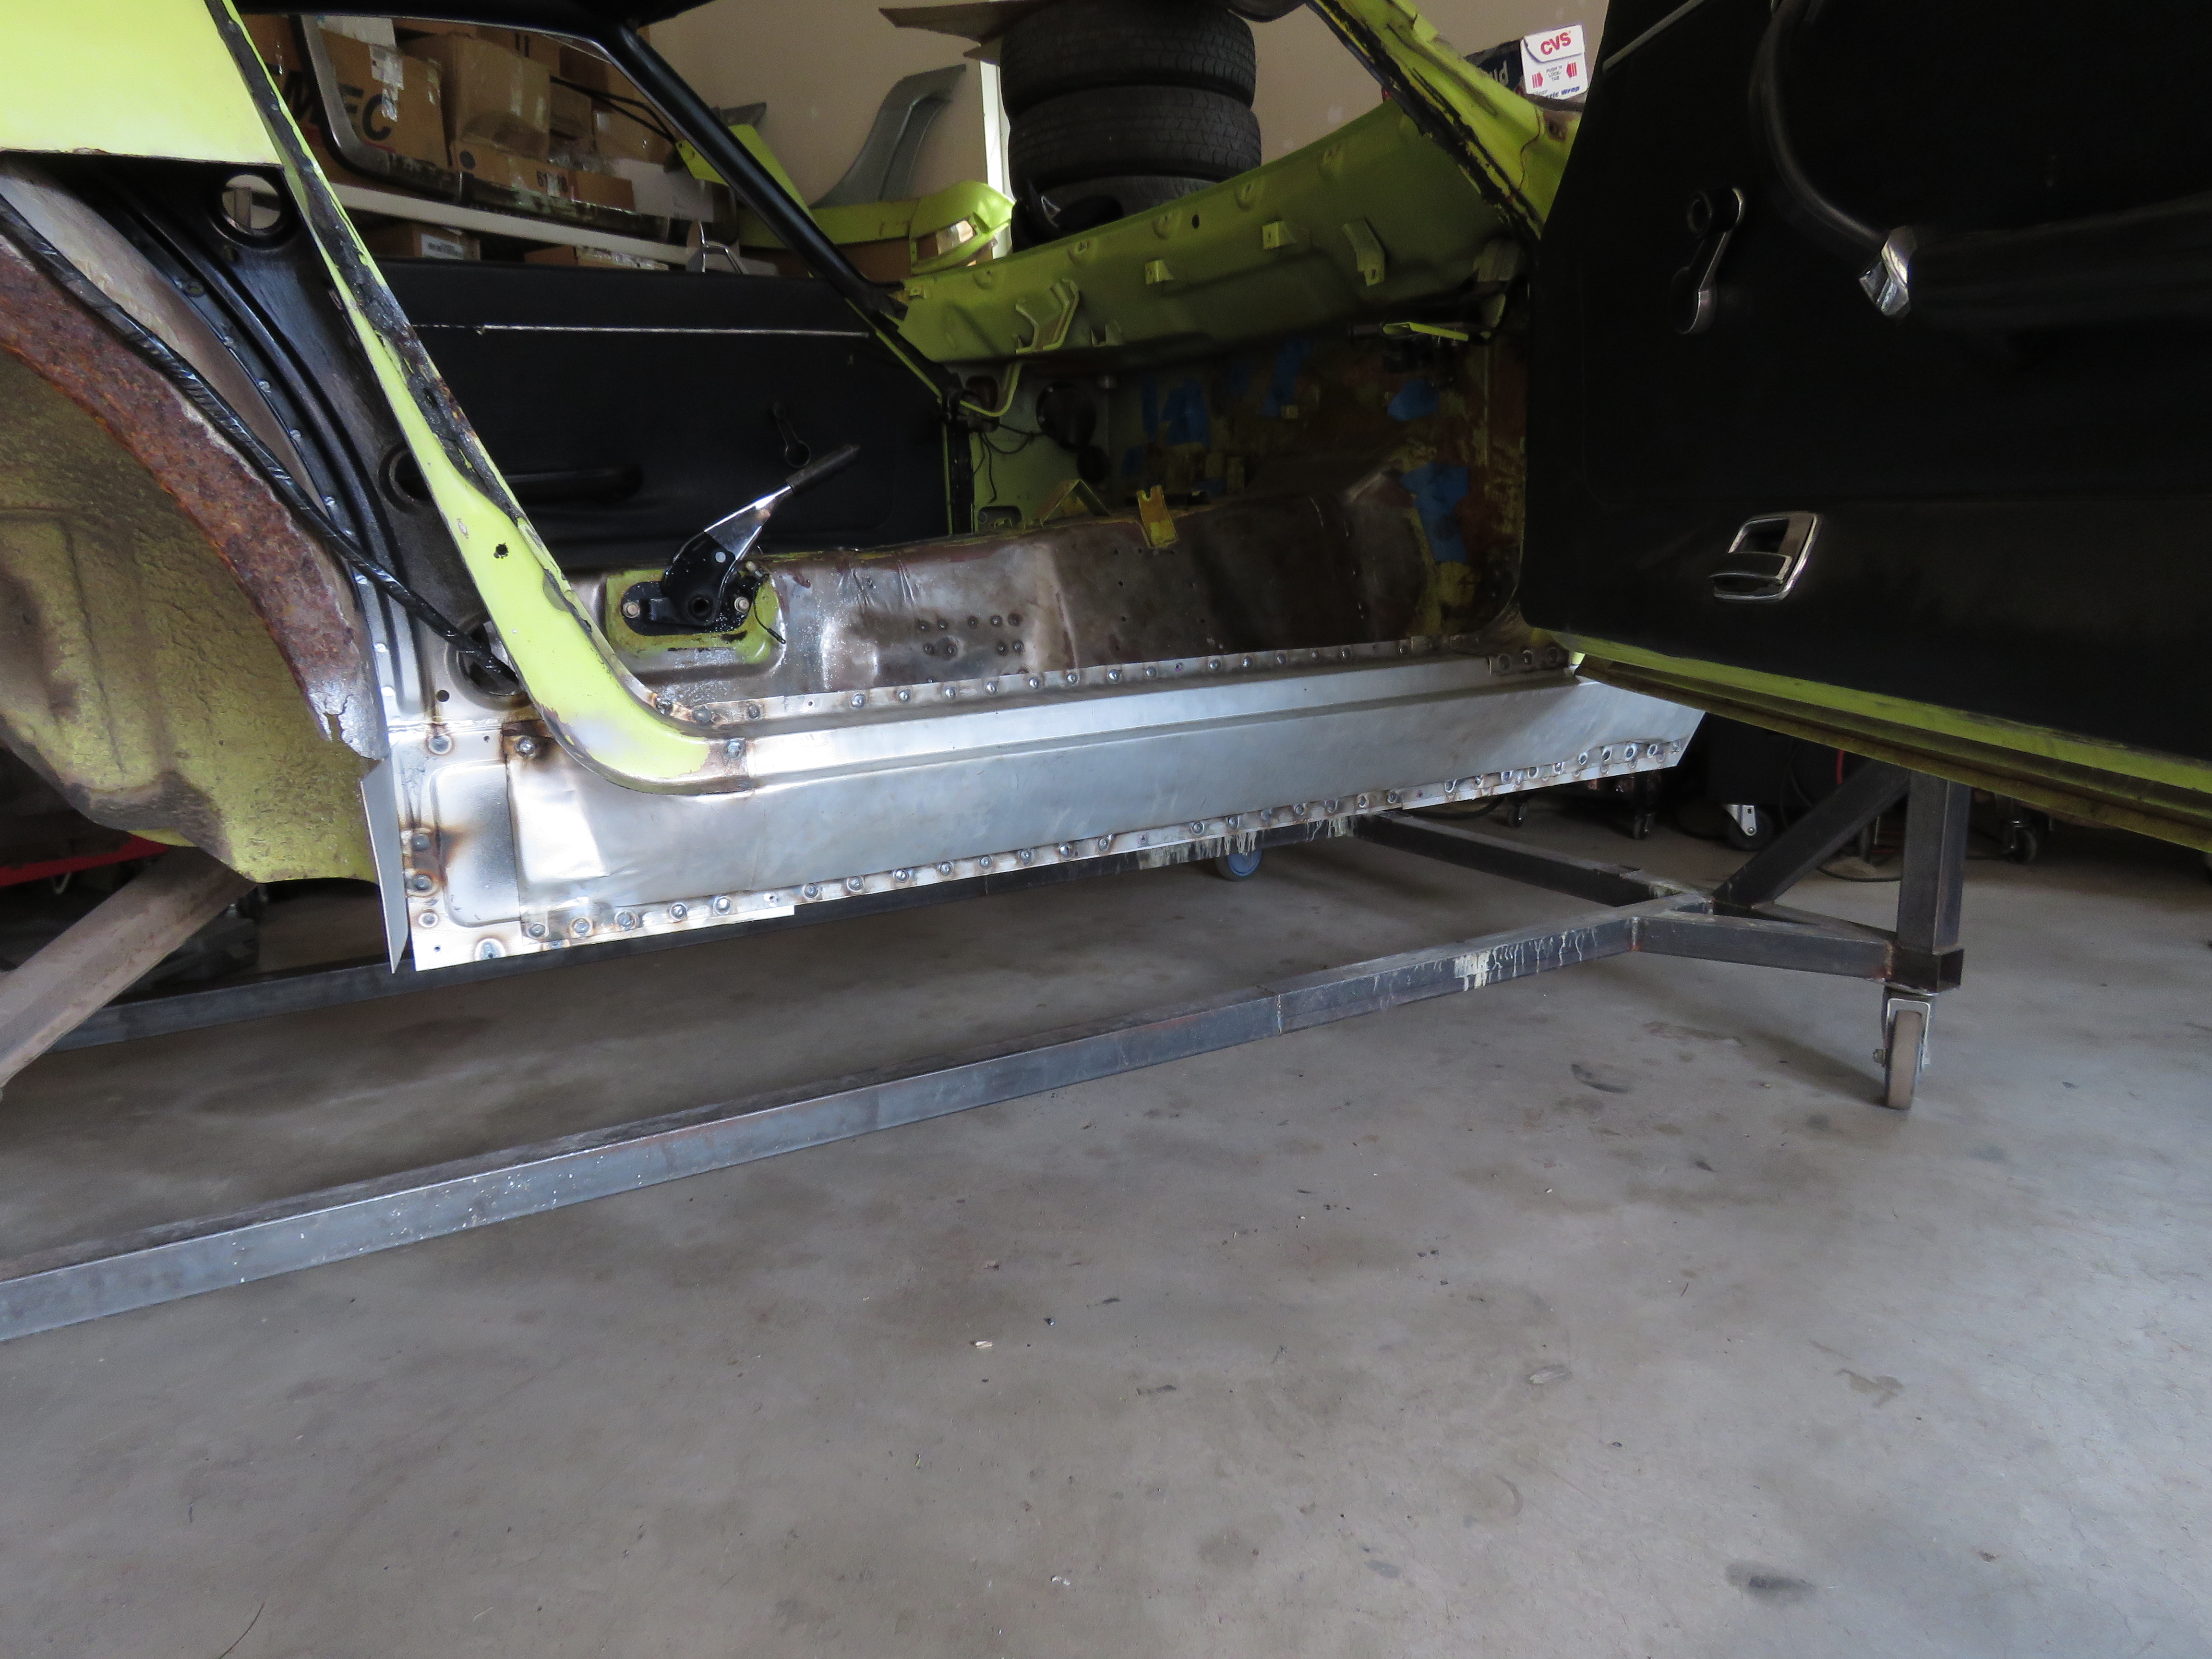
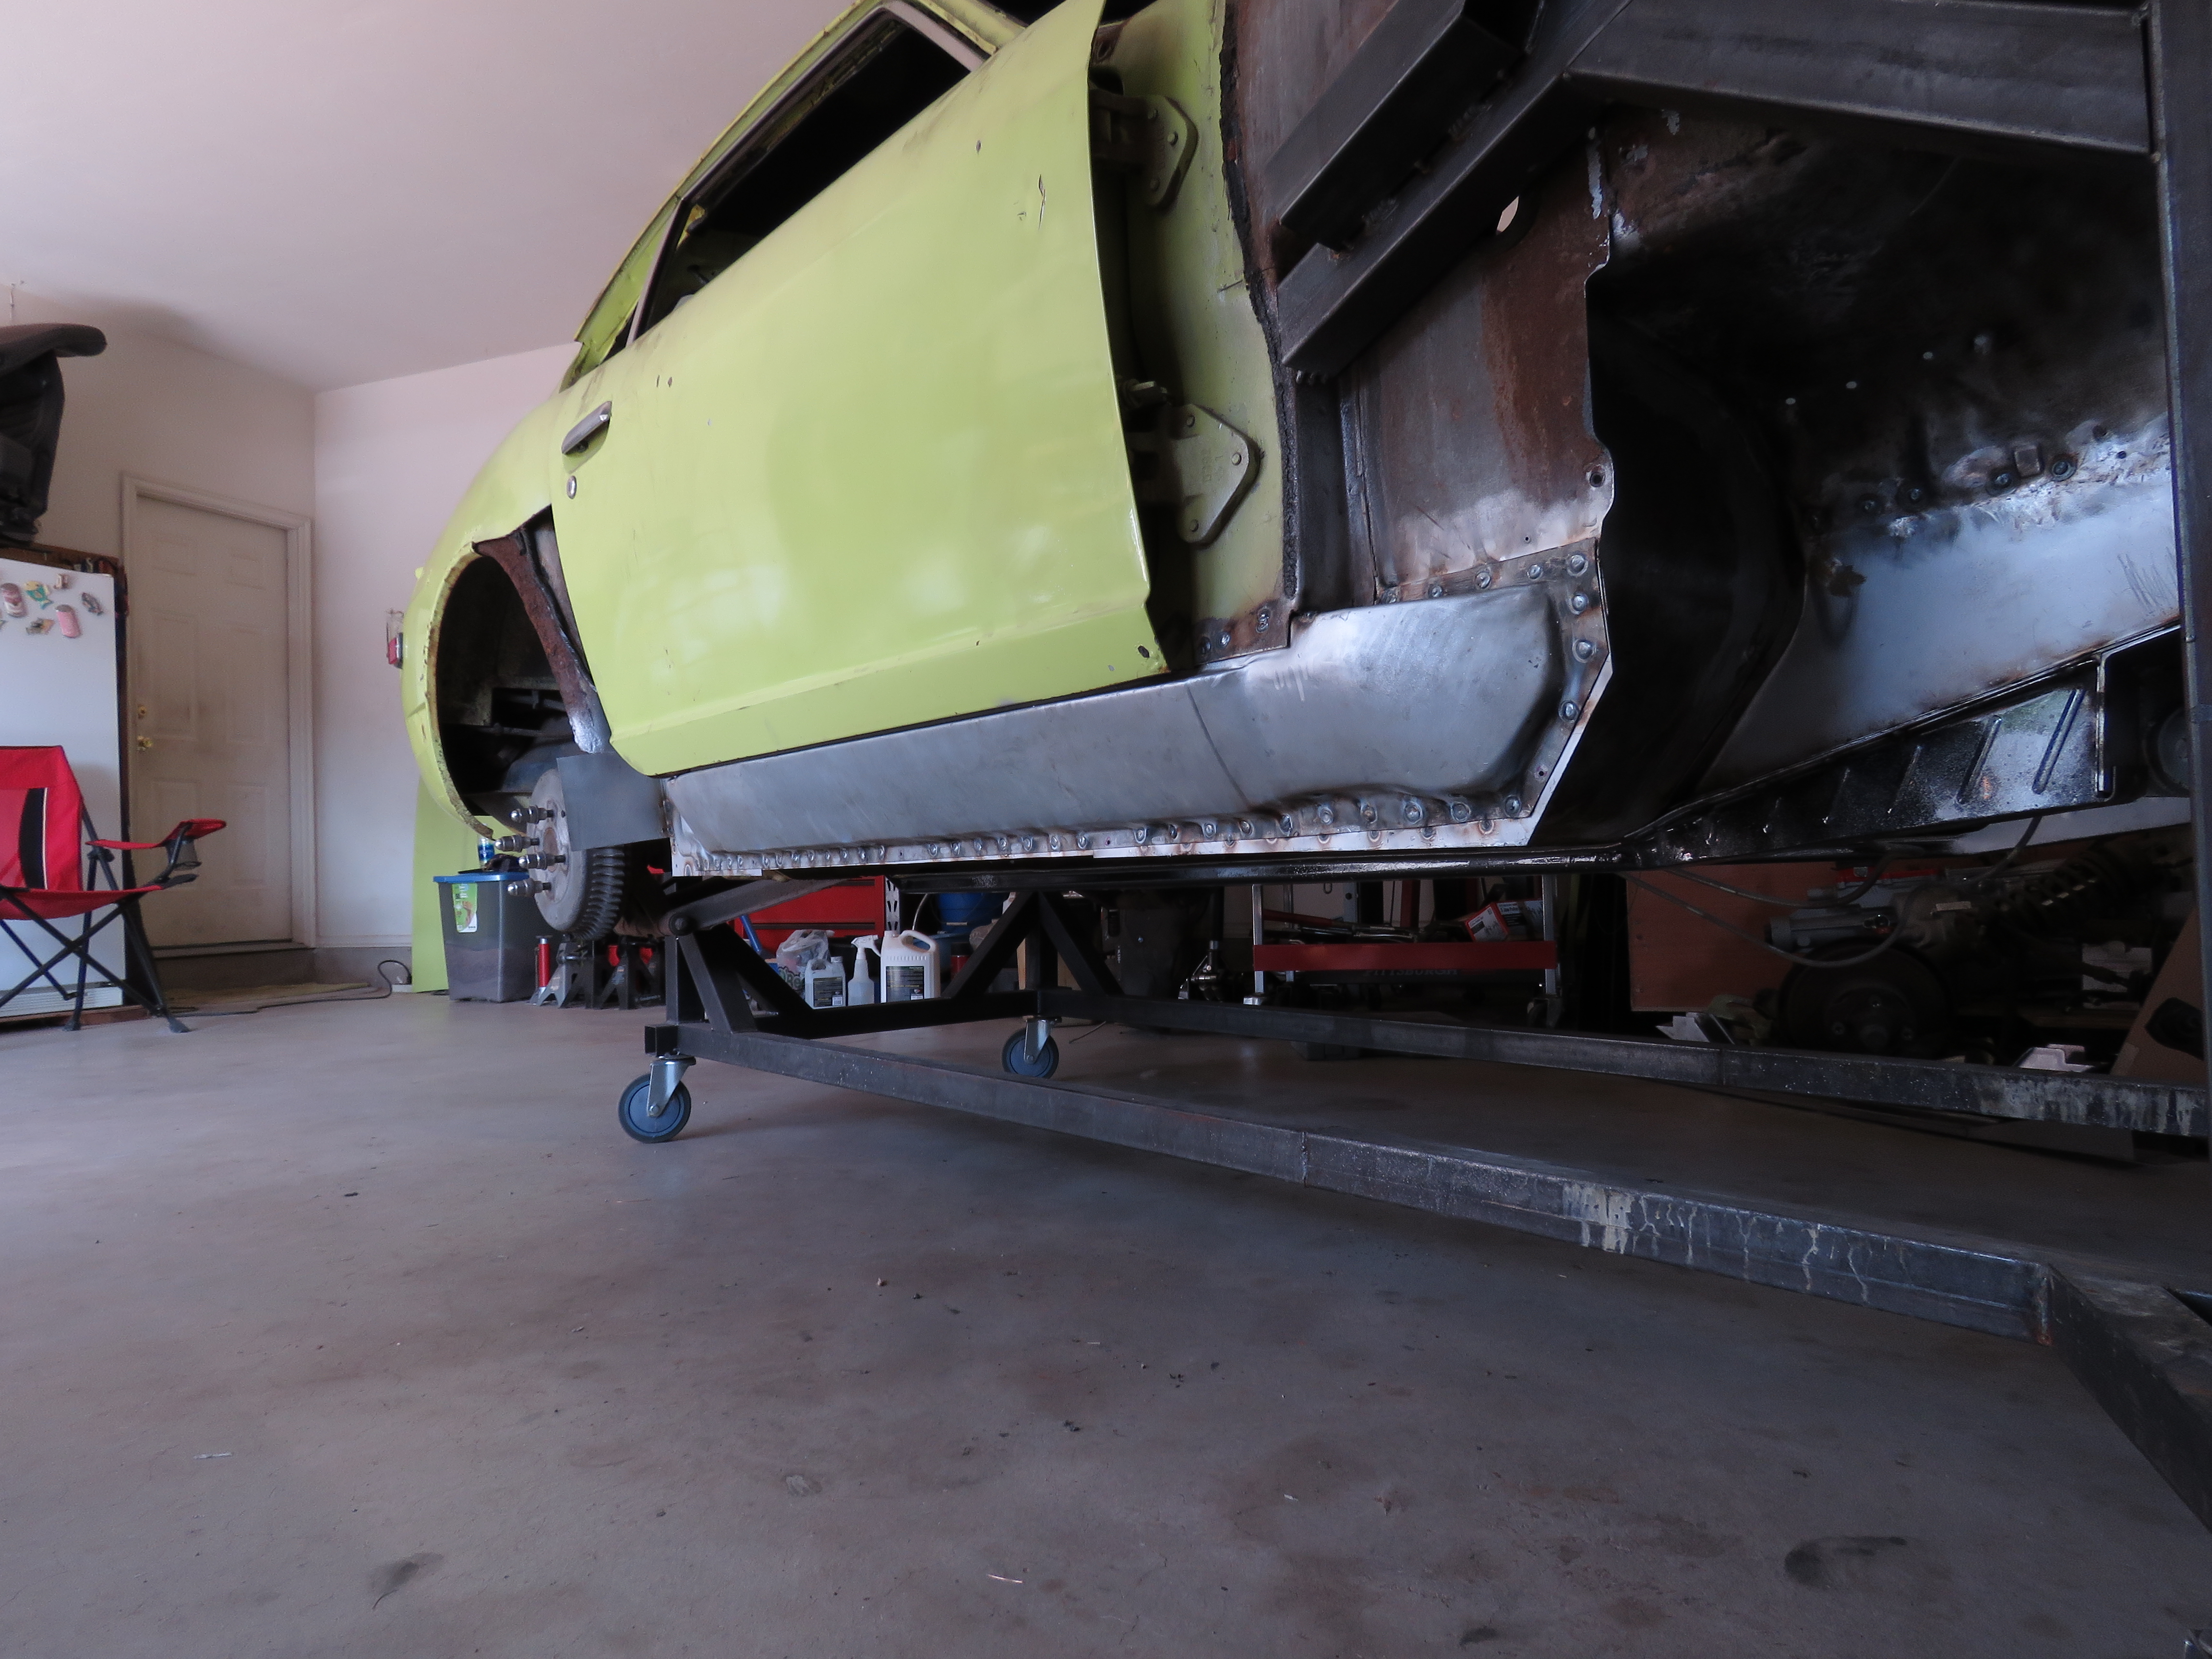
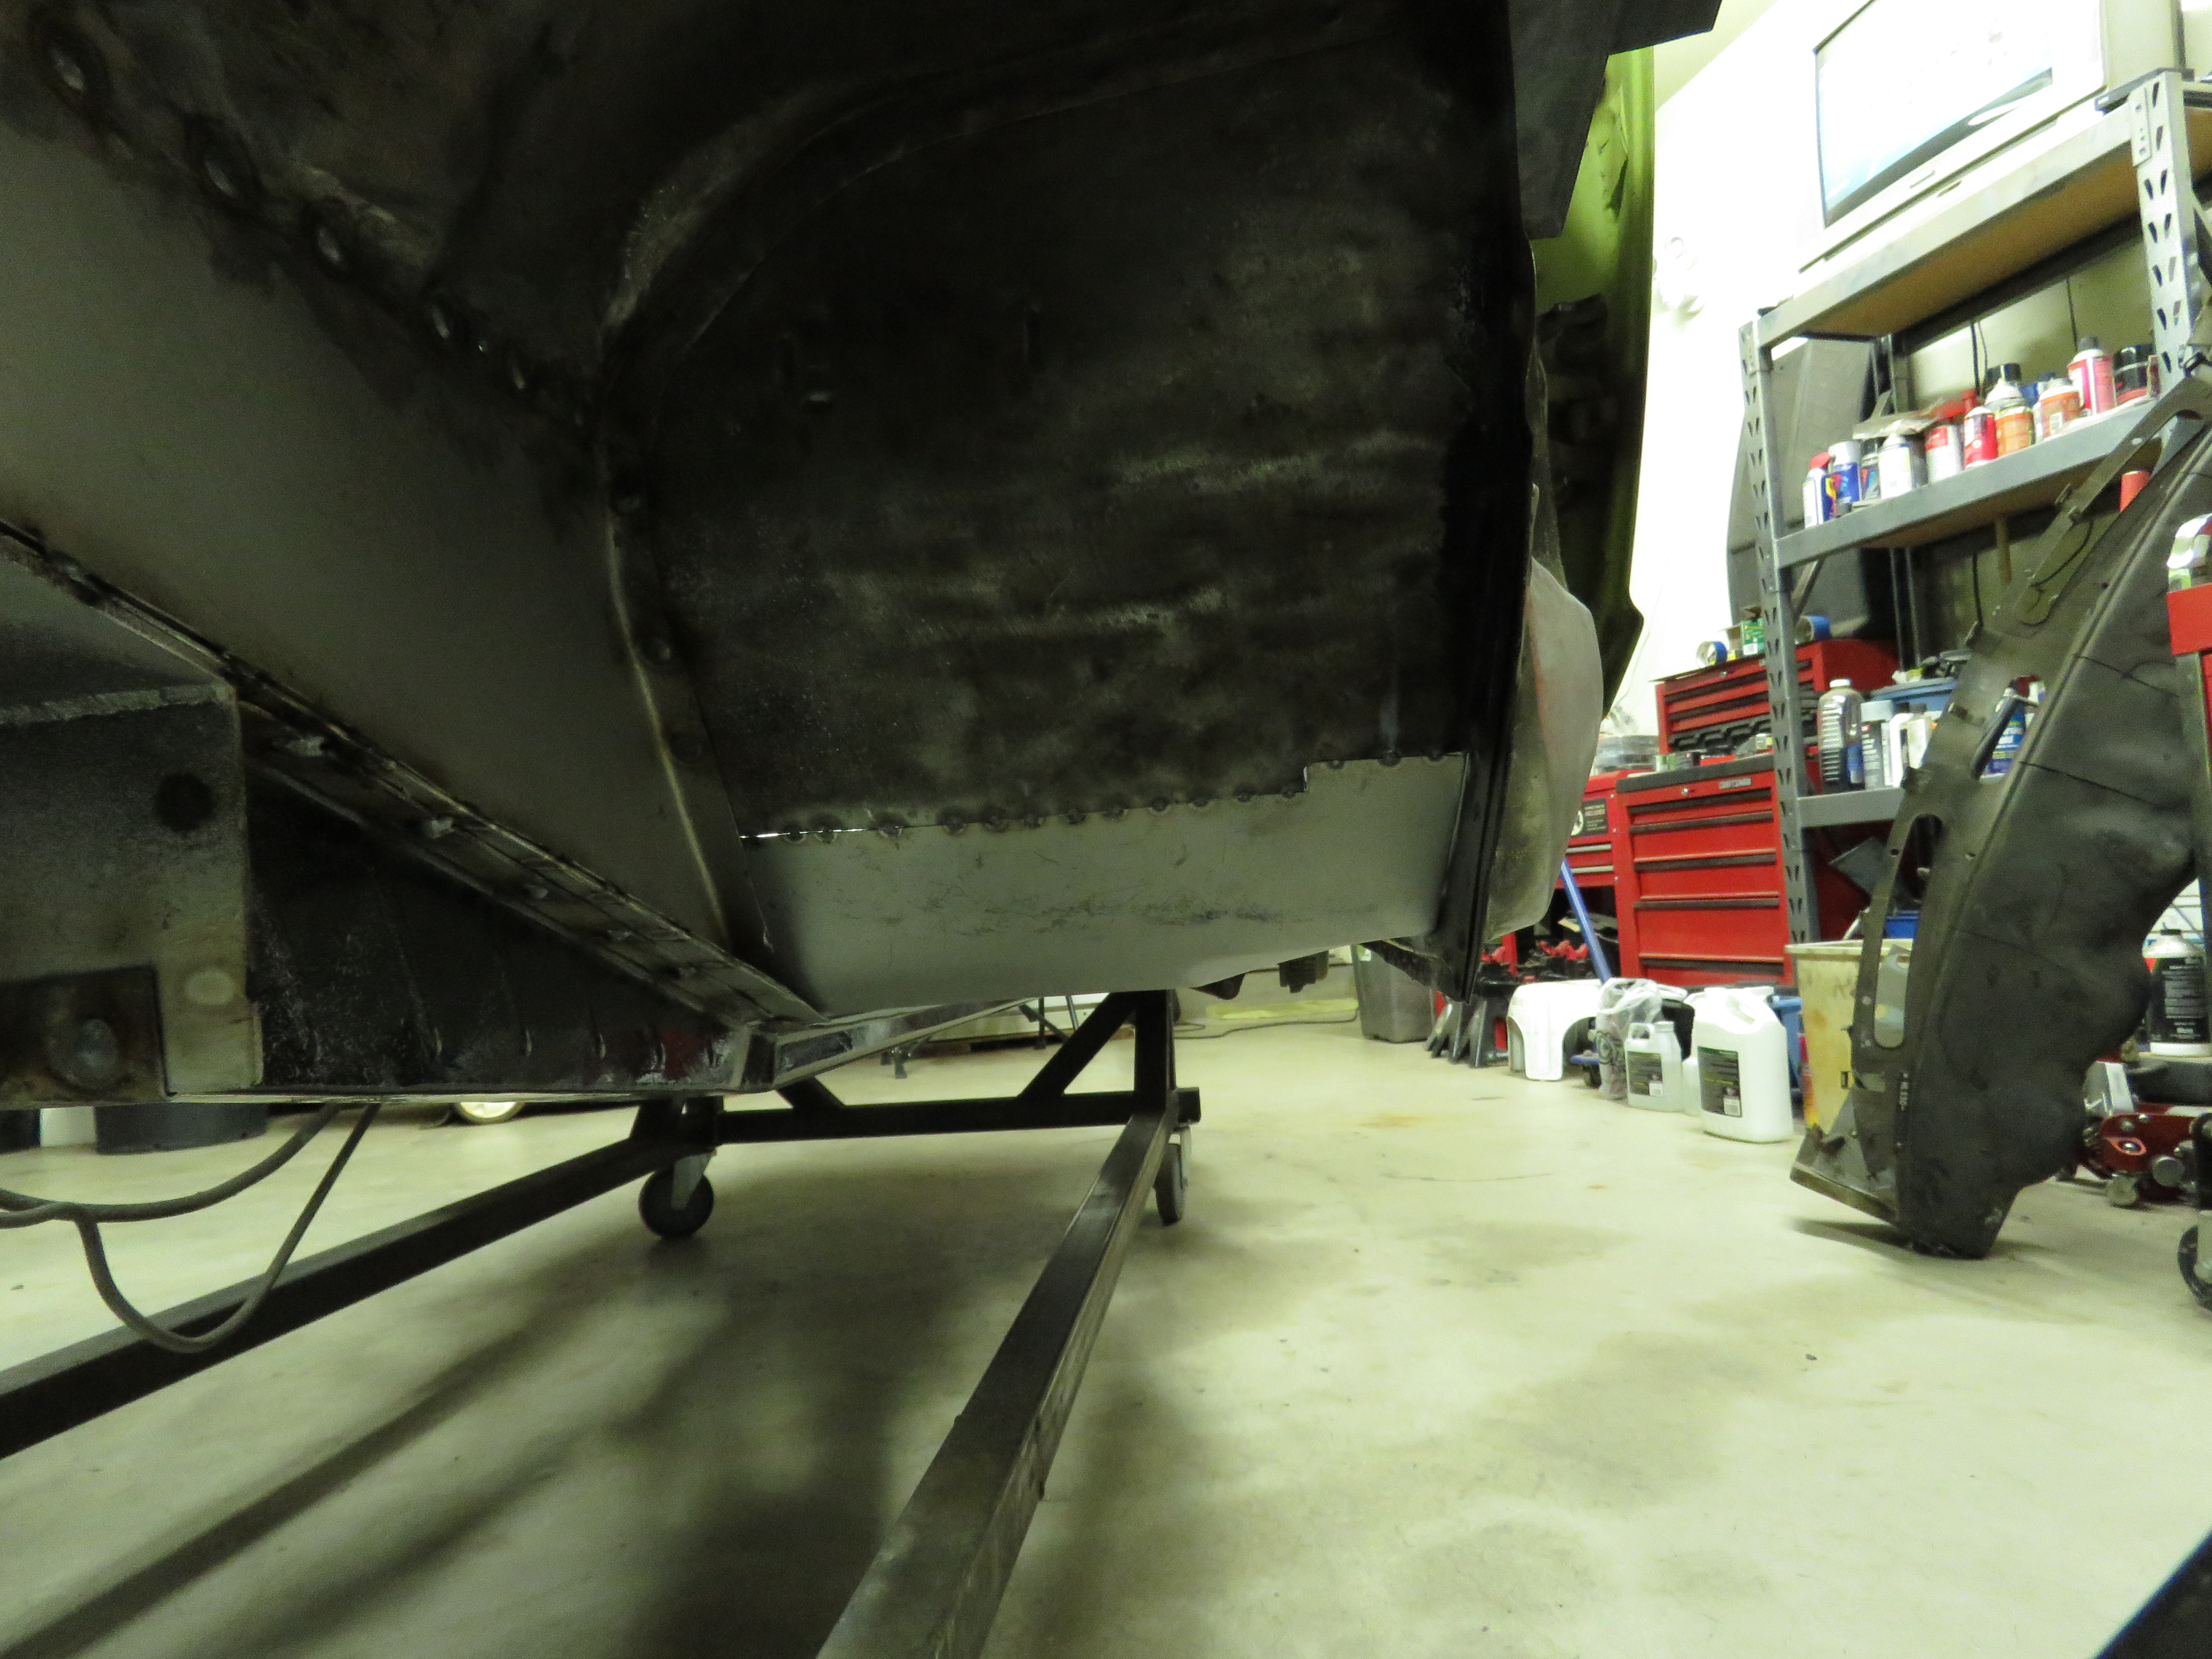
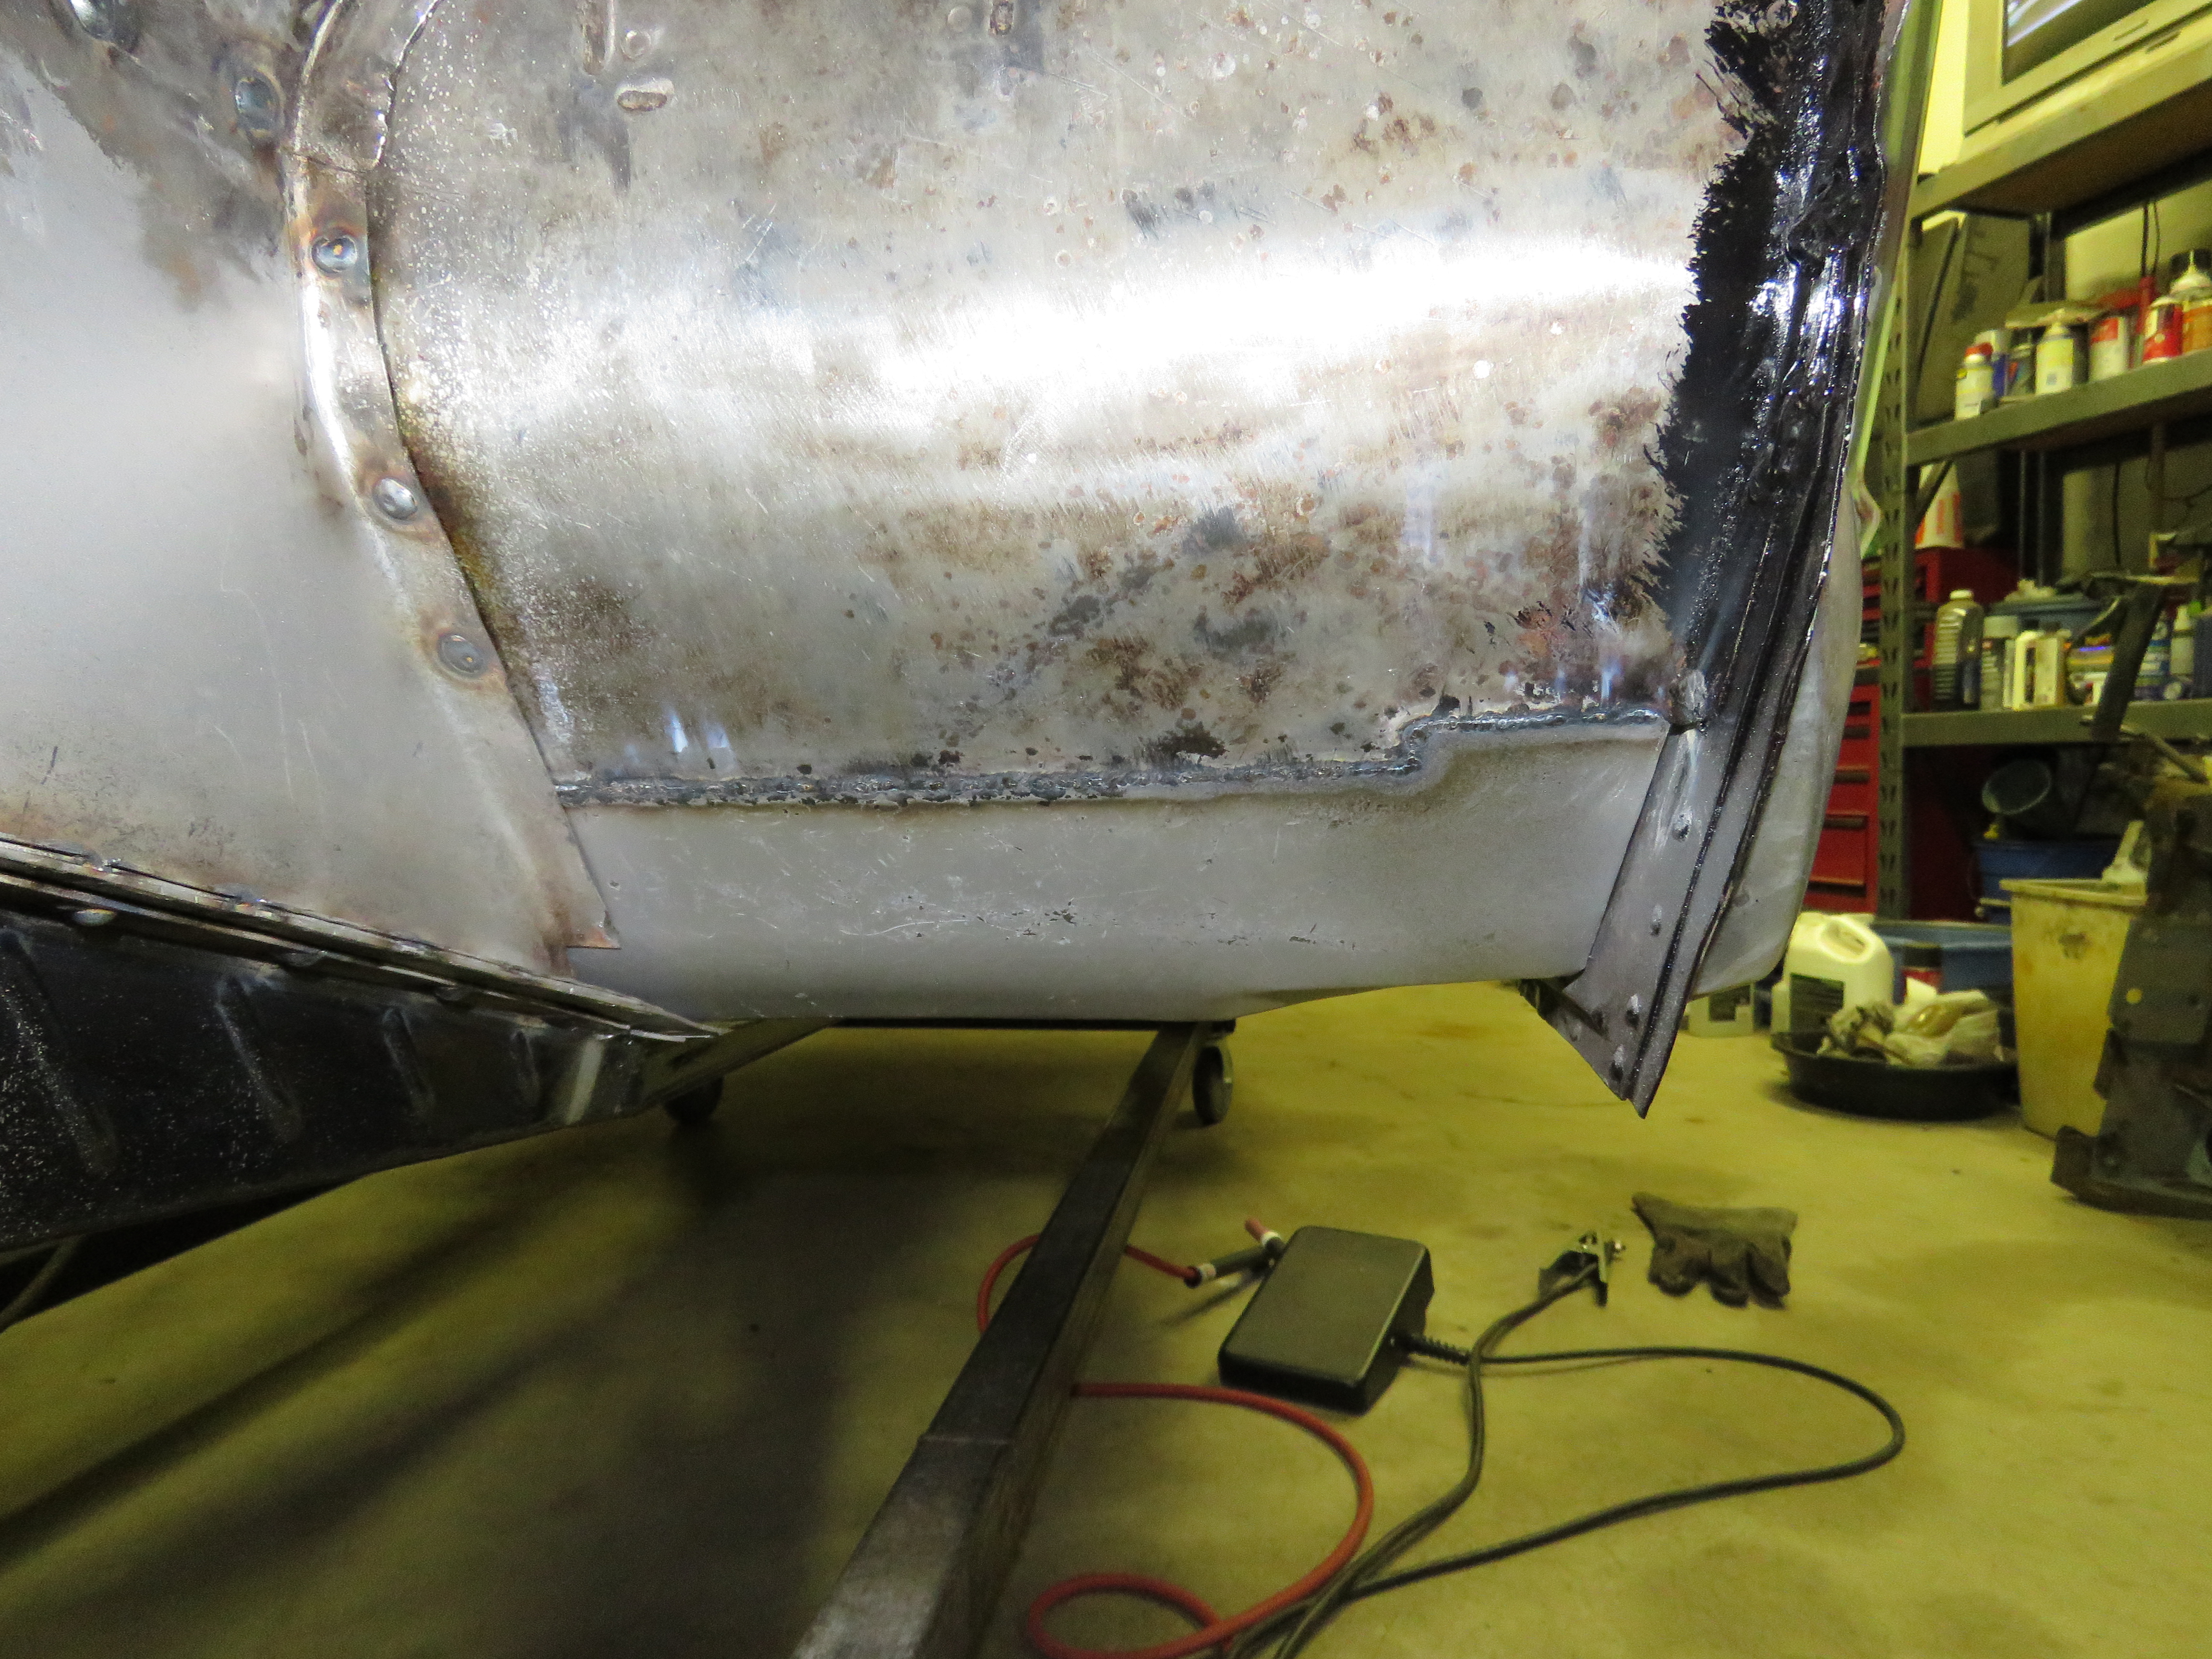
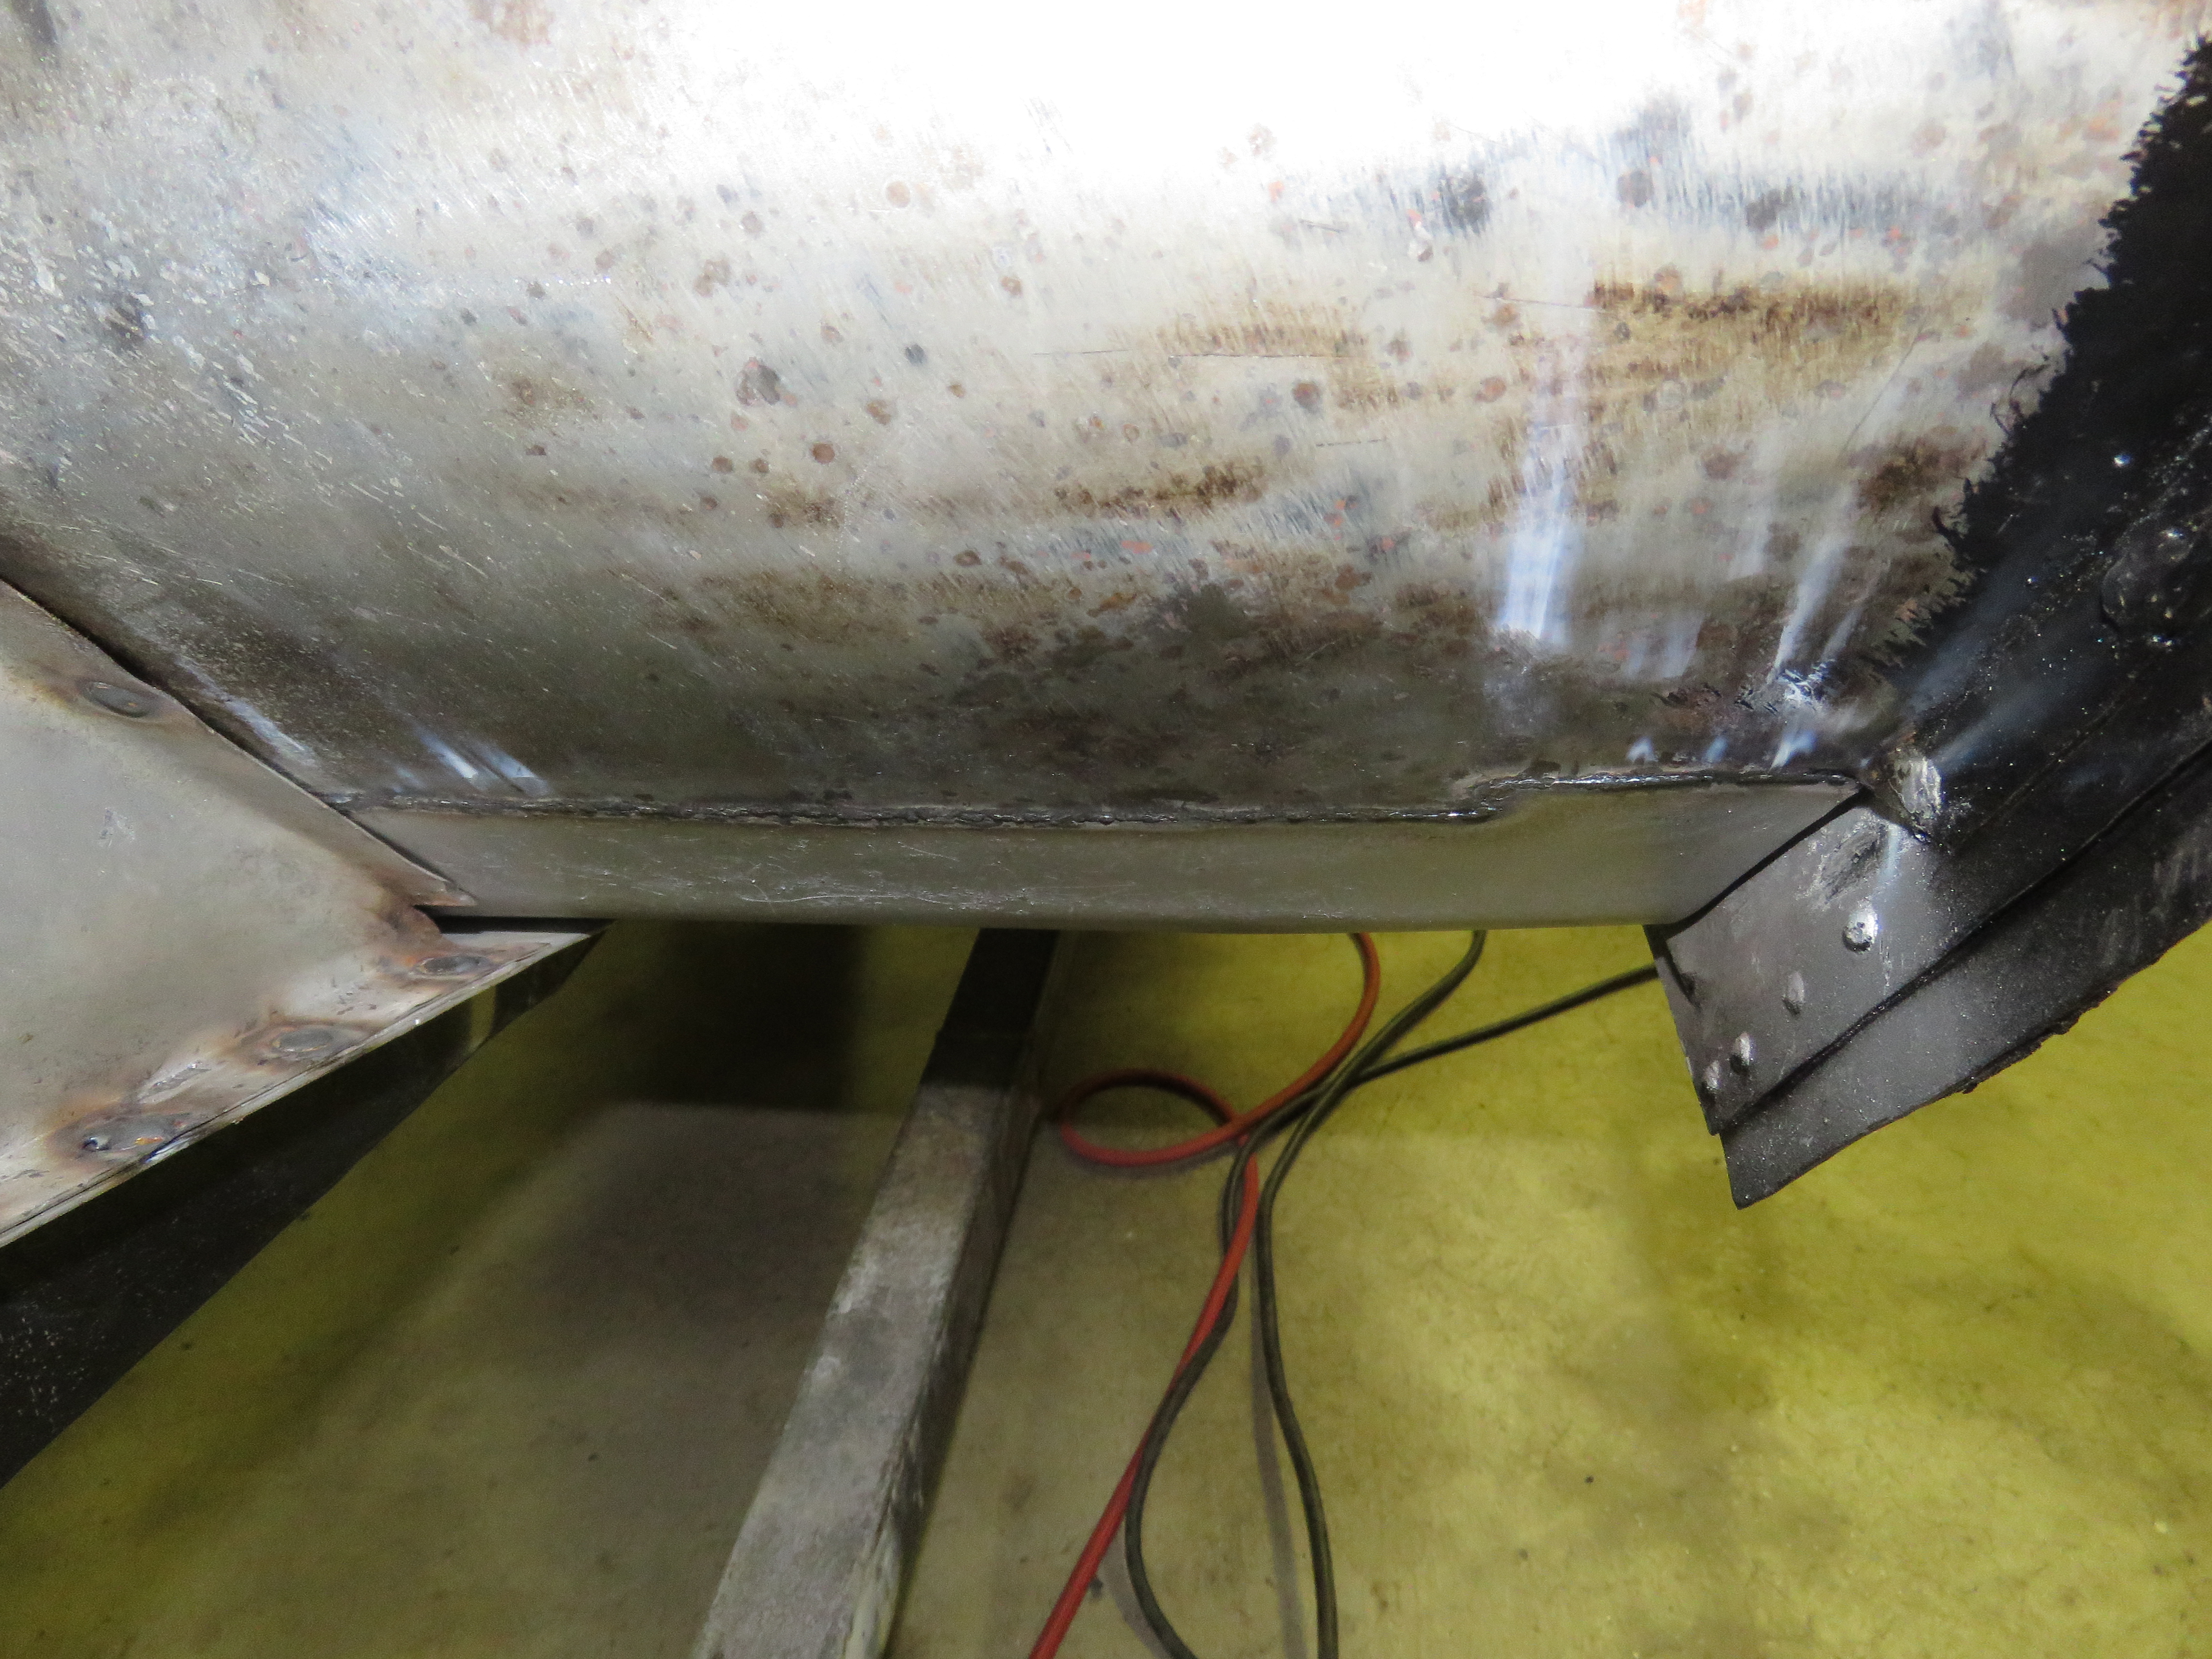
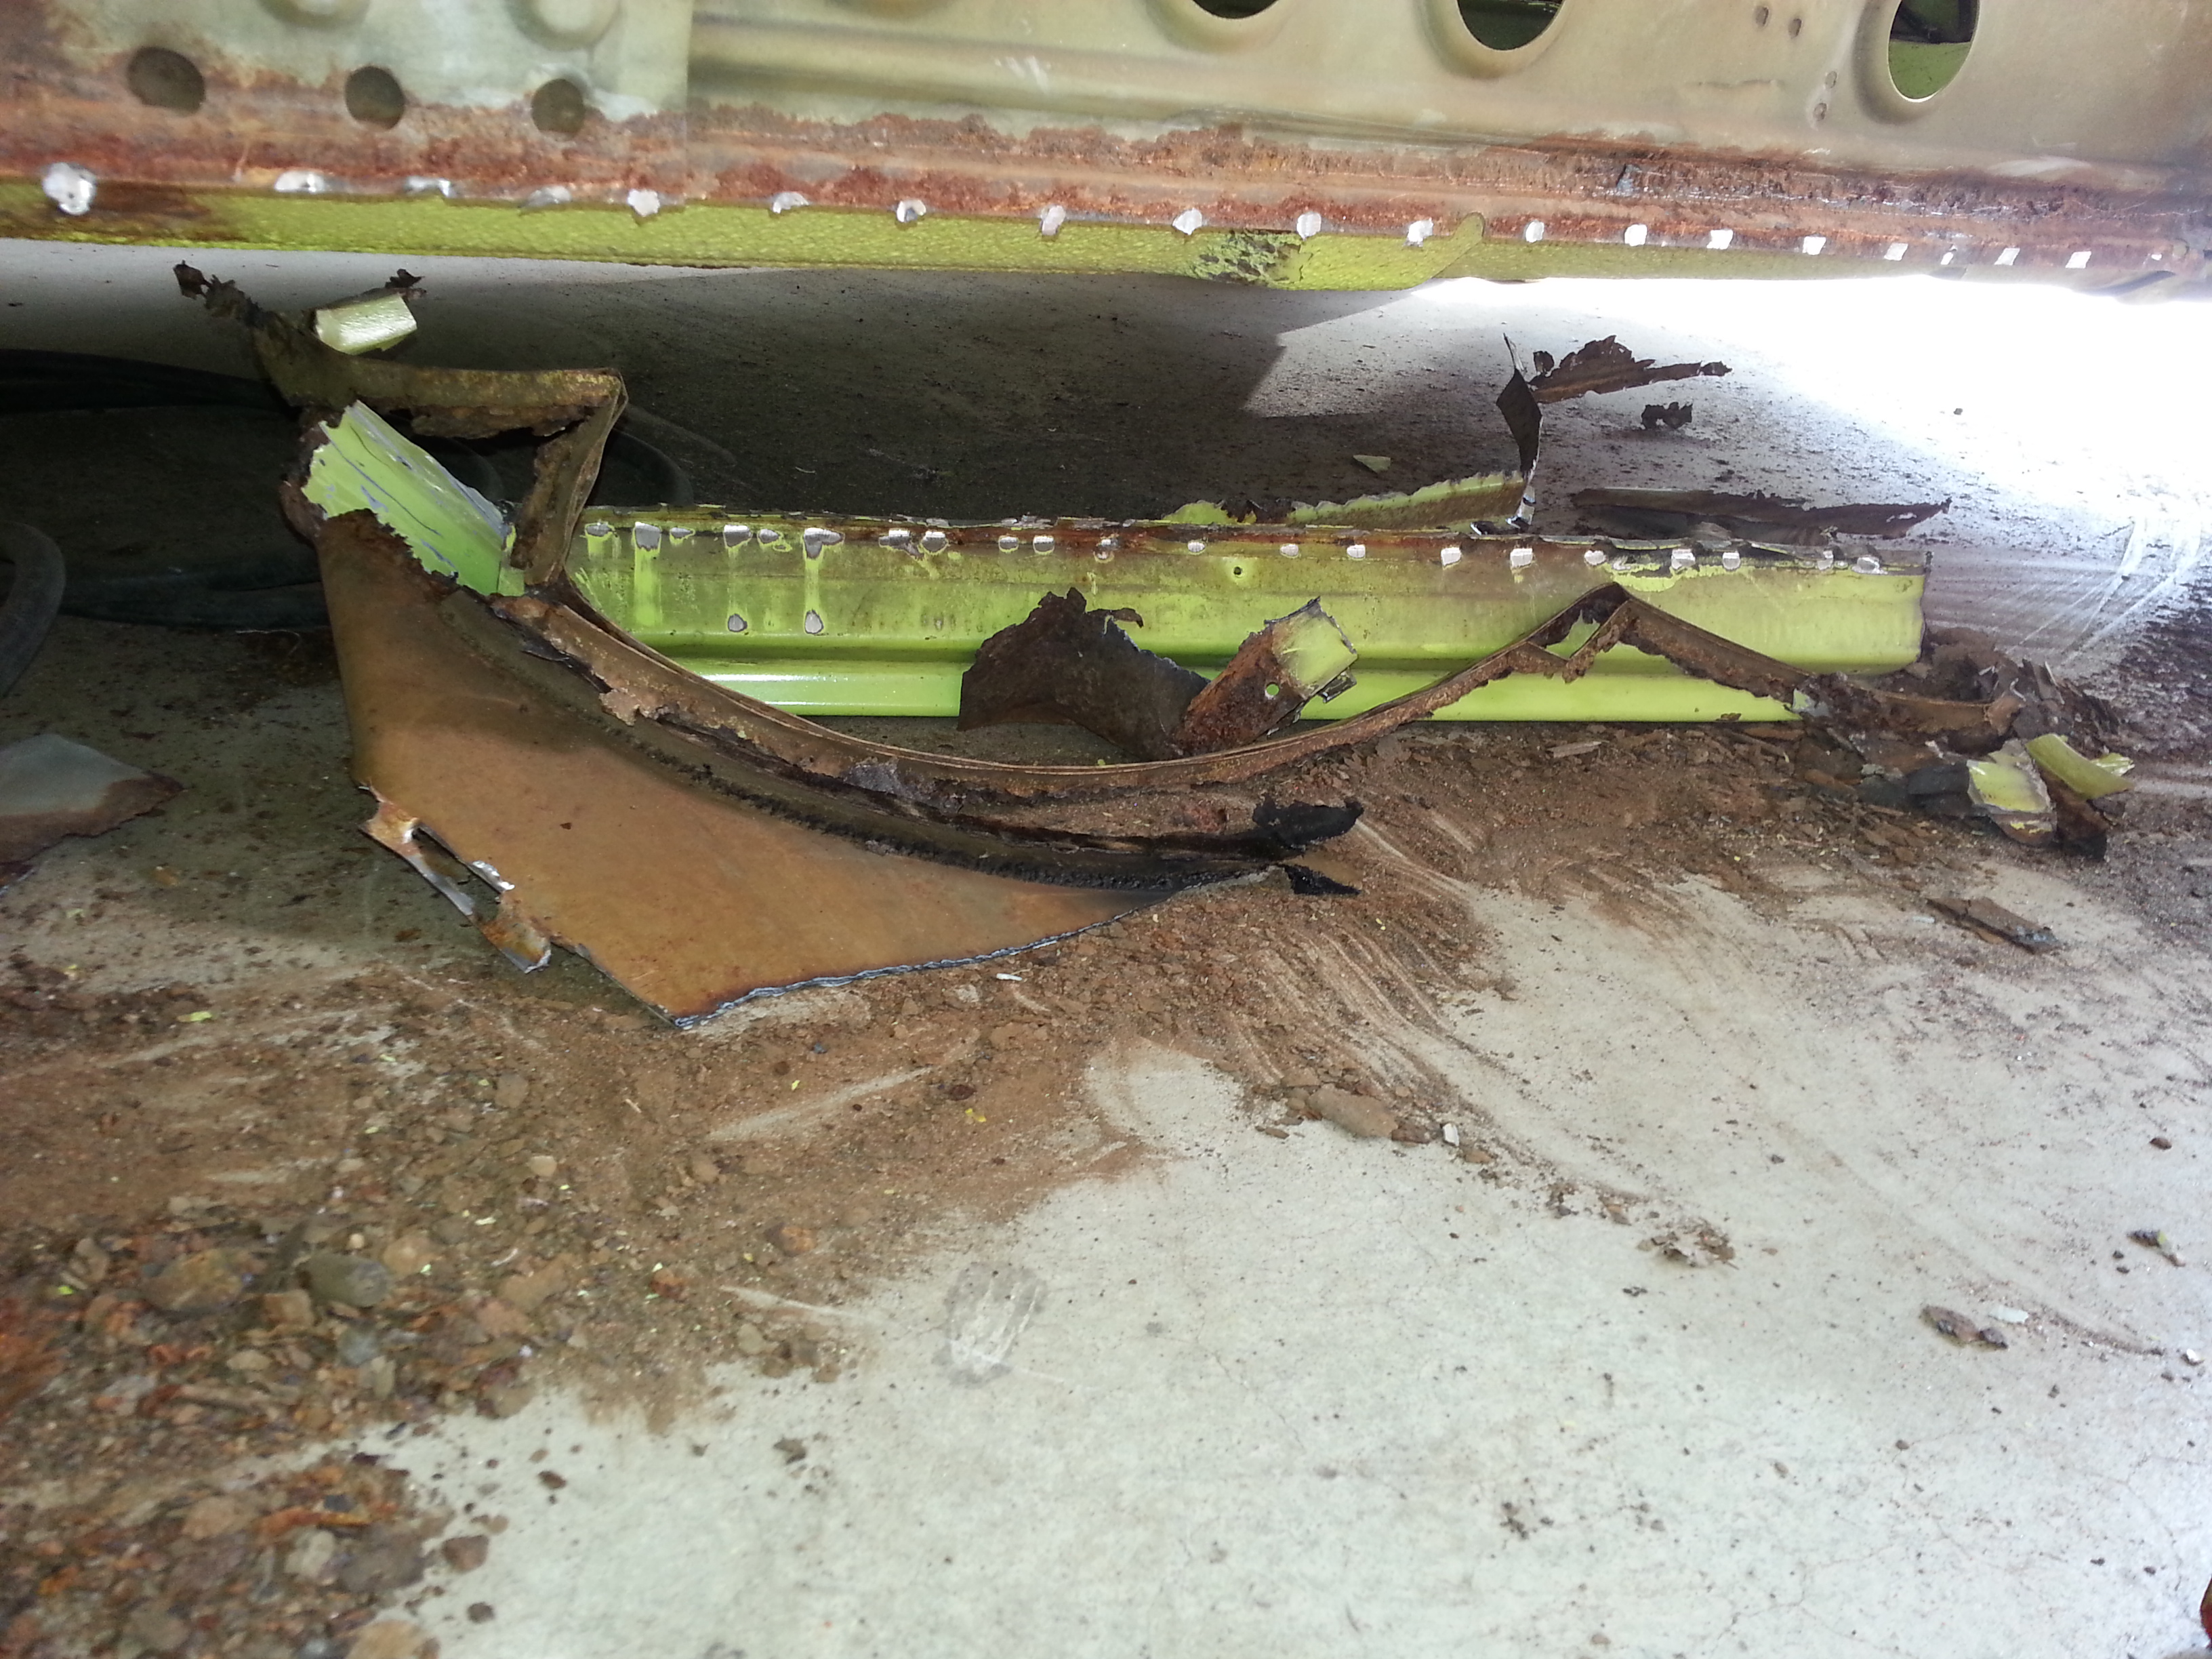
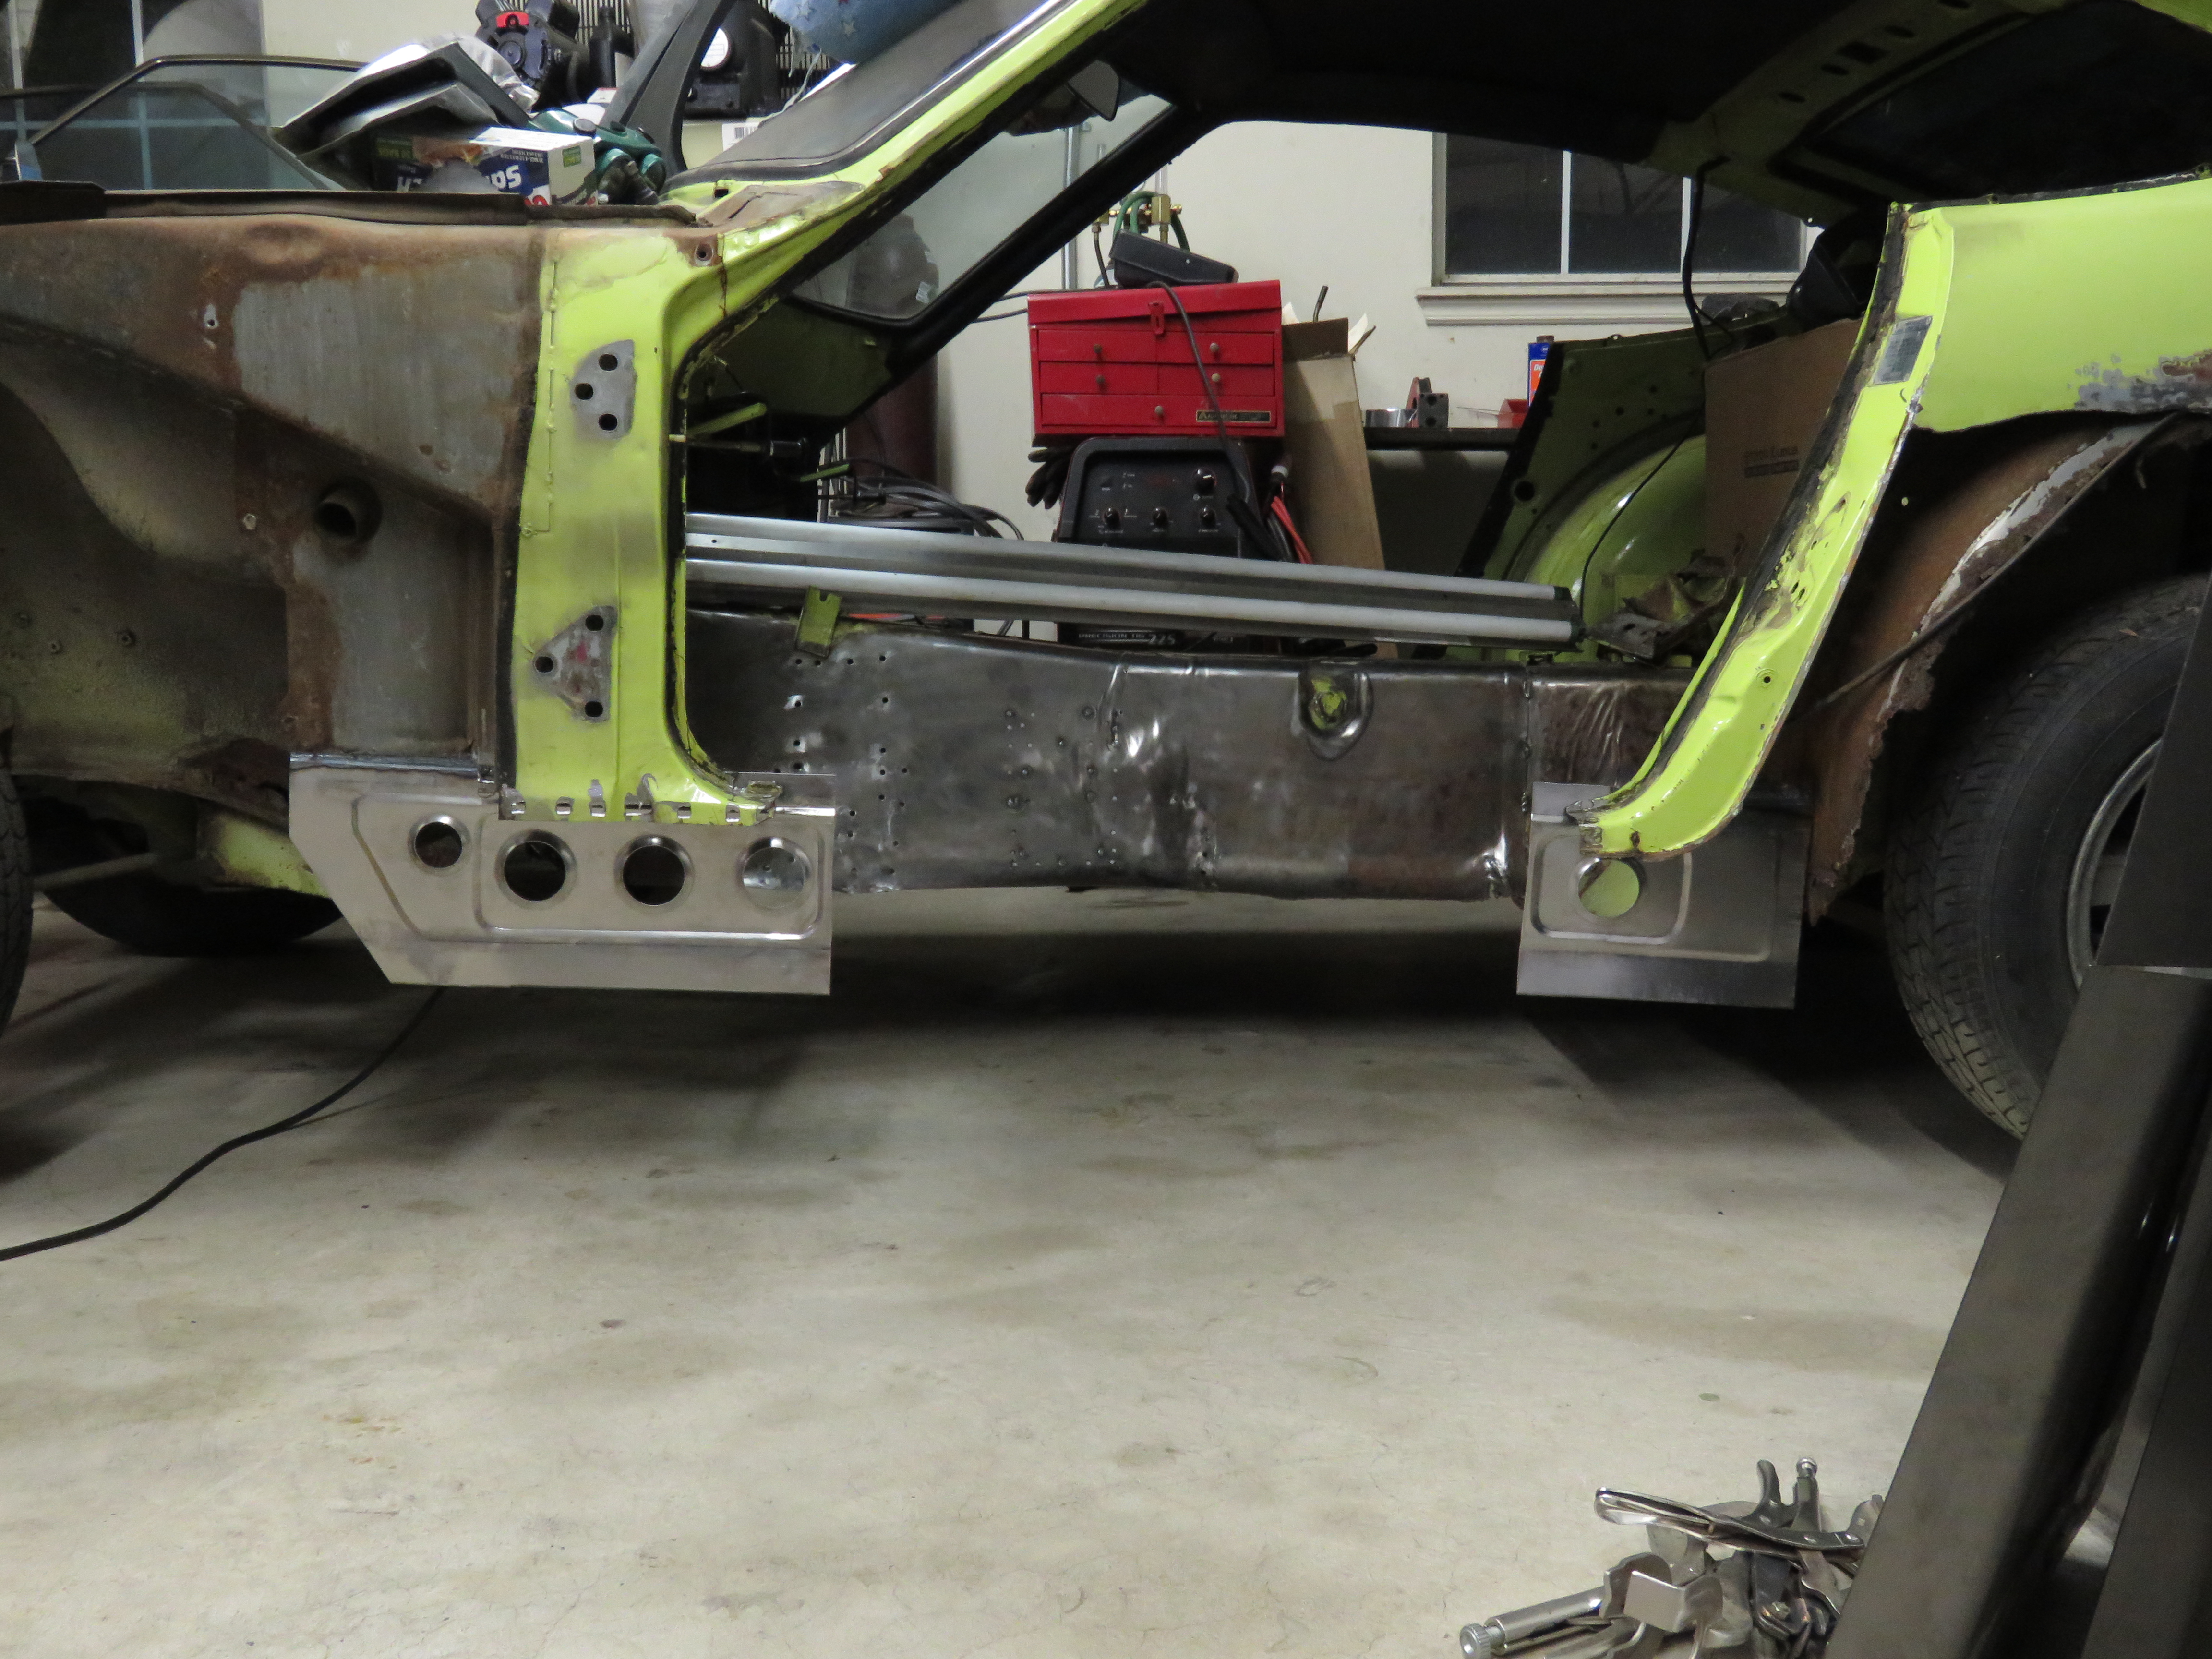
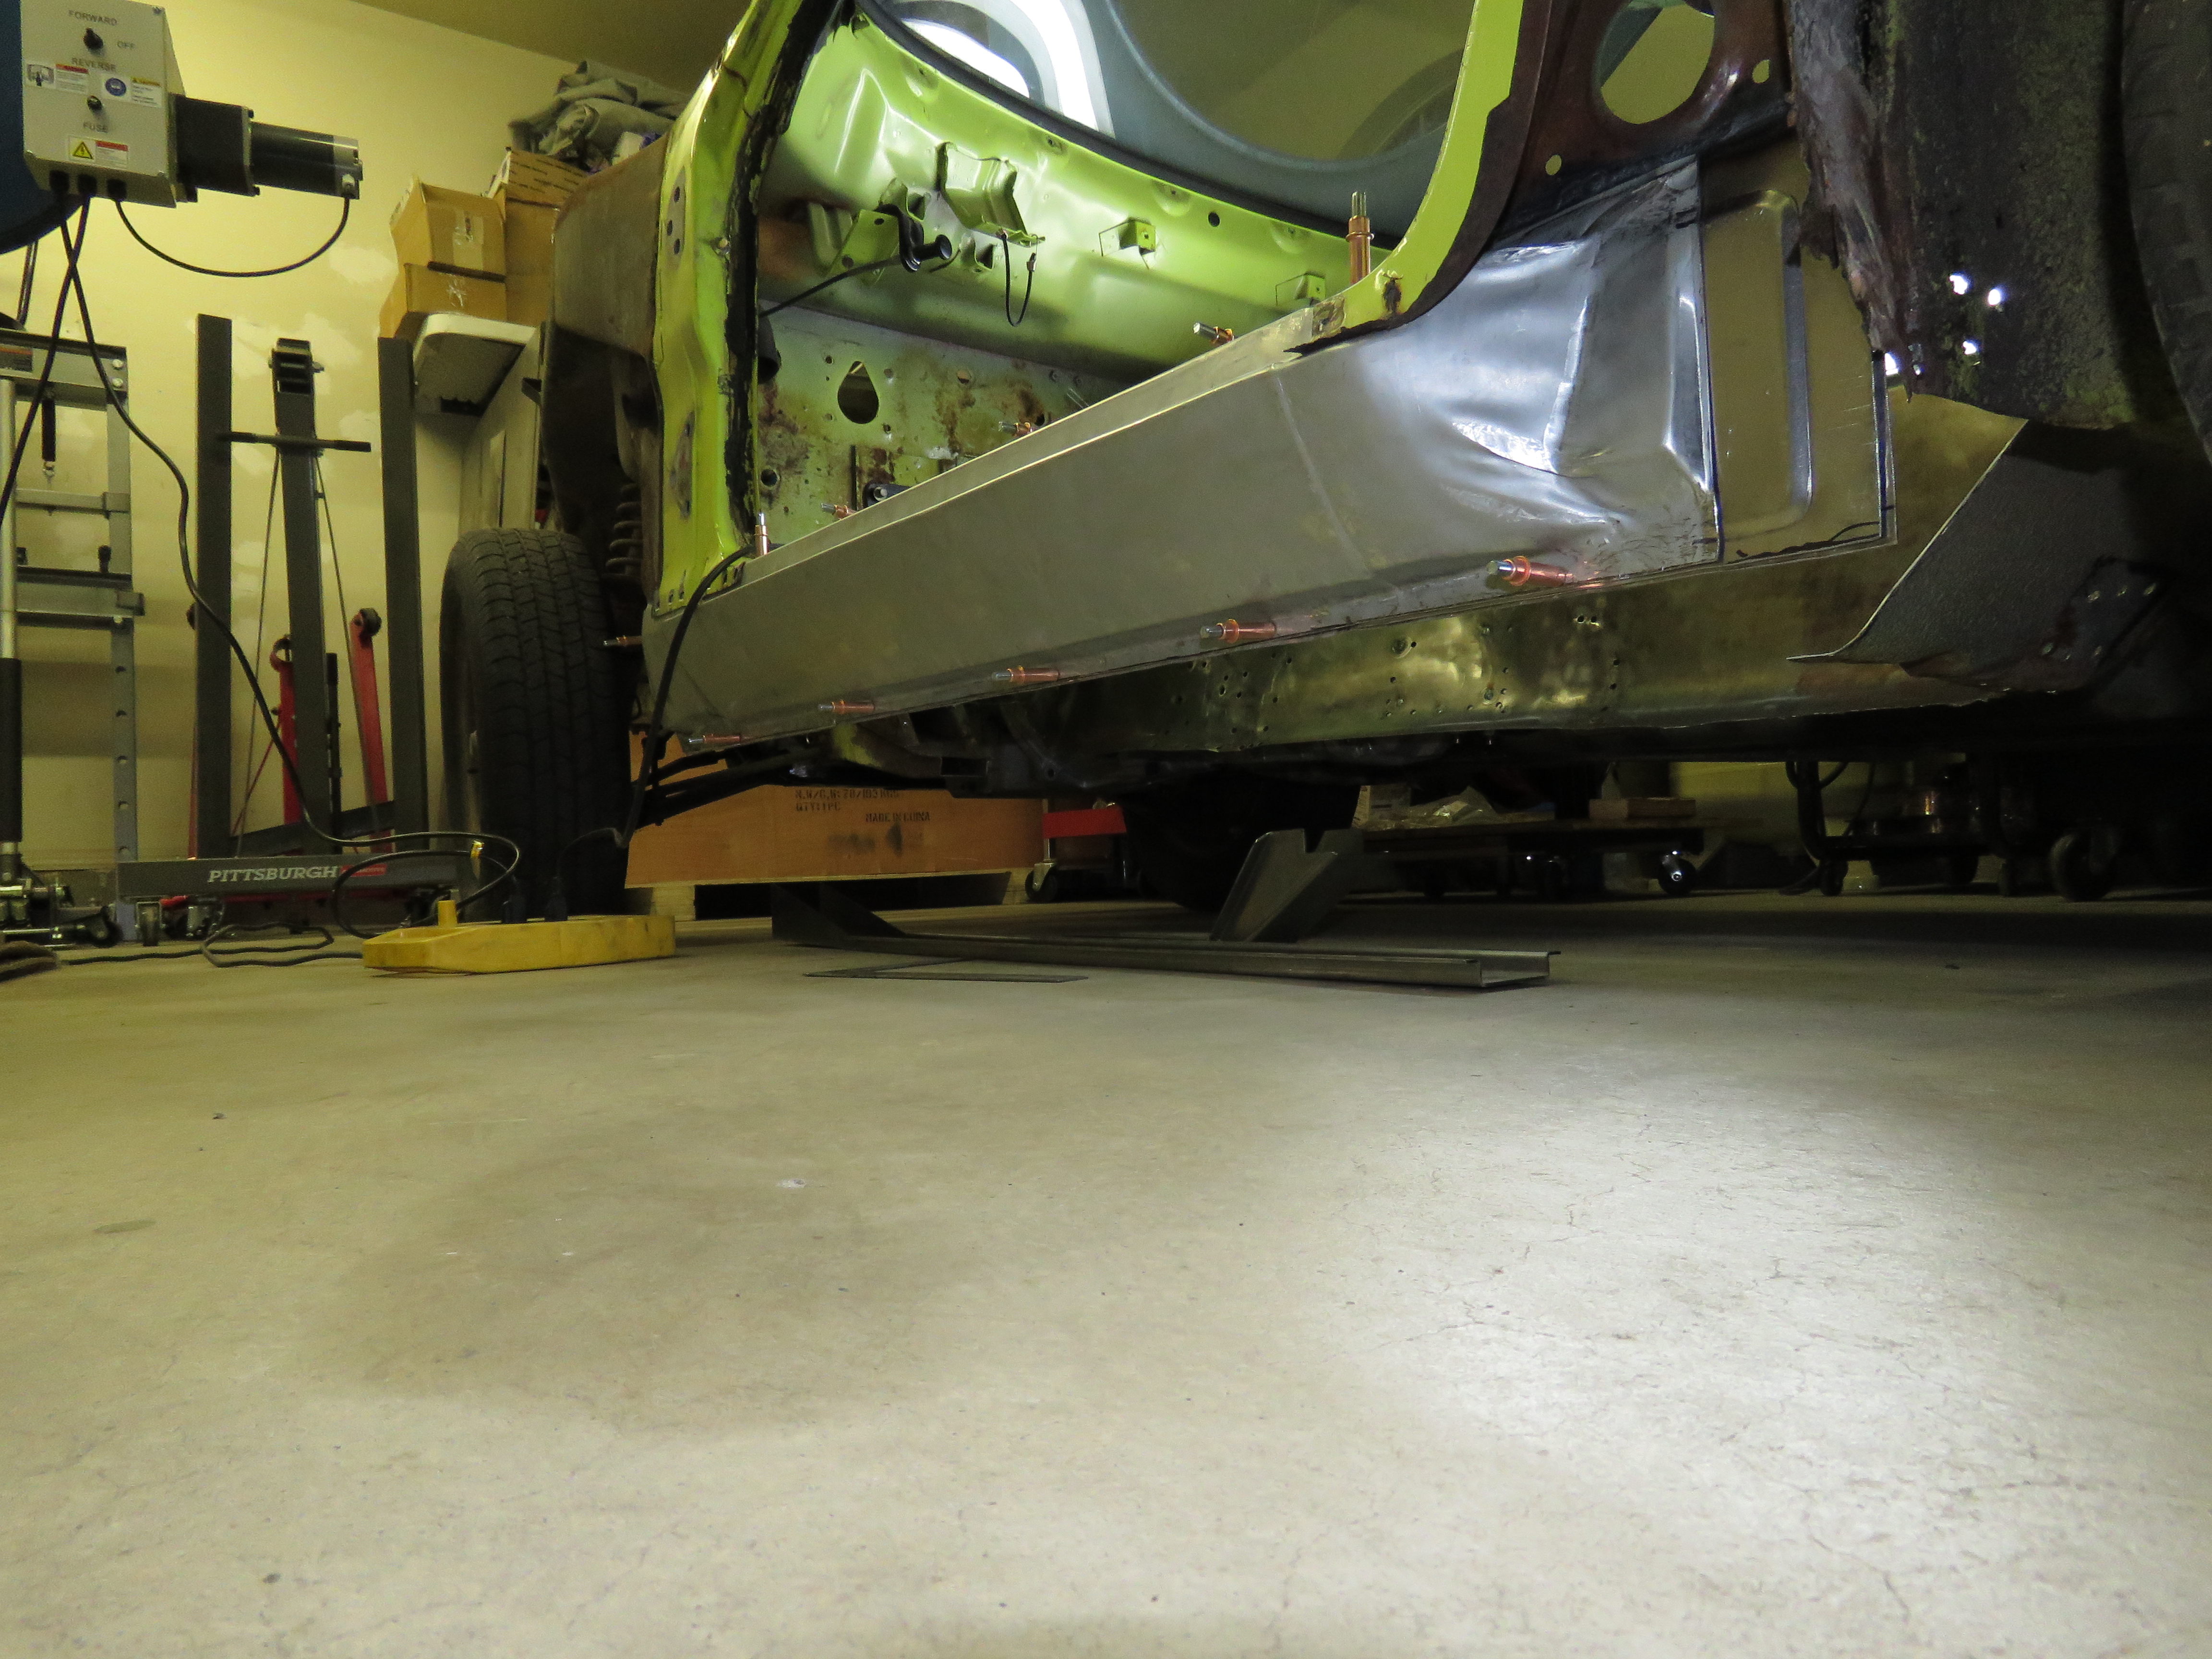
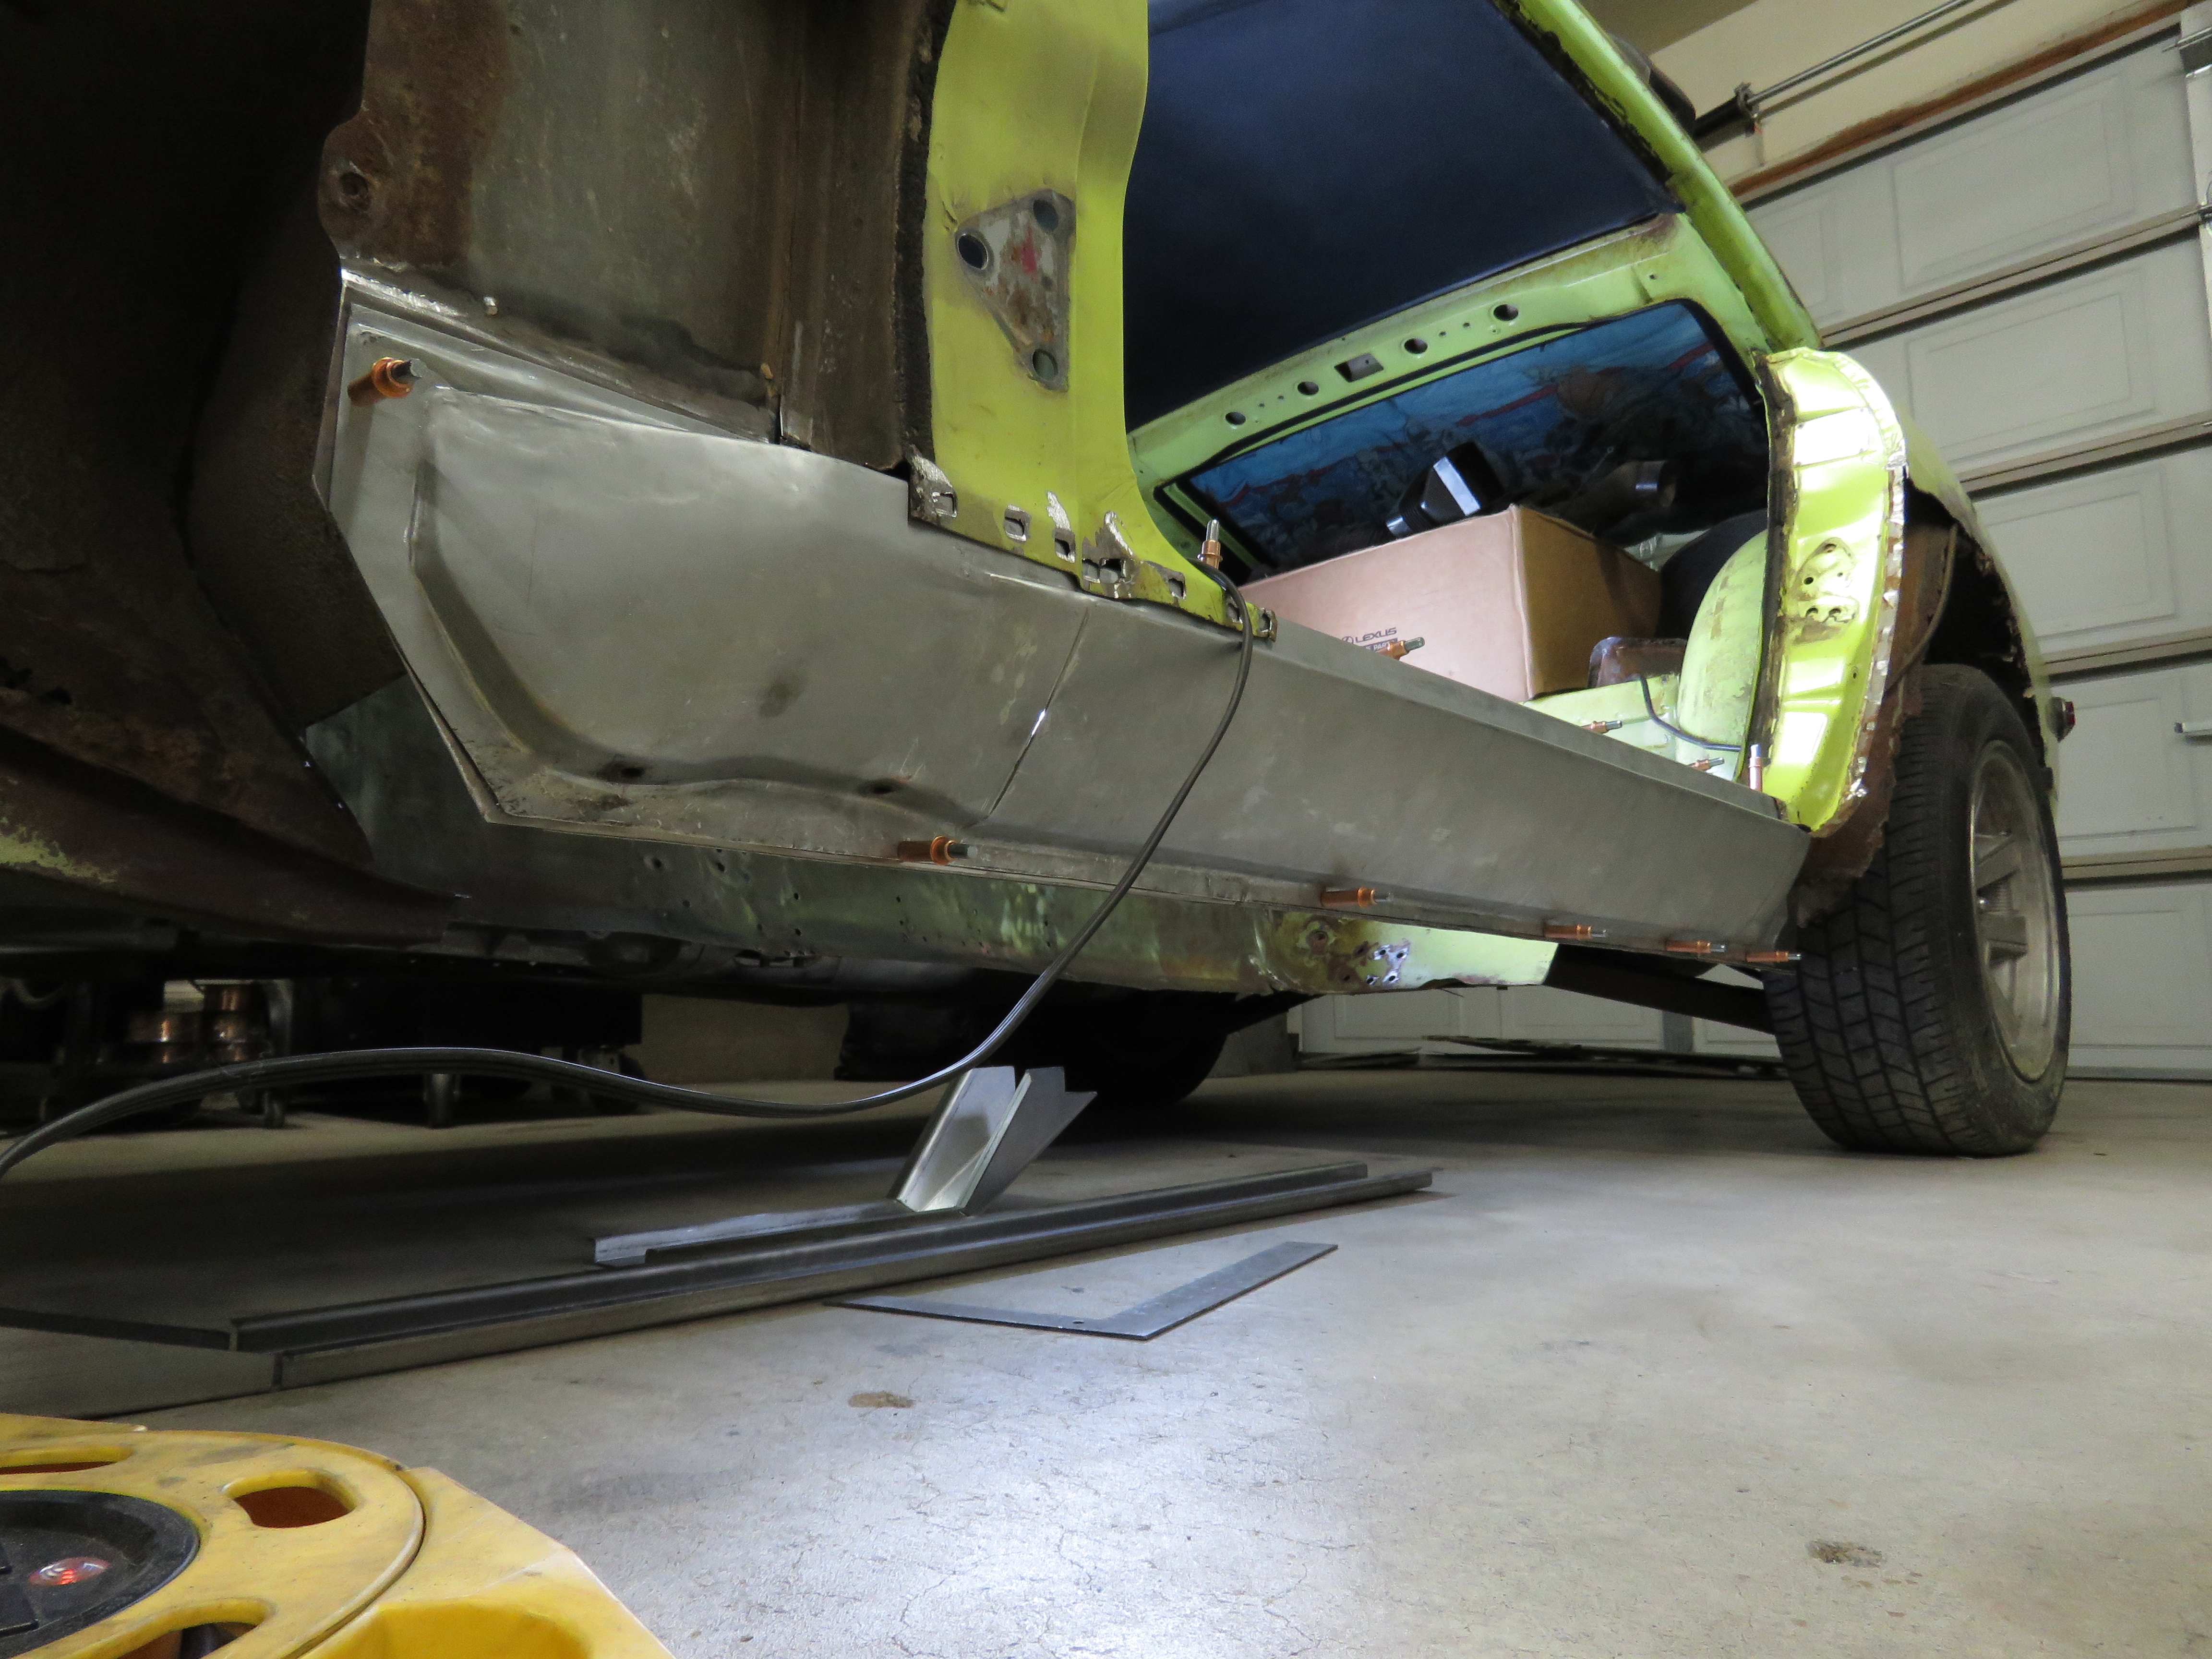
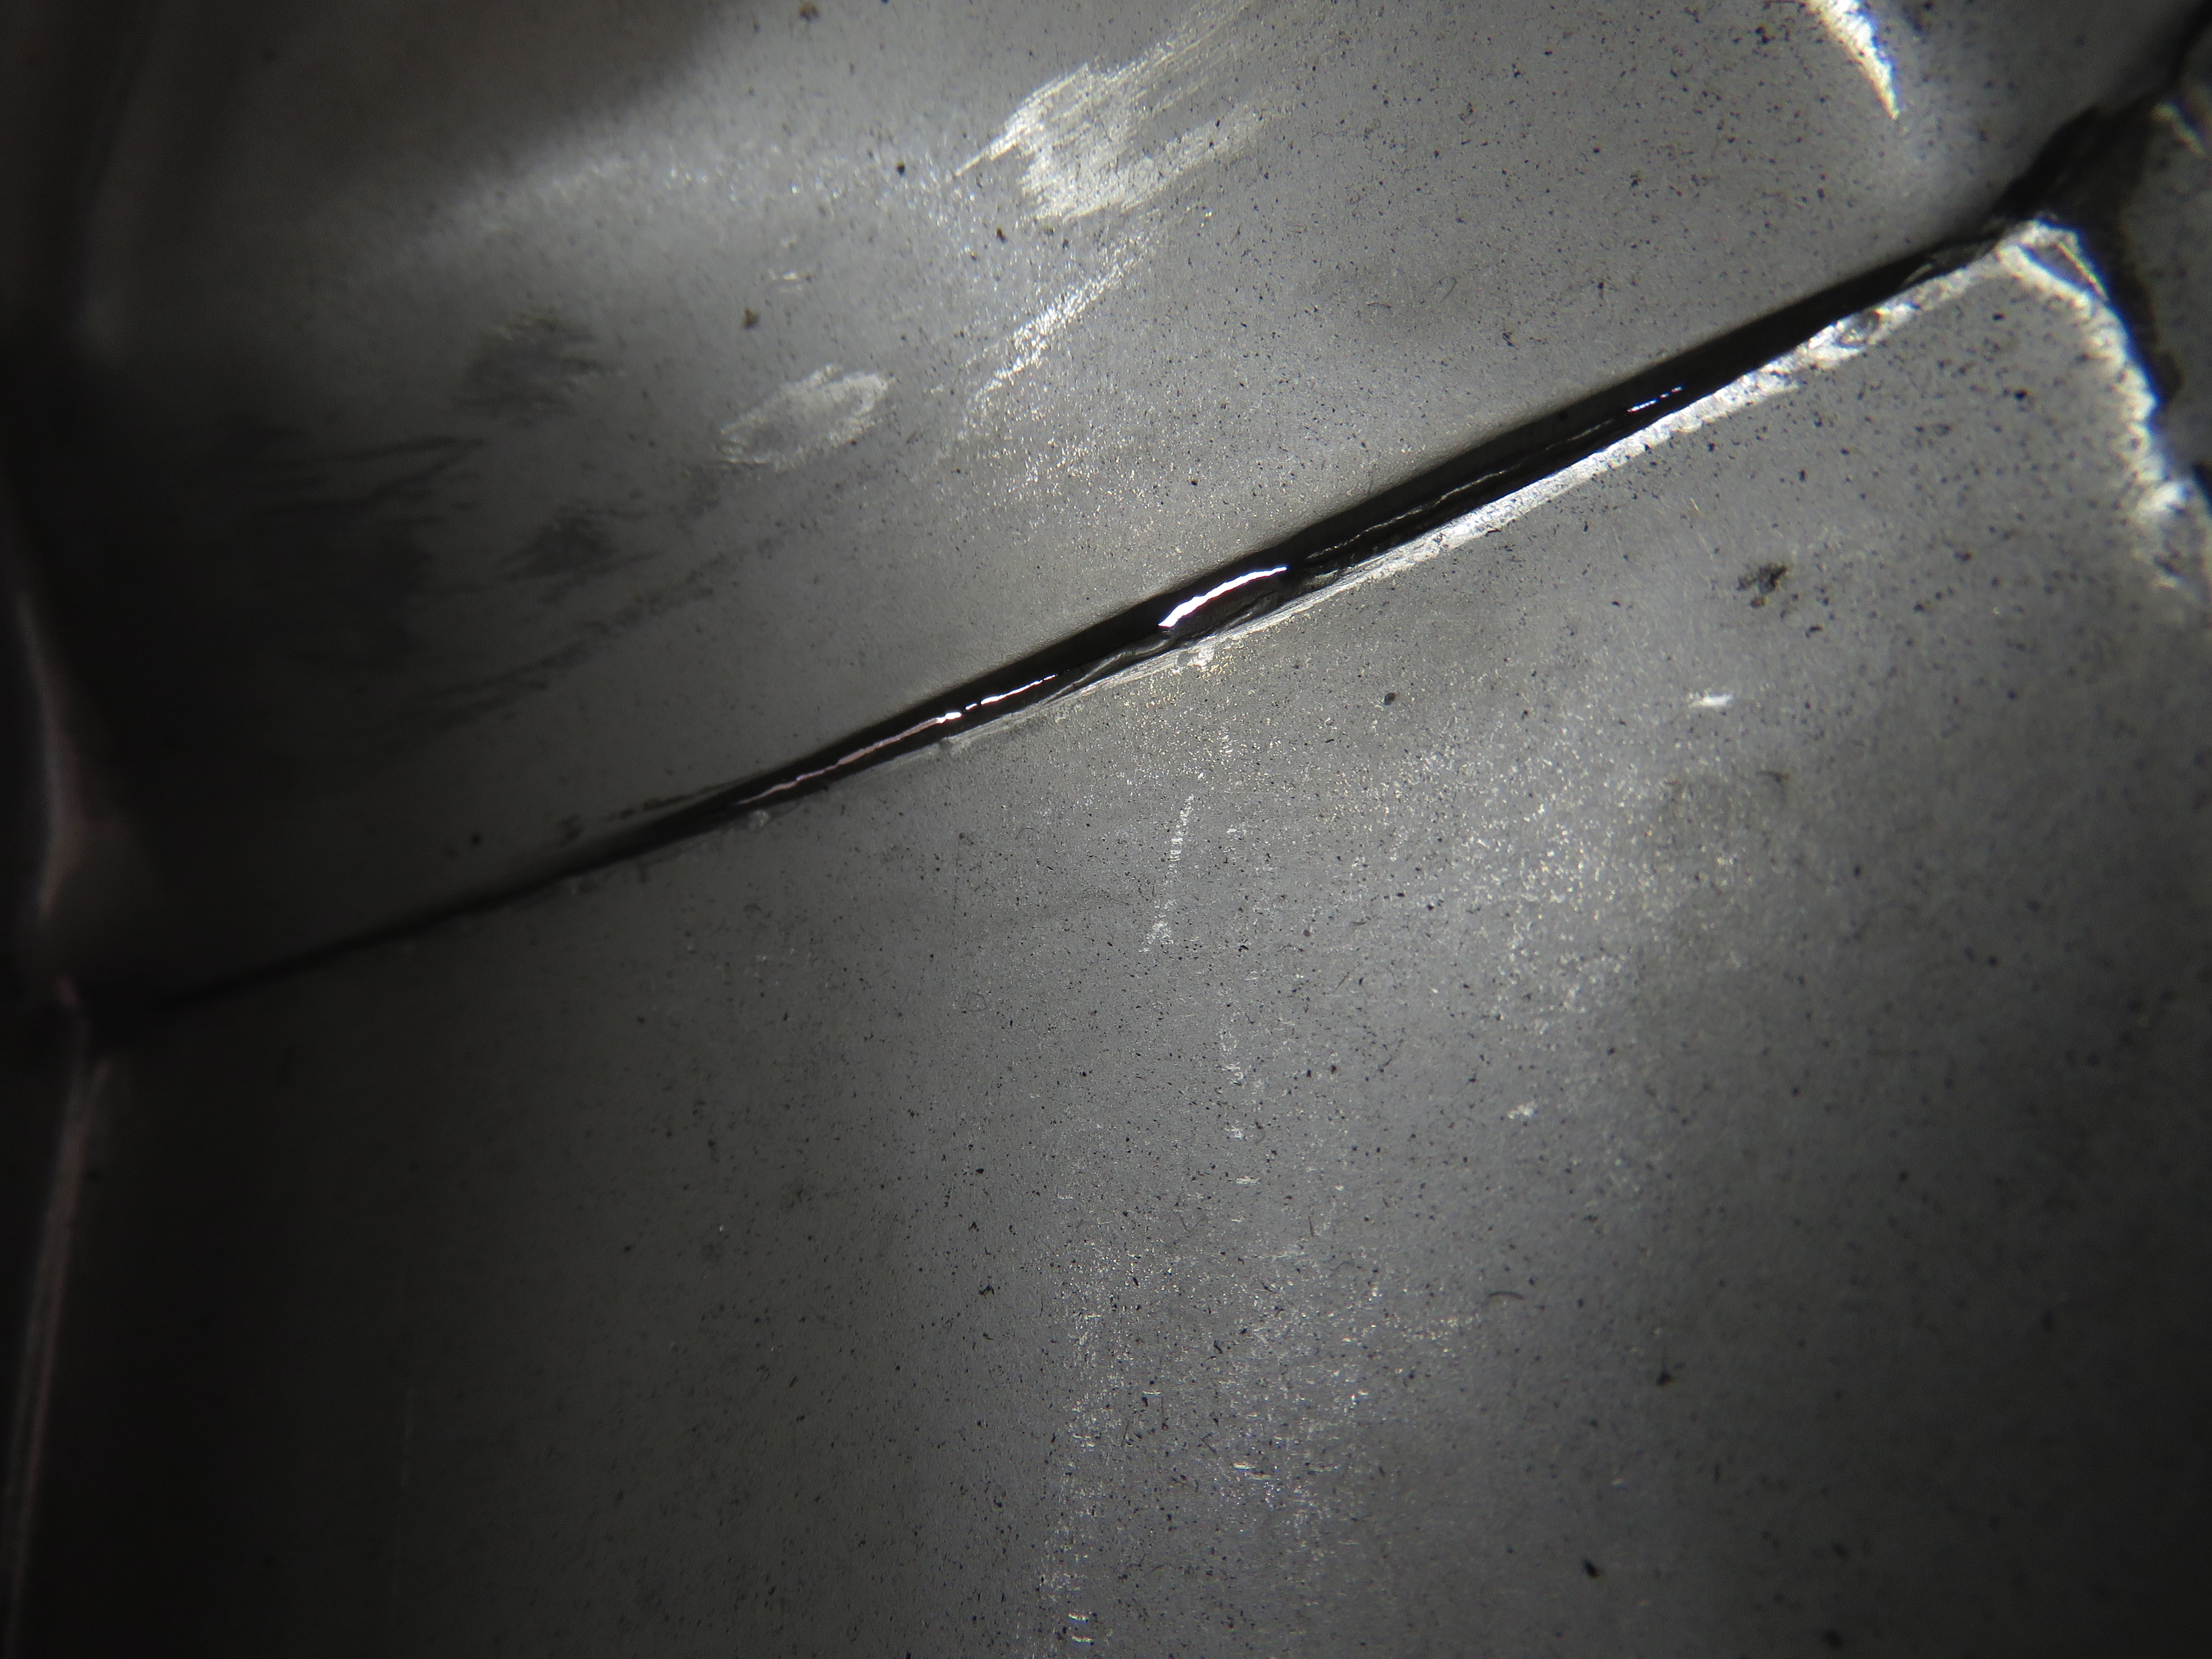
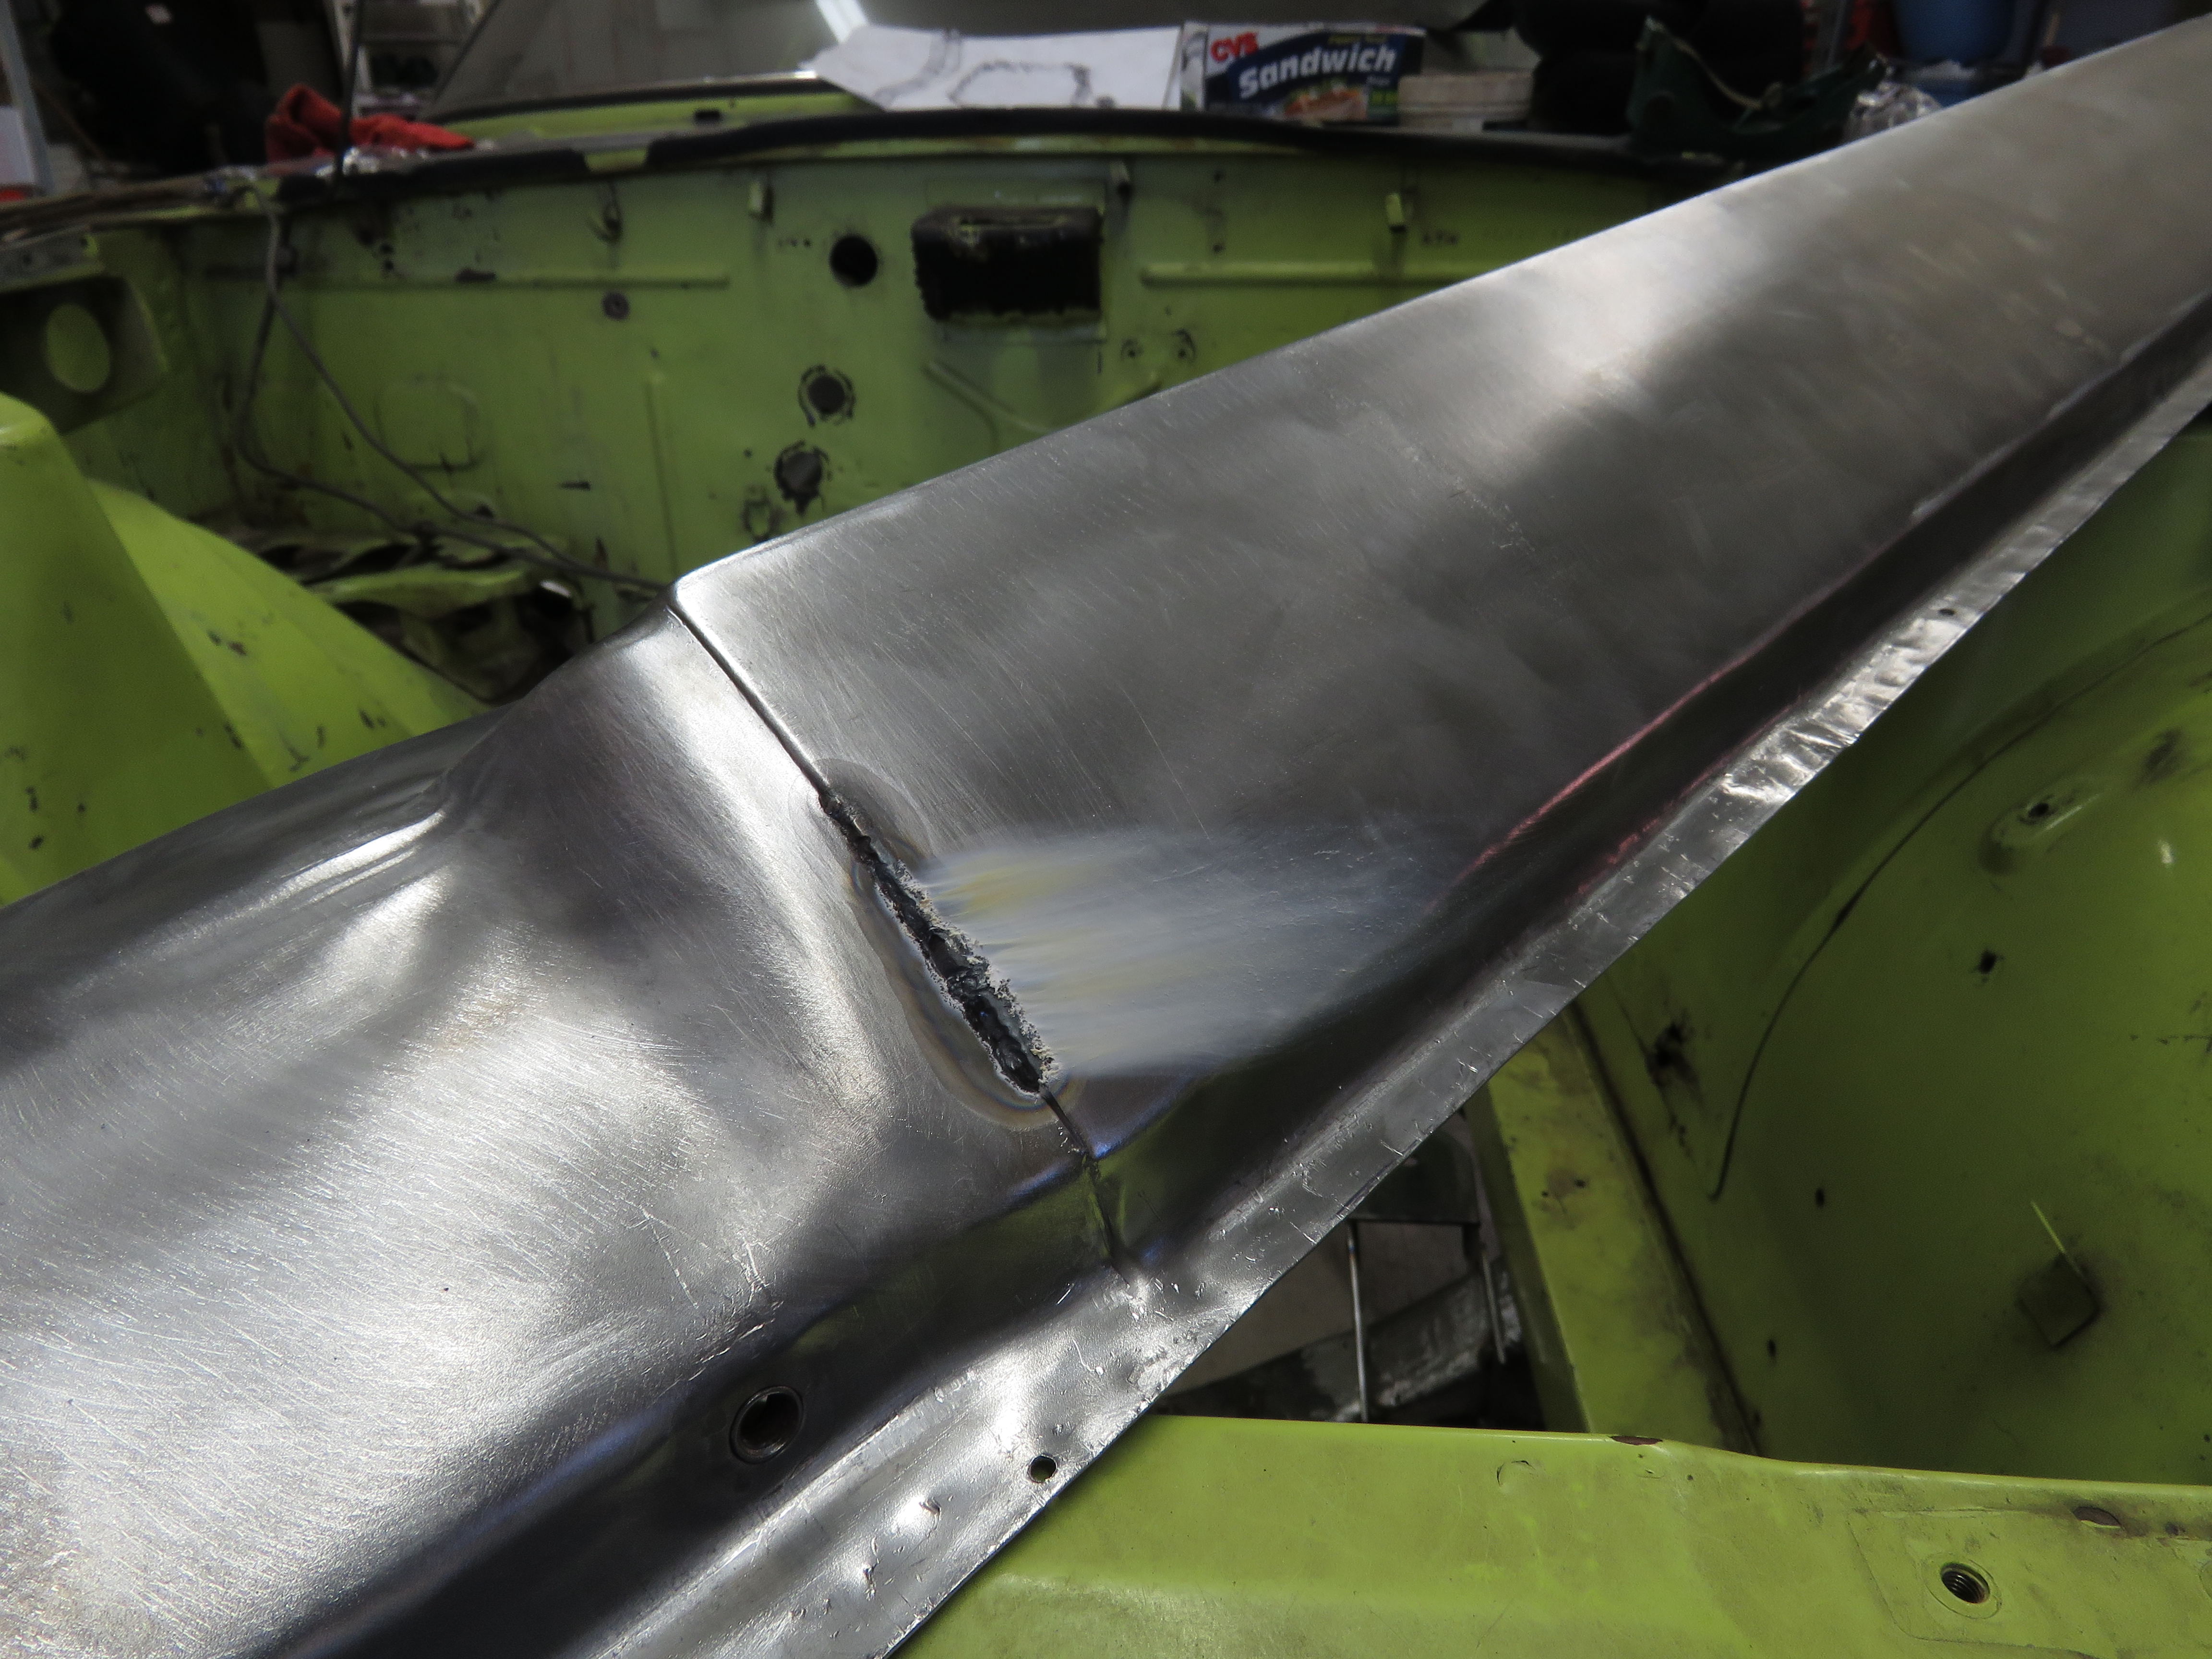
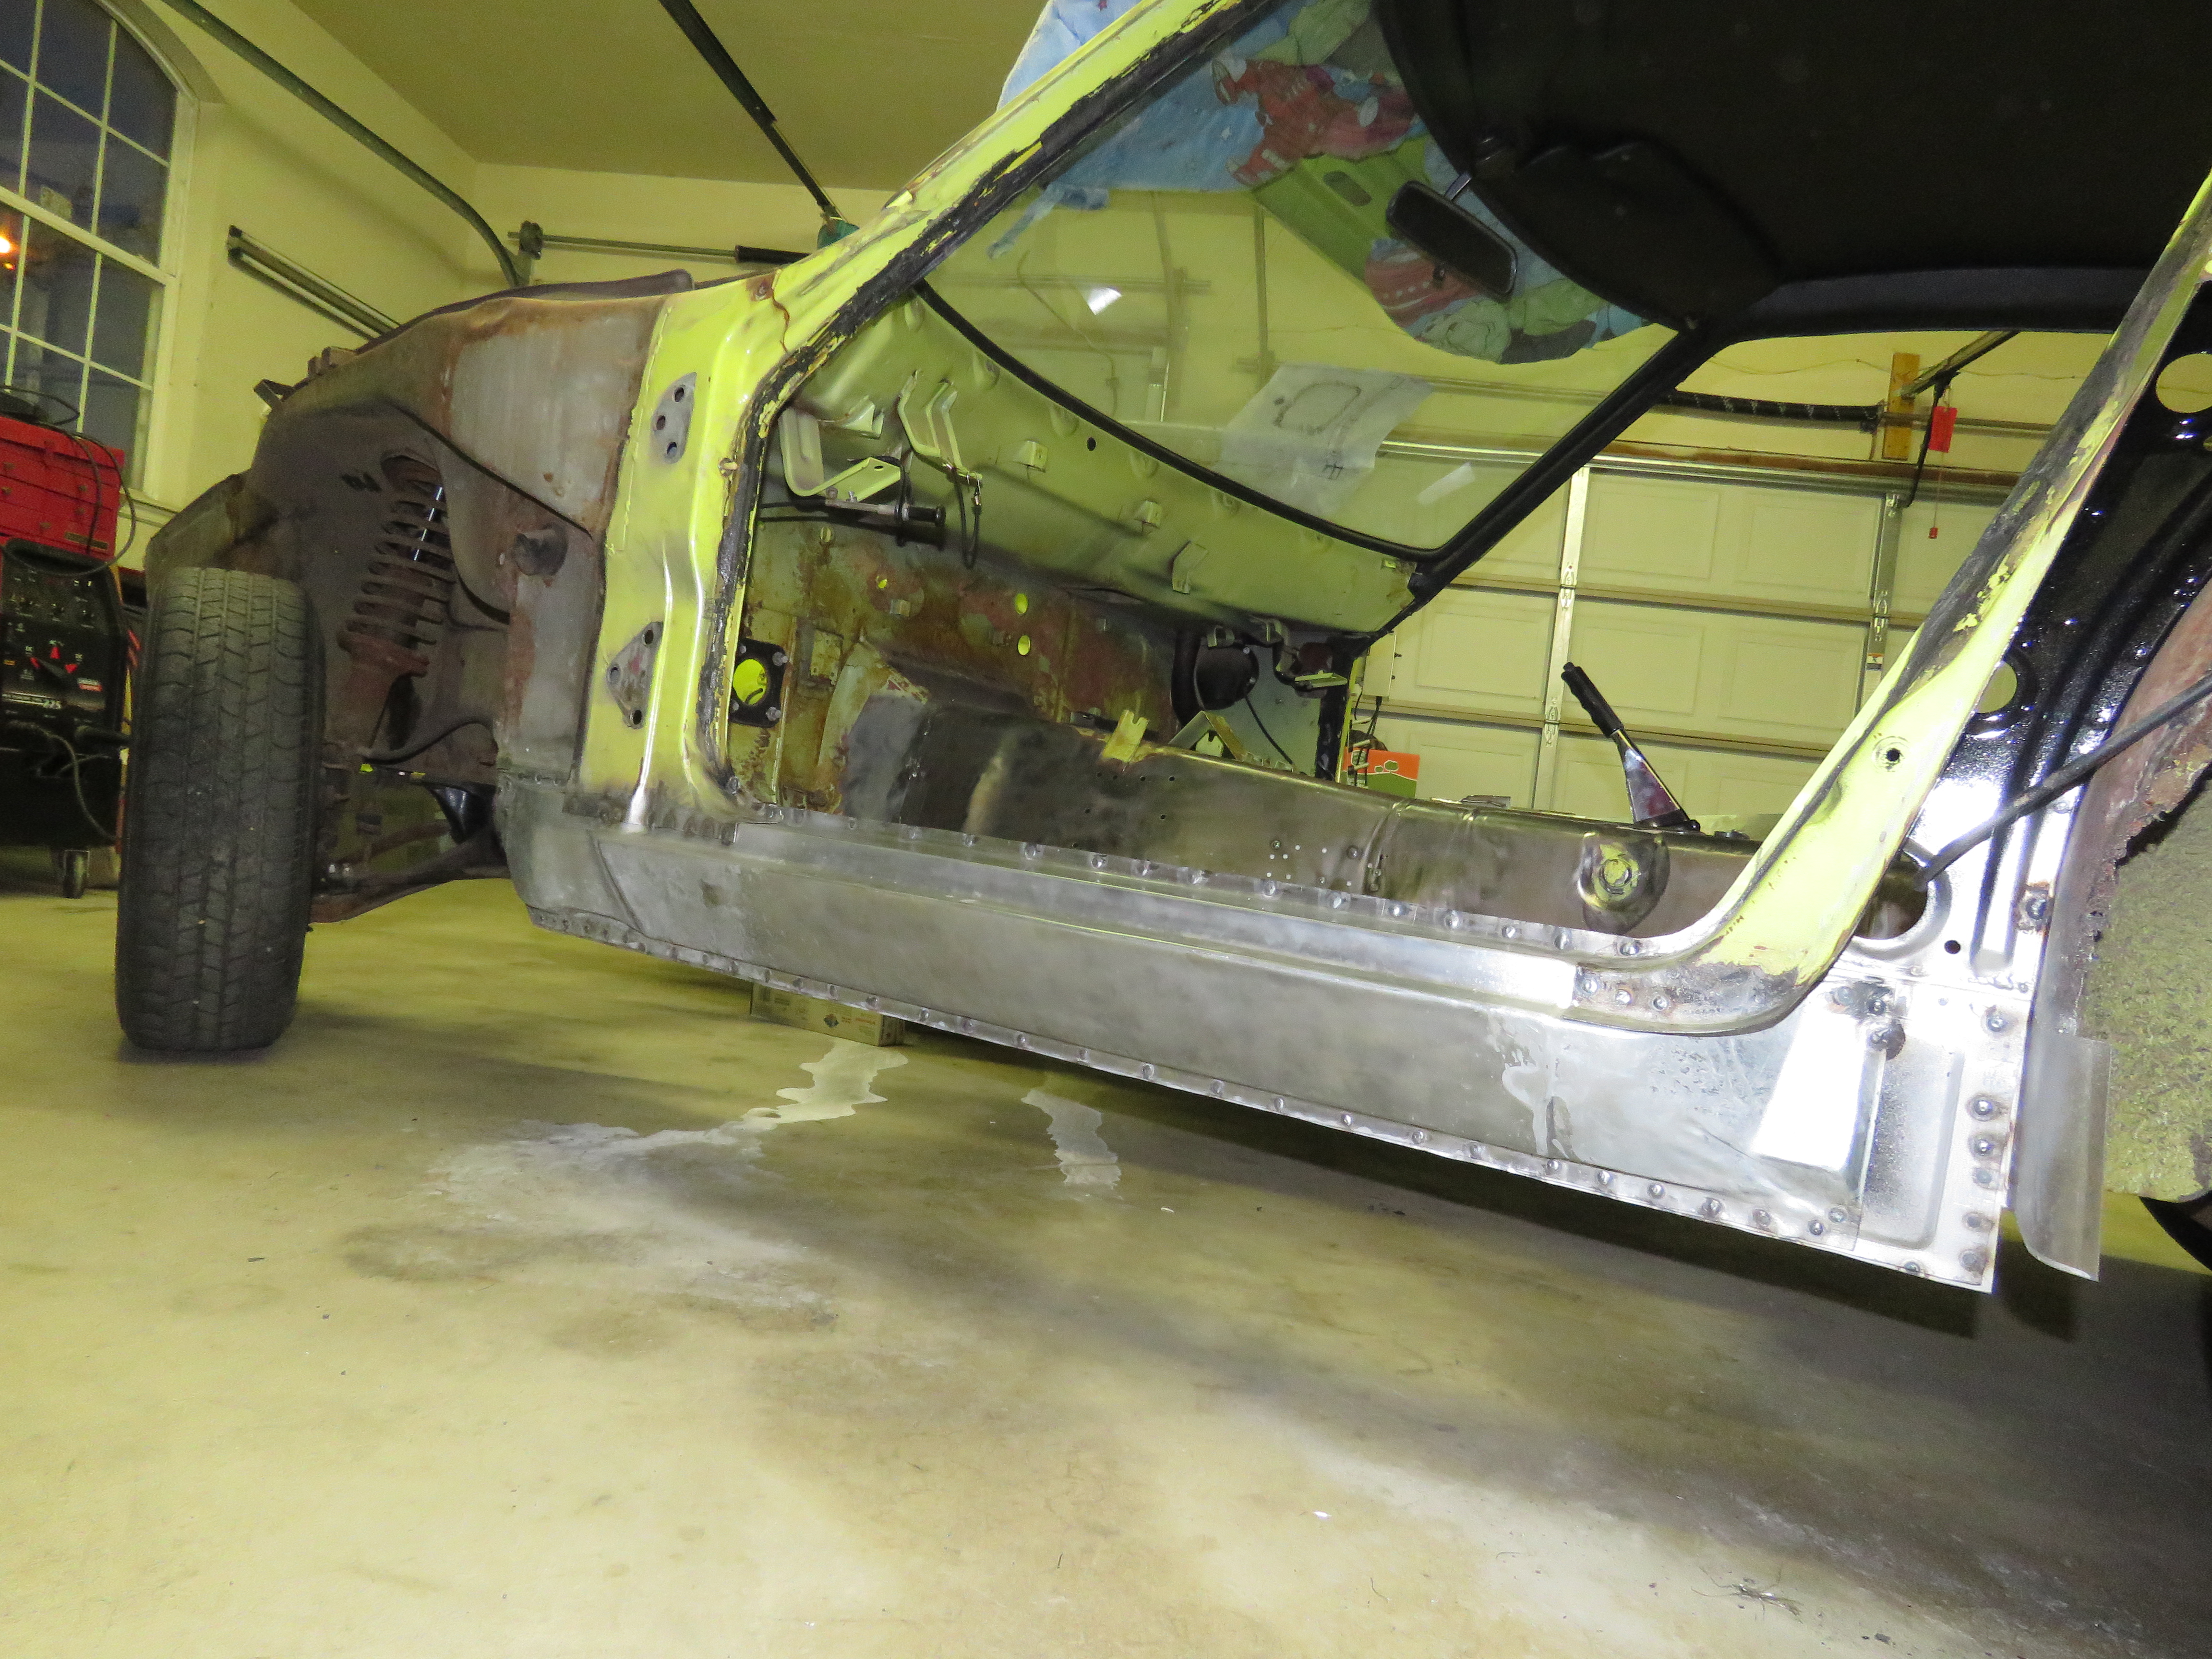
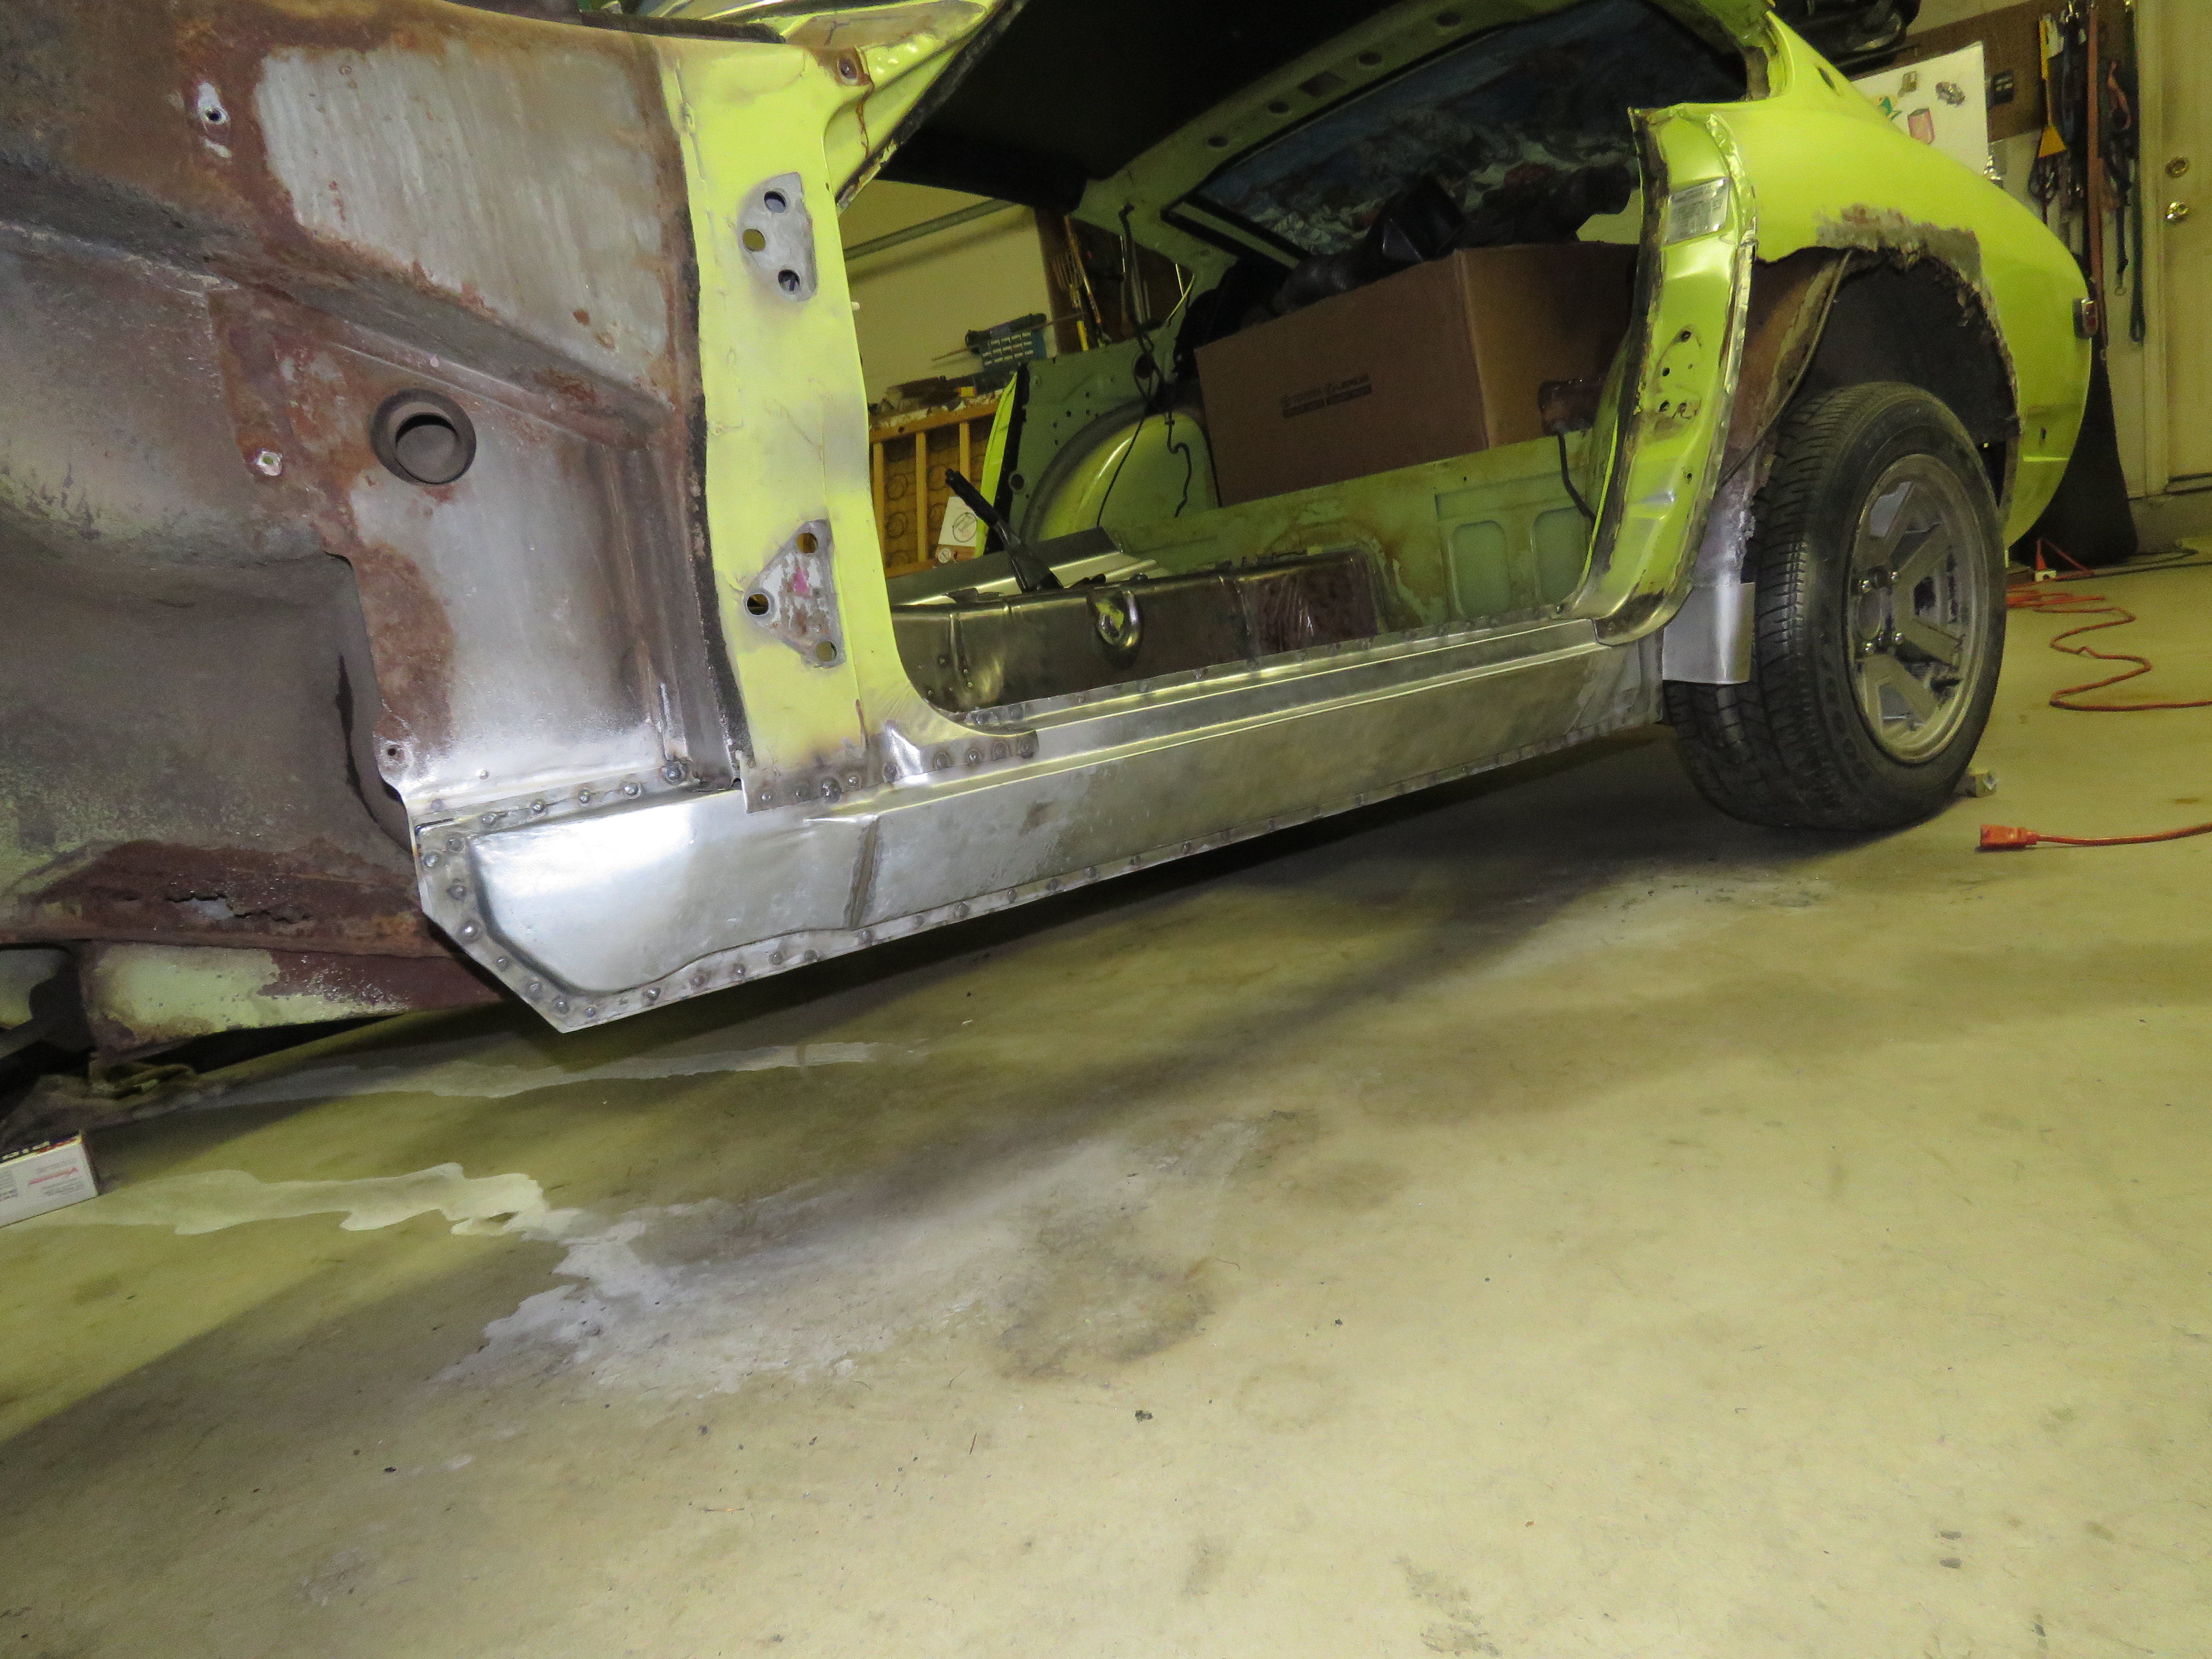
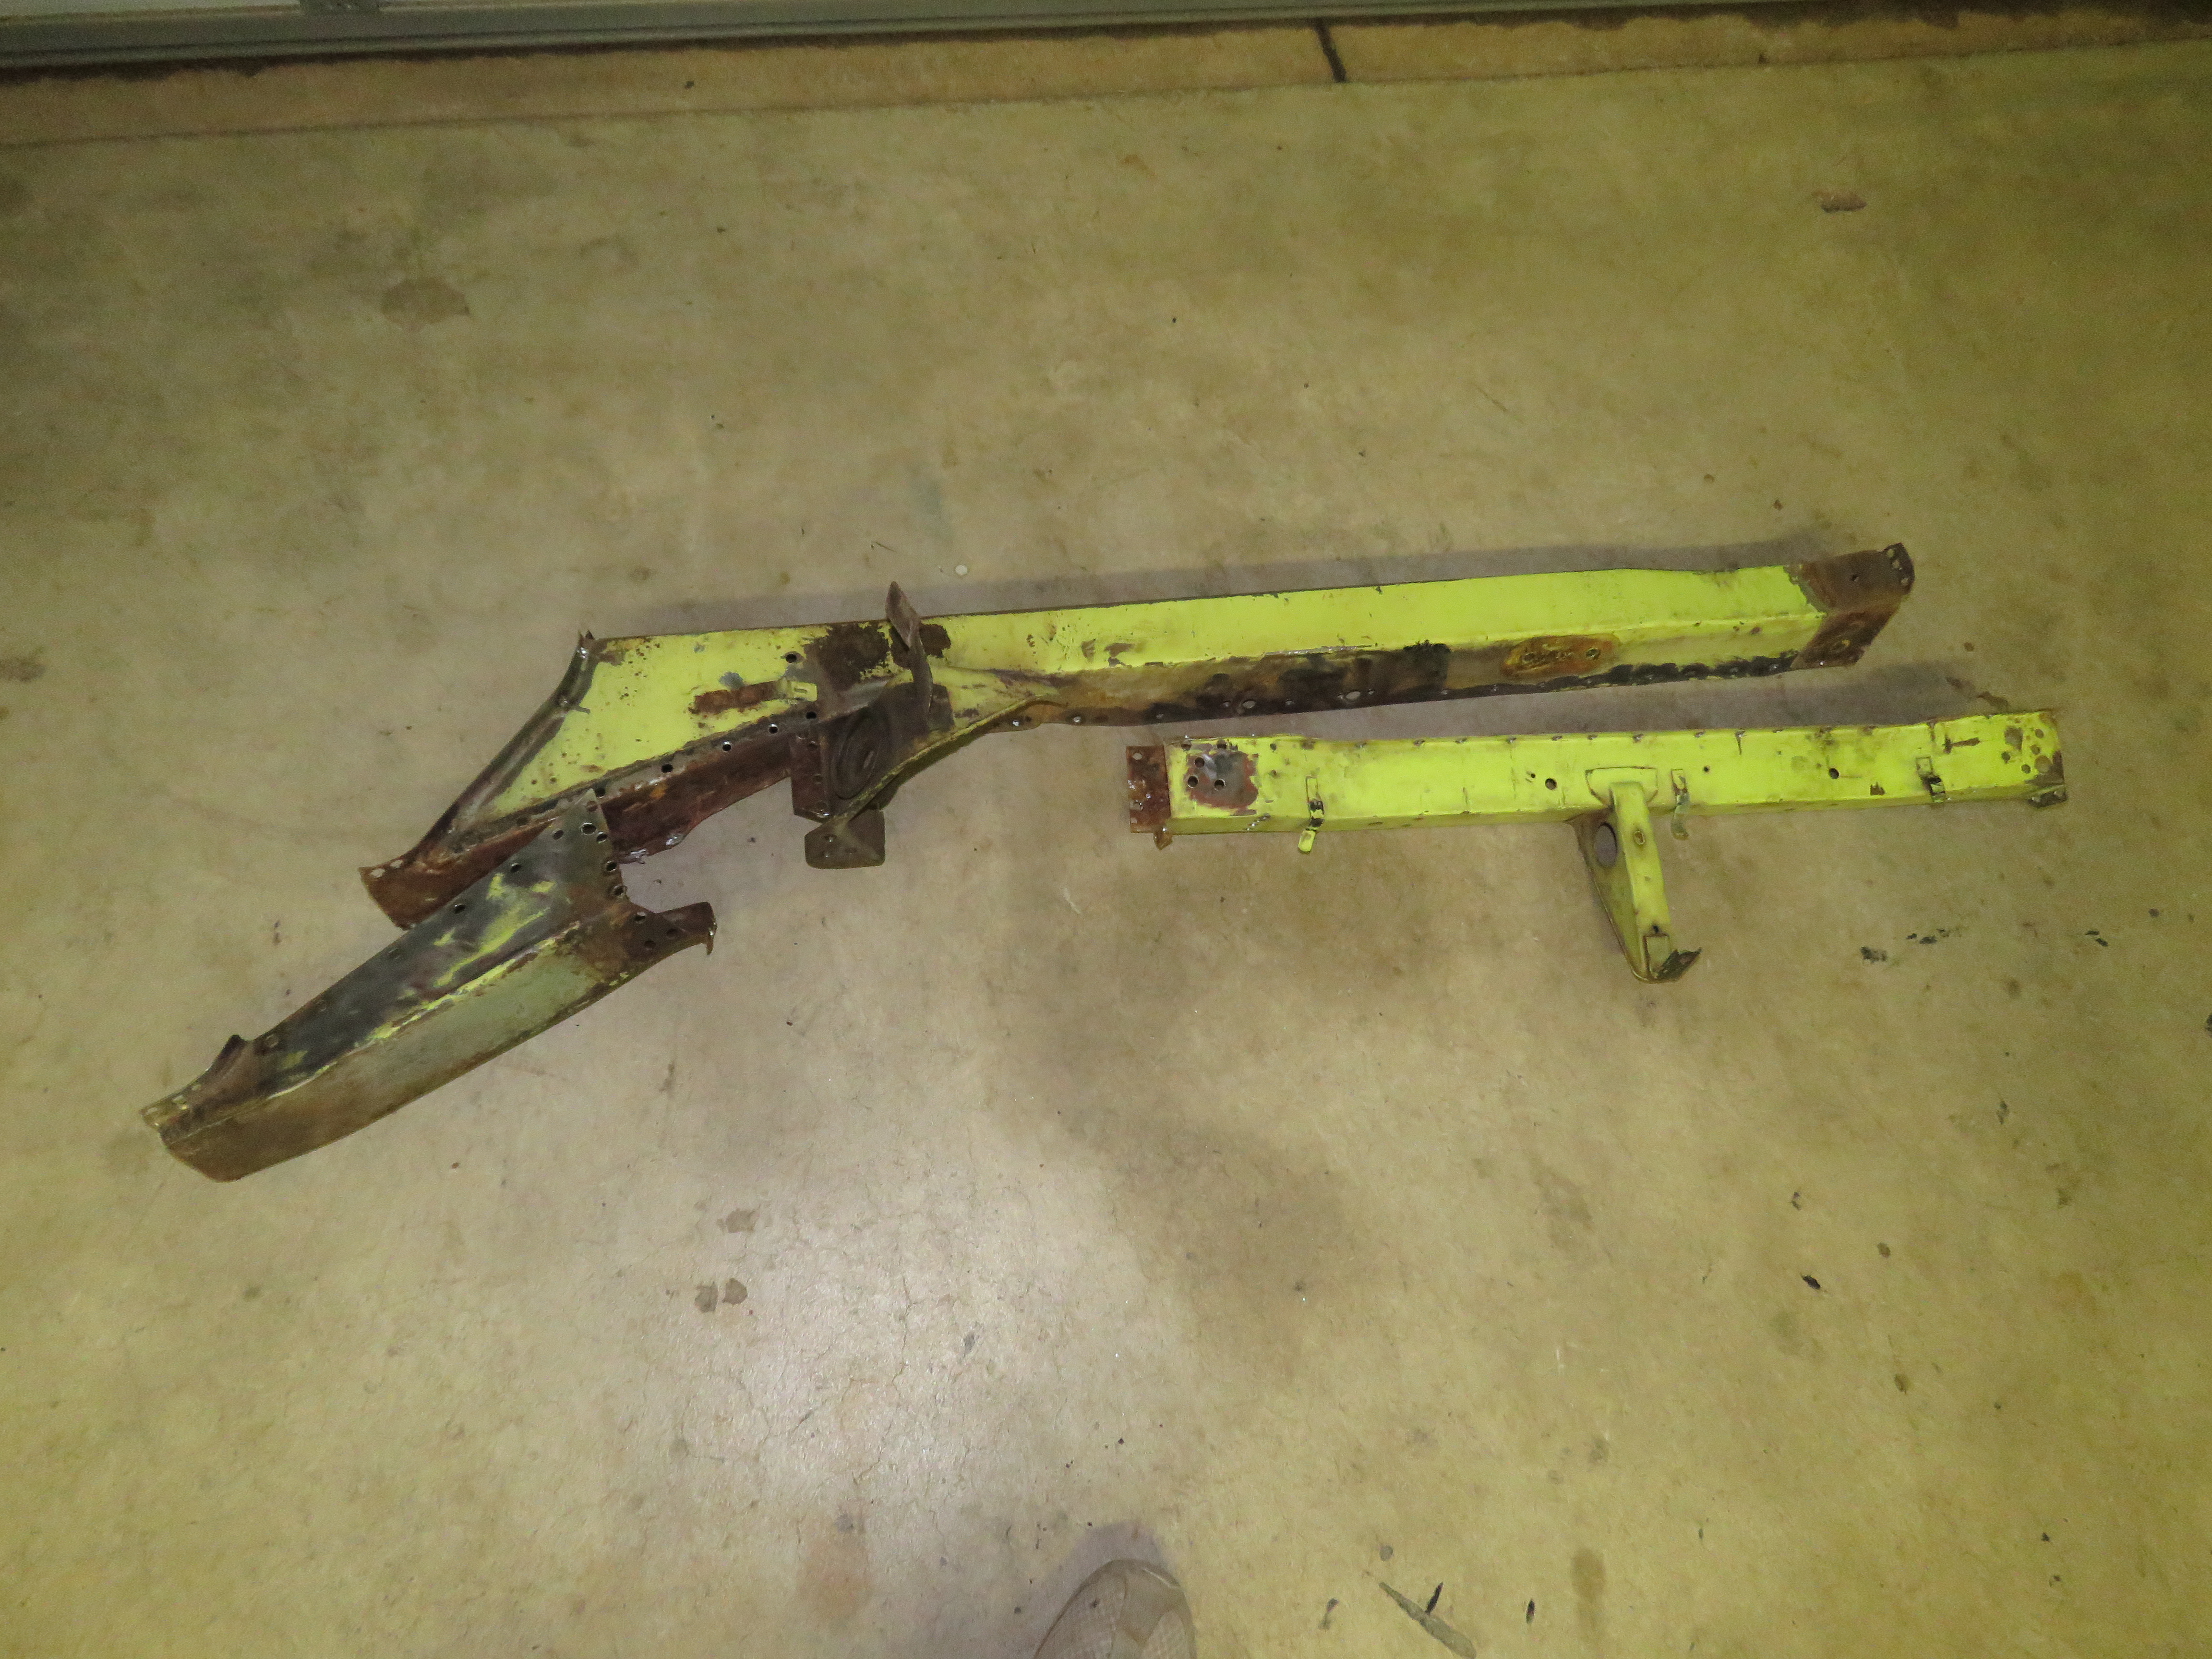
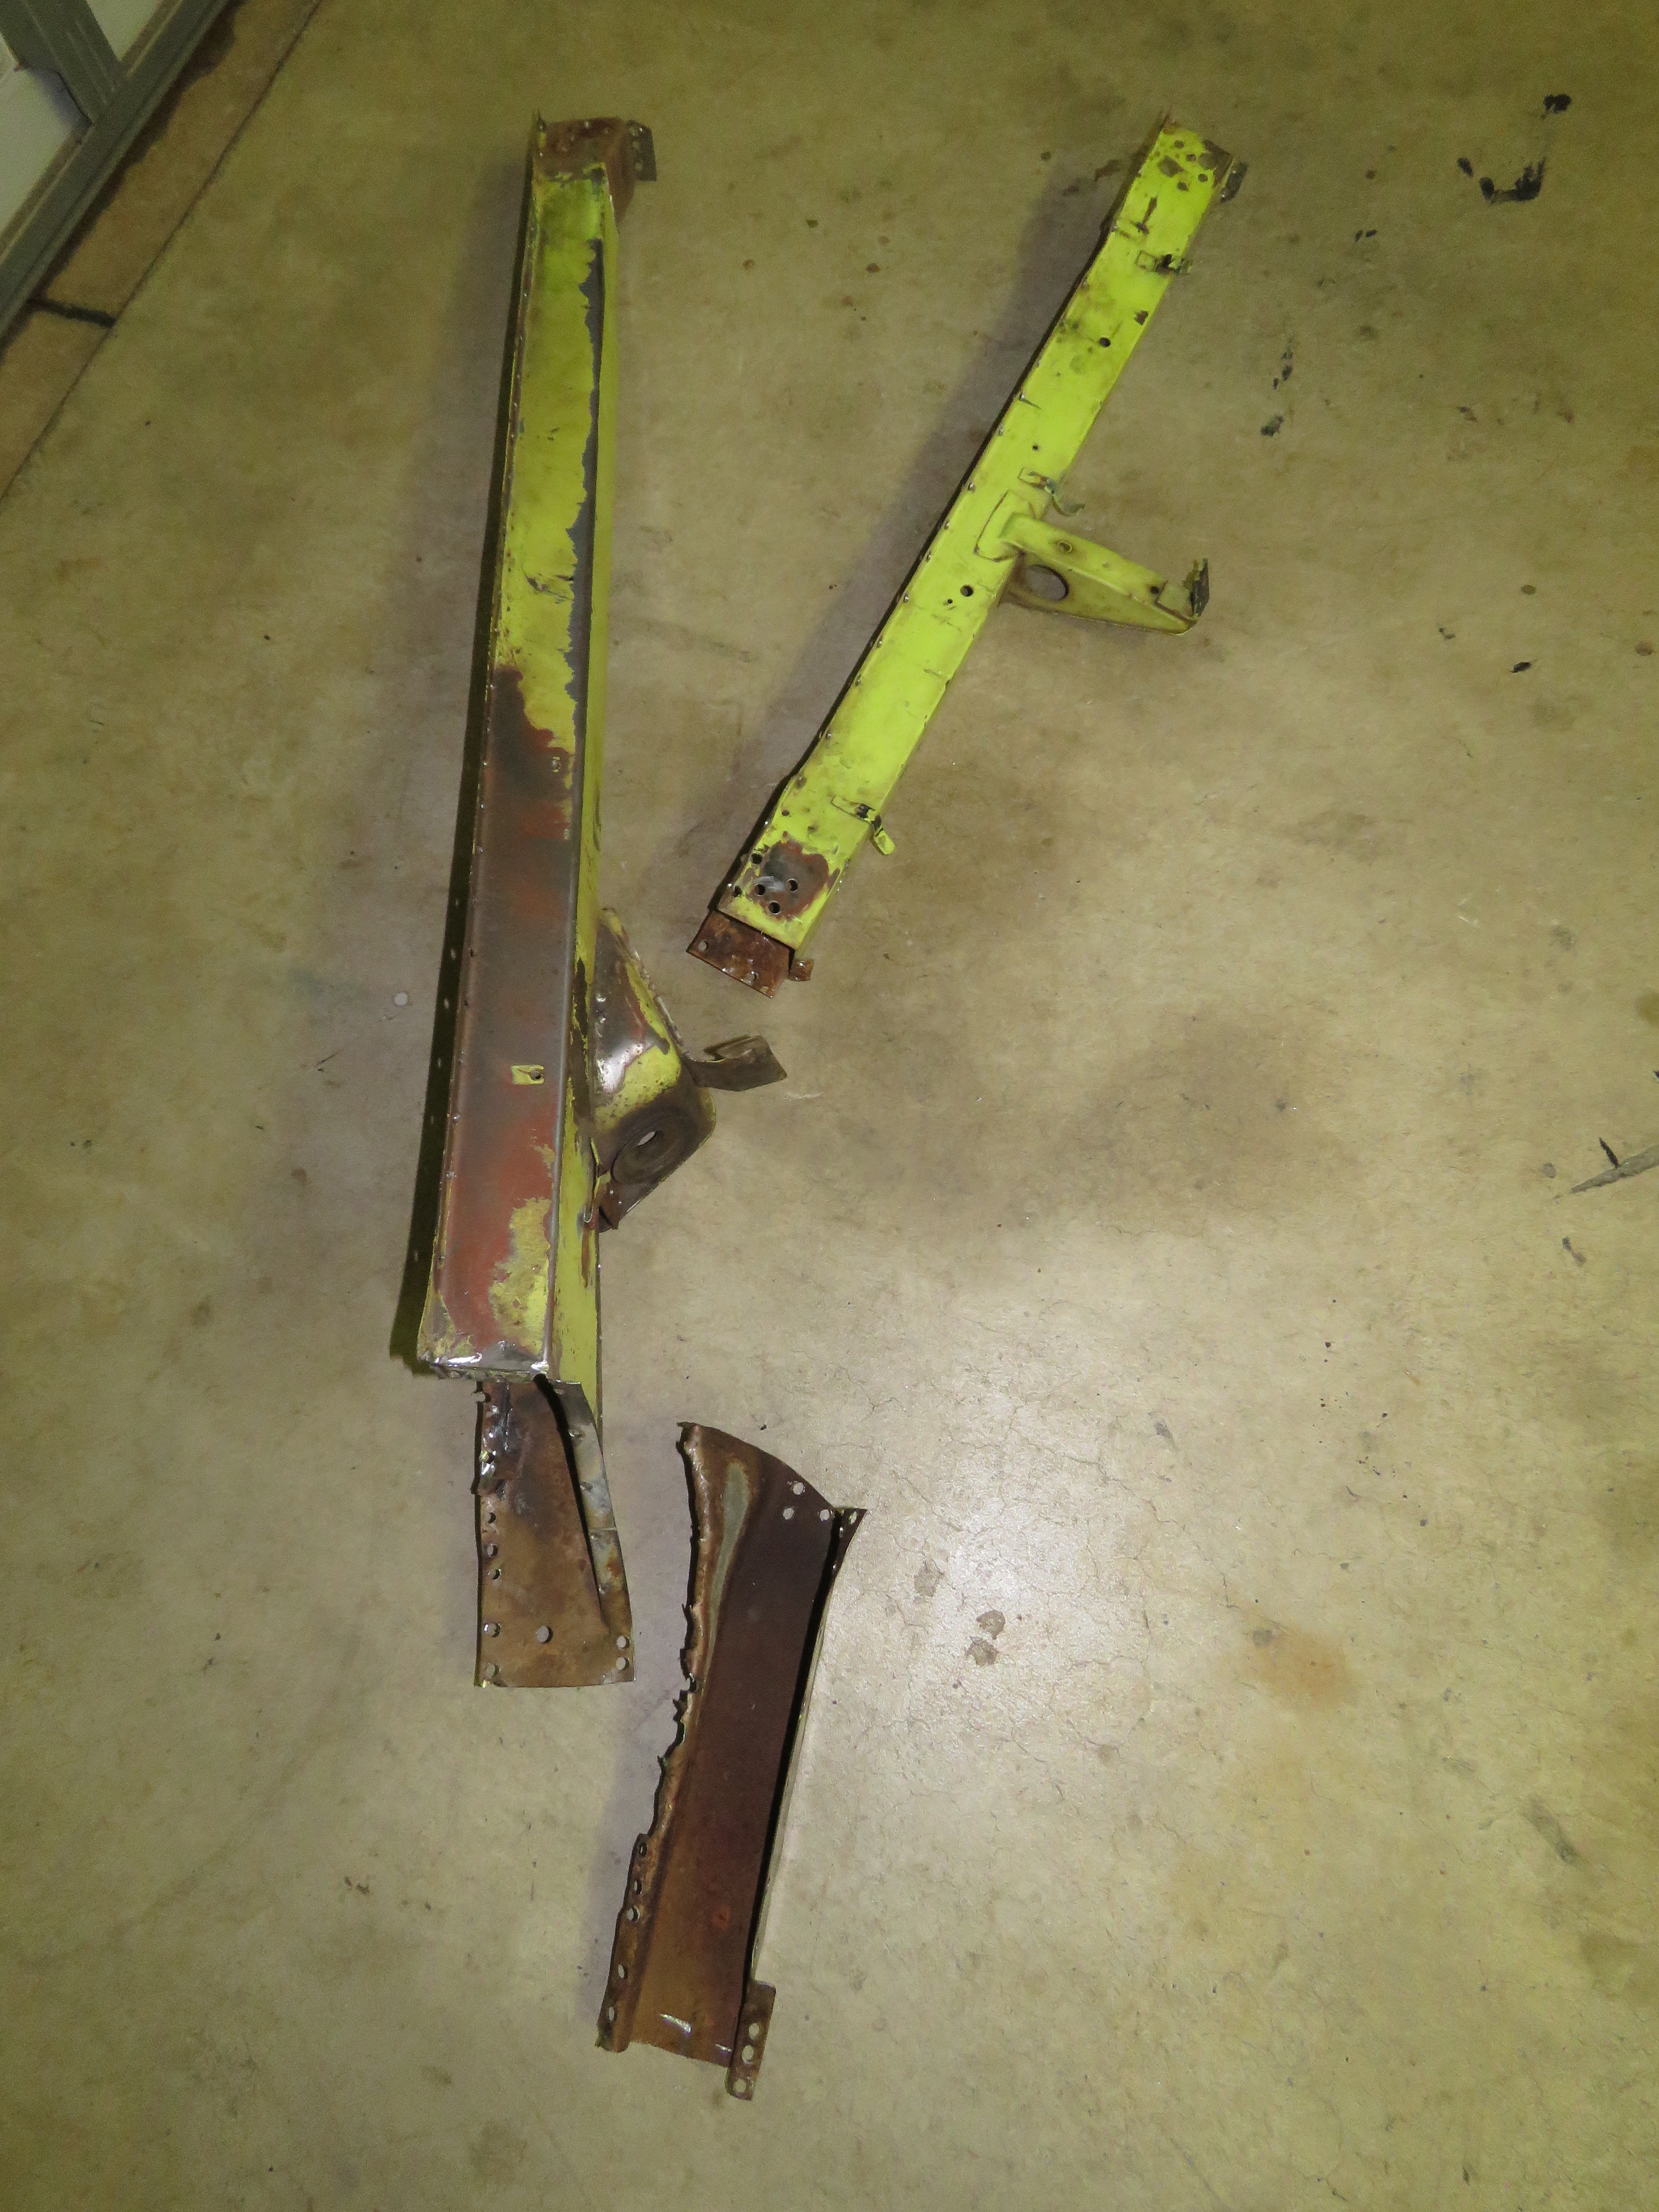
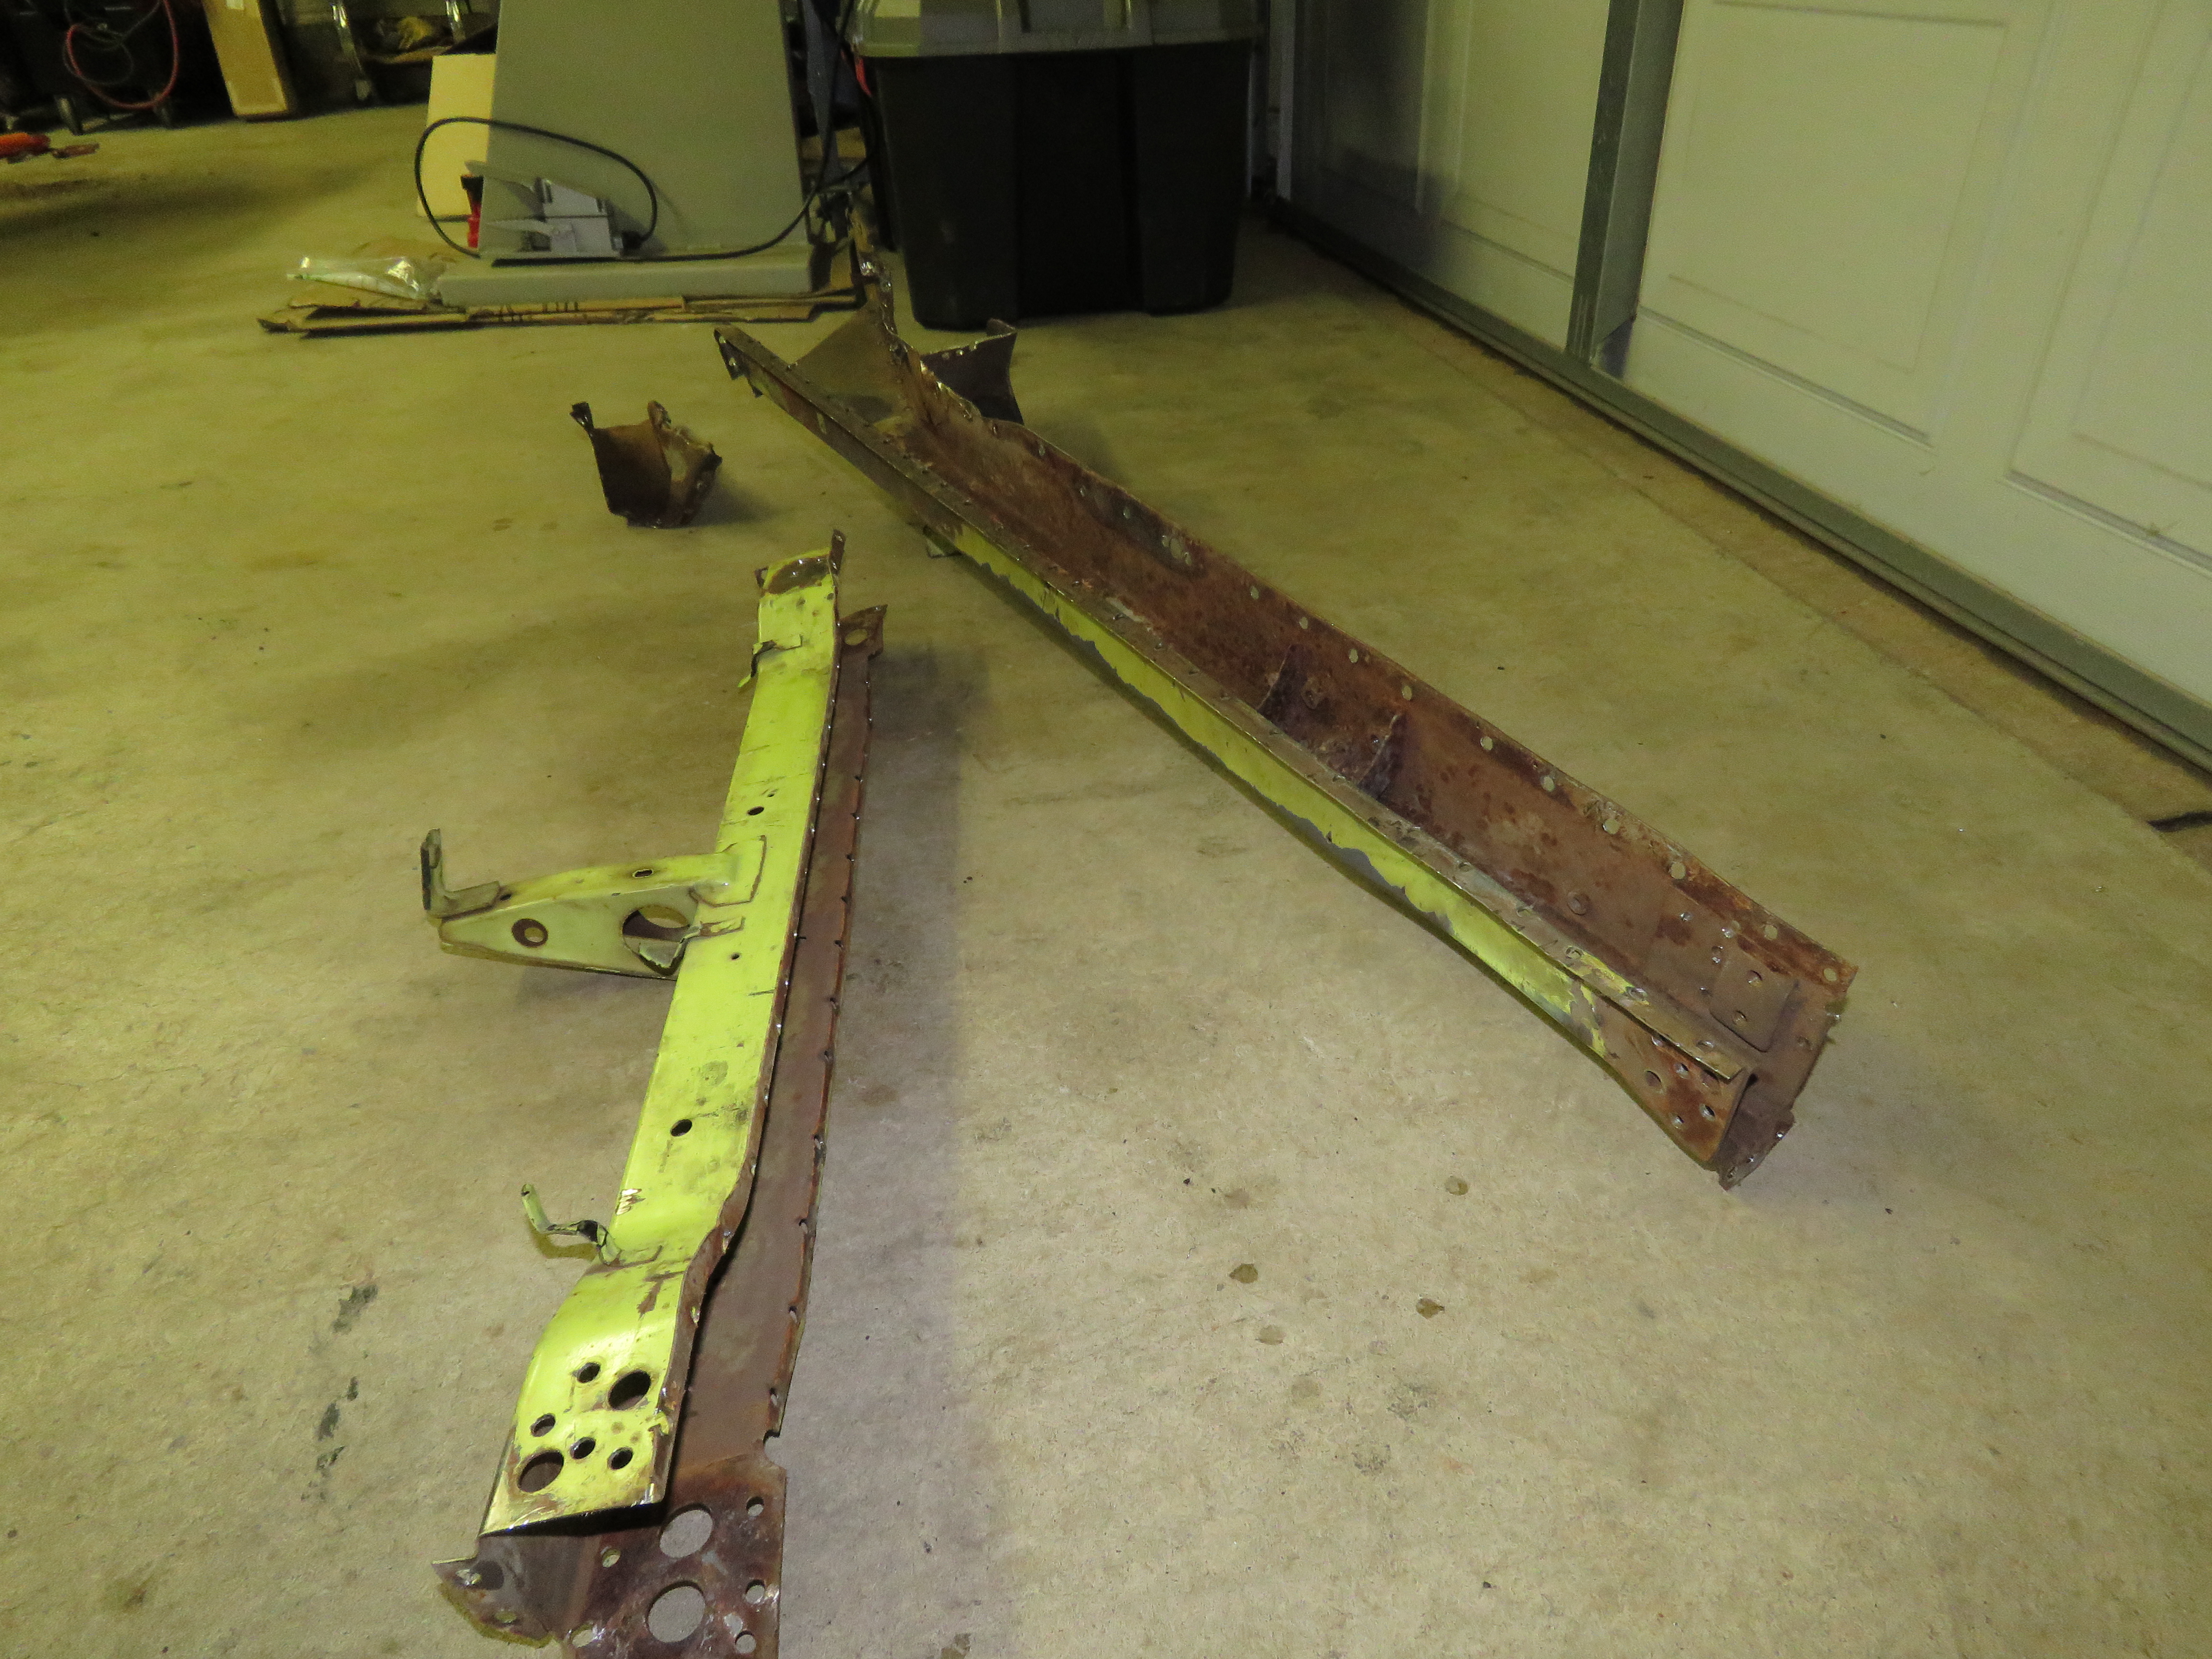
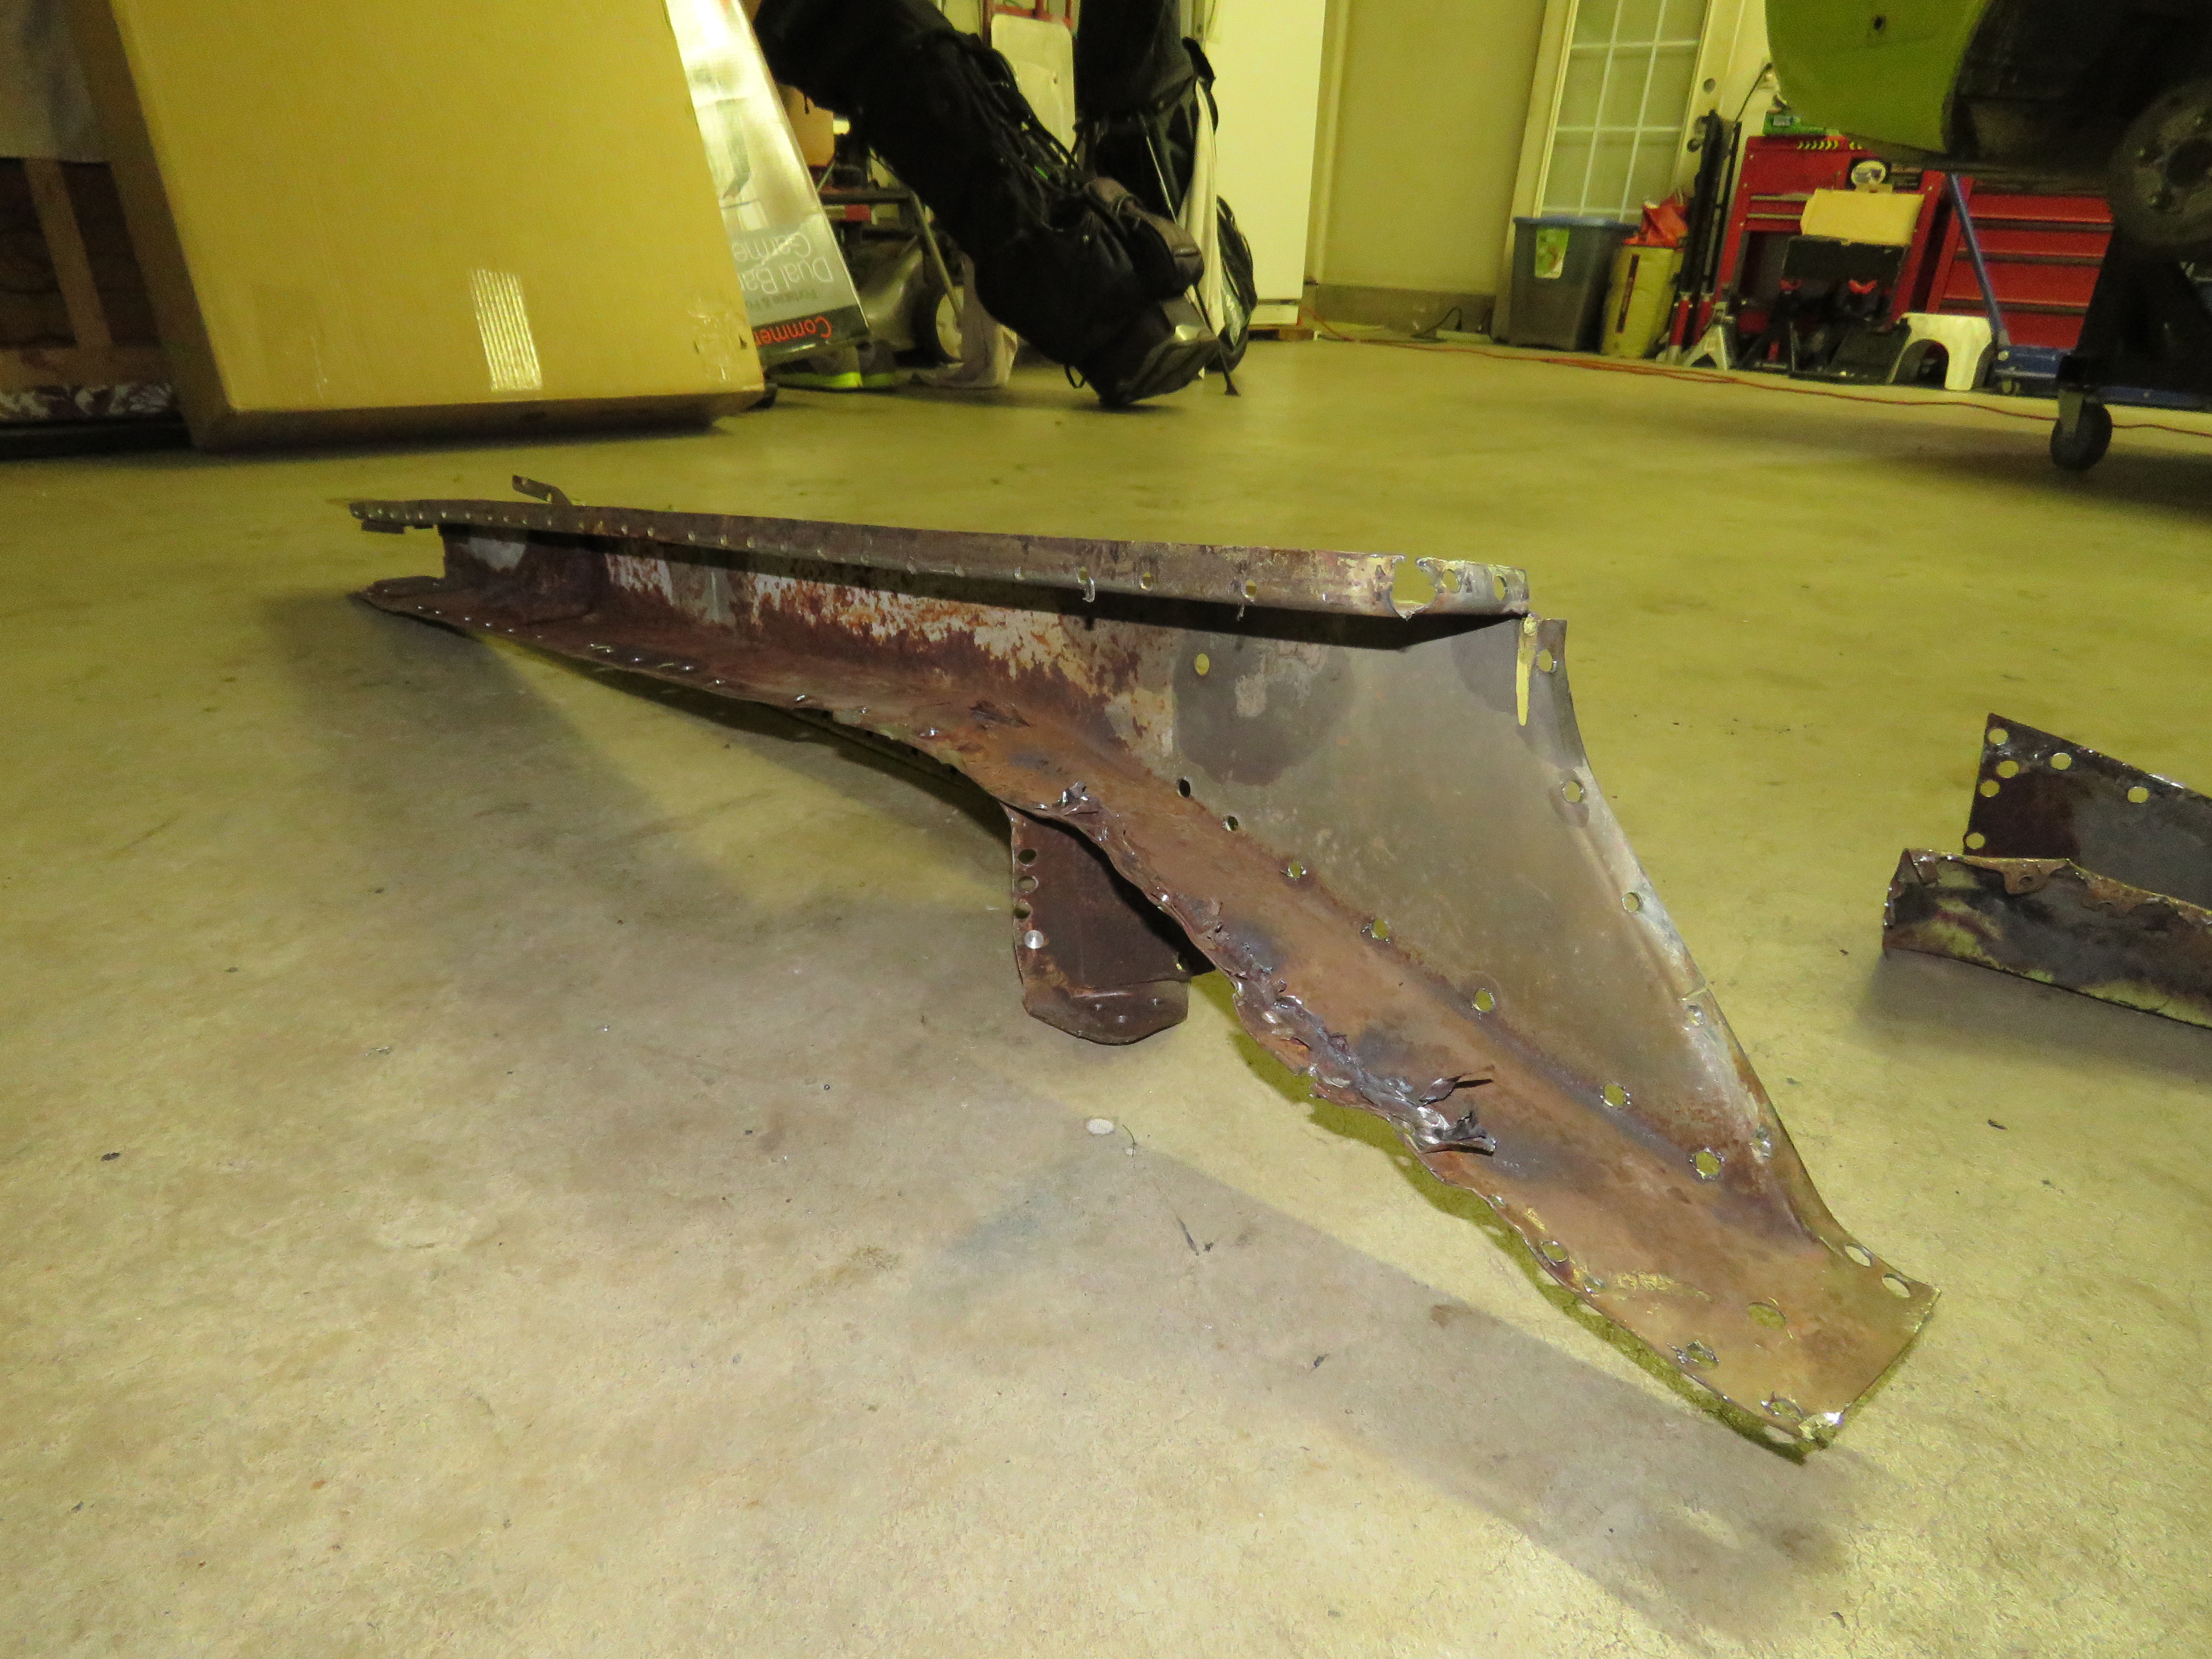
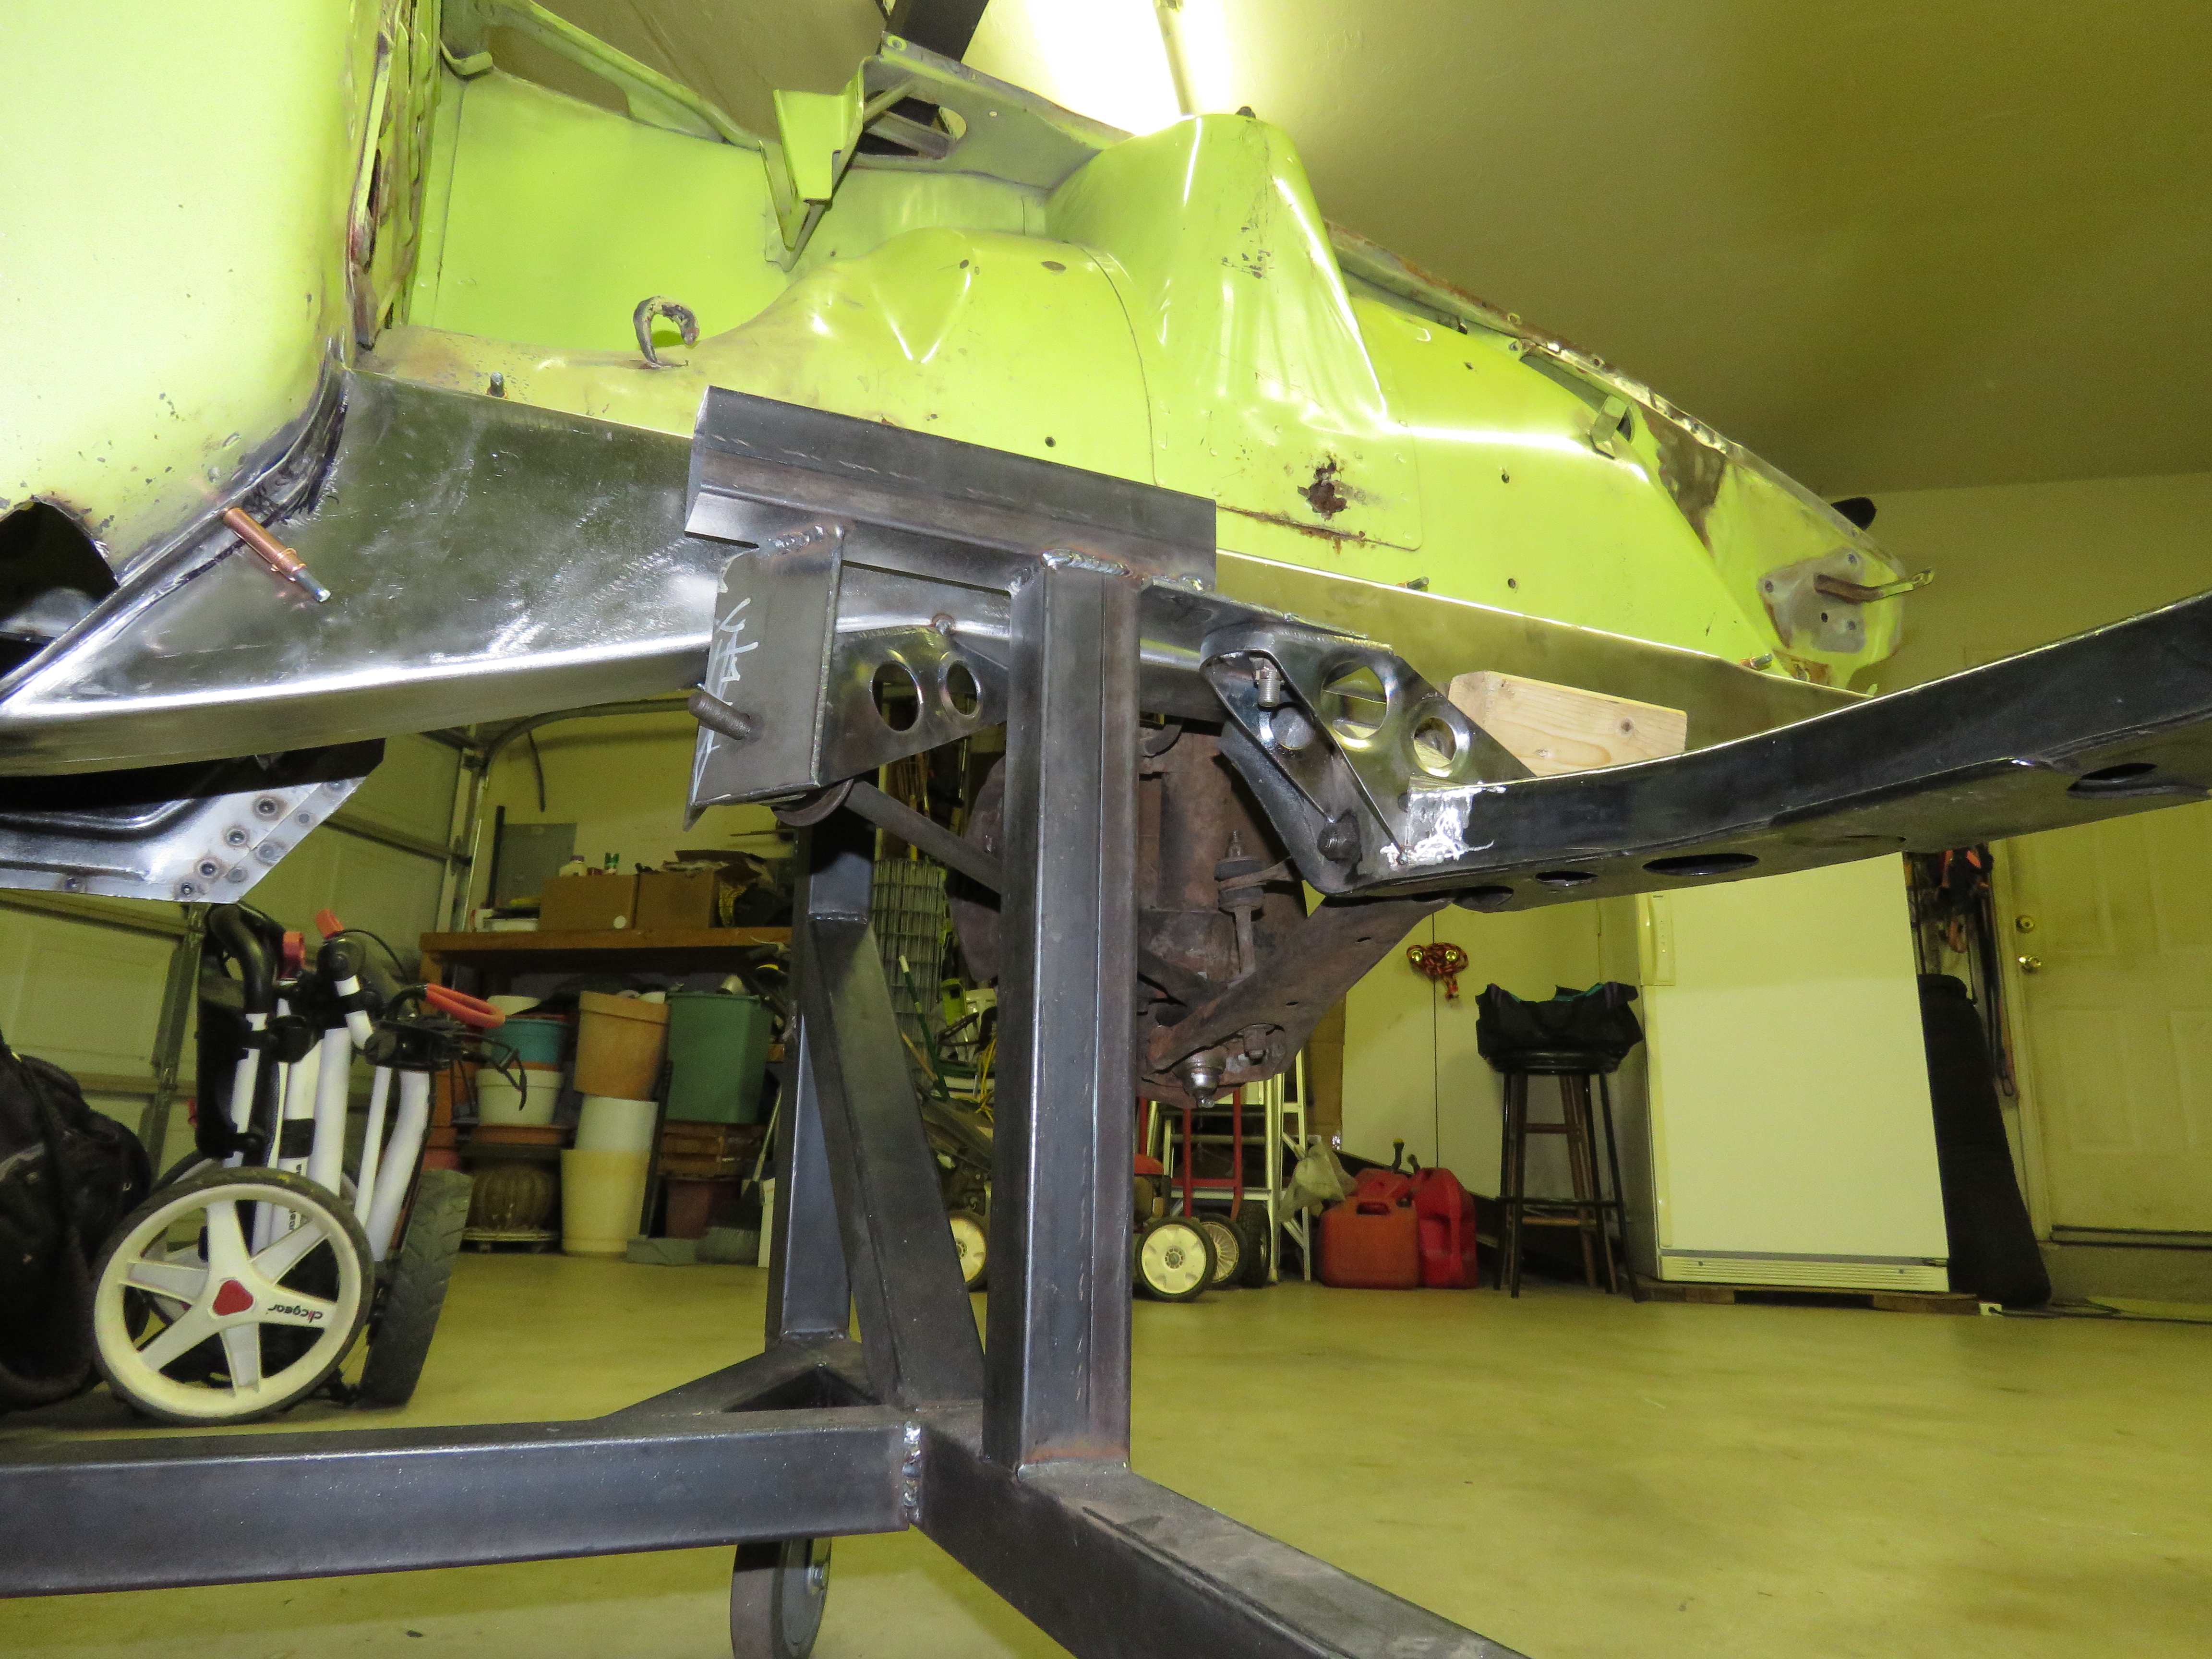
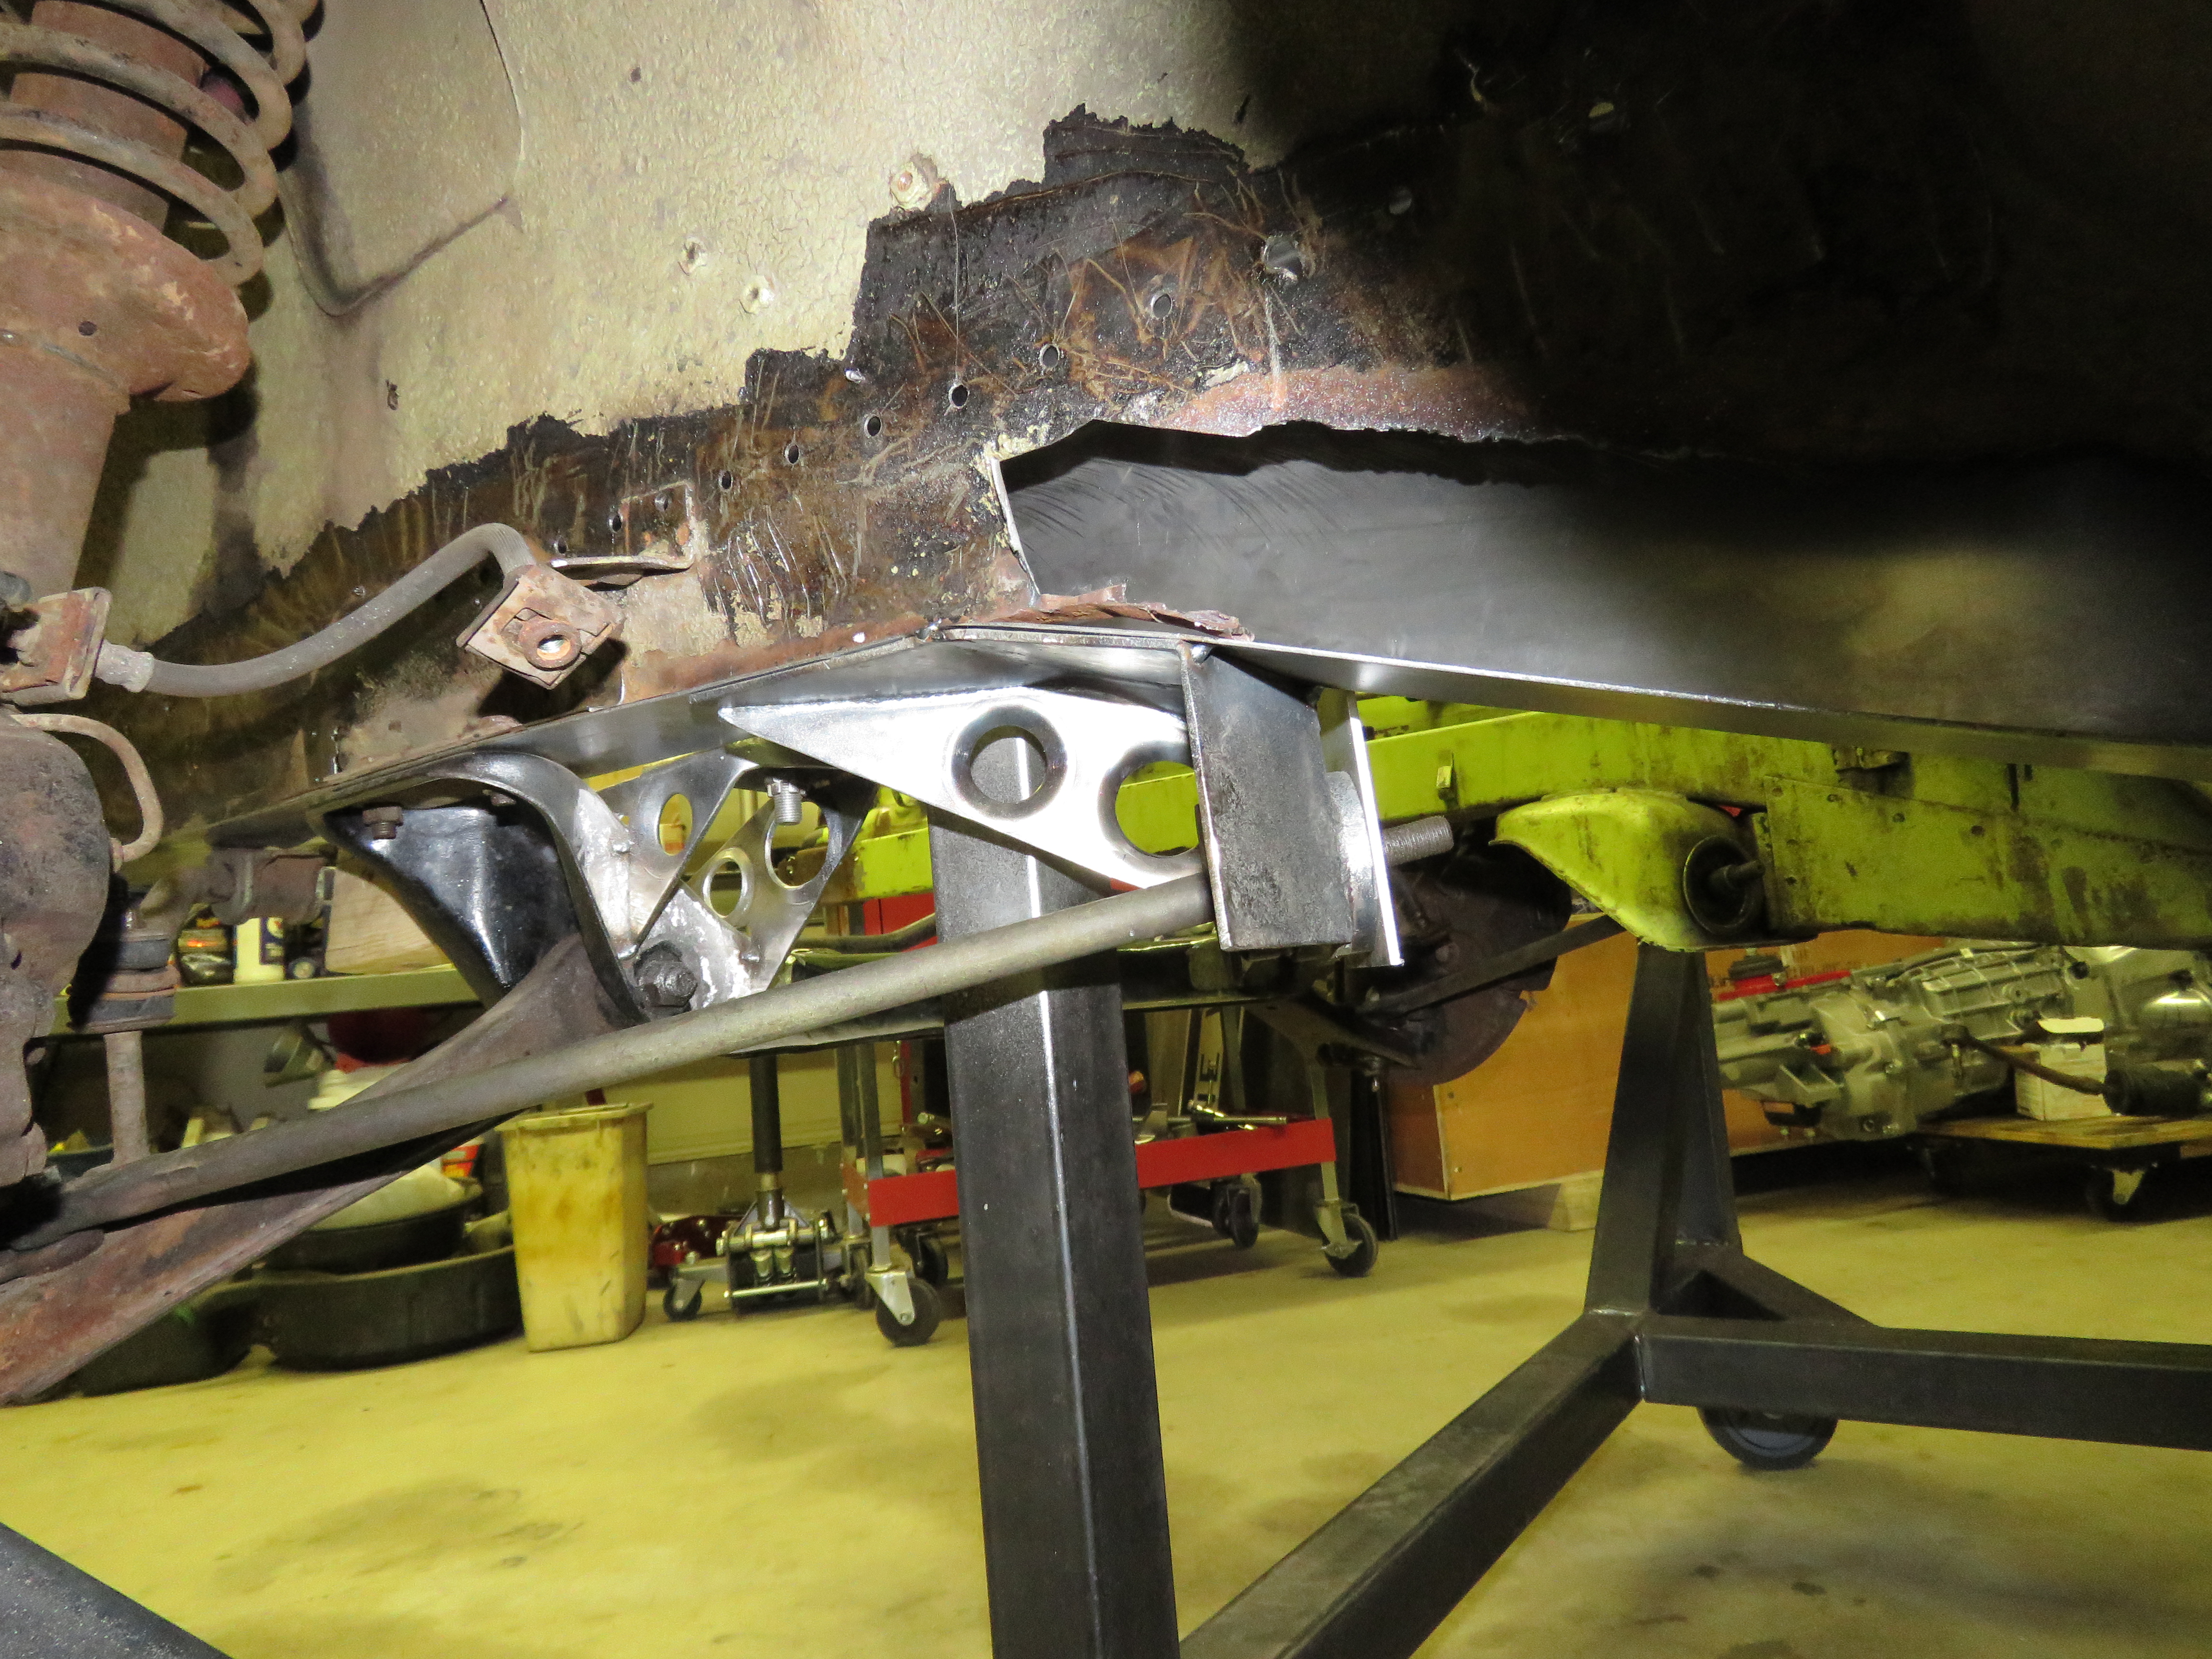
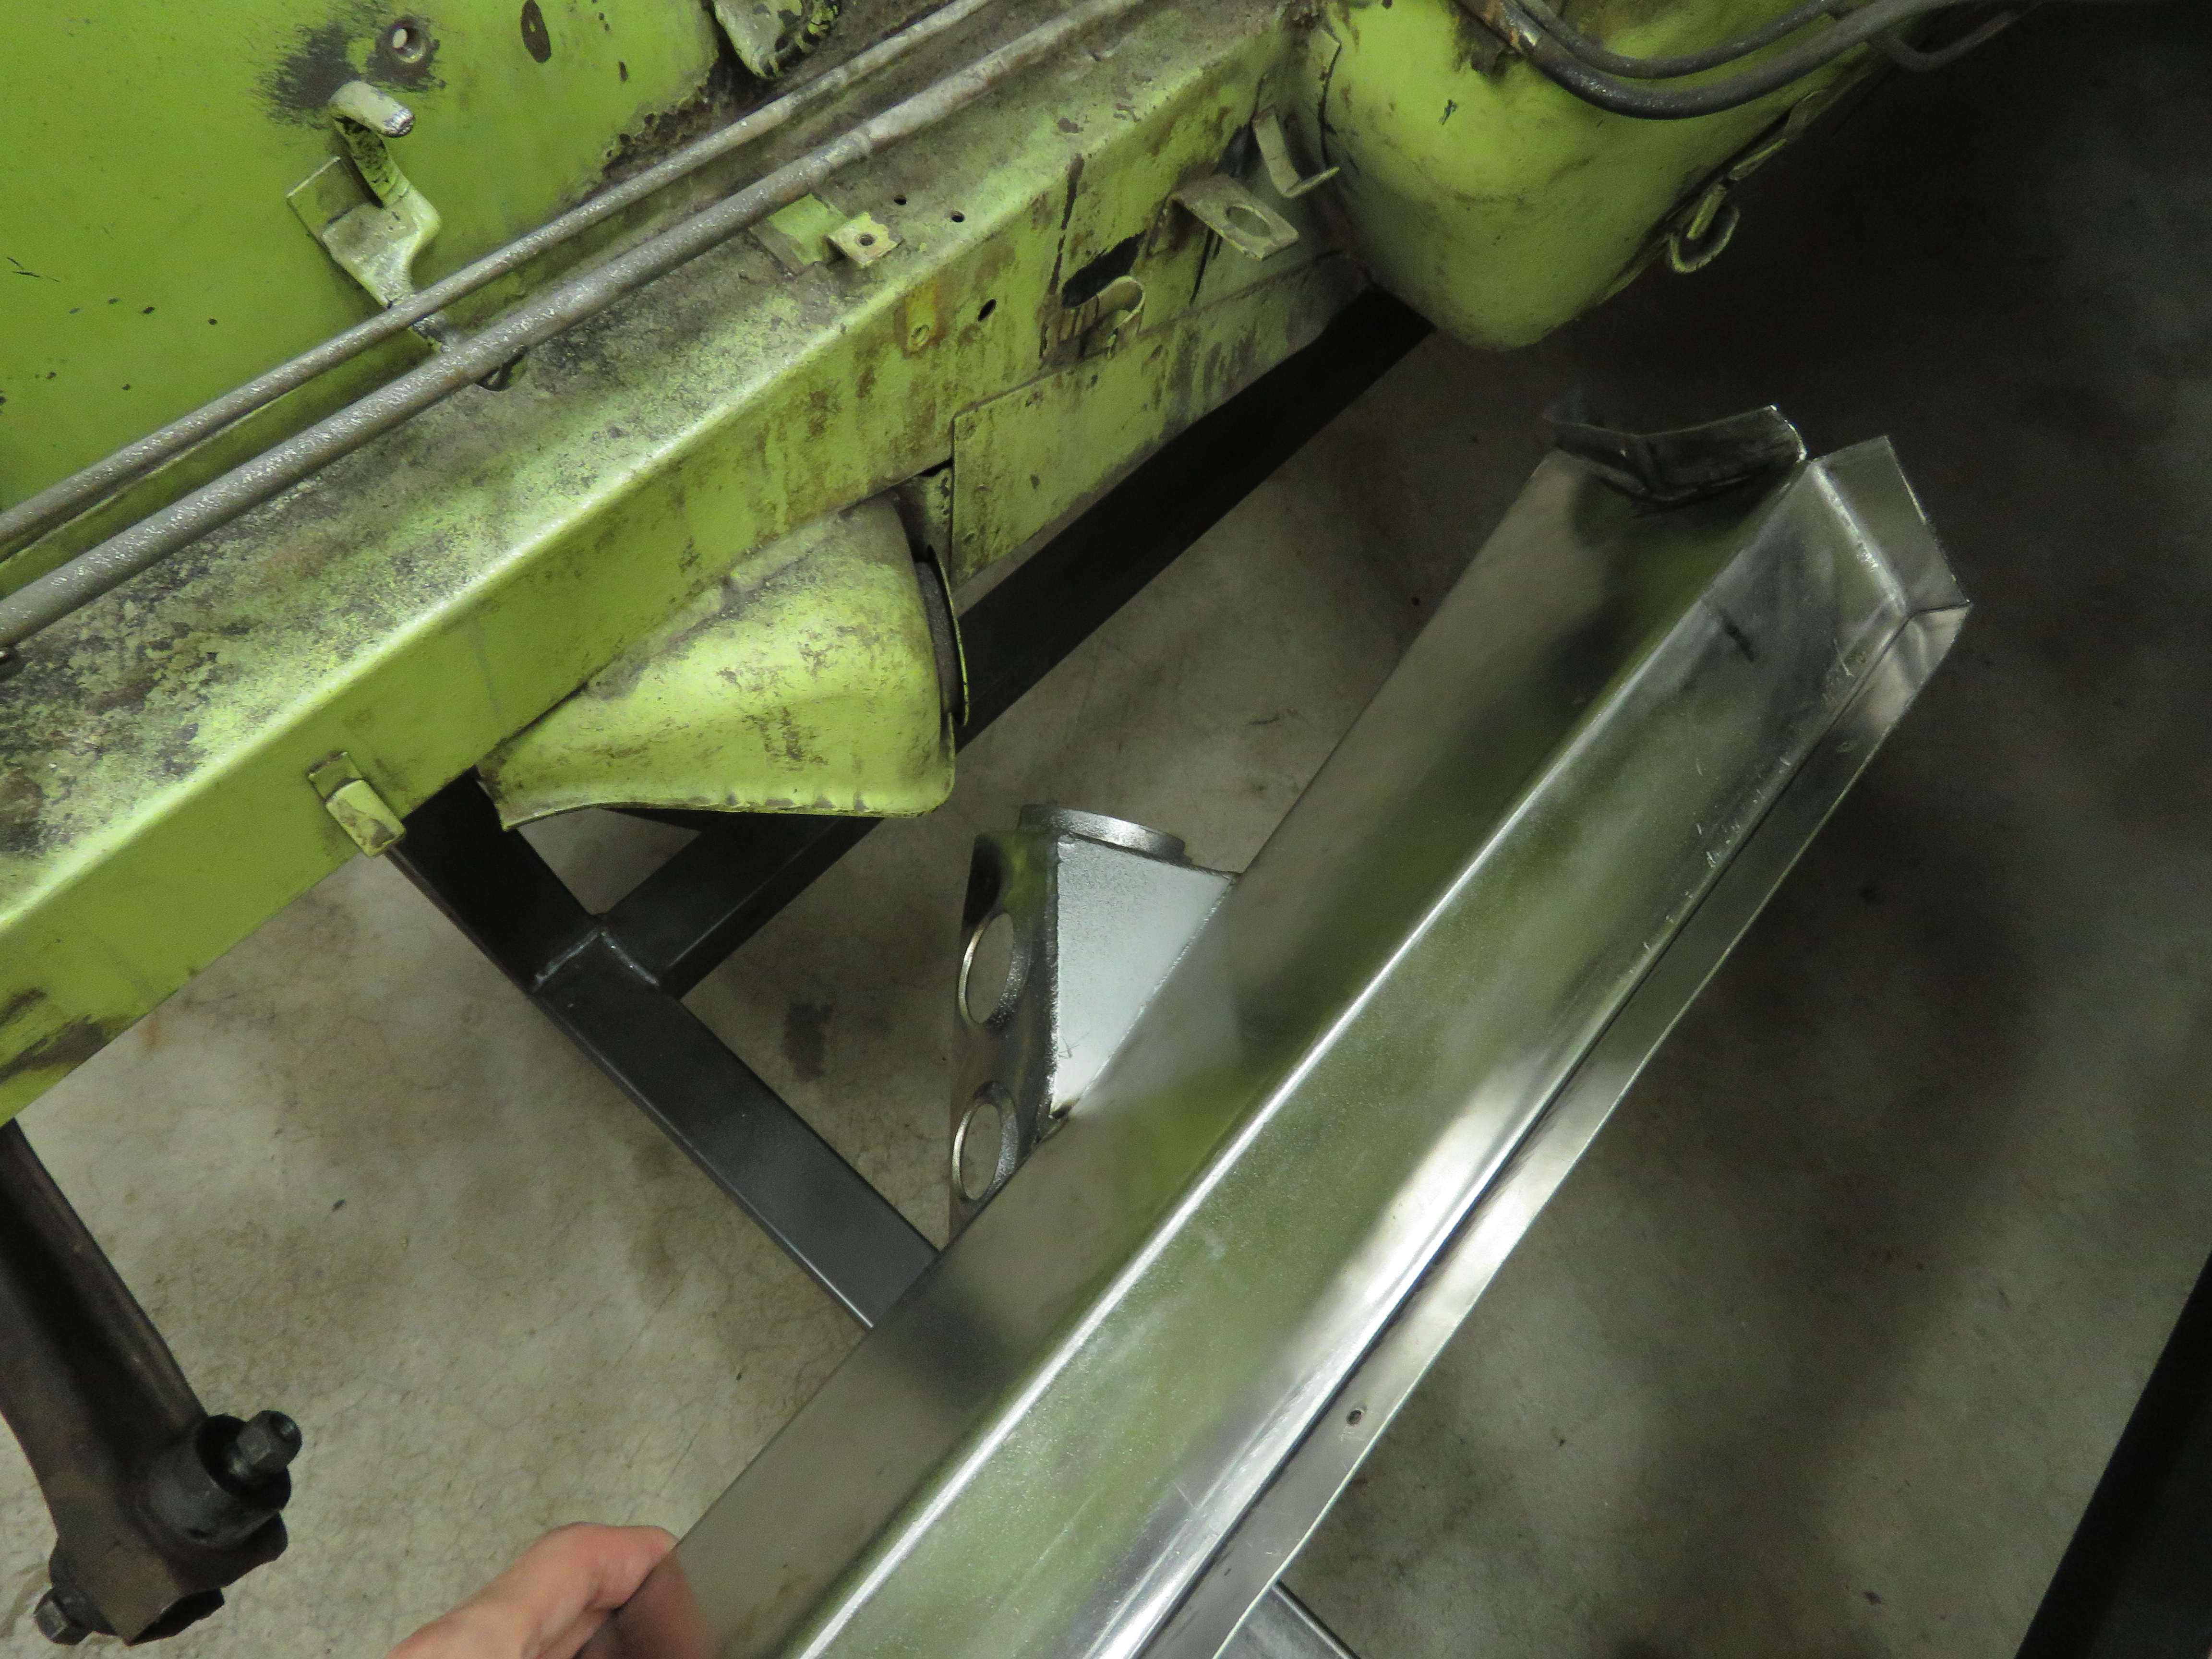
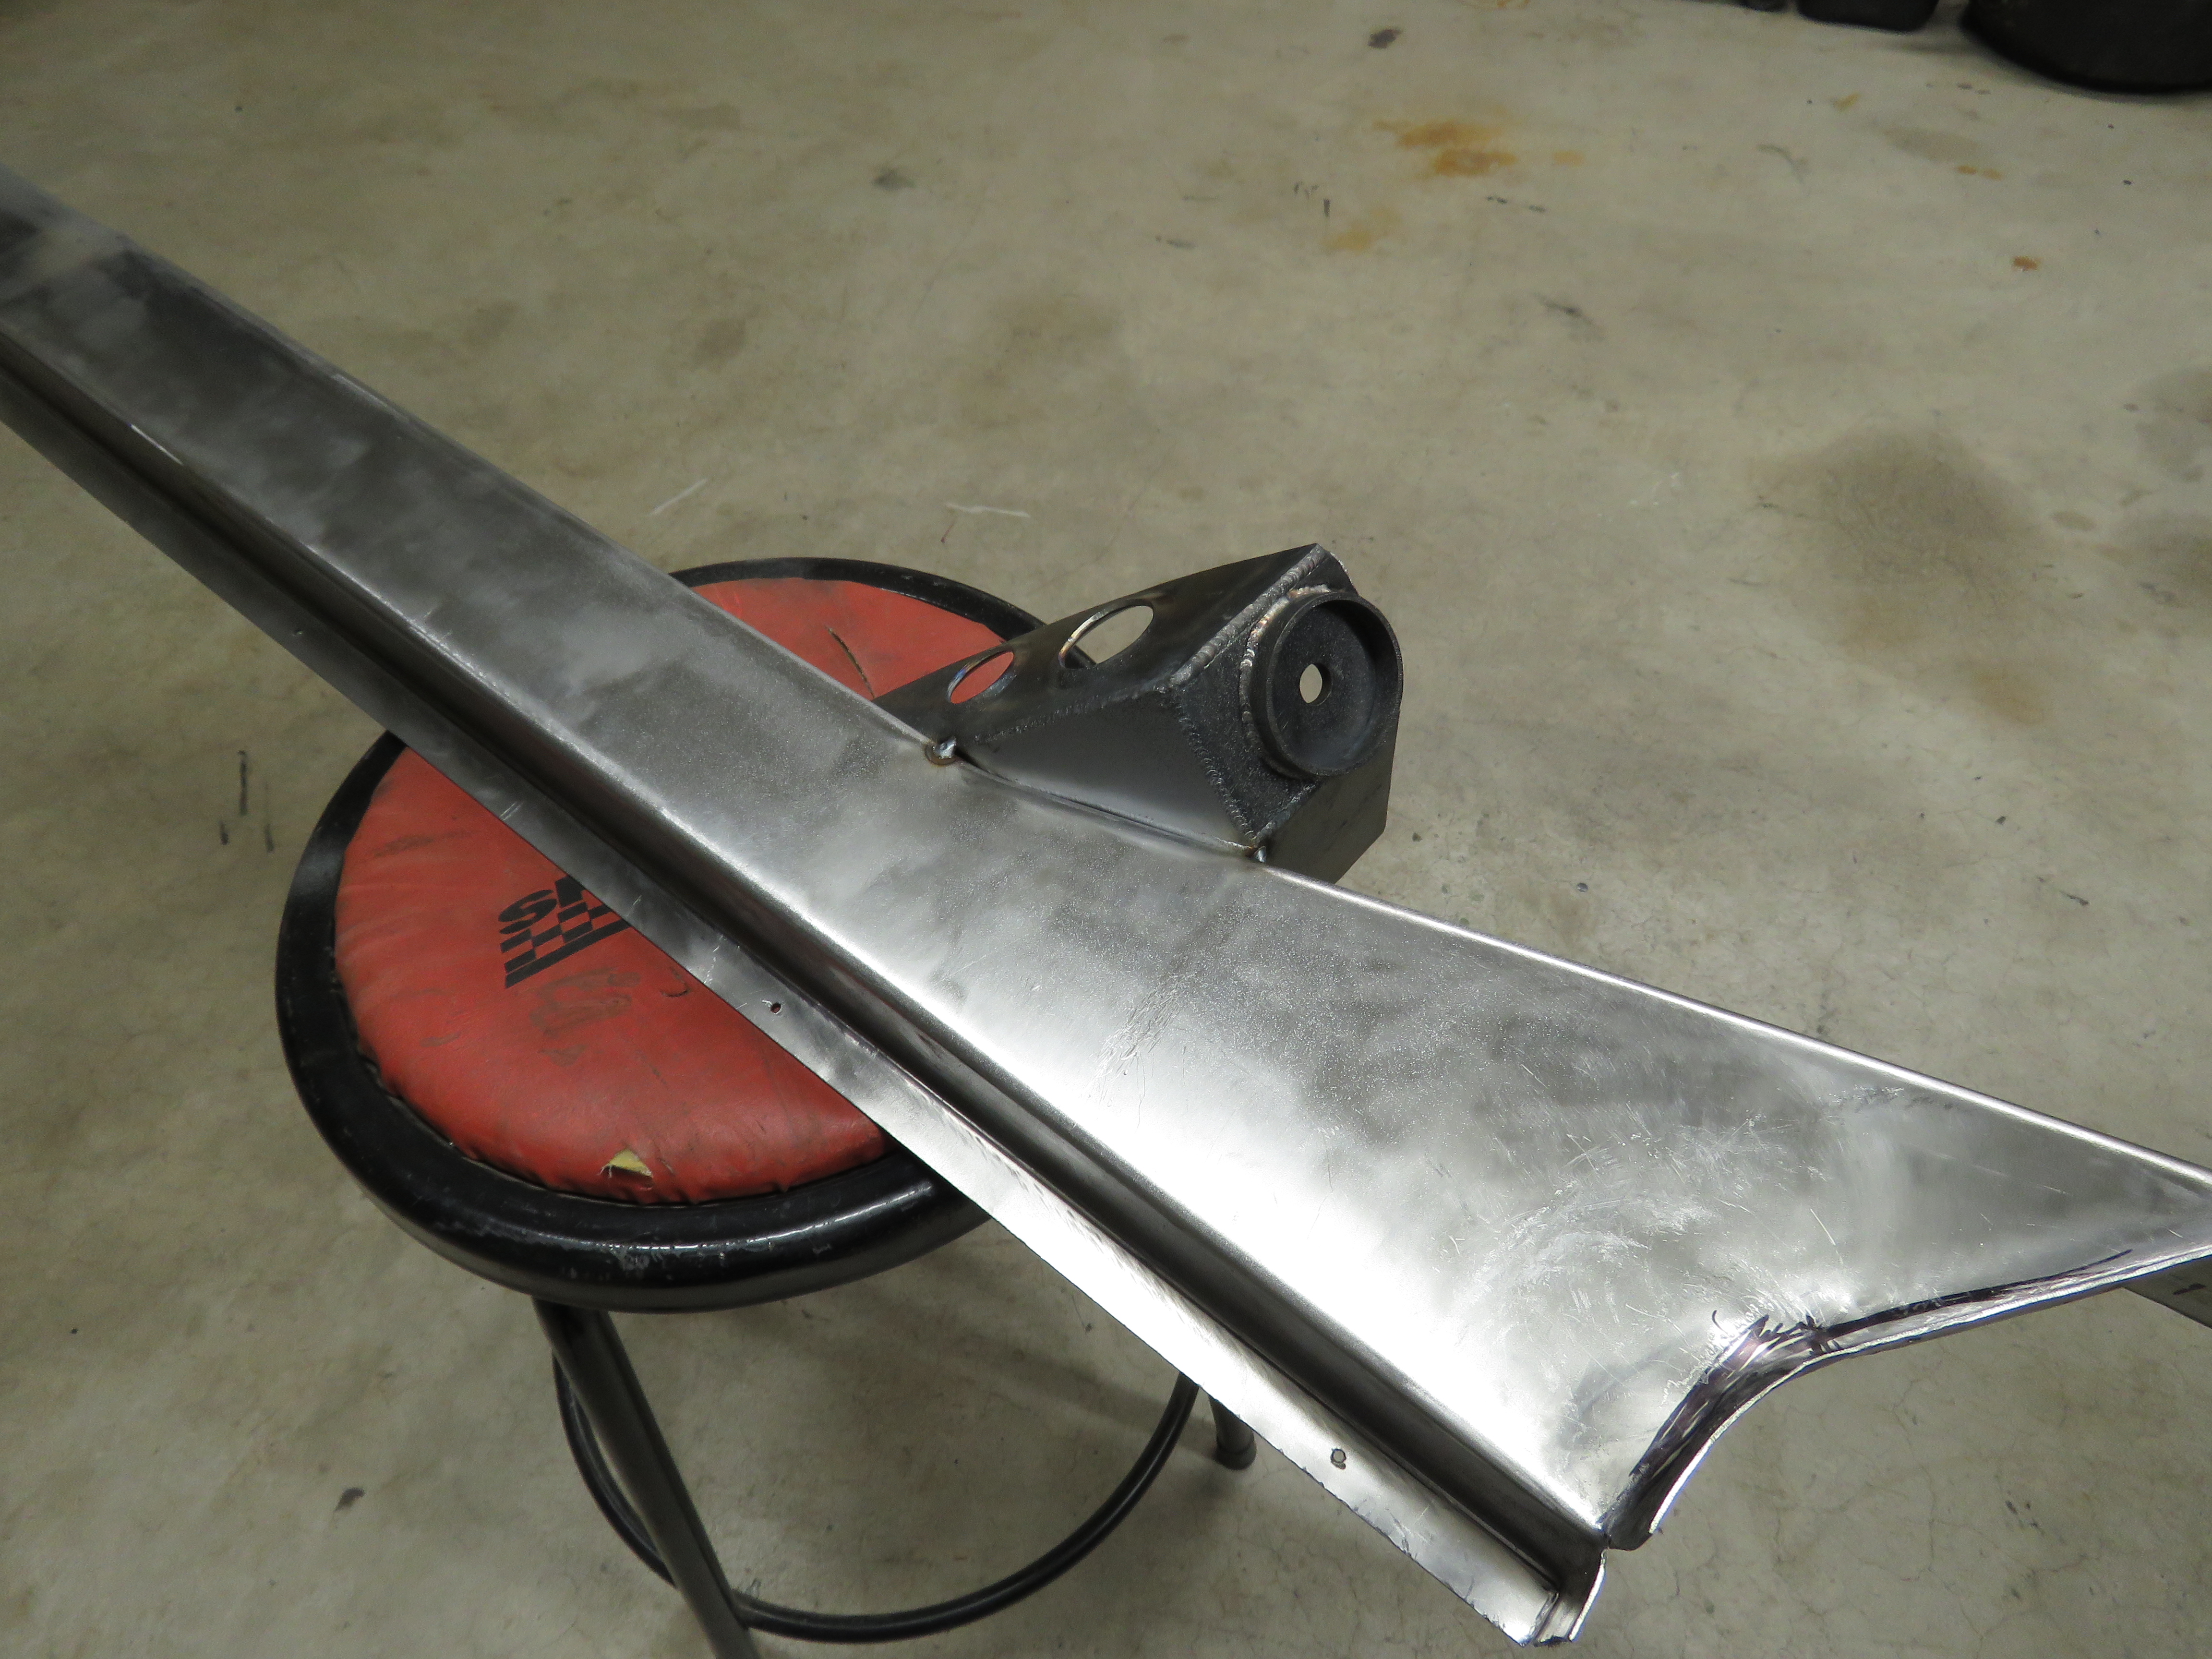
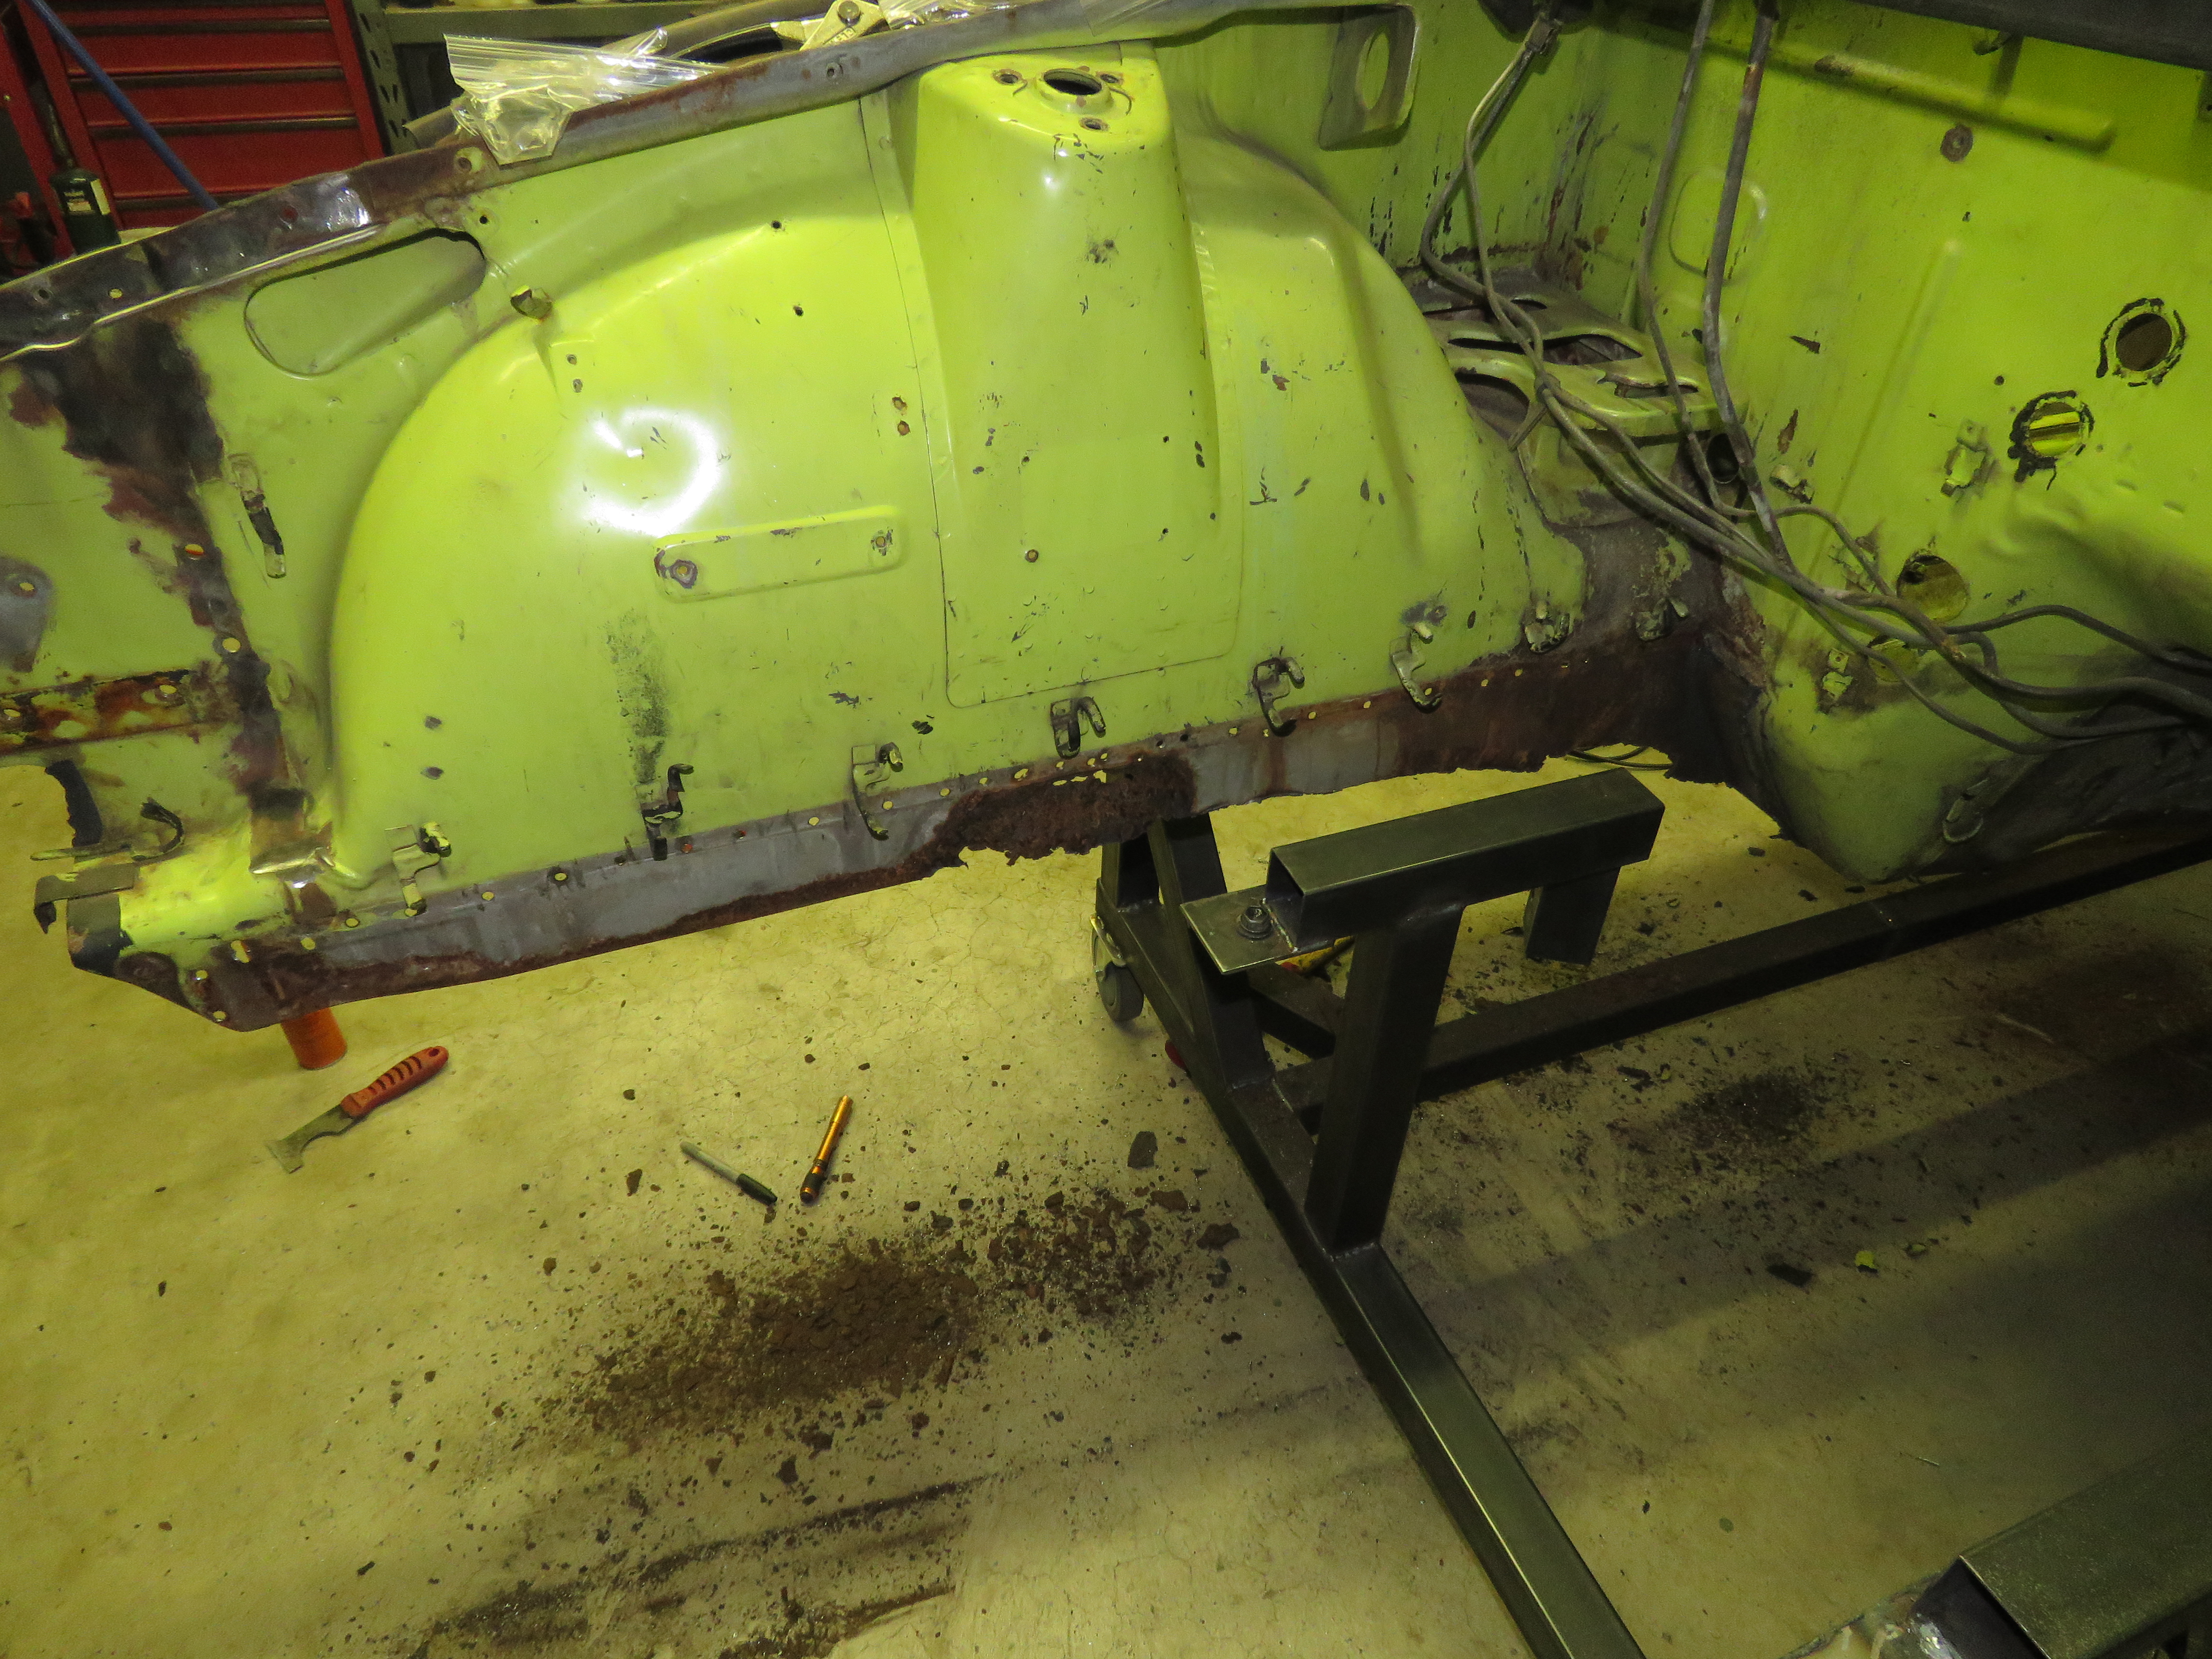
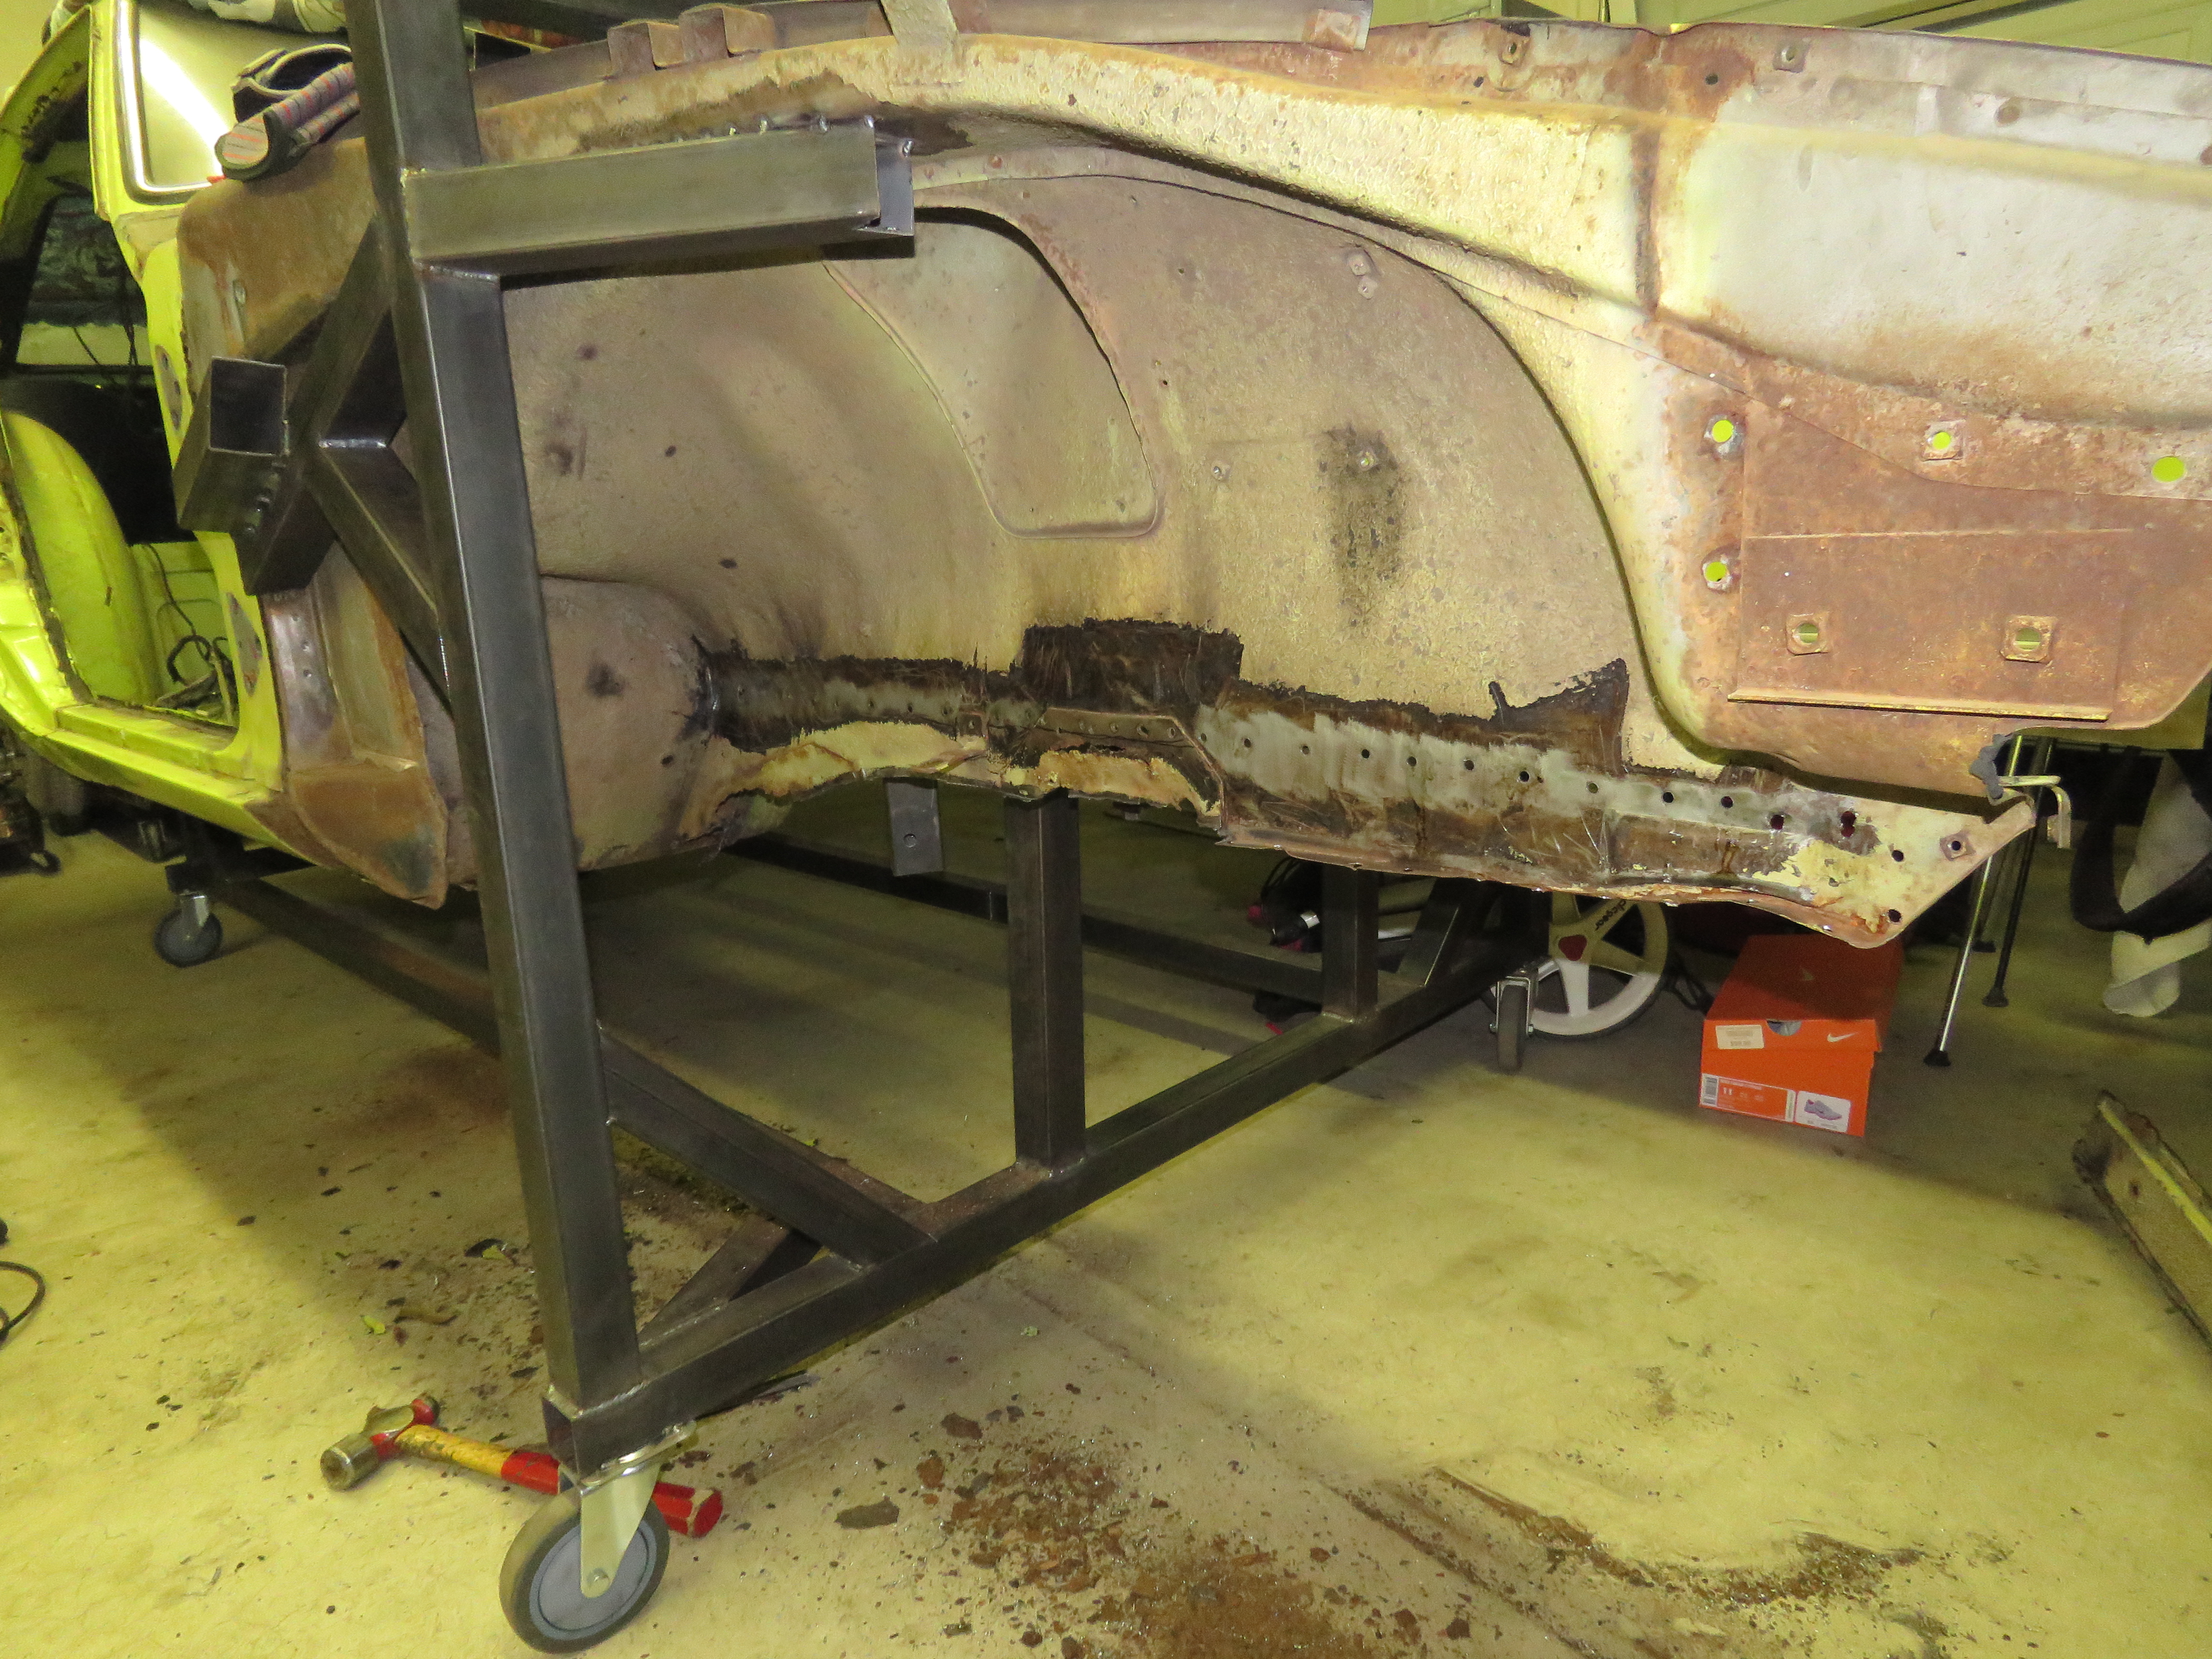
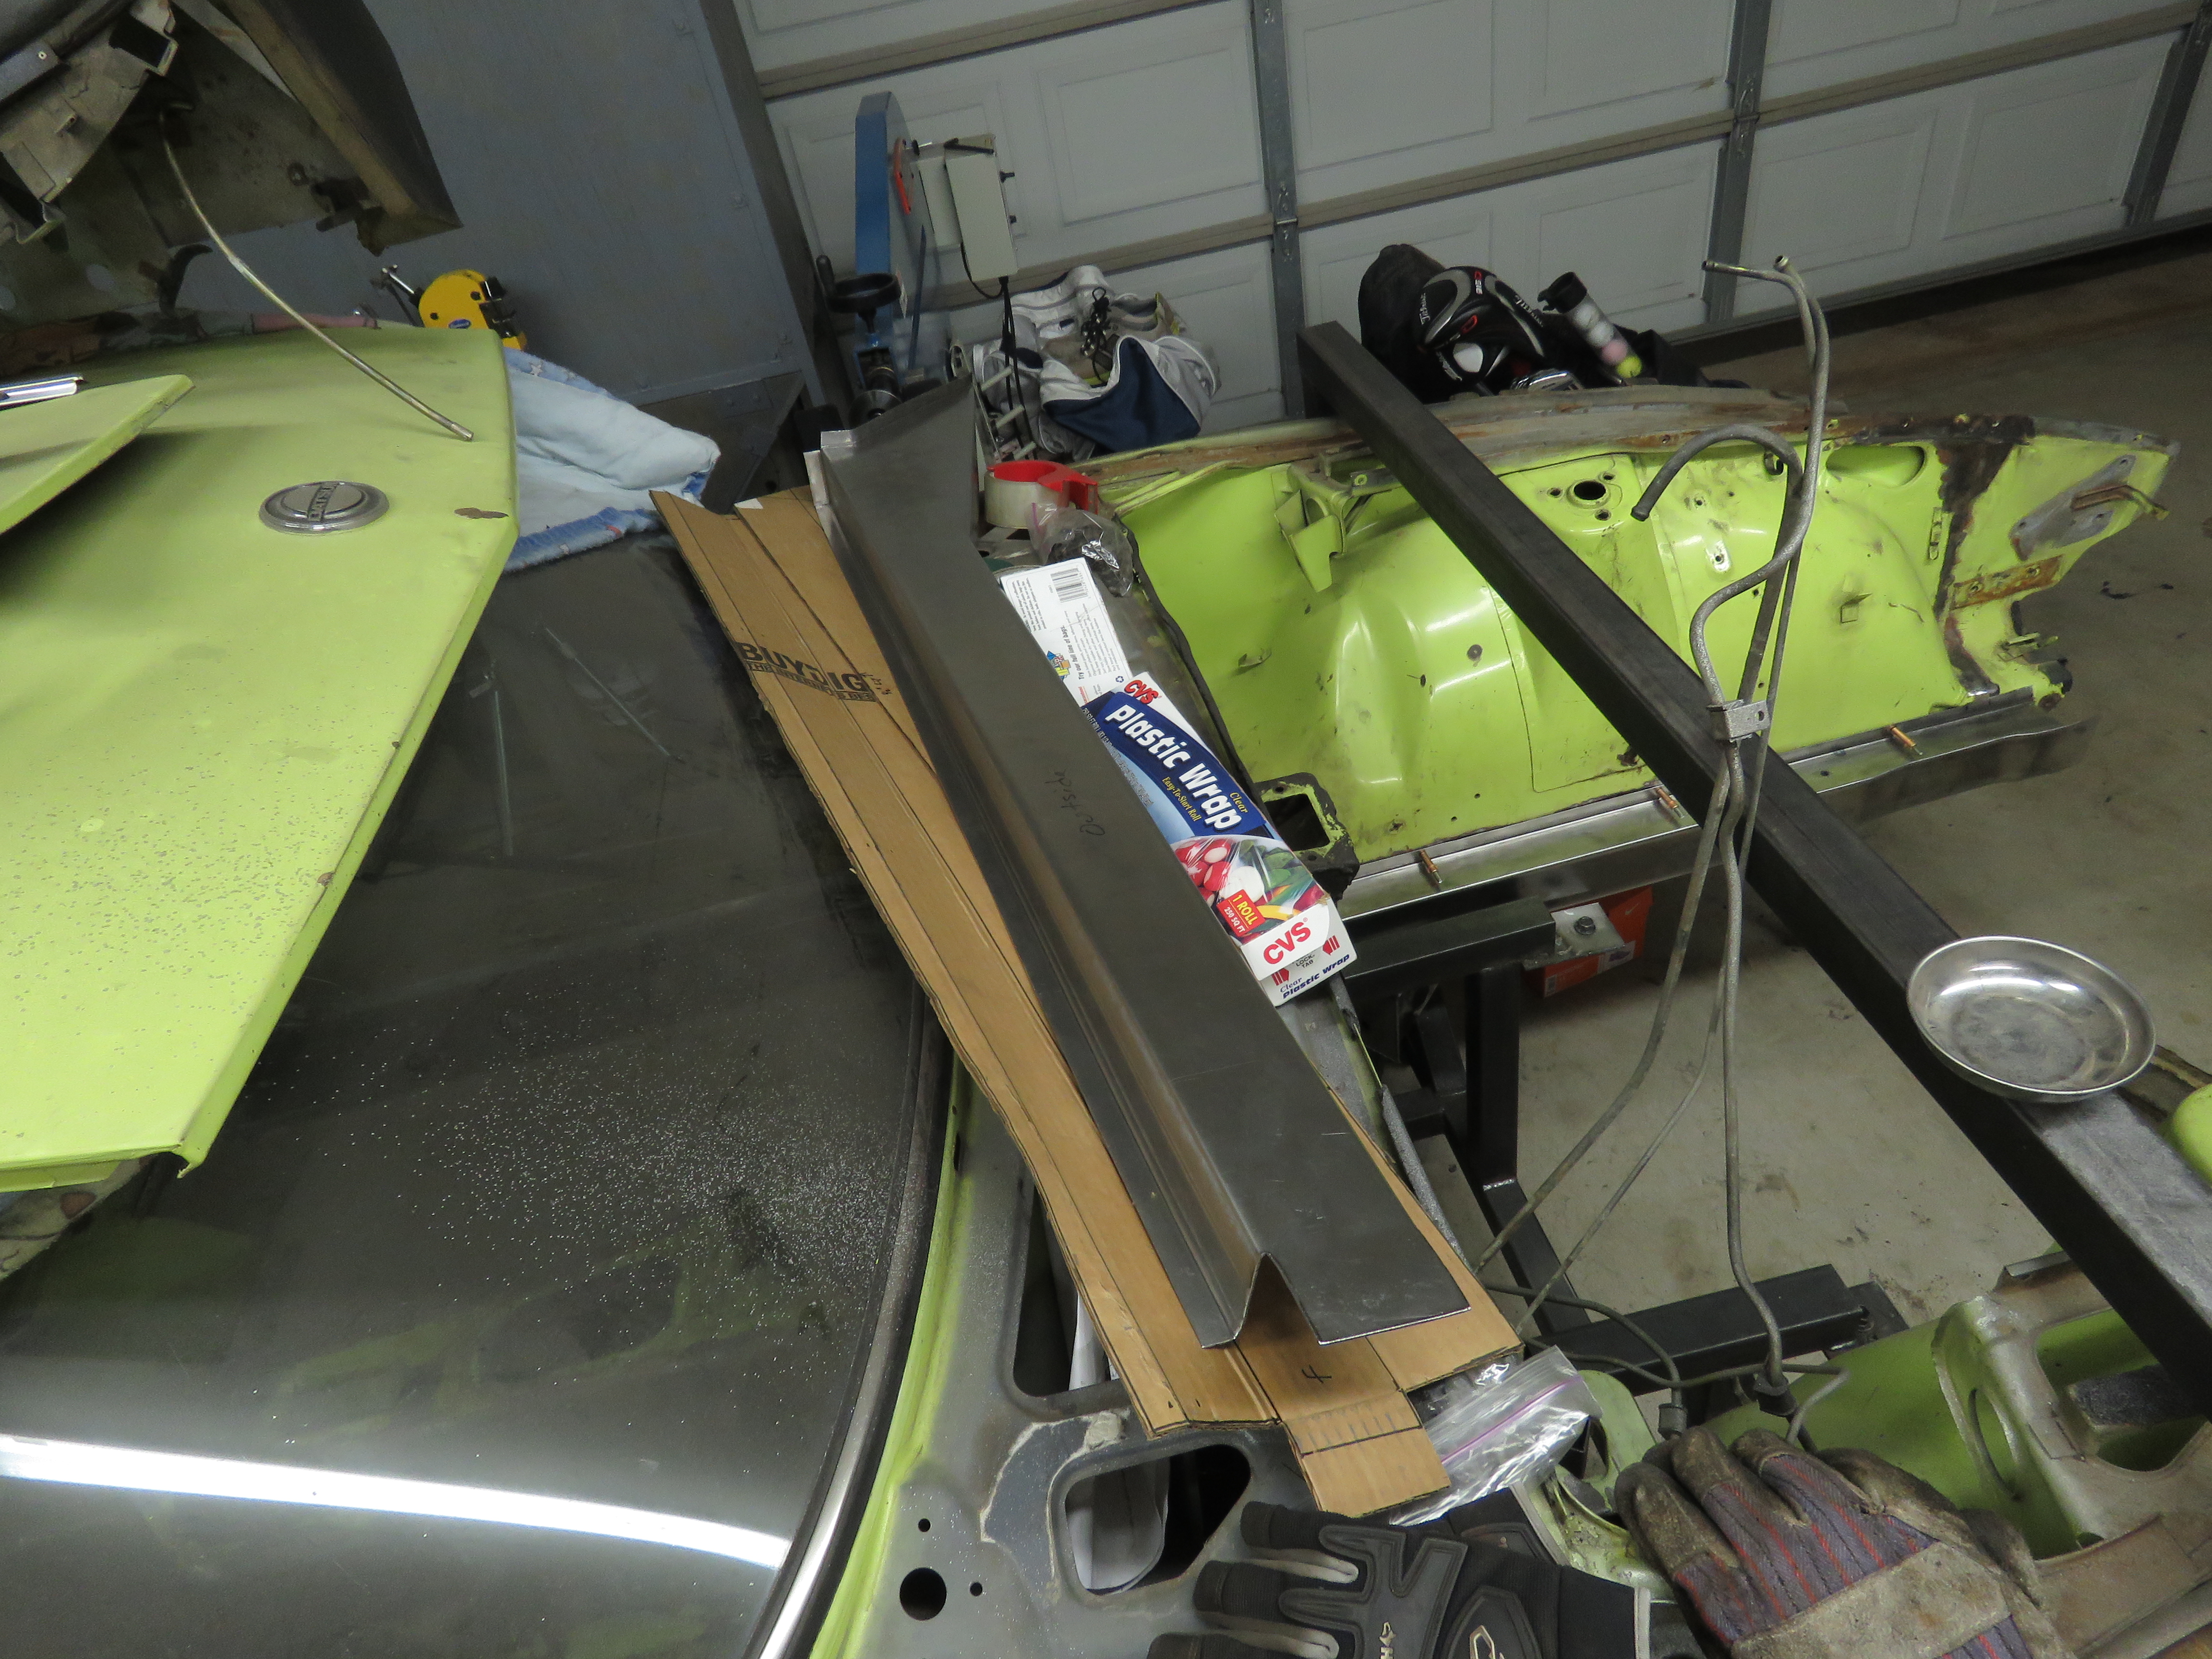
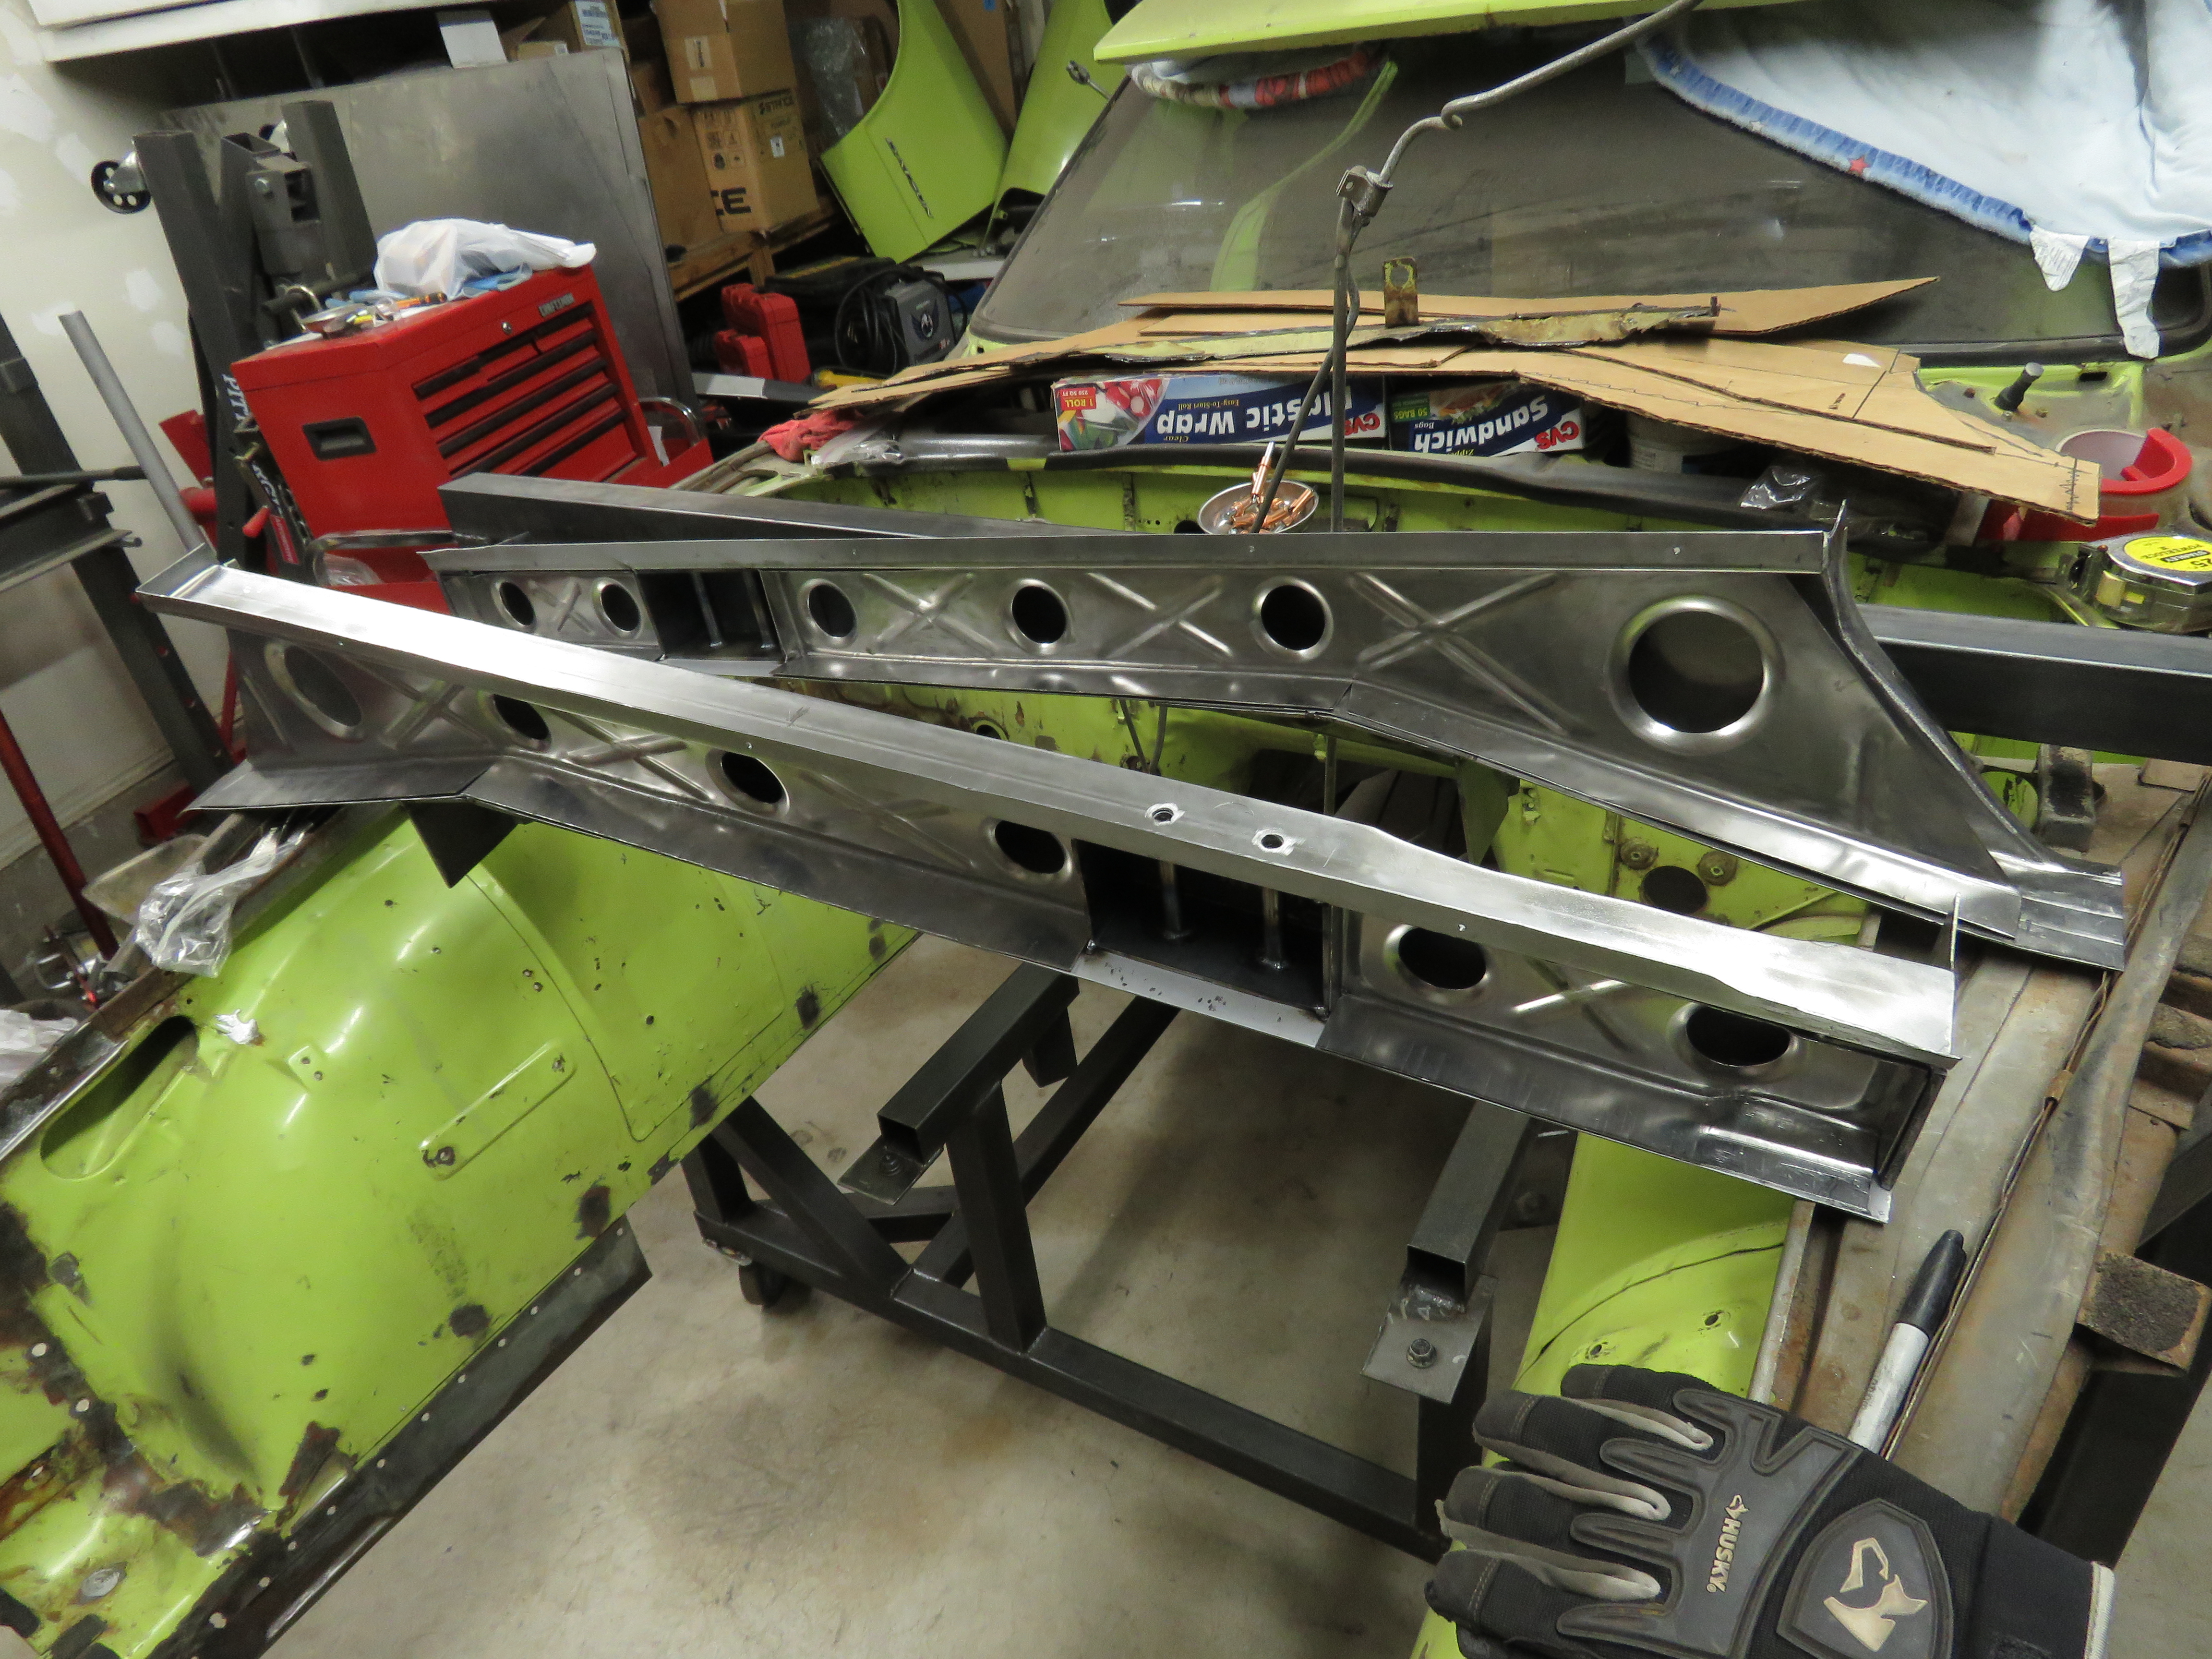
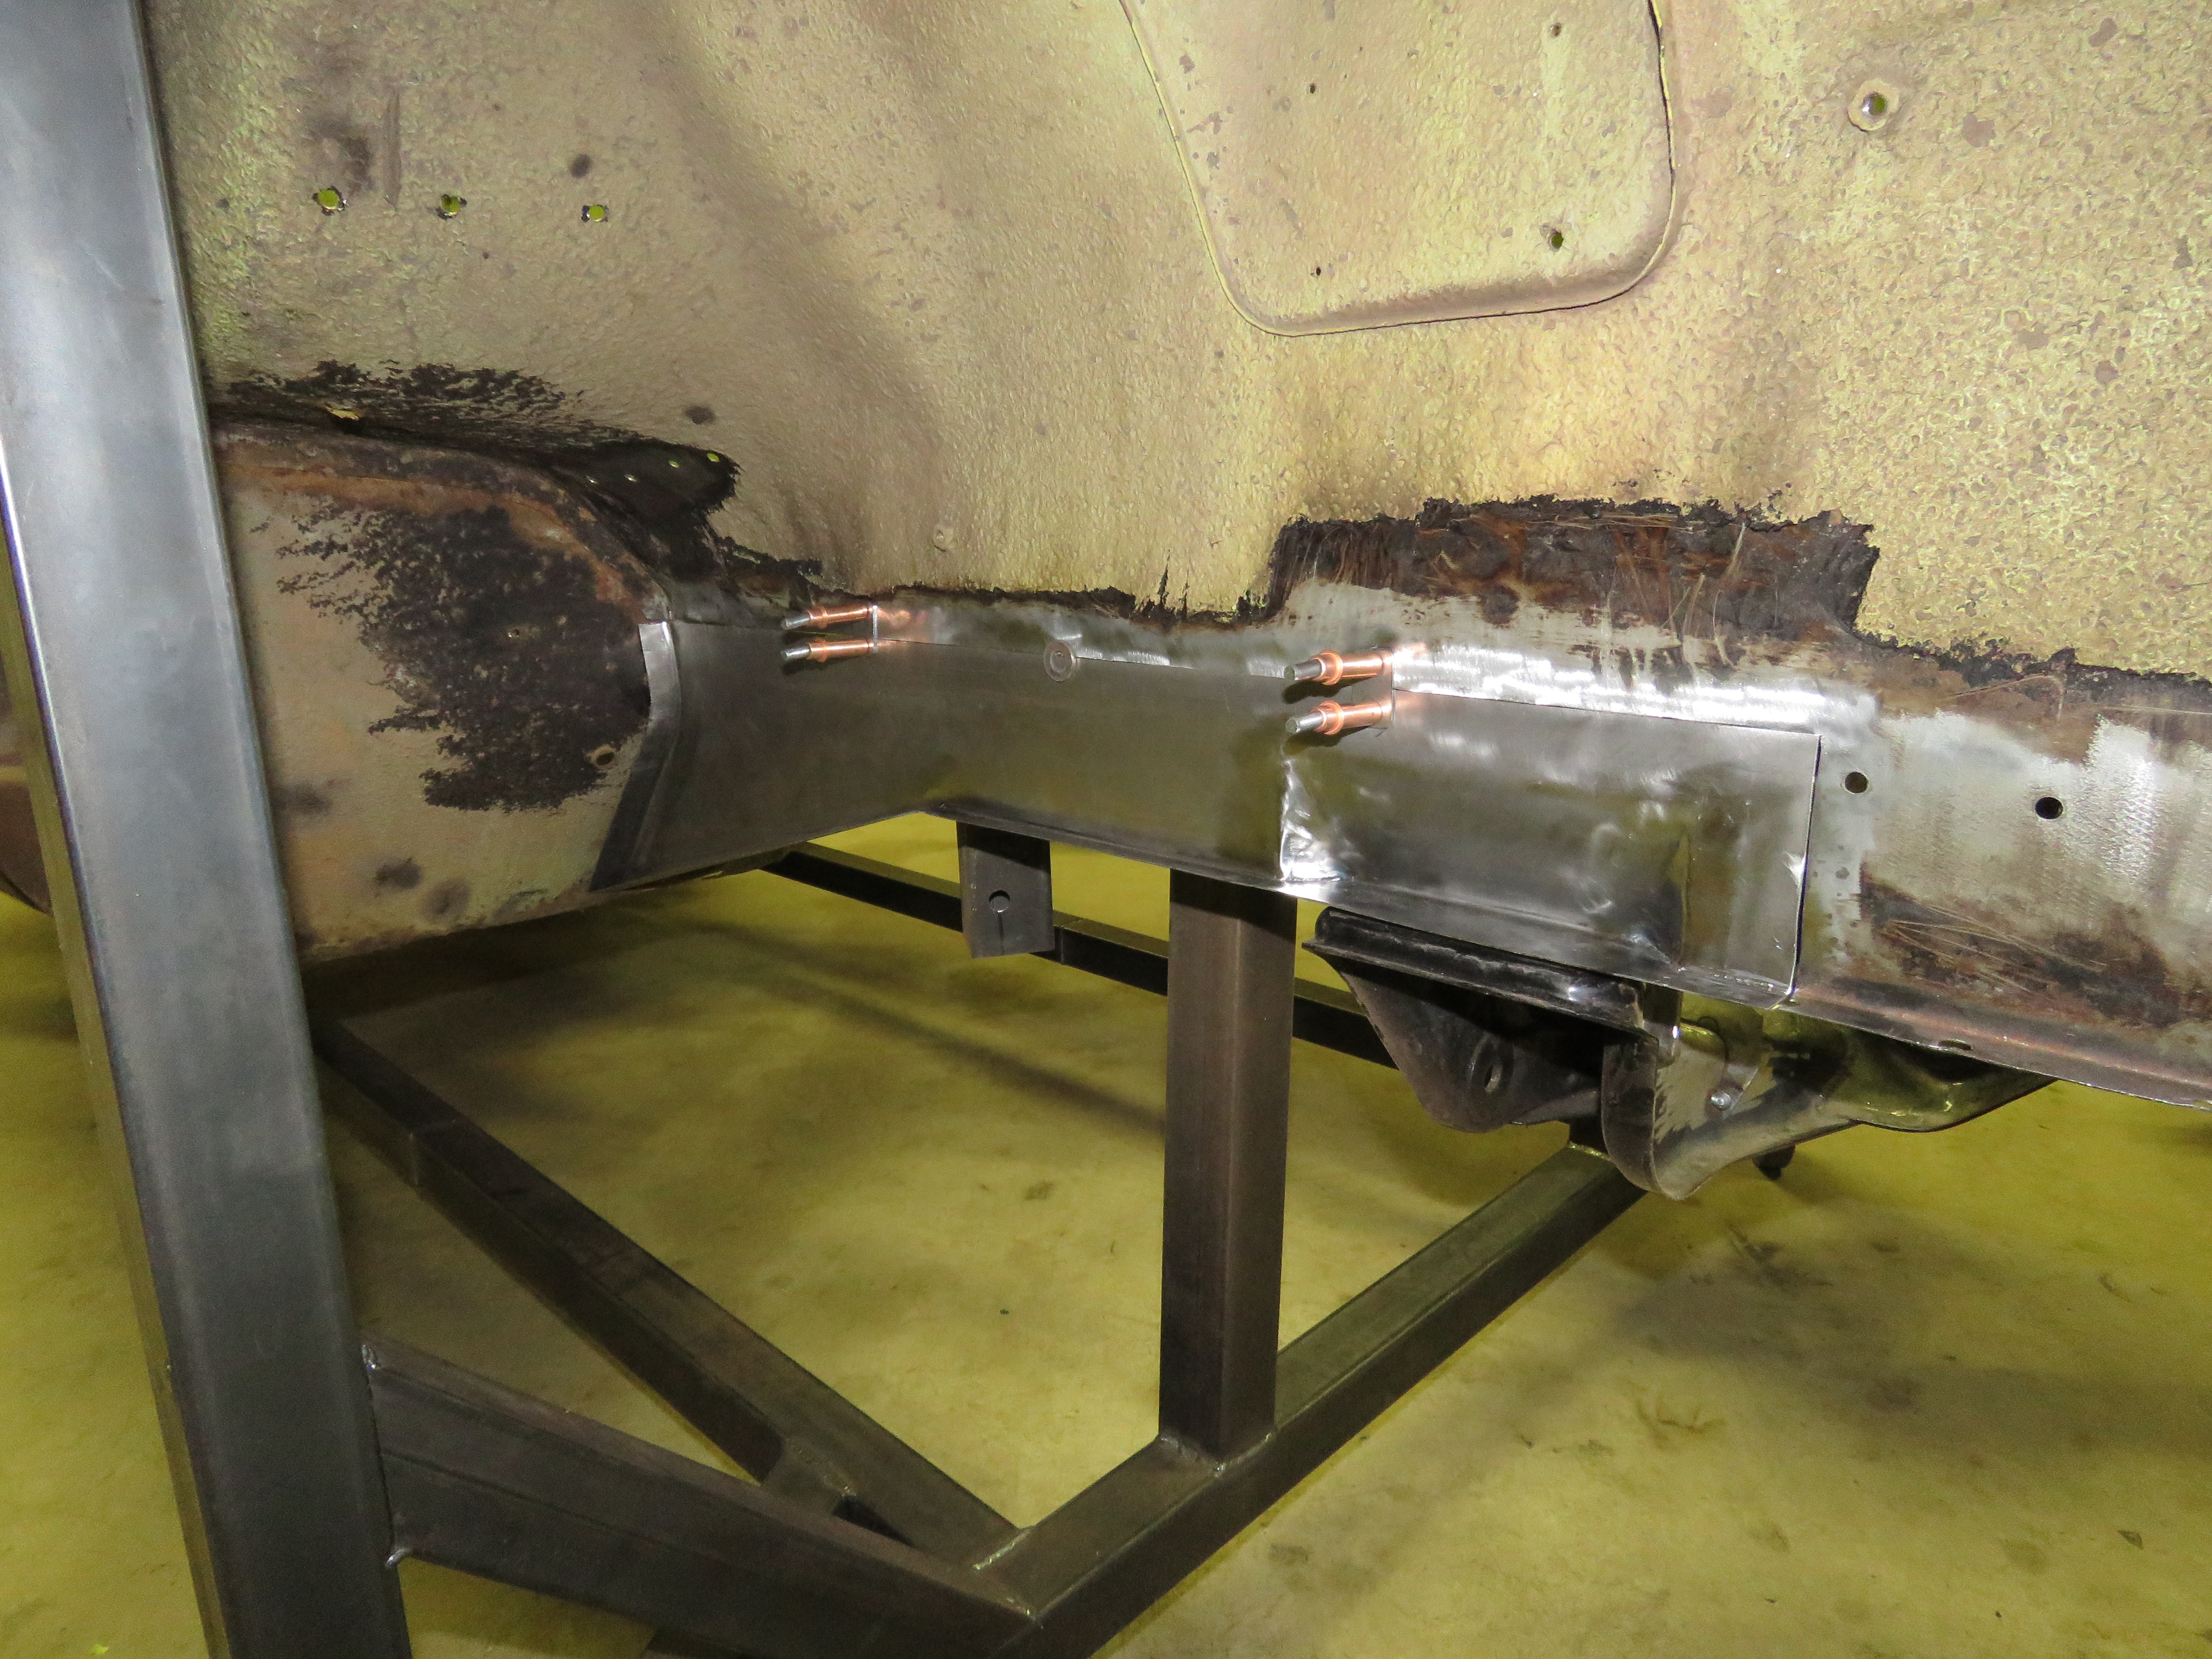
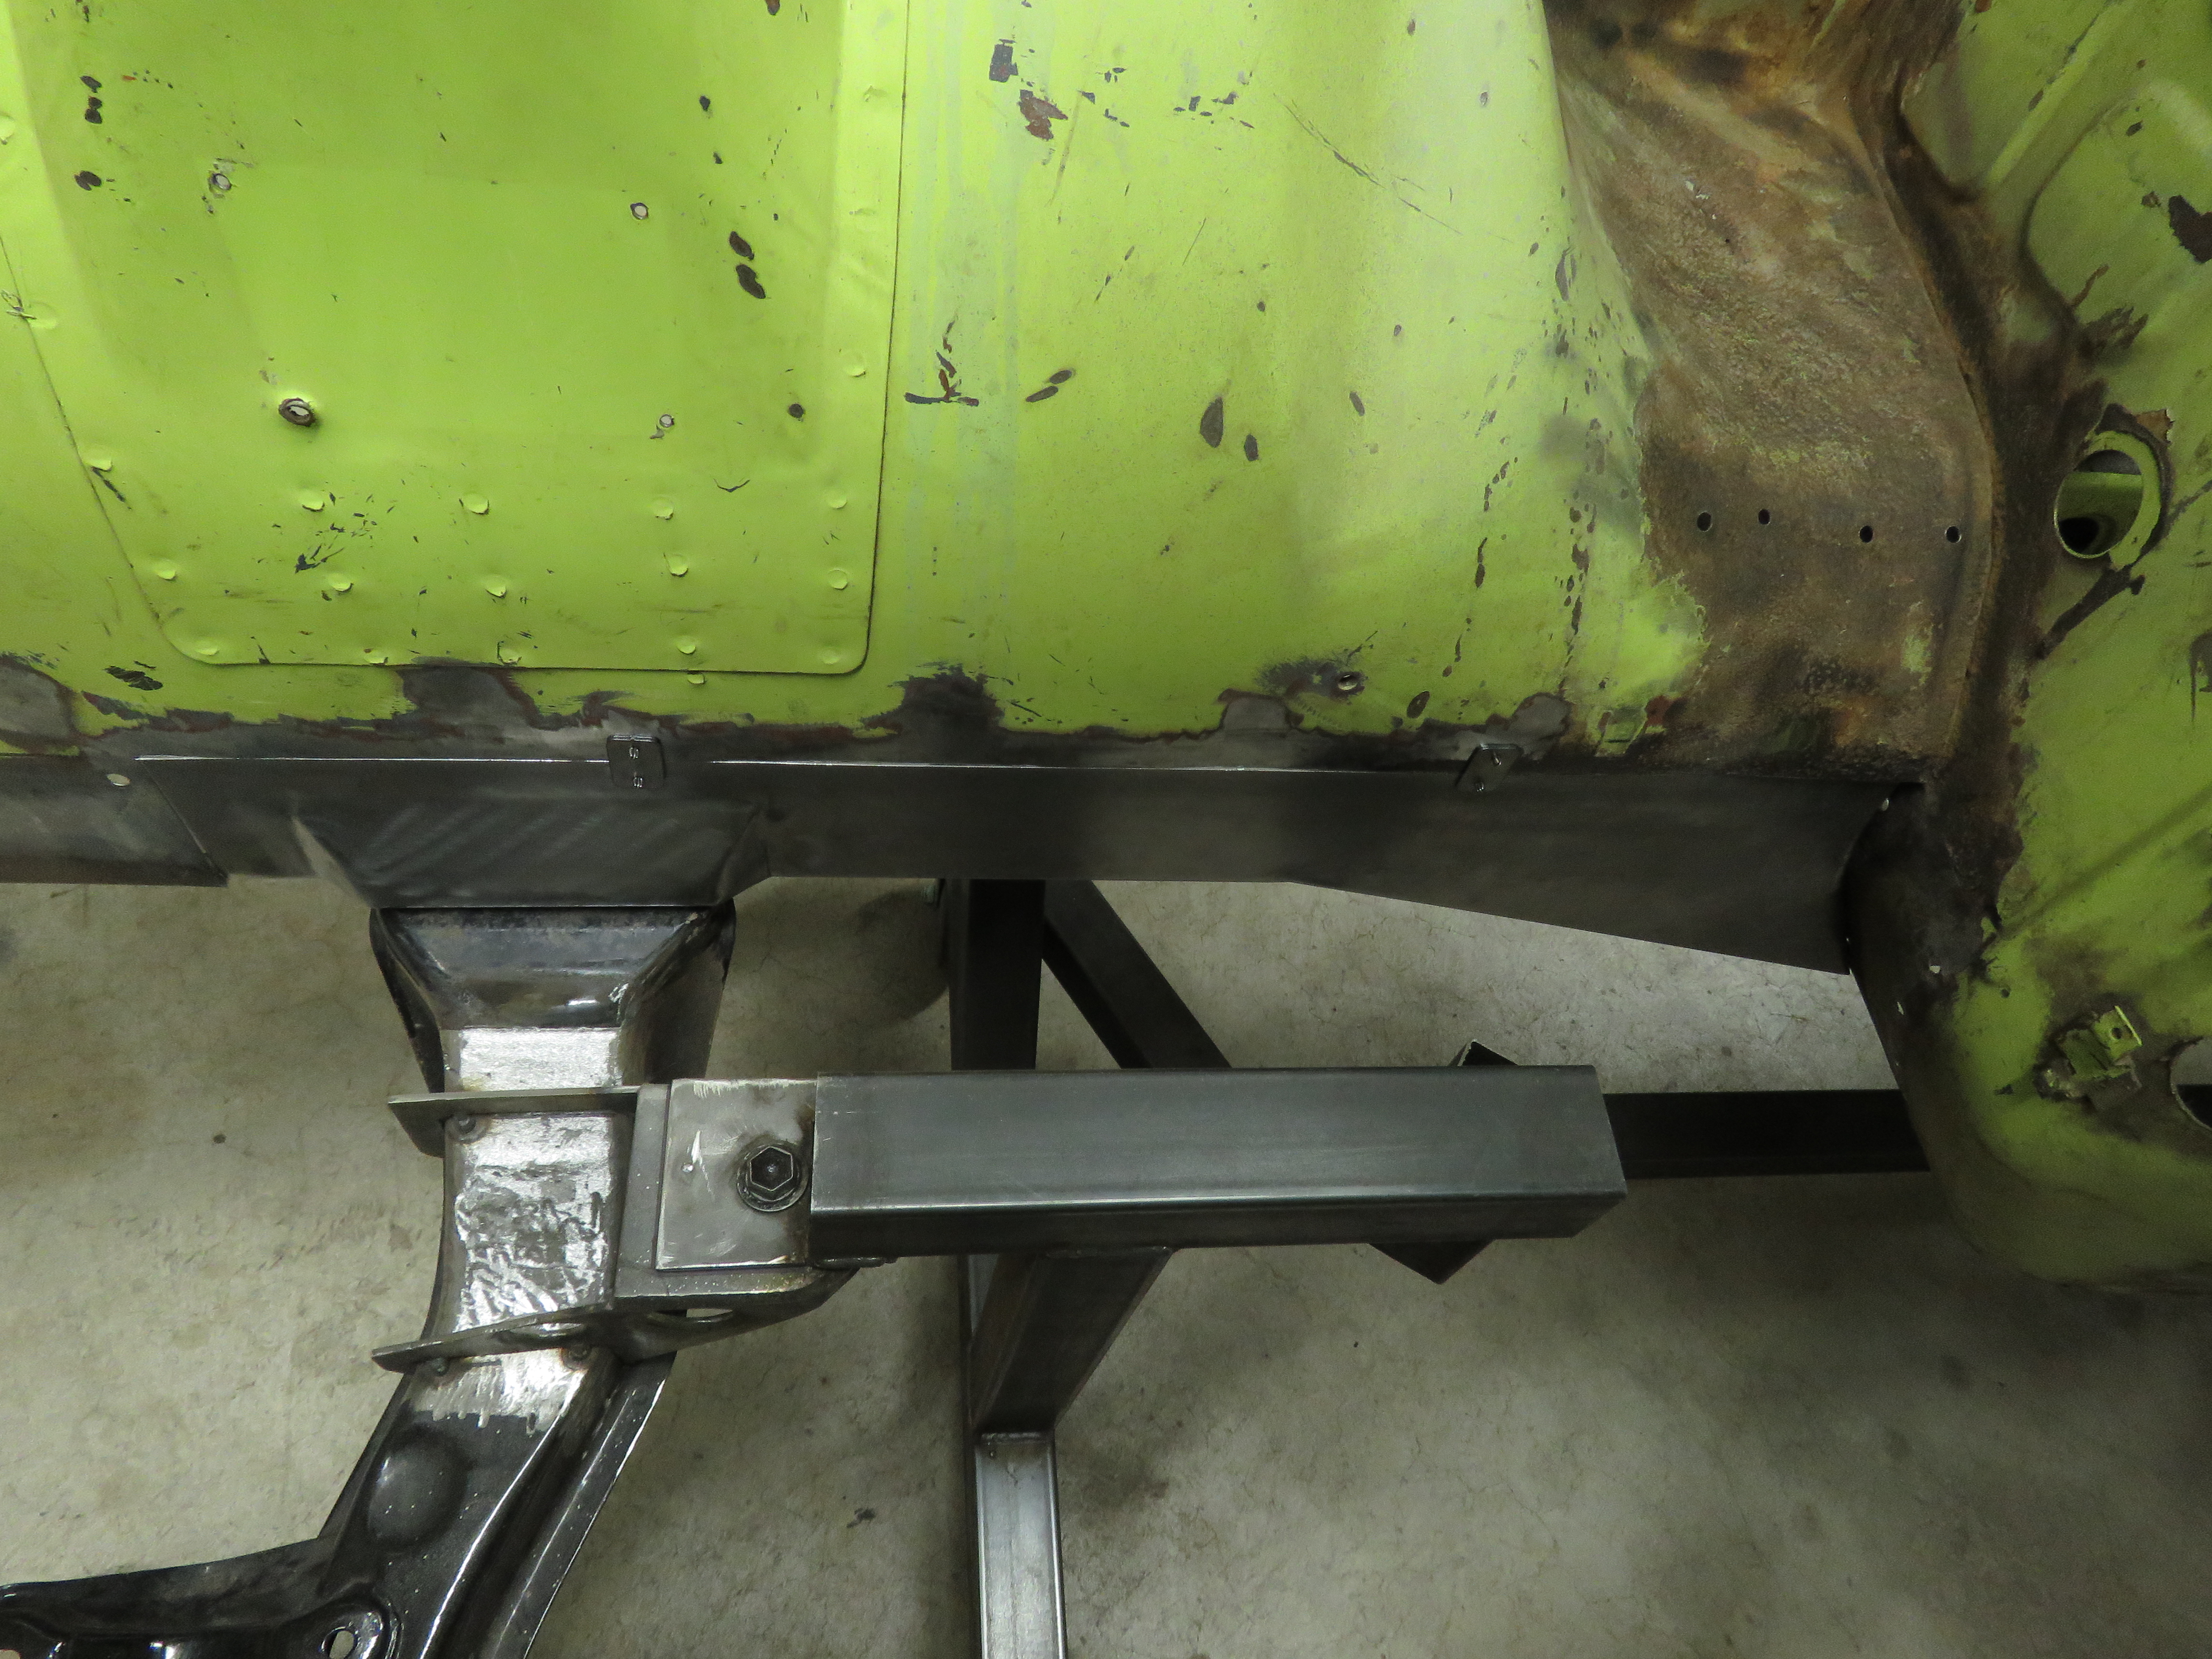
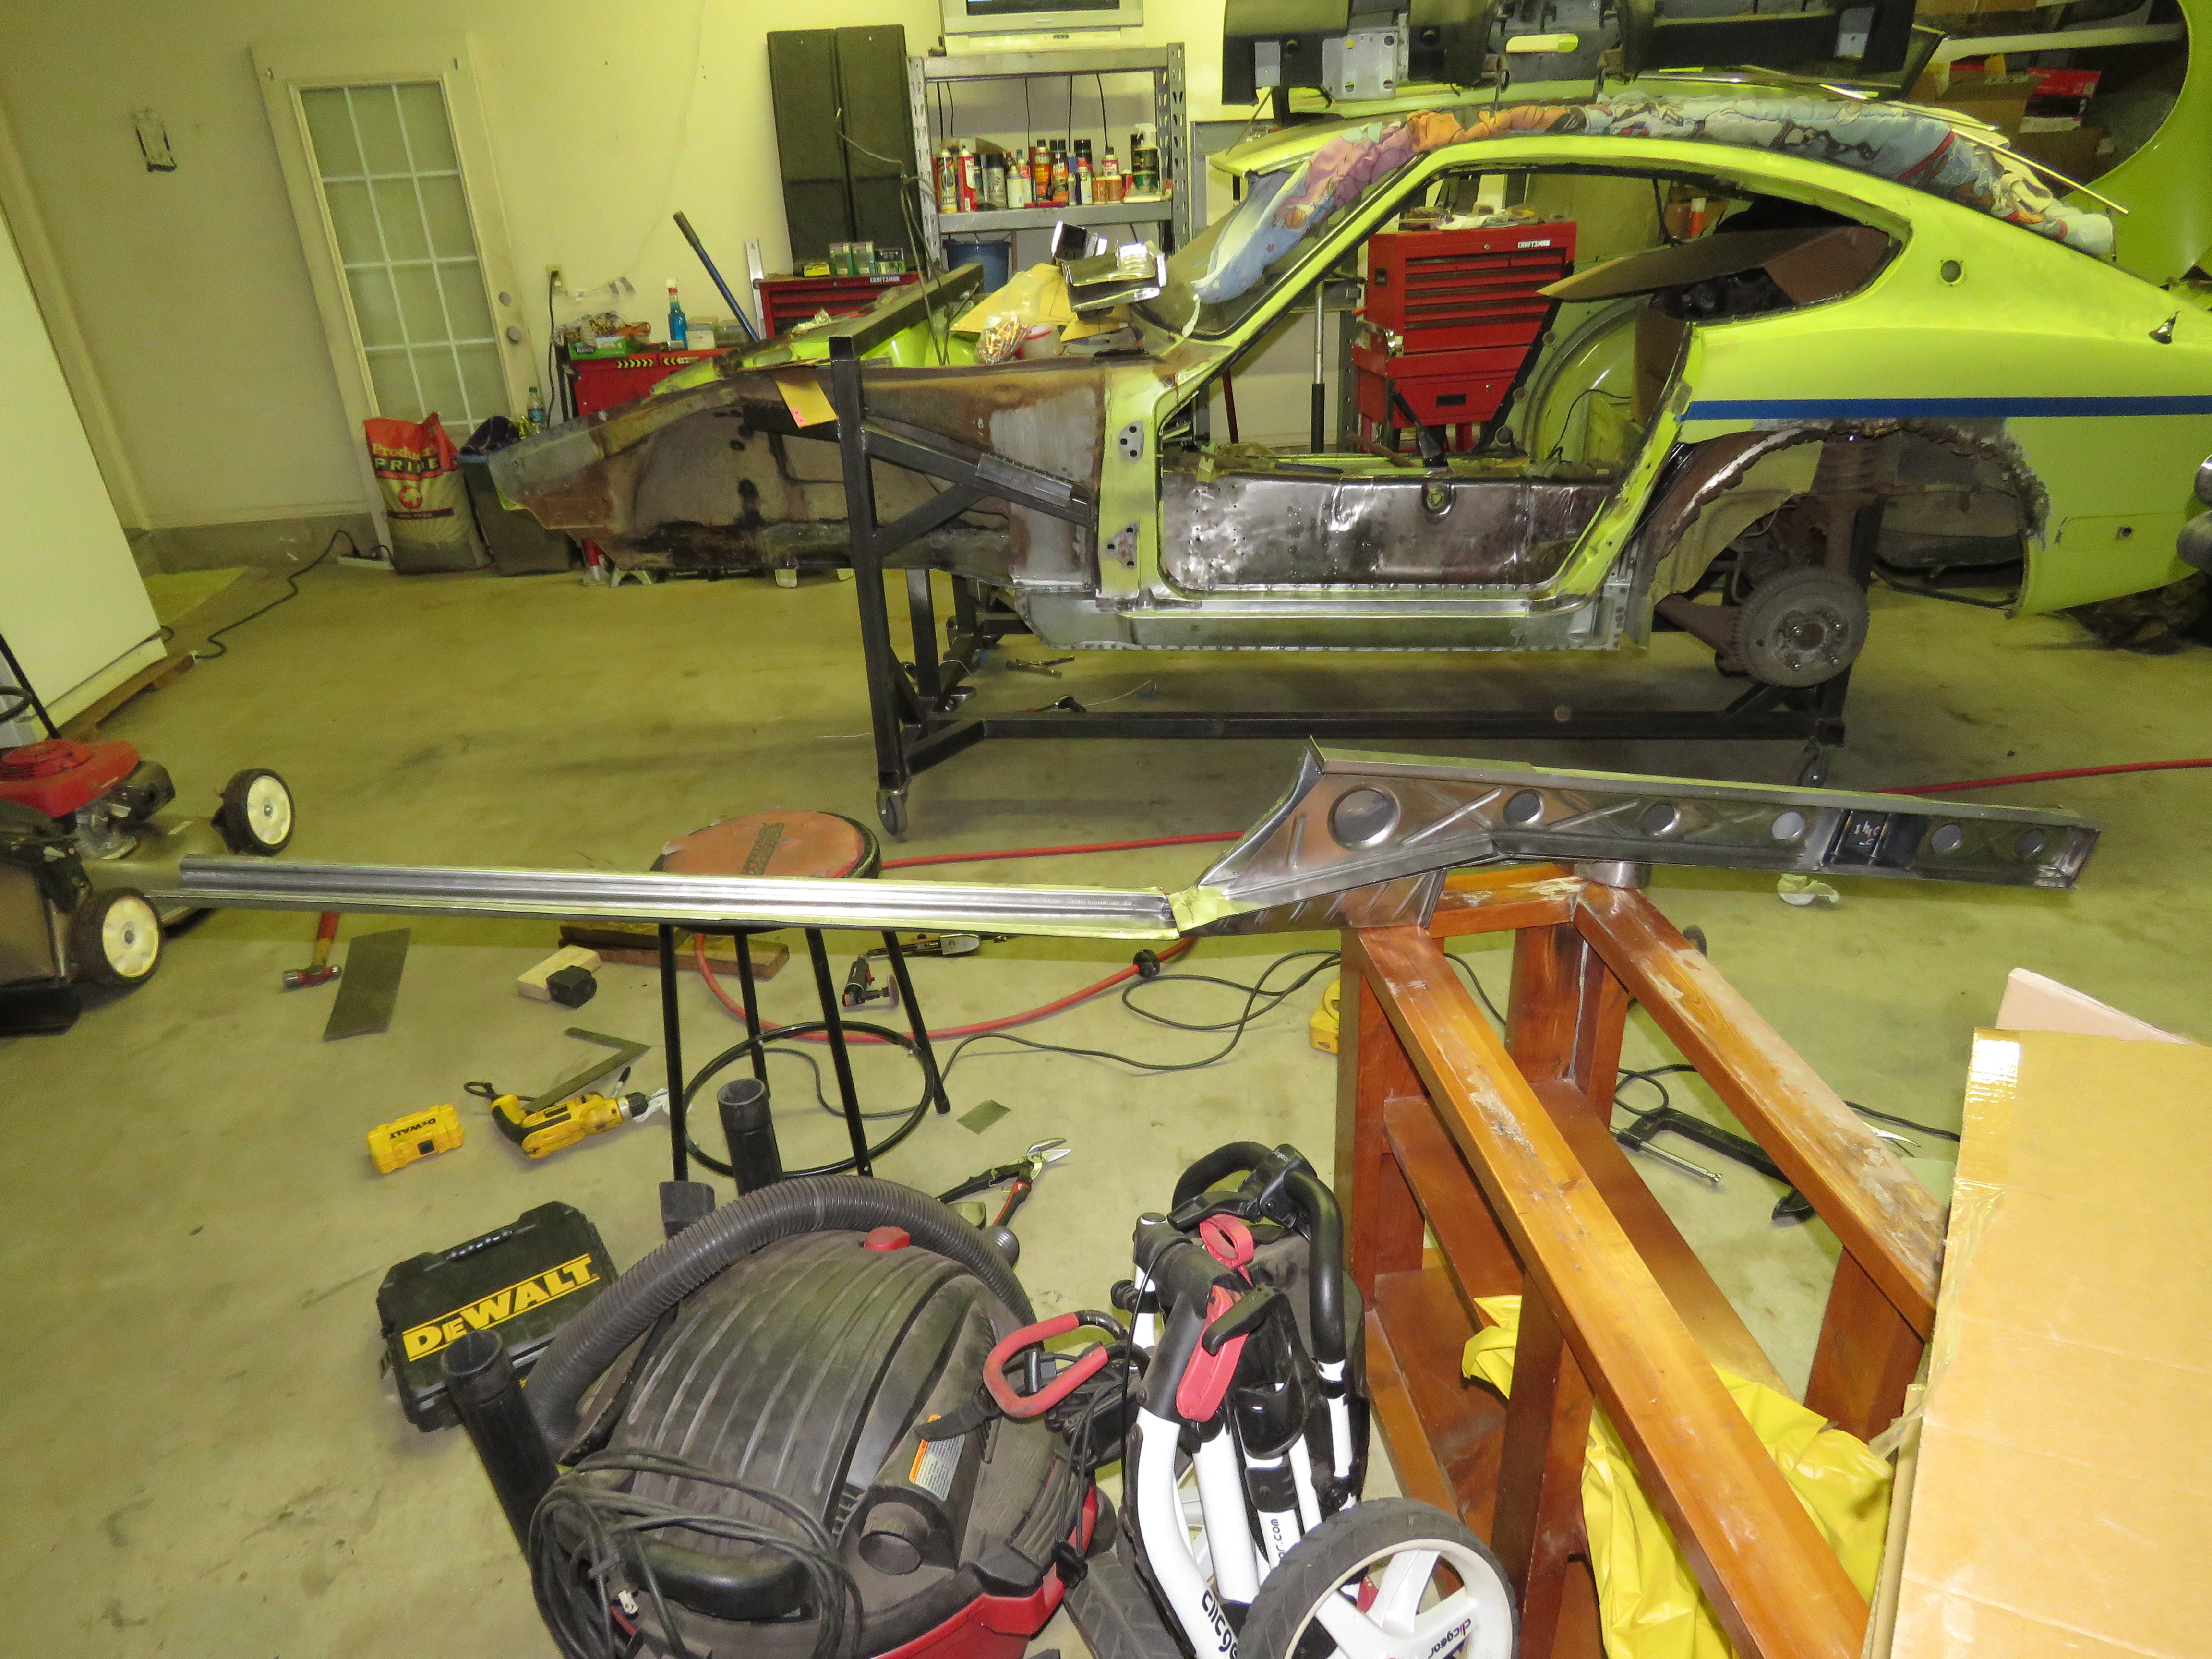
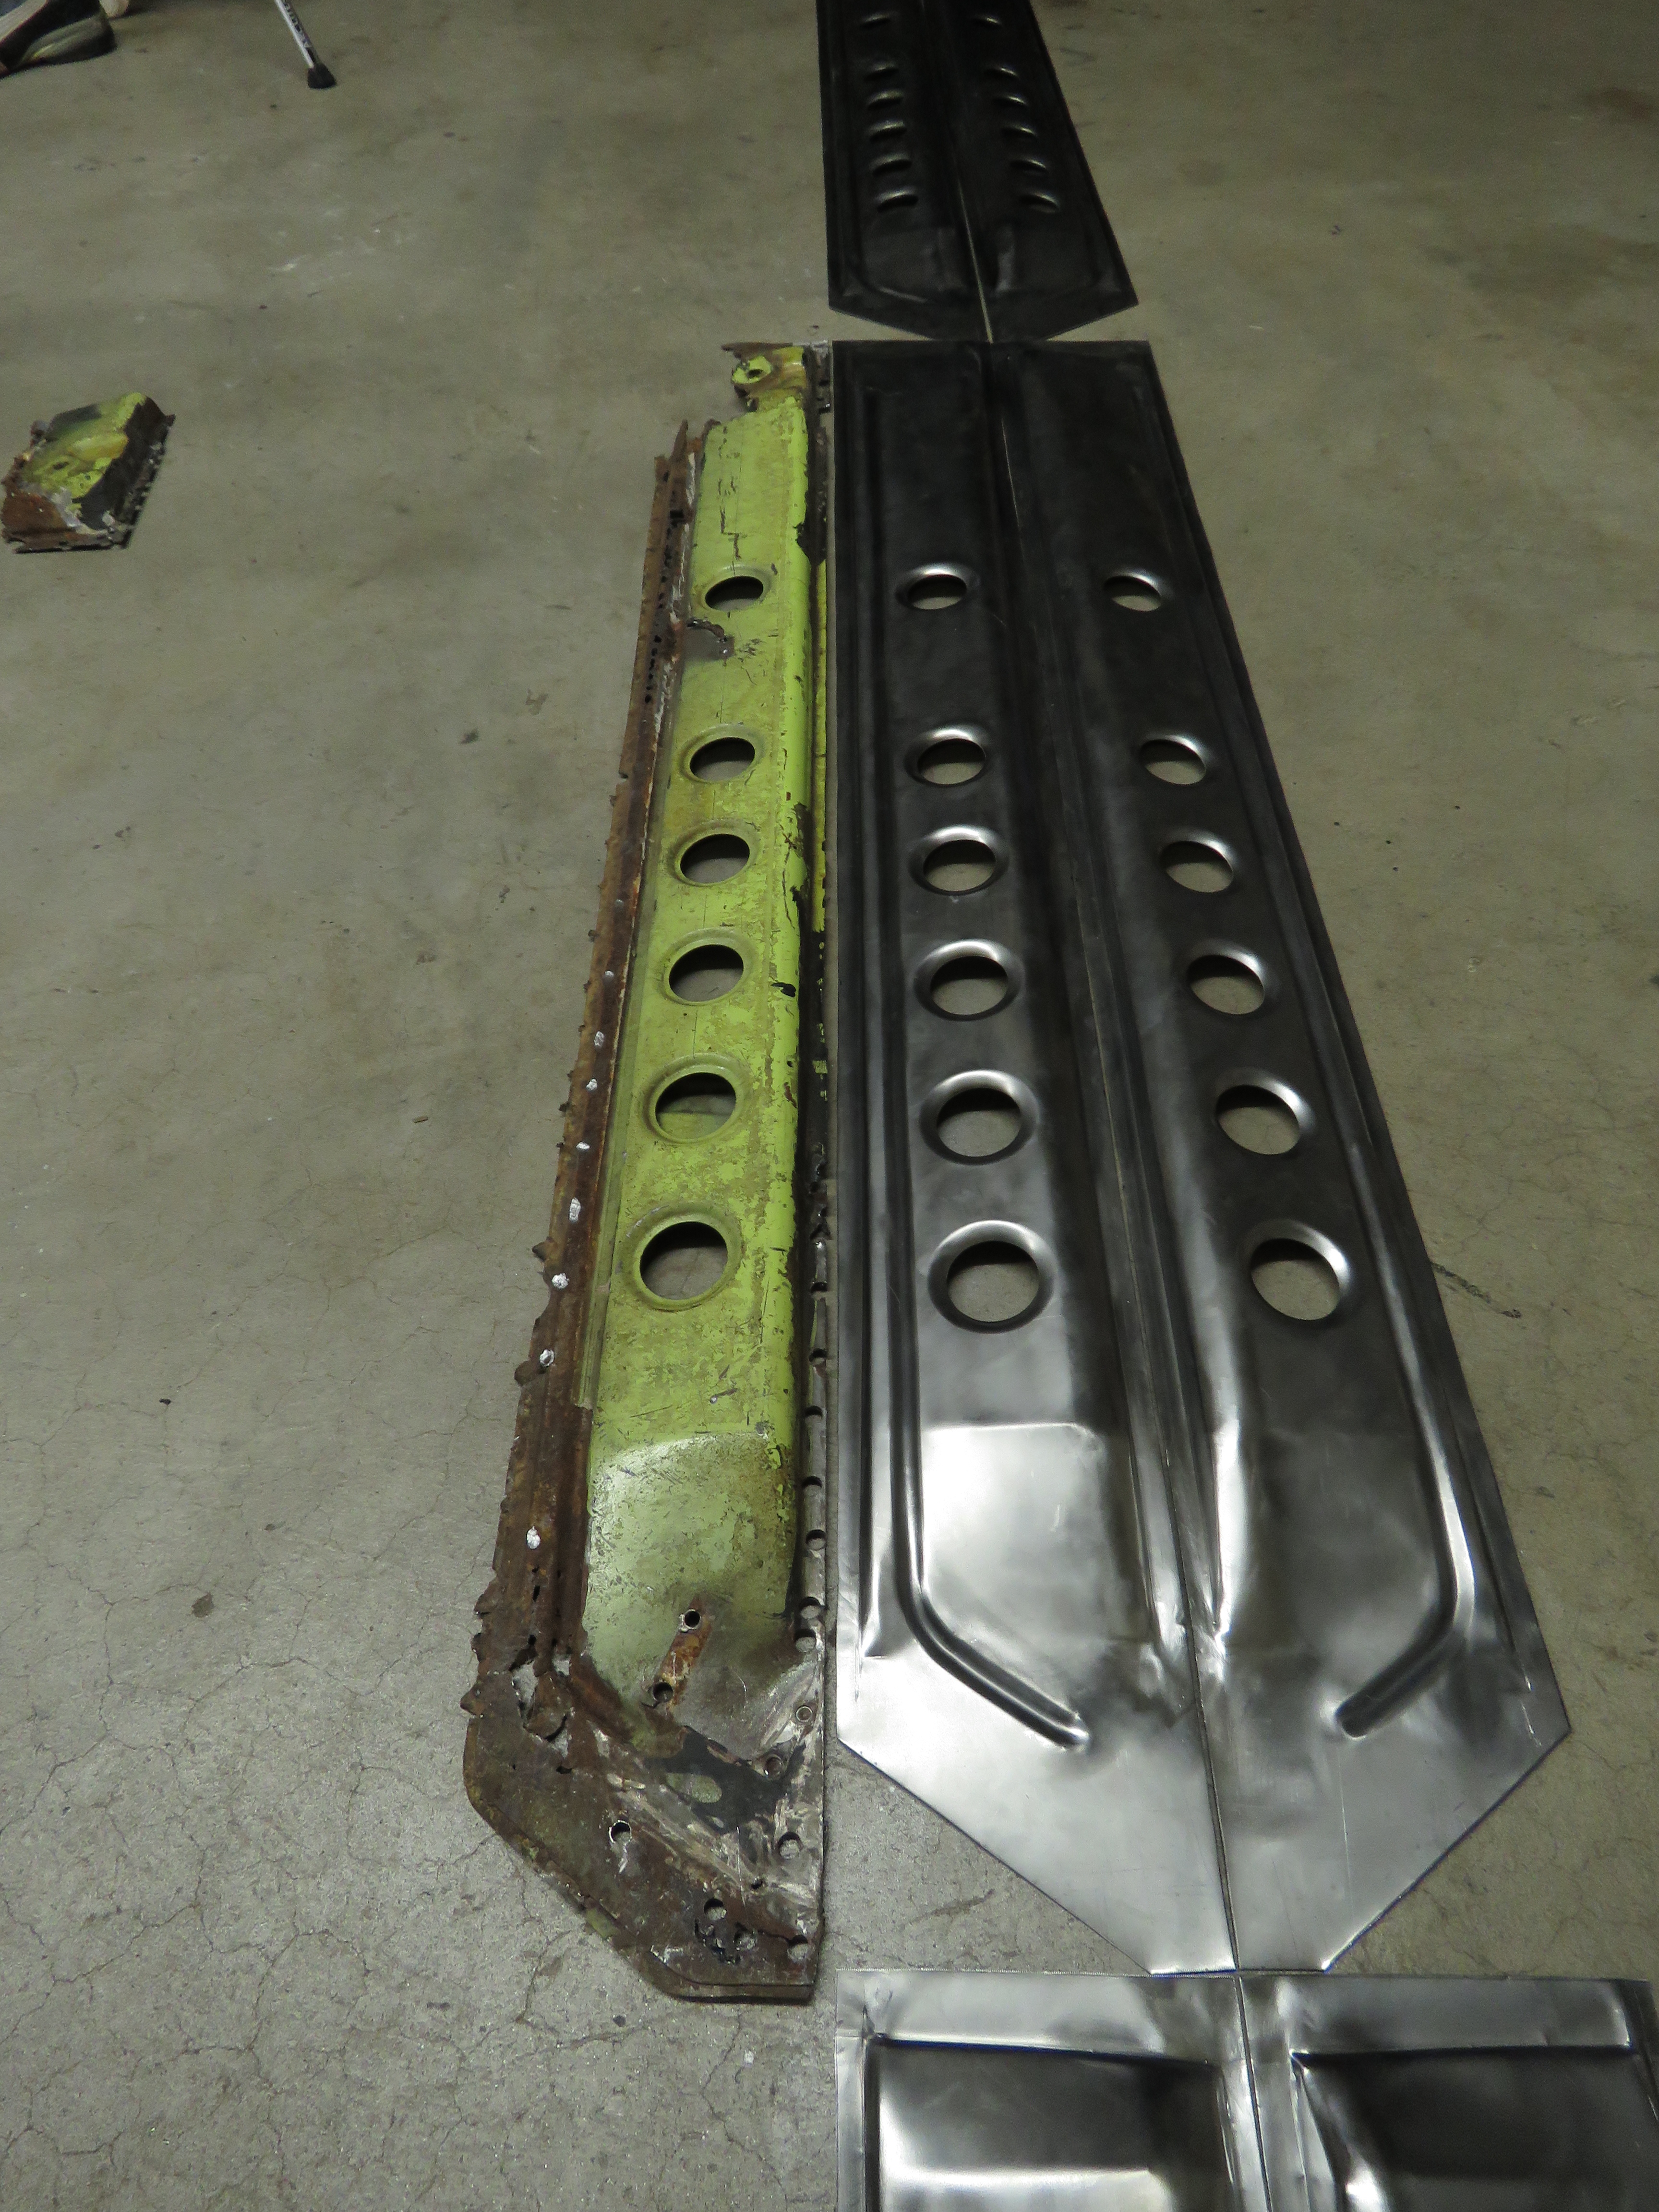
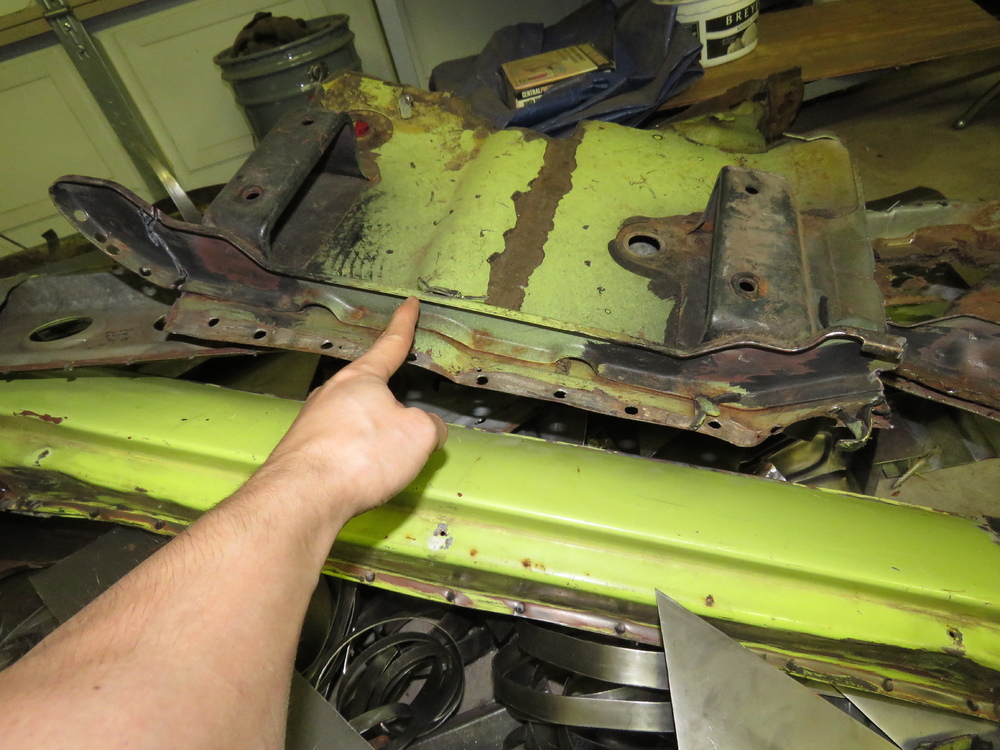
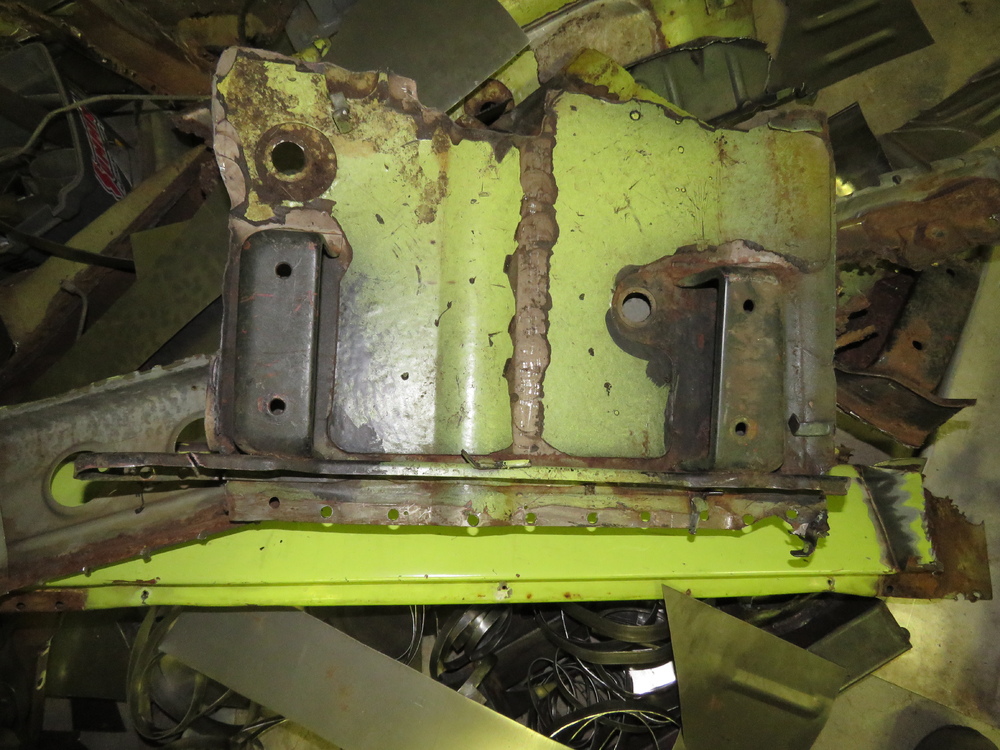
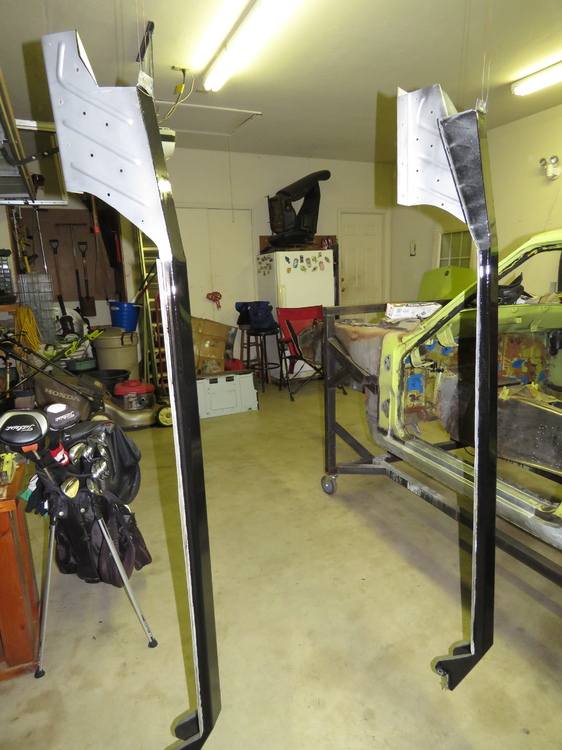
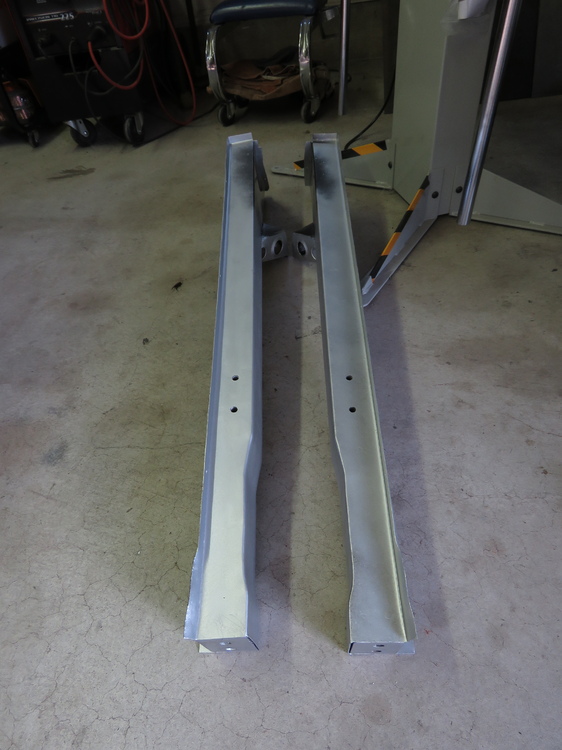
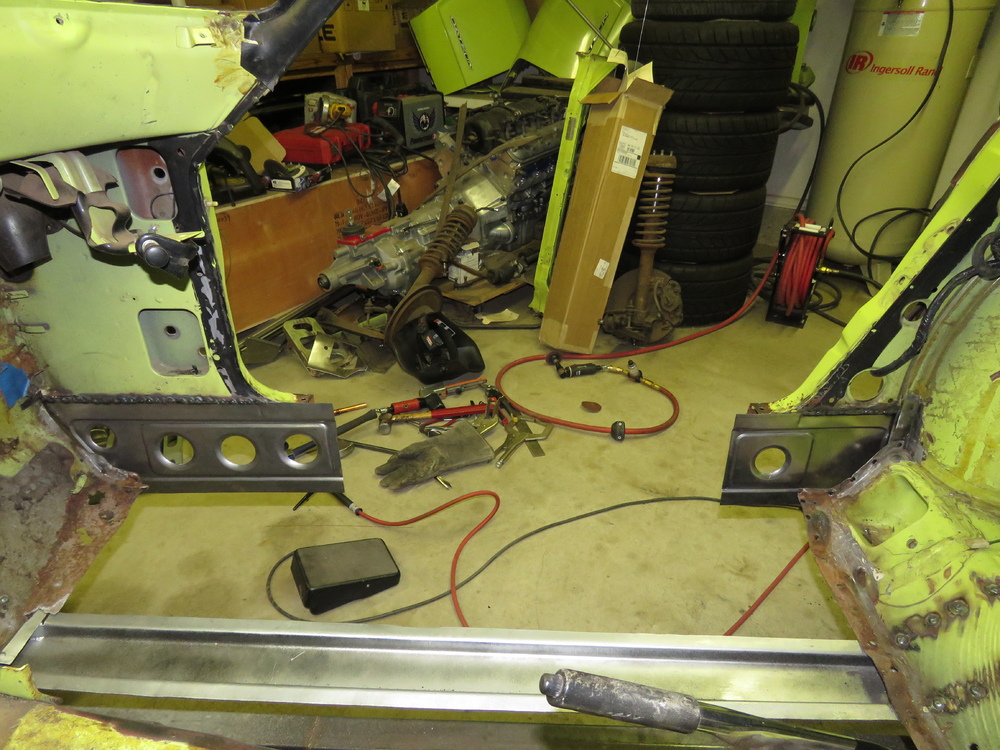
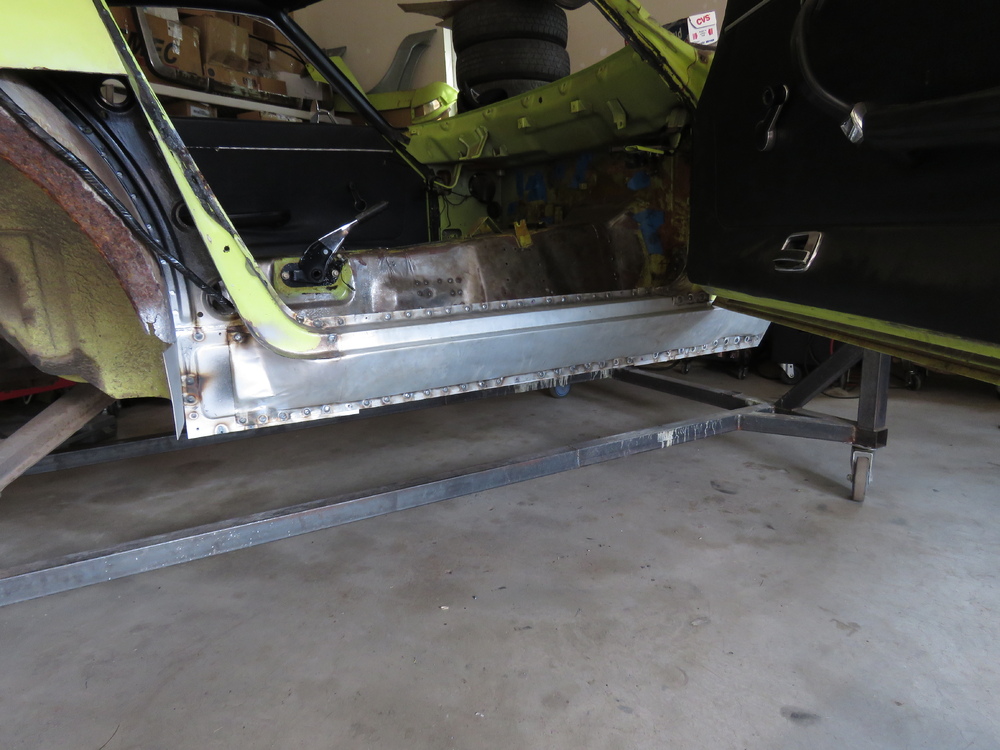
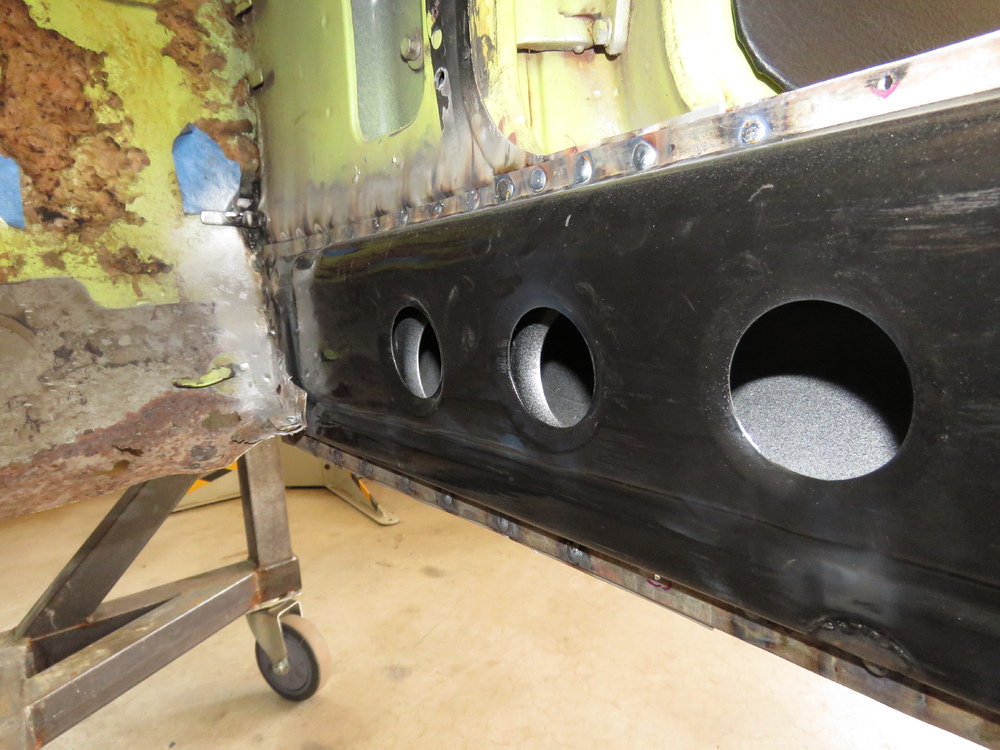
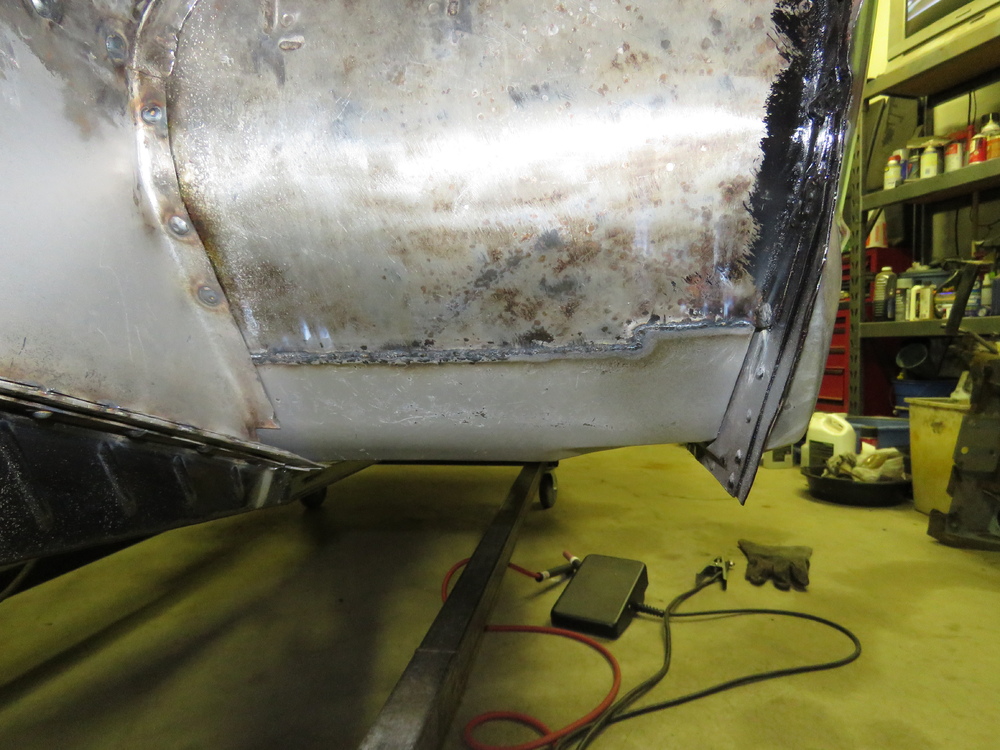
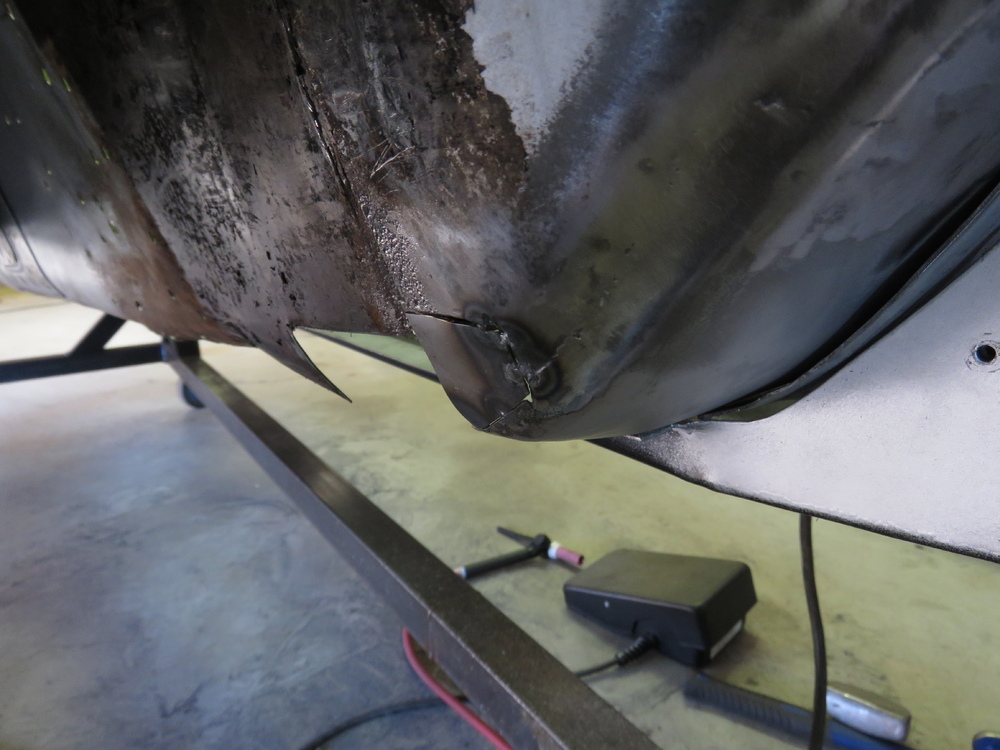
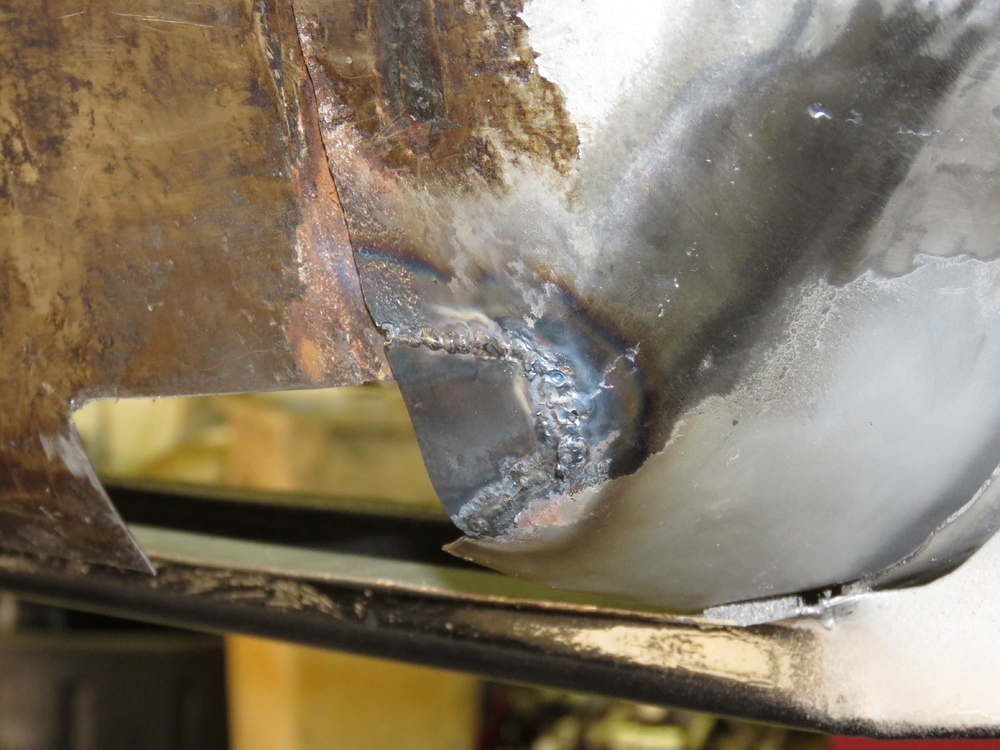
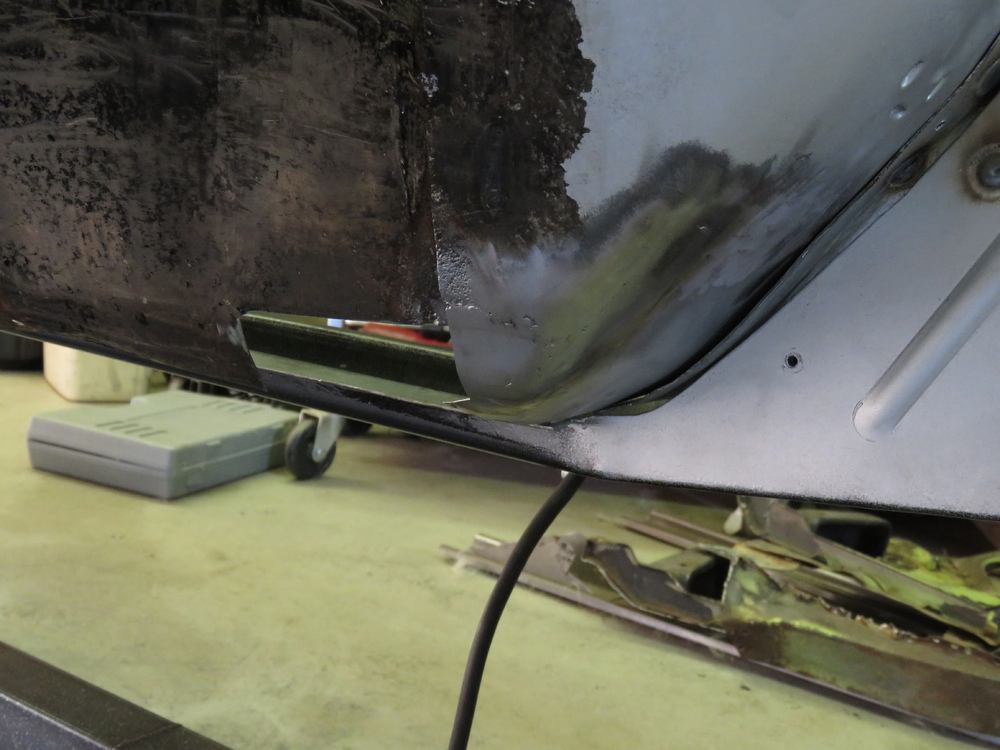
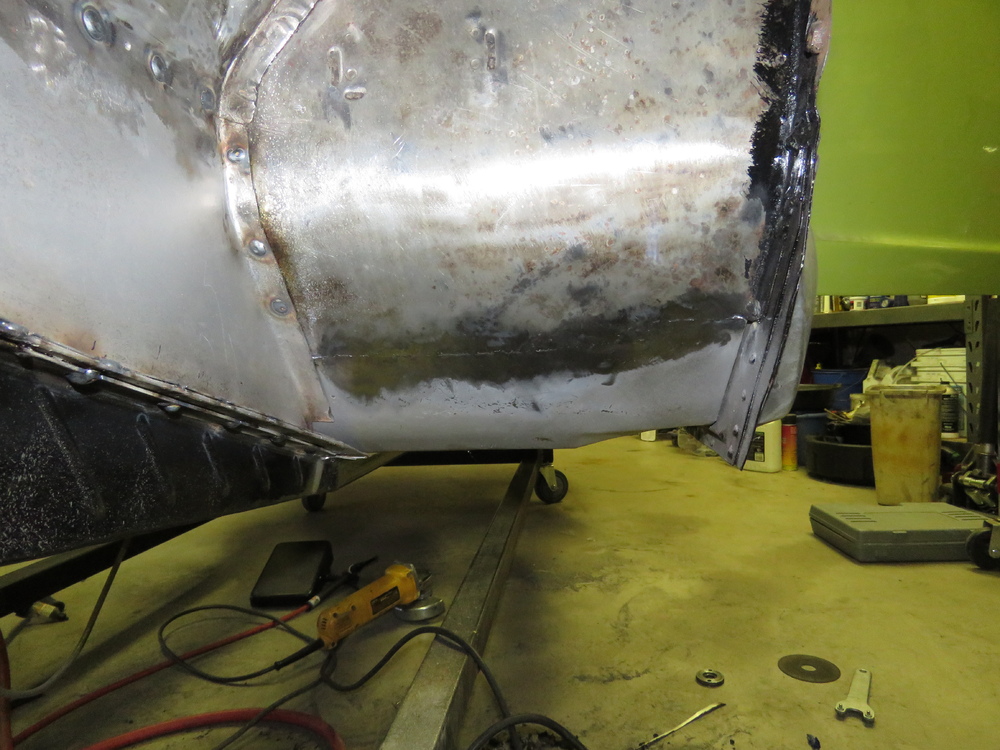
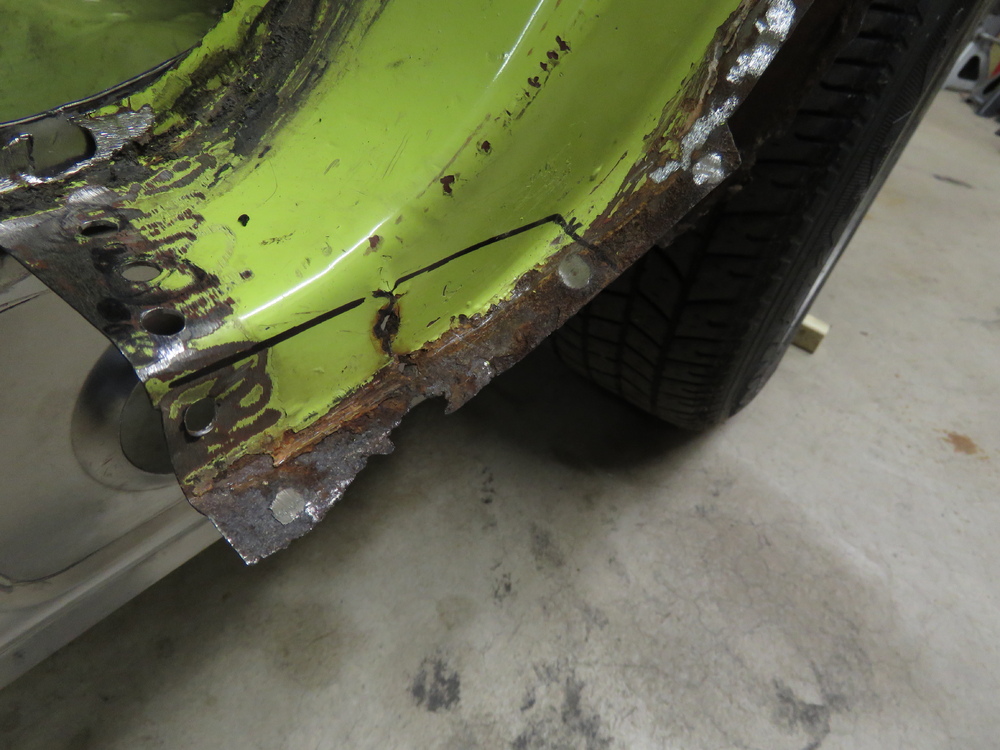
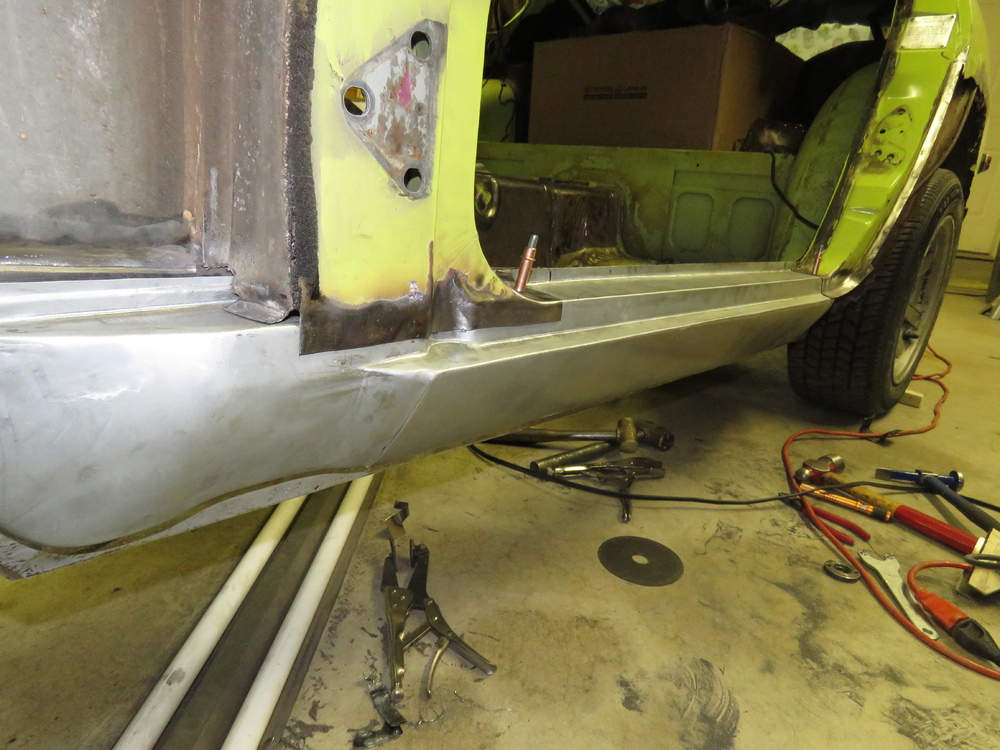
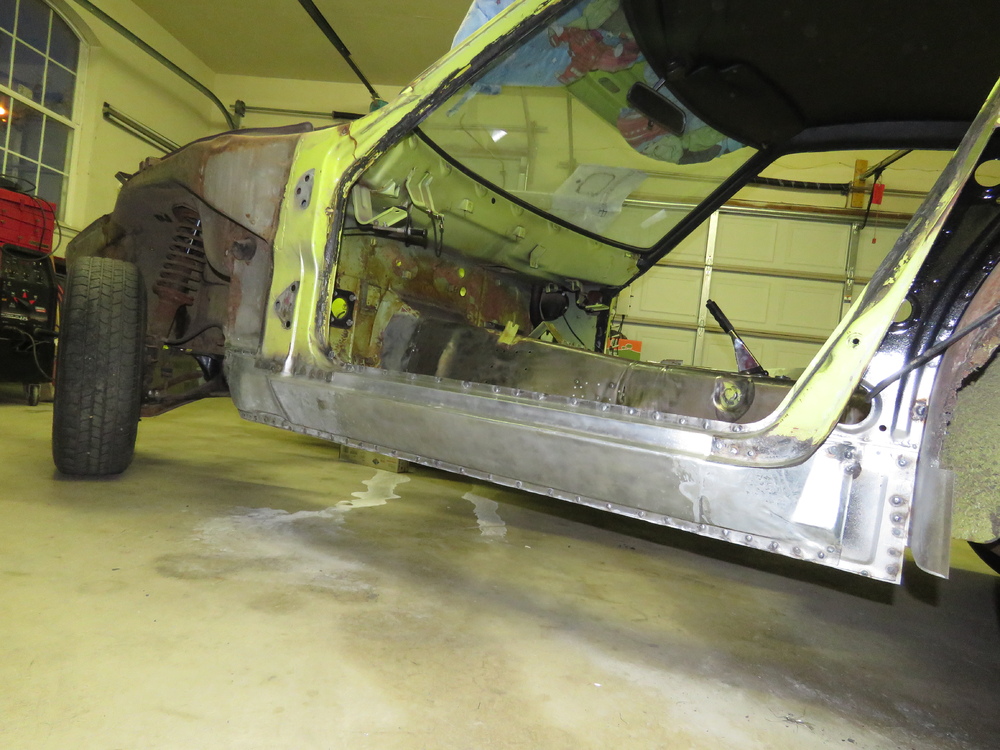
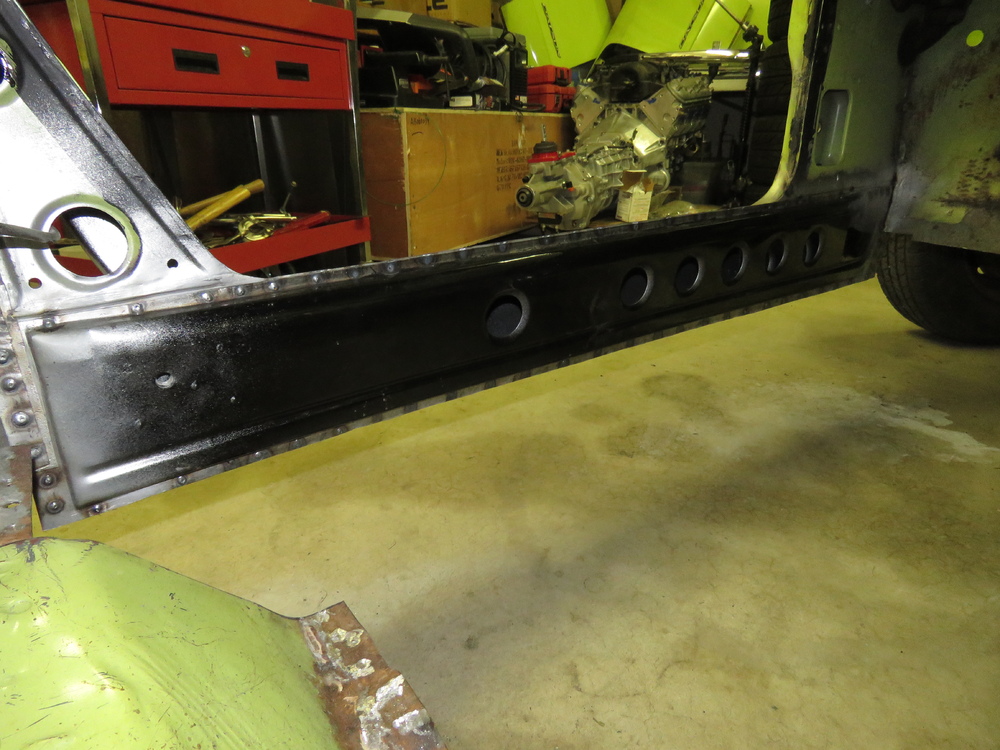
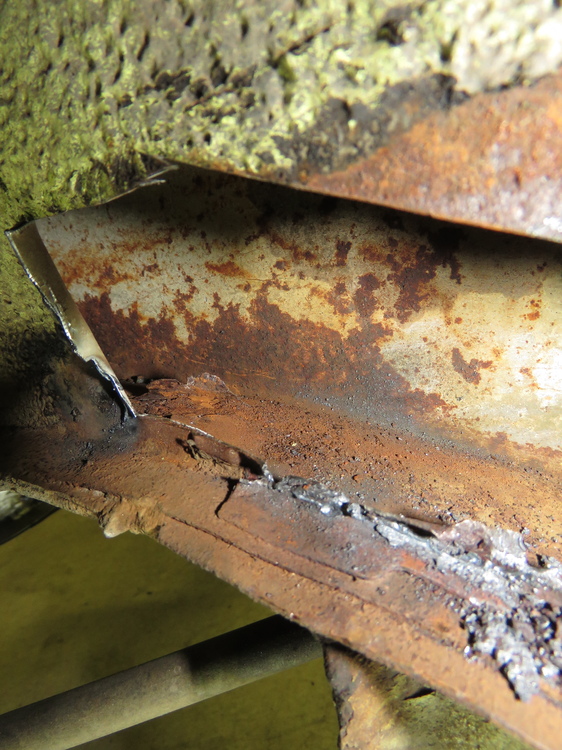
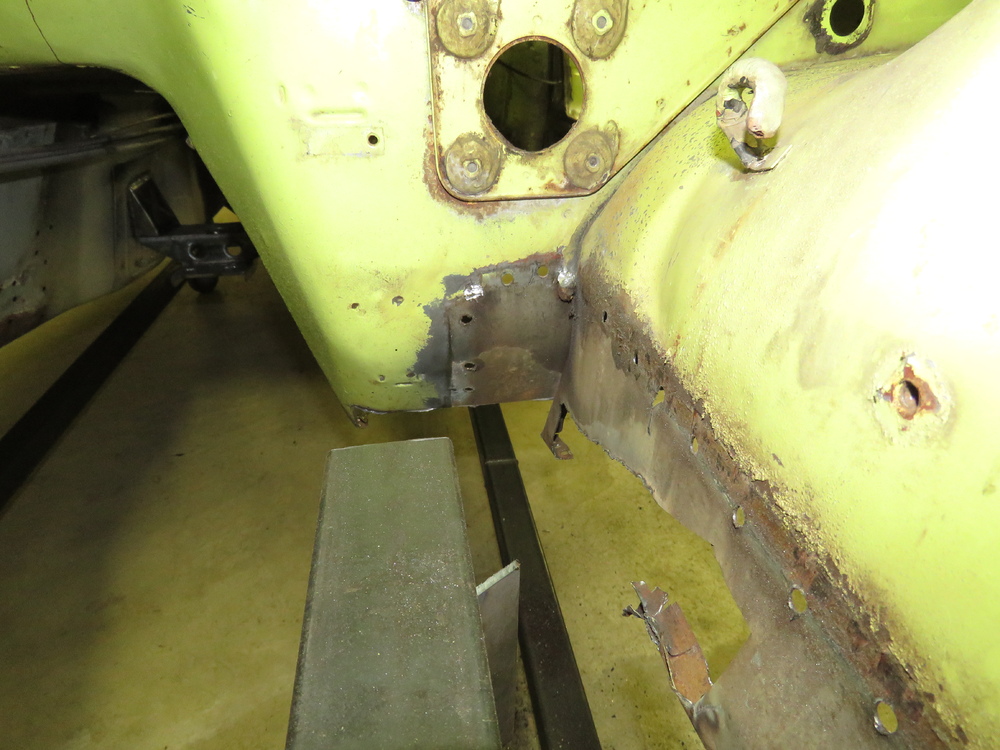
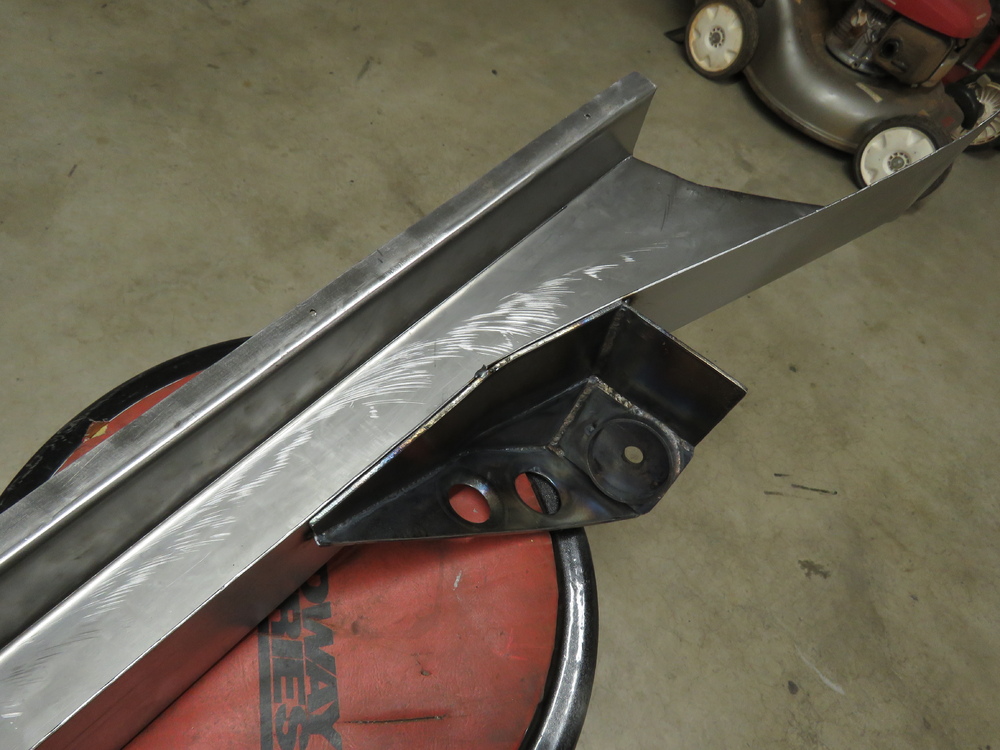
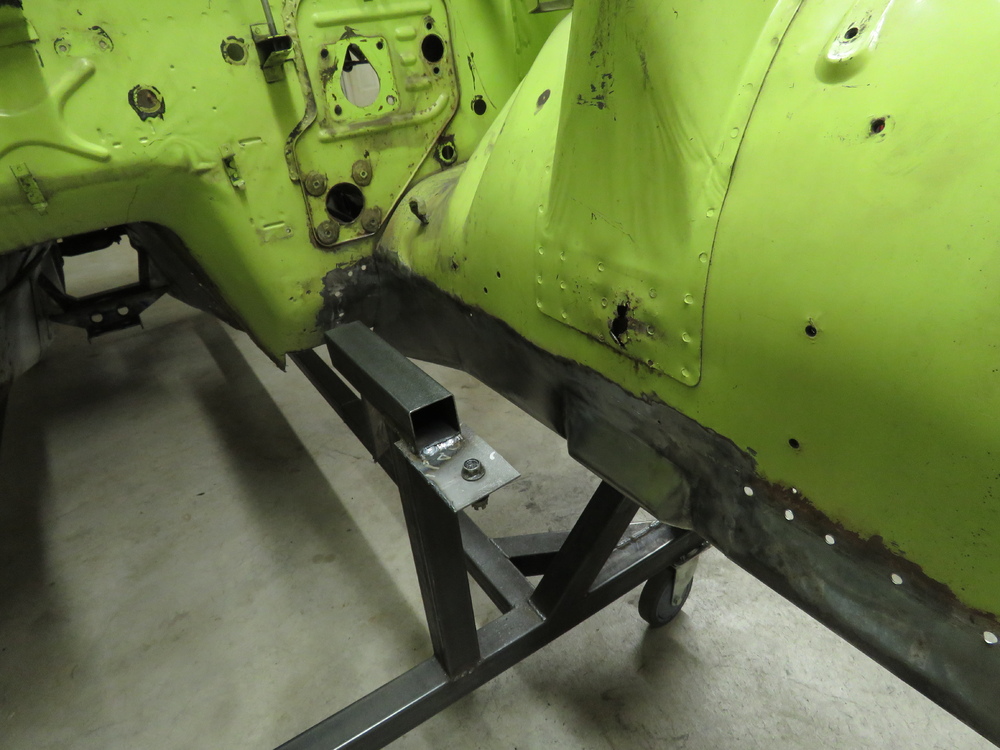
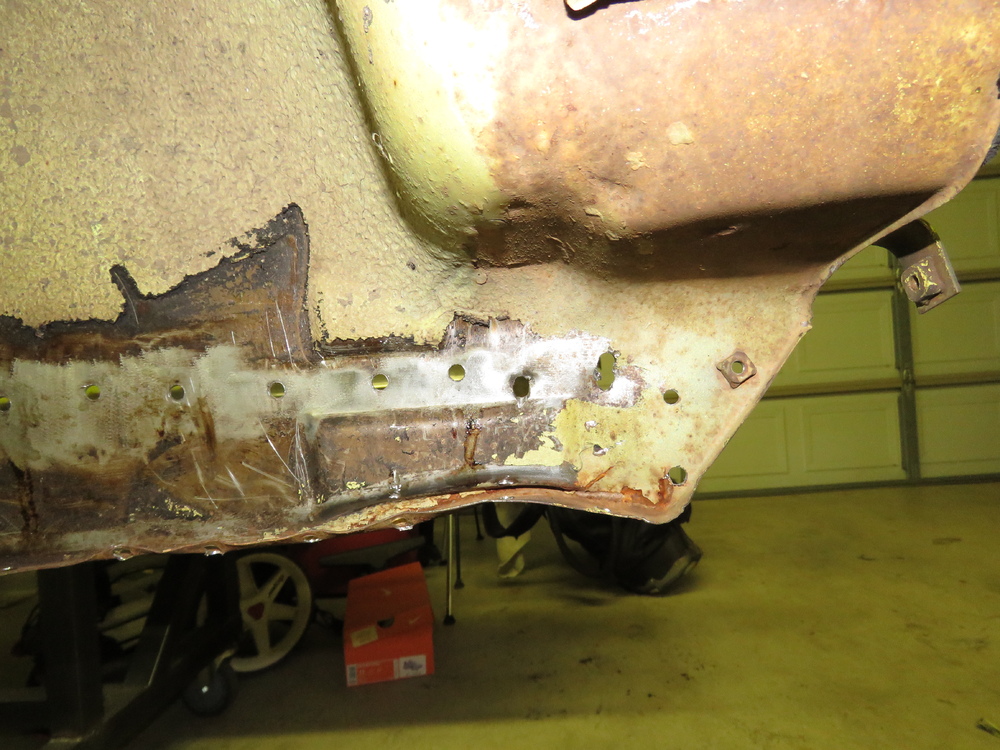
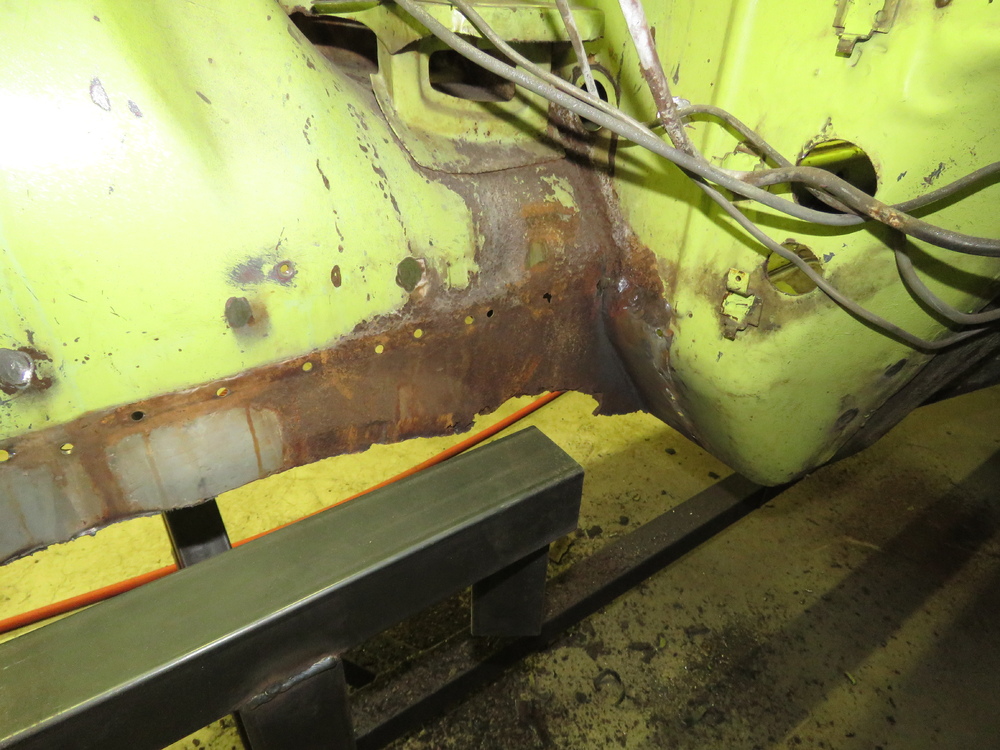
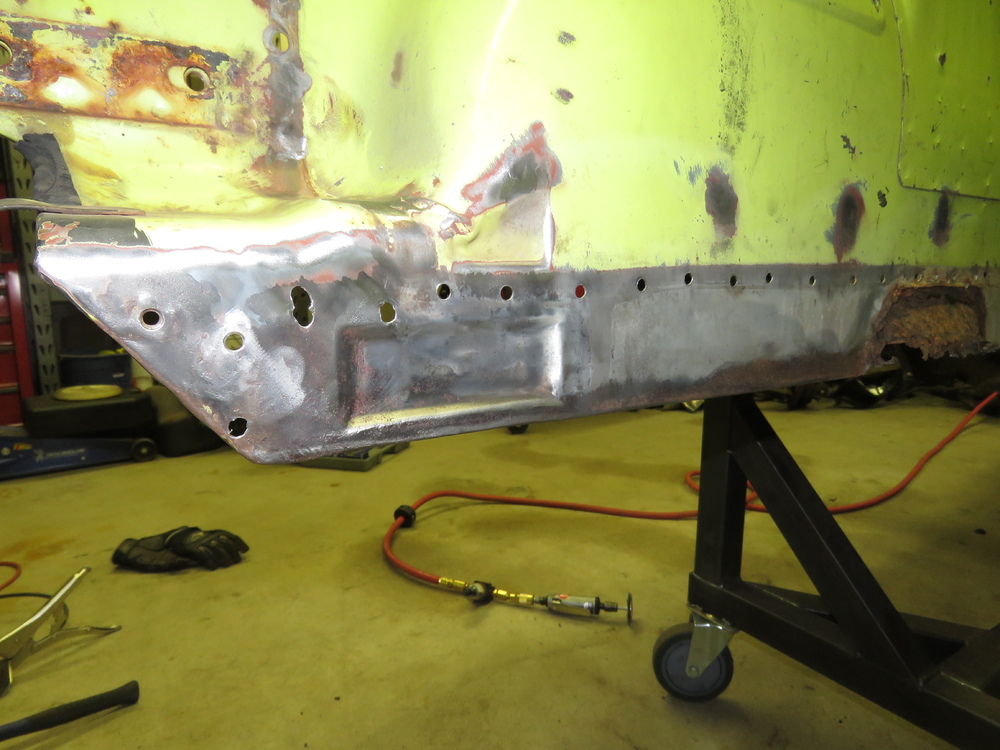
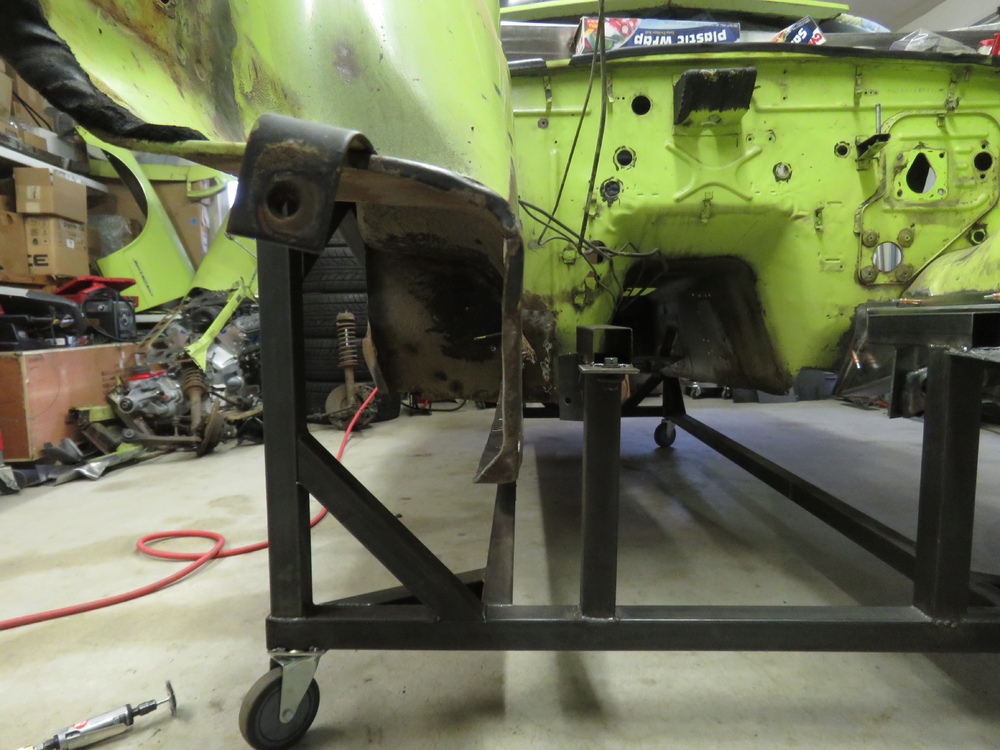
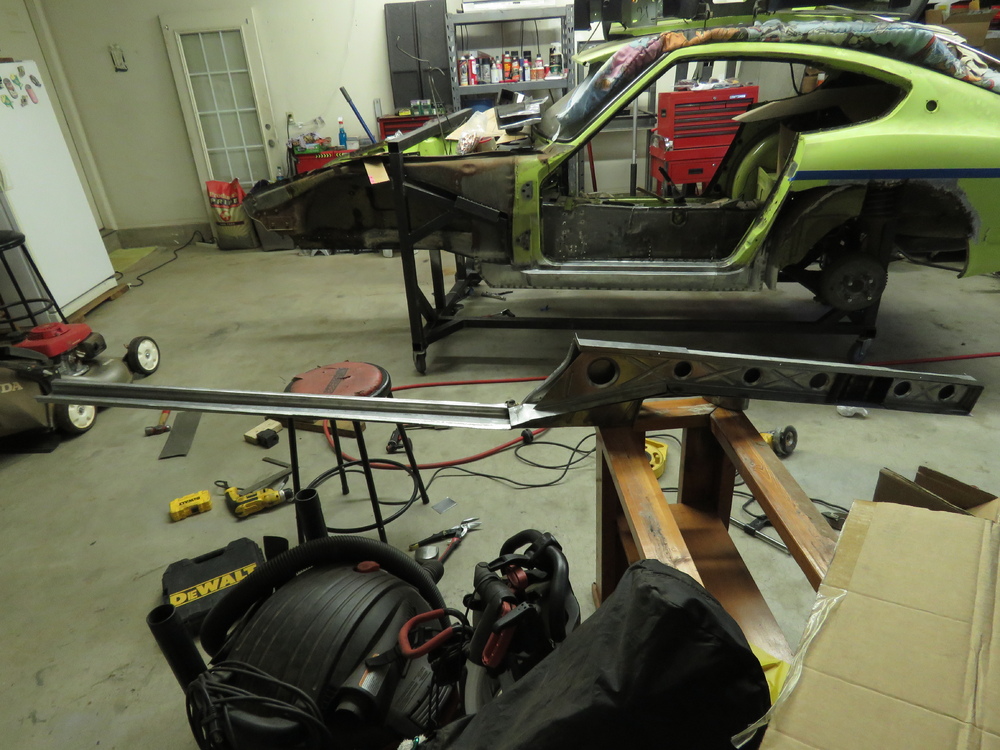
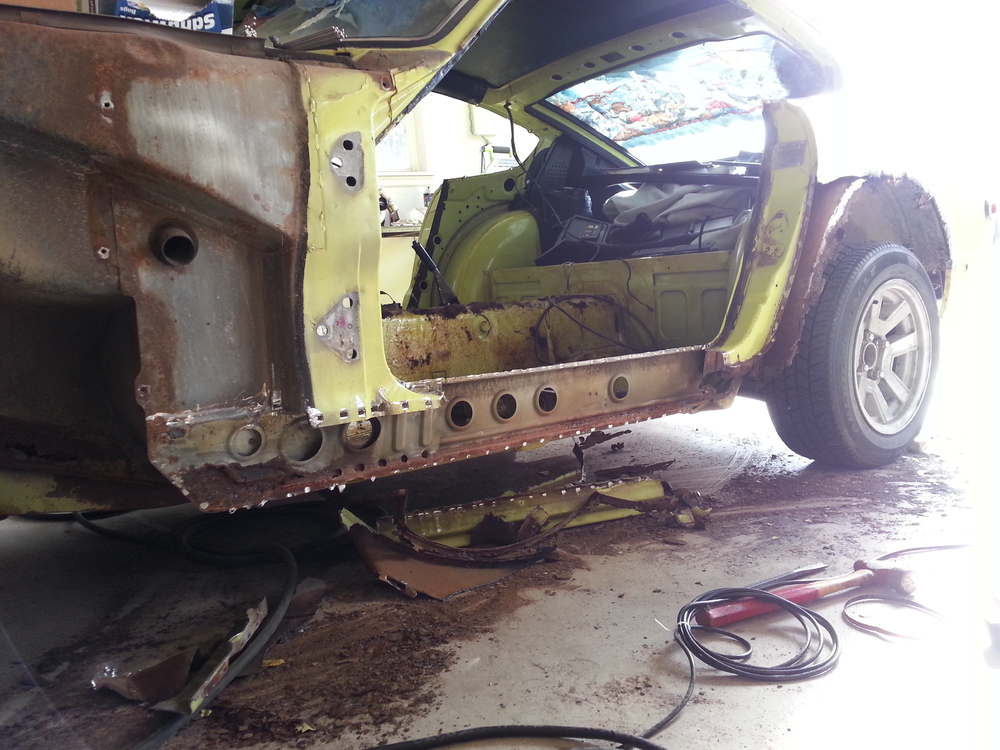
I bought the Tabco outer rocker panels. Its actually the only replacement panel I had bough and actually used. Fits great, however as you can see in some of the pictures, there was a crack at the seam, most likely due to stress from what ever machine they used to press/pound those into a mold. Would be nice if they made them out of a tad thicker sheet metal. Other than that no complaints. You never know, could be in the future I may entertain that idea, Id like to wait first though until my skills are on a professional level, as of now I am still in the Noob/beginner category. Though I am making the interior rocker panels upon request, already made a few for some people with great feedback. Refer to my garage business thread for details. Also I will attach to this post a PDF file a how to guide for replacing the rocker panels for those that want a more in depth process. Depends on what you say is simple, hehe. Send me the plans and I can take a look for you and let you know. Funny thing is I took someone elses Idea on another forum (Member has an awesome project going on) and created my version of the frame rails support that tie in with the front frames. He was cool with it though, hehe, I mean come on all the Auto companies steal each others ideas. Again thanks fellow Z members, both to those I quoted and didnt quote for the comments, Let me know if any of you need better pictures of any area of the car that I have went over for those ready to tear apart their cars for repairs. I may or may not have it. I have crap ton of pictures, at least a thousand , if not a couple thousand pics. Alright had some time after work today to figure out the rear seat brackets. Sometimes I feel so dumb for not thinking of a simple idea with out a ton of work. I originally was going to try and salvage the original rear seat brackets, but a couple of them are just too rusted to spend time patching them up and besides I absolutely hate drilling out spot welds, sick of it. Original brackets The rear brackets have an angle to them so the seat angles upwards from back to front. Man I am amazed how quickly metal rusts here in Oklahoma, gotta love the humidity. I need to get on it and treat the newly made floor pans, Dont want to do twice the work. Decided to just copy the design of the front seat brackets for the rears. This will also allow for the support from let to right the whole length of the floor like the original brace between the two rear brackets. Dont think its needed in my situation to make the top of the bracket as long as the original, So I cut it off about here as shown in the picture. I am going to use the original seats. Wouldnt be hard to add on in case I install different seats later in life. Cross brace I was talking about. Also able to get a ratchet wrench underneath to tighten the nut on the seat rail. Thats it for now. More to come! INTERIOR ROCKER PANEL INSTALLATION GUIDE.pdf


-
I though the same thing after I finished the driver side. Luckily both doors fit just fine and are aligned really well. Correct, Lots of youtube videos and reading online helped me a whole lot. I actually just got that wheel a couple of weeks ago. Ended up ordering a 3x8 upper wheel and some specialty lower anvils from Hoosier Profiles Inc.. Thinking they will arrive sometime end of this week. I actually wasnt impressed with the quality of the Baileigh English Wheel, for anyone thinking about buying one, I would advise another brand. I actually complained about it to baileigh and they pretty much blew me off and said it is the way it is. Because of my experience, not sure id buy baileigh again. Thanks all for the comments. Probably would had been better to buy a better shell and ditching this one, but couldnt do it.
-
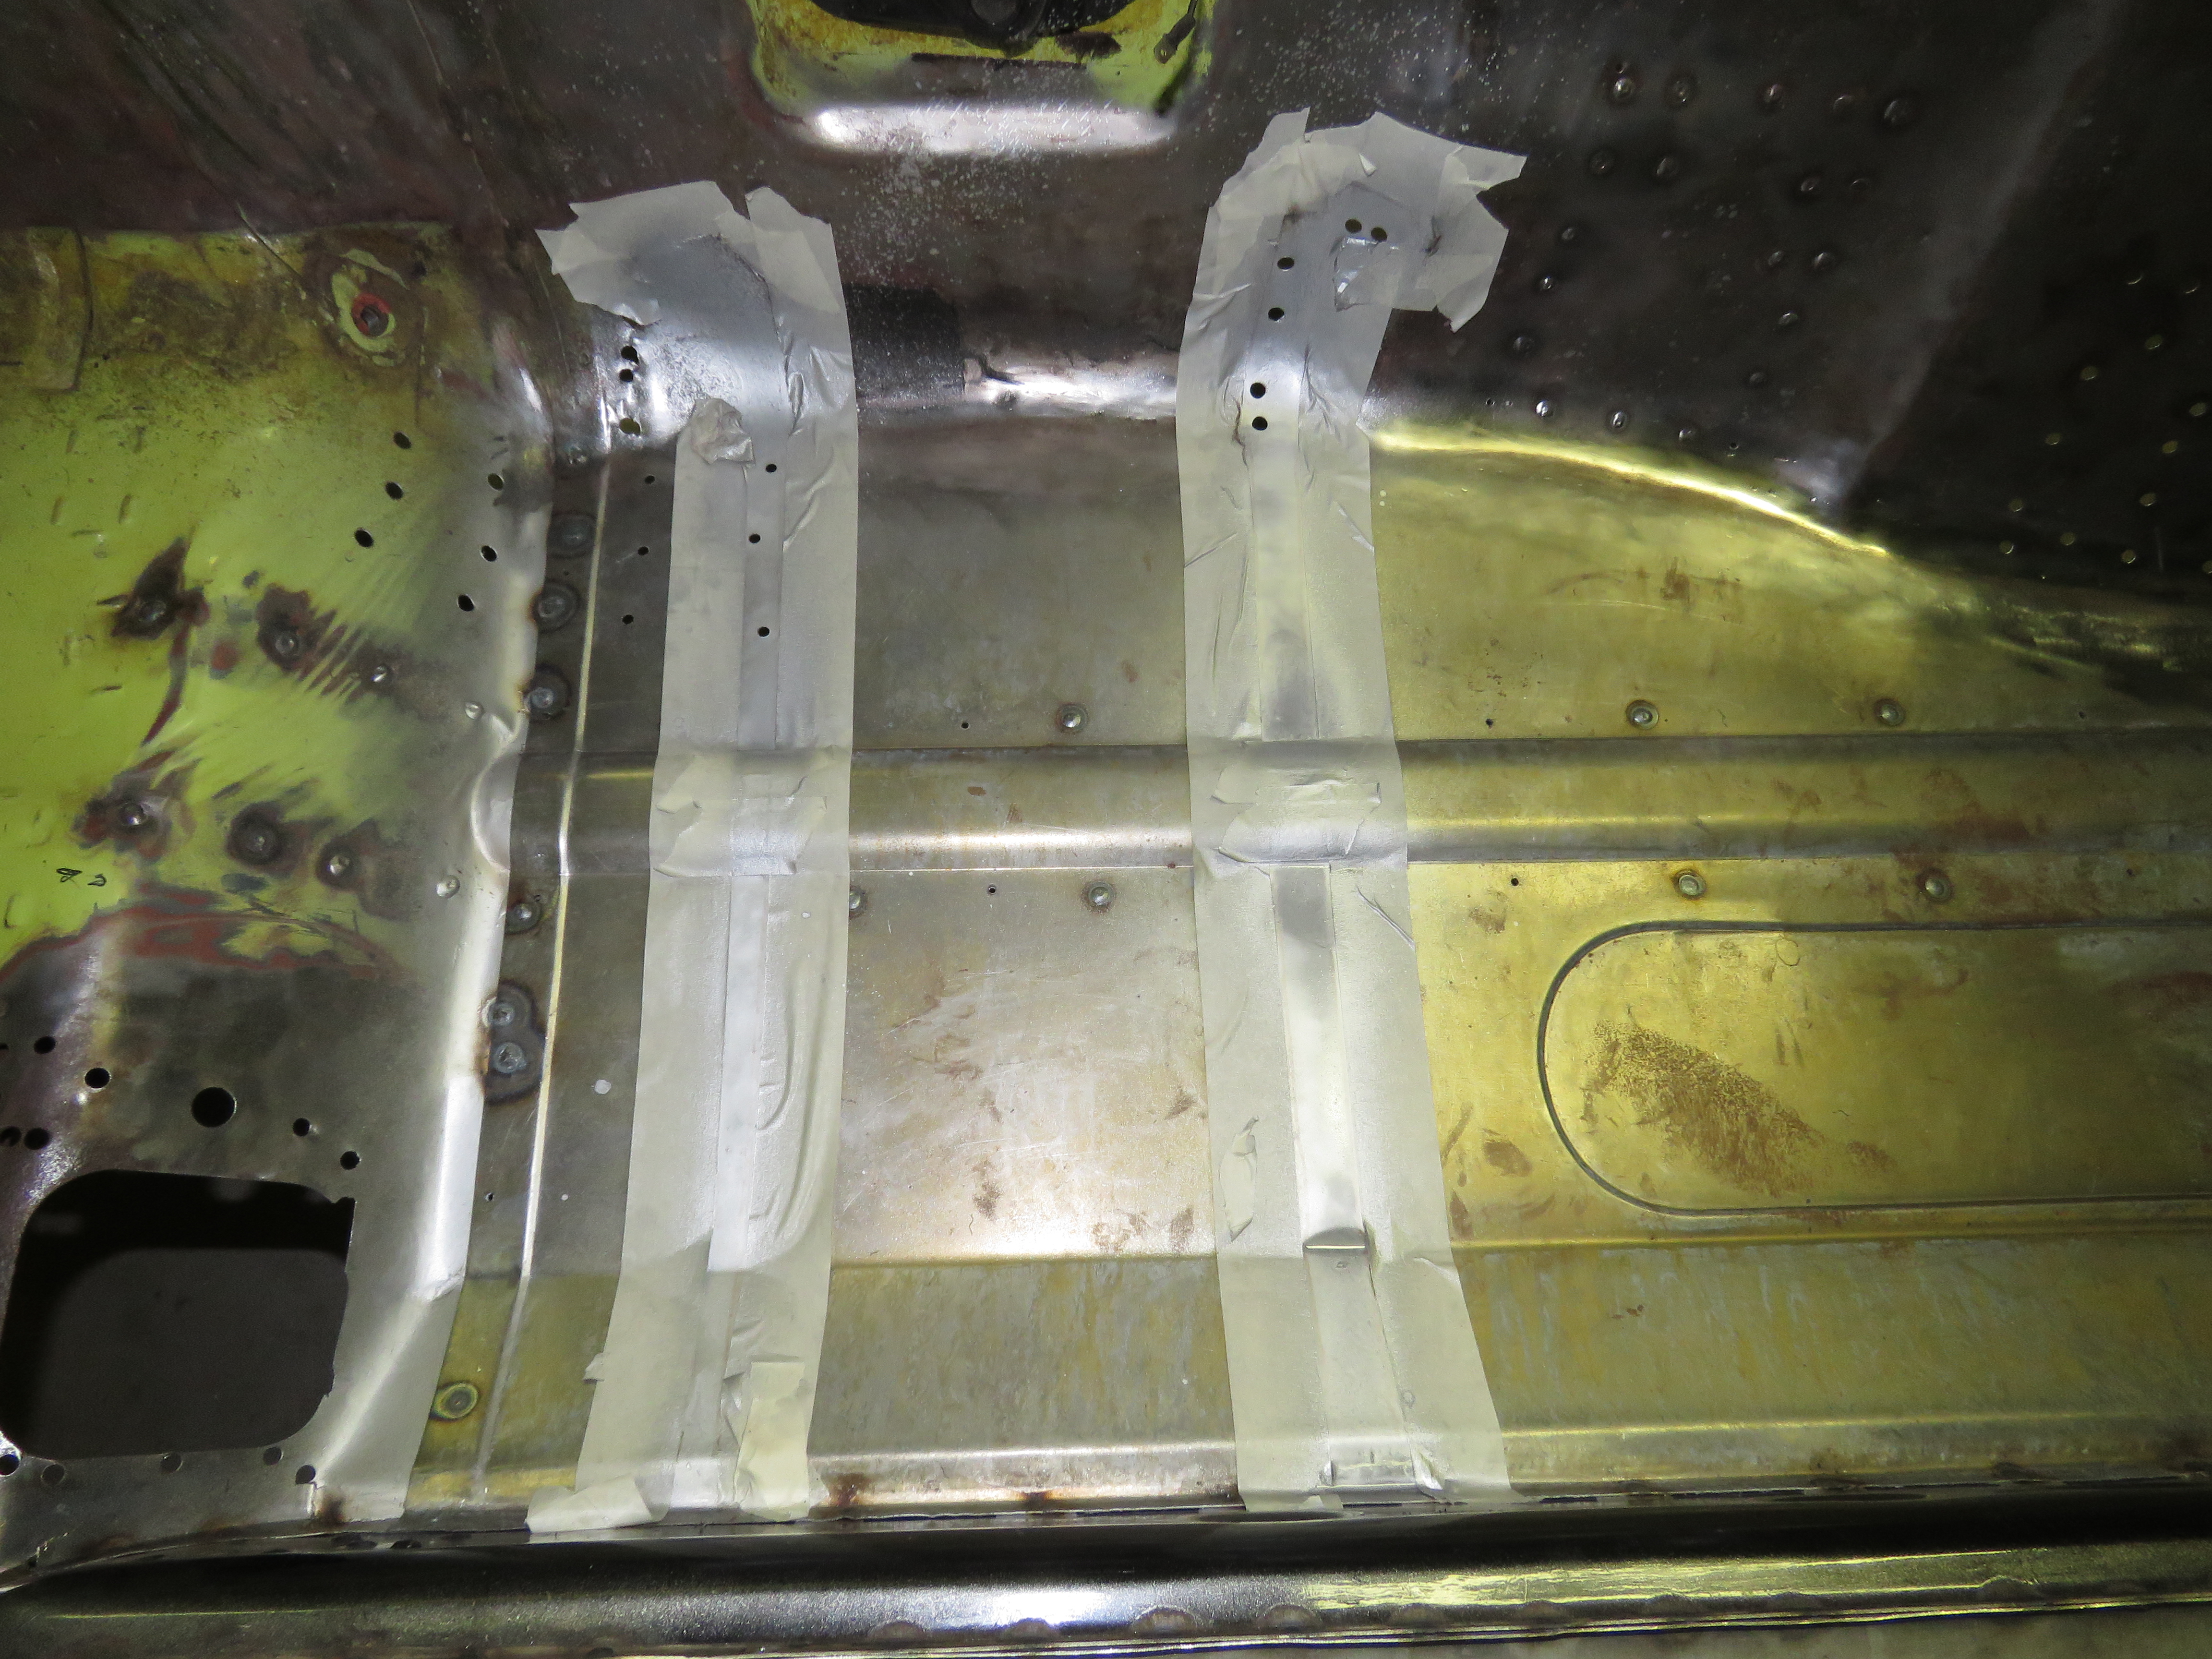
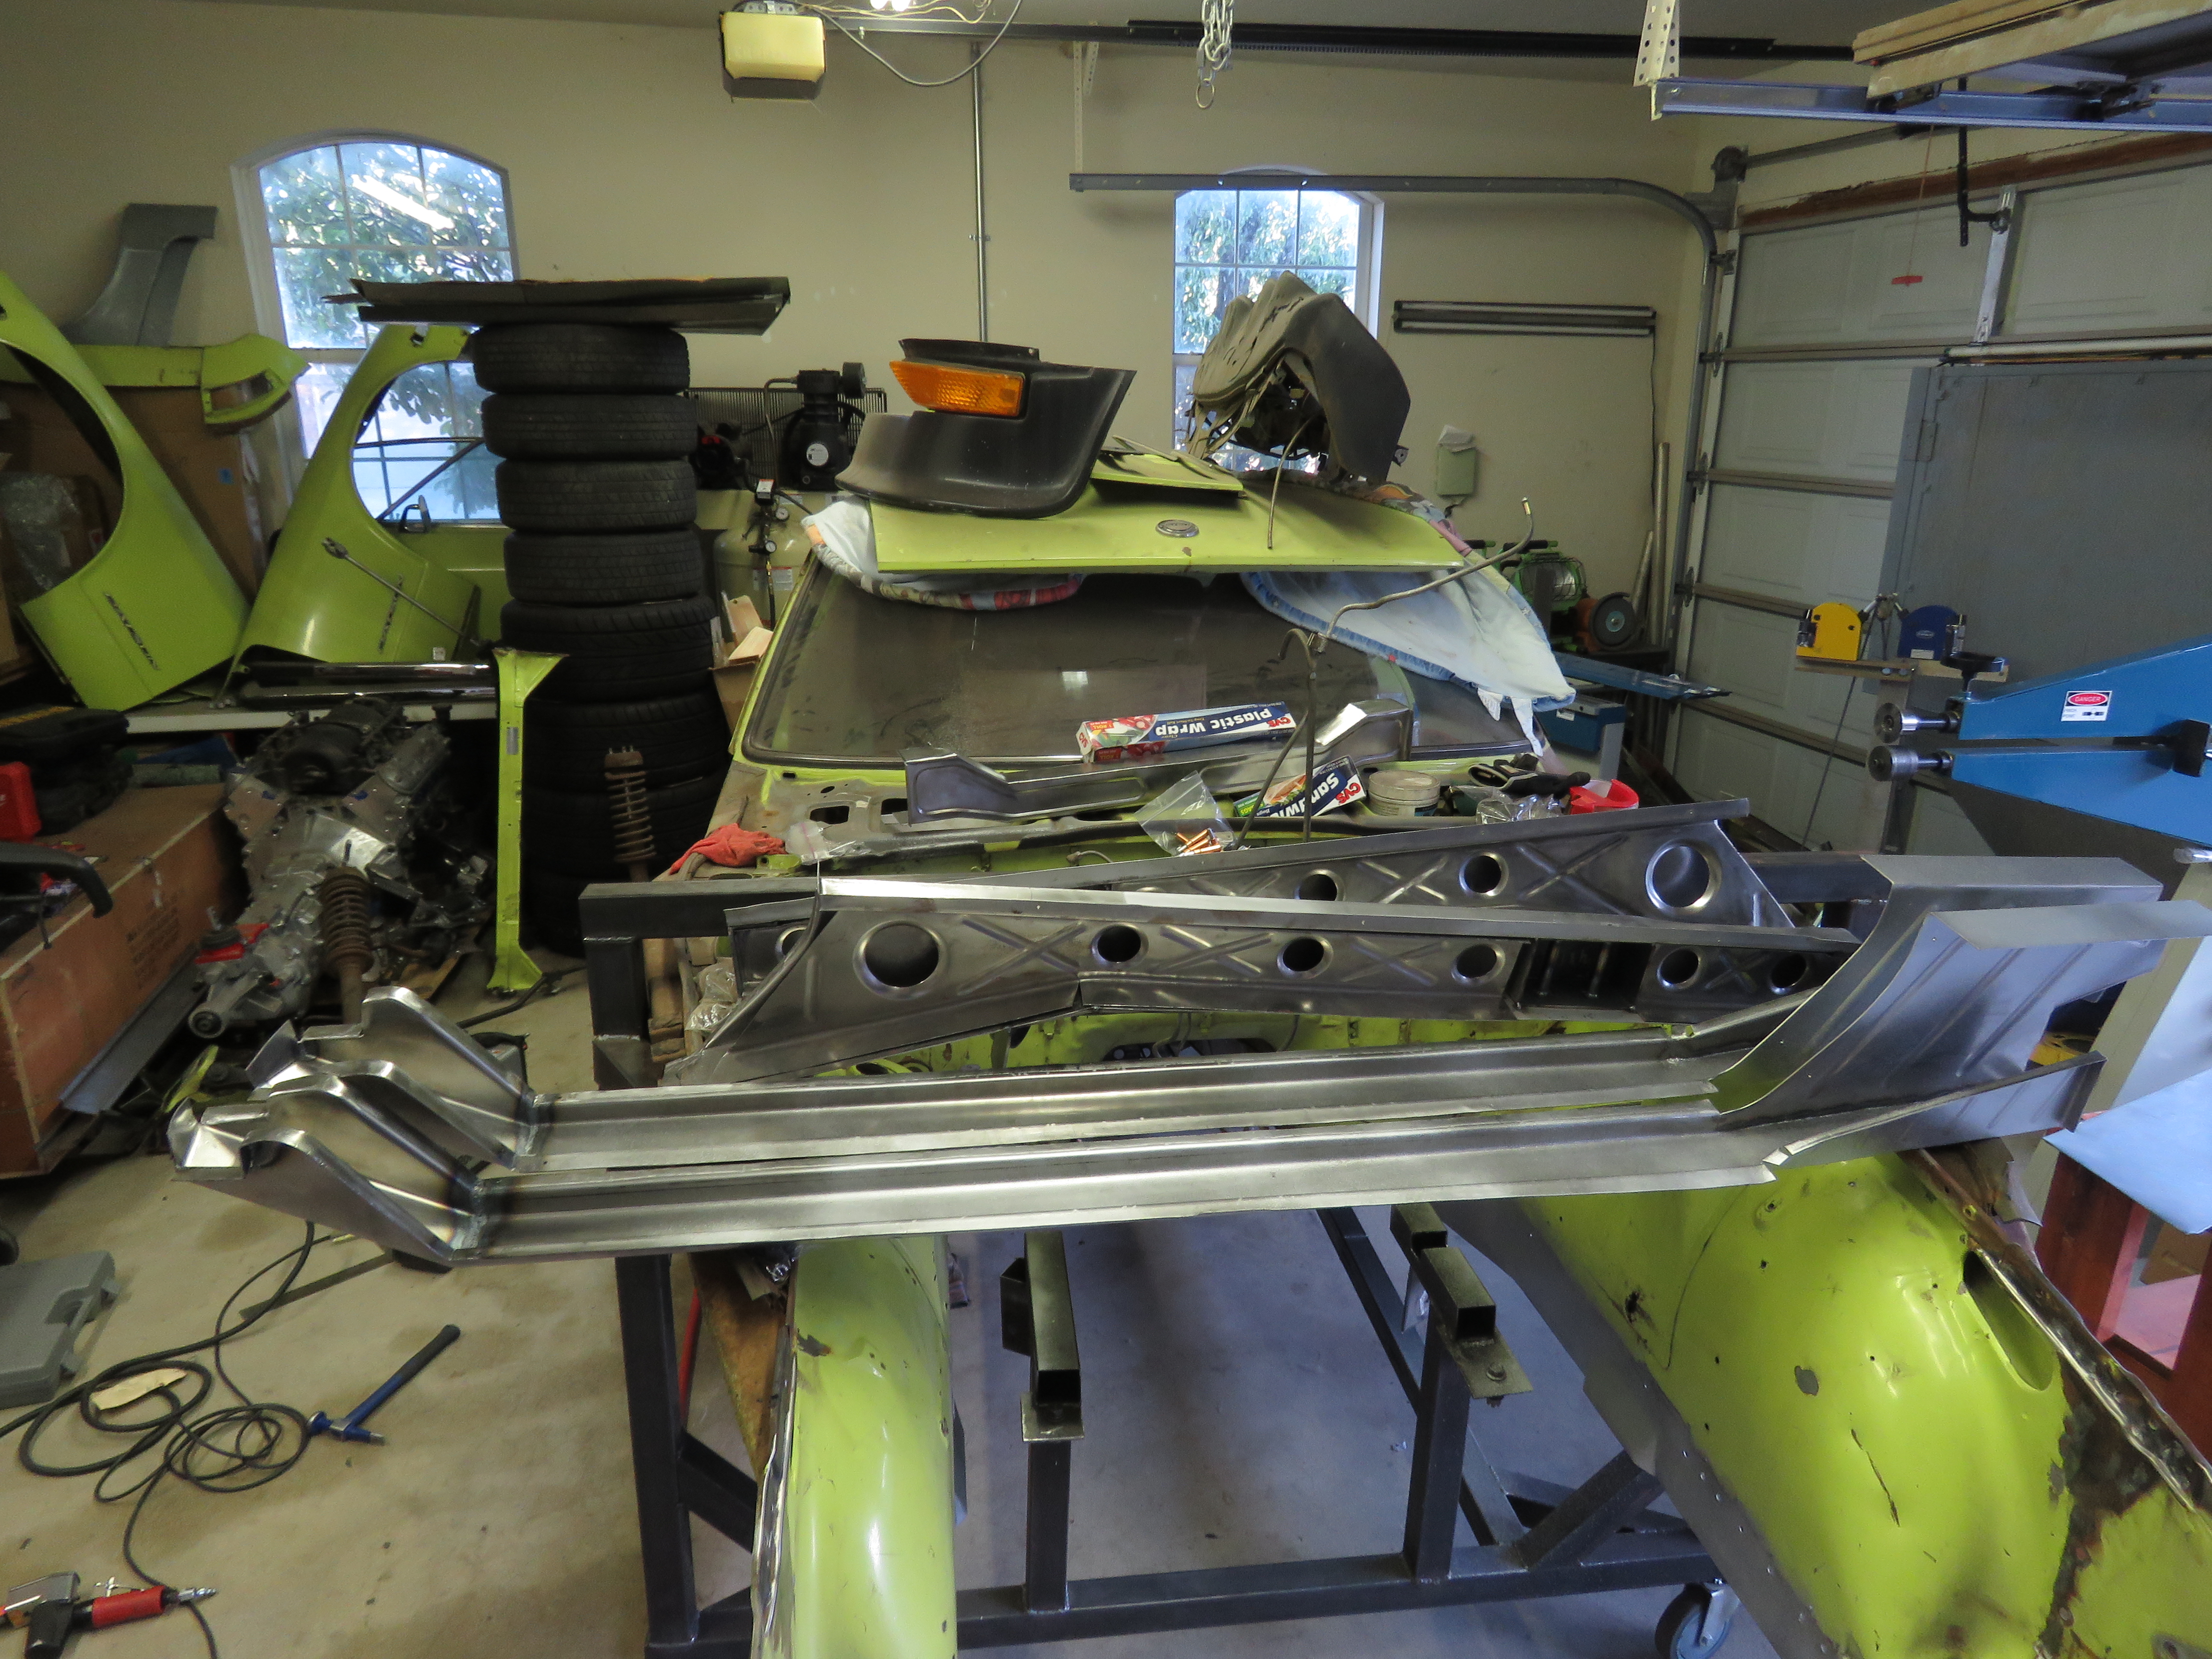
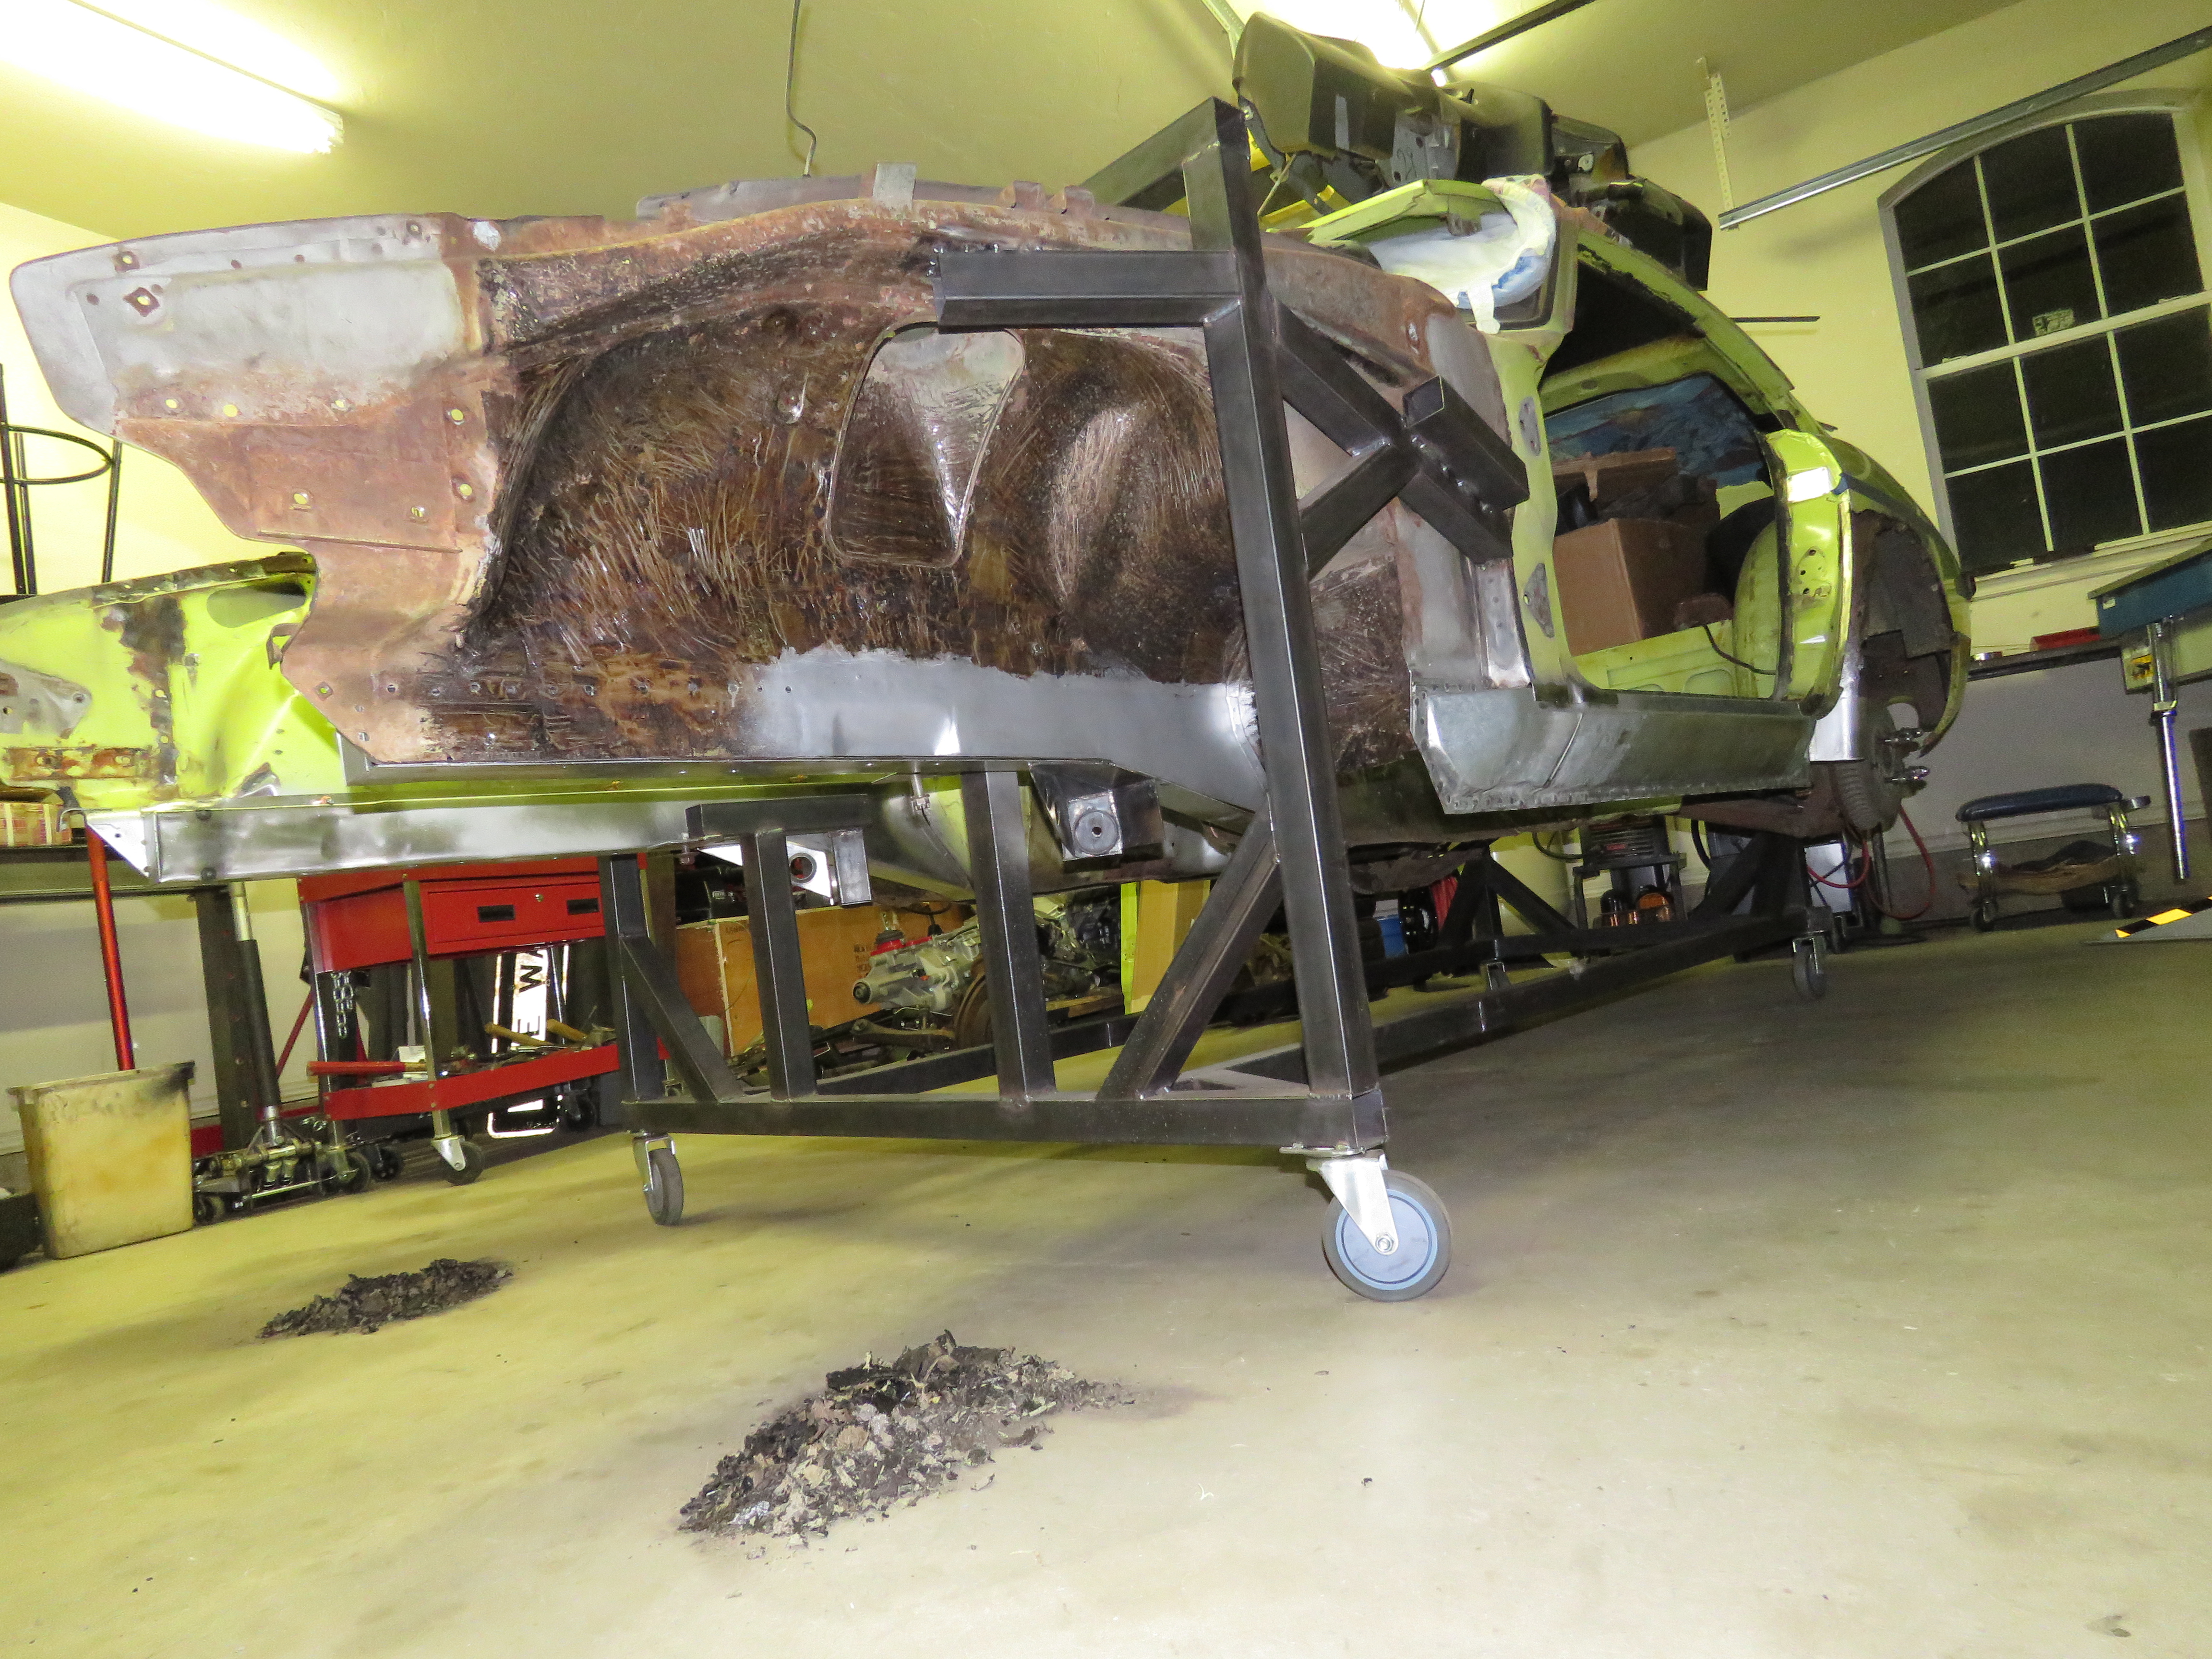
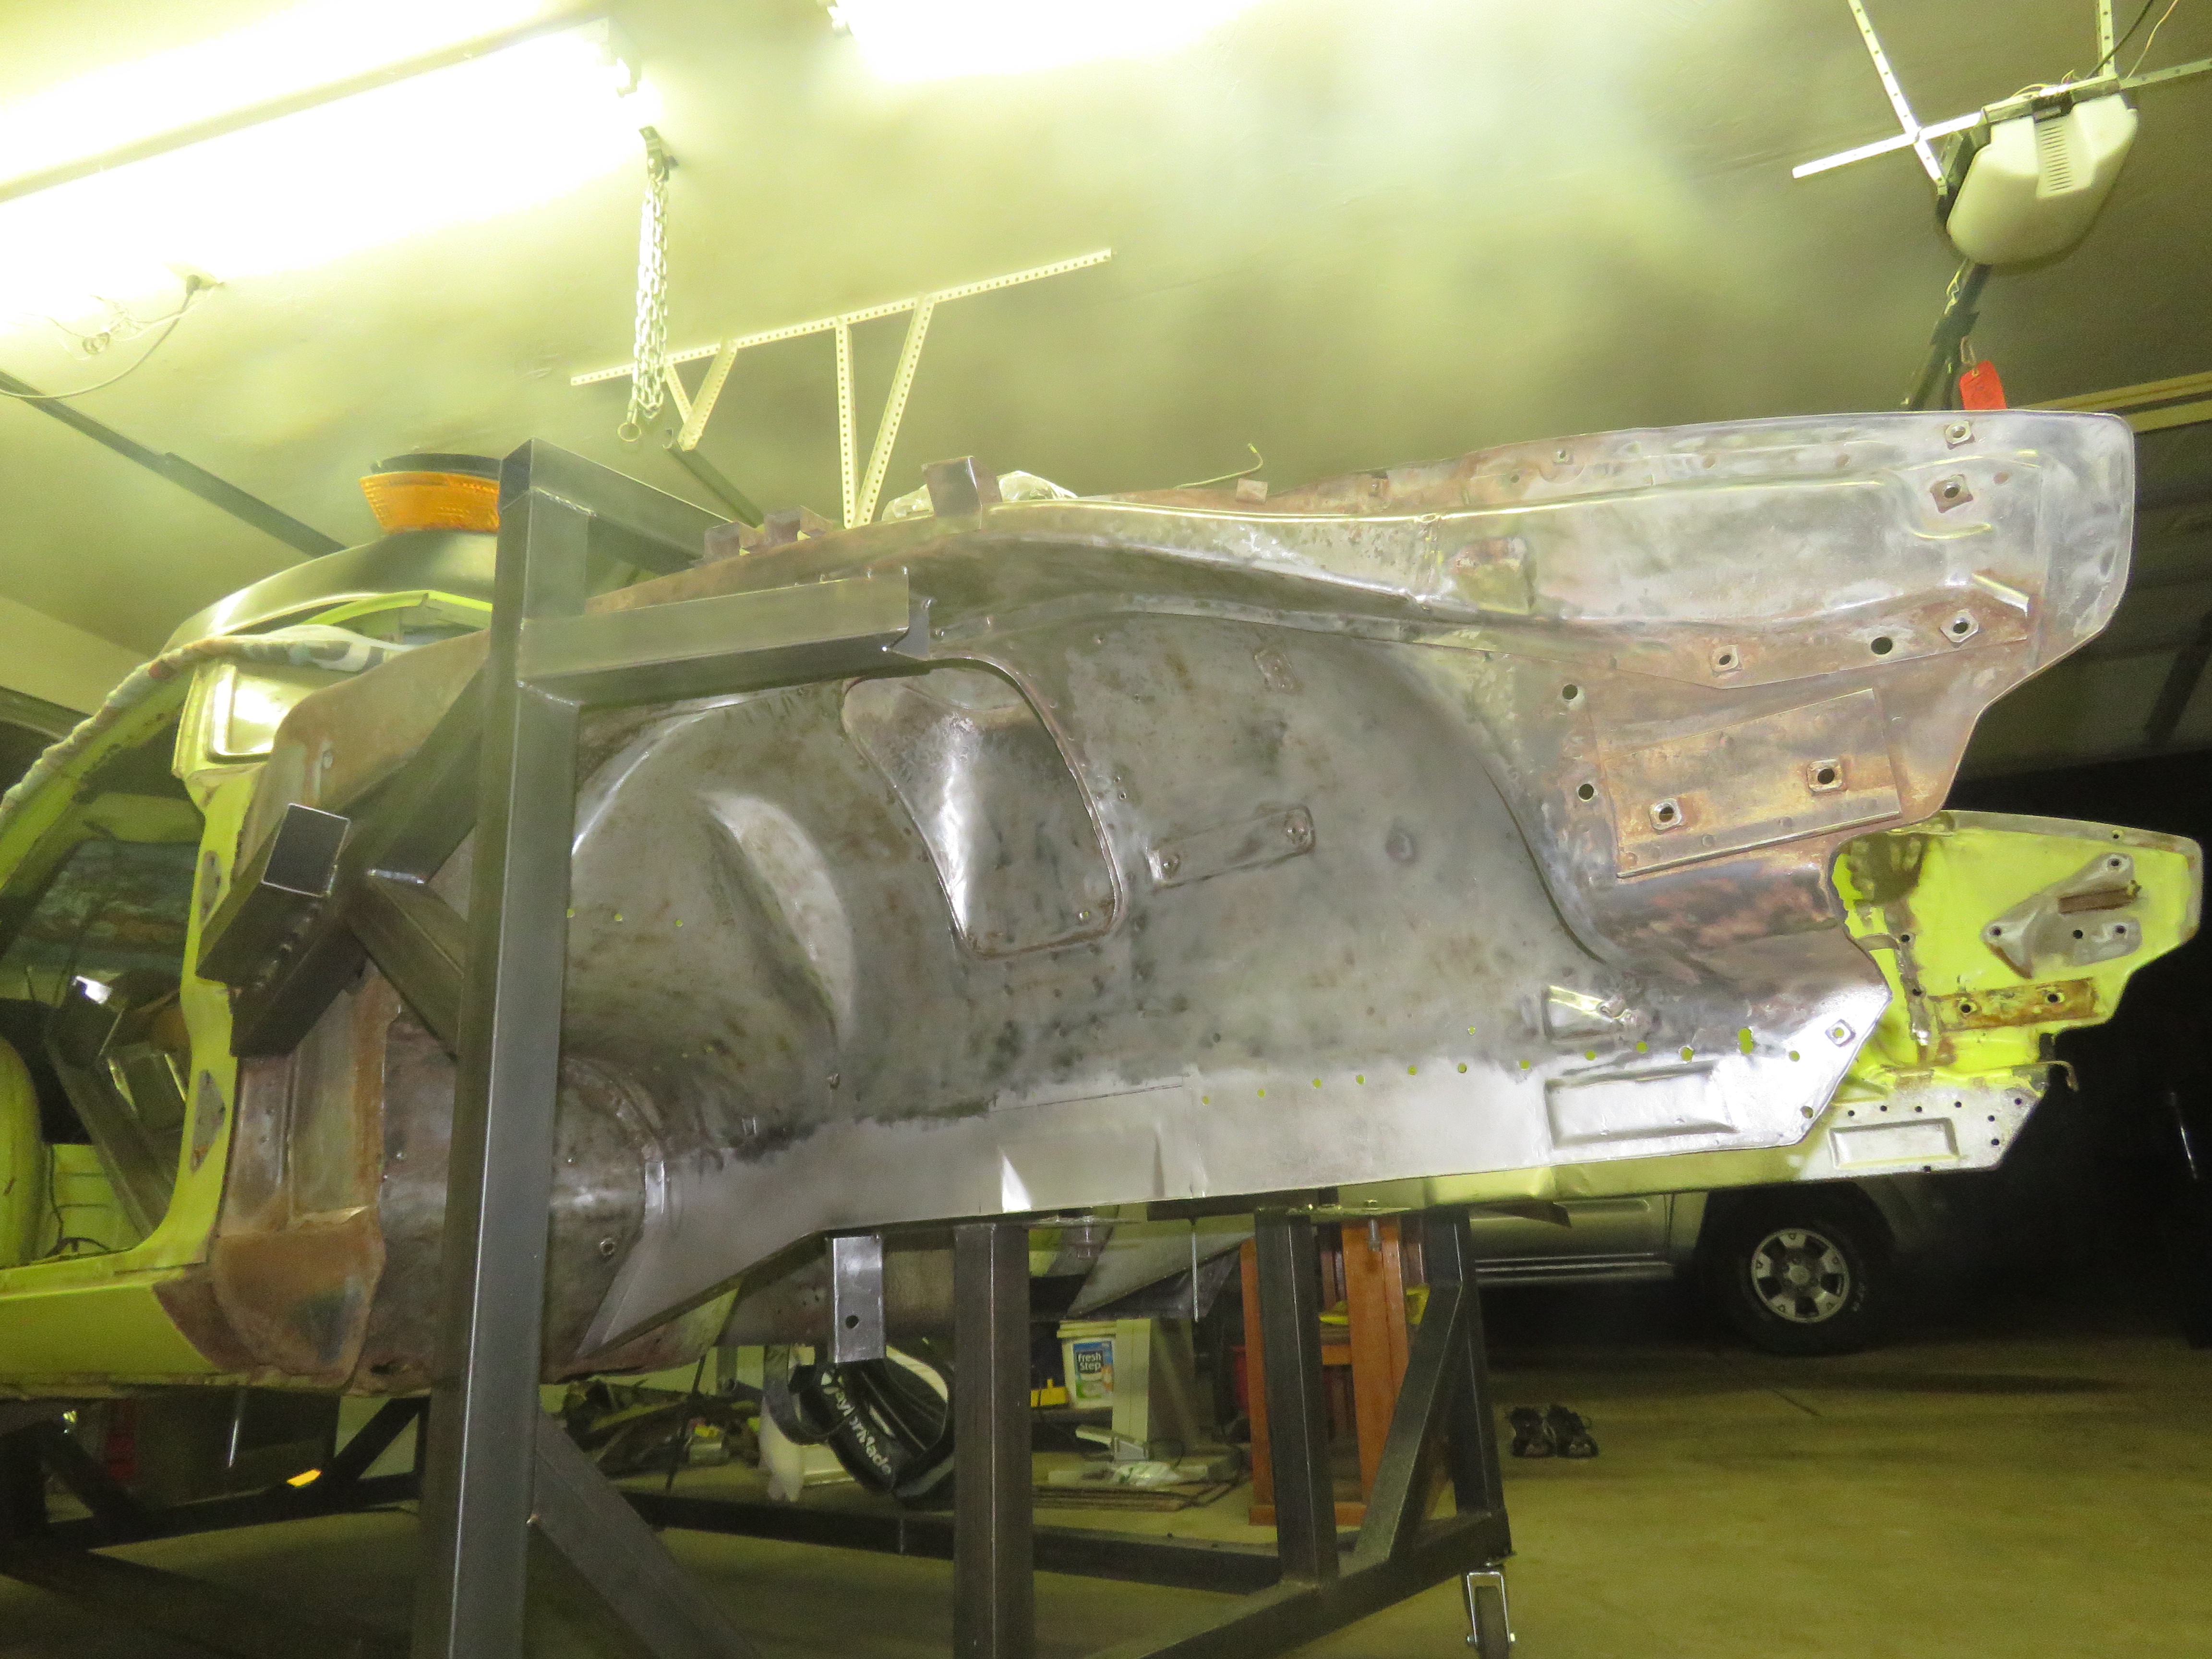
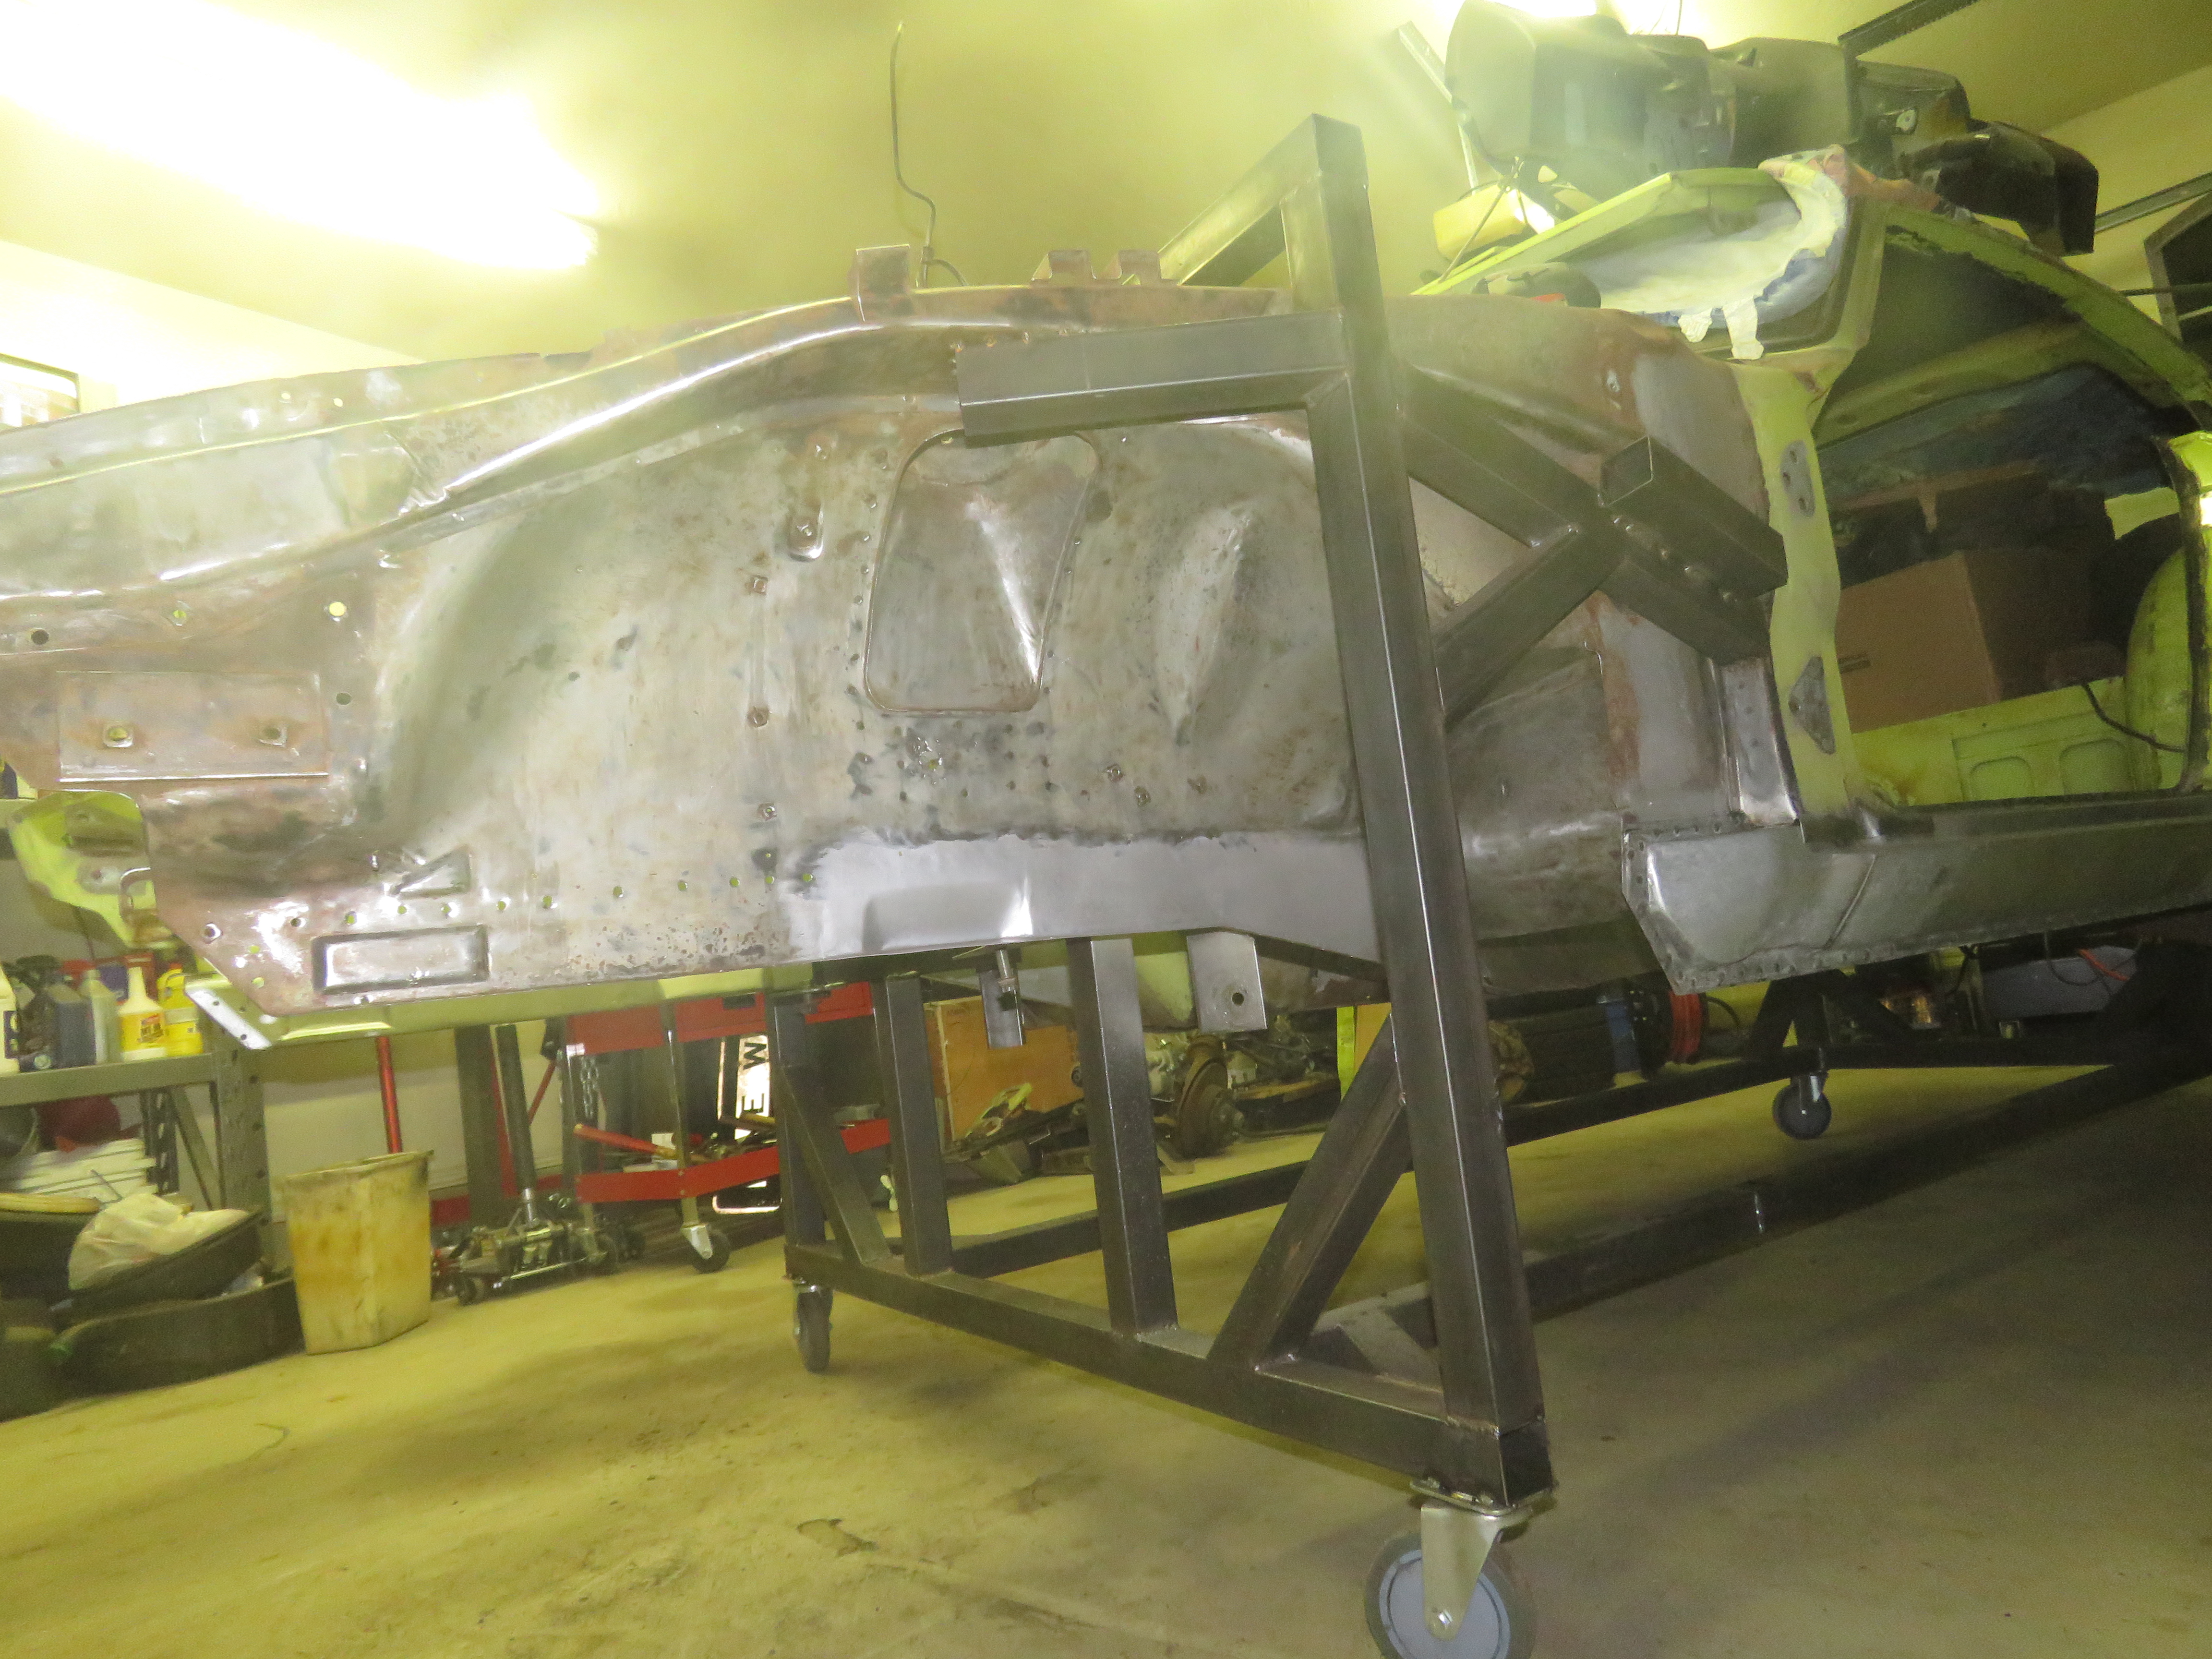
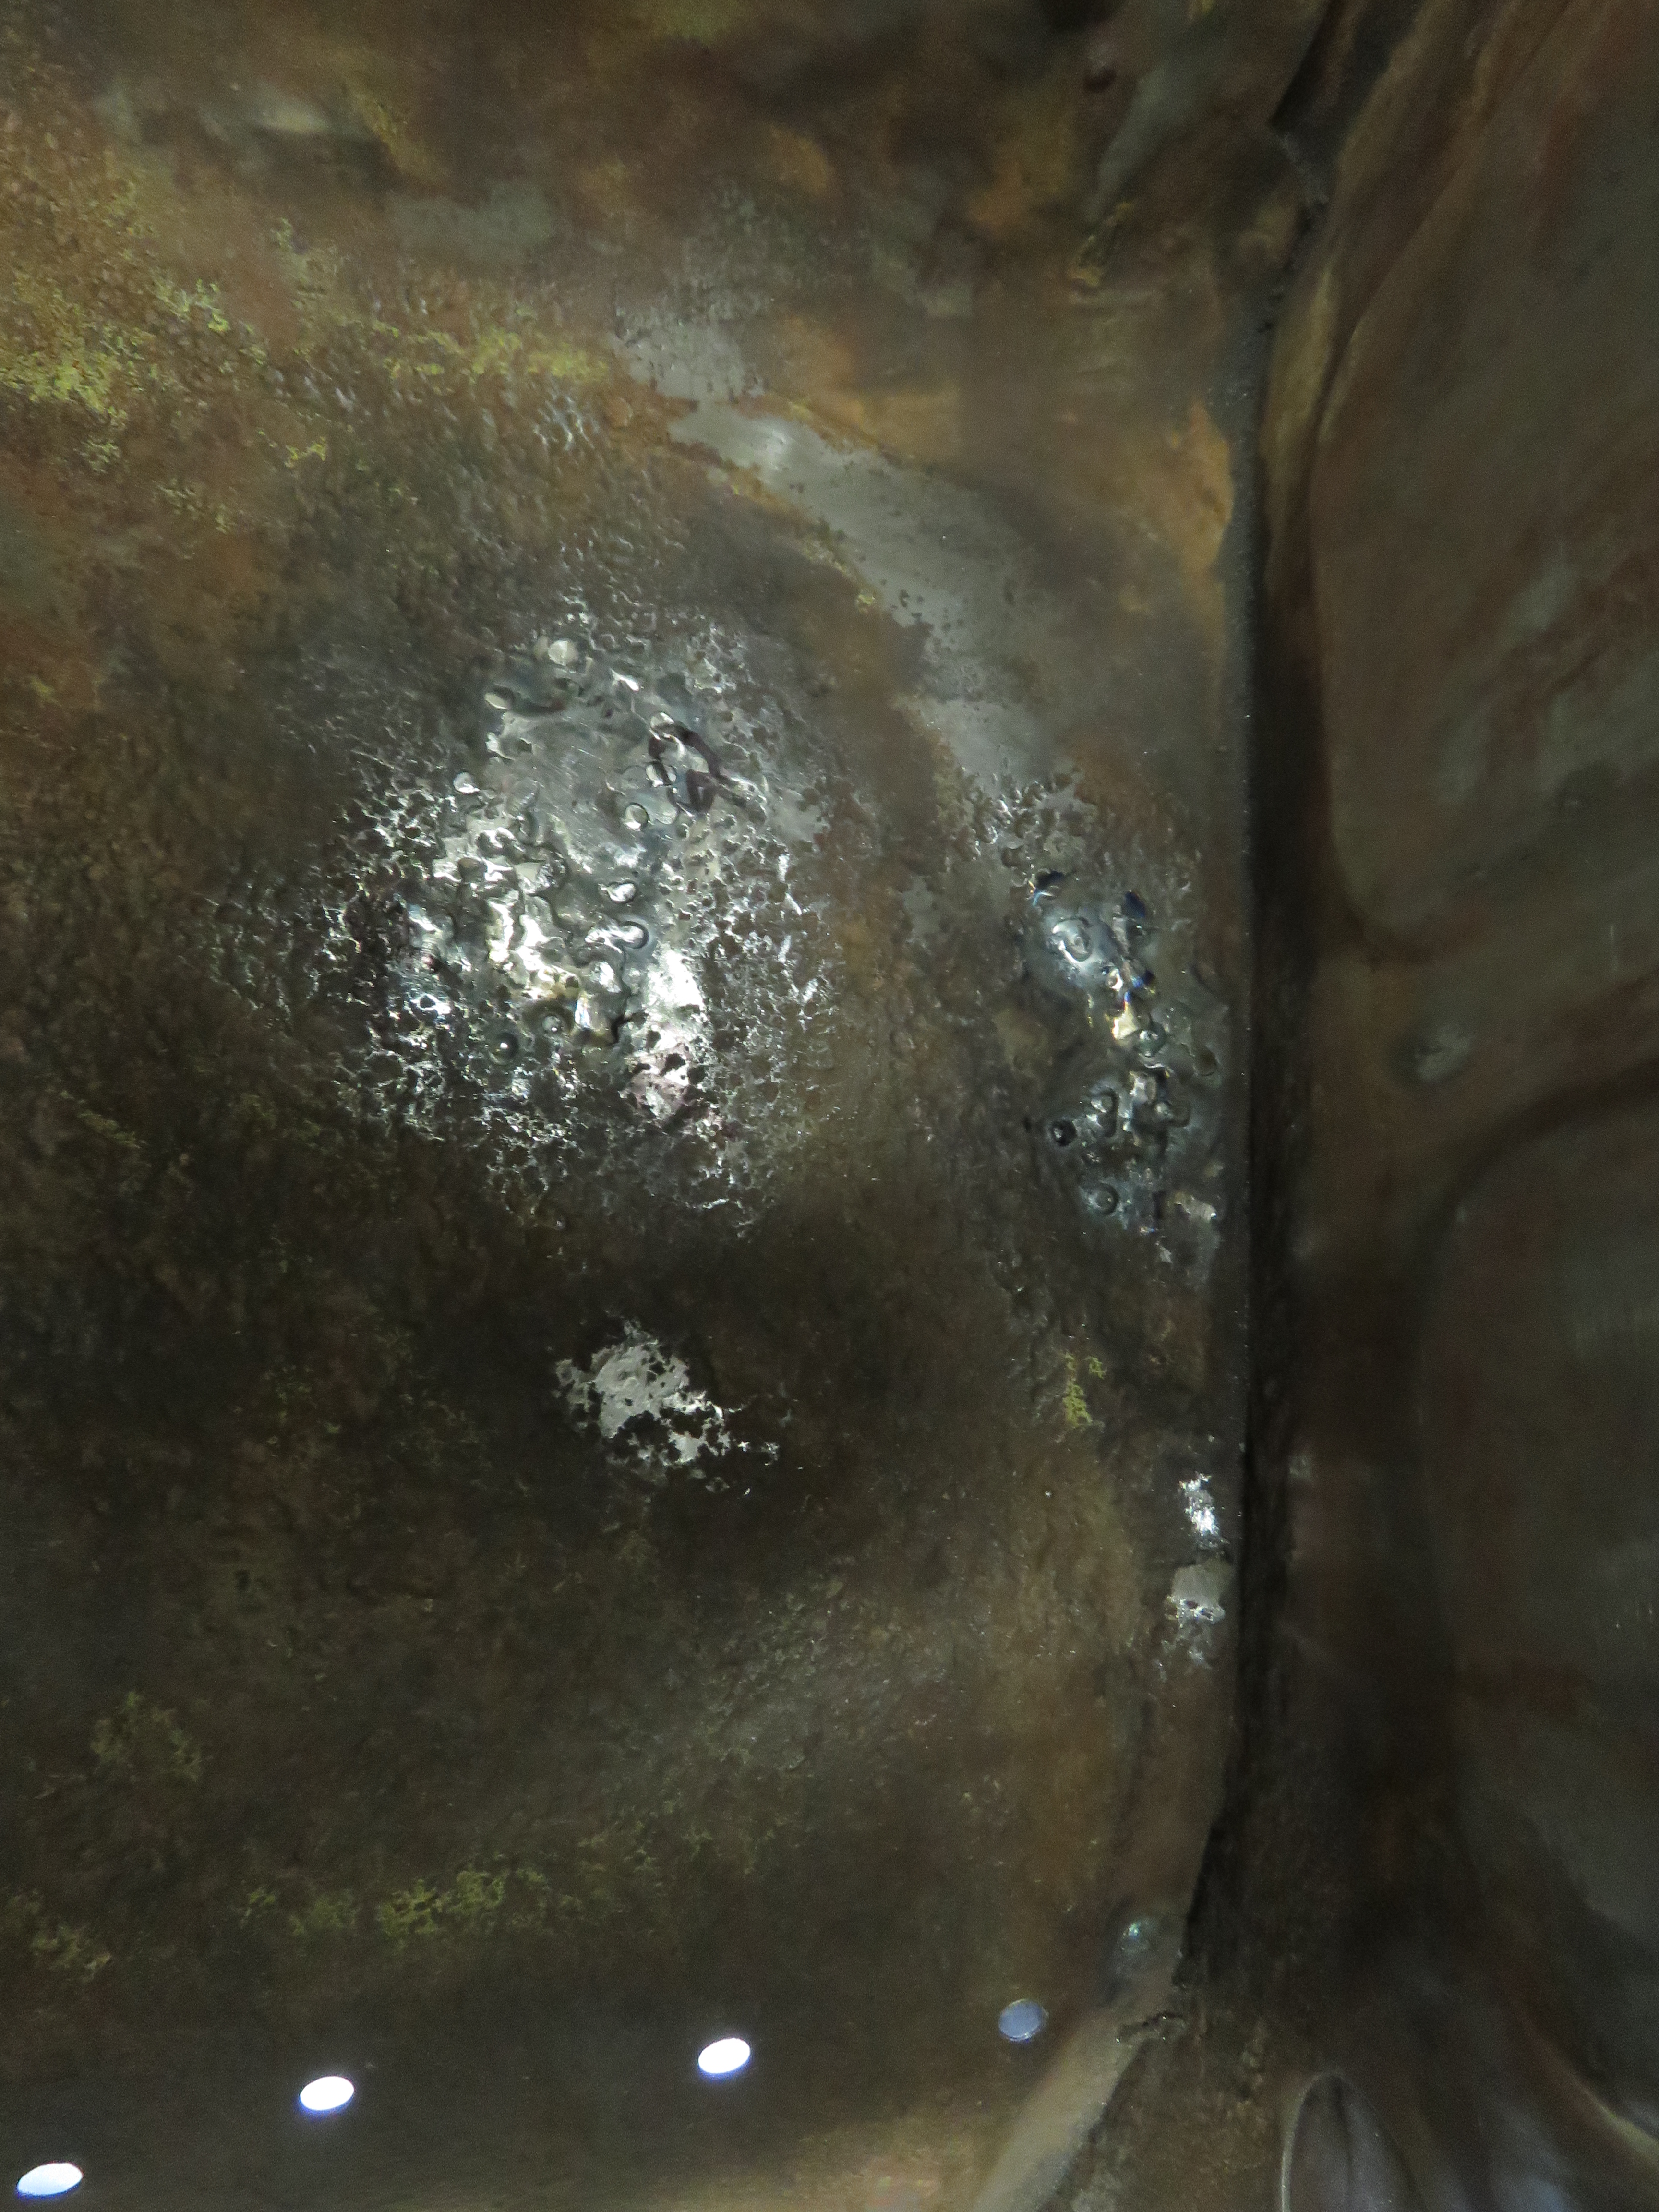
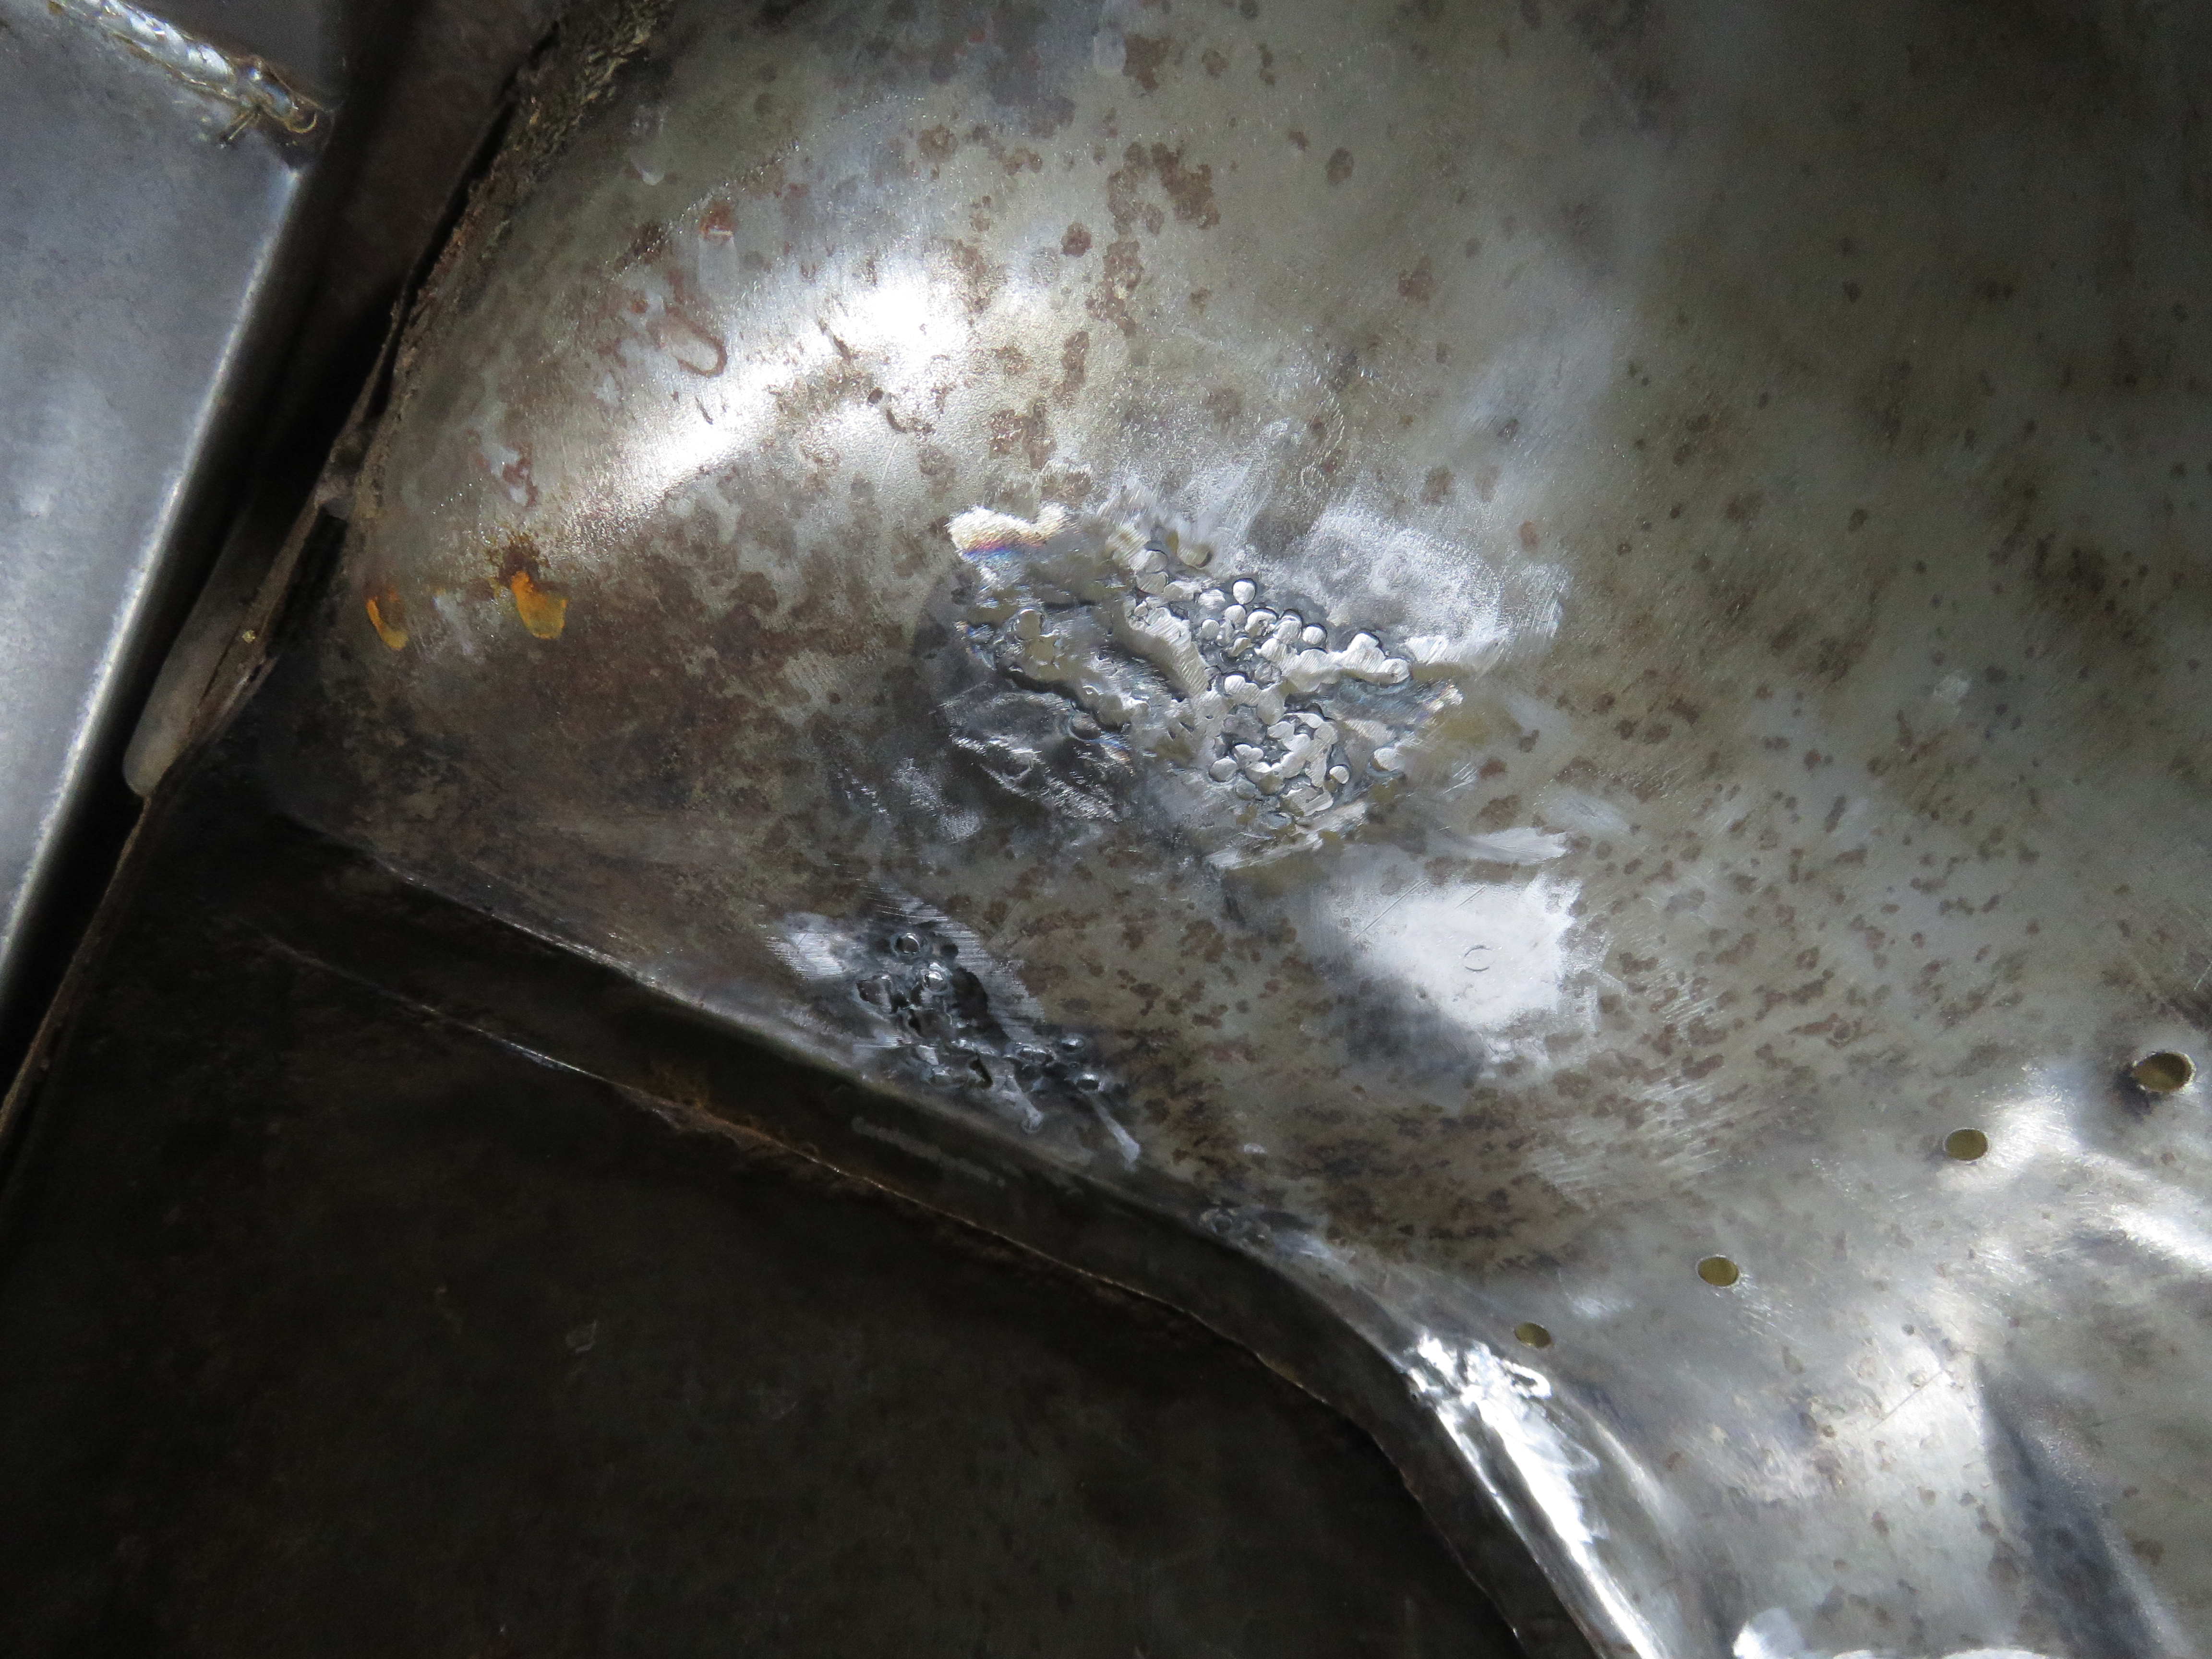
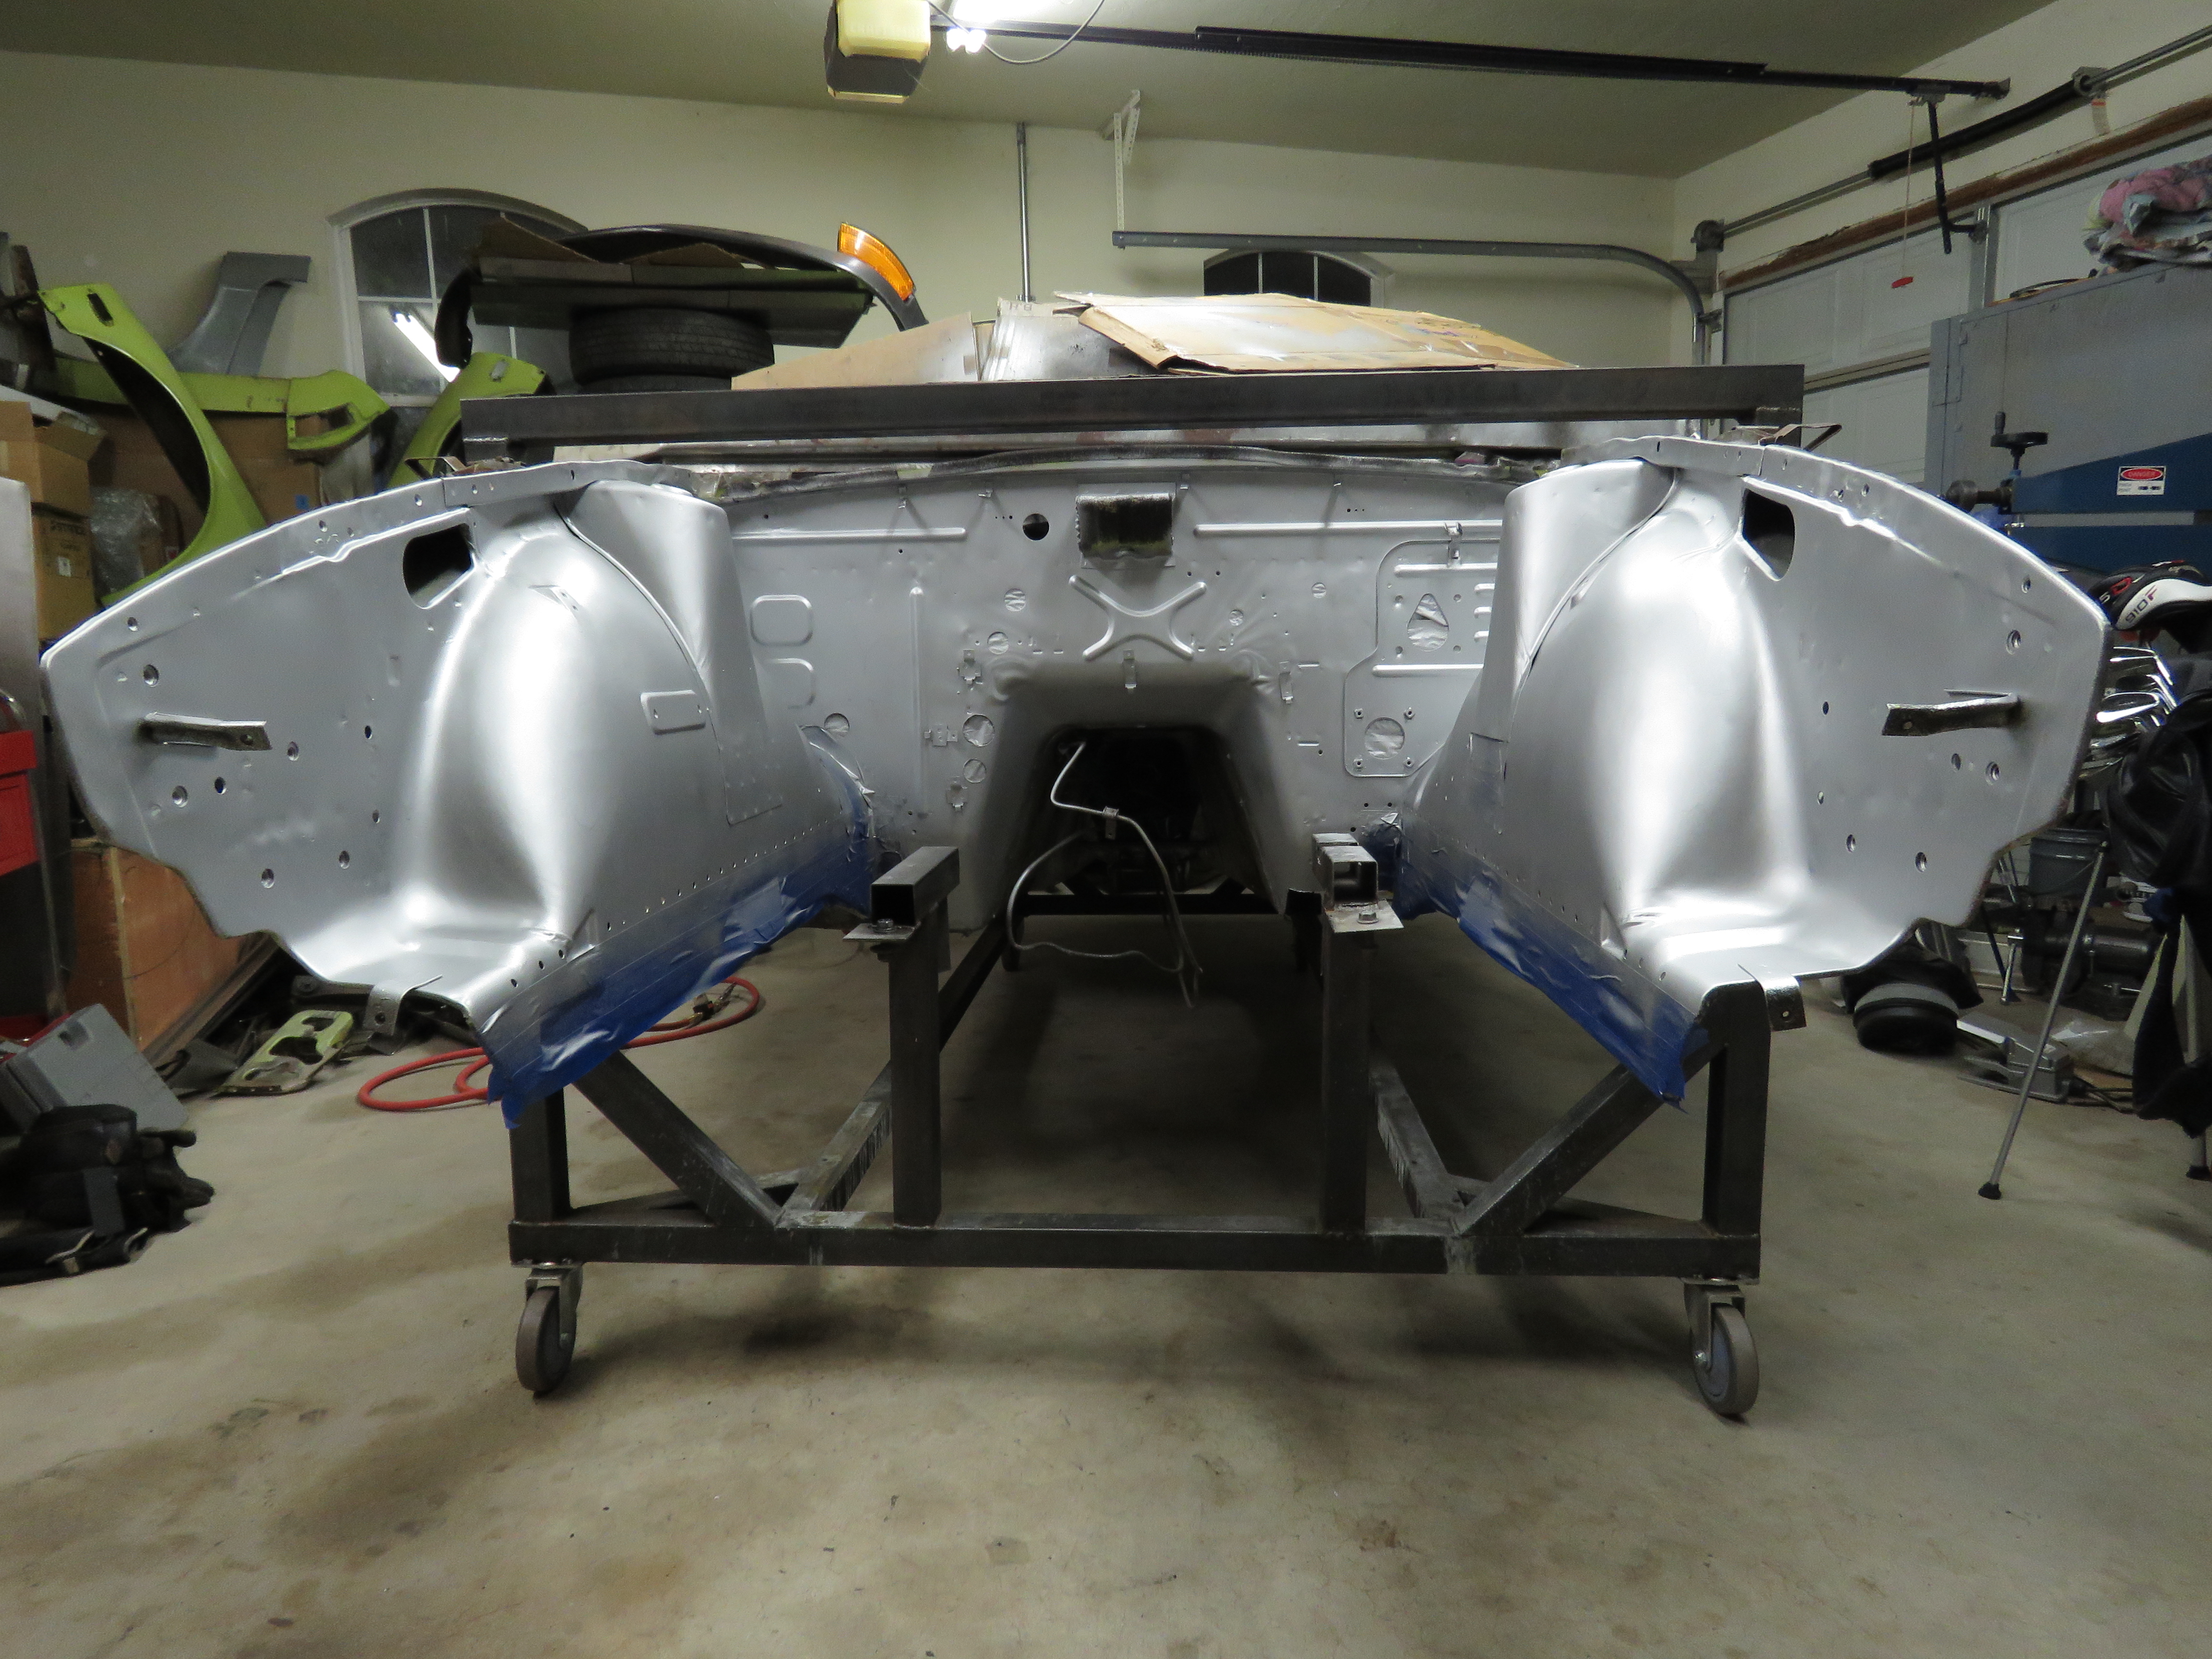
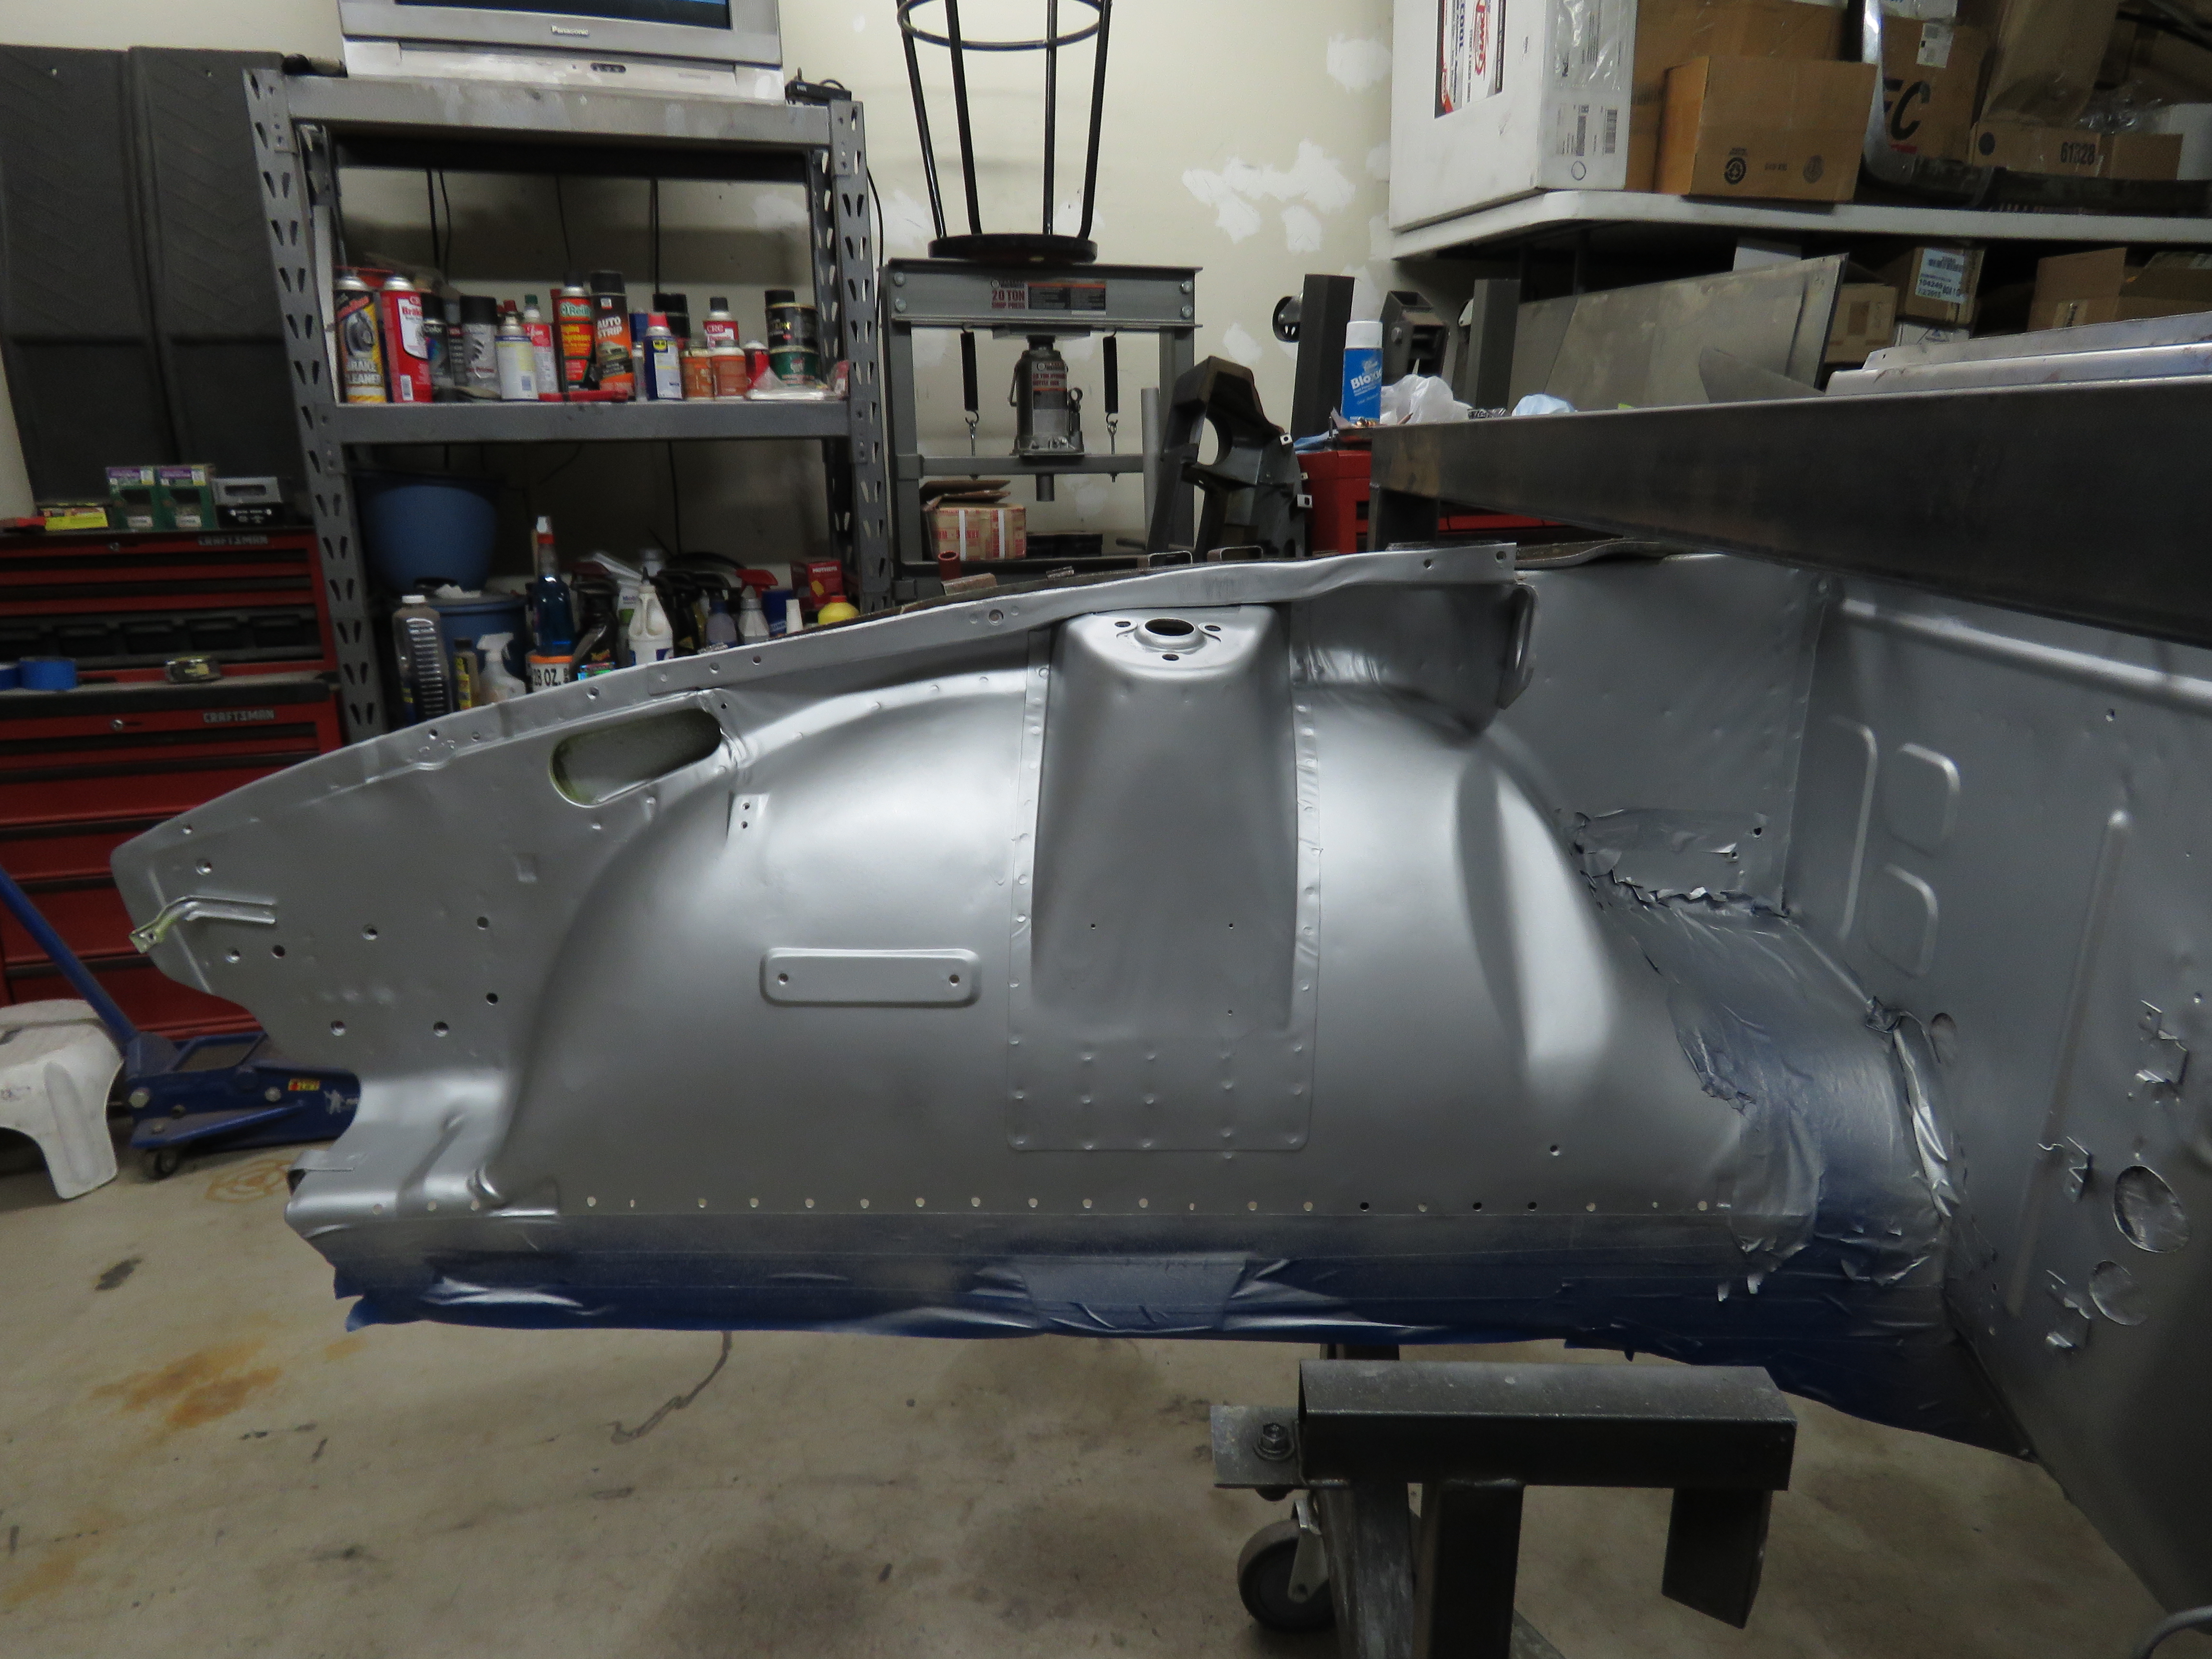
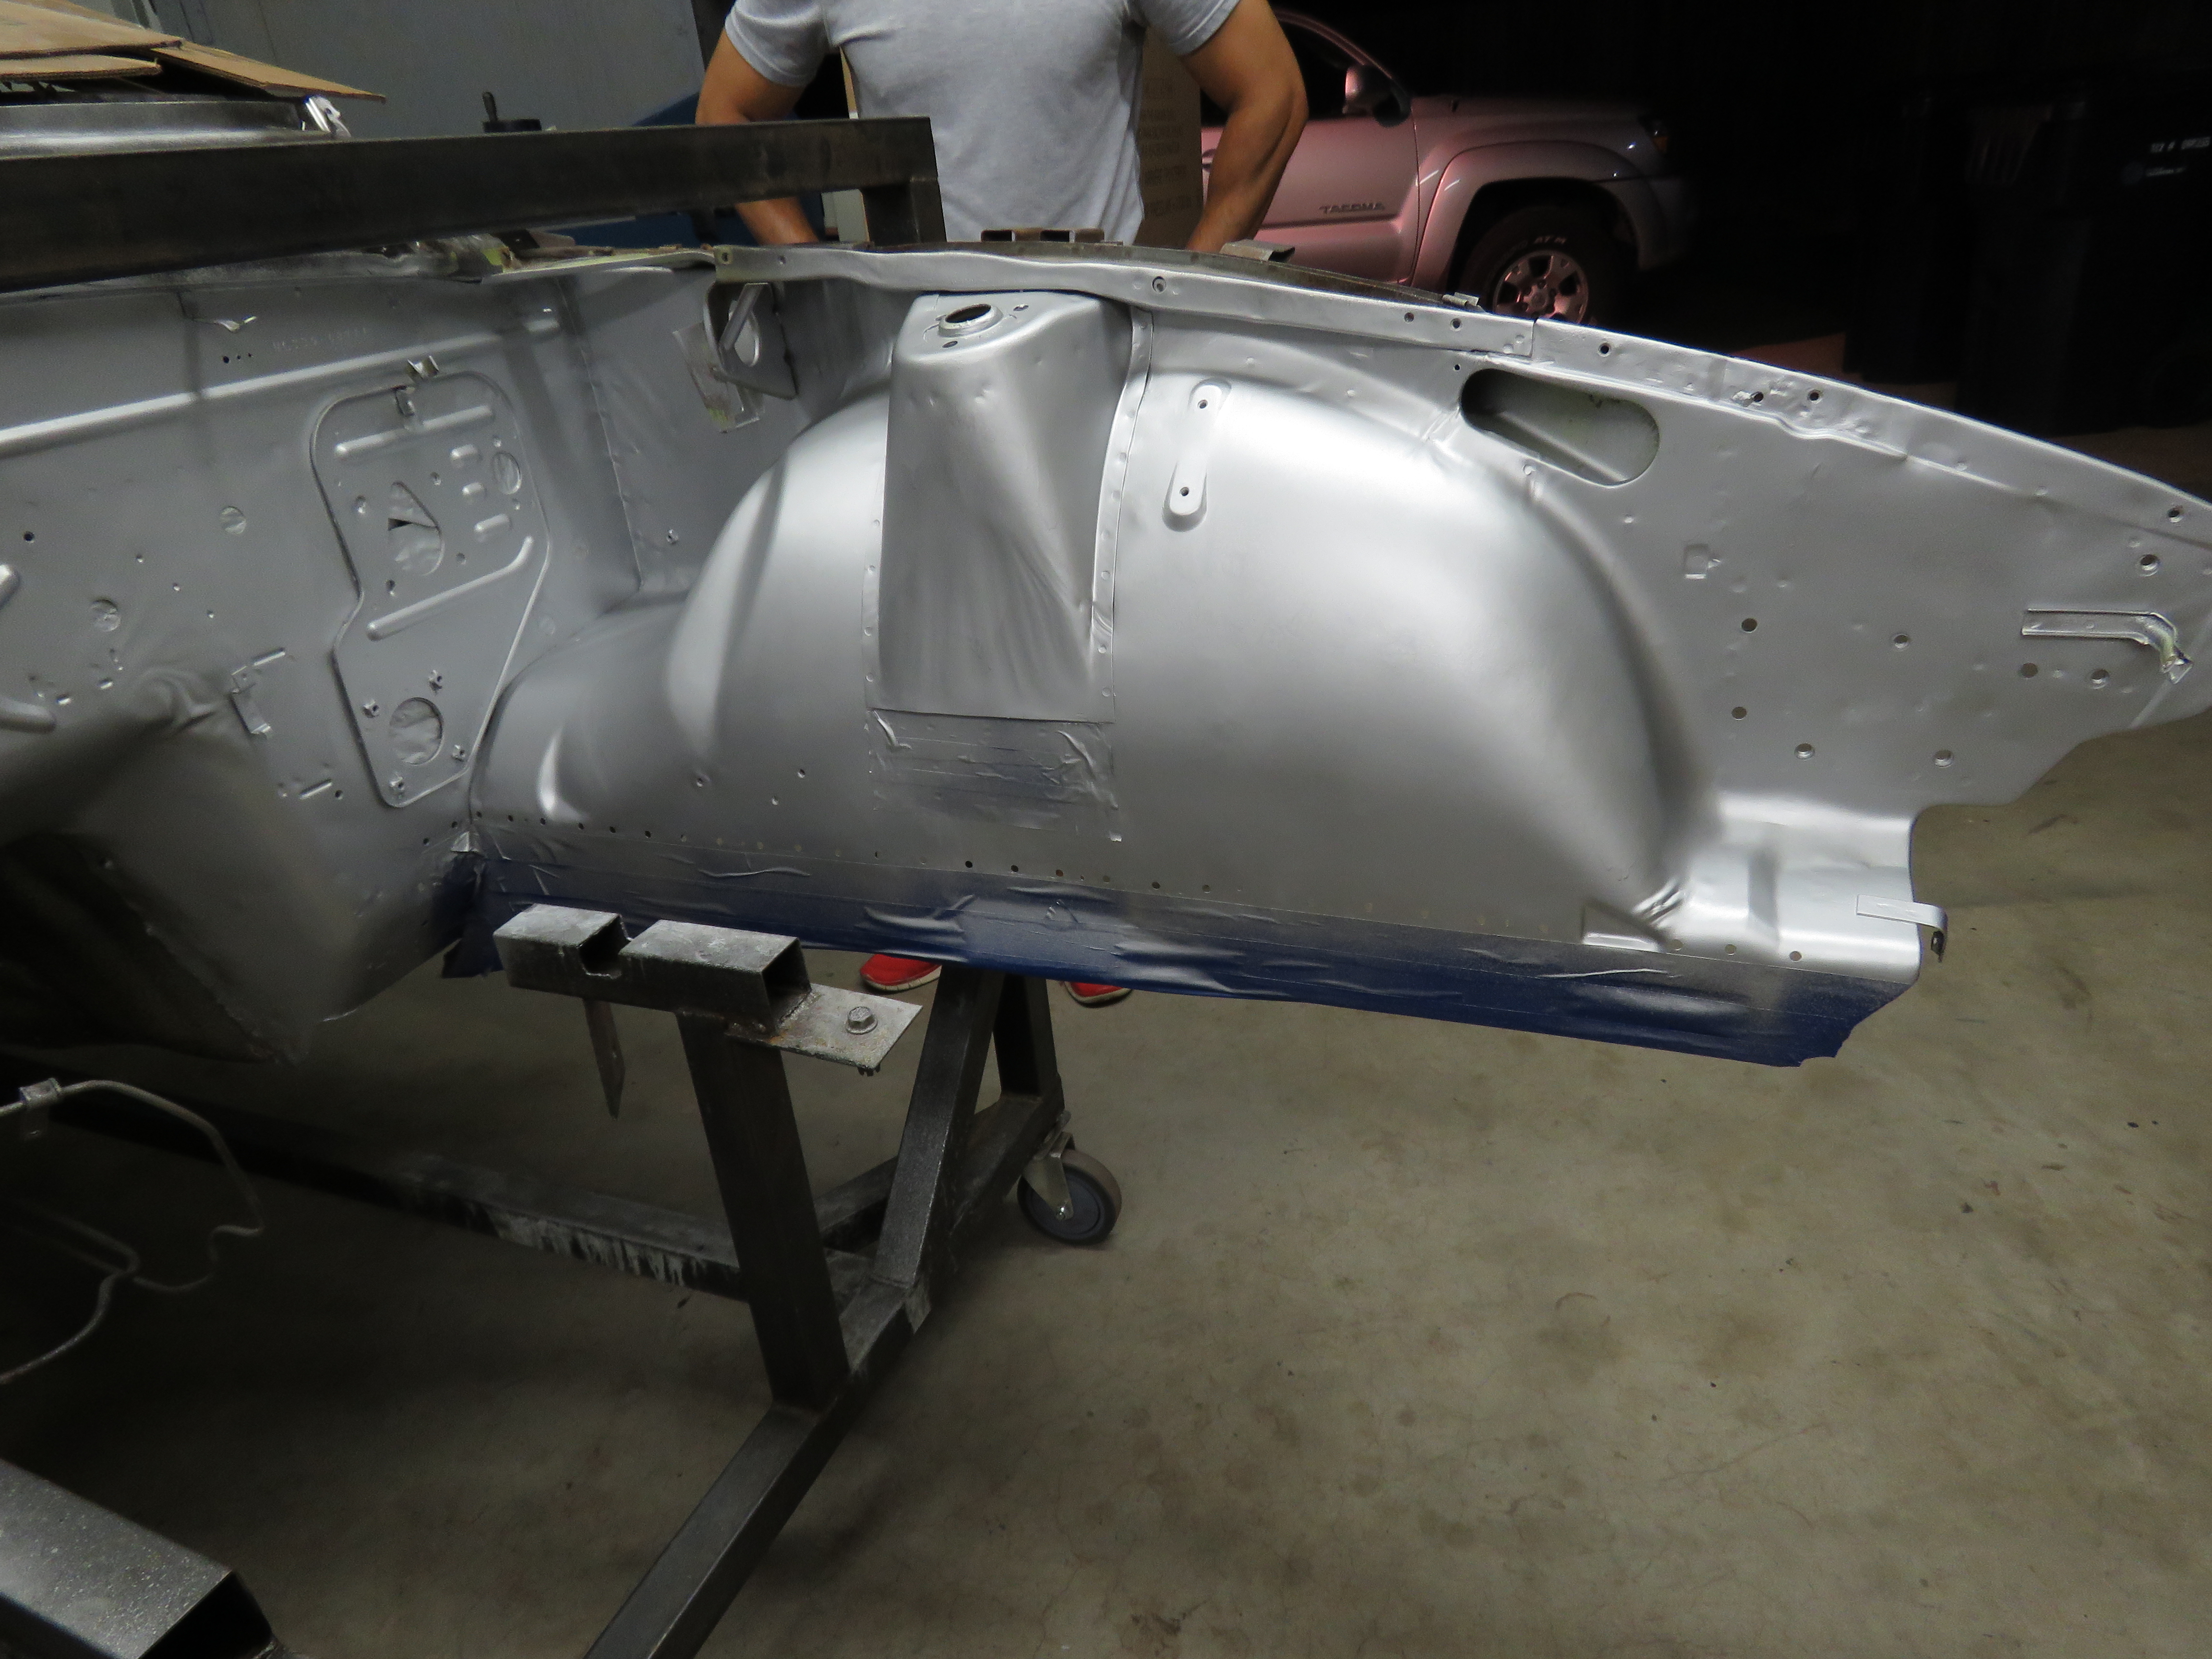
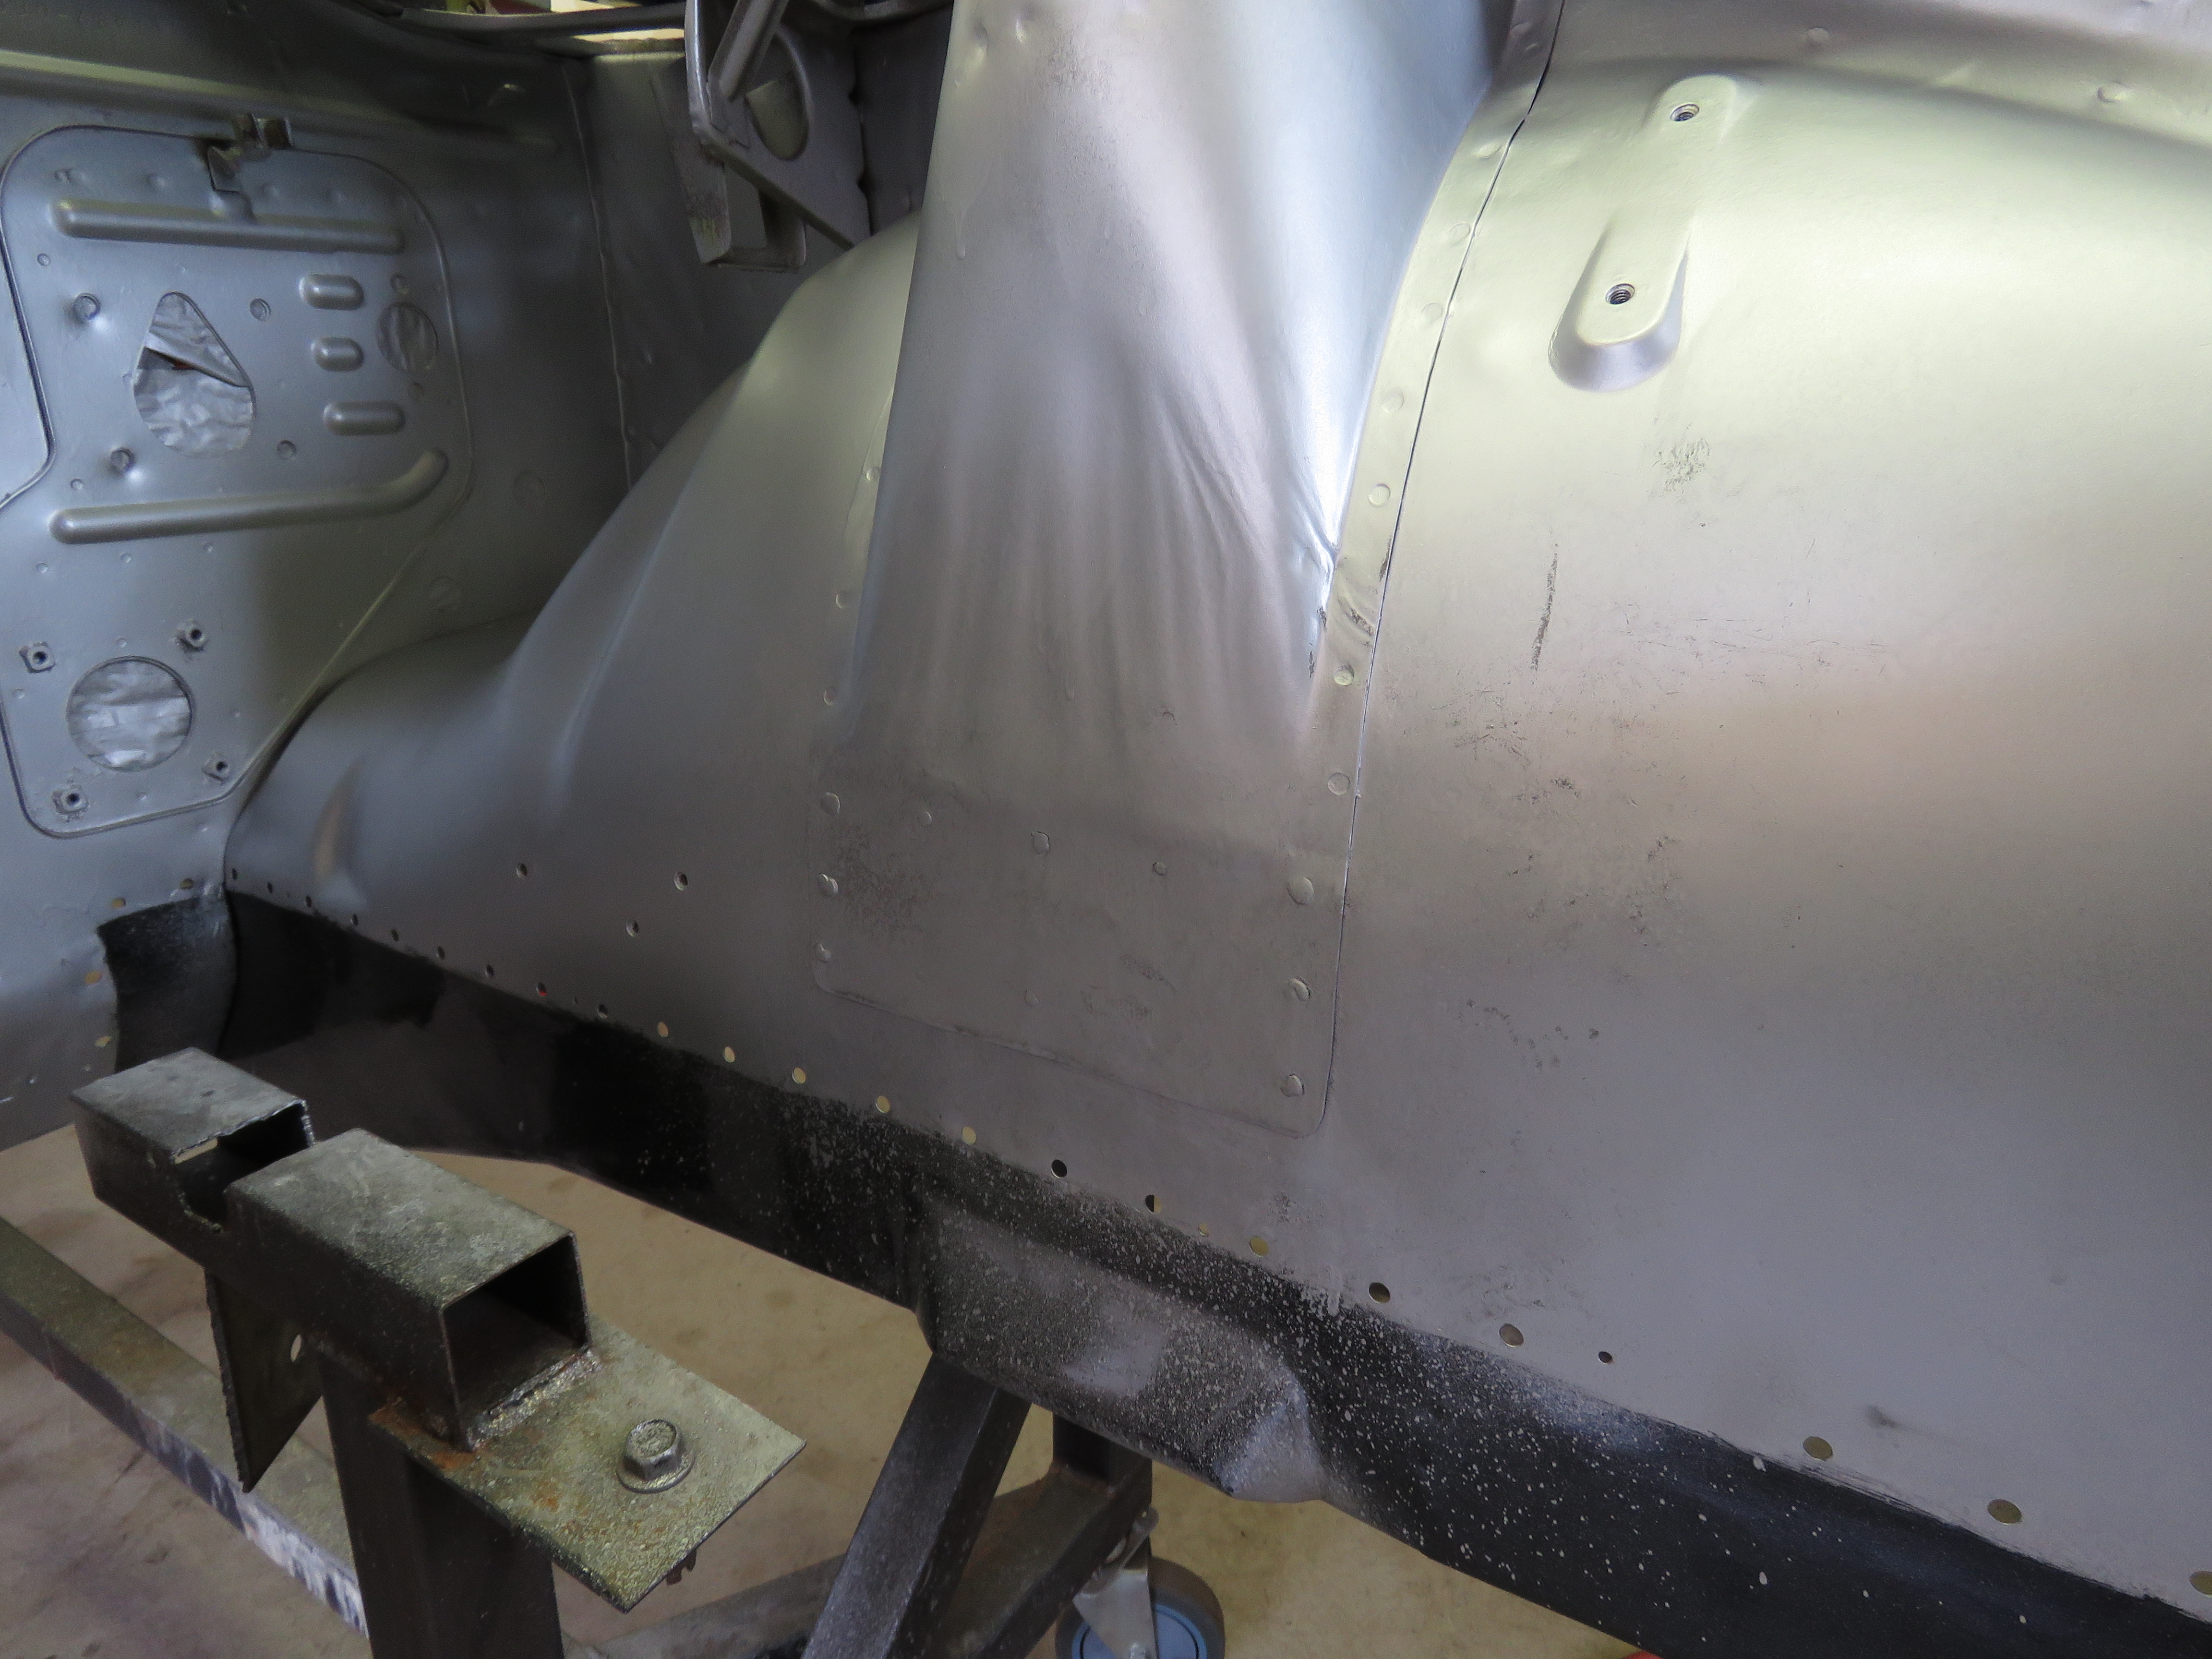
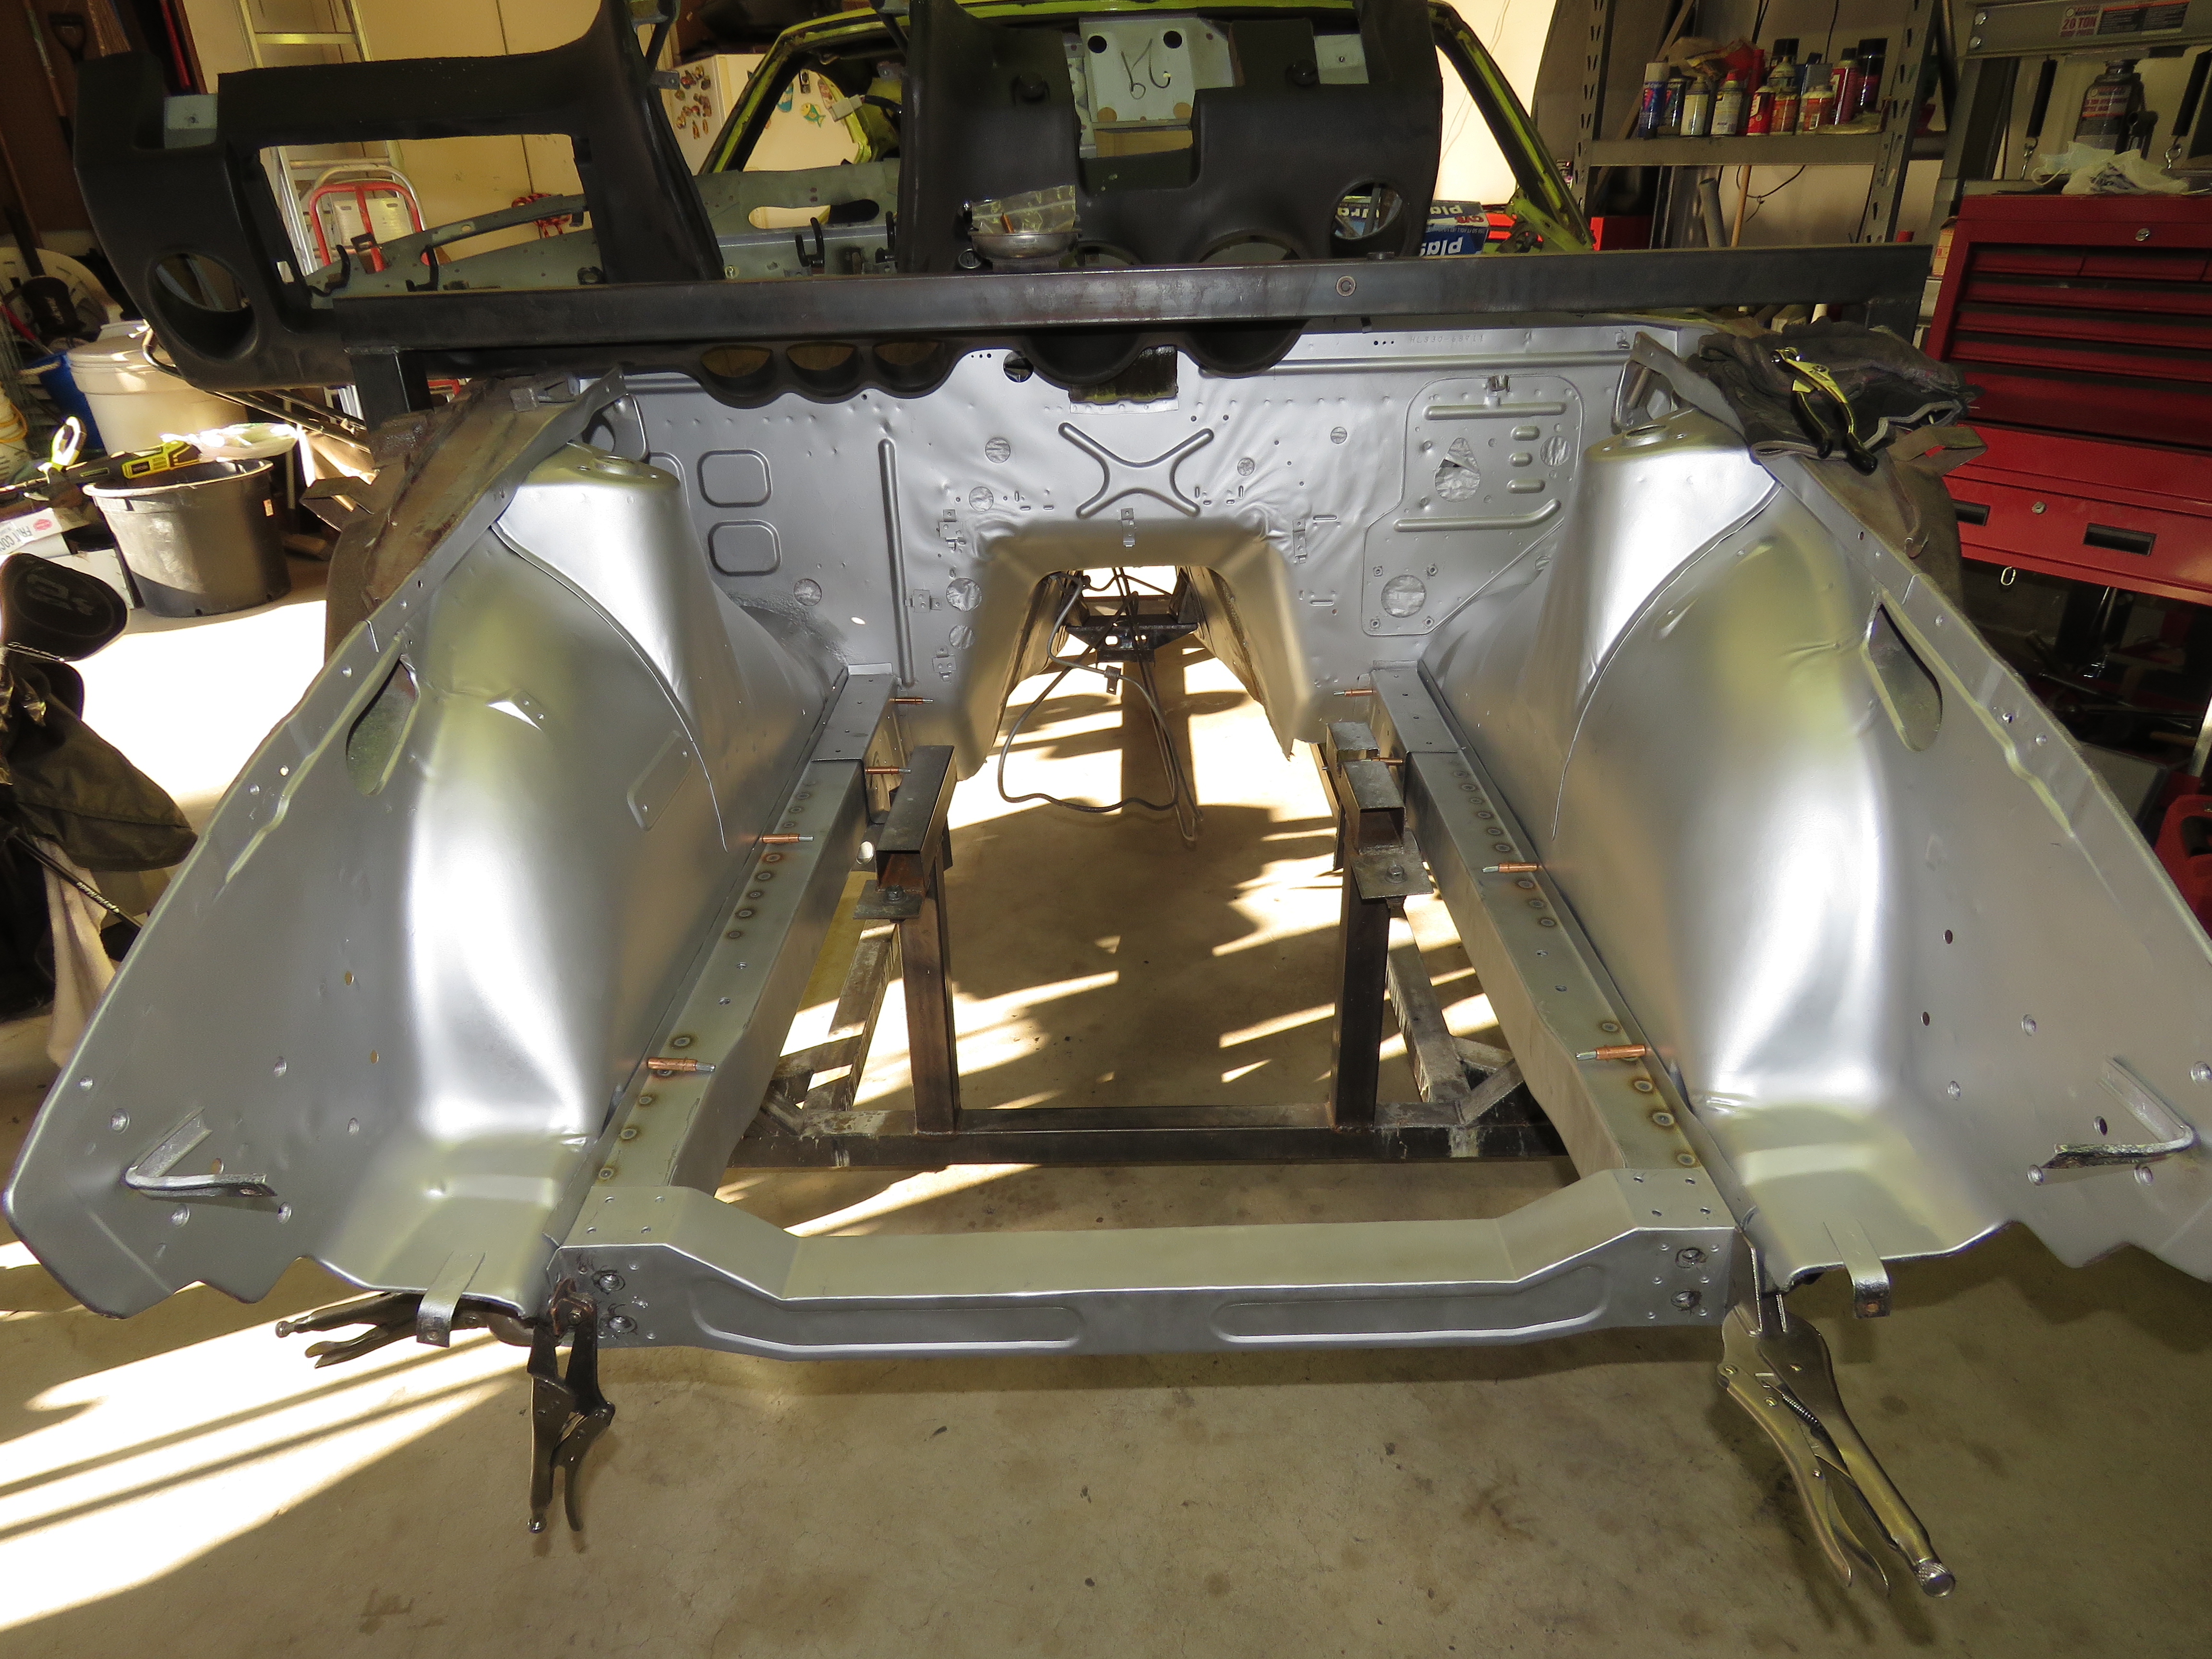
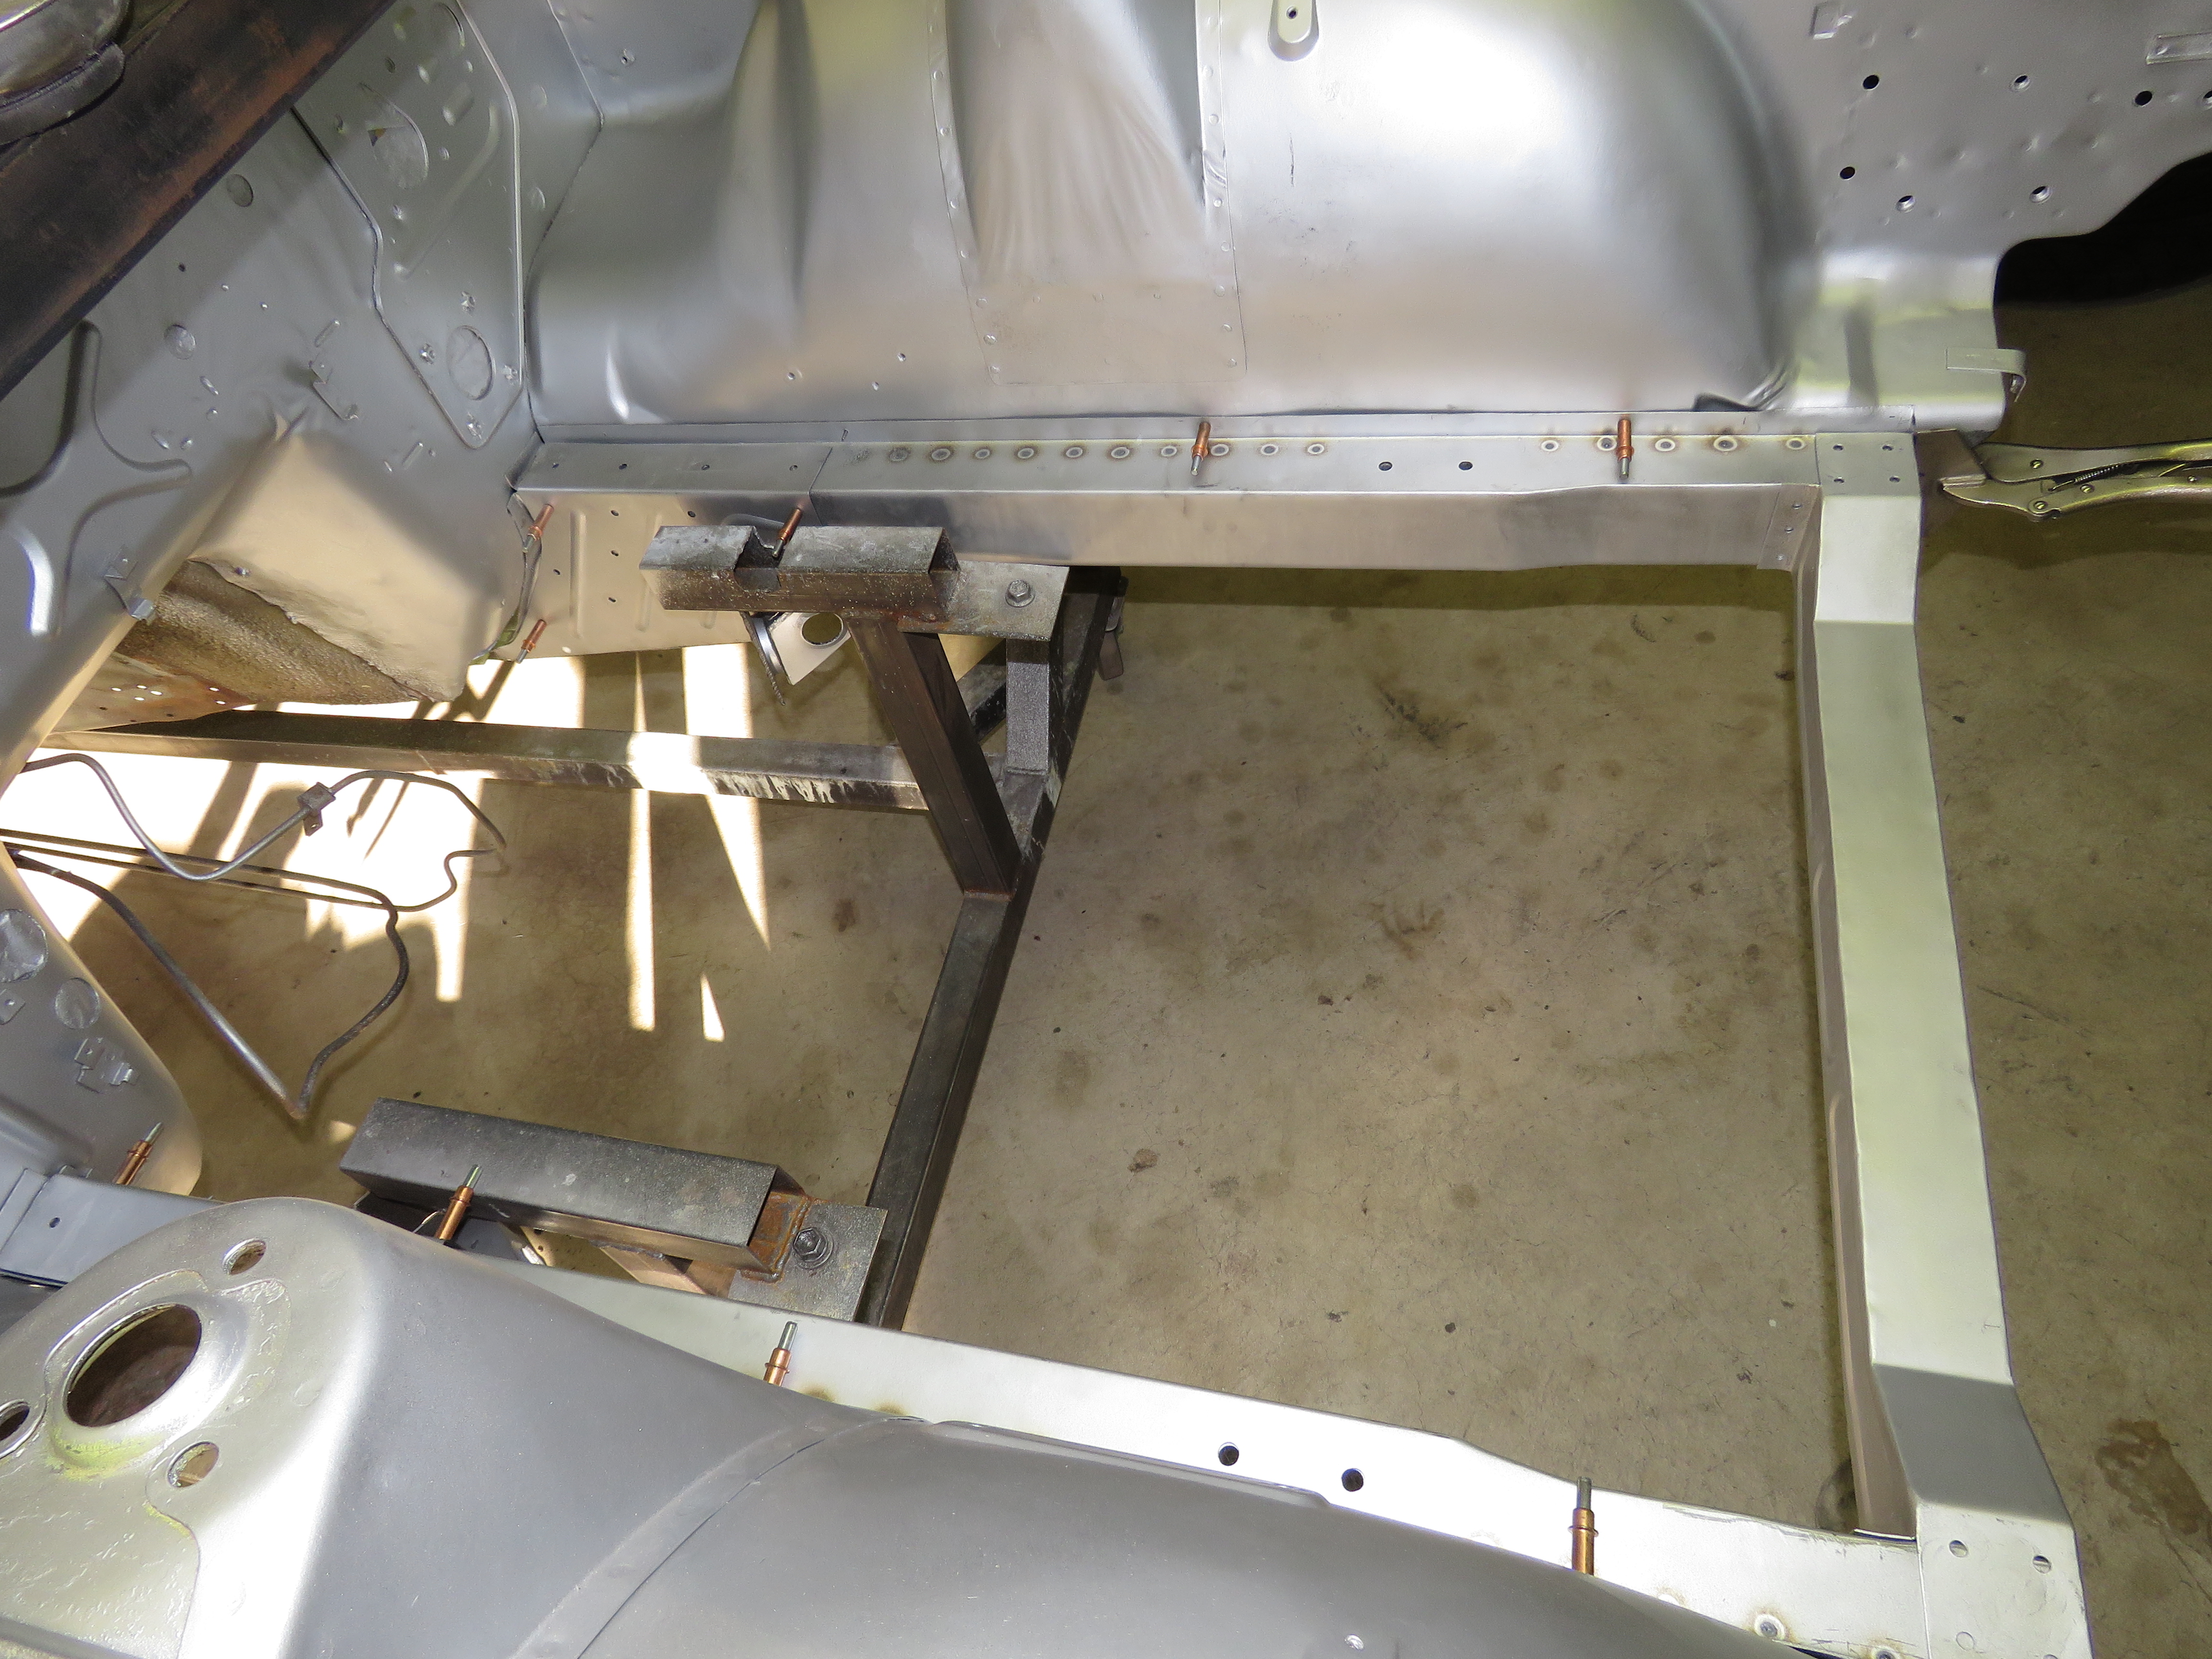
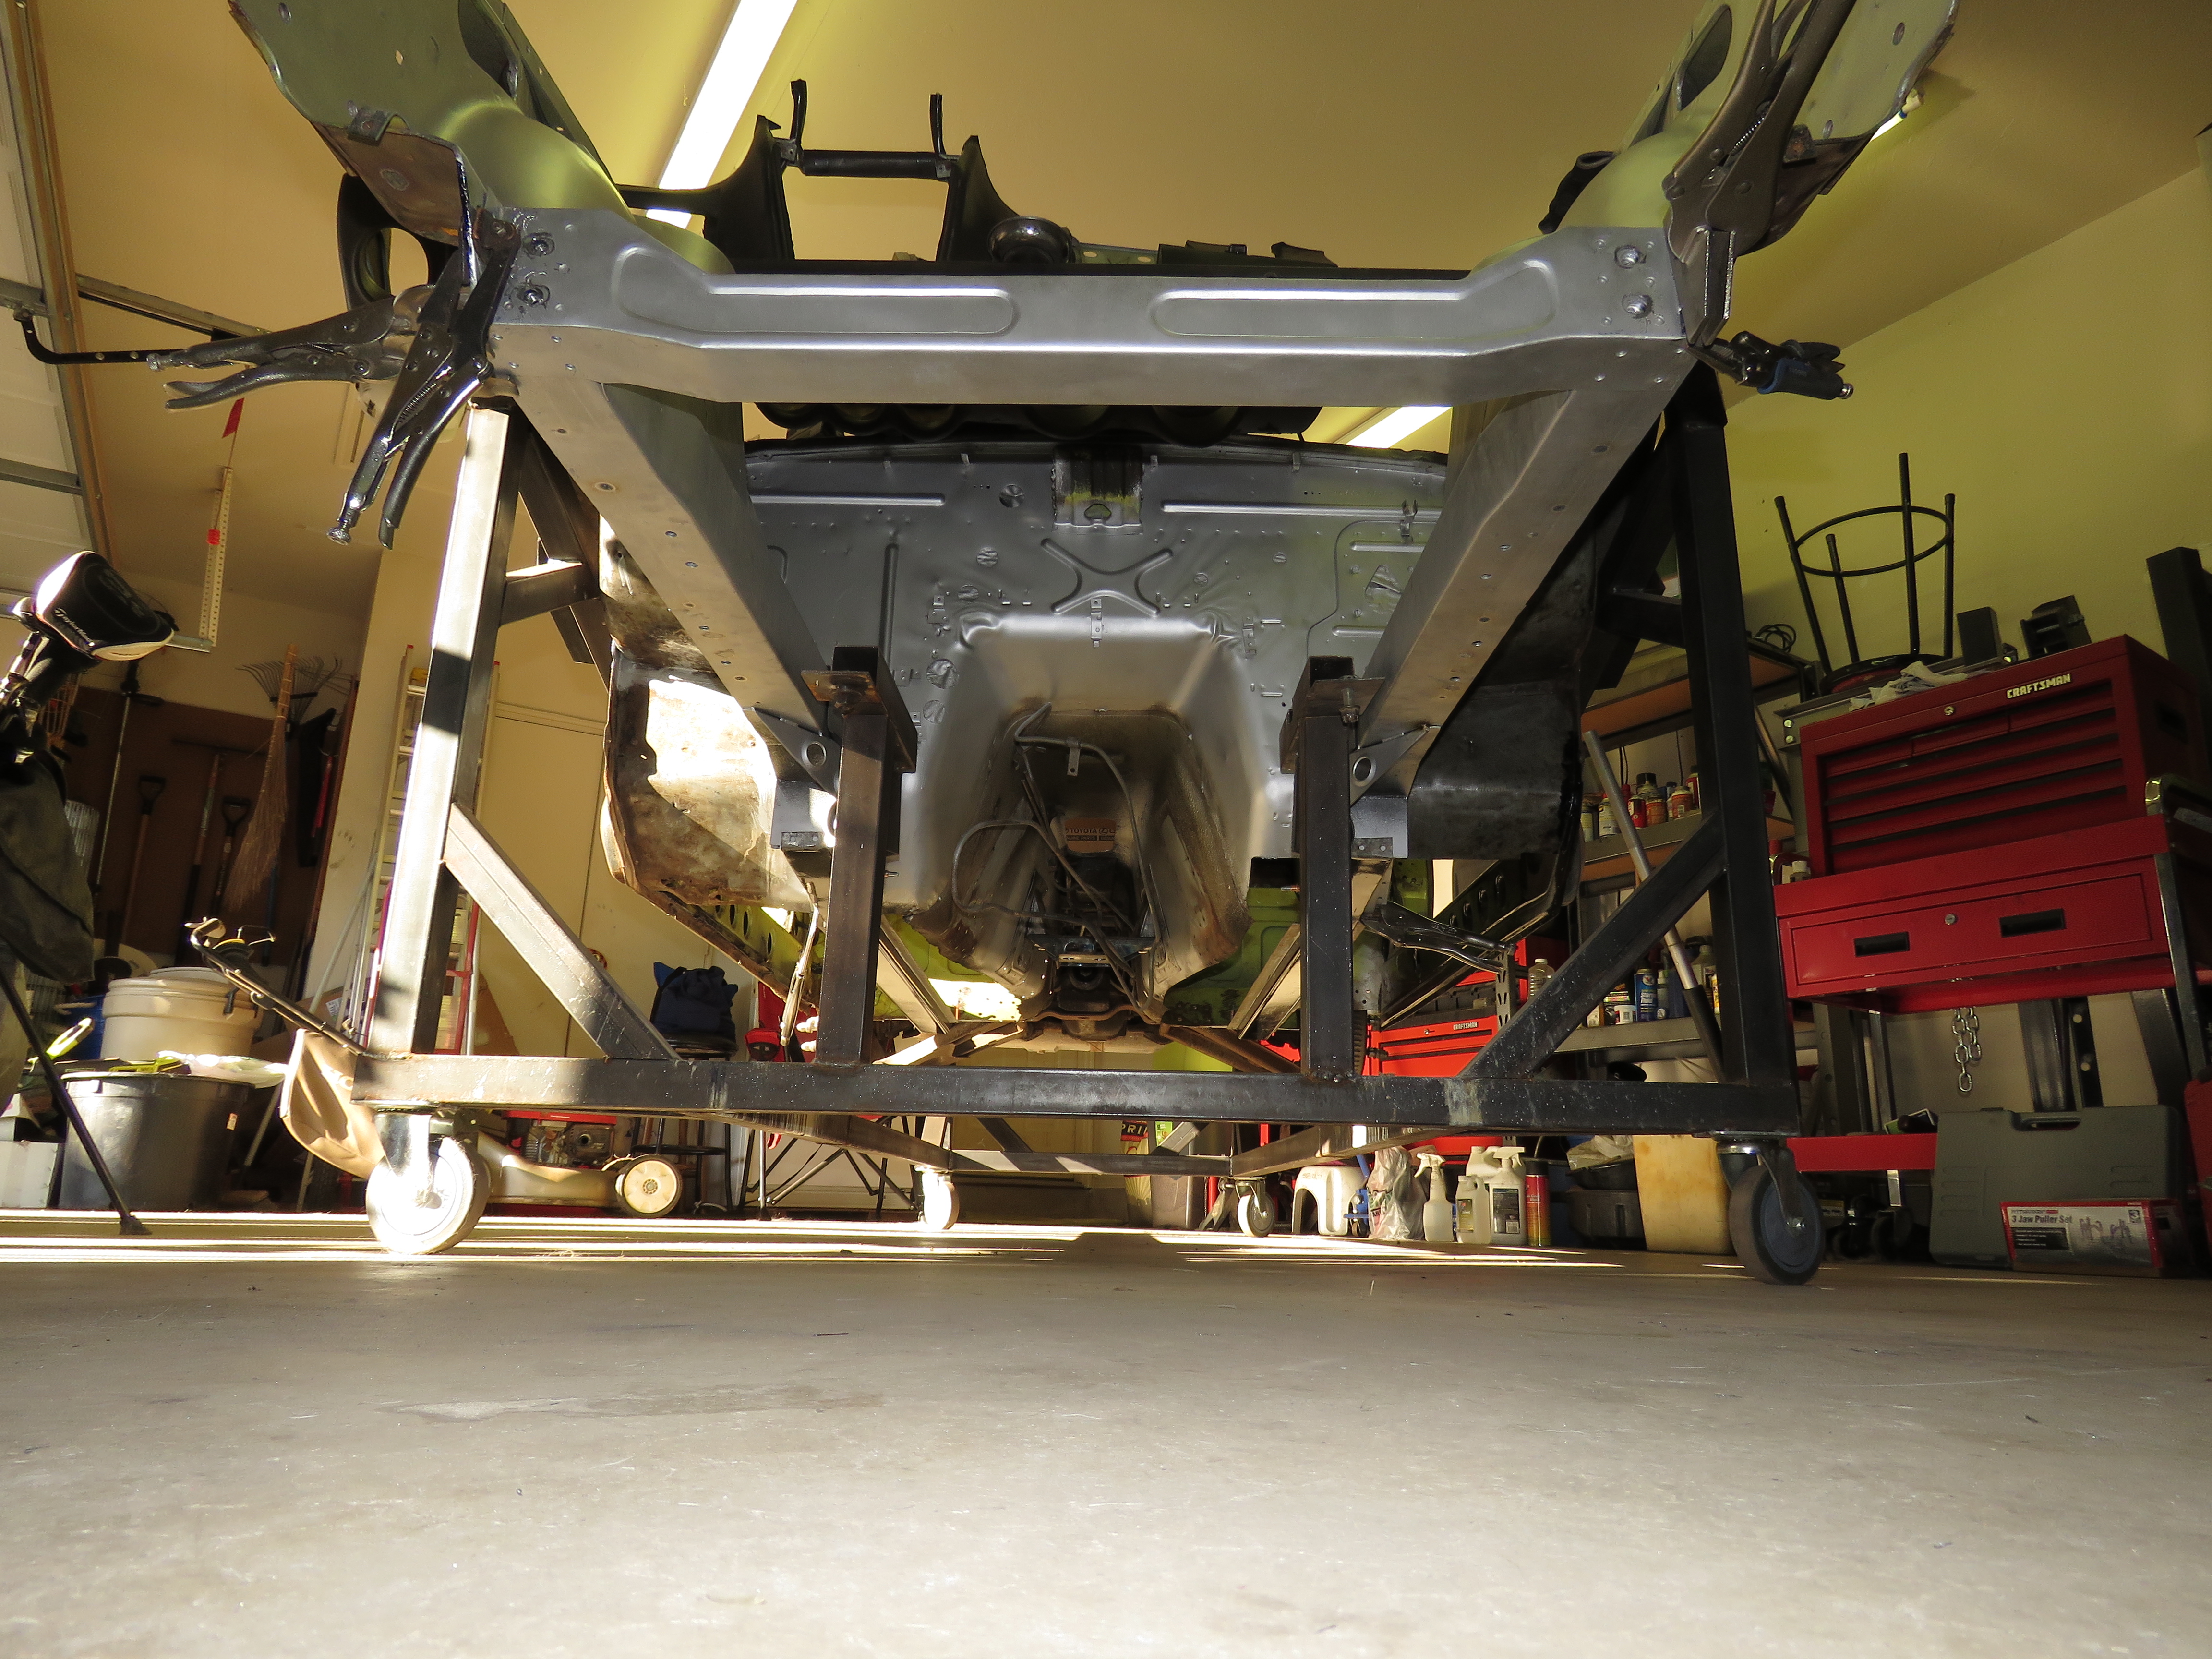
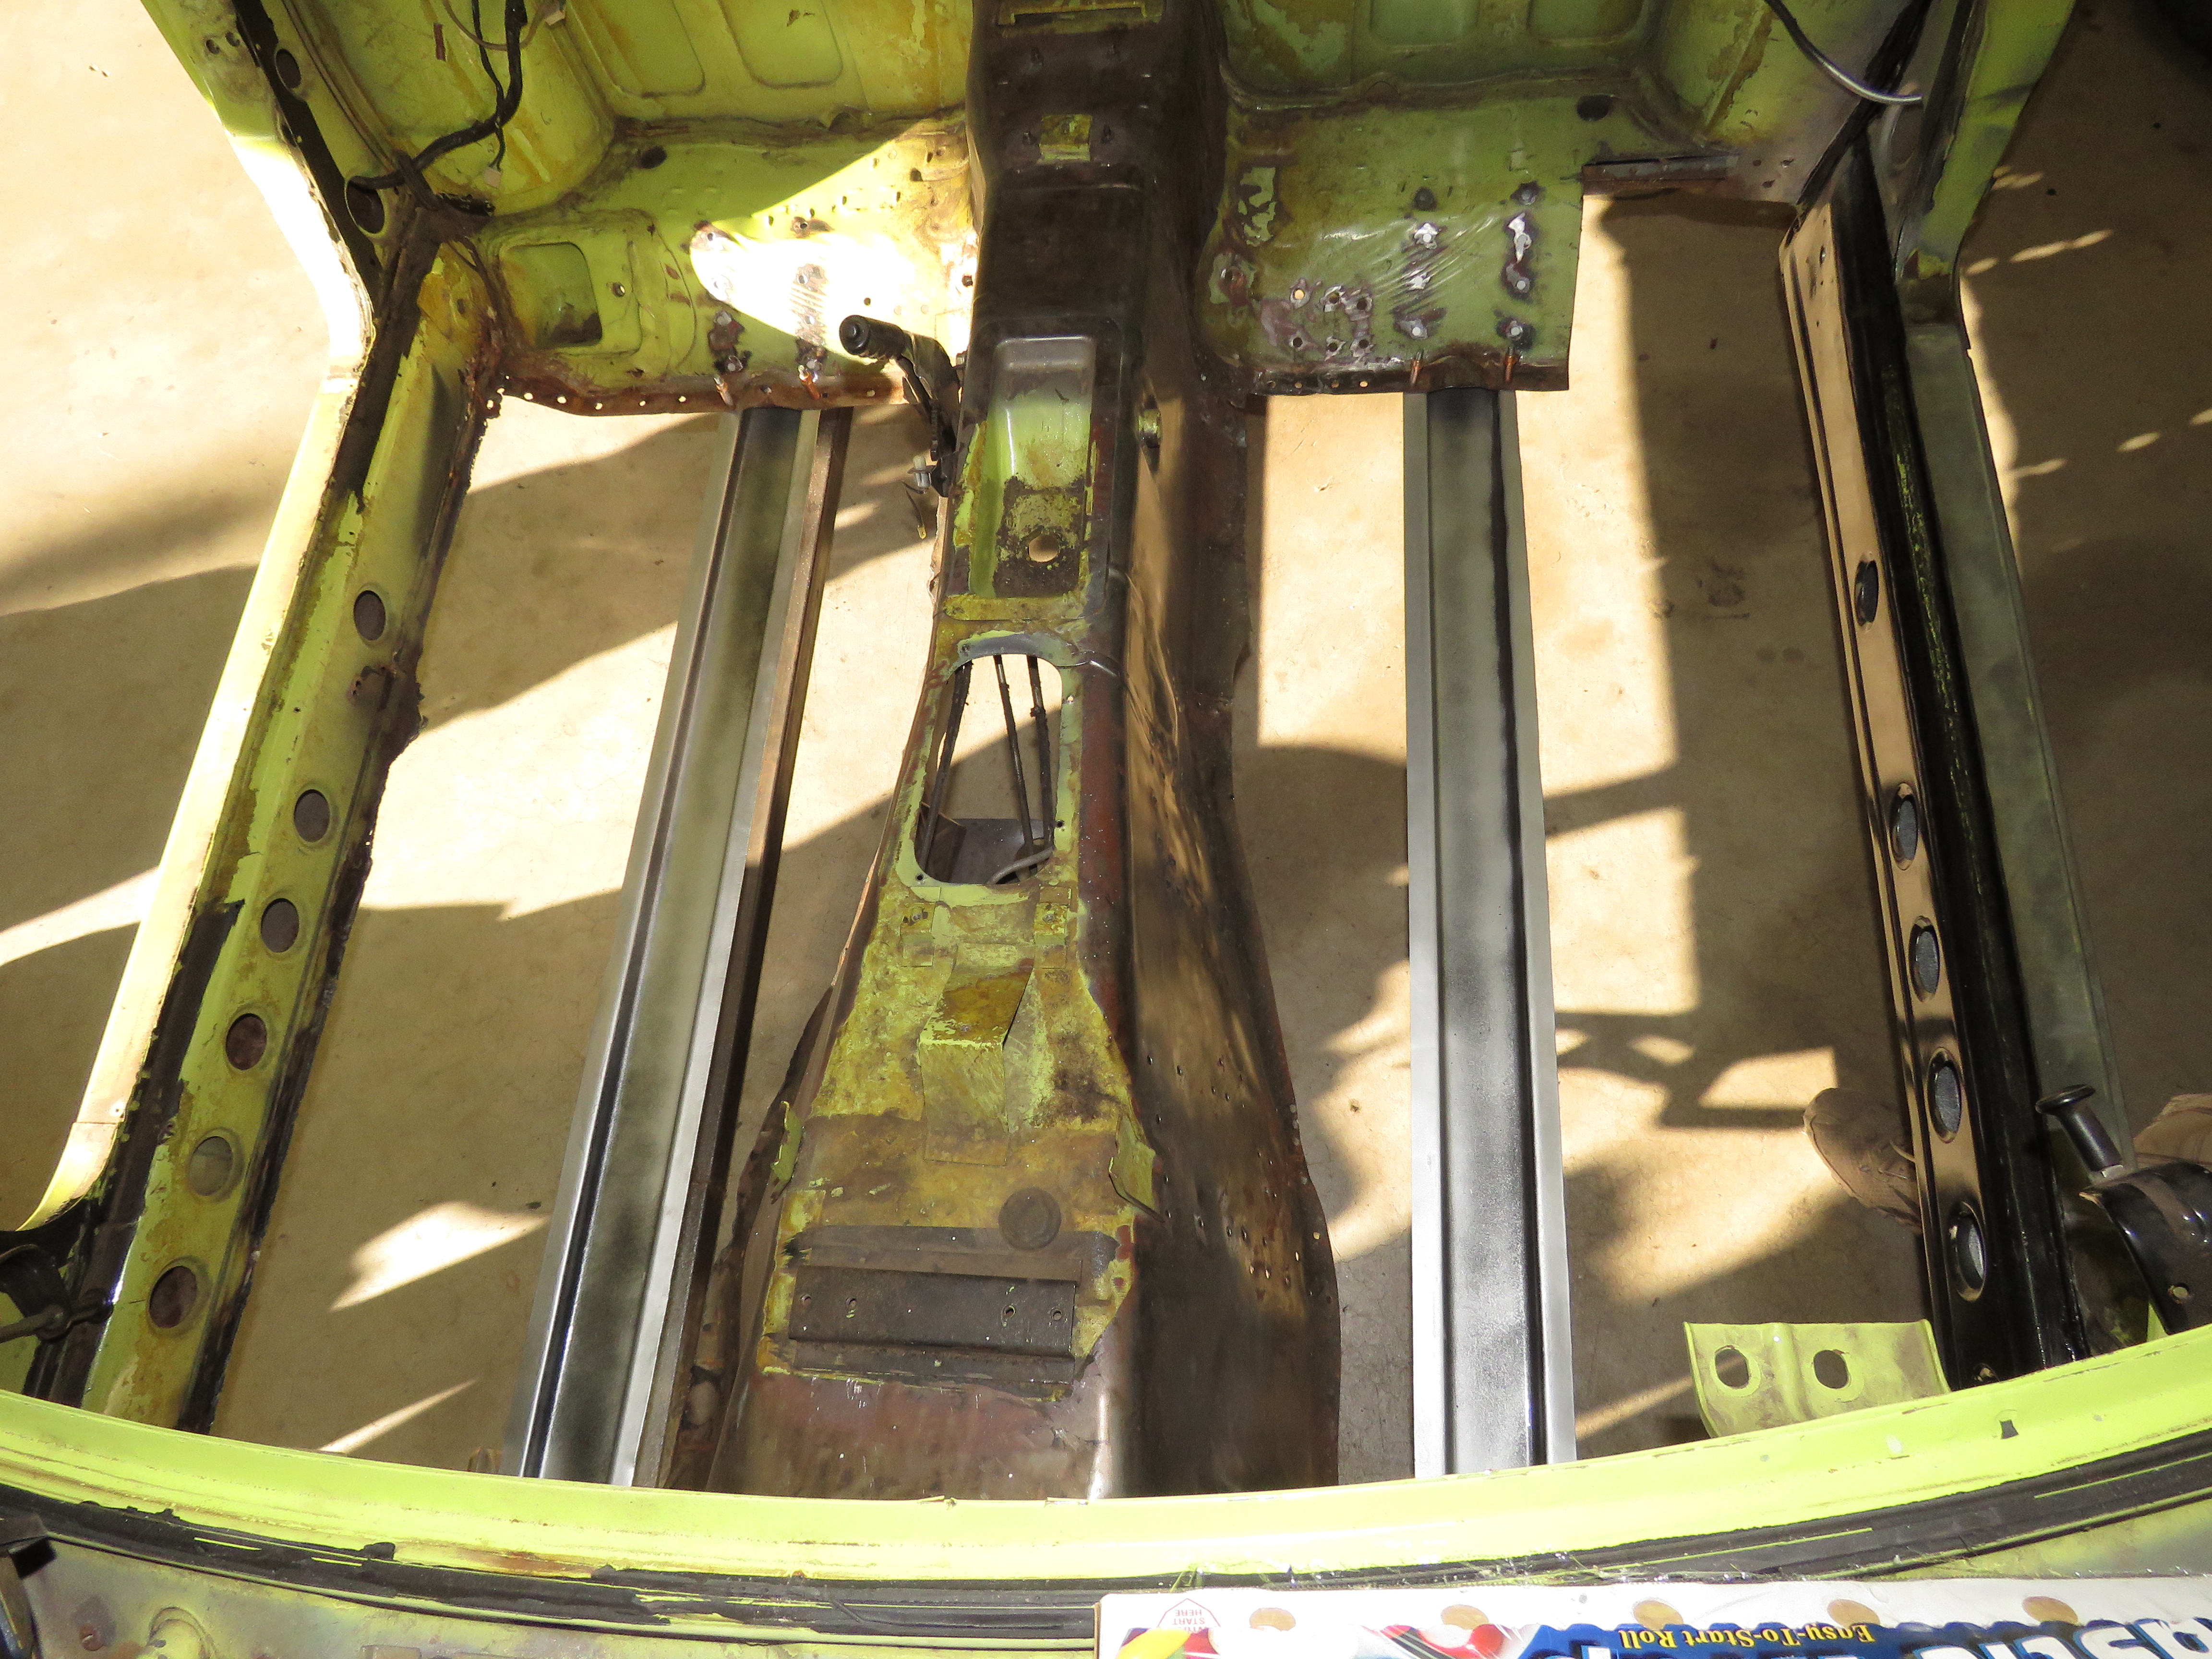
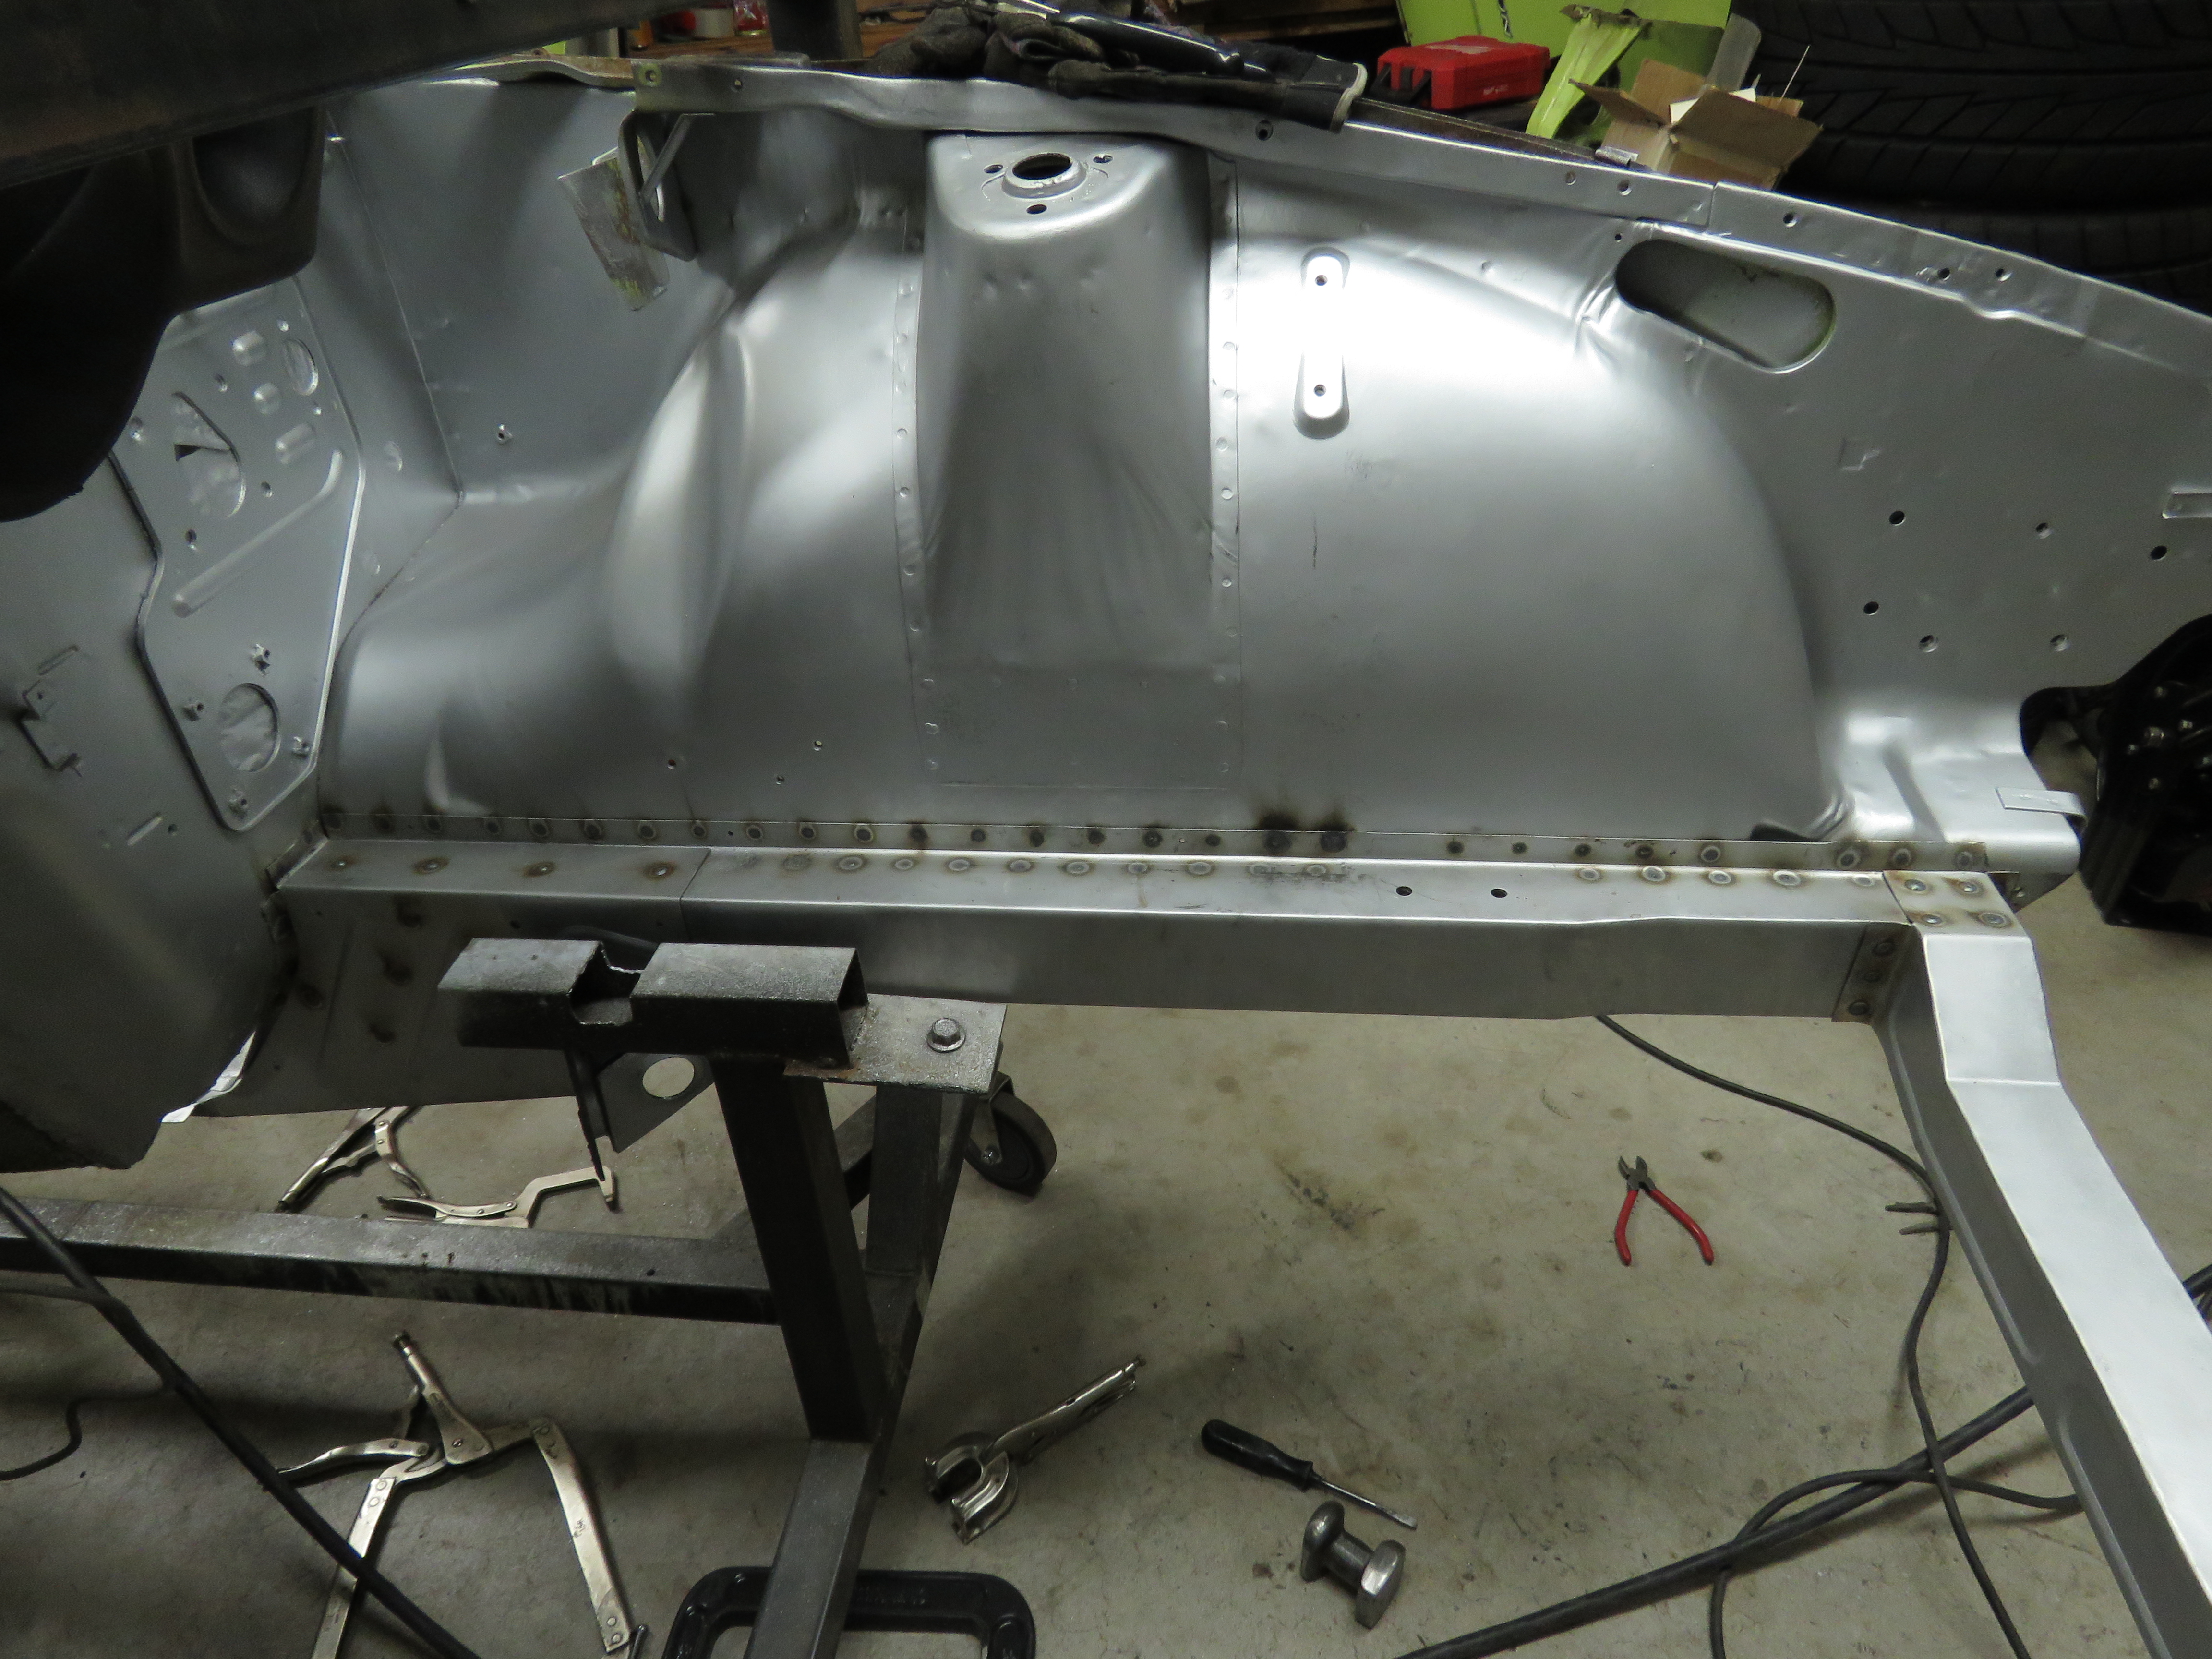
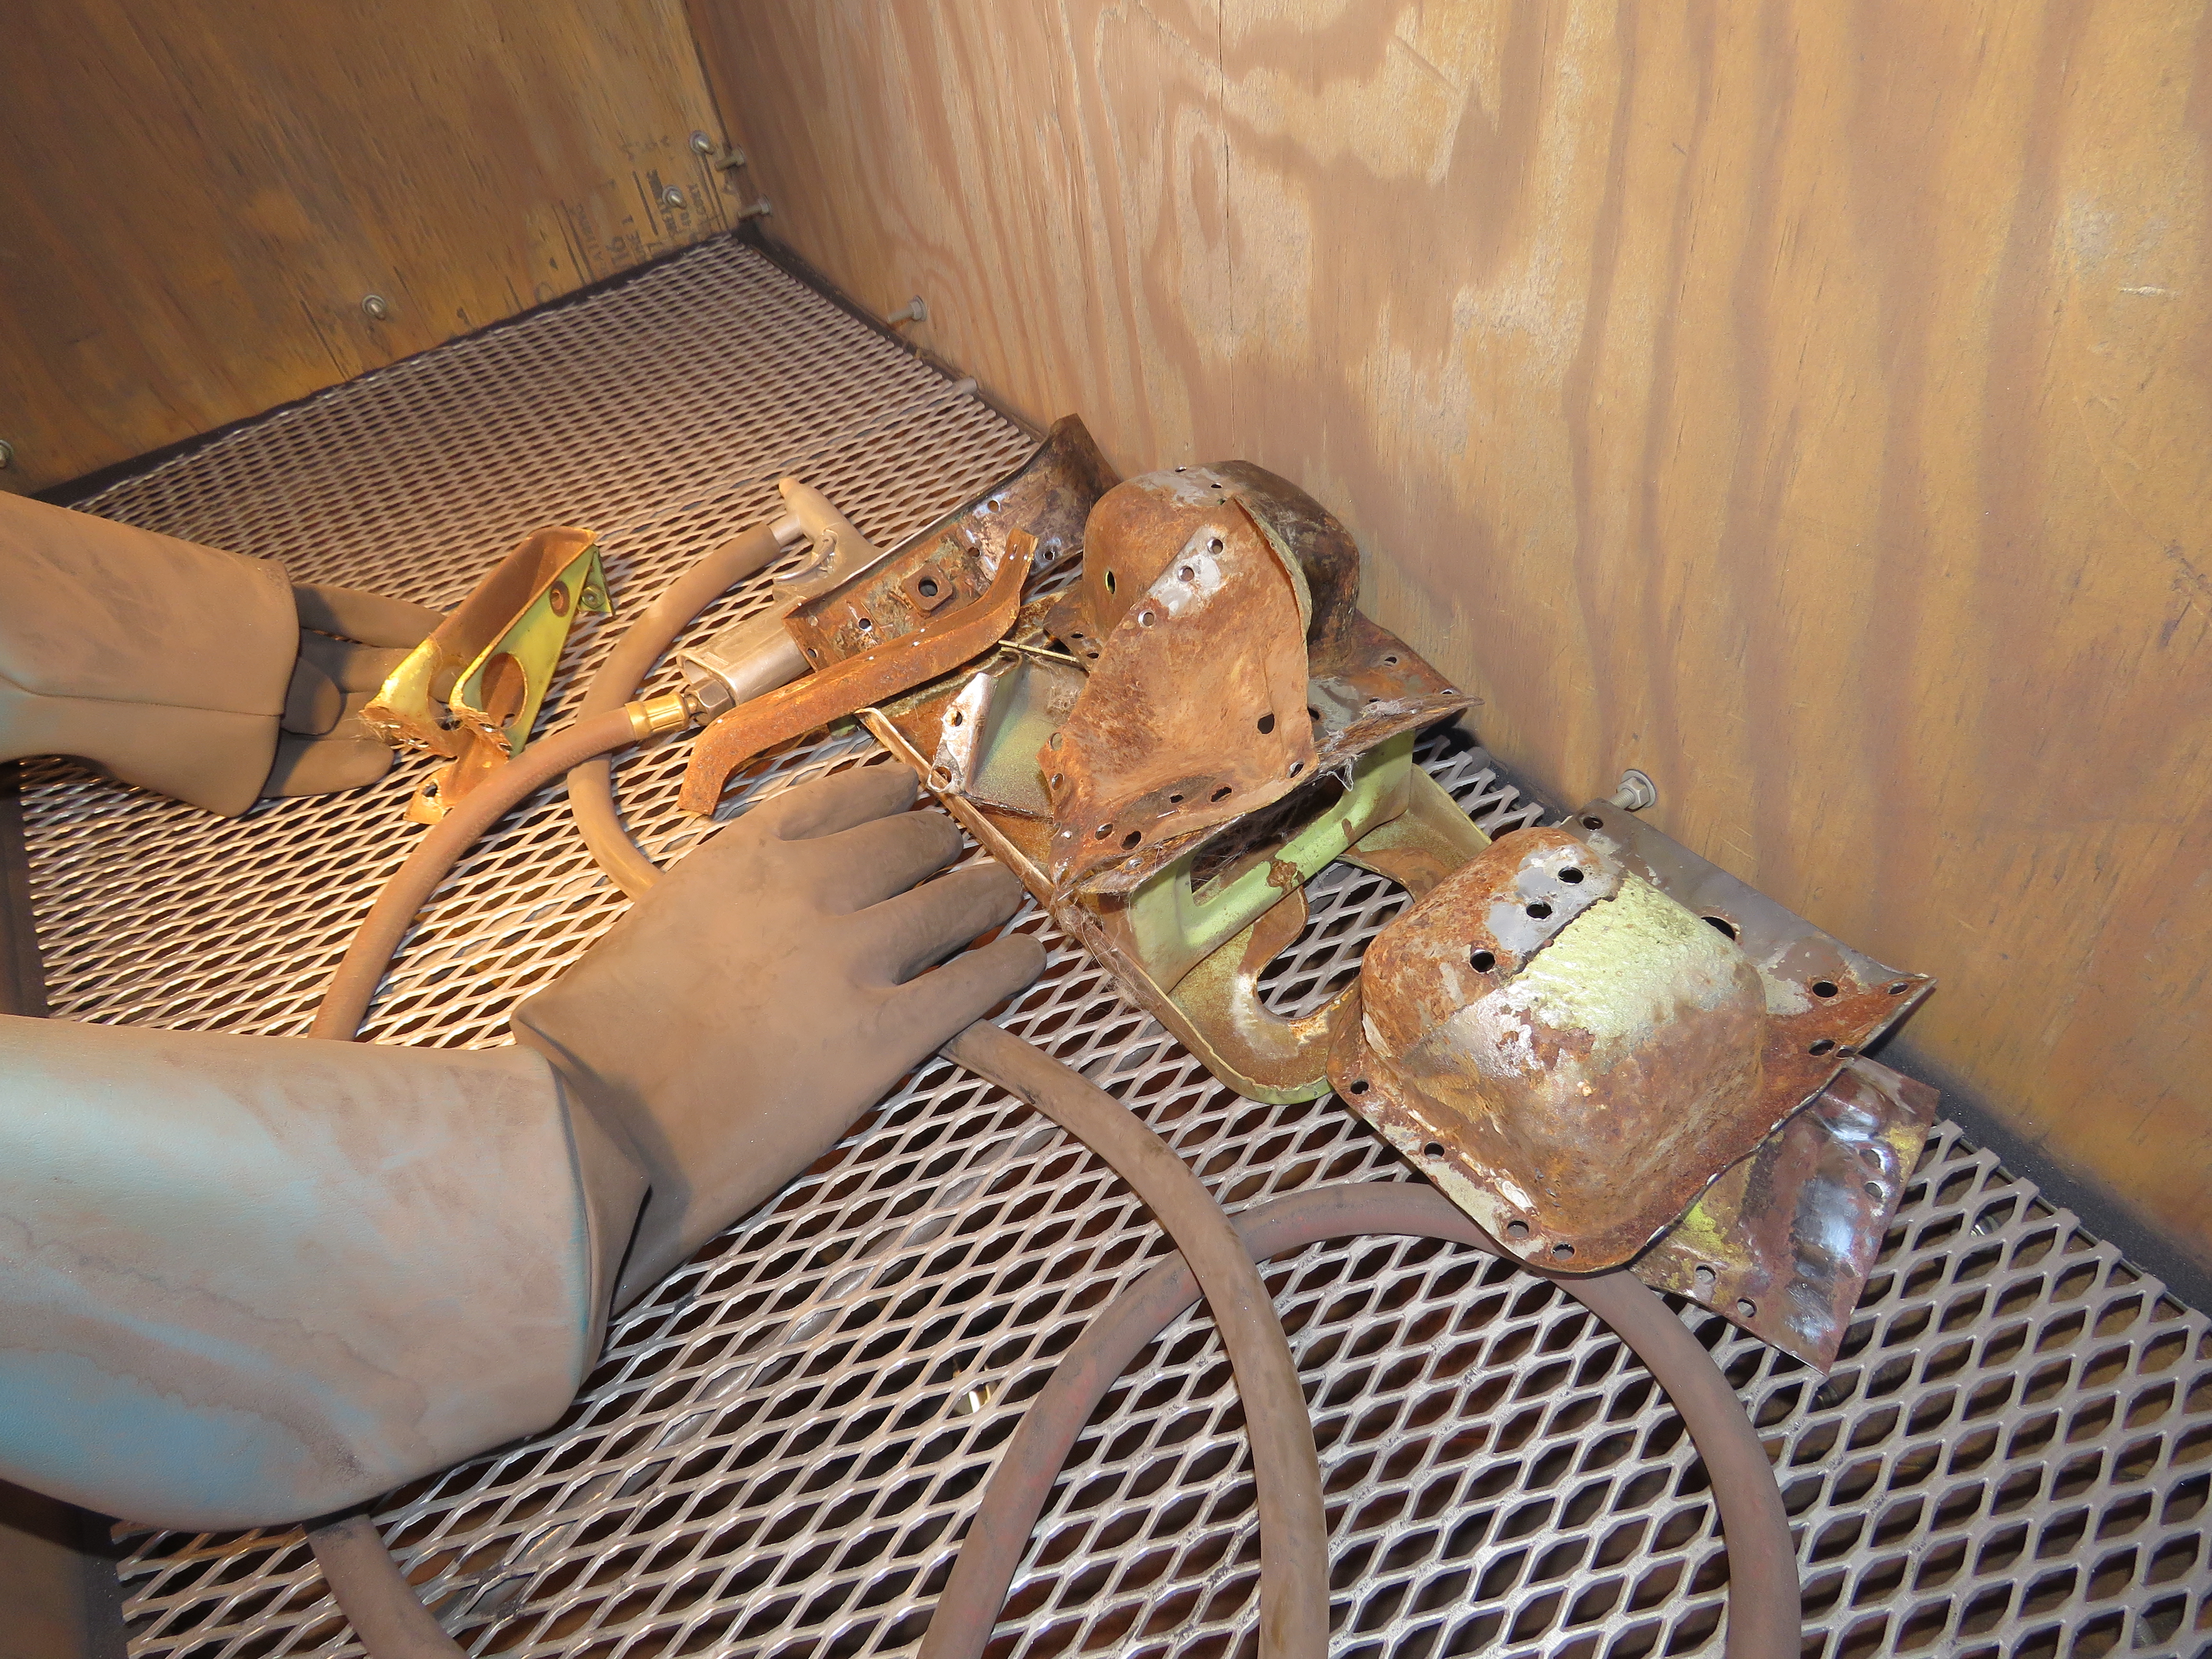
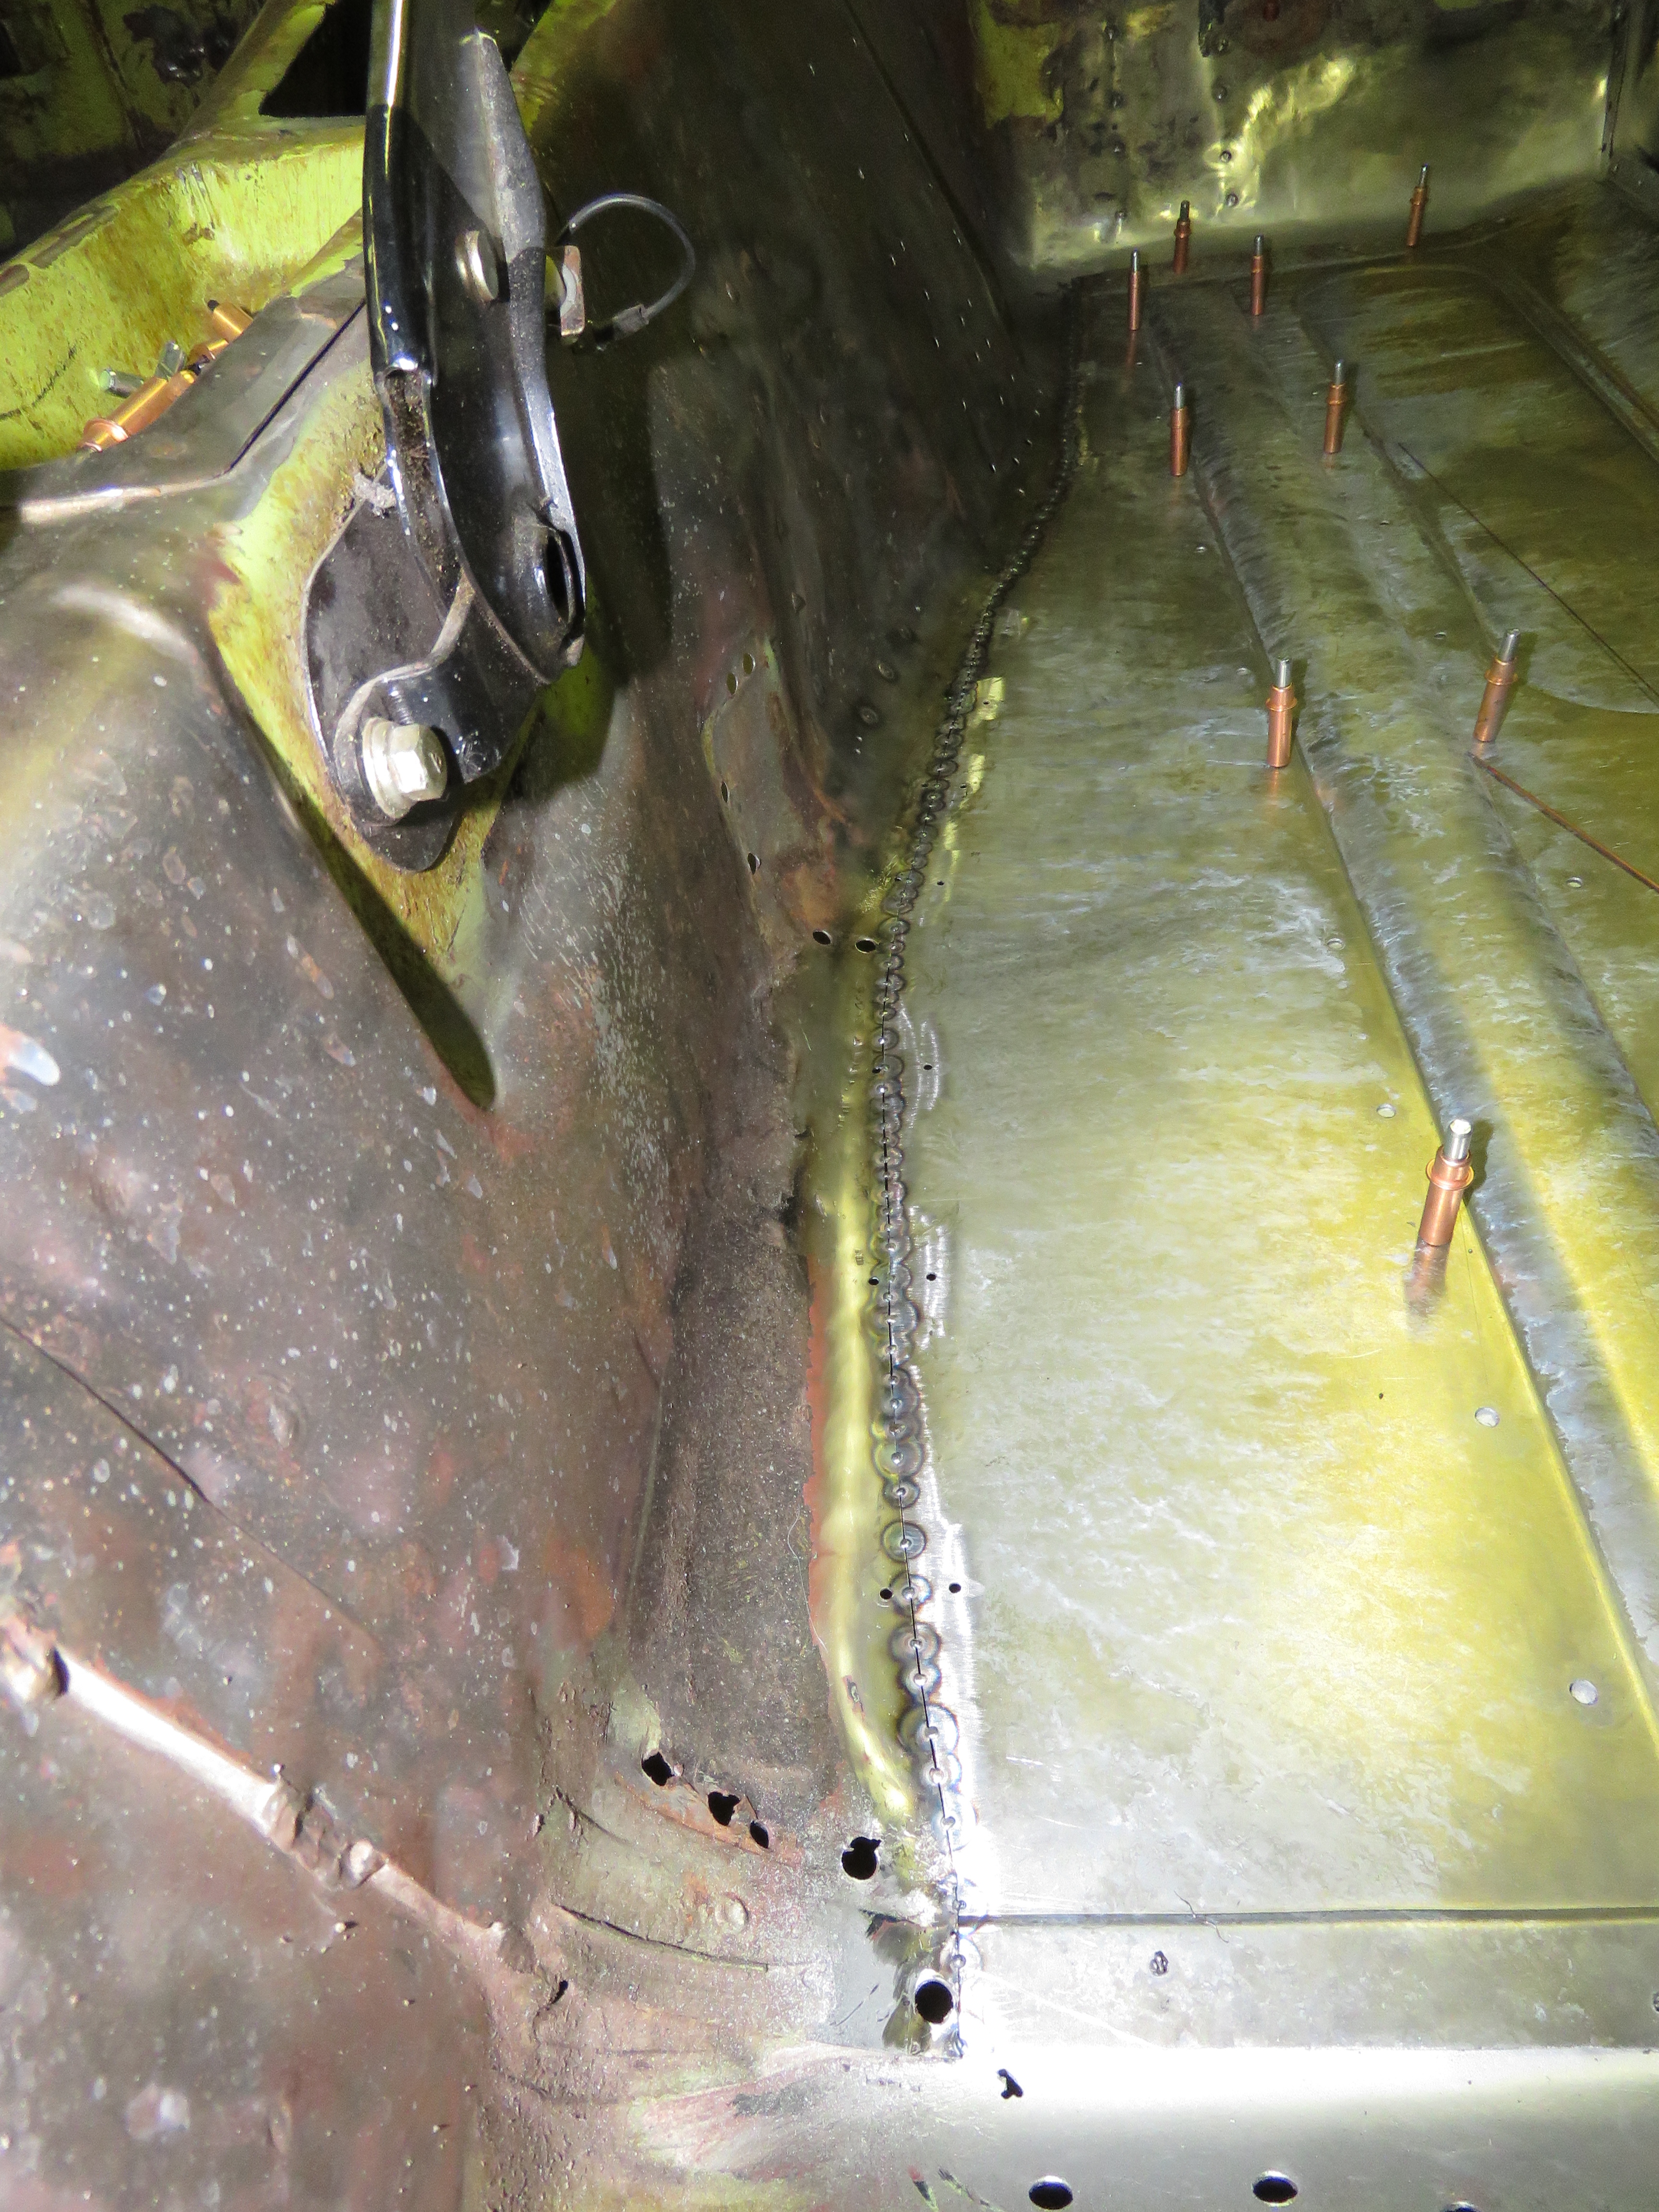
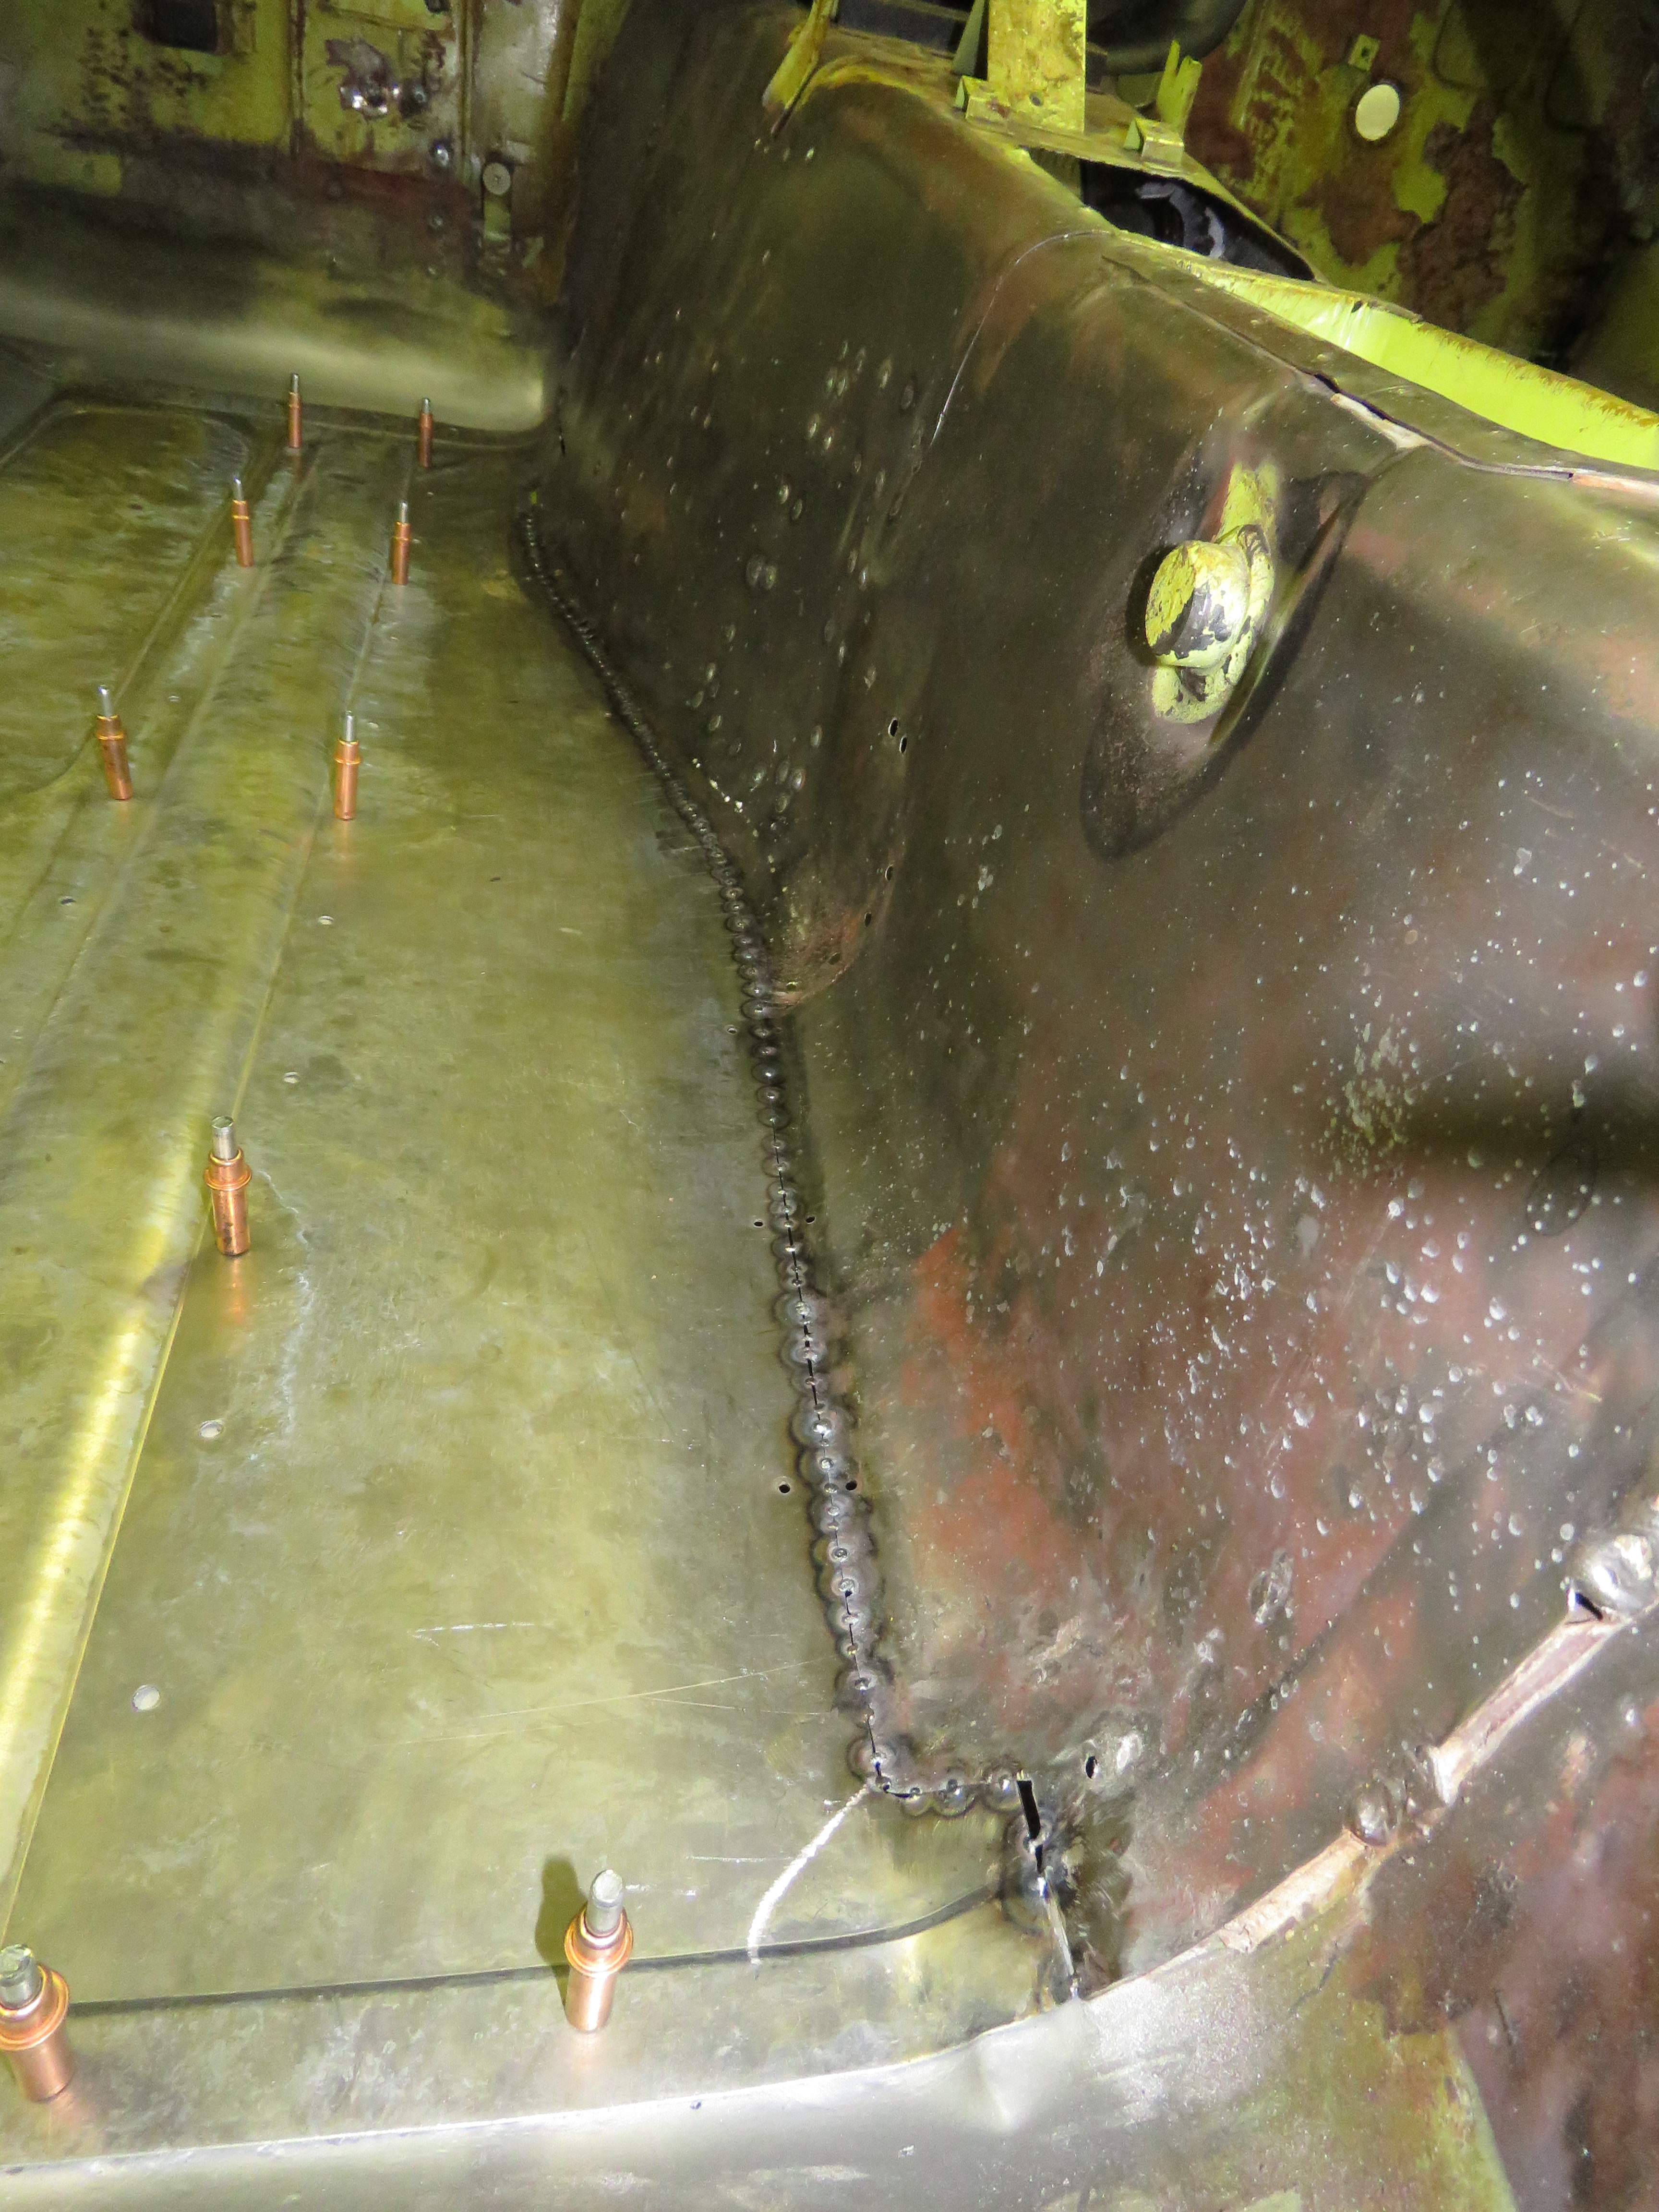
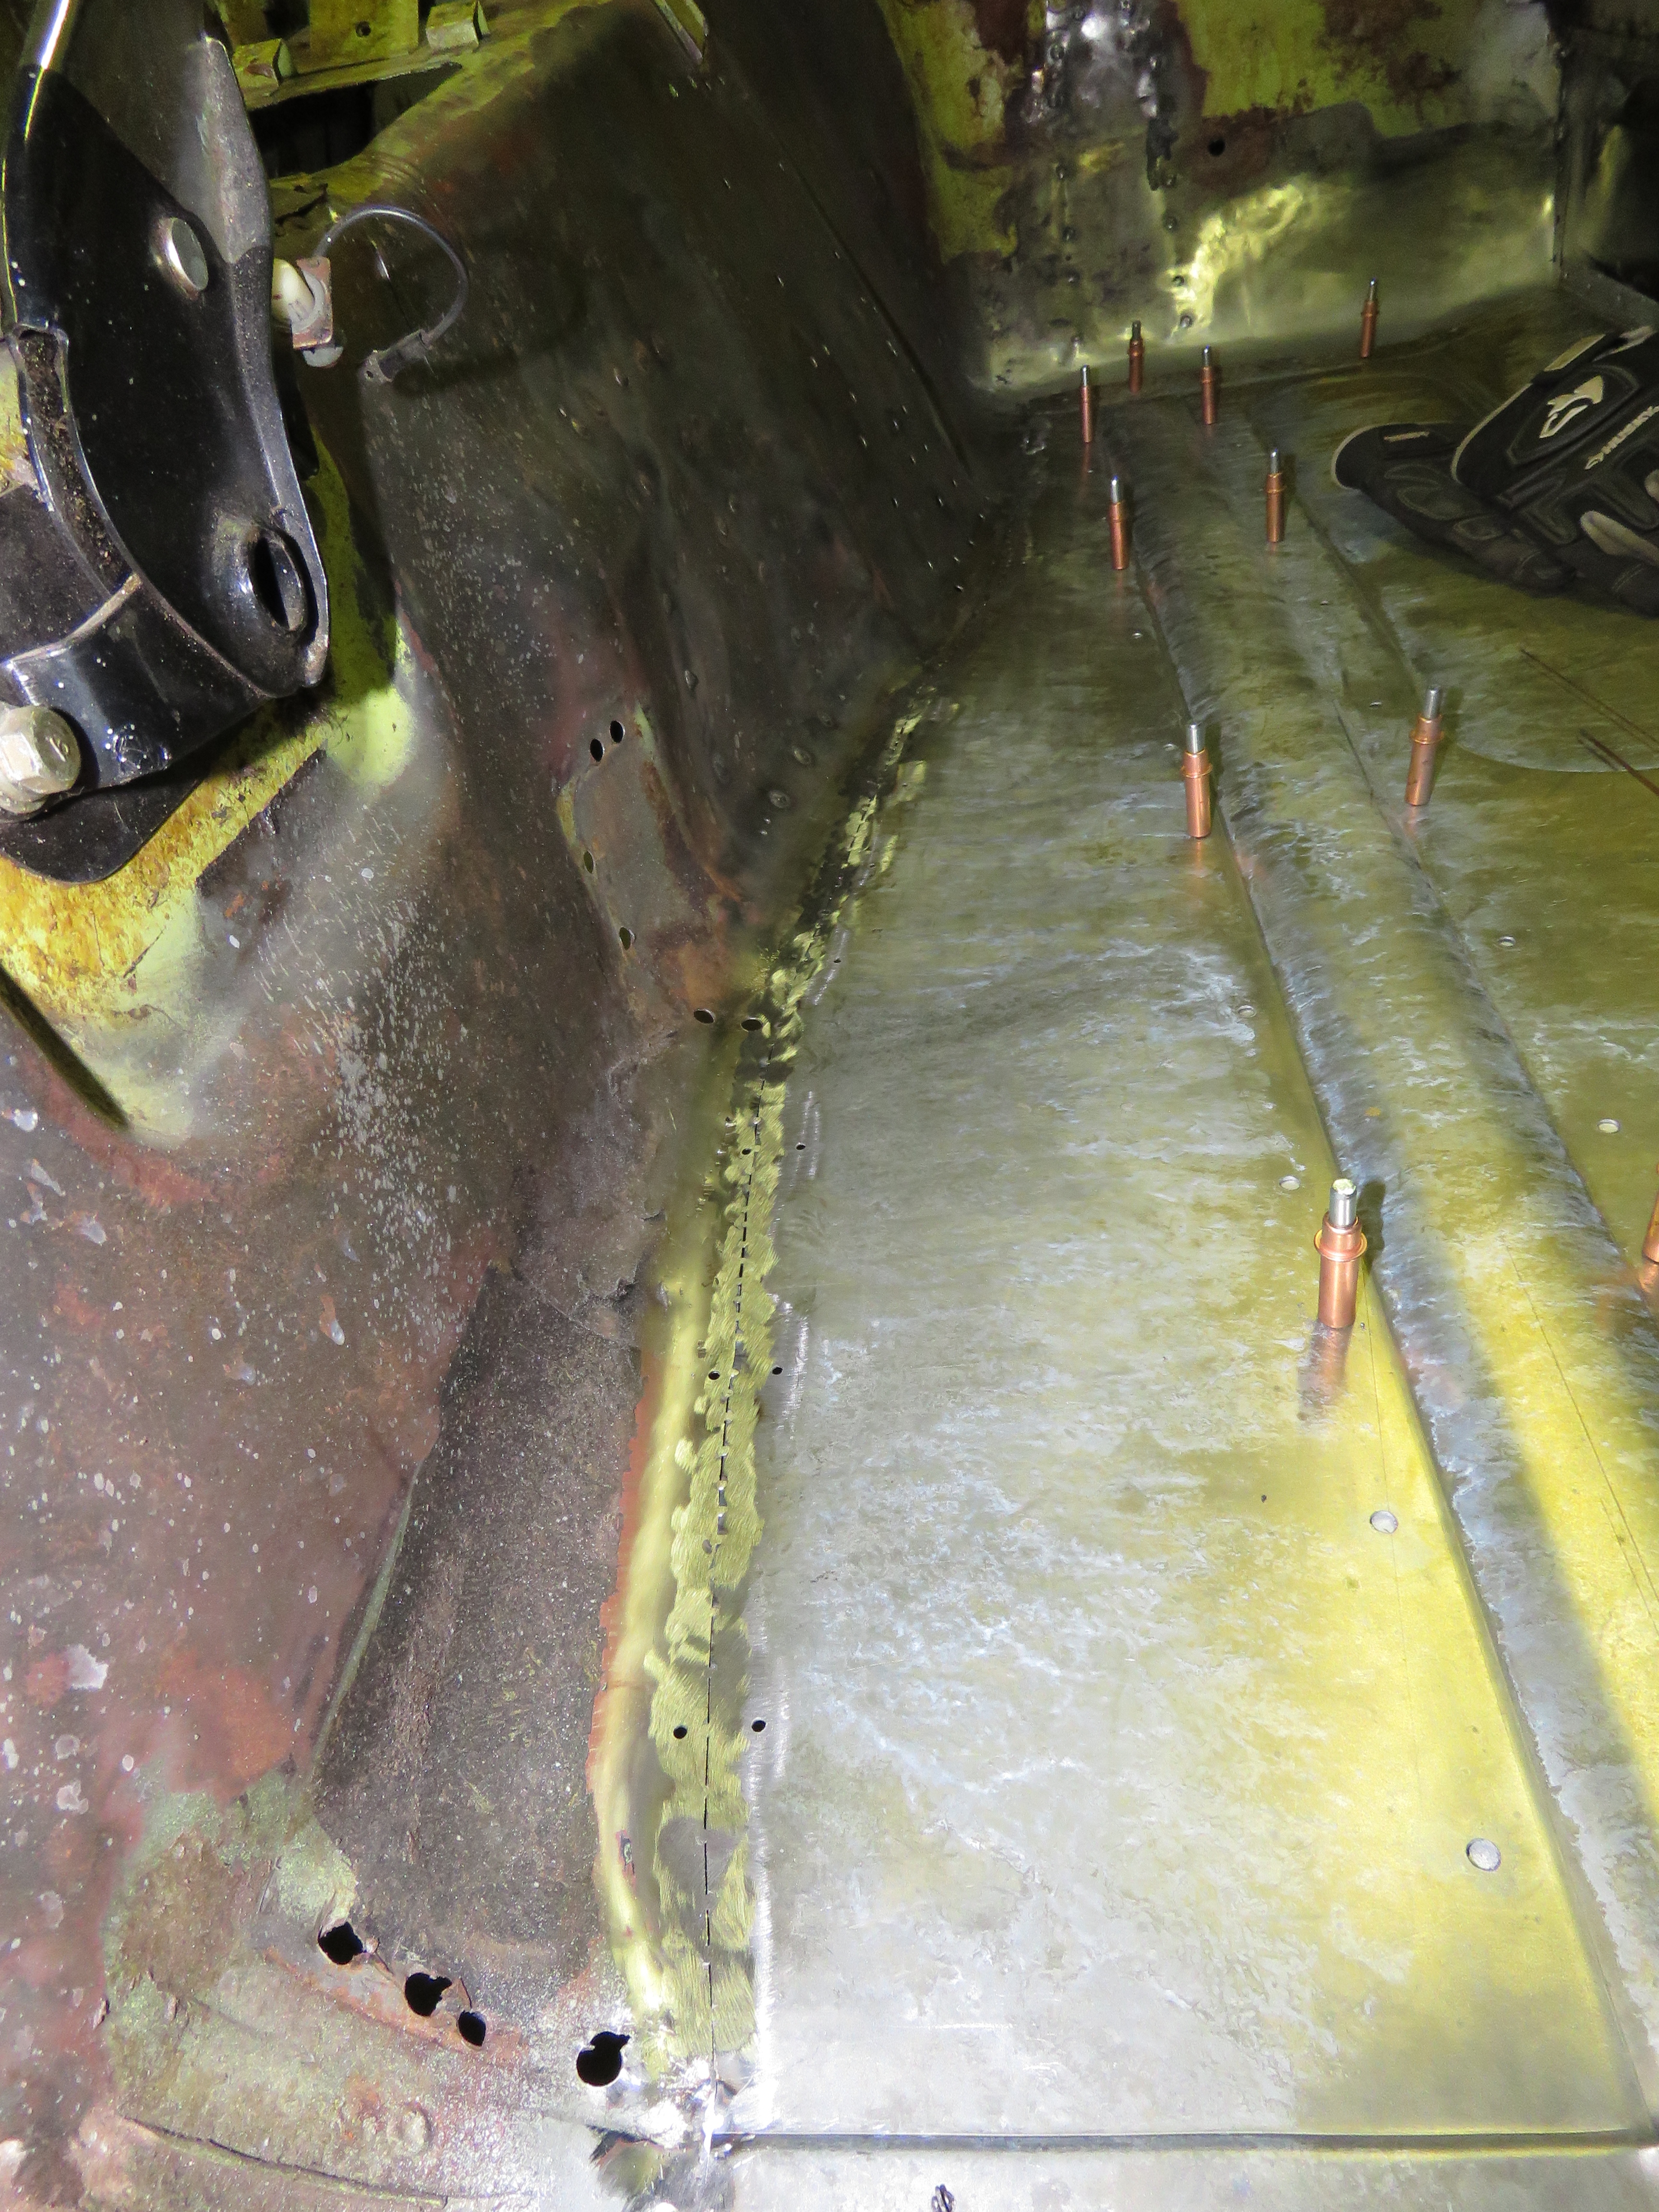
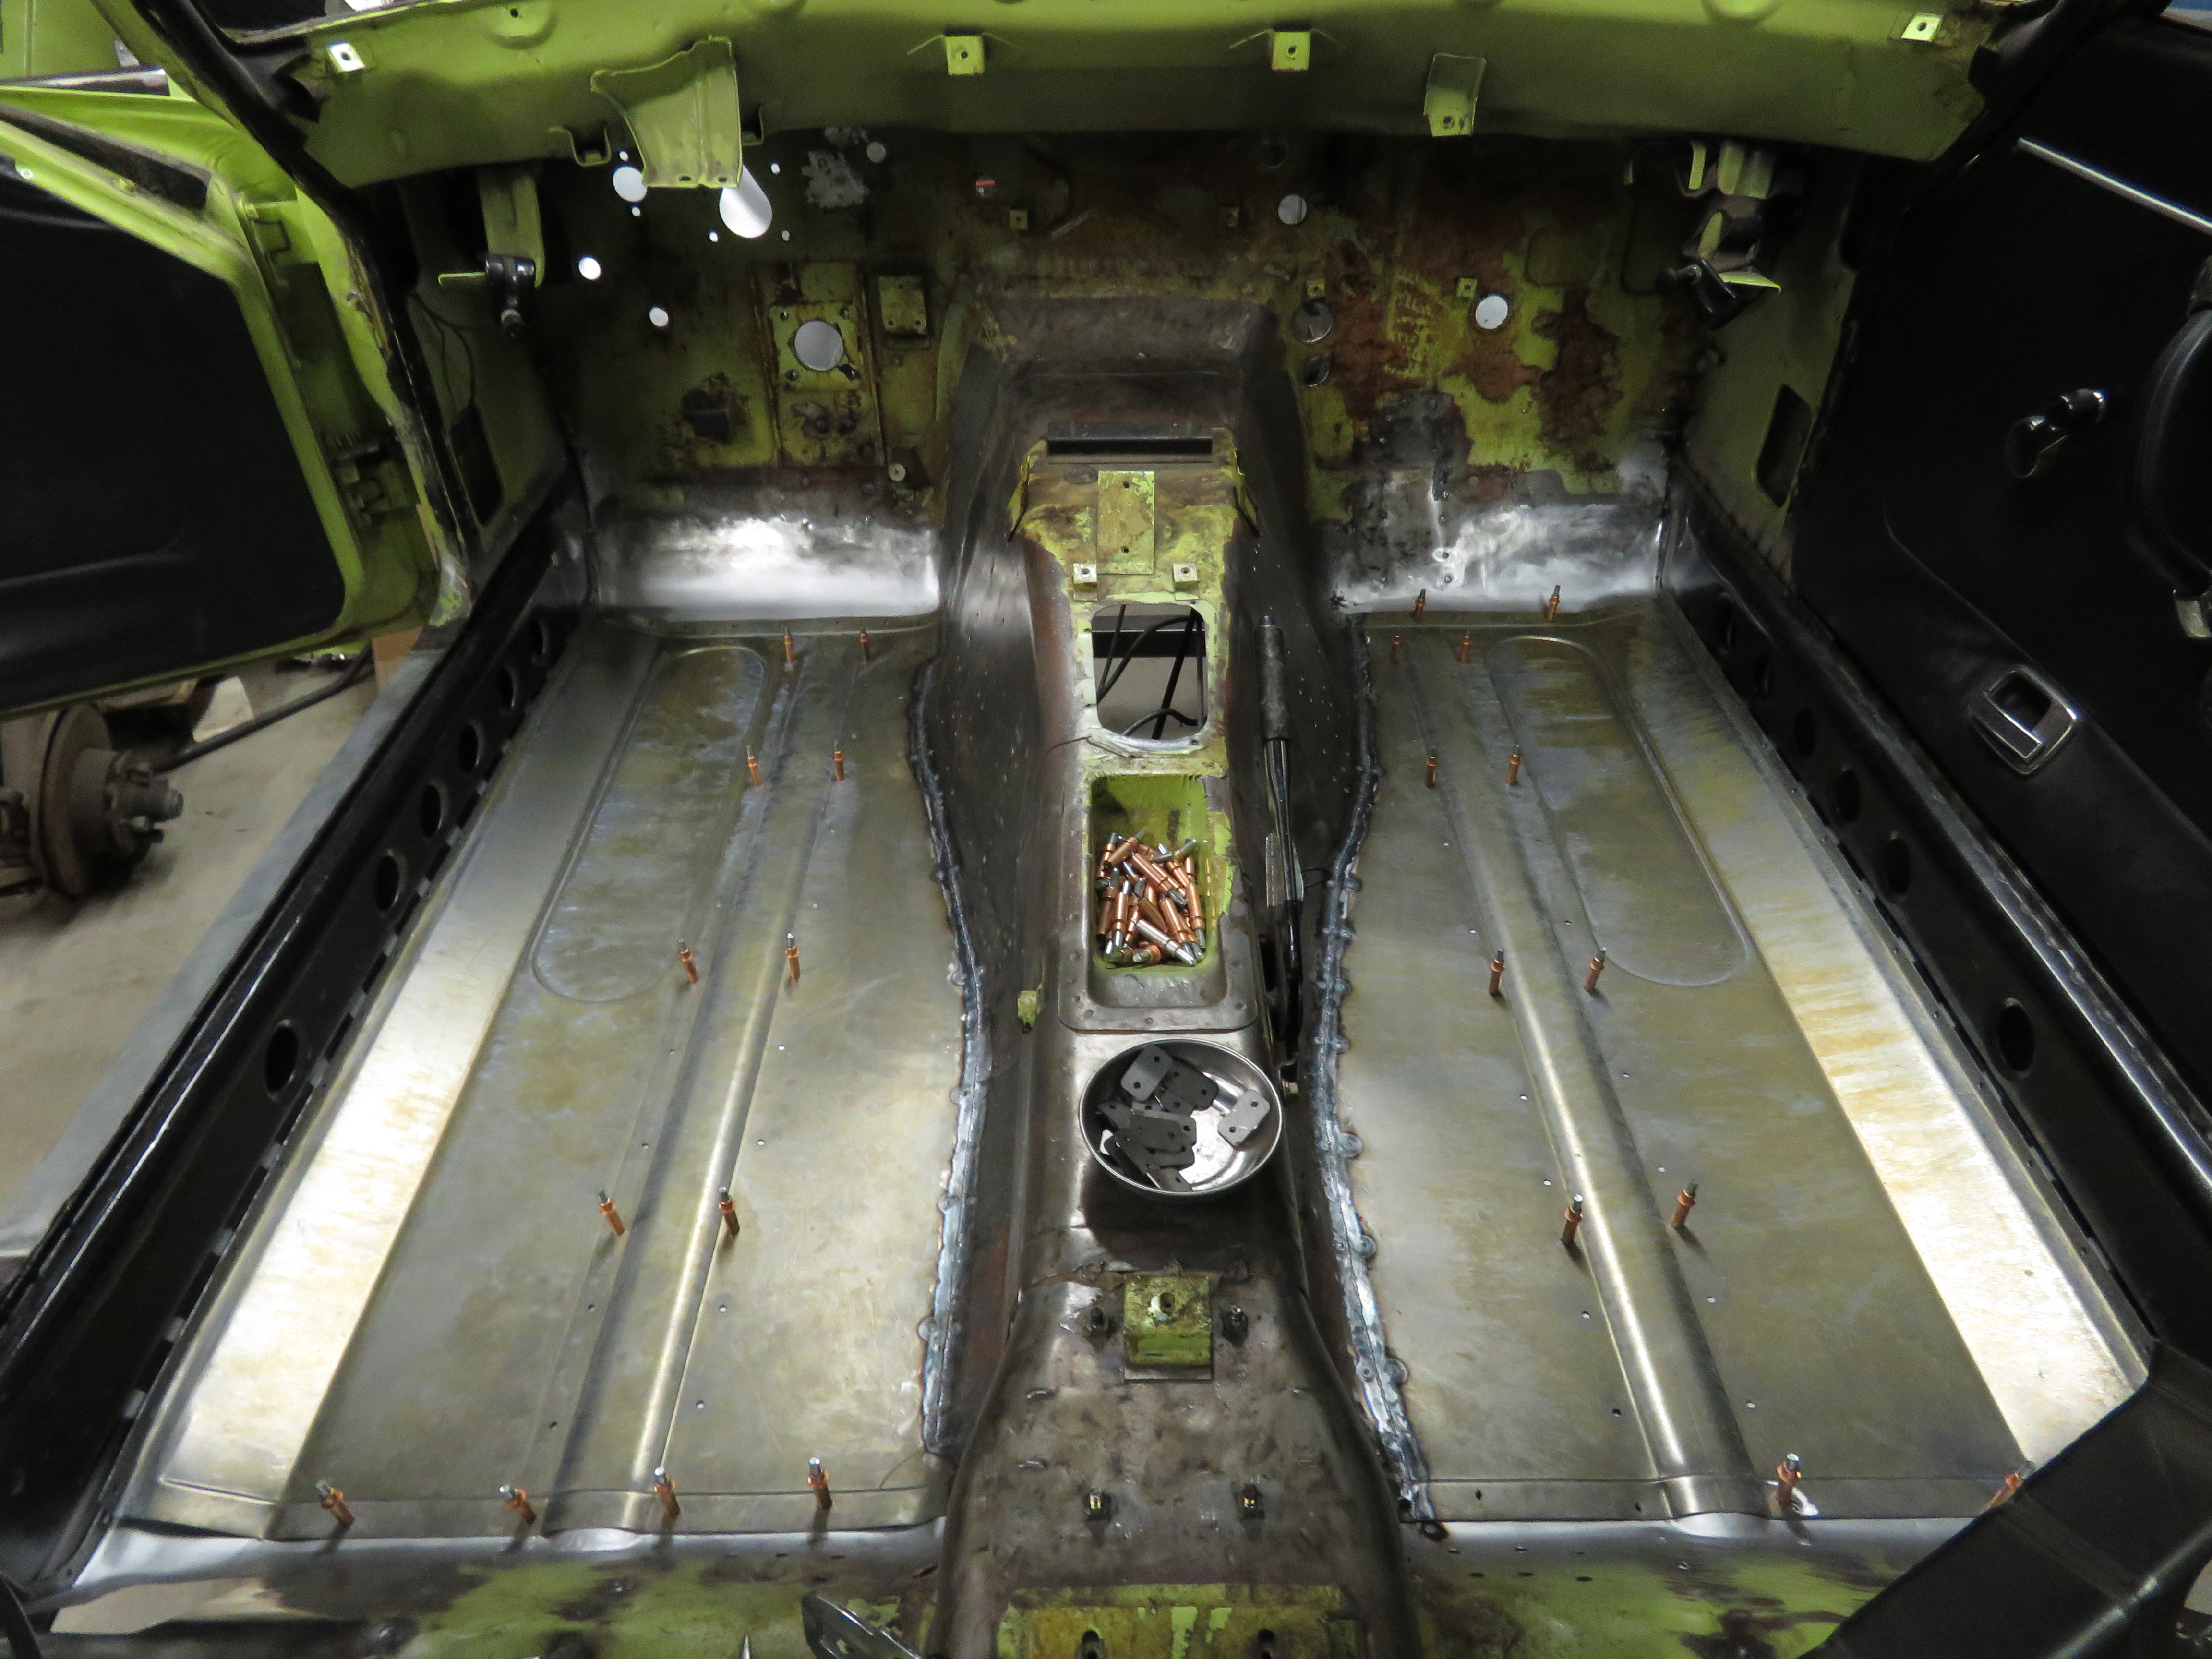
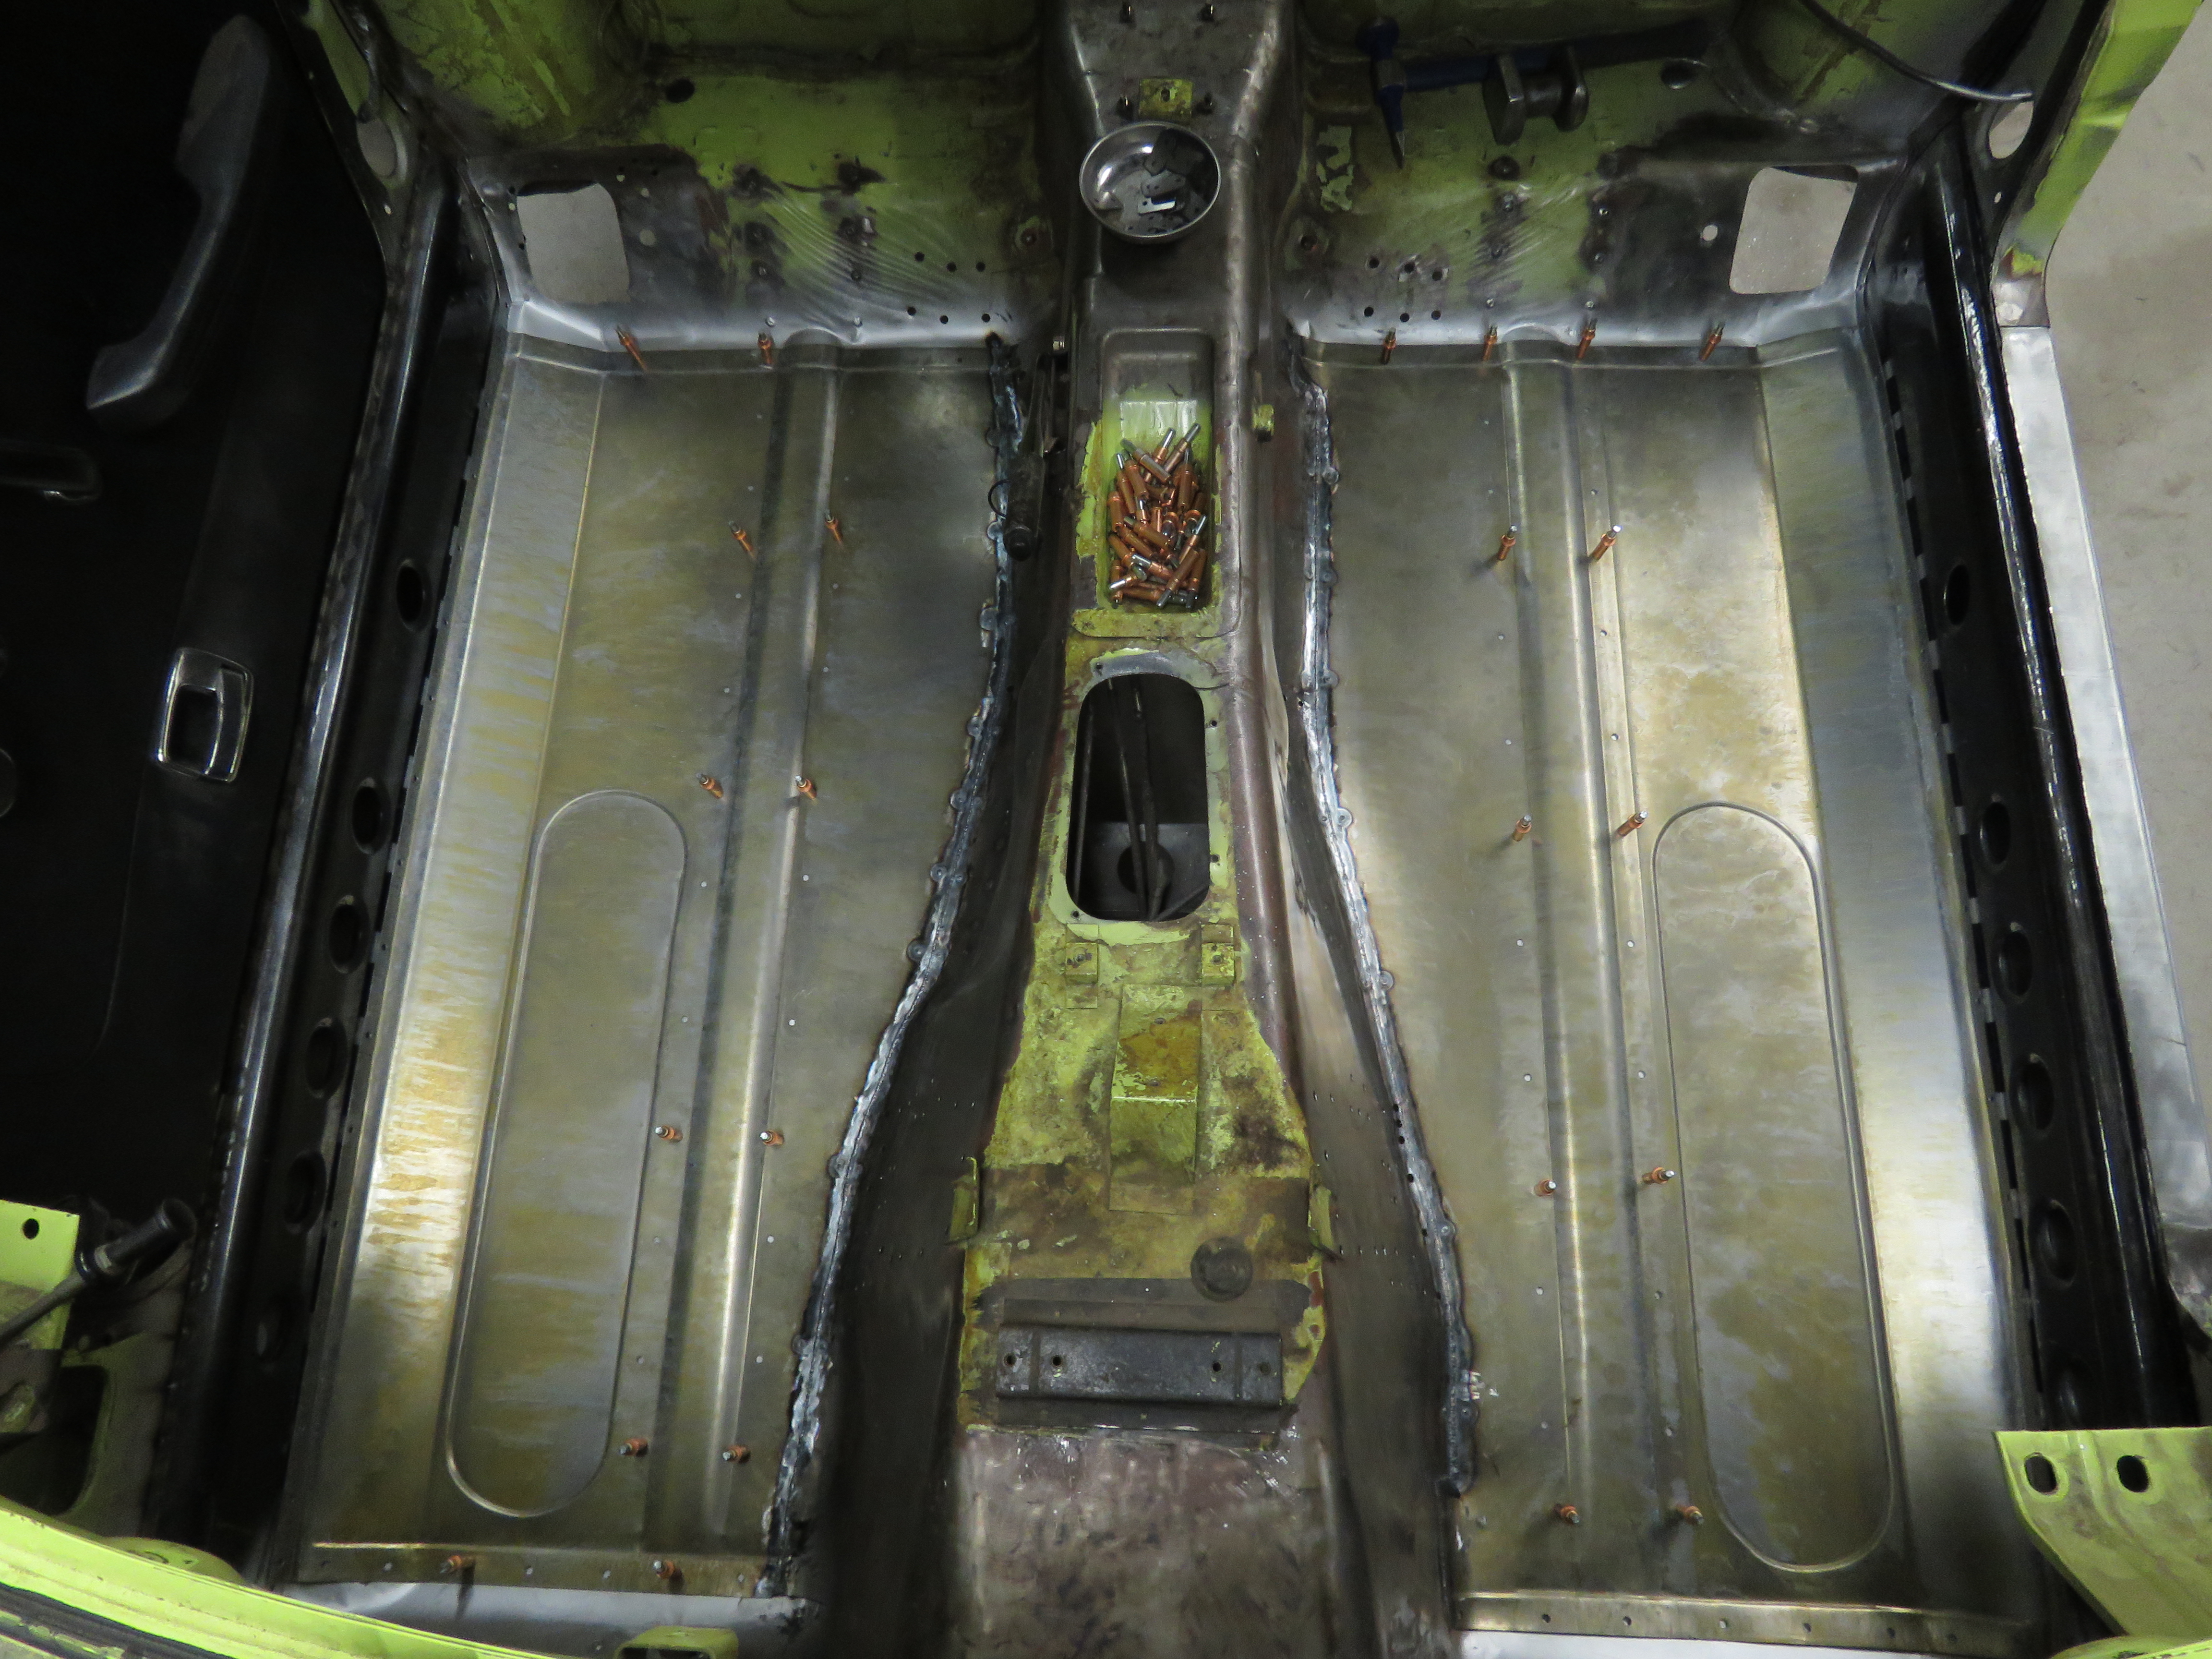
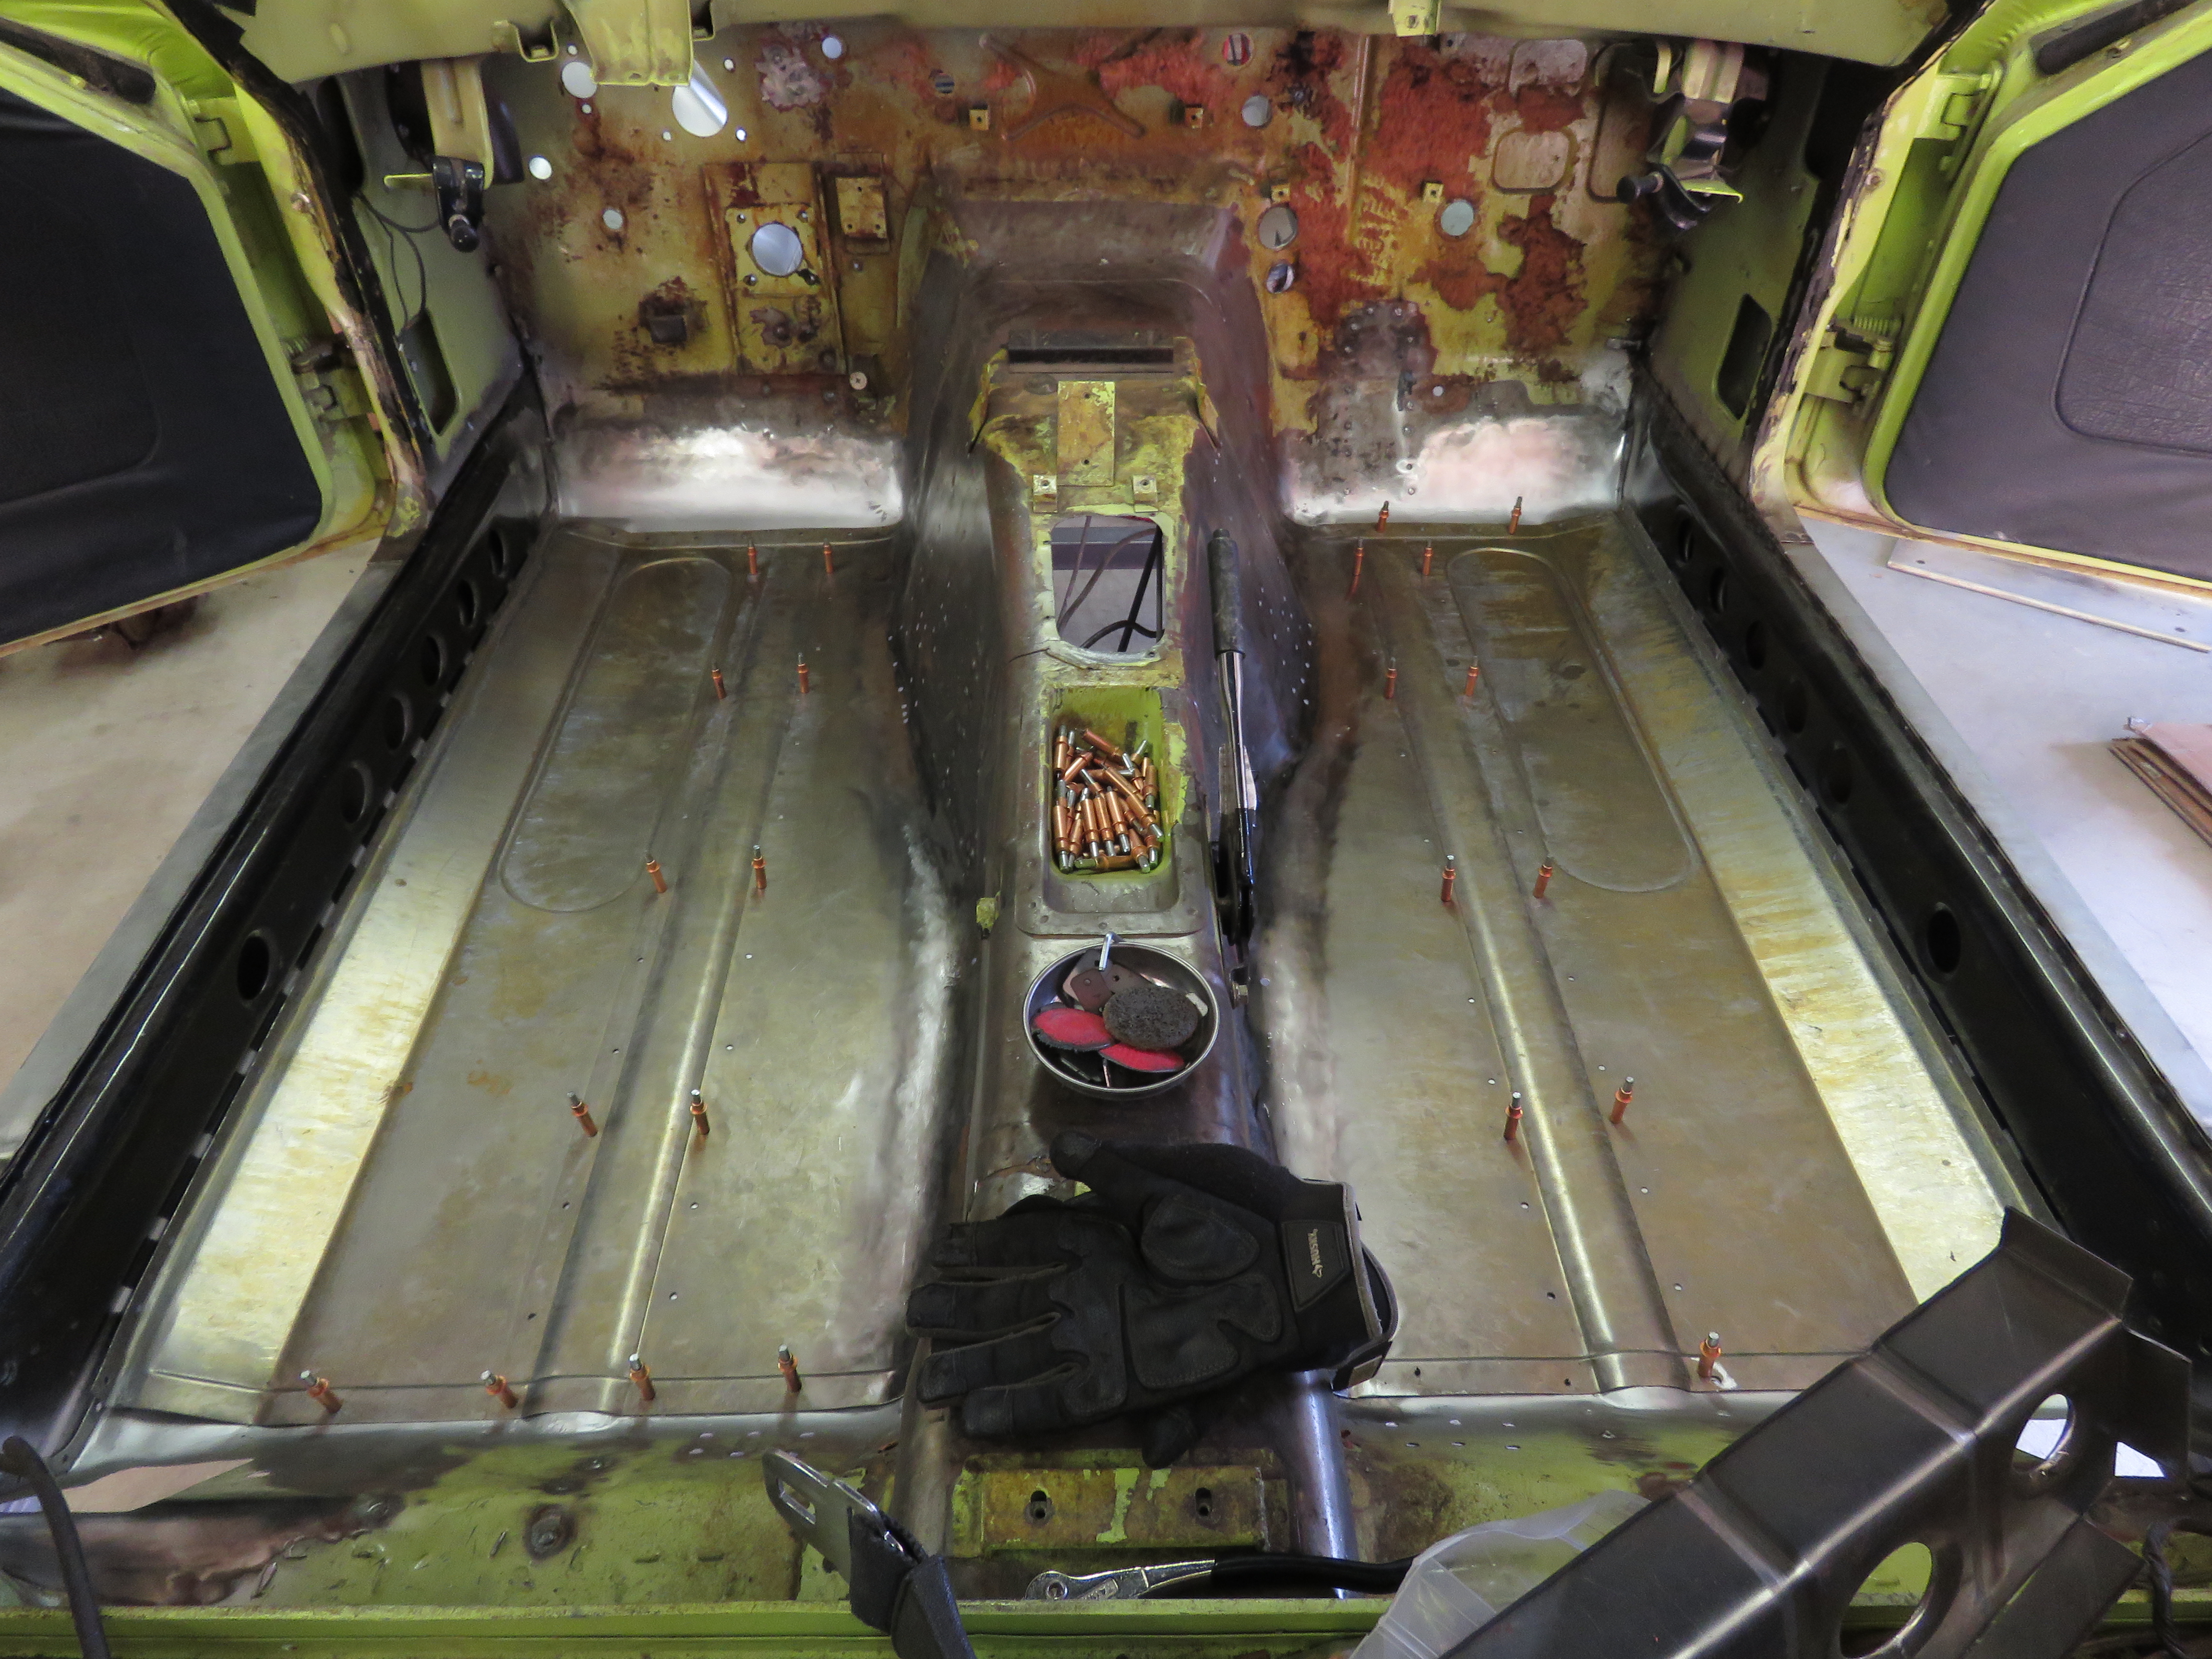
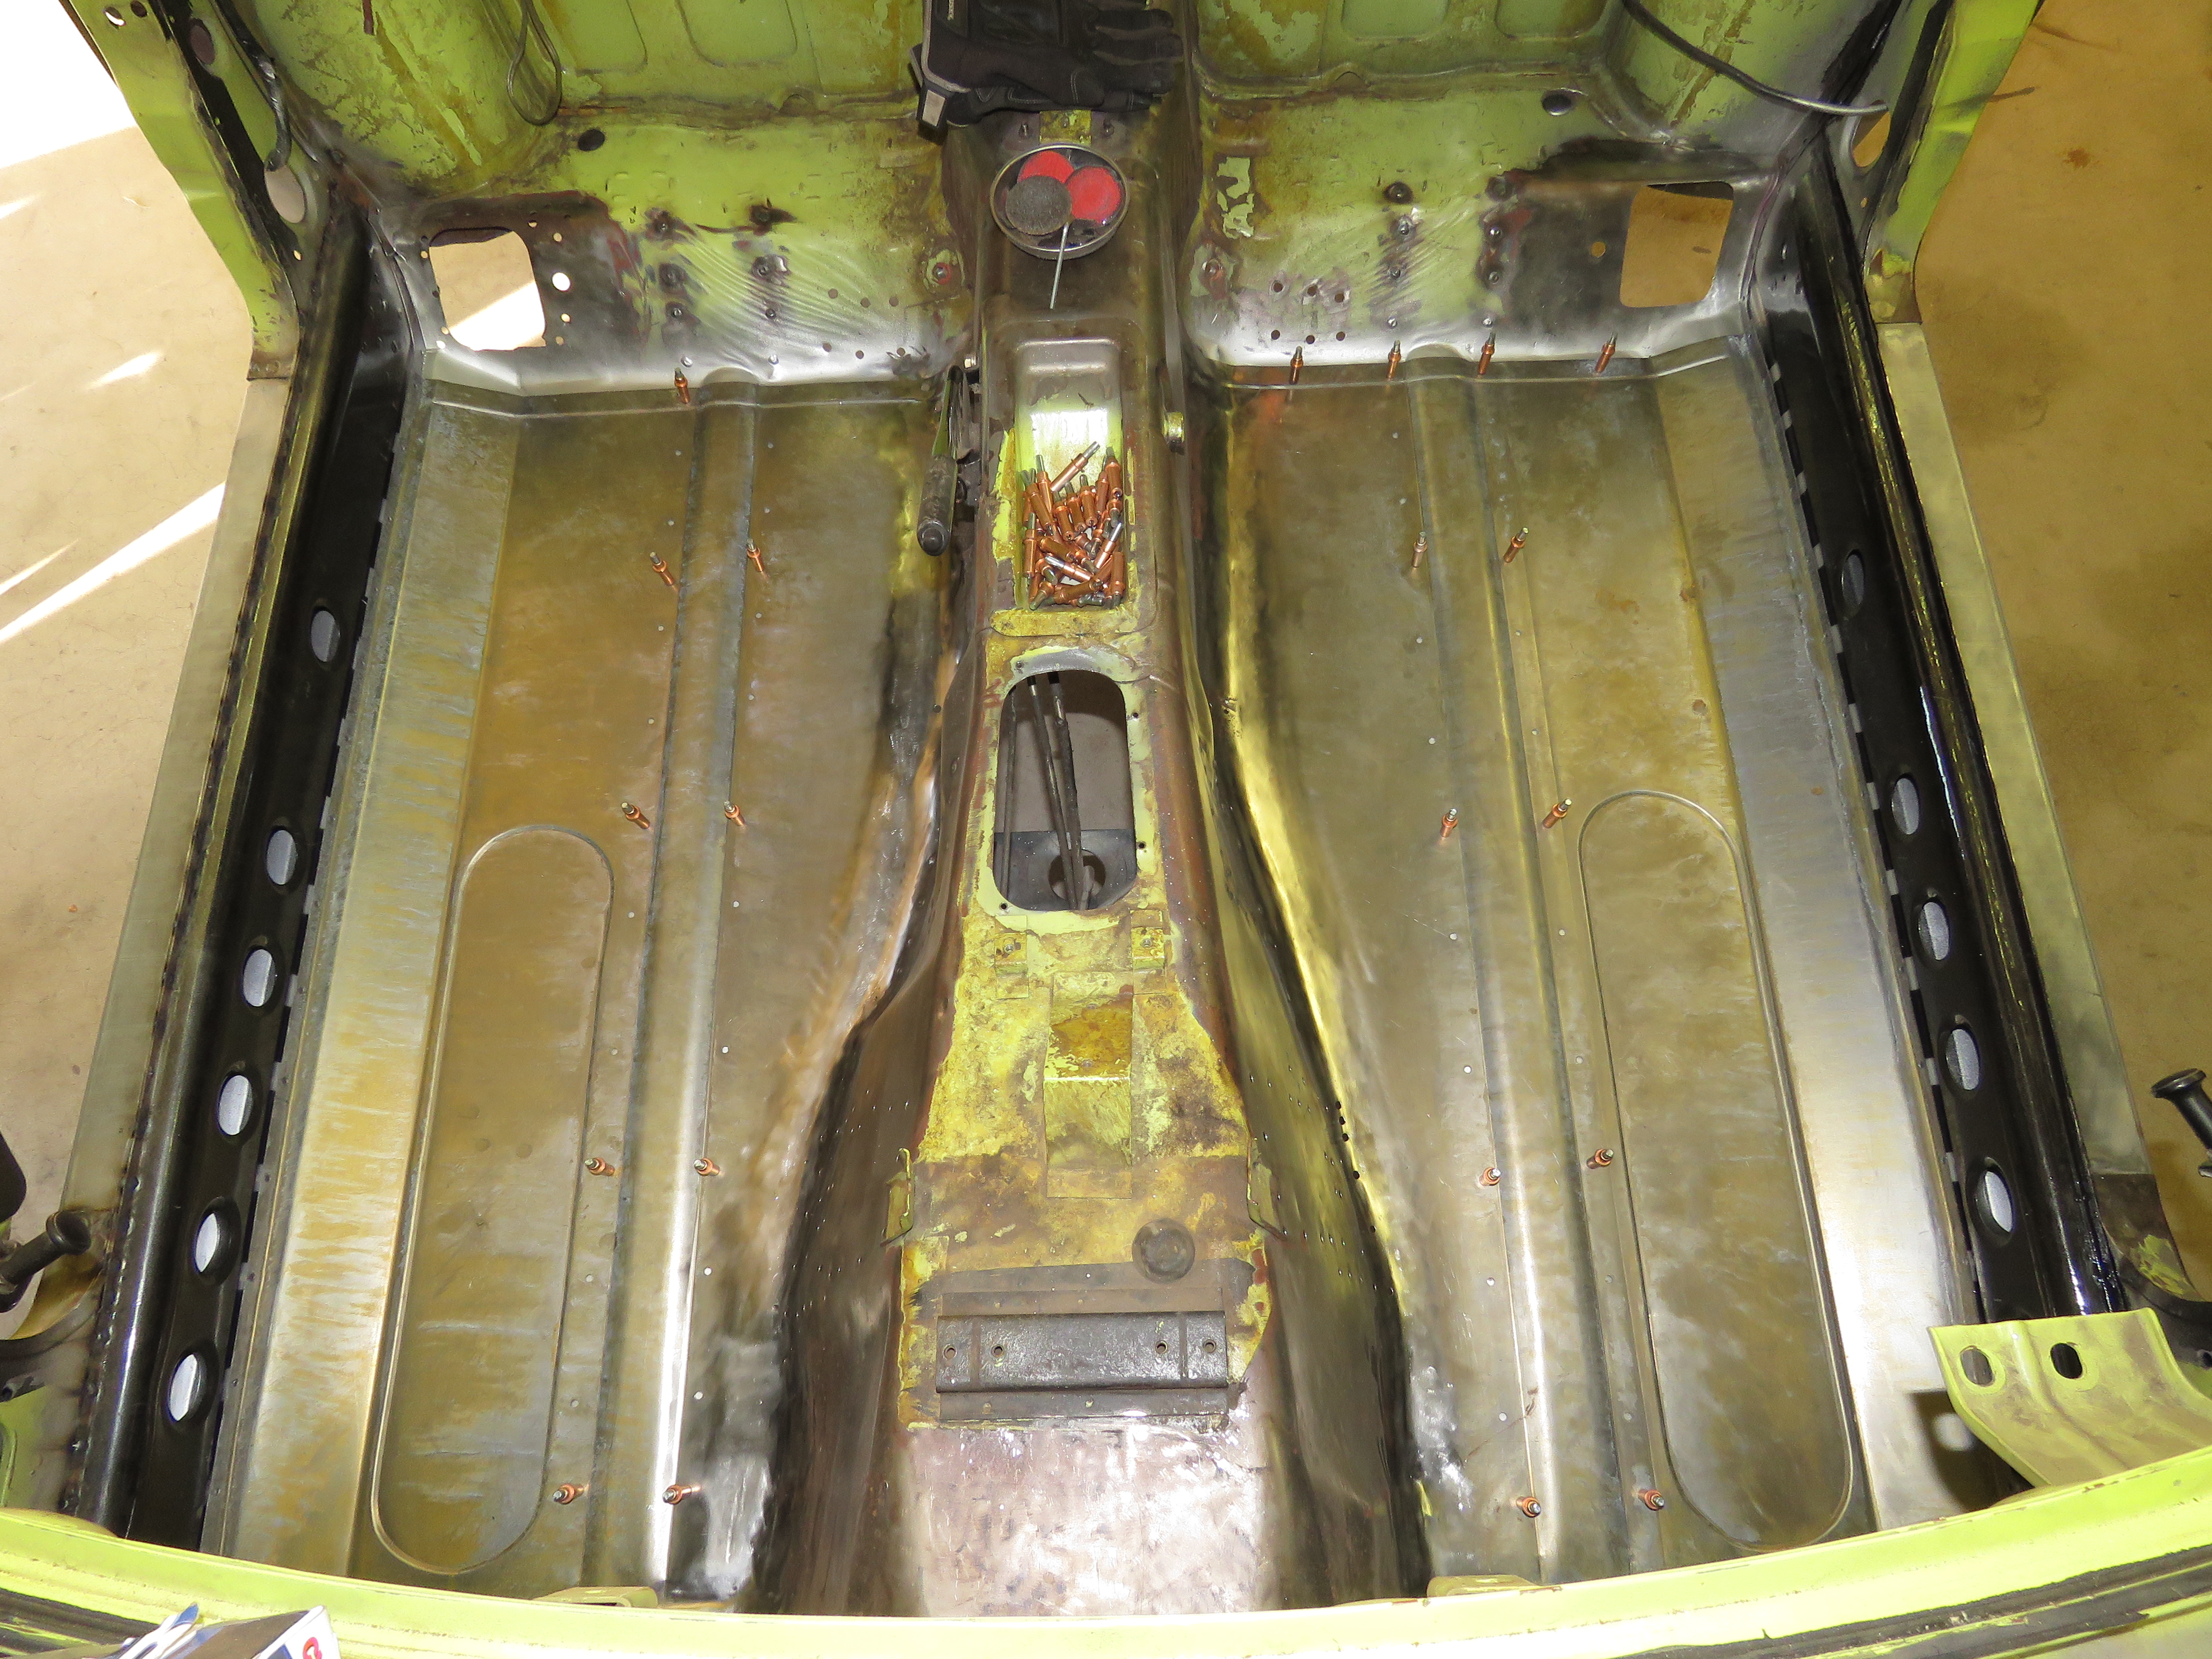
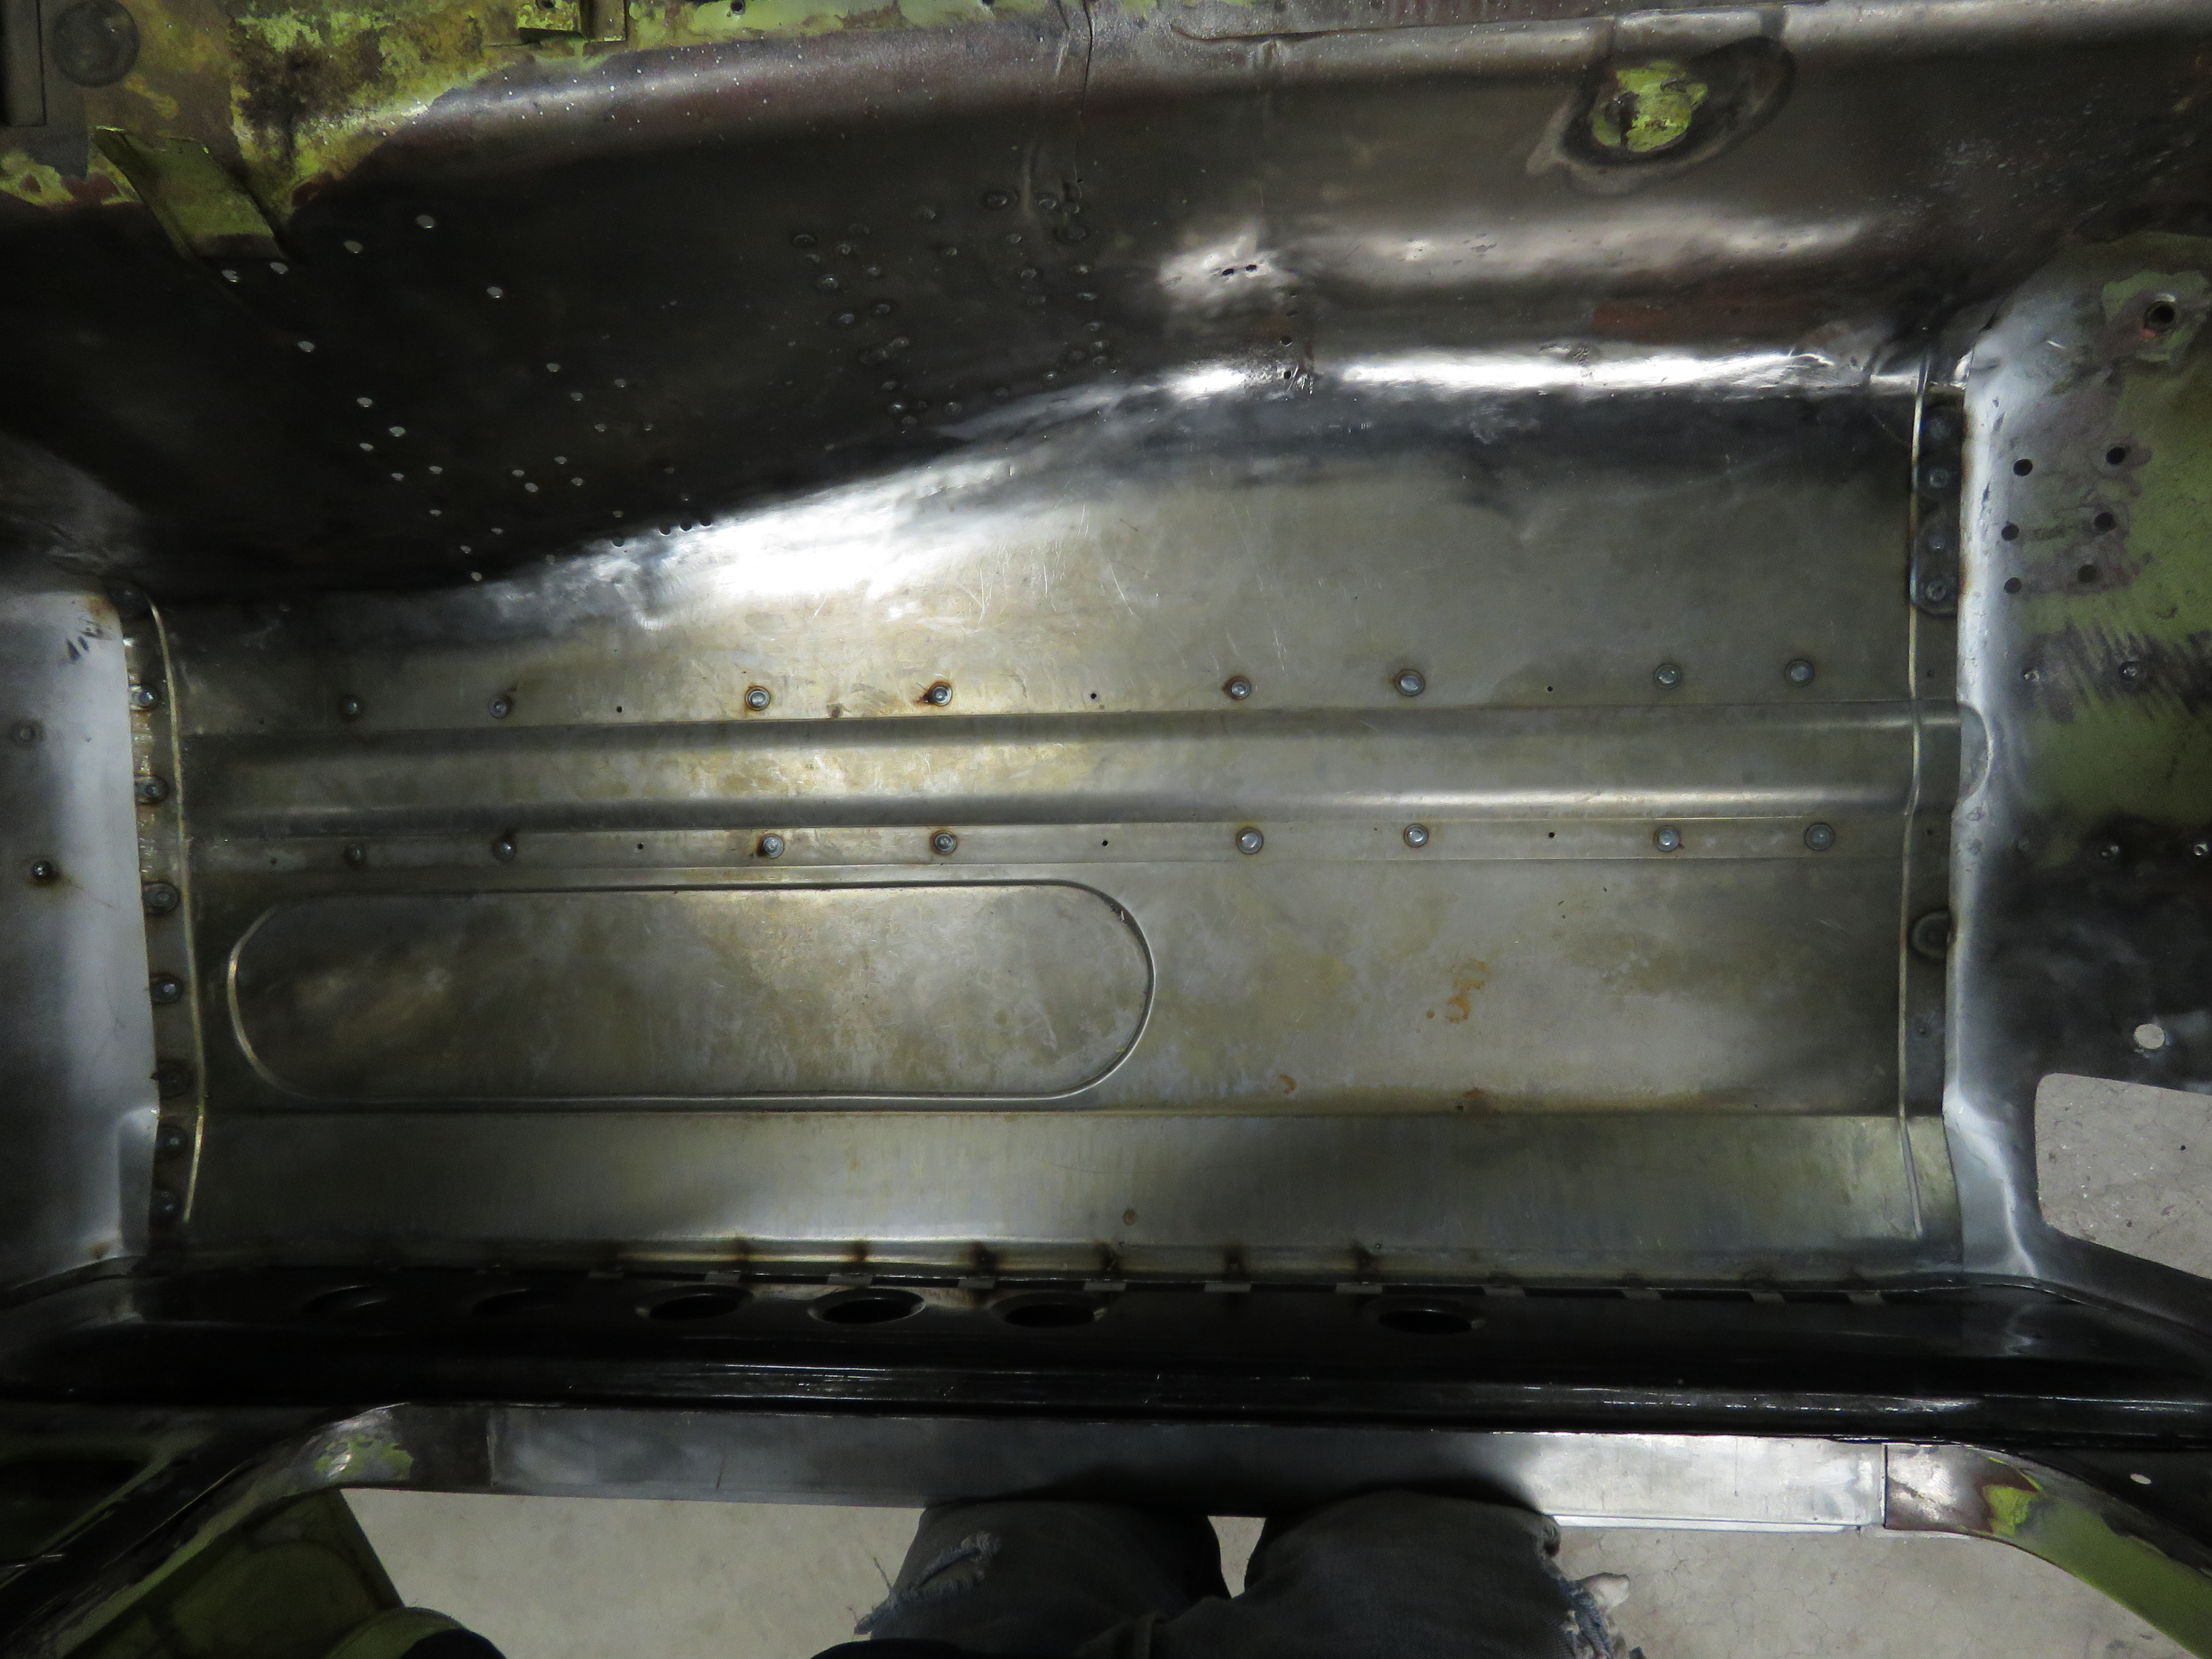
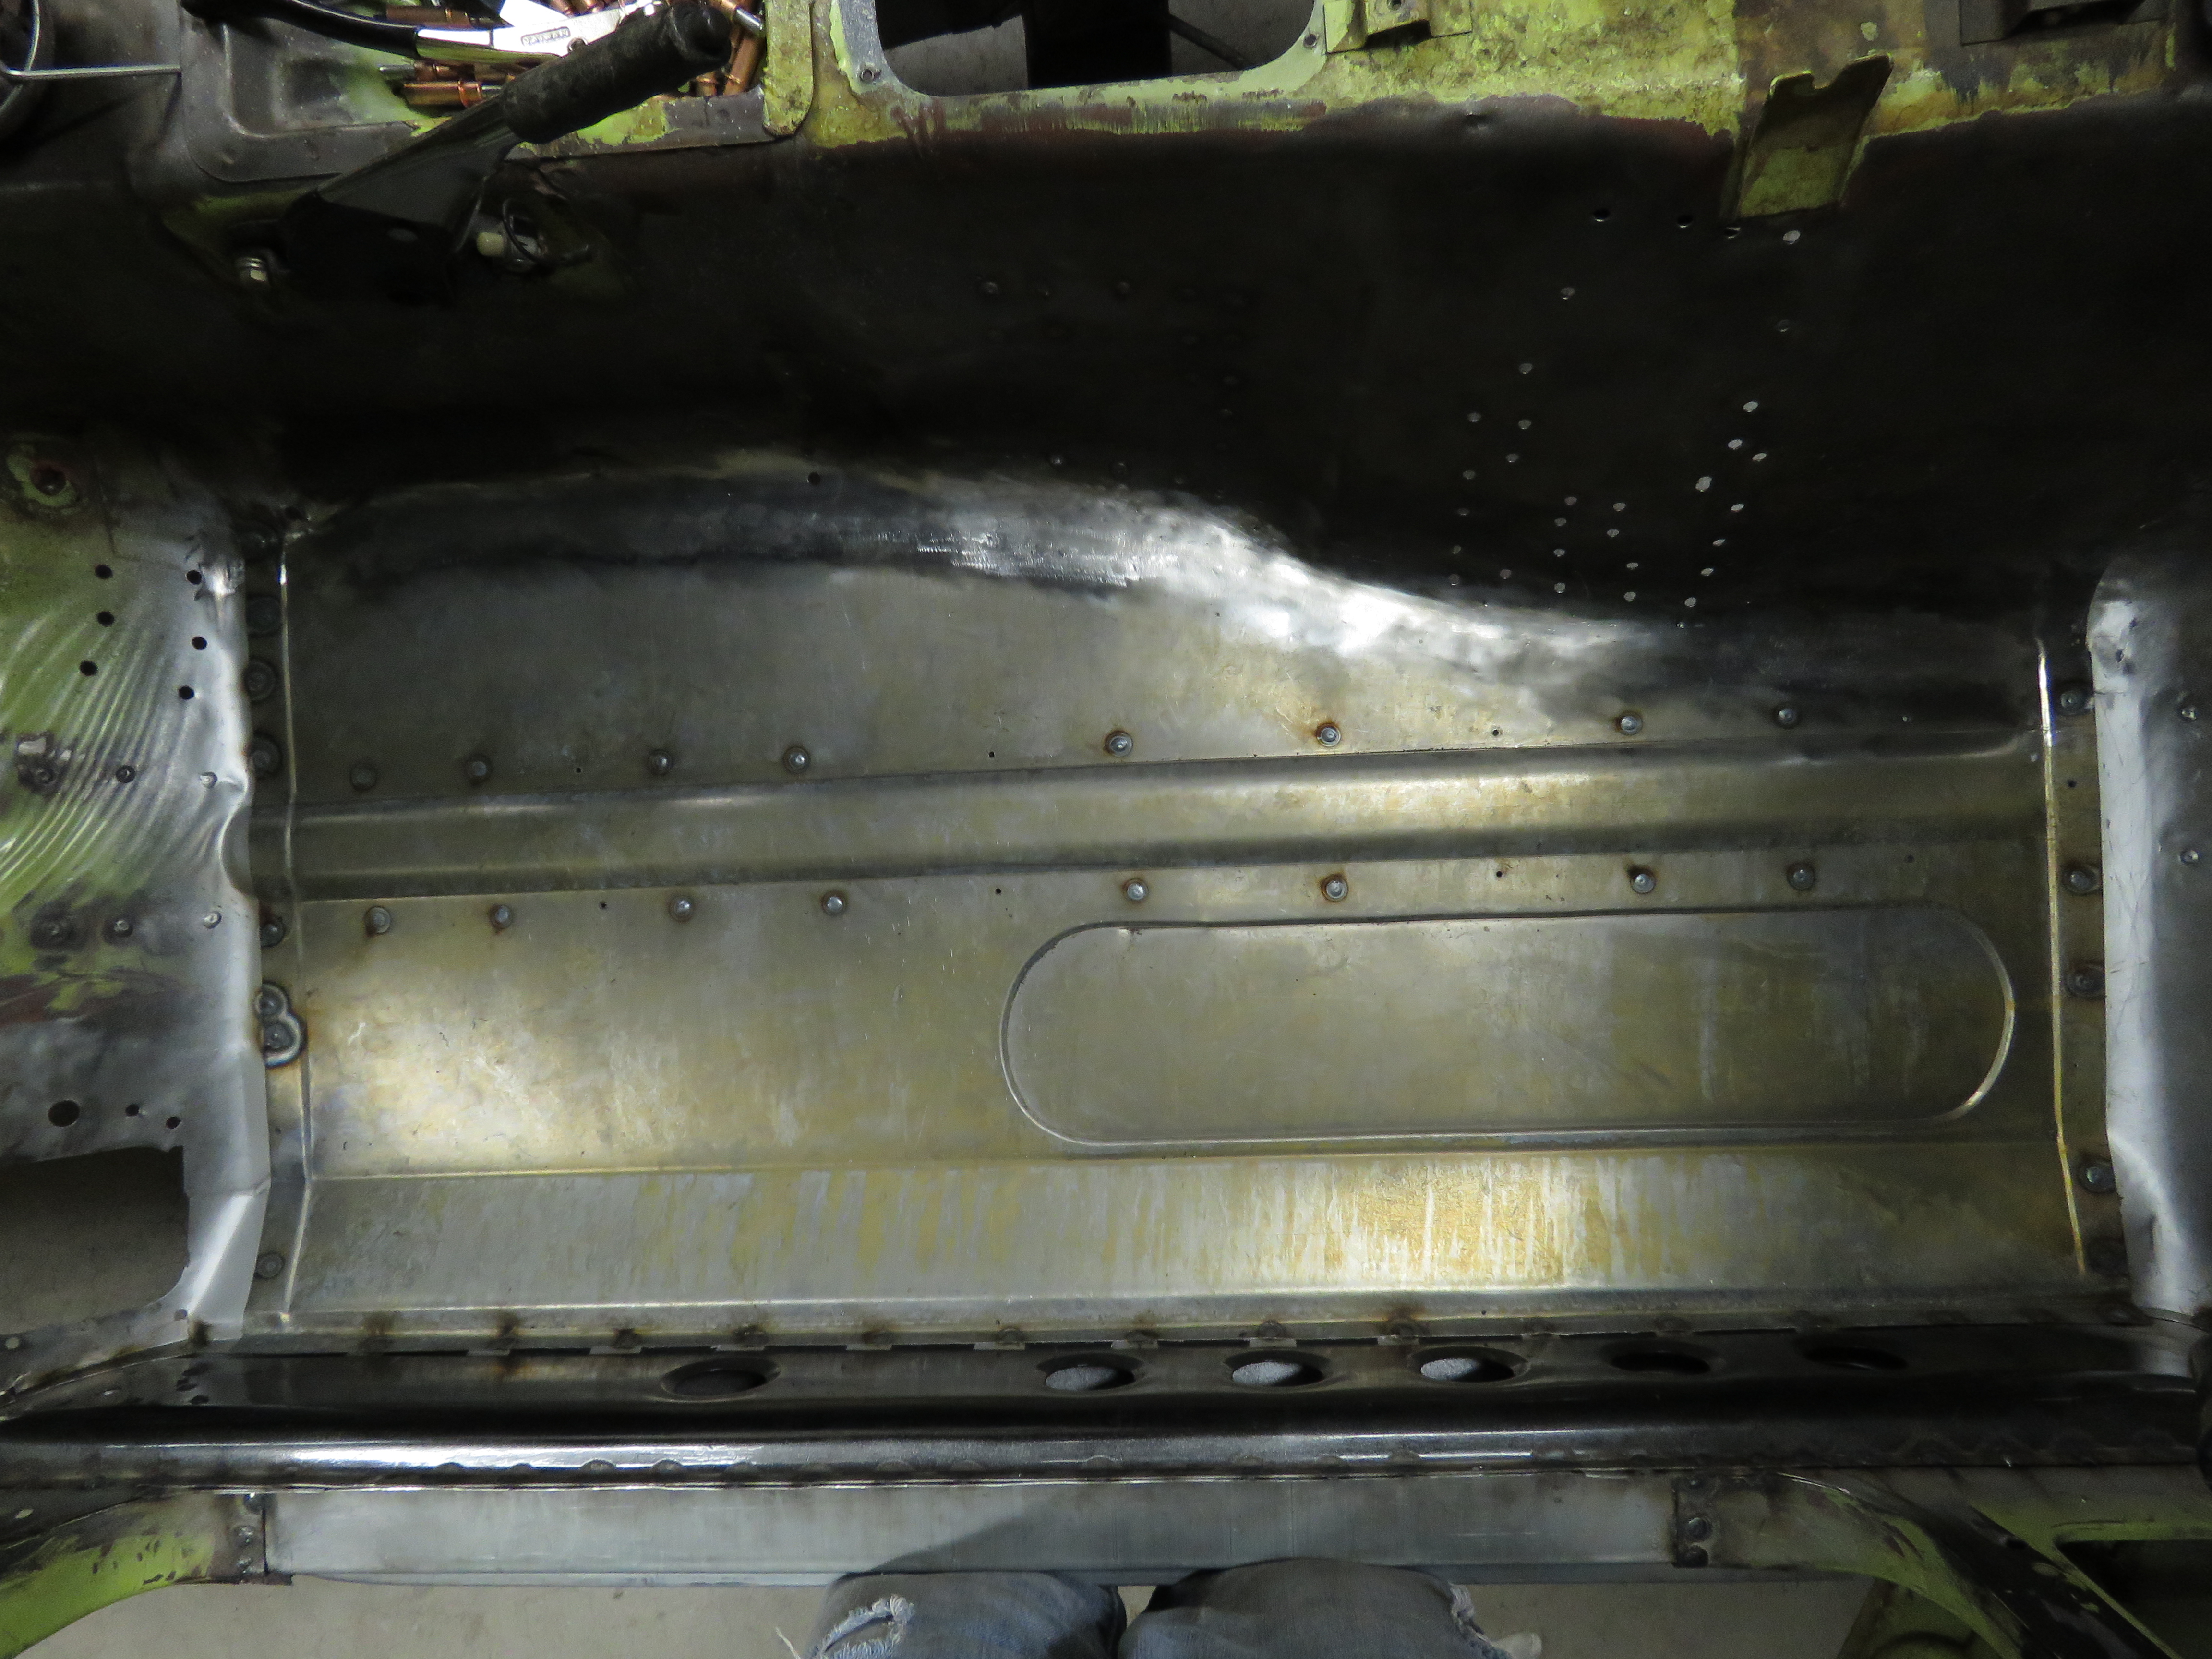
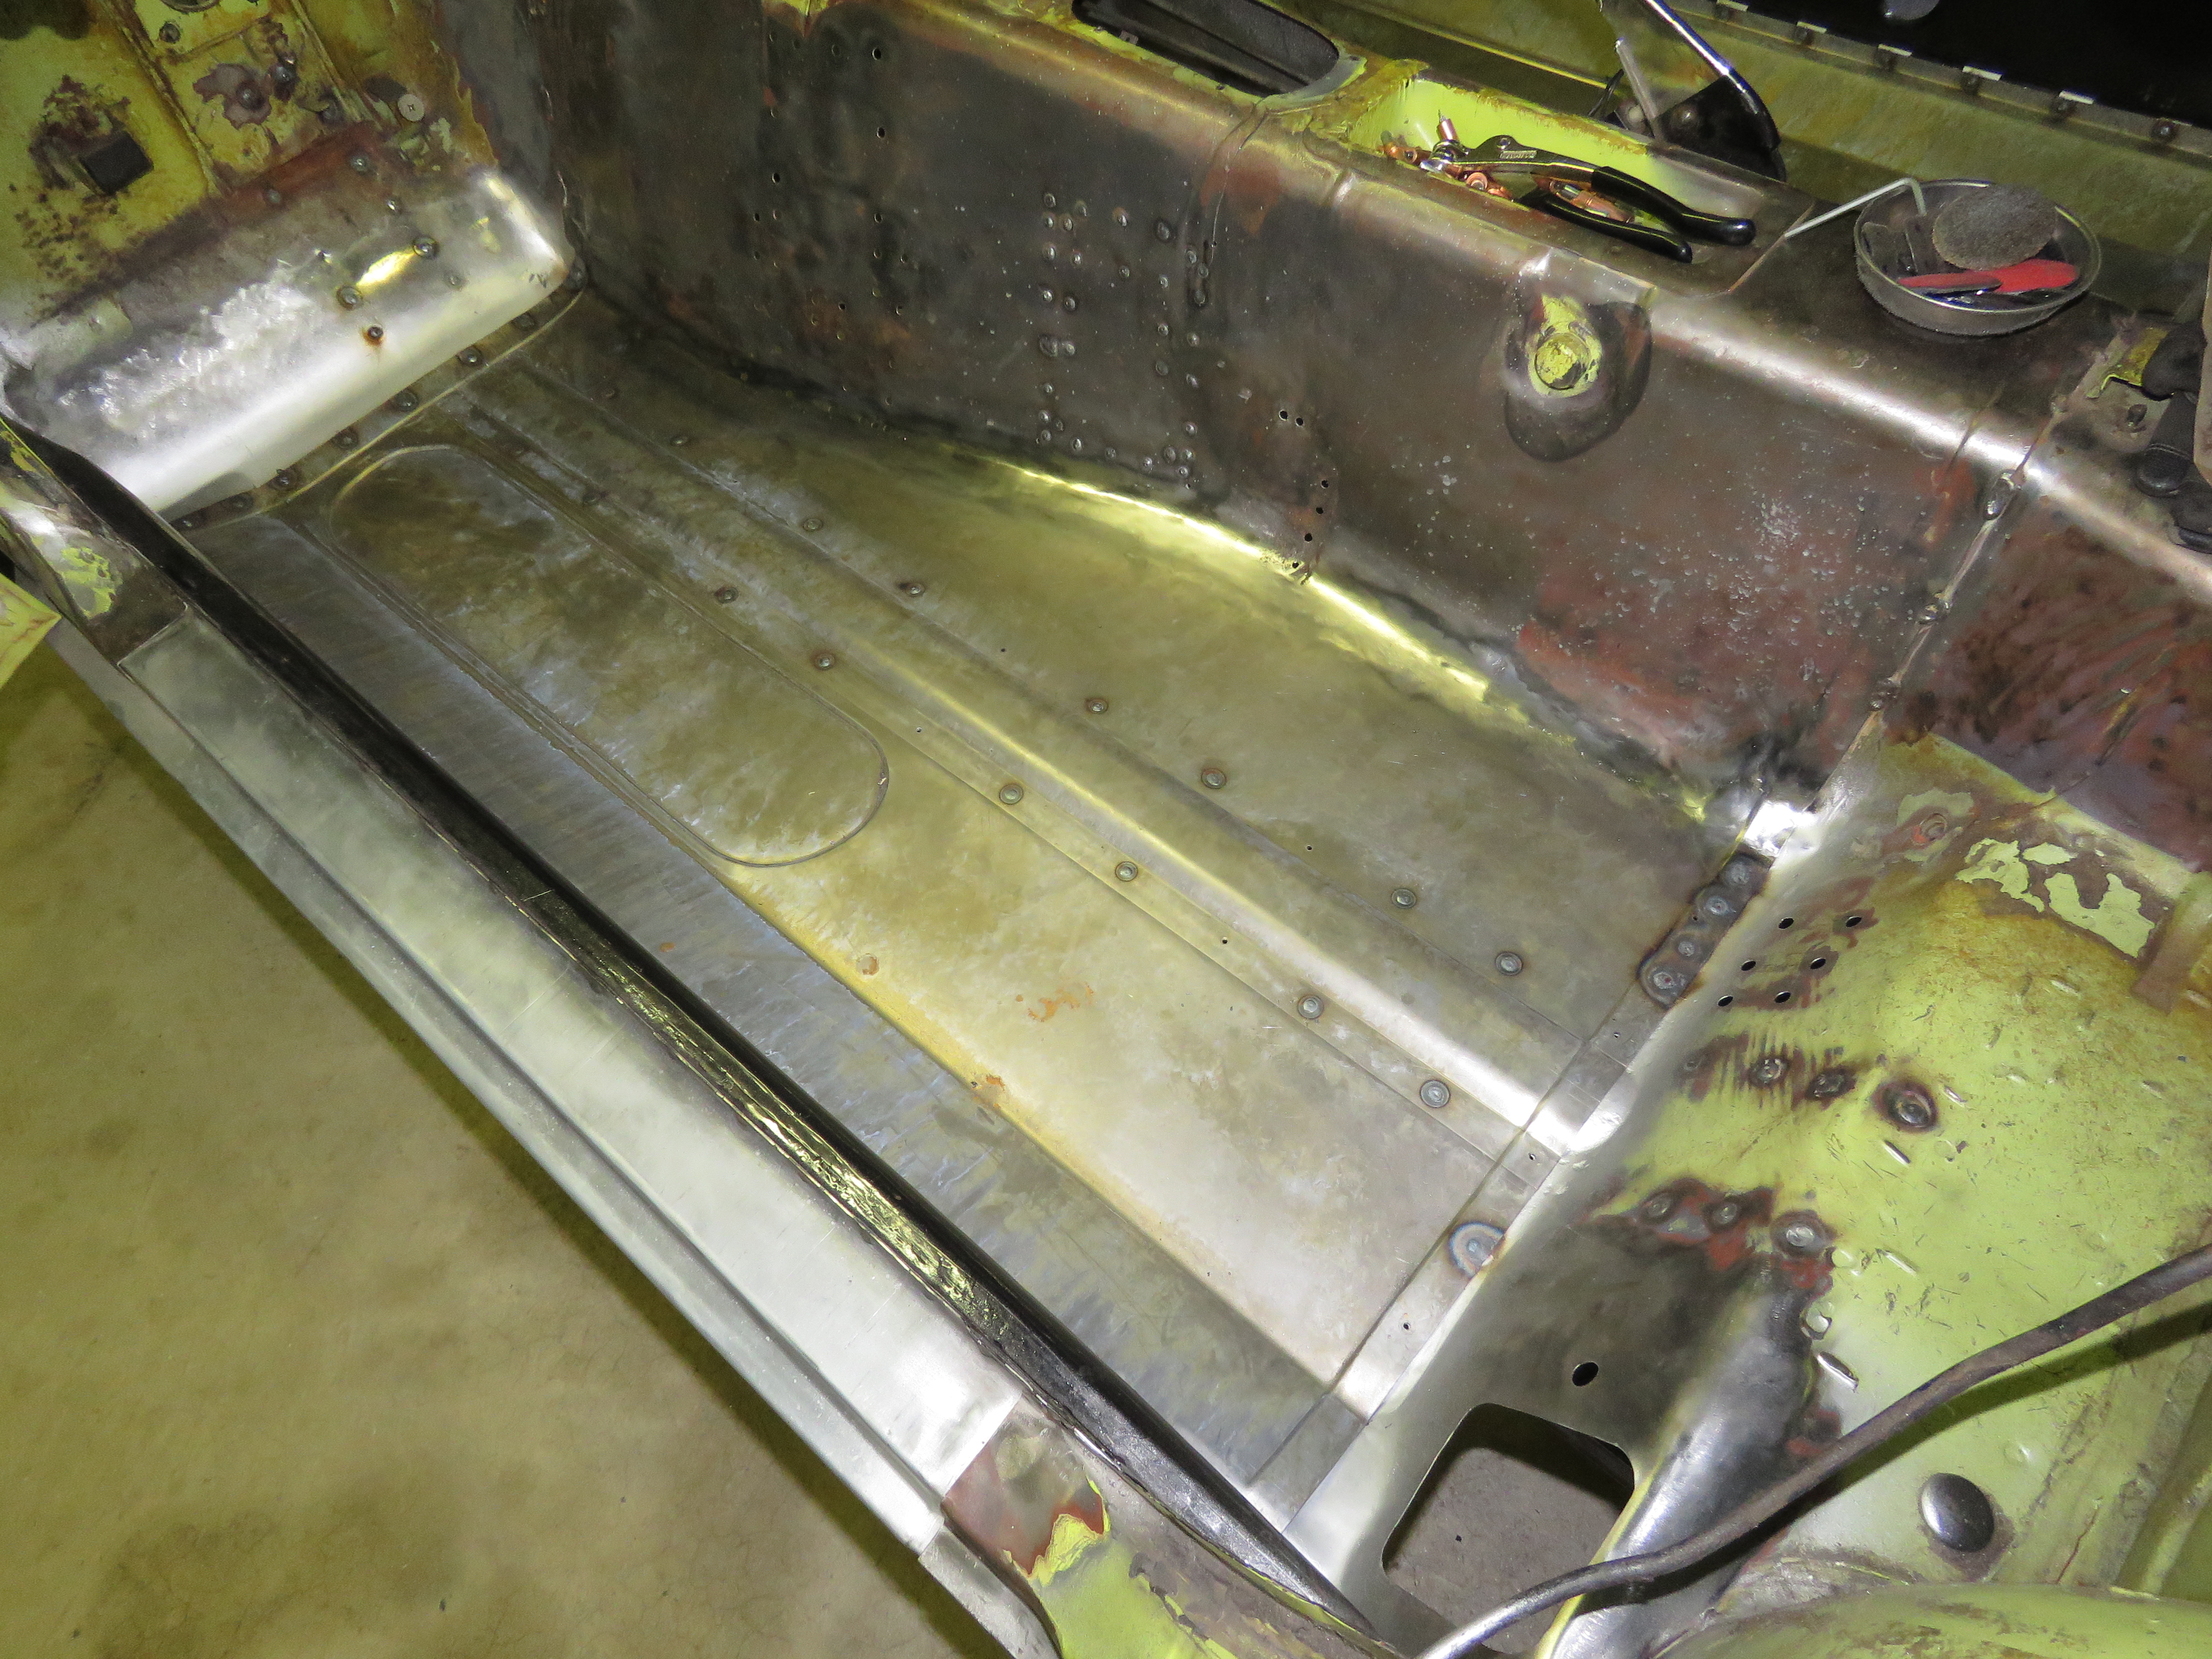
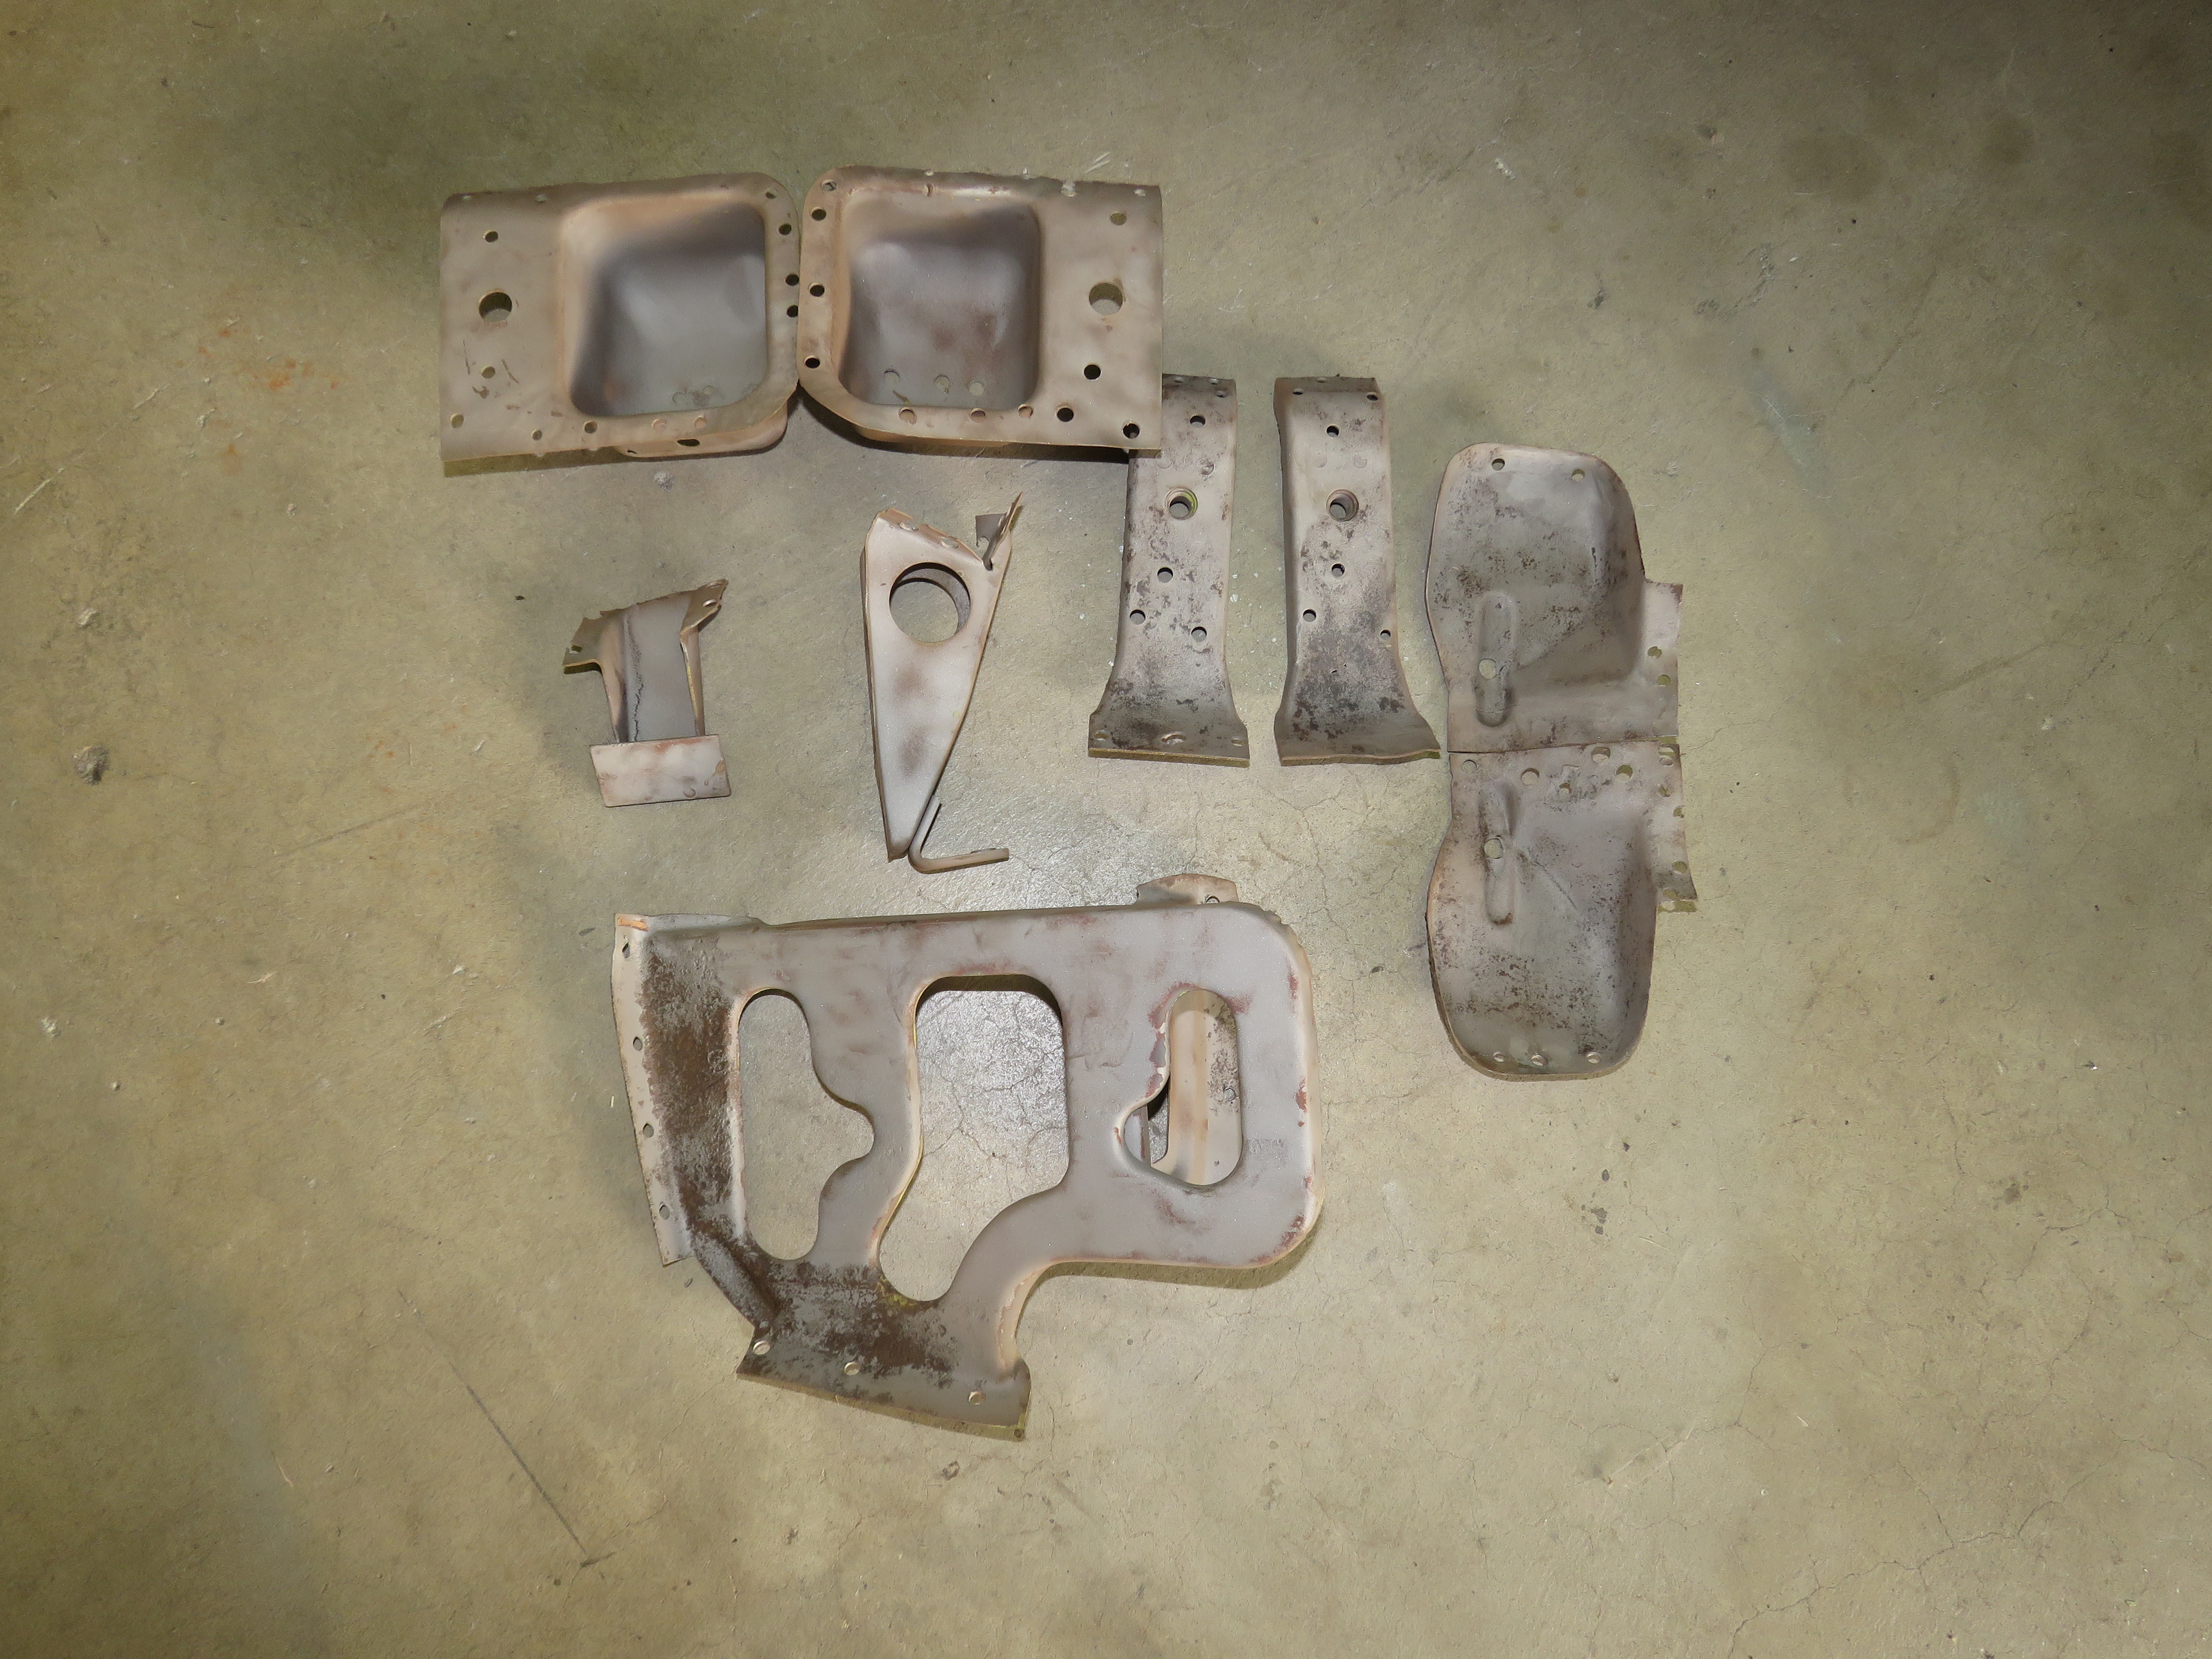
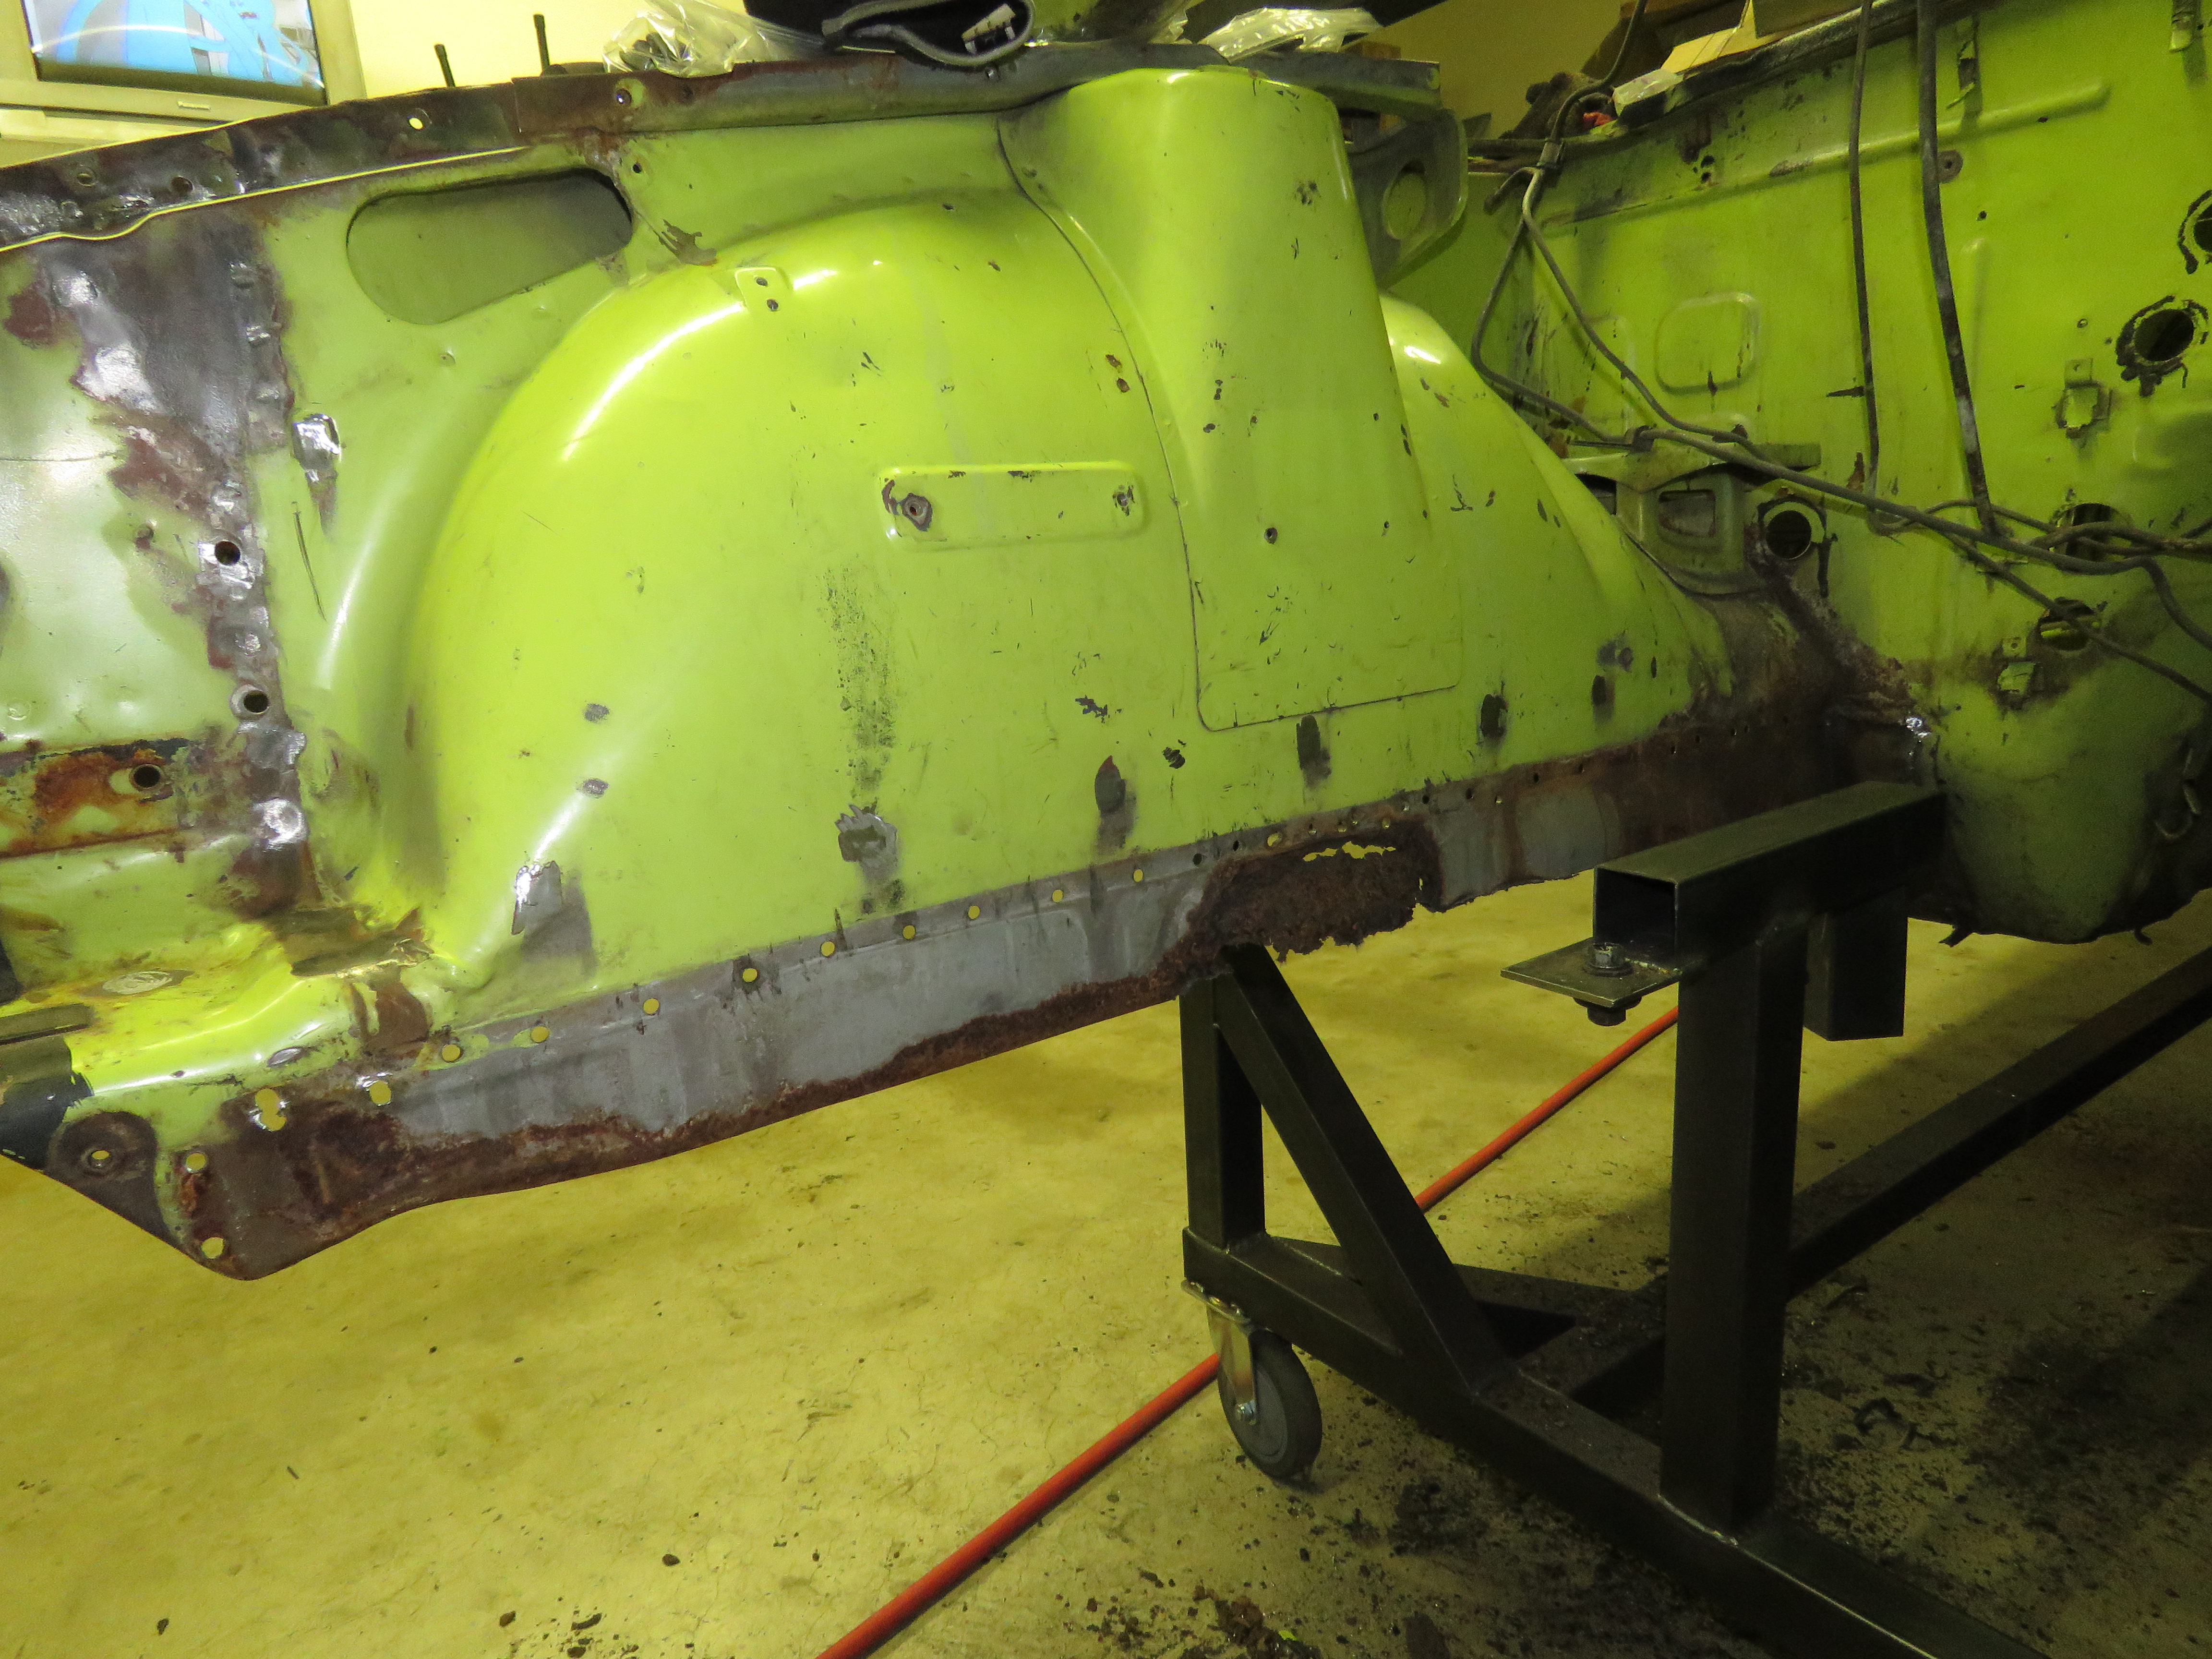
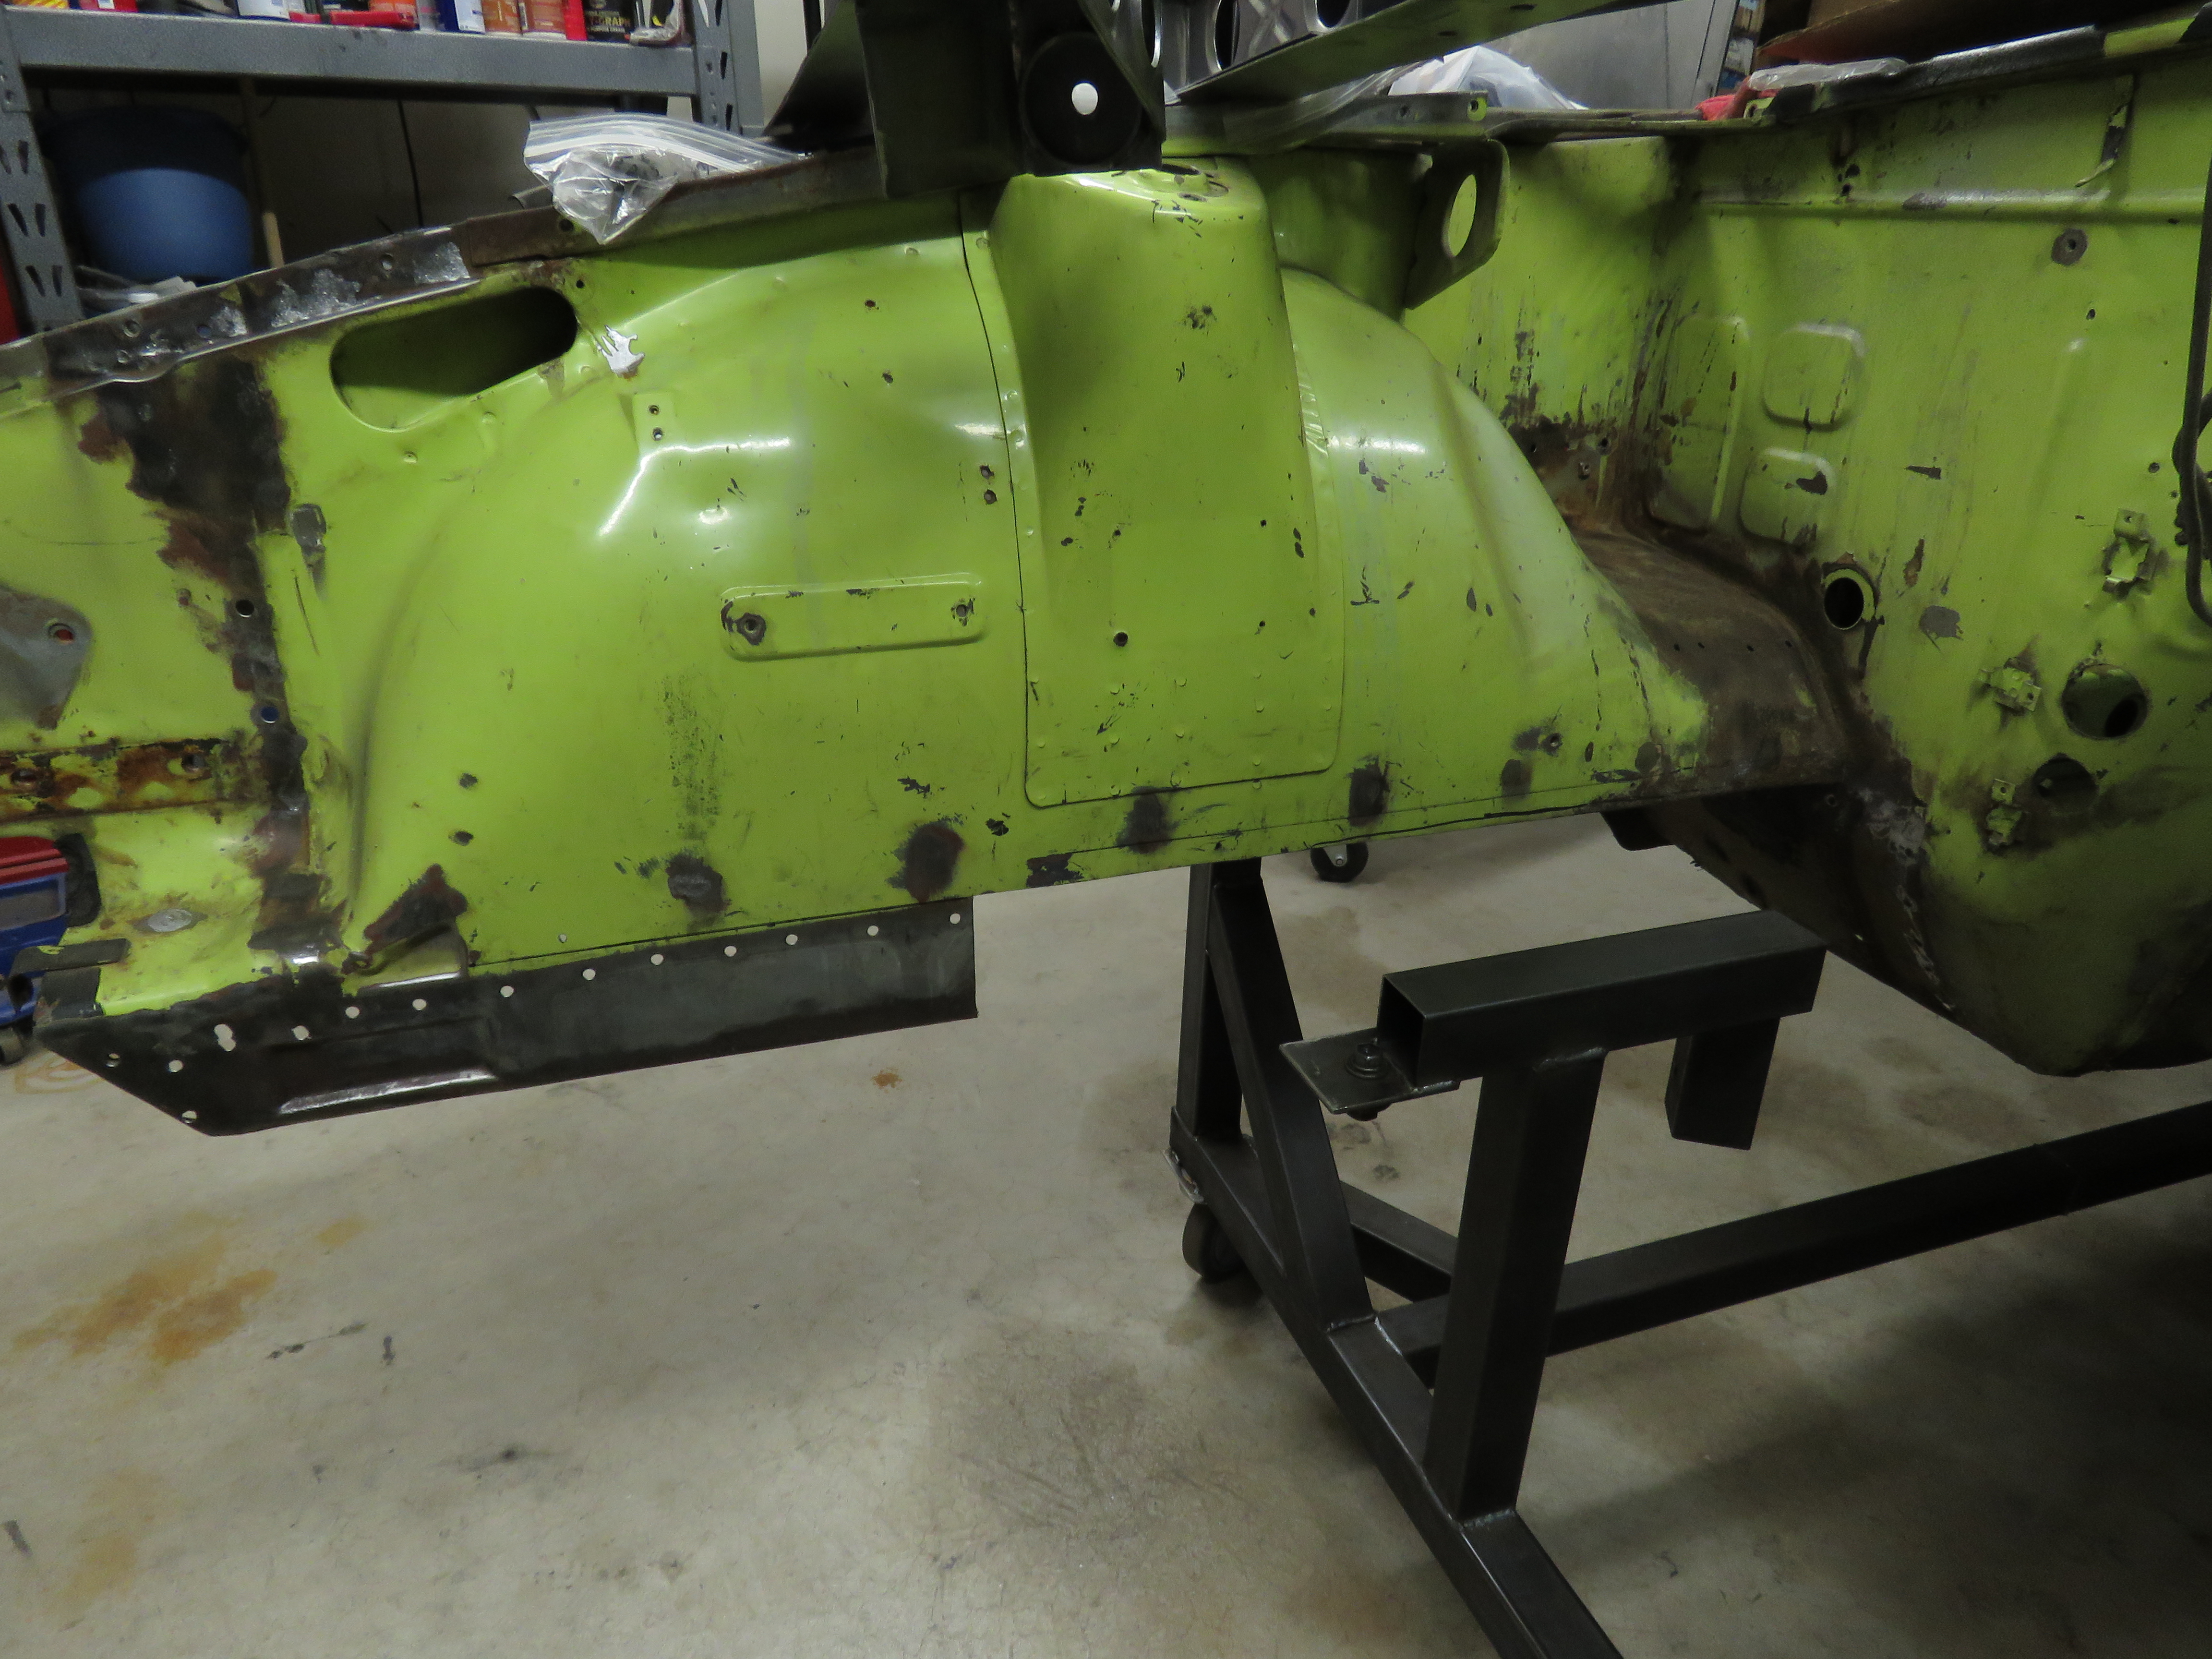
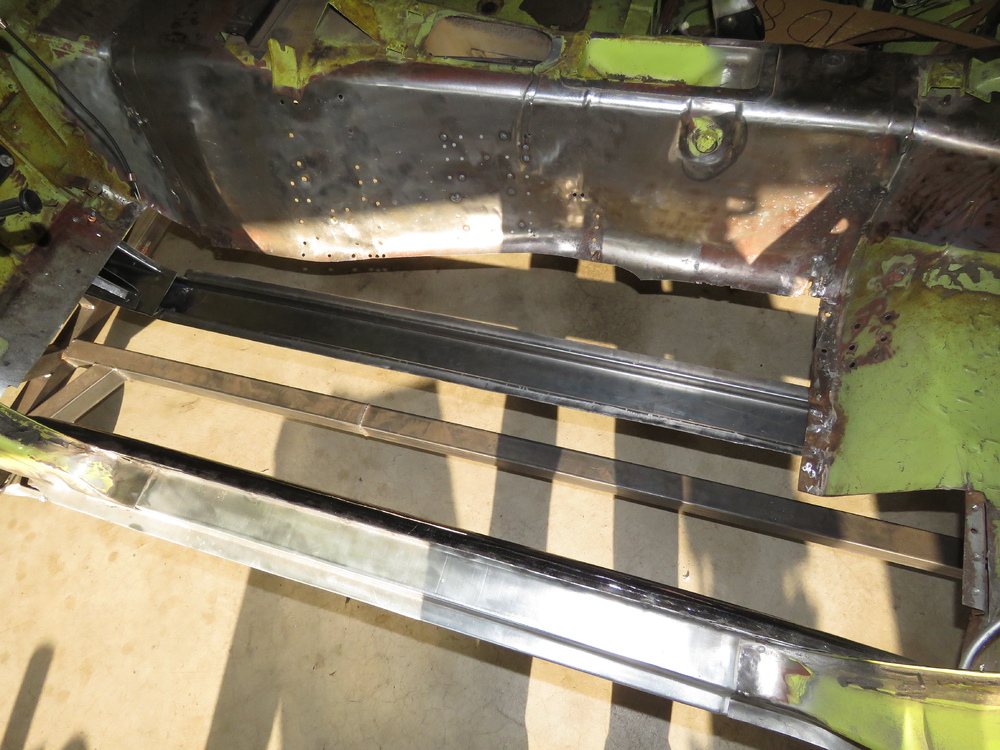
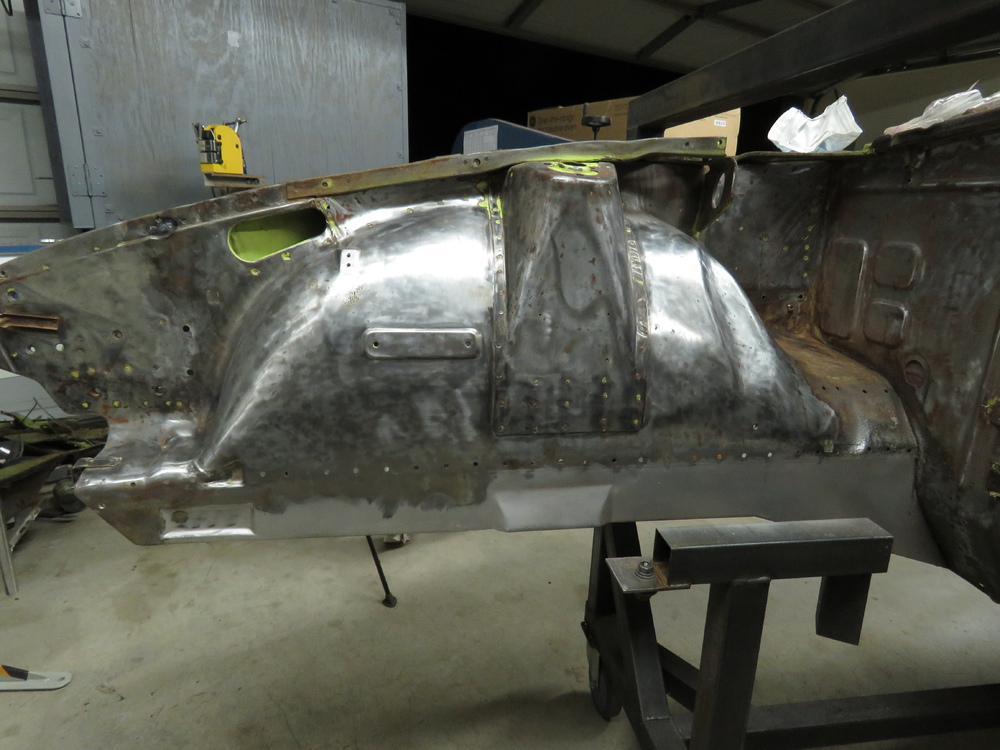
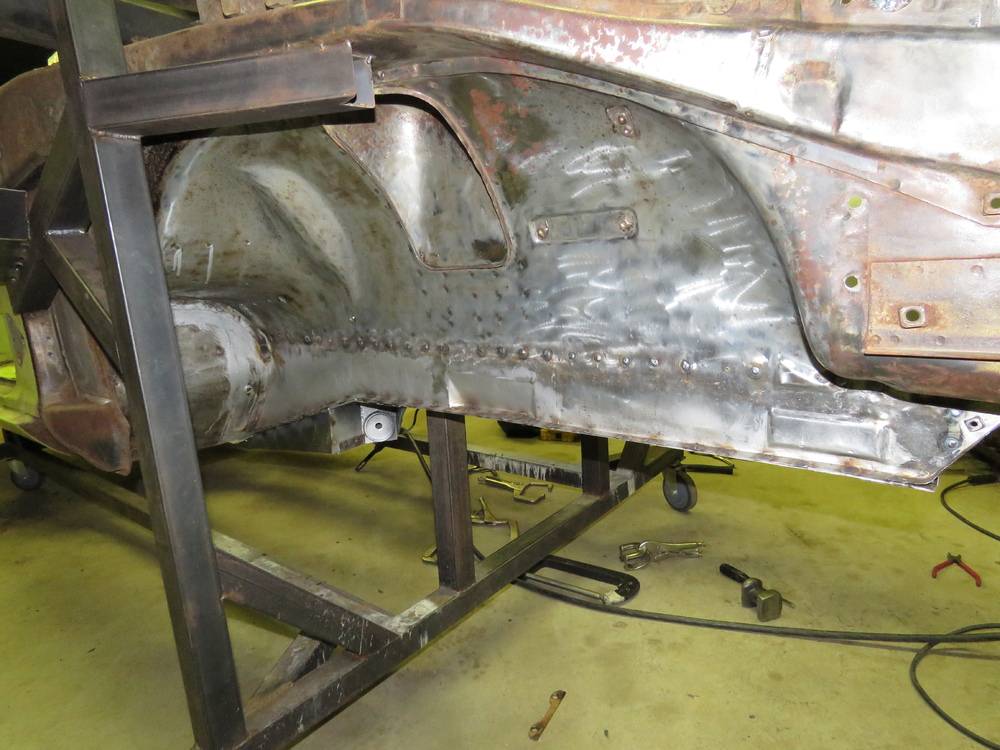
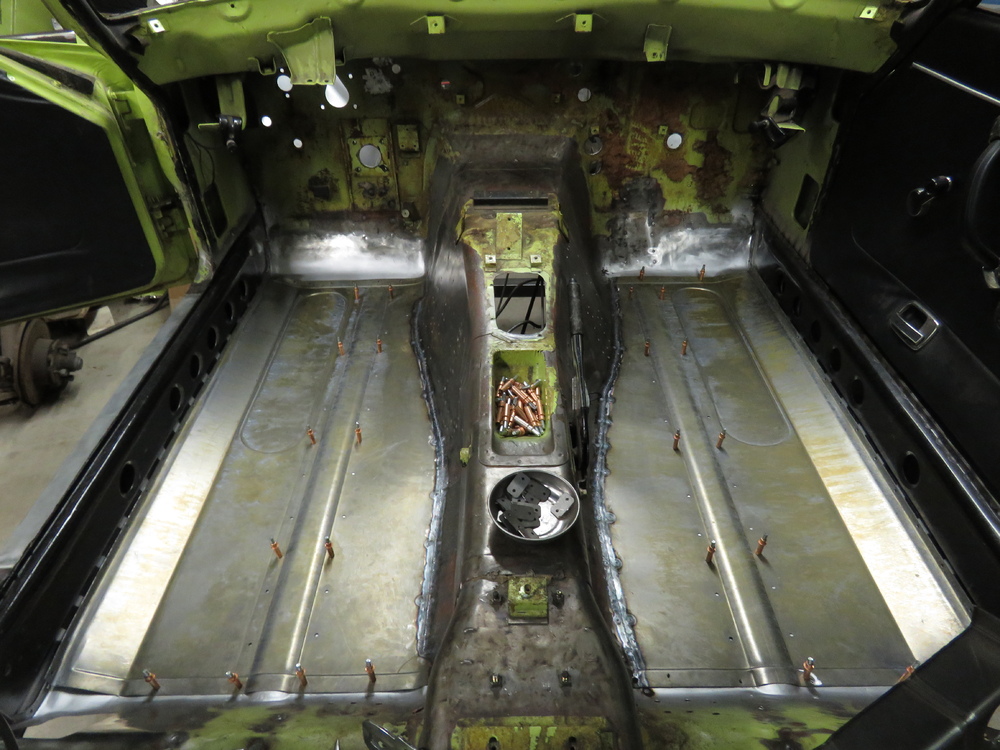
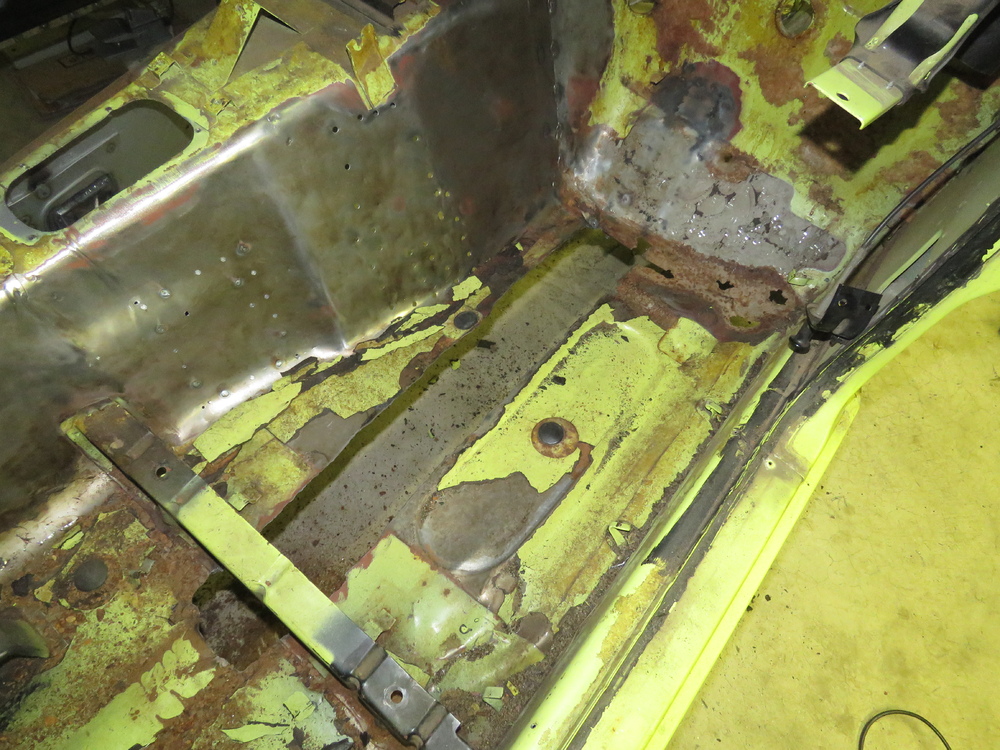
Part 2 of picture mania! Alright, pictures below are where I left off recently last weekend. Sandblasted some parts that go to the interior for the seat belt mechanism and other random parts. Finally got the floors permanently welded in. The reason the floors look so nasty is because I sprayed it with POR15 Degreaser and Prep and Ready. This also helps it from rusting prematurely before I actually paint it. Currently working on getting the seat brackets and the parts I sandblasted prepped for installation. STAY TUNED!


-
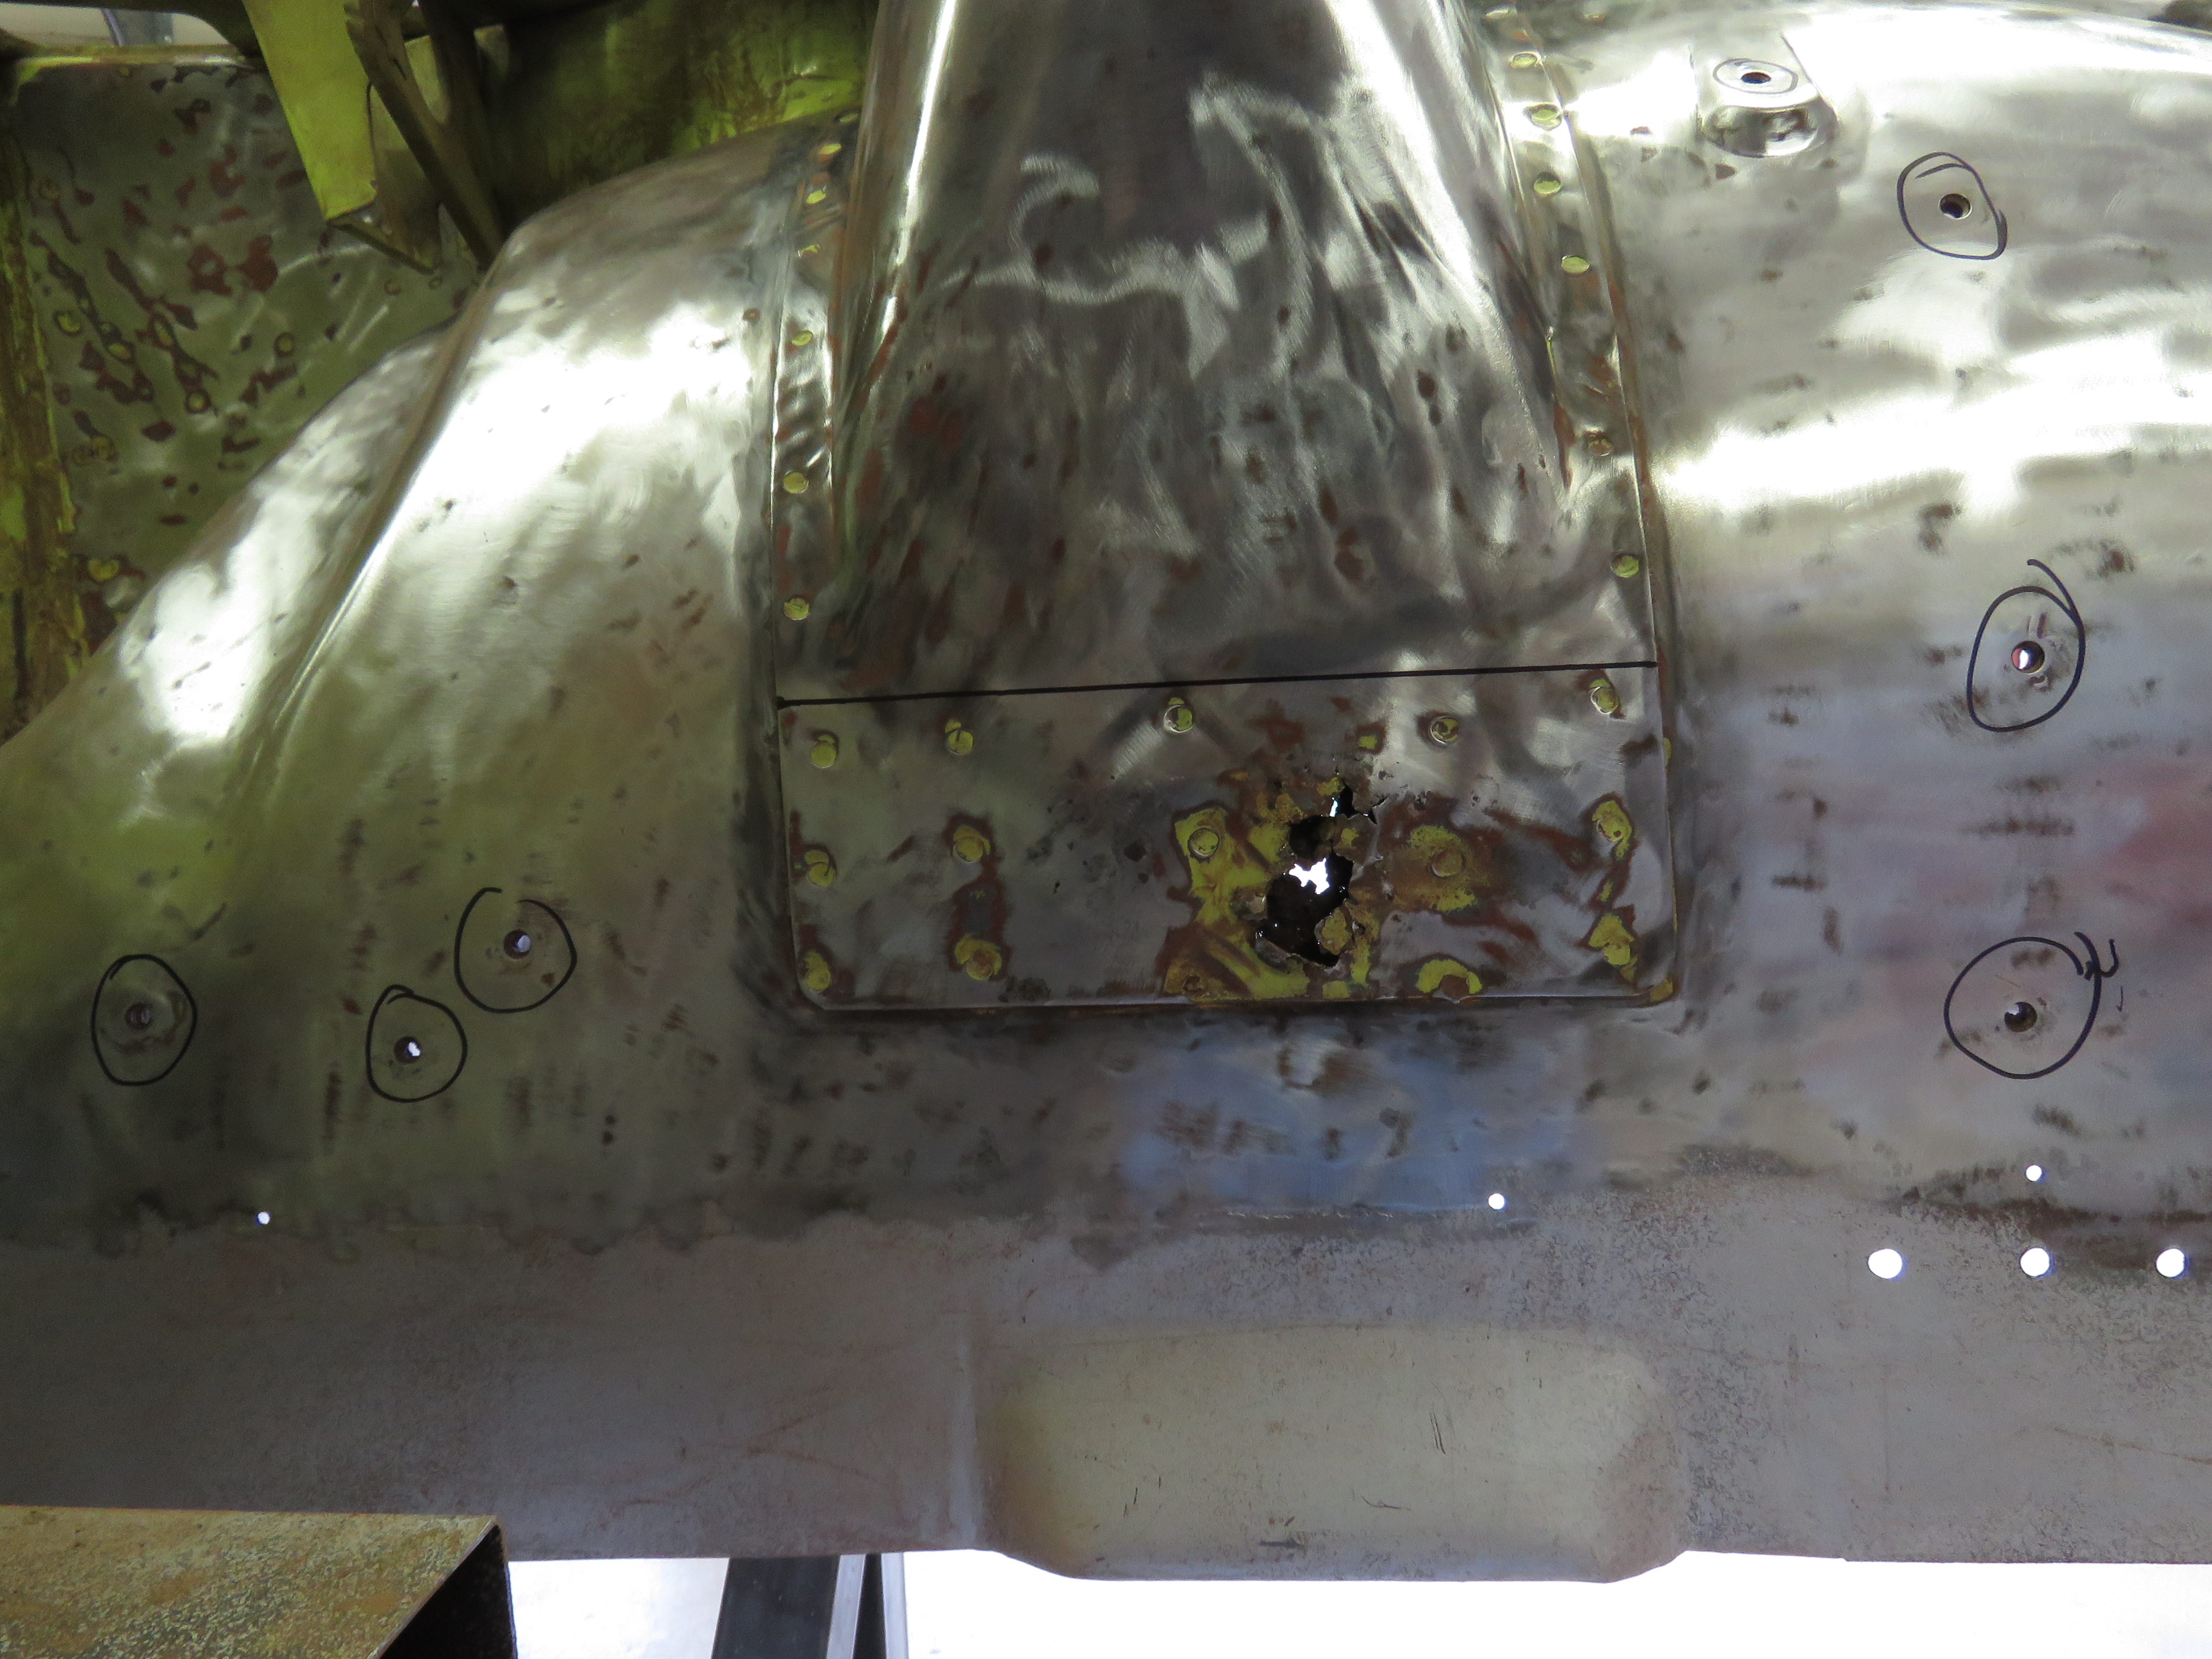
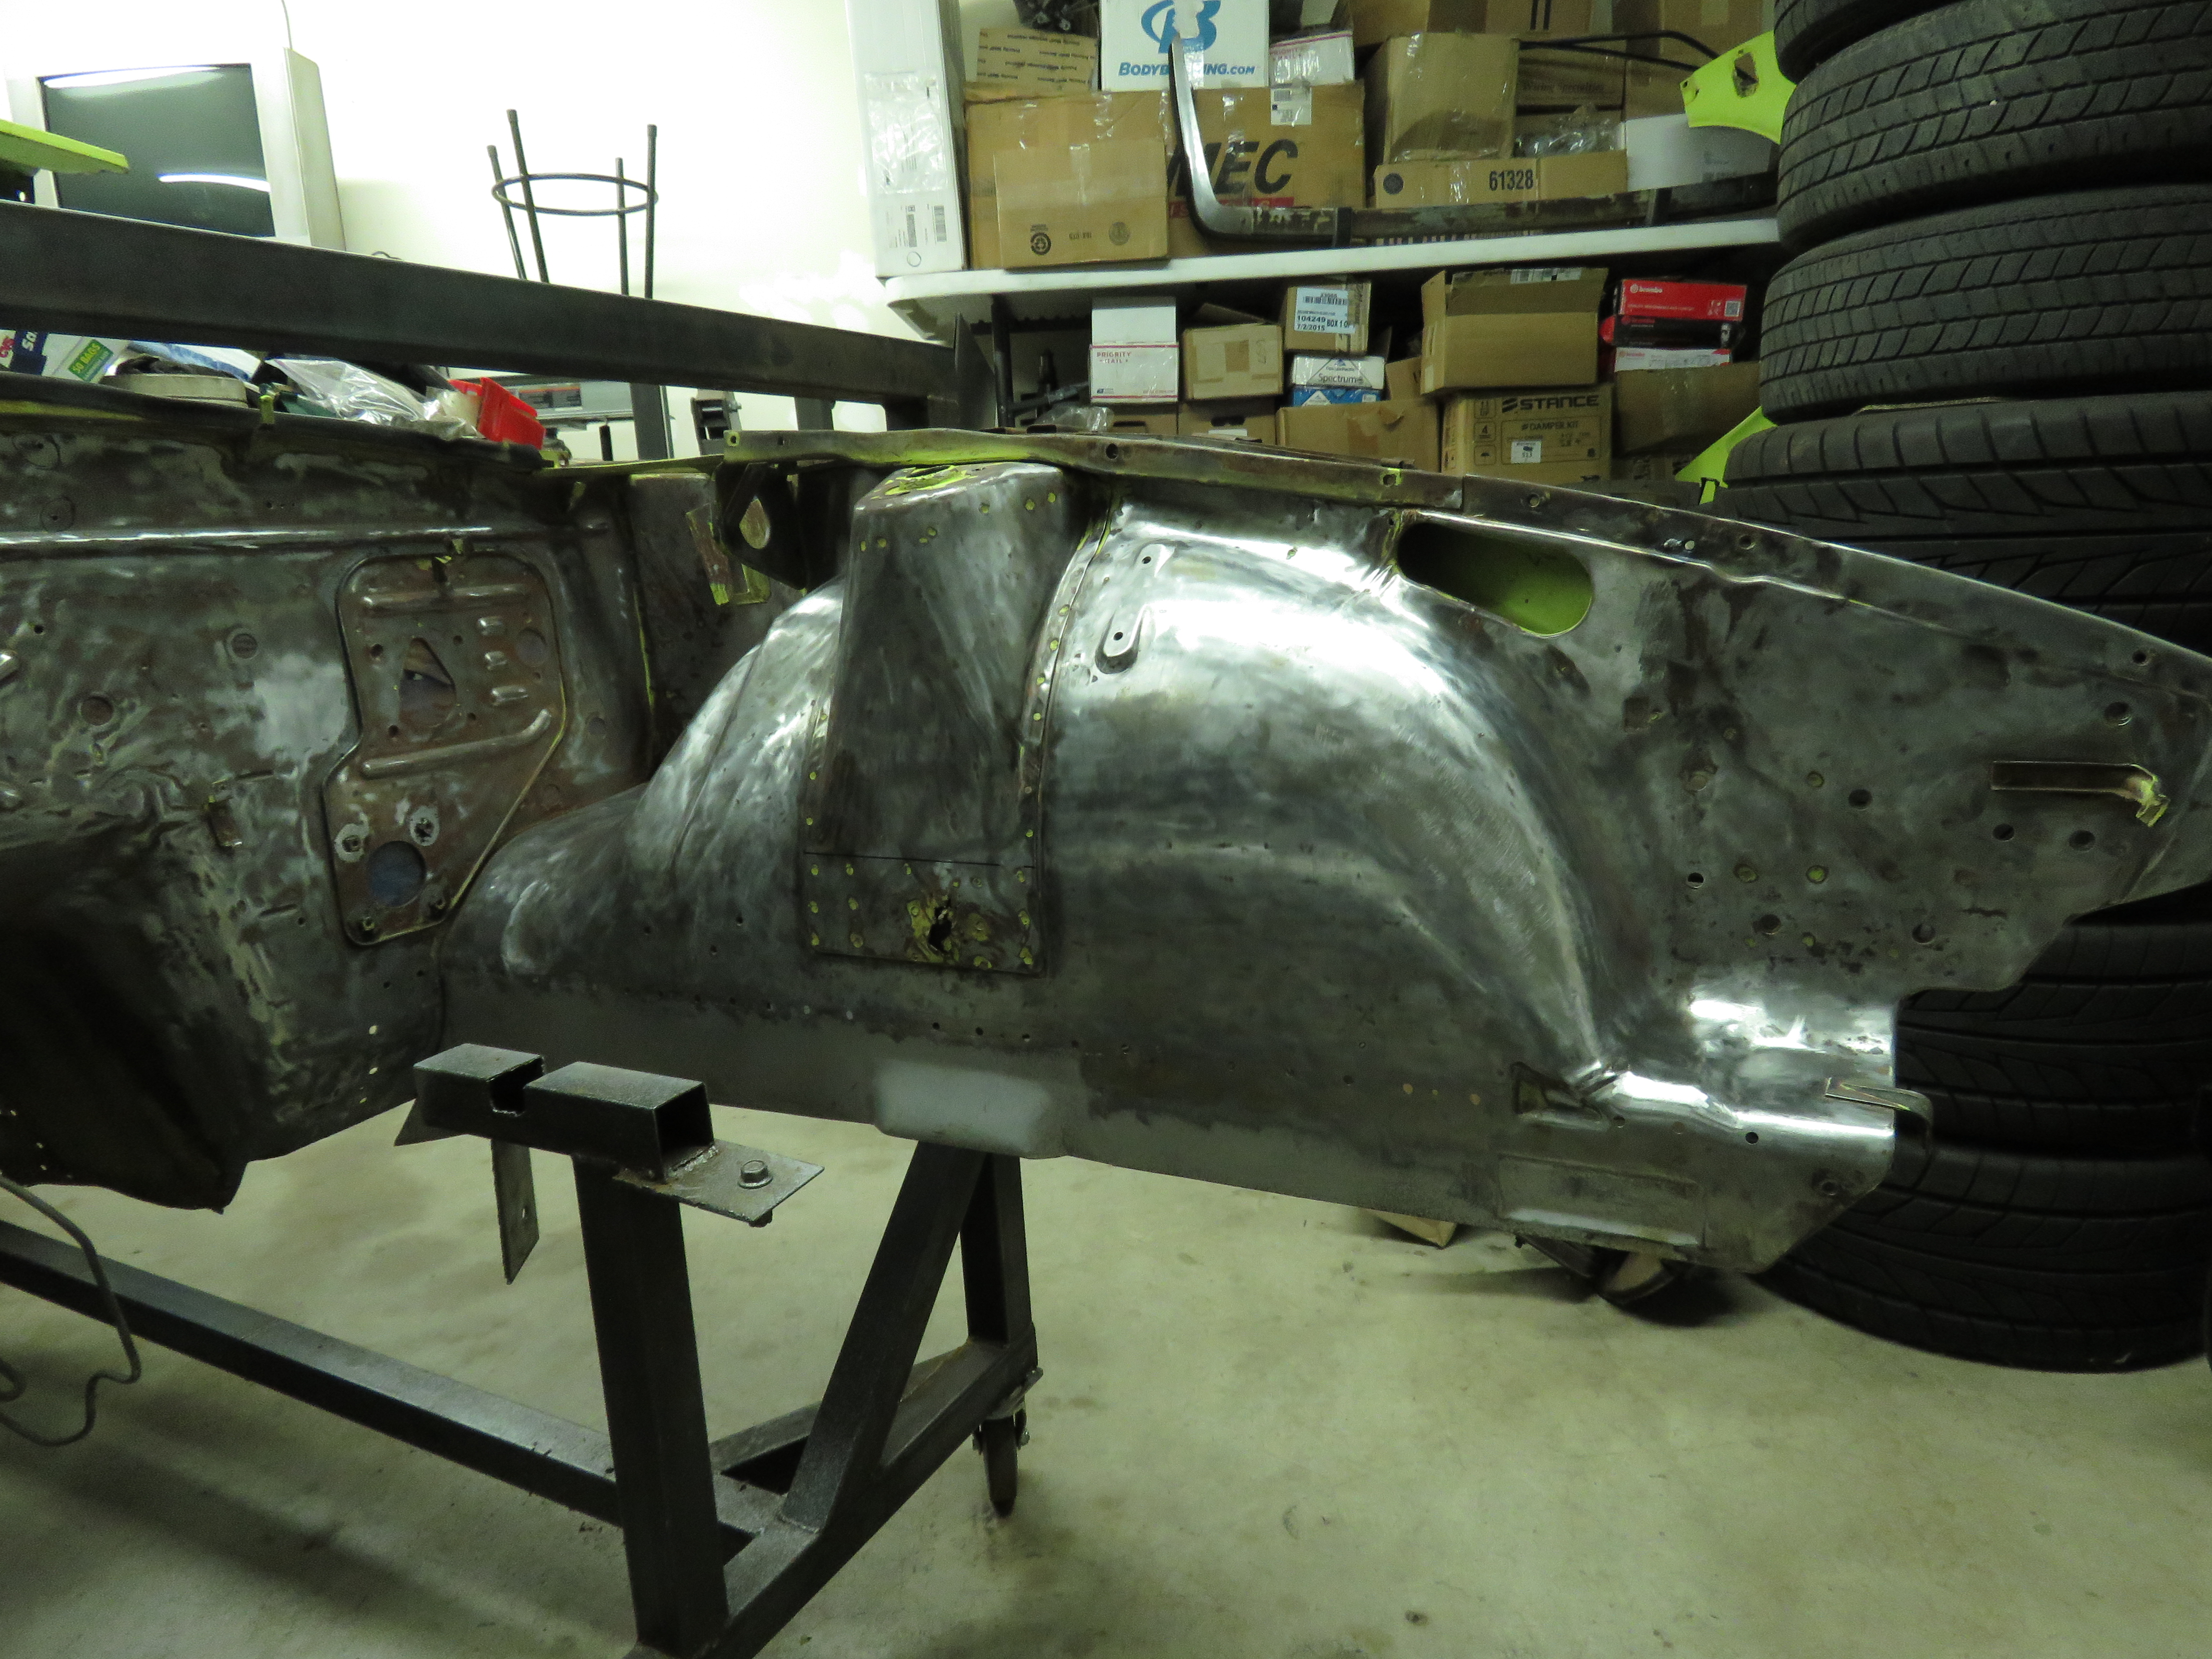
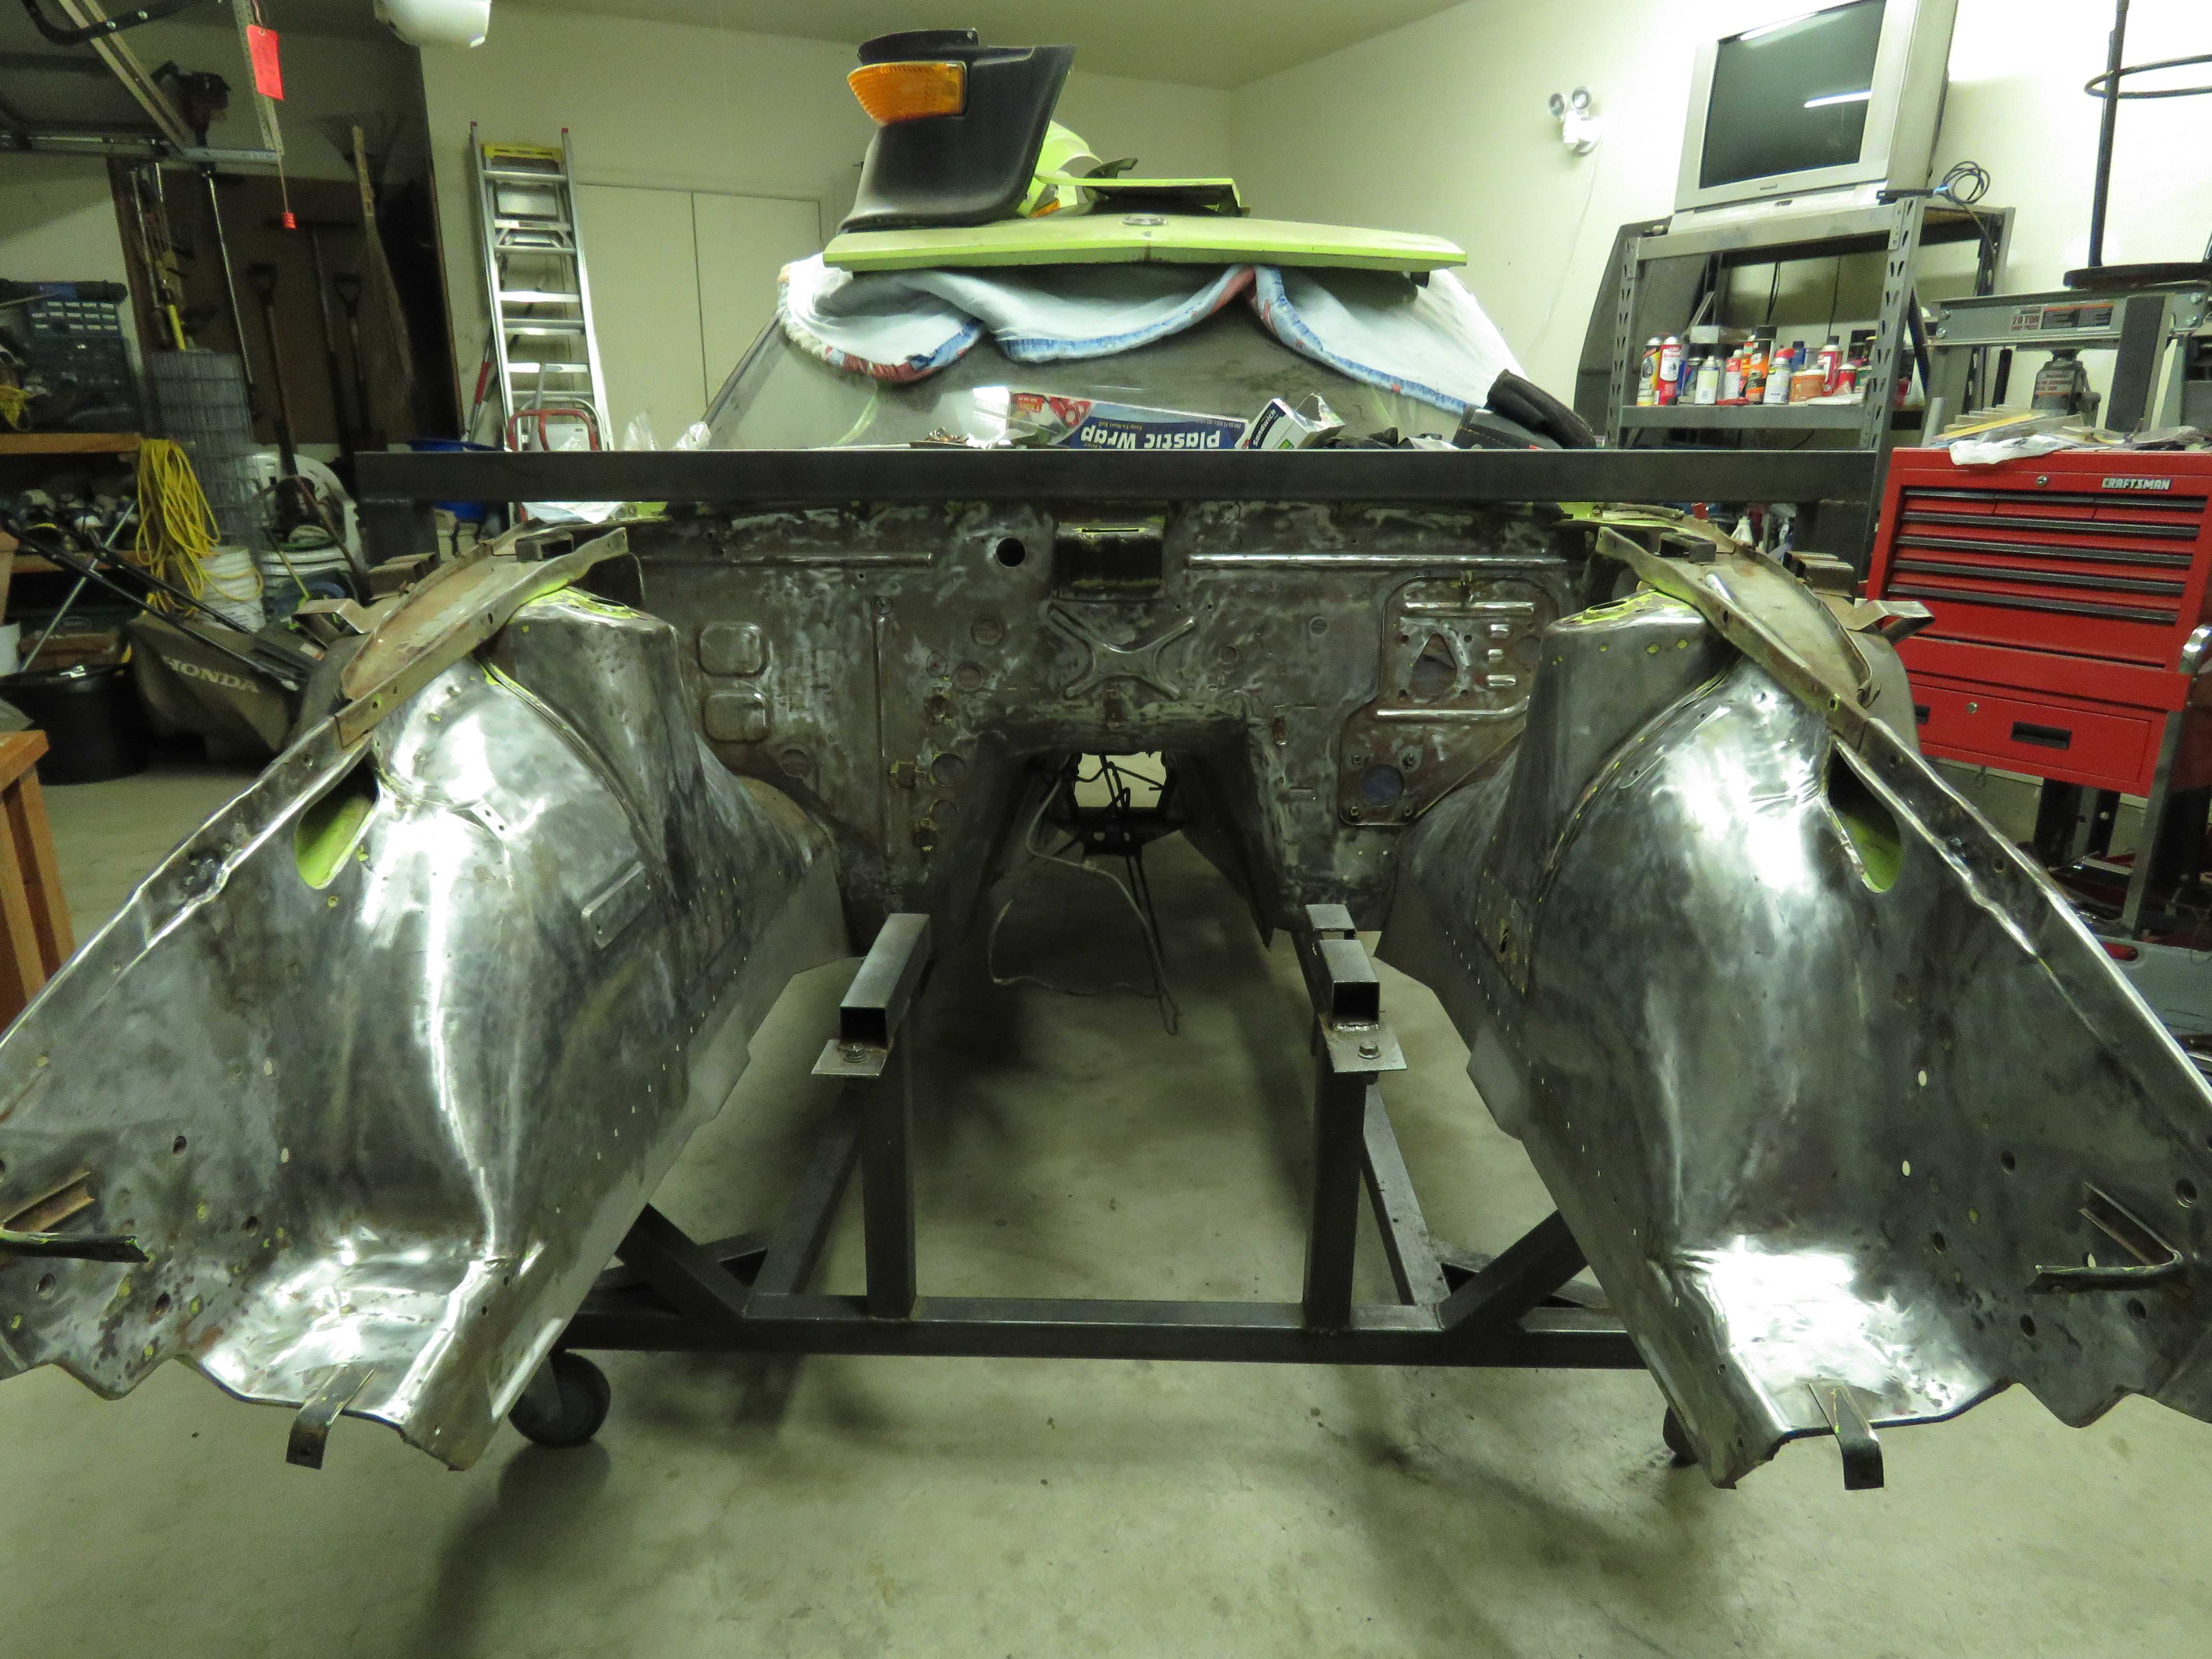
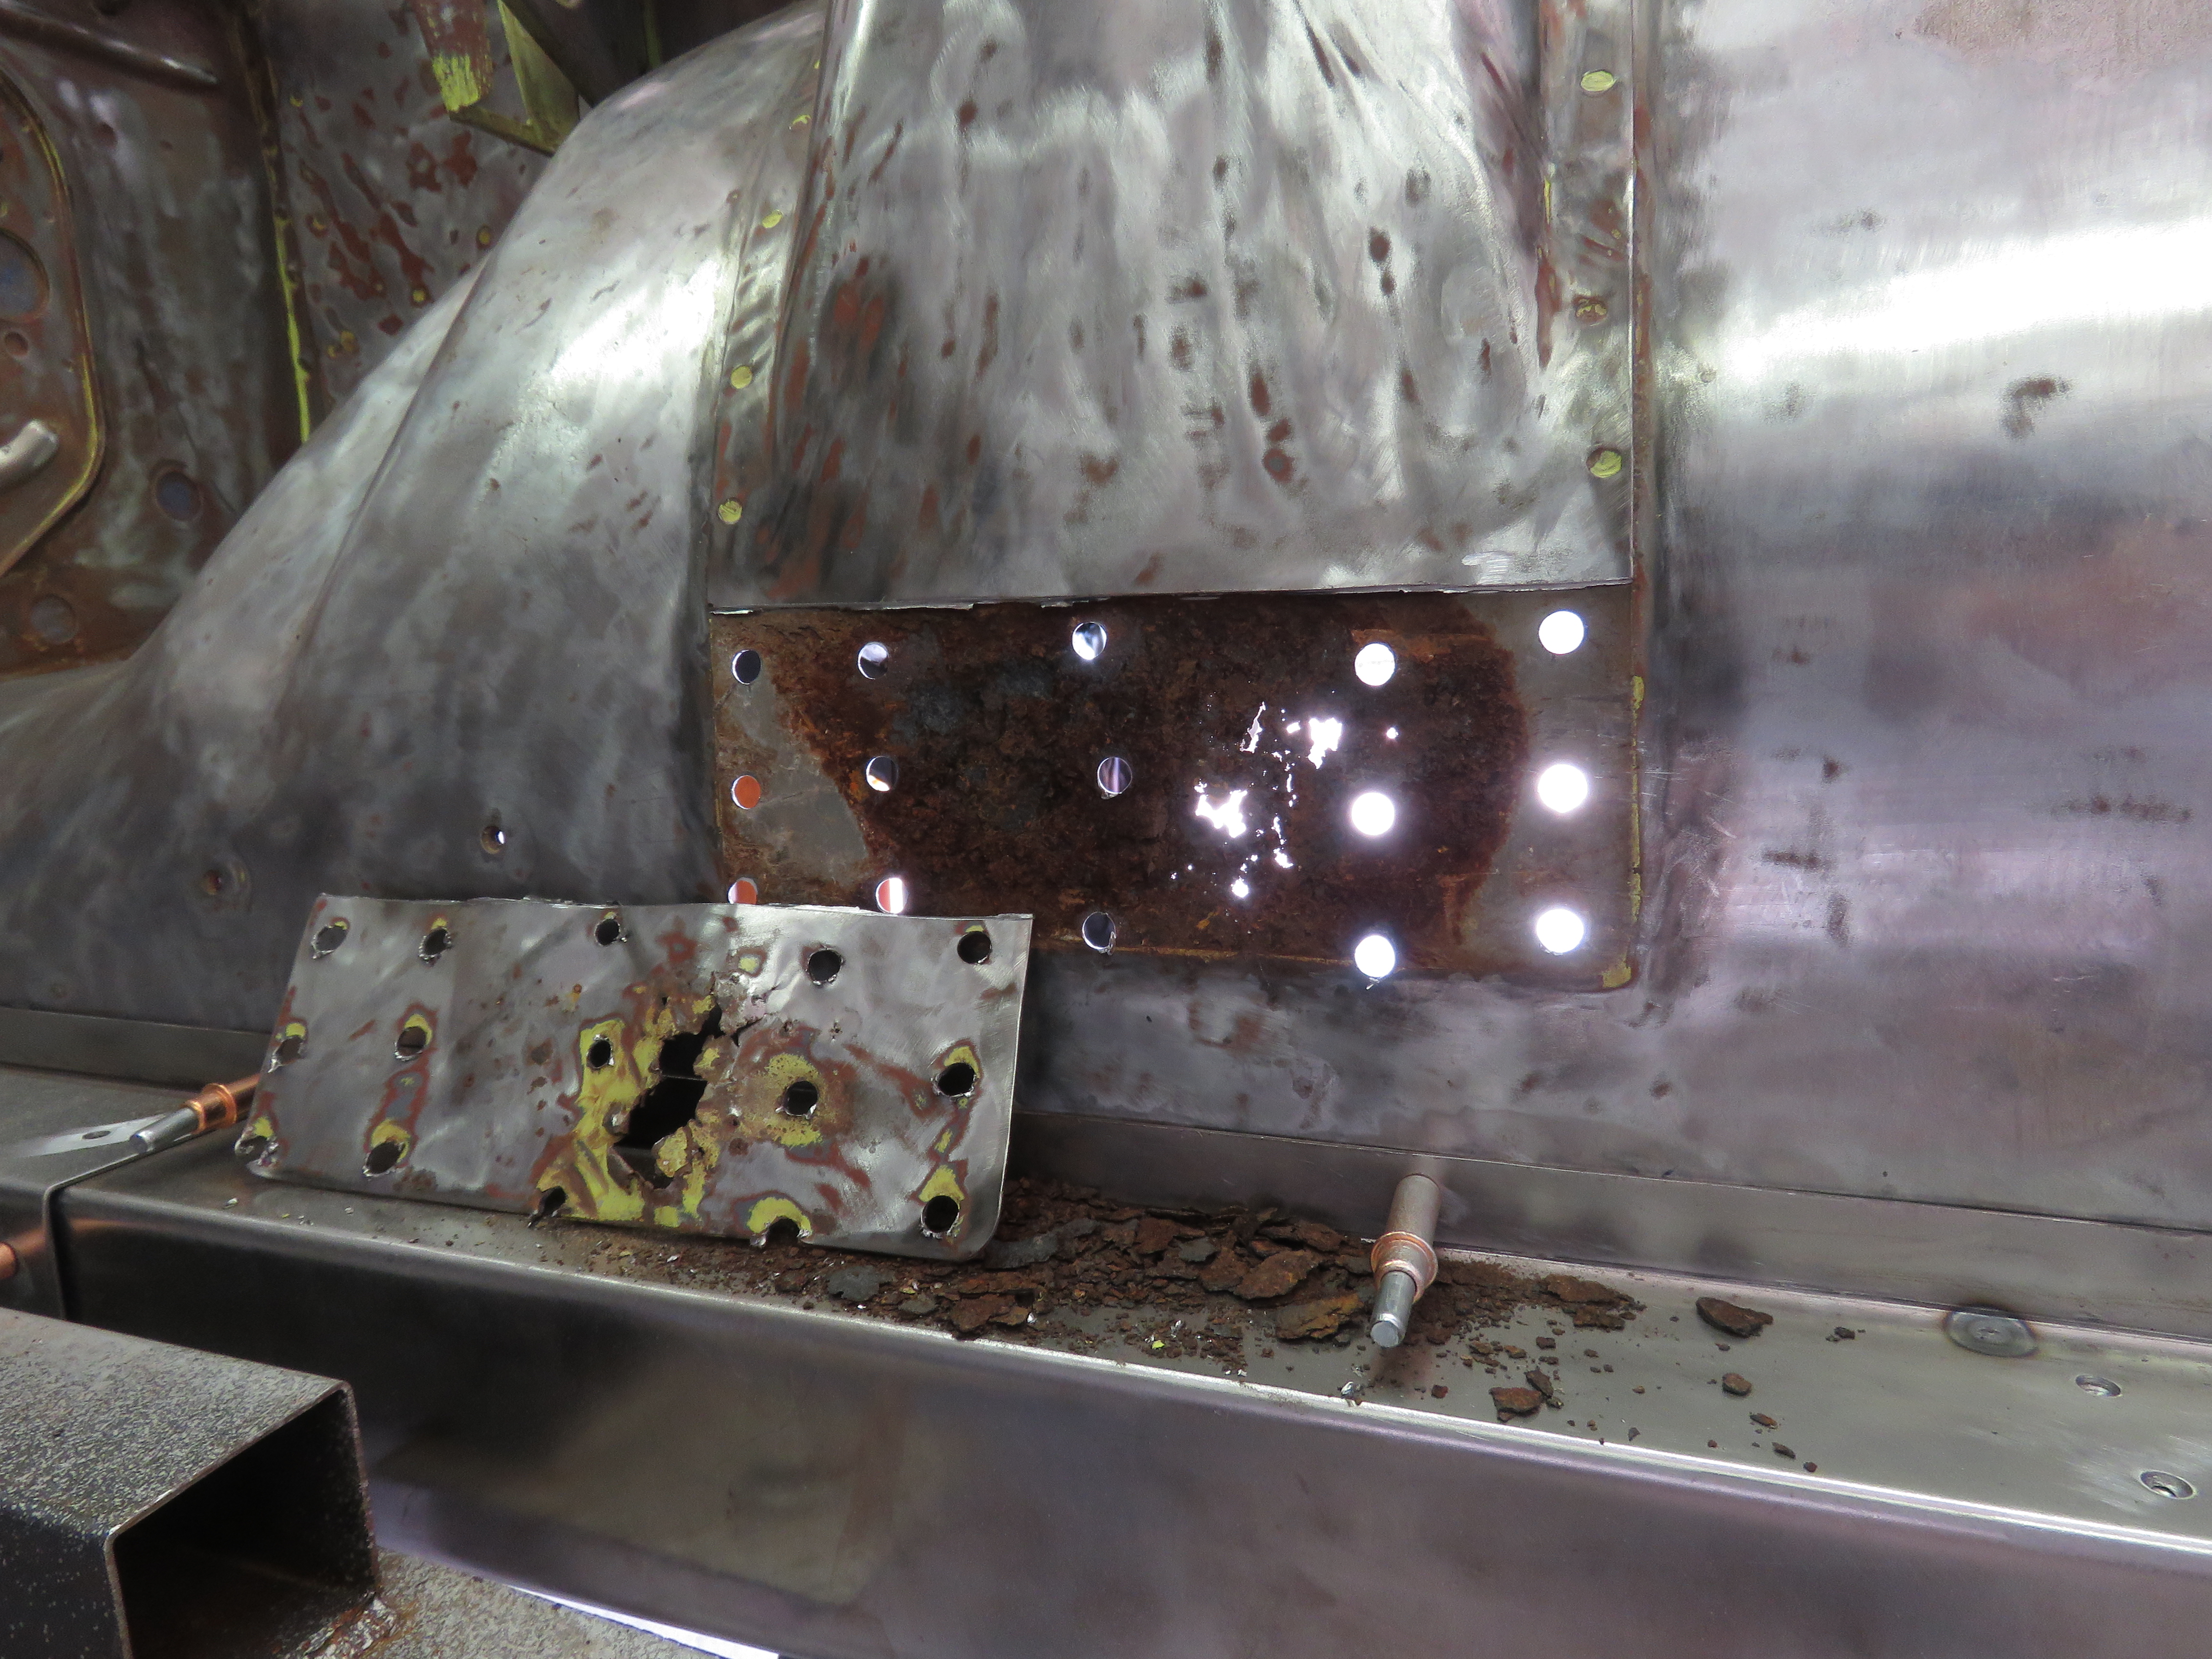
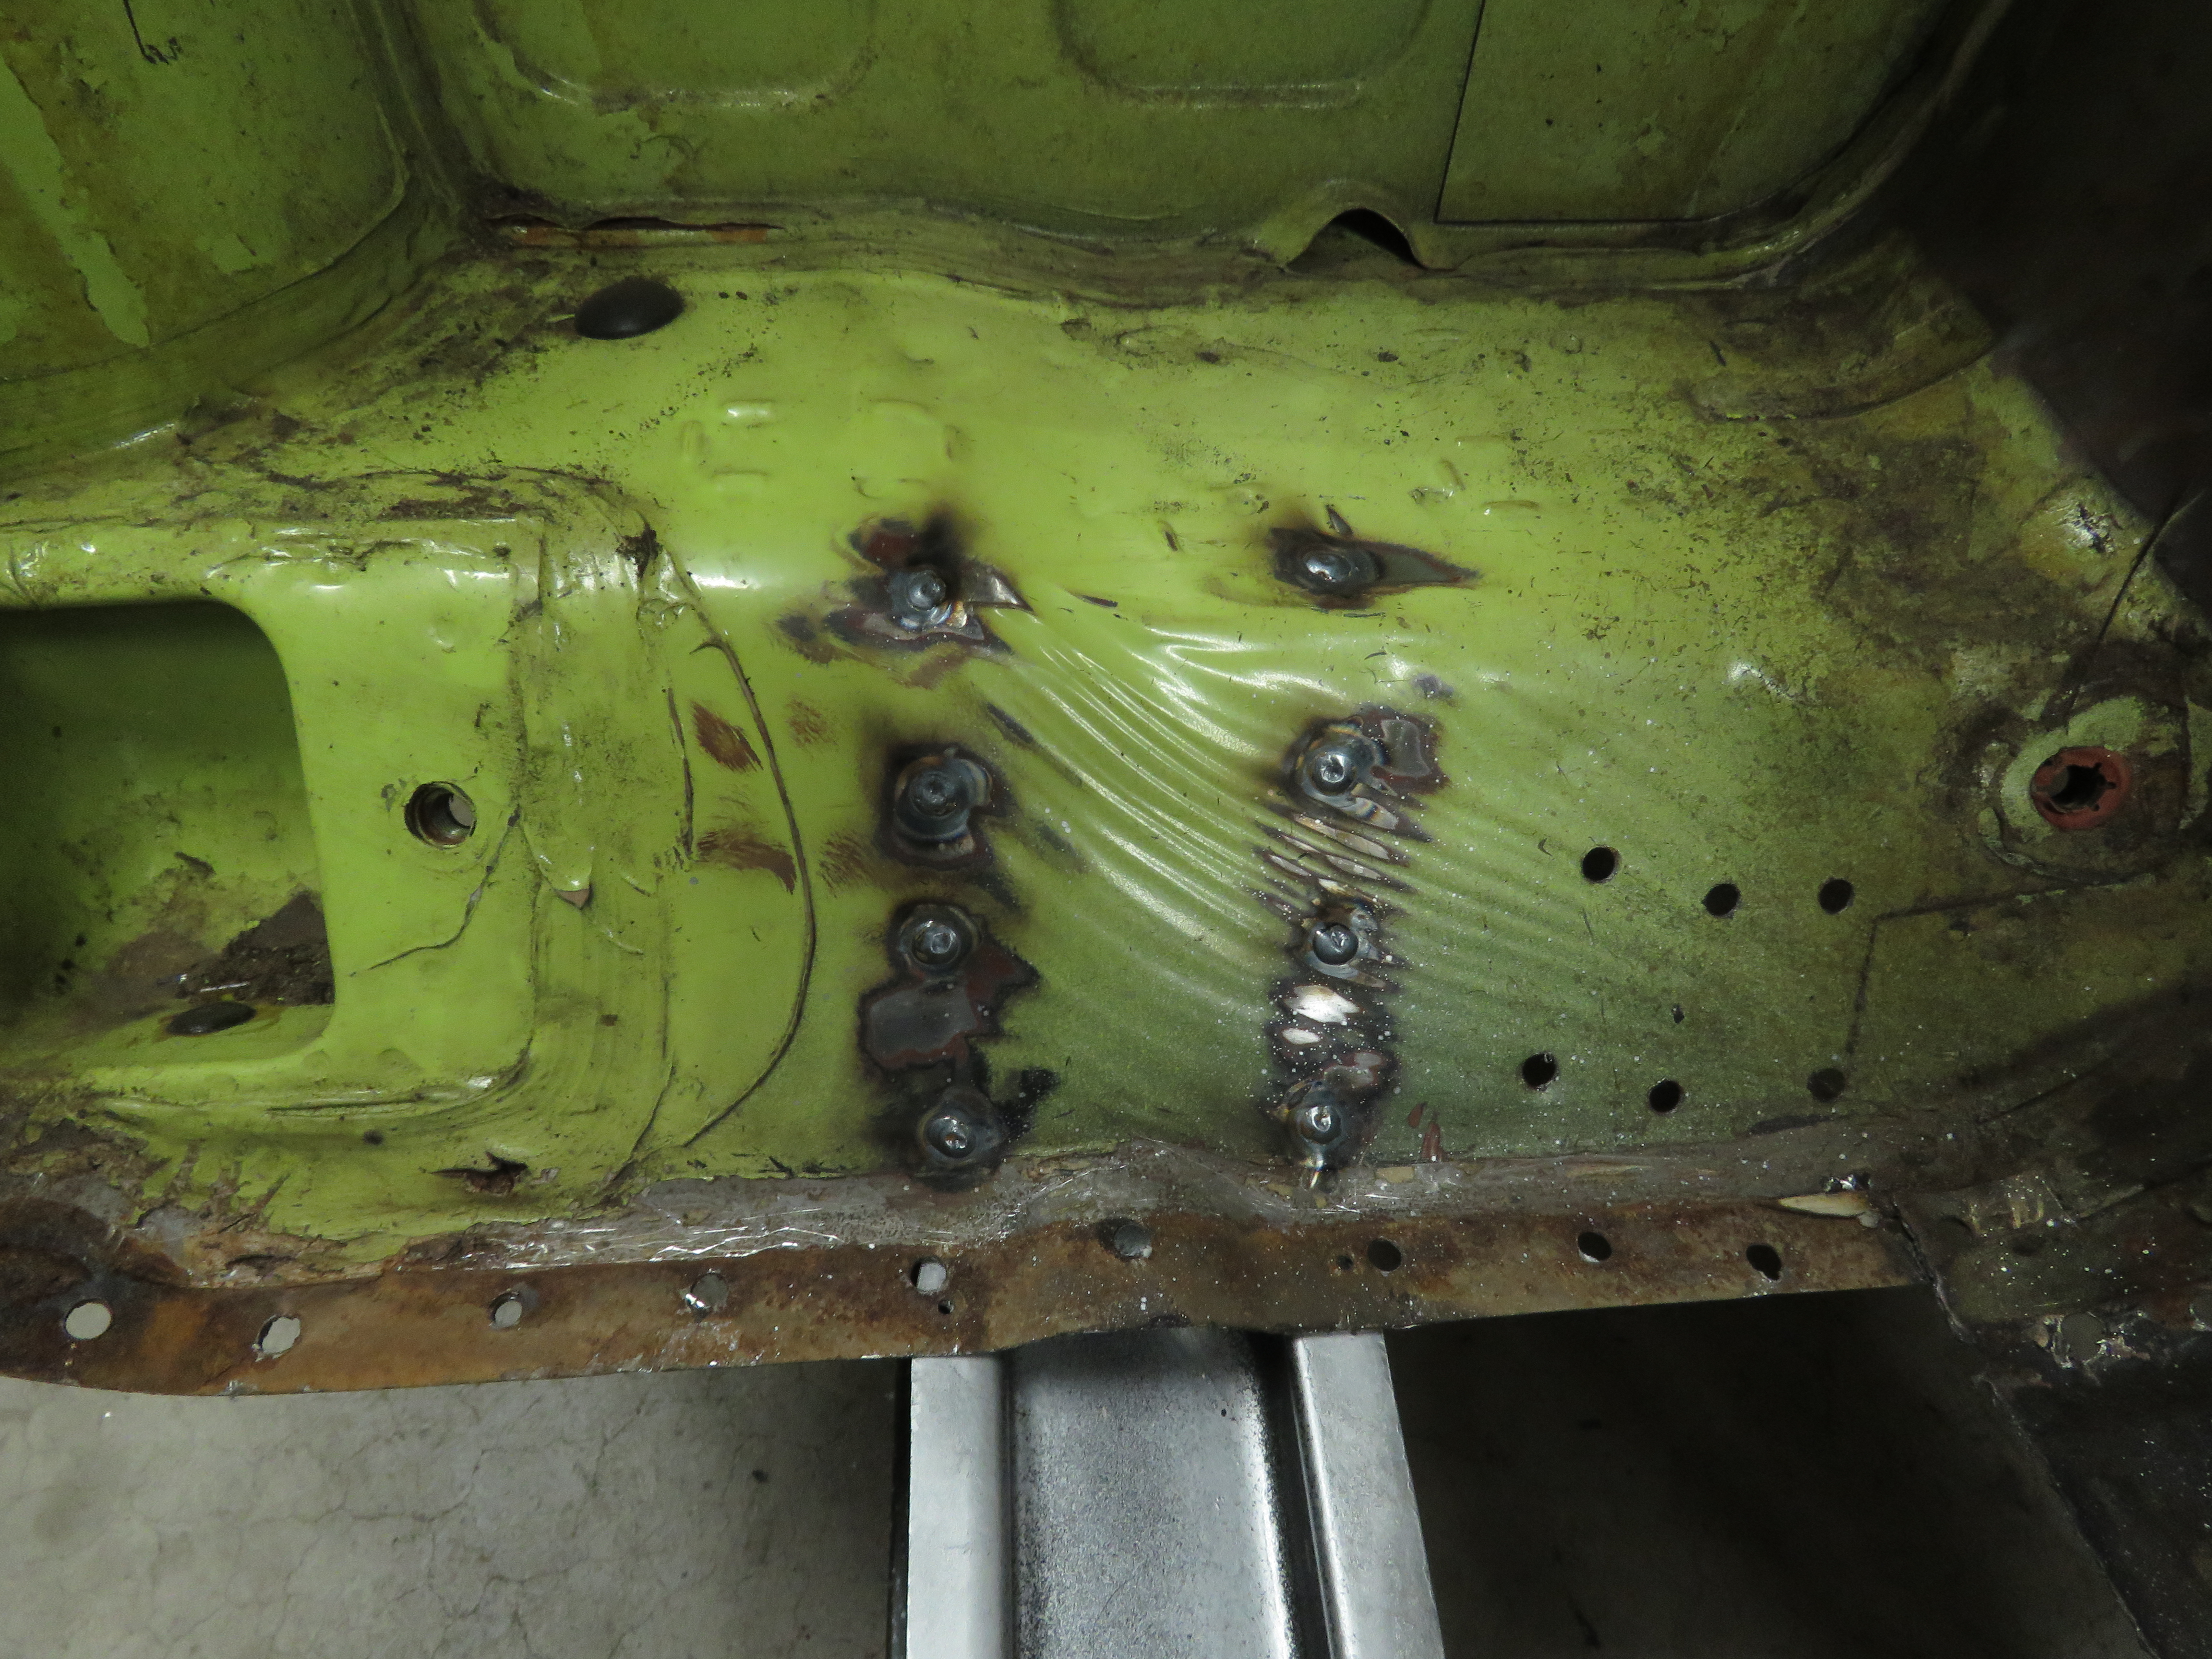
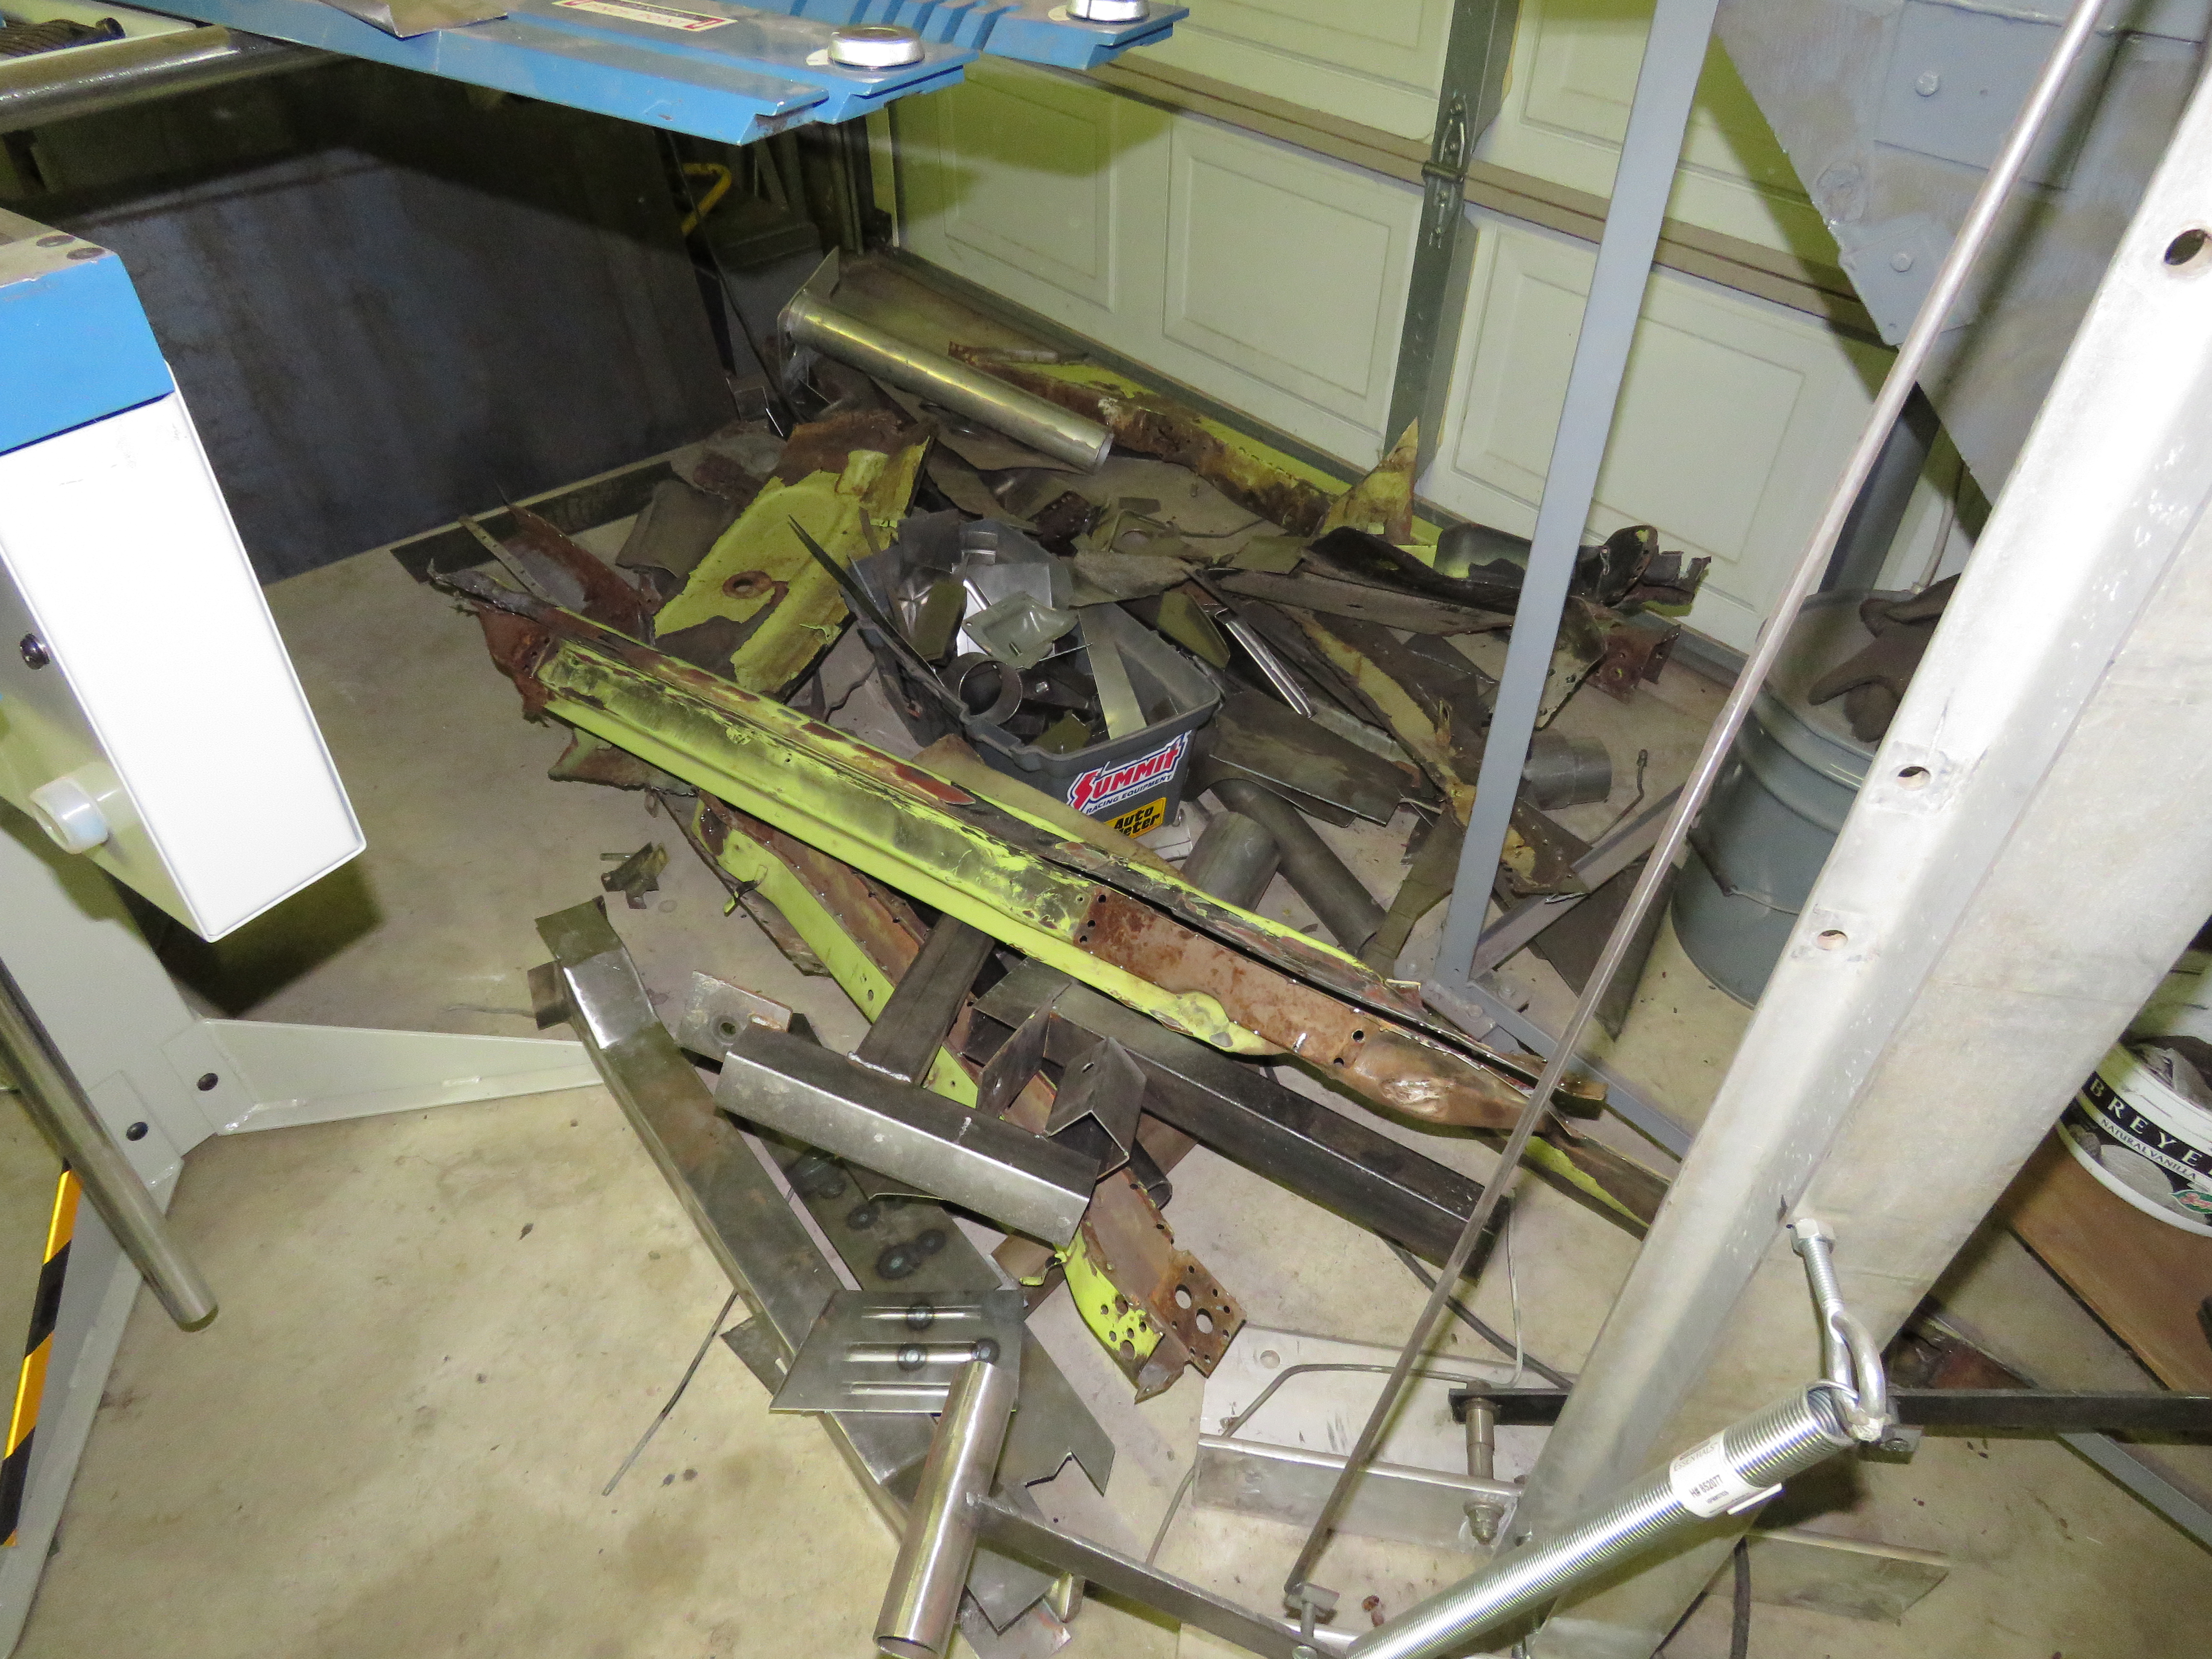
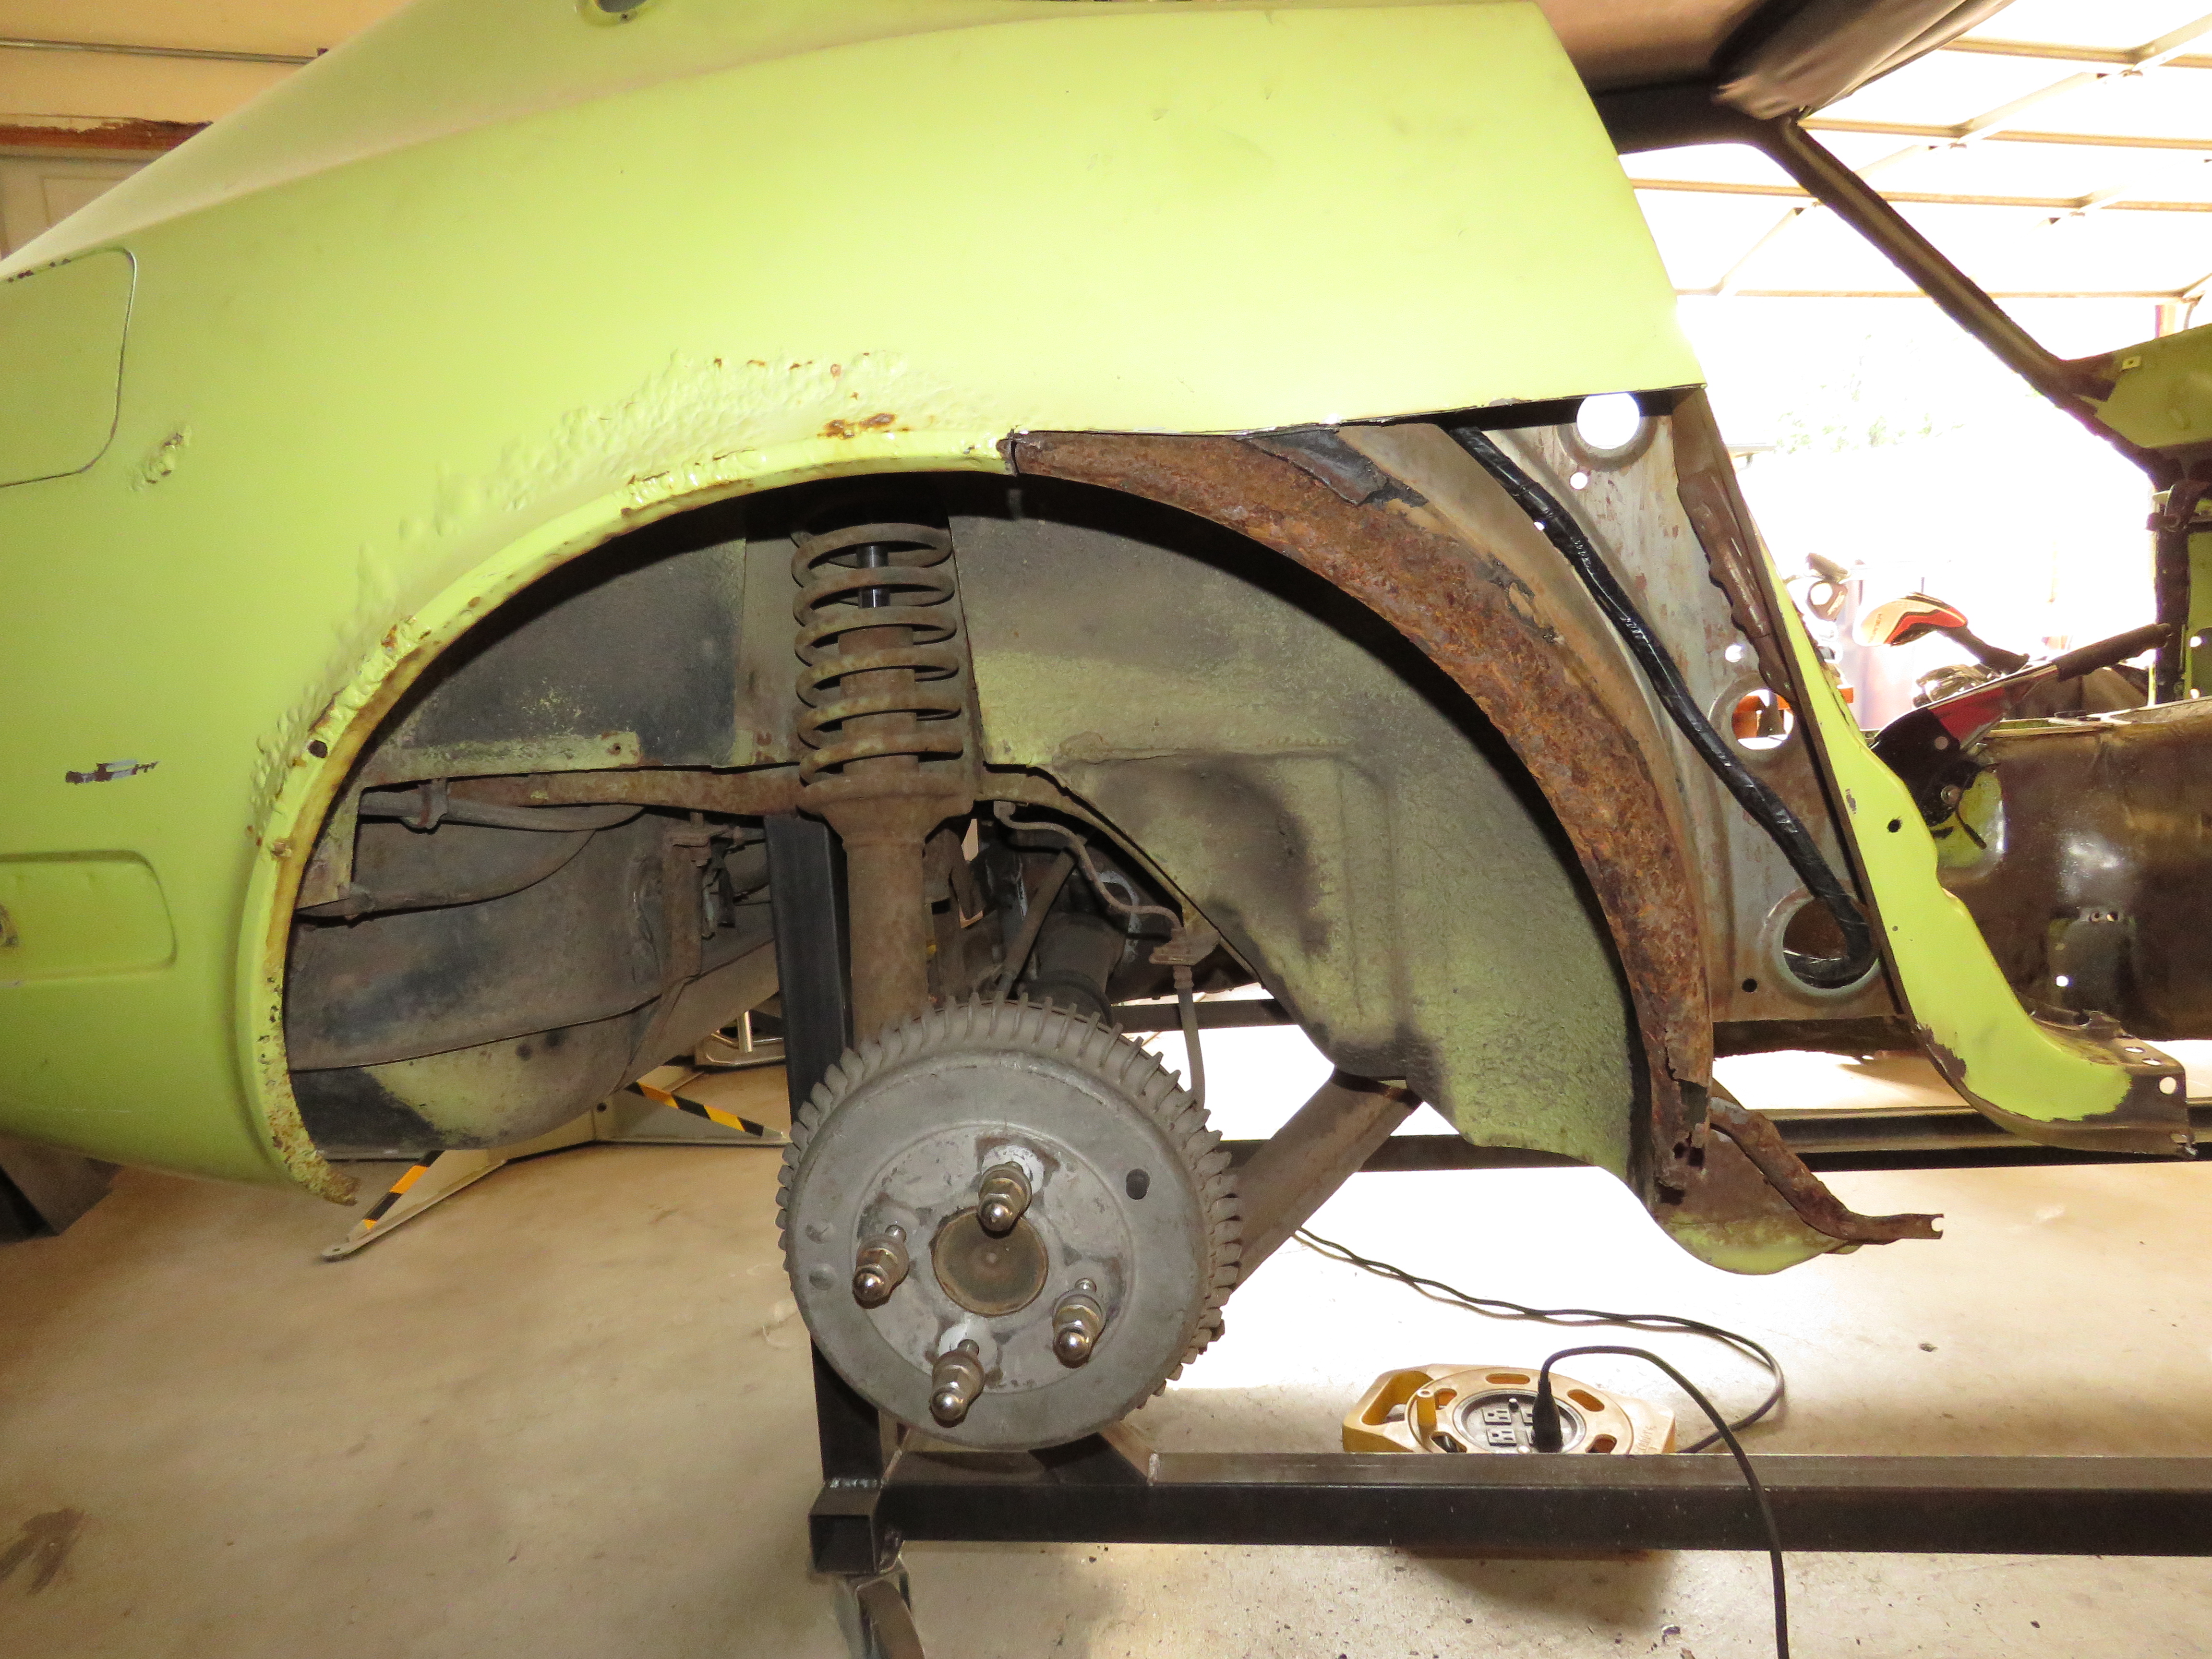
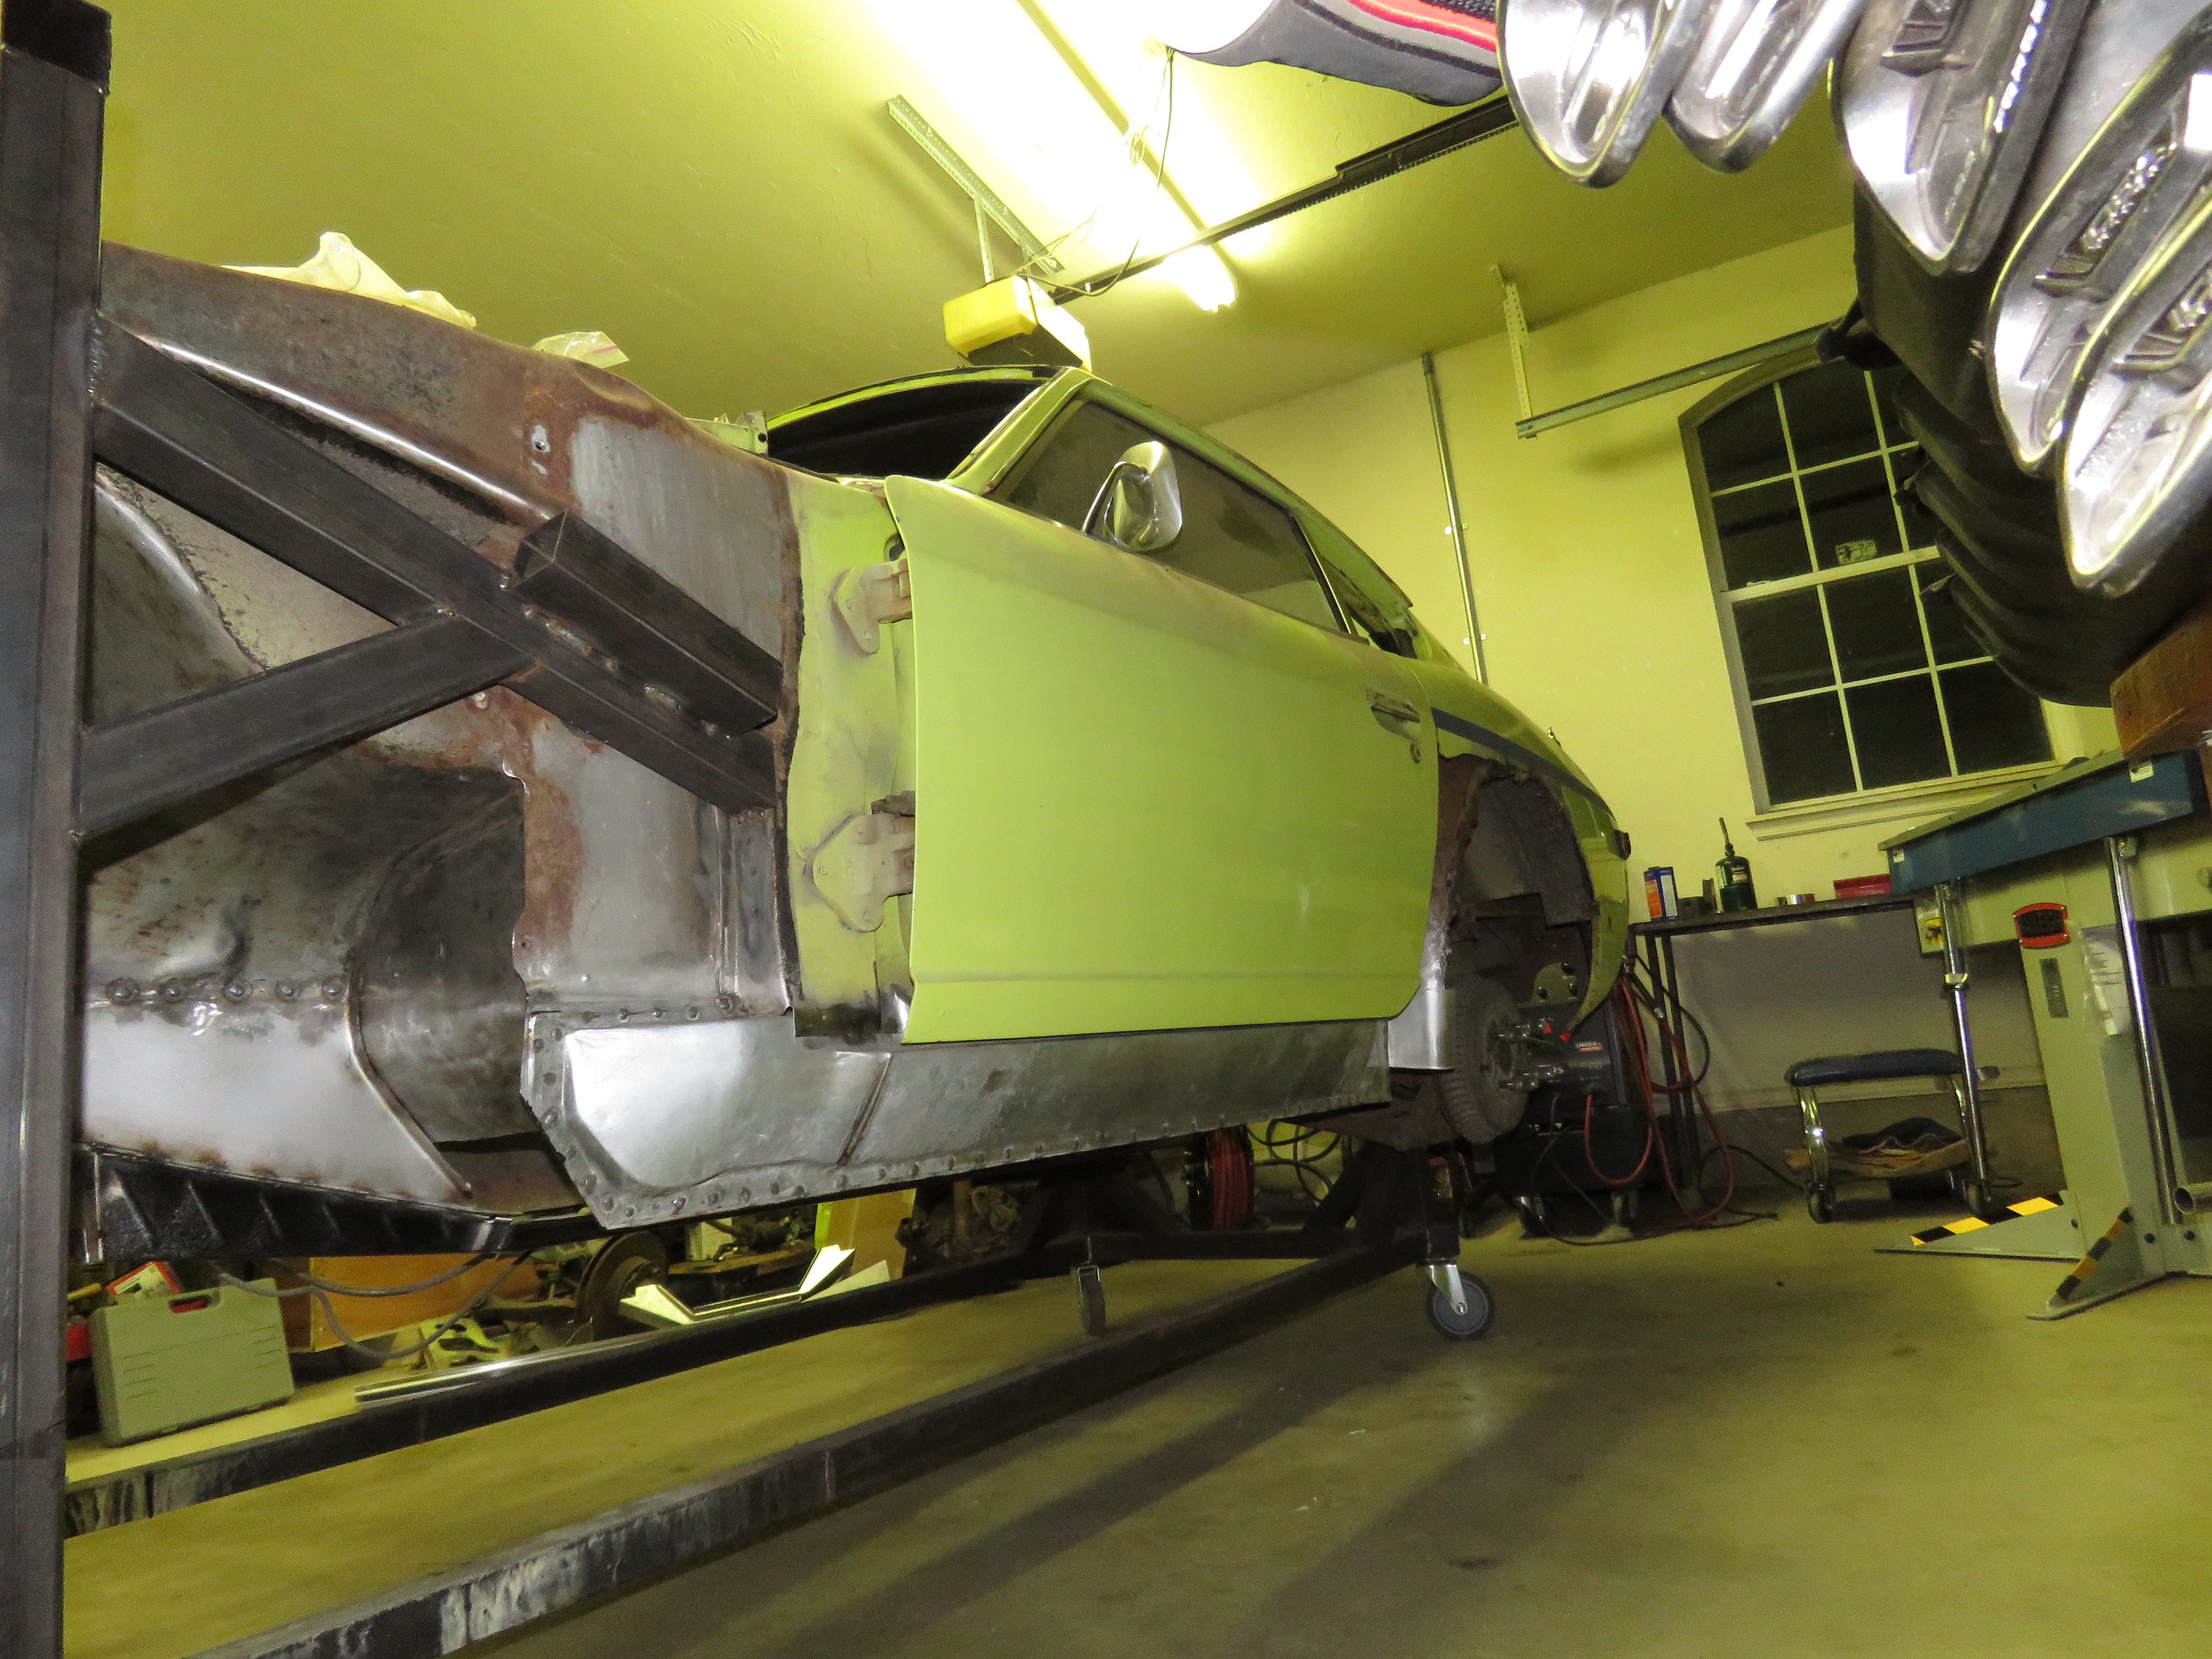
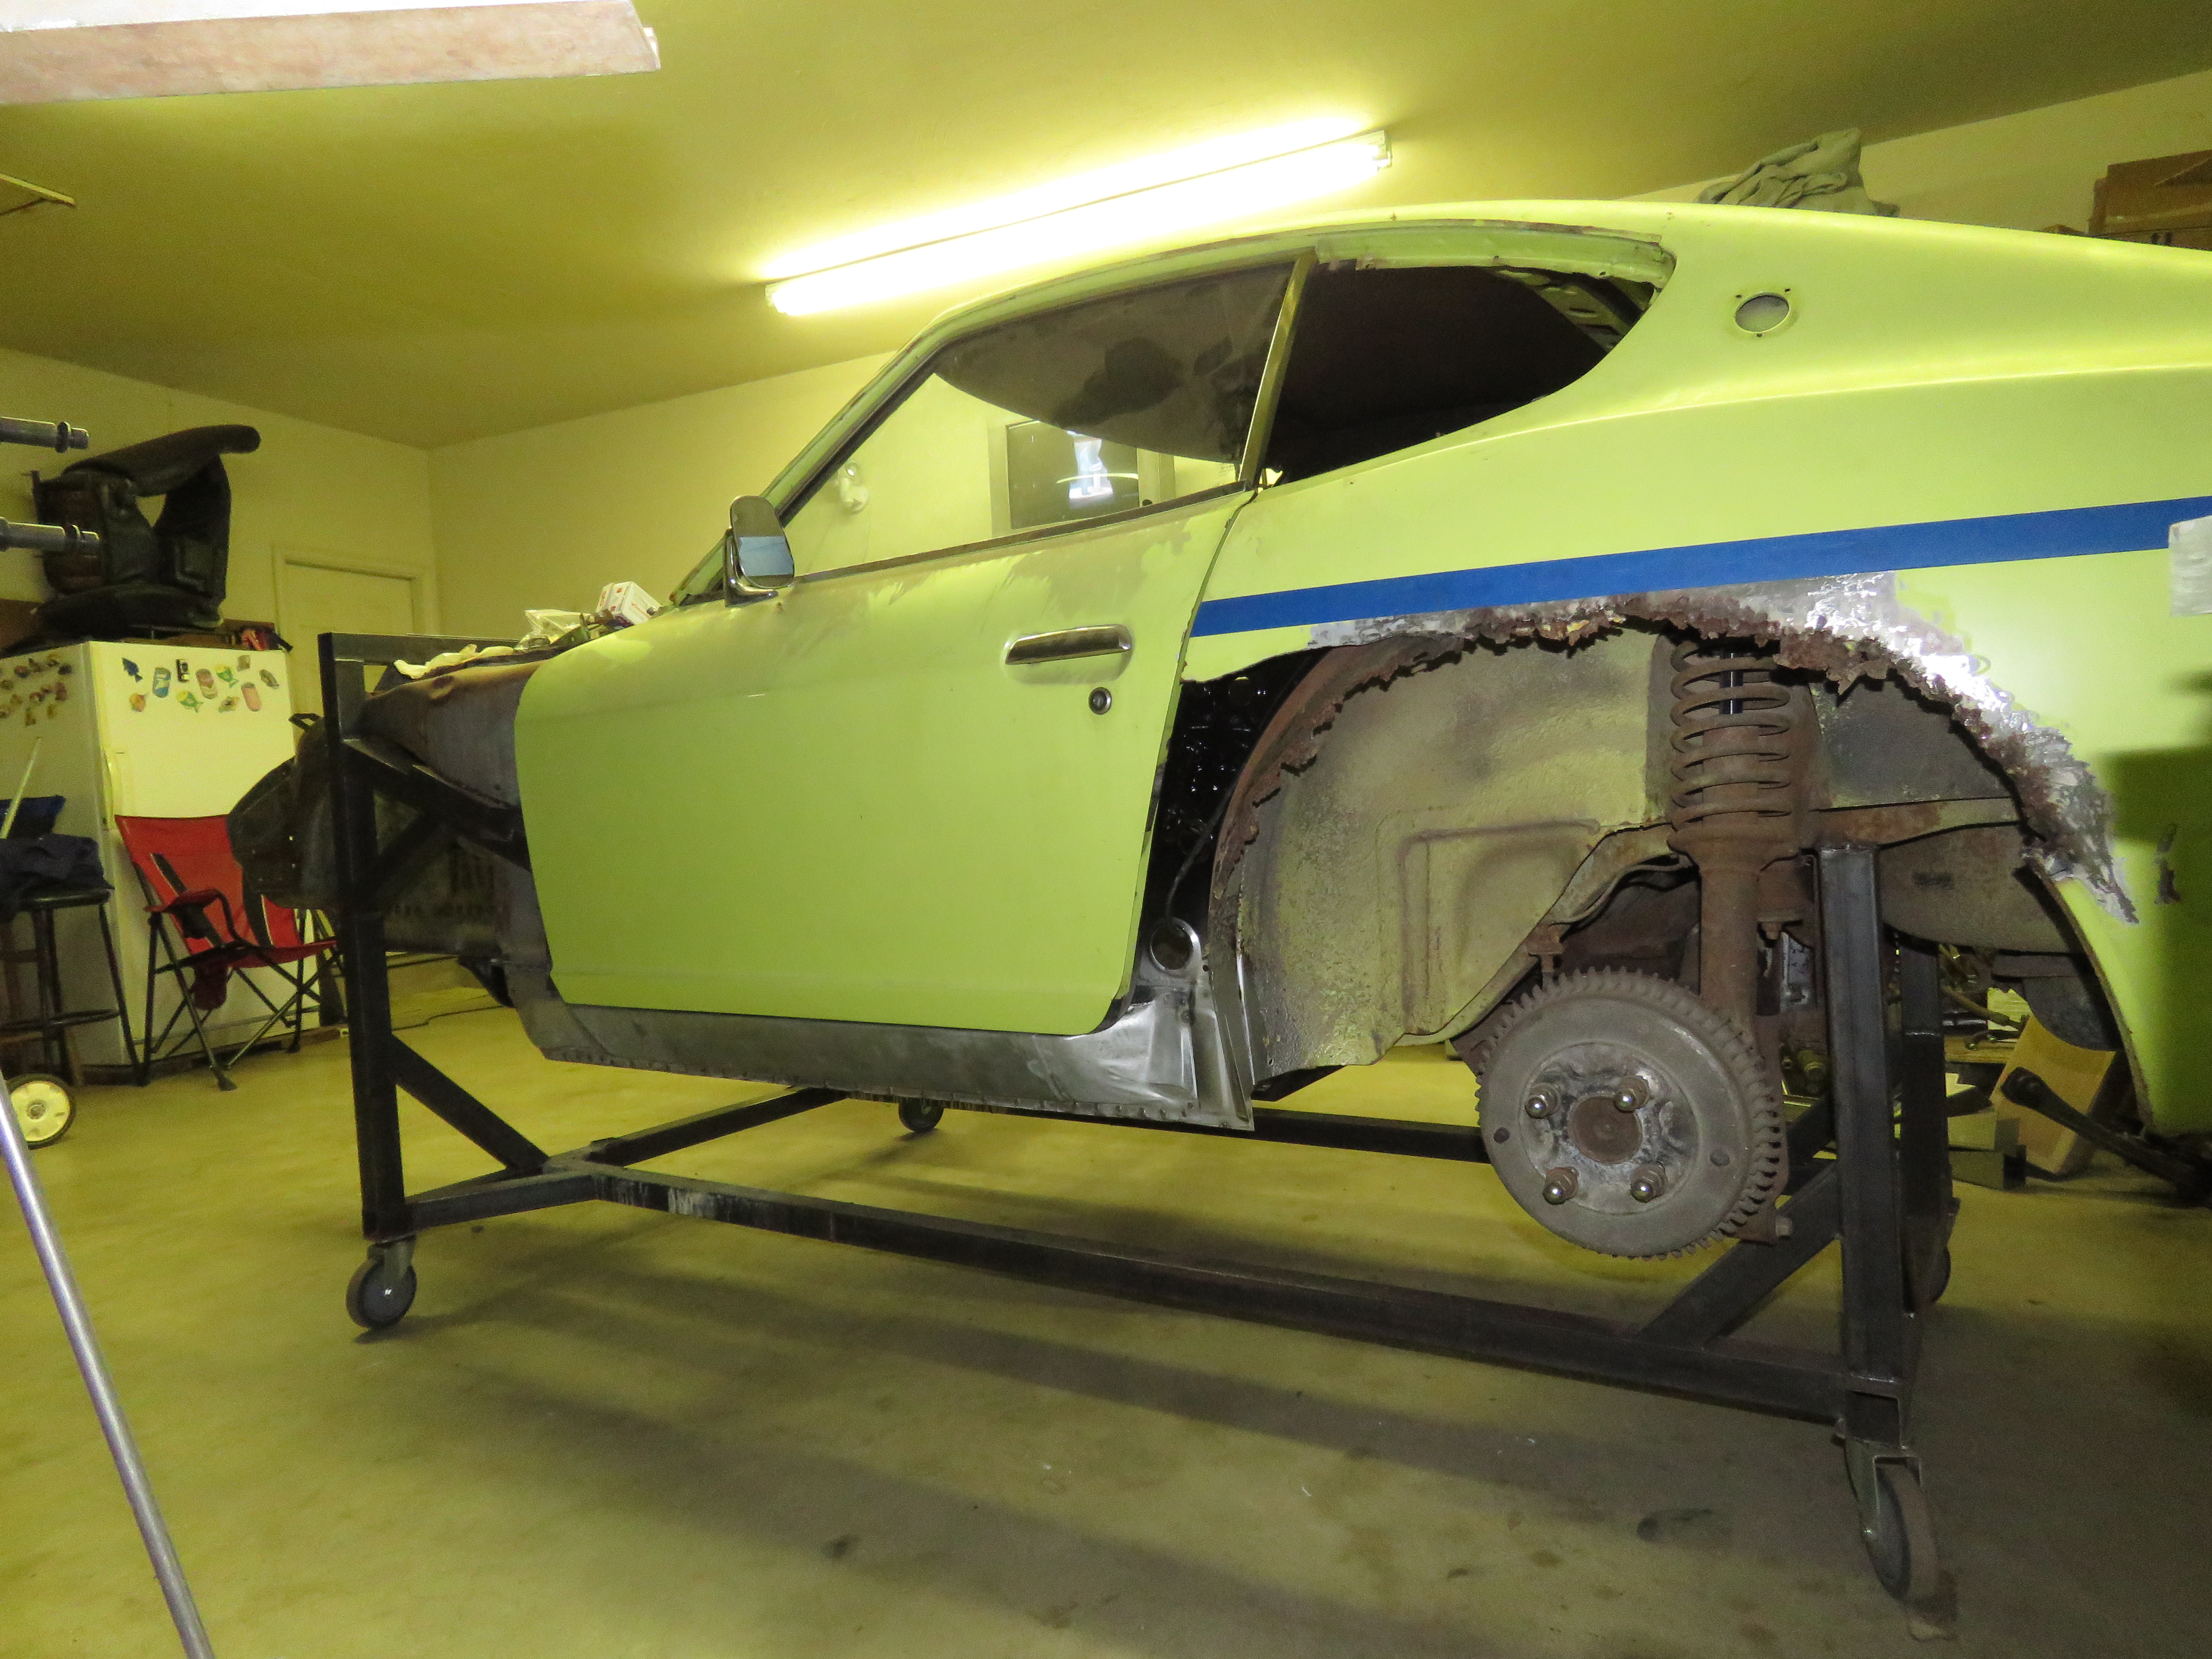
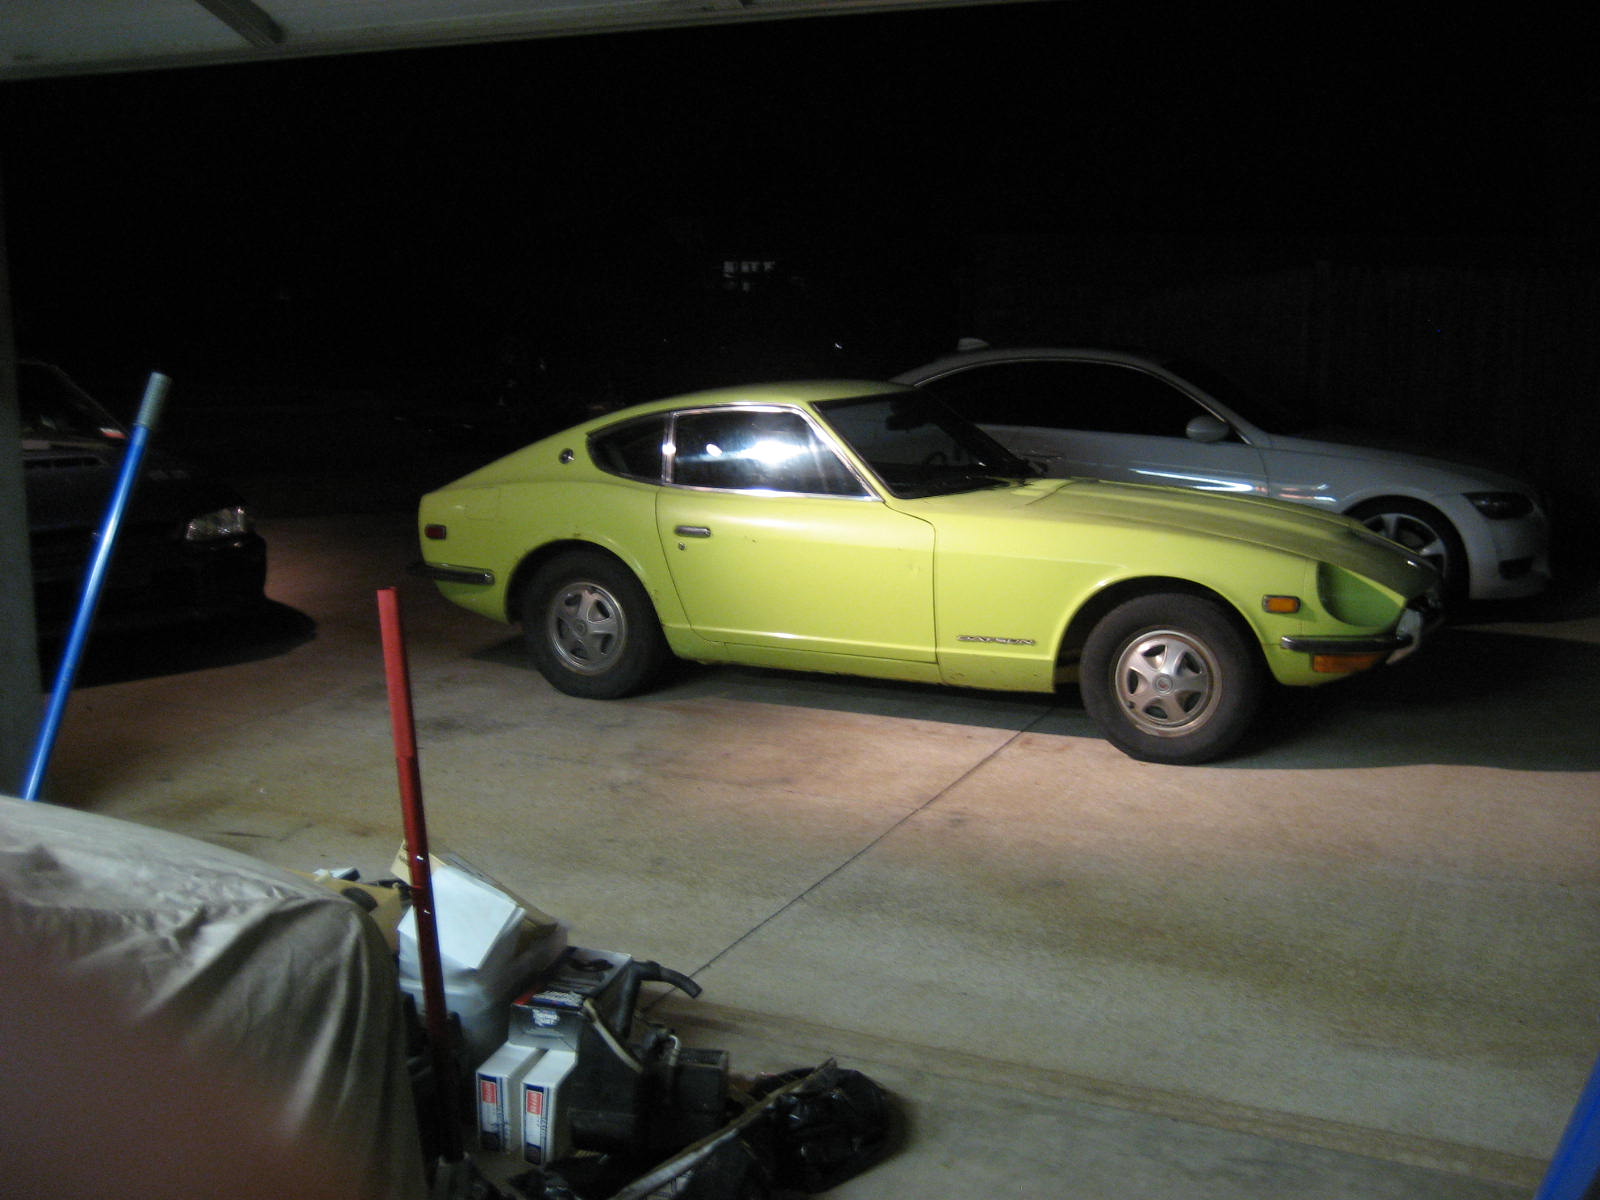
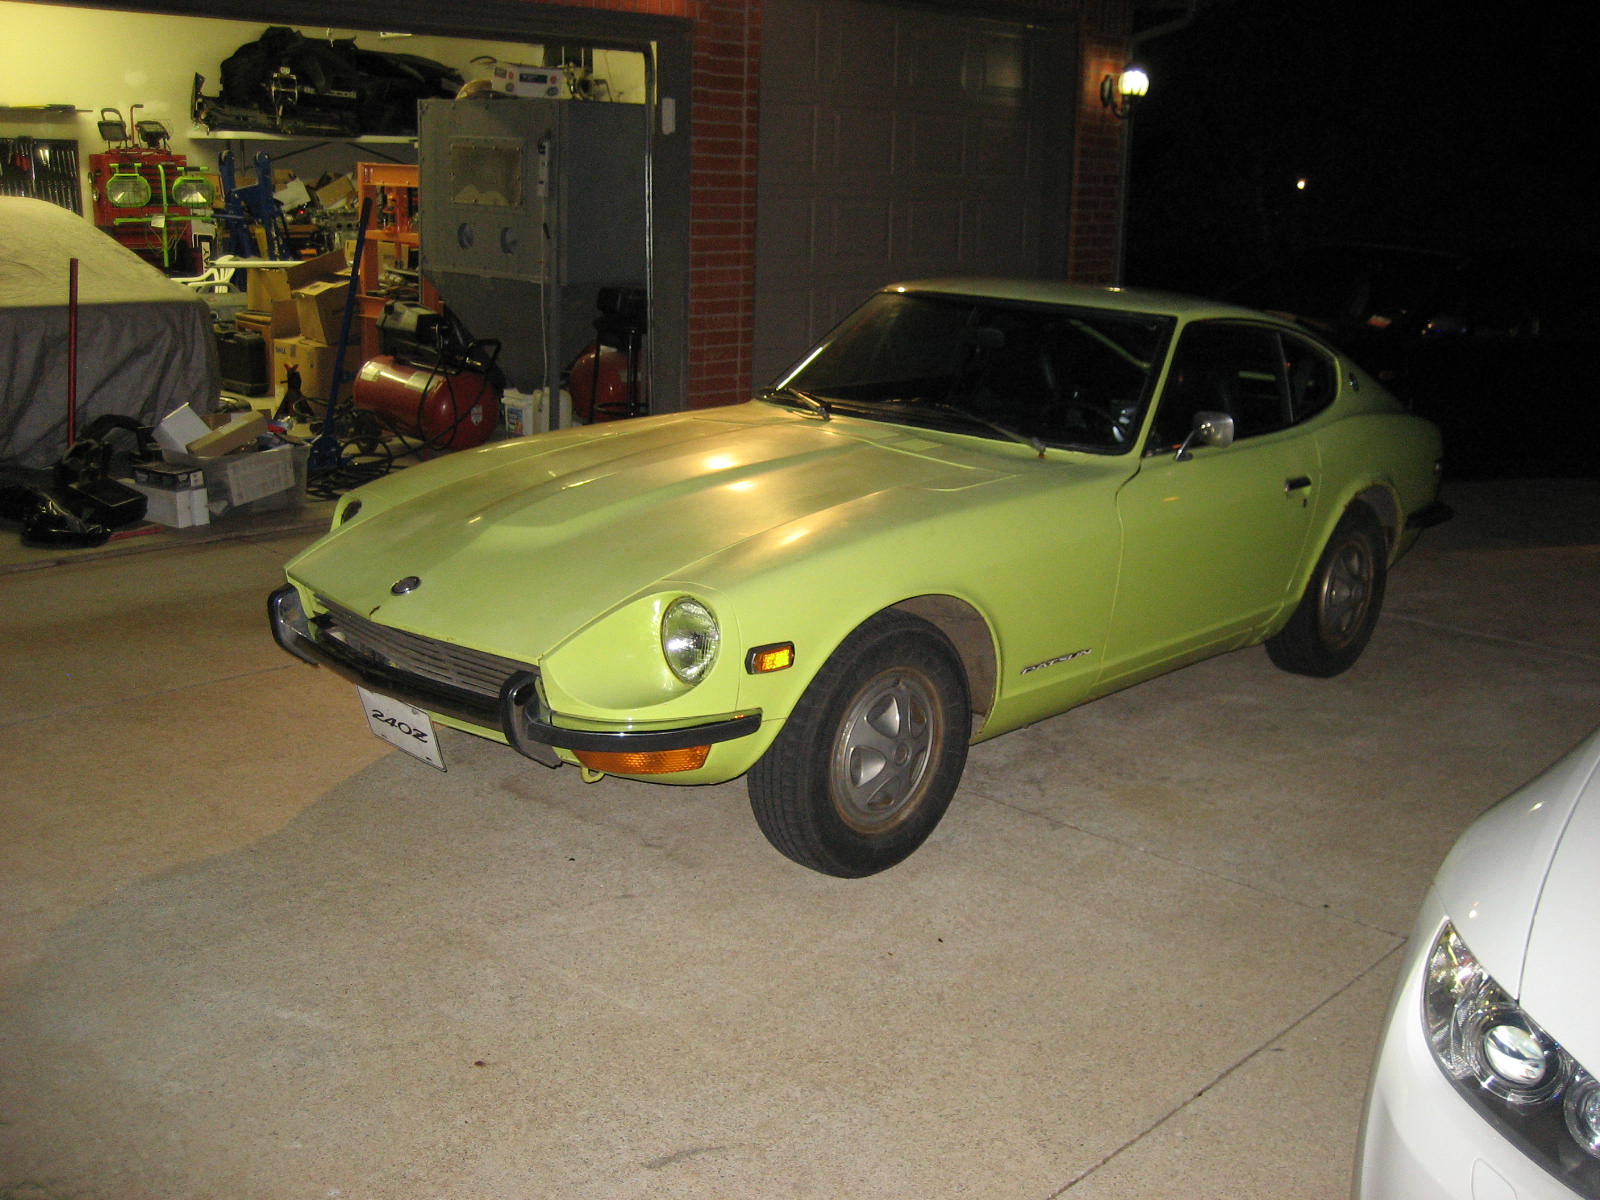
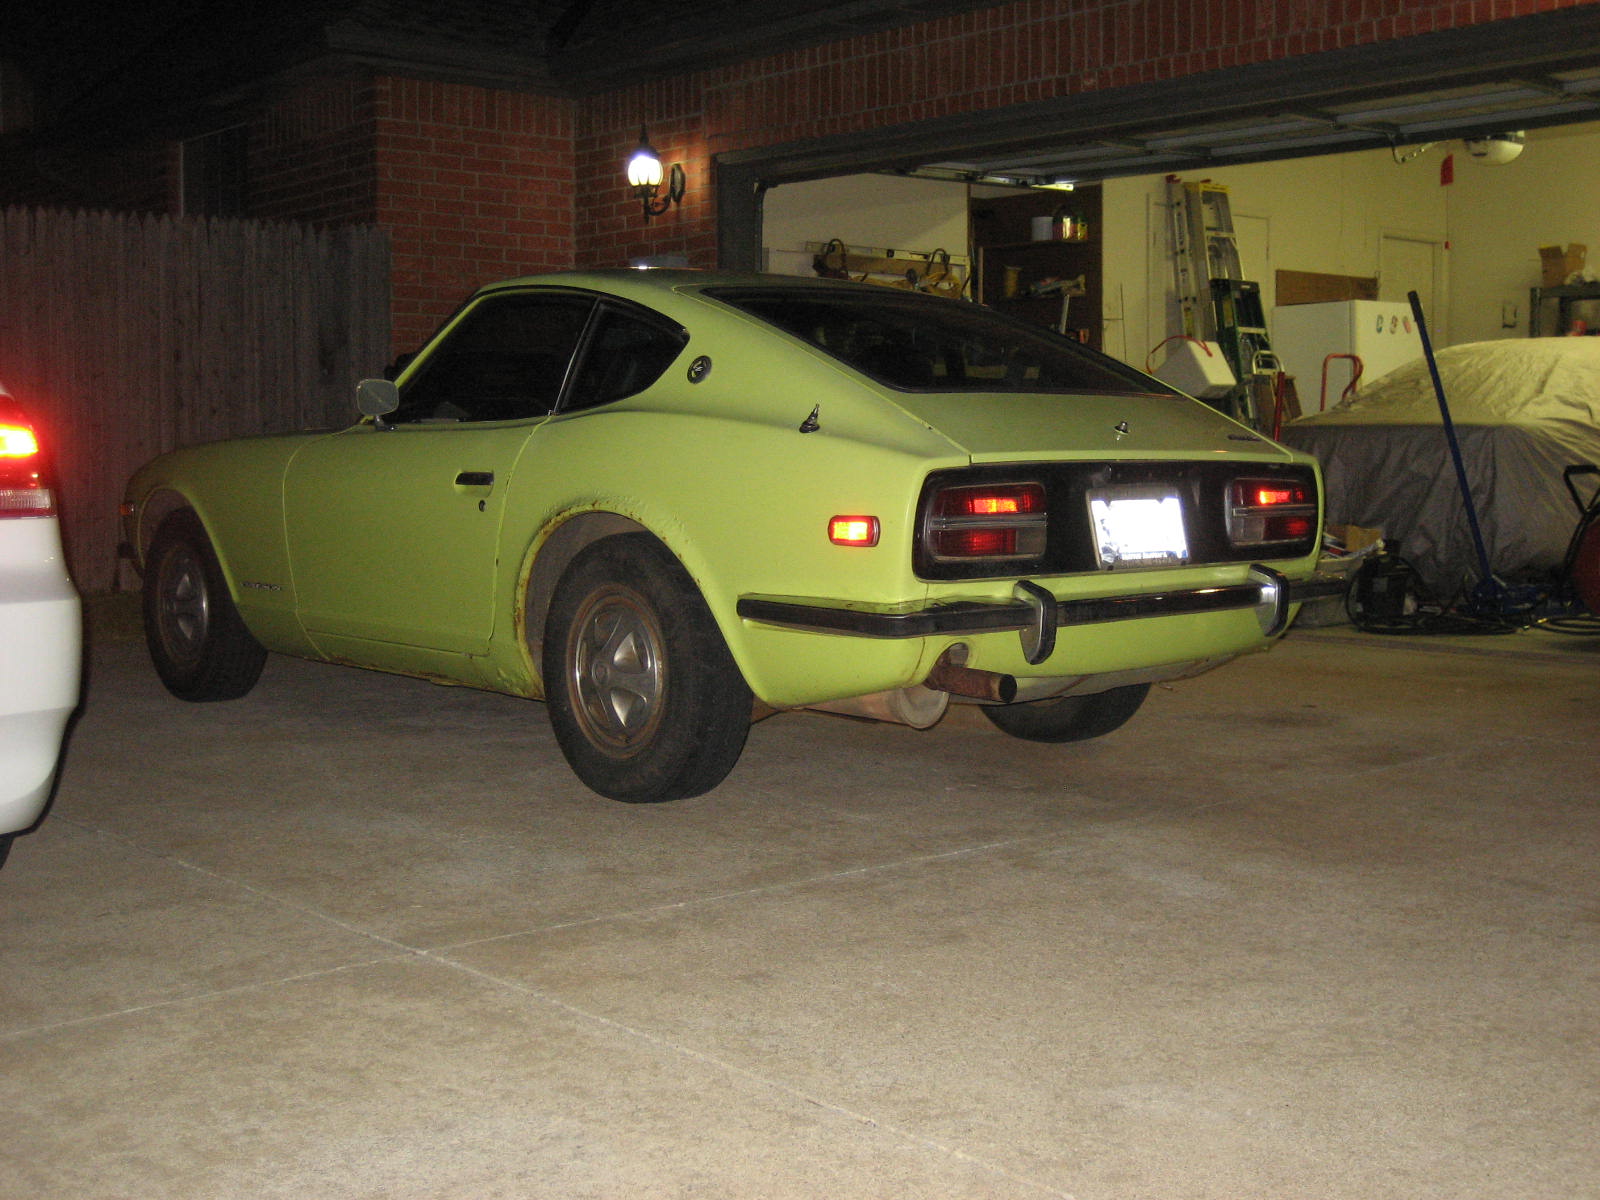
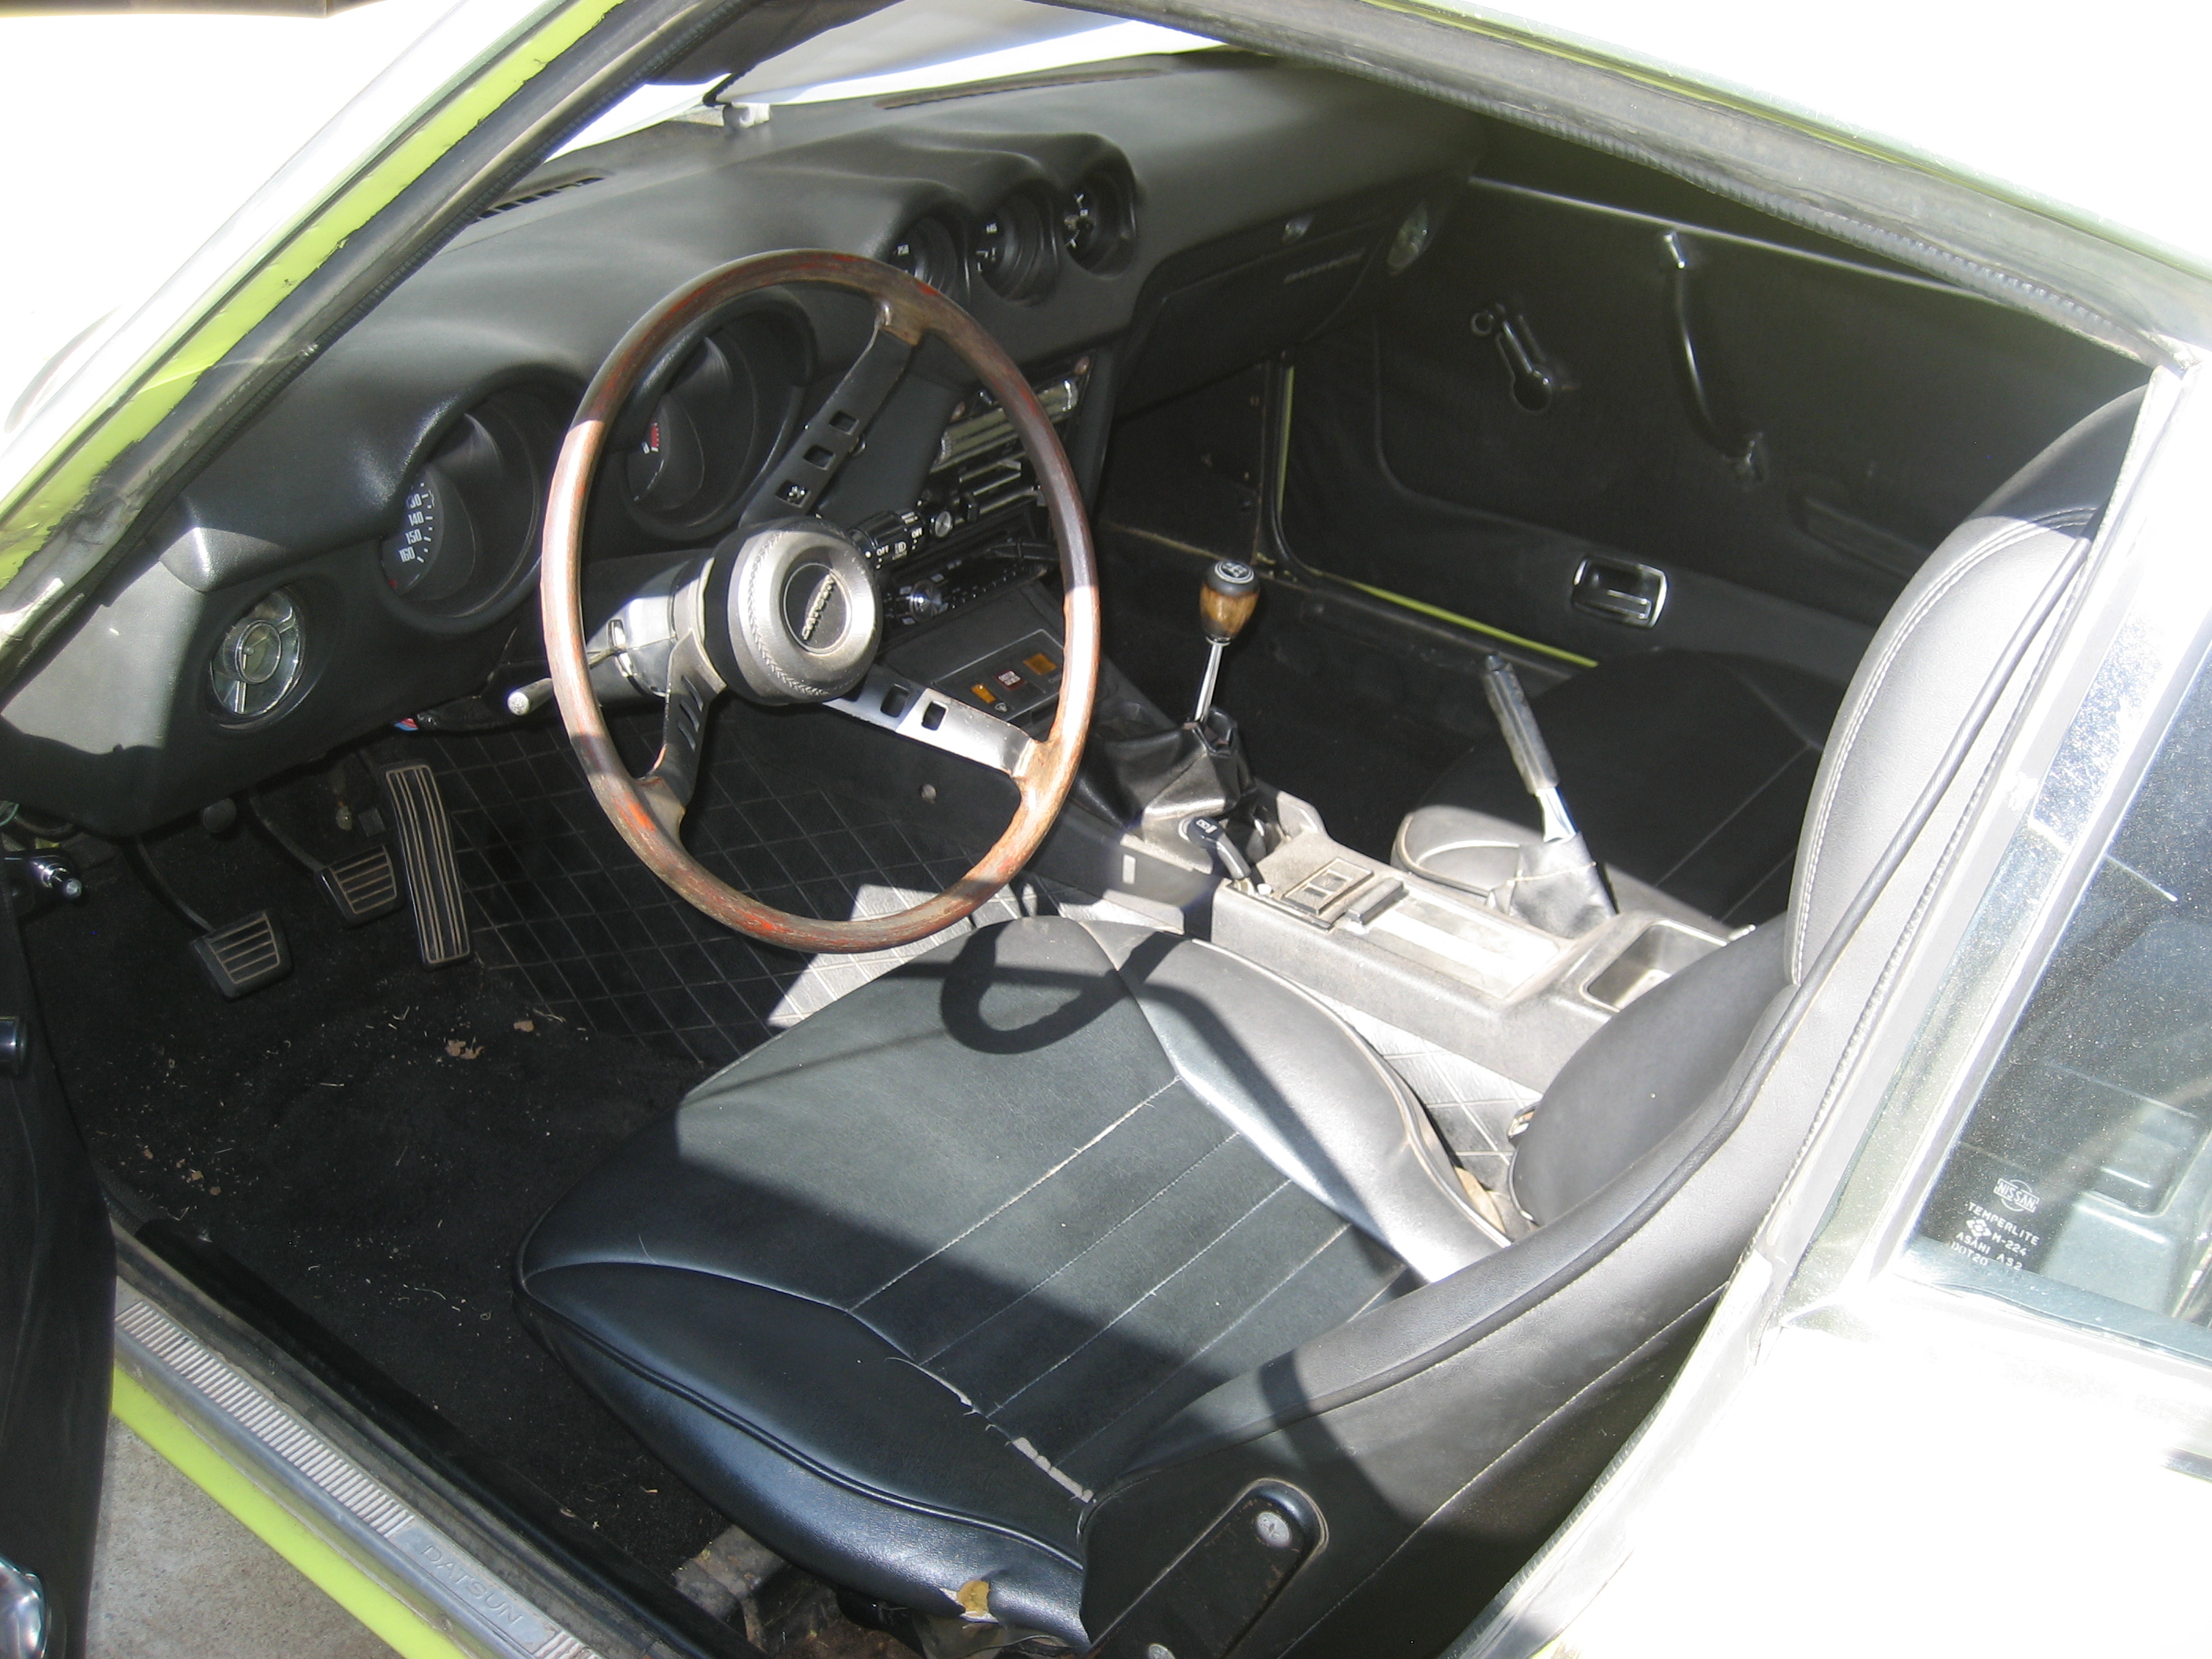
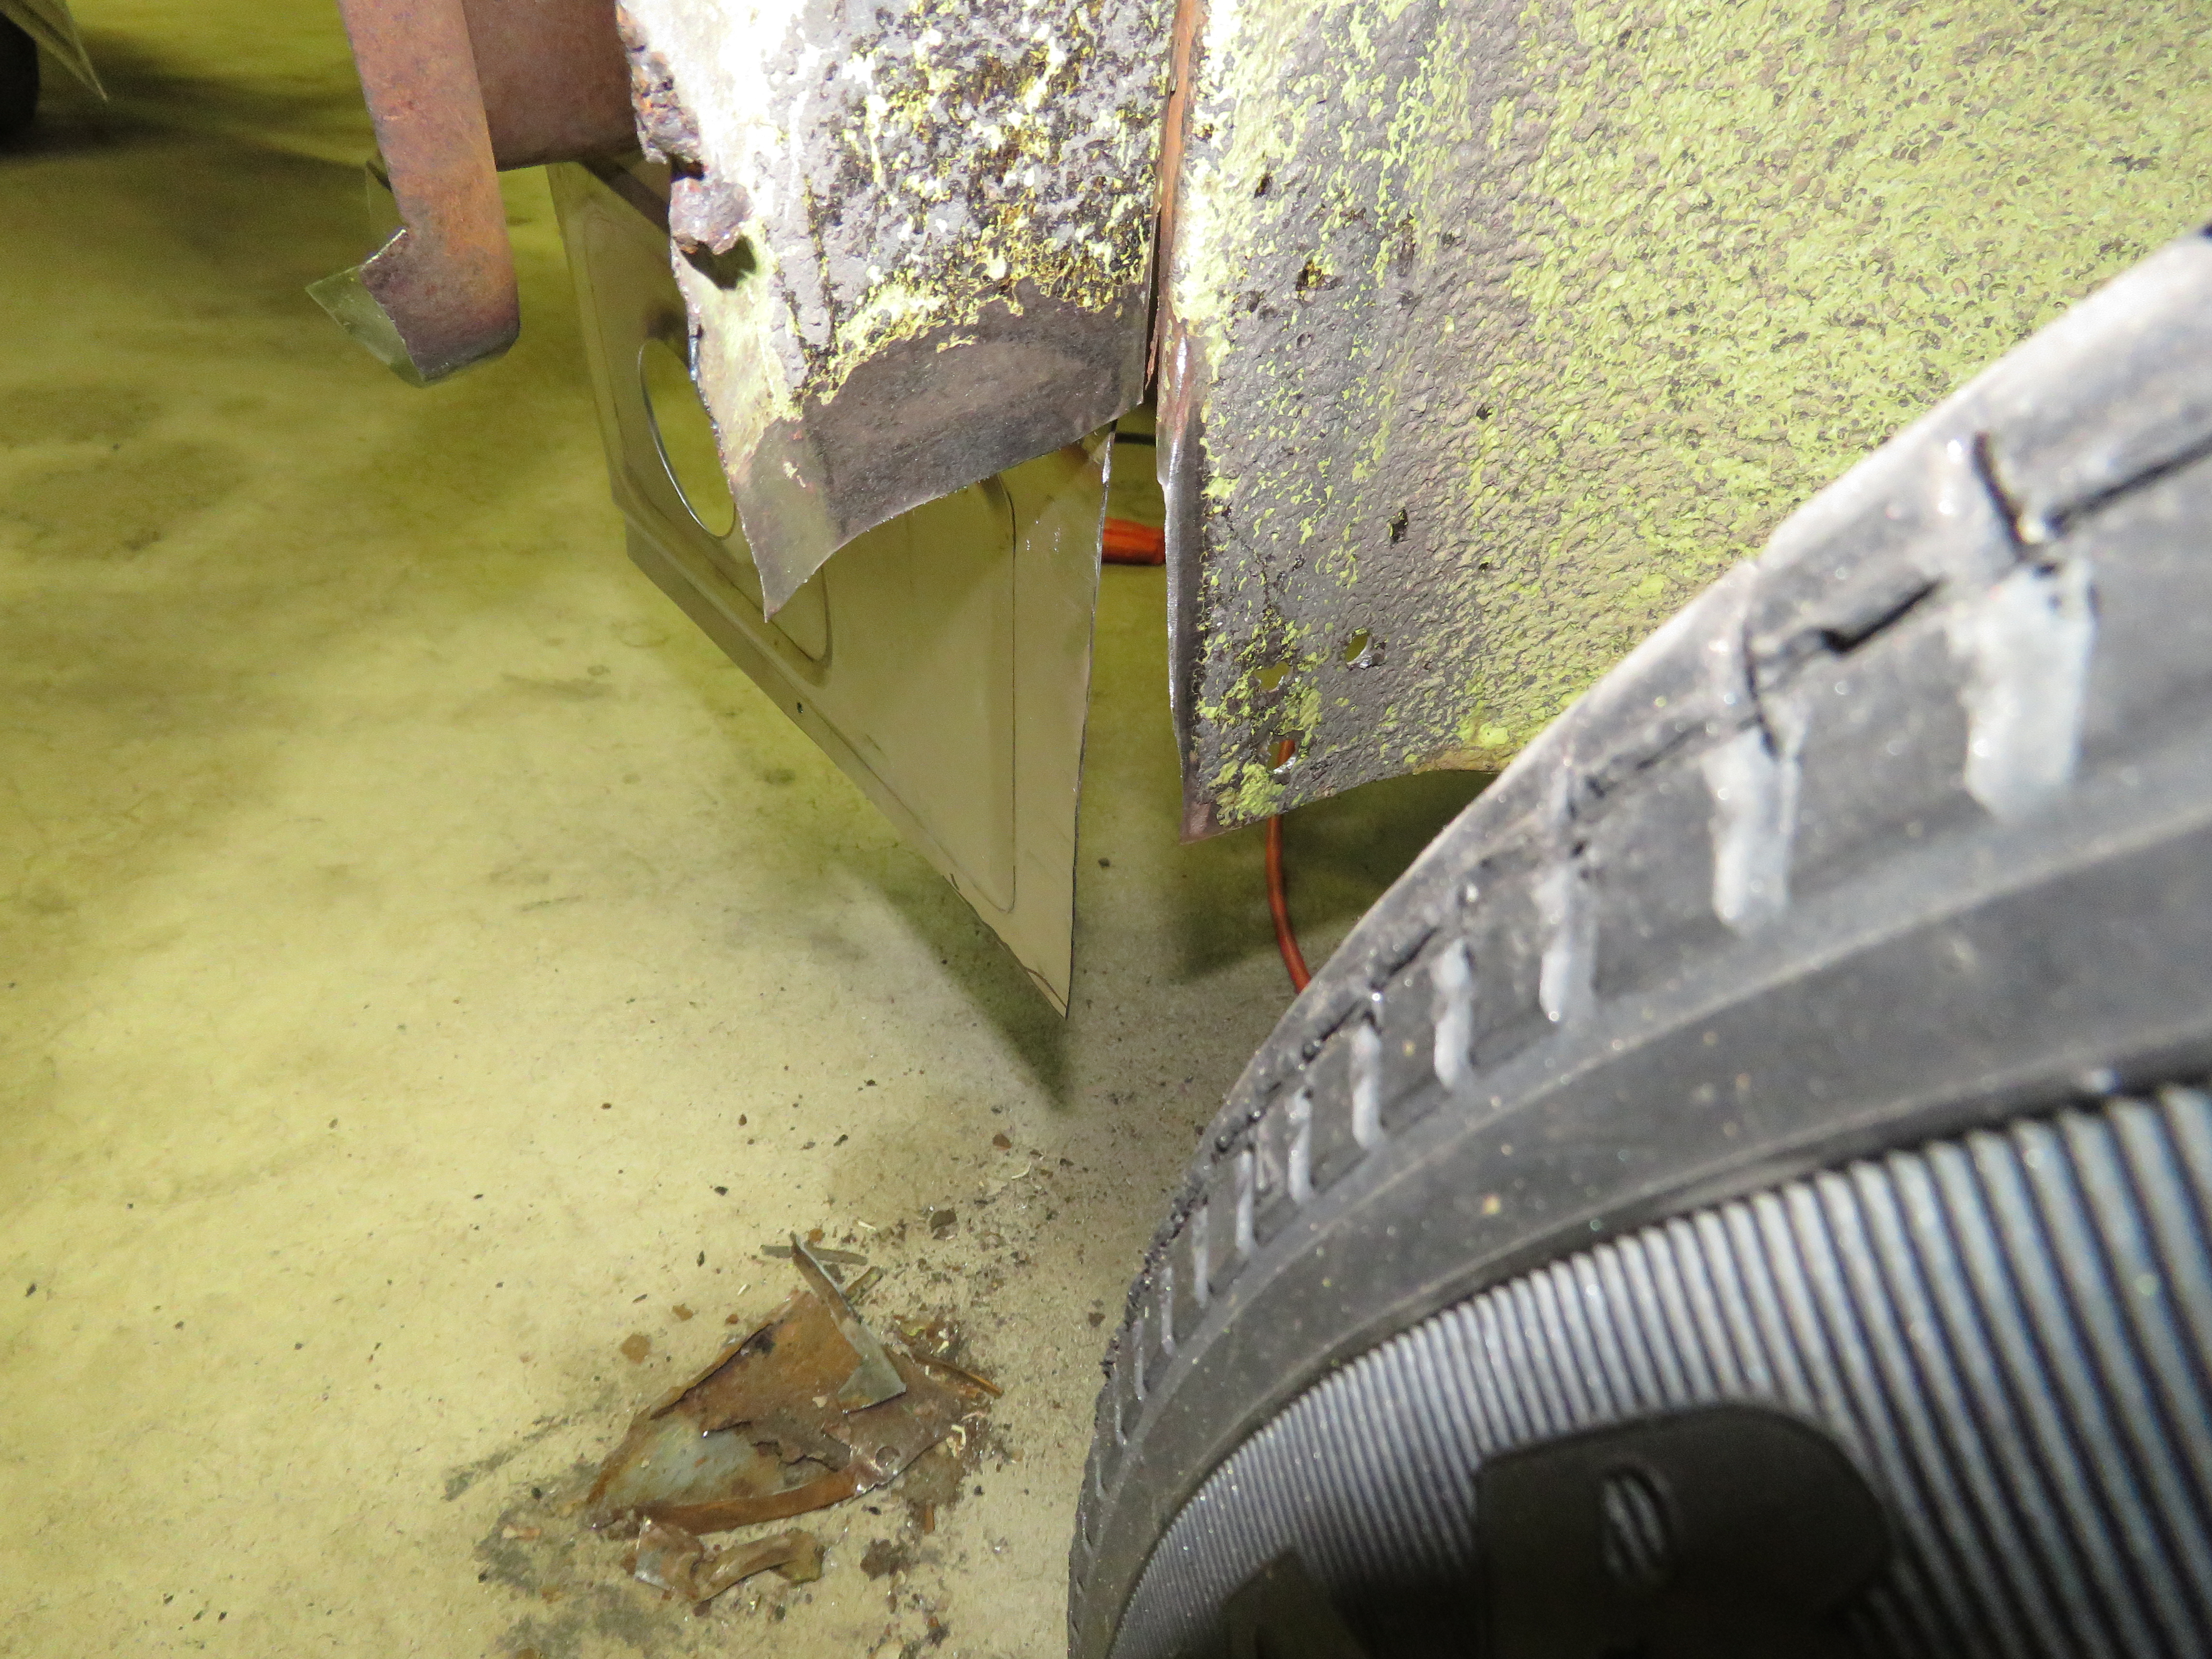
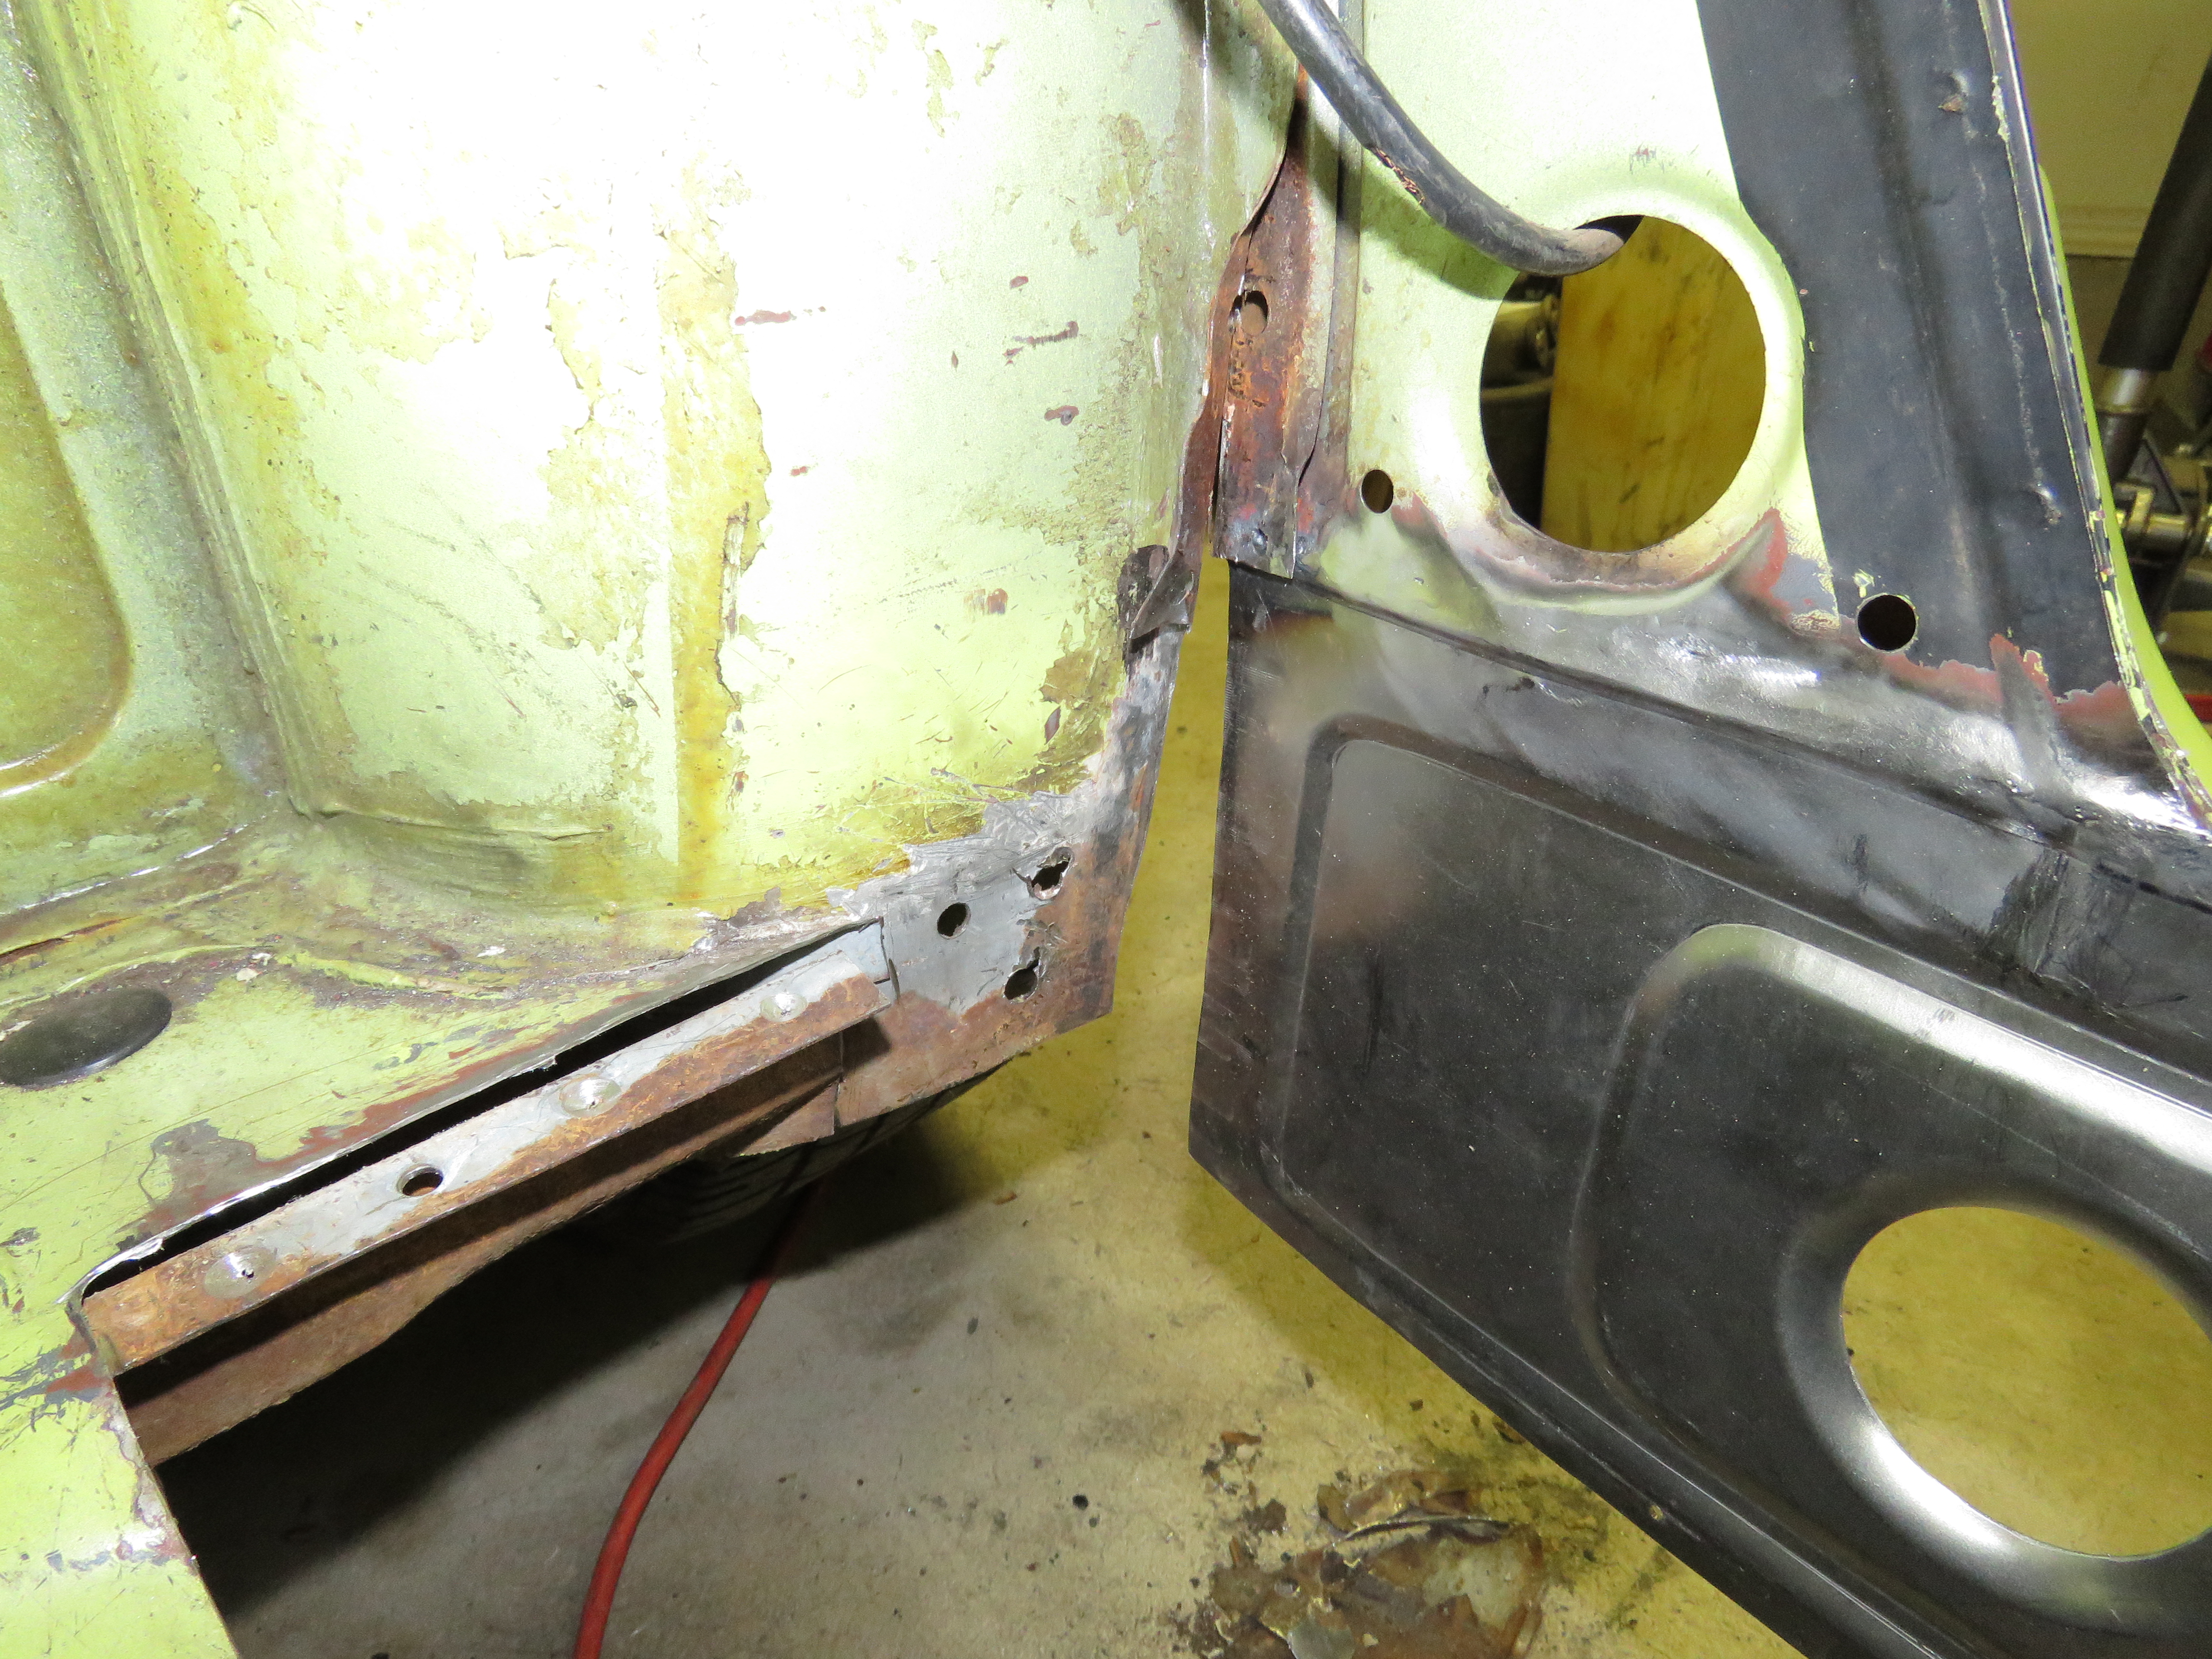
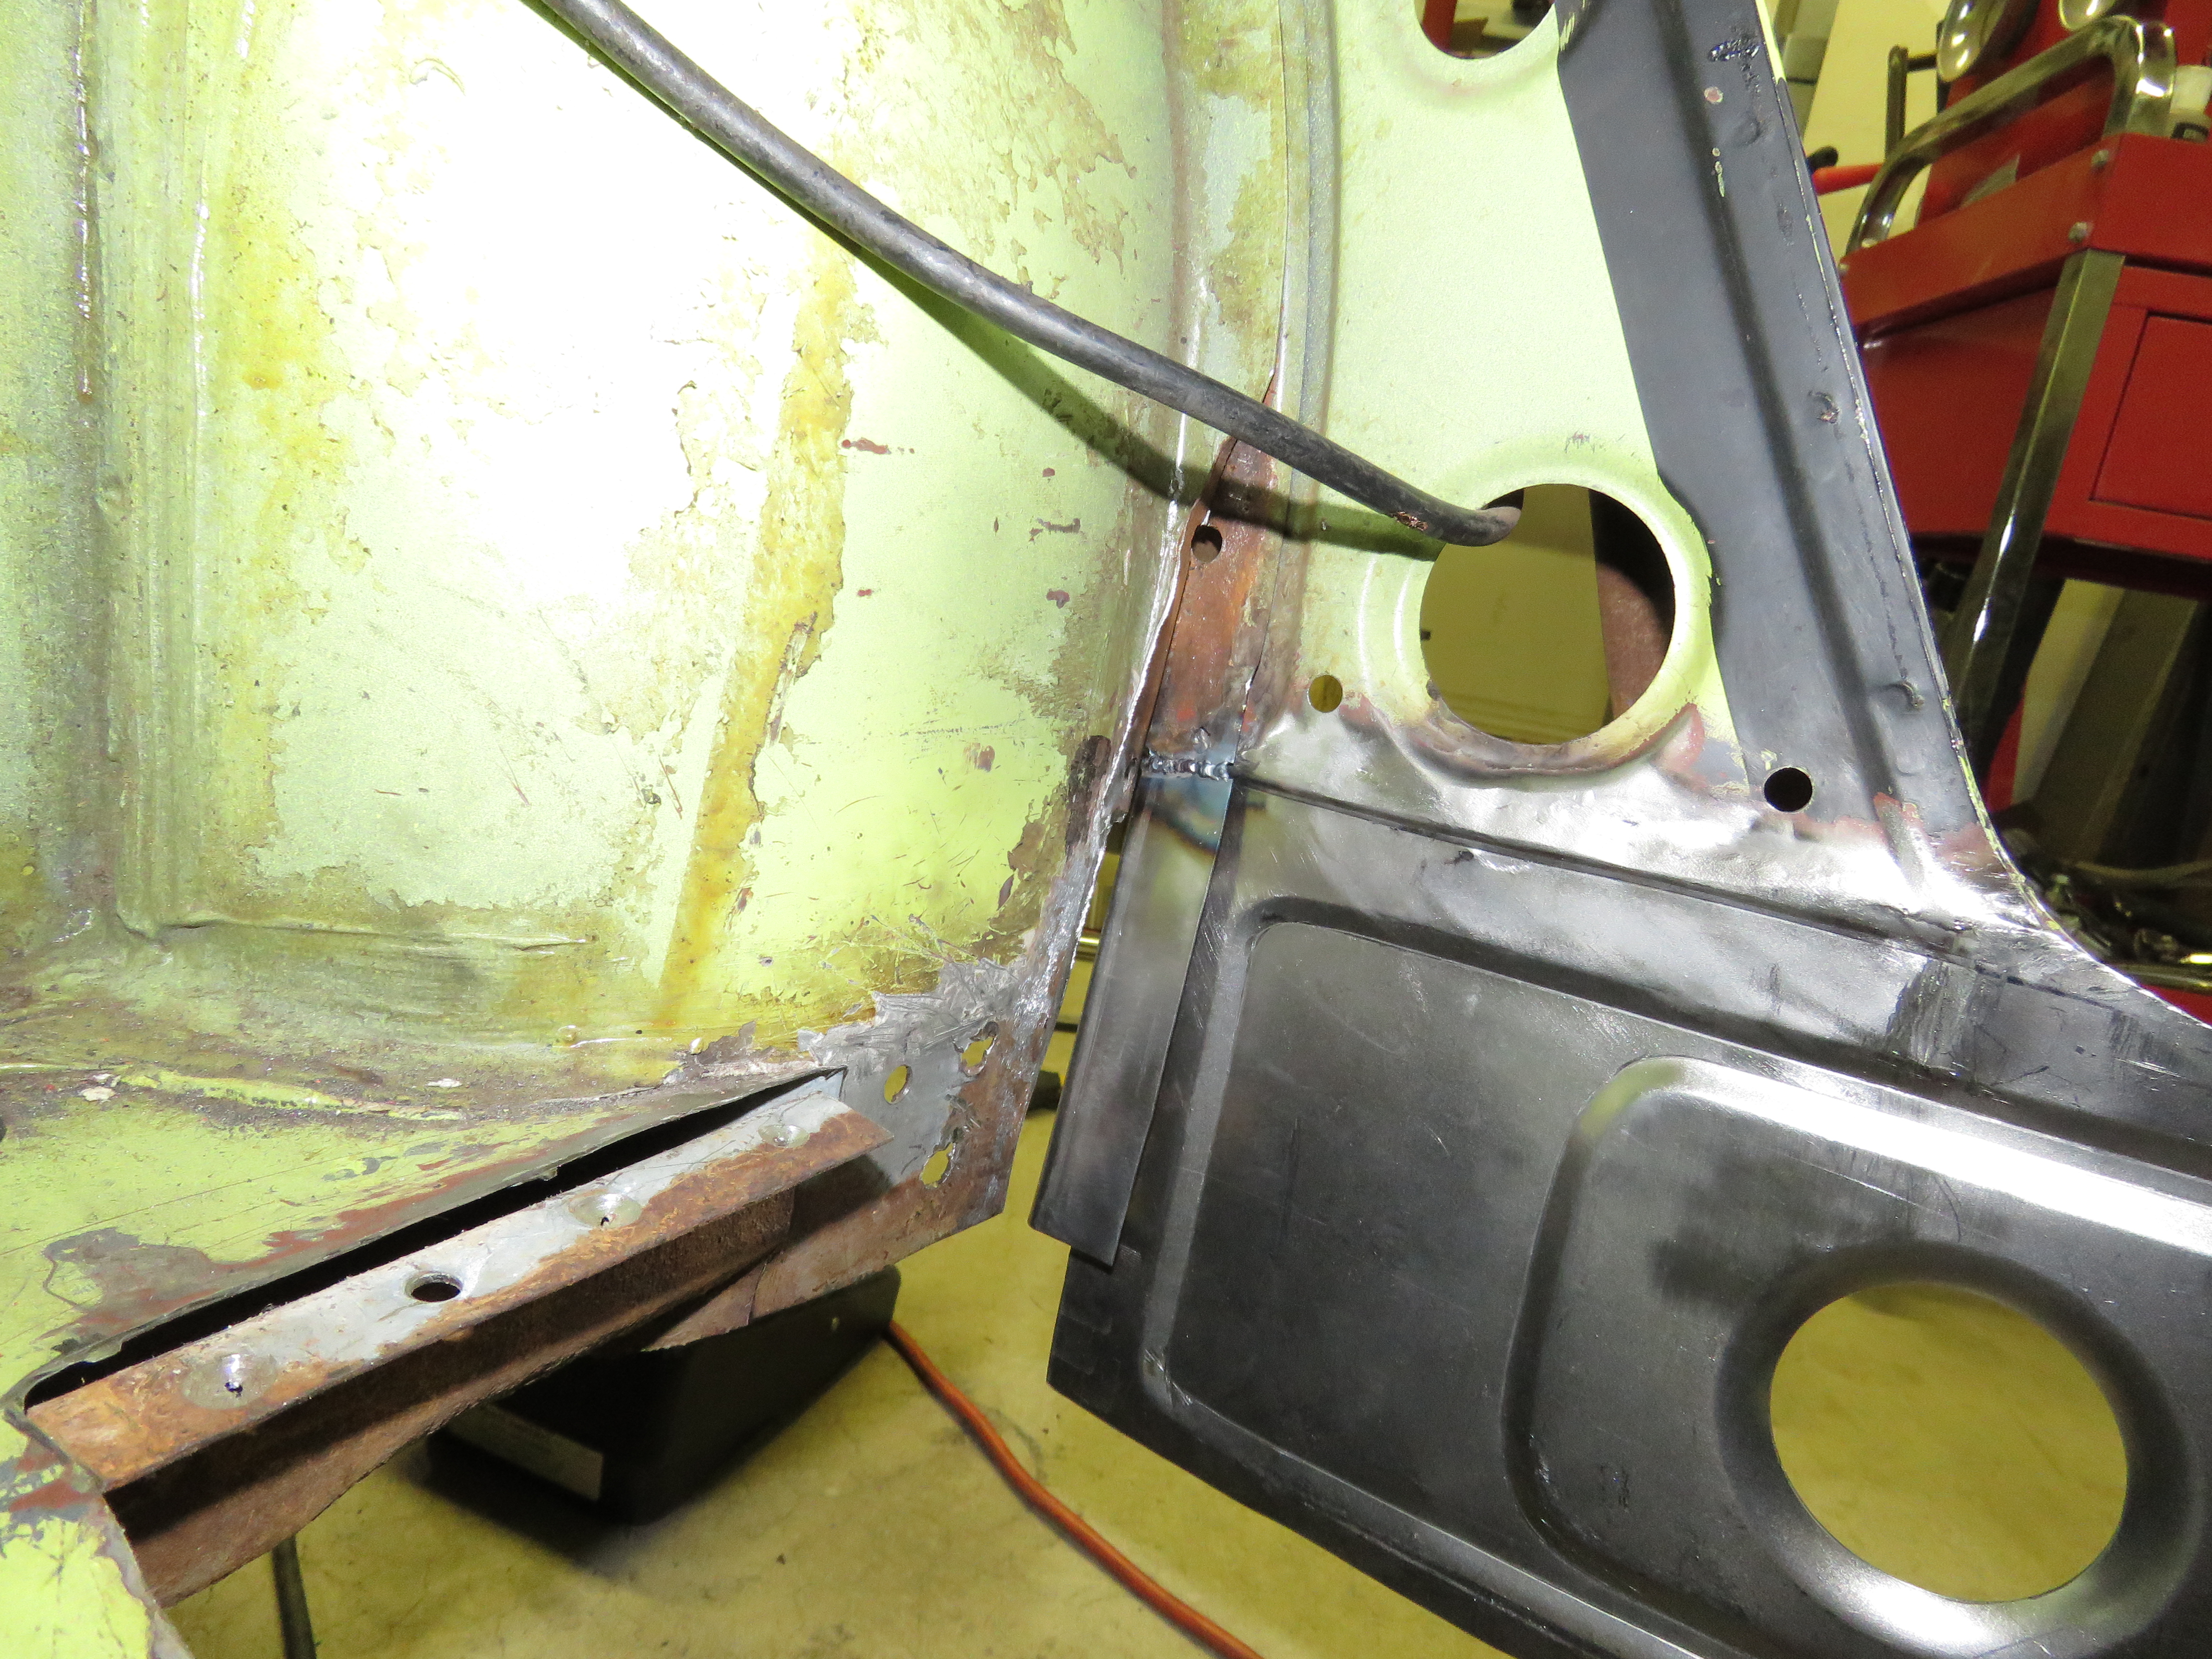
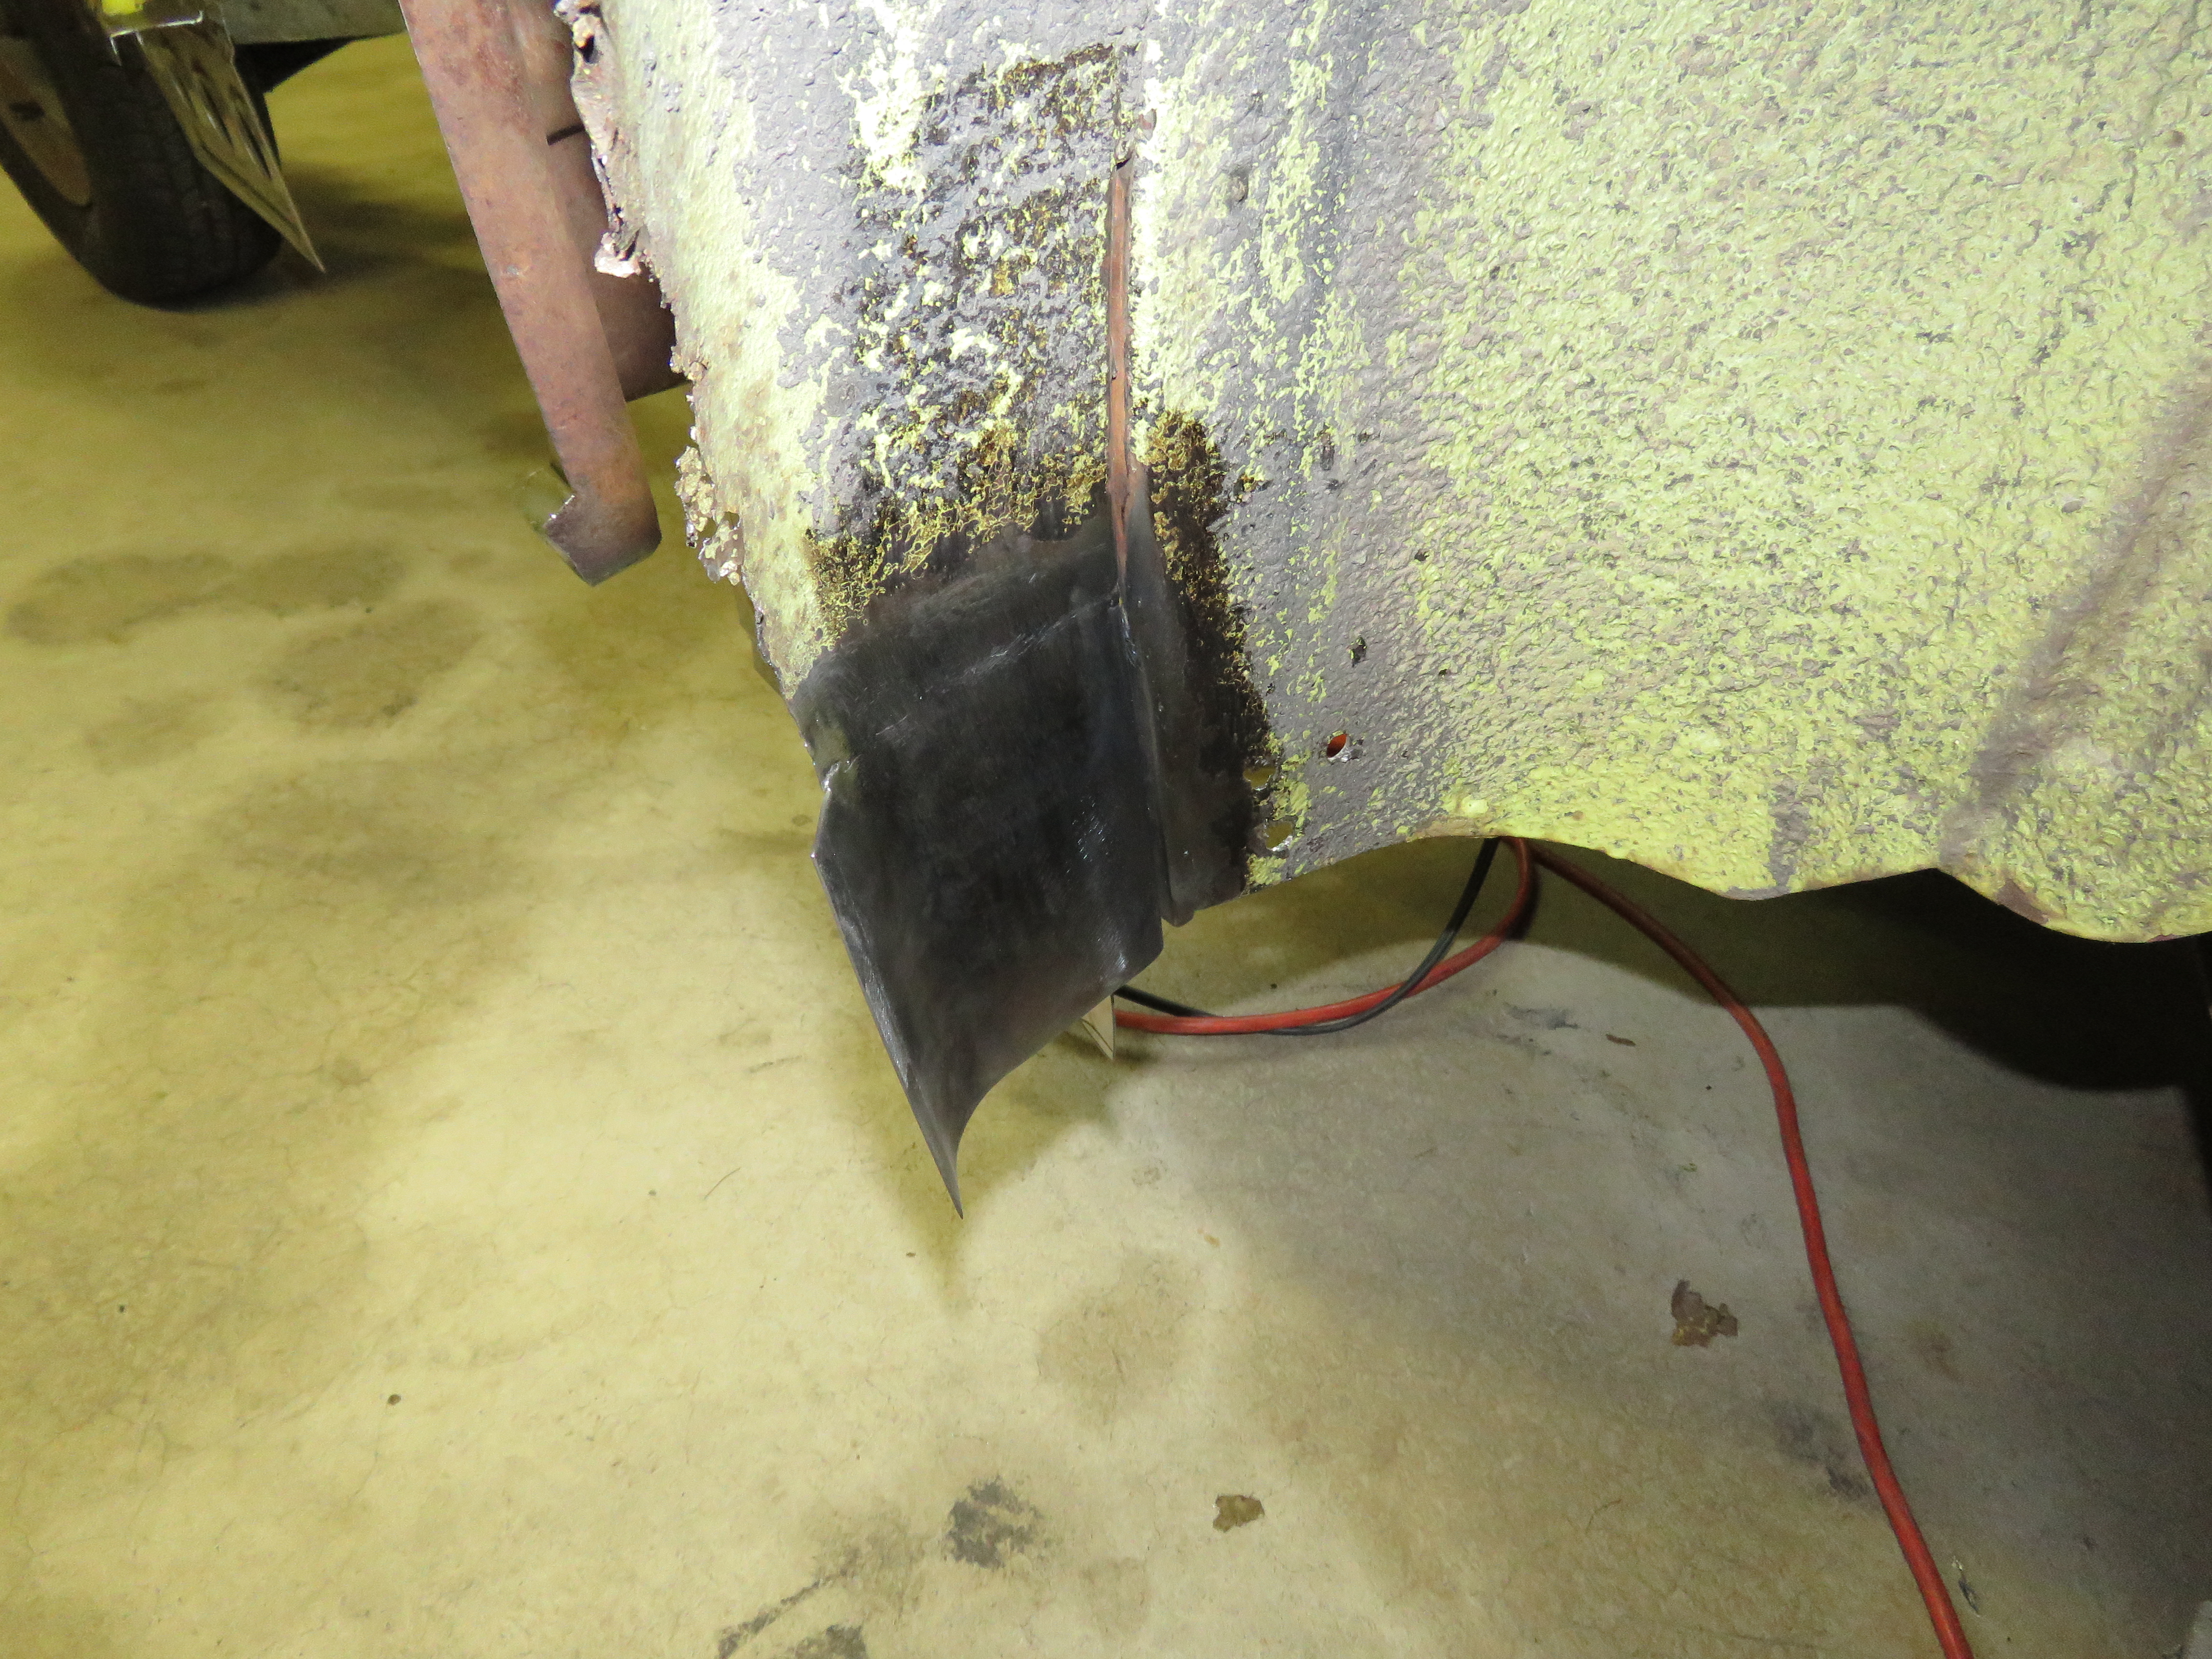
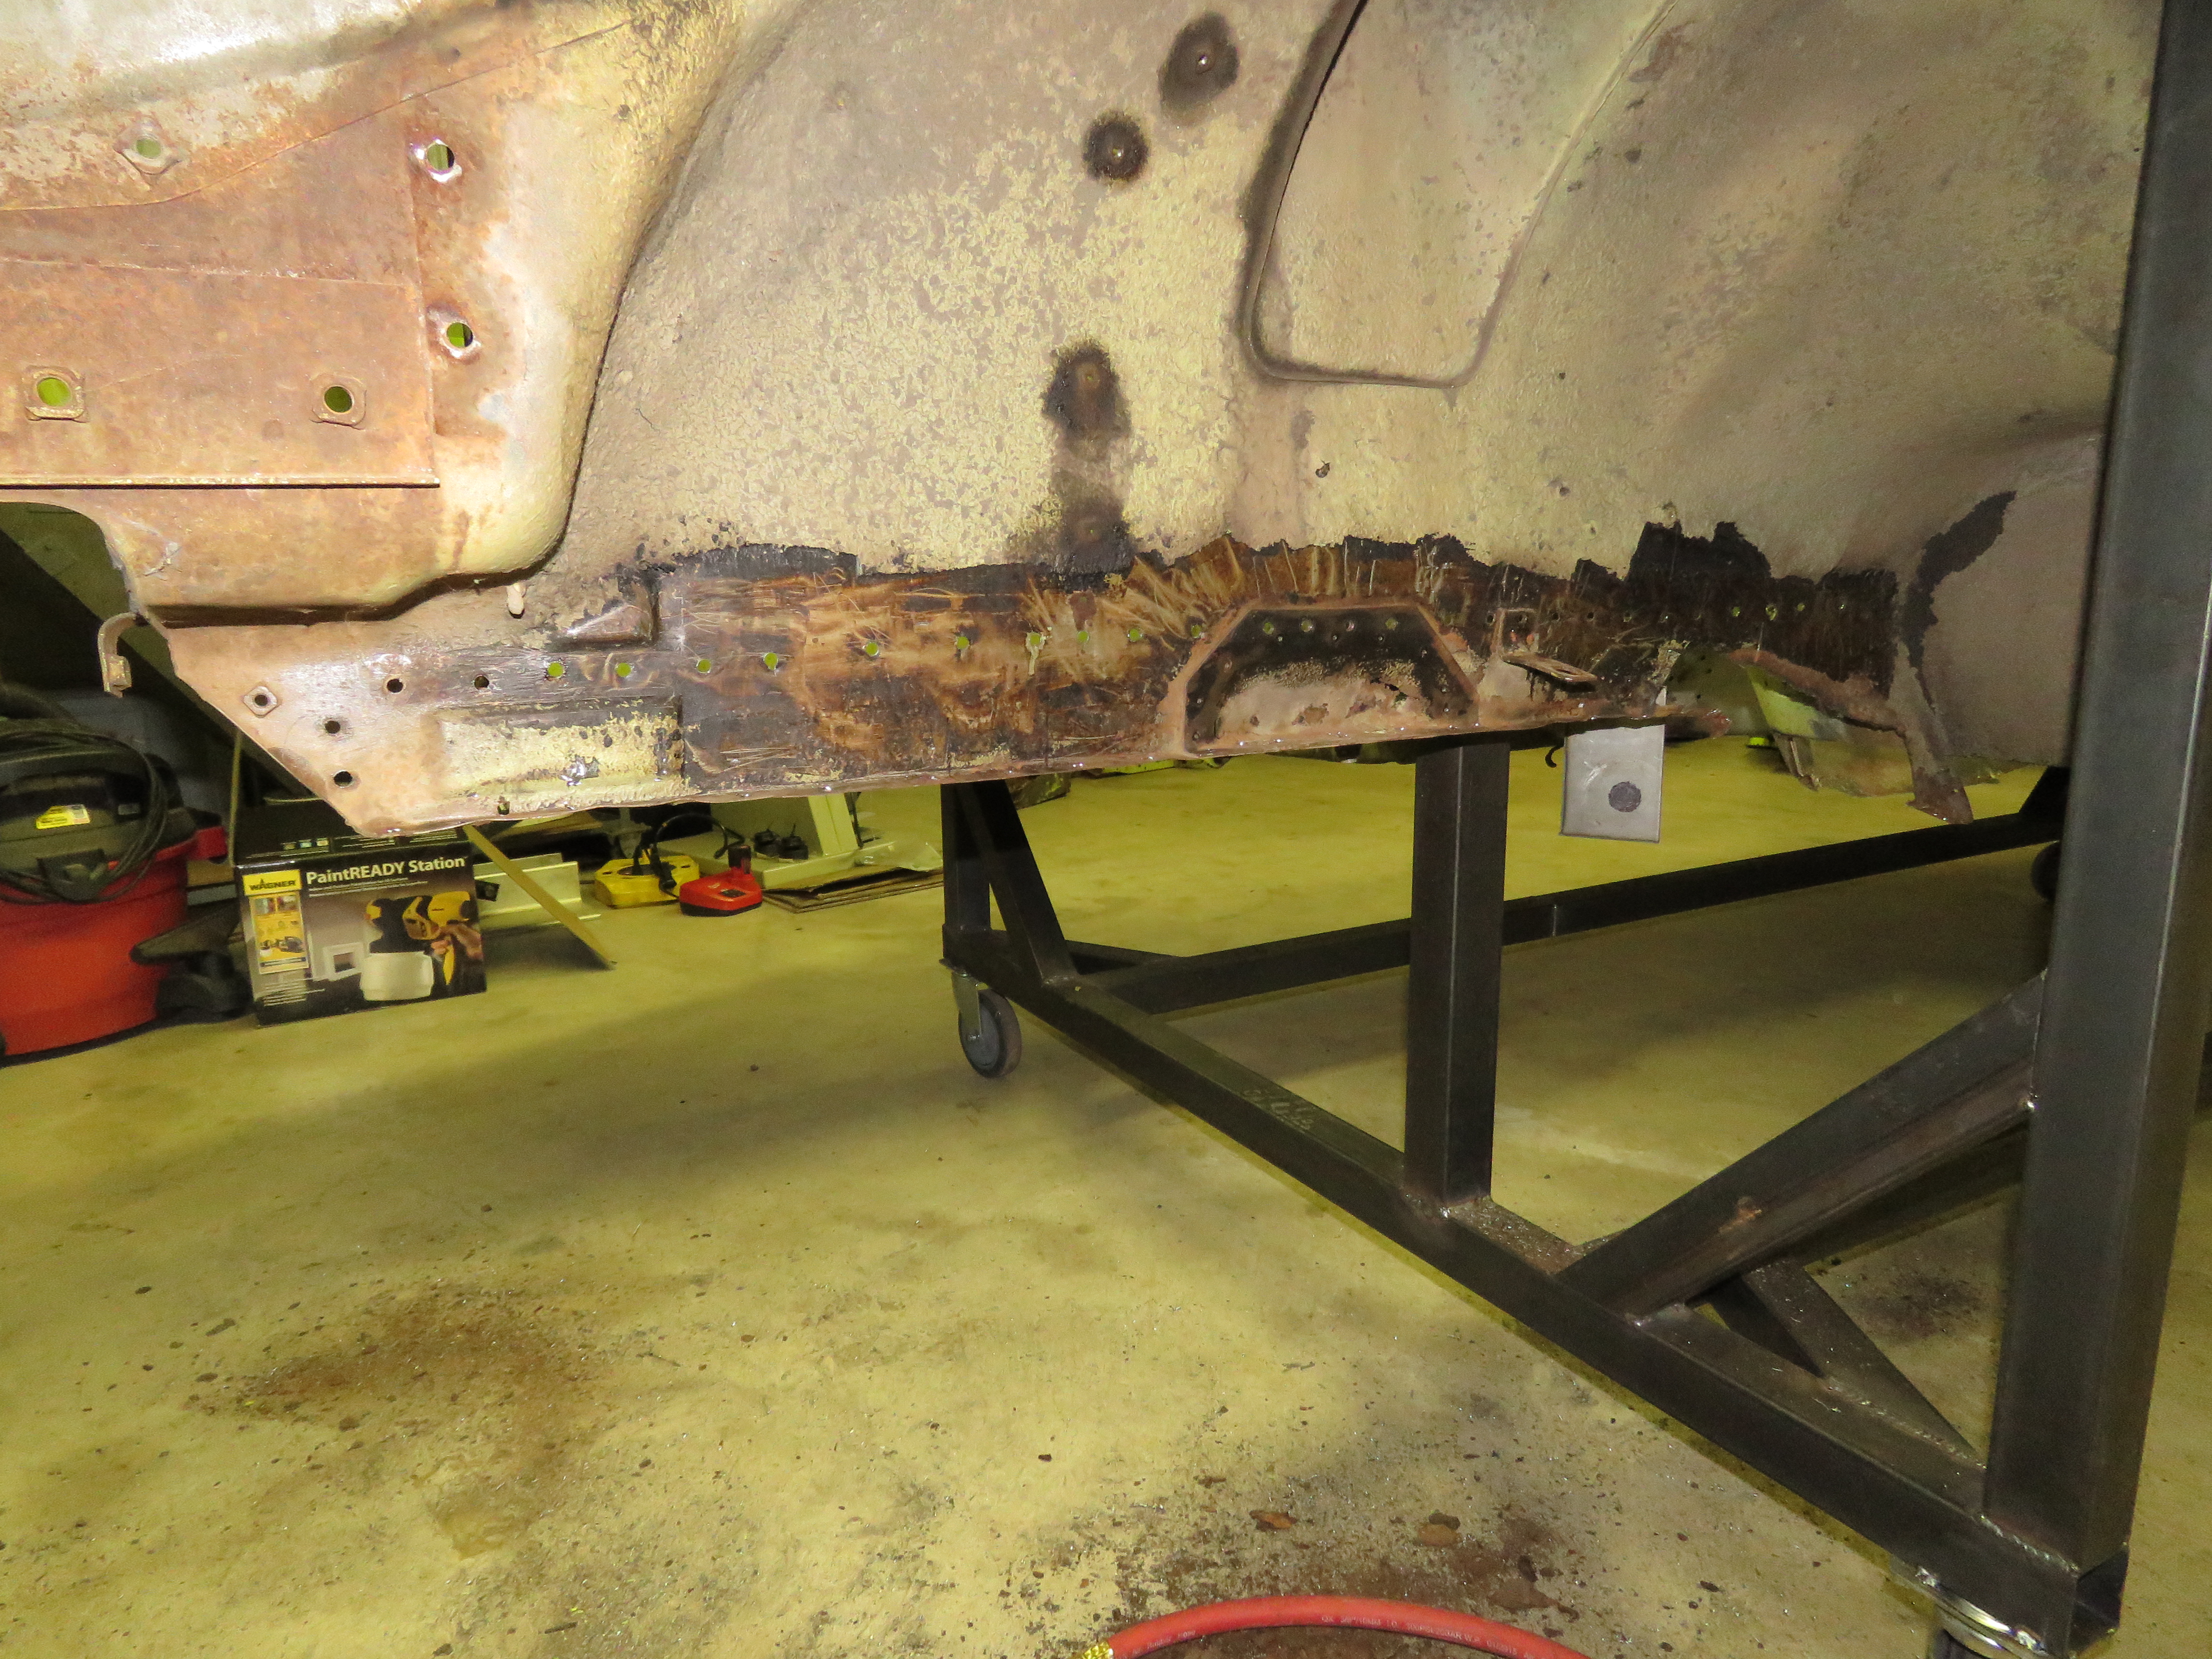
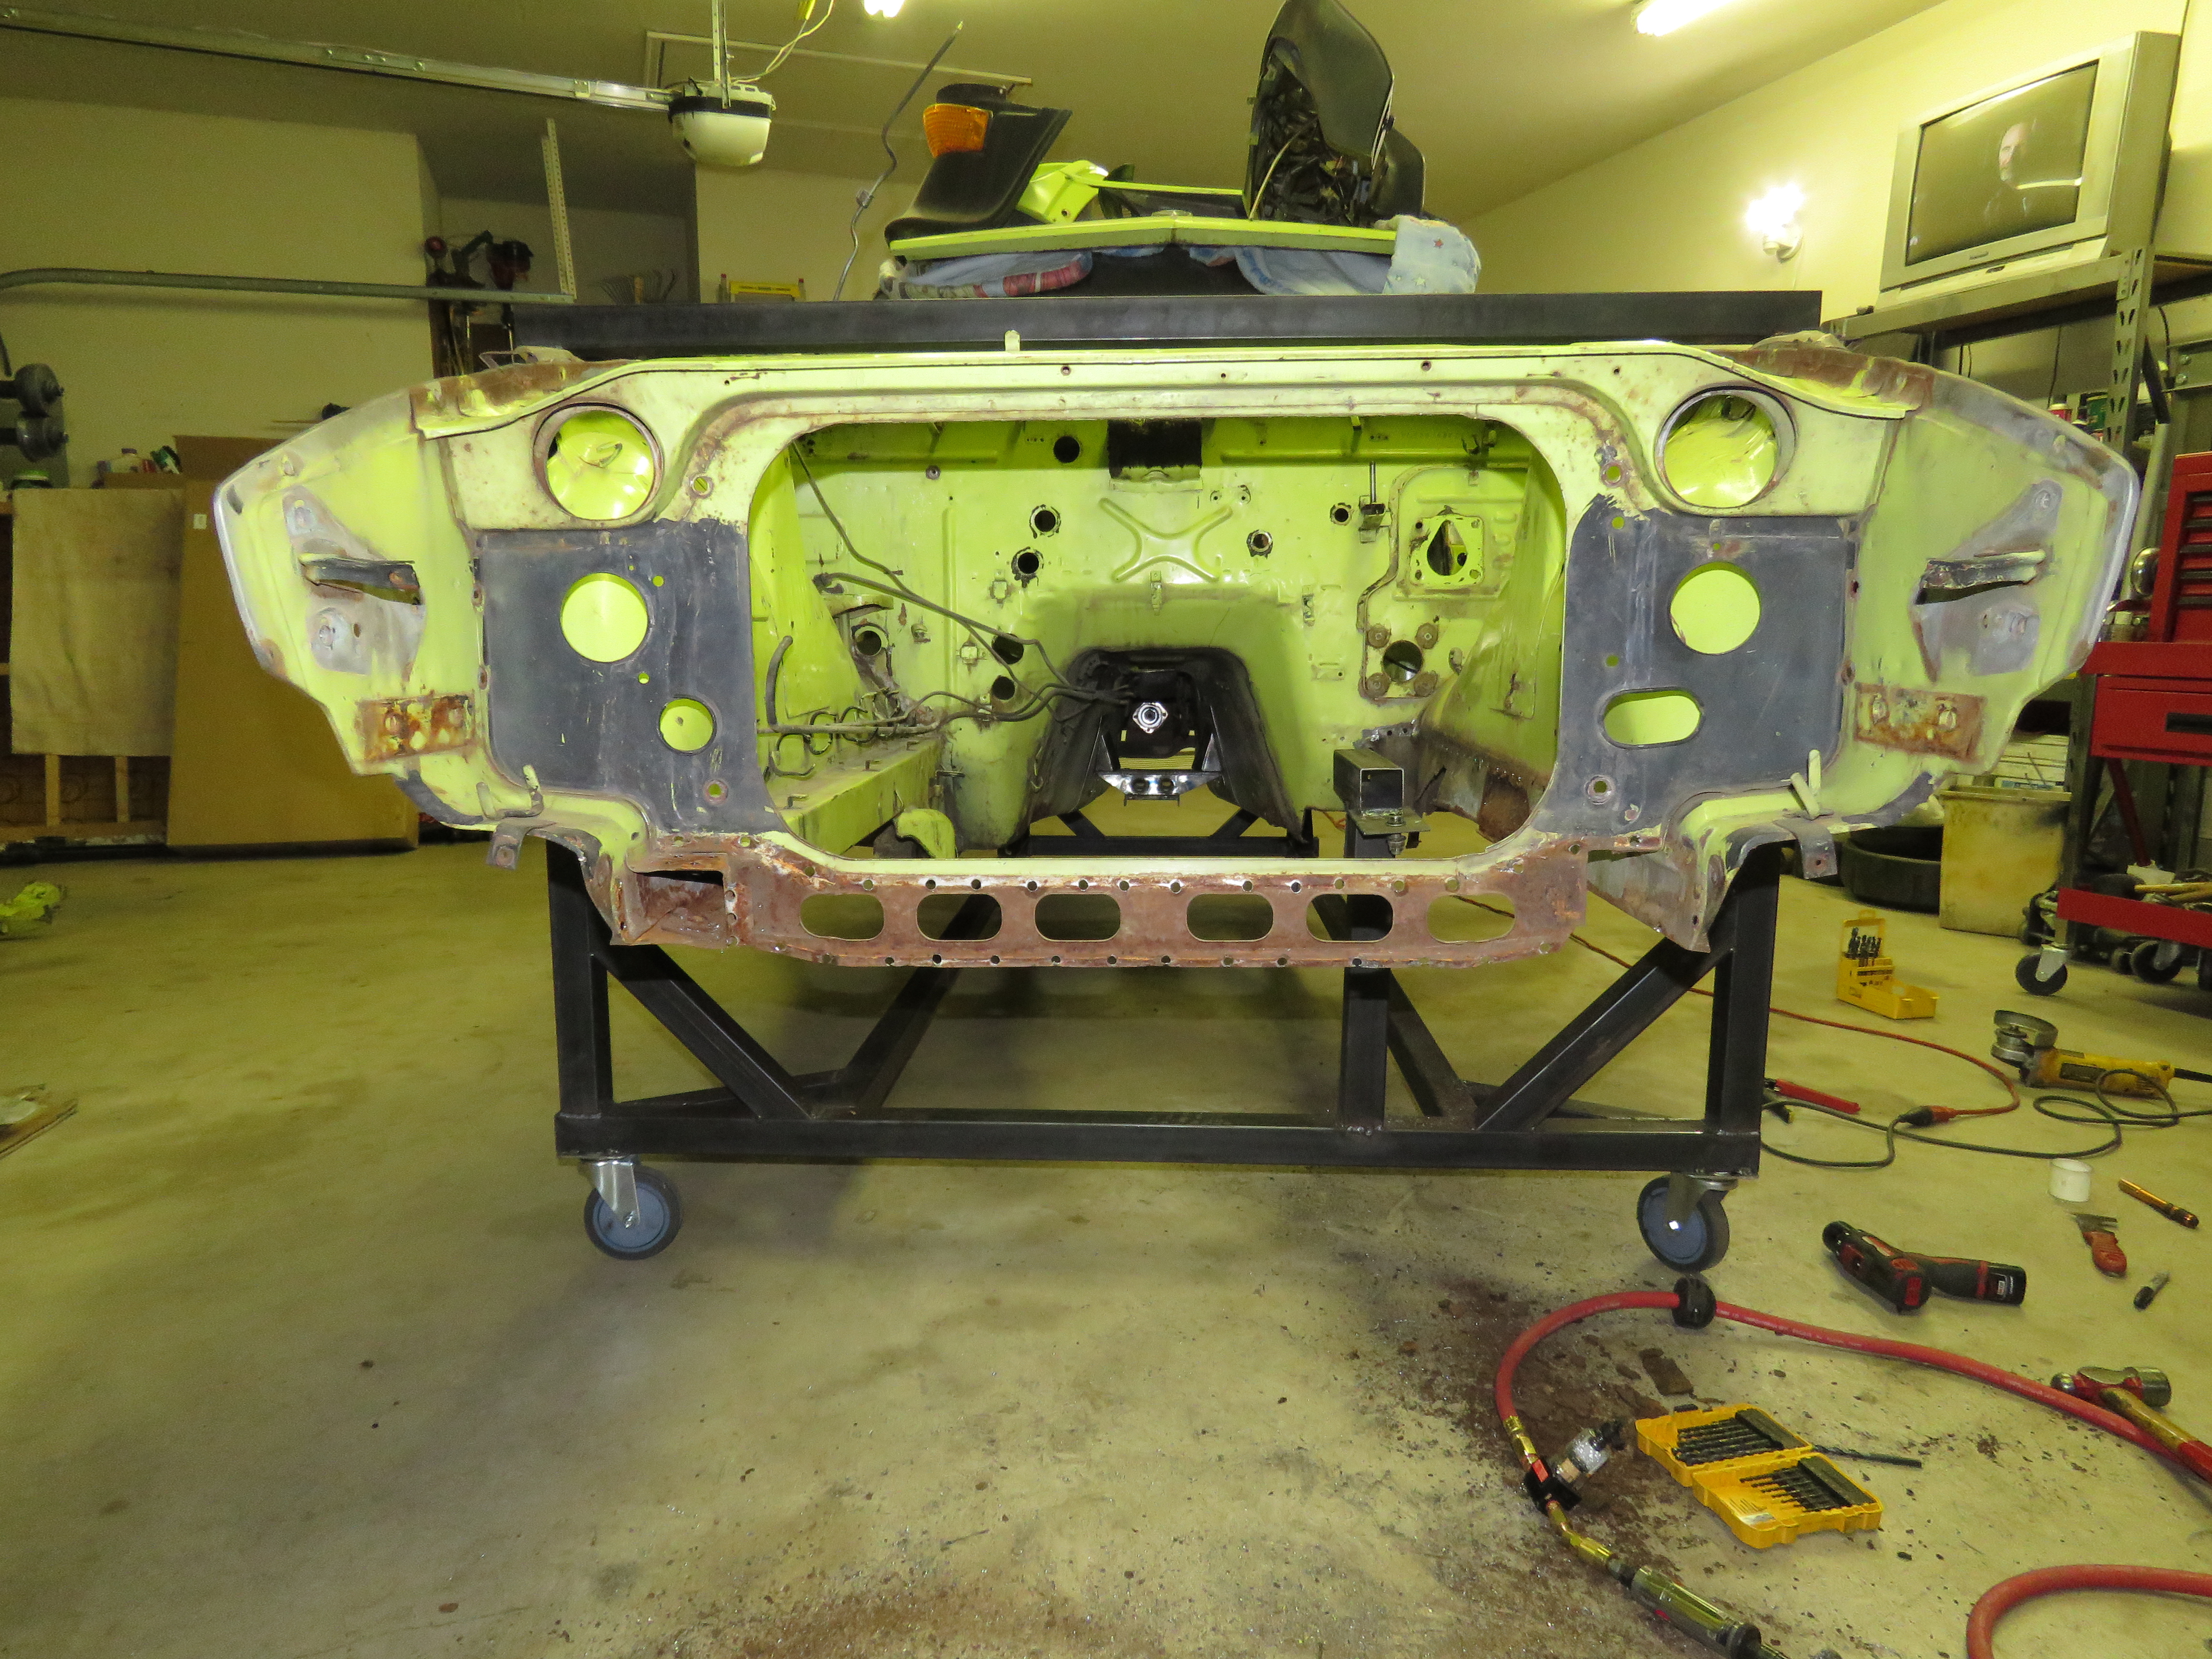
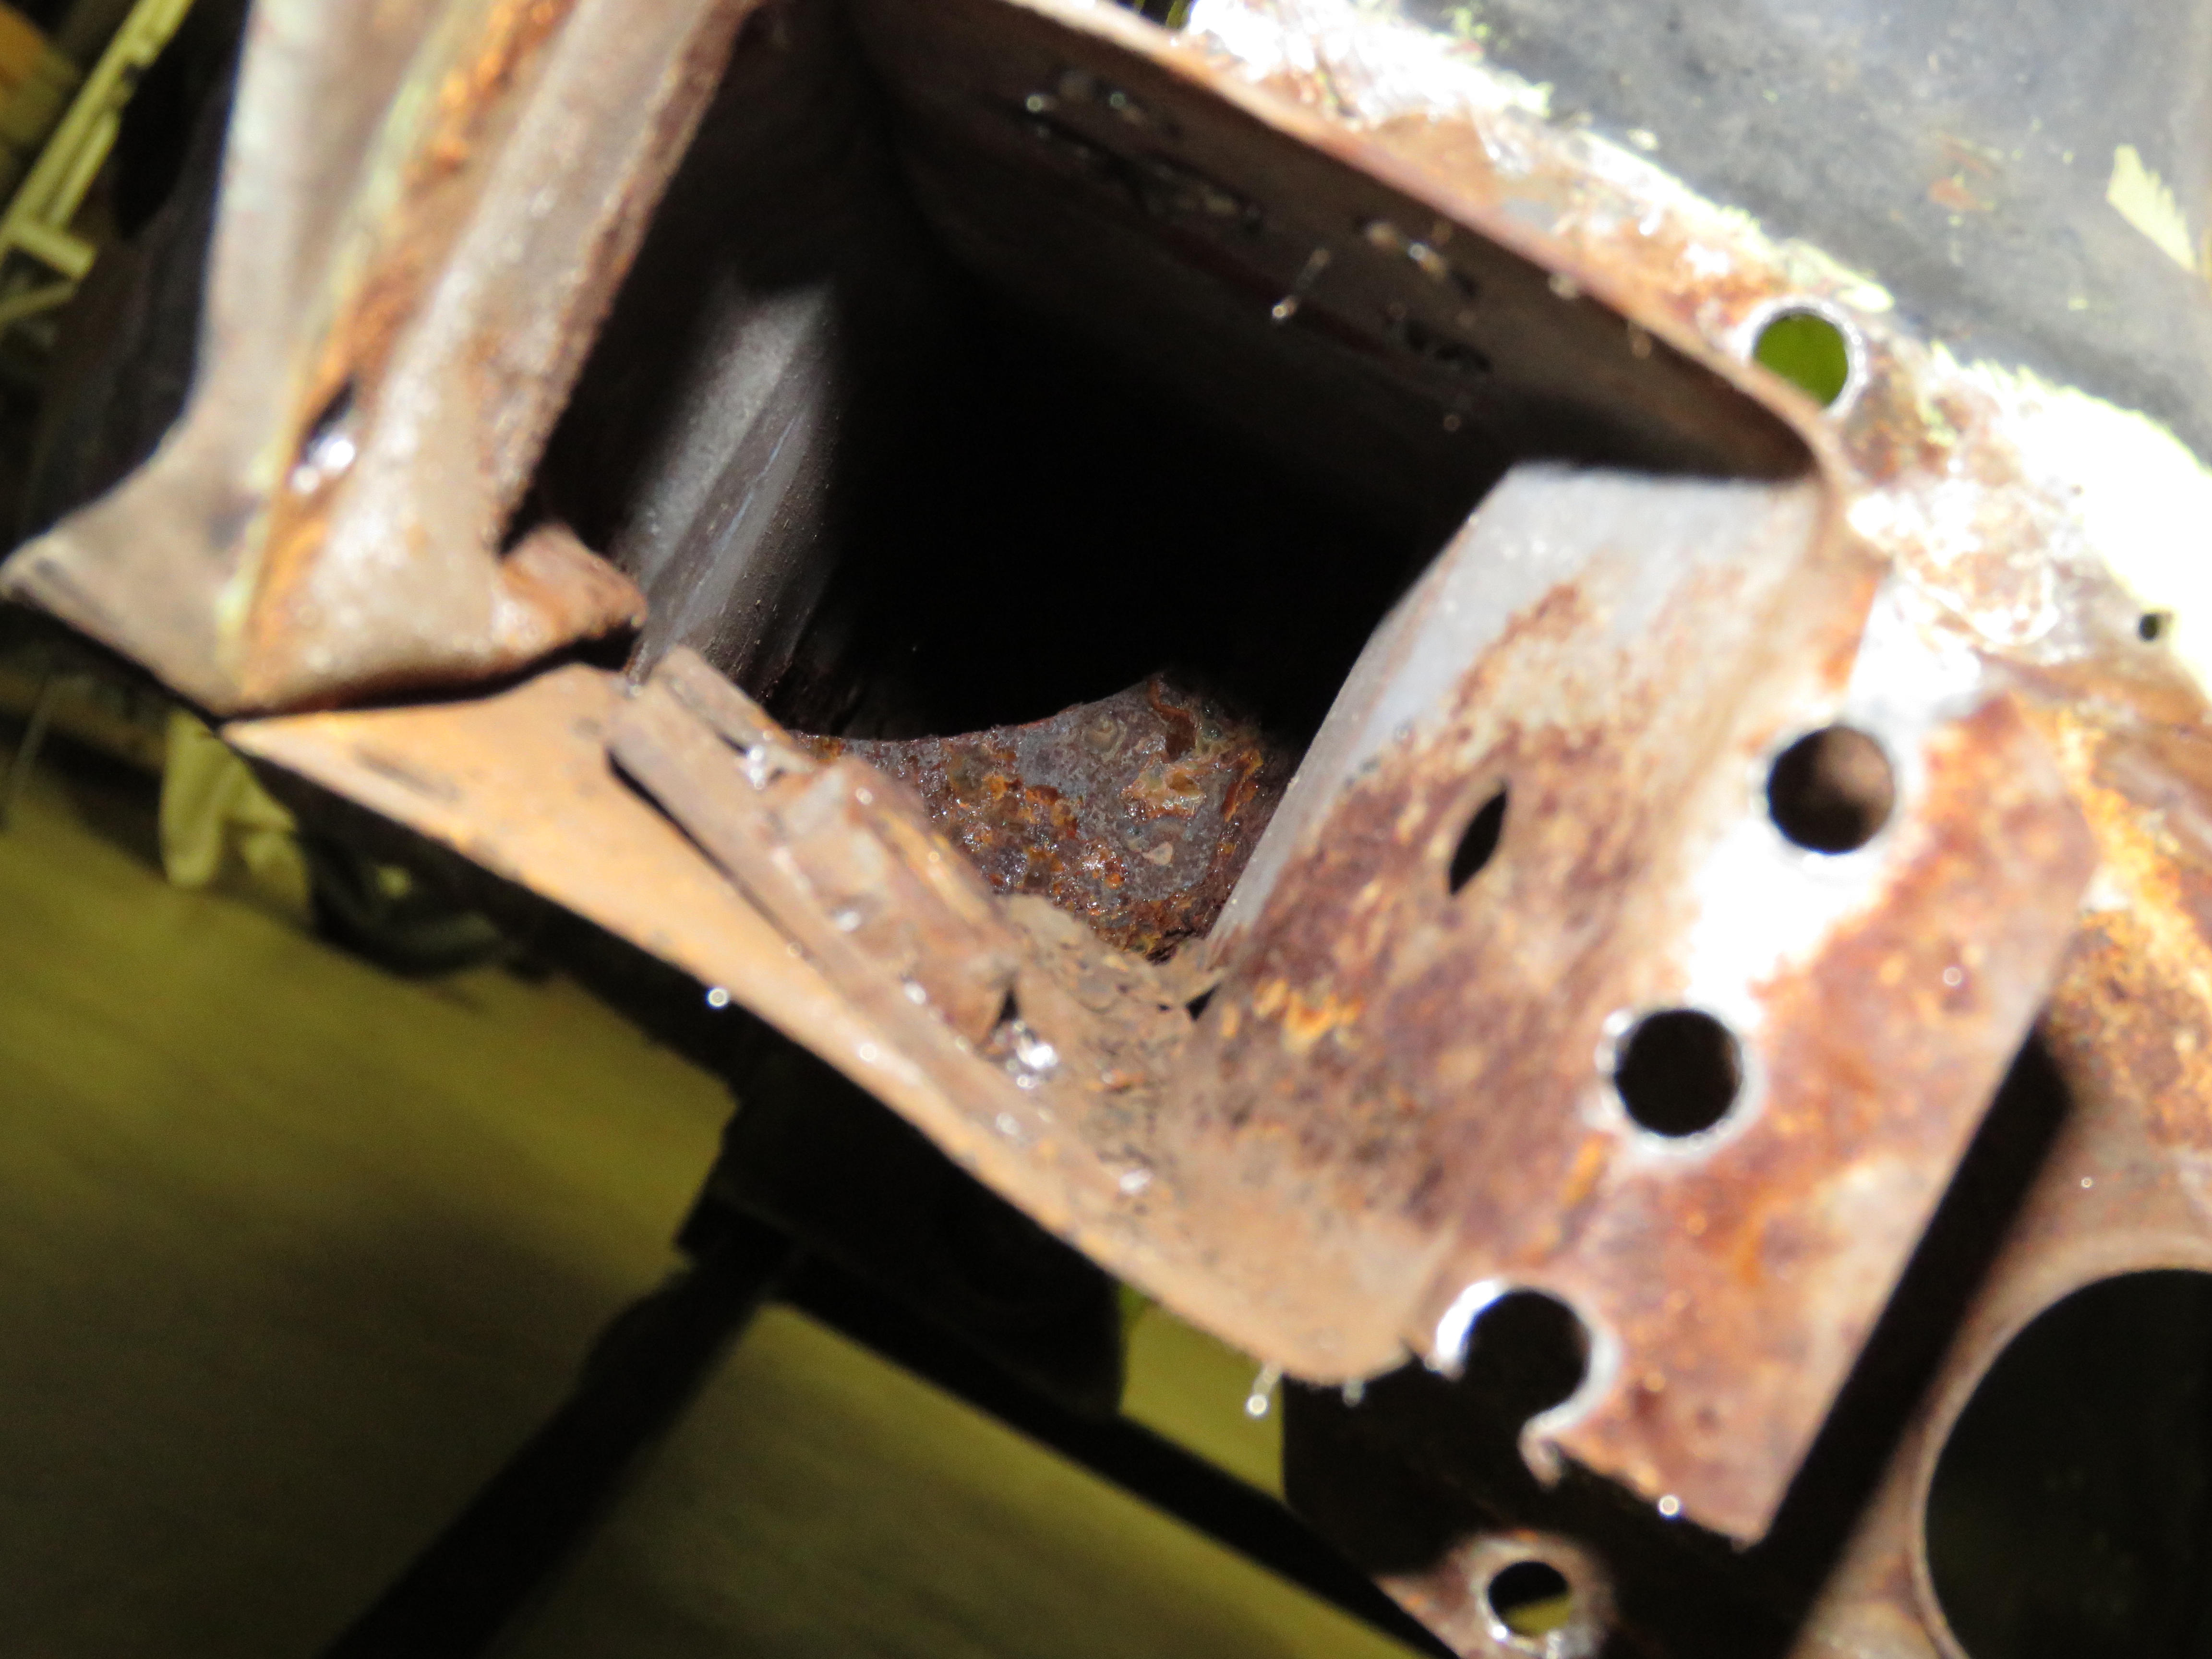
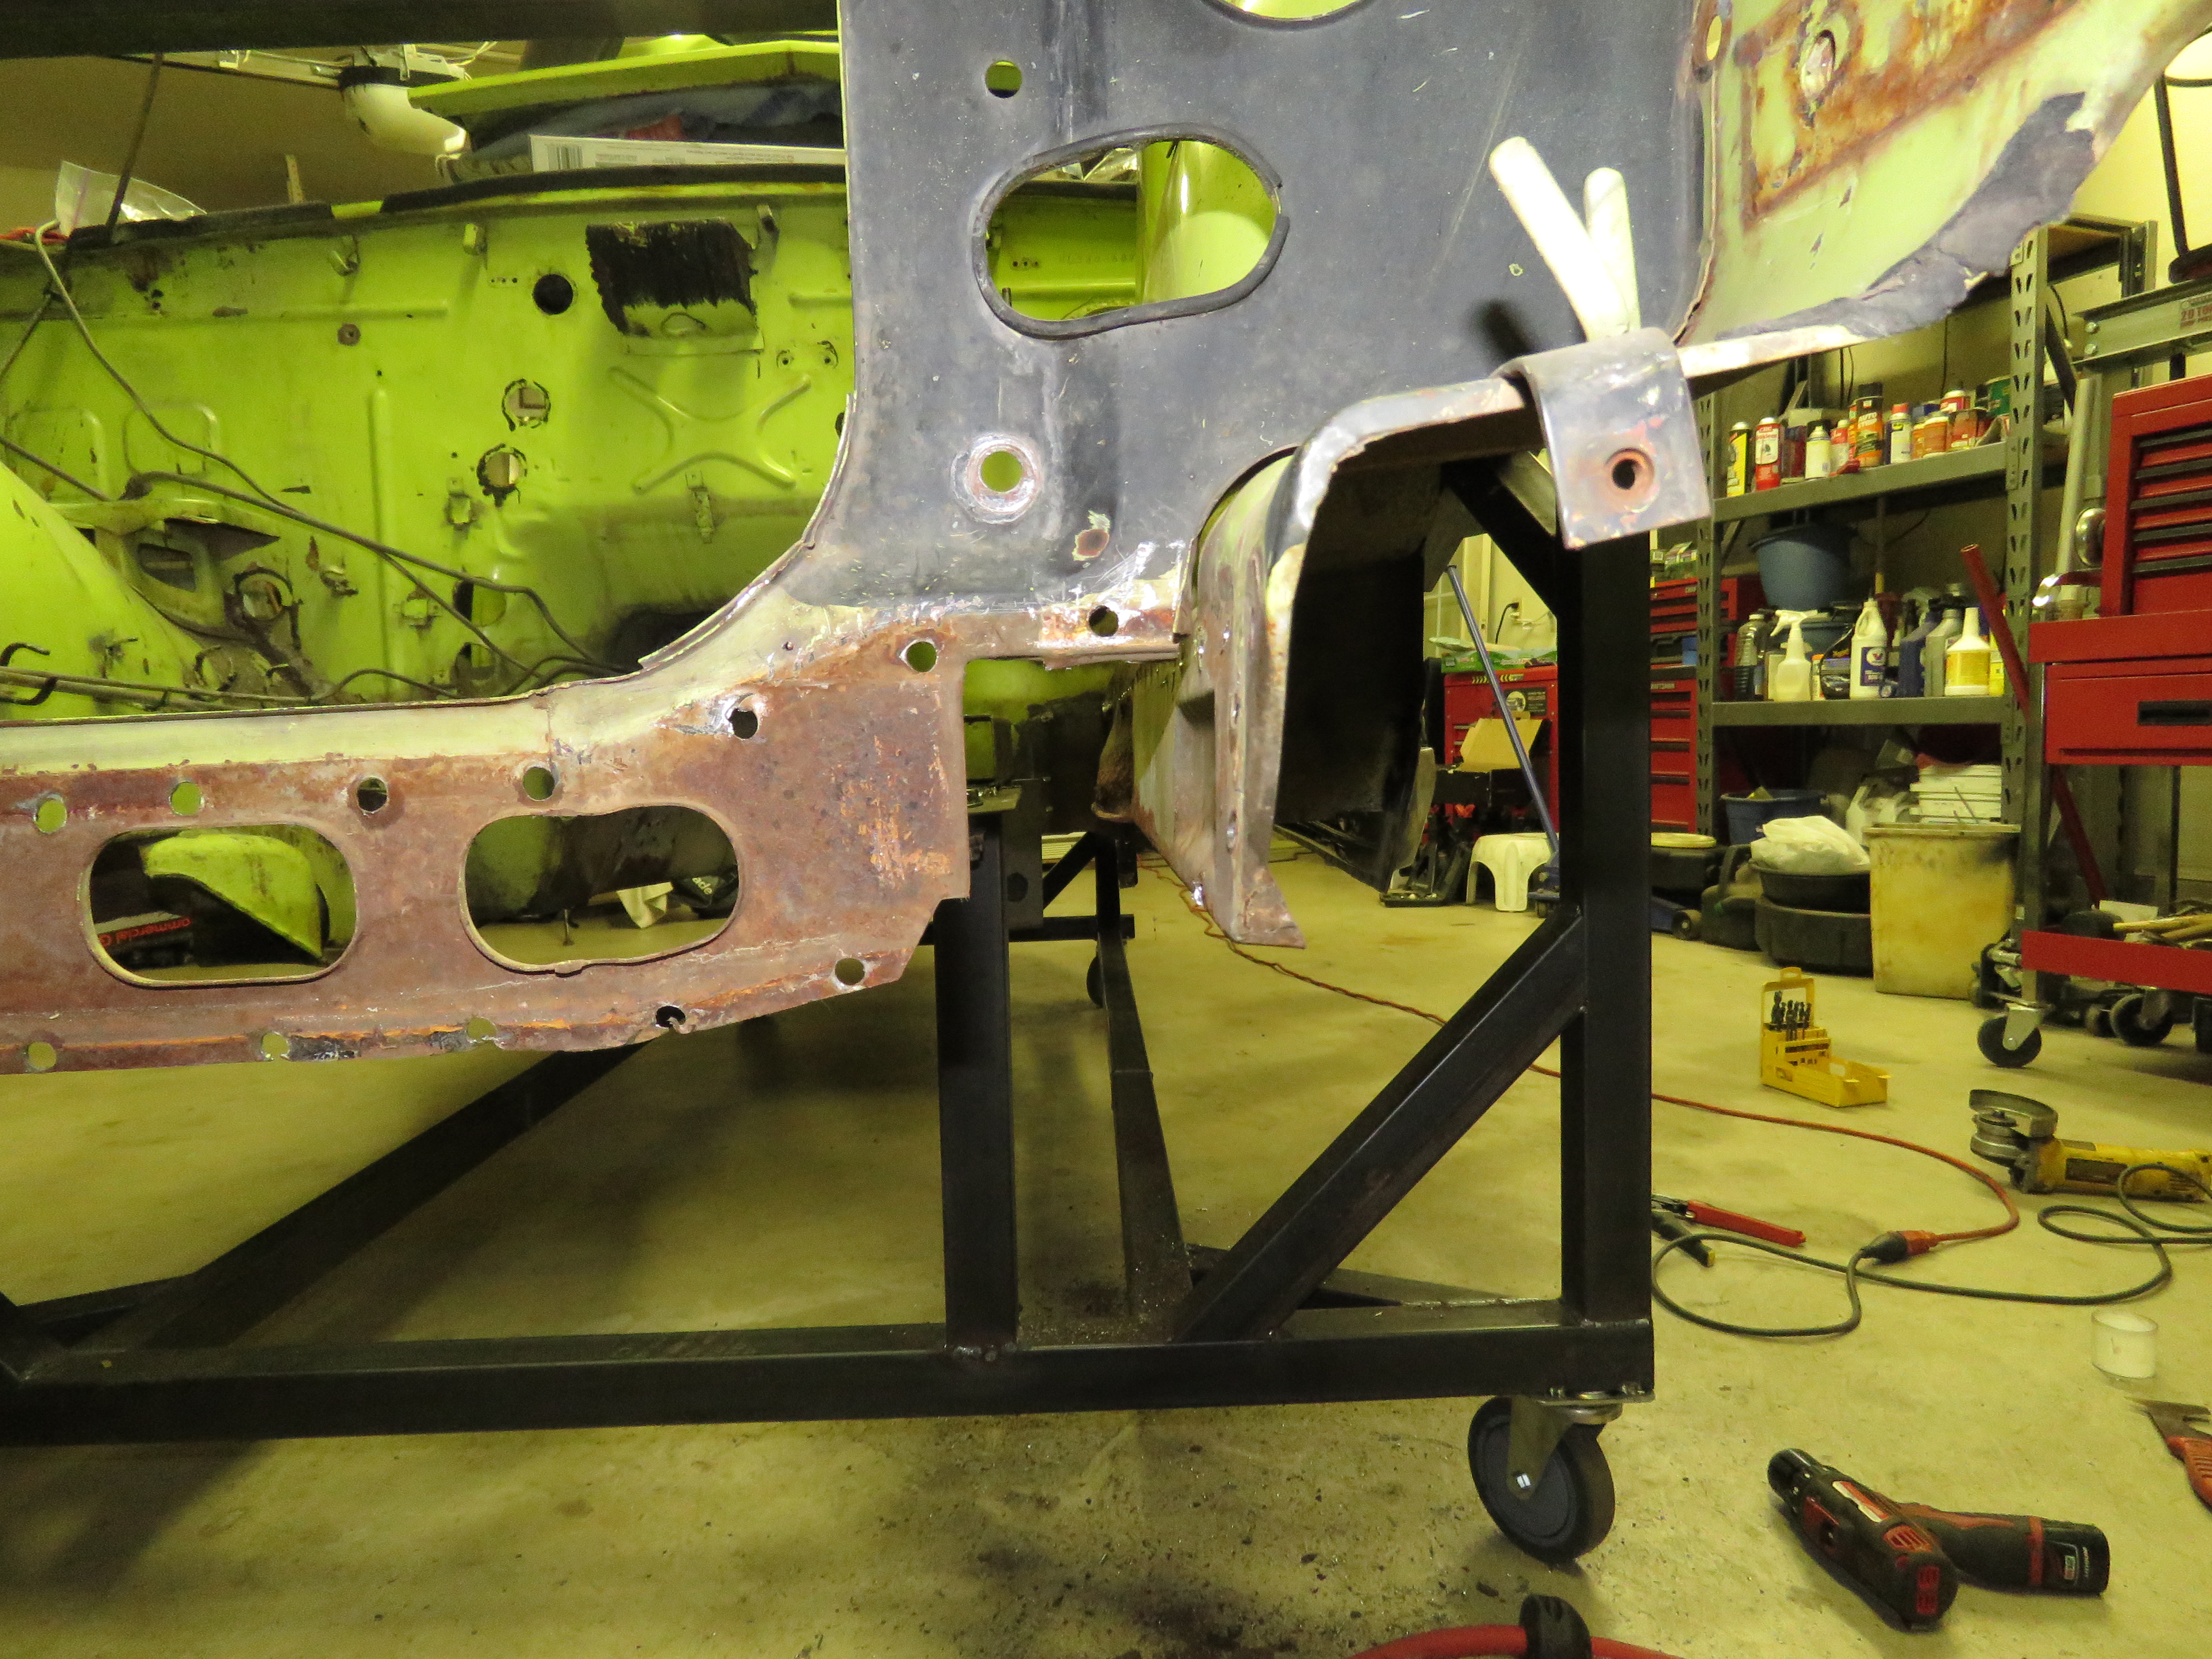
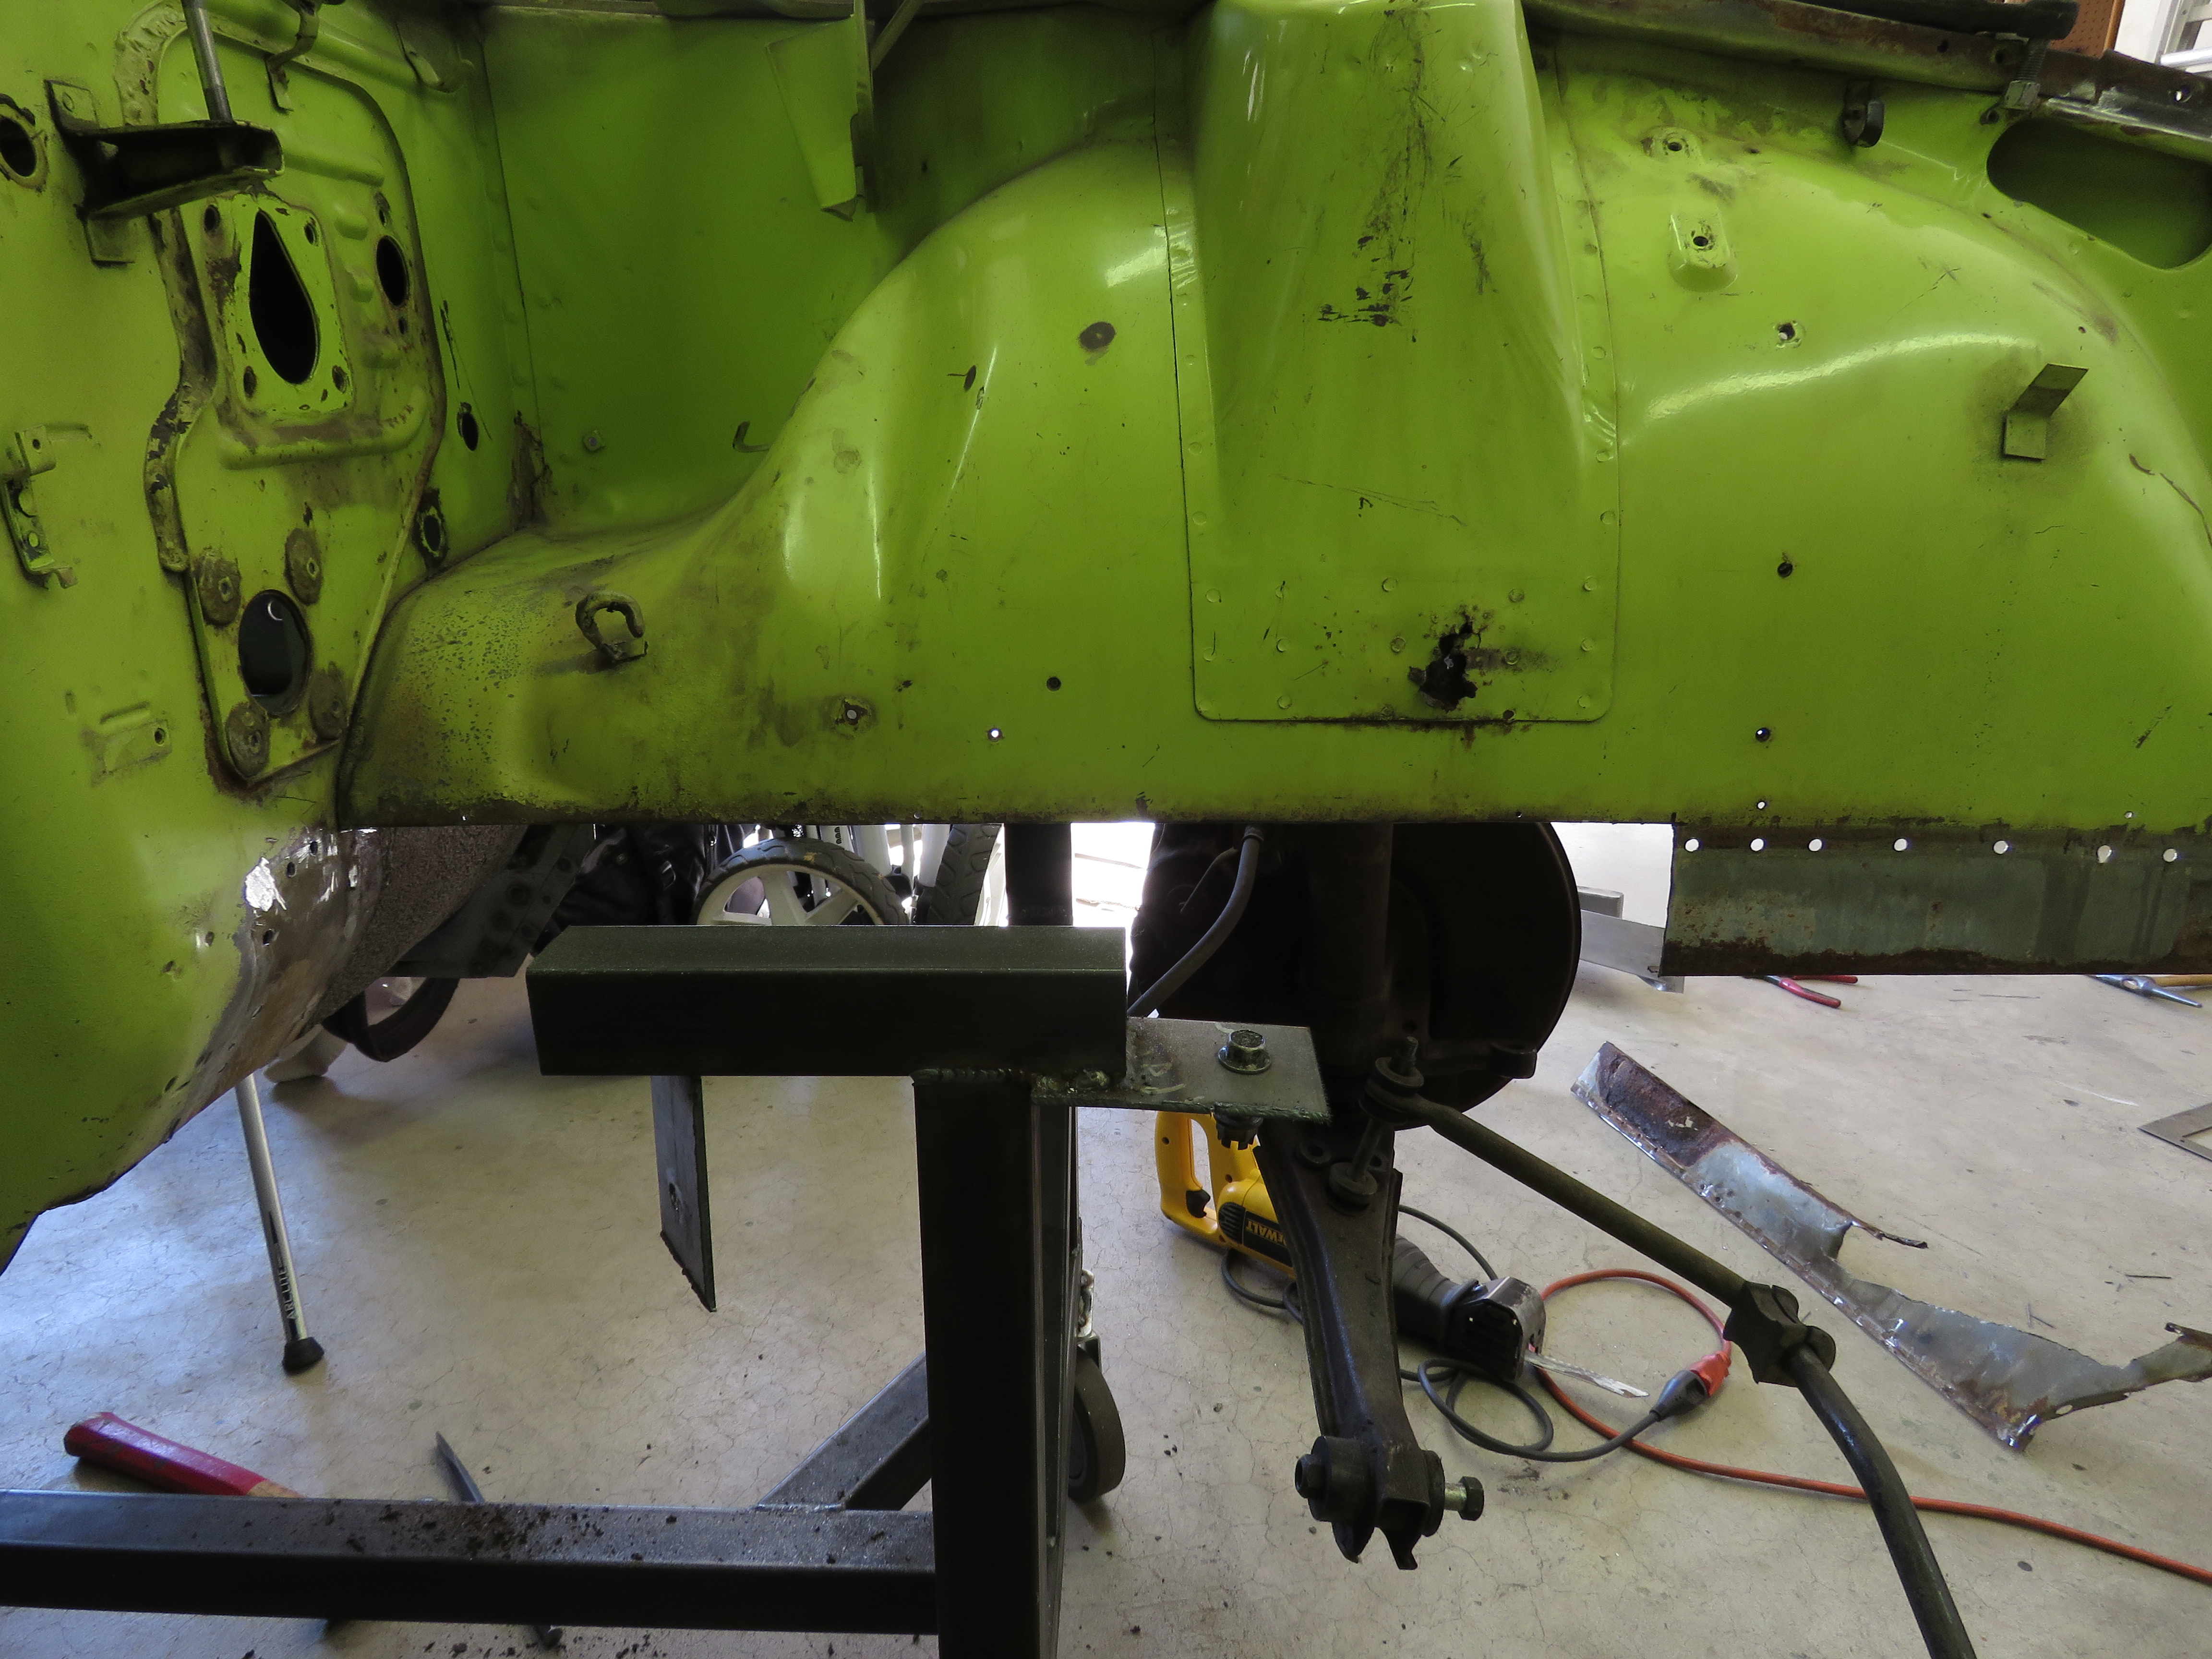
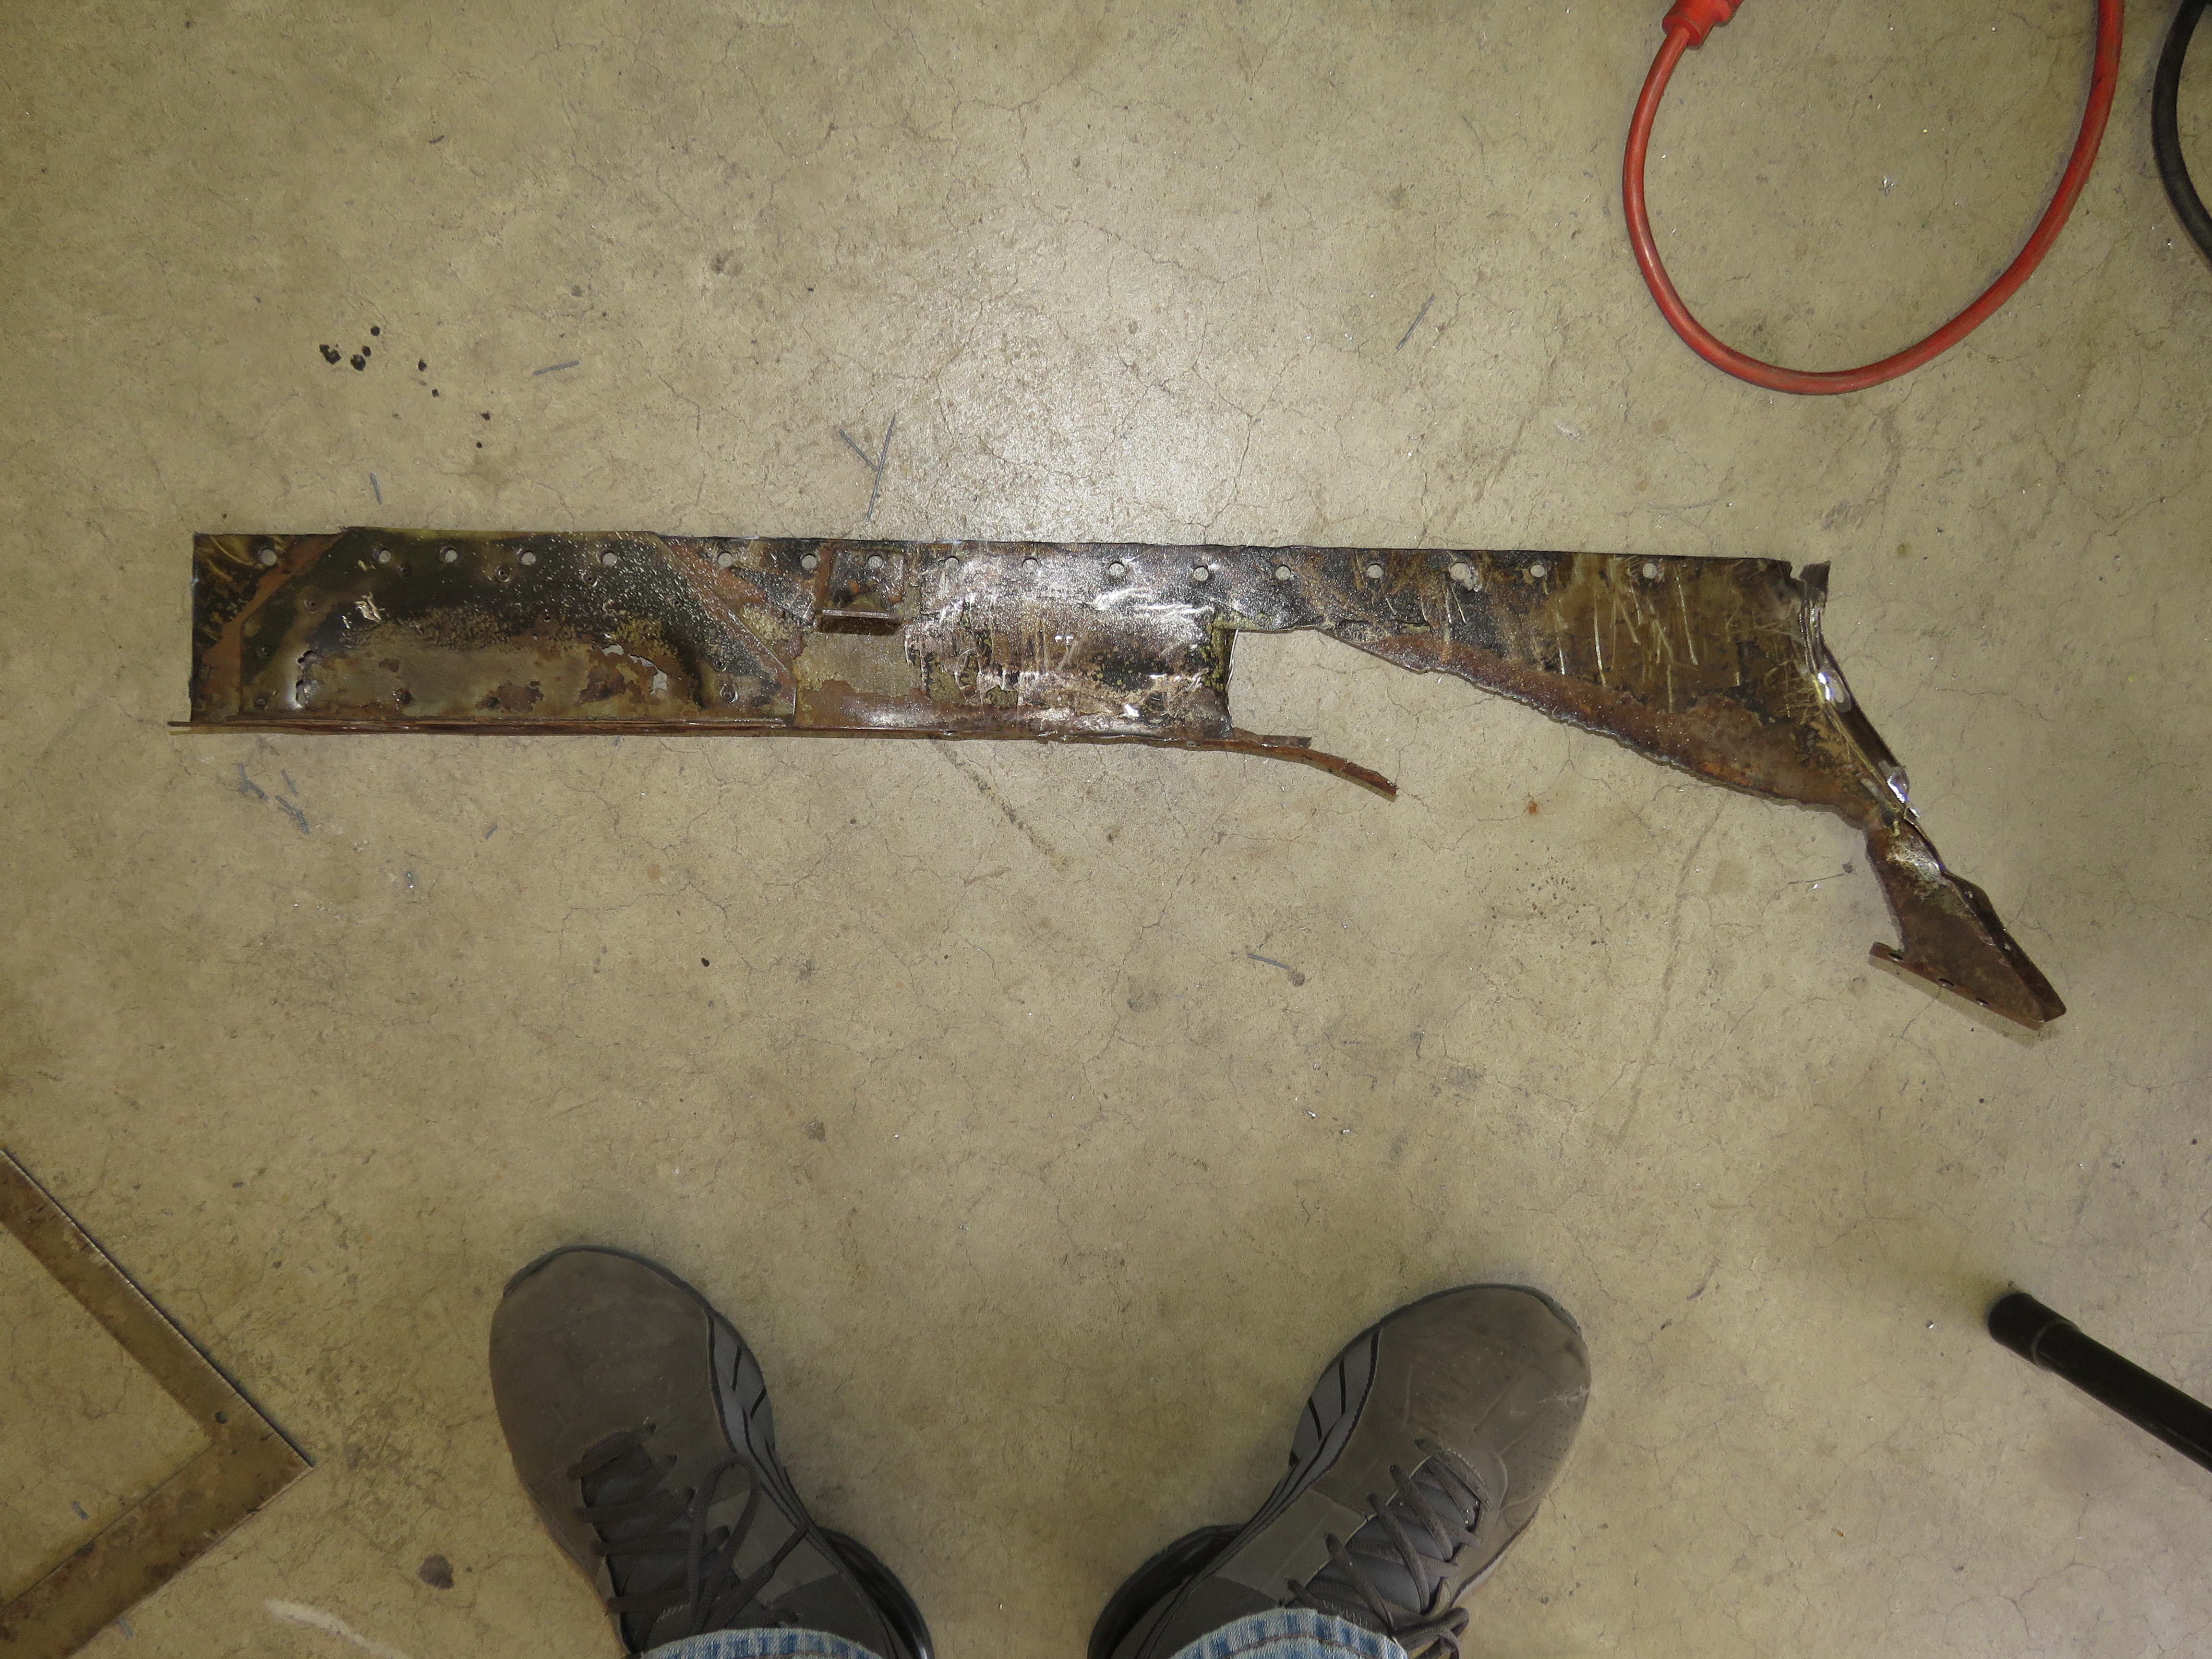
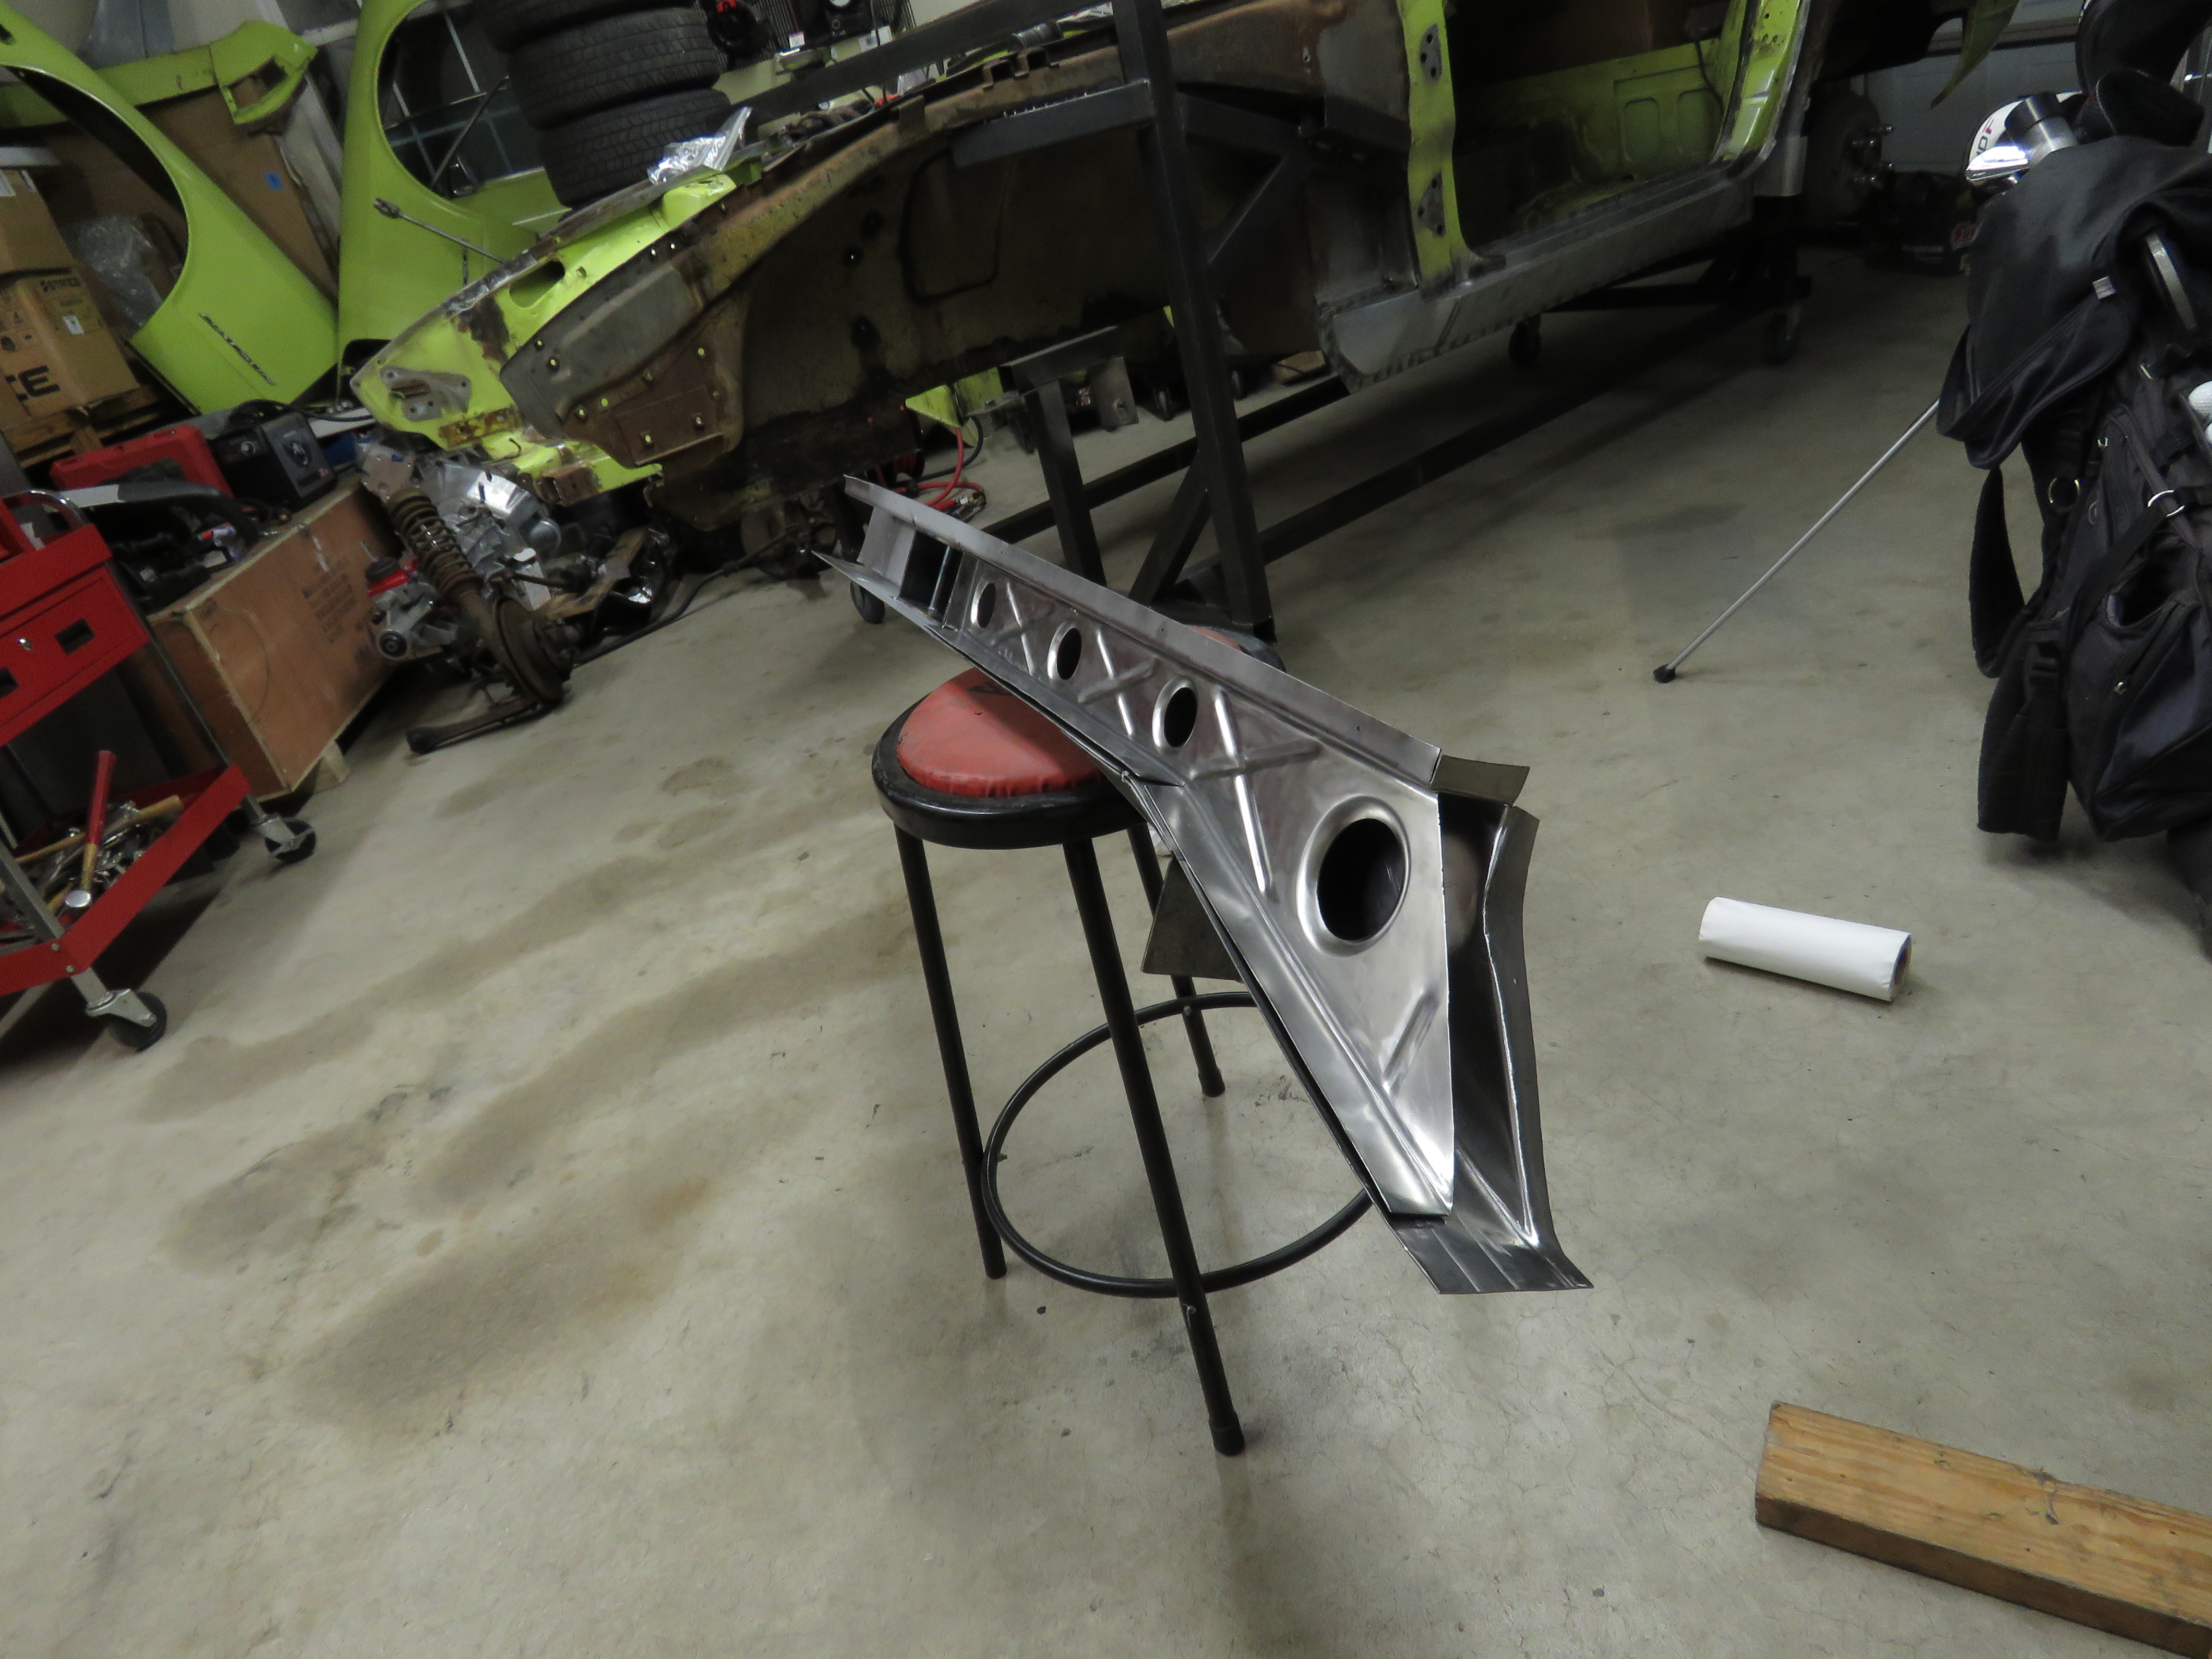
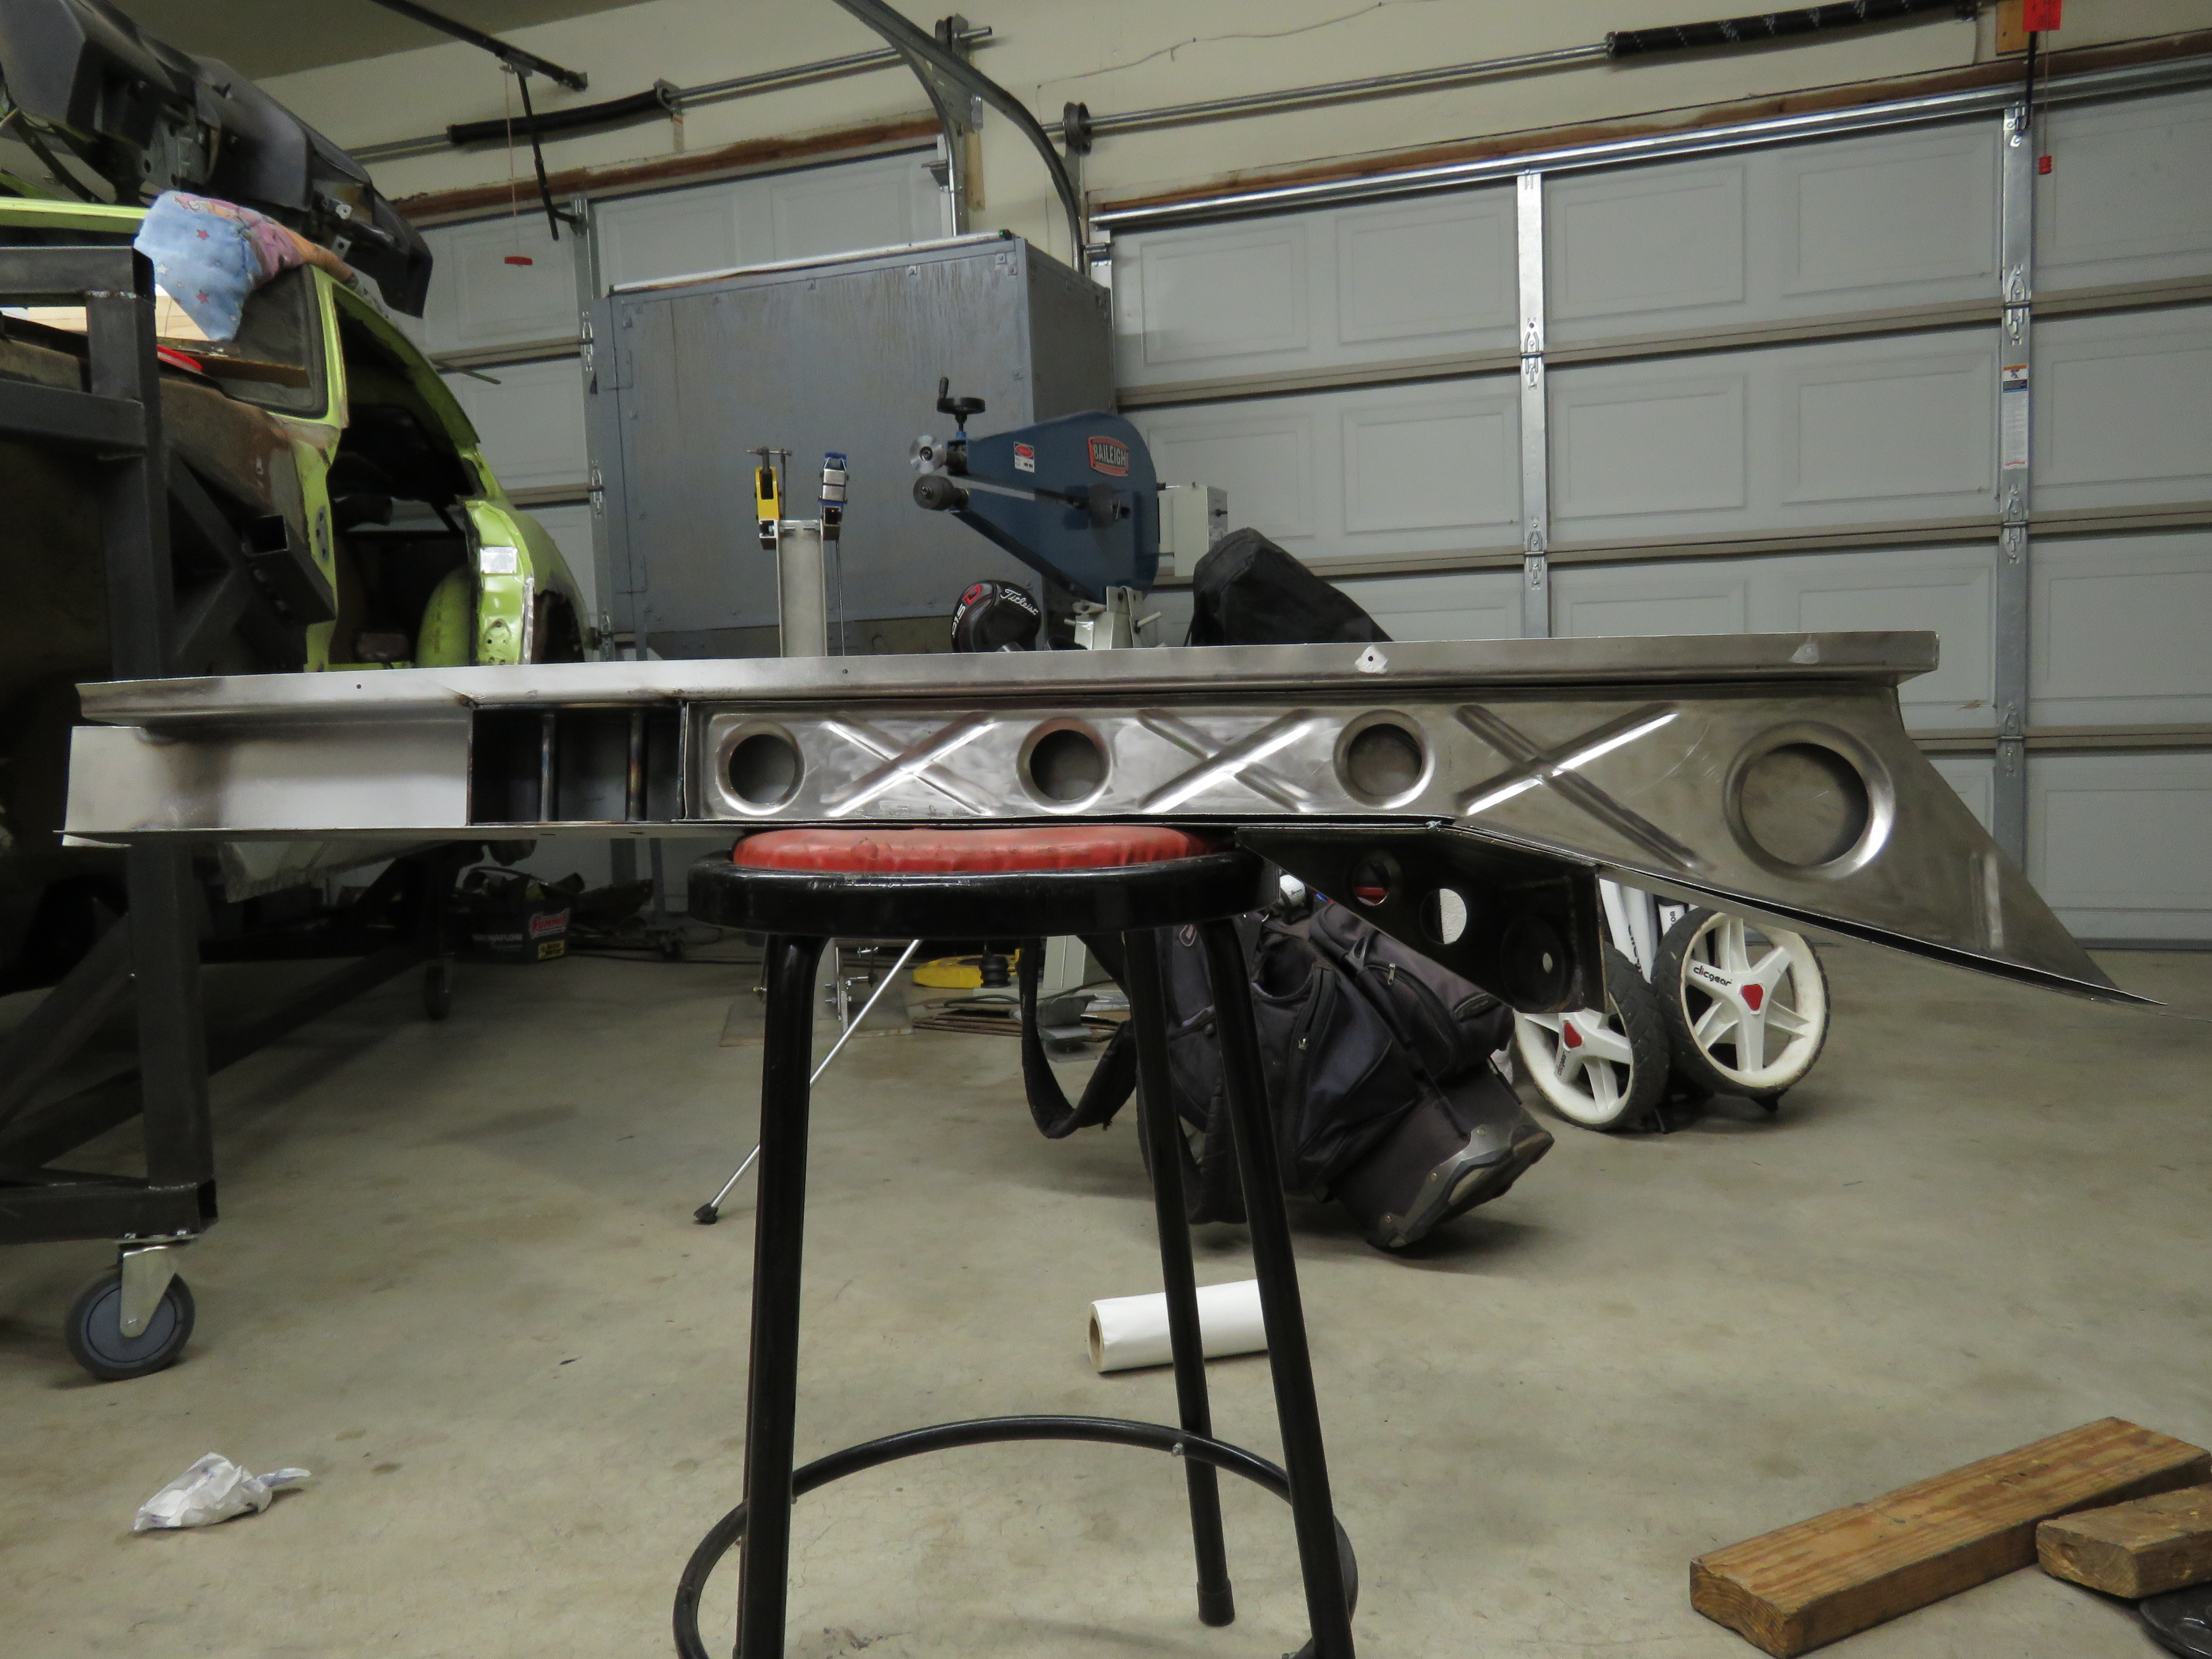
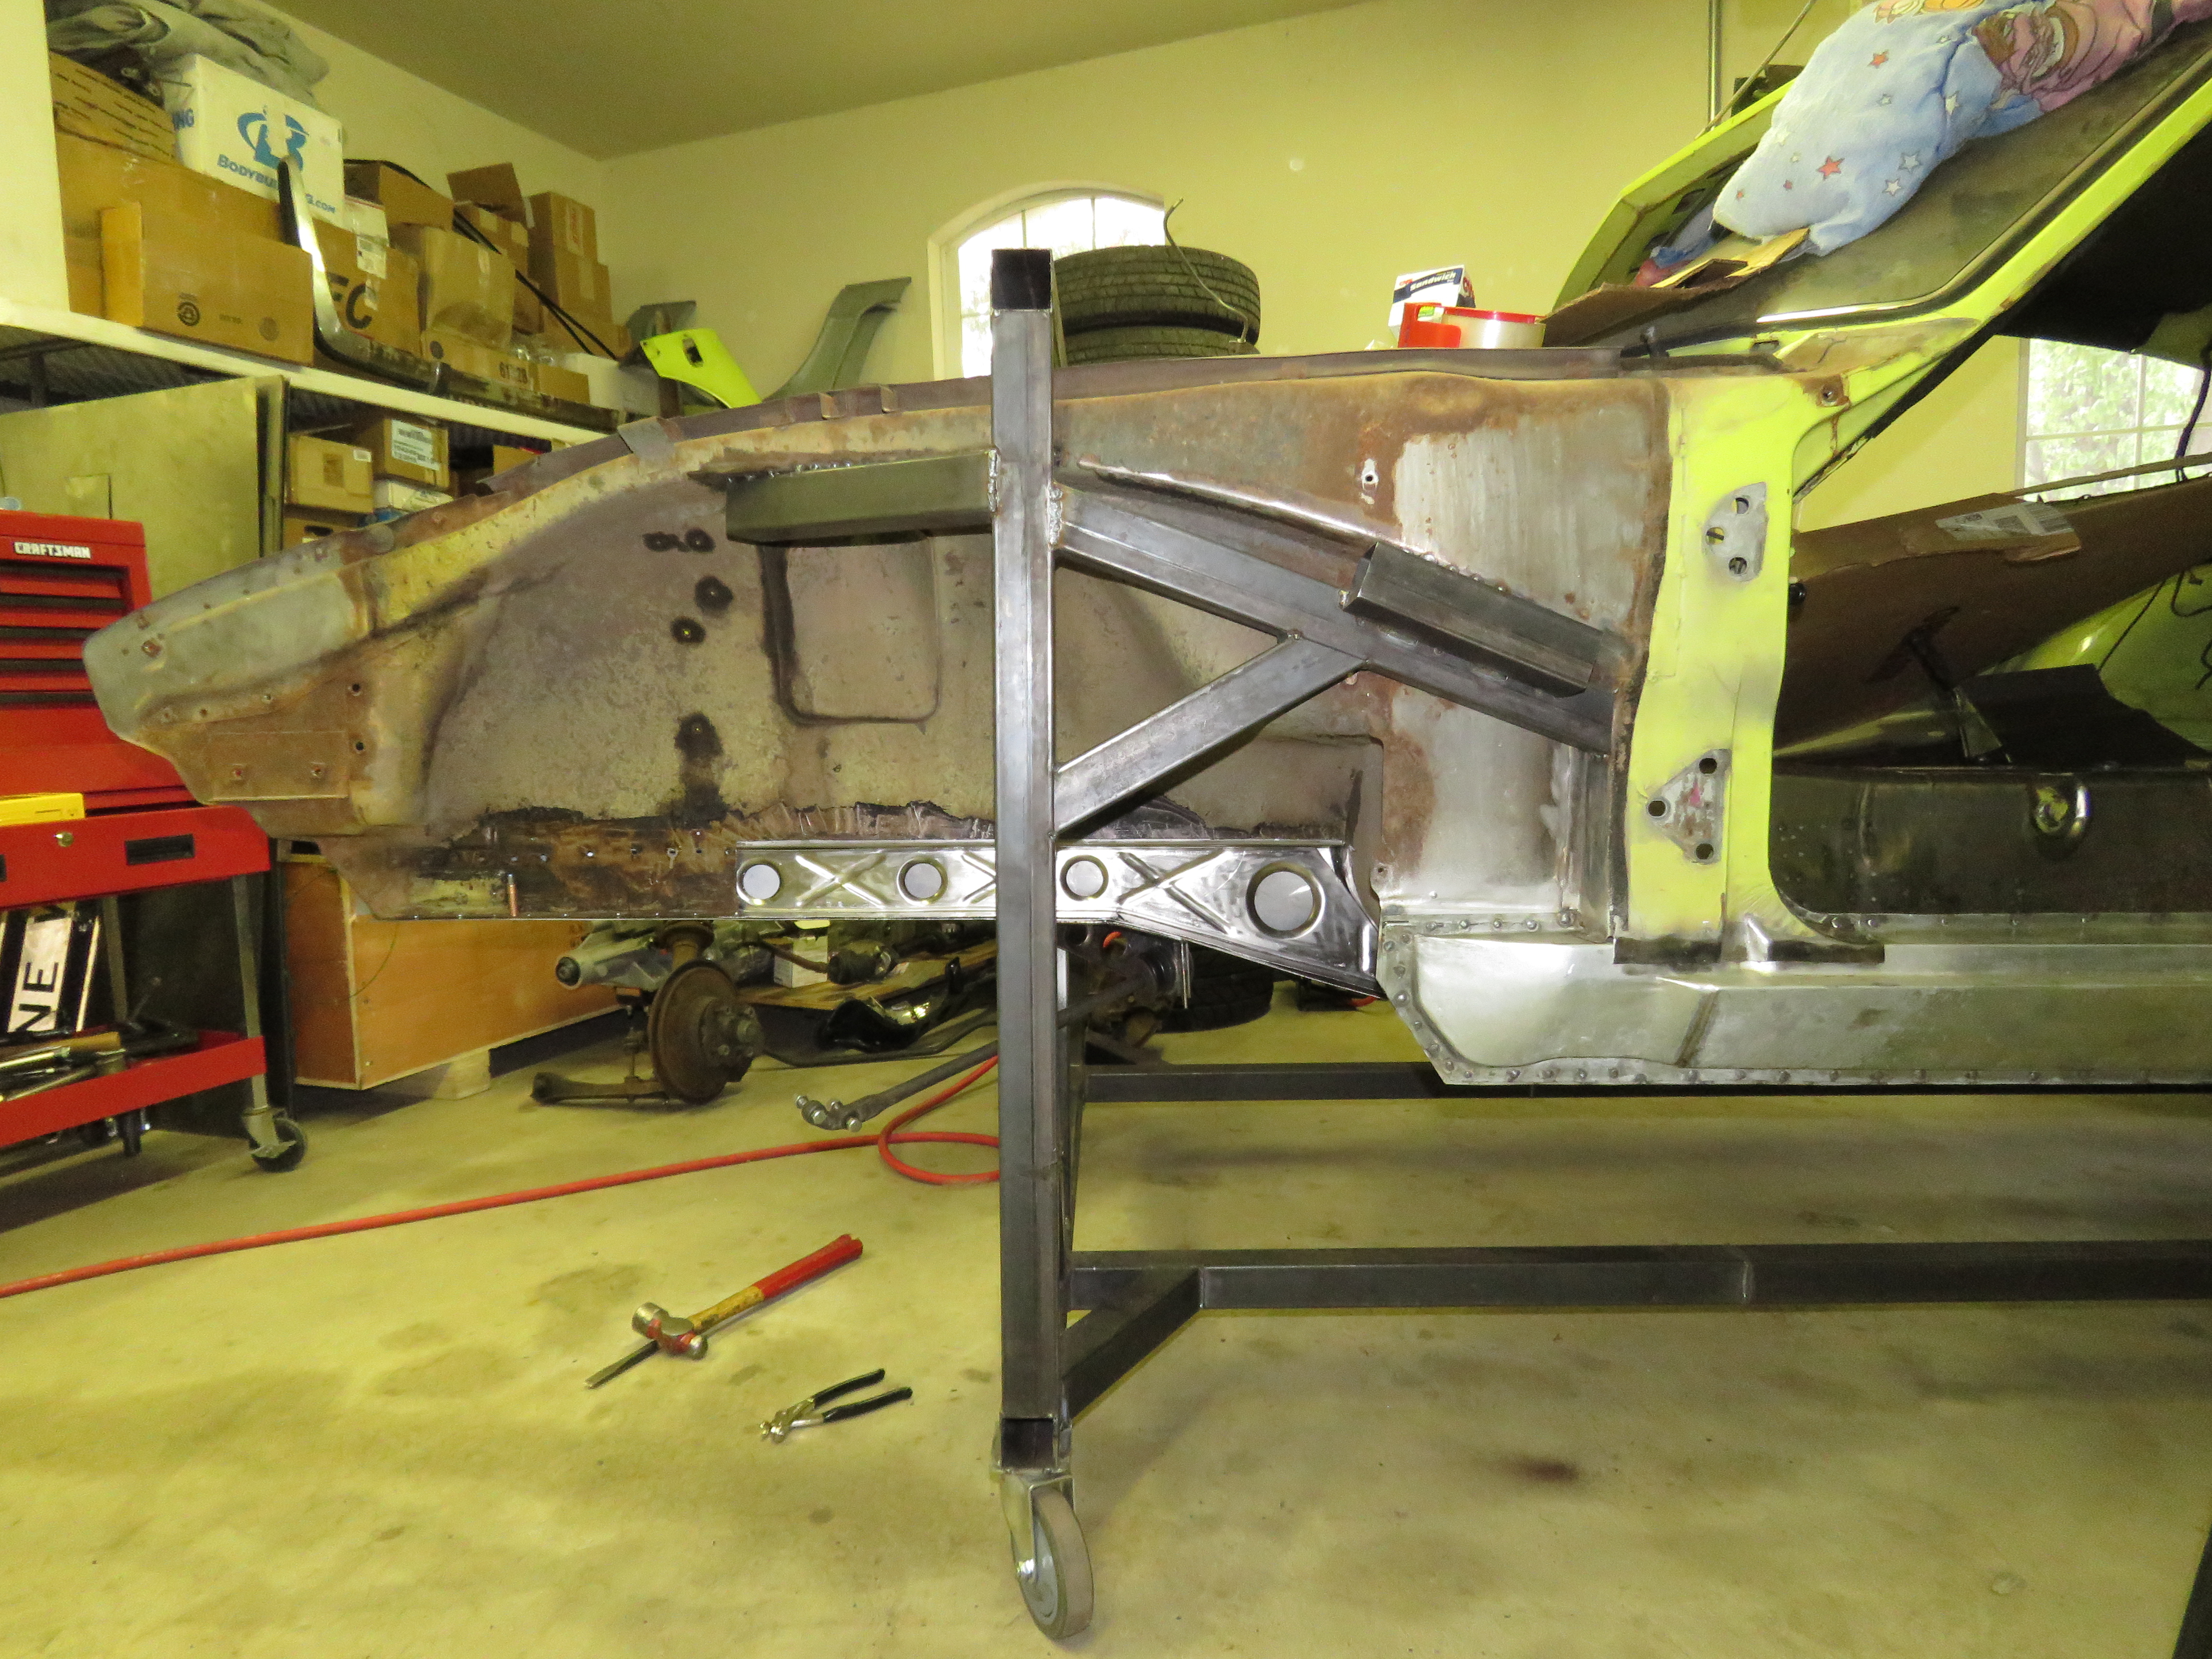
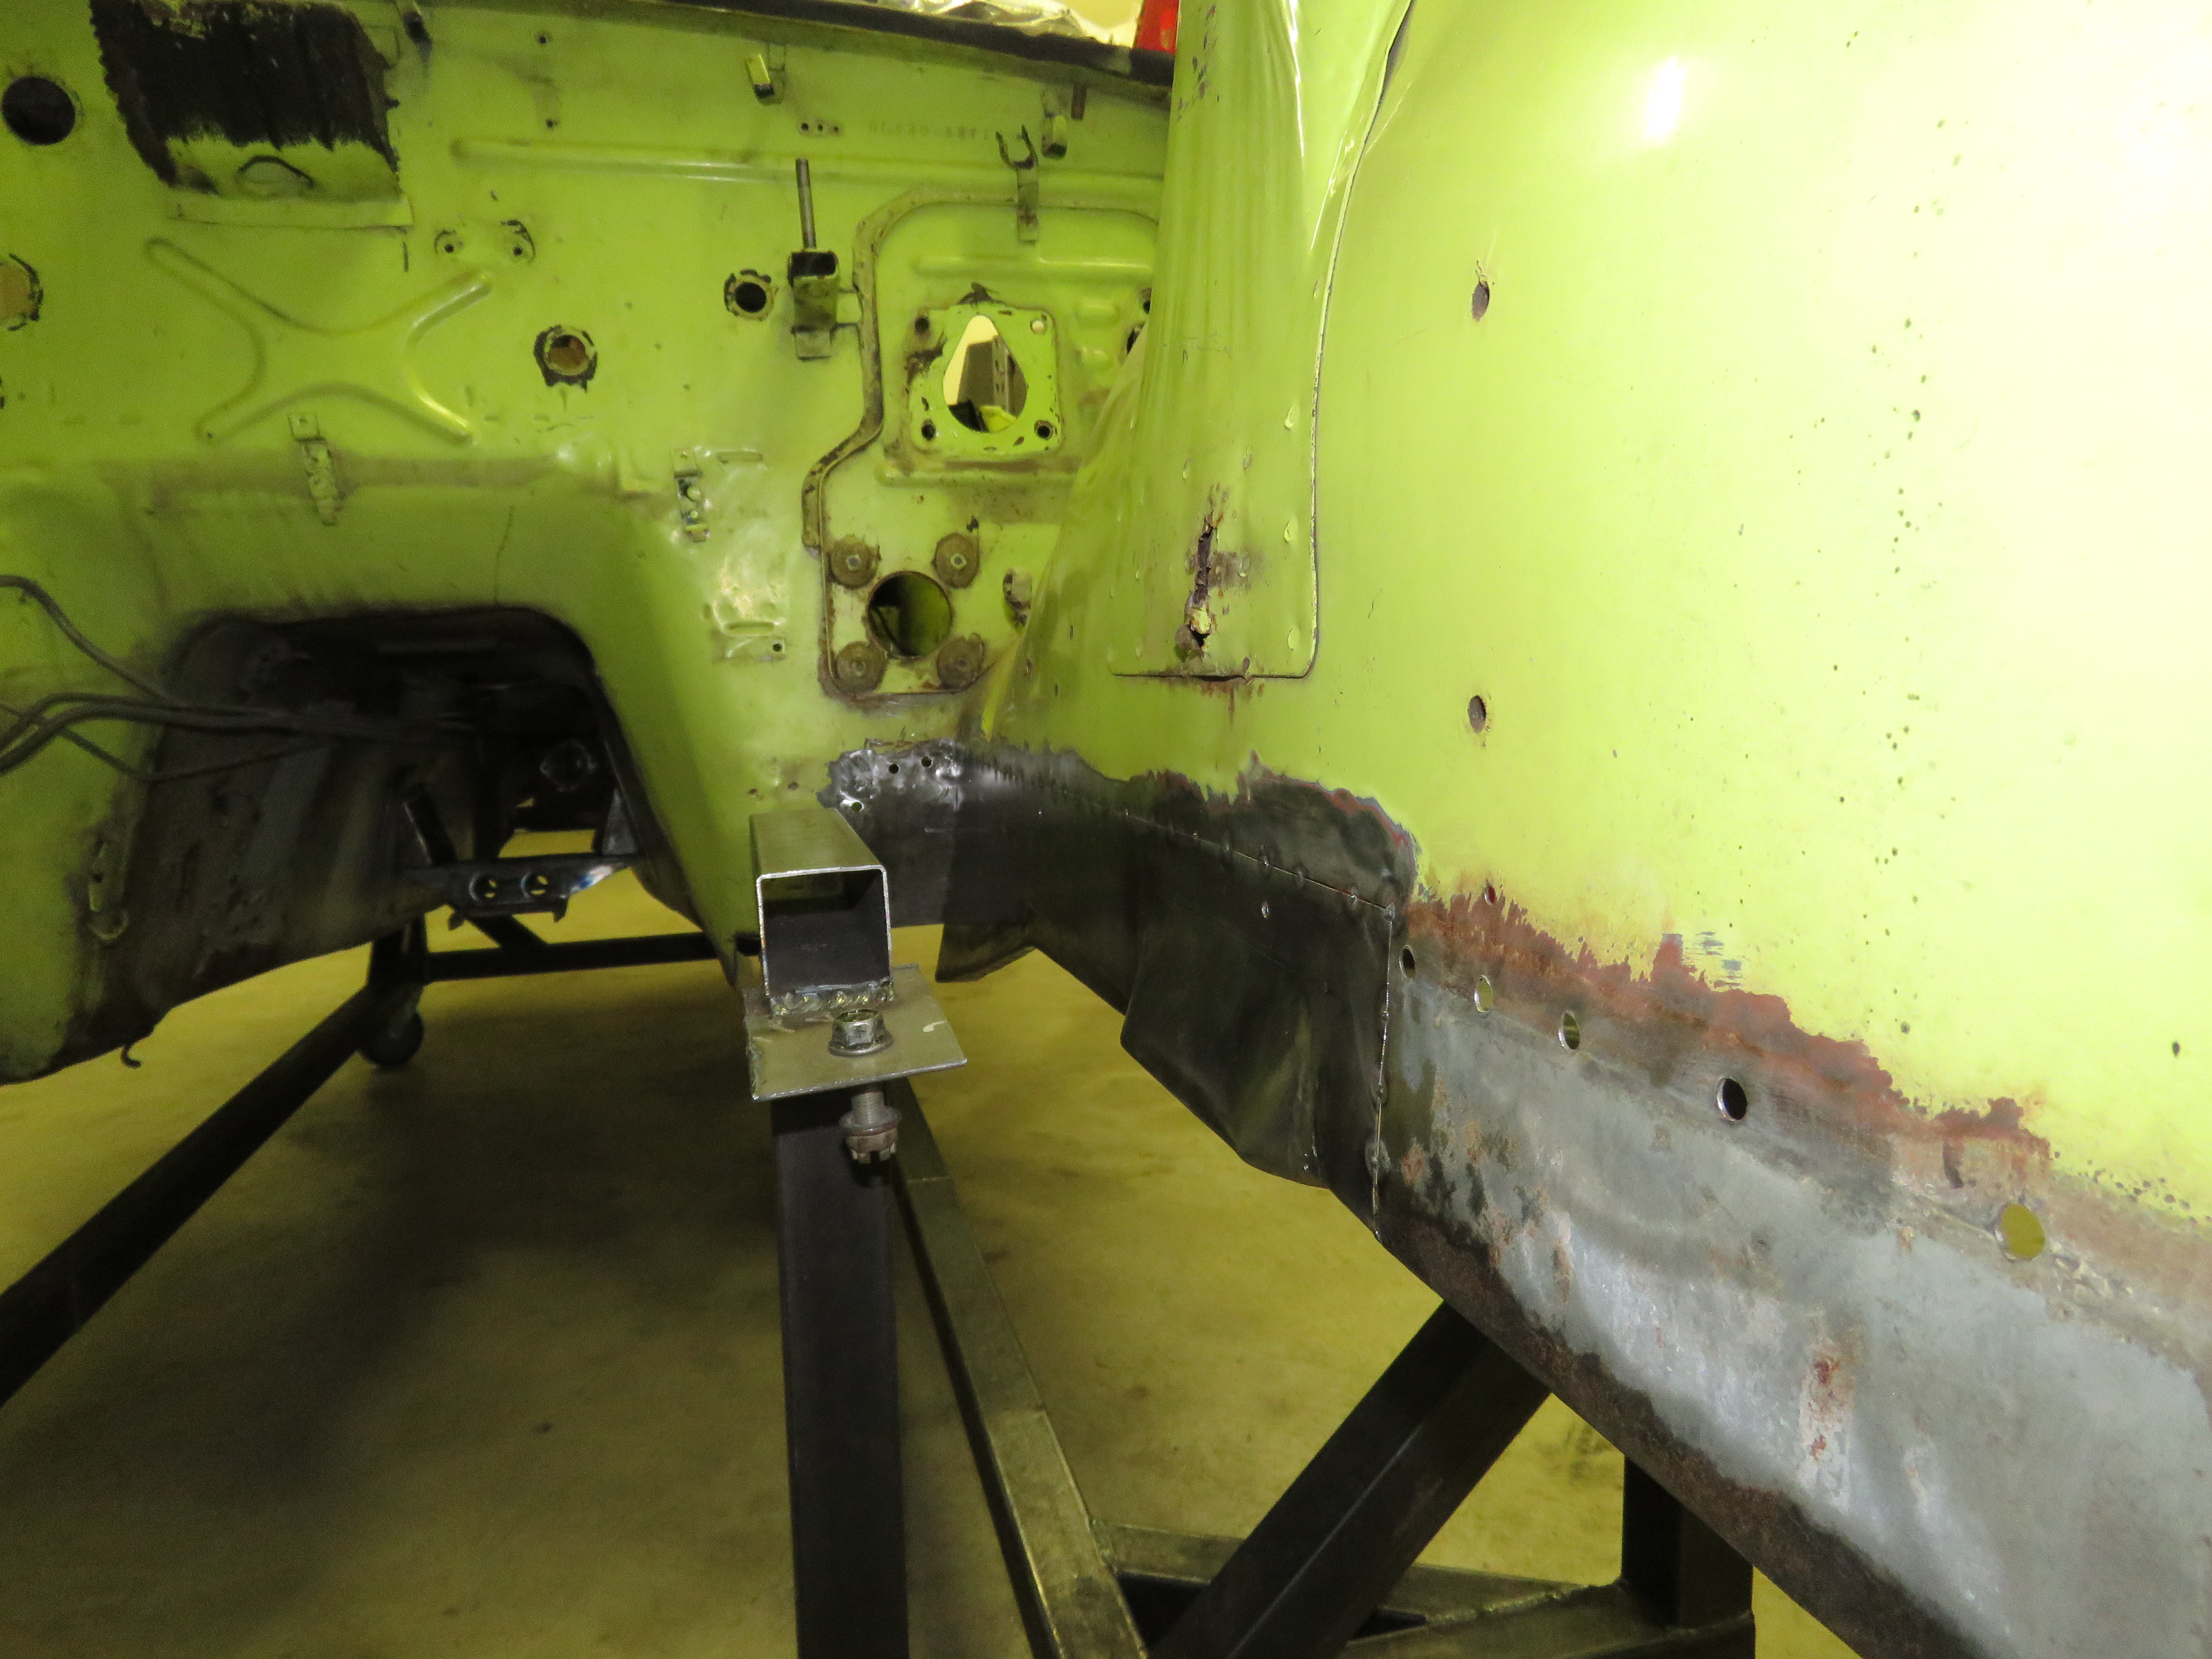
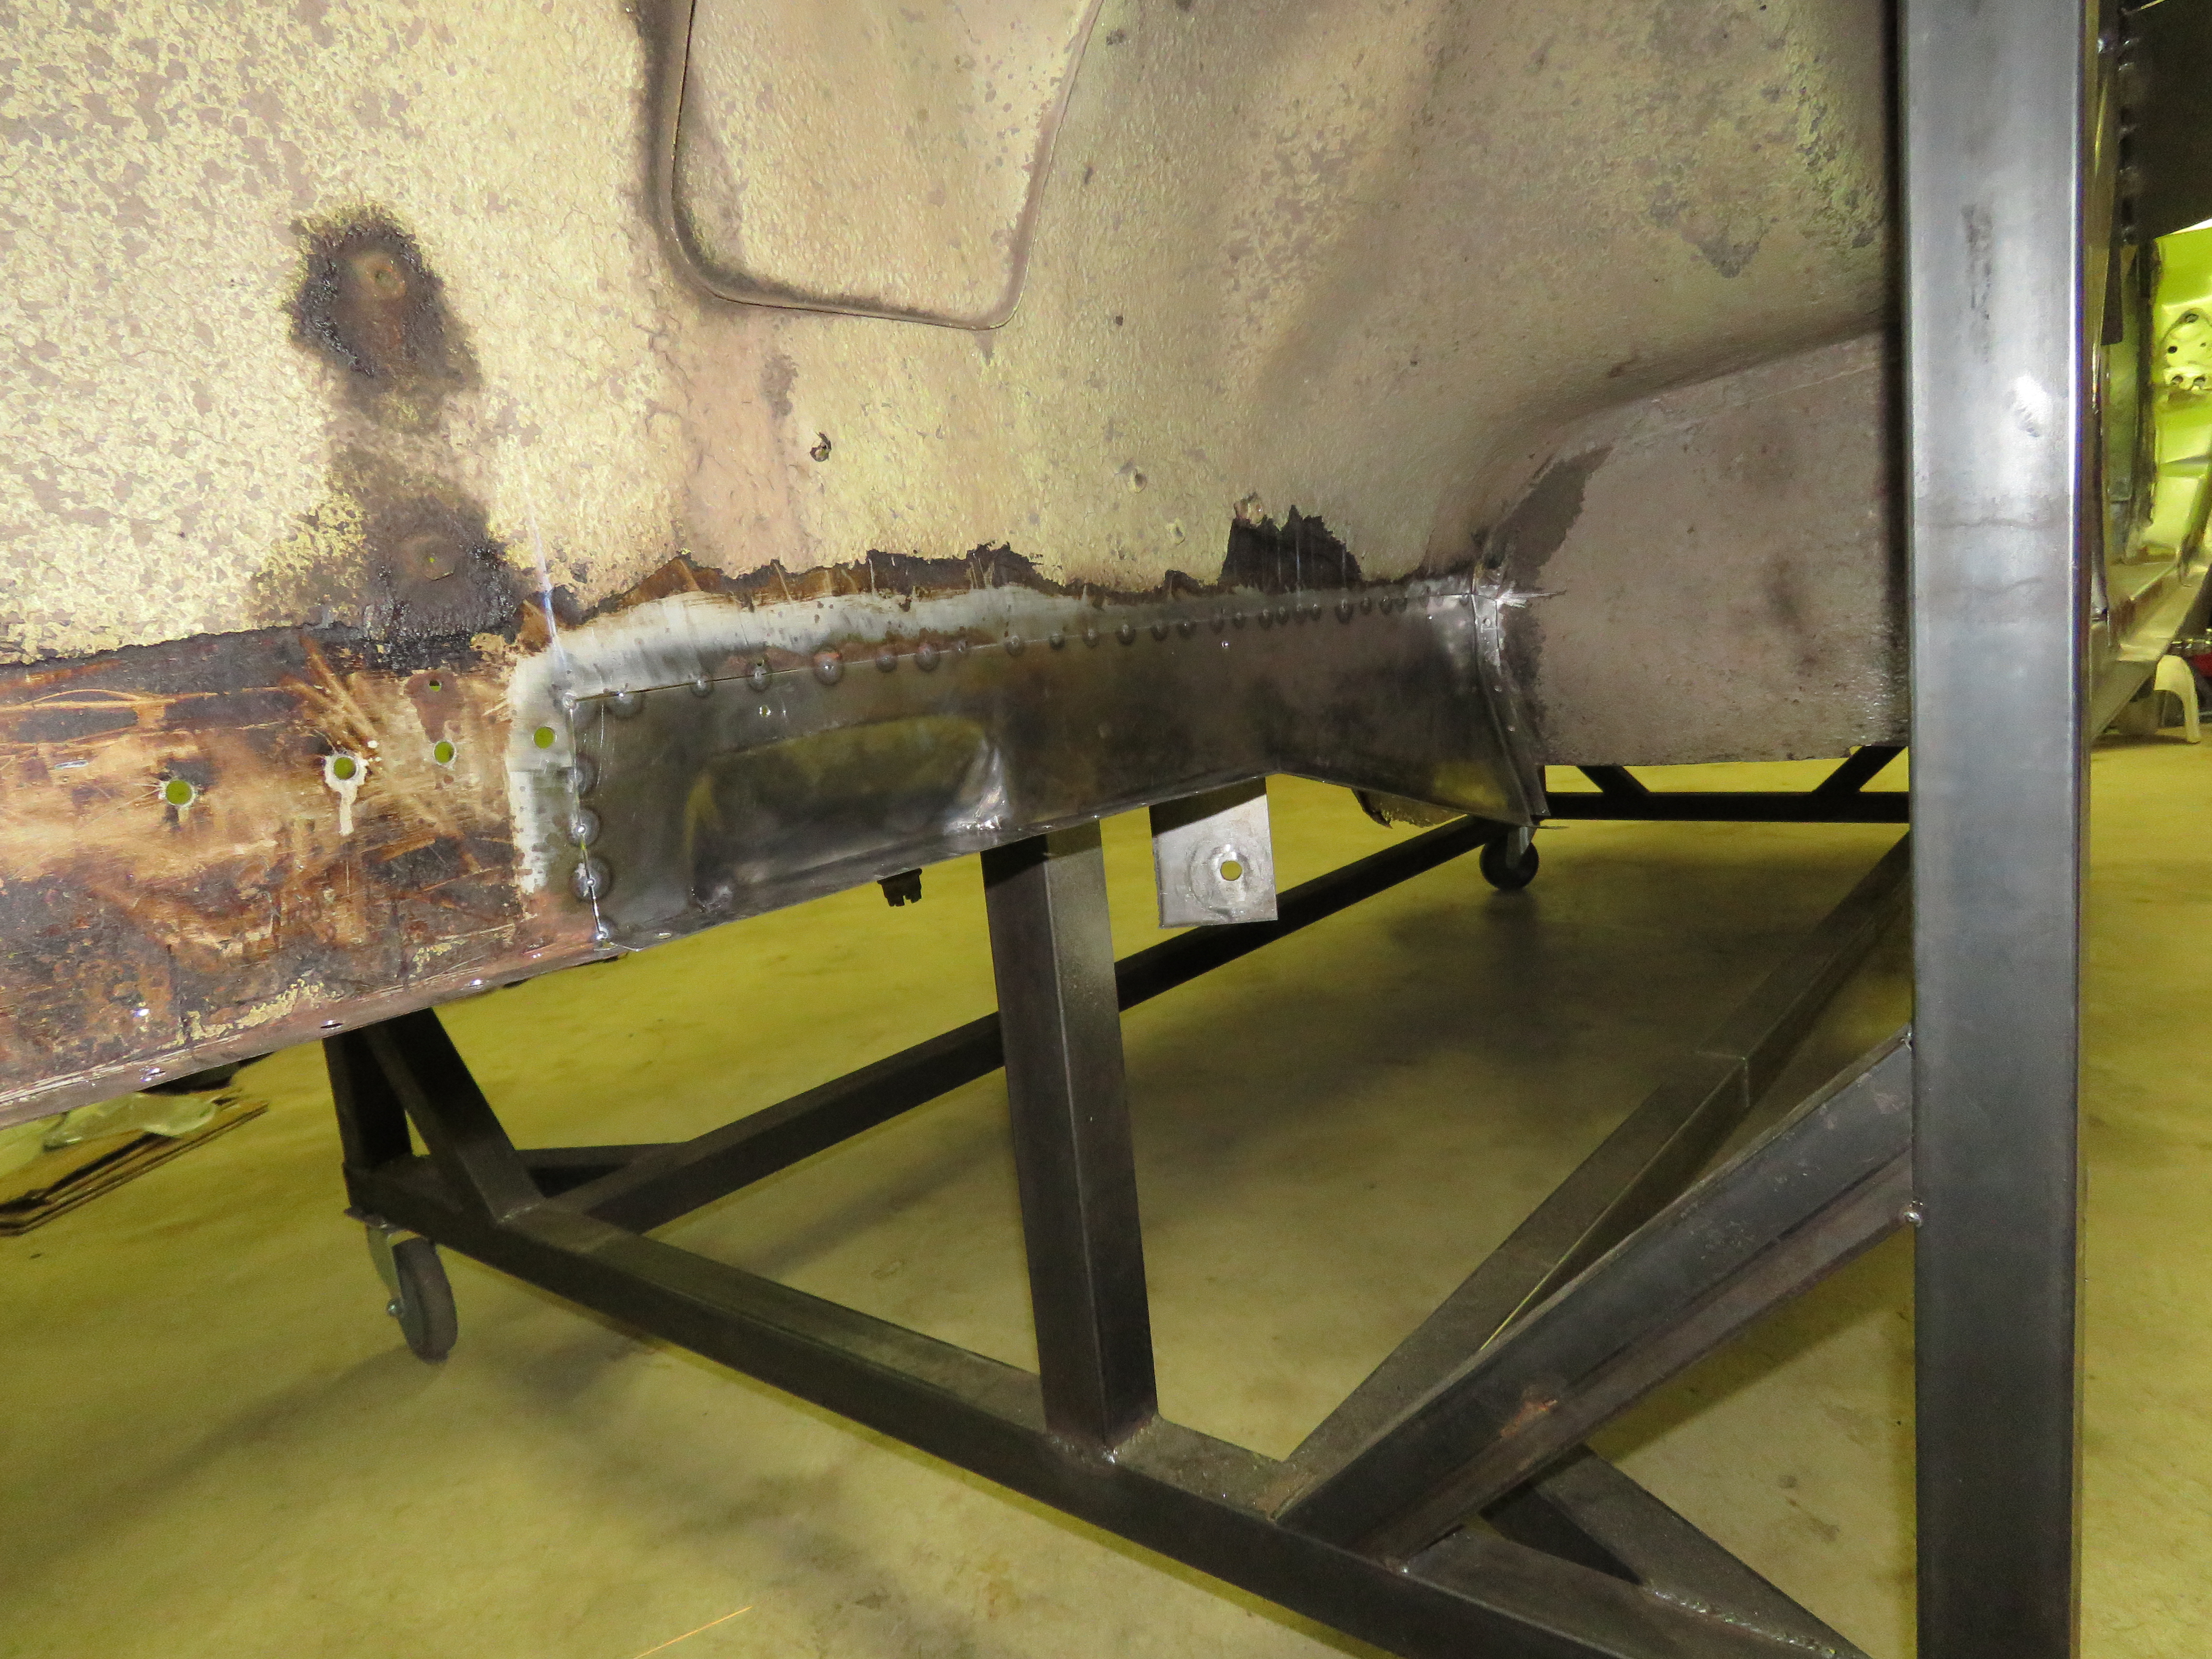
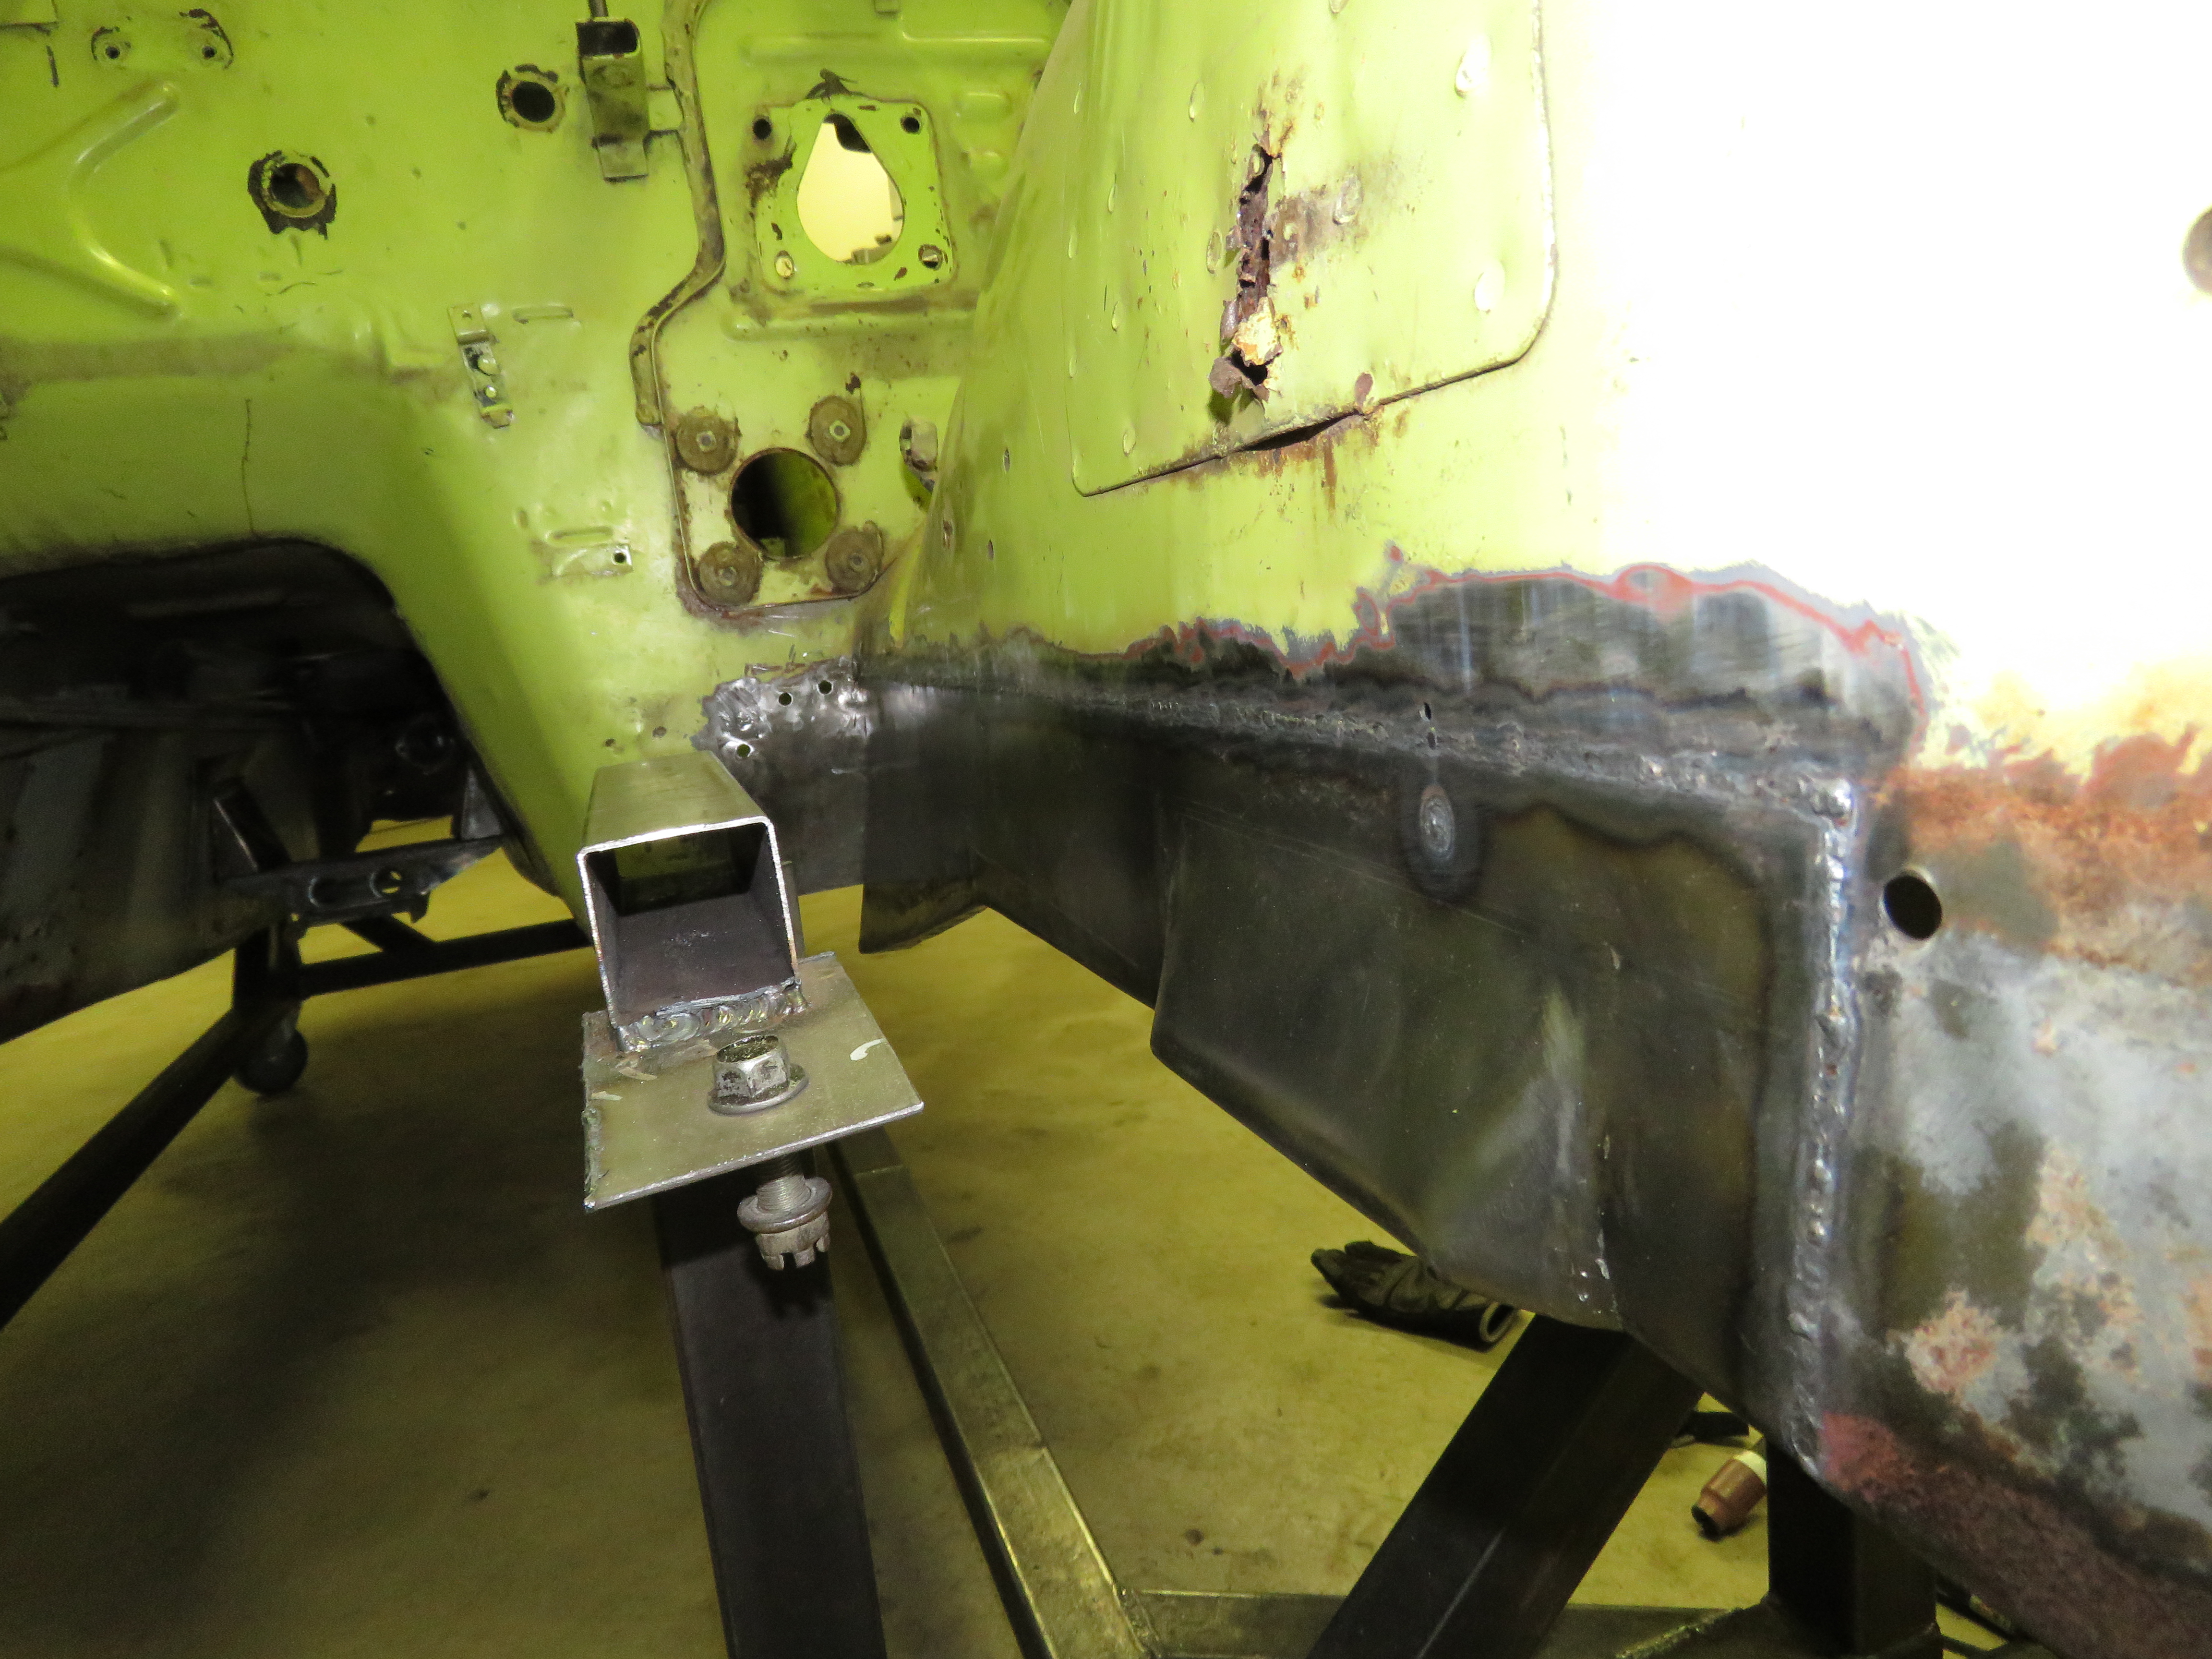
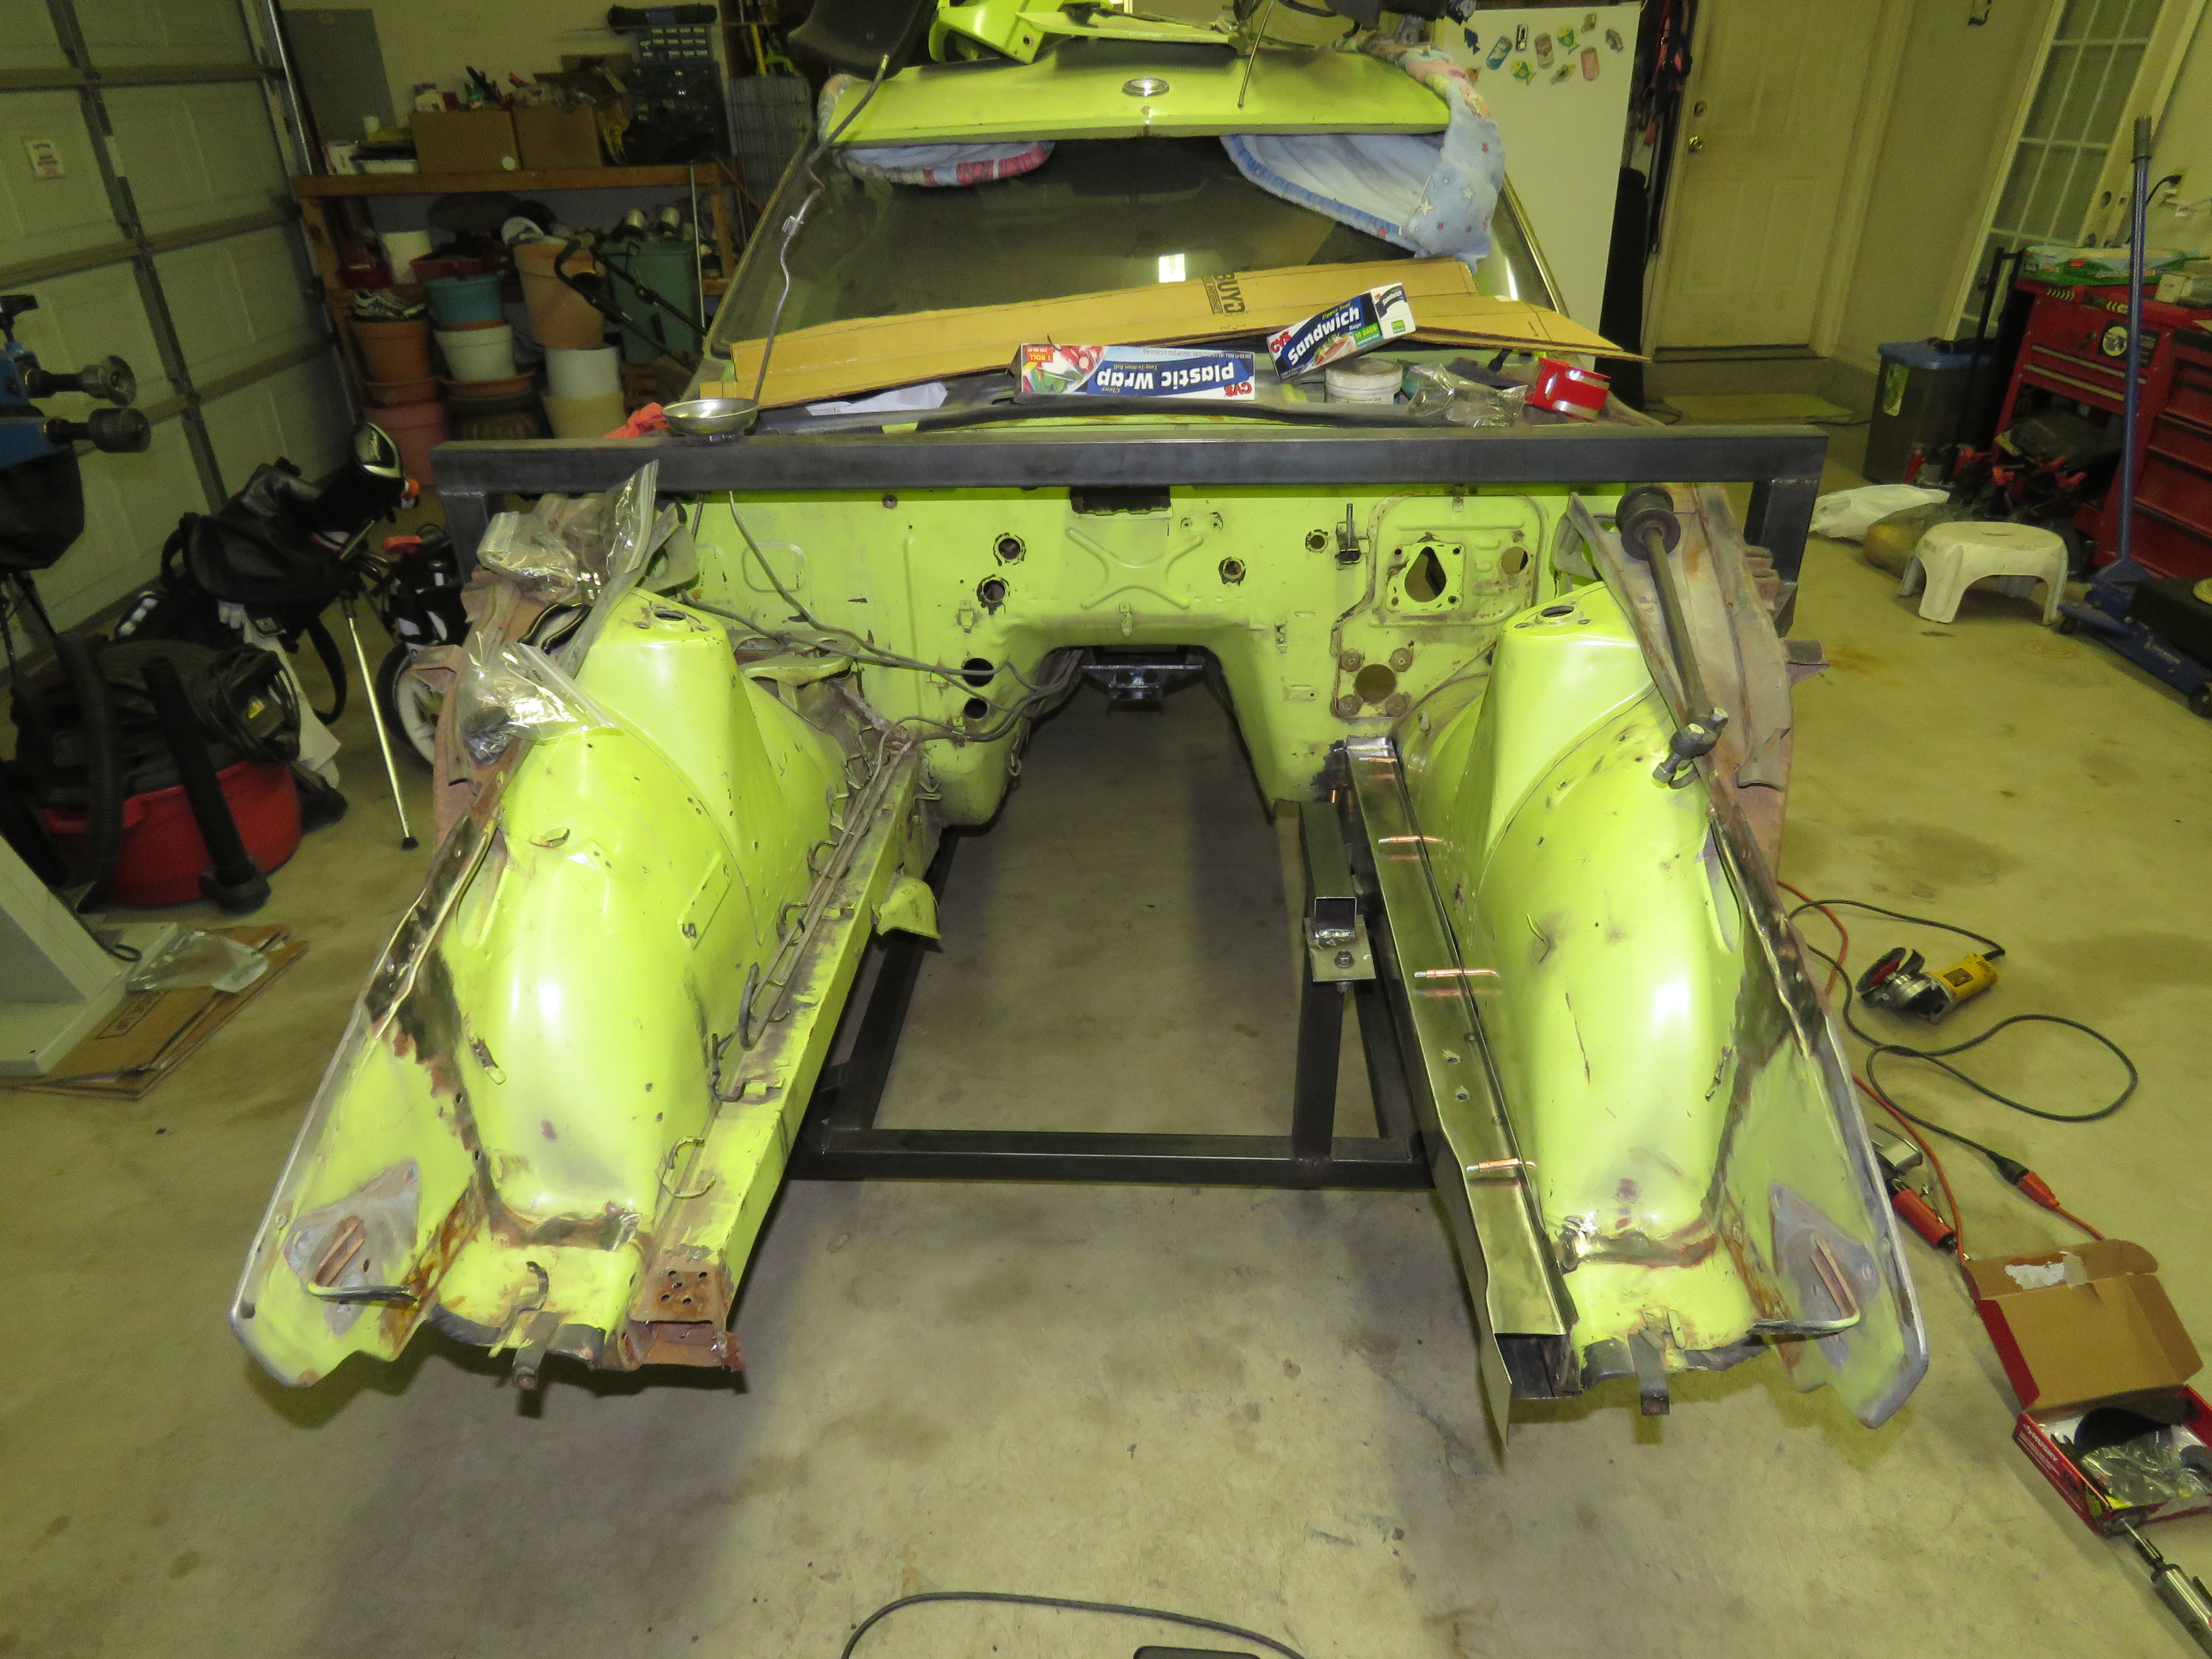
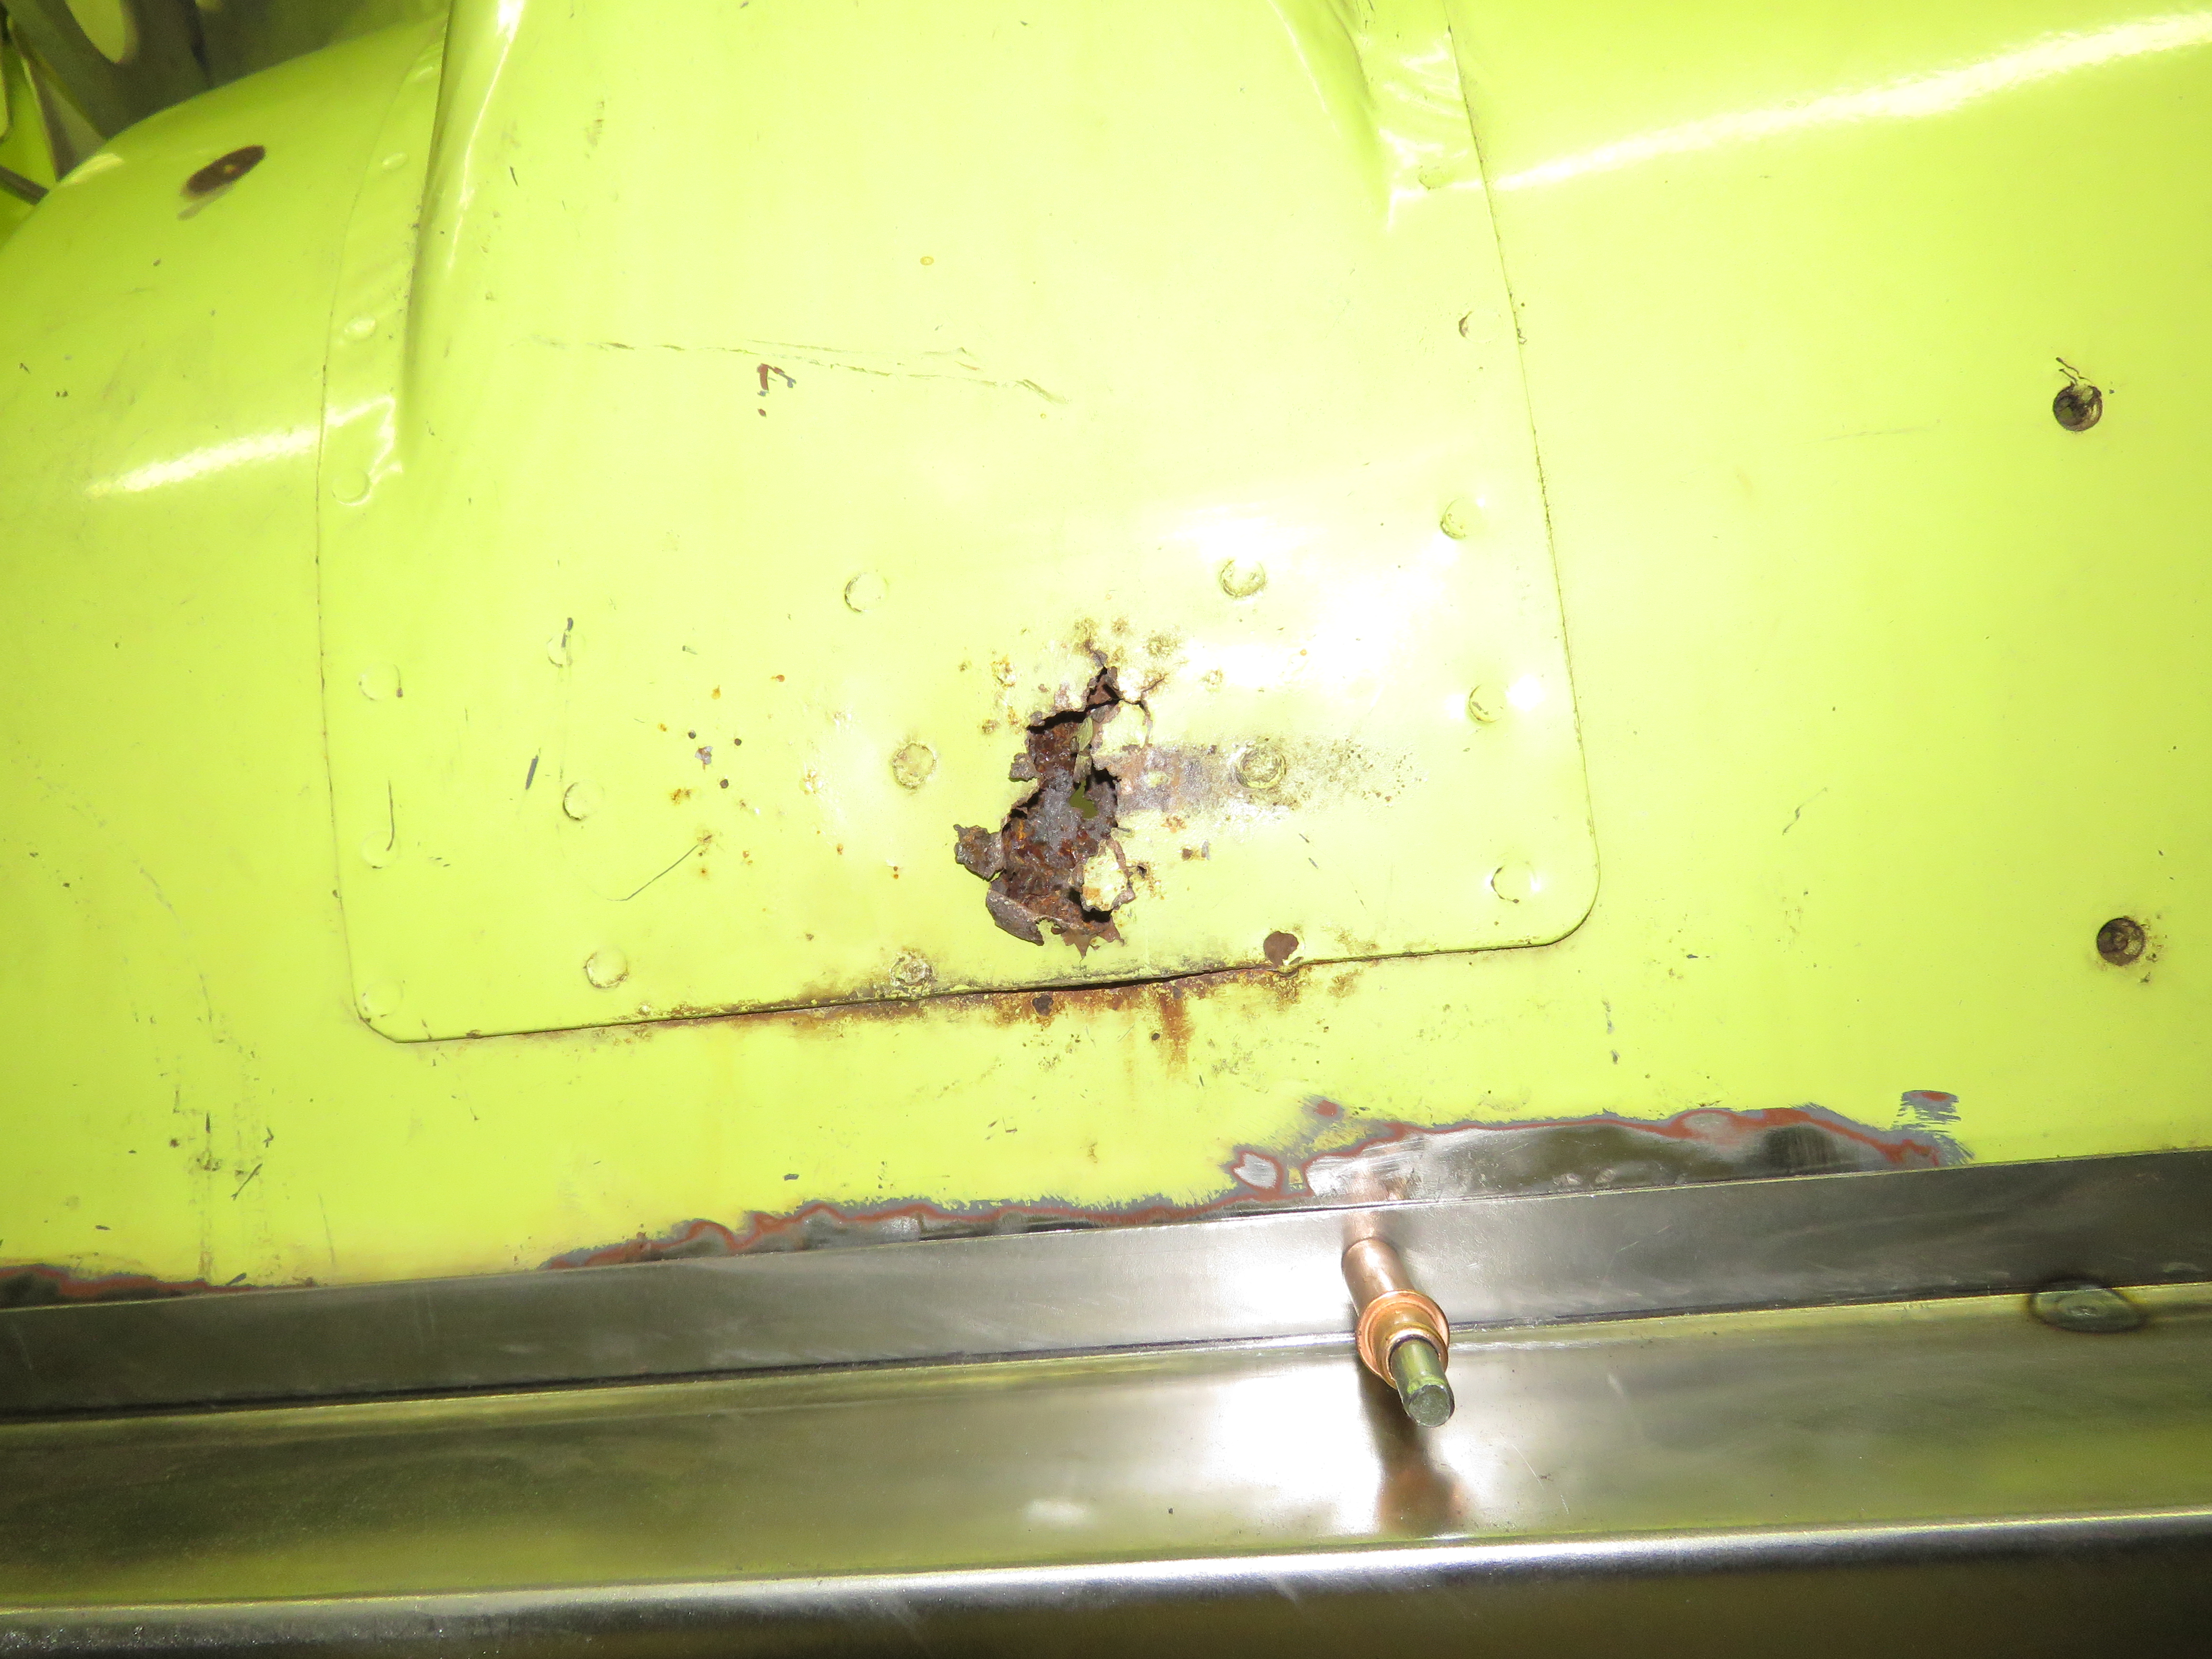
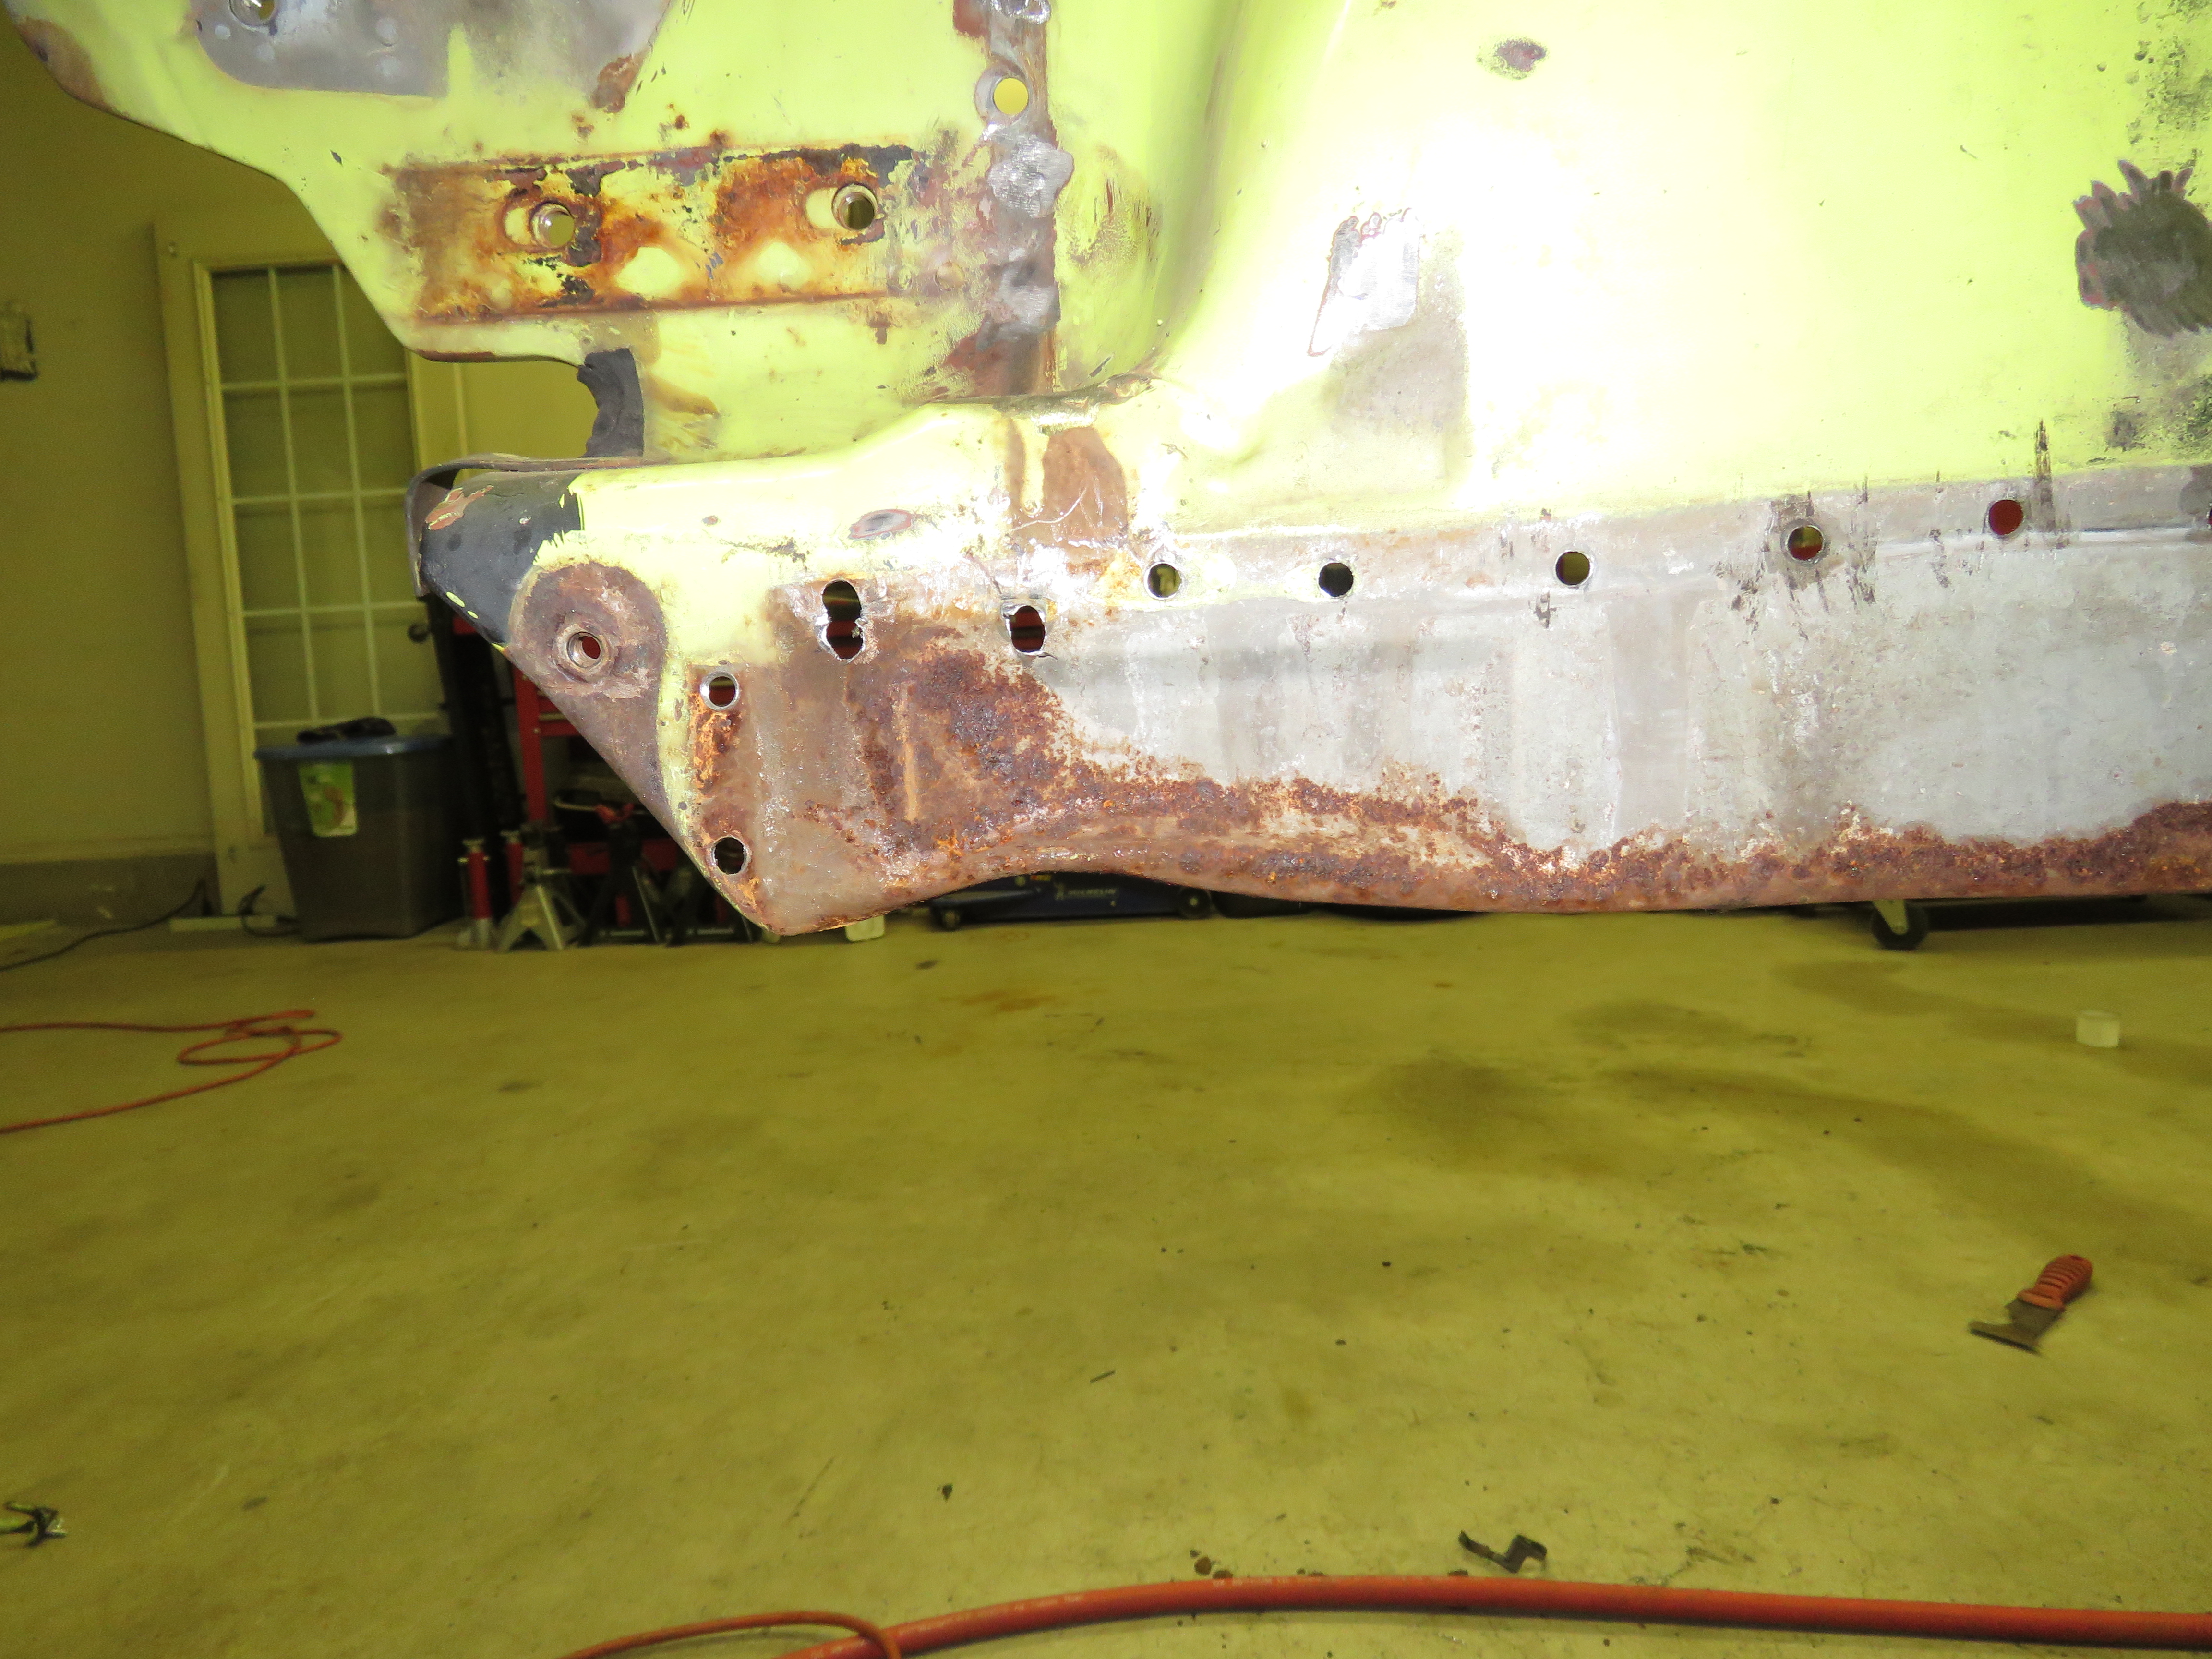
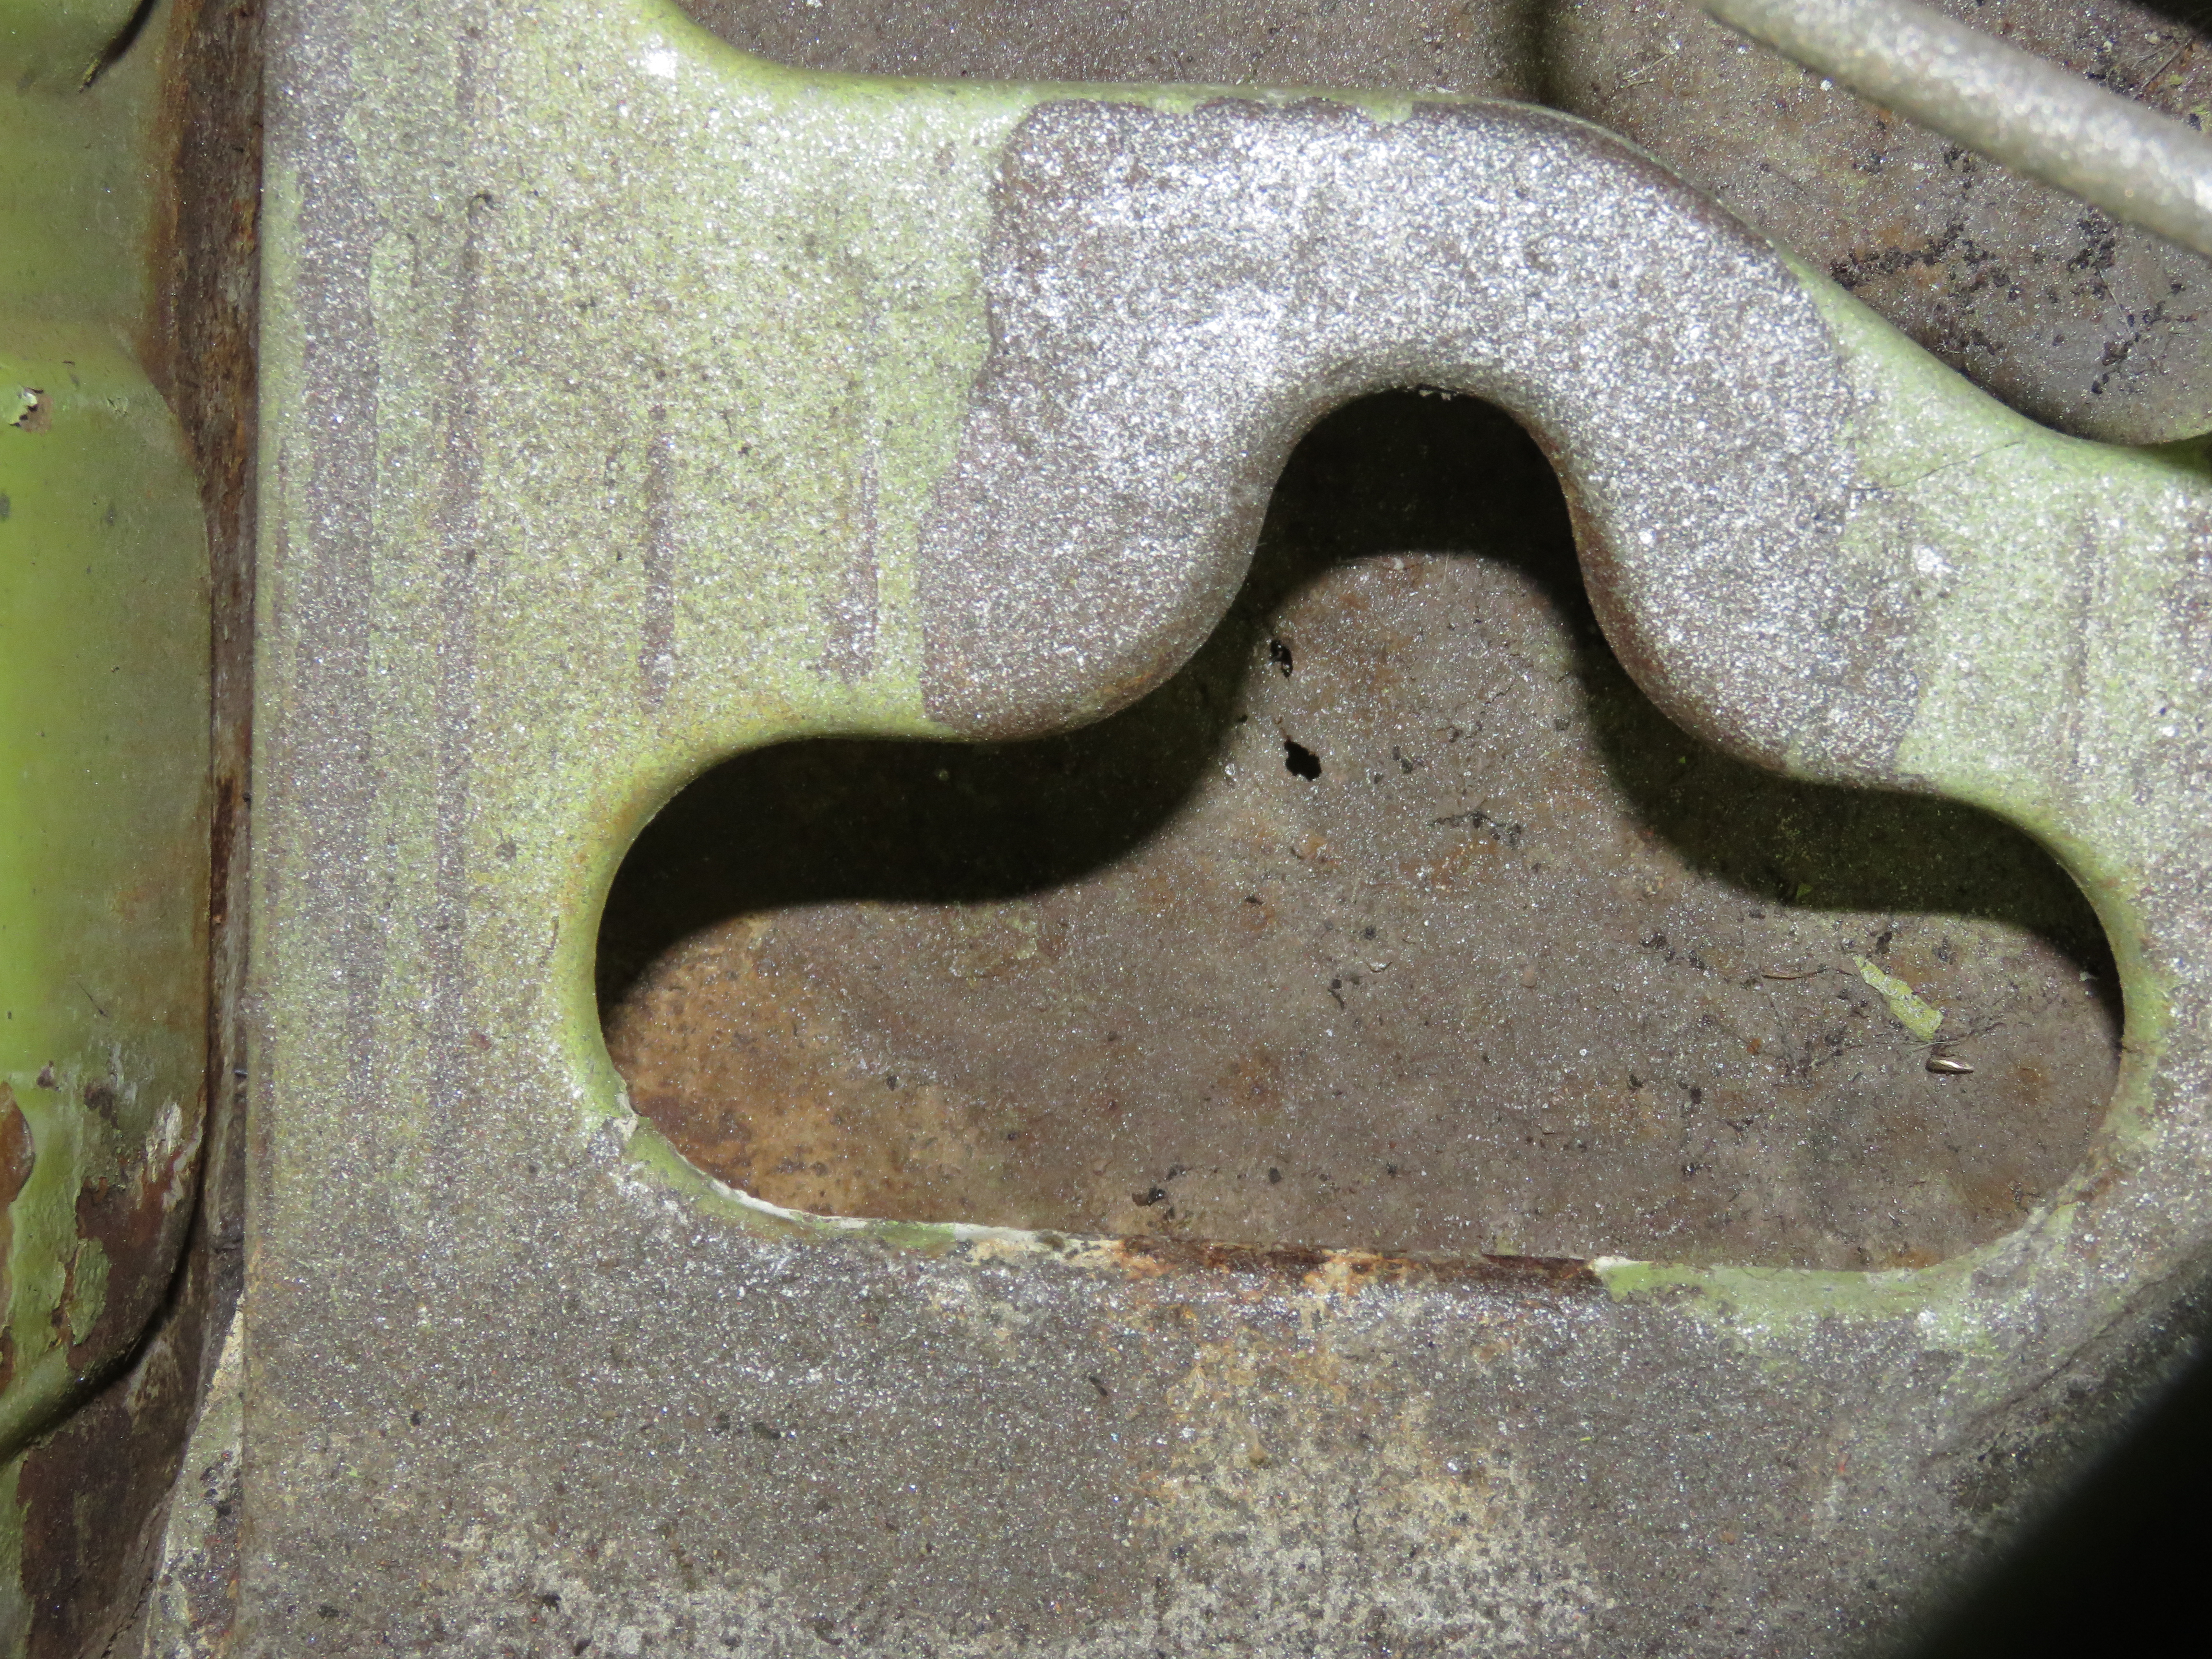
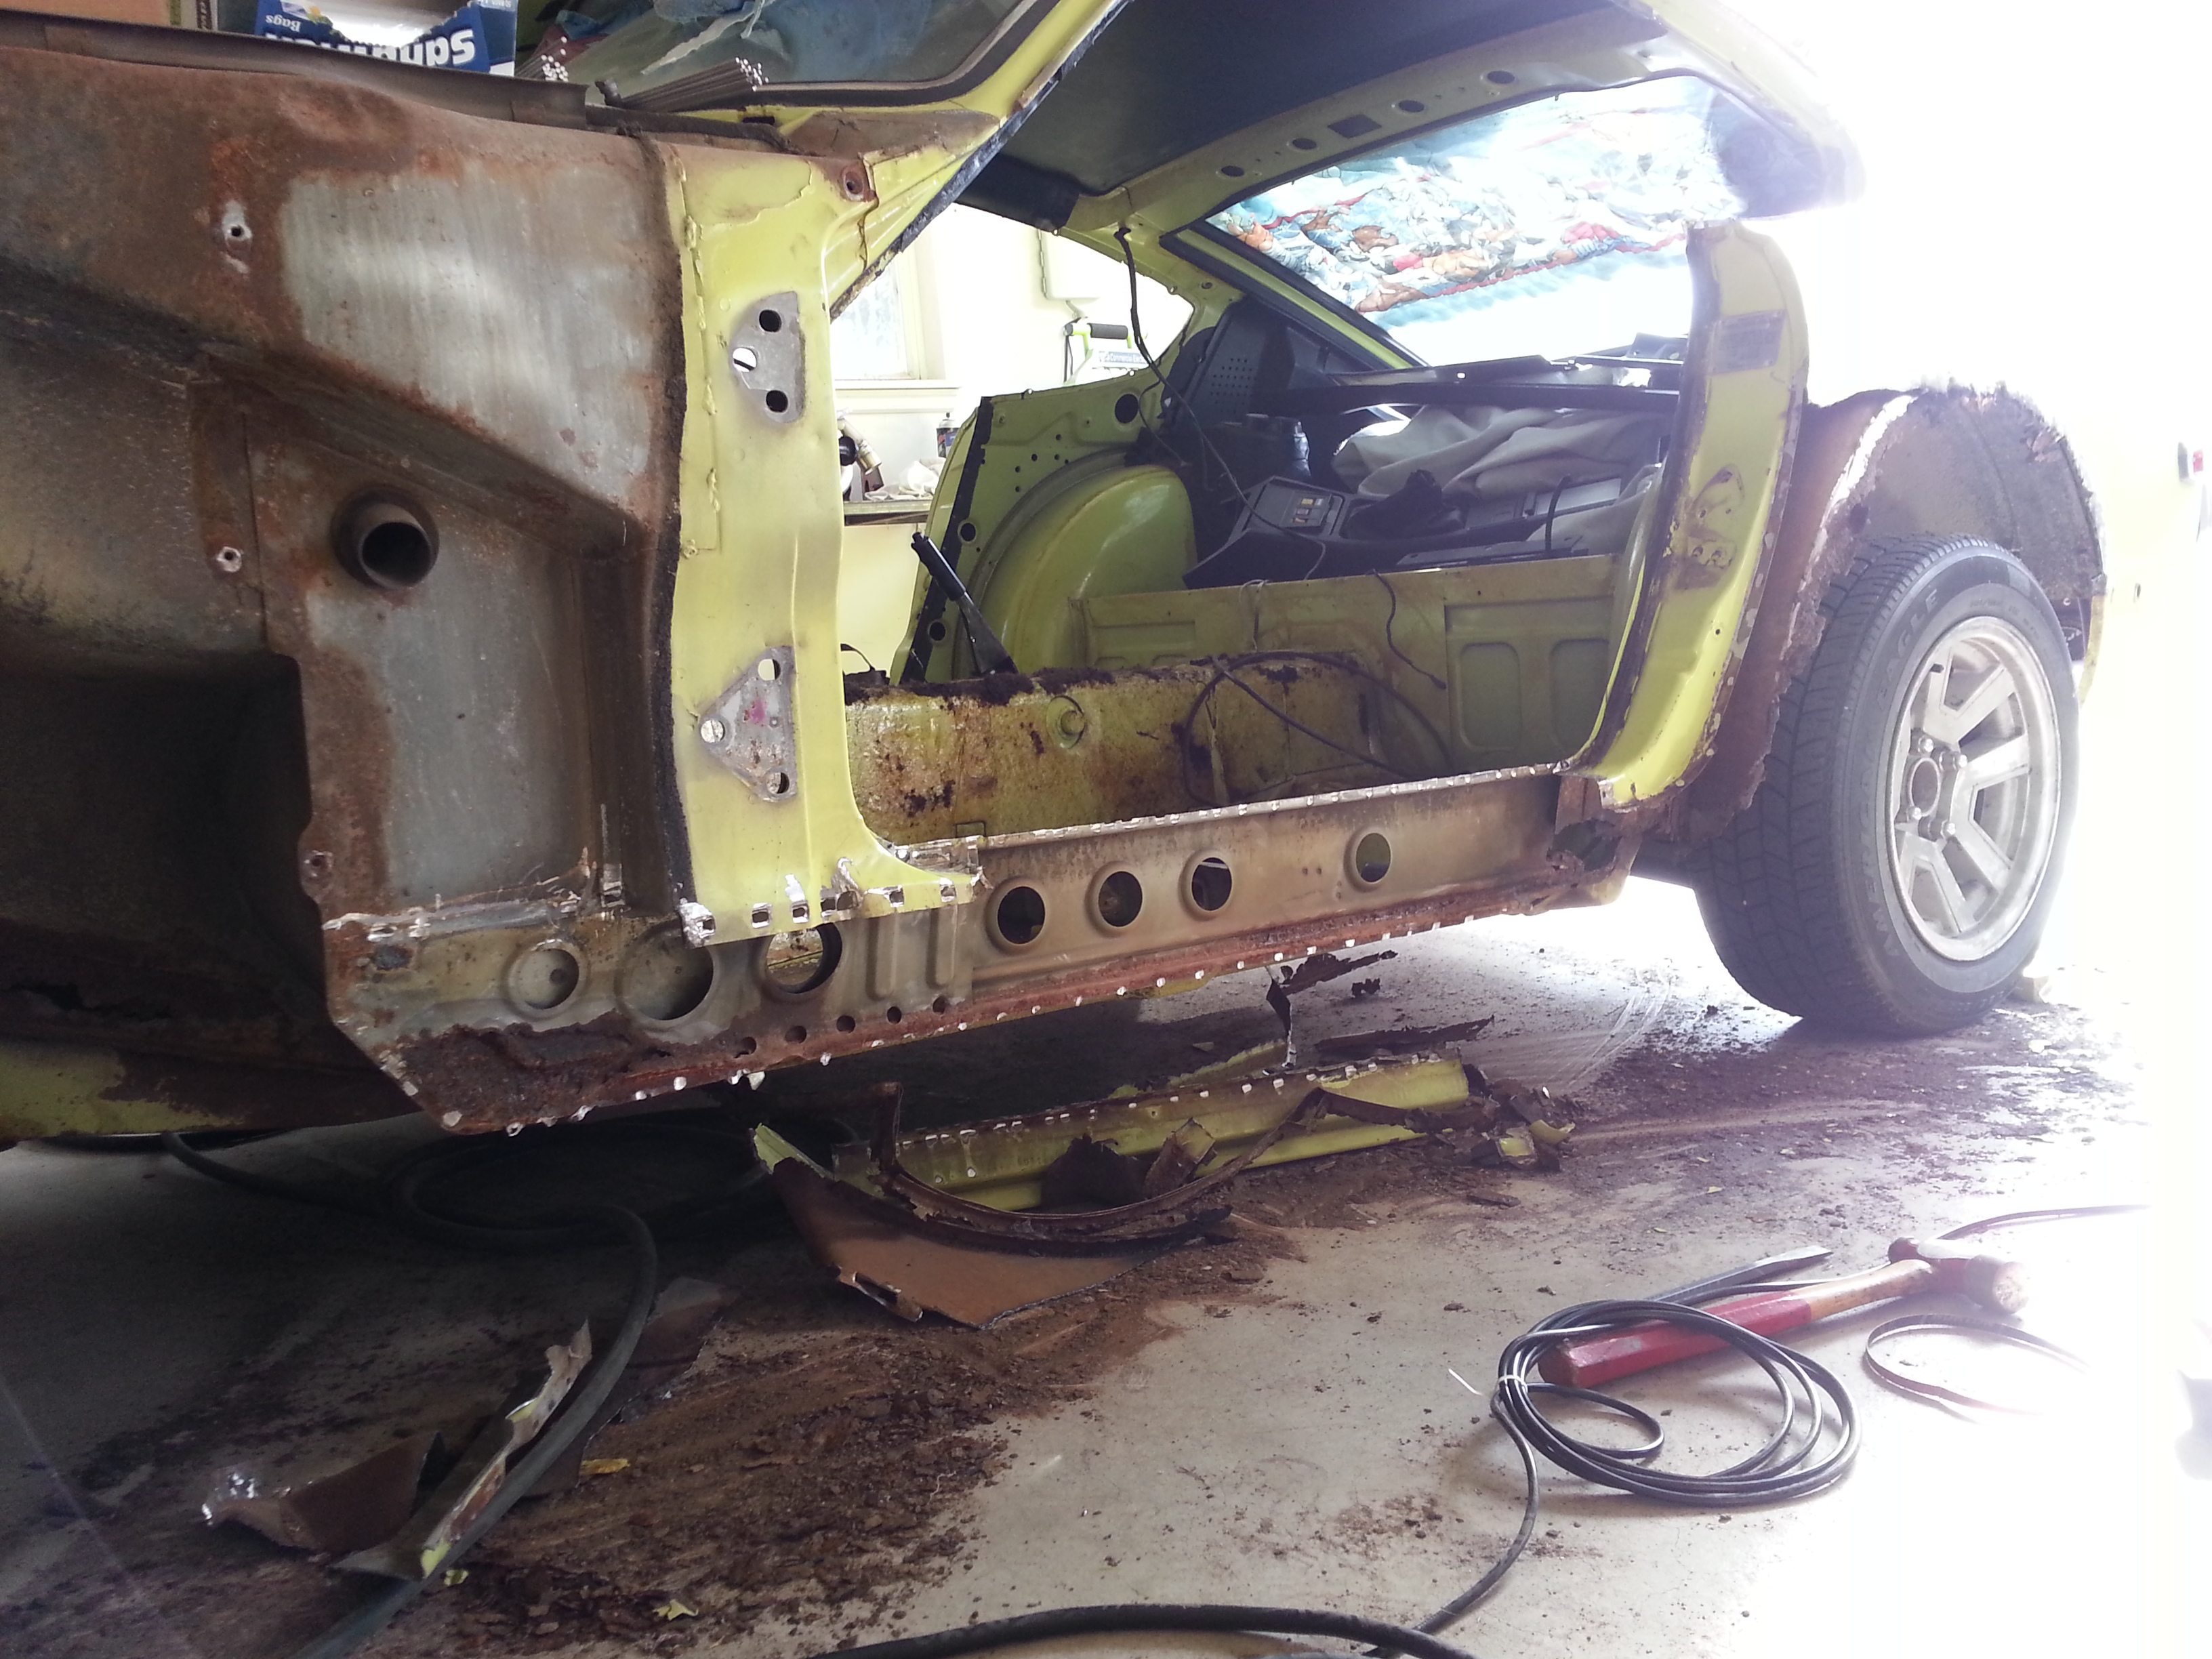
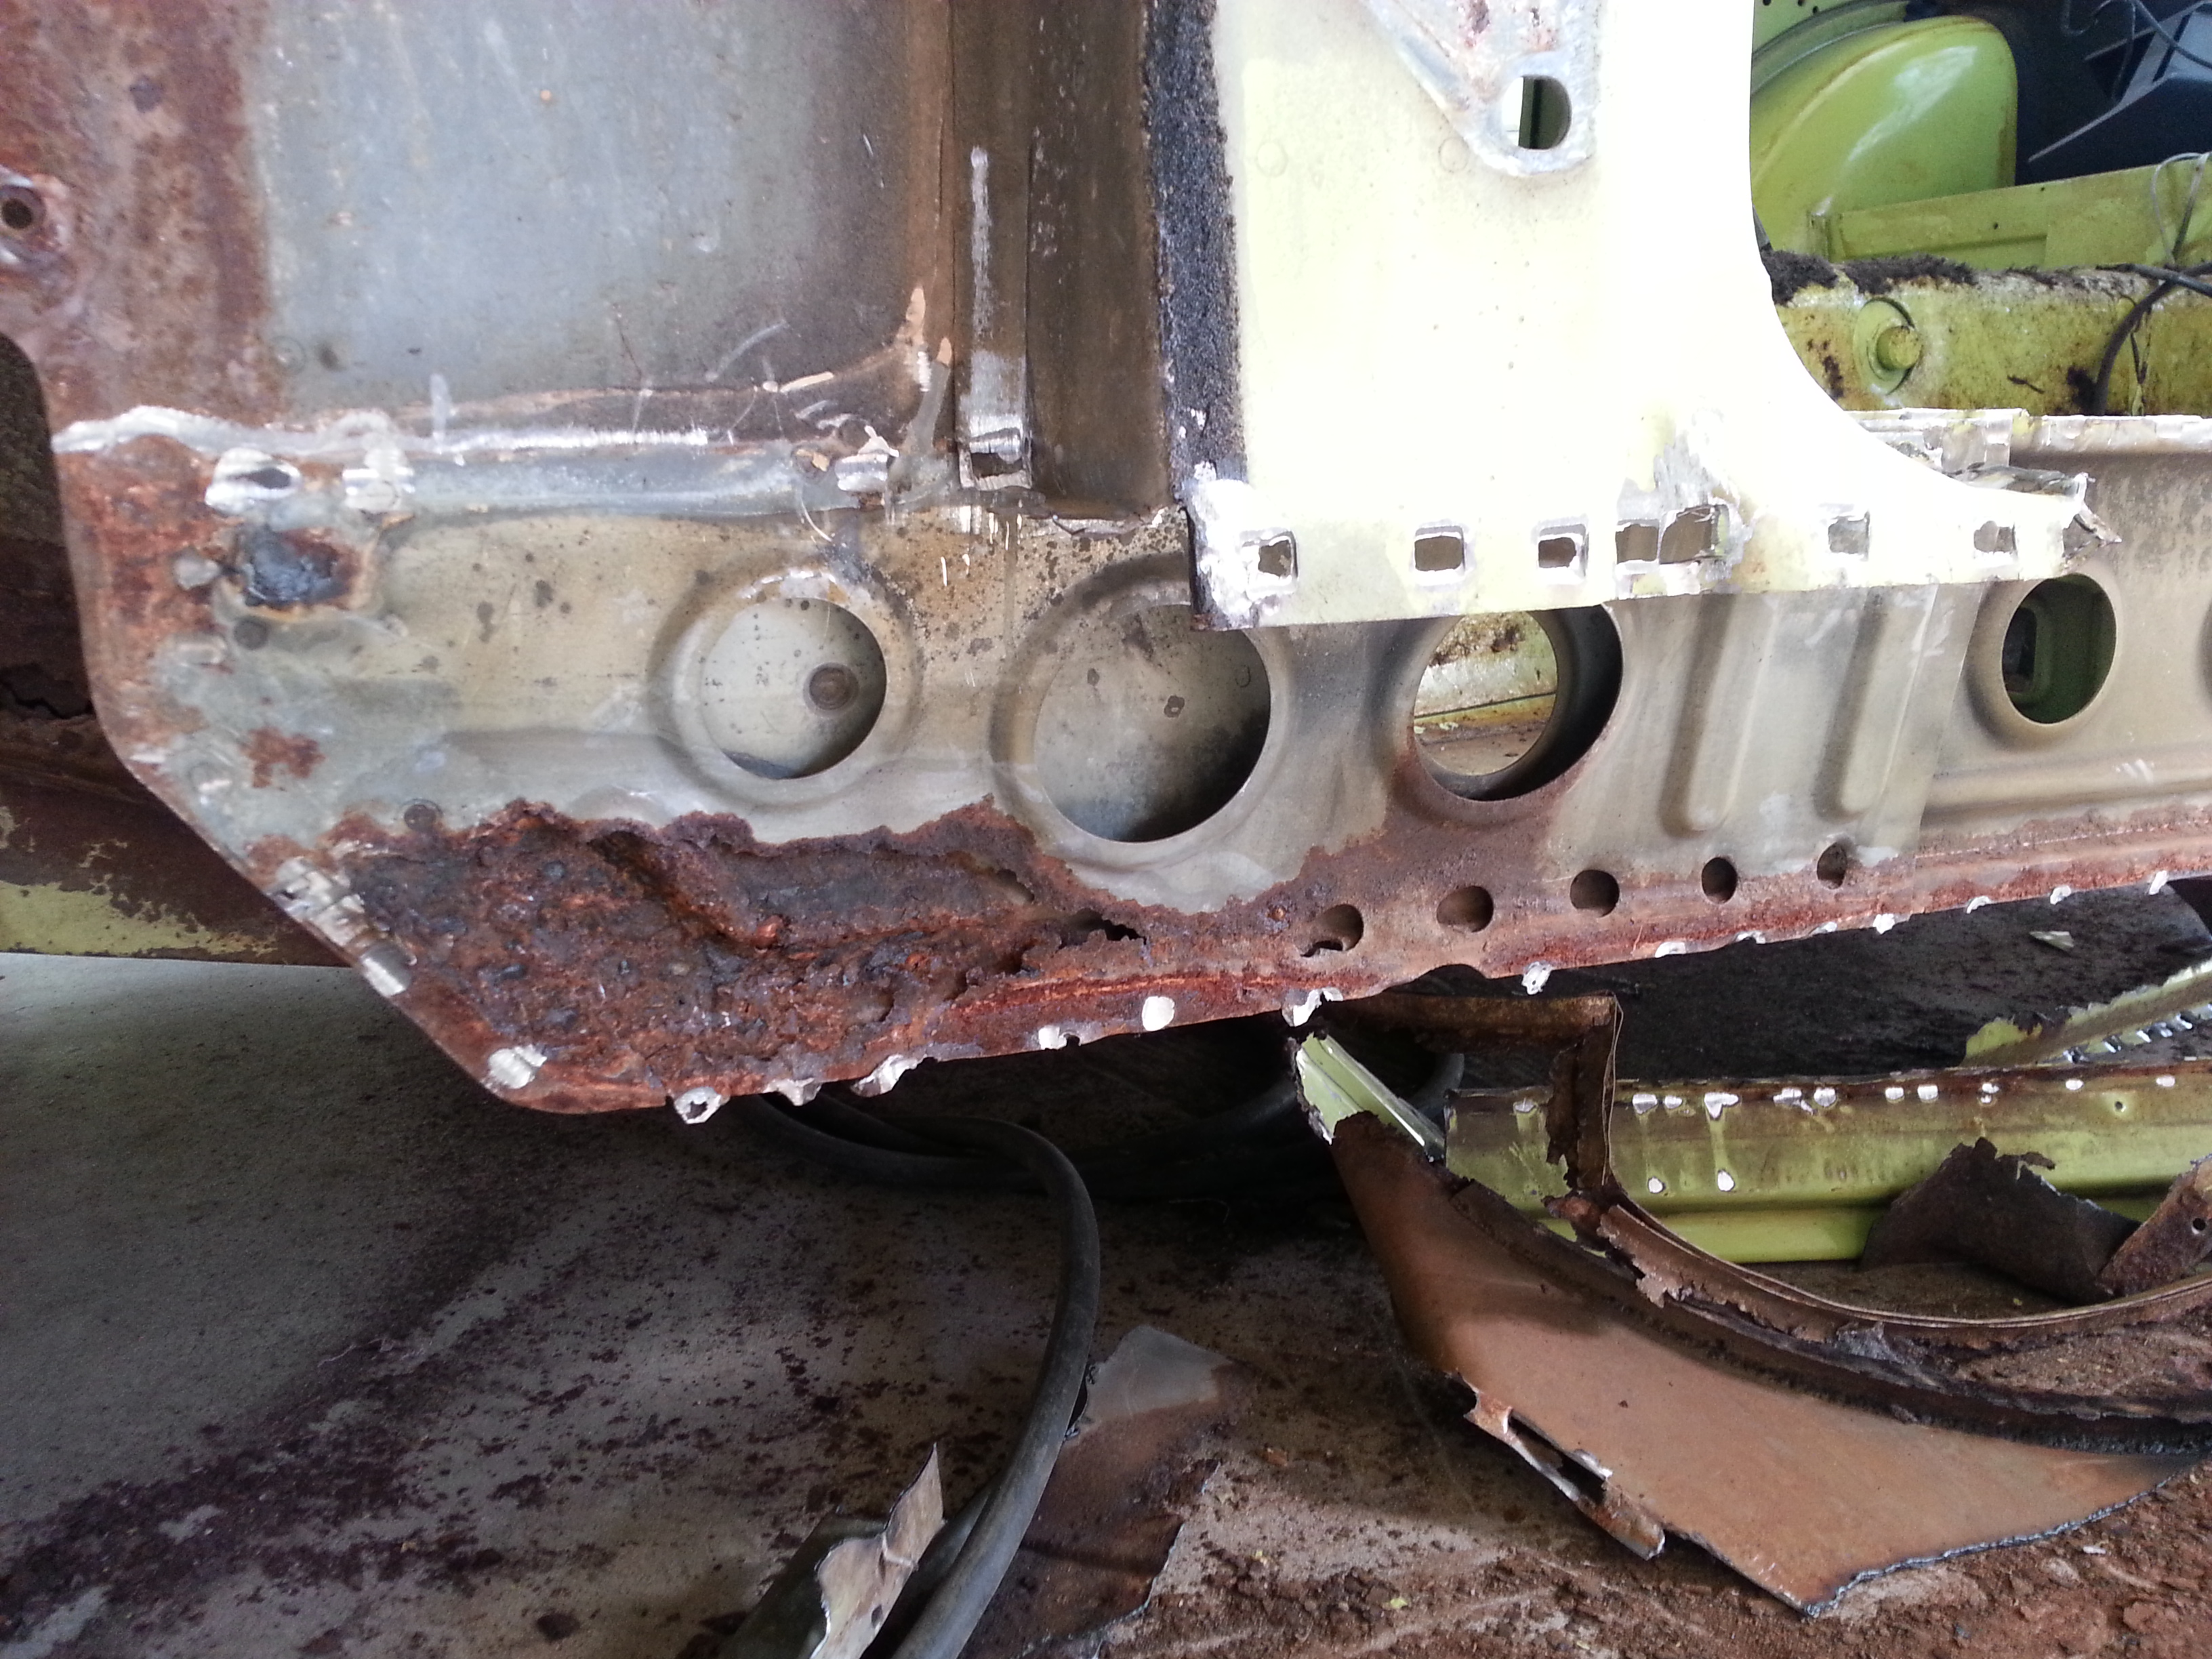
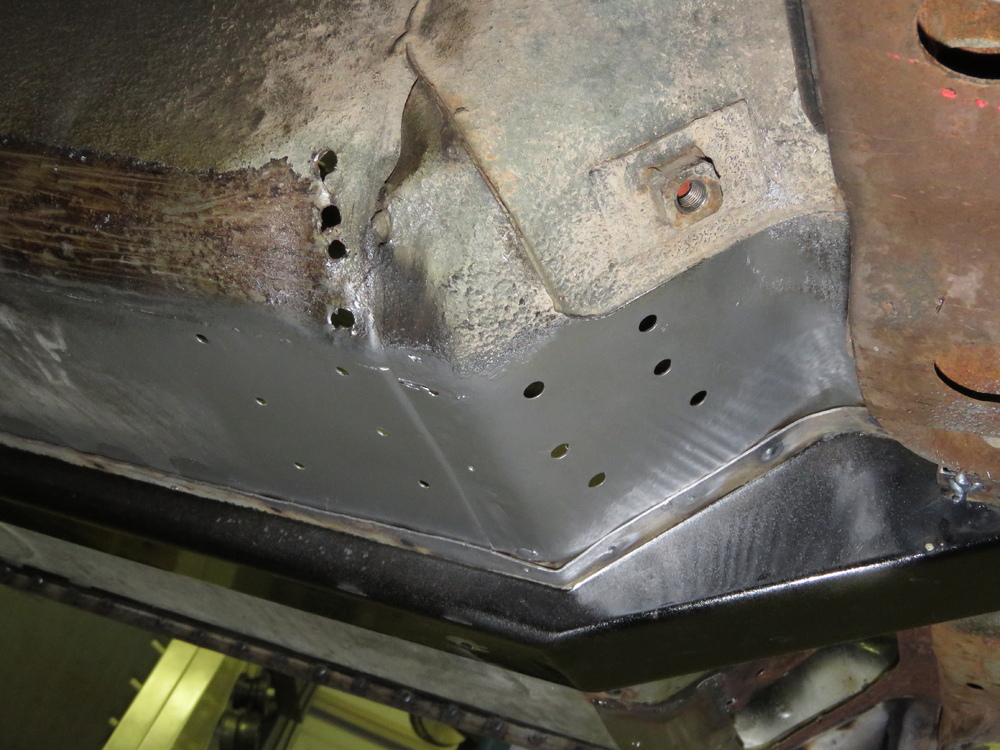
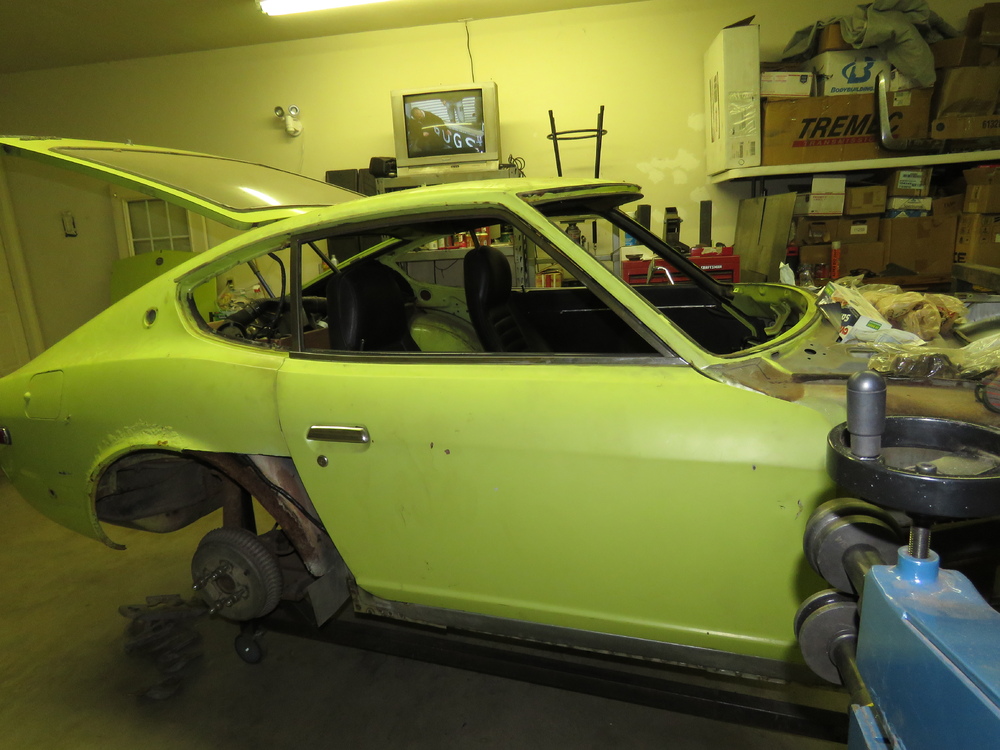
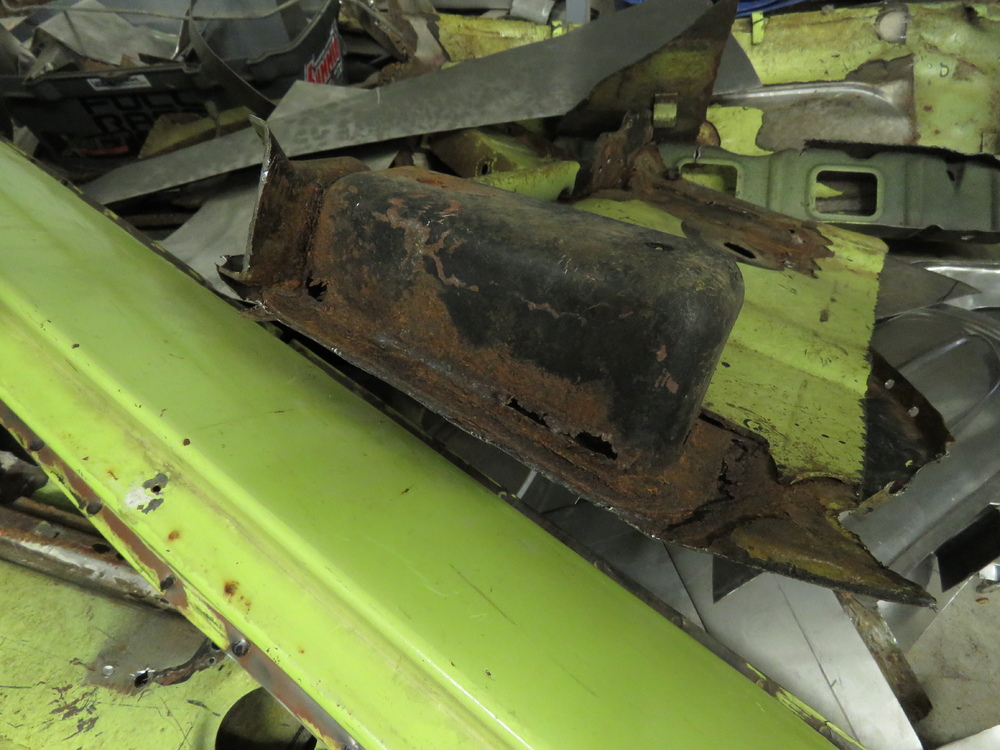
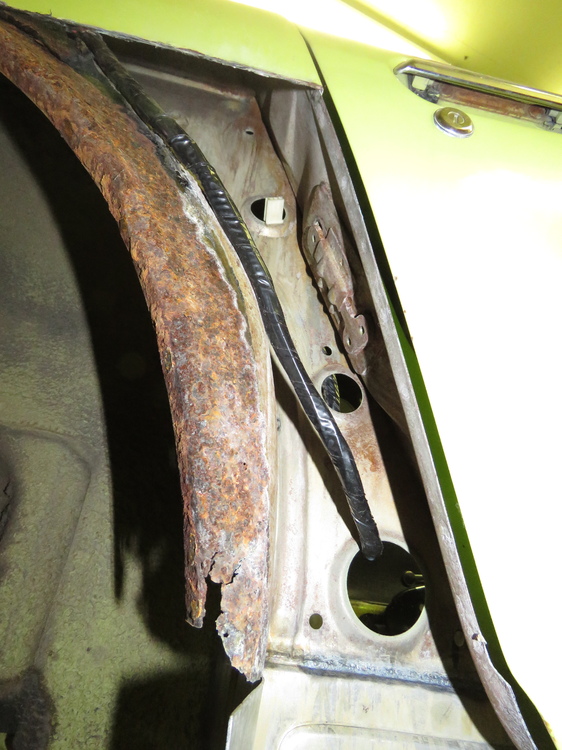
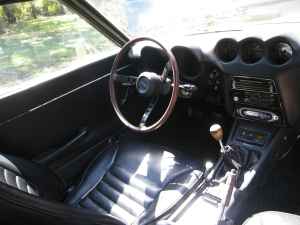
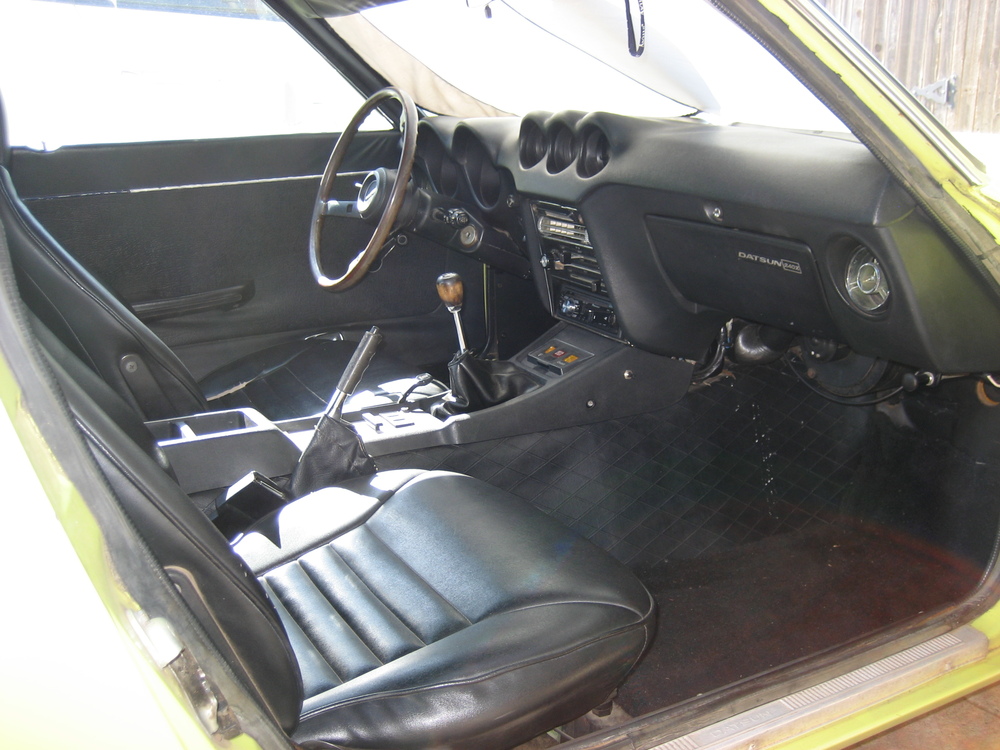
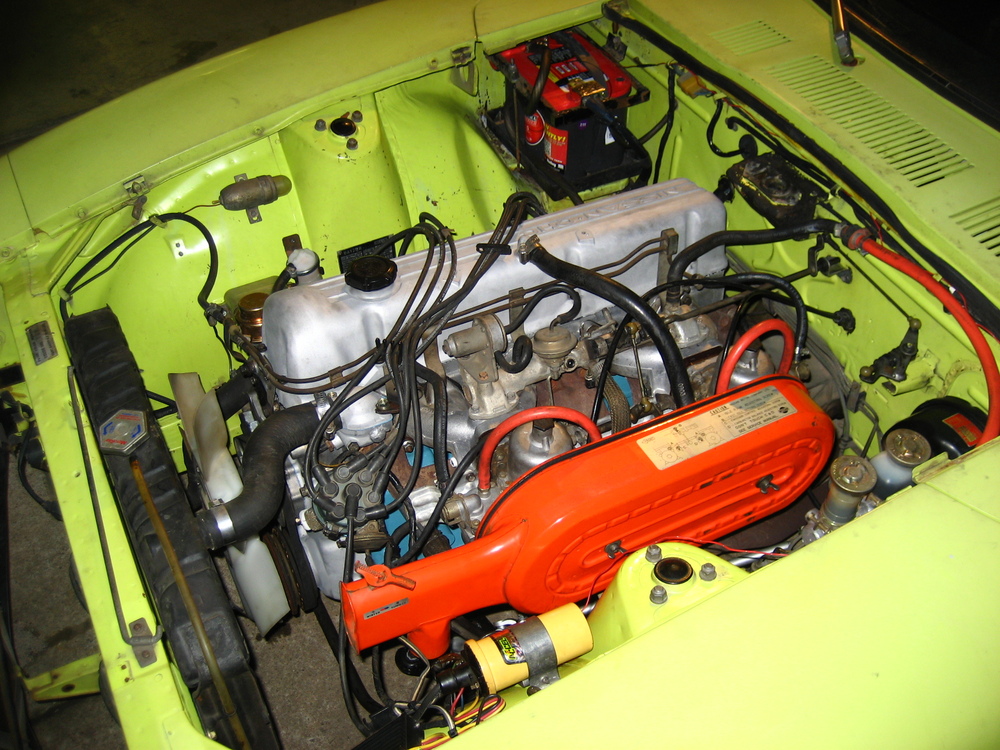
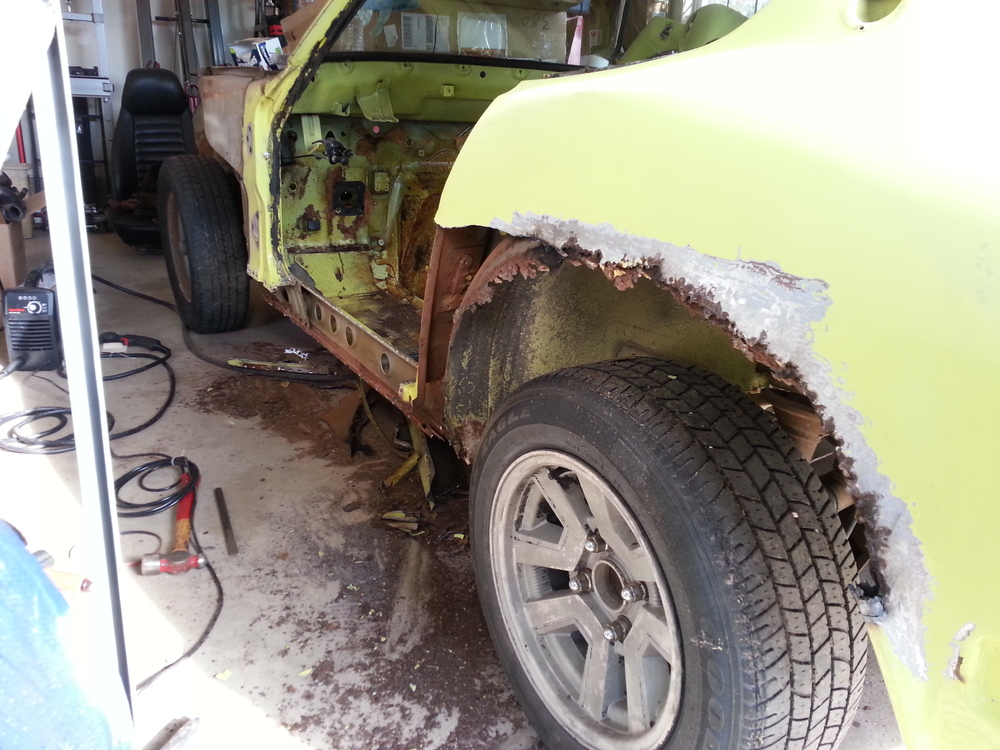
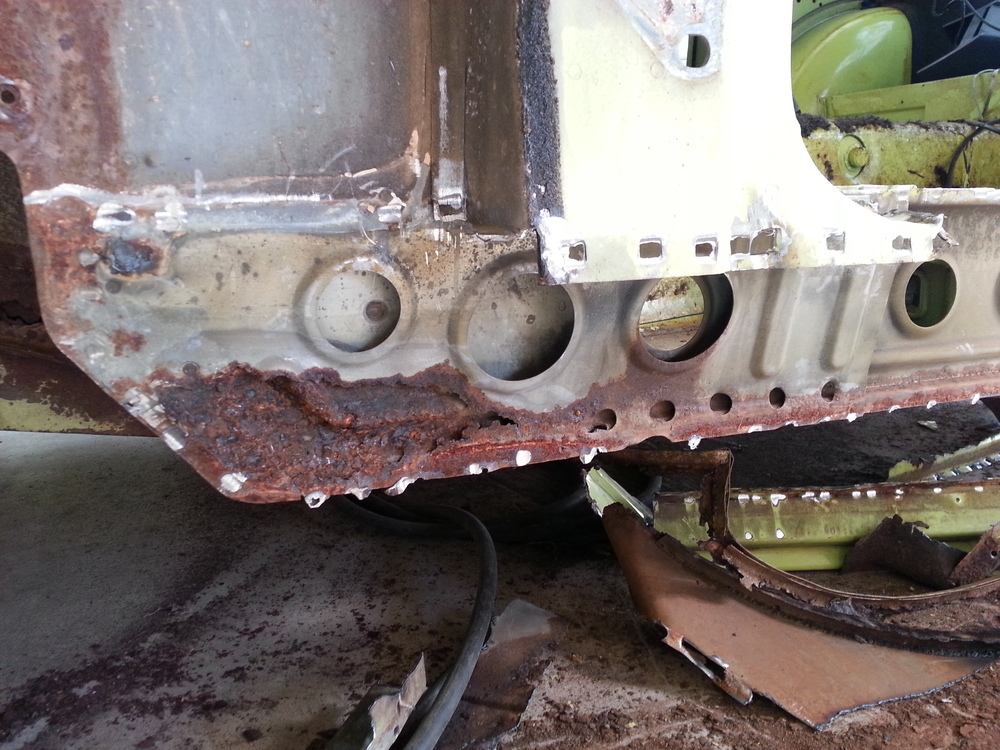
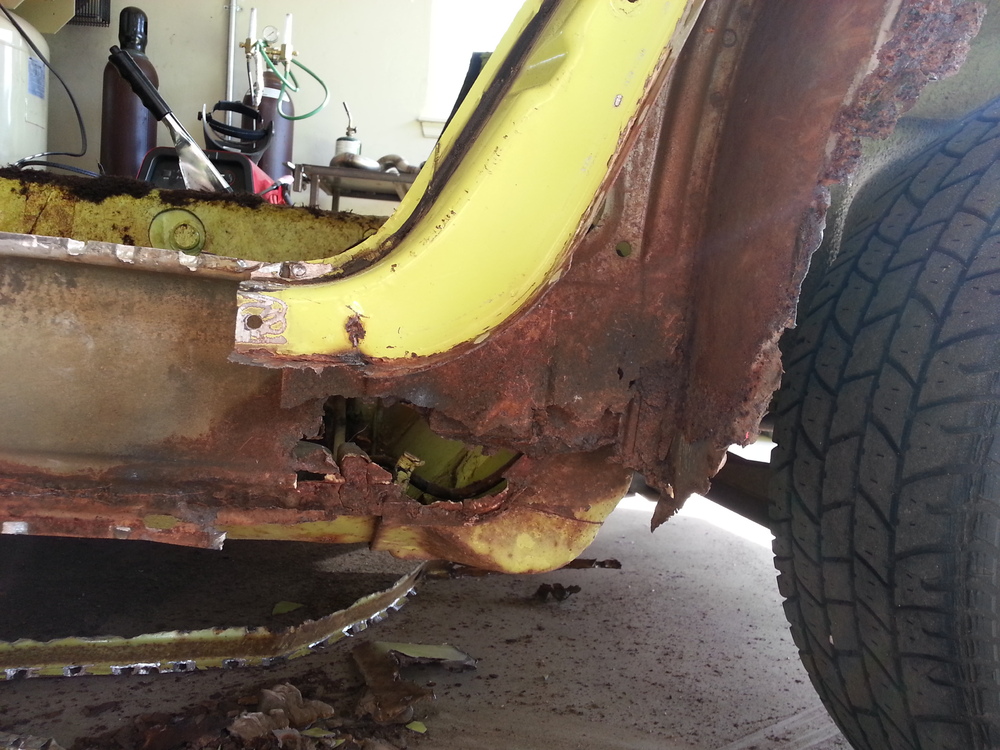
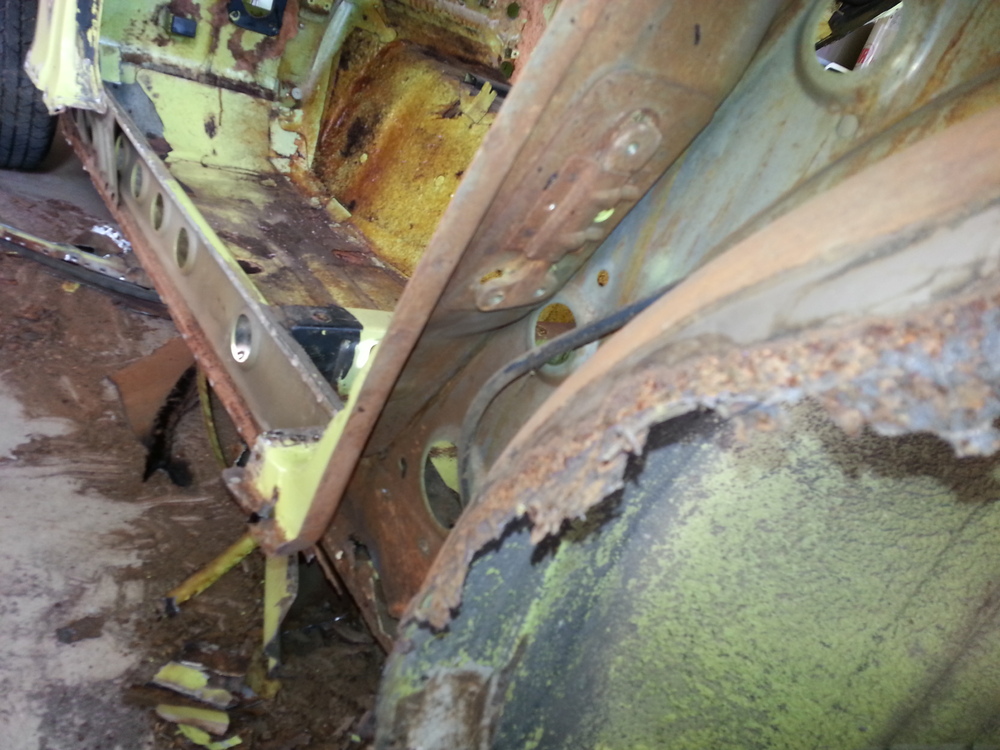
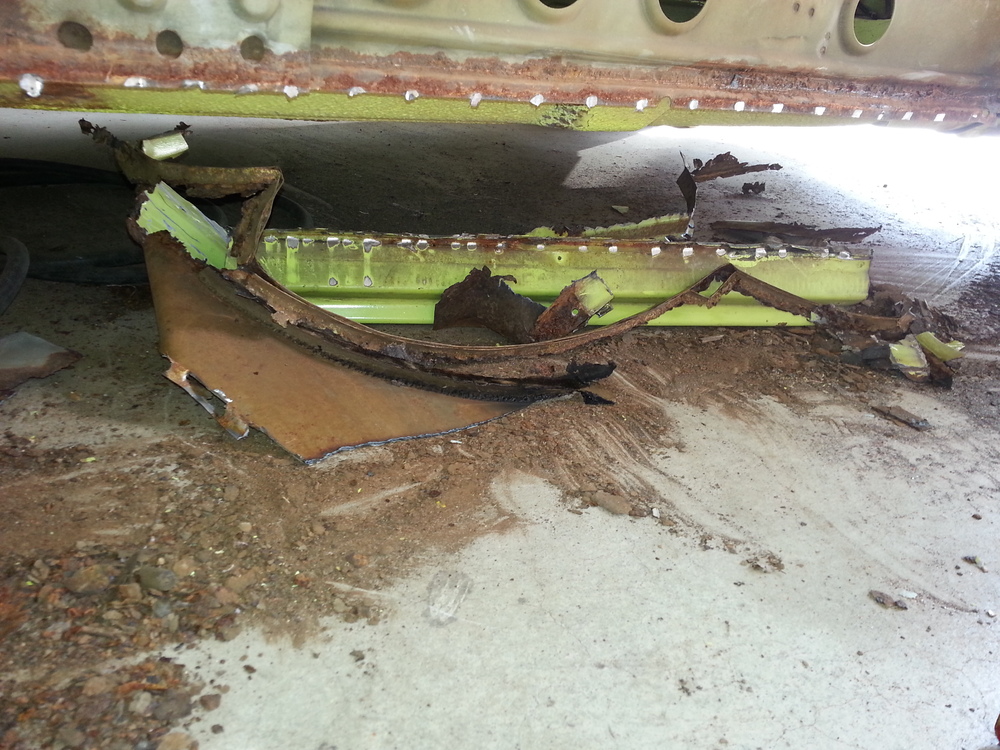
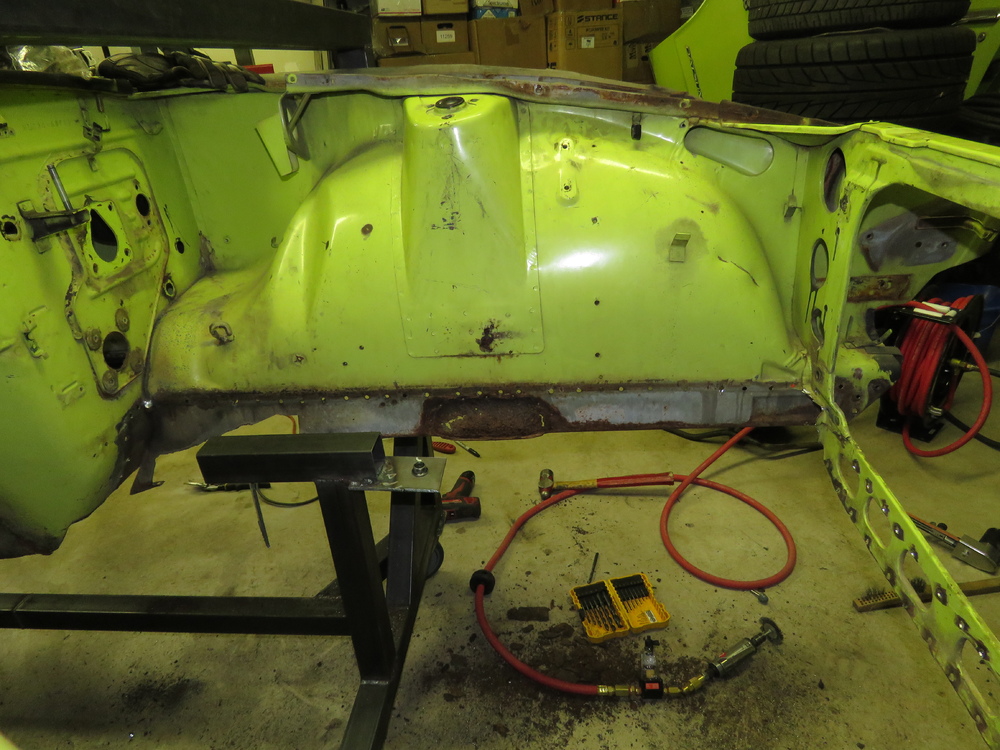
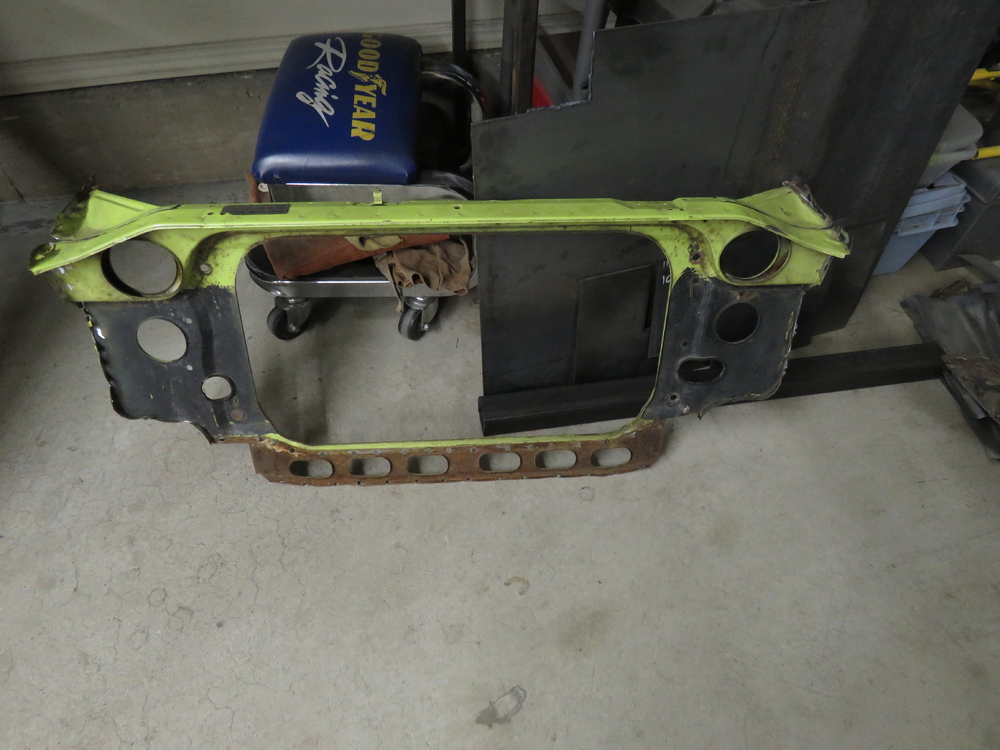
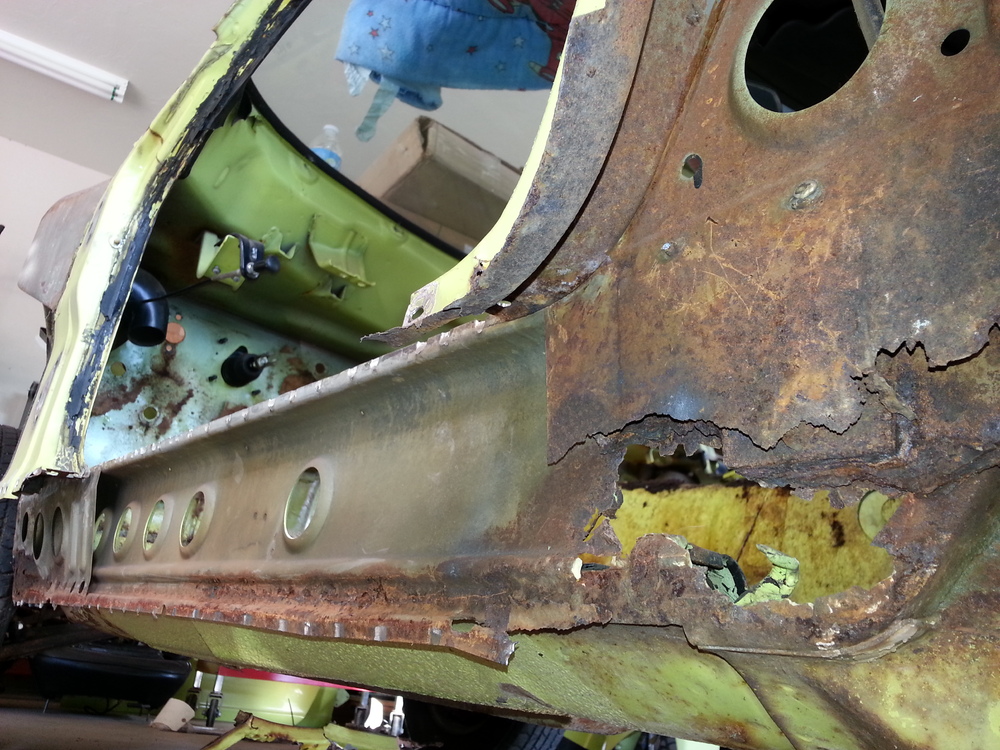
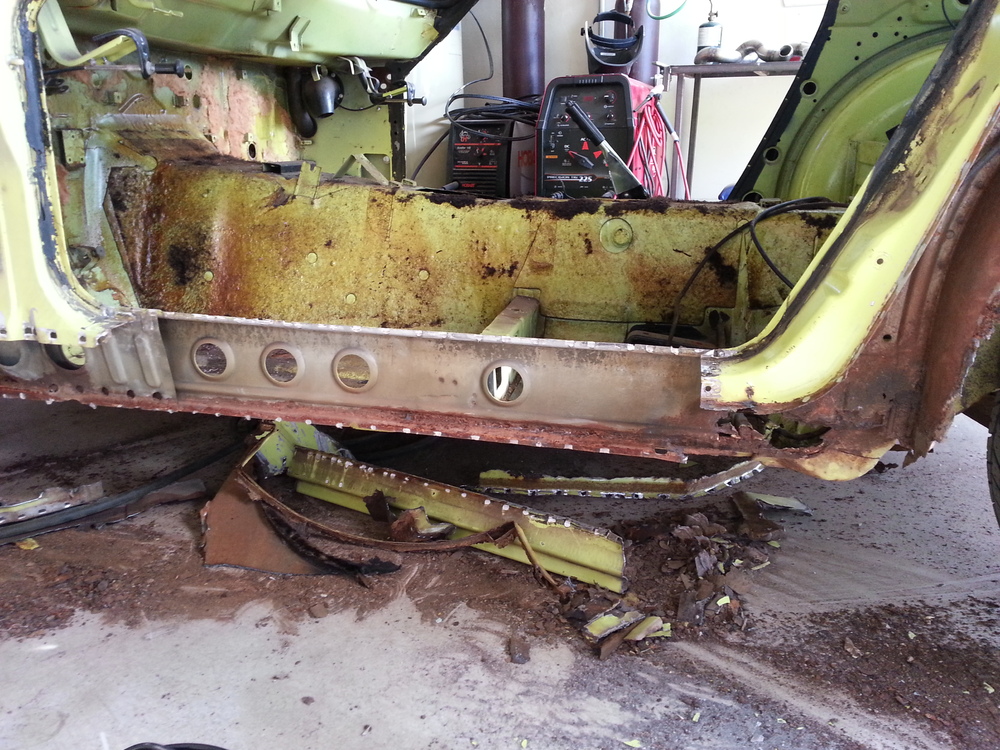
Figure I would contribute to this Forum with my experience on the I had no idea what I got my self into 240Z project. Maybe it will help others restoring their Z or thinking about it. Bought my 240Z back in 2010 or 2011, cant remember, from a student that went to the same college as me. I remembered seeing him drive the car around campus and was in ahhh every time. I usually saw him driving it same day of the week in one my classes seeing out the window during class session. Every time I wasnt able to focus on the class discussion. One day when I was browsing craigslist for Datsuns because I thought I was ready for one, I saw the same car. It was like a calling to me, SAVE ME!! Purchase price was $1,700, tried to talk him down, but his father was there during the transaction and wouldnt lower it. Well anyways, dont want to drag out this intro to long, I had no idea how bad condition the car really was. Well maybe not as bad as some of the projects I see around on the interweb, but still pretty bad in my opinion. I am doing an LS1 swap, because of that I will not show progress or pictures of that since this forum is a purest forum and dont want to start any conflicts with anyone, I think... I dont let me know if its alright and I will. What I will show for now is the rust repairs I've been working on the past year or so. Pictures: These are pictures of the craigslist ad. Pictures of when I got it, over the years. I fixed random stuff and the engine to keep it running. Interior was pretty good, few stuff thats bad here and there but over in good shape. The owners I bought it from clearly had no idea on how to work on cars, had to fix a lot, and I mean a lot of there work. Summer of 2015, Started tearing into it, repairing rust Started with the driver side rocker area. Got to start somewhere... I Will just post nothing but pictures from here, they kind of described what was going on. To much to talk about right now. Just ask me any questions, and I will try my best to answer. I will give a briefing though. I was going into this project thinking that only the common rusted areas will only need replacing and then I can move on to work on the engine, suspension, wiring, etc. to get the car going. I was dead wrong. All I had been doing mostly is making replacement panels for the rusted areas. I originally bought some of the replacement panels/rails you can buy online, but I was disgusted on the poor fitment (I will not name the companies, but will upon request). I cant believe everyone in the Z world has been putting up with crappy replacement panels offered by these companies... Because I did not like the fitment, and I didnt know anyone locally that does this kind of work, I went on my journey to learn how to shape metal, I already knew how to weld, but shaping metal is a whole different domain in the metal world. I am actually glad because I have learned so much, and it is actually fun to metal shape. The panels I made arent perfect, but I will say they fit better than the said panels you can buy online. Also I came to the mind set of this being a learning curve project for gaining experience metal shaping. Enjoy the pictures!! Next set of images will be on next post... Work in progress with getting images up.


-
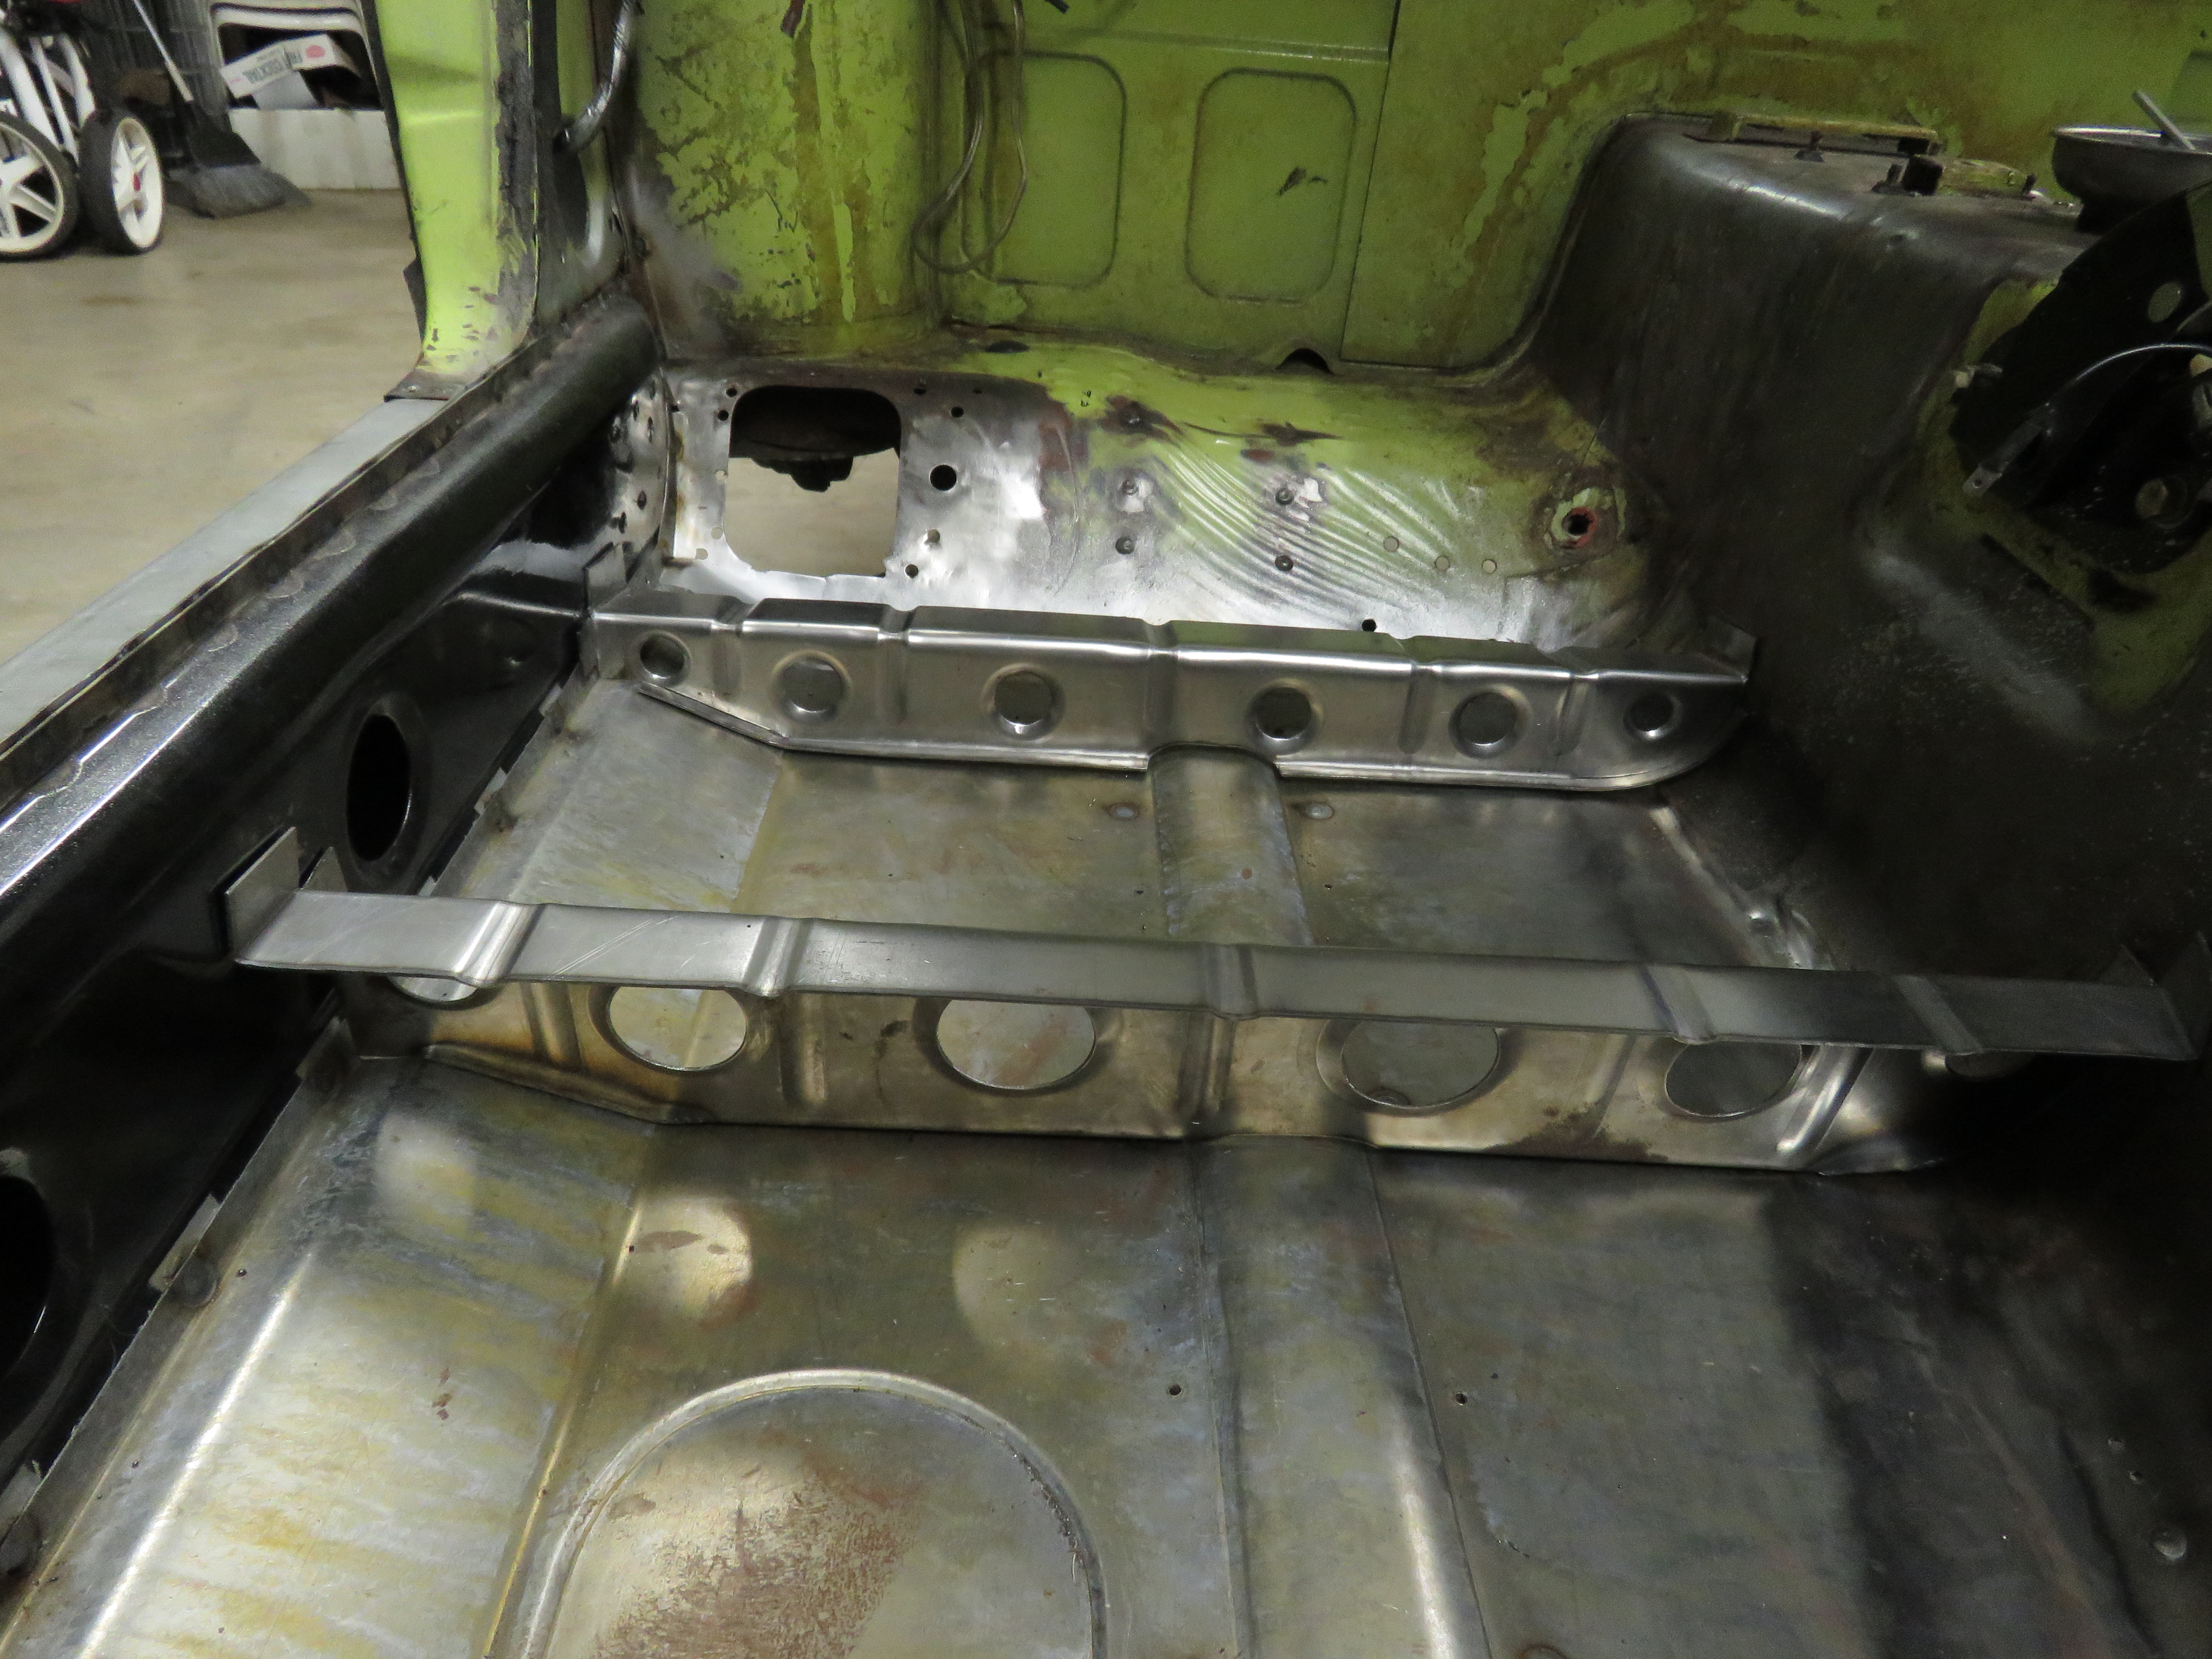
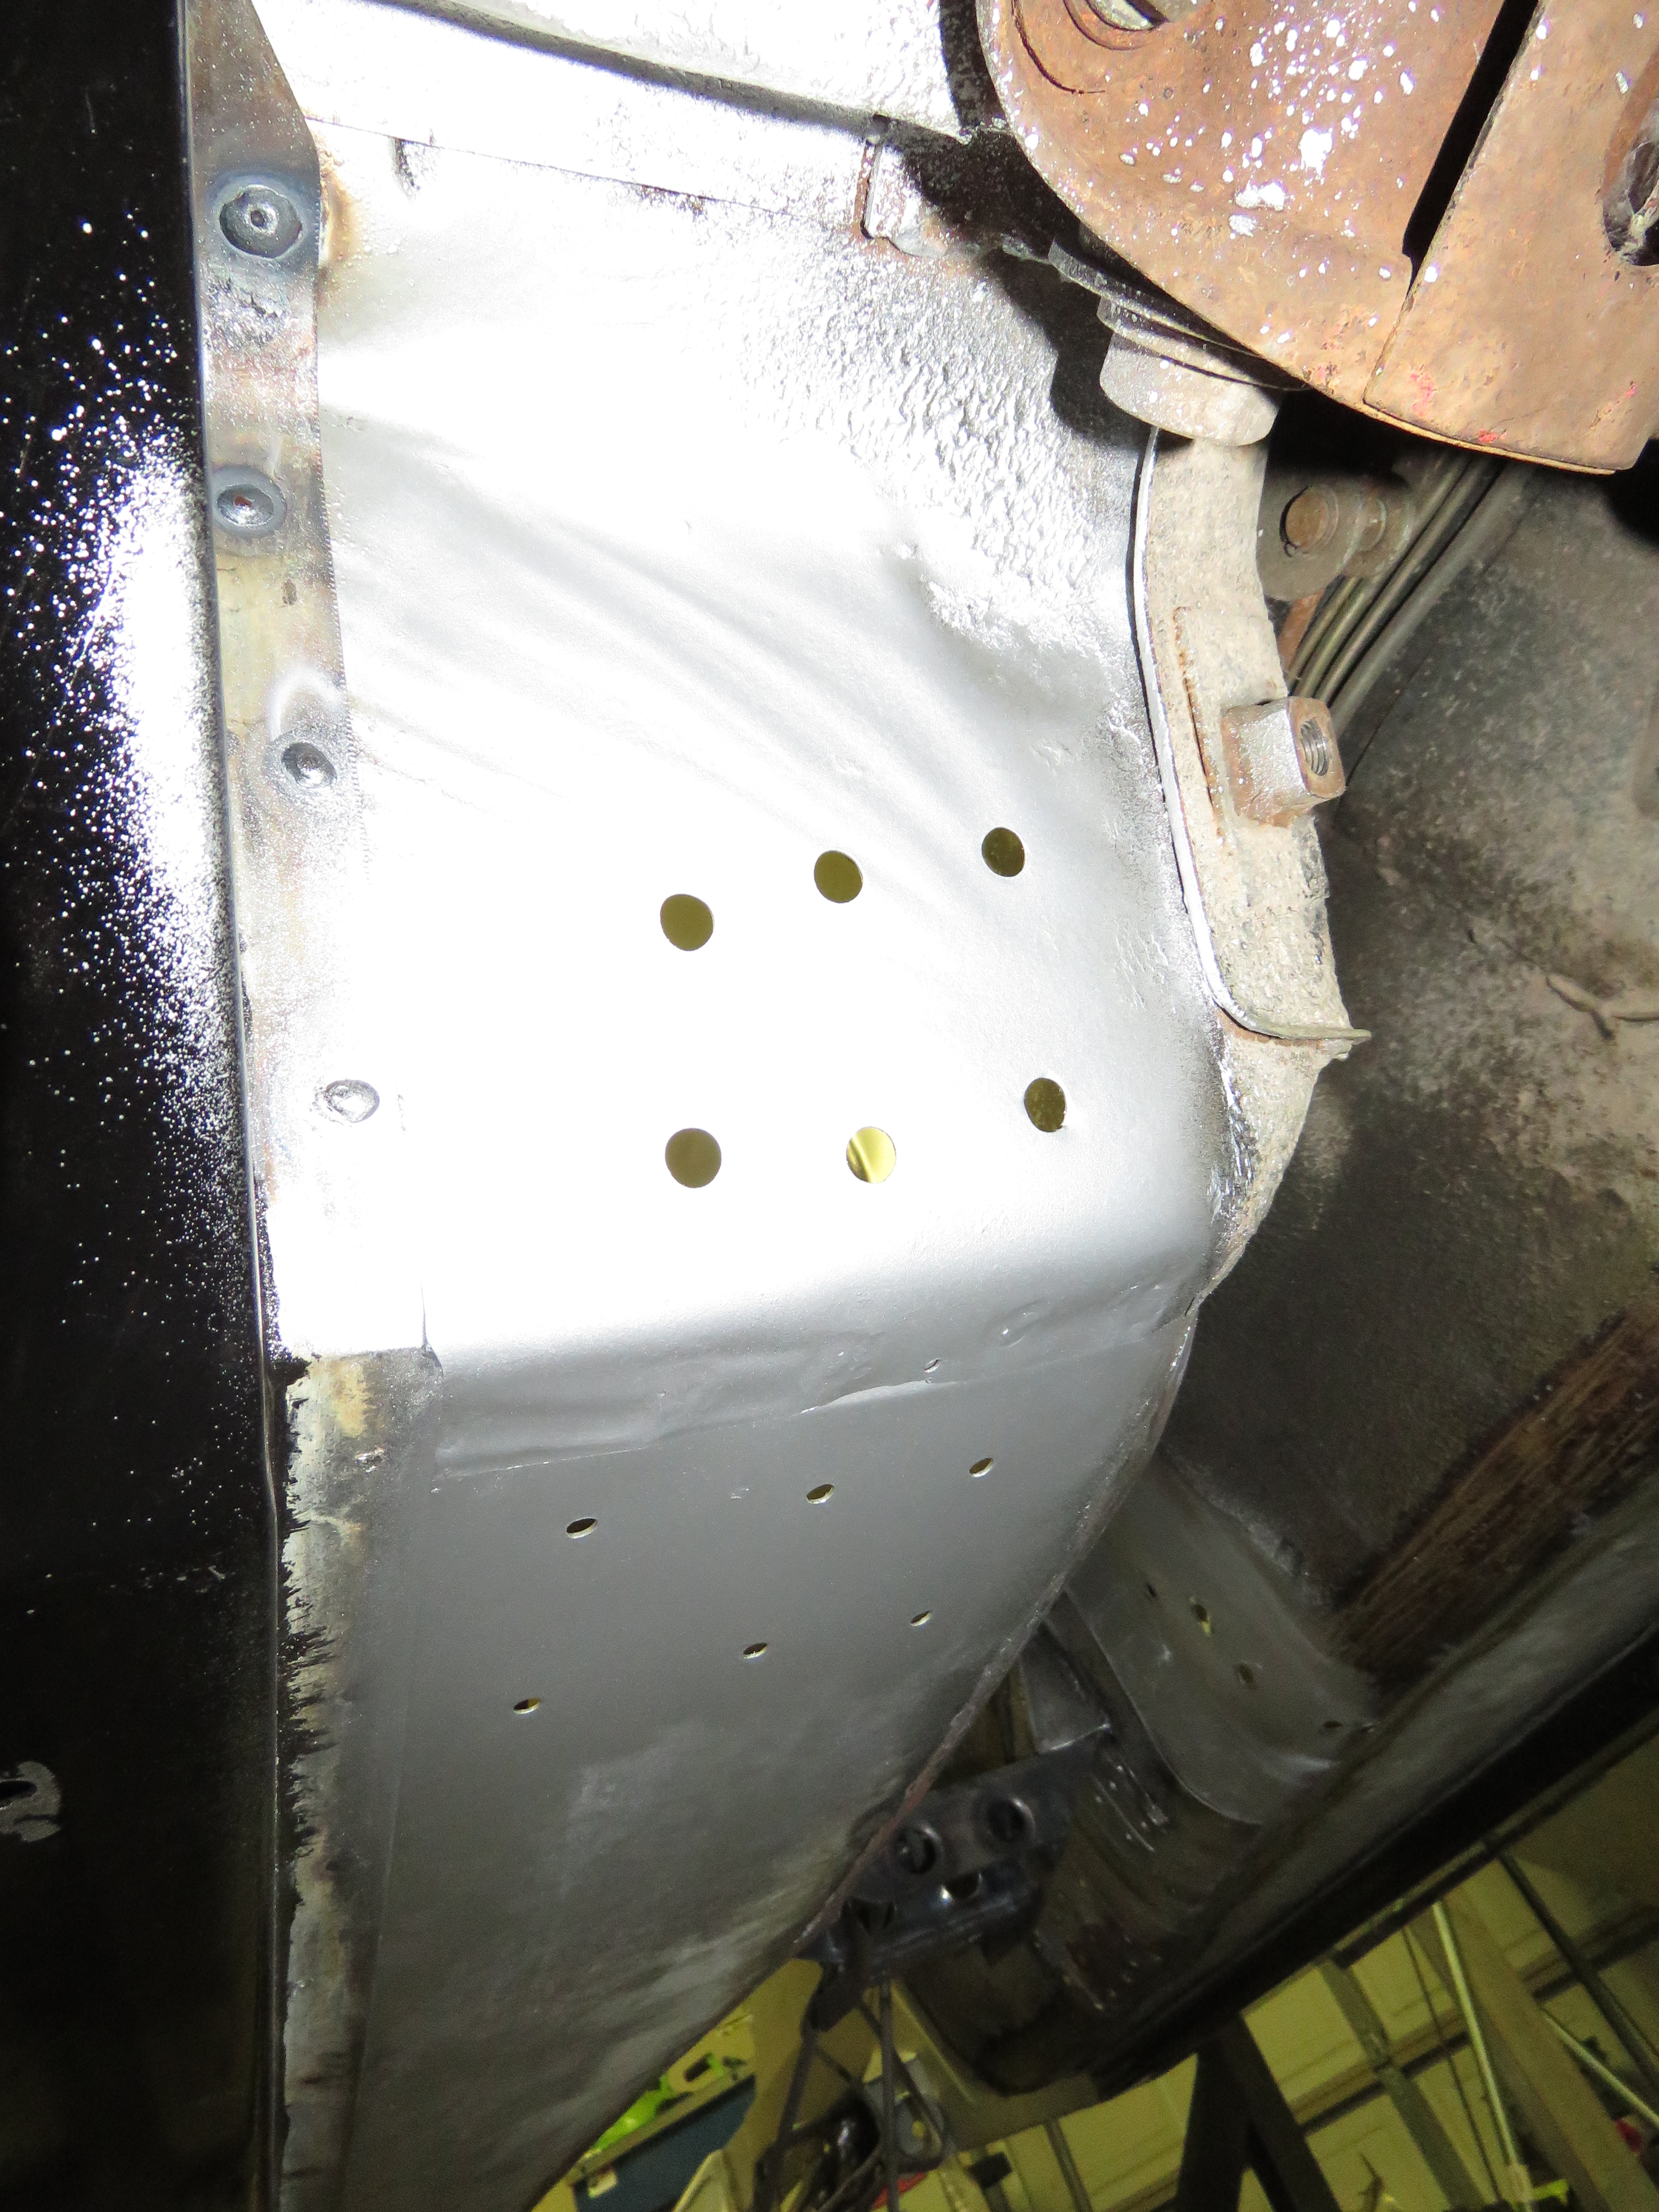
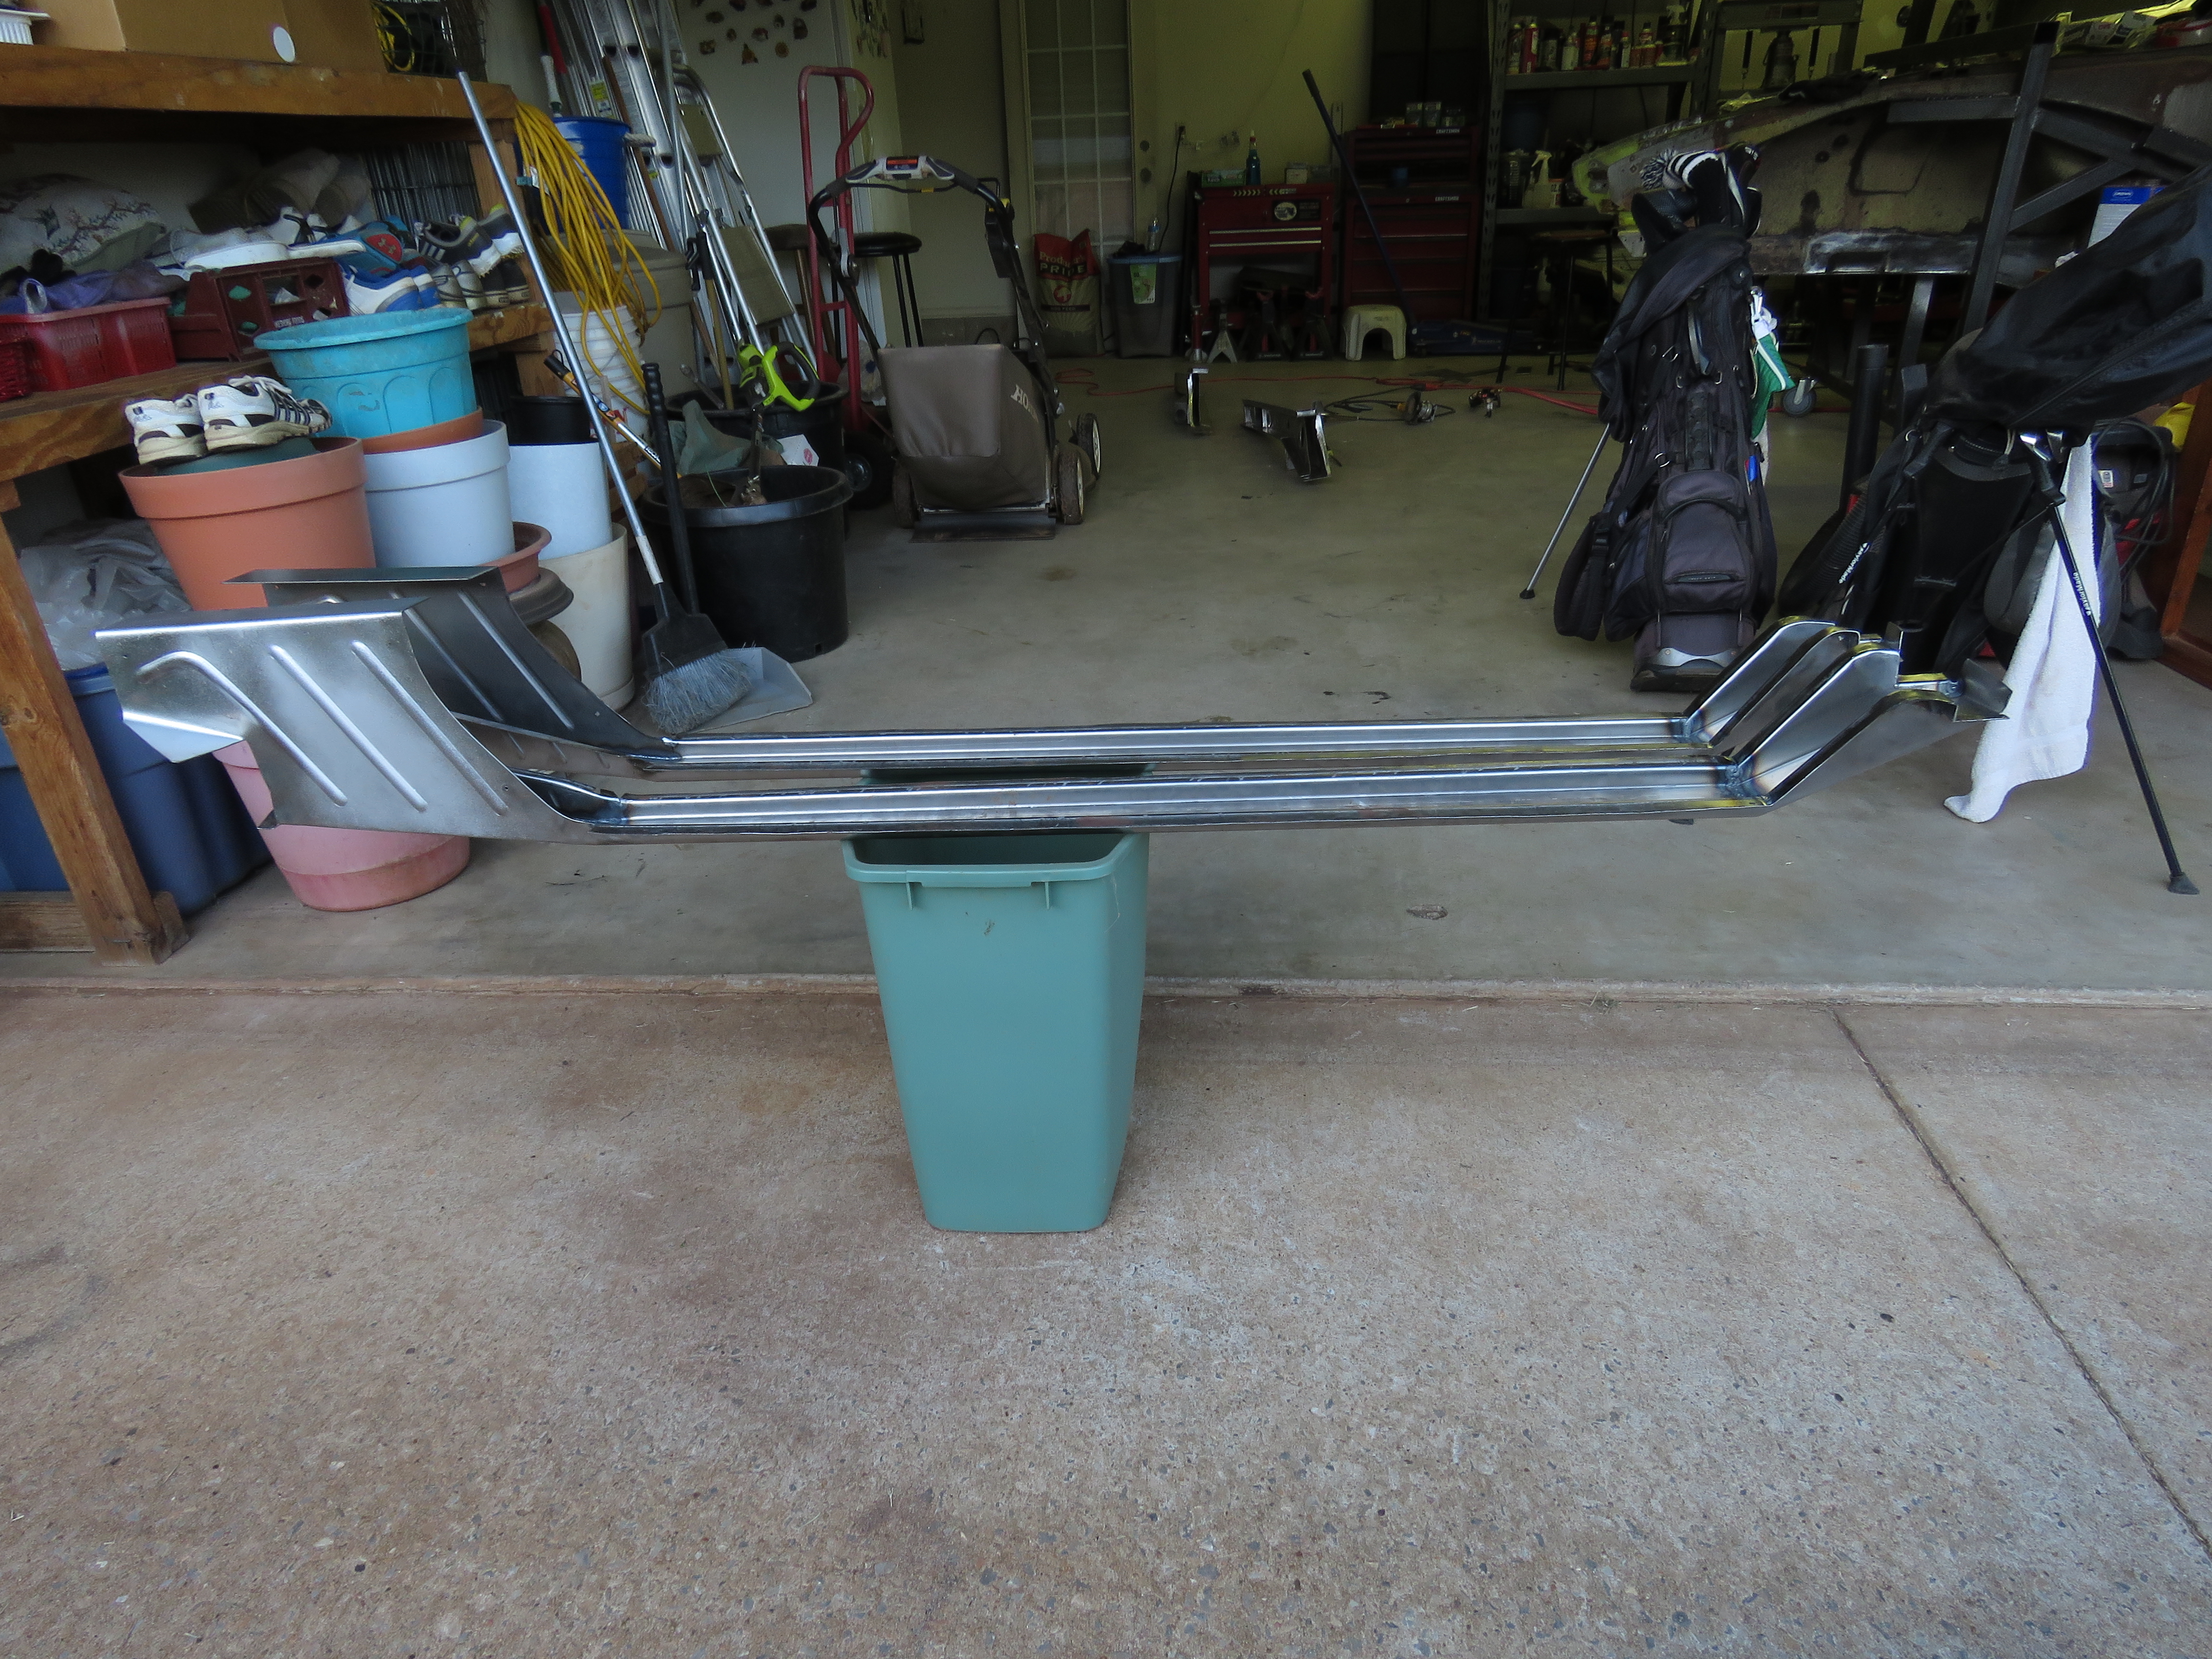
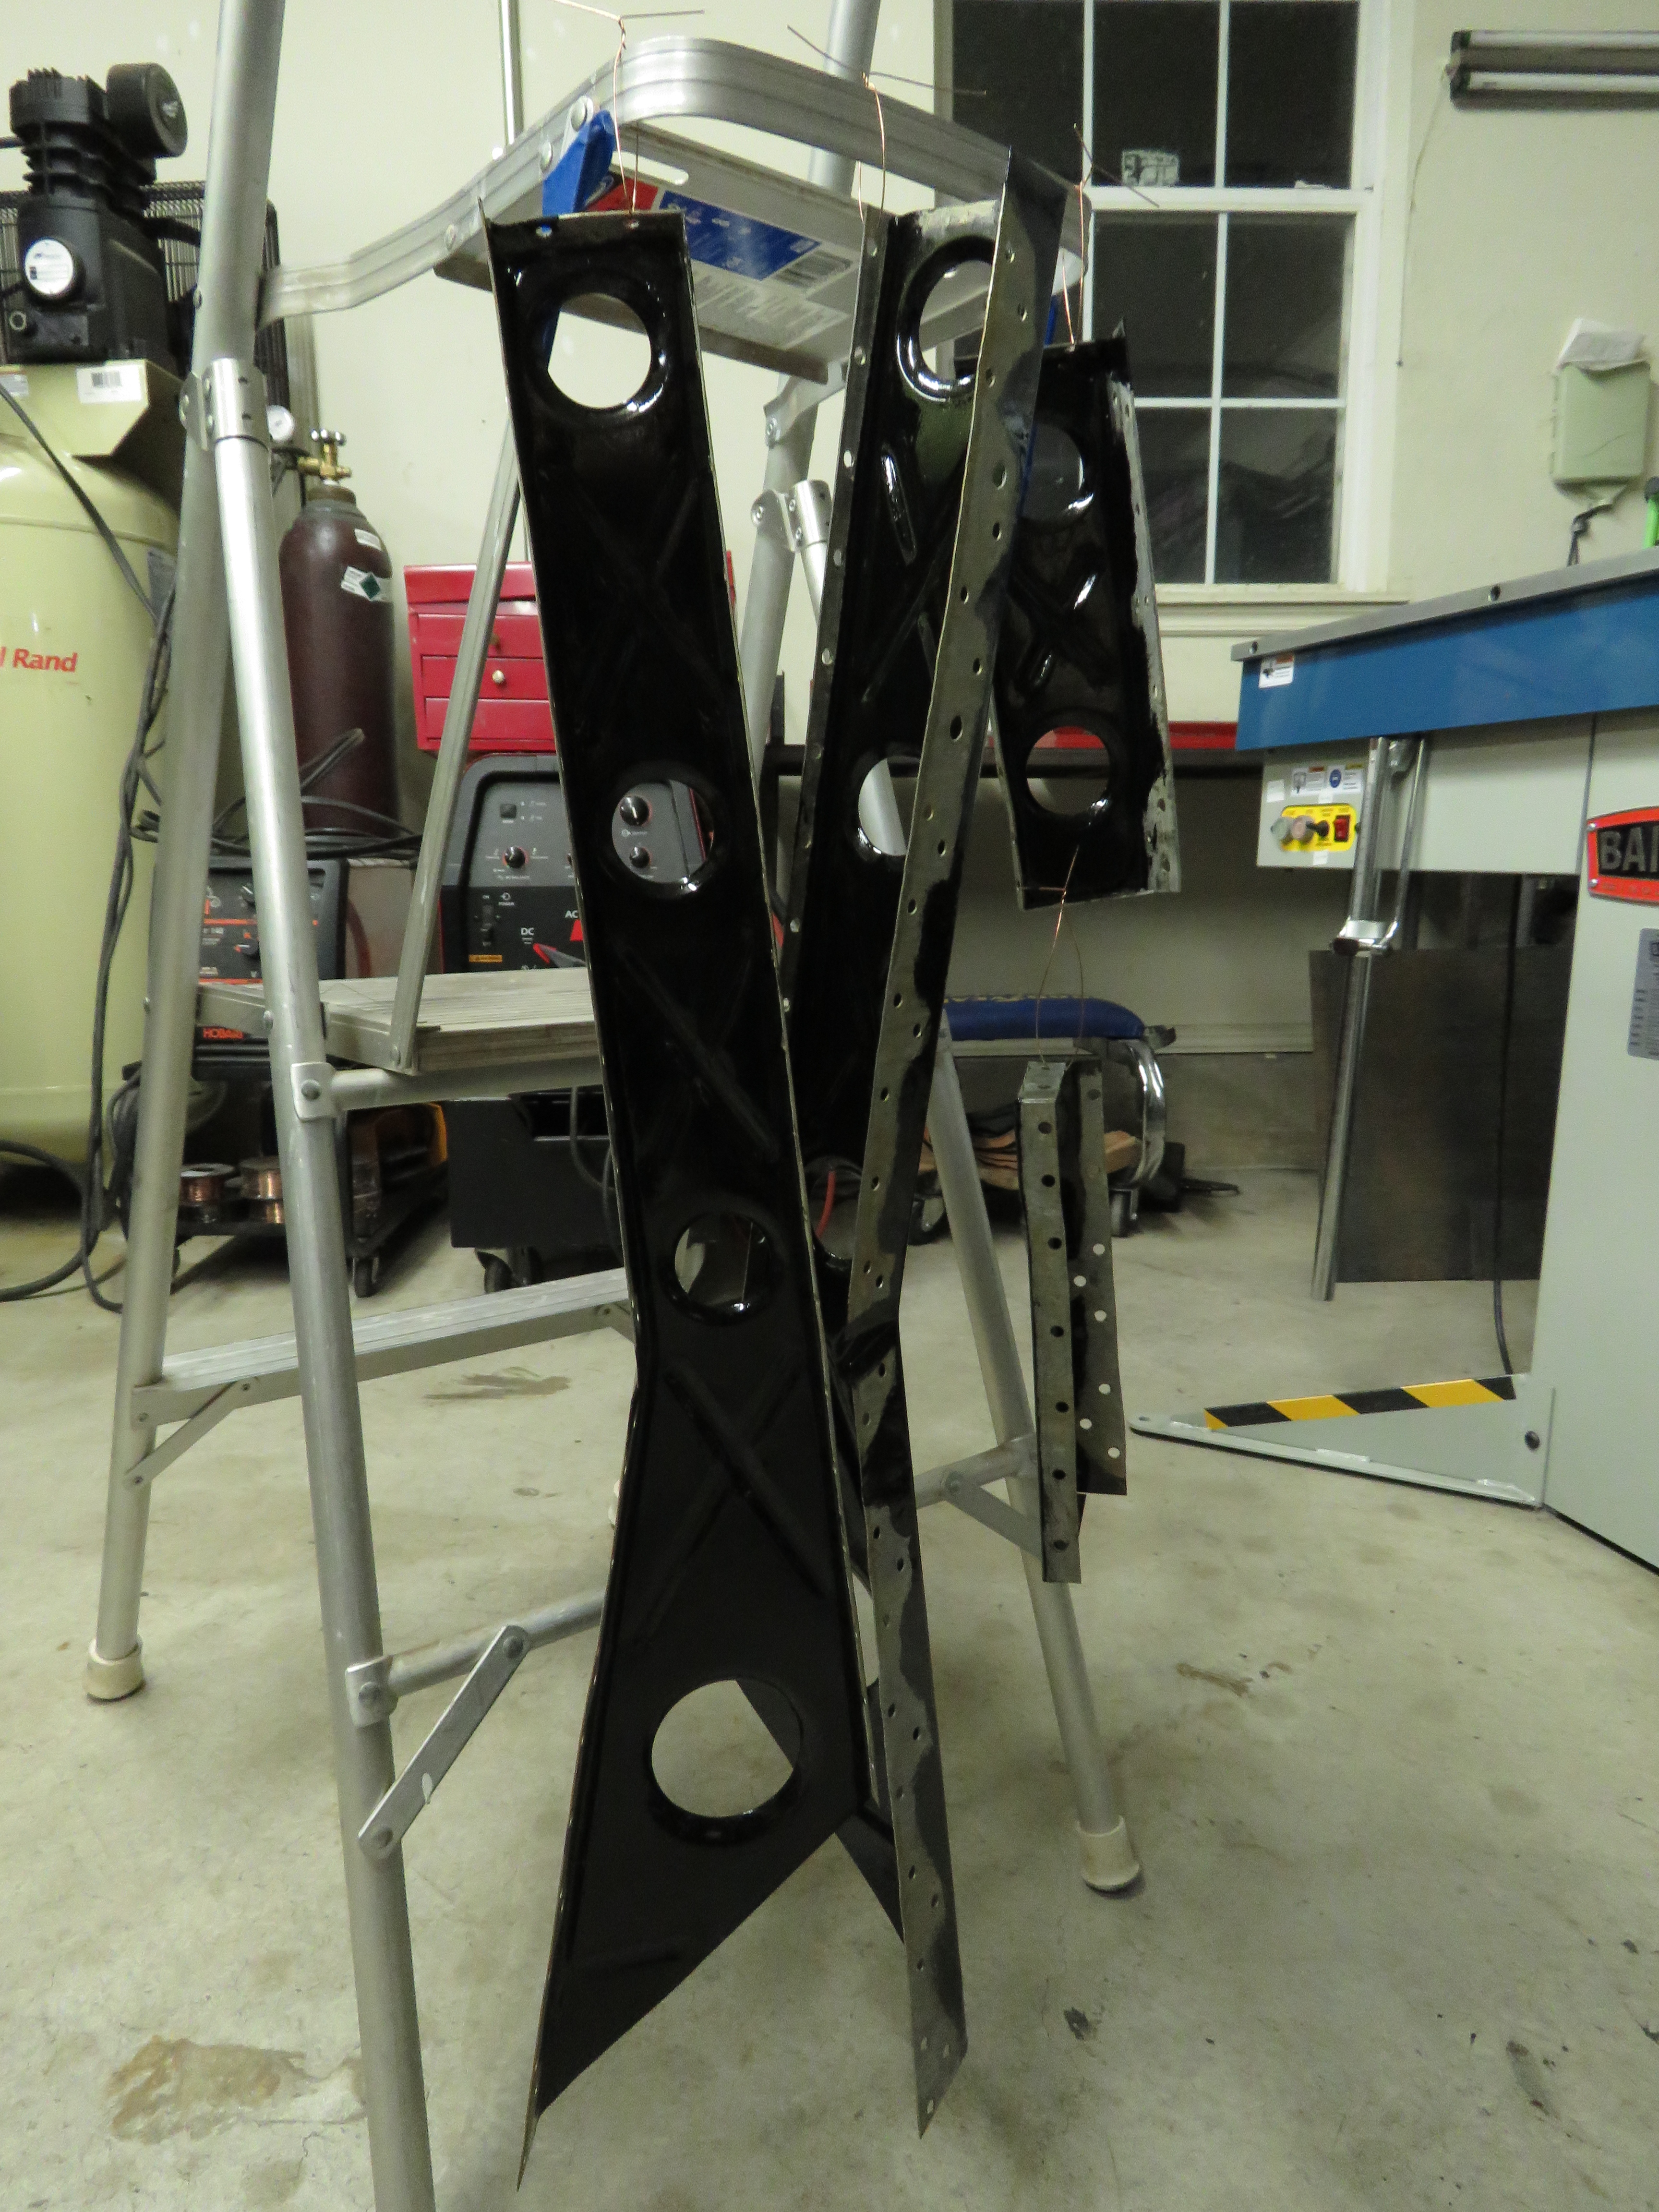
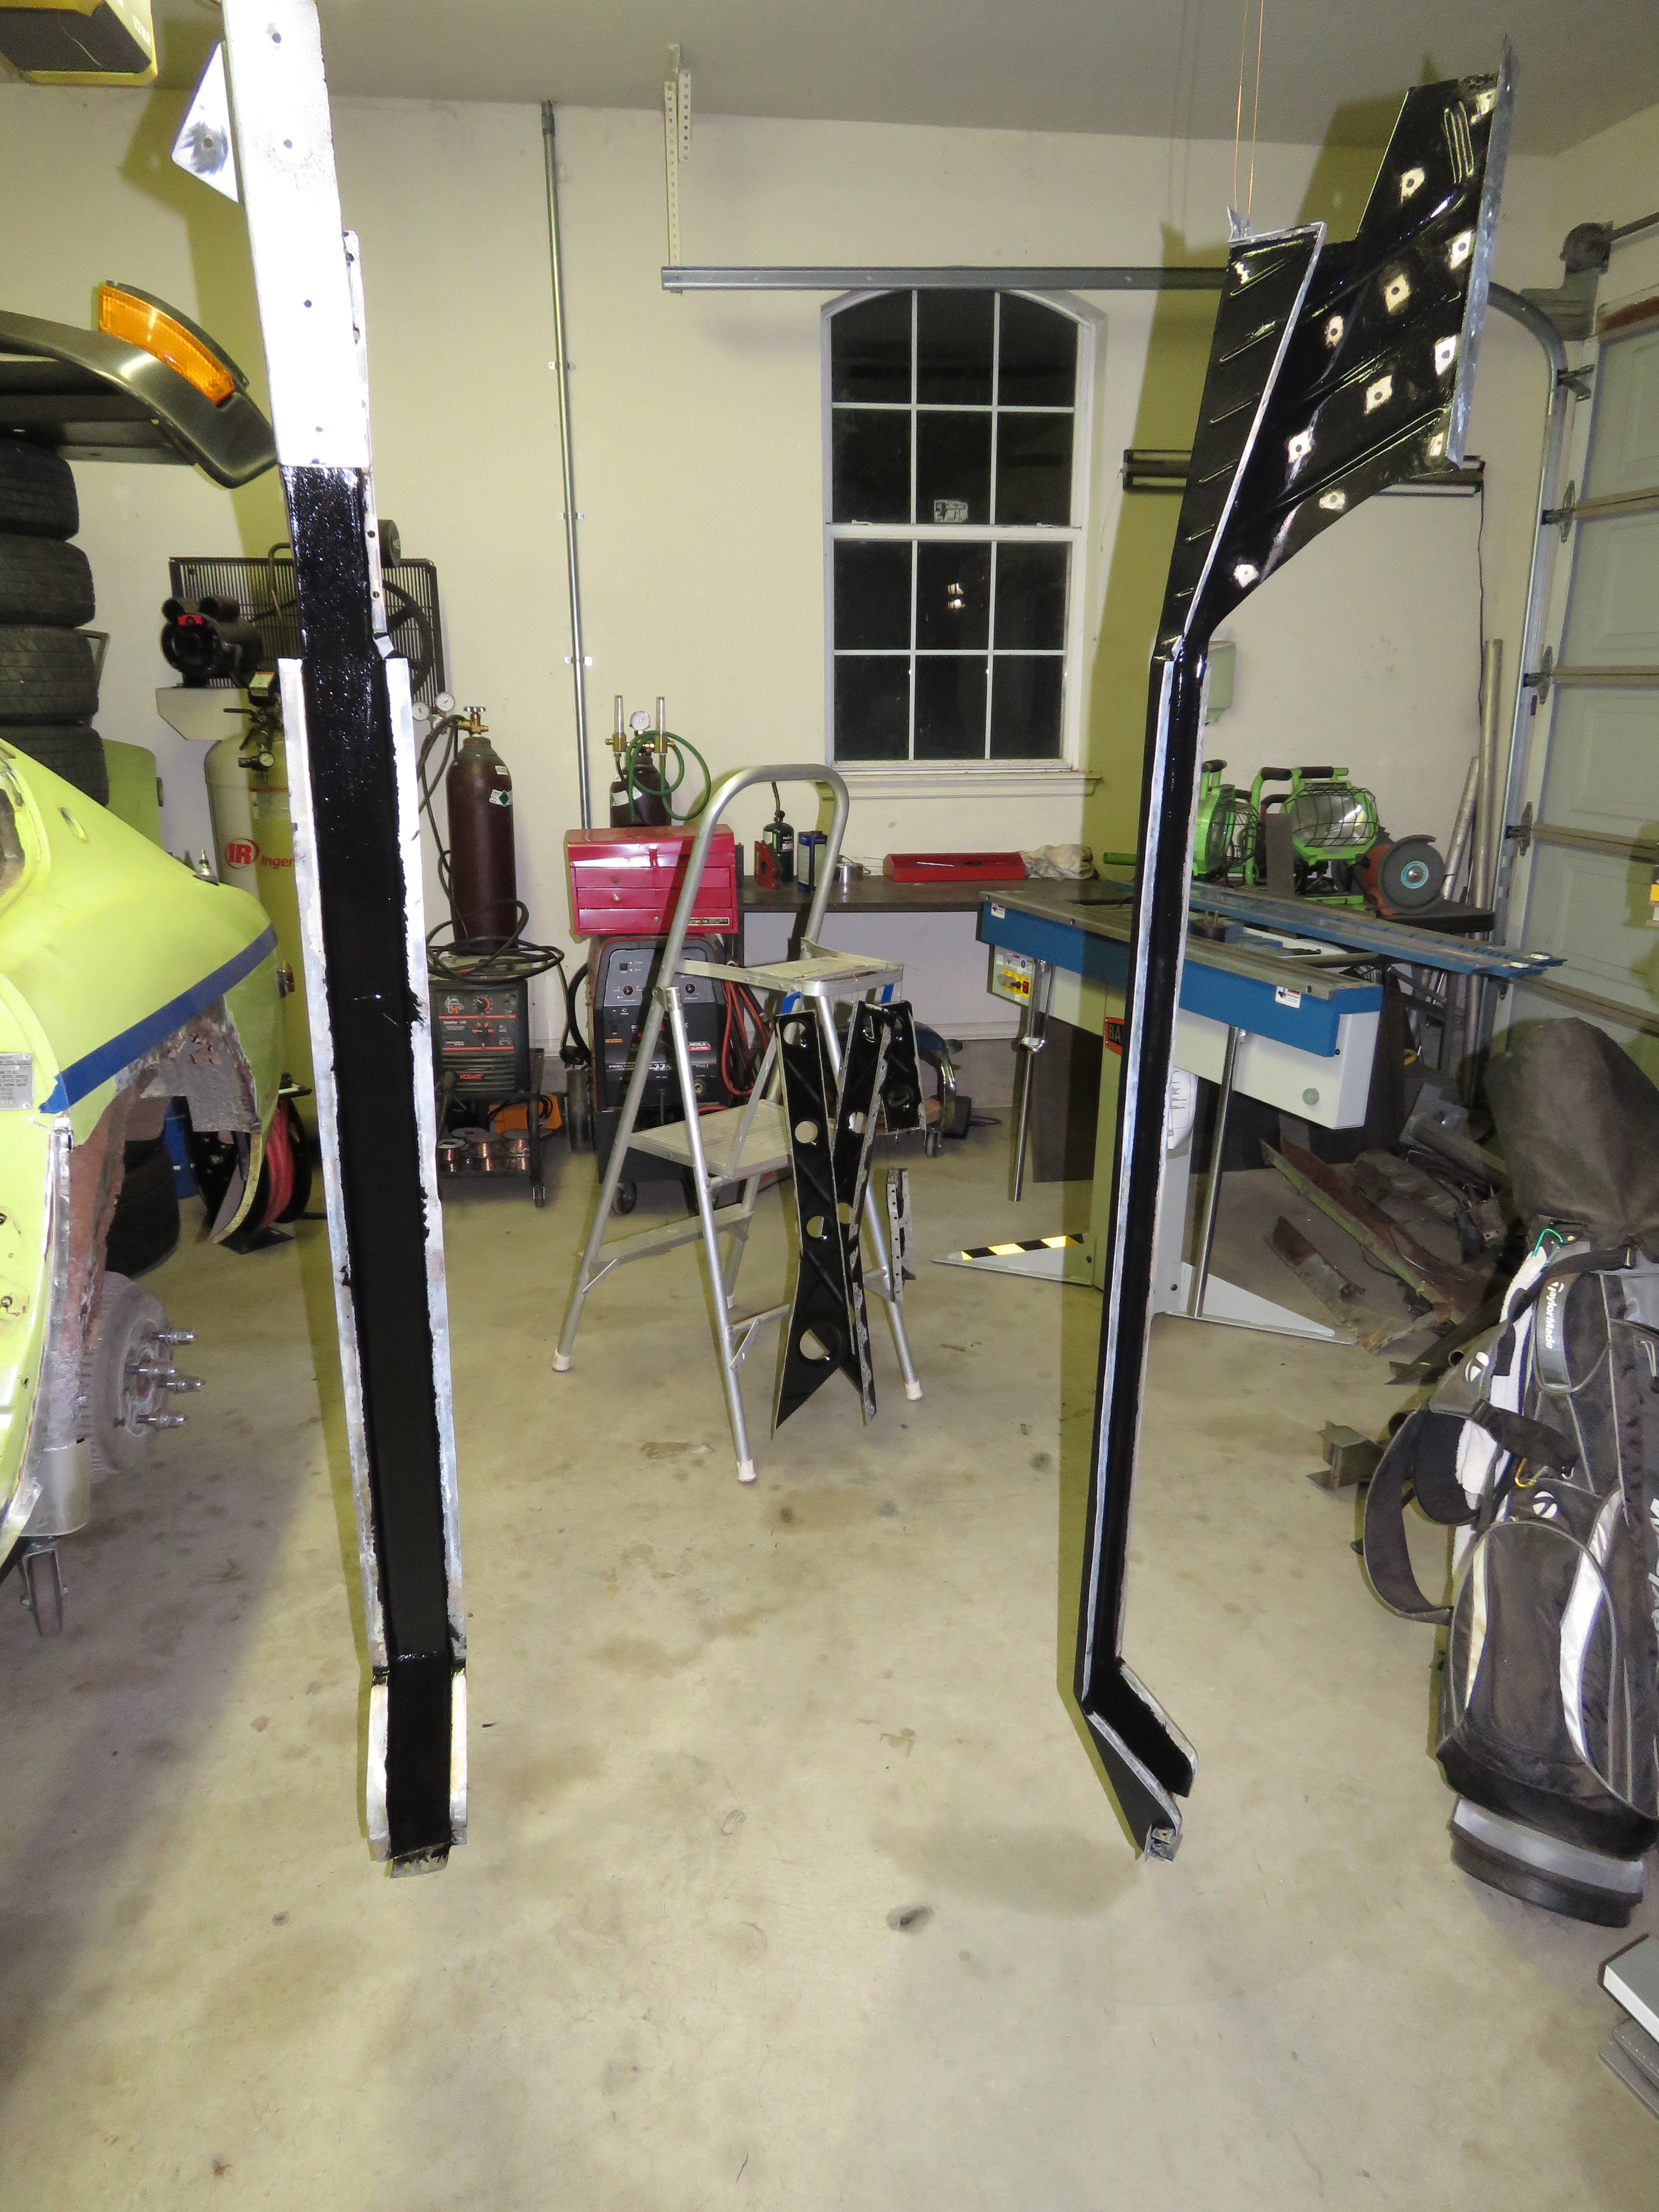
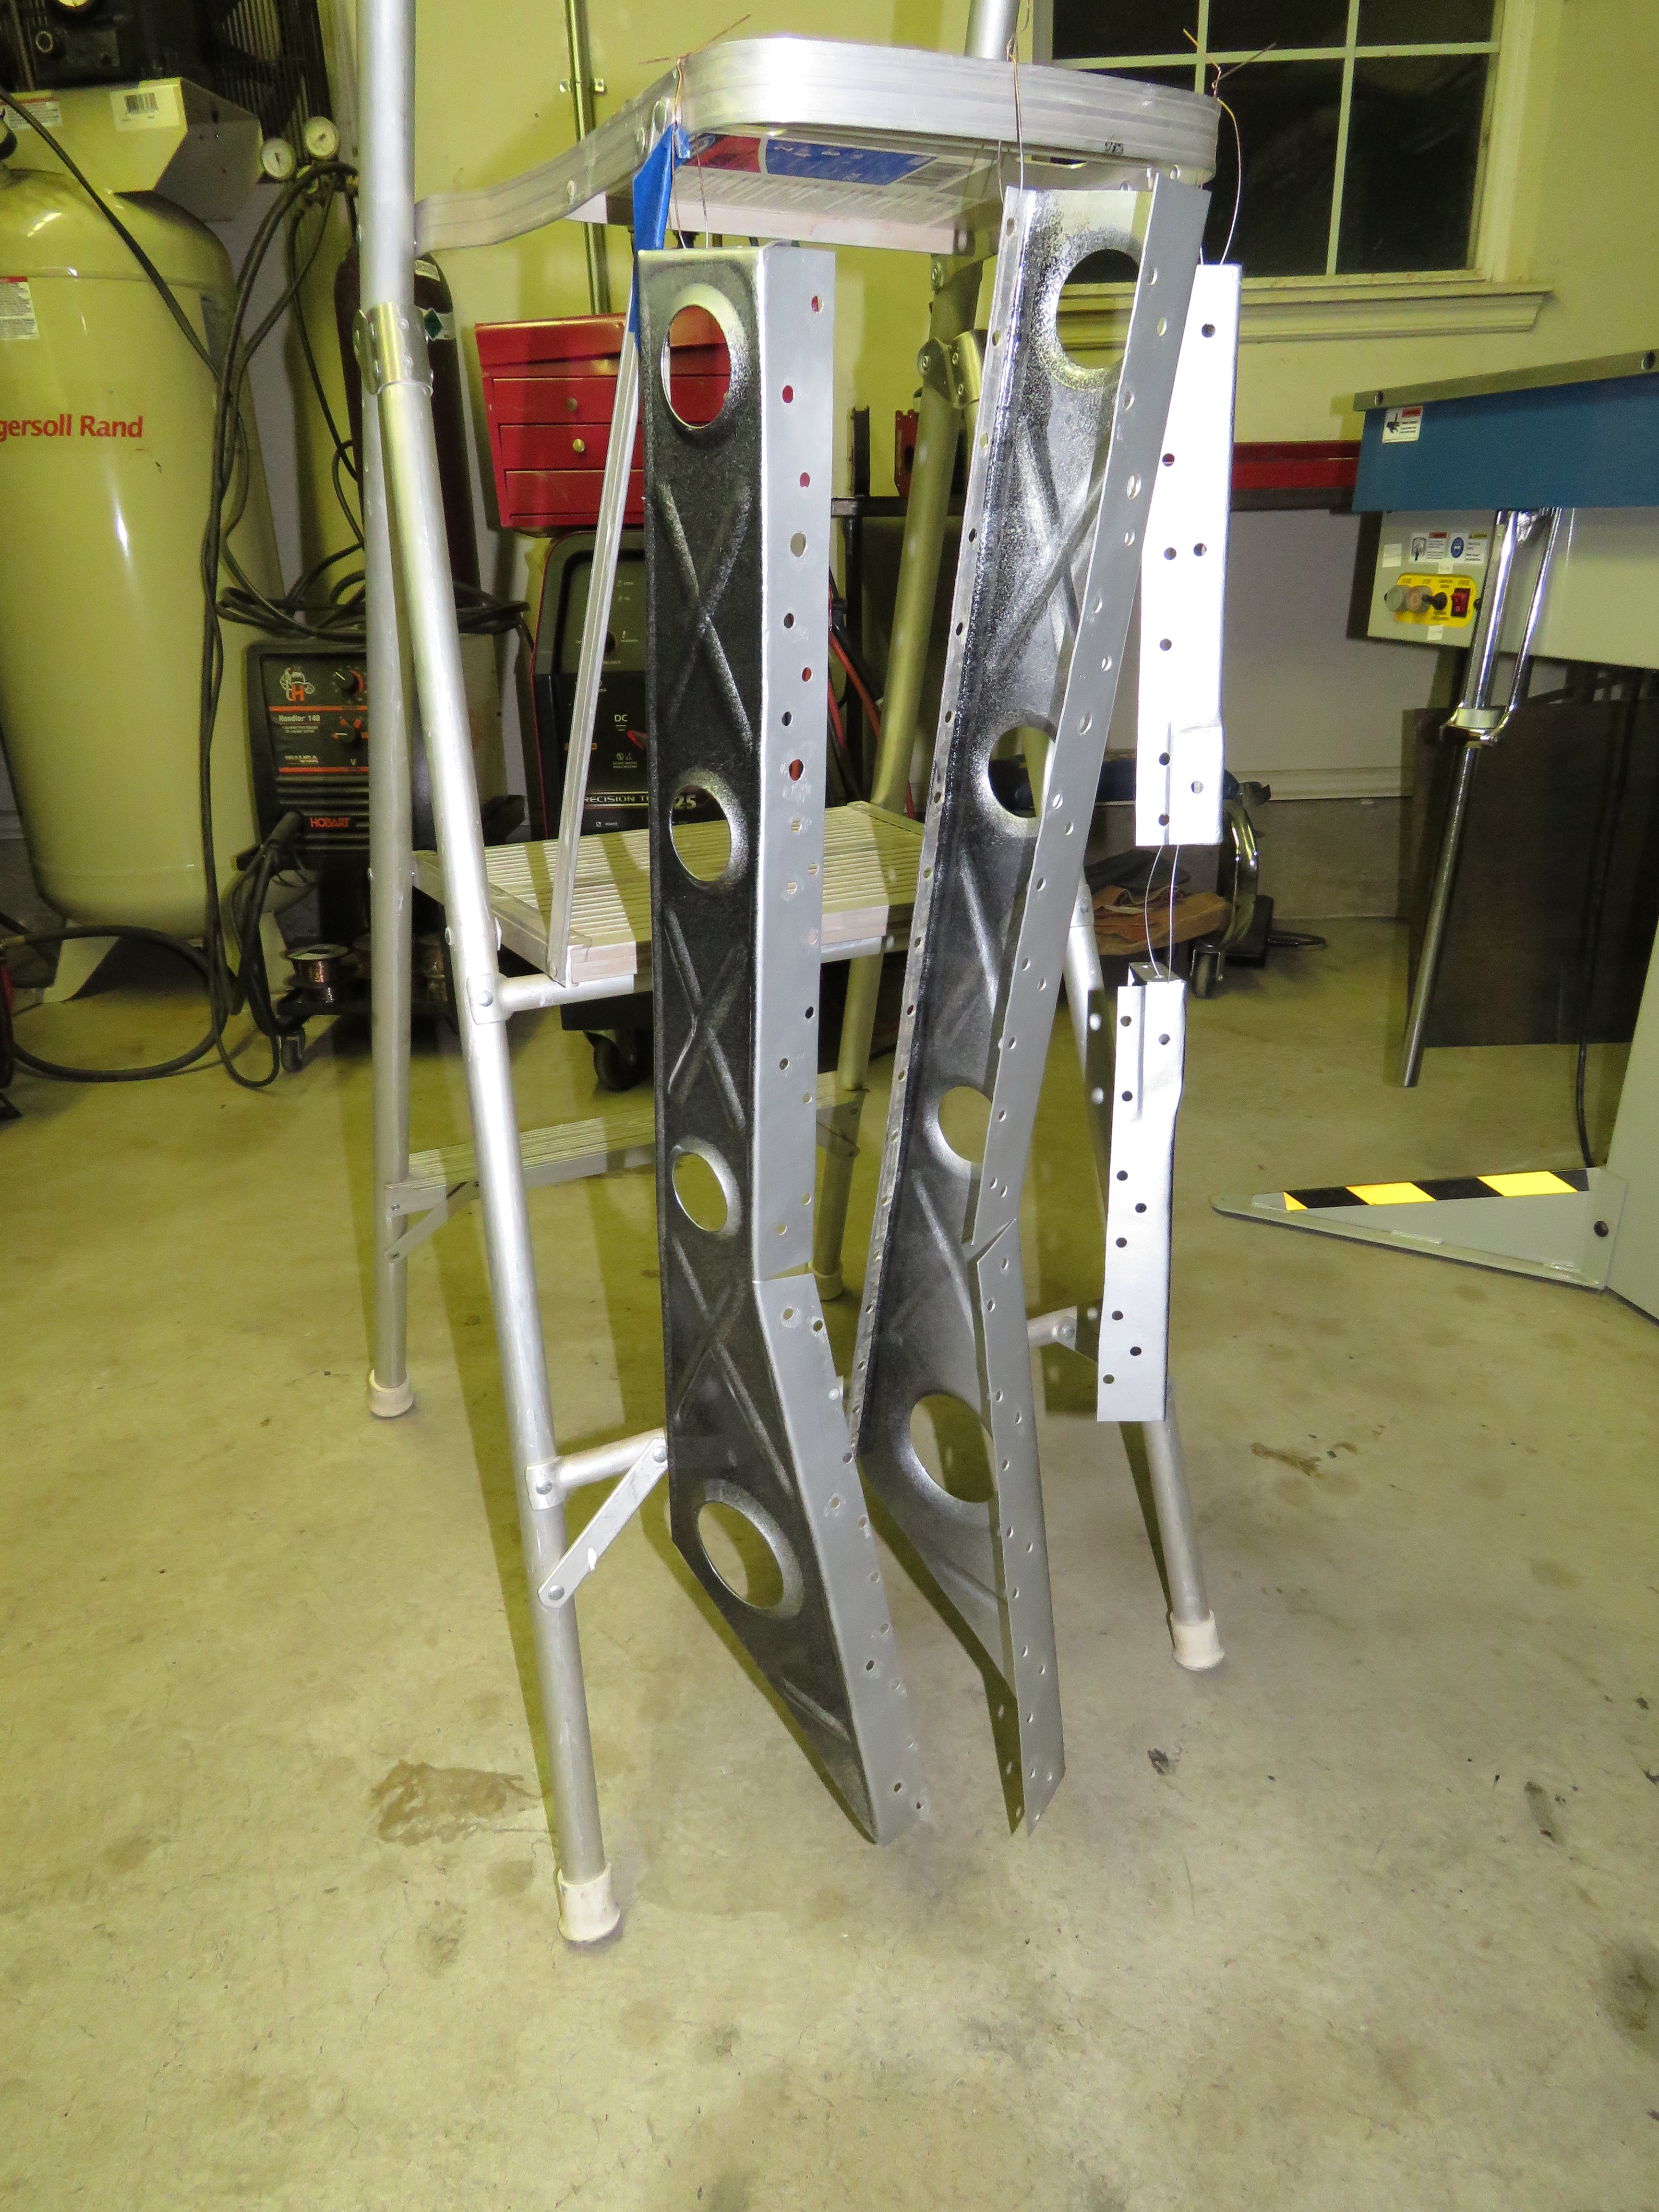
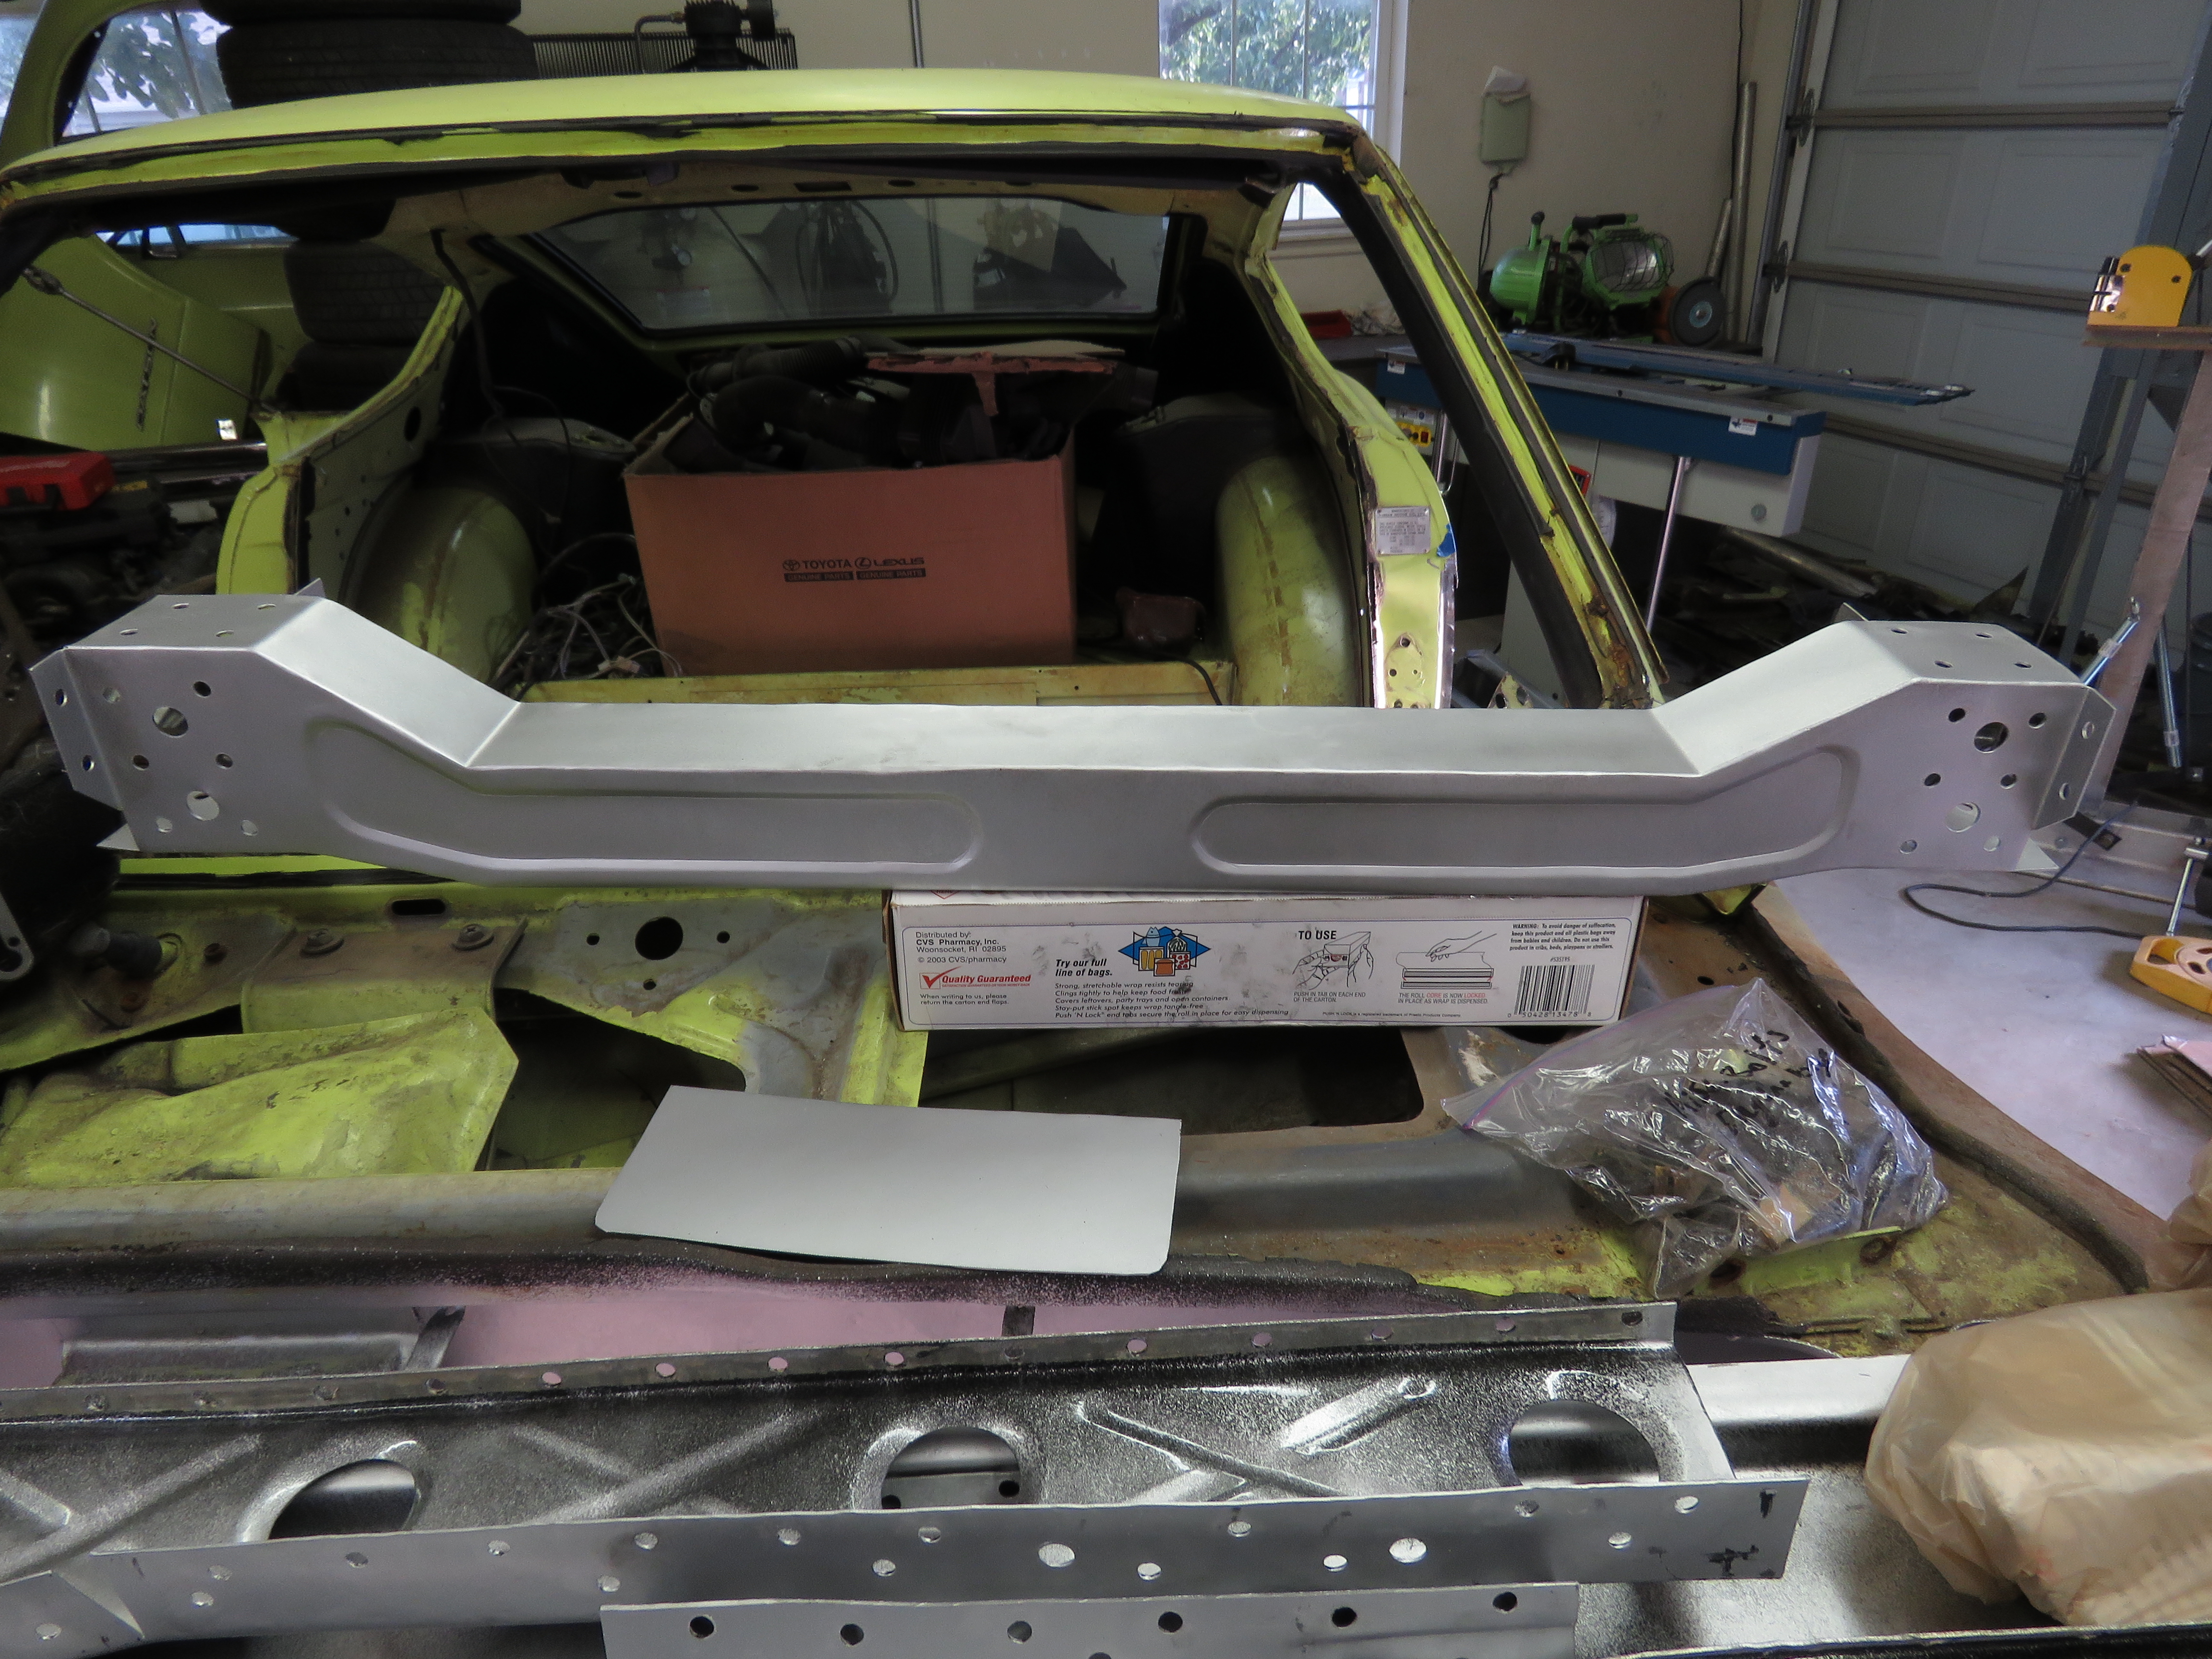
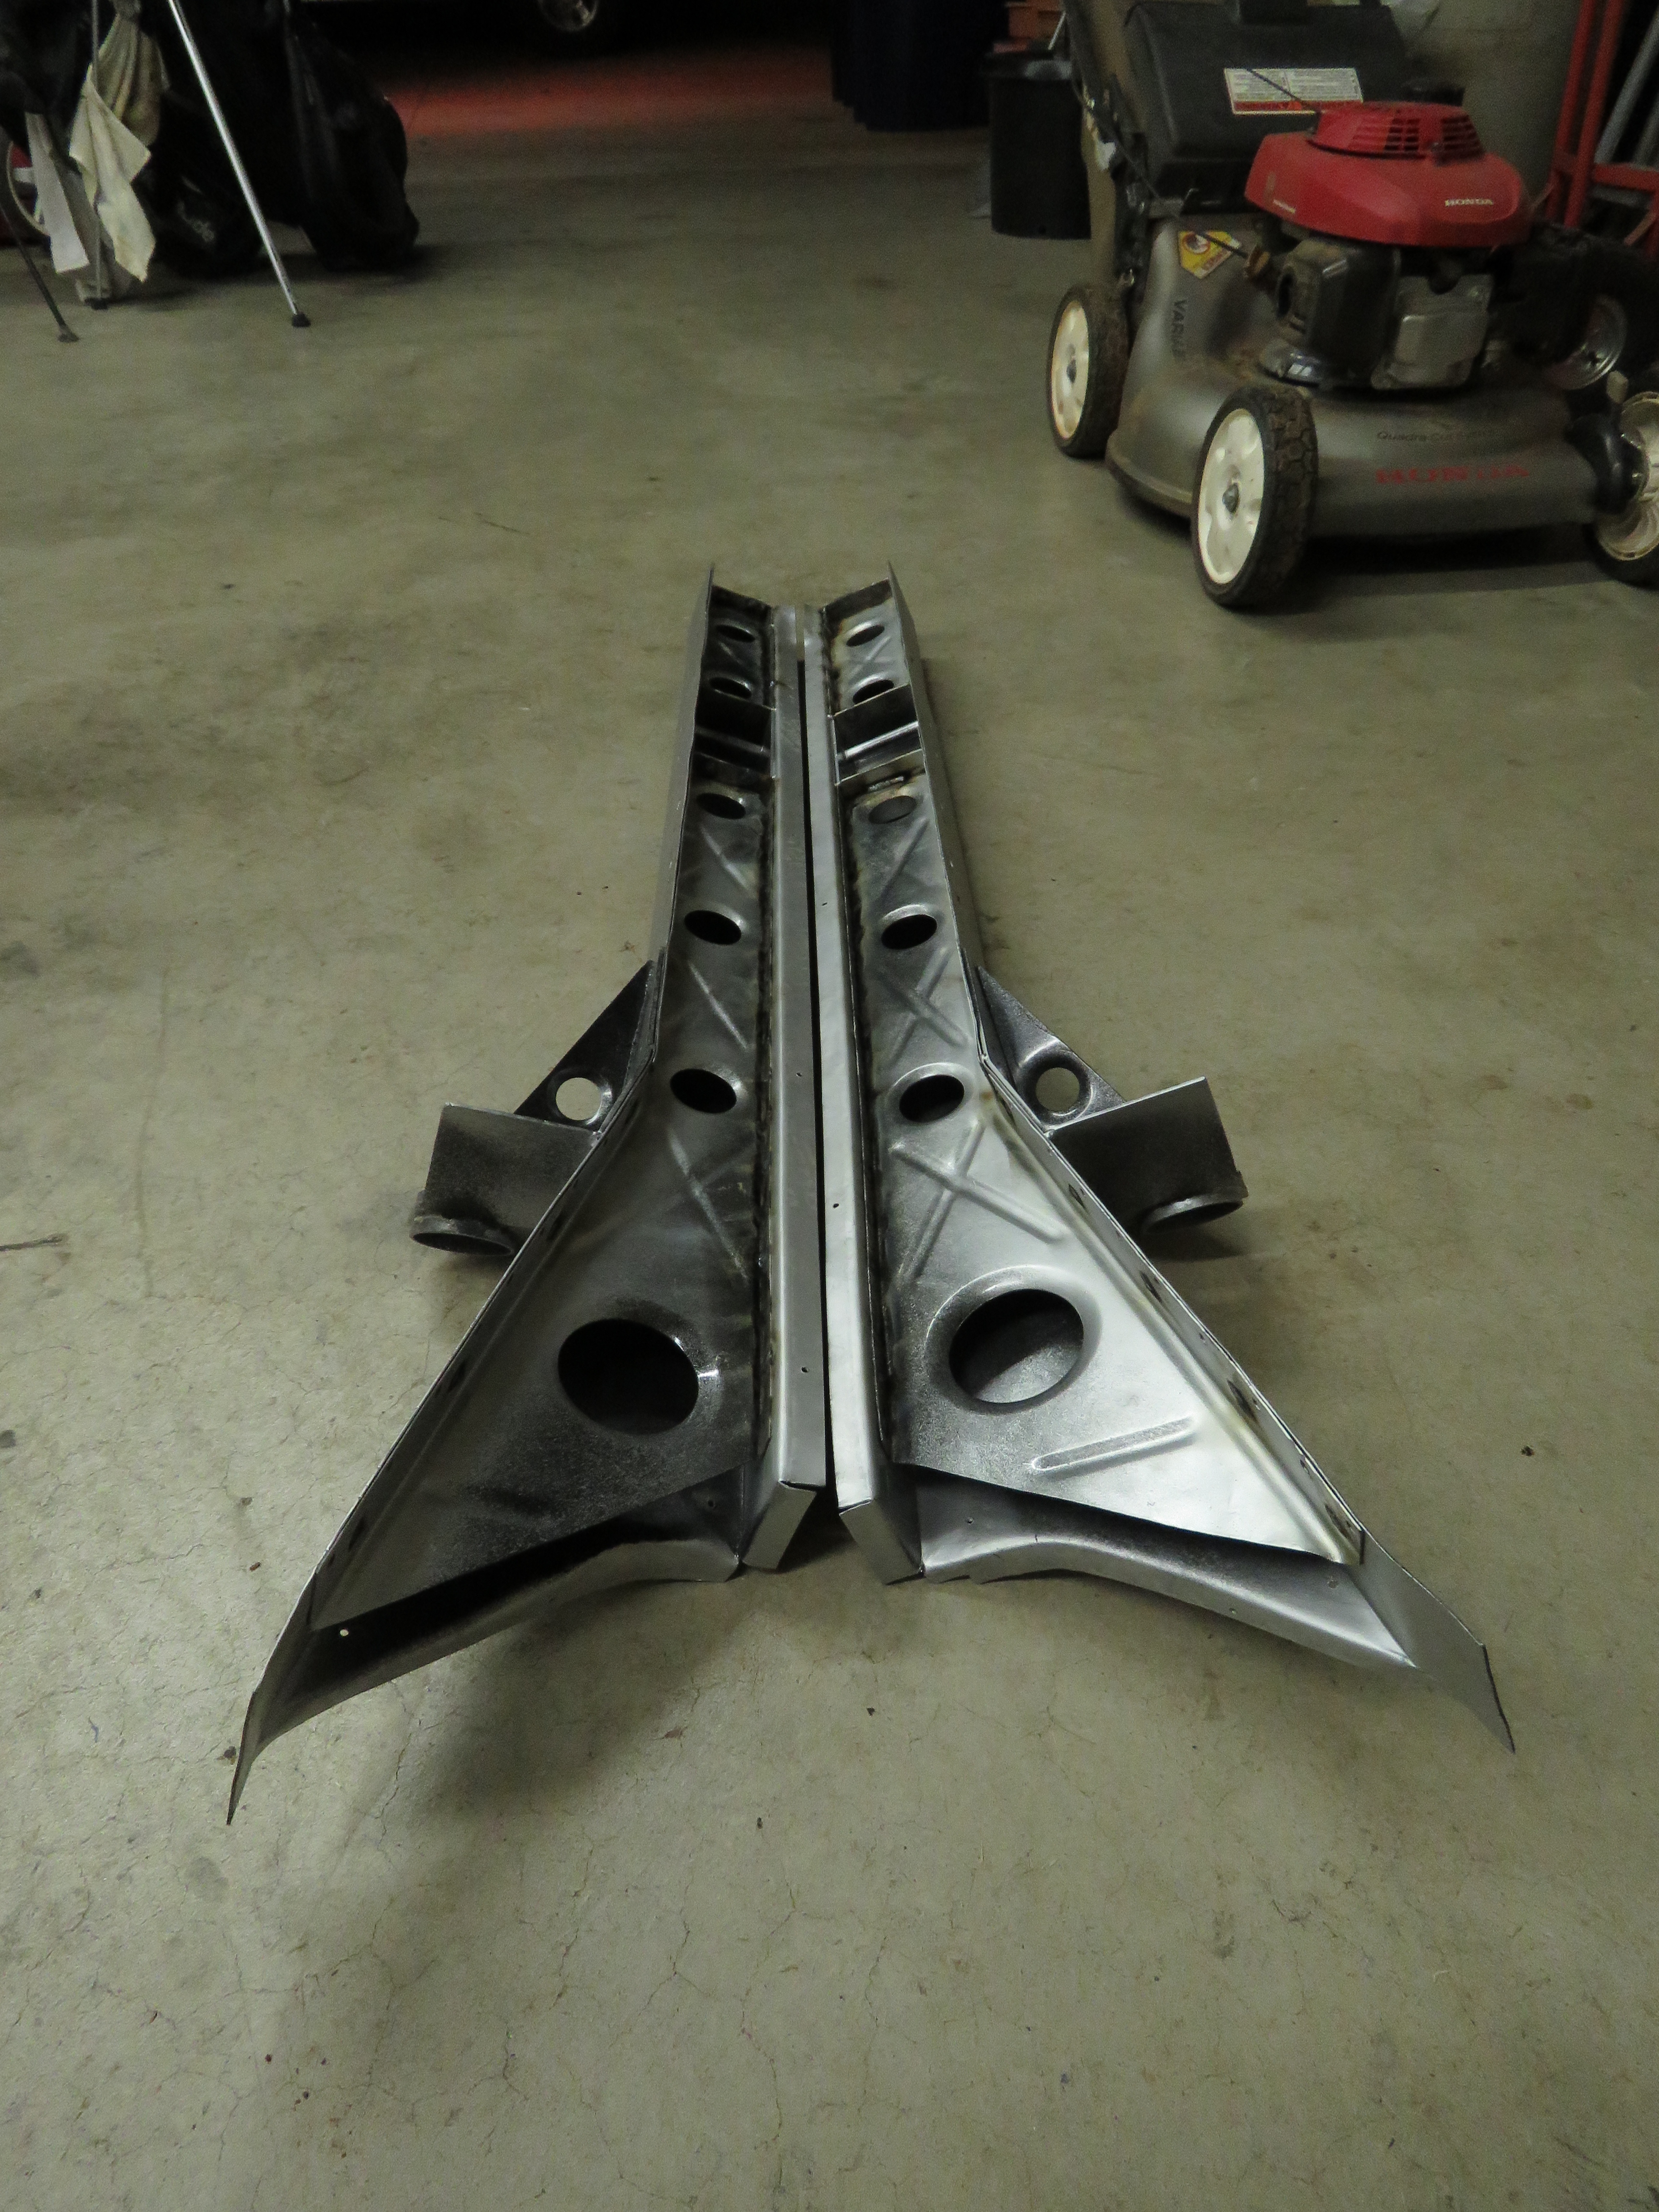
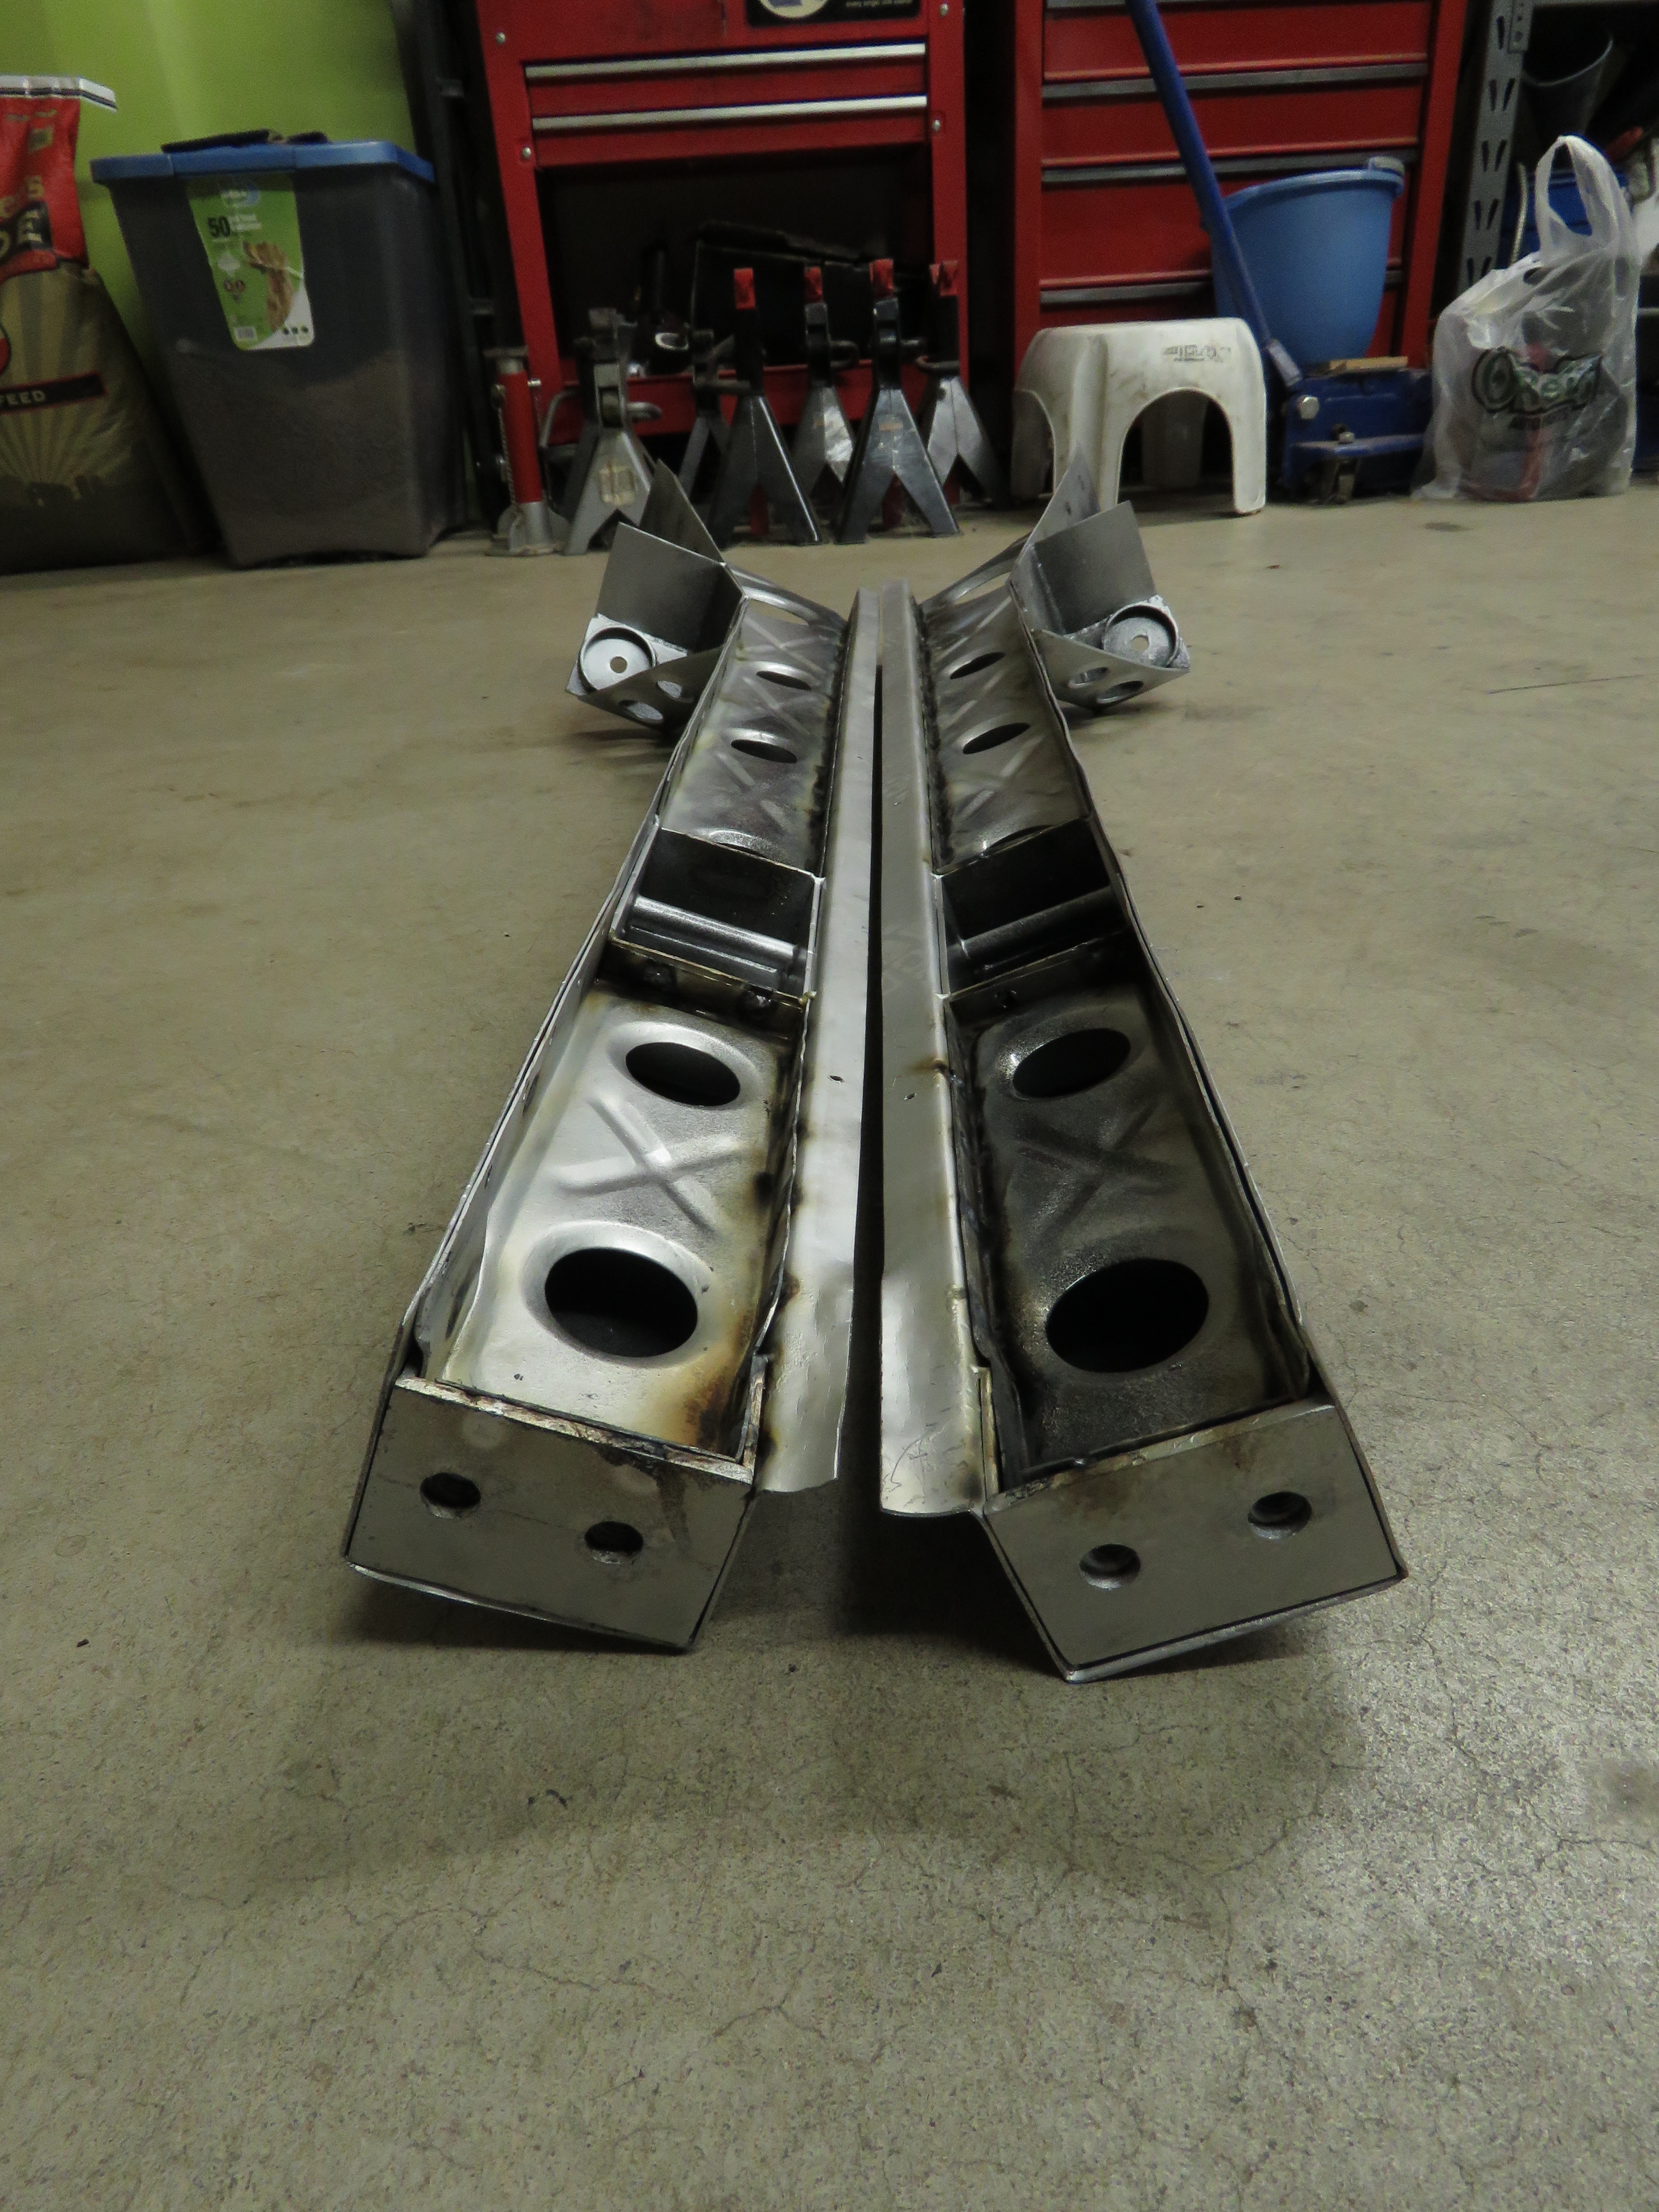
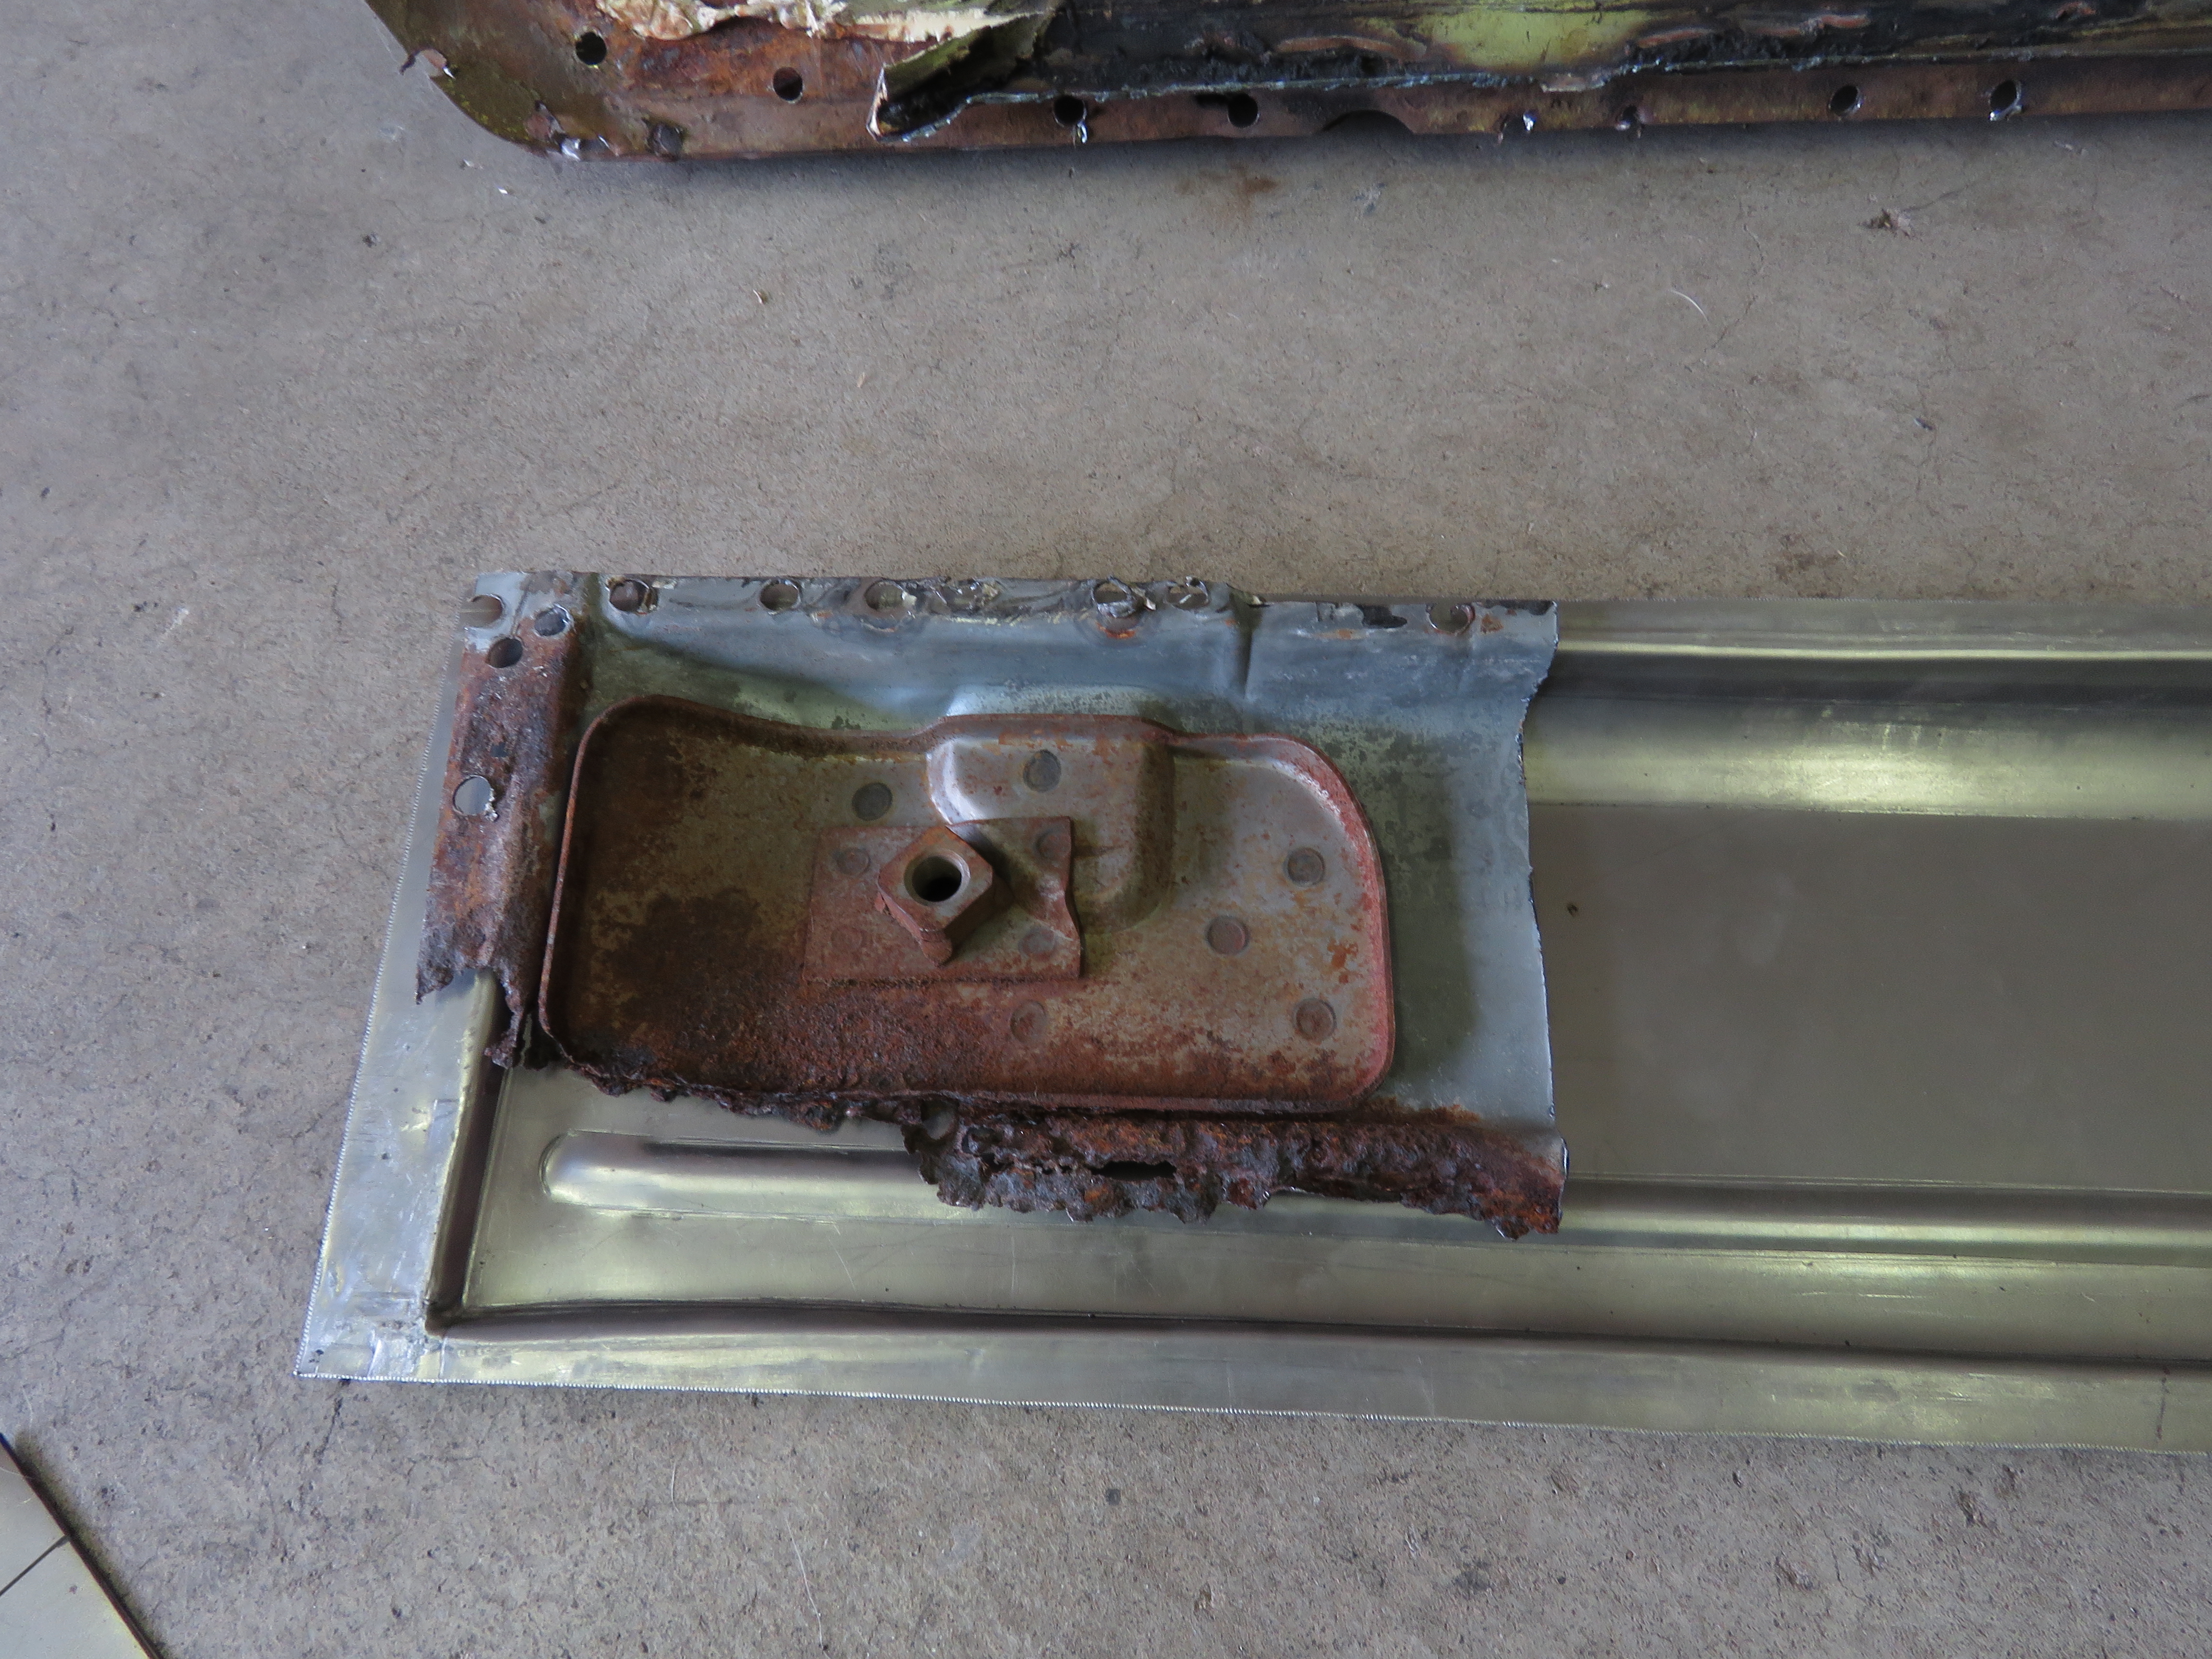
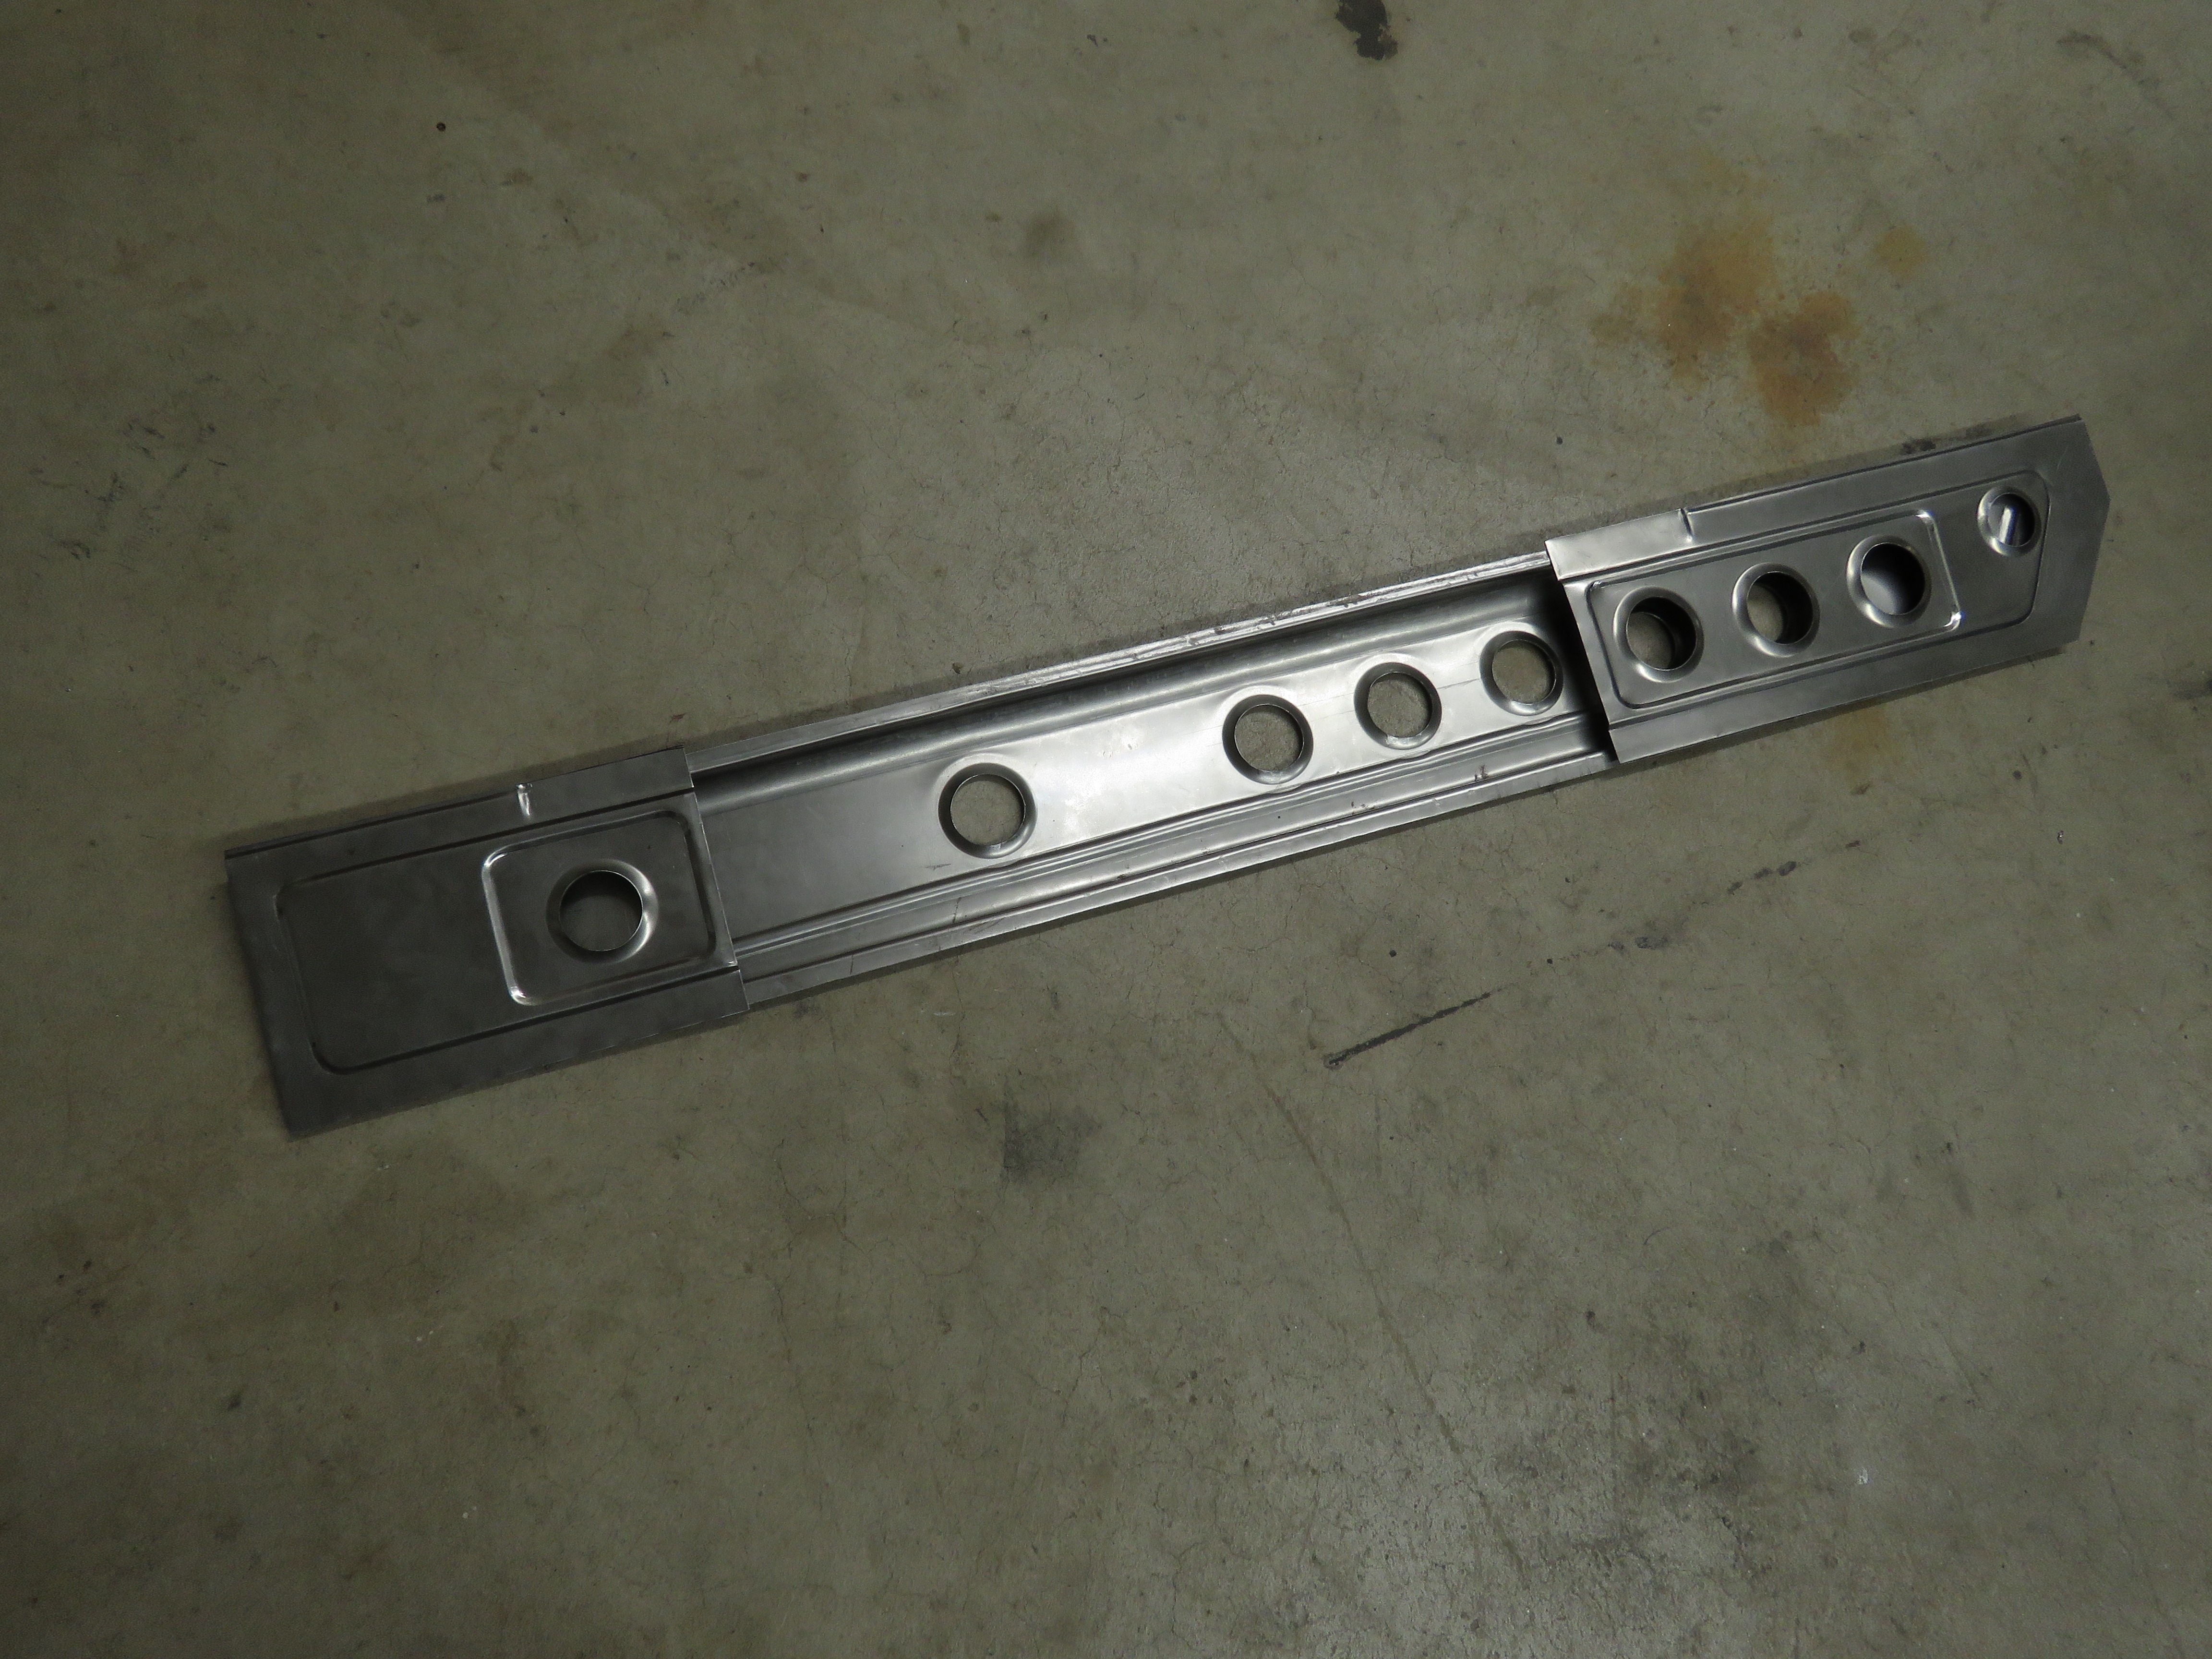
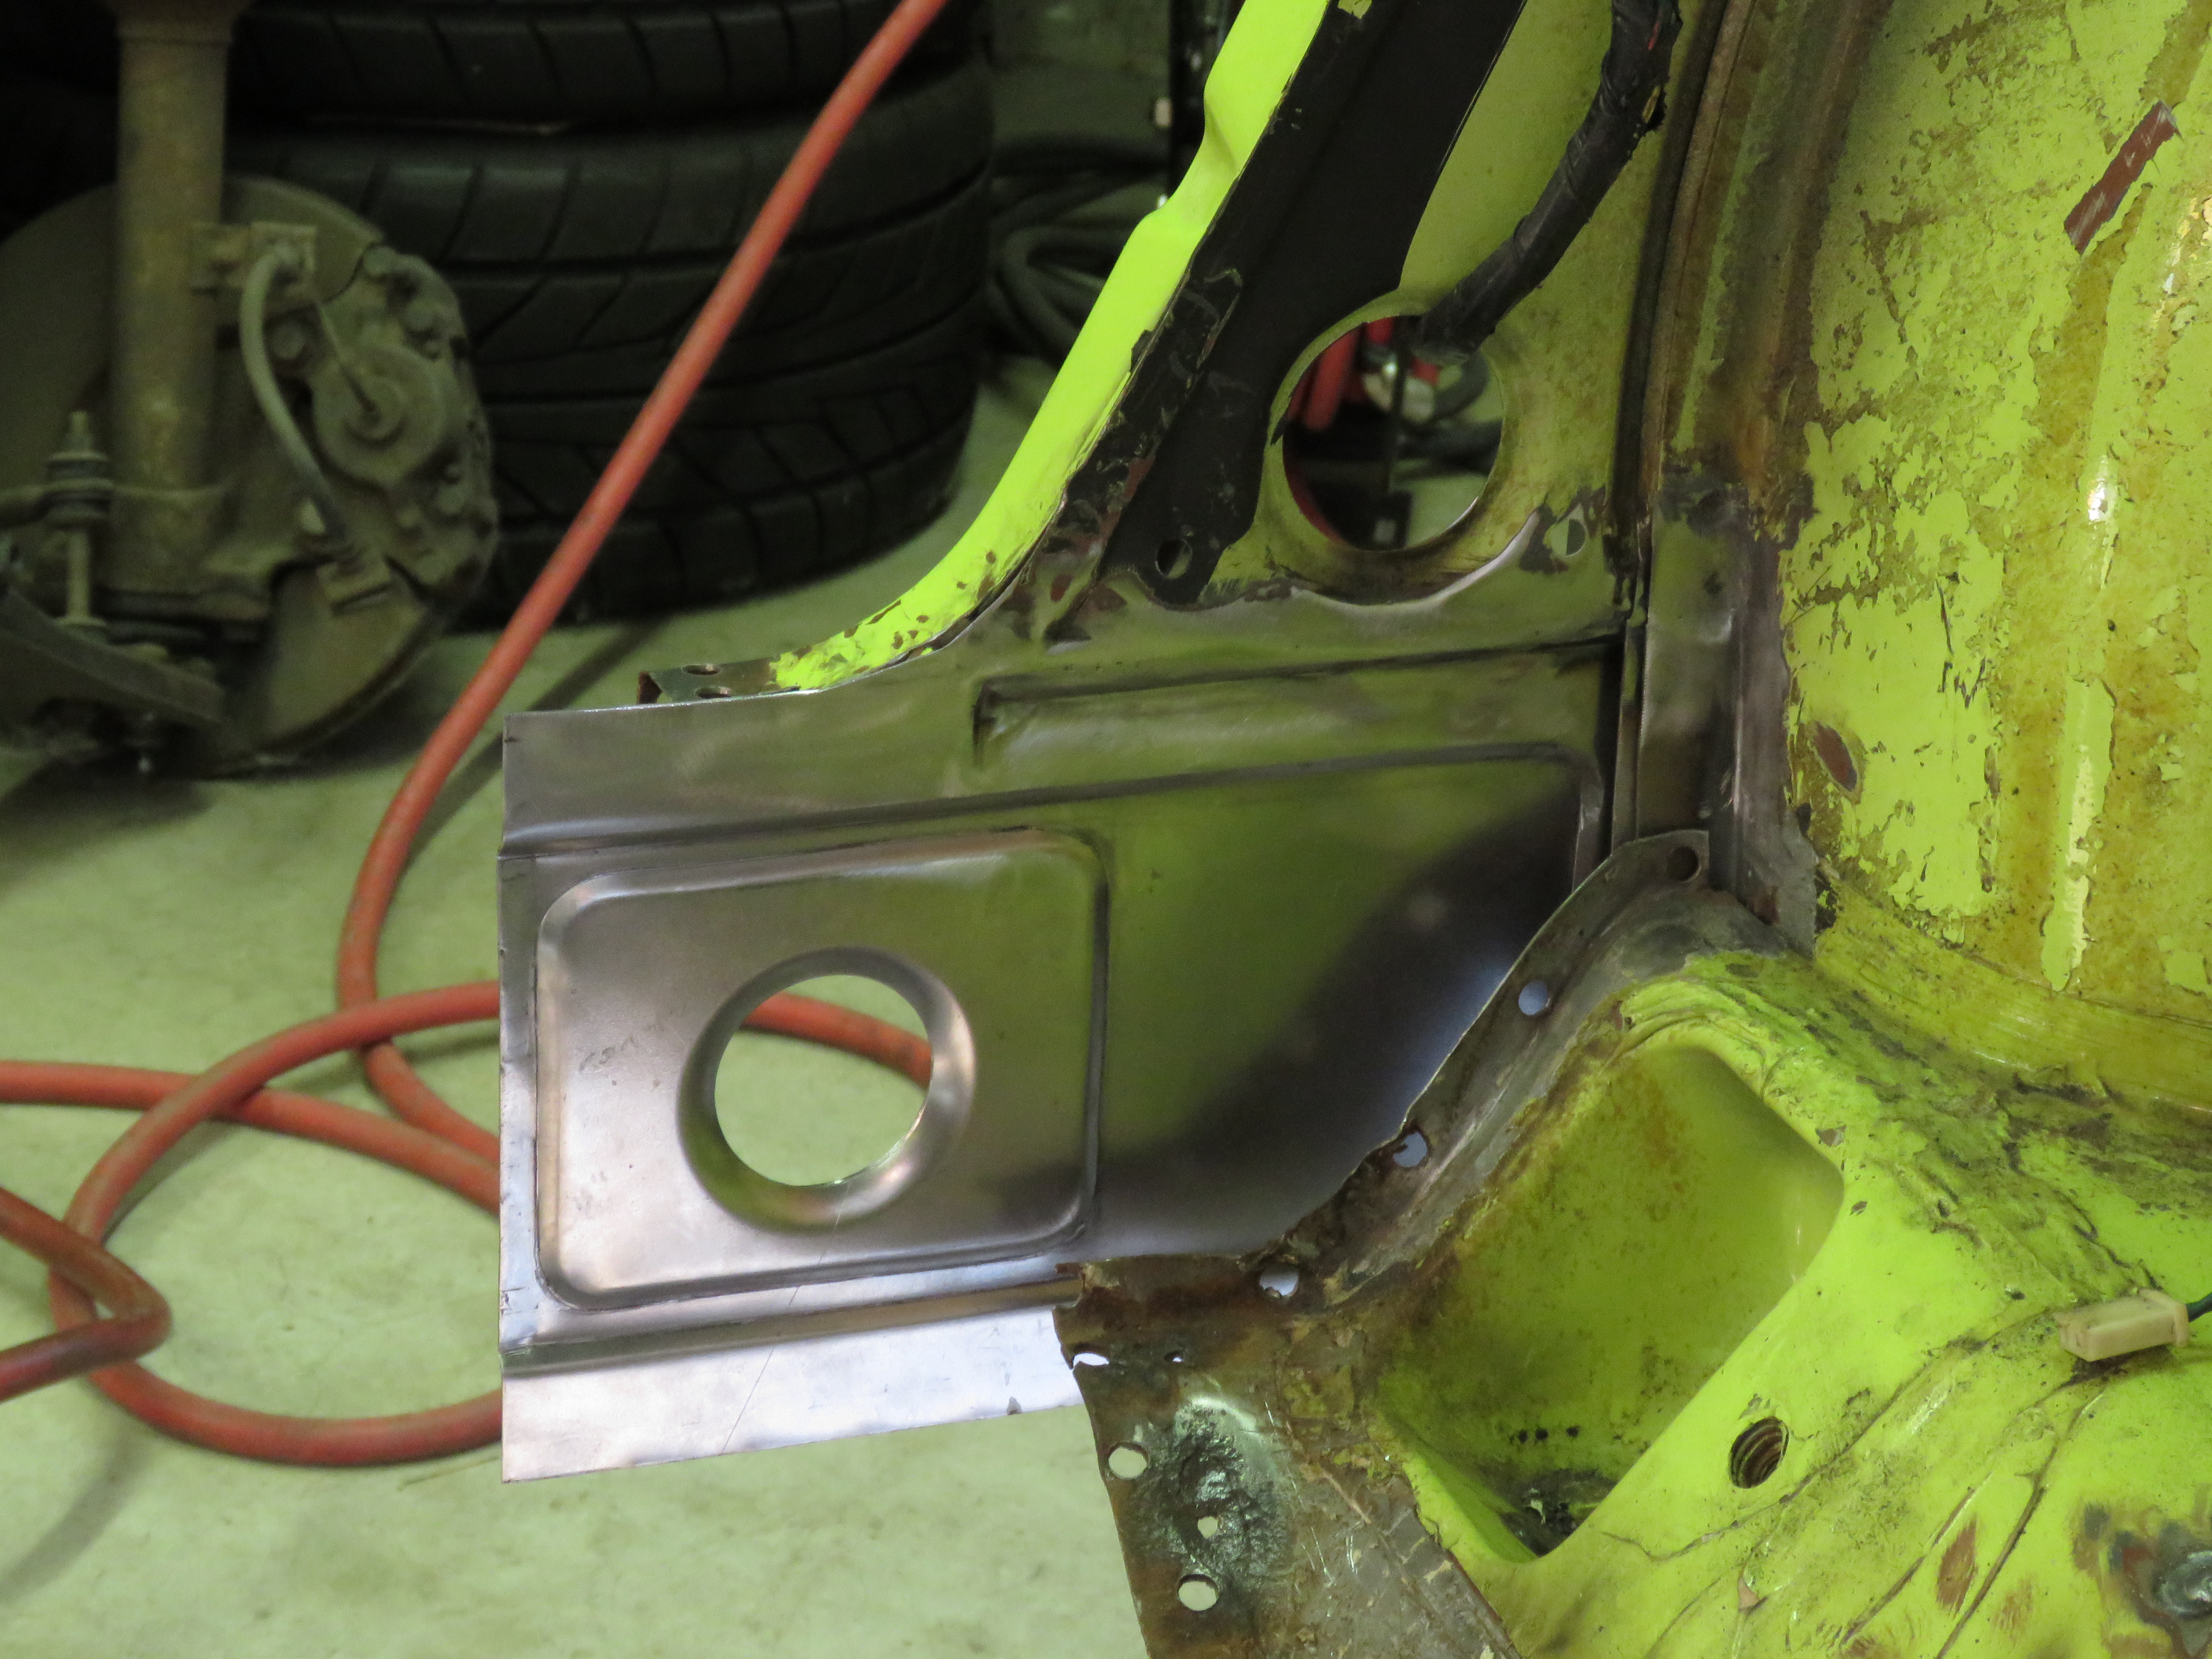
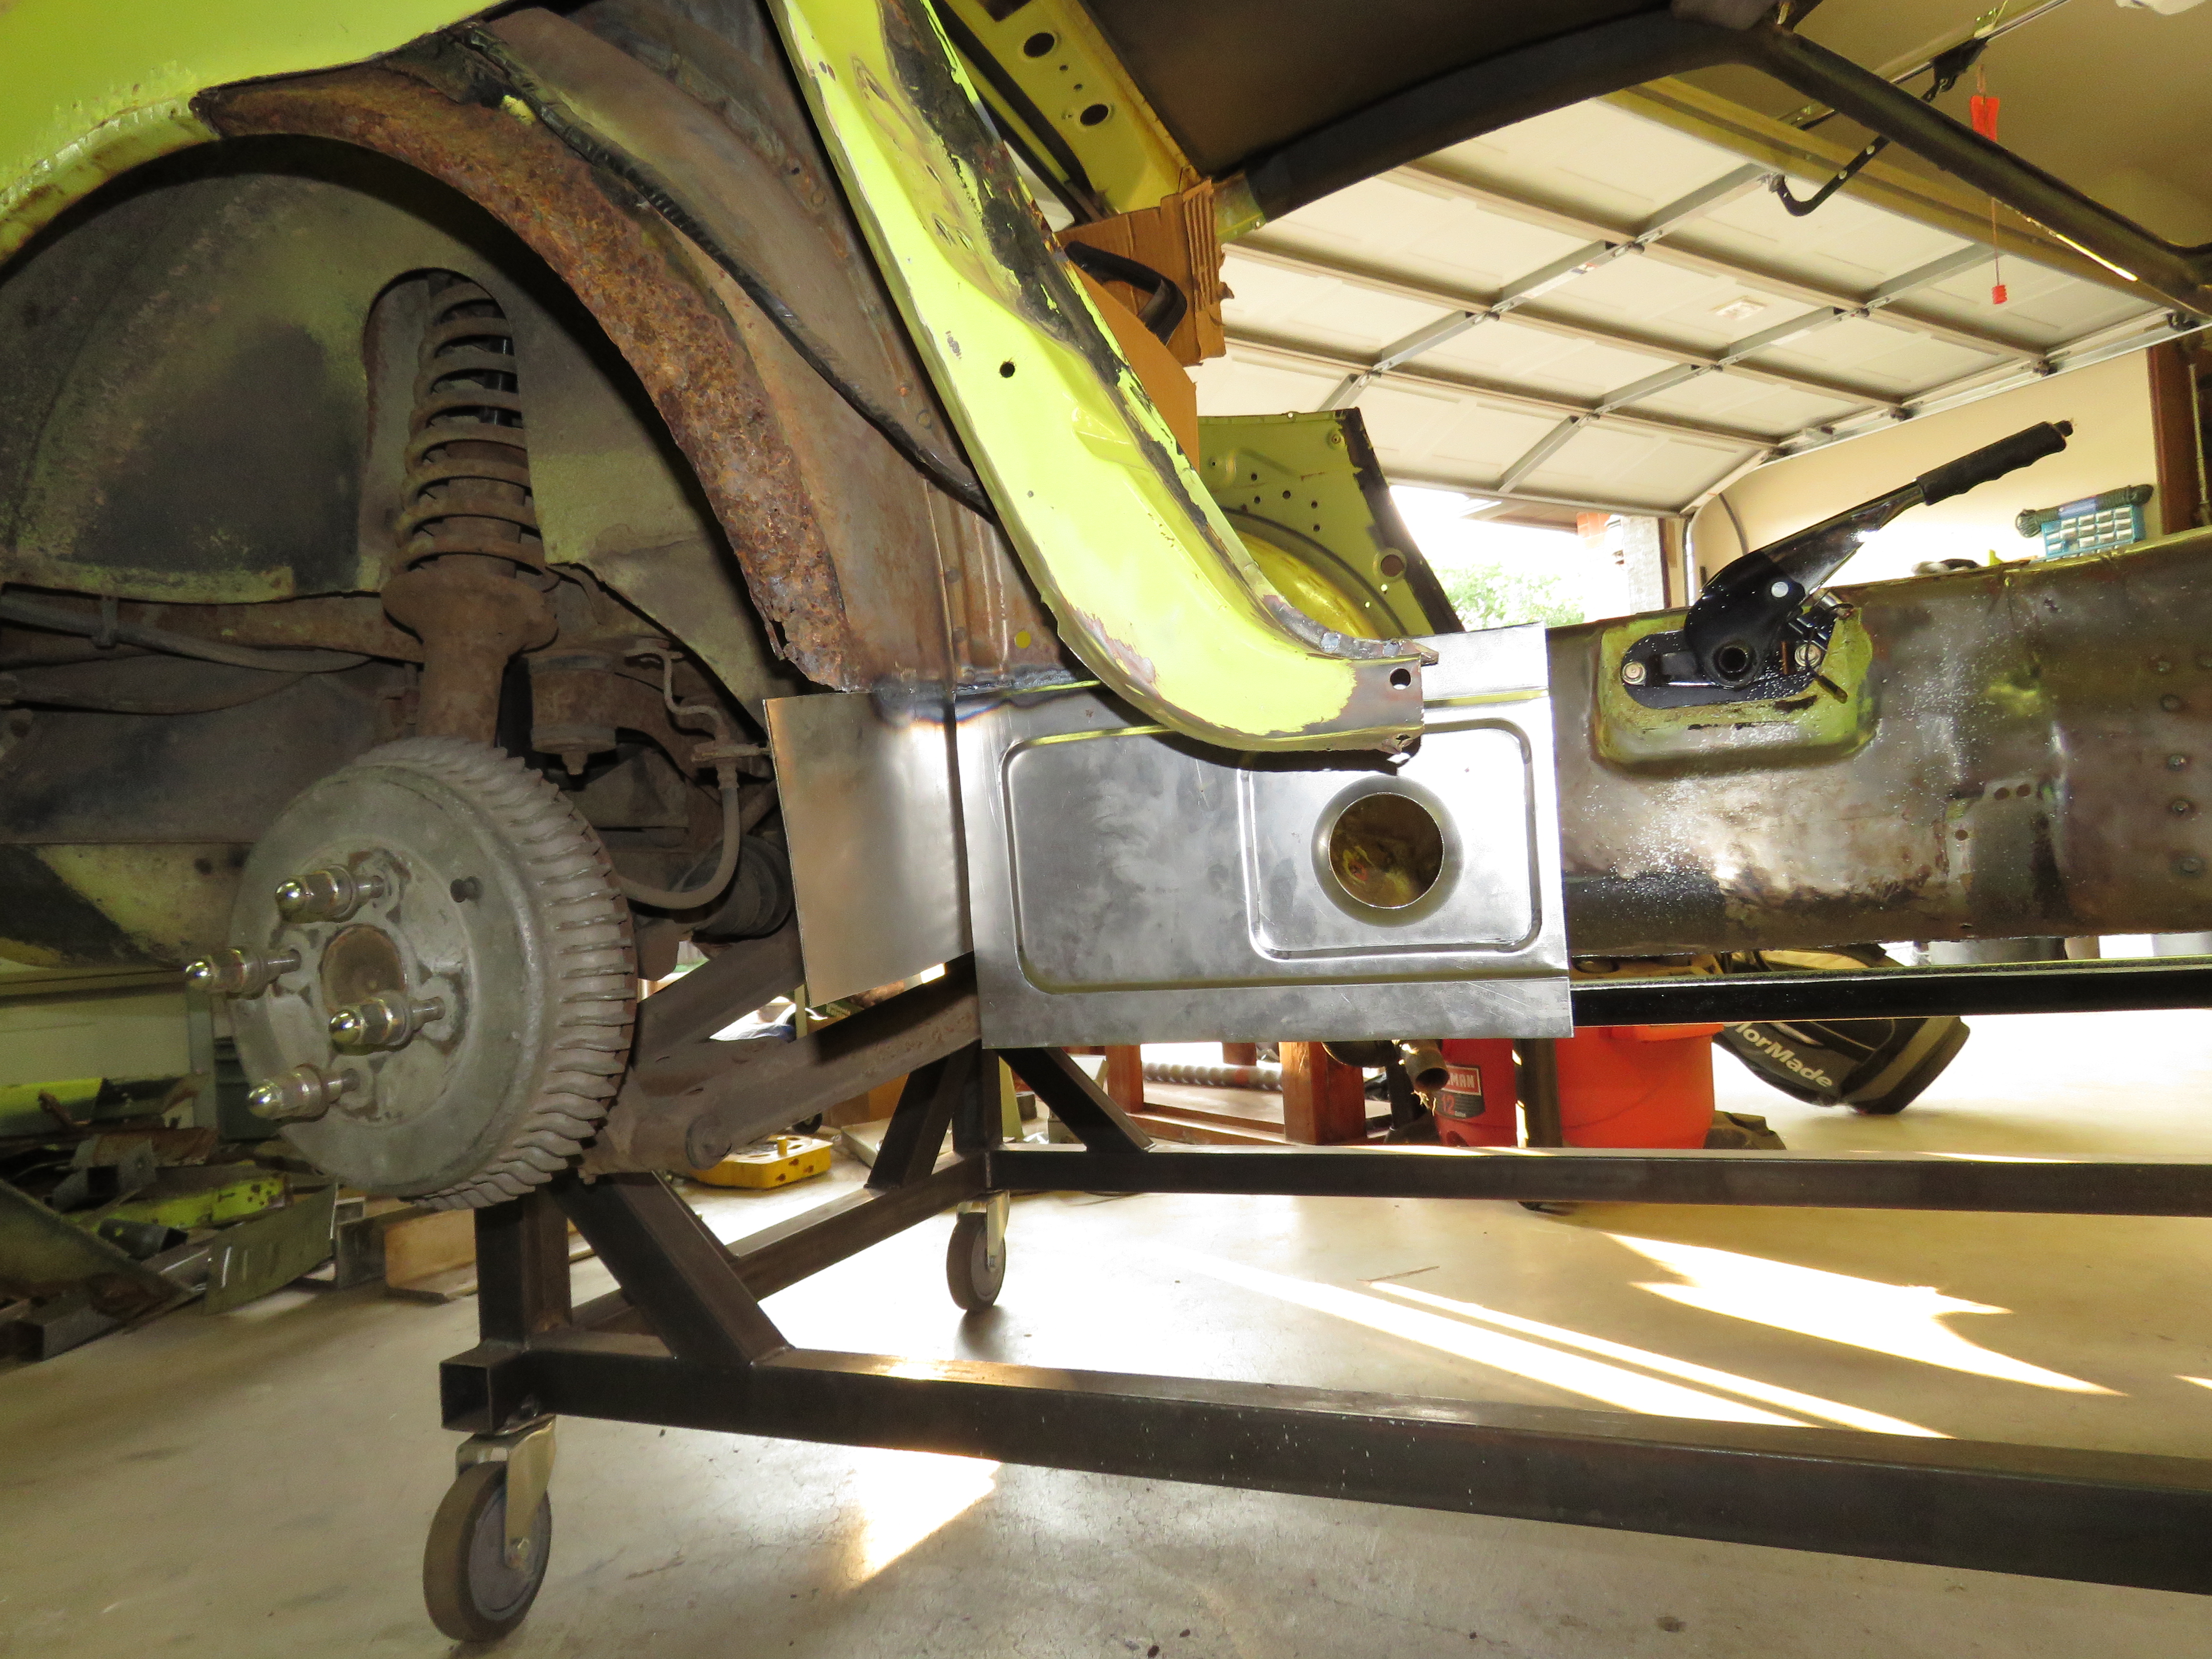
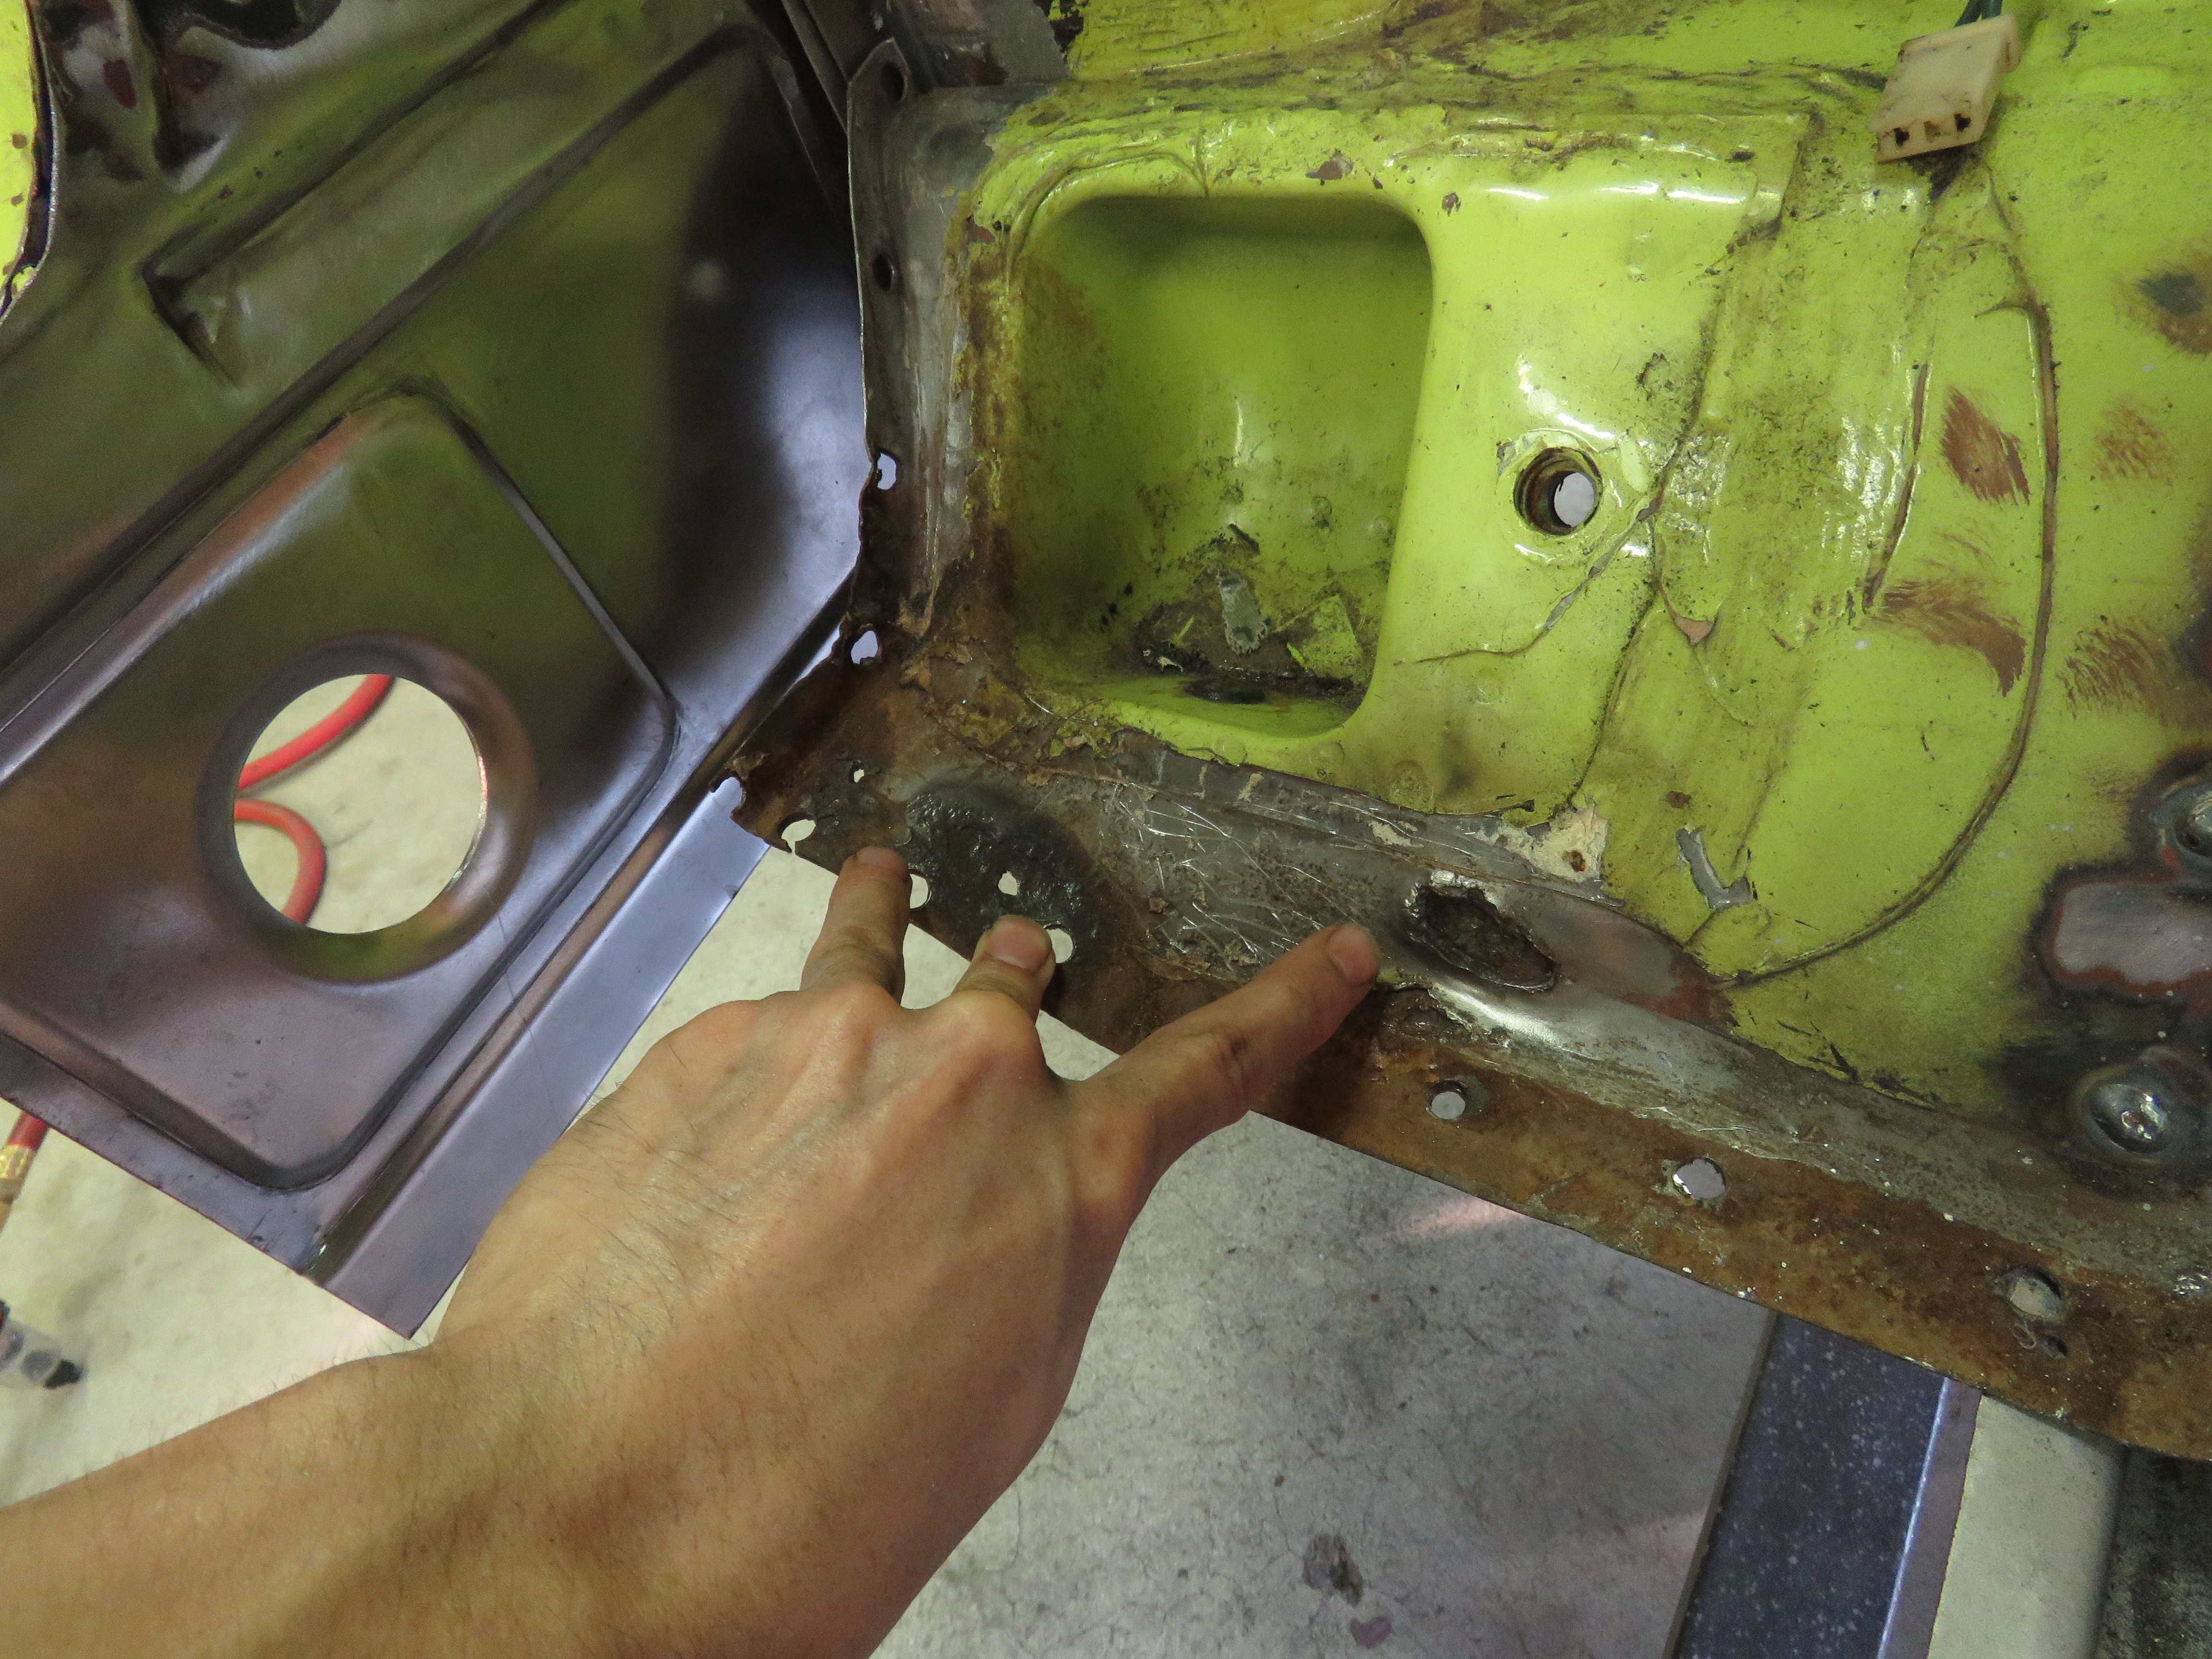
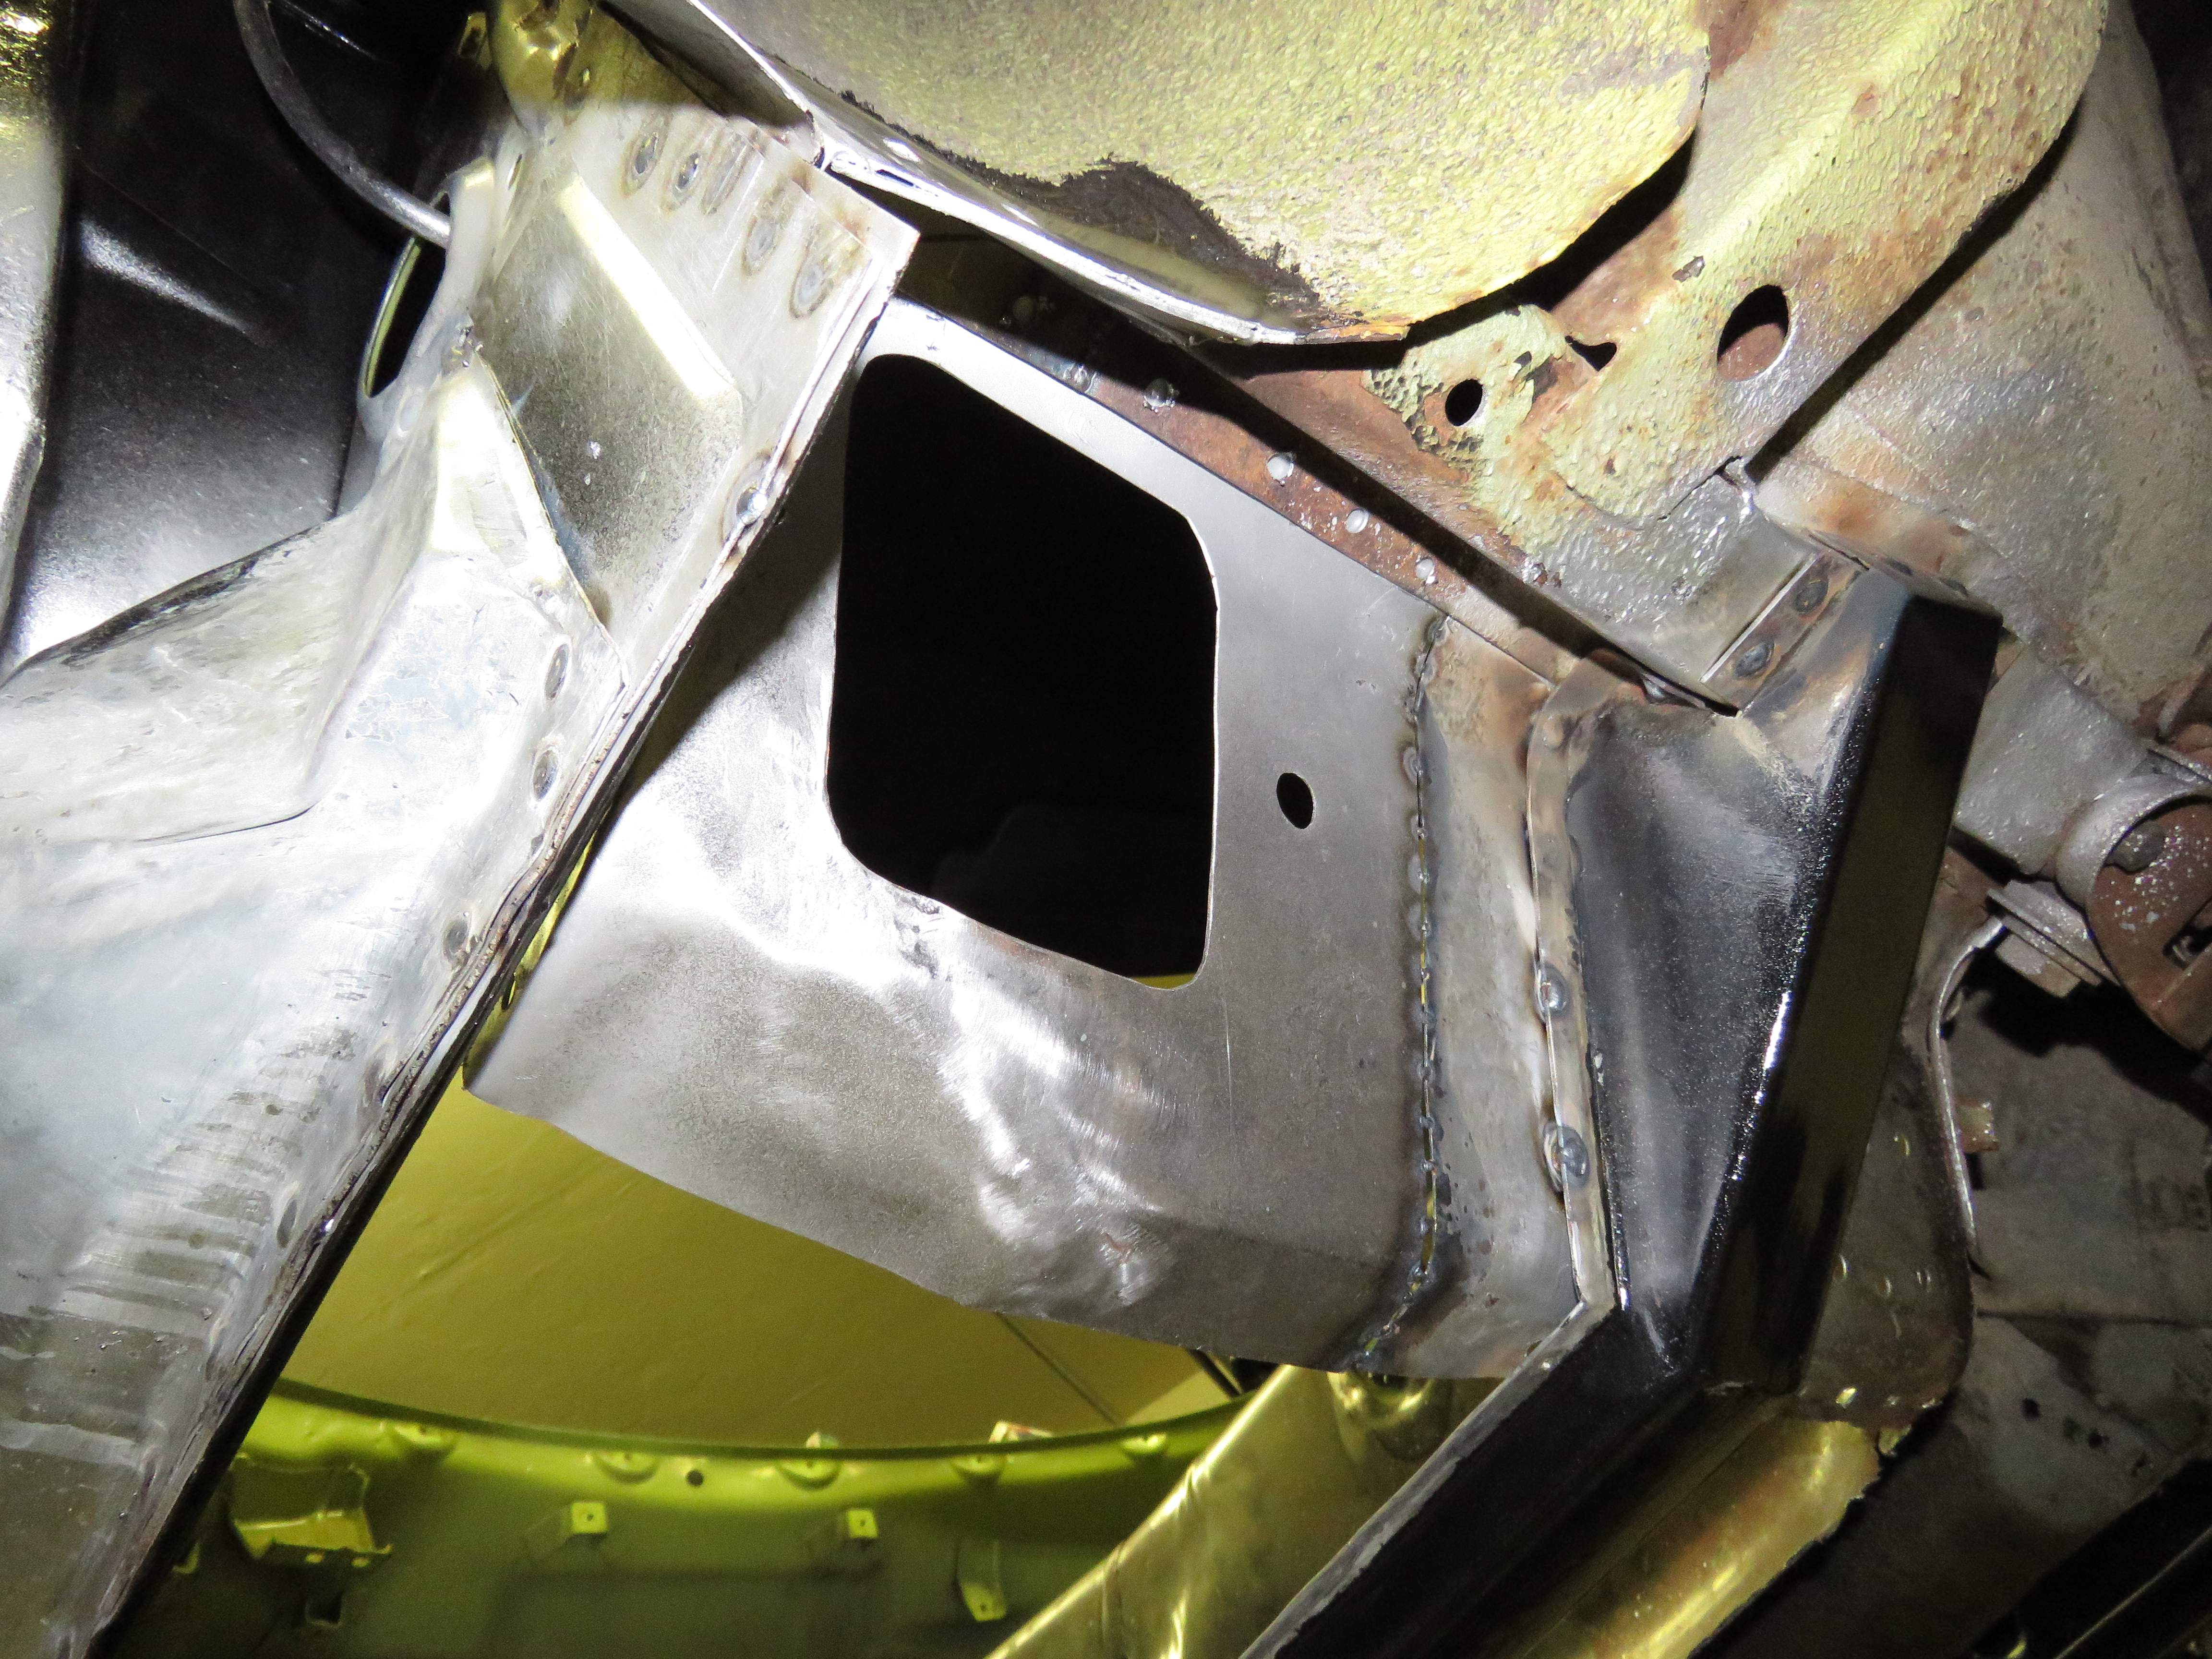
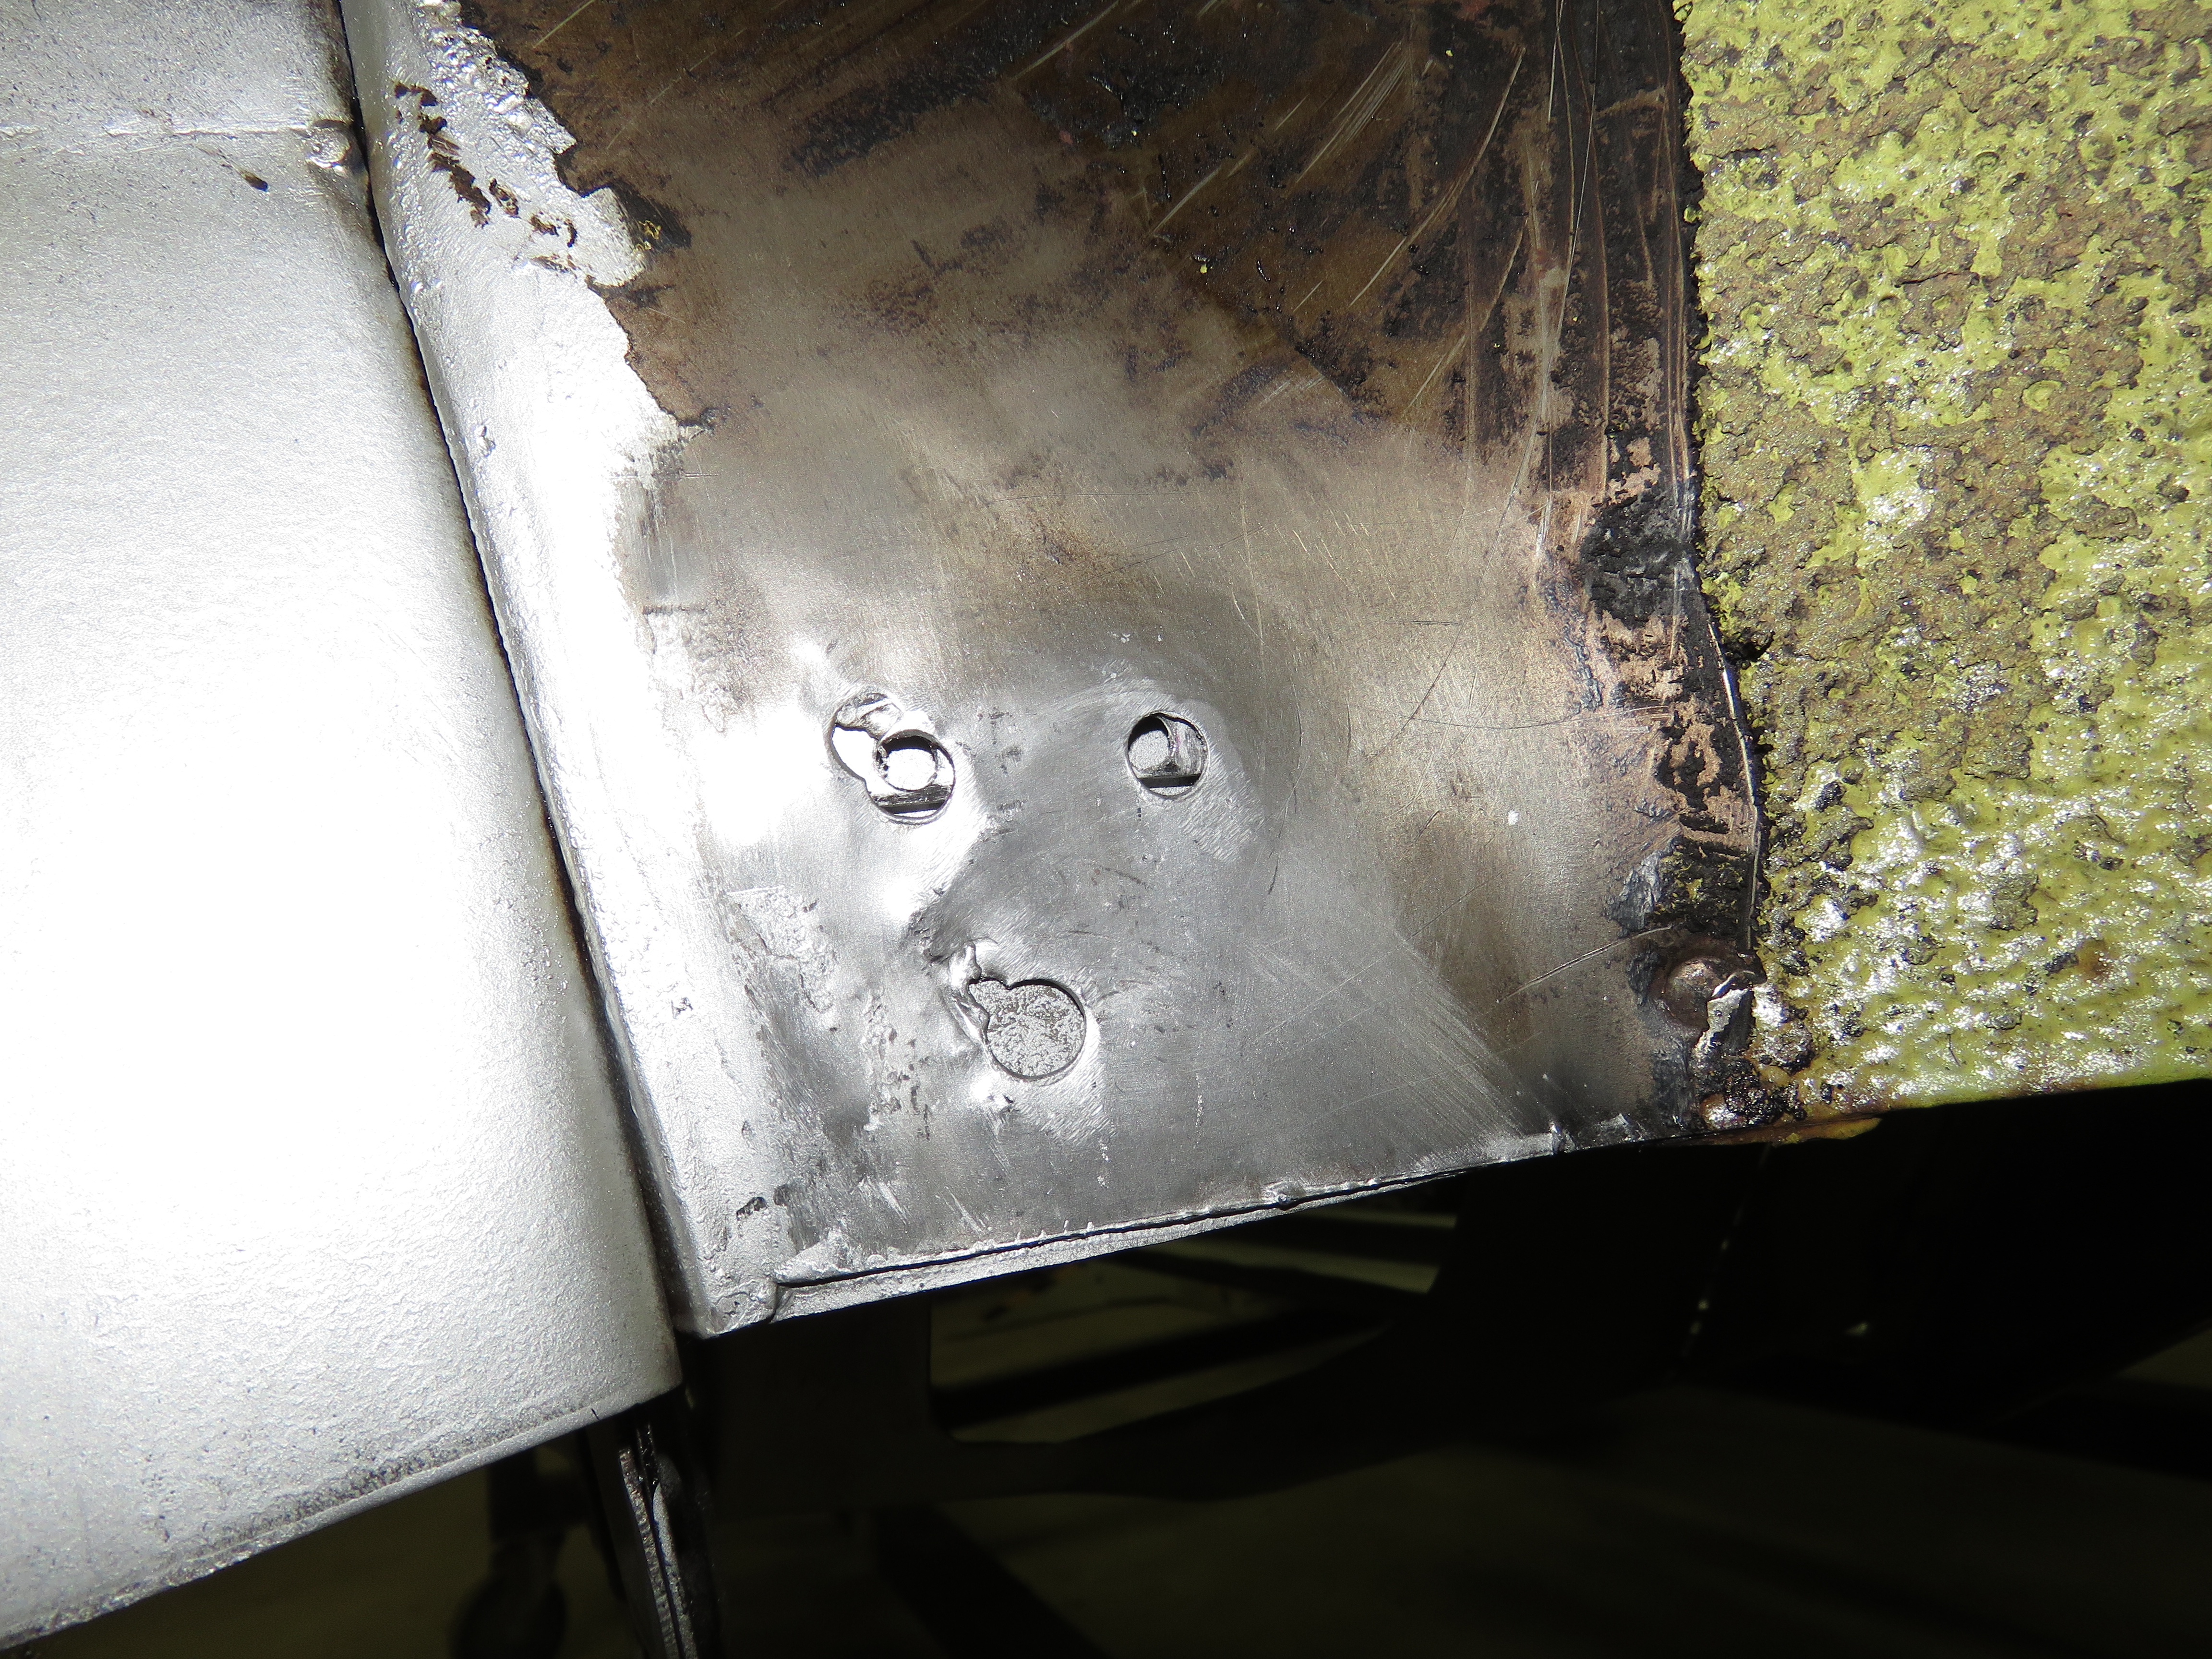
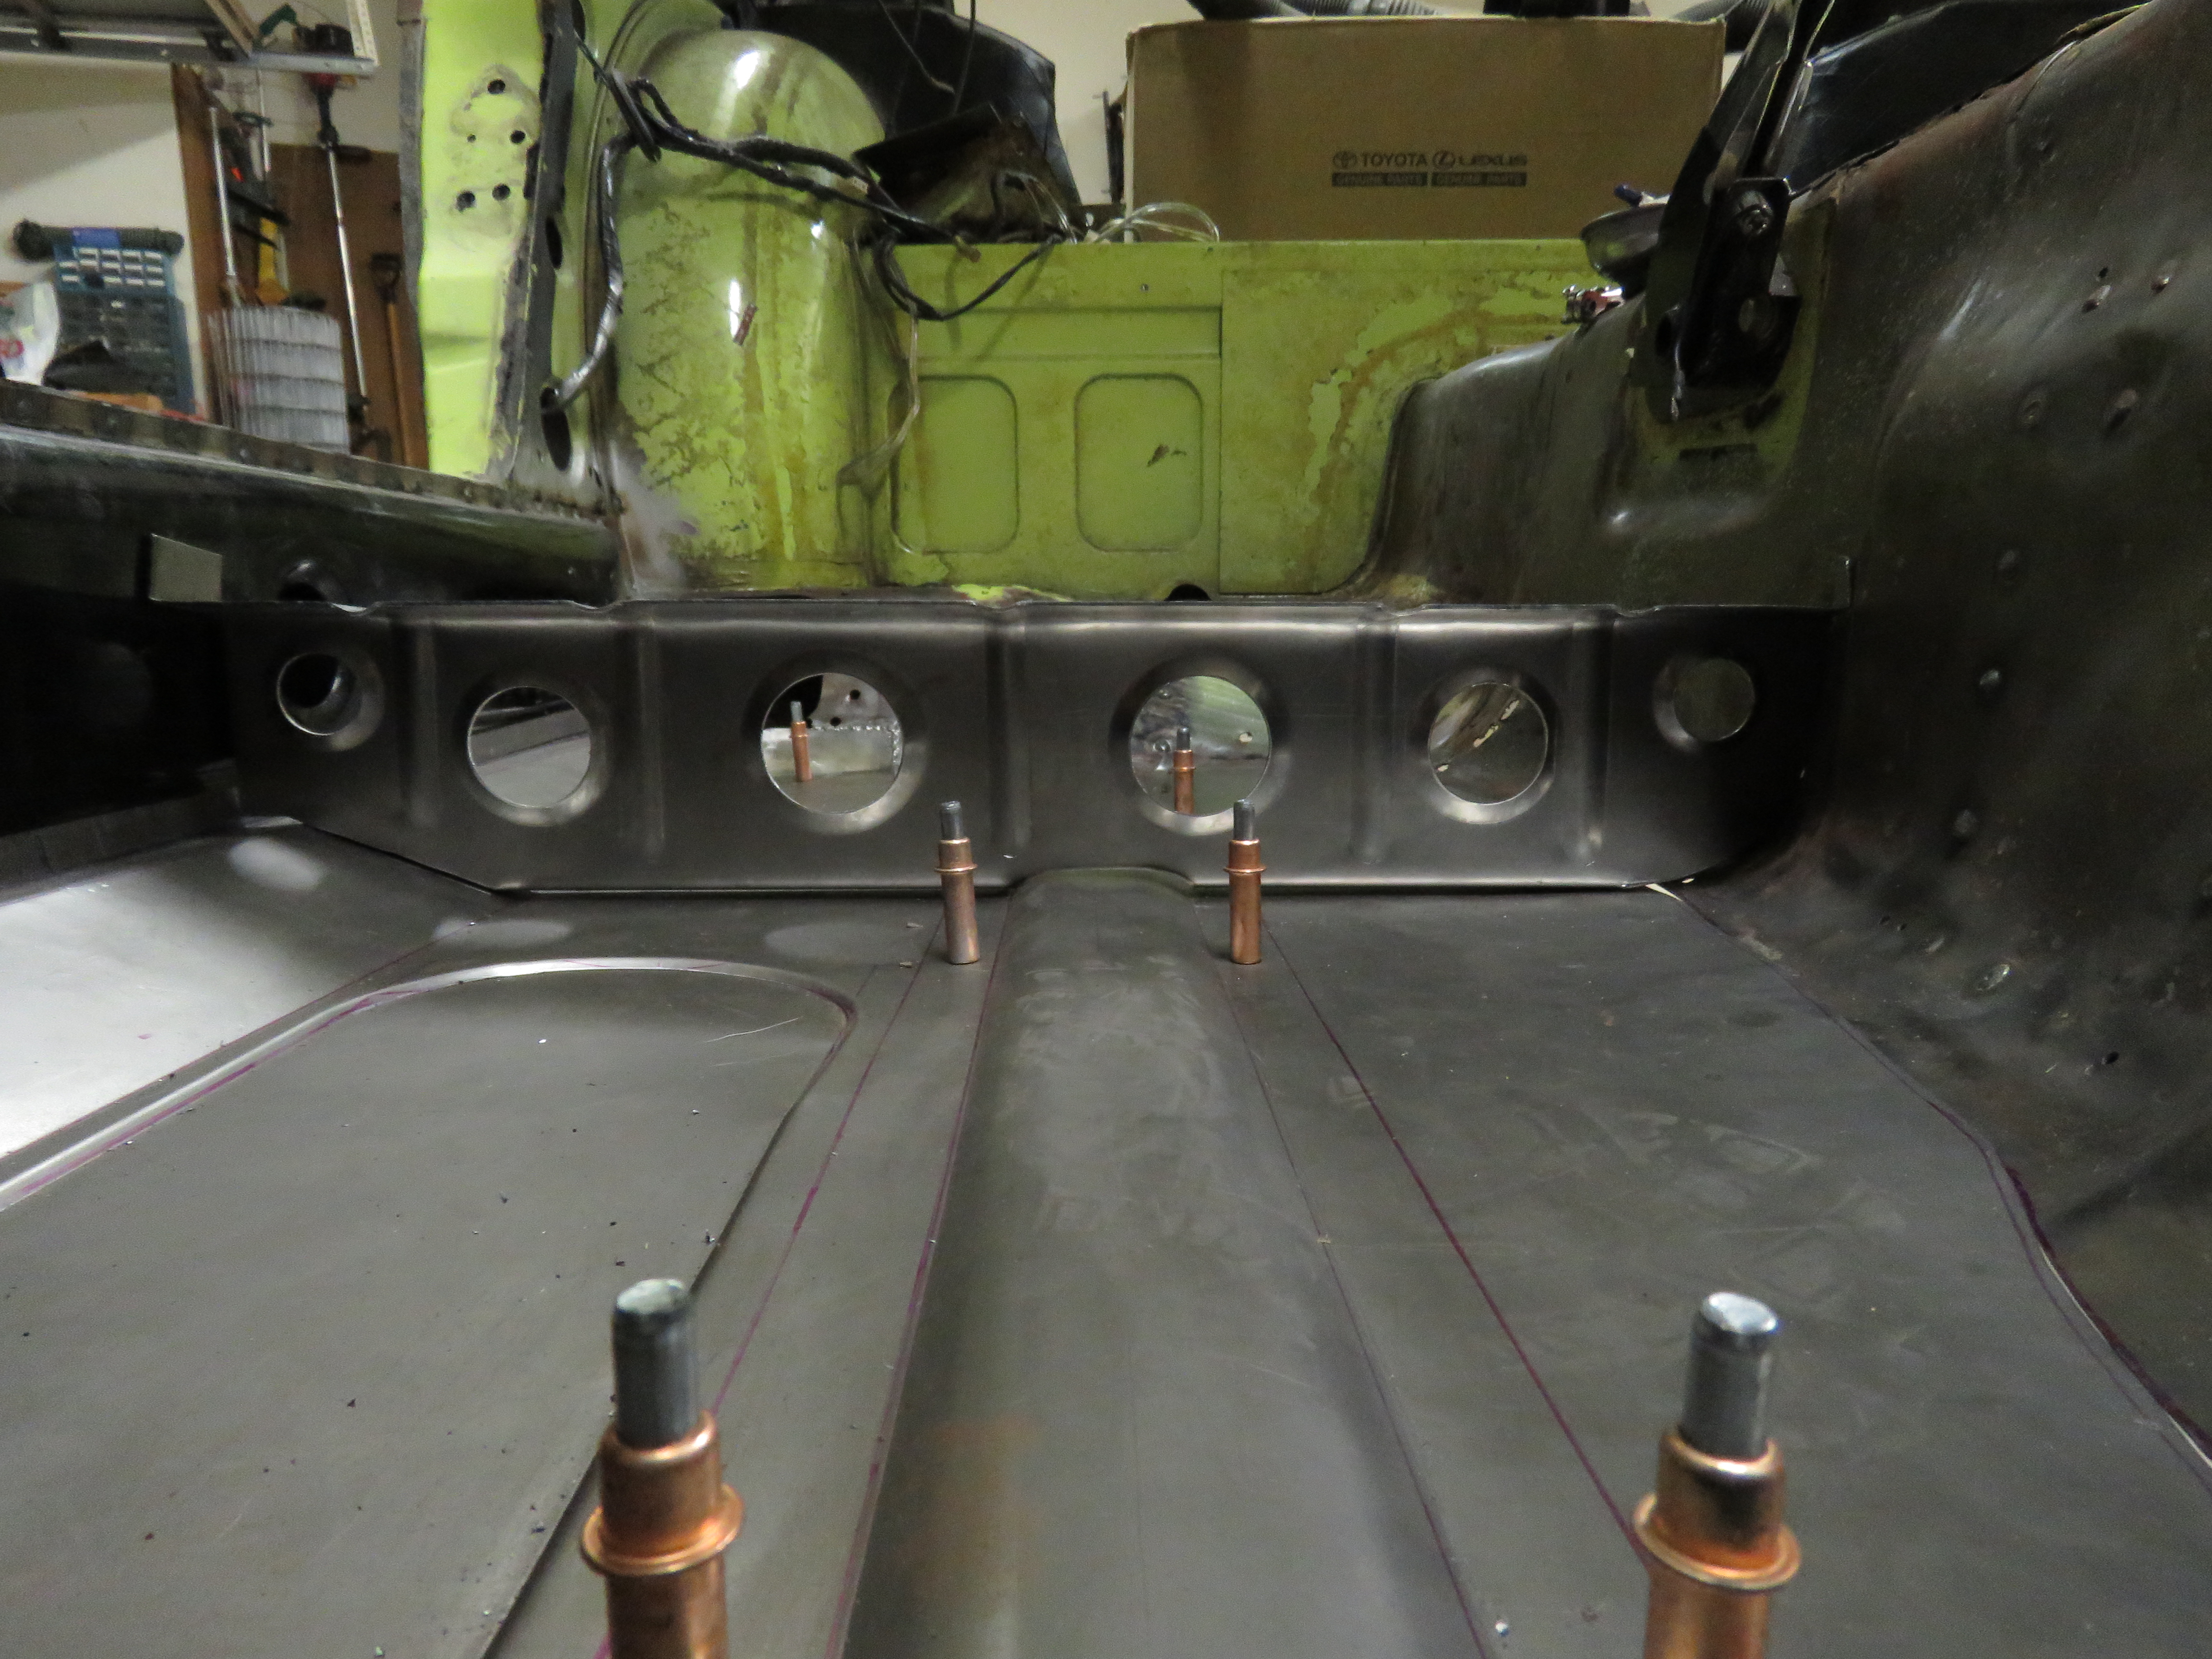
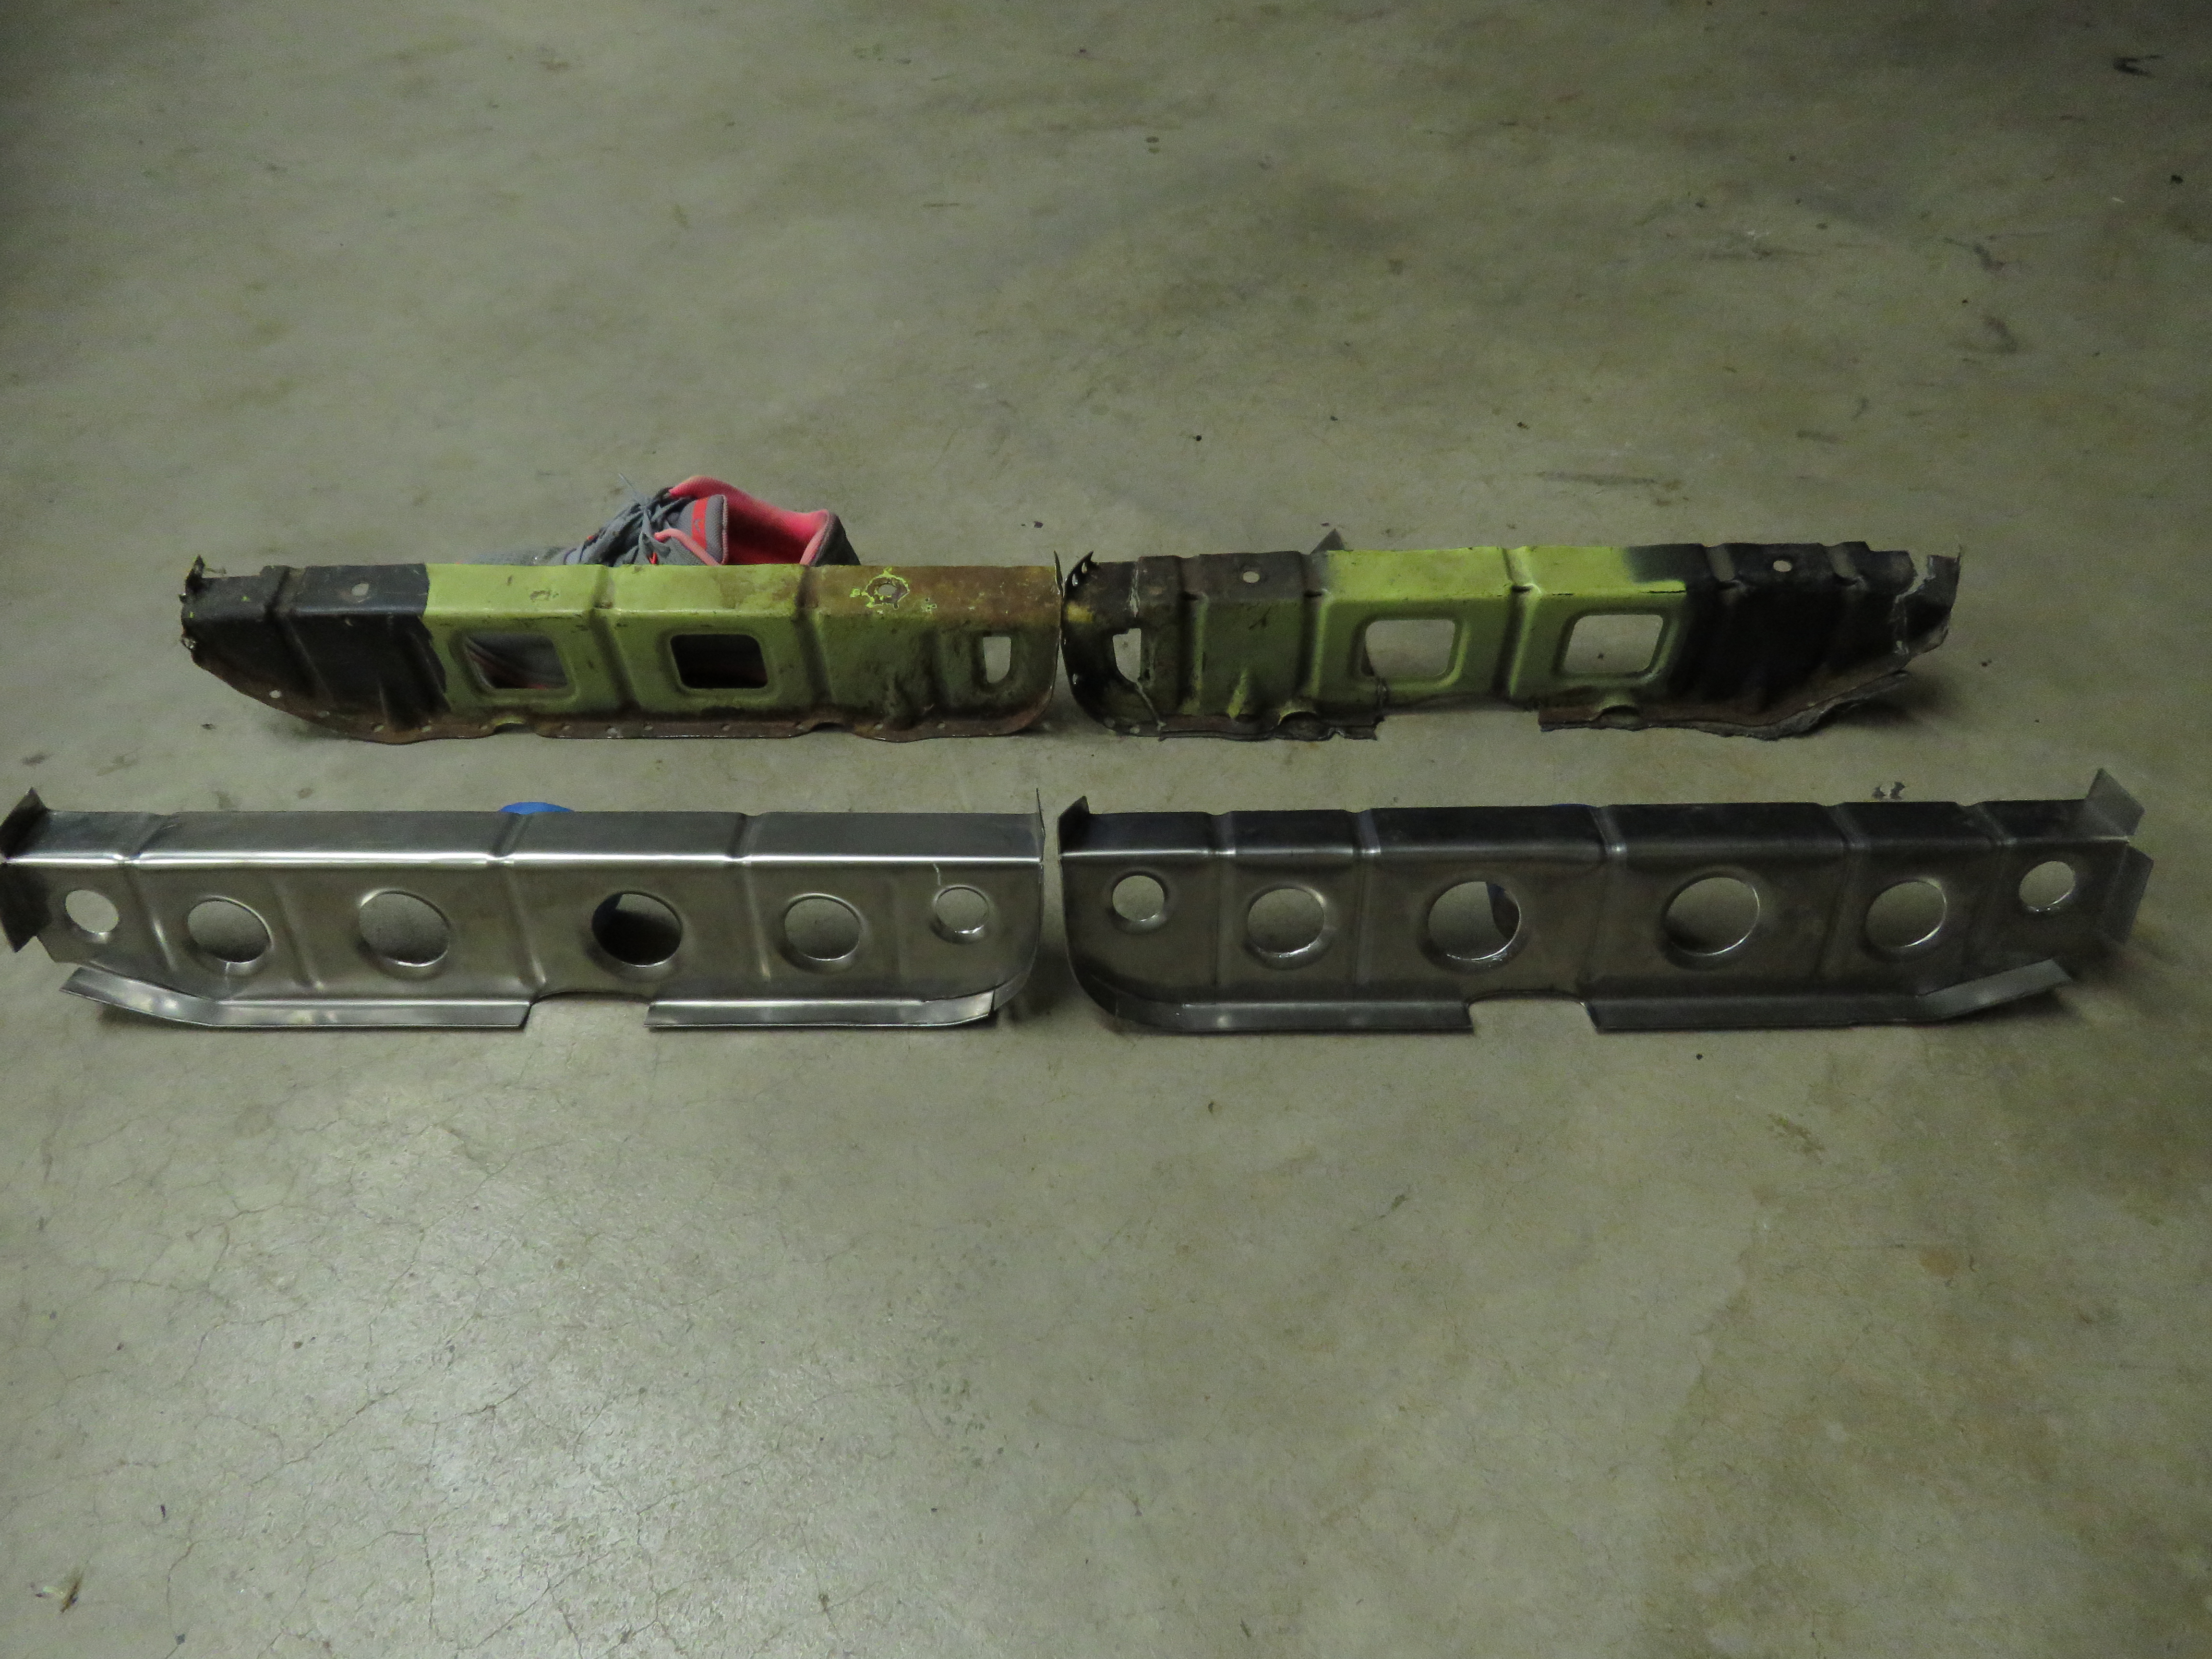
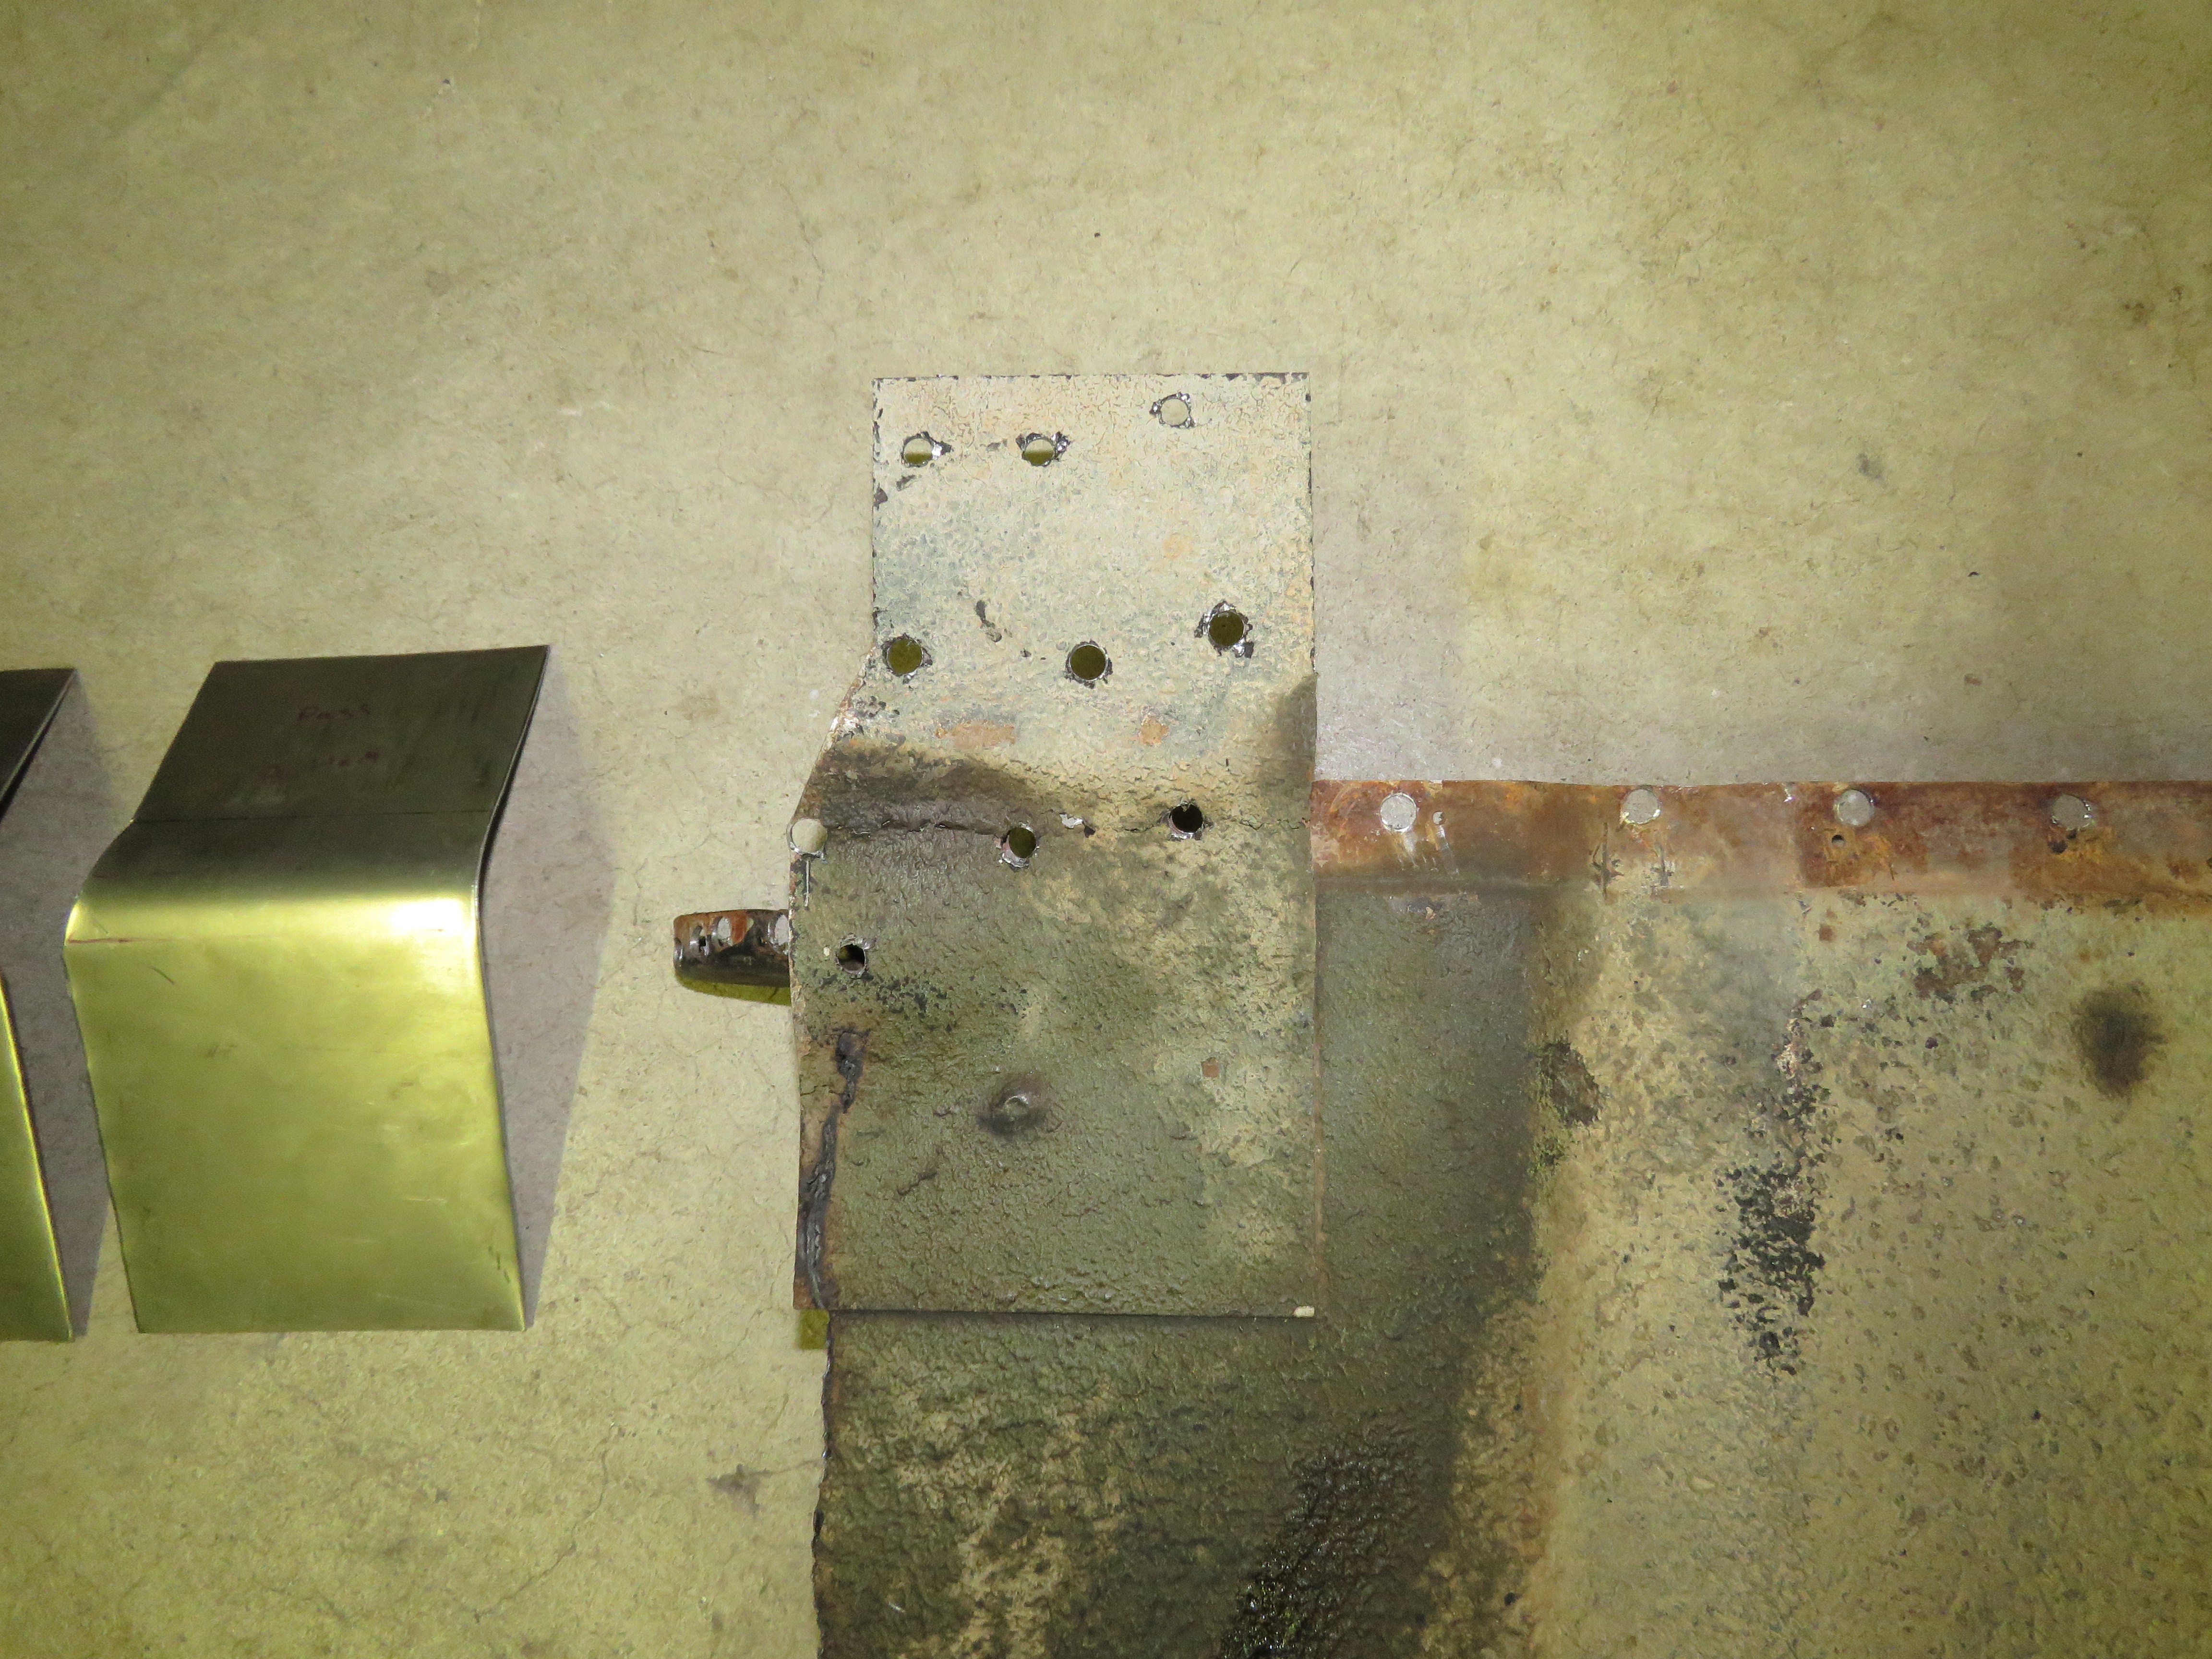
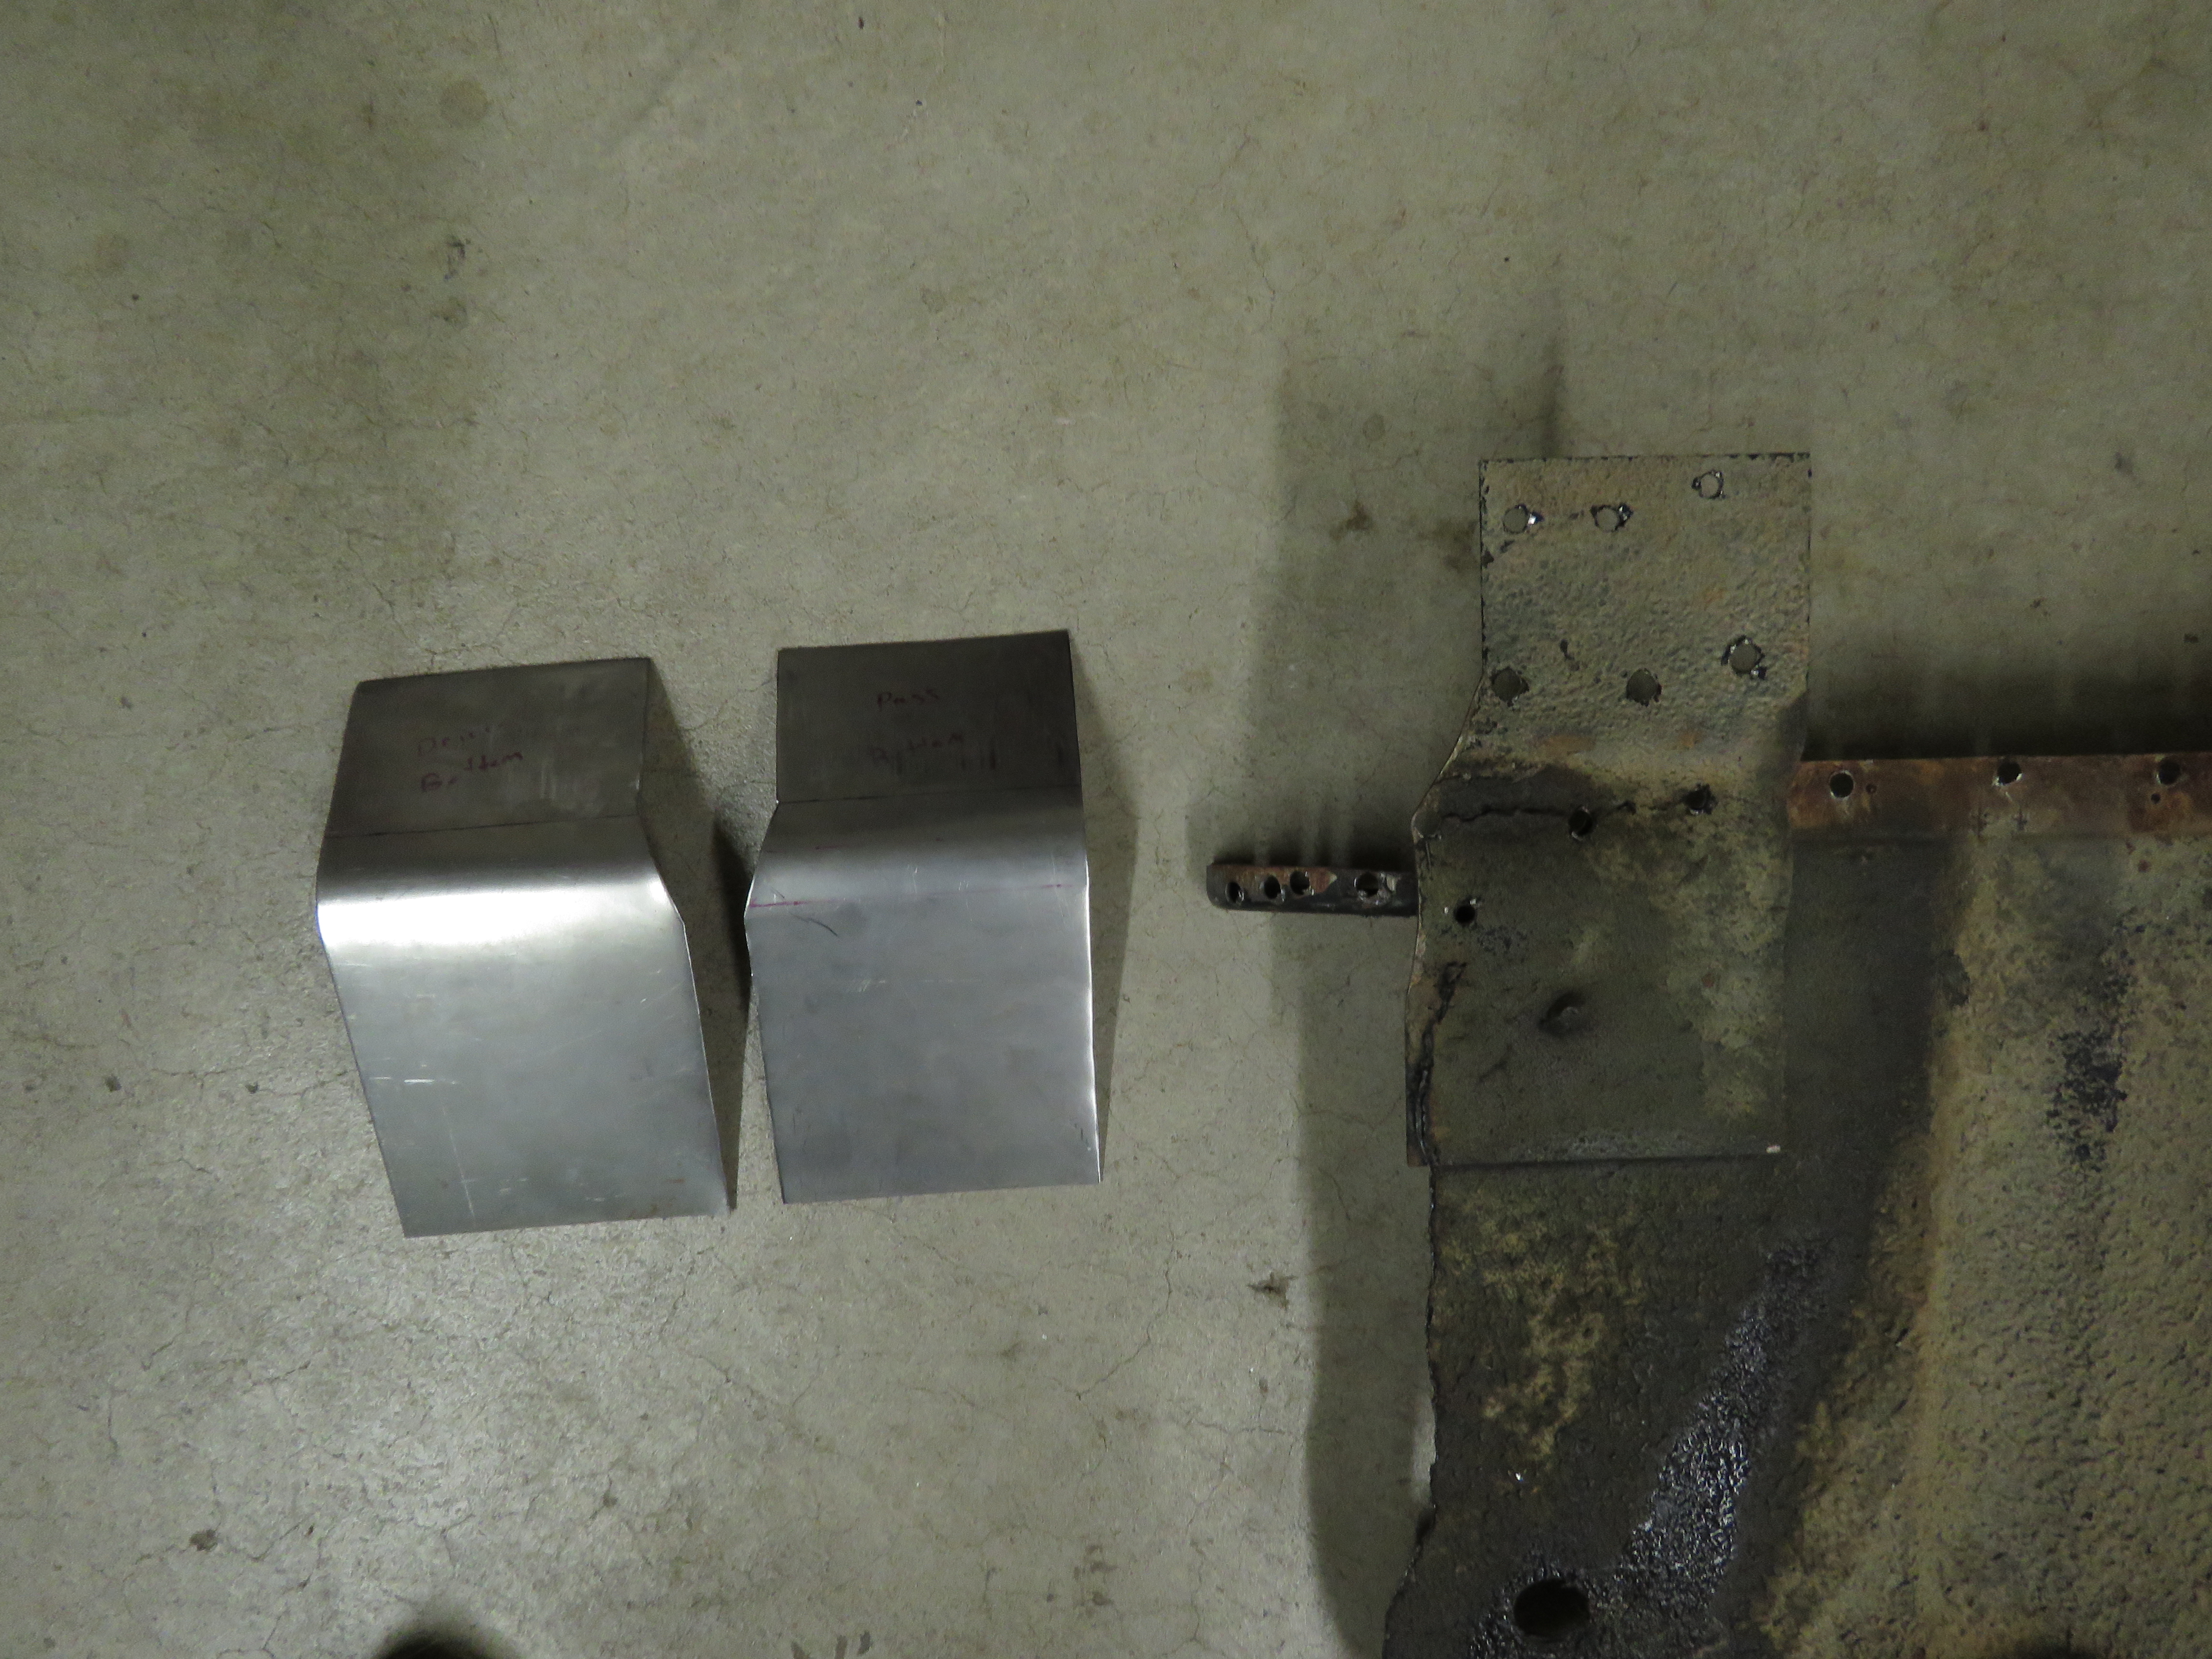
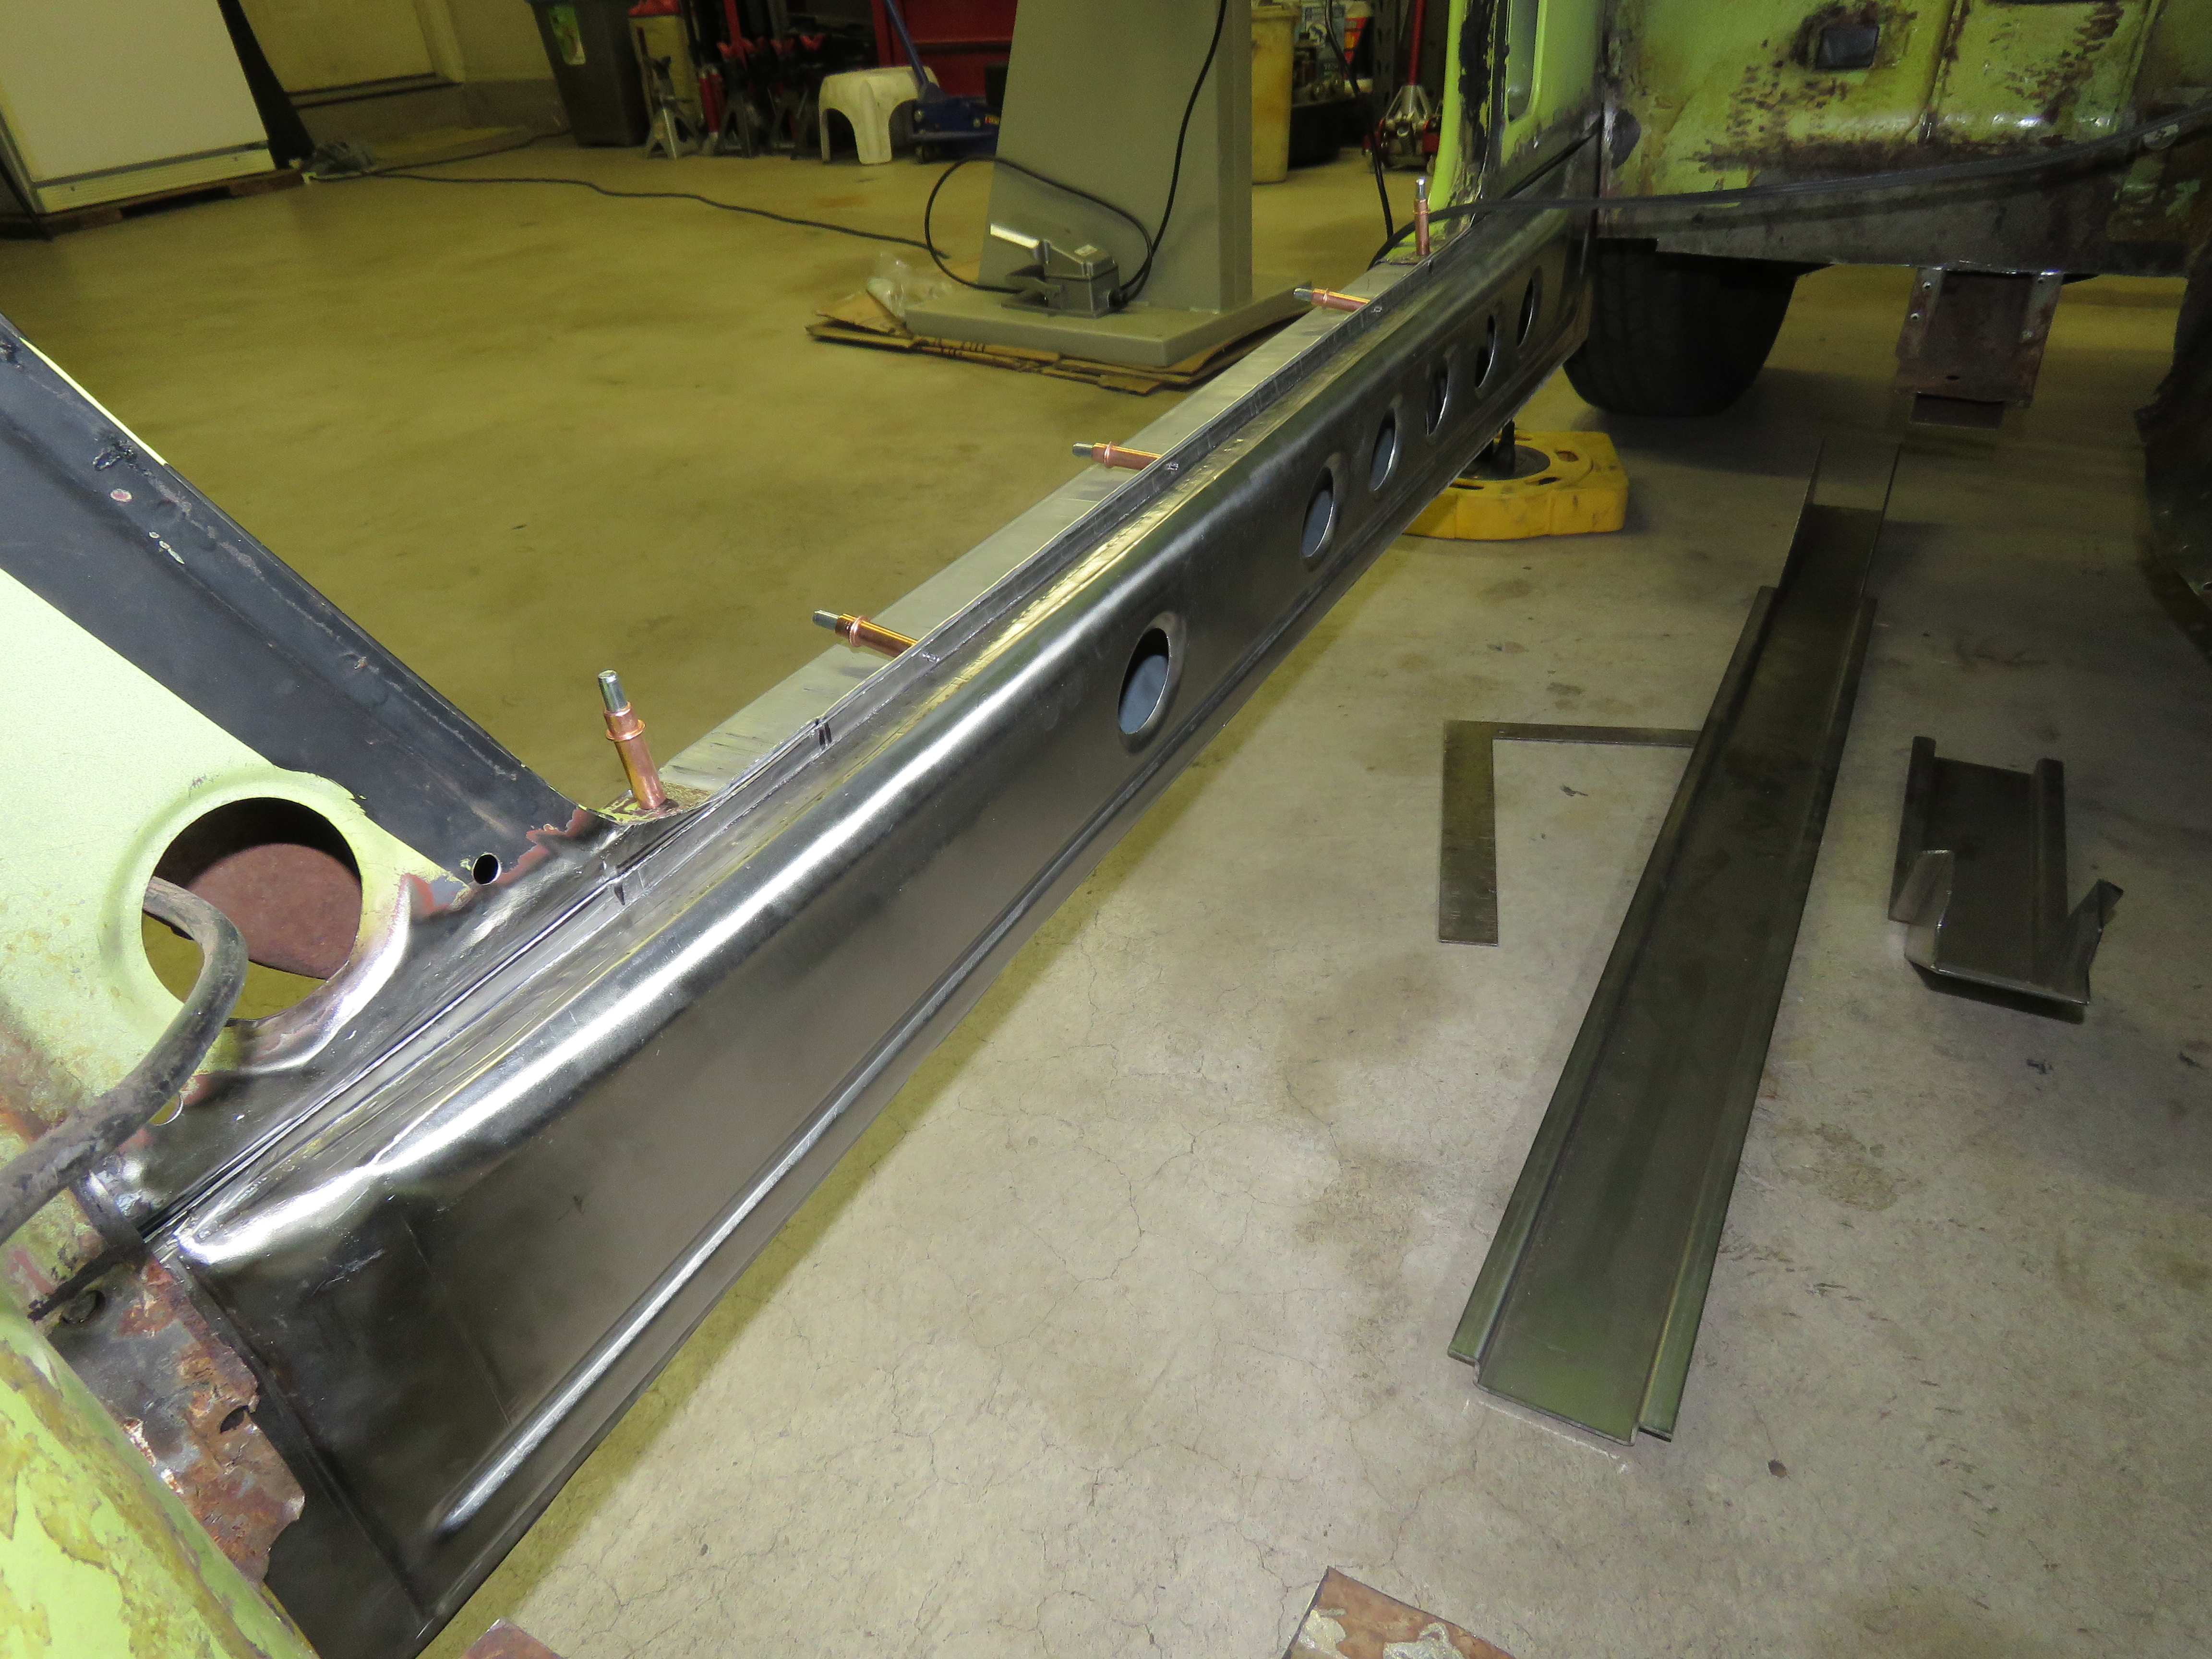
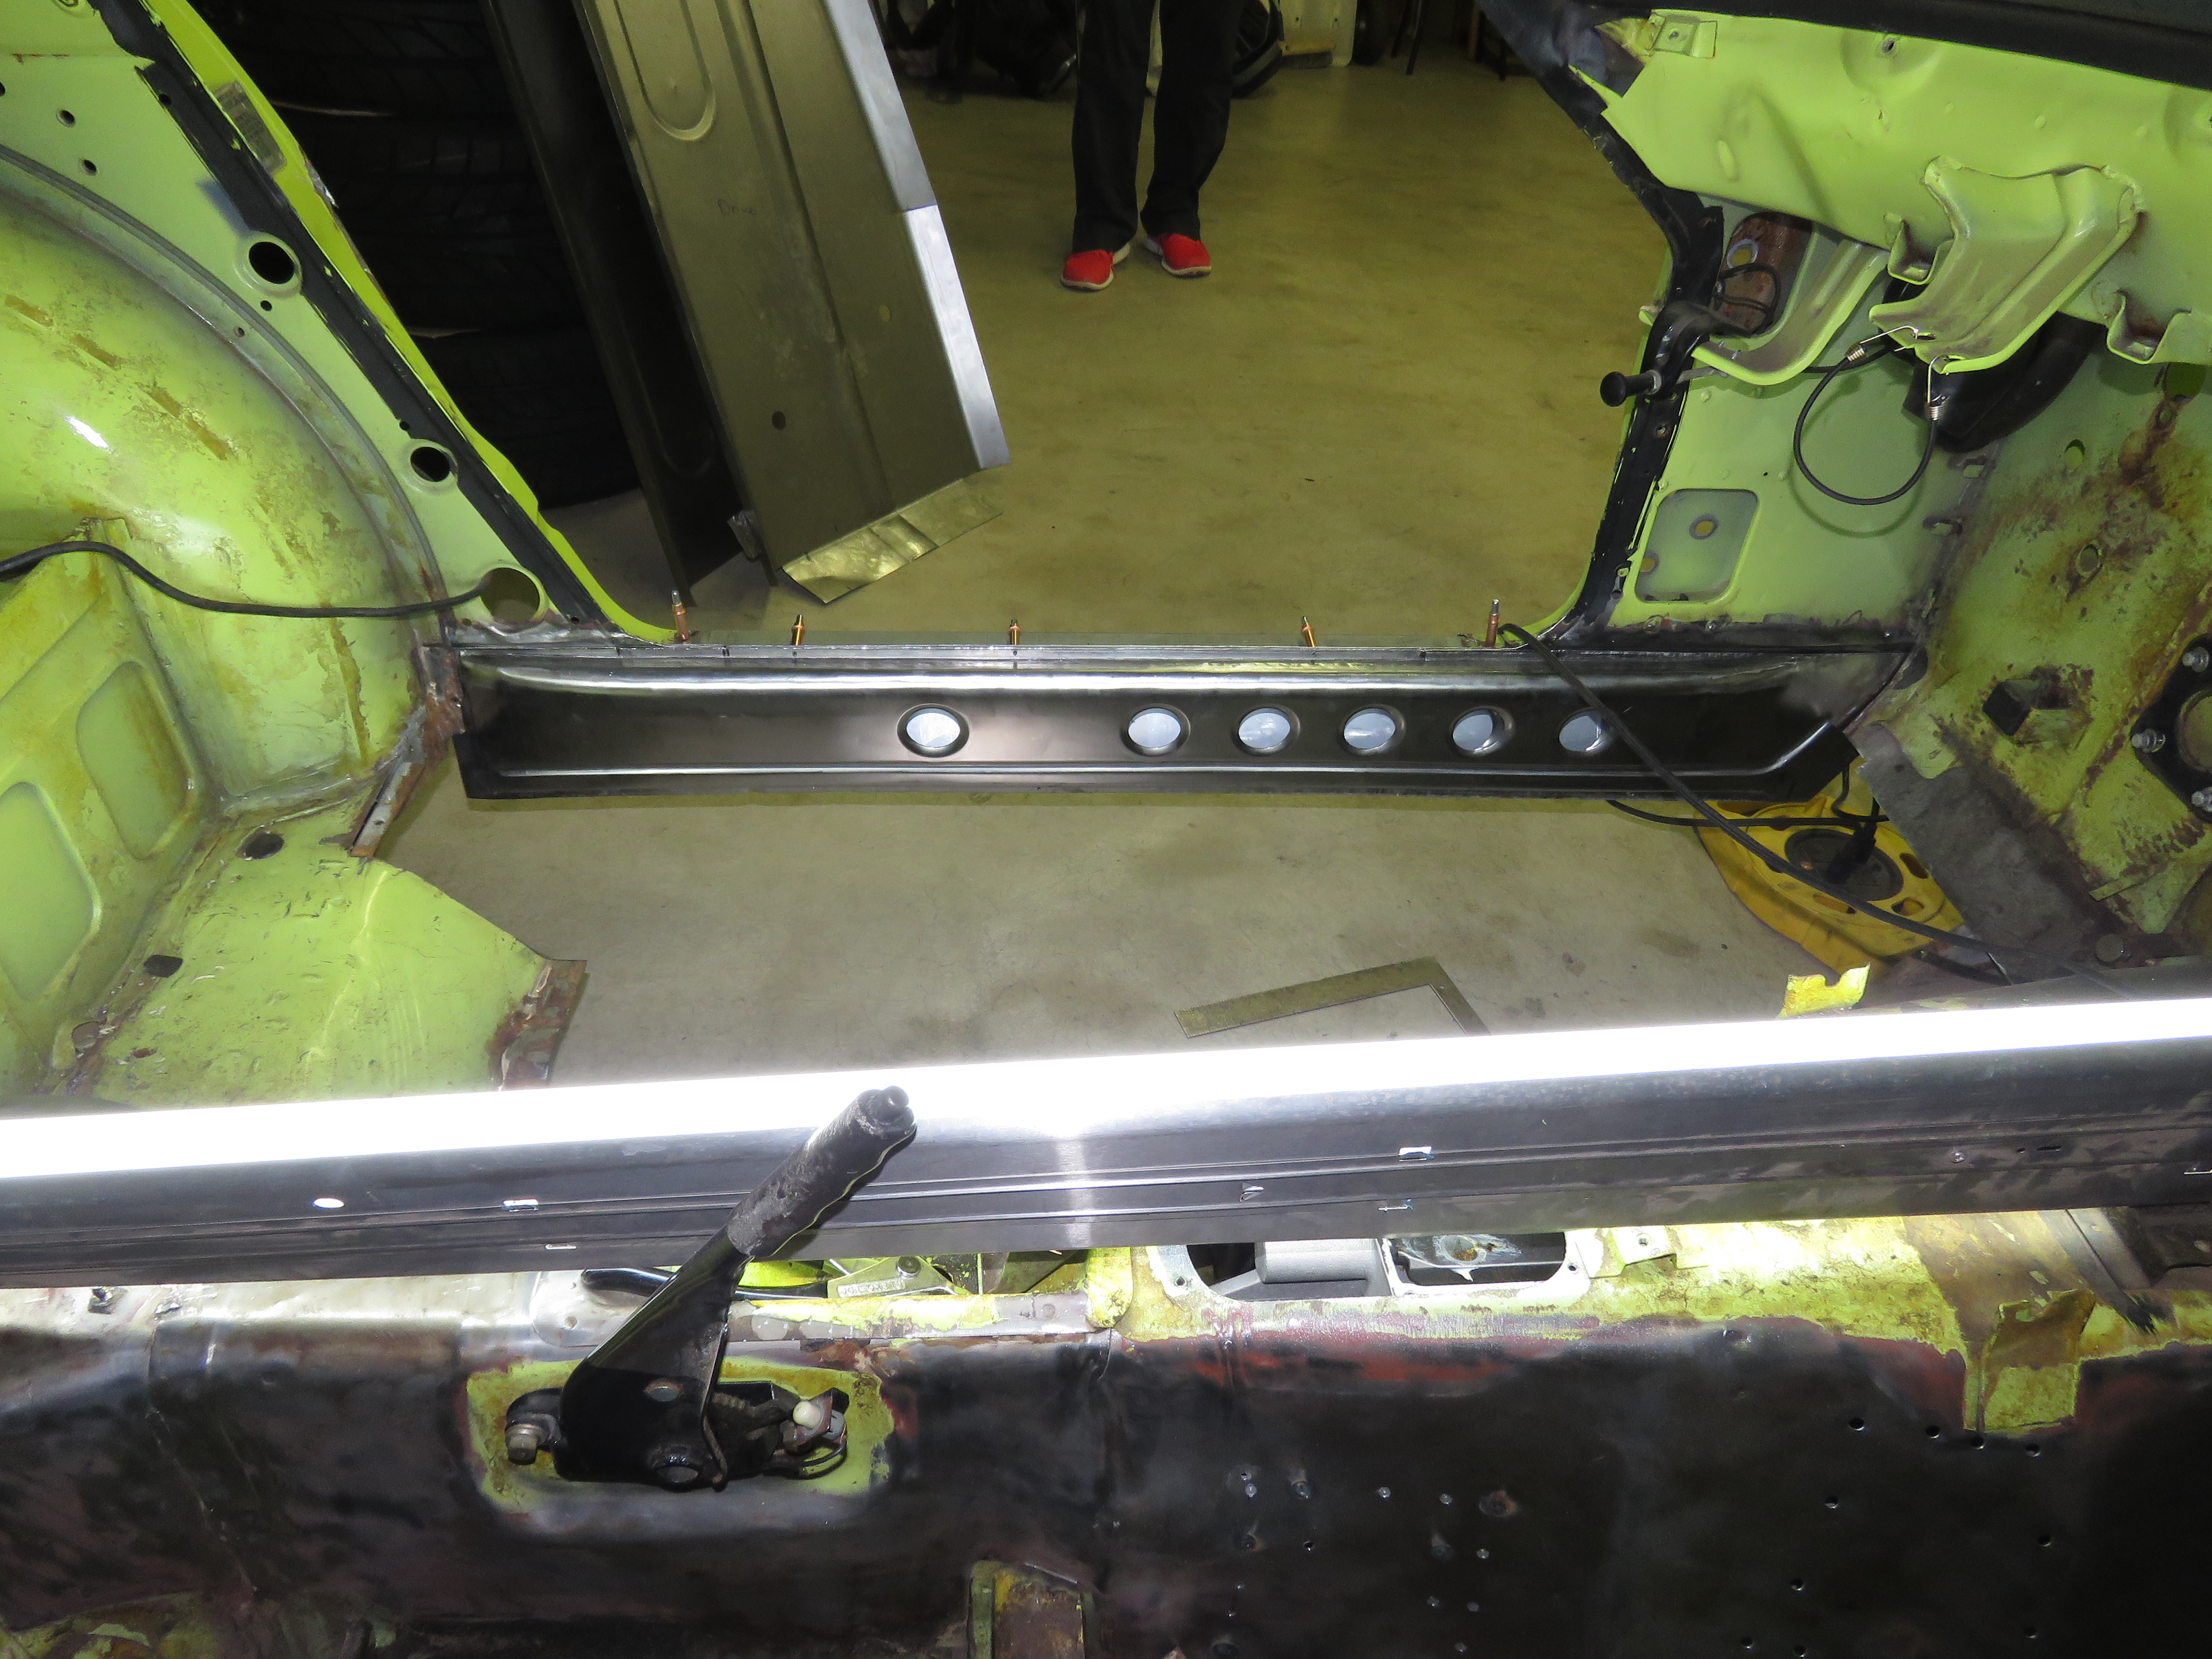
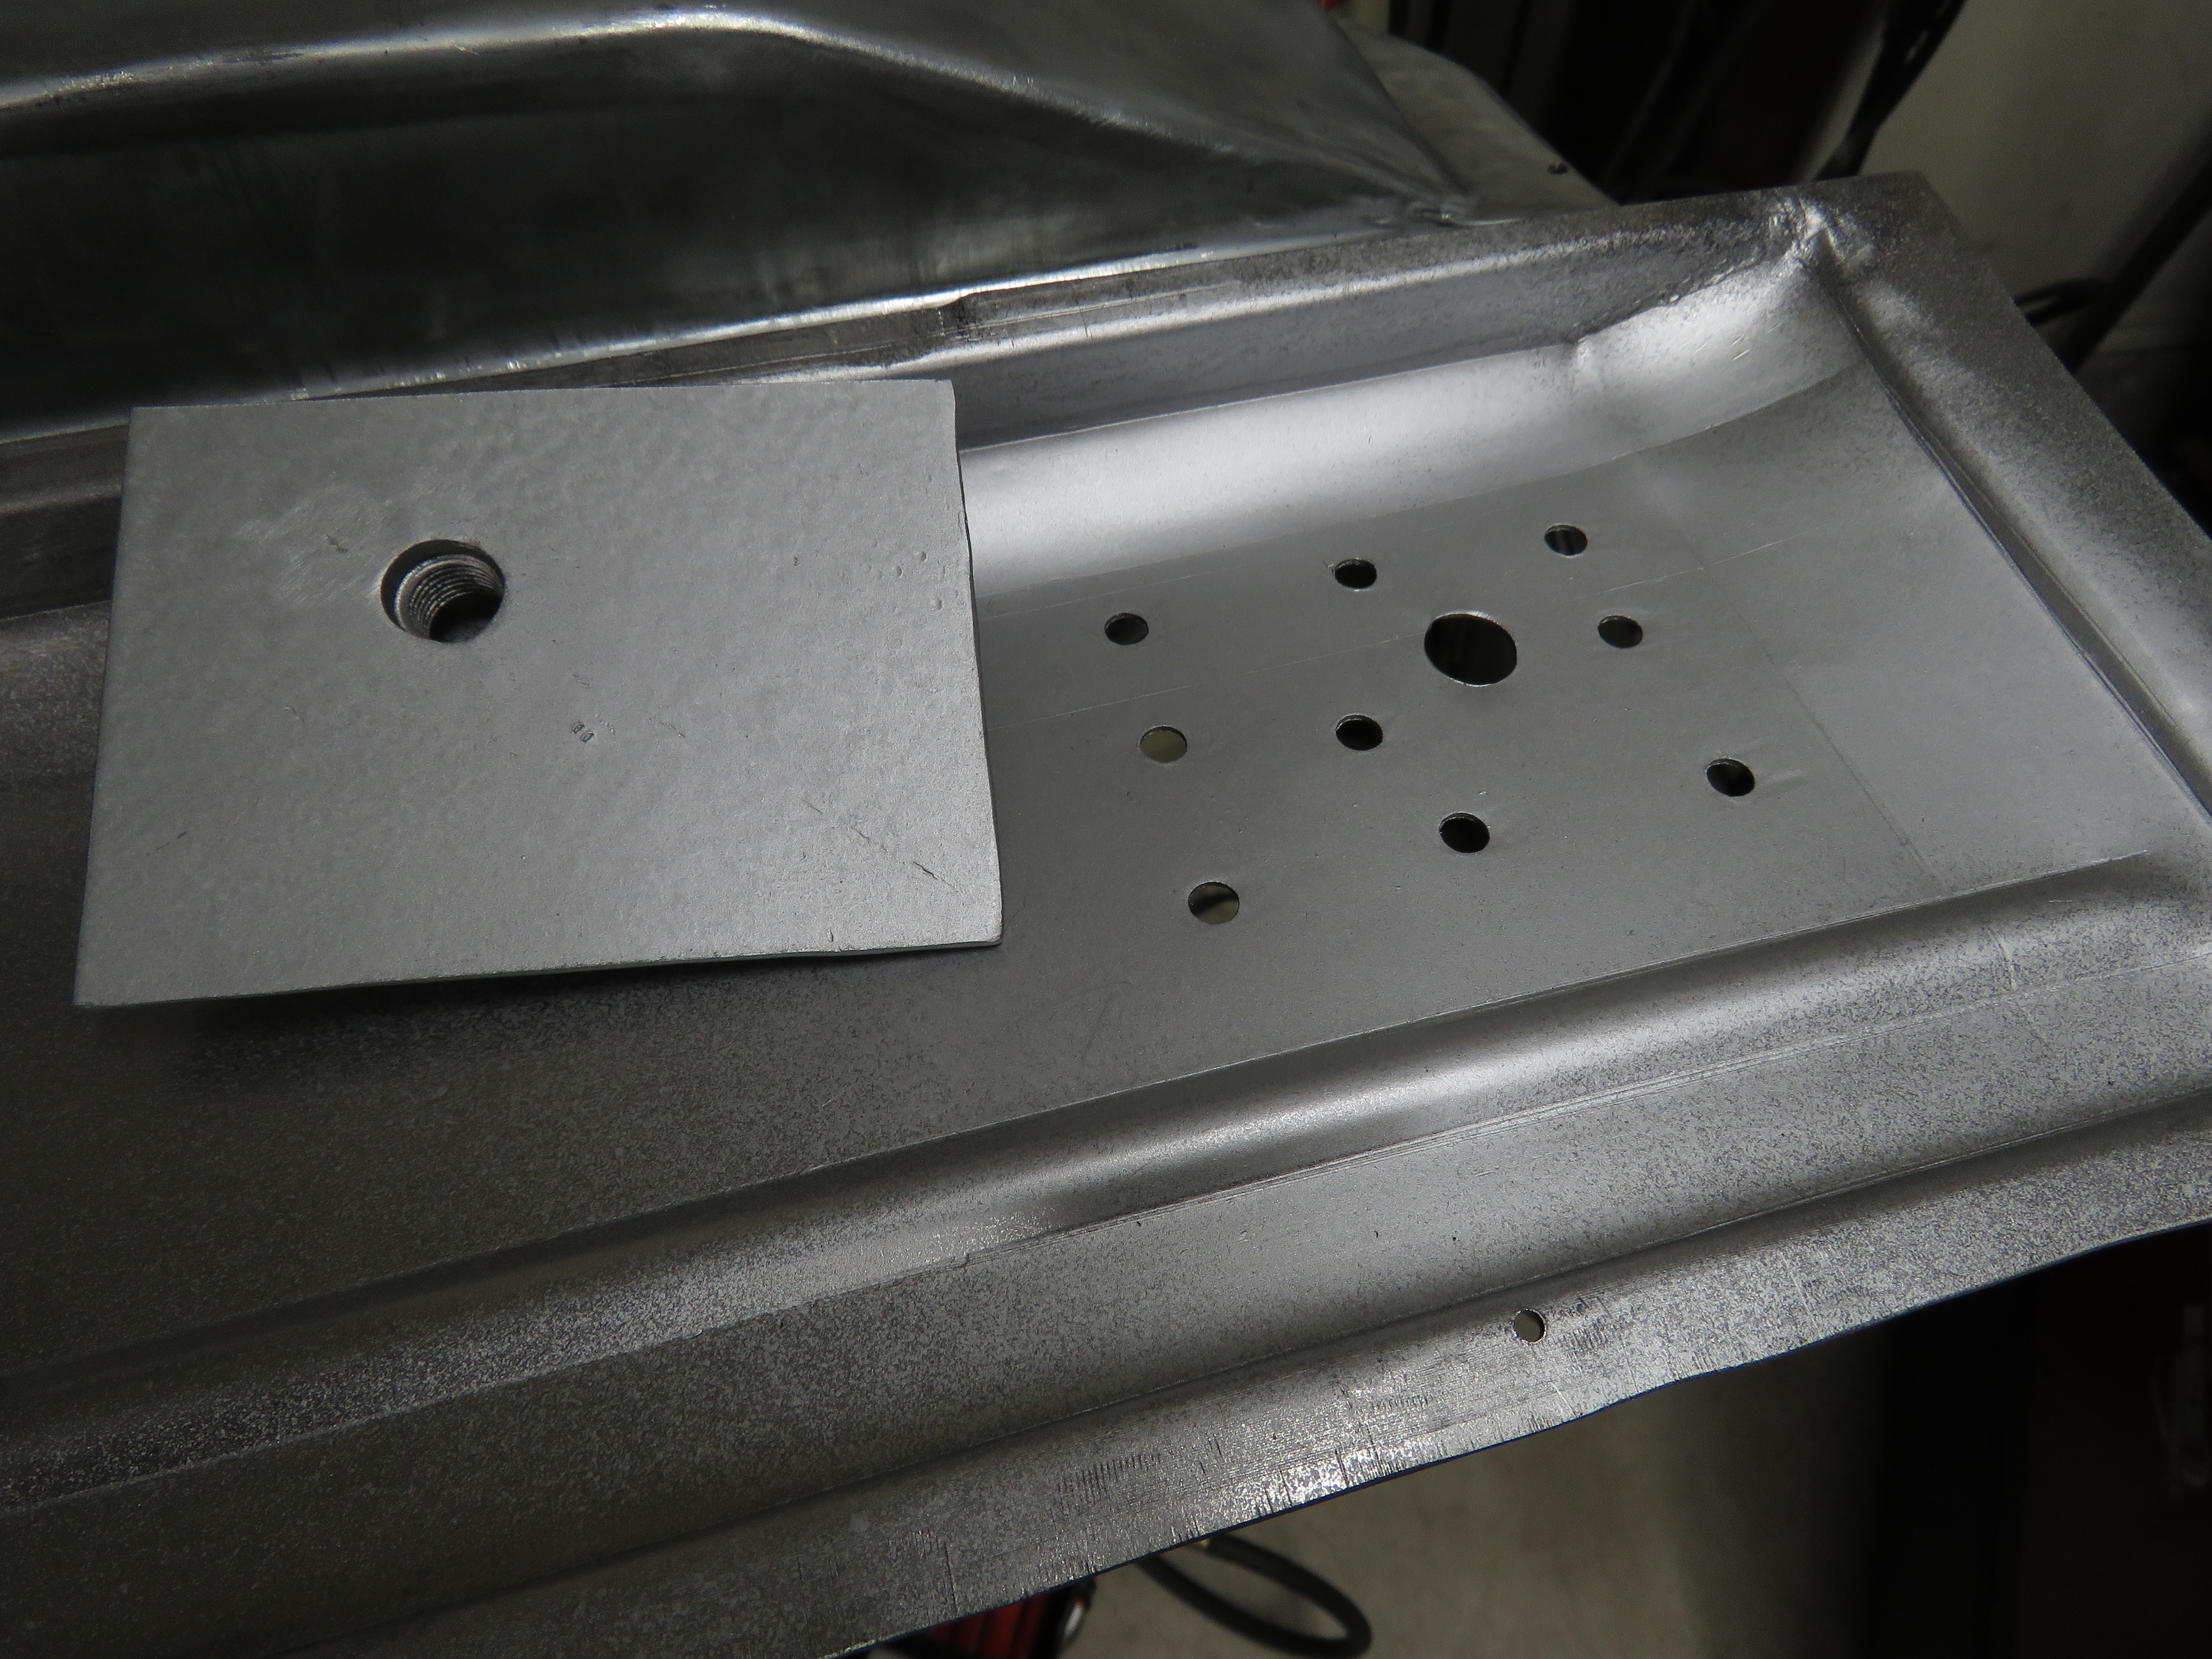
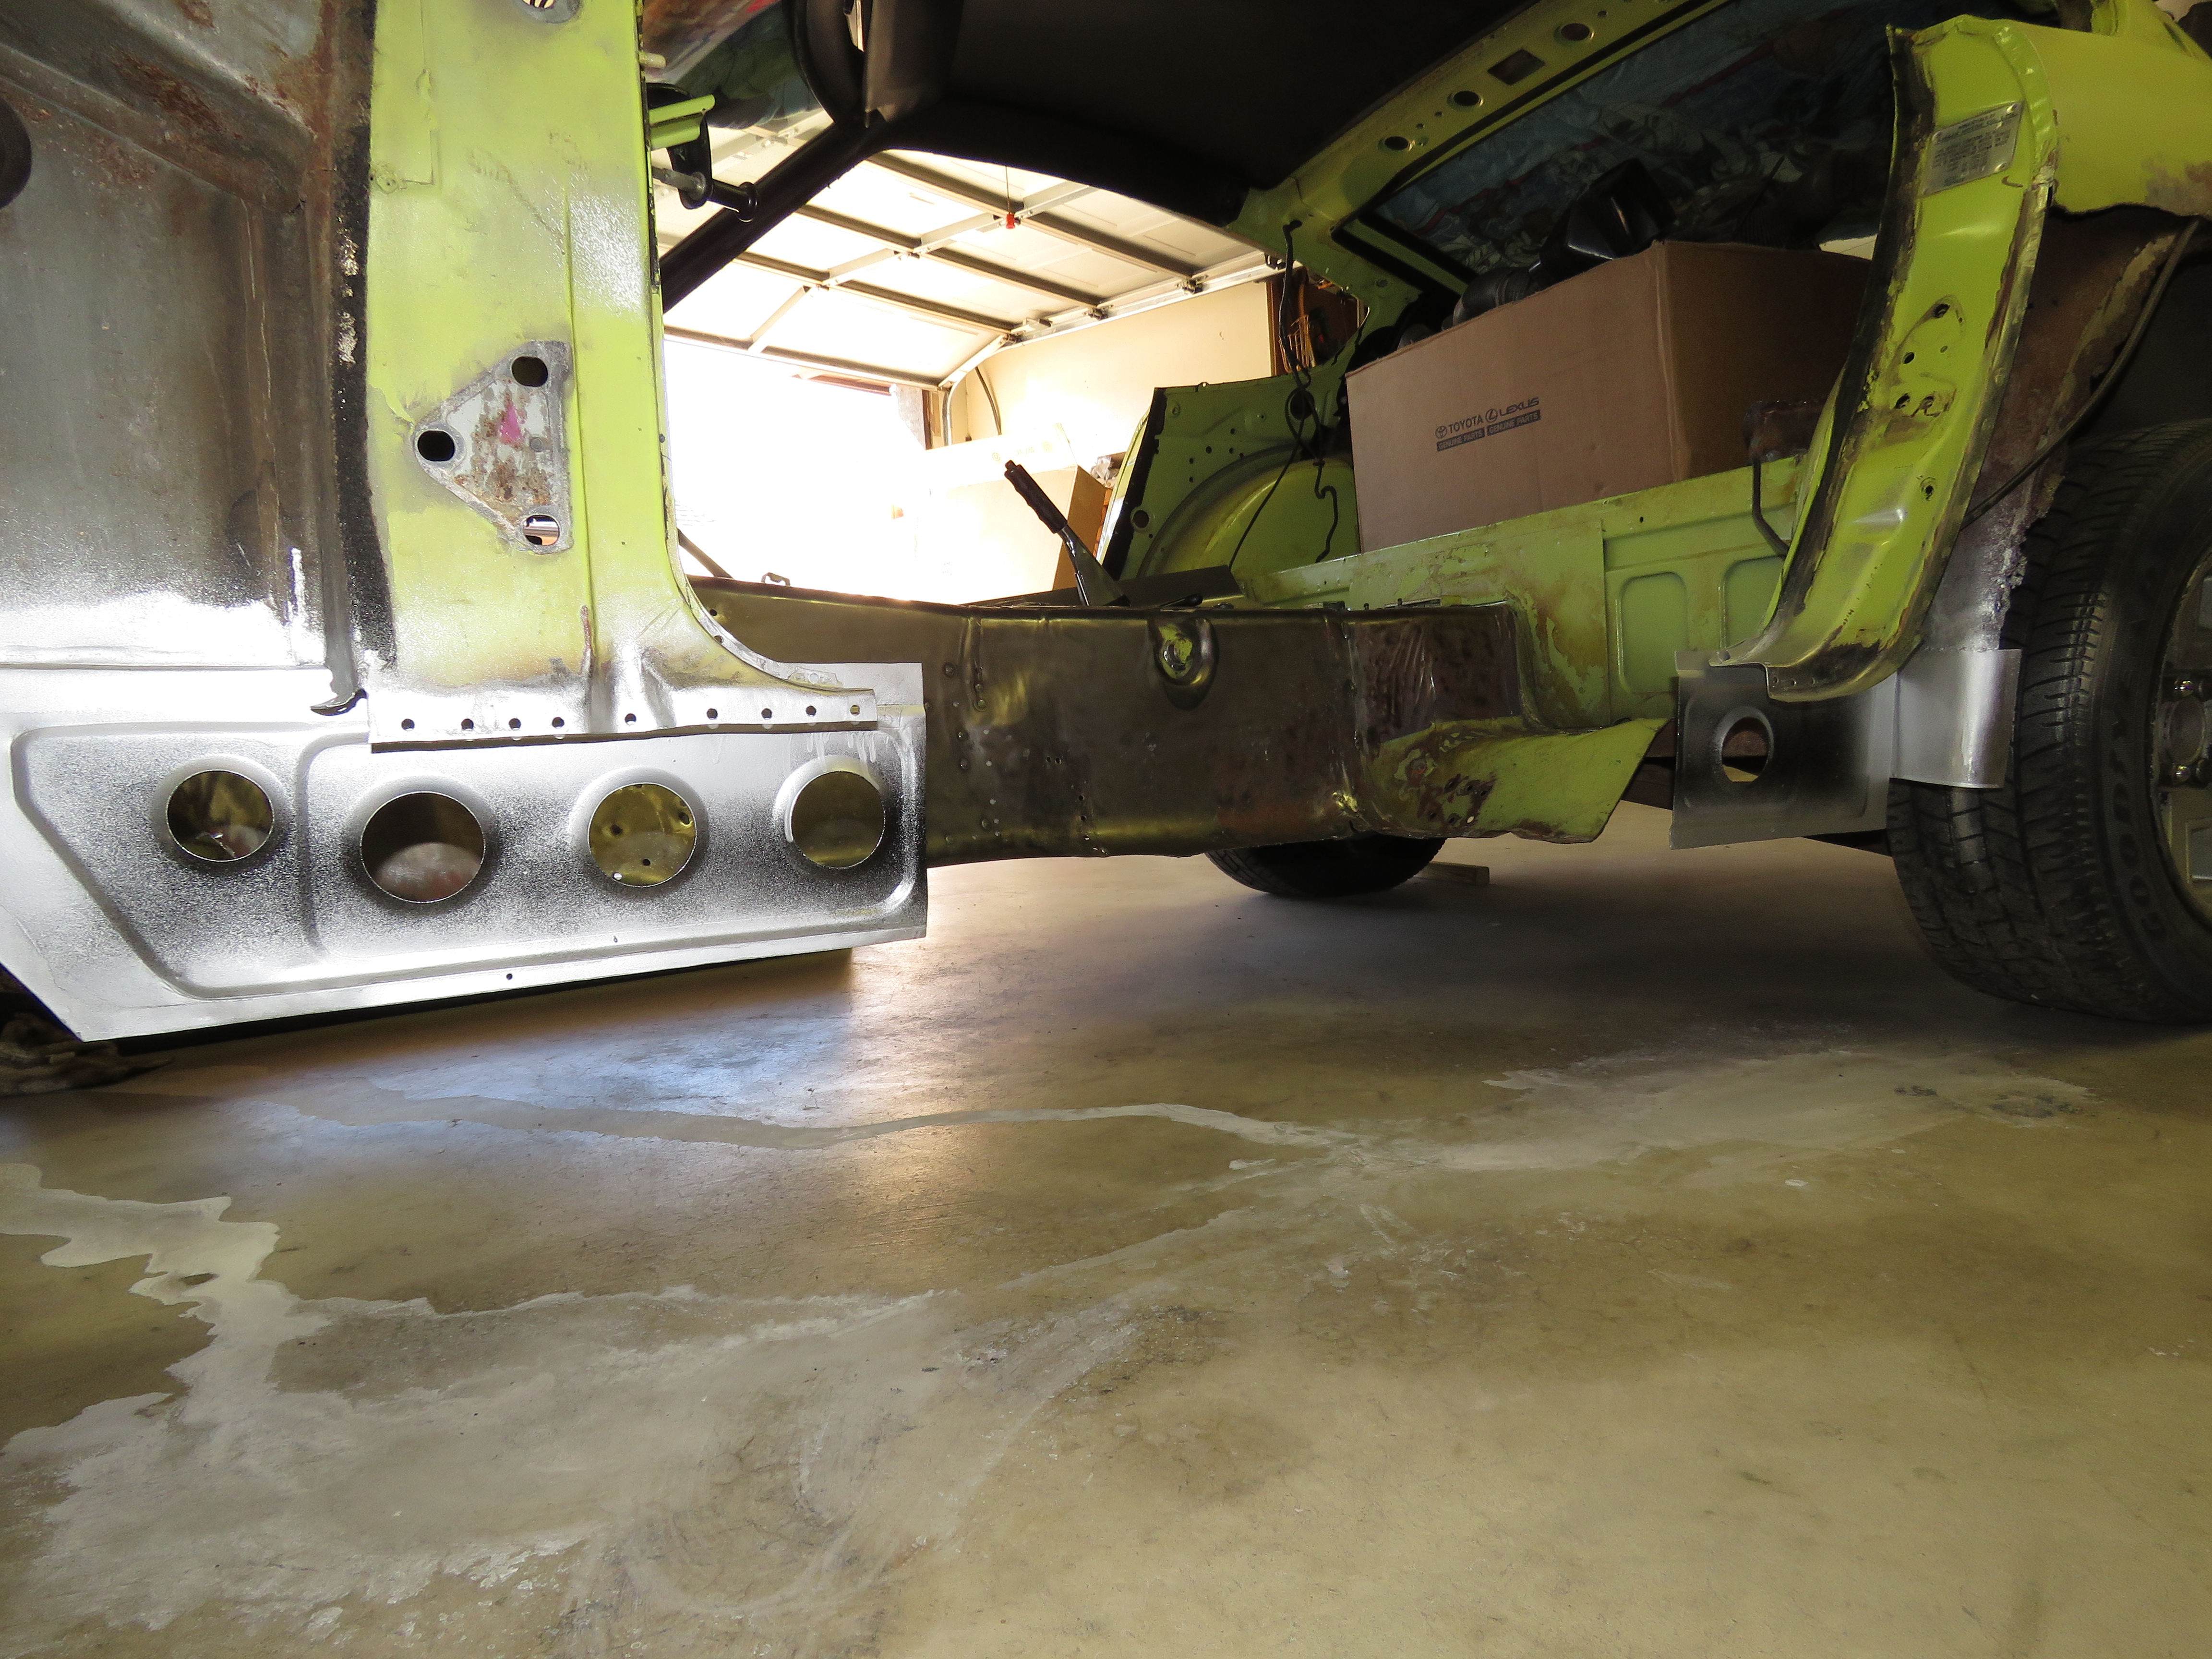
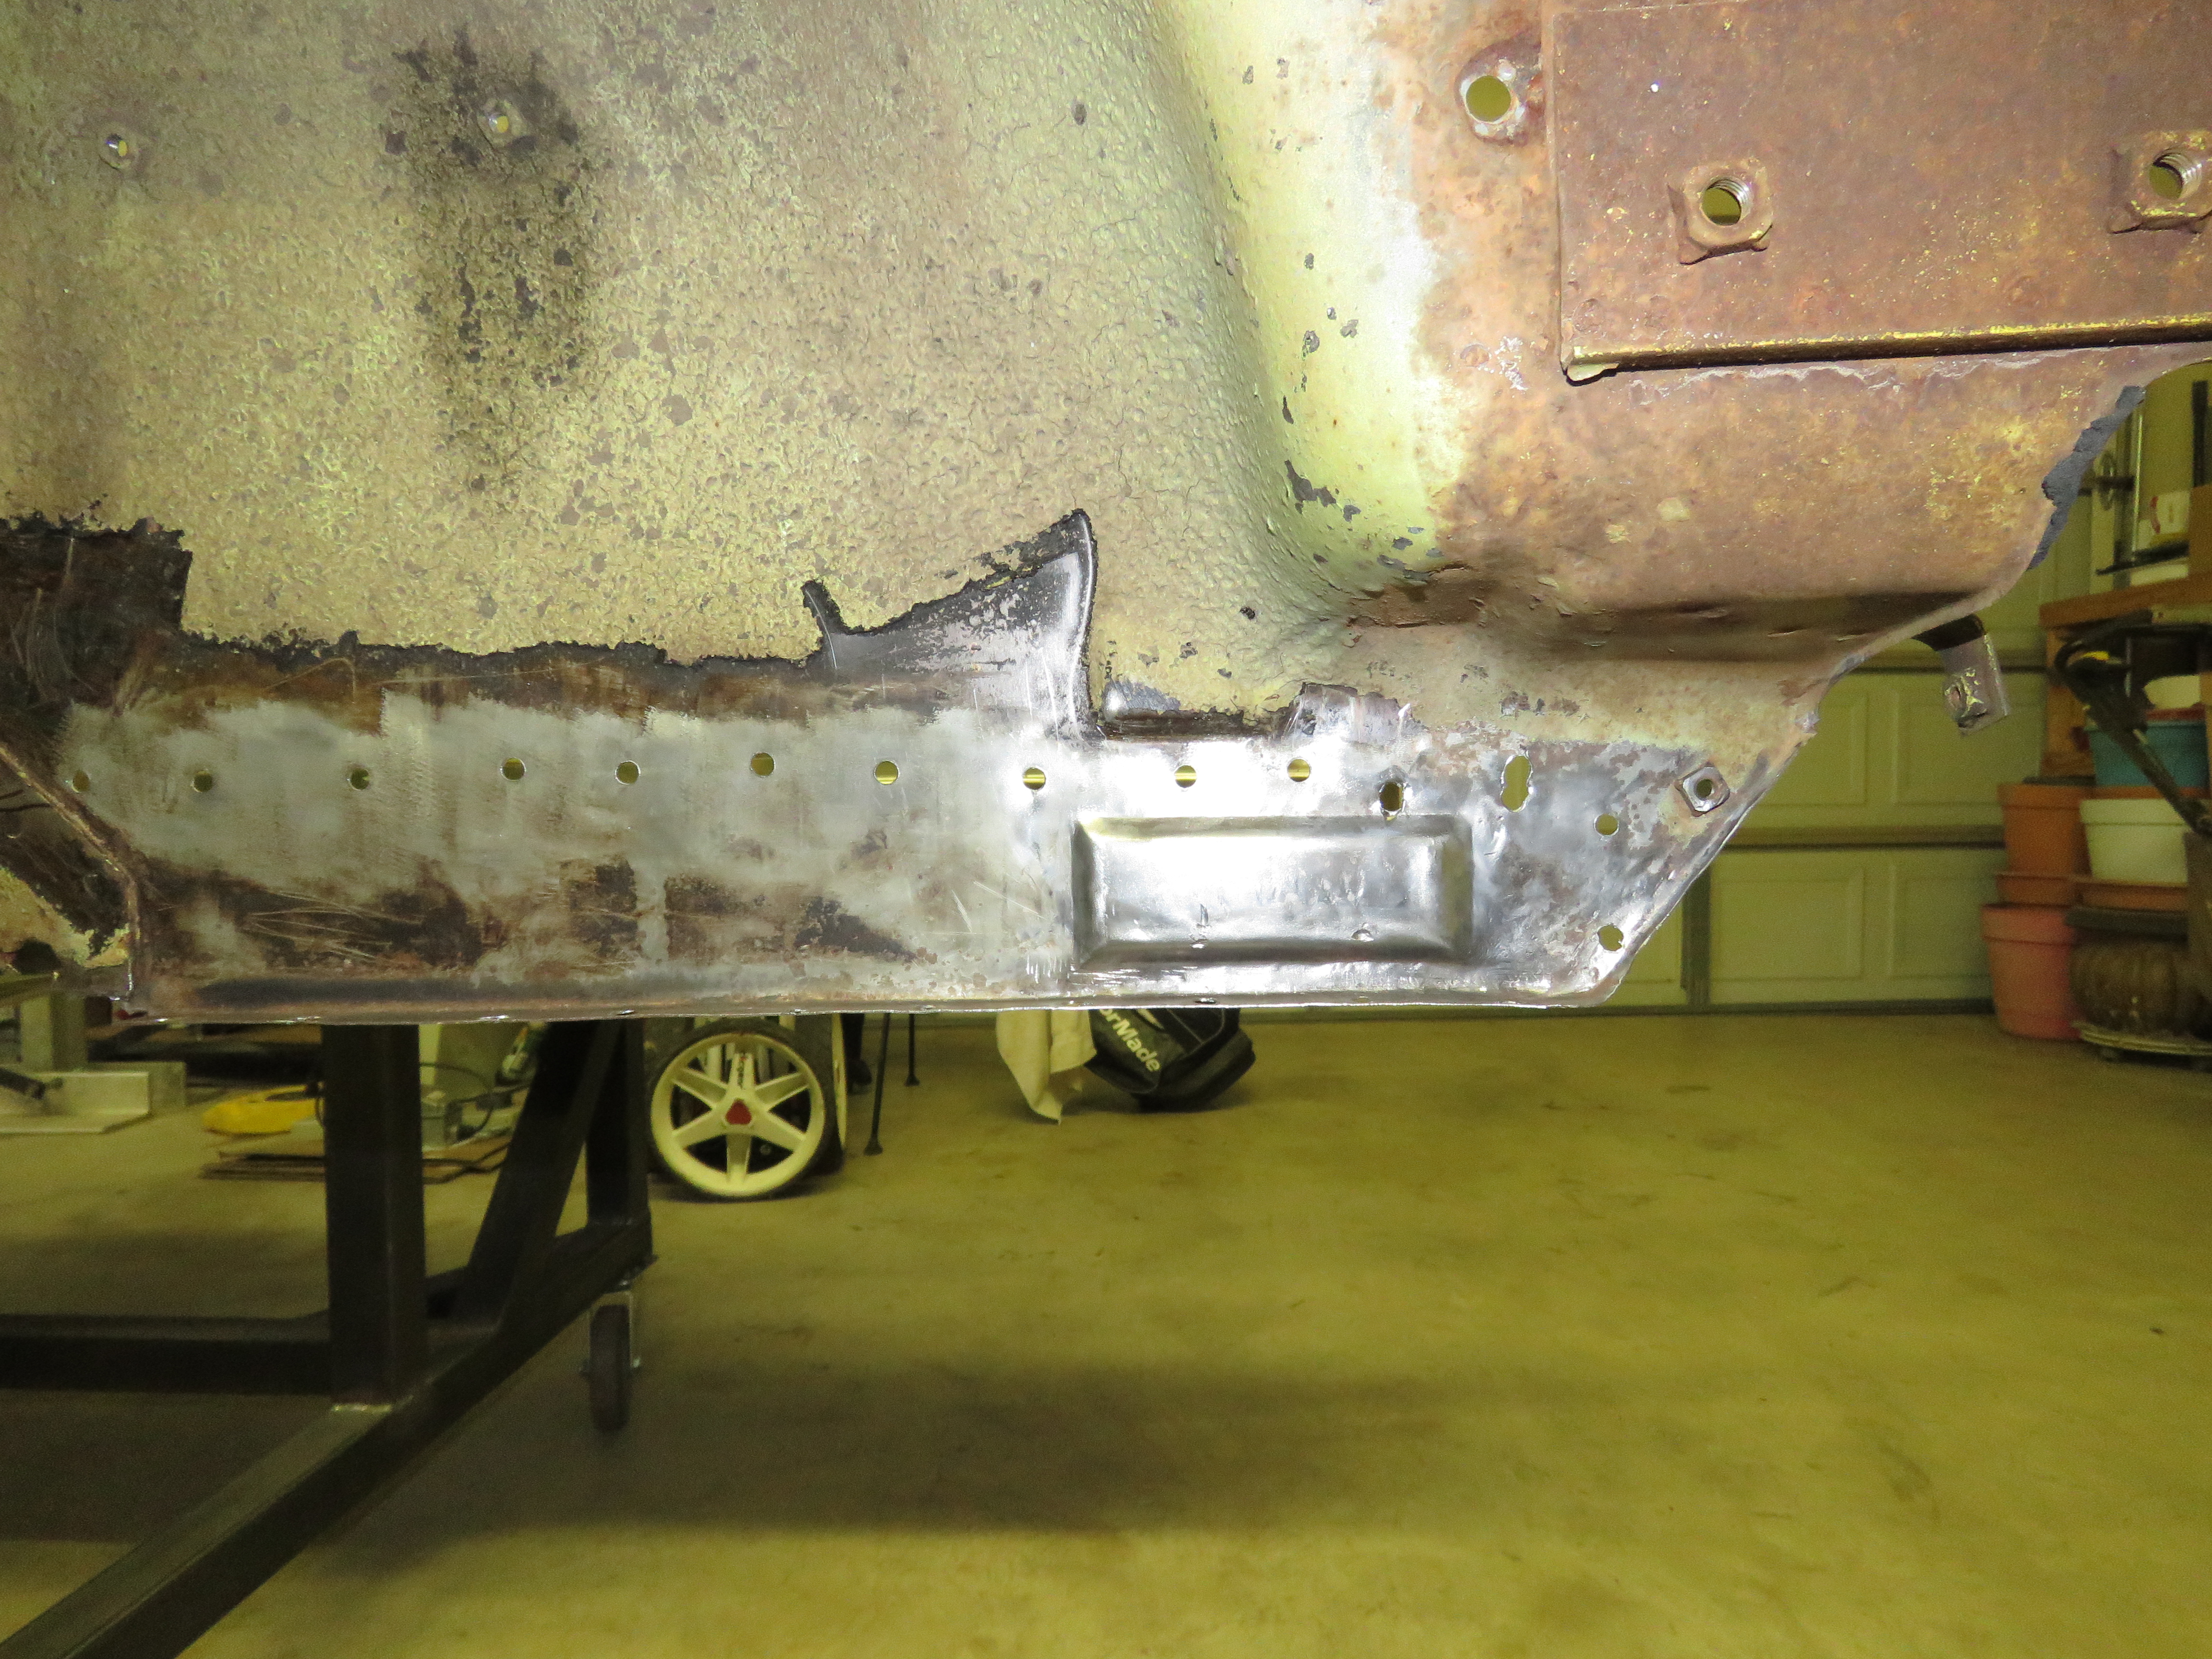
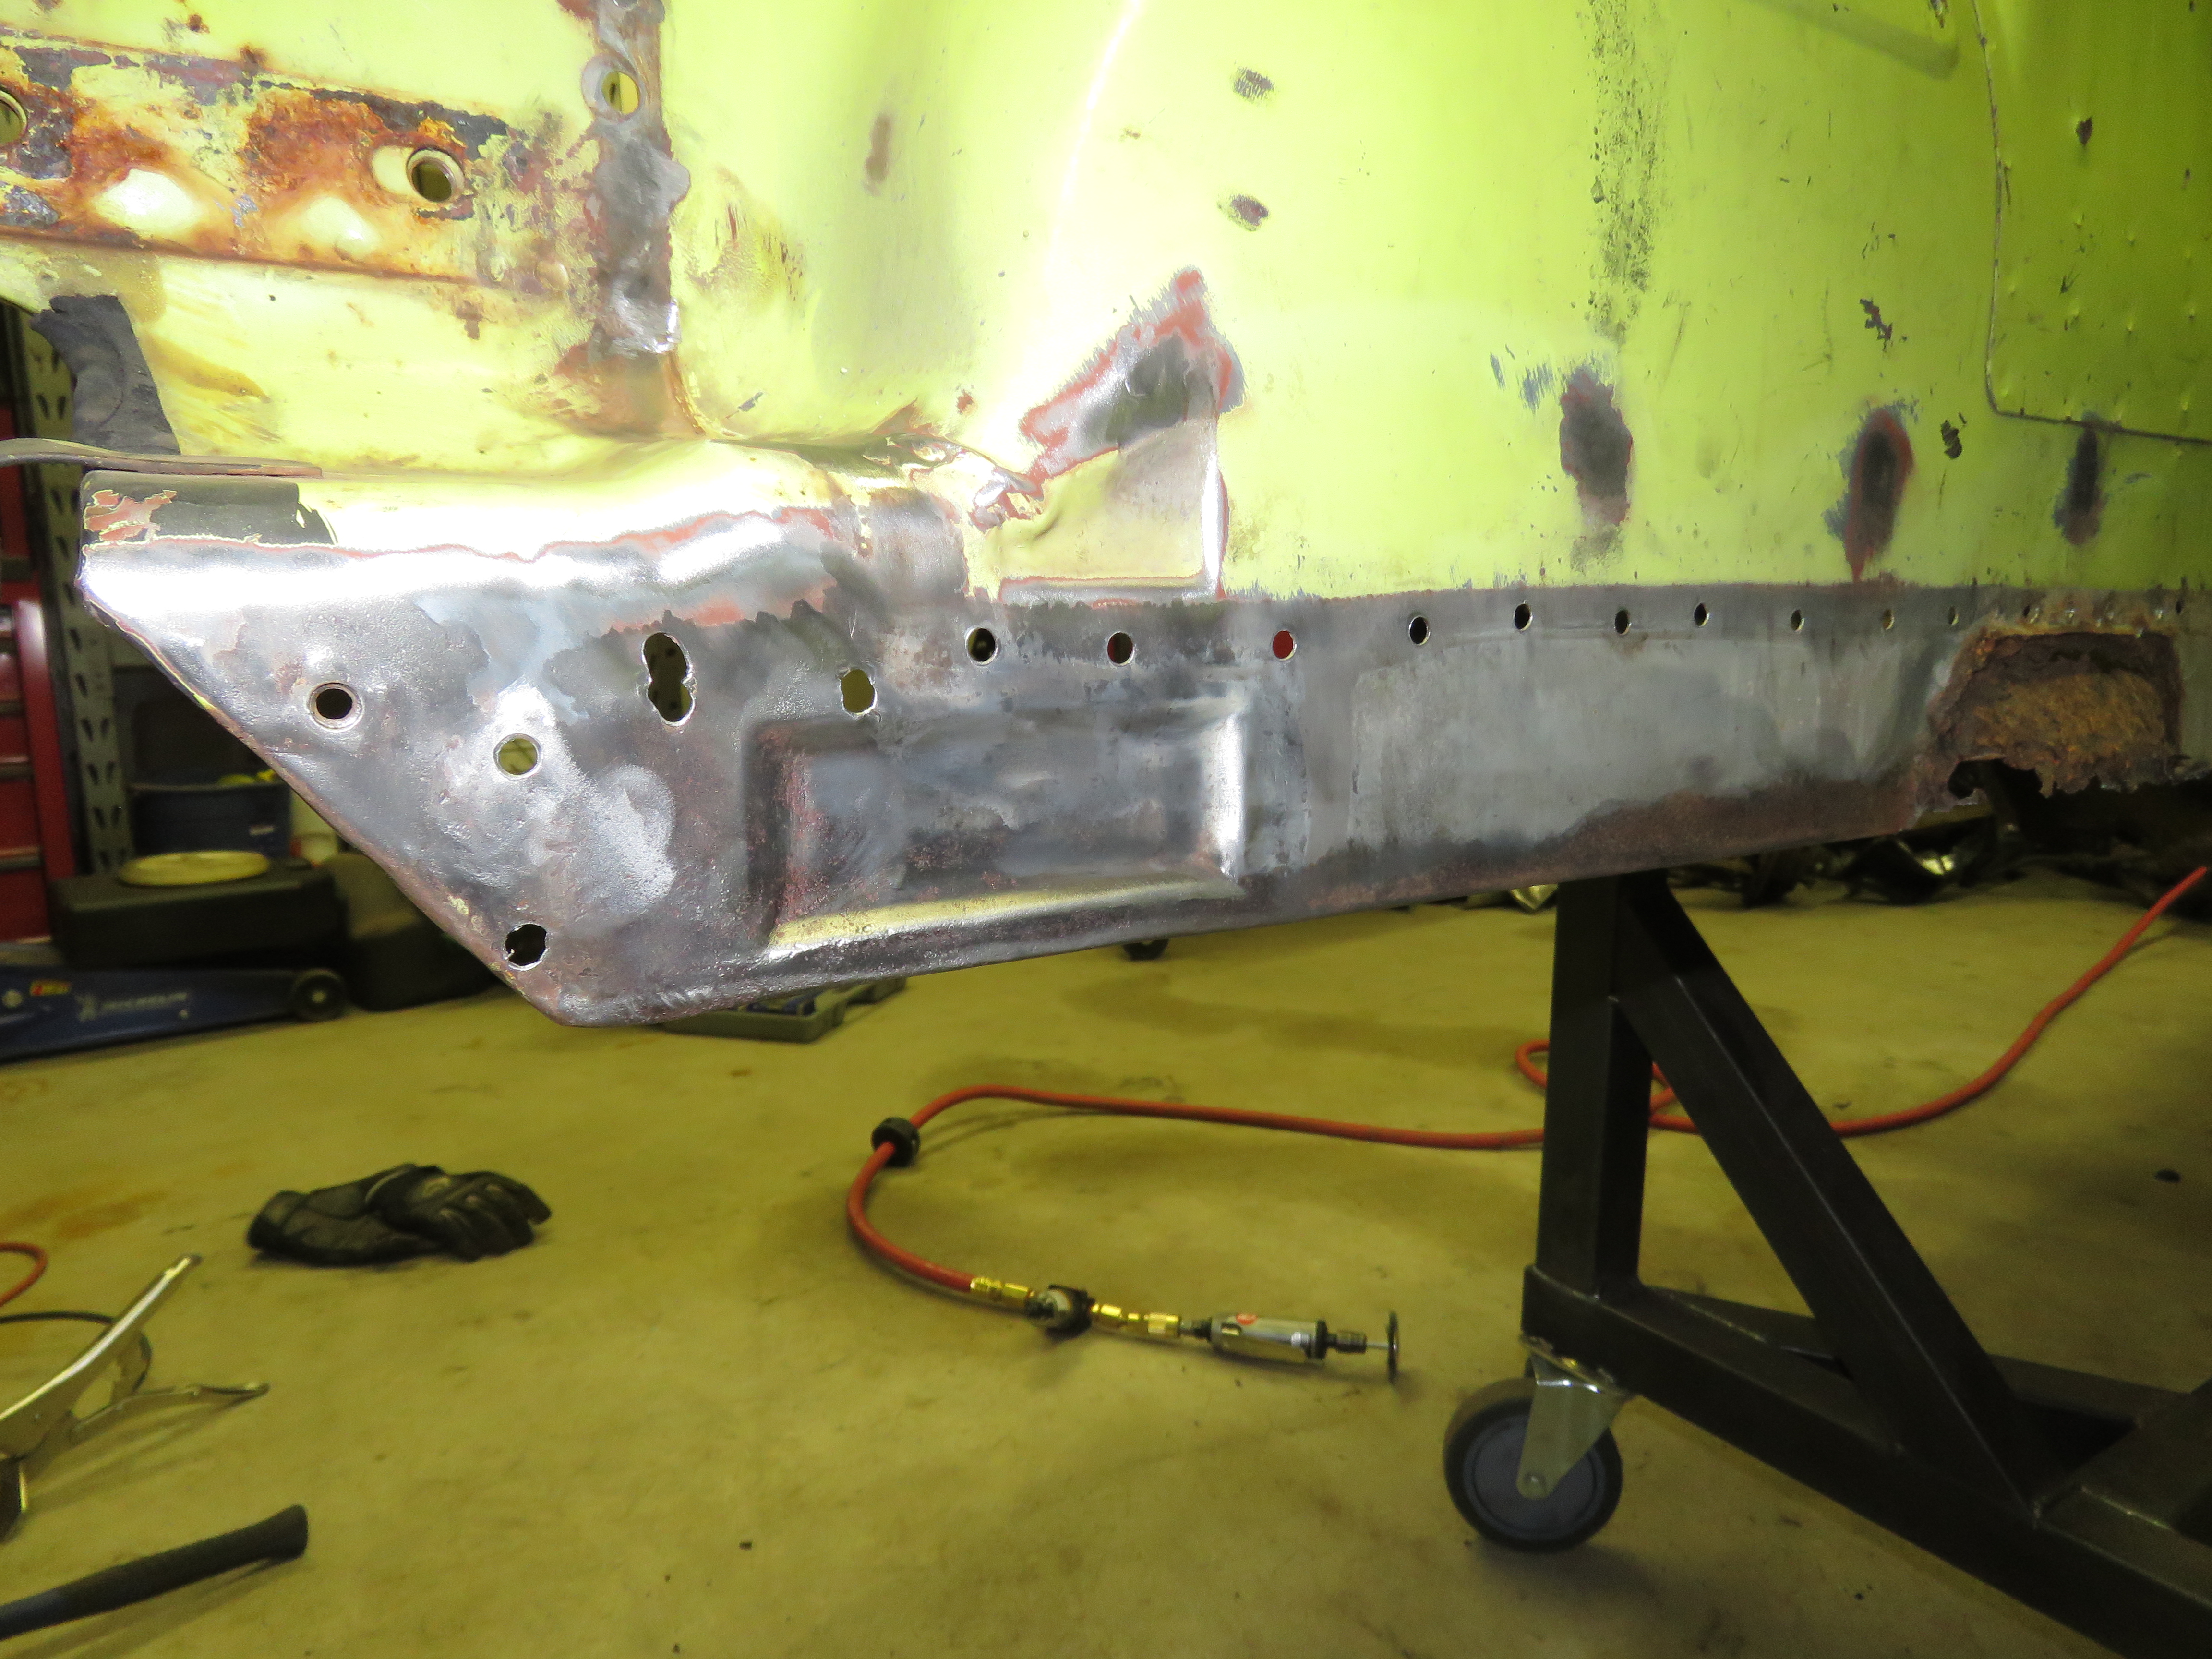
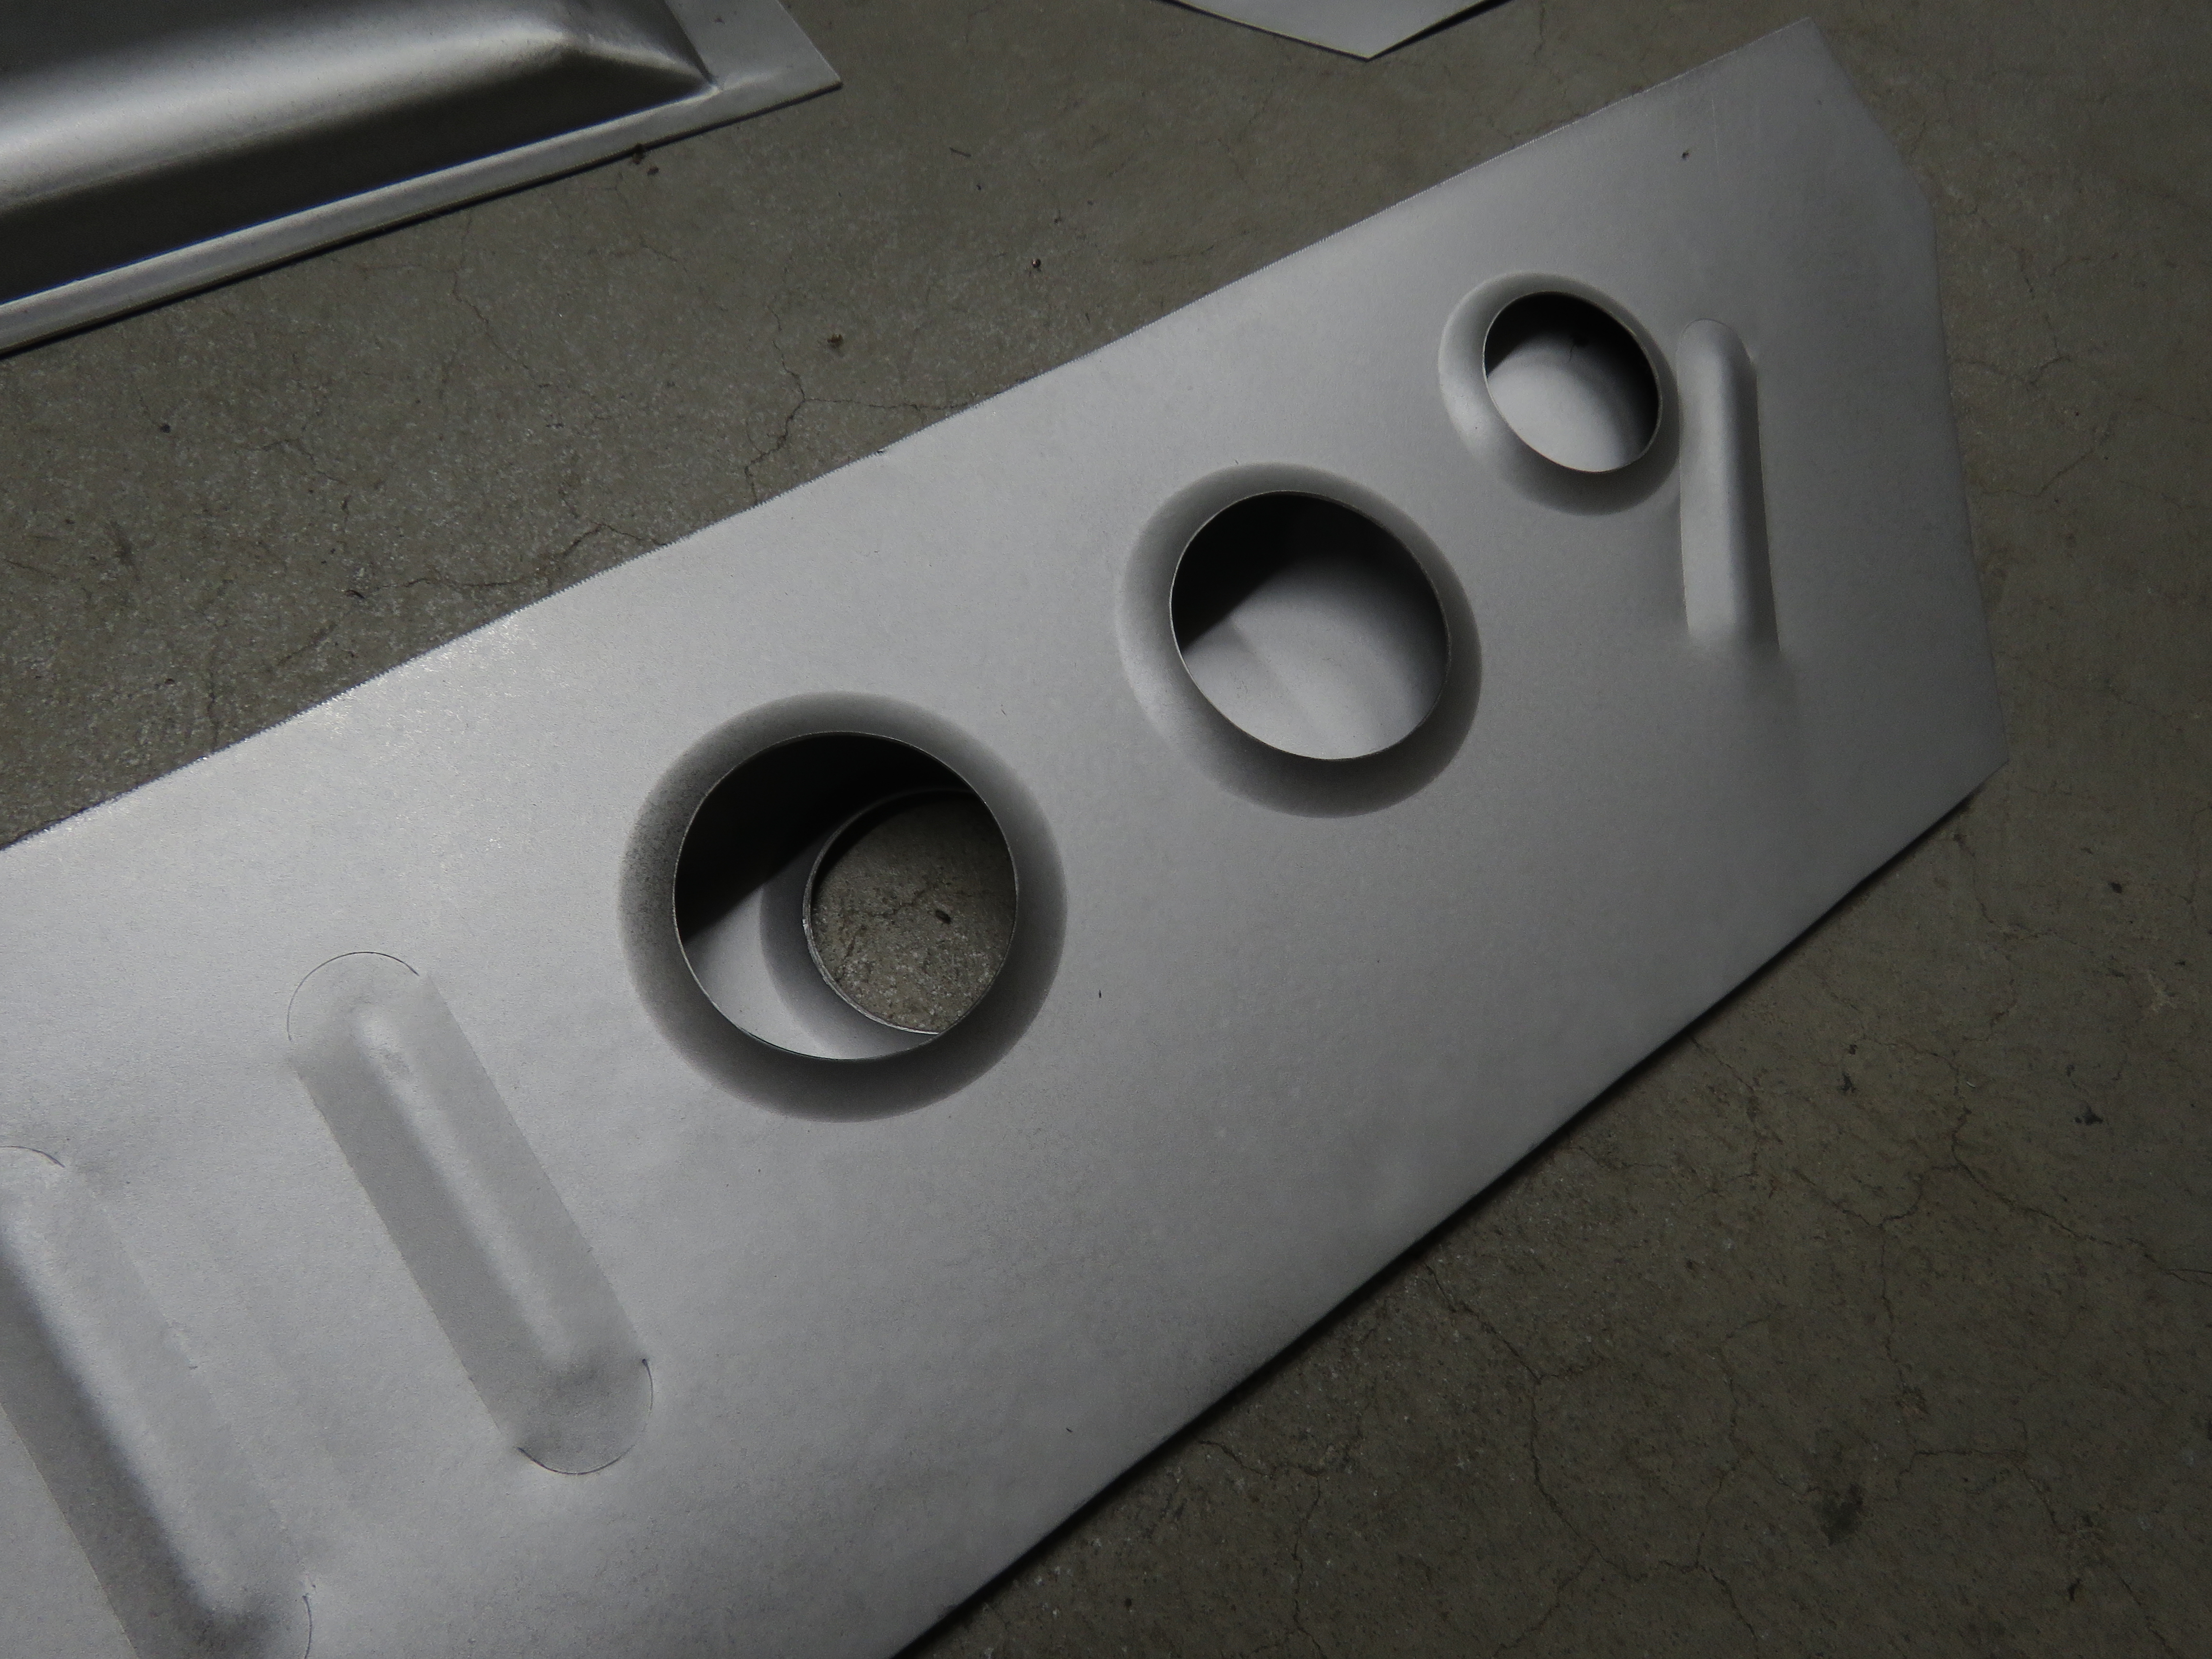
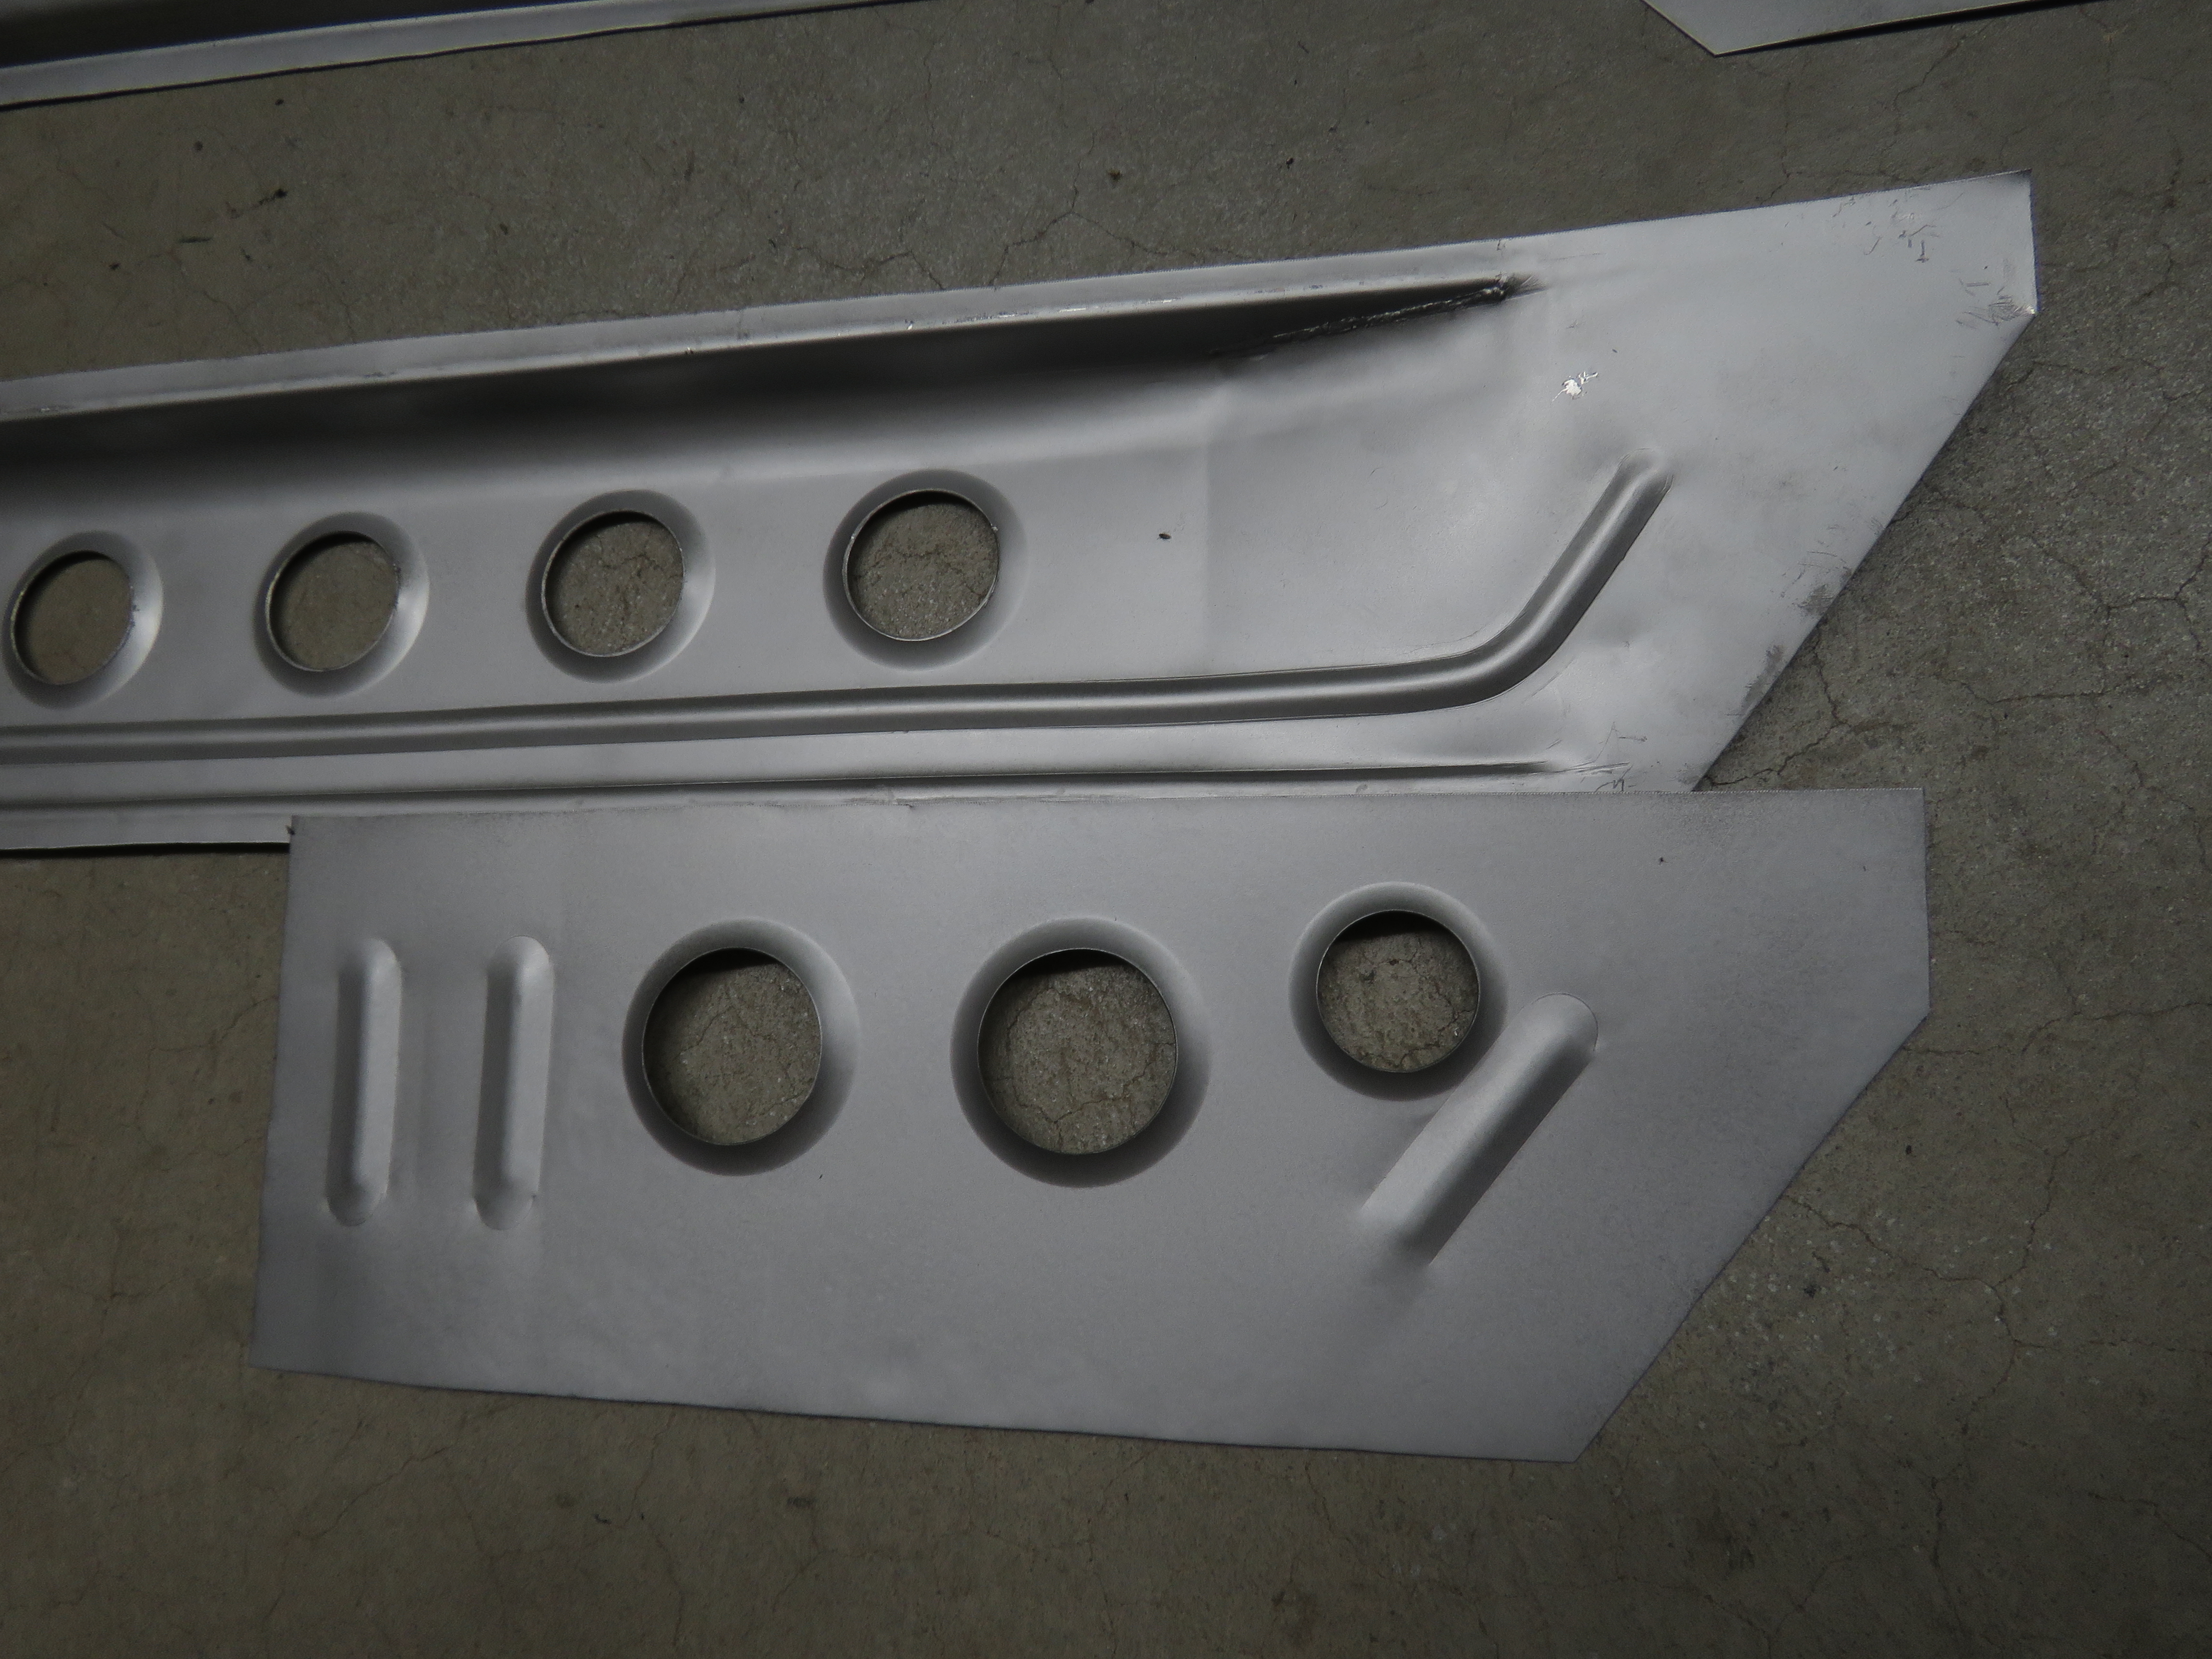
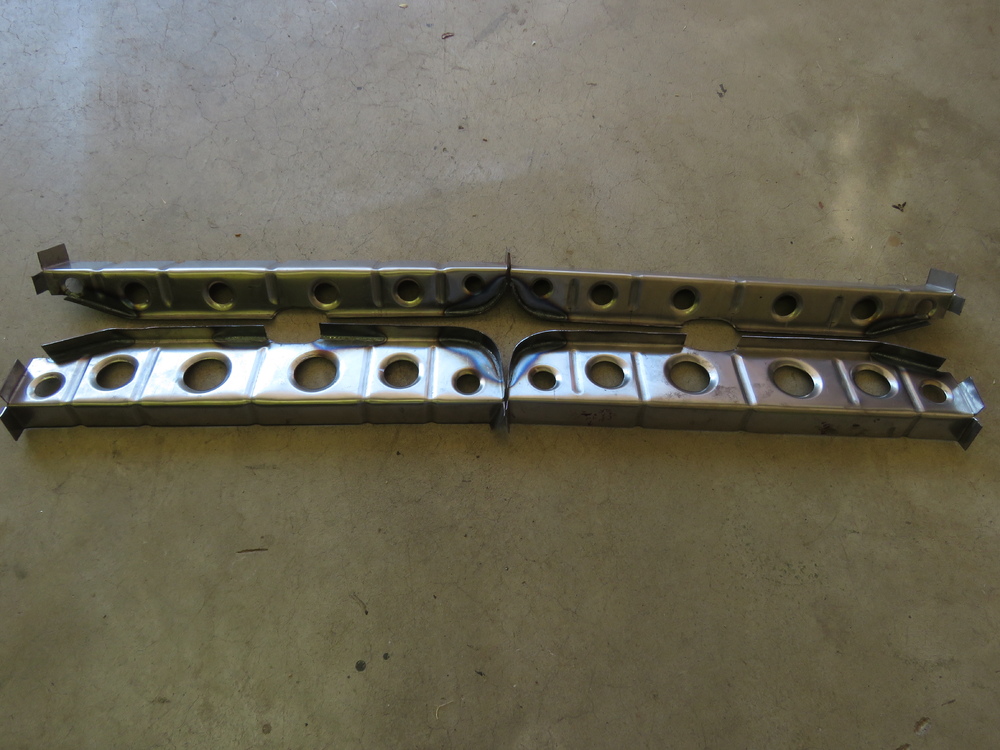
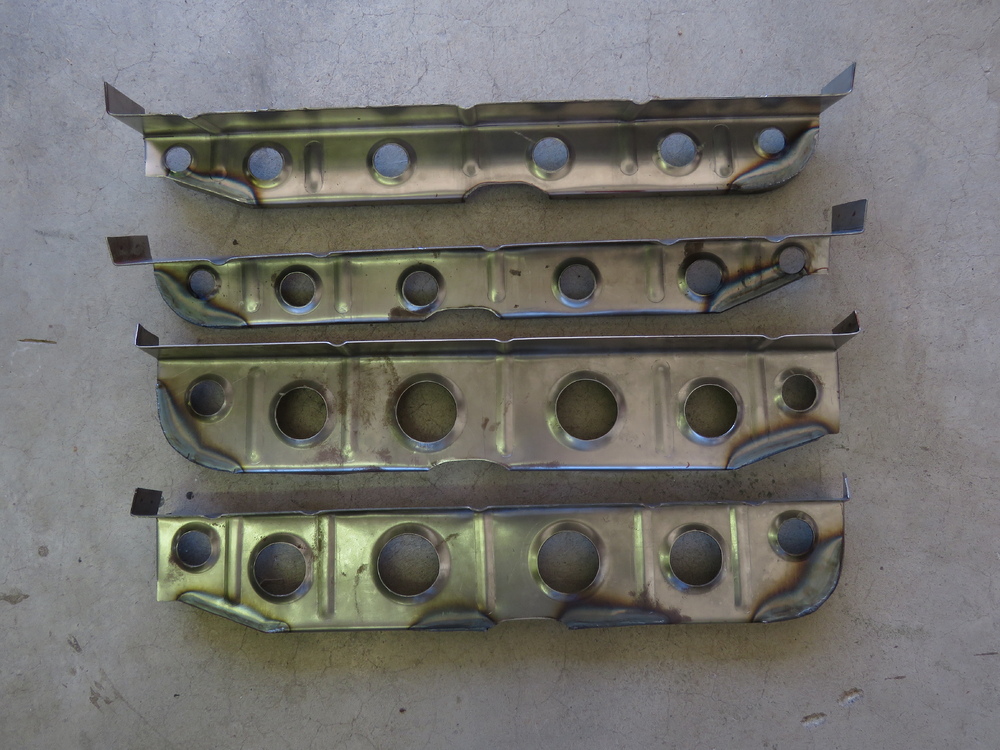
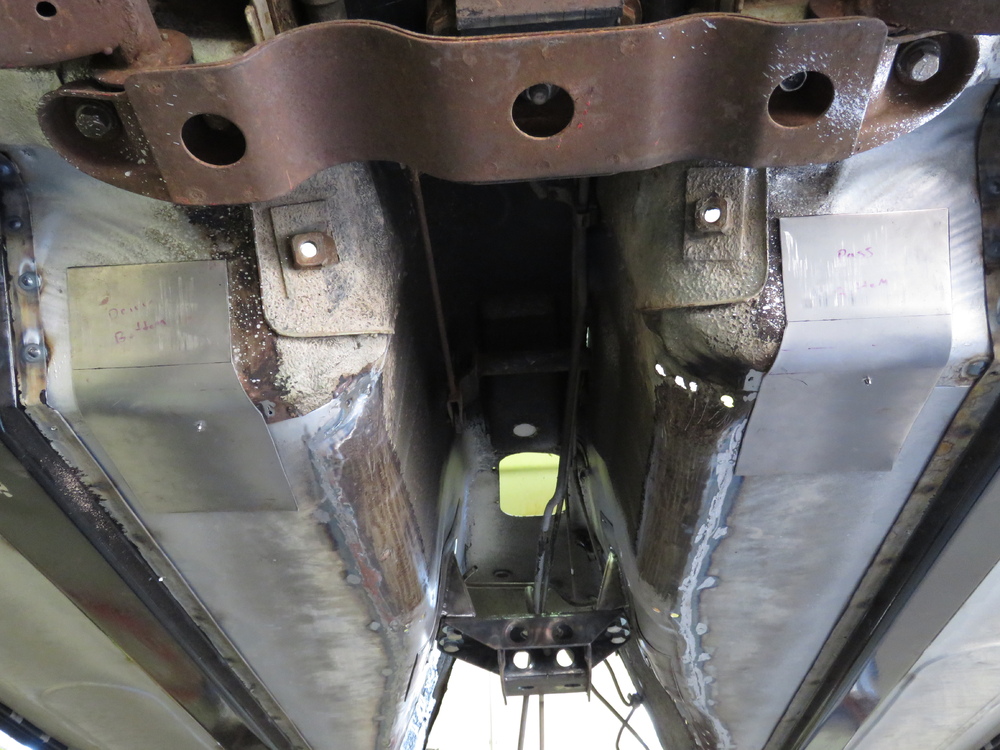
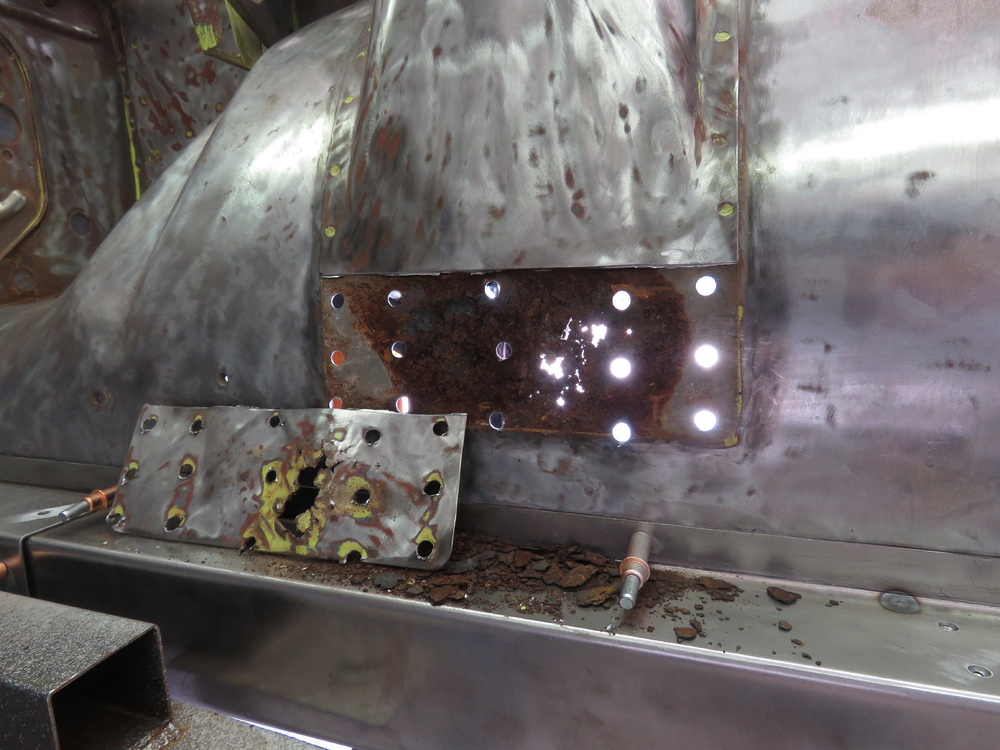
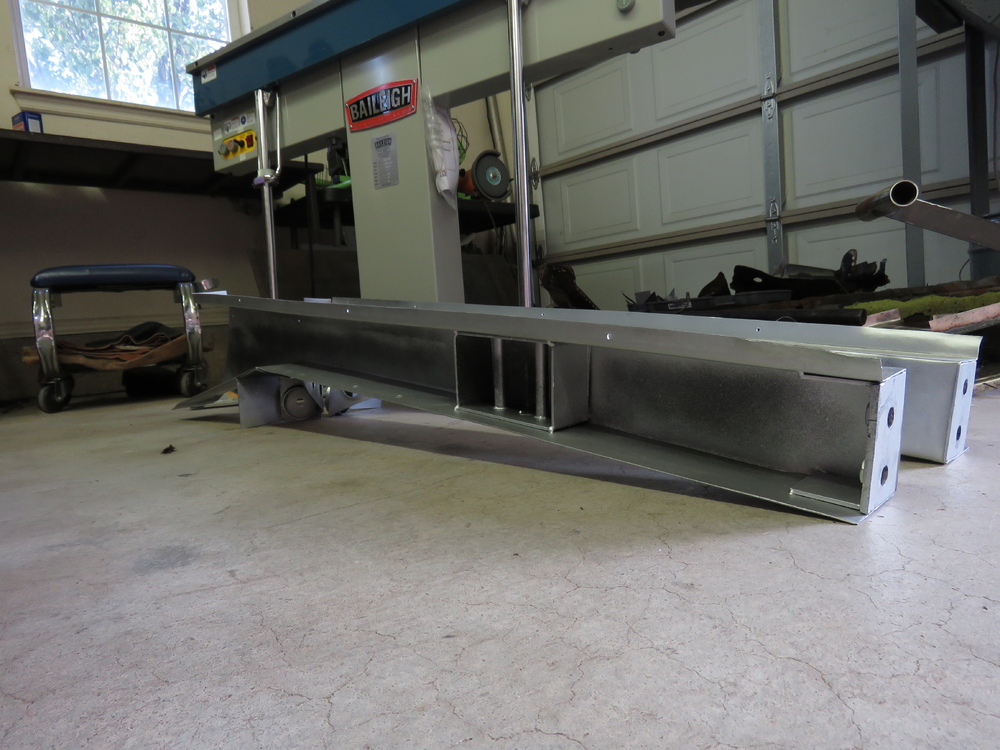
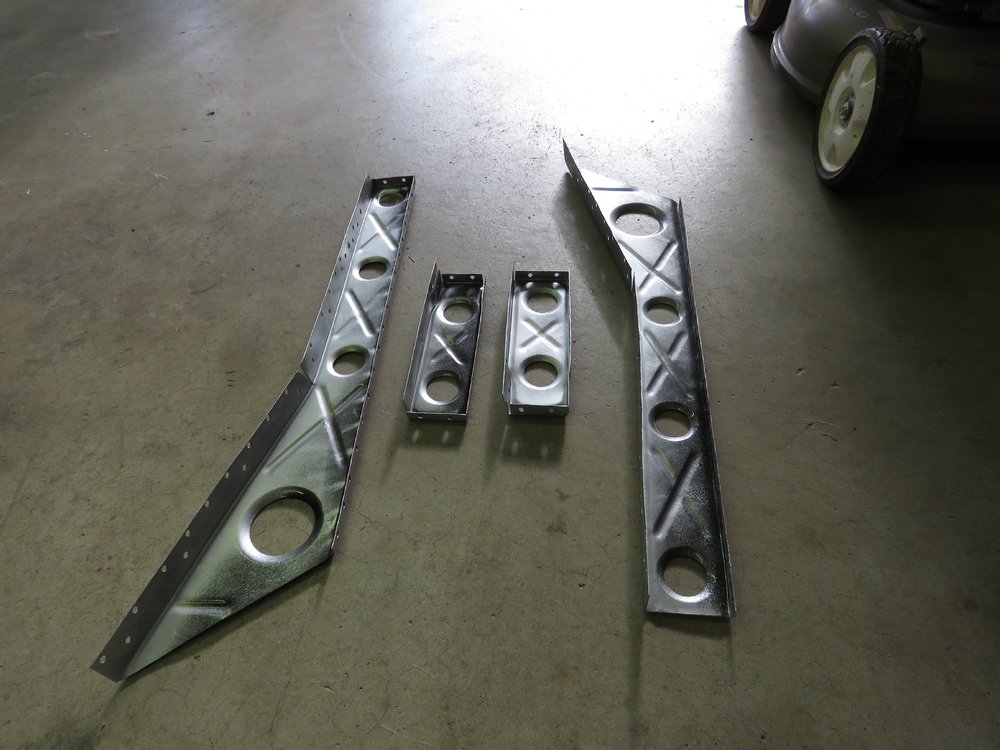
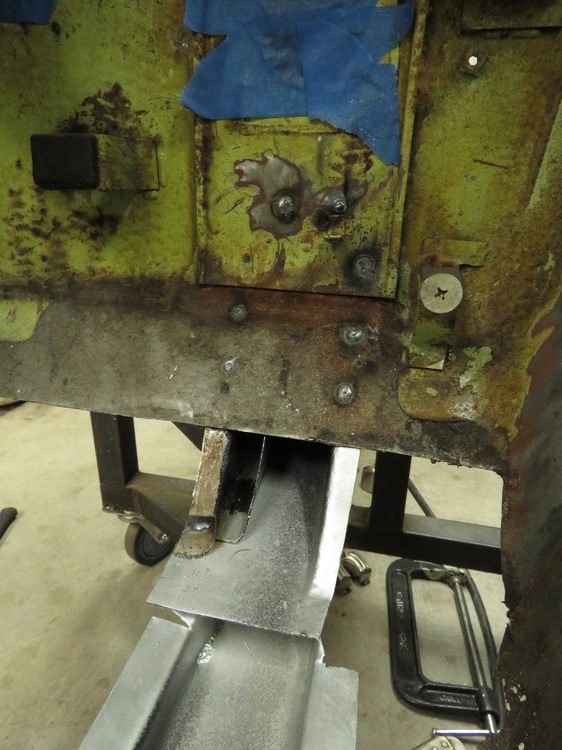
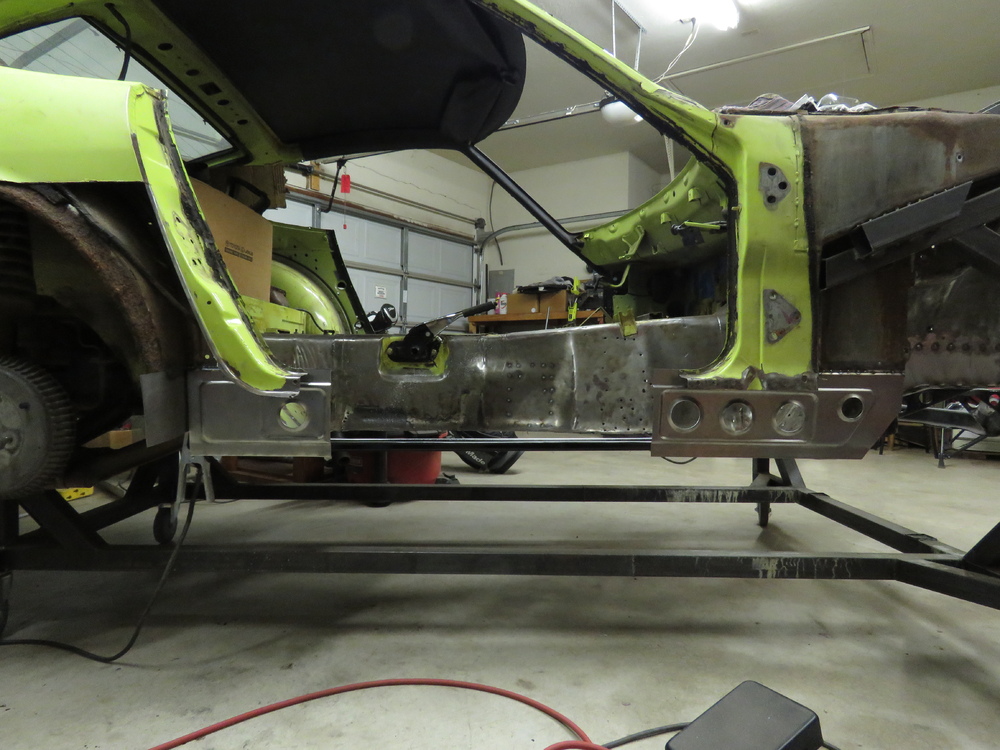
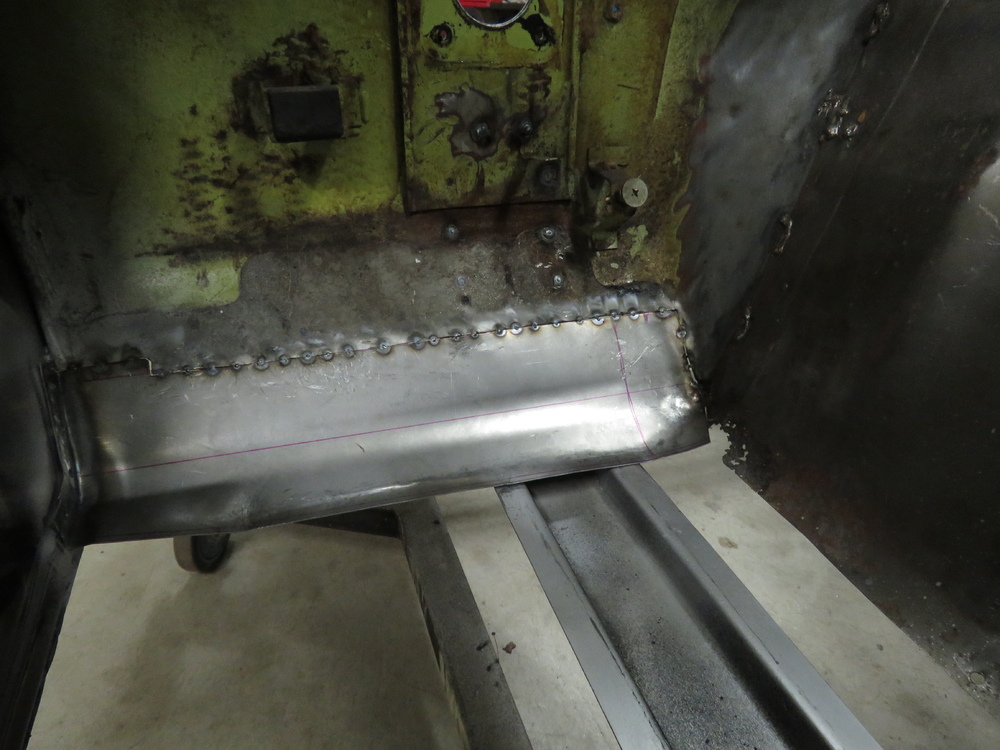
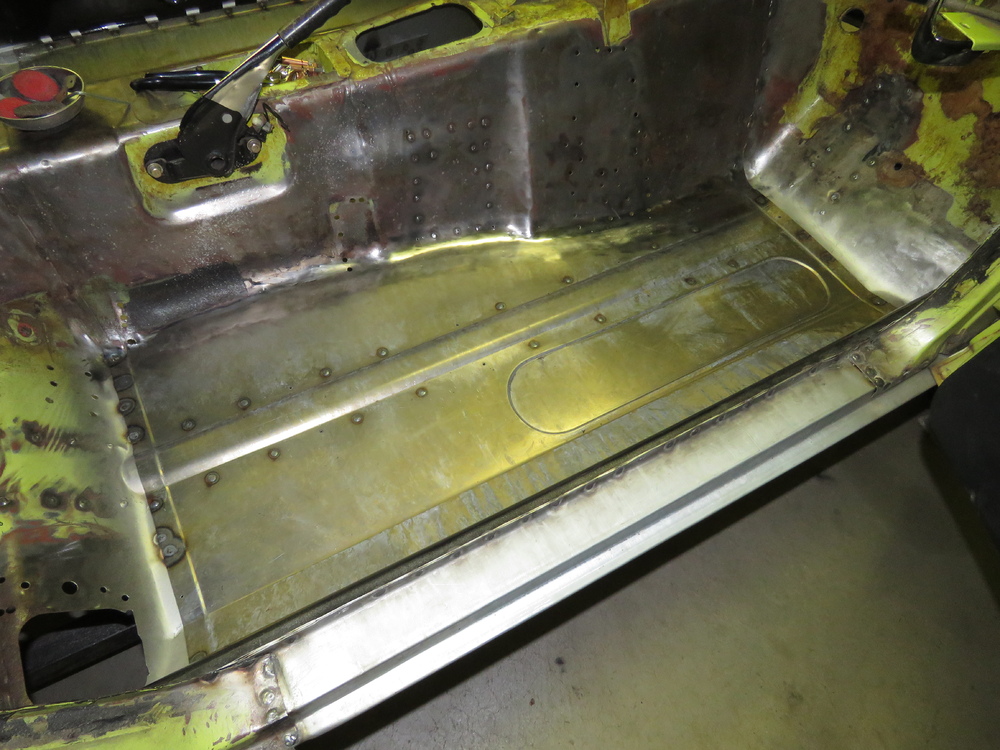
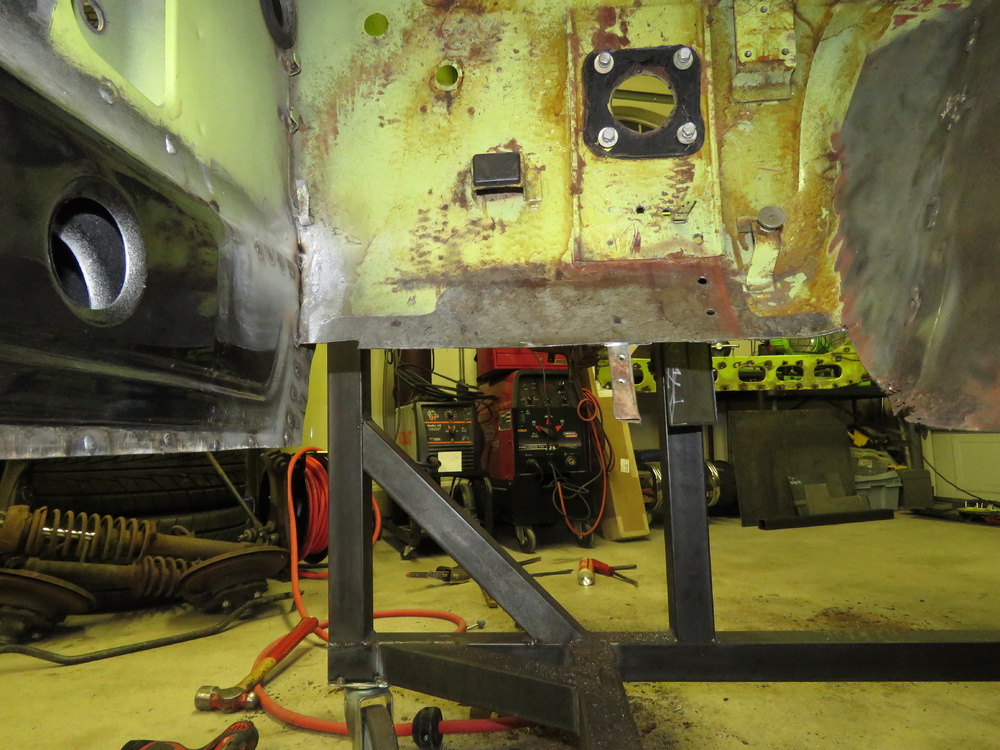
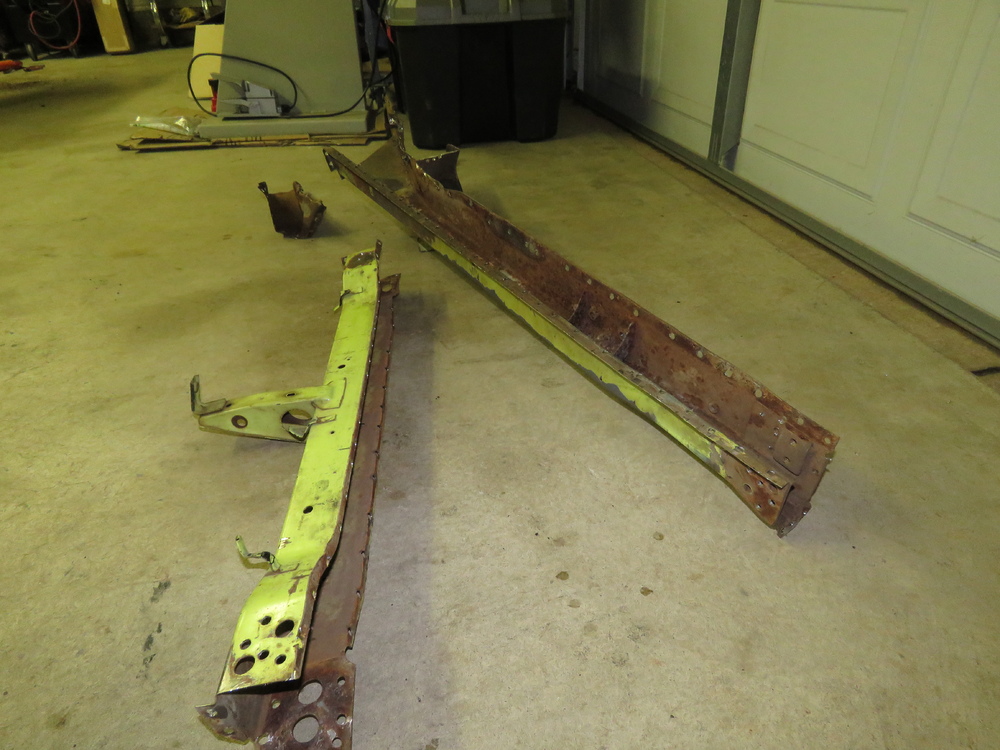
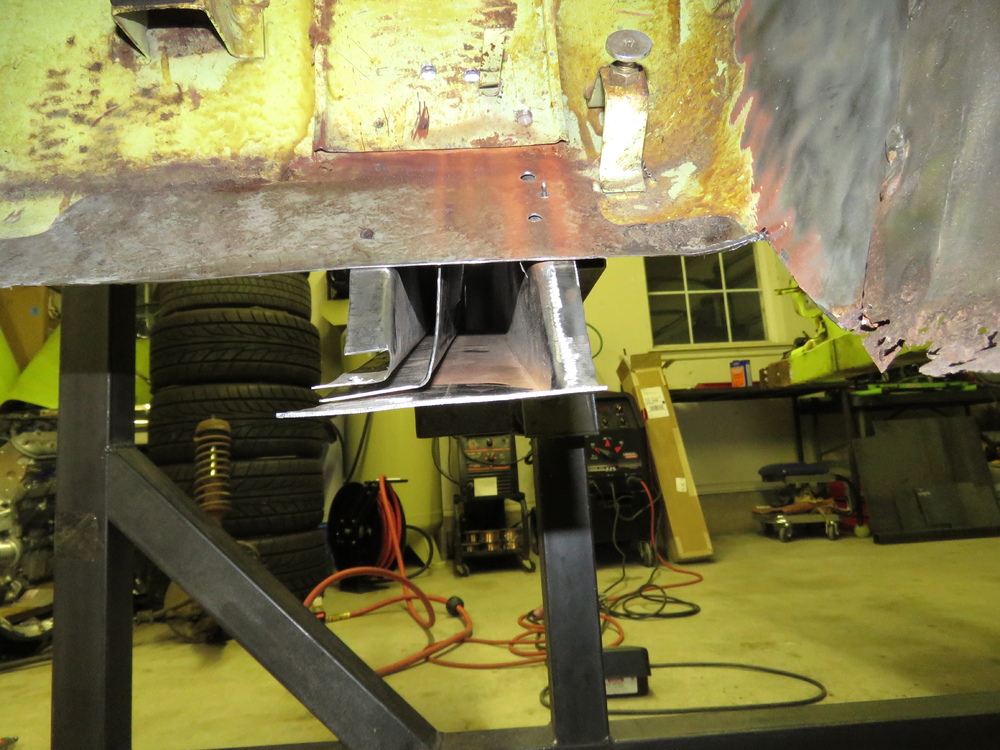
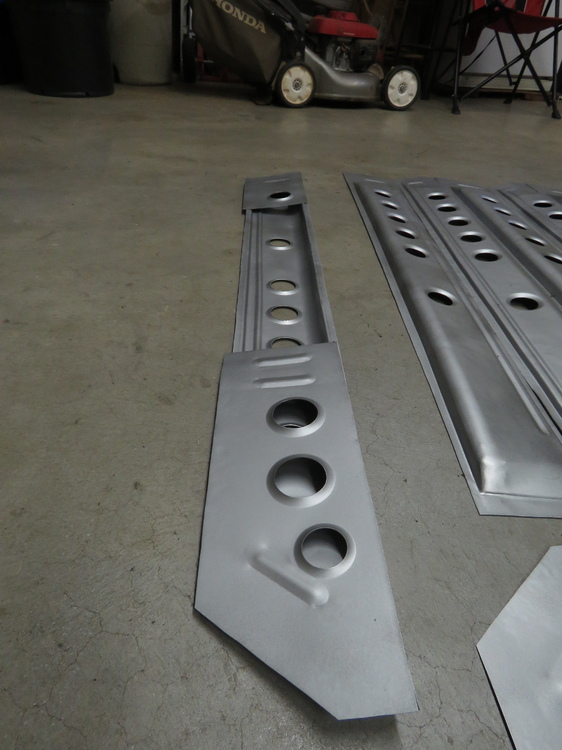
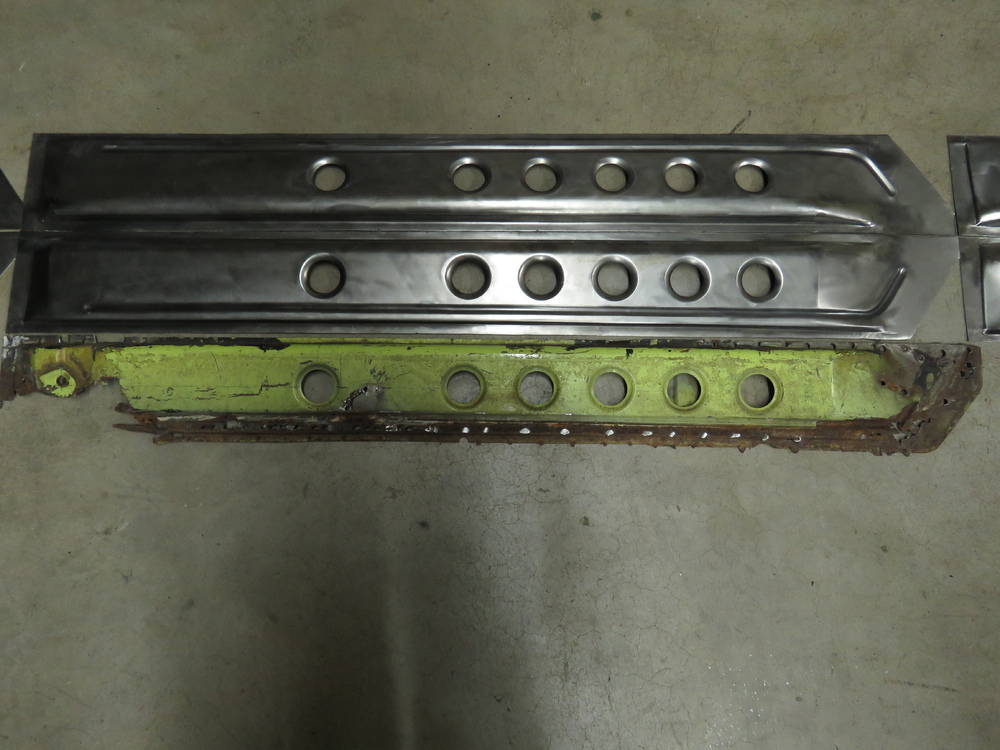
Thanks Wheee! UPDATE: unable to update my main post so this post is the most up to date information regarding pricing and purchasing. Attached are pictures of the tie in/support plates I was talking about previously. They show what they look like and where they go on the car. These plates are what the rockers mainly weld onto so it is important that these are in good shape when you are doing a repair of the rockers. These plates are made from 20g CRS and is similar in thickness to the factory material. Pricing: $380.00 shipped for a set of Rockers (as of this post date, I have a pair ready to ship out, send me a pm for details if interested) $450 shipped for a set of Rockers + set of front end tie in plates + set of rear end tie in plates. Please let me know if your interested. I am now making these upon request, allow me about one week to make a set before shipping.


-
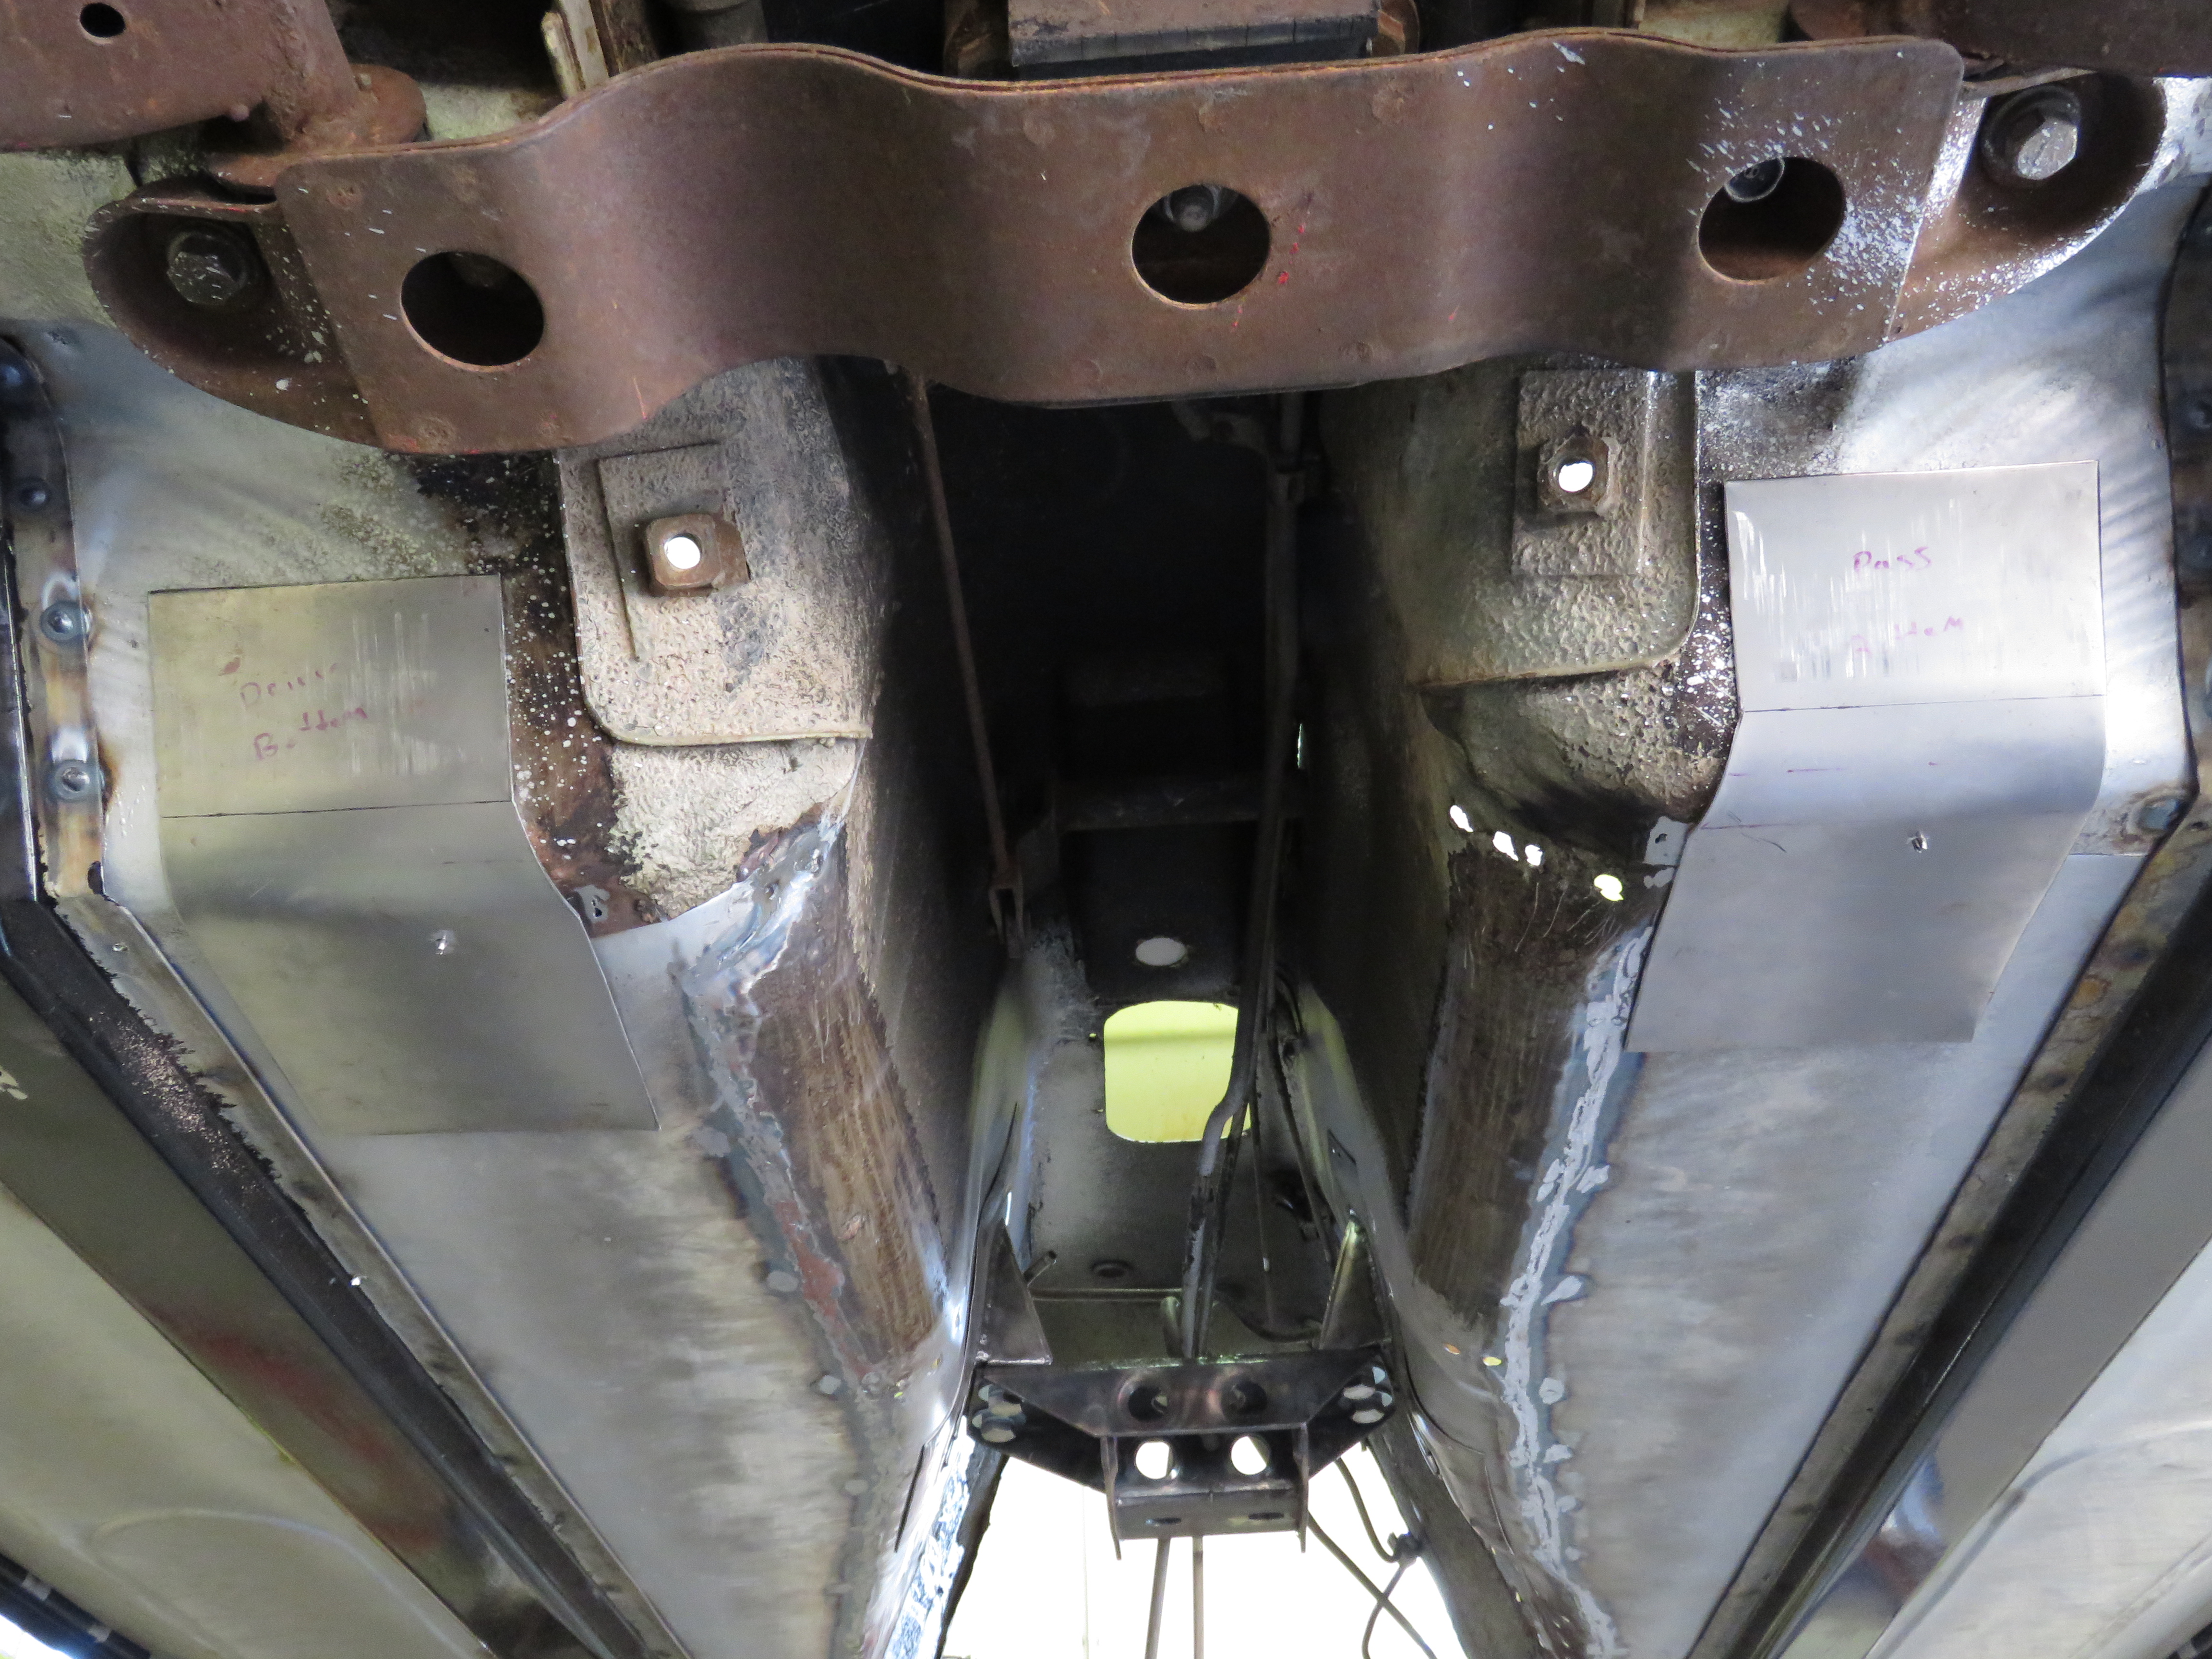
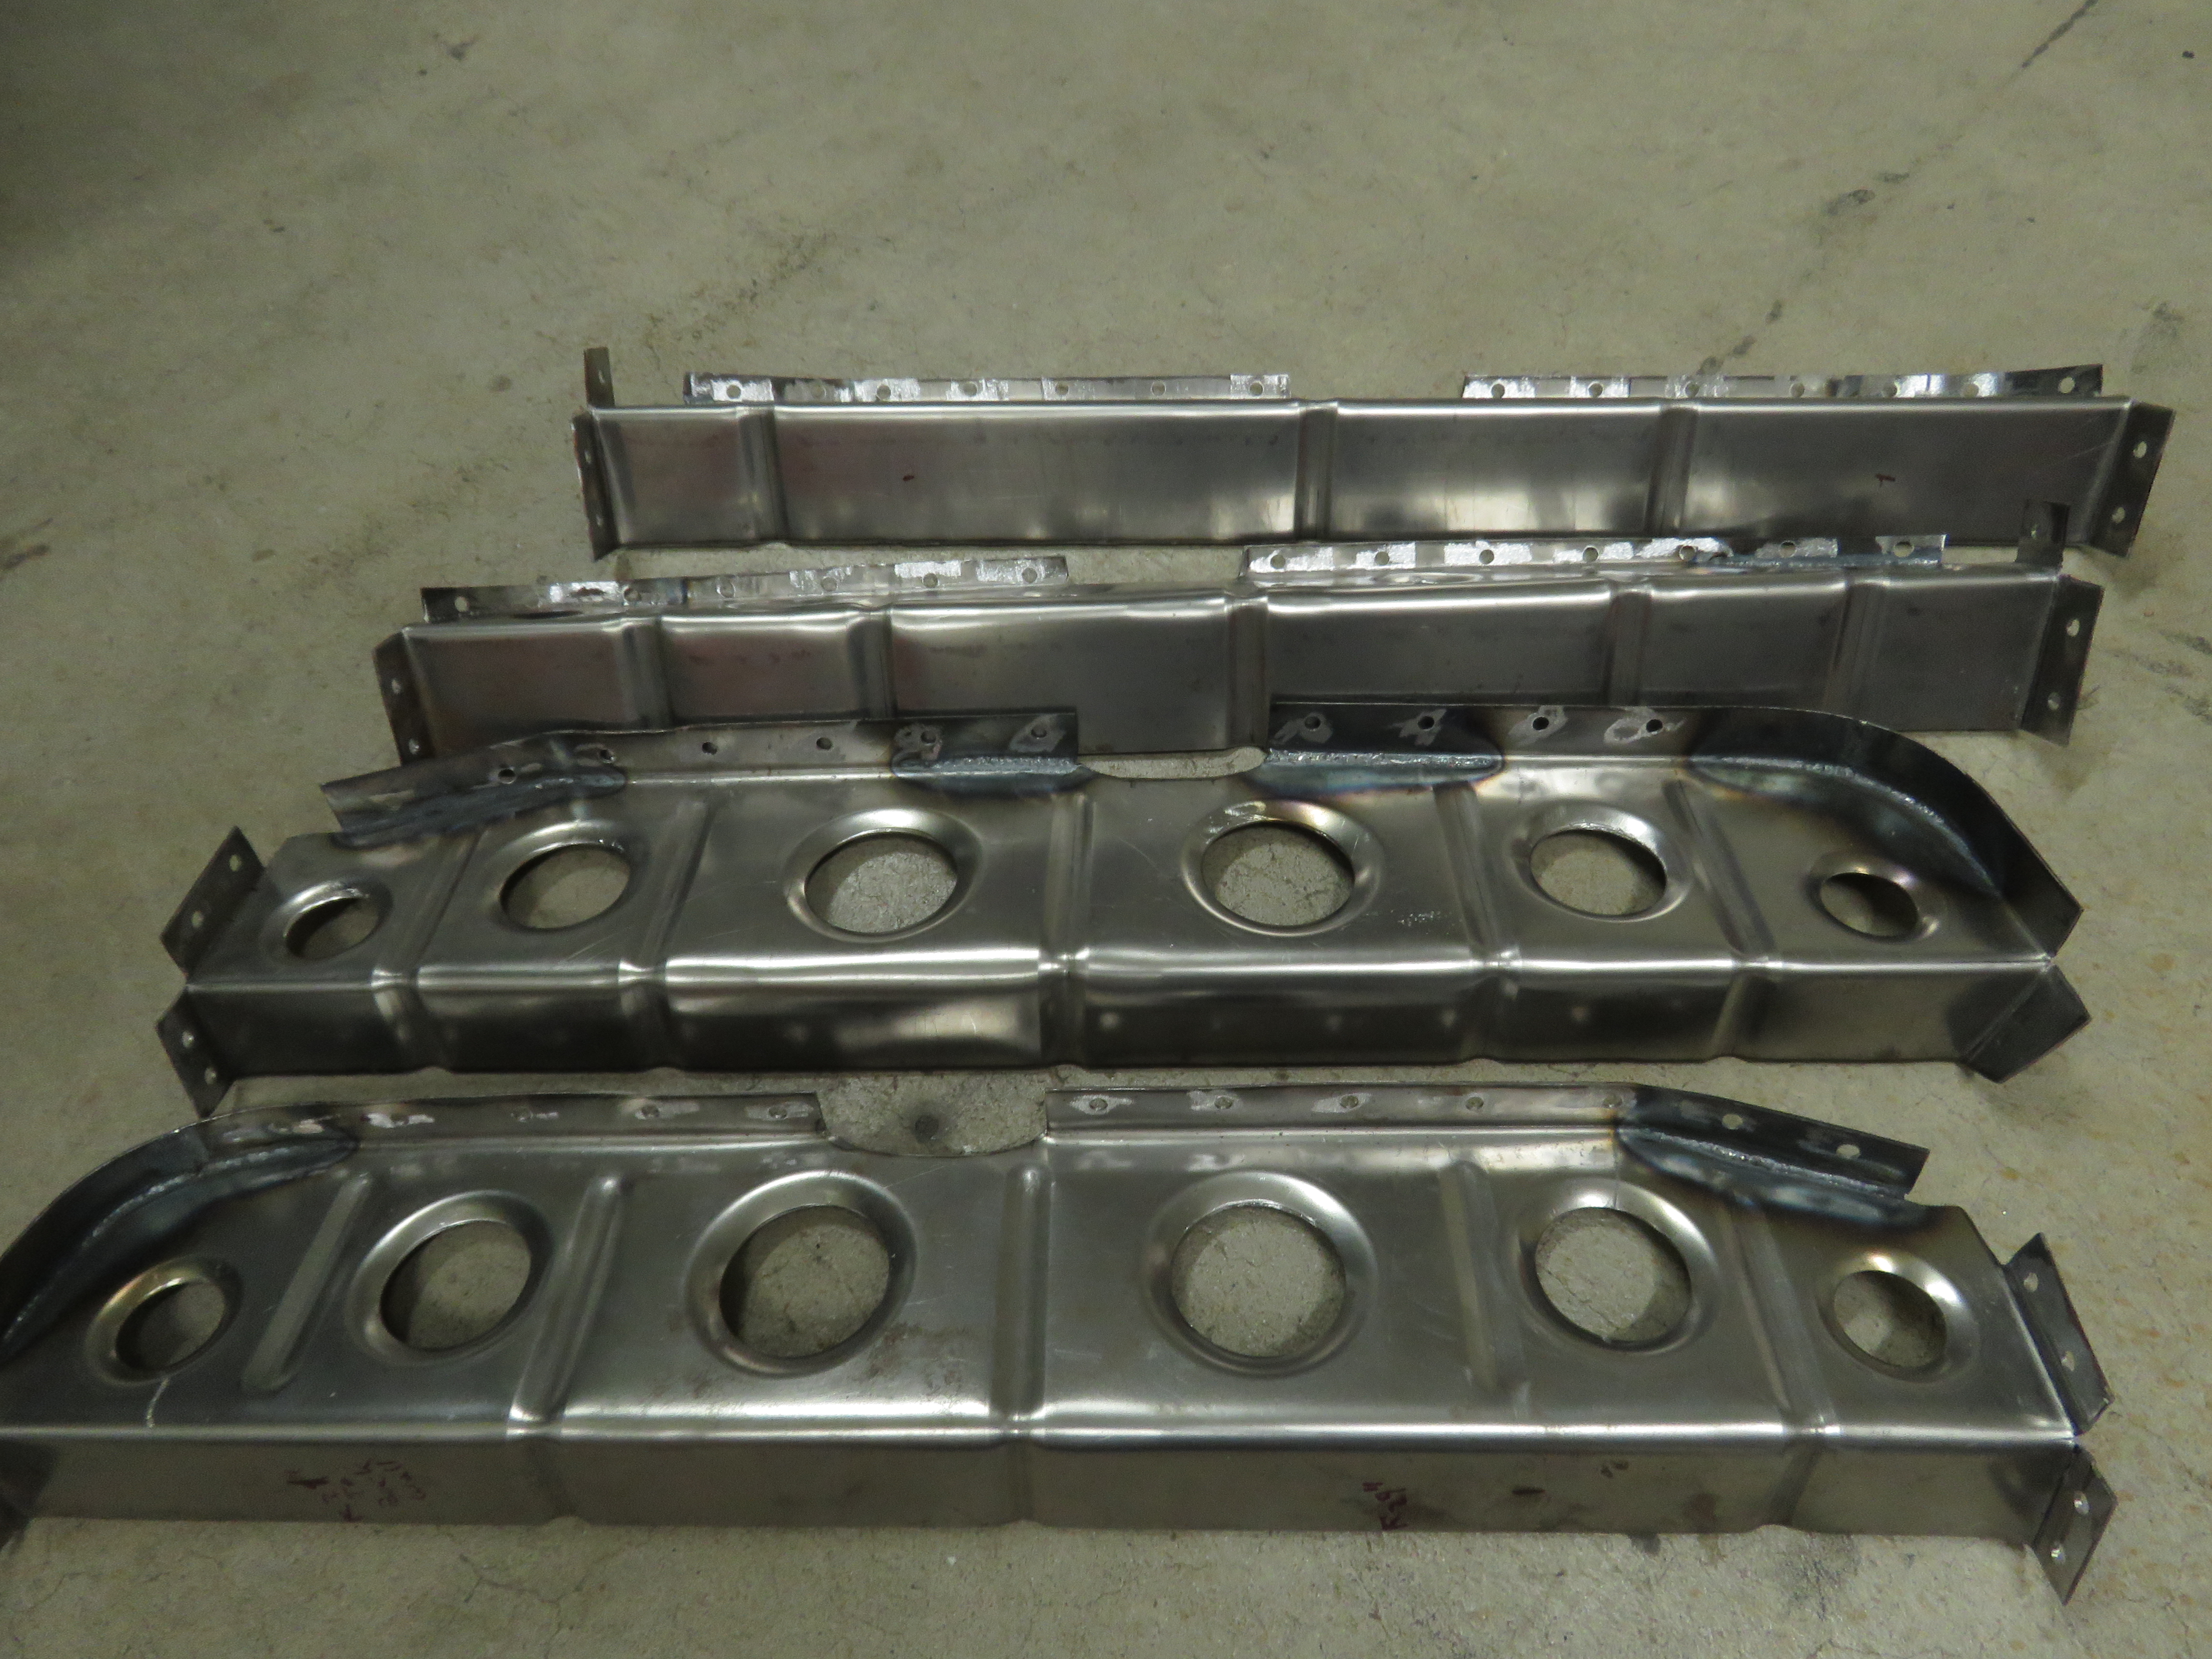
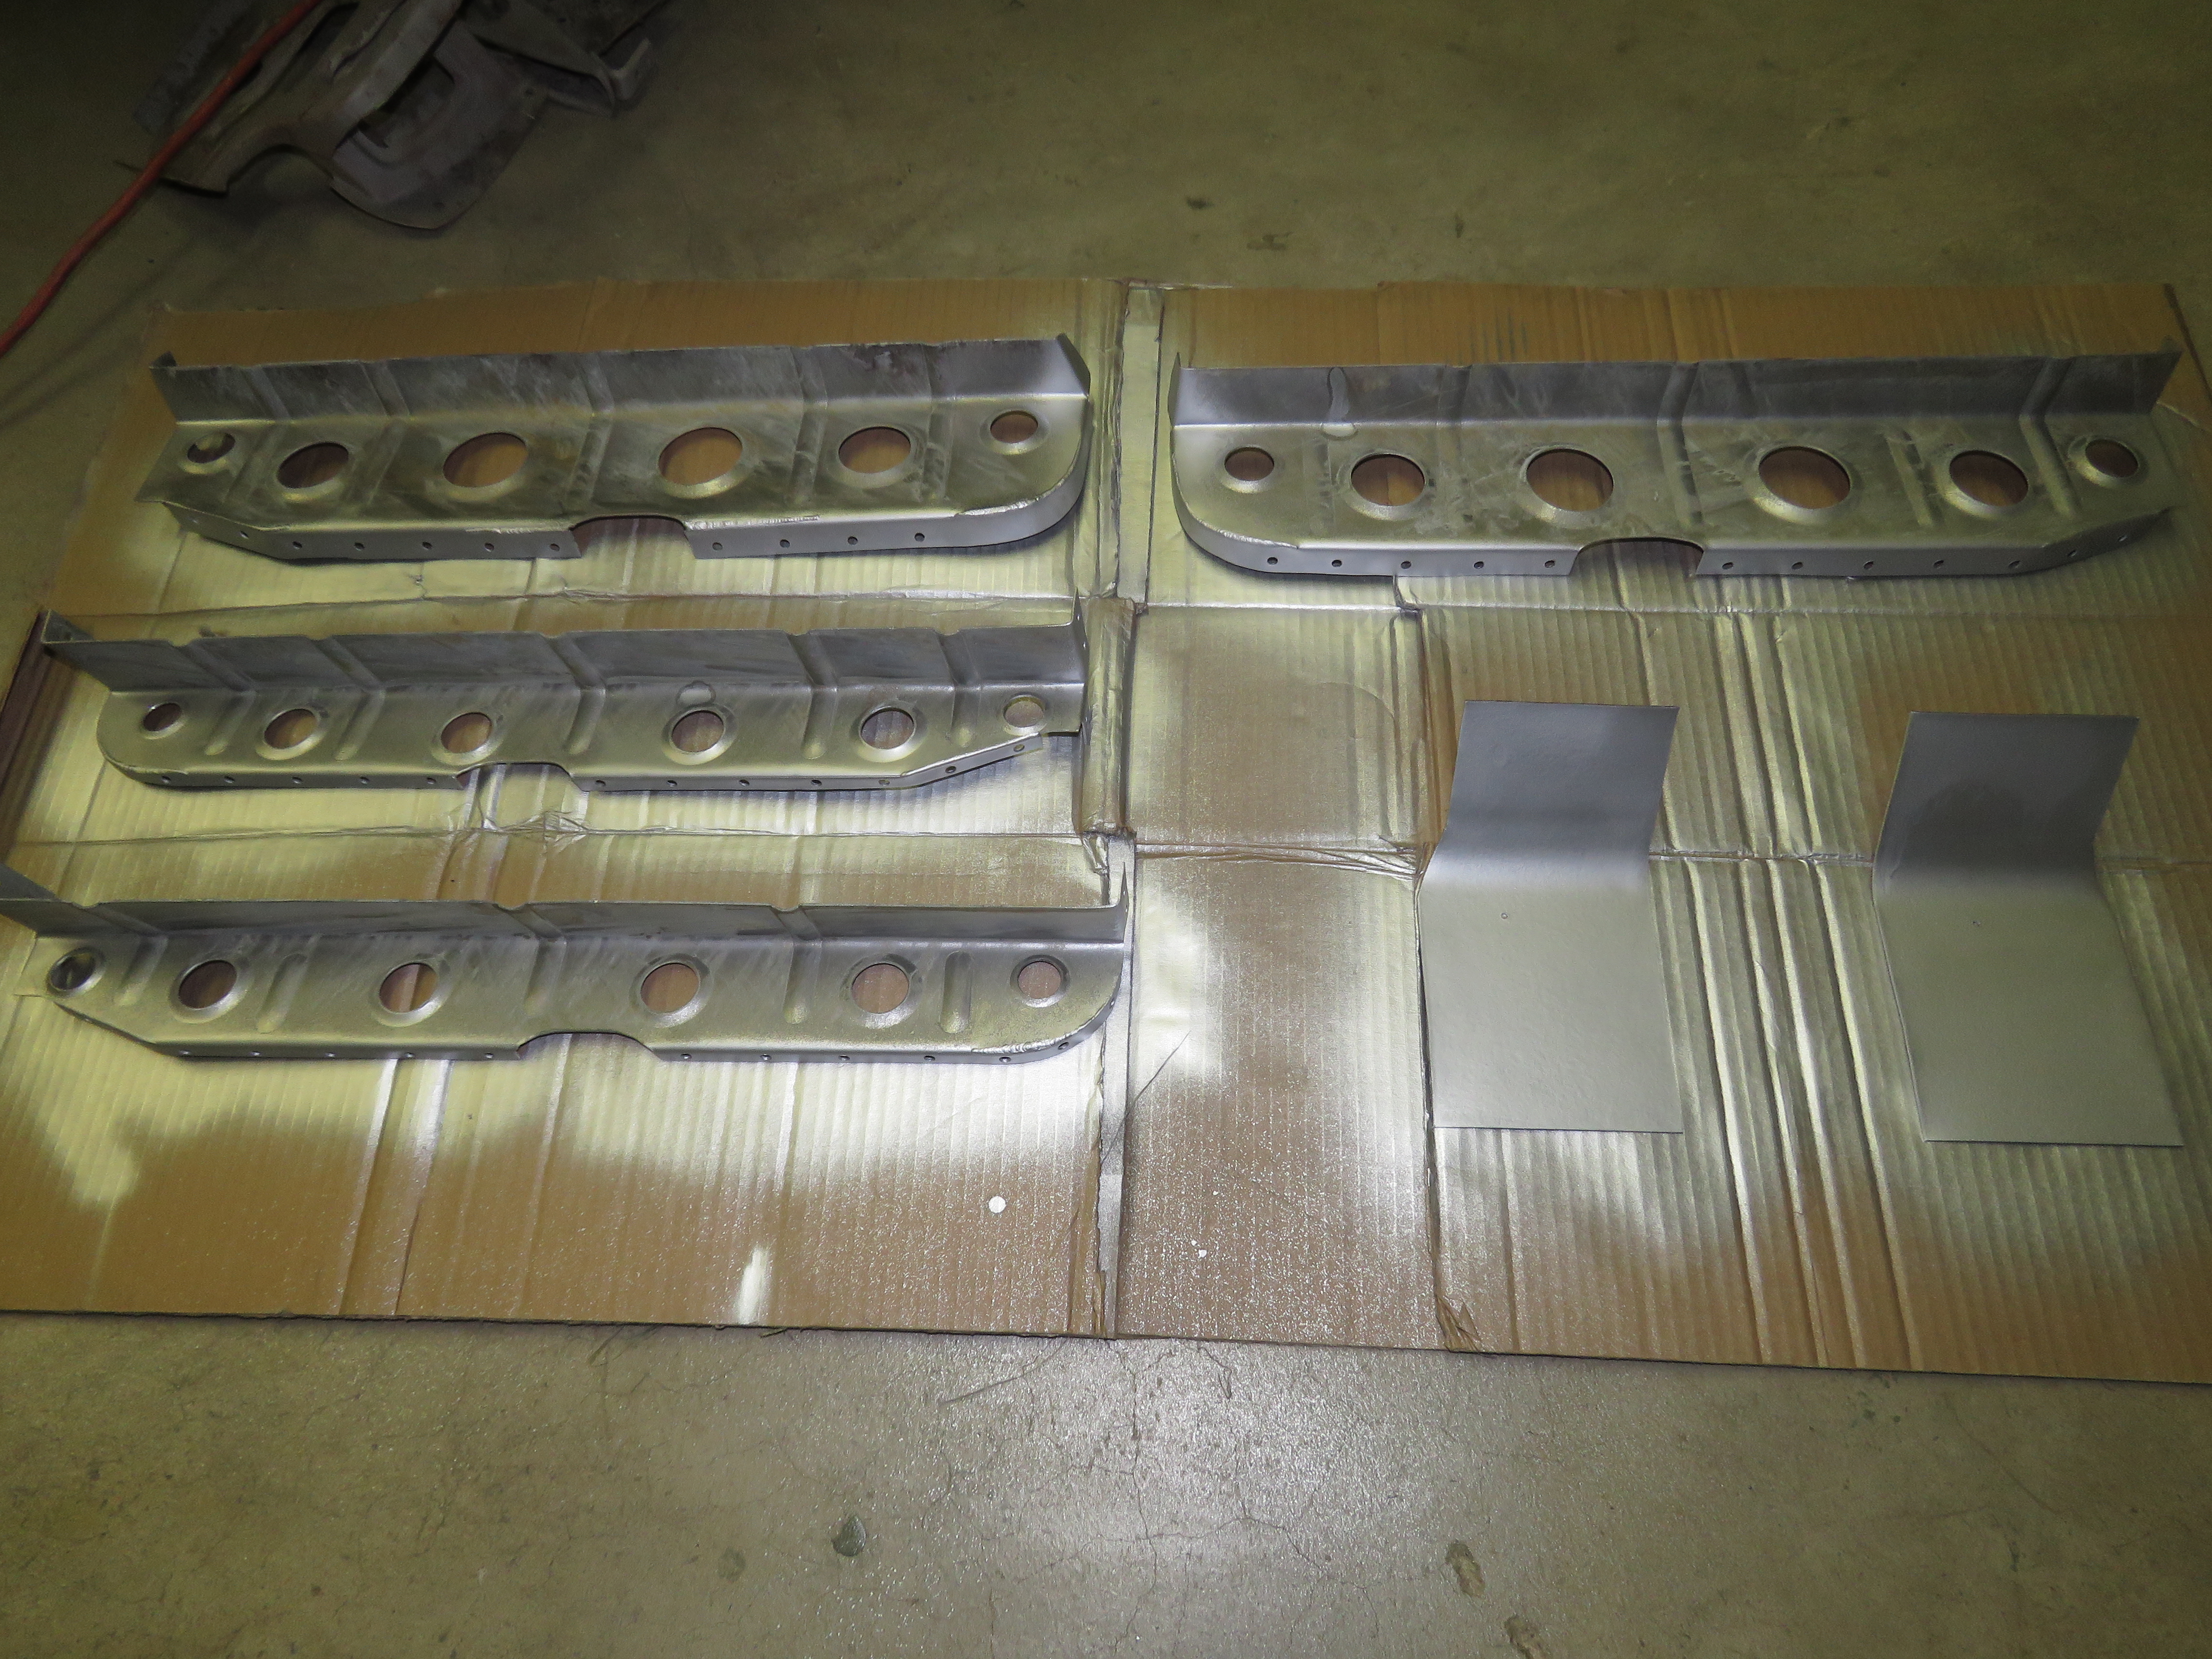
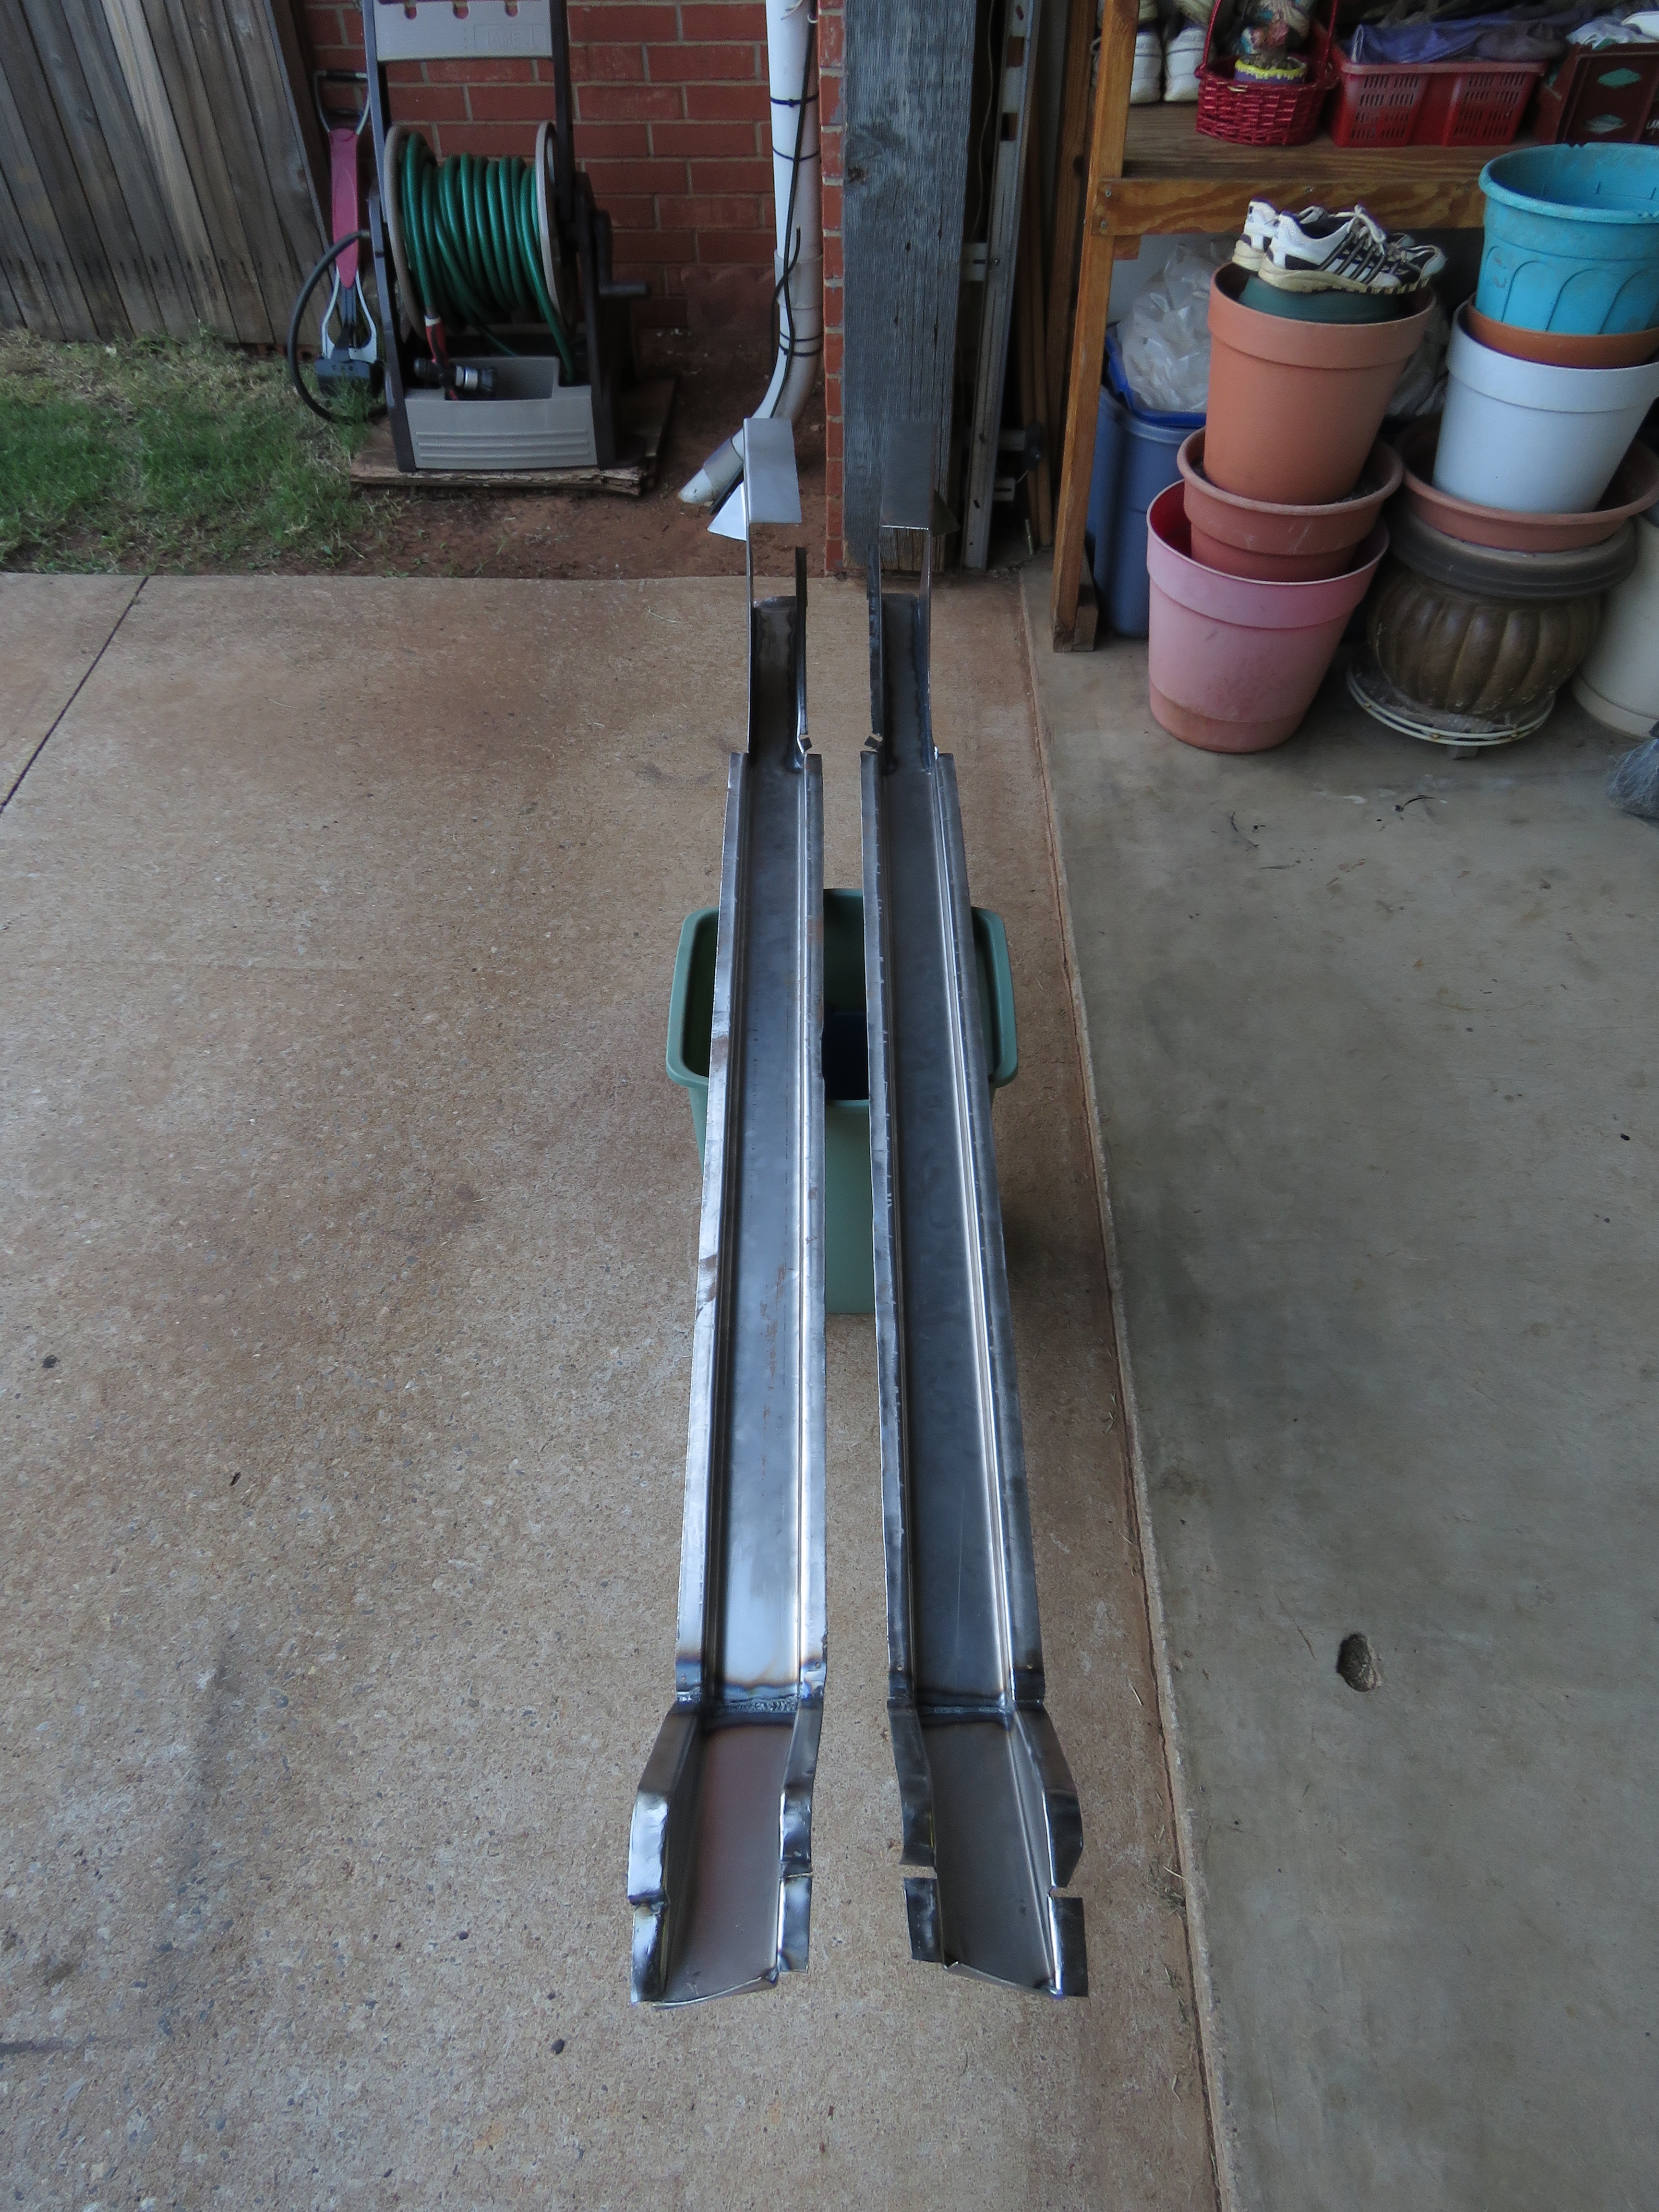
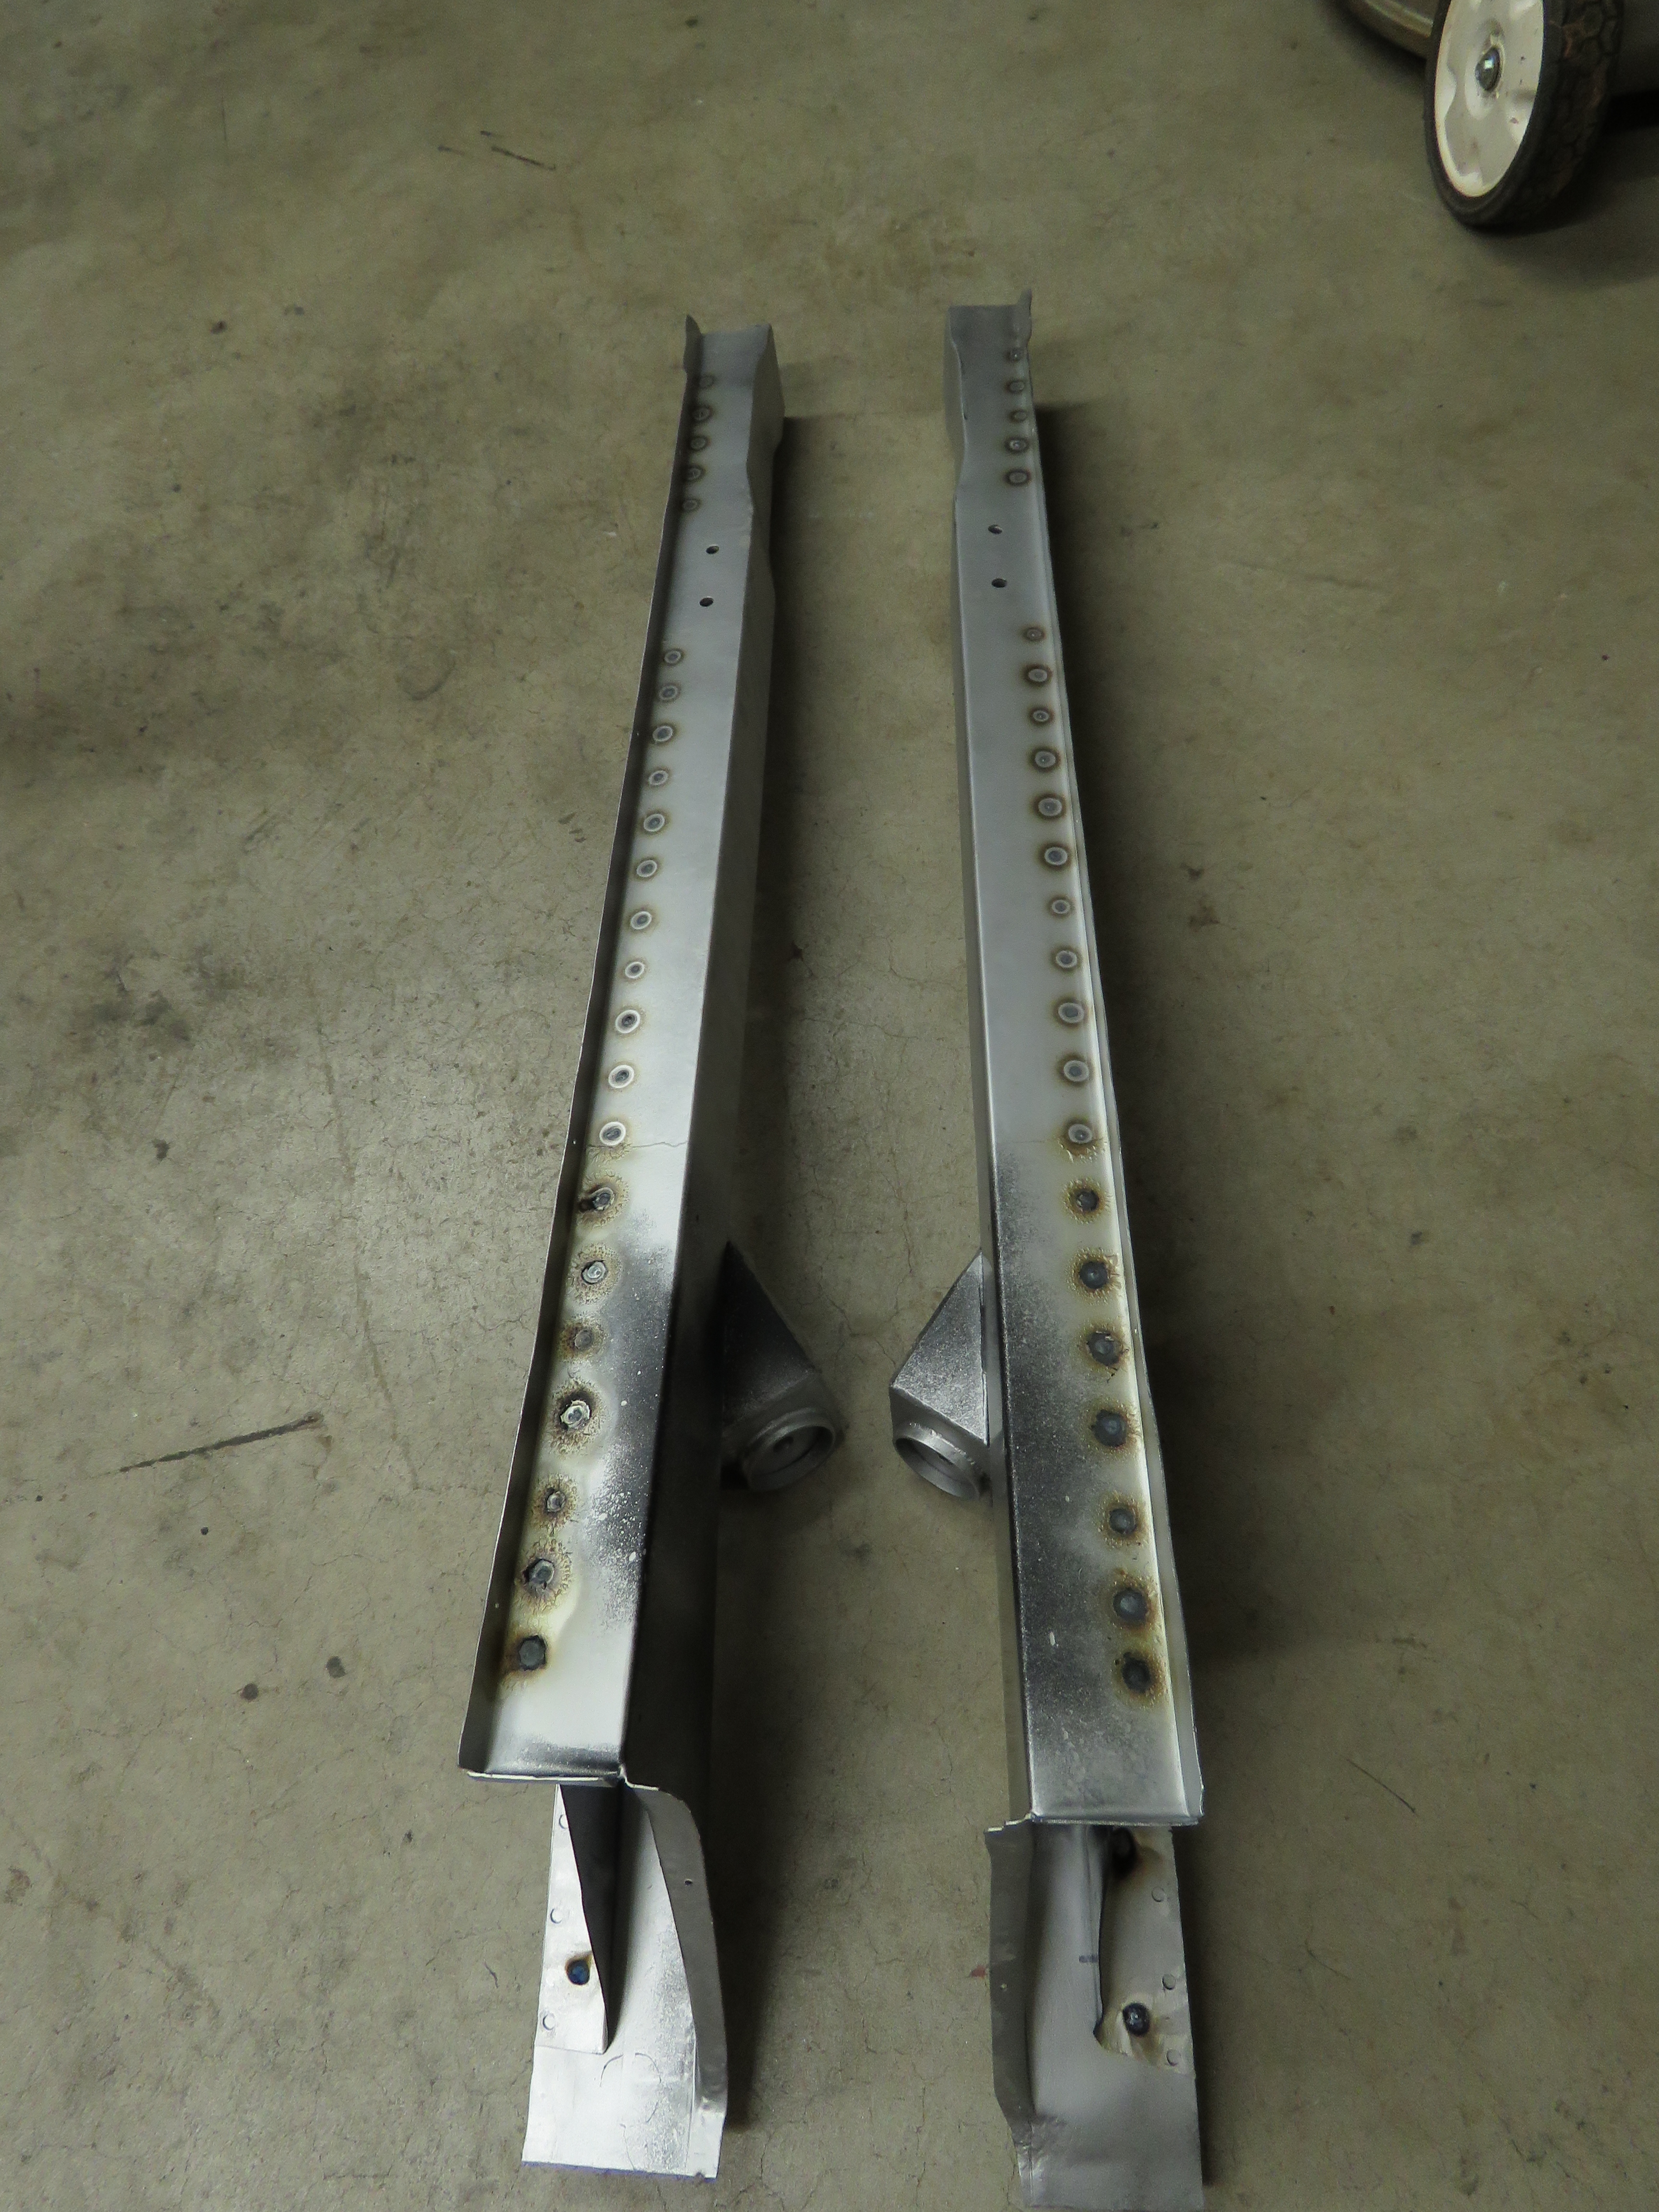
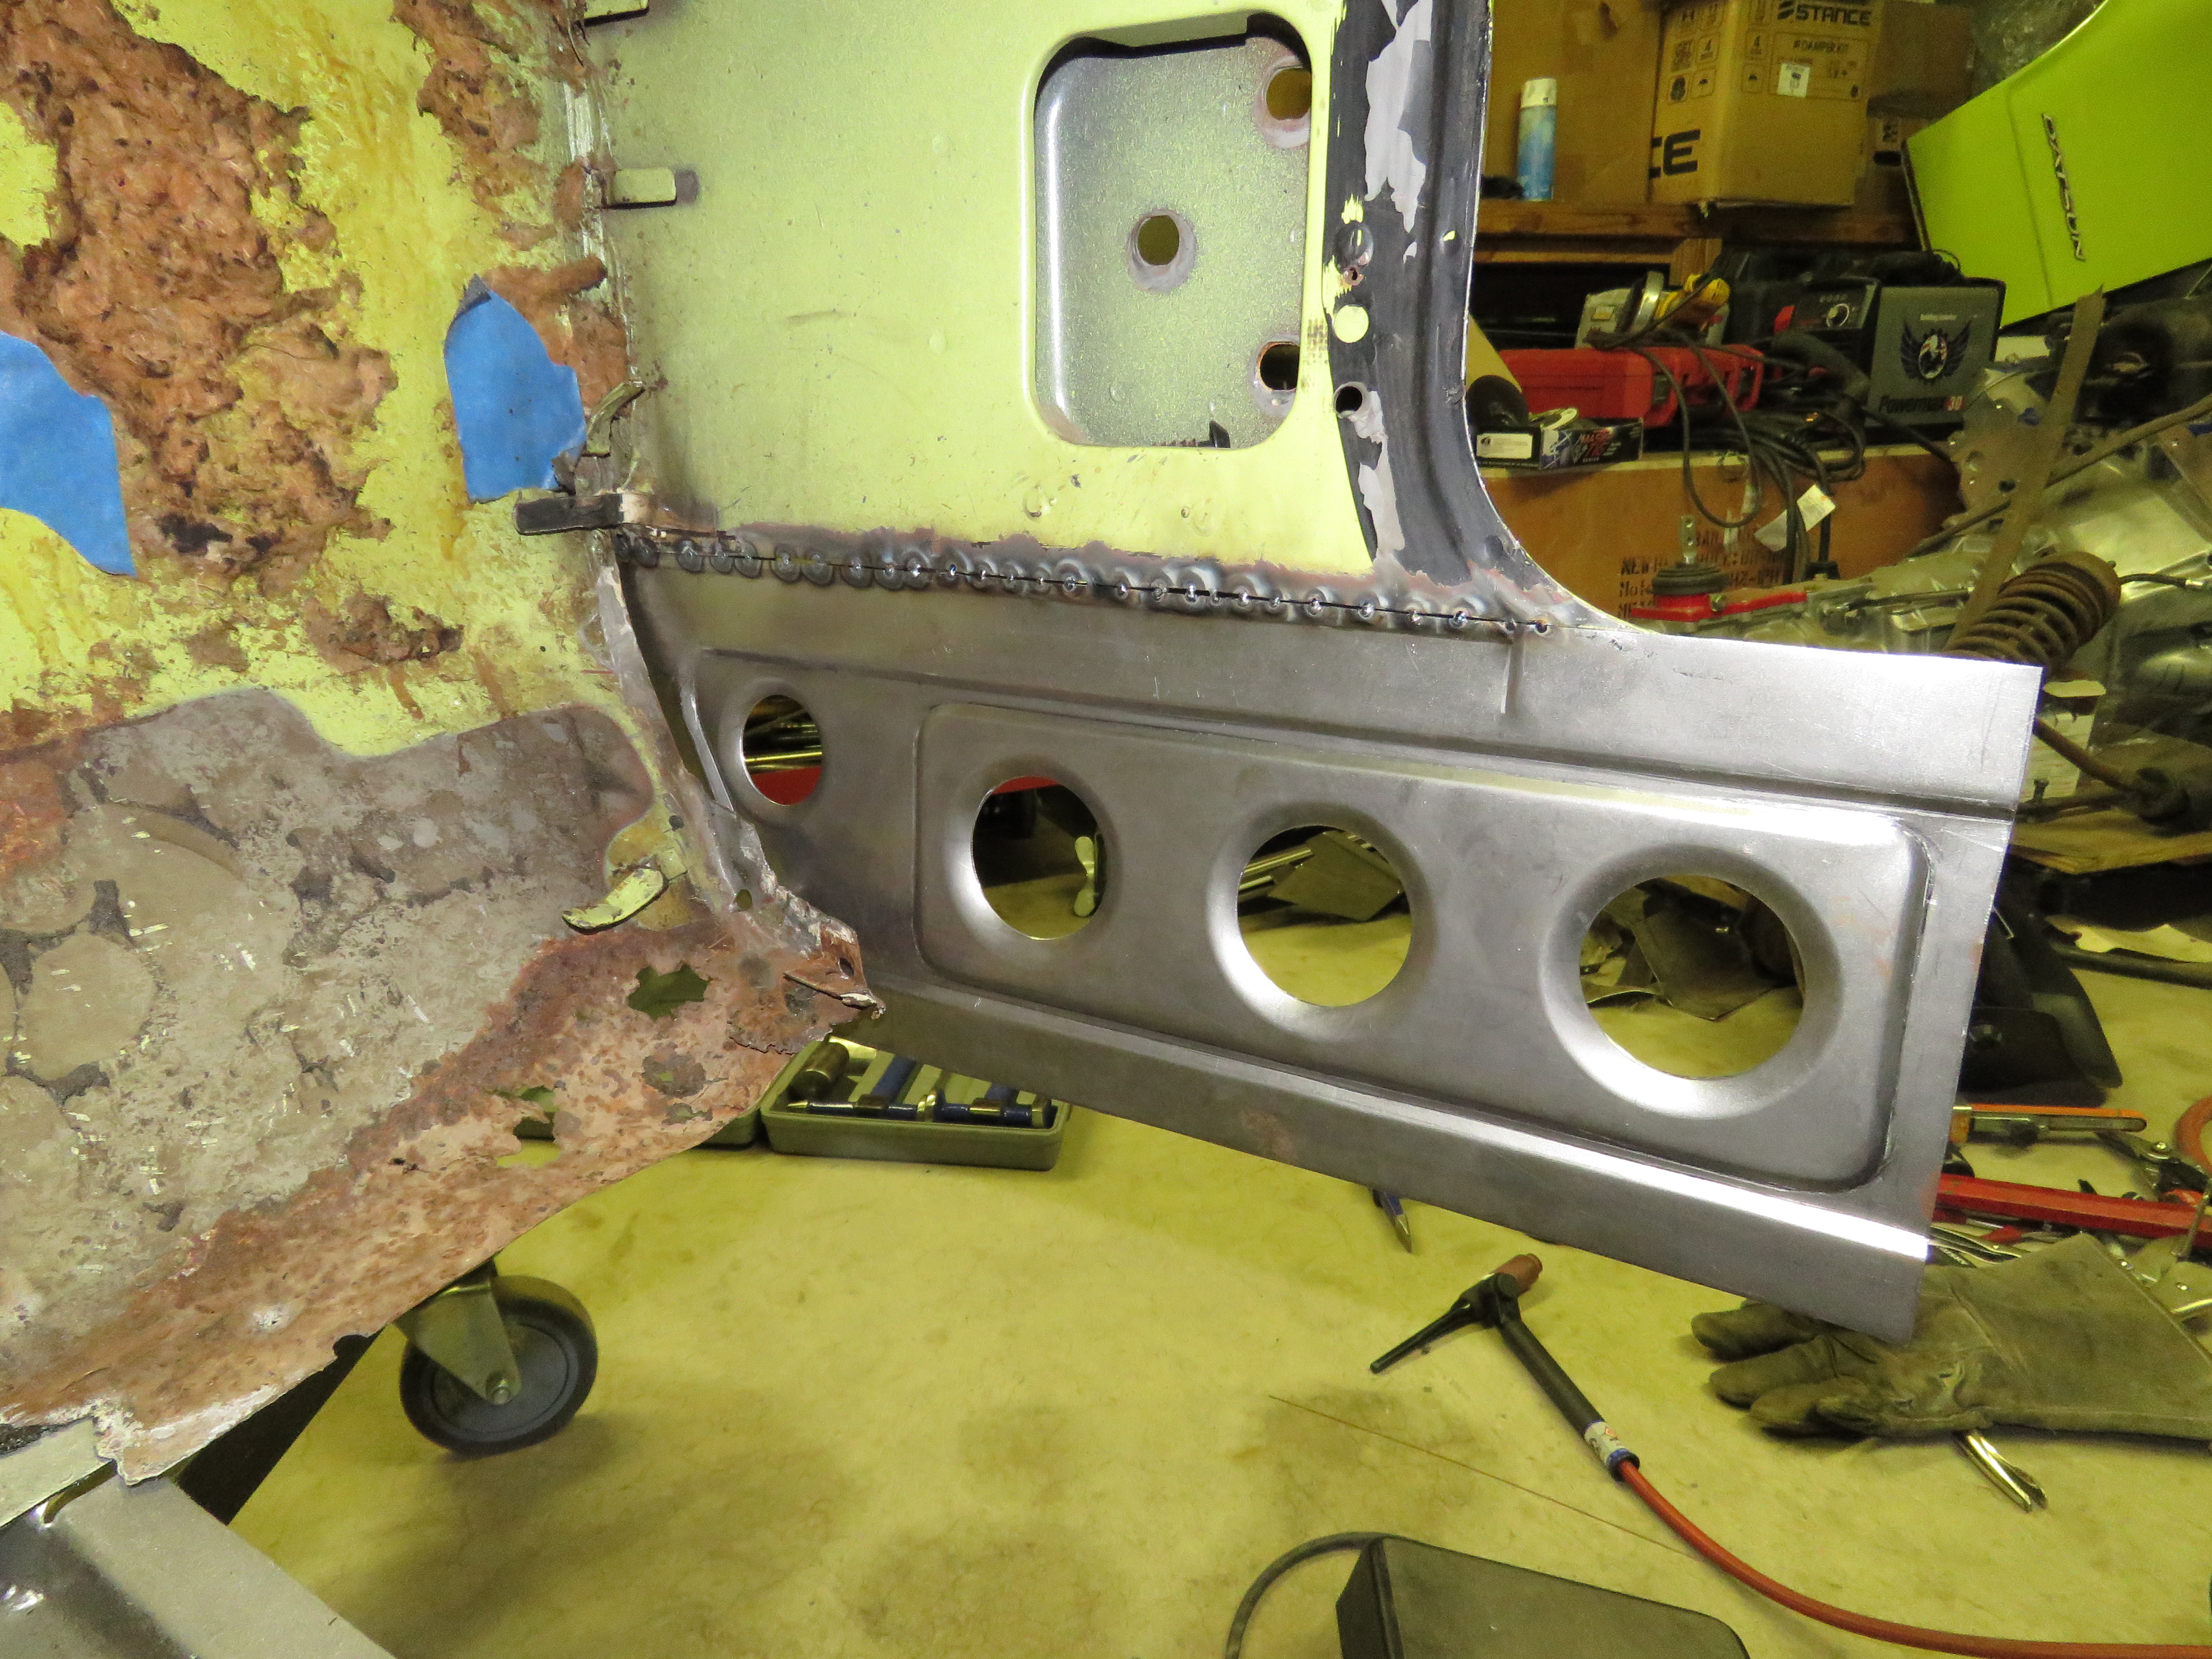
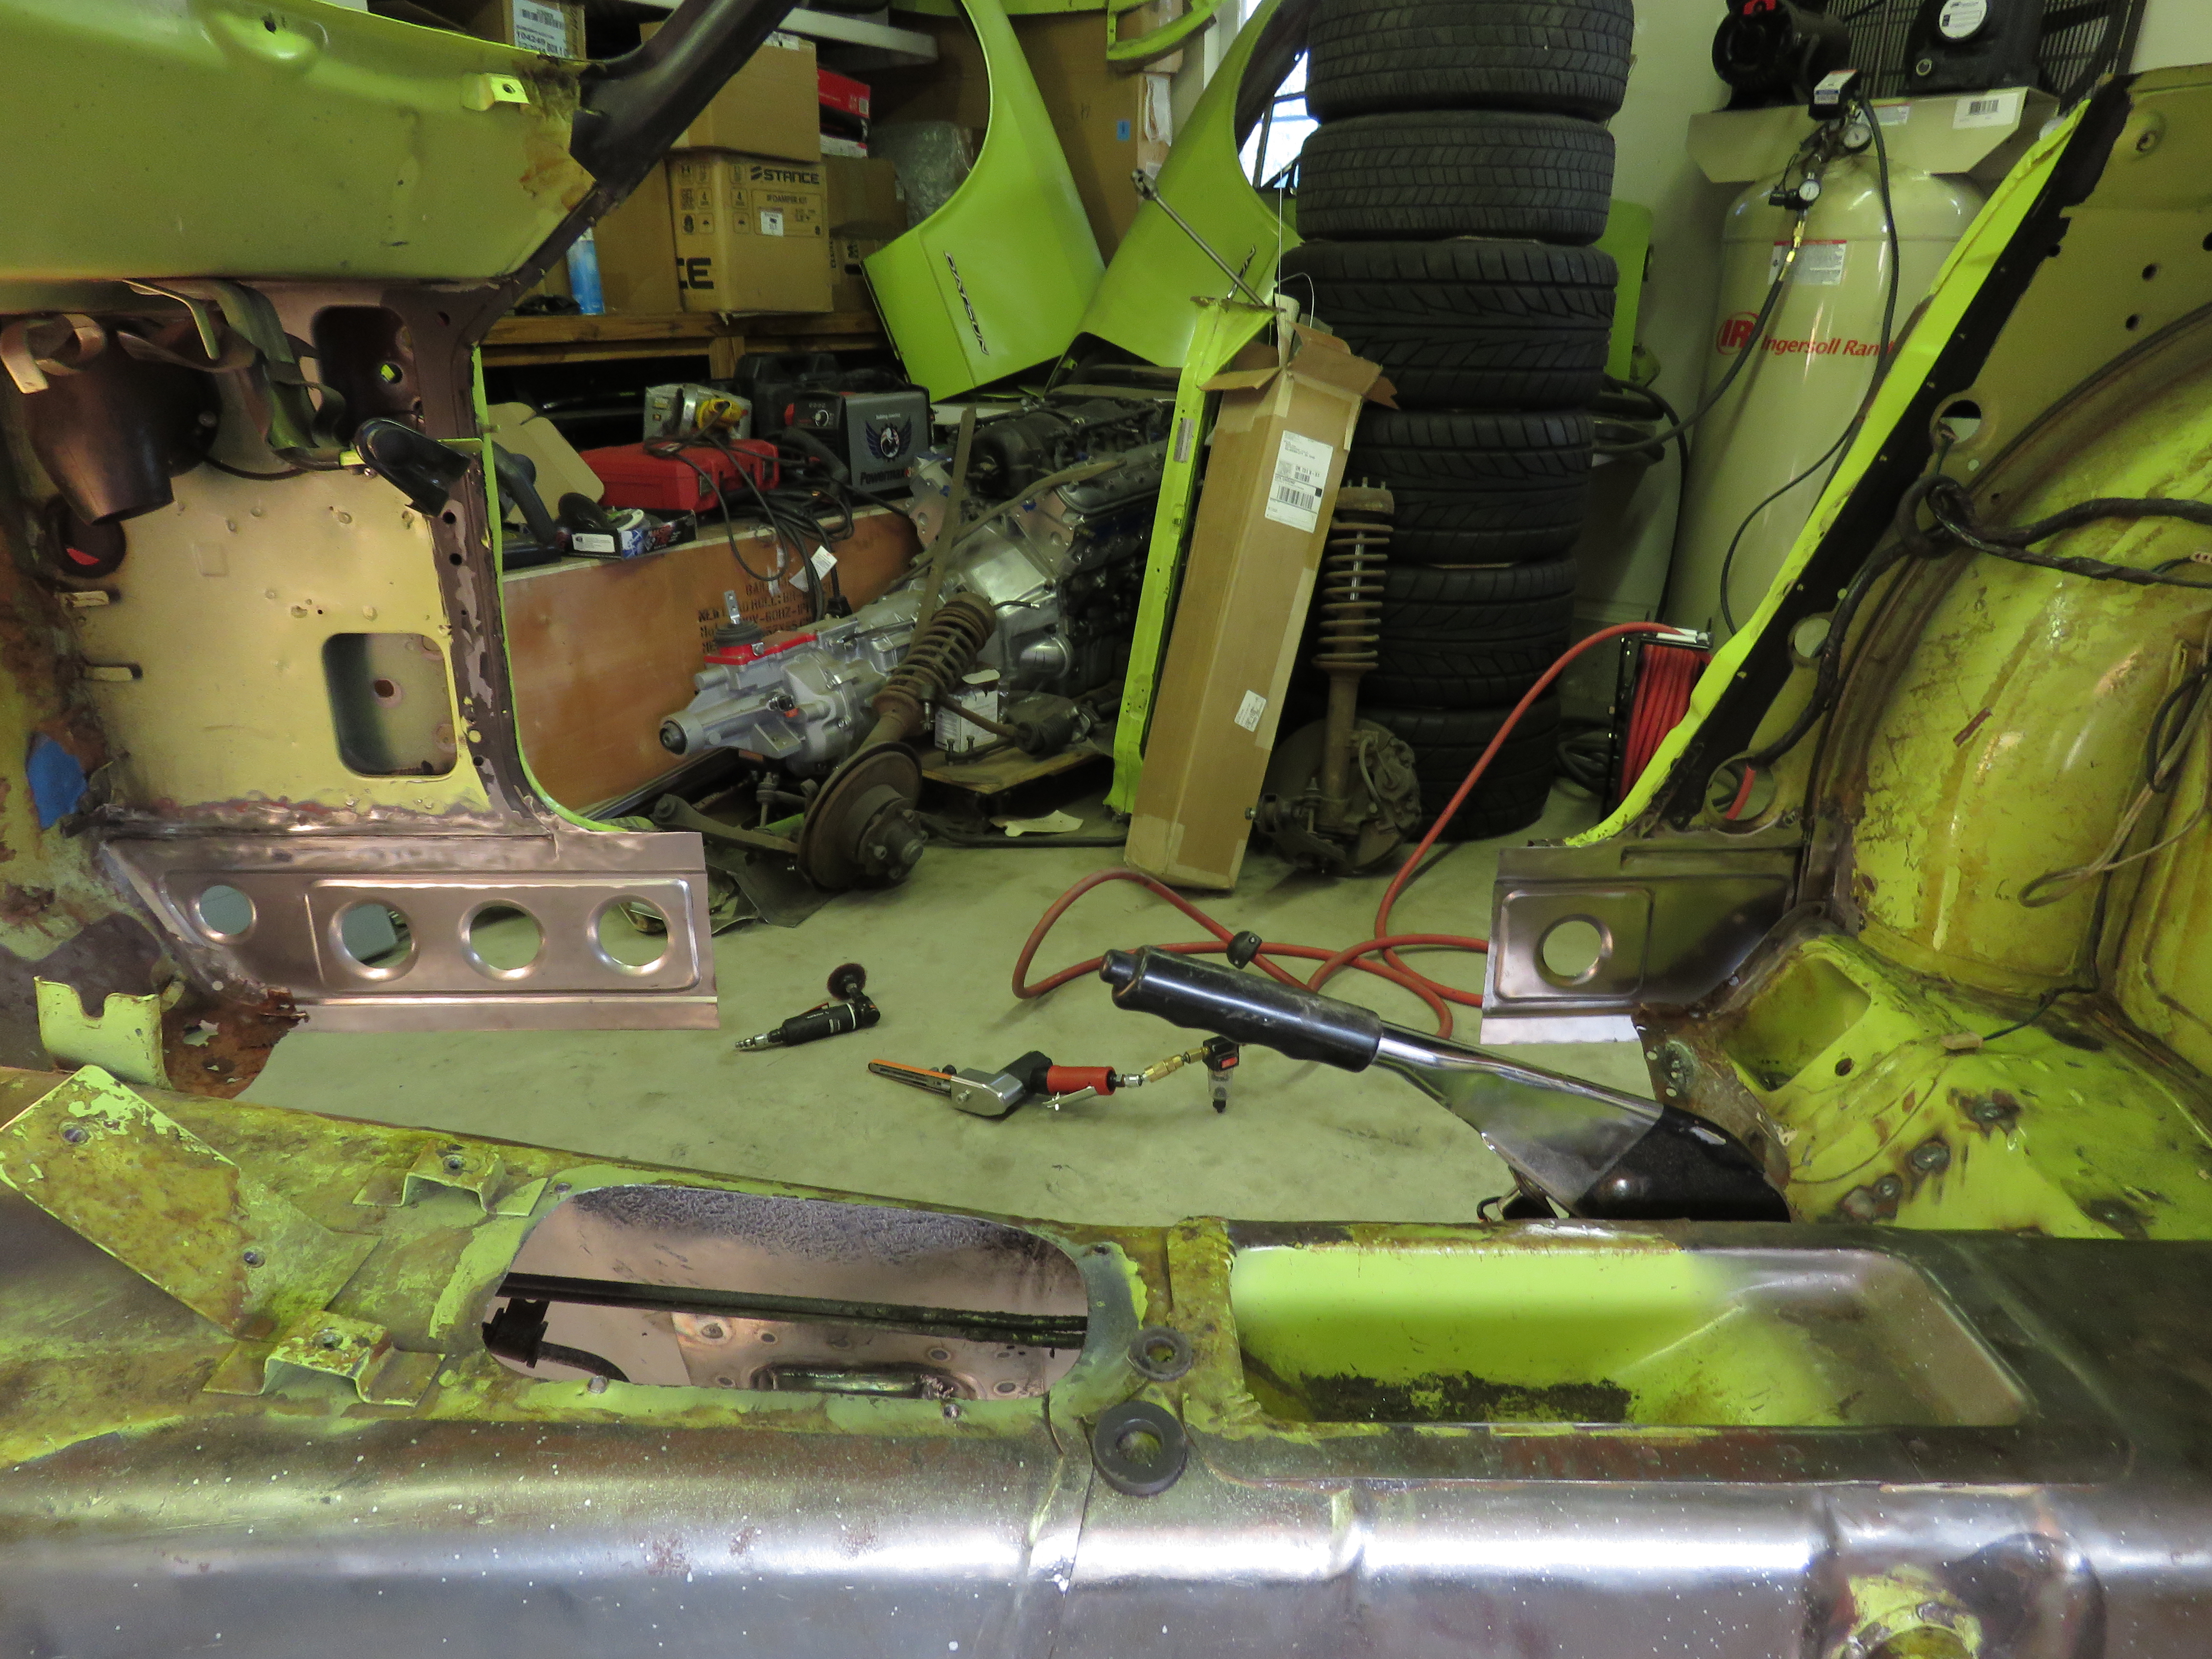
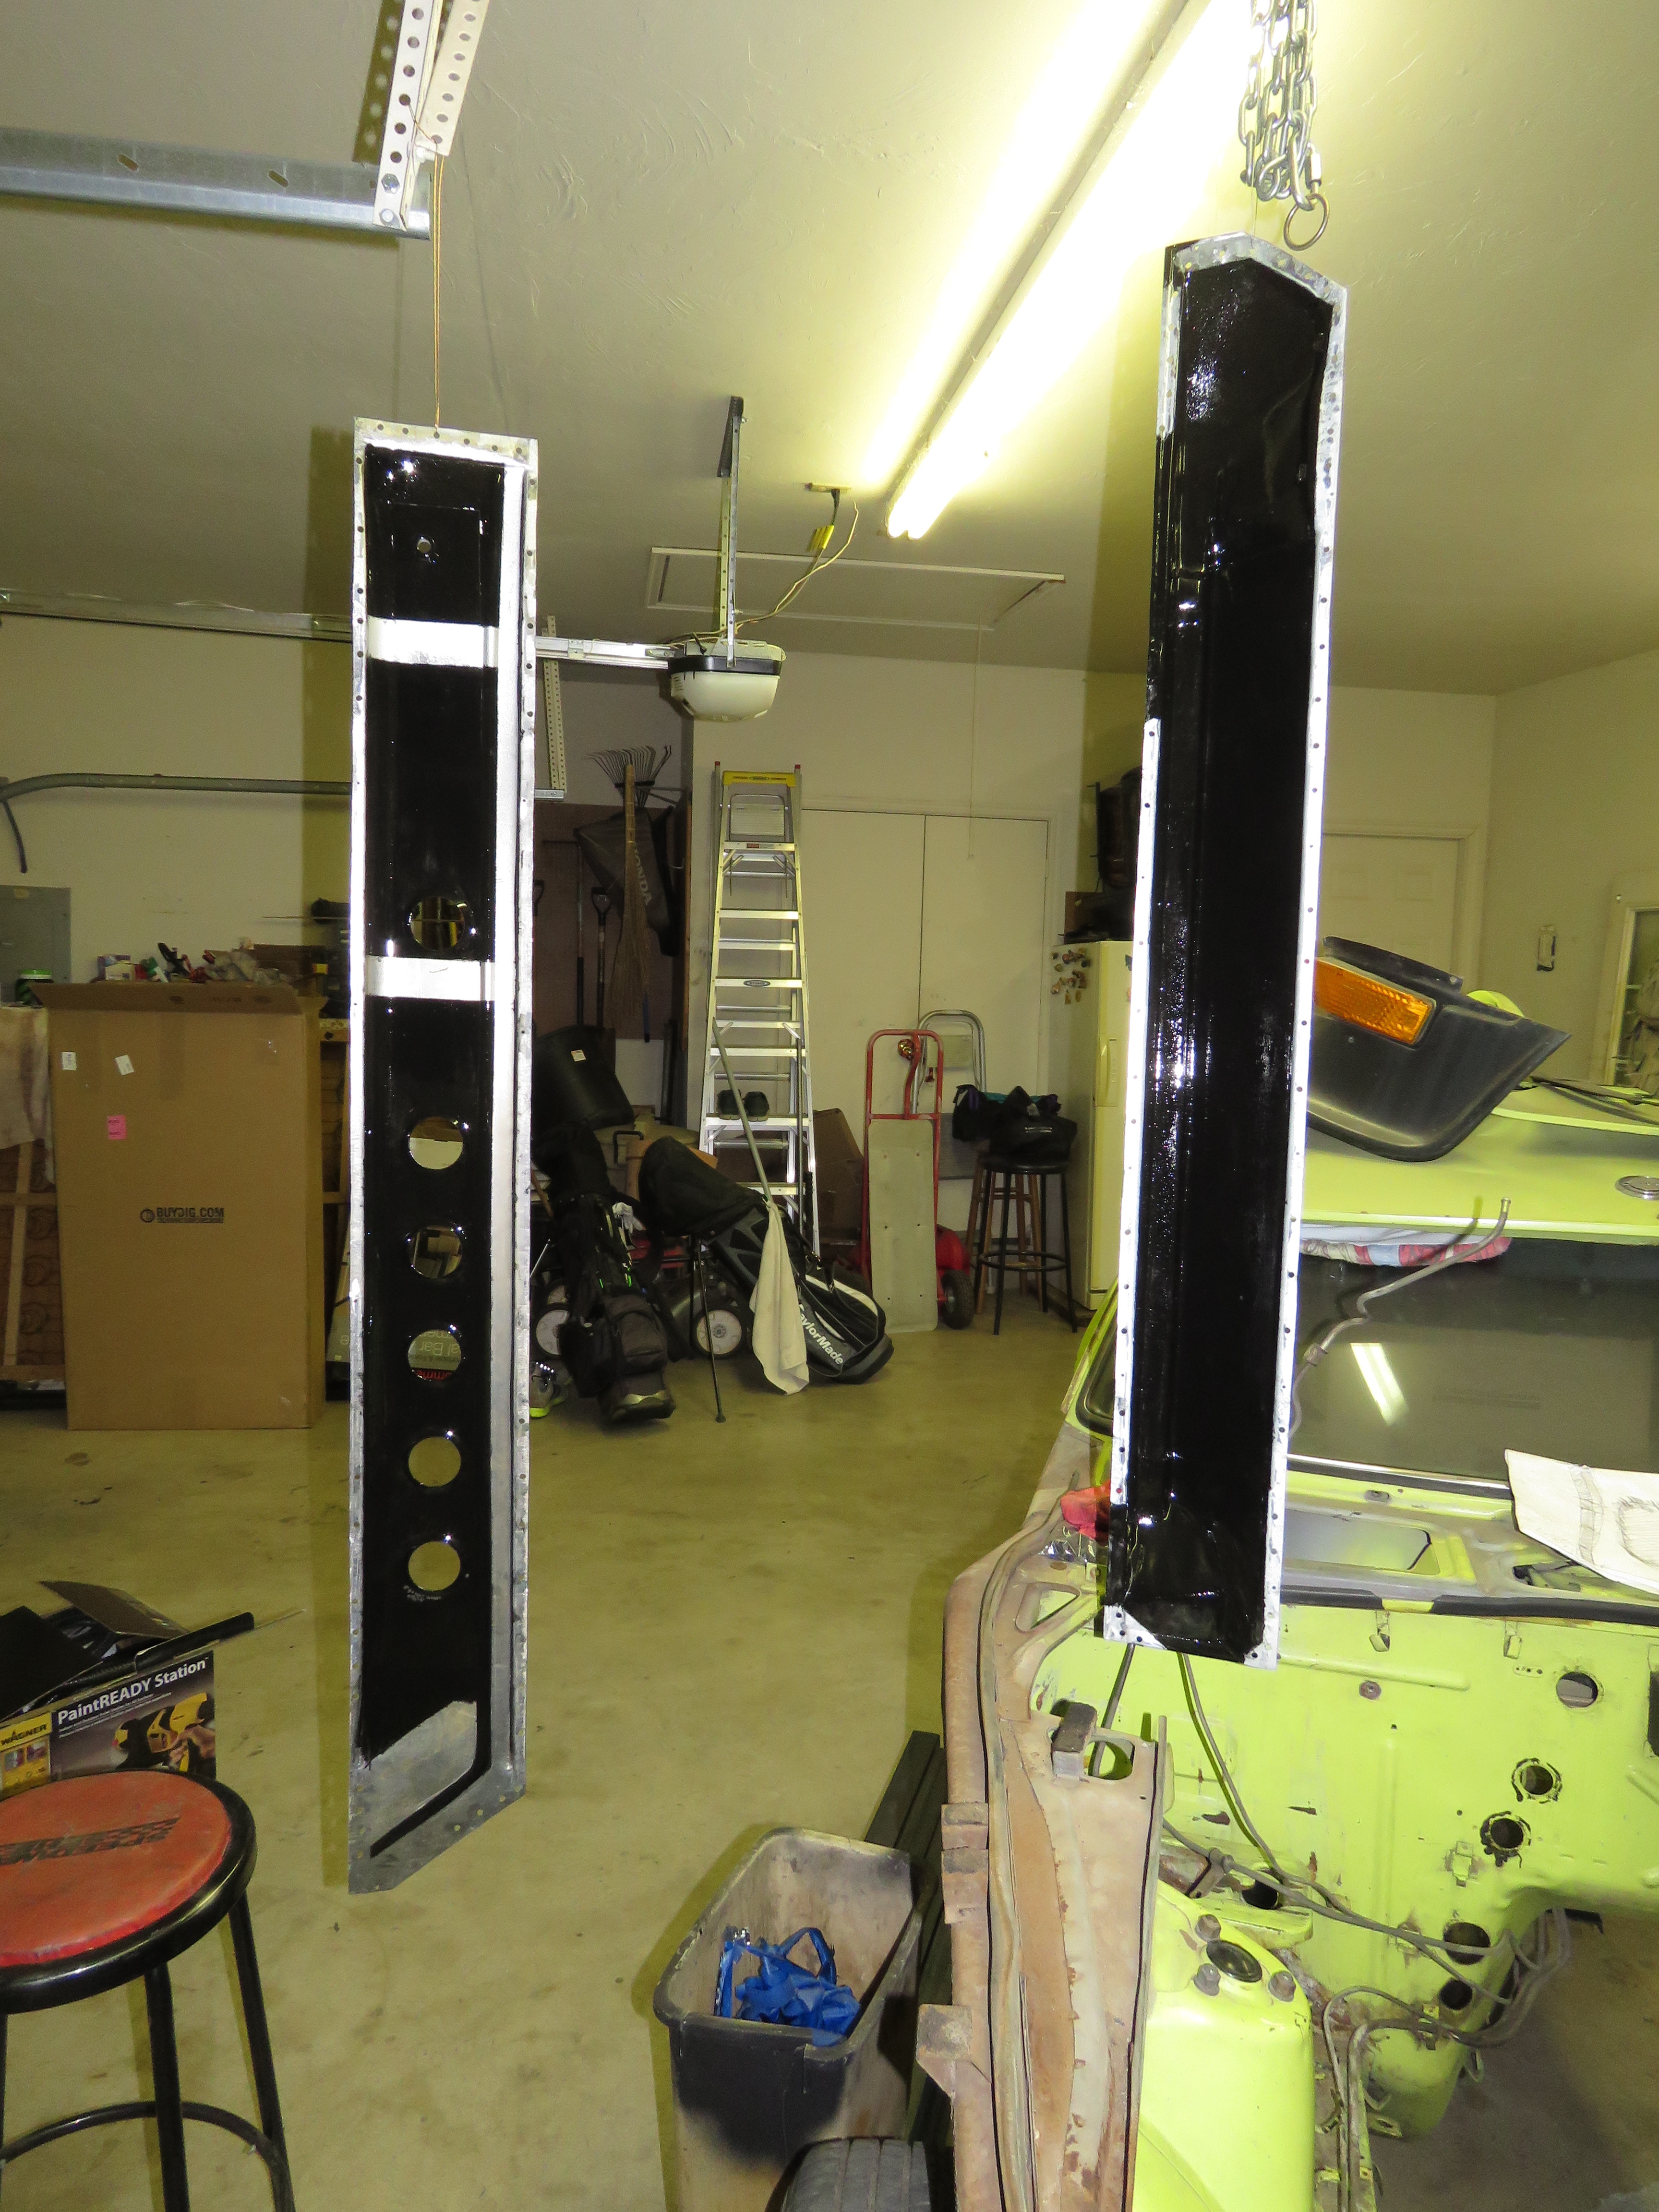
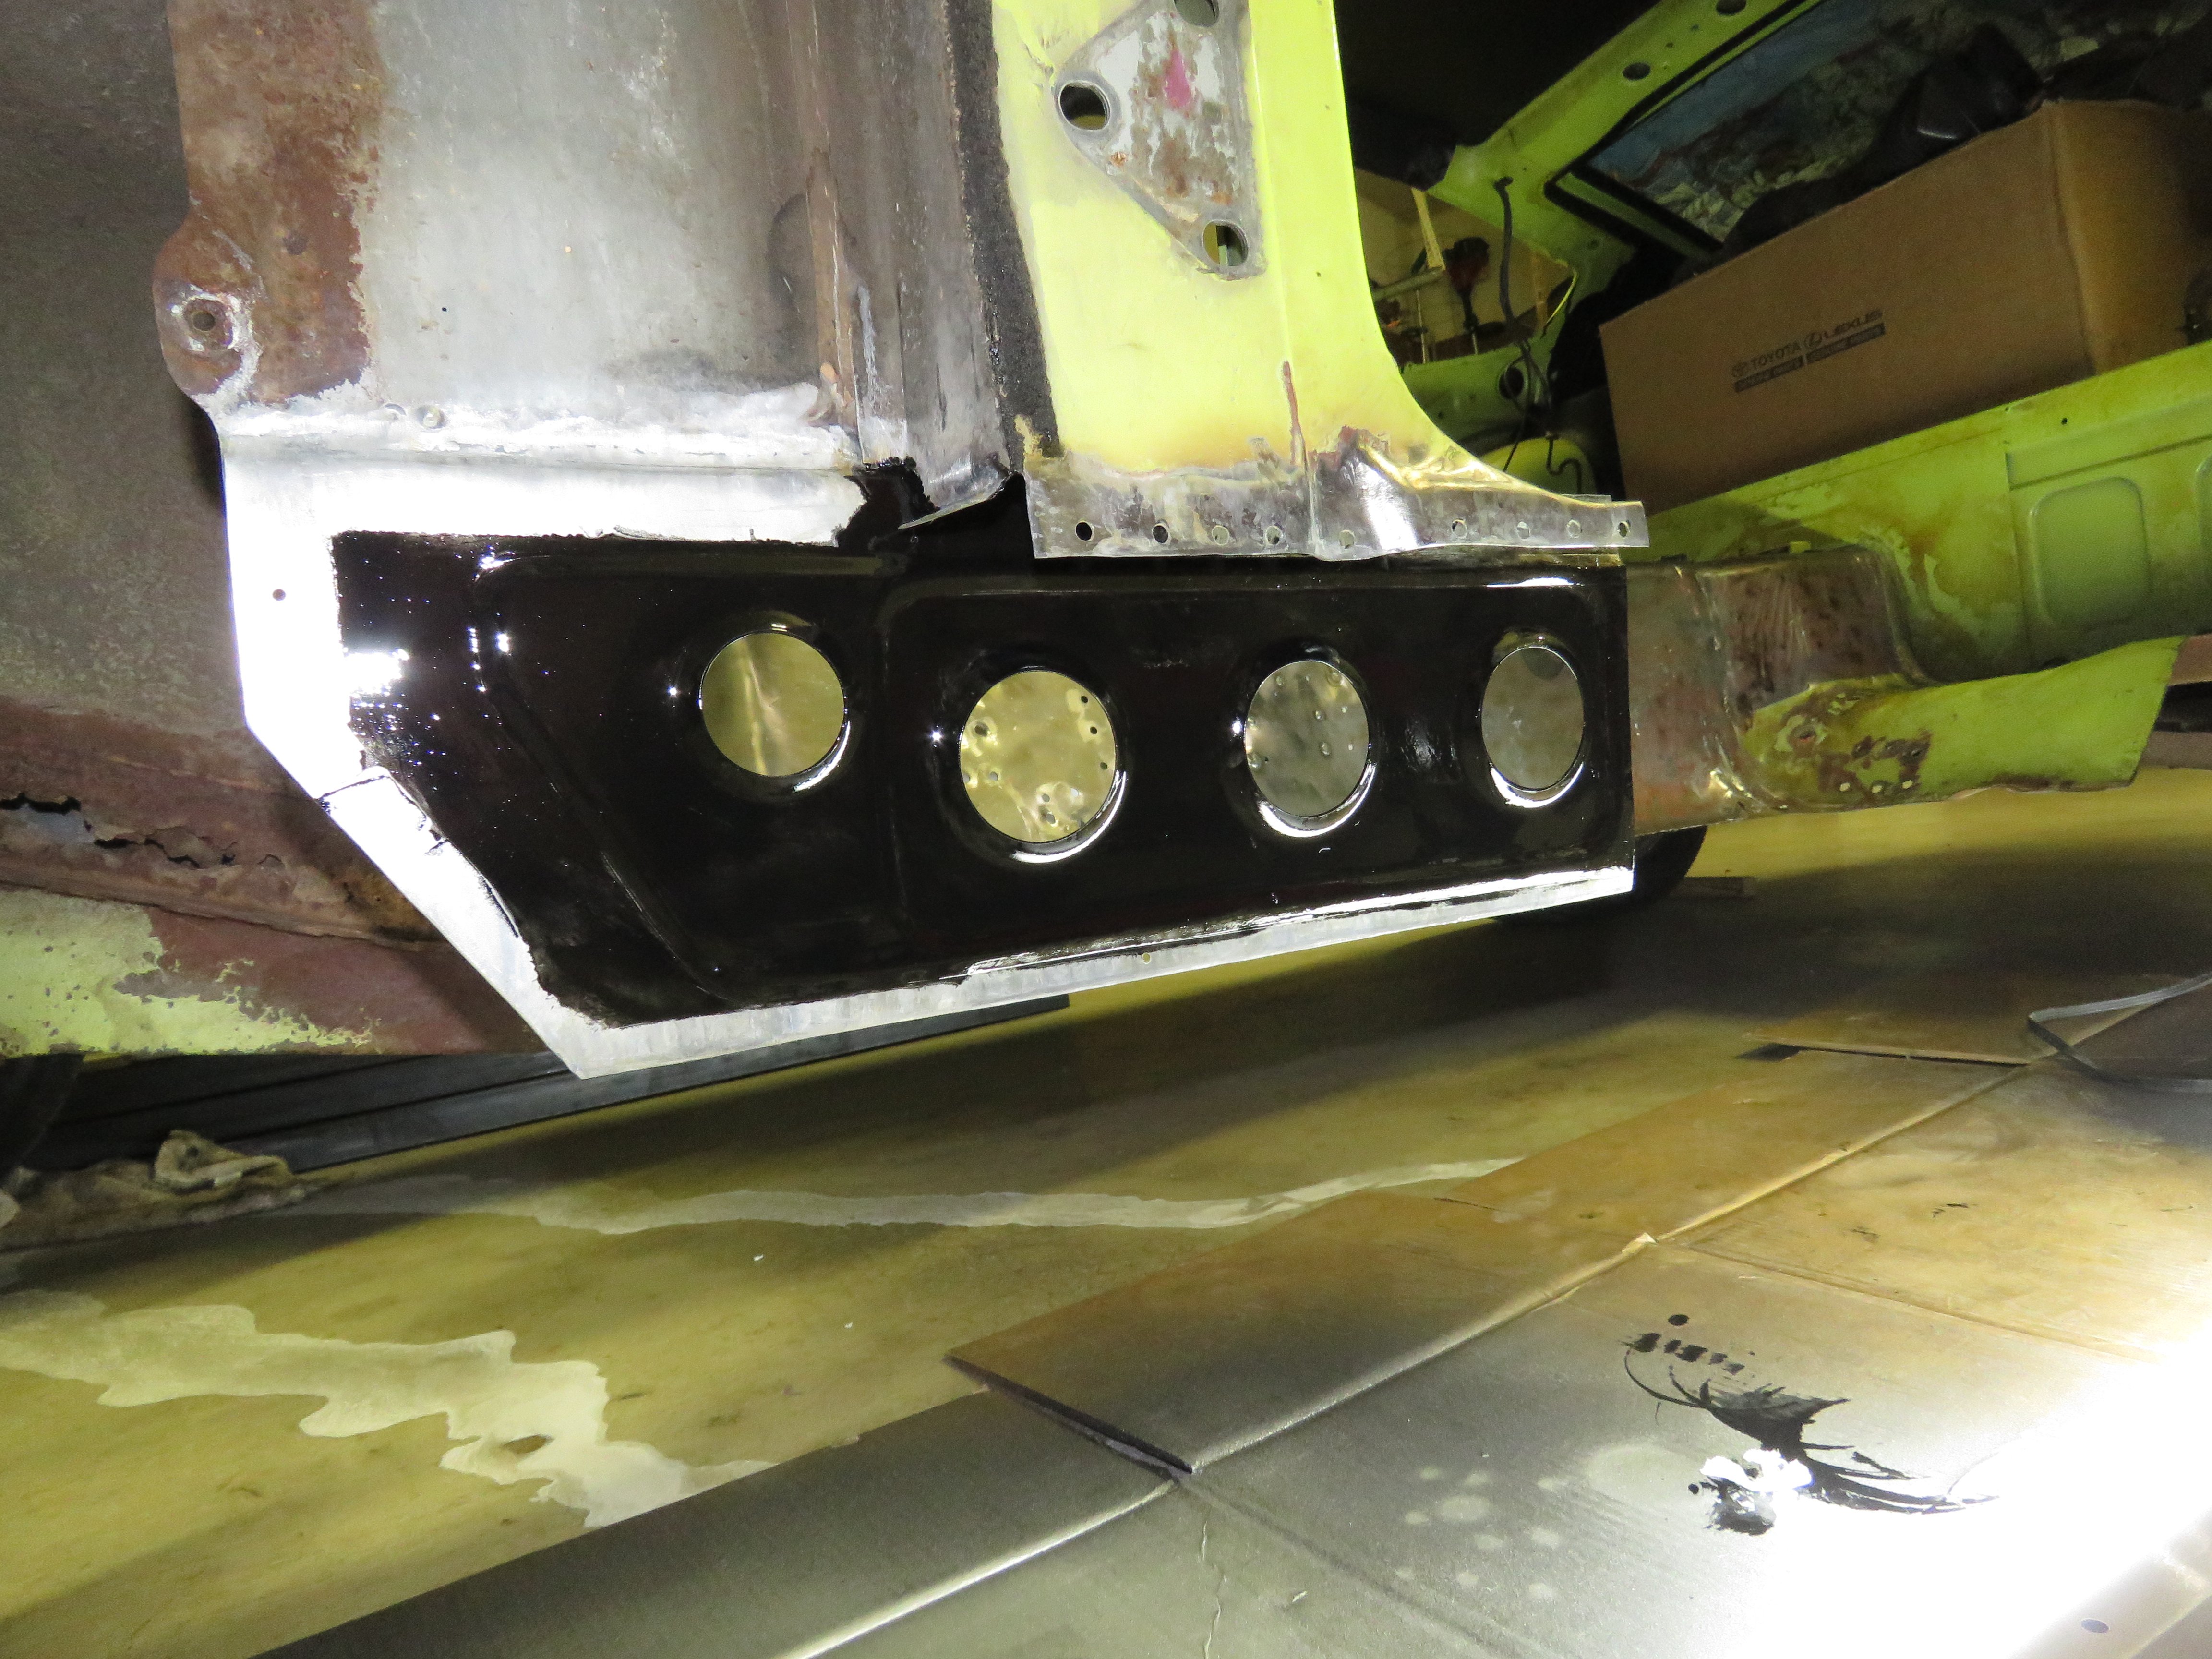
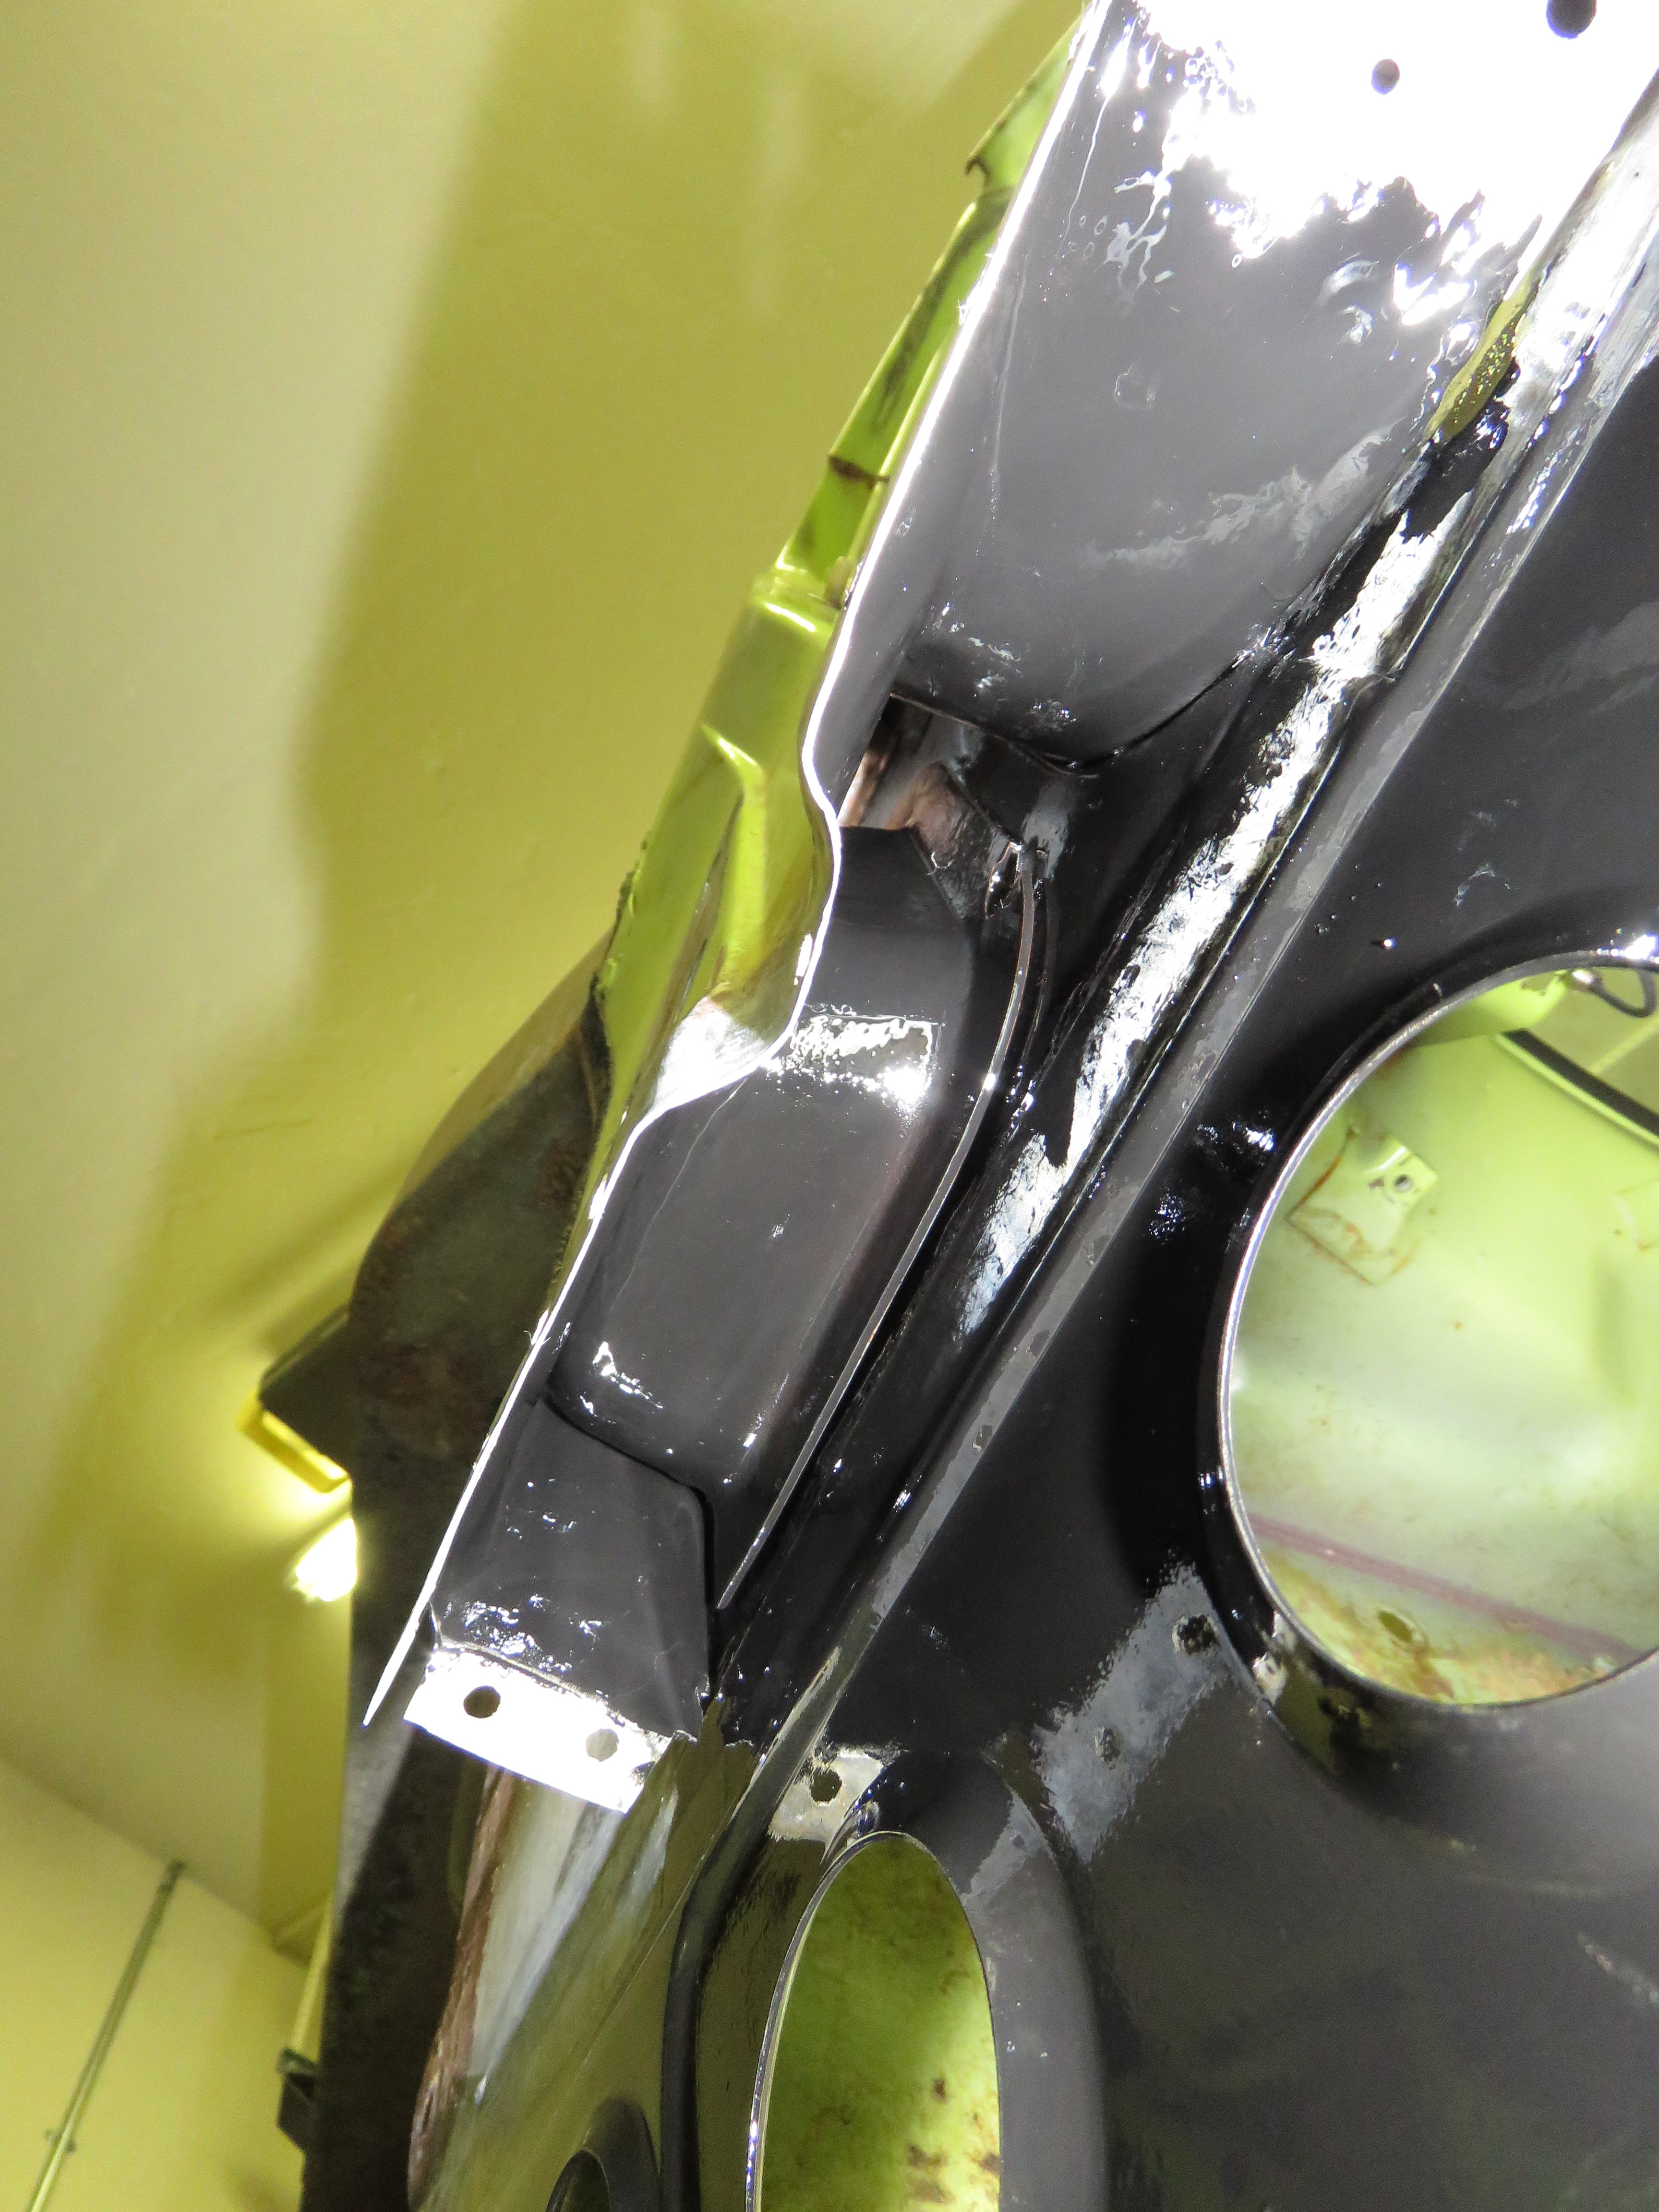
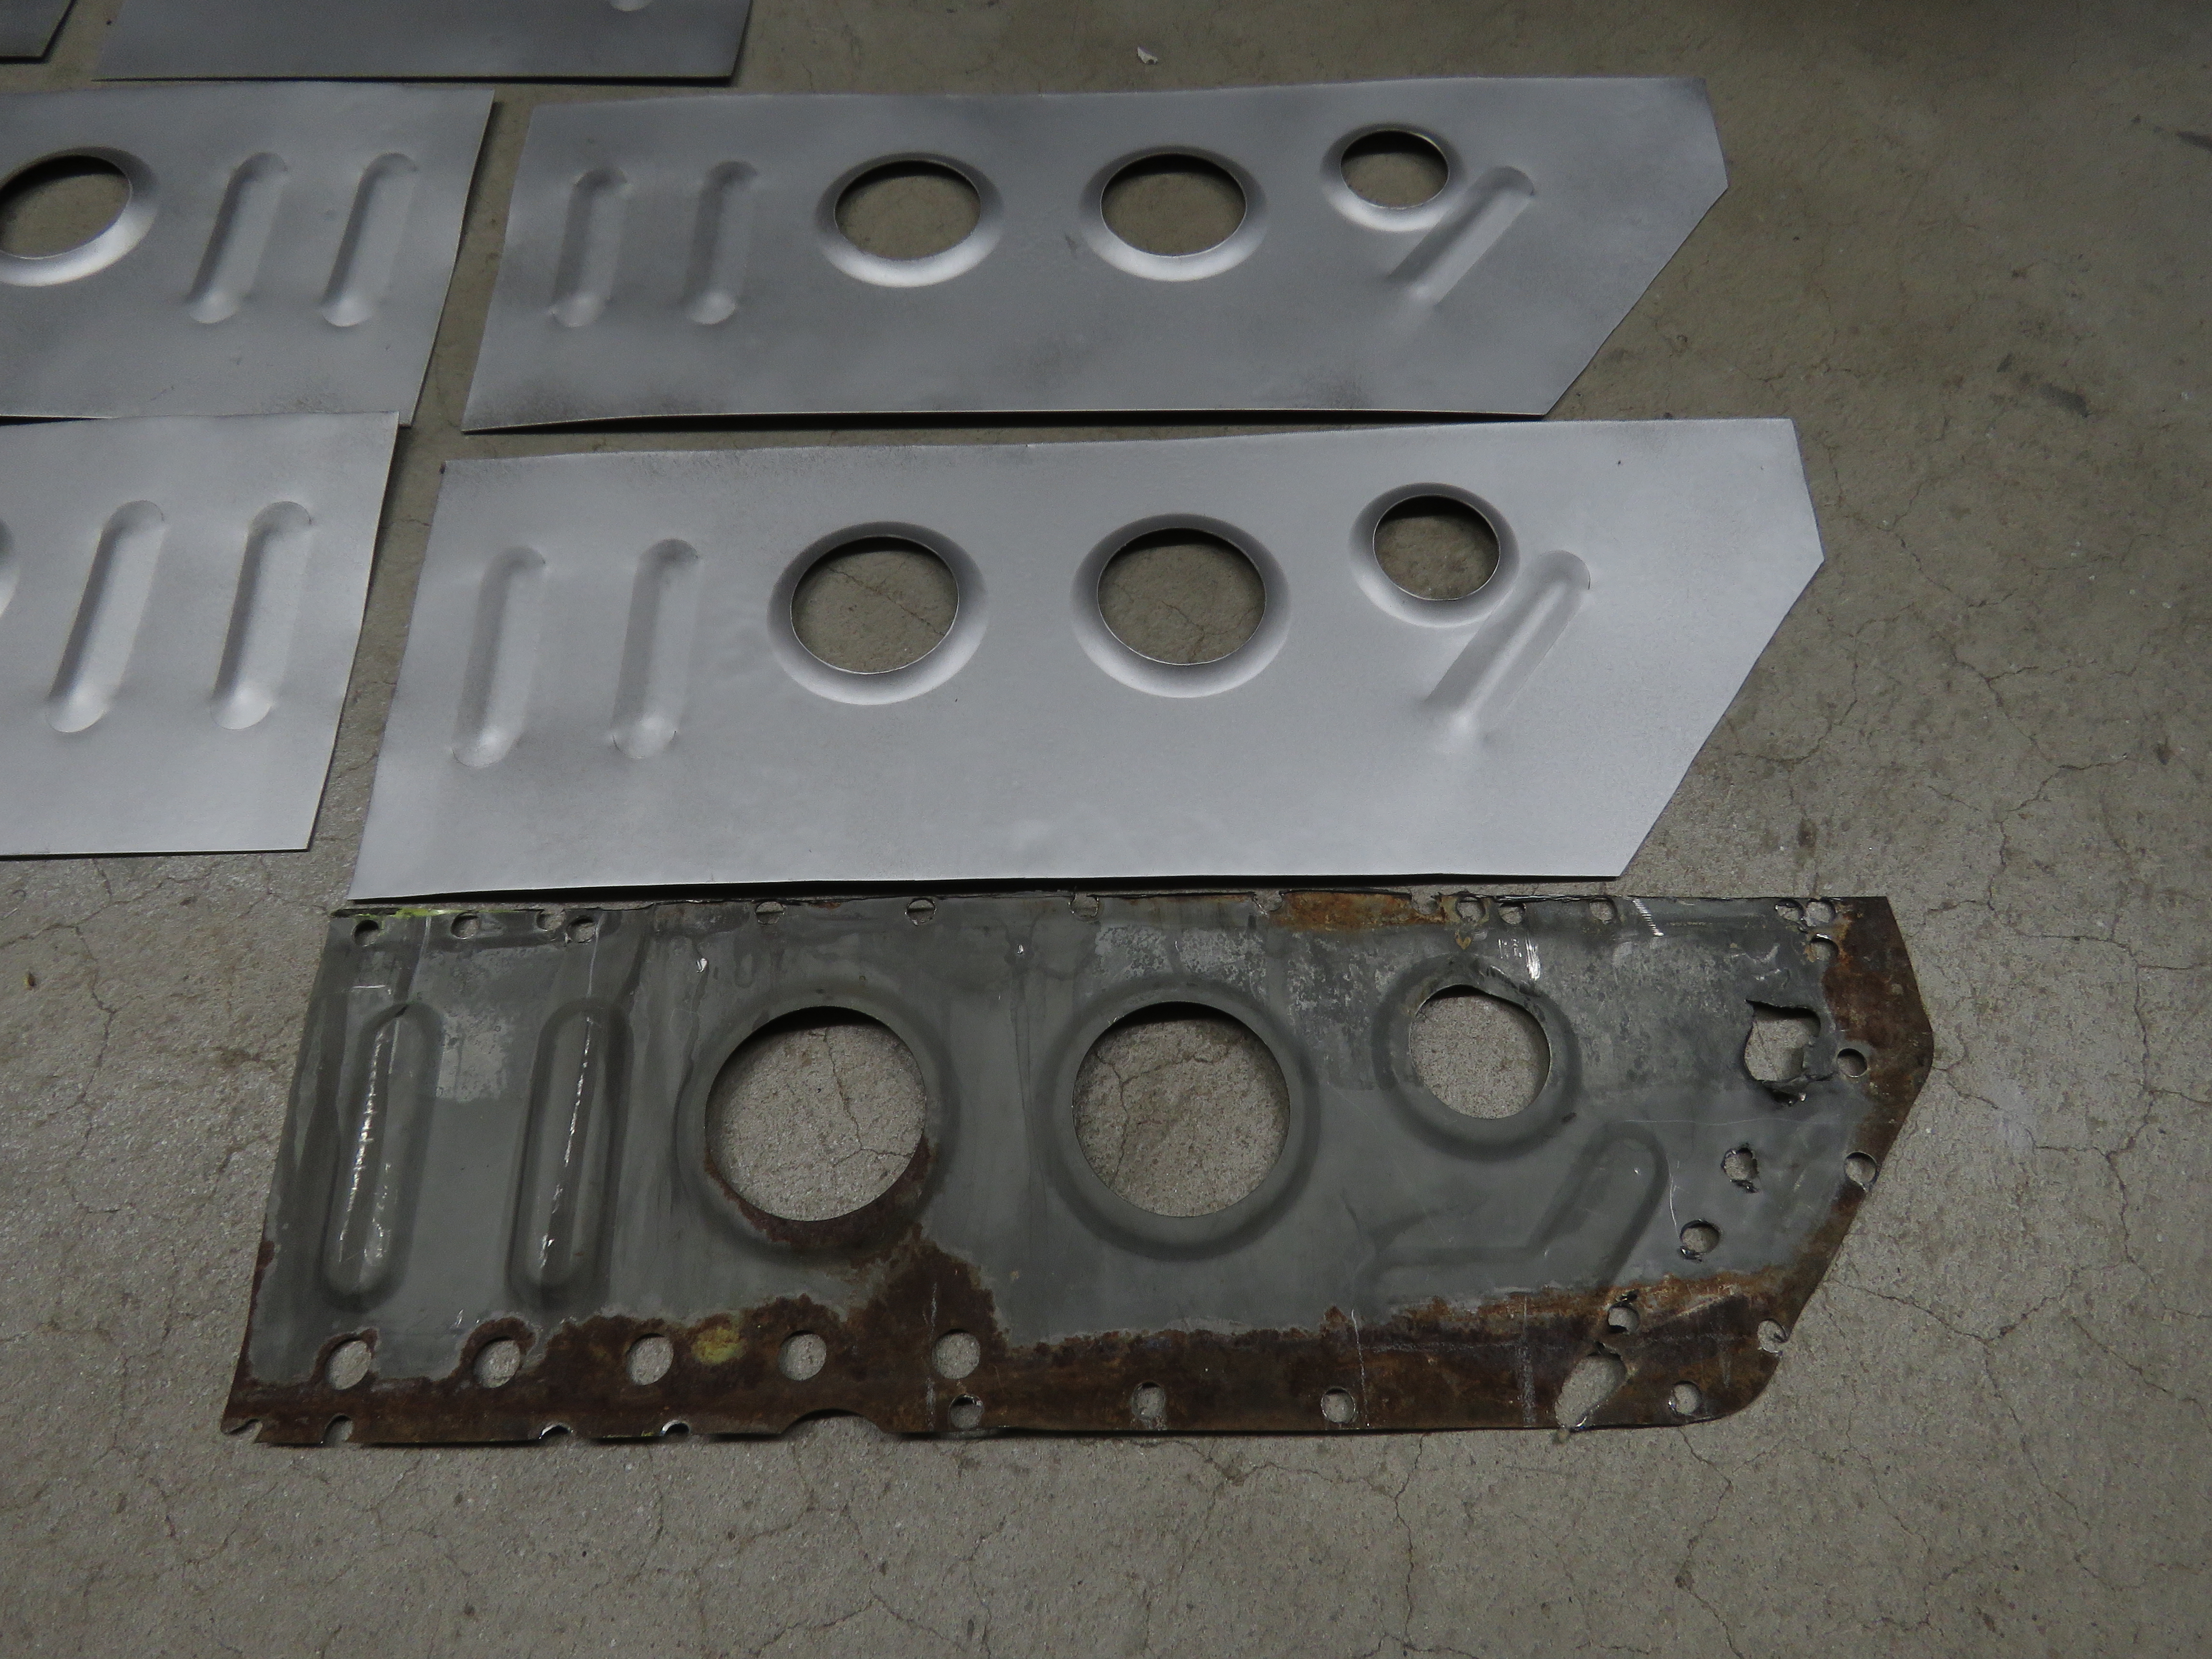
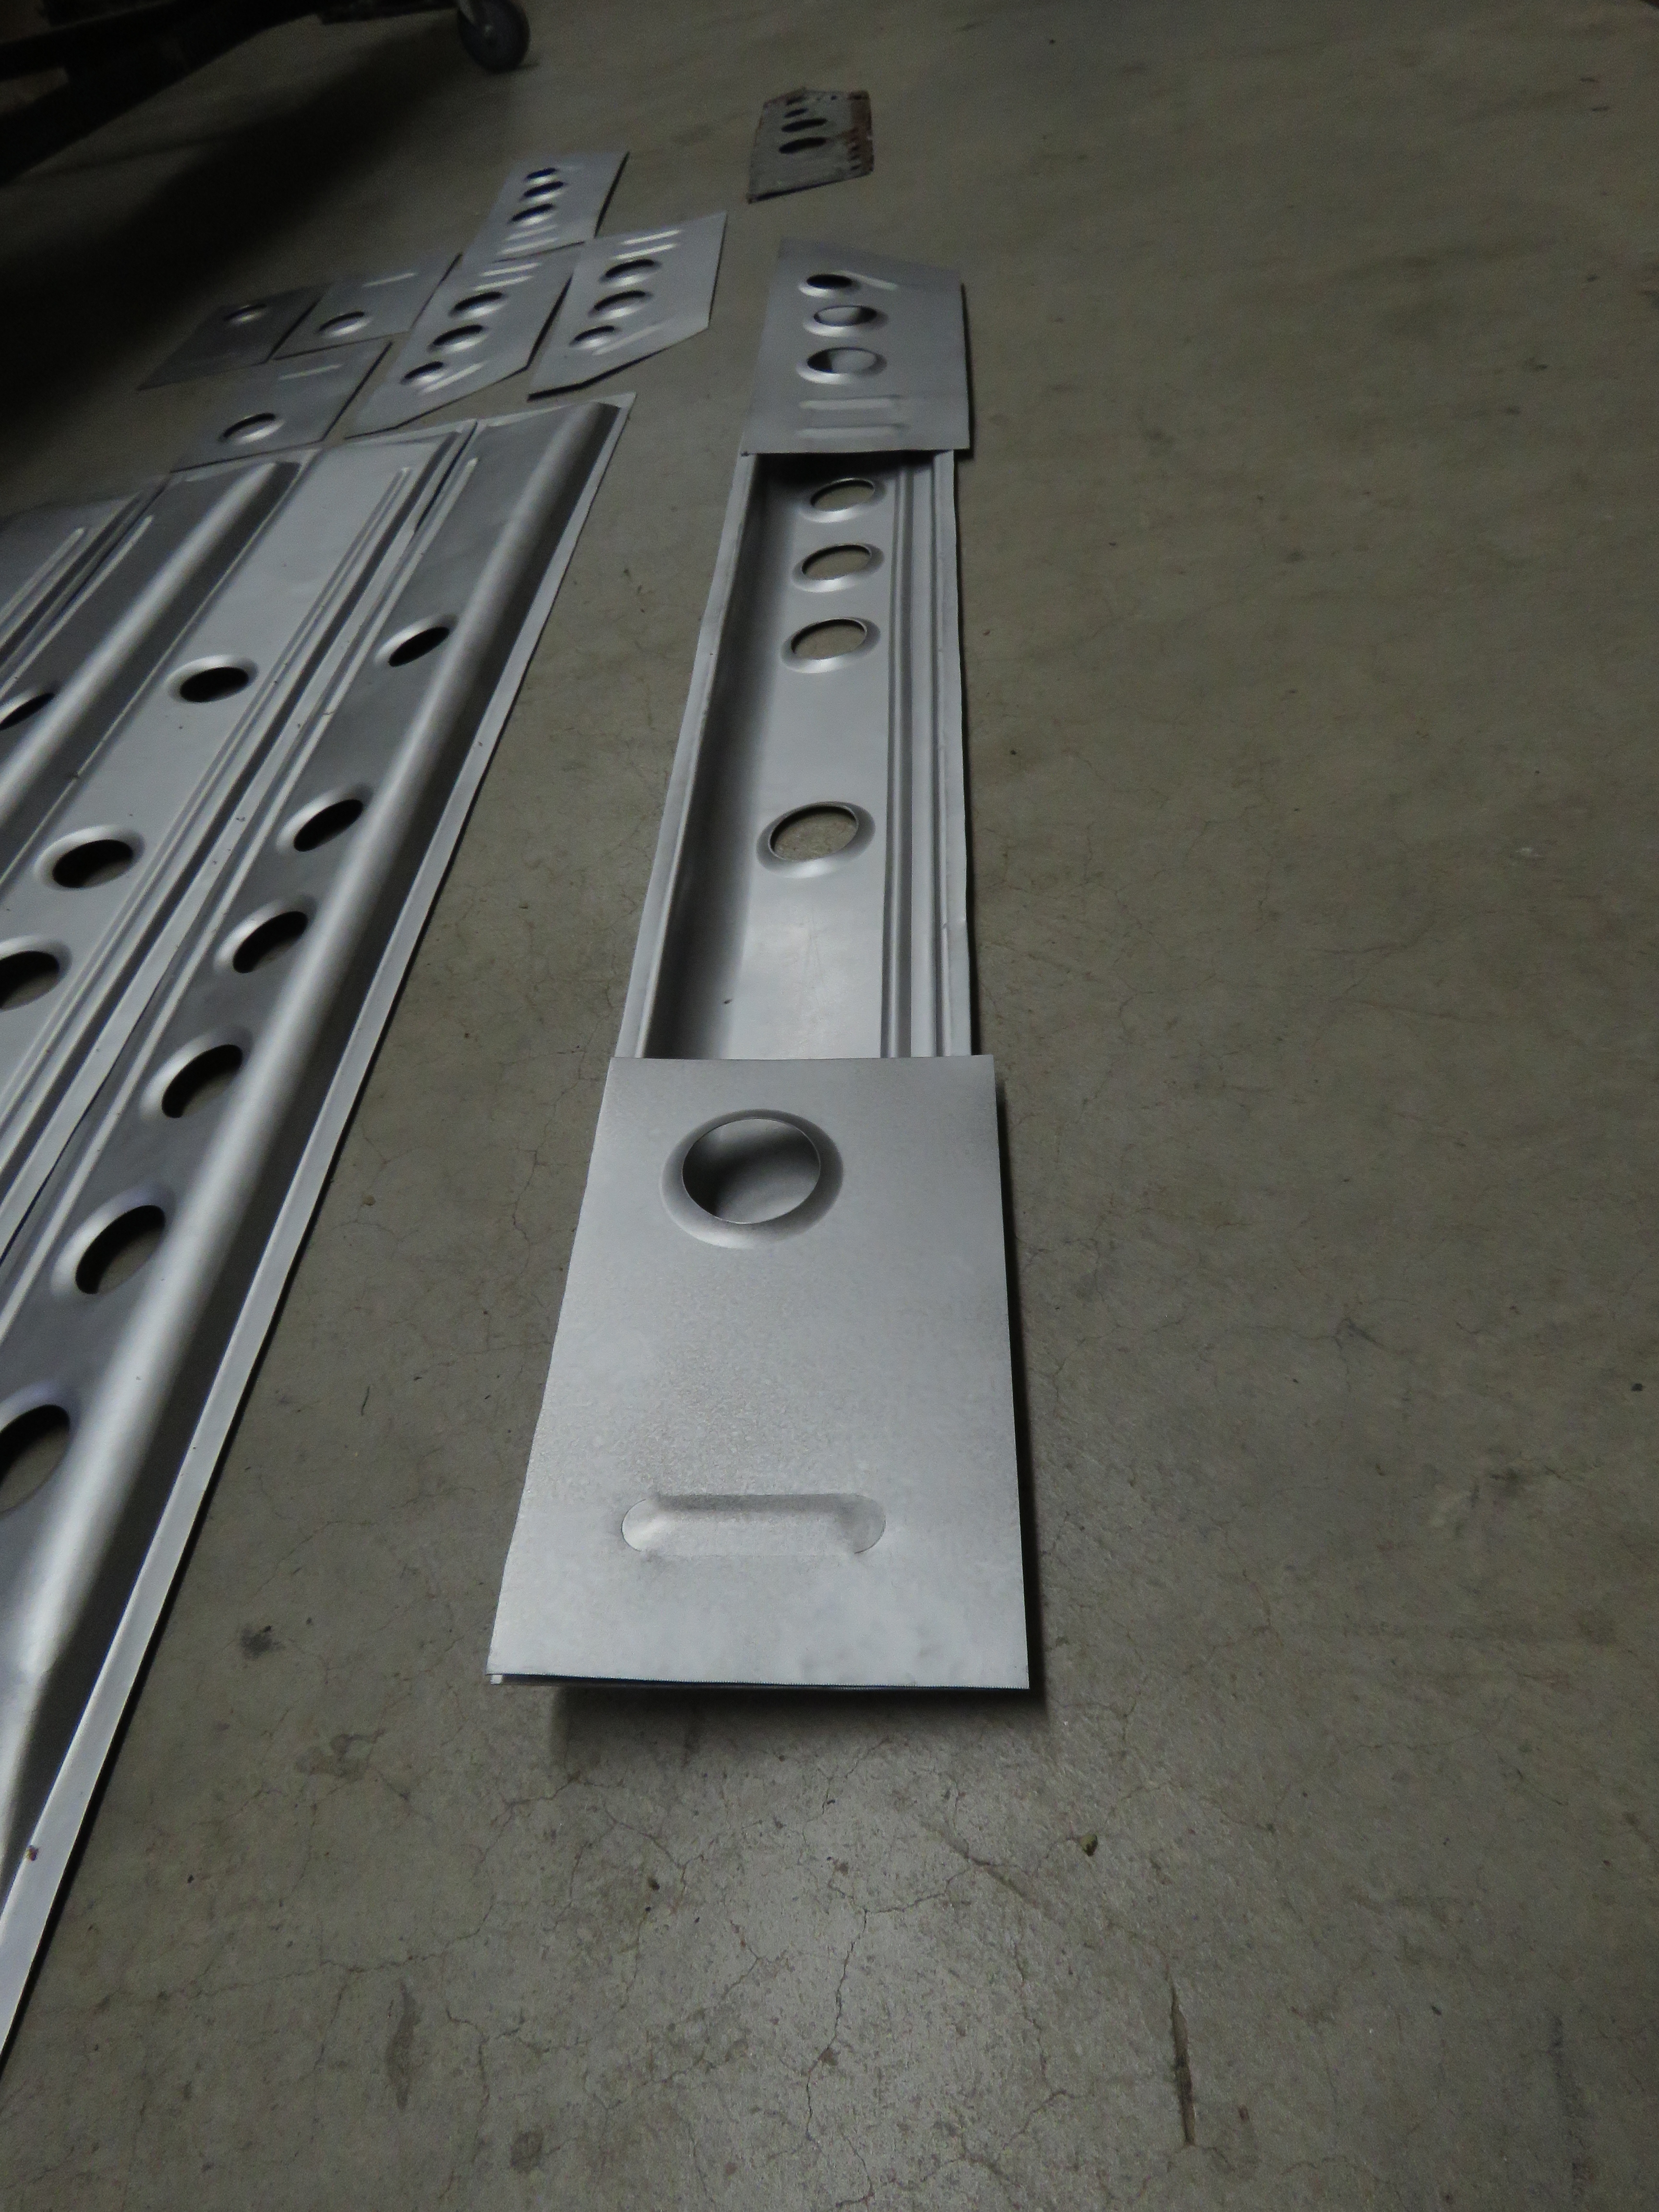
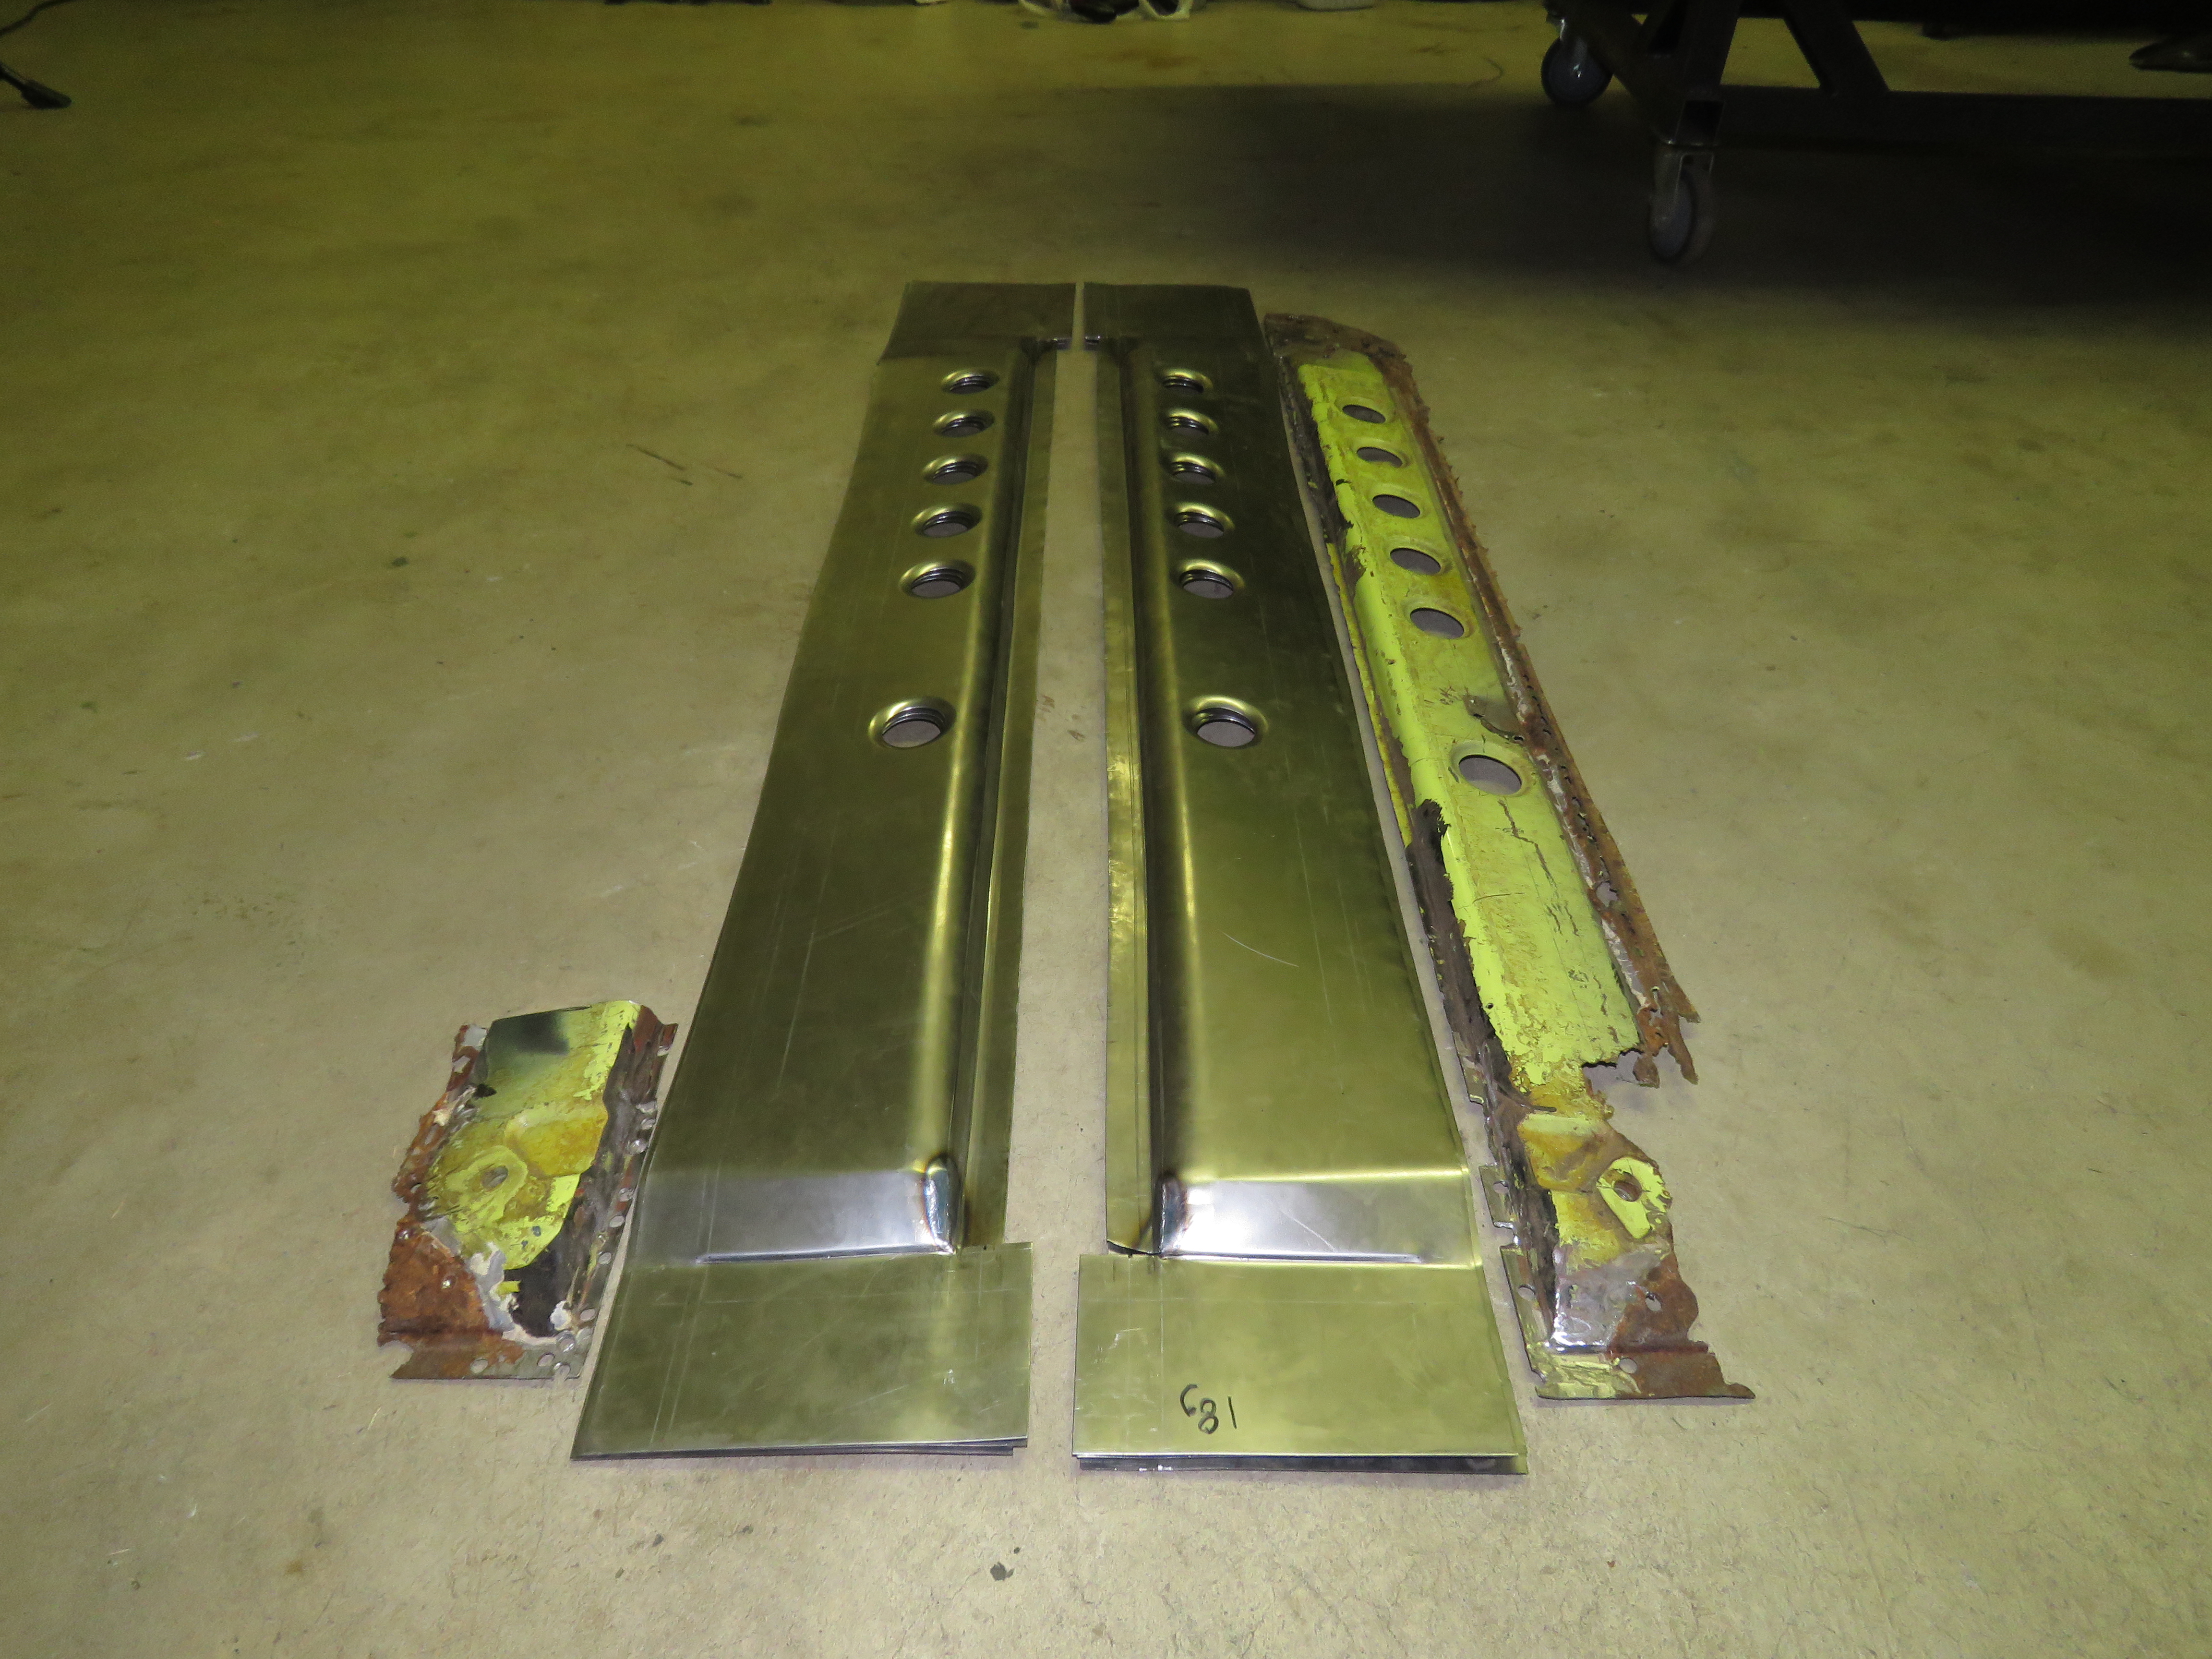
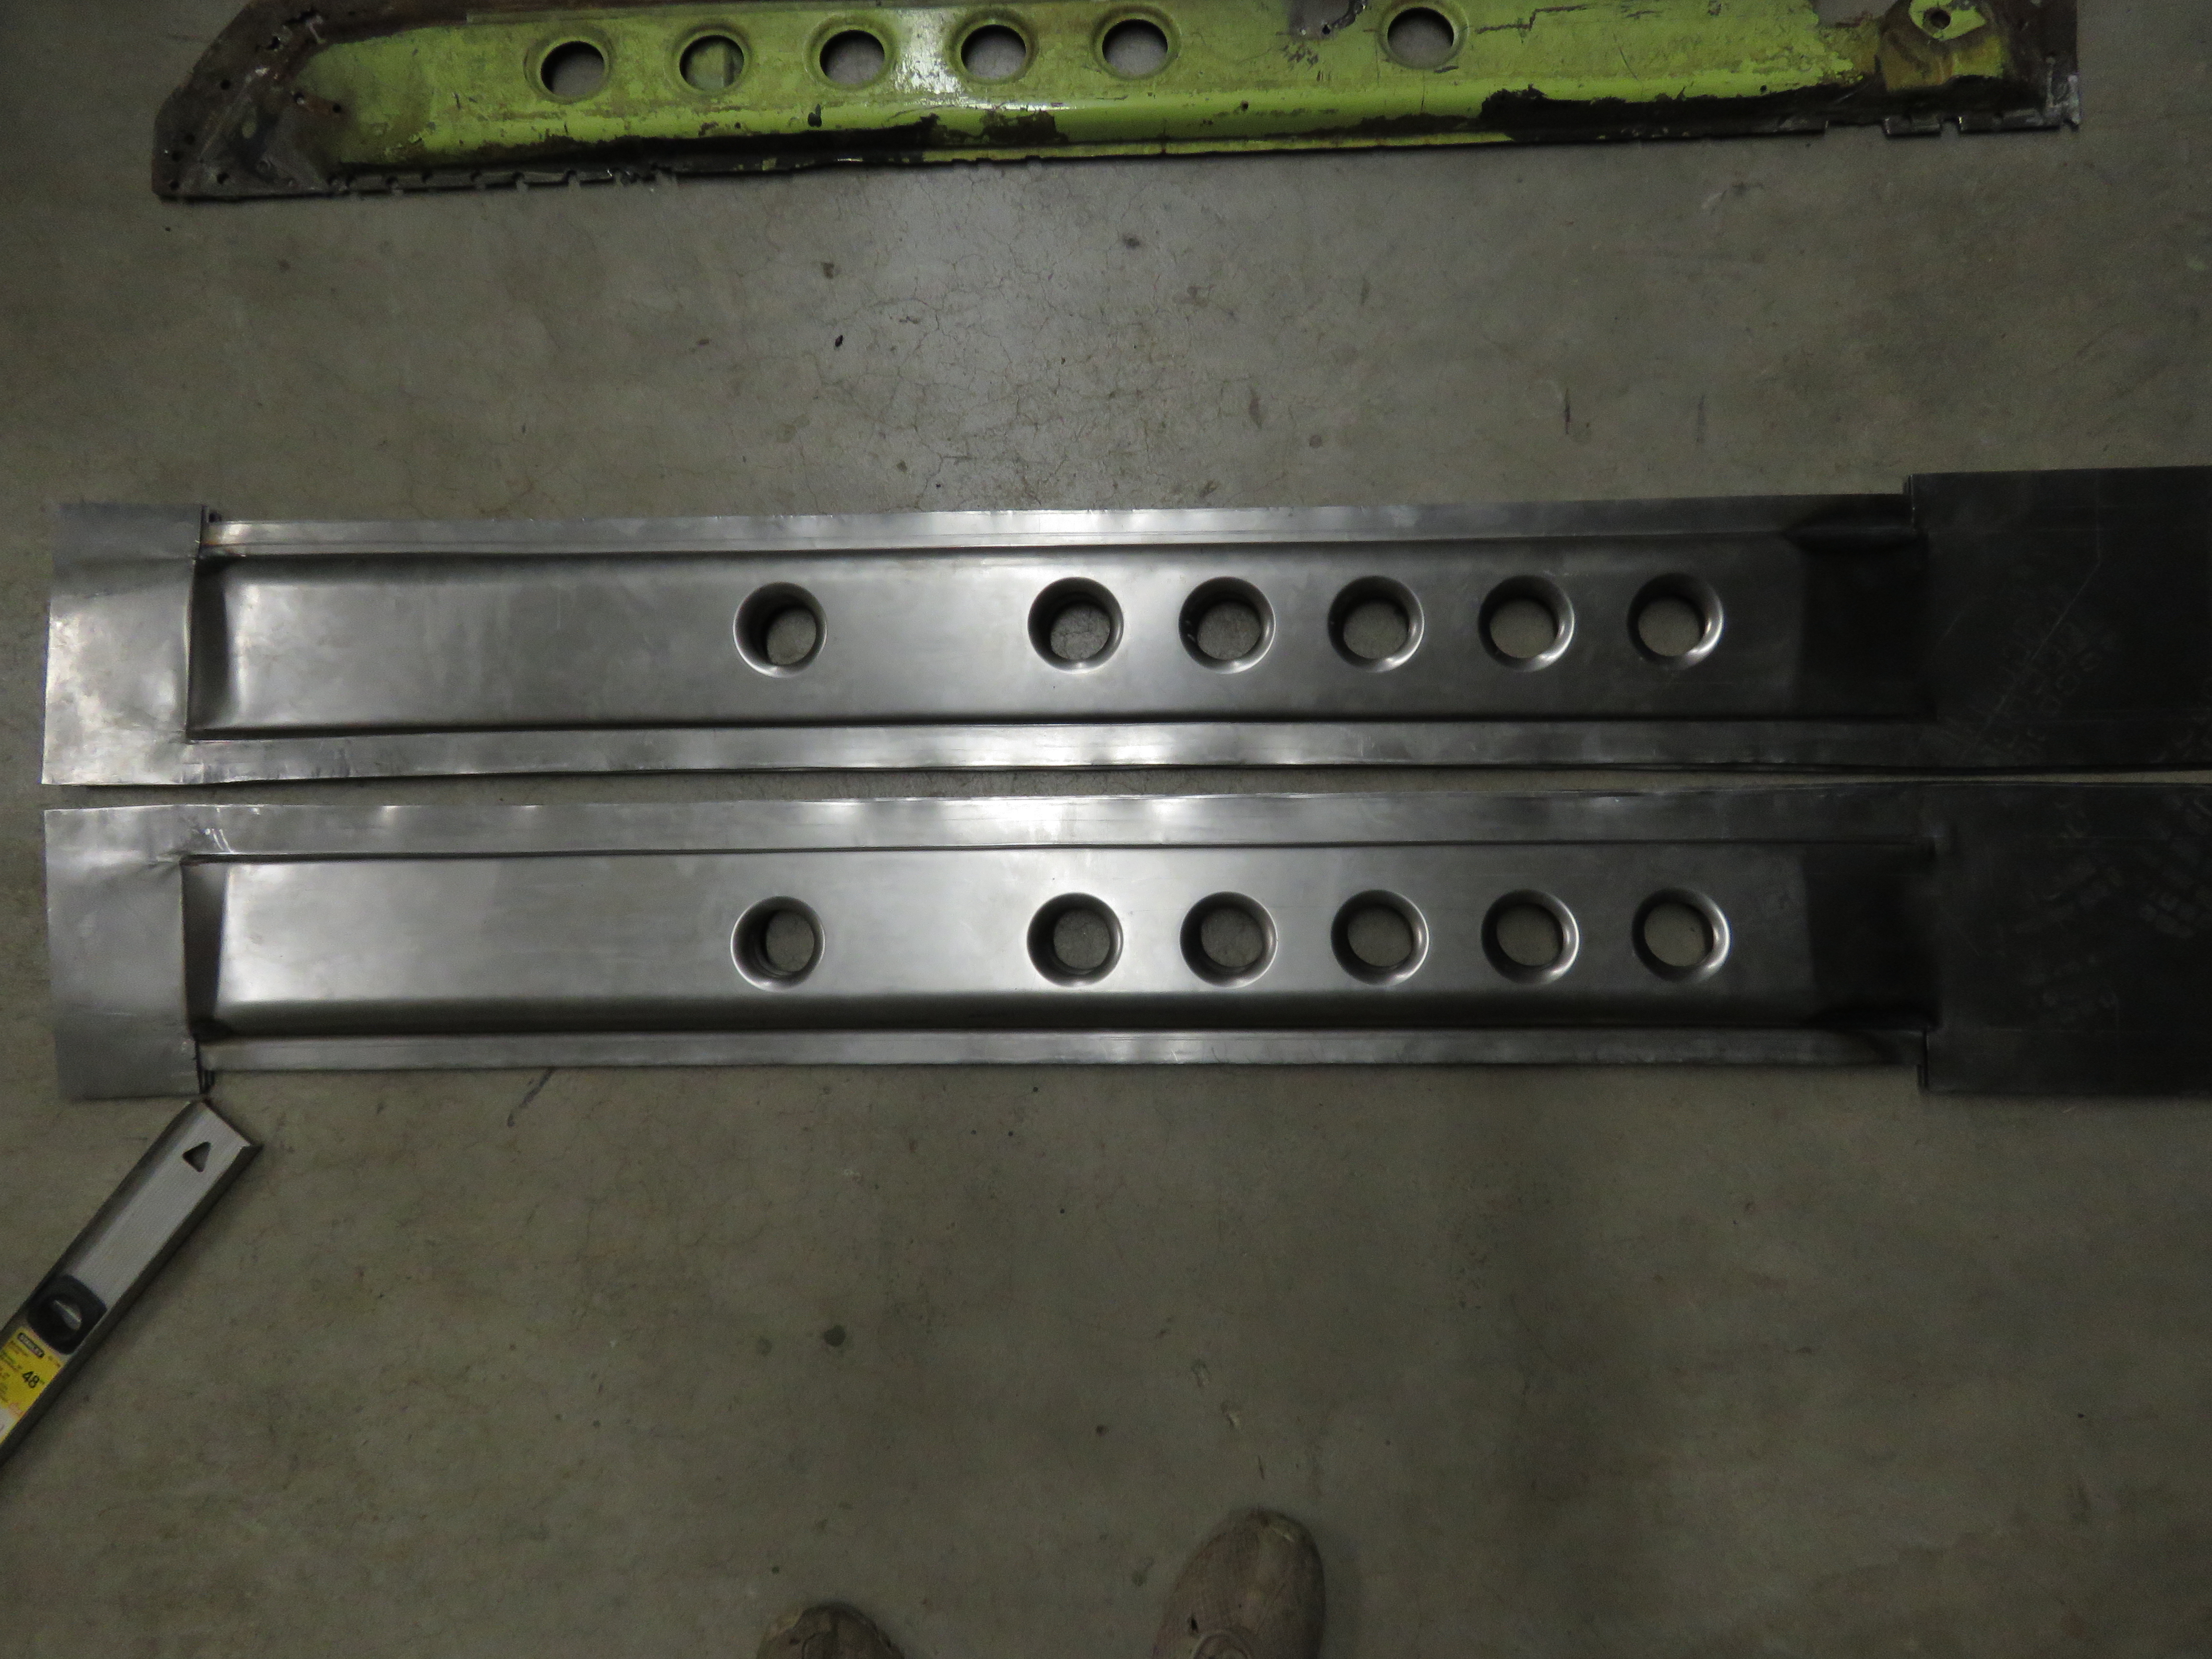
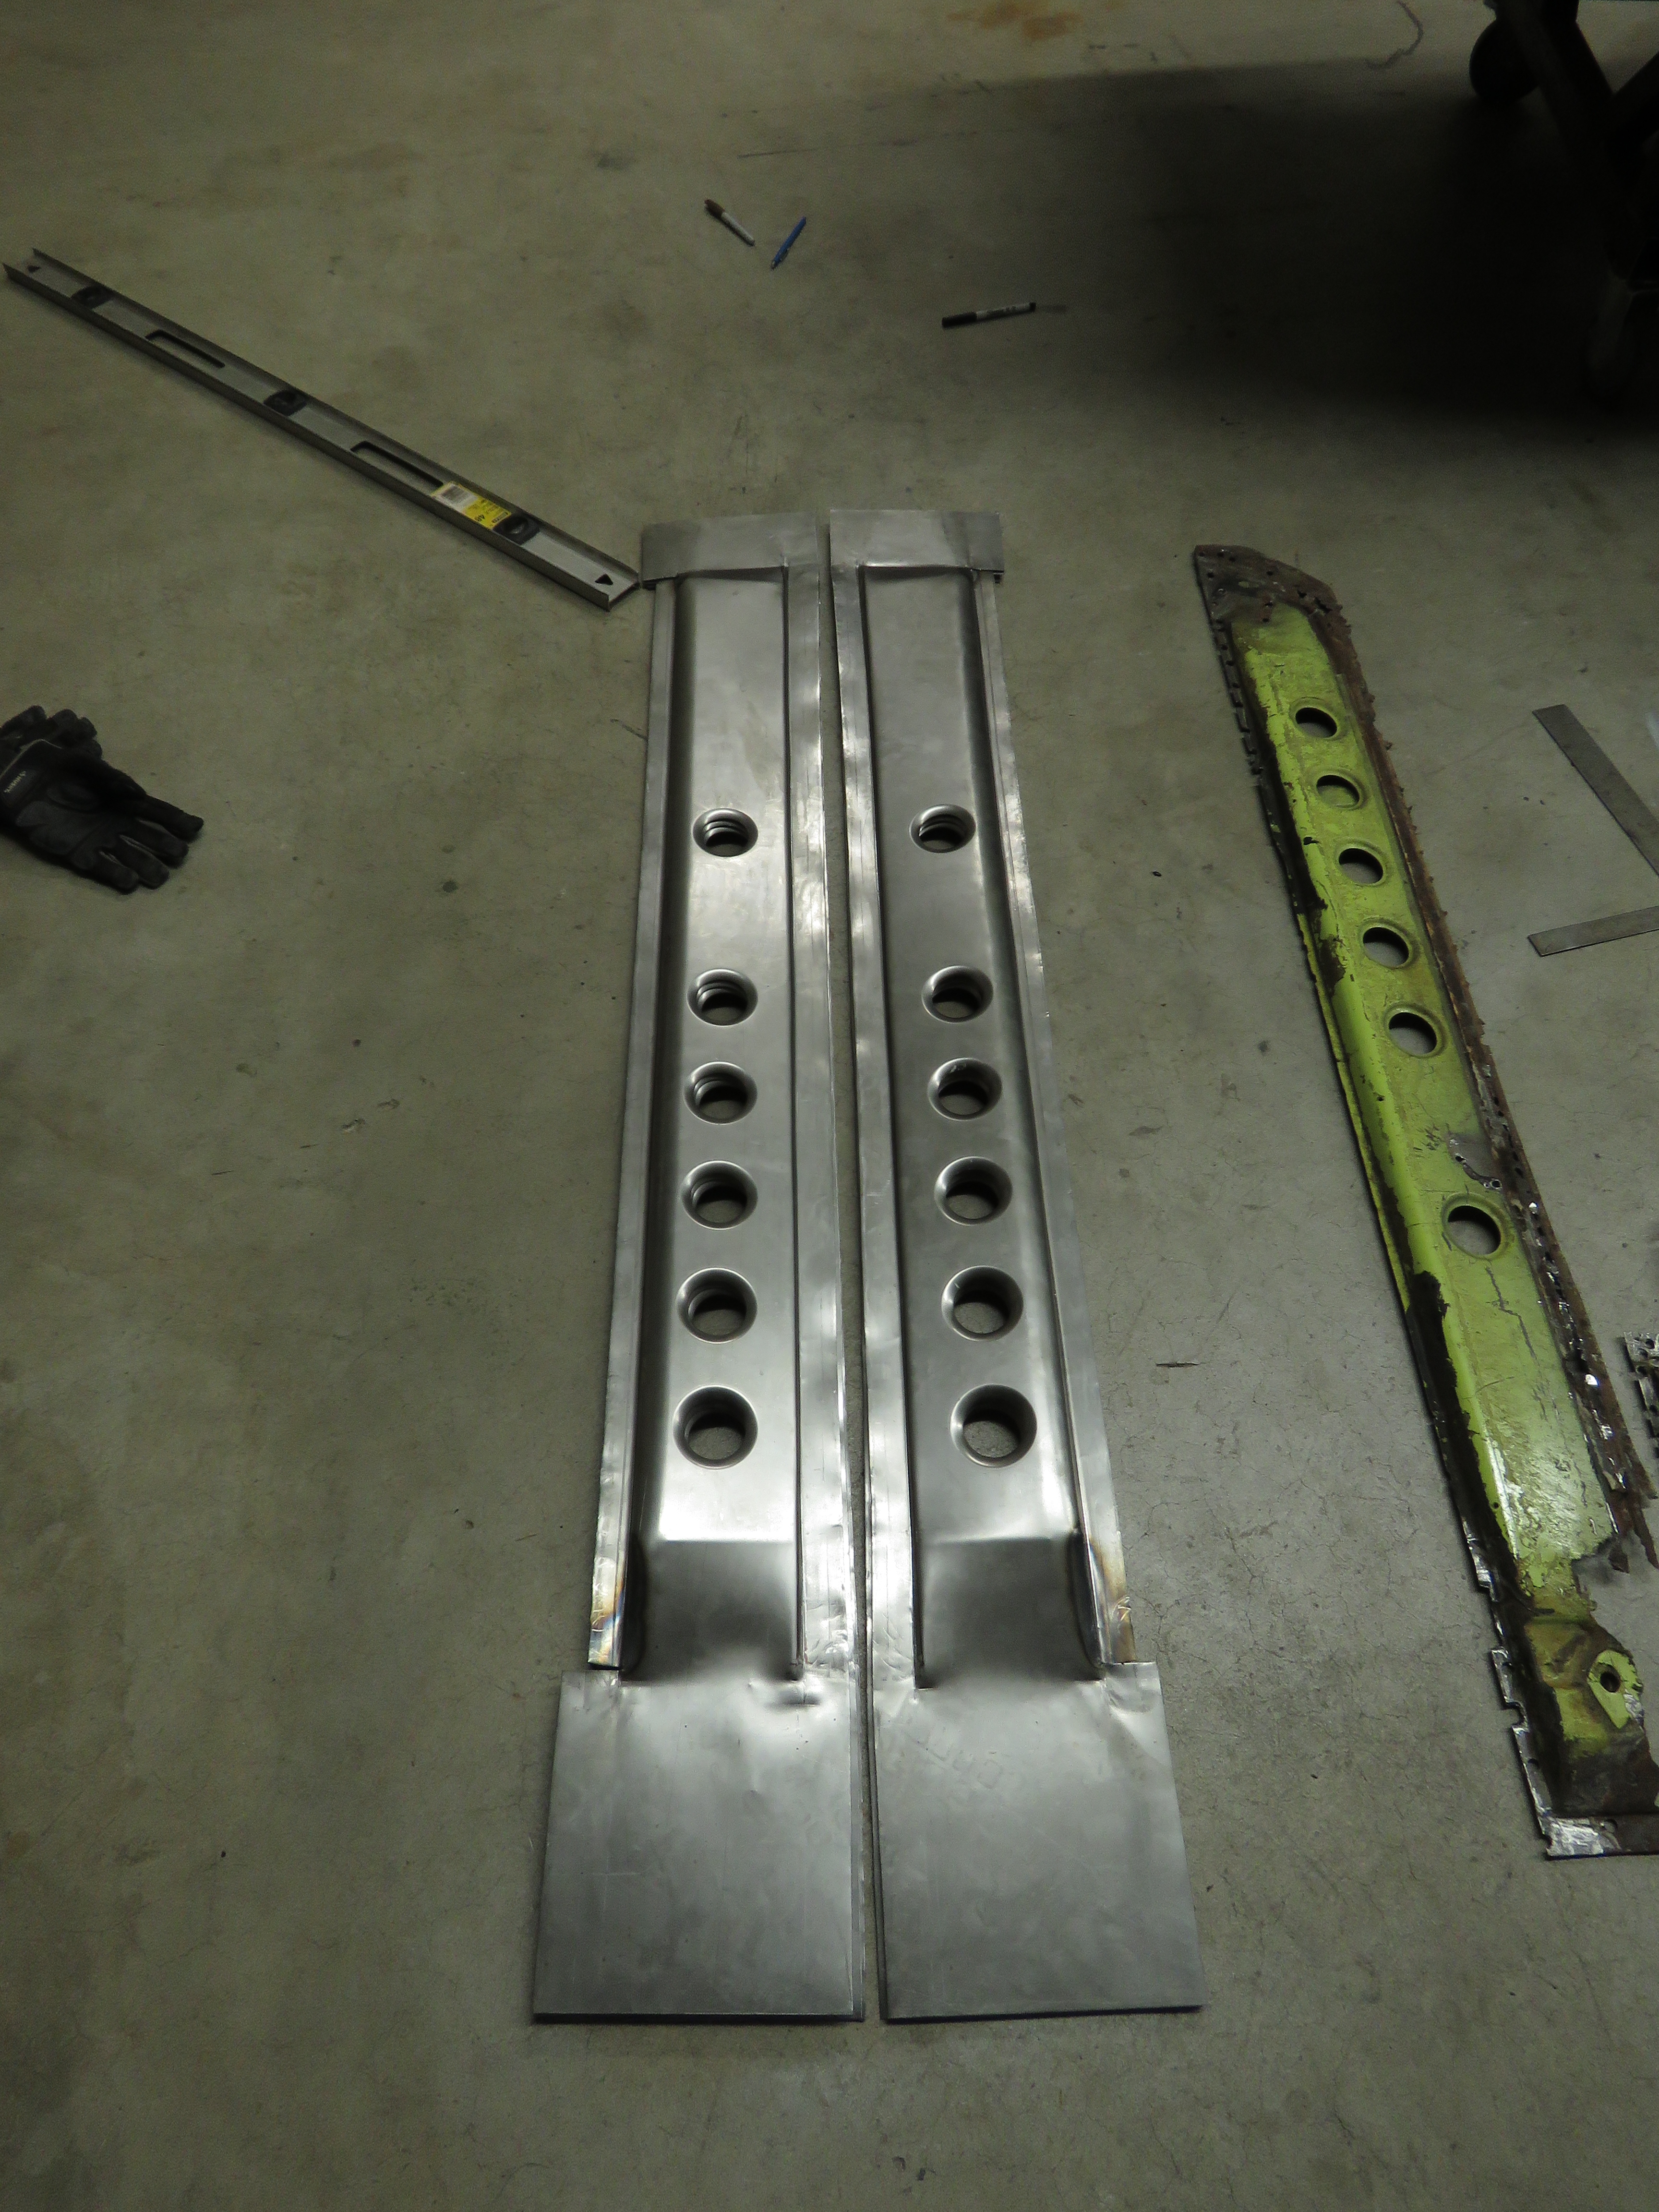
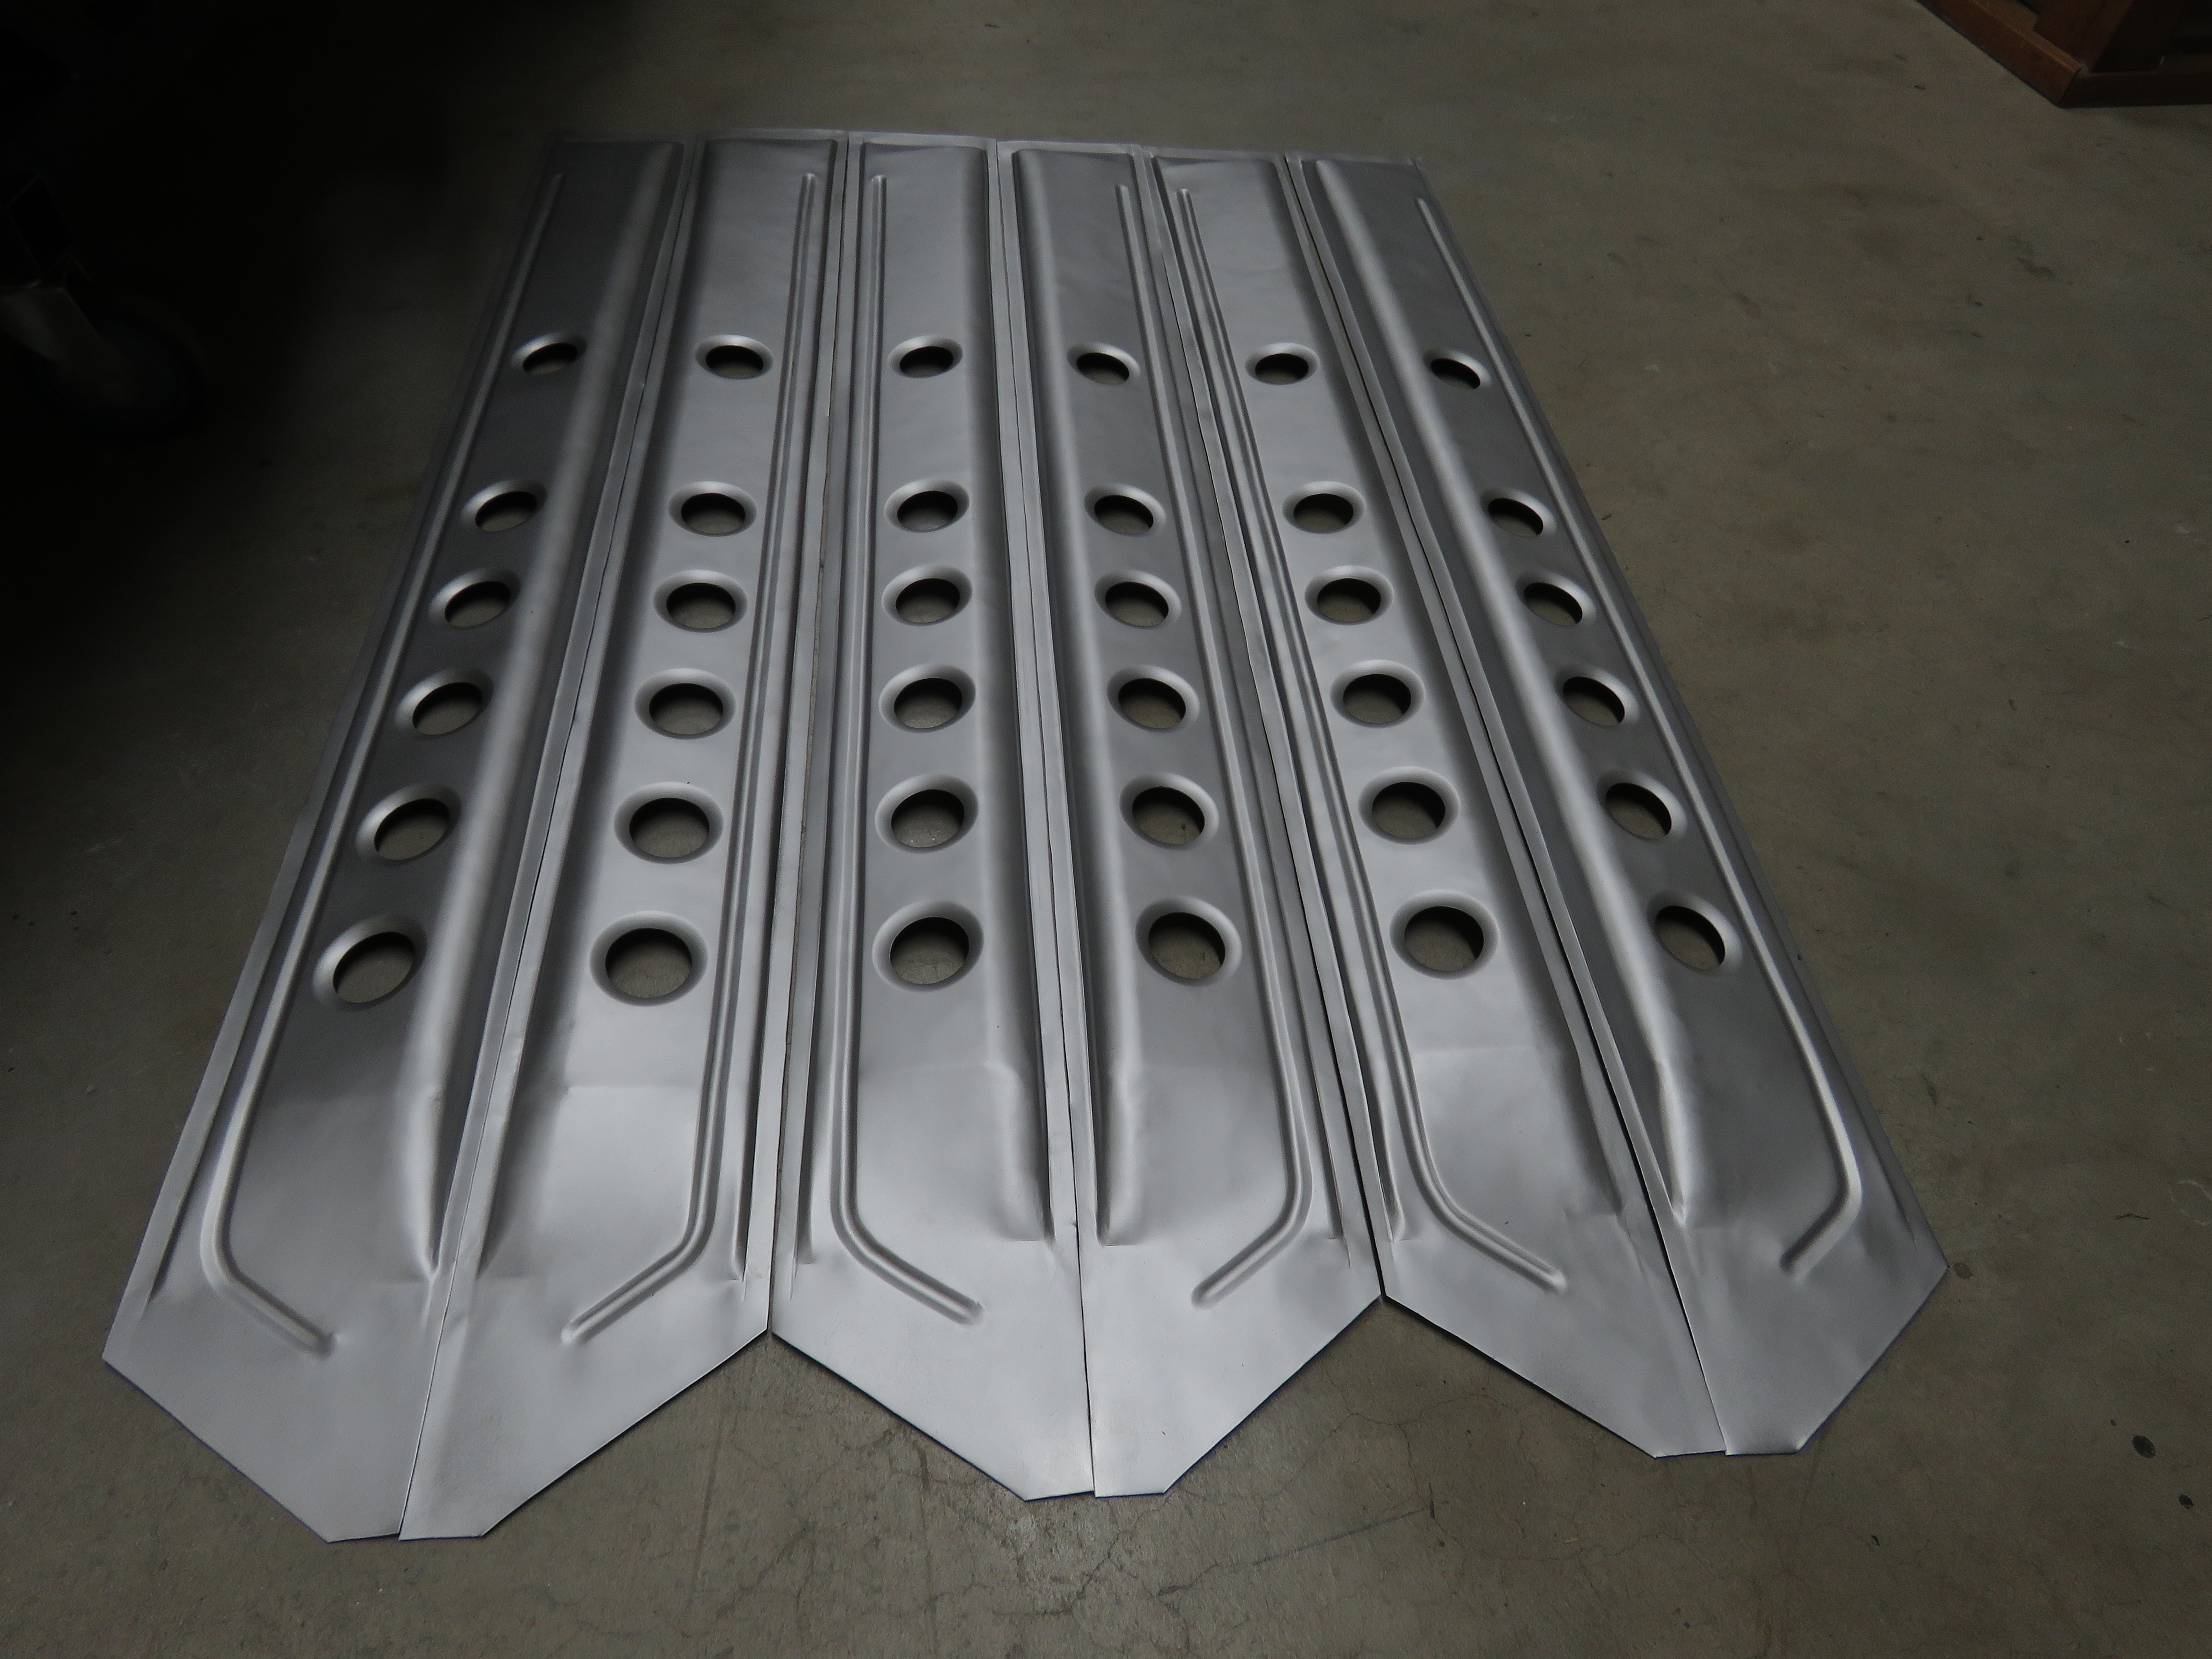
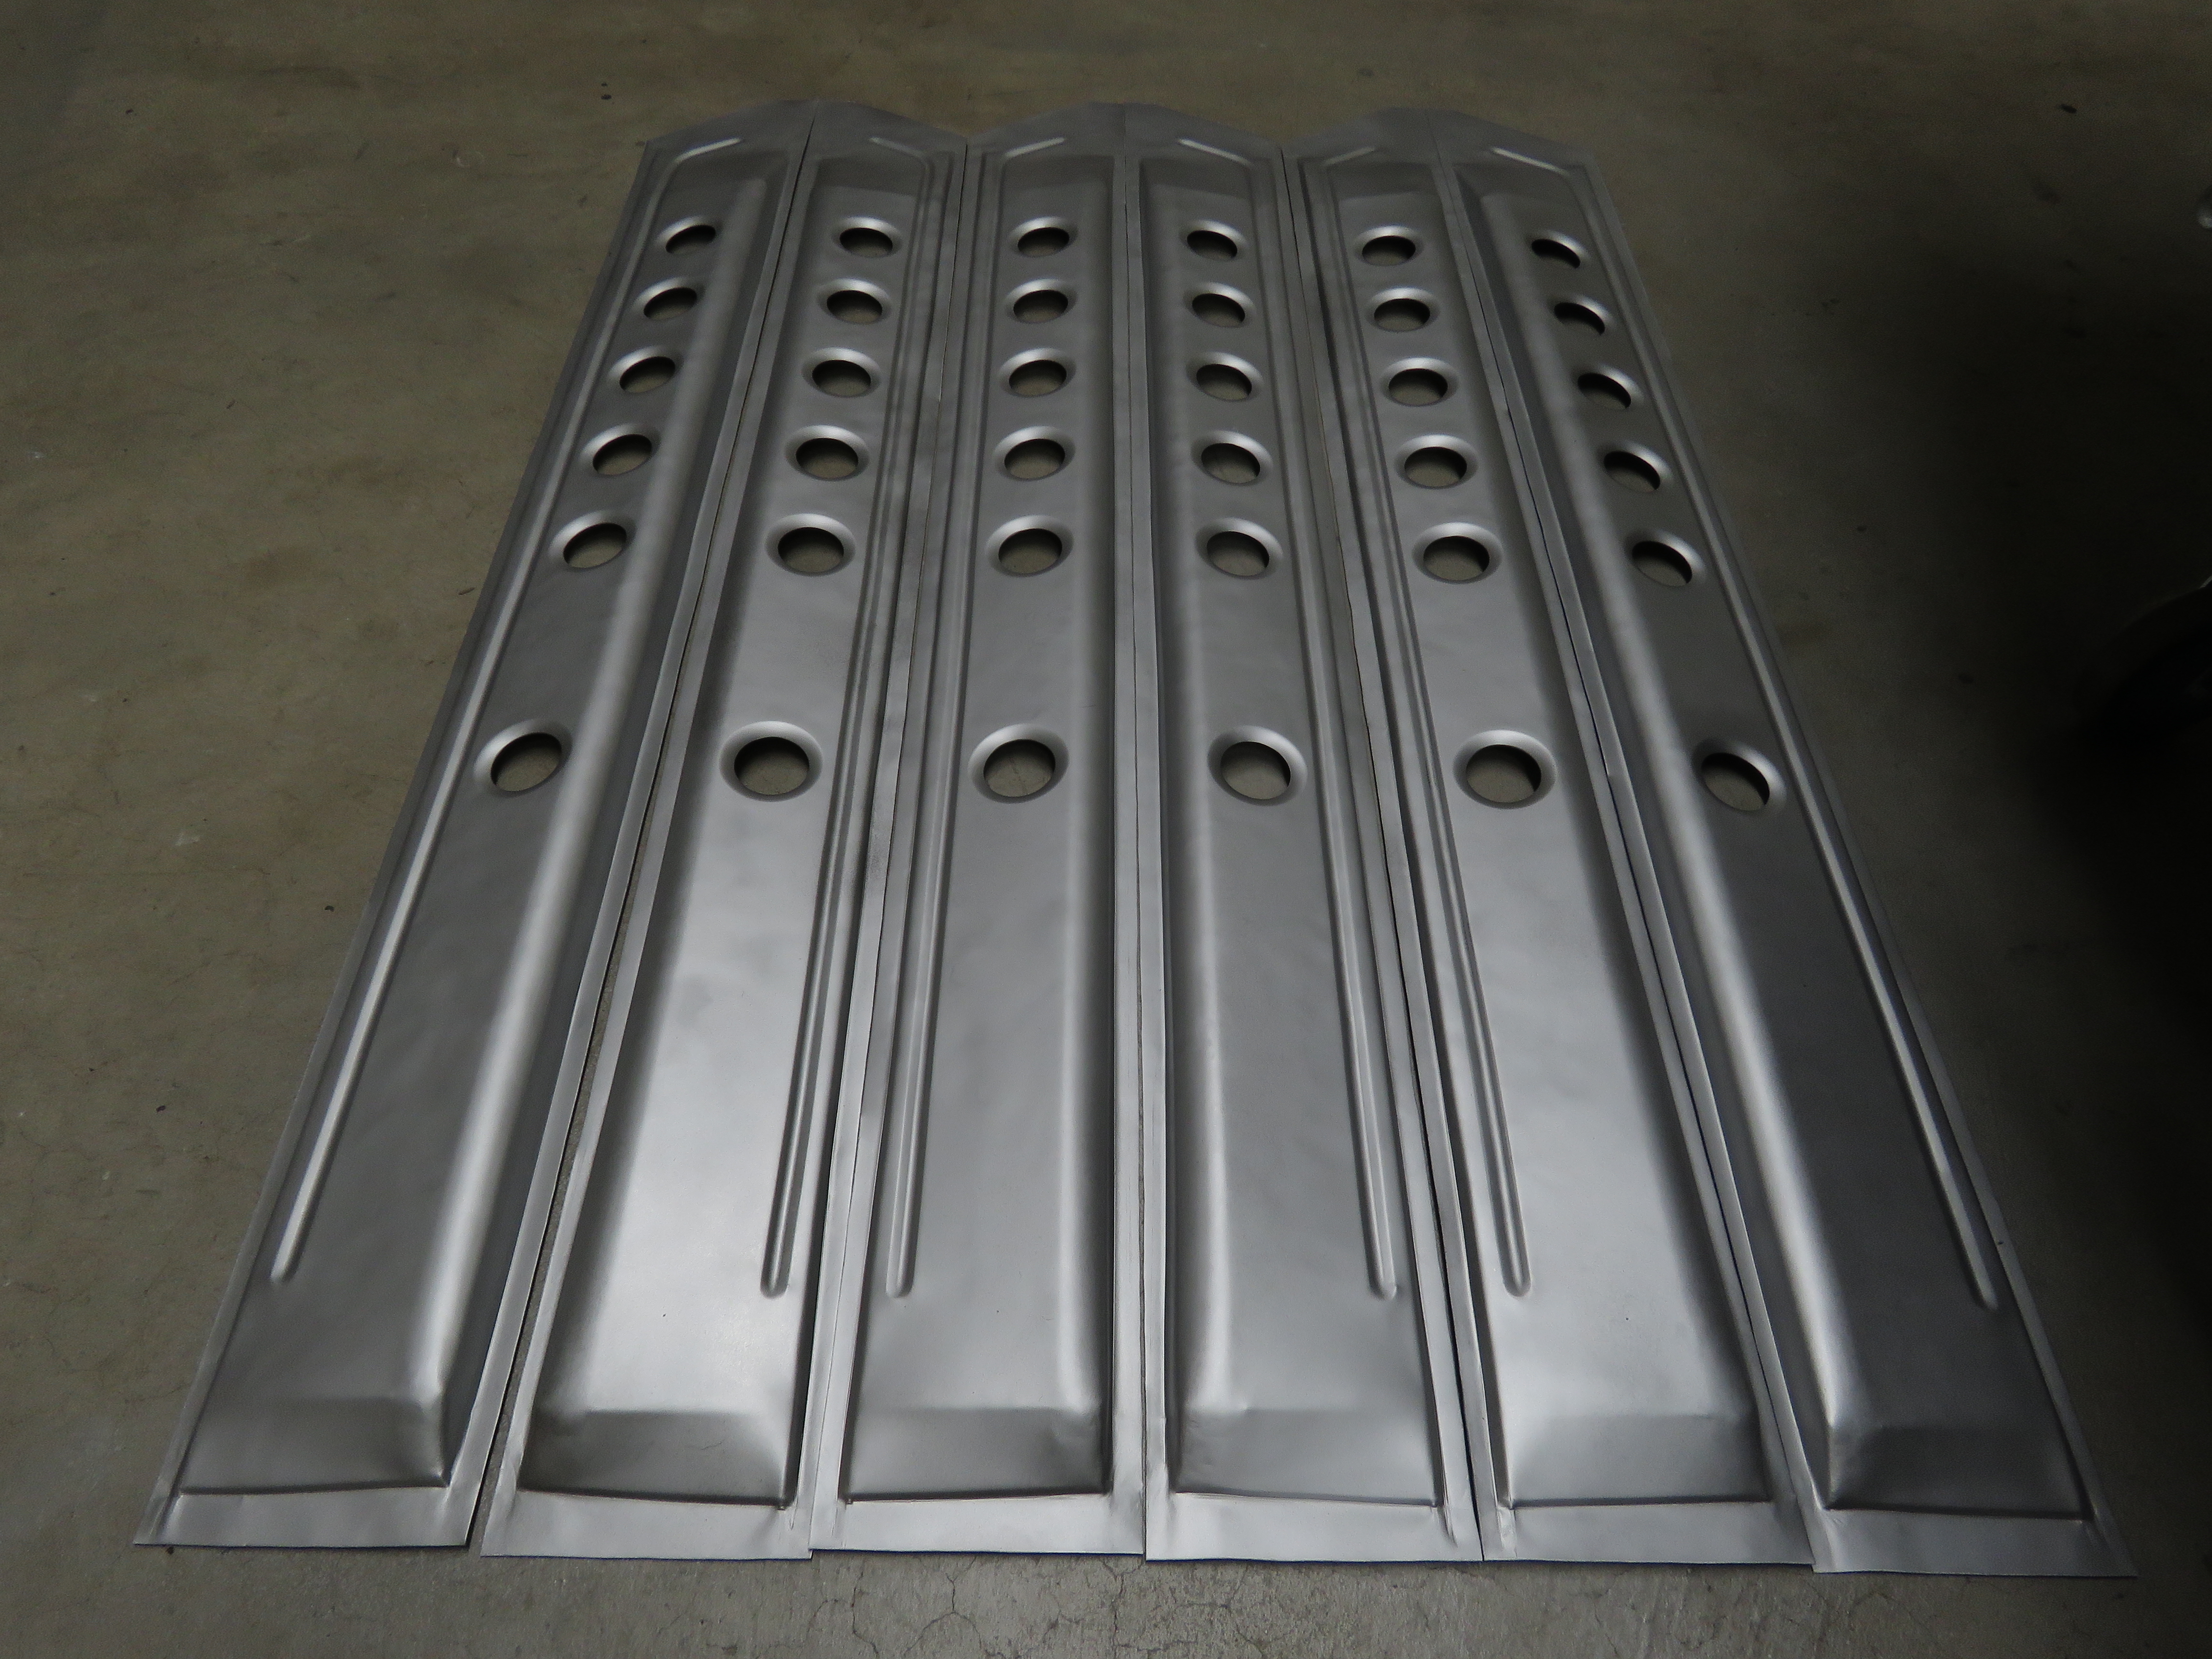
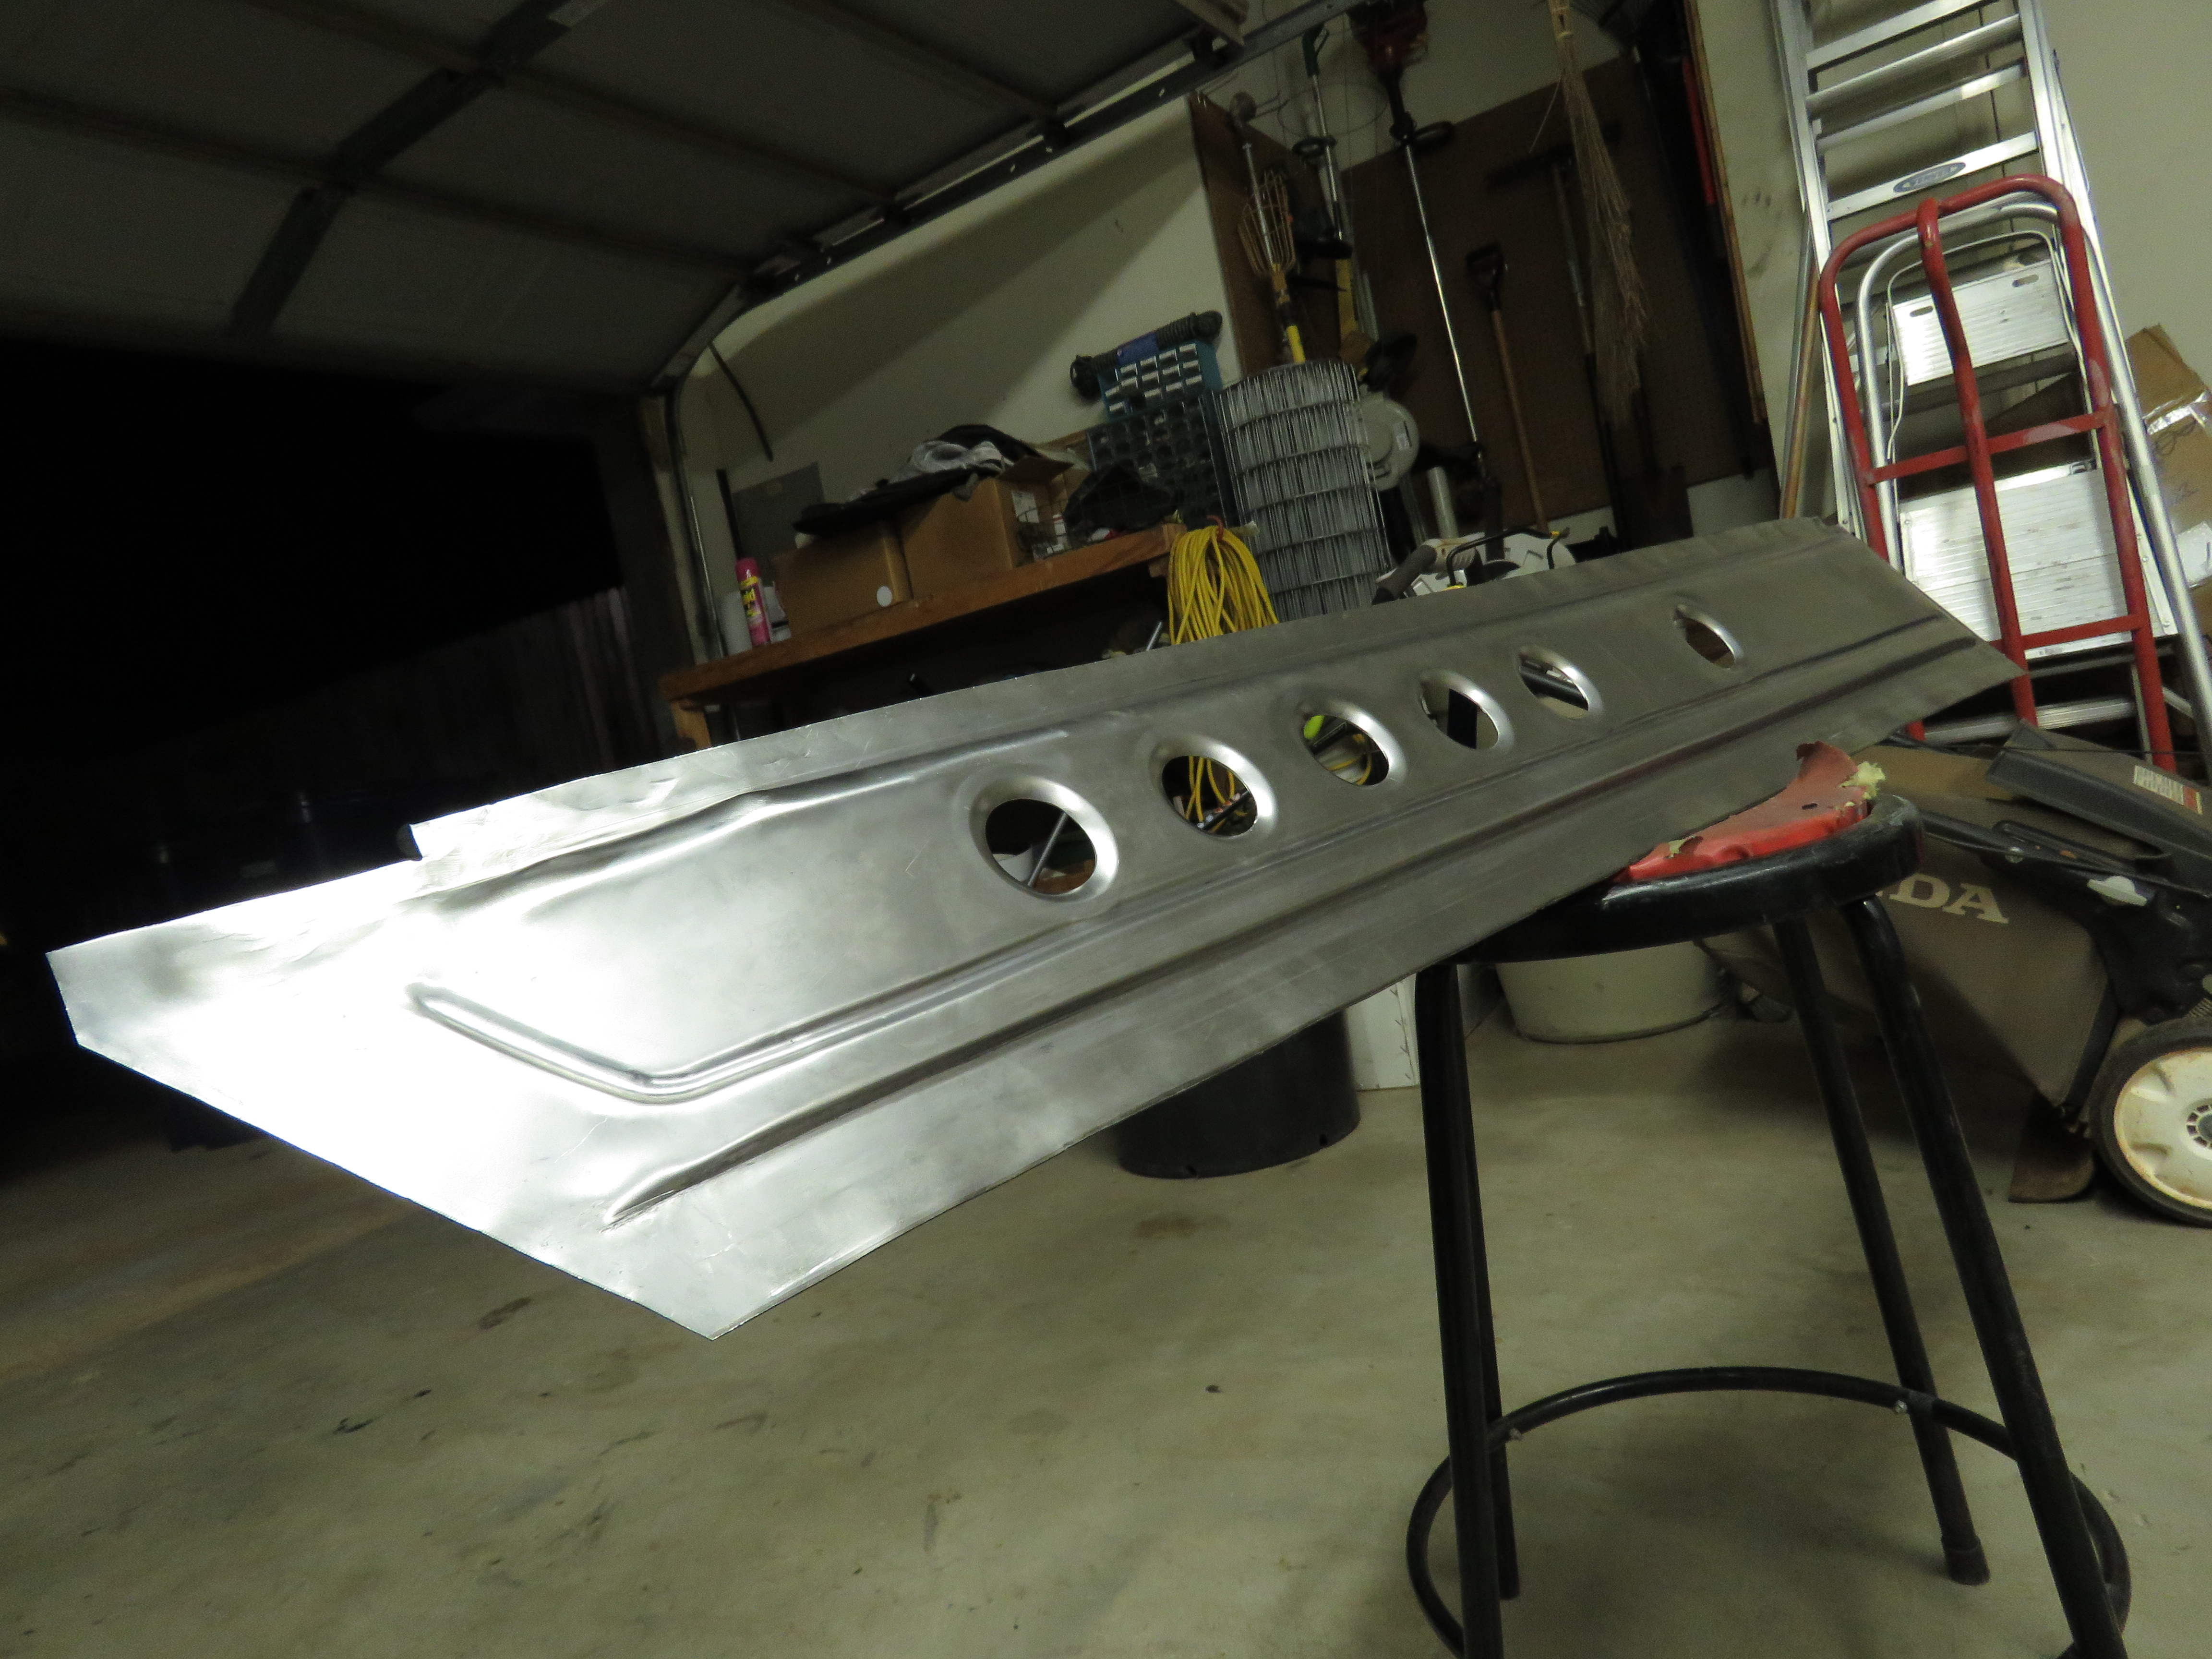
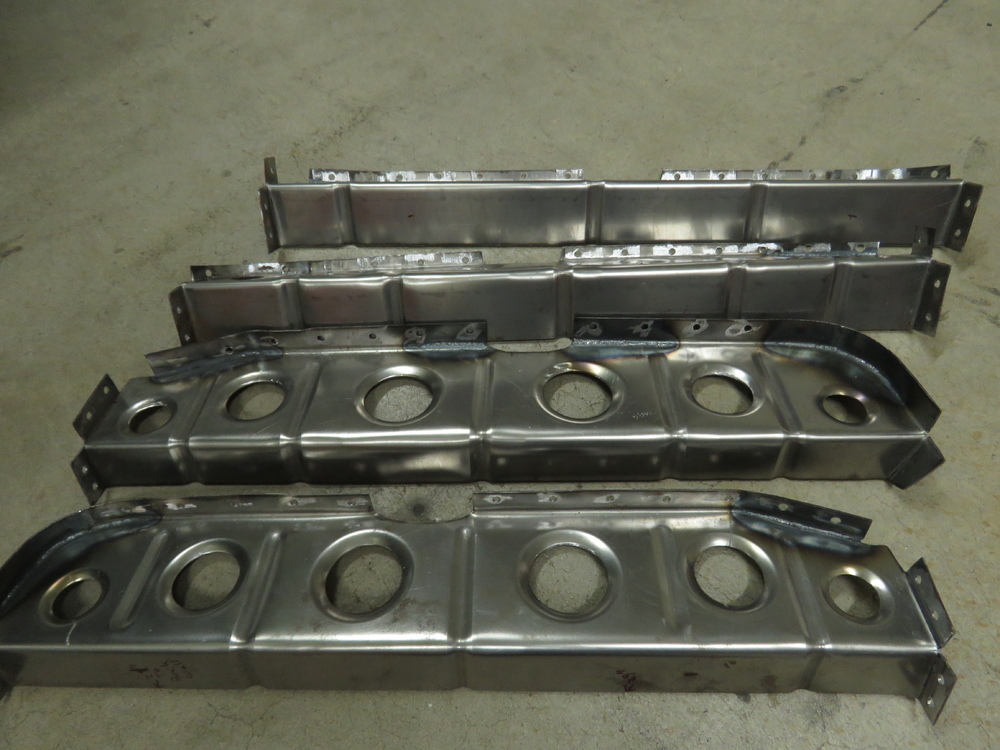
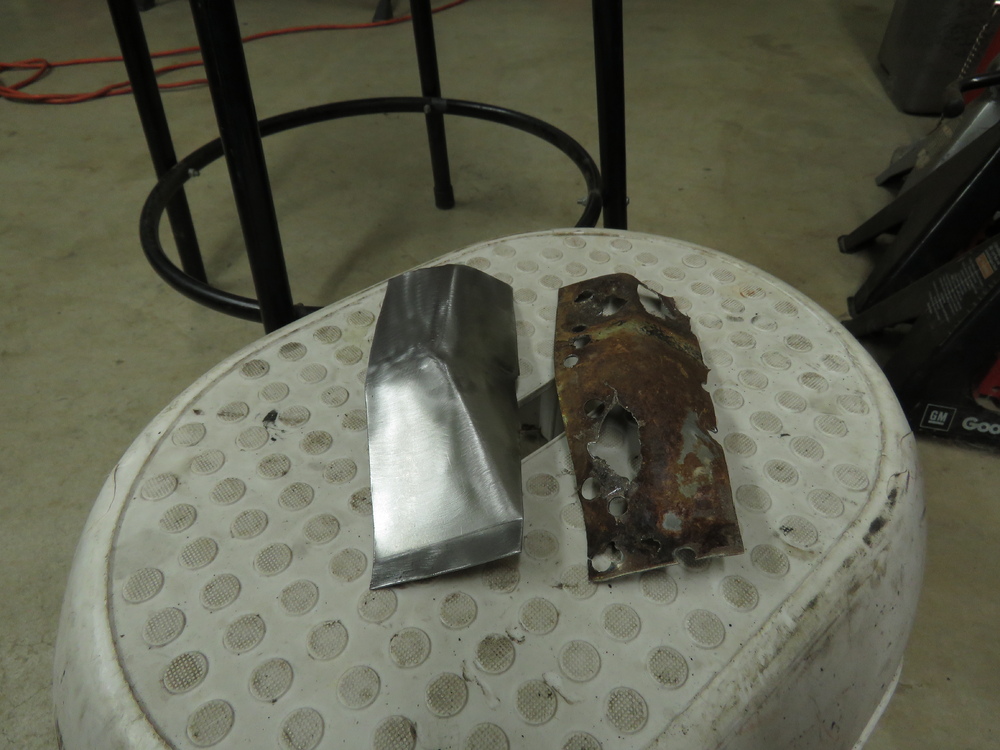
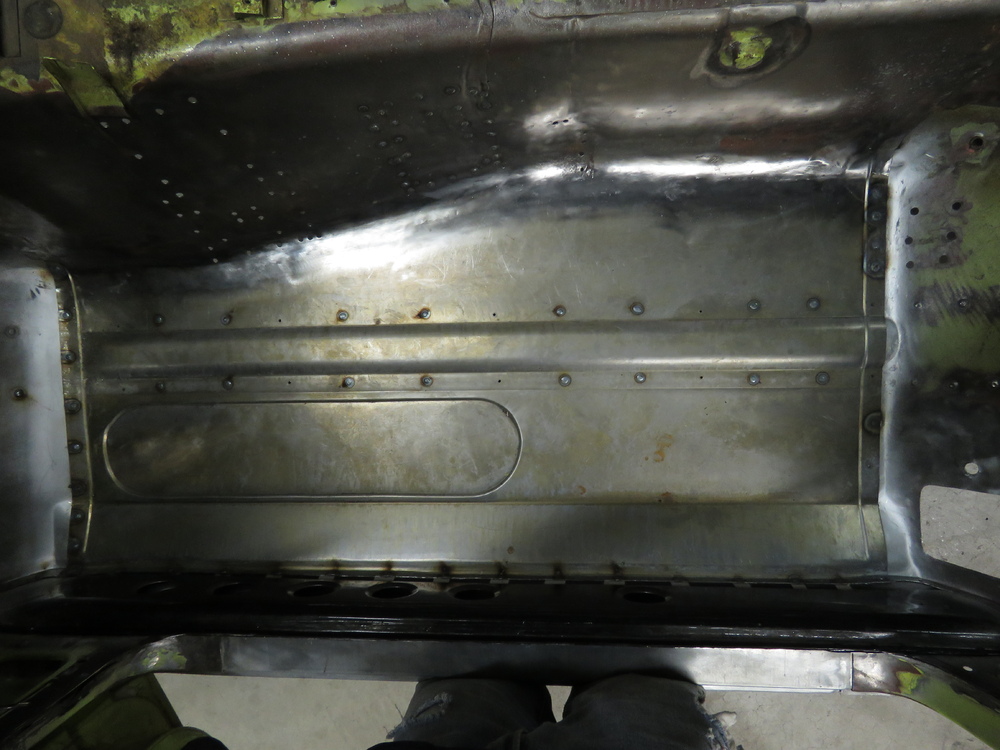
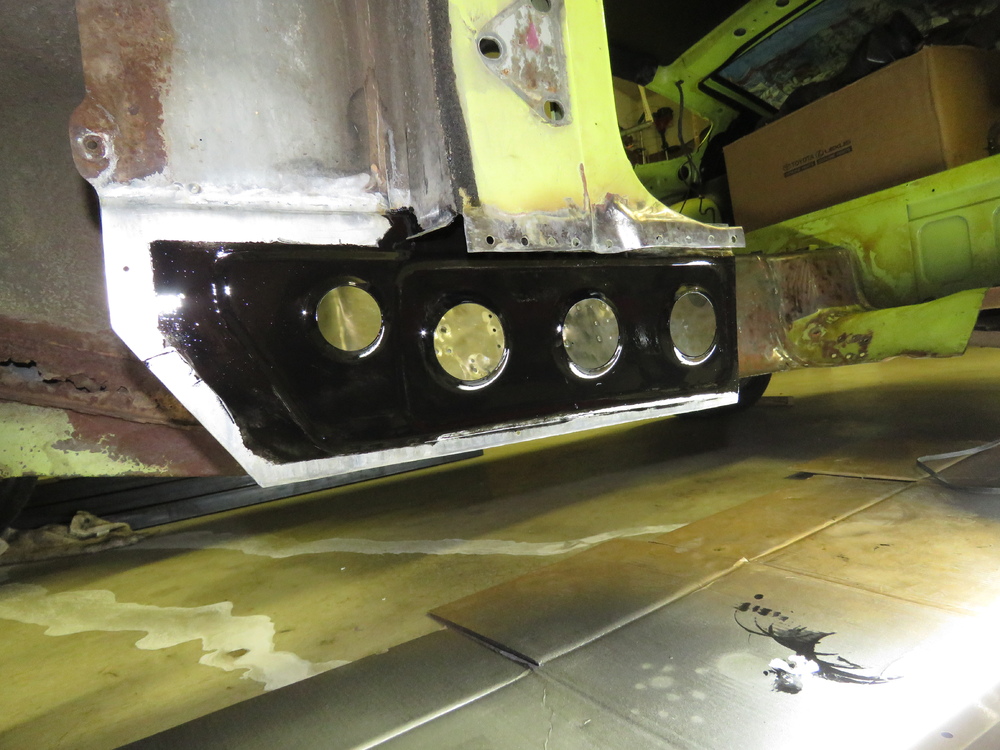
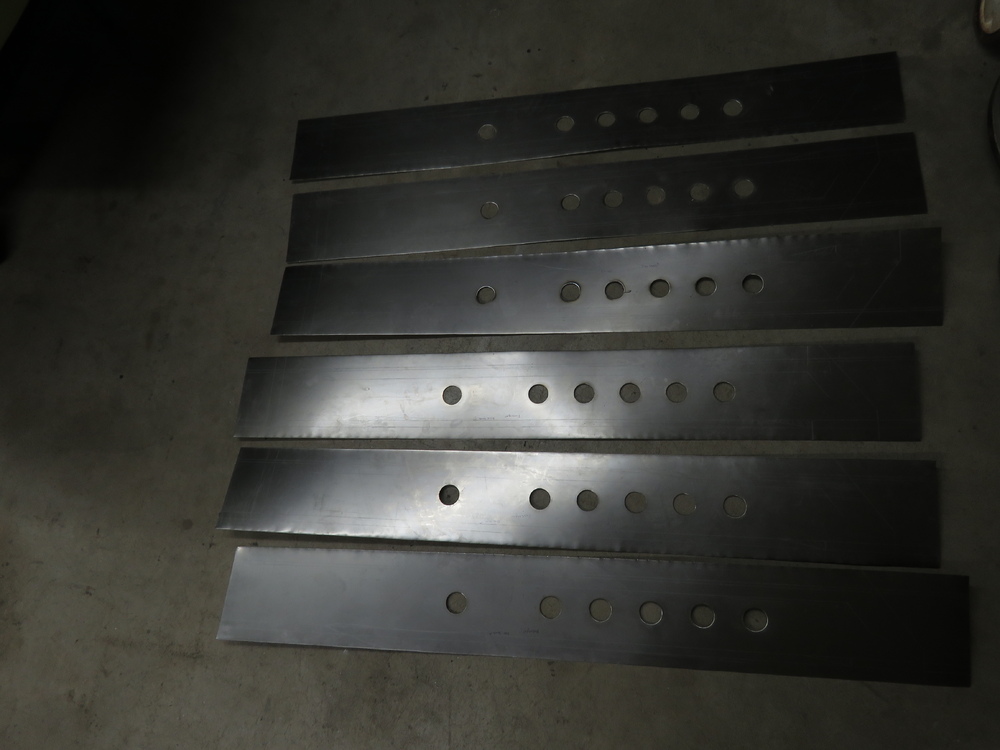
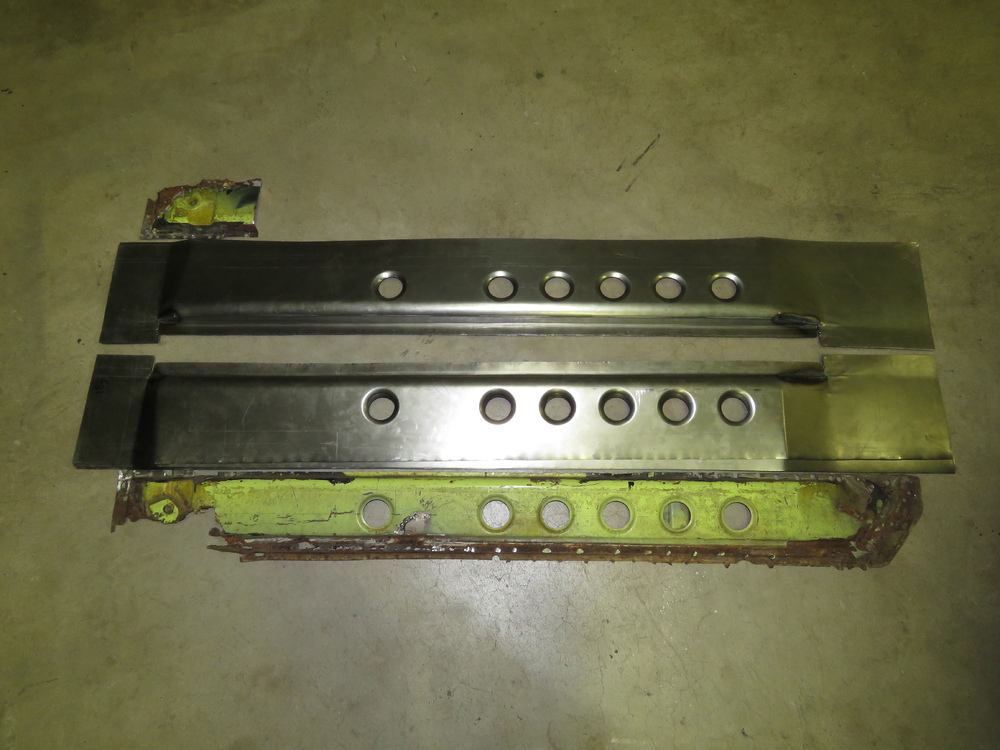
Hey Z members, Just wanted to let you all know that I have 1 set of inner rocker panels available. made two sets for two customers, decided to make an extra, below are pictures of the general process that goes into making these. The parts at the end get coated with Bloxide rust preventative weldable primer to keep from rusting during shipping and before installation. You have the option to purchase the panels with what I call tie in plates/support plates. There is a front end plate and a rear end plate on each passenger and driver side. The front plates I am selling for $25 each and the rear plates for $10 each, so a total of $70 for all four corners. The fronts are more pricey due to it being larger and containing more dimple holes and beads. These are what the outer and inner rocker panels mostly weld on to. I Do not have any pictures to show of it, but will post some up later of what they look like. chances are that if your replacing your rocker panels, the tie in plates will be rotter as well, great chance to weld in some new ones.


-
Kind of thought of it but not sure they would be interested in something like this. I've never sold anything to a business, though I guess I might could ask just to see what they say. I see, so a kit consisting of the front lower section of the quarter panel, the rear sections of the inner and outer rockers, the rear tie in plate sandwiched between the rear section of the rockers ( not sure what its called), and possibly the lower part of the door jam, also perhaps the lower front part of the wheel well. I'll have to think about that, it would indeed be a nice repair kit for the dogleg area.
-
Thanks, I know what you mean with having to many parts that may not be used. Biggest set back is having enough storage space, for me anyways. Thanks, yeah the build thread starts out slow with the l24 engine and doing some maintenance. Its a slow progress but seems like its getting there, just have to keep attacking at it. Dont want to be one of those people who gave up on their project and also tackle on multiple projects. I can post up detailed pictures later to guide those that havent done this type of work before when installing these. Ill wait until these start to sell, if it they do... The rear quarter panels may be something I can think about making, however making those would require me to have more experience to make them sellable. I havent attempted making any yet. If I am able to make them sellabe, I may even offer them in stock or wide option for those with larger wheels and offset. But that is far from now
-
Thanks Namerow Yeah working with 18G and CR is definitely a bit tougher than HR, but after a while get used to it, though it does take more time to shape depending on what your doing.
-
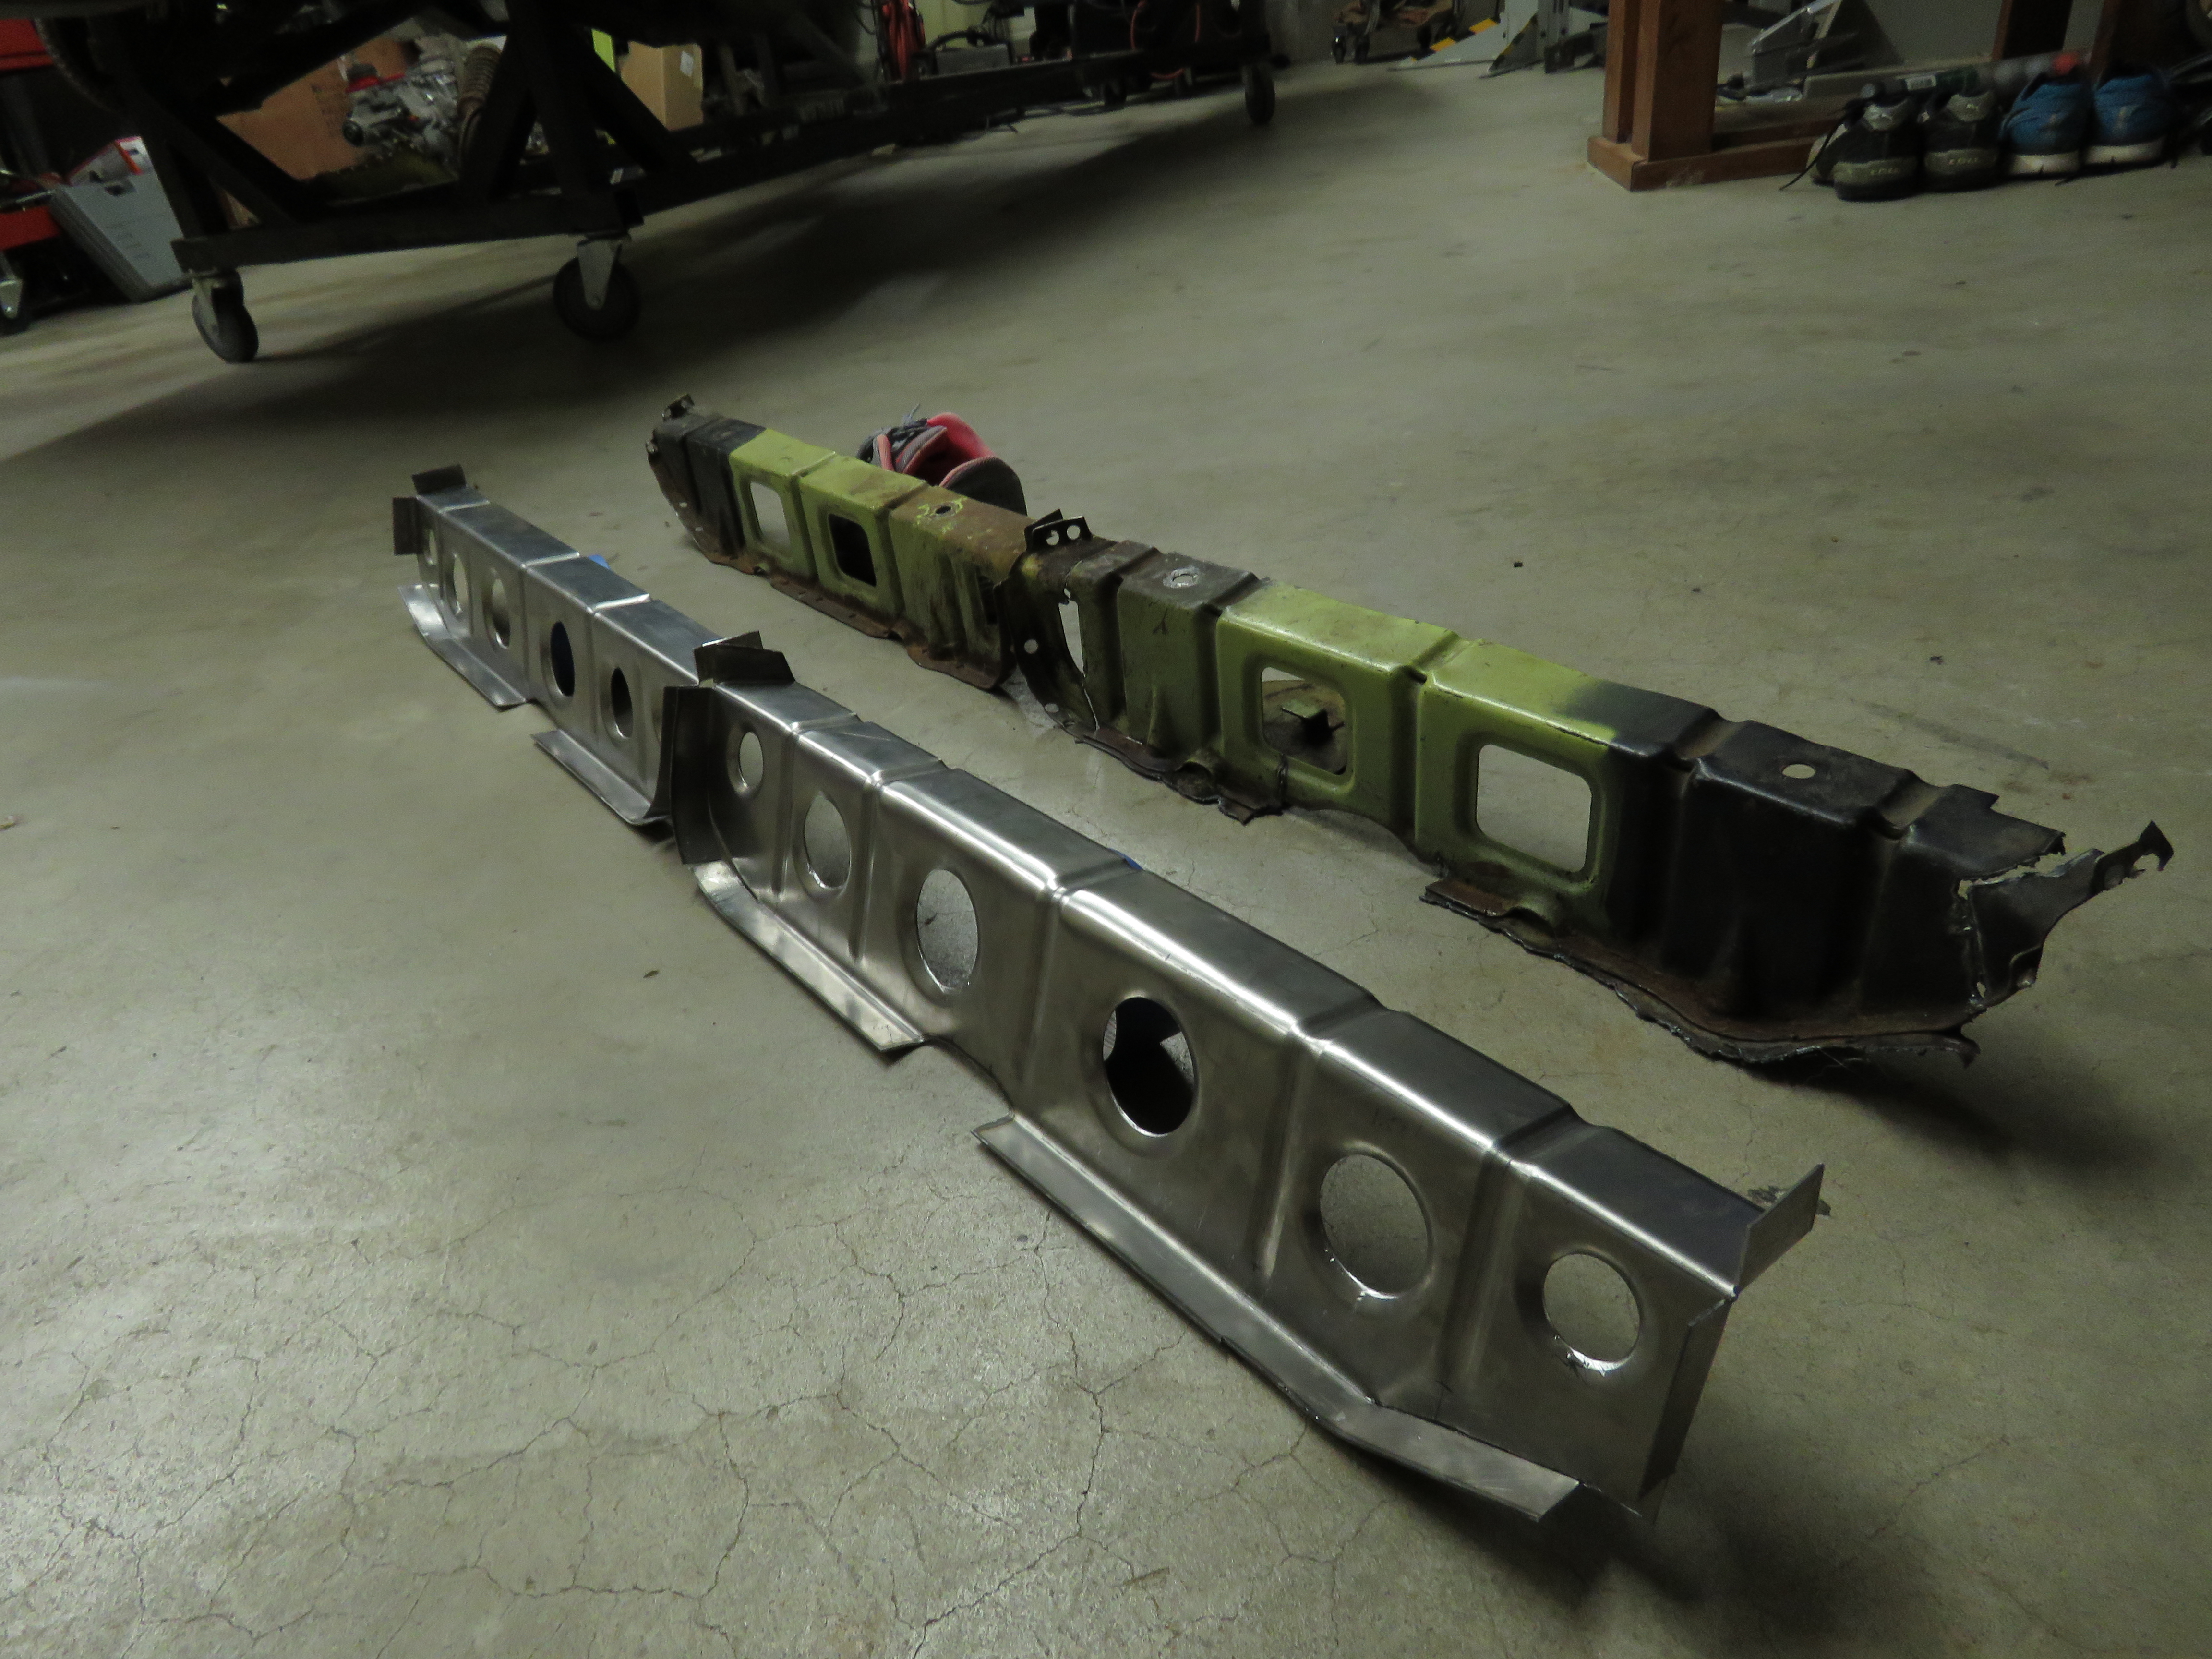
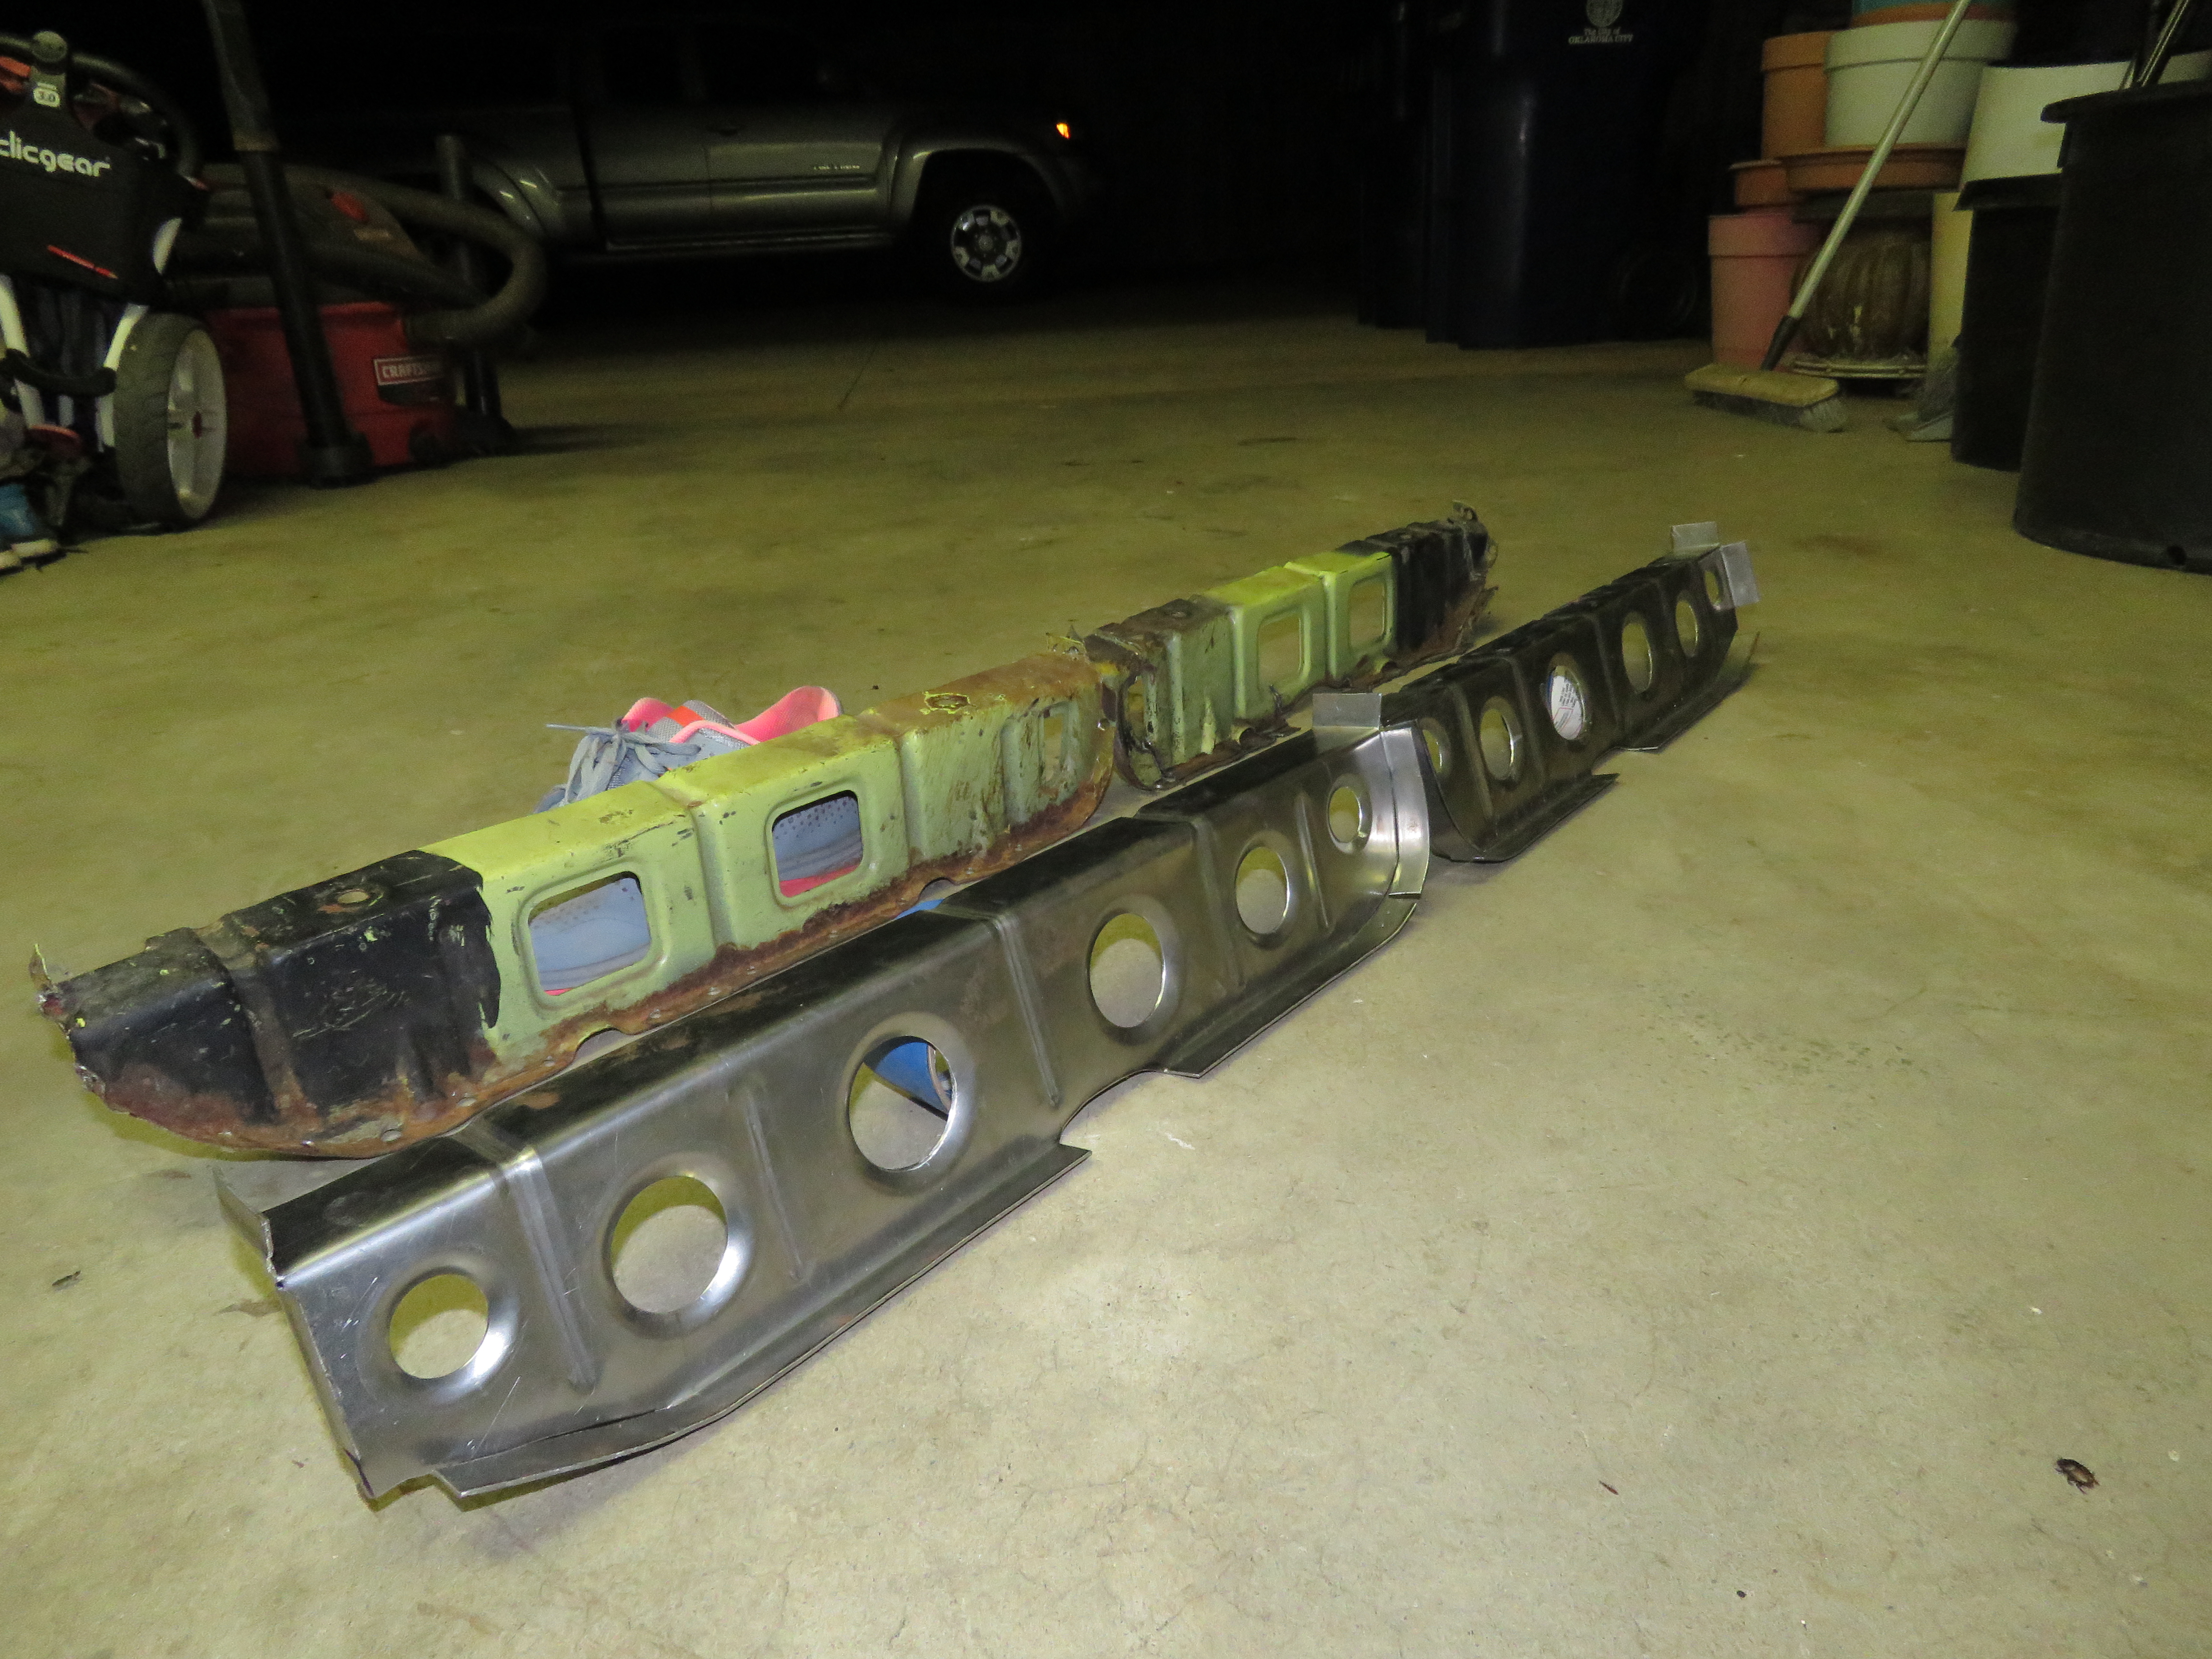
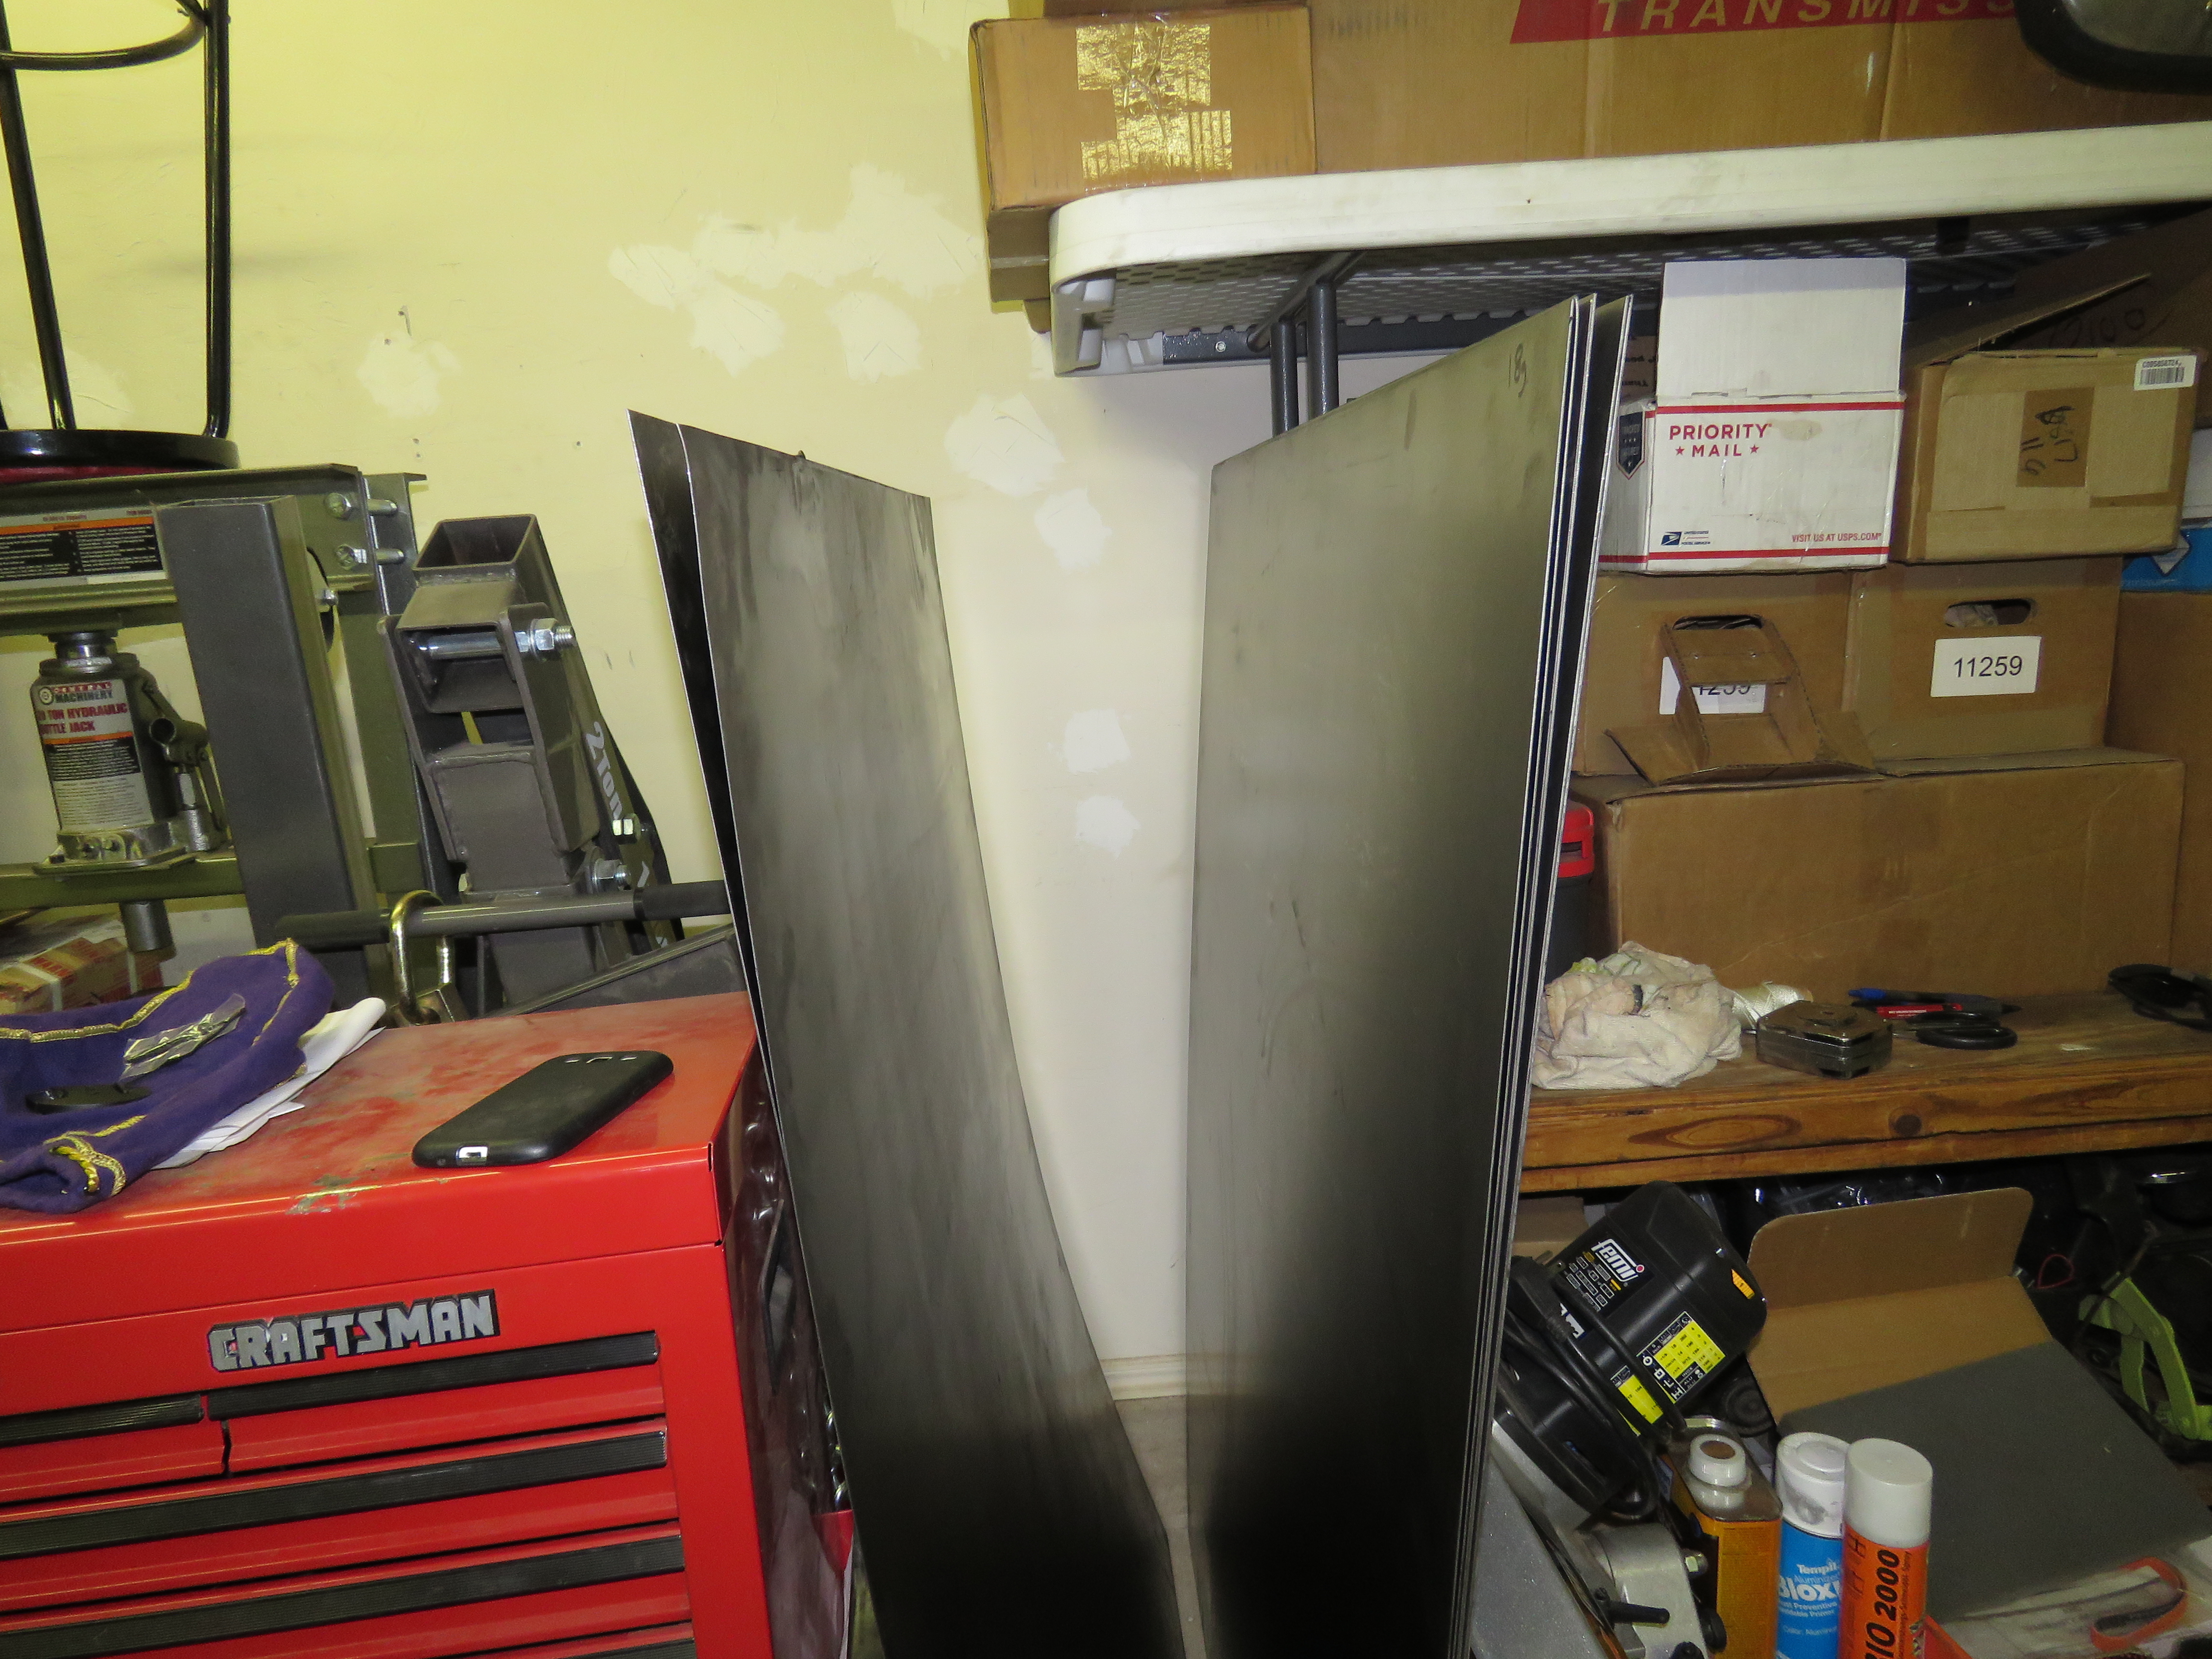
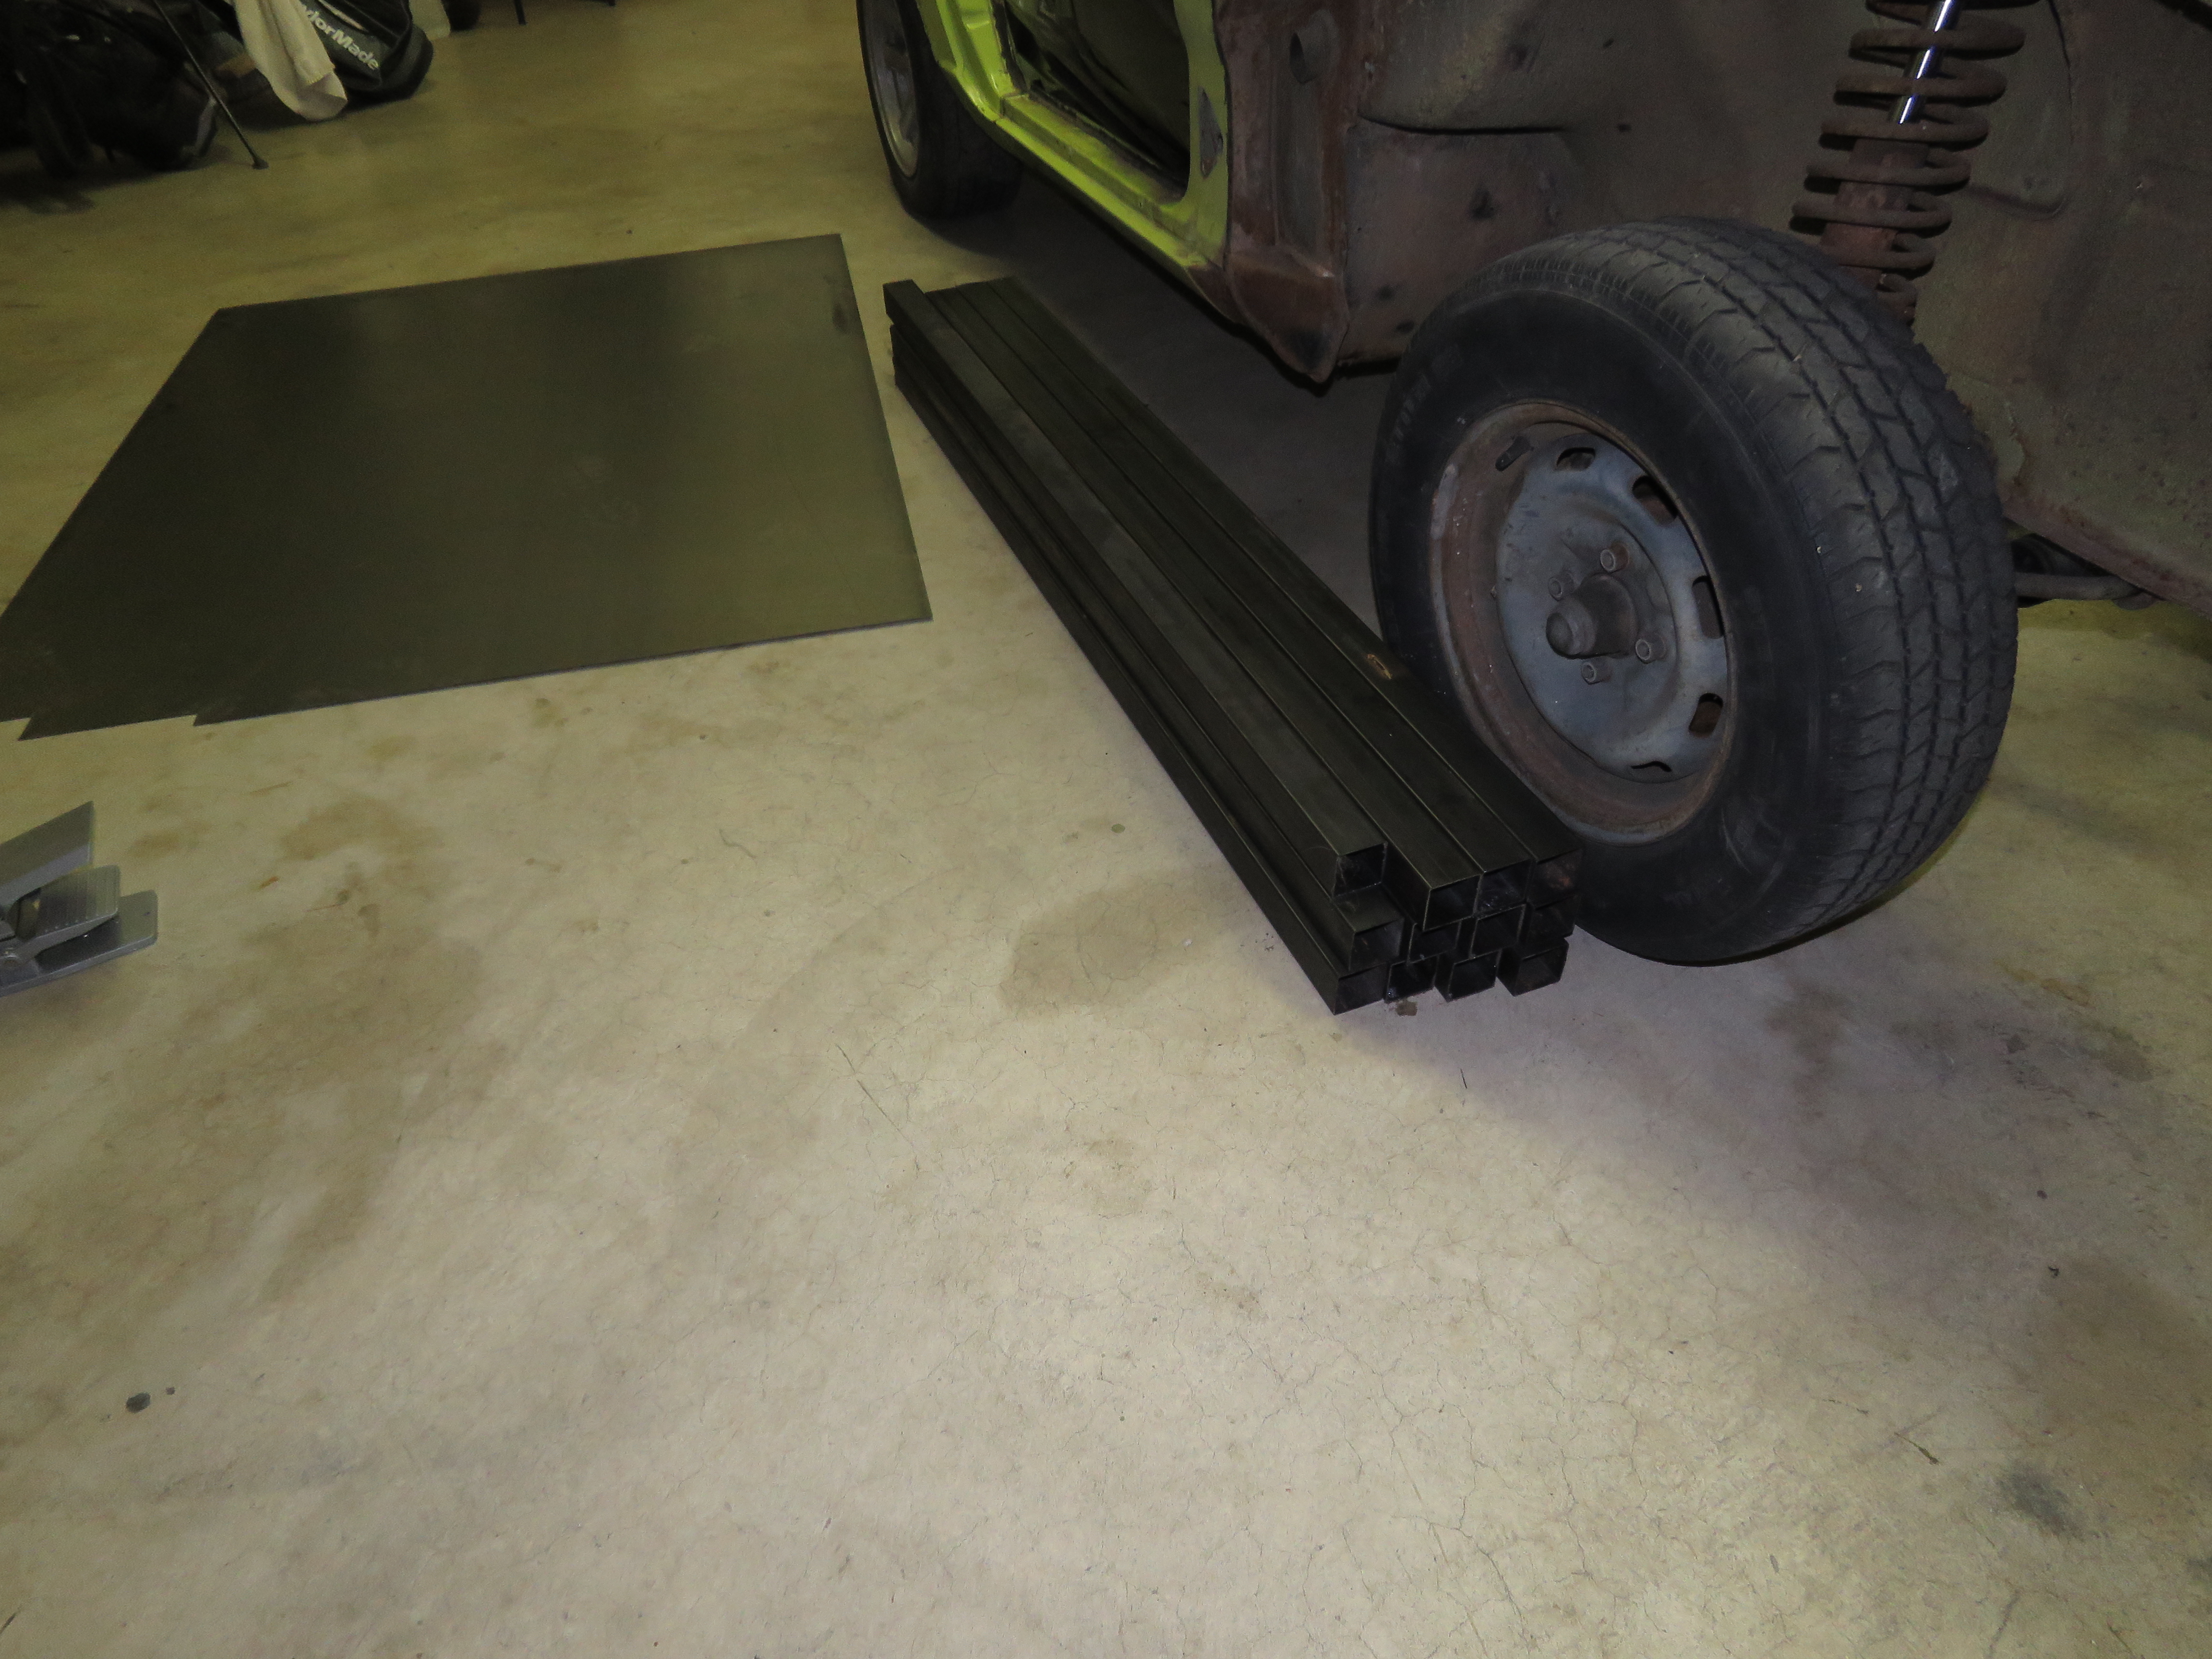
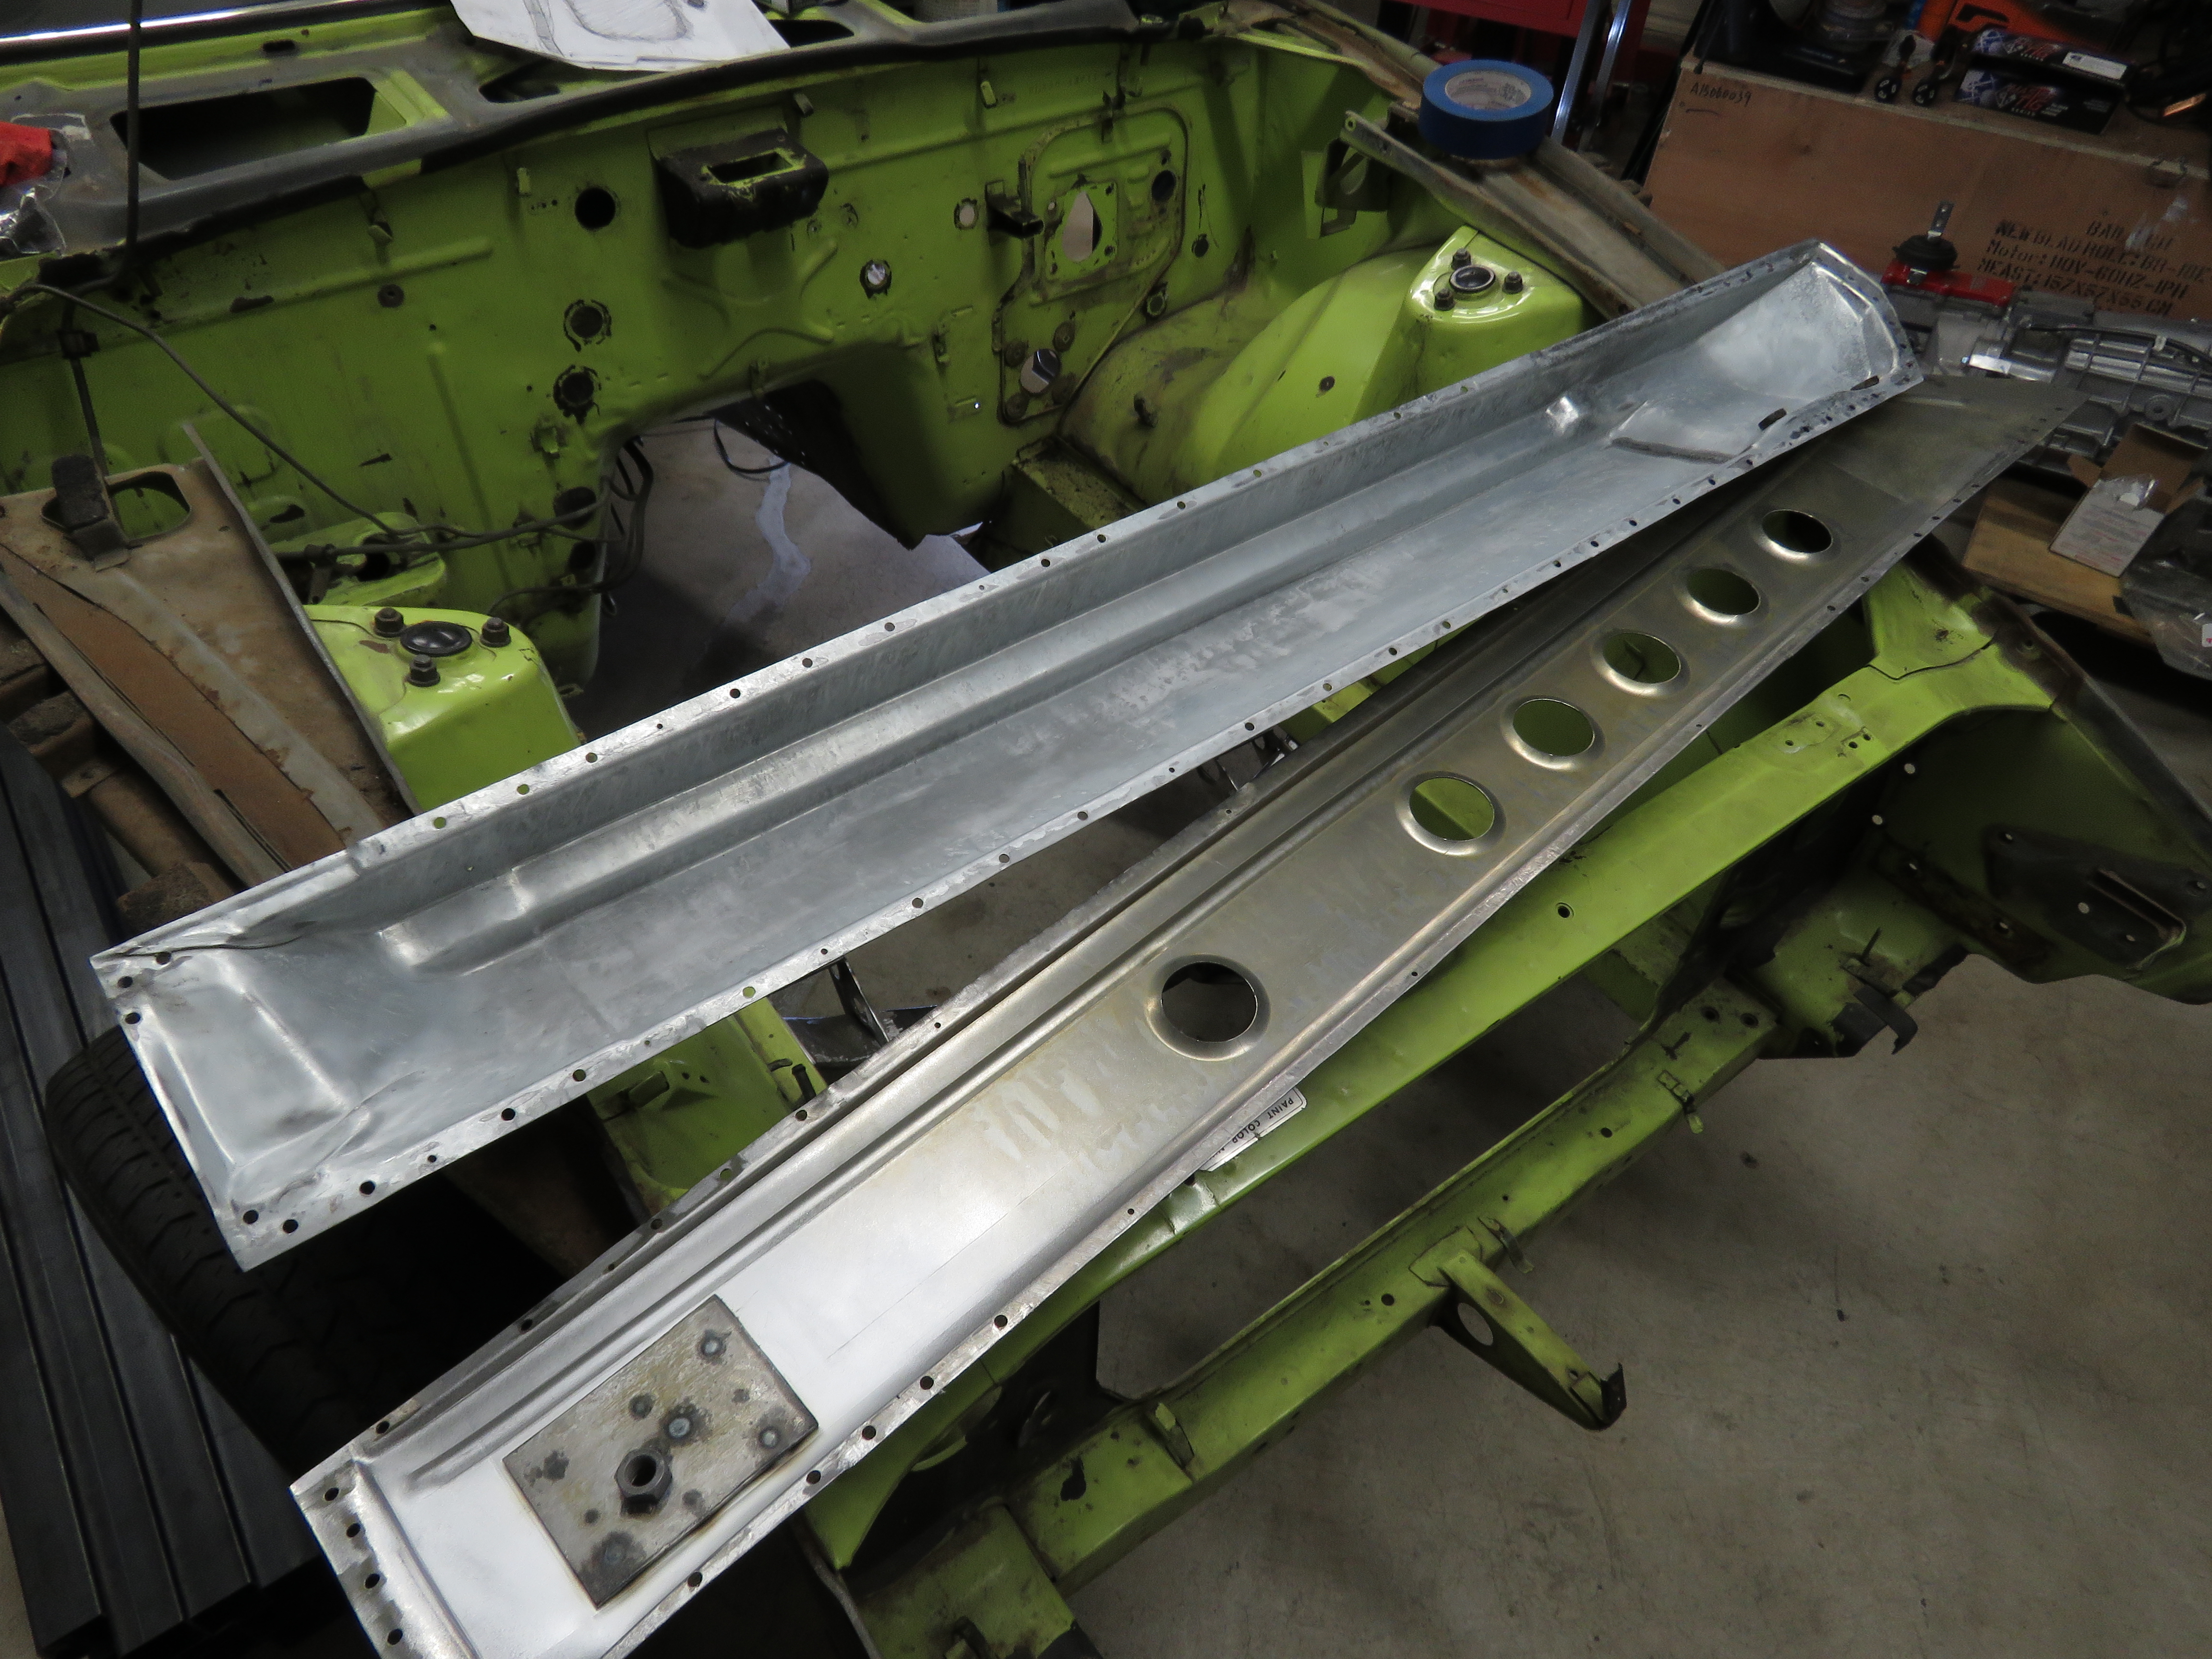
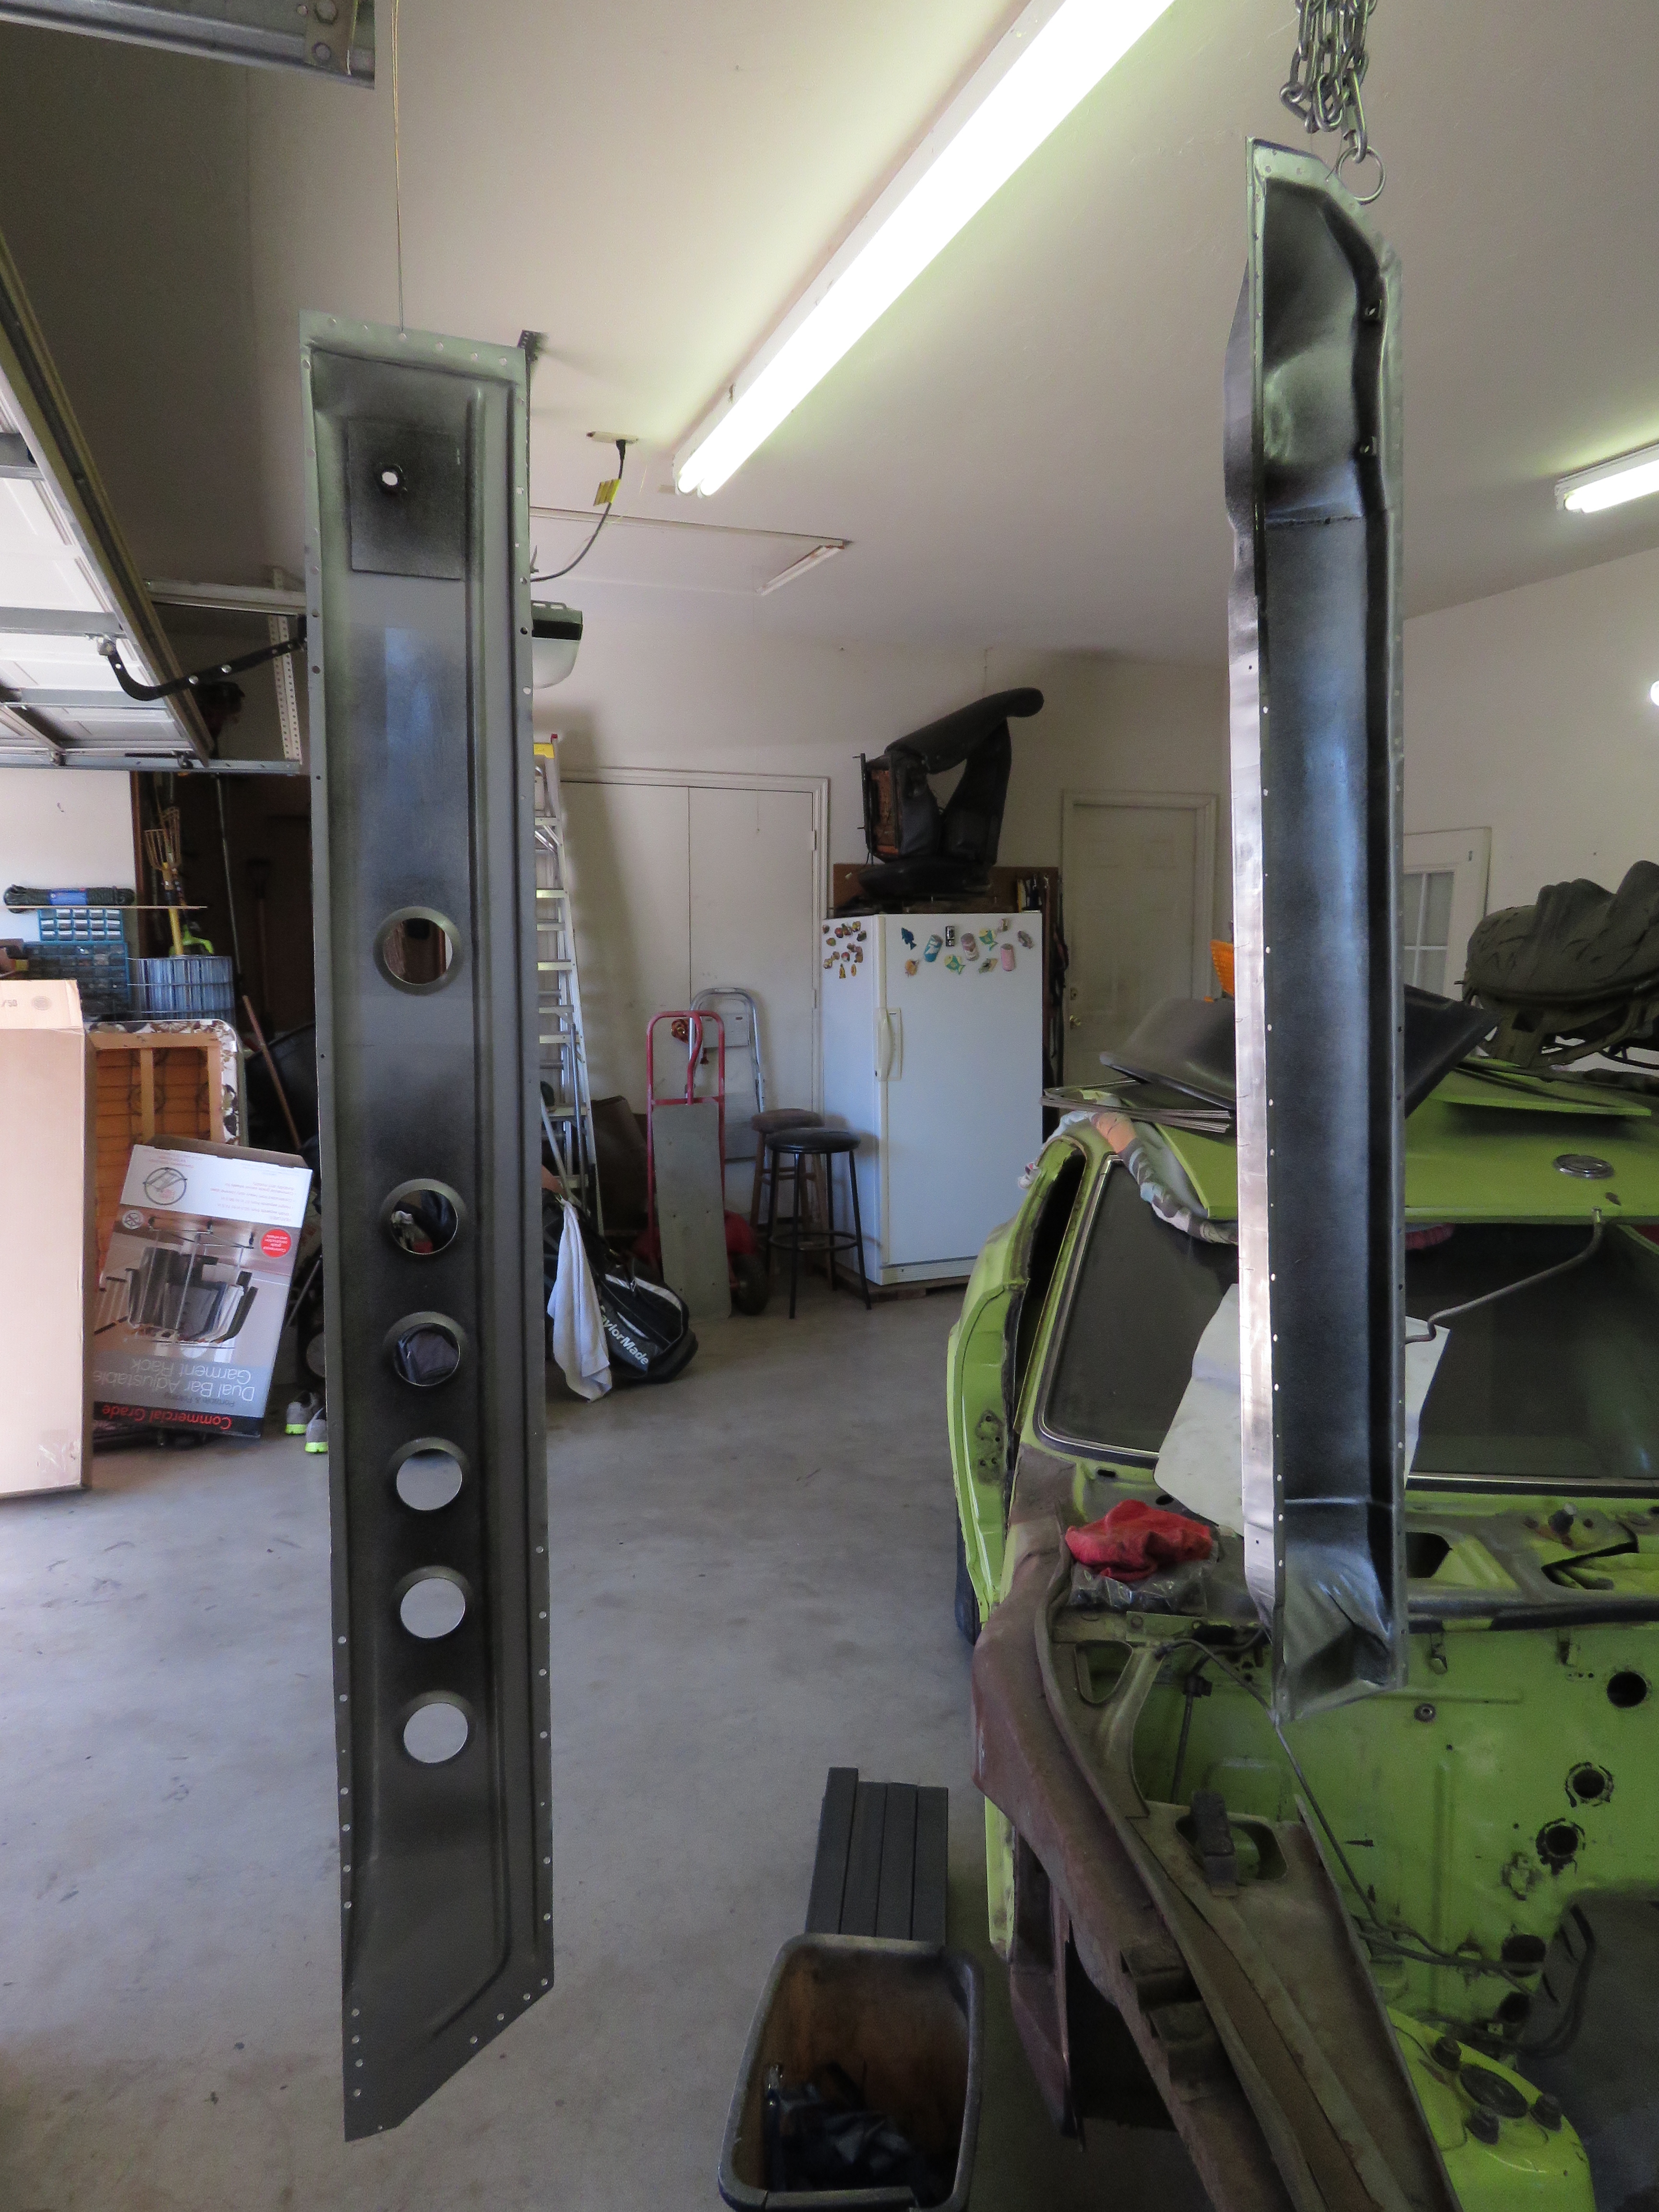
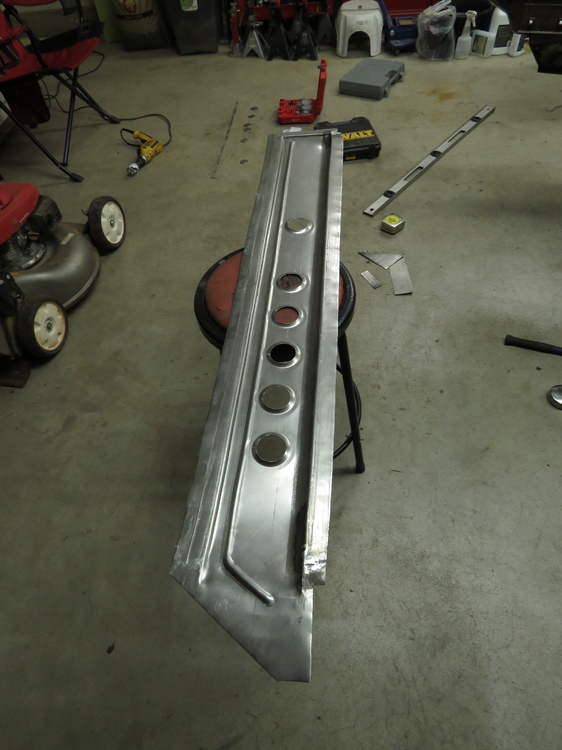
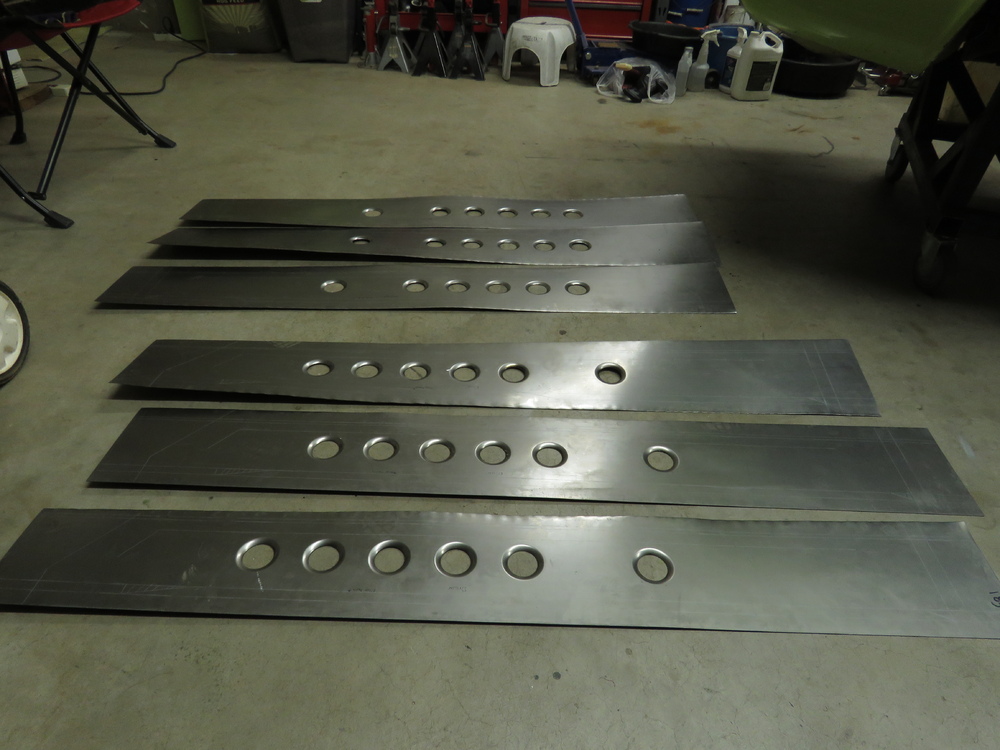
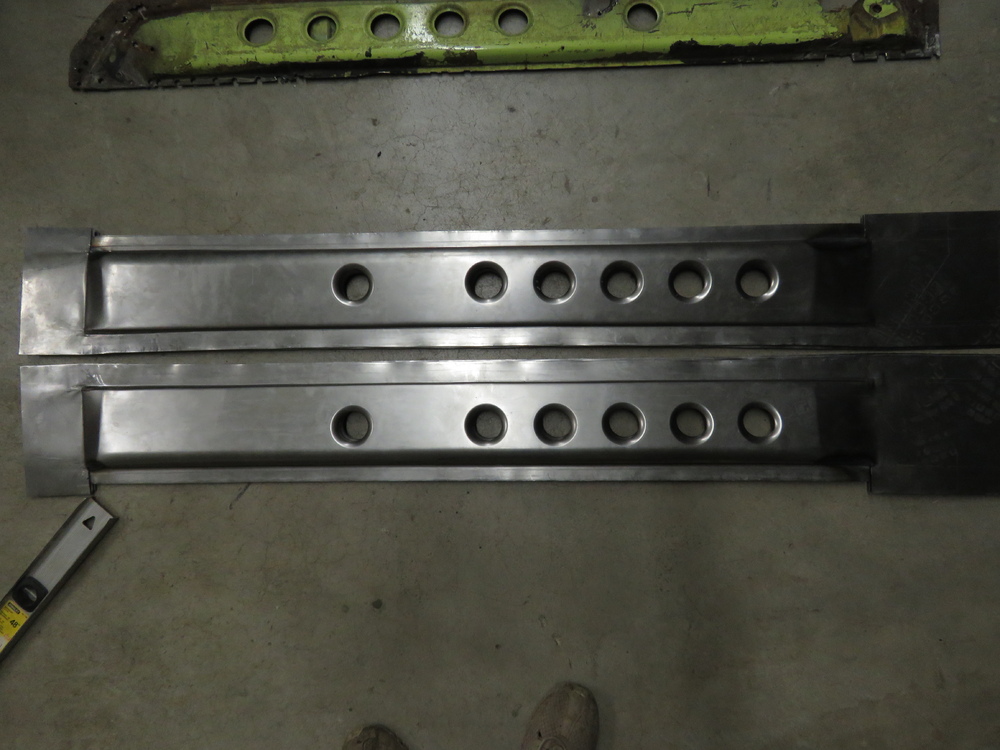
Thought I would post because I had some interest from some people asking if I would make these. Due to the amount of time and labor involved, it wasnt worth my while to make these for a those that asked. After all I have a project to work on of my own and other things I could be doing besides work . These inner rocker panels are replacements for a 240z as the pictures attached are those of my car. I am unsure about the 260z and 280z whether these would fit them or not. Please chime in if your certain to let others know. If enough people are seriously interested in getting these from me then please post up or send me a PM, if not then I guess this thread will be closed down. The inner rocker panels are constructed from 18g cold rolled sheet (CRS) metal which is just a tad thicker than the factory material (at least on my 240z). I use cold rolled as it is supposed to be a bit stronger than hot rolled and cold rolled has a smoother finish. These are not an exact match to the factory panels but close enough. The seat belt mounting plate is made from 1/8" (CRS) and the nut for the seat belt bolt is a harden Nut. If your Z suffers from rotted out rusted inner rockers then these panels would be great, save you the hassle of trying to do a questionable patch job... Price wise as of now looking at $380.00 shipped anywhere in the USA (out of Country may be subject to higher shipping rate) mainly because shipping a long box (60") like this is a bit pricey, but this is based on estimated shipping cost with Fedex, actual cost may differ which means if its lower then I can knock the price down. boxes and packaging material will be at my expense to ensure the panels arrive safely. Please note I do not have any already made except the ones pictured which are for my car. Let me know what you think and feel free to ask questions. I will keep this updated when it comes time to submit an order, if it gets this far. Thanks for Look!


-
I replaced the filter in January, it could be cracked though. The only time i smell burnt fuel is when i roll down my windows. With the windows up i smell nothing. I read up on some other threads that with the windows down the fuel/exhaust smell might be because i have a rear hatch rubber seal that is worn out and leaking, with the windows down it creates some sort of vortex (i dont know) and sucks the air from the exhaust area into the cabin. Engine runs fine, I dont see any leaks what so ever, checked everywhere. I am getting around 22mpg. The filter i have is some cheapy Oreillys fuel filter.
-
This is not about the carbs, did not know where else to post this. So my problem is that if i leave my 240z unattended for lets say 3 days, it wont start because the fuel lines are empty and fuel filter is empty. The pump will not prime the lines, i have to take a suction to one of the fuel lines for the carbs to suction the fuel through. Is the fuel supposed to empty out from the lines like that and filter? Also it seems if i drive my car everyday, and in the morning i start the car, it has trouble, because again, i think the pump isnt priming the lines and the lines are empty it seems. What do you guys think? bad pump?
-
Update!! I am proud to say that the new rocker arm and guide replacement is a success! No ticking/knocking anymore. Engine runs and sounds smooth and sexy. Pictures of the new rocker arm and guide: Sorry i do not have any pictures of it installed. I actually brought my camera out to the garage but was so excited and anxious that i completely forgot about pictures. It was tough getting the new rocker arm on. Had to really depress the spring just to barely slide the arm in. Well thanks for the help everyone, its forums like this that keep me here.
-
Look back at the order of the spark plug wires. Doesnt hurt to recheck simple things like this to make certain its right. I remembered mixing up two of them and it took me about an hour to figure out i had mine in the wrong spot. Im not sure what the 280z distributors look like, but if they have a rotor head, perhaps you took it off and put it on backwards, if its even possible to fit the wrong way. Their grooved a certain way to fit specifically one way but some people may mistake it and force it on the wrong way. Im not sure if these cars have a maf, i think they do. Check that, make sure the inside is clean or see if the sensor is working properly. I have a 240z so thats why im not certain what the 280z has. What did you gap the plugs at? Try to think back on what exactly you took off or unplugged and recheck it all, even things that do not relate to what you replaced, but for some reason you might had taken it off to get to the things you needed to replace. Sorry if im not much help, hopefully somebody with knowledge will chime in soon.
-
Ordered from Black Dragon Auto instead of the Z store, cheaper. Now its just a waiting game to get the new parts.
-
Well it seems like you guys are right about the rocker arm and lash pod being bad. I just got done readjusting all the valves and on that one bad rocker i went one size gauge smaller (.009inch). Started her up and it was completely silent, no clicking/knocking/ticking noise what so ever. However once it warmed up it began to make that noise. Not as loud as before, but still noticeable. I guess ill go ahead and order a new rocker arm and lash pod tonight. Any of you know a cheaper source than TheZStore?
-
Took the exhaust and intake rocker arms off for piston 1. I do not know how to tell the difference between a good and bad rocker arm or lash pad. Hoping someone here could enlighten me. Do the springs and keys look correctly seated? The red arrow points to the rocker arm for the exhaust that is causing the clicking noise (what i believe, wont know for certain unless i make the clearance smaller, run the engine and hear if the noise is gone). So my plan is to readjust all valve clearances on cold. put everything back on and run the motor. If noise still persist the i will make the clearance between the rocker arm and cam lob for the exhaust valve for piston 1 smaller. Put everything back together and run the motor just to see if the noise is gone. If so, then i may just buy a new rocker arm and lash pad from the z store for $42.13. Is it ok to just replace one rocker arm?
-
I am thinking about doing it real quick. I just found this link on how to remove that stuff: http://www.oocities.org/inlinestroker/seals.html this helped me understand better what the manual is talking about
-
so the largest size gauge that slides in there right now with out me doing a readjustment is .008inch which is way off than the .010ich correct gauge on cold setting.