CG240Z
Member
-
Joined
-
Last visited
Everything posted by CG240Z
-
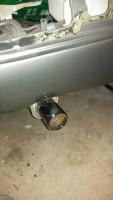
 Thanks for the diagram. So it is line #2, return, but its actually a 90 degree hard line coming off the tank. Then if you follow the line inside the tank it runs down the bottom and to the other side where the internal filter is. So a drill bet won't help much with this.
 -
I'm not exactly getting what you are saying. Are you saying connect the return fuel line into the output fuel line via a T fitting?
-
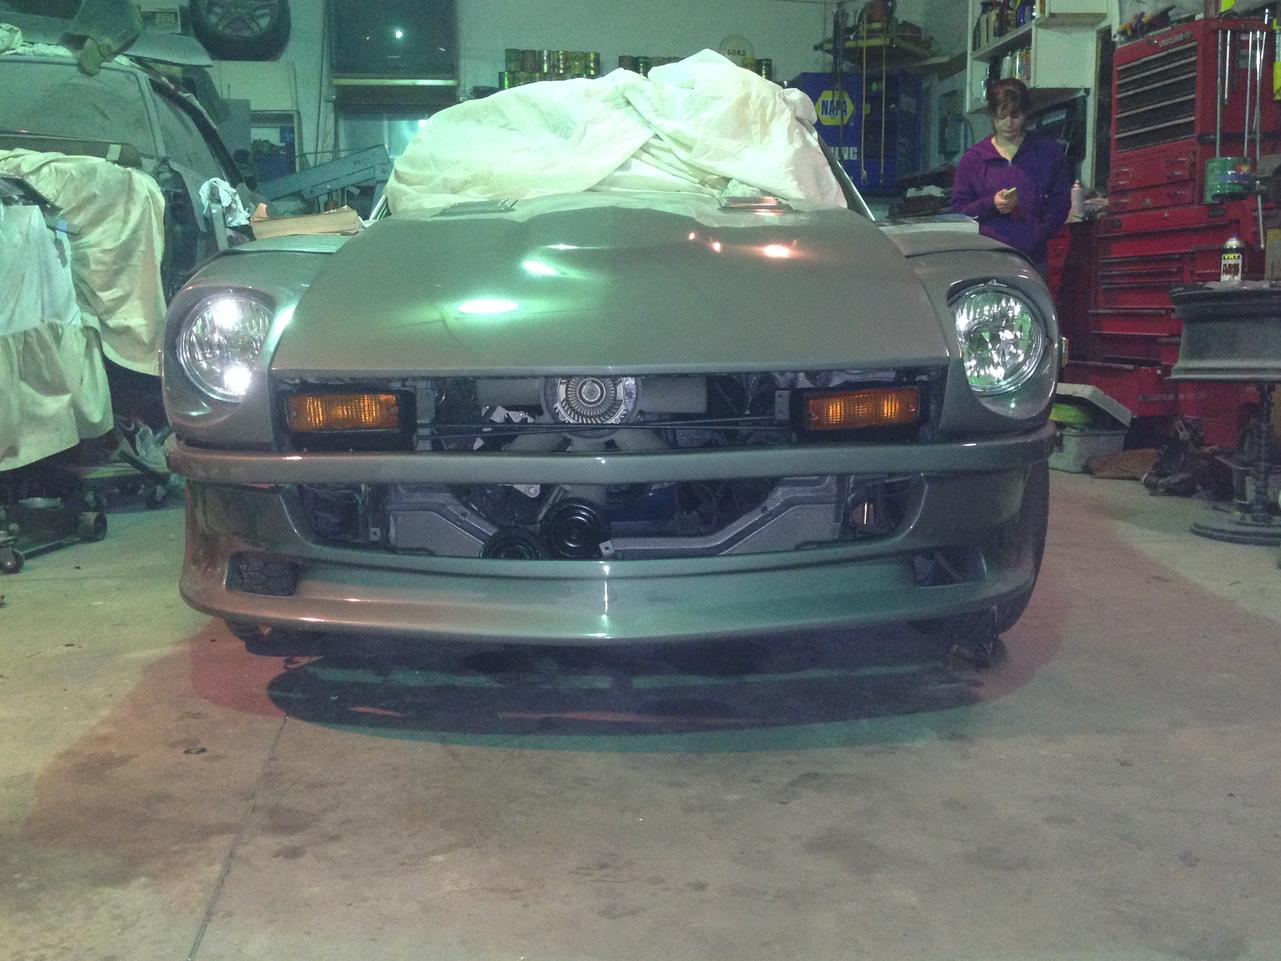
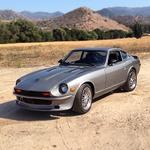
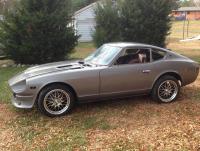
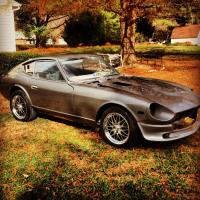
The car is moving right along! I'd say I'm sitting somewhere 85% done. You're never really done with a project, but this car should be on the road soon. The back end is looking awesome. Tail lights and panel installed, along with the rear hatch. Test fitting the spoiler in this picture, spoiler is sitting on the hatch crooked. <a href="http://s254.photobucket.com/user/taillonml/media/280z/B7FE8A3A-FFB2-4DDE-9EEC-EE7994D6D77B.jpg.html" target="_blank"><img src="http://i254.photobucket.com/albums/hh101/taillonml/280z/B7FE8A3A-FFB2-4DDE-9EEC-EE7994D6D77B.jpg" border="0" alt=" photo B7FE8A3A-FFB2-4DDE-9EEC-EE7994D6D77B.jpg"/></a> Another angle with the spoiler mounted. The hatch is sitting a little high, it might need some adjustment, but it's also all new rubber. <a href="http://s254.photobucket.com/user/taillonml/media/280z/9BE40F42-57EB-45F5-BD43-CBB0D626BF54.jpg.html" target="_blank"><img src="http://i254.photobucket.com/albums/hh101/taillonml/280z/9BE40F42-57EB-45F5-BD43-CBB0D626BF54.jpg" border="0I alt=" photo 9BE40F42-57EB-45F5-BD43-CBB0D626BF54.jpg"/></a> Check out this front end! I'm really digging the way it came out. The upper is a stock 280 grill, and the lower is a modified 240 grill. It fills in the front end nicely! <a href="http://s254.photobucket.com/user/taillonml/media/280z/42CA0D25-B97E-4B64-B1BC-EDB608FD10FE.jpg.html" target="_blank"><img src="http://i254.photobucket.com/albums/hh101/taillonml/280z/42CA0D25-B97E-4B64-B1BC-EDB608FD10FE.jpg" border="0" alt=" photo 42CA0D25-B97E-4B64-B1BC-EDB608FD10FE.jpg"/></a> Blasted and painted the spare tire and painted the rear jack. Looks great! Makes a good accessory at car shows. The tire looks like it would actually work, I'm not going to try. I have 3 original cans of air to go with it too. <a href="http://s254.photobucket.com/user/taillonml/media/280z/9238146F-B63E-4AFA-838E-533EC6537A76.jpg.html" target="_blank"><img src="http://i254.photobucket.com/albums/hh101/taillonml/280z/9238146F-B63E-4AFA-838E-533EC6537A76.jpg" border="0" alt=" photo 9238146F-B63E-4AFA-838E-533EC6537A76.jpg"/></a> The original stickers are in pretty good shape. <a href="http://s254.photobucket.com/user/taillonml/media/280z/42C3295F-4DC1-4650-B74A-F2BB81A76508.jpg.html" target="_blank"><img src="http://i254.photobucket.com/albums/hh101/taillonml/280z/42C3295F-4DC1-4650-B74A-F2BB81A76508.jpg" border="0" alt=" photo 42C3295F-4DC1-4650-B74A-F2BB81A76508.jpg"/></a> The steering wheel has been rewrapped and repainted. Looks great. <a href="http://s254.photobucket.com/user/taillonml/media/280z/52931859-772C-4CF6-8FB9-E87FEDB5D26E.jpg.html" target="_blank"><img src="http://i254.photobucket.com/albums/hh101/taillonml/280z/52931859-772C-4CF6-8FB9-E87FEDB5D26E.jpg" border="0" alt=" photo 52931859-772C-4CF6-8FB9-E87FEDB5D26E.jpg"/></a> Got a lot of the interior in. Door panels came out great. The plastic and vinyl pieces are looking good. <a href="http://s254.photobucket.com/user/taillonml/media/280z/F92C4BE2-E522-4F49-93DE-F5BC0A79F139.jpg.html" target="_blank"><img src="http://i254.photobucket.com/albums/hh101/taillonml/280z/F92C4BE2-E522-4F49-93DE-F5BC0A79F139.jpg" border="0" alt=" photo F92C4BE2-E522-4F49-93DE-F5BC0A79F139.jpg"/></a> Car is off to the interior shop tomorrow. Getting the headliner put in. Also getting him to do the finish touches with the carpet. I got the carpet kit from Zcarsource. It didn't come with any padding and the fit isn't too user friendly, so I'll get him to make it look right. <a href="http://s254.photobucket.com/user/taillonml/media/280z/B34E1E00-5F27-4F54-BEB3-84DA425043A8.jpg.html" target="_blank"><img src="http://i254.photobucket.com/albums/hh101/taillonml/280z/B34E1E00-5F27-4F54-BEB3-84DA425043A8.jpg" border="0" alt=" photo B34E1E00-5F27-4F54-BEB3-84DA425043A8.jpg"/></a> Notice the garage wheels are on the car. Don't want to get the nice wheels messed up. After this I need to finishing hooking up the engine harness, hook up all the brakes, and get the gas tank in. Then she should be on the road under her own power. Gas tank is kicking my butt right now, I posted a thread about the gas tank to night.
-
Subscribed to this thread! This is awesome stuff. Sounds like a perfect upgrade to my Z.
-
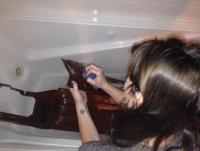
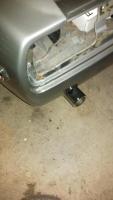
Hey guys, some of you guys might have seen my build thread on my 280. Cars about 85% done, I need to update the thread with some new pictures, but my computer is down and I'm having to use my tablet. Anyways, one thing that's holding me back is the small inlet on the gas tank is clogged, I'm assuming this is the return line since it is the smaller of the two. The tank was in pretty bad shape, a lot of rust on the inside, but I had it boiled and it cleaned everything up, except this one line. I've tried the speedo wire and drill trick with compressed air and carb cleaner, no luck. When I look through the sending unit hole I see the line runs into the internal filter area. Does anybody know if I can cut an access panel in the tank, then chop the hard line before the clog. Then weld the tank back up. Hopefully that makes sense. I'm thinking if its a return line, it shouldn't matter where the fuel gets dumped back out at. Or any other suggestion will be helpful. I've also been keeping my eye out on craigslist for a clean tank. Once I get this tank situation solved the car should be making some nice very soon!! Thanks guys!
-
Does anyone have any info on this or a build thread? I haven't seen a supercharged Z setup like this before.
-
It's my dads, he's about 95% done. He did a full frame off restoration, it's be going on for about 10 years now. It will be done by spring time. 400ci 4spd, white interior.
-
You know, I'm not sure. I will pop the cover off and double check. I remember looking at it and wasn't quite sure which way it went. Thanks for the catch!! Really appreciate it.
-
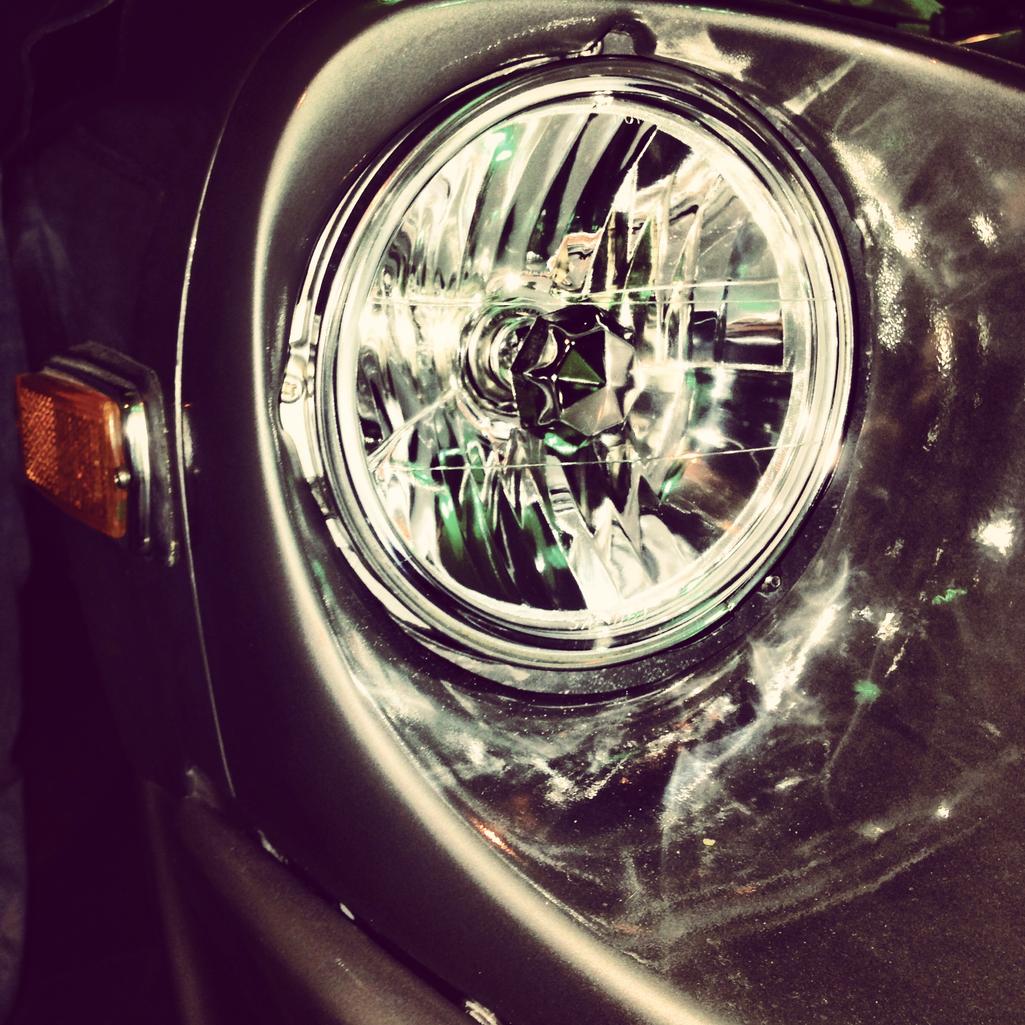
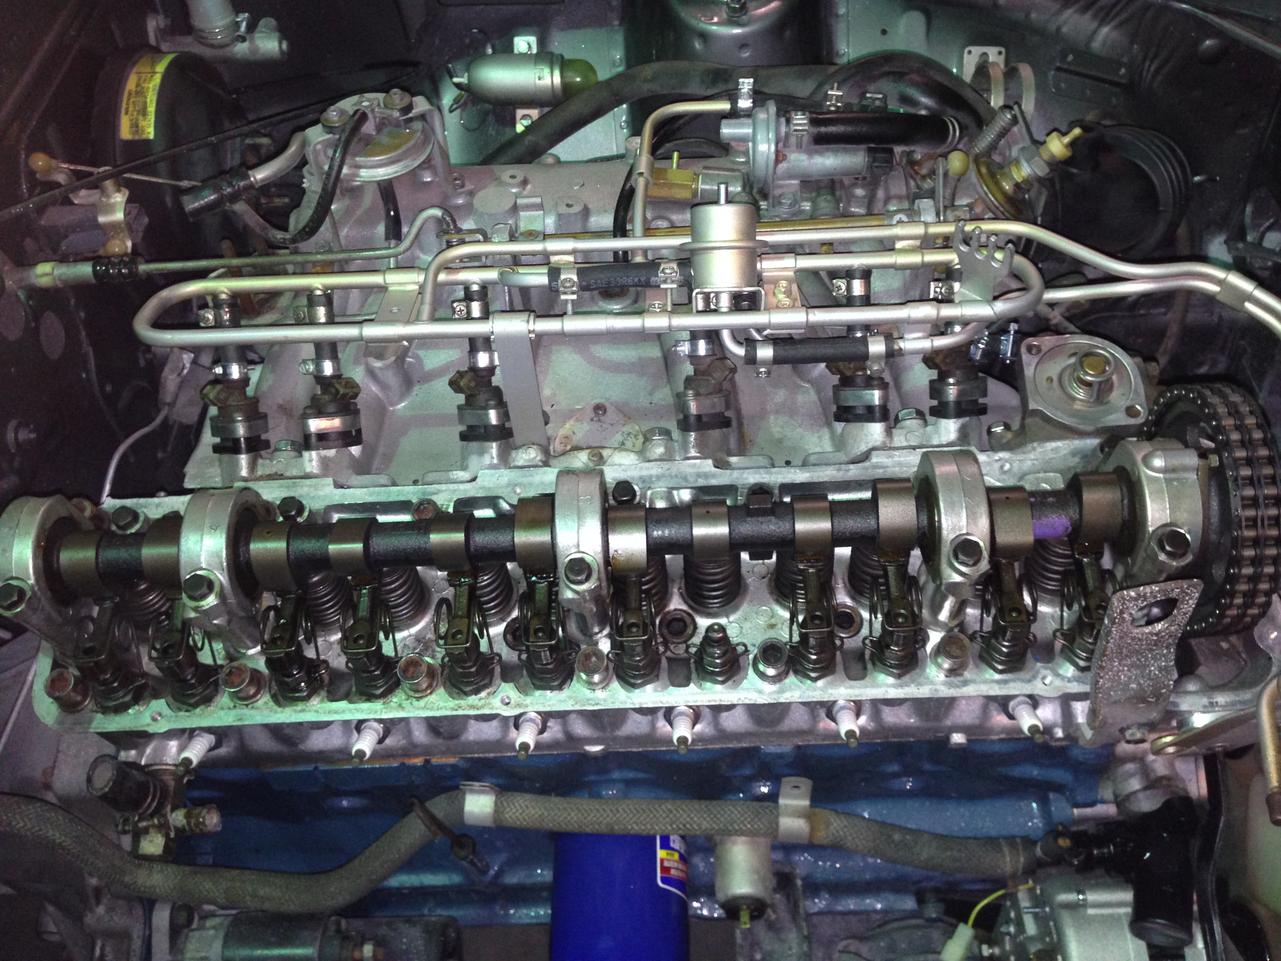
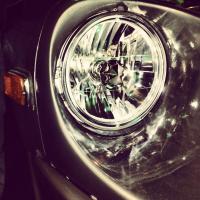
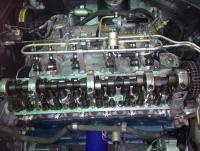
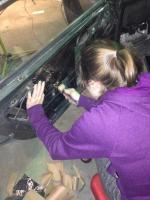
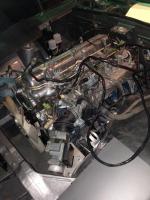
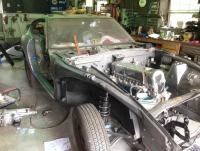
New headlights and blinkers in. The blinkers I cleaned in the dishwasher and they came out great! I love the crystal clear headlights. The front end is looking sharp! Still need to get the grill made up. Got the fuel injection rail repainted and put in. I also re-taped the entire engine bay wiring harness, it looks much better. I hooked up the fuel injection wiring harness and some of the engine harness. It's hard to get the wires to look clean. Wire harness looks sharp, harness laying across the engine. Had the misses in the garage helping. She did the sound dampening on the doors. Hopefully it helps some. She also washed all my plastic interior parts, getting them ready to be painted black. Got the cars all tucked in the garage. Starting to get some winter weather in Va. Ordered some random parts like a new aluminum radiator and chromed valve cover. Can't wait to get them in!


-
Good information. I am in the same boat and am about to tackle this project.
-
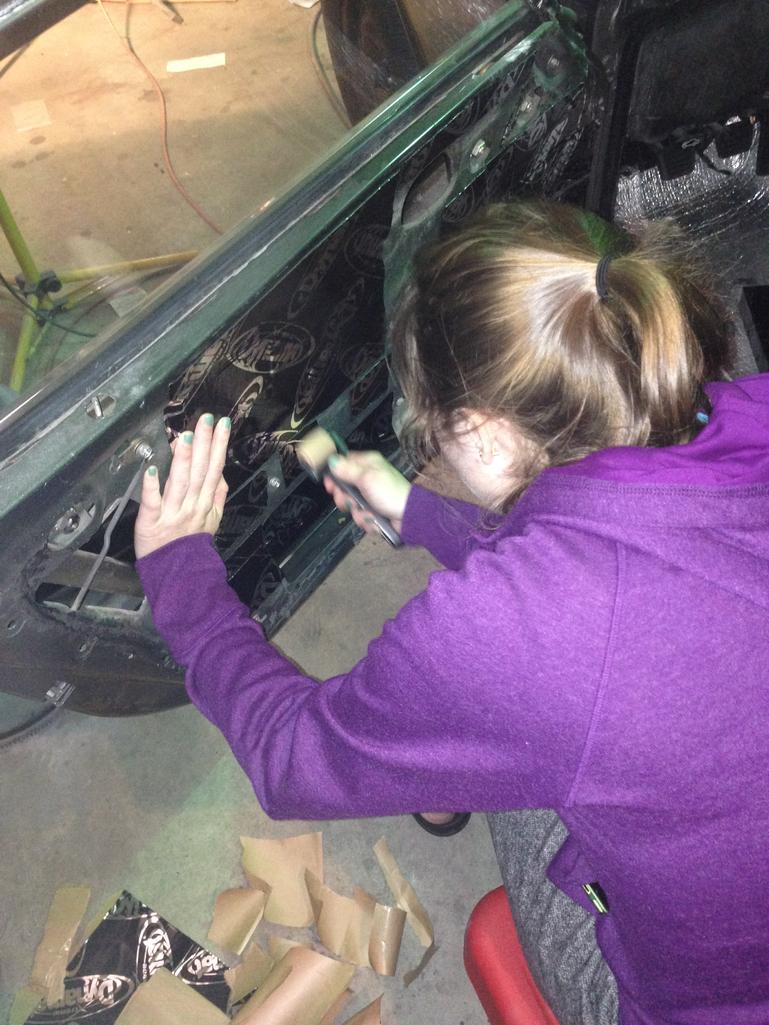
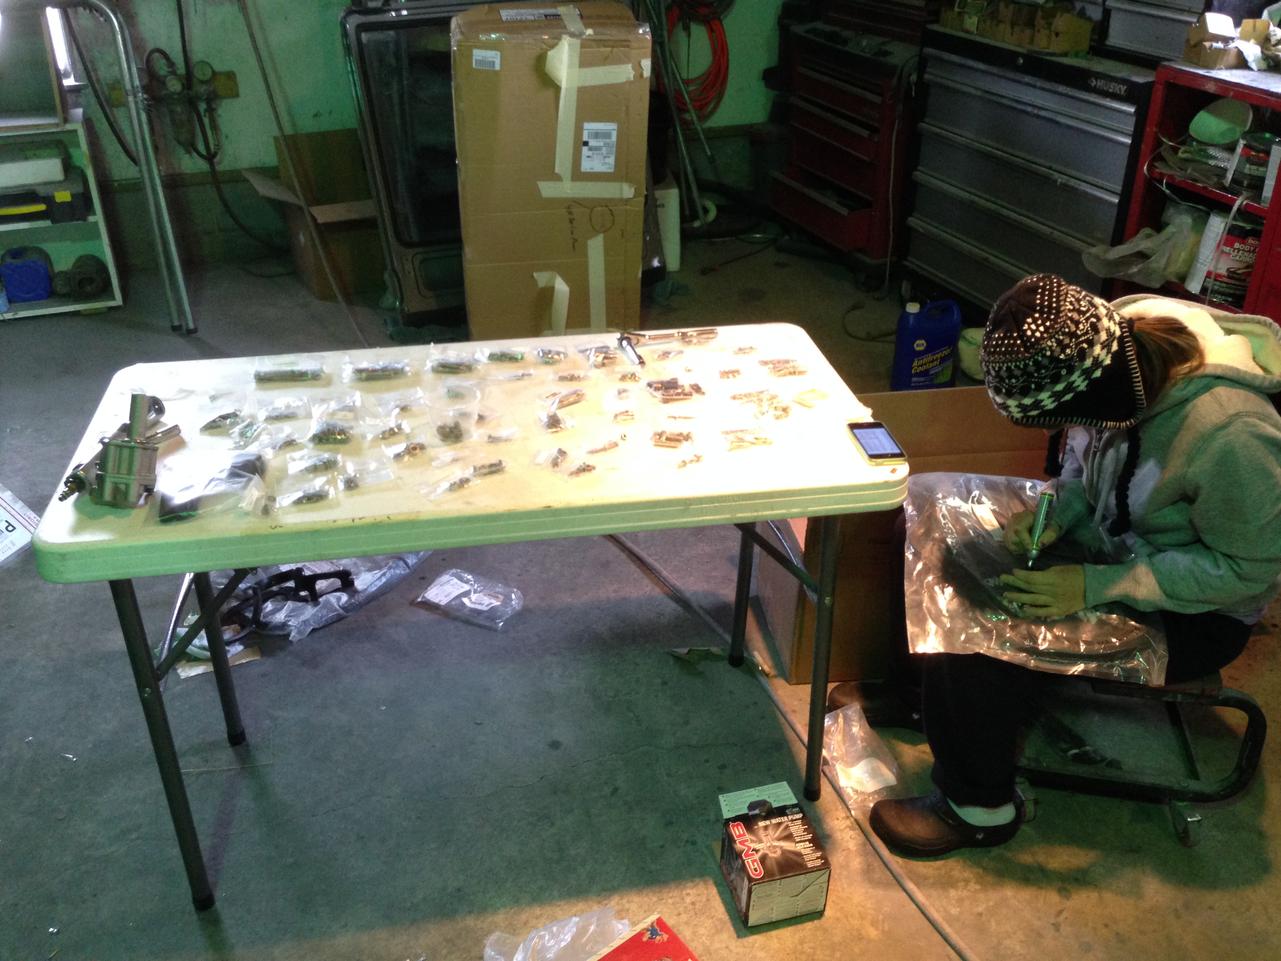
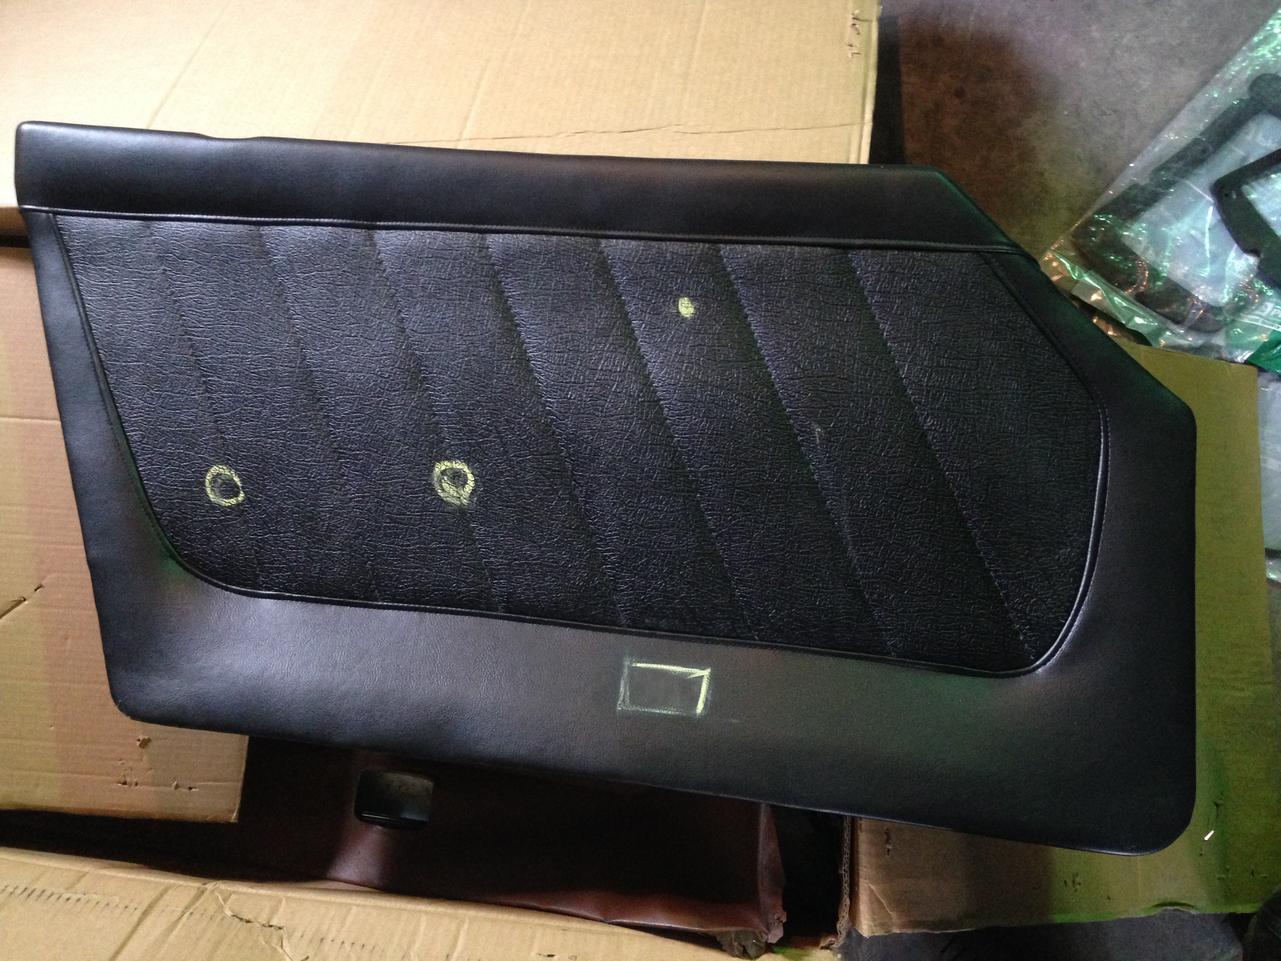
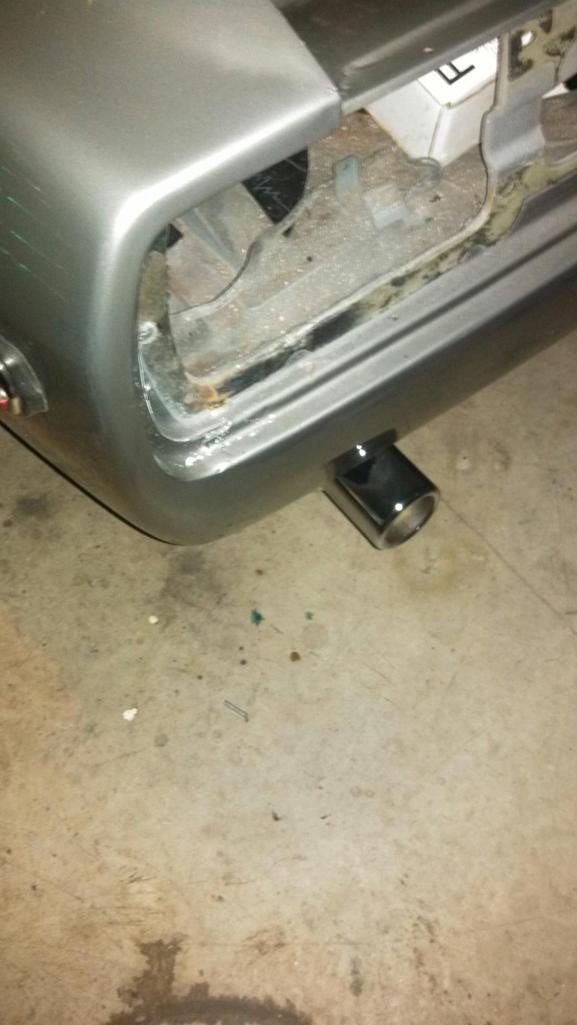
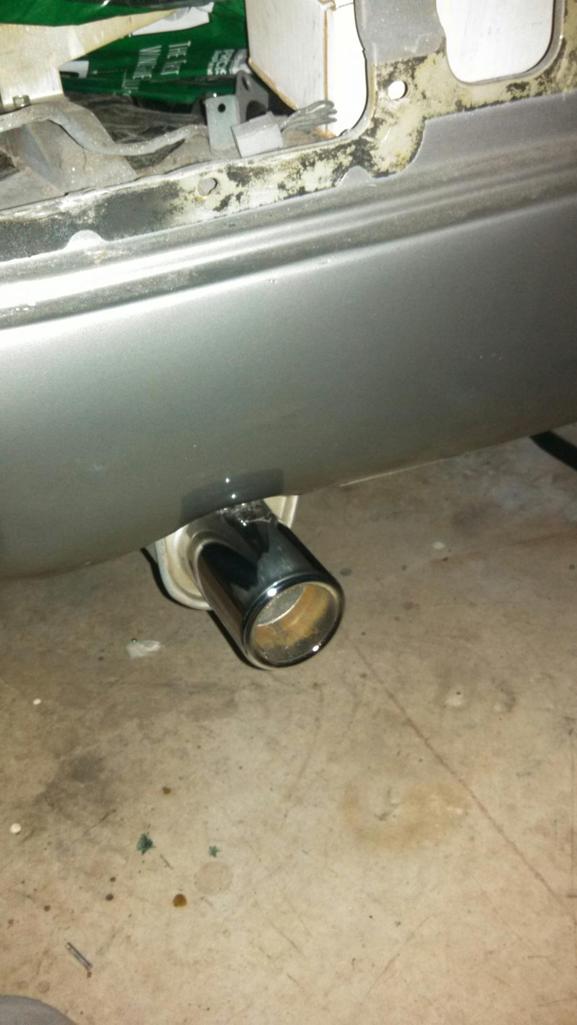
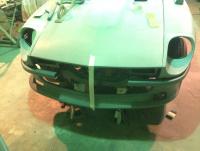
A little more progress is being made. I'm getting the fun stuff now, I don't have more body work to do. I ordered a bunch of stainless steel bolt kits, I laid them out so I could grab a bag when needed. These kits have already proven themselves! No more searching through my poorly labeled bag bolts for rusty bolts I have to clean. Now I have brand new bolts that are clearly labeled. Also had some help labeling all the weatherstripping bags to make finding them easier. Got my door panels back from the upholstery guy, I bought all the interior pieces from Z Car Source. I didn't realize the design was different from factory. Not many options though when buying a new interior, so I'll take it. All window chrome polished and windows cleaned with a razor blade. Glass looks brand new! A shot of my half cleaned window. Notice the '95 inspection, I'm thinking I'll keep it on their for kicks. Took the rear quarter glass apart to replace all the weather stripping. The edges were full of dirt from the old weather stripping. Lastly got the muffler installed and tucked up nicely. I put the header back exhaust on a couple of weekends ago, now it's finished up with the muffler installed. The chrome tip that came with the MSA exhaust kit stuck out way too much. Cut it in half and welded it on. I'm glad the muffler was able to be tucked in, I don't like the look of seeing half the muffler hanging out below the car. I've also been debating on whether to put the 240 rear bumper on. It has already been fitted and painted, but I'm really liking the way the rear looks without a bumper. All the holes were completely filled in before painting, so if I leave it off, everything is smooth. Hopefully make more progress this weekend! This weekend my main focus is the engine and engine accessories. I want to hear this beast run!


-
Is is the Xeon airdam, I really like the way it looks. I don't have the exact measurement on me, but I can measure it for you. I test fitted the top grill with the 240 bumper and I don't think it looks that bad. The stock 280 bottom grill is worthless with this setup. I'm not sure if I will leave the bottom space empty or try to make some sort of grill. That is something that I will figure out once I get the lights and top grill put in and can get a better overall picture of the front end.
-
Thanks for the advice! That's exactly what I will do.
-
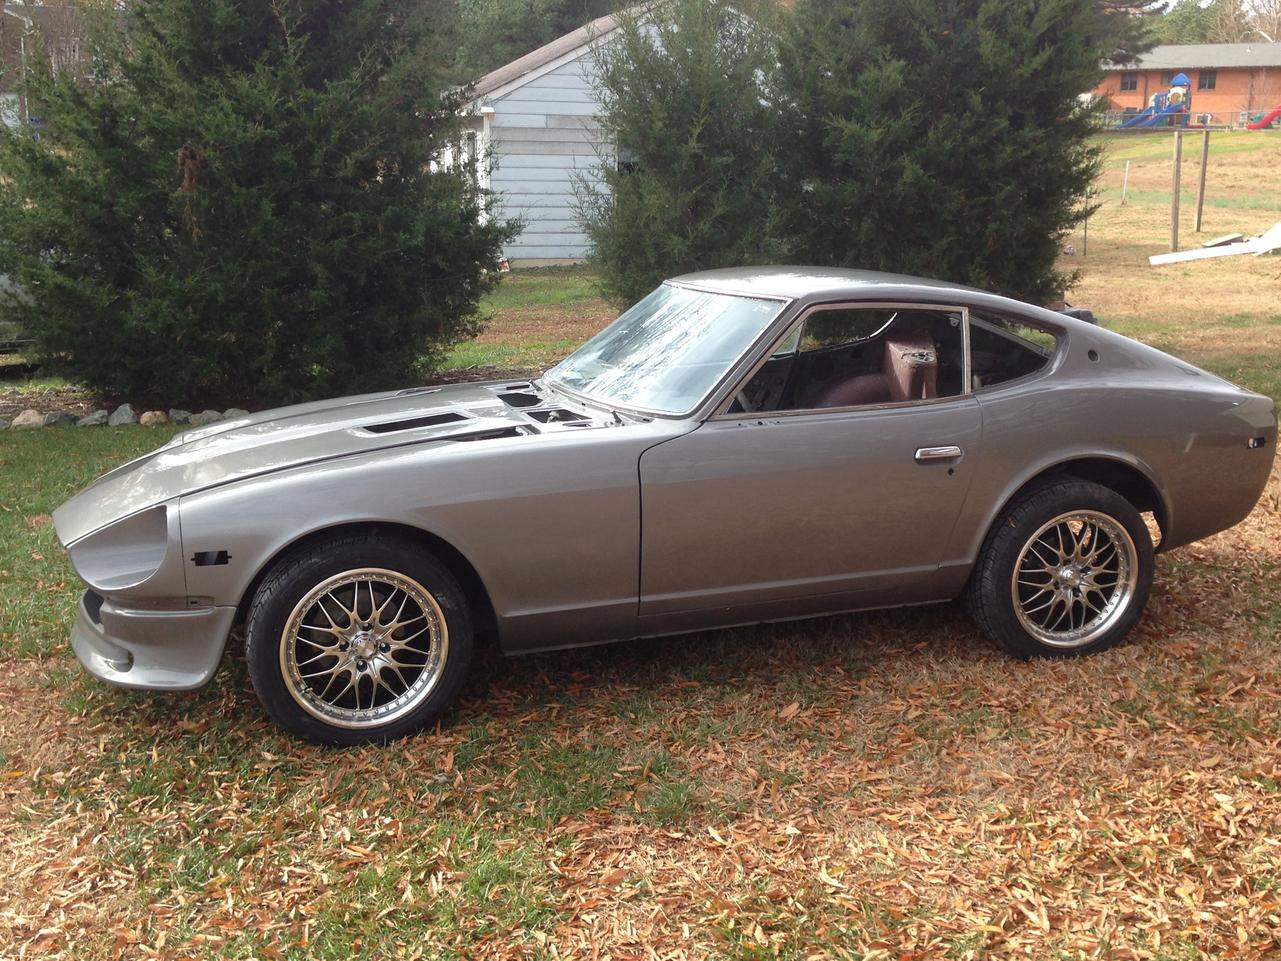
The wheels I got from MSA. They are 17" Konig's with a +6mm offset. Tires are 205/50r17. Full lock to full lock nothing hits and everything clears well. I wanted 16" wheels, but couldn't find anything I liked, so I went up to 17". 15" I was worried wouldn't clear my brakes. Thanks for the positive comments.
-
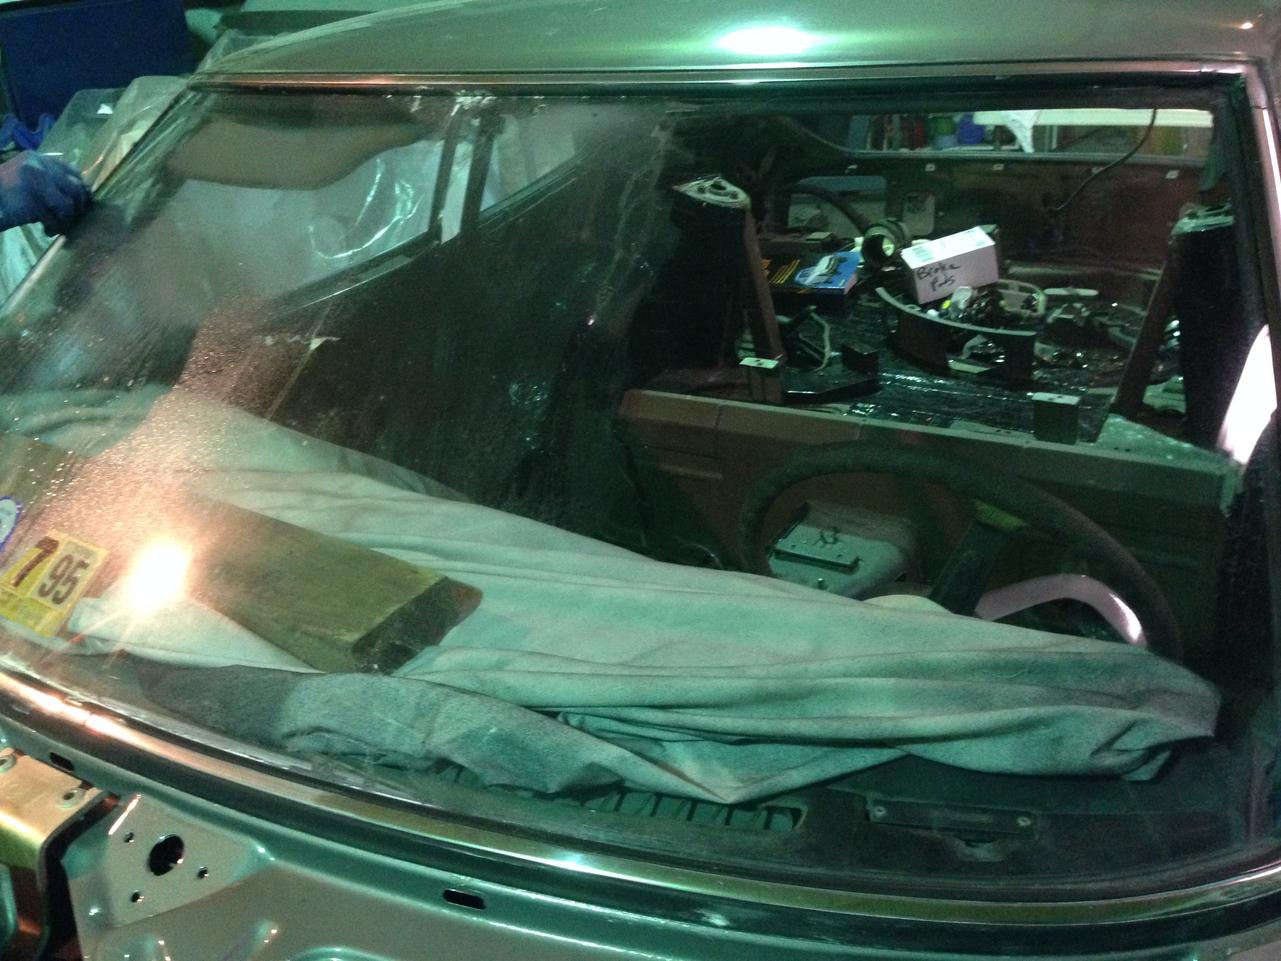
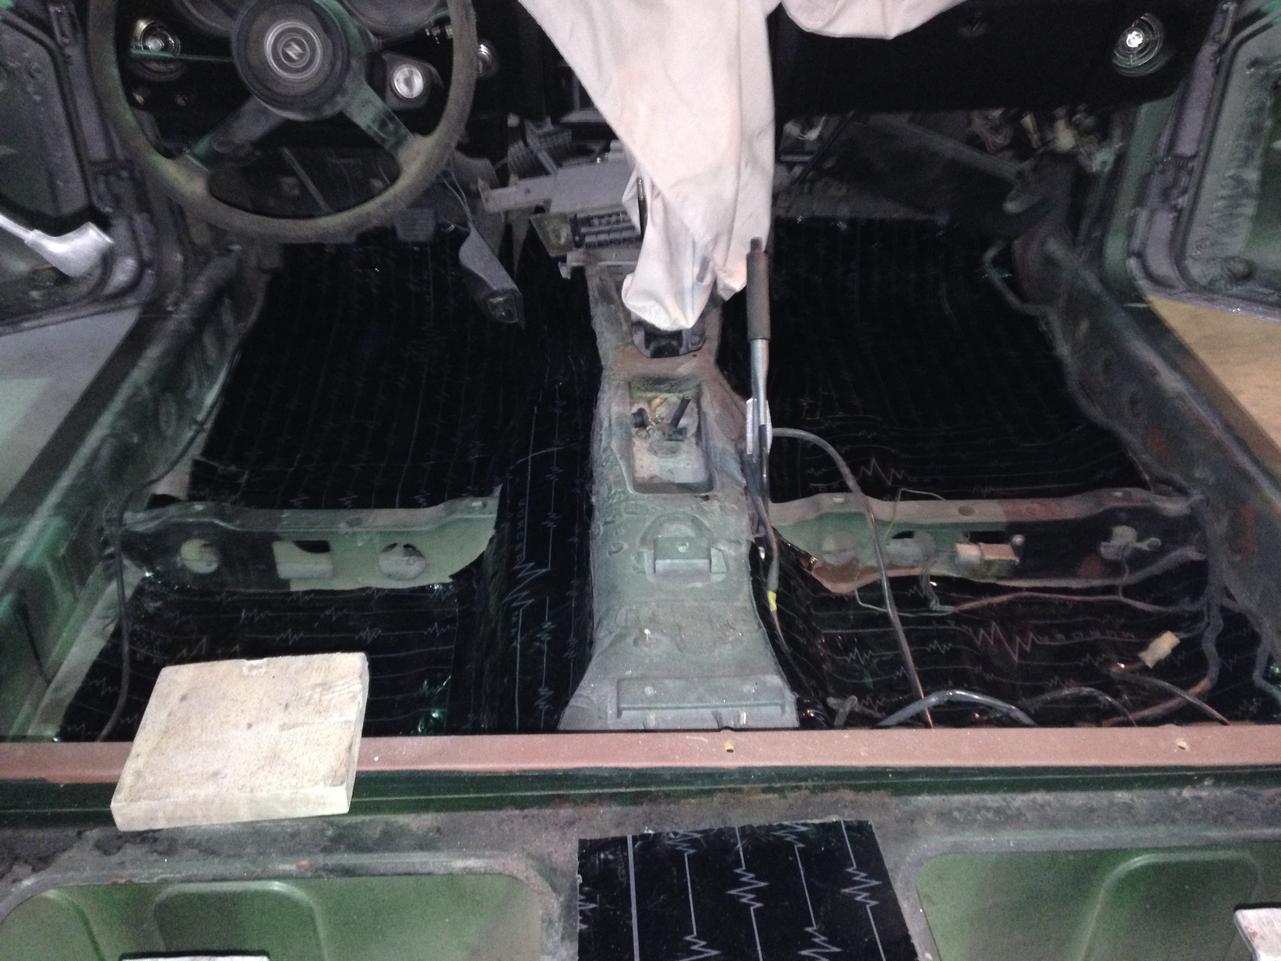
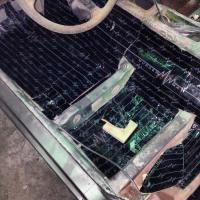
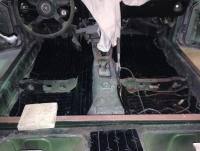
A little more progress has been made! I still have a ton to do before she's on the road. The big updates are, got the murder mat in, header back exhaust in (except muffler), and new shoes on. Murder Mat is in. I have good coverage on mostly everything. I hope it quiets the road a bit. Installing it is an art form, one that I'm not too good at. But I figure the carpets going over it, so it should be fine. It has Eibach lowering springs, but the back is sitting a bit too high. I'll wait till I get everything in, but I might have to chop the rear springs a little. Hopefully I can make some more progress this weekend. I can't wait to get this car on the road!!

-
Maybe take the resin and brush it over everything? Hmm
-
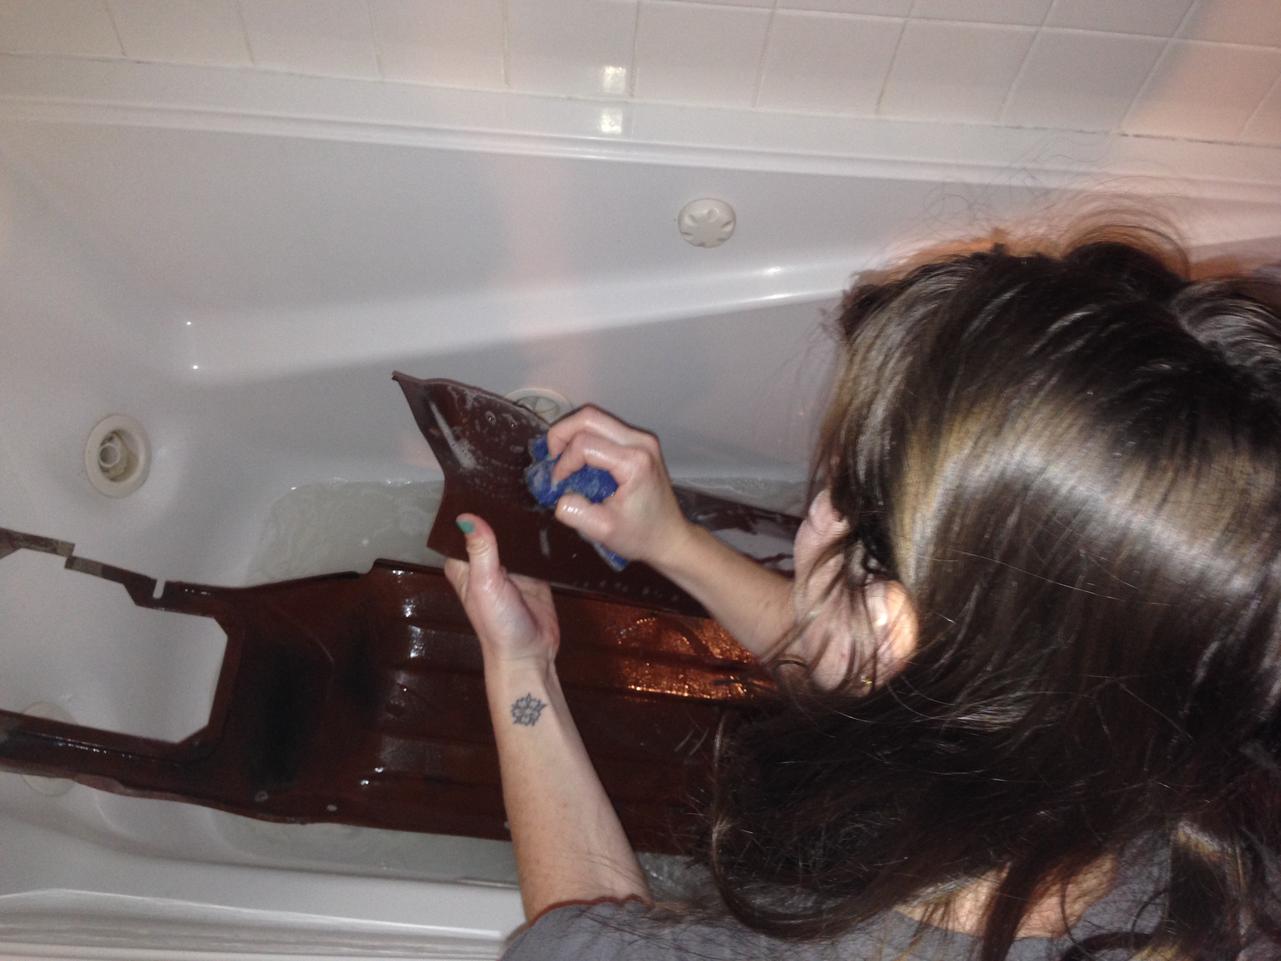
To bring this thread back. I found some inner fenders off Craigslist. They have some minor cracks, but are still in 1 piece. Also they are still really fragile. Does anyone have any ideas for toughening the fenders up? I thought maybe coating them in truck bed liner? Any ideas would be helpful. Thanks!
-
That's a good question. I was going to put the 280 grill on and go from there. Maybe have to make or modify a grill. Do you have any suggestions?
-
Awesome looking engine bay! I know you're ready to hear her run.
-
Tonight I ordered another $1600 worth of parts. Got the wheels/tires ordered, along with the complete weatherstripping kit, and a few random odds and ends. I can't wait to start putting this car back together.
-
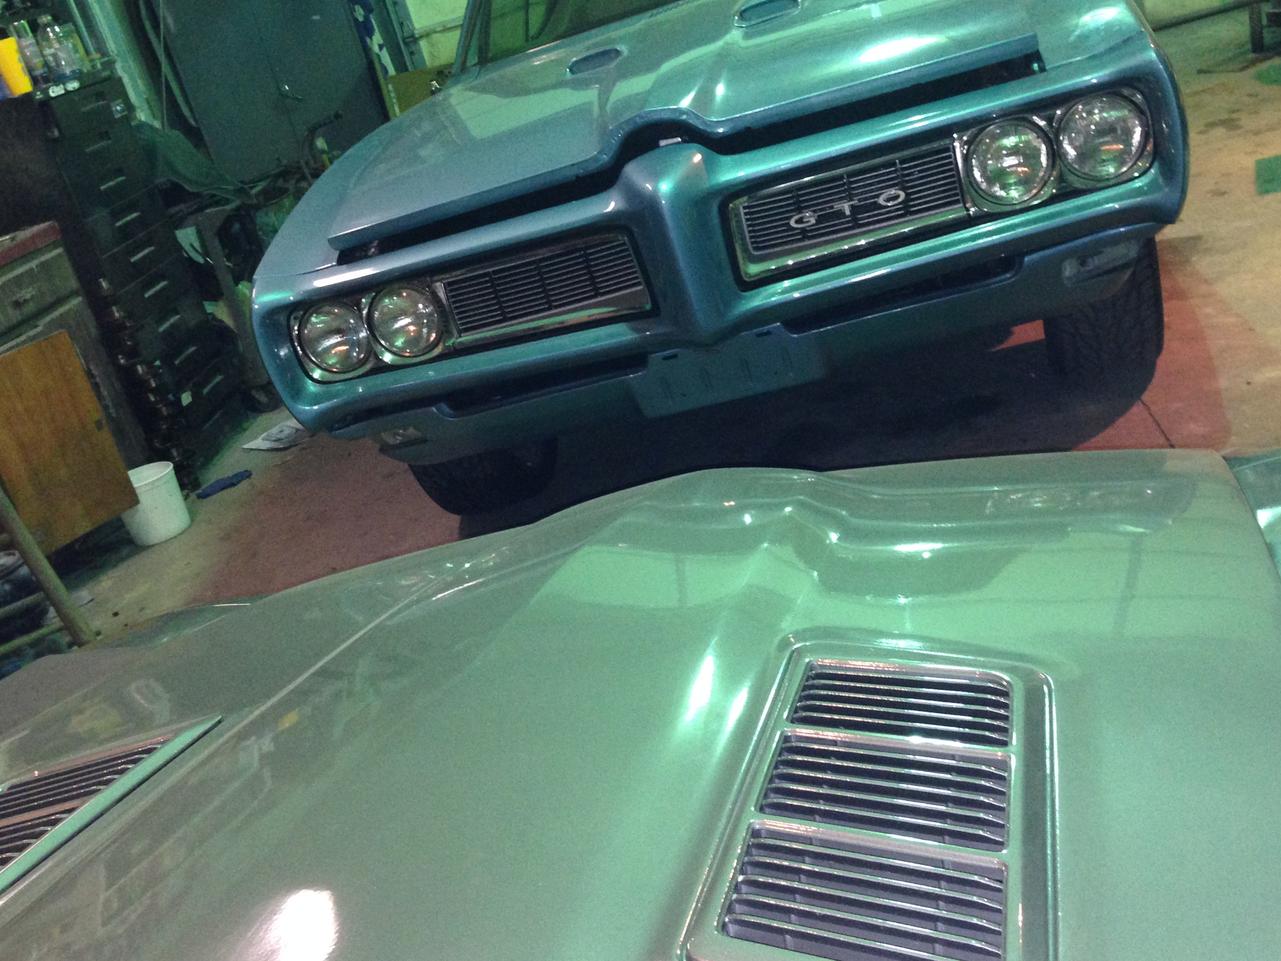
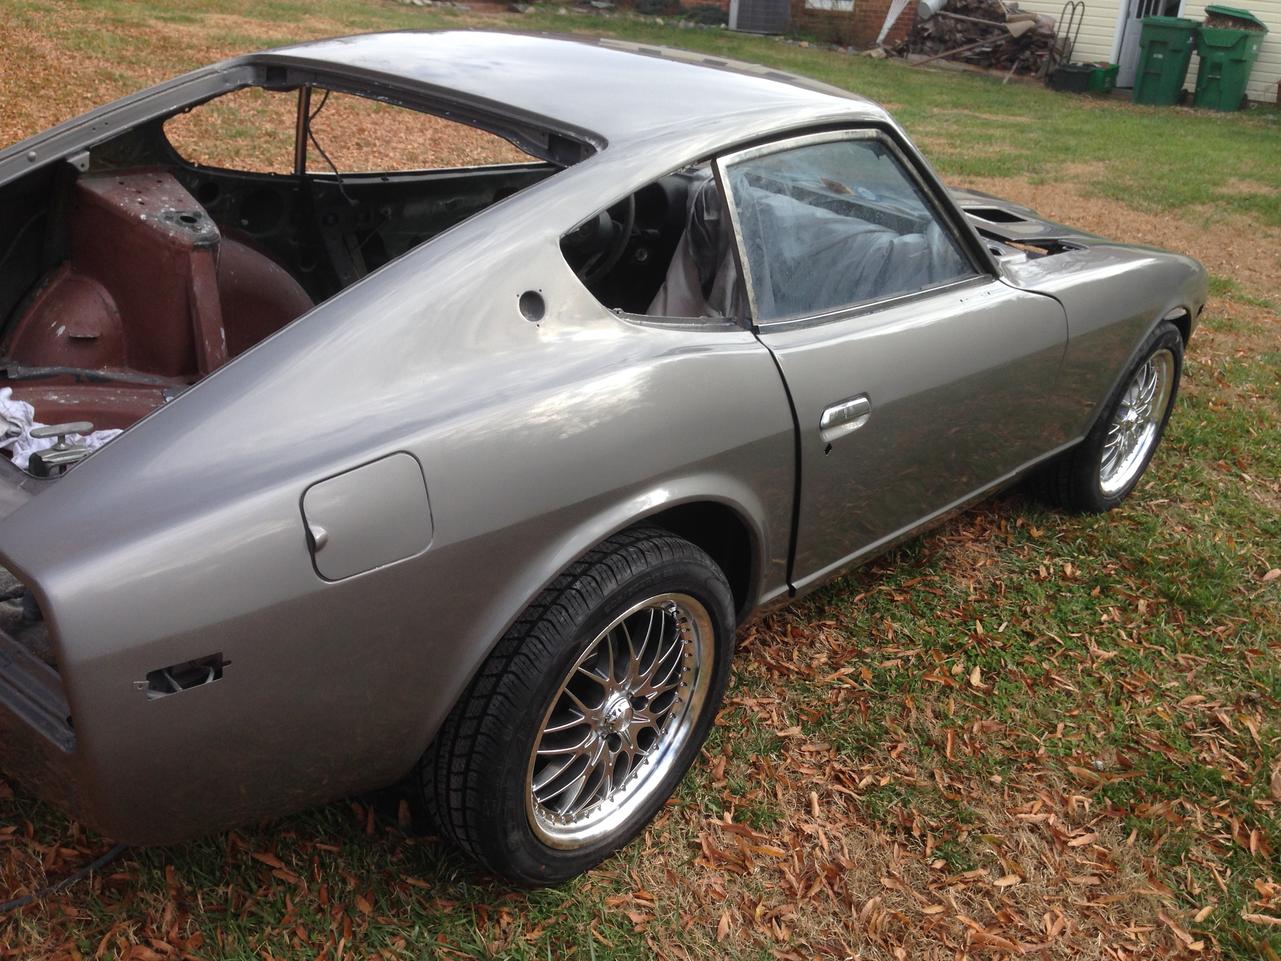
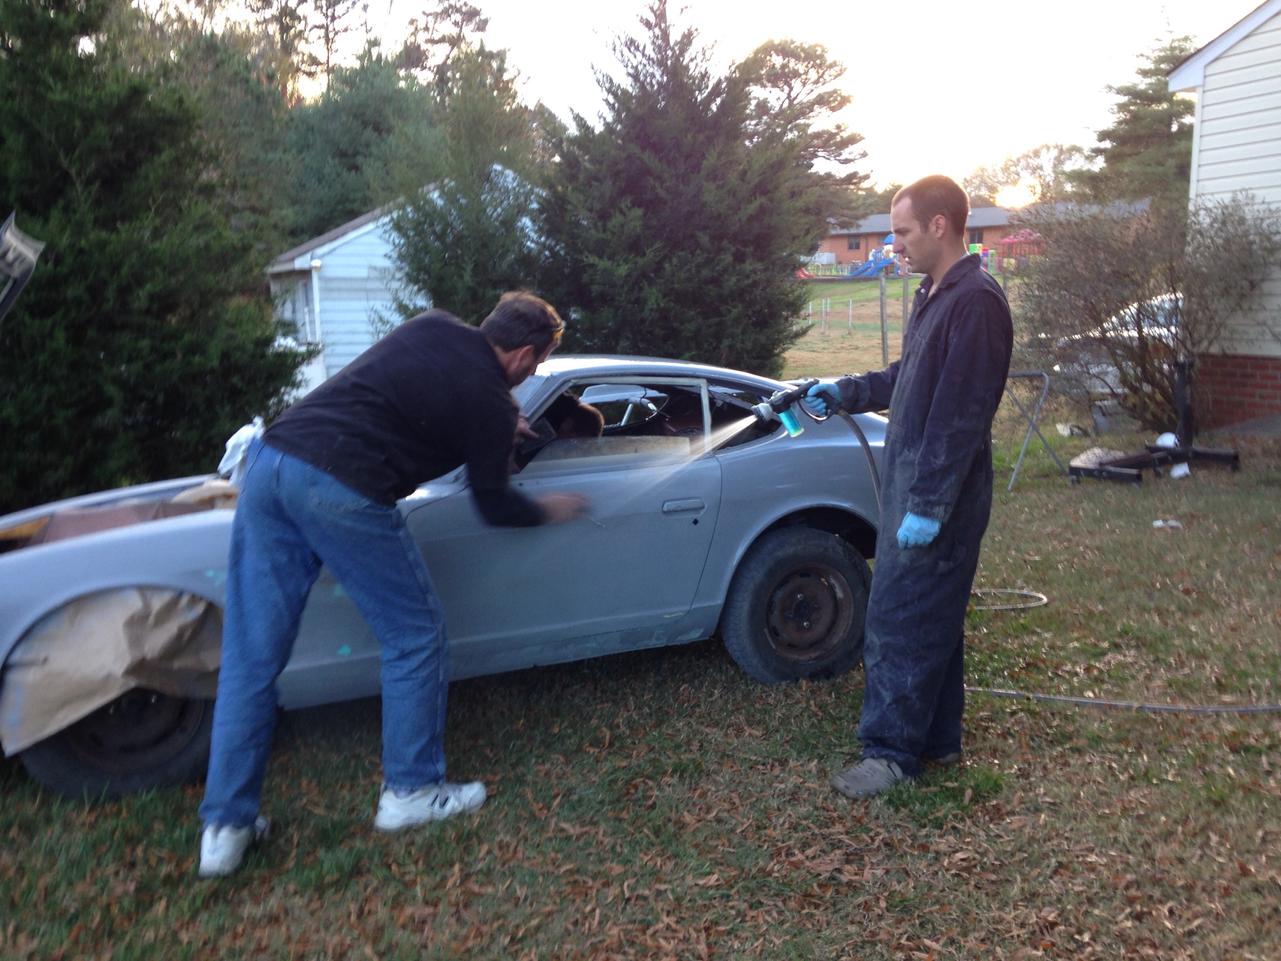
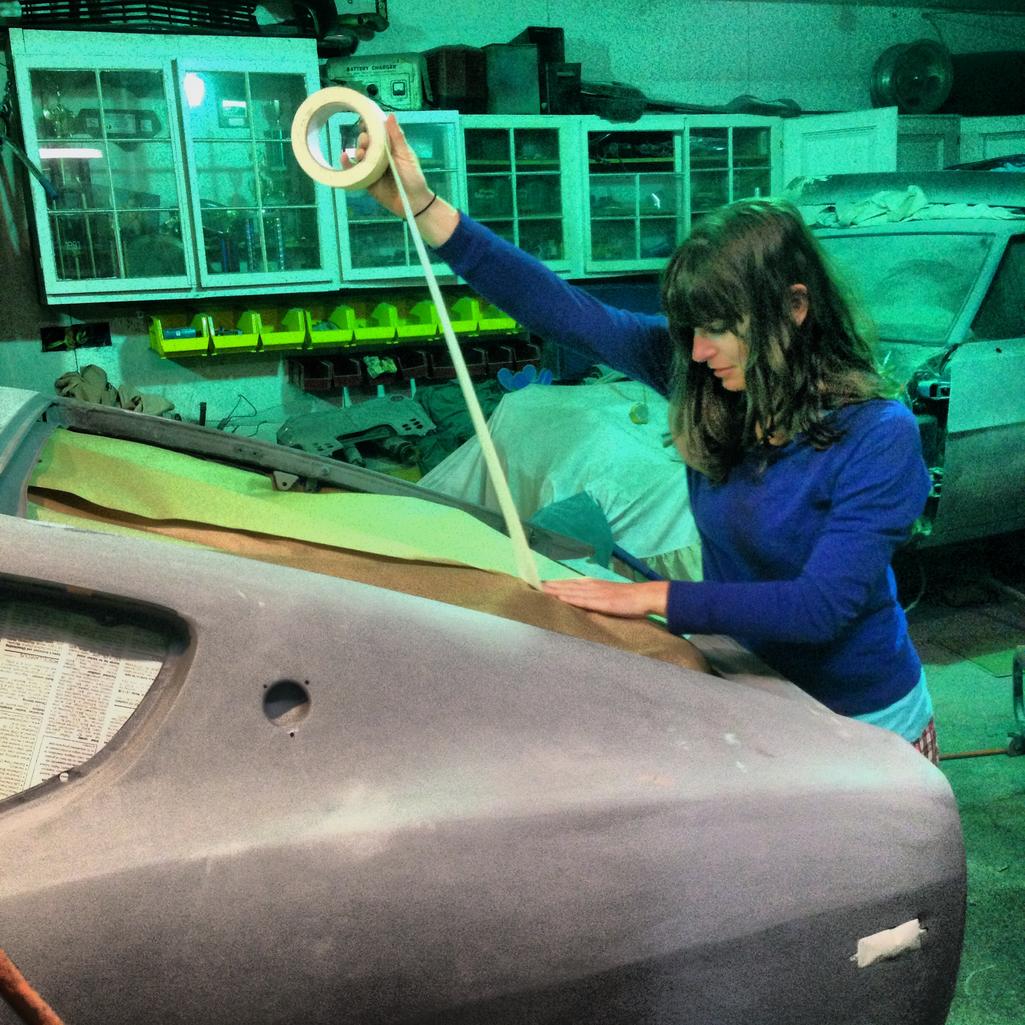
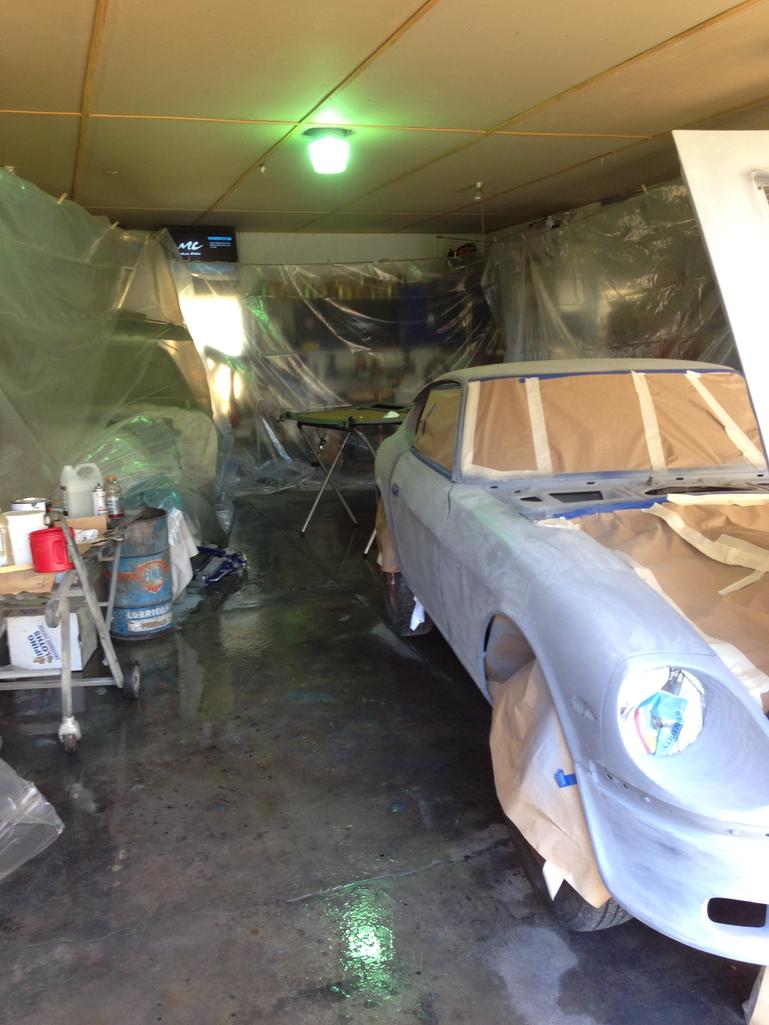
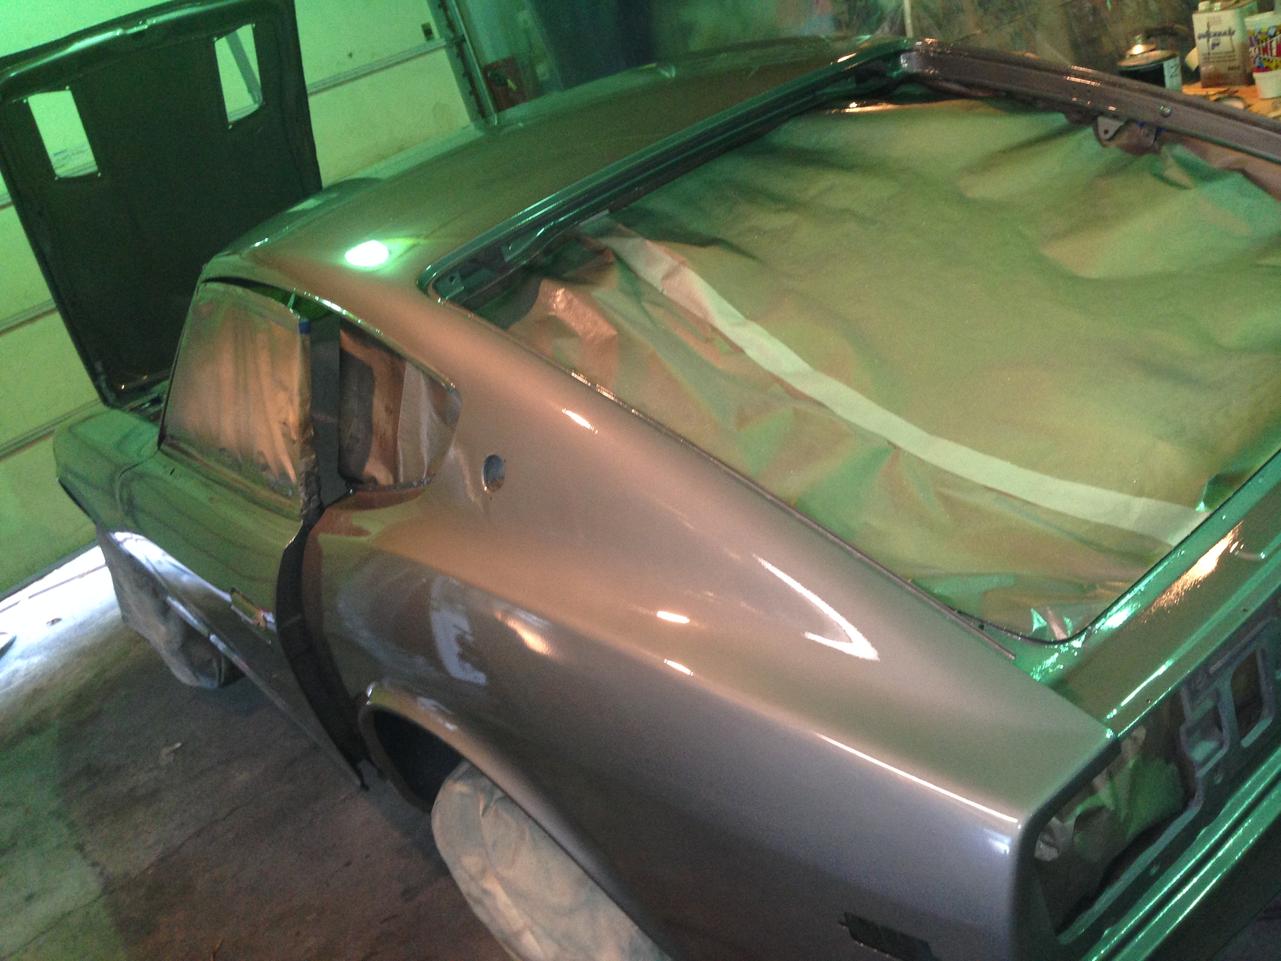
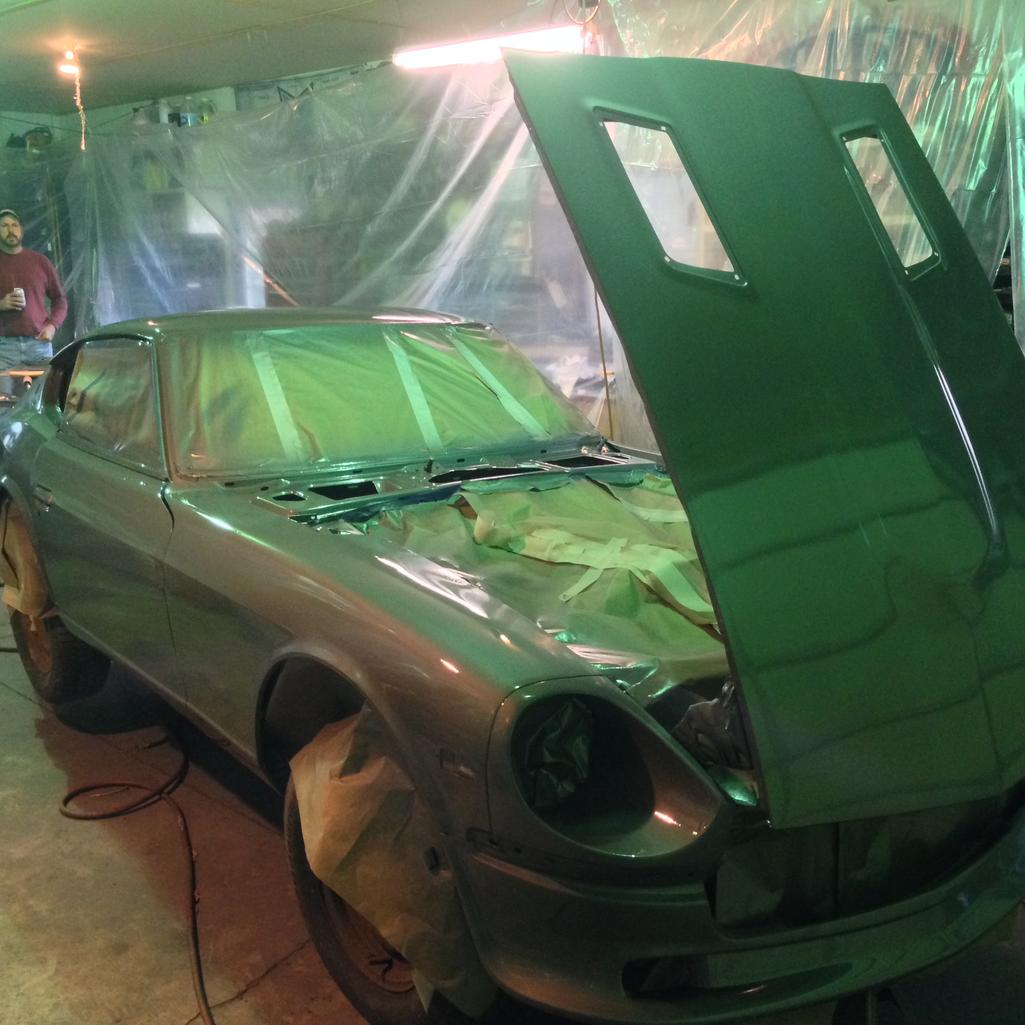
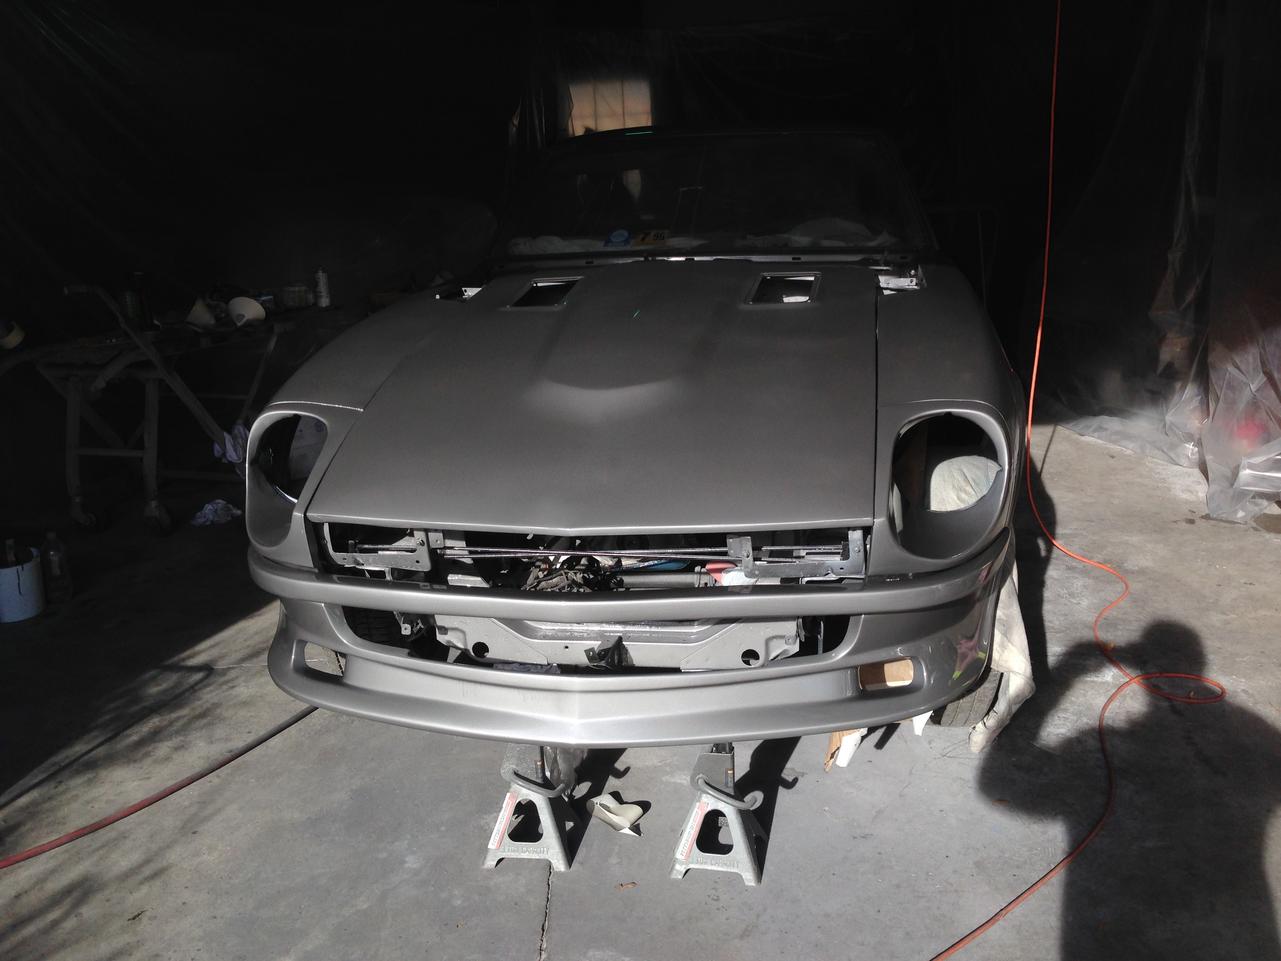
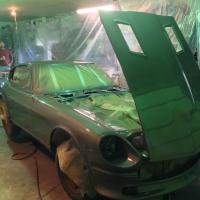
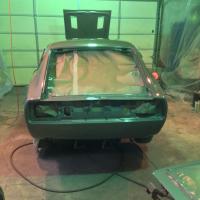
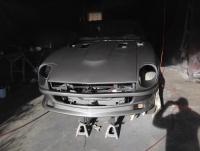
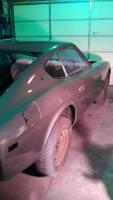
Now for some good news! The car has been painted! I had three day weekend, so pops and I put in some serious hours and shot it Sunday. It came out really well, but once I do the final wetsand on it to smooth out a few minor things, the paint will be great! I am beyond pleased with the results. The cars still on jacks so I haven't been able to roll it out yet to see it in the sun completely. The car is easier to work on when it's on jack stands. Here we rolled the car outside to look for any more imperfections before we put the final coat of primer on. After I primed it, doing the final wet sand before we apply paint. The night before painting was a late night, even had the girlfriend helping tape up. Paint booth all set up and ready to paint. 3 coats of base and a gallon of clear later I have a shiny car! Test fitted the front bumper and it looks great. You can't beat the lines on a Z. Now it's how fast can I put this car back together! The plan is by February 1st. It's past my original goal, but I'm okay with that. I knew from the beginning there would be delays, and there definitely has been.


-
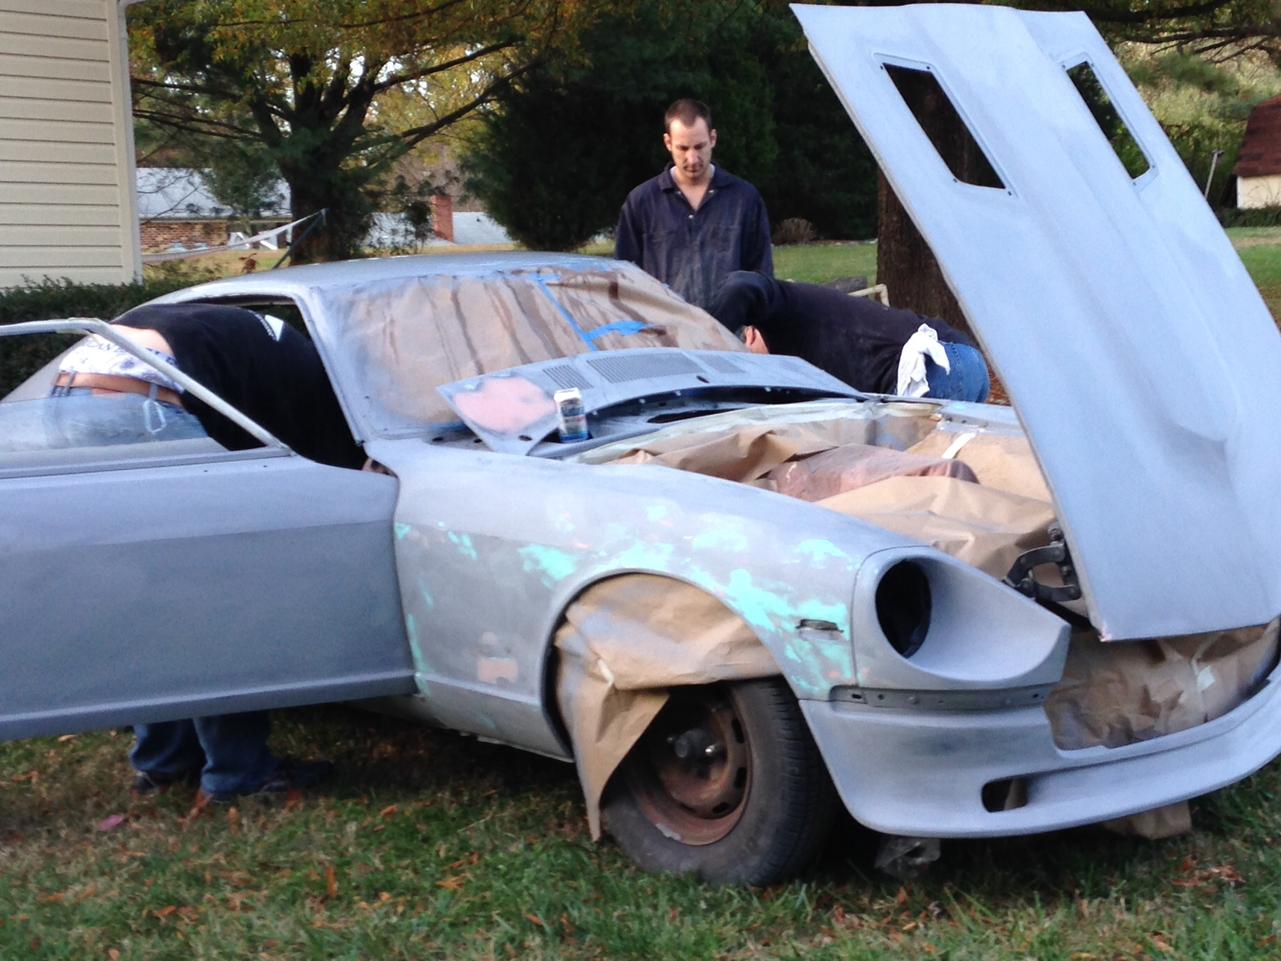
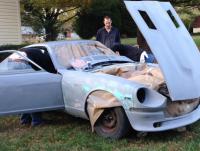
I've been meaning to throw in some updates, but everyone knows how the busy schedule goes, it gets in the way of Z time. First update is that aftermarket parts have been kicking my arse! I purchased new fenders from Black Dragon. The fit was absolutely horrid! First glance, they appear to be very well made fenders, but fitment is a whole other issue. Right off the bat they wouldn't bolt up correctly, had to do some grinding near the headlight bezel to even get them to set into place. Next problem was the gaps were incredibly bad, not an even gap anywhere. The doors were hitting the fenders, the hood was hitting the fenders, and there was a 1.5" between the fenders and cowling. My dad spent about 40 hrs working on them, trying to get everything aligned. Welding in some metal on some gaps, grinding other parts, etc. They absolutely would not fit. So for ****s and giggles, I said lets try my rusty original fenders. I pop them on and BAM, all the gaps are perfect and fitment is perfect. Ended up cutting on the $600 Black Dragon fenders and using them as patch panels for my original fenders. The BD fenders were a complete waste of money and time. I called the company and told them about all my fitment issues and they said they've never heard of any problems before. I told them they must have never actually tried to use these fenders, because there was absolutely no way they would work. Needless to say, they were unable to resolve my issue or cared to help. Secondly, I bought a set of 240 fiberglass bumpers off ebay, the front bumper was about 5-6 inches too wide and the rear bumper's angles were completely wrong. The ends of it were pointed at a 45 degree angle away from the car. Also the "brackets" that came welded on them were complete junk and I had to fabricate and reweld my own. So for the front bumper I ended up cutting it in 3 pieces, shortening it, and re-fiberglassing it back together. The rear I cut the sides off and glassed in my own. Both bumpers turned out great, after hours of work that shouldn't have needed to be done. Here's a picture of where I cut the bumper into 3 pieces, mounted the sides, and then measured the inside piece for proper fitment. Sorry for the rant guys, but I expect after spending good money on parts, they would be produced with some kind of quality control. It seems lately whatever I buy doesn't come close to fitting. I do have good news though, that's coming in my next post.
-
Thanks for the responses. When I wrote that I thought I wasn't essential, apparently I am, and I got sent down to Florida for the shutdown. So now I'm getting the exact opposite, no time to work on the Z!! It's killing me. My dad has been doing some tinkering on it while I'm gone. He started mocking up the fenders. Apperently they are fitting like Chinese fenders, and not OEM fitment. That's disappointing to hear because the whole point of buying new fenders was to save time, now it's going to take time to get these to fit. Just how it goes in the Datsun world. Hopefully this shutdown will end soon so I can get back to work on it!
-
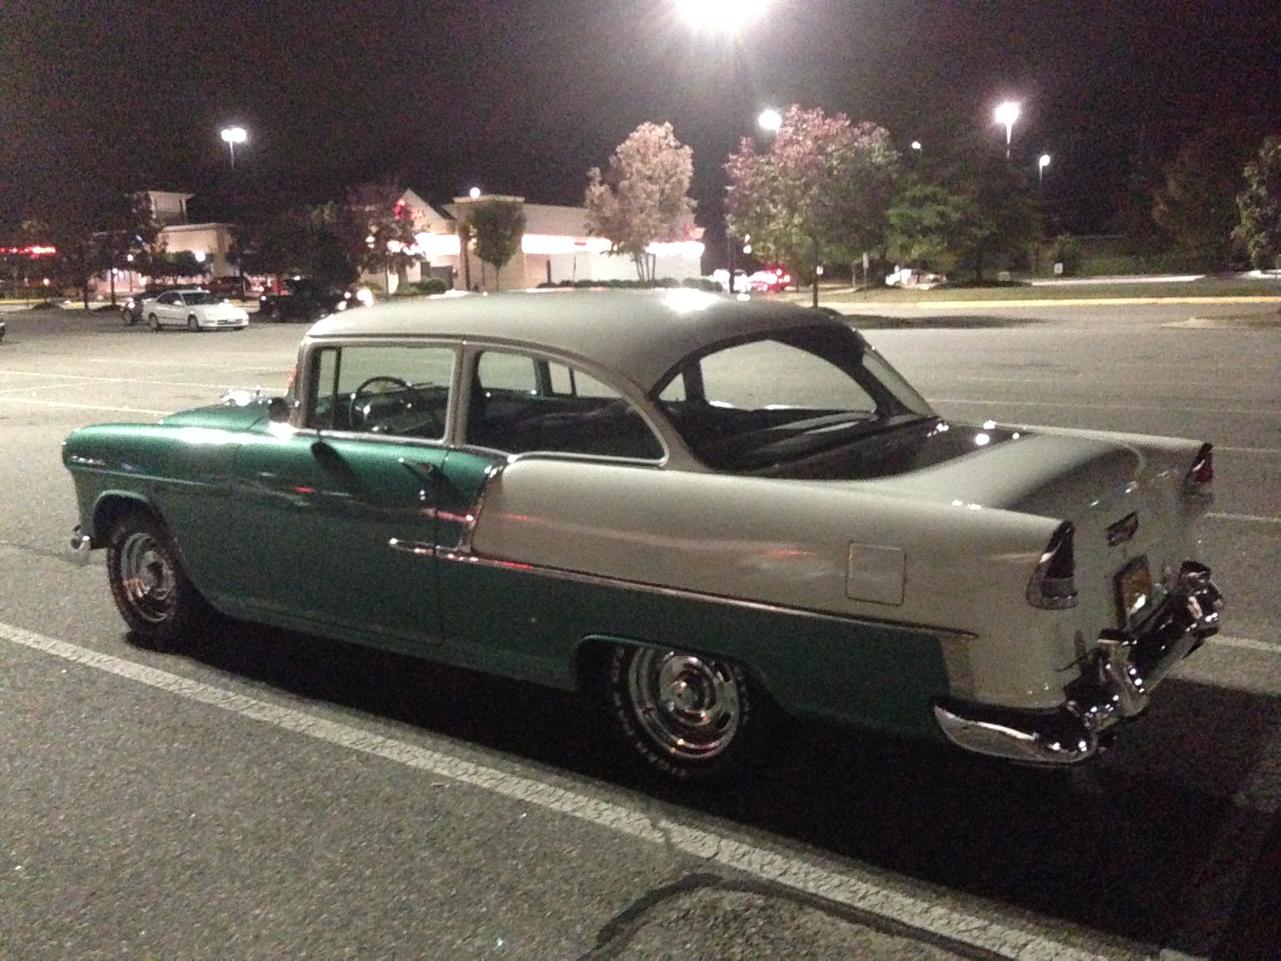
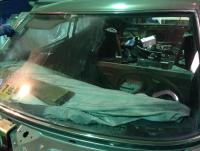
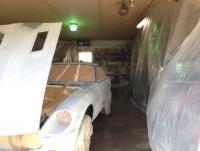
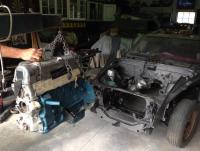
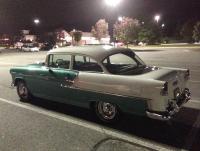
Engine and trans are in, not hooked up, but in! I was going to start hooking it up, but shifted my focus to body work. It's the most time consuming part. (Trans is sitting next to the car in this picture) The transmission put up a good fight, I'm installing polyurethane bushings everywhere, and they are such a pain. They are over sized compared to the stock rubber and makes everything barely fit. I did notice I had a broken exhaust stud in the head. Worked a couple hours on it with easy outs, no luck. Looks like I'm going to have to drill it out and get a helicoil in it. As you can see, I only use the best tools with my easy outs. I take the 55' Chevy out for parts runs. Got the jams, rear spoiler, front/rear bumper, hood, and front air dam primed. Rear bumper holes welded up, next is to get some filler over it to smooth things out. I work for the government so as of now I'm furloughed, to me it means more time to work on the Datsun! We'll see what happens tonight to see if I get more Datsun time or not.

-
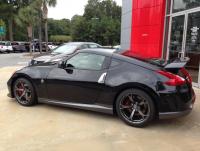
Went to the dealership today to order some parts. This bad boy was sitting outside, 370 Nismo. Only $52k. :paranoid: Ouch! I'm not sure she's worth all that, but it's definitely a good looking car.