Hardway
-
Posts
1,332 -
Joined
-
Last visited
-
Days Won
16
Content Type
Profiles
Knowledge Base
Zcar Wiki
Forums
Gallery
Events
Downloads
Store
Blogs
Collections
Classifieds
Everything posted by Hardway
-
I actually think $16.5K is very fair but I certainly would not have paid over $10K for it. Most of that is for the VIN. Right off the bat the new owner will need to source new/used front fenders, a hood, a front bumper, a headlight bucket, possibly a grille, and a complete lower valance panel assembly. Thankfully all those parts can be sourced but even if you did not have to ship any of it and got a good deal on all of it you are looking at least $1K. Even if you only painted the new parts it will be $1K - $2K and it wont match the rest of the car. This would be just to fix everything that can be seen. However and we can all agree, the damaged floors need to be fixed, rear rockers and inner fender needs to be cut out and fixed, and the suspension needs to be gone through. In the end if the new owner has connections and does some of the work themselves they might be in the car for $22K - $25K getting everything right. Make it a bare metal re-spray and really restore it, $30K easy. Possible resale when all is said and done, $40K+. Like all of you I hope the buyer restores it but only time will tell.
-
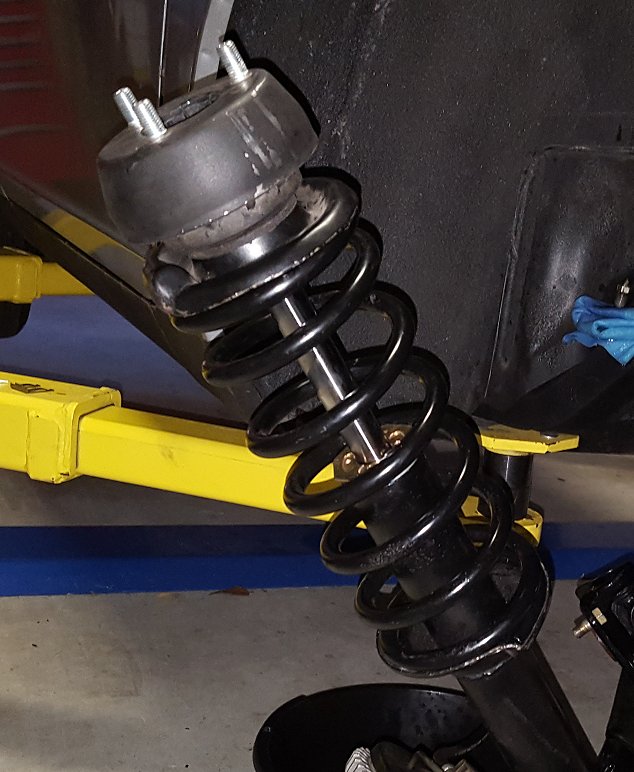
 Ever since I bought my '71 240z in June 2014 the rear of the car would squat down at take off but never rebound. I could tell as I was driving down the highway the car was nose high. I witnessed just how bad it was when I had to take the car for its annual inspection watched the inspector drive it. Even sitting still the rear always sat lower than the front of the car. At first I thought the strut inserts were shot (and they were) but even after replacing them there was very little improvement. Seeing that the springs were at least 47 years old I was sure they were fatigued. Not wanting to lower the car with Eibach or Vogtland springs but still wanting a new spring I went on the hunt to find something that matched up. Some of you may remember with my lime green '72 240z I went through a lot of trial and error with a full set of Moog 6558 springs that are designed for a Chevette. In the end they were too stiff and no matter how much they were cut down it was never right. Going back to Moog's giant spring chart and knowing I needed to stay within the inner and outer diameter of the stock springs which is 3.5" ID and 4.5" OD respectively I narrowed it down to the CC223. I placed an order for a pair on Rock Auto which ran less than $50 with shipping. The stock springs have a free height of 14.25" and an installed height of 10.5". The CC223's have a free height of 14.5" and and installed height of 12". The CC223 has a ID 3.5" and a OD of 4 3/8". The stock springs have a wire diameter of 11.46mm and the CC233's wire diameter is 12.56mm. I am unsure of the stock spring pressure but the CC223 is 130 PSI. Here is a picture of the original on the left on and the new CC223 on the right. You will see the CC223 is a variable rate spring while the original is progressive. Personally I did not care as long as it worked so I installed them but installed the variable end on the top. Once both sides were done I put it back on the ground and unfortunately it made the Z look like a shackled up muscle car. It had some compliance as I could push down on it but there was no way I could run it like this. So off they came and through some trial and error I cut three coils out of the variable side and put everything back together. The end result is exactly what I wanted. The car sits level, has good compliance and handling, and has very little rear end squat at take off. Now I just need to get some taller tires and it will be spot on. I welcome any questions or feedback you have. Thanks!
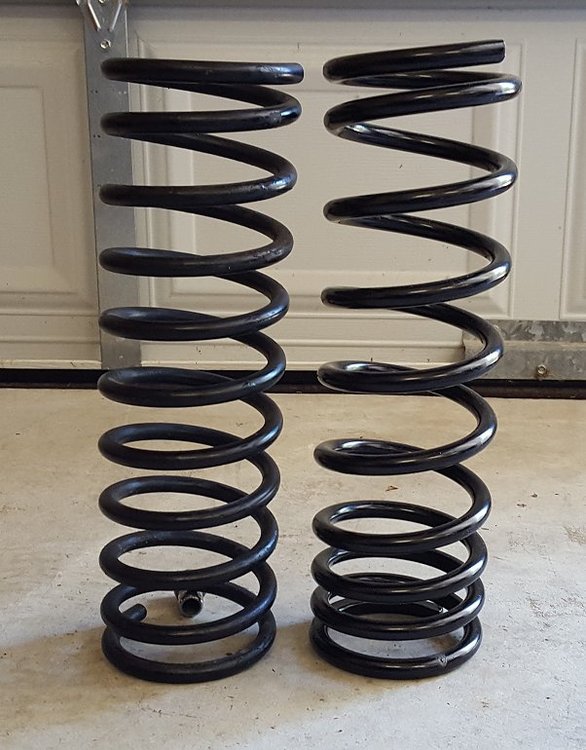


-
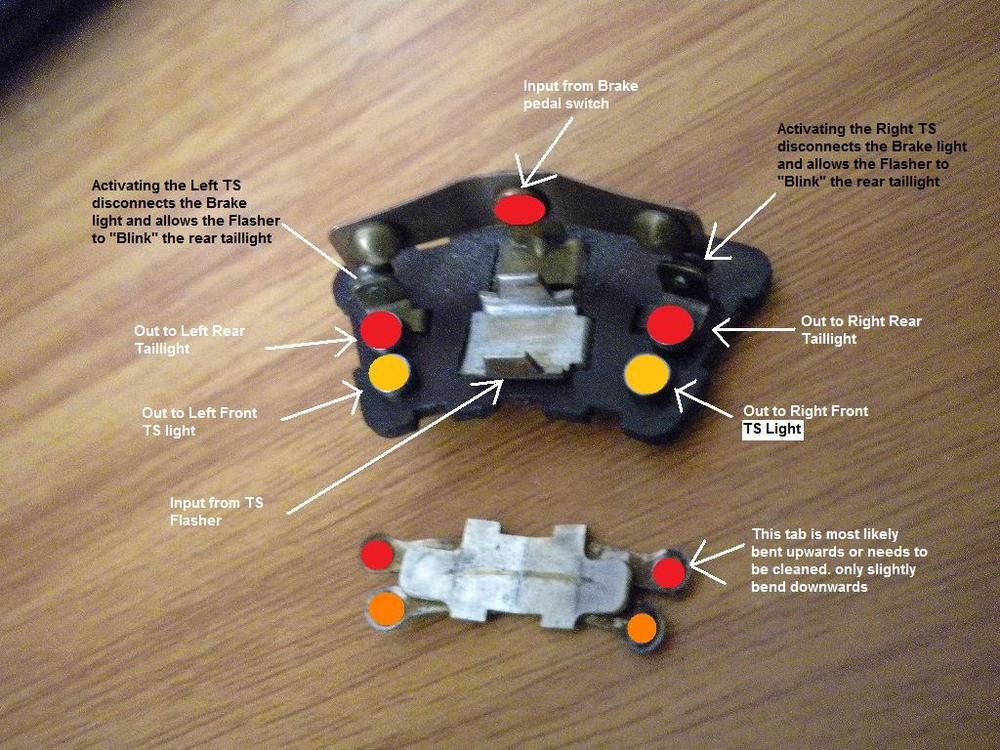
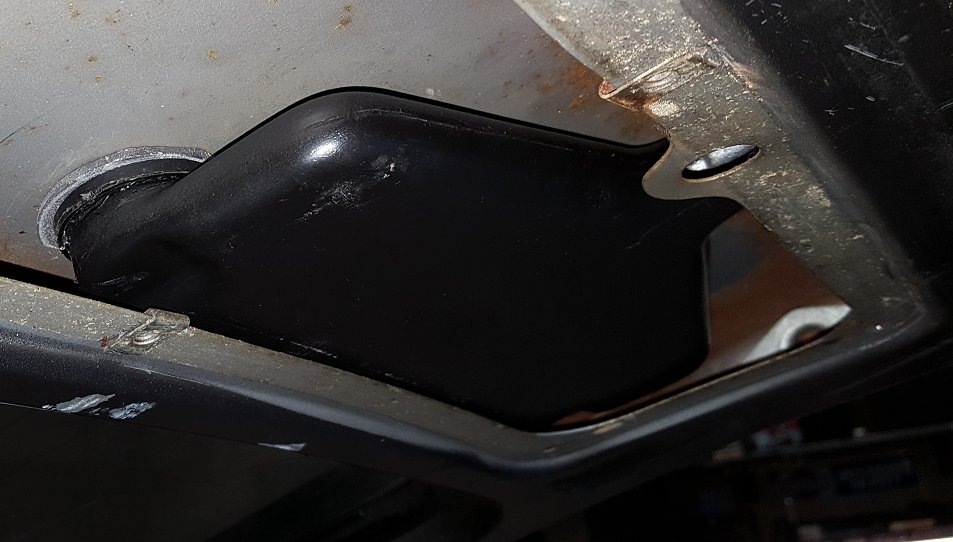
The front and rear are on separate contacts, see diagram below. The contact for the right rear taillight is what needed attention and now that I have been through this exercise, I would have only put a little solder on it and filed it down. I can see how using copper might be better but I would feat heating up the copper on to the contact would distort the thin metal of the contact. I will see how my fix holds up and report back if it fails.
-
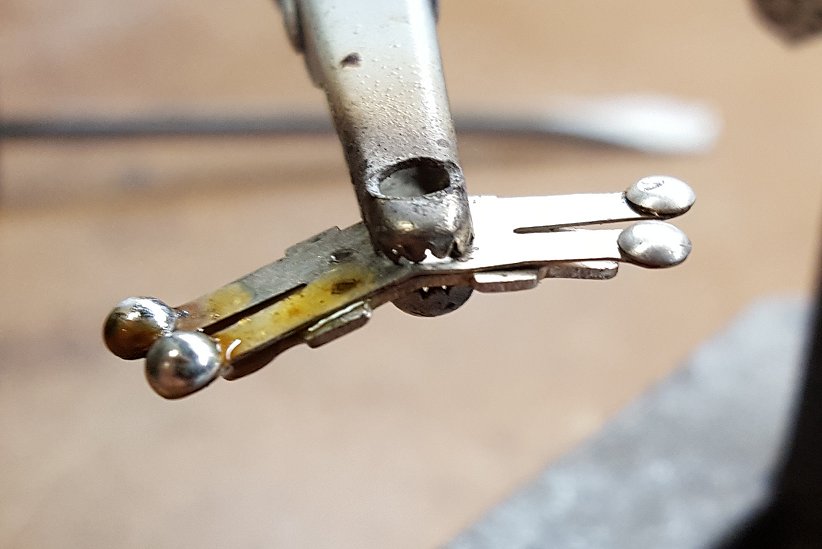
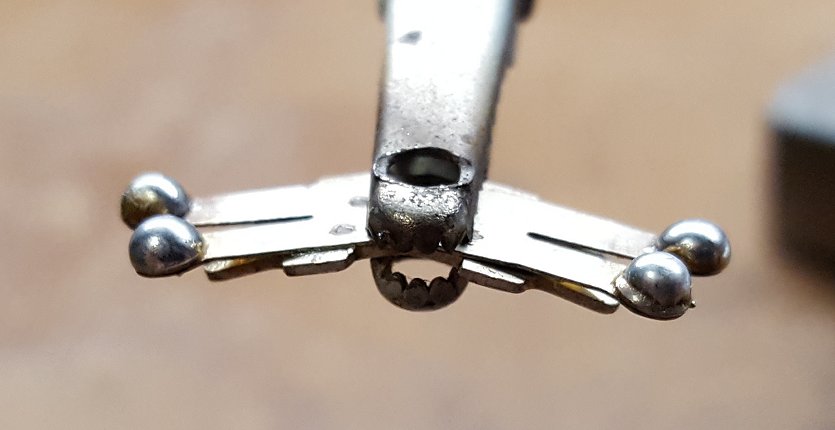
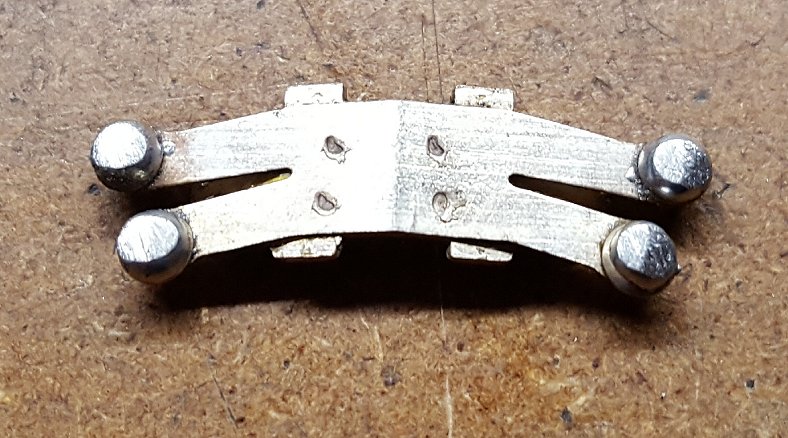
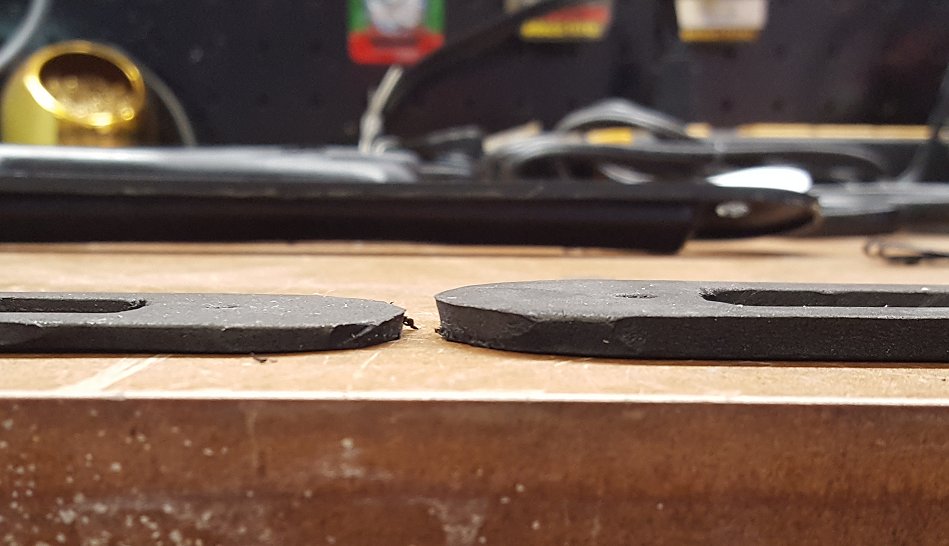
The turn signal switch in my 240z is actually a "restored" switch I bought in April 2015 from Parsignault Parts on Ebay. It has worked flawlessly up until April of this year when the right side rear would not blink but the circuit would turn off the brake light. So when I was at a stop light with the right turn signal selected, my right front turn signal flashed but the right rear light was dark with only the left brake light on. With ZCON coming in June I wanted to get this taken care of. After some troubleshooting I determined the problem was with the switch, UGH! The switch was not completing the rear turn signal circuit when activated so I carefully opened up the switch and removed the rocker contact, bent the tab up a little, and reinstalled. On the bench it tested fine but once back in the car and a few more cycles were performed, it would stop working. The thin metal of the rocker contact has weakened over time and so I spoke to Dave Irwin about restoring. He said he could do it and should run $70 which sounded very fair. Before I spent any money I wanted to have another go at it. Since the metal was fatigued I figured I would add some metal to the contacts using some rosin flux and solder. Here it is with the first side done on the left. Then I did the other side. Knowing this amount of solder was too much I started filing it down and reinstalling it on the switch base to check it. It took a fair amount of trial and error and I ended up filing off approx. 90% of the solder. I didn't take a picture of the final state of the contact but needless to say it worked and only took about three hours of my time total with all the troubleshooting and work I performed. If your switch is not working properly, take the time to troubleshoot it. All of these switches are between 40 and almost 50 years old and may just need some cleaning or in my case, a little extra metal added back to make them consistently work again.
-
Like FunkyTownZ said, kudos to you for keeping your emotions in check and not going beyond your limit. I know it stings to have one pass you by but in the end you made the right decision. Keep hunting and good luck with your search!
-
I have been saying this ever since I got in to classic Z's. For as much as Nissan uses the 240z in its marketing and references its heritage and history, its about a time they started supporting it properly. I am sure prices will be high for everything but at least they will be new and can be obtained. This will only help the values rise on high quality examples as the true cost of parts will be known. Looking forward to see what they offer as time goes by.
-
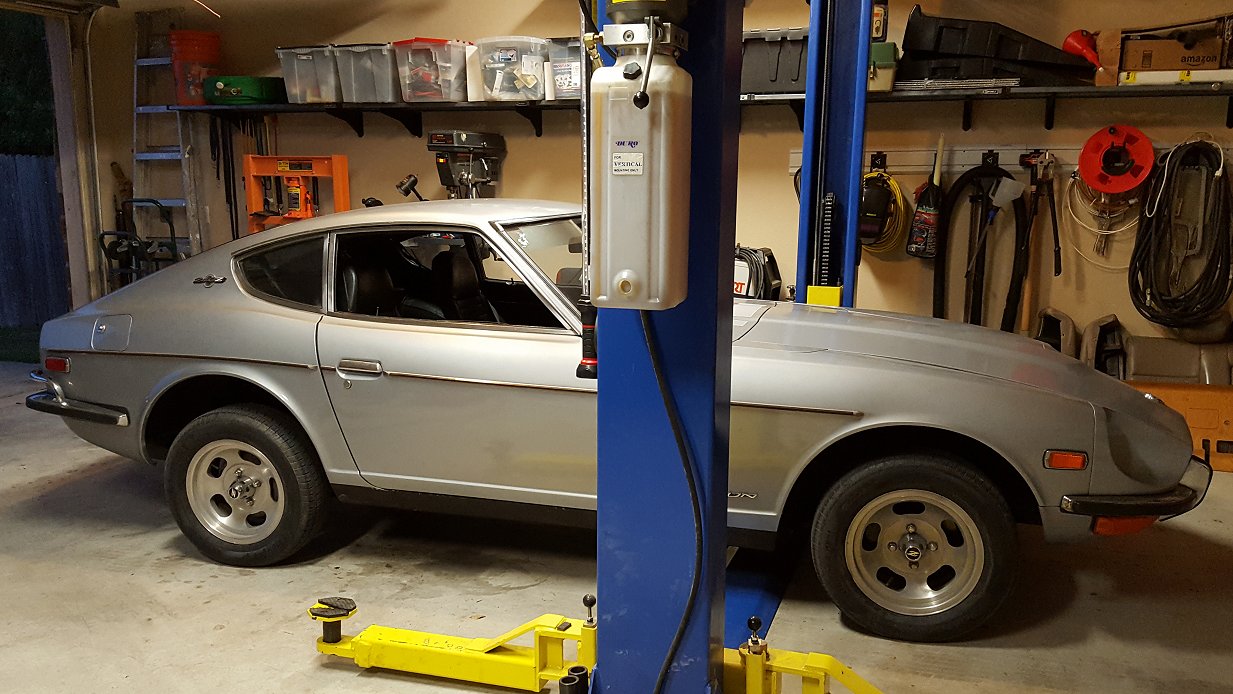
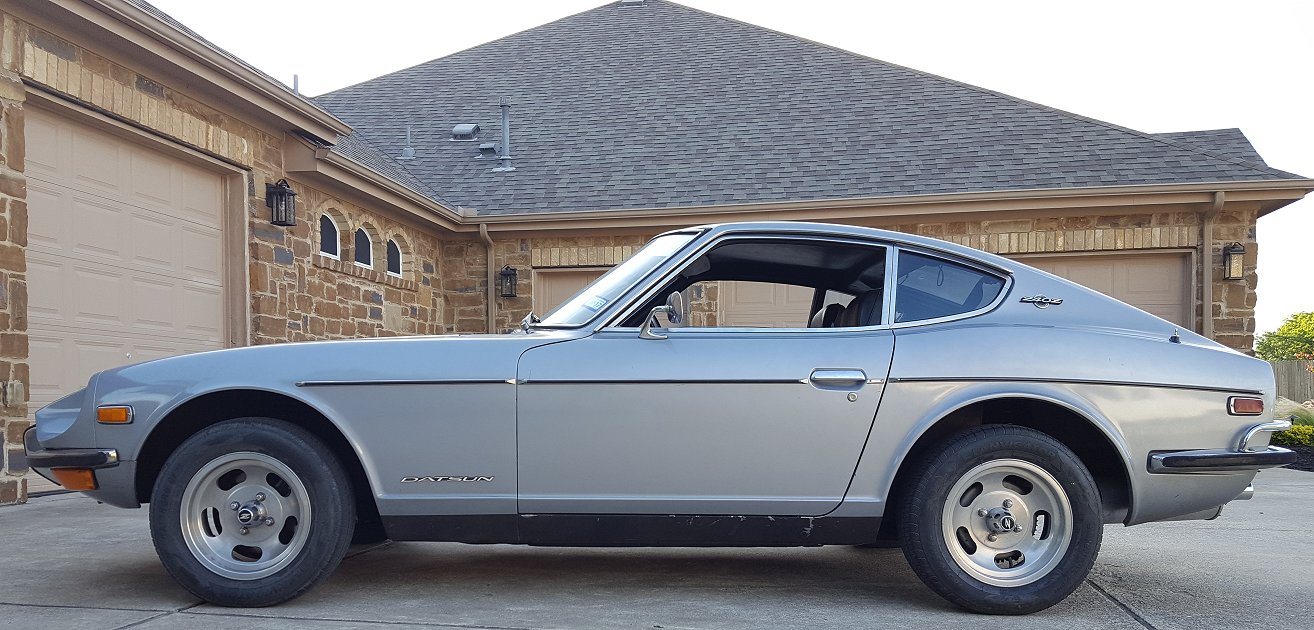
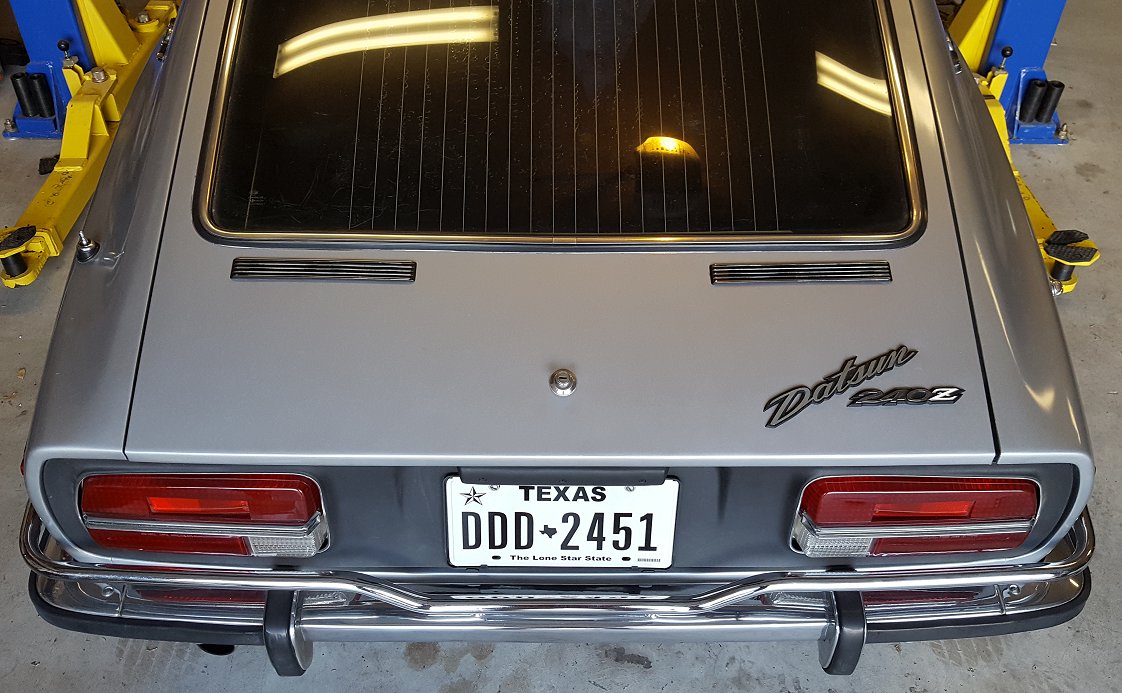
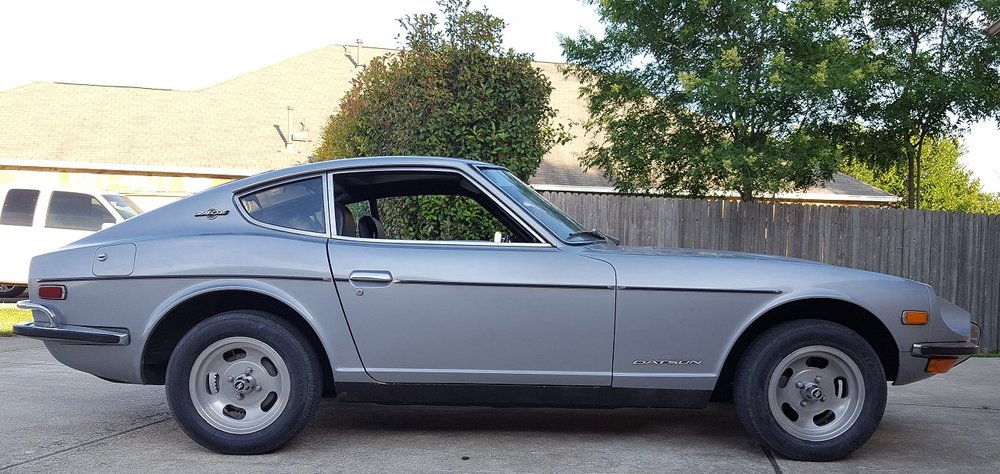
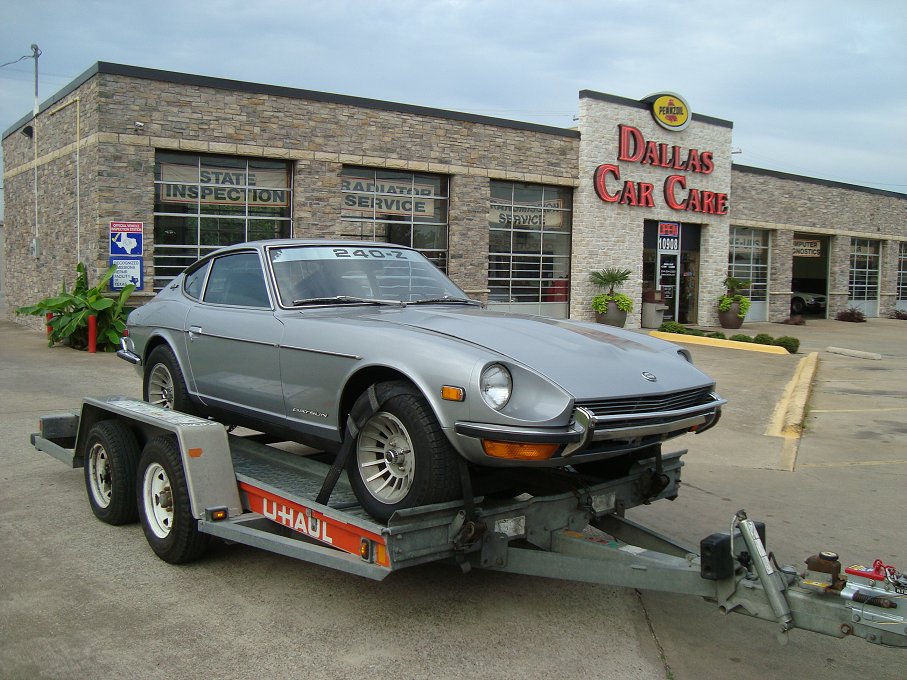
In 2014 I was back on the hunt for a nice 240z ever since I sold my lime green '72 240z several months prior. In June I saw a Craigslist ad in Dallas for a 1971 series-1 240z. It was the color I wanted (silver), had already had the entire suspension rebuilt and detailed along with the engine, and it was pretty much ready to be enjoyed by its new owner. Asking price was $10,000. Given all that was done I thought this was fair as long as it was 100% what was described and luckily my wife thought the same. I called the seller and expressed that I want it, I am serious, and I will be there on Saturday morning which was 2 or 3 days away with cash. The seller was Dave, owner of Dallas Car Care, and really nice to deal with and even though I offered a deposit he said one was not needed. I told him I plan to drive it back home so I bought insurance for it, sent him a copy of my insurance card, and he inspected it and placed a sticker on it so it was legal. When we got there early on Saturday morning we looked it over and took it for a test drive. On the drive I could tell the brakes were really spongy so when we got back Dave put it on the lift so we could see under it. To my surprise 3 of the 4 flexible brake hoses were dripping brake fluid. This was not the end of the world as it is something I could fix at my mom's house once I got the car. We went to his office and I offered $9500 since it needed the brake hoses done and he refused stating its $10K firm as he had a line of other buyers after me. I went back and talked about it with my wife and felt really stuck. I wanted the car but could not bring myself to pay full price and immediately have to do work to it. I talked to Dave and offered $9500 again, put the cash on his desk and I said it would be the full $10K if he fixed the brake hoses today and I would come back. To my surprise he turned it down so I left. On Monday before I went and put the cash back in the bank over my lunch hour I called Dave to see if one of the other buyers purchased the car since the Craigslist ad was still up. He told me everyone else had either made low ball offers, had some car to sell first or some other story. I told him my offer still stands and he countered with agreeing to the $9500 and fixing the brake hoses. So I made the trip back up the following weekend, this time just by myself as my wife had an commitment to keep. We put the car back on the lift and I confirmed everything looked good, handed over $9500 cash, and headed home. And like Zed above, I have been spending money on it ever since! To be fair, I have also driven it more than any other classic/toy car I have ever owned. In my book, more drive time and less wrench time = more fun. Check out the links in my signature to see more about the car and other adventures with it.
-
Longer brake hoses - Anyone have them or made them?
Hardway replied to Hardway's topic in Wheels & Brakes
Thanks guys! Running longer brake hoses is common in the Jeep/4x4 community. Some of those guys are running extra feet of hose with no issues. Now I just need to find a place to make me some. I will keep you posted with what I find. Yeah, on the rear you will never get around unbolting the half-shafts and disconnecting the e-brake cable. That is simple stuff and does not waste anything unlike rounds of bleeding brakes. -
Has anyone ever had longer brakes hoses made for their classic Z? I am doing some rear suspension component testing and pretty much cannot swap out anything with out opening the brake system. It seems that if the brake line was 3-4 inches longer the system could stay closed and I could swap components at will. Of course, I am sure the length of hose was determined by an engineer but was curious if Is spec'd a stainless set from a brake hose company would there be any negative affects?
-
Thank you everyone. You are right, testing them by hand is not an accurate test, I just hoped they would have more resistance. I had the rear suspension apart today and compared the KYB's to what I had installed before, some Ebay inserts that actually have the same part number as the KYB's. They pretty much felt the same and rebounded just as quickly as the KYB's so I left them in for now.
-
I just received a pair of rear KYB strut inserts, part# 361001. I know they have to be compressed and allowed to rebound a few times to "activate" them. As I did this the pressure needed to push the piston down did increase some but after 10 - 15 cycles, it still does not feel stiff enough. I know these are considered as close to a factory replacement that is available but I was hoping for a little more pressure. What has been your take on these out of the box?
-
Those look fantastic! If the run as good as they look your motor should purr at idle and scream at WOT. Keep us posted!
-
Series-1 Hatch Vent Duct Clips & Restoration Info Needed
Hardway replied to Hardway's topic in Body & Paint
I am sorry Patcon. I tried my best to let everyone know their availability. If I do decide to move forward with another run I will let everyone know. Thank you for the compliments 26th-Z. The company that made them and plated them did a great job. I have already sent some business their way from other fellow car enthusiasts. I am sure someone could get a factory overseas to make 10,000 of them for the price I paid for 100 but I am not that someone. Plus, I wanted to make sure that anyone that bought them knew exactly what they were getting from a fit and quality stand point. -
You will have to take it out and have a radiator shop or someone that can tig weld aluminum. Regarding the fear of metal shavings I am sure the shop would thoroughly flush it out as part of the repair. Shocking that it does not have a drain **** on it. Who is it made by?
-
Series-1 Hatch Vent Duct Clips & Restoration Info Needed
Hardway replied to Hardway's topic in Body & Paint
"That's all folks!" The last set of clips just sold on Ebay. I appreciate everyone that purchased a set and look forward to meeting up with those that will be picking up their sets at ZCON. This has been a team effort for sure and I thank everyone who was a part of it. They say it takes a village to raise a child, it certainly takes a community to keep these old cars on the road. If a large enough need presents itself I would consider doing another run but I feel this first run took care of a lot of folks that were needing them.
-
"That's all folks!" The last set of clips just sold. I appreciate everyone that purchased a set. This thread can be closed.
-
Thank you loudoun! I will shipping out tonight's purchases tomorrow afternoon.
-
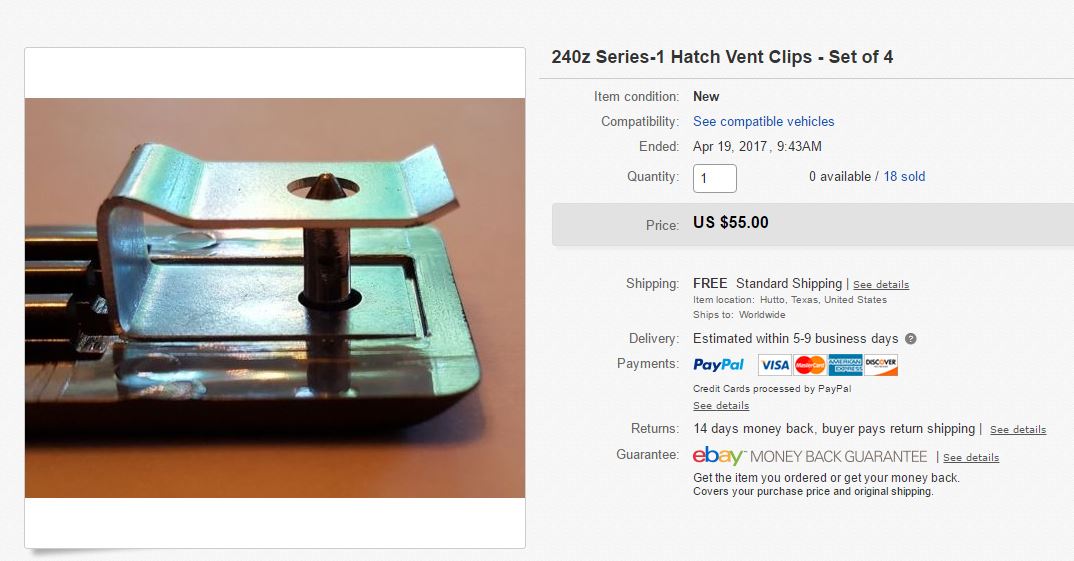
Since I was not getting anymore orders from here I put the remaining 18 sets on Ebay. You can find them here if you would like a set. http://www.ebay.com/itm/112366651557?ssPageName=STRK:MESELX:IT&_trksid=p3984.m1558.l2649 Thank you!
-
Series-1 Hatch Vent Duct Clips & Restoration Info Needed
Hardway replied to Hardway's topic in Body & Paint
Yes I did test it. It repels water very well but if you submerge it in water it will soak up a little but nothing like a sponge. You are correct, the thicker piece was too thick and would not collapse enough to get the duct work under the holes in the hatch as the sheet metal is bent downwards. The 3mm piece was spot on as it would compress enough to allow it to be worked in to place. -
I think I used axle high temp bearing grease when I did mine on my '72 240z several years ago. I no longer have the car so I cannot say how it has held up.
-
Series-1 Hatch Vent Duct Clips & Restoration Info Needed
Hardway replied to Hardway's topic in Body & Paint
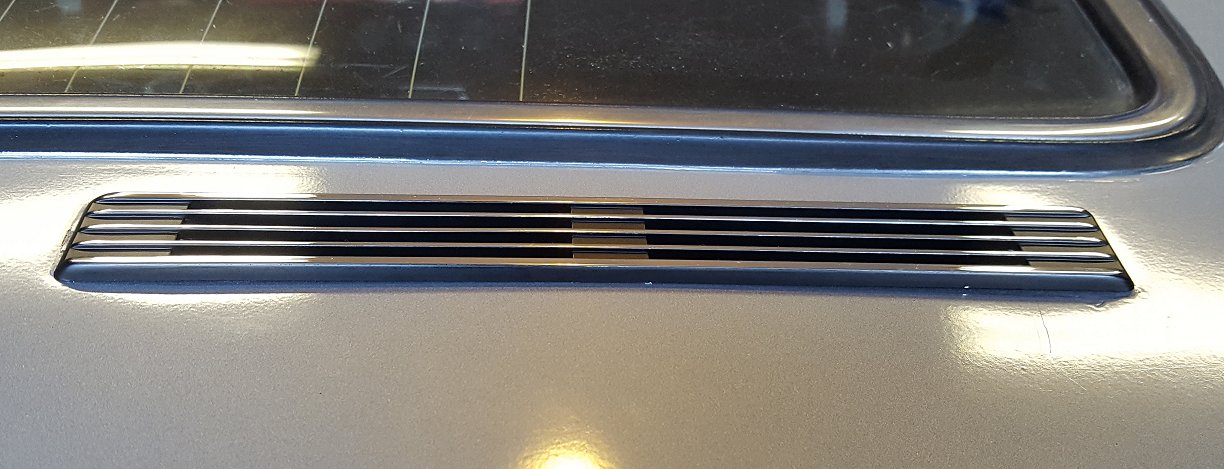
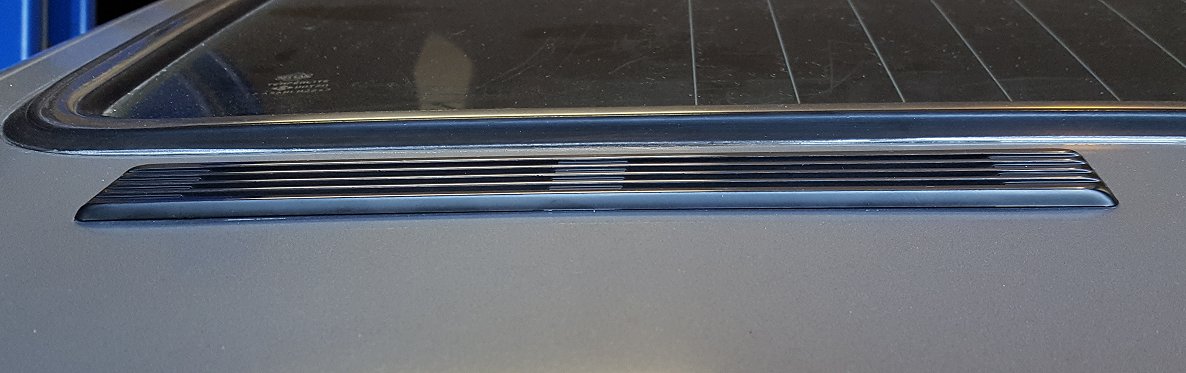
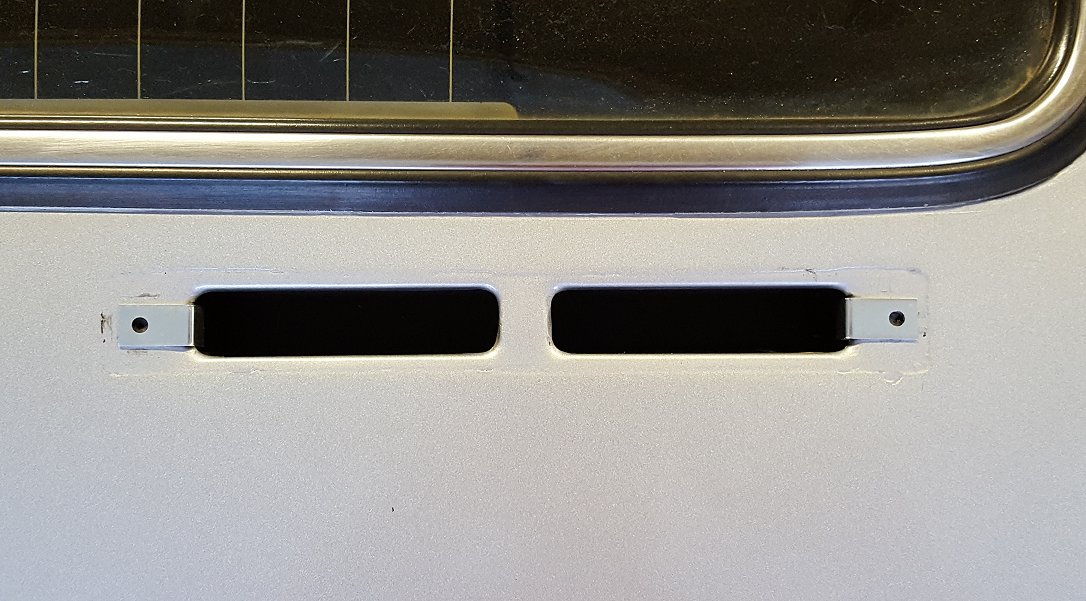
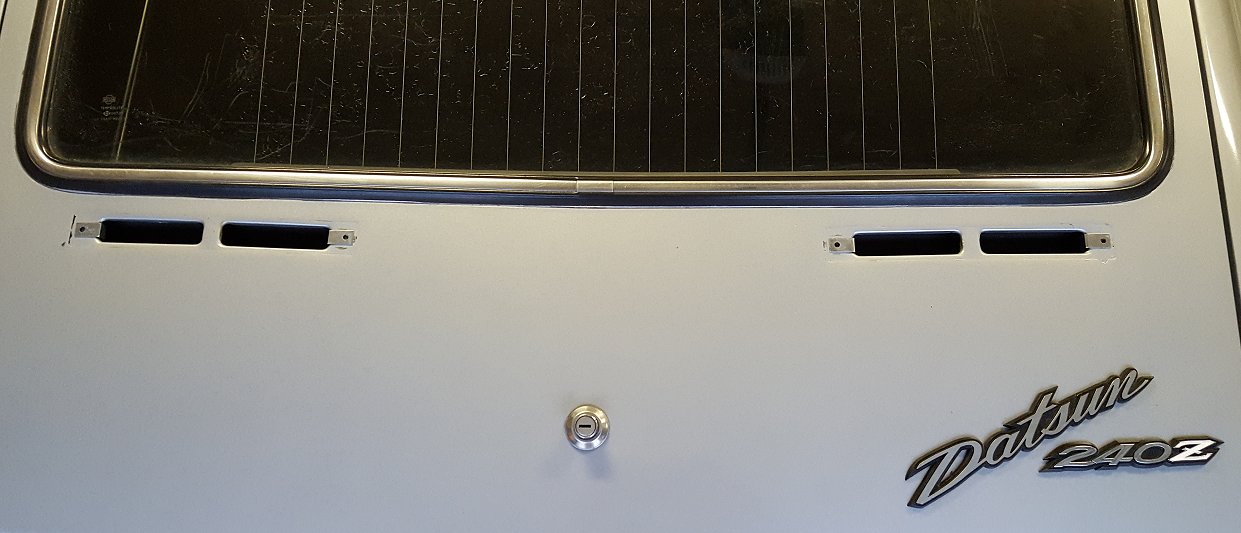
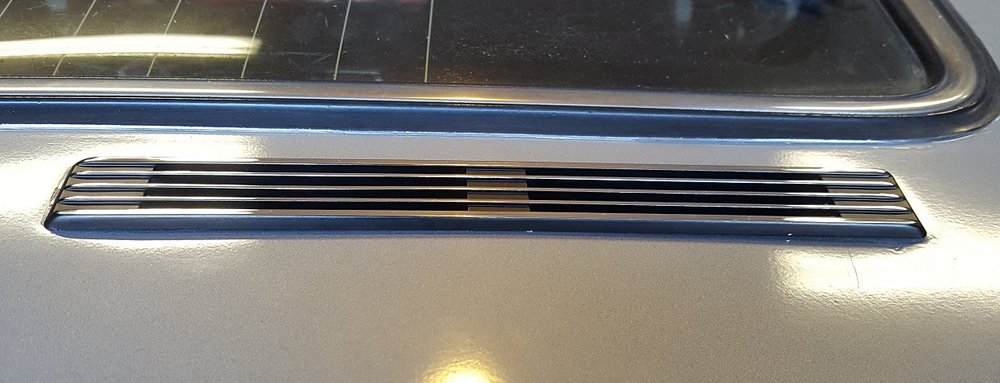
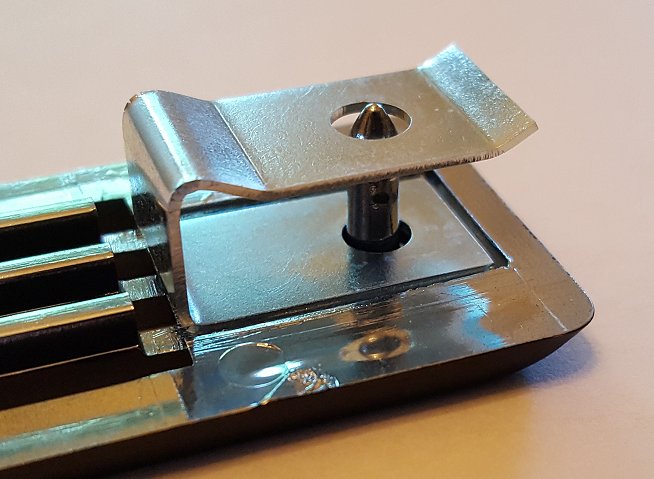
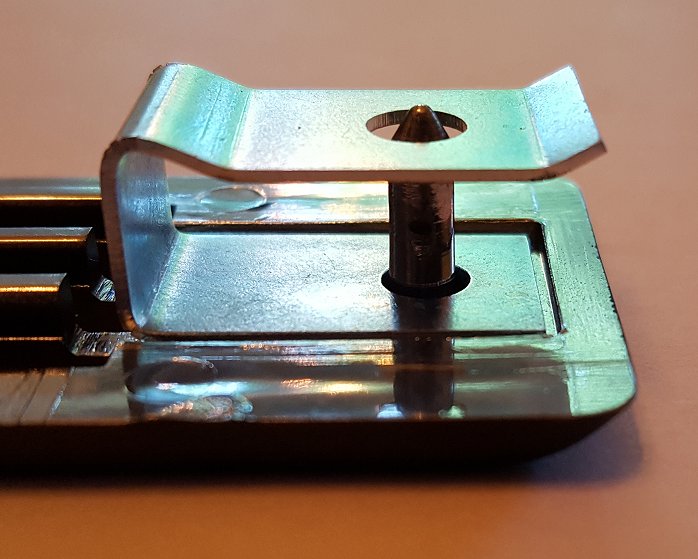
I have responded to your requests Philip and Jim. Thank you for the compliments on the clips. Just glad I could solve one of my own problems and help others at the same time. I was not able to find any barrel clips that were small enough for the holes as everything I had on hand was too big. Knowing I will remove these at some point in the future to paint the car, I did not want to do something so secure that it would break the pins off when I remove them. I ended up using some black RTV gasket maker to essentially glue them in place. Using some blocked of styrofoam and a few bungee cords wrapped around the hatch to apply pressure on each end, the final result looks fantastic. They sit nice and flush against the body. I tried pulling up on them and so far they seem pretty secure. Below are some pictures of the end result. Job done!
-
Series-1 Hatch Vent Duct Clips & Restoration Info Needed
Hardway replied to Hardway's topic in Body & Paint
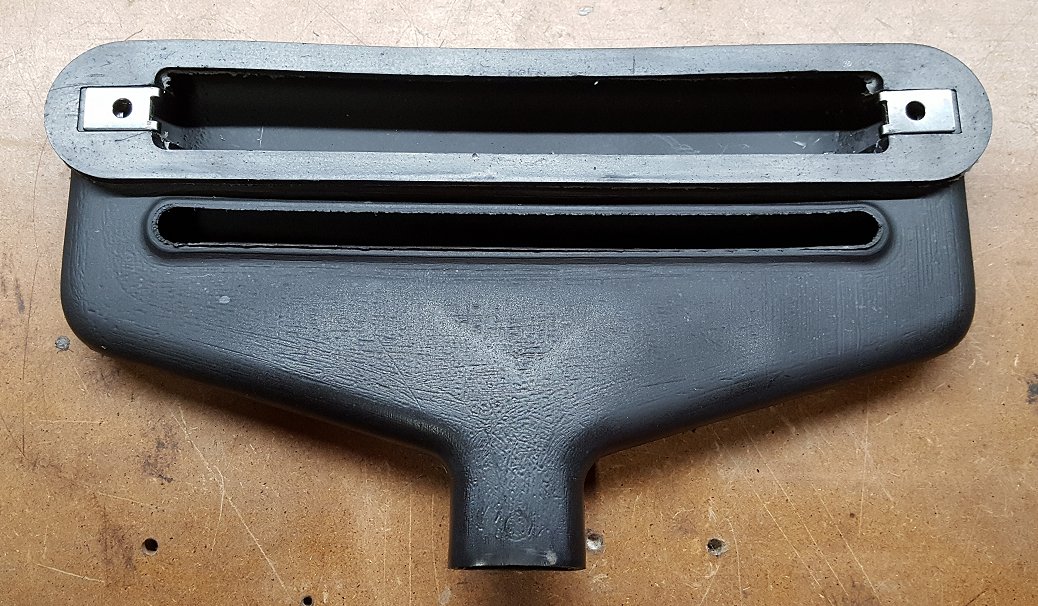
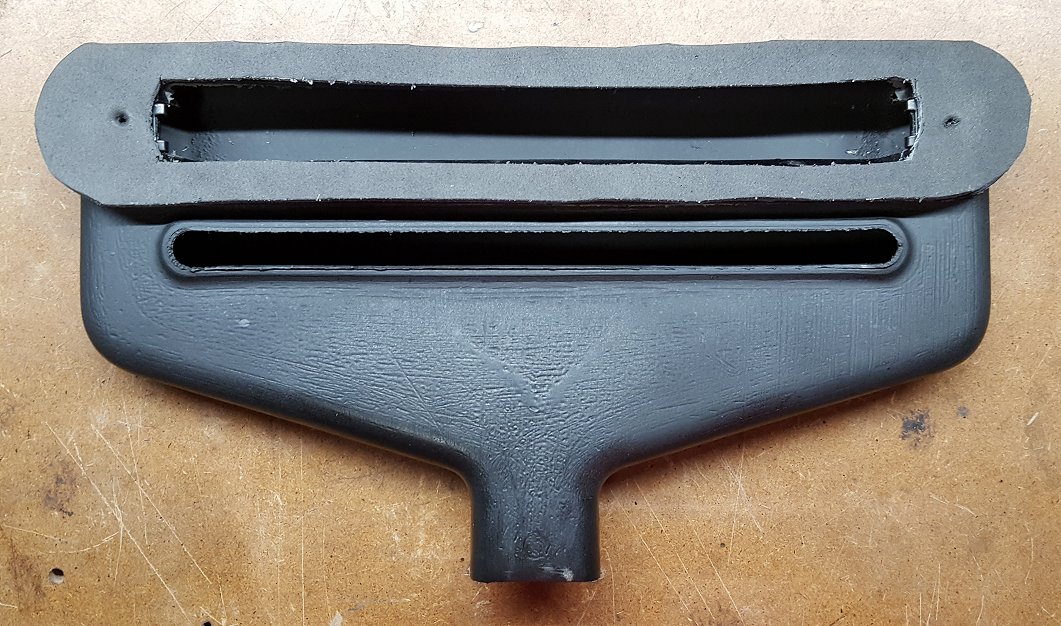
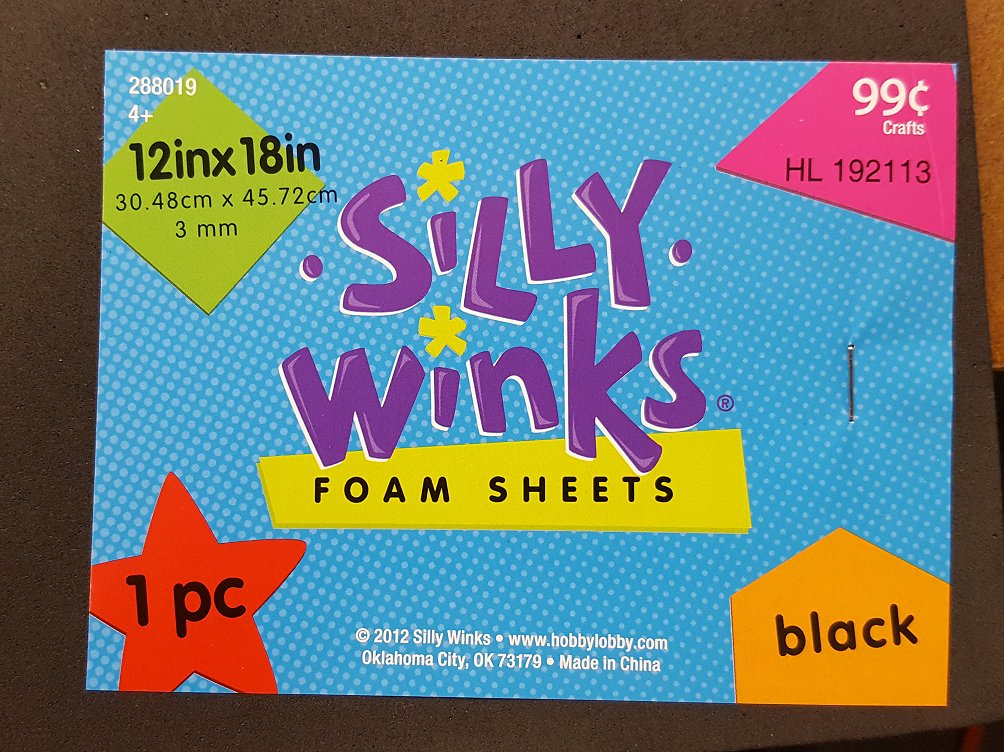
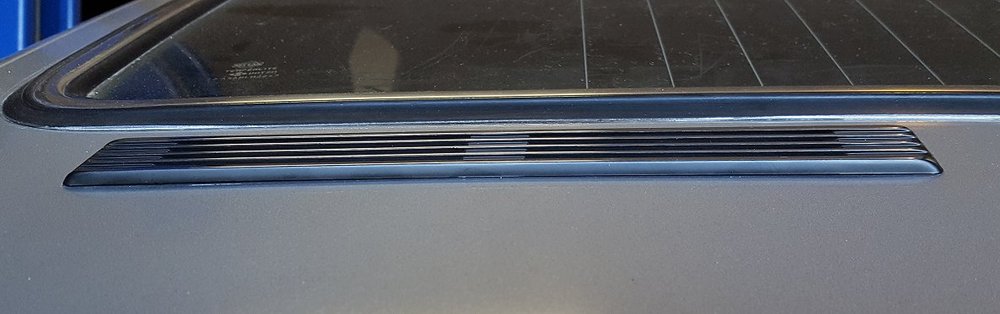
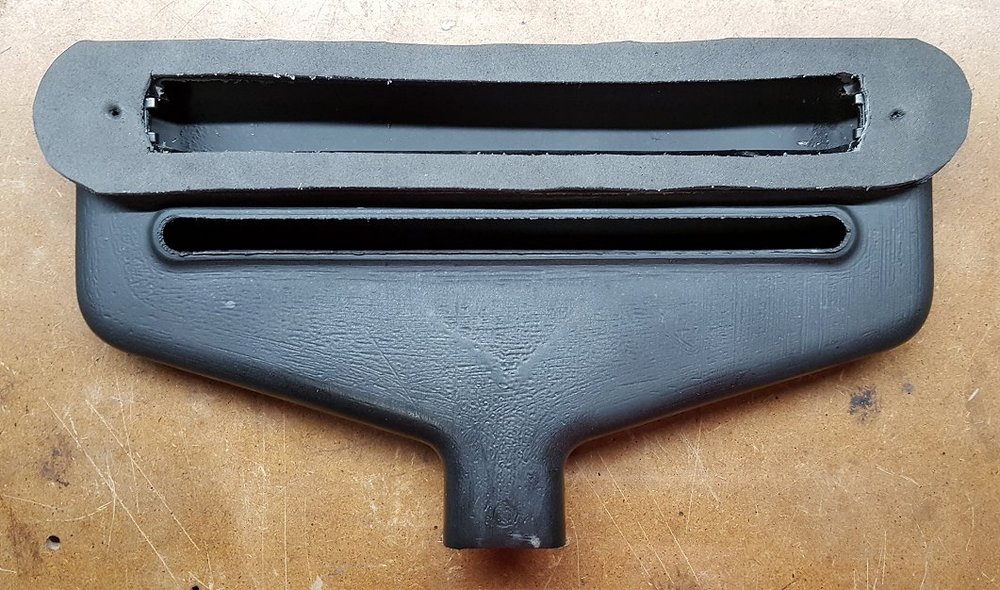
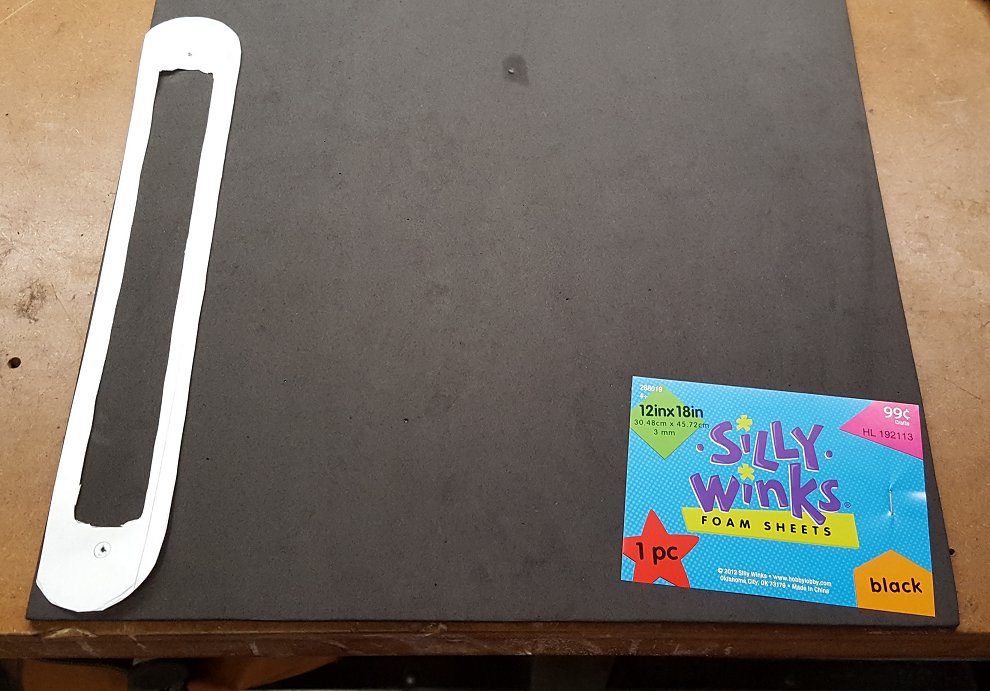
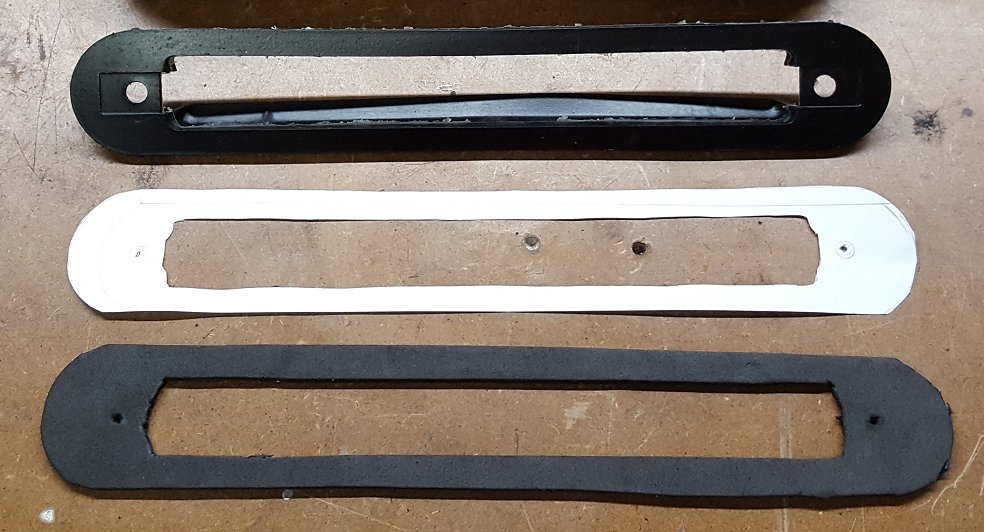
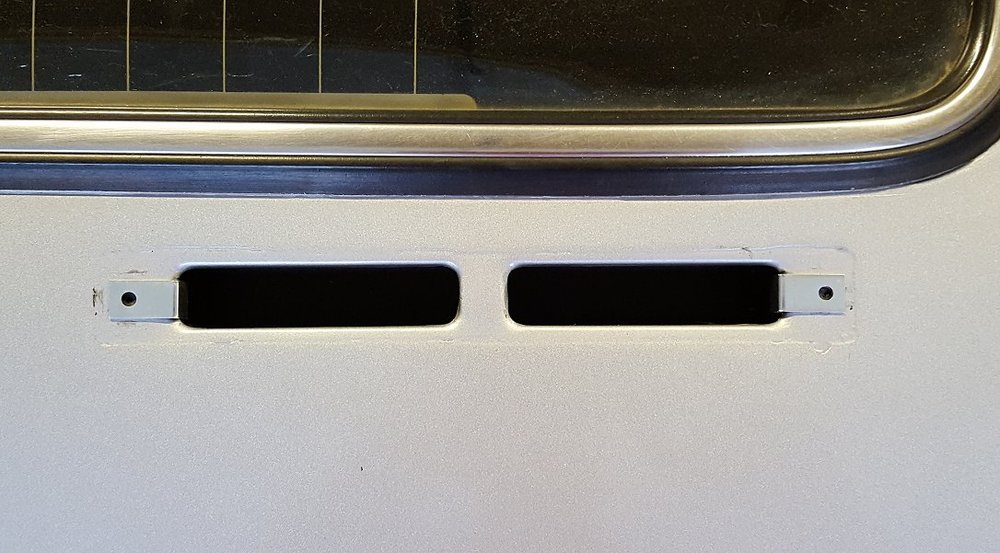
With the new hatch vent clips in hand I set about getting everything back together. I stopped by Hobby Lobby and picked up some 3mm and 7mm closed cell foam. It is made by Silly Winks. Using the rubber duct seal I bought from Steve I made a template of what the seal should look like. Since I had both sizes of foam I cut out gaskets from each size. After some initial testing I determined the thicker foam would not collapse enough to fit in the hatch opening. Below is a comparison. Using some automotive contact cement I glued the rubber gasket to the duct. The used the #10 speed nut I bought from the auto parts store as it is a 95% match to the original. I sprayed some 3M spray adhesive to the foam gasket I made, placed it on the rubber gasket and let it set up for about 15 minutes. I patiently worked the assembly duct back in to the hatch opening, taking care not to damage the foam gasket. After a few minutes of fiddling, it was in. I then secured it using the clips I had made. The clips hold the assembly nice and tight! Now that the severe weather has passed I am going to track down some barrel clips so I can attach the chrome plastic grilles over the vent openings. The finish line is in sight!


-
Series-1 Hatch Vent Duct Clips & Restoration Info Needed
Hardway replied to Hardway's topic in Body & Paint
I picked up the clips on Friday from the manufacturing company and they look and function just as expected. Below is the link to the thread I posted in the Garage Business forum. The sets are a little more expensive than originally communicated due to the higher cost of the slightly thicker spring steel and tax. At $50/set shipped in the US I think it is very reasonable. I will post up all the work I did to install the ducts once I go through and edit the pictures. Thank you again to Zup and everyone who contributed to this effort and making it a reality! -
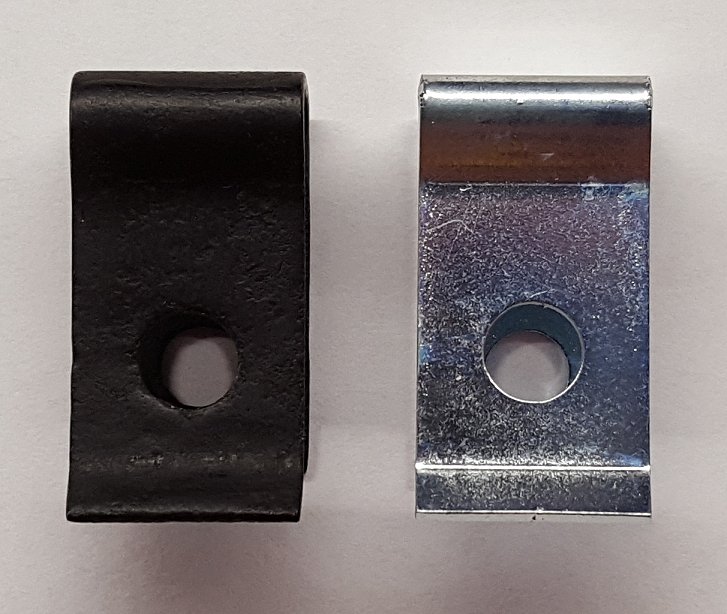
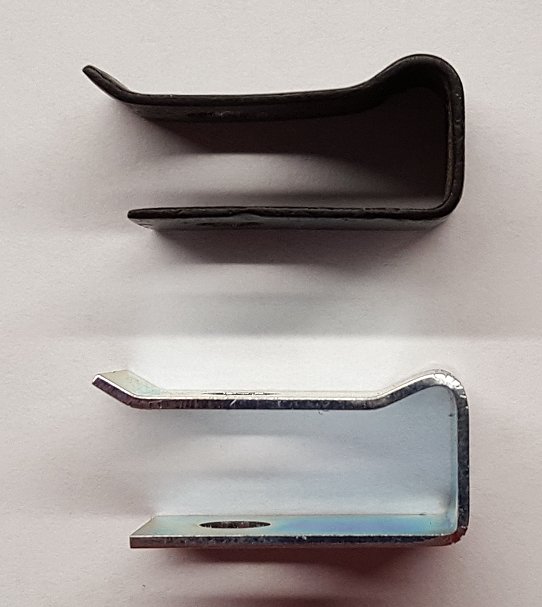
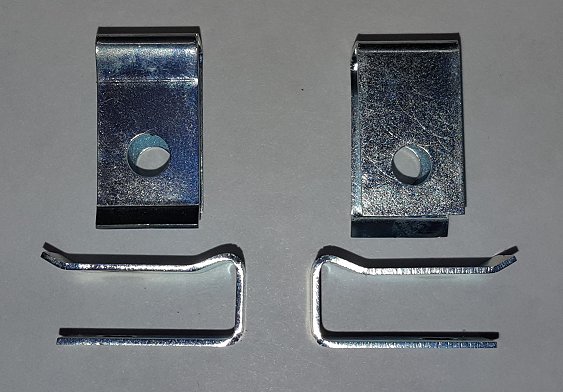
For sale is a set of 4 clips that hold the duct work to the backside of the hatch sheet metal and provide the location for the barrel clip that holds the vent grille on. Also known as a Tailgate Ventilator Clip. Please reference Nissan part# 90829-E4100 and the link below. These have been NLA for years and I discovered a personal need for a set. With the help of others I had a local sheet metal fabrication company produce a run of 100 clips which equals 25 sets. I needed a set myself and I am keeping an extra as a spare thus making 23 sets available. The clips are made of spring steel just like the originals and are clear zinc plated to protect against corrosion. Each set is $50.00 US shipped w/insurance & tracking to anywhere in the continental US. Shipping to Canada should not be too much more but reach out to me for a specific quote. There is a $5.00 discount for each set after the first if you purchase 2 or more sets at one time. Meaning 1 set = $50, 2 sets = $95, 3 sets = $140. Please review all of the pictures below. The clip in black is an original that was used to model the new clips off of. The new clips hold the duct work nice and tight to the under side sheet metal and fit very well in to the recess of the plastic chrome vent grille. Please ask all questions prior to purchasing. Payment accepted via Paypal and I will only ship to the Paypal address. Please DO NOT use the friends and family method. PM me for my Paypal email address or mailing address as check is welcome as well. I will ship out each set within 2 business days of payment being received. Original link - http://www.classiczcars.com/topic/57001-series-1-hatch-vent-duct-clips-restoration-info-needed/


-
In my experience with Eibach springs in the past, the Pro-Kit springs are black/dark grey and the Sport Line springs are red. Sport Line's are usually lower than Pro-Kits. I am unsure if they ever made Sport Line's for the classic Z's.