Site will go down for maintenance soon. Please finish your messages.

Hardway
Free Member
-
Joined
-
Last visited
Everything posted by Hardway
-
 Despite the door drama you are making great progress @wheee! I know how deflating it can be finding that kind work from previous owners but its what we sign up for and get from time to time. Glad to see you are pressing on and hopefully the replacement doors work out for you. Keep up the good work!
 -
Great photos and a beautiful Z @Mike I am looking at VTO wheels for the future.
-
Thank you for sharing all of this @26th-Z and kudos to you for making the car your own. I know some would run moan and groan about not making it 100% stock when you have everything to do so. However, no matter how rare or low the VIN, these cars were meant to be driven and enjoyed. Everything you are doing will make it a fun car to drive. Plus, if you ever wanted to return it to 100% stock, you could. Keep up the great work!
-
Thank you Bob. Stick with it, you will get it done. If it were easy, everyone would do it. I believe key is being organized and planning ahead. If you can have all the parts you need on hand before you start, makes things go a lot faster.
-
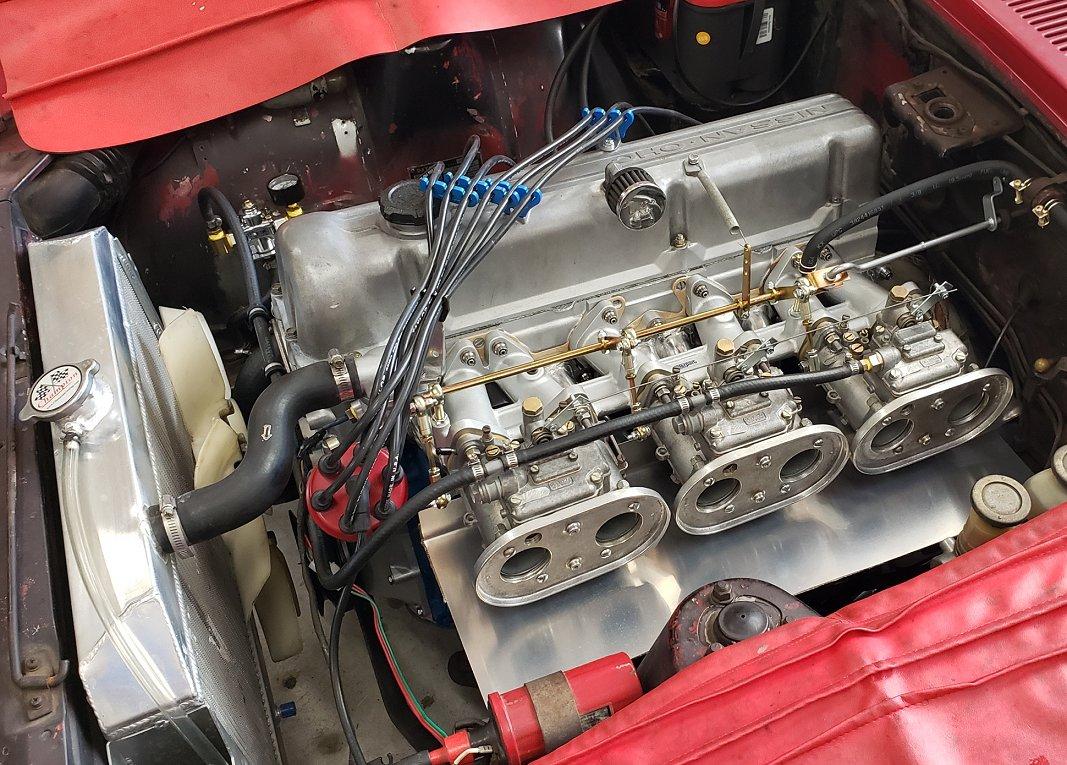
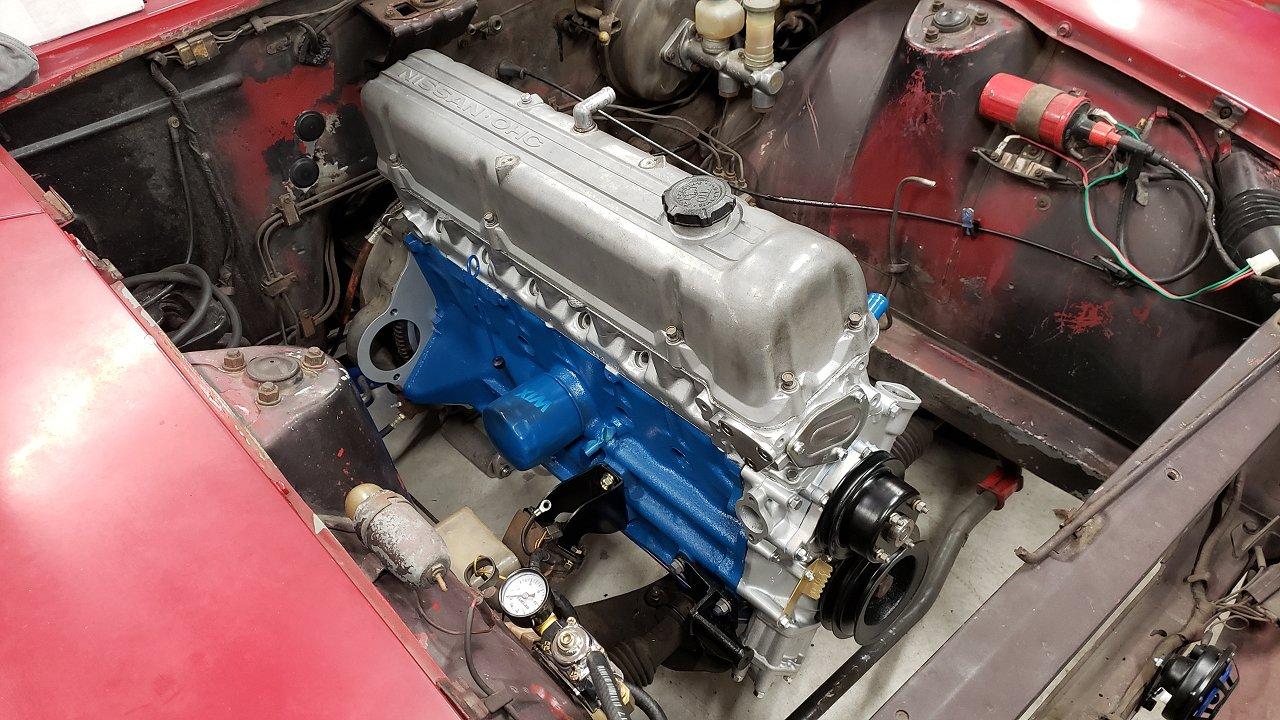
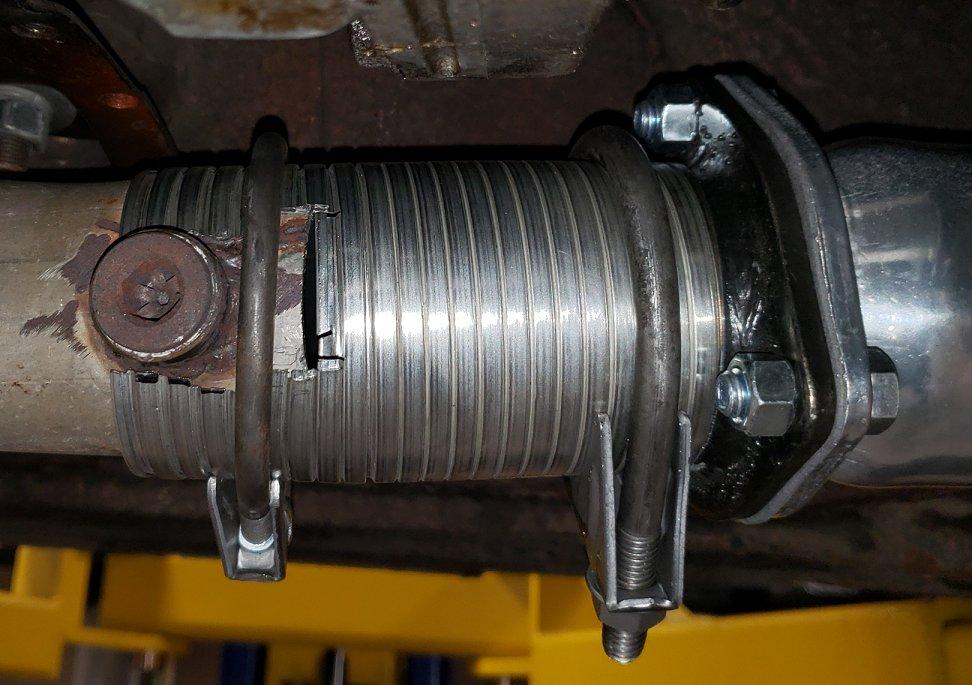
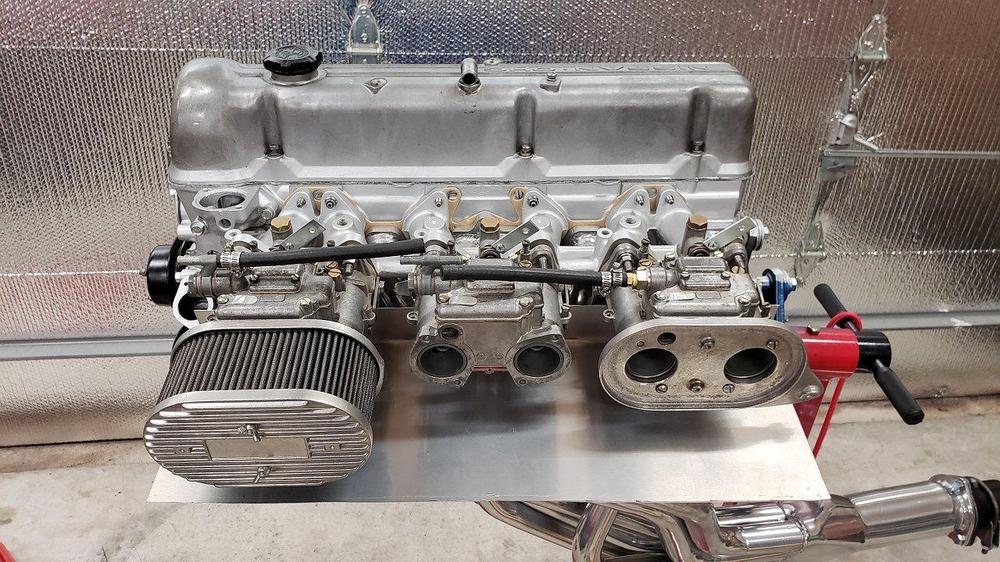
Knowing I needed to do something about the super loud exhaust, I set about a temporary solution to connect the new header to the existing exhaust pipe. This is so I could finish filling it with coolant, purge any air, and be in a position to drive it to the exhaust shop for something more permanent. I bought some 2.5 inch flexible exhaust tubing at the parts store and trimmed it to fit the oval shaped opening and around the O2 bung. Once I was close I closed the hole with some HVAC metal tape. Not leak proof by any means but sure quietened things down some. My wife helped me put the hood back on and I got the cooling system filled. With so much accomplished I decided a quick jaunt down the street was in order. The clutch action felt really good, brakes worked, the engine ran and rev'd great through the first three gears. I was honestly shocked as I expected coughing and sputtering from the carbs until they were tuned. After almost a year, it is back! All in all, I am super happy to have it back together and running again. I hope to get it to the exhaust shop next weekend or earlier and start tuning the carbs some. Stay tuned!

-
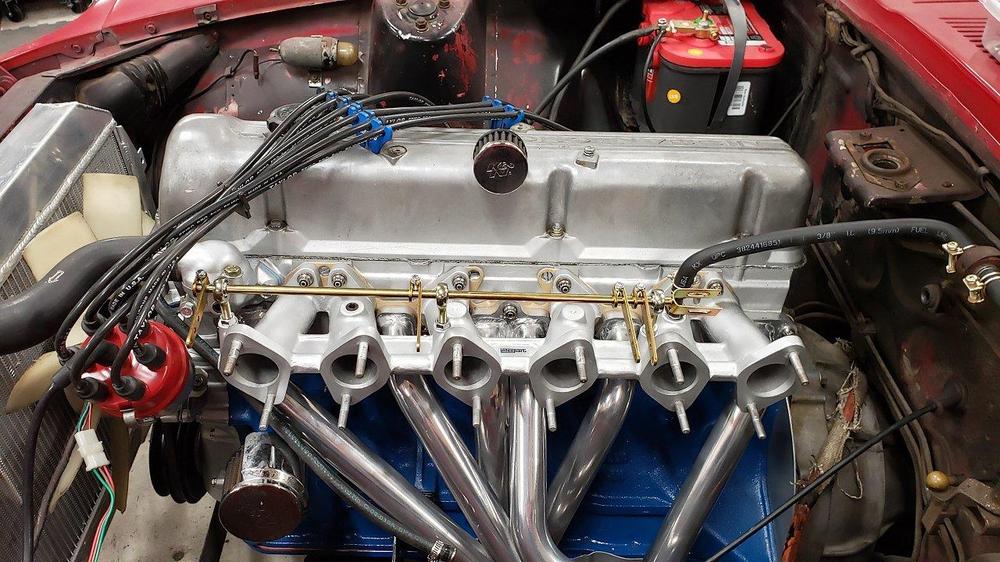
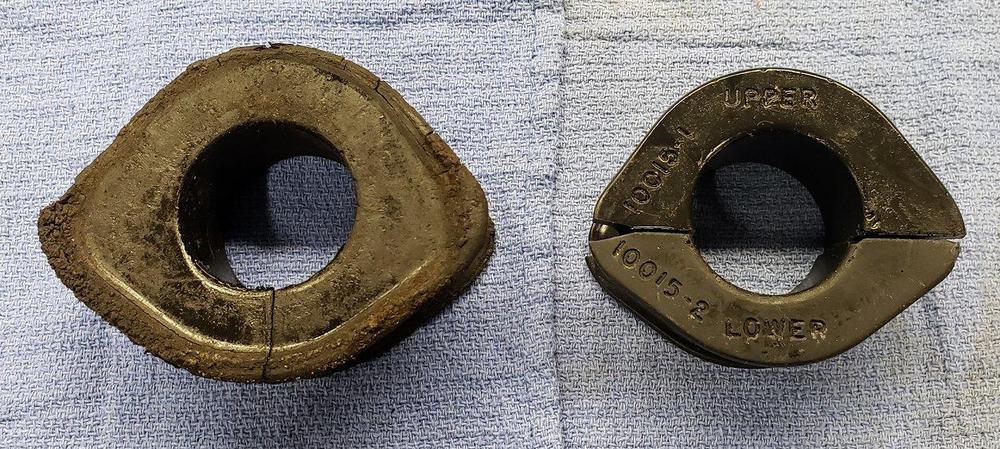
My new o-rings from McMaster-Carr arrived. These were to replace the flattened o-rings in the soft mount holders. I glued them in with a little shoe goo and laid a board with a book on top to provide even pressure over night. The next day was carb install day. Getting the carbs on with the heat shield is a bit challenging as it adds another item you have to contend with in an already tight space. Some patience and care not to drop anything saw it come together in the end. I left the linkages loose for now as I know syncing and tuning would be in my near future. With a cursory system and fuel pressure check complete and a fire extinguisher at the ready, I put my wife in the driver seat and had her turn the key while I worked the carbs and choke. After about 7 spins of the engine I could tell there was nothing happening. A second inspection revealed a coil ground wire I had removed and forgot to re-connect. Once connected my wife turned the key again and I don't think the engine turned a full rotation before IT FIRED UP! It scared my wife as the open header exits right under the driver seat. (sorry sweetie) I dis-engaged the choke and was shocked to see the engine settle in to an idle at 1k RPM. With the open header, it sounded awesome! I had to rev it a little bit just to hear it. WOW! With the stage-2 cam, new timing chain, and lightened flywheel, it revs super quick. It really sounds like a race car. Unfortunately it cannot stay that way.


-
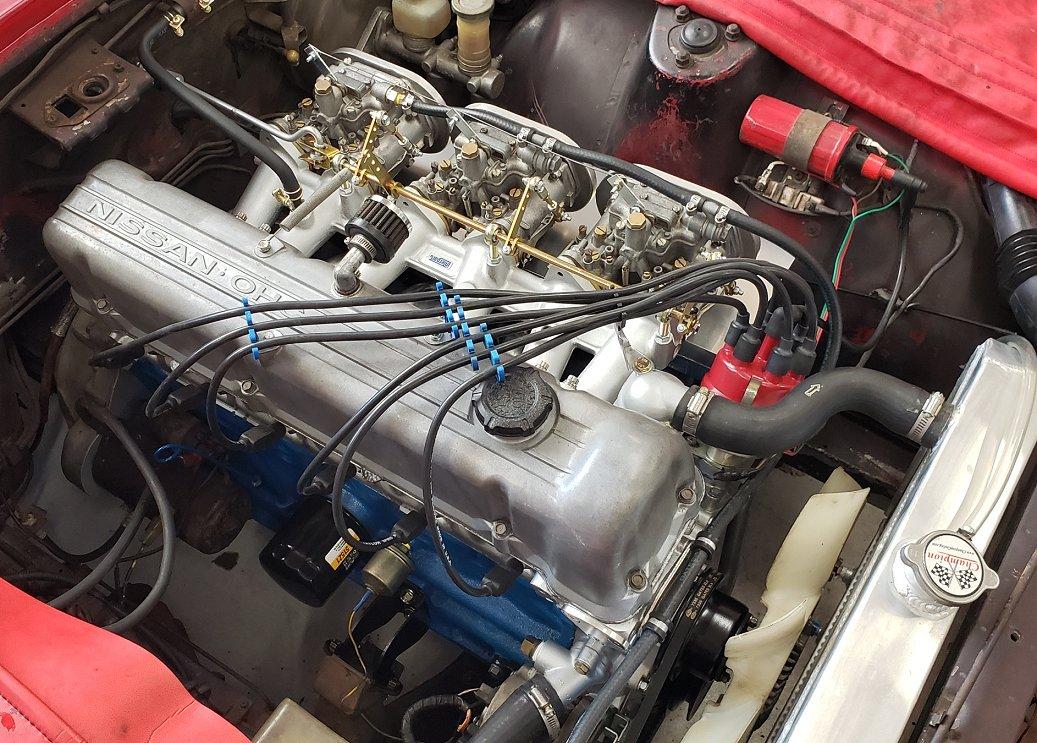
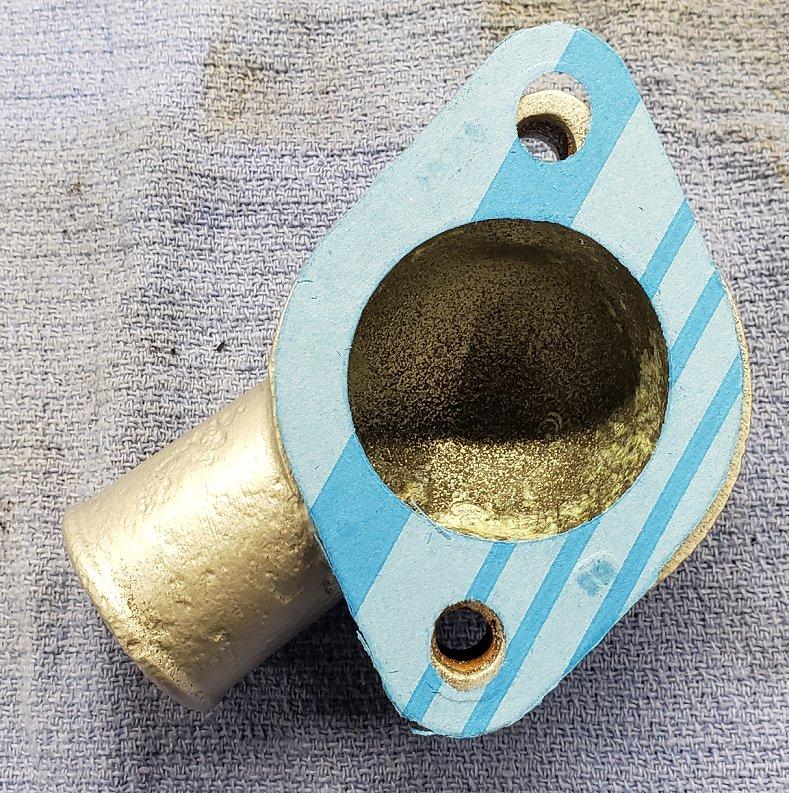
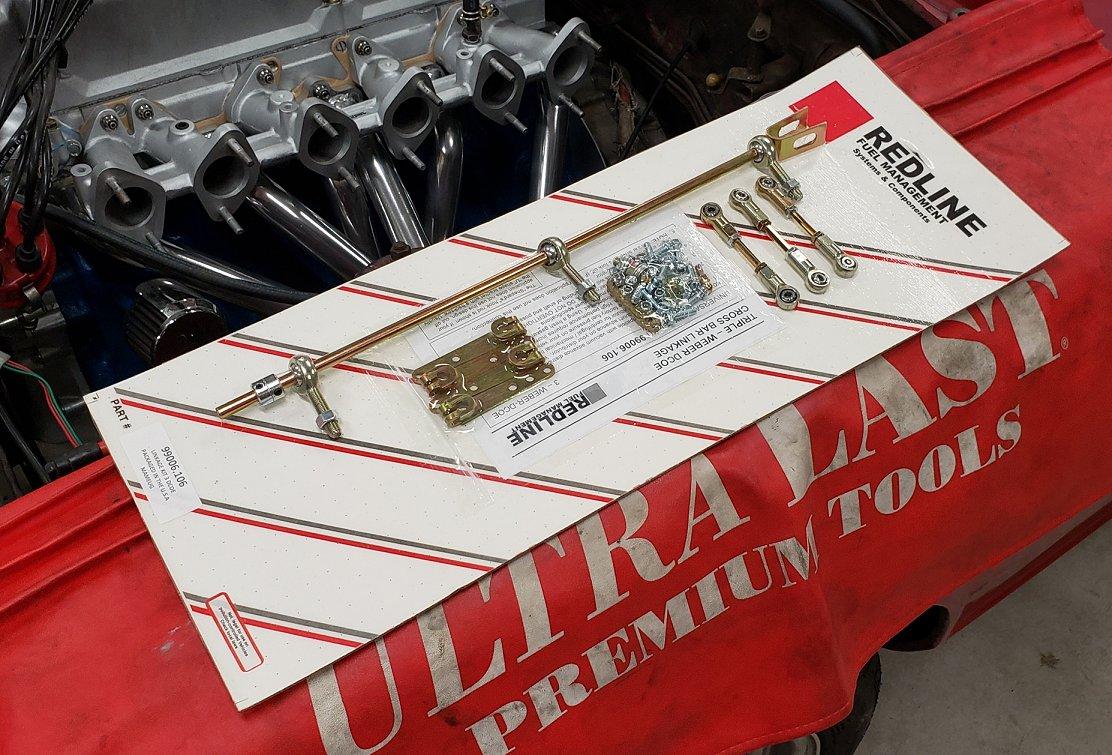
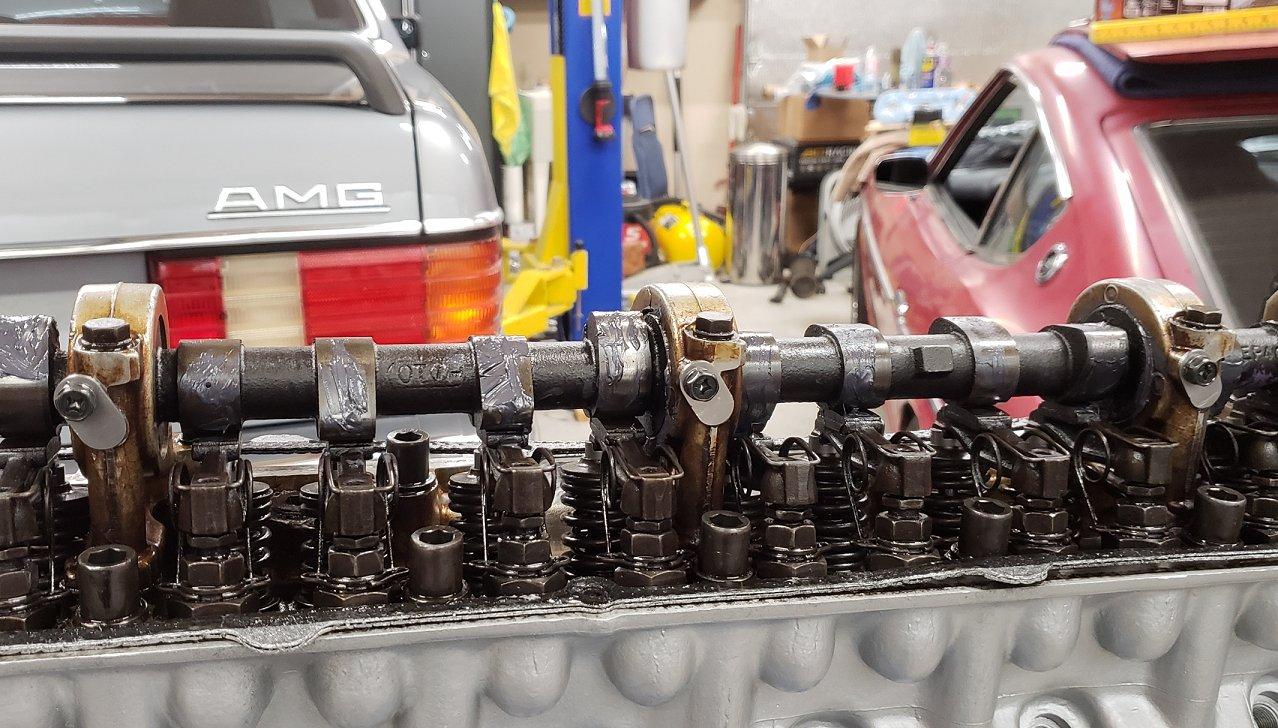
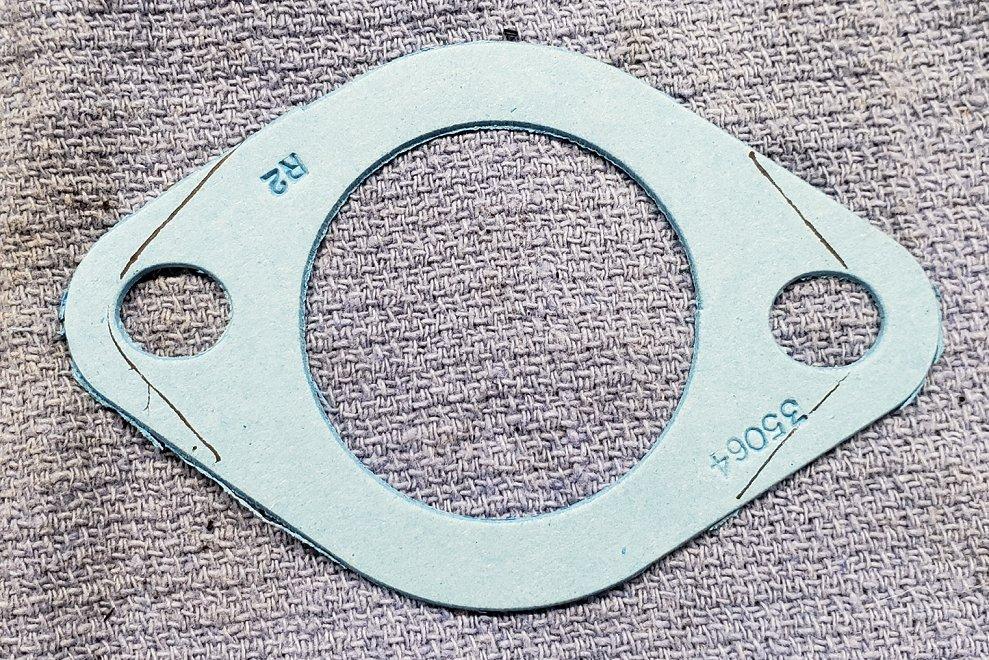
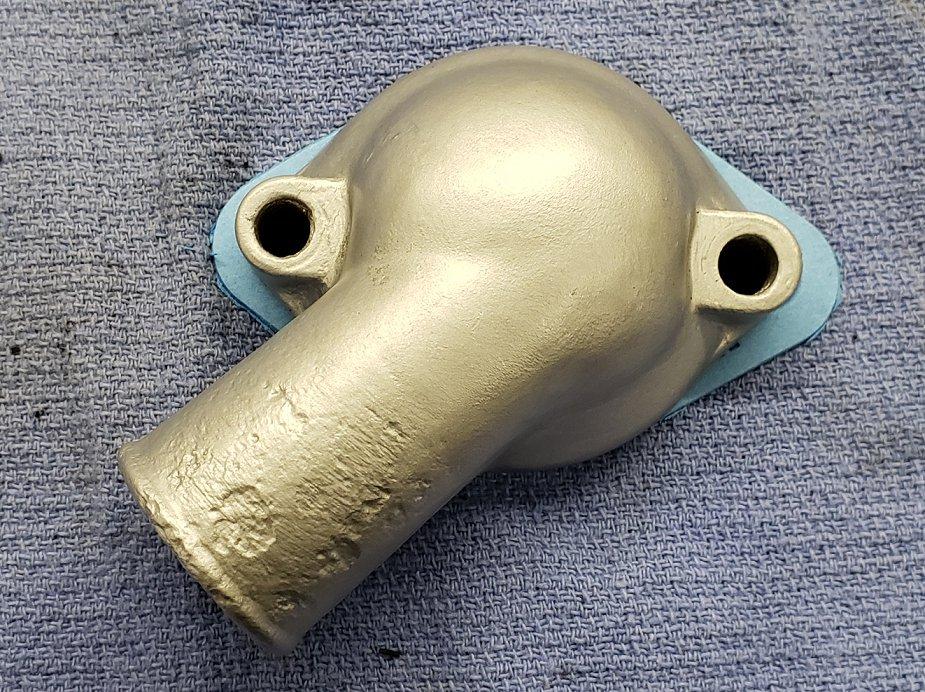
Got a few updates as the finish line gets closer. I ordered a new 160 degree thermostat and Fel-Pro t-stat gasket. The gasket is labeled for a small block Chevy. It was sorta close and after some trimming it was much better. With the upper t-stat housing installed I put on a new Wix filter and filled it up with fresh Valvoline 20w-50 VR1 racing oil. I never made a tool to prime the pump but I did pour some oil in it when I installed it. With no spark plugs the engine turned over pretty easily. I pulled the valve cover and asked my wife to watch the cam and tell me when the oil starts flowing out. After about 10 turns the cam was liberally covered so the valve cover went back on. I spent the rest of the day getting everything buttoned up. As I started to organize the new carb linkage components, I quickly realized an oversight I had made. I should have setup the linkage bar before installing the intake. No biggie, a few minutes pulling the intake and about 20 minutes spent getting the bar straight and the linkage arms on.


-
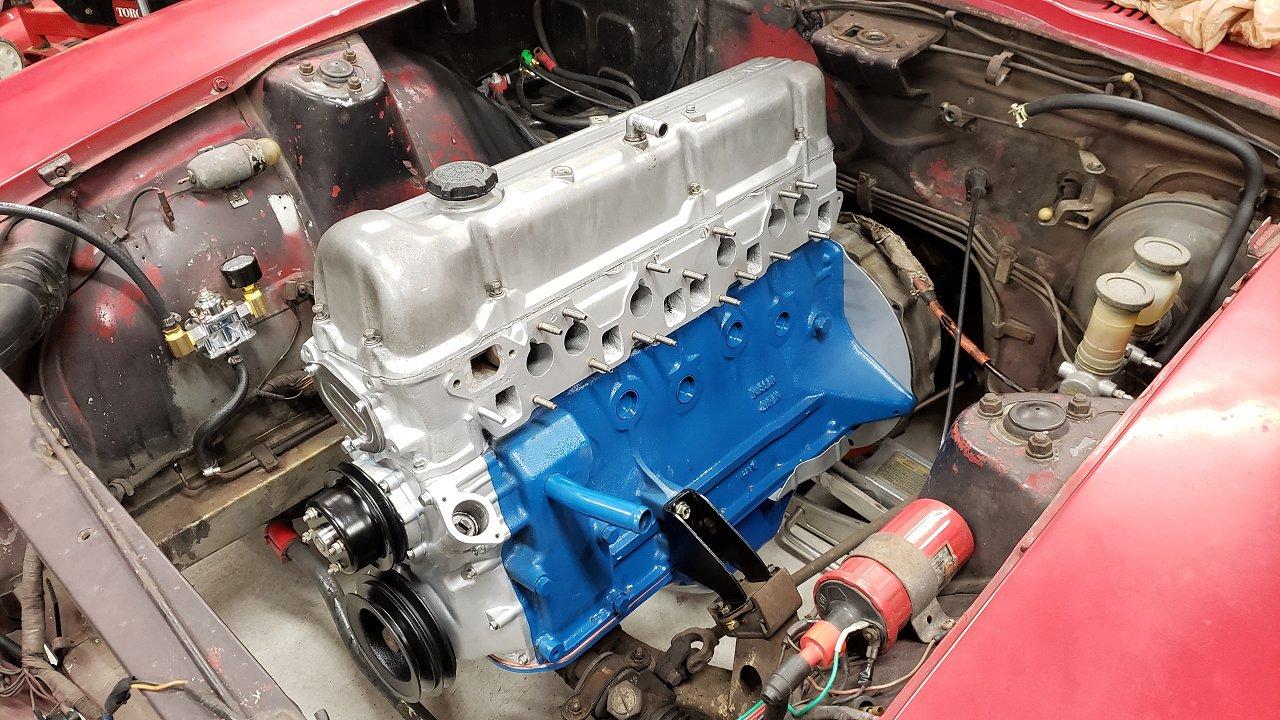
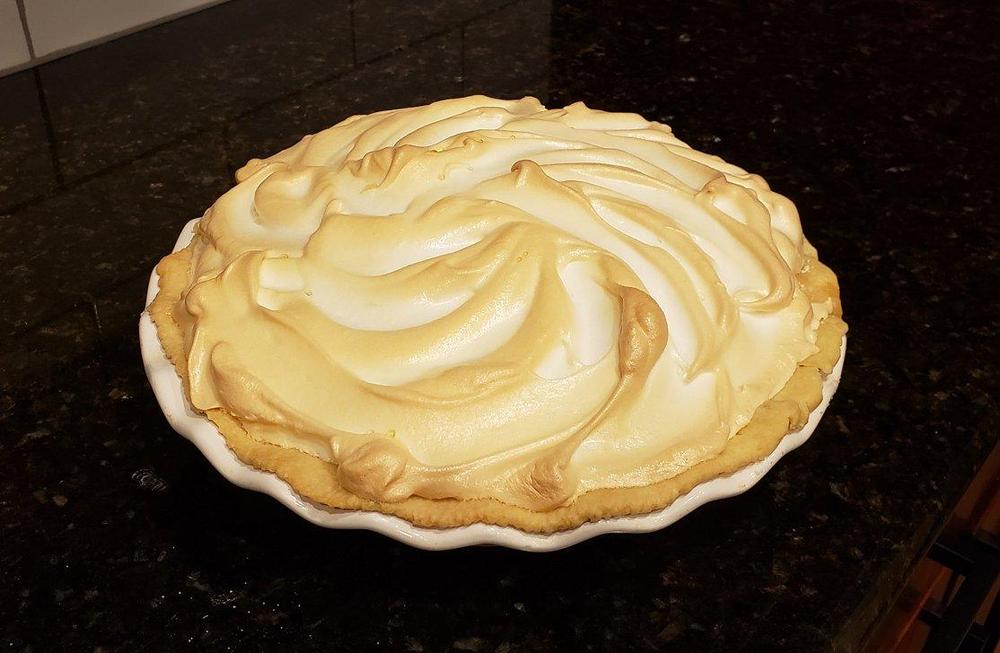
I celebrated my 40th birthday over the Memorial Day weekend and my wife asked me what I wanted. My wish list was three things, 1. Lunch at Gloria's 2. Make me a homemade chocolate meringue pie and 3. help me put the engine back in the Z car. Needless to say I have a wonderful wife and I got everything I wanted for my birthday. It took us about an hour and a half to get the engine in. Getting it lined up on to the transmission and tilting the motor over at the same time proved to be harder than we anticipated. In the end we go it done together. I used some long bolts to help draw the engine the last inch to the transmission. If I ever do this again, I will just pull the transmission with the engine like I have done in the past with other cars and re-install in reverse fashion.


-
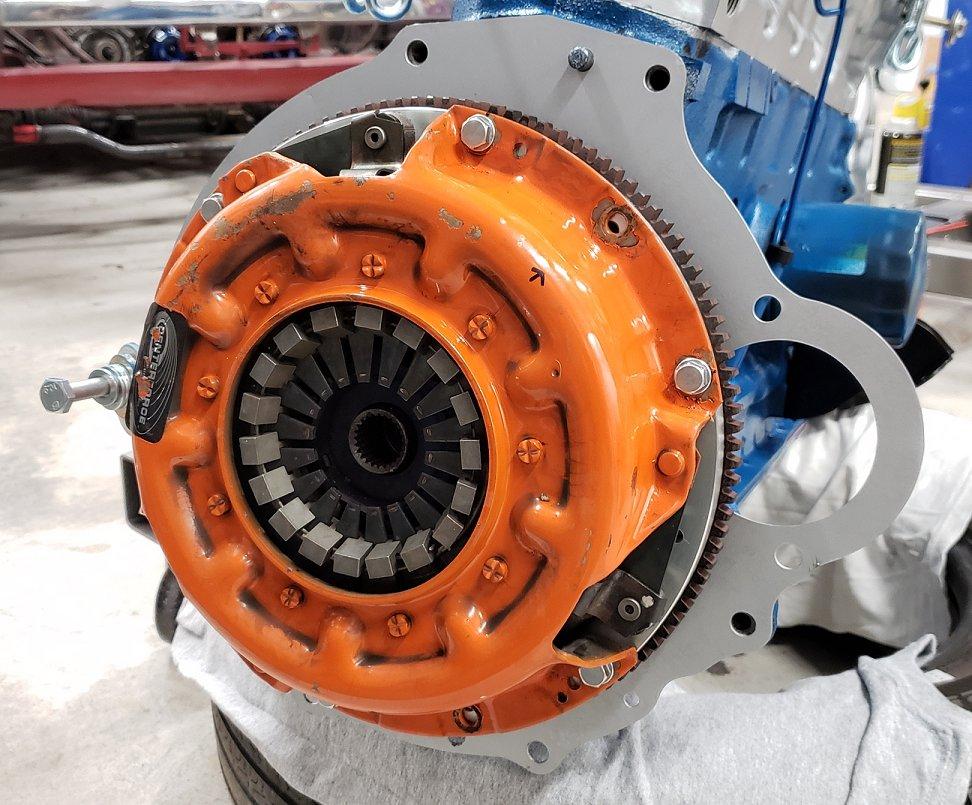
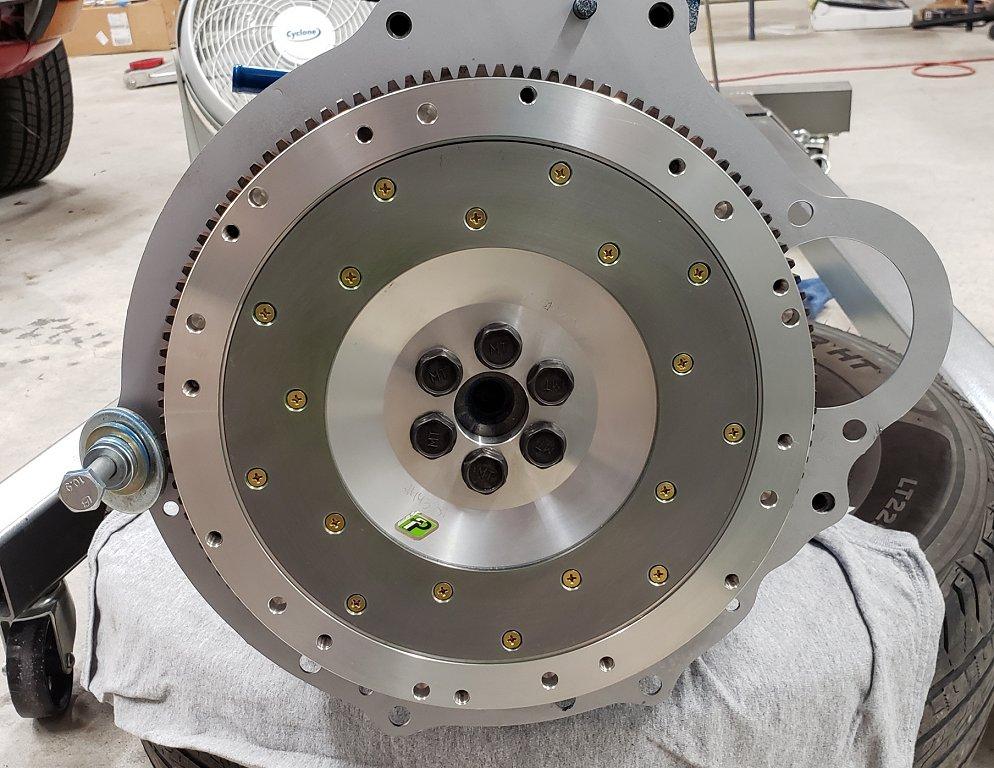
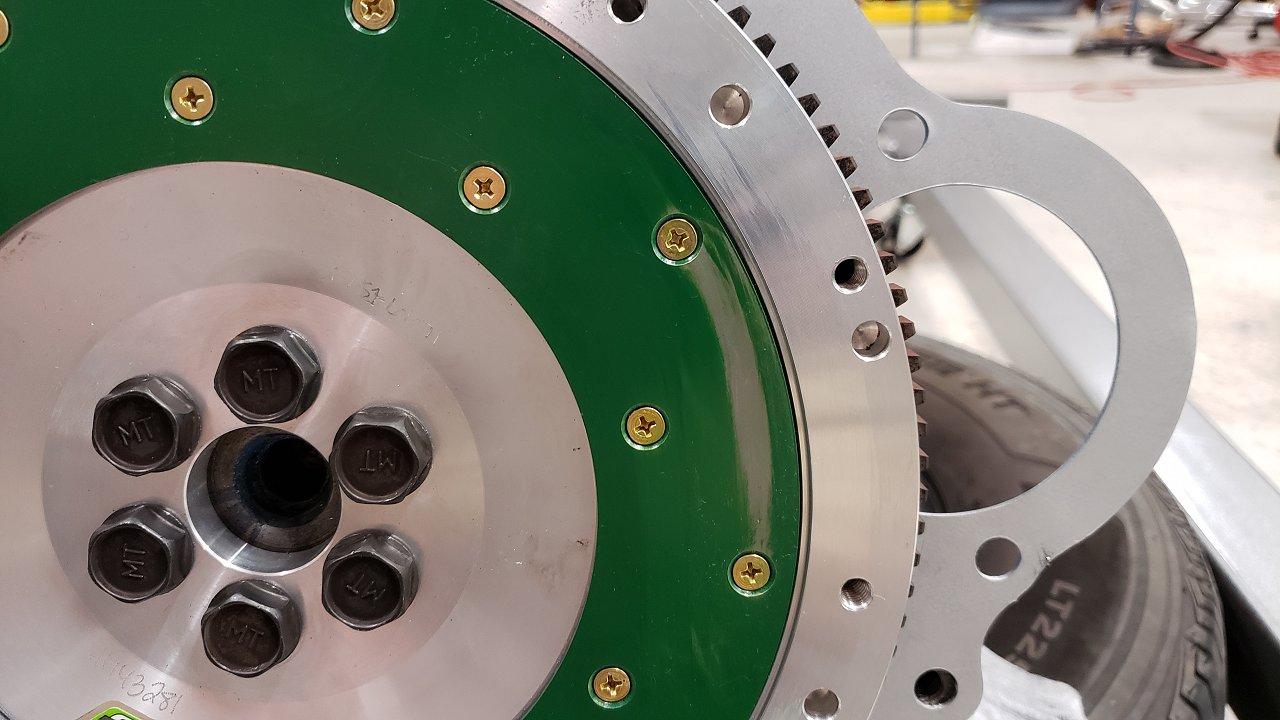
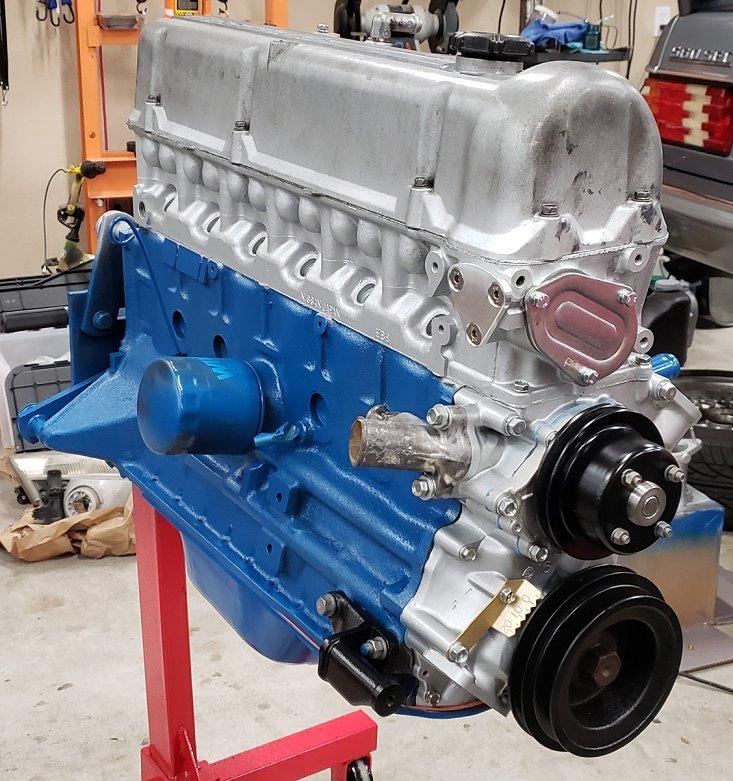
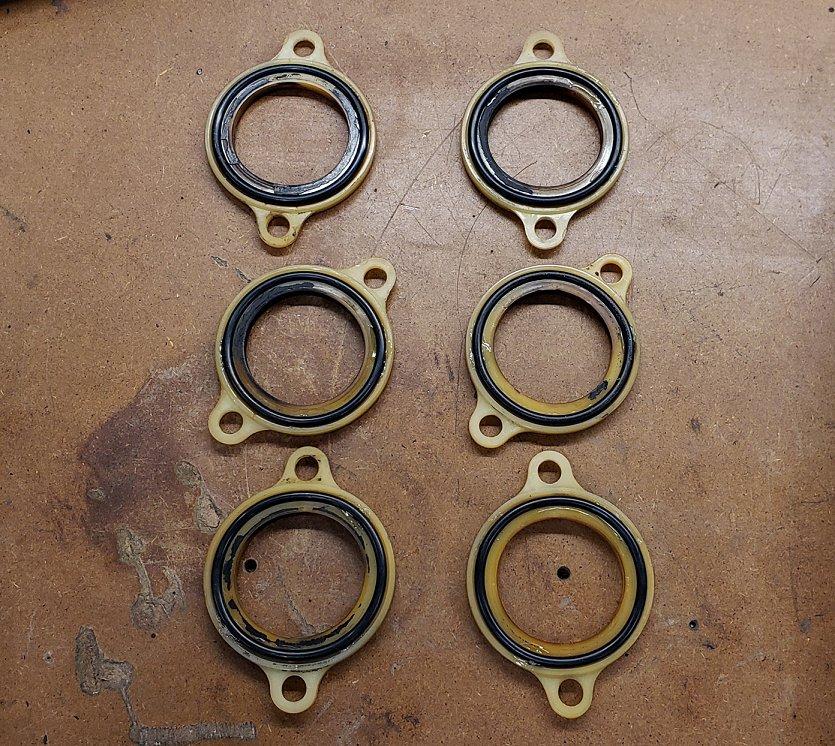
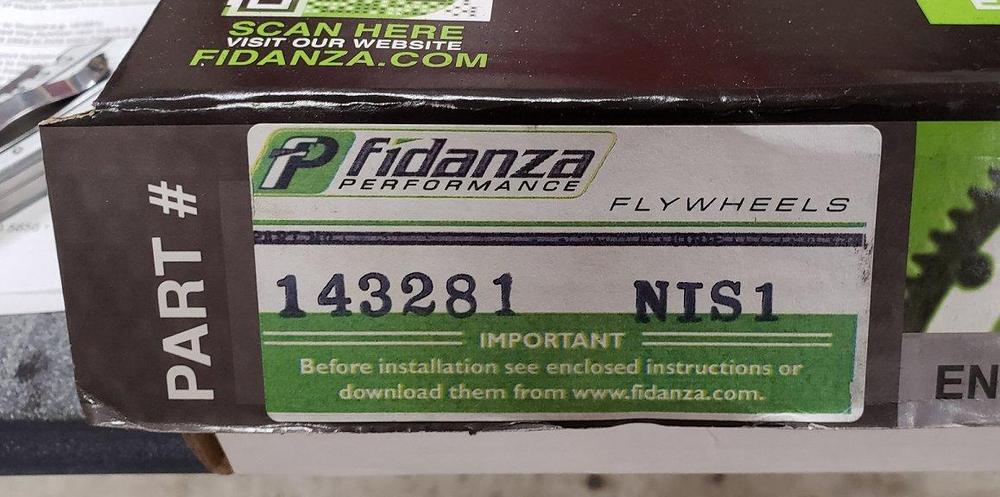
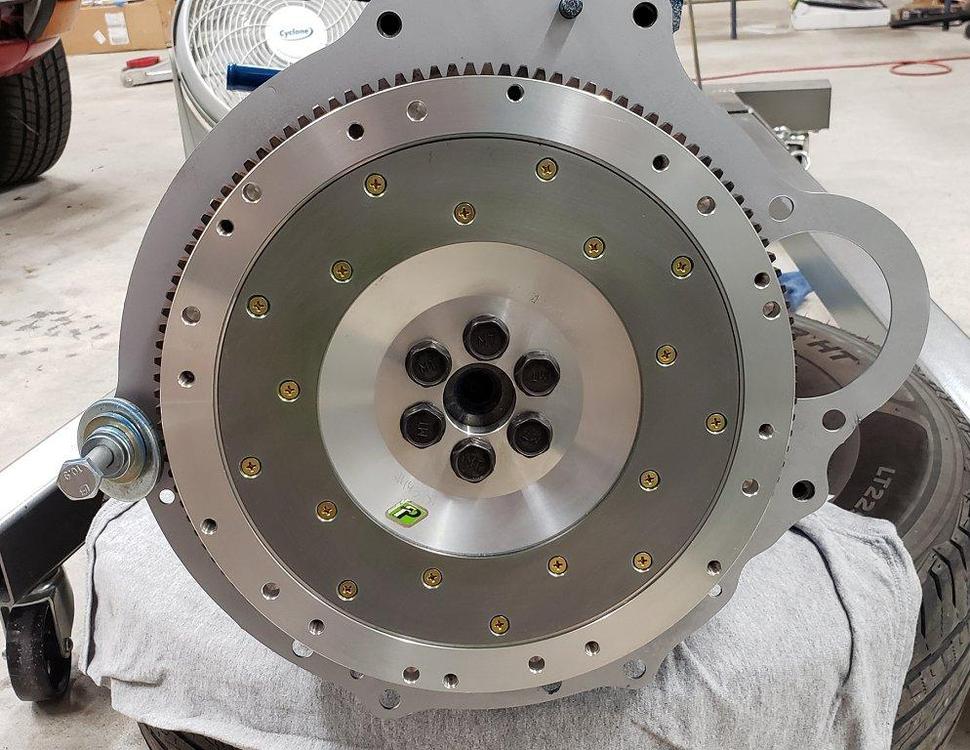
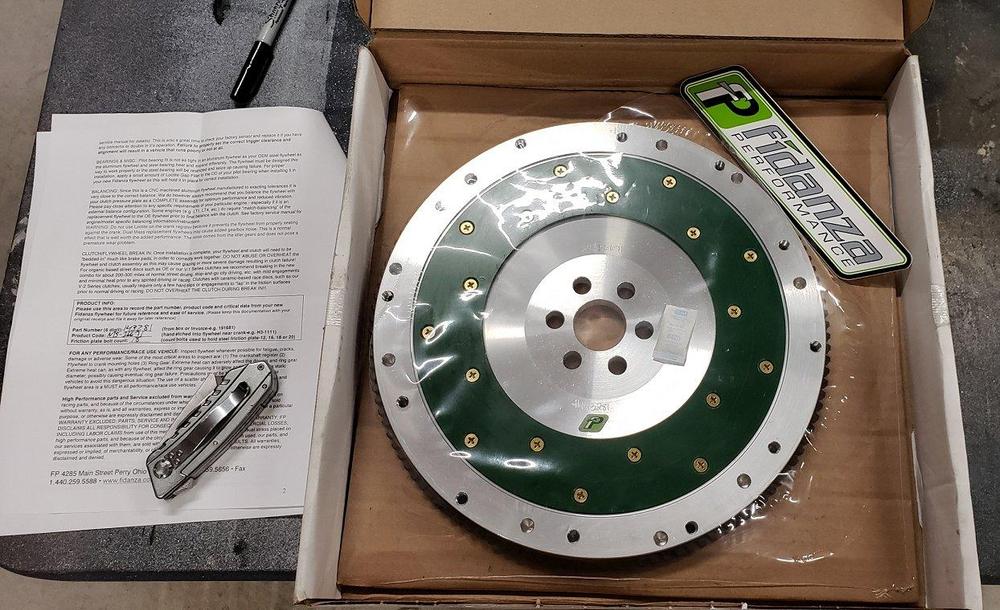
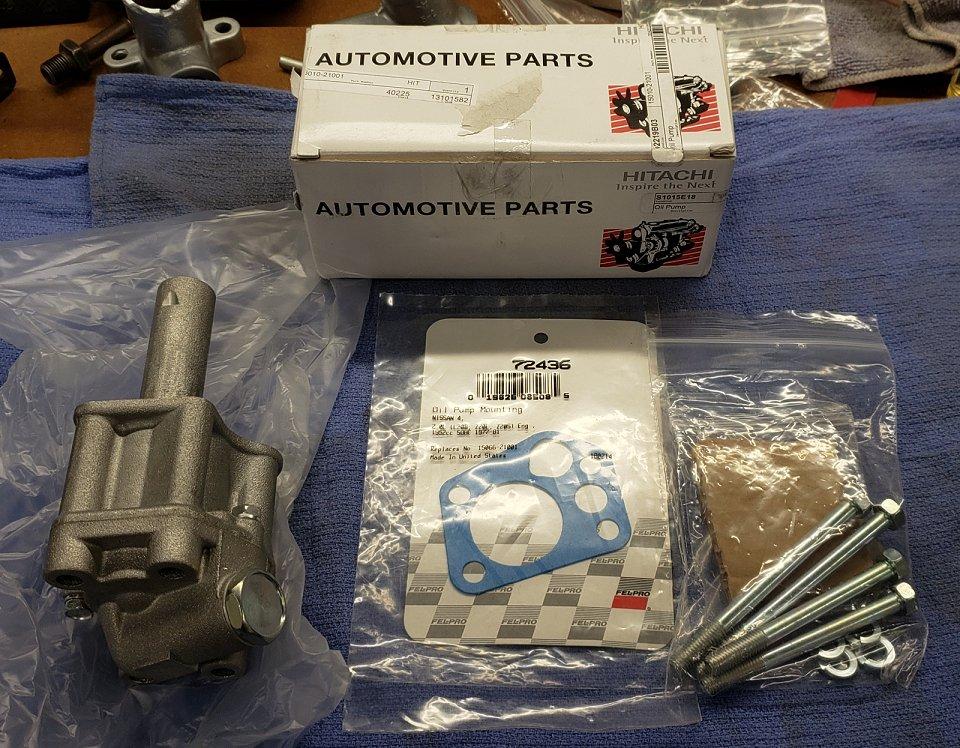
The engine was now ready to come off the engine stand. I purchased a lightweight Fidanza flywheel to accompany the Stage-2 cam that was now in the engine. The Centerforce II clutch was in great shape so it was going to be re-used. With the flywheel on the table, I took a few minutes to get it indexed correctly and made some marks with a sharpie. New flywheel and clutch cover bolts were used along with a little blue Loc-tite, torqued to 100ft/lbs and 14ft/lbs respectively. The instructions that came with the flywheel said to remove the green coating and wipe everything clean before installing the clutch. A little brake cleaner and a lint-free rag made short work of it. The clutch went on with no issues. With the engine out I also took a few minutes to install the new oil pump, gasket, and bolts. One step closer!


-
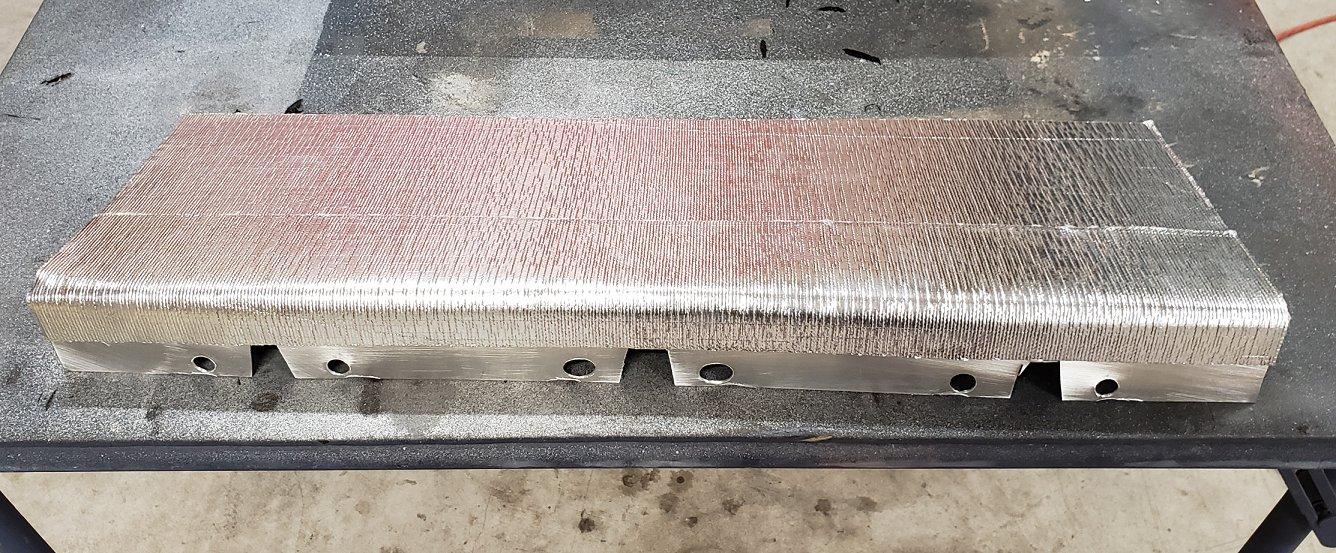
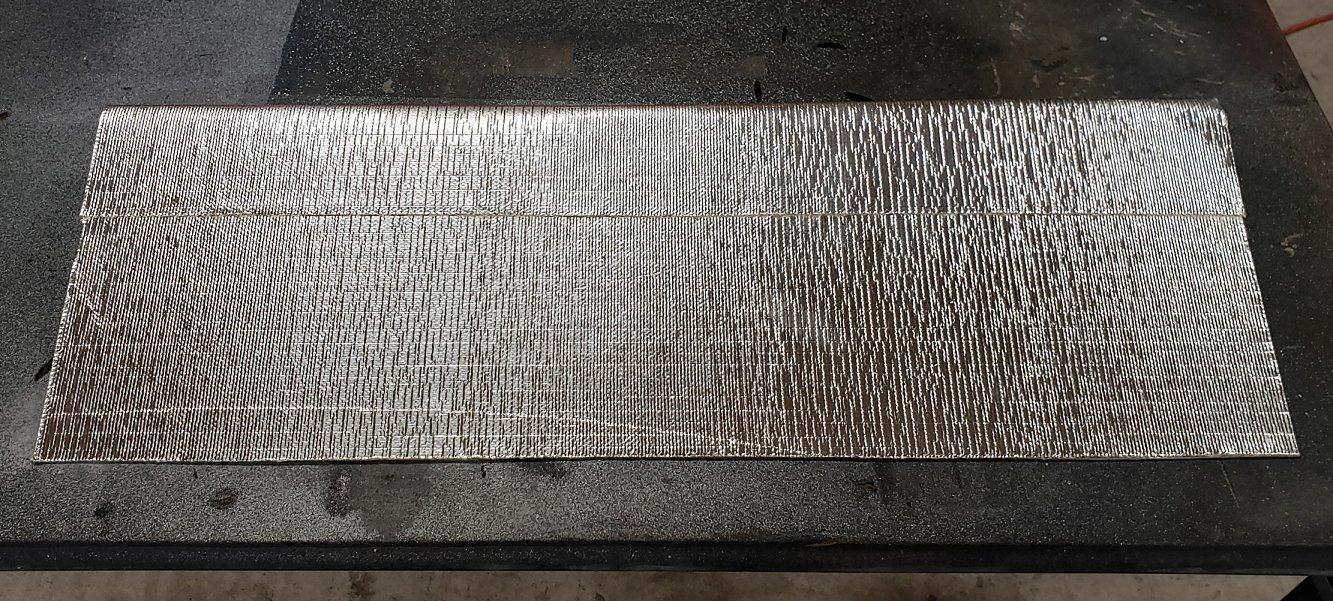
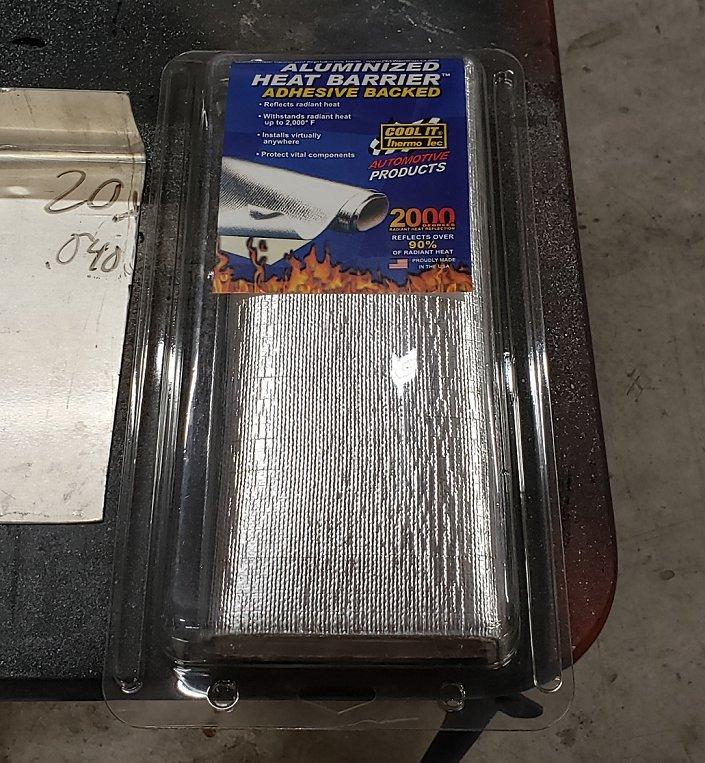
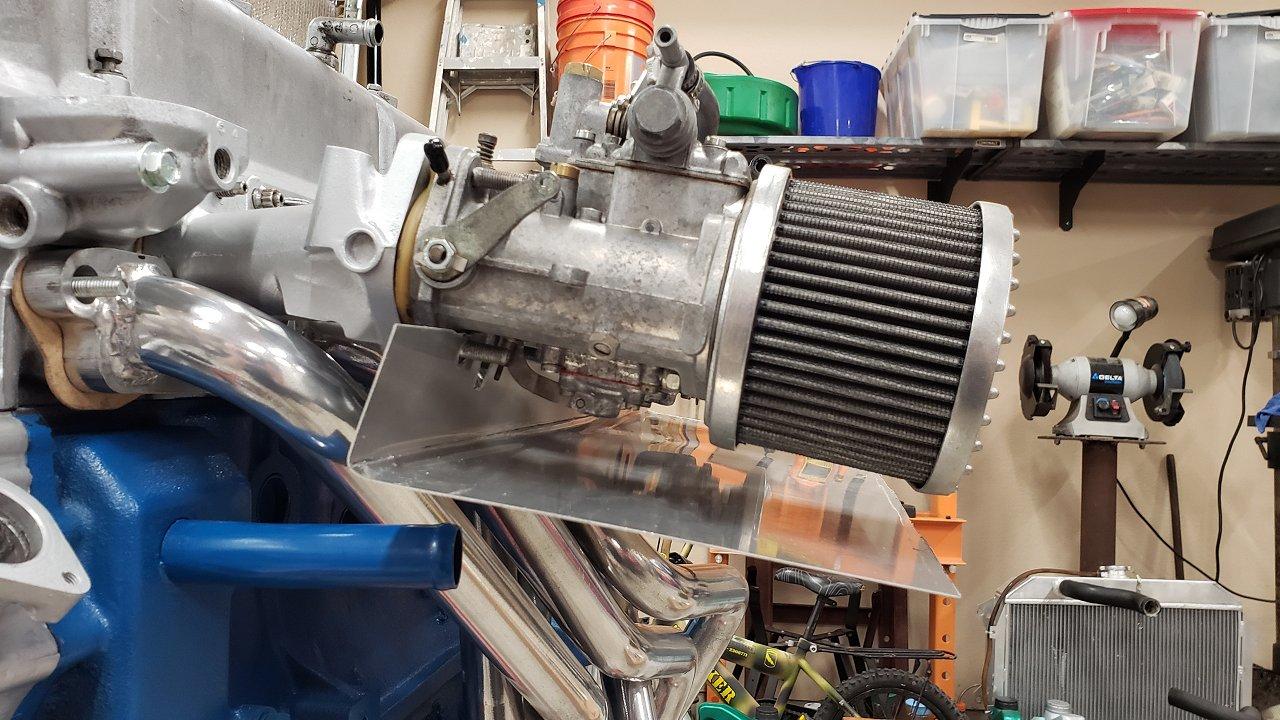
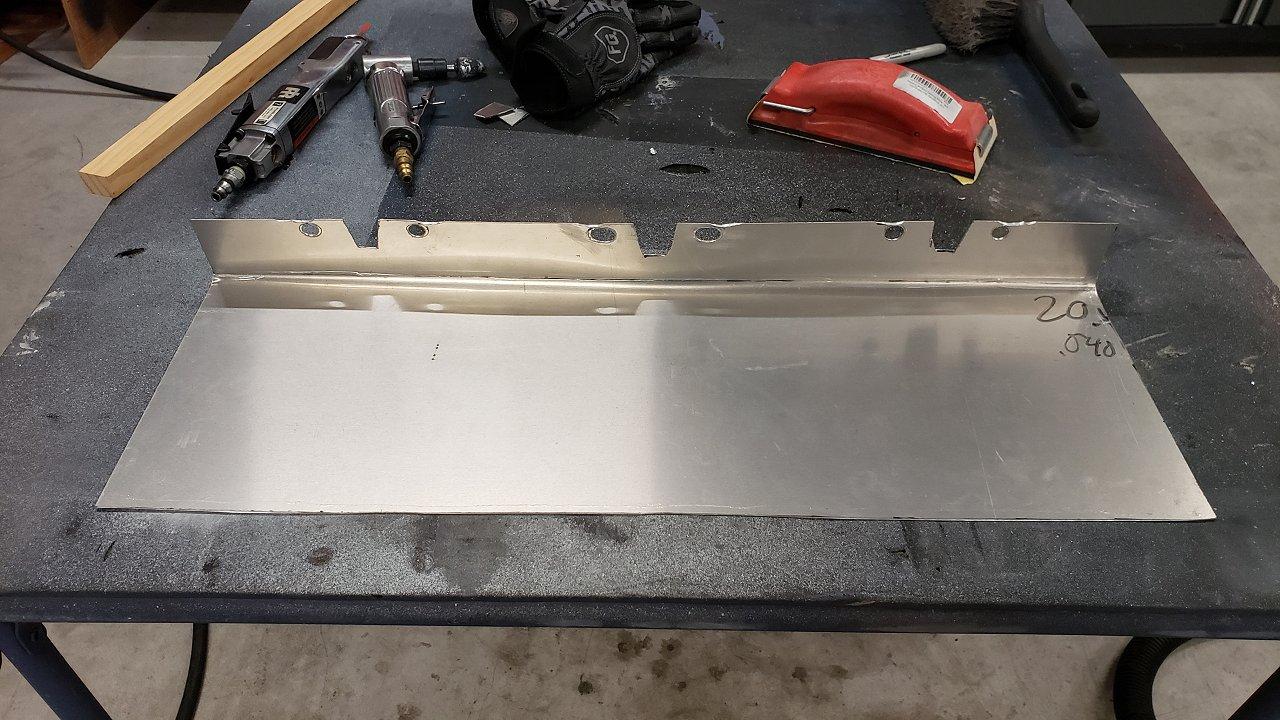
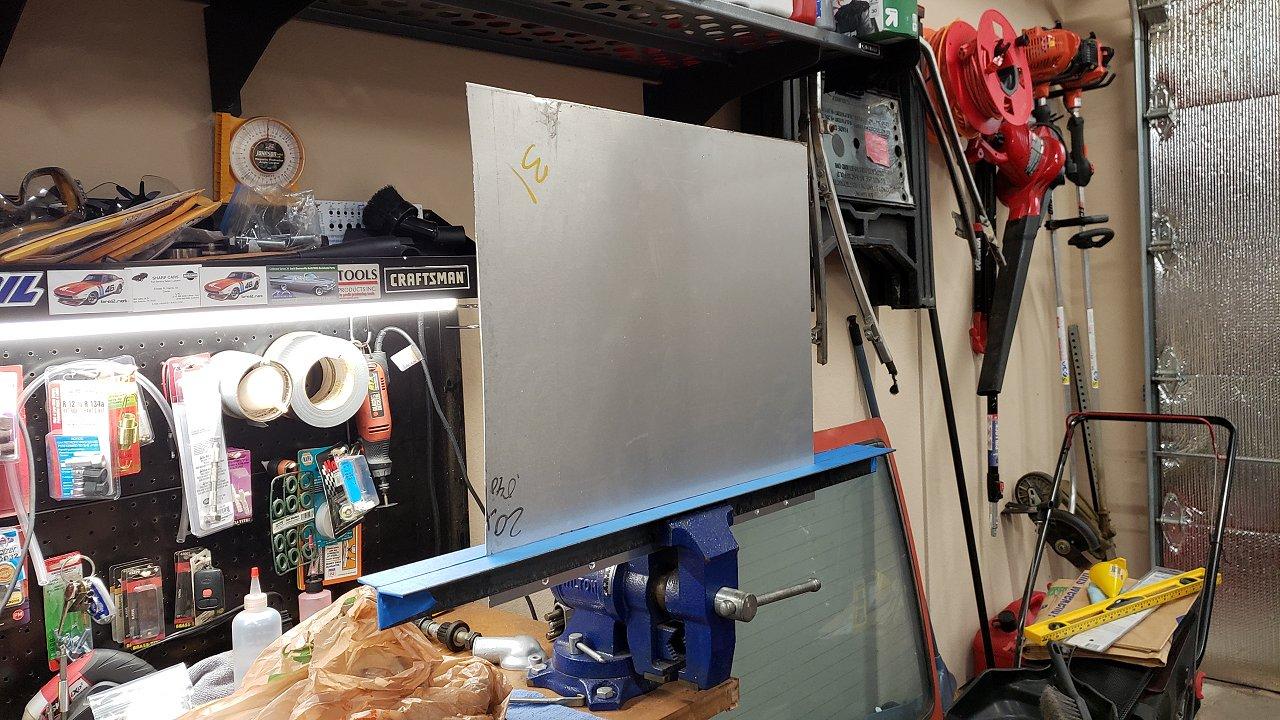
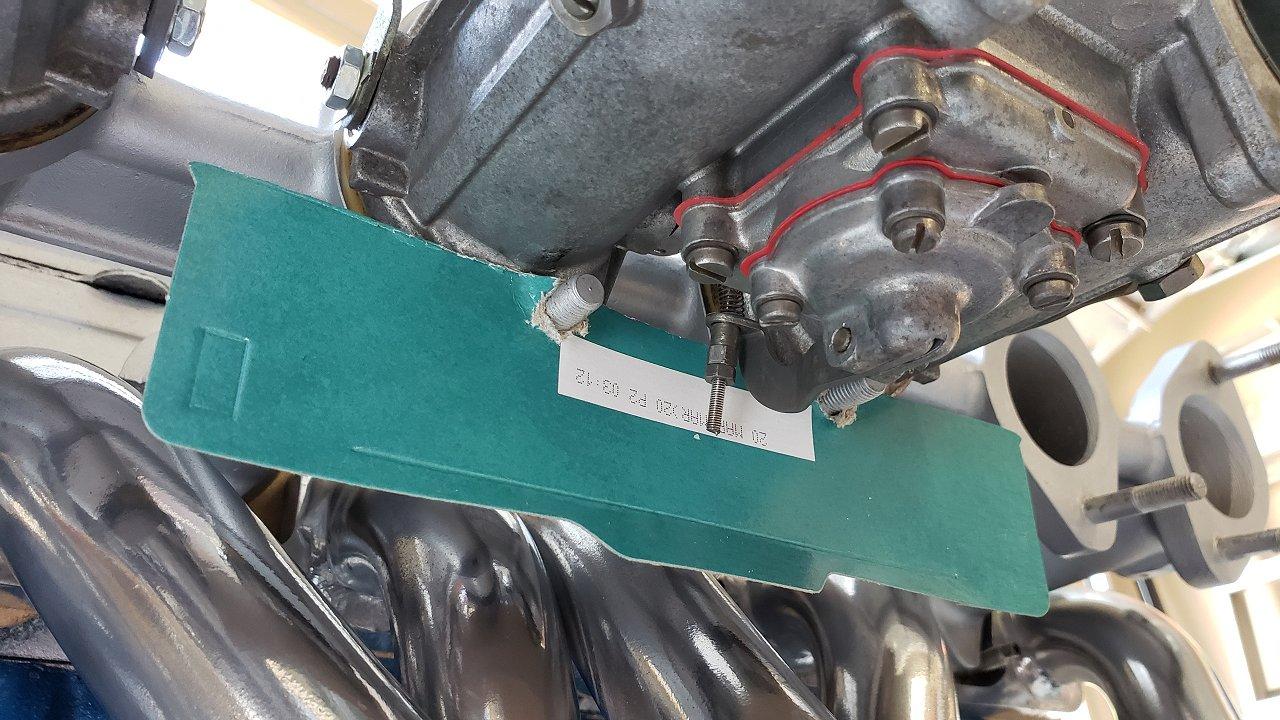
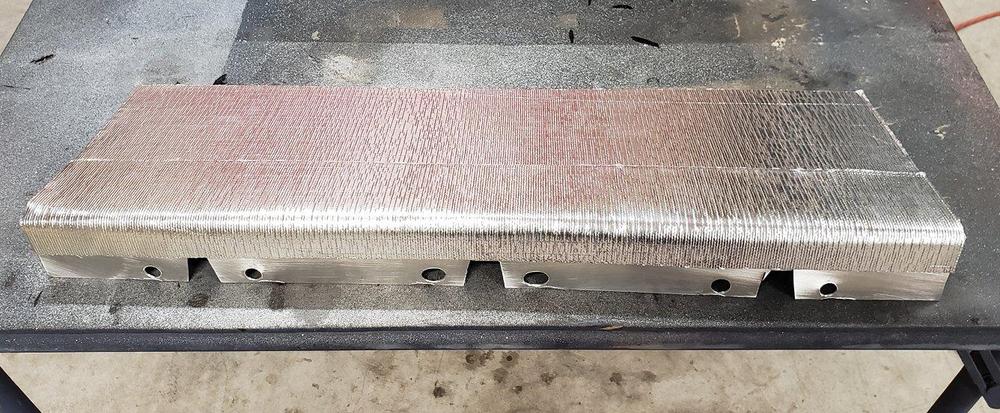
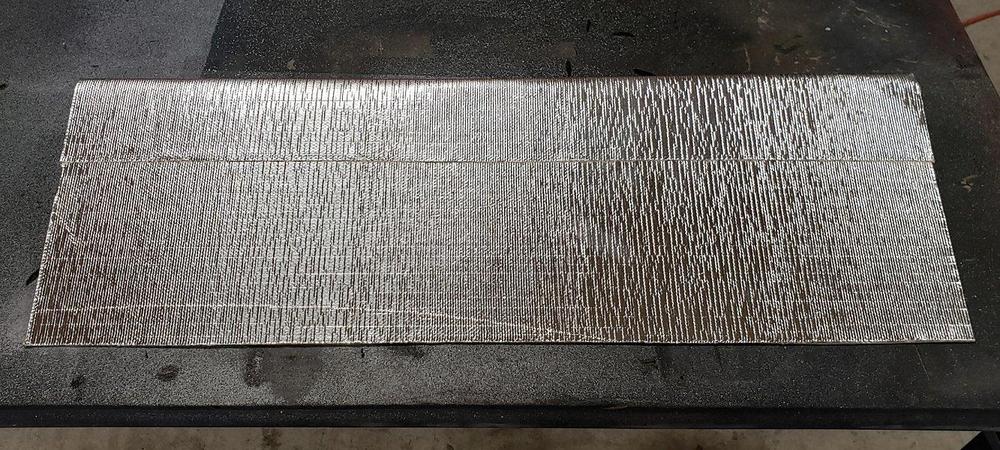
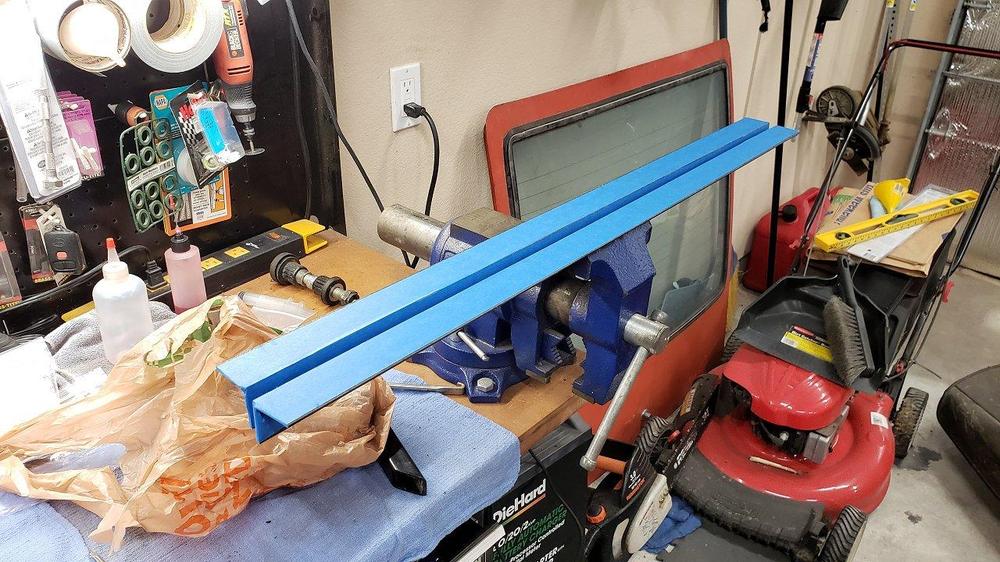
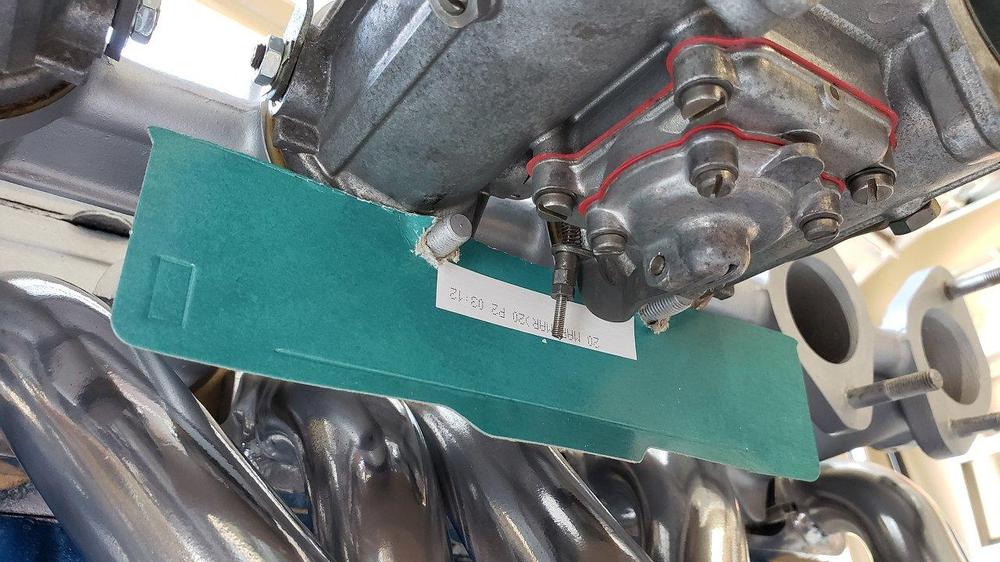
With the header successfully installed I turned my attention to making a heat shield. Using some pieces of cardboard from a cereal box I did some initial mockups. I know there are several ready to install options that run $100+ but this was going to be a much more affordable DIY solution. I stopped by a local metal supply shop and found a scrap piece of .040 aluminum that measured 20 x 28 inches with some minor damage for $10.85 out the door. I only needed something that was approx. 12 x 24 so I knew I could trim away the damaged sections. Next was to find a way to make a consistent 90 degree bend. I needed a metal brake of some sort so I bought a 6 foot section of angle iron at HD for $18, cut in half to make two 3ft sections, and wrapped them in some painters tape so the rough edge would not damage the aluminum. With the angle iron and sheet of aluminum in my vice, after a few adjustments I went for it and bent the sheet. I may have slightly underestimated how strong .040 aluminum is but I got it done. After drilling some holes and more trimming I got it to where it would slide on and not catch the levers of the accelerator pumps on the bottom of the carbs. Happy with the outcome I laid down some self-adhesive heat reflective material I bought off Amazon for $21.94. I doubled up where the bend was as this was the closest point to the header. Not too bad for a DIY effort and once the carbs and air cleaners are on, you will see very little of it.


-
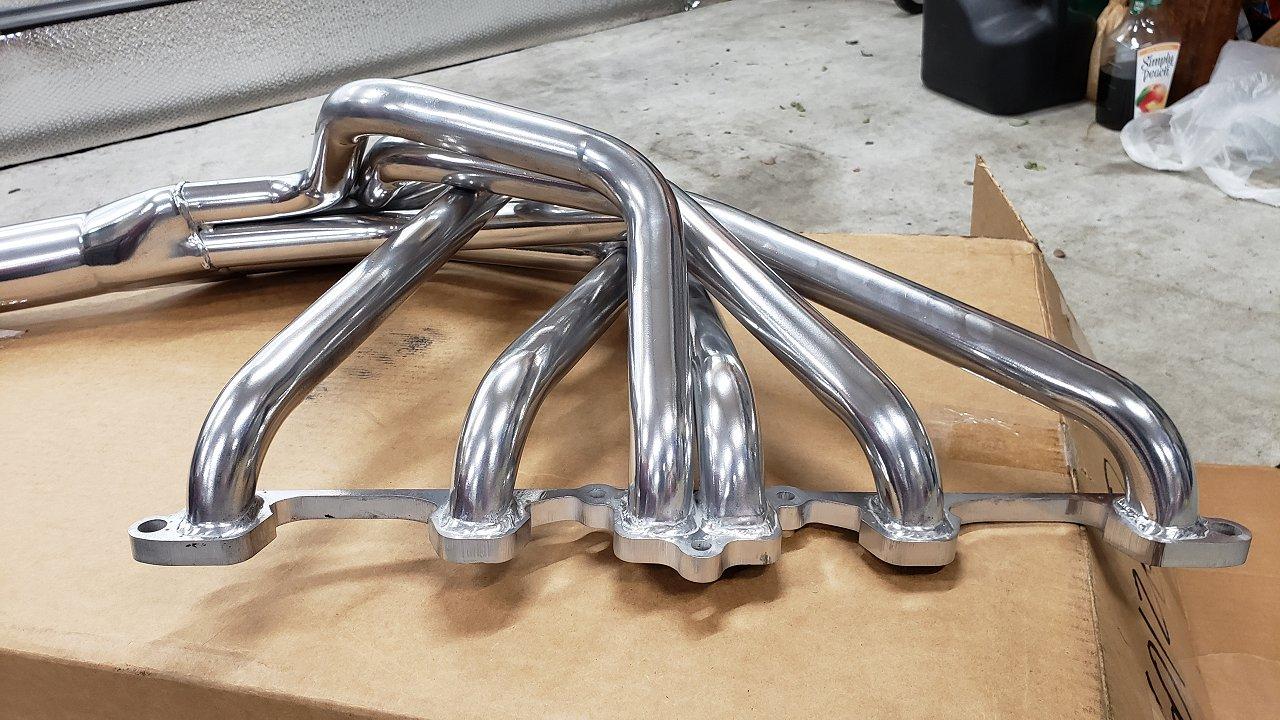
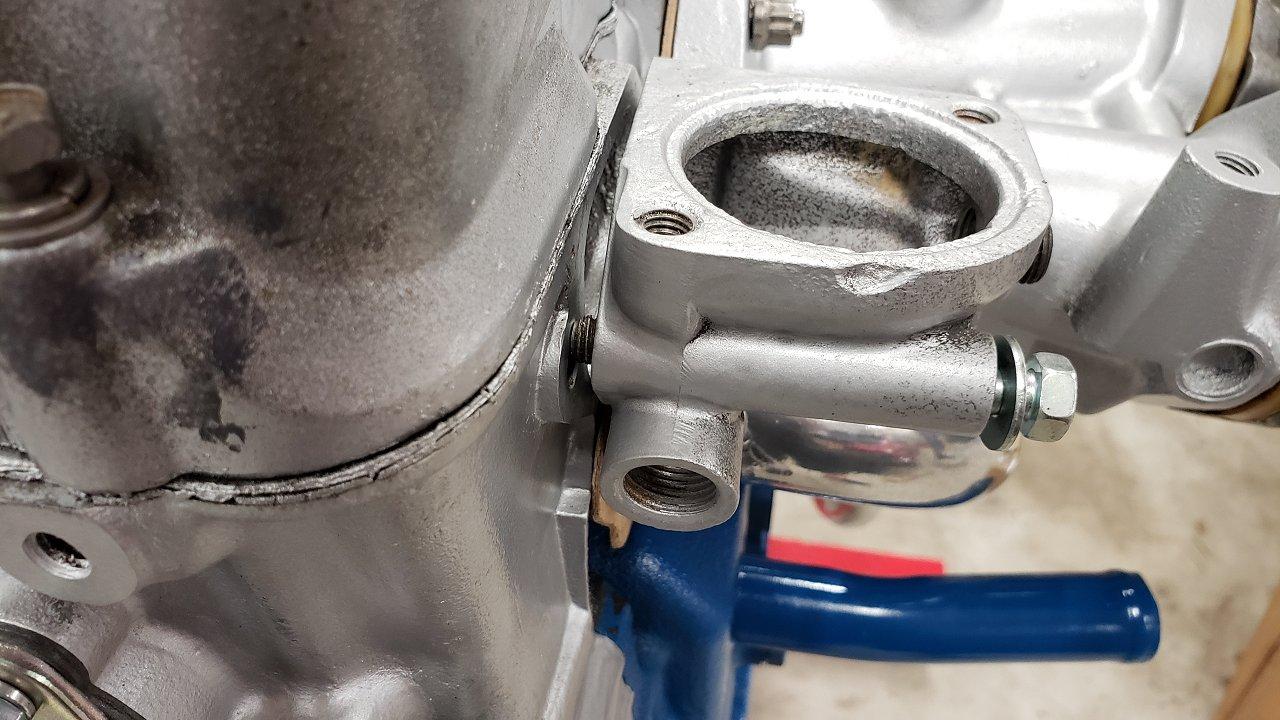
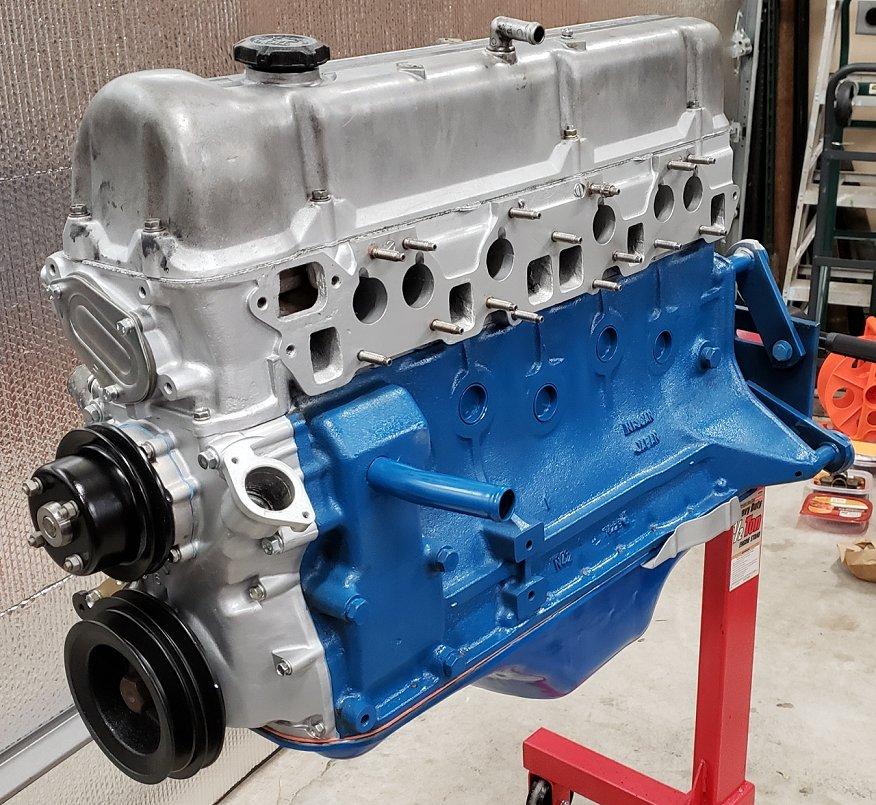
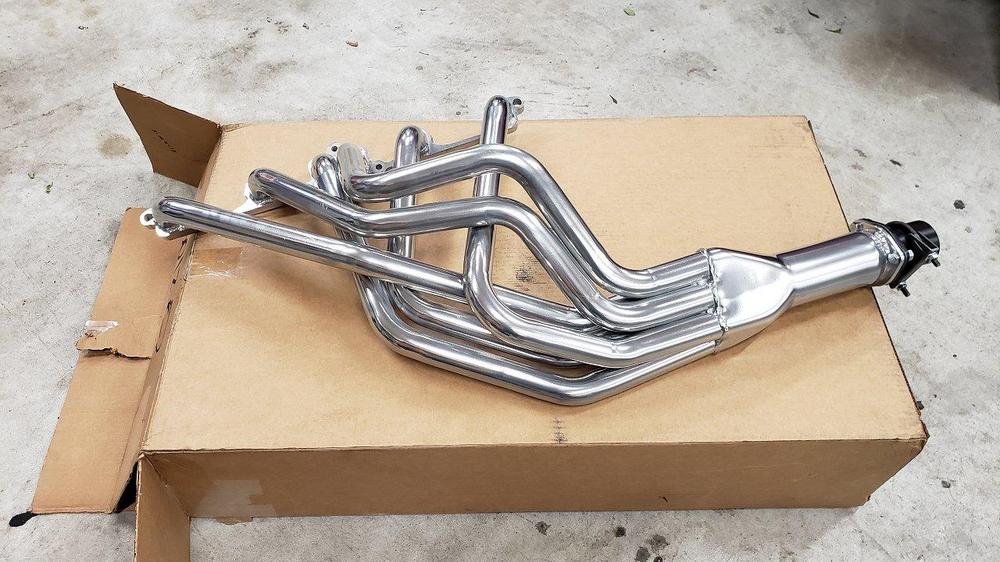
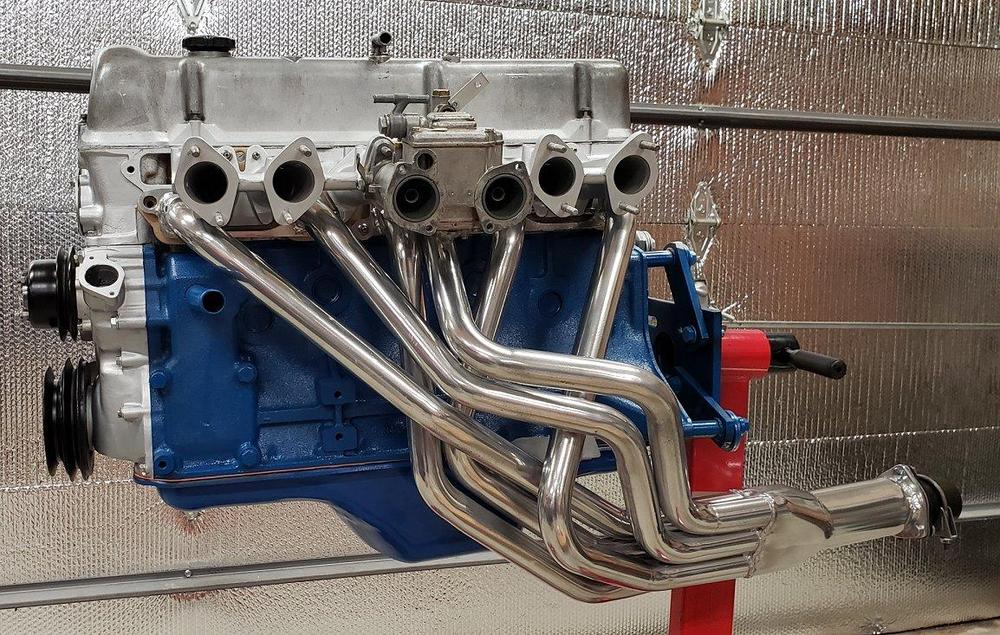
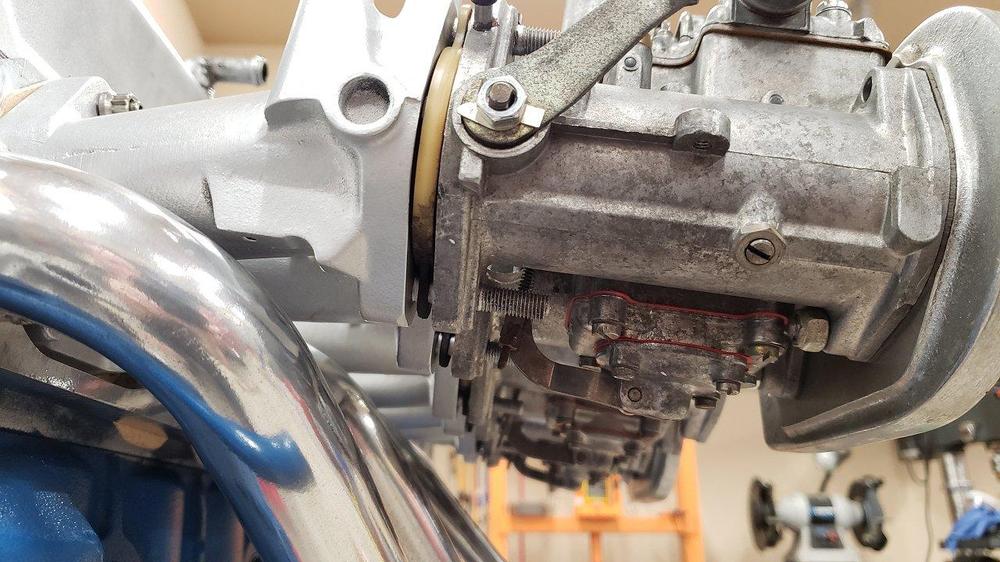
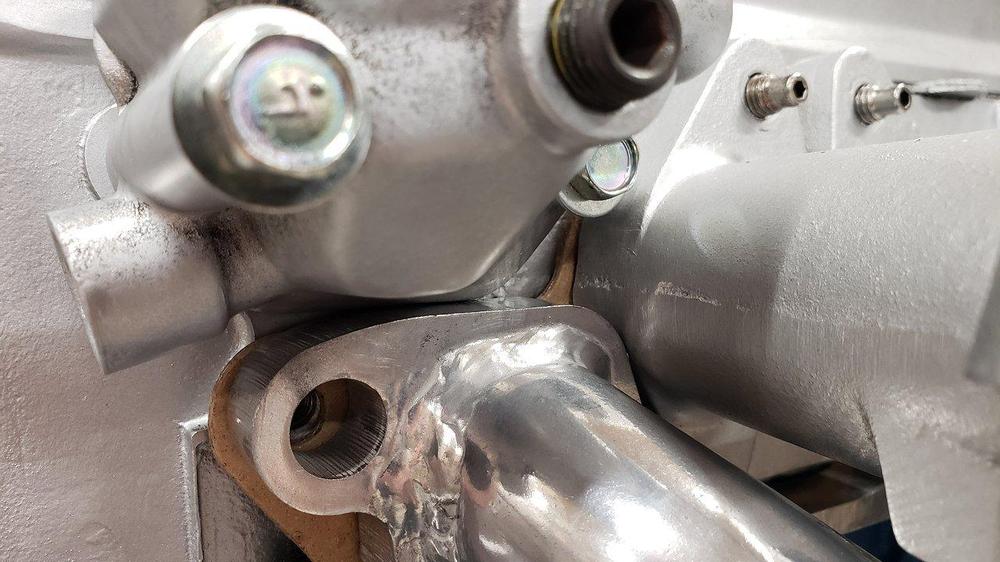
Been making some progress over the past few weekends. My coated MSA header arrived so I went about mocking it up on the engine. Upon initial test fit of the intake with the header I noticed it was a pretty tight fit. Then once I attempted to install the water outlet base, it would not line up. I knew I would need to shave off a little material to keep the intake and header from touching along with removing some material from the base of the water outlet. A little time with the grinder solved all my problems. I did a few rounds of grind, test fit, and grind a little more as I did not want to remove anymore material than was absolutely necessary. The end result was achieved with everything fitting in its proper location with no touching or interference between parts.


-
To answer your question @87mj I believe you install the barrel clips over the pins first and then push the emblem in. This way you do not risk pushing one of the barrel clips in to the body.
-
Thank you @siteunseen Here is the direct link to make it a little easier. https://www.classiczcars.com/forums/topic/49682-diy-datsun-script-emblem-repair-refurbishment/
-
Thank you @240Z240Z240Z I have seen both of these and unfortunately I cannot use either solution since the cast threaded hole at the end is the throttle arm stop adjustment. The smaller shields do not have provisions for the accelerator pump linkage on the bottom. The heat shield I plan to make would only cover the carbs and partially cover the filters. Just trying to see how everyone else mounted their heat shields so I can get some ideas.
-
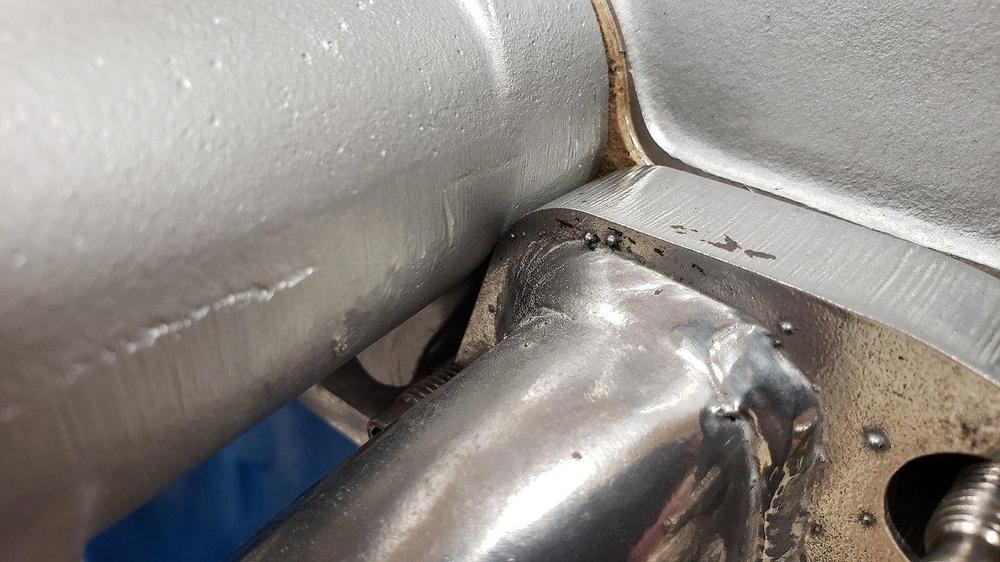
Thank you everyone for your feedback. I think I will start by grinding the header flange ever so slightly, just enough to keep it from touching the other components. I don't think rust should be a huge concern but I will try to keep the area I grind down as small as possible so I protect it without compromising too much of the coating. I plan to give it a go one night this week.
-
@PatconPreventing rust was my concern as well. I believe my only option would be some silver high temp. paint sprayed over the spots that exposed the bare metal.
-
Started mocking up my DIY heat shield using a cereal box as a starting point. I want to ensure there is enough room for the linkage on the bottom to fully operate. To do this, I believe I need to mount the heat shield using in between the intake manifold and the rear of the carb. However, this presents some challenges as I am using a soft mount kit for the carbs. If I try to mount it to the front face of the carb I will have to cut some pretty big V notches to clear everything. For those that have done this, how did you do it? The manifold is a Interpart piece and the carbs are Dellortos. Thank you!
-
I recently purchased a MSA coated square port header for the 2.9L E88 that goes in my '72 240z. I have the engine on the stand and figured I would mock everything up before dropping it back in the car. The fitment between the header flange and my Interpart triple carb manifold is very tight as the #1 and #6 exhaust port flange is touching/pressed against the intake manifold. The lower thermostat housing is also touching the flange. Before I grind some of the flange material away on the header I wanted to ask, have any of you run in to this before? If so, did you grind the header flange or the intake manifold? I don't want to grind the any material off the lower thermostat housing as I believe it needs all the material it can get. I welcome thoughts and opinions. Thank you!
-
Sorry you missed it but probably for the best. This same car was posted on the various S30 Facebook pages so I am sure someone saw it there and scooped it up. Keep hunting, the right one will come along.
-
Looking at the "before" pictures again, this project epitomizes the phrase "The Greater the Struggle, The Sweeter the Victory" So glad to see it reach this point! Keep up the great work.
-
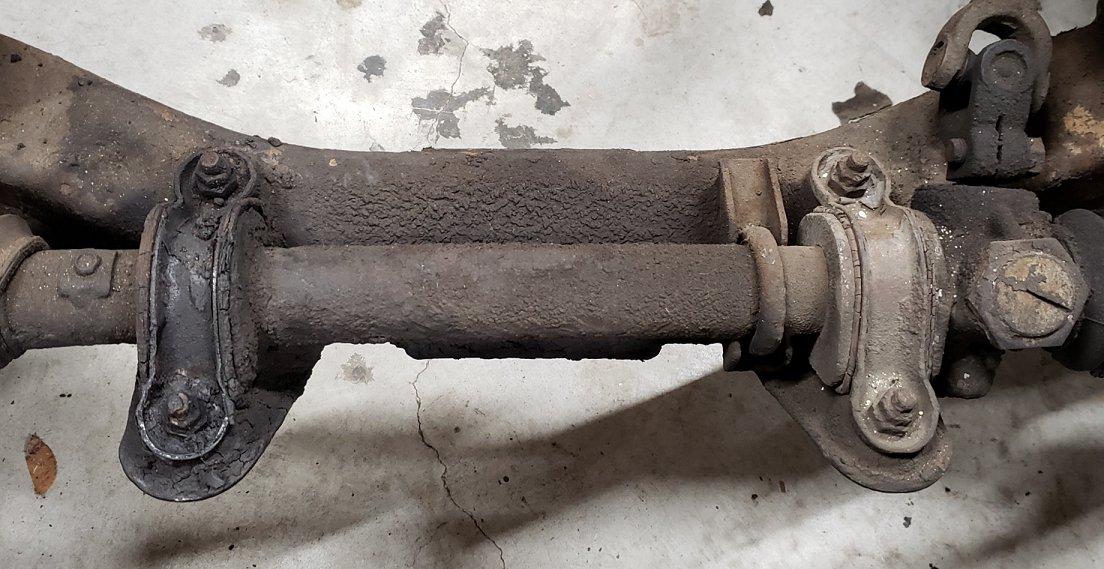
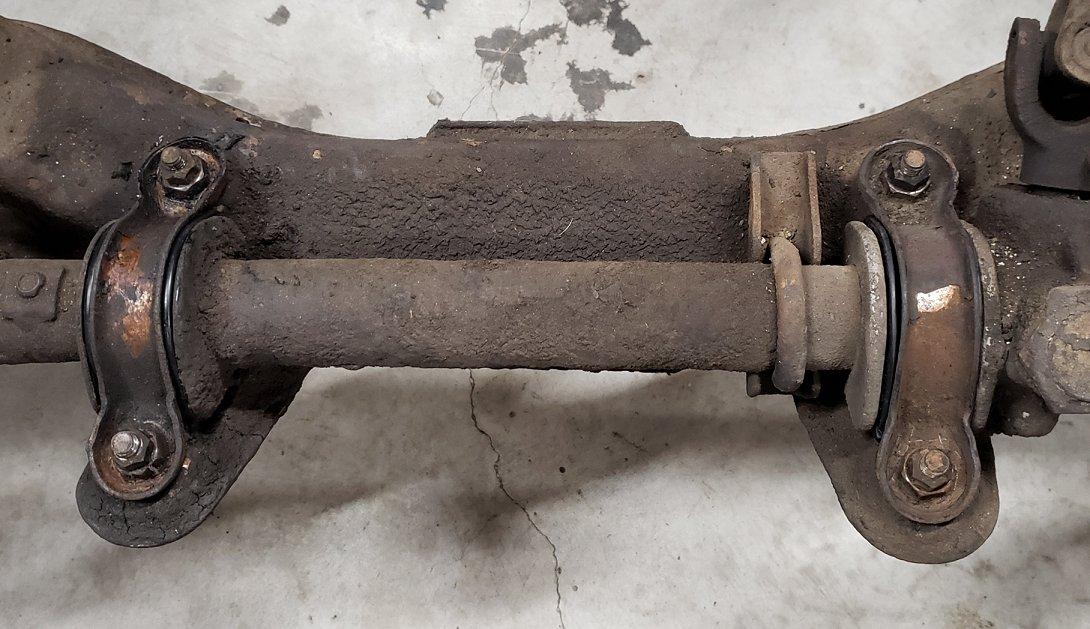
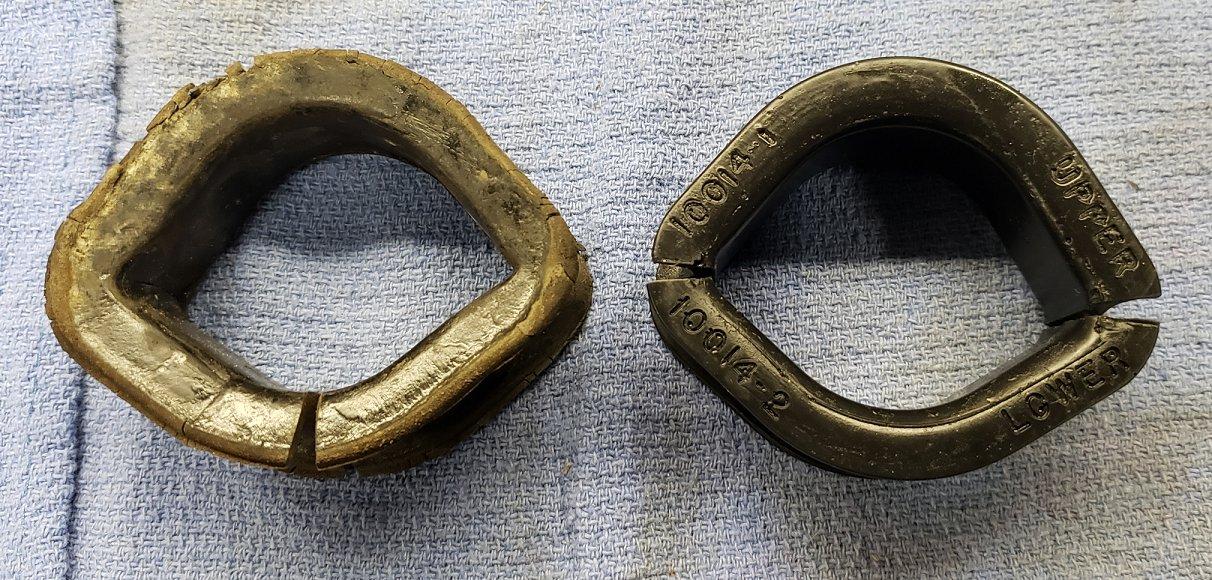
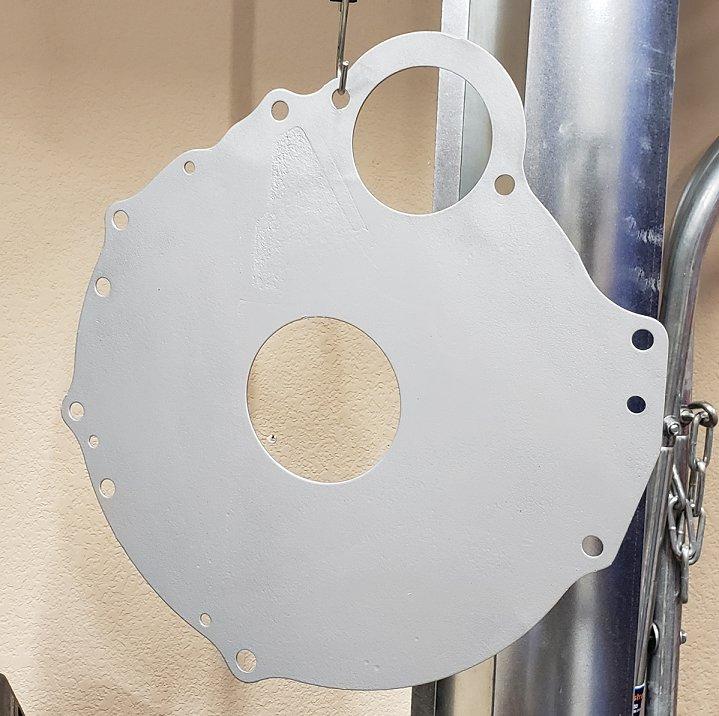
Every time I step out in to my shop I am greeted by the empty engine bay of the Z. Its somewhat sad to look at it I am not in a position to strip it down or tear the entire front suspension apart and detail it but I did want to swap out the steering rack bushings as access would never be better. I bought the Energy Suspension bushing set and went about swapping them out. The old ones were shot as they felt like sponges. Another straightforward project done! As I get a nice weekend day I try to clean and paint what I can. The engine plate was certainly ready for some attention and it got it. A deep cleaning followed by some wire wheeling to knock off the corrosion and then some silver Rustoleum paint. The other side was in much better shape but received the same treatment. I sold my 1988 Mercedes Benz 560SEC a few weeks ago on BAT. With the sale and a very tiny profit I ordered a coated header from MSA. Of course being my luck it was on back order but it has now shipped. With its arrival later this week it should kick this project in to high gear.


-
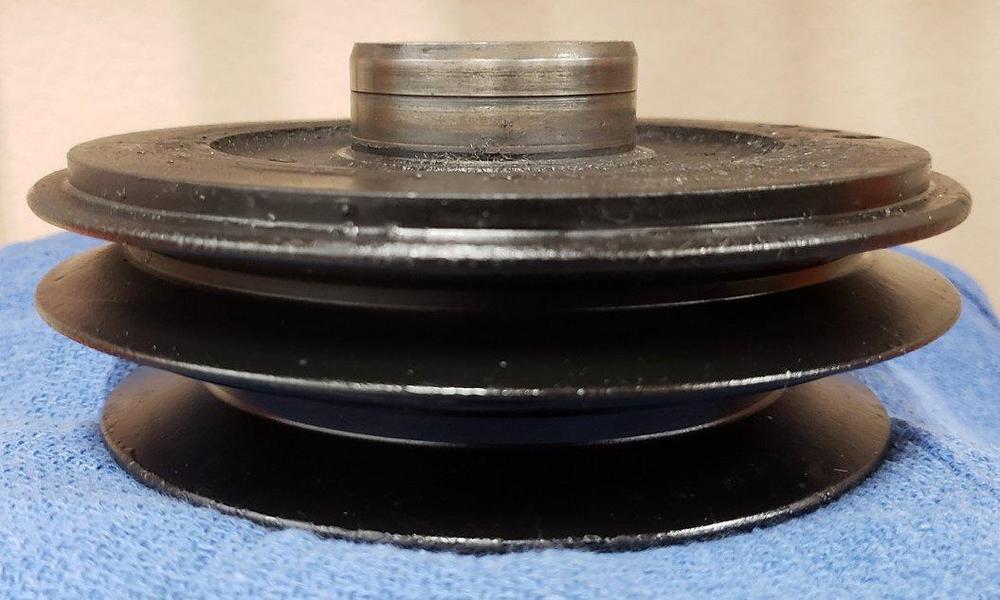
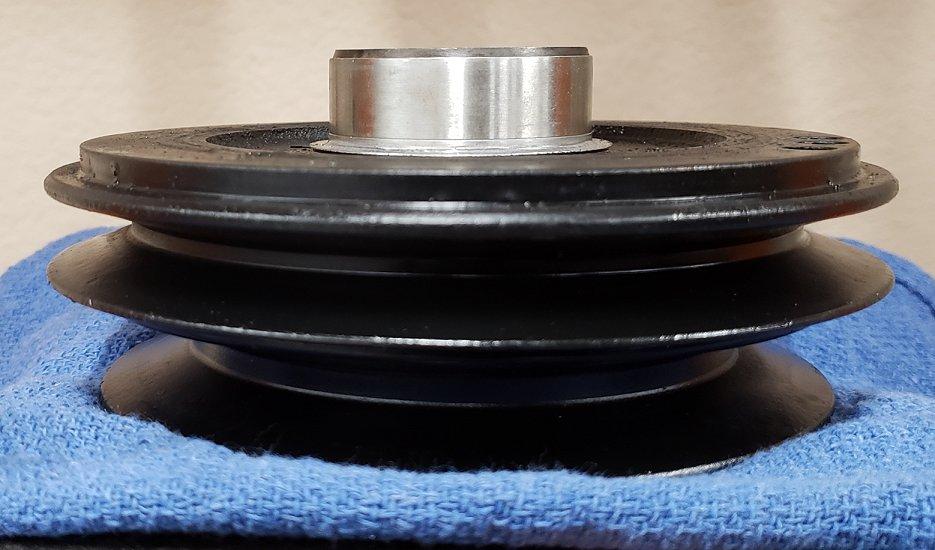
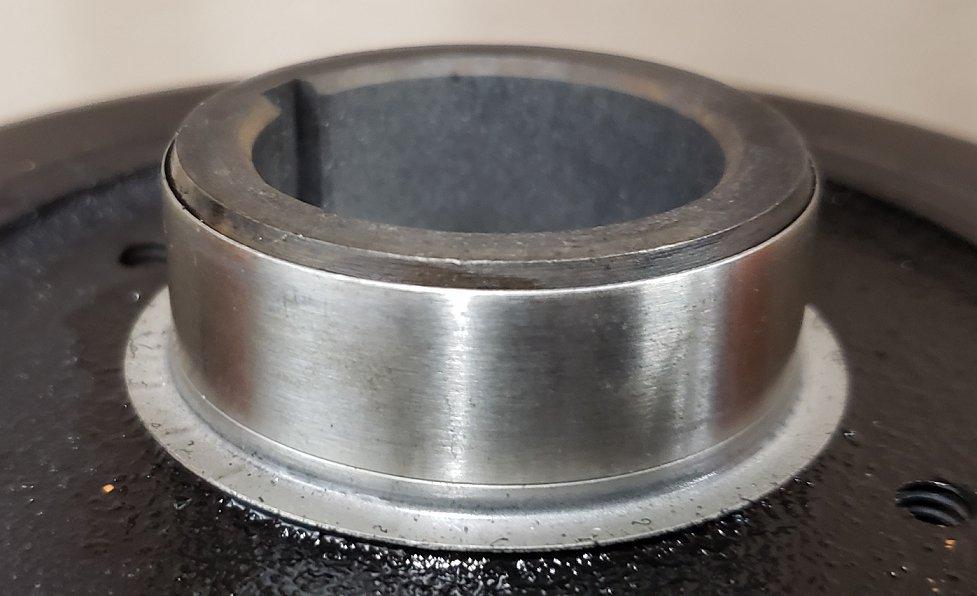
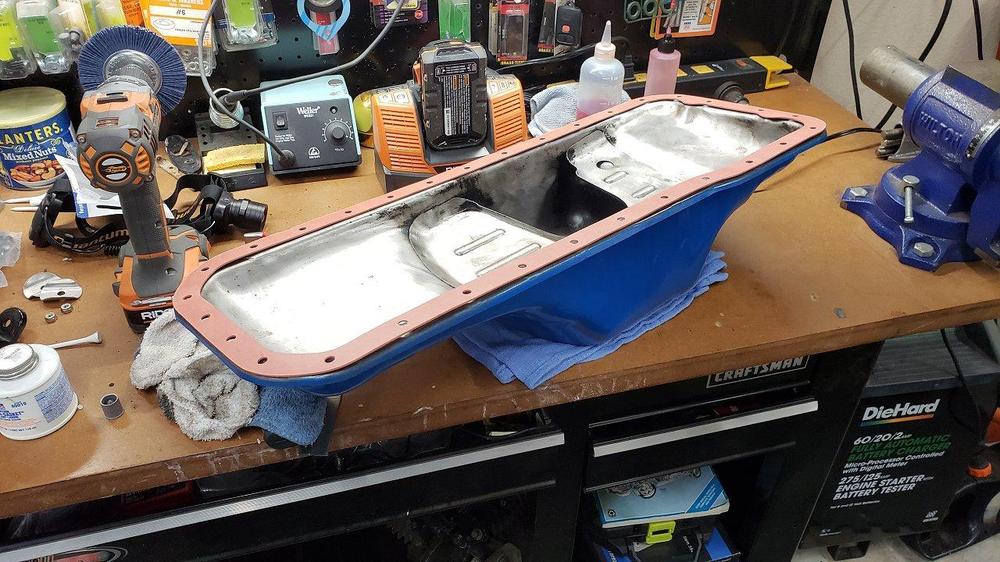
Wow! My last update was November of last year. Believe it or not, I have been working on the Z, just very slowly and as time has allowed. I crossed off an easy project by installing the oil tube block off plates I bought from MSA. Nice materials and quality. I used a little gasket maker to go around the edges of the oil holes. When I got the balancer back from Dale Manufacturing I knew I needed to repair the snout of the balancer as the seal had carved a groove in it. I ordered a SKF Speedi-Sleeve kit off Amazon for $30. Part # 99189. It went on easy-peasy using my 20 ton HF press. Next up was the oil pan. I used the Competition gasket sold by MSA. A brand new Fel-Pro gasket just seemed too thin and the MSA gasket is easily 30-40% thicker. The pan went on as planned and all fasteners torqued to spec, 7ft pounds. The silver support rails provide a nice contrast to all the blue even if they are not correct. With the balancer installed the engine takes a few more steps to completion.


-
@Craig24 I got your message and wrote you back. Feel free to reach out any time!
-
Its been a crazy week at work and I am just now seeing this thread. Wow! What a nice Z and WOW, what a great price! As other's have already said, barring any major issues you flat out stole it. Shocking the seller did not have a reserve on it as classic Z car prices have really been on the rise for the last 5+ years. I concur with everyone else, drive it, maintain it, and enjoy it. Its appreciating all by itself so you owe it to yourself to get some real seat time in it. If you like Miatas, you will love the Z. I referenced Zedy in your other thread looking or a mechanic. He is a great guy with a sweet silver 240z himself and a Datsun Roadster. We all look forward to your updates and driving impressions.
-
@Zedyone_kenobi Would you be able to look at a Z that a fellow owner just purchased near you?