Hardway
Free Member
-
Joined
-
Last visited
Everything posted by Hardway
-
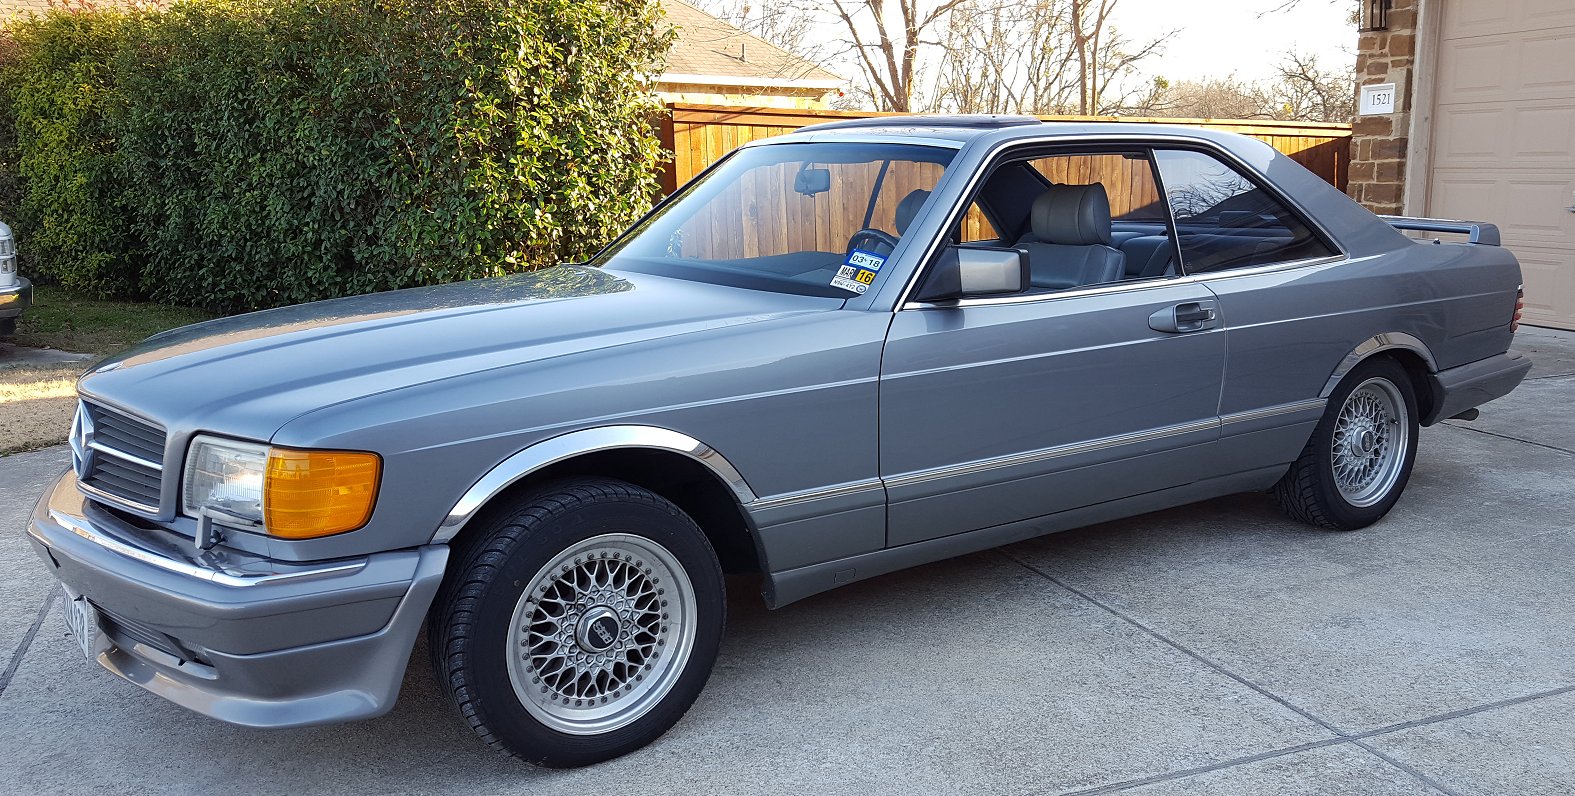
 I did not see if the tensioner was still in place when I had the valve cover off and should have also checked the timing marks with the engine at TDC. Oh well. The car runs and I can move it in and out of the garage. I really want to get the chain replaced before I do anything else but I will make note of everything before pulling things apart. The Z will have to wait as I will be doing a timing chain replacement this weekend on my other project, a 1988 Mercedes Benz 560 SEC.
-
I will admit, I suffer from a bad case of "while I am at it" so I apologize for jumping from spark plug and compression testing to a possible engine tear down. First things first is the timing chain. After thinking about it some more I will probably just replace it with the engine in the car. From there I can look at advancing the ignition timing. With the timing chain replaced, would I still look at moving the chain to one of the other position to alter the cam timing?
-
I don't think moving the chain over is something I feel comfortable with. Given that the chain has so much slack, as shown in the video in my build thread, I don't feel more power is worth chasing until the primary components of the engine are right. When I pull the engine to do the chain replacement I am going to pull the head at the same time to look at the block and pistons. At that point I may drop the head off with my machine guy and have him install a stage-2 or stage-3 cam and install a ceramic coated header as well. That way I can really take advantage of the triples on the car. Build thread -> http://www.classiczcars.com/topic/58524-hardways-red-rocket-1972-240z-build-thread/
-
I had some time to mess with the car today. Before I did anything I replaced the leaky valve cover gasket and cleaned up the spark plug side of the head. That alone took an hour+ since the current gasket had been glued to the valve cover with a generous amount of adhesive. Once cleaned I installed the NGK BR6ES-11 #7131 spark plugs, gapped at .033 and hooked everything back up. Using an external tachometer and timing gun I had 12 degrees adv. at idle which was 1,000 RPM. I could not get the car to idle smoothly below that so I ran with it. I observed the advance maxing out at 32 degrees at 3,000 RPM. I did not make any adjustments to the distributor. A quick test drive did not yield any change in driving impressions. With the valve cover off I noticed some dual parallel scoring from the timing chain on the inside. During a previous valve adjustment I noticed quite a bit of slack on the driving side of the timing chain so the scoring on the valve cover confirms its not right. At this point, for many reasons I am parking the car and will not drive it until I fix the timing chain. I fear it could slip or break causing severe damage to the engine. On that note I am thinking of pulling the engine so I can re-seal it, clean it, and paint it. At the same time I can decide what I would like to do about painting the engine bay as it is currently three different colors, black, red, and silver. I appreciate all of the help and feedback regarding this issue and will keep you posted on my progress. Thank you everyone!
-
Thank you for all the feedback guys. I am going to go pick up a set of spark plugs over my lunch hour and install this evening so I can determine where my timing is. Regarding the plug selection, should I go with set of NGK B6ES-11 or BR6ES-11 spark plugs. Do I need resistor plugs or not? The coil is a MSD Blaster 2 so I believe it should handle the higher gap. However, running the plugs with a more conservative gap might be a good place to start. I will see what the plugs recommended gap is and start there. I will have more to add to this story later today. Stay tuned!
-
I knew I would get some good questions and feedback! Yes, the threads are oily as the valve cover gasket is weak. The whole passenger side of the engine is grimy. A new gasket is going on as well as cleaning up the engine some. I don't know about oil burn as I have not driven the car enough to tell. The oil level has not changed since I did it in September and that has been with a few 40 mile round trips to cars and coffee at 80mph and there is no smoke of any kind based on my personal experience and those that have driven behind me. Interesting observation on the head Zed. If I were to replace it, what would you suggest? Possibly a '75 - '76 N42? On the exhaust side, I know the manifold is not ideal but my series-1 car has an all stock exhaust and felt like it had more grunt. This car just has a Dynomax muffler fed via 2.5" exhaust with no resonator. So the gap may be too much for the Uni-Lite? Does this mean I should run spark plugs designed for a smaller gap?
-
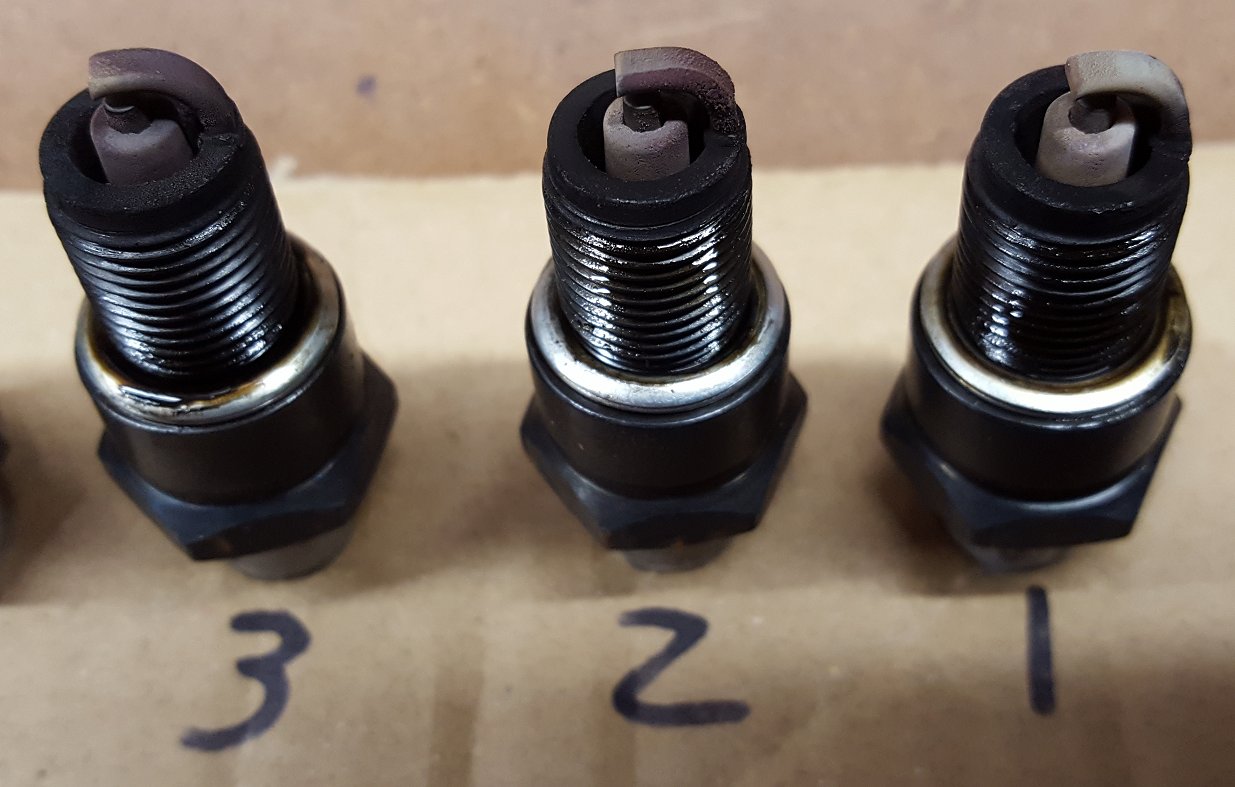
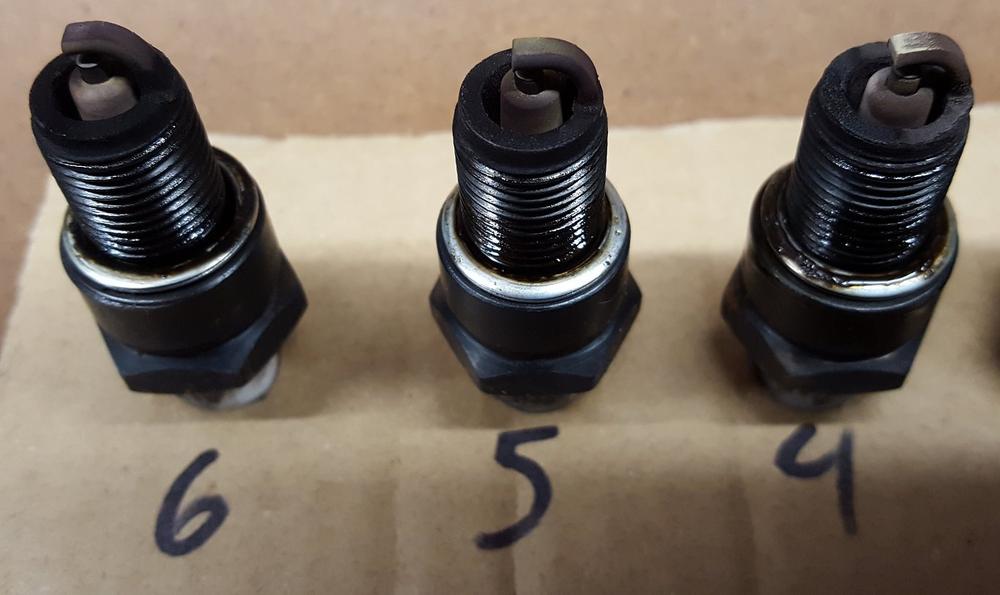
I have been gathering some baseline info in an effort to find out why my 240z feels to be lacking power. It runs good, idles smooth, but just does not have any "plant you in the seat power" in any gear. Below are the specs along with some pictures of the spark plugs I pulled. I have not checked the timing and I know how important it is, just didn't want to put the used plugs back in to do so as I plan to install some new ones. L28 N42 Block #184718 Was told it was bored out to 2.9L but have no way to validate this. 1973 E88 head with stock cam in good shape and properly adjusted valve train. Triple Dellorto DHLA40 carbs, rebuilt, and appear to running a bit rich based on the plugs Mallory Uni-Lite distributor with electronic breakerless conversion, MSD Blaster 2 coil, Taylor Sprial-Pro wires, AutoLite #64 spark plugs below gapped around .044 Stock cast iron manifold Compression: #1 150, #2 151, #3 150, #4 151, #5 151, #6 150 I think this looks really good! Based on my setup I believe I should get a set of NGK B6ES-11 or BR6ES-11 spark plugs. Do I need resistor plugs or not? The transmission is a 280zx Turbo 5-speed unit in great shape. Diff is a 3.54 with a Precision LSD. Am I losing power due to my gearing? Once I get new spark plugs installed I will check my timing and post my numbers. Any feedback or ideas is greatly appreciated.

-
I would go visit some of the Z shops around Houston and ask the guys that work there, reach on Facebook, and the like. There has to be one as Houston is a huge car city.
-
Just now seeing this thread. Congrats on your new Z! Based on what I saw in the BAT auction it was well bought. Glad you made it home with little drama are off to the races with making it the way you want. If you are ever in the Austin area post a shout on the Capital Z of Texas club FB page. Are you planning to attend ZCON in Atlanta in October?
-
Congratulations on your acquisition and welcome to the club! Your Z looks great, very period correct with the mags, spoiler, and headlight covers. We look forward to your updates on it.
-
Kudos to you for working to make it road worthy again. Amazing the AC still works! That paint removal looks miserable but productive.
-
Just wanted to give everyone an update. Everything is now sold out on eBay. I have 6 sets left. If you need a set I recommend buying a set as I do not plan on having anymore made. Thank you to everyone that have purchased a set and for your support.
-
Thank you Phil! Couldn't have done it without the work you did on the books and articles.
-
I am in Hutto just around the corner from the high school off 79. At the rate things are going I cannot hold any sets as I shipped off 6 more sets over the lunch hour and had someone else come by to pick up a set in person earlier this morning. He was from Cedar Park too. I would suggest buying 3 sets and then if you determine you only need 2 then I will simply give you your money back, no worries.
-
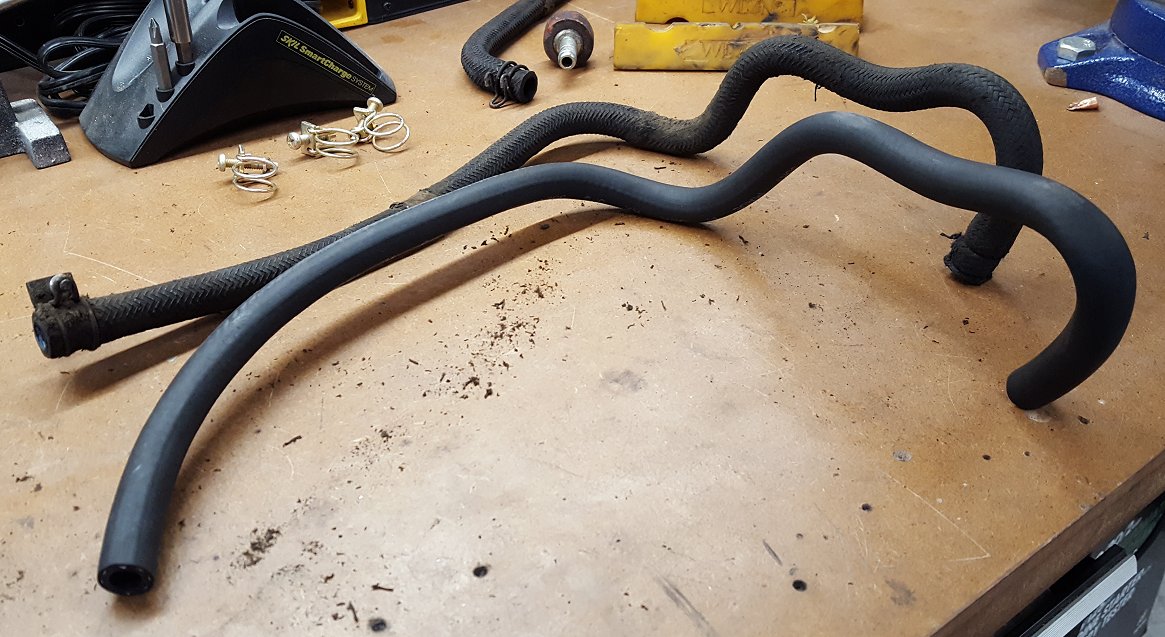
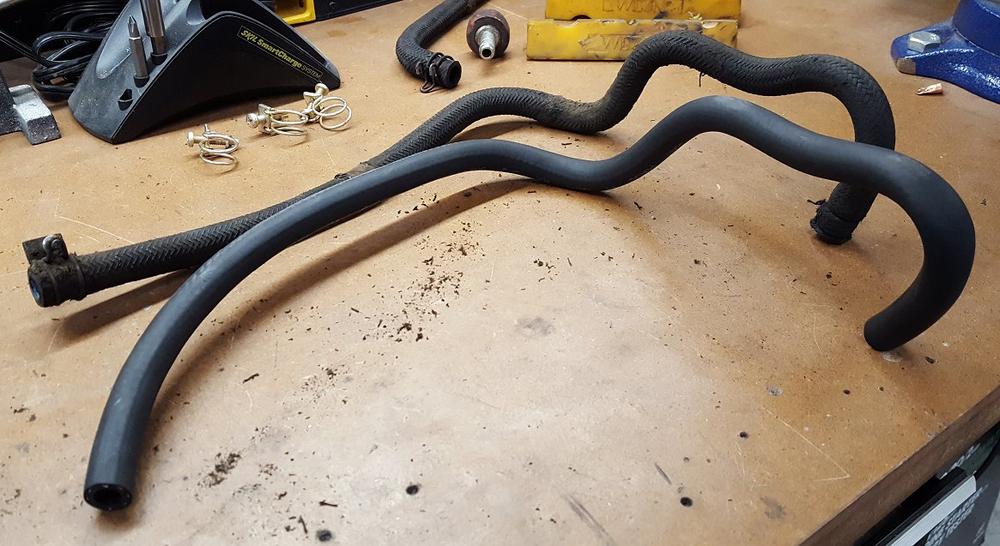
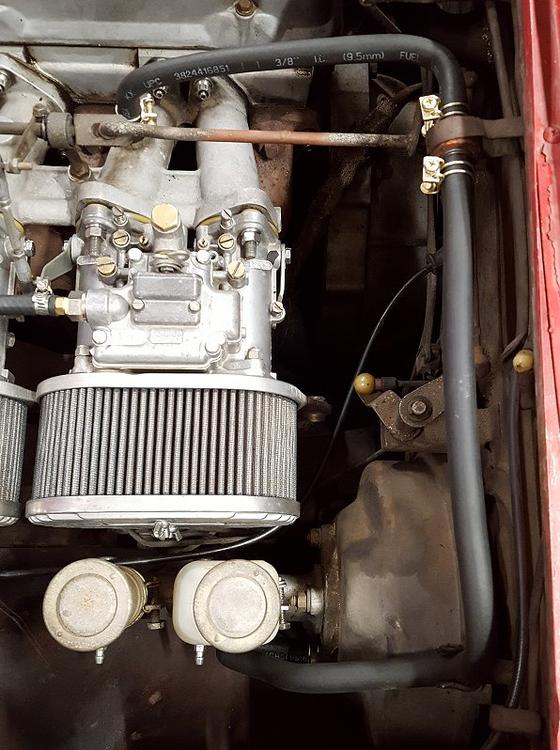
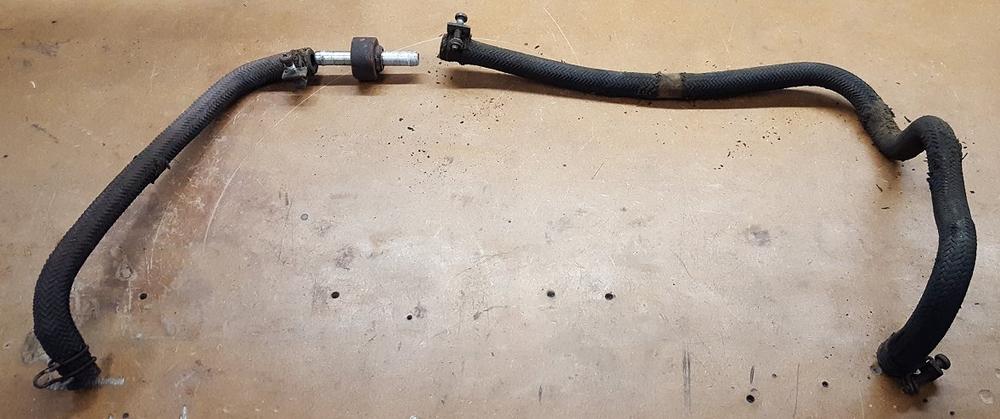
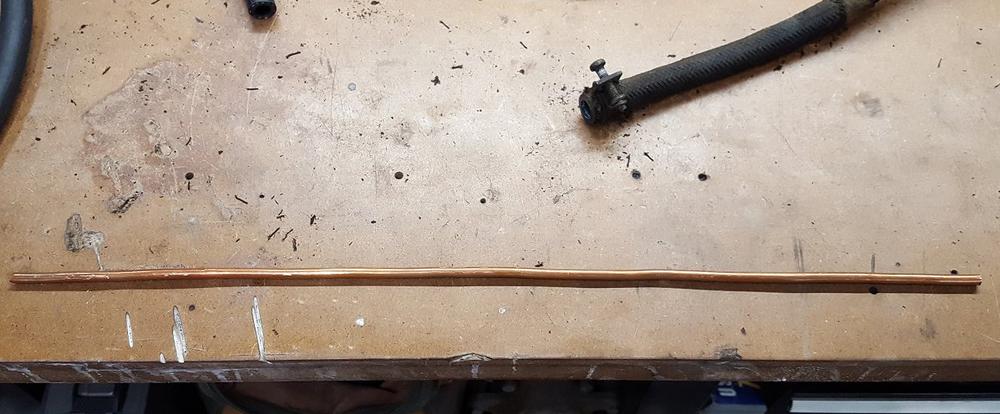
Last night I resolved something that has bothered me ever since I started working in the engine bay... the absolute sorry state of the brake booster vacuum hose. Every time I touched it or breathed hard near it, more of the deteriorating braided fabric would crumble off or leave some part of my skin or clothing dirty. This is no surprise since it is the original hose and I am sure many others are dealing with the same issue. Leaning on the replacement hose experience that AZ-240z made me for my series-1 240z, I knew I could make a new one on my own. I pulled out some solid copper wire I had laying around and straightened a 16" piece of it with my bench vise. I inserted the copper wire in to some 3/8 inch fuel vapor hose and started bending. After about 10 minutes I was pretty happy with the overall shape. I left both ends a little long so I could trim them to fit once they were on the car. I did the same for the smaller hose and used a piece of 4" copper wire at each end to accomplish the bends. With the hoses on the car I did some trimming and adjusting so they fit right. While I was at it I installed some freshly yellow zinc plated original style hose clamps to add a little bling. The end result is not factory or restoration accurate but it is worlds better than what was on the car and fully functional. A few things to note from my personal experience. This was actually the second booster hose I made. When I did the first I used 24 inches 1/4" copper tubing which is much easier to bend and I recommend it over the solid copper wire. However, 24 inches was too much and I had no way to cut it down or push it out once I had formed the hose. When pushing the copper in to the hose, make sure you push it in far enough so it does not interfere with the ports that each end will go on to. That is why you really only need 16 inches of copper. Of course this makes bending the curves on the ends a little challenging but it is do-able. The best part of this project is if you completely mess up, the cost to try again is minimal. Additionally, you are saving yourself a lot of money over buying some pre-molded hose unless you truly need restoration caliber hoses, in that case be prepared to pony up. Next up is my modified choke cable project. Stay tuned and Merry Christmas everyone!

-
Thank you Melvin. I am planning to ship them out over the lunch hour.
-
The hinge boots are also known as a hinge seal. MSA carries them along with other vendors, see link below. http://www.thezstore.com/page/TZS/PROD/classic01a/34-2236 The clips and brackets for the tail light finisher panel are easy to come by. MSA and other vendors sell the correct size push pin clips as they are smaller than the interior panel clips. The lower brackets/pinch clips are welded to the body so unless you cut them off they should still be there. If you did cut them off I believe you are doing to have source some used ones and weld them back on as I have never seen them offered for sale separately. Maybe some others can offer up alternatives.
-
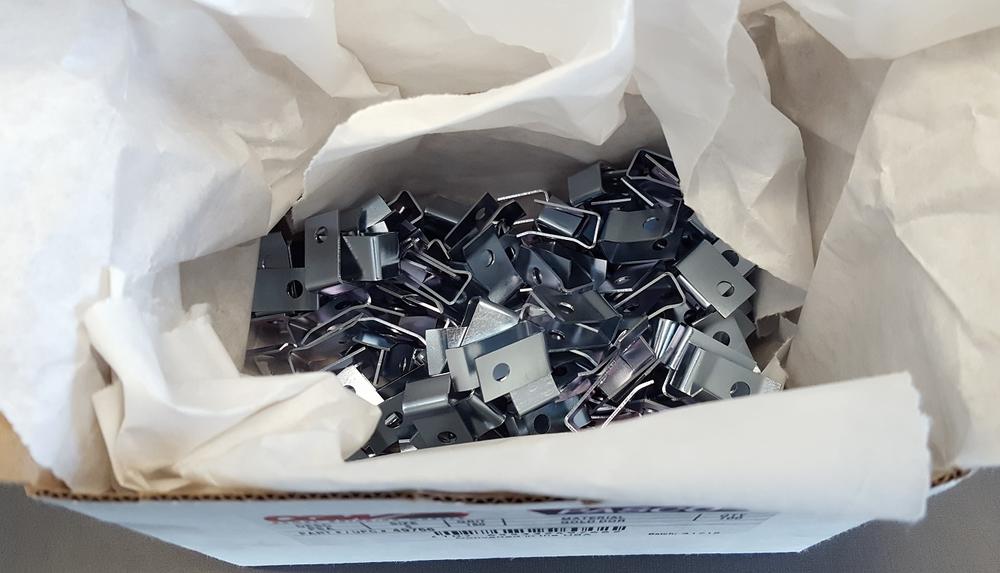
All of the clips sets that have been purchased so far have been shipped out. I have PM'd the buyers with their tracking numbers. I realize many of you may not get around to installing them for awhile but when you do, please post up some pictures and feedback as I would love to see how they worked out for you. Thank you again for your purchases and support.
-
I just got it. Yours will be in tomorrow's shipment as well.
-
Thank you everyone for your prompt purchases! I am packing up everyone's purchases tonight so I can ship them off tomorrow morning. I will PM you with your tracking number once I am at the office.
-
Good news! The fabrication company got my order done early and I have the new batch of clips in hand. They are $55 for a set of 4 which includes free shipping and tracking in the continental US. I am sorry but due to the cost I cannot offer any quantity discounts this time. If you need an international shipping quote or would like to send me a check or MO, please PM me and I will provide my info. These clips are just like the first run, made of spring steel, clear zinc plated, and ready to install. I will work to make sure all forum members get the sets they need before putting any on Ebay. Thank you for your support! PayPal email: chevyguy1969@hotmail.com Please indicate it is for Goods & Services.
-
Awesome! Thank you 240dkw.
-
The red plastic collar around my check valve has seen better days. On my series-1 Z it had a black rubber collar around the check valve and looked new. Does anyone know where to find these? I hate to buy a whole new valve when I just want to replace the collar. I looked around at Home Depot for awhile and did not really find anything. Any ideas or suggestions are greatly appreciated. Thank you!
-
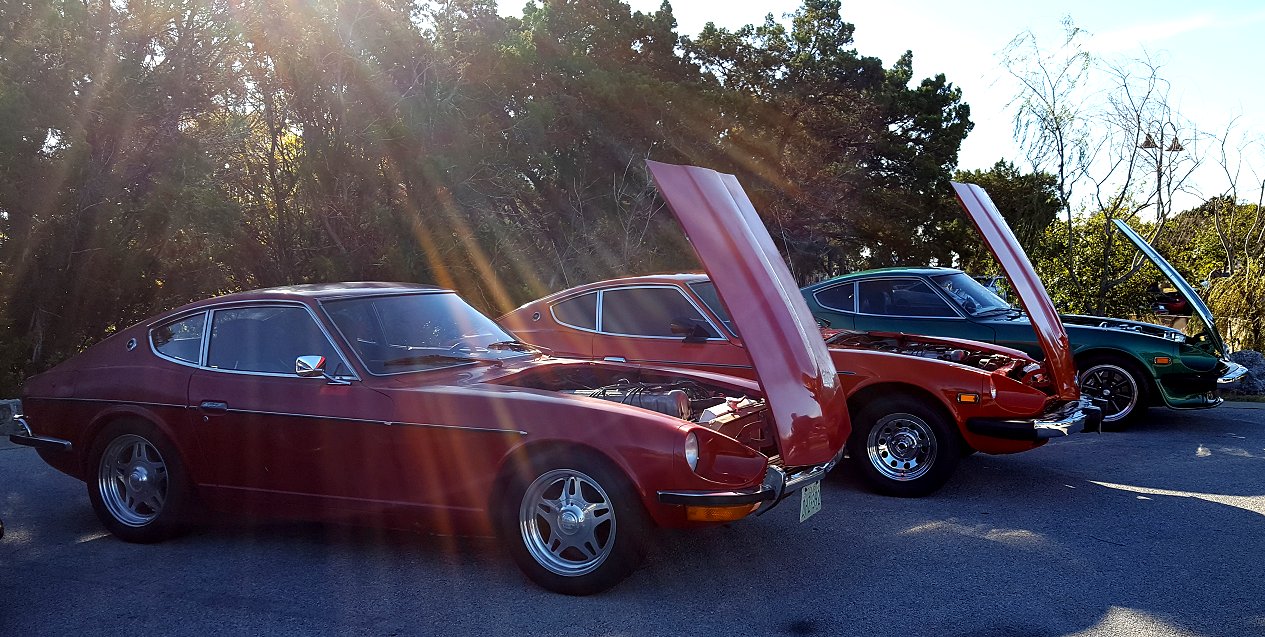
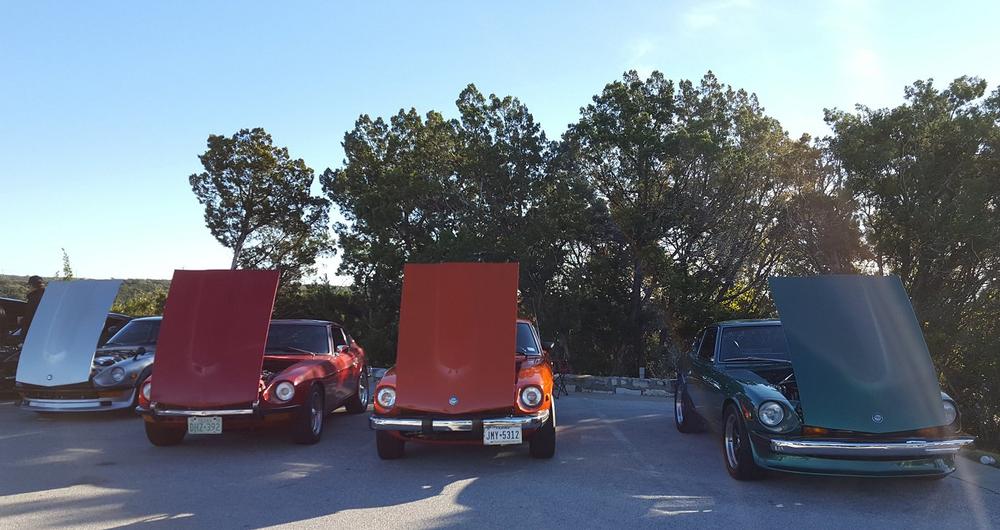
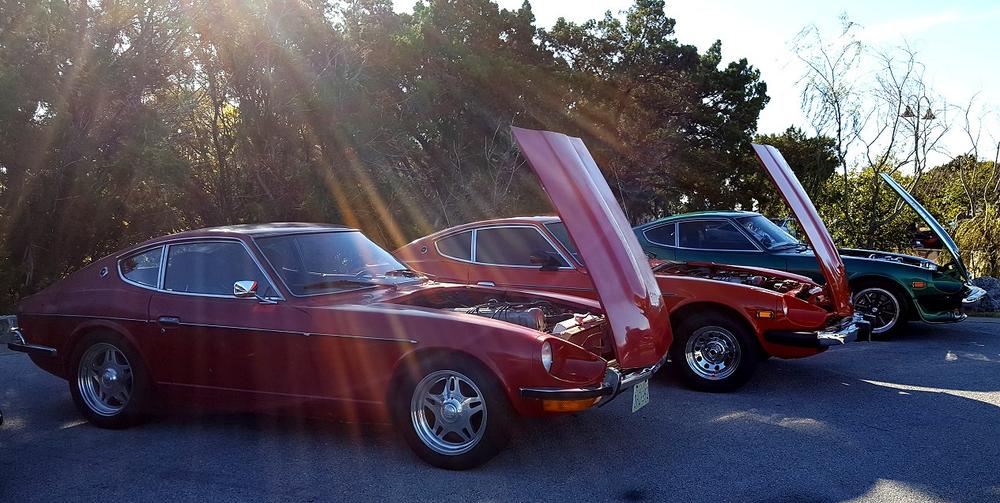
Last Sunday I officially waived my personal banner of "Mission Accomplished" as I made it out to the final Cars and Coffee of 2017 in the Z. The trip there and back was drama free and the Z got its own fair share of lookers. It was great to hang out with Mike W. and our buddy Kyle McKenzie. The previous owner of the car was there too and was happy to see it out, taking in all the work I had done, and being enjoyed by its new owner. Once the sun came out it got packed fast with lots of foot traffic. My apologies for the poor picture quality as it was nearly impossible to get a picture of our row without people passing by. My goal for 2018 is to start using my DSLR with a glare hood to get better pictures. For now, phase 1 is complete and I am making plans for phase 2.
-
Thank you for all of the interest guys. We are still a few weeks out but as soon as they are ready I will let everyone know.