Hardway
-
Posts
1,332 -
Joined
-
Last visited
-
Days Won
16
Content Type
Profiles
Knowledge Base
Zcar Wiki
Forums
Gallery
Events
Downloads
Store
Blogs
Collections
Classifieds
Everything posted by Hardway
-
Another great example of how the car hobby brings good people in to our lives. Congrats on meeting another Z enthusiast and the awesome gift of the dash. Is your new friend here on the forums? If so, we would all love to see the progress of his restoration.
-

Hardway's 1971 240z #8011 - Build and Repair Thread
Hardway replied to Hardway's topic in Open Discussions
With the Z’s brake lights working properly again I turned my attention to the diff mount. I ordered a new RT diff mount the same day as the turn signal switch and both arrived on the same day. I have installed this kind of mount before and knew of the challenges lay ahead of me. The rear suspension of my car was rebuilt by the previous owner so I knew I should not encounter any rusty bolts. However, the last time I installed one of these mounts I had all of the suspension out as well as the diff so access was going to be limited this time around. A quick inspection revealed the original strap mount was shot and was probably original to the car. It leaves me scratching my head why the previous owner did not install a new one when he had everything out. I do know he did not put many miles on it after he put all the work in to it so maybe he never realized the ill effects it had on the car. After some wrenching and “speaking†to the car I got the old strap mount out. A side by side comparison of the old vs. new shows just how superior the RT mount is. For those that have installed these before you know they are a VERY TIGHT fit. Since the diff and drive shaft was in the way I used a small piece of wood and my floor jack to drive it in to place. It was somewhat of a “ballet of persuasion†with my wife working the jack as I was using a rubber mallet to tap the mount until the holes were perfectly lined up. After about 20 minutes and more “speaking†to the car all four bolts were in. Another 15 minutes were spent doing some trial and error fitting of the mount. I ended up having to cut 3 layers off the mount so that is fit correctly above the diff. The threaded bolt end of the mount and included lock nut are too tall and interfere with the parking brake mechanism. As part of my trial and error fitting I cut the bolt down and used a short nut to secure it. As you can see there is no room for a lock washer but there might be room for a star-washer. The pull of the poly rubber mount should keep it in place. I will double check it after I put some miles on it and if I see an issue I will address it. That is all for now. Next up is looking over my carbs as the car seems to run a tad rich all the time and possibly installing the other Kia door seals in place of the door seals on the Z. -
Hardway's 1971 240z #8011 - Build and Repair Thread
Hardway replied to Hardway's topic in Open Discussions
Several weeks ago I had the Z out on a cruise that involved some of the quickest and most spirited driving I had done with the car. Two items of attention quickly bubbled to the surface. The first being that my diff mount was shot as I could hear the diff thunk and clunk as I shifted. The second item was disappointing as I was advised by a fellow driver that my left brake light was not working. It appears my fix to the turn signal switch from a few months ago did not hold up. After some quick trouble shooting I confirmed the issue was with the turn signal switch again. Knowing that I was tired of dealing with the old unit that had been messed with numerous times I bit the bullet and spent $140 on a restored swtich from a seller on Ebay. He offered a 30 day warranty so I clicked Buy It Now and was in my hands within a few days. My first impressions were good. The entire mechanism was clean and properly lubricated. The turn signal switch itself was super stiff and I was a little concerned the action was too tight. The stalk had been cleaned and painted and the horn contact had a good dome of solder on it. The only point of concern for me was the mounting pin that is cast in to the switch assembly. My original switch’s pin was in very good shape which made installing it a breeze. The pin on the restored switch was crushed pretty good. Once this happens I don’t know what could be done to fix it but it was a little disappointing. Swapping the switches was quick and the newer switch mounted up just fine. Once everything was hooked up I did a round of testing and everything checked out 100% I have driven the car around some and noticed my turn signals flash faster and the tightness of the switch has let up a little so all in all it was money well spent. -
Hardway's 1971 240z #8011 - Build and Repair Thread
Hardway replied to Hardway's topic in Open Discussions
My only point of concern was the threads for the hard brake line fitting. The driver side caliper’s threads looked a bit questionable but the passenger side looked just fine. I did a quick test with an extra brake line I had and the fittings seem to go in just fine for each so I proceeded further. The install was quick and drama free. With the help of my wife I got everything bled, checked for leaks of which there was none and took a test drive. Since bad weather was closing in fast I only got in a quick lap around the block but everything seemed good. Job done! -
Hardway's 1971 240z #8011 - Build and Repair Thread
Hardway replied to Hardway's topic in Open Discussions
It has been awhile since I have posted an update on the Z. Over the past few months I have completed a few projects but nothing ground breaking. Back in March I noticed my front calipers were dragging and not releasing like they should. At first I thought the clevis that links the pedal to the brake booster needed some adjustment. I was careful not to back it out too much as I did not want the reaction disc to fall inside the booster. With as much adjustment as I felt comfortable with and a quick trip around the block revealed that did not fix the problem. I pulled the wheels off and could clearly see the pads firmly pressed against the rotor. The pads were being pressed so hard that I could not turn the wheel by hand. I was able to use a c-clamp and pull the pad away a little bit. Once I did this the wheel would spin freely. I pulled everything out to inspect it further and I could see the dust seals were showing their age and there was rust around the edges of the pistons. Based on the appearance of the calipers it looks like someone sandblasted and painted them, installed new pistons and seals, but reused the brake hardware and bleeder screw. I don’t know the history of the brake system on the car other than the previous owner installed new hoses just before I bought it and I had adjusted the rear brakes right after I bought it. Oh well, time for new calipers! I ordered a set of calipers from Advance Auto Parts as I had used their re-manufactured calipers in the past with good results. Plus, they were the right price at $33/each. On their site the brand is listed as Wearever but the boxes say OEM. They included new hardware and appear to be well done by the reman. company. The pistons looked really good and the seals looked to be of high quality. The reddish liquid you see in the picture is oil residue from the re-manufacturer. -
I use the National Corvette Museum Insurance Company (NCM). It works the same way as other classic car insurers and you don't have to have a Vette to insure a vehicle through them. I have the agreed value on my '71 240Z at $10K. It costs me $125/year. I really need to increase it to around $15K - $20K since values continue to rise. Their customer service is good but I have never had to make a claim through them. A lot of classic Vette owners use them so they must not be too bad.
-
I just wrapped up my Kia hatch seal install and documented it in my build thread. Check out the link below. http://www.classiczcars.com/topic/49581-hardways-1971-240z-8011-build-and-repair-thread/page-4 Here are a few pictures of the finished product. Definitely a great alternative to buying reproduction seals!
-
Hardway's 1971 240z #8011 - Build and Repair Thread
Hardway replied to Hardway's topic in Open Discussions
Since this is a used part the seal is a little more collapsed on the right than it is on the left. There is also a permanent impression in the seal where a panel pressed against it from the factory. Overall the fit is very good considering the seal probably has 80K miles on it. A few small challenges presented themselves along the way, the first being a rip in the seal that was not noticed until I was 80% done. I decided to wrap it in electrical tape for now. Since the seal is about 2 inches too big I placed the cut below the lower strut mount. The seal is very hard to cut through even with an industrial pair of shears. Therefore my union did not turn out as pretty as I had hoped so I decided to cover it with some electrical tape as well. All in all for $3 and a few hours of my time it was totally worth it. Even with the imperfections, given the state of my old seal I will take function over form any day of the week, especially at a savings of $32! I still have the 2 other seals and plan to replace the door seals in the near future. -
Hardway's 1971 240z #8011 - Build and Repair Thread
Hardway replied to Hardway's topic in Open Discussions
Once done I attacked the ugly blocks of foam. With the foam pulled off a very thick and gooey layer of adhesive was left. It took several rounds of soaking with professional strength Goo-B-Gone to get it off. *NOTE: Professional Strength GBG smells and acts just like brake cleaner, protect yourself properly. Once it was all gone the end result was some good looking original metal. With all the goo off I moved on to installing the new/used Kia weather stripping. This is an interim solution as I plan to buy brand new weather stripping once I repaint the car in the future. With that in mind I decided not to glue it down as the clamping force of the seal was pretty tight. I used a passenger door piece that already had a 90 degree bend in the top corner so I started at the top left corner of the hatch. Installing it was pretty straight requiring some patience to work it in and fully seat it with a couple of taps from a rubber mallet here and there. After about 20 minutes I was done and the visual difference was immediate. -
Hardway's 1971 240z #8011 - Build and Repair Thread
Hardway replied to Hardway's topic in Open Discussions
With my new job keeping me super busy it has been a few weeks since the Z saw some attention. With a beautiful Valentine’s Day Saturday upon me and my wife busy with her own projects in the house I was back on the Z to get some things done. After my last post regarding my valve adjustment I went back and did another round of checking and adjusting to make sure everything was spot on. Sure enough, 4 valves were too loose and now I know why. When I was adjusting them I left my wrench under the rocker arm thus giving me a false measurement and making the valve too loose once the wrench was removed. Now everything is within spec except for my #4 intake valve. It is currently at zero lash and even the smallest feeler gauge won’t fit under it. I took it for another test drive and the engine ran smoother and felt more predictable. Plus, it was both quiet at start up and quiet fully warmed up as I examined it in the garage after my test drive. I still need to further investigate the #4 intake valve and have been reading up on other people’s experiences. I did hear back from the previous owner and all he could remember was the engine and head was rebuilt to stock specs. Switching gears, I saw the thread regarding the use of Kia weather strip seals again and was inspired to try this on my Z. See the thread here -> http://www.classiczcars.com/topic/50845-just-did-the-kia-hatch-seal/ The rear hatch seal on my Z was far past its expiration date. In addition a previous owner had added blocks of black foam to the hatch panel, possibly quieten the squeak of the hatch since the weather strip was no longer providing a cushion for it. Needless to say it looked pretty sad and really started to bug me when I was trouble shooting my brake light issue last month. Seeing I could get a new Kia door seal for $35 shipped I checked my local salvage yard and saw they had five 1993-2000 Kia Sportages in the yard. After looking at all 5 vehicles I came up with 3 good door seals. At a cost of $3 each the trip was well worth it. As I checked out at the pay counter the guy even said they were some of the biggest seals he has seen that still looked good. Definitely the most bang for the buck! Below is a picture of what one looks with a can of spray paint for reference. Next came the task of removing the old seal. It started out promising but quickly turned tedious as the old seal proceeded to come out in about 10,000 pieces. -
I actually pulled a rear passenger seal out to compare it. It was probably about 8 inches shorter but due to the rear passenger door being closed 99% of the time the seal was pretty compressed and would not rebound so I left it. If it would have rebounded I would have bought it since I already had it out but I could not justify spending $3 for something that really was not useable anymore.
-
Seeing that KORAPS is always an option and we ended up having a beautiful day here in Austin I decided to check my local Pick-A-Part for the seals first. Their website showed they had 5 93-02 Sportages in the yard. Between all 5 I was able to get 3 really good seals, 1 driver side and 2 passenger sides. Once home I started removing my old original hatch seal. After a few hours my back was telling me to take a break as the seal was coming off in lots of little pieces. However, I am optimistic and looking forward to the end result. For anyone wondering just how big these seals are, here is a picture of one of my mine with a can of spray paint for context. At $3 per seal it was a bargain! I did pull a rear door seal to compare and they are probably 8 inches smaller.
-
Hey JMHTX. You need to test all the connections and make sure the all the contacts in the switch are truly making a reliable connection. All of these switches are between 30 and 40 years old now and even with a good cleaning and though visual inspection the contacts may not actually be touching when they are supposed to. Once you have confirmed with an Ohm meter that everything is making the proper connection then move down the path of the wiring, make sure the flasher is getting power. If it is, try replacing it. I just went through some turn signal switch woes as well with my '71 so I know what you are going through. Keep us posted.
-
Hey Ross, can you tell us which site you found the piece at for $35. I have been hunting around online too and besides KORAPS who shows it for $14.61 I cannot find anyone else selling it for $35. Thanks!
-
Still Deciding On Which Carter Electric Fuel Pump To Purchase
Hardway replied to Johnny wick's topic in Carburetor Central
I recommend the Carter fuel pump. Just have to install an adjustable fuel pressure regulator. -
Hardway's 1971 240z #8011 - Build and Repair Thread
Hardway replied to Hardway's topic in Open Discussions
You bring up a good point Jonathan. The engine was rebuilt under the previous owners care and I still have his contact info. I will reach out to him to see if he has any specs or documentation about the engine rebuild and cam shaft that was used. -
Hardway's 1971 240z #8011 - Build and Repair Thread
Hardway replied to Hardway's topic in Open Discussions
It has been awhile since I posted anything about the Z. The holidays were good and I am now employed again which is even better. Once the holidays were over I decided to tackle an issue with the driver side brake lights. I was in no rush as the weather had been crappy until the last few days. I am happy to report I got the issue solved and you can read all about it in the thread I posted in the Electrical forum -> http://www.classiczcars.com/topic/50735-turn-signal-switch-spring-ball/?p=462461 Once I got the brake light issue solved I turned my attention to the engine as I had noticed the valve train was a bit noisy. With the valve cover off and spark plugs out I went about checking the clearances on all the valves. Blue helped me do this on my old lime green Z so I was familiar with the process. It is definitely easier with 2 people but I managed just fine by myself. I was a bit surprised that about half the valves were too tight. In addition the #4 intake valve may need a new lash pad as the adjuster is bottomed out yet I still could not get my .008 feeler gauge between the cam and rocker arm. Everything else checked out fine once it was adjusted. With the engine buttoned back up I instantly noticed it was quieter at idle and ran smoother. I took it for a shakedown run and when I came back the valve train was a bit noisy-er but not like how it was before I started. Maybe I got a few valves too loose? Either way I will be getting back in to it as I need to replace the valve cover gasket, take care of the #4 intake valve, and polish up the valve cover as it could use some attention as well. That is all for now. All in all, a good note to the end weekend on. -
SUCCESS!! Since all of the driver side lights would light up with every other function except the brake pedal I figured there was no ground issue. Since I could never figure out to test just the wiring I went back to the switch itself and opened it again. After studying it a little longer I figured out the V or roof shaped terminal was the component controlling the power to the brake lights and would push the contact open when the turn signal was switched in that direction. After some quick tests I determined the driver side contact was open by just a fraction of a millimeter. I cleaned it with a emory board and bent the tab a little so it would provide a reliable connection. Once reassembled and installed on the car my repair results were confirmed as I went through several cycles of the switch in all positions. Thank you Steve for all your guidance and the information you have provided to the Z car community.
-
Hi Steve, I didn't know you had them available other wise I would have sent you a $5 bill for one. Oh well, i have 24 left now, not to mention 250 3.5mm ball bearings. When you say measure the ground resistance on each side, can you be a little more specific? Maybe I should open the switch back up and surgically inspect the brass switch mechanism/rocker?
-
My apologies that it has taken me several weeks to get back to my thread. After some trial and error I determined the correct size ball bearing is 1/8 inch or 32mm. I found a local bearing supplier on Ebay and picked up a 25 pack for $5 shipped to my door. After getting the bubba solder glob off the spring I put some dielectric grease on it along with the switch mechanism itself. When I was putting it back together I could tell the spring & ball was applying more pressure to the switch mechanism so confidence was high as I was reassembling it. The picture below shows the ball on the spring but without the dielectric grease. Once reinstalled my confidence faded as the problem still exists. I did notice the action was smoother and more profound than before but the driver side brake light still does not light up even when jiggling the handle. Looking over the wiring diagram about 20 more times I am now at a loss of what is causing this. Based on the wiring diagram, since the neutral position on the turn signal switch sends power to both brake lights when the brake pedal is depressed, it makes me believe the turn signal switch is fine. The hazard lights work fine, each turn signal L&R works fine, with the brake depressed each turn signal flashes properly as well, just the driver side brake light does not stay on when the passenger side is flashing. Any input or advice is greatly appreciated!
-
I plan to Steve and I responded to your PM. Thanks!
-
After some trouble shooting on my driver side brake light I determined the point of failure was coming from the turn signal switch. Once on the bench I could tell someone had been here before as the tabs showed tool marks and were not flat against the board, this is usually not good. After carefully opening it up I discovered everything was pretty clean but the usual ball bearing stalk contact had been replaced a glob of resin and solder that has been sanded in to shape, probably due to be lost the last time it was taken apart. Should I try to just build up the solder or track down the ball bearing? I think the bearing route is best but does anyone know the size? Might be worth it to get a new spring too.
-
The original manual for my car came with it. Car was built 08/70, purchased at Datsun of Los Angeles on 9/30/1970 but is titled a '71. The manual says on the back "Issued Date: 20th July 1970 (050500)" Below that it says "Printed in Japan Publication No. OM0E-0S30U3" Hopefully that helps and does not add to the confusion.
-
If you don't have a headlight relay harness I would highly recommend one along with the turn signal relay harness. Depending on your budget I would take a crack at cleaning up and repairing what you have first. You might be surprised at the results. You can always go the H4 route and if you are dead set on doing that then go ahead. In the end, its just what you want as H4's are easier to service and are a better light but the original setup with a relay harness is pretty good too.
-
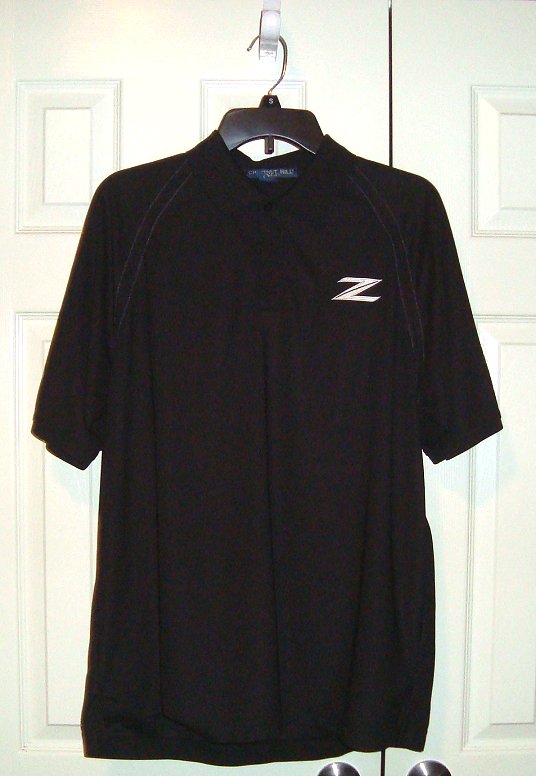
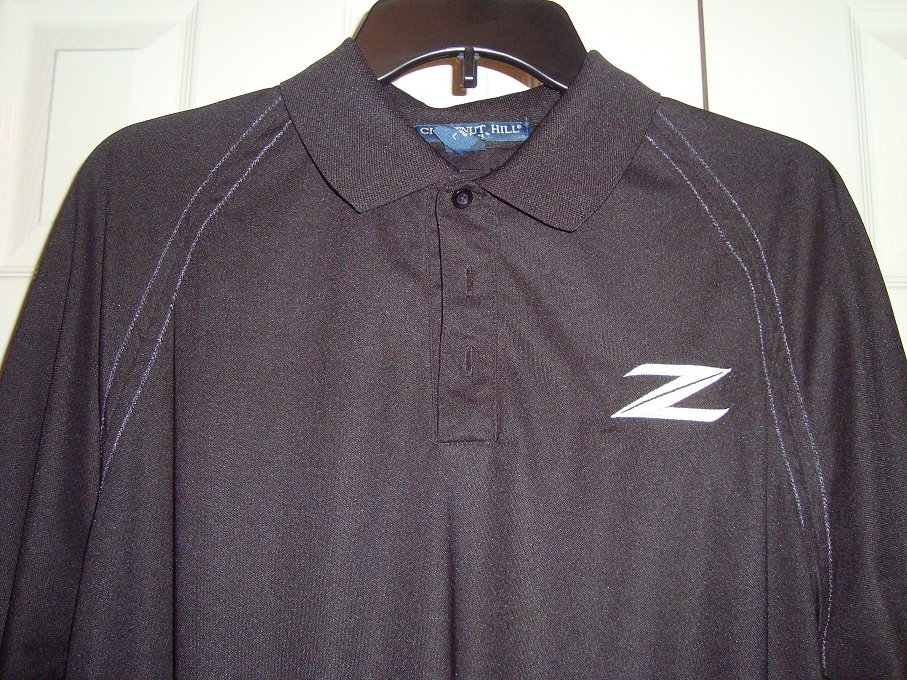
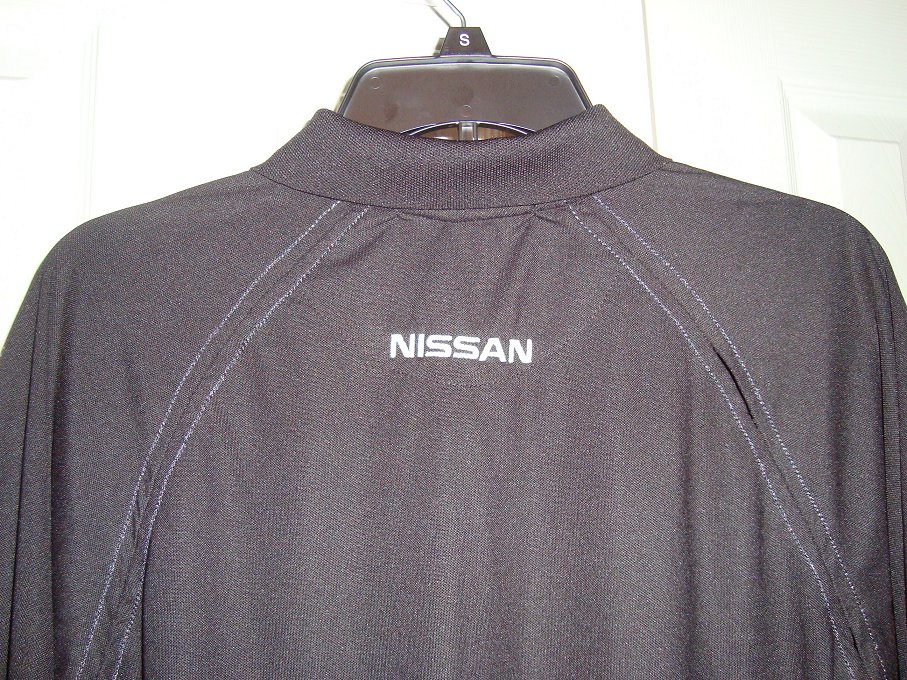
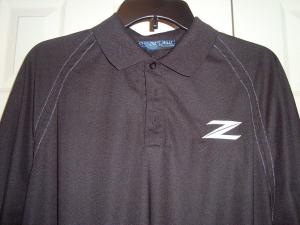
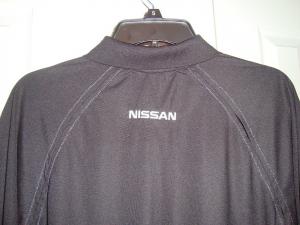
I am a regular customer of various Goodwill, Salvation Army, and other thrift stores around me. I primarily hunt for things I can flip such as vintage audio gear, glassware, toys, etc. Lately I have made a point of taking time to look through the clothing as I have picked up clothes for work and to work on cars for dirt cheap. One particular item I look for is the Dri-fit style polo shirts as they are perfect almost year around here in central TX. The week before last I stumbled upon a shirt that I knew was waiting for me, a Nissan dealership sales person shirt with the 350 or 370 Z logo on it. For $2.34 out the door it was definitely the find of the day! Now I have a nice shirt to wear to out to car shows, meets, and such.

- 1 reply
-
- 2
-