grannyknot
Free Member
-
Joined
-
Last visited
Everything posted by grannyknot
-
 Like this, very nice,
-
-
Pretty slick, got to love a well thought out stealthy modification, now you just need some good speakers up front. http://datsunworks.com/page3/page2/
-
Some good ideas on this thread, http://forums.hybridz.org/topic/123146-240z-tank-modification/
-
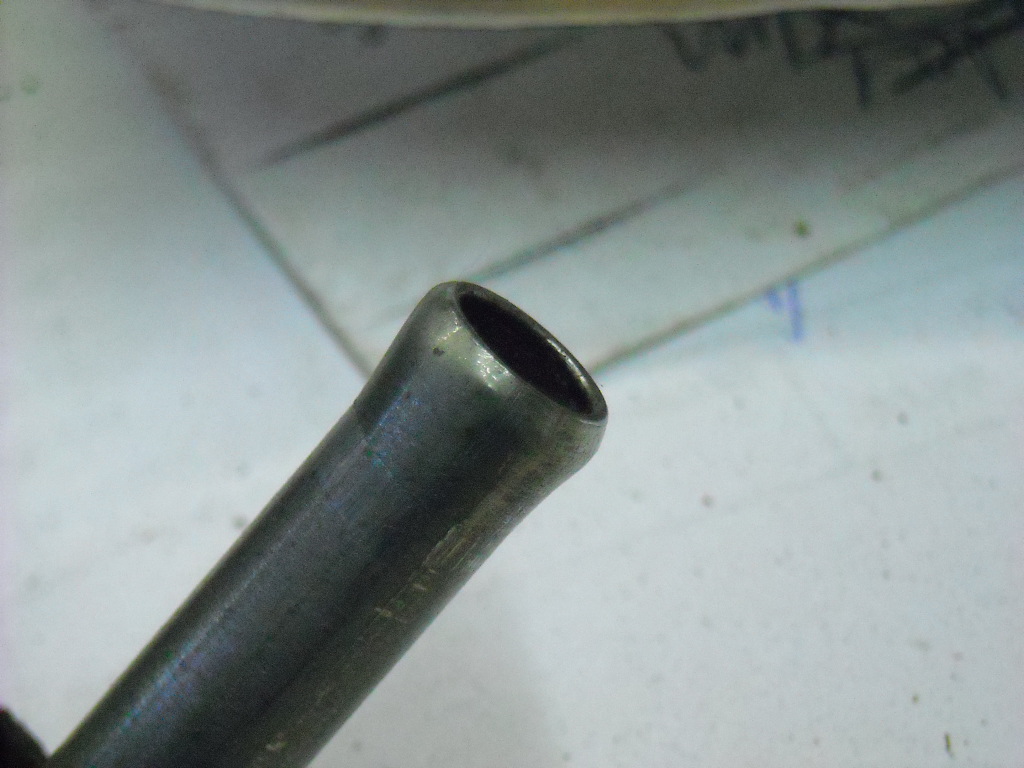
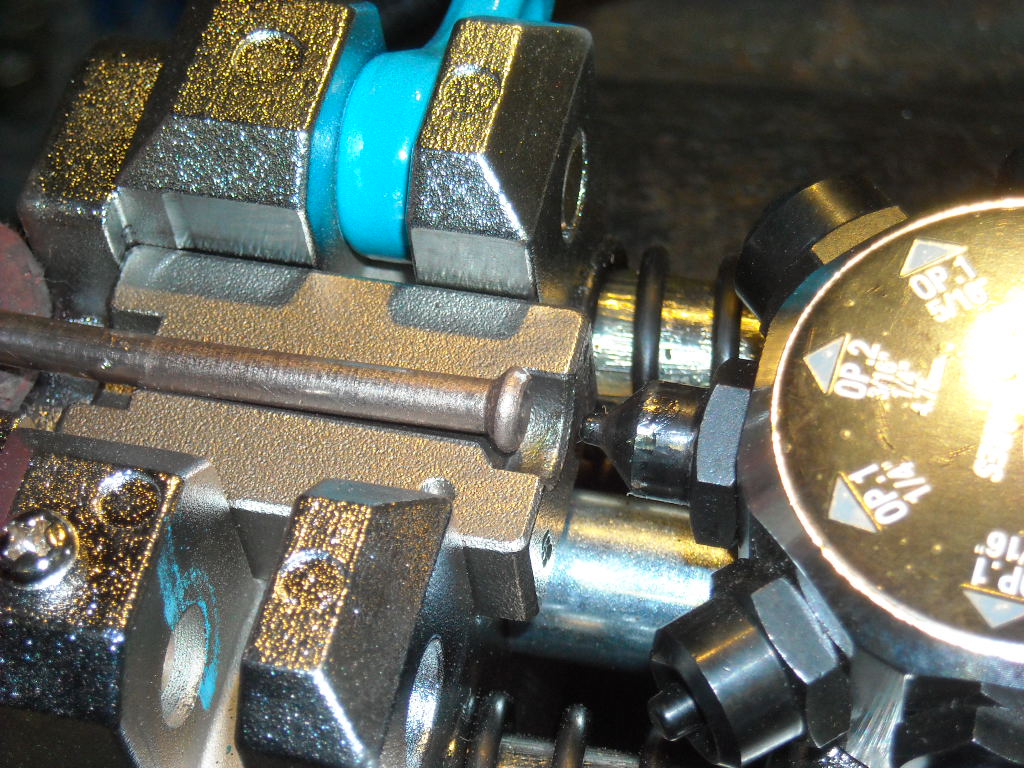
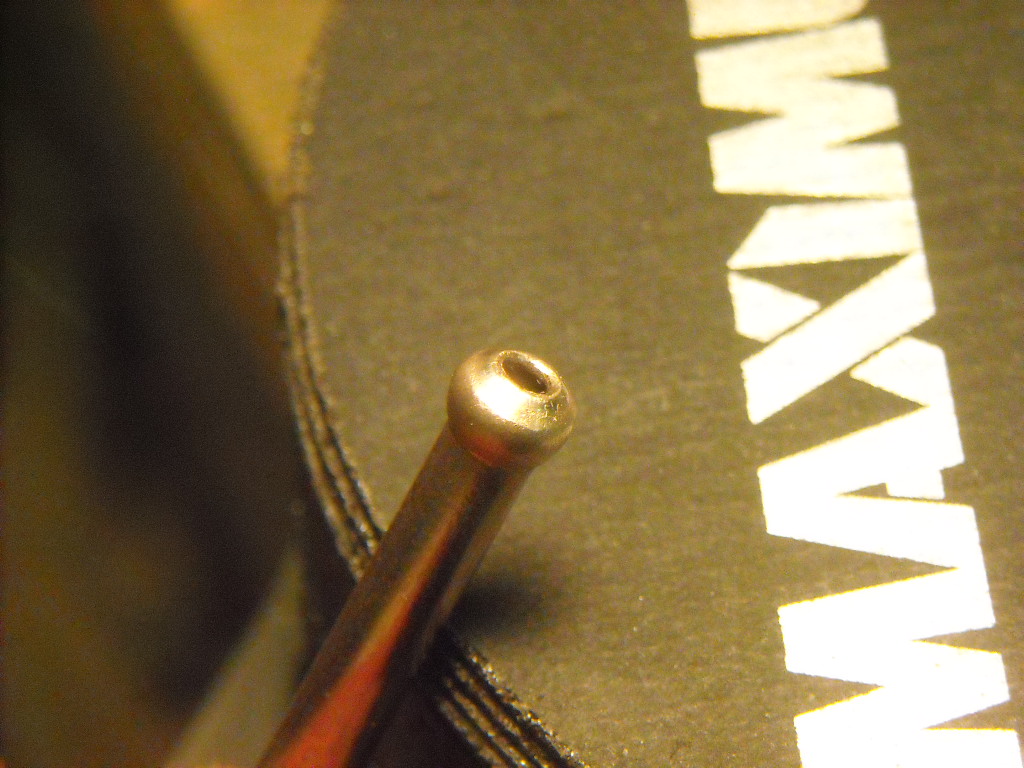
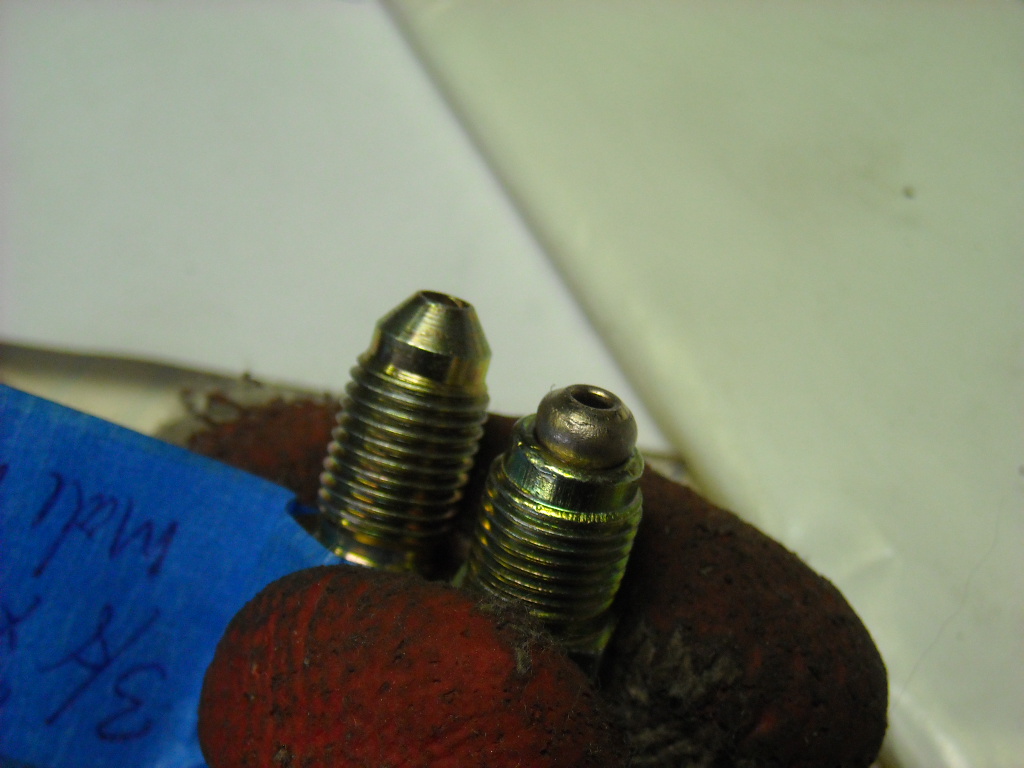
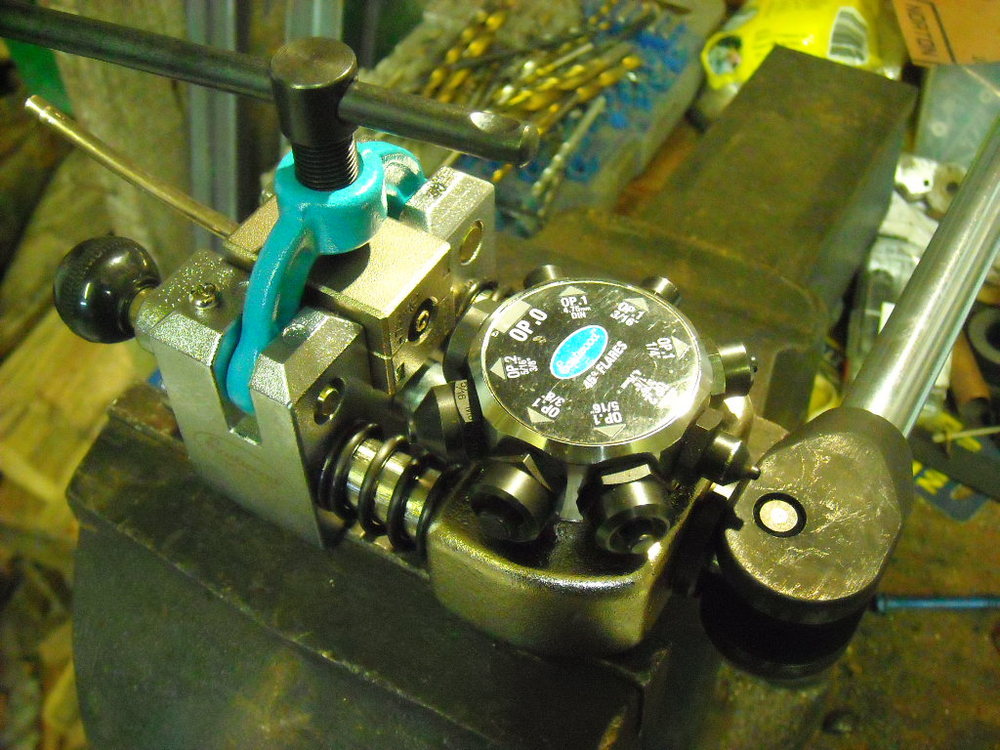
Eastwood finally came through, this is a sweet little tool, well made and good action. It makes a wide variety fitting ends. Here is a single bubble flare or step 1 of a double flare, A double flare, It even makes a good lip for fuel lines by engaging the 3/8" flare just a bit, The Tilton clutch master cylinder requires a male single flare and I'm wondering if I can use a single bubble to mate with it. Anybody know if I can do that?


-
^ will do
-
Hey, I tried your air scaler idea, works great, especially in the morning before the shop warms up and the tar is cold. Thanks
-
It's the original? Forget everything I said about taking it apart, it will be disgusting inside, throw it out and buy new. You got your moneys worth out of it you cheap buggar
-
-
Yes that is just down the road from me, I will try to contact him. Although now that I have promised to buy a can from Jim I might get Gibbslapped for buying one locally.
-
So basically your giving it away
-
Yeah that's the rear most seal on the Master that has gone. Since the M/C has to come off anyway you might as well disassemble it, maybe some crud got between the seal and the bore.
-
$17,000 now, looks pretty clean, seeing lots of polyurethane in the wrong places but let's get the betting started, I'm going going to say it goes up $27,000 and either sells or doesn't make reserve.
-
What Canada Post doesn't know won't hurt them, besides that is just the lawyers talking.
-
It has been a while,... I think I just googled poly spring spacers then found one with a similar diameter and the height I was looking for, I had to cut it to get the step and shaved off the the upper edge to match the stock perch. You will need proper spring compressors to get the shock nut on, I was trying to eliminate the rear end sag that sometimes happens with Eibach lowering springs, this how the car sat with those 3/4" spacers on the rear, to my eye that is the right height for these cars.
-
Site, you don't really have to plug the carb intake holes, you could leave them open with no problems, makes the job 50% easier.
-
-
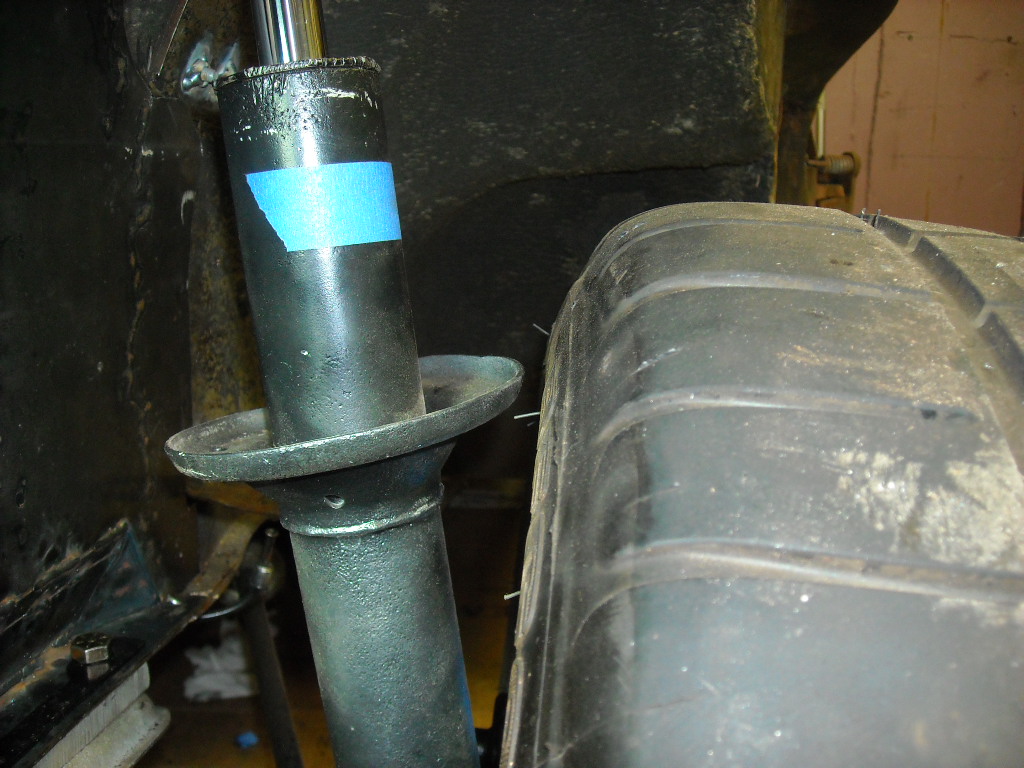
In a pinch you could use a isolator/riser like in the pic but newer spring would be the best solution.

-
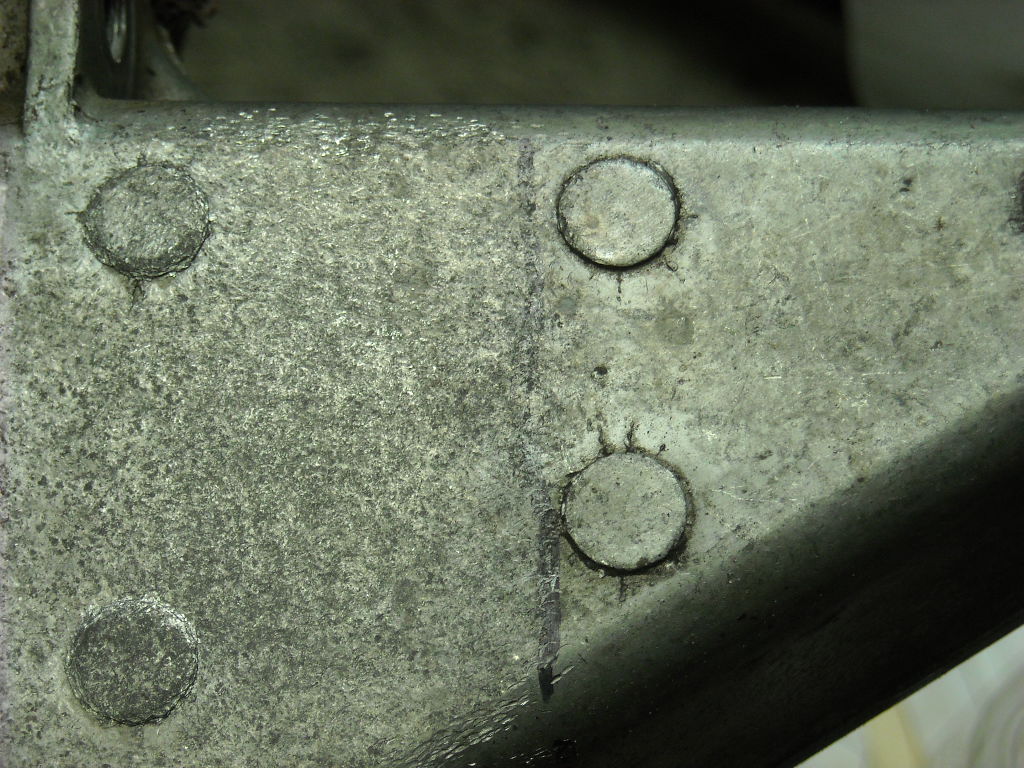
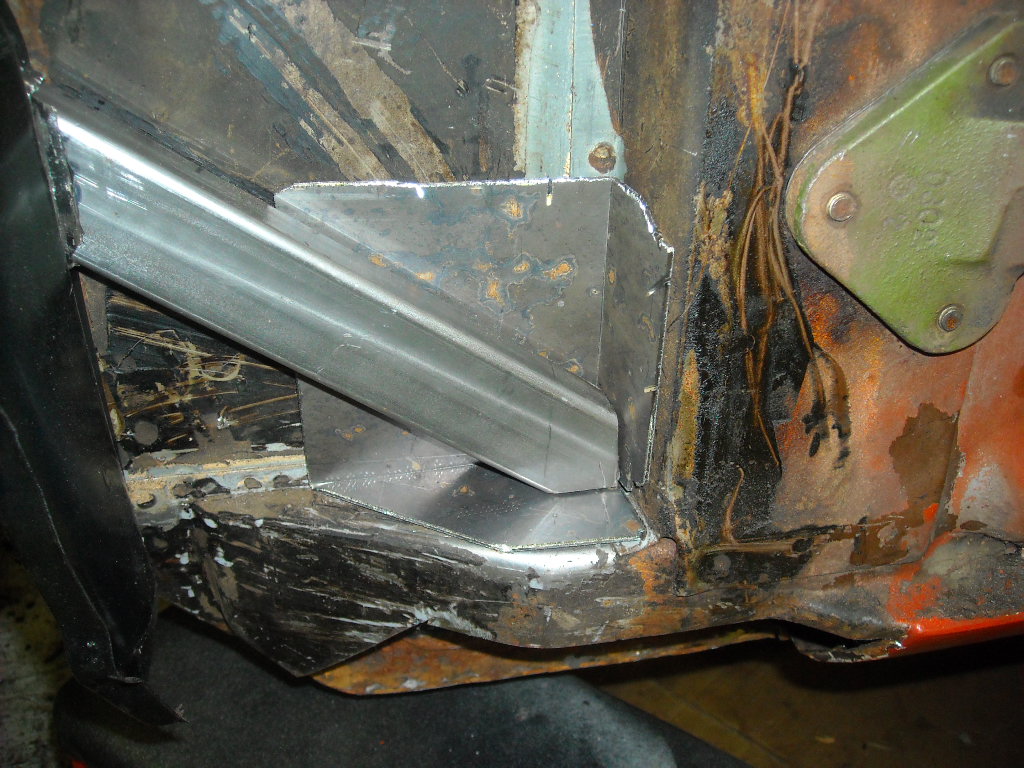
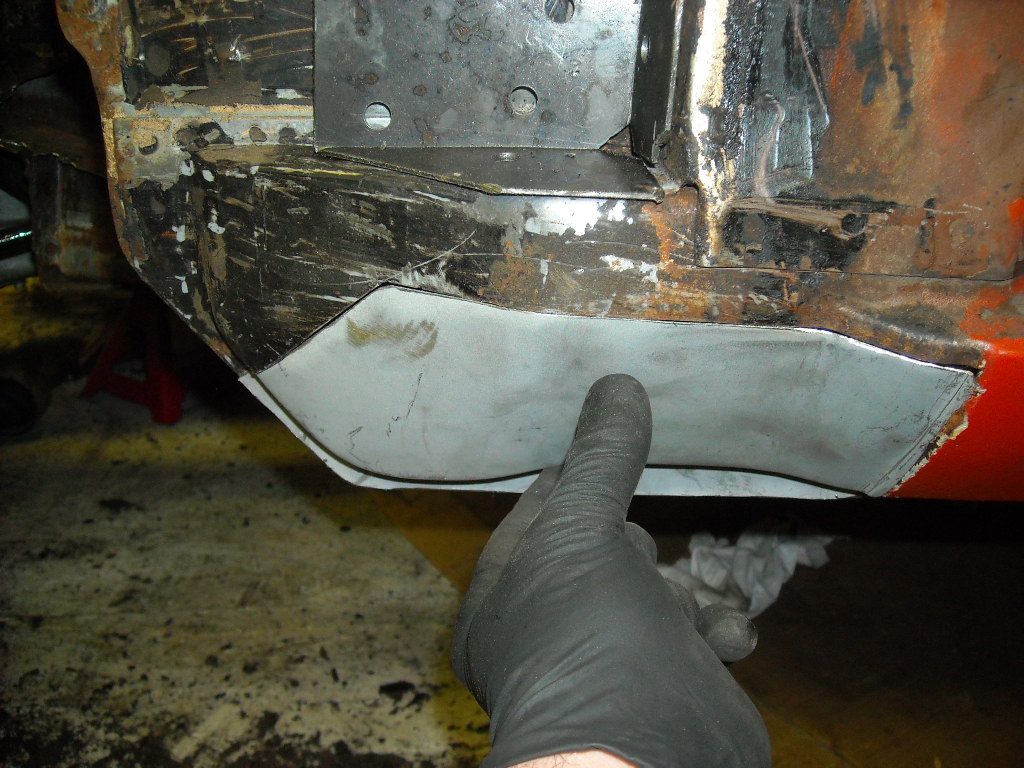
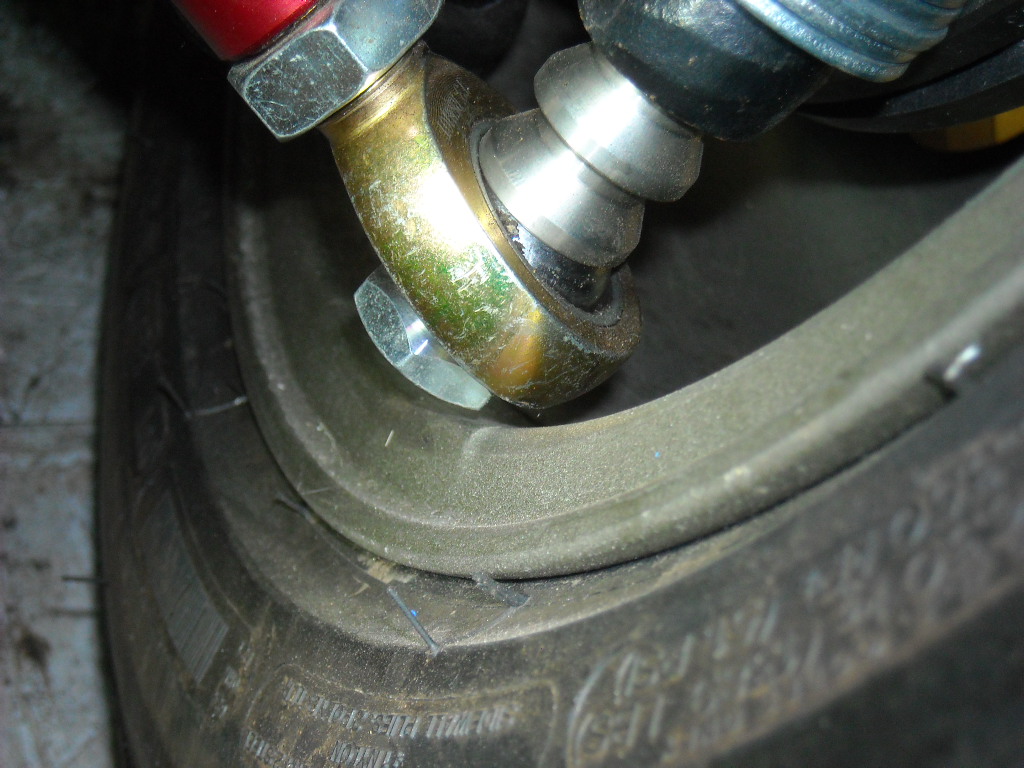
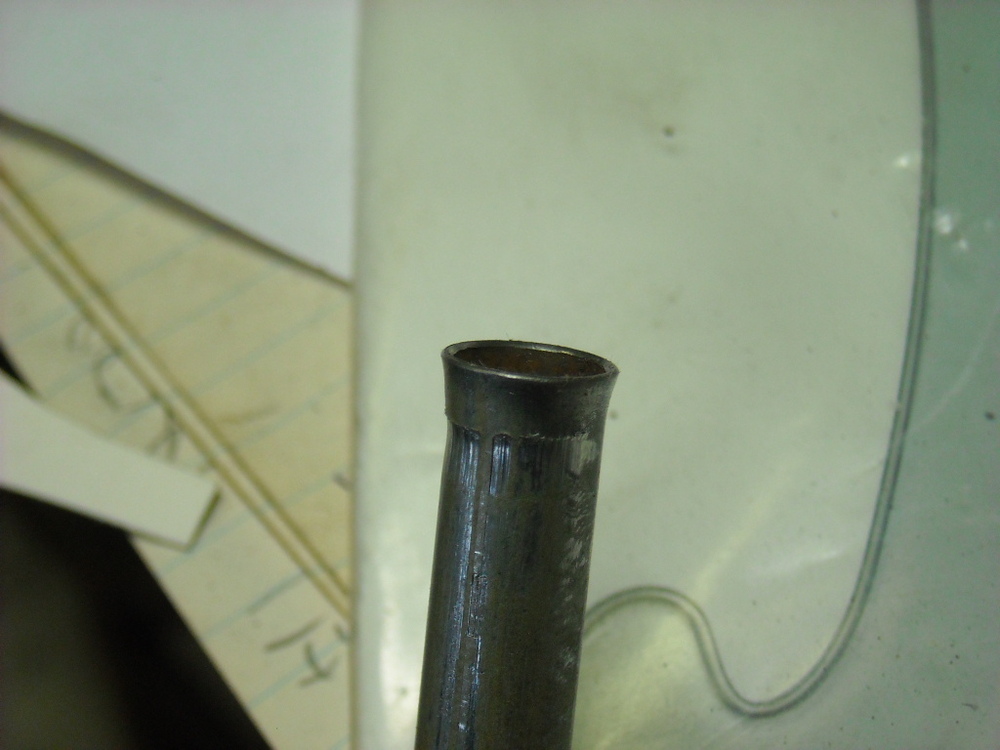
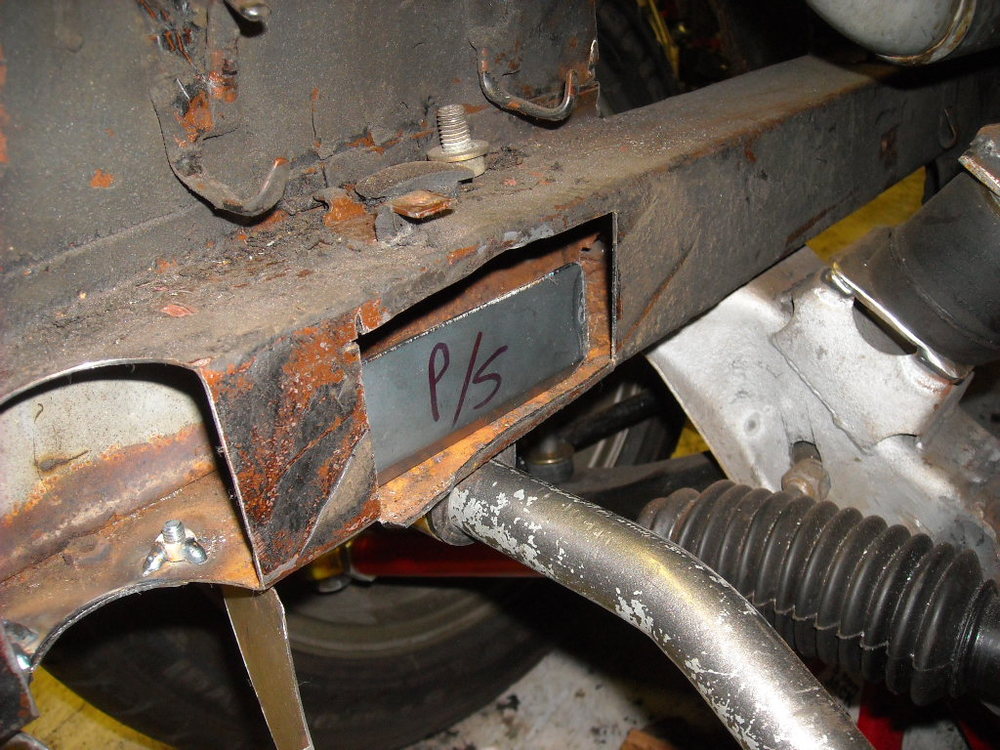
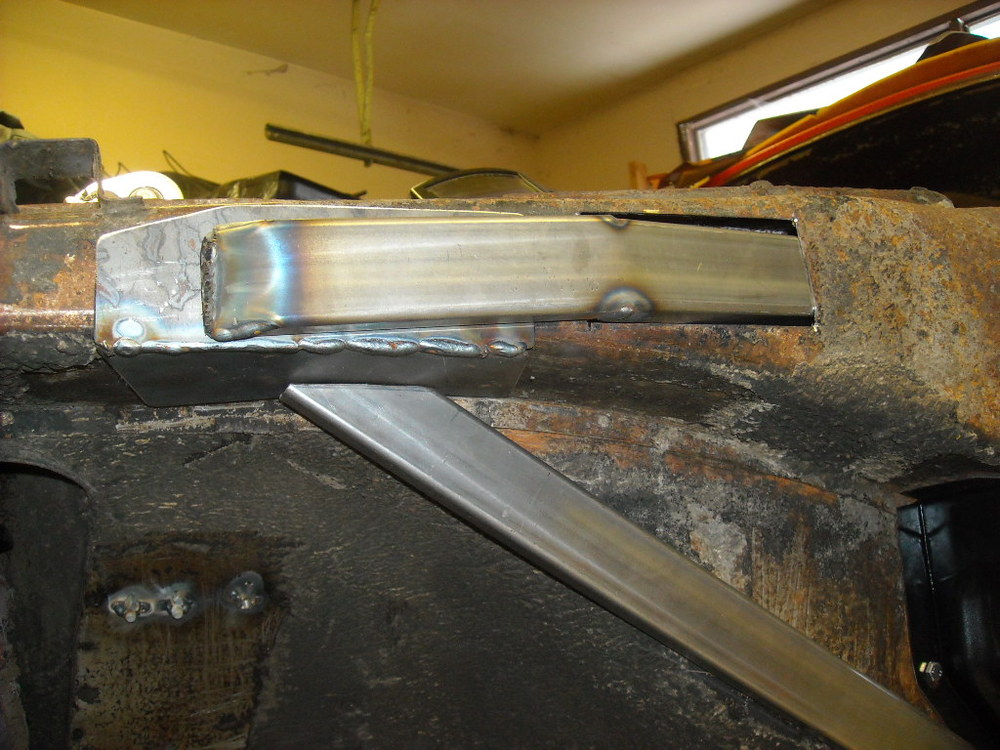
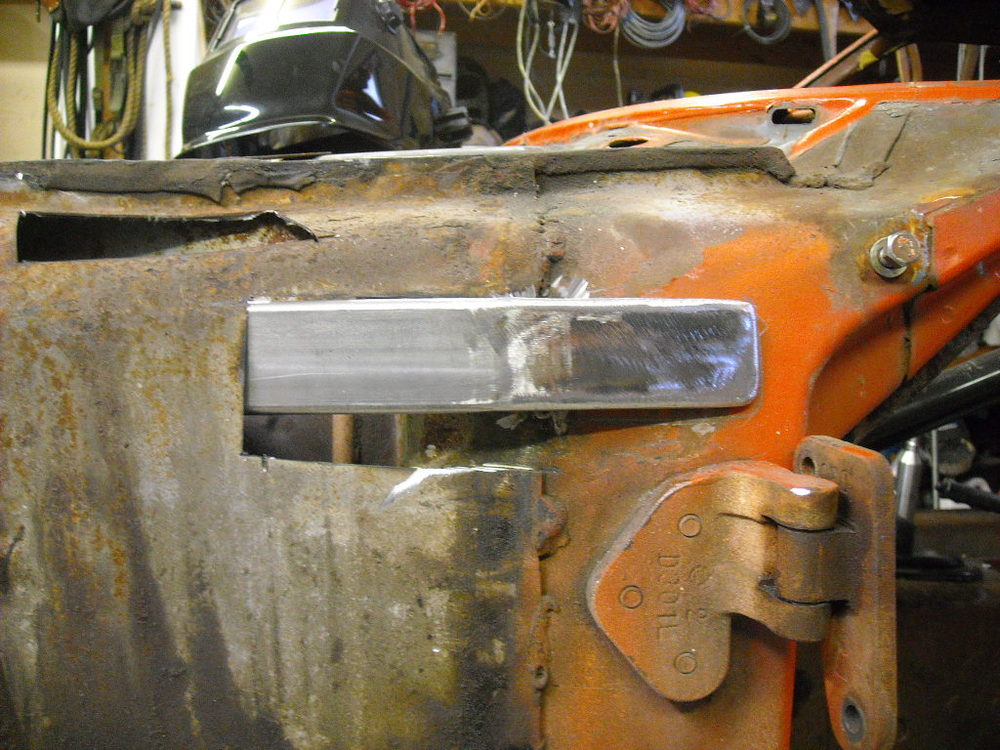
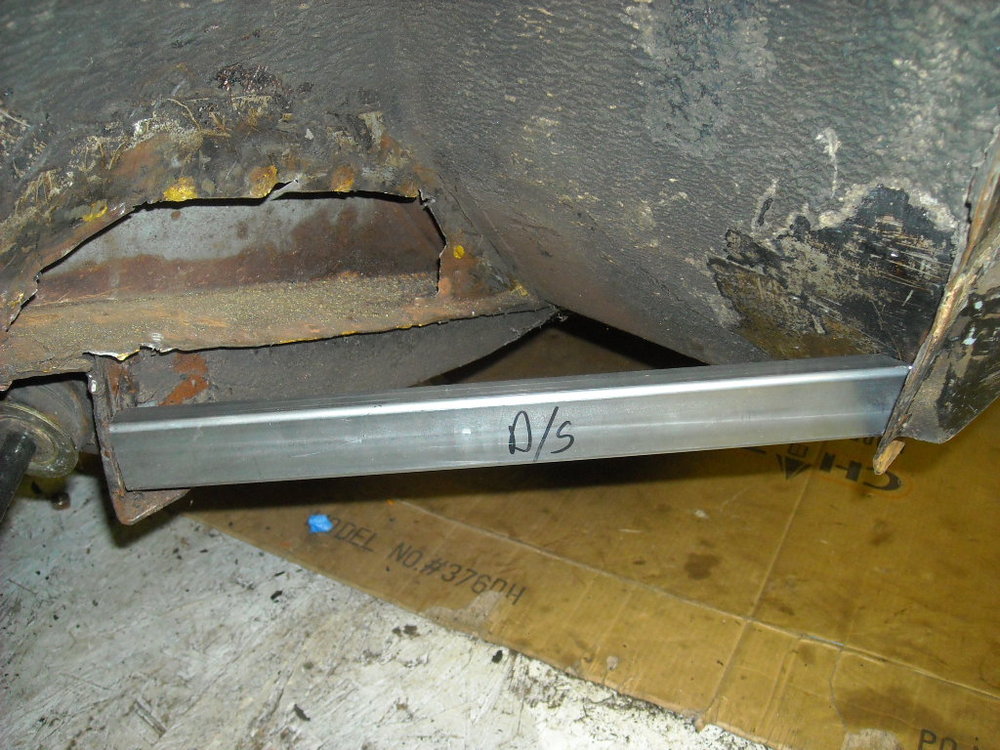
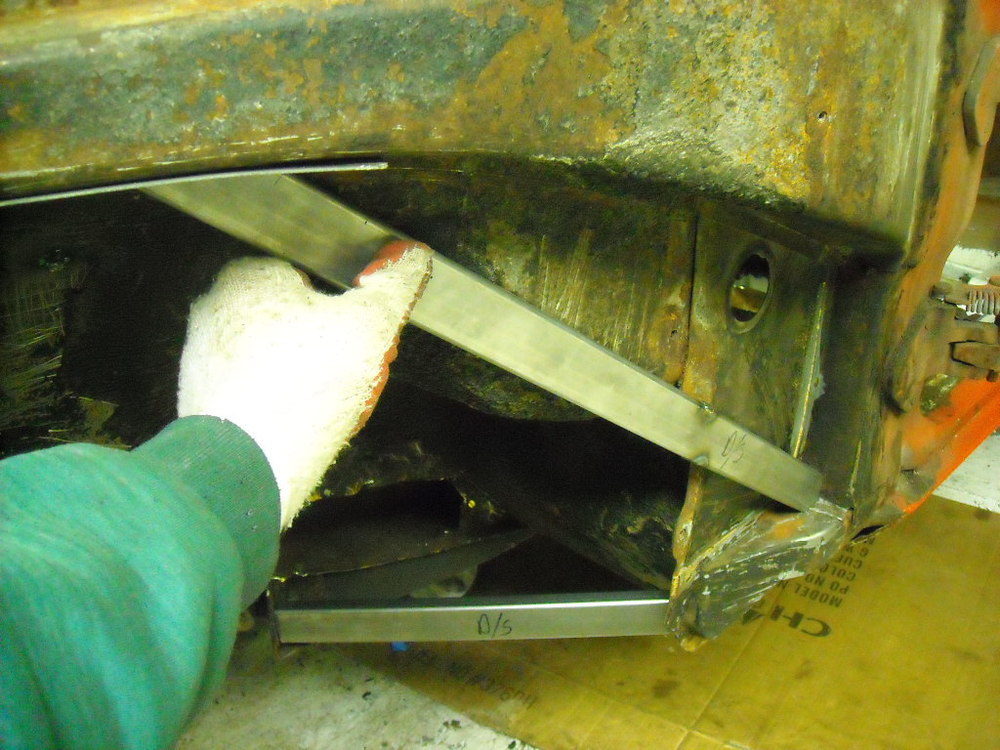
No, the new studs are now proper length, the pic above shows how much thread is engauged in each case, the stock studs are technically not long enough for after market aluminum mags although I'll bet most of us have driven thousands of miles under the same conditions. Like this, Seems a shame to cut such a small piece off of a full rocker panel but then I haven't taken the car down to bare metal yet so who knows what other rot I will find it comes back from the dippers.

-
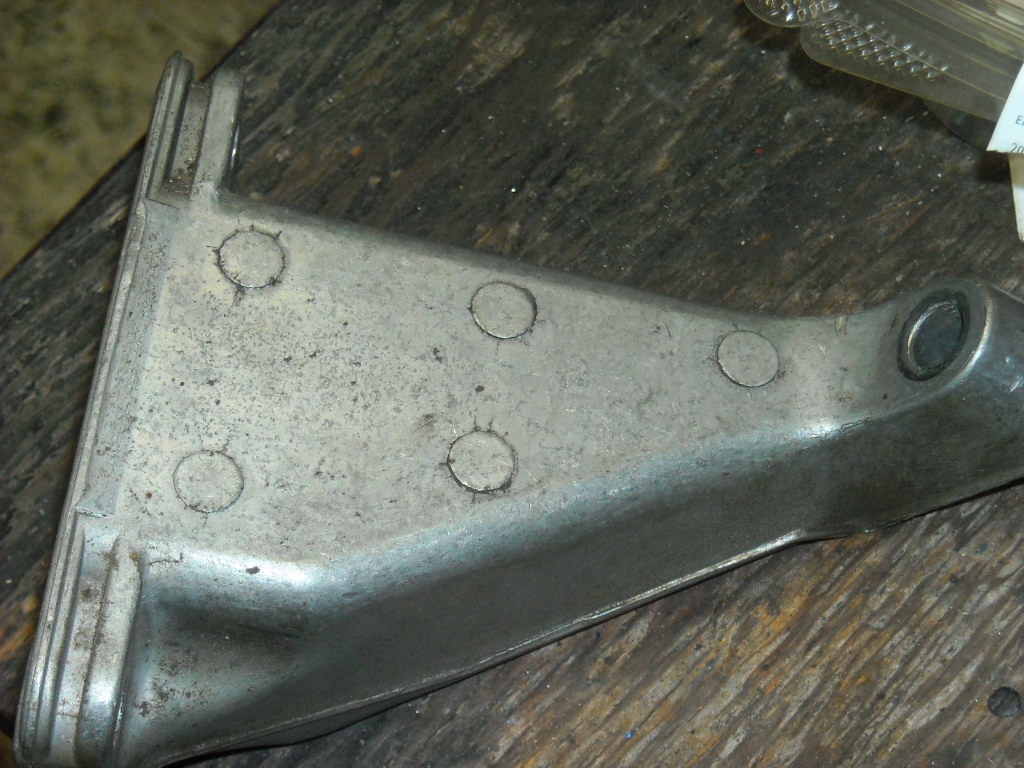
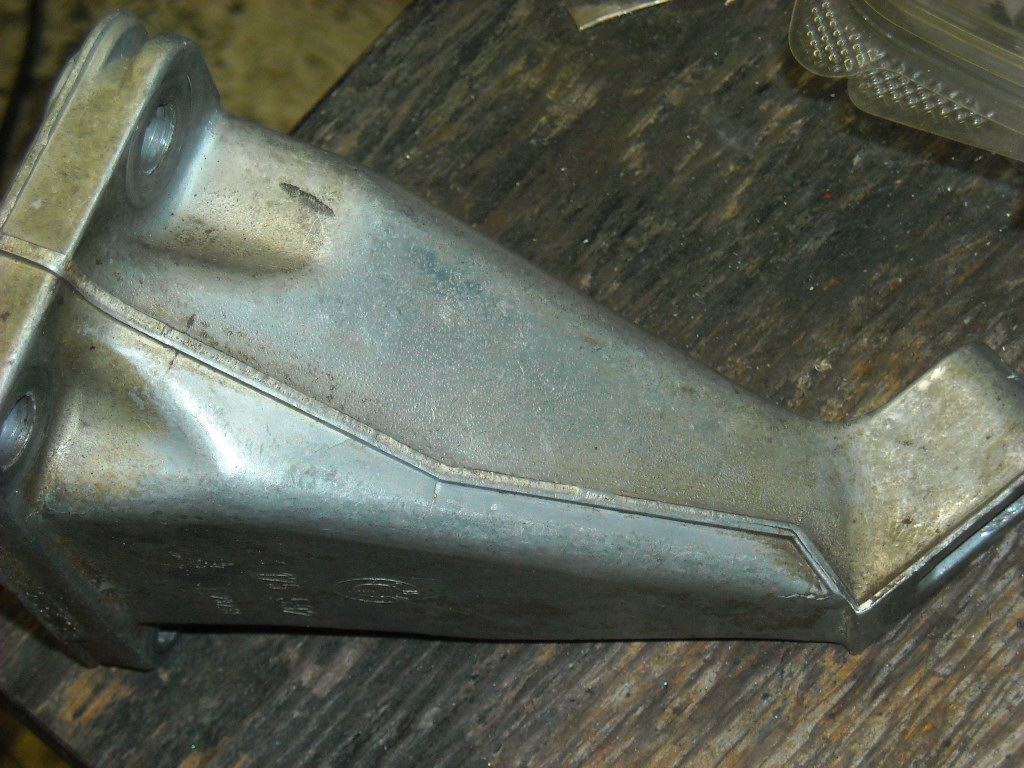
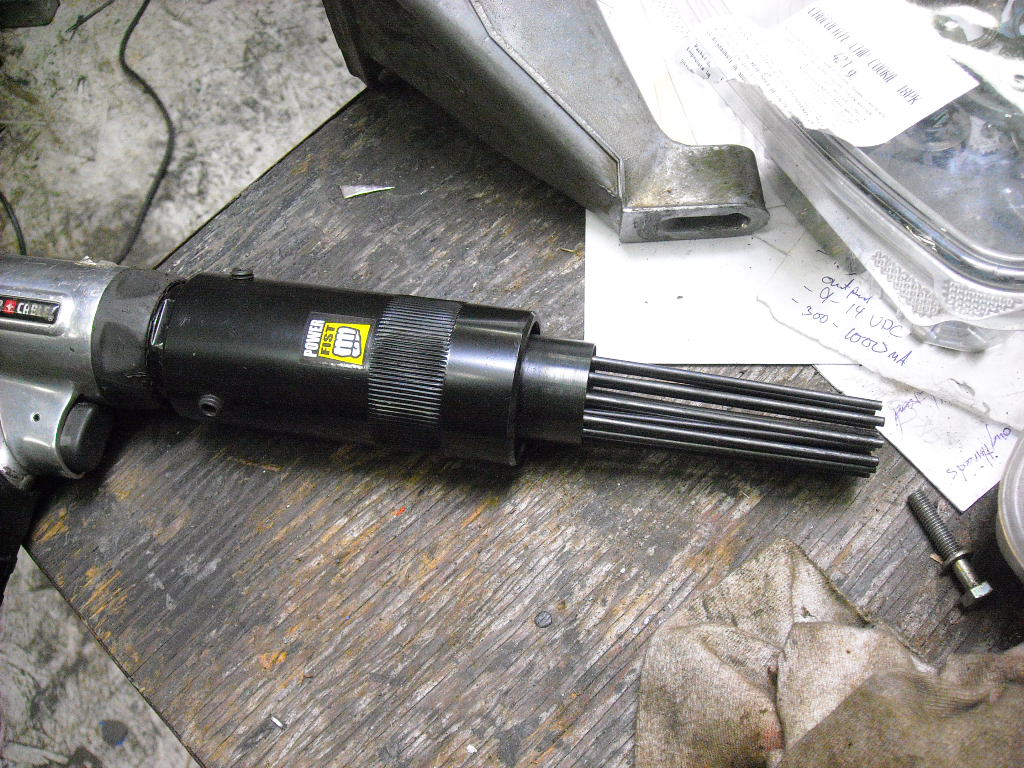
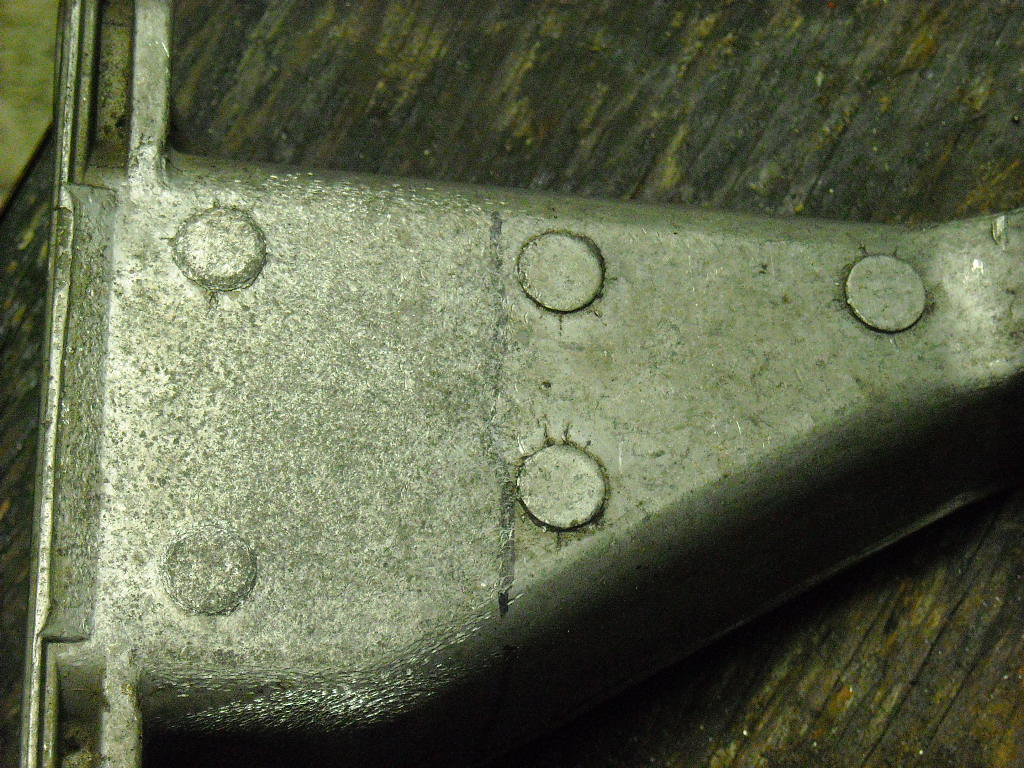
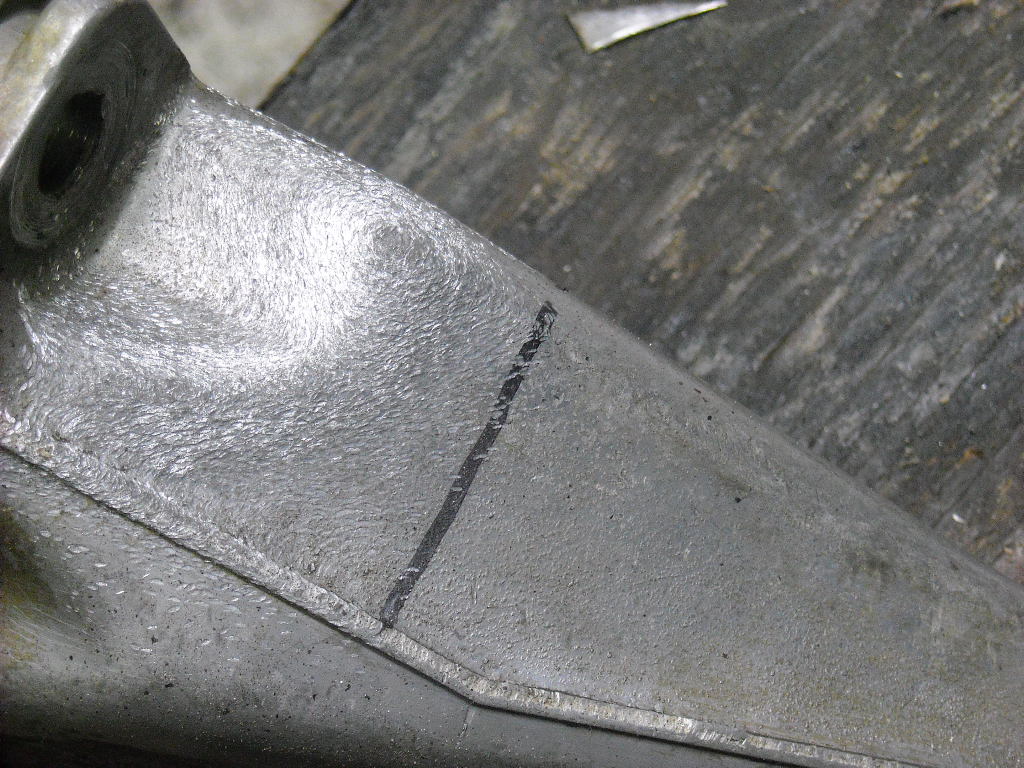
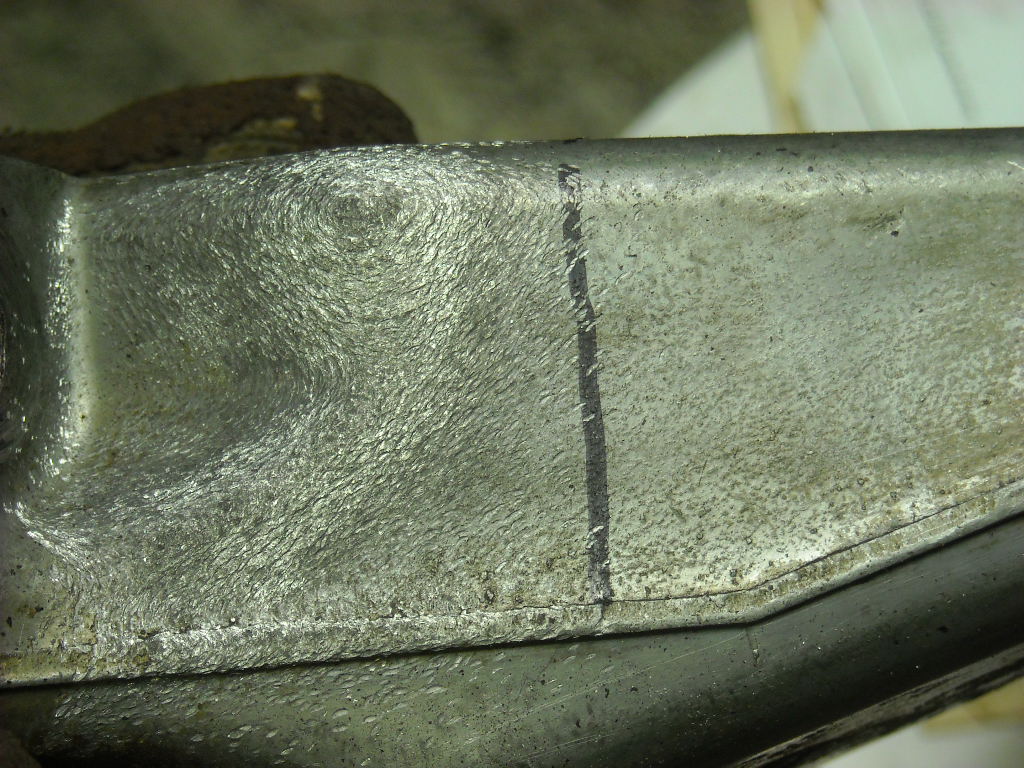
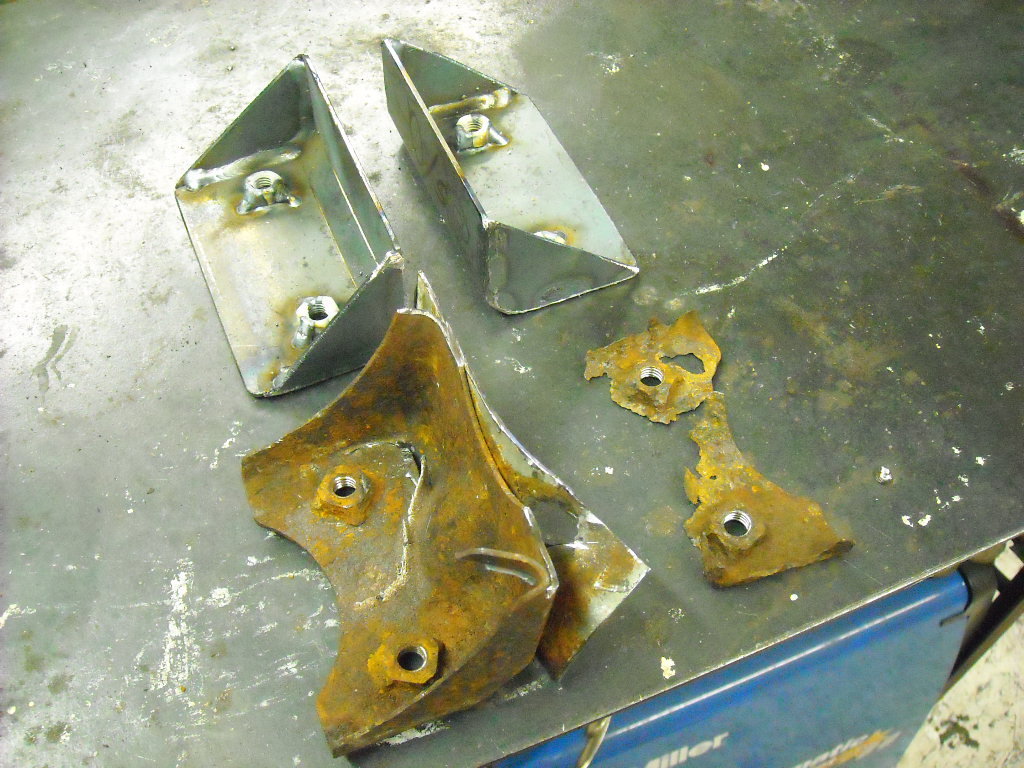
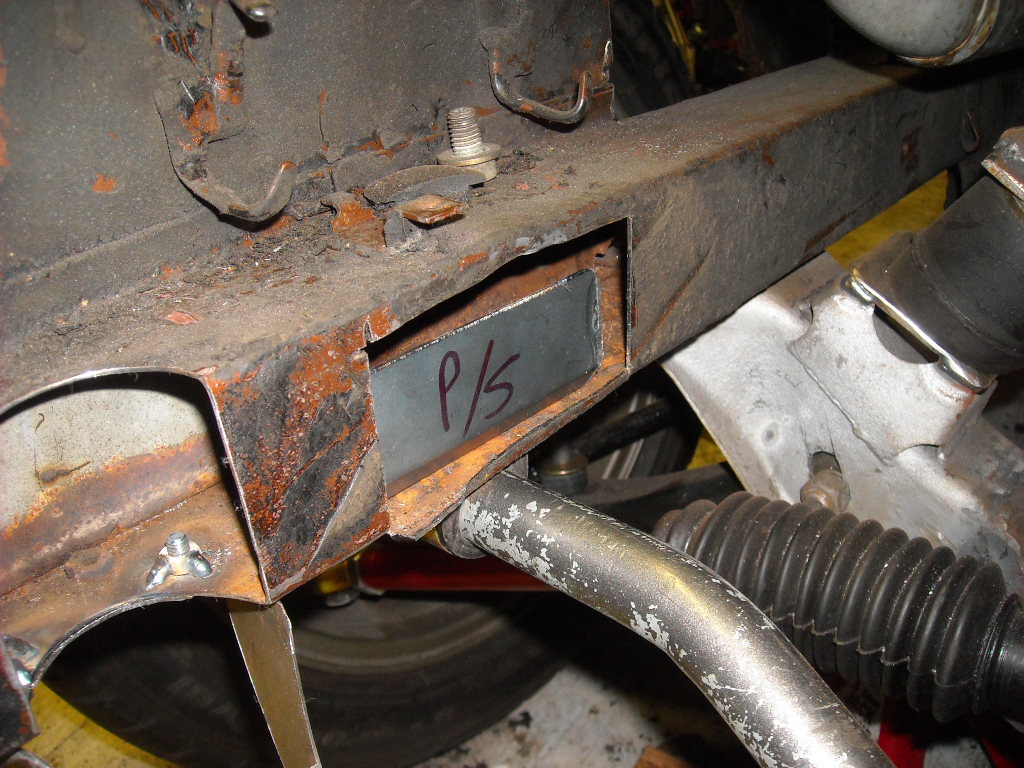
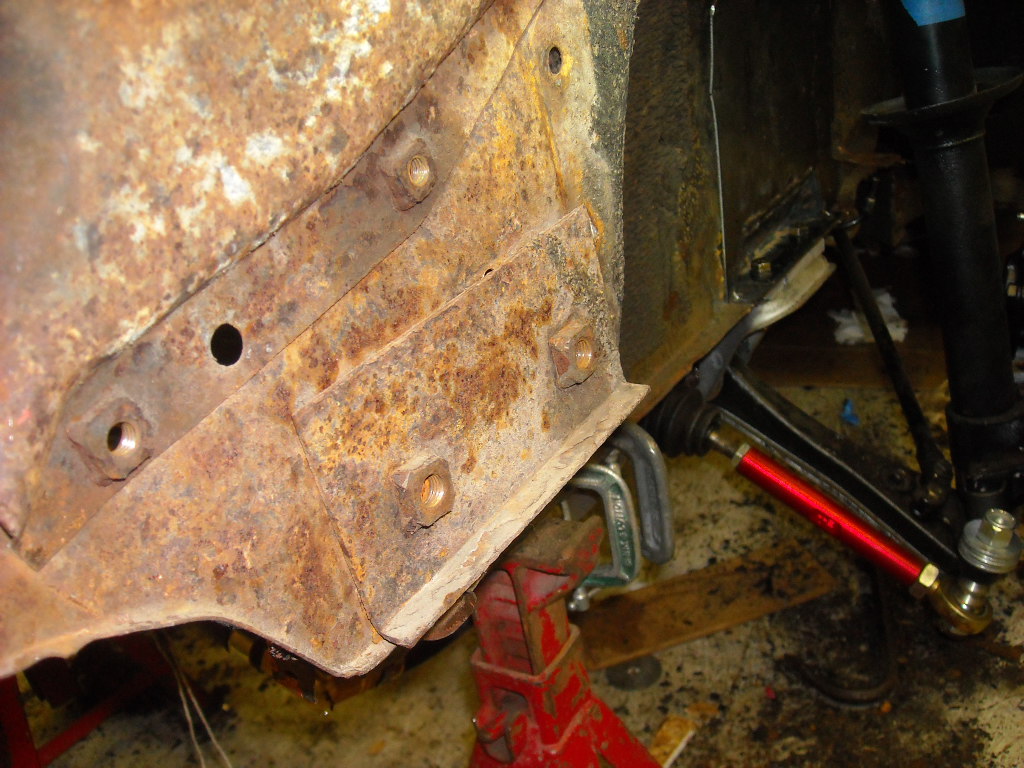
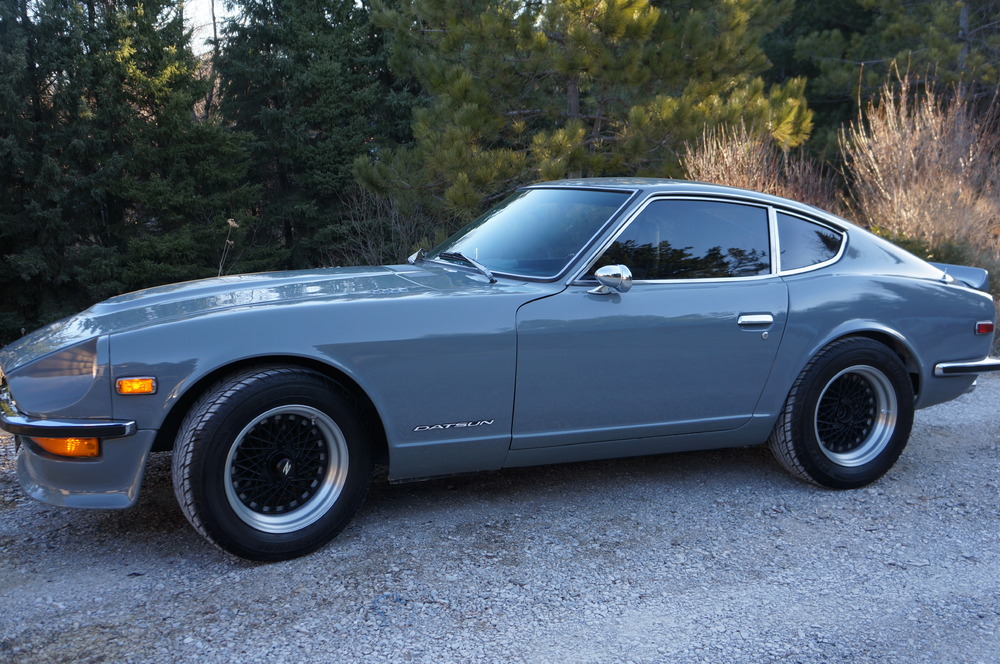
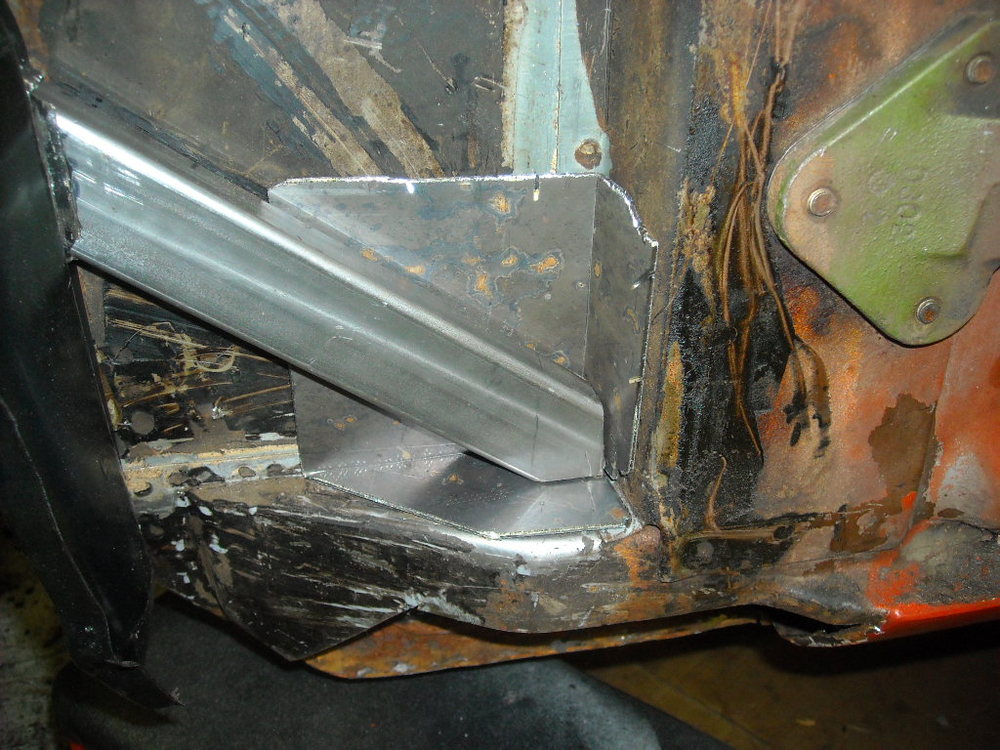
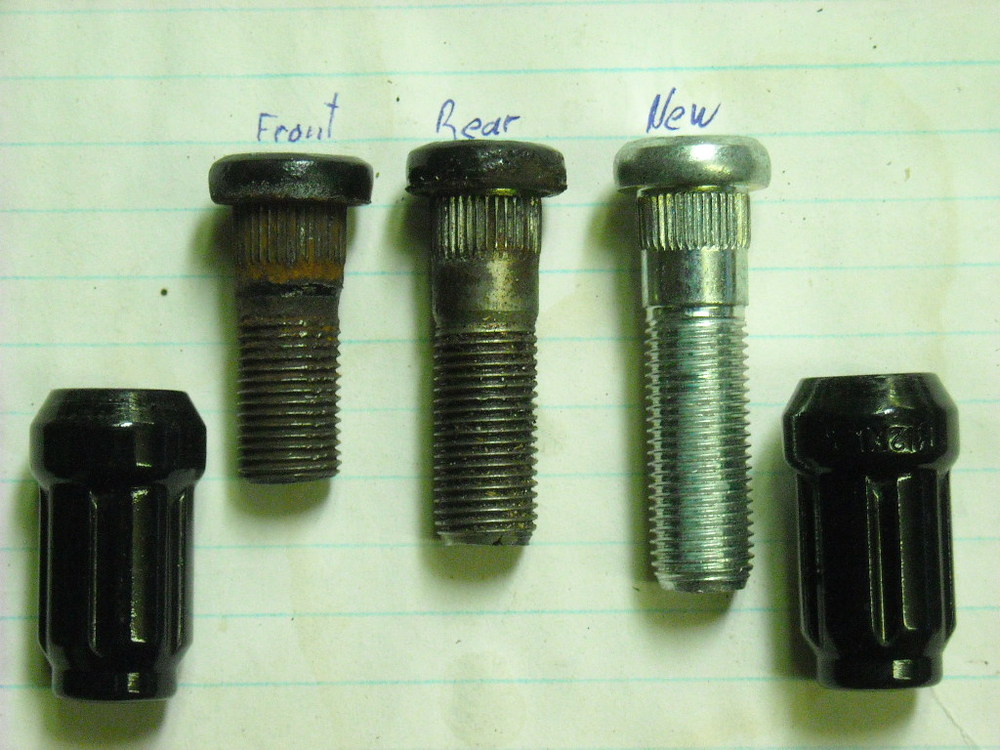
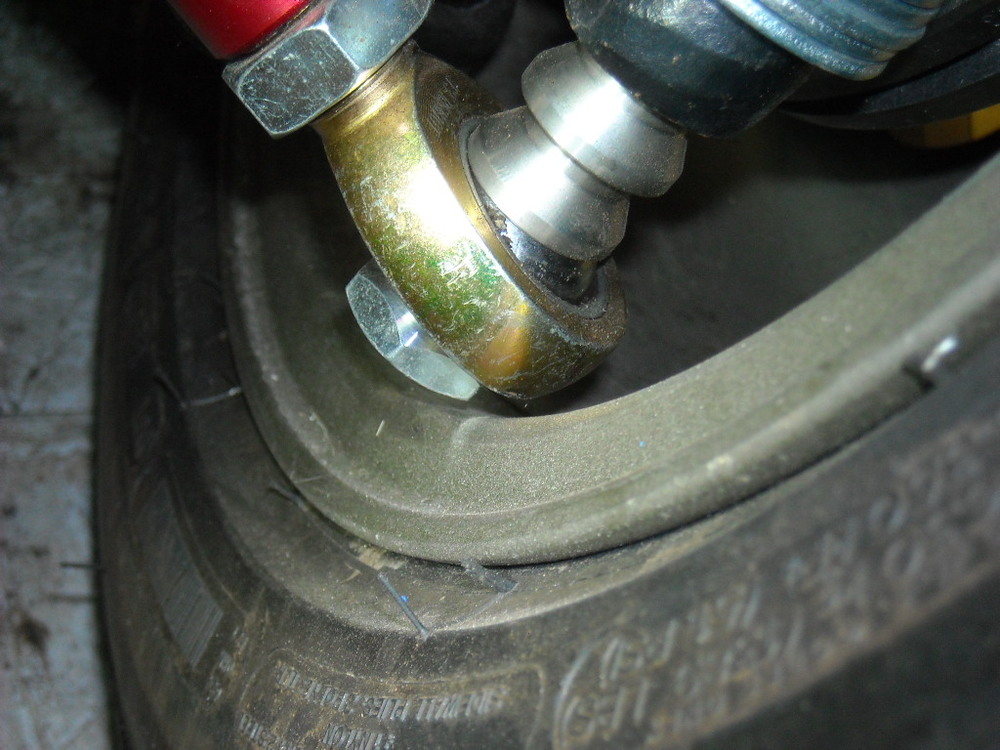
Thanks boys, Ryan, when I get it done you can take it out for a rip. I spent several hours today re tapping all the stock welded in nuts, there is got to be over a hundred and as soon as you think you have all of them done, you find more. I was tapping the front sway bar nuts in the frame when I felt the nut break off inside, so I cut into the frame to rescue my tap and repair the bracket inside, there was virtually nothing left of it. In the pic below the driver side sway bar bracket in on the right, what is left of it but the frame around it is still good, passenger side on the left still whole and pretty solid. Very strange, anyway I rebuilt them and upped the strength a bit since I'll be installing a thicker sway bar. I ordered 16 new wheel studs and when I started replacing them I noticed that there was only 11mm of thread on each stud holding the wheels on, I think the general rule is 1.5 times the dia. of the stud(12mm) of engaged thread. The rear studs are a little longer to compensate for the thickness of the brake drum. I guess the studs where sized for the stock steel wheels and it`s the aftermarket aluminum wheels that are pushing the limit. After 45 yrs and dozens if not hundreds of times having the nuts run up and down those threads I guess it`s time for some fresh studs and nuts.

-
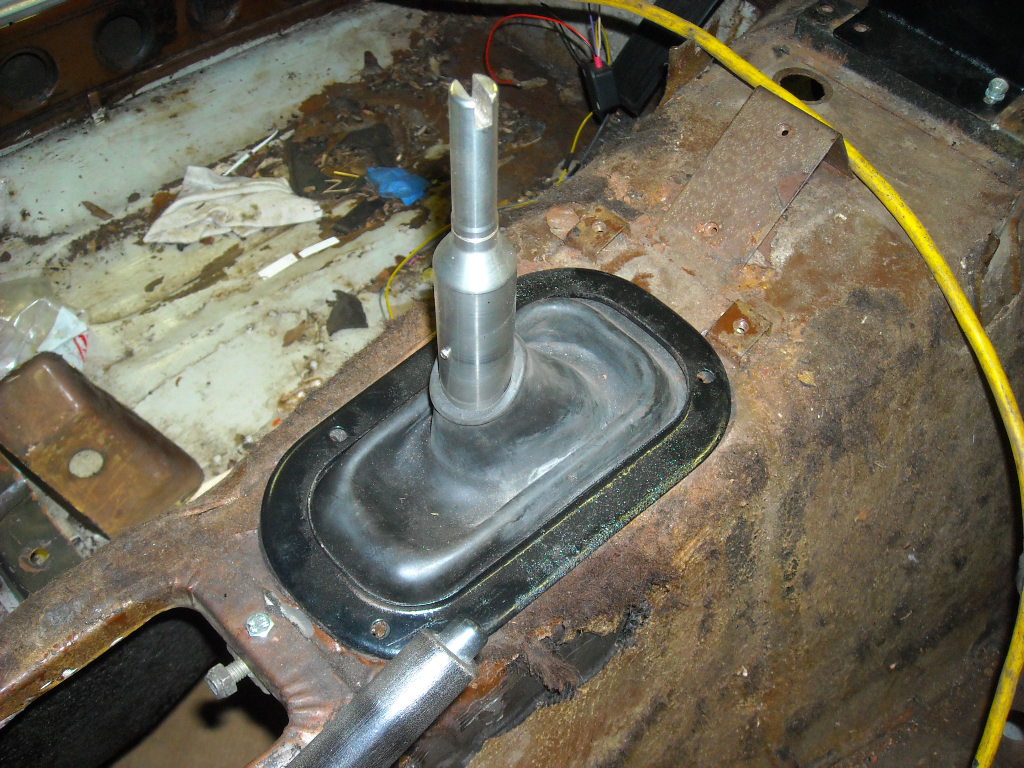
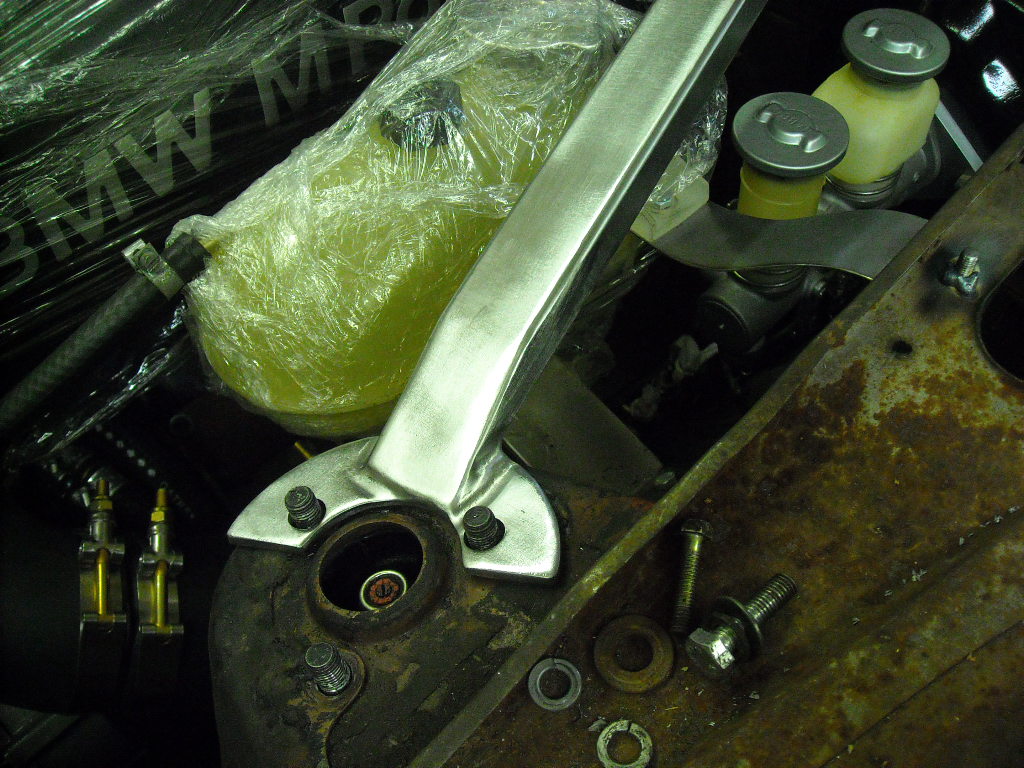
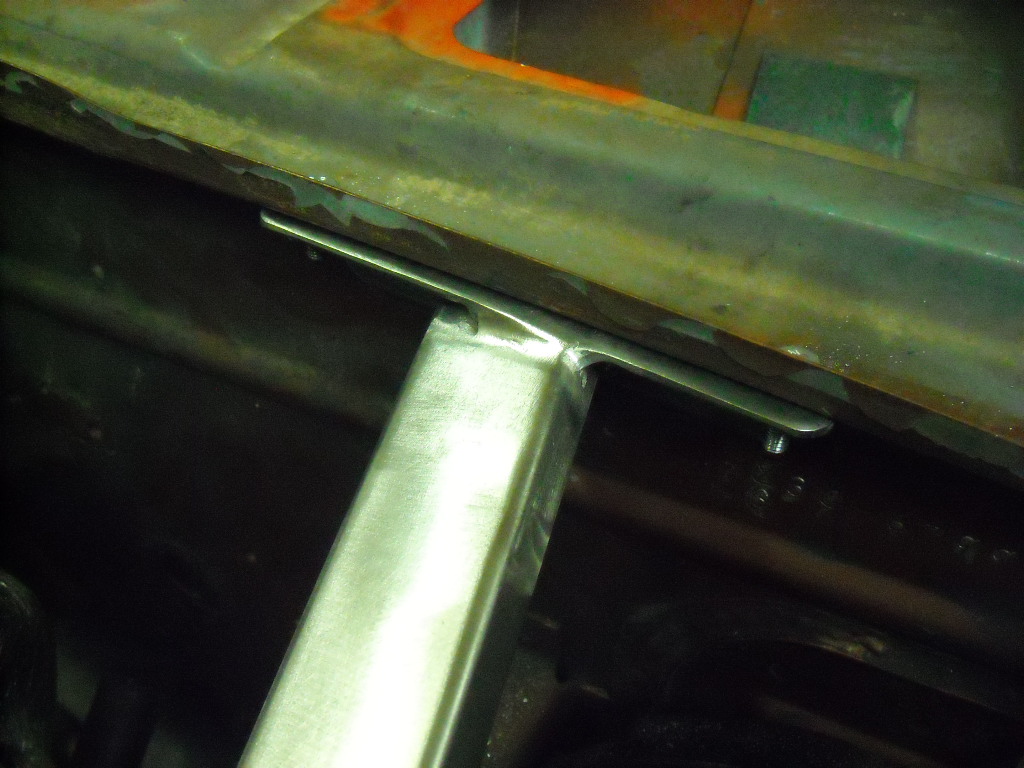
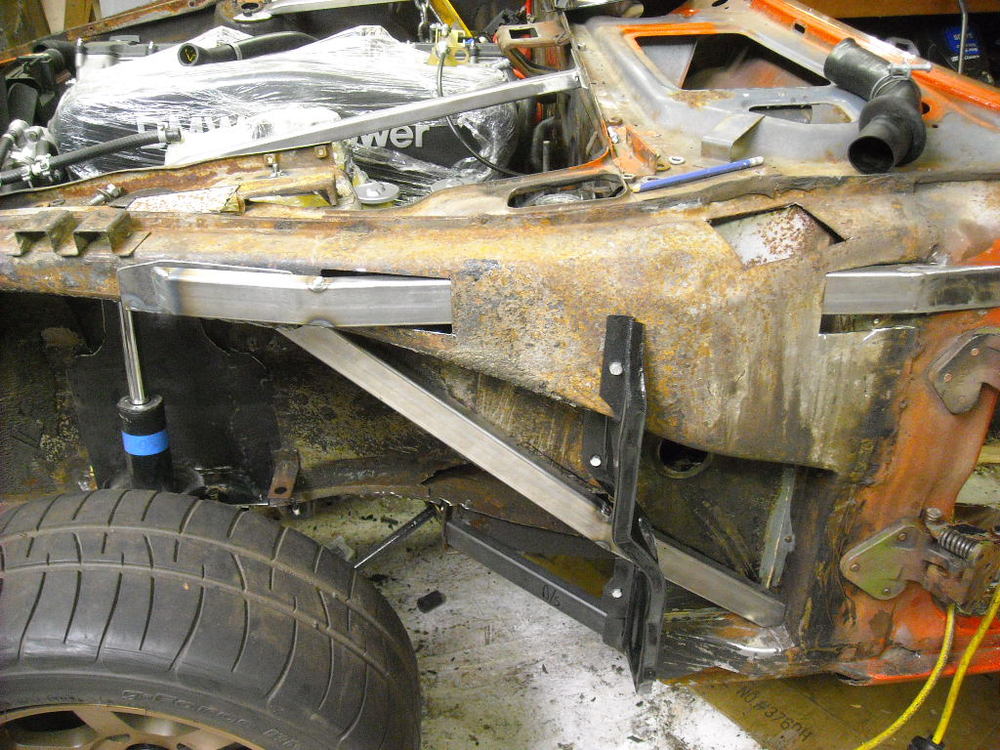
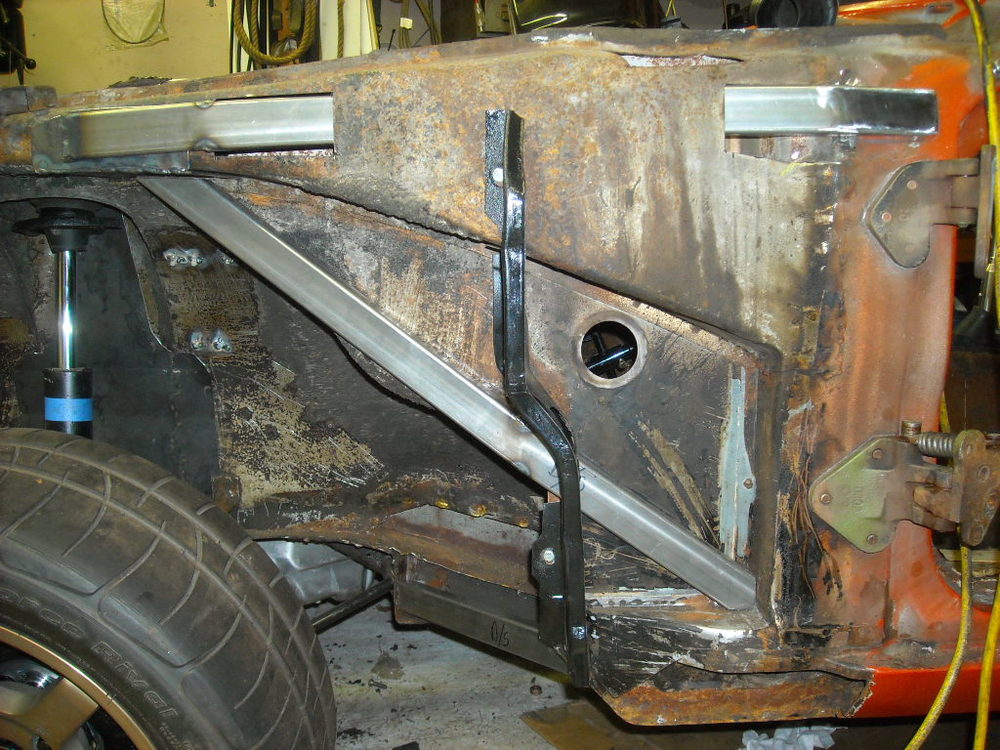
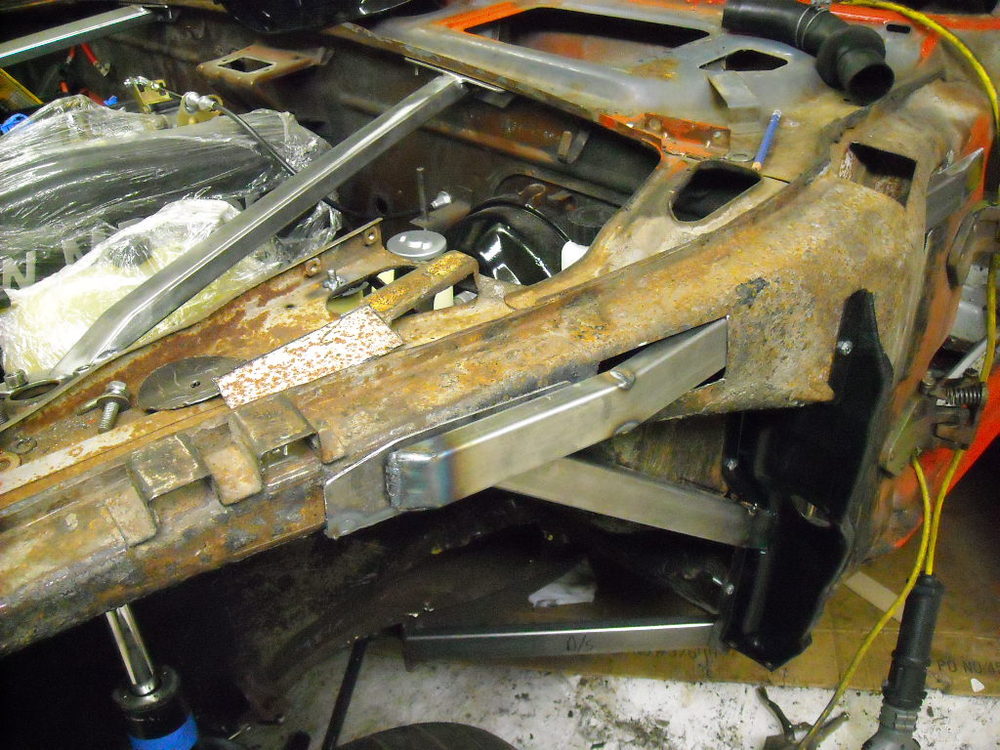
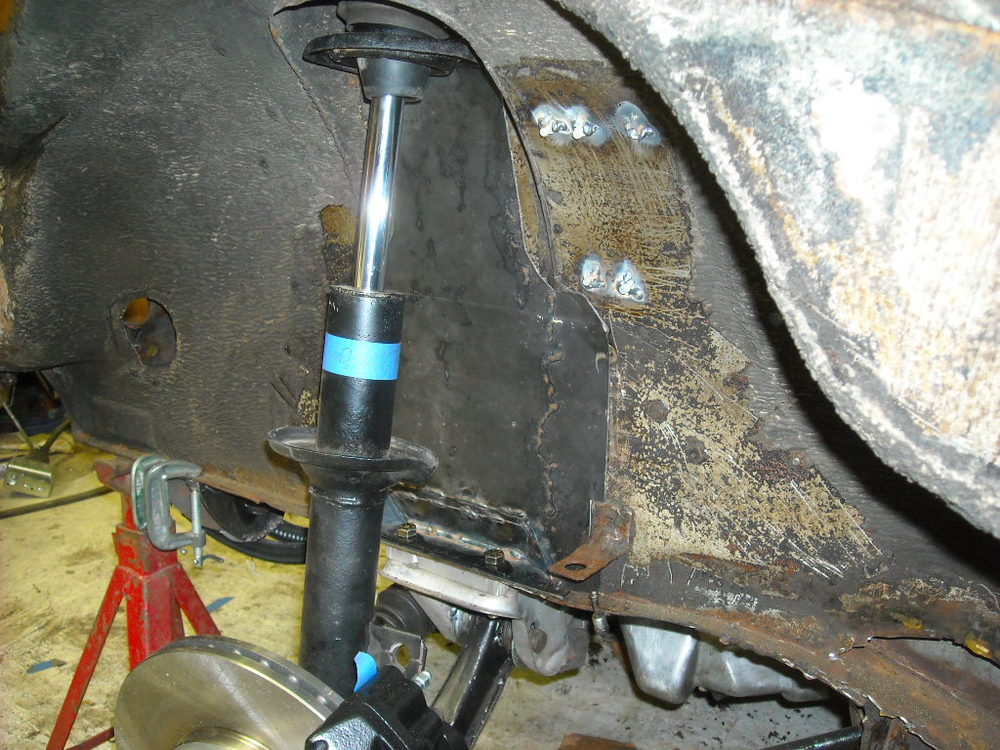
So that's what they are called, being an aftermarket bolt on product, using the door hinges make sense but on a Z the door hinges are so close together there wouldn't be much of a base to the triangle. Finished off the rest of the triangle today, once everything is welded in place I will make patches to seal around that upper brace, total weight for all the bracing will be just under 19lbs. Now is all this really necessary... probably not but I'm still not sure how far I'm going to go with the power output or how much time will be spent on the track. Easier to do now with no regrets later on. Adapted the stock shifter boot to fit the new stick shift,

-
You have one customer here
-
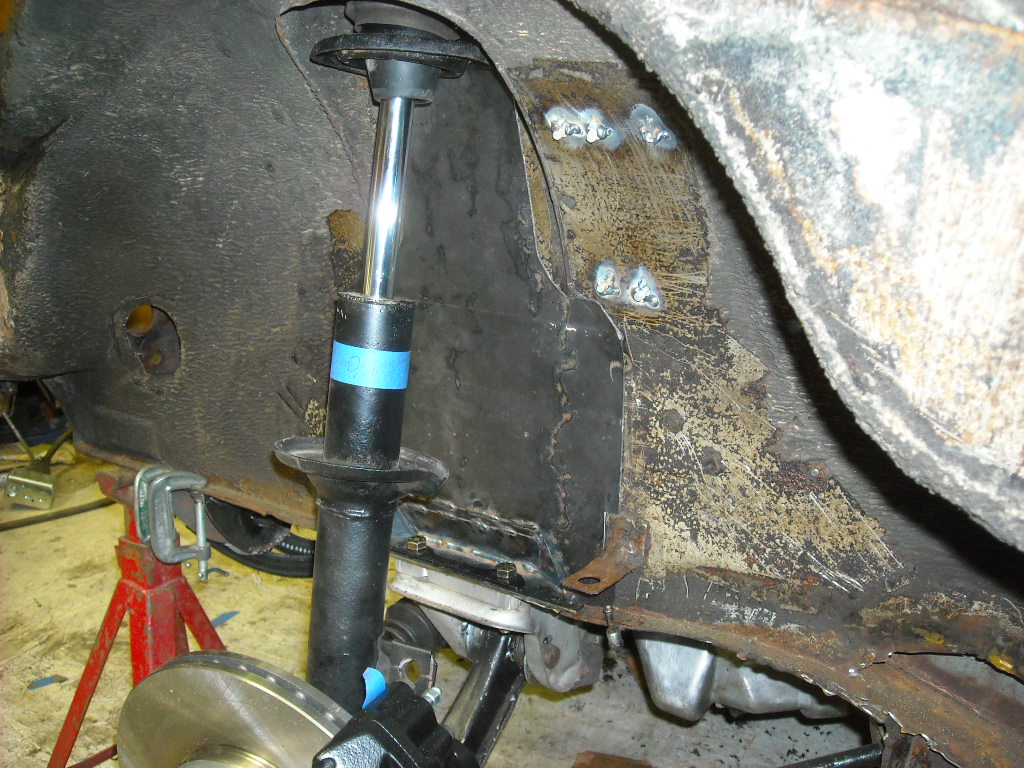
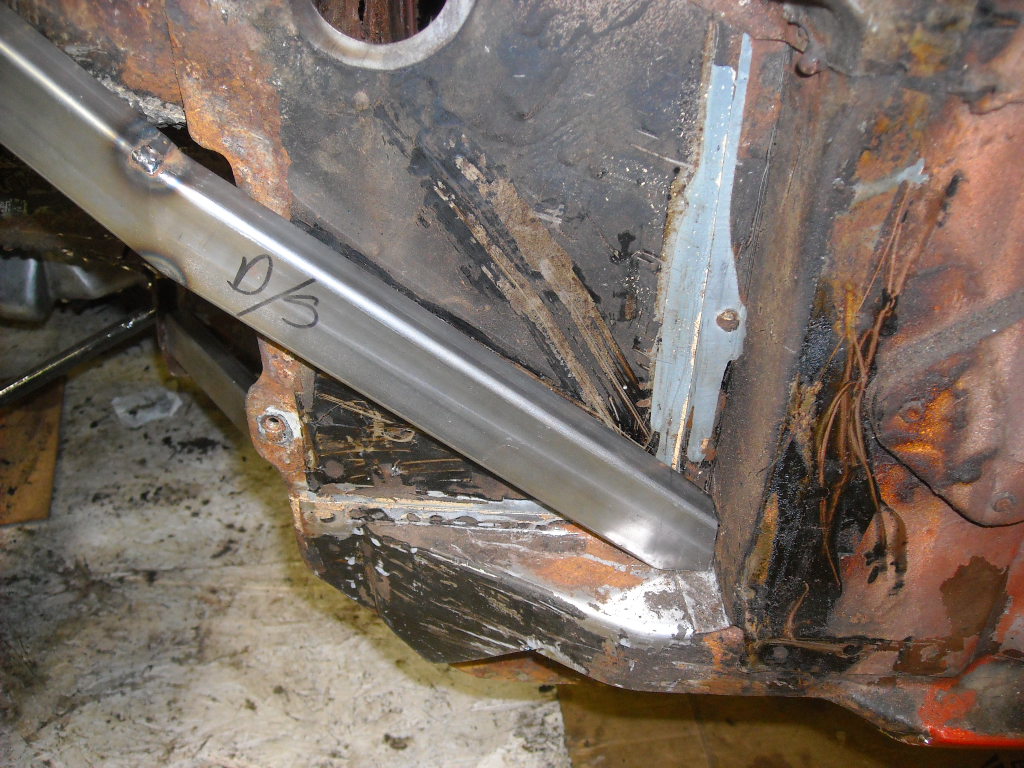
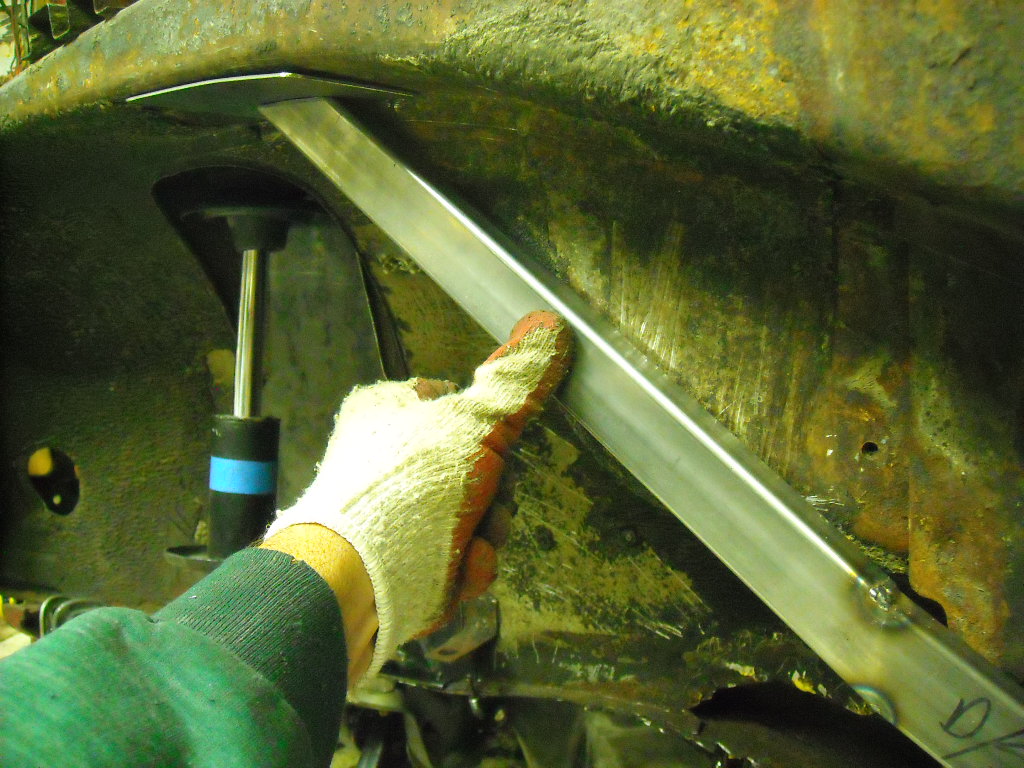
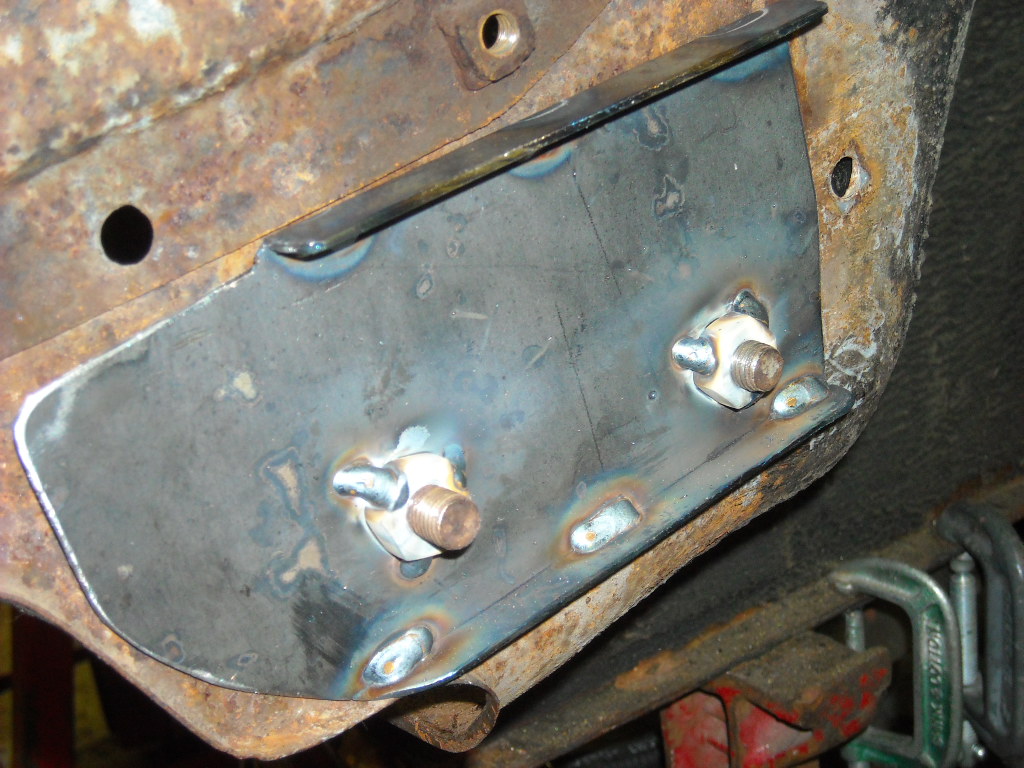
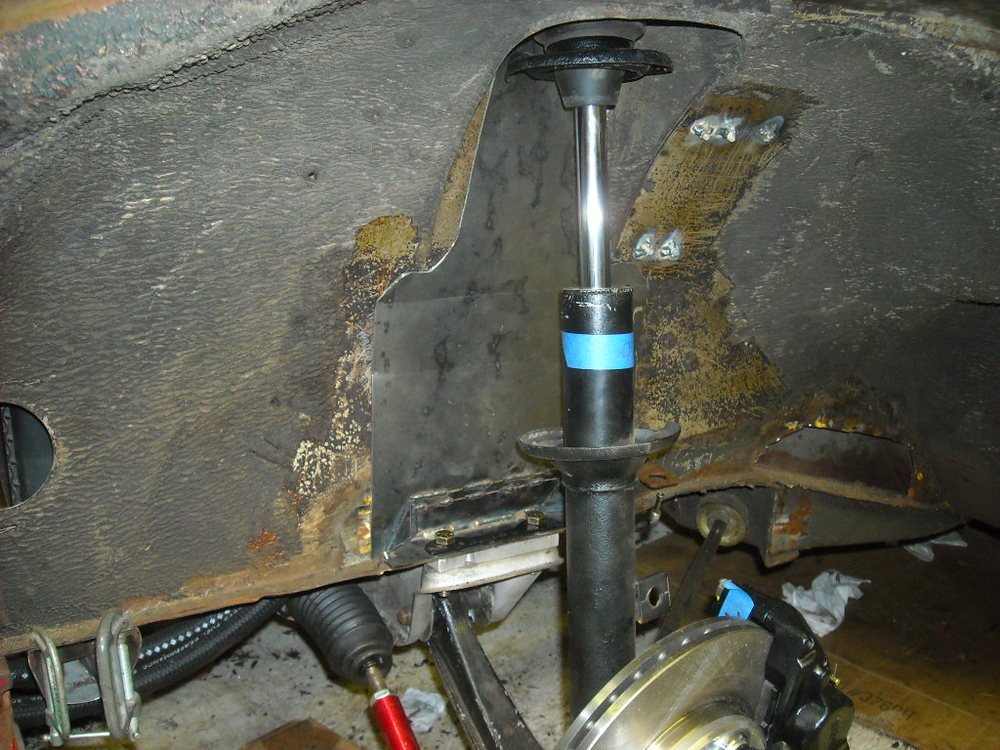
The steering wheel shaft would be poking out my spine before those braces hit me. Here are some pics of the under fender stiffening I'm thinking about, the notched stiffening plate where the crossmember bolts on had to be rebuilt anyway so stealing ideas from disepyon and wheee I rebuilt them and extended the 12ga plate right up to the top of the shock tower so there is a one piece connection. Nothing is welded in yet, still lots of fitting, These next two braces I have seen on a few track cars and appear to connect the rockers to the front quite well, the diagonal brace will be welded to 5 different sections. Found when I put the wheel on that I'm pretty close to the limit on certain things,Also had to remove and rebuild the bumper supports so I could repair the rust behind them.


-
Rear end squat as I understand it has more to do with the spring rate than the shock, a stiffer shock like the Tokico Illumina on setting 5, the stiffest, will slow down the rate of the squat but the rear end will still end up at the same height of squat or close to it because it is the spring that is holding the car up not the shock. (If I have that wrong someone please correct me) The Illuminas on setting 1, the softest, will probably give you a stiffer ride than what you have now but a different shock shouldn't effect your height. Your original springs are 46 yrs old now so are probably a little tired, new springs of the same rate as the originals would help your situation, but there are many threads in the archives where guys mention that installing stiffer springs did not adversely effect the ride comfort. For the kind of driving you say you are doing a new set of 4 KYB's would work well for you, they are a great shock for the price and a good all a round shock.
-
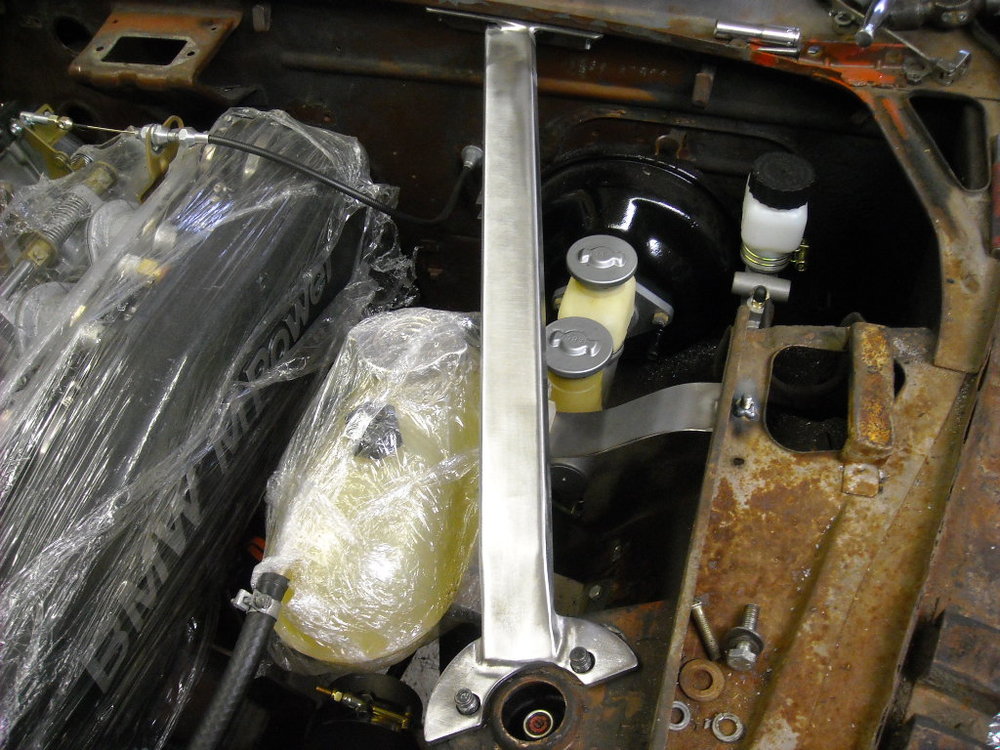
Yeah, not my favorite tool but sometimes they are a godsend. Because this engine is so tall and close to the hood I don't have room to install a shock tower brace bar, so I am going to weld in some bracing that will be hidden under the fender that will help keep any flex to minimum. I'll have some pics of that in a couple of days but here are the only visible part of the stiffening.