grannyknot
Free Member
-
Joined
-
Last visited
Everything posted by grannyknot
-
 your right, normally closed switch that opens at 14 lbs of vacuum. Thanks
 -
I have to pick through my photo's carefully before I post them now so I don't look like a rank amateur compared to Brent but that is a small price to pay to be able to see such great work.
-
Is this what you mean? http://www.thezstore.com/page/TZS/PROD/10-2240
-
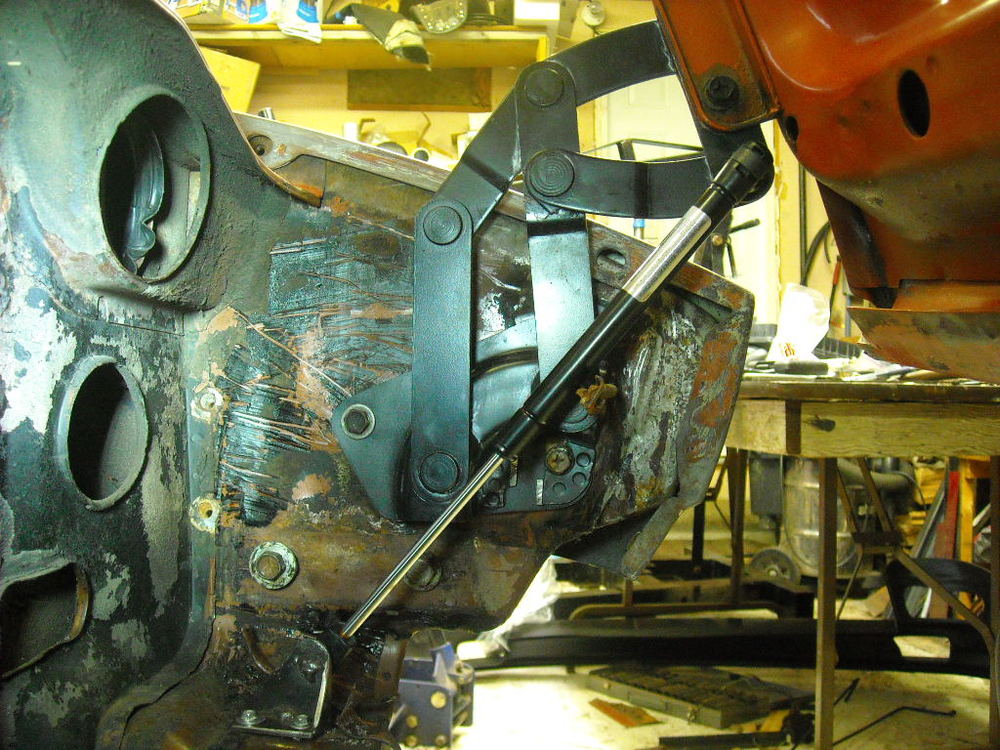
Brent, can you describe how you got the indent on your replacement panel in this pic? It looks like it was pressed in, I have to recreate that same indent for both sides on my car. Thanks

-
Man, your on fire! That is a lot of disassembly since your last post. The screw extractor you mentioned is called an impact wrench and you should be very careful using it on your front grill, the grill is quite delicate and so are the 5 little brackets that support it. Since the screws are toast anyway you might try a pair of Visegrips on the head of the screw or maybe drill them out. Have you found much rust yet? The car looks pretty solid from your photos, looking forward to your progress. Chris
-
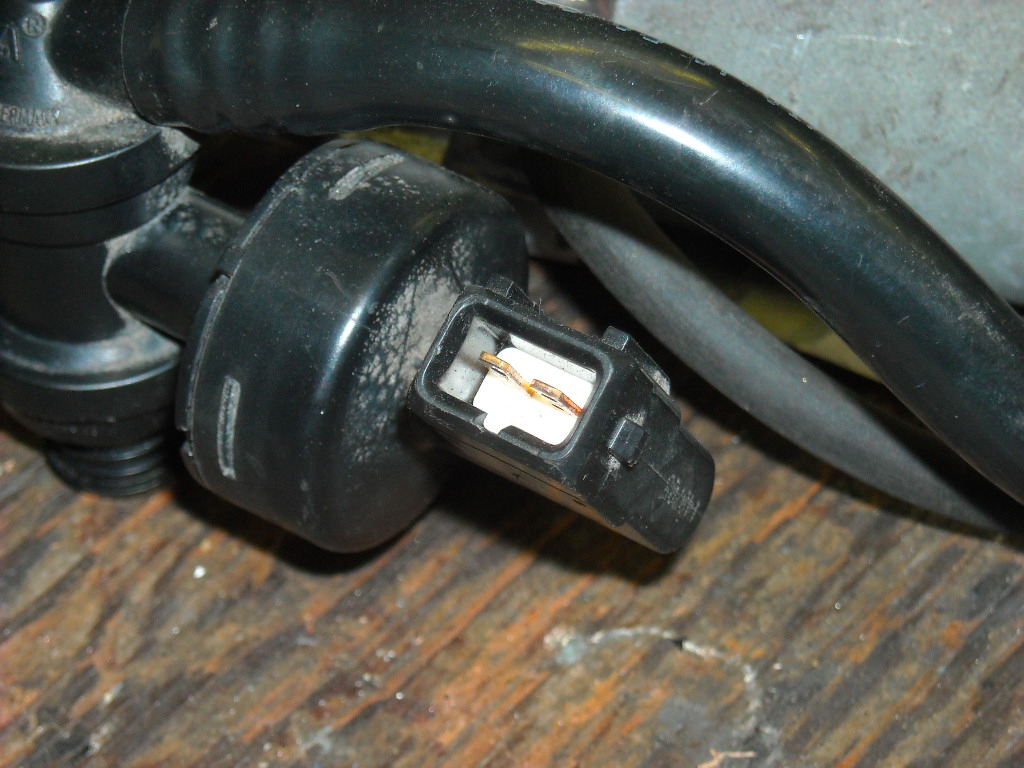
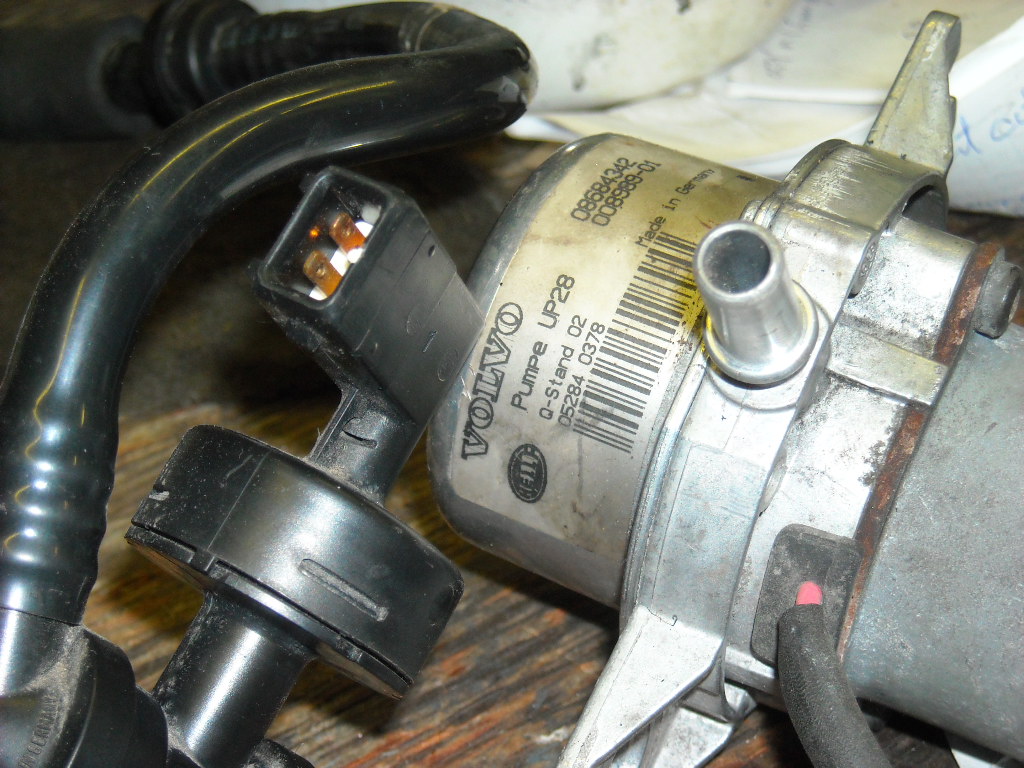
I'm installing a vacuum pump to supply the brake booster with vacuum, it came with a sensor that detects low vacuum that triggers power to the the vac pump. I'm not at all sure if this sensor requires power to make it work or if it simply supplies power to the pump by a switch that is activated by low vac. Anyone have experience with these kinds of sensors? Thanks, Chris


-
Say What?
-
You gotta remember the stripped shell of an early Z is only about 550lbs. Remember this getto contraption I slapped together? I spun that car hundreds of times over 4-5 months. To get the car truly balanced for spinning either the front or the back needs to be mounted off set 5"-6" higher than the bumper mounting point, the car is a little top heavy. Now that I look at your rotisserie I can see you have already done that. Is this car #2? So the first on is done?
-
Can you imagine trying to go turbo with 6 ITB's There's hardly any room left in the engine bay as it is. But bmw did twin turbos on this engine when it was in the M1, they got something like 800 bhp out of it.
-
If your coolant is 50/50 antifreeze/water that you added the 12oz WW to then you will be fine, I have had that combo in my vehicles down to -30C with no problems. But it kinda sounds like you are running straight water and WW, if that is the case you will have to drain half your coolant and top it up with full strength anti freeze.
-
-
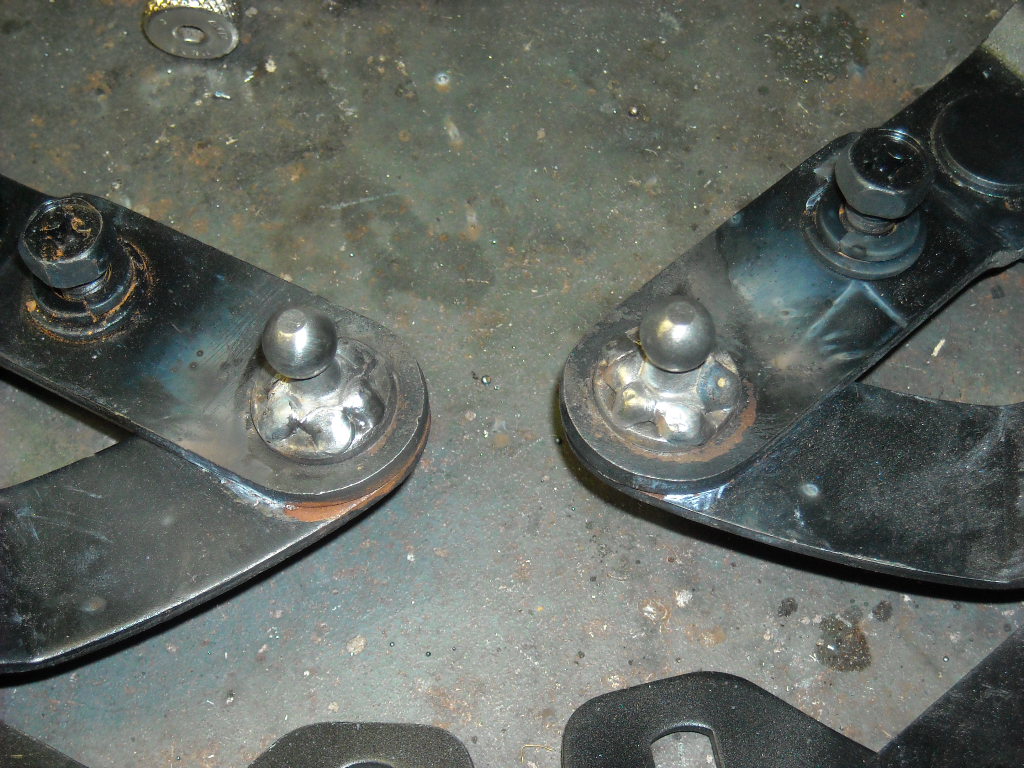
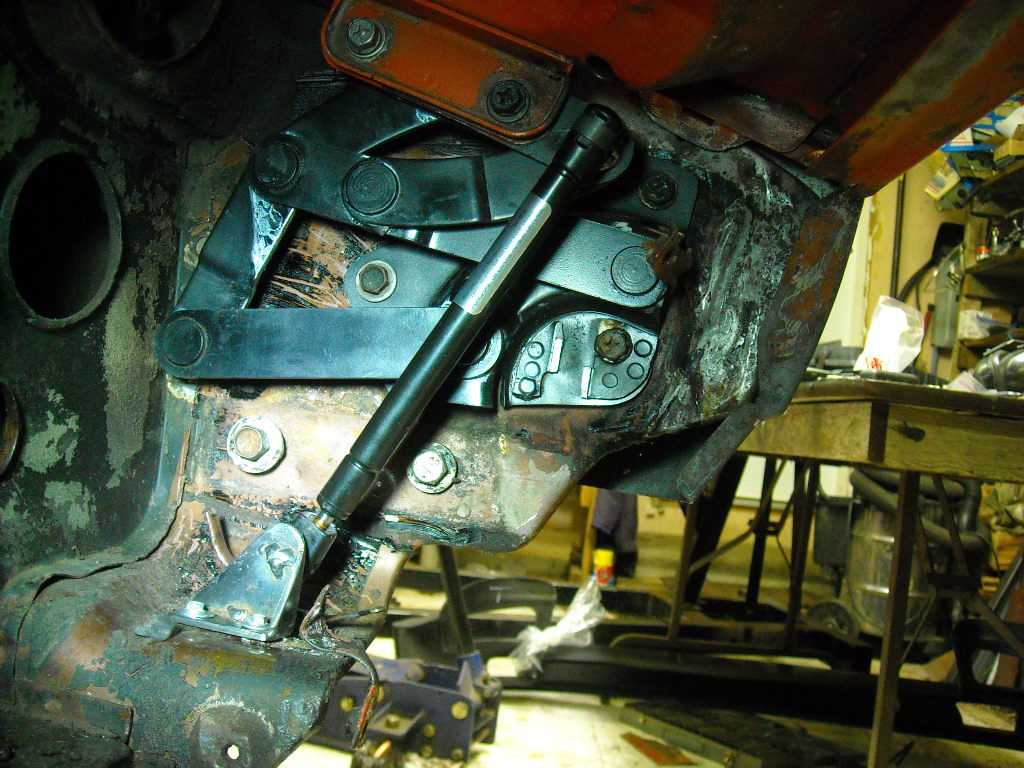
I got the hood gas springs in the mail yesterday and installed everything today. In this thread, http://forums.hybridz.org/topic/91439-hood-strut-conversion-for-s30/?hl=zraceproducts I copied what Litman did in post #10. I used two 4477N10 gas charged lift supports from these guys, http://www.liftsupportsdepot.com/strong-arm-4477n10-gas-charged-ball-socket-lift-struts-supports-10176n10w/ The 43lb gas springs hold the hood easily in any position higher then 16" from closed, lower then that and the weight of the hood takes over and starts to close by itself. I cut off the bits that were used to hold the torsion springs onto the hinges and welded the ball to the hinge pin.


-
I bow to you sir, learning so much from your pics, absolutely invaluable source of info. I will be heading deep into frame myself in the next few months, your gallery is going to be my shop companion.
-
Looks really good, 10 dizzies? Did you just keep returning them until you found a good one? Tilton makes a clutch master that is slightly bigger and a direct bolt on but a new stock unit should do the job unless you have modified the tranny/clutch pack.
-
Your switch is probably salvageable, the electrical switches in cars from this era actually need to be used to keep them in good order, moving the switch cleans the contact area. If I were in your situation I would clean all the terminals from the headlight itself right back to the switch with special attention to the grounds. There are a few good How To threads in the archives on dismantling the switch and cleaning it, it is also the only way to know how bad the heat damage is. After you get the headlight system working properly again you might want to have a look at the rest of the terminals, grounds and switches in the rest of the car, they have had the same lack of use so probably have the same amount of oxidation on them.
-
Good on you, you won't regret it.
-
After perusing all the threads I could find on hood shocks I have ordered 2 lift springs from Liftsupports.com they are 8" compressed, 12.5" extended and 43lbs of force. I think I can make a working system out of them. I'll put up some pics when they arrive.
-
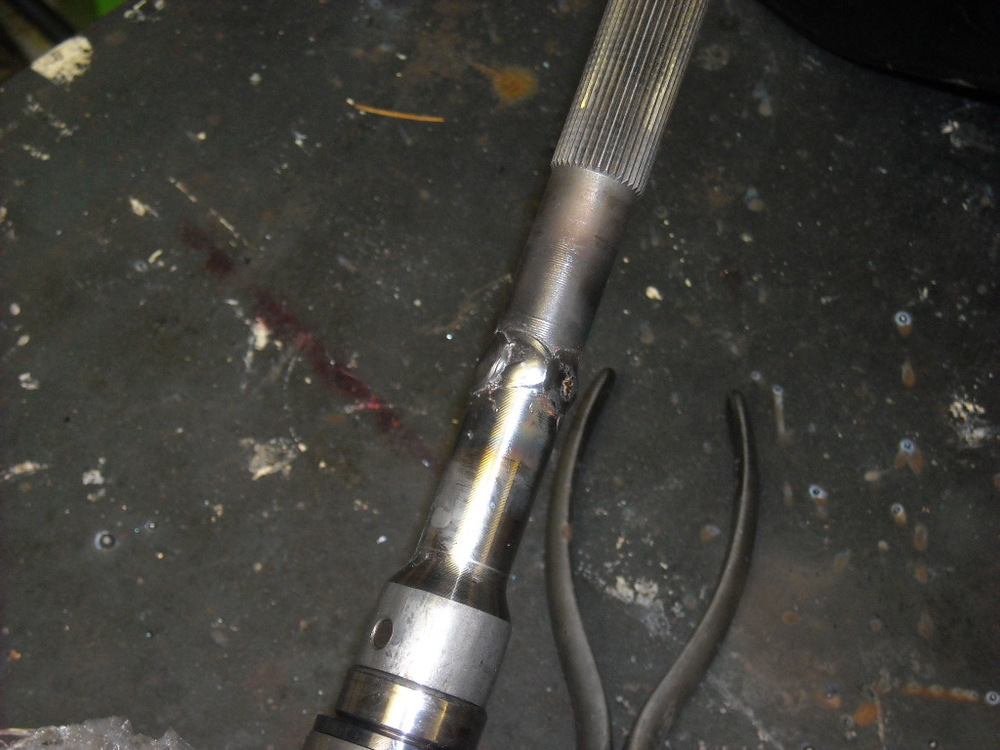
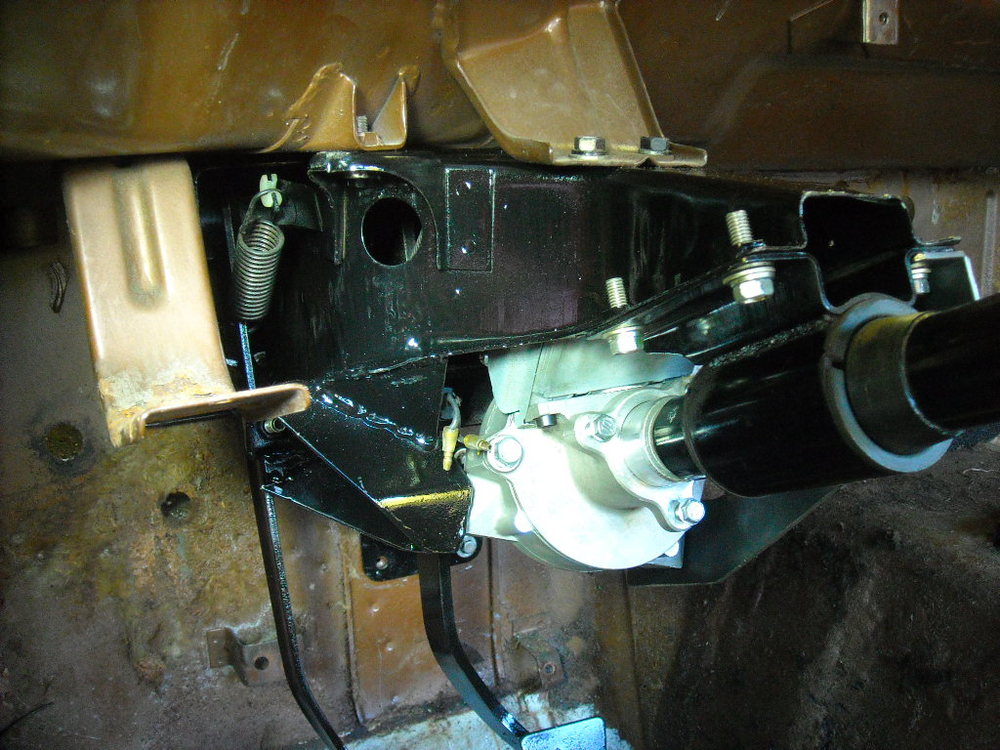
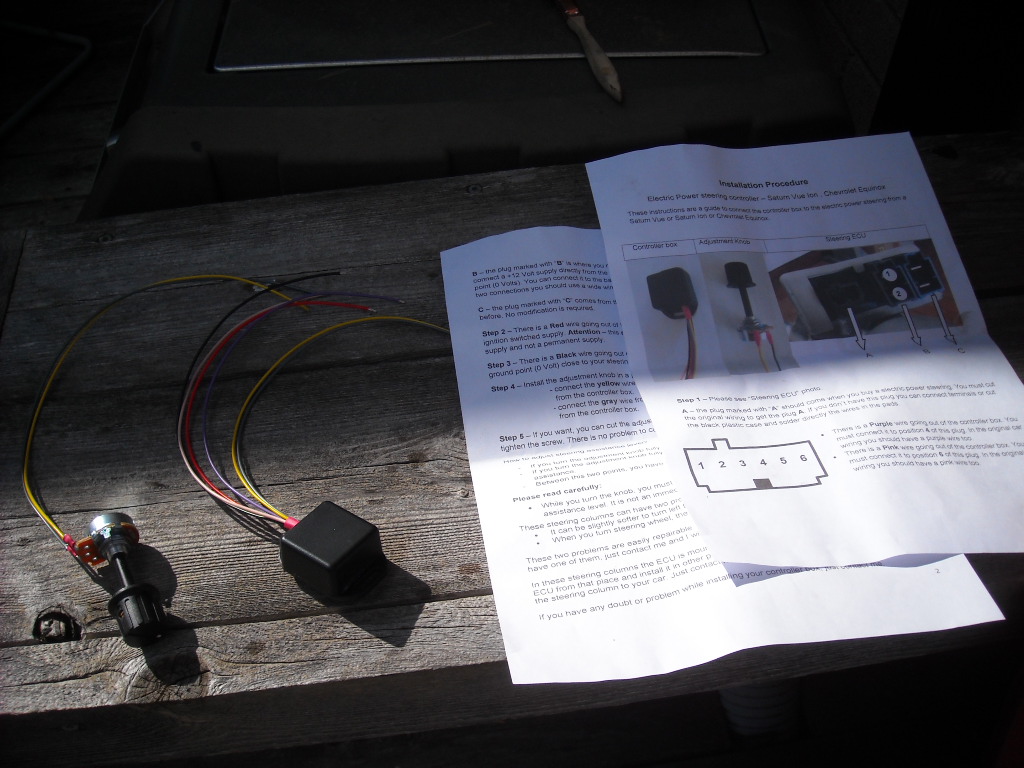
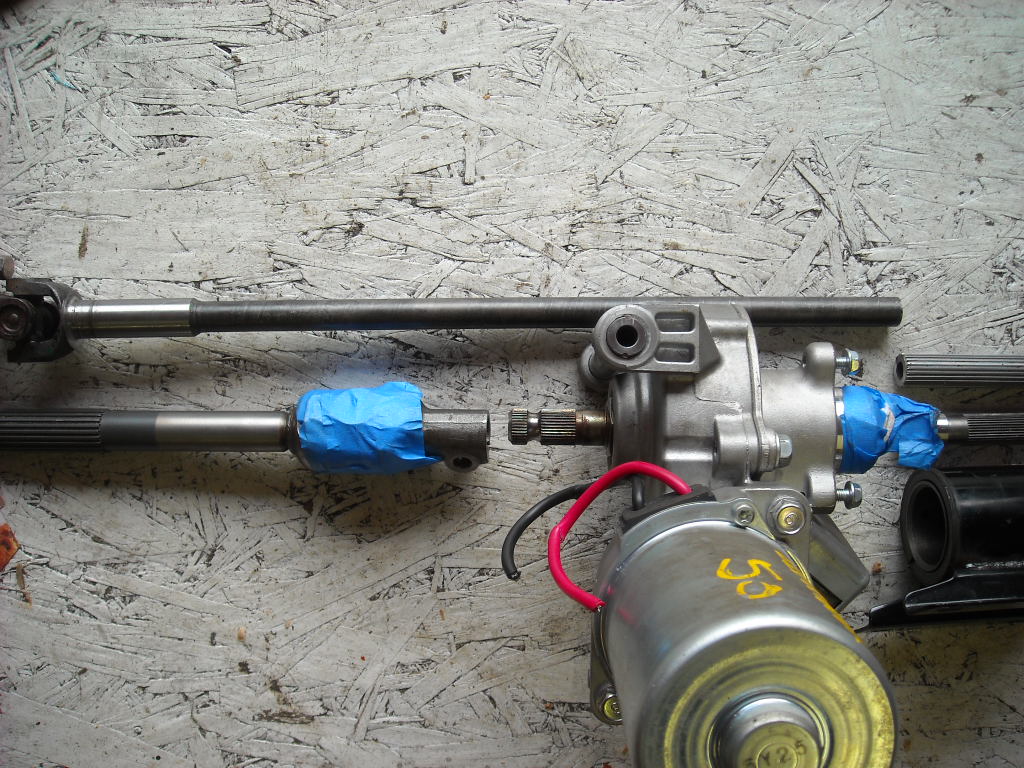
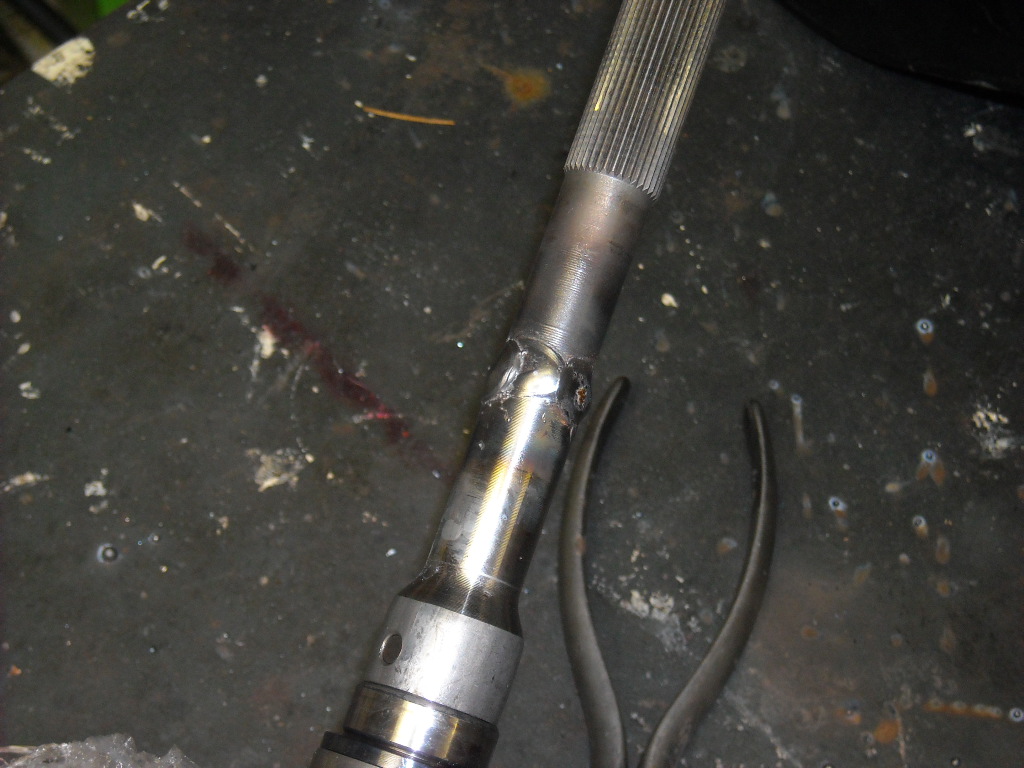
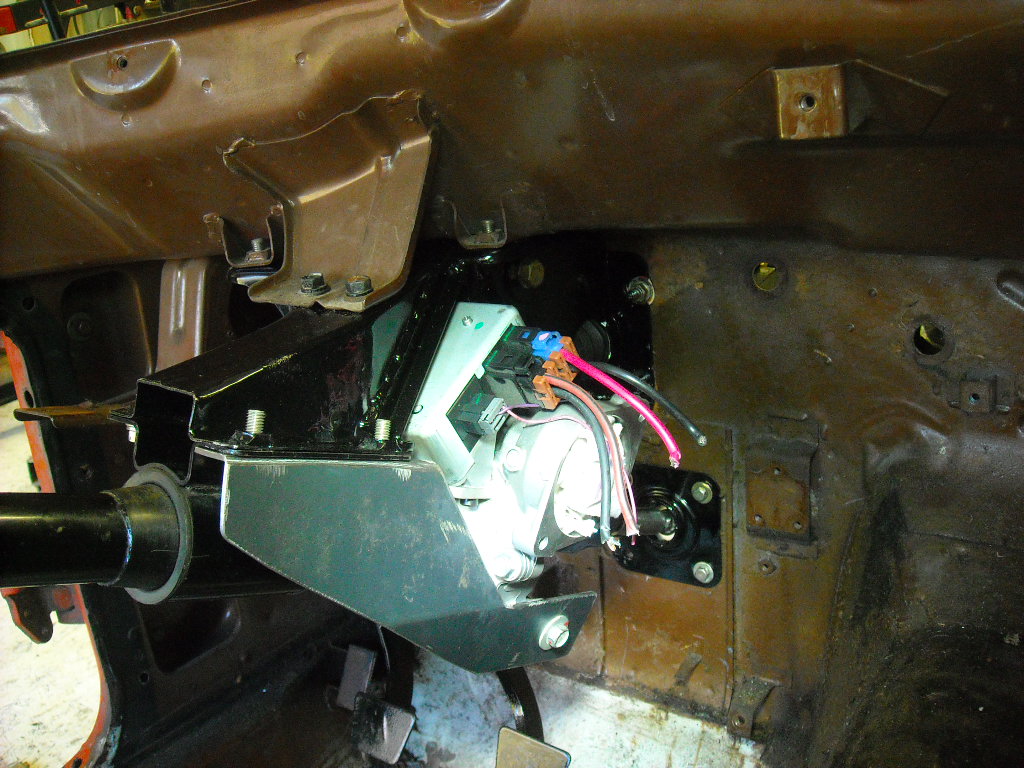
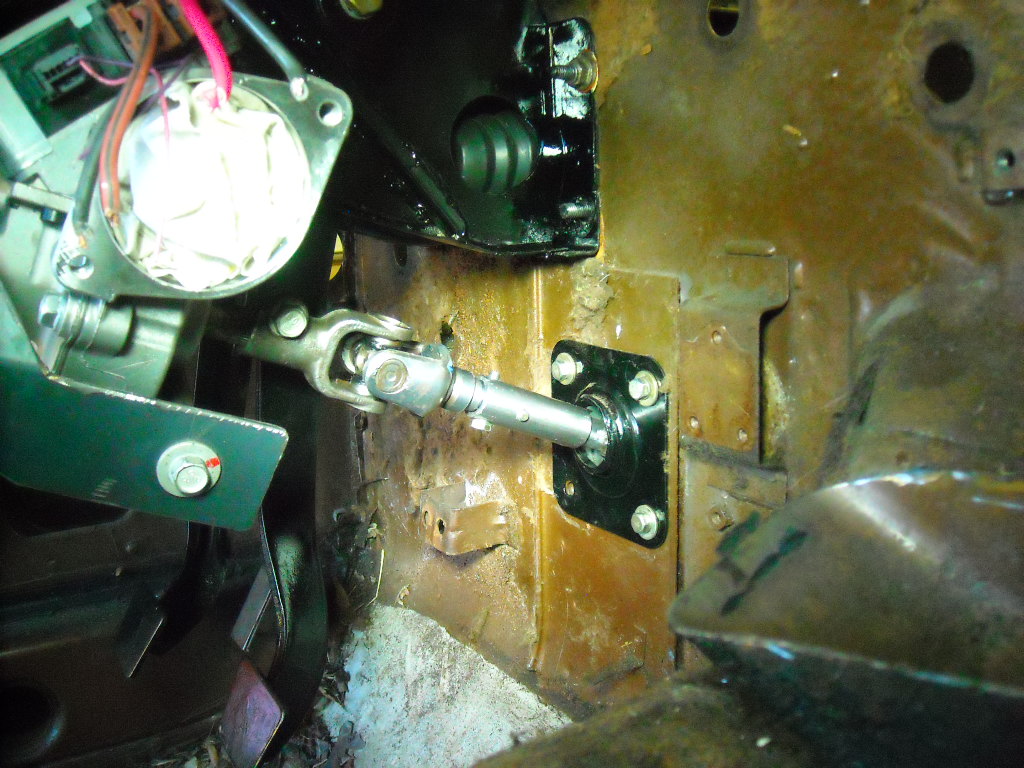
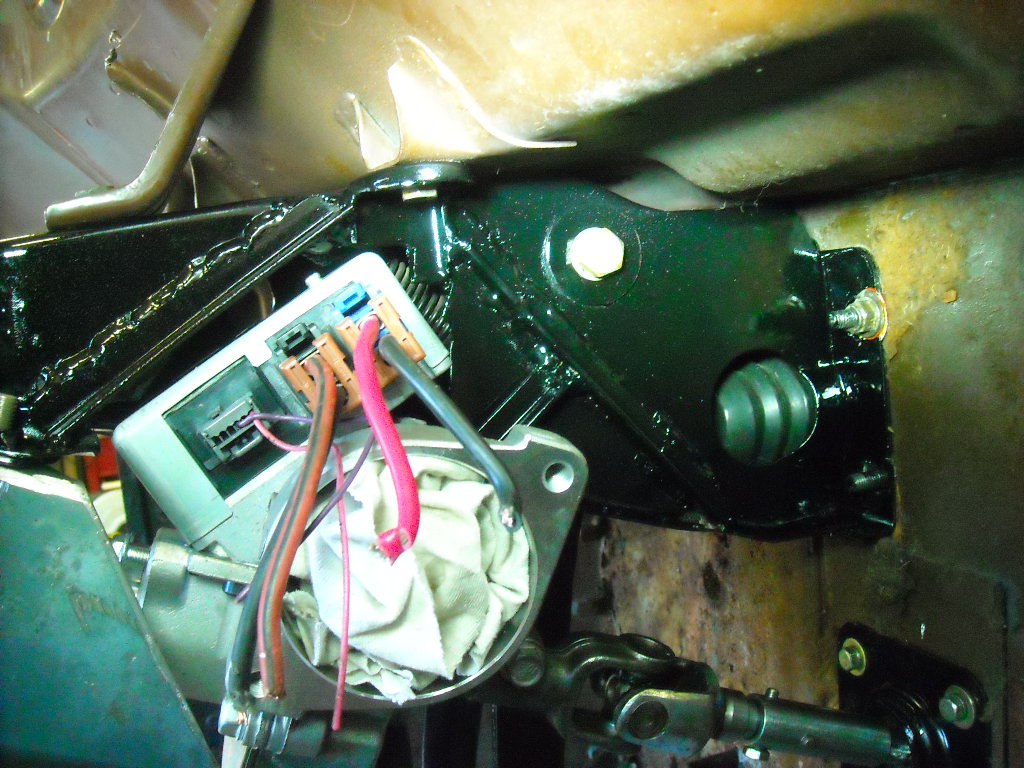
I received the wiring kit from Bruno, his instructions could use some work to make them clearer but it is pretty simple to figure out. Everything works perfectly, there is no assist with pot turned off and turning the wheel is effortless with the pot turned all the way up, everything in between is exactly the way you would think it should be. There is a funny little 1-2 second delay between changing the assist setting and the change in effort on the steering wheel but I only noticed it when going from full off to full on. Very happy with it, will be a treat to use in tight parking or low speed maneuvers. Bruno's instructions say to wire the the motor up straight to the battery, shouldn't there be a fuse in there?

-
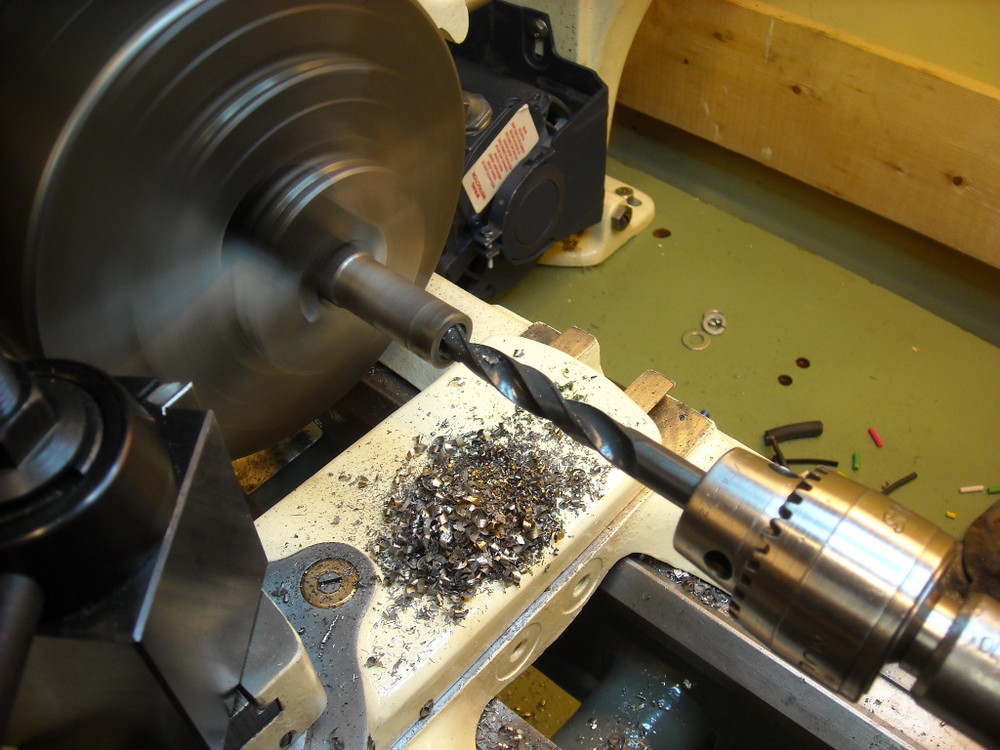
Good idea, it will also keep the sand and water out. The list is long, Find a place for the air filter to live, it's getting tight in there. Find a place for the oil cooler and plumb it in, Figure out how to lift the hood with small gas shocks, the stock spring is in the way of where the air filter might go, Machine an adapter to mate the back of the drive shaft CV joint with the Diff. Make up a heat shield to protect the wiring harness from the headers. Build a new or modify the old wiring harness. Build the battery box, find a spot for the fuel pump/fuel filter to live, plumb that in. Install brake lines and proportioning valve. Weld up modified shifting linkage, figure out how to attach existing throttle cable to Datsun gas pedal. Build an exhaust system Good times I meant to put sleeves in but got carried away, had to drill and grind away the bottom holes large enough to fit a 14mm socket into. Well, I know it fits, I won't know if it works for another year. Prototypes always have surprises waiting for you.
-
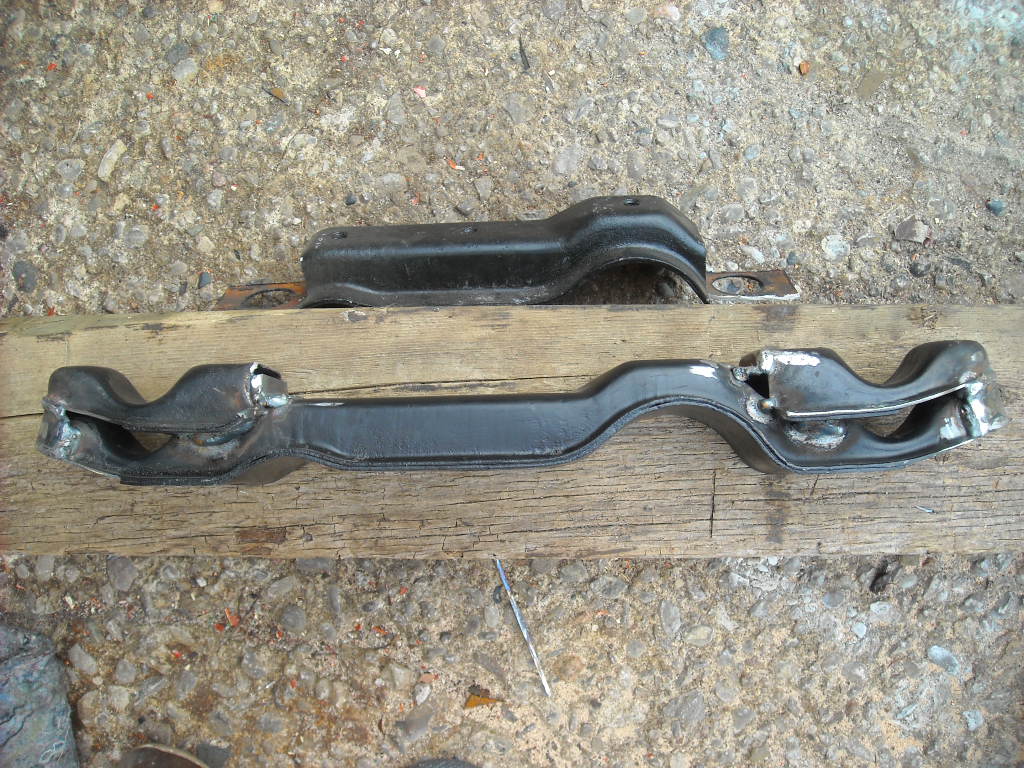
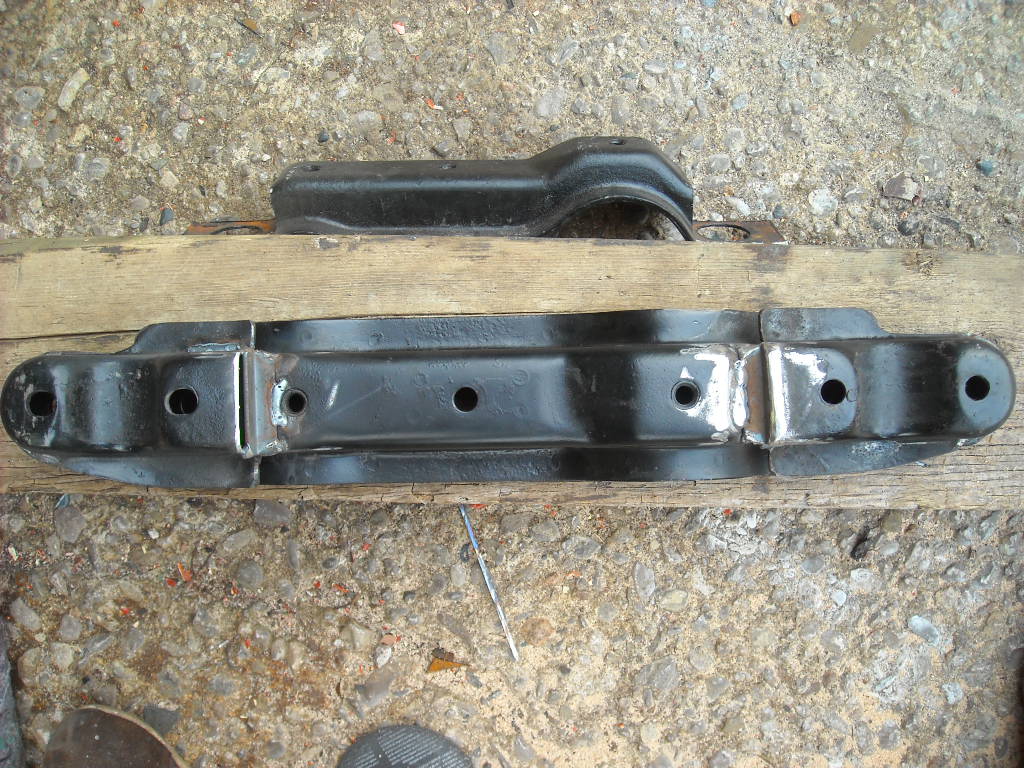
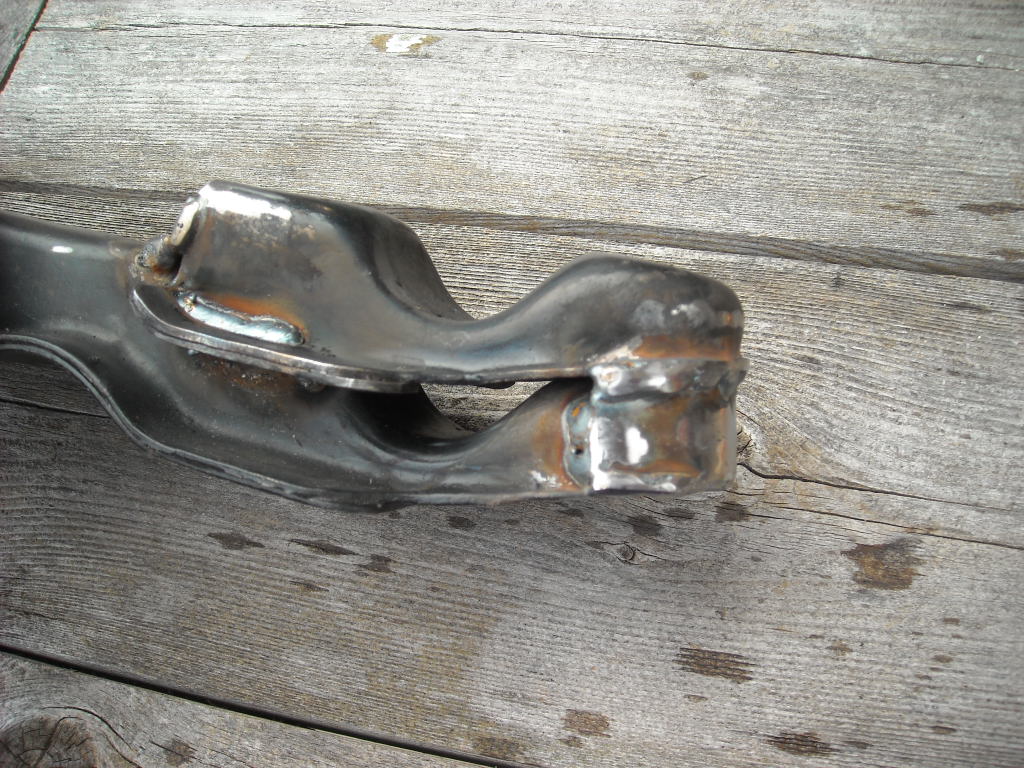
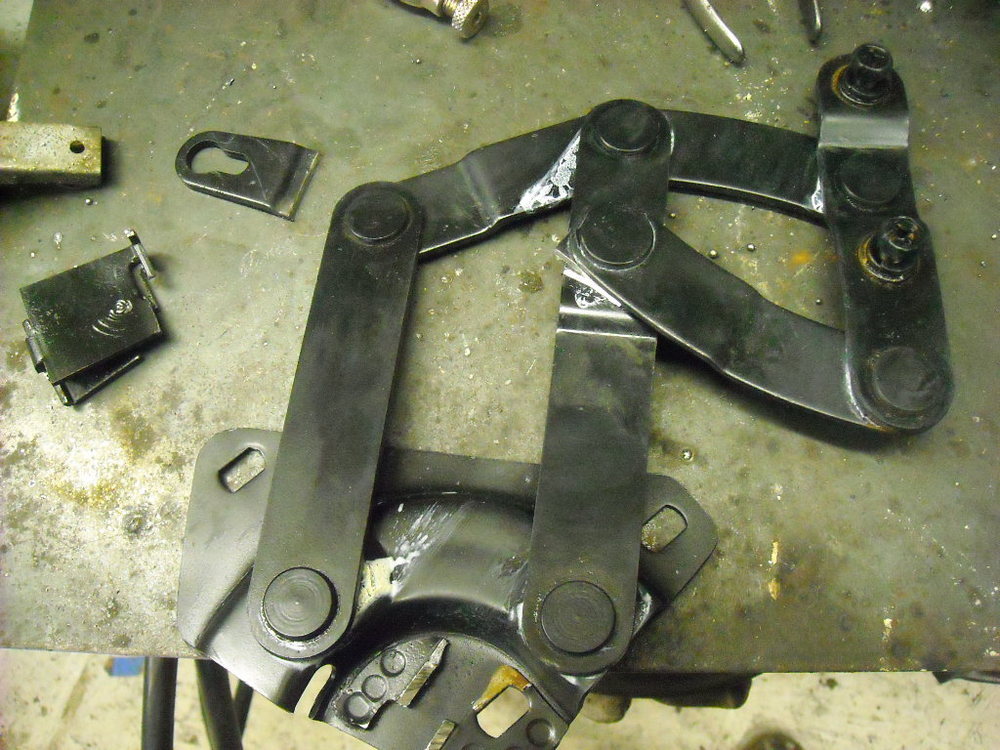
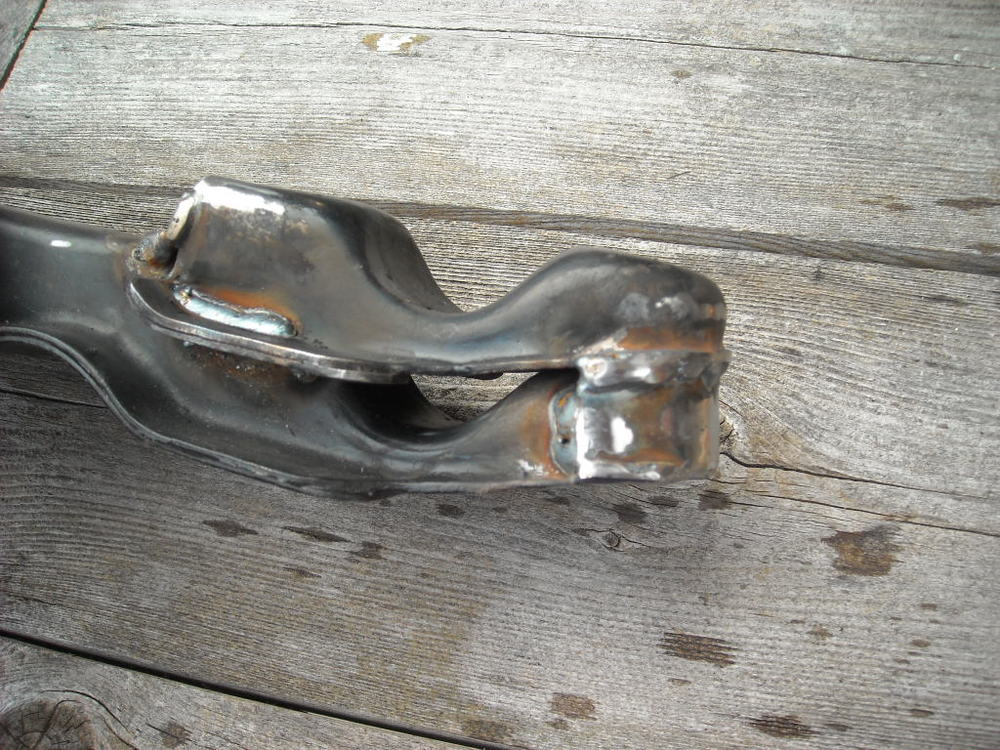
Okay, now this may be the fuglyest thing I have put together in a while but the damn thing really works well, I needed to drop the front of the R200 diff down by 1" to get the right angle for the drive shaft, with this monstrosity installed the drive shaft will be inline within half a degree.


-
TonyD just posted this over on Hybridz, check this out, http://www.jenvey.co.uk/products2/twin-throttle-bodies/dcoe-heritage-bodies/heritage-dcoe-twin-body-40-48mm-tdsxx Classic look with modern FI
-
The Duesenburg would be a much better zombie killer, the Lambo would just cut them off at the ankles, save the Duessy.
-
$4000 for a 3 yr old 370Z theft recovery! There are some good prices there.
-
The 3m finesse will help some but the real problem as Patcon says is the orange peel, you need to get all those little bumps down to a smooth surface for a real shine. I have used the Finesse on a few single stage painted cars and it works well but the prep stages before it are the most important. If you are not going to colour sand it because you don't know how thick the paint is, at least clay bar it first before you start the finer compounds and polish
-
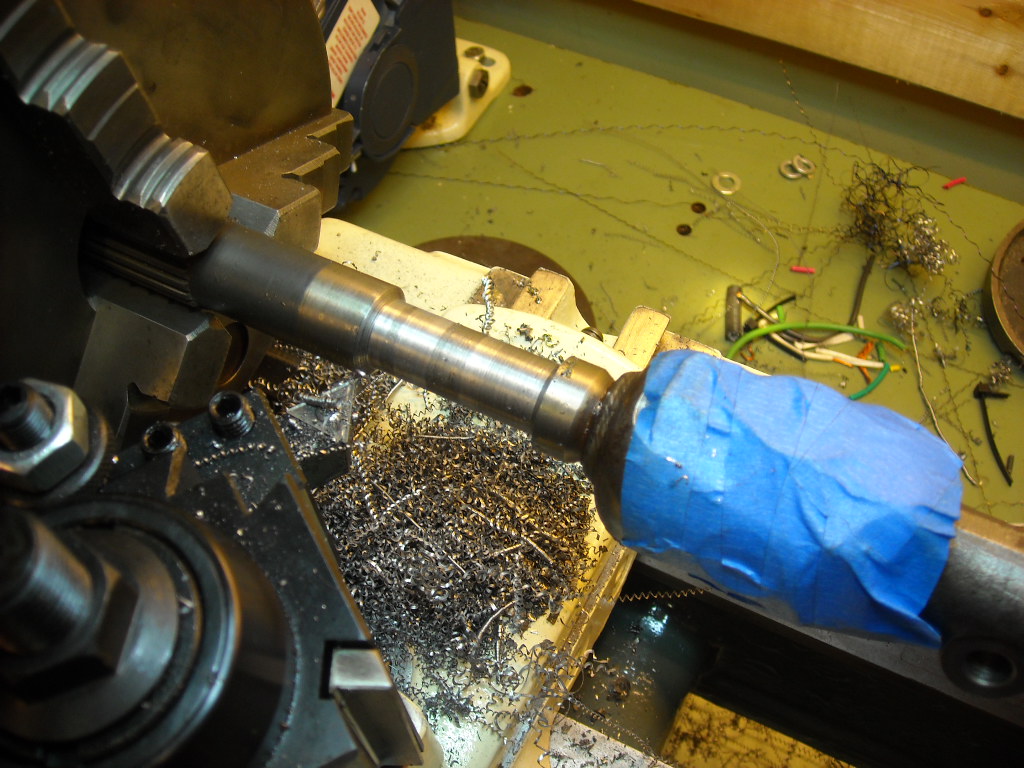
So I have it basically installed, I haven't received the wiring kit from Bruno yet but it is all lined up. If you don't have access to a lathe the shafts could be joined with a simple sleeve and bolts.