grannyknot
Free Member
-
Joined
-
Last visited
Everything posted by grannyknot
-
 I might be mistaken but those look like kind where the venturi, chokes and butterfly are installed from the rear, so if that lip you mention is sticking up into the air flow then it will interrupt the laminar structure of the flow. Now does that mean less power, maybe, probably not but if you can smooth it out you will get the most from the stacks. Those air filters you have won't fit anymore but there are stainless steel mesh caps or foam sock filters that can be used instead.
 -
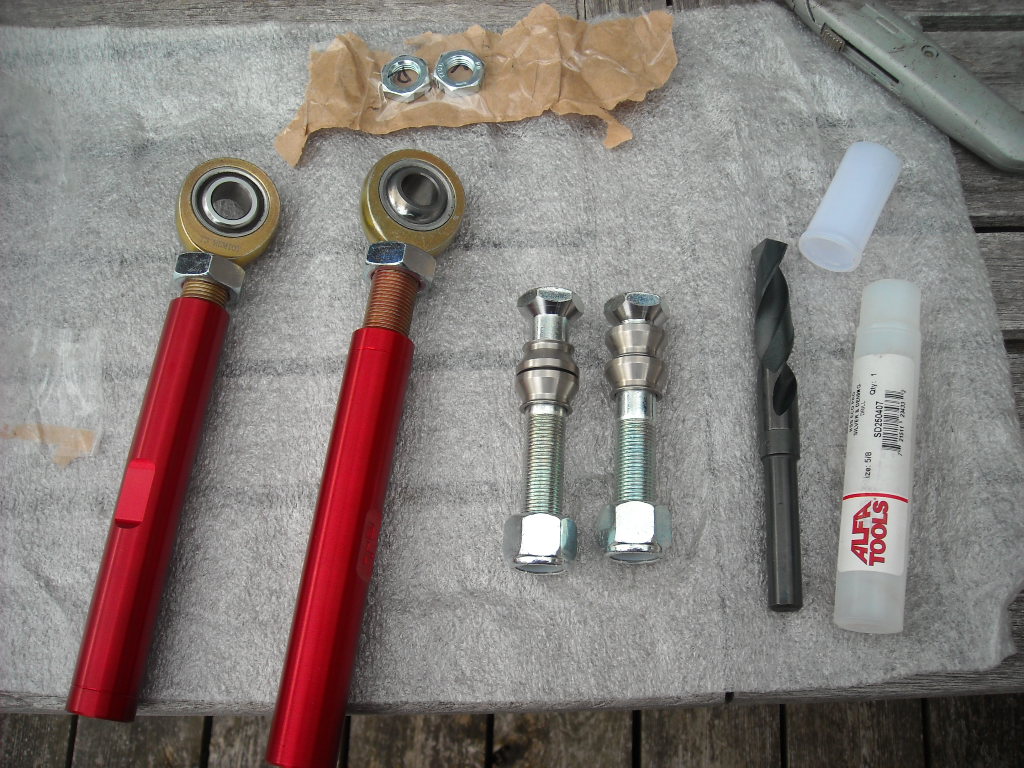
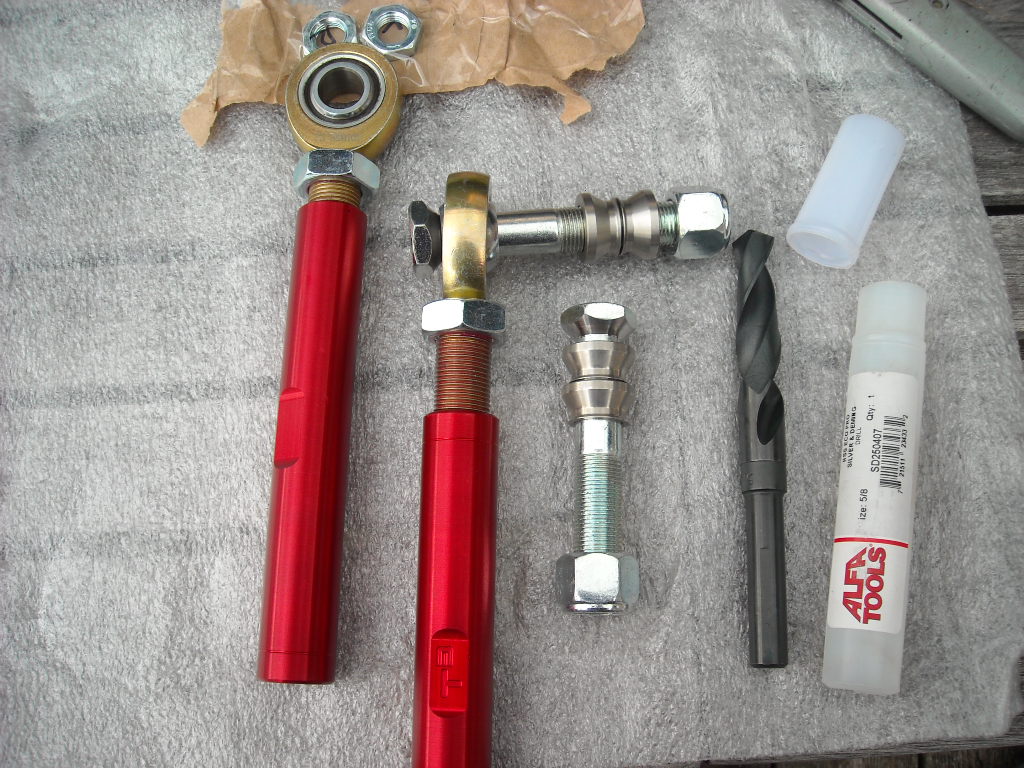
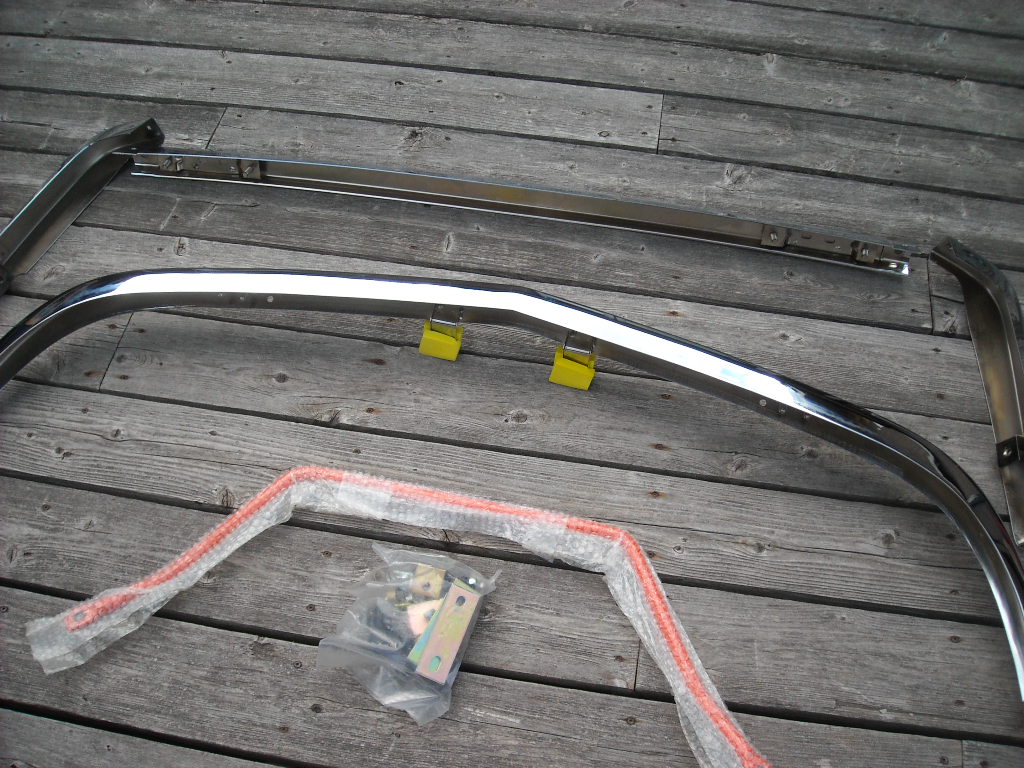
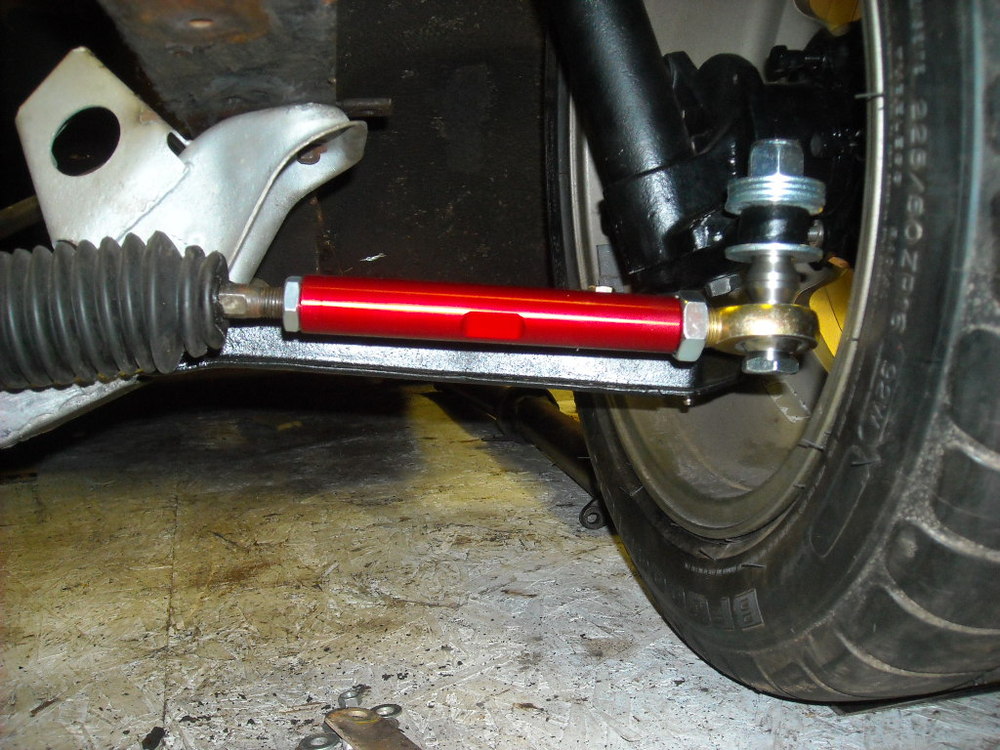
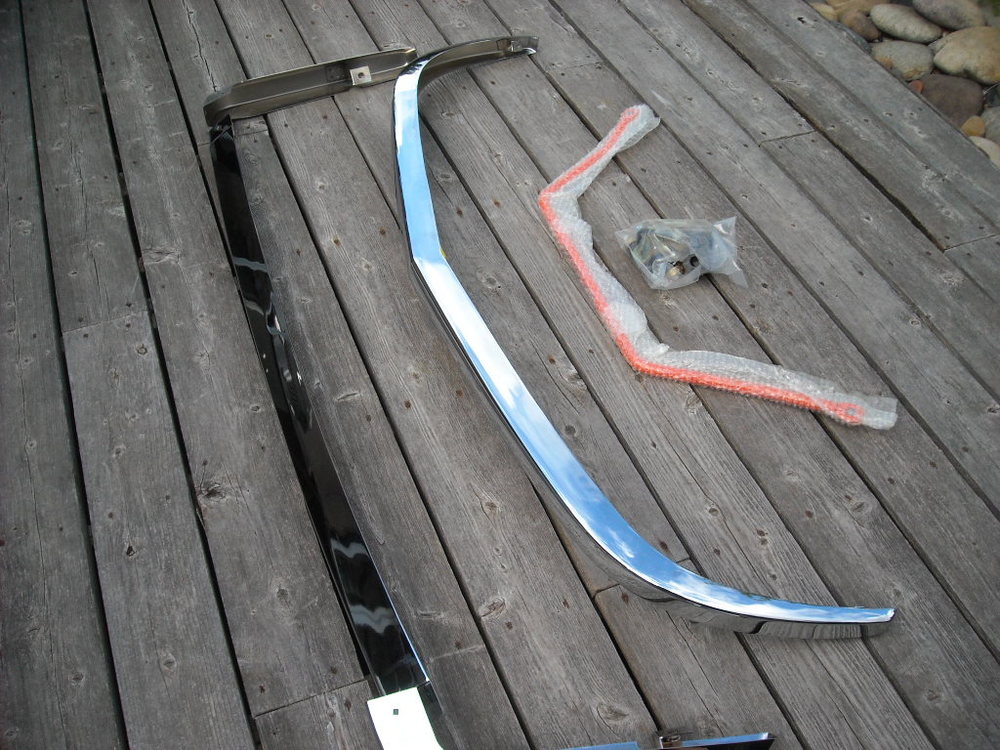
Well I guess I'm not that bad off then, my S/H was 52% of product cost. The thing I like the best about these bumpers are there are no holes for the rubber protective straps, just simple and clean. Got the TTT tie rods in and played with them so that the car can go from just a little higher than normal driving height, hit a bump and bottom out with 0 toe in or out. The strange thing is the D/S rod end is lowered 1.125" from the steering knuckle but the P/S had to be lowered 1.5" to get the same 0 reading. If I lower the P/S the same amount as the D/S the P/S has 7mm of toe in. The stack of washers under the lock nut is just so I don't have to cut into the fresh nylon of the lock nut until the final assembly.
-
The off set tie rods came in from TTT, they look very pretty, going to install tomorrow and then do some more bumpsteer measurements The new chromed bumpers also came in from Futofab, very pleased with them, they are flawless and were well pakaged, a great company to deal with. FEDEX absolutely raped me on the shipping costs, I don't even want to say how much but, the bumpers are perfect.


-
Ksechler, just realized I answered an insulation question of yours on another thread, your car is perfectly positioned to add some extra sound and heat baffling right now since your interior is still out. Also a good time to make sure all those little openings in the back are sealed up so the exhaust doesn't sneak back in and a chance to have a second look at all the interior gas hoses so you are not smelling raw gas once you get all the panels installed. I's looking really good. Those Electromotive coils seem like a good upgrade but is it something that can be felt, is there a noticeable difference with them?
-
Can you post a couple of pics of the front of your carbs, looking down the throat? We need to see your configuration. The slide in type stacks can be used to butt up against the venturi but there are also short sleeves that will do that but don't interfere with a bolt on stack. Make sure that the inside dia. of the bolt on stack is the same dia. as the opening of the carb body. You don't want a lip there, you want a smooth transition between the bolt on stack and the carb.
-
Most Rad shops could solder that back on for you, but you would have to pull it from the car.
-
I coated the interior with my version of LS (microspheres are known more for their heat insulating than sound), then laid in 40 sqft of MurderMat, then 1/2" thick auto carpet underlay. Compared to the stock 240z ambient sound this car was like riding in a Lexus, very quiet. Other Z guys that drove the car always commented how different it was from their Z, also the window tinting really helped keep the heat out as well. You'll be glad you went to the extra effort.
-
I thought about that too but what about the dissimilar metals heating/expanding at different rates?
-
Half a gal. the whole interior.
-
I did the DIY lizard skin and not only saved a bundle but I can't imagine the car would have been any cooler or quieter had I spent more money, it's simple and it really works. Half a gallon white Tremclad rust paint and about a pound of Microspheres/Microballons, that's it. Mix them together until you have a very thick paste and paint it on. From the research I did I don't think LS is using anything different then paint and microscopic glass spheres. I think my total cost was $50, at that time LS was $400 per gal.
-
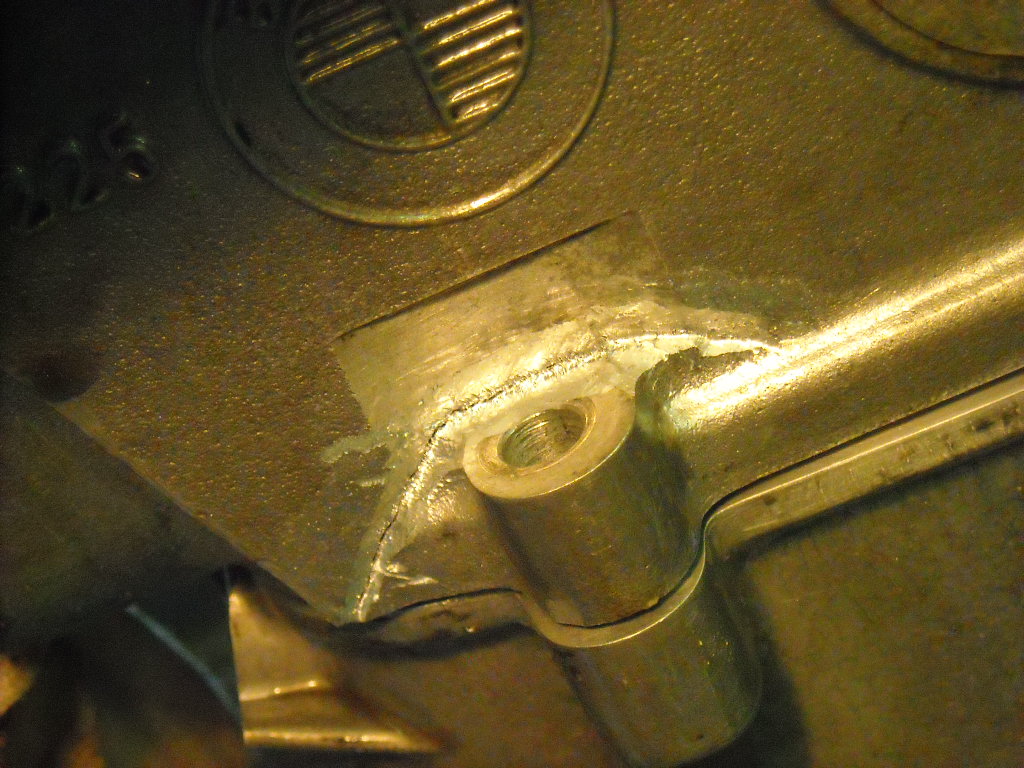
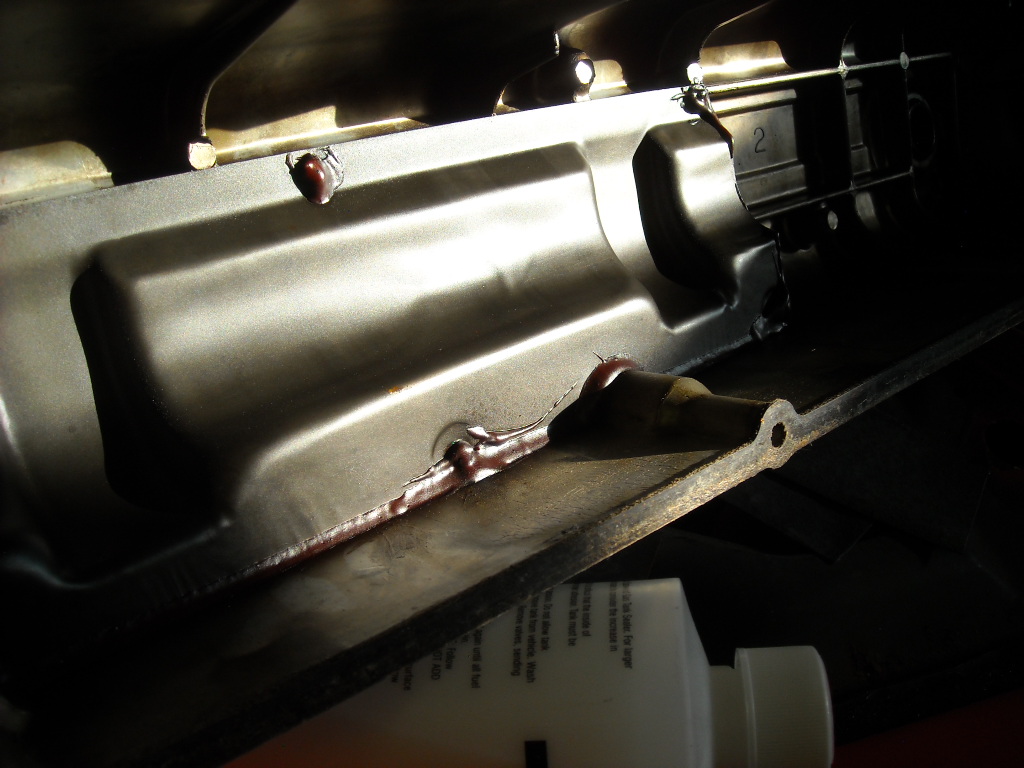
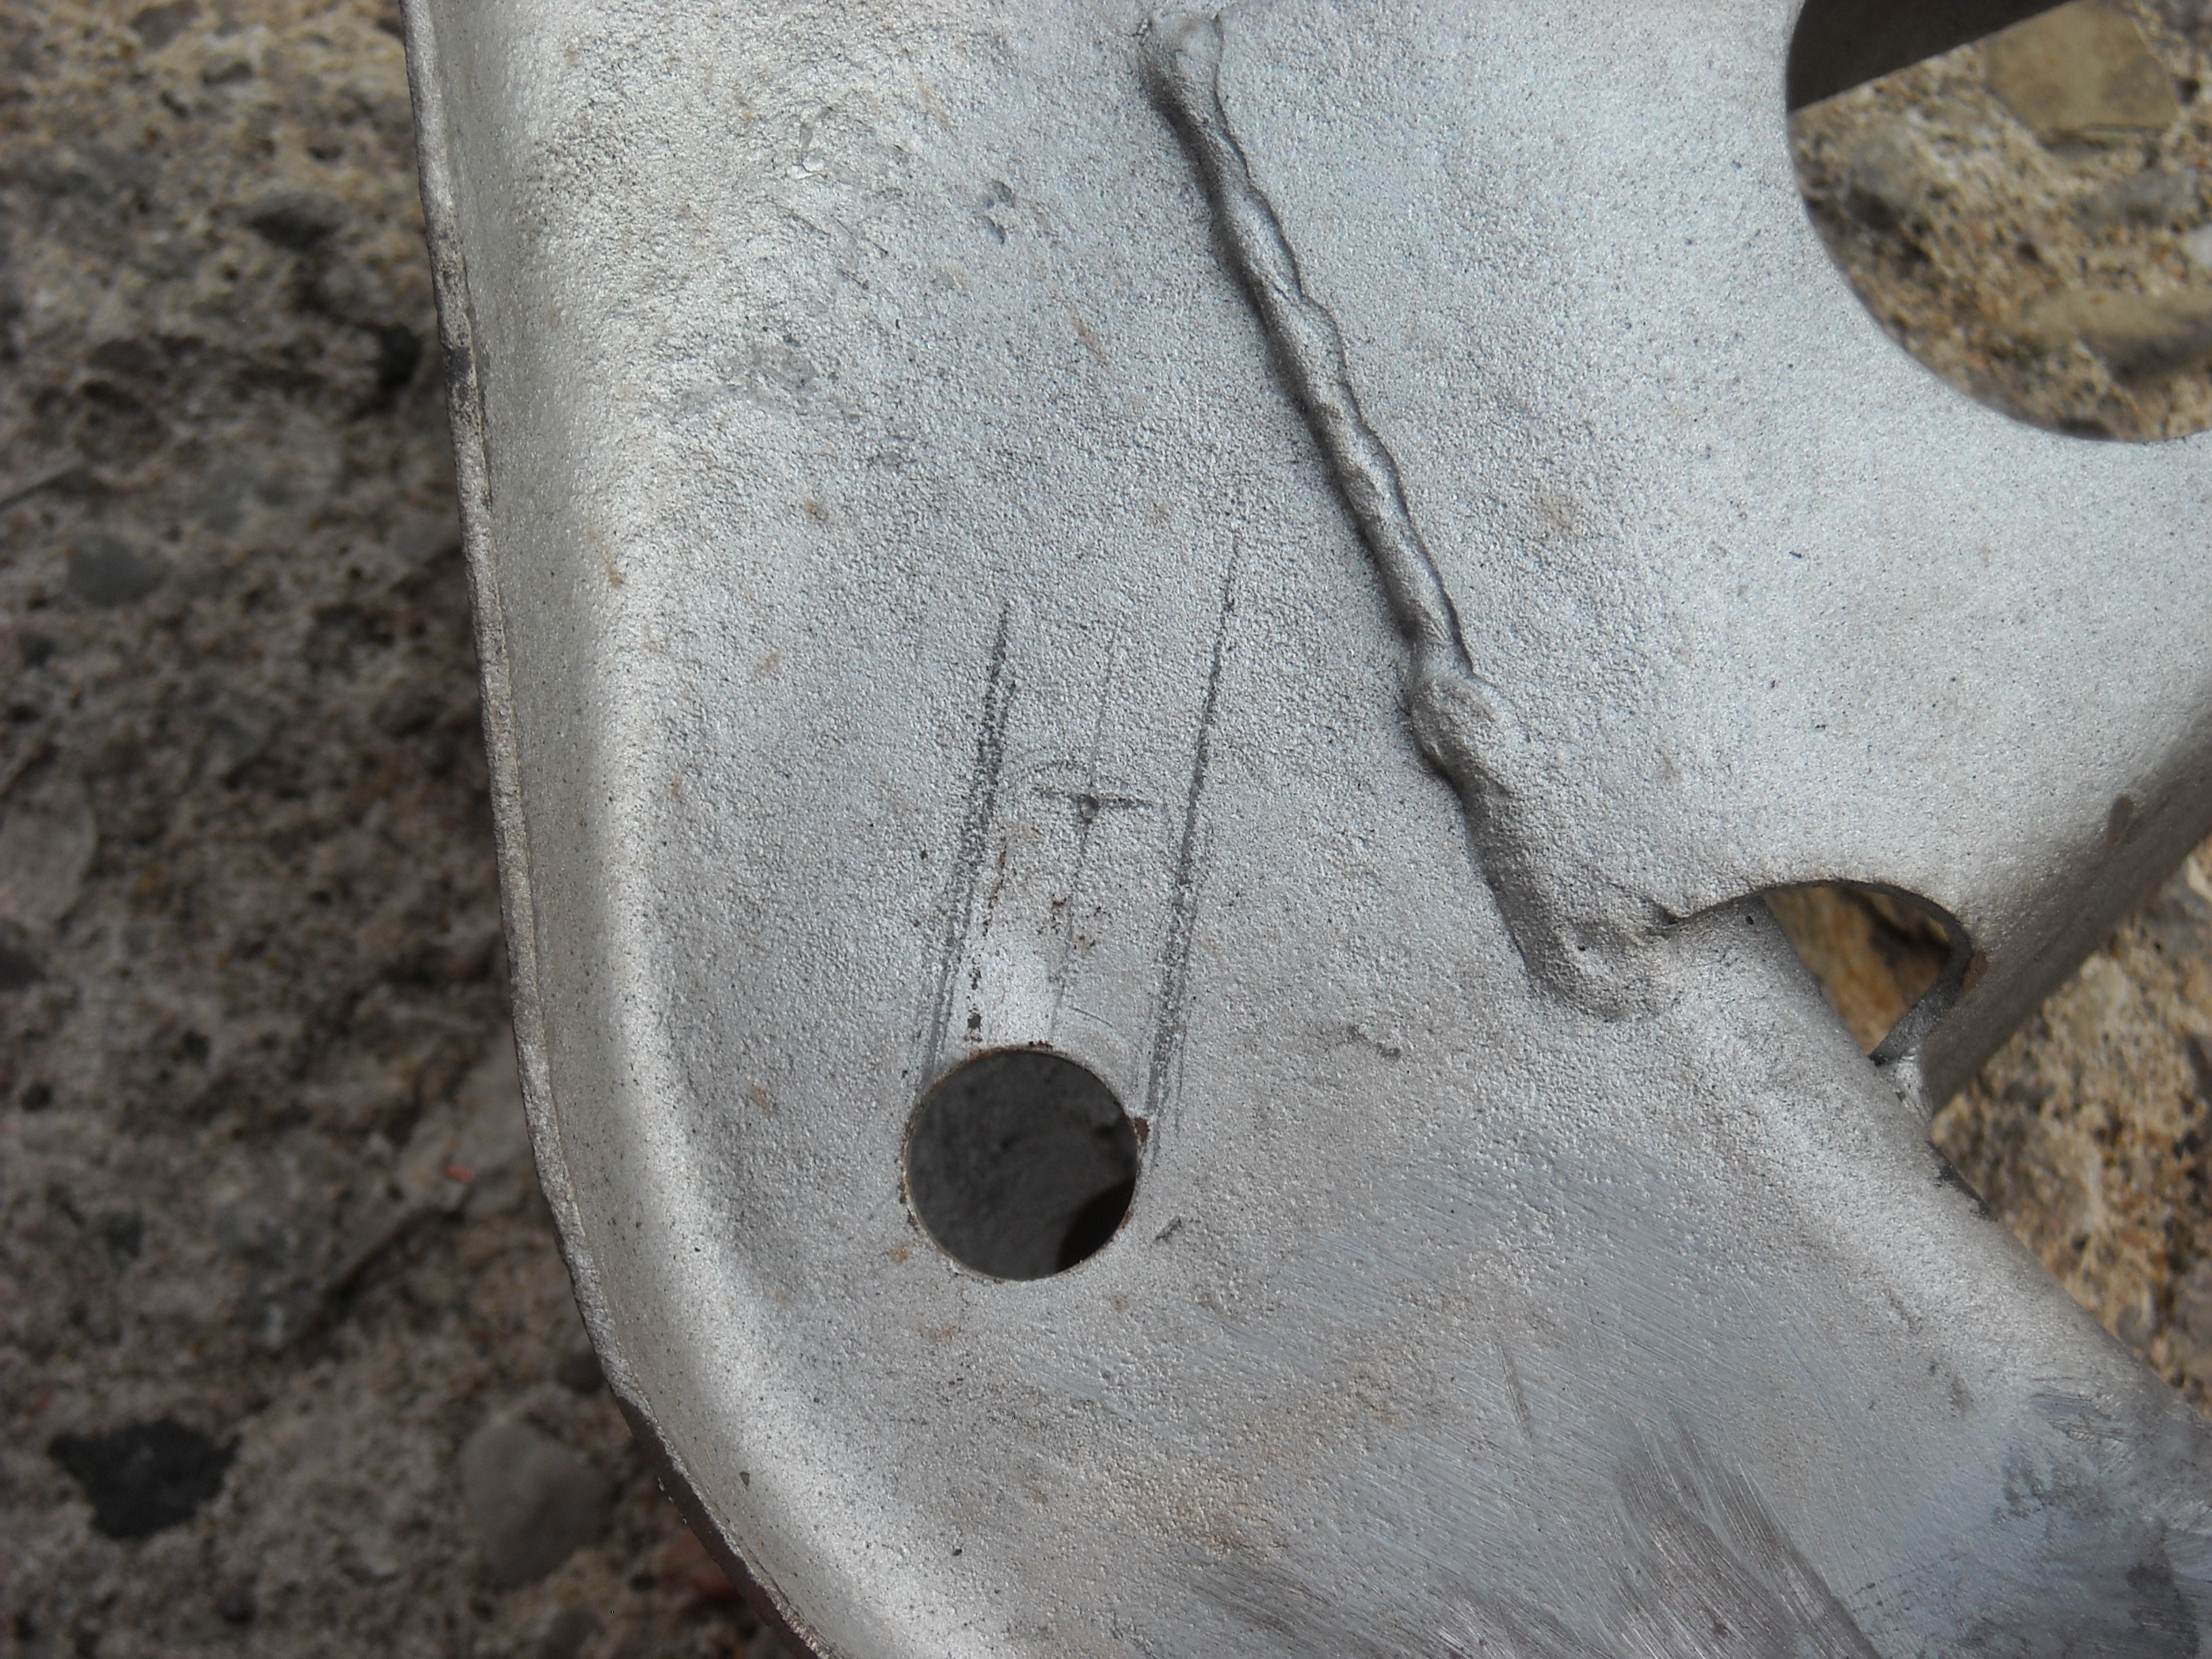
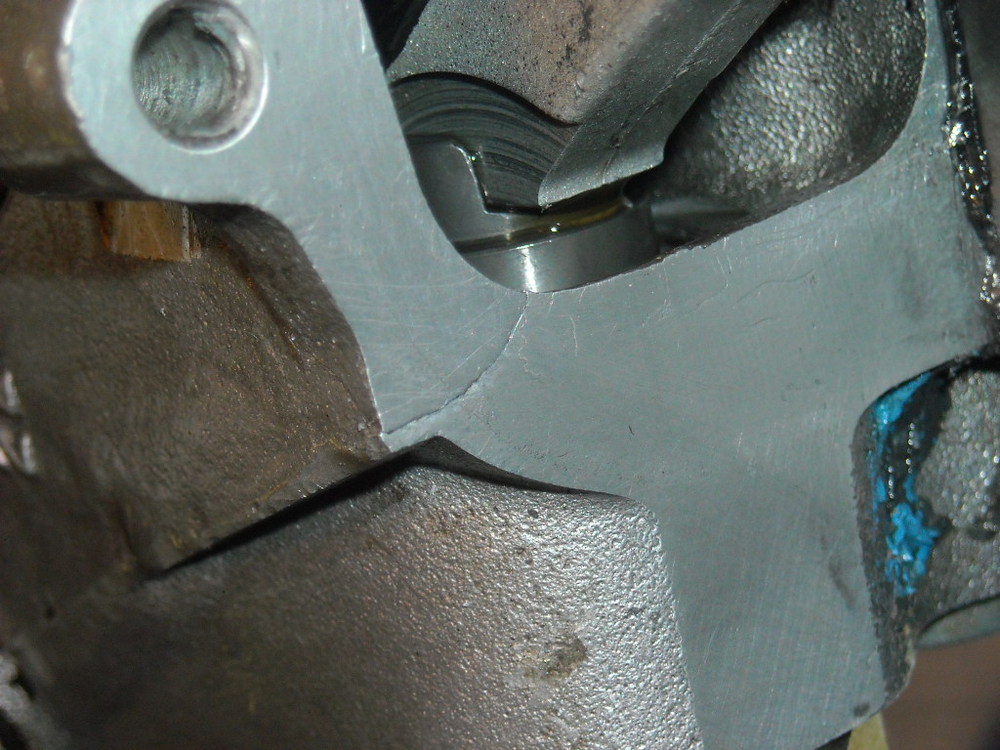
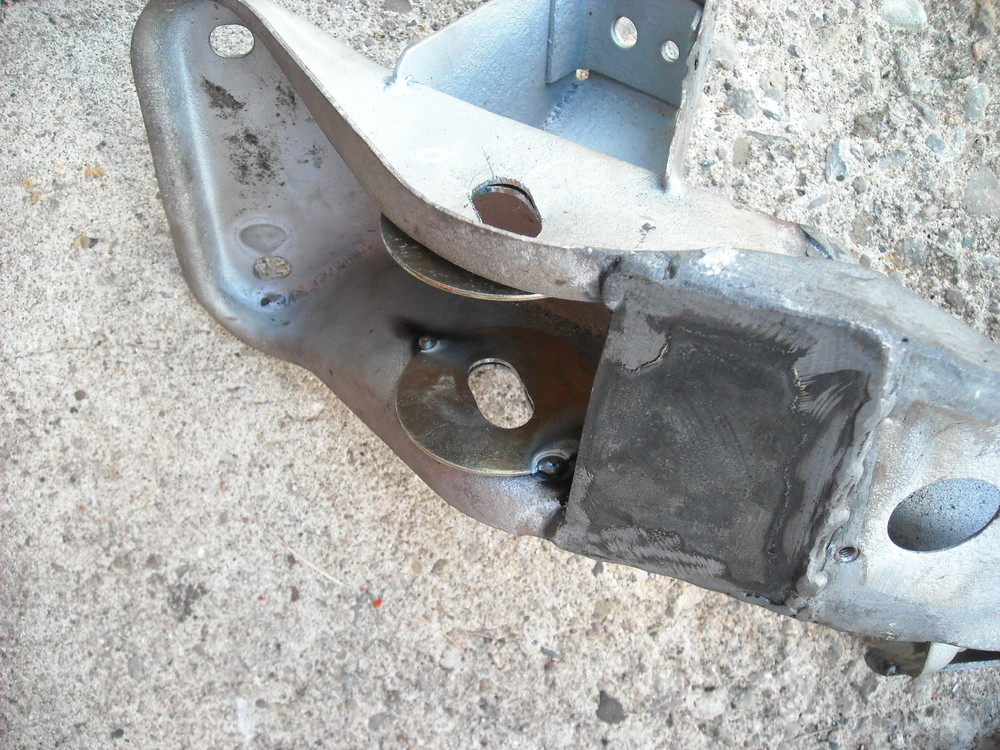
Ben, the guy who did the nice custom Tig welding on the modified oil pan has agreed to come down to my place with his potable tig unit and have a go at that crack while the head is still bolted to the block. I'm thinking this is the safest/best option, it will save me from pulling the head and things won't get much of a chance to heat up until most of the welding is done, then the inside of the crack will be sealed with something, not sure yet. I ground out a small v along the length of the crack with a steel burr cutter, also noticed the crack is getting longer. Should I drill a small hole at the end of the crack to try and stop it?

-
Much love !
-
I think all that insulation on the fuel rail is keeping the heat IN. The early fuel rails are bolted to the head in three places, the heat travels up those contact points and heats the hardline, insulating that just keeps it in, not to mention the 4' of travel around a hot engine bay once the tube emerges from the tranny tunnel then another 4' to travel back. I say bring the fuel line across the firewall to the D/S of the tranny tunnel then dead head it straight into the carbs with no return. I ran mine like that with no problems.
-
The ones I have taken apart the top of the head was flush or close to it but I would go whacking it until it was flush. A few taps and torque it should do the job.
-
I know the ad says you don't have to clean the piece but I read a few forums where guys had tried the stuff and said all the general rules of solder/brazing still apply, clean everything. I may even stress the flange a bit so I can get some brake cleaner and compressed air in the crack. The real problem with trying to fix it this way is the head itself is a big heat sink and is going to very quickly pull heat out of the area I want to braze. Pulling the head on these engines is quite involved because of cam and shim housing that is bolted to the top of the head. I think I'll just stare at it for a few days before I make a decision.
-
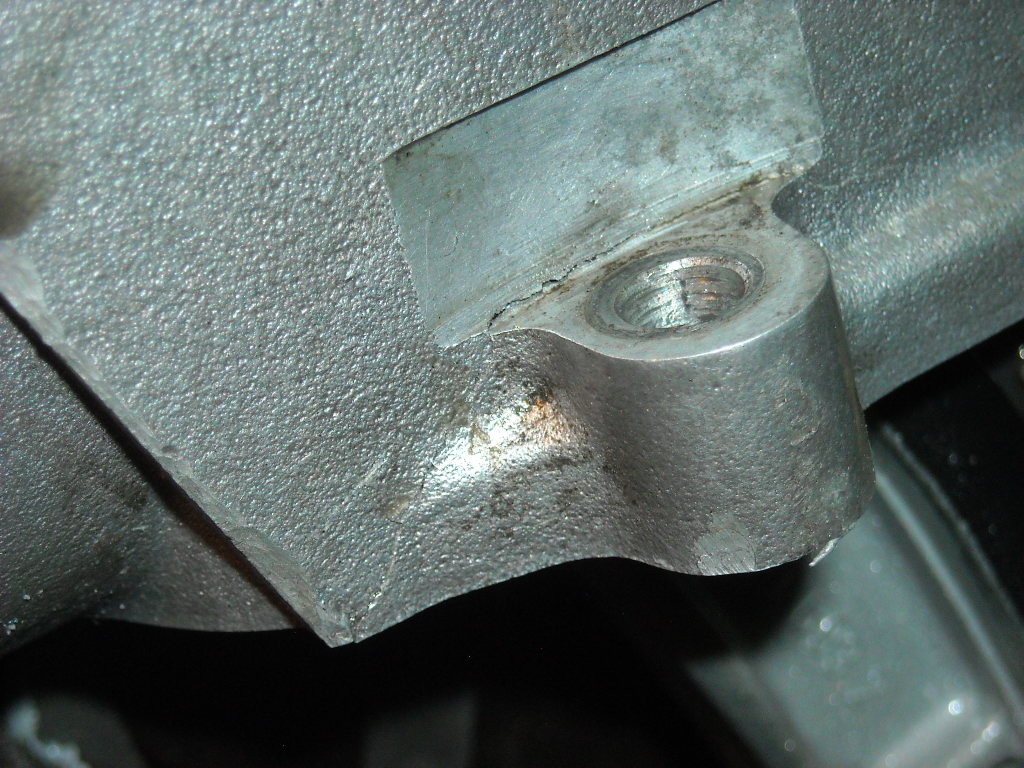
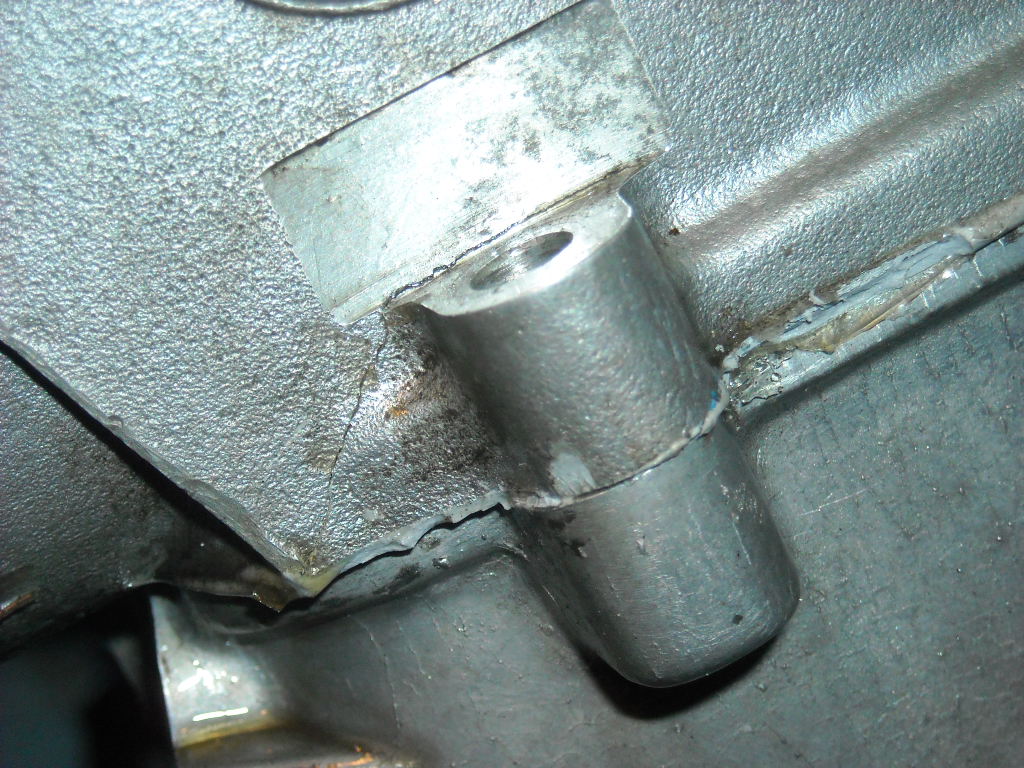
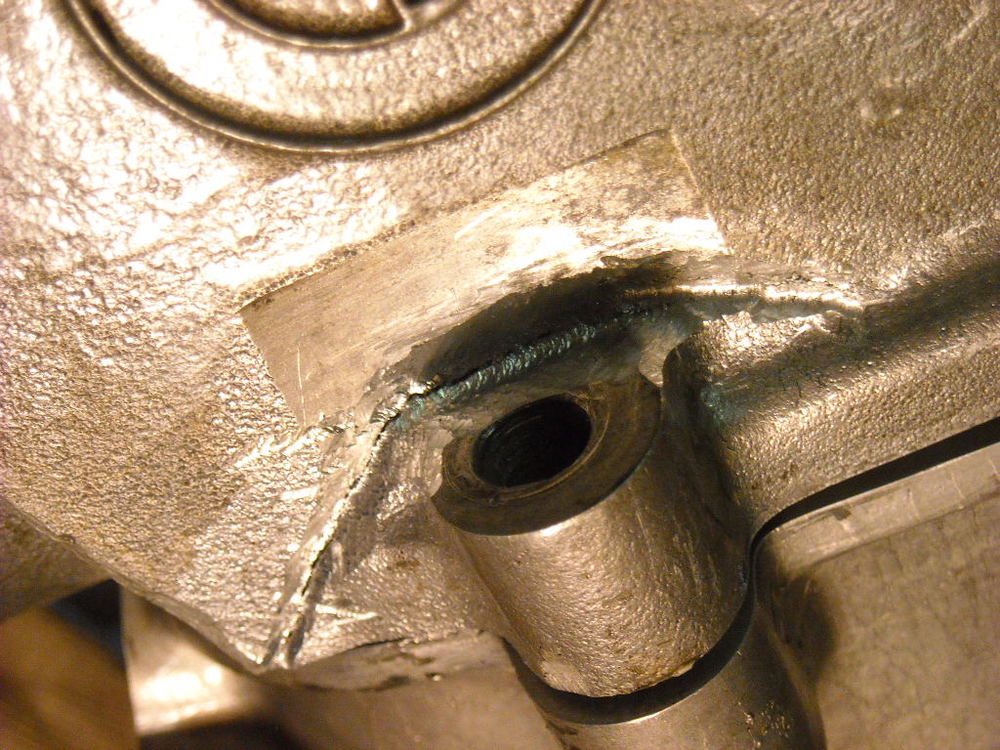
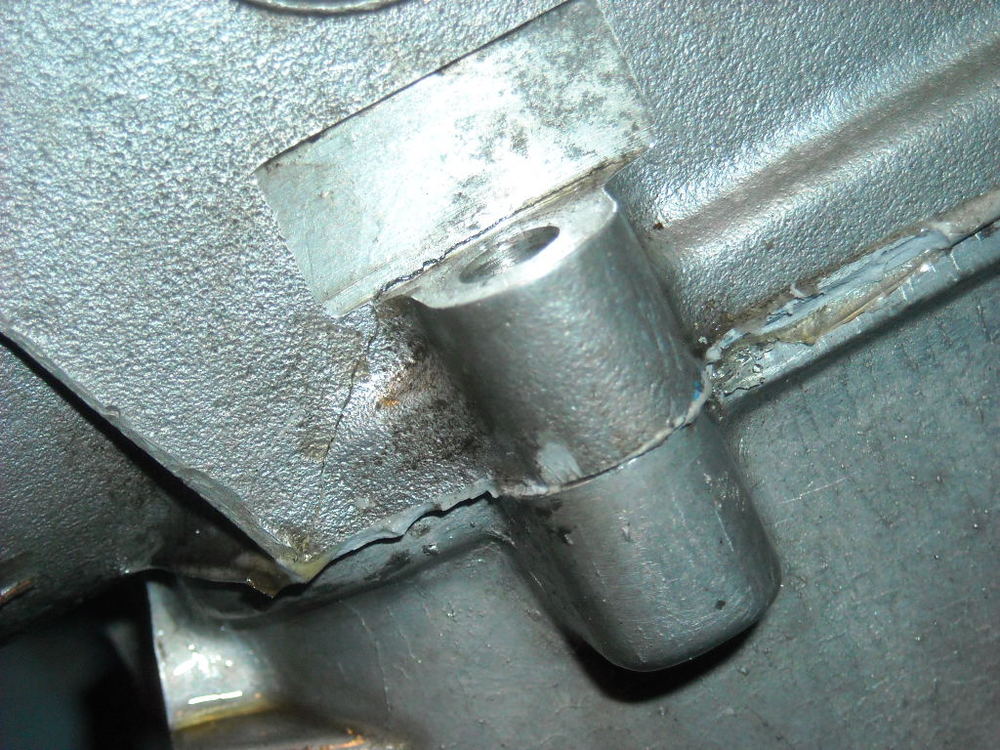
So I pulled the timing cover to get a better look, it is cracked through to the other side and there is a lip that protrudes above the head surface, although the whole bolt flange is still firmly attached to the head. I was looking at this stuff, https://www.aluminumrepair.com looks like interesting stuff, maybe I should just bite the bullet and pull the head.


-
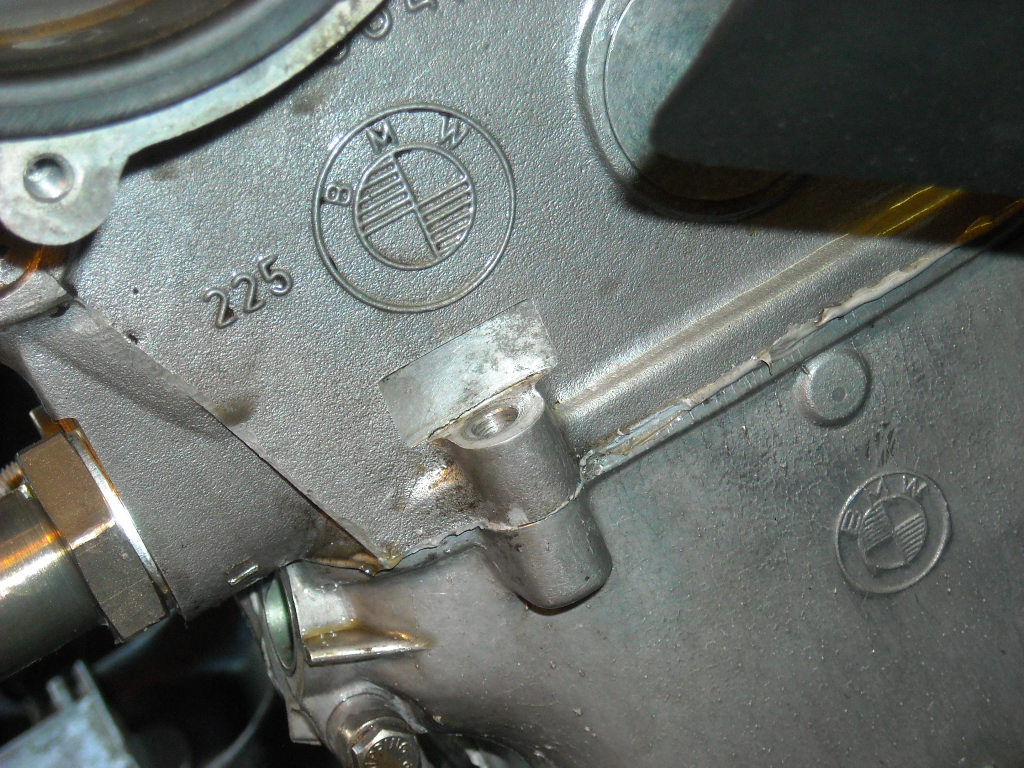
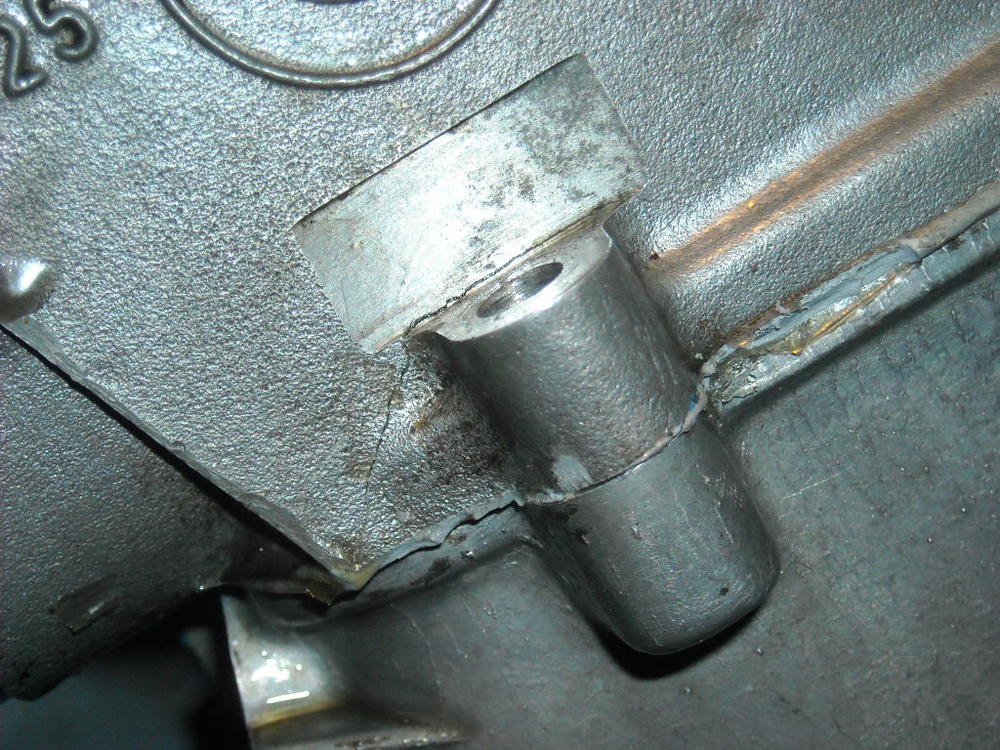
Exactly, the small bolt that pulls the head down to the timing cover is not crucial to the seal of the pistons, it's just an oil seal. I was thinking of removing the timing cover, thoroughly clean the area with a variety nasty solvents then apply some kind of flexible sealant like Three Bond 1194 on the inside and outside of the crack. Then when I go to tighten that bolt wedge a thin shim in the front to take the stress off of the crack. I guess I could even adhere a thin patch of something like pop can aluminum over the crack from the inside. Anyone know what sealant Nissan used in the early valve covers? That stuff is 46 yrs old and has been through thousands of heat cycles soaked in hot oil and is holding up perfectly.

-
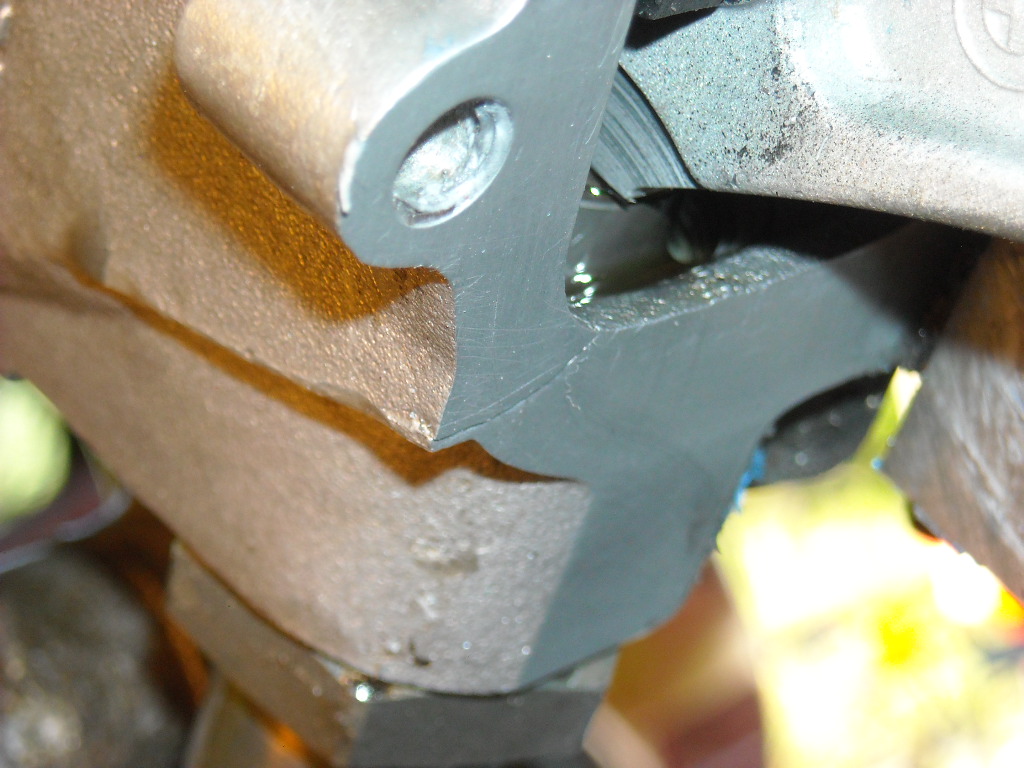
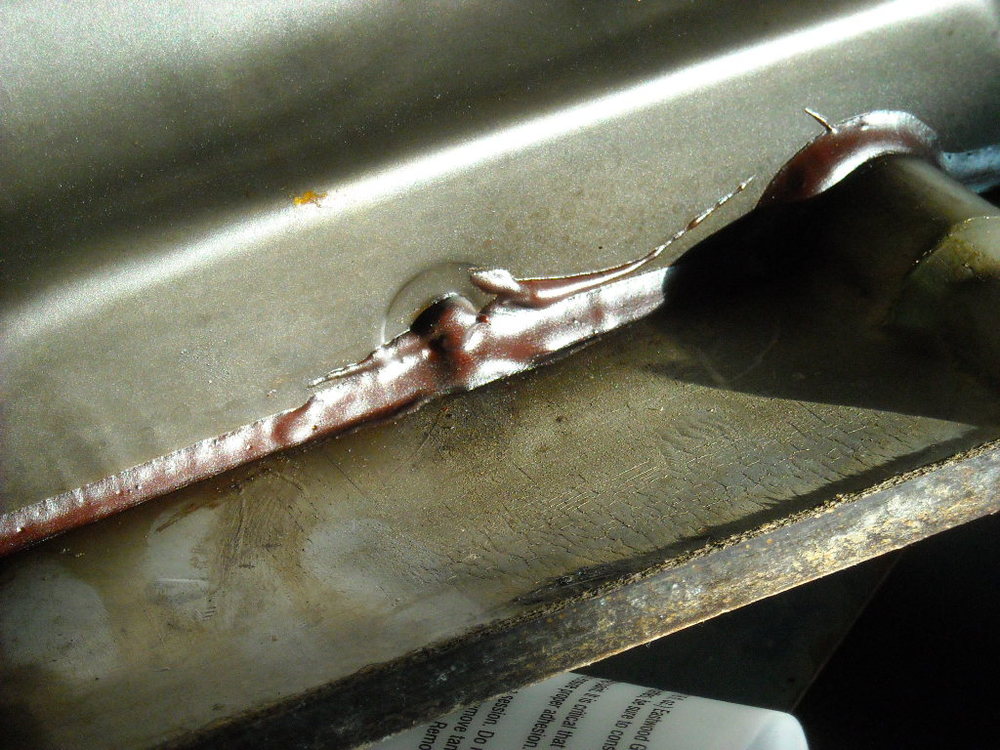
When we got the engine running the other day I noticed a fairly big oil leak coming from the upper front of the engine, about 1 drop per second, after removing every thing to get a good look I can see a crack that almost circles a flange that holds the front of the head to the timing chain cover. I'm sure this is where the oil leak is coming from. Behind where the crack is, is the timing chain galley, so what are my options here to fix this? Weld it from the outside, try and seal a patch of some kind over it from the inside? I'm willing to try anything before removing the head.

-
That's a great looking Z, love the colour. There was a thread happening recently about pushing in those bumpers for a sleeker look, and you might have a look at this as well,
-
Hey Mike, congrats on your new Z and welcome to the forum. Anything you need to know about your car you can find it here, either in the archives or from just asking. I think you got a pretty good deal, I hope you are not put off by the stigma of the 'automatic', it's nonsense. If you don't like it it is easily changed out for a 4 or 5 speed manual and has been mentioned above, auto's are only going to climb in price as familiarity with the stick disappears with us old farts. Chris
-
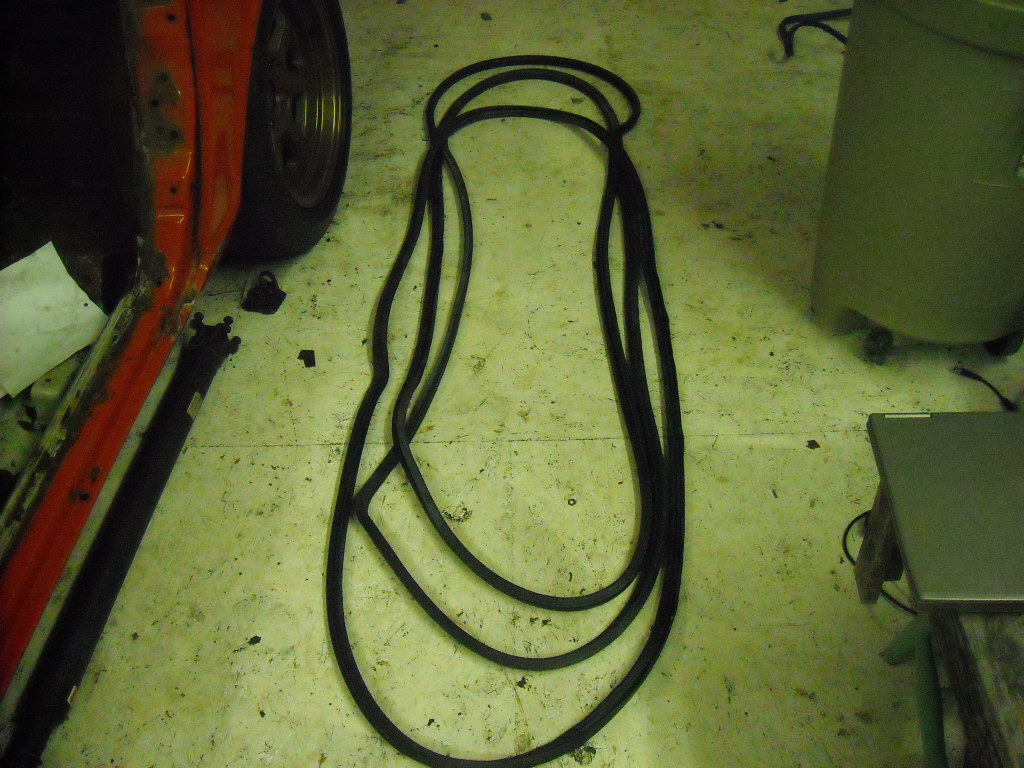
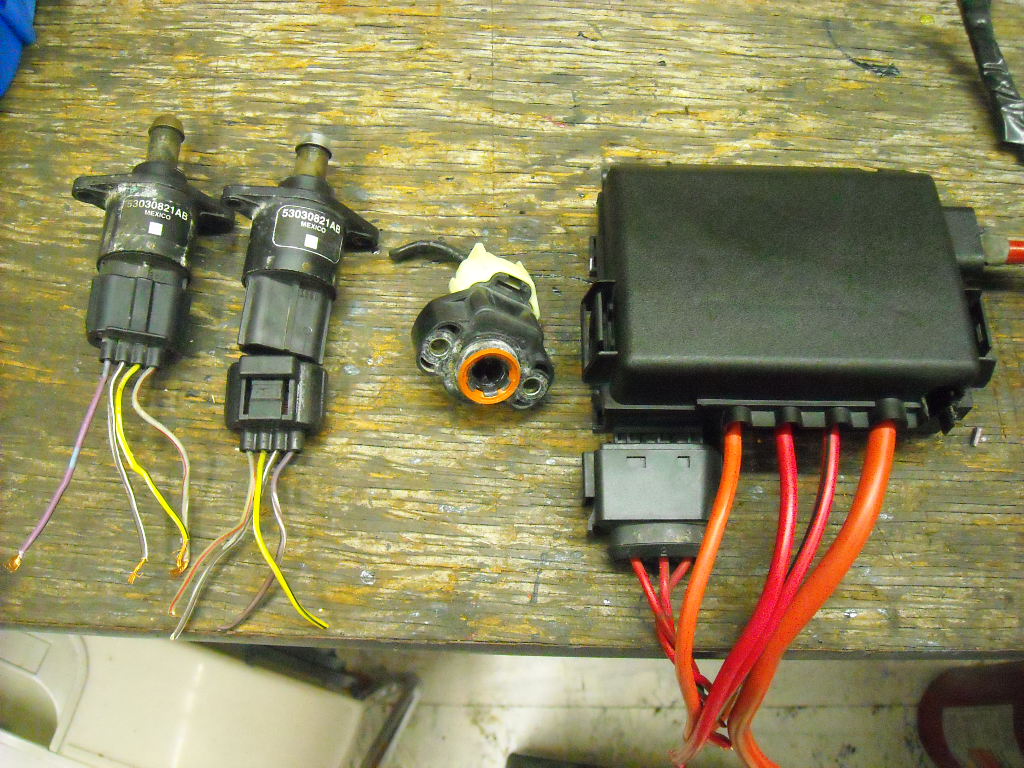
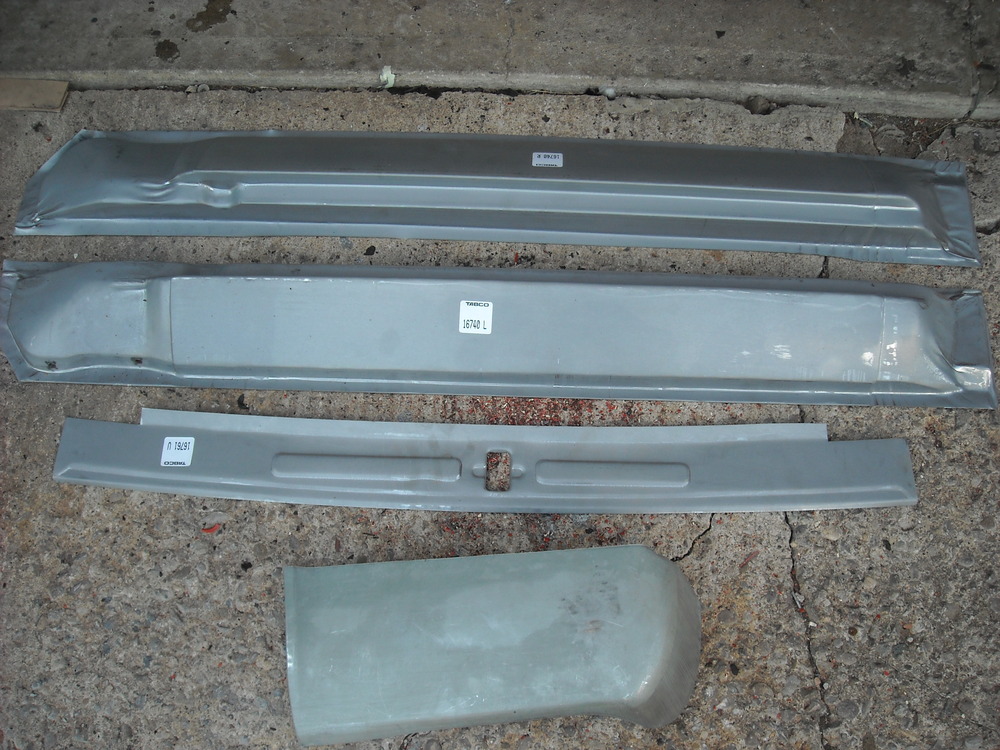
Chas, I think I see what you are saying so I have ordered the TTT lowered tie-rods, they should arrive late next week. I also re-installed the modified crossmember that has the lowered steering rack mounts, that way the only thing that will have changed in the steering/suspension geometry will be the height of the rack so the LCA's and the rack will be parallel again. I also modified the LCA anchor point so that will be there if needed. One of the best things about this build is all the new areas of study that are coming up, things I have only touched on before now require an in depth familiarity. The Tabco replacemnet panels came in the the other day, and headed off to the pick and pull to find a vacuum pump, didn't locate one but picked up 3 Kia Spotage door seals incase the new seals don't work, also a couple of Idle air control valves, a spare TPS reostat and a nice Audi power distribtion box. Also, most of the Megasquirt problems have finally been sorted out so now the engine test stand can be dismantled and I can start final test fitting with the engine/tranny in the car.


-
I never seen this approach before, interested to see how things work out. Have you thought about using one of the full dash covers as now that the original surface is gone?
-
Actually he just offered it to me, really great guy but I made sure he was well compensated for pulling my arse out of the fire. The stock bmw IAC valve has 3/4" fittings that plumb right into the ITB intake manifold and is an on/off valve and is very finicky even when it is working perfectly. Now that I'm moving to a stepper motor IAC valve, maybe it will be more forgiving for tapping into the vacuum. There is one small 1/8" vacuum port that I blocked off, it had a 4' tube that lead to the barometric sensor in the far corner of the M6 engine bay. MS has a builtin baro sensor, I don't know if 1/8" tube would be sufficient to supply vac for the brake booster. The best/worse way to test that would be at high speed, high revs with very little vacuum being produced and having to slam on the brakes to see if it passed the test.
-
I'm almost at the same conclusion but want to give the vinegar/epsom salts one more try to see if I can use all of the hard won success tips from John and Charles. That is if I ever get my power source back from some guy who borrowed it,
-
I don't know what is going on with the audio, sounds like a room full of sewing machines, it is just the stock exhaust system. DSCN0485.AVI So Matt says it's ready to go now, he wants me to get rid of the stock bmw idle air control valve and replace it with the stepper motor version from a jeep 4.0L. He says when I get the engine in the car he'll drive up and he can tune it while I drive him back to his shop. SO HAPPY! Thank you all for your help and suggestions.