


grannyknot
Free Member
-
Joined
-
Last visited
Everything posted by grannyknot
-

-
-
-
Hi Clay, welcome to the forum, I agree with ZedHead, that passenger side floor pan has been replaced but they didn't add the rails like they should have. Don't despair, it doesn't necessarily mean the car is junk or anything like that. You need to get the car up on jacks or a hoist and have a body man check it out throughly. The repair may have been done 20 yrs ago, it may have been done badly or maybe not. If you can post a lot more detailed pics of the the undercarriage and the inside of the car with carpets pulled up so we can see the metal underneath we may be able to give a much better idea of what has been done to it. There is a lot of very experienced guys here who are more then happy to give you a hand, don't despair. Chris
-
Thanks gents, I'll give that try when I get the car back in 2 weeks, having some paint chips and panel alignment done. Chris
-
Jim, I think heard about those belts from you, been using them for 3 yrs, they're great.
-
The alternator is a 3 wire GM unit, 140amp, internally regulated. Not sure how long it's being doing this, I had it rebuilt 4 yrs ago and tested it after I installed it and it was fine then. The ammeter reads dead center of the gauge most of the time and the needle only moves to the + side a bit when when I turn something on like the the blower or headlights. I only checked it yesterday because I'm trying to figure out a tach problem. I have Zsonthebrain's diode fix installed,(the white cap from MSA) also Dave's recommended 8ga wire from the positive output on the alt. to the starter, the unit is well grounded with a dedicated grounding wire. All I can think to do is pull it and take it to a rebuild shop to be tested.
-
Even with sense and field wire disconnected the alt is still putting out 16.8v Blown regulator?
-
Maybe I have the sense wire mixed up and the alt thinks the battery is flat. I hate electricals.
-
That's correct, hard line goes from the wheel cylinder at the bottom backing plate to the top of the backing plate, flexible SS line connects to it, SS line connects to hard line on the body of the car. Make sure when you tighten up the second fitting on the SS line that the line is not twisted or looped and bent away from the tire. If the SS line has been measured properly it should give you a good amount of slack at full droop but not enough to interfere at full bounce. Chris
-
Jean, I can't say for sure with out some measurements but that flywheel will probably take a standard clutch kit, but first off you need to take the fly wheel to a shop and see if there is enough meat left on it so that it can be turned flat again, you can't use it the way it is. At least from the photo it looks grooved.
-
I checked my alternator while the engine was running and it's putting out 16.8 v at the alternator and the battery, that's way to high isn't it? Thanks, Chris
-
CO, I had 1st gen. Miata seats in my TR6 and as you say they looked the part and were just okay for comfort. The speakers in the headrest were fun but I wouldn't do them again, I have spent some hrs in my shop sitting in the 350z seats reading when I bashed up my foot and could work for a few days. Very comfy.
Where is Blue? I emailed privately but no answer.
This should cover everything,http://s160.photobucket.com/user/psanders240/library/BSR-260Z-IMSA?sort=3&page=1 This is also one of John's many greatest hits, http://forums.hybridz.org/topic/91330-240z-chassis-prep-reinforcements/
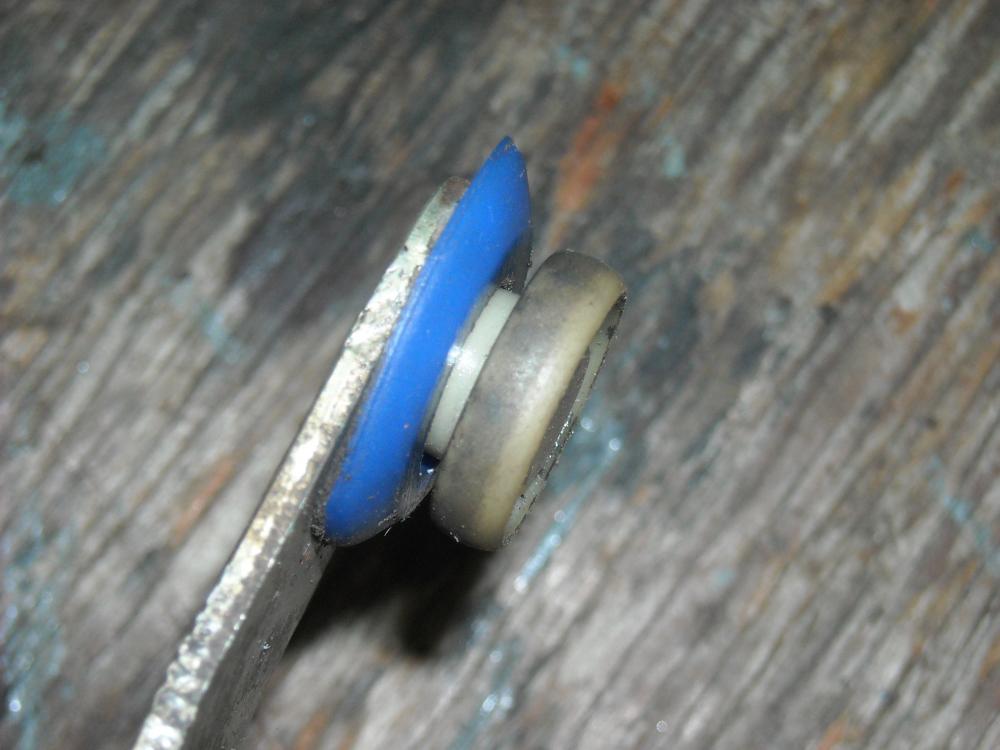
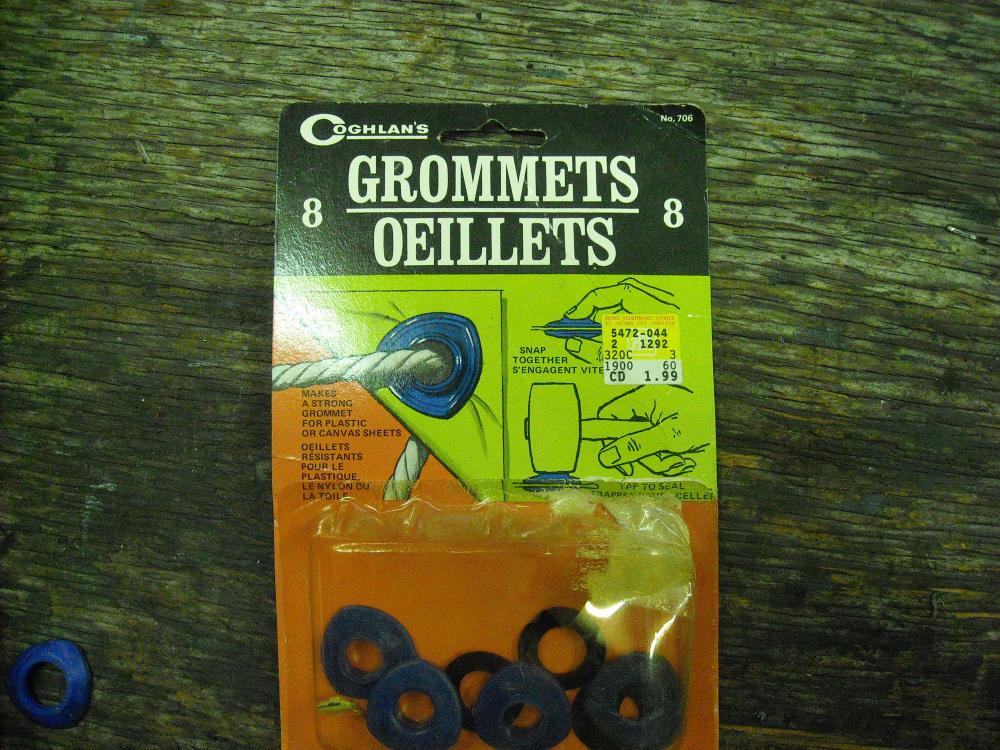
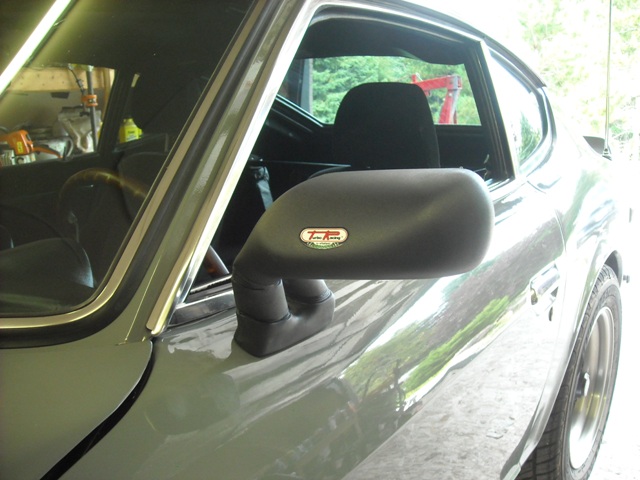
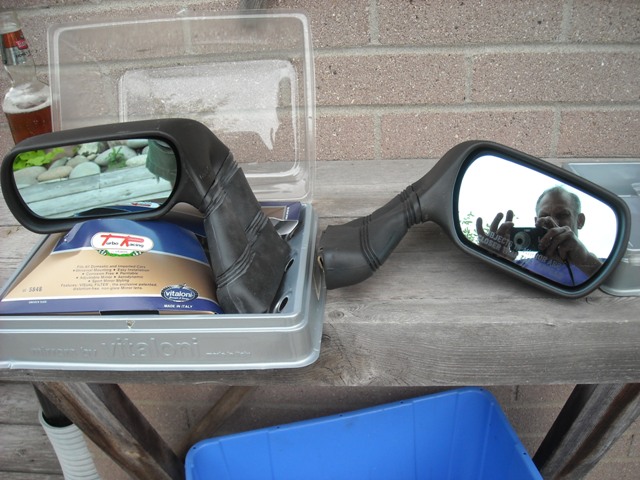
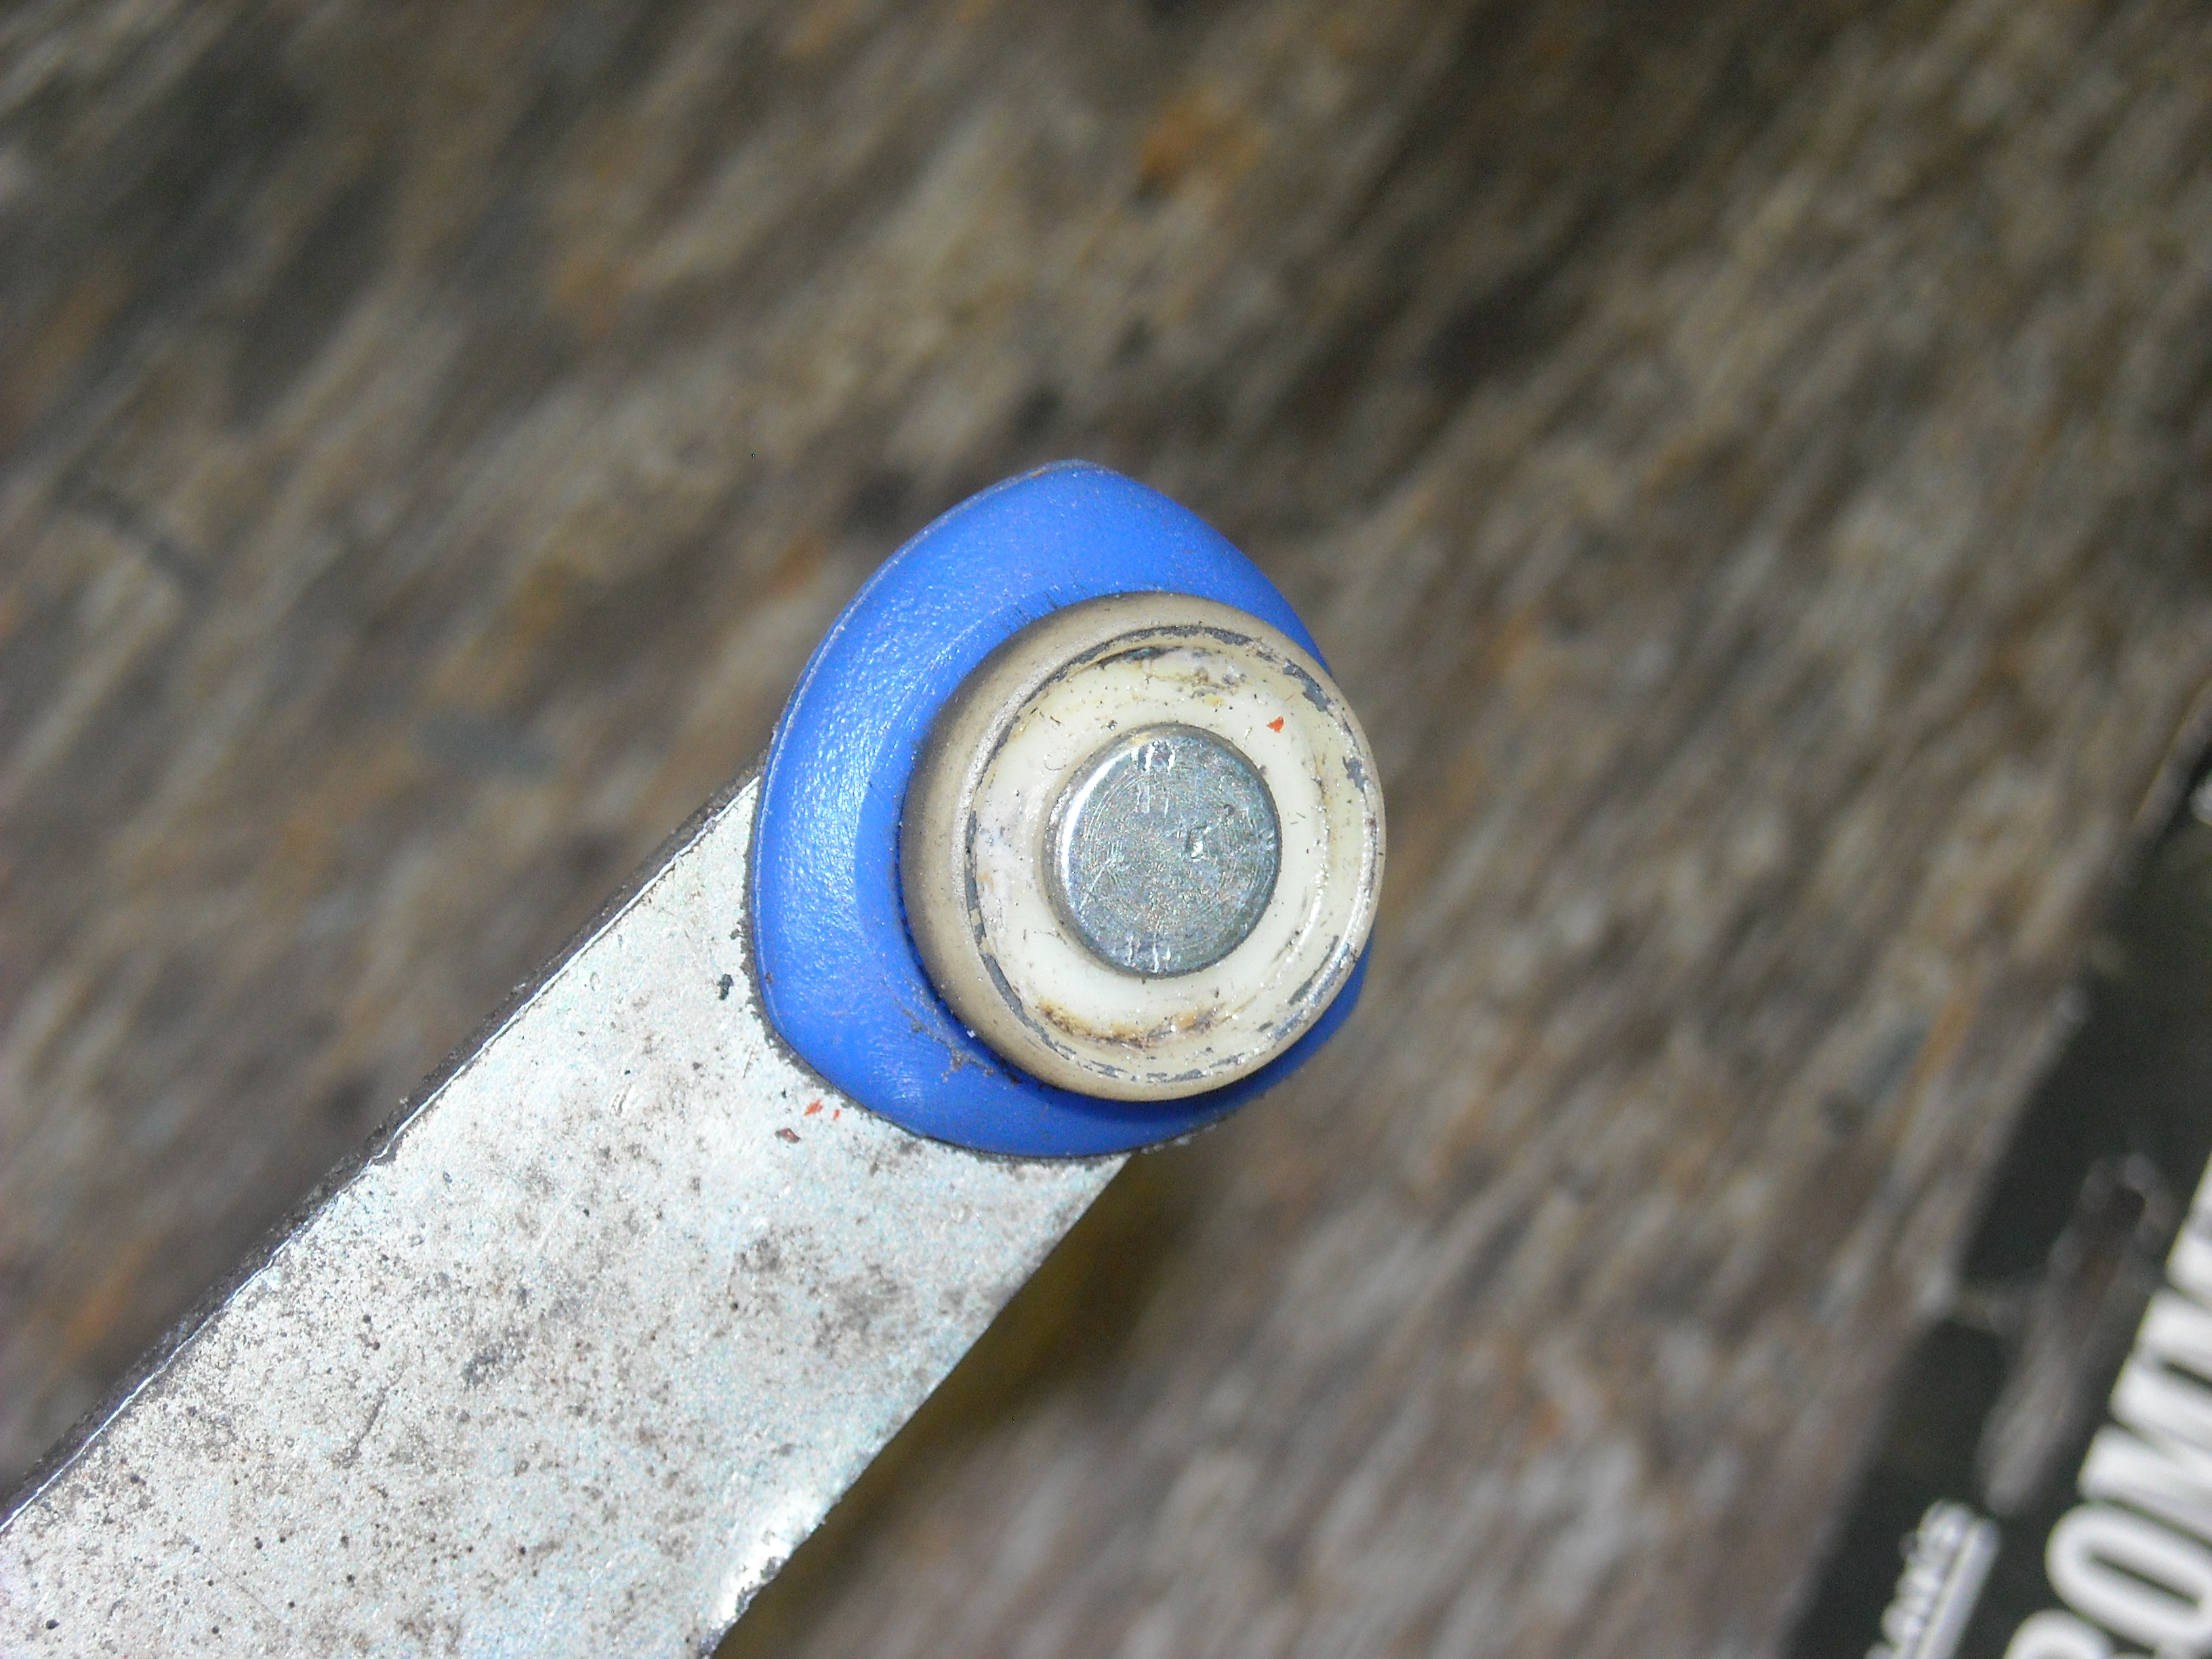
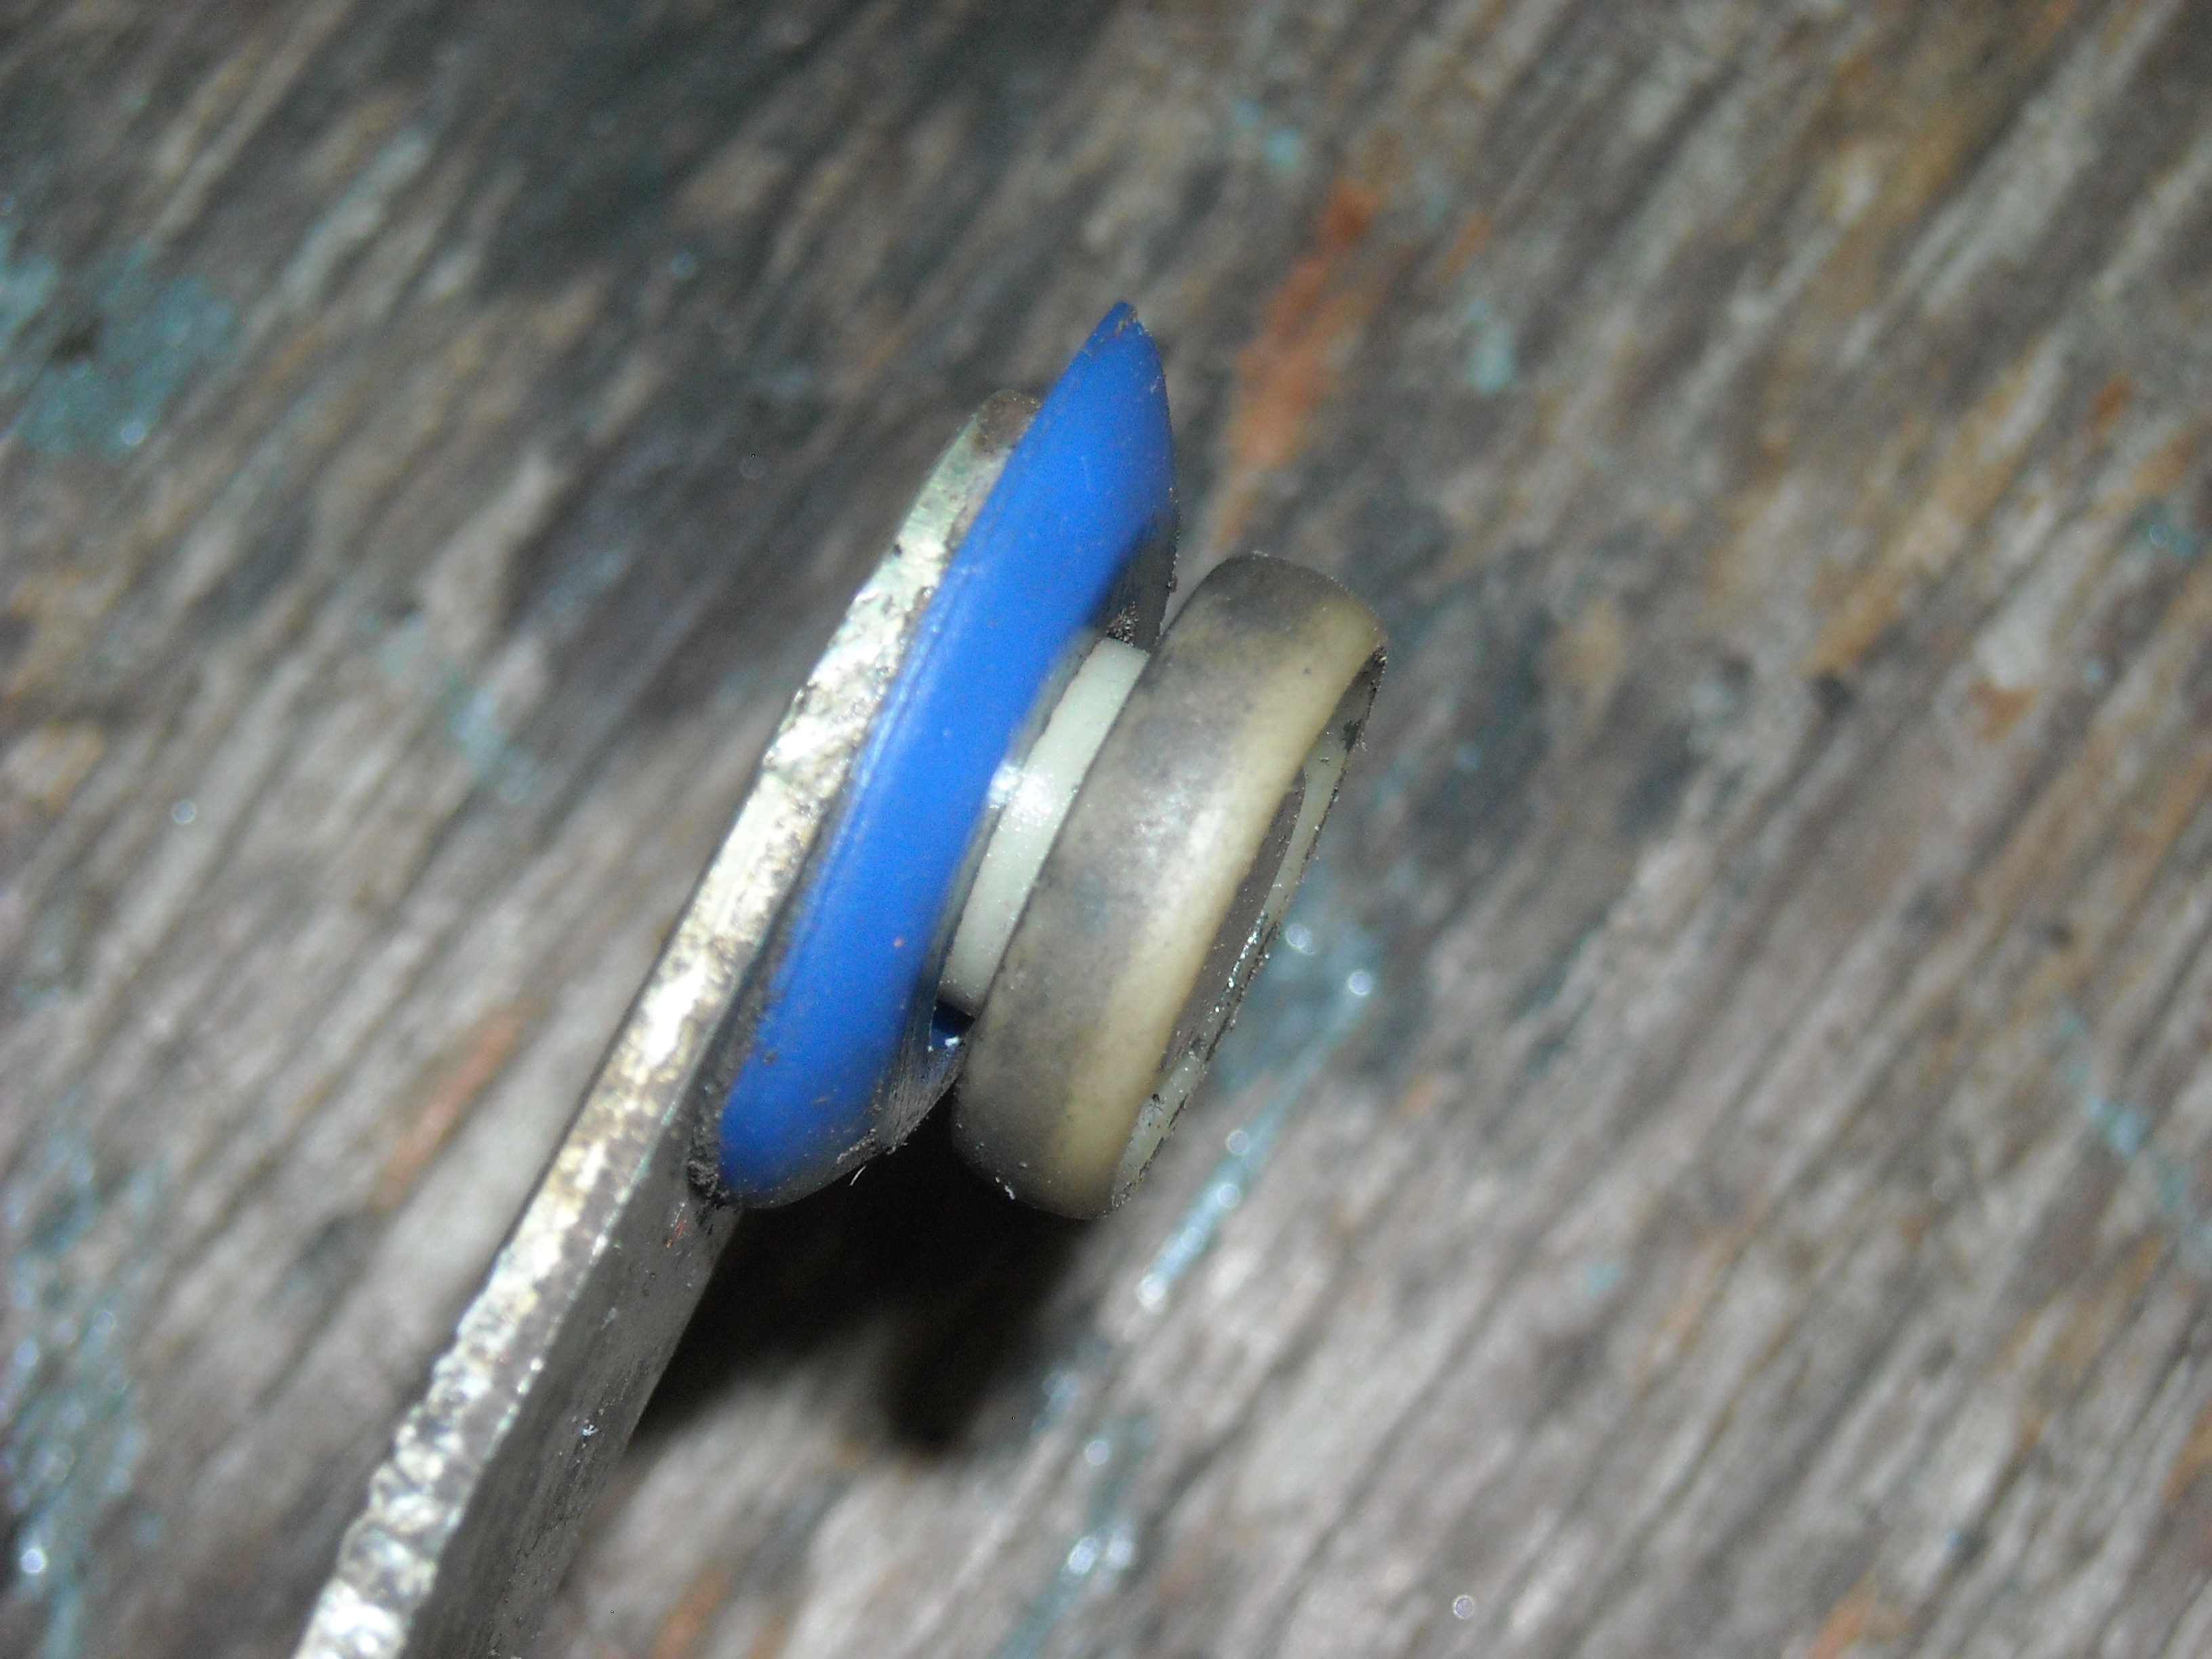
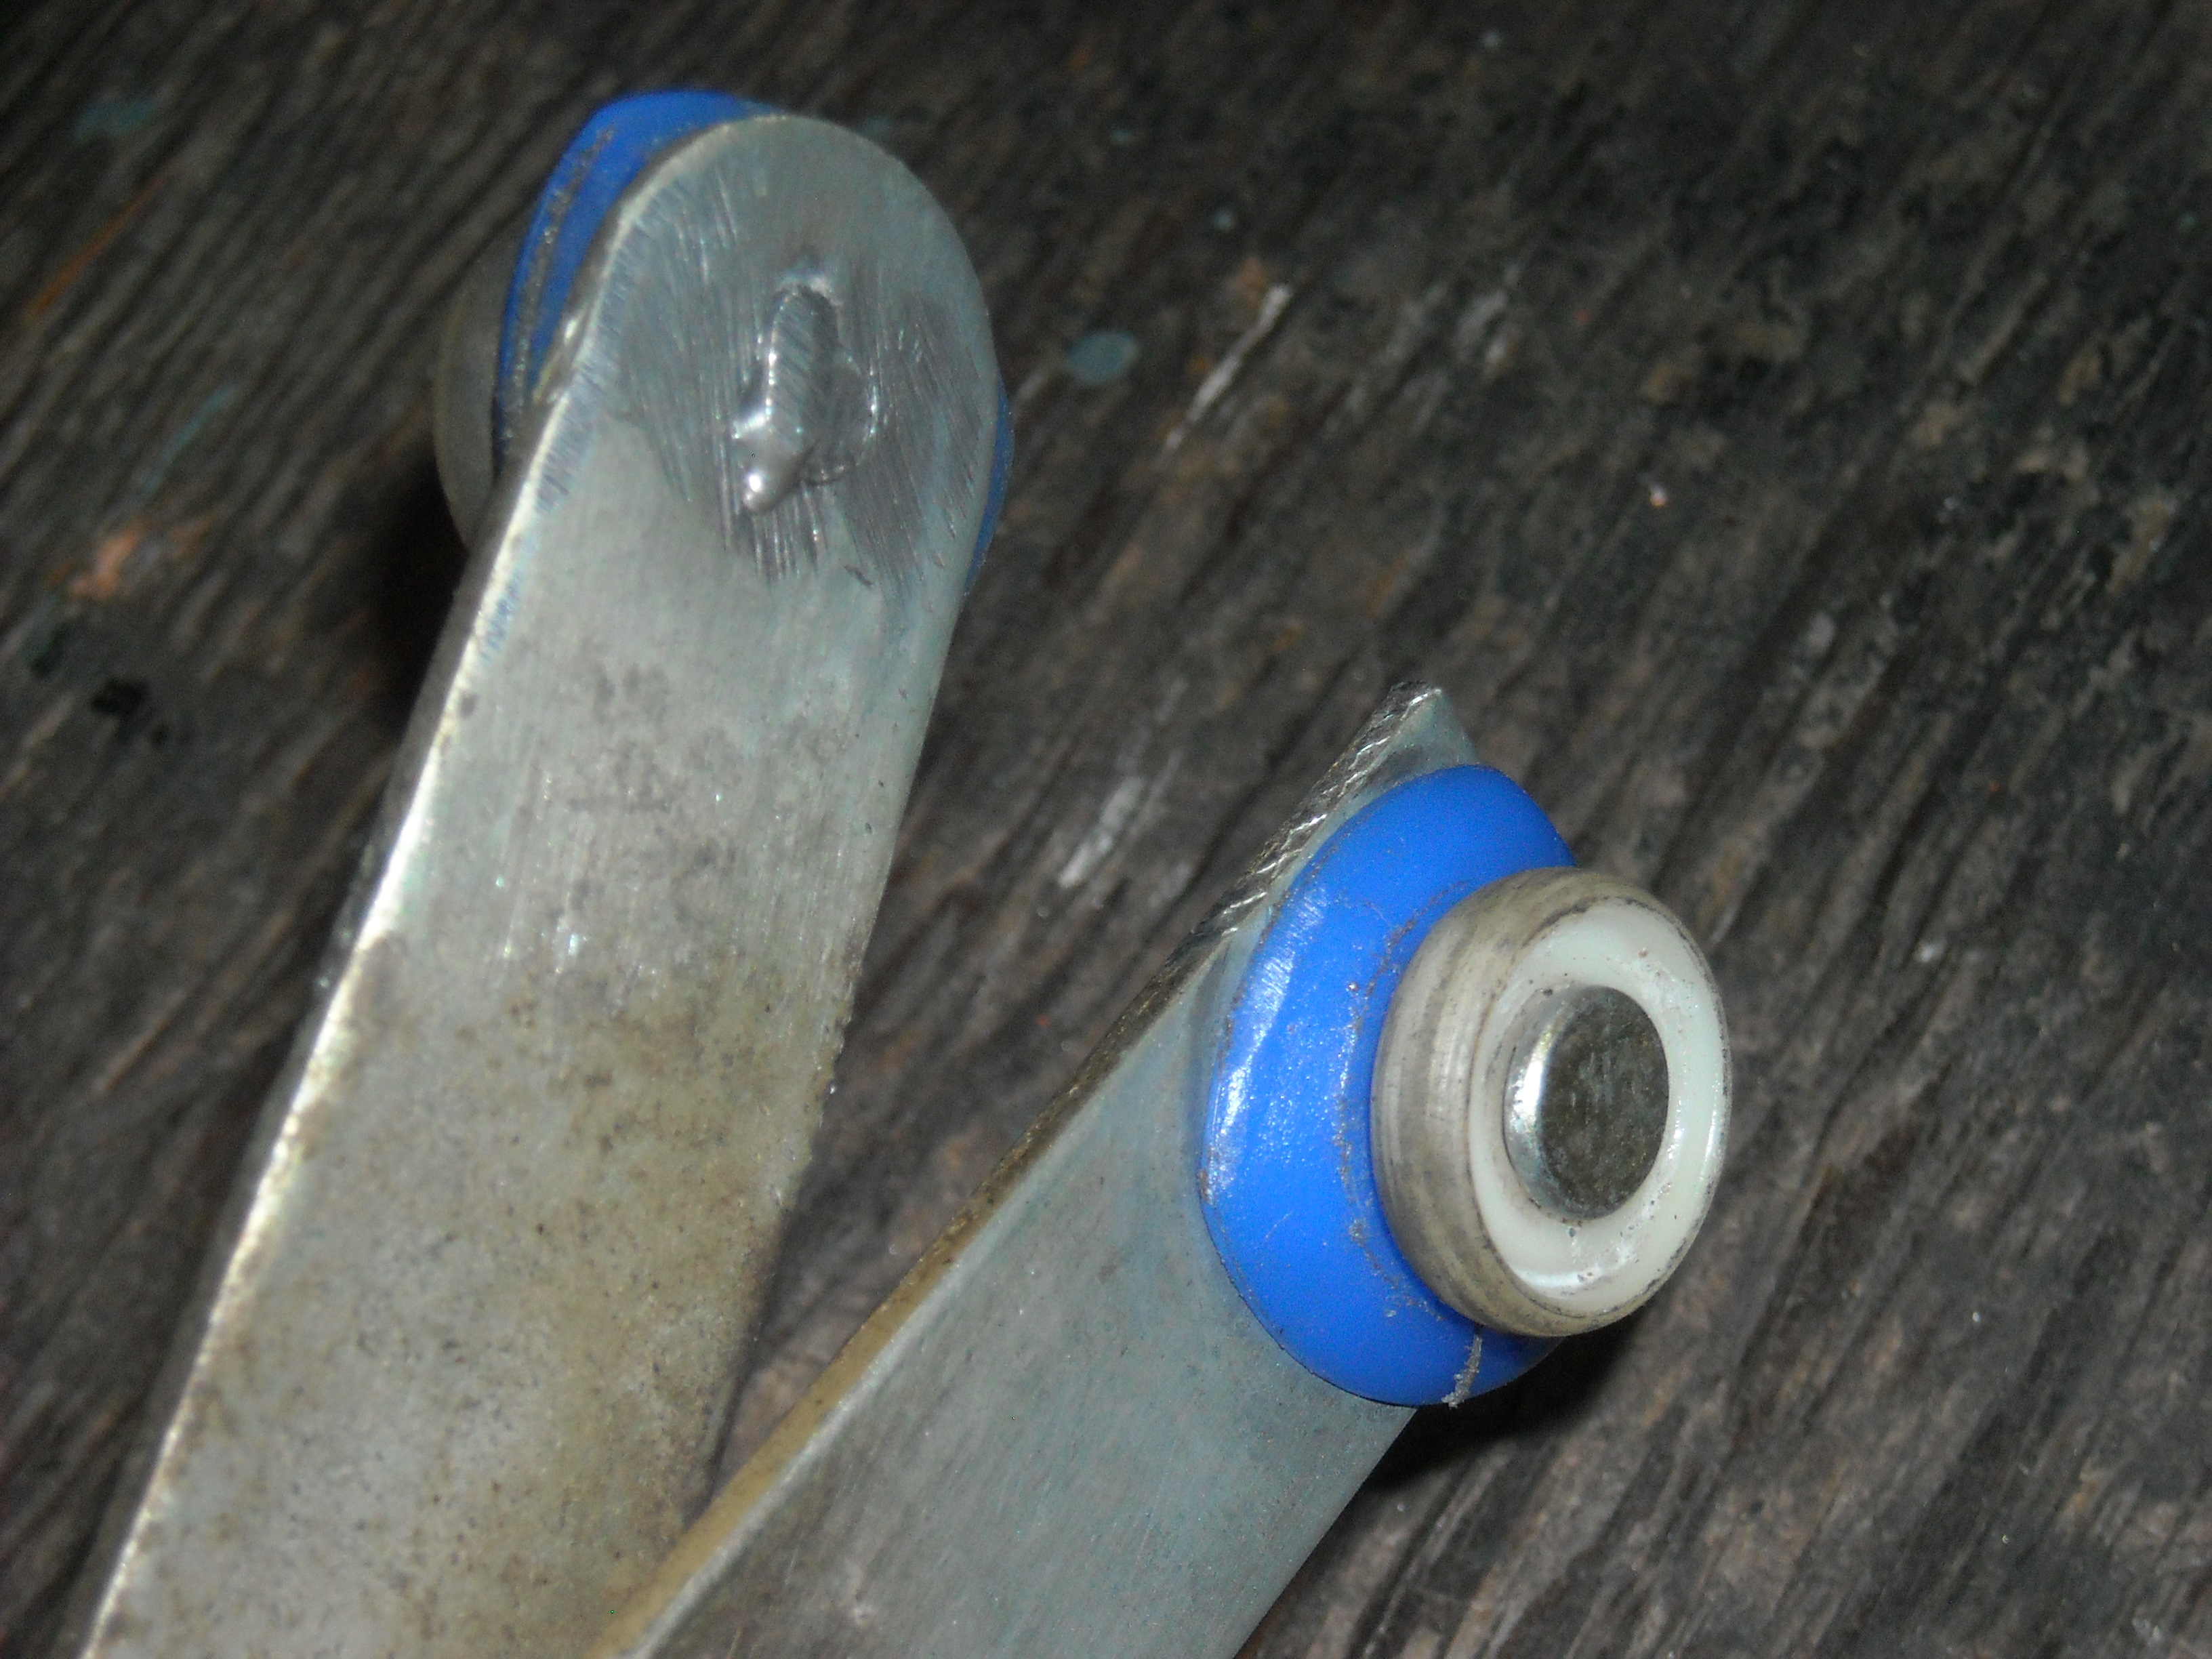
The Canadians here have access to Princess Auto that sell the grommets that 240Ziggy used for his fix, so I went out and found some very common camping tarp grommets to see if they would work as well. I had to put the conical half on the belt sander to remove a 1/16" from both sides so it would be the right thickness but that is all. The spacing between the blue grommet and the white nylon wheel is about what you need to get good action when it is in the channel rolling. If you have a Mig welder then all you need to do is a quick tack weld on the back and dunk it in water fast to cool it off and you can re use the existing stud. Lube it up with Lithium grease and good for another 40 yrs.


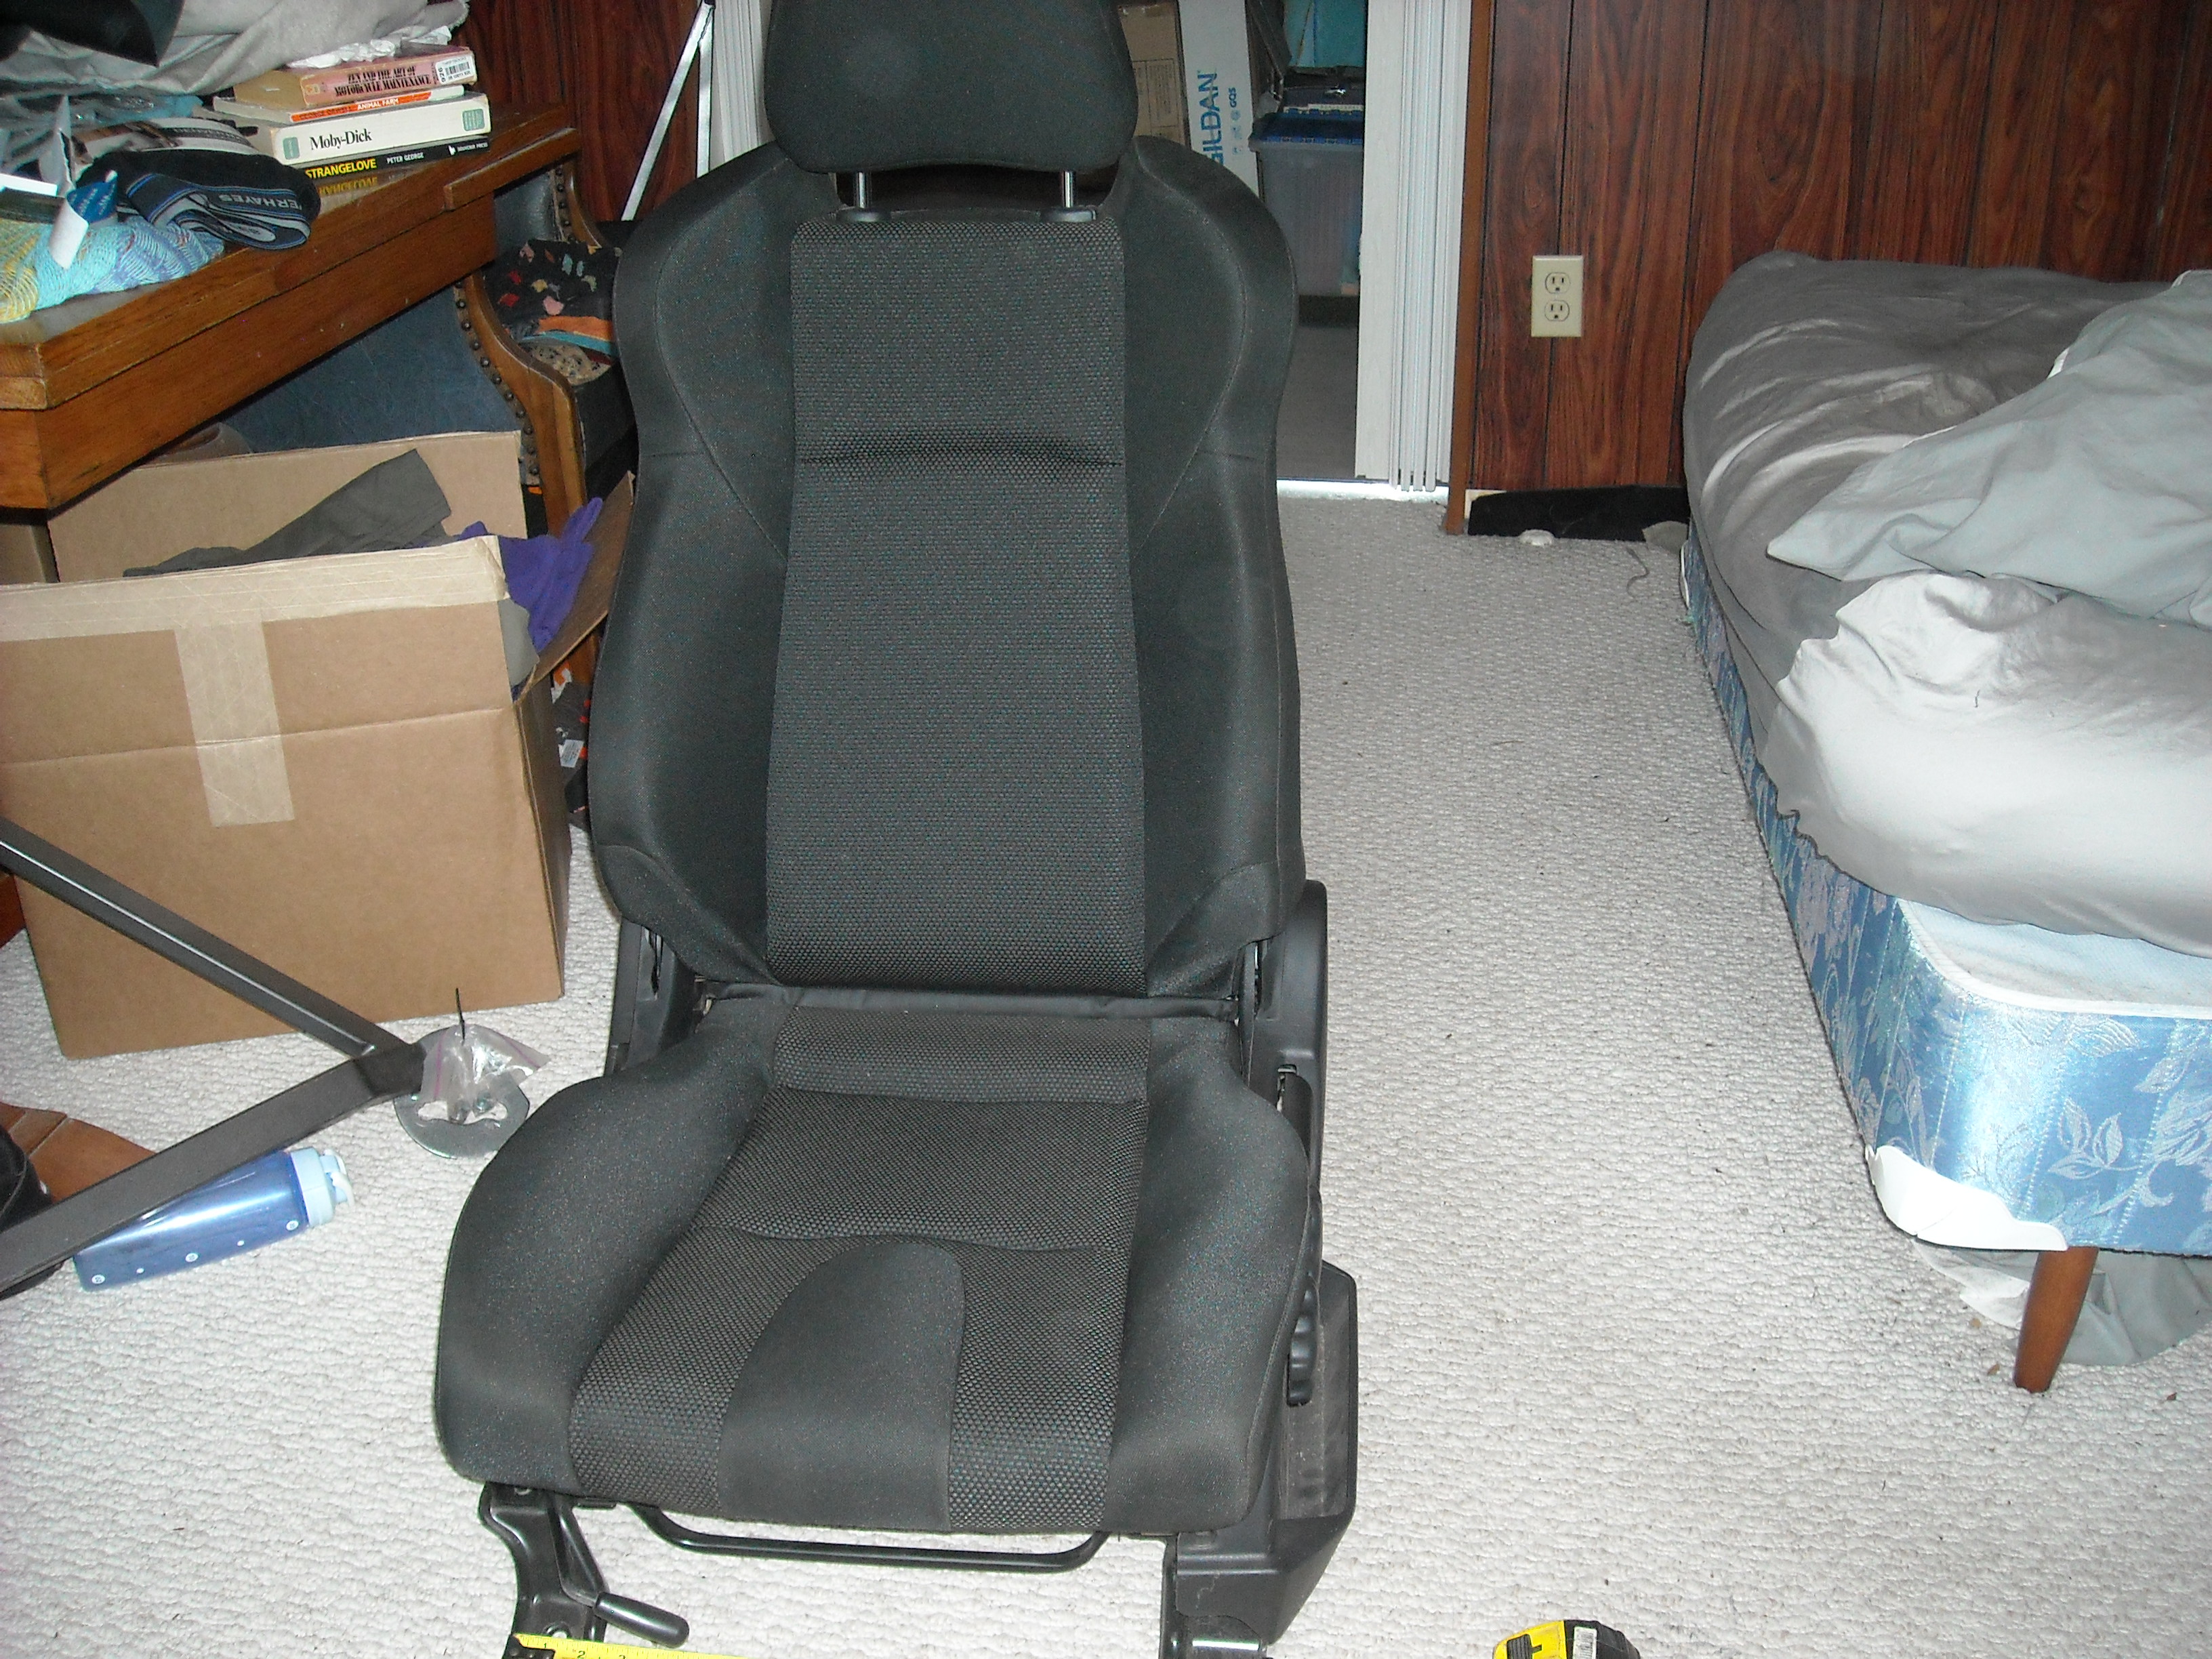
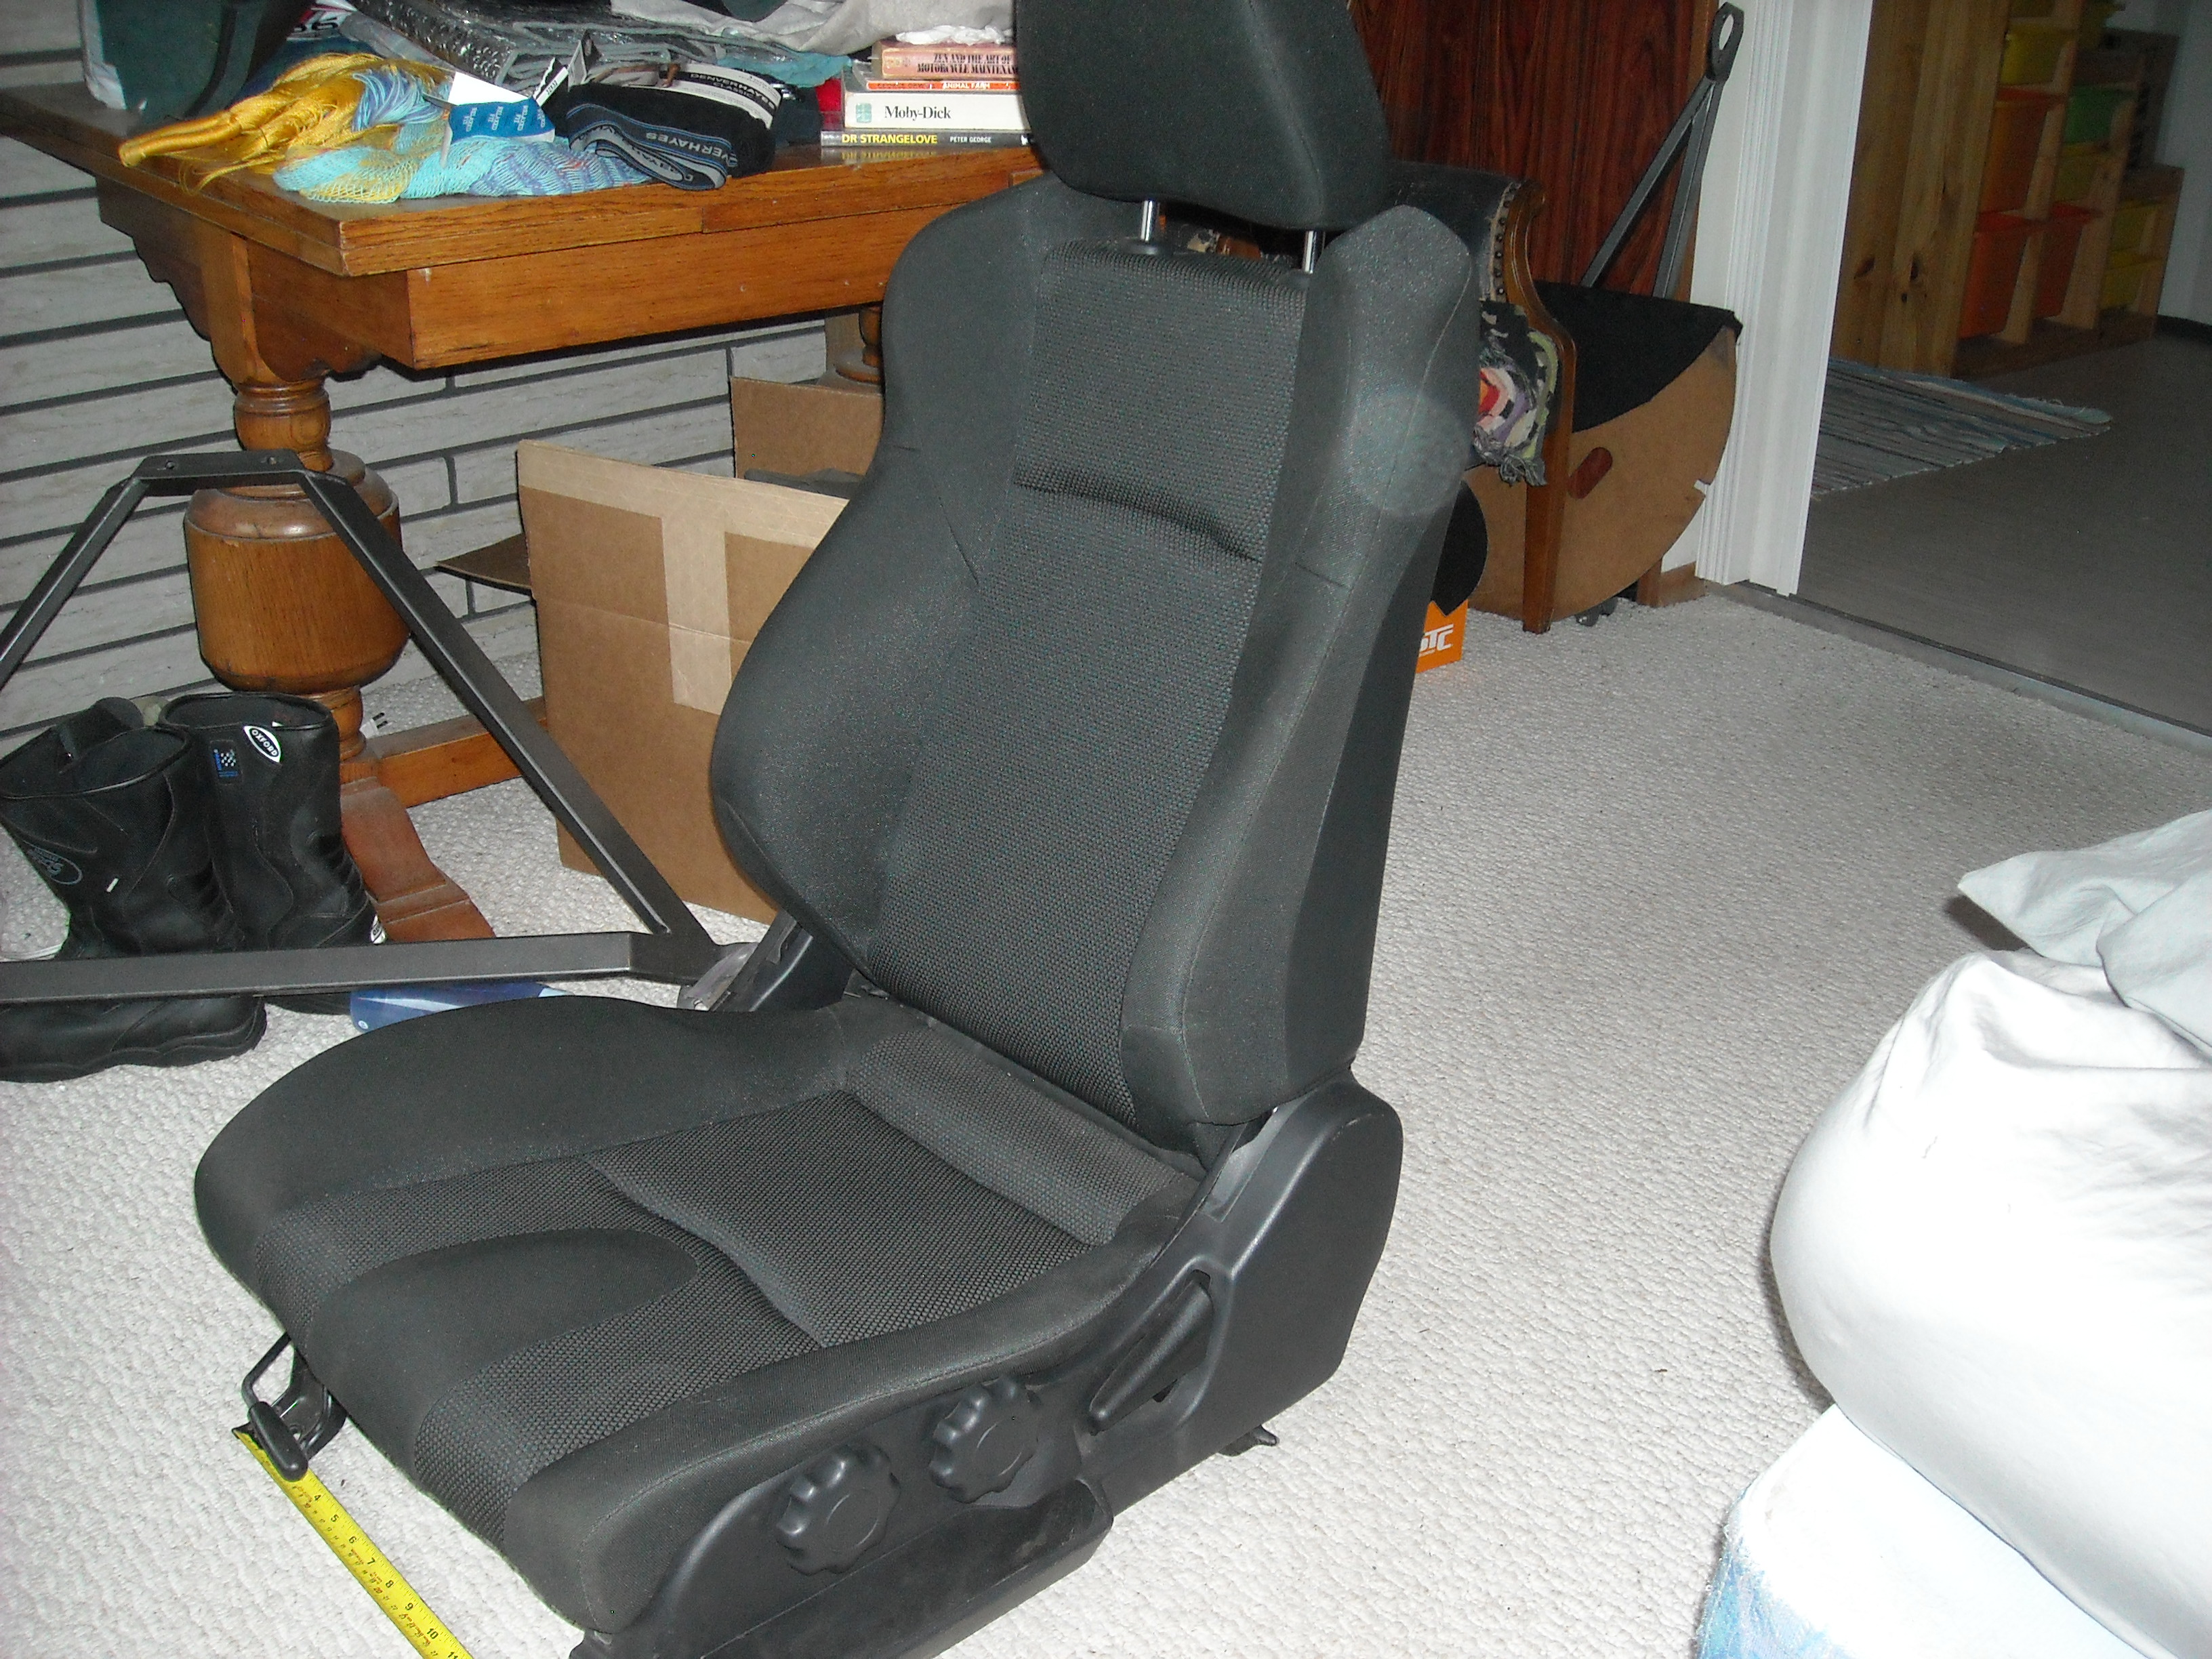
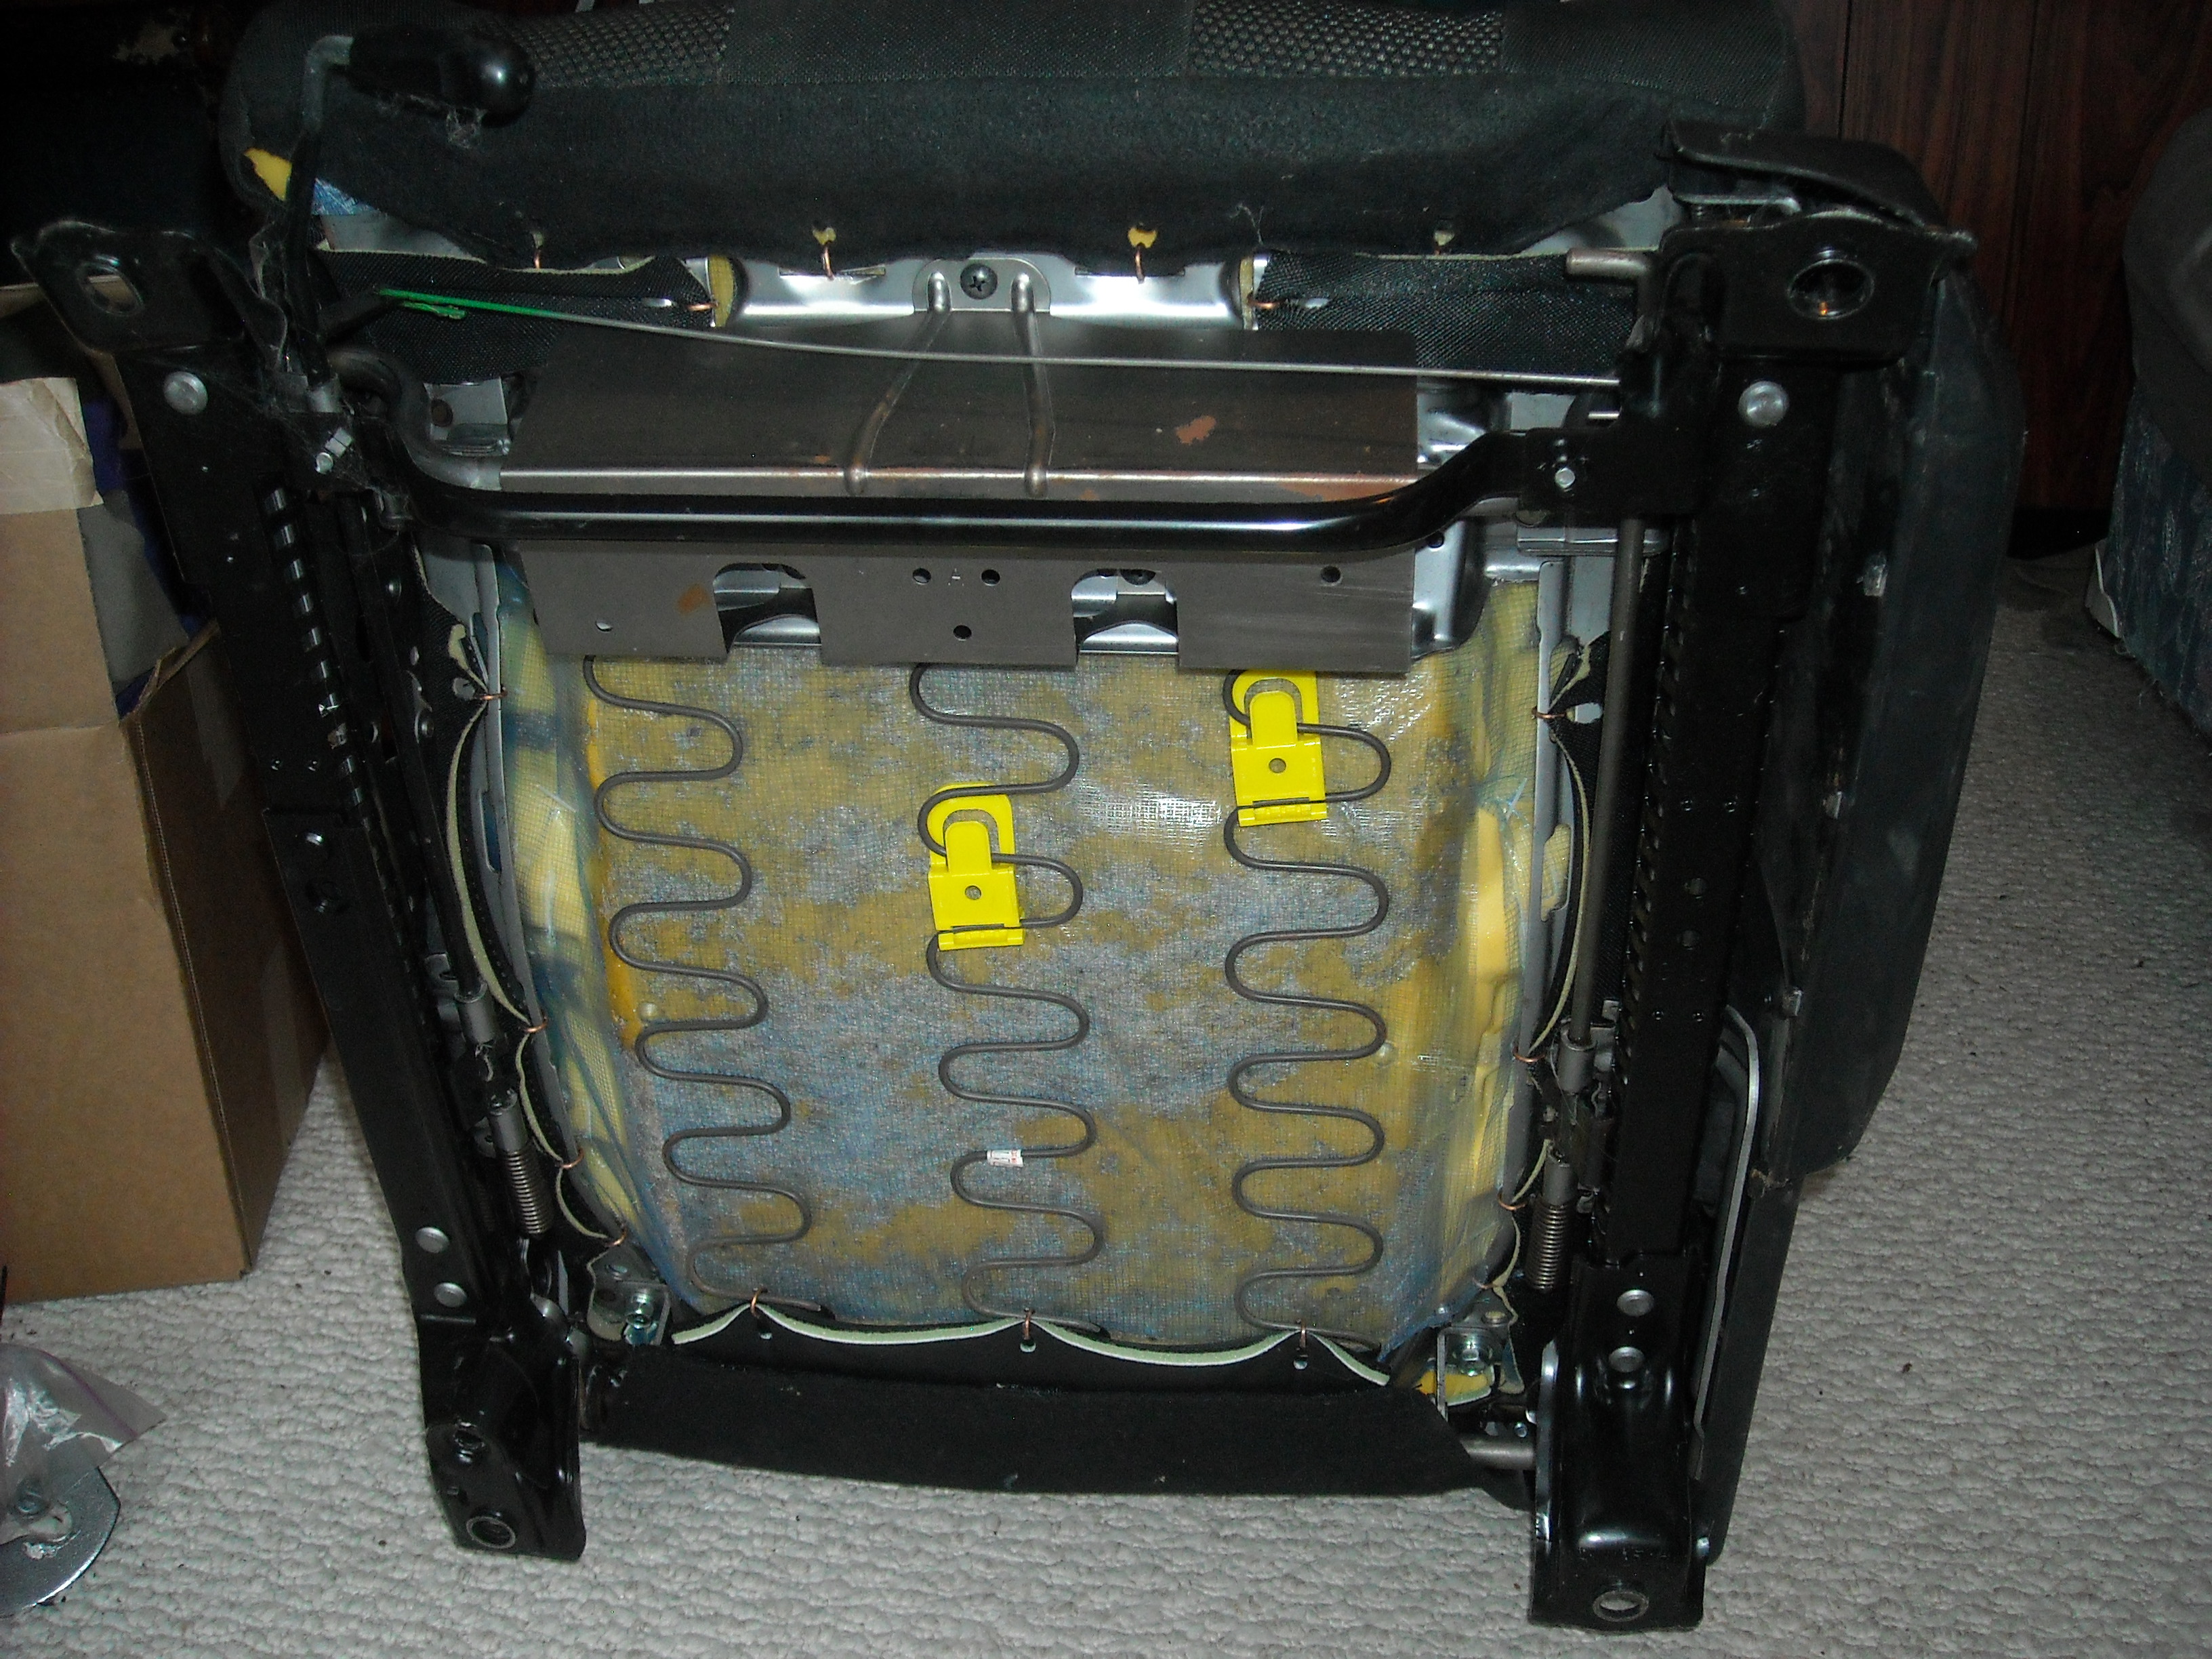
 I have be sitting on these for a year now and it will be another year and half before I get to them. These are Z350 seats, no heat, manual adjustment, I haven't started really looking at what it will take to adapt these to the Z yet but I don't think it will be too difficult. These measurements are for the bulk outside size but if you are willing to do away with some of the plastic trim around the base you could get the footprint smaller. width 20.75" length 24" ht. 39" It's a smart looking seat and very comfortable with lots of bolstering for cornering.
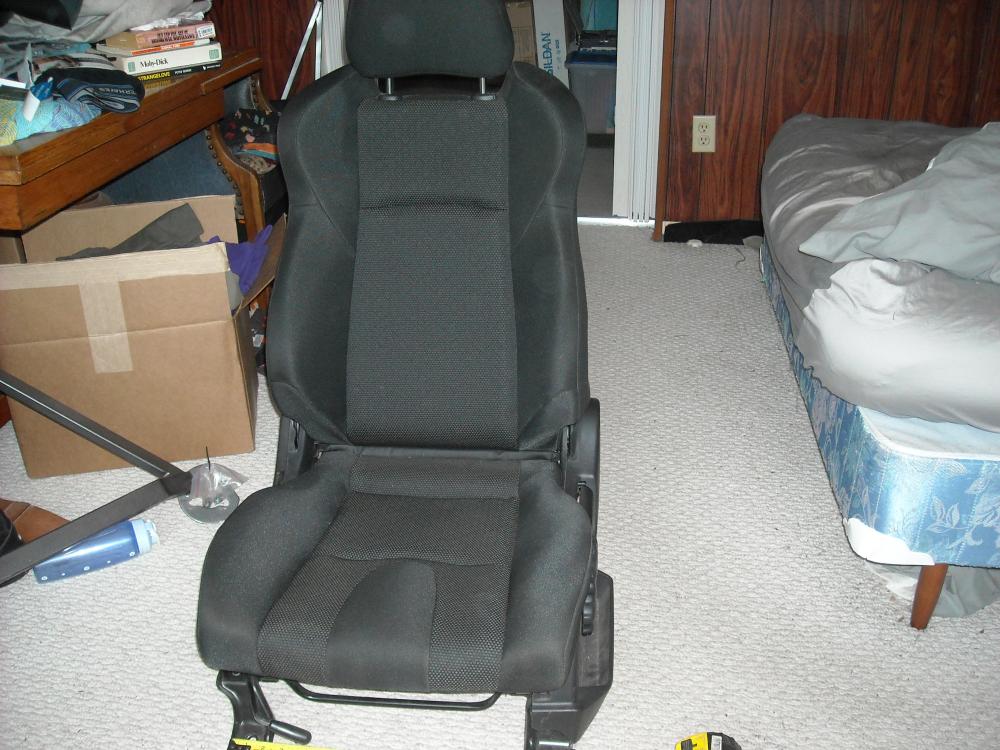

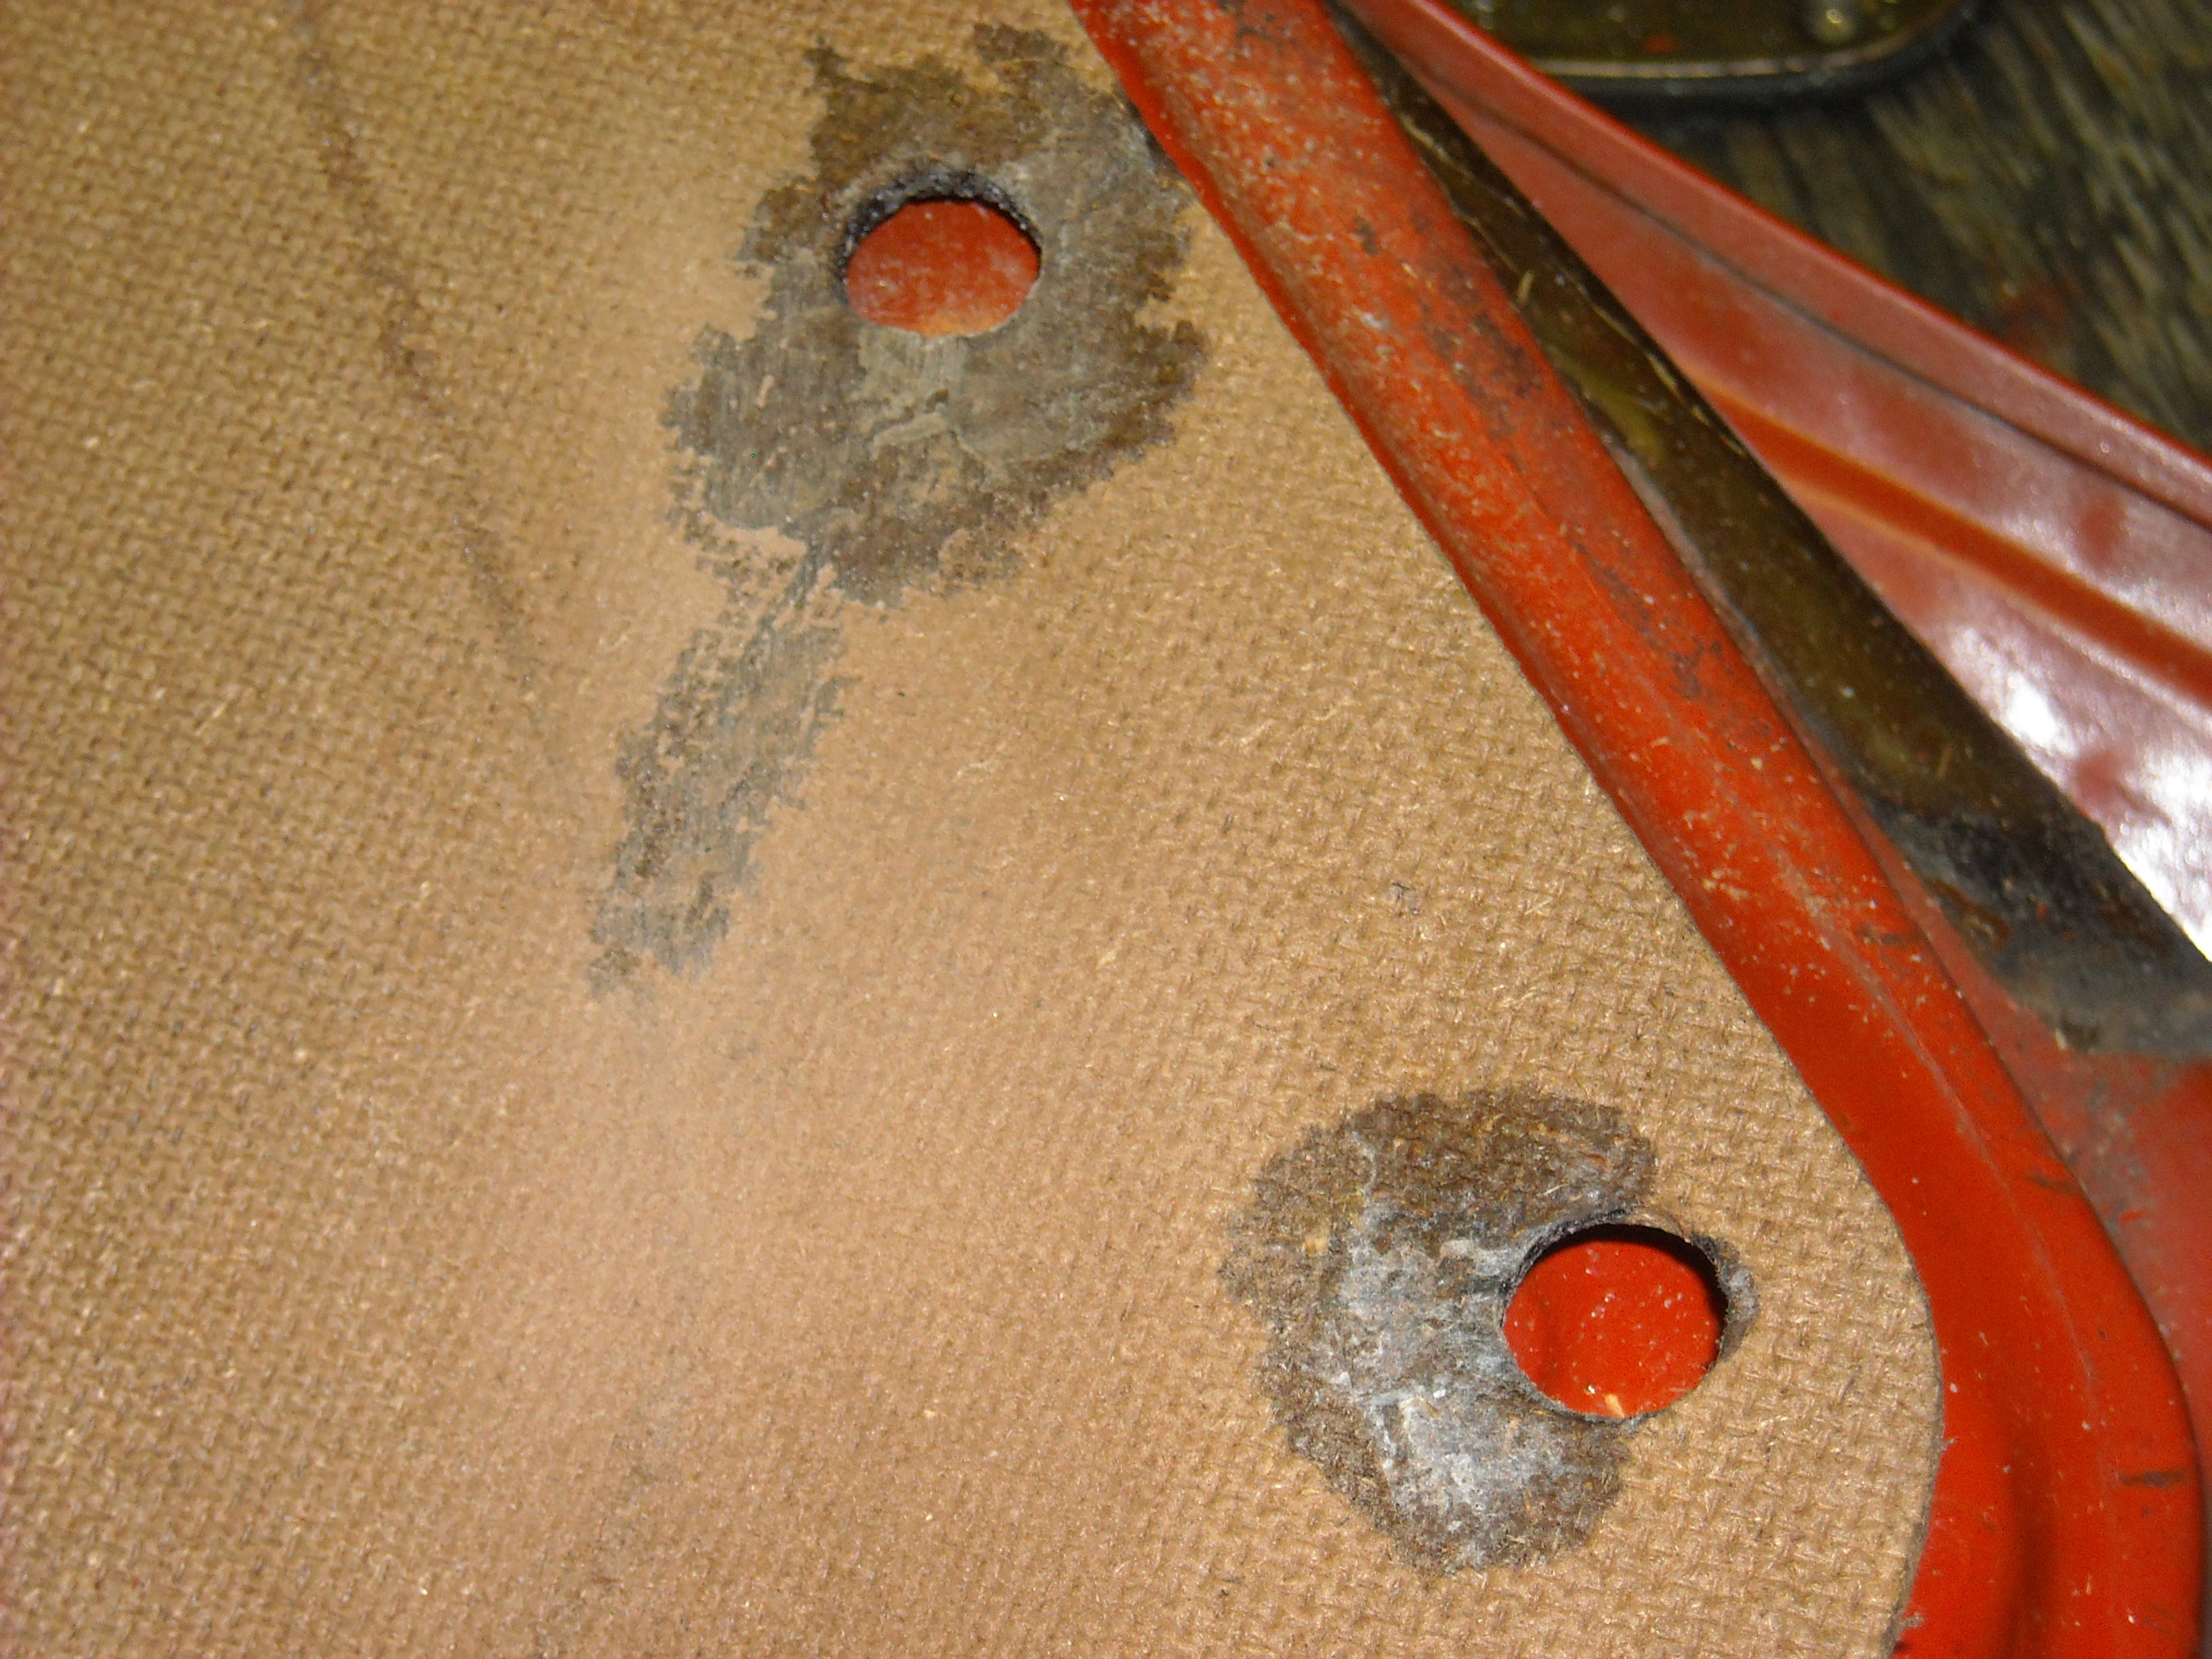
 So far I have only used the CA glue to reinforce areas where the panel board fibres are broken and torn but still intact, I haven't used it to fill voids because it doesn't seem that it would have much strength that way. I have purchased a gallon of 3M microspheres/microbaloons that I will be using to make my version of Lizard Skin heat/sound deadener for the cab of the car but the boat place I bought the fiberglass supplies from suggested to use some of the microspheres and resin to fill voids. It seems reasonable from what you say that I could also use the microspheres and CA to fill voids. I can also attest to the noxious fumes from the CA when heated, my shop is fairly cool, 55-65*F with low humidity which extends the working time with CA from 5 sec. to 2-3 minutes. Once I have everything clamped I hit the area with a hair dryer to set it up. You really need to do this at arms length, squinting with your T-shirt over your nose, the vapor plume only last a couple of seconds which is why I didn't bother with a mask but if you get in the plumes way it attacks the nose, eyes throat and lungs instantly. Of course the hair dyer is unnecessary if you have time to cool set it. Djwarner, just saw your post, yes I think I will give it a try.
Jarvo, I guess you have a 1.5 ohm coil and a ballast resistor? I have a 3 ohm coil and no resistor. Zed, do you know what the specs on that pot would need to be ? Thanks guys, Chris
Welcome aboard, looking forward to the pics. I'm not trying to discourage you from posting questions, not at all but there is an extensive archive of this forum that covers everything and can really help your re build move along. Pretty much any problem you will run into with these has been solved and a lot of them with a photographic essay showing you how to do it. GL, Chris
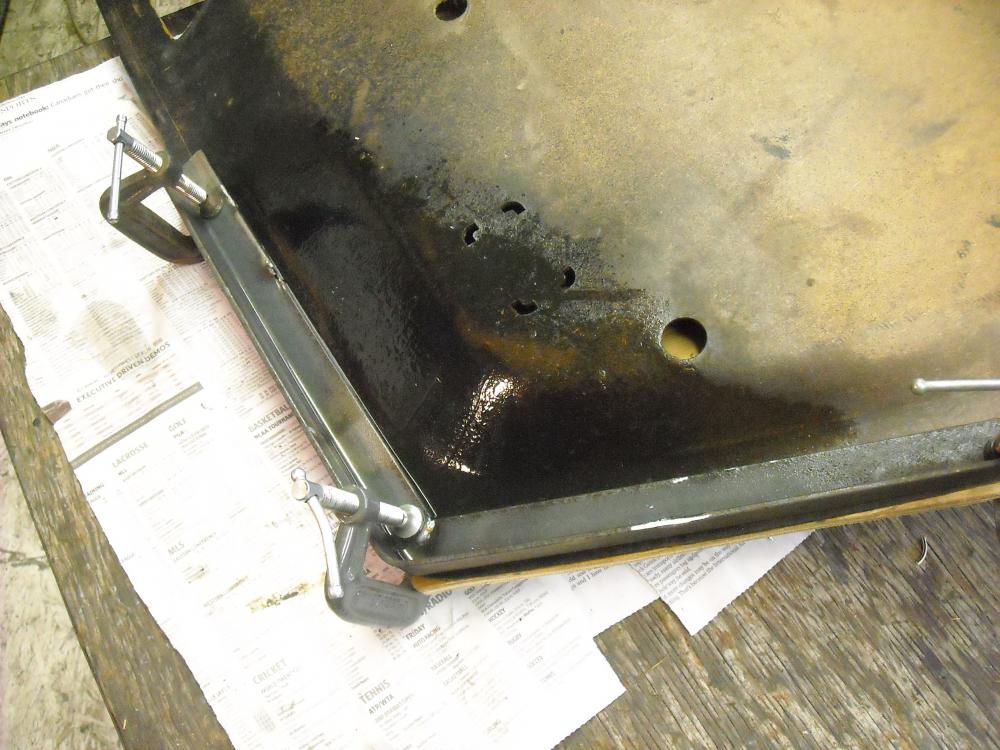
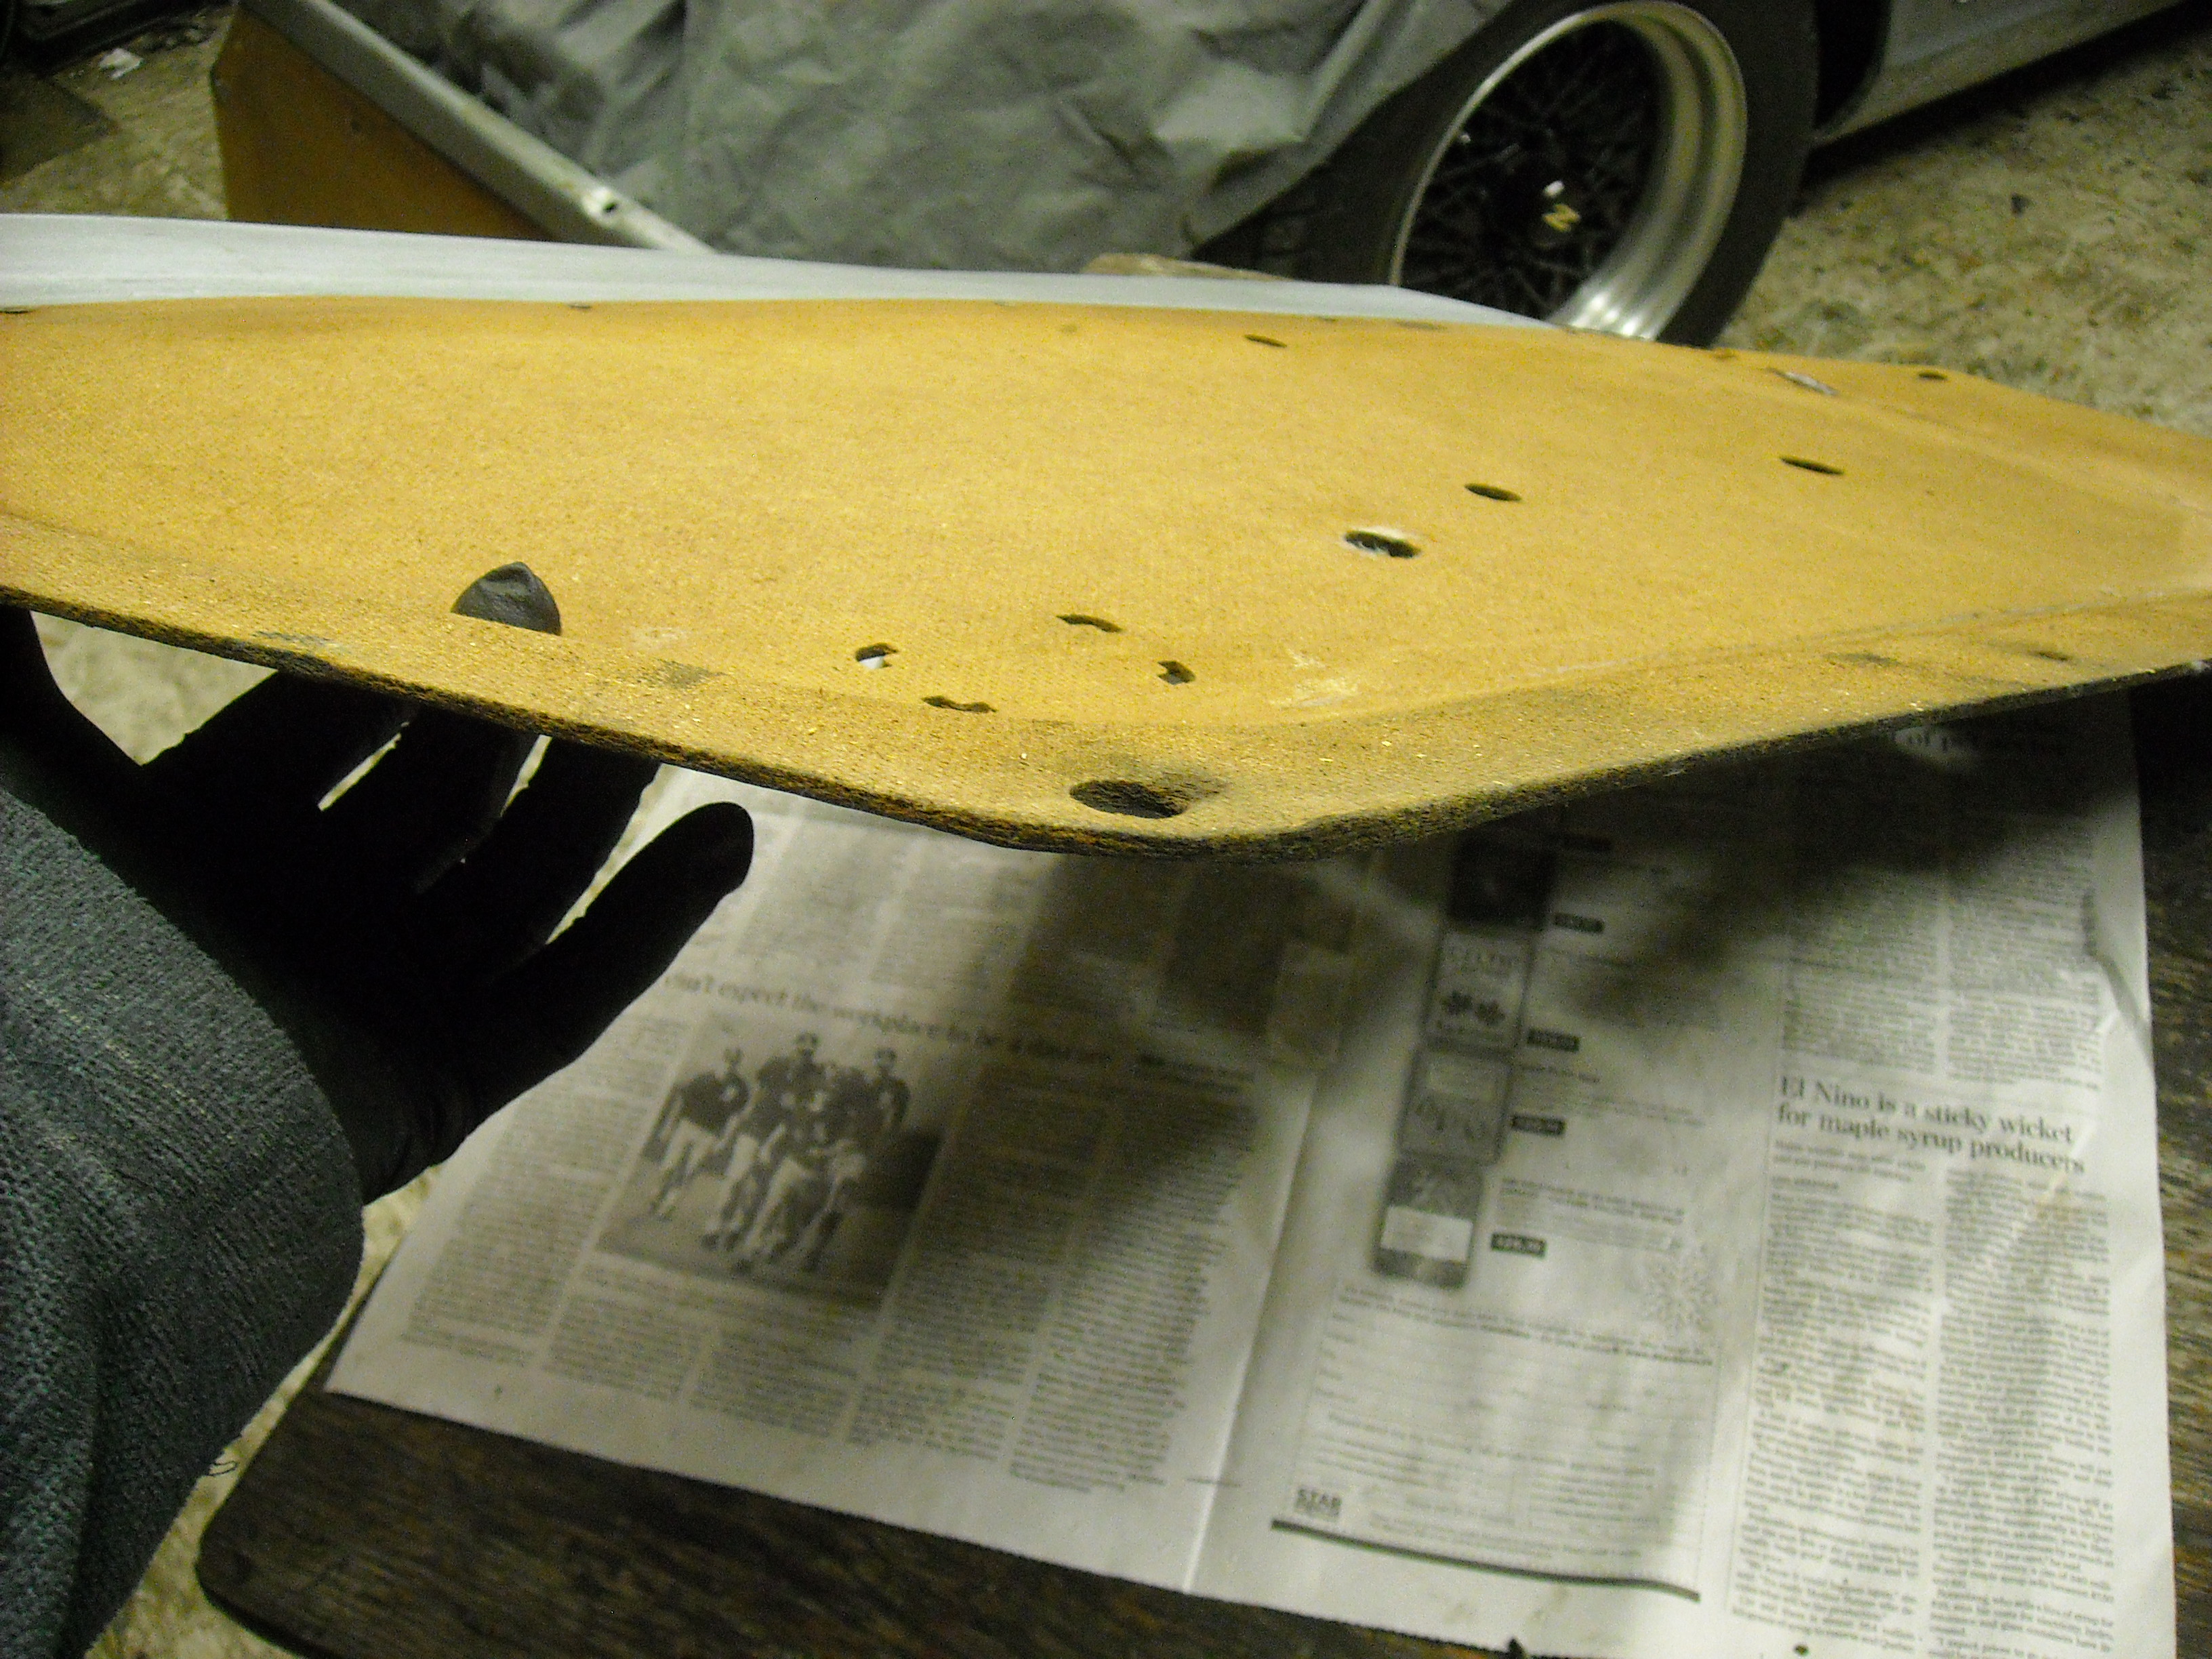
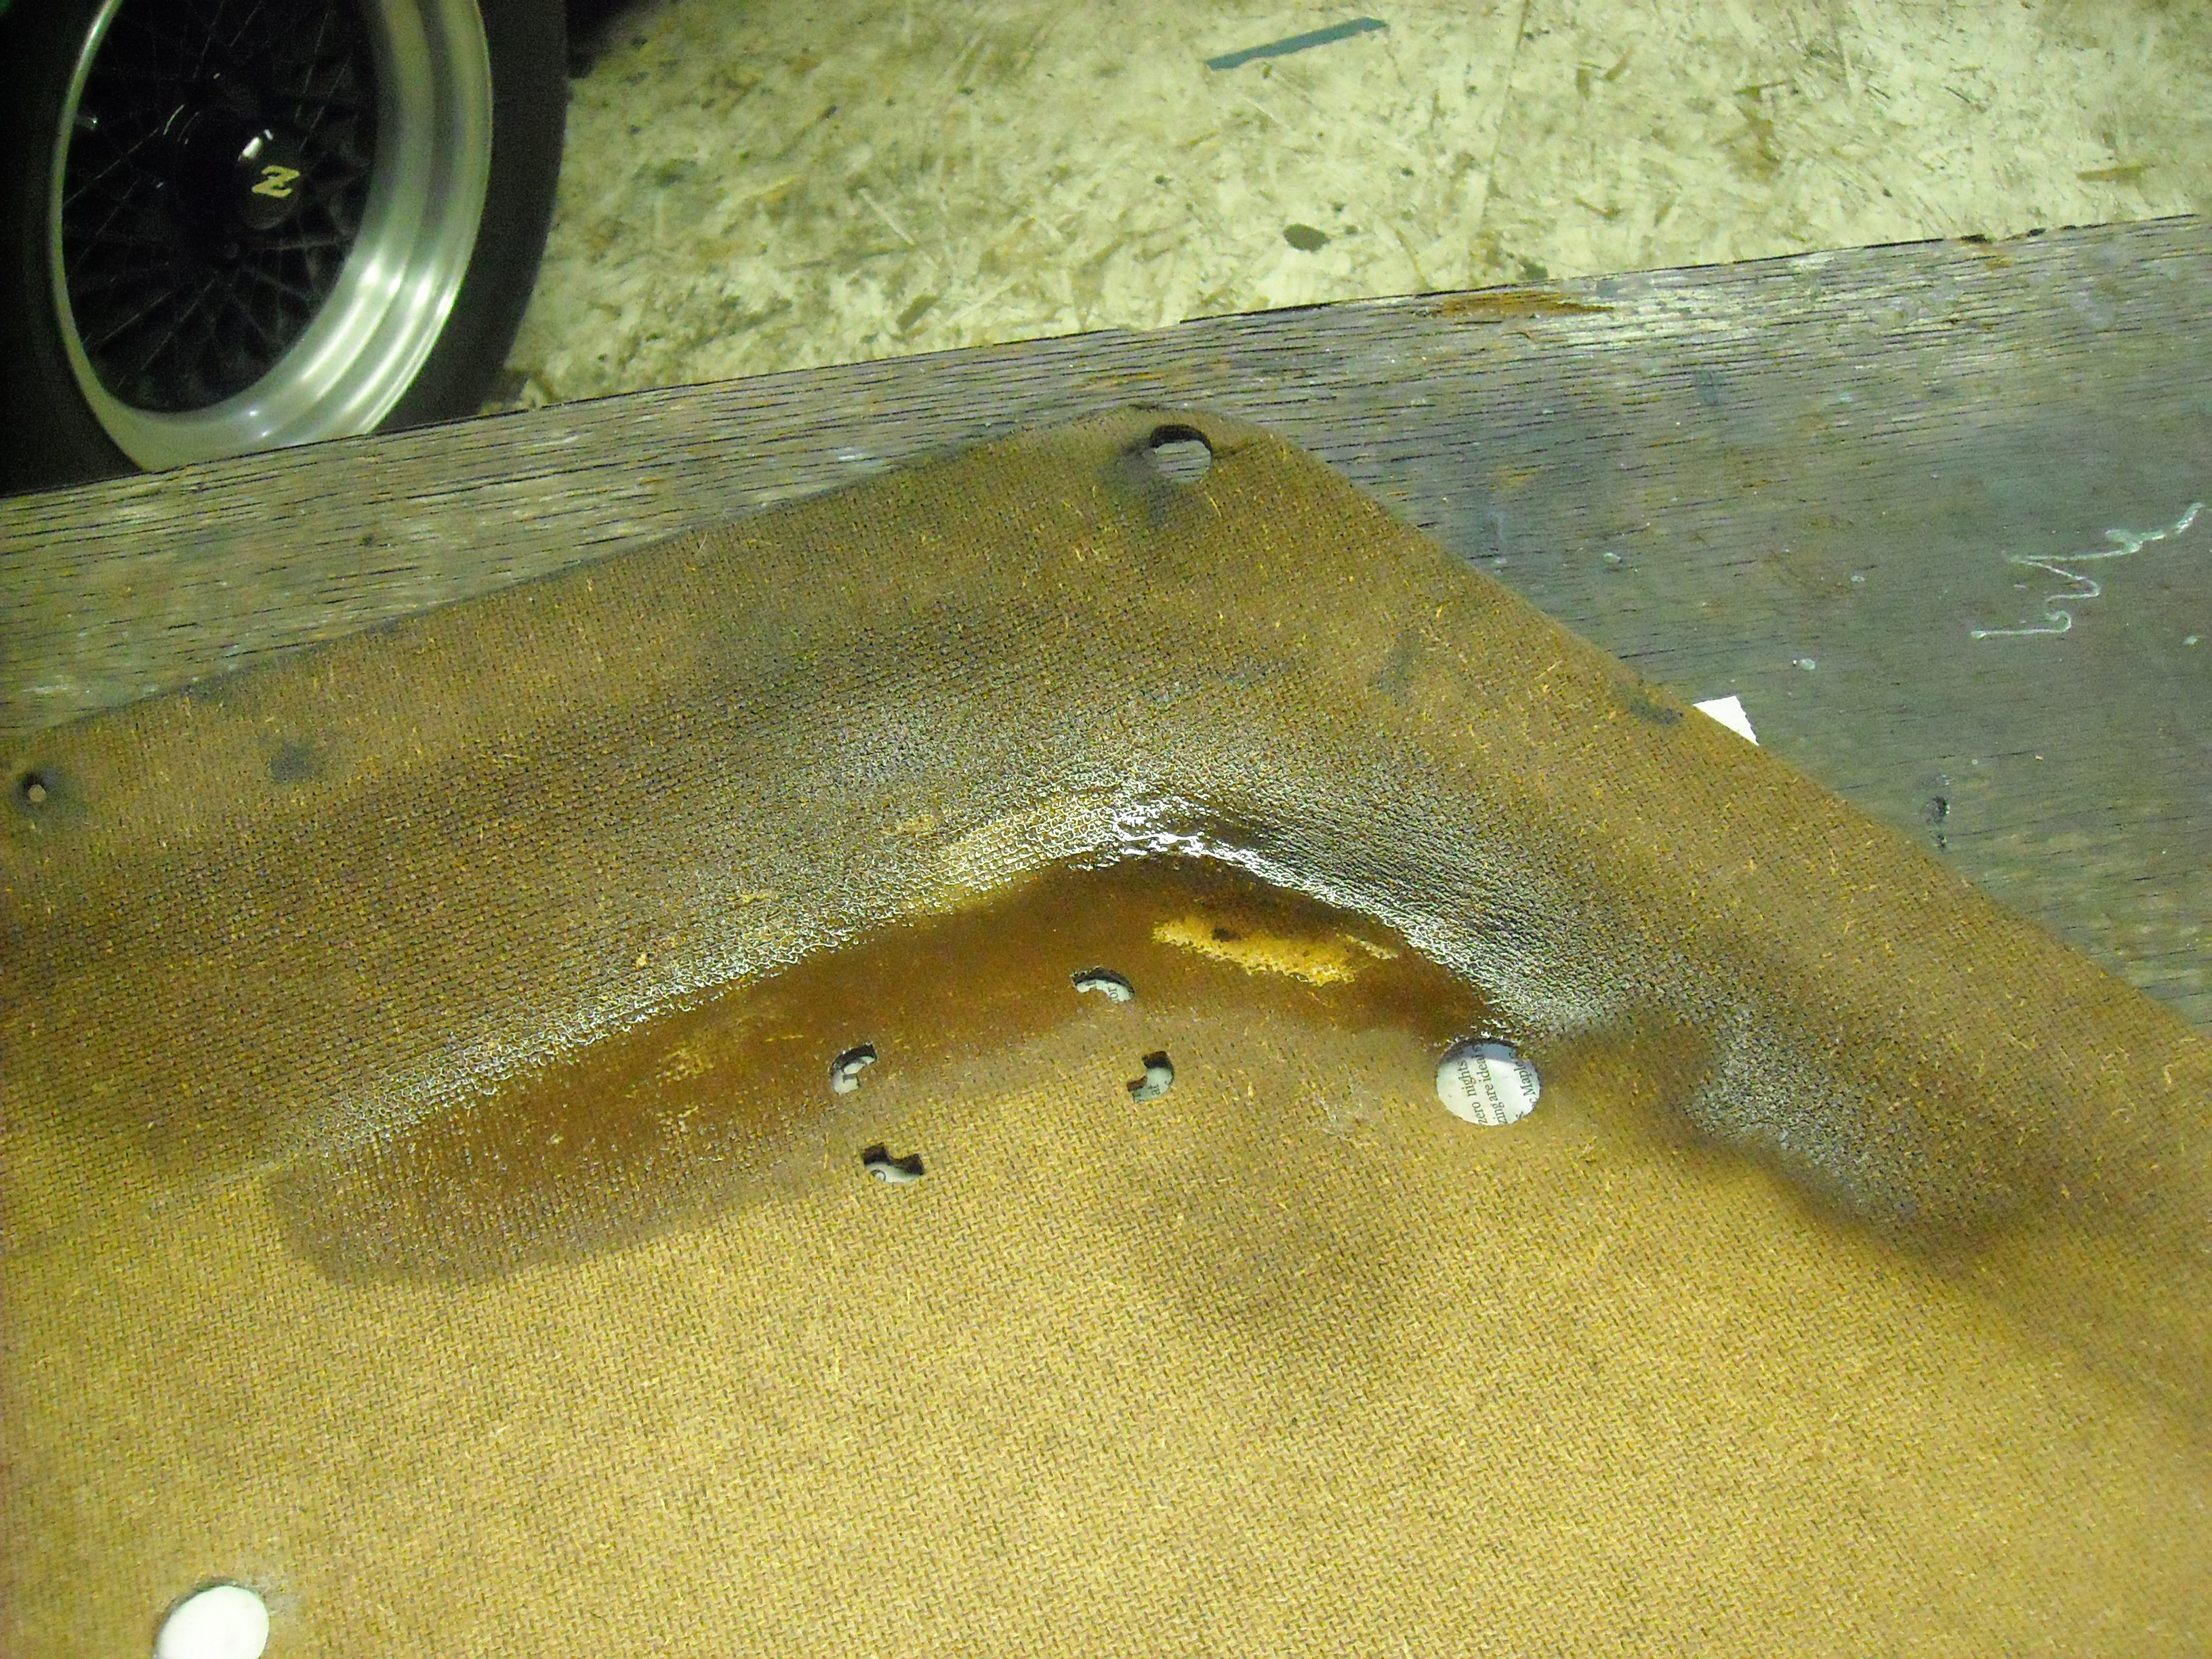
The soaking in methyl hydrate and pressing flat did the trick, all the edges are clean and straight now so I can add a layer of fiberglass to the back of the panel now to give it some stiffness. Got to say that I'm really impressed with the cyanoacrylate glue, I've only ever used it in drops in the Krazy Glue form but used liberally it soaks into the fibre of the panel and reinforces it. (not sure what I did to change the type face of the lettering?)
So far I have only used the CA glue to reinforce areas where the panel board fibres are broken and torn but still intact, I haven't used it to fill voids because it doesn't seem that it would have much strength that way. I have purchased a gallon of 3M microspheres/microbaloons that I will be using to make my version of Lizard Skin heat/sound deadener for the cab of the car but the boat place I bought the fiberglass supplies from suggested to use some of the microspheres and resin to fill voids. It seems reasonable from what you say that I could also use the microspheres and CA to fill voids. I can also attest to the noxious fumes from the CA when heated, my shop is fairly cool, 55-65*F with low humidity which extends the working time with CA from 5 sec. to 2-3 minutes. Once I have everything clamped I hit the area with a hair dryer to set it up. You really need to do this at arms length, squinting with your T-shirt over your nose, the vapor plume only last a couple of seconds which is why I didn't bother with a mask but if you get in the plumes way it attacks the nose, eyes throat and lungs instantly. Of course the hair dyer is unnecessary if you have time to cool set it. Djwarner, just saw your post, yes I think I will give it a try.
Jarvo, I guess you have a 1.5 ohm coil and a ballast resistor? I have a 3 ohm coil and no resistor. Zed, do you know what the specs on that pot would need to be ? Thanks guys, Chris
Welcome aboard, looking forward to the pics. I'm not trying to discourage you from posting questions, not at all but there is an extensive archive of this forum that covers everything and can really help your re build move along. Pretty much any problem you will run into with these has been solved and a lot of them with a photographic essay showing you how to do it. GL, Chris
The soaking in methyl hydrate and pressing flat did the trick, all the edges are clean and straight now so I can add a layer of fiberglass to the back of the panel now to give it some stiffness. Got to say that I'm really impressed with the cyanoacrylate glue, I've only ever used it in drops in the Krazy Glue form but used liberally it soaks into the fibre of the panel and reinforces it. (not sure what I did to change the type face of the lettering?)


 I know this has been a recurring subject over the years but so far I haven't found a definitive fix for it in the archives. 1970 240Z, same year tach, Pertronix ignition. Tach will accurately show RPM up to 4000 then it cuts out and the needle drops back down until the revs come below 4000 when it will start working again. Any advise welcome, thanks, Chris
That's probably why it popped into my head.
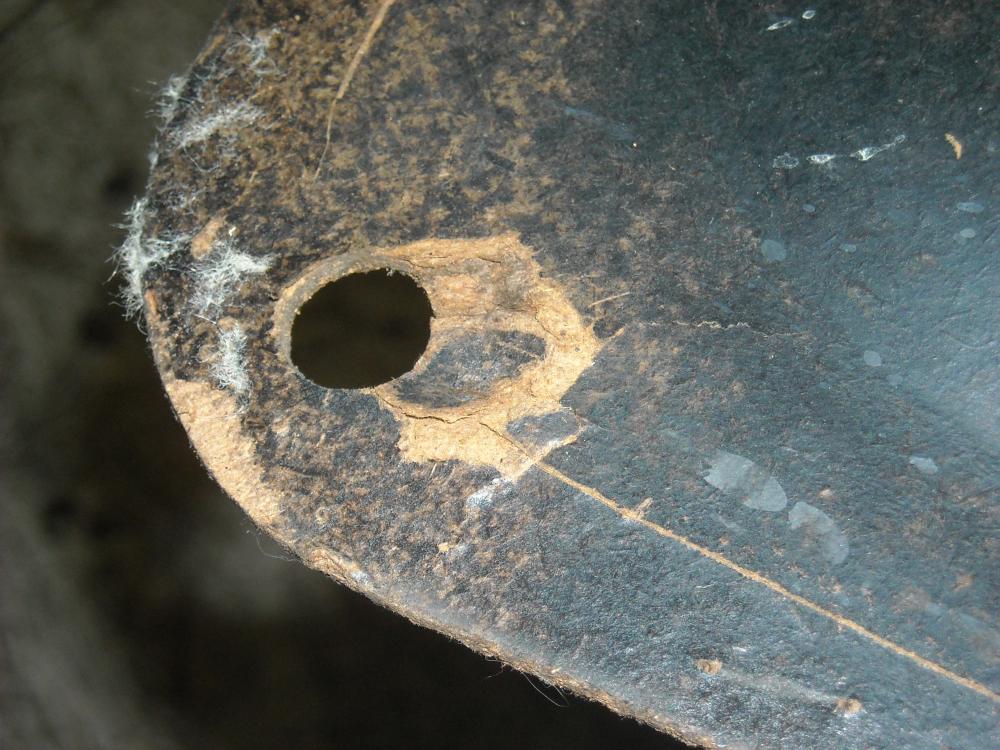
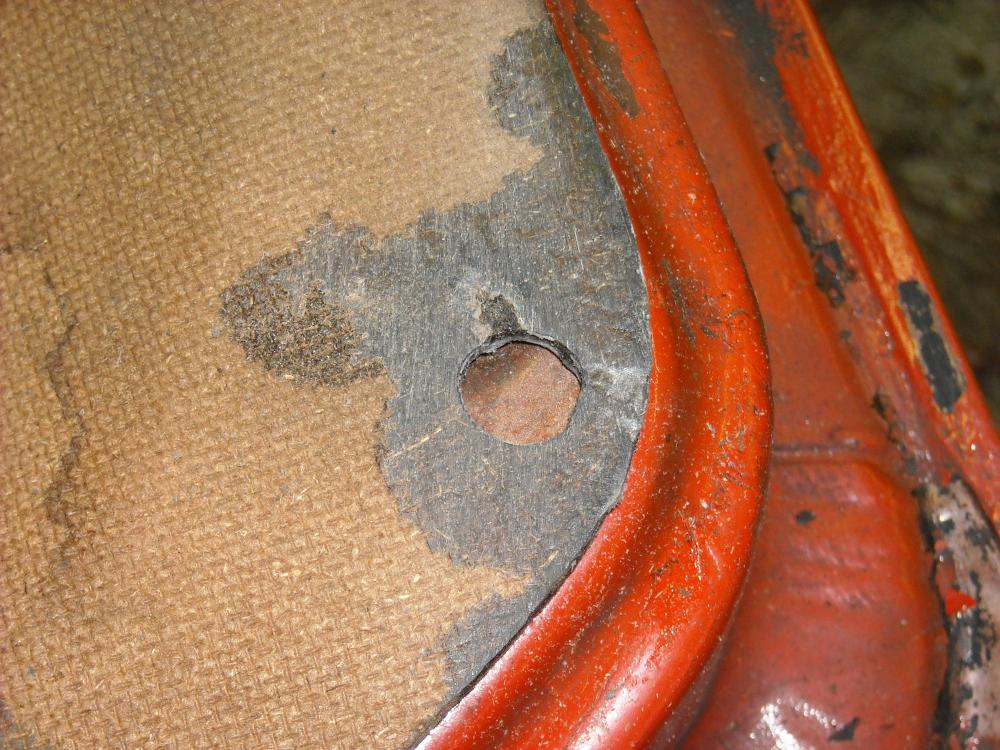
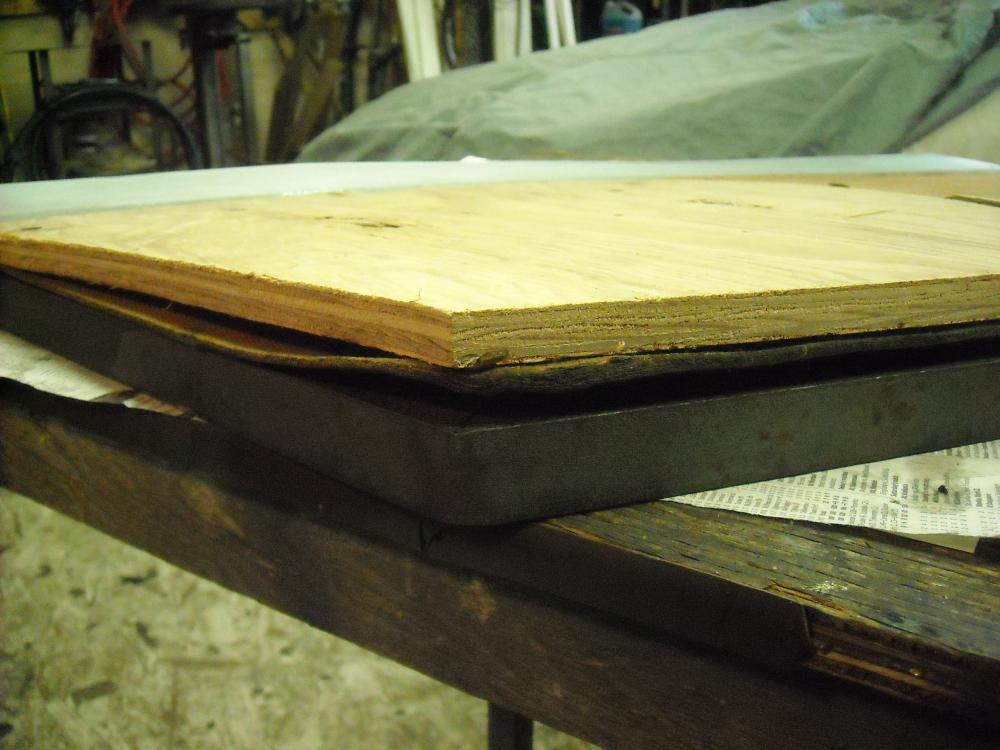
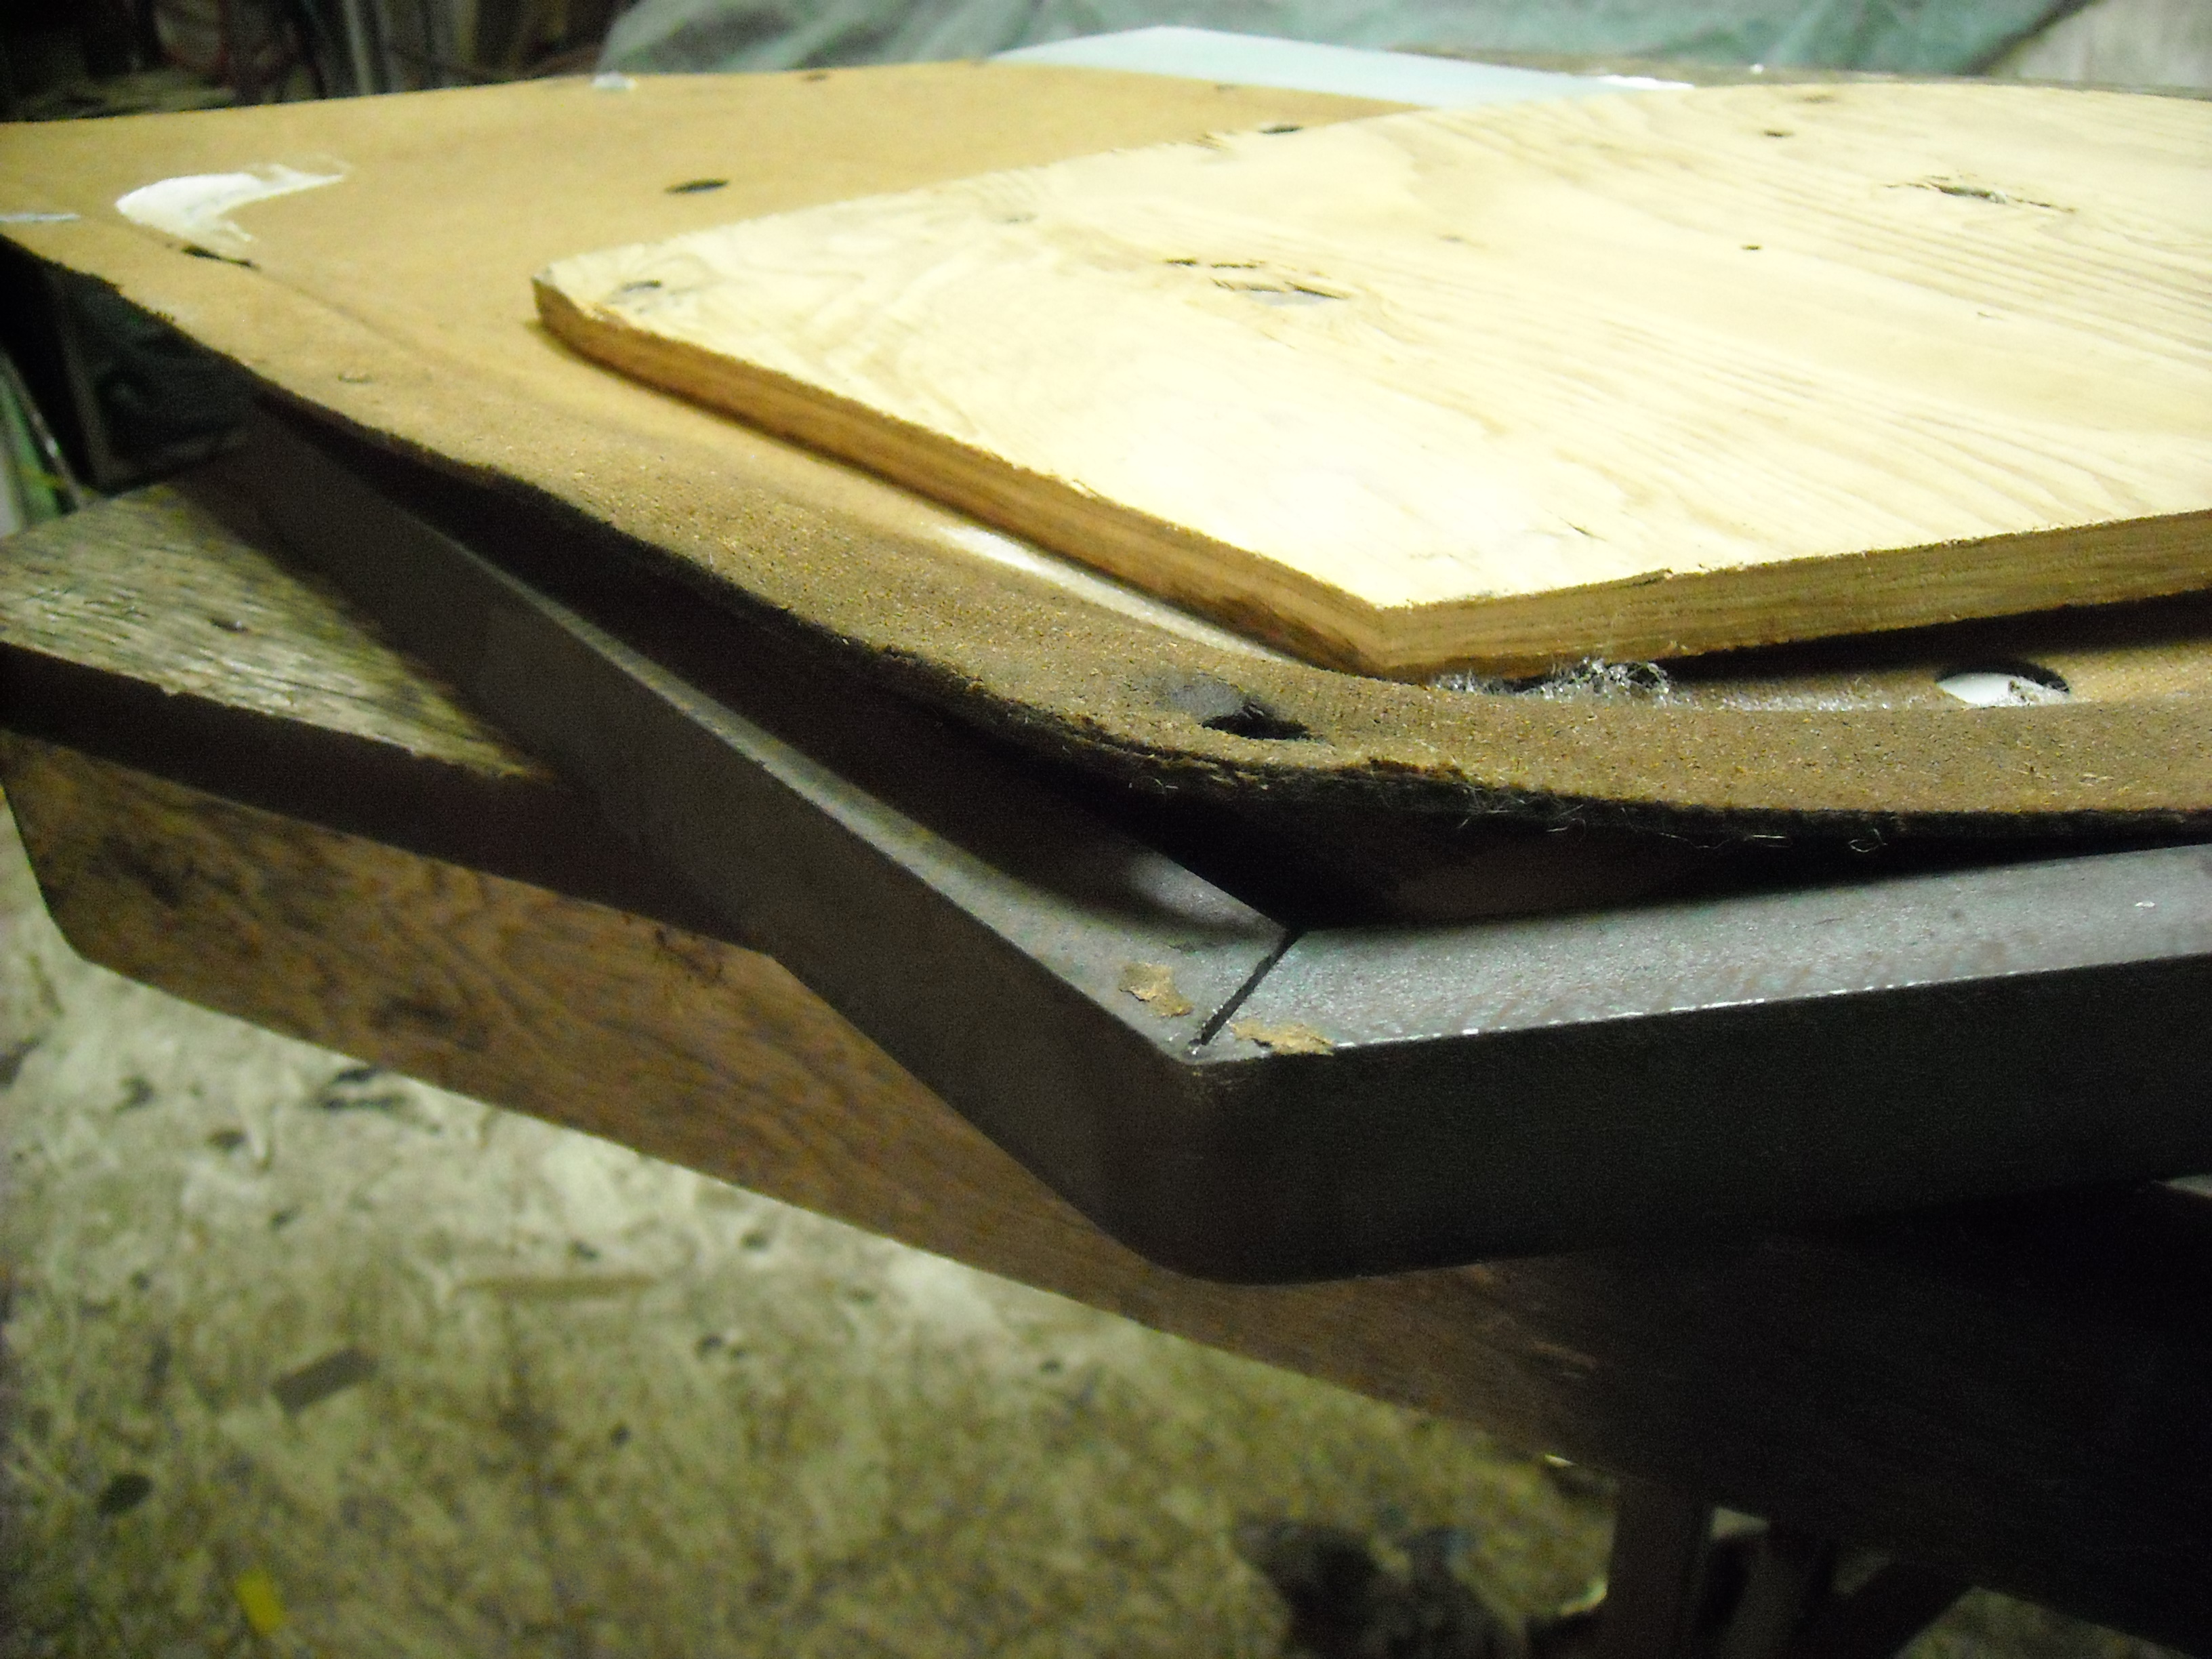
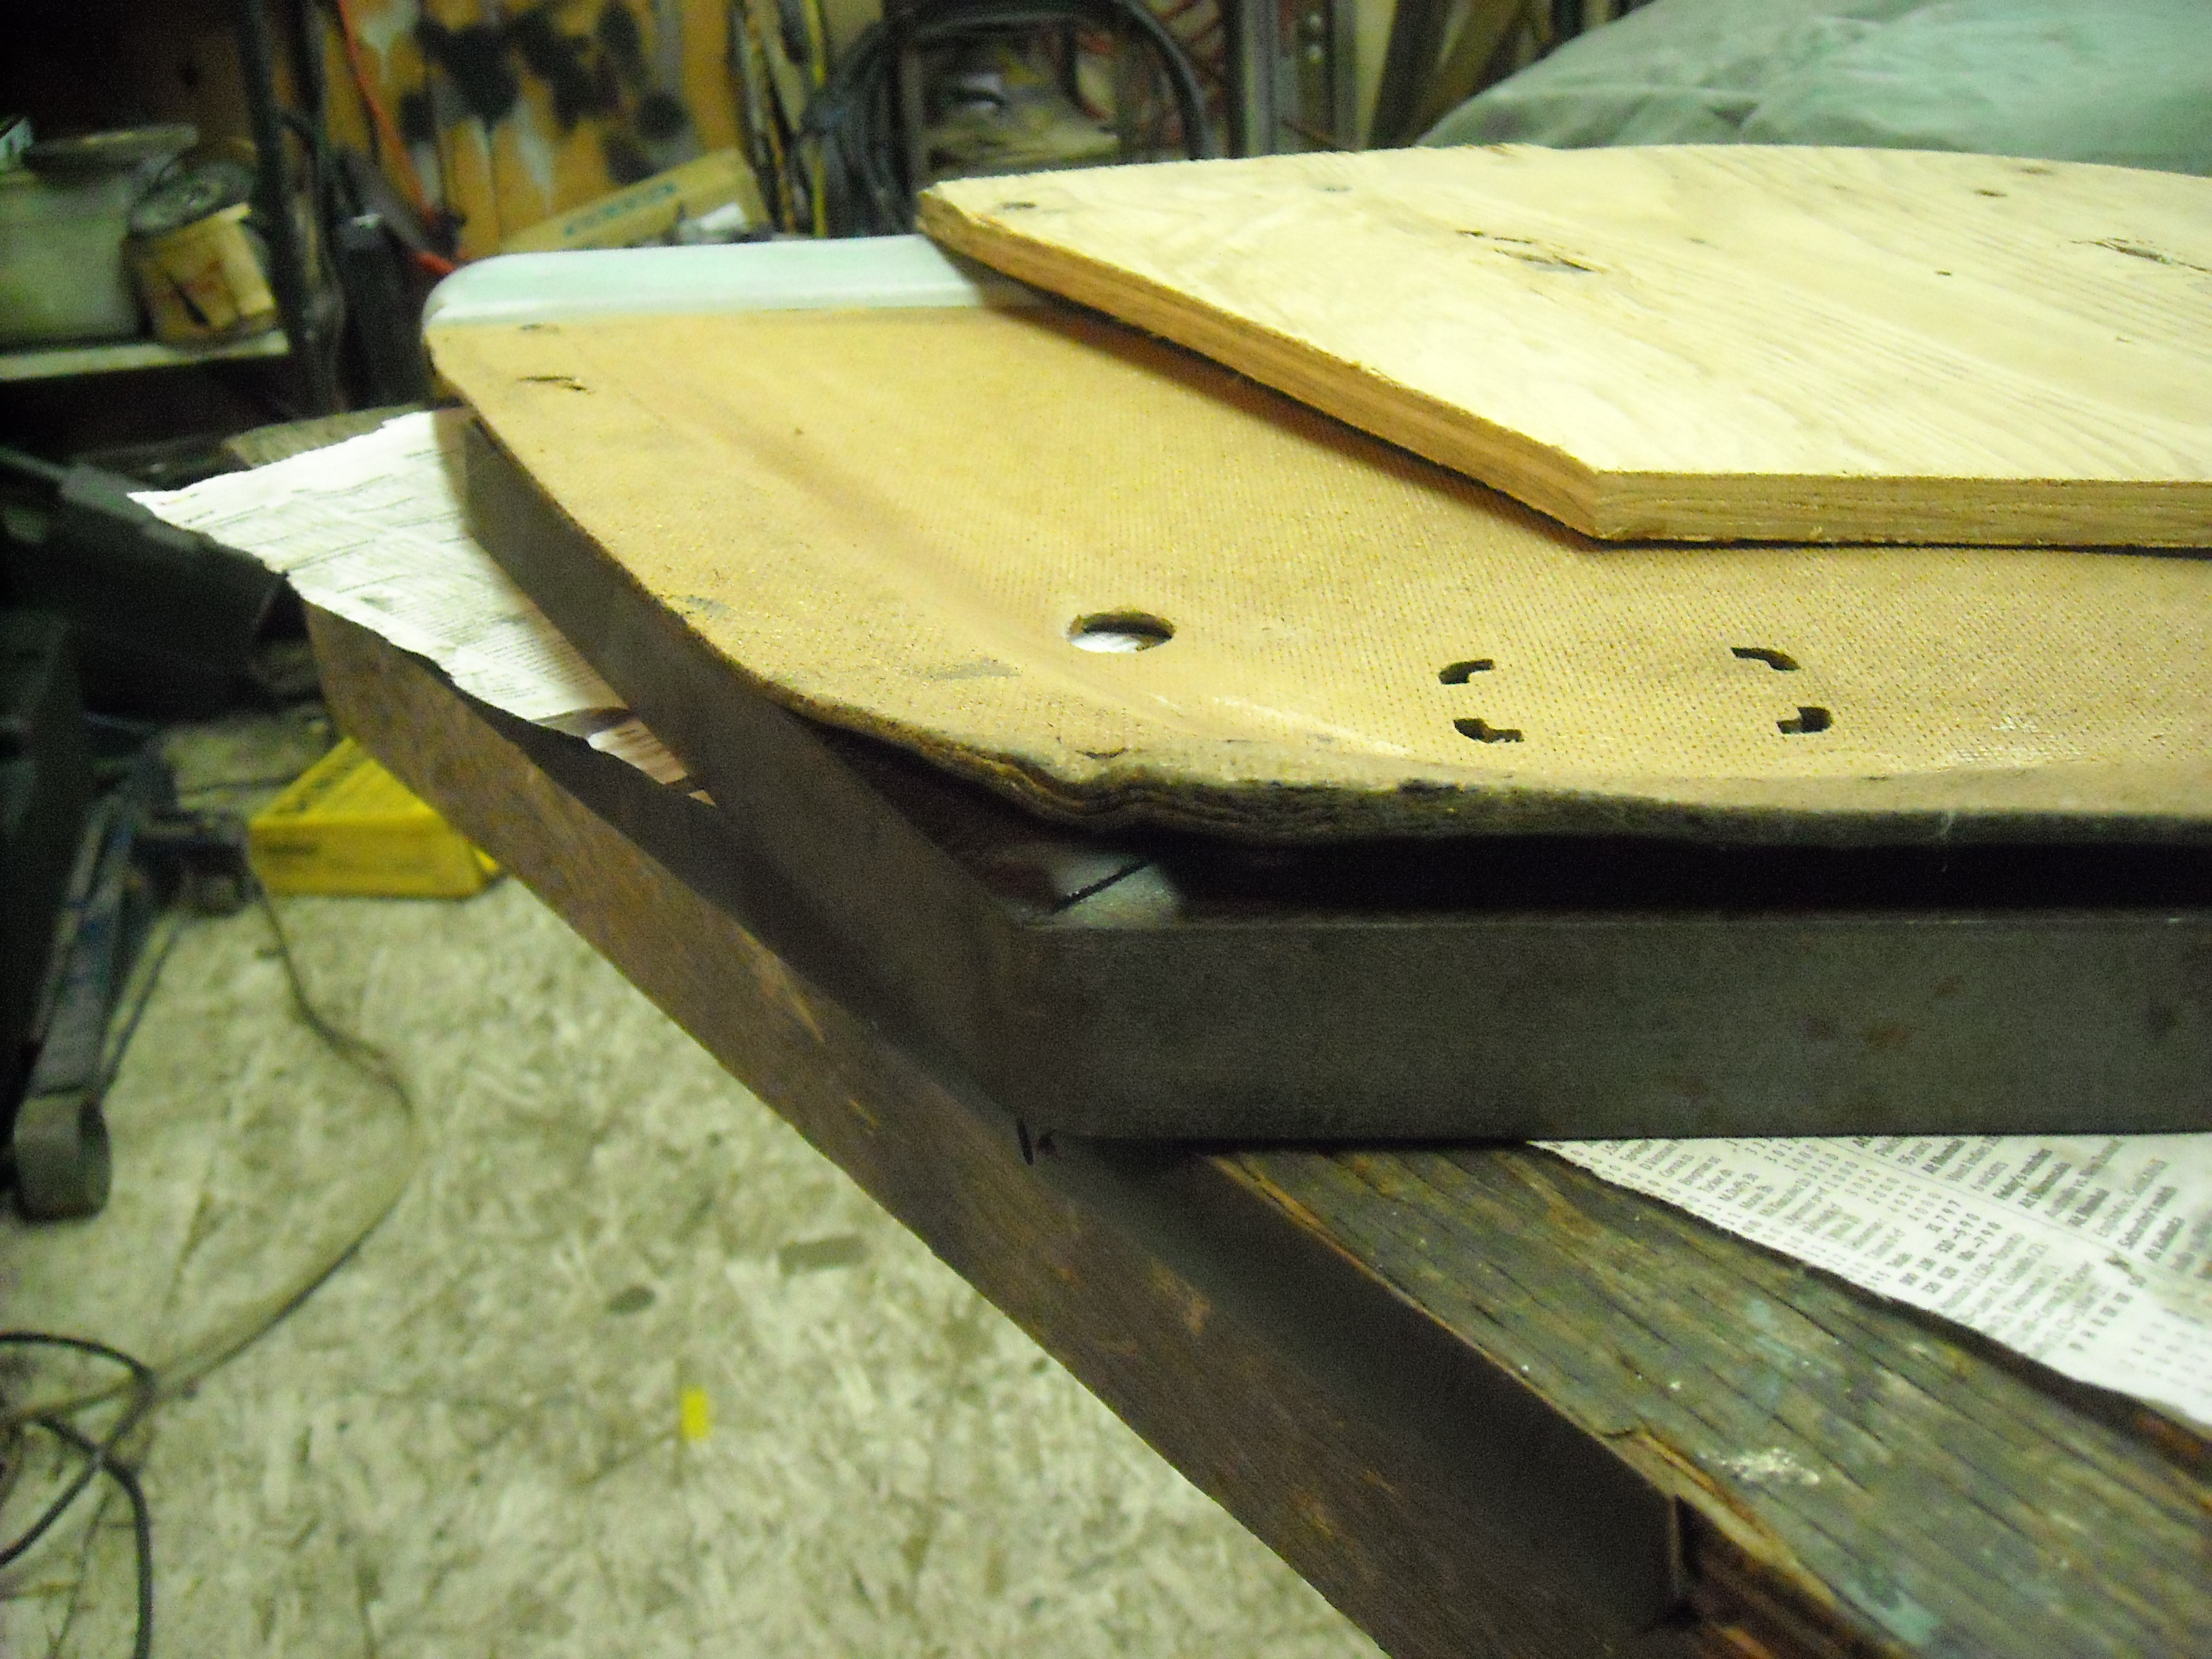
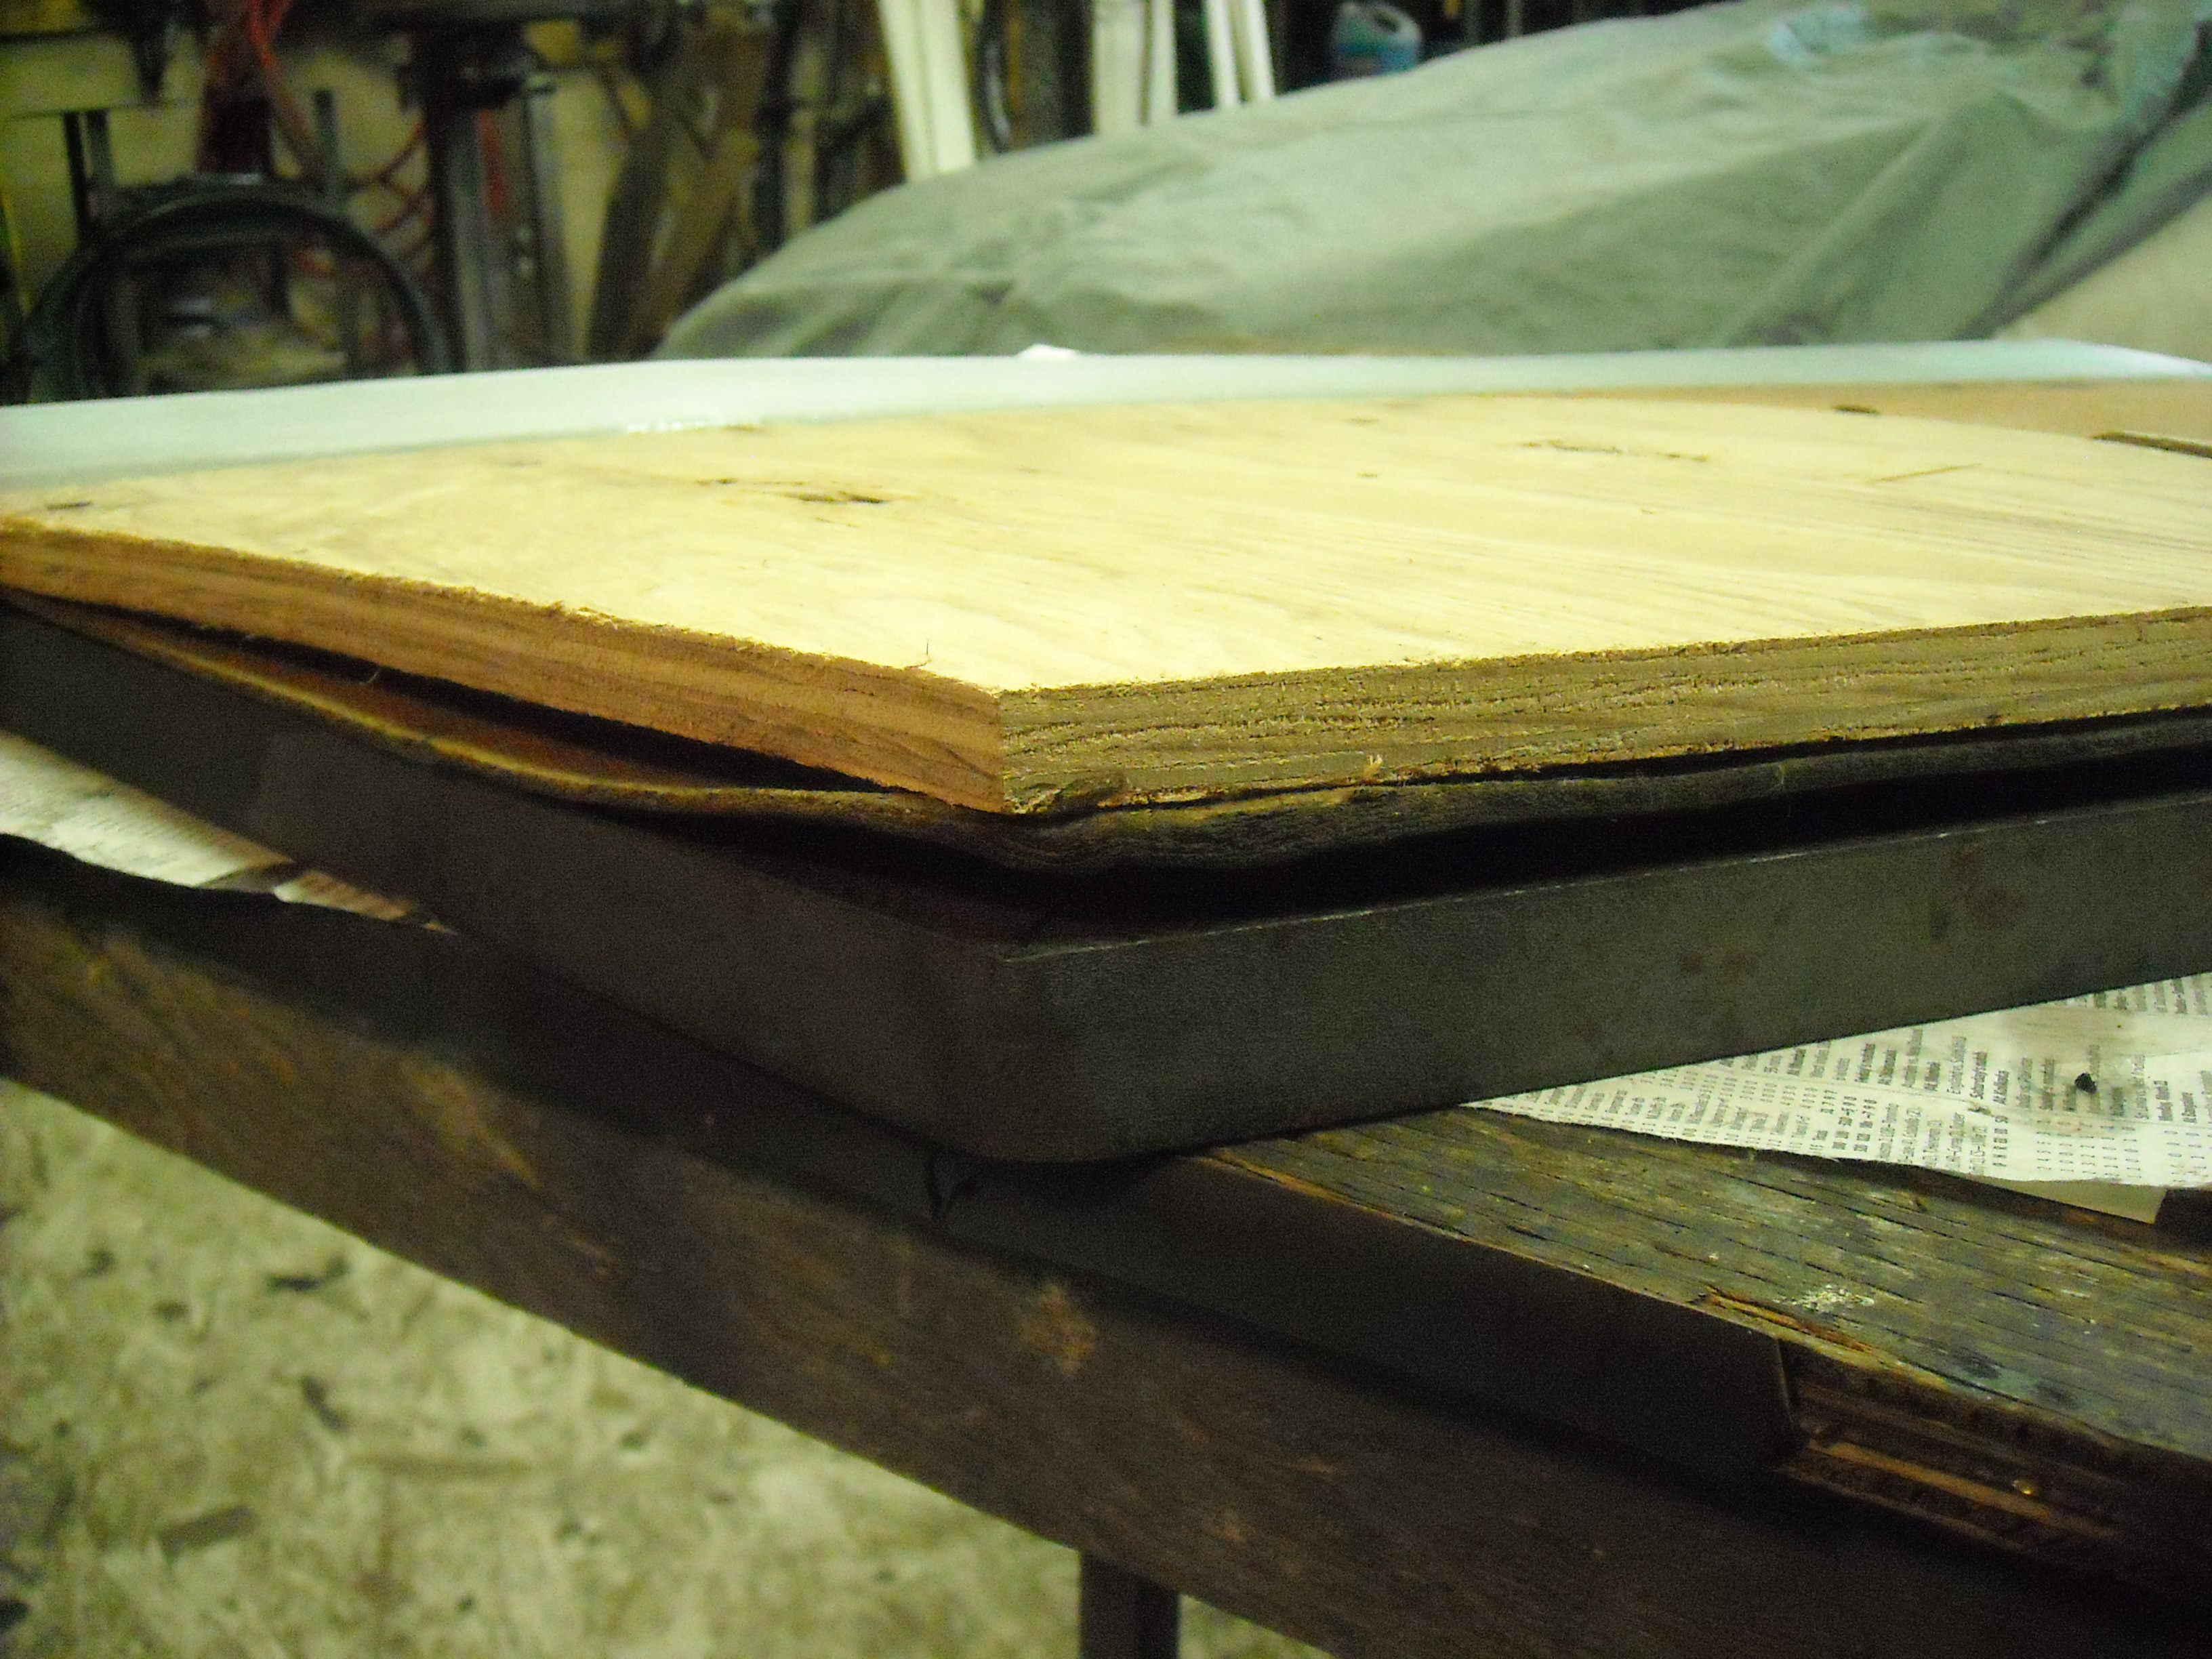
Well I decided to use a bunch of the suggestions you guys have offered and so far everything seems to be going well. Before I start repairing the holes I have to get the panel straight again, it has been warped by getting wet too many time and curling. I made a splint out of angle iron and plywood, soaked the corner of the panel with methyl hydrate (wood alcohol) until it was almost squishy and pliable then clamped it down. Now I'll let it dry slowly and hopefully it wont be warped when I un clamp it. The lower section by the door handle was warped and had multiple tears and breaks, that area I soaked in cyanoacrylate glue and clamped it up with wax paper covered splints, I'll have some better pics tomorrow.
I know this has been a recurring subject over the years but so far I haven't found a definitive fix for it in the archives. 1970 240Z, same year tach, Pertronix ignition. Tach will accurately show RPM up to 4000 then it cuts out and the needle drops back down until the revs come below 4000 when it will start working again. Any advise welcome, thanks, Chris
That's probably why it popped into my head.
Well I decided to use a bunch of the suggestions you guys have offered and so far everything seems to be going well. Before I start repairing the holes I have to get the panel straight again, it has been warped by getting wet too many time and curling. I made a splint out of angle iron and plywood, soaked the corner of the panel with methyl hydrate (wood alcohol) until it was almost squishy and pliable then clamped it down. Now I'll let it dry slowly and hopefully it wont be warped when I un clamp it. The lower section by the door handle was warped and had multiple tears and breaks, that area I soaked in cyanoacrylate glue and clamped it up with wax paper covered splints, I'll have some better pics tomorrow.


Important Information
By using this site, you agree to our Privacy Policy and Guidelines. We have placed cookies on your device to help make this website better. You can adjust your cookie settings, otherwise we'll assume you're okay to continue.