grannyknot
Free Member
-
Joined
-
Last visited
Everything posted by grannyknot
-
 The cast aluminum they used back in the day wasn't as pure as it is now and it can out gas while the powder is melting and cause bubbles. Just ask your powder coater to throw your pieces in the oven with other stuff he has so it can go through a few heat cycles before he coats them or you could do it in your own oven even.
 -
I had one sender that had a little blob of something on the coil wires so when the slider went over top of it there was no signal but worked on either side of it. I used a rounded Xacto blade to carefully scrape away the blob.
-
These guys make good stuff, https://vintagerubber.com/datsun-nissan/240-z/
-
Is the window rolled up or down, I can't tell?
-
You try these guys, https://zcarsource.com/catalogsearch/result/?q=+pulley
-
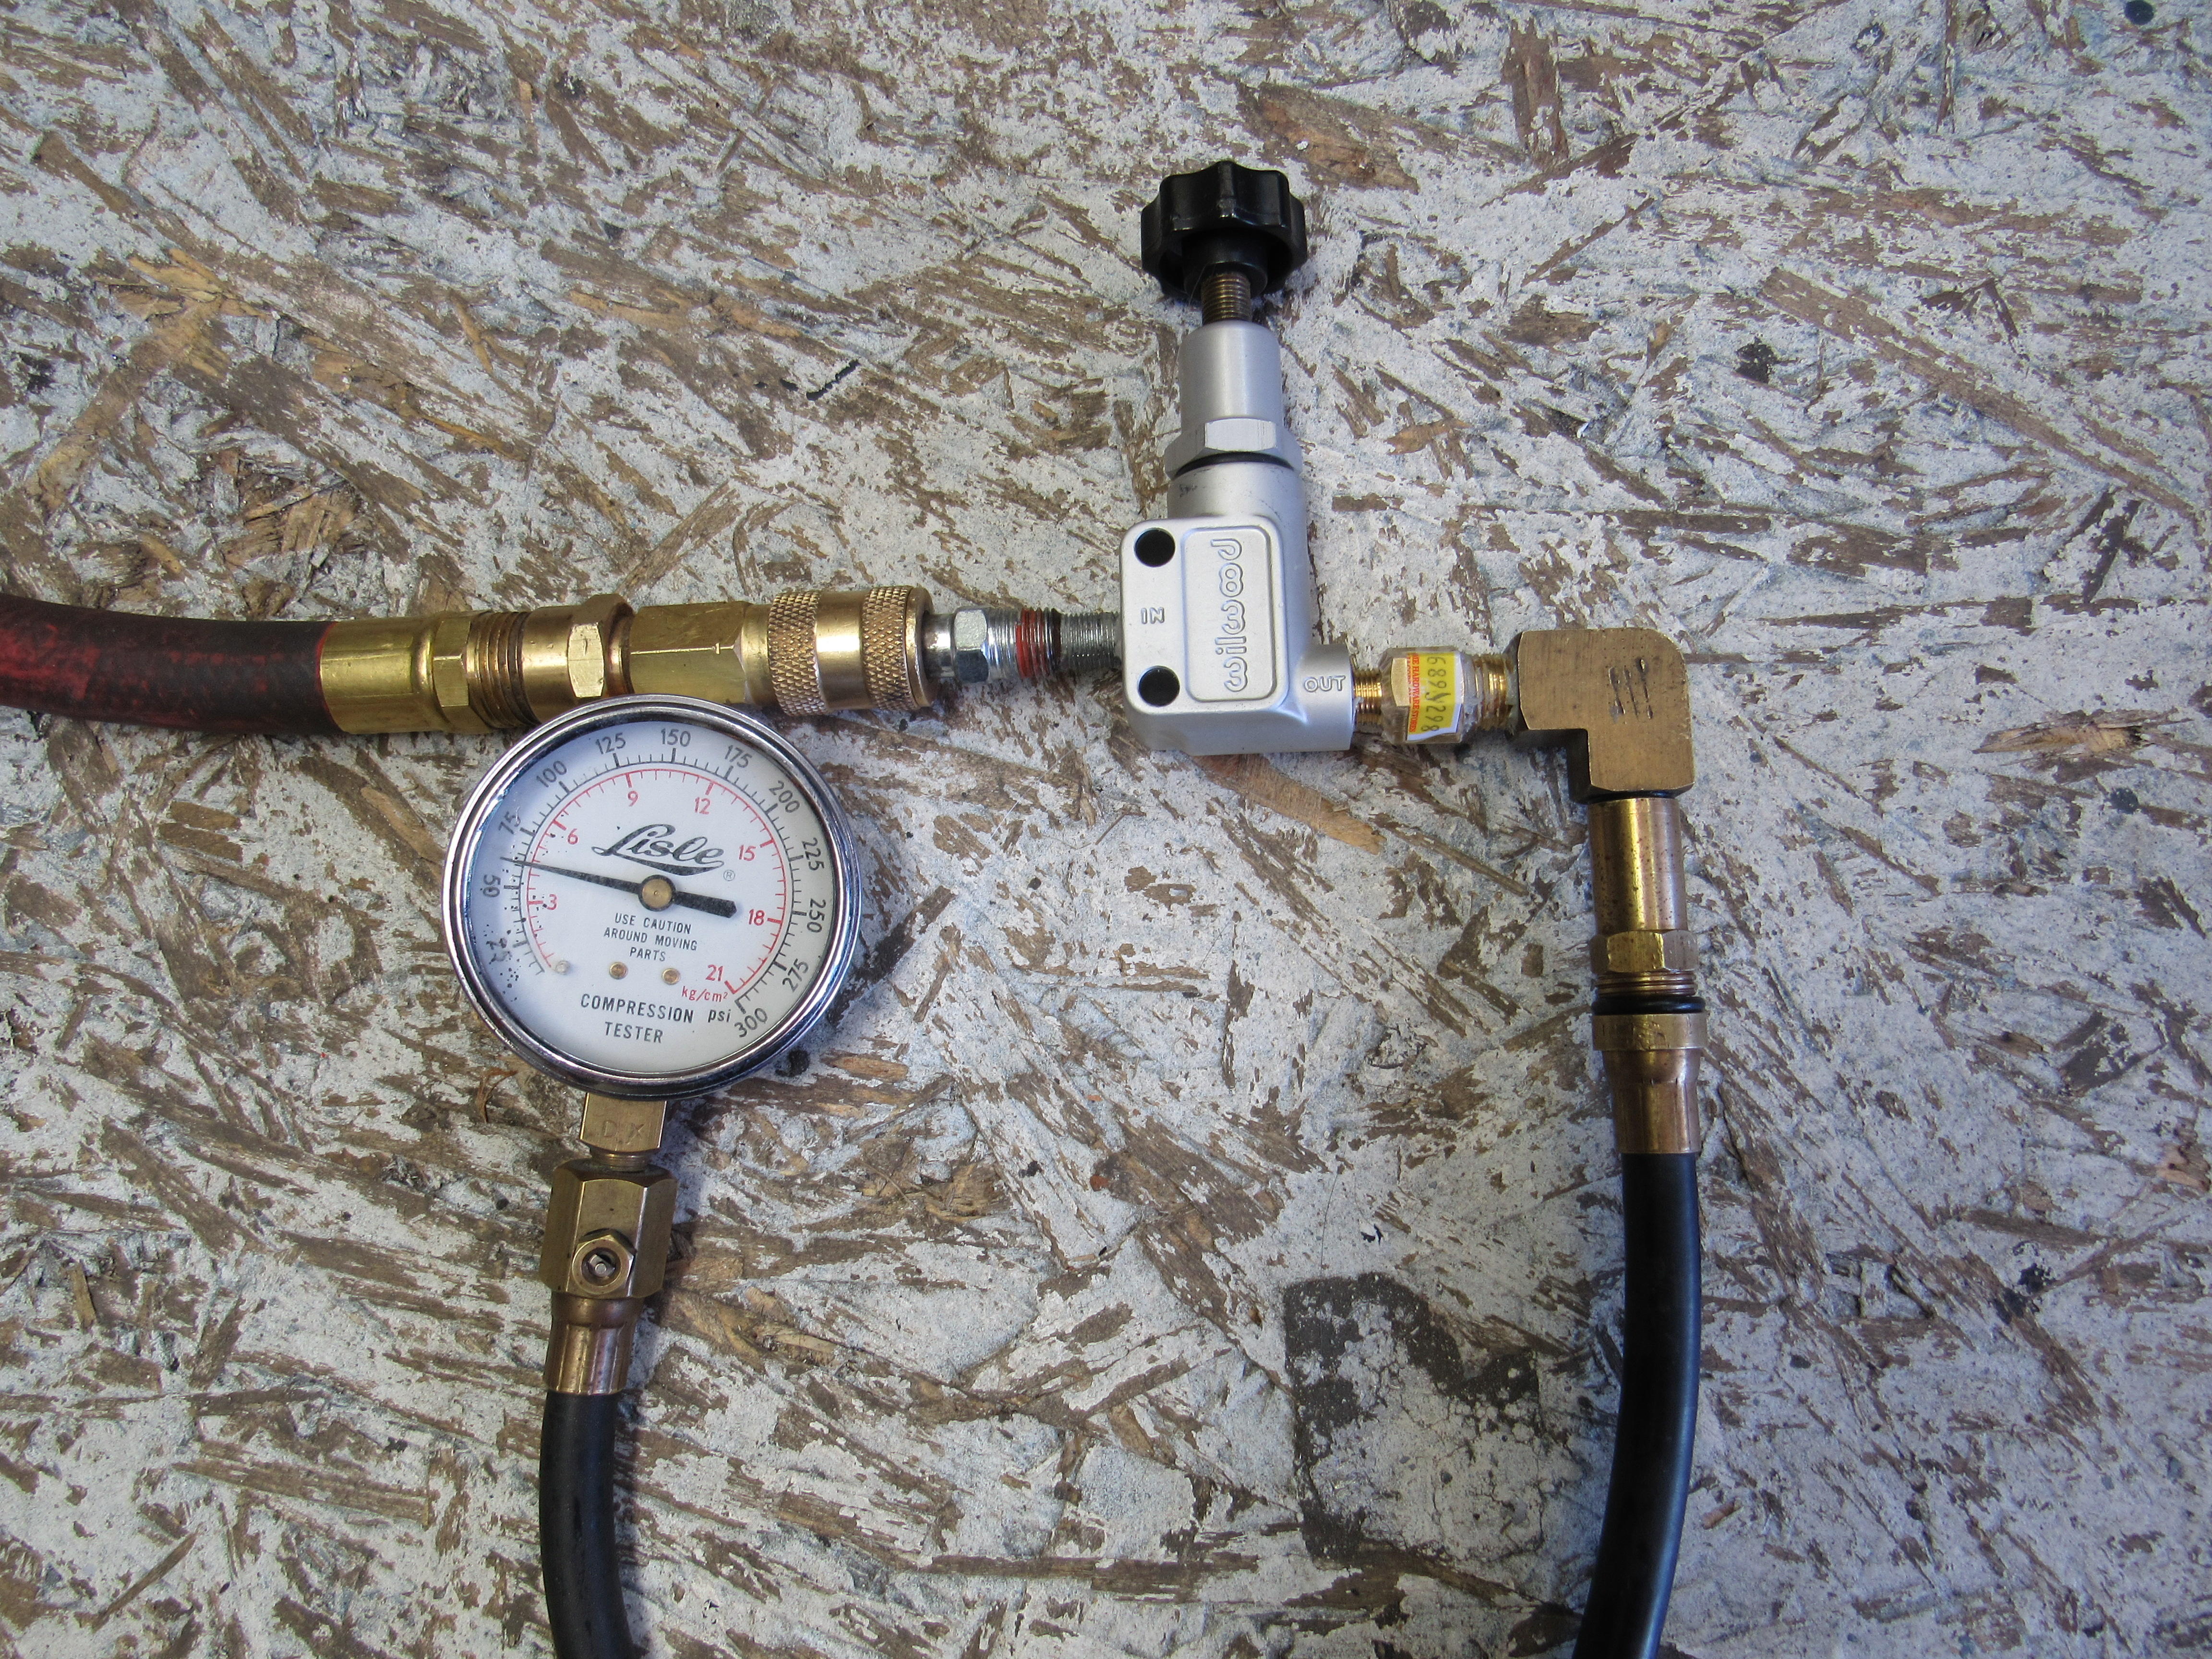
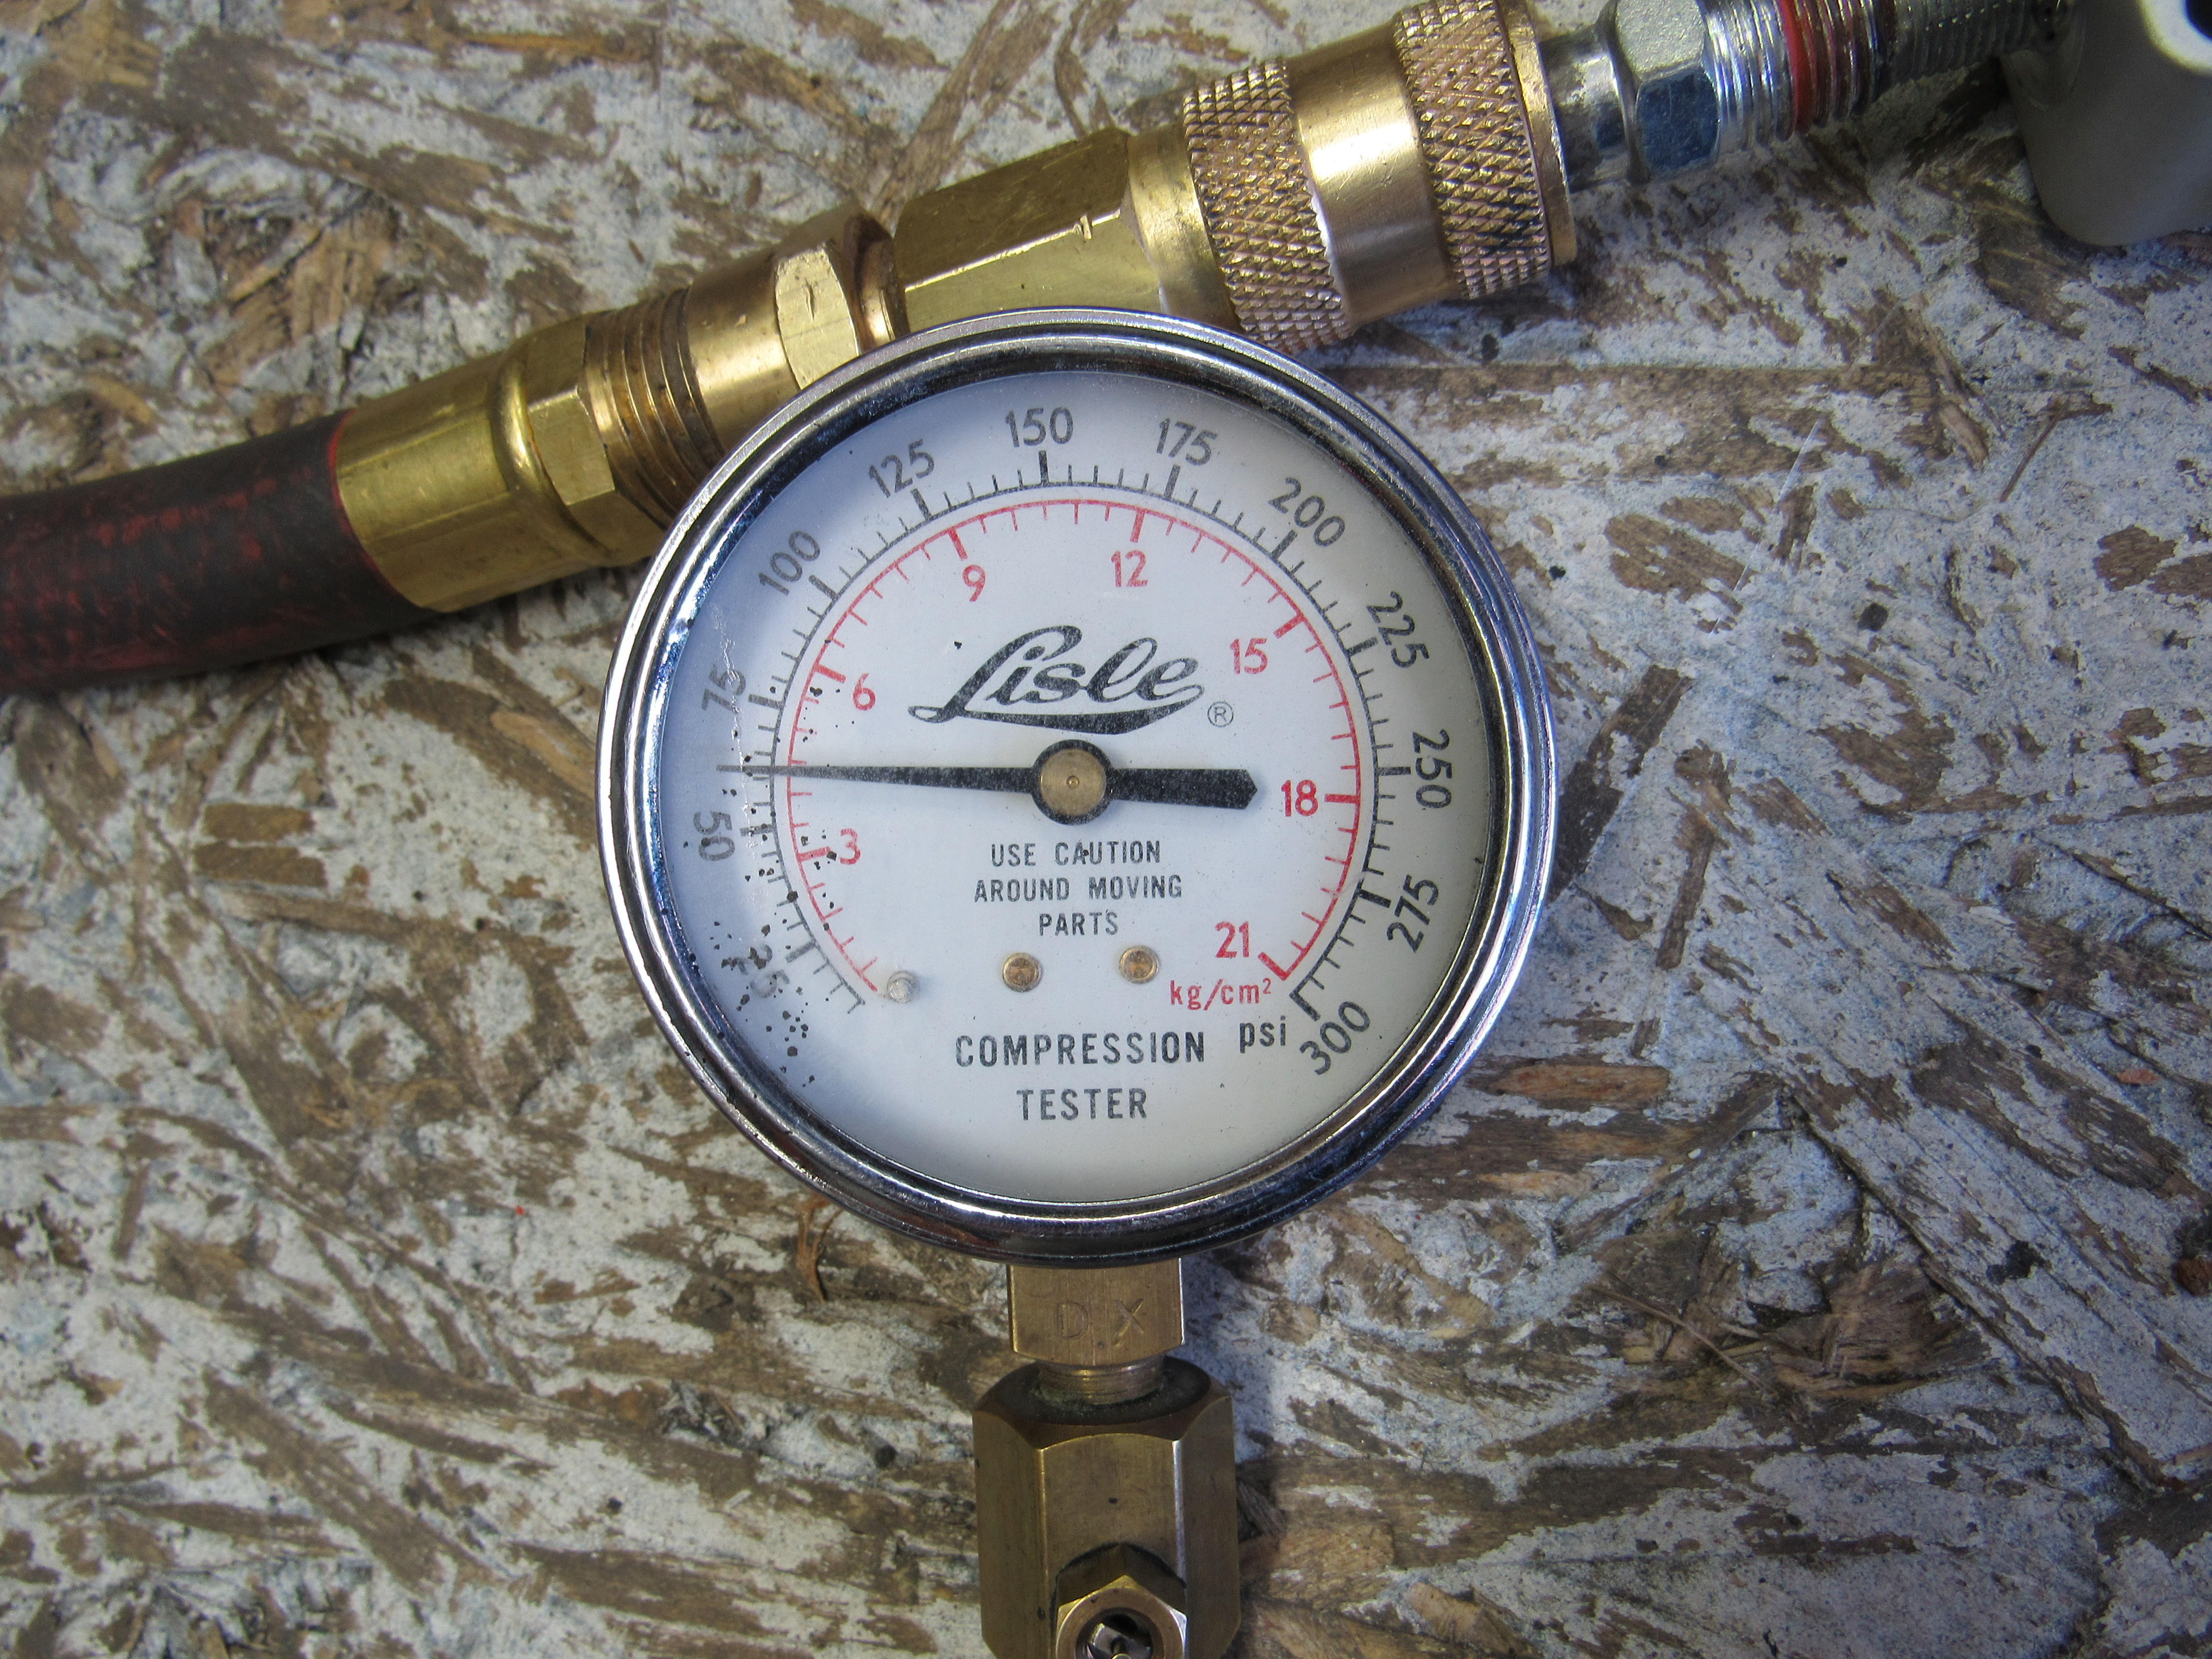
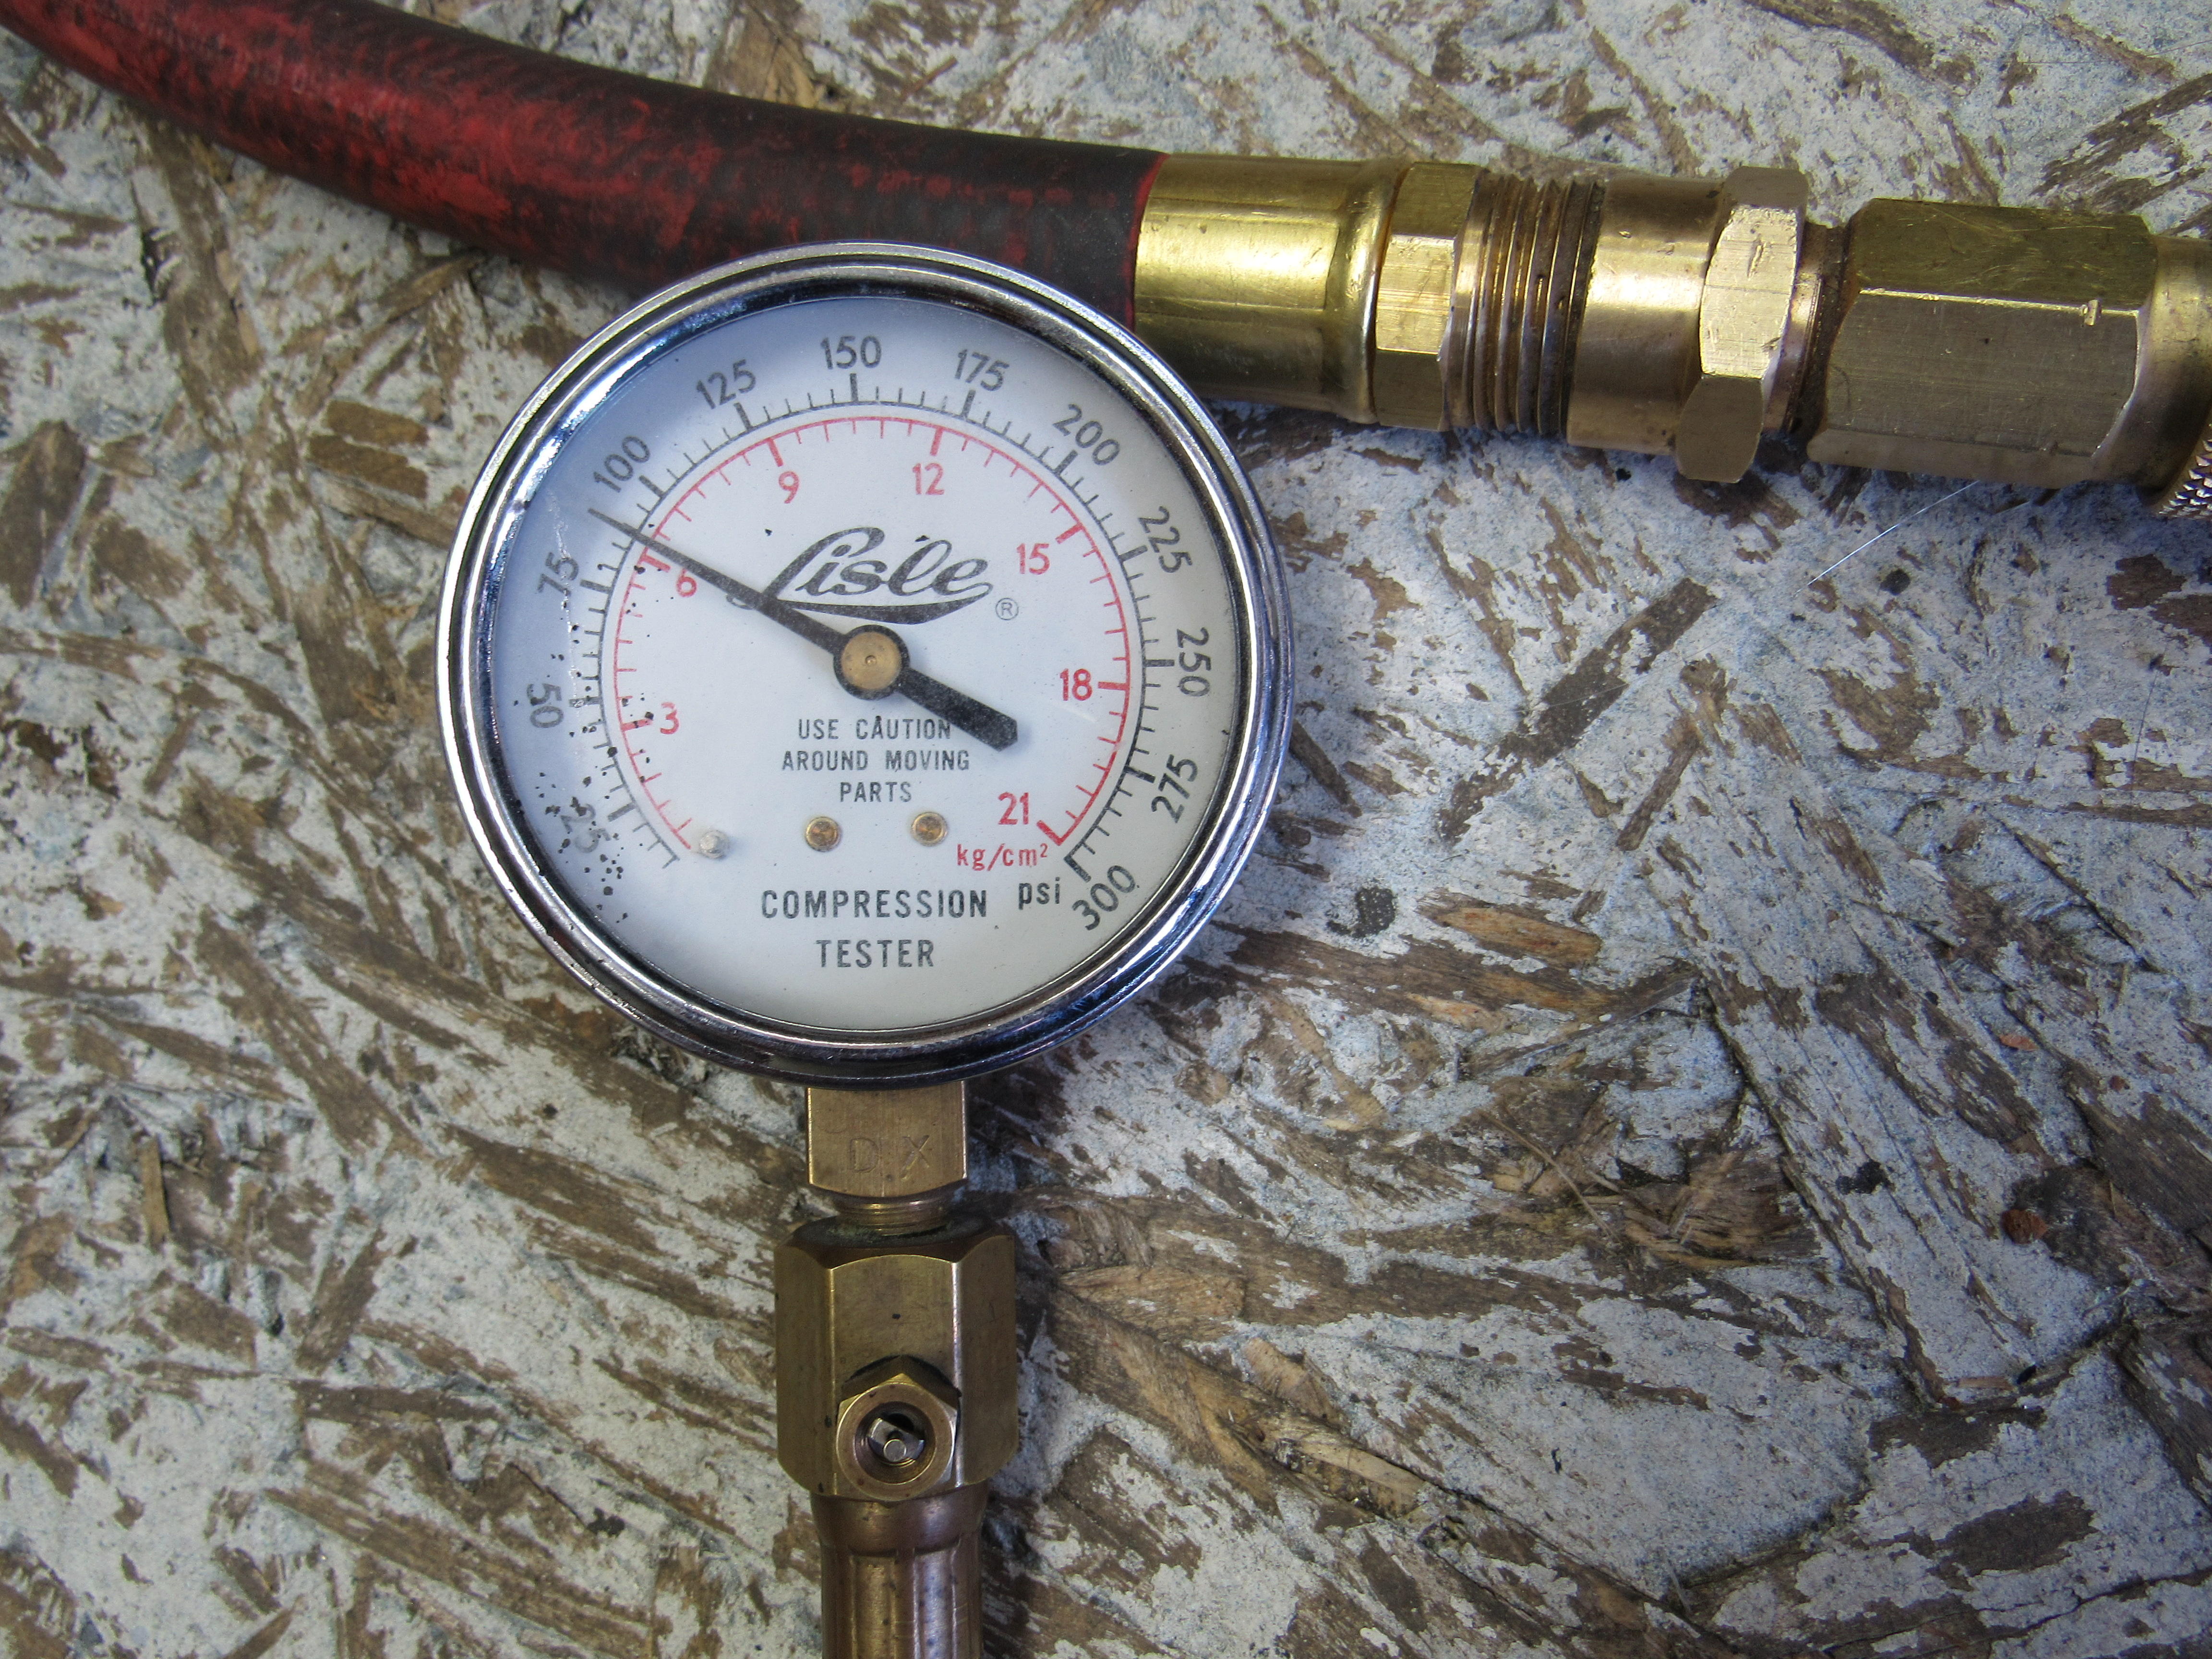
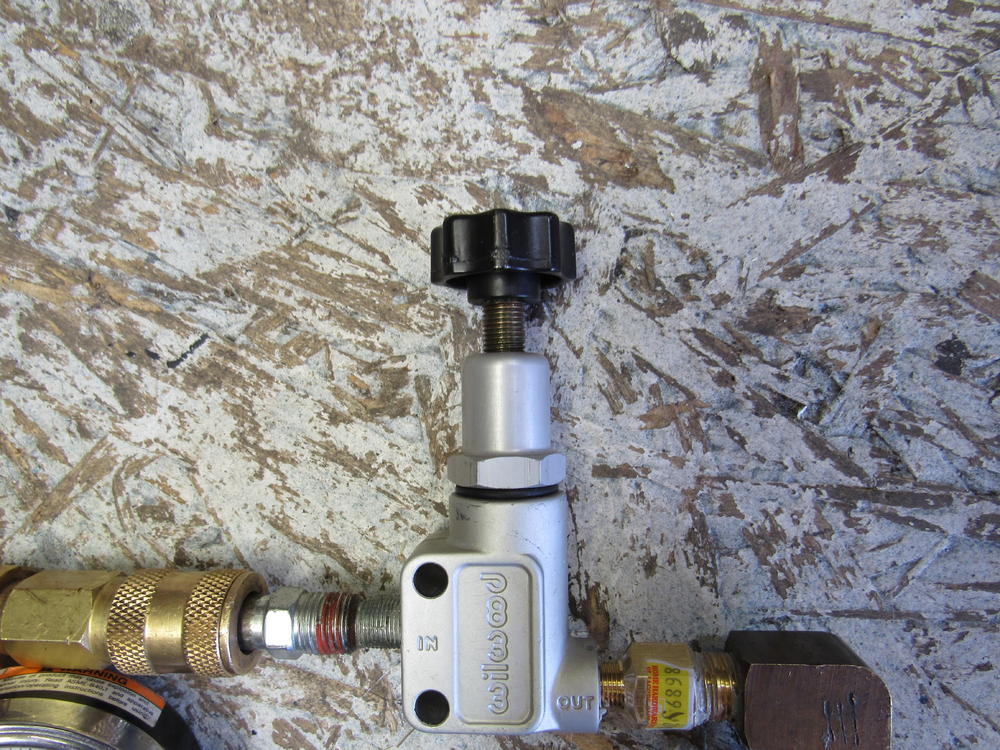
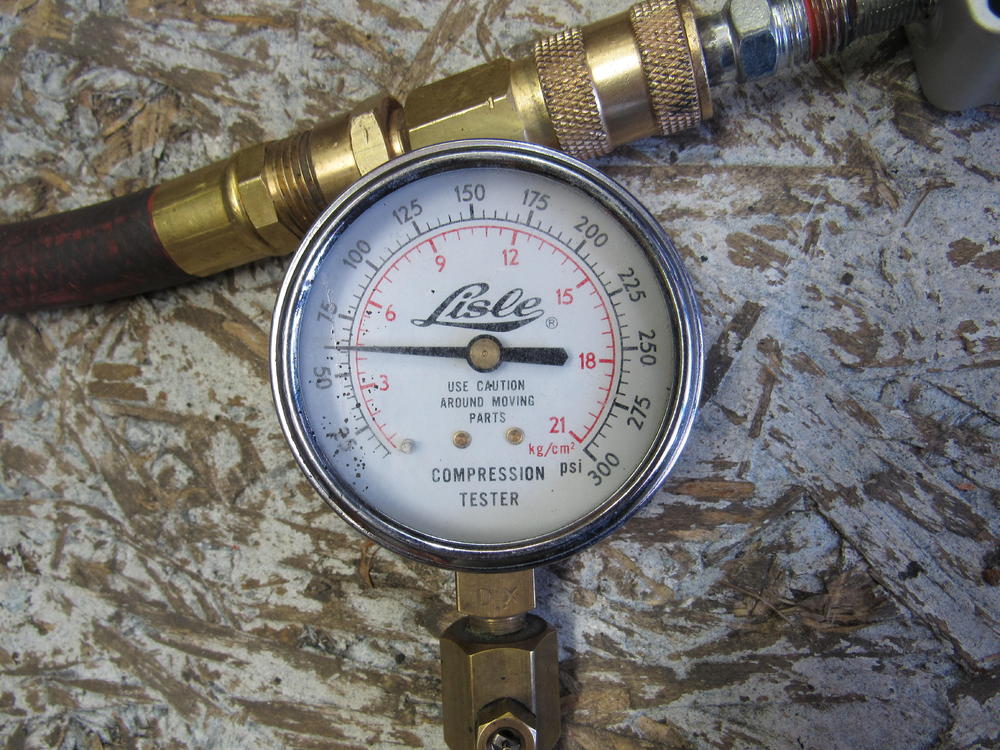
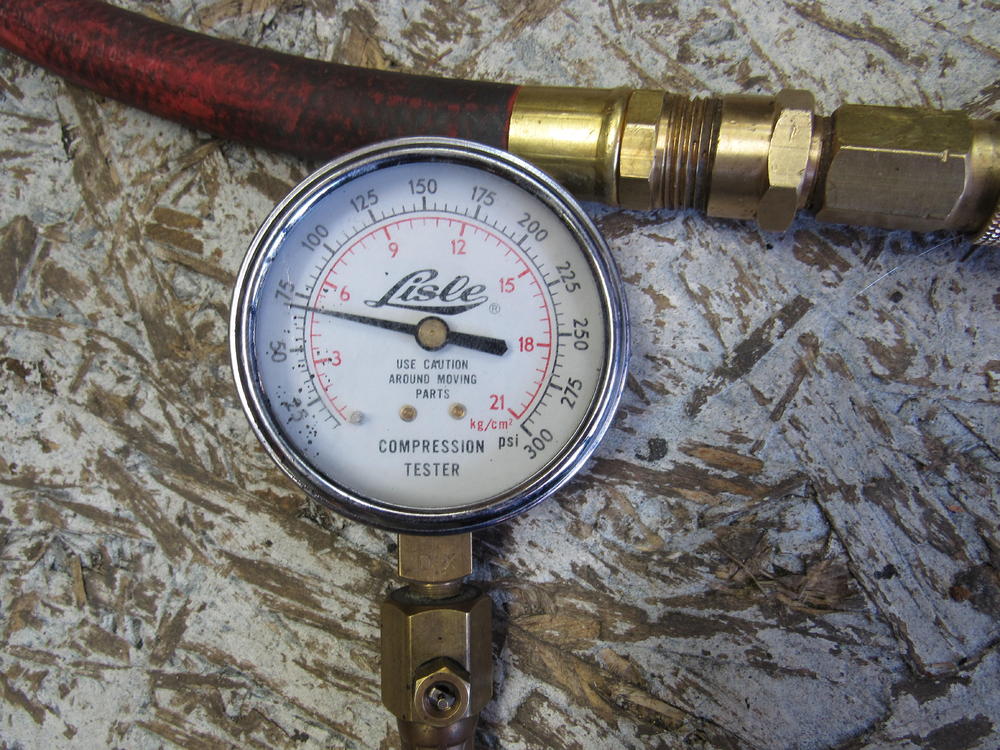
So I have had the car out on the road a couple of times but being nice to it while breaking in the new clutch and brake pads and there is 13 codes on the OBD2 reader. I have ordered a bmw specific scanner to pick up the bmw codes so I can start to figure out where the problem lies. Even with 13 codes it's running okay, some stumbles on acceleration and stalling if I come to a stop too quickly. Already though I can tell the there is too much bias to the rear brakes, very easy to lock the rears up. I had a Wilwood proportioning valve on the last setup and couldn't tell if it was doing anything so before installing it on this brake system I thought I would try some testing. Now fluid dynamics is a big subject and I only understand a bit of it but since compressed air was available to me I used it instead of brake fluid for my test. I hobbled together some fittings that were air tight, Wilwood says this unit will decrease the amount of braking pressure by 50% with the knob turned all the way up to the top of the threads, well I found that 33% was the best I could get from it. The proportioning valve only has a 1000 miles use on it and is very clean inside. I started with 90psi which resulted in 60psi for the rear wheels, with one full turn of the knob CW the pressure came up to 75psi, with one more full turn brought the pressure up to the full 90psi, so all of it's proportioning takes place in the top two turn and there is still 9 more full turns left until the knob bottoms out. So why are those 9 other turns on there? Just to confuse me I guess. 33% is more than enough to work with I think but I'm glad to know where range of adjustment is now, should make the dialing in easier. 3rd pic at 60psi, 4th pic one turn down, 5th pic 2 turns down.


-
That sounds like it will work fine for big leaks as the exhaust system is cold, other leaks may show up as it heats up.
-
Maybe they think your shock is already installed, as heyitsrama says, you just slip the bumper over the top of the strut.
-
I don't know but those bumpers are made by many companies and available in all sizes, the foam bump stops I have are made by Koni.
-
But wouldn't those nuts or bolts be coated too and stuck to something.
-
Franklin Mint huh? Just look at those panel gaps.

-
I have them on Illumina shocks with Eibach springs on my Z, they work great.
-
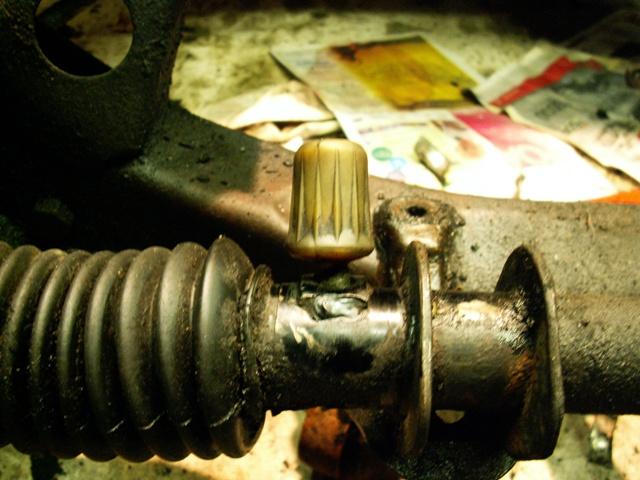
If your 71 Z was made in 1970 what you see on the P/S steering rack might be the plastic threads of the original grease reservoir that broke off. If that is the case you should be able to turn it out and replace with a threaded plug. This is what it looked like,
-
-
While you have your struts apart for new springs and shocks do yourself a big favour and get four urethane foam bump stops. https://www.polyperformance.com/eibach-micro-cellular-foam-shaft-bump-stop When you go over railroad tracks or a big pot hole you don't get the bone jarring thump that you get with rubber or solid urethane bump stops. The lowering springs reduce the amount of travel in the shock, the foam bump stops make sure it is a gradual stop.
-
I pushed a length of string trimmer line through the metal gas line with a length of kitchen cord taped to it, then put aside the trimmer line and tie a piece of rag onto the end of the cord, spray the rag down with brake cleaner and pull it through, you won't believe what comes out. If the cord breaks and the rag gets stuck heat the gas line from outside until the rag burns up and blow the ashes out with compressed air then start over, you will want to do it a couple of times. This is all just a feel good exercise but it does clean some crap out.
-
That's a good idea.
-
I've done the POR15 gas tank kit a couple times now, just follow the instructions to a T. Clean as you can it then a hair dryer running through the tank for an hour until you are sure the inside of the tank is dry. I had so much left over that I took a brush and gave the outside of the tank a good coat too.
-
Pooky, that looks great, love the wheels and the 240z hood. More pics?
-
Gotcha, I didn't see the sun roof and other mods, as long as the paint job is done well and isn't too outrageous it shouldn't affect the valve much at all.
-
Check this one out, https://bringatrailer.com/listing/1973-datsun-240z-124/ Perfect example of how not to fix up a car, the guy spent so much time and work on the appearance and the bottom of the car is rivet patched and rotten. The next owner has to strip it down to the shell and start over which is a shame because the body work and paint look pretty good, he did some nice work.
-
Welcome to the forum. All the paper work and you are the second owner? That's quite the find you have there, painting it the original silver will not only preserve it's originality but also it's resale value for some time in the distant future. The change over to 240 bumpers is pretty easy now and reversible. I'm sure you will enjoy it for decades to come but it's always worth considering the next owner. That is a real gem. What are you're plans, any pics of the engine bay or suspension you can post?
-
Hmmmm maybe $800
-
-
Have you tried using more leverage? With the wheel off place a block of wood under the ball joint, get the socket on the bolt head and an extension pipe over the breaker bar, 4-5 ft. should be enough to crack it.