


grannyknot
Free Member
-
Joined
-
Last visited
Everything posted by grannyknot
-
 I would just warn you to only work on one section at a time, finish the battery area then move on to one of the floor pans with the other intact. Finish the second floor pan then move to one of the rockers. Yes, remove the doors.
 -
Pretty sure that's where the black plastic J hook goes, it's for the seat belt to hang on. Not sure anyone ever used it for that, usually they are broken.
-
Who knows with 240z prices in the toilet, not as much as I sold it for😉
-
The guy I sold my ///MZ to has it up on BaT https://bringatrailer.com/listing/1972-datsun-240z-342/
-
You've been holding out on us, nice work.
-
First 4" of the hood.
-
I've done 4-5 rear glass installs and agree with you, more difficult than the front. As mentioned by Patcon, hatch needs to be mounted on the car, install the rubber gasket on to the glass, install the SS trim into the rubber gasket. Lose the rope and get some string trimmer/ weed wacker line, install the trimmer line in the pocket that will go over the pinch weld, lube every thing up, I just use a squirt bottle with water with a small squirt of dish soap. You really need a second pair of hands, close the hatch, mount the glass on the hatch, snug the glass down on the bottom of the hatch, that the will be the edge that gets installed over the pinch weld first. The last section of the rubber to be installed will be up near the roof. One guy is inside the car laying on his back, the other outside. Start pulling the line over the pinch weld, once you have it over the entire bottom lip the guy outside needs to pull the glass down to ensure full contact. It is crucial that this step is done now, once the sides are done there will be too much fiction to adjust the glass. Once the bottom is properly seated work the bottom corners one at a time, proceed up the sides equally, then the top corners, then the top horizontal section. On the corners it is helpful to rotate the line in a counter clockwise circle to help the the rubber over the lip without tearing, also, once the rubber lip is over the pinch weld you will want to push/pull the lip down from inside with your fingers so it is fully seated.
-
Once the bumper is mounted it will be hardly be noticeable.
-
Maybe the fuzzy side of Velcro that holds the particle board spare tire cover down?
-
In the bottom left hand corner of your pic, one of the 3 screws that hold the mechanism to the door appears to be too long and may be interfering with the lock lever, just a guess.
-
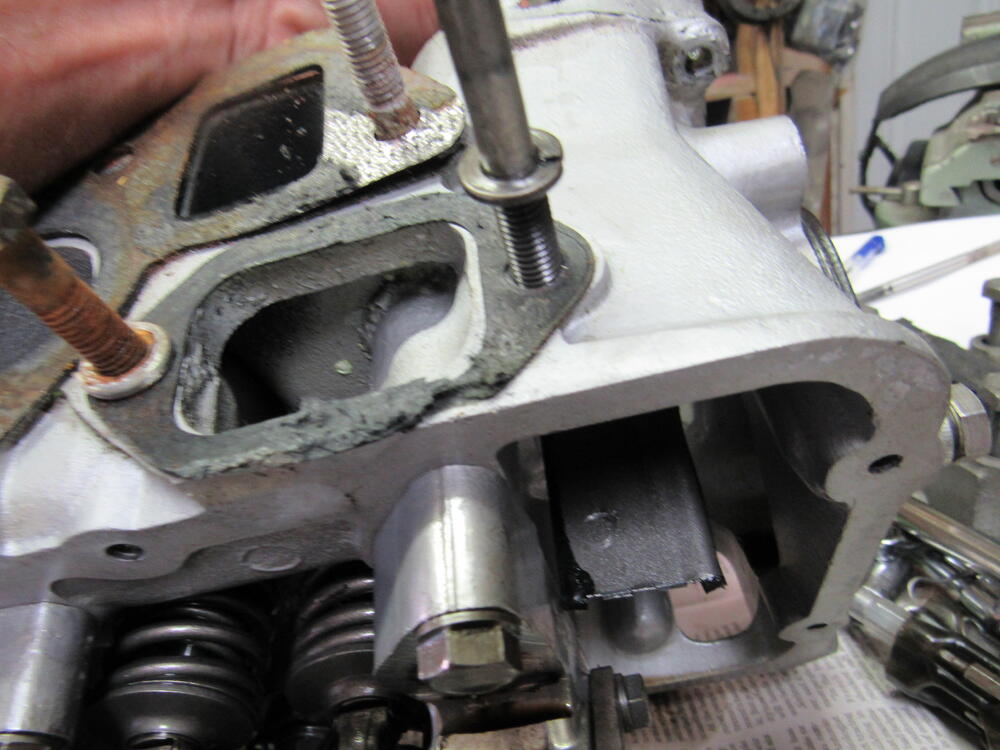
Don't guess, remove the valve cover, install that forward bolt holding the thermo housing on, make sure there is space between the end of the bolt and the back of the chain guide. @Captain Obvious is right about the chain guide being steel, I'm mixing up BMW chain guides with Nissan guides. If the shavings you found in the pan are aluminum then they came from somewhere else and as mentioned above could have just been sitting in an oil passage and got blown out into the pan on first start up.
-
Same here, I believe Precision changed their design on the door seals 4-5 yrs ago because I haven't seen a bad one in that time, they use to be really bad.
-
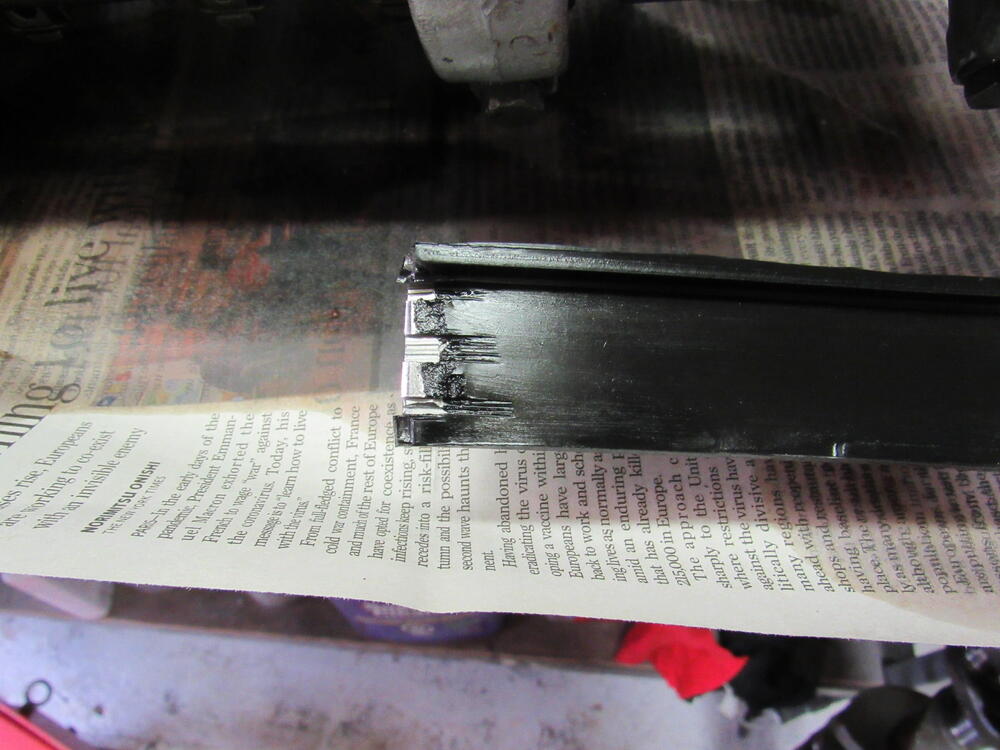
Here is a common cause of aluminum shavings in the pan, a bolt that is too long for the job is used to secure the thermostat housing. It makes contact with the back of the chain guide and if the bolt is long enough can bend the chain guide and and force the chain to eat into the top of the guide. These pics were taken of an freshly rebuilt L28 with perhaps and hour running time on it.

-
Try raising or lowering the receiver/strike plate slightly, sometimes the latch on the door will ride up and jam.
-
As you say, the hole farthest to the d/s.
-
If you do a leakdown test on the cylinders and the valves are worn and letting air escape you will be able to hear it with an ear to the exhaust pipe and the opening of the throttle body. If the rings are leaking, removing the hose from the blowby on the engine block should let you hear air escaping. Did you do the compression test on a hot or cold engine?
-
Do you hear the same grinding when you spin the hubs with the drums removed? If the backing plates aren't interfering with the drums then the grinding could be a bad wheel bearing in the hub.
-
The original wheel cylinders may be leaking and the newer style is a good compromise but a leaking wheel cyl wouldn't cause the grinding sound you describe. jack it up, remove the wheels and and spin the hubs, could just be the drums rubbing against the backing plate.
Looks like a fantastic money pit, would love to get my hand on it.
In situations like that I have always just made up an adapter on the lathe, then have the thickness of the adapter cut out of the drive shaft and re-welded by a drive shaft shop. You could also turn the flange 10 degrees and re drill.
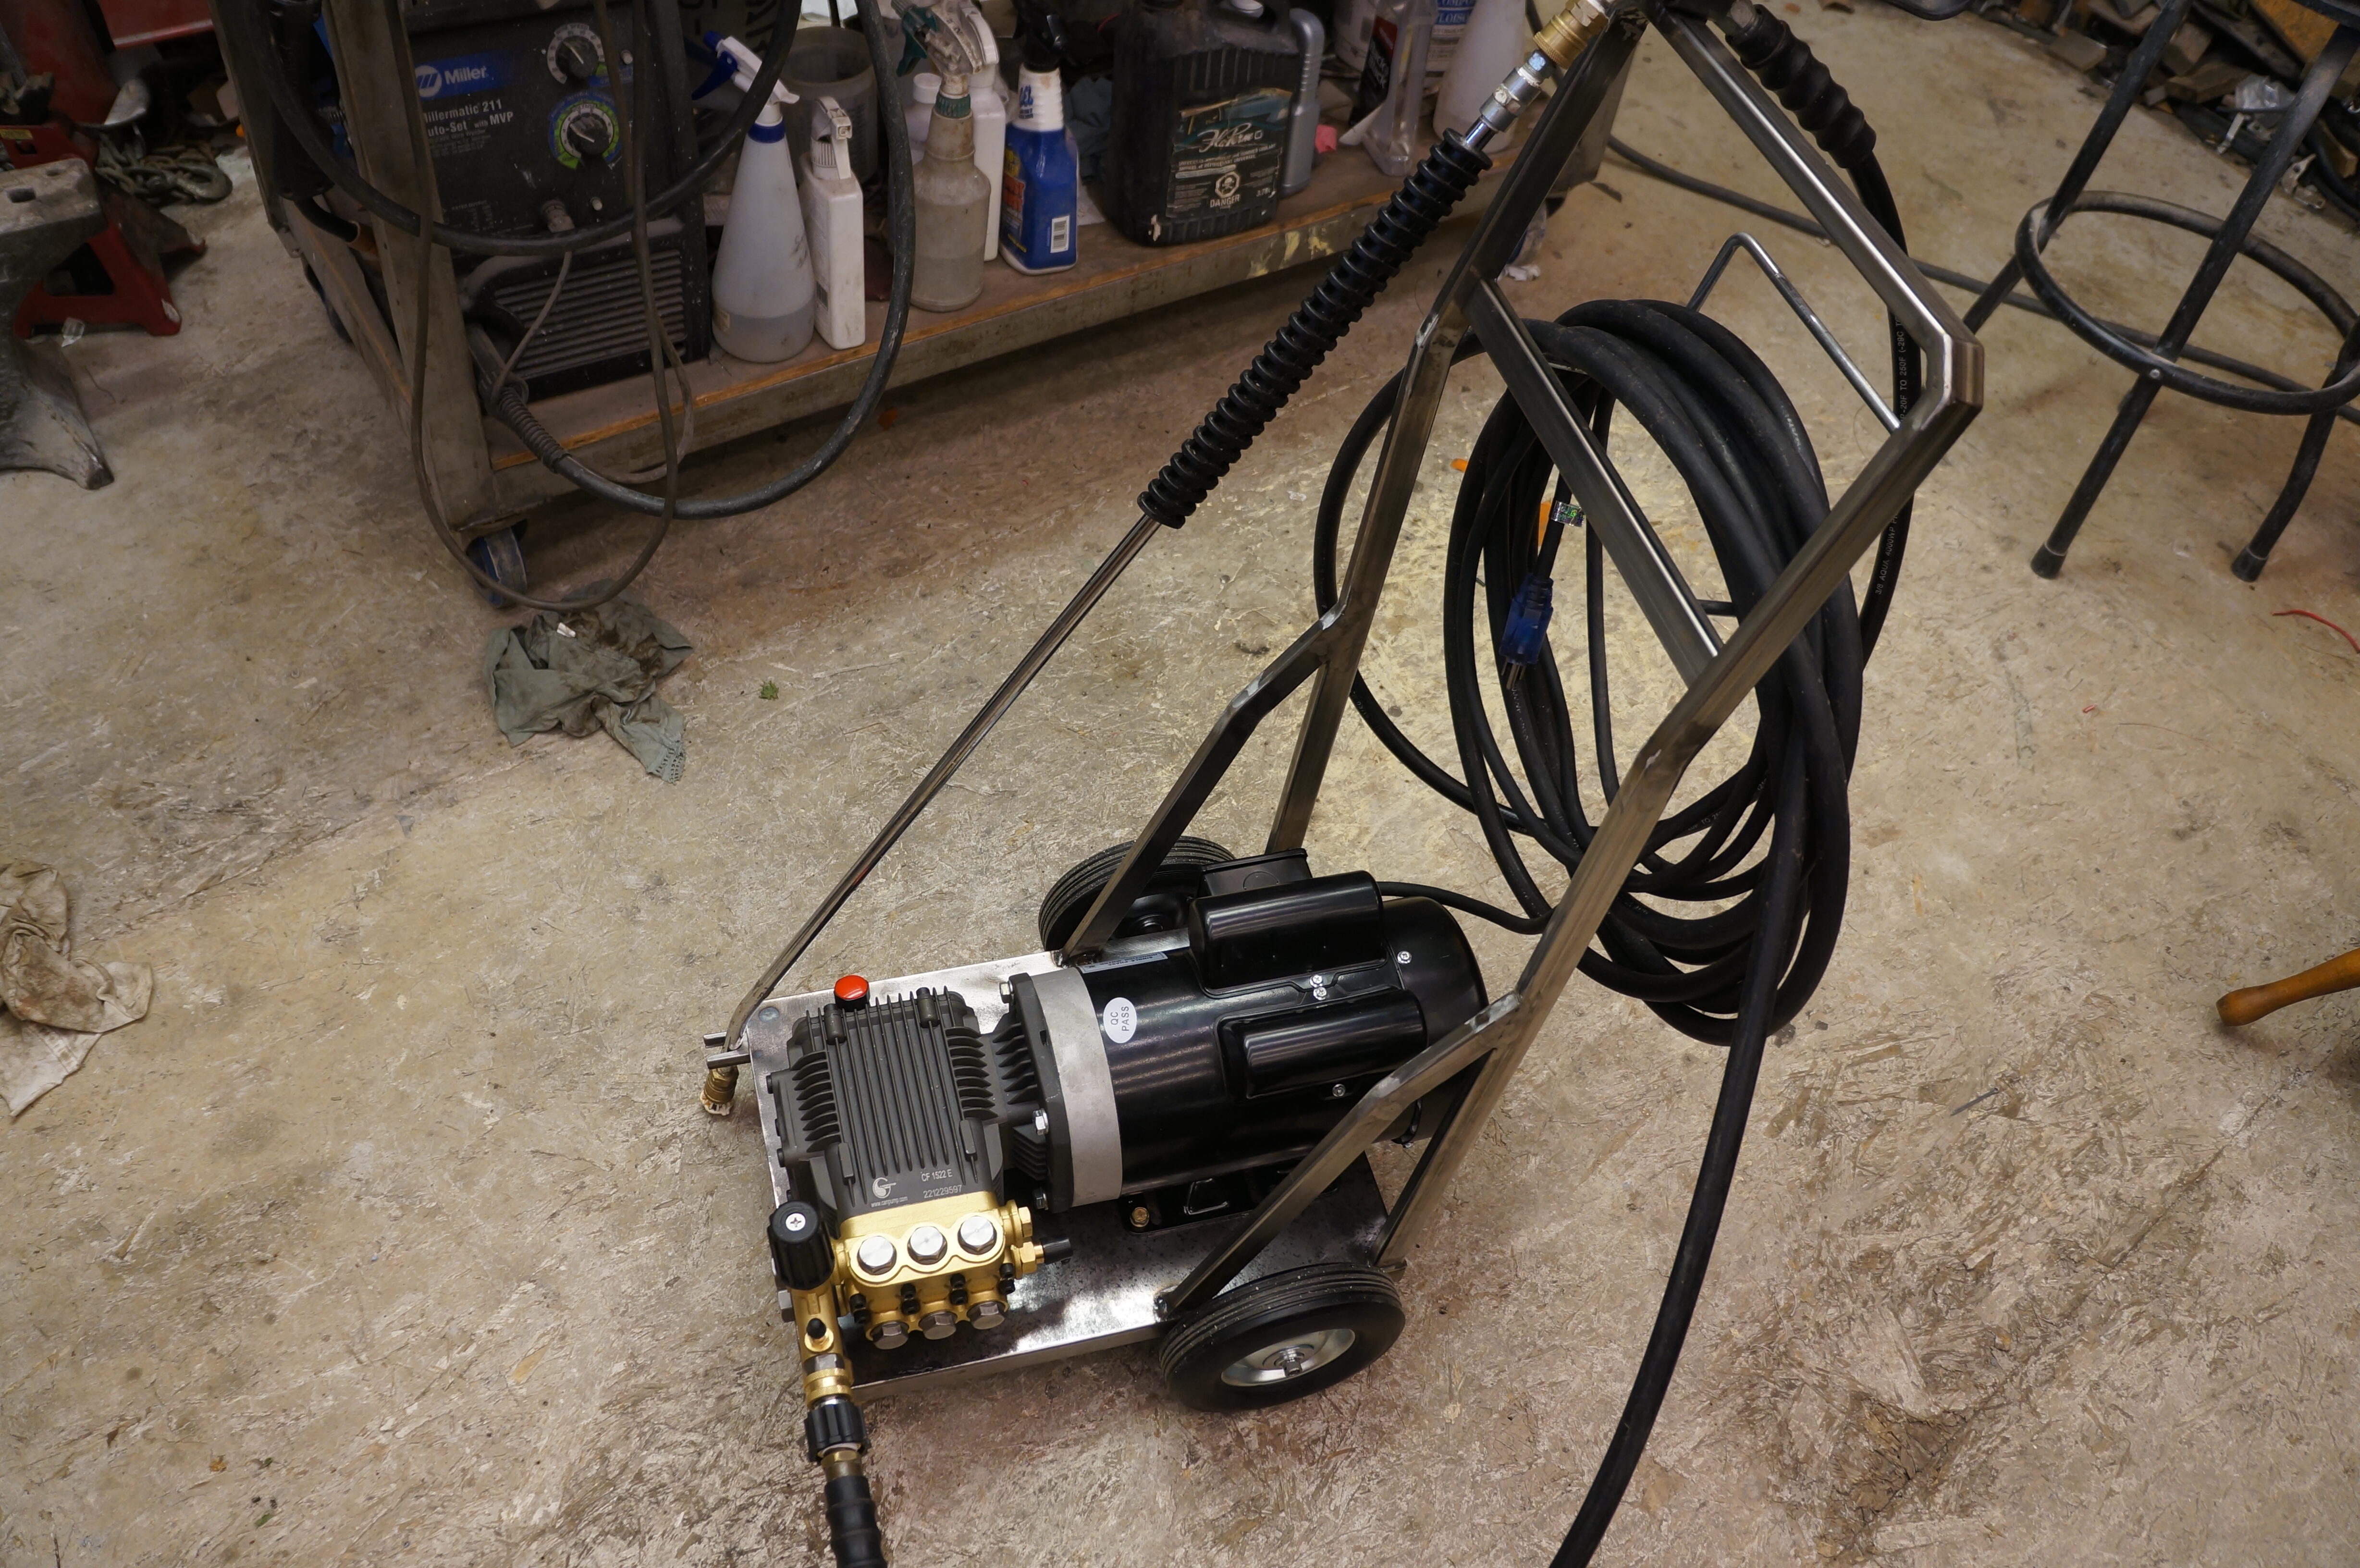
There are rubber seals all over the motor but the hose is 30ft, a long way from the business end of the wand. Actually the motor is rated for nominal 1800 rpm but 1725rpm is the standard speed for single phase, 110 - 120 vac. After using the gas powered PW for years I noticed this unit is much smoother, less vibration and pulsing of the water jet coming out.
115v, 15amp, 1725 rpm
I have a gas powered pressure washer and it's great, but it's loud. I like to wash the cars early in the morning on weekends but my neighbors aren't too happy about it, so I started looking around for an electric PW. Man there's a lot of junky units out there, most of the consumer grade PW's have axial pumps and the build quality looks like they won't make it through the summer. Kranzel has good reputation but the prices were too much for this old cheapskate. So I started looking around at commercial products and found if you are willing to do some leg work and assembly you can put together a good quality system that will last many years and not empty the wallet, too much. I started with this Triplex pump, 1500psi, 2.5 gpm https://www.amazon.ca/dp/B07V2BG92C?...osi&th=1&psc=1 for $310 cnd (cheaper for you guys in the states) 1500psi is fine for car washing, patios and decks so I should get a lot of use out of it. Paired it with this 2 hp compressor motor, https://www.ebay.ca/itm/165599464830...1&isGTR=1#shId I have a good quality hose and wand from the gas powered unit that I can use and welded up a cart from scrap metal I had in stock. I had the cart powered coated for $40, so in all, I spent about $600 cnd.


 The rack that sticks out of the housing when the steering wheel is turned all the way to the right


Important Information
By using this site, you agree to our Privacy Policy and Guidelines. We have placed cookies on your device to help make this website better. You can adjust your cookie settings, otherwise we'll assume you're okay to continue.