grannyknot
Free Member
-
Joined
-
Last visited
Everything posted by grannyknot
-
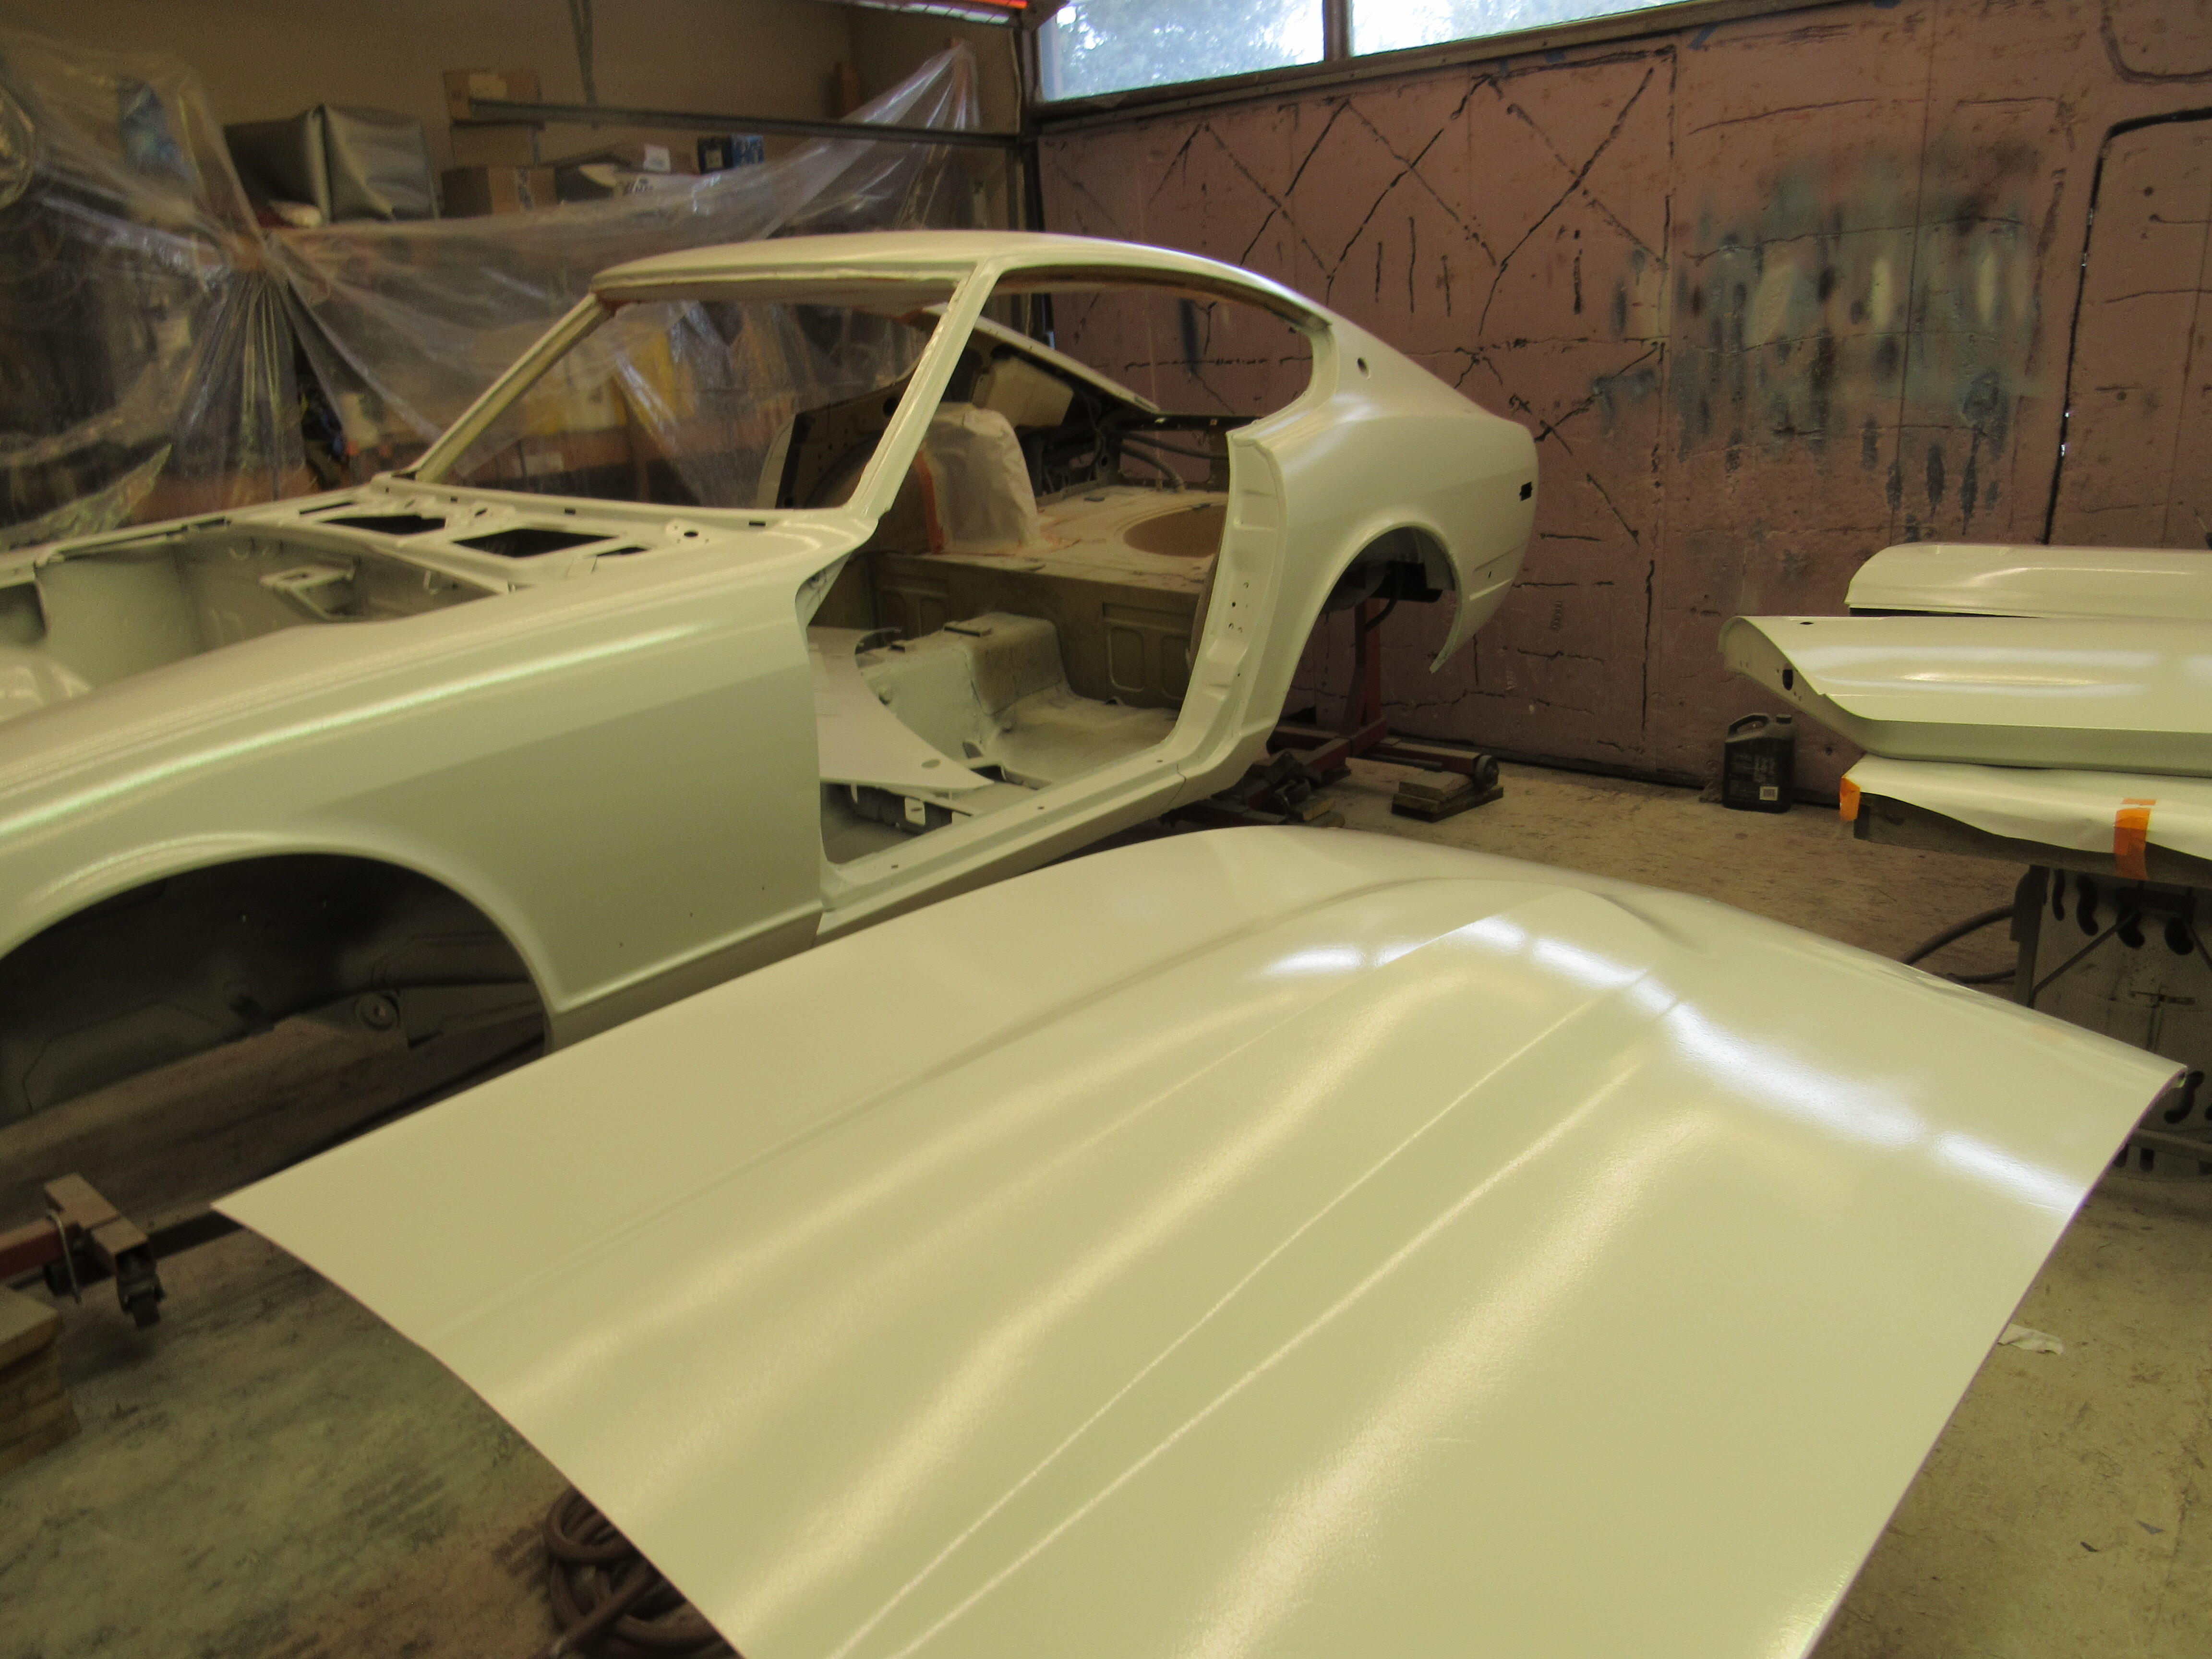
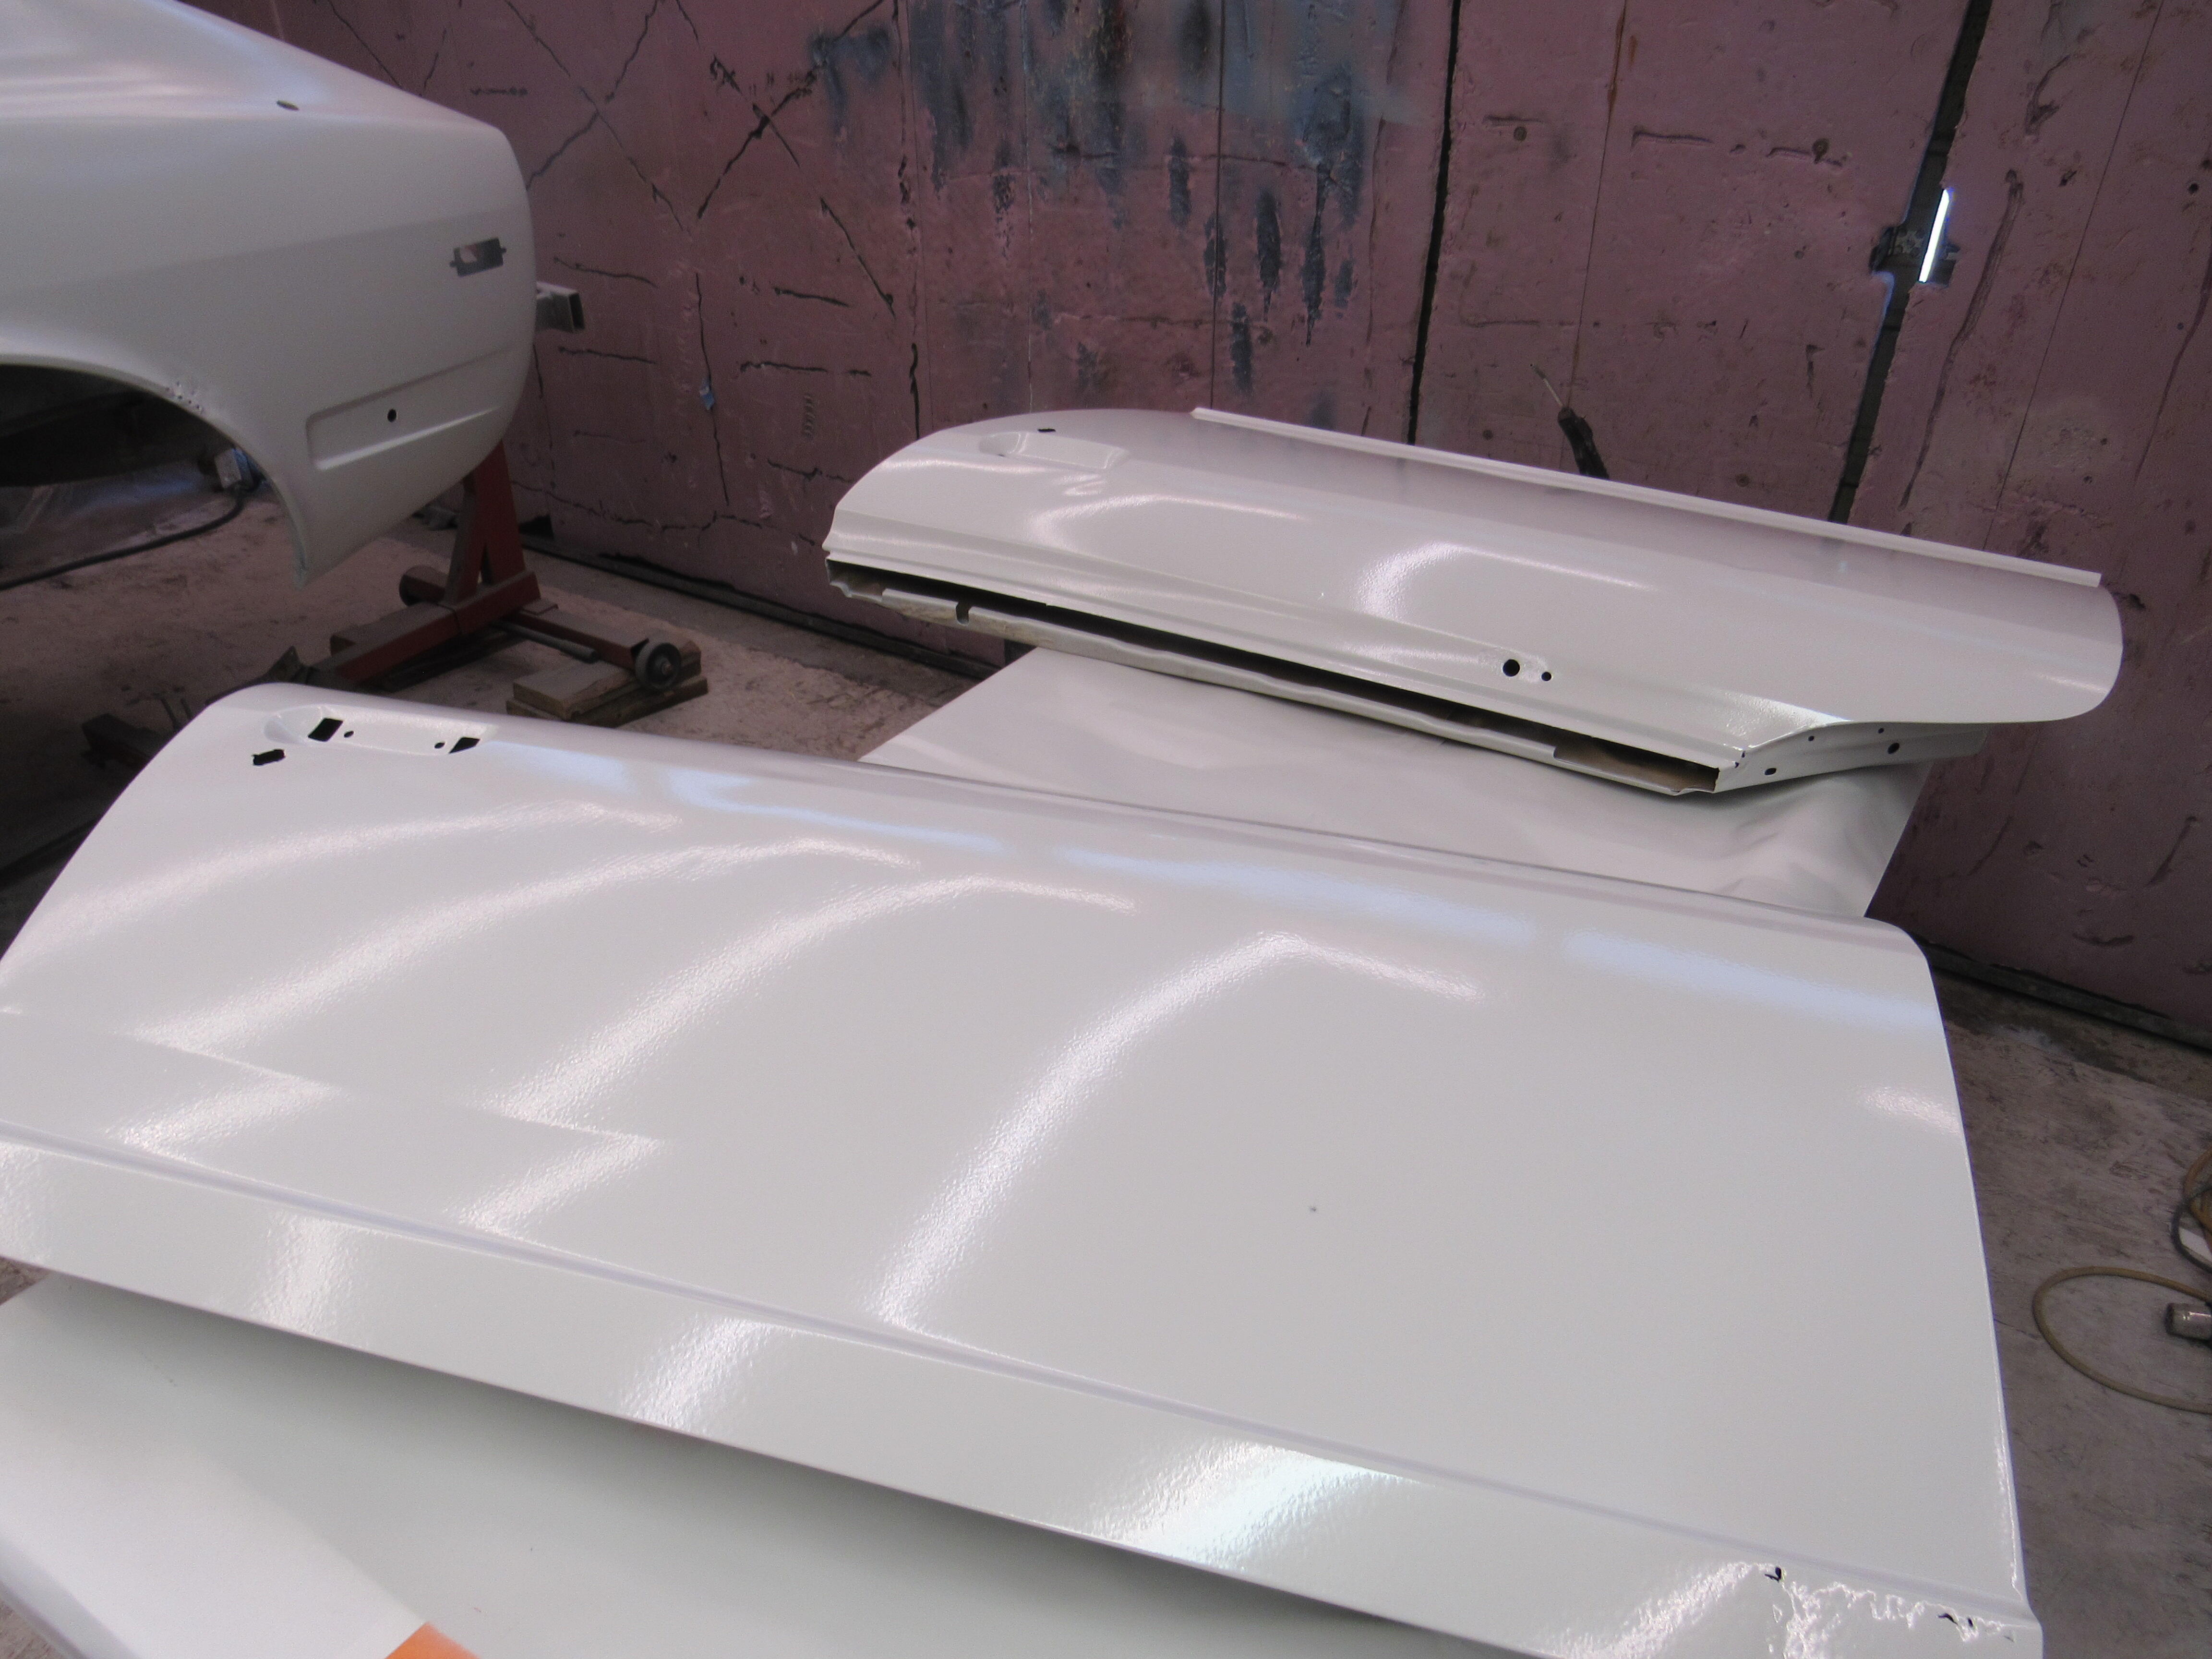
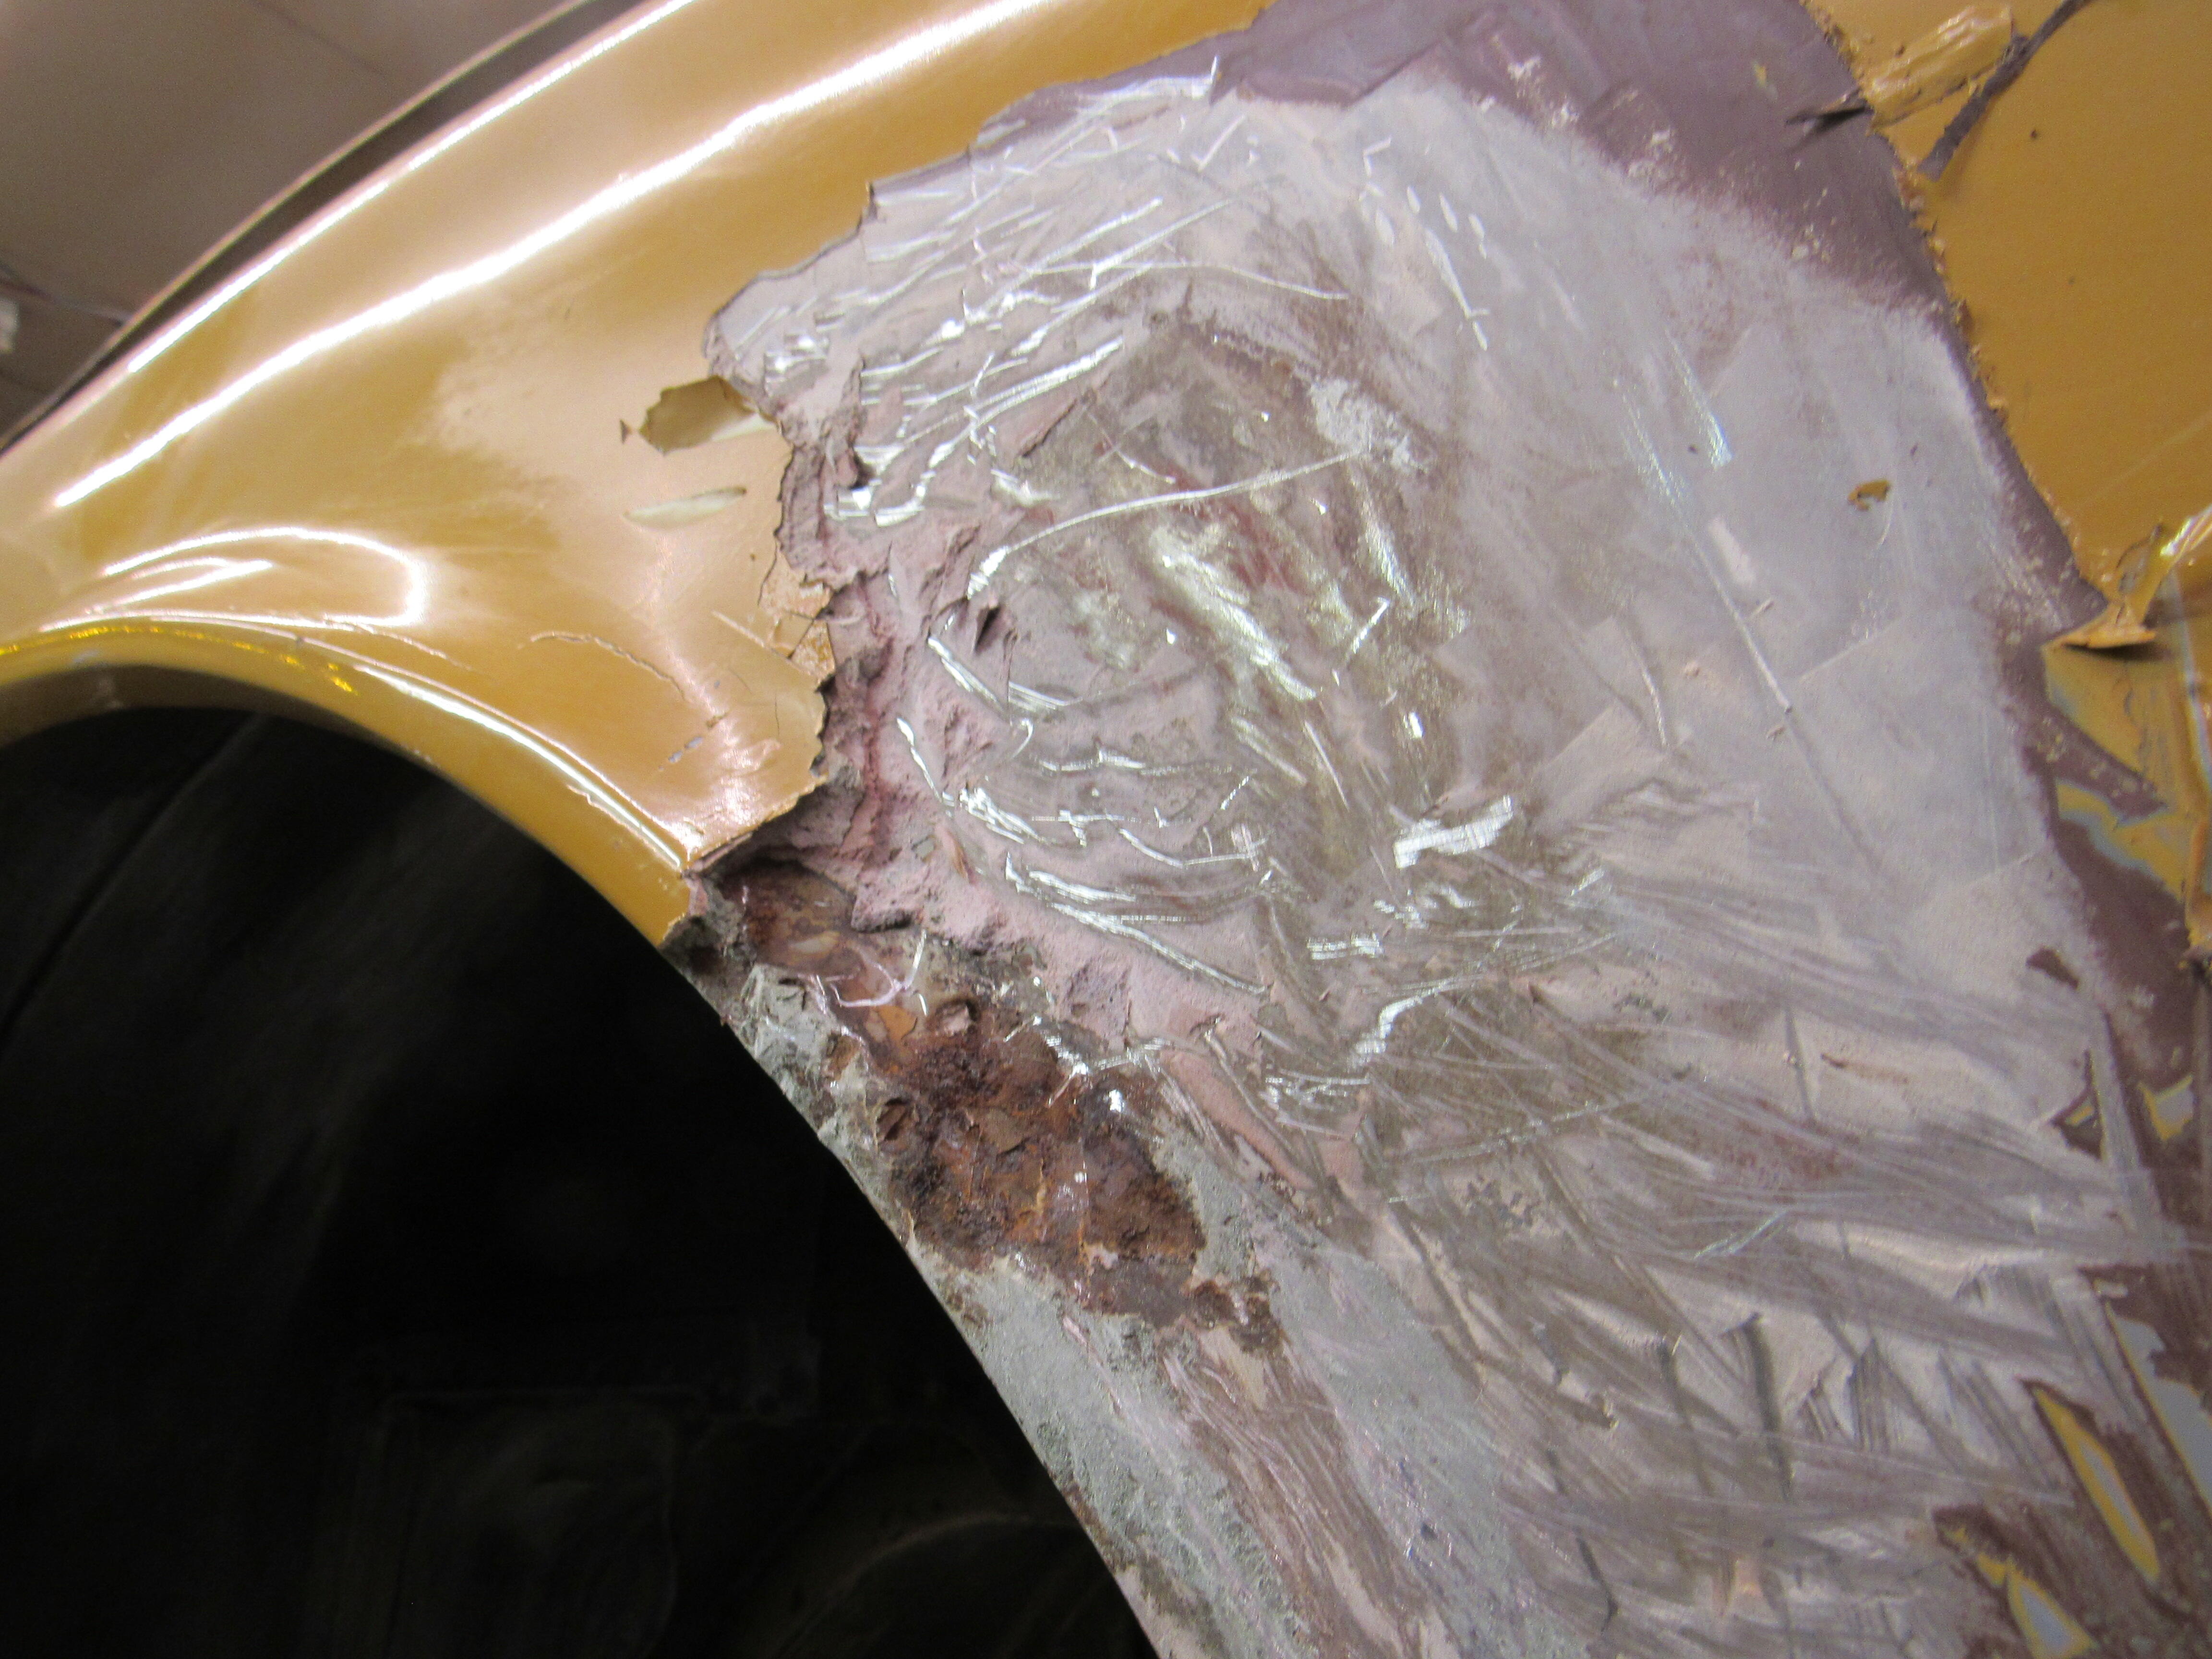
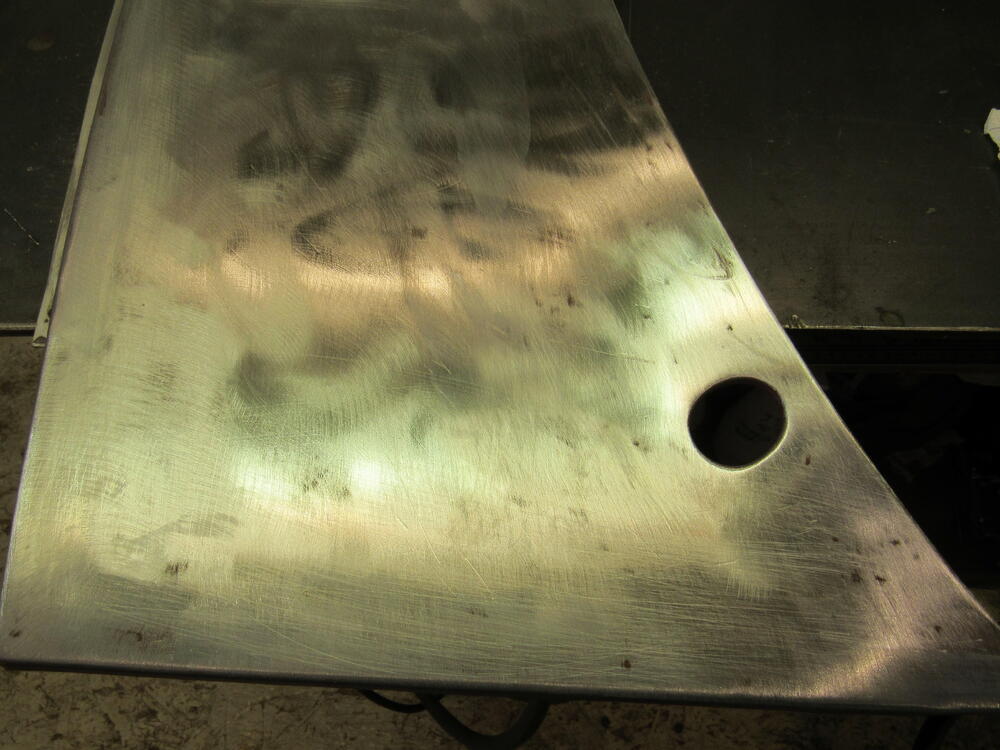
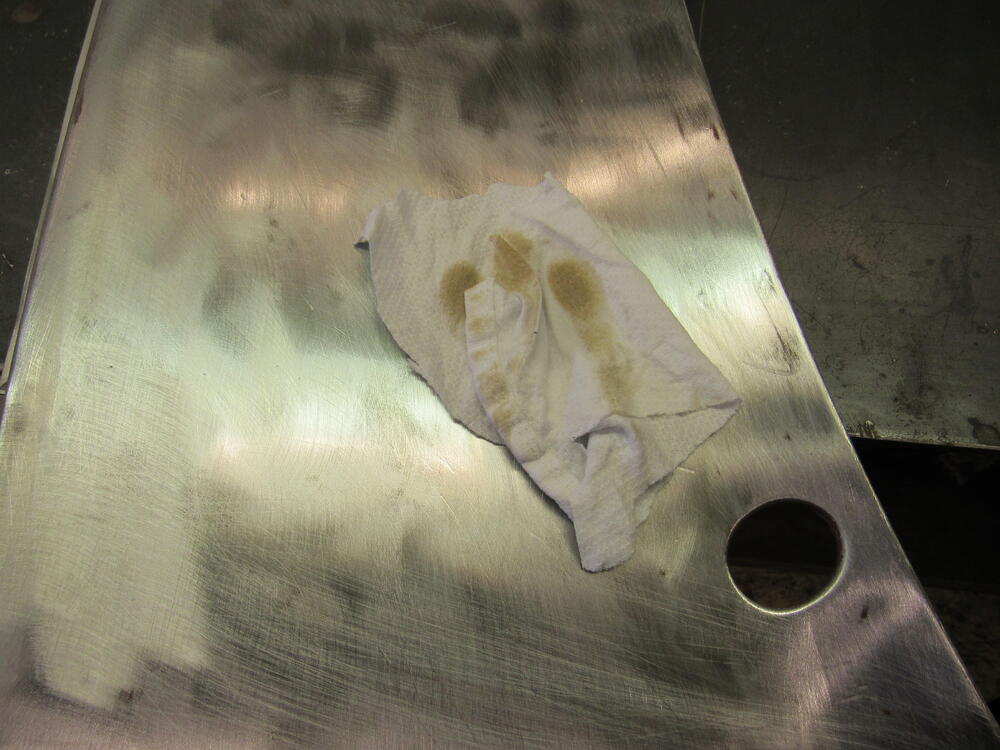
 I got 2 coats of epoxy primer on everything this morning, a good feeling having all that bare metal sealed up. I got the shop temp up 28 degrees C using both the infra red heaters and the big propane burner, and that was the perfect temperature to wake up all the mosquitoes that were hiding. Lots of bugs to sand out of the primer now. I rigged up a new exhaust fan so no more mist in the air, so effective that by the last shoot I decided it was safe enough to have the over head infra red propane heater on. No boom. I have mentioned this before on other builds but it still surprises me, this panel was freshly sanded, washed with a fine steel brush and Acetone, wiped clean with Acetone until a white cloth came away clean, then repeated with Methyl hydrate until the white cloth came away clean. Then I washed it again with an industrial Lye cleaner and look at all the dirt that was still on the metal.
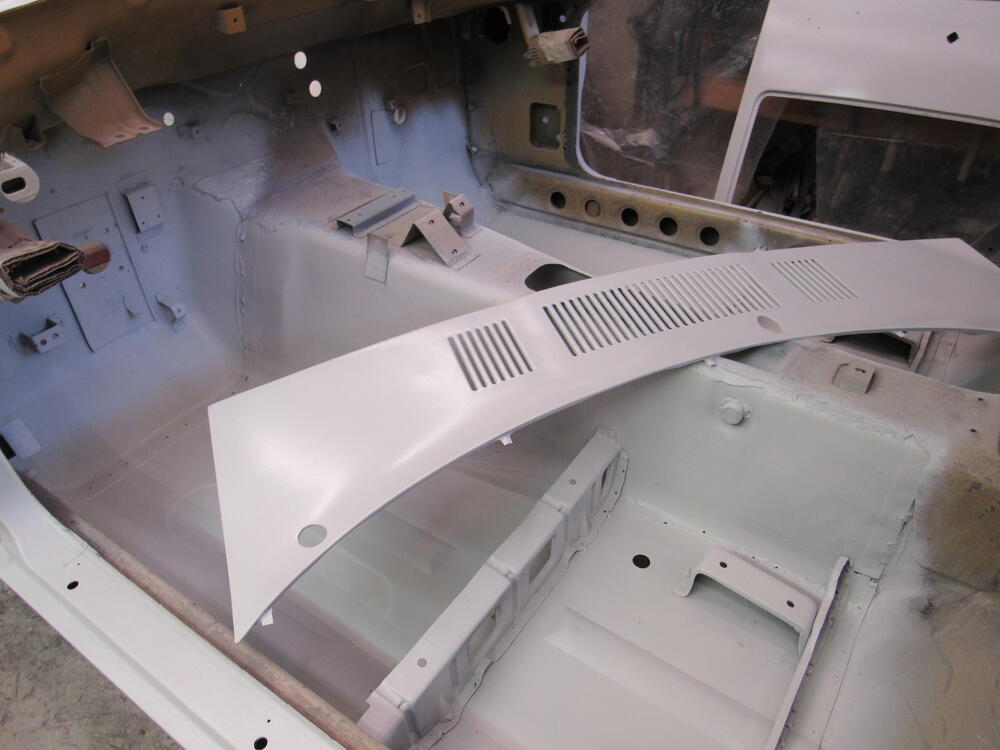


-
Arts & crafts stores carry that kind of mat board or even a frame shop, or, like everyone else I'm sure you have a dozen Amazon boxes kicking around🙂
-
I was just on their site and they are now offering a stock looking Datsun 240Z face plate, wish they had that when I was buying from them. https://speedhut.com/gauge-applications/legacy-classic-street-rod/classic-led-tachometers/classic-led-standard-tachometers/4-1-2-classic-tachometer-8k-rpm-dash-mount-jdm-datsun-z-series/?dd-link=0kx6p31reeb
-
No, I cut up my original gauge backs to fit them in, the car was so heavily modified there was no going back anyway.
-
I went with Speedhut gauges on a previous Z because they offer so many different options for back ground colour, typeface, needle colour. It's not hard to put the combinations together to end up with a fairly stock looking gauge if that is what you are looking for. Their GPS speedo works perfectly.
-
In the top left hand corner of your stock fuse box is the fuse for the A/C circuit, as long as you don't have A/C on the car then you can use that circuit for your add ons, also, the accessories circuit usually doesn't have a big load on it so you might be able to use some its capacity. Personally I like to stay away from the stock fuse box and add a new one with its own power source straight from the battery. You also might want to upgrade your alternator to make sure you are covered for times of heavy use. https://www.amazon.ca/DaierTek-Indicator-Marine-Waterproof-Automotive/dp/B0BD4FYFKQ/ref=sr_1_5?crid=3PWCNNVK8NYLQ&keywords=fuse%2Bbox%2B12v&qid=1704636873&sprefix=fuse%2Bbox%2Caps%2C136&sr=8-5&th=1
-
Beautiful! That's a nicer finish than it had when it came off the line. I'm going to have to pull the SS trim out of storage and have another go at it.
-
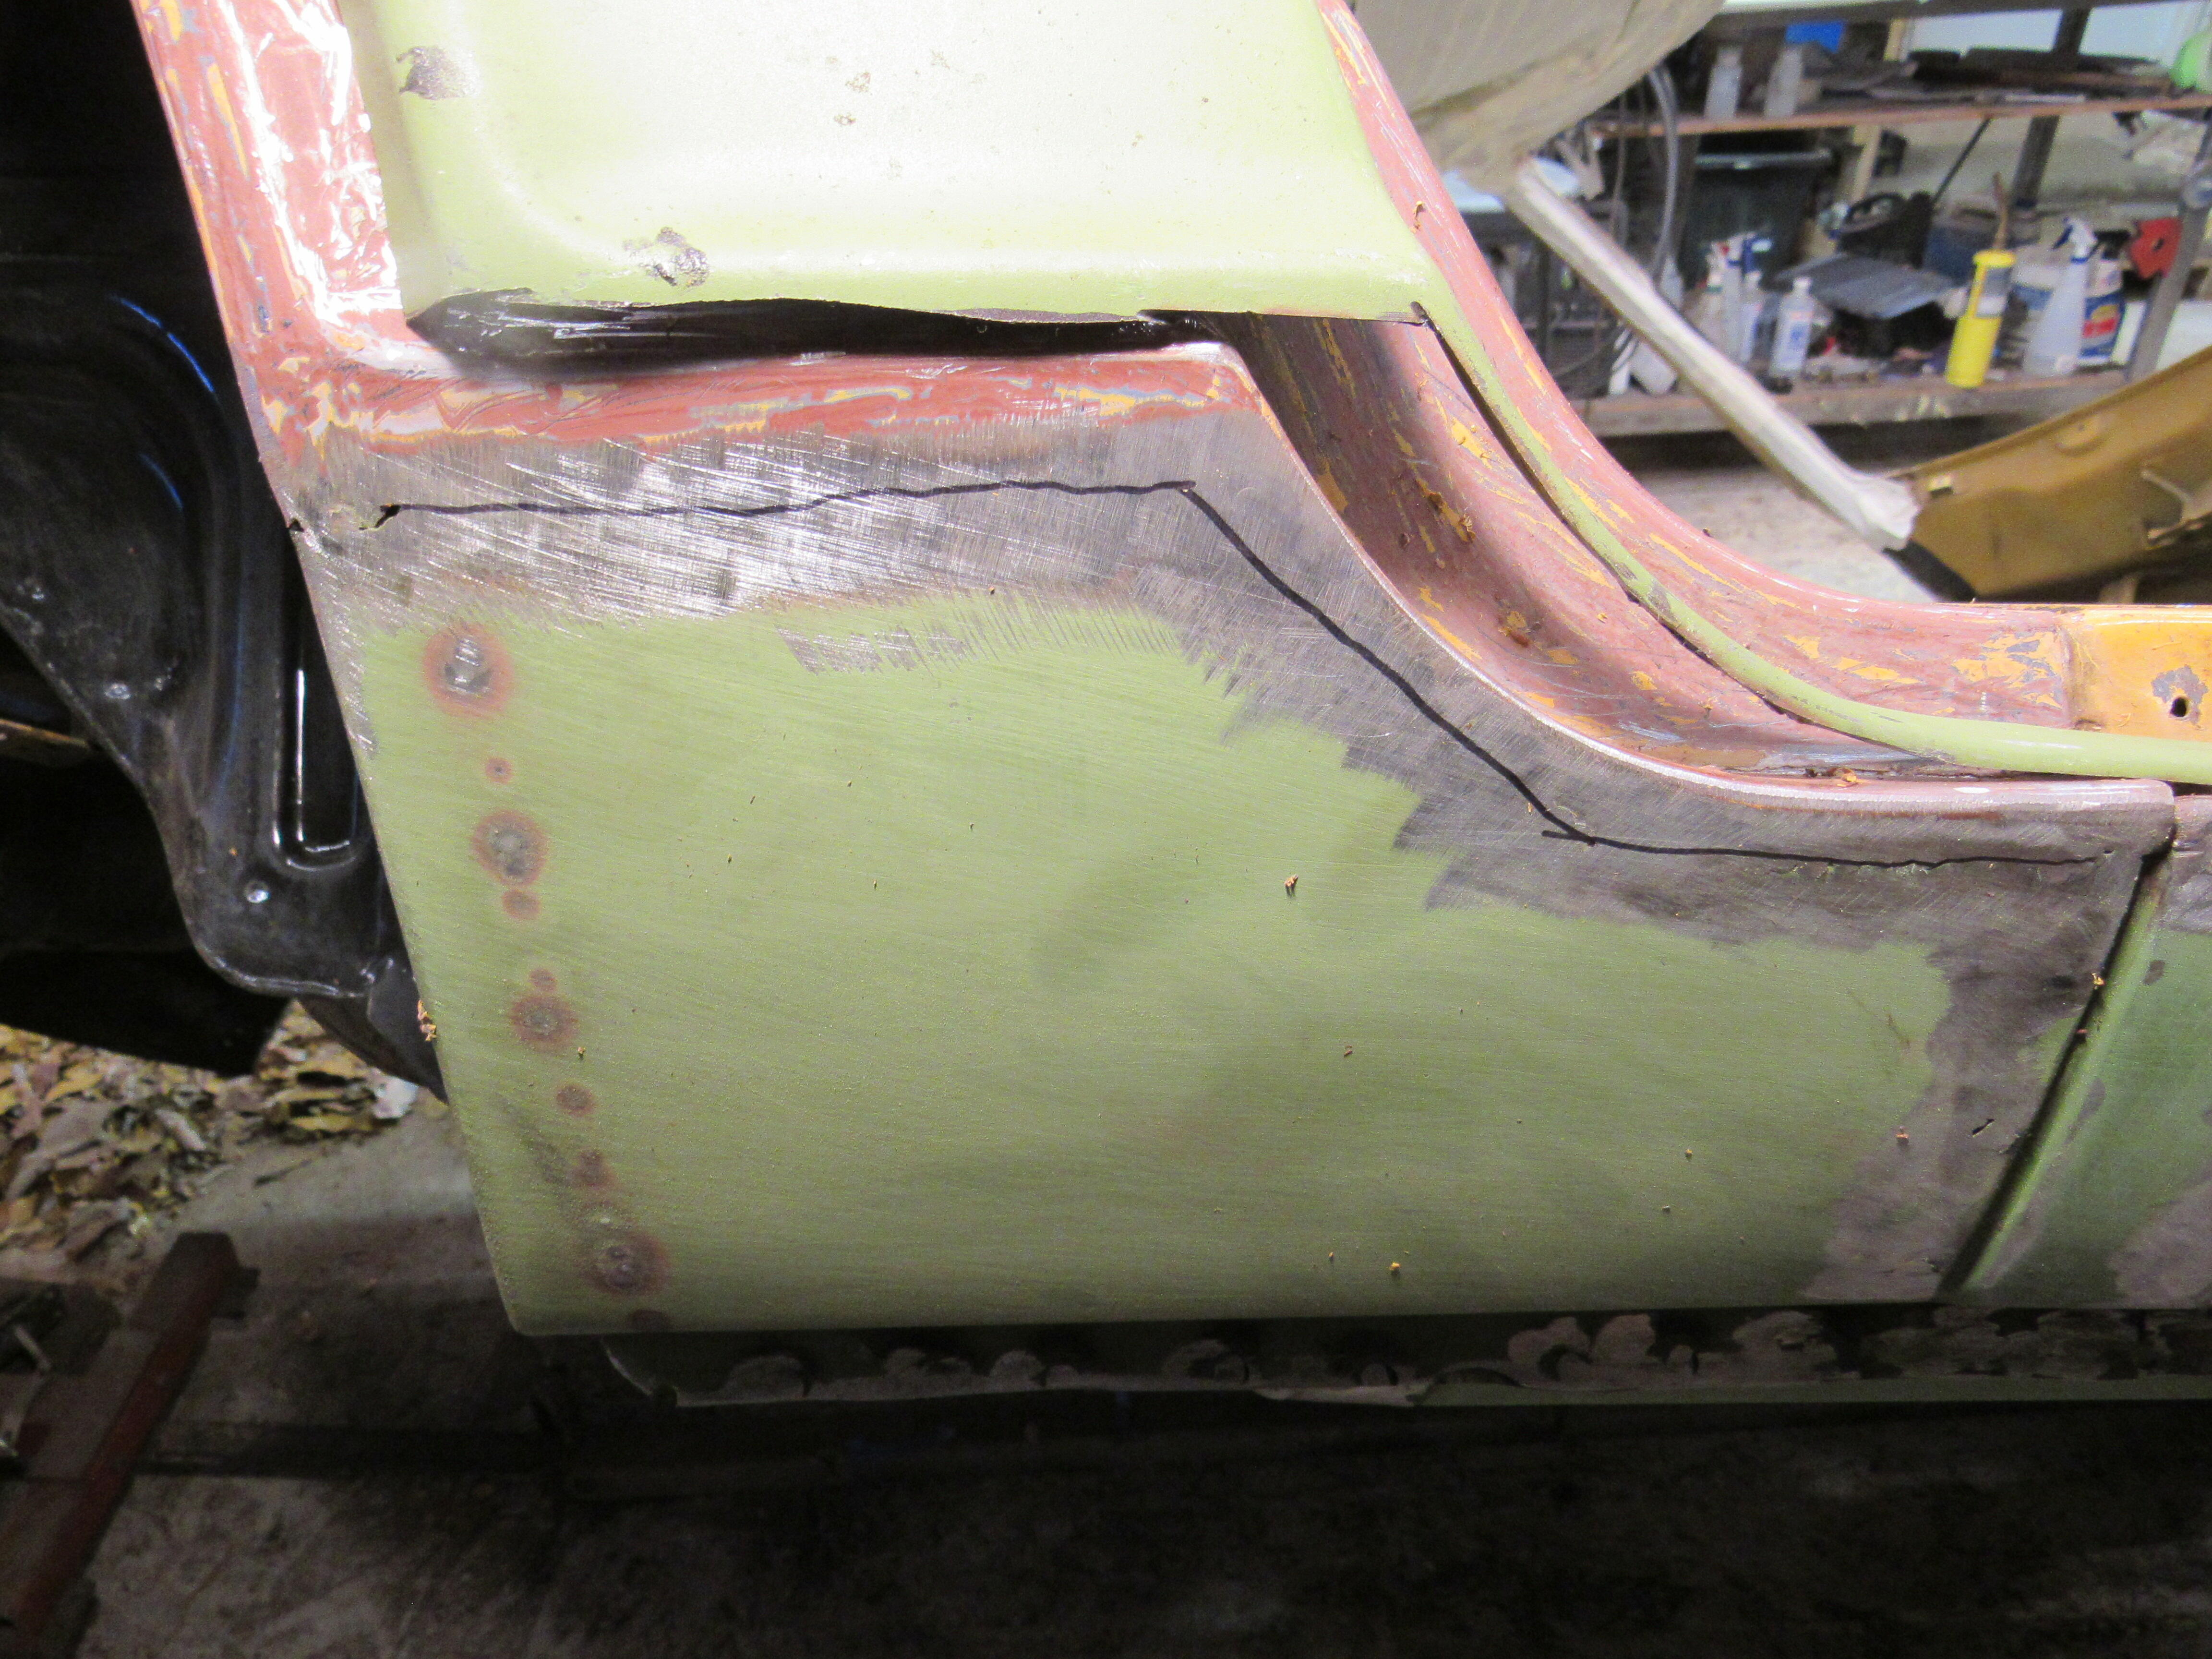
The first 6" is bumpy and the opposite side is covered by the inner frame so I'll concentrate the flame on the high spots and see if I can tap those down then cool quickly with a wet cloth. Other than that I would have to drill out every spot weld on all 4 sides to get access to the bottom of those dents.
-
So not too bad, I thought it might be worse, I'll hit with a torch and try to hammer down some of the highs.
-
The screws are aluminum, at least on Z's from 73 and earlier. @inline6, if you would like to eliminate the rattling of the door handle linkage, a length of 1/8th" tubing, rubber or vinyl slit down one side and slipped over each rod works wonders.
-
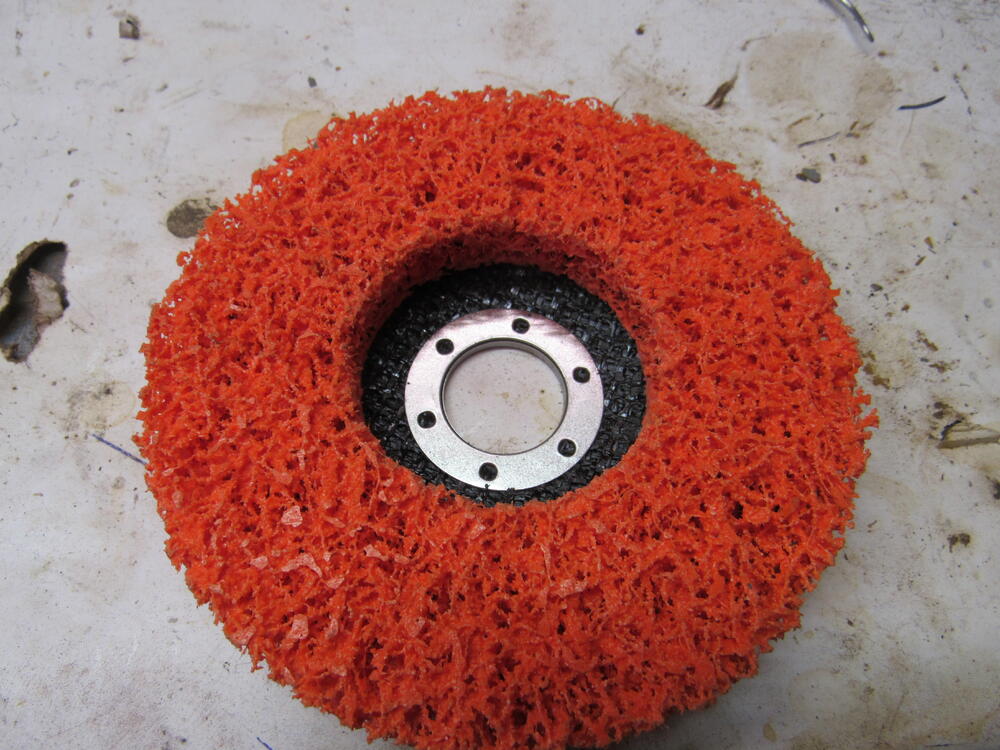
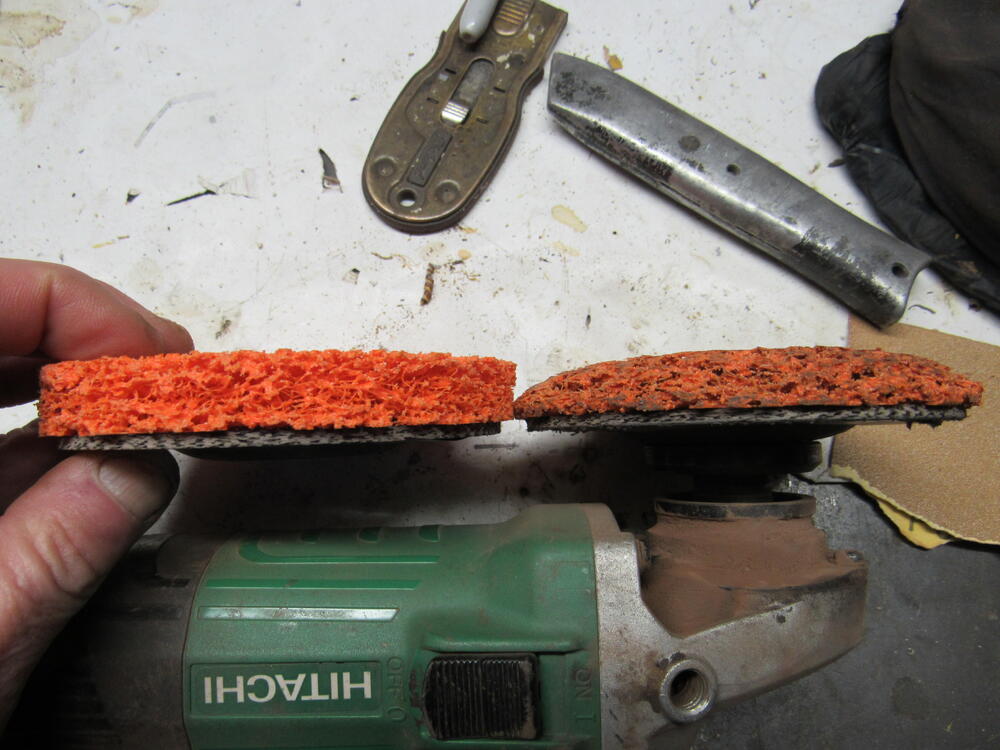
Yeah, as much as you can see in the second pic of the last post. The red oxide primer never comes off with a scraper, the striping discs are the only thing that will remove that stuff.
-
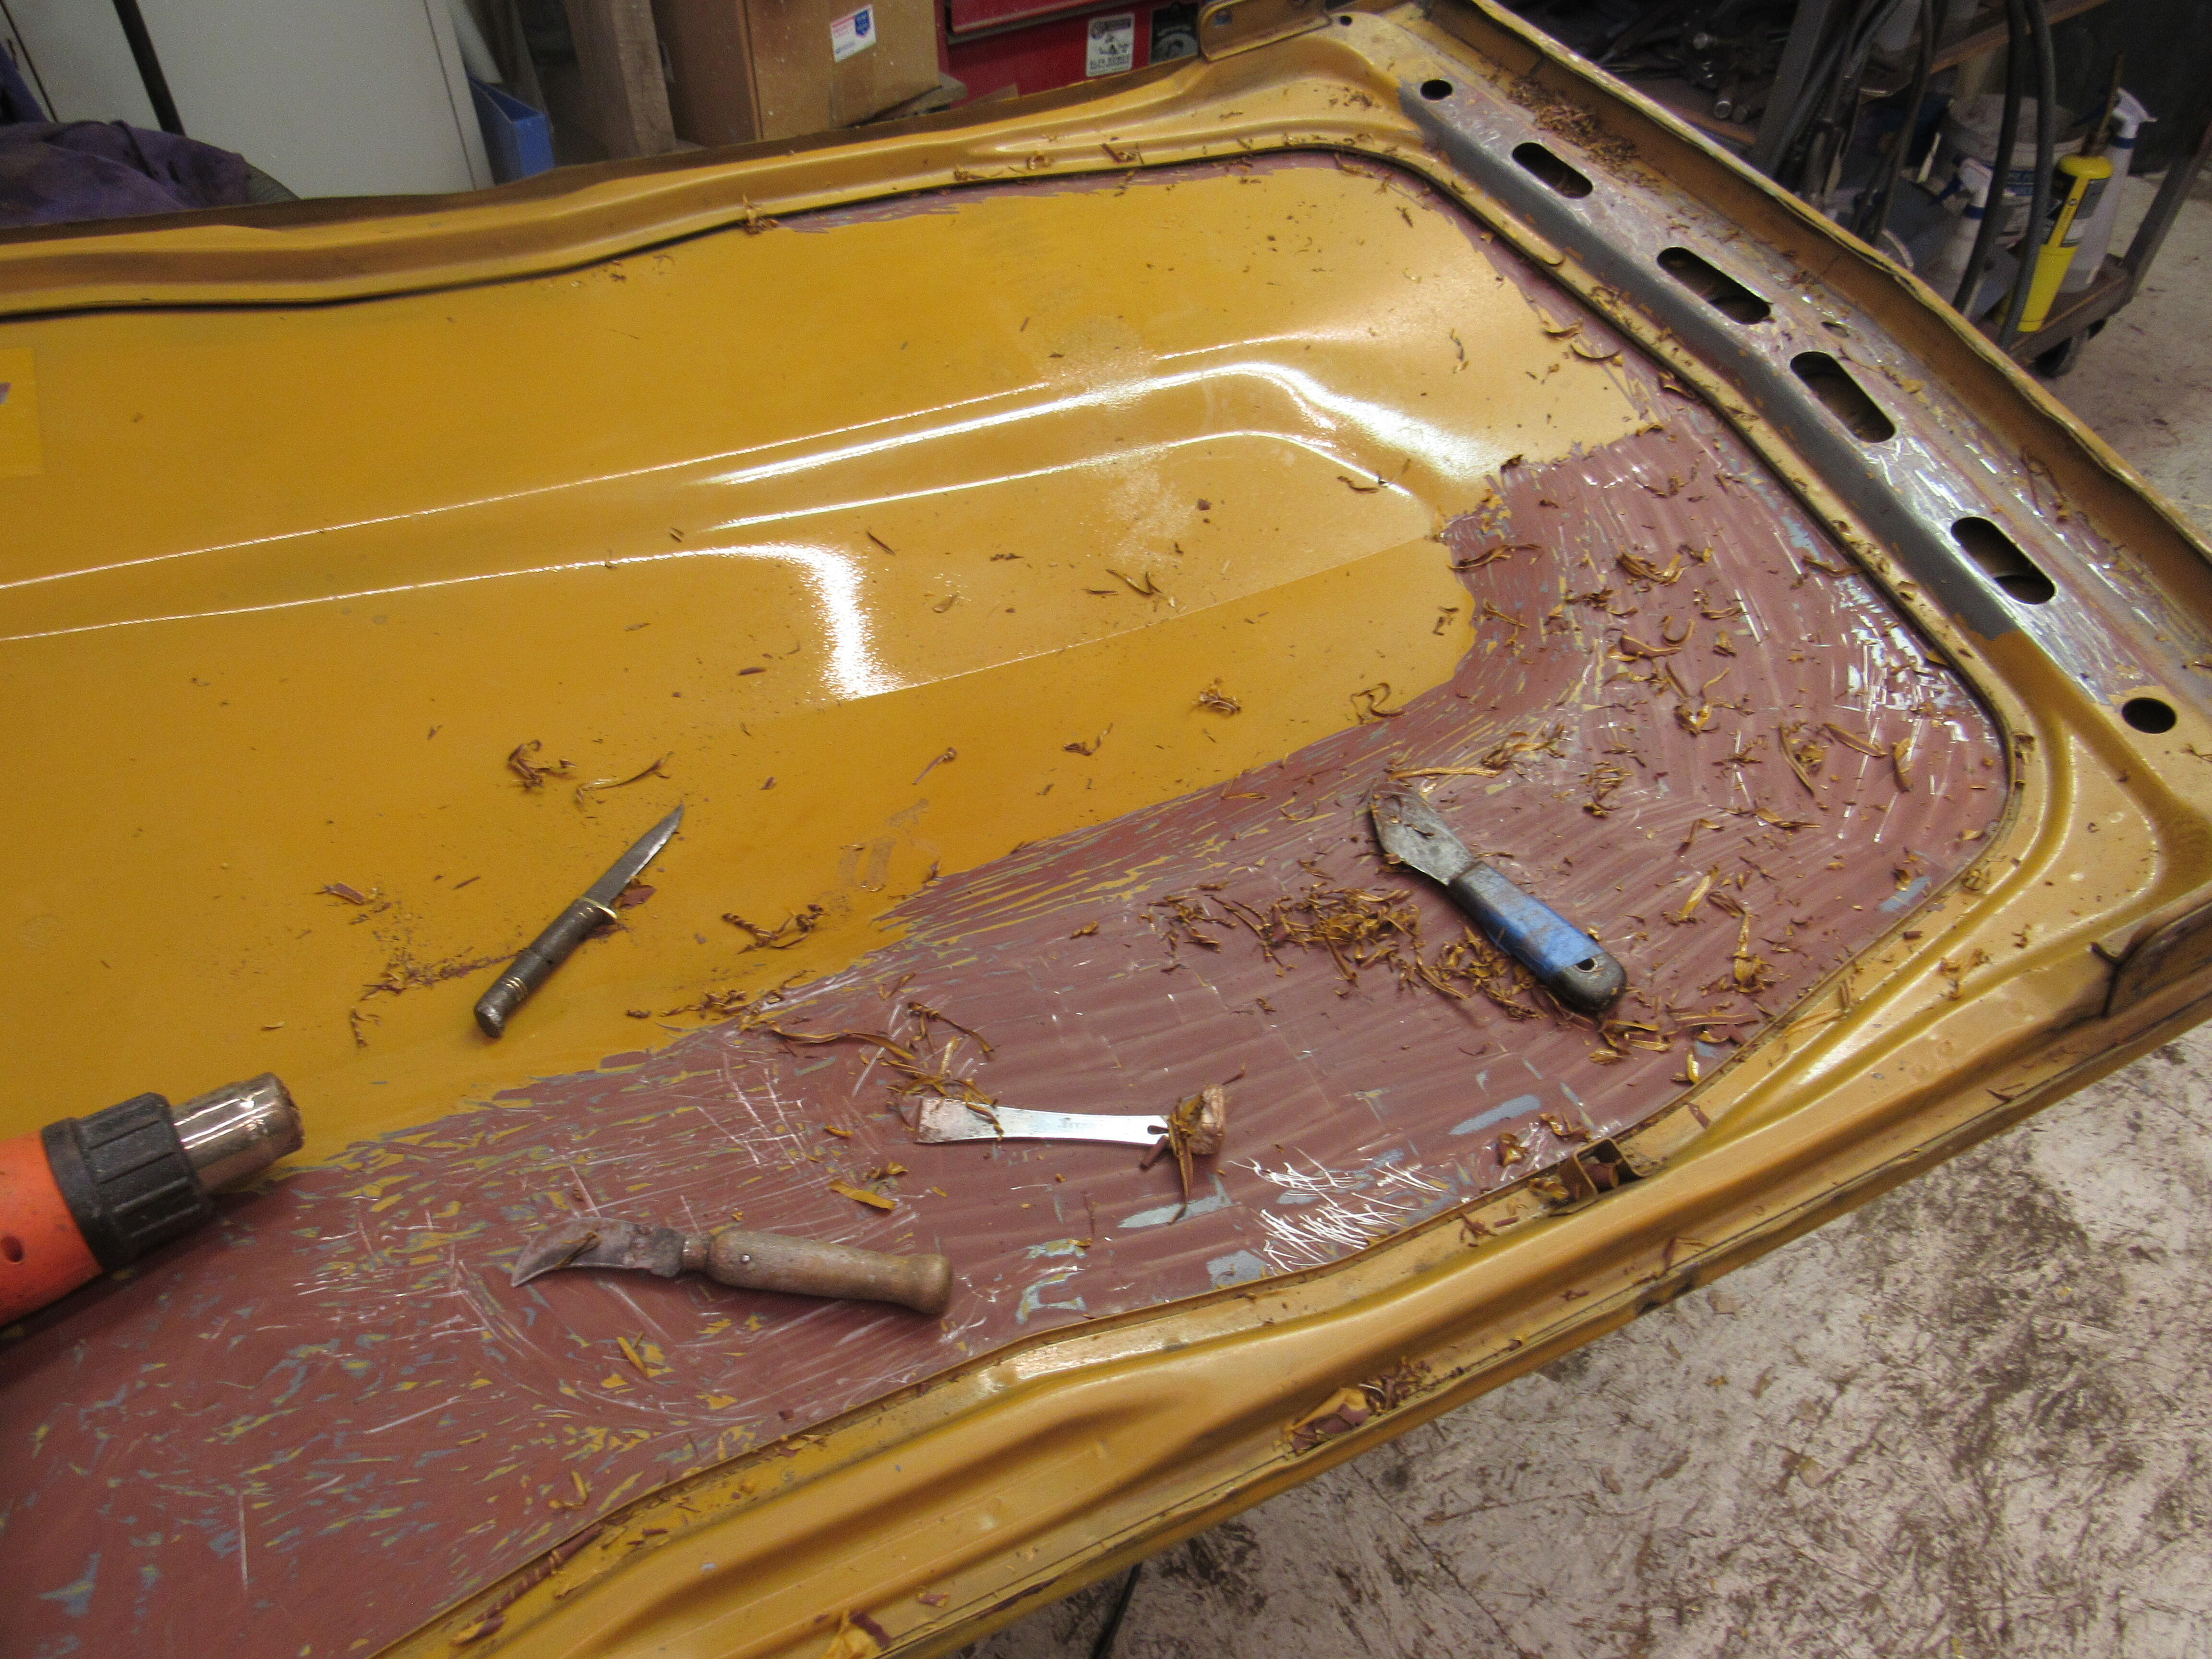
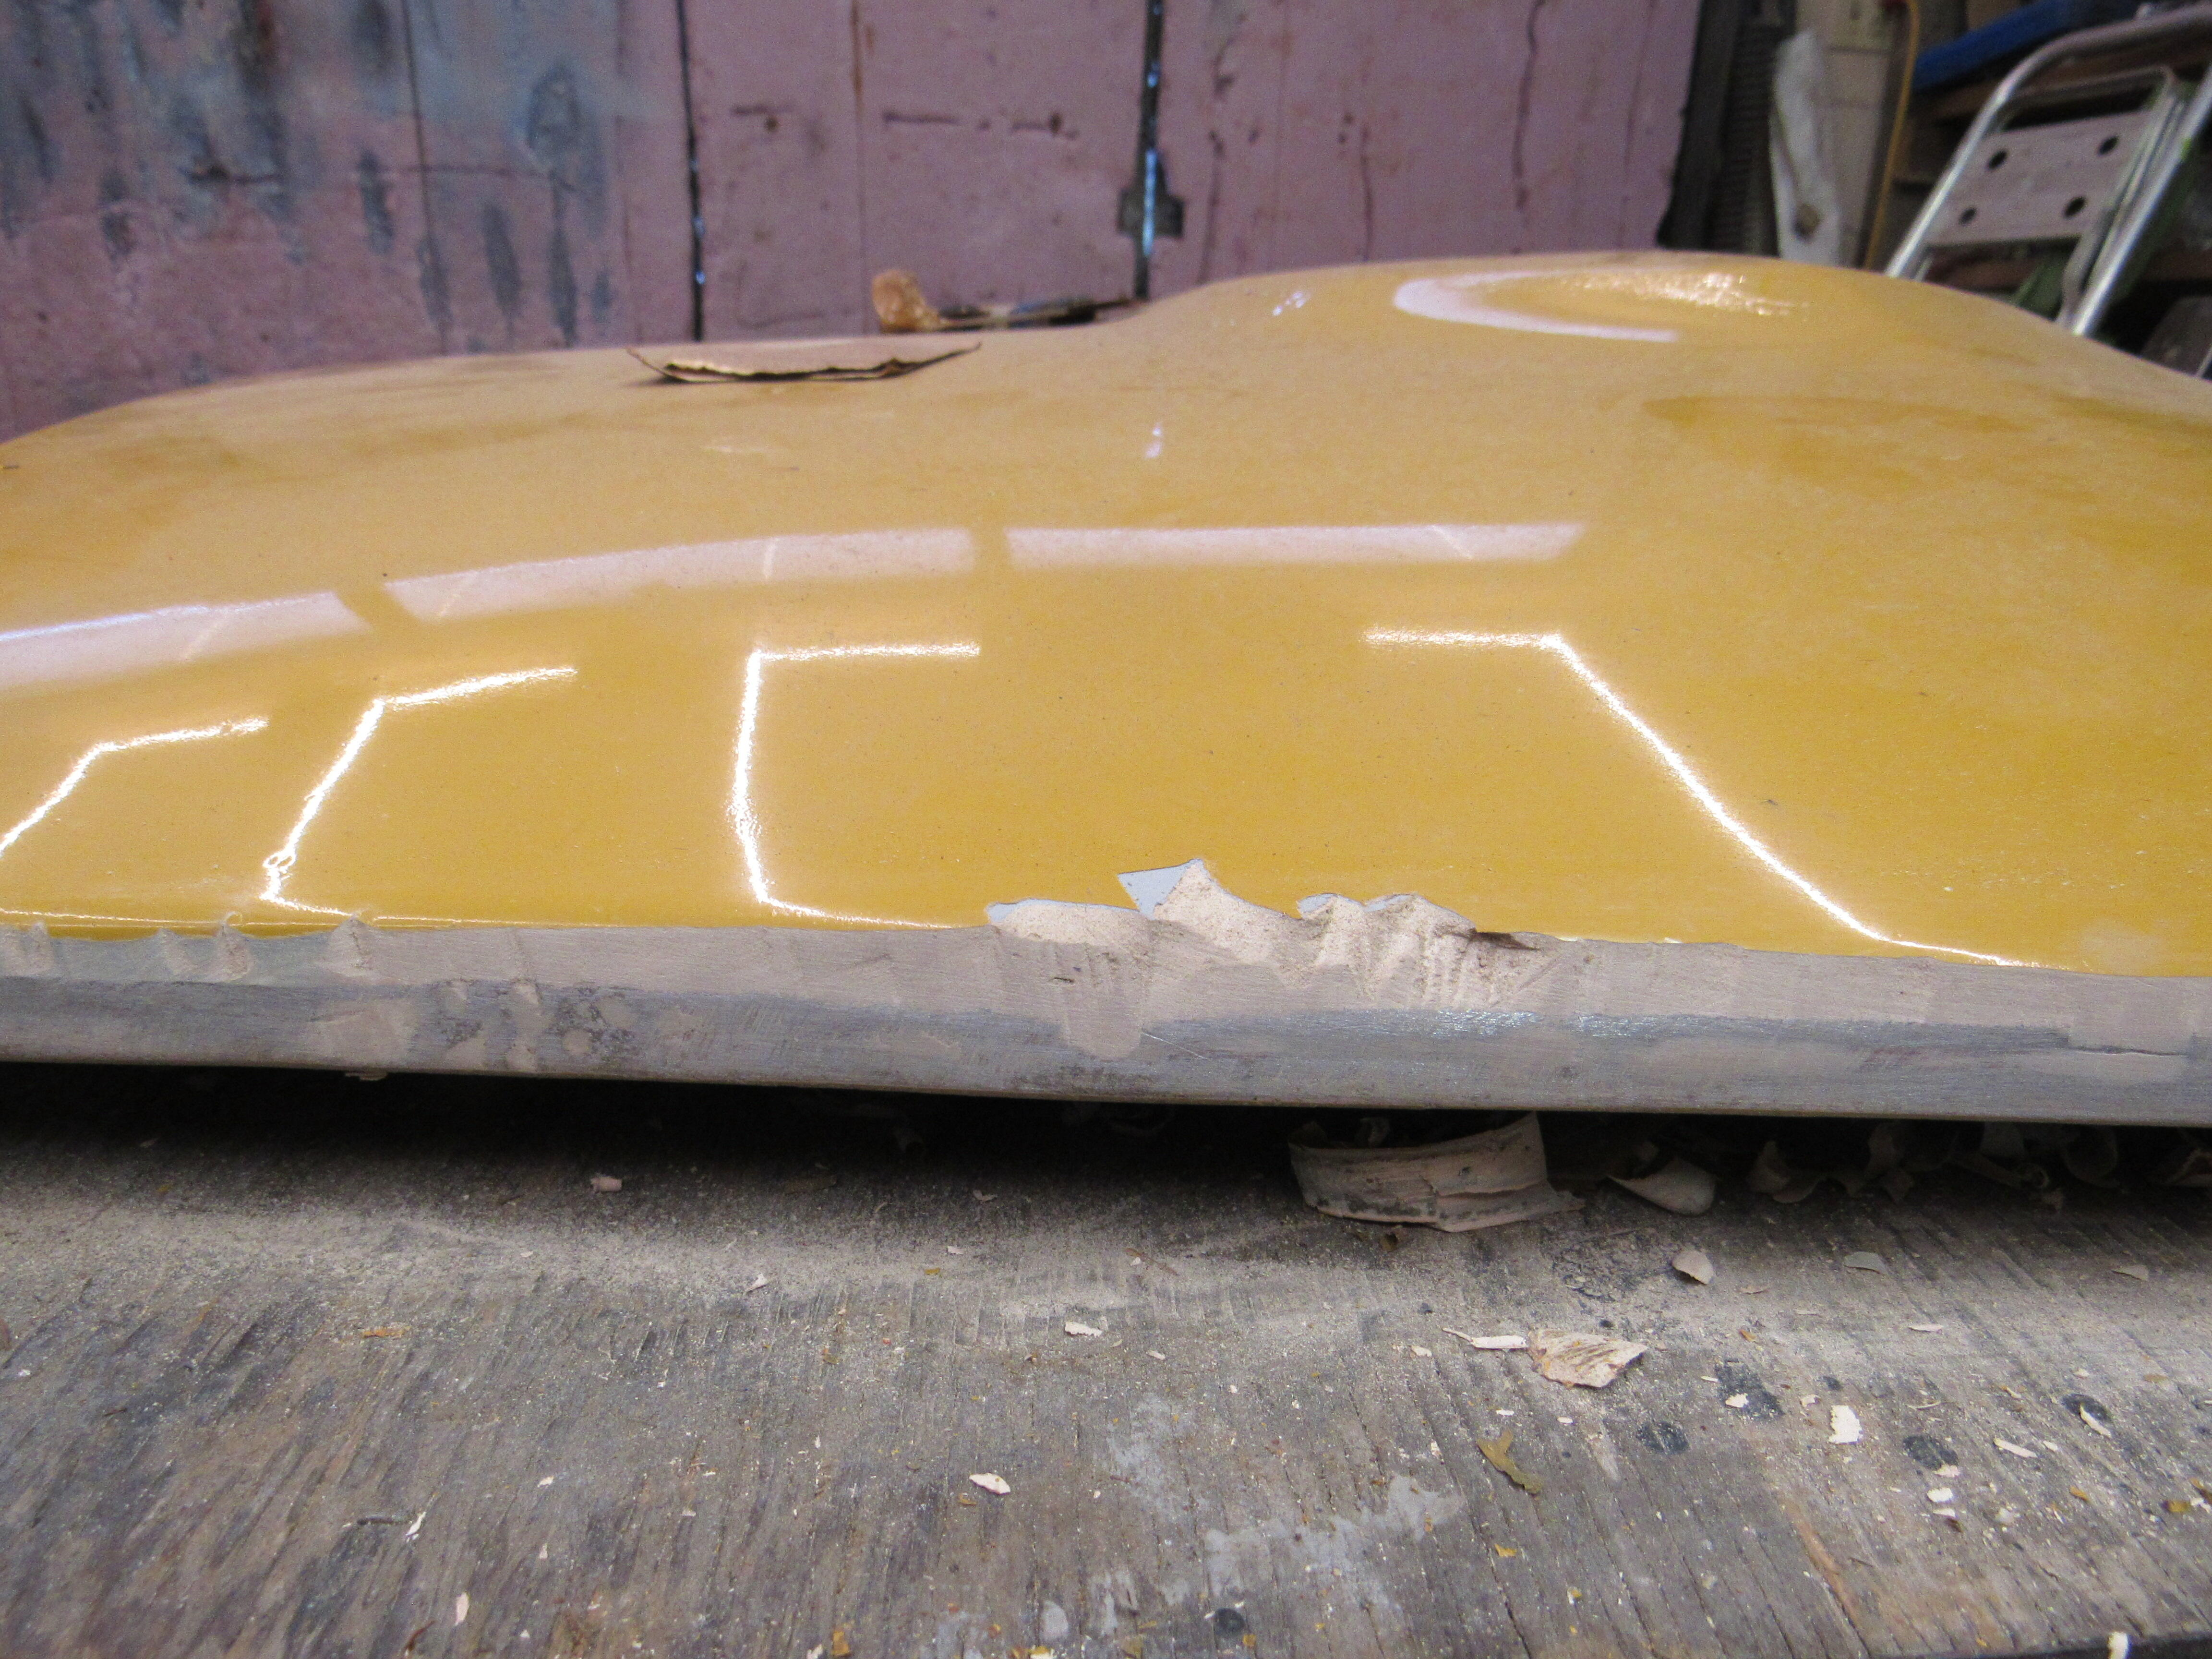
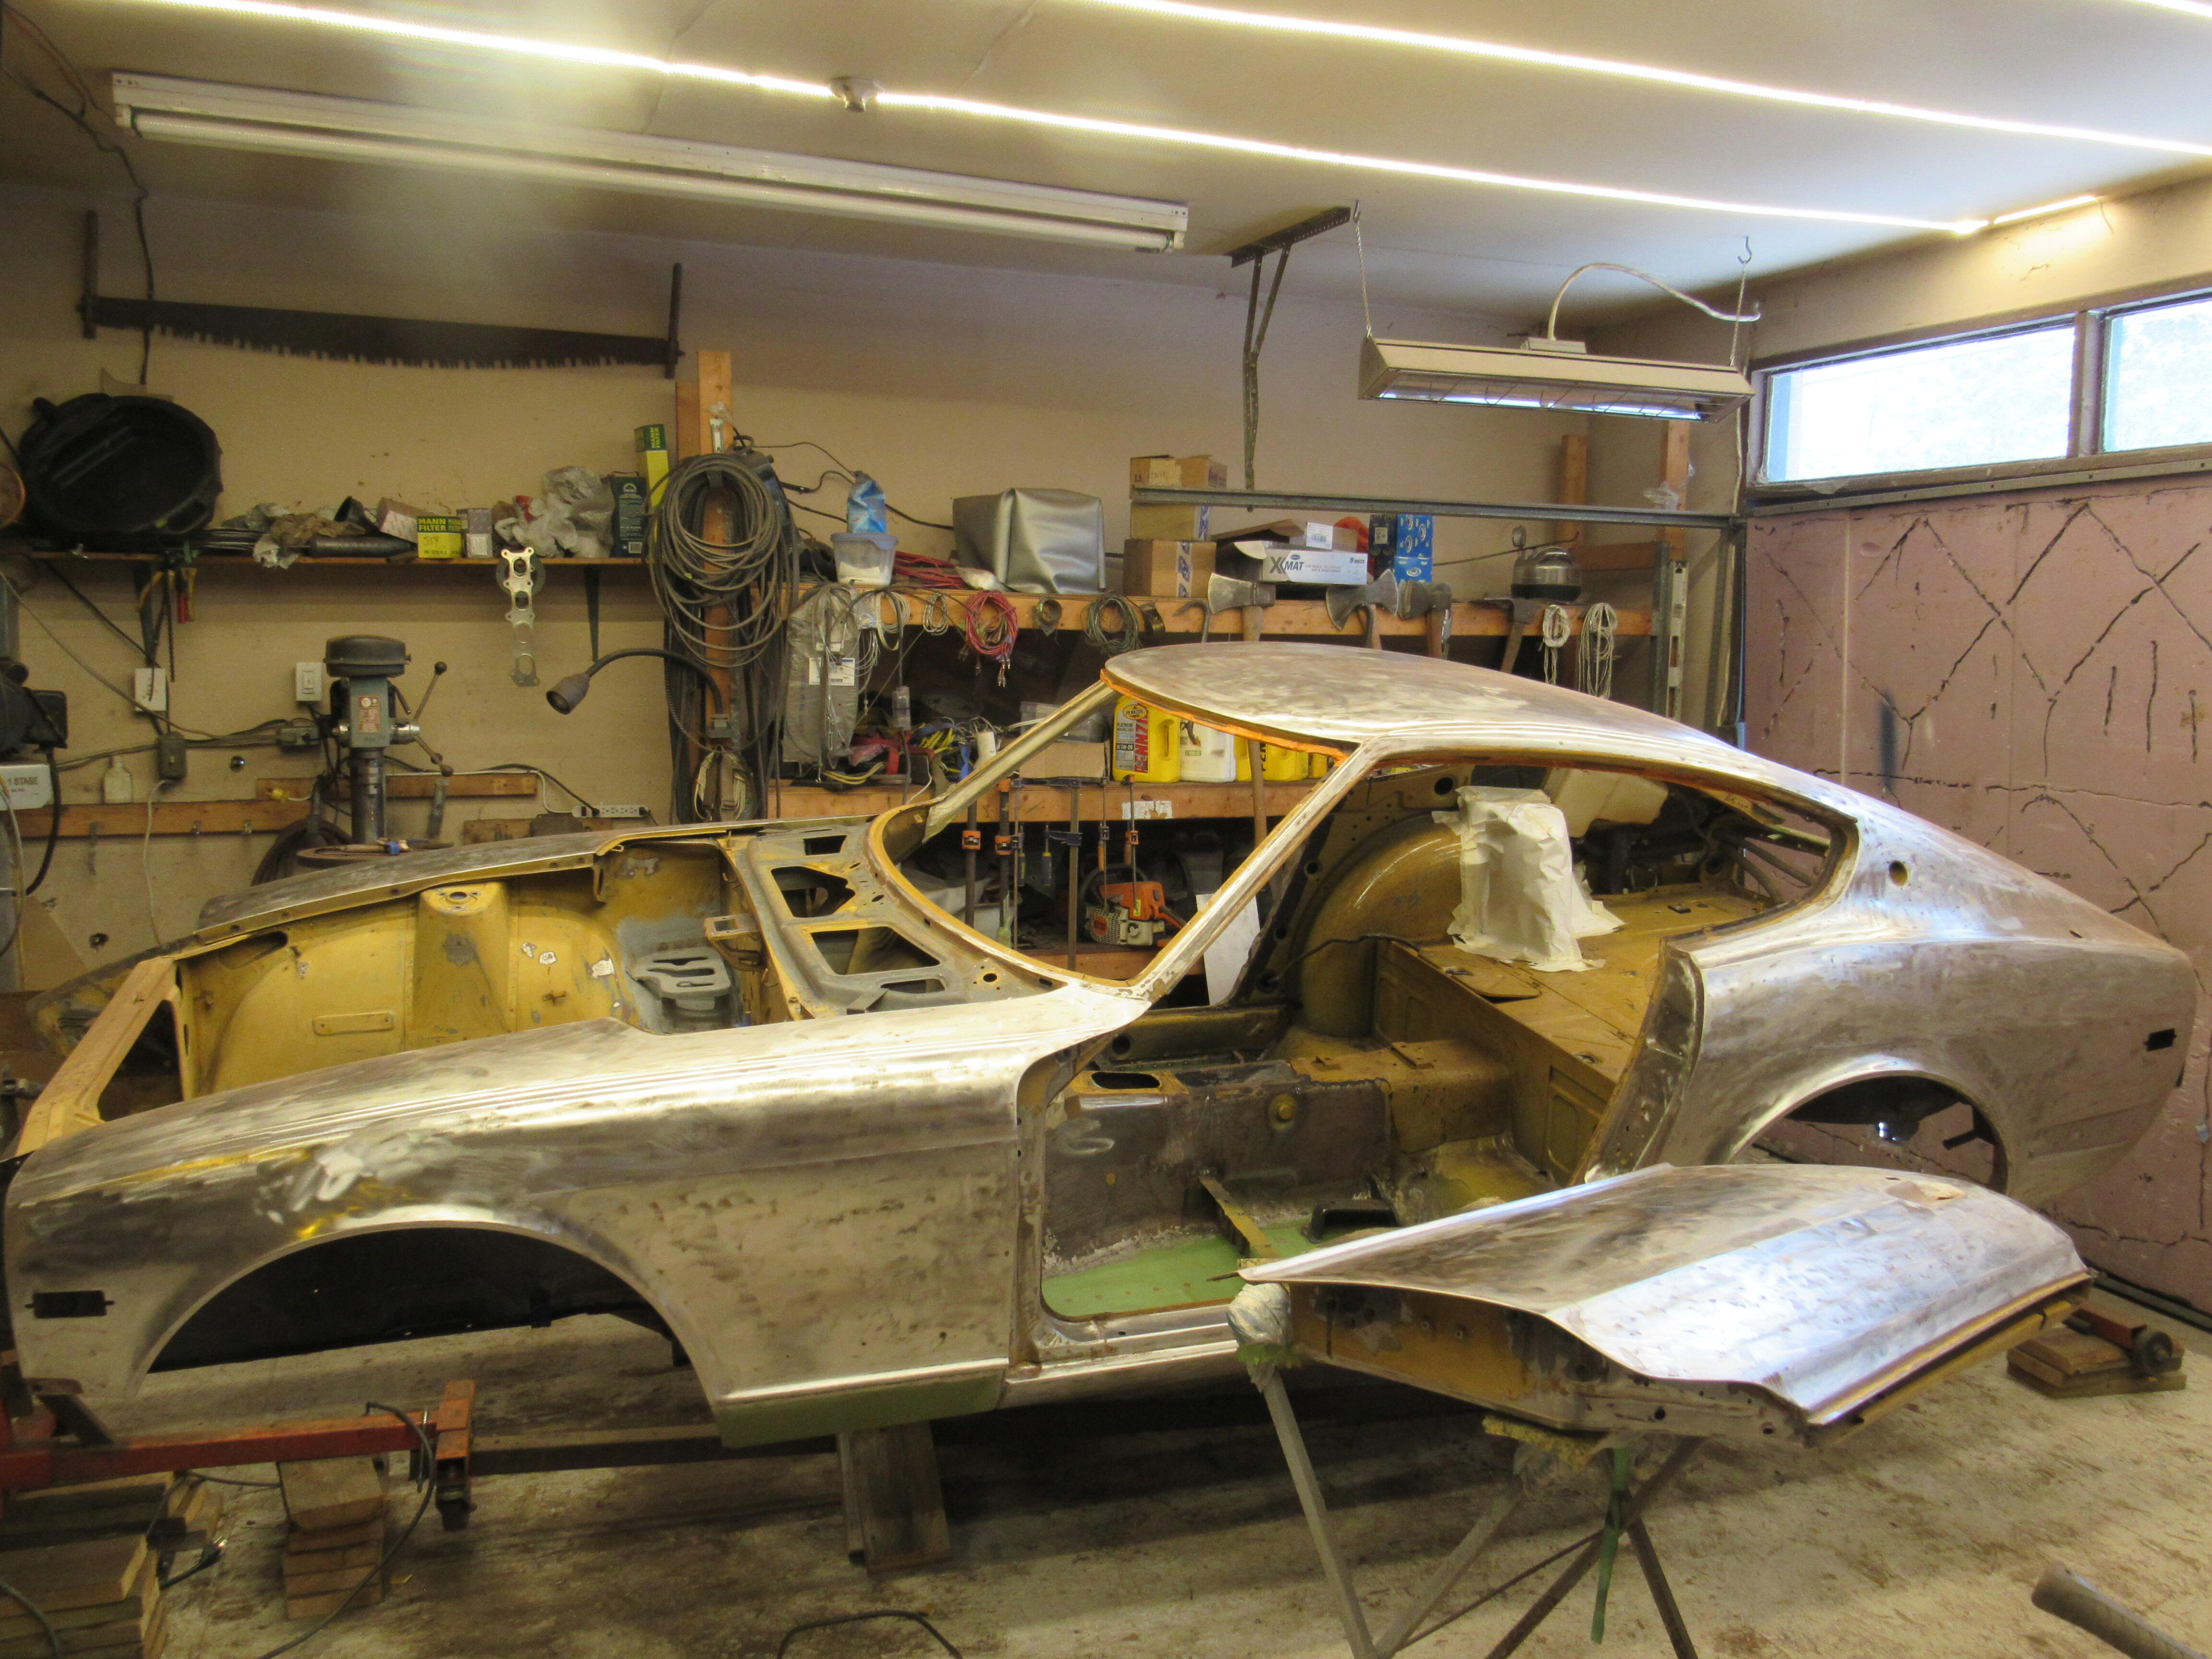
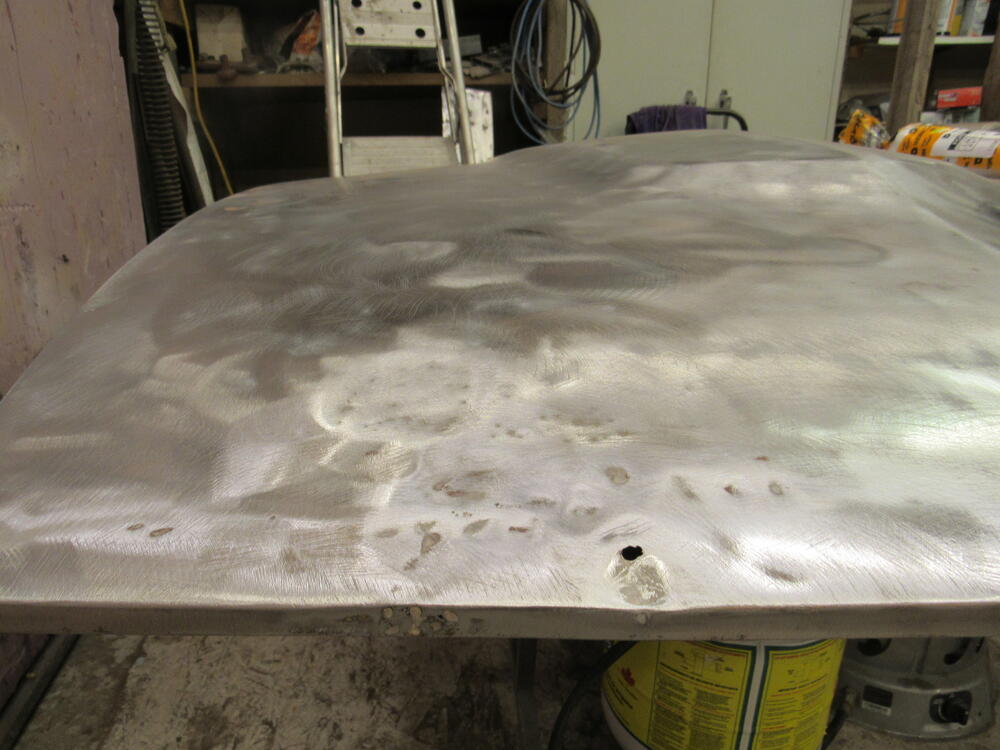
I started on the hood today, I dread doing the inside of the hood, all the little curves and angles make it the hardest panel. Nobody even notices it unless it is done badly. I'll strip the outside of the hood tomorrow, looks like I have a surprise waiting for me.


-
Not if you keep it moving. If you want these discs will easily cut through a 1/2" of paint and filler, I just prefer to heat and scrape so I can put all of the shavings in a bag instead of having a thick layer dust everywhere. If you are grinding out rust then yes the heat would ramp up quickly so just keep moving to a new area.
-
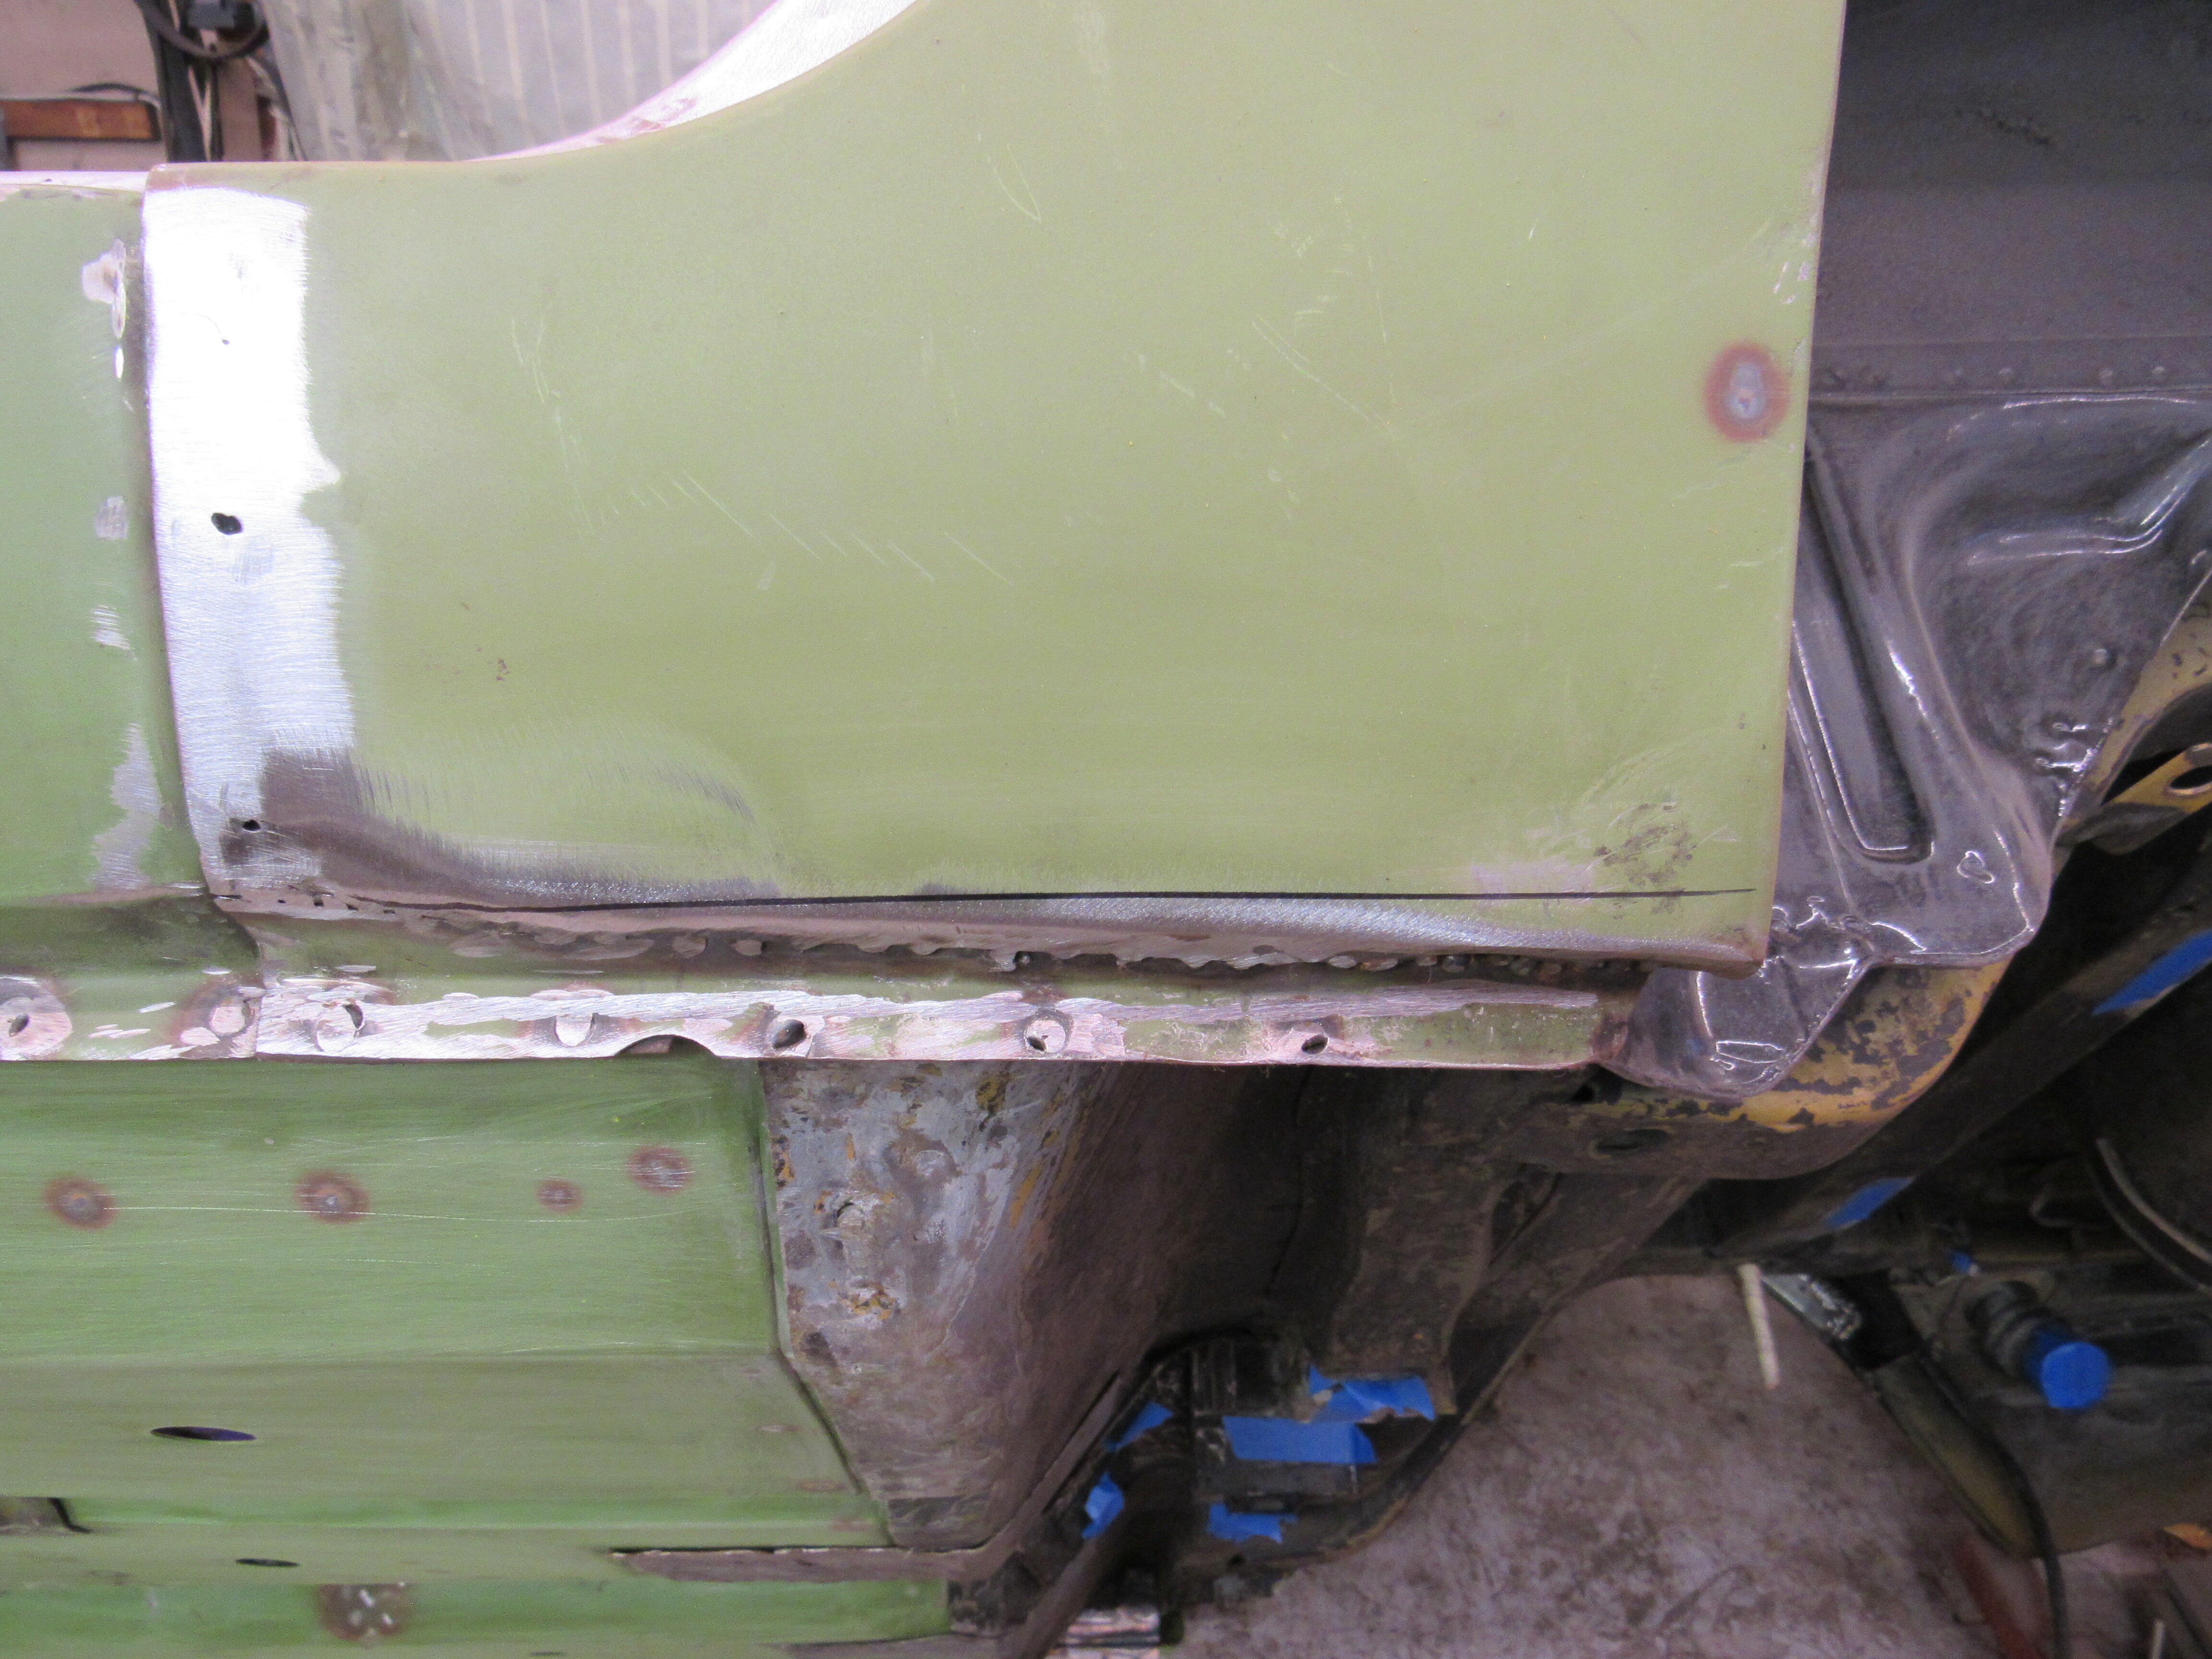
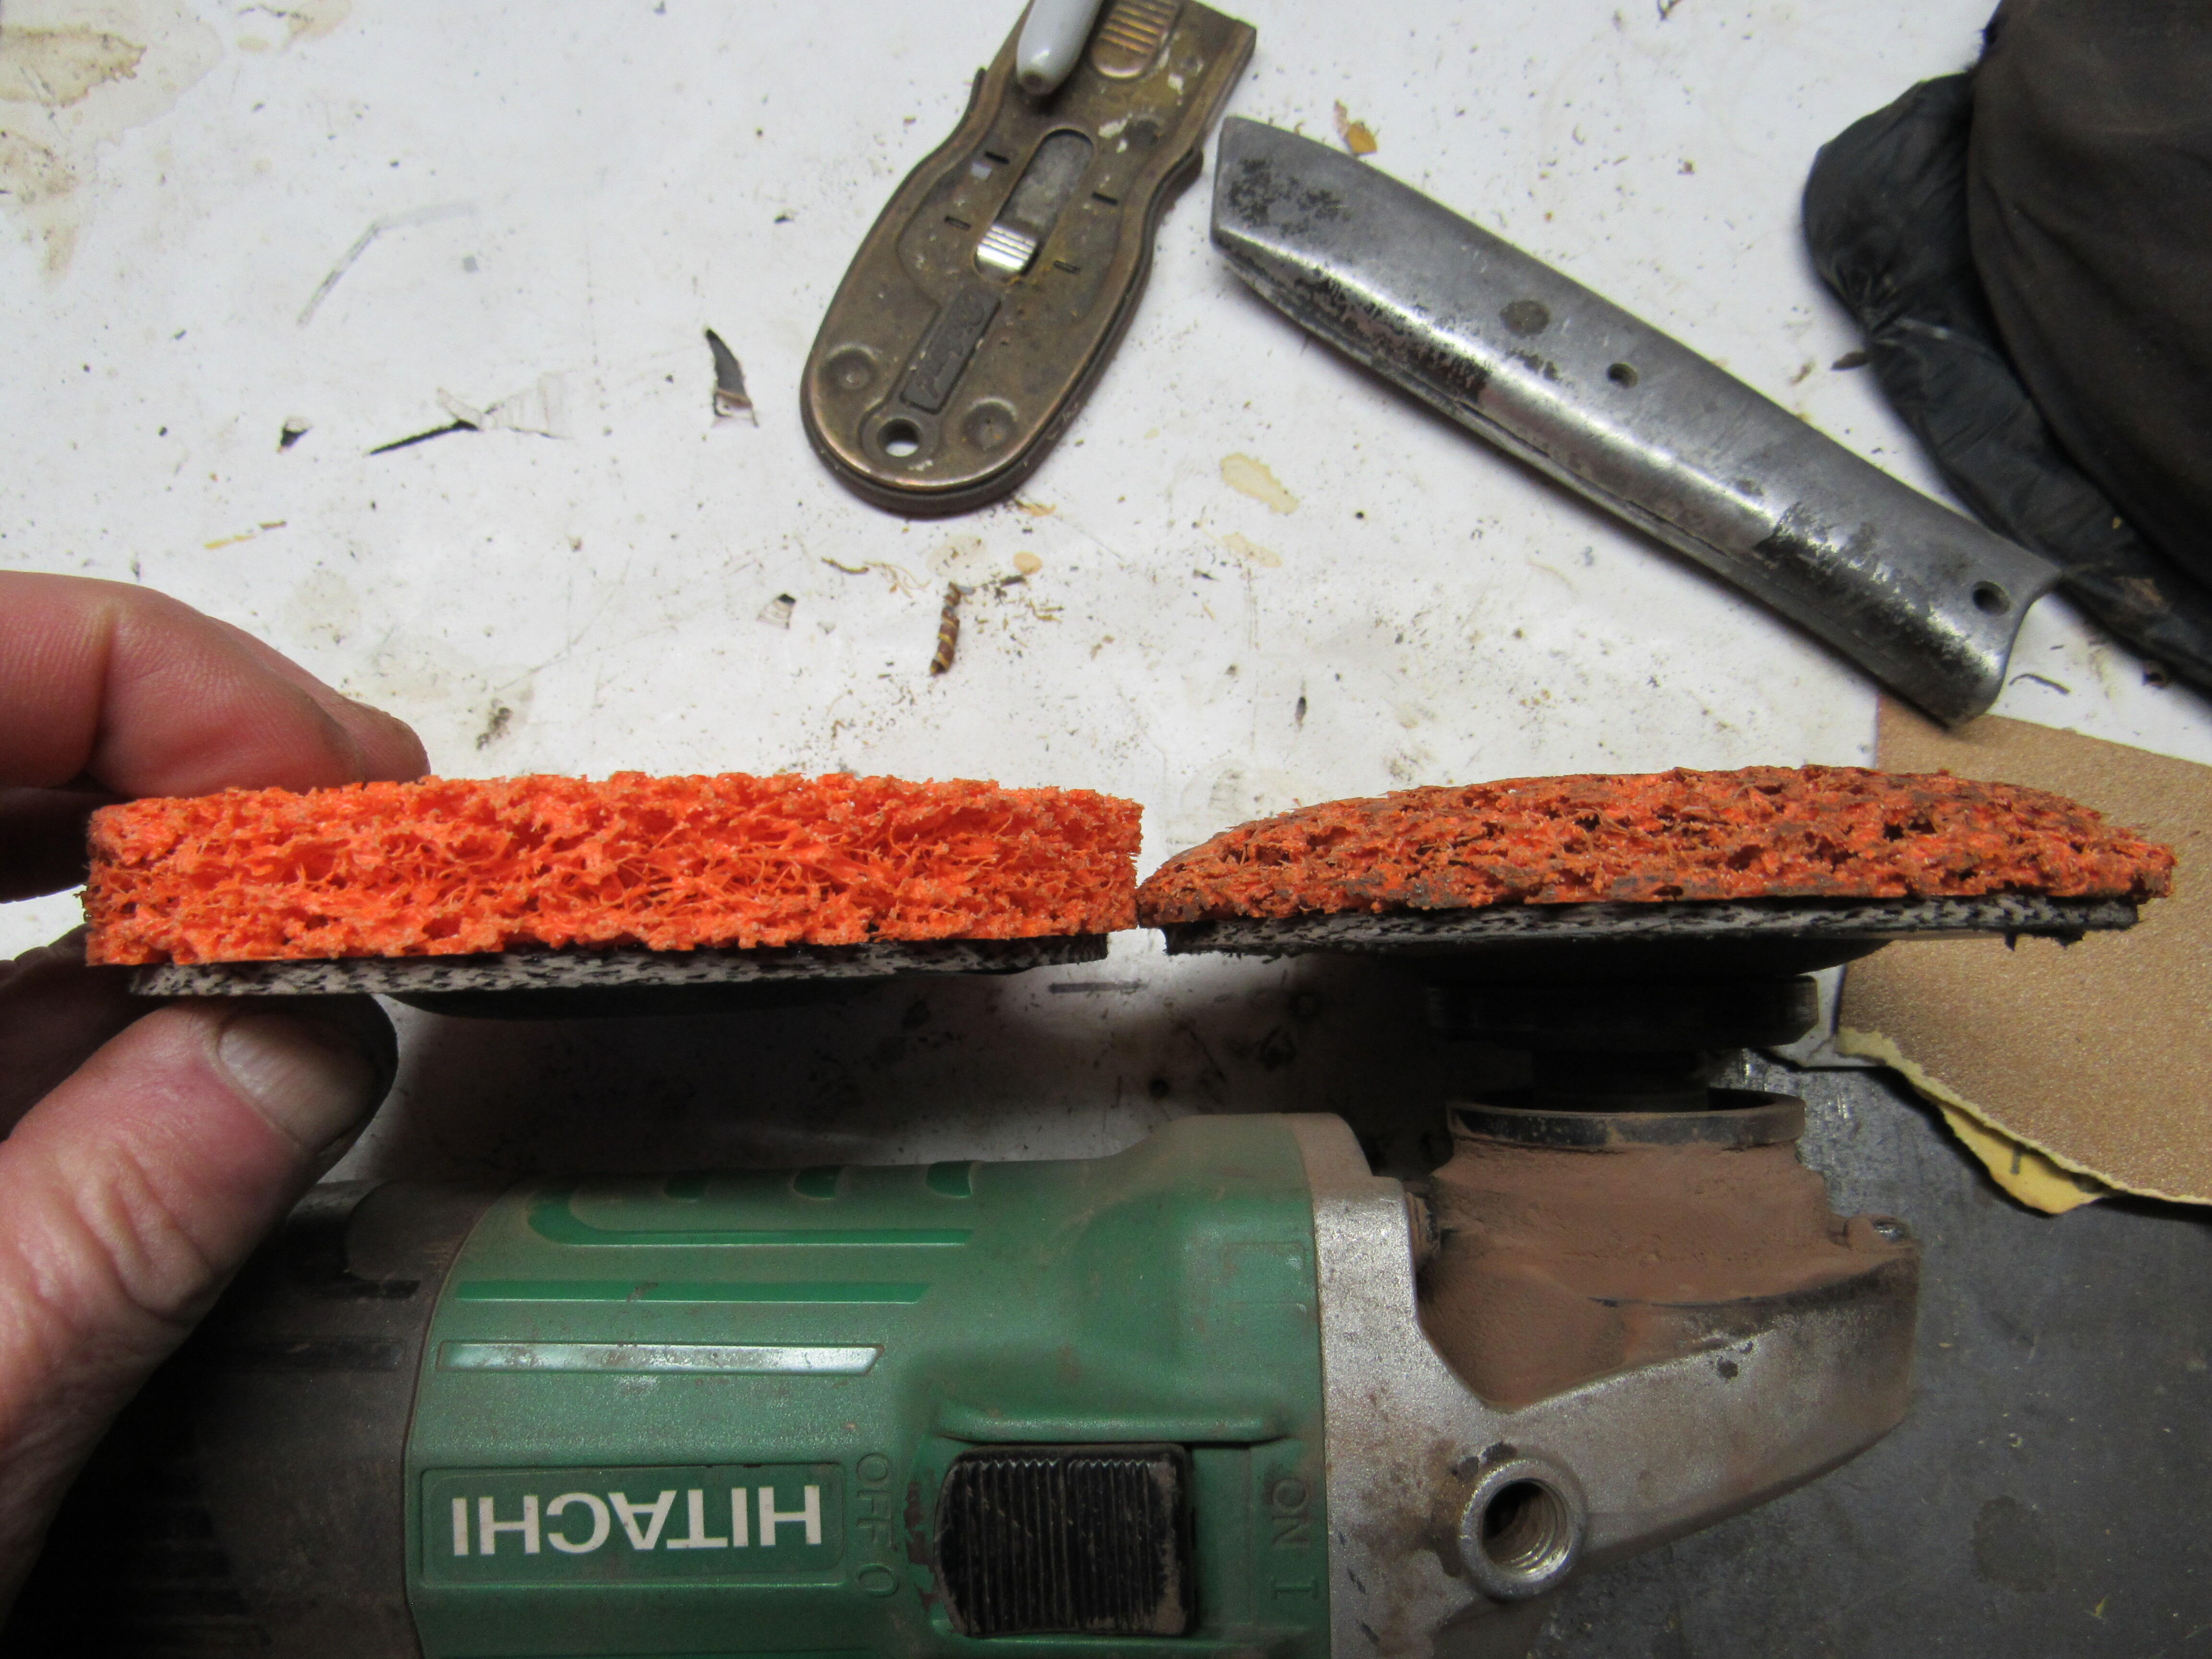
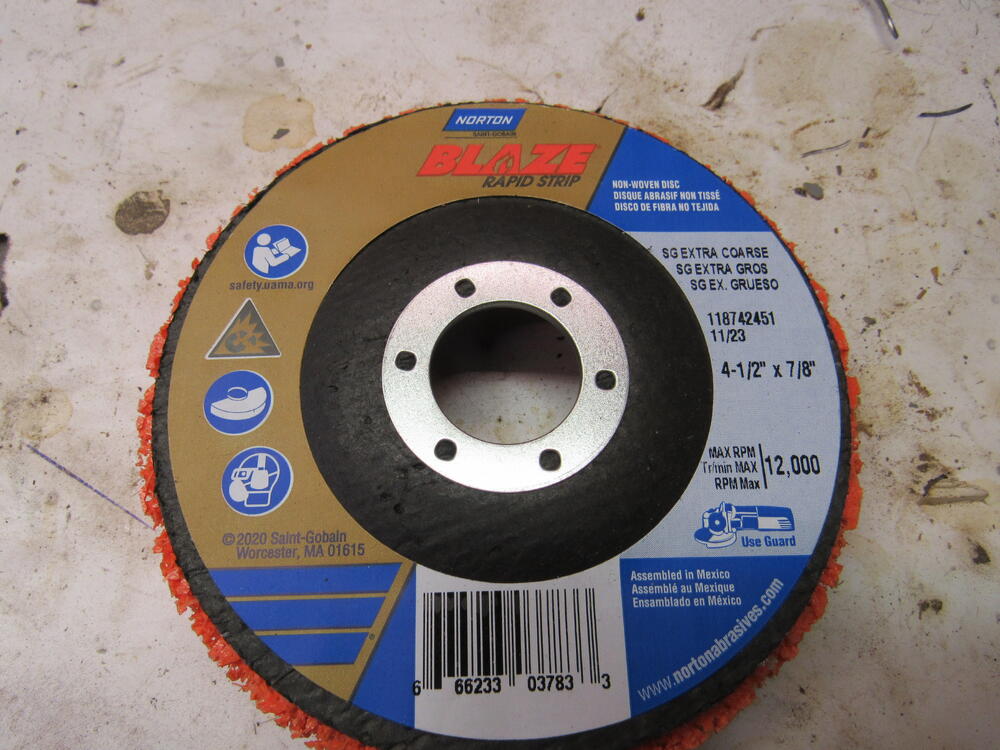
Well, they are miles better than the Tabco panels but some of the KFV panels fit better than others. The floor pans are just about drop in and weld, the other panels all seem to be too big, which is better than too small. At least with the panel being bigger you can cut it up into 2-3 separate pieces so you can make each edge match the way it should then mark it, cut it and then weld it all back into one piece. Here is the first D/S dog leg I installed, I didn't realize at that time that the panel was too big so I still have to go back and cut the bottom where the marker line is to get rid of that droop. On the P/S I saved myself that work by cutting the dog leg up and using it as a patch, the marker line is where both panels were cut and welded. The bottom of the fenders and deck lid supports were the same, I had to cut out as much as a 1/4" in places, then reweld them together. I hope I don't sound like I'm complaining because I'm not, nip/tuck and massaging is all part cutting out rust and putting fresh metal back in. After I scrape as much paint off as I can with a heat gun, I usually start blocking with 80 grit, but this time I thought I would give these a try, Norton Blaze rapid strip disc. I've tried the 3M version and it wore out so fast it was waste of $. These aren't cheap at $27.00 CDN a piece but I've done a little more than a 1/4 of the car and you can see how little has worn away. I'll probably go through 3 discs for this project and save probably a 100 hrs and a lot of wear and tear on the back. The only down side is they dump everything into the air, even with a fan on sucking the dust out of the shop there is still a layer of leaded red oxide dust on everything.


-
Canadians have to be fluent in both systems of measurement, it's the only way to do business with our neighbours to the south (Imperial) and the rest of the world (Metric). Although metric seems to be making inroads as I know Ford has been using metric fasteners for many years now.
-
Thank you so much!
-
I went to the autobody supply store to day to pick up everything I need and the paint guy couldn't find a modern code for 920 Safari Gold, I have had them mix a few different Datsun colours over the years but he couldn't locate this one. Does anyone have a modern PPG or Dupont code for 920 Safari Gold? I could take one of the smaller panels down to them so they could scan it but the car has had a respray and is a different shade and the original paint looks like it has dulled down over the years. Thanks

-
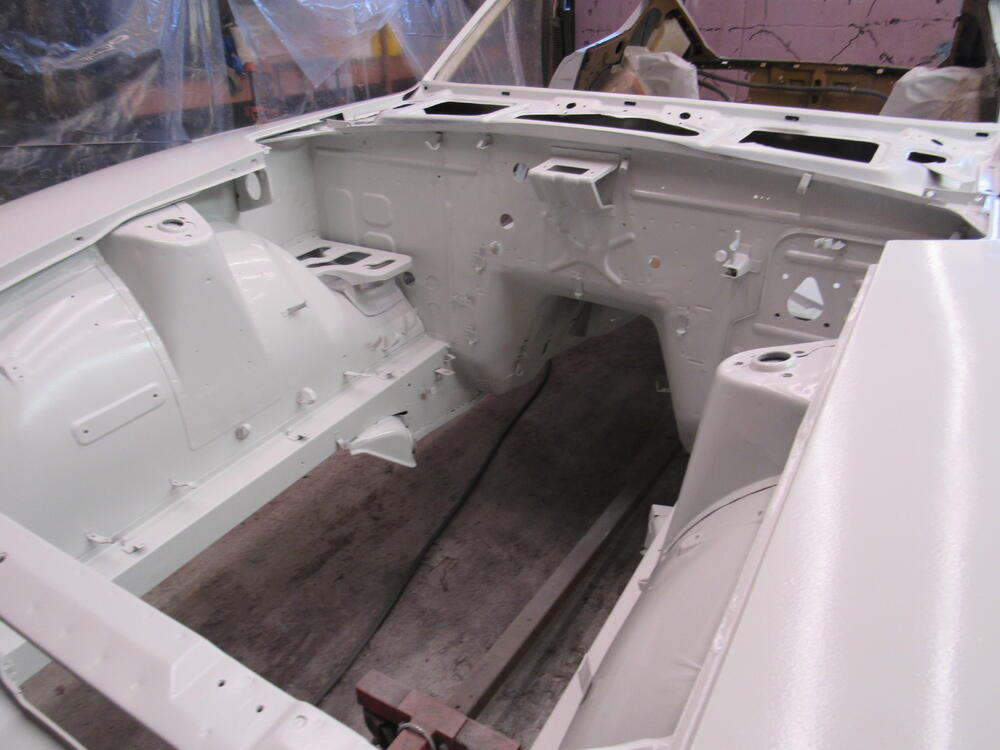
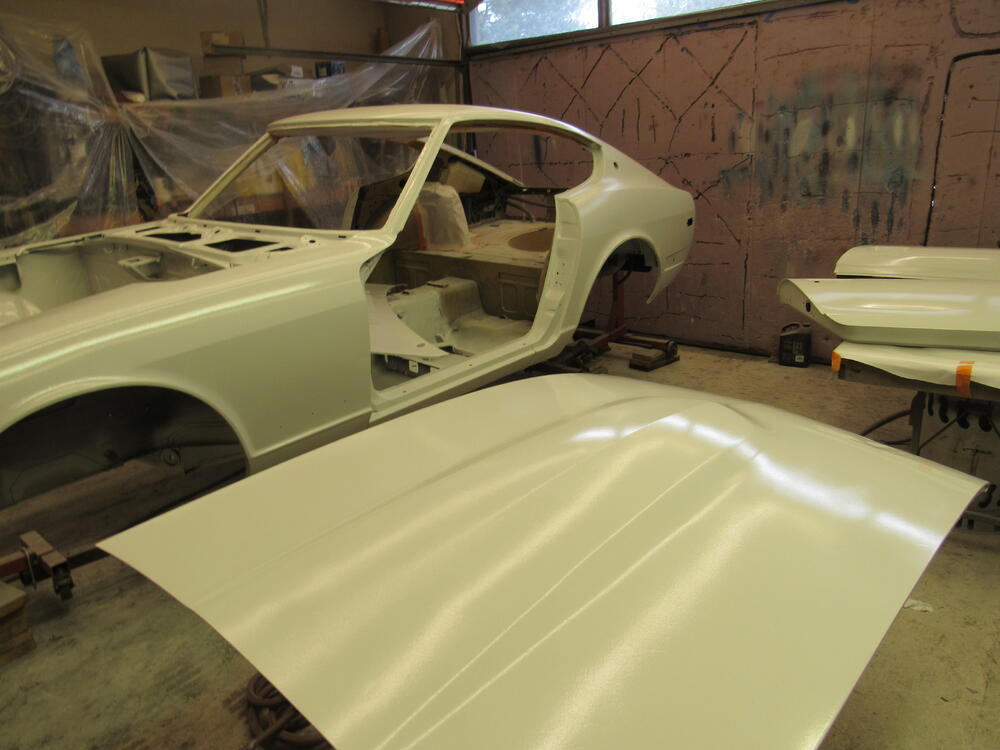
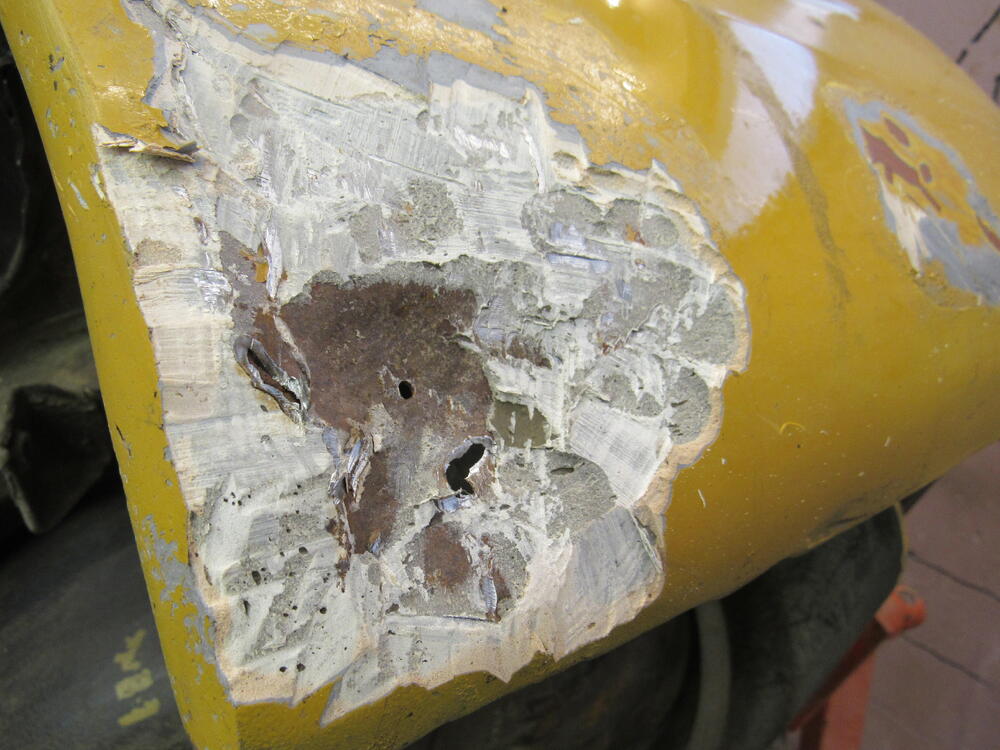
I think I have most if not all of the metal working done now, at least the cutting and welding. I picked the supplies for the new paint job today, still have to go back p/u the paint and clearcoat as the guy at the autobody supply shop couldn't find a modern code for 920 Safari Gold. I'll ask that question in a separate thread. We knew there was something funky going on with D/S quarter panel, I got all the filler dug out yesterday. Time is money in collision shops, so much so that an extra 10 min with a hammer and dolly is asking too much.😄


-
Ah yes, you're jogging my memory from grade 8 Metalworking class, harden first then temper.
-
CO, the Amazon stuff says it is "Full Hardened Temper", of course with amazon it could be anything but wouldn't that be hard enough to handle the 100 or so ft.lbs of torque required for the pinion nut?
-
I've never seen that transmission mount shield before, nice addition.
-
The shim stock on Amazon is certainly the right kind of metal but shaping it to the diameter inside and out could prove to be a tough job, the McMaster Carr washers are probably your best bet.
-
I would strongly recommend only doing one side at a time, do the pan, when that is all welded in then the rocker, then on to the other side. It may be overly cautious but better that then having a door that won't close properly.
-
The floor pan rails stiffen the pan itself but most of the longitudinal strength is in the rockers, trans tunnel and roof. As long as you strip all the weight off the shell before mounting I think you would be okay to put it on a rotisserie. If the rockers also need replacing then that is another story, you would have to weld in some supports in the cab to stabilize and keep from flexing. Is that Z from the Bay area? The rust certainly looks like road salt damage.
-
You need new pans and rails, from the extensive rust your photos are showing now I don't think it is even worth removing any more of the tar and paint. It's a big job for sure, but so is trying to weld patches to punky old metal like the last guy did.