grannyknot
Free Member
-
Joined
-
Last visited
Everything posted by grannyknot
-
 I'm in the same boat, I did an ohms test and the float is working so I don't want to screw it up. I'm planning on taking a dental pick to it and scrape the worst off of the crud, just be very careful of that thin wire.
-
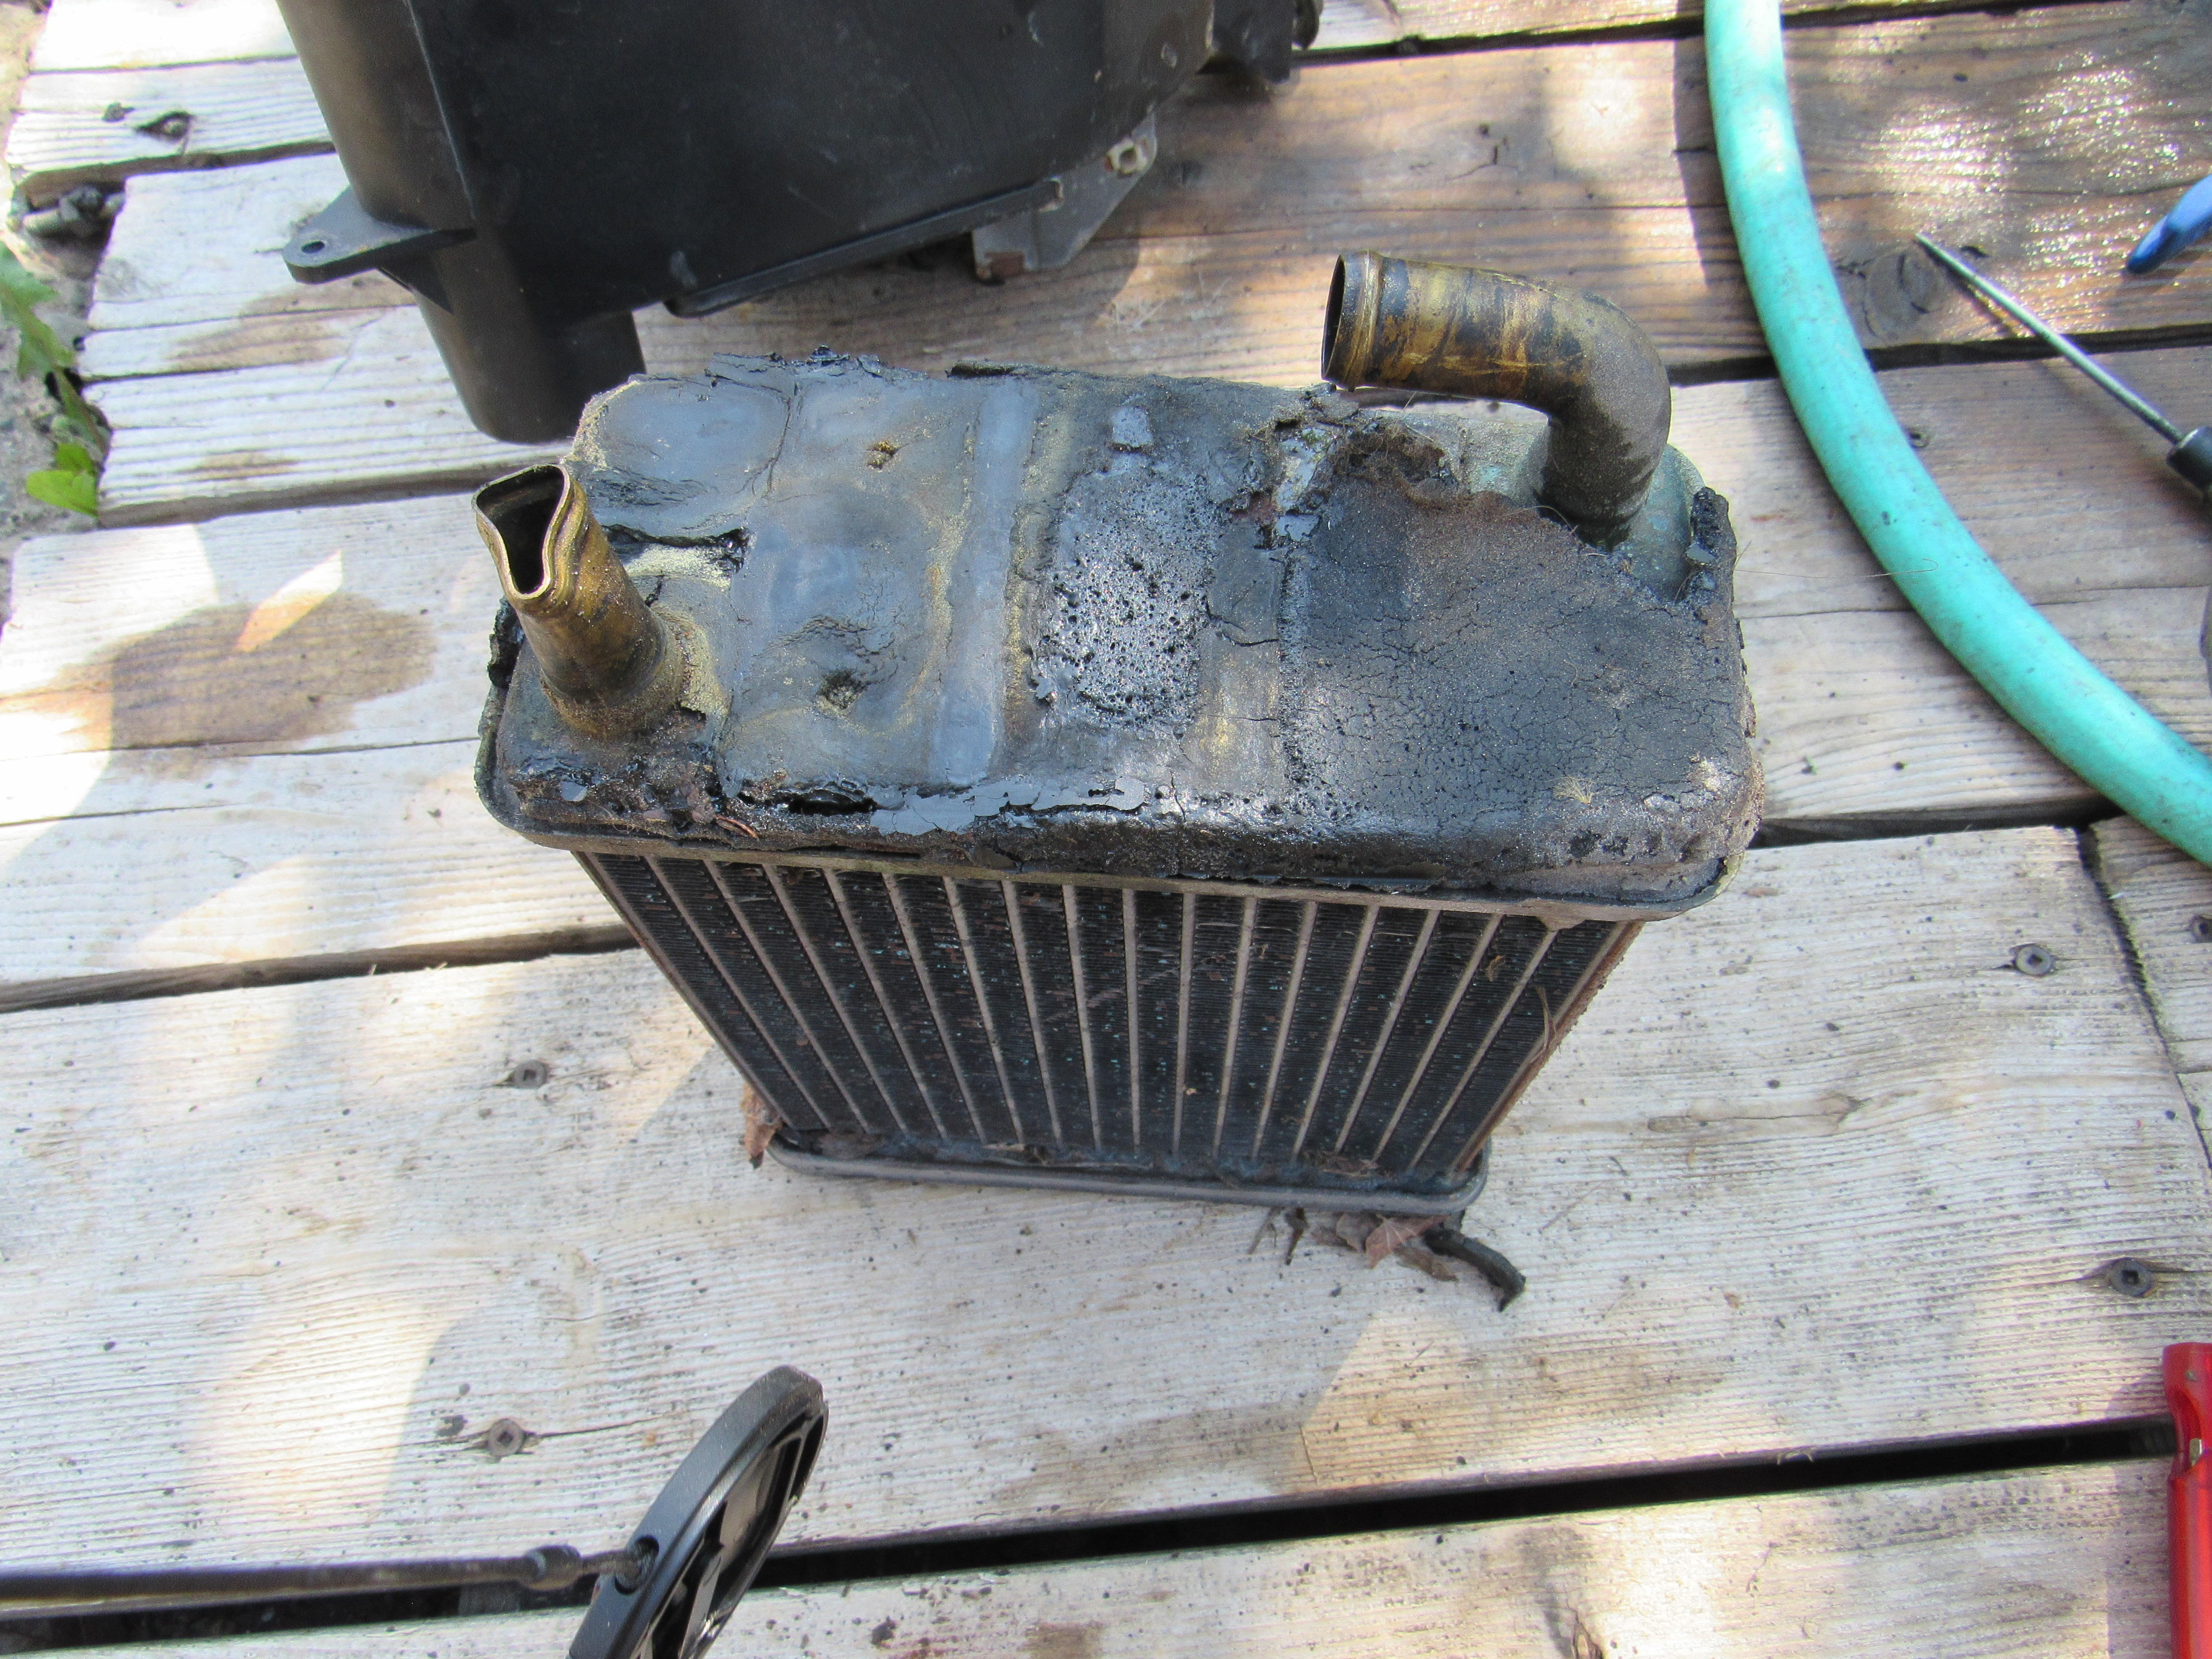
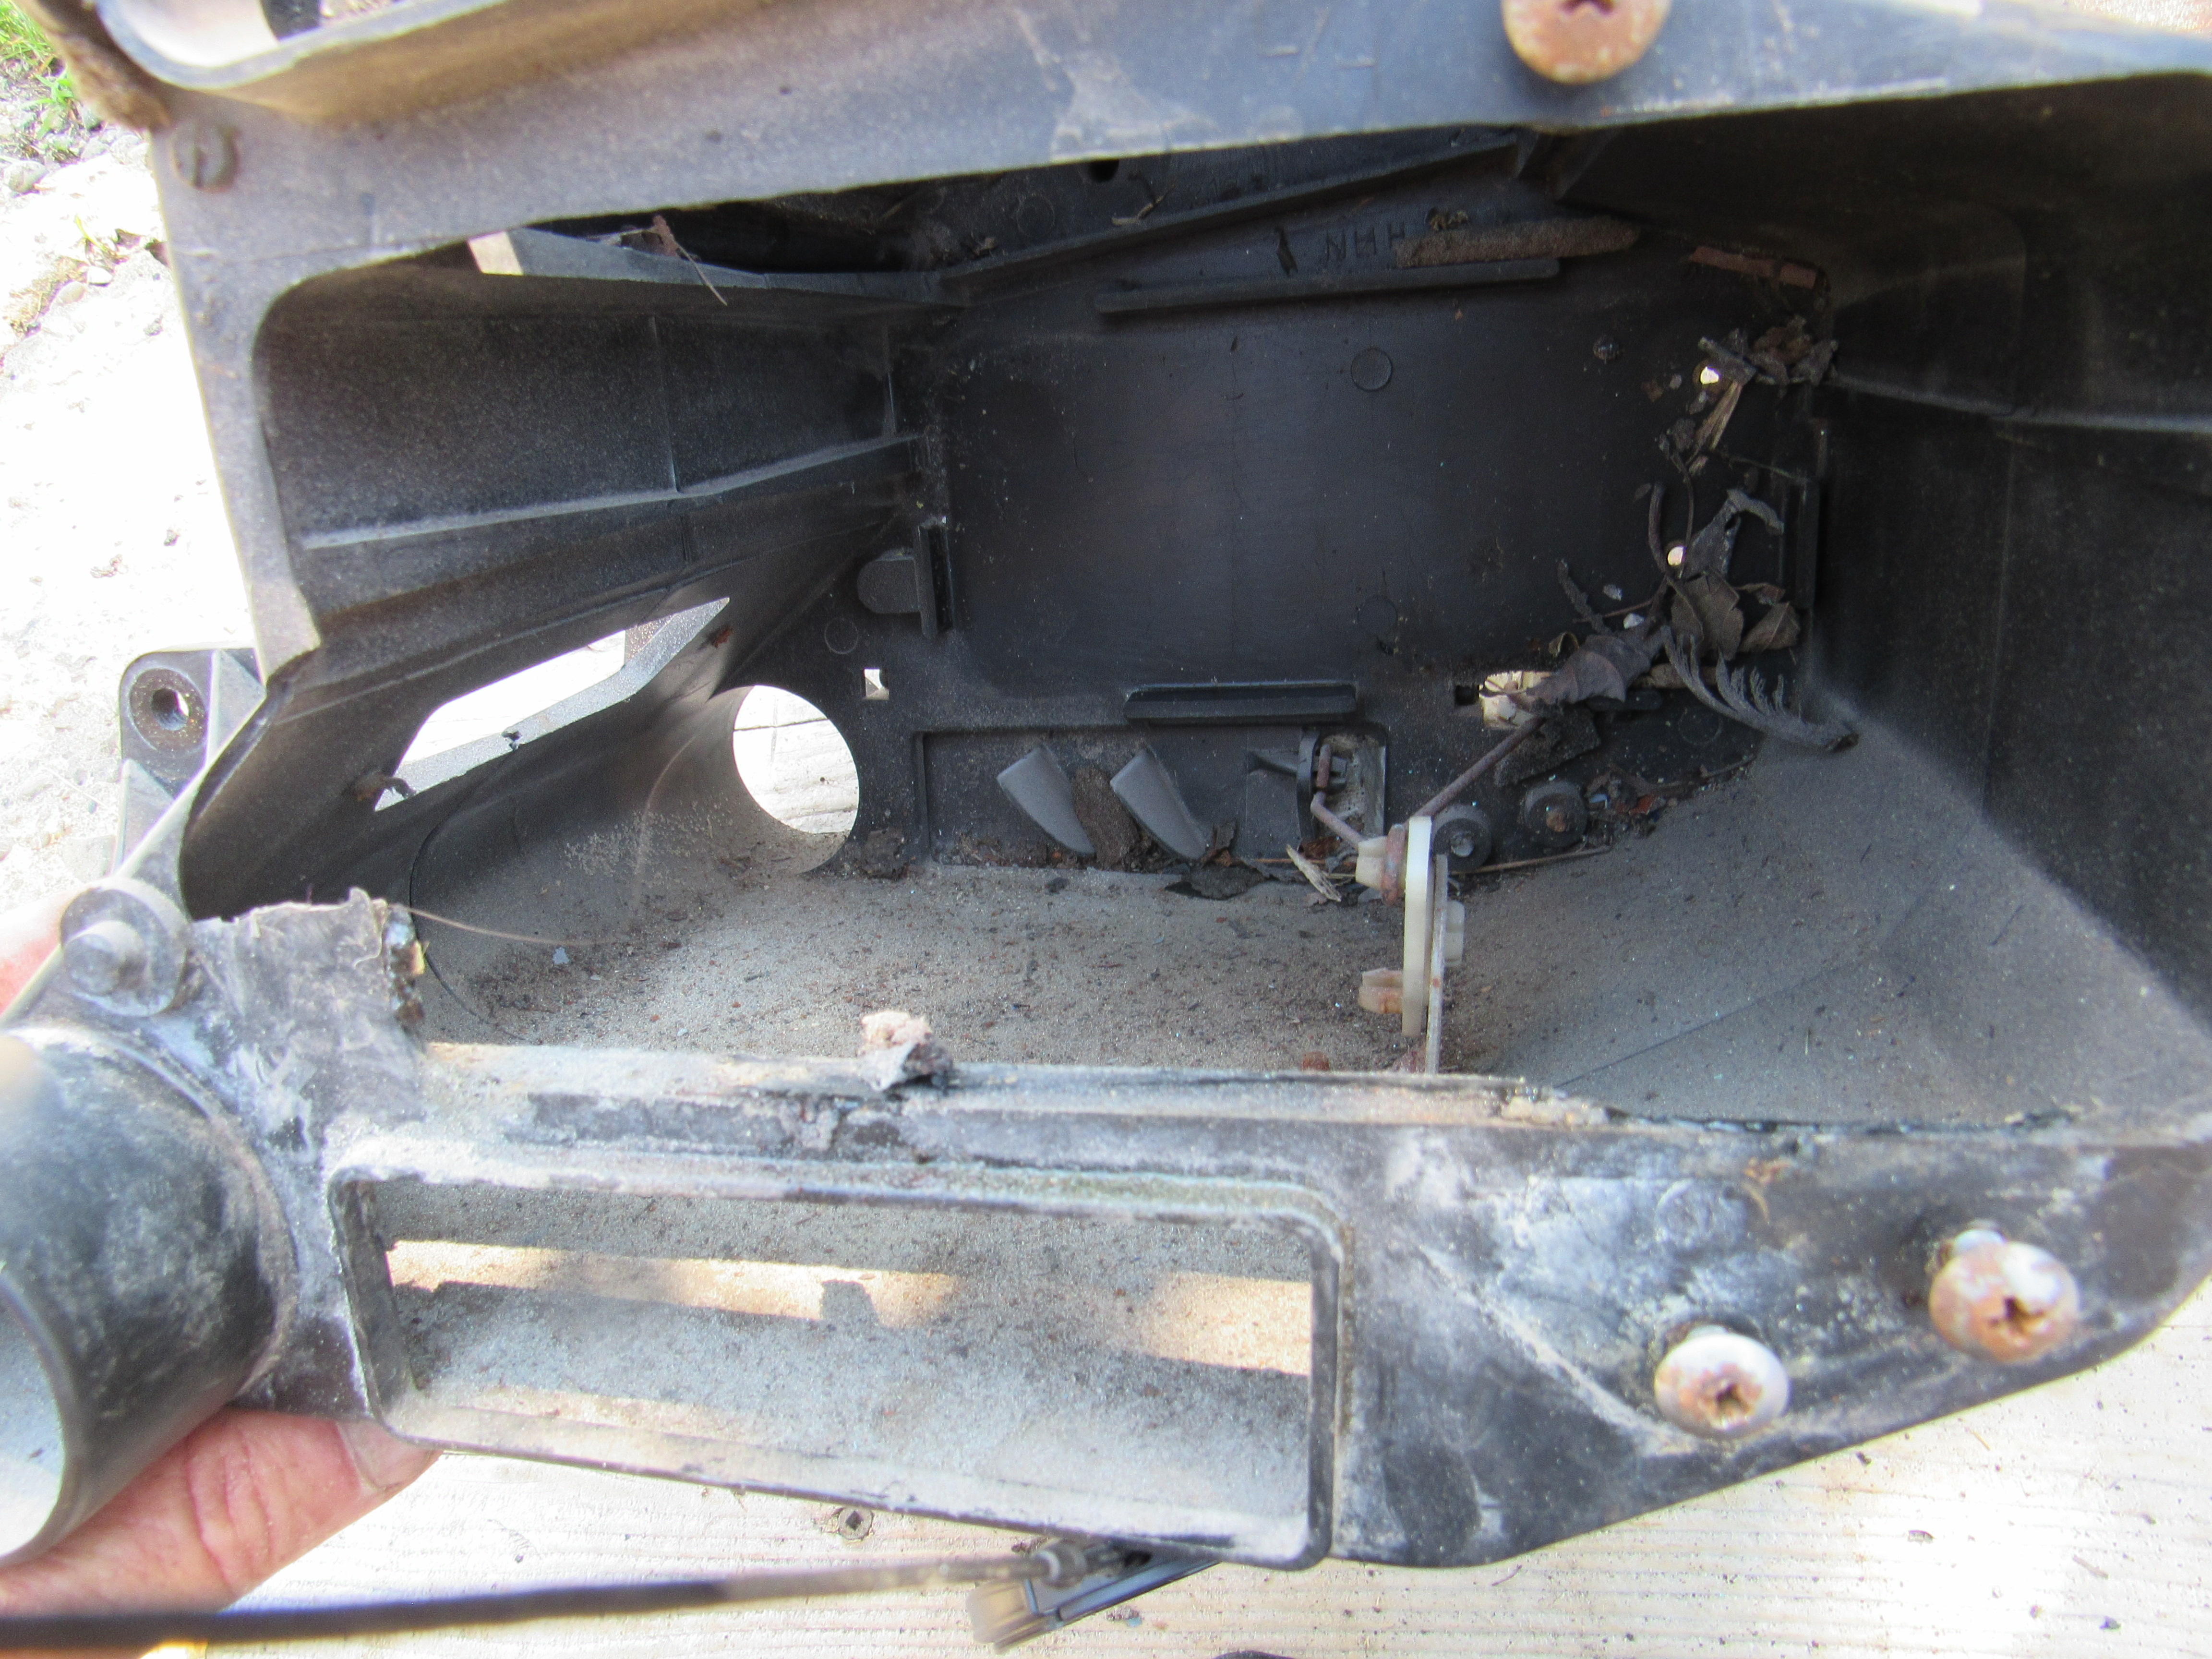
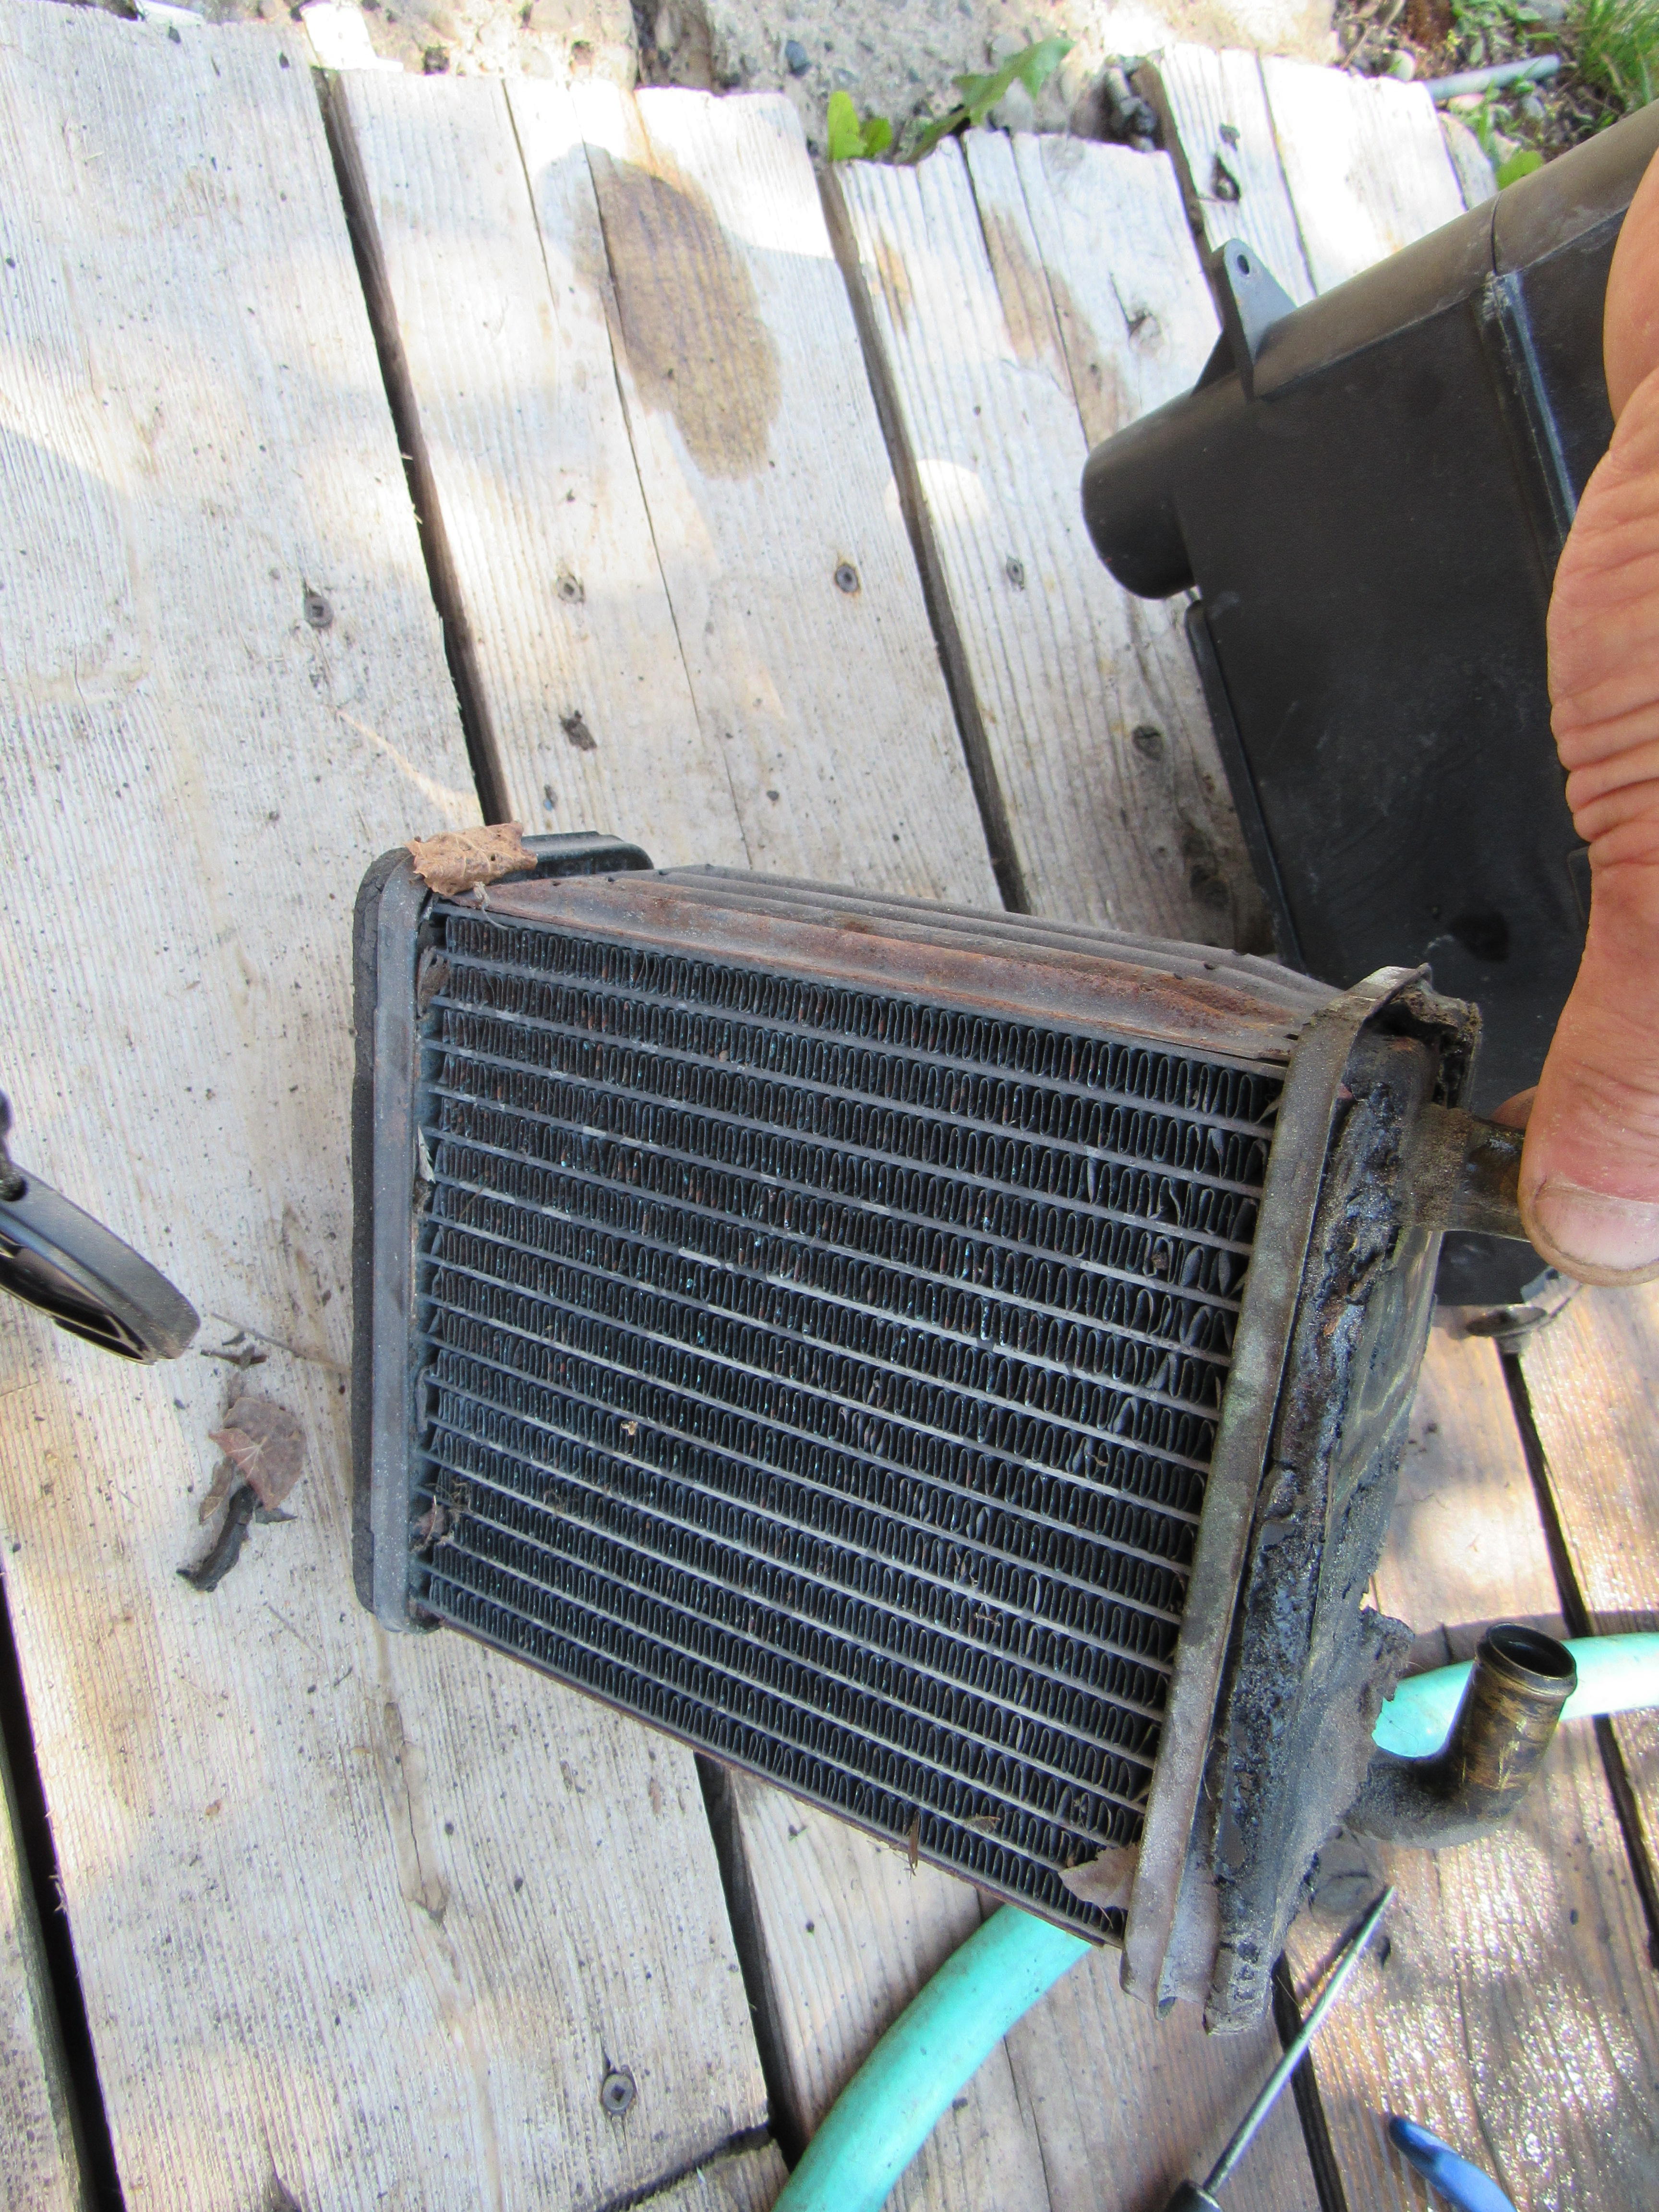
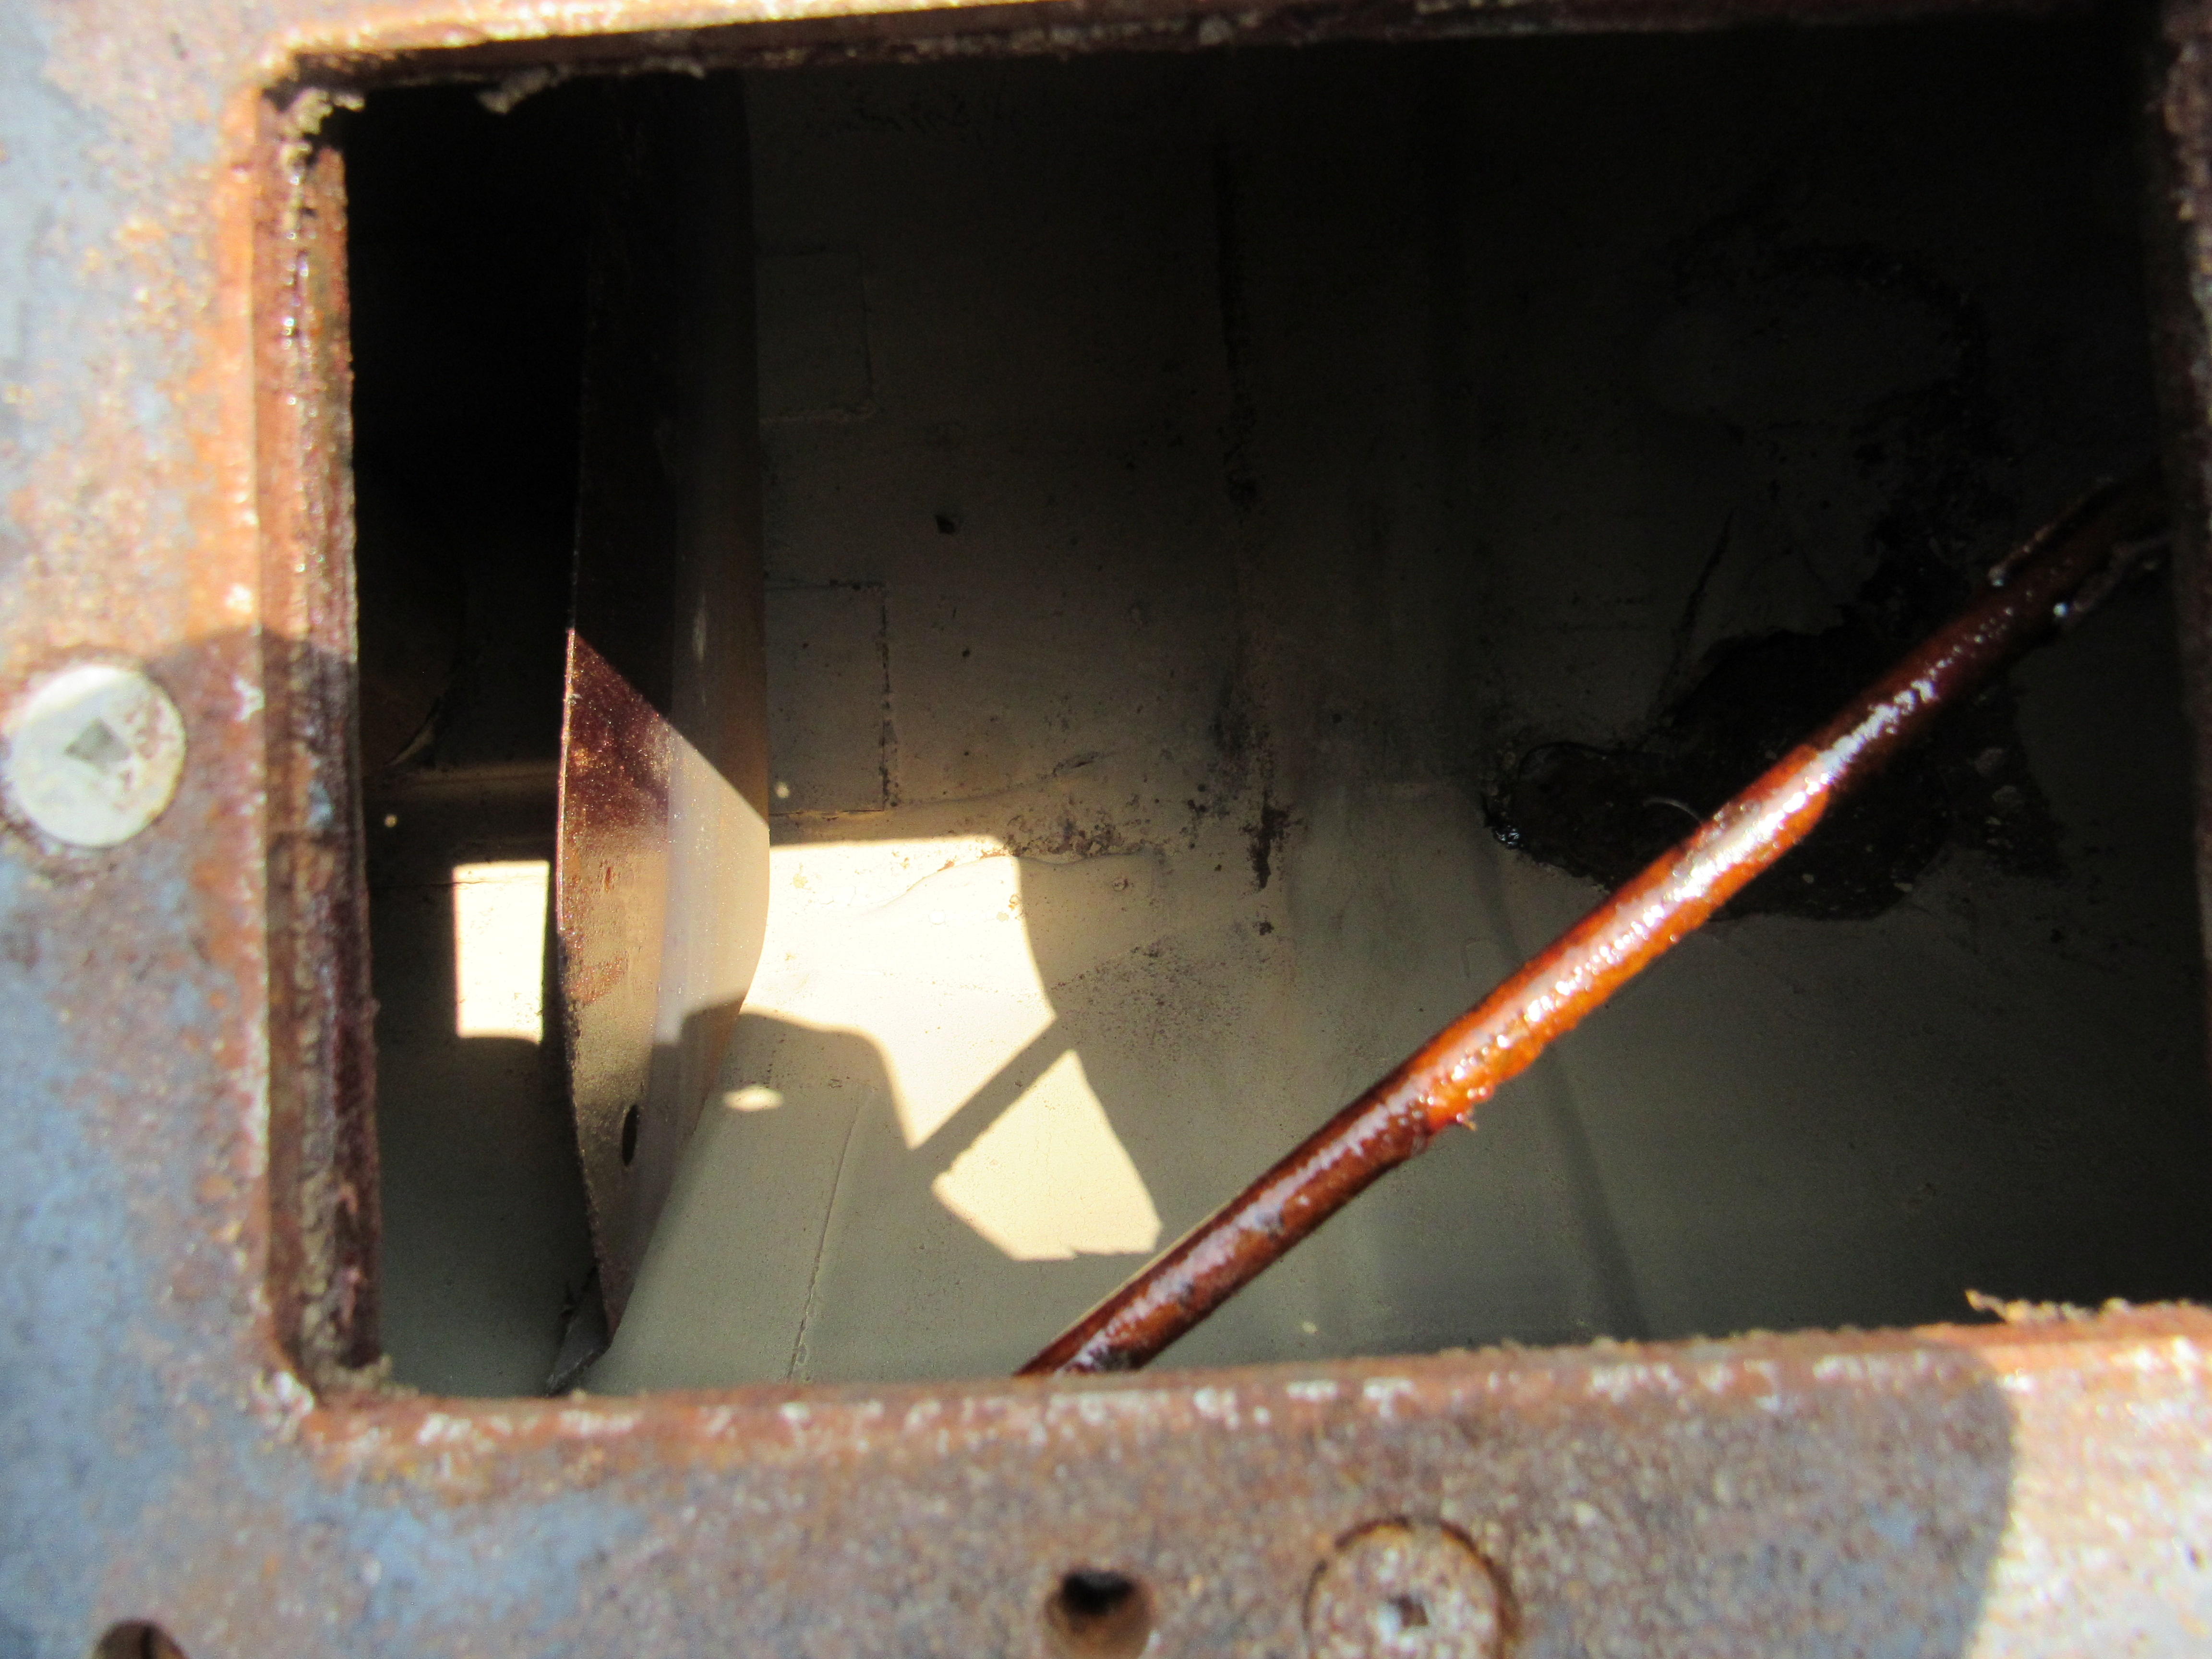
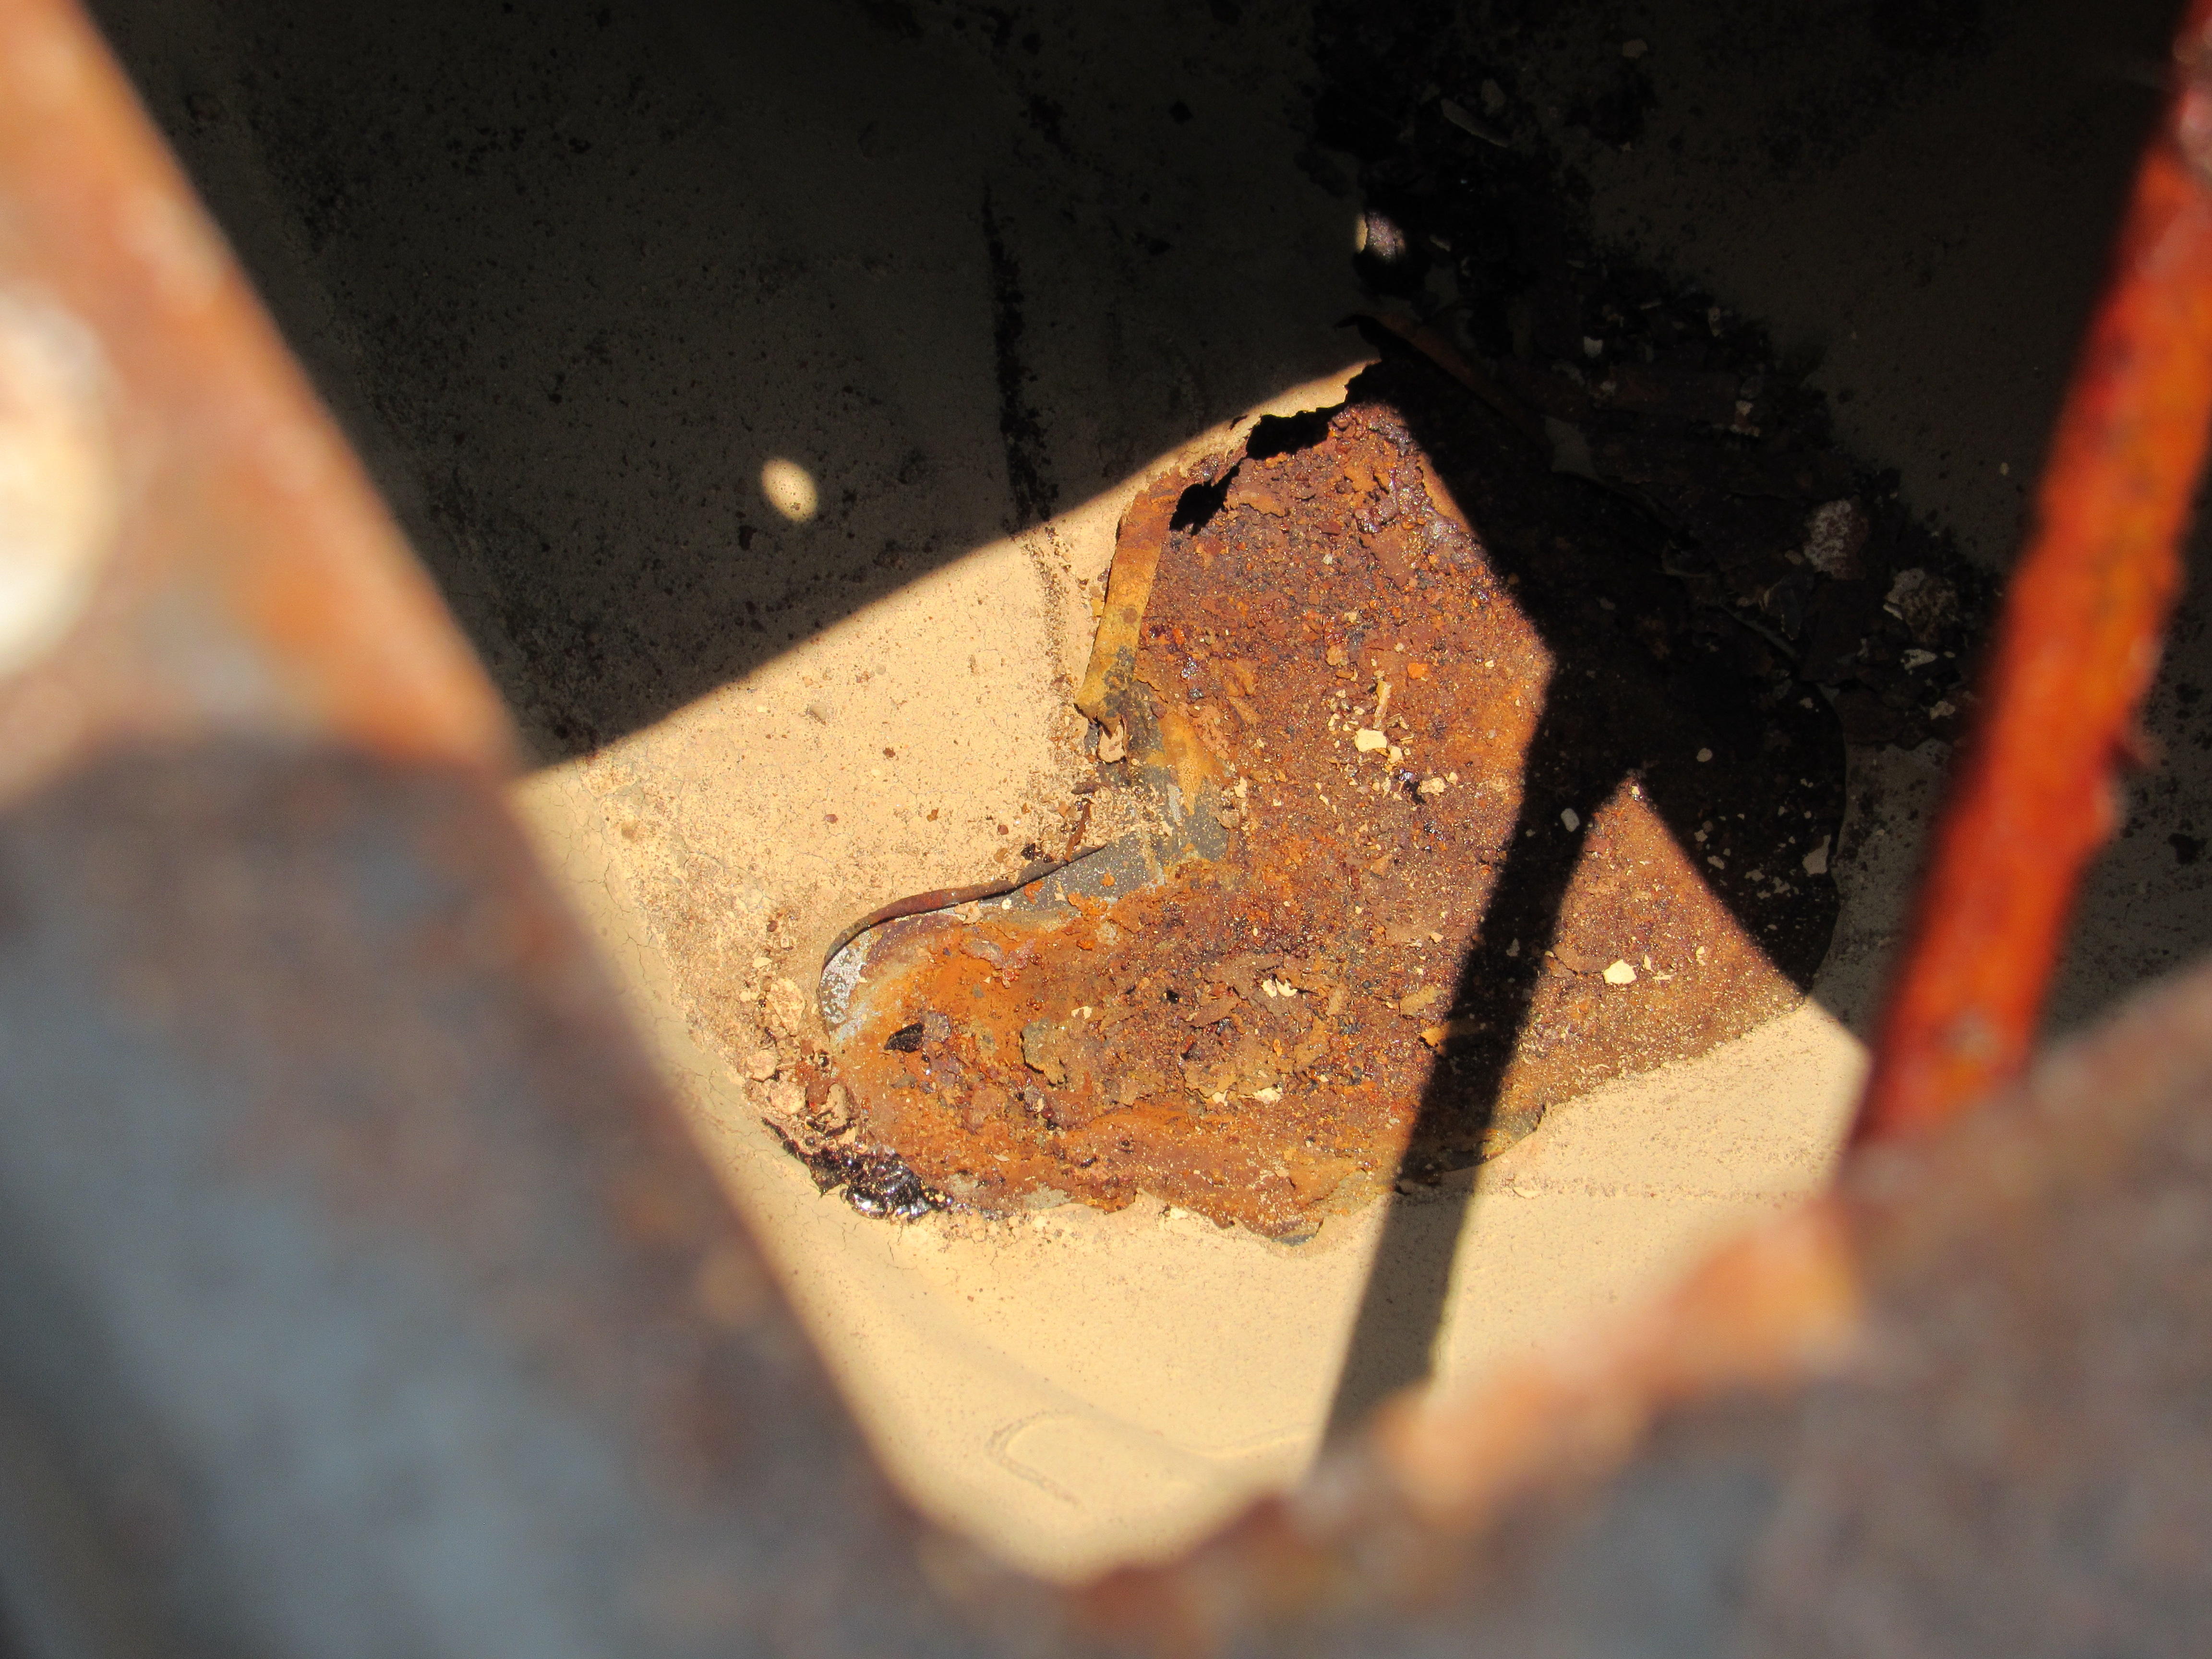
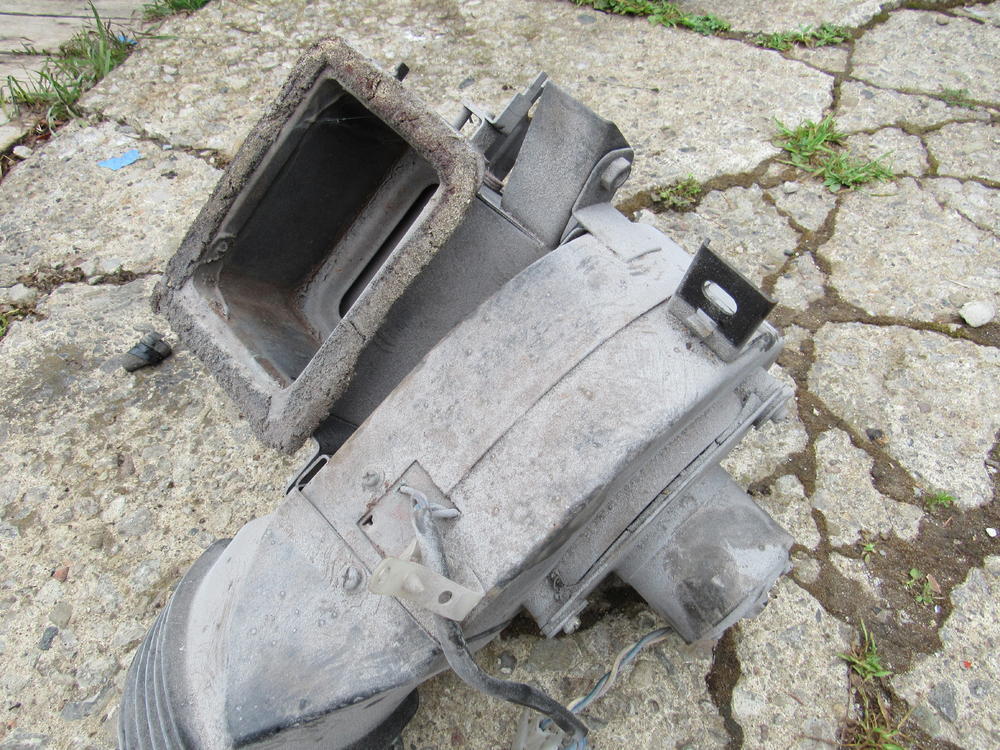
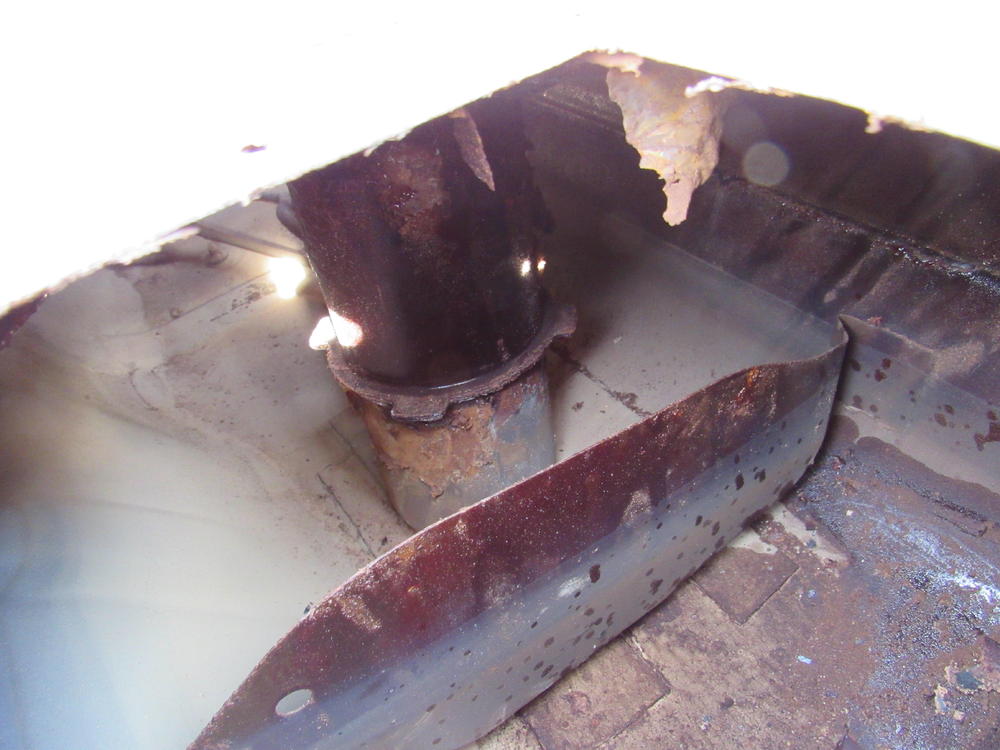
Well I don't why the last guy melted that square hole in the cover (with a soldering gun), heater core is stock and everything looks good except that missing flapper door. Bruce, could you point me in the direction of your engine bay heater valve thread, the valve on this car is corroded solid in the open position and since rubber parts for these are NLA I might as well bypass it completely and mount one in the engine bay where it belongs.


-
Now that I re read it you were very clear, that was me not thinking clearly.
-
-
Good question, hoping to answer that today after I clean up the shop, no fun projects until I can see the floor again.
-
For more jargon you could have a look at this site, https://www.autobody101.com/forums/index.php?sid=f044bf1f351a02abe241234902095df9
-
The pin is still available, they just changed the p/n. The hole on the pedal that the pin goes through sometimes gets elongated from wear, in that case you can weld it up, fill it in then grind it flat and re drill. Not that Delrin isn't a good idea as a simple pivot but the constant stress of pressing the pedal might end up cracking the pin. Just the other day someone suggested in another thread of pressing in a roller bearing which I think would be the ultimate fix if not overkill. http://www.thezstore.com/page/TZS/PROD/21-2223
-
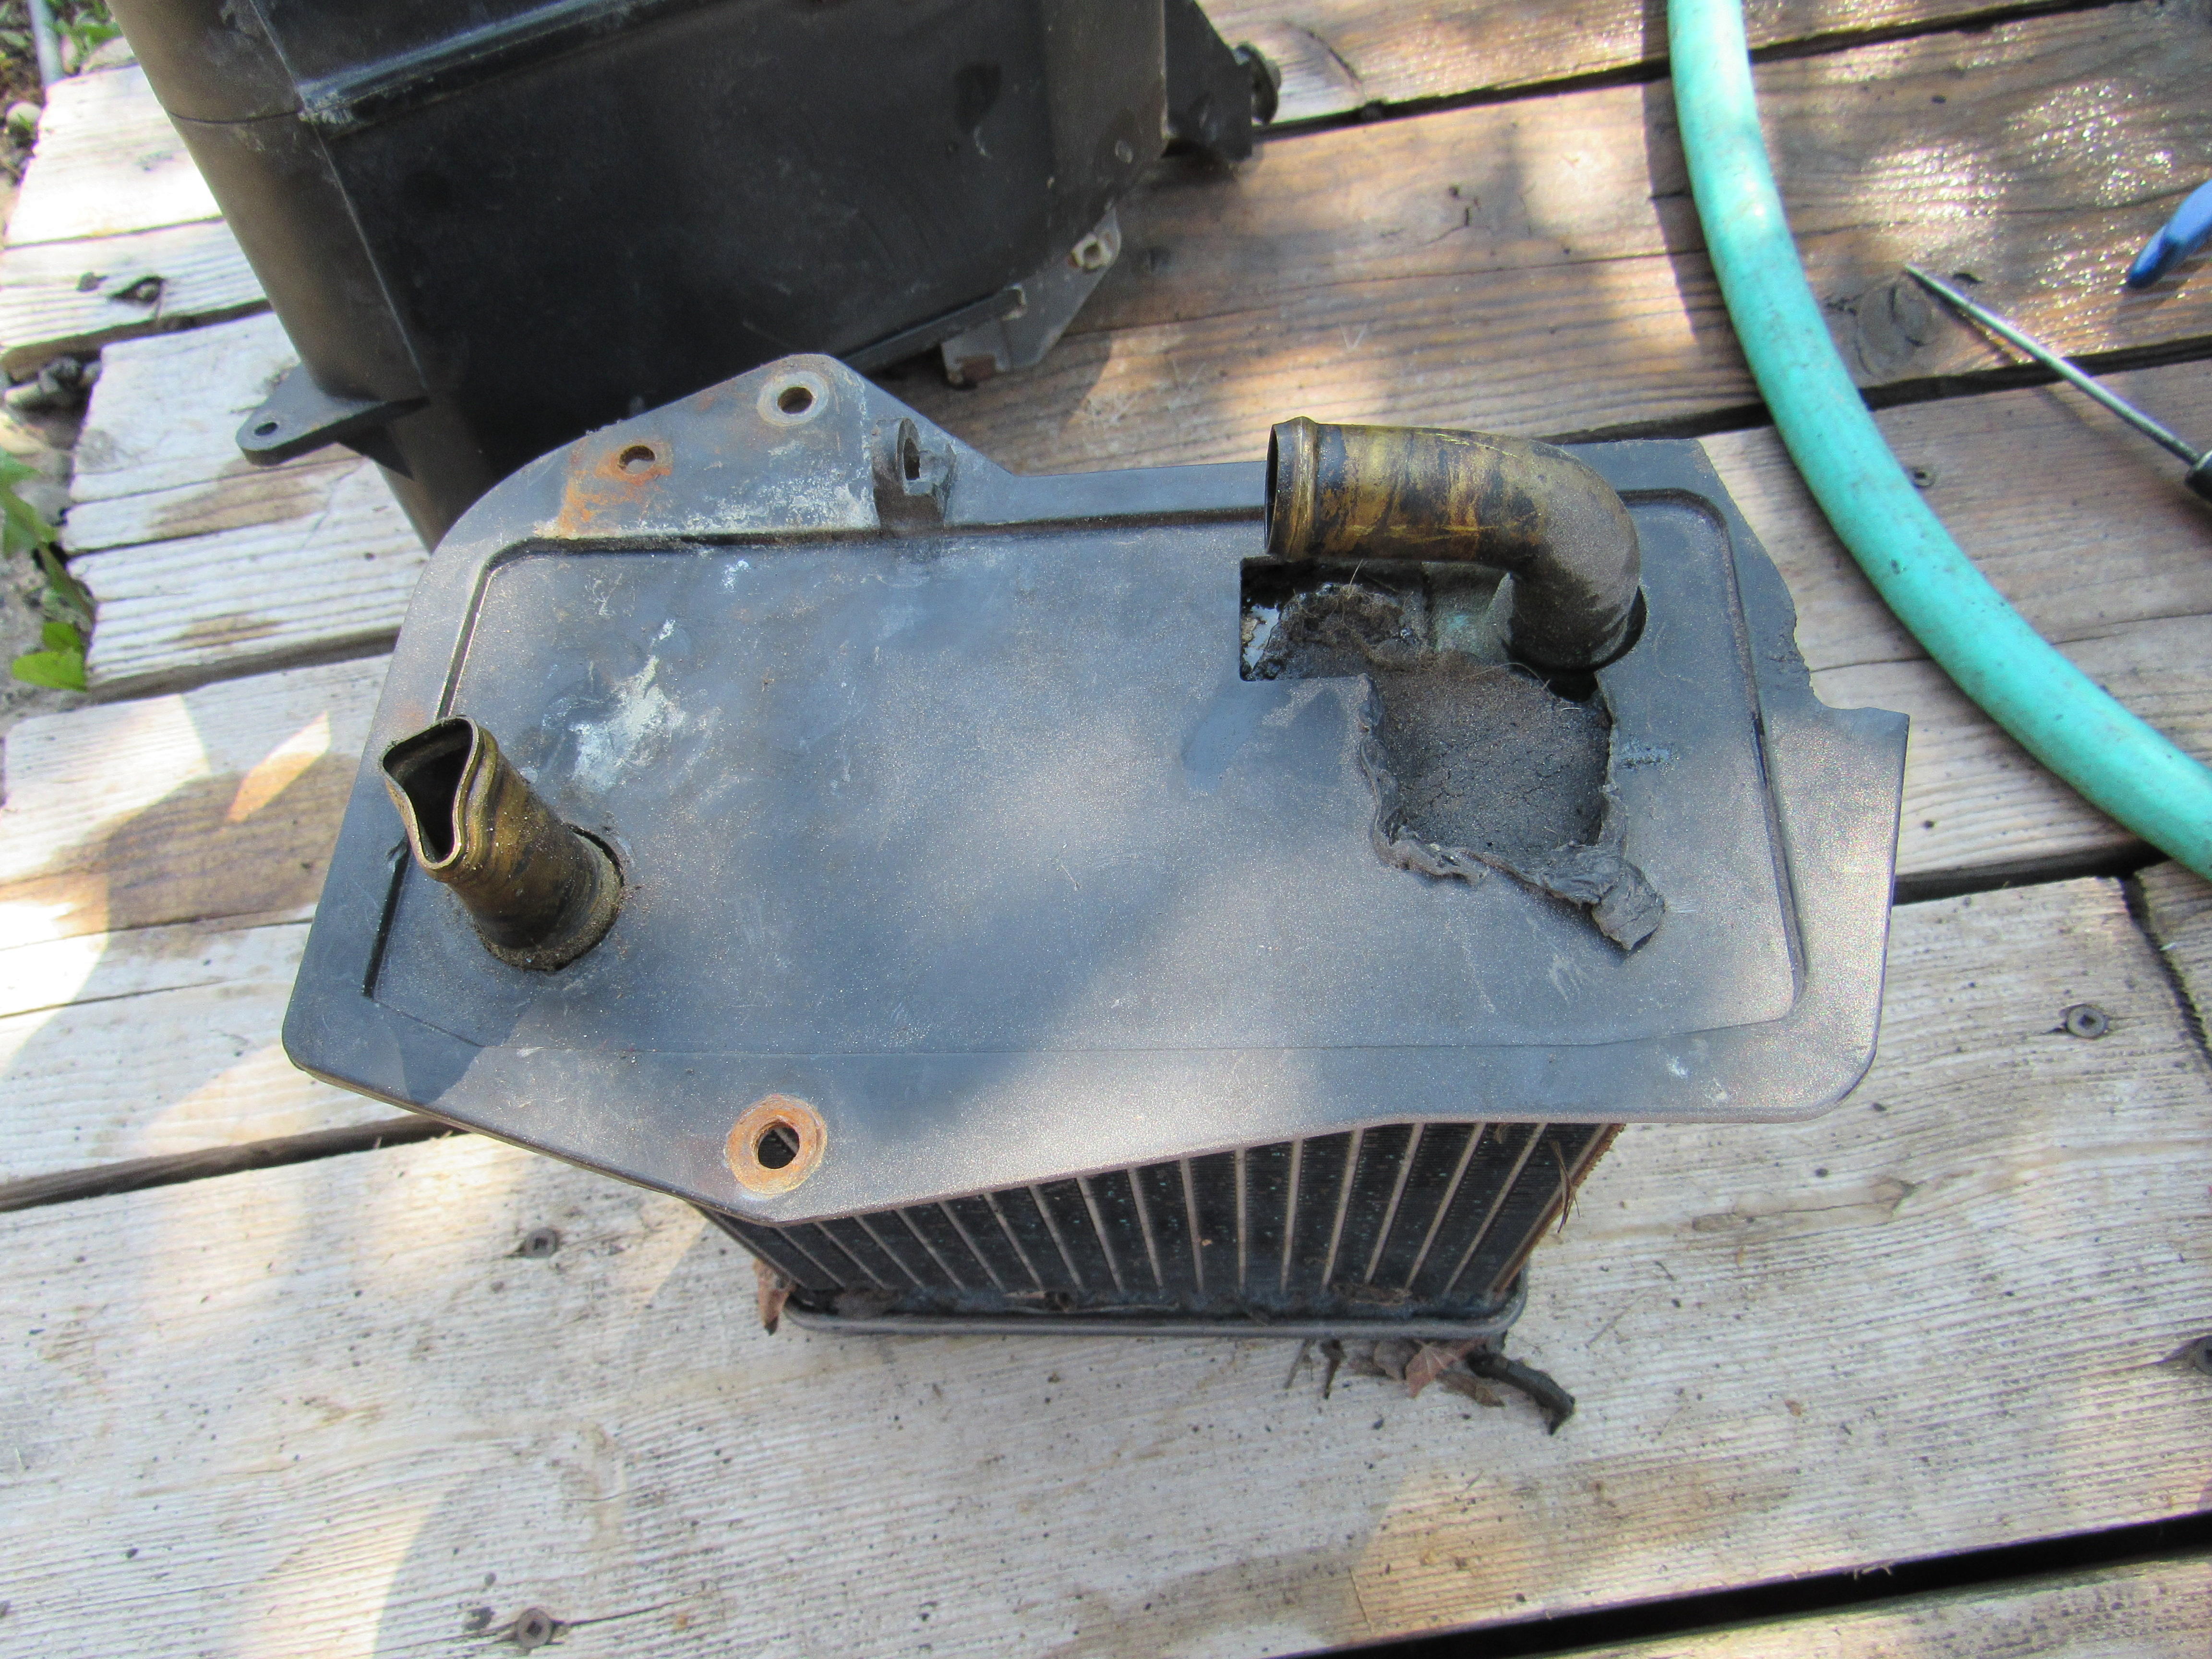
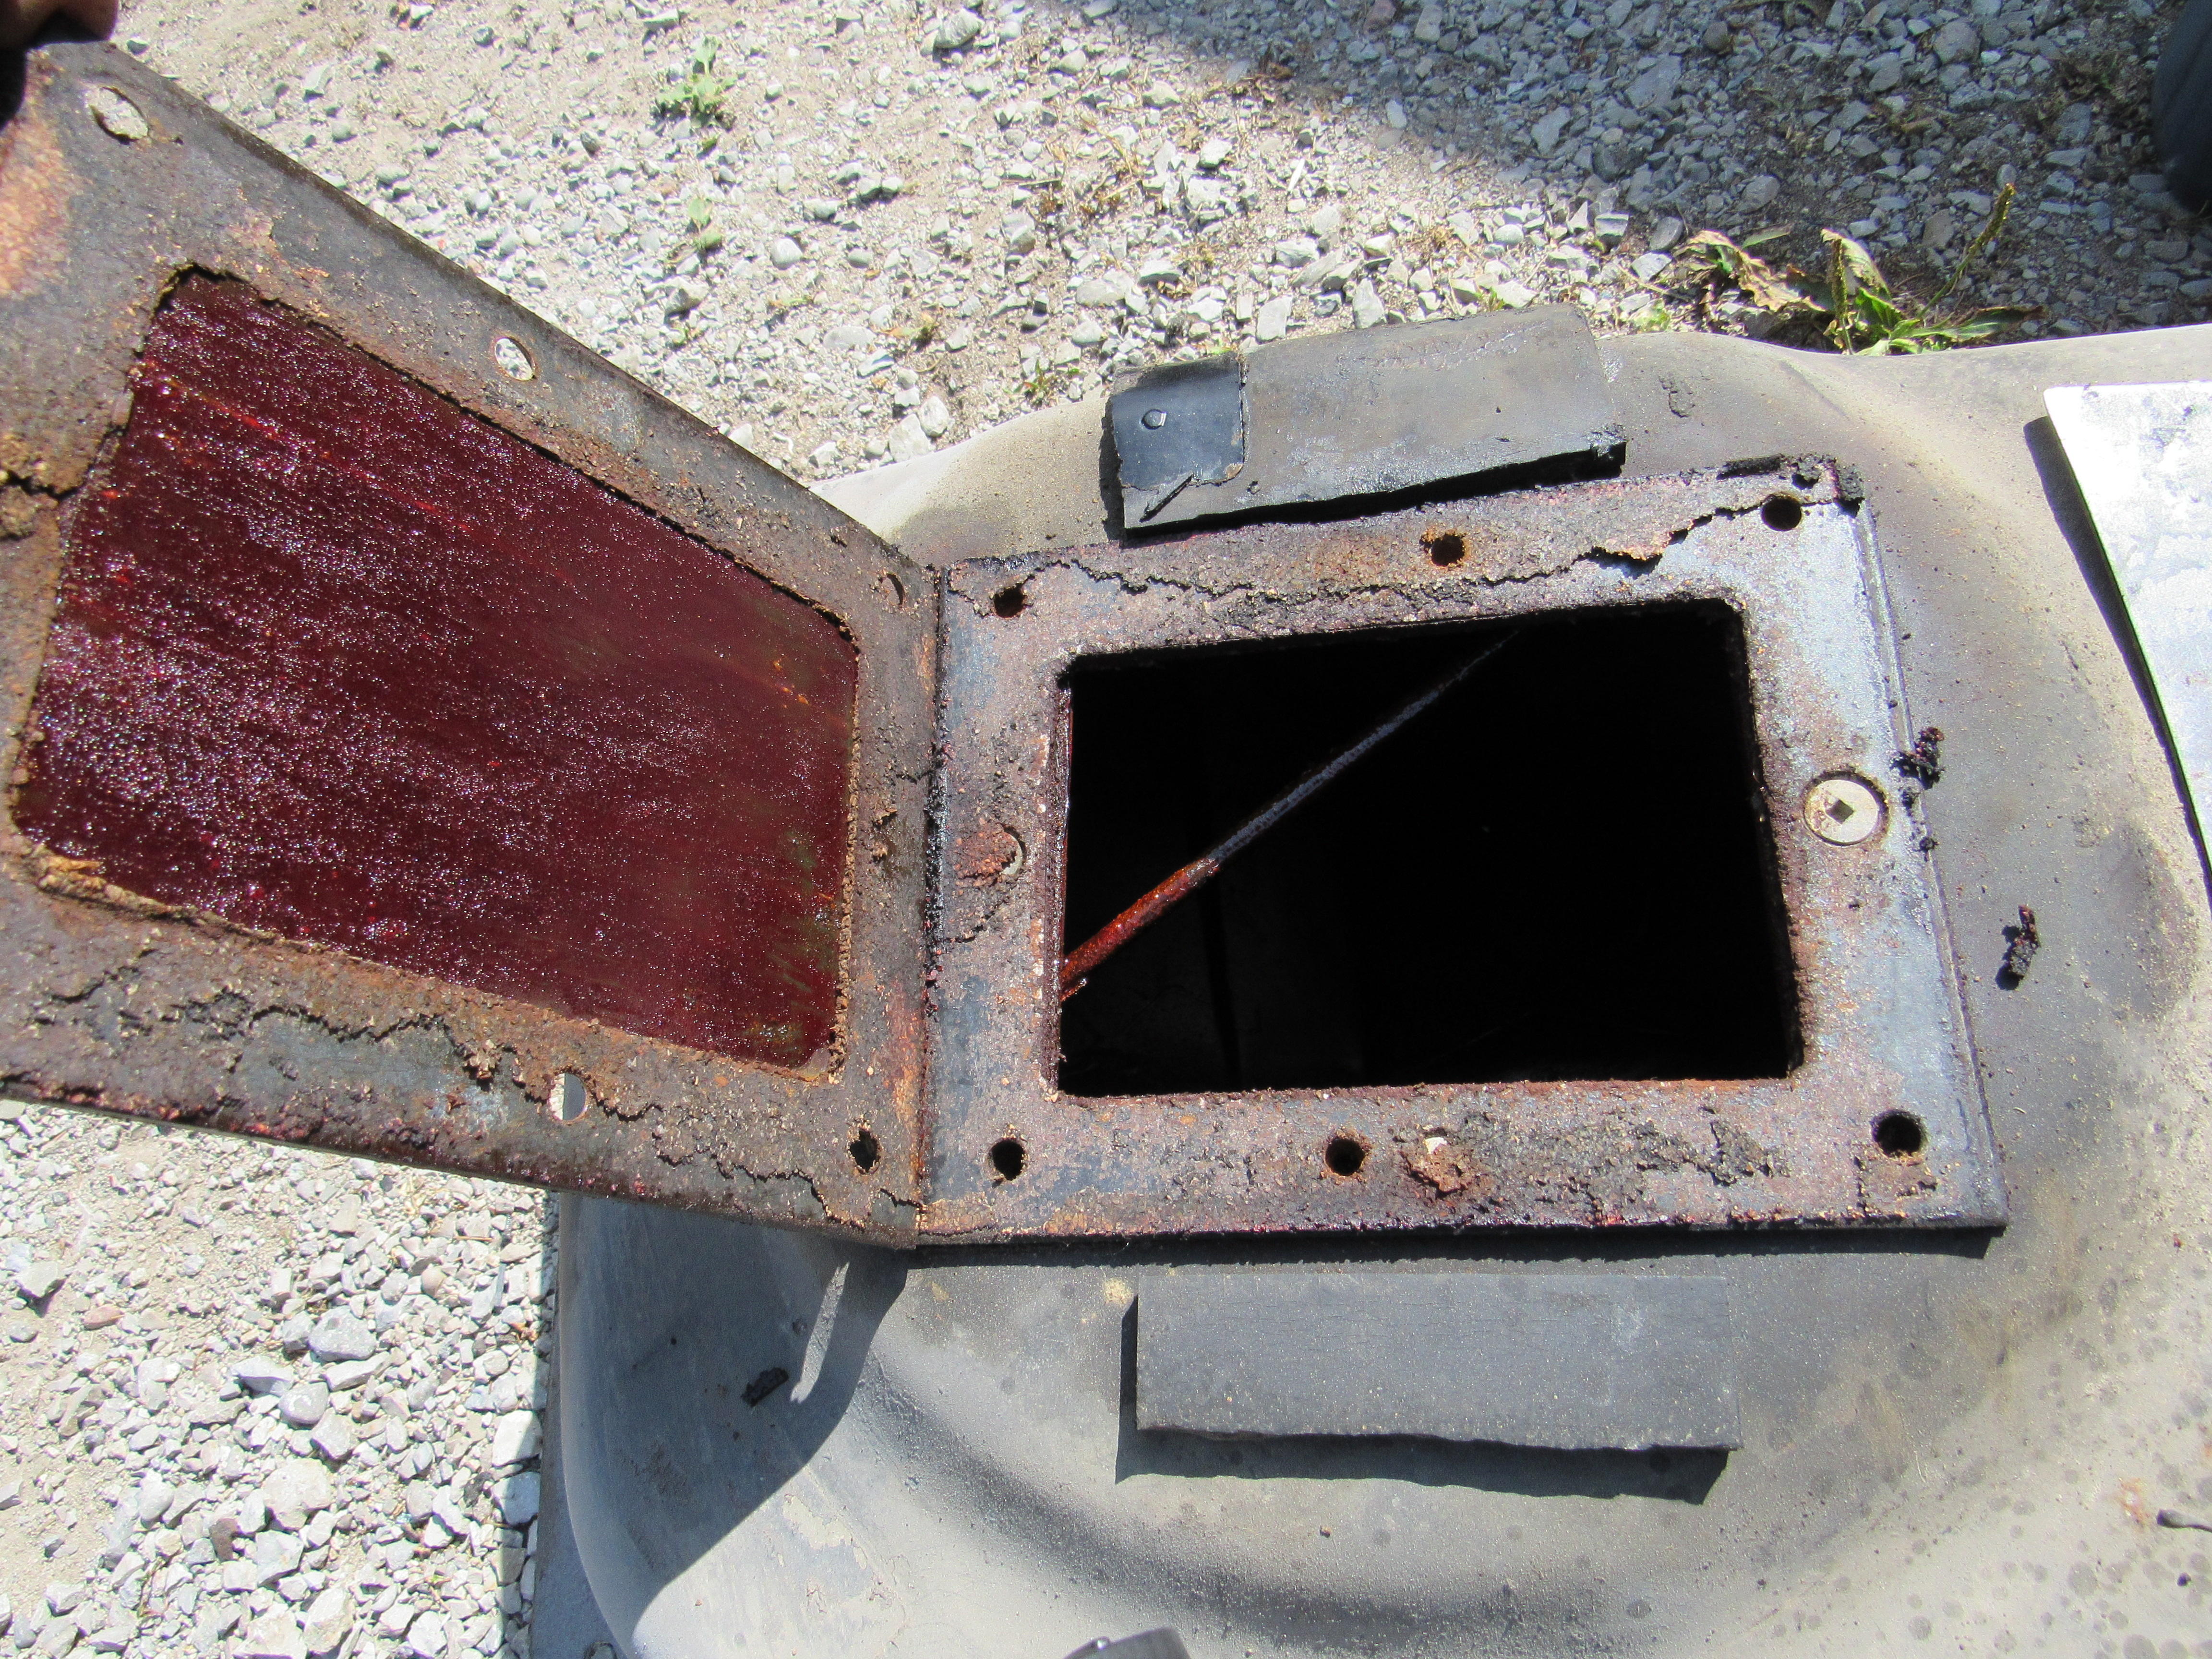
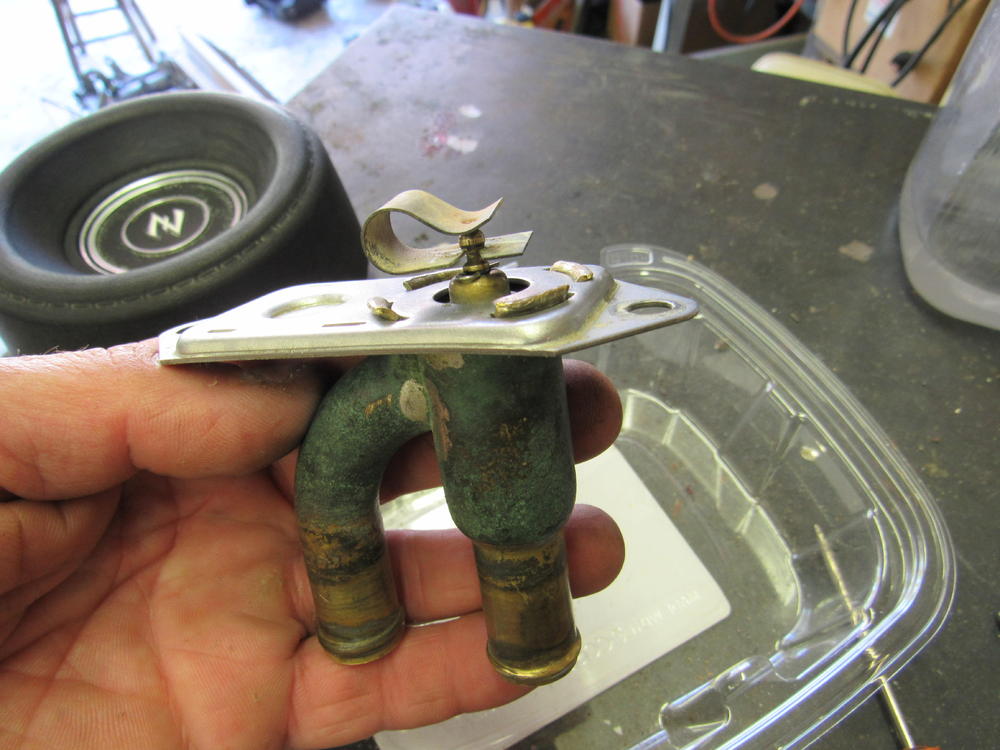
I pulled the dash this morning, Man are 280z dashes easy to pull, I swear I had that thing out in 10 min. not so with a 240z. Actually I had completely the wrong idea about 280's, coming from 1970-72 240's I assumed 280's were heavy and fat with too much needless crap. But there so many refinements from the 240's, the rats nest of wire connectors up under the P/S dash on a 240 becomes 3 large plastic connectors that are easy to separate, there 8 tiny philips screws that have to be removed while lying on your back with your head crammed into the foot wells to get the heating push cables off on the 240, with the 280 it's 4 one handed clips. I have noticed many small refinements like these that I'm sure the line workers appreciated just as much as I do. Managed to get the dash cap off, a nice clean crackless dash is a wonderful thing but they are just so damn expensive, there has to be a better way to install a cap and make it look good. I've seen dash caps on Z's at shows that looked great, if anyone is interested we could start a separate thread just on caps and techniques to make the work and look better. The pic of the coolant control valve on the heater has a very A/C looking temp sensor on it, is this stock for a 77? This car does not have A/C nor did it come with it when new. Why such a complicated switch for such a simple function?


-
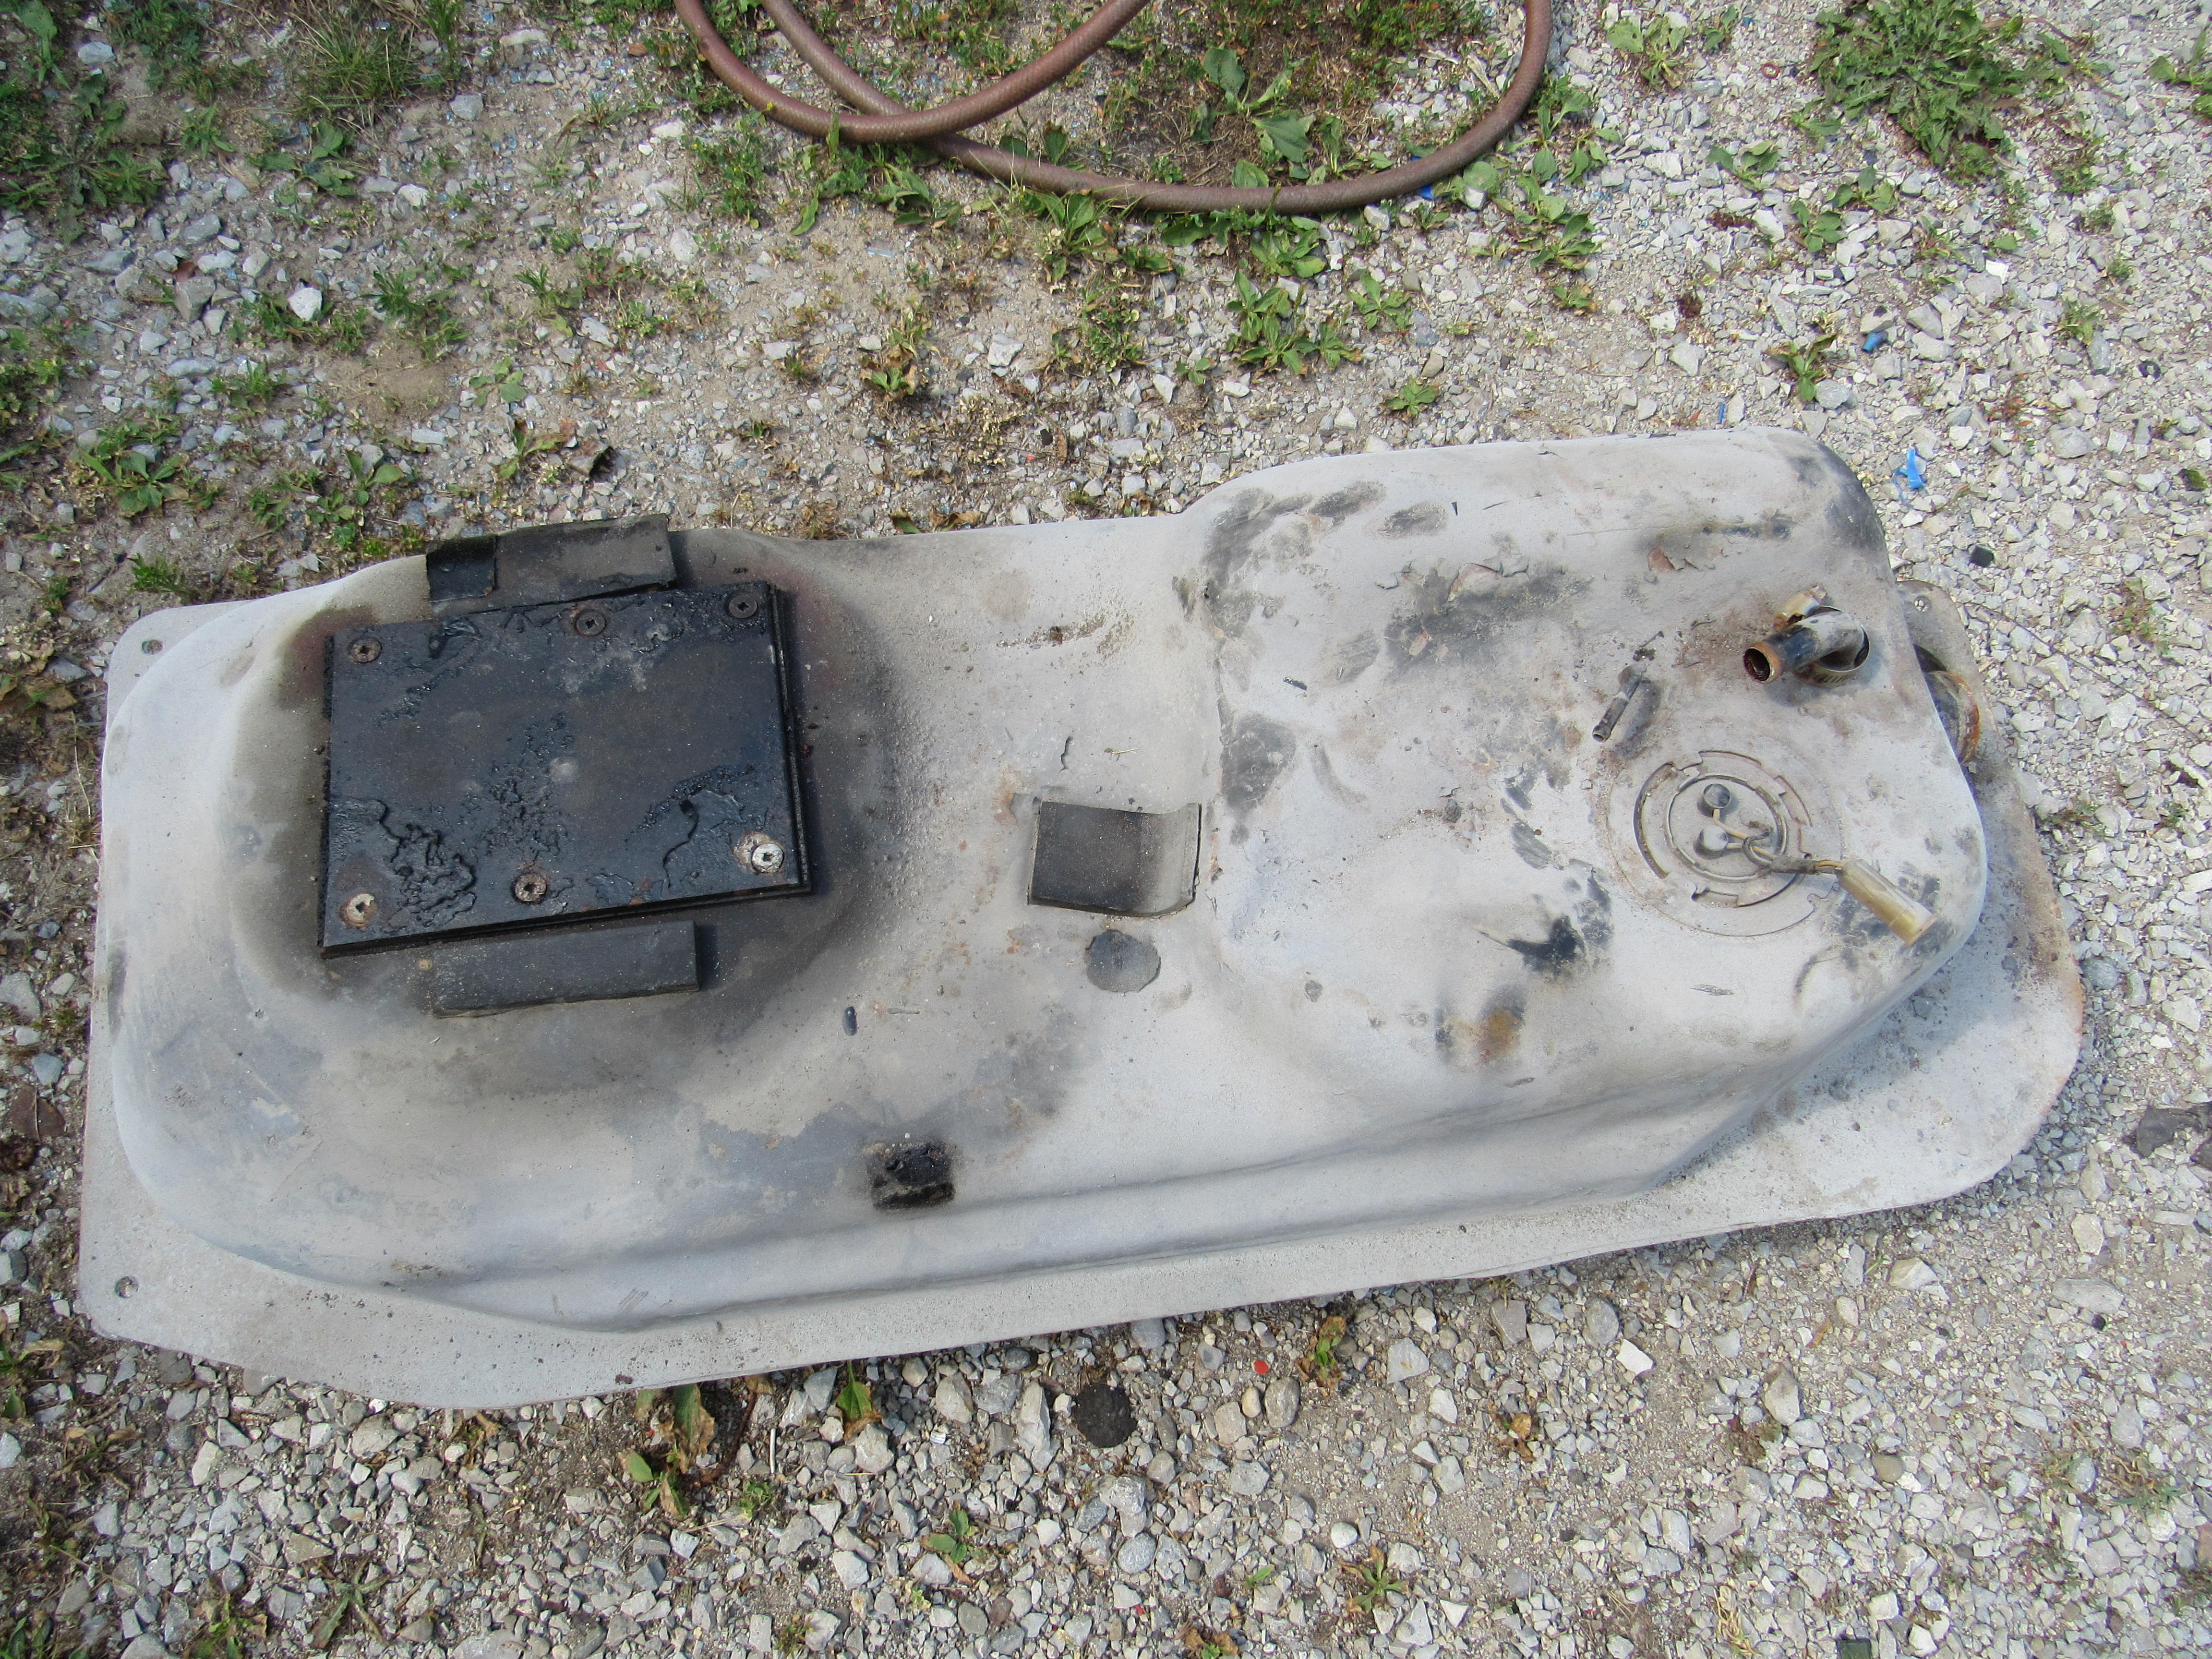
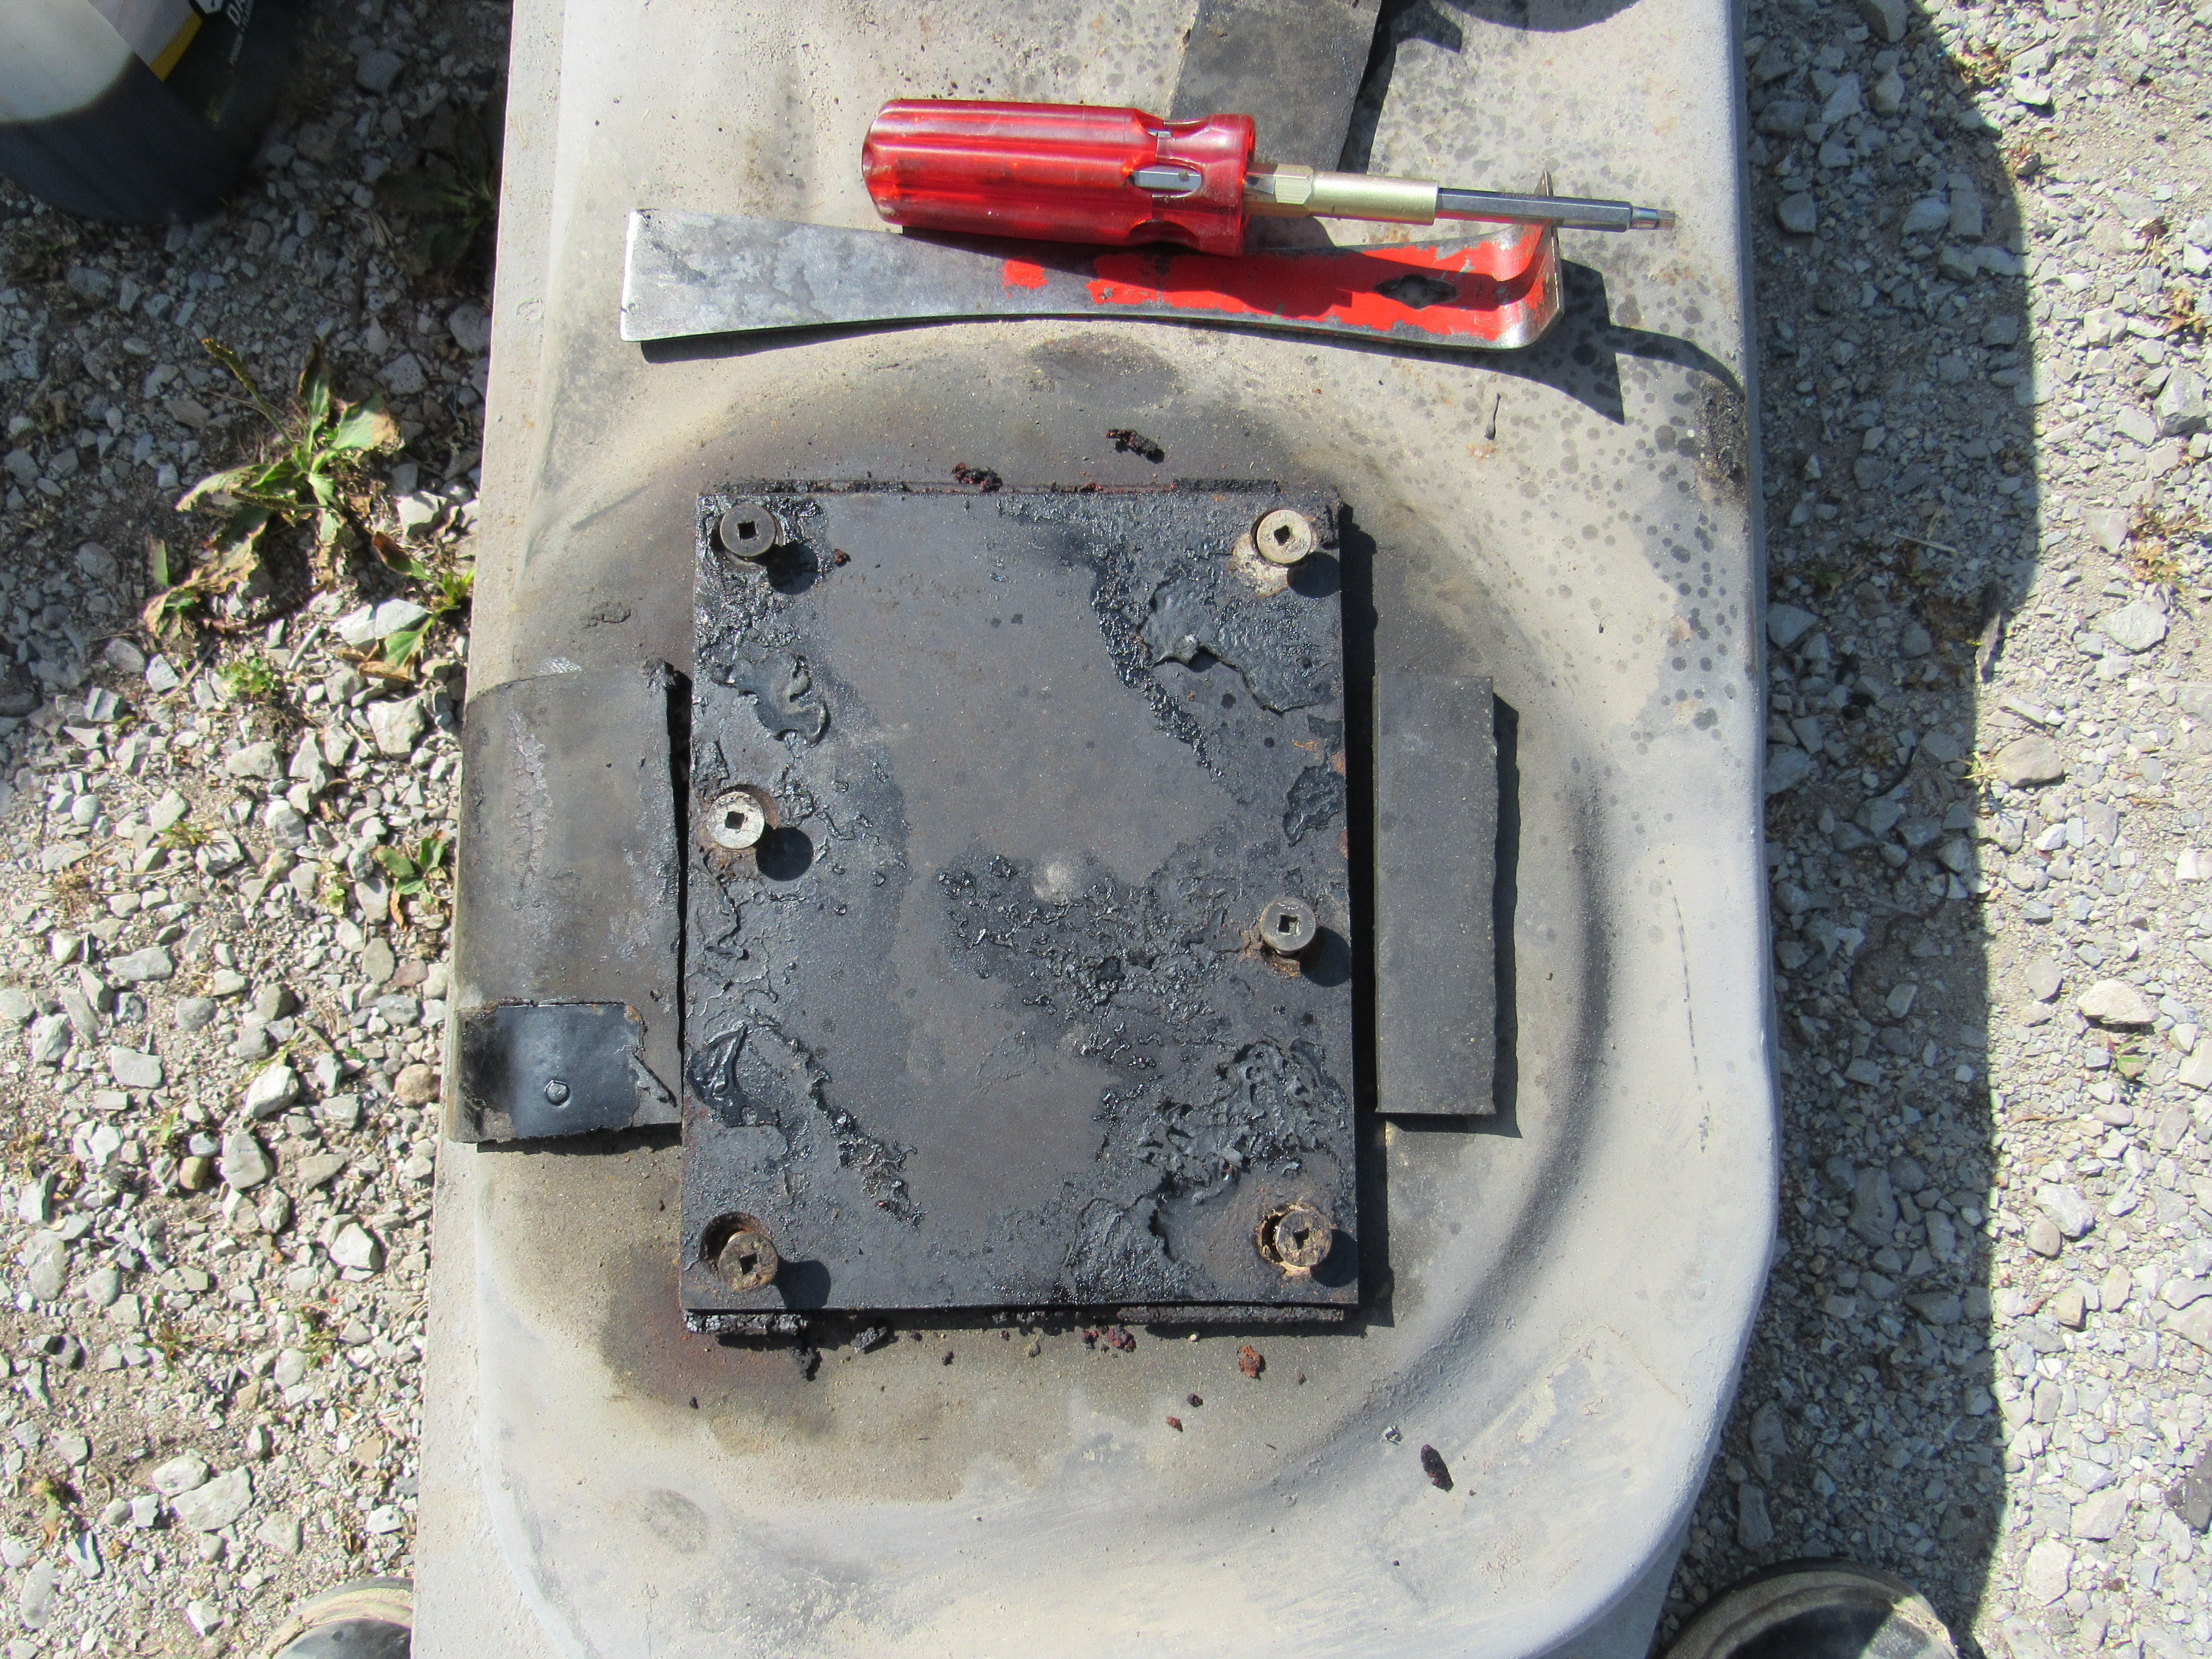
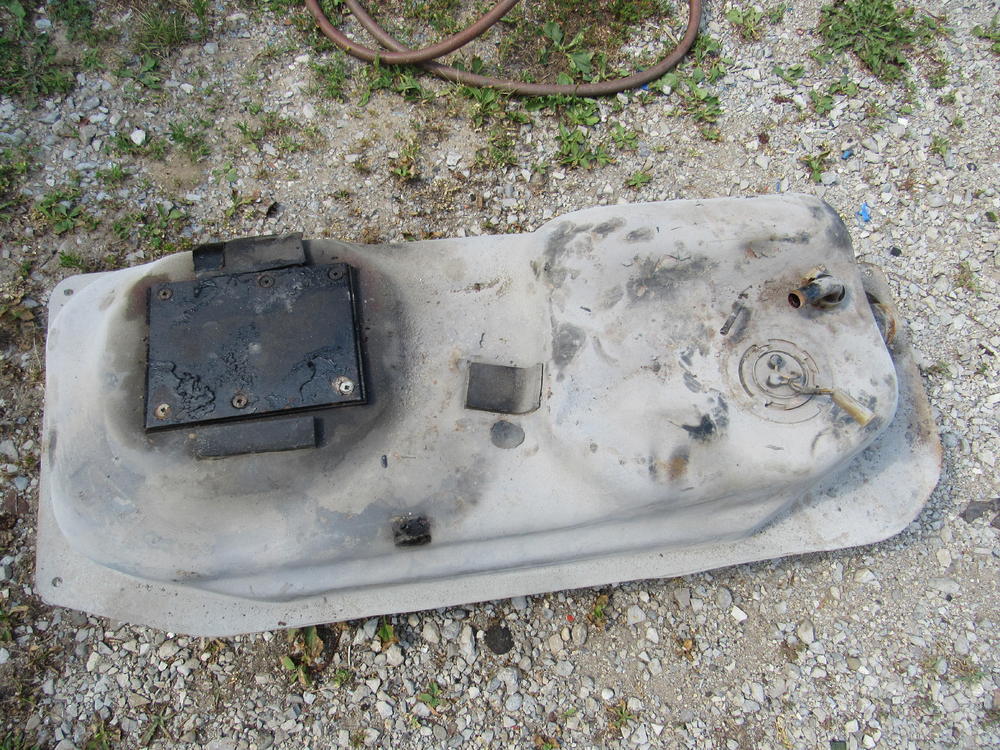
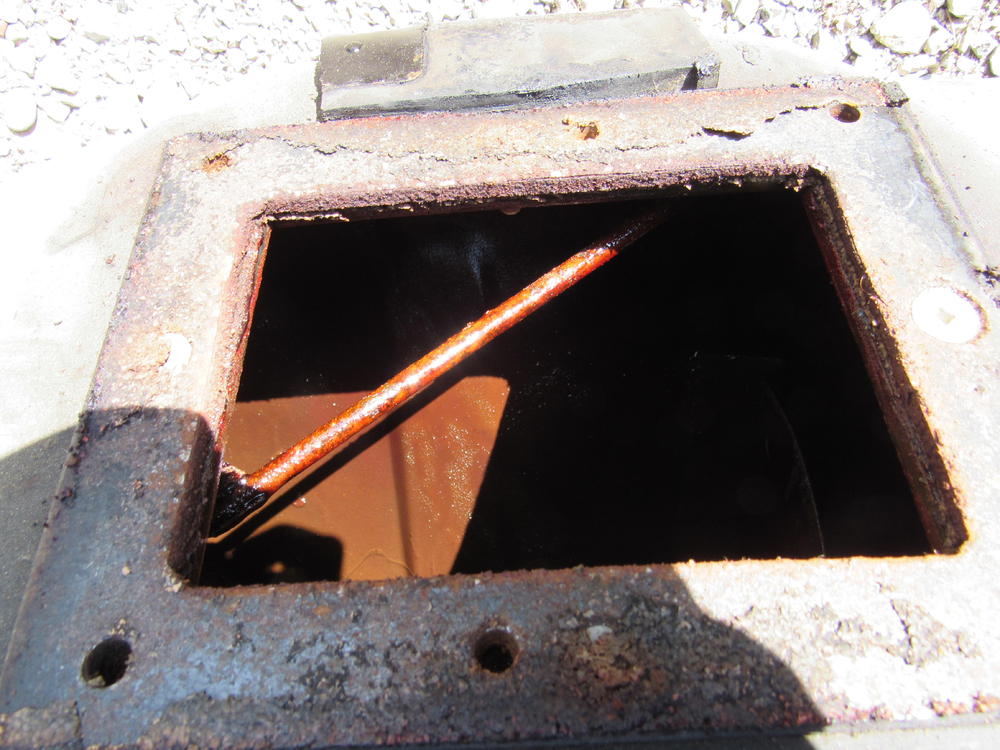
Aimed the openings of the tank just right this morning with the sun to get a pic of this, feed/return canister buried right in the middle of the tank. I suppose not many people get to see this so here it is. The fuel pump assembly and the coil holder/ballast are my jobs for tomorrow.


-
They used Red Kote as the sealant, they covered both sides of each cork gasket, seems to have worked pretty well. I might do exactly the same thing only with the POR15. There big areas where the coating is still intact and working but others where it bubbled up and rusted underneath.


-
-
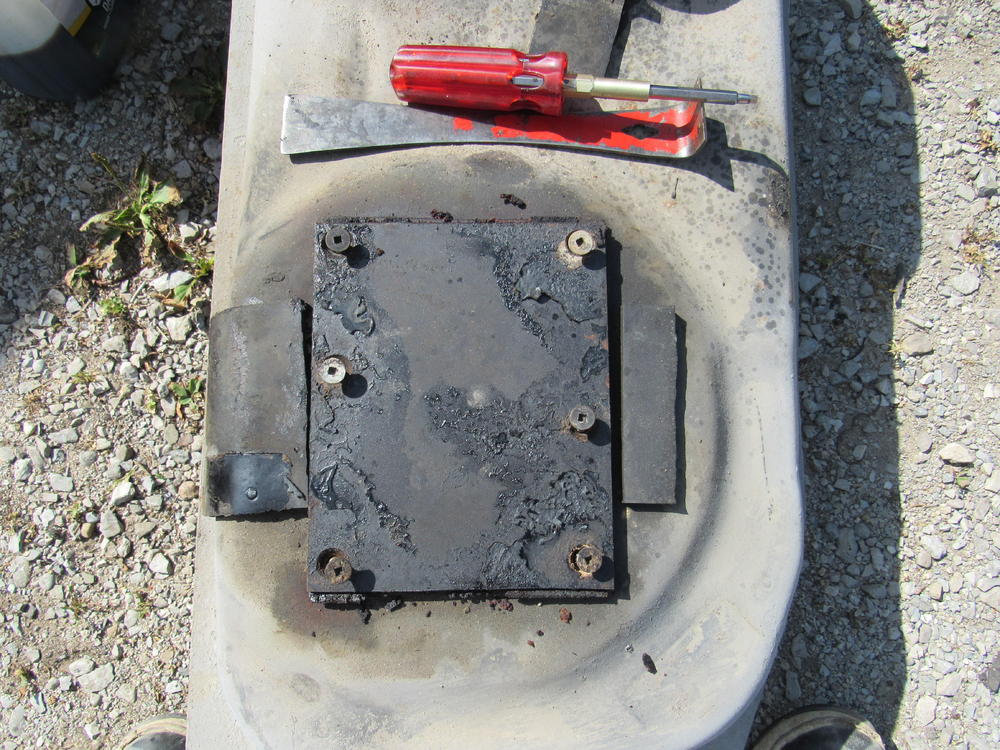
I dropped the gas tank today, anyone else have an access hatch? At some time in the past this cut out was added so the tank could be cleaned and coated with Red Kote, looks like it was done a long time ago, the Red Kote has not held up well as the whole tank is quite rusty. I may just pay the $150 and get the tank dipped rather than trying to get all that crap out myself.


-
http://www.baddogparts.com/
-
I think you are going have to find a parts car and cut that piece out.
-
Pretty sure Tabco is the only manufacturer of repair panels and you can buy straight from them, other vendors just re sell. Although sometimes Tabco is out of certain panels and it can take weeks or months before they get around to stamping more. The other vendors may have panels in stock.
-
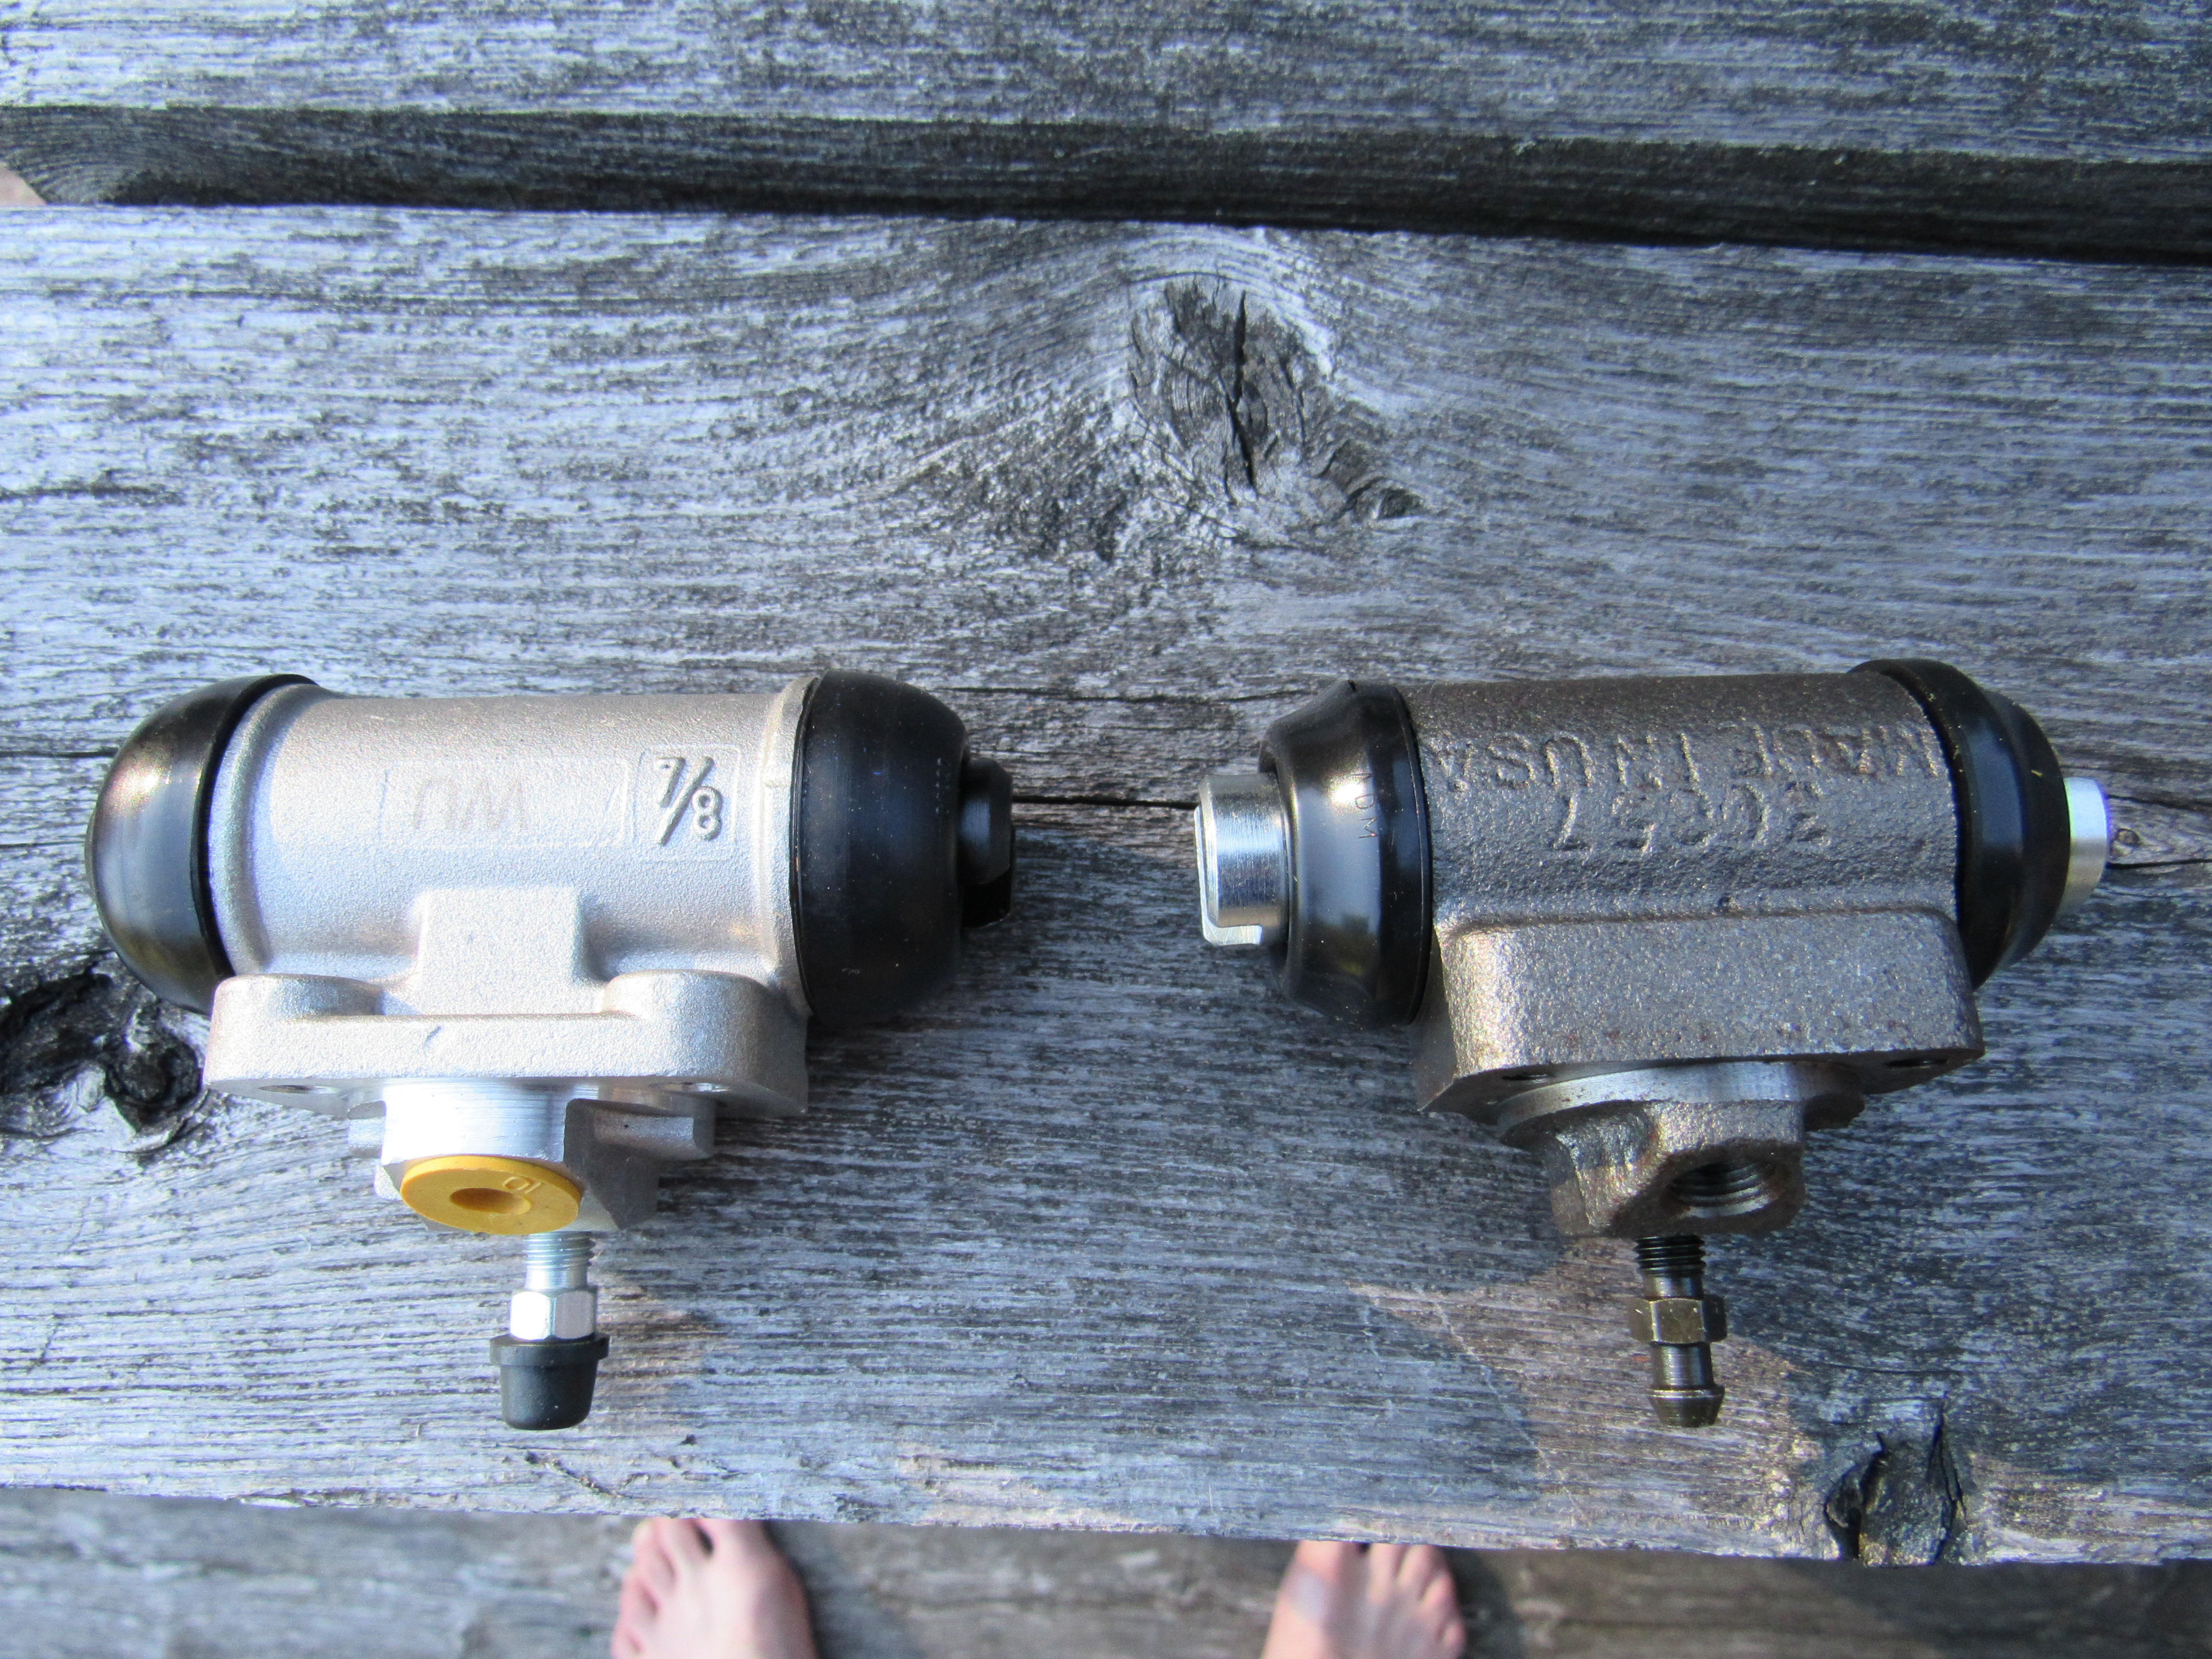
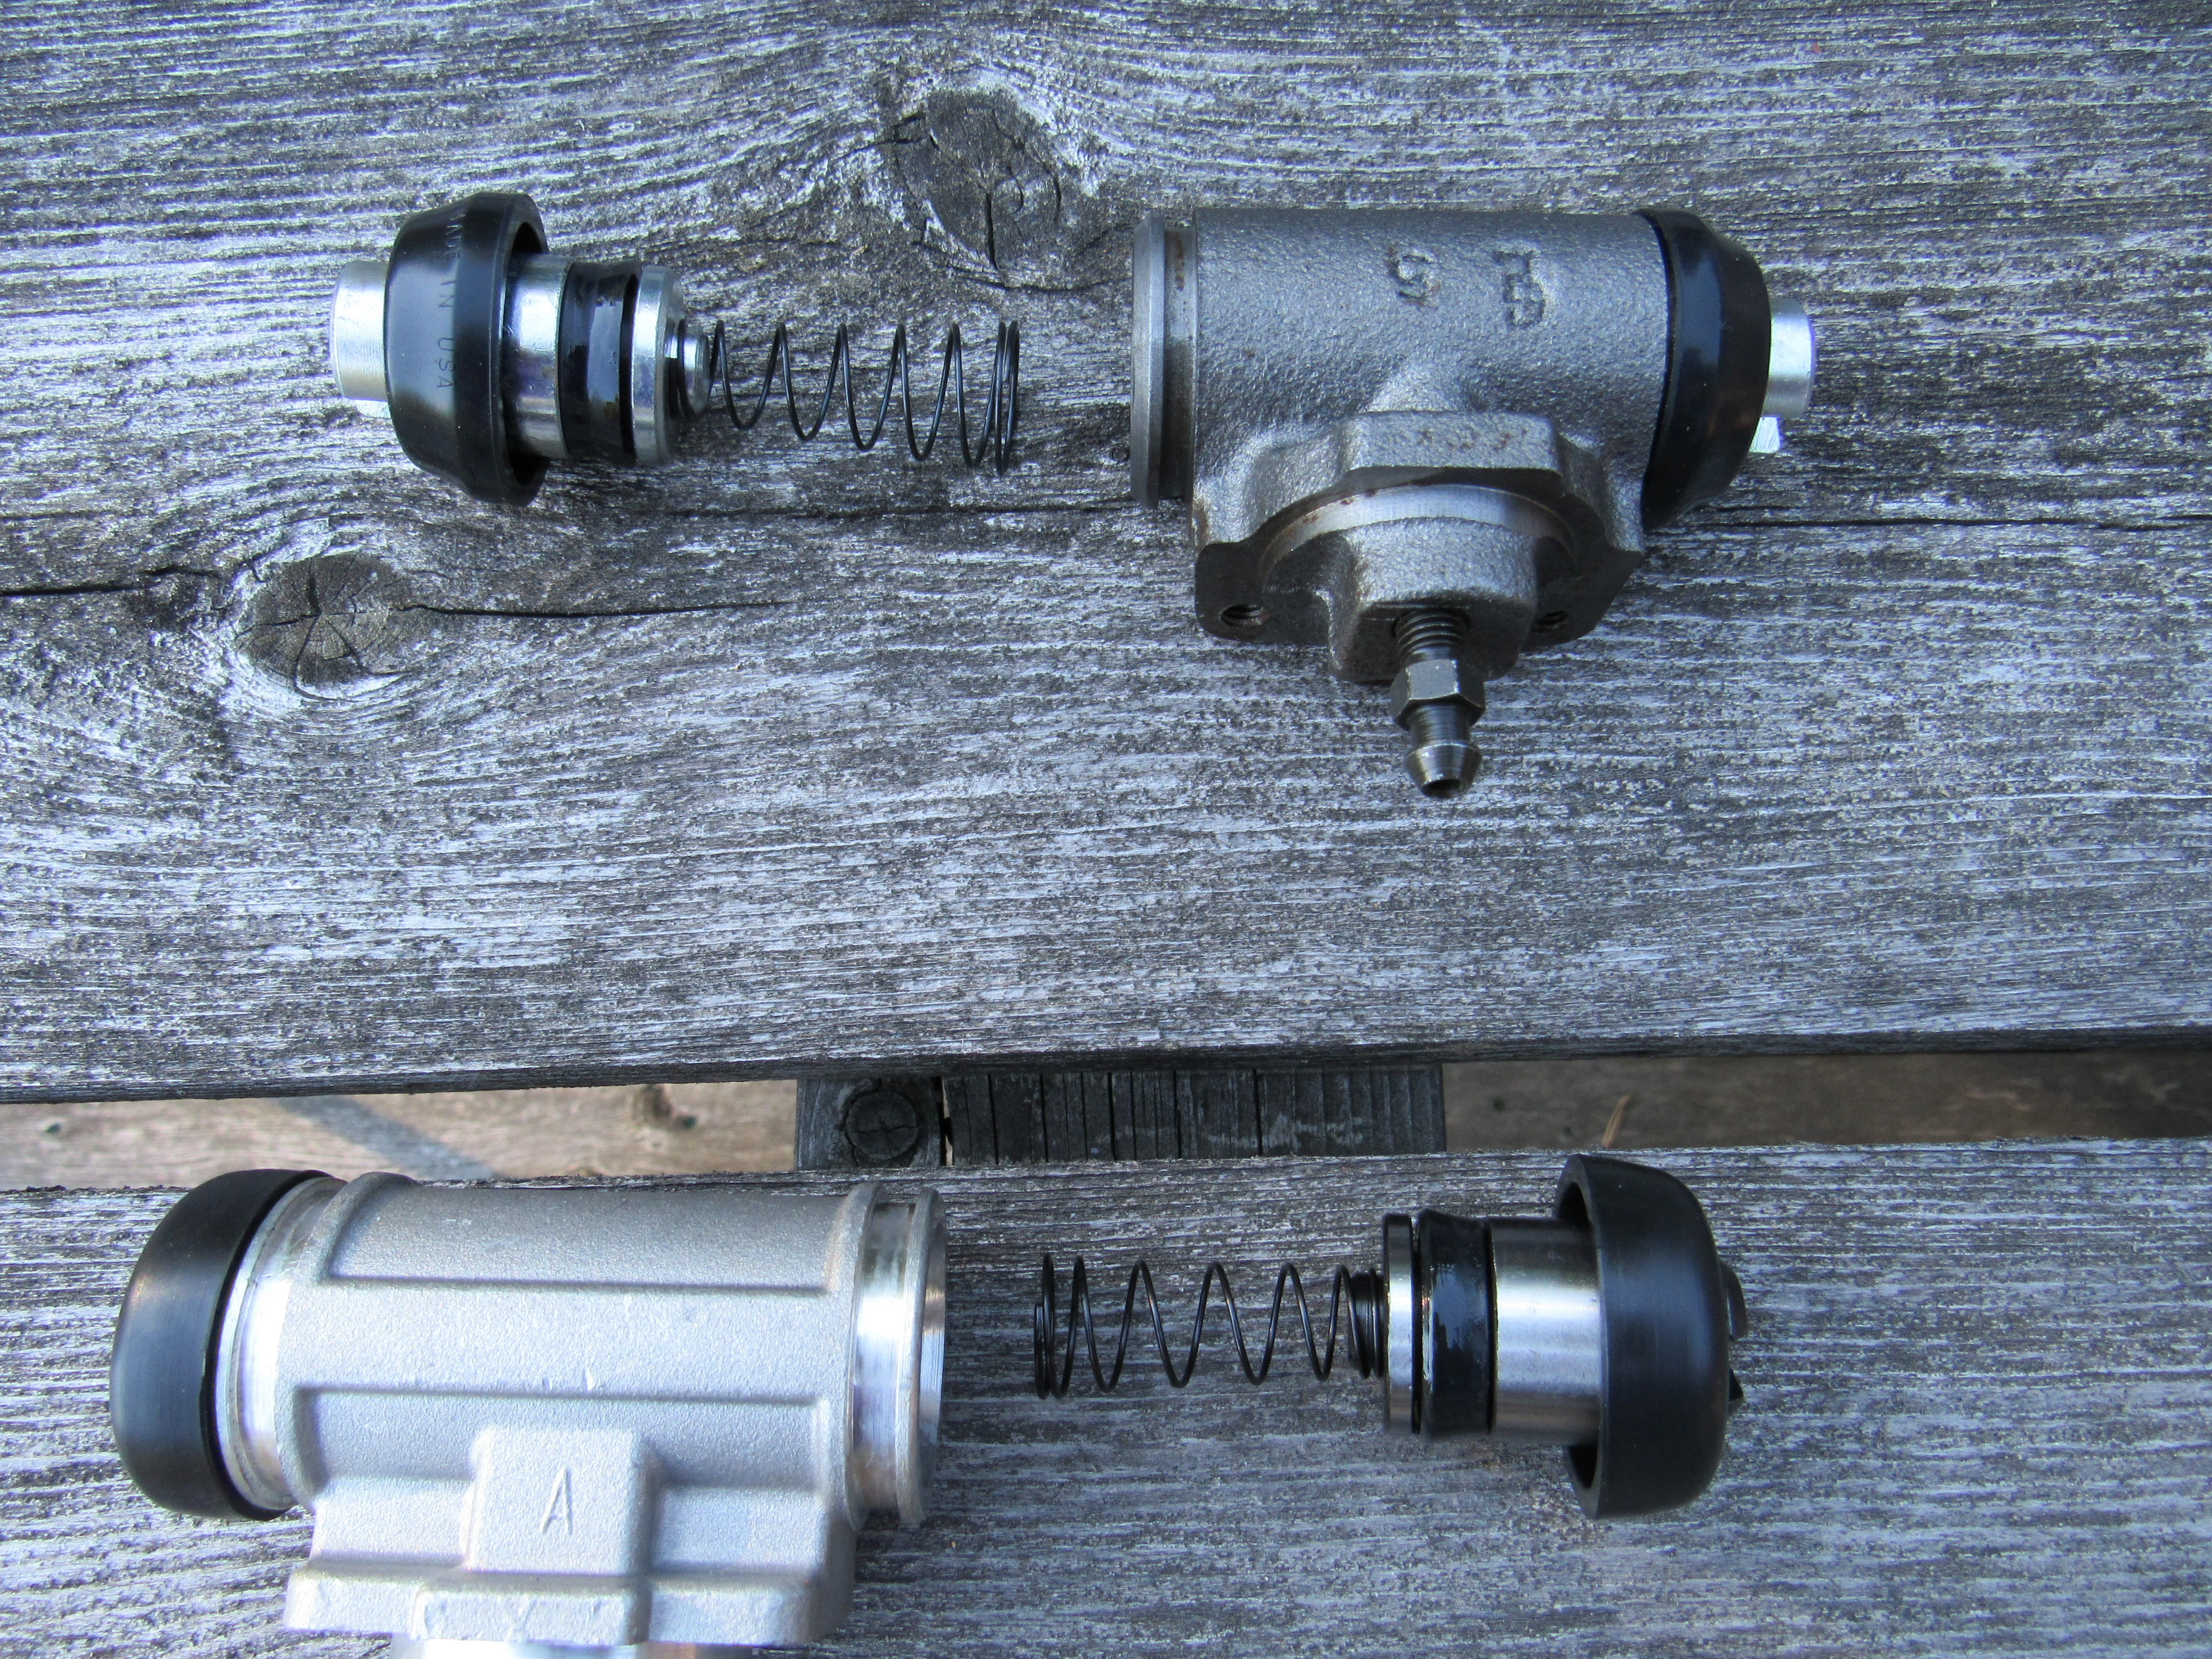
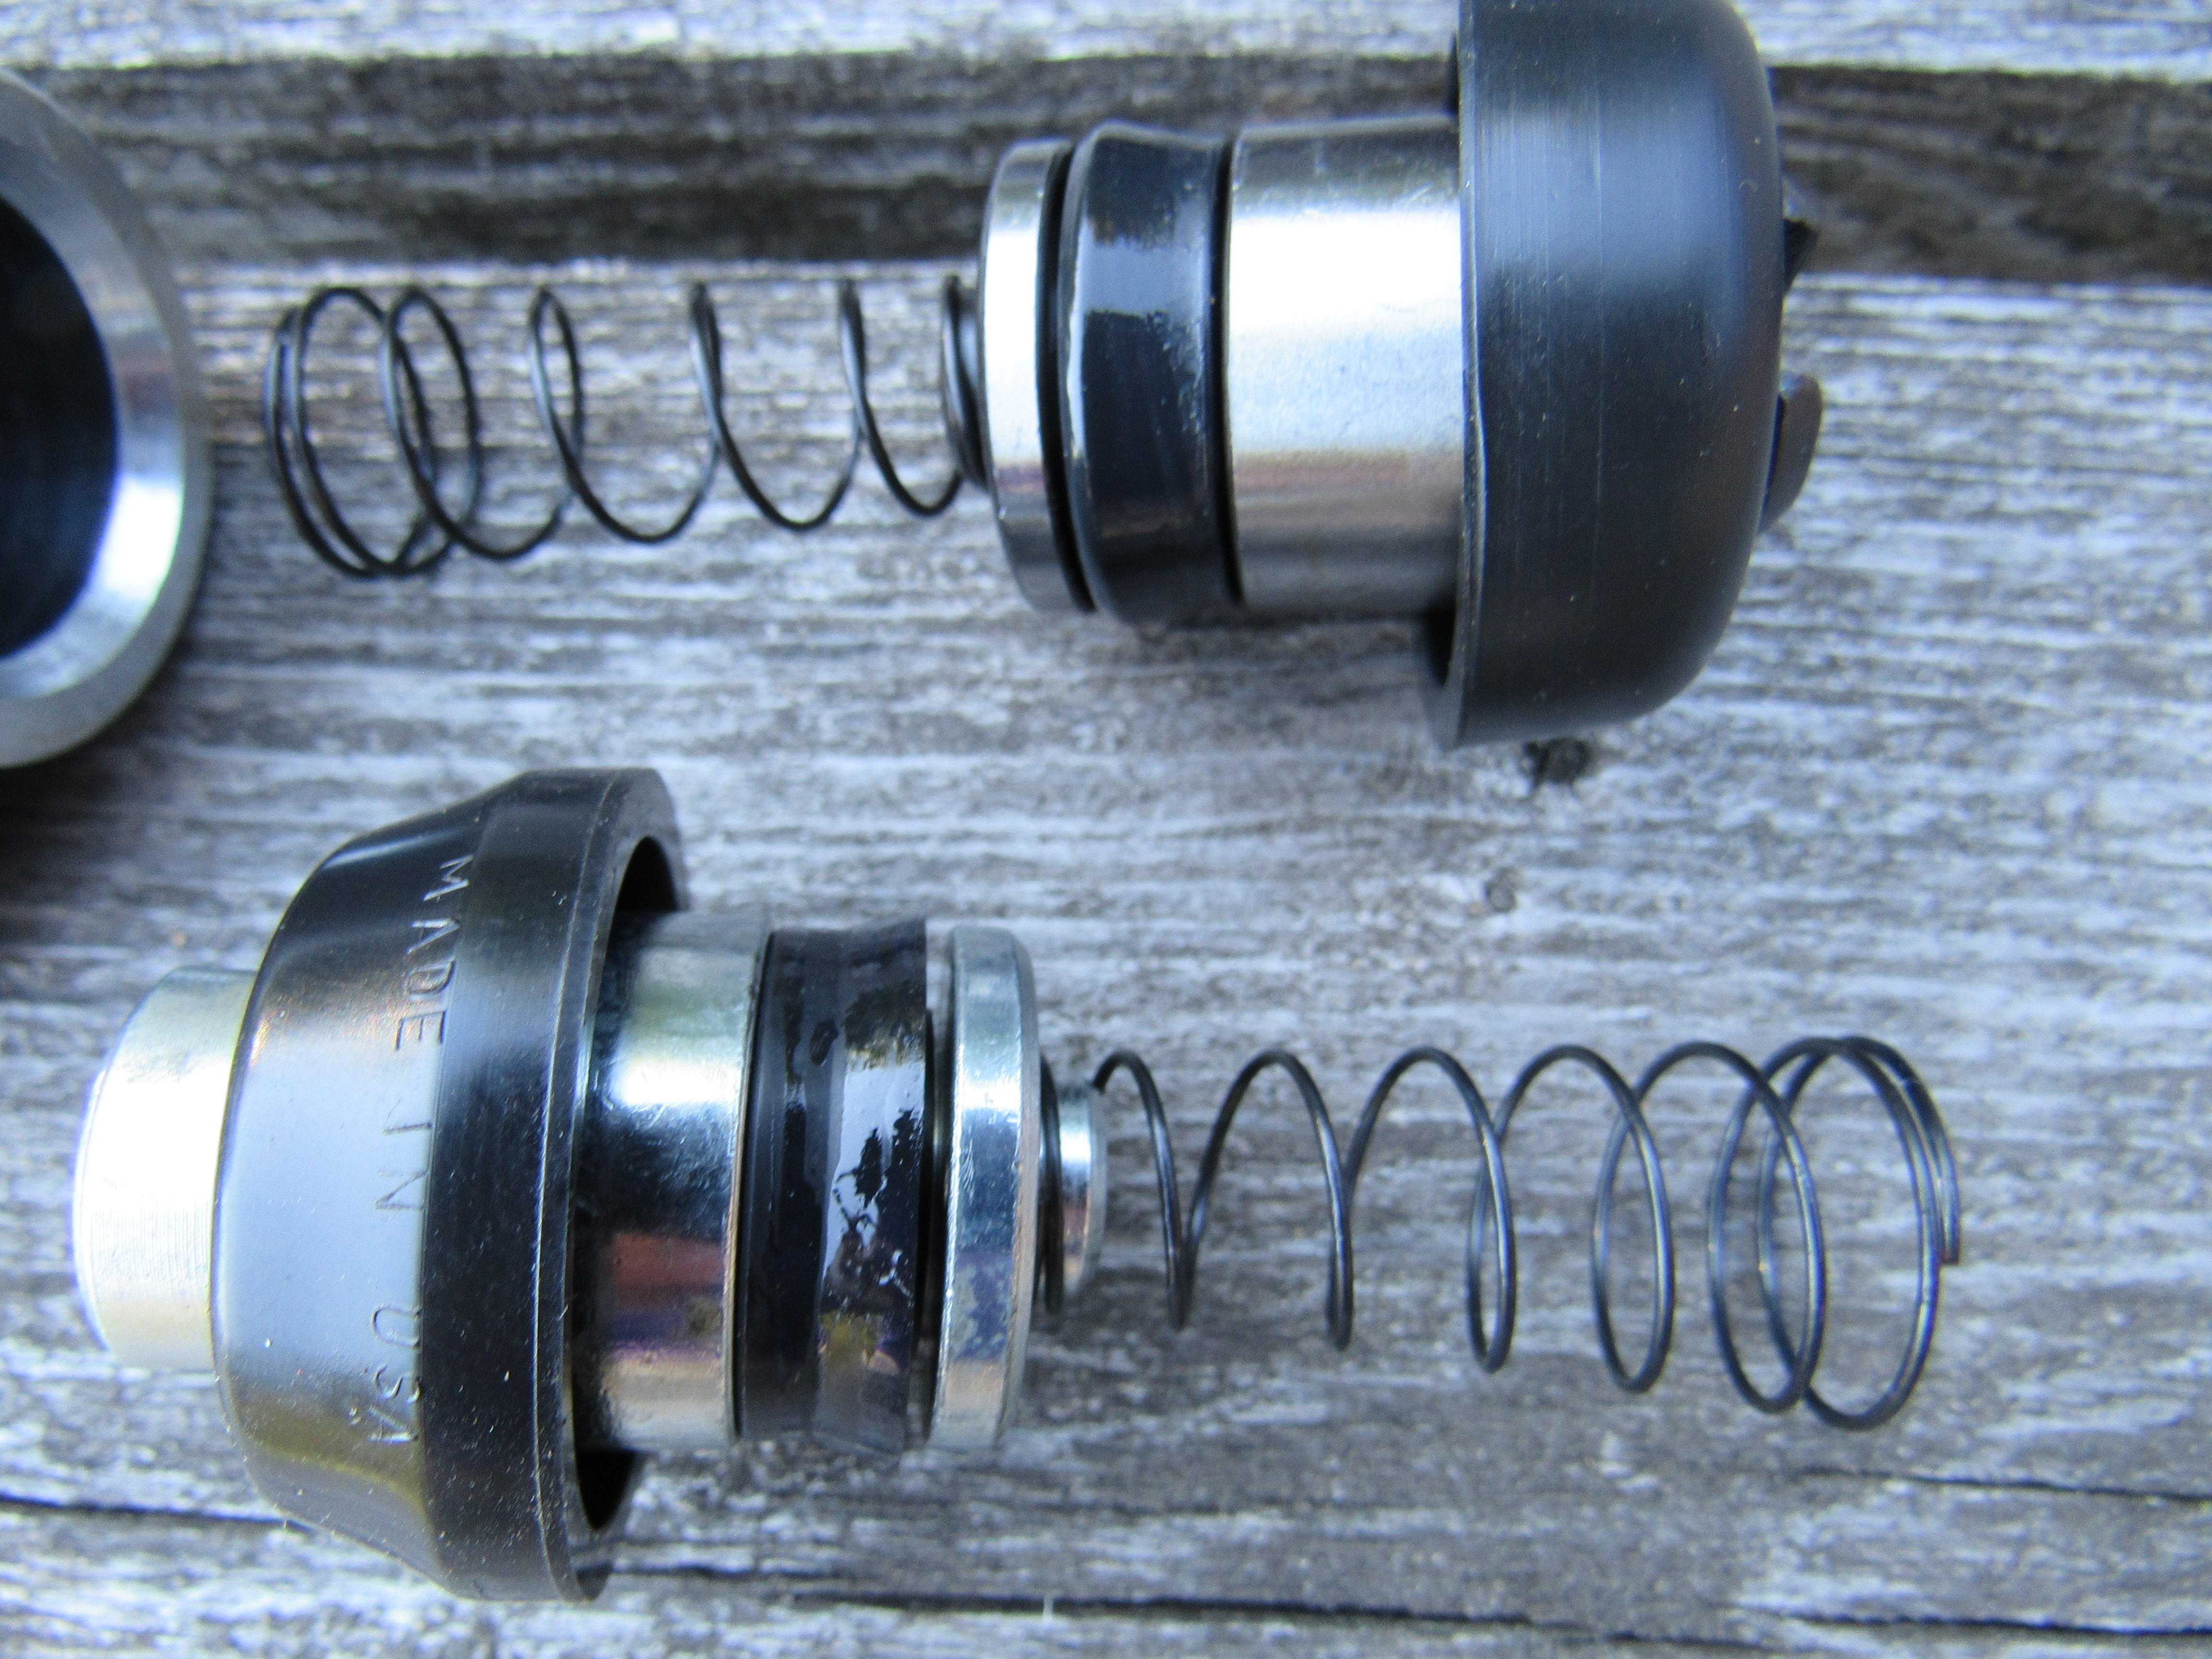
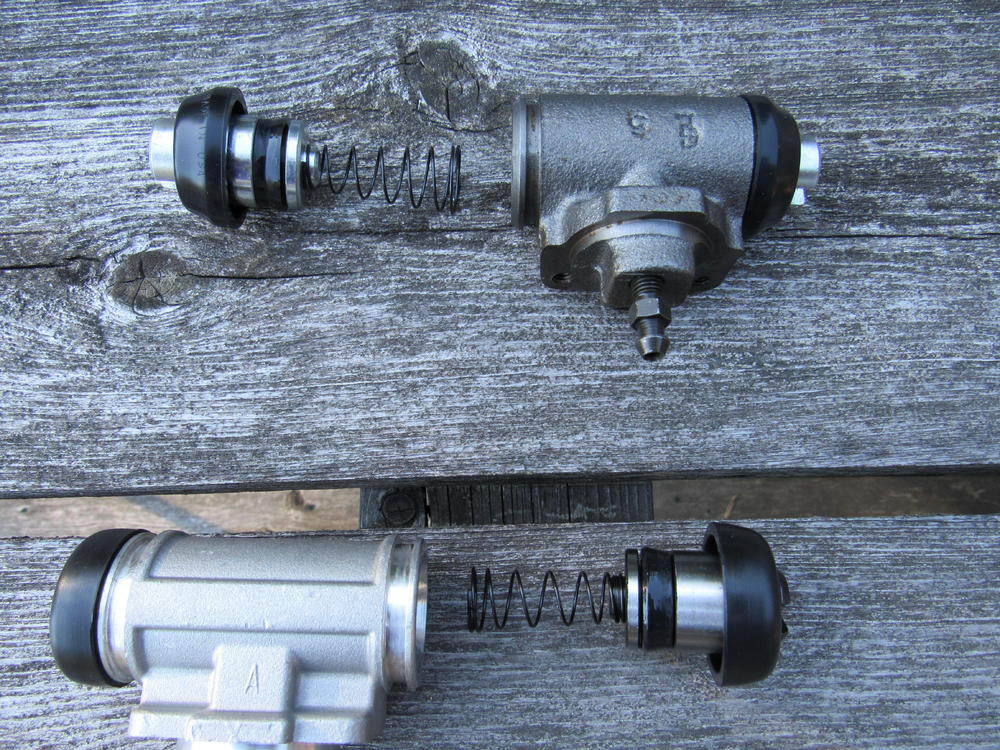
I ordered 2 Raybestos p/n RAY WC37405,
-
We do get a couple of months of bare foot weather each year Nice fix, I would be temped to leave the repaired wheel cyl. in just to see how long they lasted, I'm willing to bet you would get years out of them.
-
Taken from the link above, Vacuum Advance You should have a functional vacuum advance canister for street driving. The vacuum advance canister alters the ignition timing in response to engine load. The vacuum canister does not produce advance under full throttle operation, manifold vacuum is much too low so canister shouldt effect tendancy for engine to ping under full load.. Under partial throttle operation, on the intake stroke the piston pulls against the blockage of the throttle plate so vacuum is produced in the intake manifold and the cylinder receives less than a full charge of air/fuel and retains more of the burnt exhaust gas in the cylinder. This causes the fresh (partial) intake charge to burn slower when ignited so earlier ignition is needed to extract maximum energy from the fuel. Not using vacuum advance will give you no real increase in performance and will decrease your gas milage and increase emmisions unnecessarily for street driving. The vacuum advance canisters can also be recurved. All the EI dizzys use the same canister that is adjusted at the factory for desired advance characteristics. To re-adjust, remove the putty blob on the end of the canister with a high speed grinder to expose the adjustment screws. Inner coaxial pin limits vacuum advance travel, outer grub screw adjust the spring pre-load on the diaphragm. Turning the outer screw counterclokwise reduces the amount of vacuum necessay to initiate advance. If you are using sidedraft carbs and the vacuum signal is decreased, use a gauge to measure vacuum under cruise conditions and then re-set the advance canister to give full advance at this vacuum level. It may take some trial and error to find the correct amount of vacuum advance, I would think that between 15-20 degrees (crank) at 10-15 in Hg would be a good starting place. Advance beyond the initial + mechanical limit of 36 degrees is needed with under high manifold vacuum (low engine load). For each 1mm of travel of the vacuum canister actuating rod, the timing is changed by 4.24 crankshaft degrees. Once you have finished adjusting canister, you must re-seal the threads of the adjusment screws with paint or hardeing silicon putty or air will leak past the threads
-
Nice product, quick and easy.
-
Where did you get those? I thought they were NLA, I made mine out of foam rubber.
-
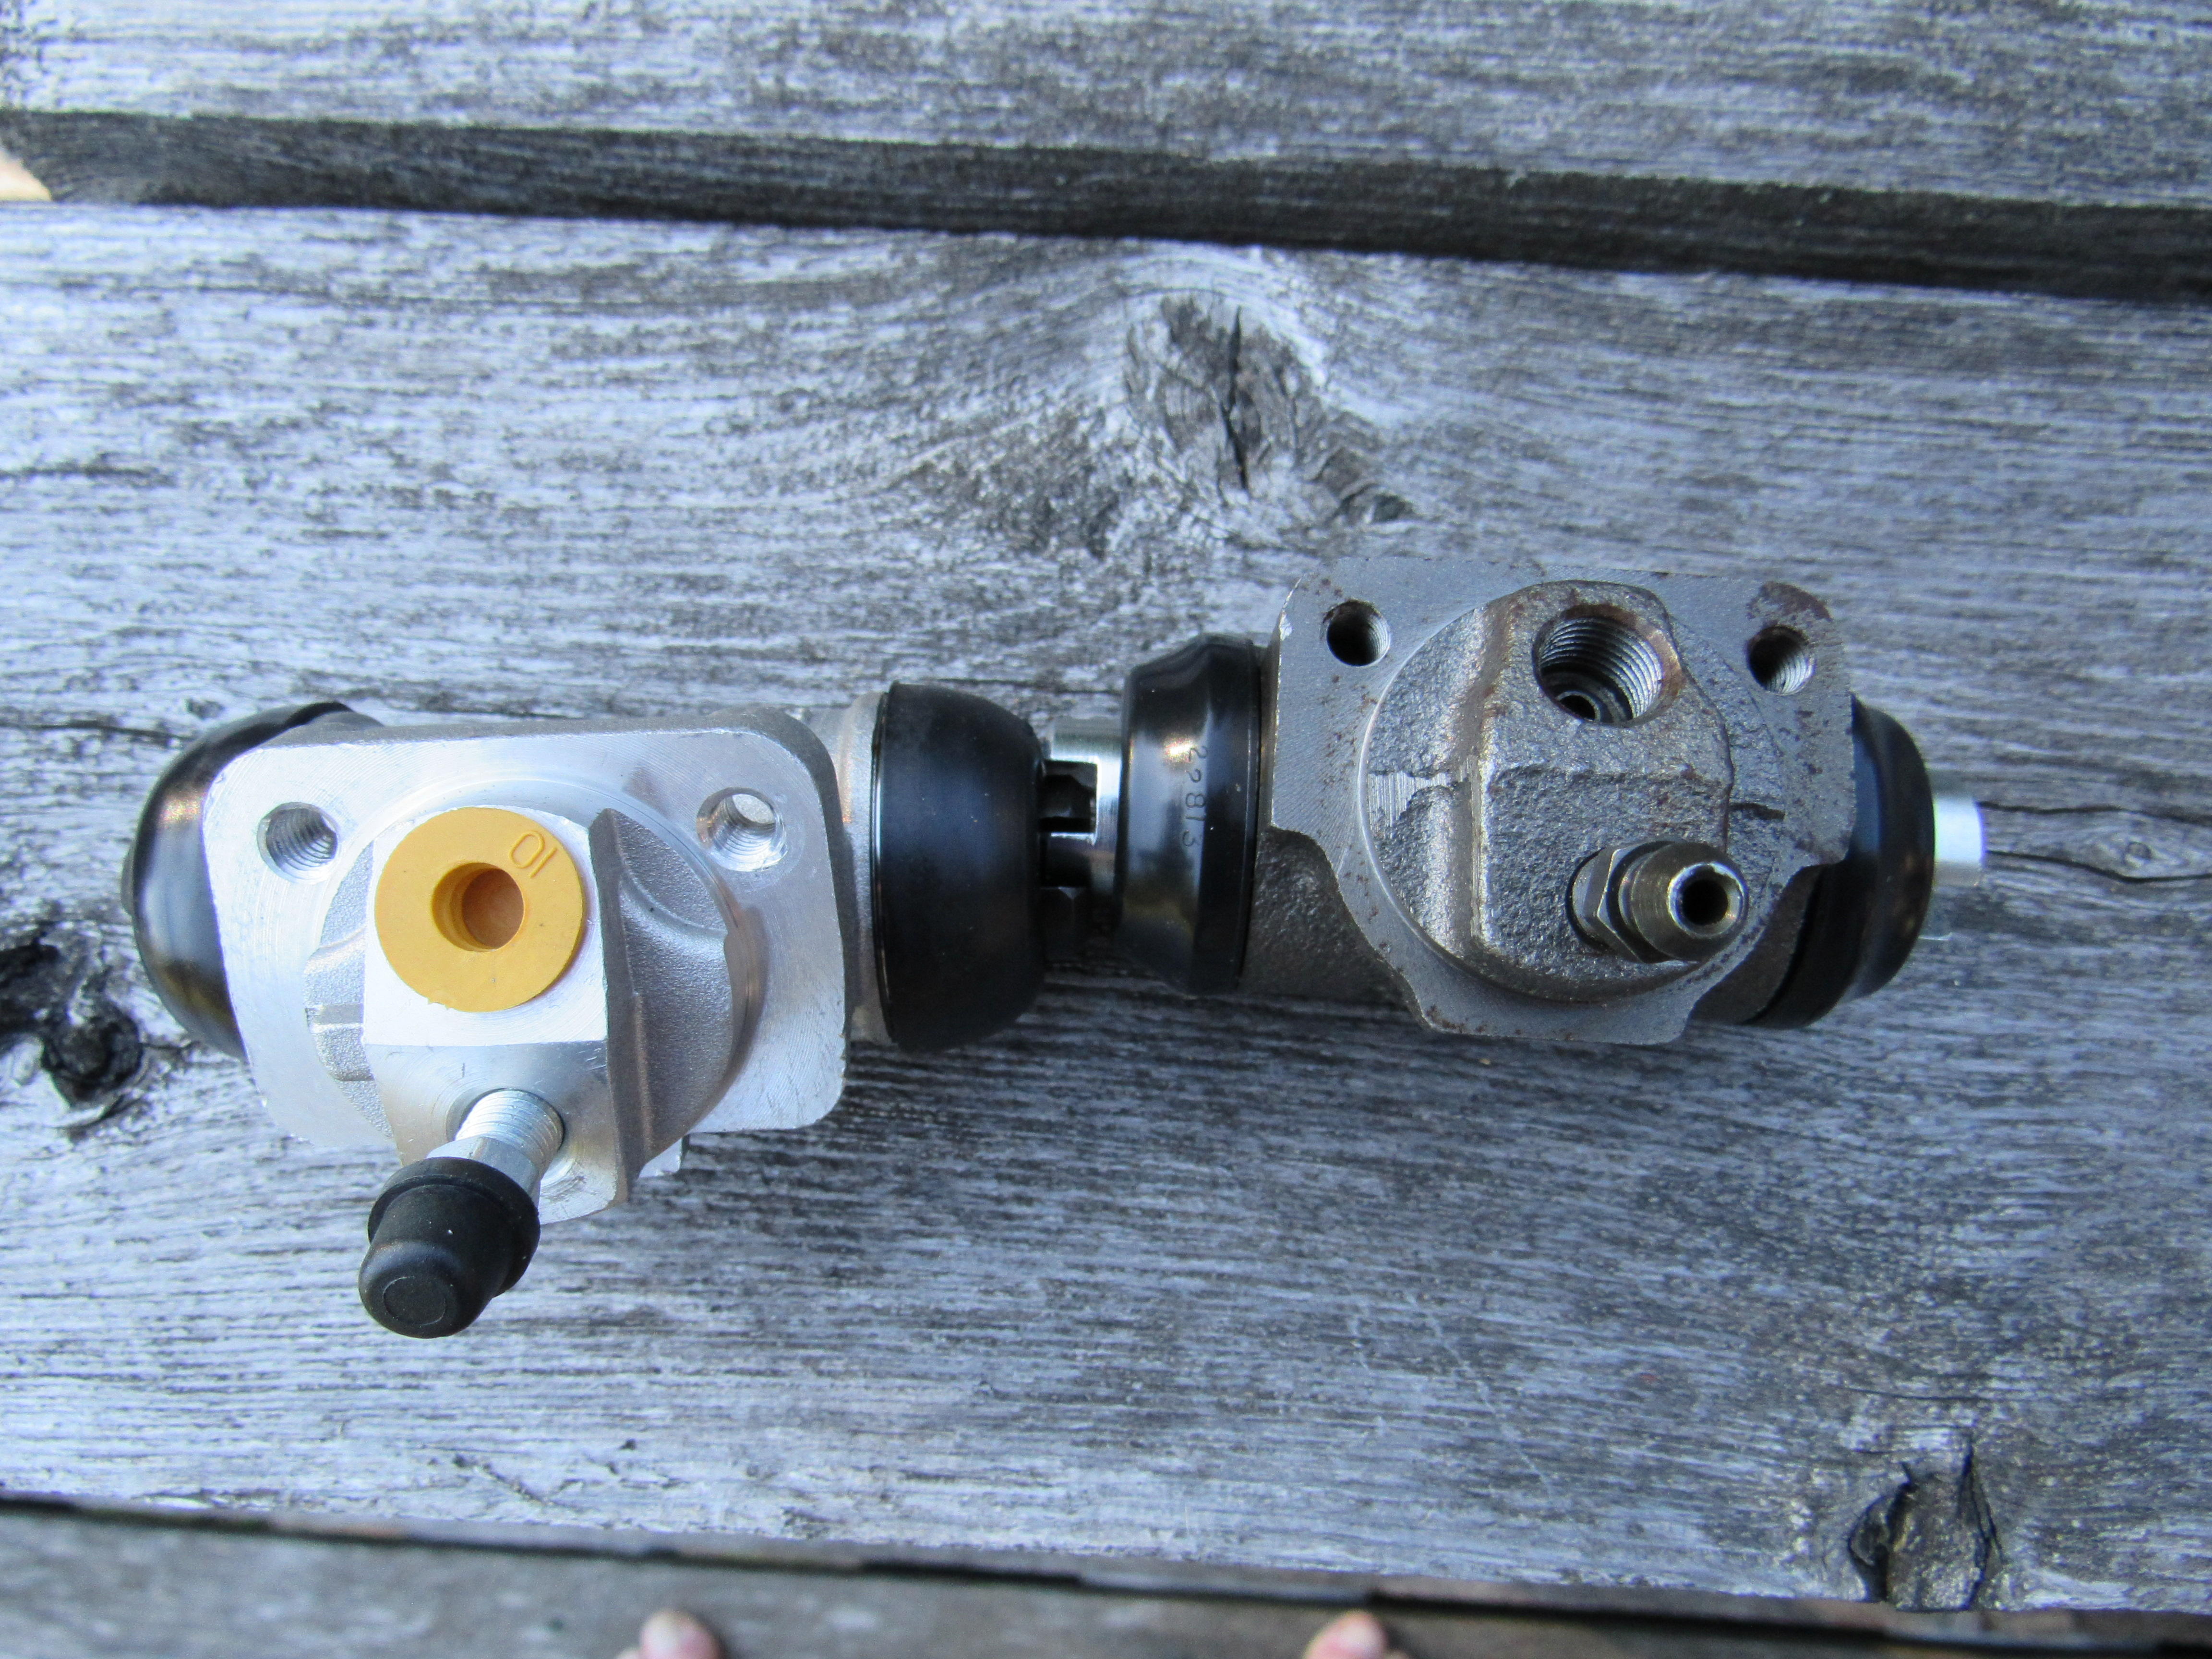
I think you are talking to me right? Yes they came in separate boxes from two different warehouses, the darker one is cast iron and the plastic bag that it came in had holes, wear spots, looked like it had been kick around on the floor for a few years. Hopefully they will both work just fine.
-
Were here for you, my comments are just cautionary. The PO's took excellent care of the top half of the car, very smart looking Z, the joys of salt eh?
-
I received my rear wheel cylinders for the 77 280z from RockAuto yesterday, here is what they sent,


-
Ideally the car would be stripped to the shell and you would be in a shop with a proper frame jig that would prevent any movement of the other components as you cut out that major support. Since you are working on your driveway you'll want to spread that load out equally to many support points so that the dimensions of the uni body don't change. Screw jacks are good for this kind of job, you could also use off cuts from building lumber with wedges. Is the engine still in the car? You will have to be careful to support all the weight of the engine, the body could twist easily once that rail is cut out, maybe use an engine hoist/cherry picker to take the weight of the engine from above. Edit- gotham22, I just went through all of your photos again and your car really is on the balancing point between parting it out and major surgery. It can be saved but it will be extensive. My advice if you want to go ahead is strip this car down to the shell, not only so you can find all the rust that hasn't been discovered yet but also to take the weight off the frame. No half measures.
-
They always get you on taxes and that I don't mind so much, it's FEDEX that I can't stand that's why I drove down to the border this time. All that stuff was about $690 USD, with Fedex taking it across the border and delivering it in 9 separate boxes I would have been looking at another $700.