grannyknot
Member
-
Joined
-
Last visited
Everything posted by grannyknot
-
 😆 Yeah, I know what you mean, my work looks like a hack did it compared to this guy. That small blaster he is using inside the car I think is a dry ice blaster, there is no blast media build up when he's using it.
 -
This guy, incredible. Not too many know how to lead anymore, I love the faux spotweld dimples he recreated on the rear wheel well lip.
-
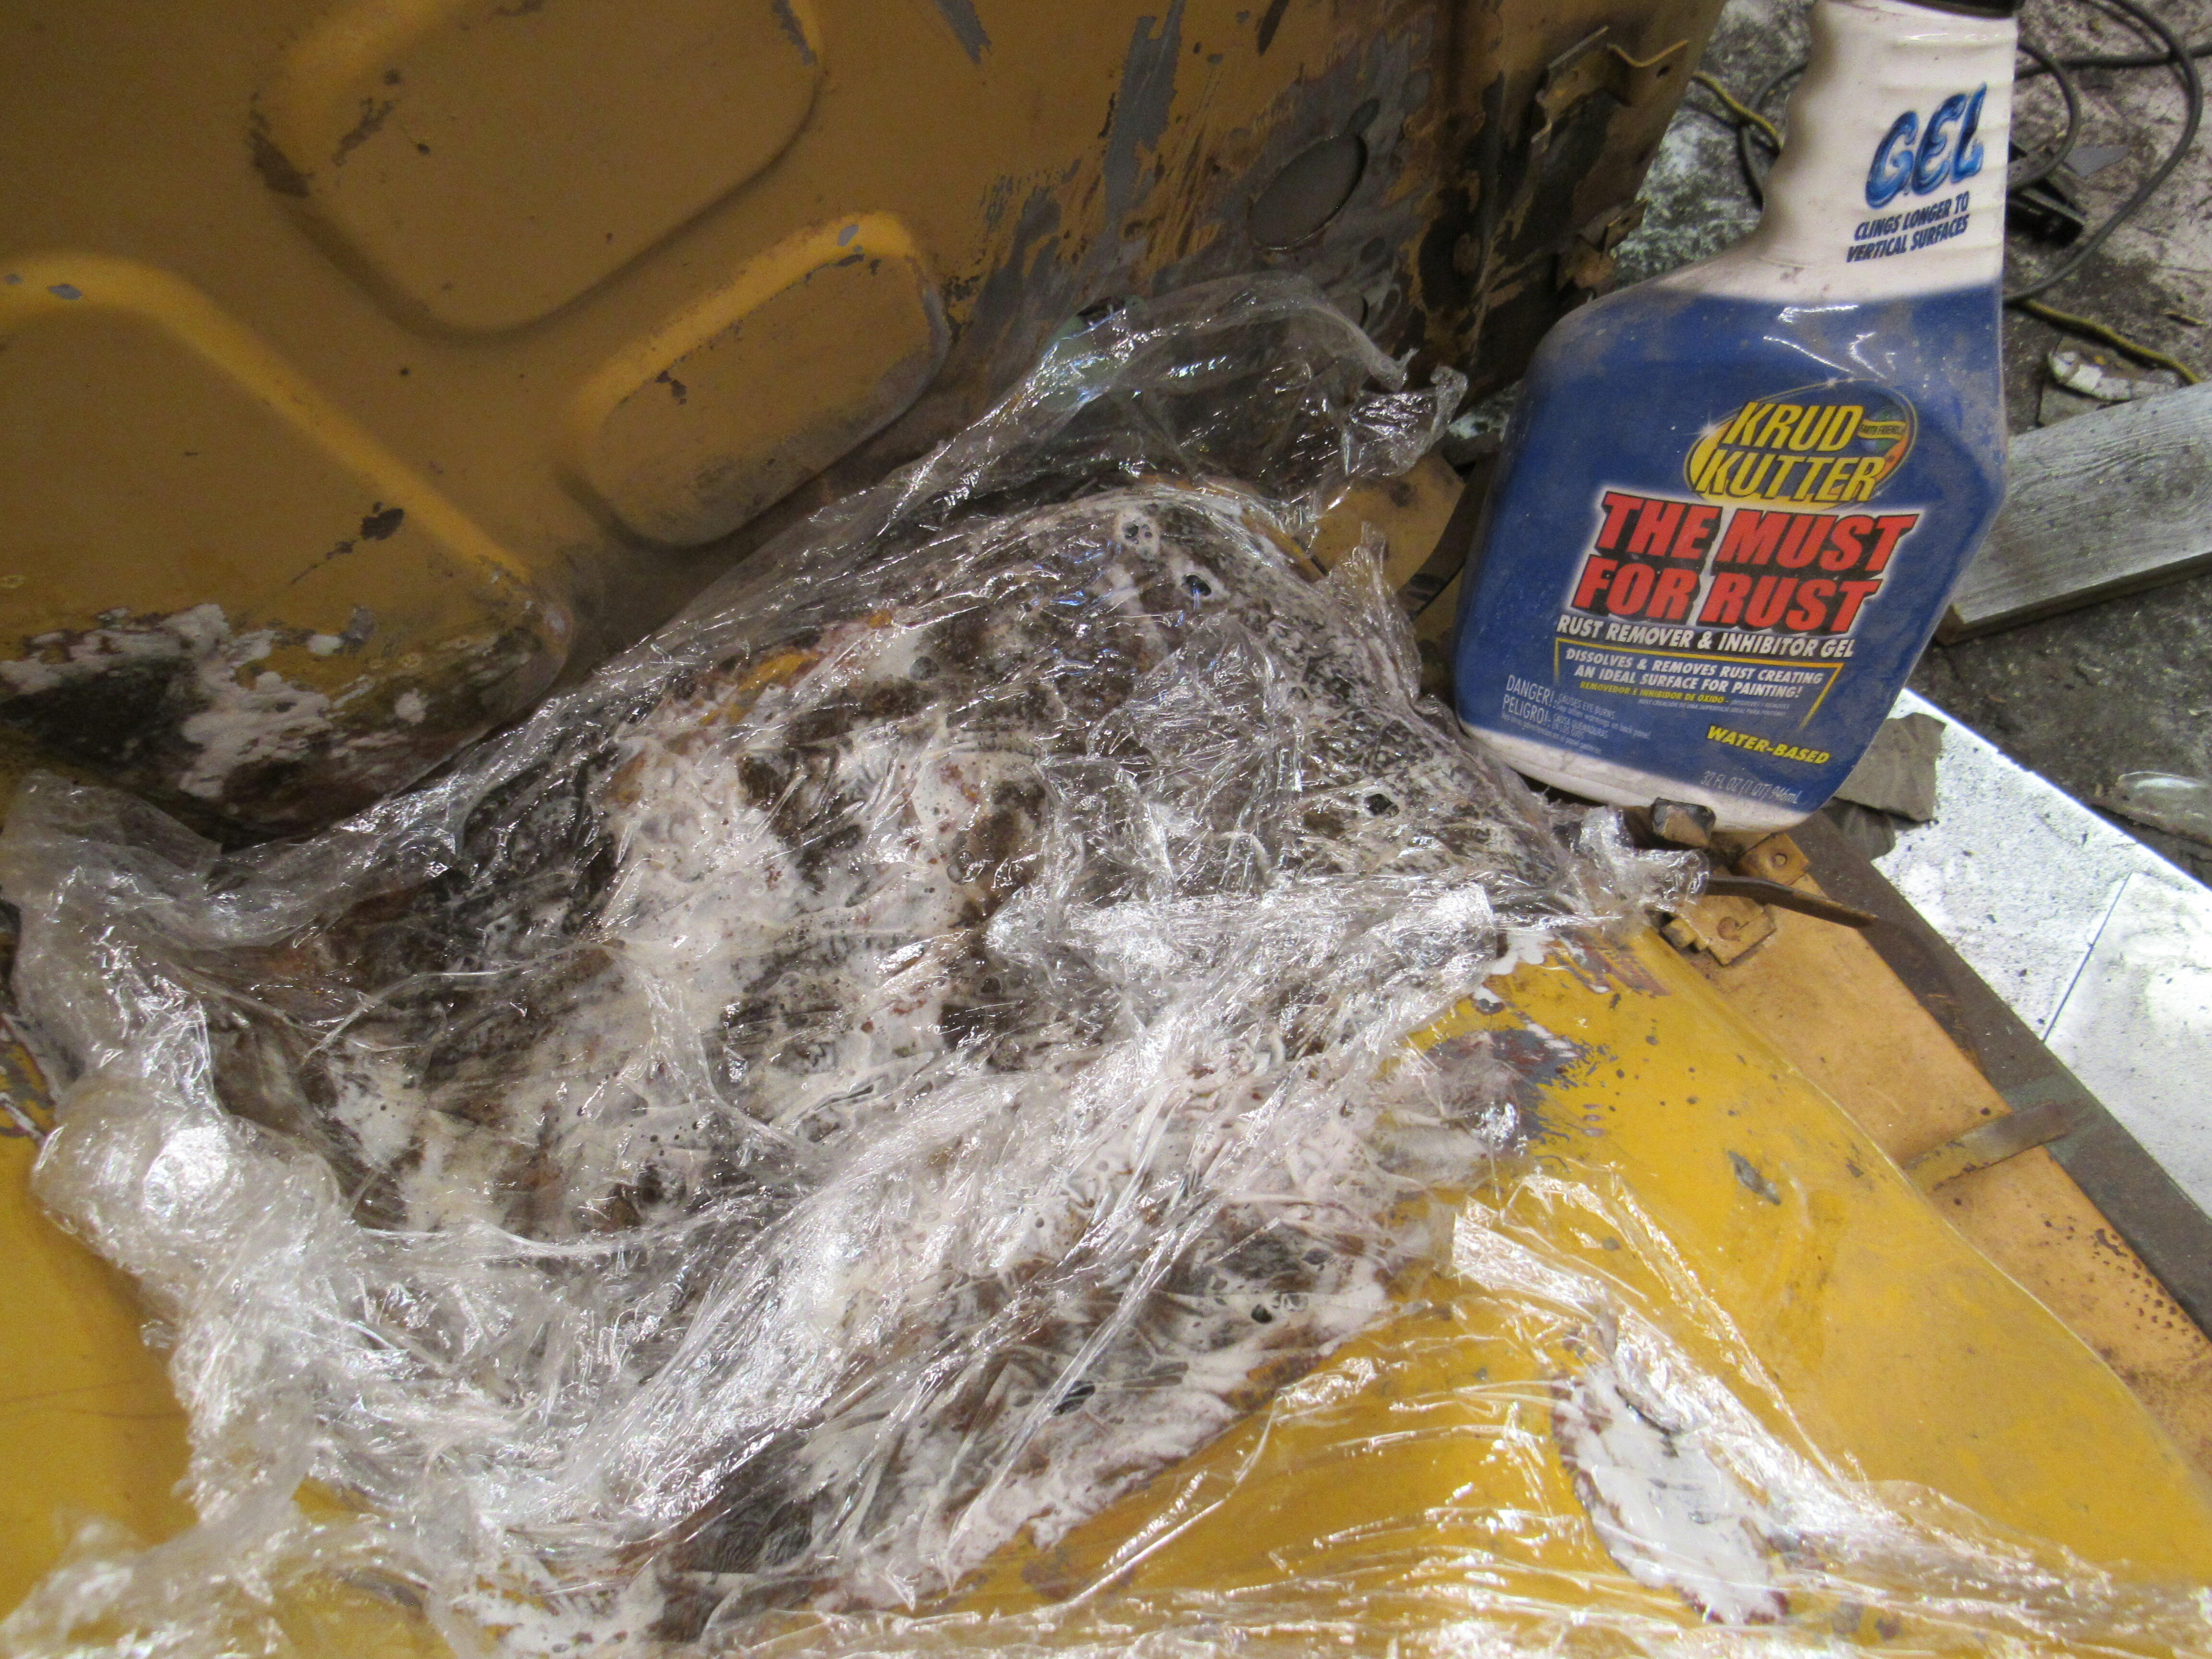
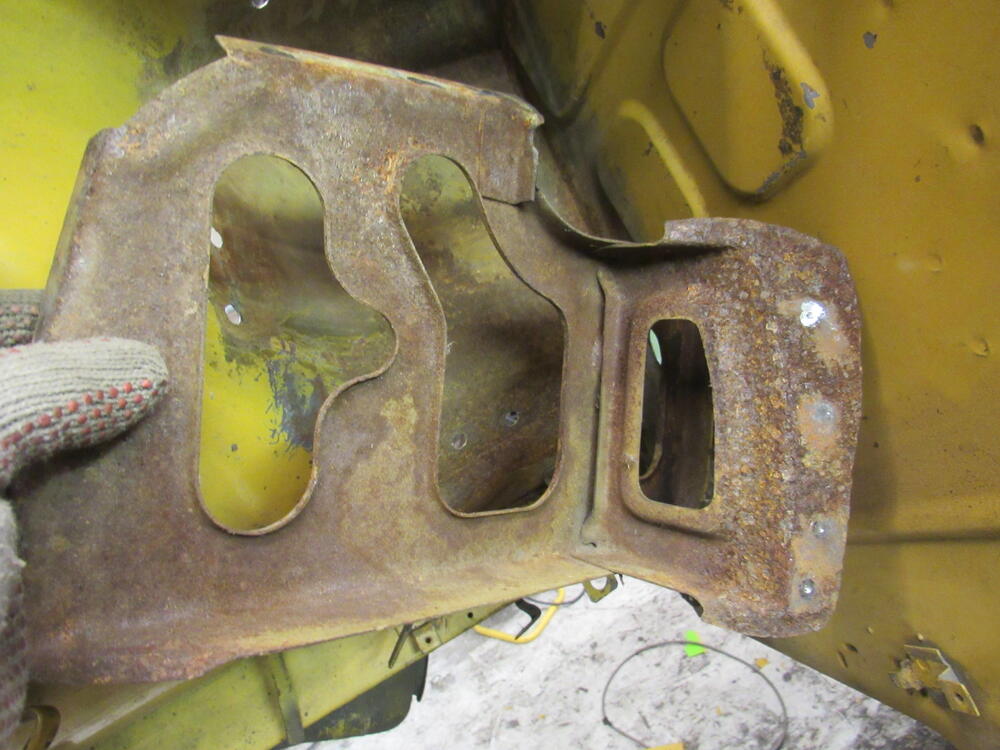
I wasn't sure if I was going to be able to save the battery tray or the inner fender supporting it. The tray I threw in a bucket of citric acid for a few days, some big pits but nothing broke through the surface so it is still usable. I used a air scaler on the inner fender but couldn't begin to get the rust in the pinch weld so out of desperation I pulled out a phosphoric acid product I purchased years ago. I've never had much success with phosphoric acid but this stuff was really good, thick gel like consistency, it took several applications with scraping in between but I'm pretty happy with the results.


-
I took it down to Techno strip and had it dipped.
-
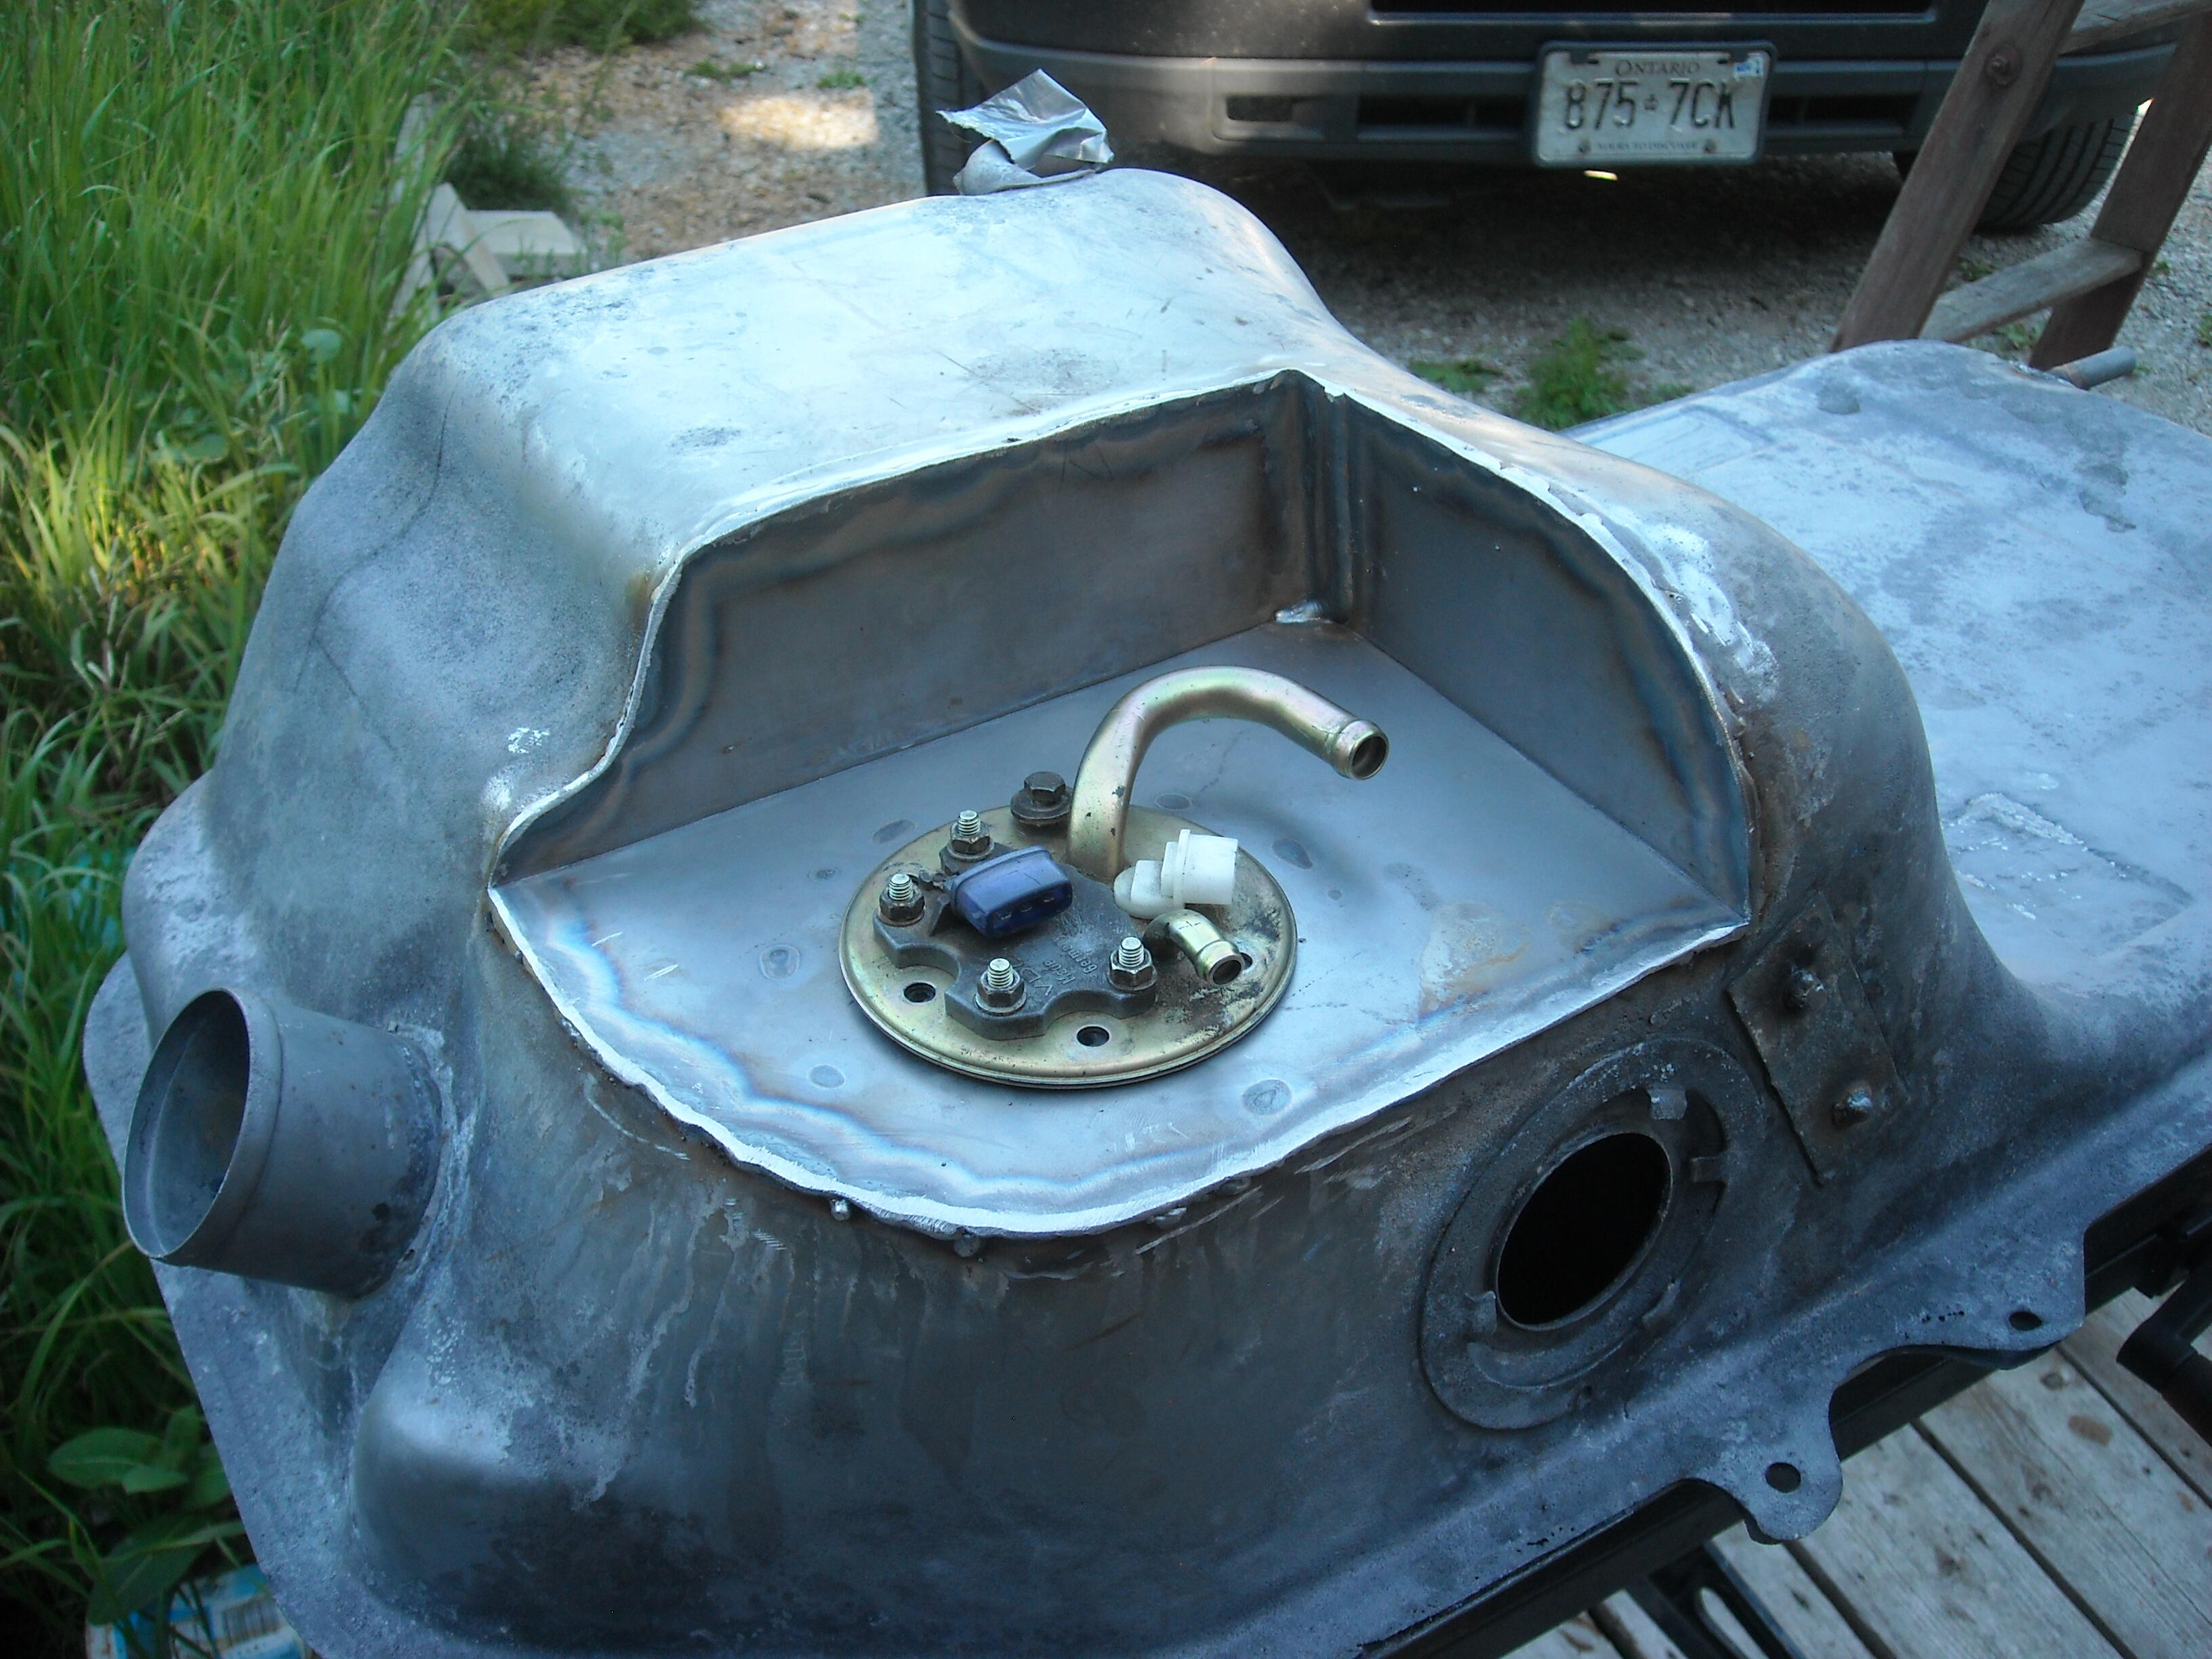
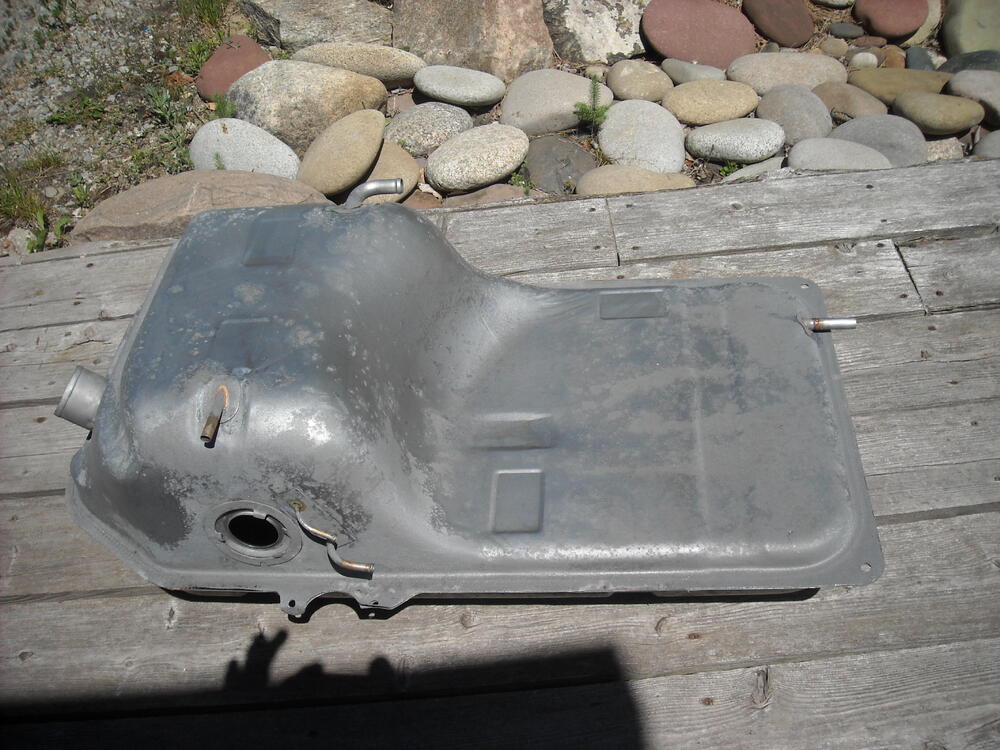
Mig, I did the welding, lots of tiny spot welds until I plugged them all up then coated inside and out with POR15 gas tank kit.
-
Nicely done, the curved section, is it a piece of pipe you cut down or did you roll it out?

-
Jim,


-
Good on you.
-
I'll dig it out tomorrow morning and see if I can get a closer shot.

-
https://speedhut.com/gauge-applications/revolution-racing-performance/performance-led-tachometer/performance-led-standard-tachometer/4-tachometer-8k-rpm-shift-light-jdm-datsun-z-series/?dd-link=0kx6p31reeb The Speedhut 4" tach is a good fit for the stock gauge bezel. I can't find my photos atm of when I did it but a few members here have done it. You do have to take Speedhut housing off and modify the stock housing but it is a good fit and looks largely original. Have a look at post #83,
-
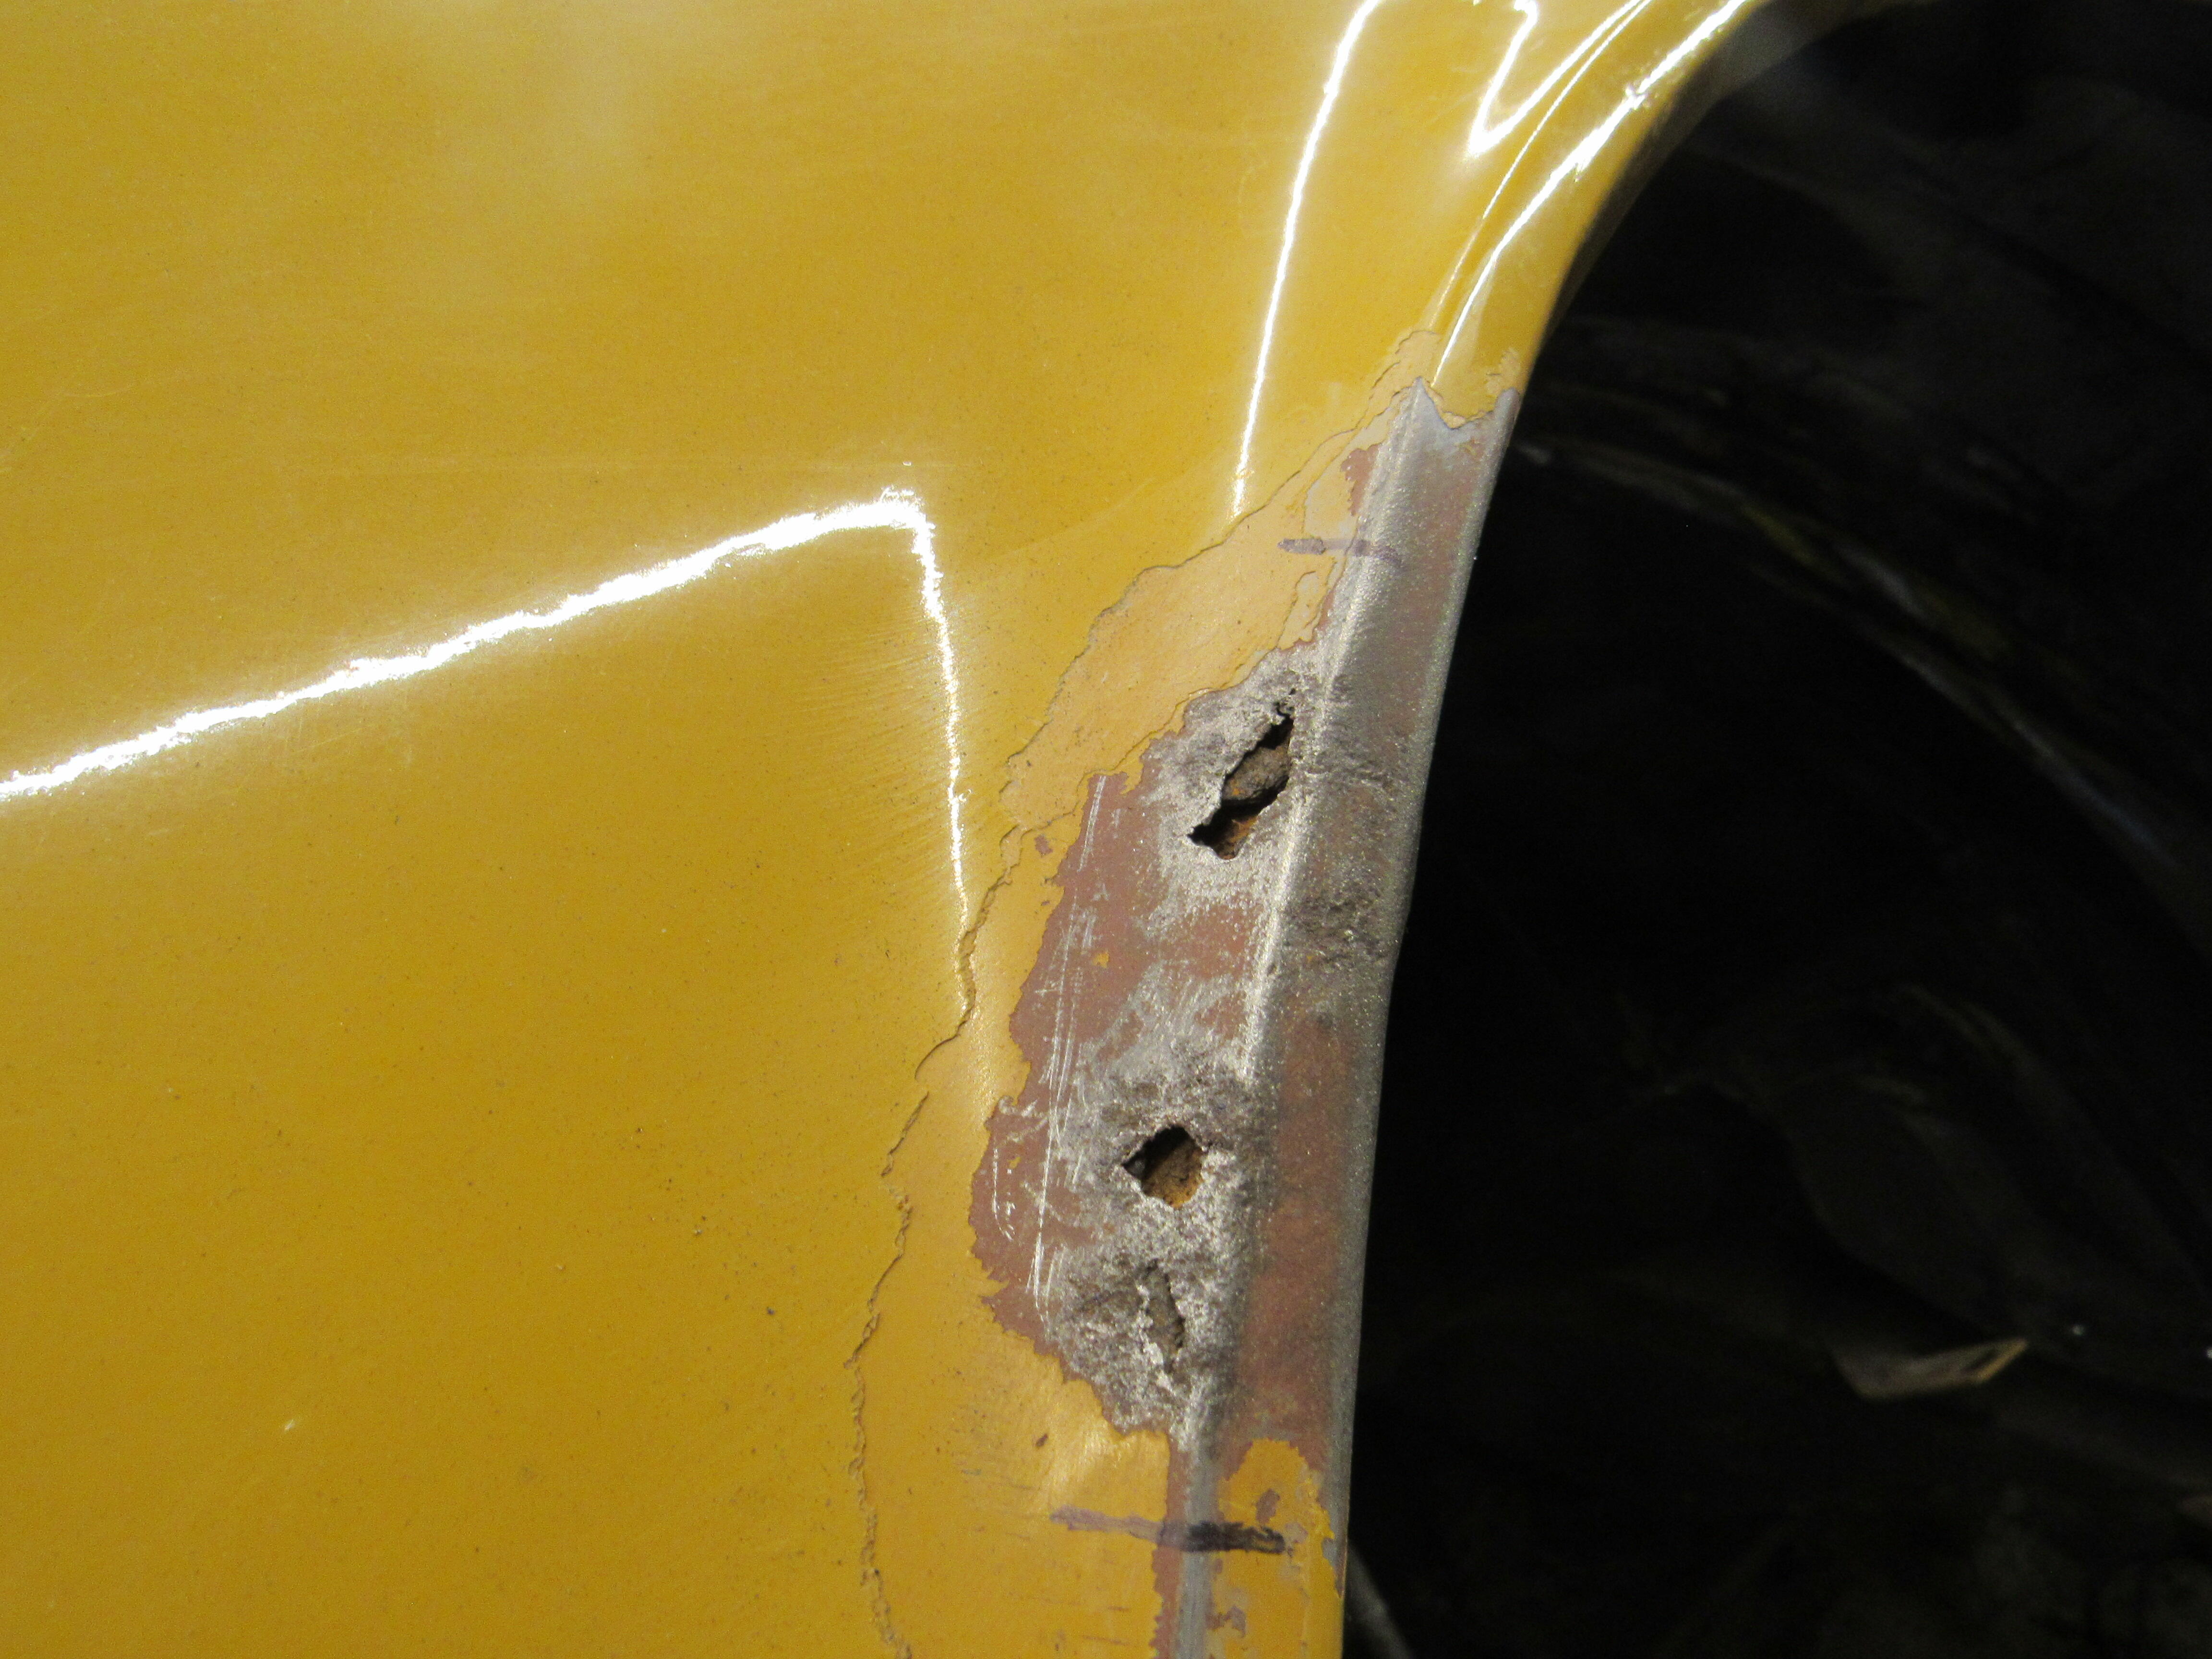
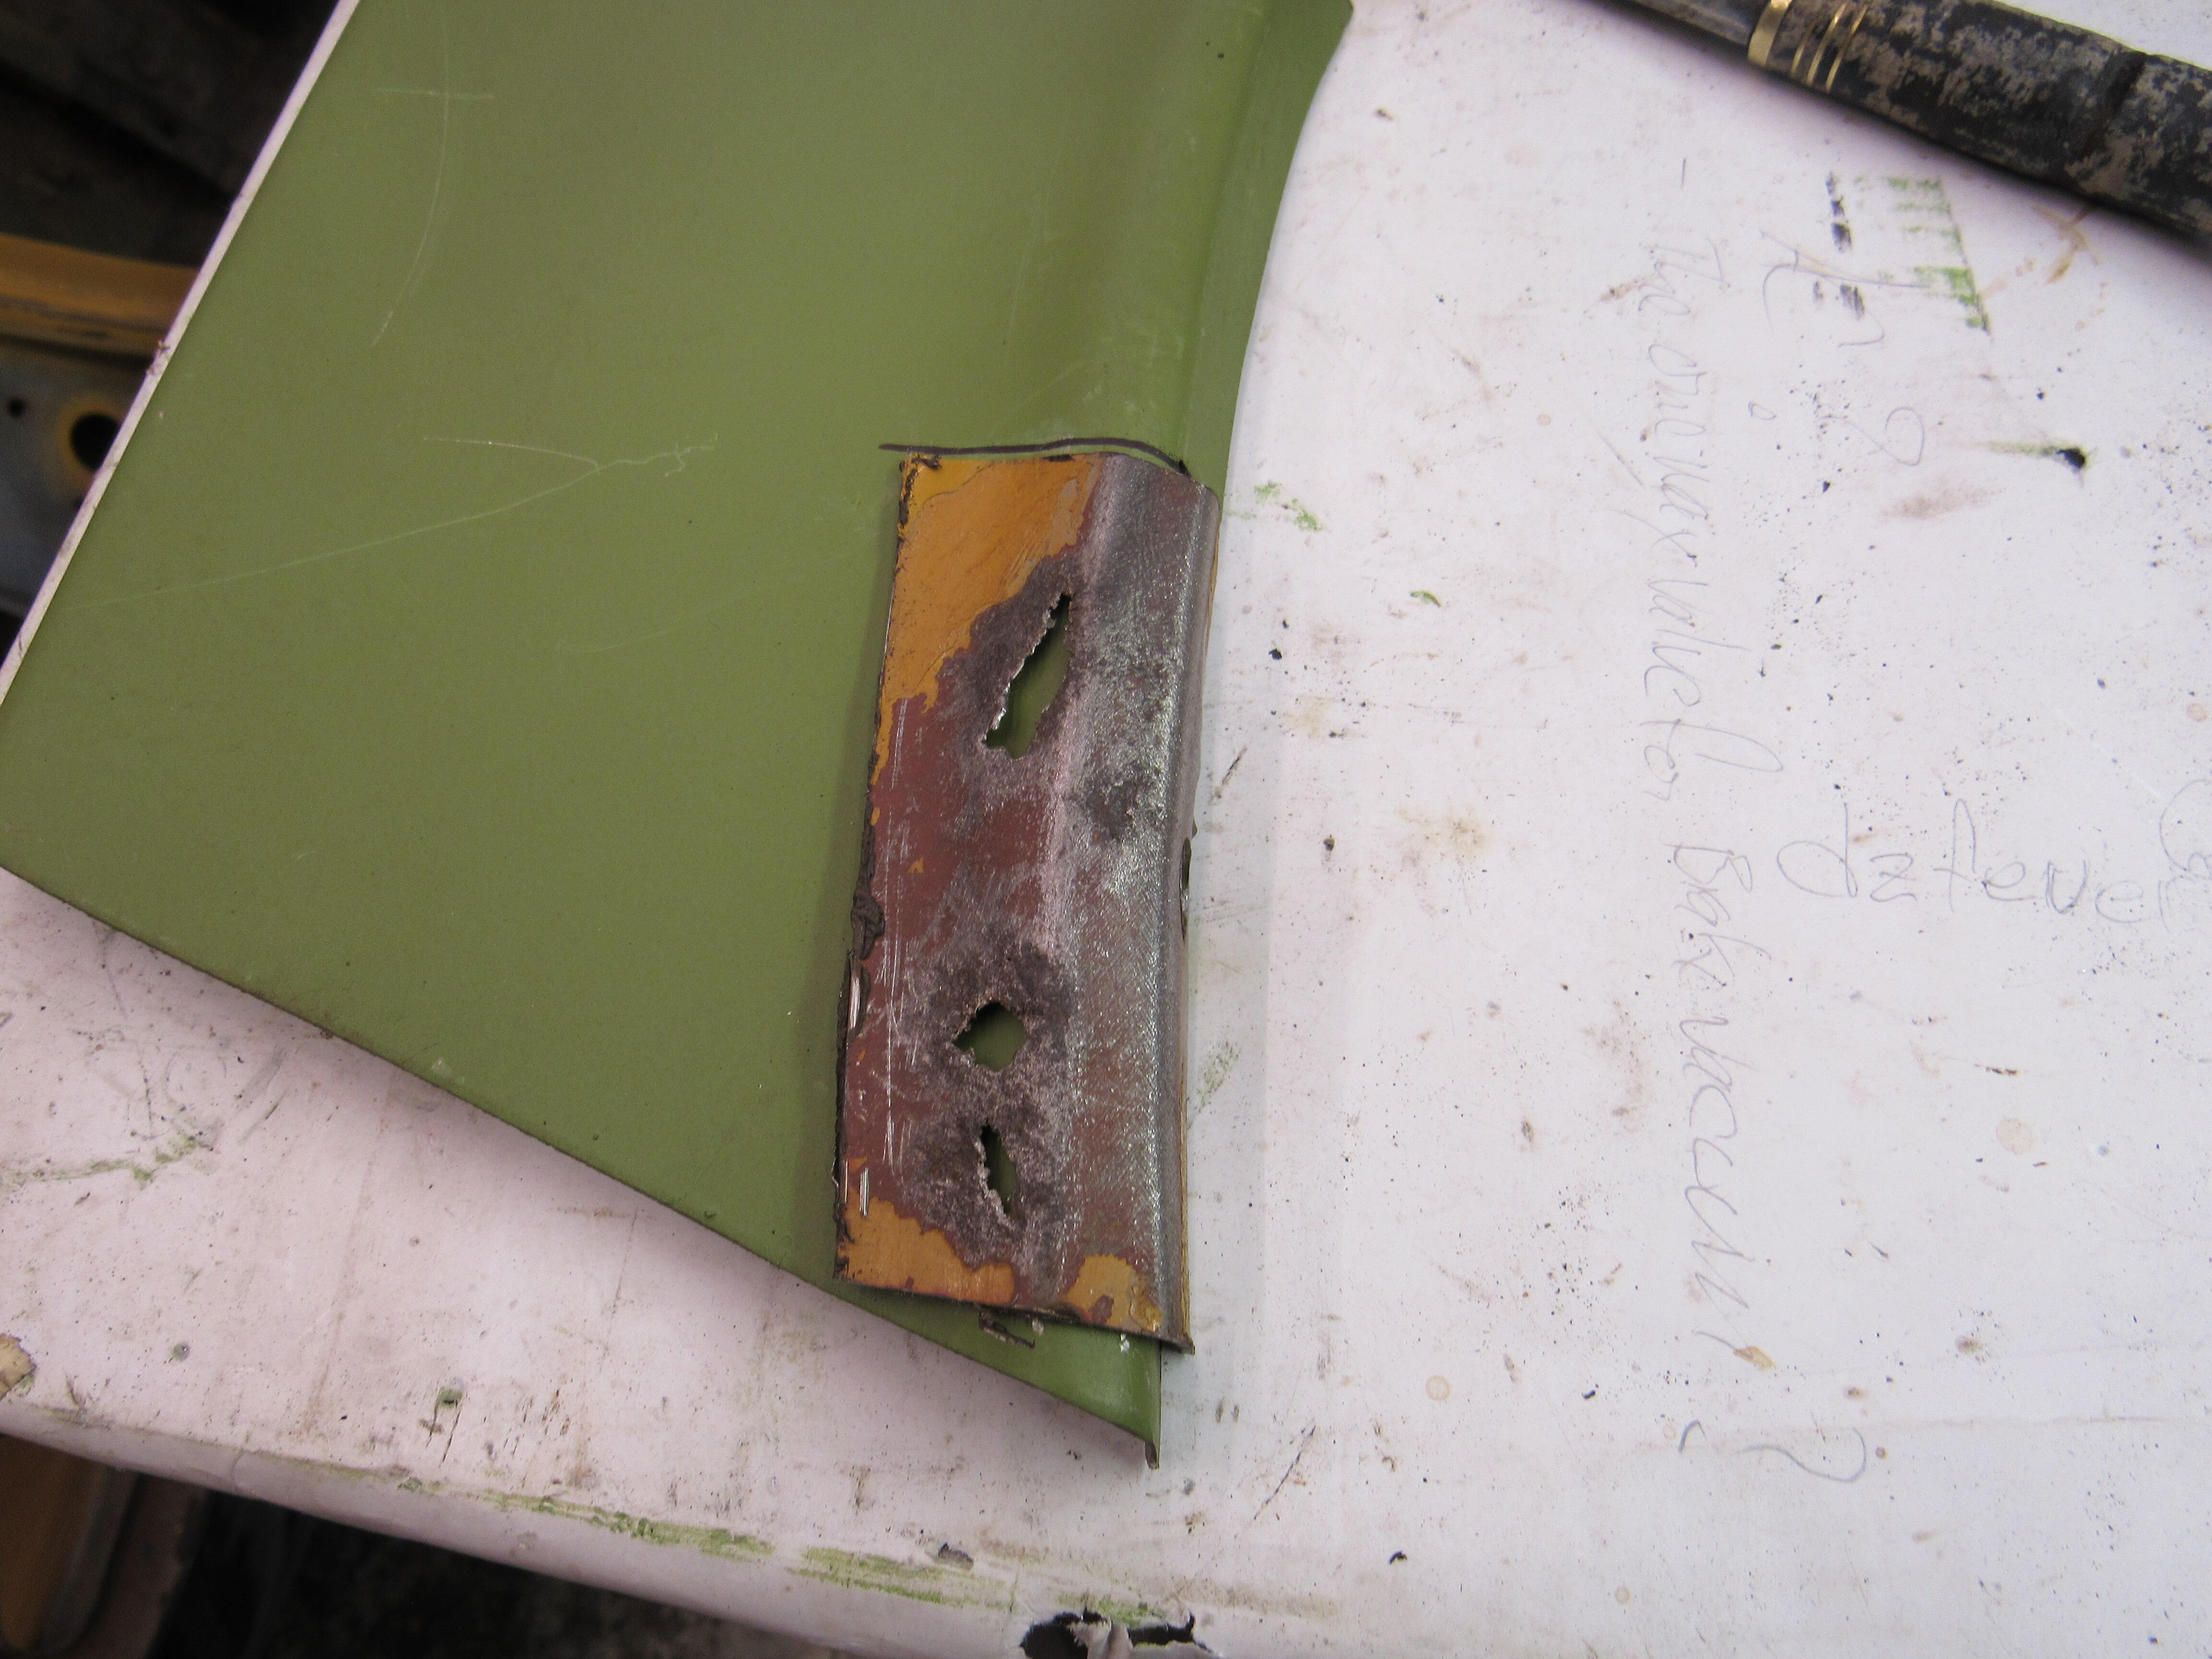
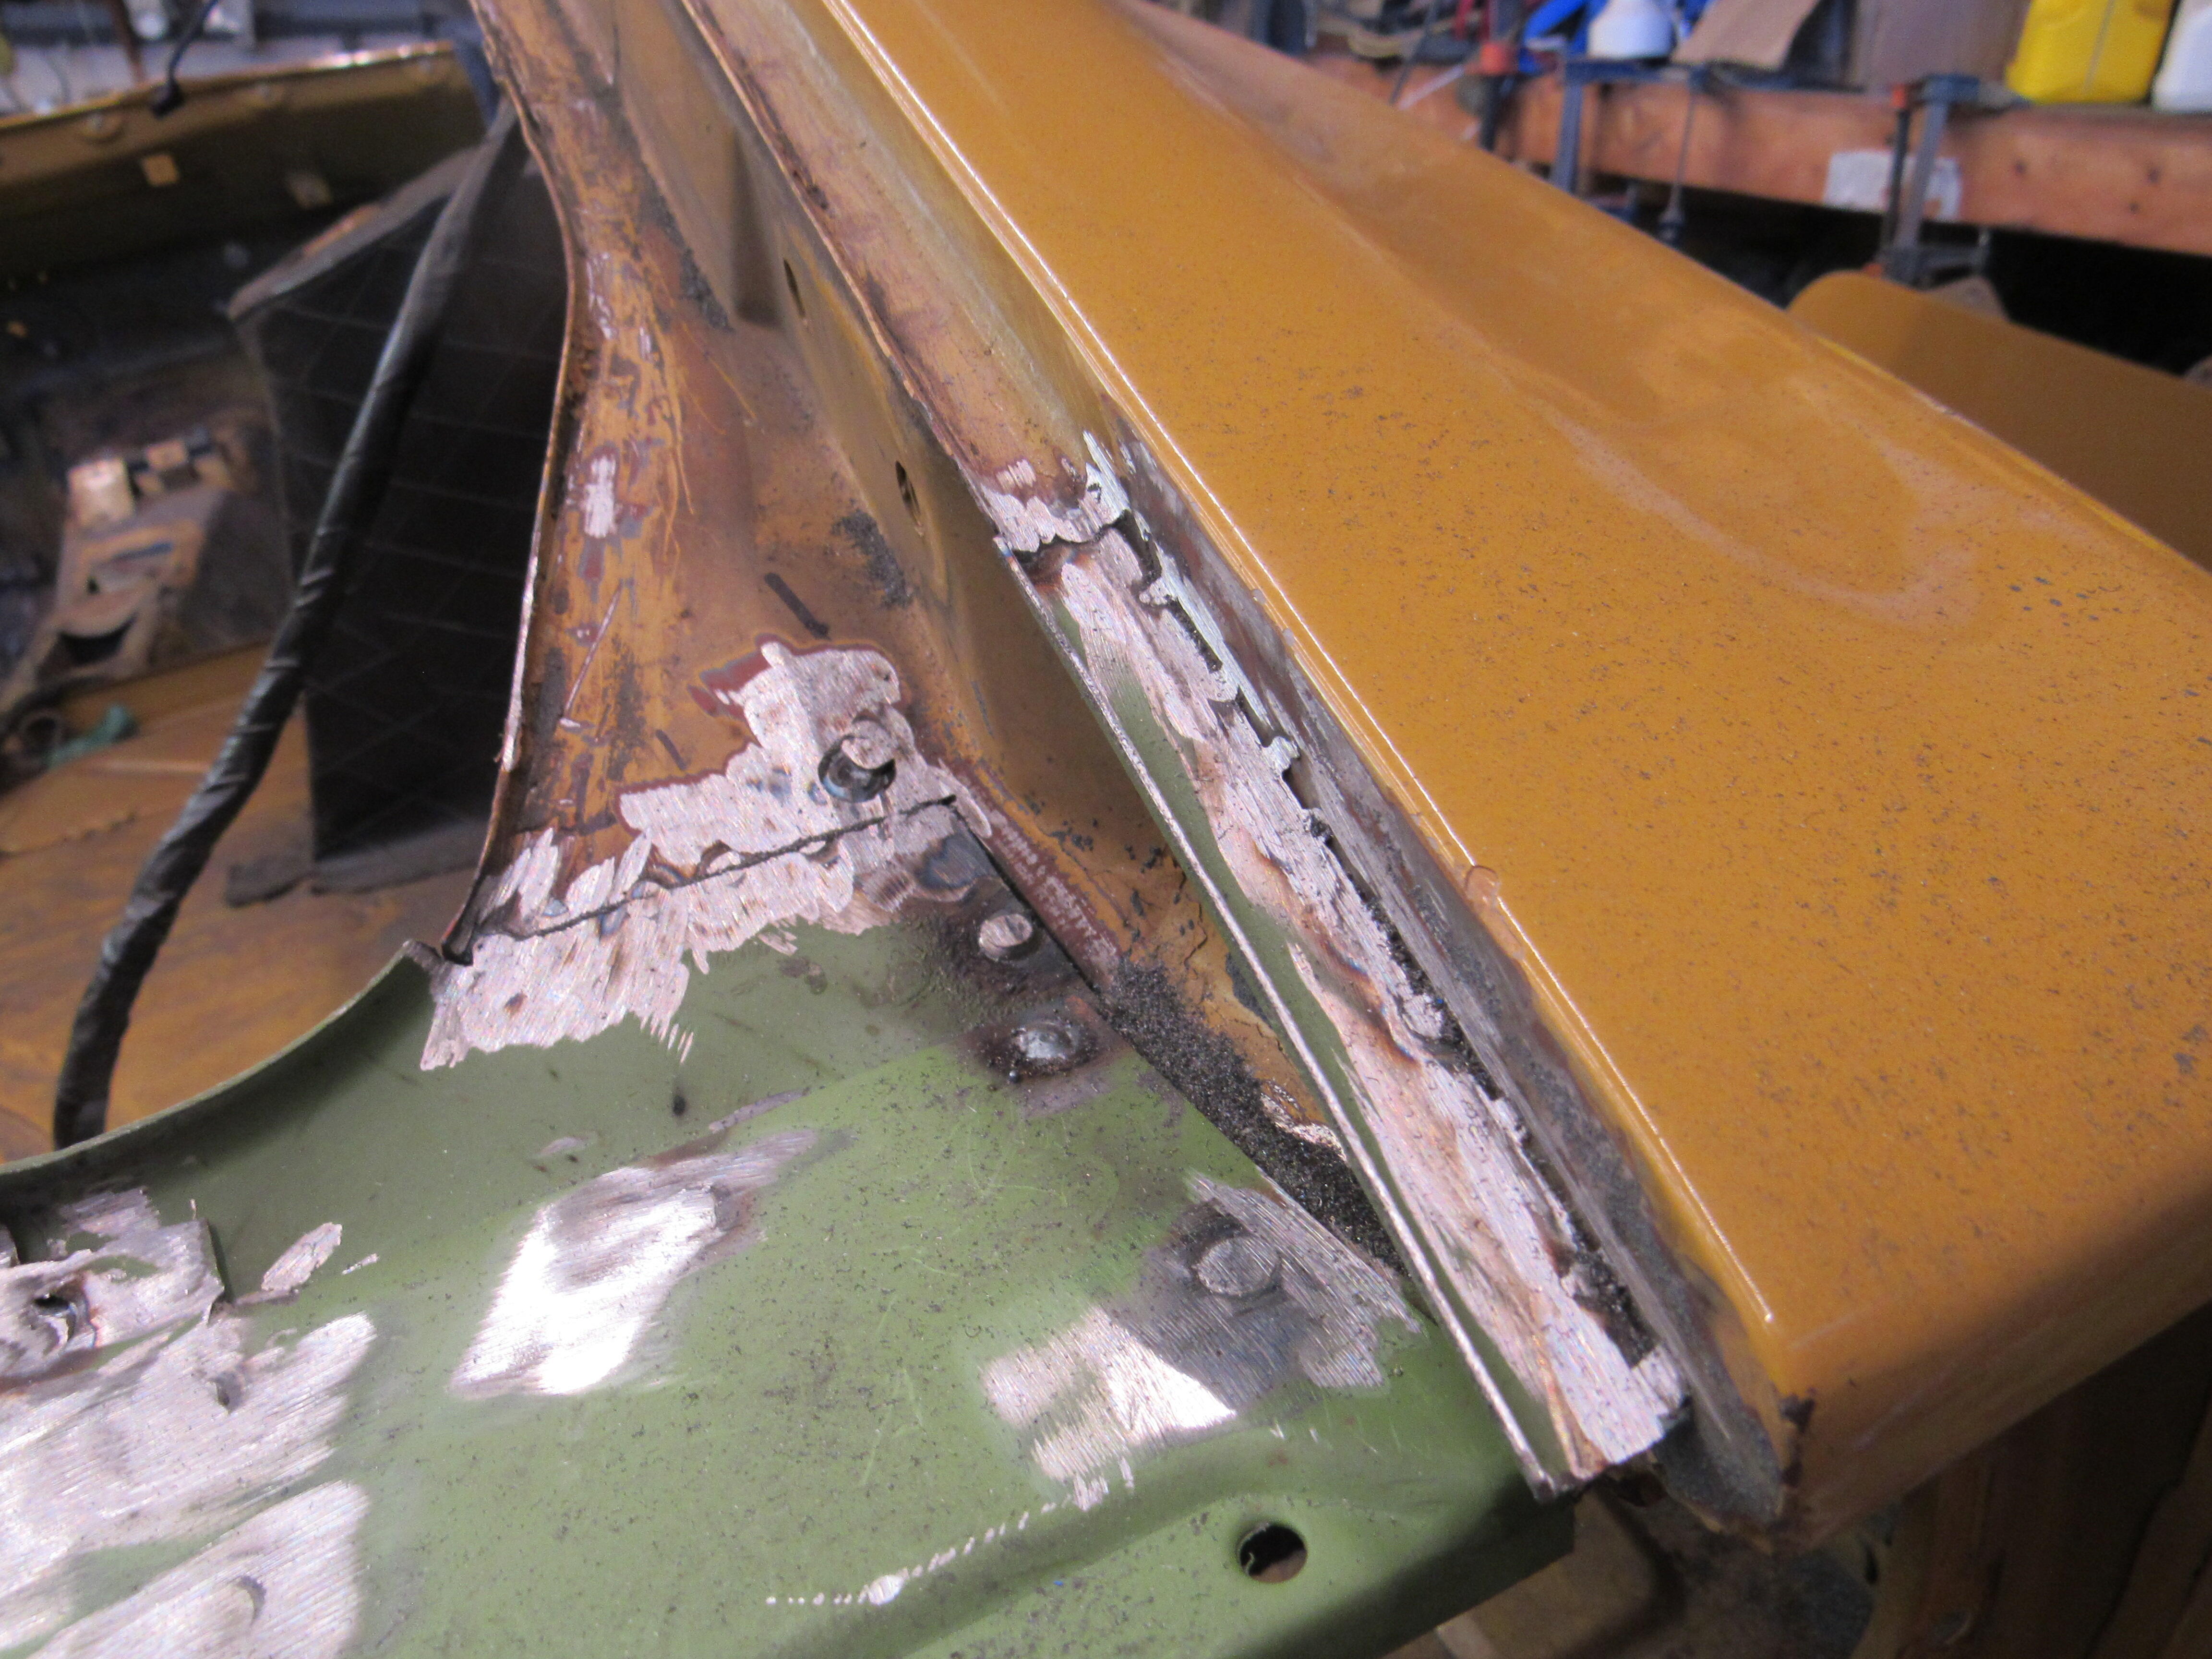
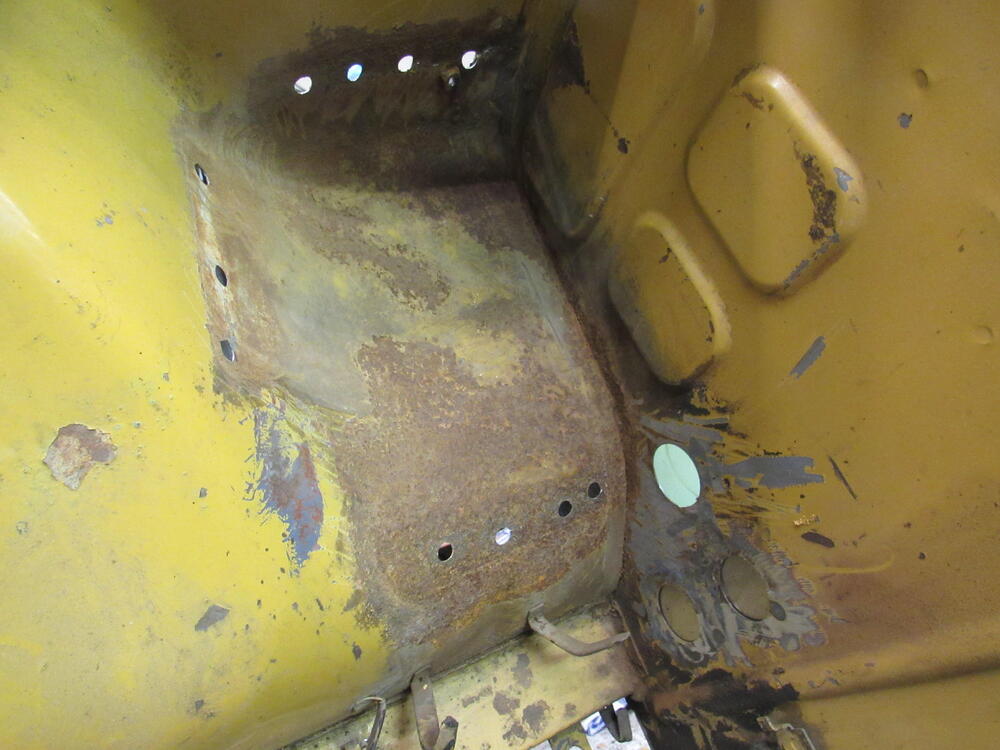
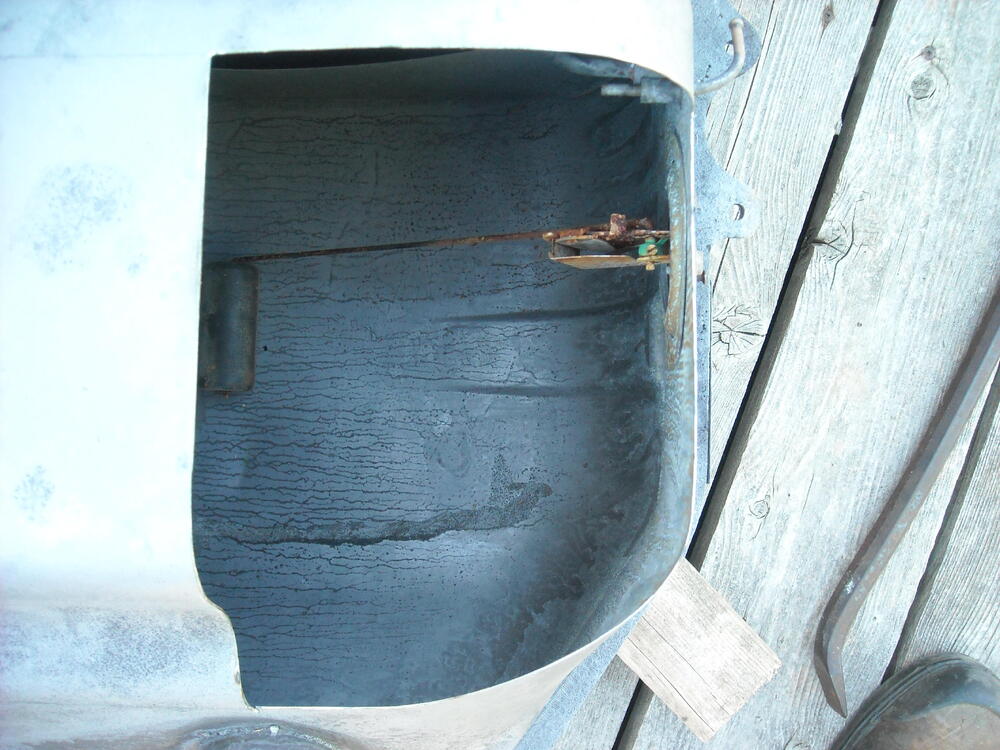
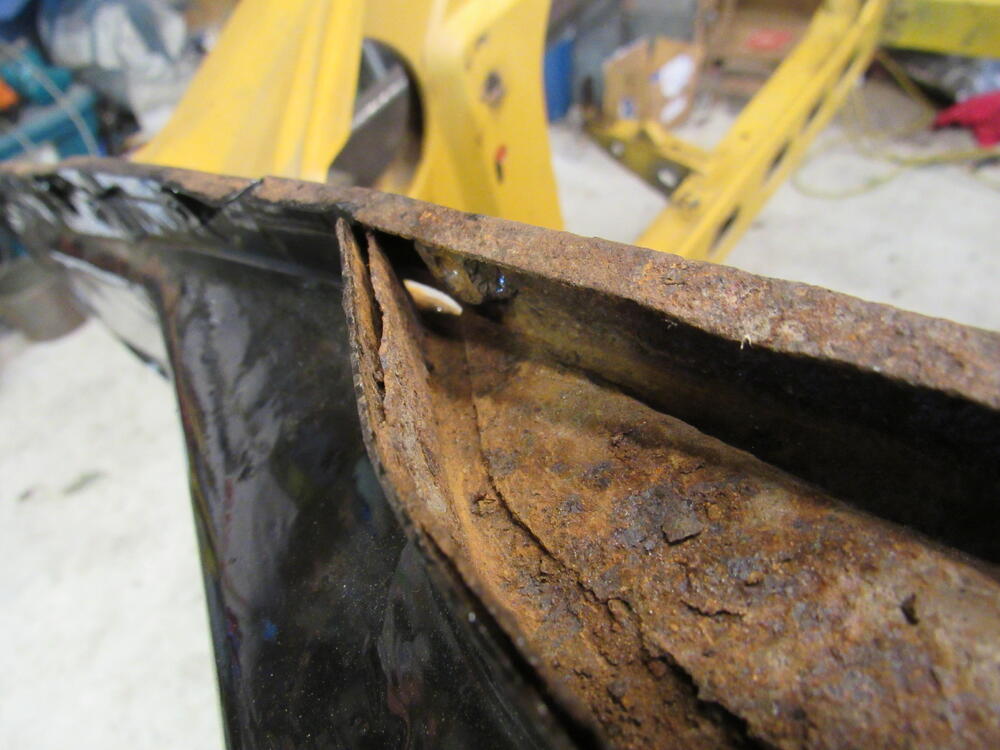
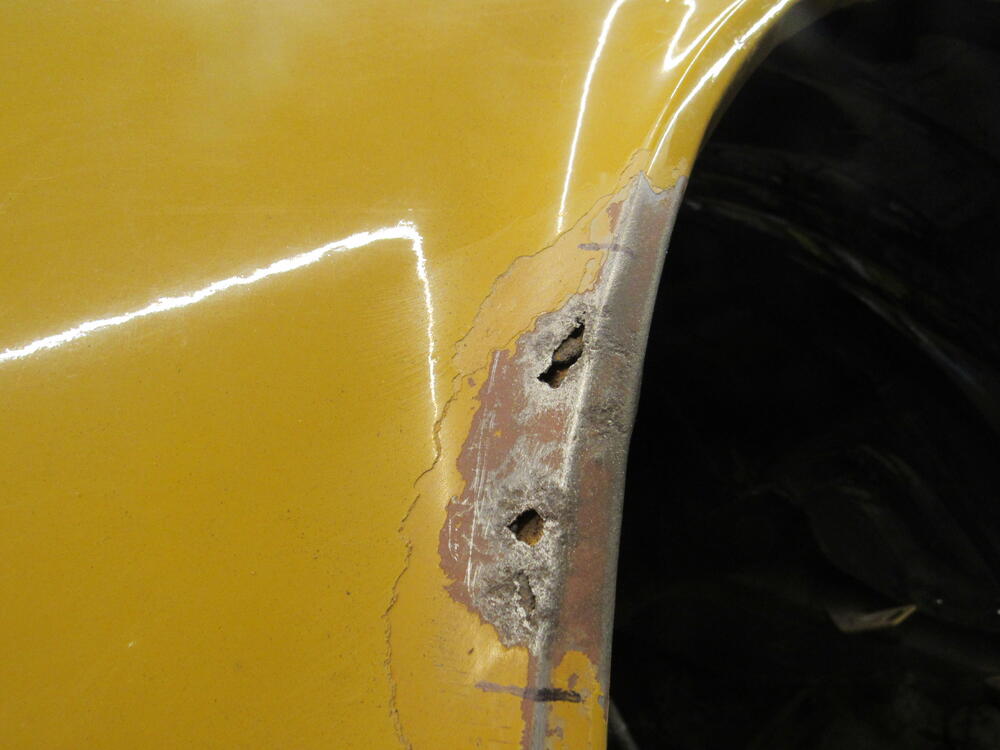
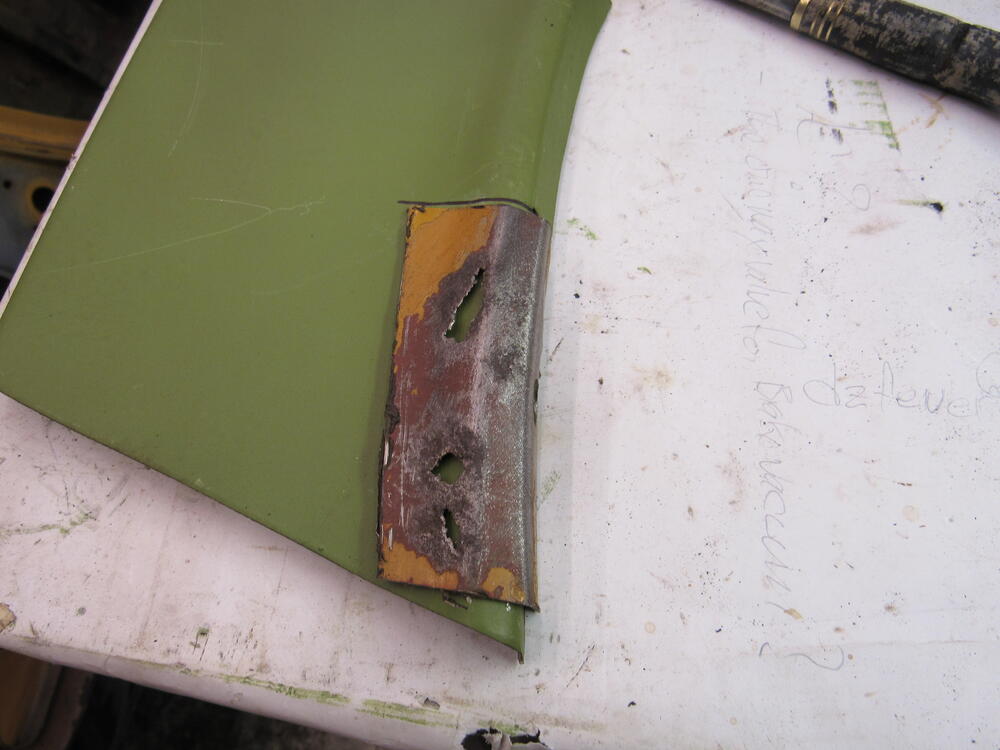
That area rusts out because the drain hole was plugged up with seam sealer, so the water sits there in a pool. The 2nd pic I have chipped it out.

-
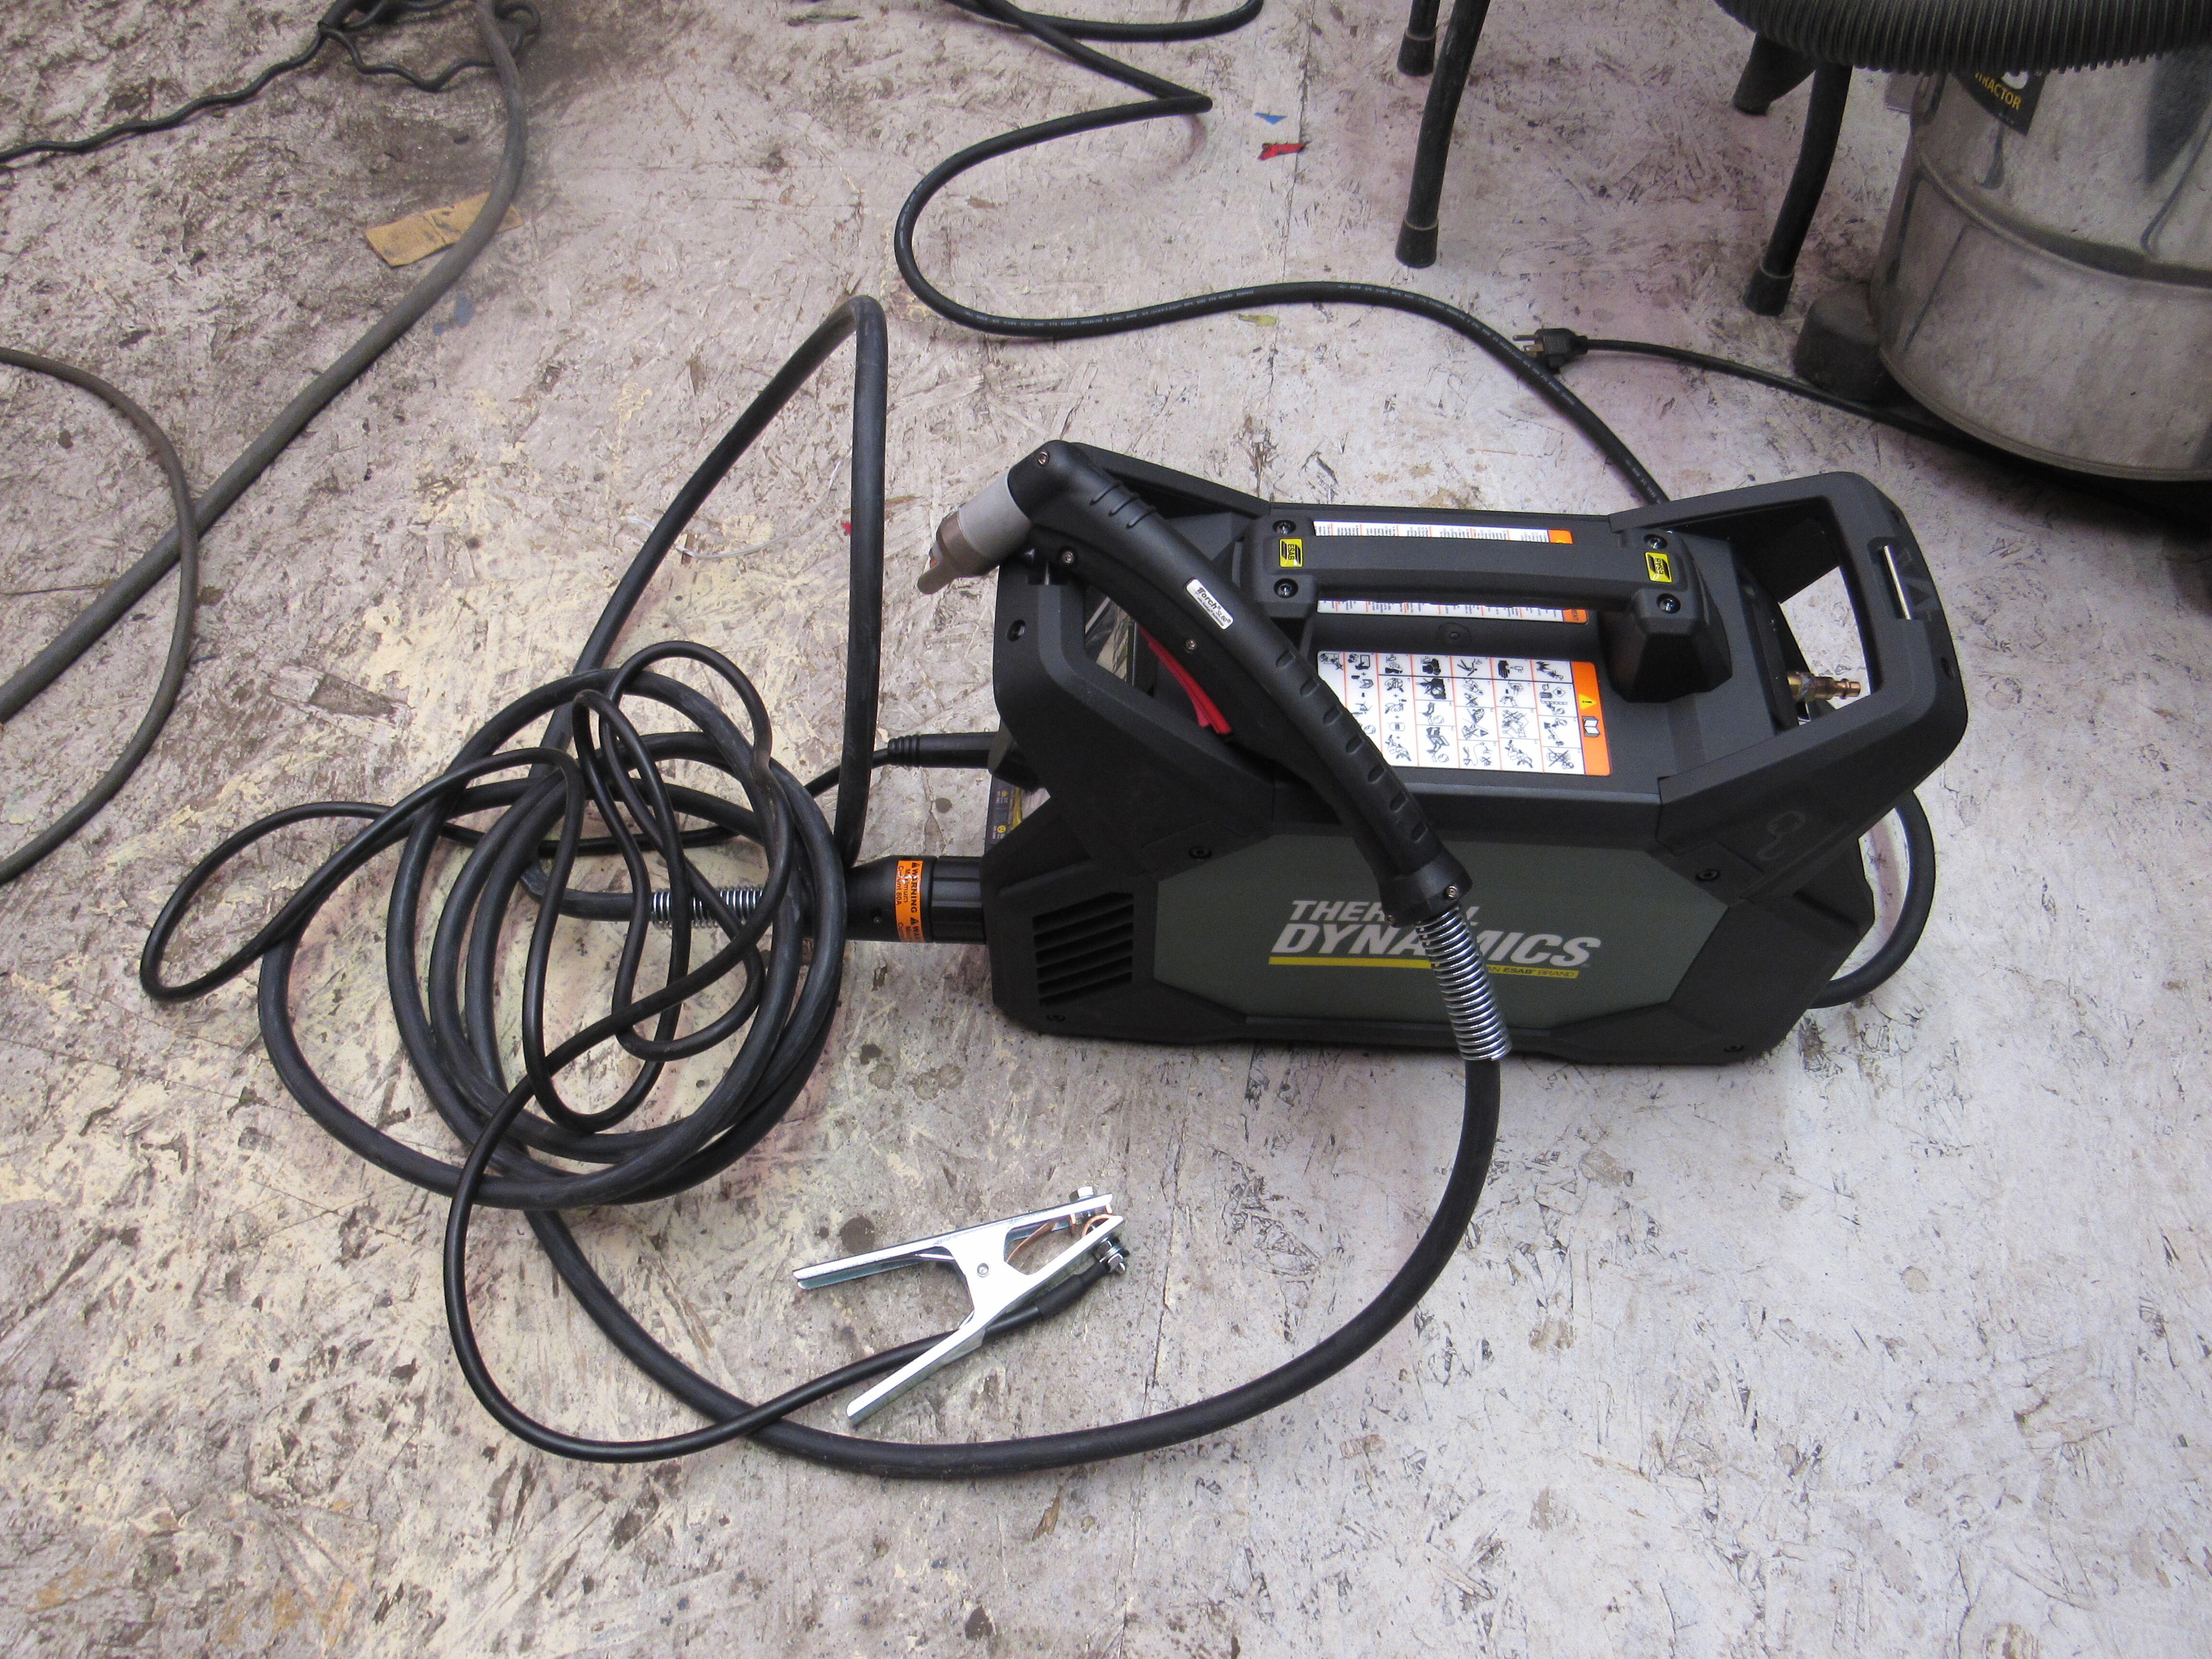
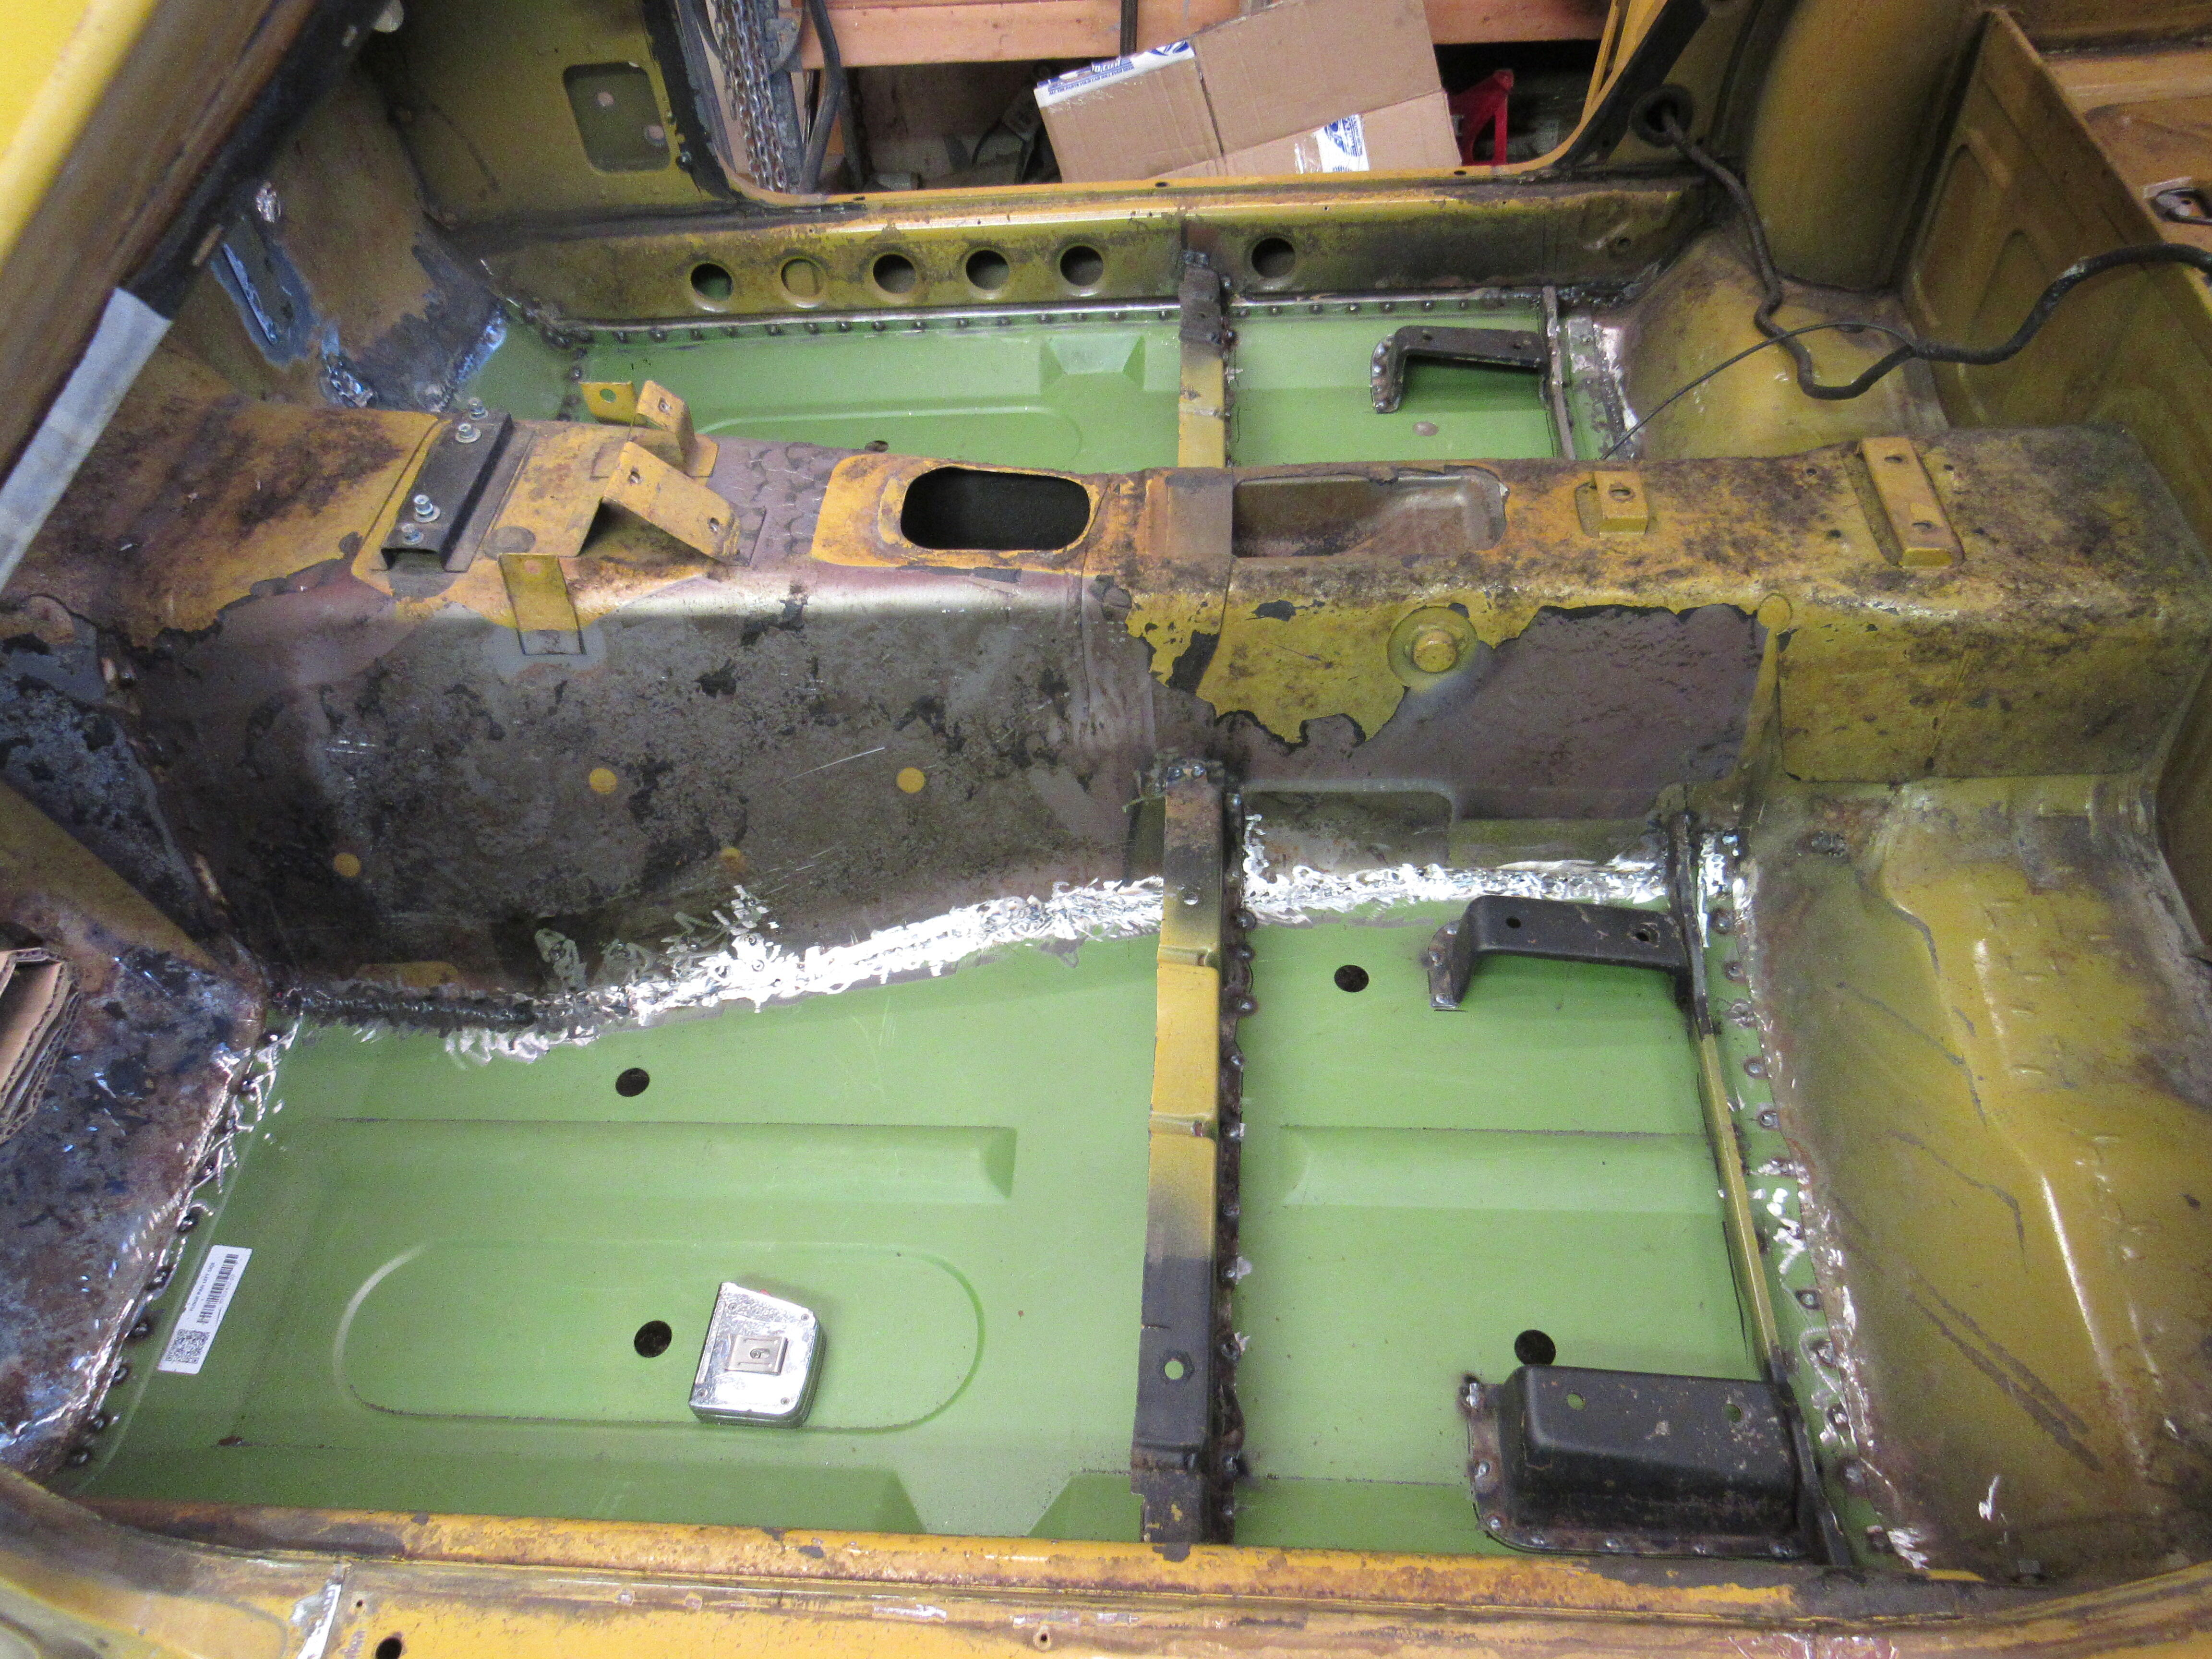
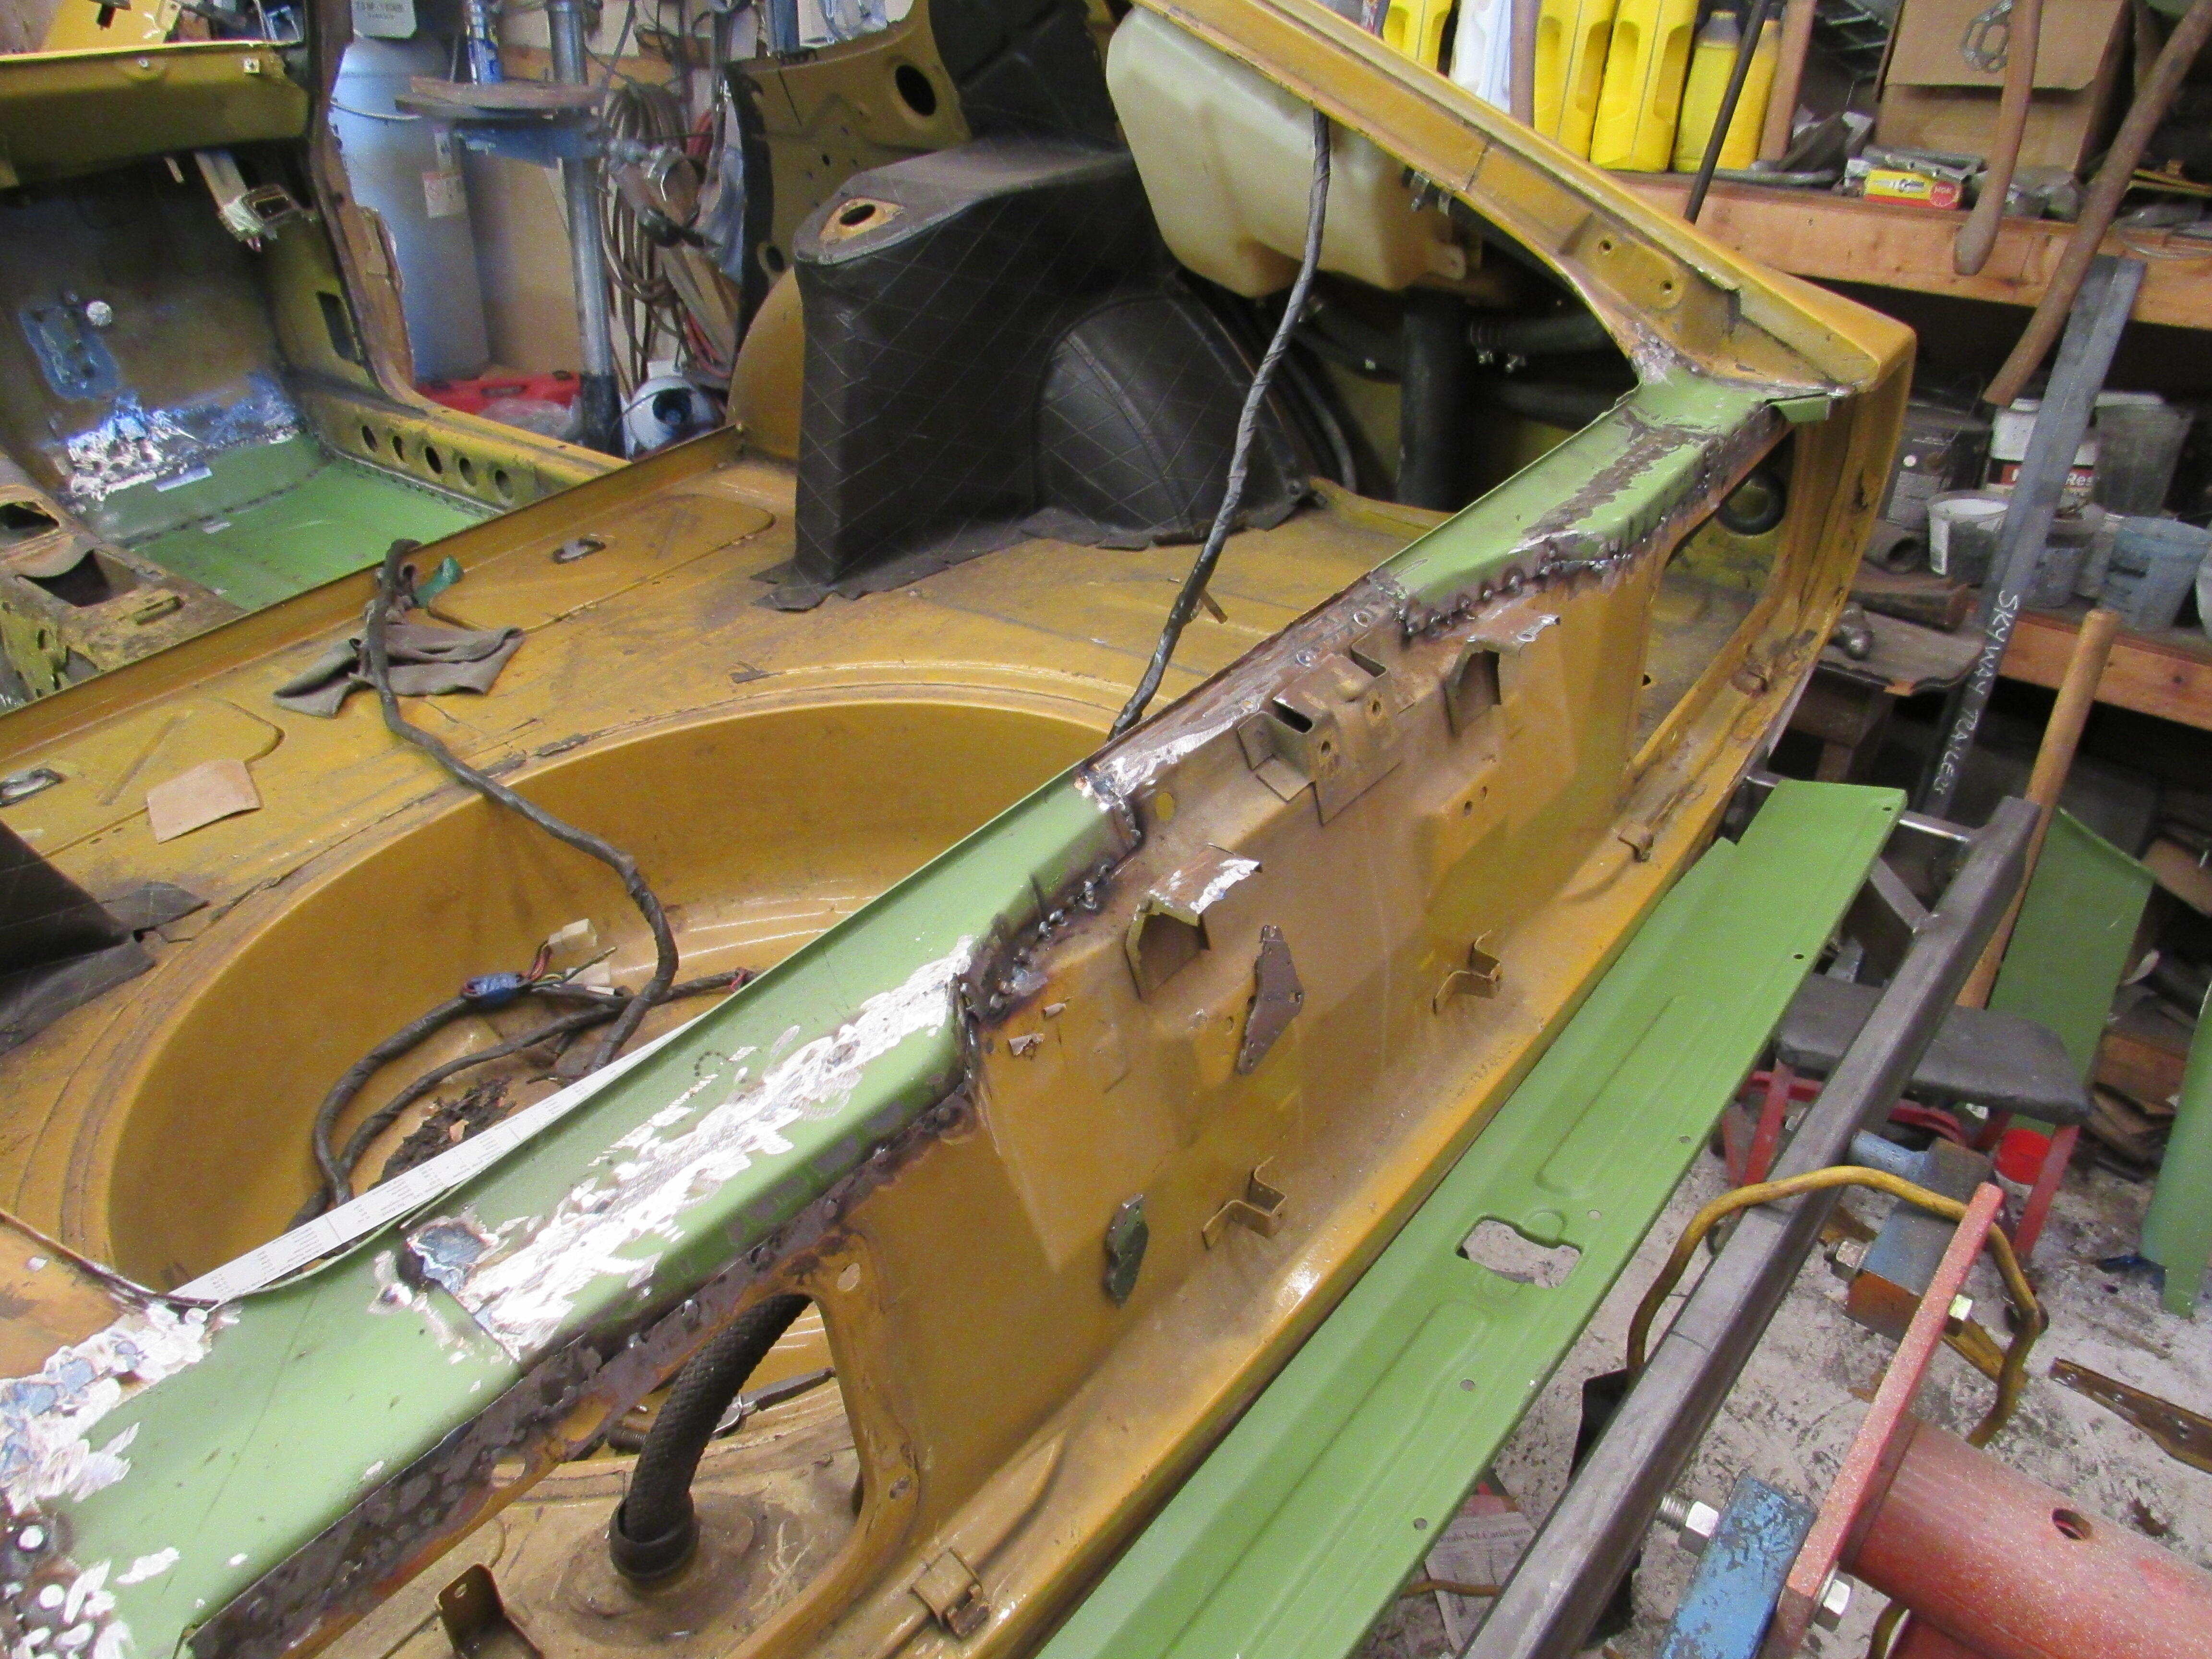
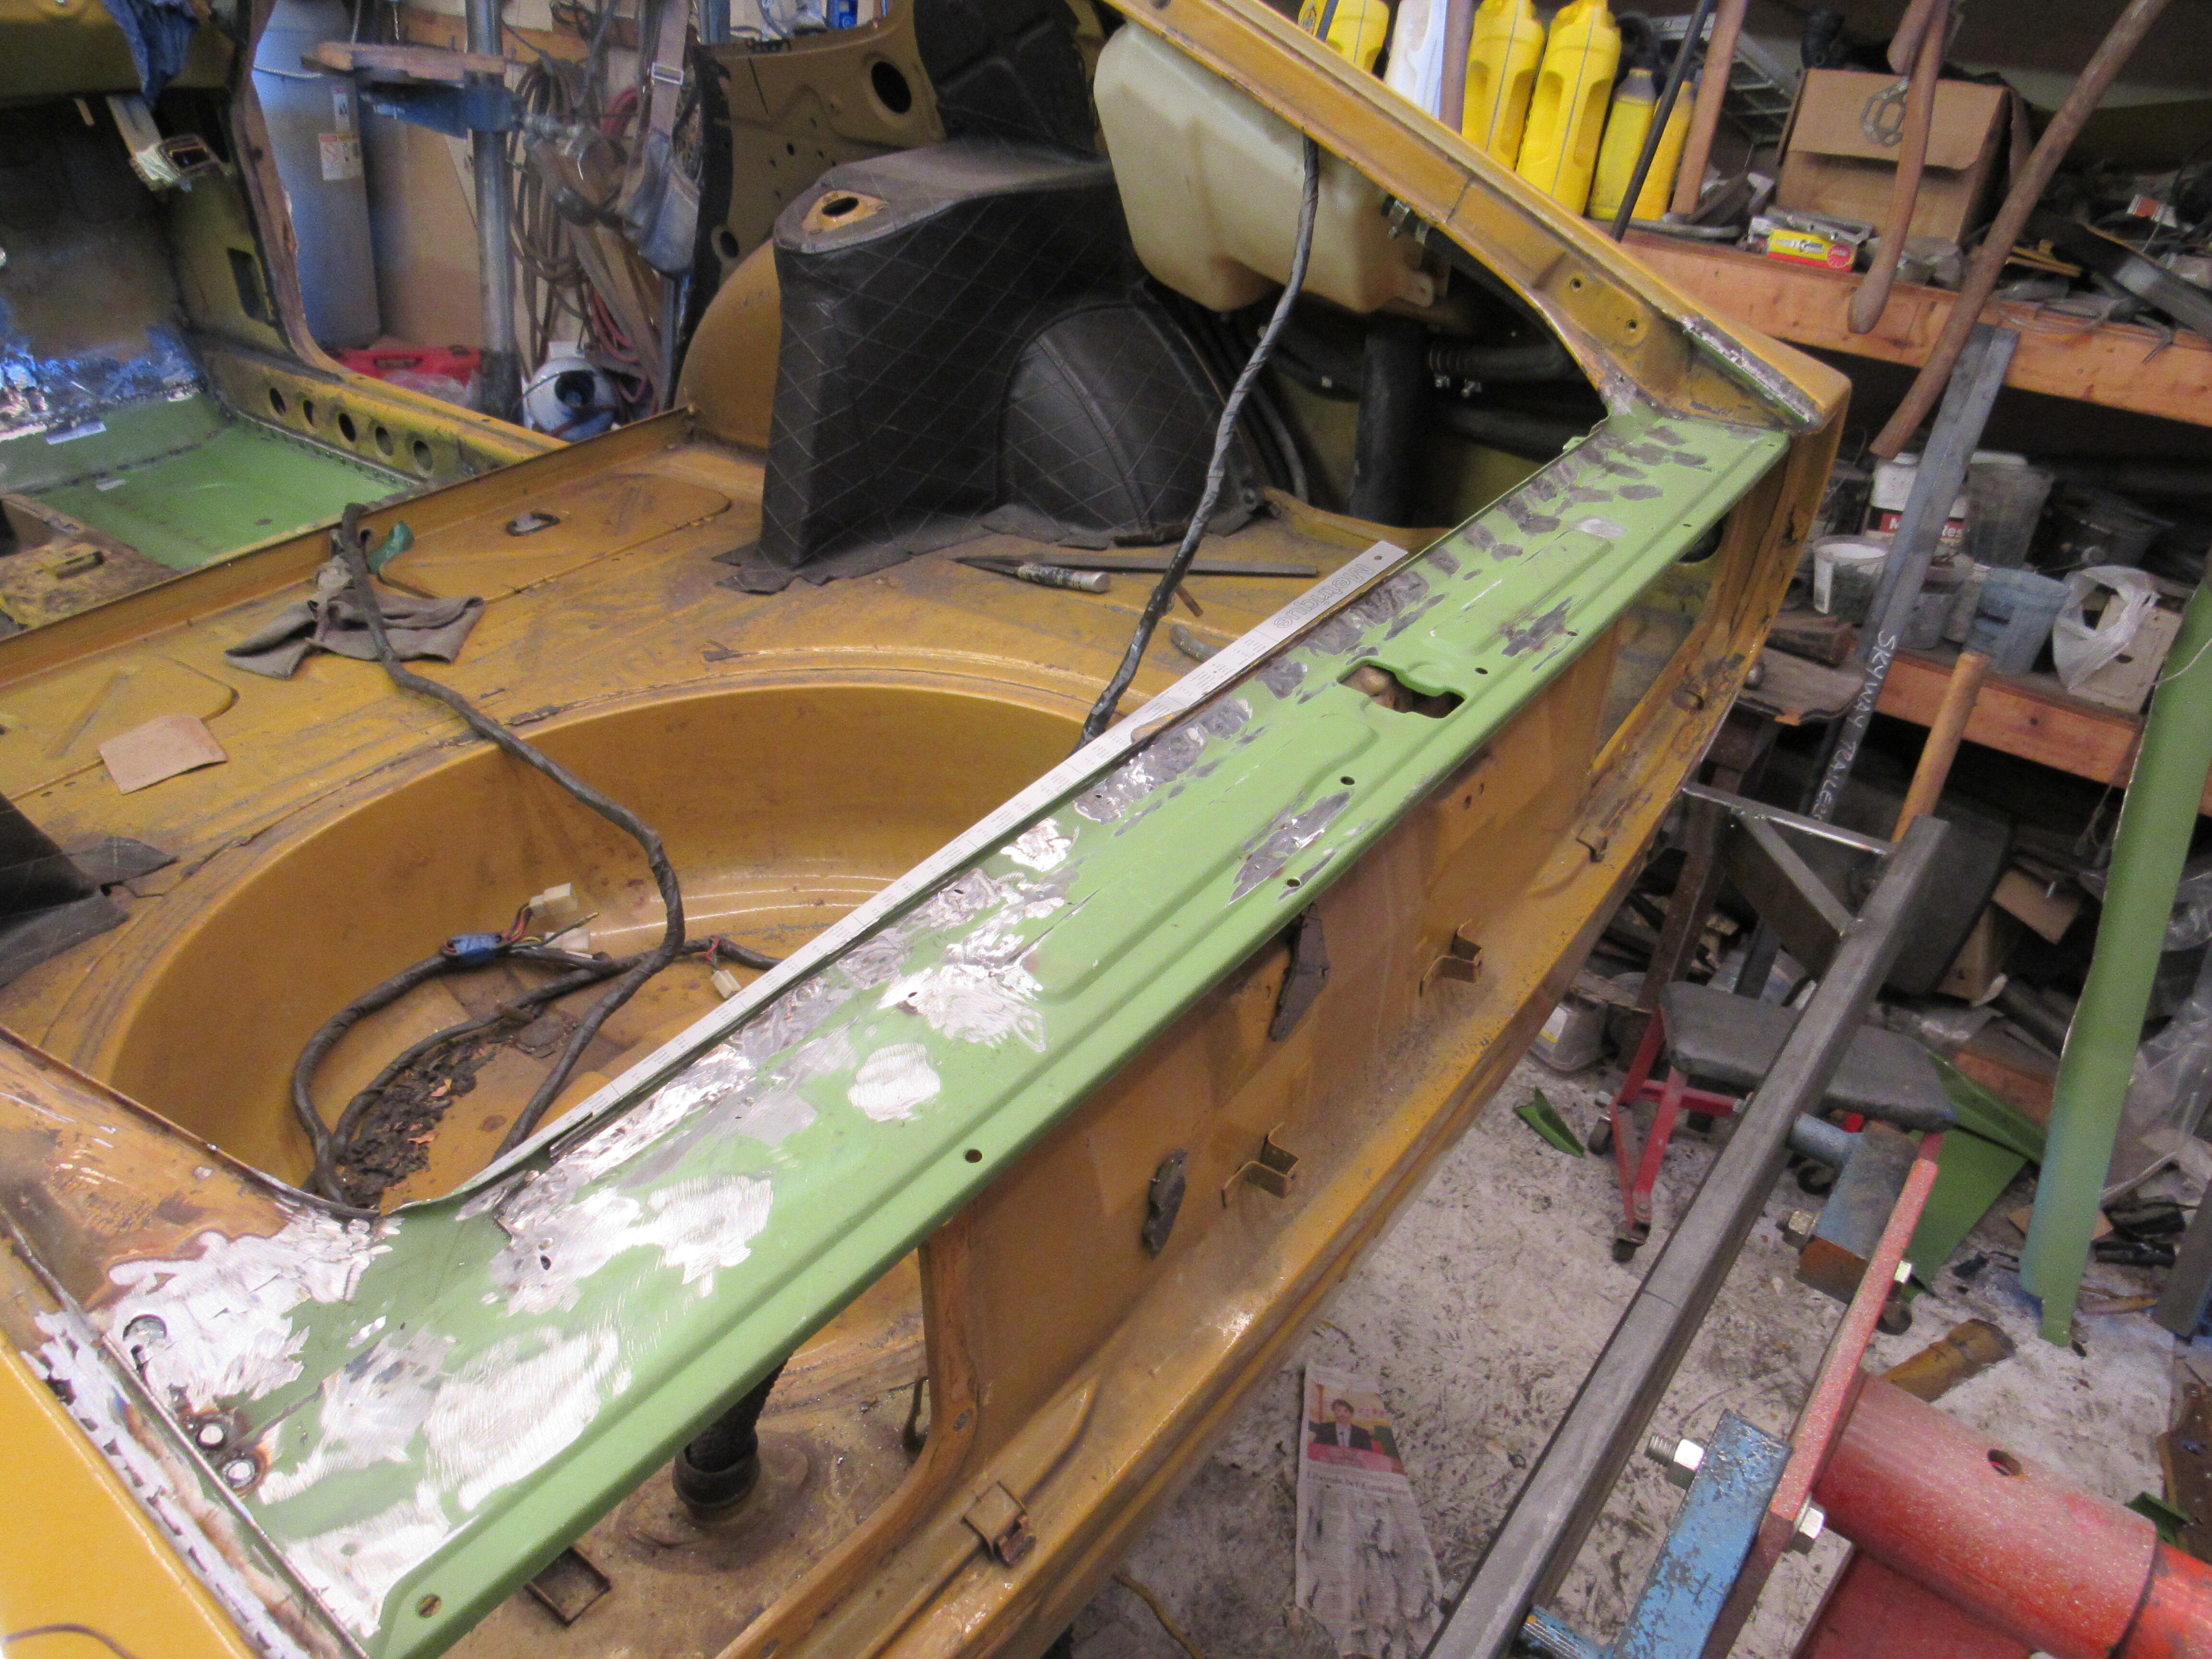
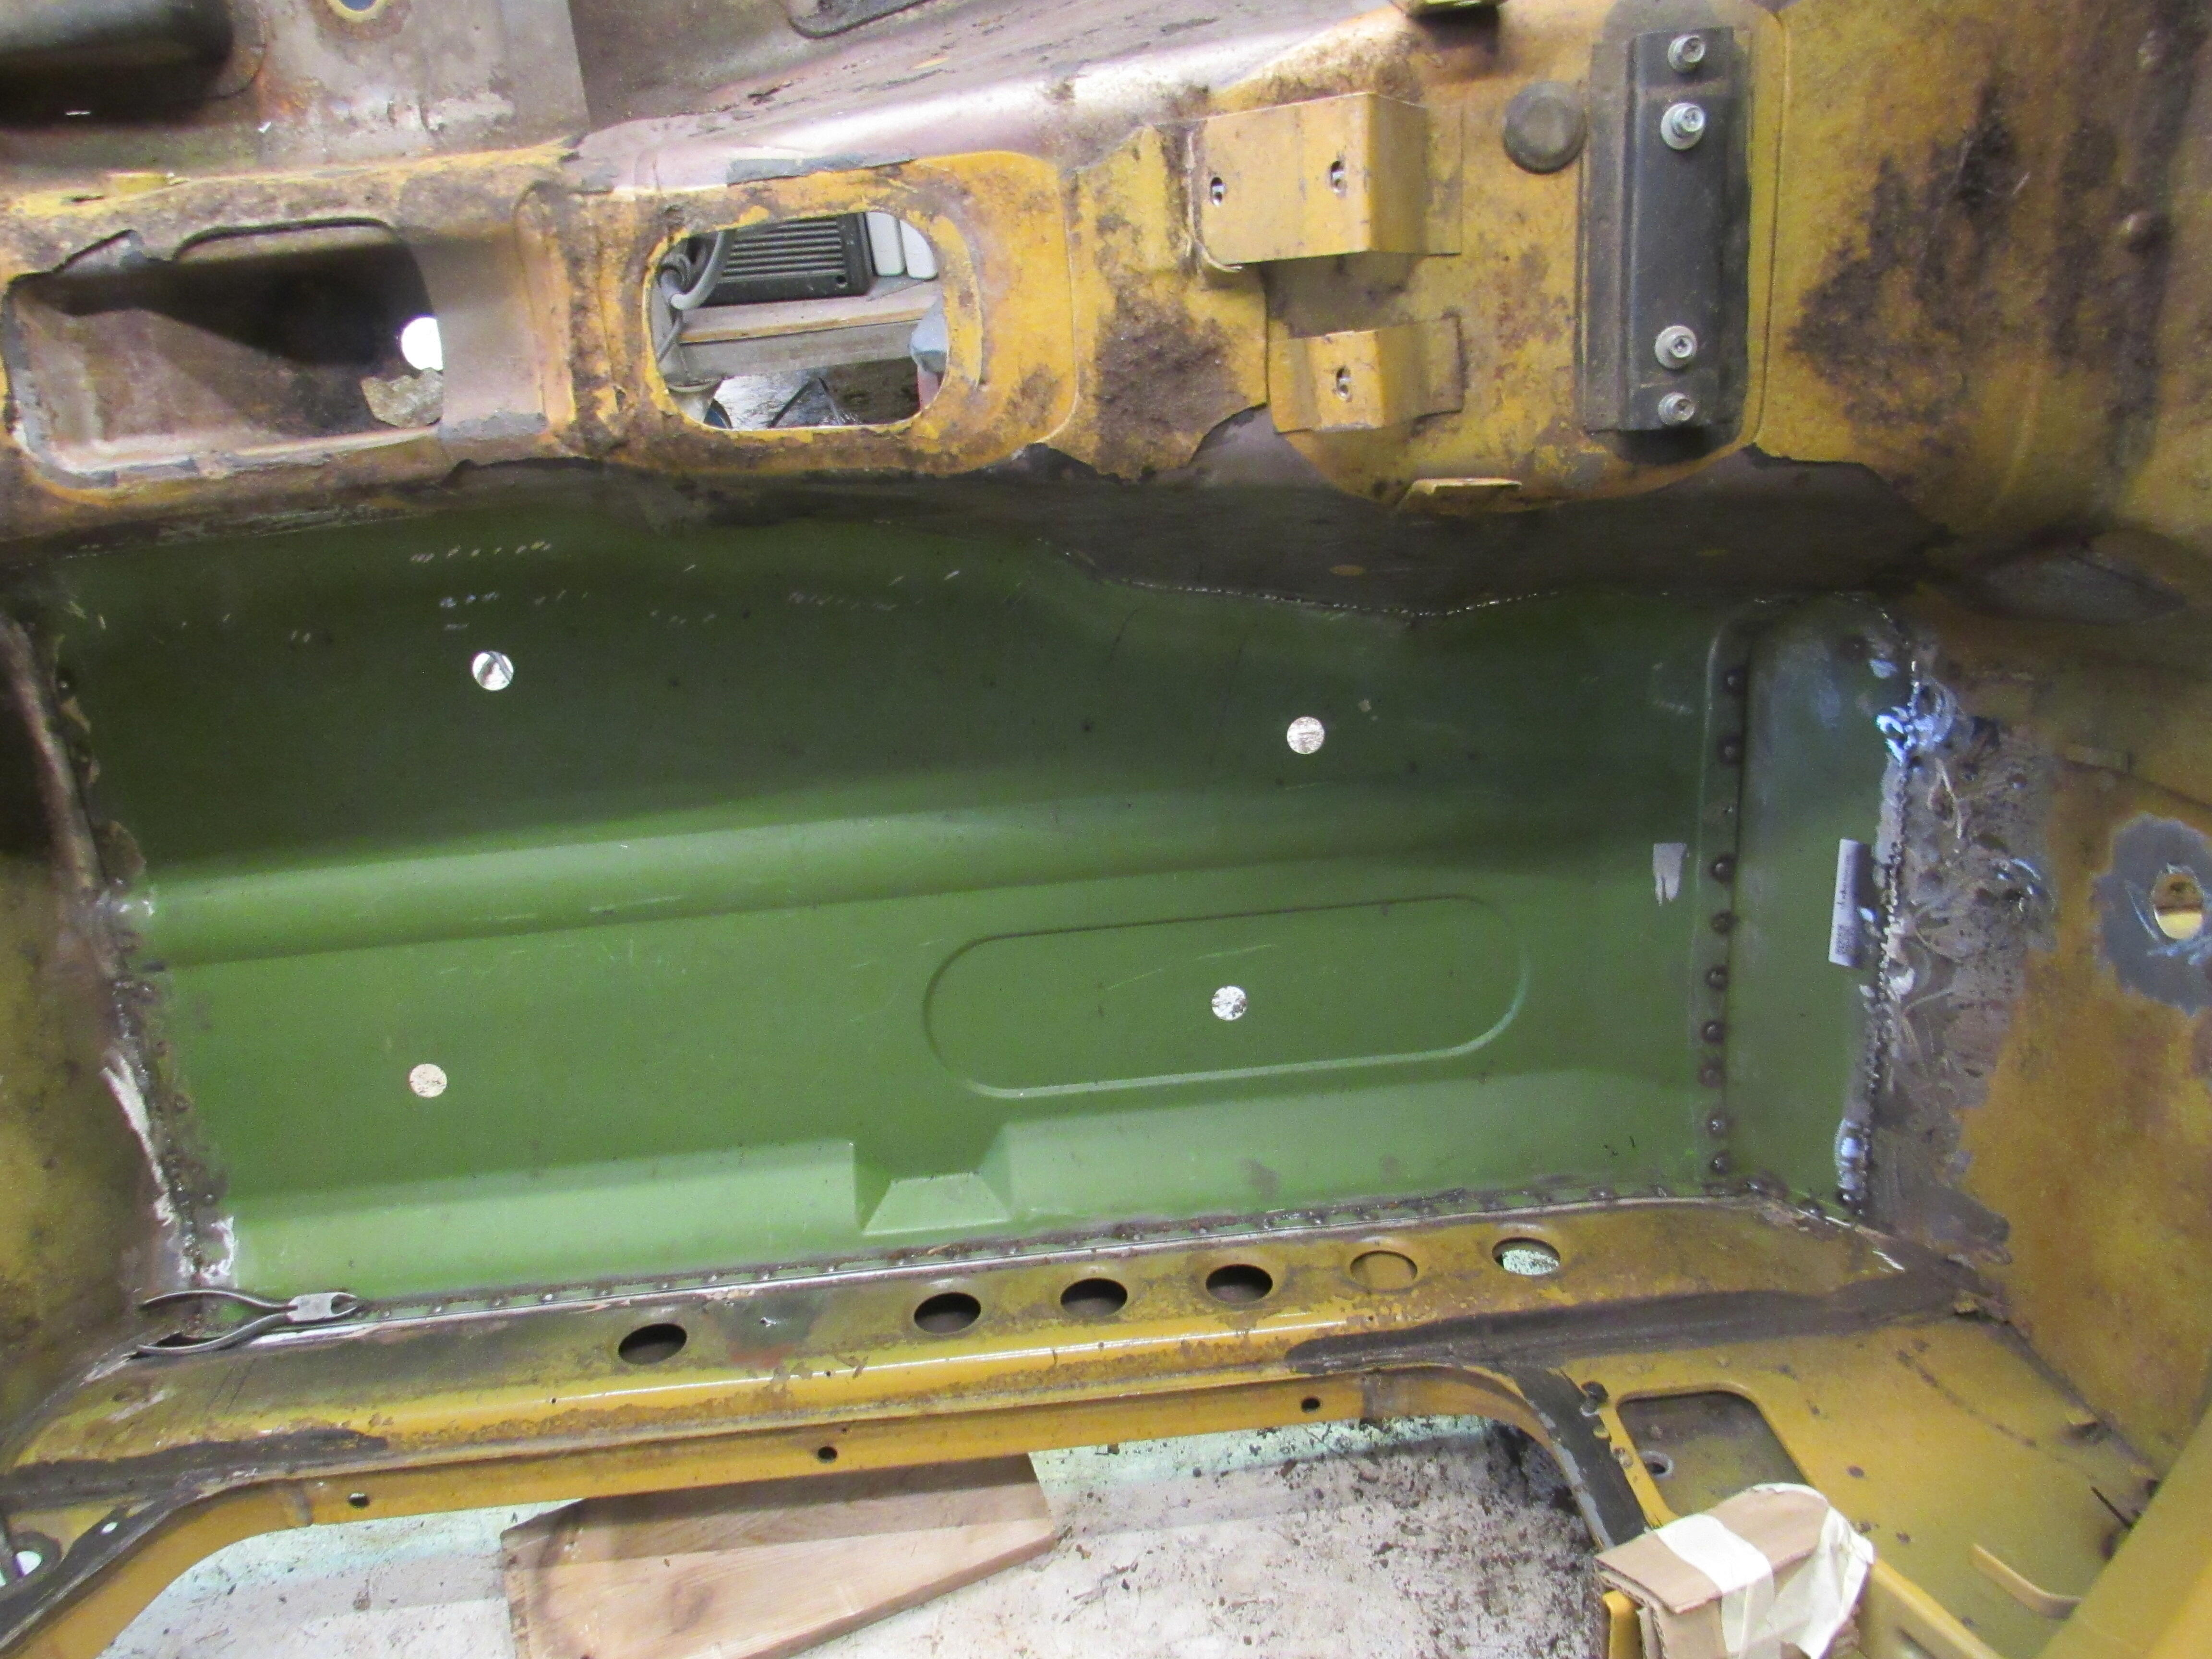
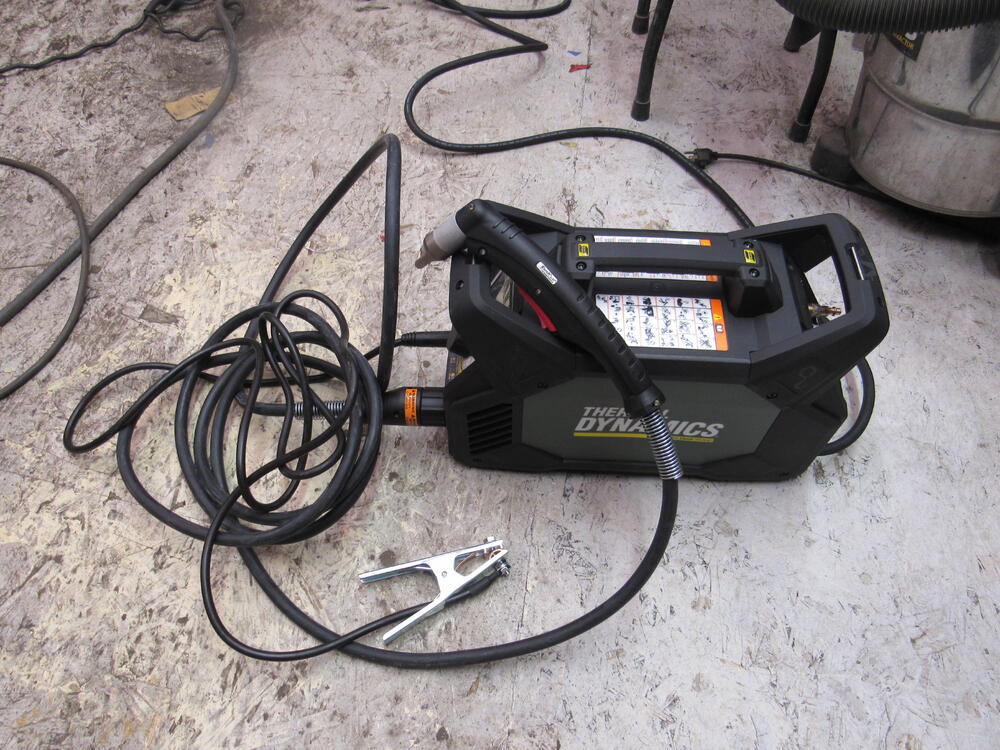
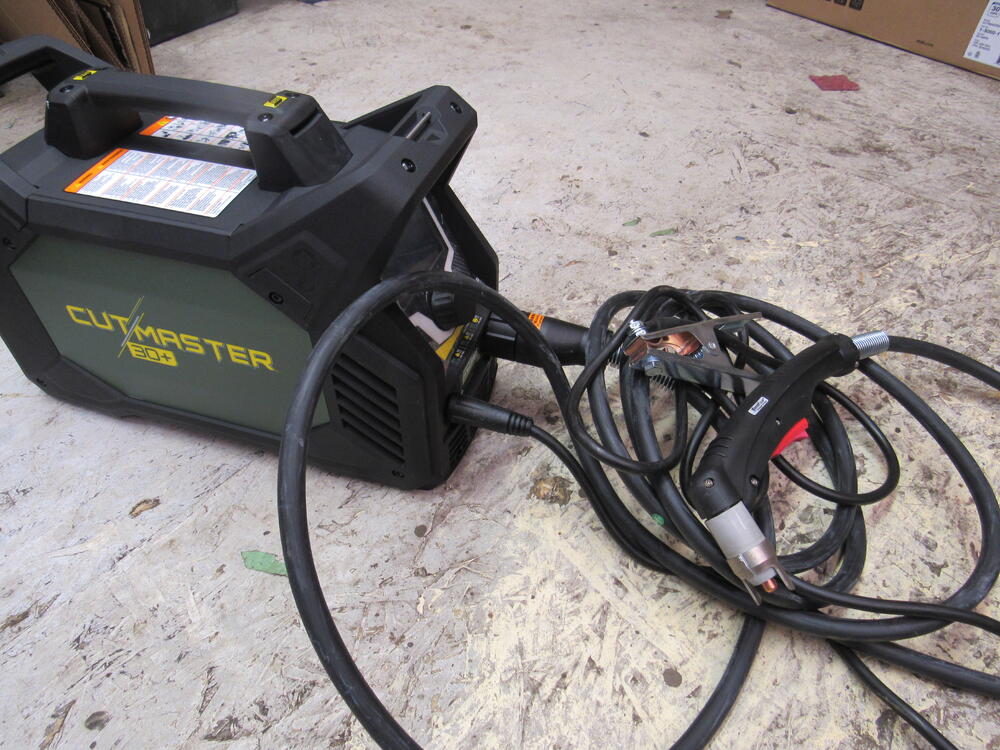
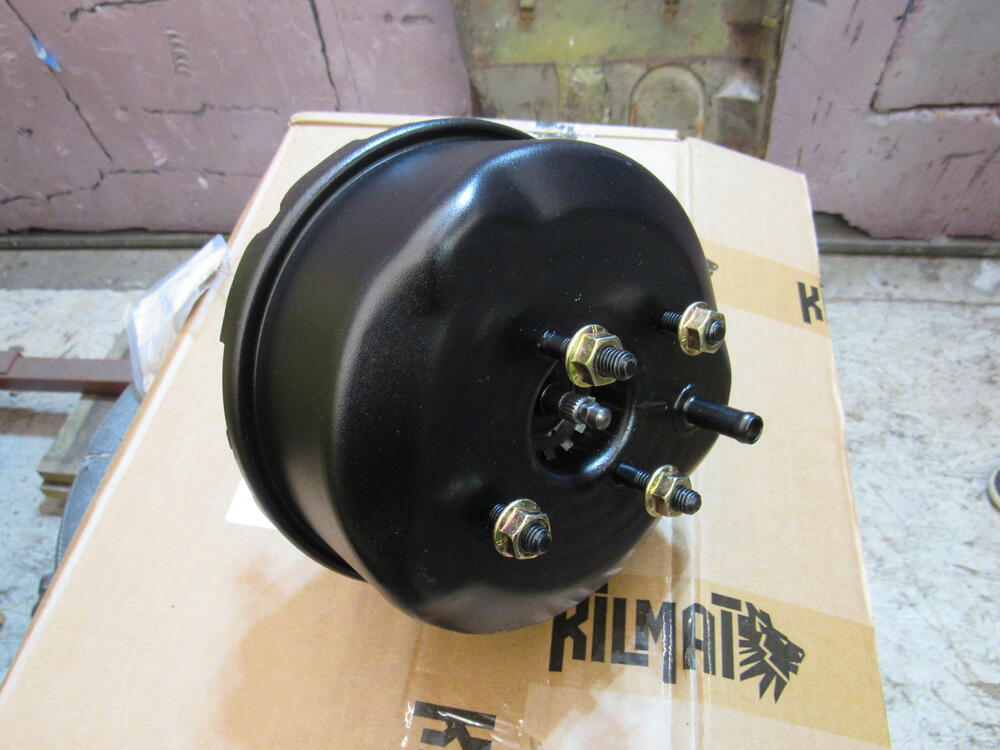
I'm working for the best customer you can imagine, Dave just dropped off the best Xmas present I have ever received. An ESAB Thermal Dynamics Cutmaster 30+ plasma cutter! This thing is such a sweet toy, I used it today to cut out the last reinforcement plate for the D/S rail. I have wanted one of these for years so it is going to get a lot of use. Repairs on the wheel well lip can be a real bugger, the quarter panel and inner wheel well liner are so close there is very little room to work with. Fortunately, the off cuts of the KFV dog leg panels came in handy as they are a good match for the lip. Both floor pans are in now, if you install the rail first you can end up with a gap under the front seat mount even though it is at the correct height. So on the D/S I installed the seat mount first but found the rail to have a big gap, had to slice the end of the rail so I could get everything to line up and then weld it back together.


-
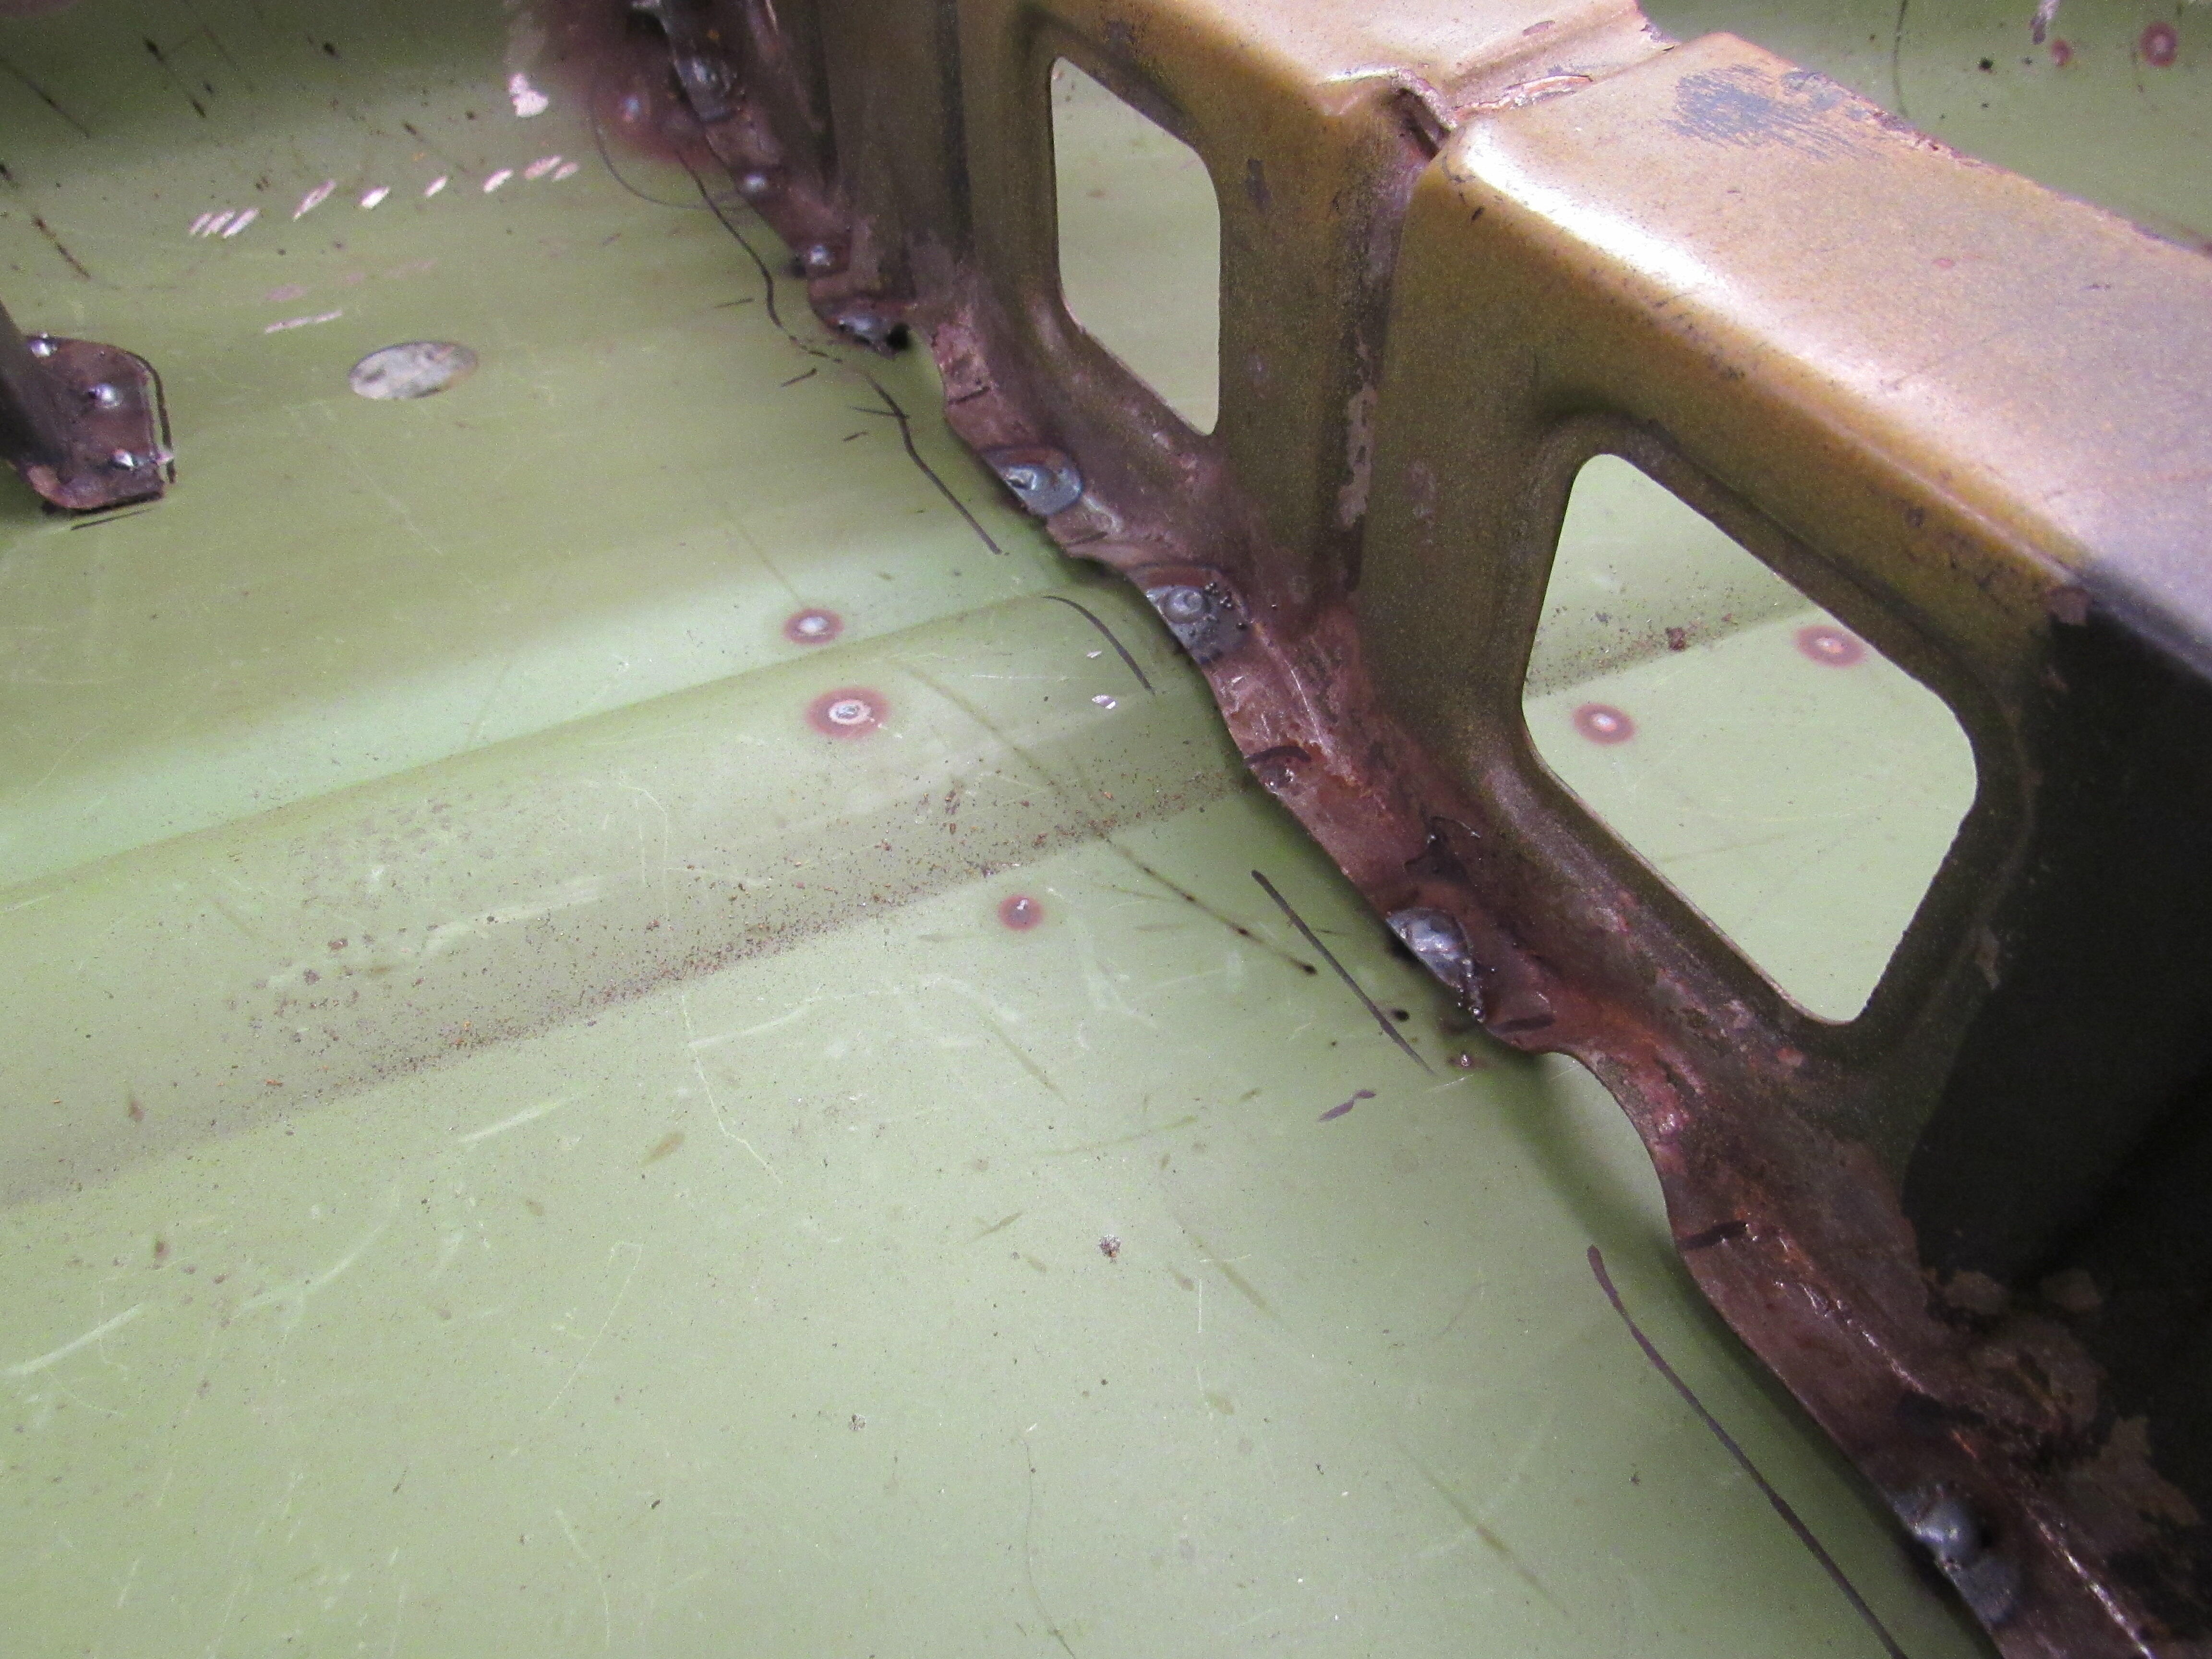
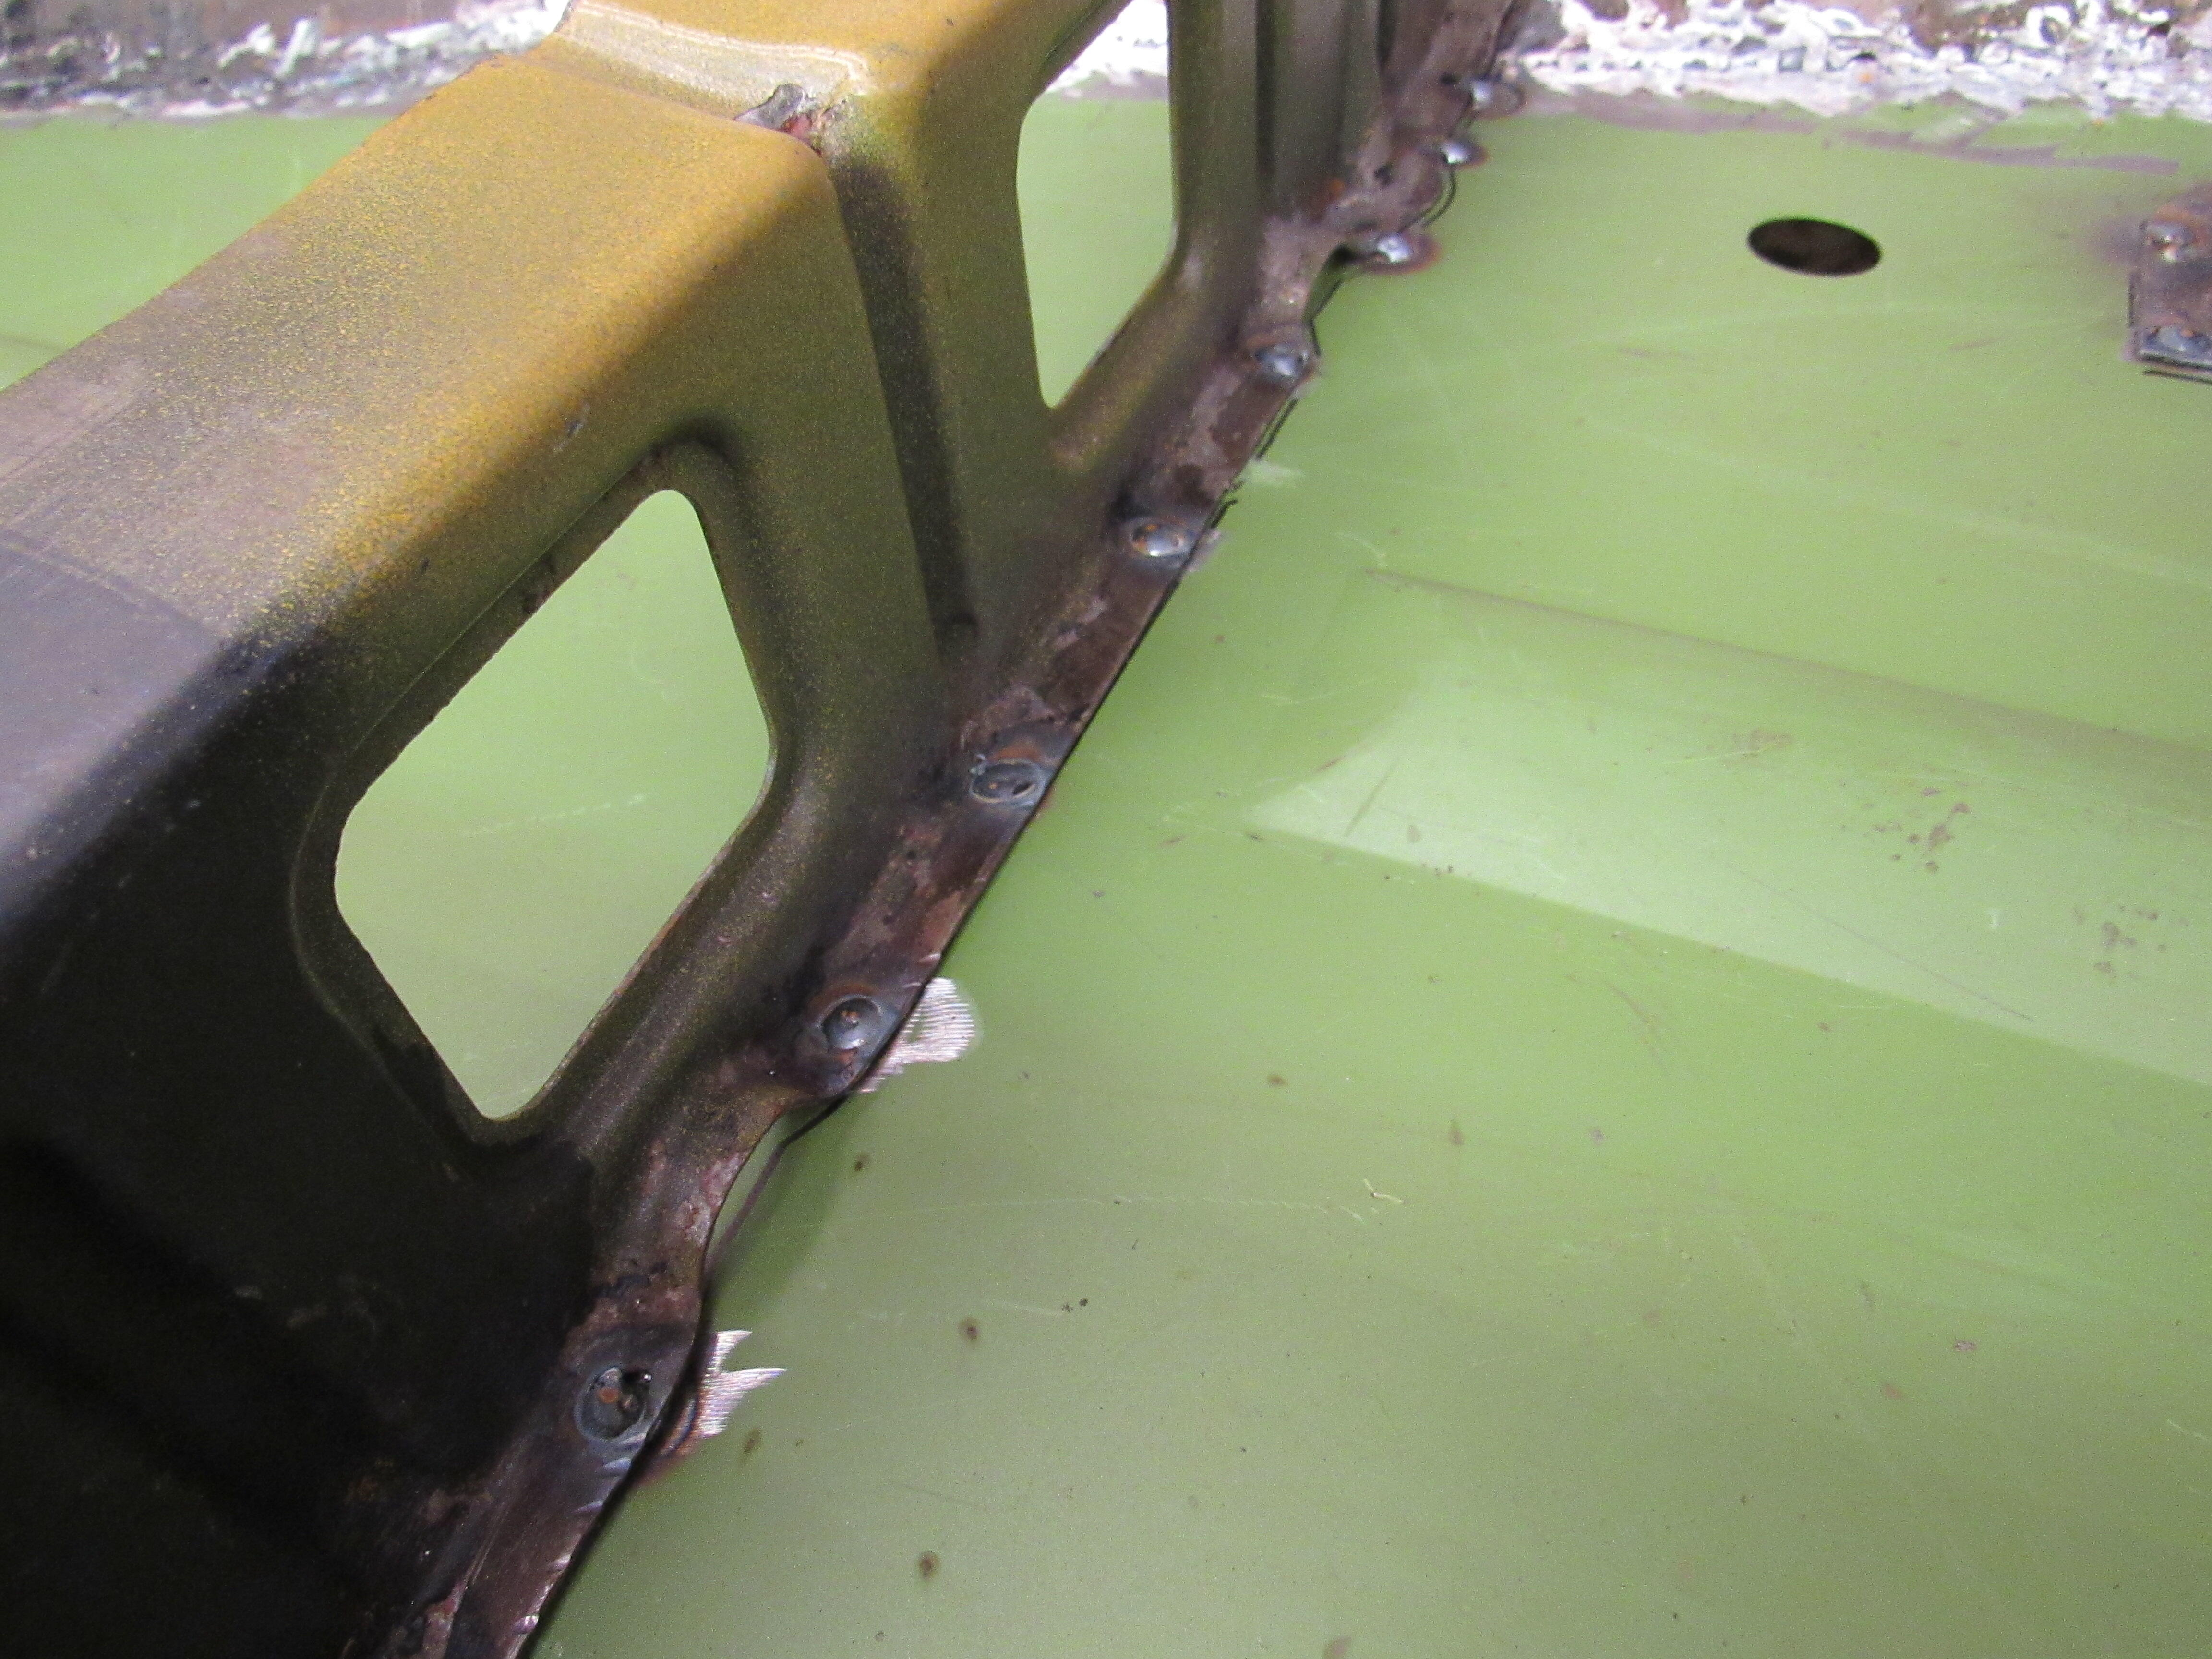
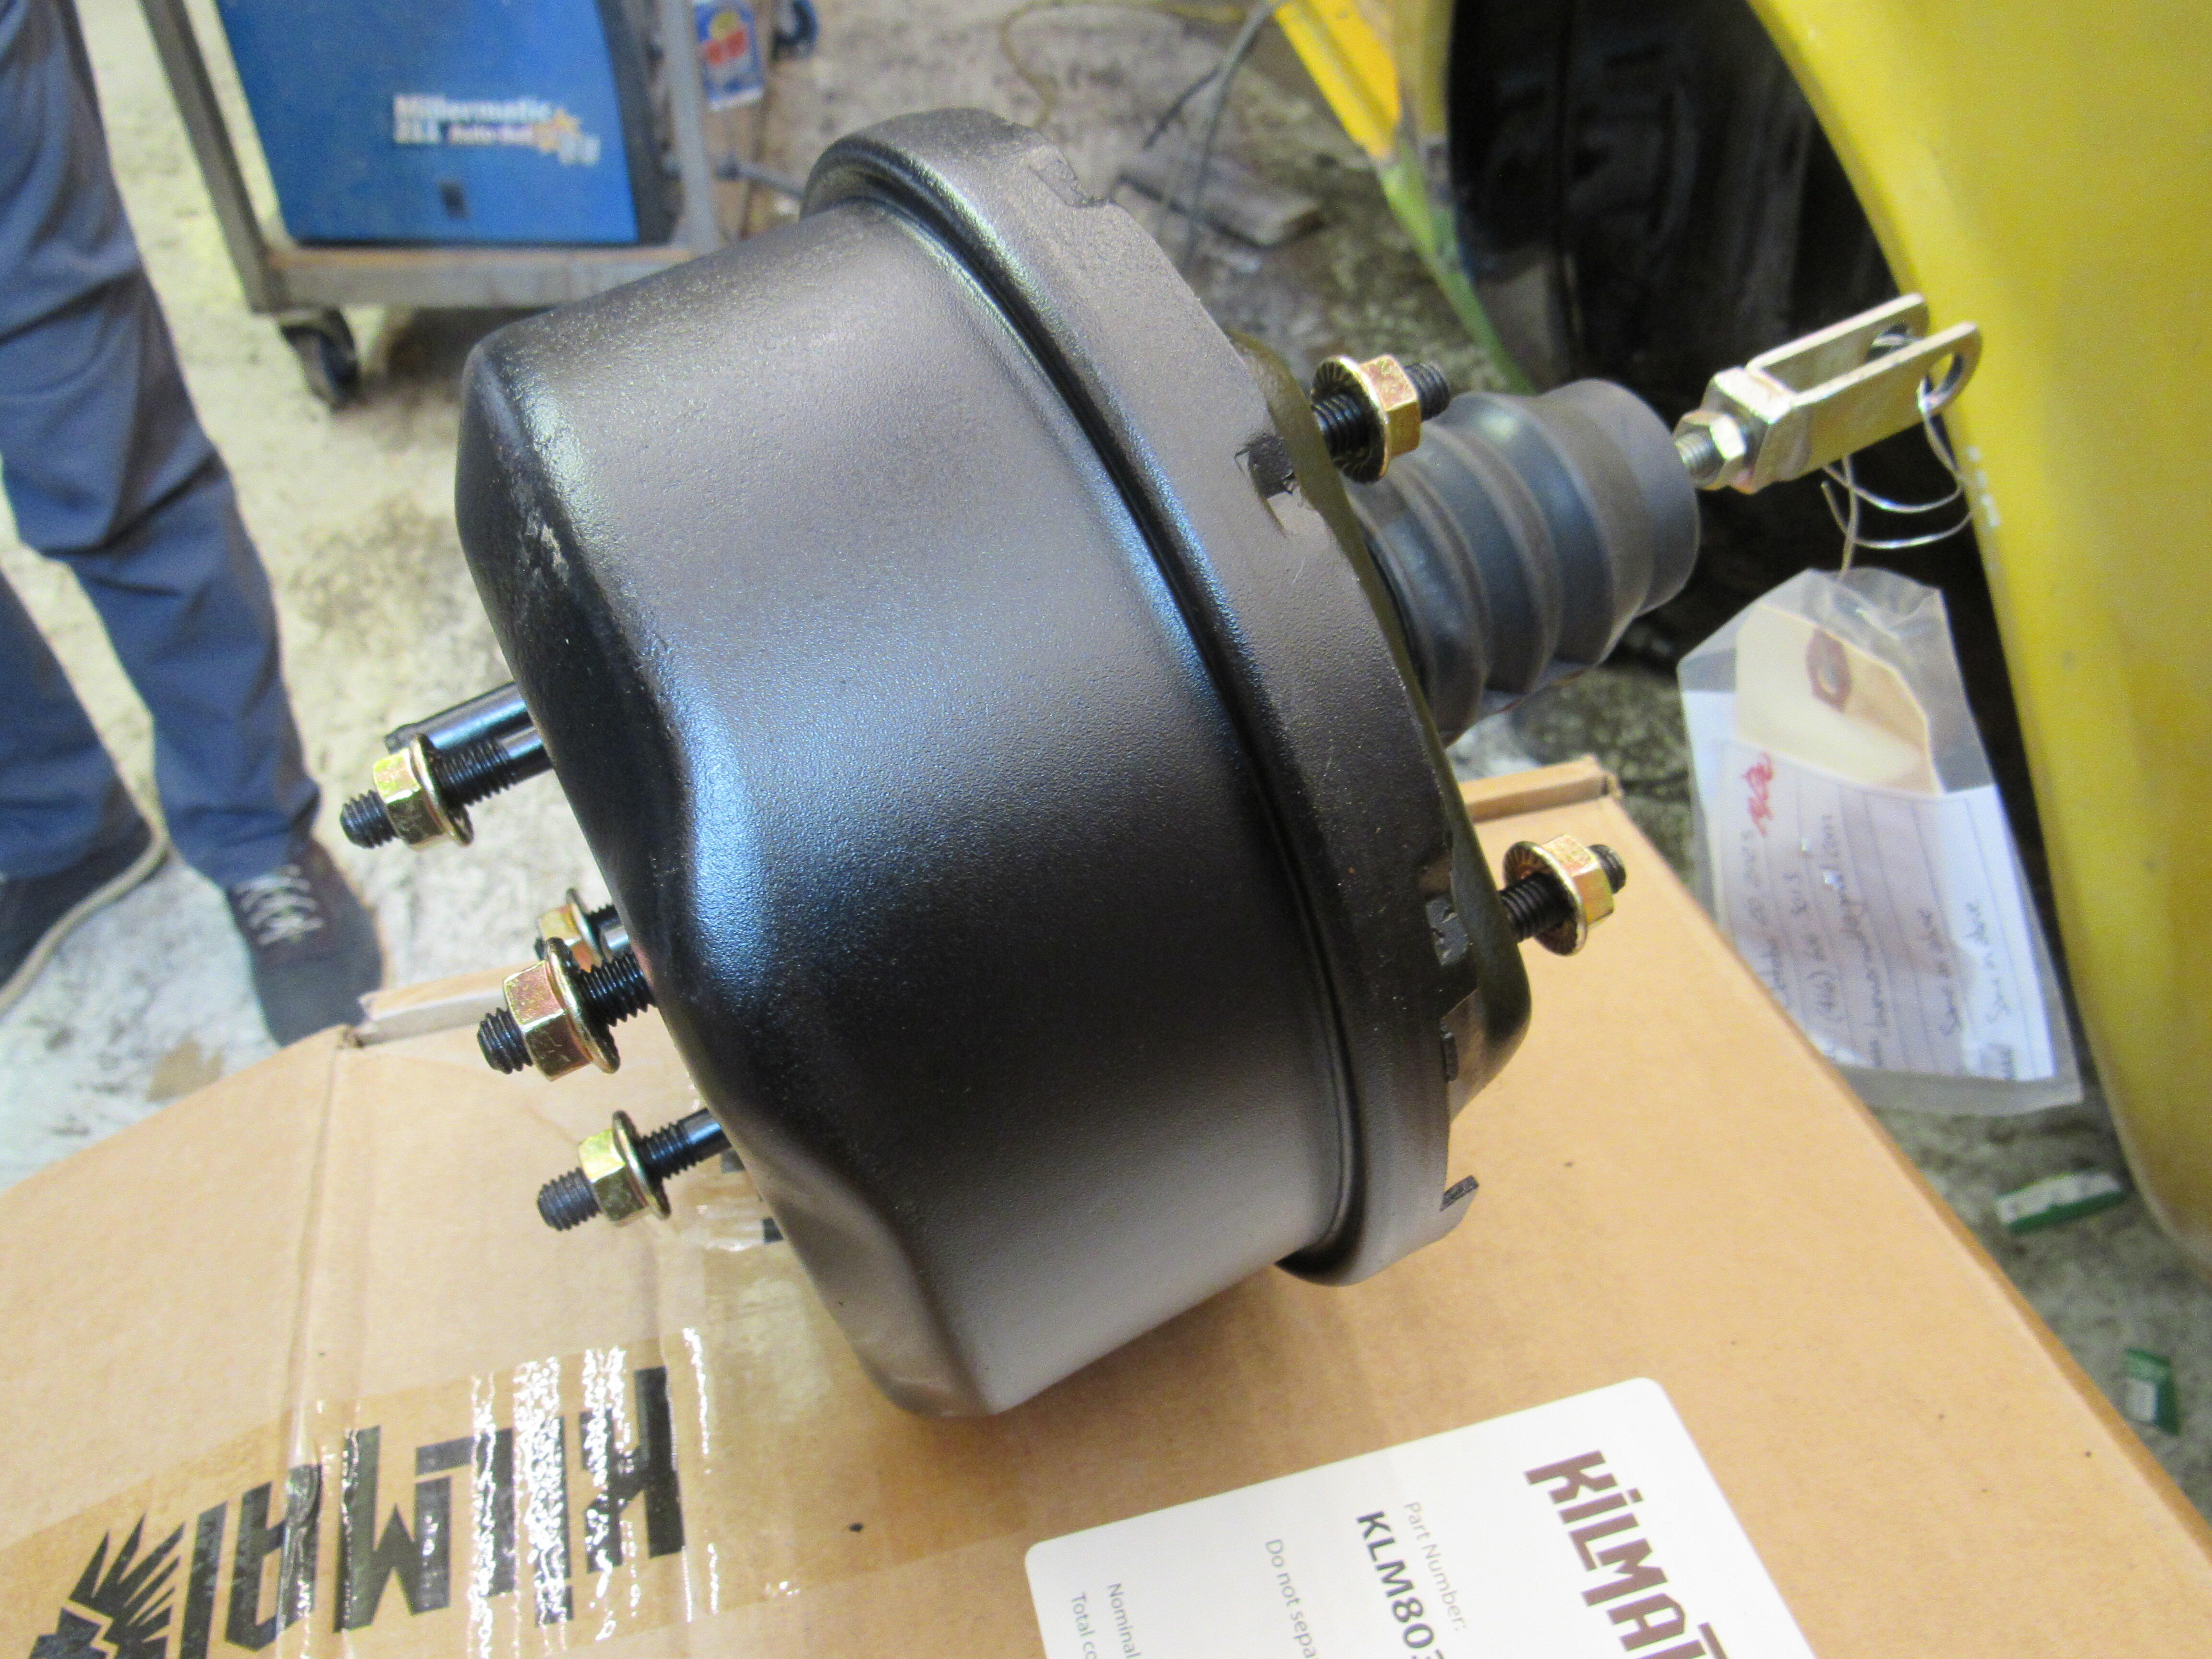
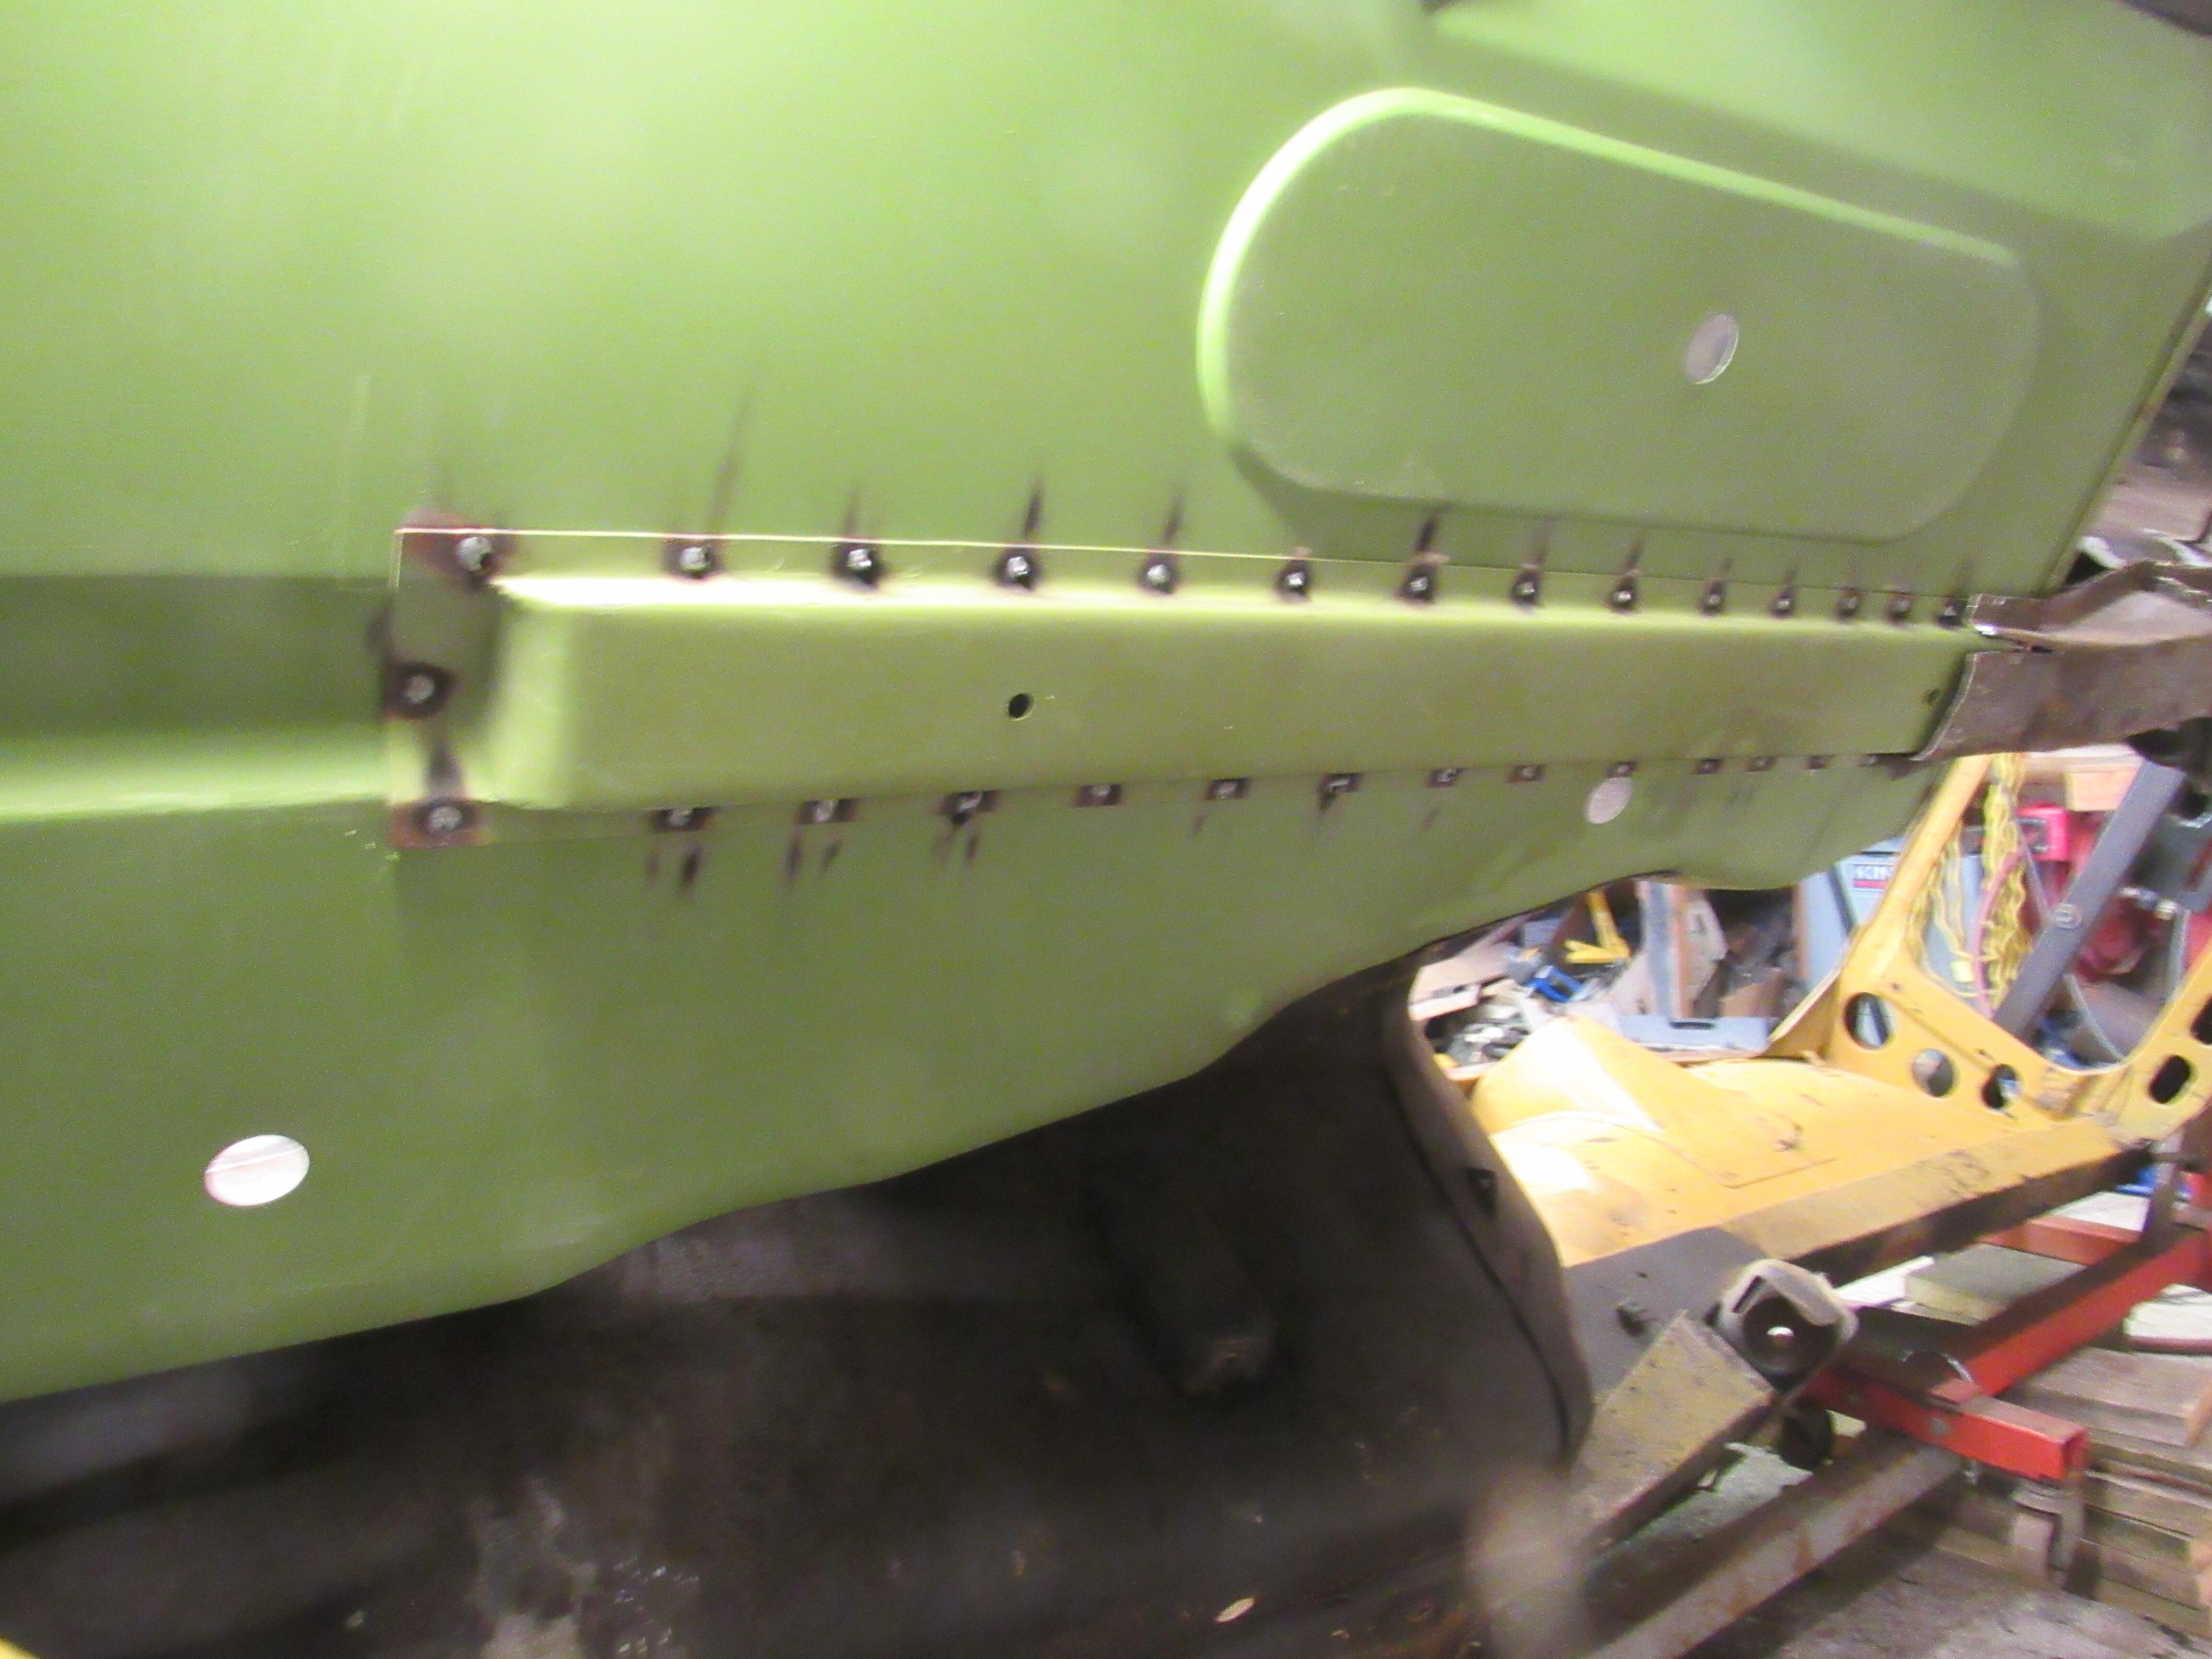
Most if not all welds in these pics aren't completed yet, I'm just trying to get the bulk of the metal work done before Xmas. Filling them in and finishing will be in the next stage. The front triangular sections of the rails were pretty banged up so I hammered them back into the best shape I could and now I'm adding 2.5mm plate on the bottom to add some strength and make them into jacking points. Dave stopped by with the rebuilt brake booster, they did a beautiful job. Two full days to figure out the deck lid supports and add the new deck lid. The KFV parts in this area are not all that accurate so lots of massaging was needed. Here is a little addition I wish Nissan had added back in the day, the original channels dump the water right into the corner of the deck lid and then it just sits there, rotting the metal. This extra 4" of channel has the water clear the deck lid before draining on to the ground. Made from the off cuts of the KFV panels.


-
I love the cardboard to hold the dry ice against the trans tunnel.
-
I would love to get my hands on that 280, there is potentially a good car in there. He has only one shot of the floor pans, I've asked him to post some more. I'm tempted bid on it but with the exchange rate and transporting it across the continent the costs could get out of hand pretty quick.

-
I suspected as much, I didn't watch all 57 min. but I'm sure you stopping faster by the end. I haven't read a single negative comment about their performance, well, except the price.
-
Had you bedded them in before making the video?
-
If you can get the door to sit right without manually tweaking it then that's perfect but reshaping the door by twisting is a standard body shop technique. Have a look at your door hinges, they're cast iron, you are not going to hurt them in anyway. This technique was used on every assembly line back in the 70's.
-
This one has potential to be a nice driver, you would have to strip off the 80s style bumpers and side skirts and try and match the paint. Has a dash cap rather than the replacement dash as the description says but otherwise it is nice shape. The seller says he purchased from Barrett Jackson so he probably paid more than he should have but I'm thinking BaT agreed to about a $15,000 reserve. https://bringatrailer.com/listing/1972-datsun-240z-300/
-
Hey ConVerTT, welcome back, I thought we had lost you and you had moved on to some other project. Looking forward to you installing the Apex suspension, so much potential. I read a horror story about one of their kits a couple of years back but never heard how the problems were rectified.
-
If you don't need all 4 then try one or two, you could also shave them down a bit so they are not dragging on the paint of the hood side lip. Also, sometimes you can rub the contact areas with the end of an old paraffin wax candle.
-
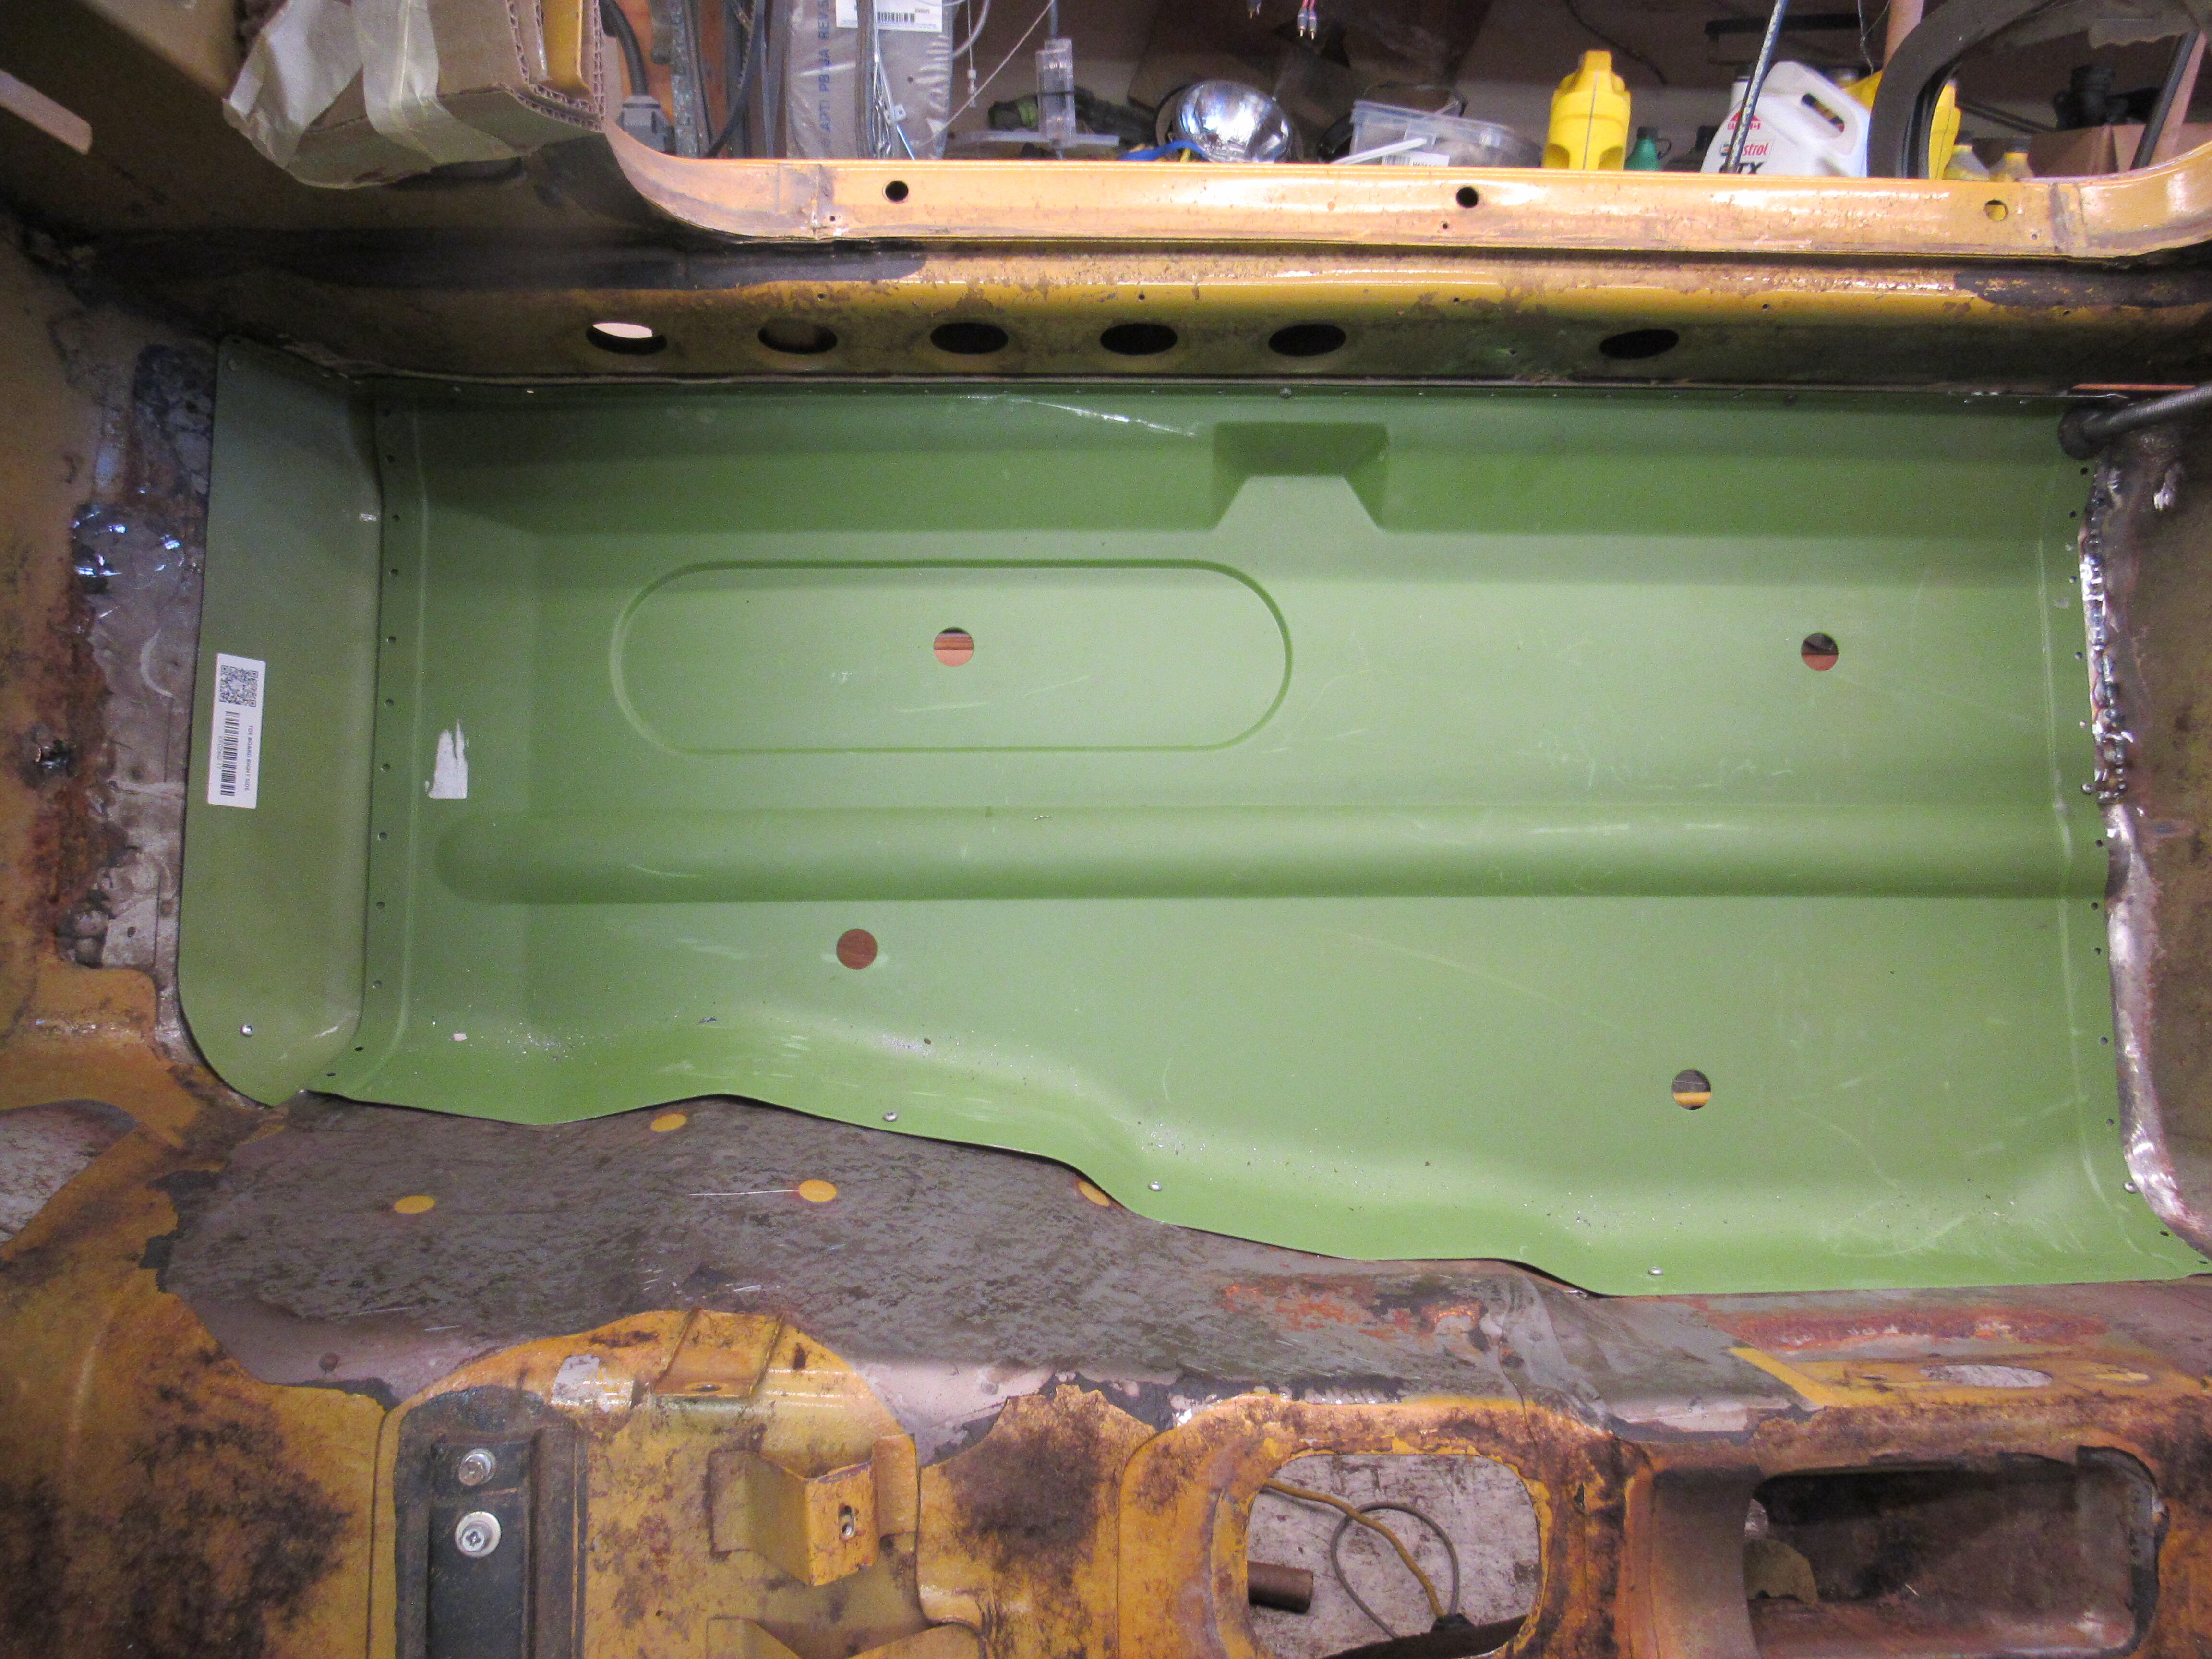
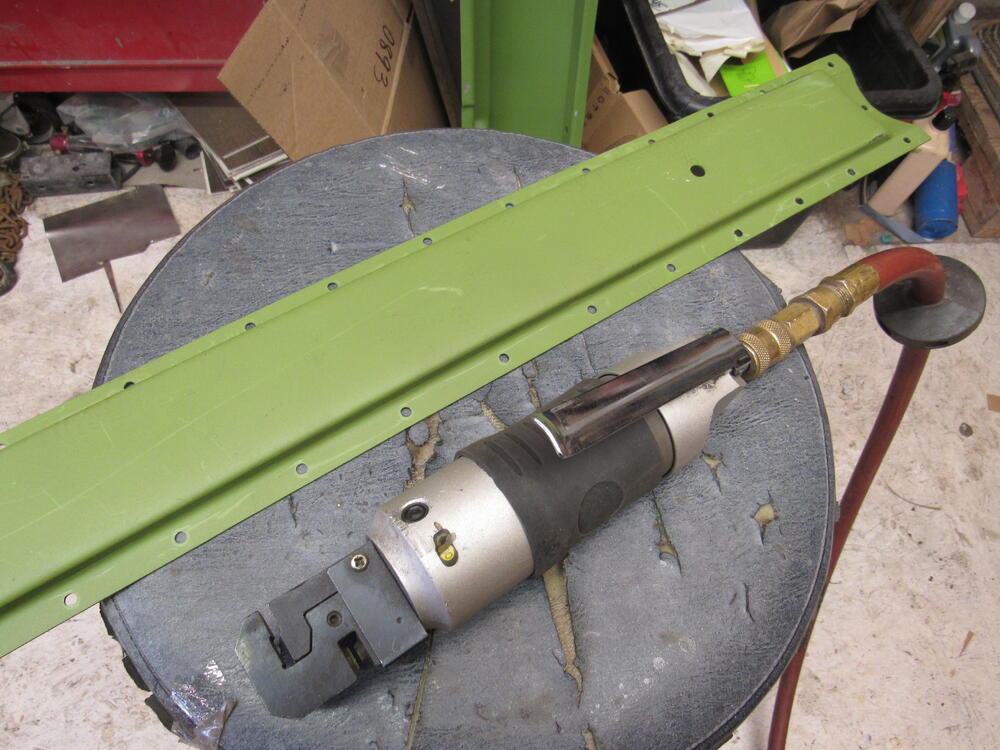
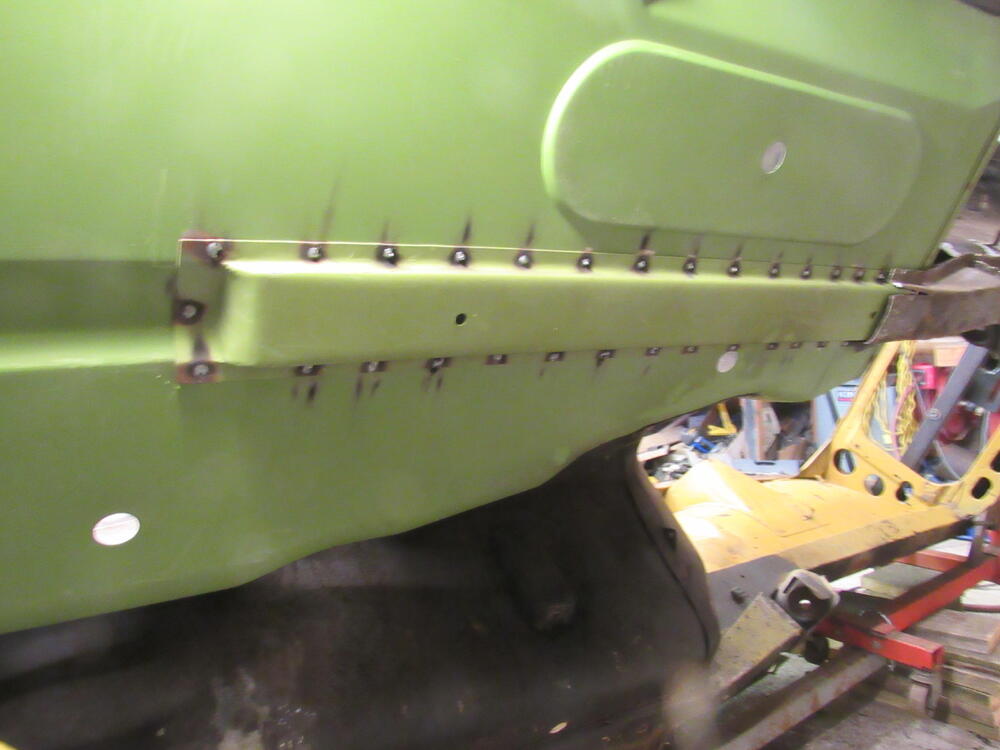
I test fitted the floor pan and toe board yesterday, then cut the transmission side and welded in today. I still have to fill in the welds and grind more but it's good enough for now. This is an air tool I don't get to use very often but sure saves lots of the labour of drilling holes, I paid $40 yrs ago at a pawn shop. A hole punch on one side and a flanger on the other.


-
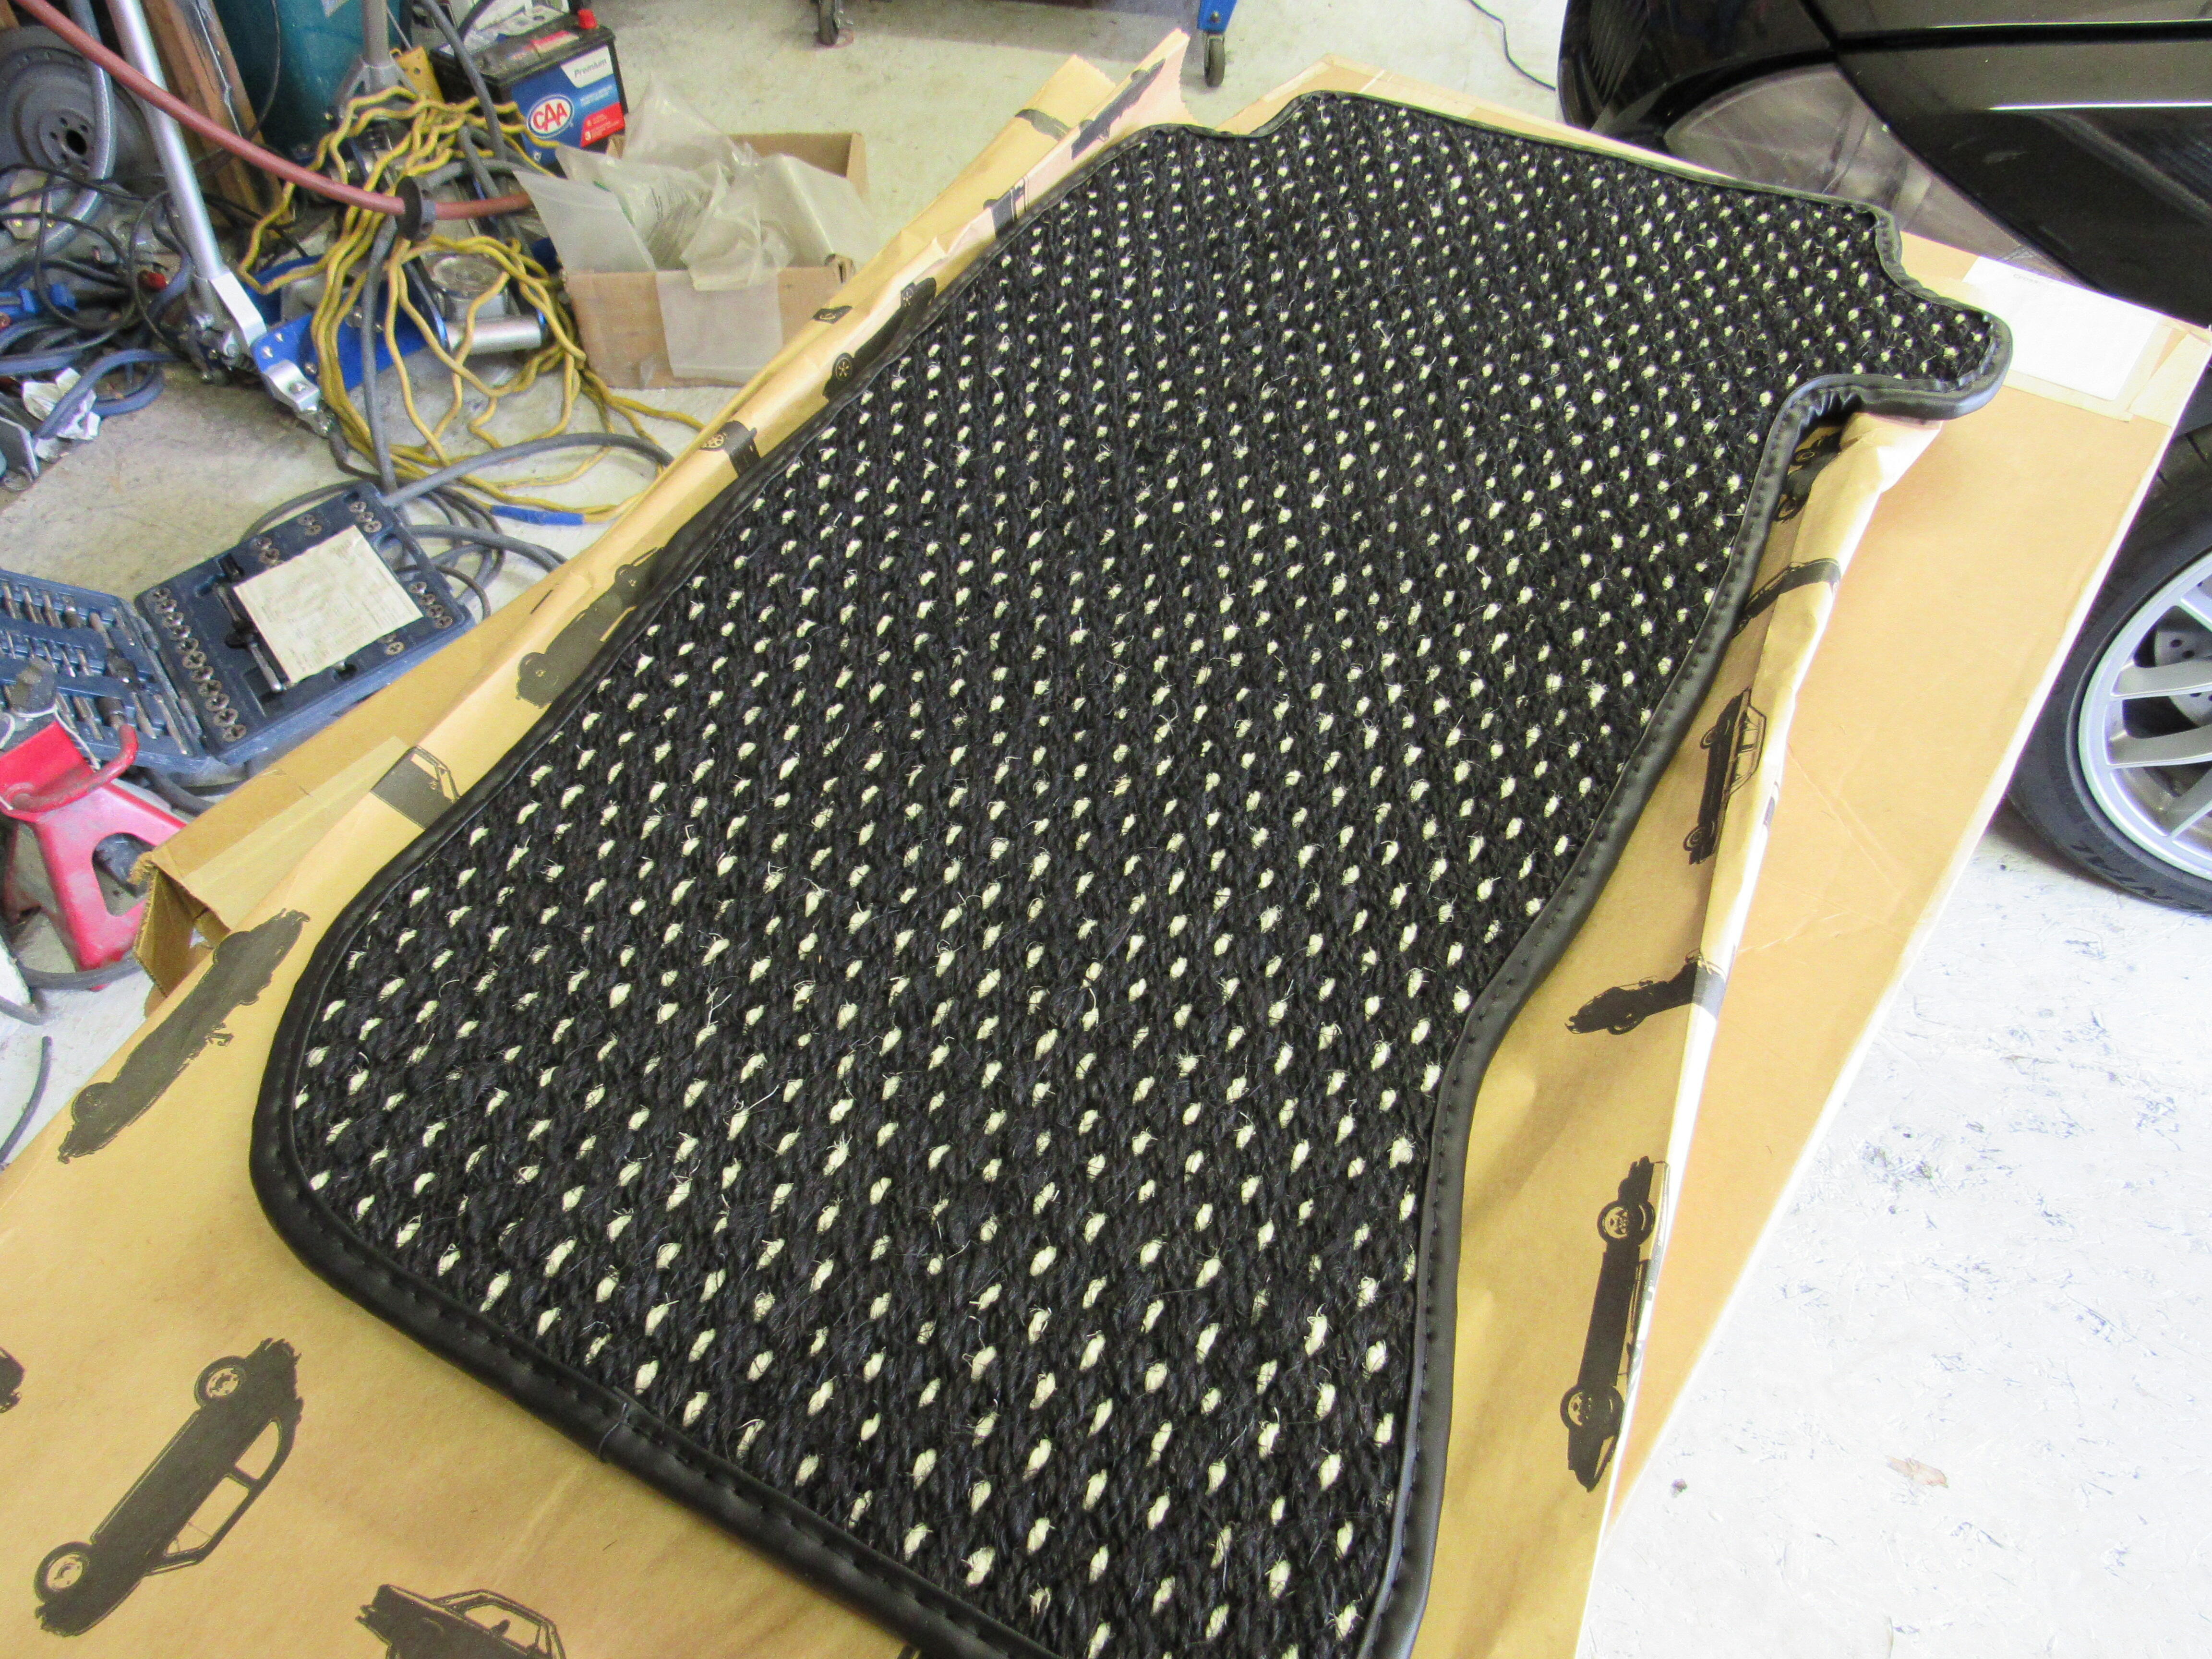
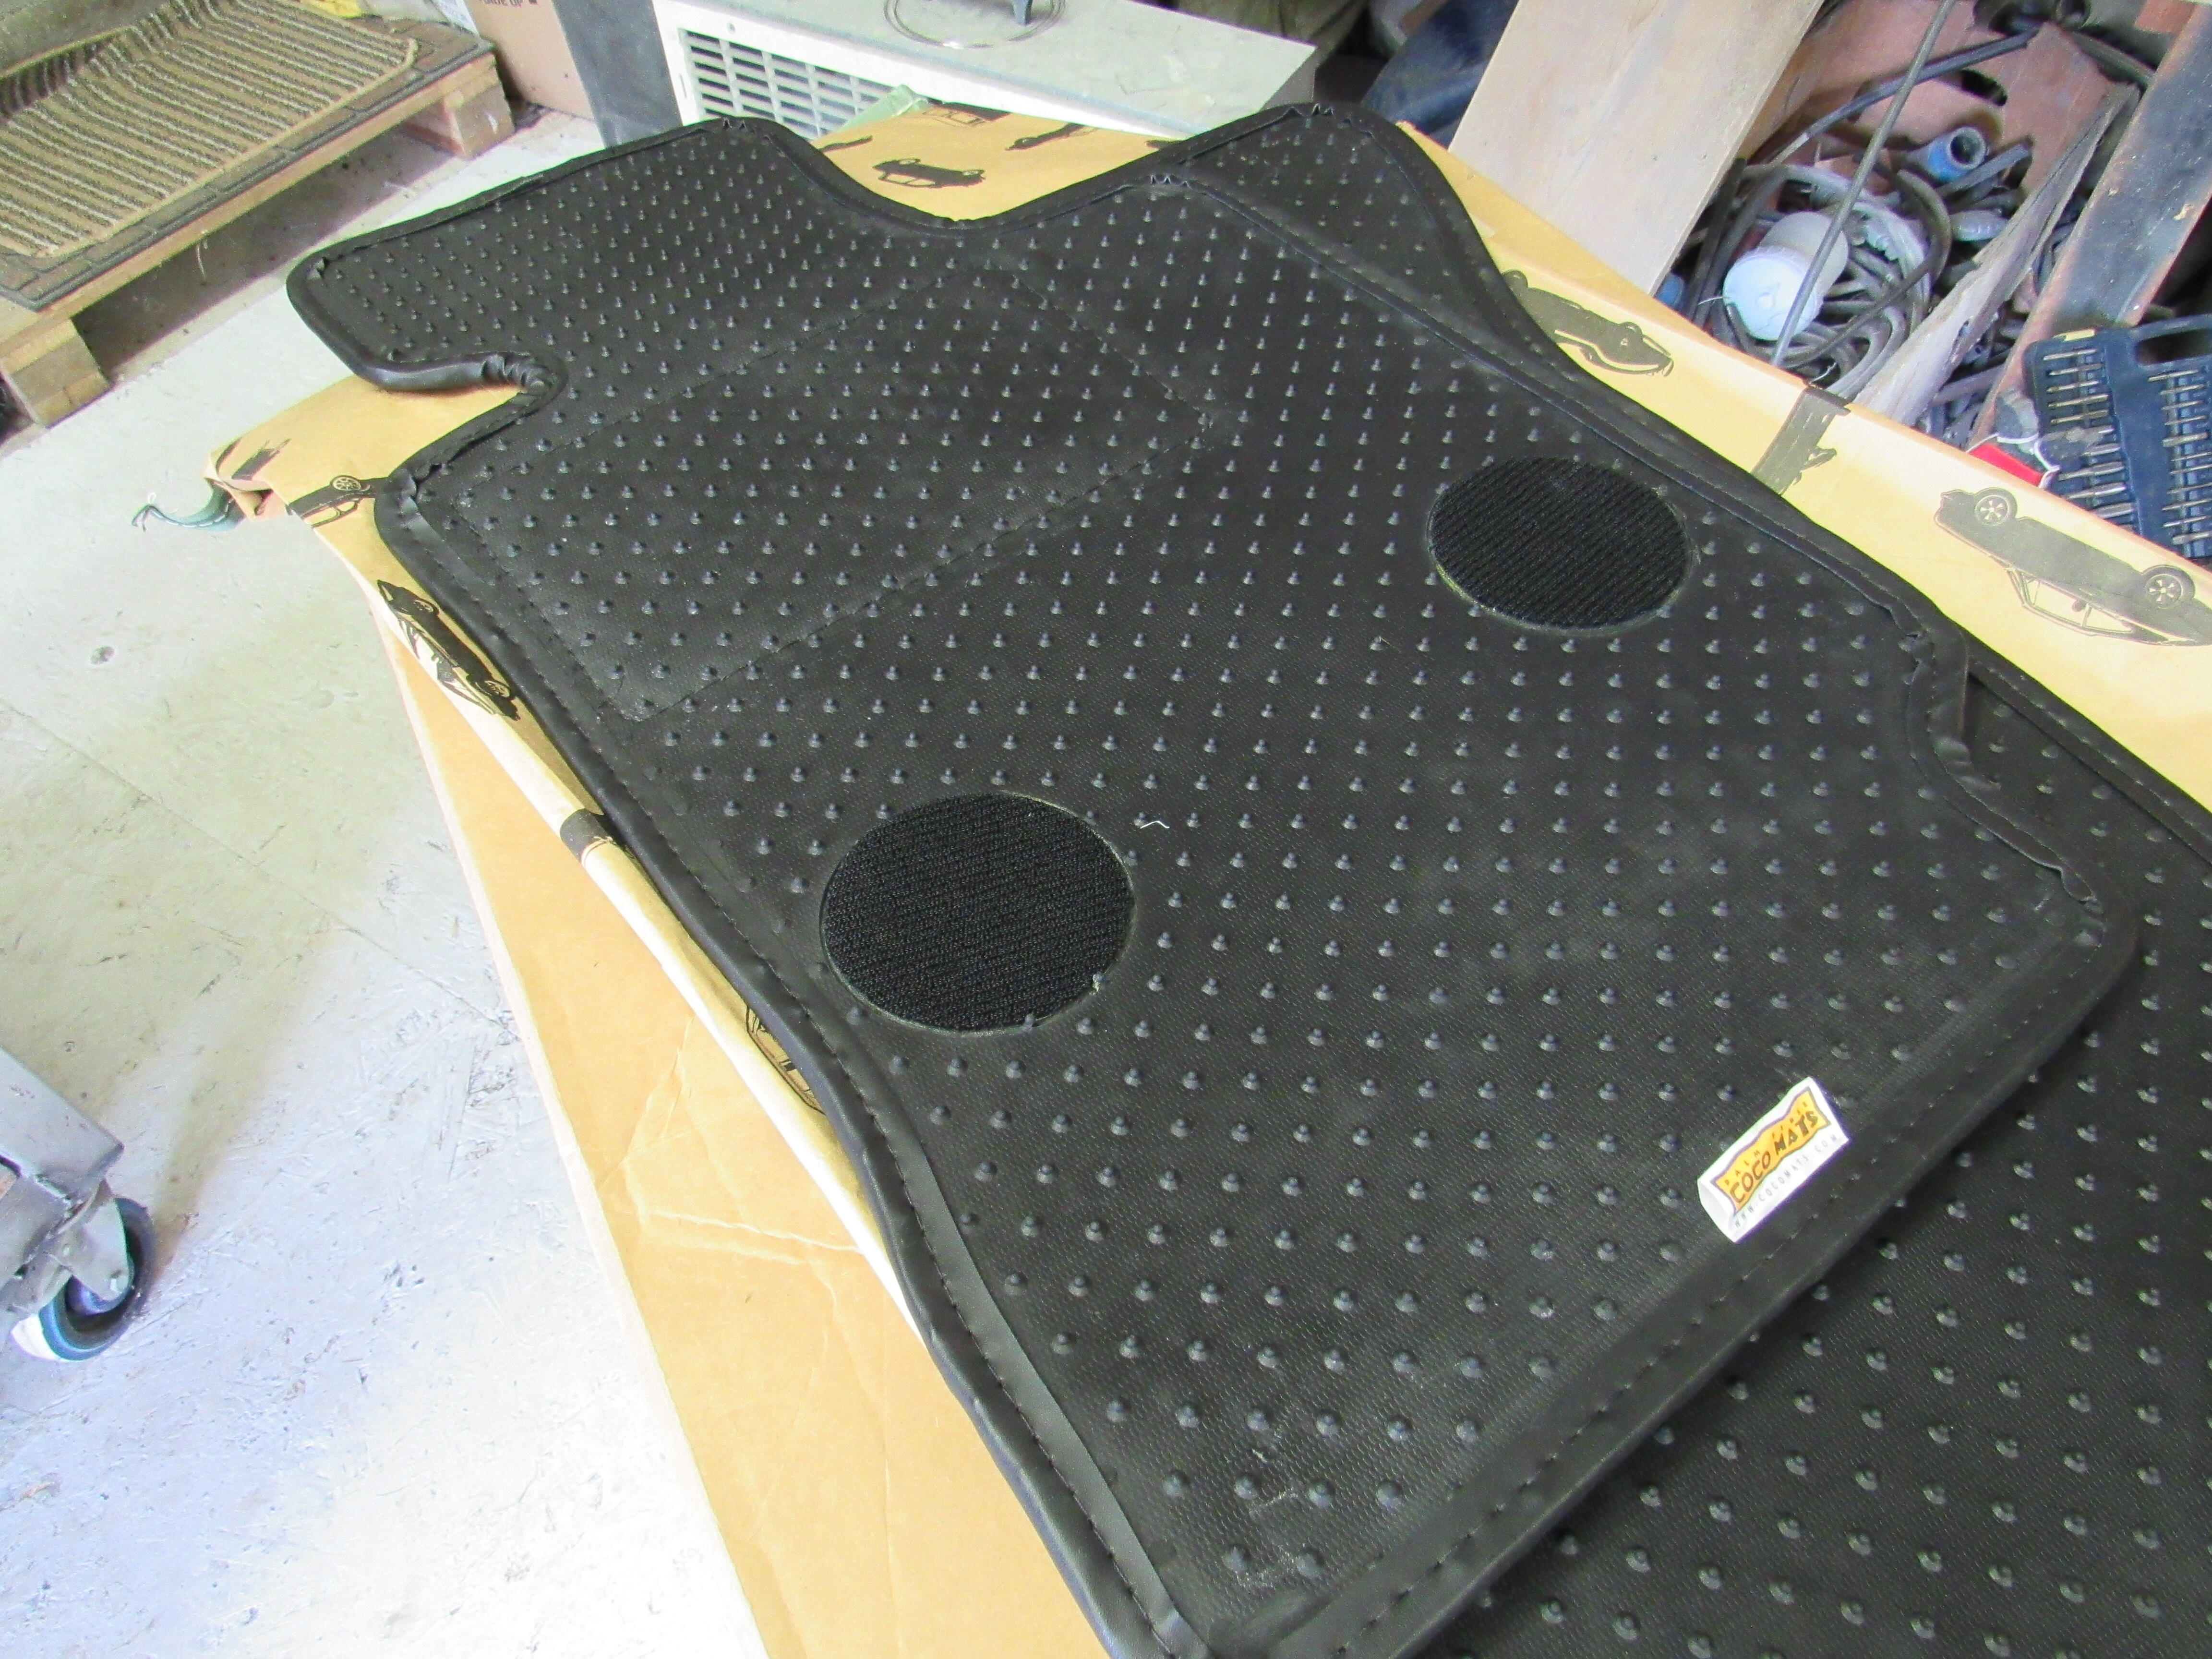
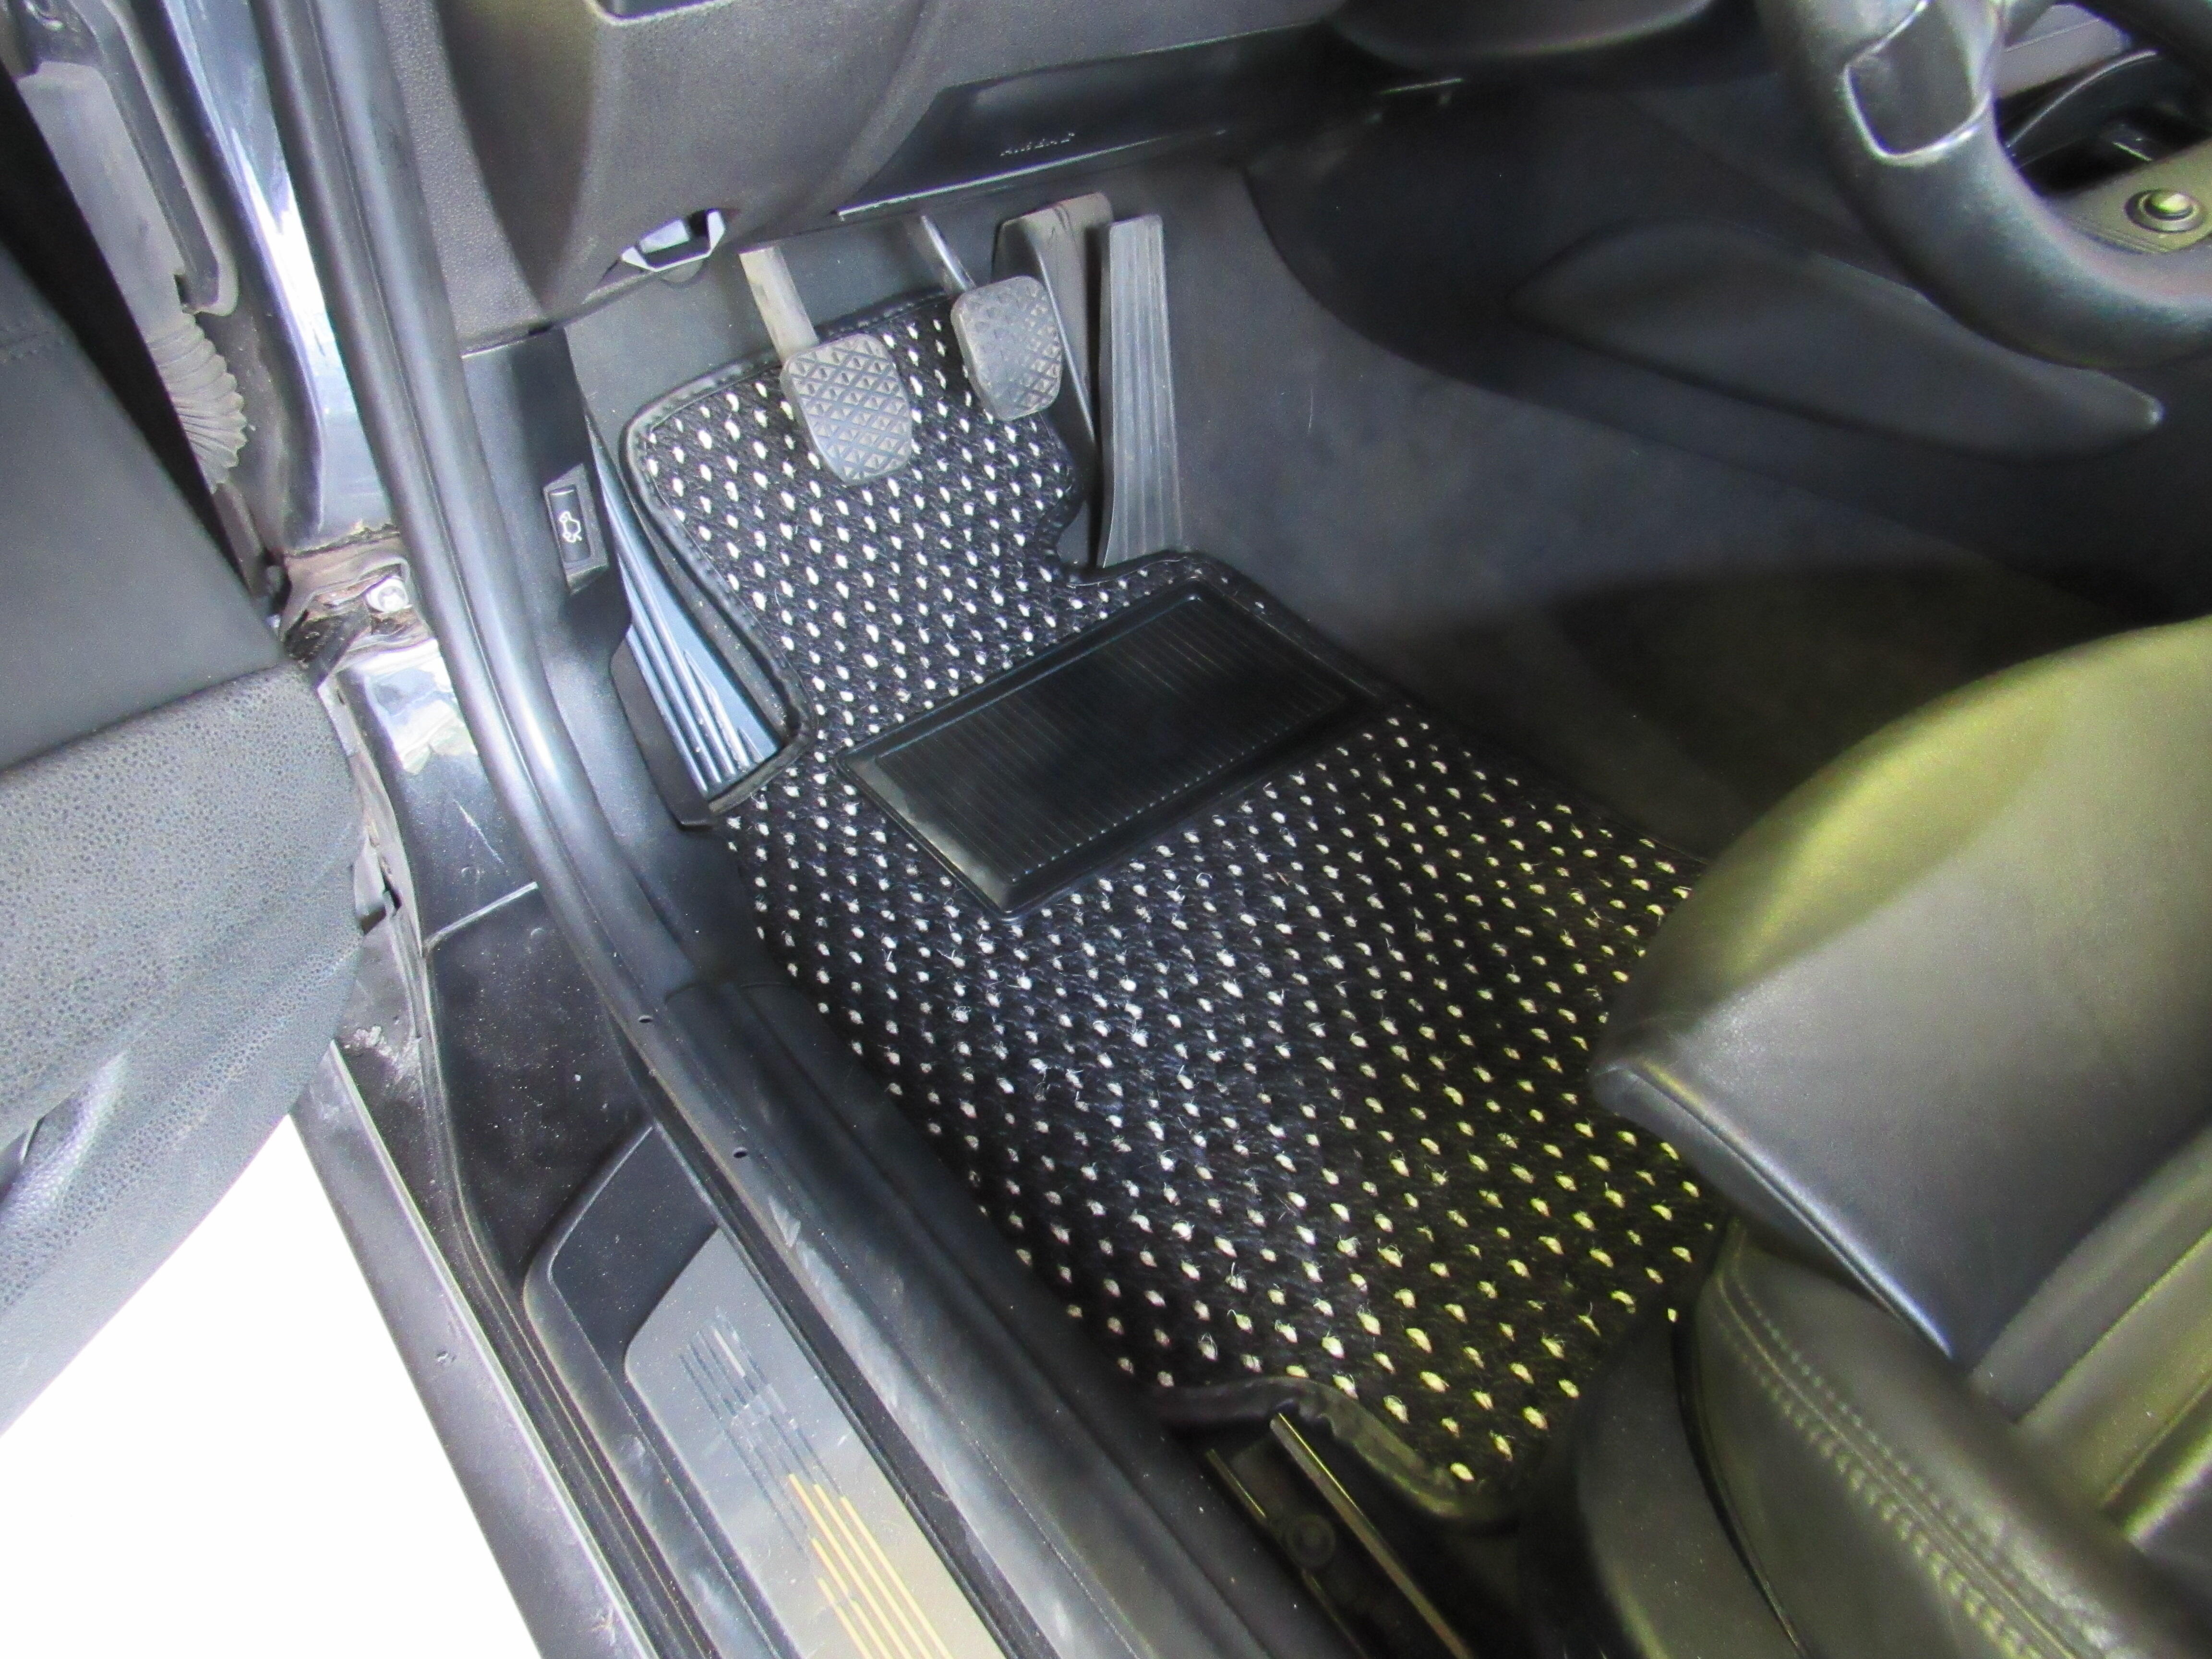
It's a shame, there is market for quality carpets just not a big one. You might want to have a chat with these guys, https://www.cocomats.com/ I bought some floor mats from them for my Z4 M Coupe and the quality is outstanding. I don't know if they would be interested in in doing a carpet set but it would be worth a try. Cocomat is what they work with but I'm sure they could source anything.


-
He must have made those rivets out of mild steel then and the sound in the background was a compressor or something and not the press.
-
Either way, you need a second person. I've always found the rear glass is more difficult to install than the front and having the hatch attached to the car allows you to push the glass and seal down in the corners while the second person, lying on their back is inside working the cord/trimmer line. Preferably a young guy with a good back I think those clips are for the chrome finisher grill, I just double stick taped them down as the pins had broken off. The black plastic drain ducts had to be glued with 2 part epoxy cement around the edges and then I inserted a spacer/wedge between the drain duct and the inside panel of the hatch to keep them in place, easier to do while the hatch is off. Also oversized screws rather than the M4's. My drain ducts were bowed a bit from the heat of the sun so had to flatten them on a belt sander to get good contact.