grannyknot
Free Member
-
Joined
-
Last visited
Everything posted by grannyknot
-
 I hear you. What is amazing is that the rear brakes actually work like that, the parking brake doesn't but the rest does. I haven't got to the electrical system yet🥴 I can't wait.
 -
This is one of those cars that has been through many different jobbers, rust guy, body/paint guy, mechanical guy over the course of 5-10 yrs and in each case the owner paid for and thought good work was being done. That's the problem with a long term project like this, there was no project manager to oversee all jobs and keep track of quality control and continuity. The owner is a busy guy, All I'm doing is going through every system to make sure at a minimum, it is safe and reliable.
-
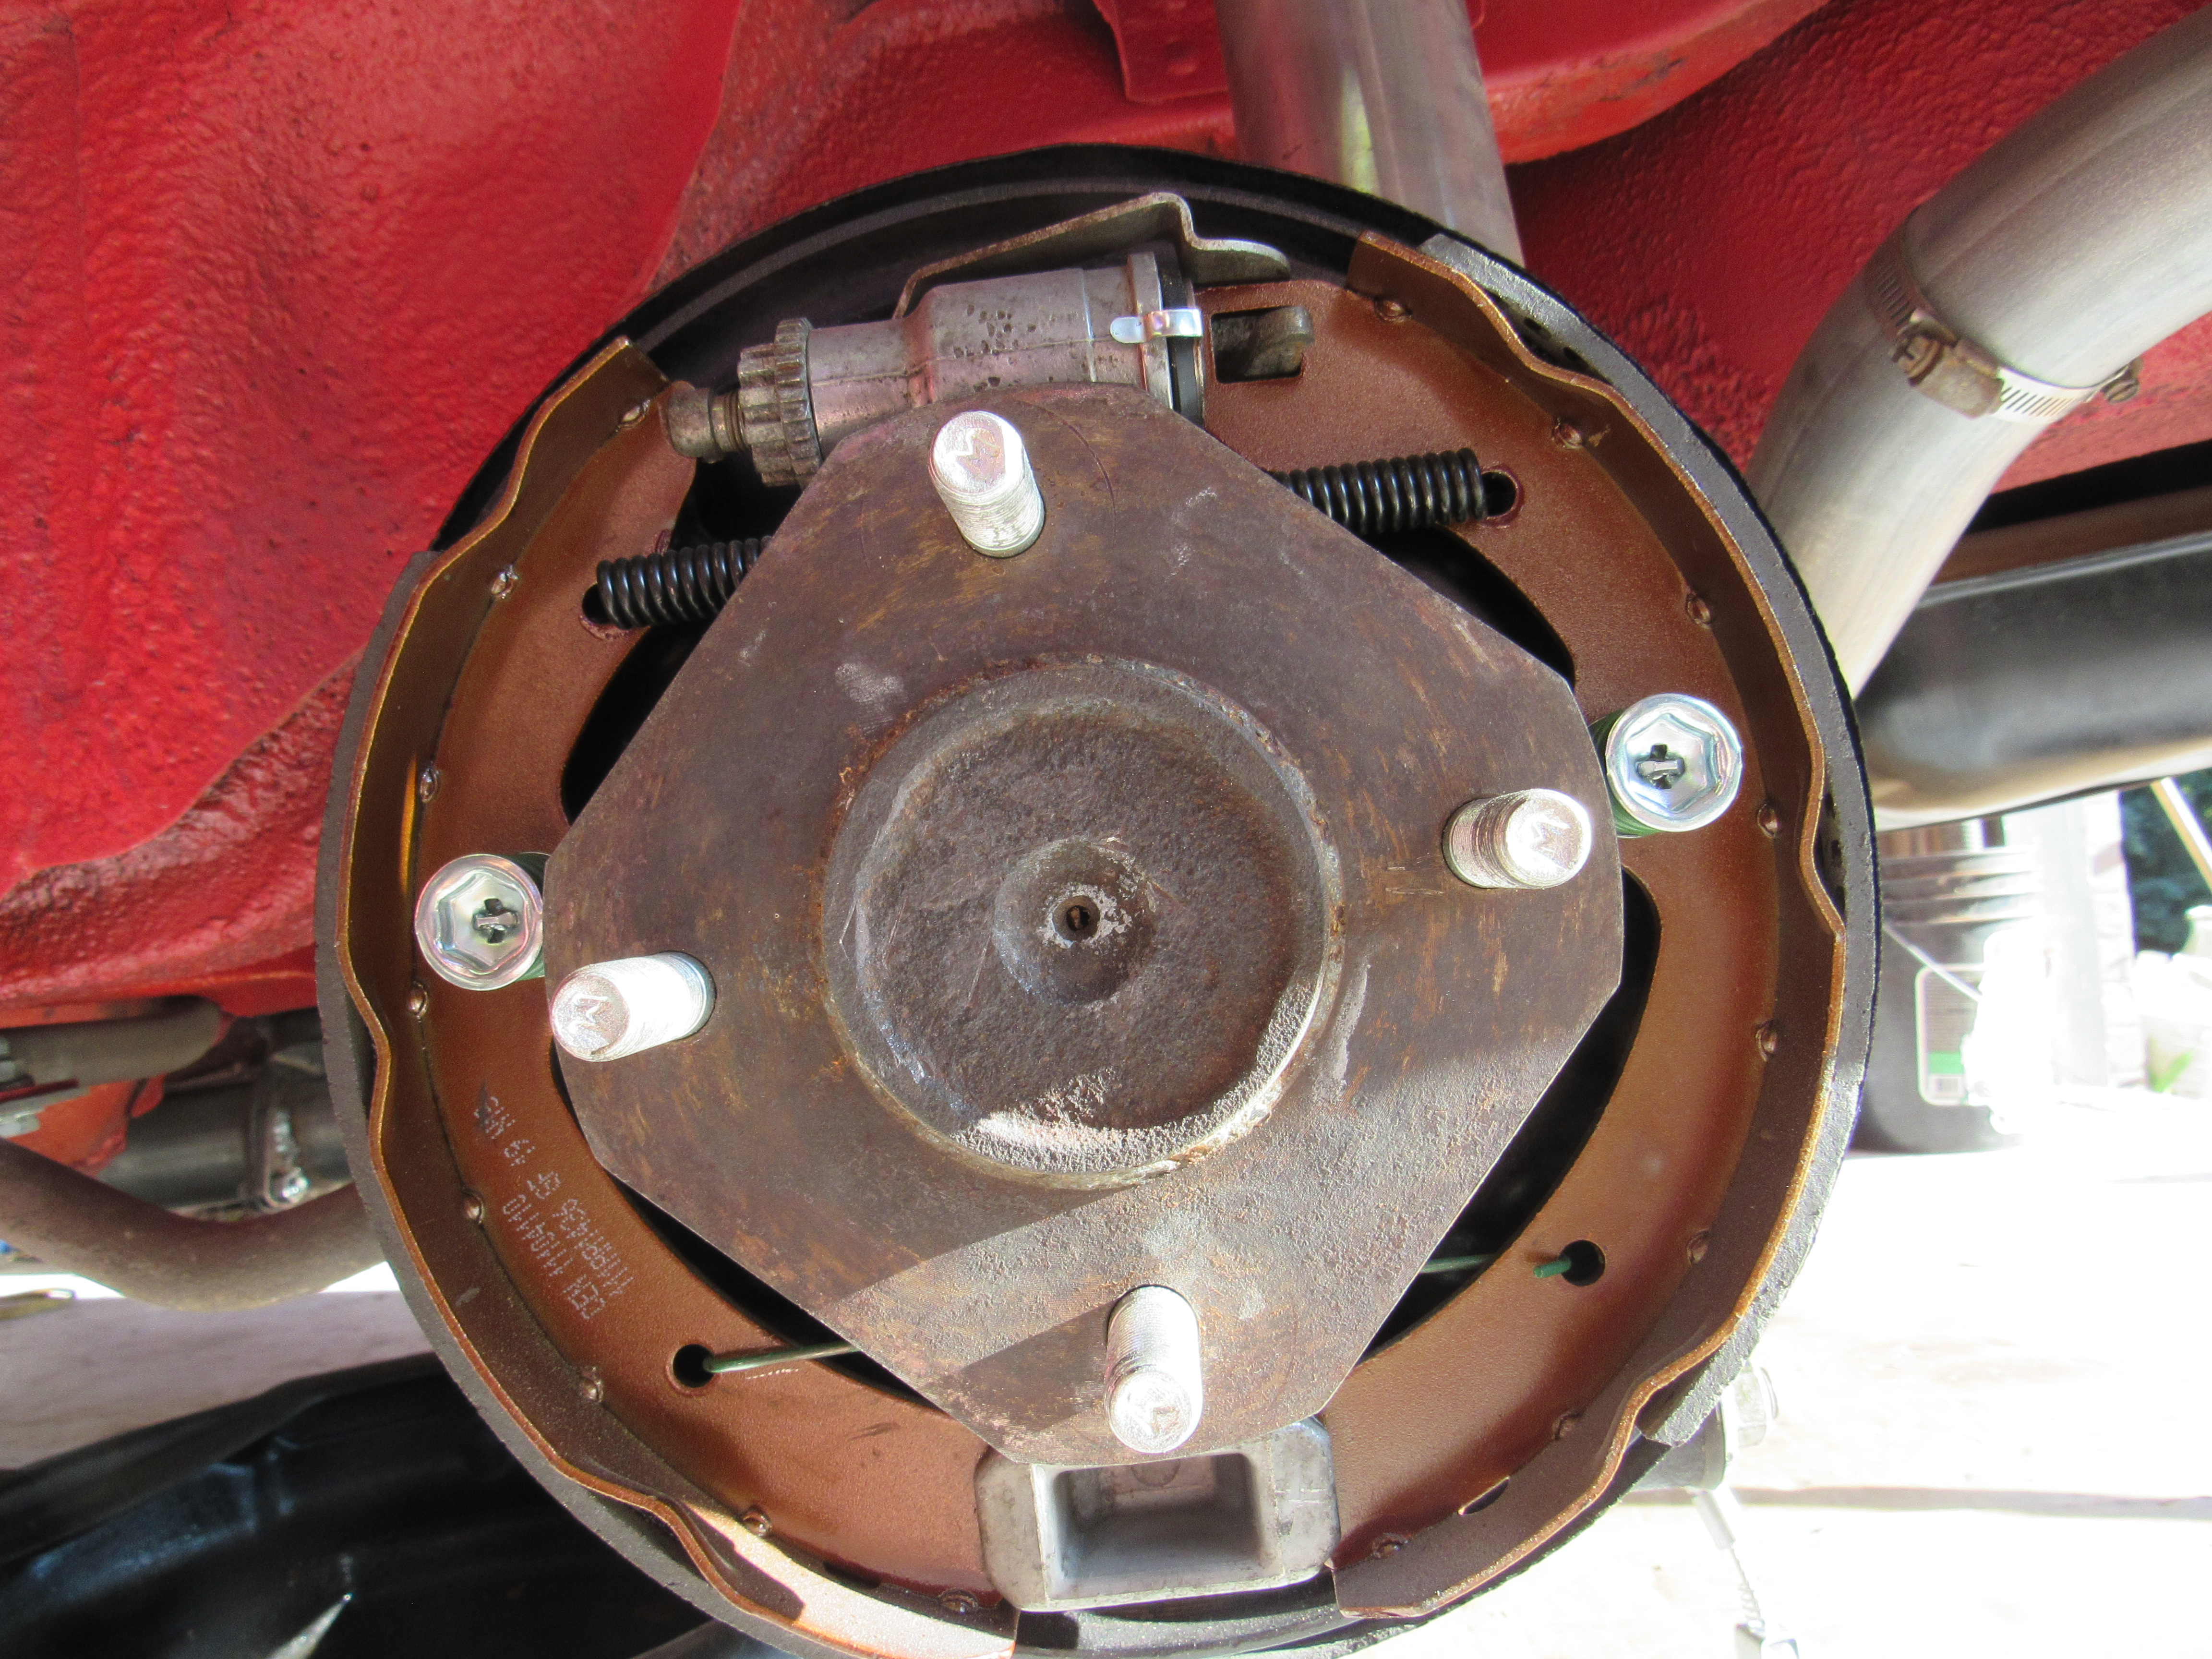
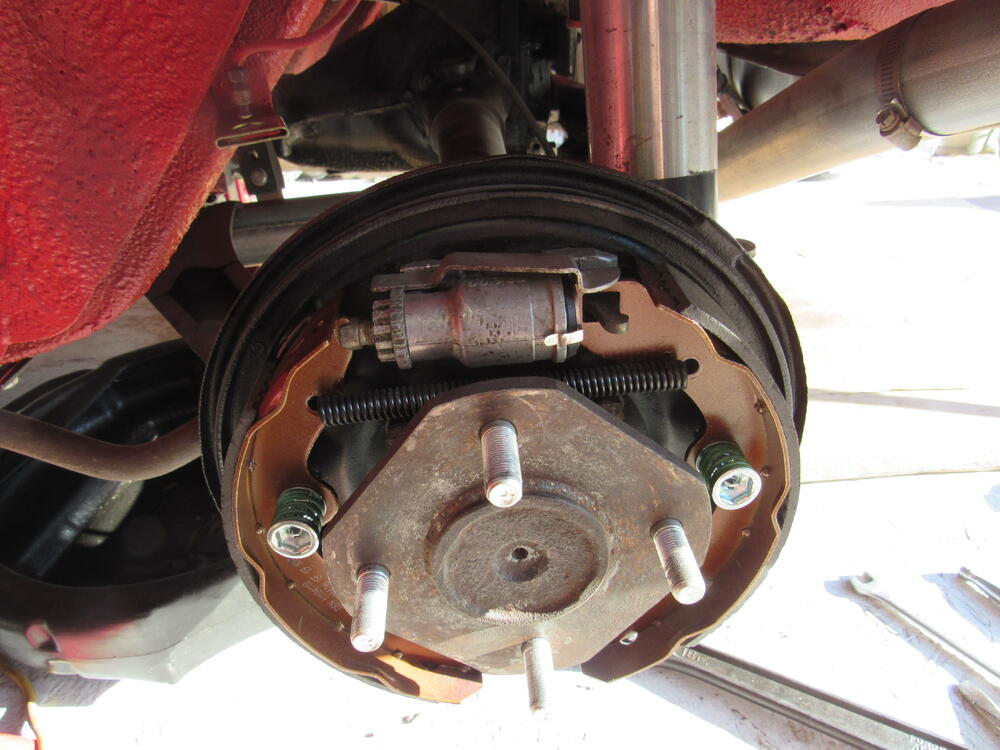
These brake backing plates are the 3rd major item I have found backward on this car, the other 2 being the seat mounts welded on opposite of where they should be and 2 of the pistons were facing the wrong direction. If I find a 4th one, I'll stop counting.

-
One of the jobs to be done on this car is get the parking hand brake working, I got under the car but something didn't look right, took off the drum and it all became clear. Not only was everything upside down, everything was switched side to side. In order to fix it both struts had to come out, press out the axle hub (new nuts required) and switch the backing plates.

-
Yeah, BMW uses sheets of that stuff and i squirrel away when I find it, just thought you might have found a source of virgin heat shield.
-
I was going to ask the same question.
-
If I open up the inside walls then the mount looses it's strength, I suppose I could cut open the inside of those mounts then weld a plate on the outside to close it up, The existing holes had to be widened.
-
I like how you have added that 4" extension that pushes the muffler up into the corner of the rear quarter and deck, it never looks good having the flat oval mufflers visible. Pretty tight clearance, you might start smelling the melting undercoat.
-
I bought one of those kits from MSA years ago and installed them, I used the included metal C for the measurement, 2 yrs later the white nylon bushings were split and cracked. I don't know if I got a set from a bad batch or what but I just went back to rubber on both sides.
-
I'm installing a pair of Corbeau seats myself at the moment so I'll keep the thin headed mounting bolts in mind but here is the kicker, the guy that replaced the floor pans welded the rear seat mounts on pointing in the wrong direction. I need raccoon hands to remove the original seat and bolt in the new.


-
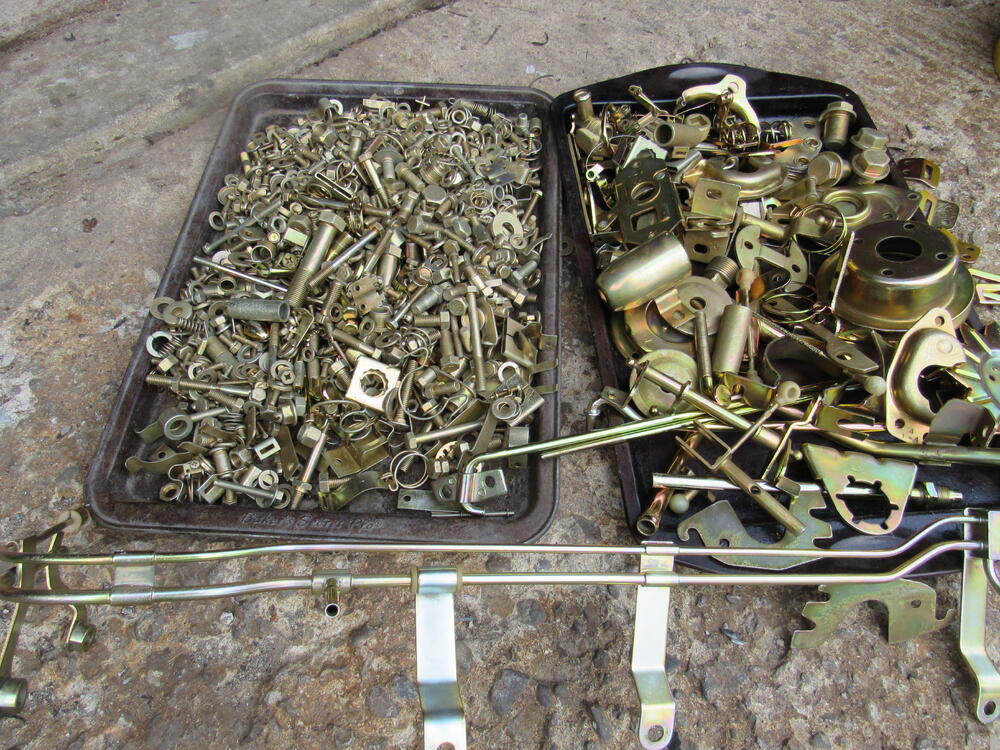
As Darren McGavin says "Mind Power"😄 Everything that isn't a fastener goes on one cookie pan, then after sorting, the second sheet only has threaded pieces and then the sandwich baggies come out. All the lock washers in one baggie, flat washers in another, 3/4" M6 in another, etc. One baggie will be oddball and specialty fasteners that don't fit in other categories, it takes a couple of hours to do the sort but saves lots of frustrations later on. Also sometimes I take pics of the part just removed with all the fasteners arranged next to it. After doing so many of these cars a lot of pieces on the cookie sheets look so familiar I just pick them out and put them where they belong and best move I ever made was buying that rusted out green 240z years ago that I parted. Every fastener on that car went to the platers and is now part of the "slush fund" so if I'm missing something or it's too badly damaged I can draw from that box.
-
It's always a good day when the plating comes back, makes all those hrs at the wire wheel worth it.


-
Yeah, I checked, they were good, the work the machinist did is excellent, very consistent, it's the guy who reassembled it🤡
-
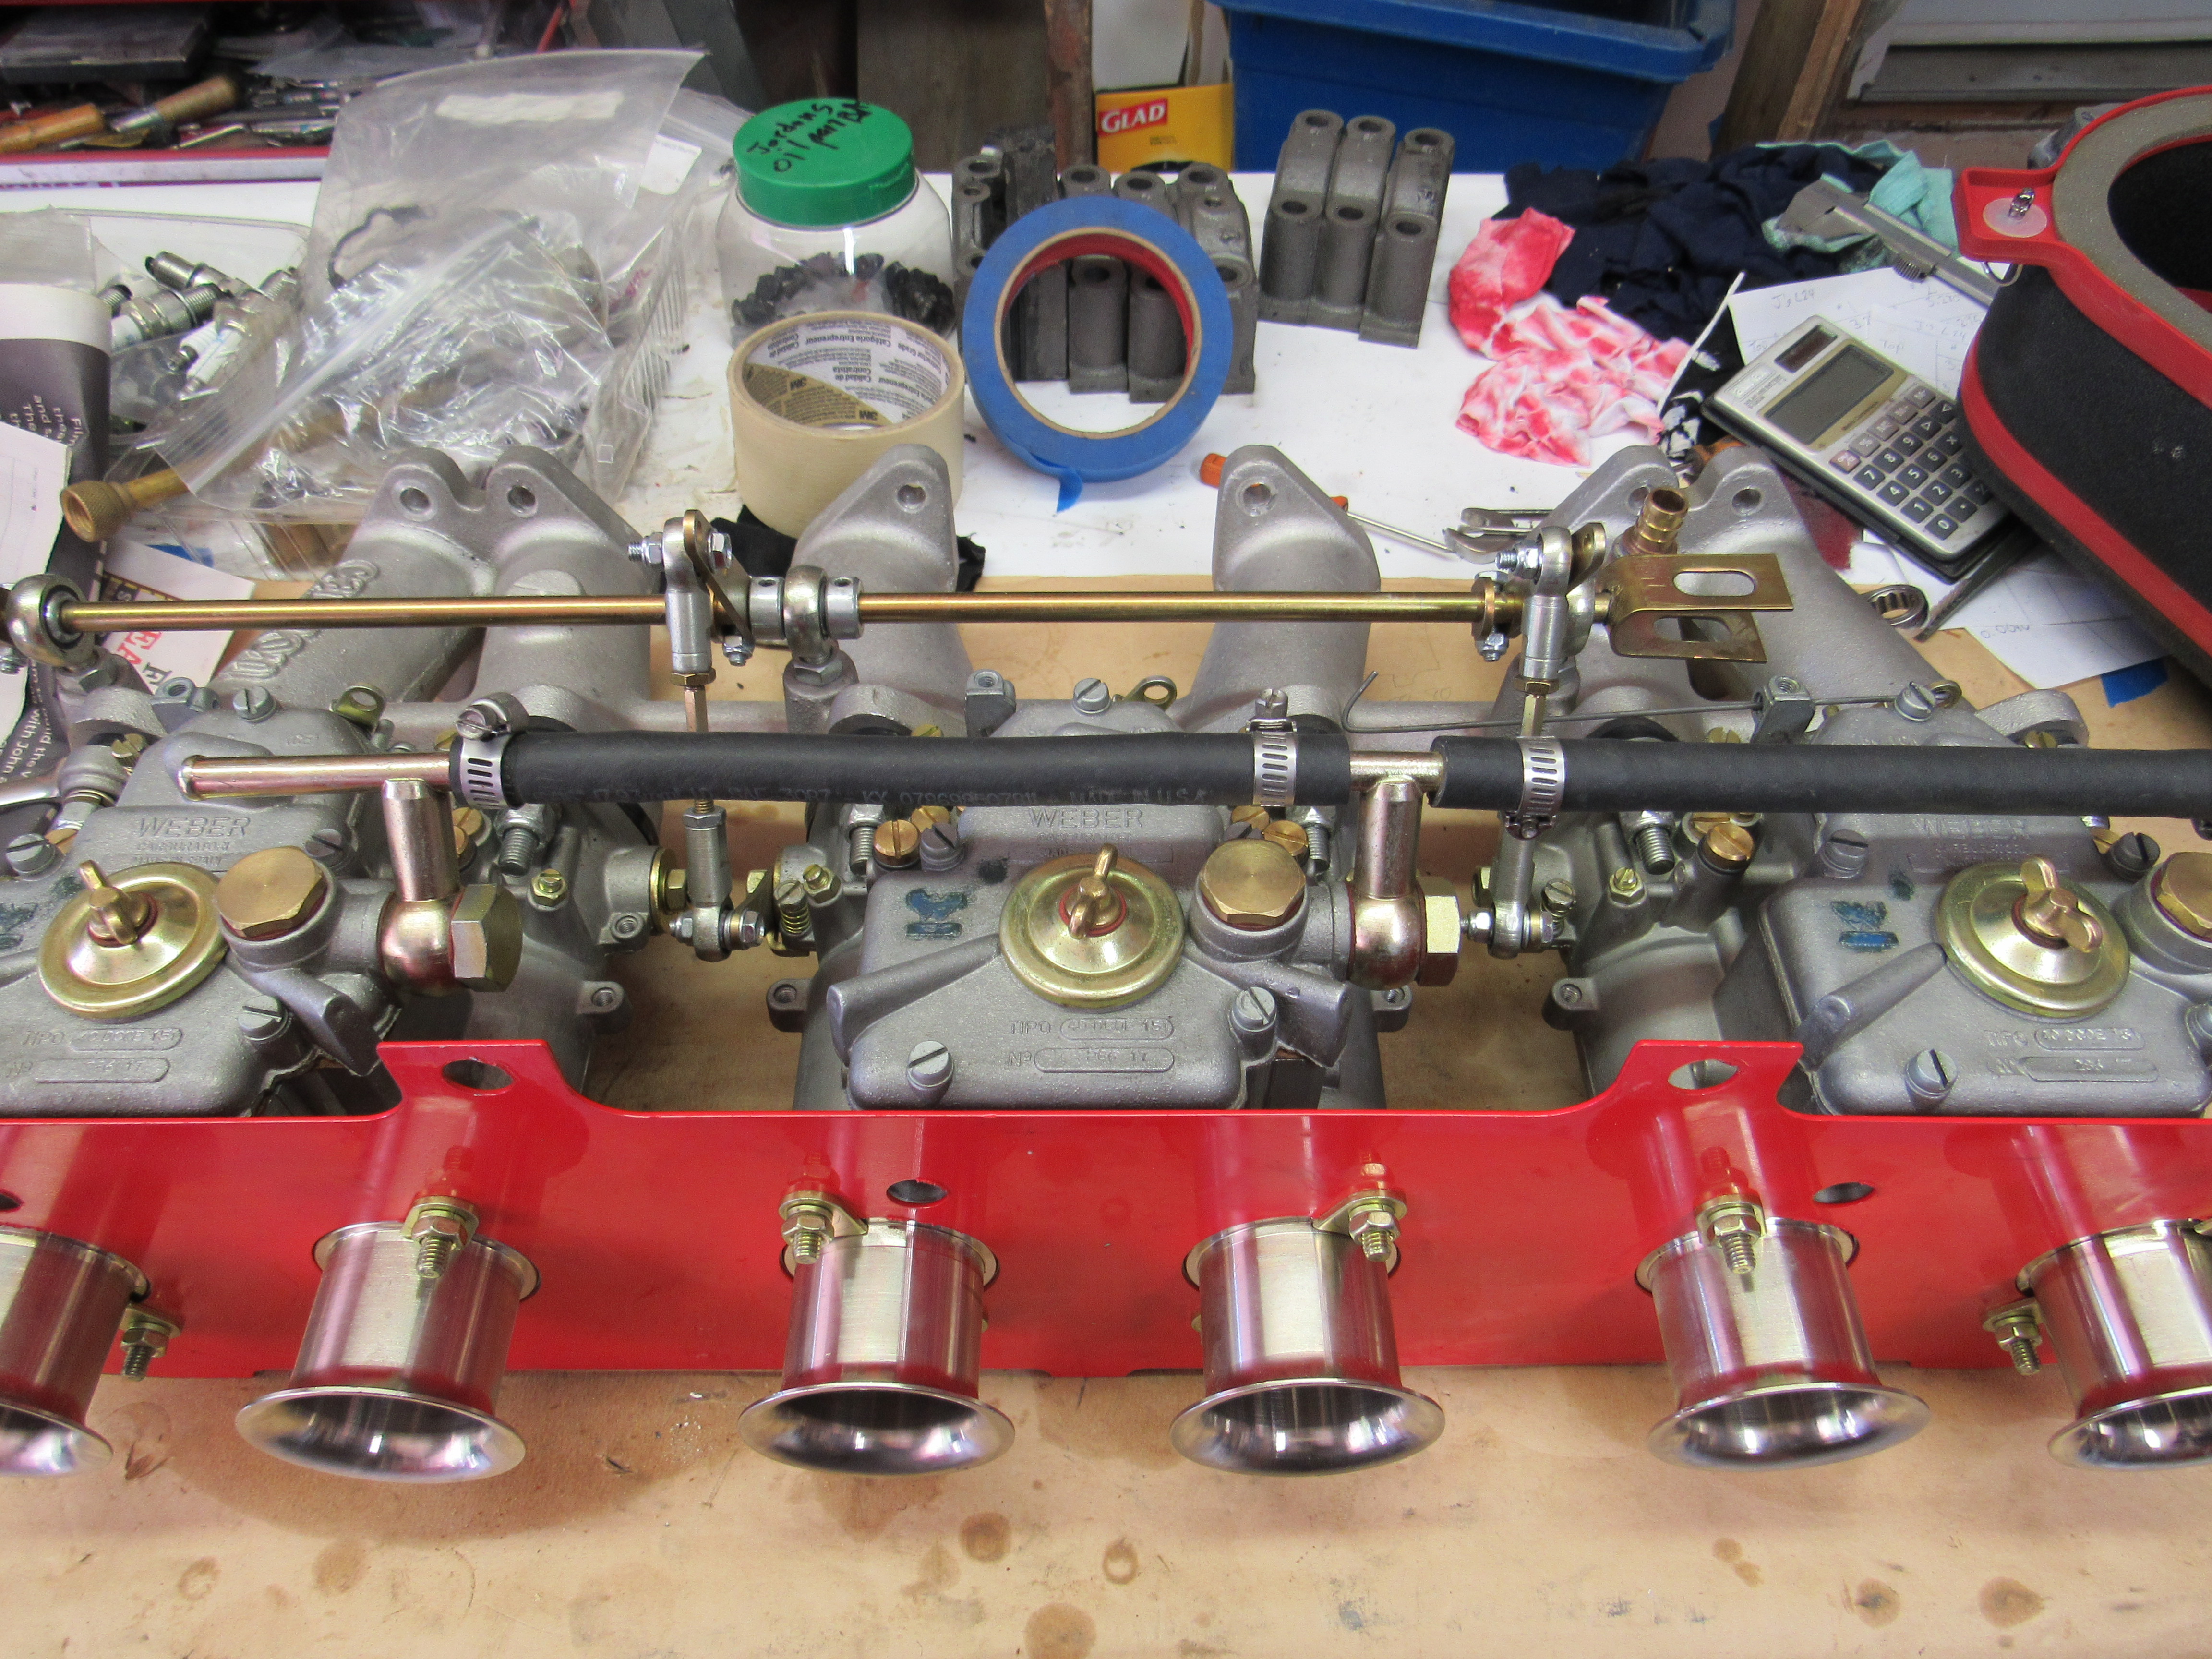
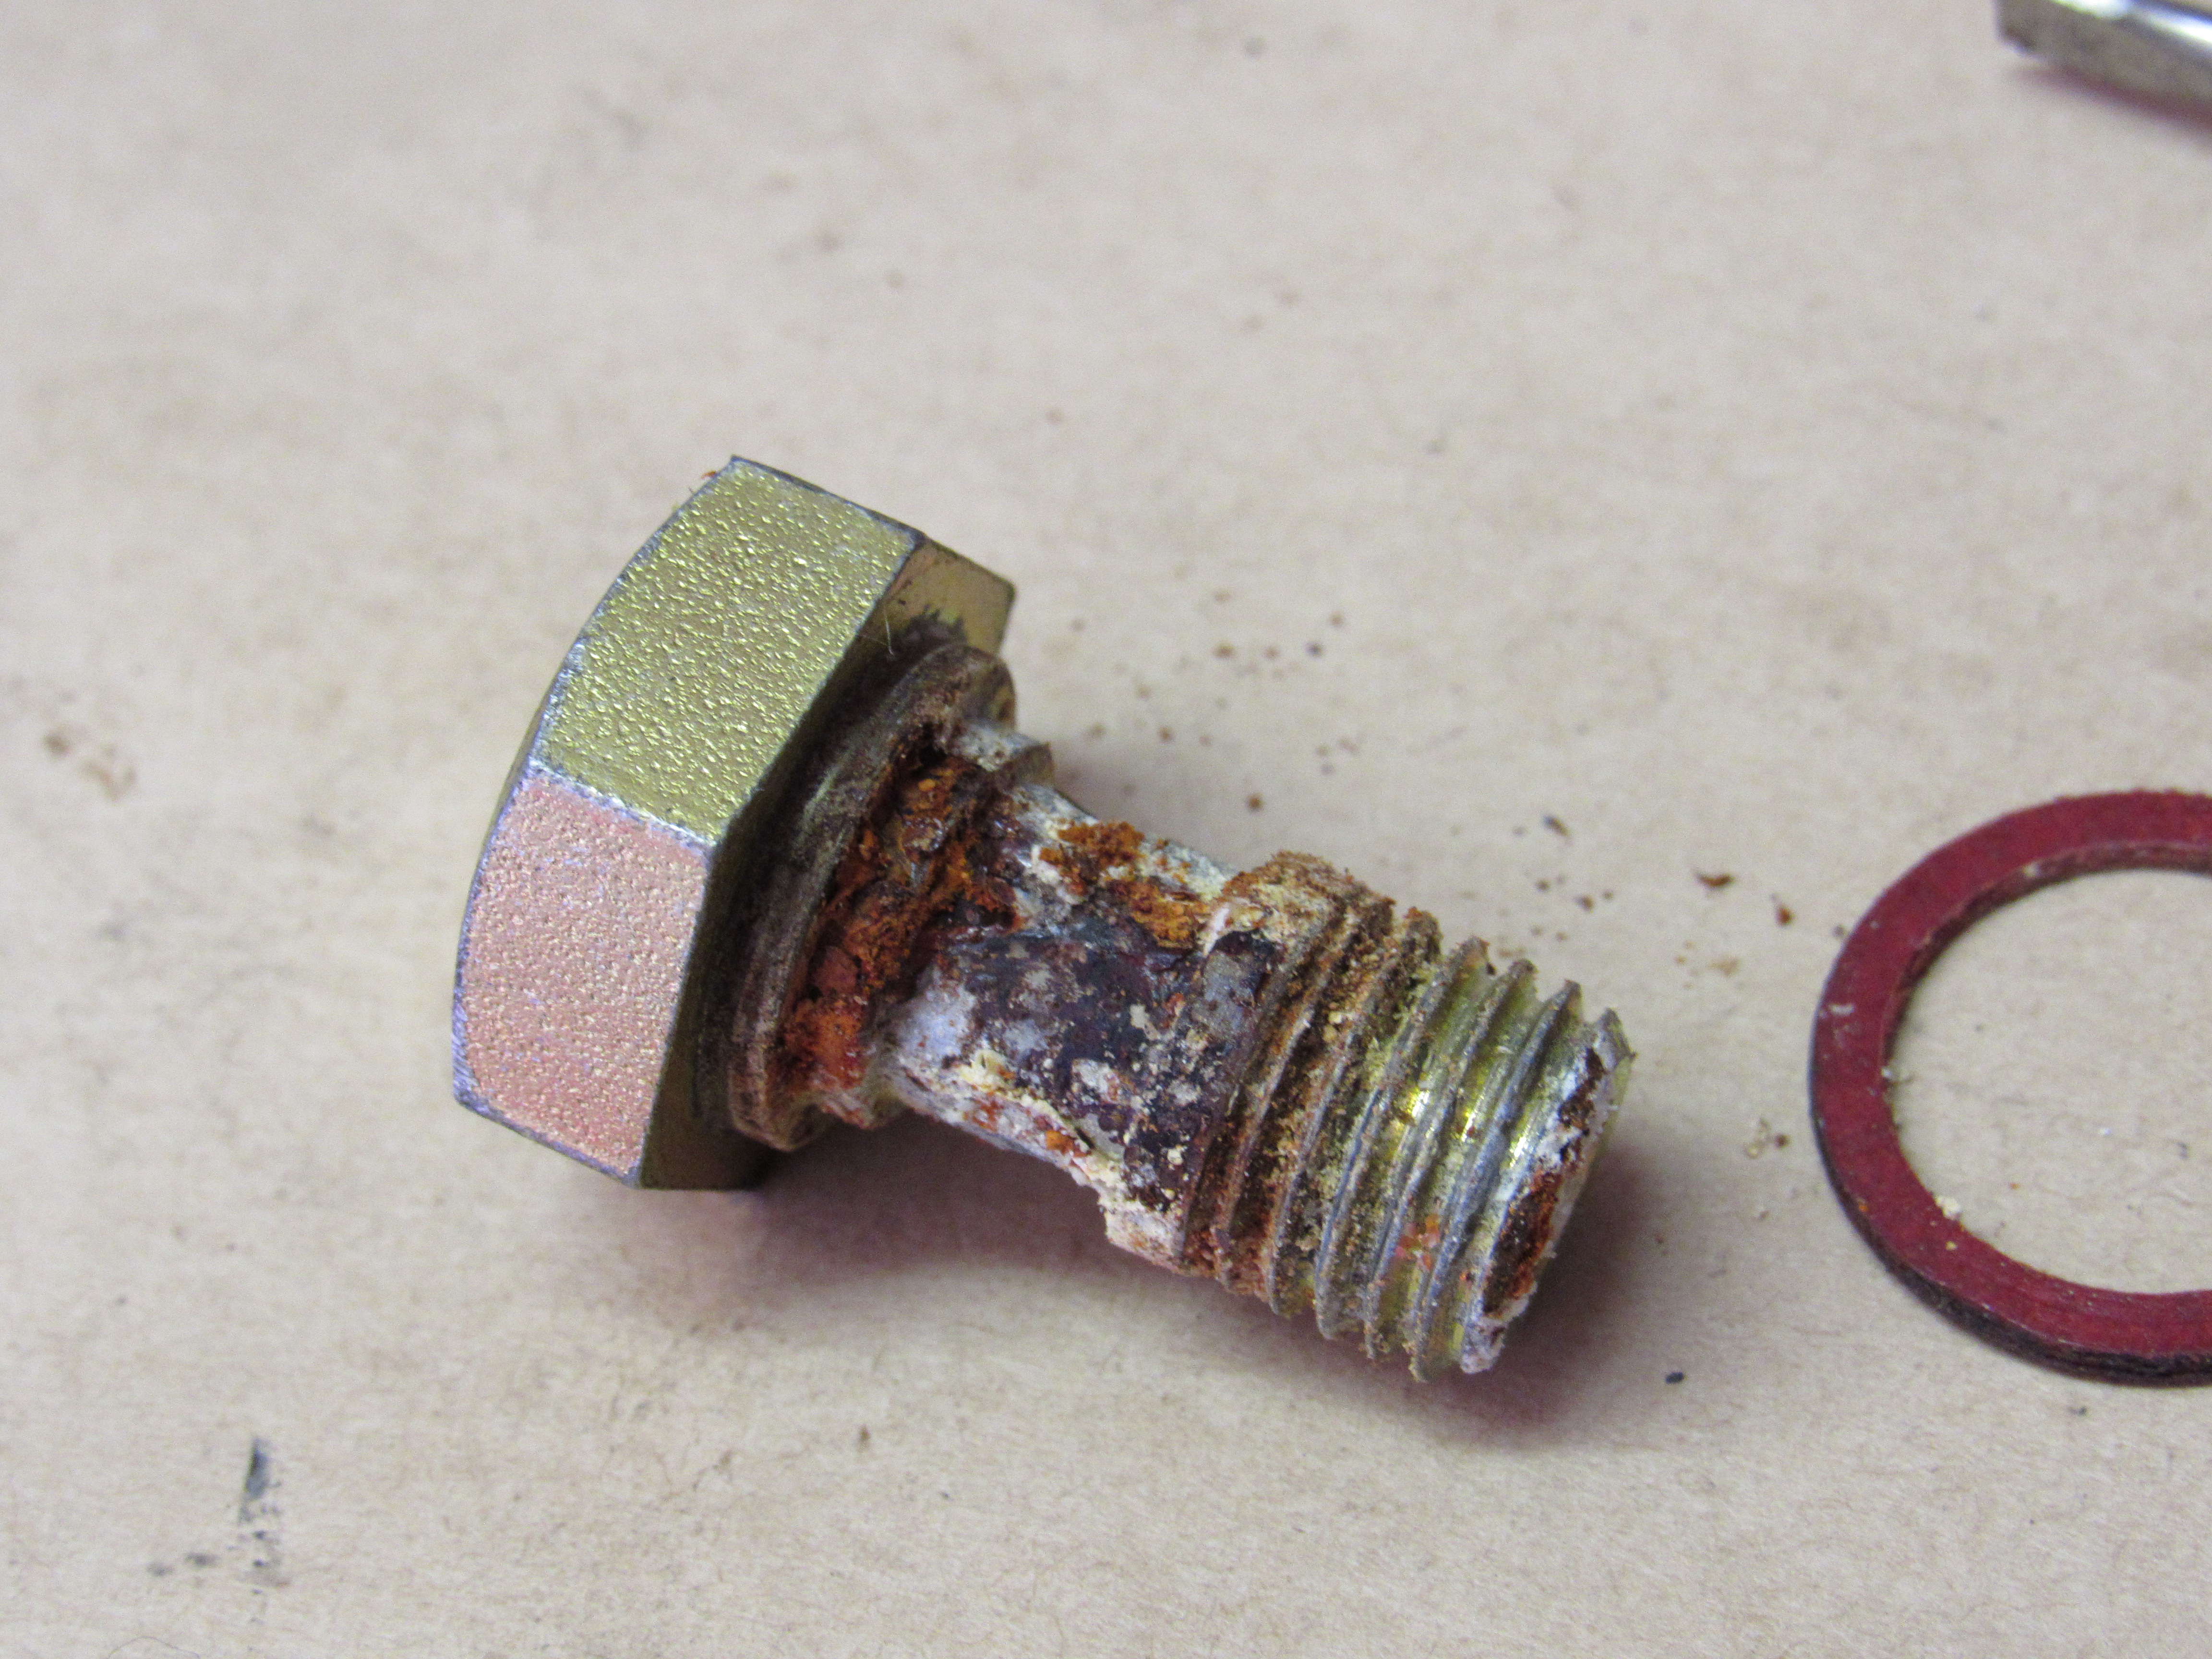
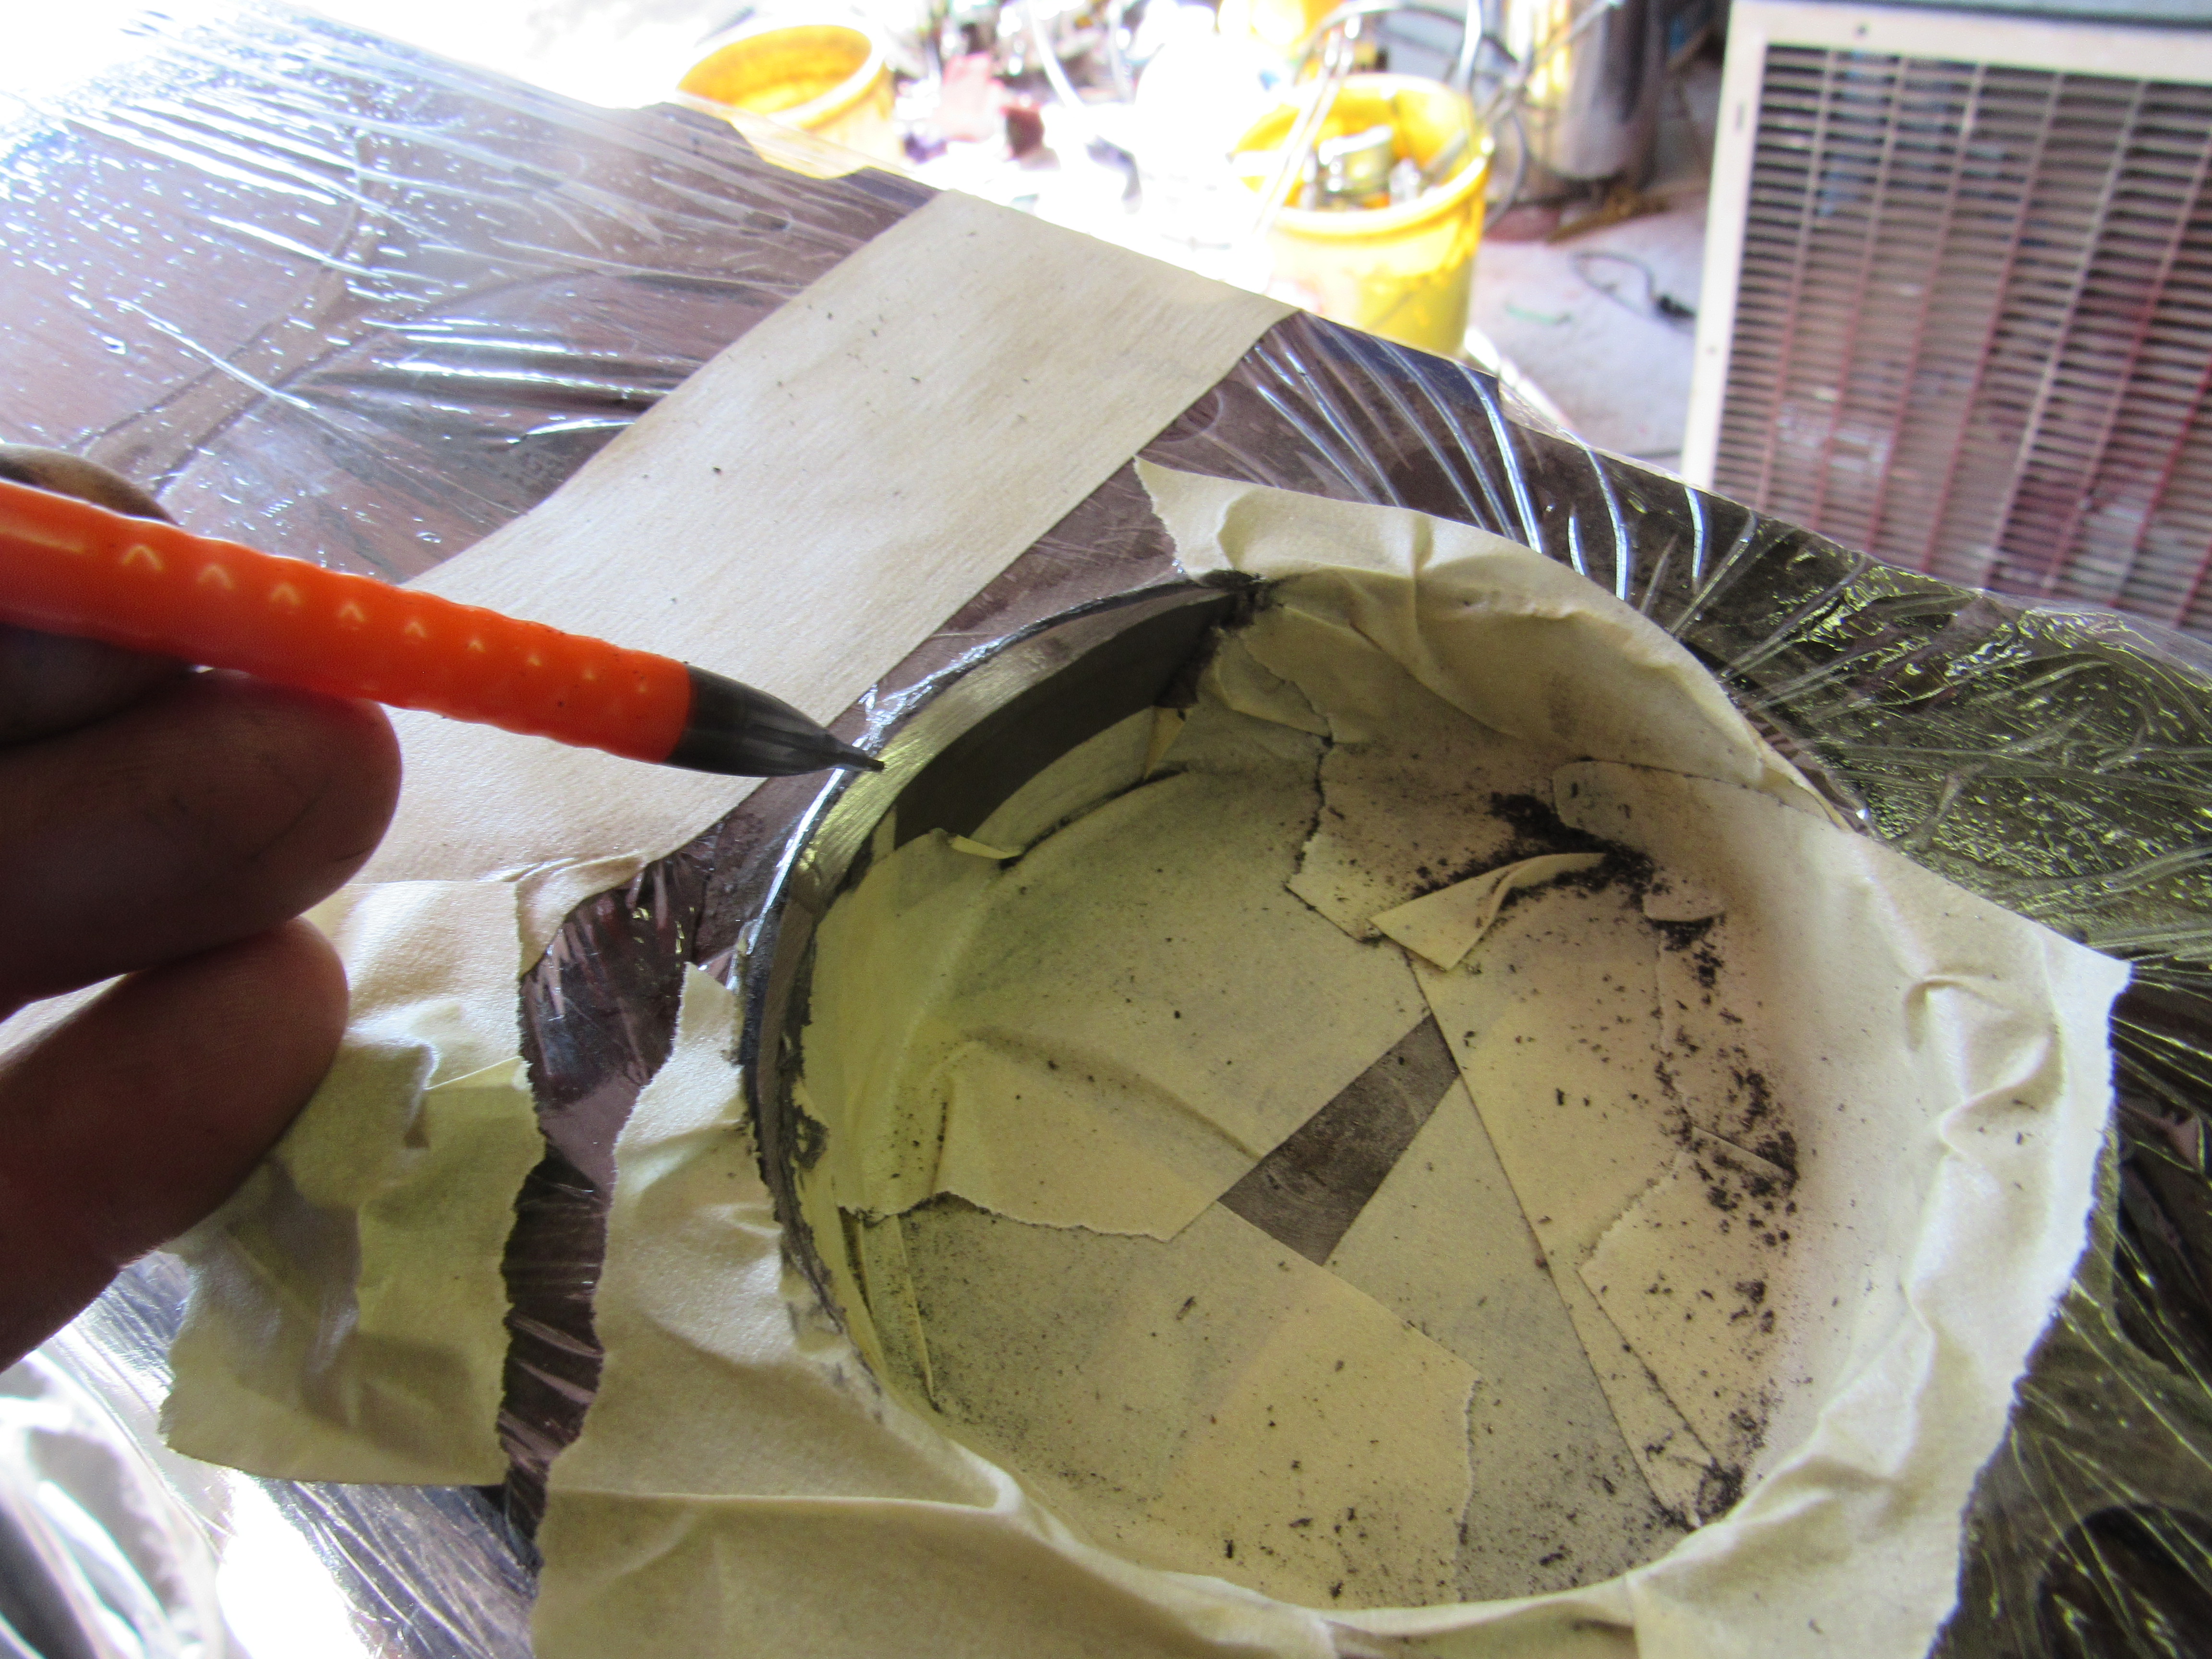
Right, and I found the reason for the gas flooding, the idle mixture screws on the triple Webers are suppose to be somewhere between half to one and half turns open, if the carbs need more than that you have to start changing jets. On these carbs the idle mixture screws were turned out 5 1/2 turns, so the gas was just gushing in.
-
Great! I thought someone must make it.
-
Also, I wish Weber made a choke mechanism where the lever moves in the opposite direction, thinking about trying to rig up the choke levers so they can be pushed open from the cabin. Are the chokes on Weber's an enrichment circuit and can't I get that from an extra squirt of gas using the pedal?
-
I'm helping a guy get his unfinished project on the road, on a bored out L24 is new set of triple Weber 40 DCOE 151, made in Spain. The choke tubes are 30mm, air corrector jets 170, pump jets 40, idle jets 60-F8, emulsion tube F11 and the main jets are 125 Although they only have a few minutes of running time on them they have had gas sitting in them for a few years I would think so had to do open covers and clean them out. With linkage disconnected I've adjusted the throttle stops to half a turn open, set the linkage to be identical for all 3, idle mixture screw to 1 full turn open. Ideally, I would like the engine to start up on the first turn of the key but would appreciate any other recommendations for set up that will help. Thanks


-
Nice car, someone took care of it, that original under coating is infamous for for hiding rust underneath it. The only way to be sure is scrape it off with a putty knife, great job for the winter. "Horsepower sweating" I like that. New seat covers are fairly cheap and is a DIY job, the engine bay looks very original right down to the air snorkel. Those 5 mile and hr bumper shocks are probably seized but you might get them moving by backing the car up to a big tree or building and compress them in reverse, use a 2x4" to spread the contact area. You might want to start replacing the the old rubber bushings with fresh rubber, it will really improve the feel and only use poly bushings on the steering rack. Unless you are planning on doing fast road or tracking the car you may find poly bushings in the other locations as pretty bone jarring. BTDT What are your plans for the car?
-
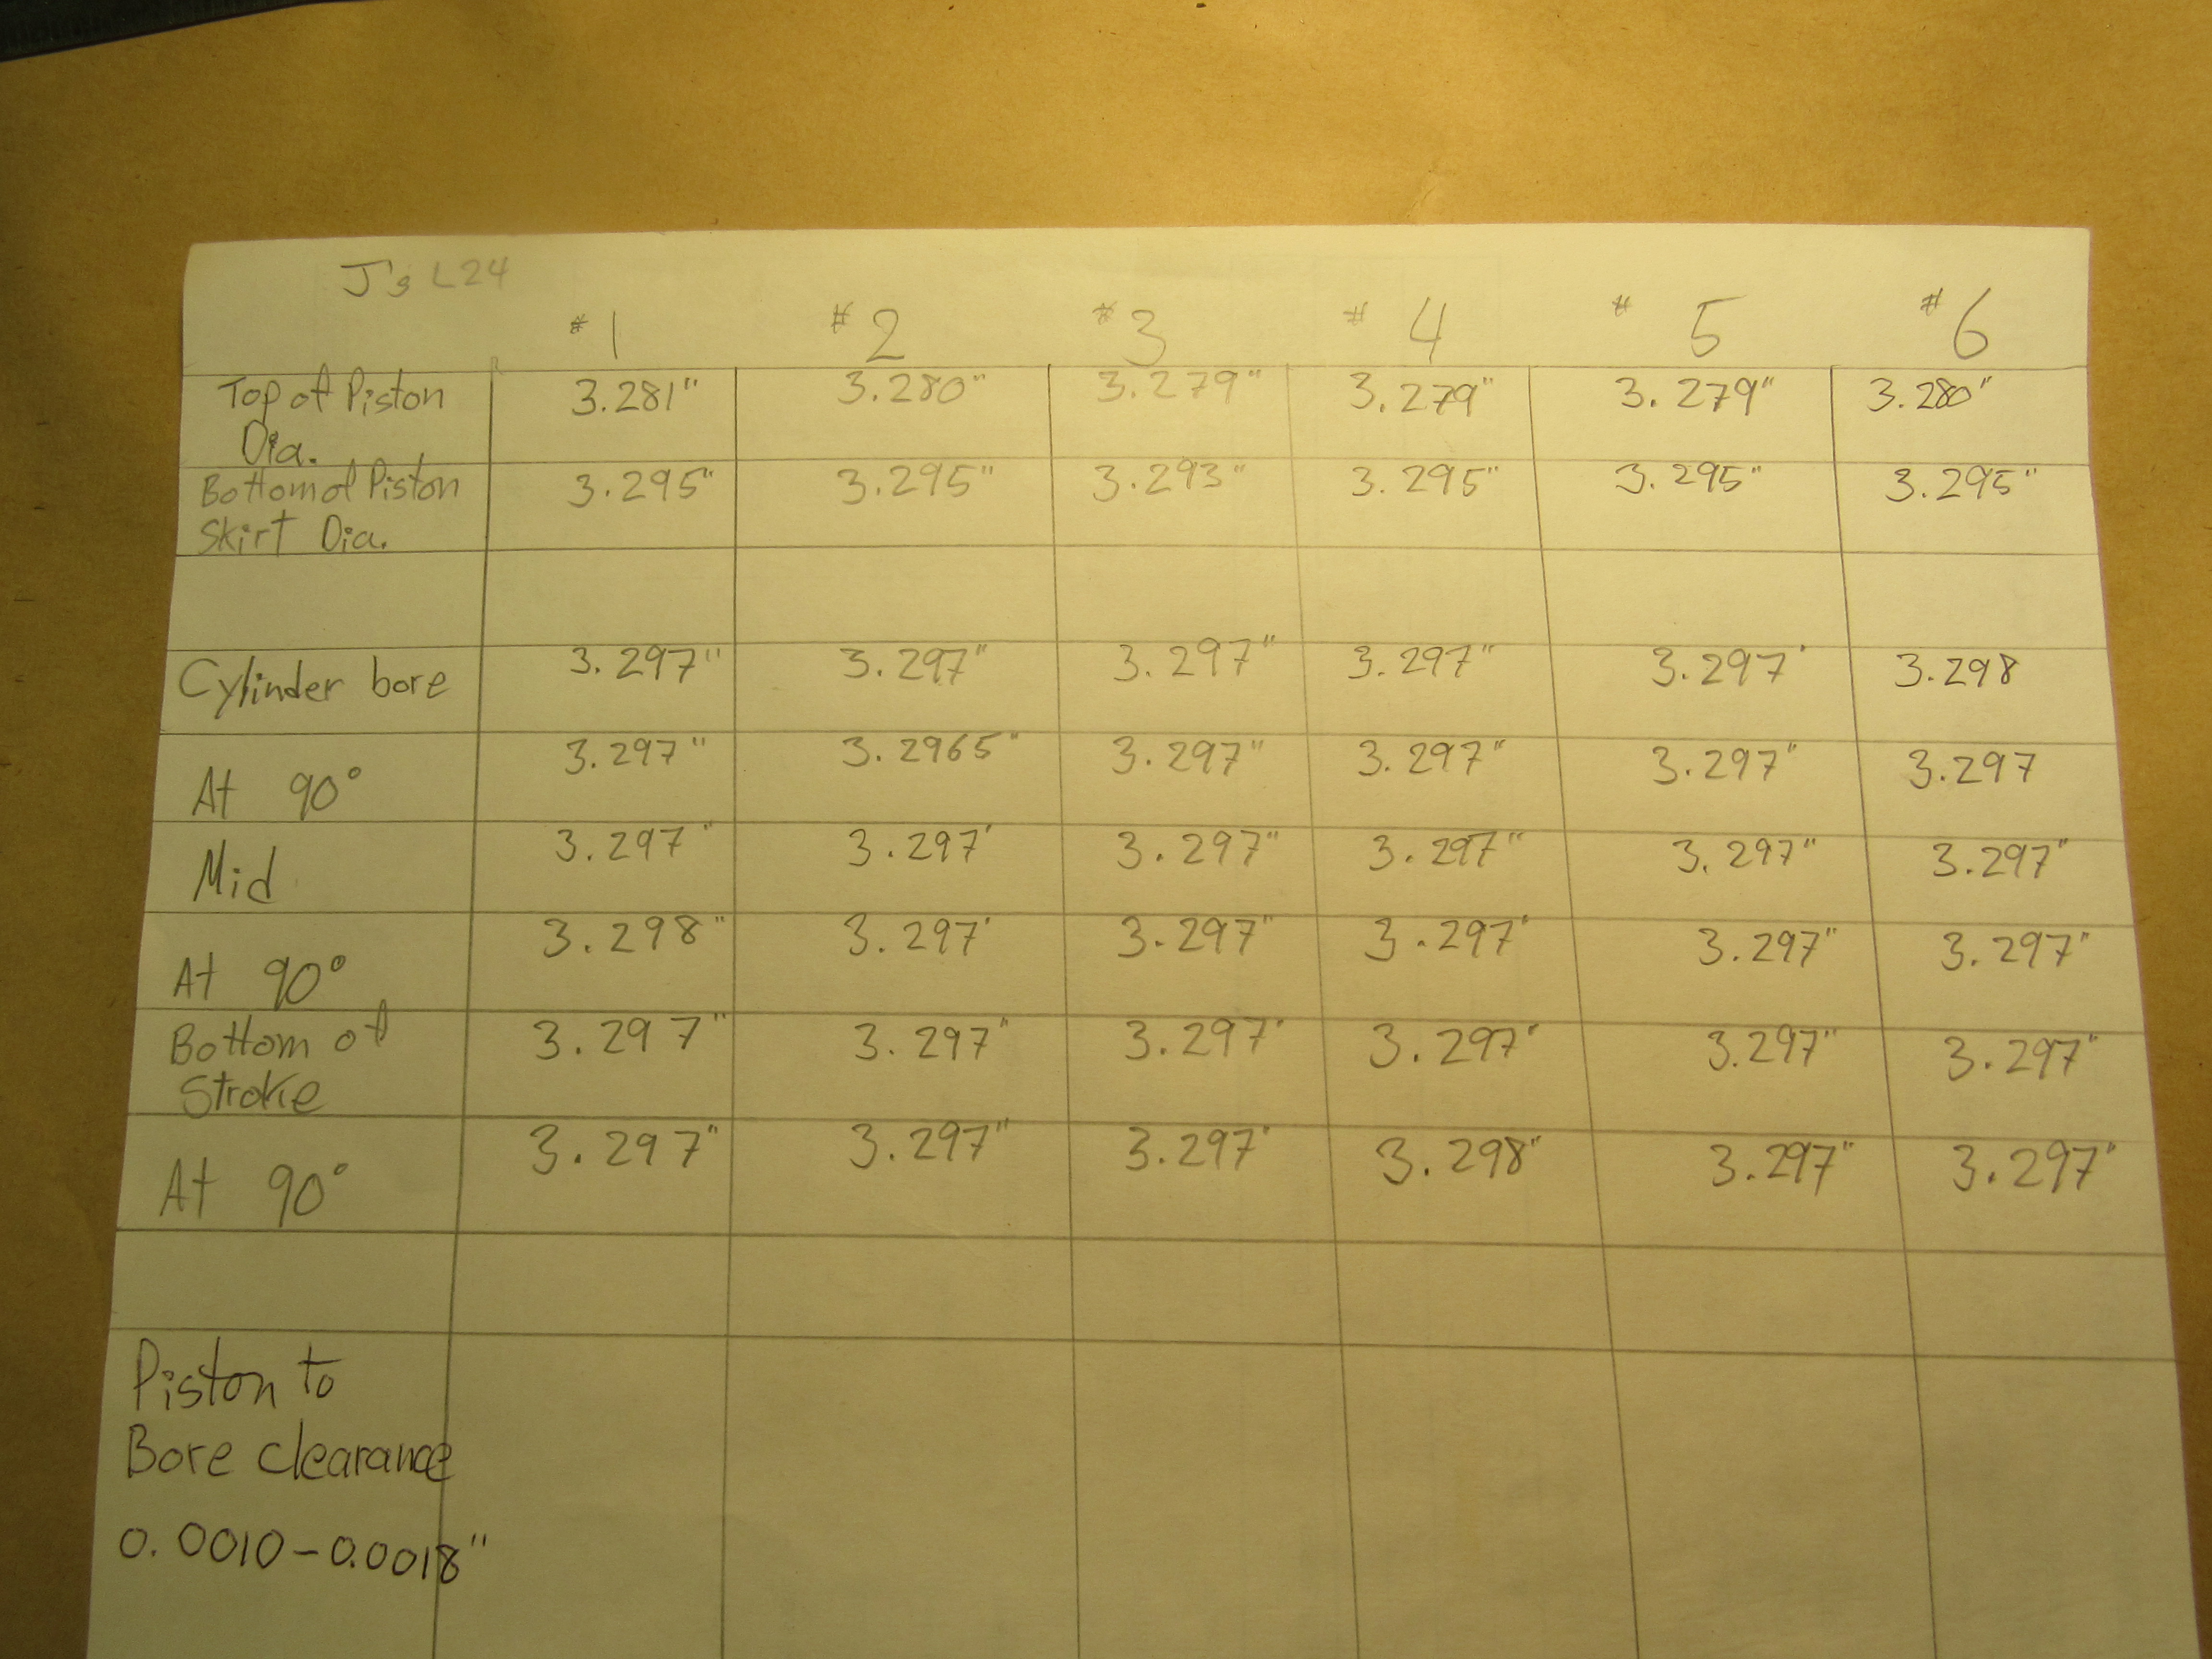
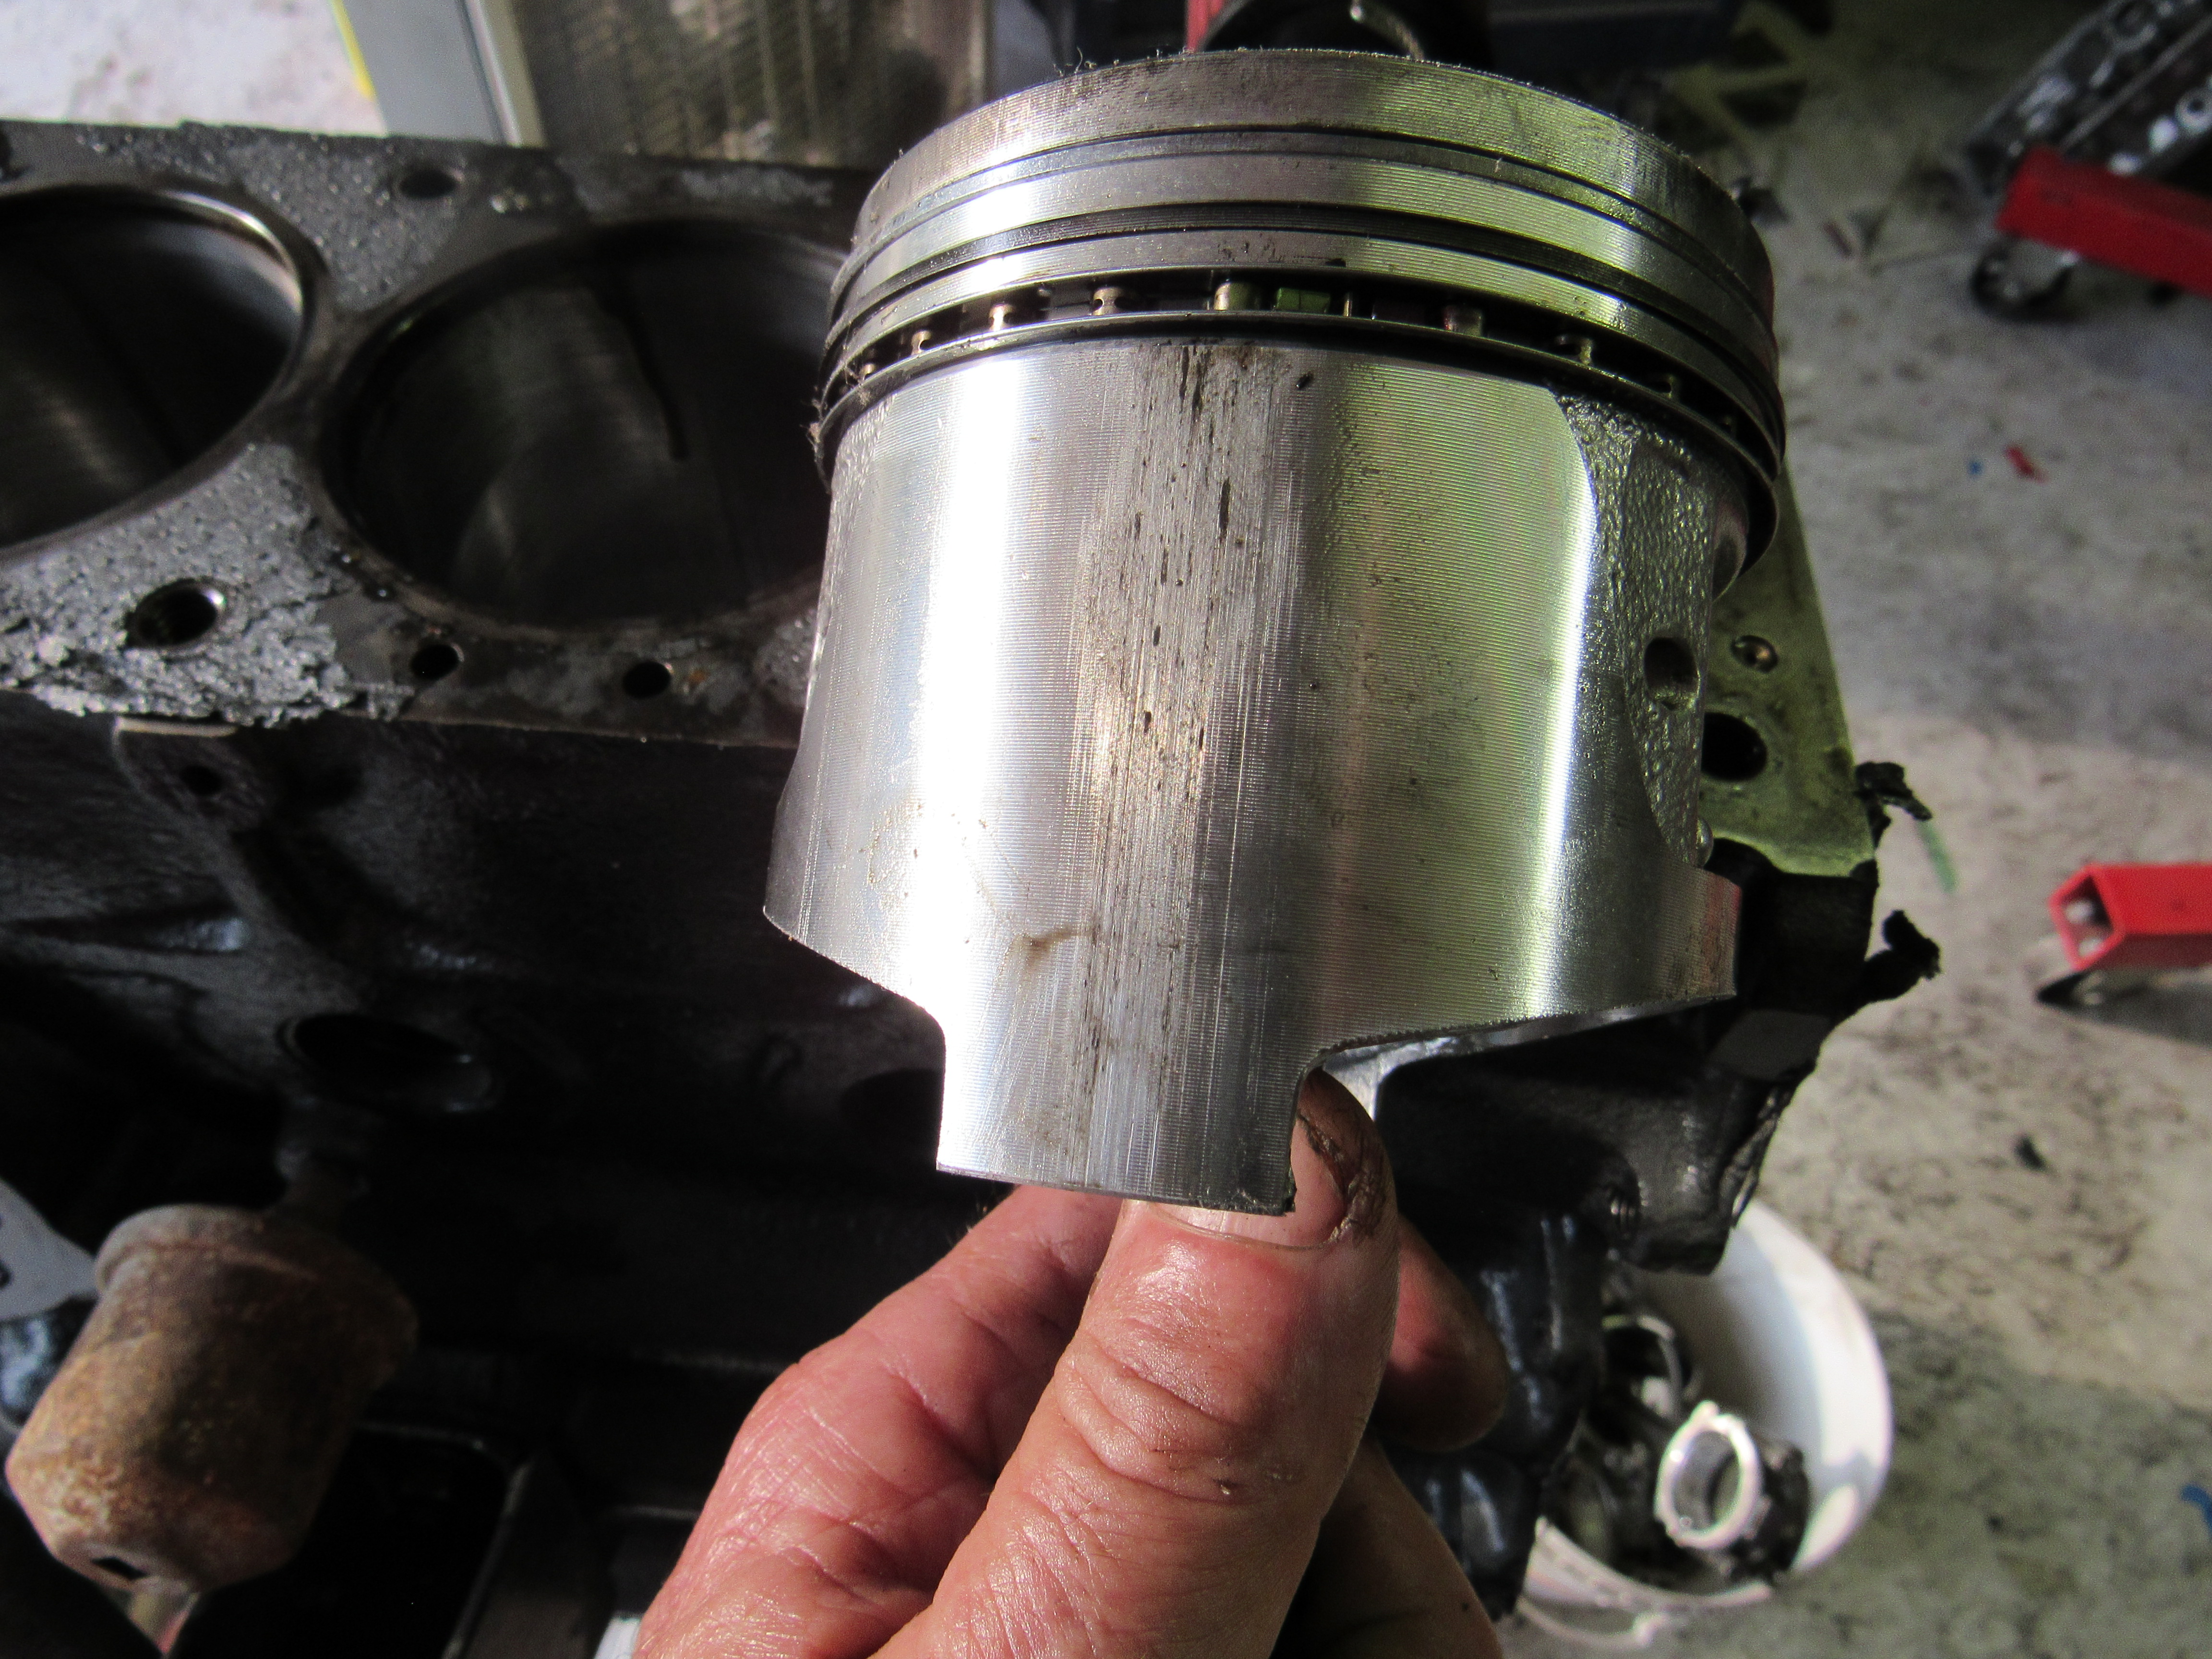
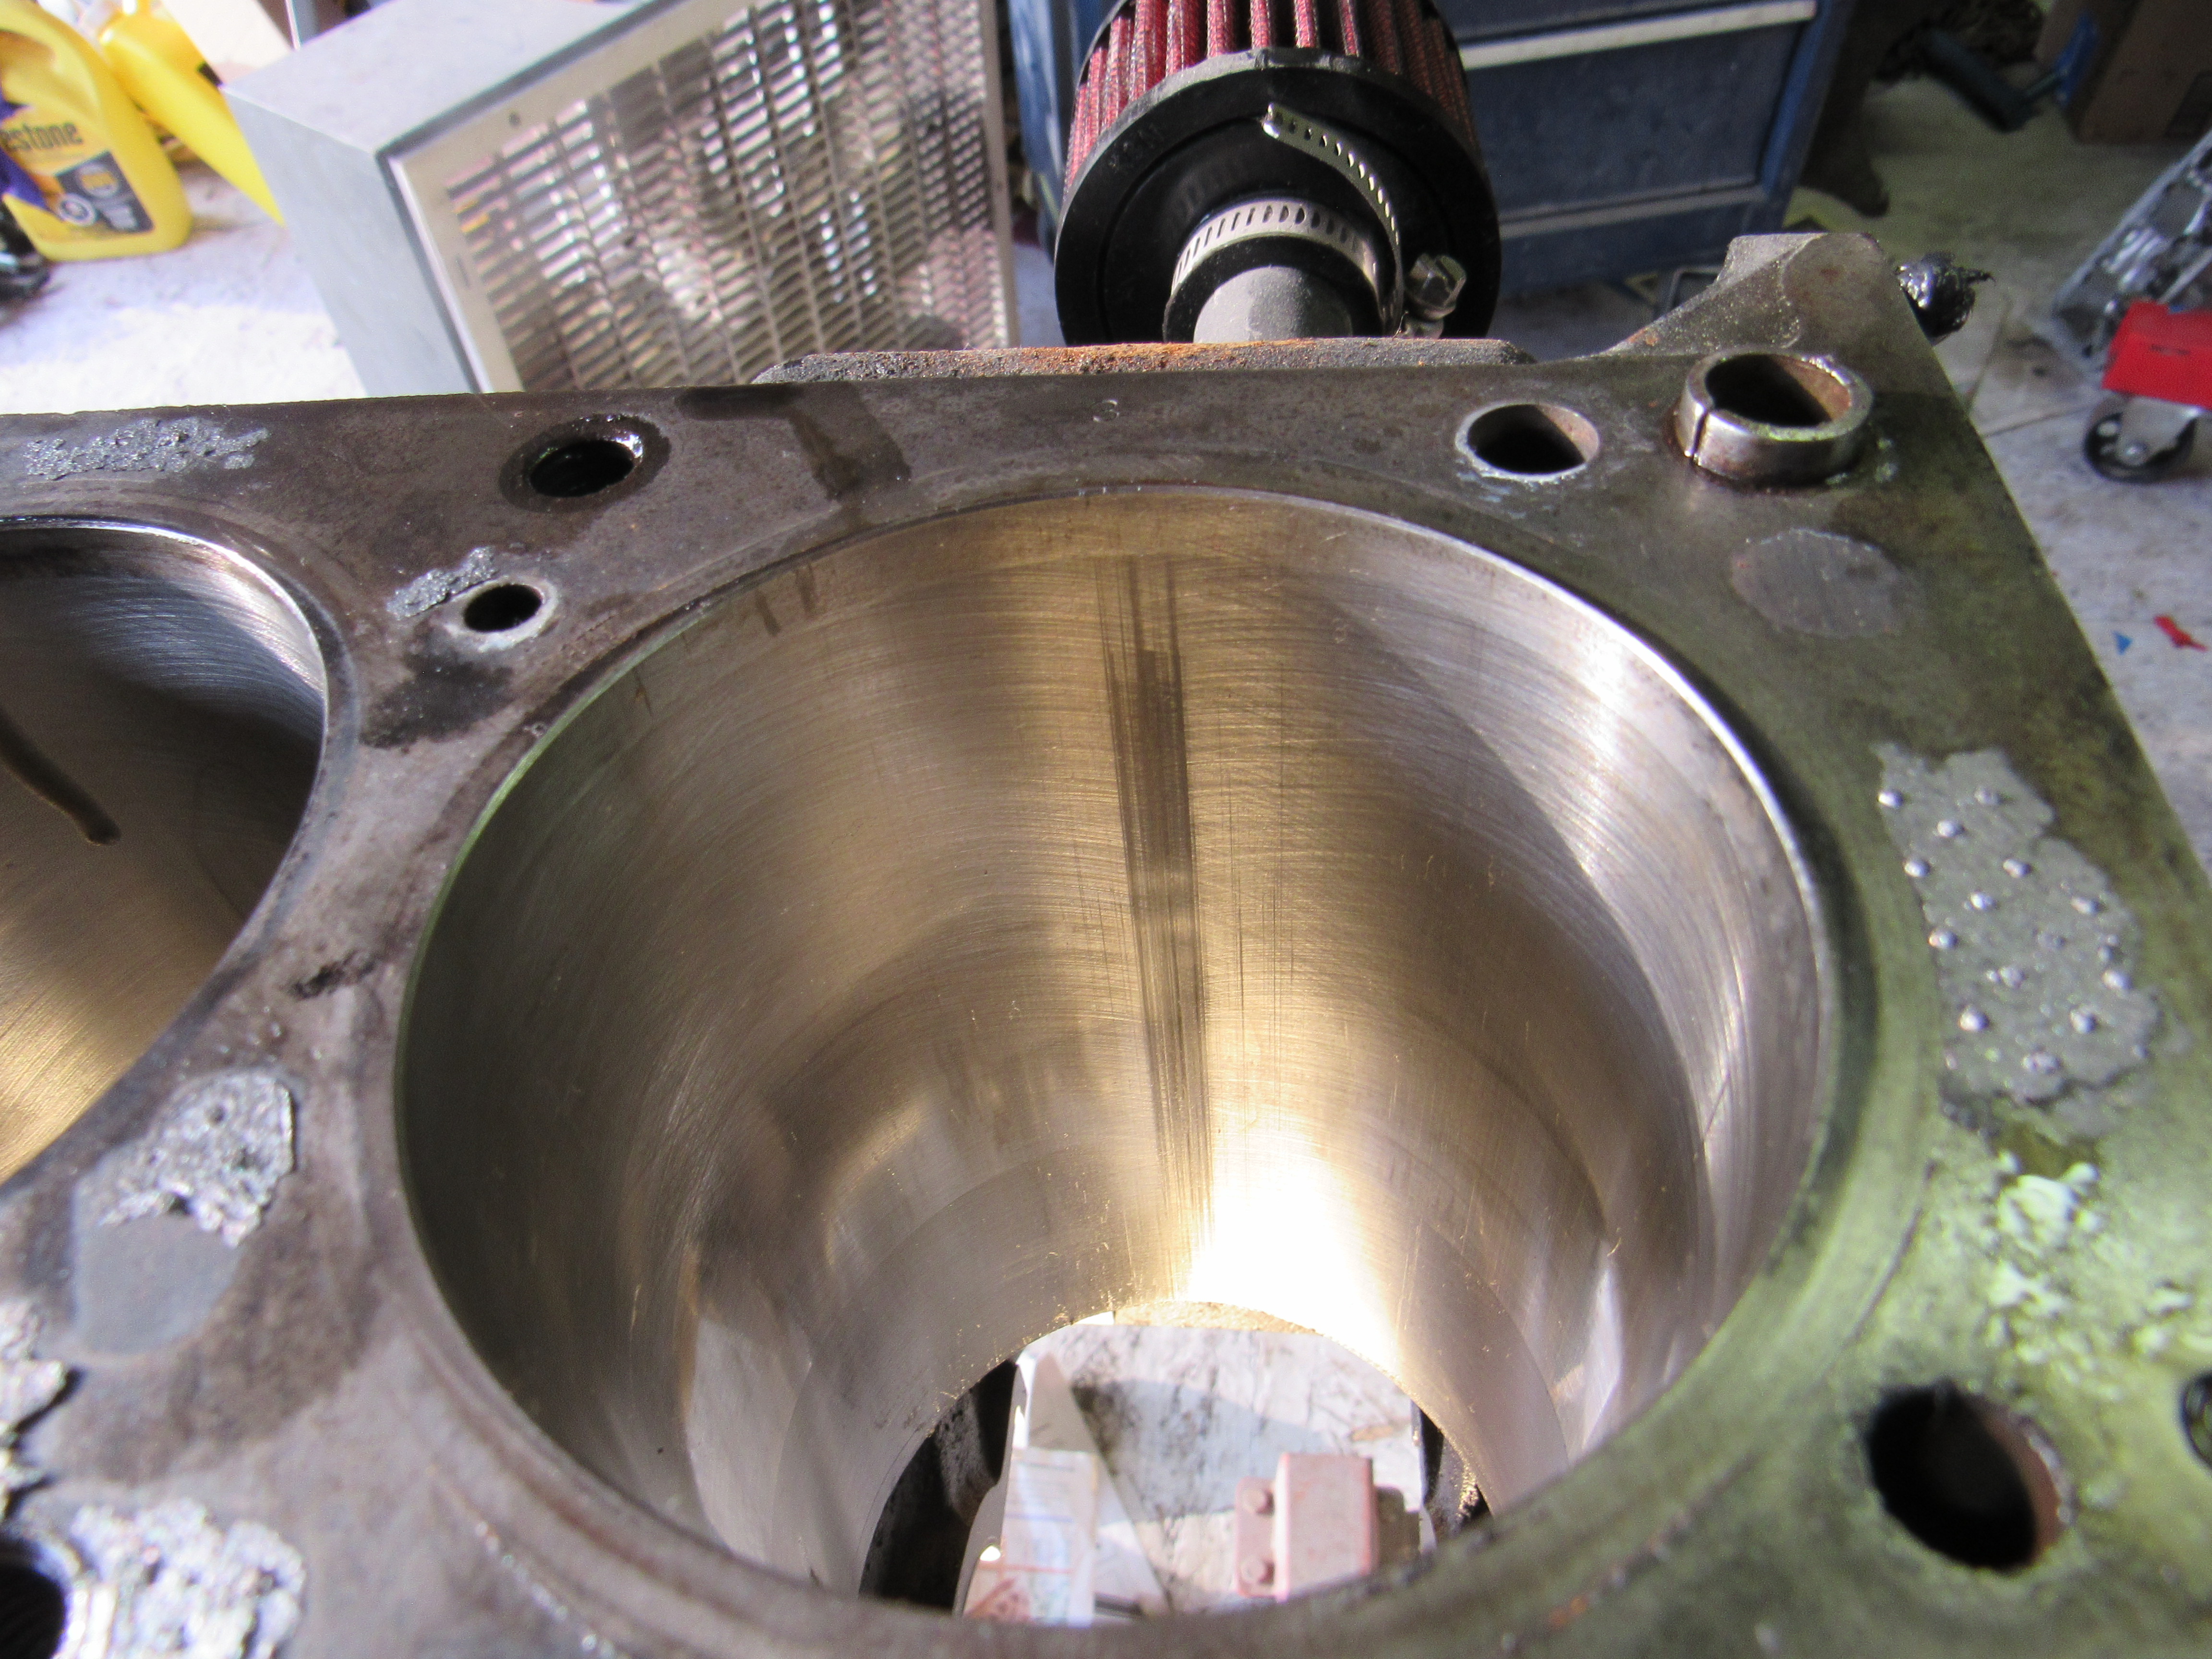
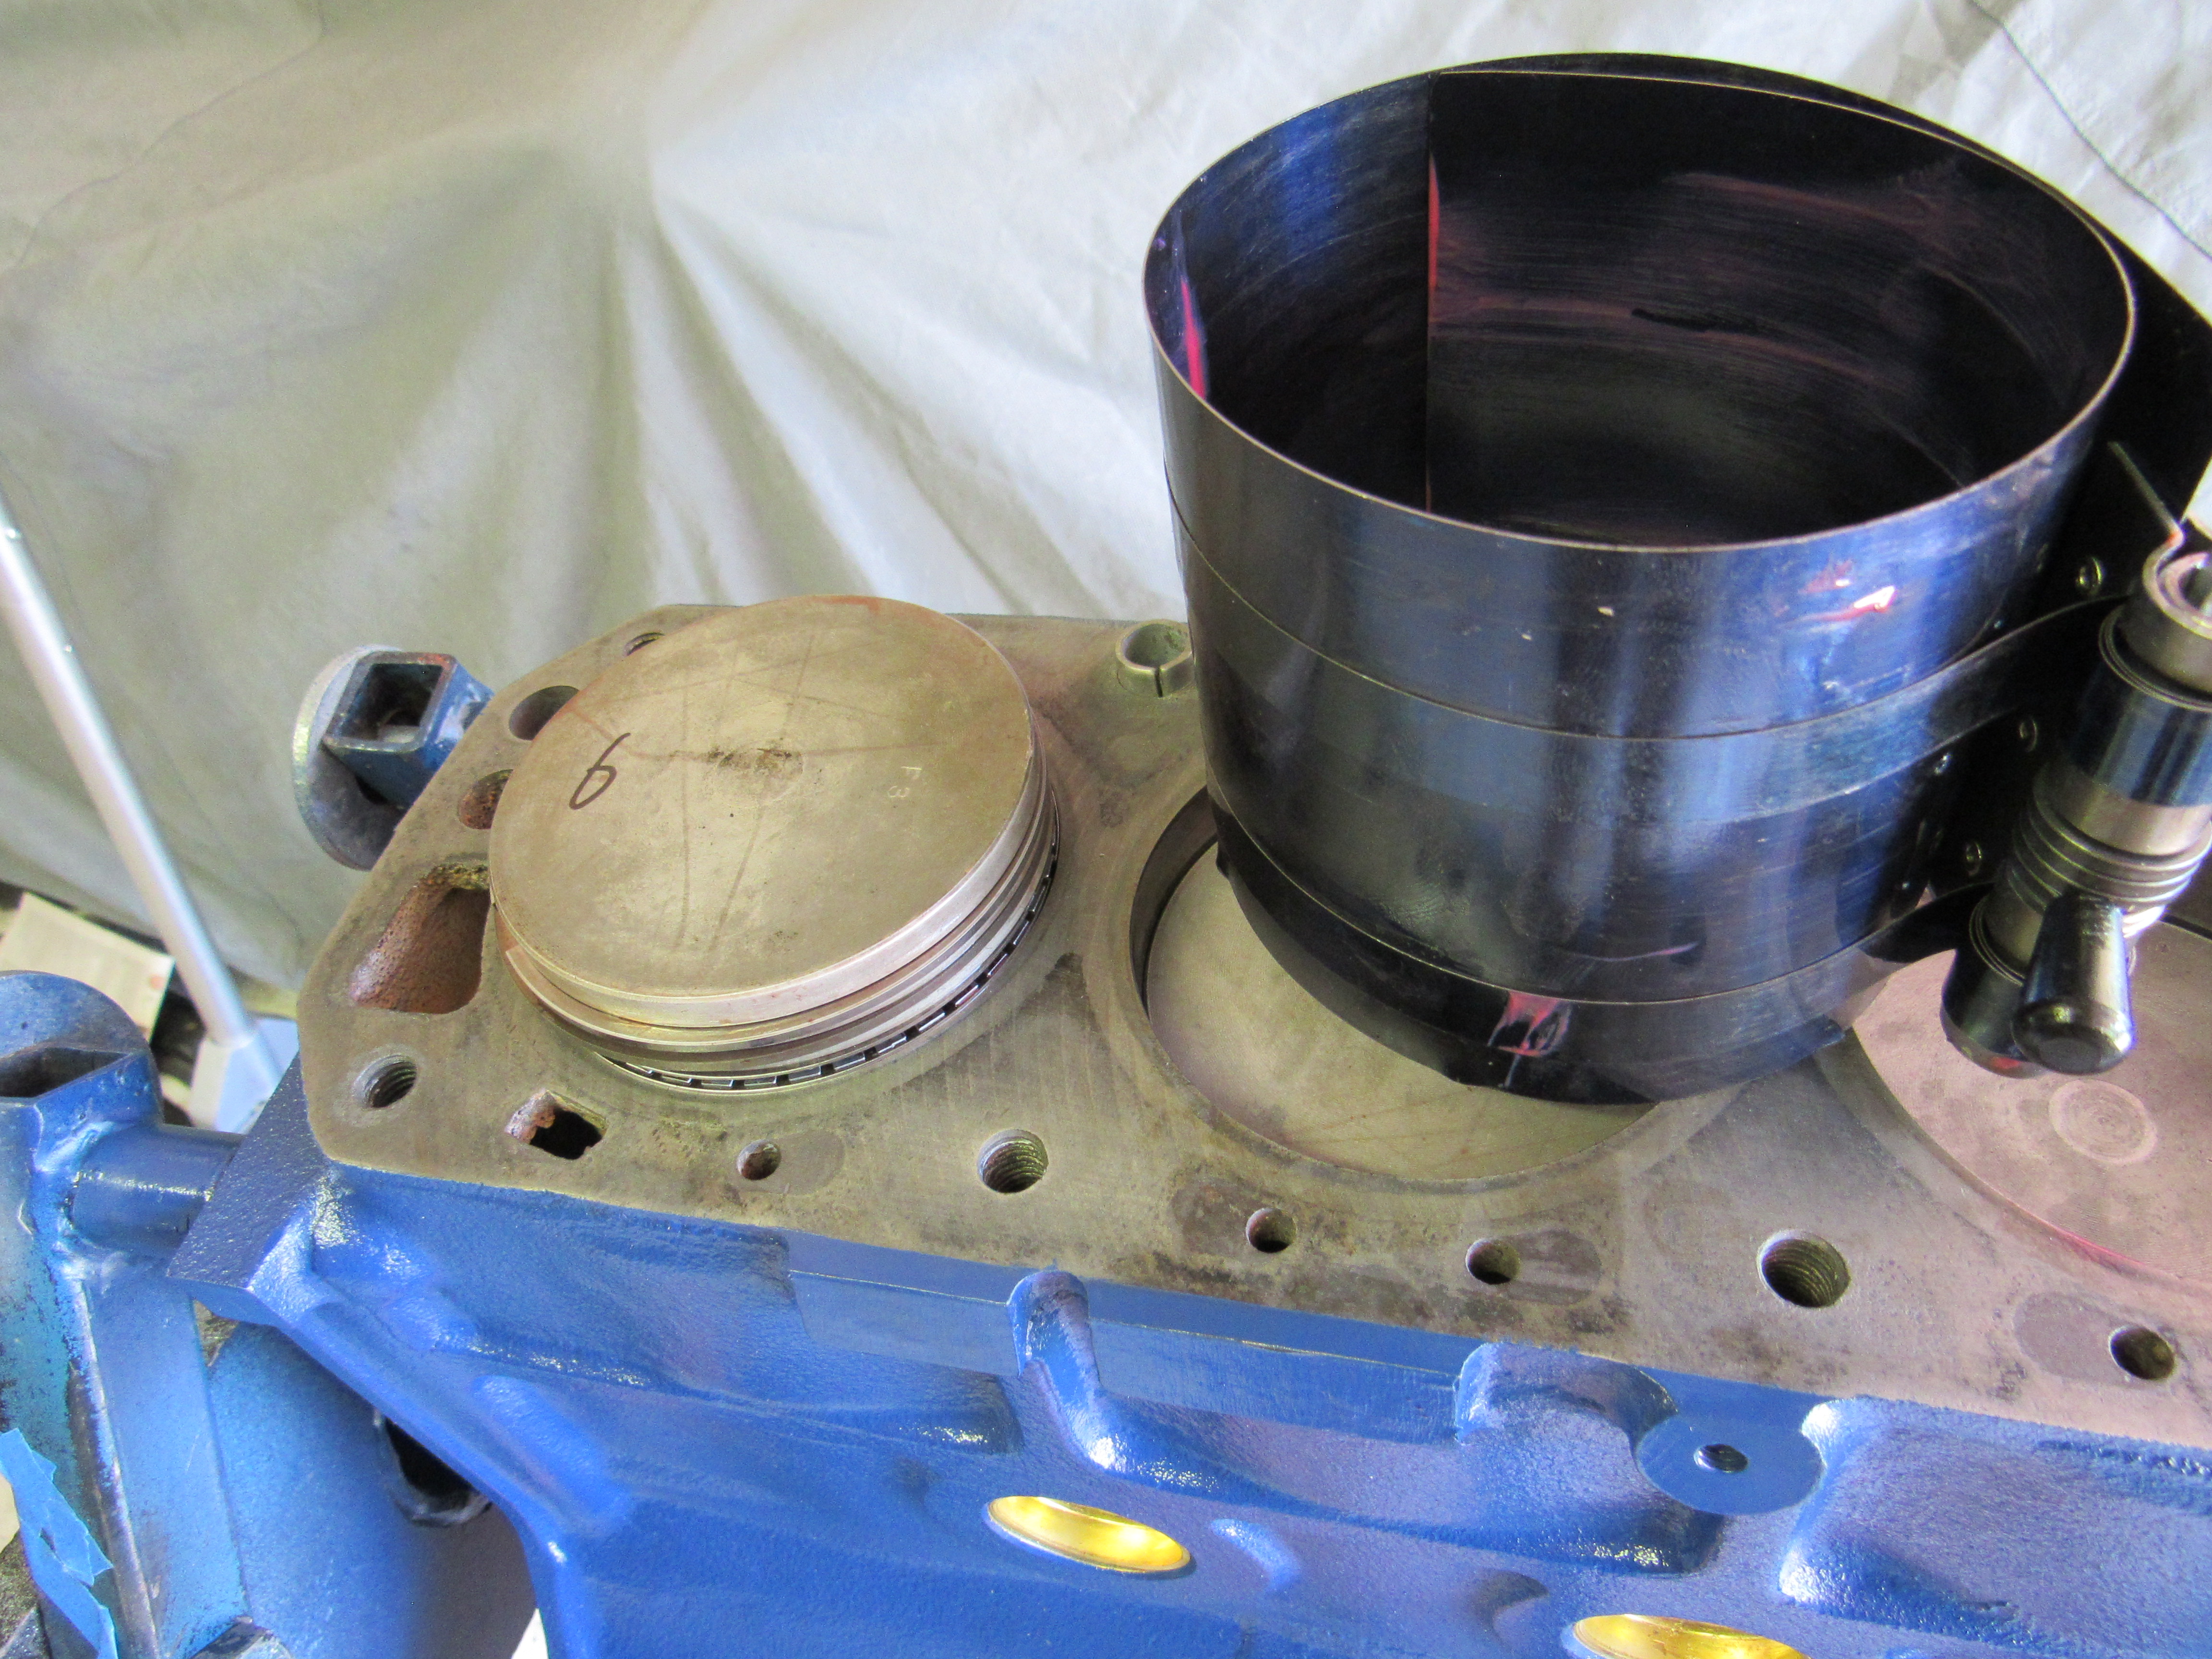
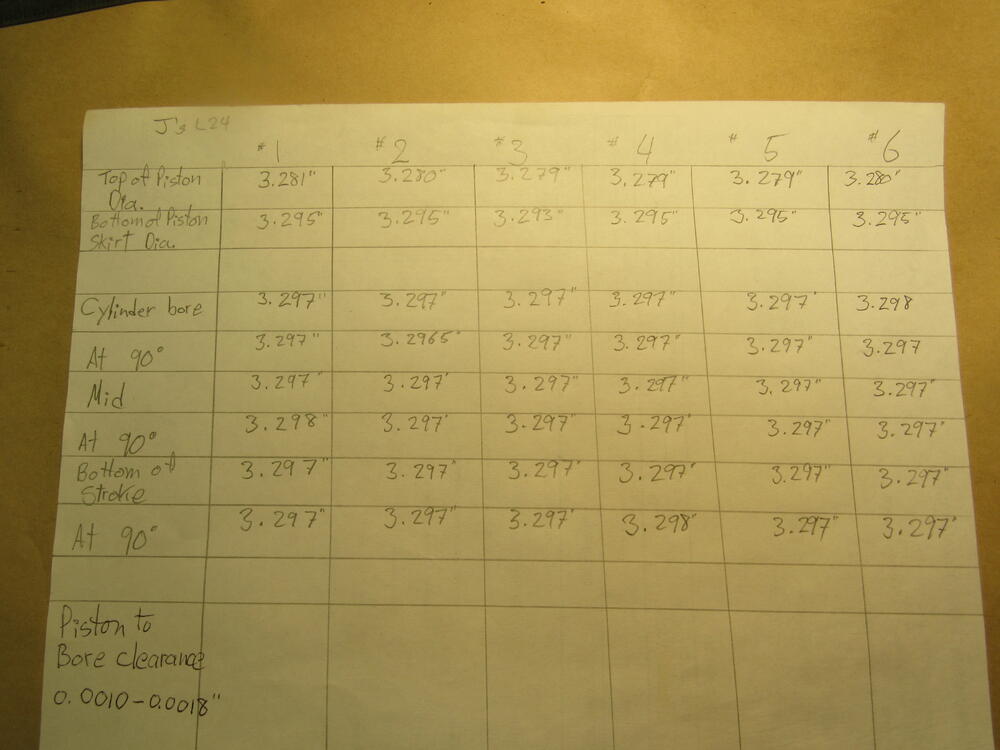
I spent a few hrs today getting all the measuring done, as you can see it's pretty consistent as you would expect from a freshly rebuild engine, the piston to bore clearance is suppose to be between .0010 and .0018", my clearance is working out to be about .0020 so I'm good with that. I noticed that all the scuffing on the sides of the piston and cylinder wall are on the carb side of the engine so that's making me think the gasoline flooding is what washed the lubrication away and caused the scuffing


-
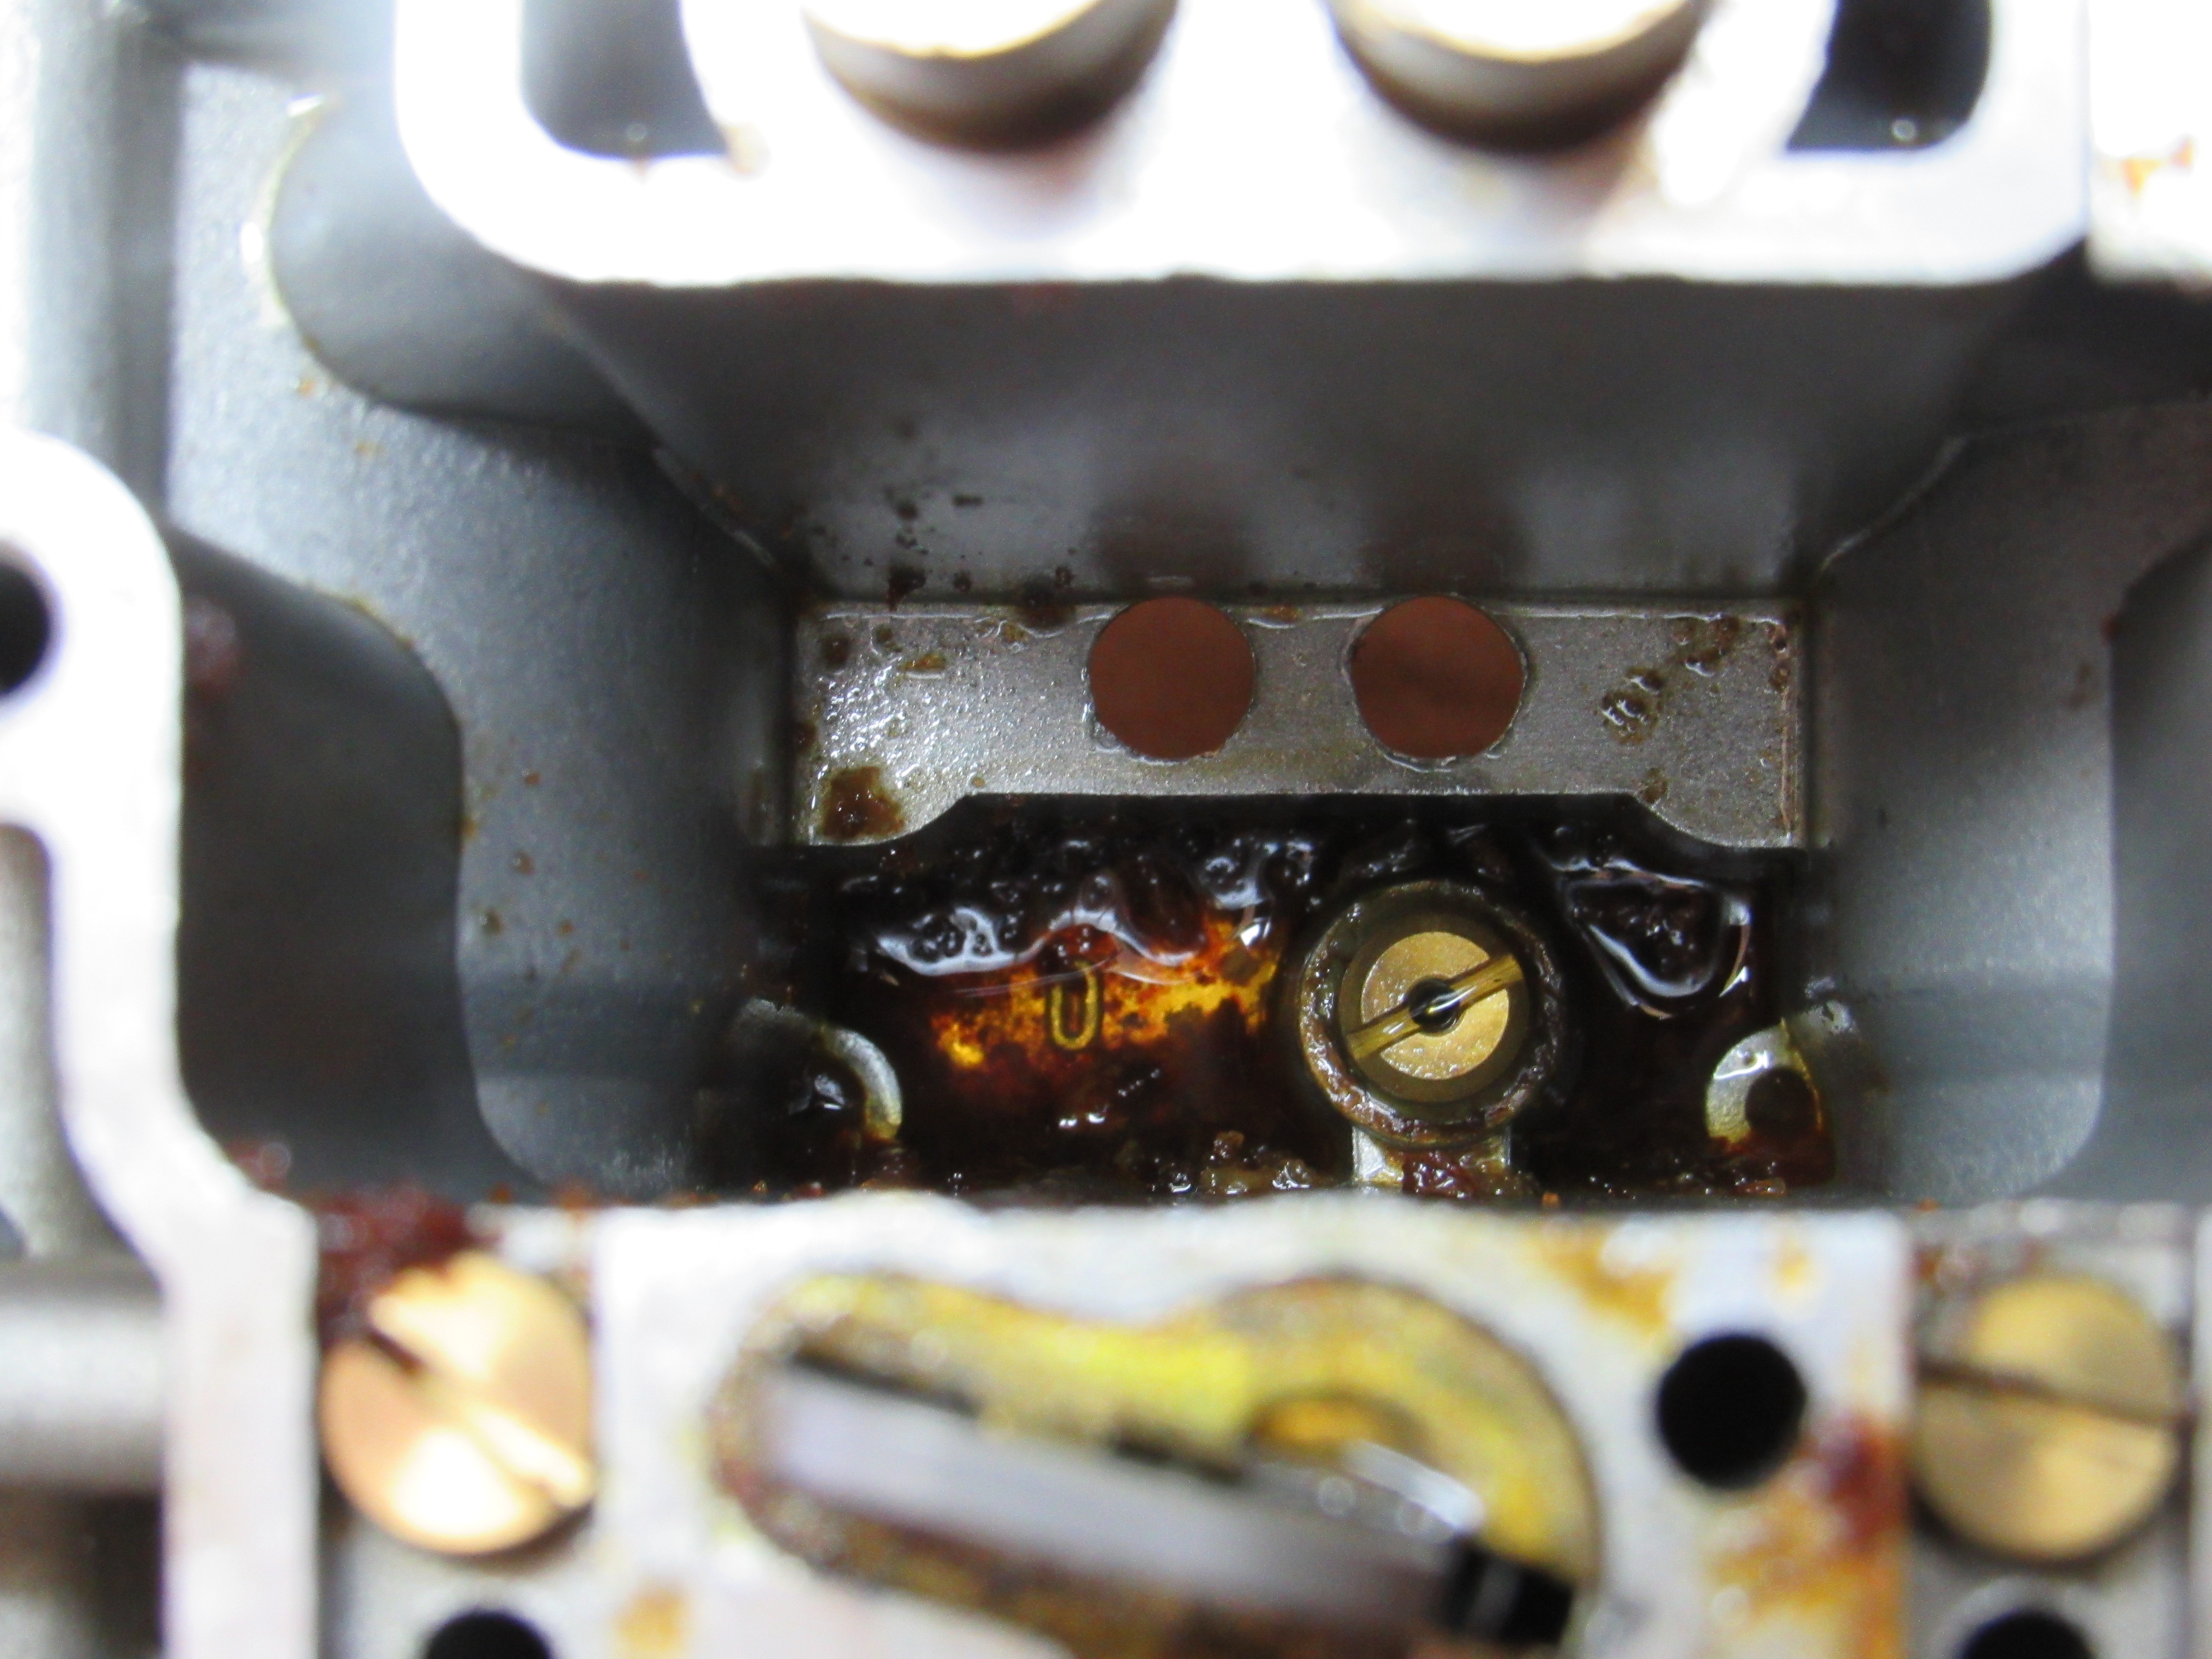
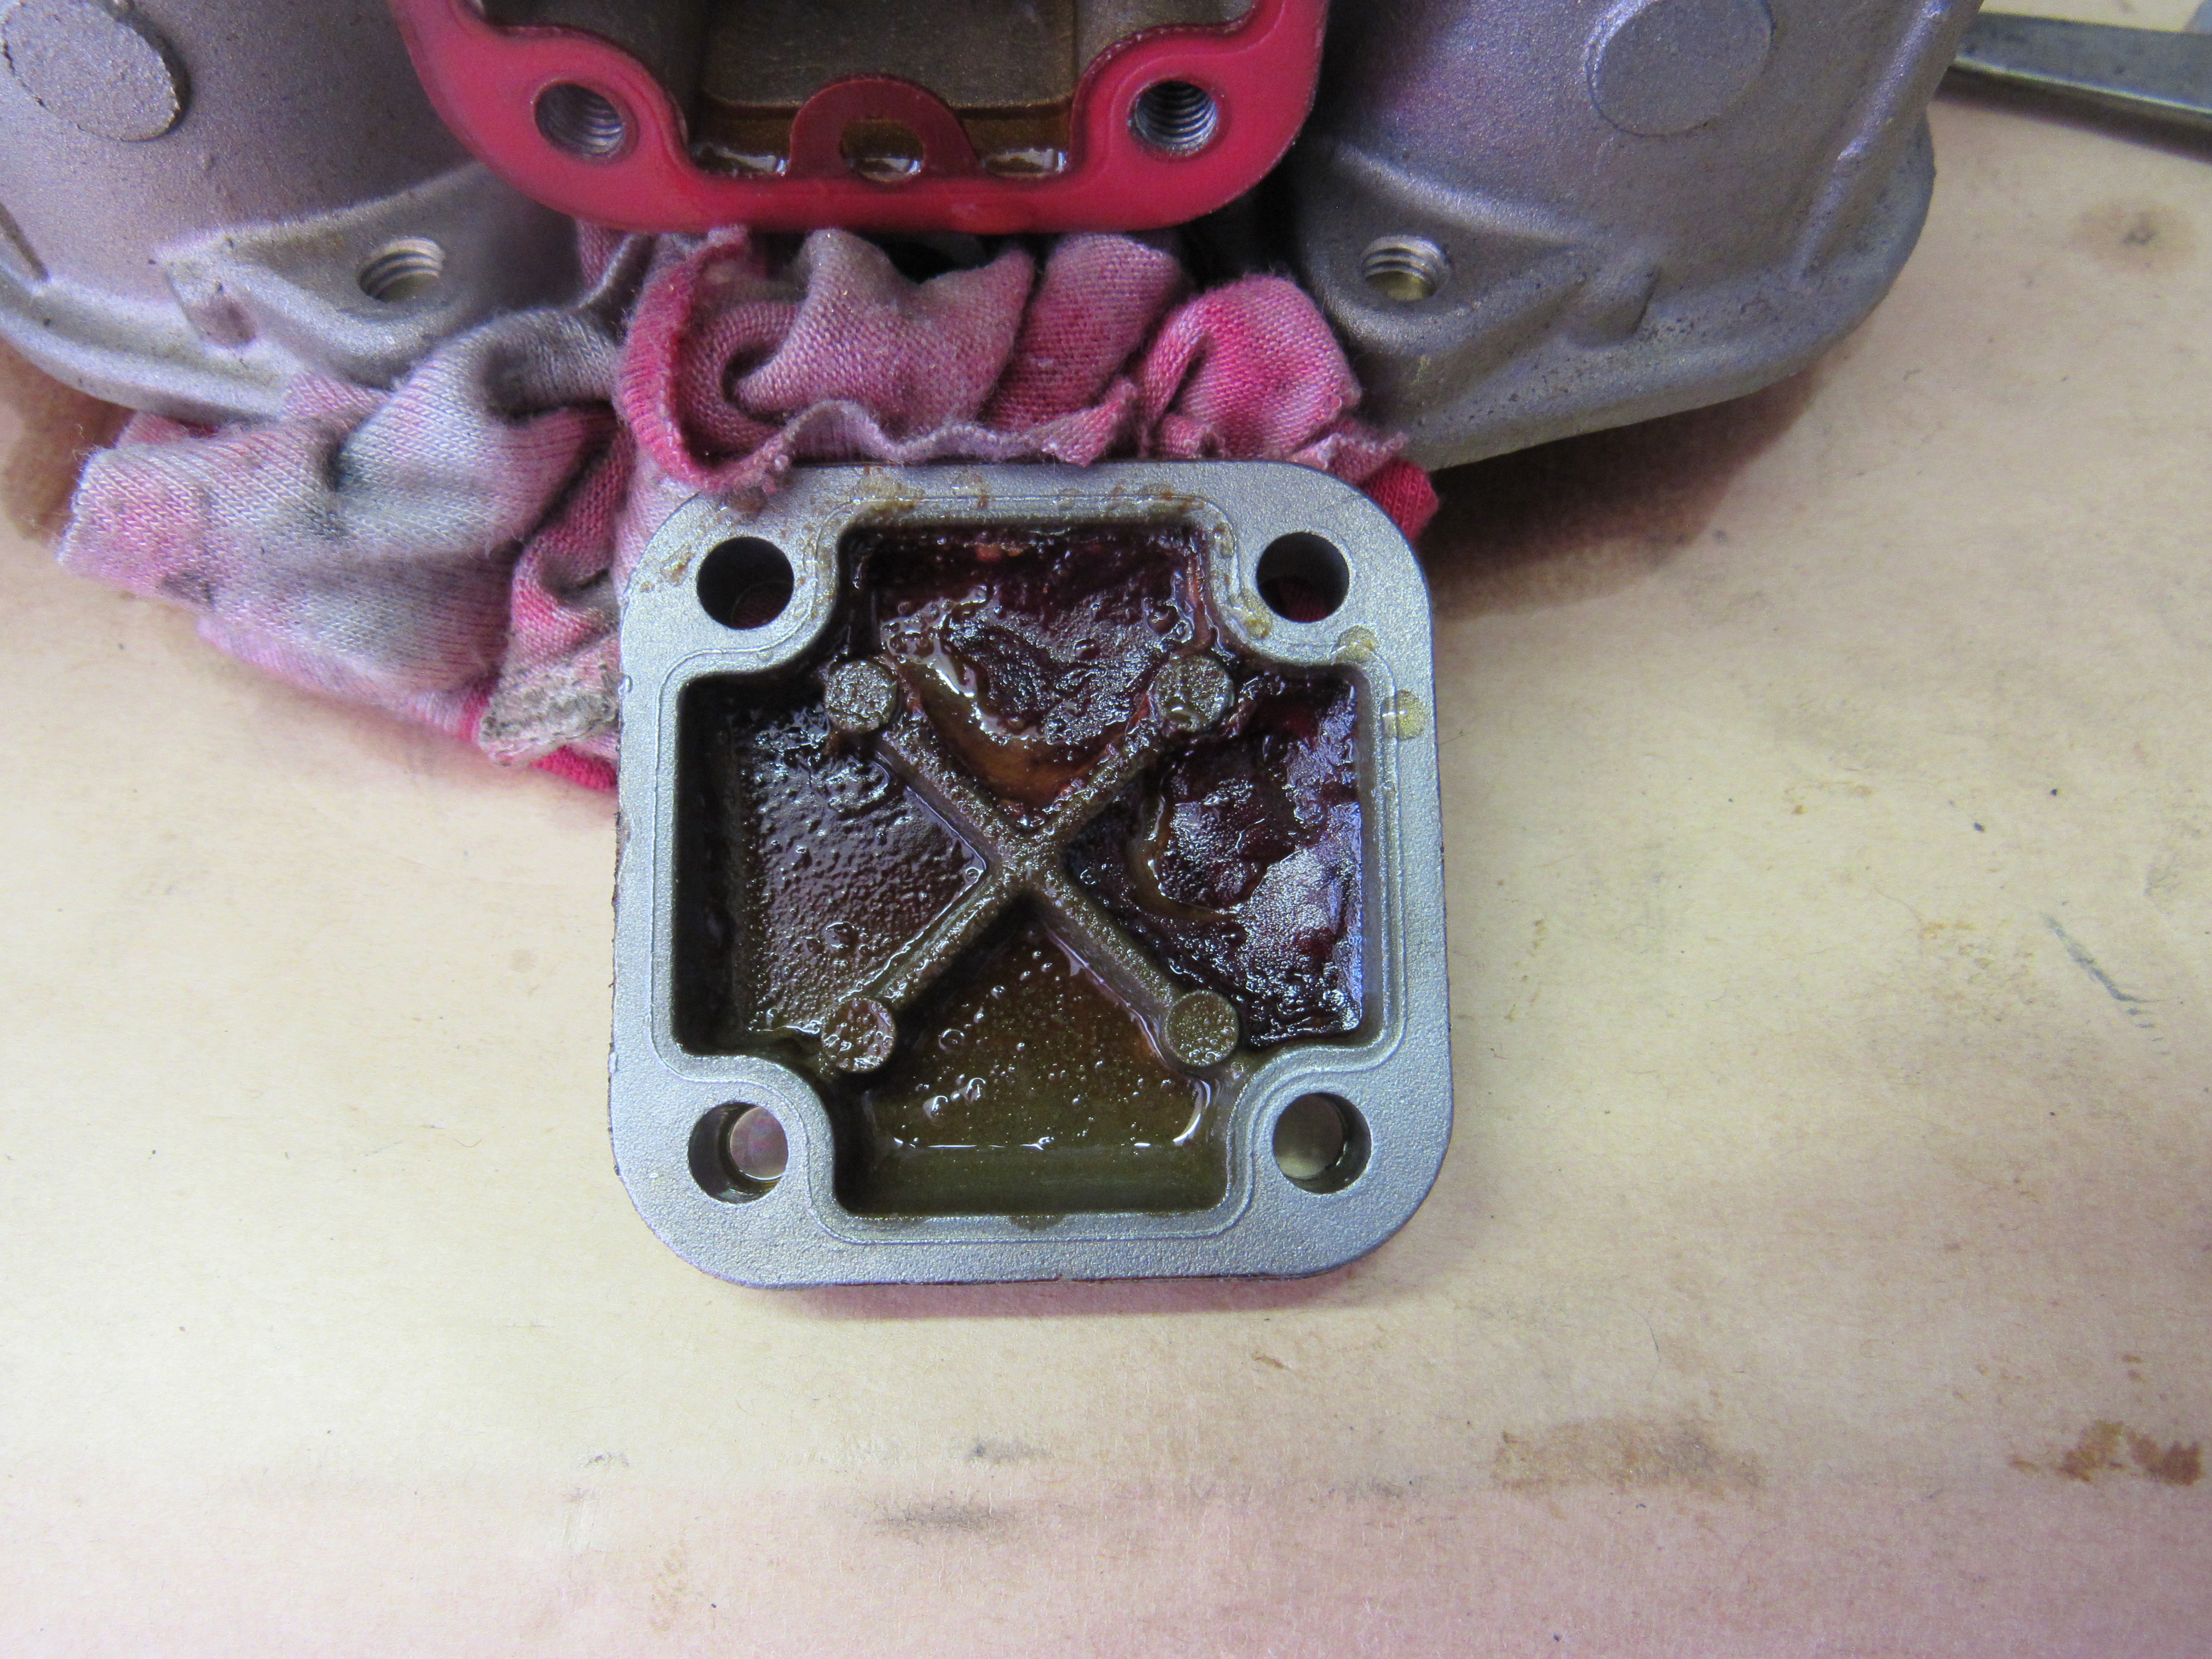
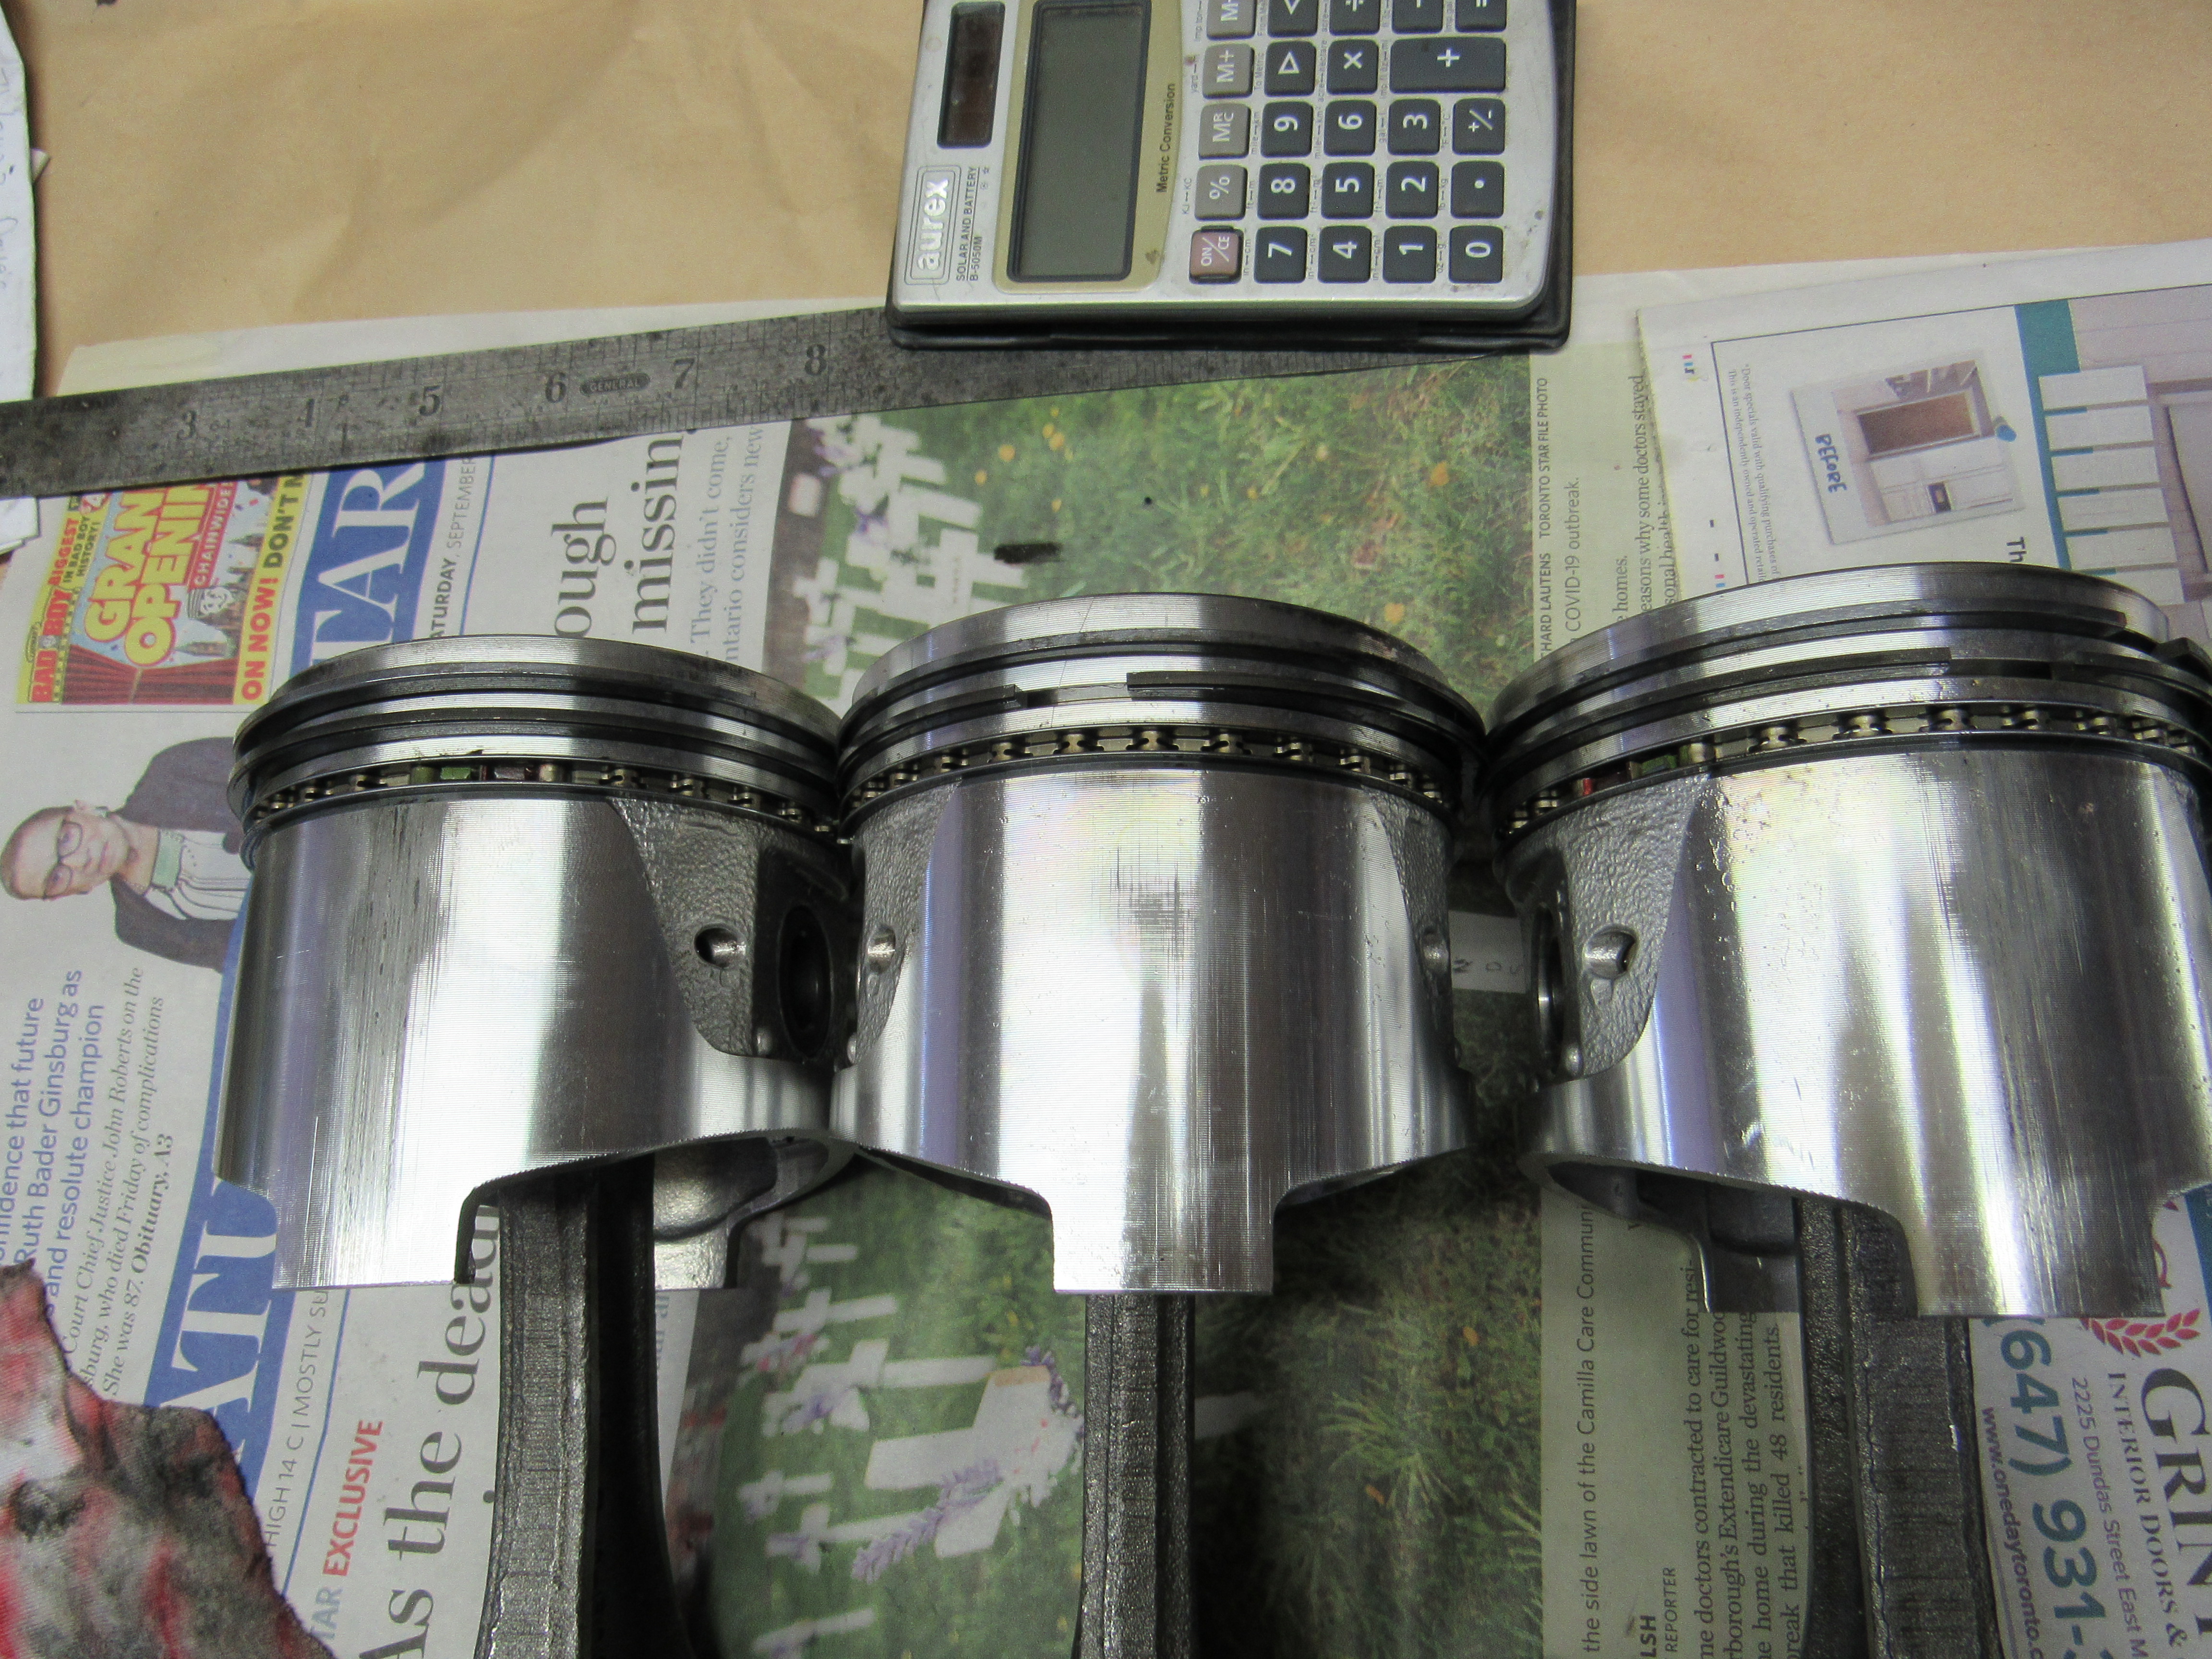
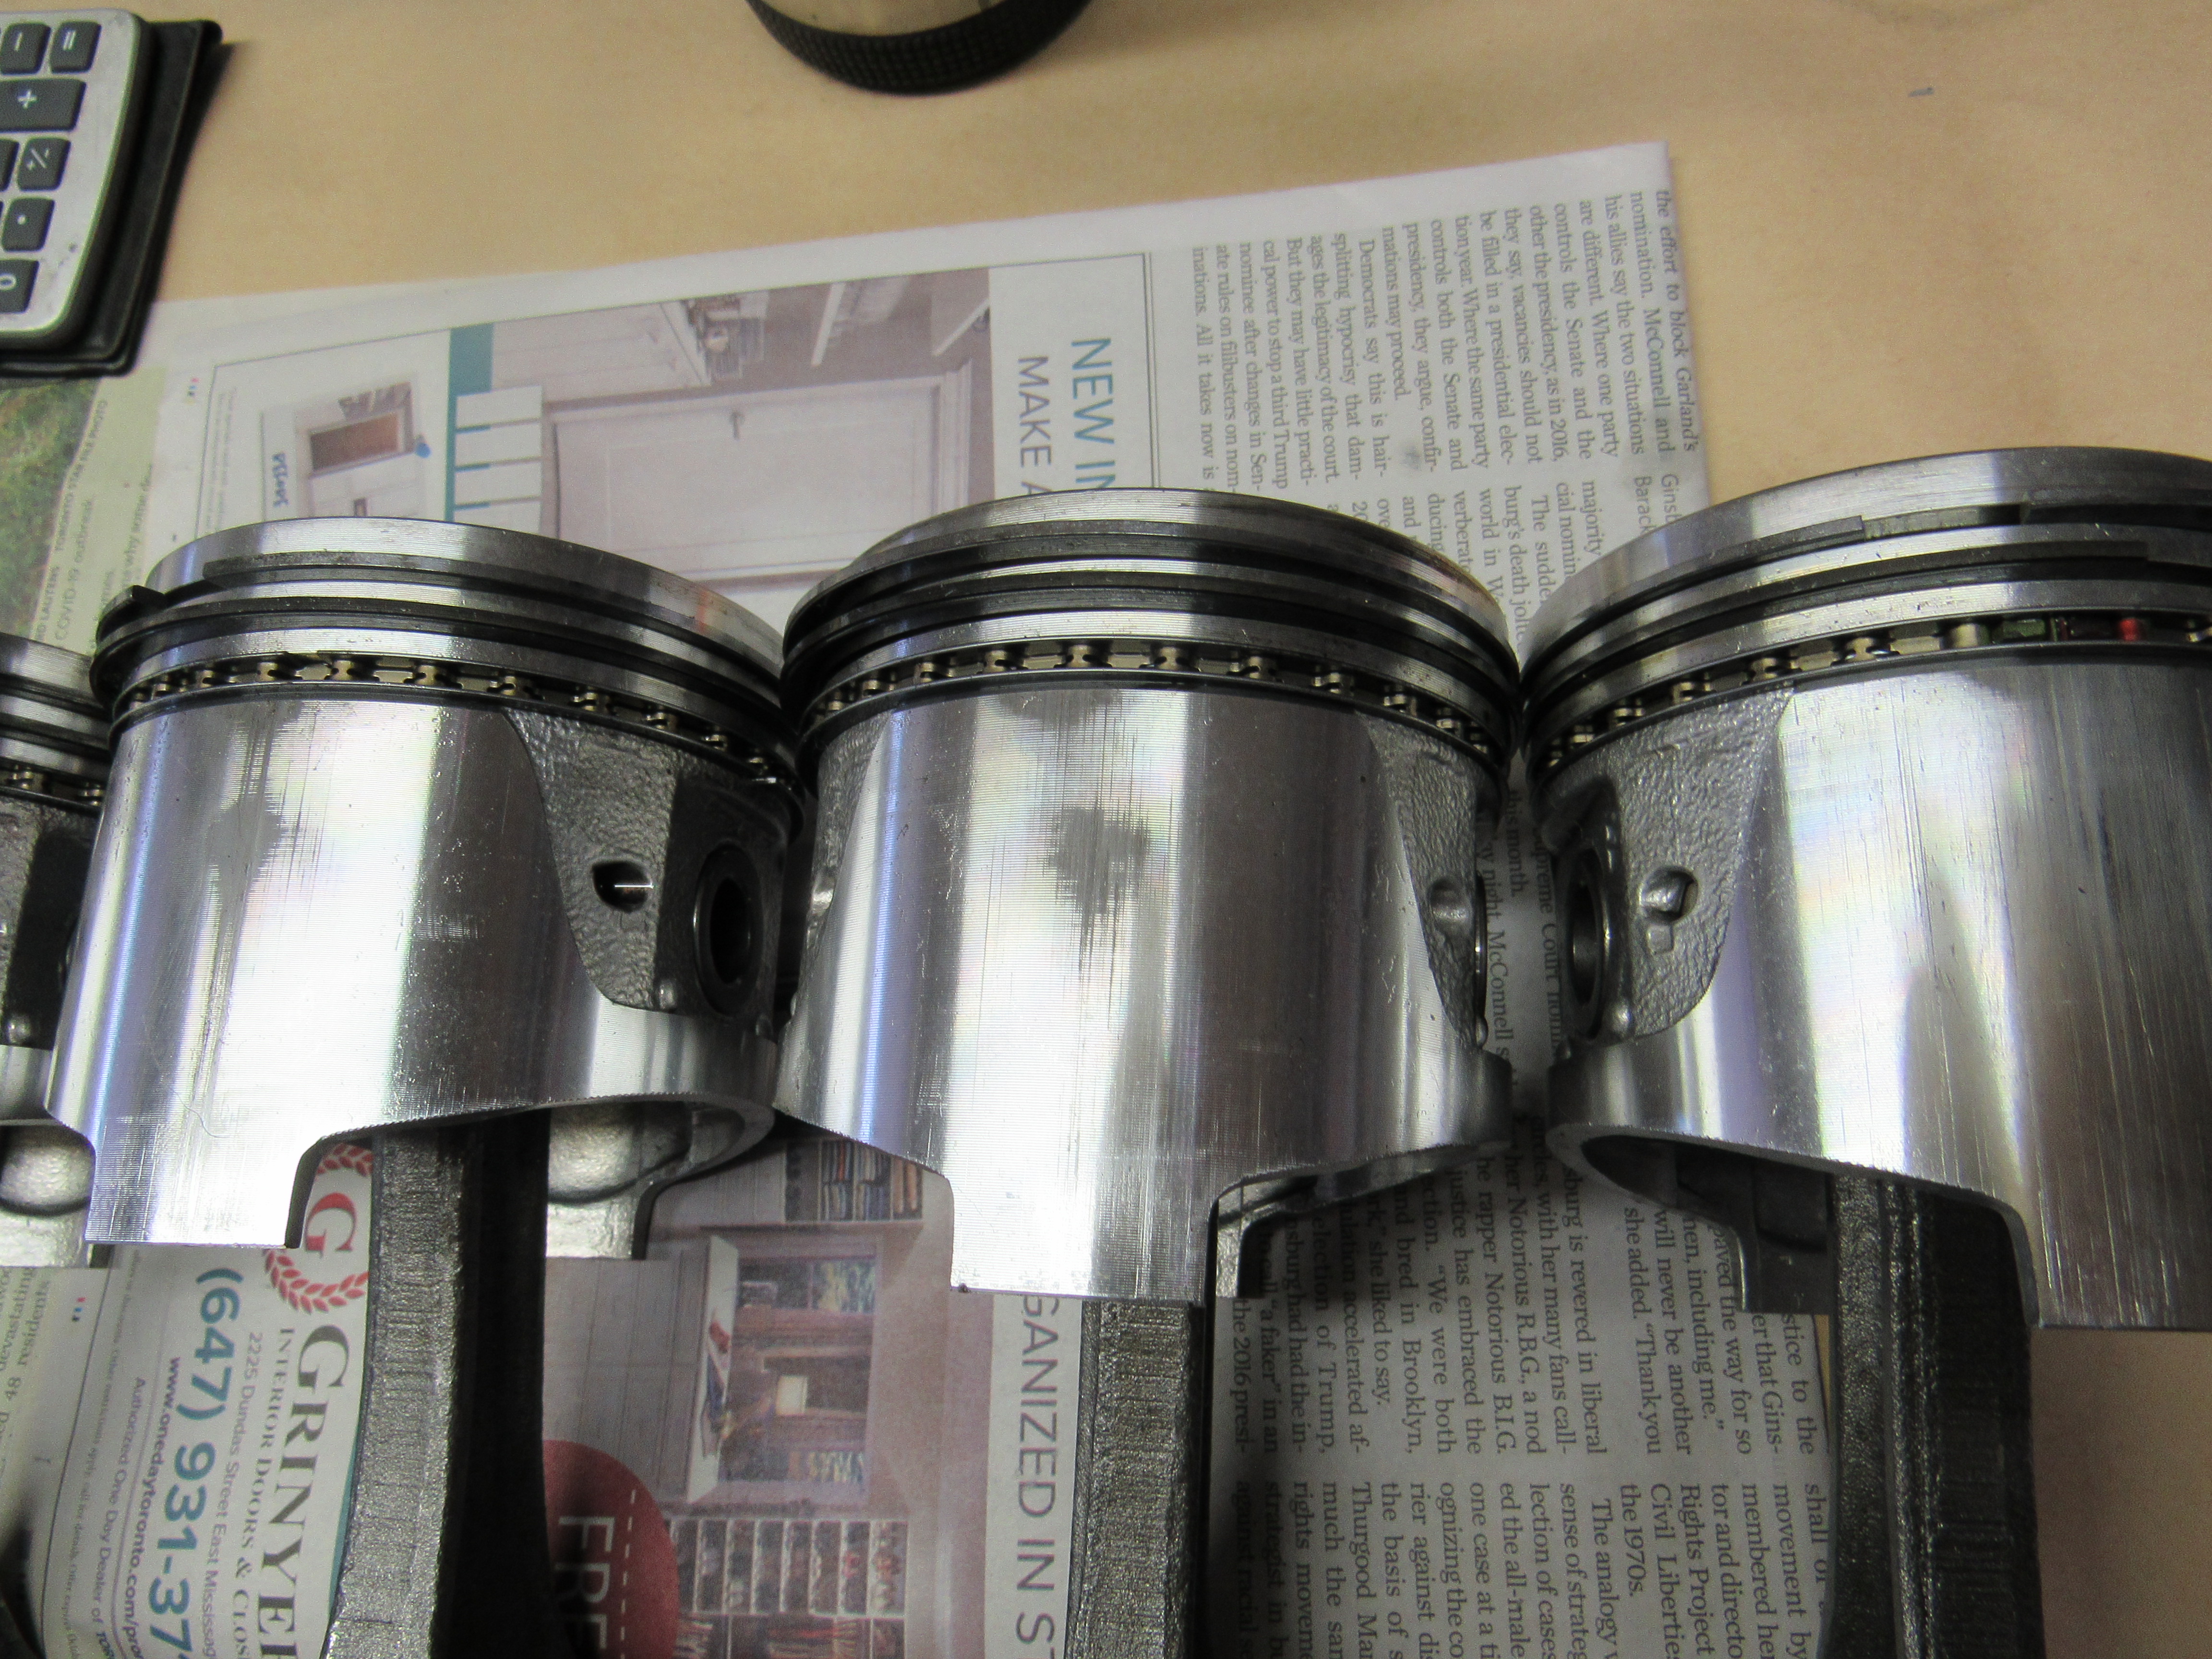
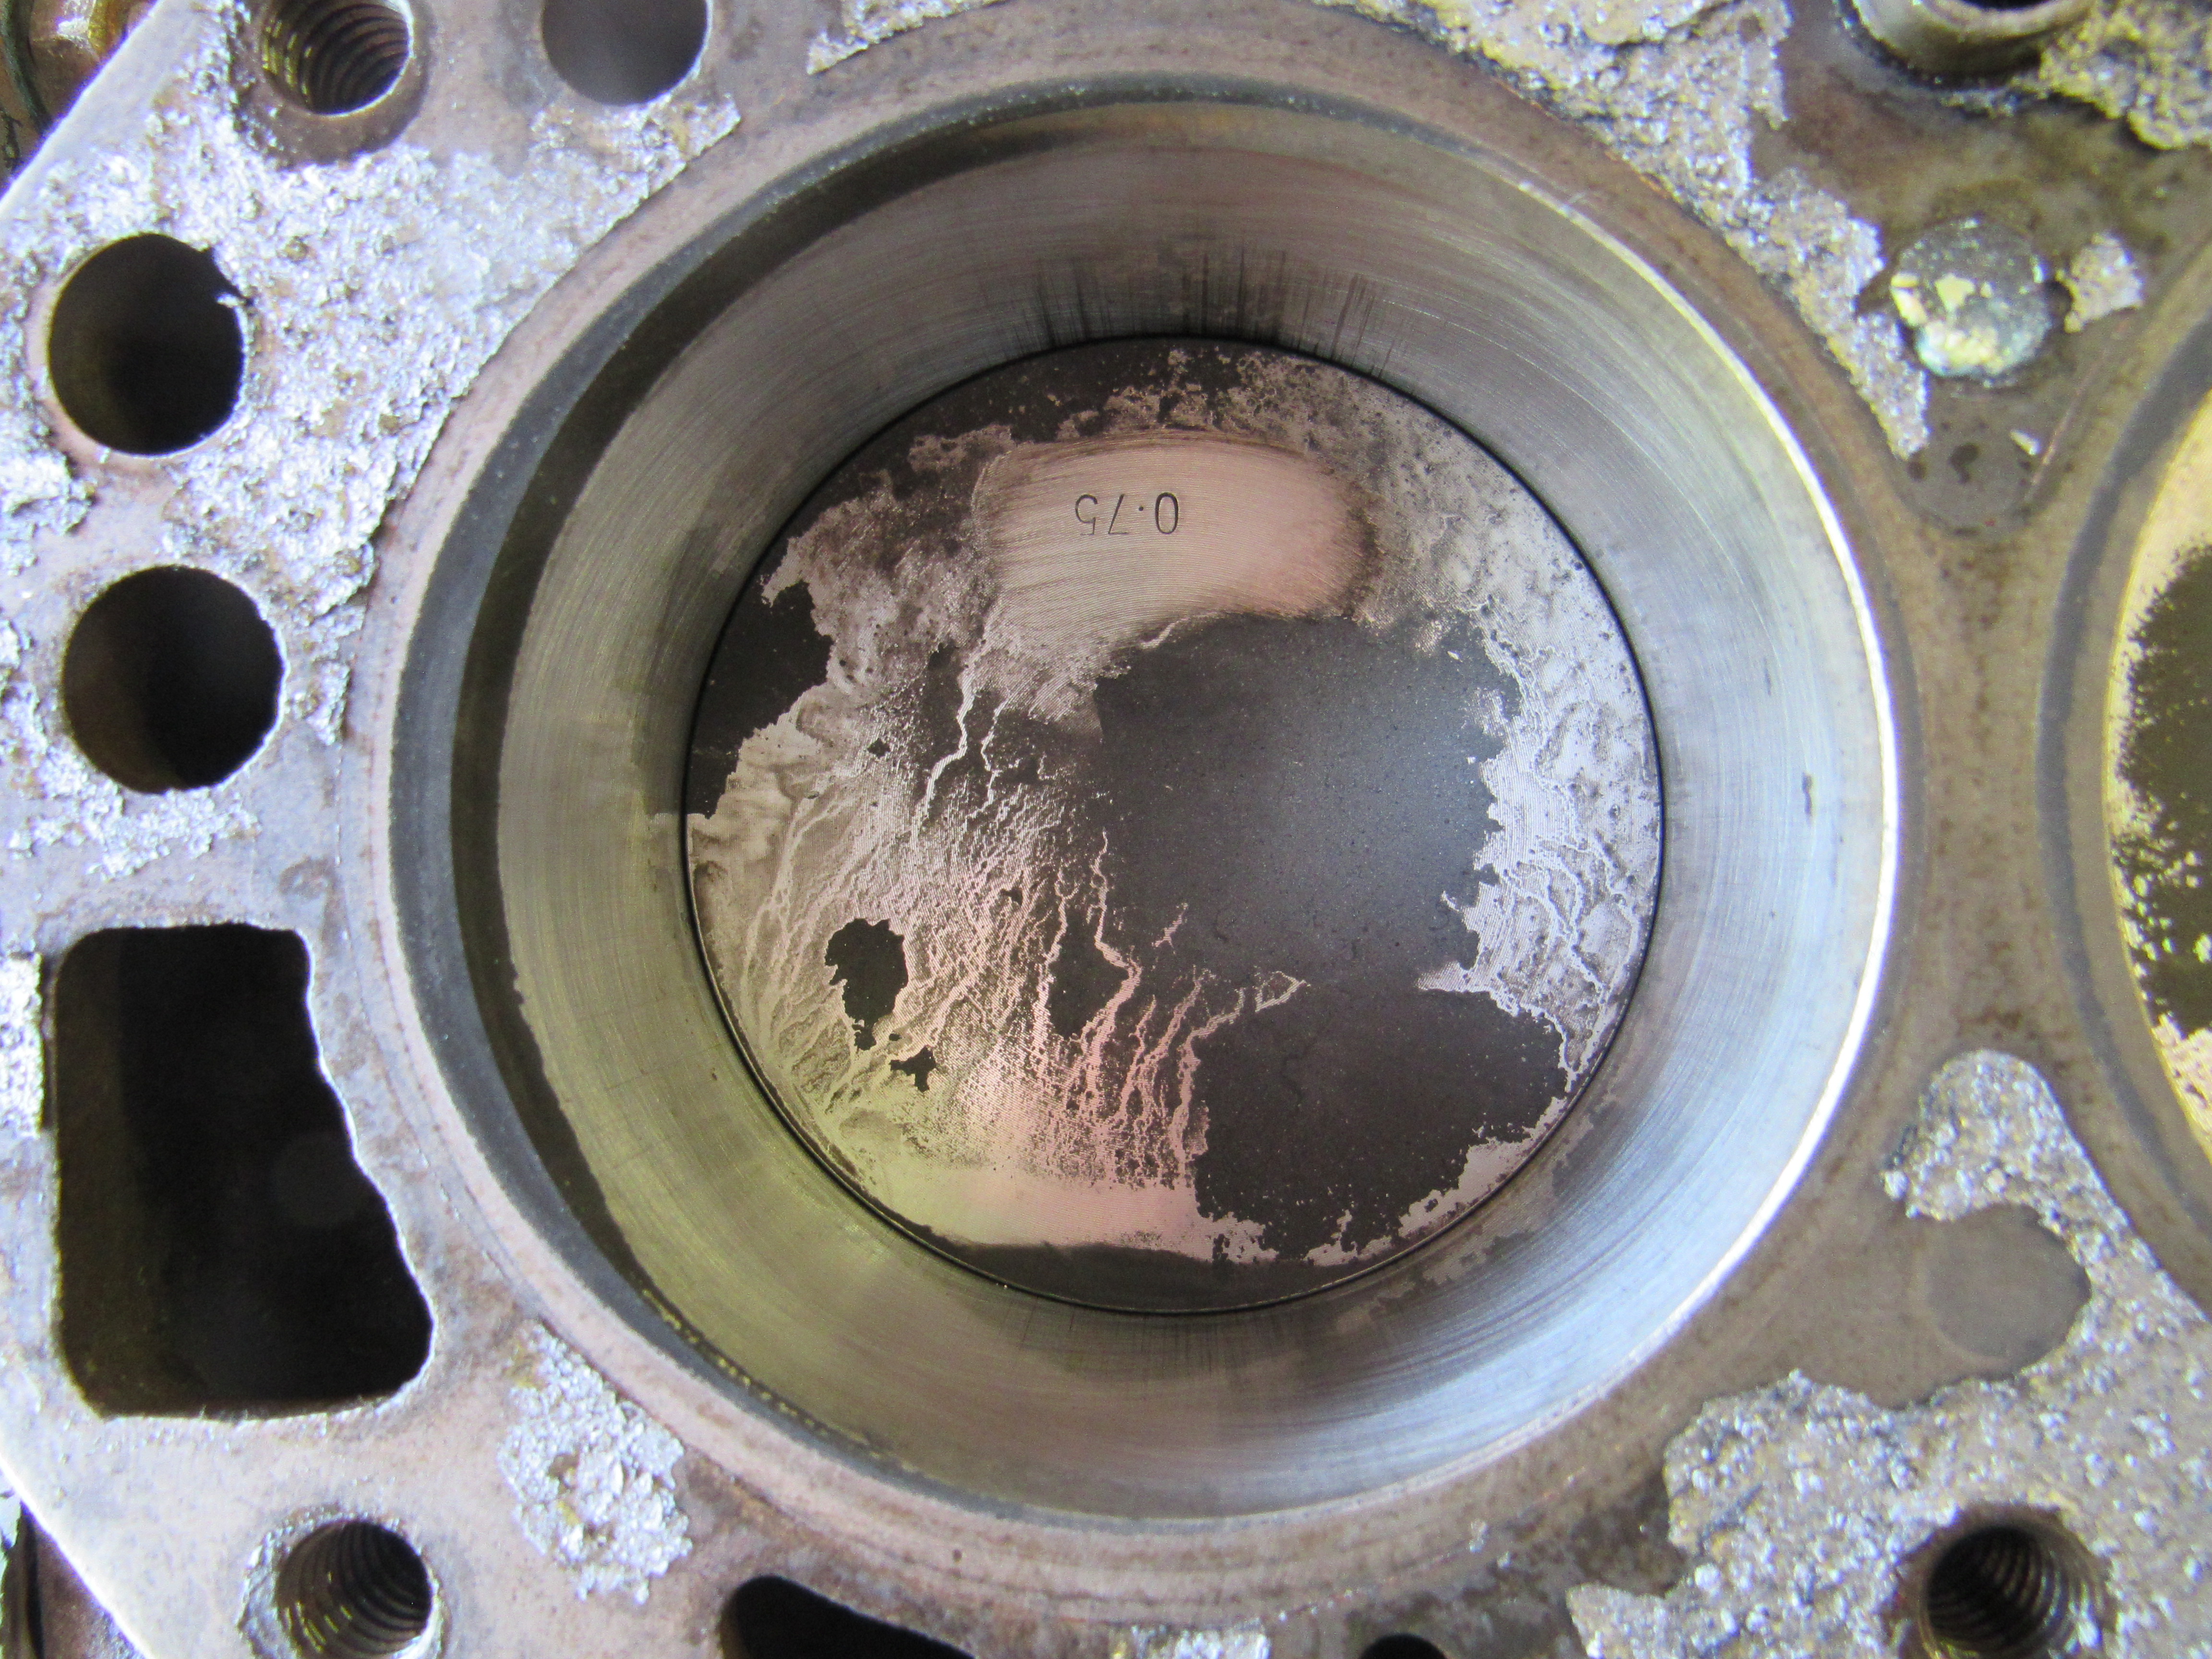
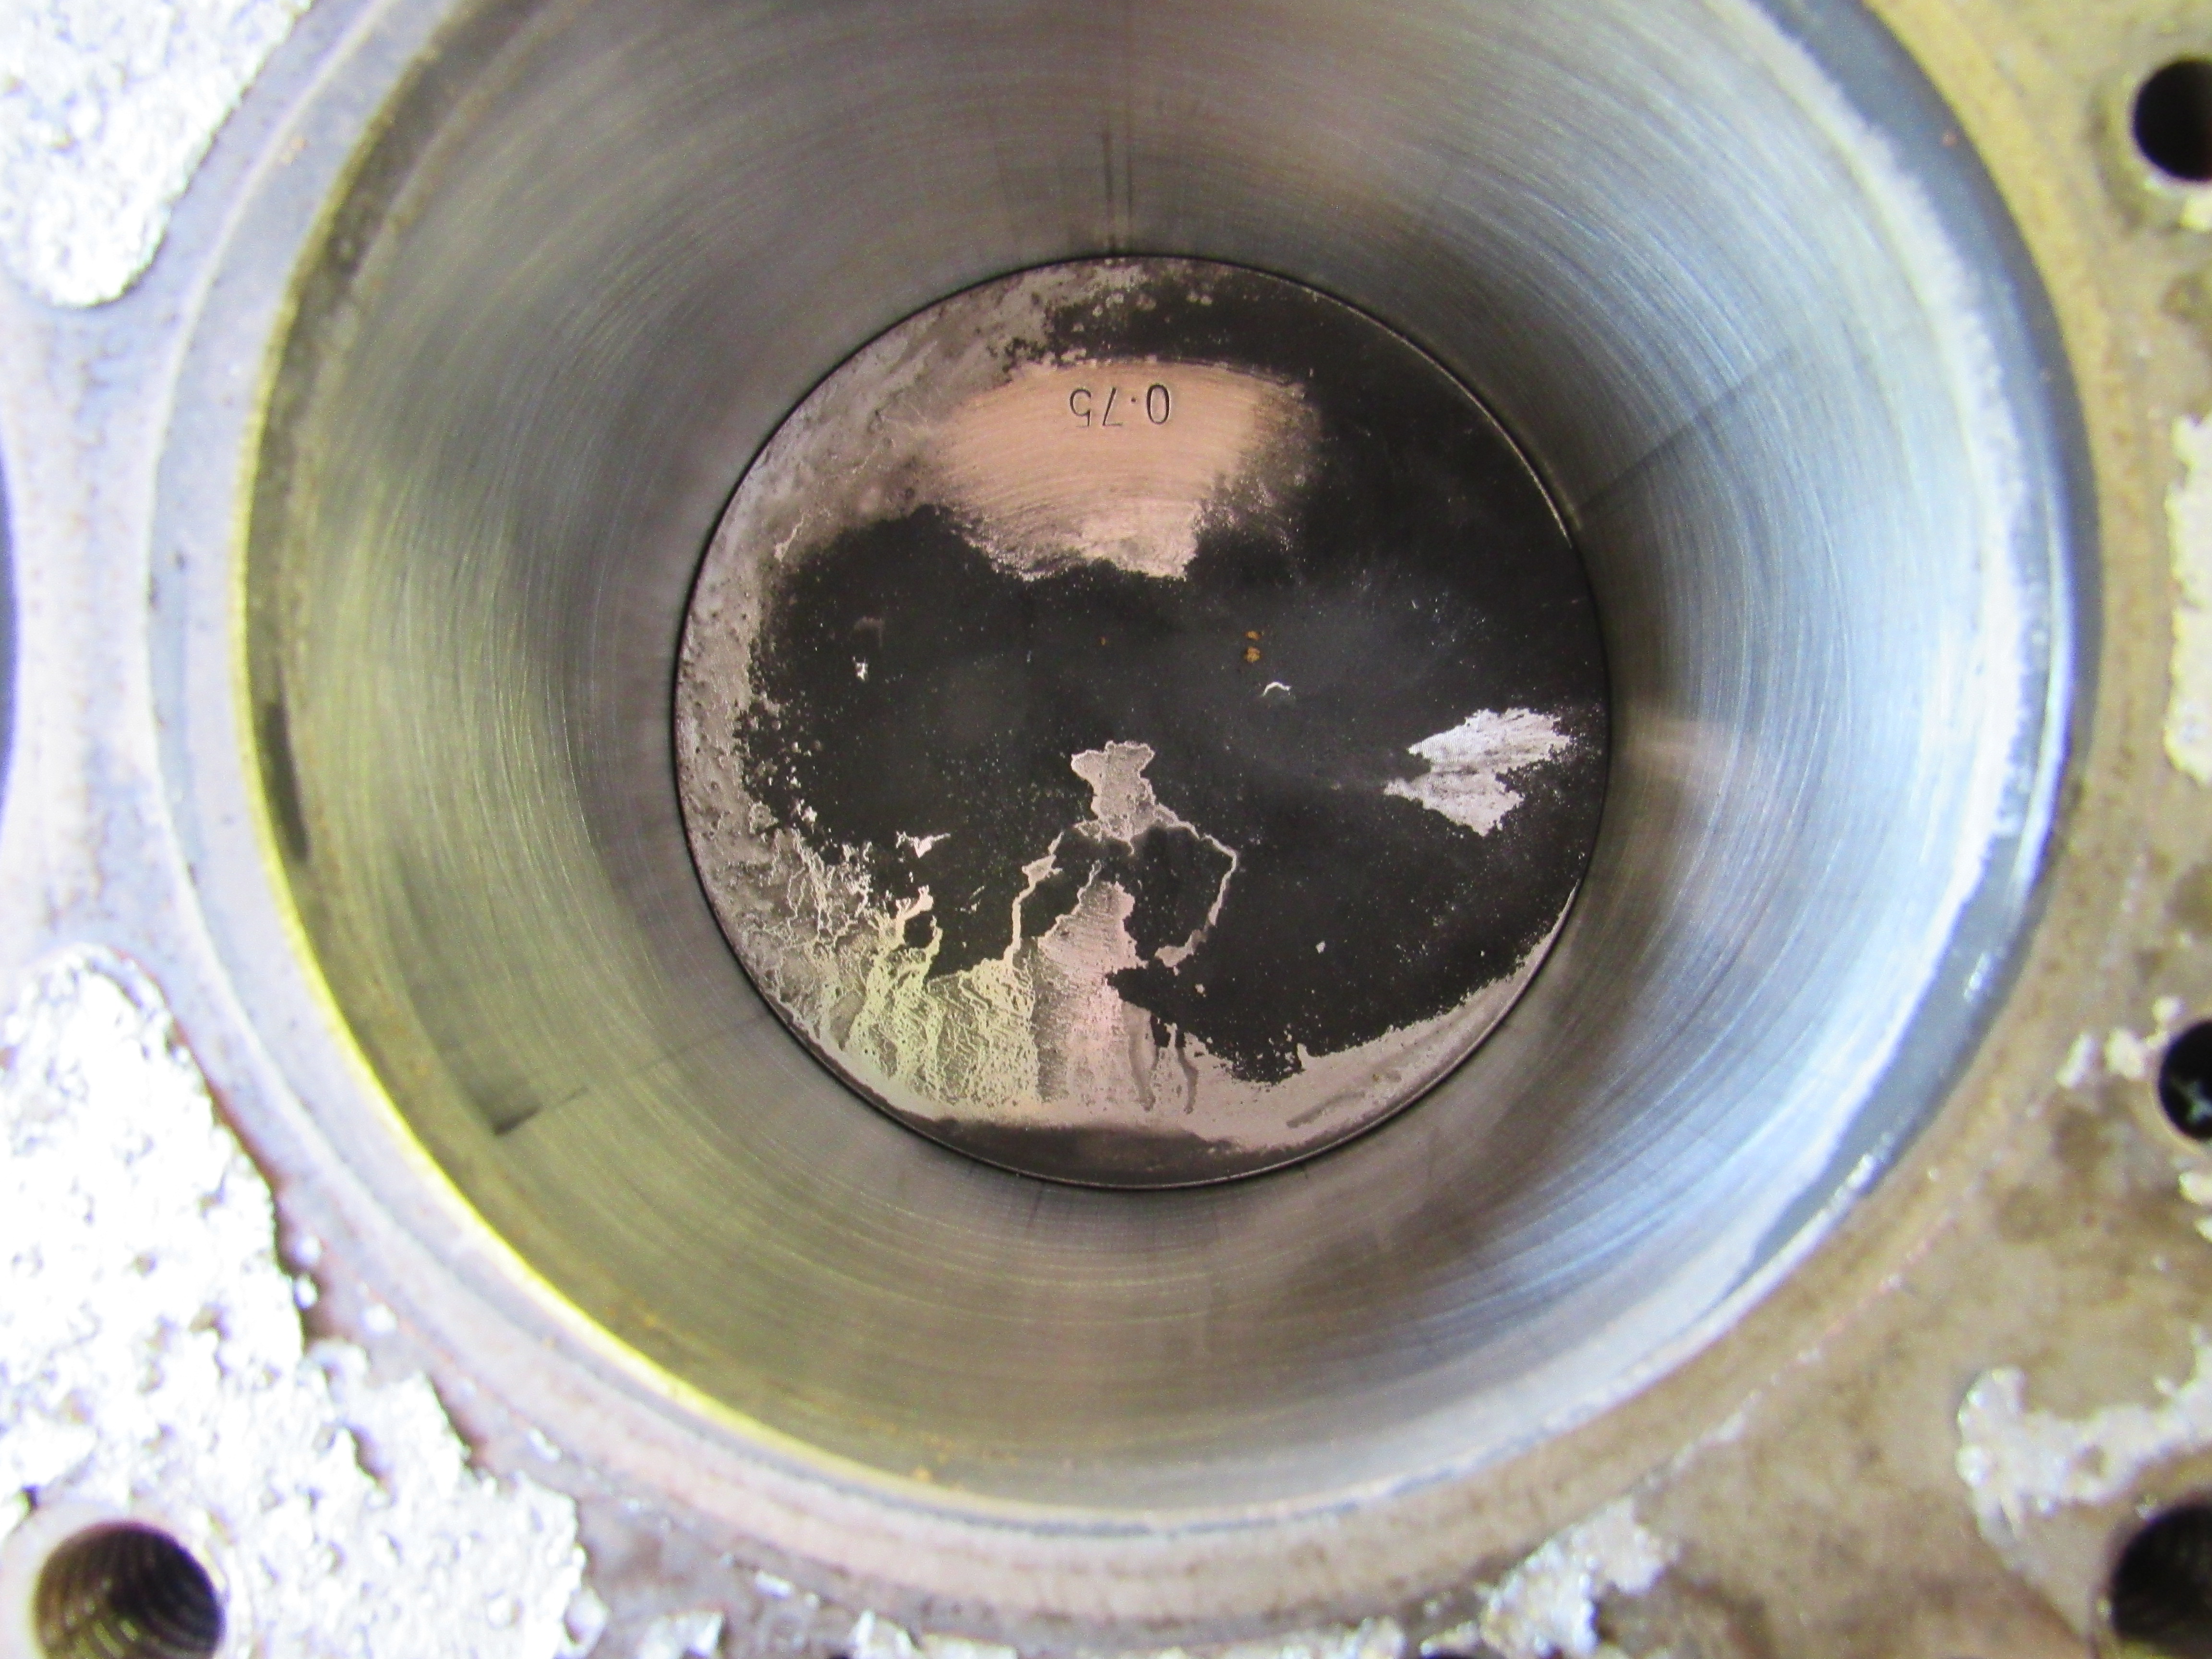
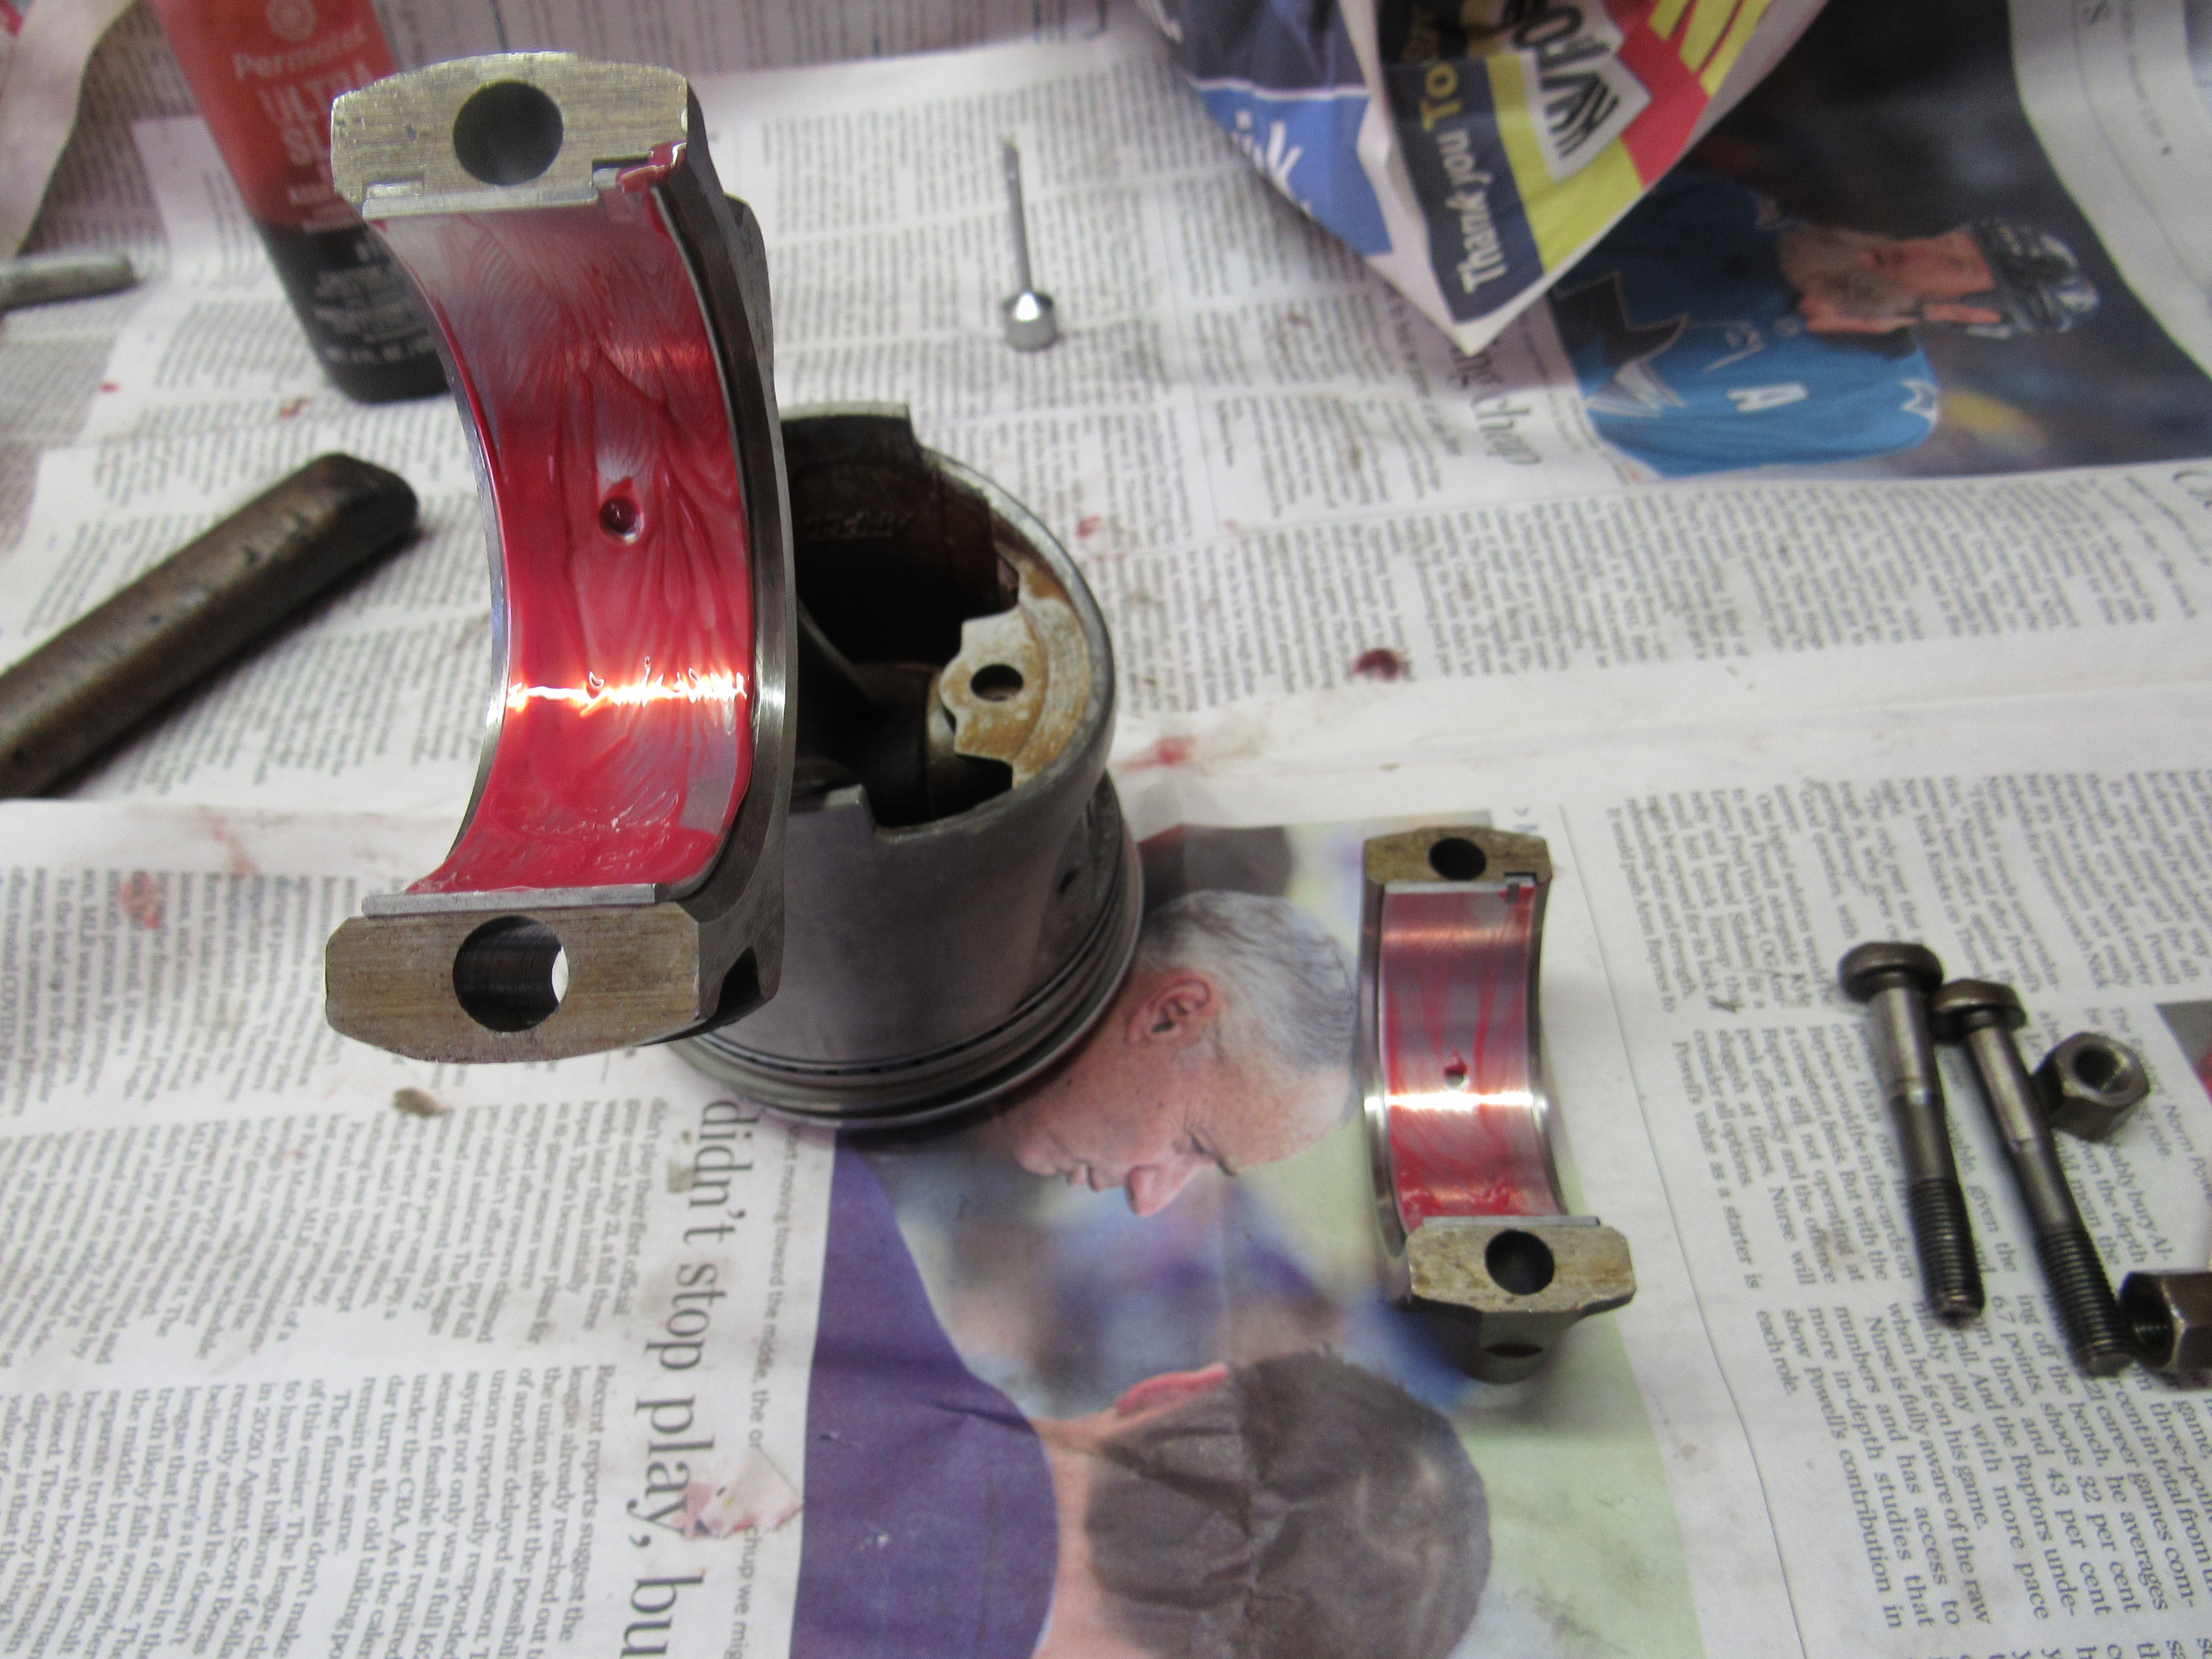
Not sure yet if the pins themselves spin but the conrod moves freely on the pins, will get out the measuring tools tomorrow and get some hard numbers. I was told something about the oil pressure sender not being in place on start up and the oil gushed out, and I have seen signs of gasoline flooding the cylinders, washing the carbon off and pooling as in these pics so the gas would have washed any lubrication off the walls.


-
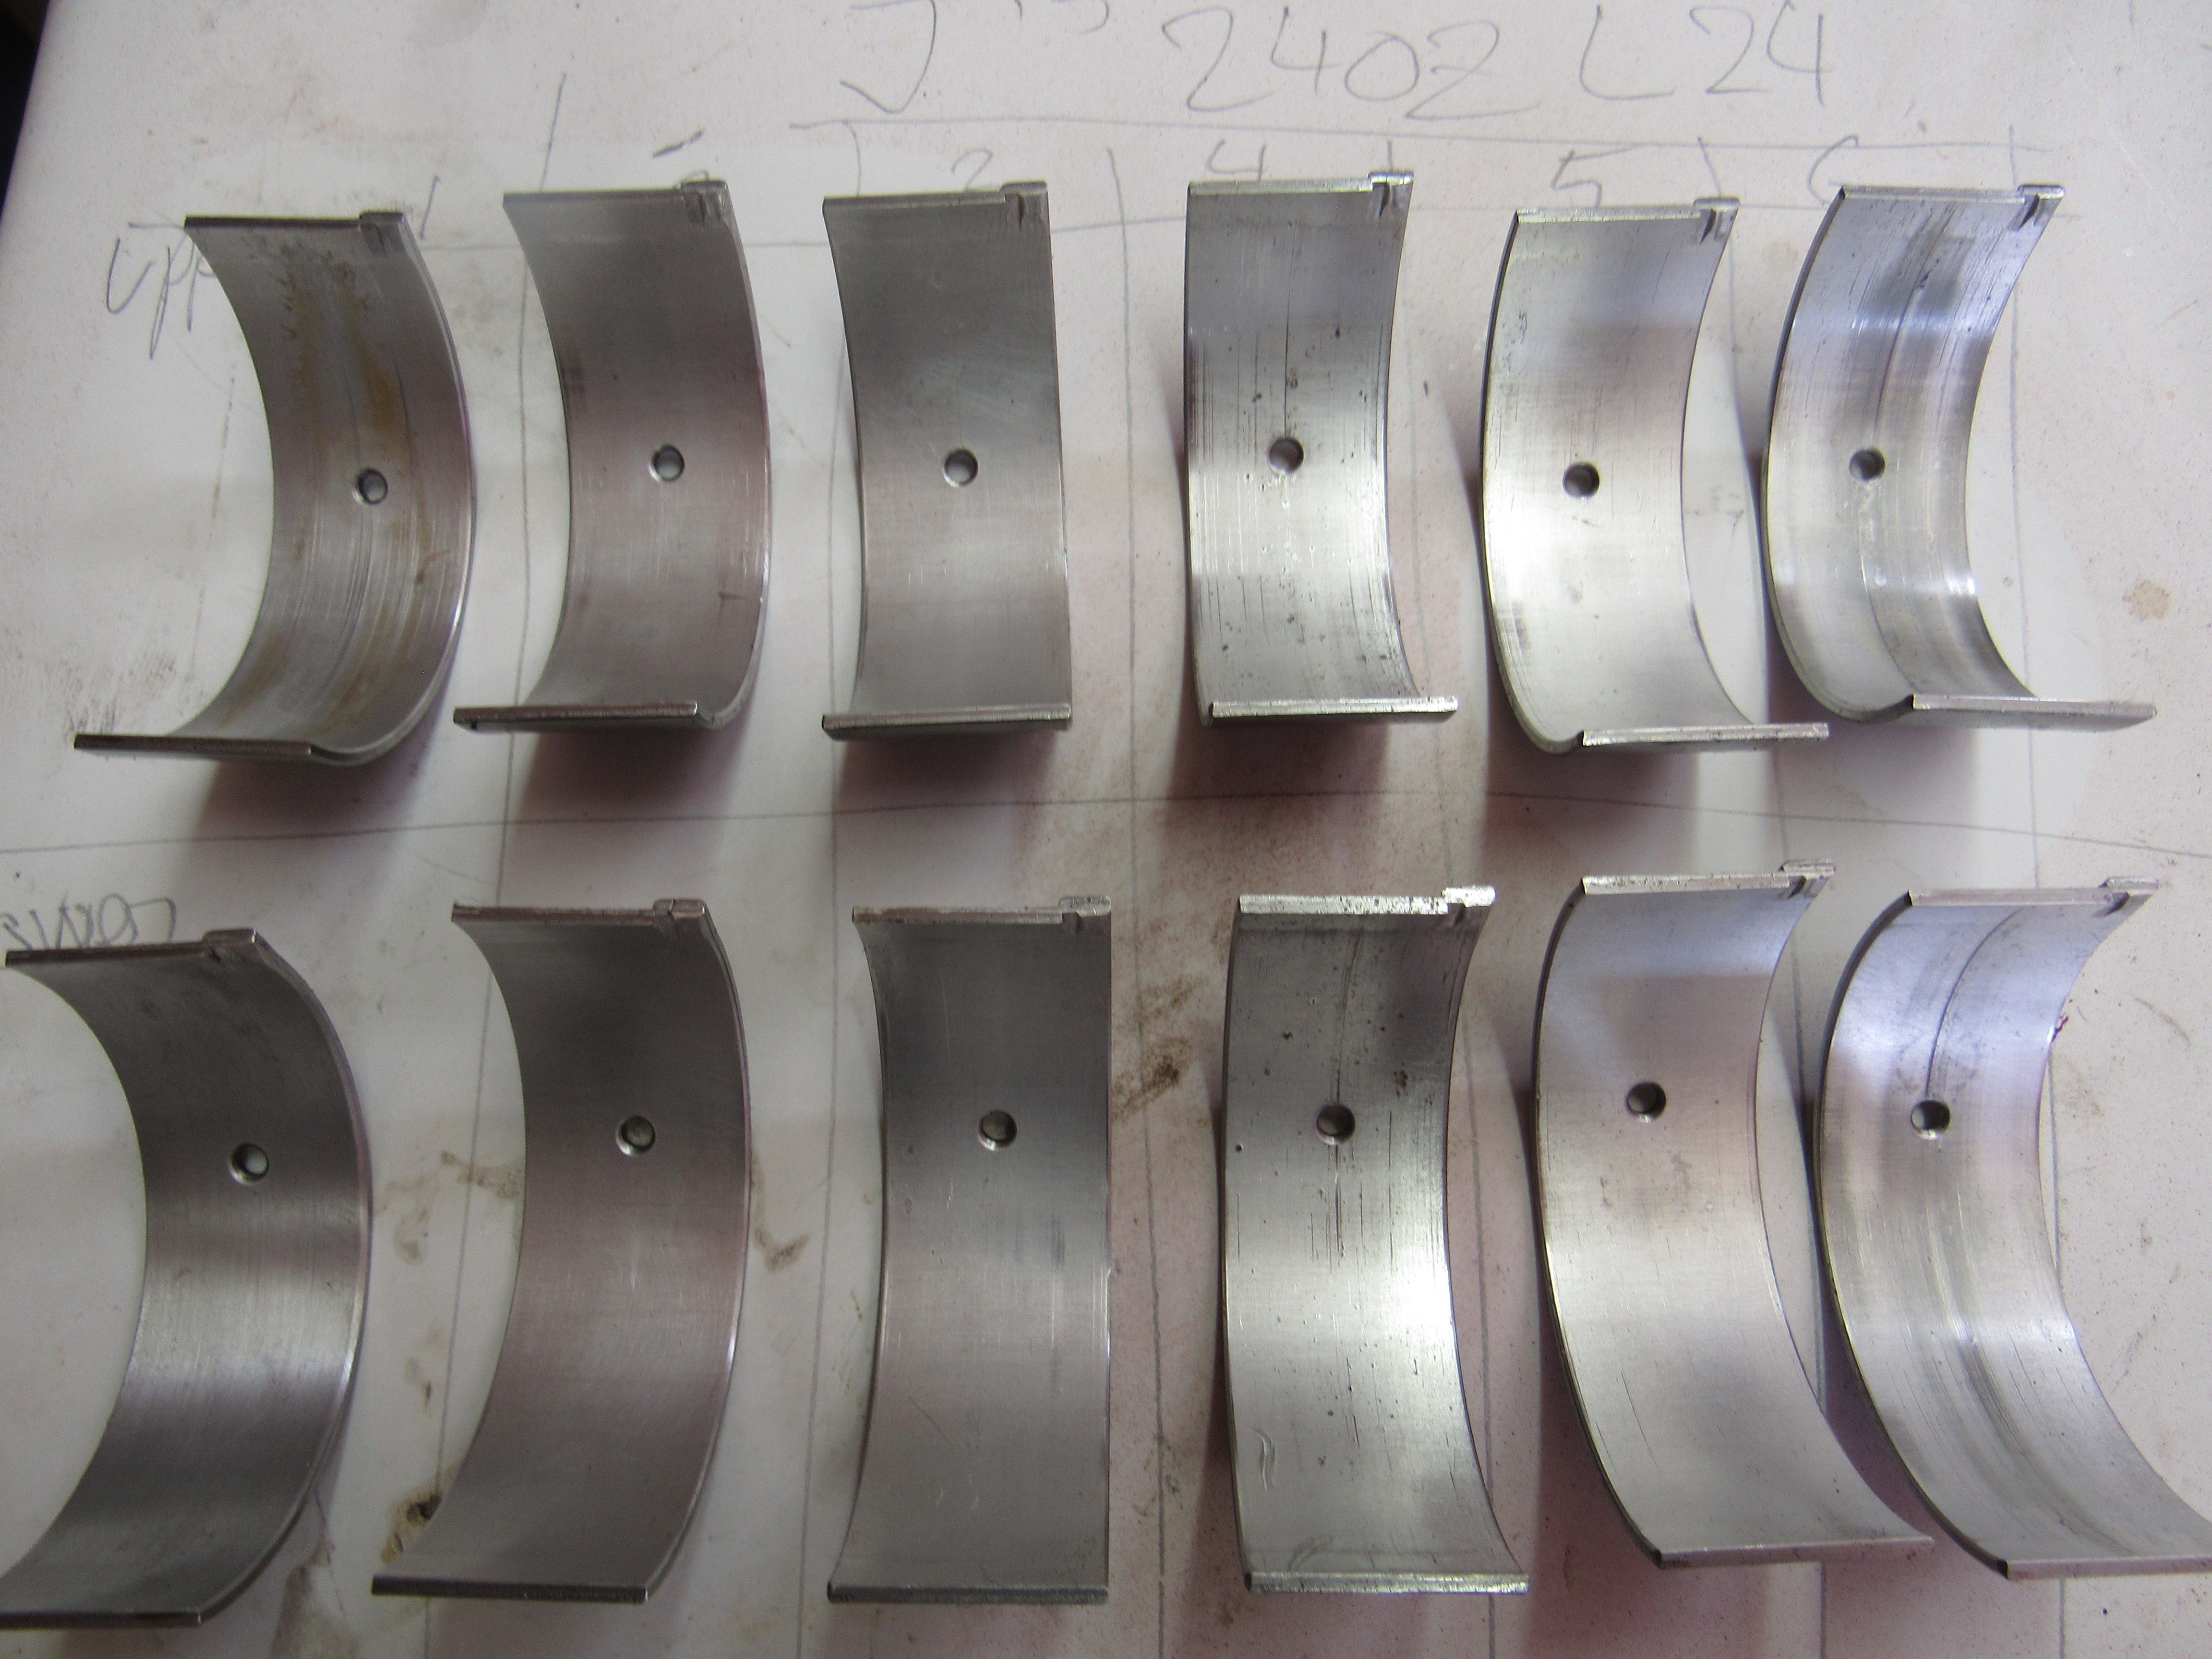
I believe there is only a few minutes running time on an engine I'm tearing down at the moment. This is the #1 cylinder and is the worst one, there is a minor amount on a couple of others. Also, the rod bearing shells.


-
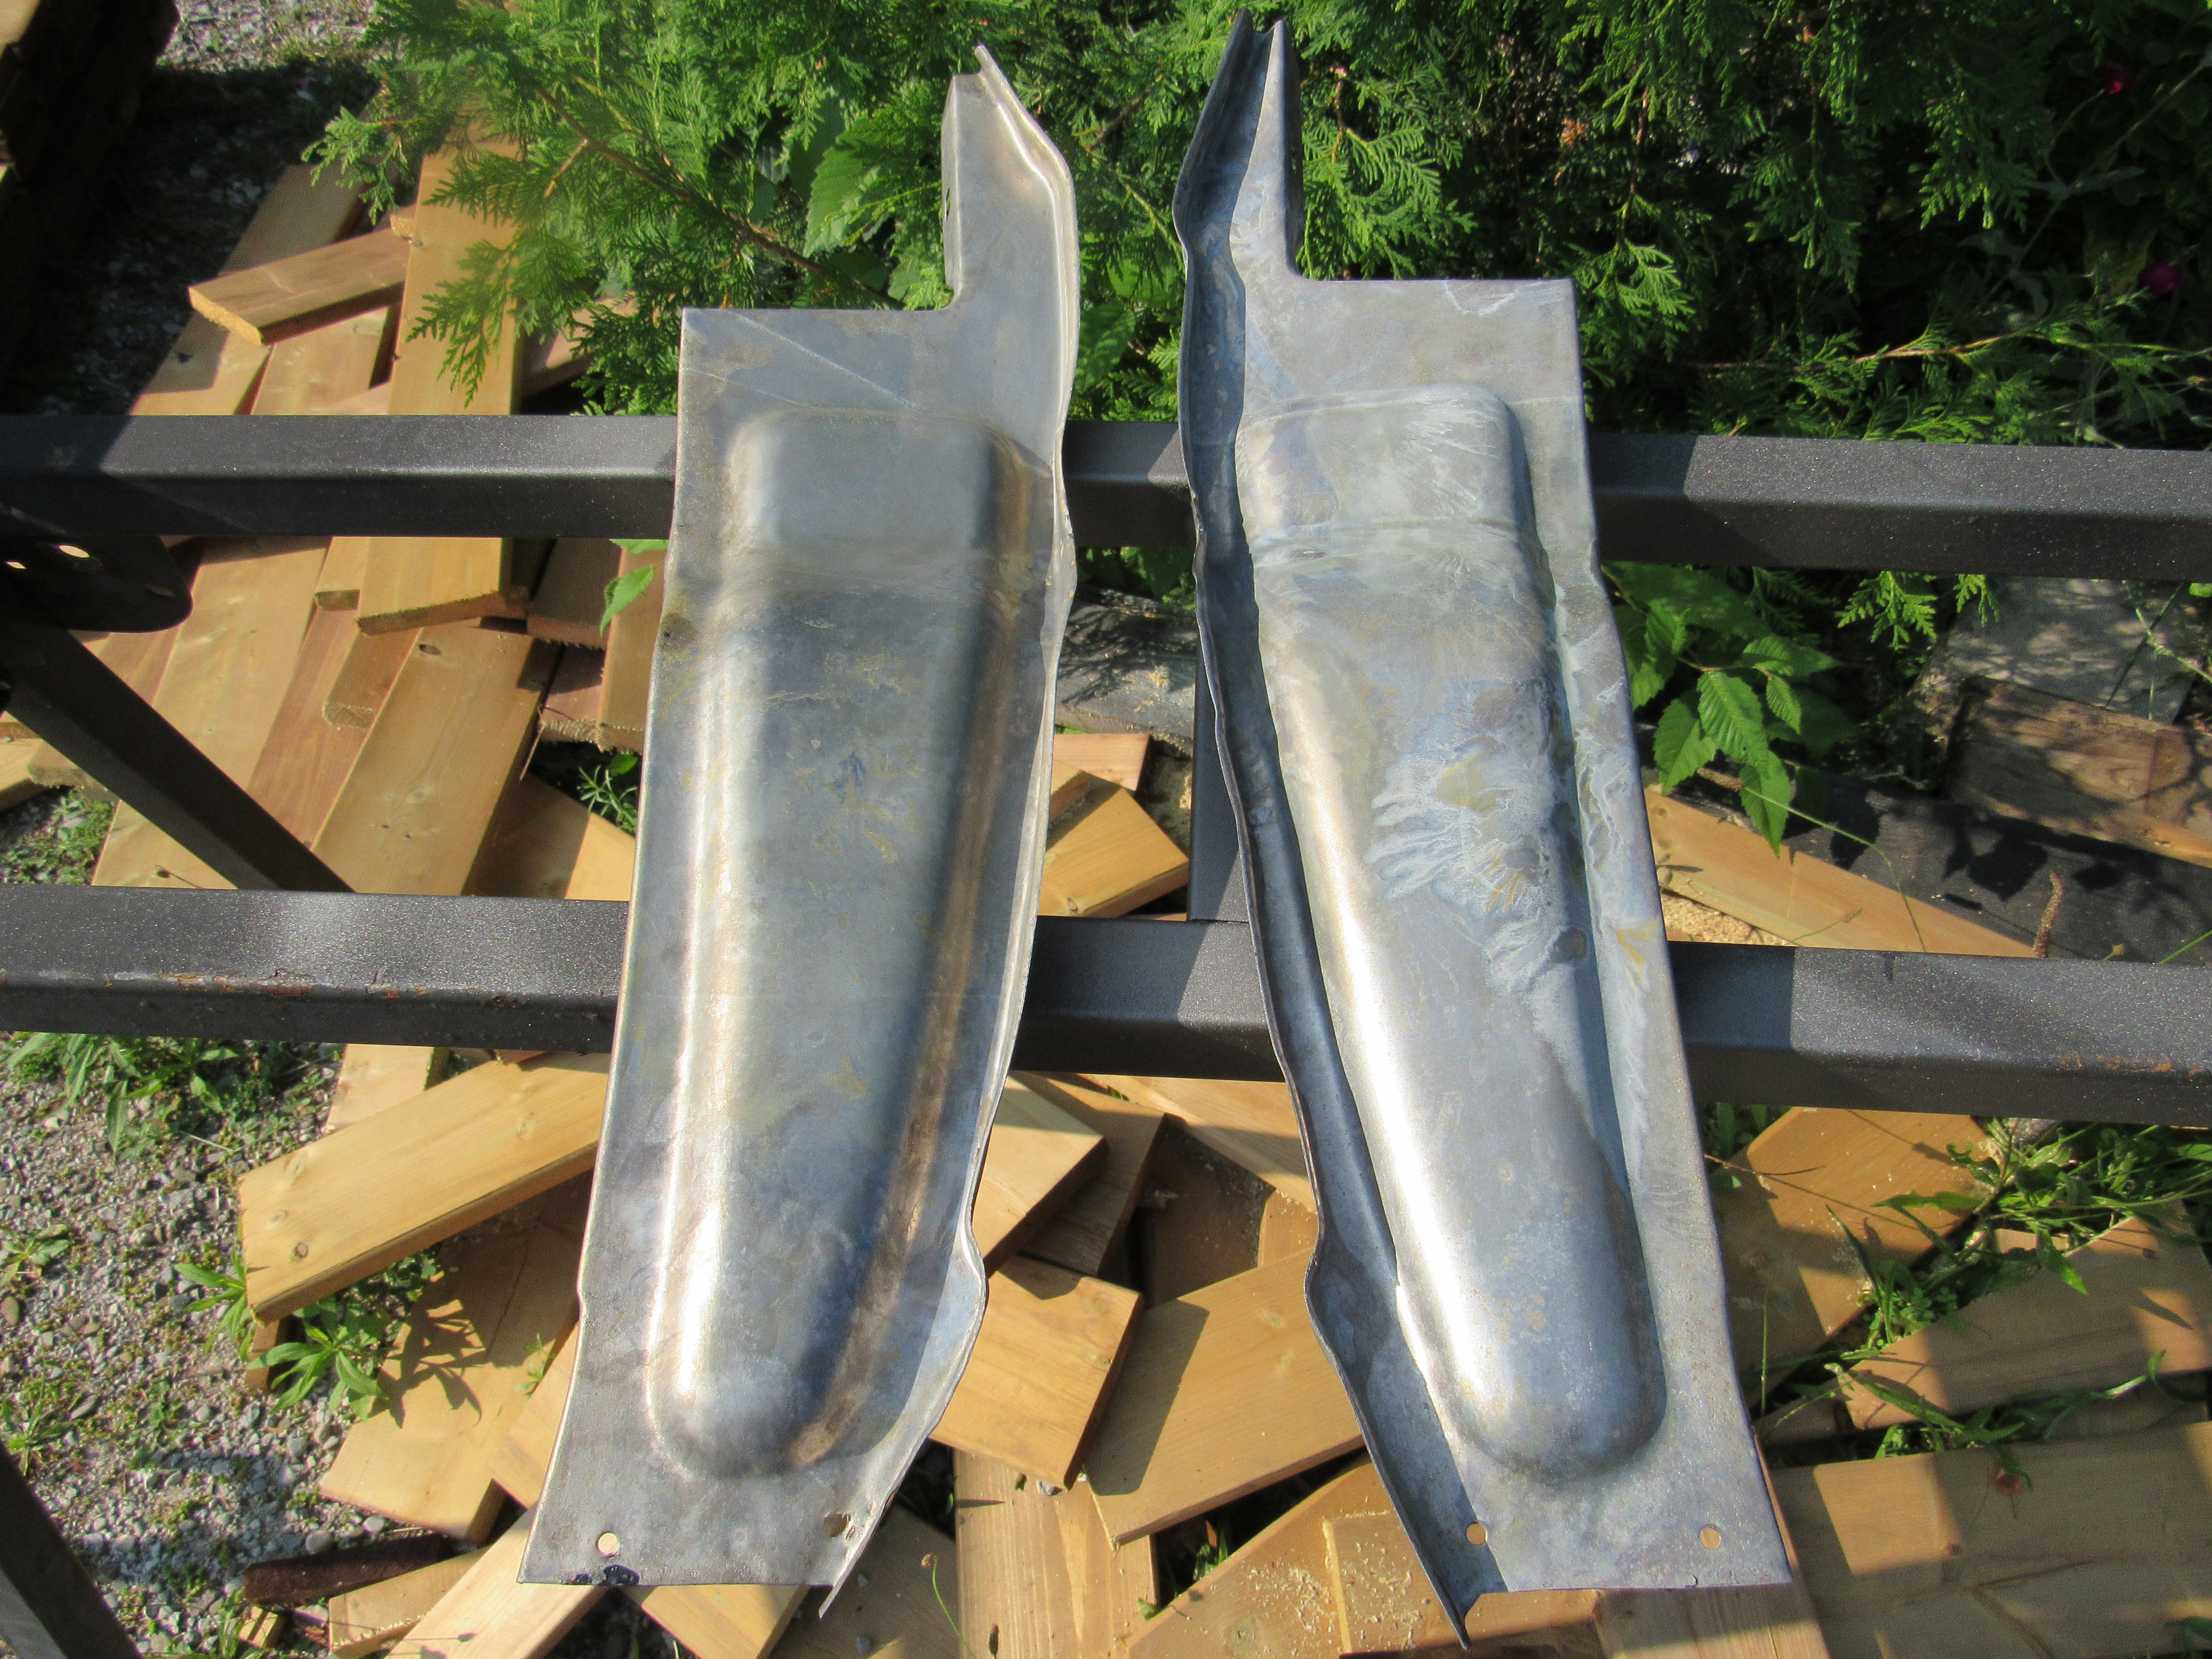
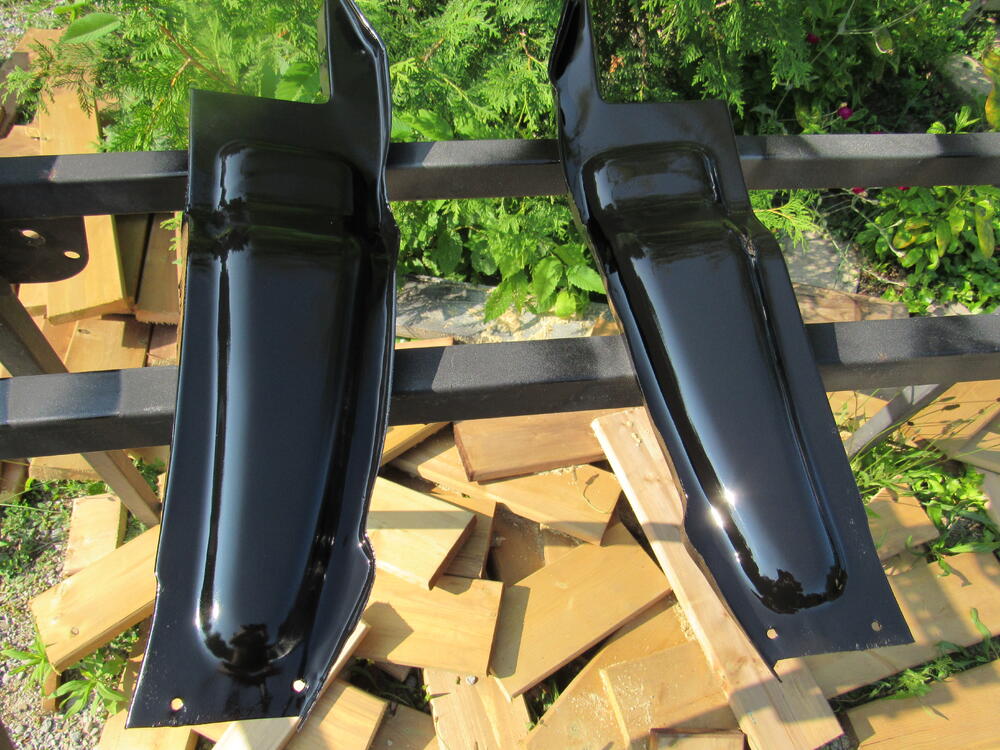
24hrs in a pan of Lye (sodium hydroxide) then a heat gun and a putty knife. I call them mud guards as that's all they are really doing.
-
AEM was a low cost alternative 15-20 yrs ago, they've been going down hill since then, their digital gauges are junk as well. I guess it's the Amazon business model, keep selling the same inferior stuff and most people will just throw it out and not complain.
-
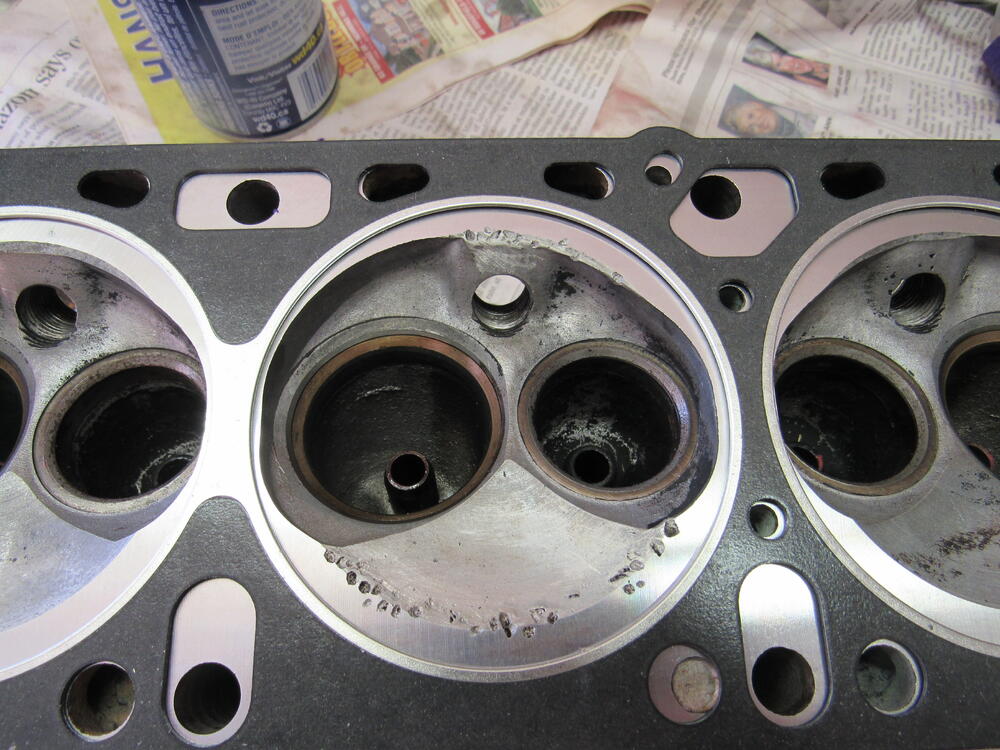
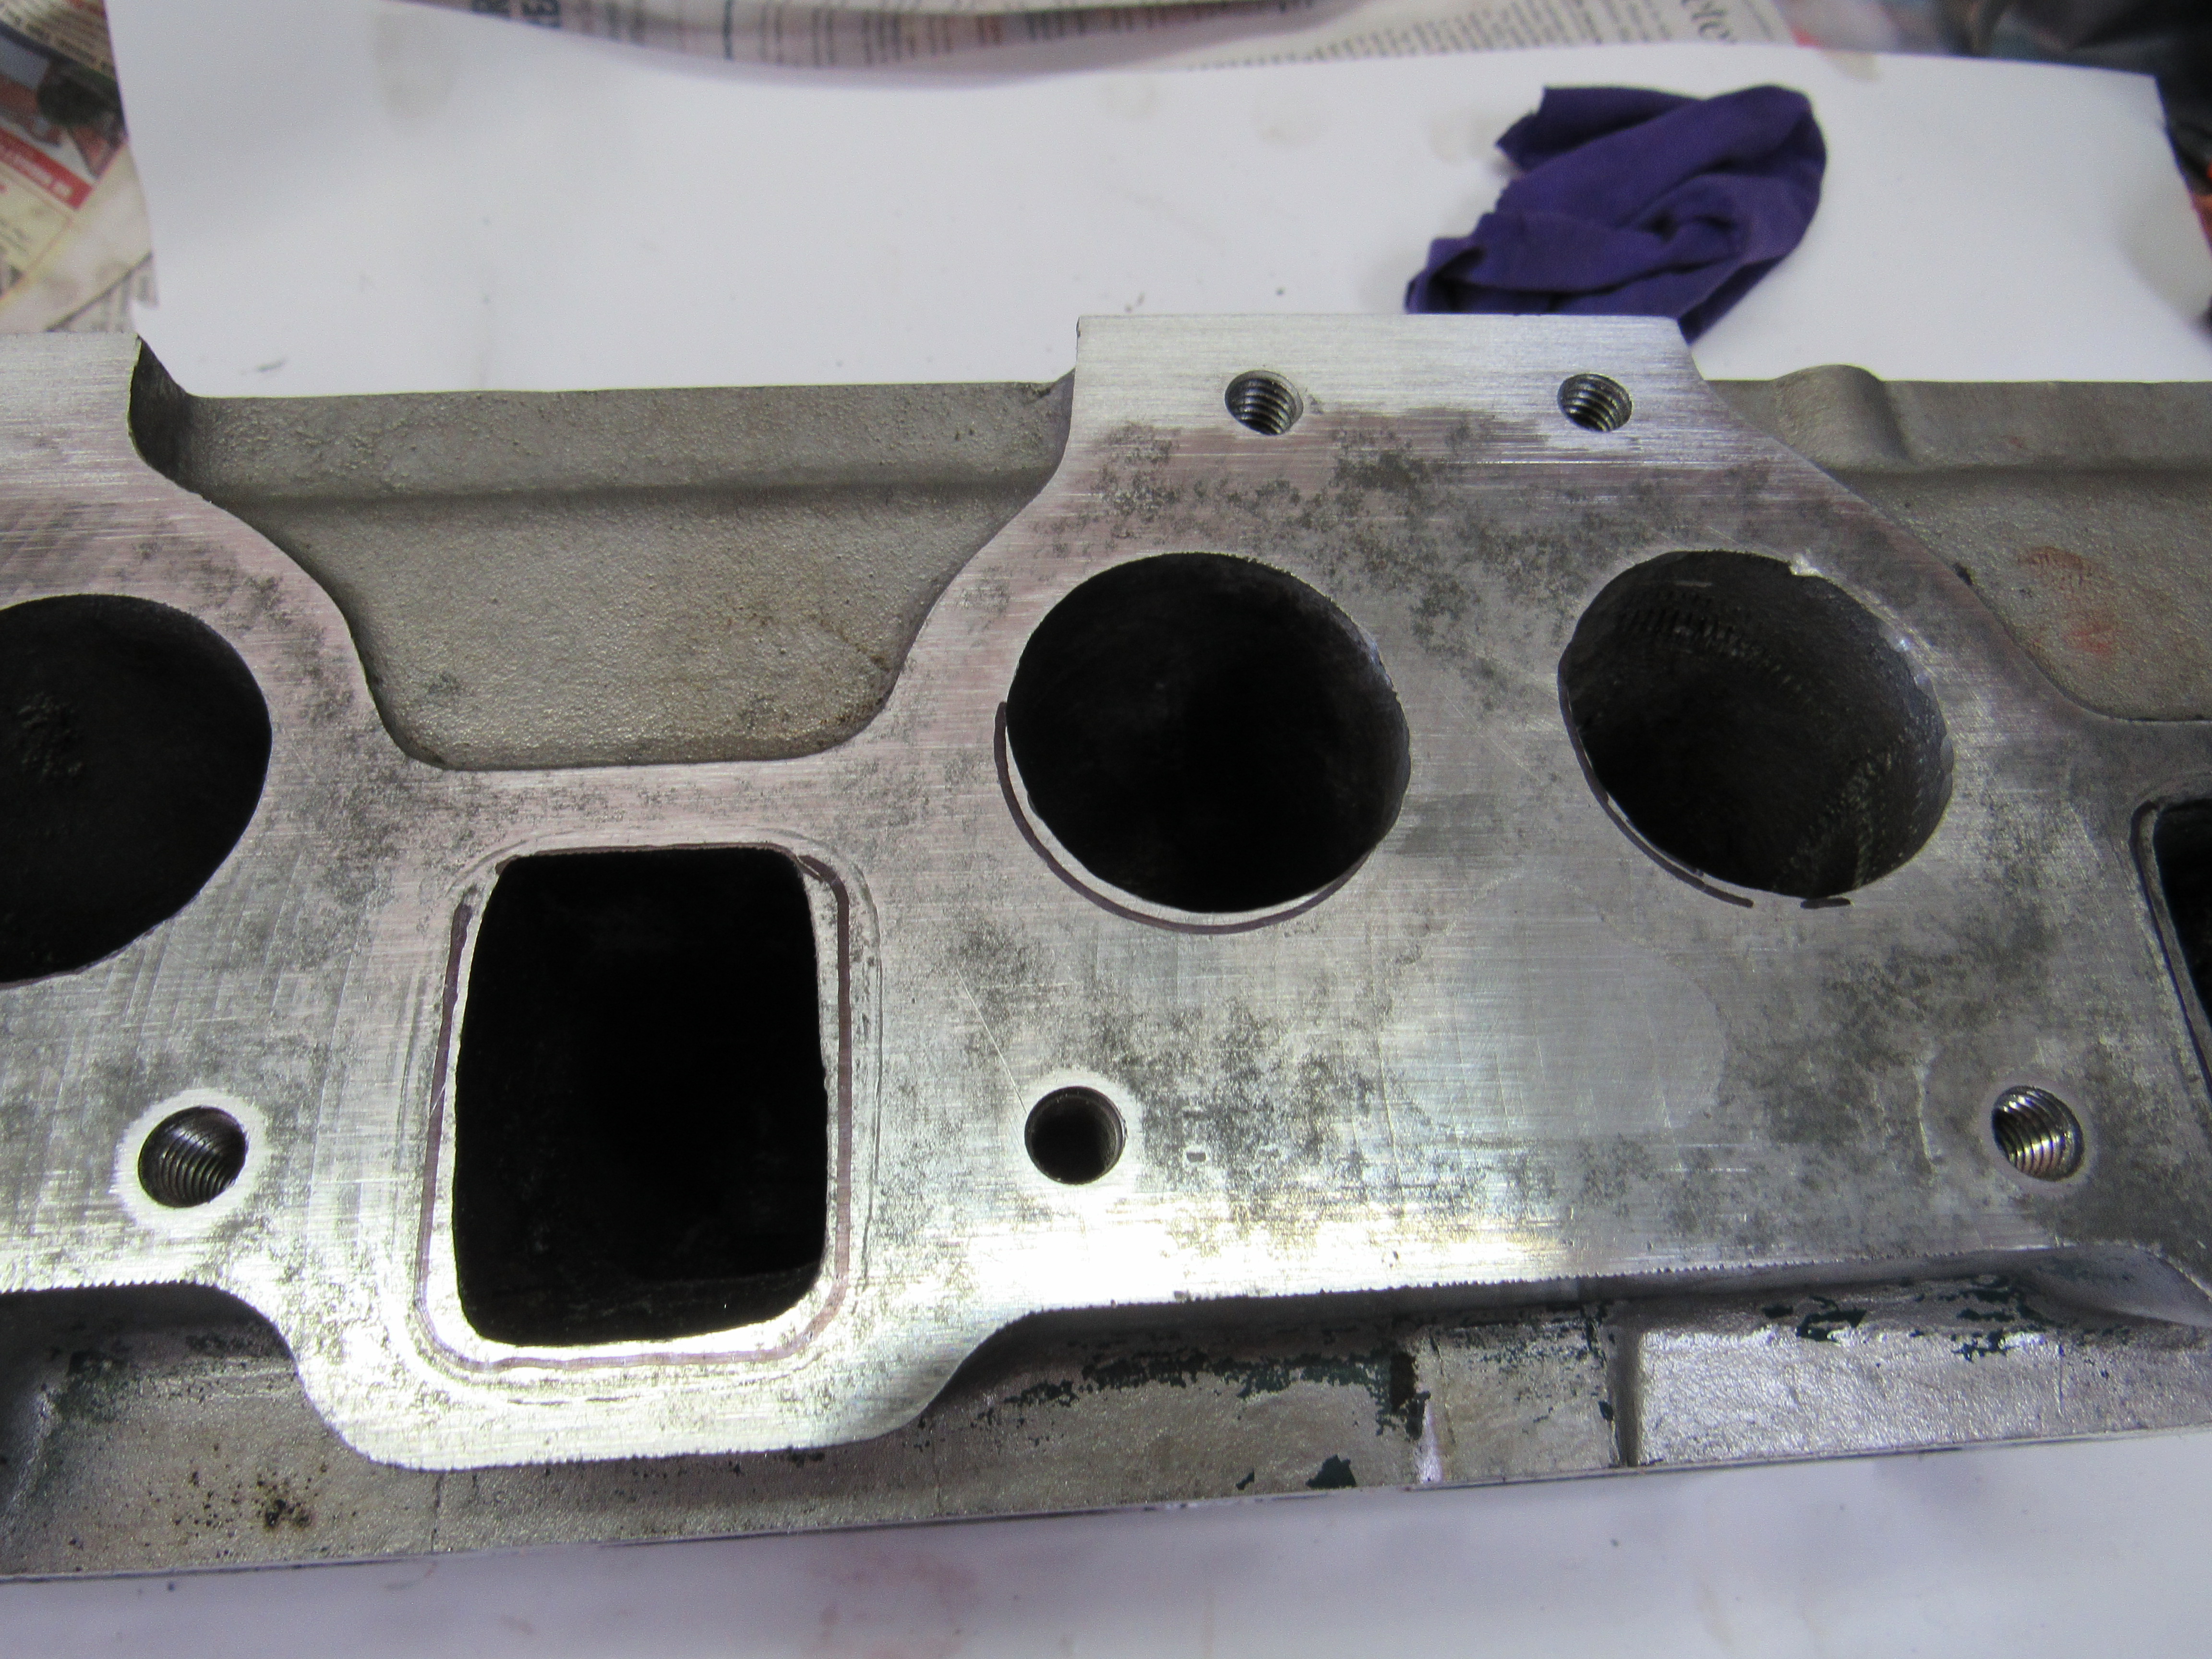
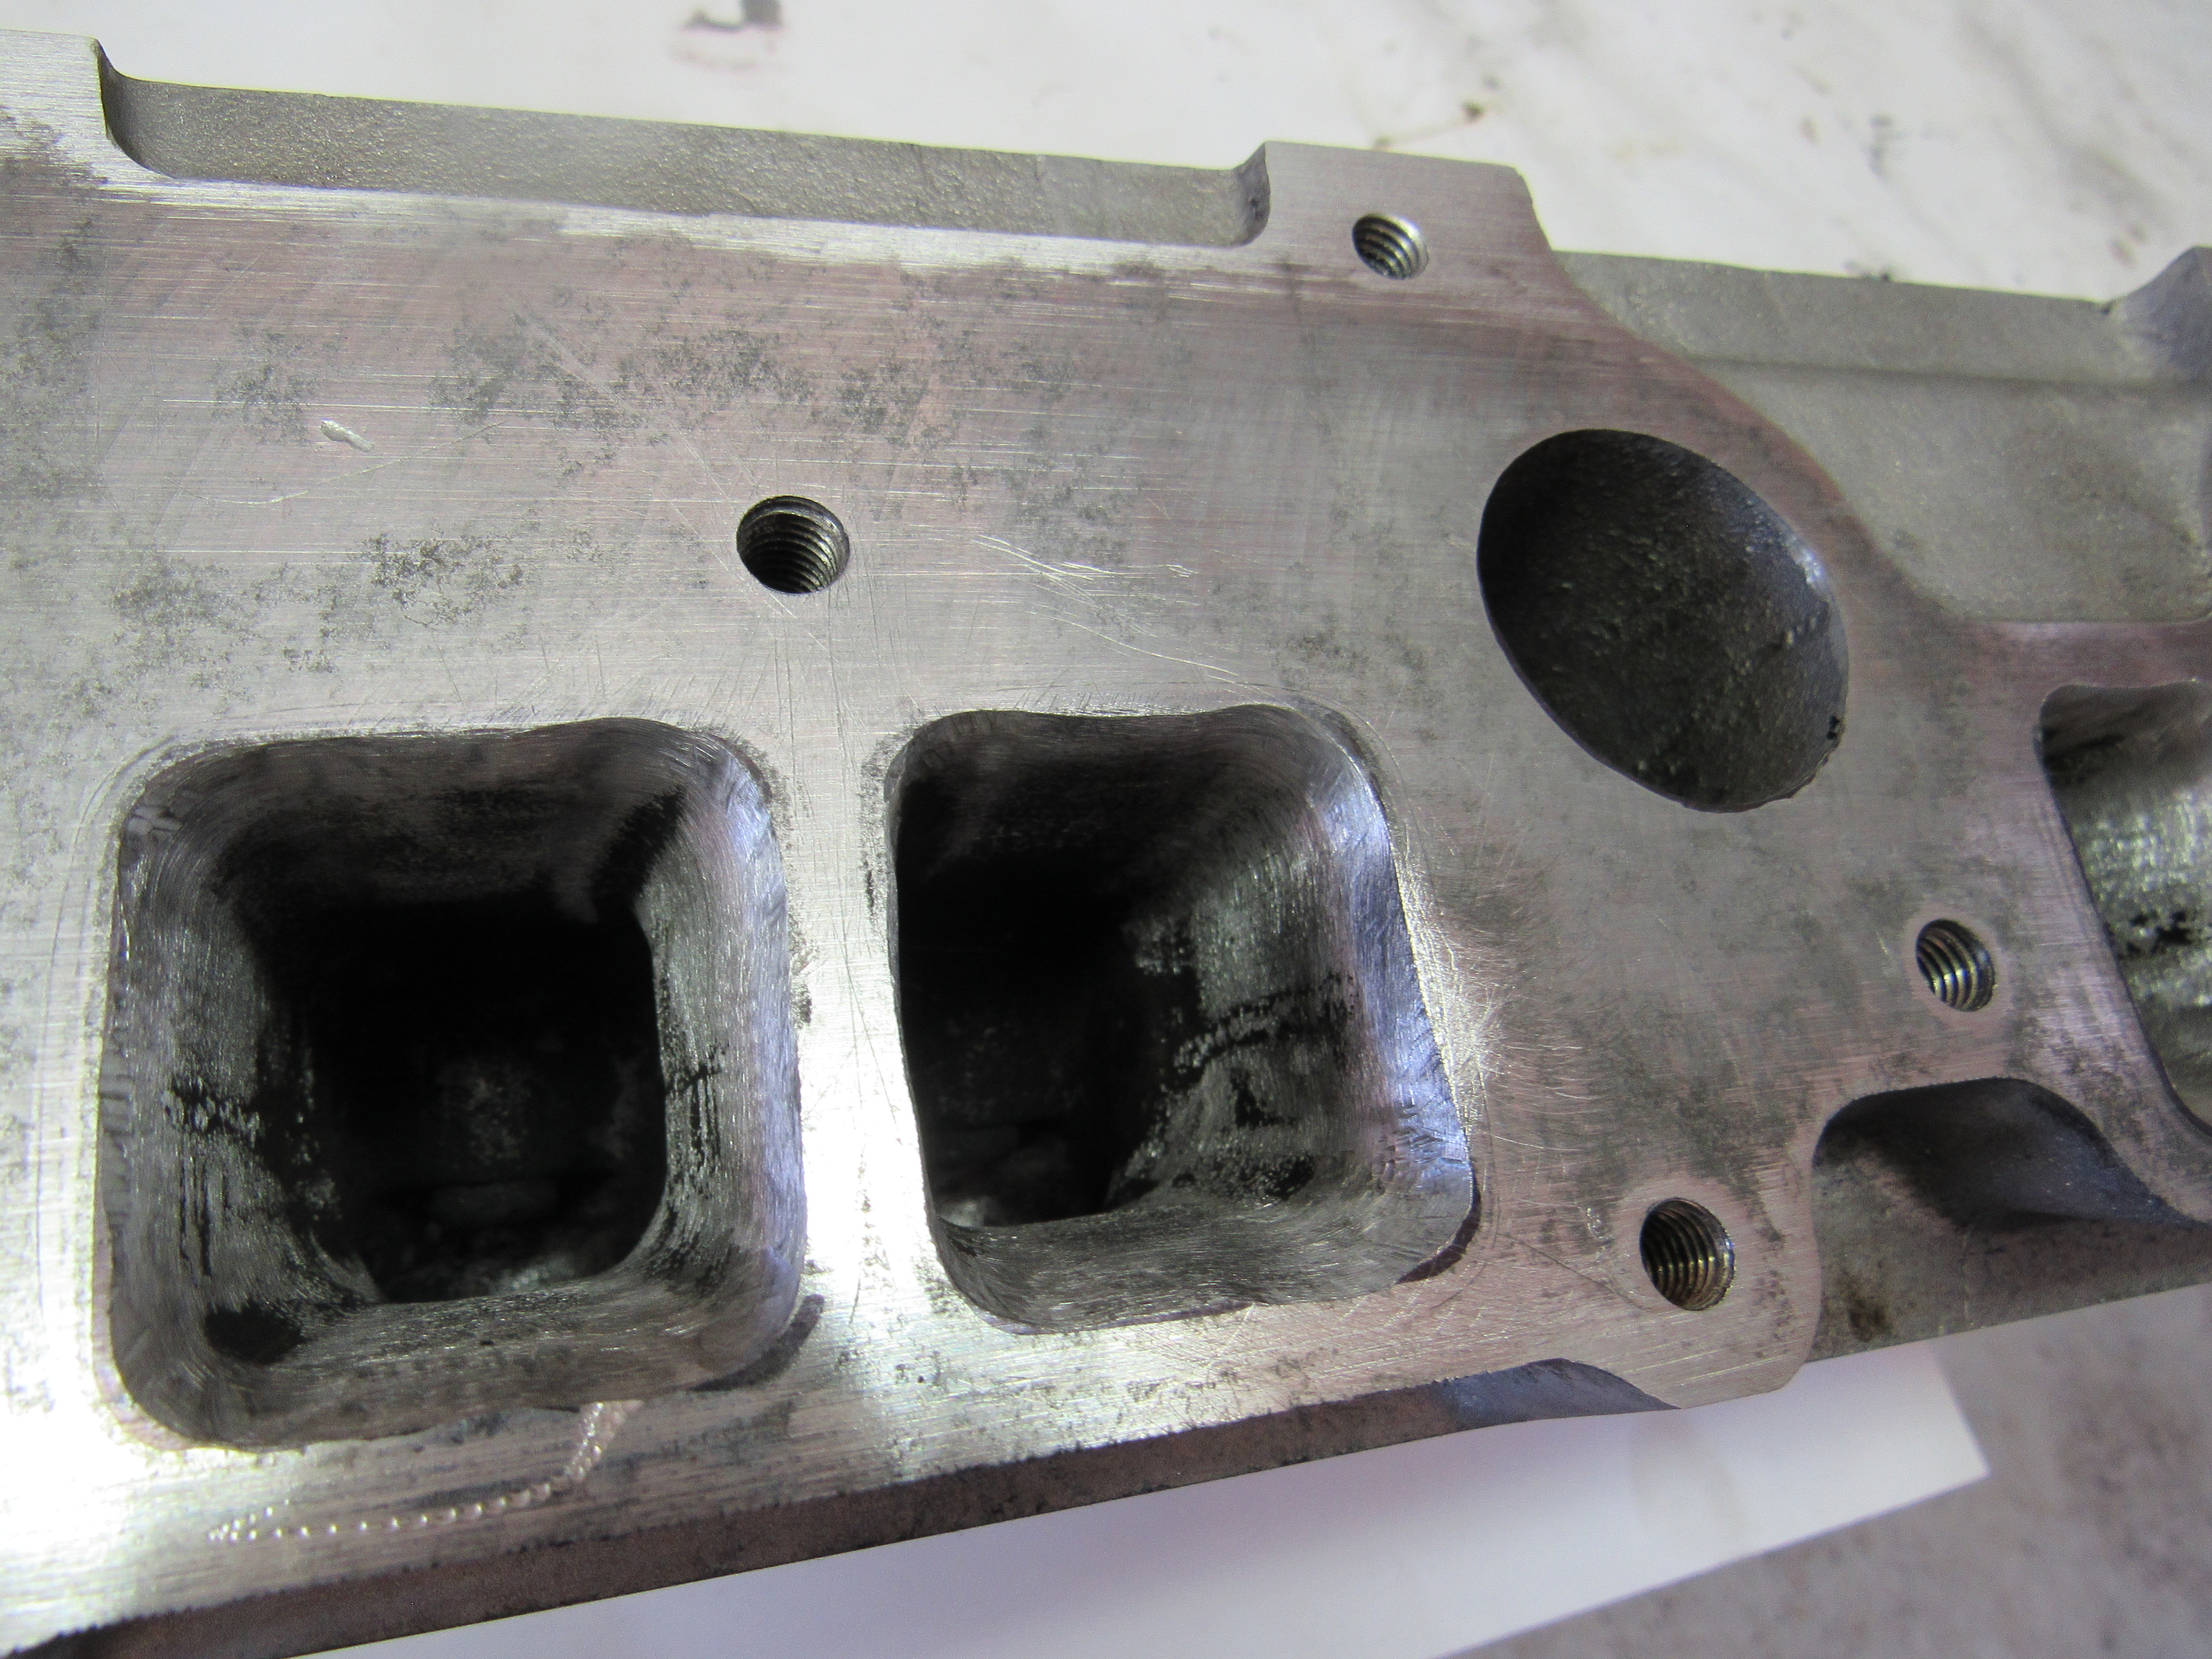
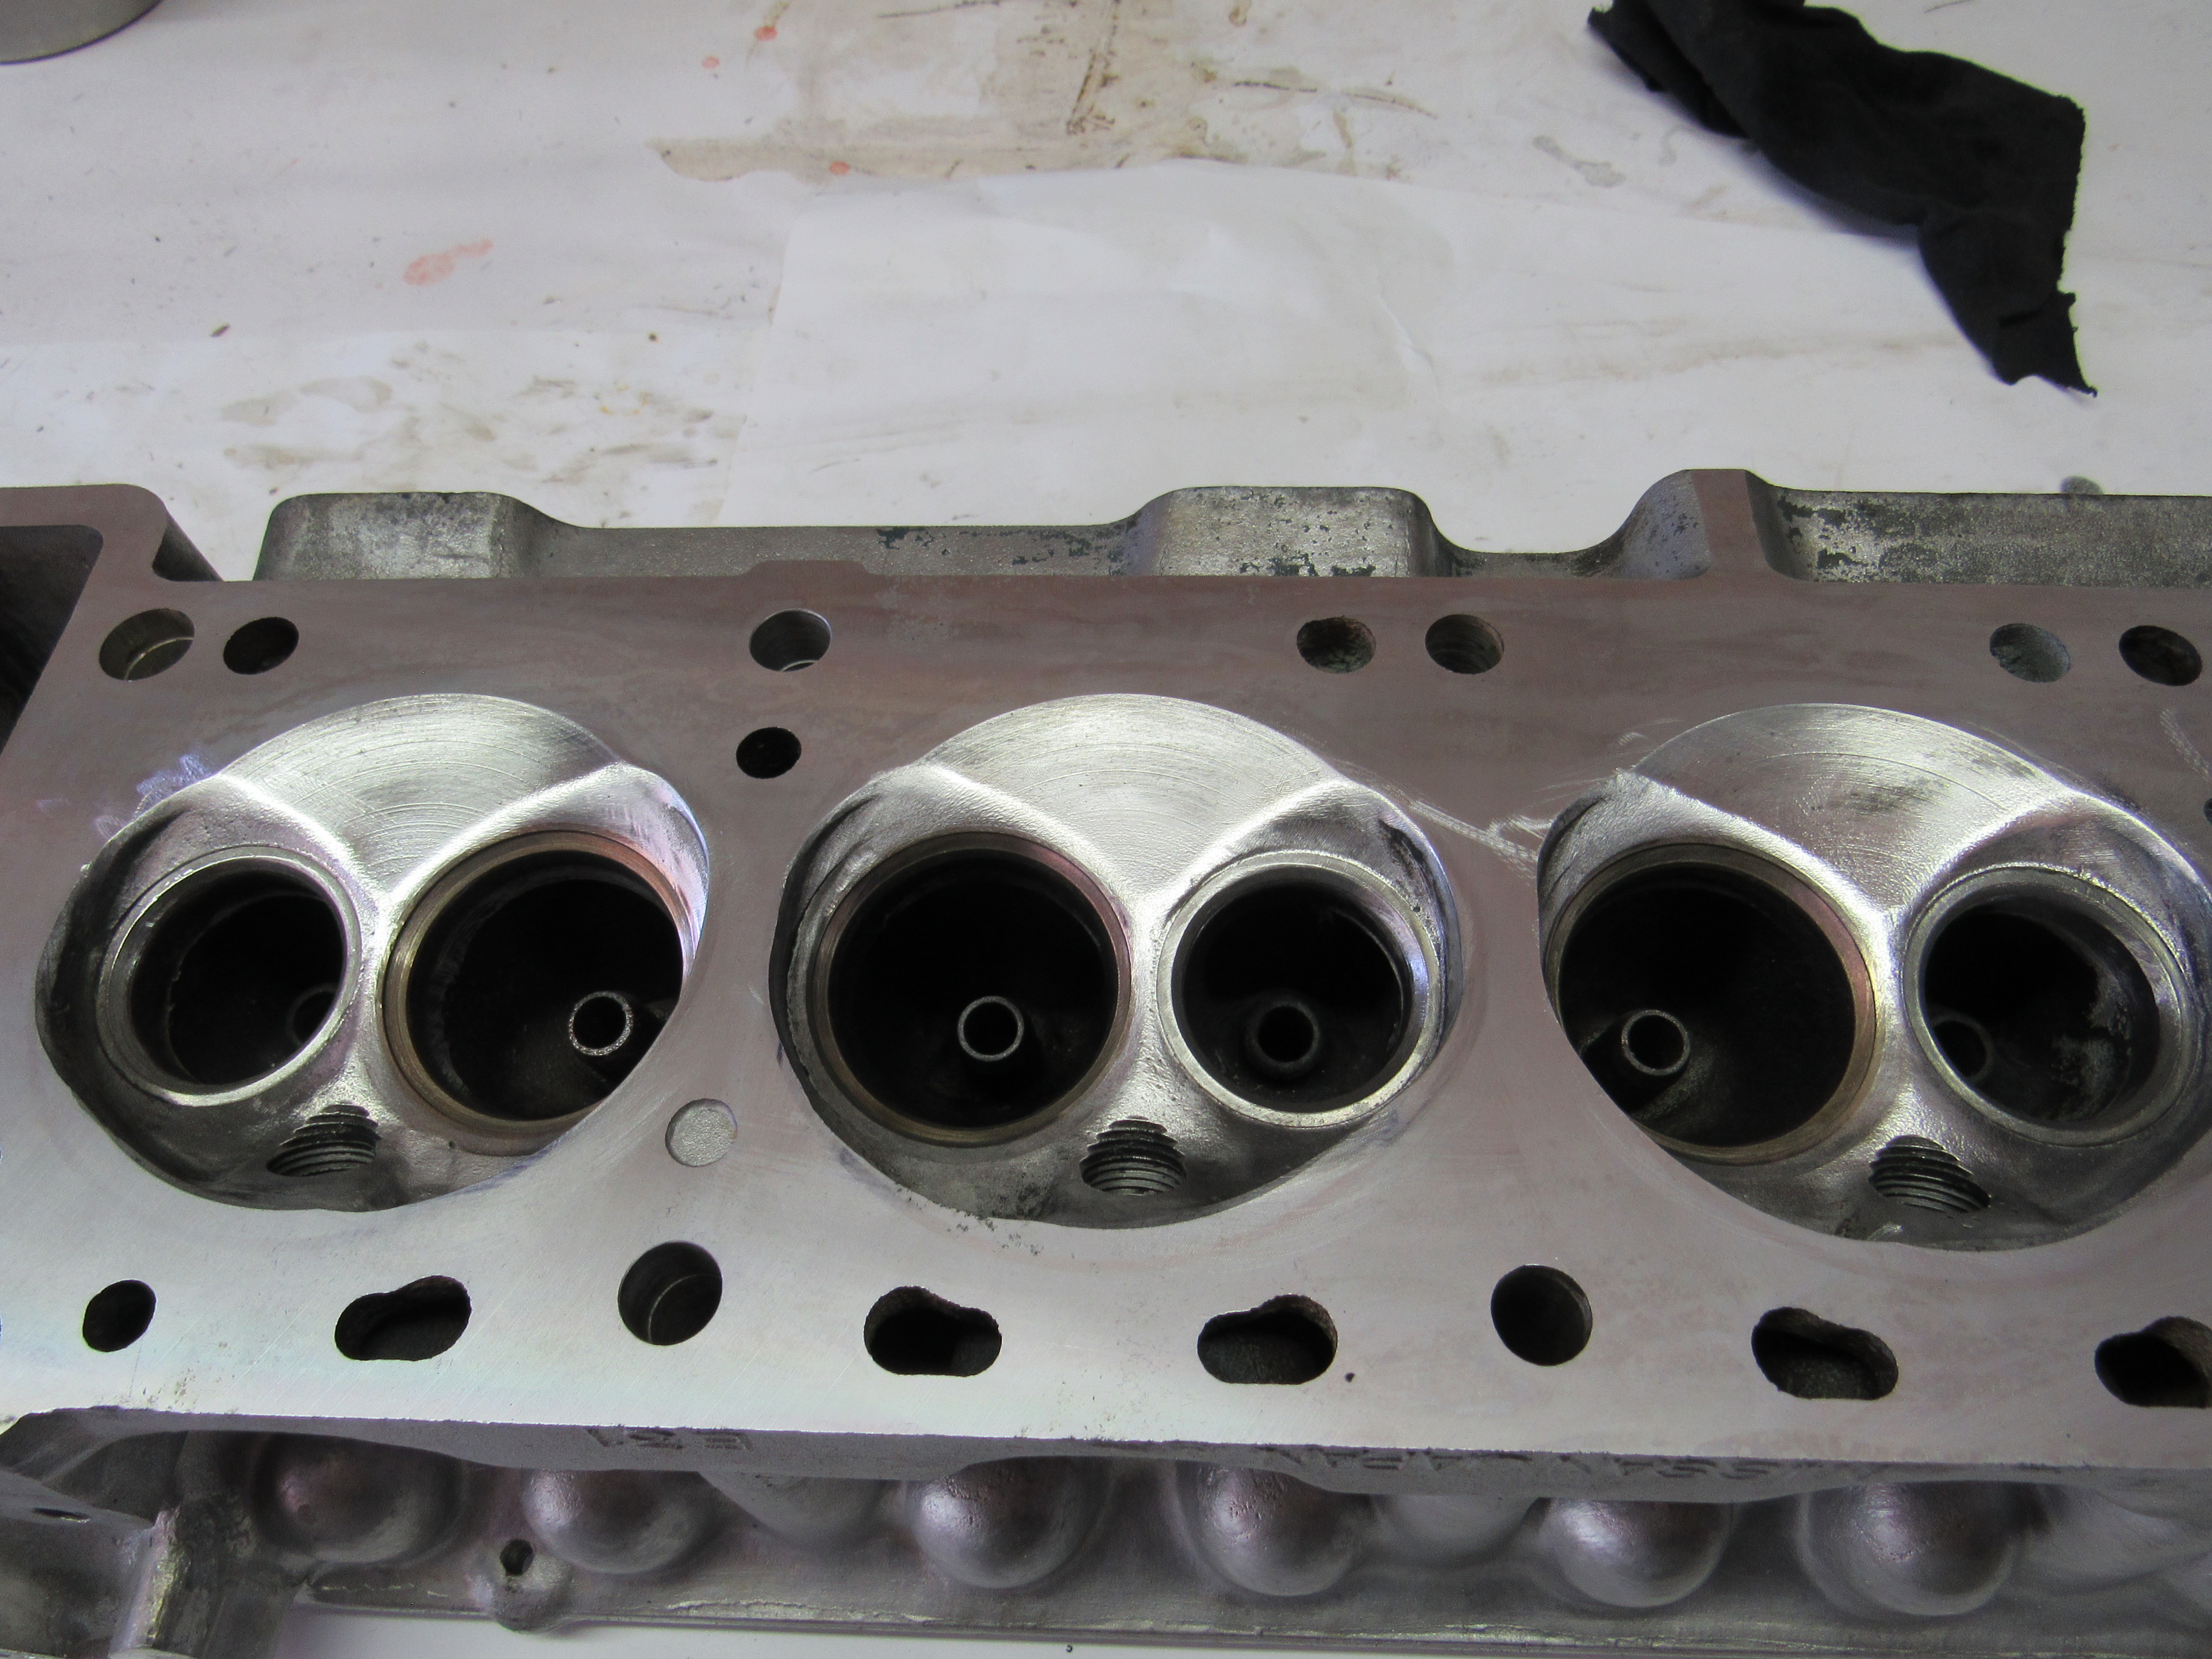
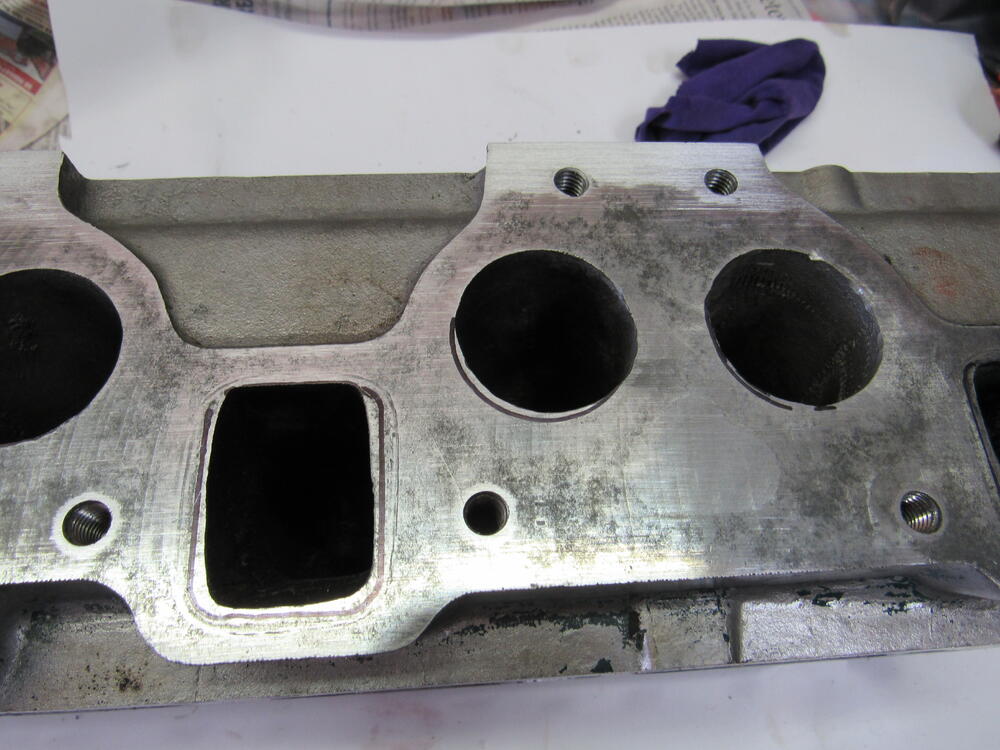
Now this isn't anywhere near a proper port n polish but I thought I would smooth out the combustion chamber since the seats are coming out anyway, opened up the exhaust runners a bit so at least the ports match better. Still have to grind down the fresh air pipes in the manifold. Also clearenced the cylinder walls for the new intake valves. This car surprises me again and again how pristine most of the parts are, once you get the crud and minor rust off.


-
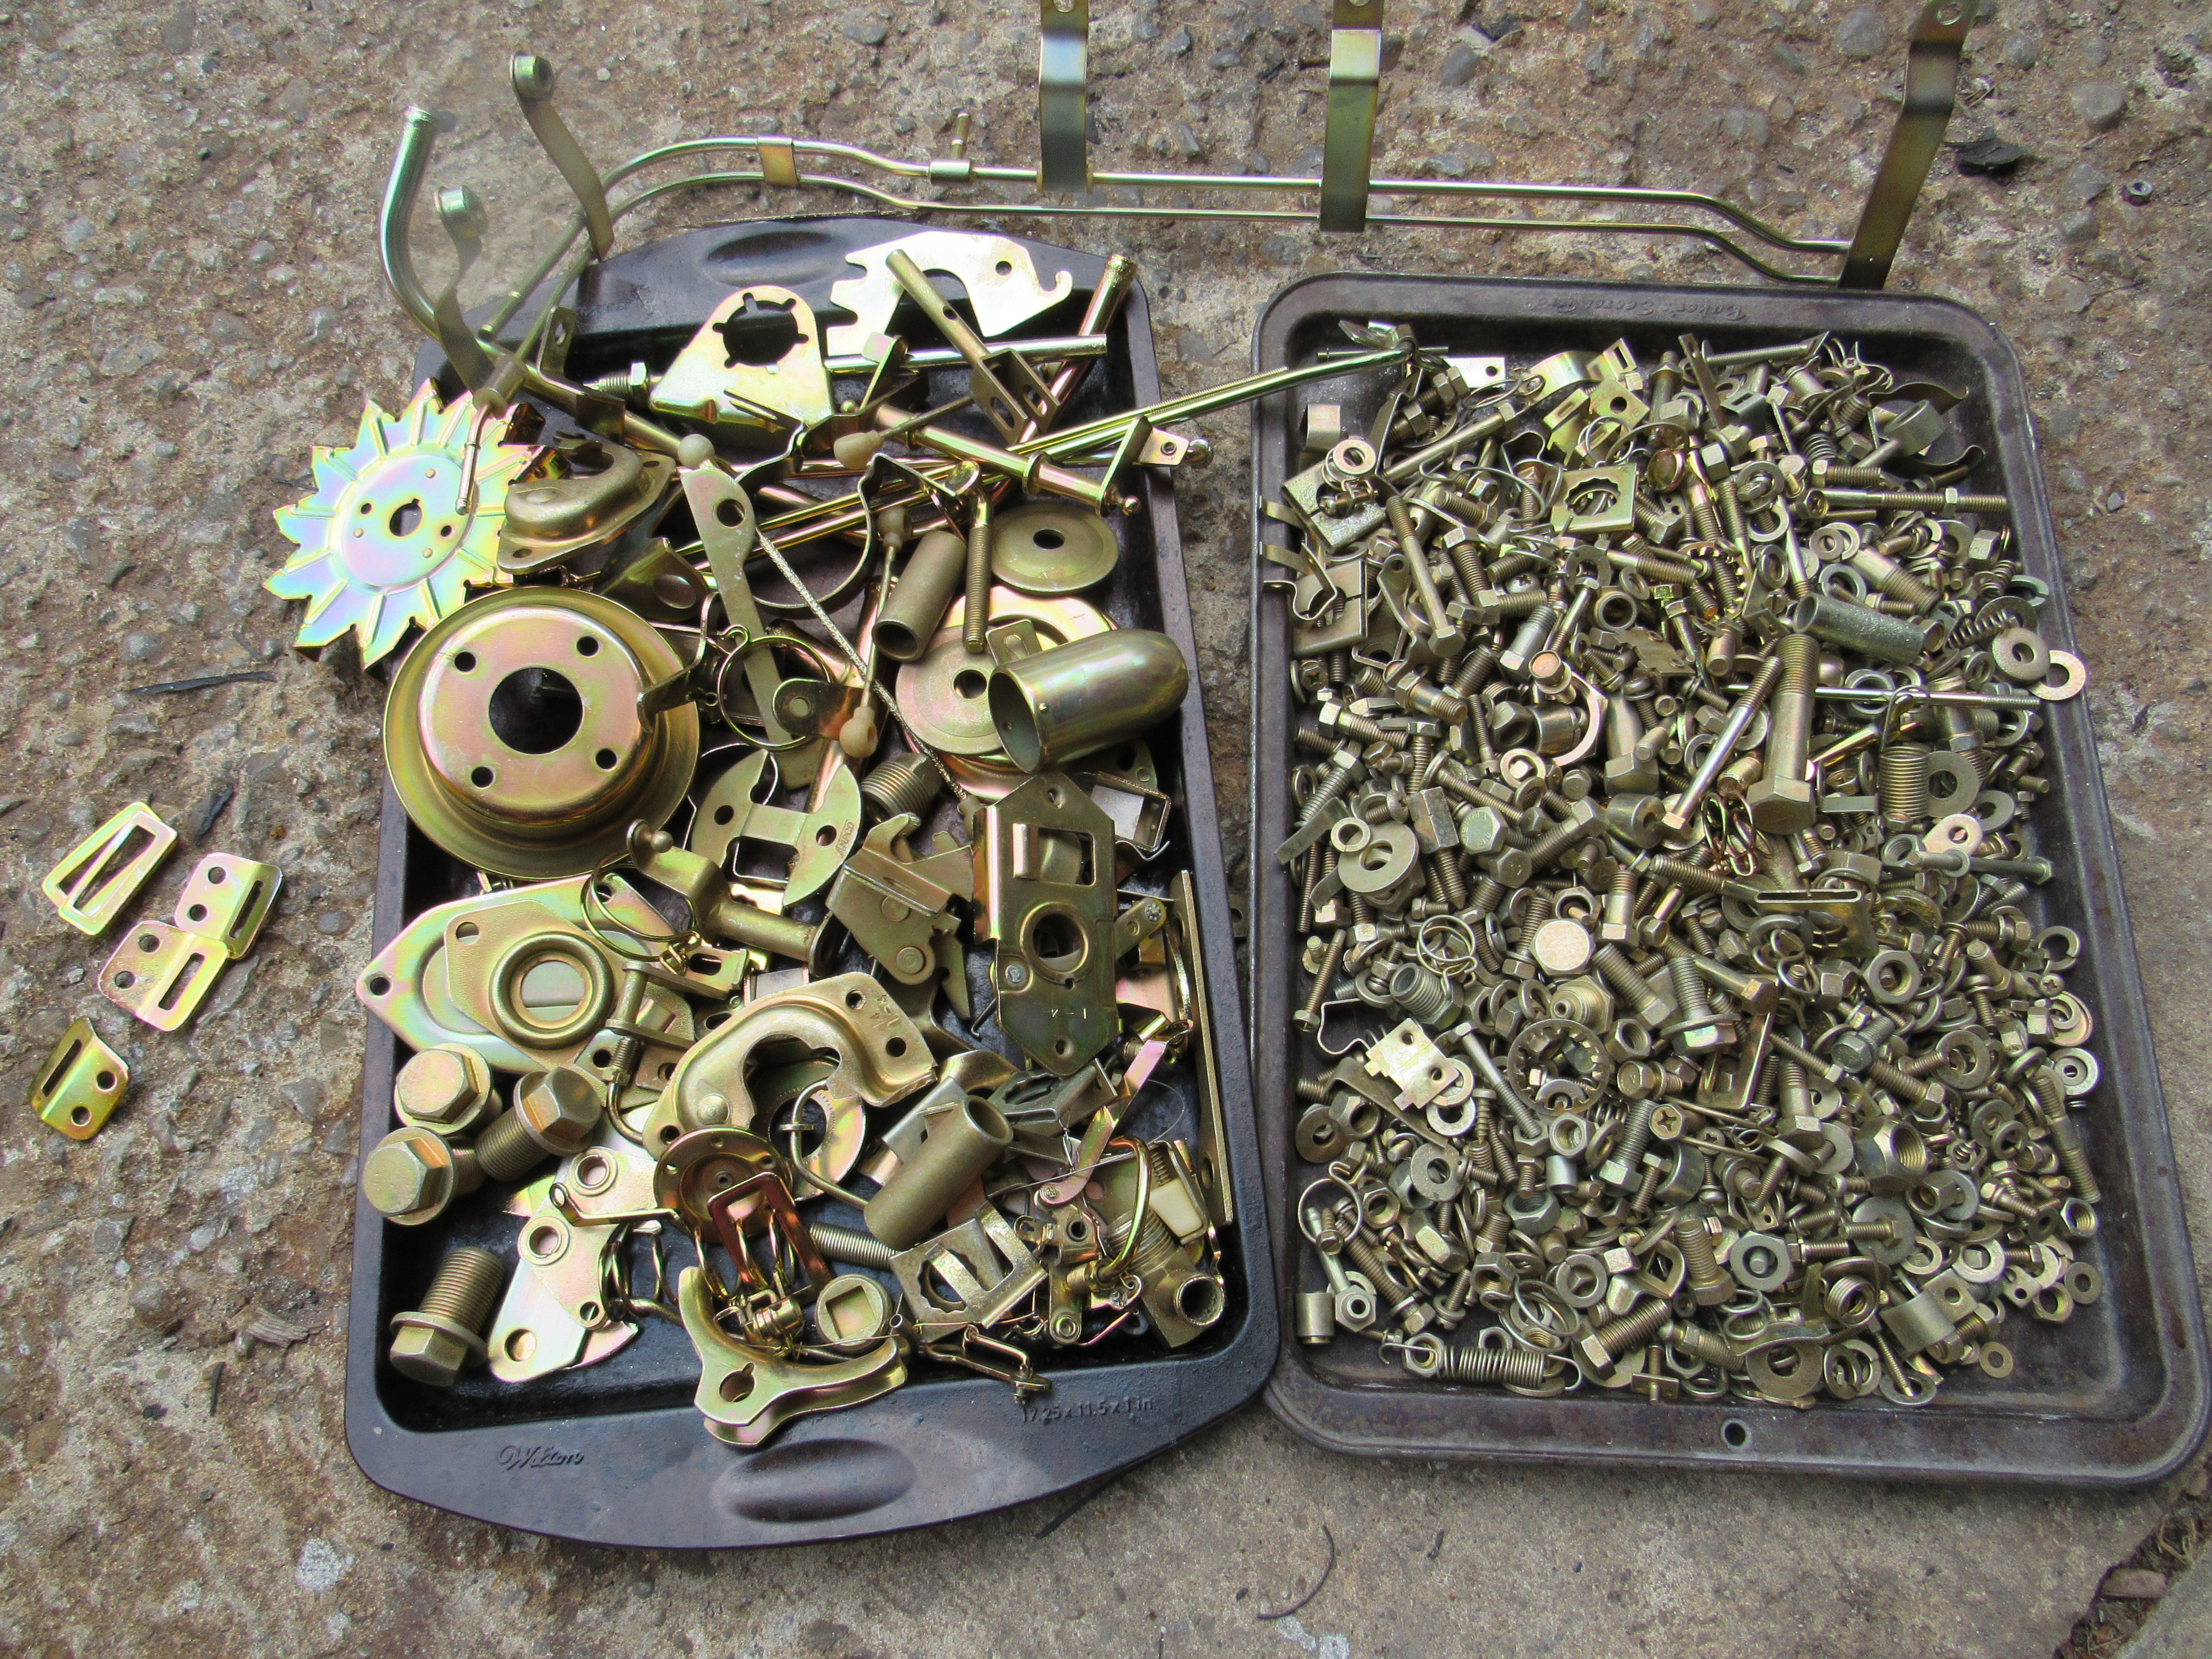
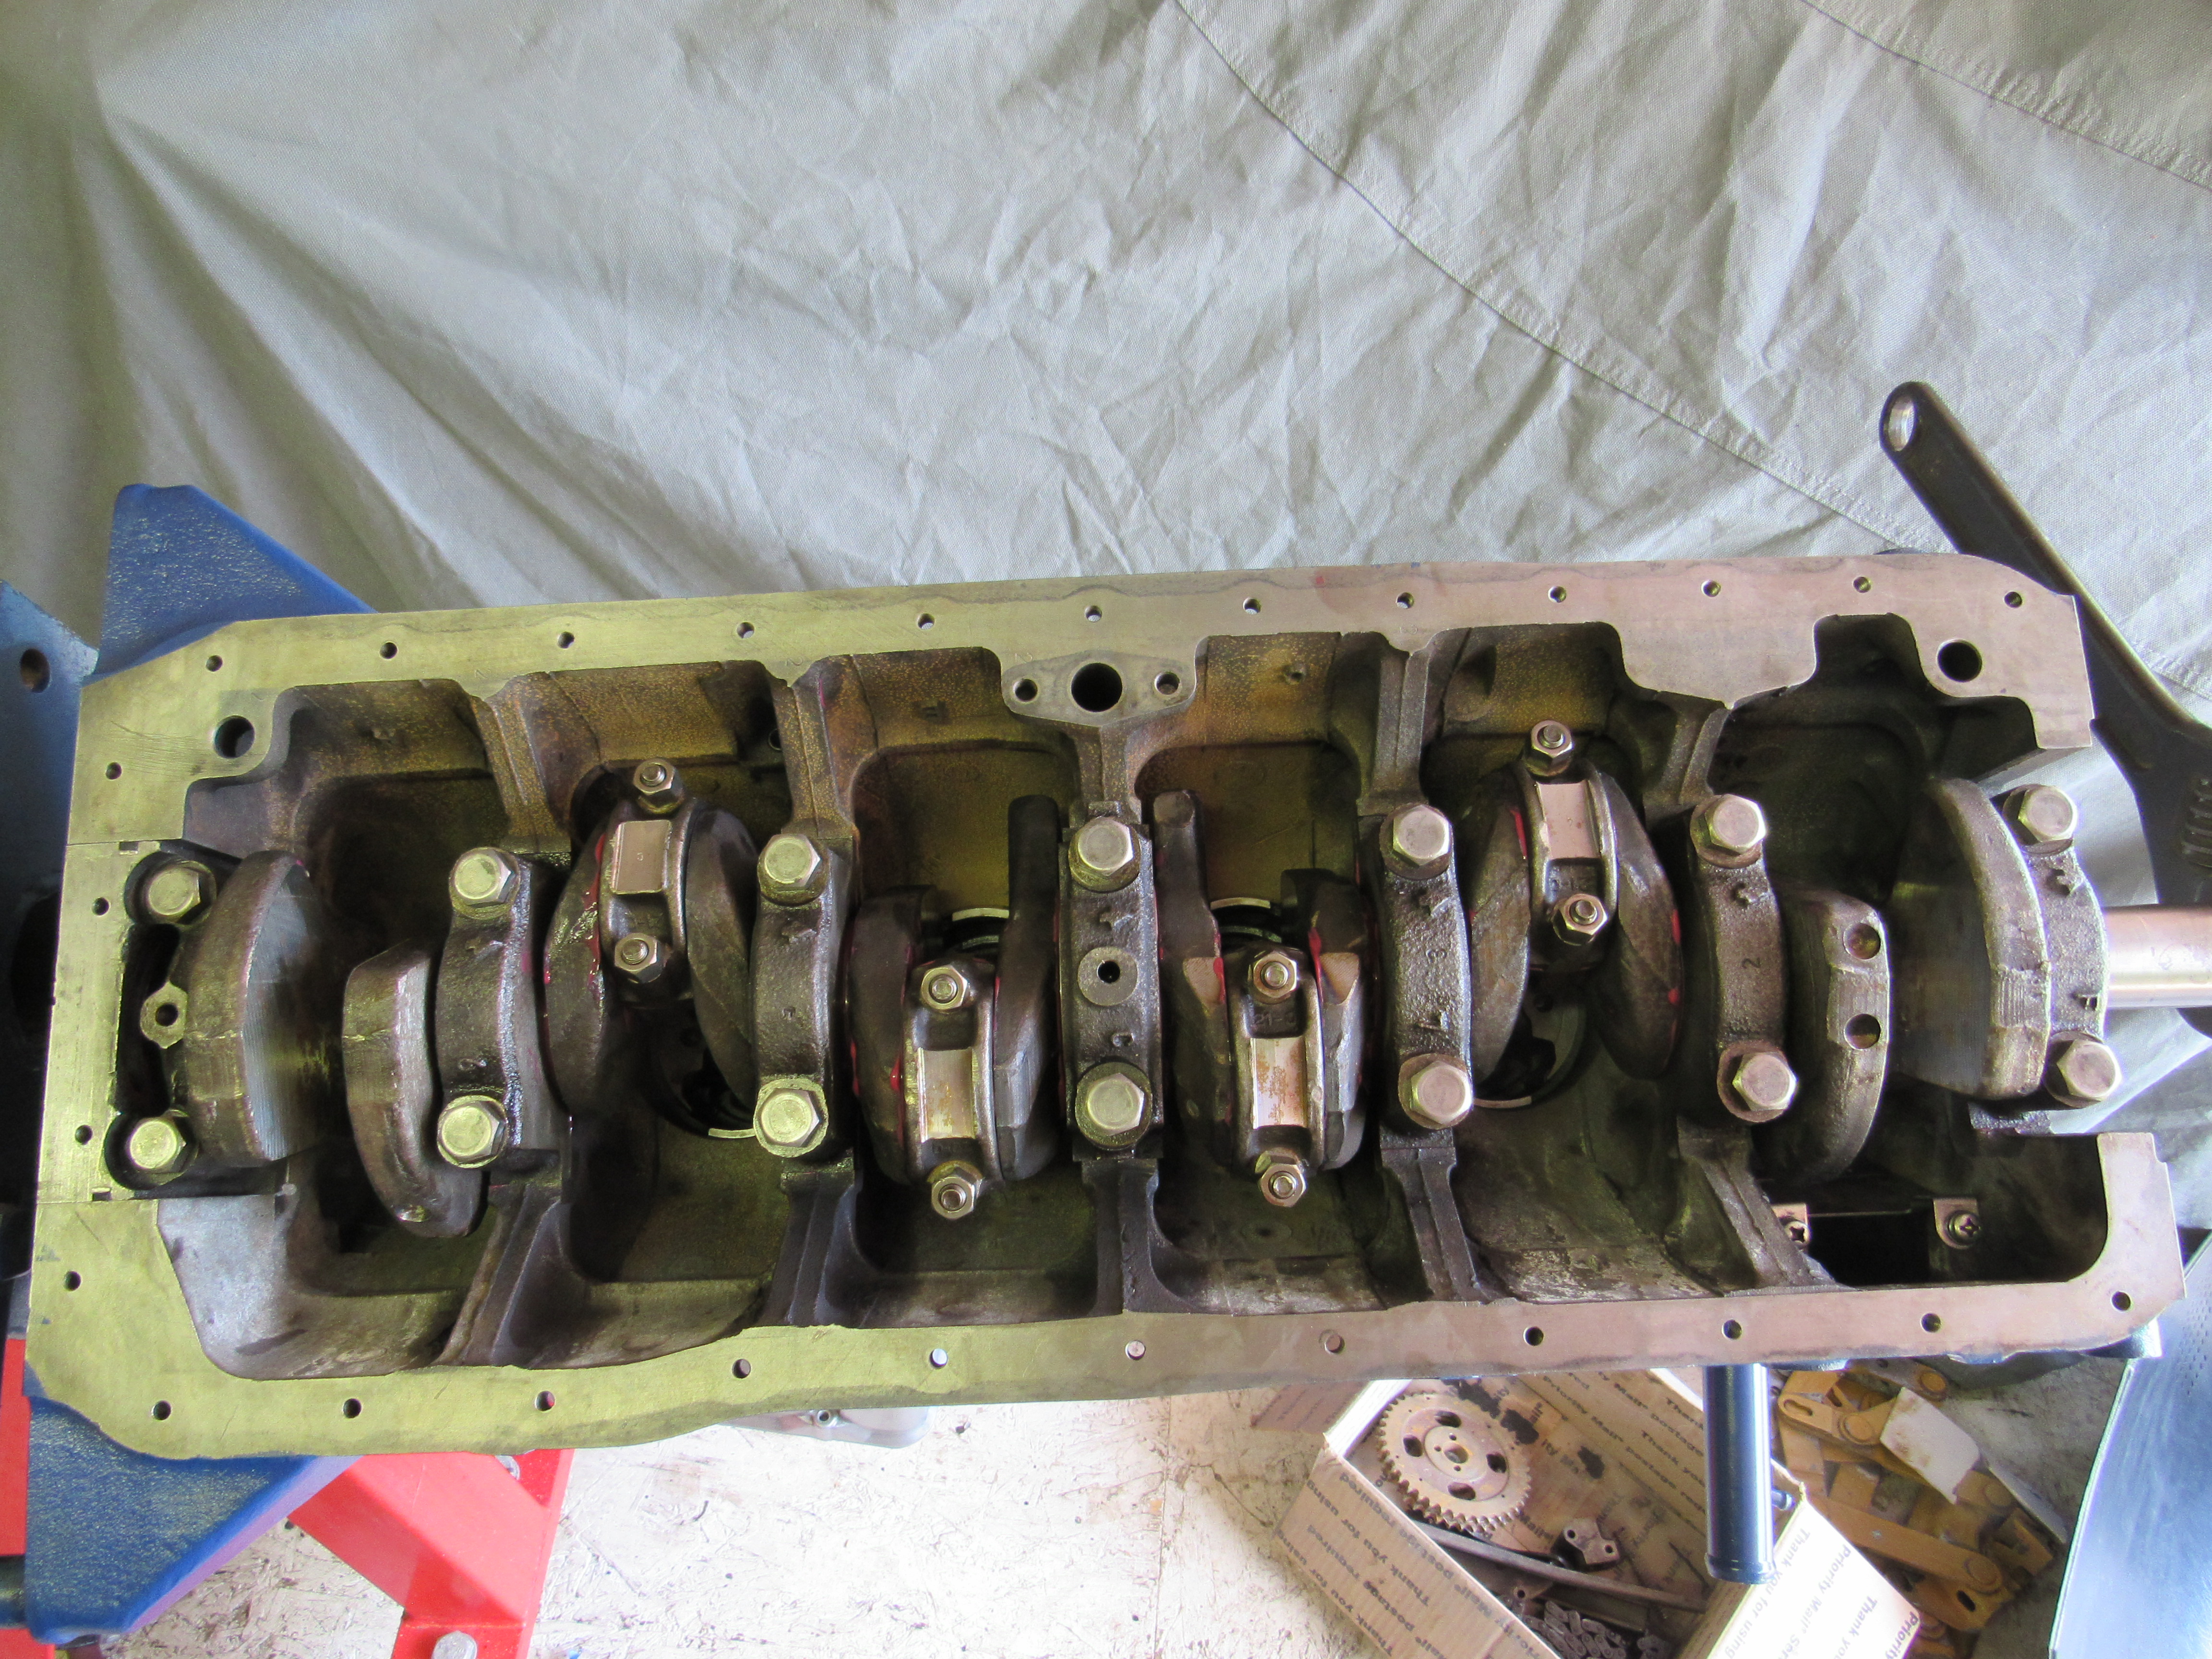
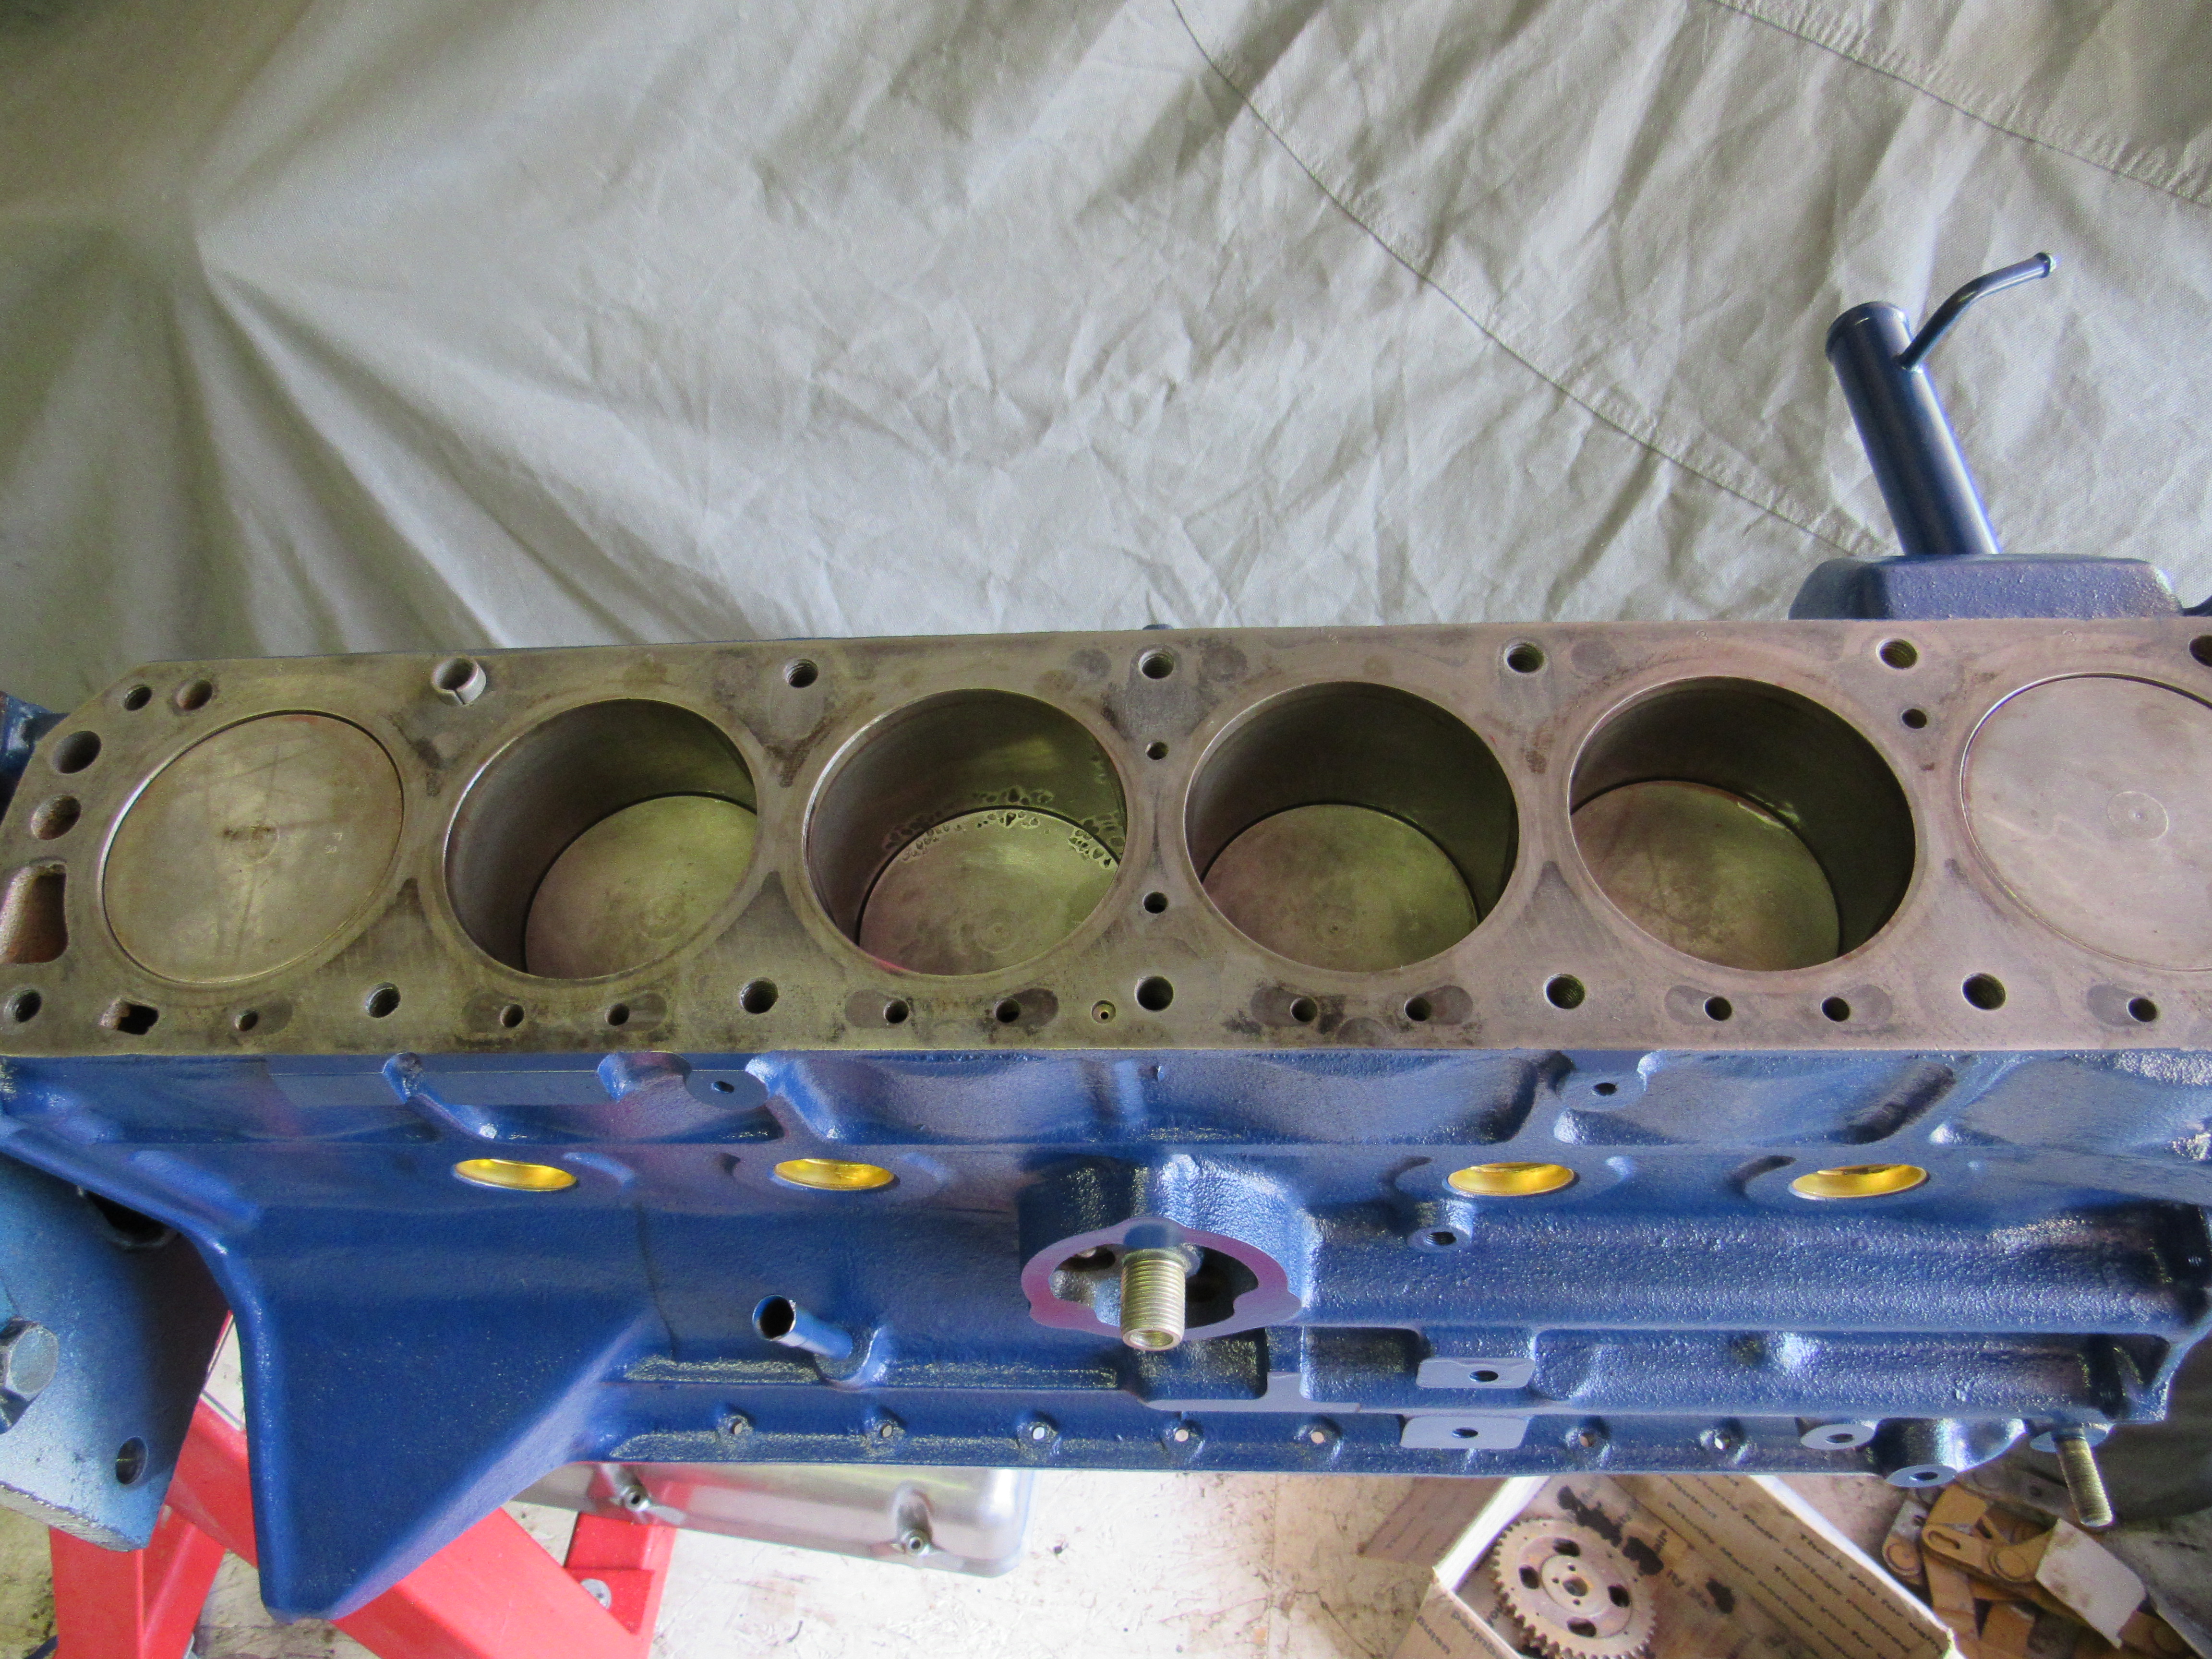
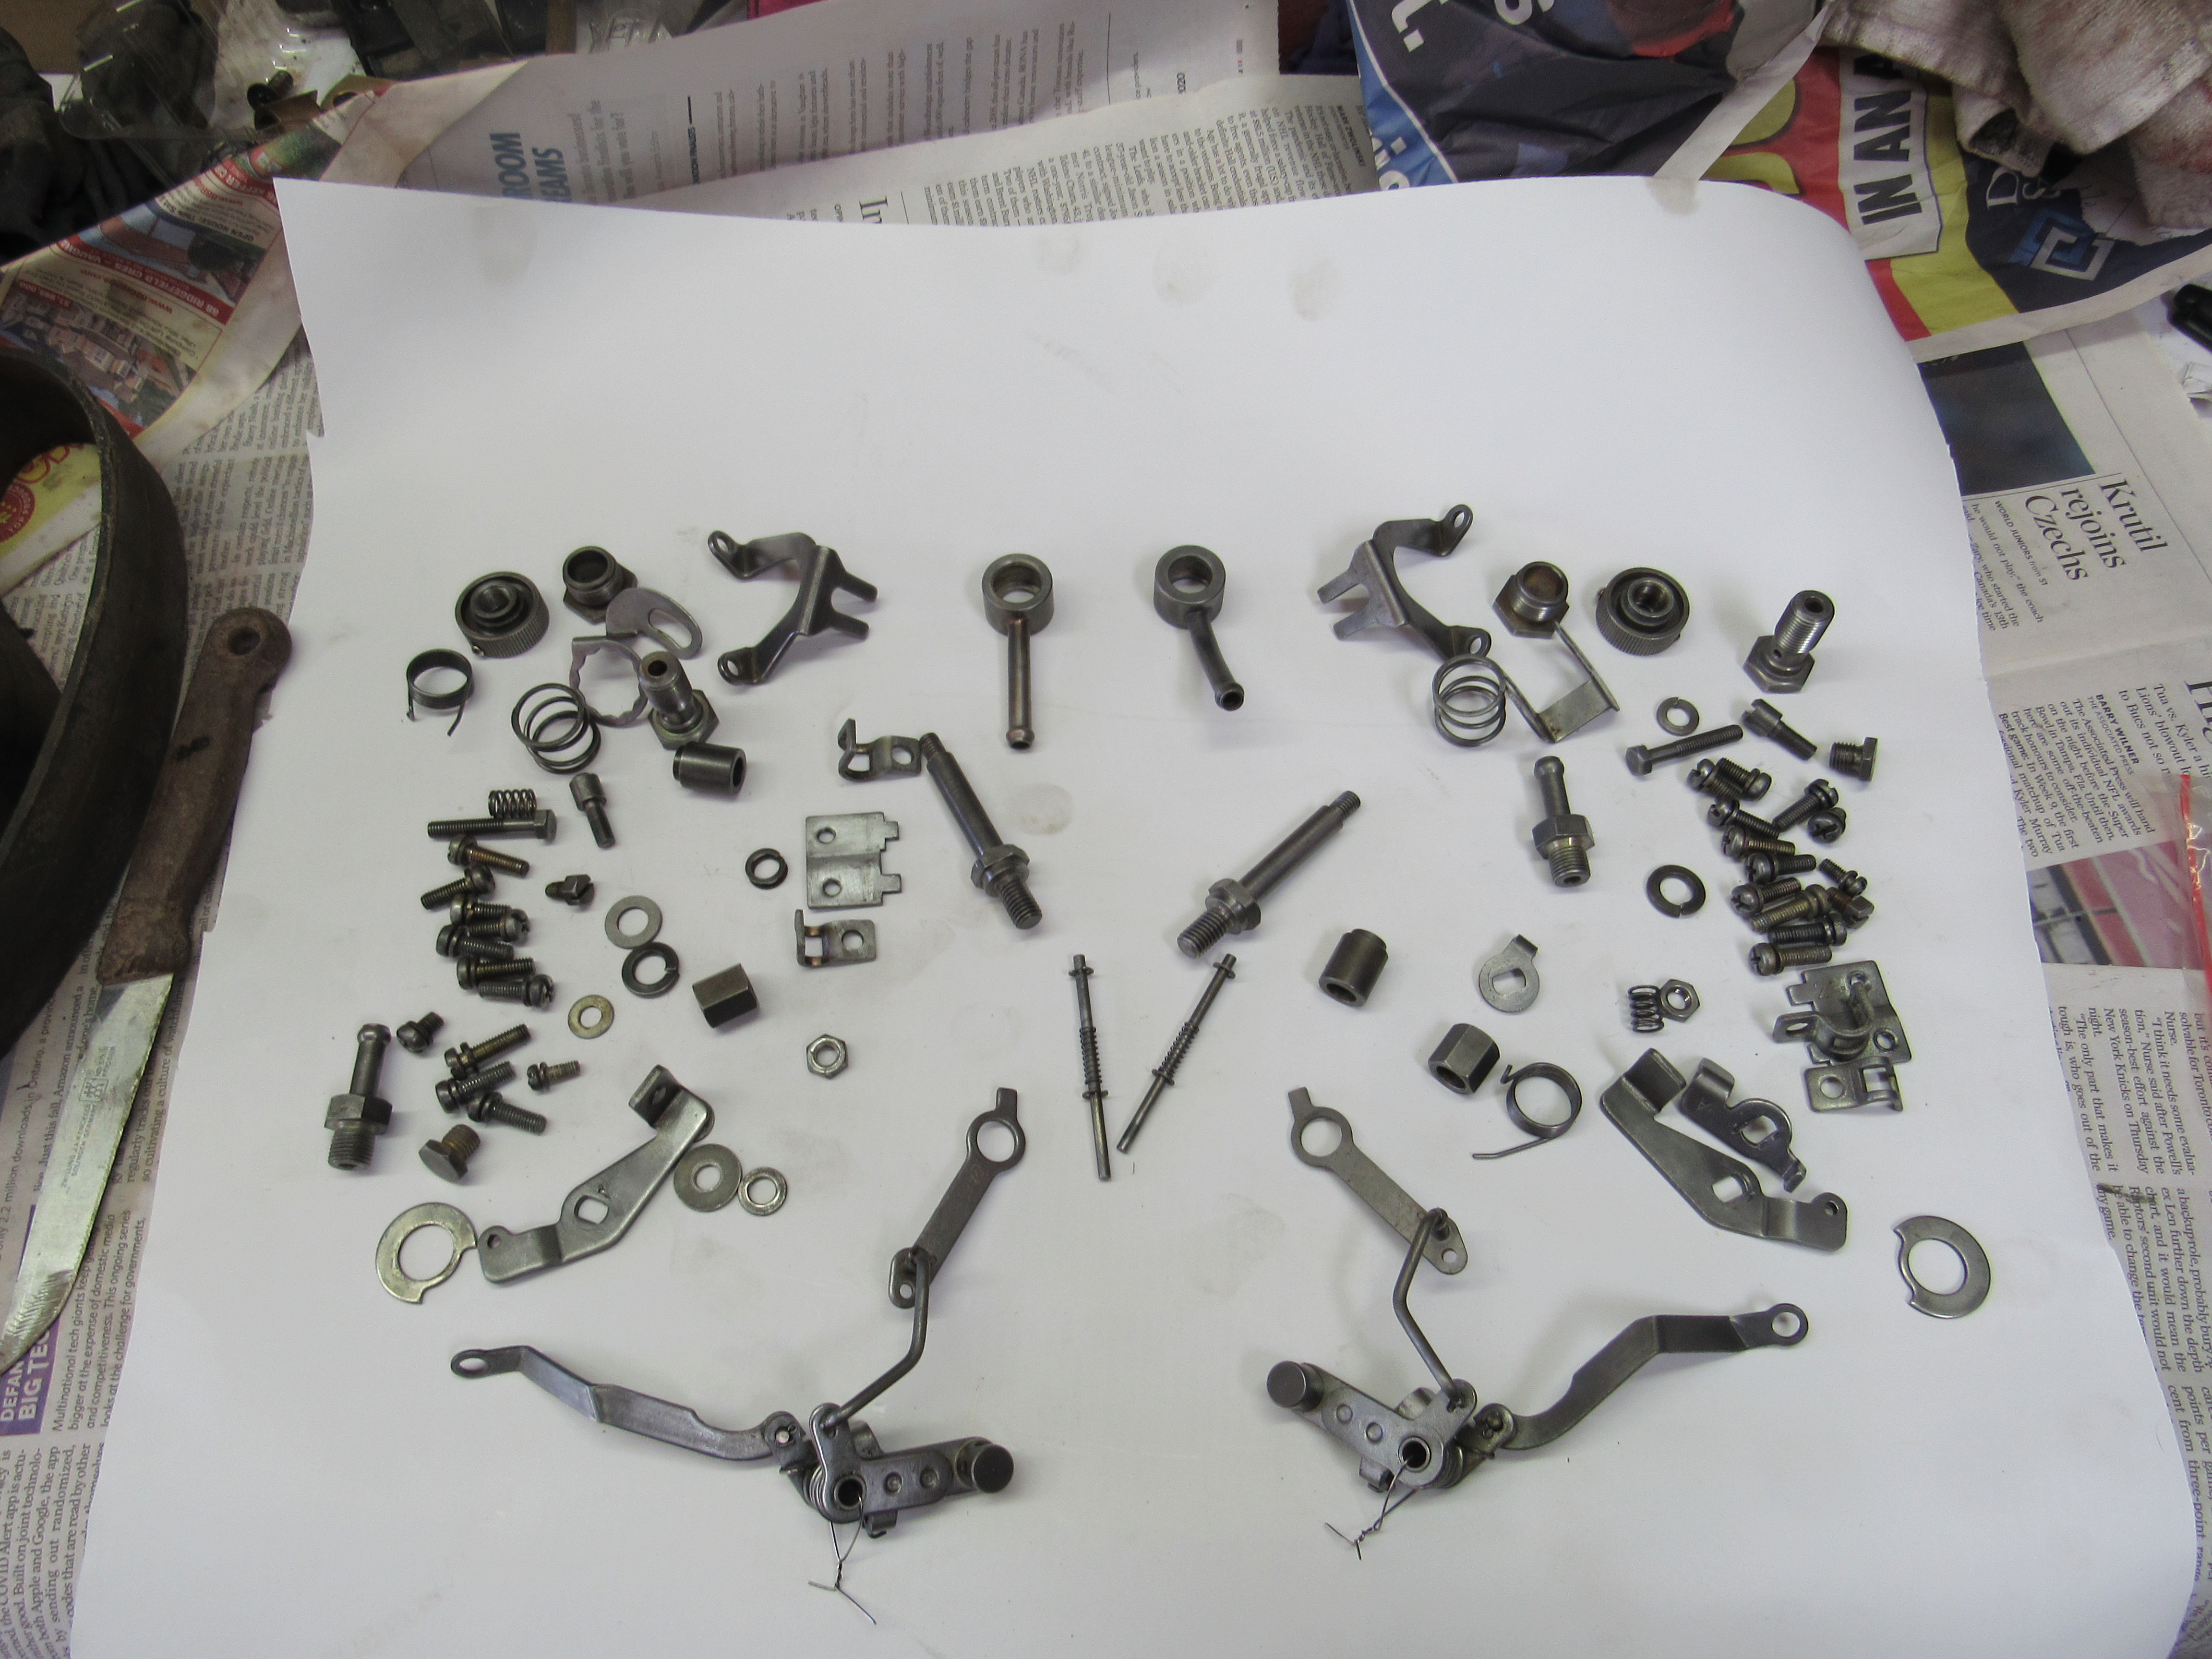
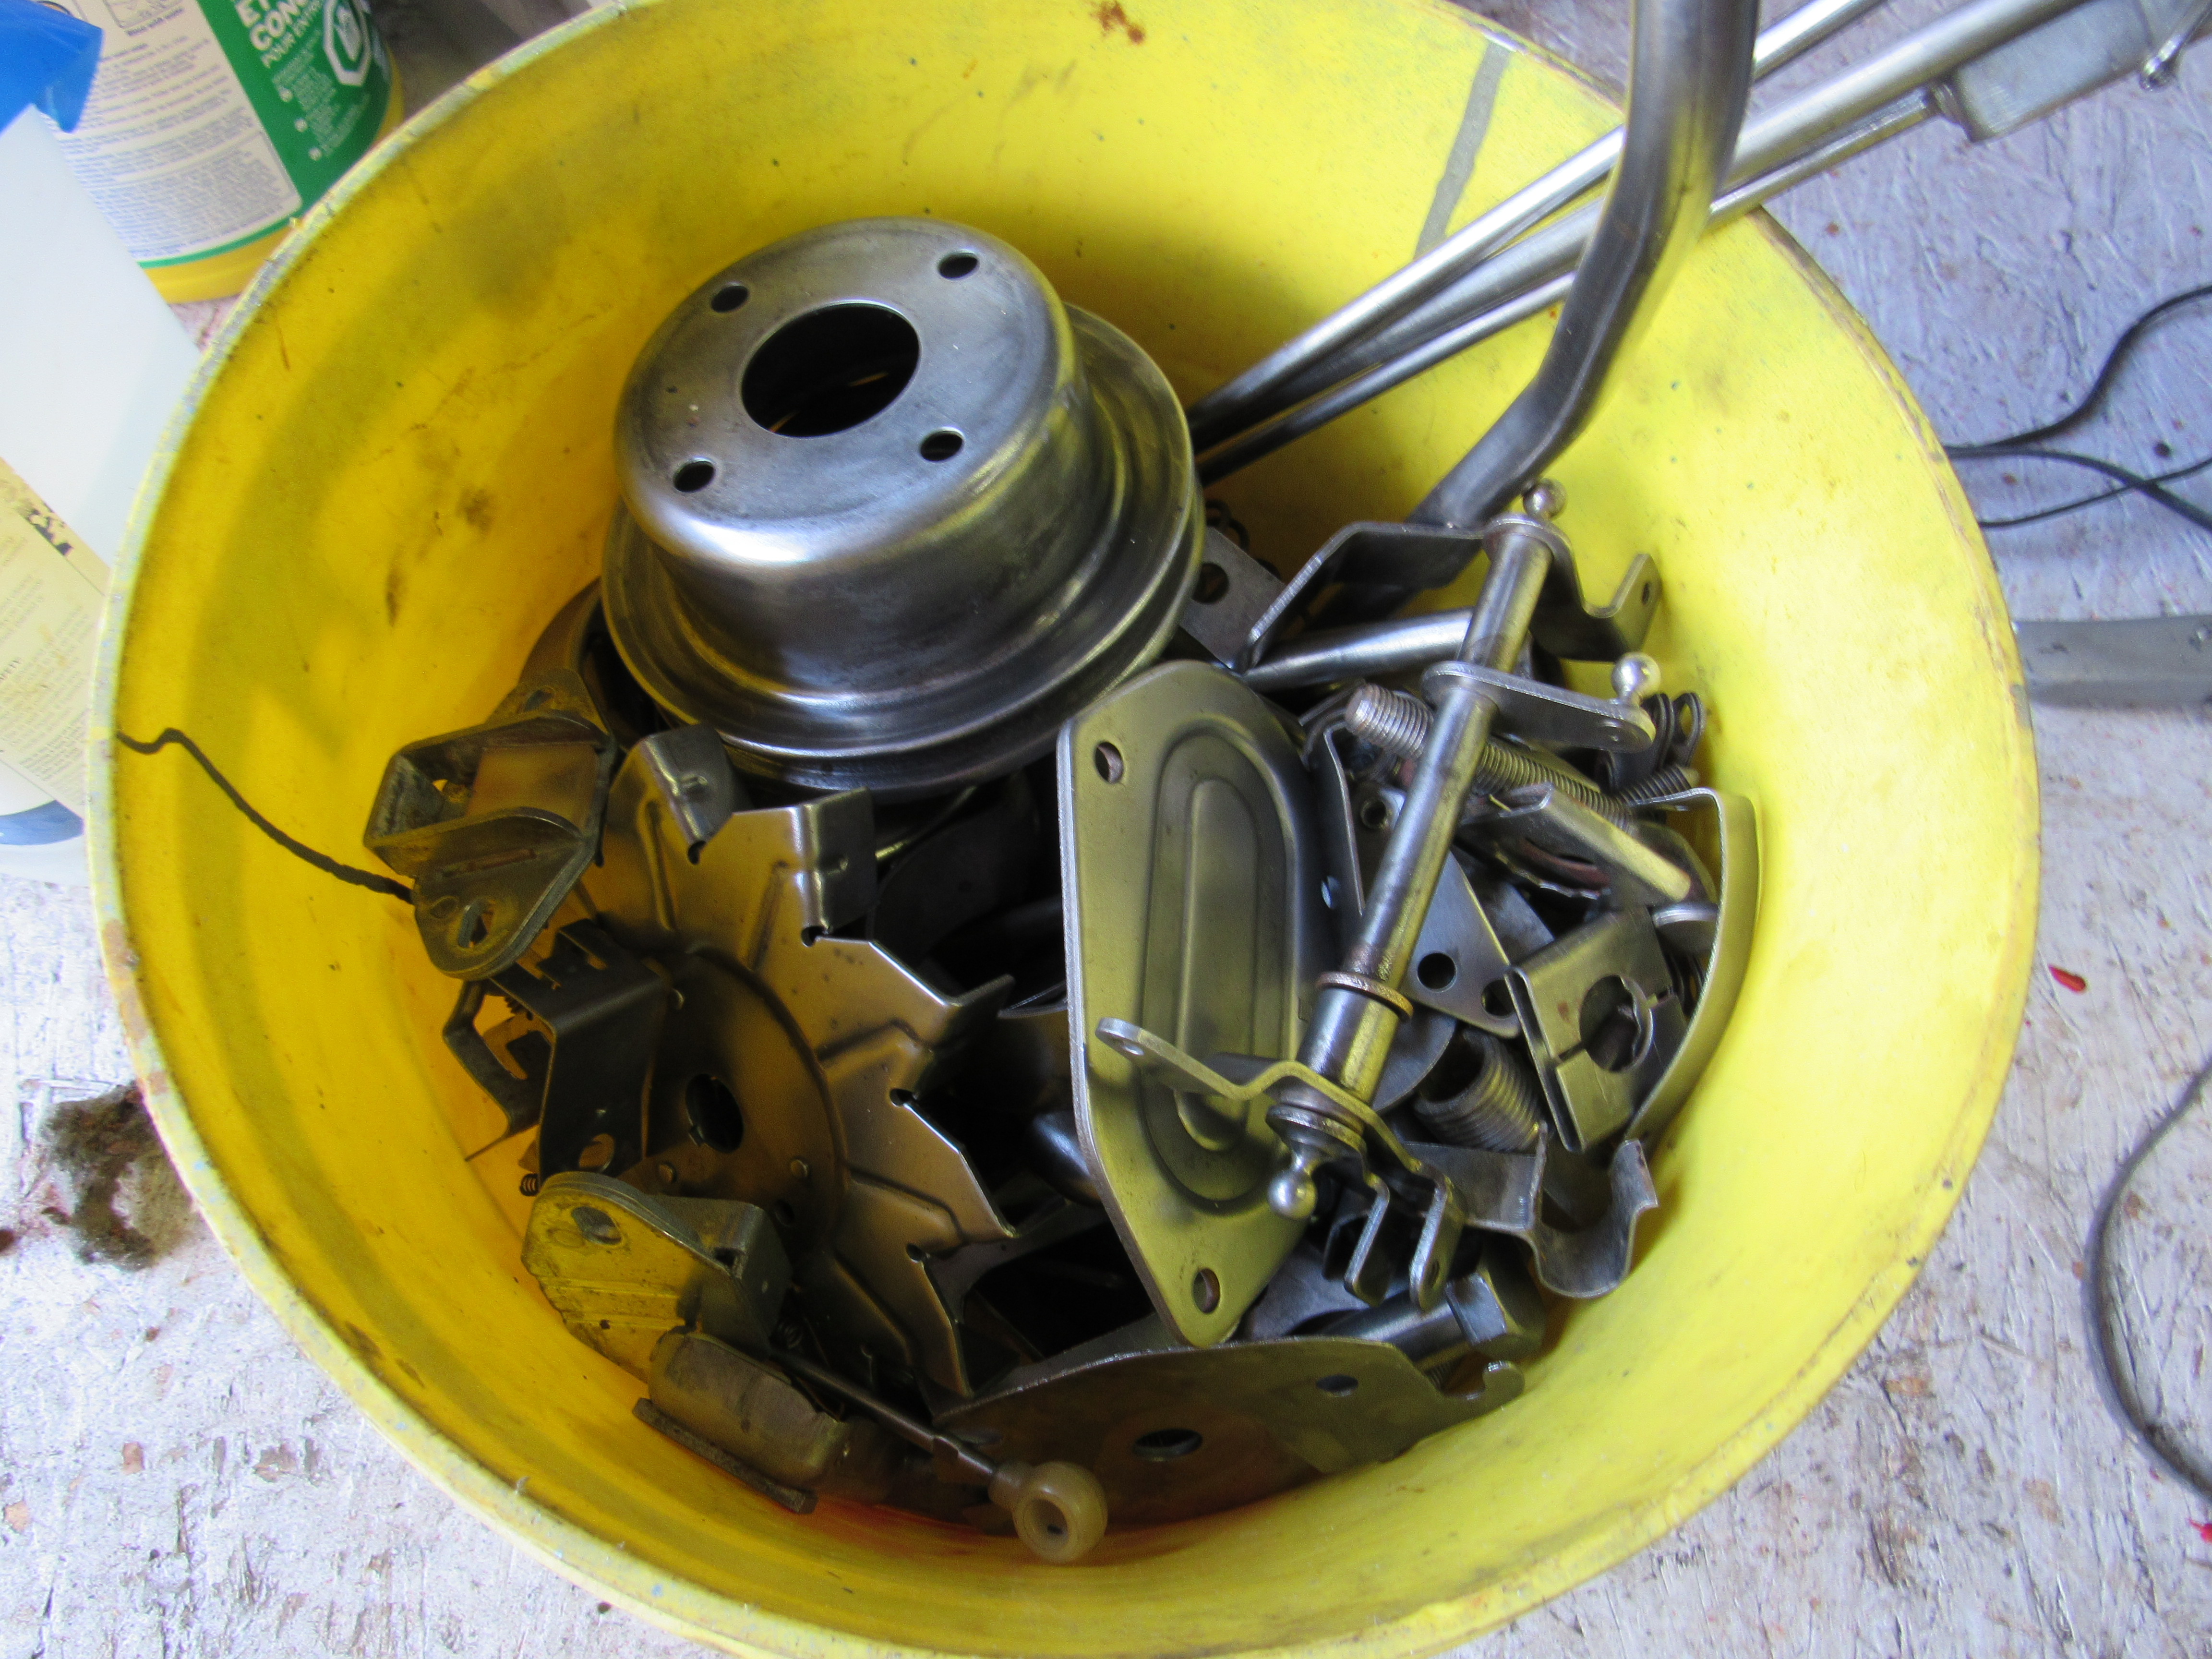
Thanks, yes I will take 6 of your exhaust valves and the same of intake valves if you have them. I'm trying to send you a PM with my address but it doesn't seem to working, did that function change while I wasn't looking? Those detonation marks have lots of room from the fire ring. Just a few shots of the block assembly, 3rd pic down is the #6 piston going back in, next to it is the knuckle cutter, also know as a ring compressor. I hated throwing all the duplicated SU parts in to the plating bucket but I had to or it would cost twice as much, here's my map to sort them out afterwards. Plating is going in on Monday.