grannyknot
Free Member
-
Joined
-
Last visited
Everything posted by grannyknot
-
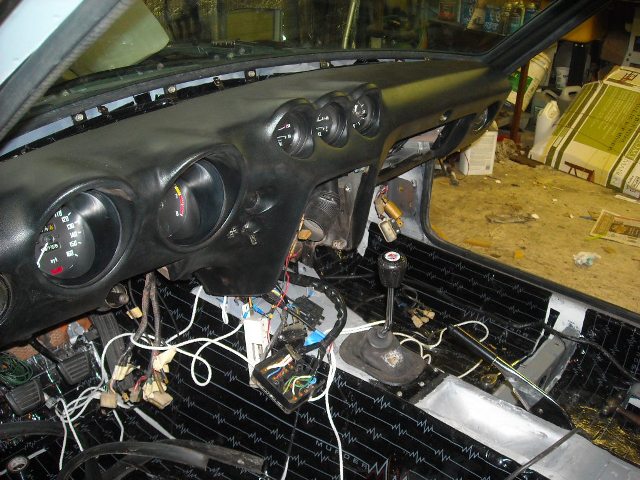
 Having re-installed the dash today I can say that weighs a good 45-50lbs. If you did the aluminum plate dash as many racers do... Also, the 280 transmission mount weighted 4x what the early trans mount did.
 -
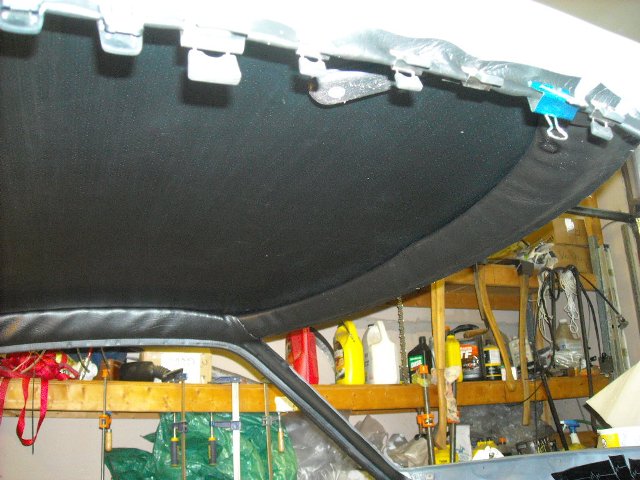
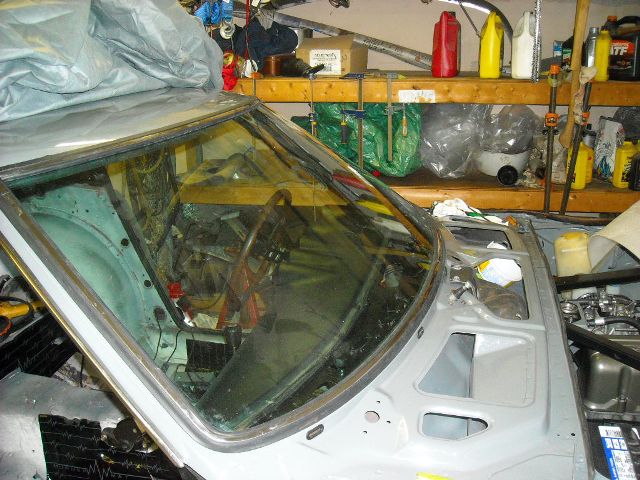
I think I have found something that is worst than sanding, gluing vinyl. Just finished the headliner and header, what a hateful job! You get like one and half chances to get it right. Nerve wracking. And you can see from the wrinkles one the DS header I didn't get it right, hopefully the heat of summer will relax that a bit. Got the rubber seal and chrome strips on the hatch window and windshield without too much trouble. Tried twice to get the hatch glass installed and failed, I thought if I can't handle the back glass I'll never manage the front but it went in about 20 min. Once the windshield is in the dash goes in and as soon as the fuel pump switch (oil pressure safety switch) arrives in the mail I can start the engine!


-
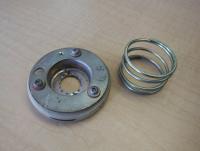
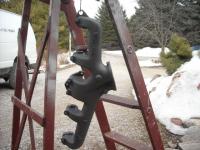
I'm trying to find this horn spring, I've tried all of the usual sources but no one seems to carry it. Thought I would ask here for suggestions before I start hunting around for something else to do the job. I've tried MSA, ebay, Amazon, Rockauto, Arizona Z car source. Thanks, Chris
-
But in a 1970's version of what is collapsible. When I had my steering column apart this winter the outer column (which looks like the Micheln Man's john thomas) dropped off the work table on to the concrete floor, it rung like bell, like a solid piece. But, even if it crushed like foam the 1/2" dia. tempered steel steering shaft will be perfectly usable after they pull me off of it. Leon, just saw your wink. Hope you're joking.
-
Well if I ever get into a situation where I'm dodging frame rails and strut bars it's nice to know that the un-collapsible steering column will already be halfway through my chest and the rest just won't matter much. Remember back in the 60's/70's when a NASCAR or F1 car crashed badly, the car wasn't in too bad of shape, fixable. The driver, not so good. Well the Z's we love fall right into that category. But then I also ride motorcycles... safety is subjective. Chris
-
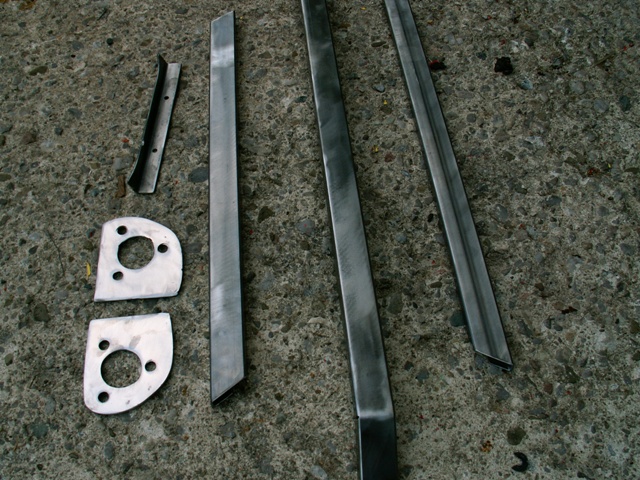
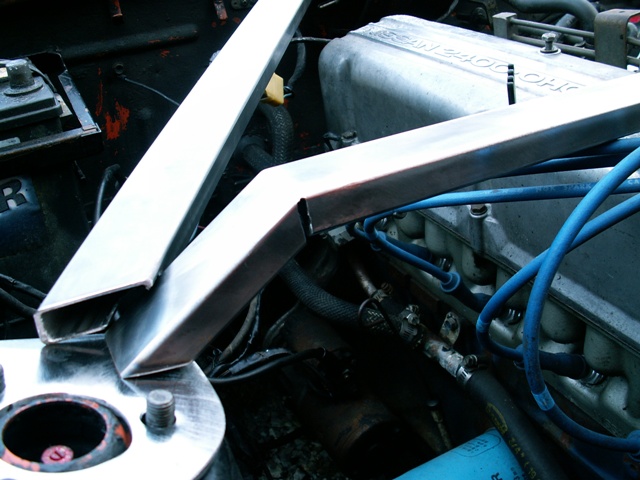
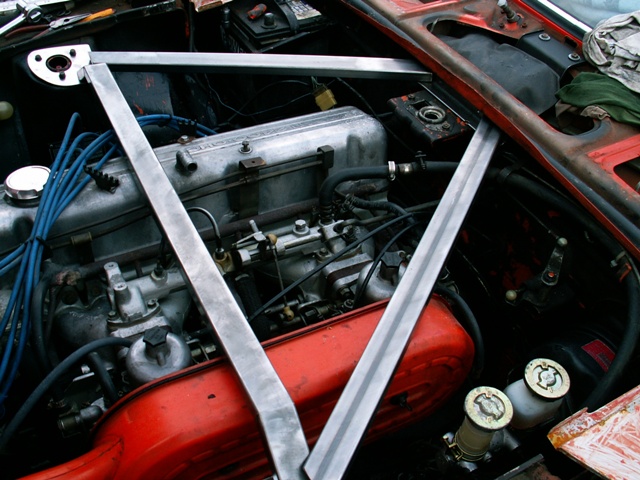
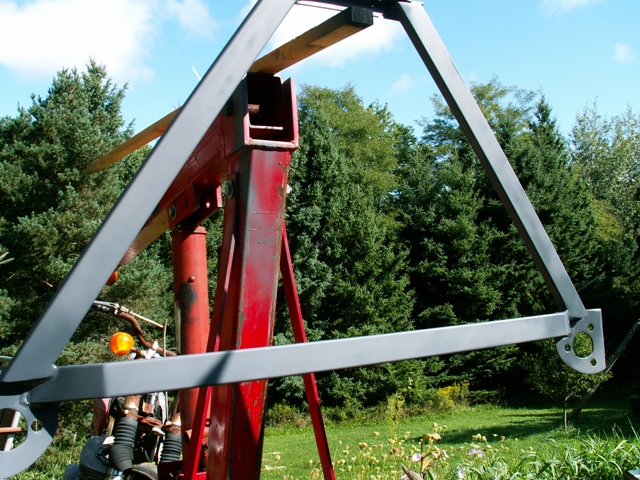
I made the front and rear strut bars last fall before I tore it all down so I could do all the test fitting without fear of wrecking the paint. There is this one,Top End Datsun 240Z Front Ultimate Strut Tower Brace | eBay It looks very strong.


-
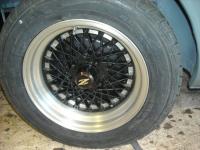
Ollie, the wheels are Dyna-Lites sold by Alliance in the early 80s, the center caps came with them, I just cleaned them up, painted and put the Z stickers on them, they are made out of fairly thin plastic.
-
If you remember the 944 and 928 models from the 1980's then you can see some resemblance. (Most people don't look at car styling very closely) Chris
-
They were nice weren't they. Is it just me or is the negative offset on those wheels seem way too much for a Z? It sure seems to recess back a lot in the pic. Chris
-
-
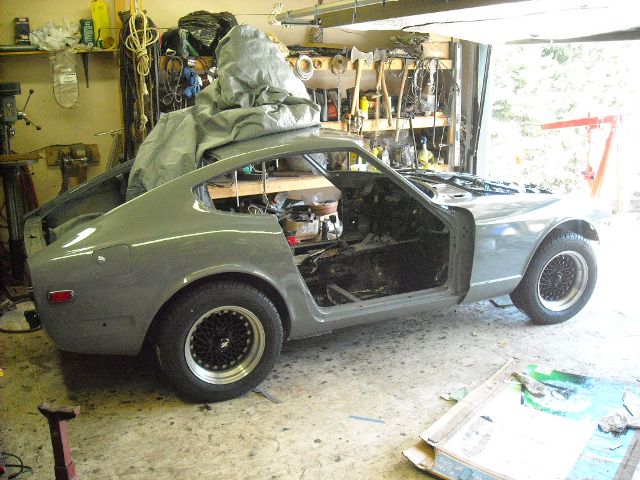
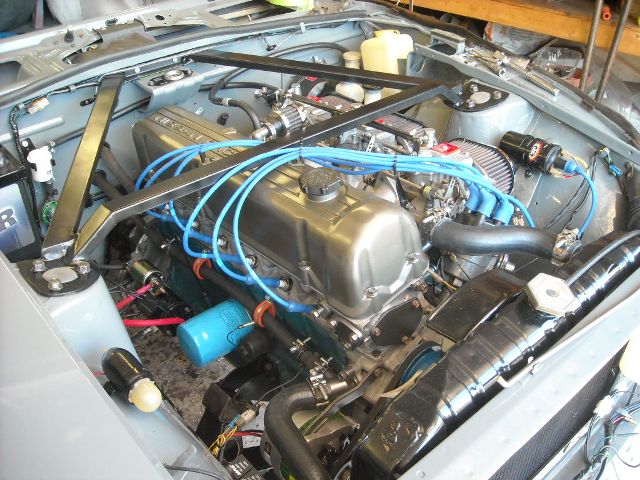
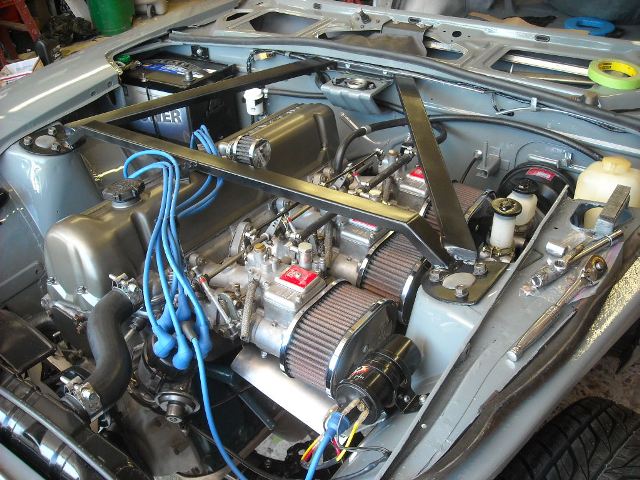
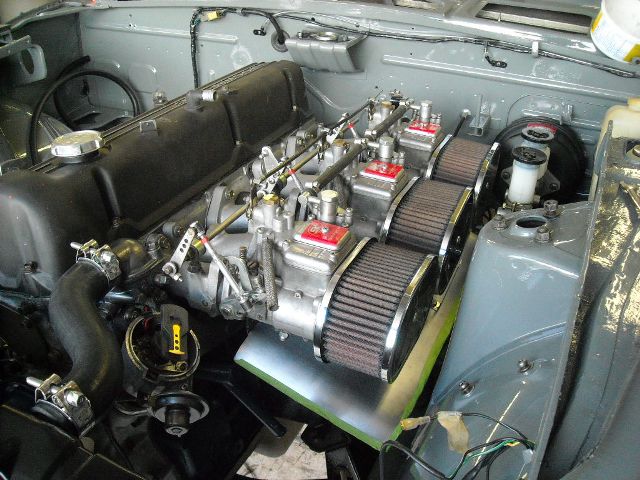
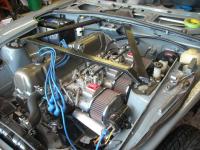
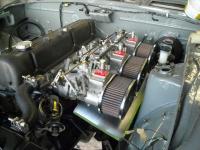
This working for pay sure gets in the way of working for fun. Got the wheels back from the powder coaters last week, reassembled them and sent them out for new rubber and road force balancing. Here they are, the tires are Bridgestone Grid Potenza 215/60 R15 Should be a good compromise between comfort and grip. Besides, there is not much to choose from in this size. Engine almost finished, finally got the new strut tower brace on. Now I have to get the headliner and header vinyl in before the windshield, then the dash and then I can finally start it. Chuck, your right about the fuel line, I had forgot that braided line is more than just bling.


-
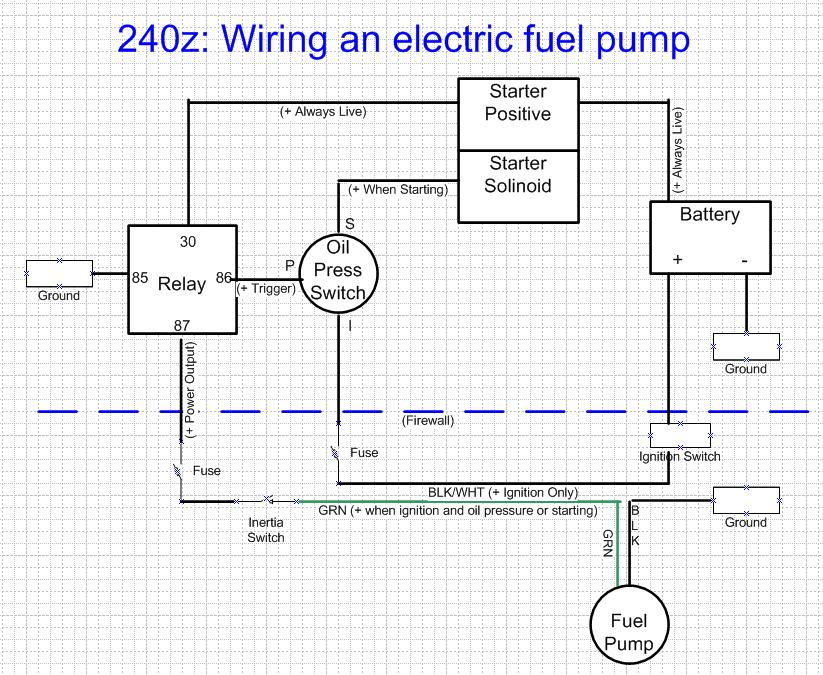
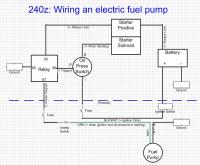
I'm using the existing green wire that is in the wiring harness, I'm pretty sure it's 14ga, the in line fuel pump is the RX7 unit that seems to be a popular replacement for our cars. So I guess a 20 amp fuse should do the job. Thanks a bunch, Chris
-
Crack a beer! Nice work. Just remember not to tighten up those end nuts on the rear control arms until the car is back down on the ground with weight on them. Chris
-
This post is mostly for archive searchers like myself, I couldn't find the size of battery I needed so pm Steve to get the answer. 24C is the OEM configuration. But if you want the POS terminal out from under the access lid, then get a 24F. Same size but poles are reversed. Chris
-
I'm going to use this diagram to wire in a new to the car fuel pump but I'm not sure what size of fuses to use. I would appreciate recomendations from those who have a handle on the theory, I'm a practical guy. Thanks, Chris
-
Okay, so I thought I would have the Murder Mat in a week ago but just finished it today and couldn't be happier. It adhered to my version of Lizard Skin very well and once it is rolled down is very difficult to remove. Although the surface facing inside the car is slick after it is cleaned with an alcohol wipe, it takes spray on 3M adhesive very well. I'm a long way from getting the sound system going but the echoee sound inside the cab is gone. I'm sure most of the stick on sound deadeners would do the same thing. I bought 40sq. ft. and was able to cover everything I thought needed it. Chris
-
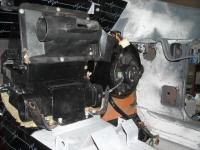
Stanley, the heater core is up on top of the trans tunnel right next to the firewall, the blower is what hangs down into the Passenger footwell. If you remove the H/C from the heater/ventilation box you would certainly get more blow from the blower but to do it you basically have to remove the dash, centre console before you can even get to the heater box, lots of work. Chris
-
Chas, that's pretty amazing work, the ones you are making are identical. Such talent on this board! Please put me down for one. Chris
-
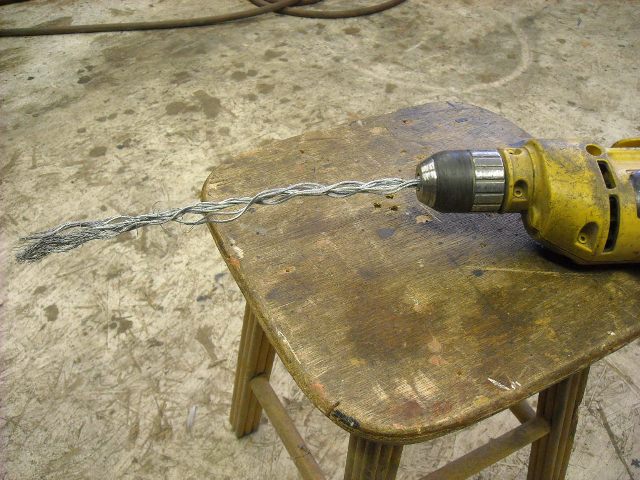
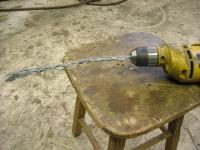
Stanley. I've seen pics of this set up that pumps a slurry of abraisive sand through a manifold and smooths it out, I would love to get that done but haven't been able to find anyone that does that kind of work, I suppose some kind of bottle brush honing tool being spun by a hand drill might work. I rigged up this cat of nine tails by using a piece of 3/8ths aircraft cable, it made very short work of 43 years worth of carbon build up in the exhaust manifold,
-
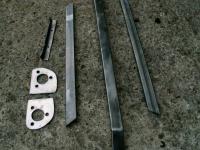
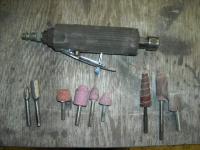
These are the tools I use, far left are the die grinders for removing metal quickly, then the stone grinders for smoothing and then the emery sandpaper rolls to semi polish. If you don't have air tools you can use a hand drill but it's much more awkward. Youtube has all kinds of how to vids on porting and polishing. It's pretty hard to screw up a cast iron exhaust manifold but very easy to destroy an aluminum cylinder head, you've been warned. Also, it's much more important to have your ports match one another smoothly then just to make them bigger. Chris
-
I haven't tried it yet, I'm concerned that the bleach may weaken the material. There is a local Z swap meet coming up soon, if I can find a second washer bottle then I'll give it a try and post the results. Chris
-
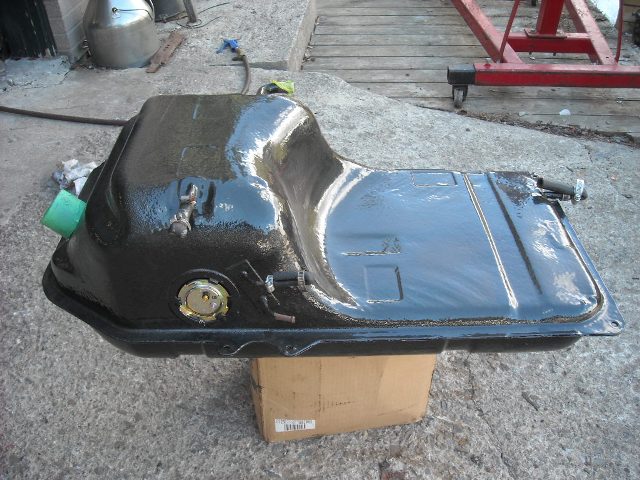
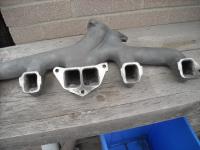
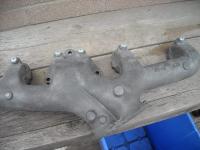
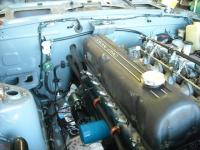
Just to close off this thread, I did work the original exhaust manifold to match the head ports, here it is,
-
After reading more than a few posts in the archives extolling how well the stock exhaust manifold breathes I thought I would work up my 1970 manifold. Ground out lots of metal and semi polished it to match the head. Heated it to 300F then sprayed 3 coats of header paint then back in the oven at 500 for 20min. Gas tank before install, Carbs are now in as are the gas tank, fuel pump, regulator, driveshaft, and exhaust. Nothing sexy at all about the heater/blower but after removing, restoring and installing I think I have spent 40+ hrs on this thing.


-
[quote=ta240;427476} That's good advice and I'm thinking this might be a good justification for me to drop the car off at Rebello this summer Oh I can hear that one, "Sweetheart, I need a $10,000 Rebello engine, it's a safety issue, can't be too carfeful these days."
-
As long as your various vin plates and stamped vins match it's hard to believe that anyone is going to make a fuss. Resto shops routinely remove them for paint and and repairs. I like to write a message to the future restorer from me , the current restorer and slide it behind the vin plate before I rivet it back on. Chris