EuroDat
Free Member
-
Joined
-
Last visited
Everything posted by EuroDat
-
 Hi Bart, did you get the clutch master cylinder in NL? Just wondering. If I cant get parts from the nissan dealer I generally end up buying in the US at Rock Auto or MSA. They are the ones with the best shipping rates to NL IMO. Chas
 -
Thats a really nice strut brace. The car is starting to take shape and looking great.
-
I cant remember mine being harder to turn in reverse. It sounds like something is wrong with the selector. My 280Z has a tranny out of a 280ZX and I changed all the bearings, syncros, nuts and such when I rebuilt it last year. I posted photos of the selectors in a thread started by Leonv. You can see in there http://www.classiczcars.com/forums/engine-drivetrain-s30/49070-transmission-id-quiz.html Chas
-
-
What are you planning to do with the valence? The 280Z leaves a big open area under the bumper and the 240Z doesnt fit without a lot of work. The front cross member drops down too low for the 240Z valence. I am playing with the same idea, but decided to finish some of the other projects on the car before going further. Might buy an air dam after the summer and work on it further. Chas
-
Thats nice work on the power booster. It cleaned ureally good. I tried to order a kit from Blackdragon but the shipping was huge. Ended up buying a complete unit from Beck/Arnley from Rock auto.
-
The diff internals look good. The pinion seal is dry and clean; nice. My advice: Dont change the pinion seal, it can be more trouble than you bargin for. Getting the preload right without doing a complete rebuild can be hard with used bearings and you end up with a whining diff.:disappoin Chas
-
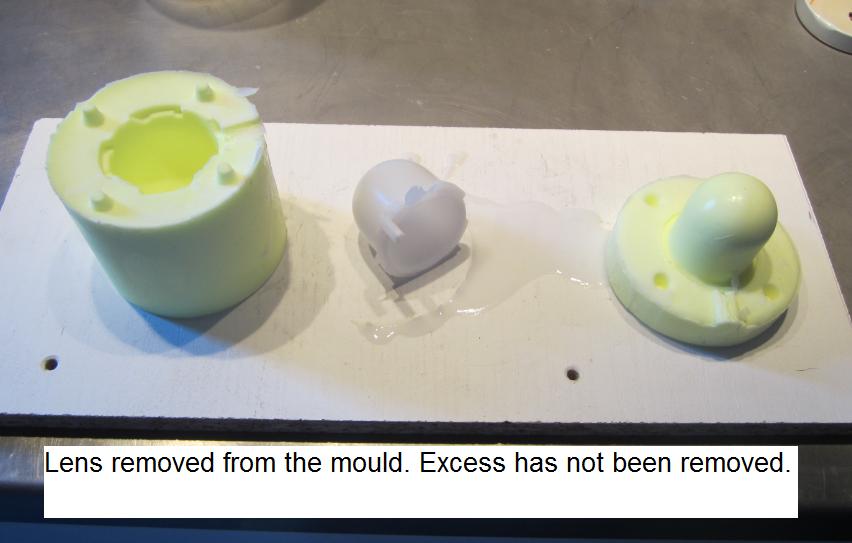
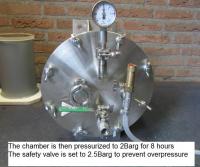
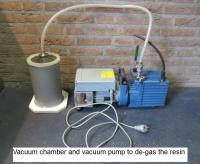
The inspection light is is NLA or very hard to find at the least, so I decided to try and make the lens. I had a light in good condition, but the lens was brittle and badly faded. Since I had all the equipment for making a set of tail light lenses for my 280Z it was not too much work to try make the inspection light lens. The Equipment I used: 1. Vacuum chamber and vacuum pump. This is needed to remove air from the silicone resin used for the mould and the clear resin used to make the lens. You can do it without using vacuum to de-gas, but the results are not as good. 2. Pressure chamber and compressor. The pressure chamber is used to pressurize the silicone mould when its curing and to pressurize the resin when you mould the lens. If you don't do this you run the risk of getting a champagne bubble effect. This effect is caused by small air bubbles captured in the resin during stirring. The silicone mould suffers a different problem. Uncompressed air bubbles in the mould will compress during the pressurizing phase of the lens making. When the bubbles are compressed the mould is then distorted and you get a strange looking lens. Trust me, I know from experience.:stupid: 3. Scale that can measure 1 gram for measuring resin, dye and hardener ratios. Very important for reproduction later. Note: If you are using dye, I suggest mixing the dye in the resin before adding dye. Mix enough for your total production and keep it stored. Mix the quantity needed with the hardener. This way you maintain the colour through out the production run. 4. Injection needle or device to evenly inject the resin without trapping bubbles in the mould. This is probably the hardest part of making the lens. I prefer to inject the resin instead of pouring it into the mould. I have found it easier to prevent bubbles this way. I fit a plastic tube to the seringe (plastic tube used for fish tank pumps) and make sure you use enough tube to hold the resin. 5. Releasing agent. Spray pack. This helps prevent the resin sticking to everything you can think of. Makes cleaning easy. Pressurize the mould. Once the mould is poured it needs to be pressurized to remove any small bubbles. I use 2Barg for 8 hours and warm the chamber to 60°C. This helps cure the lens and helps give it a shiny finish. Remove the mould, dismantle it and trim the excess of the lens.
-
Now it really gets interesting:)
-
Hi guys, I didnt think there would be much call for them. If I can get $10 + shipping would be nice. I will check what it costs for shipping and get back to you. If your still interested I now have a mould and stil have some resin so its easy to make a batch of 10. Chas Edit: Thanks for the comments guys. It all started when I wanted to make a taillight lens for my 280z and I came across the pressure chamber. I thought, the euro lights cost around $500 so if I keep the budget to that this would be more fun. And it is still.
-
That is probably because most of it has been translated from a japanese manual and most probably by someone with english not being their native language. Some sections have sentences that throw you of a bit. Takes a bit of getting use to, but you will get the hang of it. Chas
-
Hi grnsky, "progress slow" Your progress is not that slow actually. The results are looking good. Engine bay looks real good. It will be a nice ride when your finished. Chas
-
I agree on the header too. Looks homemade and the pipes dont seem to match the ports all that well. Im using stock EFI so Ill be staying with the stock manifold too. I wonder if there is any benifit on a stock to mild engine (except cosmetic) using a header since the stock manifold flows well with some port matching? For a performance engine its different, but then you would choose extractors with matched tube length.
-
I like it, Thats a good combination F54 + N42. Looking forward to seeing it progress.
-
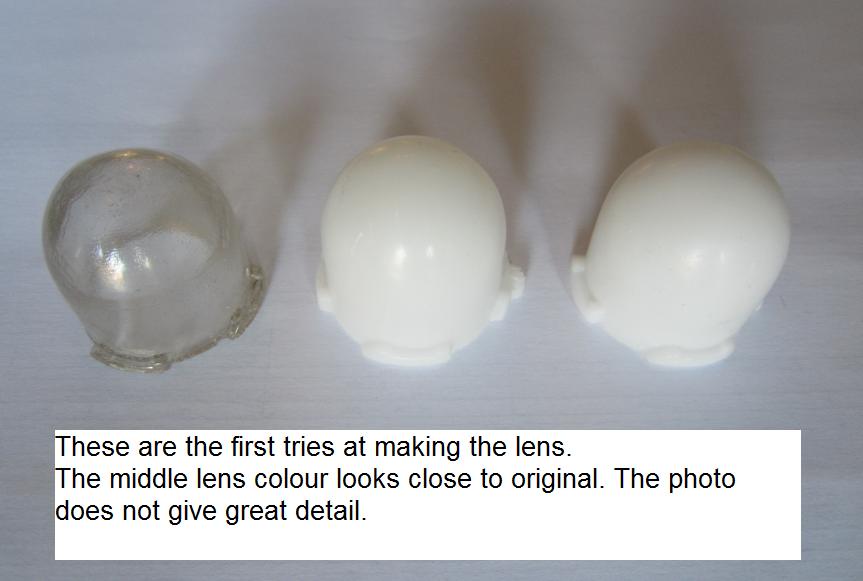
Hi Mike I made a couple of lenses with a white dye. The second one I made looks pretty close to original. Thats the one in the centre of the photo. The equipment Im using is what I had set up for making my tail light (turn signal) lenses for my 280Z. Otherwise I wouldnt have done it. I found the equipment at factory auctions and such. Equipment; A compressor - Vacuum pump - Vacuum chamber to de-gas resin - Pressure chamber to pressurize resin until it cures. This is to prevent champagne bubbles effect from forming in the lens - Scales to weigh resin, dye & hardener - Seringe or something to inject resin in mould - Release agent (spray) to help release mould and clean up. I dont know if anyone would be interested in a lens? The purpose was for my own 280Z restoration, but if any clubmembers would be interested in one. I could make some extras. I have more photos in my profile Album.


-
Hi Bart, I had that a couple of years ago when I started driving after the winter. After a week it slowly went away. I wasn't sure if I was getting use to it or what? but then I realised:stupid: the tyres had flat spots from sitting to long in one spot. Since then its on stands in the winter and havn't had that problem since. That could be your problem as well?
-
Hi Nathan, Looks neat. Nice clean engine bay. Do you have any details on the L28? Would be nice to read a bit of the background. Chas
-
Hi Chris, That thing looks dam scary to use. Cat of nine tales is the right name for it if it ever came out of the port while using it. Long ago I have seen a similar thing with 1.6mm wires and on each end a round ball shape stone that would grind metal away and that way smooth out the port. It would fit a hand drill and had about 12 stones and 30cm long and was flexable enough to go around bends from what I can remember. Something like that could smooth out the inside of the exhaust runners.
-
You could try Xenons30 XenonS30. I think we all have downloaded something from there at some time in our resto work. They might post it for you and they comment who gave it to them.
-
Know how you feel. Any serious Z restorer knows what your been though. Its probably the worst job you can do on a Zed. That and a rusted shock in strut tower. Look at it this way. The worst is now behind you. HardWay has just had the same drama.... http://www.classiczcars.com/forums/suspension-steering-s30/48583-spindle-pin-woes.html Goodluck with the rest off your restoration Chas
-
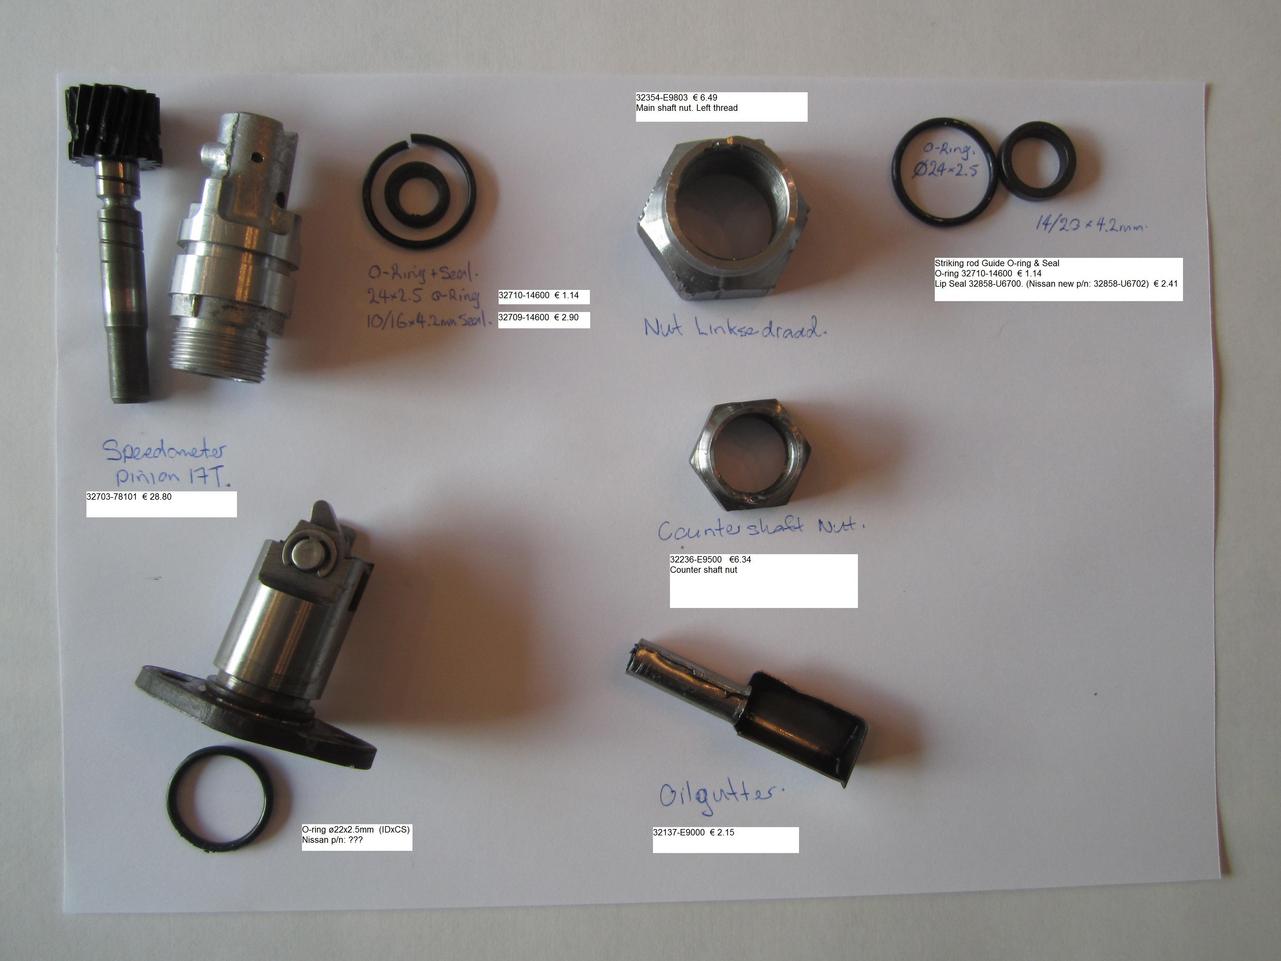
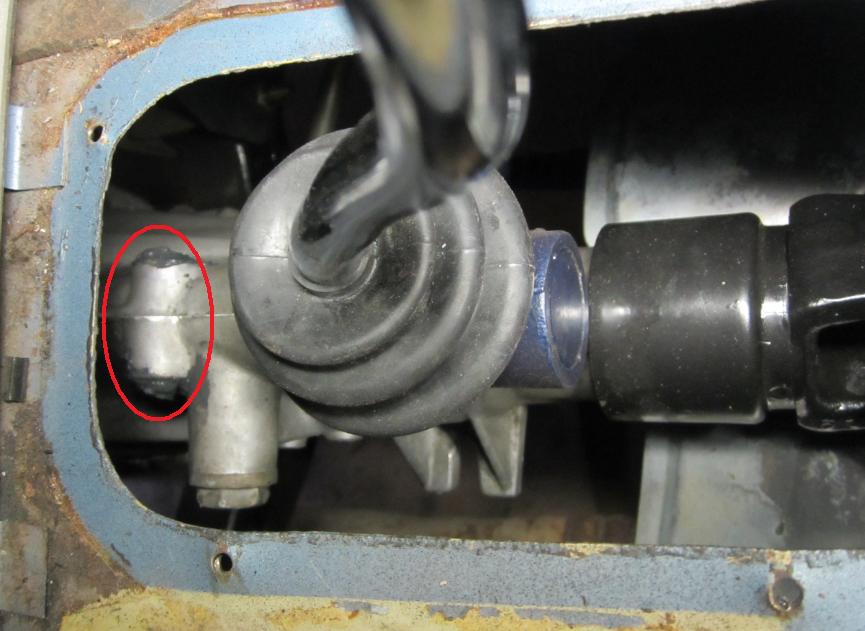
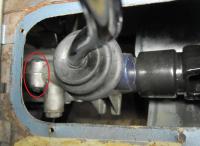
Hi Jan, Looked up the parts I used for my transmission. I have a later version of the FS5W71B (I think it came out of a 280ZX) but the o-rings and seals should be the same. You can also try the Nissan dealer. All the parts are available at my Nissan dealer, next day pick-up. Speedo pinion seal 32709-14600 Speedo pinion o-ring 32710-14600 I also replaced the bushes in the shift lever. Took out that "stick in the mud" feel when changing gears. Control lever cup 32861-N4200 Control lever bushing (2x) 32855-H1010 Rear oil seal 32136-U0100 I also had a reverse latch with an o-ring. Nissan could not supply the o-ring, just a complete unit, so I found one at a local parts store. If the oil is leaking from the Striking rod guide, then you will need to dismantle the rear of the transmission. Striking rod guide seal 32858-U6700 (Nissan quoted me 32858-U6702) Striking rod guide o-ring 32710-14600 (same as speedo pinion o-ring) When I rebuilt my transmission it had a small leak. After a couple of months it was moist around a pin just in front of the shifter. I sealed it with sealant. See photo. Goodluck with it. Chas
-
I replaced the O-rings and shifter shaft seal with OEM parts from nissan. There is also a pin that was leaking in mine which doesnt have any seal:ermm:. I sealed it with sealant on the outside. I have all the part numbers and I can post them witha photo of the pin. Chas
-
Sorry, cant help you, but what your planning to do sounds interesting. It would clean up the lines of the 260Z. Good luck with it. It would be nice if you post progress photos. Chas
-
-
Common sense really, but I just didnt realise it:stupid: Ill use the link in future to visit the sites I use. Chas