EuroDat
Free Member
-
Joined
-
Last visited
Everything posted by EuroDat
-
 My old bushing was just like yours Charles @Patcon with the same locking tabs. I have seen this style in the 71B. Can't find my old one anymore. I checked the spare 71C I have and it is hard to see with the main shaft in place, but it looks like it's slotted (2 holes) like Dave WM described. I know the originals had no holes, but later the did. Can't remember exactly when, but I thought it was in the 280ZX when they changed. Most probably after 82 because the 82 close ratio I have had the old style as well.
 -
I wouldn't drive out the brass bush. Never heard of one needing replacement and you would need to get it fabricated. All I use is a length of 2.5 or 3 mm welding rod, with flux removed, and flatten (to about 1.5mm thick) the last 5mm with a hammer on a vice or anvil. Then bend the last 3 to 5mm to 90 degrees. Use it as a hook. You can get that behind the seal and pull it out. They should come out easily unless someone has glued it in. Yours looks like the last person to rebuild the transmission put it in backwards or it could be the photos. The lip in the seal should point towards the transmission.
-
Hi Dave, I still have my old one laying around somewhere, but I know it didn't have any holes in it like the two 71C trannies I have. Maybe somewhere in the 71B production they started fitting them with the holed versions?
-
The originals did'nt have the hole. The swirl form in the bush pulls oil through the bush to lubricate and help cool it and provide some oil to the seal. The oil can then flow back through the drain back to the transmission.
-
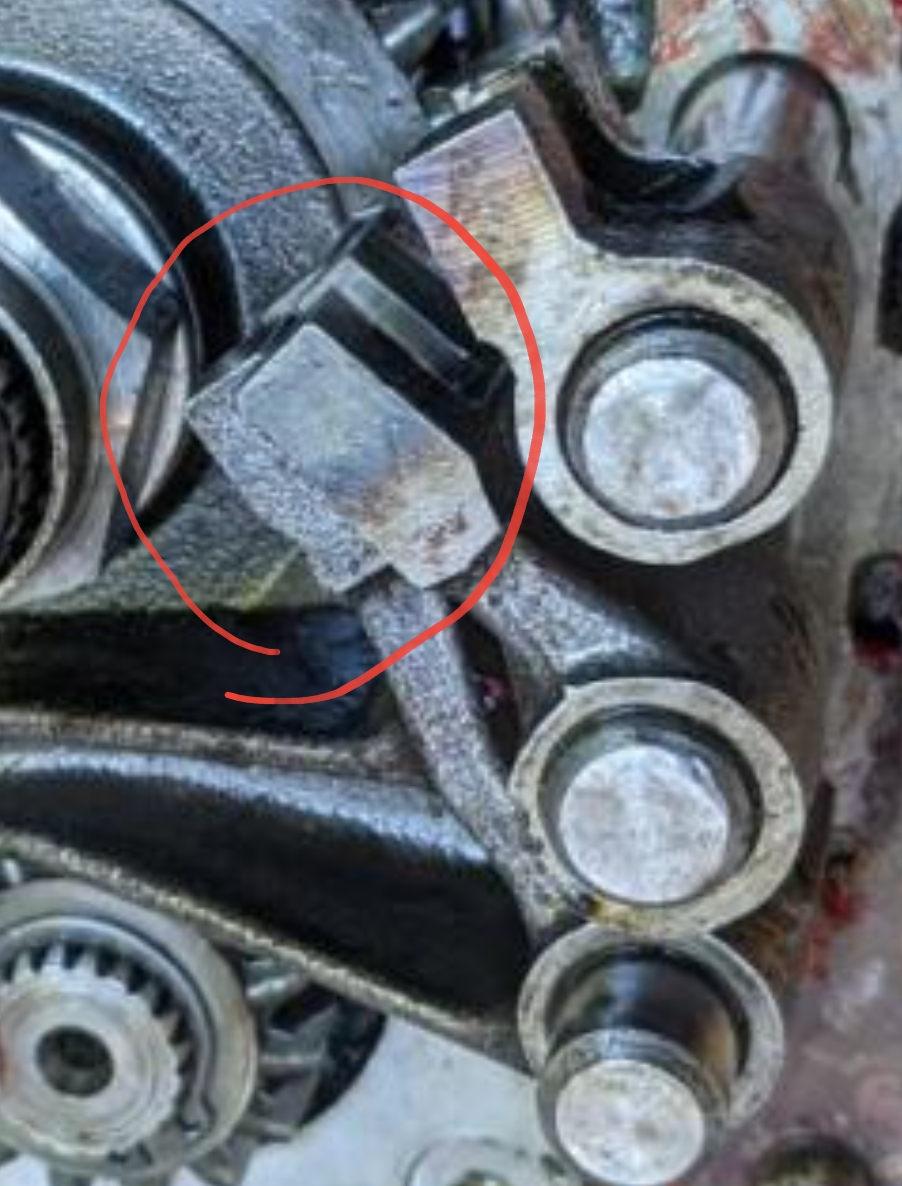
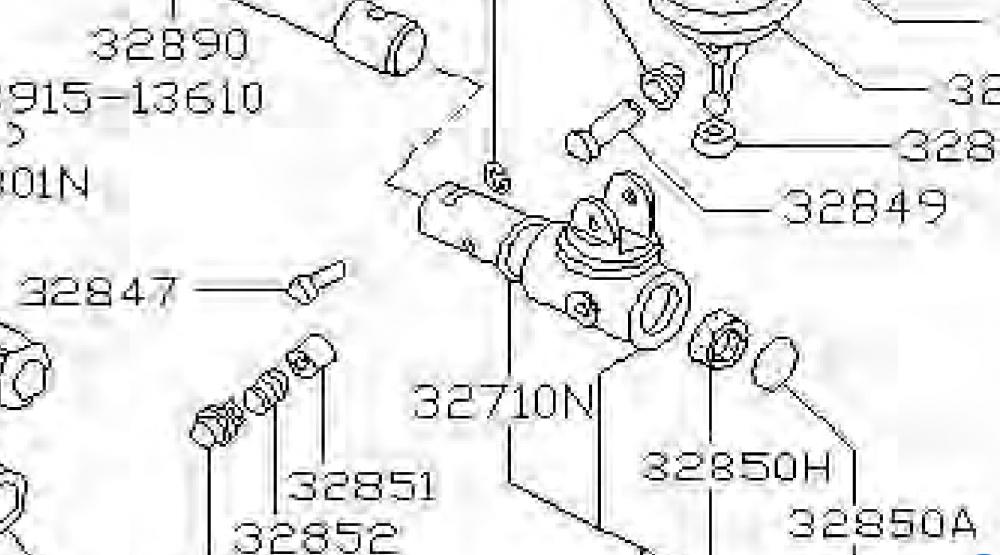
Another small improvement for when you assenmle the transmission. On the top rear of the extension housing is the locating pin/circlip for the striking rod. It is actually located on the oil side of the O-Ring seal on the striking rod. It can weep oil. It is not much, but a little sealant around the pin (32847) and its circlip will stop it and keep the area dry and clean.
-
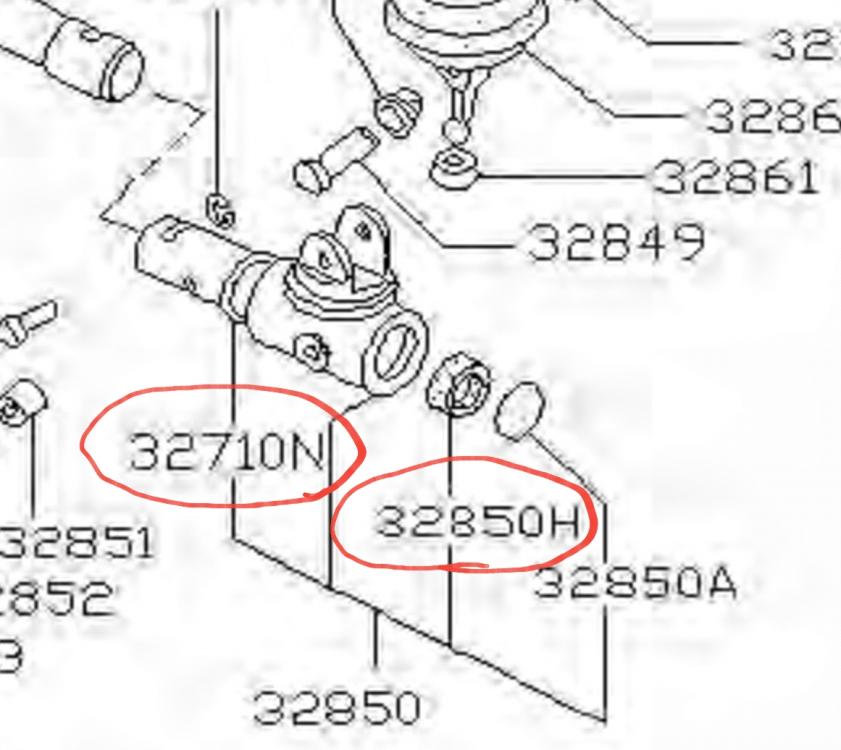
For the selector seals you will need the o-ring on the outside of the striking rod (32721N) P/N:32710-14600 size:24x2.5mm and The inner lip-seal for the striking rod (32850H) P/N: 32858-U6702 size:14/20x2mm. You will need to push the cap off using the striking rod. It will come off easily and can be re-staked with little problem. You can use a tiny amount of sealant to create a god seal. The omega bush can be fitted in both directions. The hole is not used in the datsun extension housing.
-
Yeah, Covid is making things tough all round. We are finally starting to loosen the restrictions. I'm so happy they lifted the curfew and started opening things up again. Maastricht is a beutiful city, plenty things to see and do. That sounds like a good plan. Two weeks notice should be enough to work something out. Have a safe trip and maybe we can catch up next time you are here.
-
When will you be in Maastricht? I'm not too far from there.
-
As far as I know all the European 240Z MT 5 speeds 70 -73 had the 3.9 R180. The one you found is an F5C71A which would put it in the first 18 months of productions. Somewhere in mid 71 they changed to the F5C71B in Europe and Australia.
-
2 ears means its a wide ratio, which could be a 280Z of a 280ZX 2+2. The 280ZX coupe (non turbo) had what we call the close ratio.
-
It looks like the F5C71A to me. It has all the right signs, but I'm not an expert on these transmissions. I know the 71B and 71C very well. I had one of these F5C71A apart back in 1983 from a mates old 240Z.
-
Niels has done some good research on the Euro 5 speed 71A. He is rebuilding one in this thread.
-
Hi Bart, Here is a link to tech aticles with a how to identify a F5W71B tranny. The 71B you scored looks like a wide ratio. Yours has no reverse lockout. If you check the other side of the extension housing you will see a second exhaust hanger ear and the speedo locating tab is above the speedo cable. If it was out of a 280ZX, then it was the 2+2 version.
-
True, they should fall through without too much help. Certainly not a hammer to help it.
-
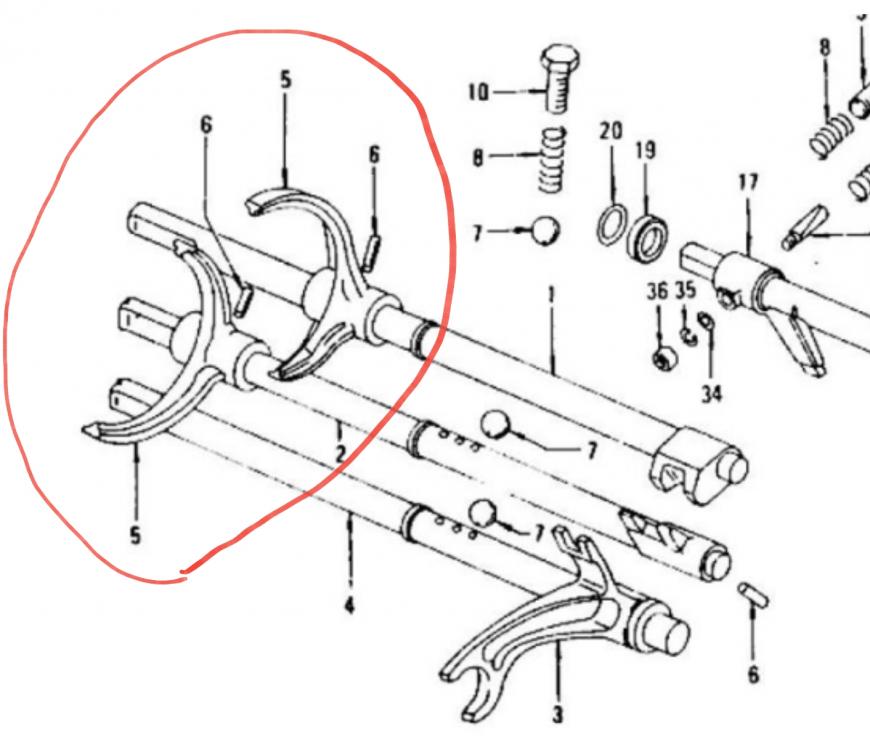
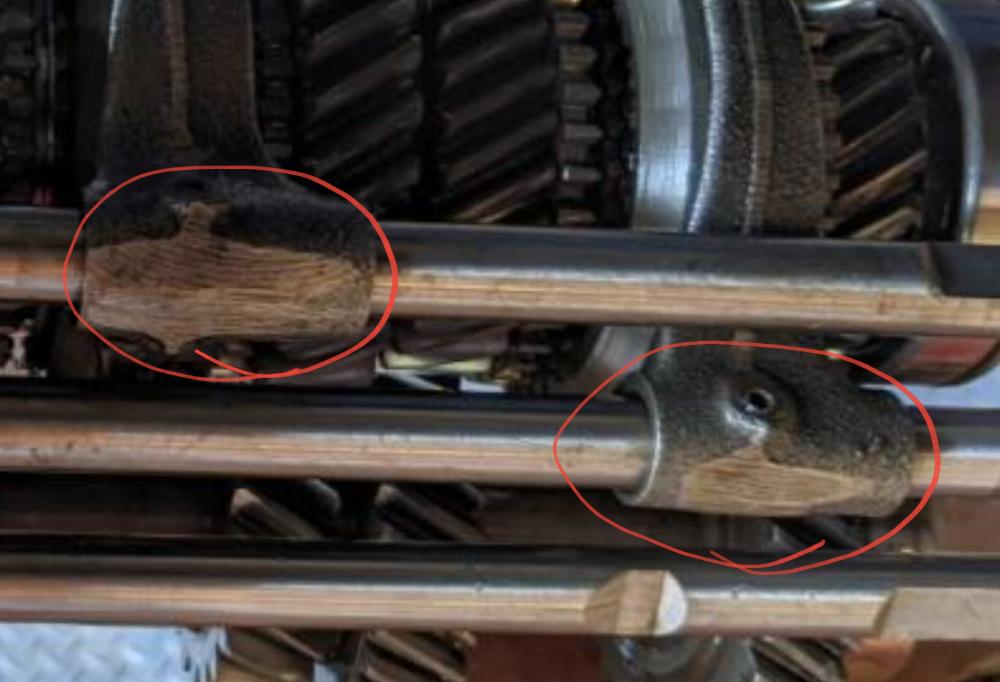
Hi Jeff, I wrote that late before going to bed. I'm away from home at the moment and only have my work laptop and tablet with me, so doing this from memory. I also borrowed a screenshot from ZedHeads post. Btw, I meant 3rd/4th and 1st/2nd forks could be reversed, but I typed reverse and 1st/2nd. Tired😴 Why I asked about the striking rod not engaging? If one of the forks (pos#5) is reversed, then the striker slots won't line up for the striking rod. That is clear in the photo. The selector rod is then twisted (turned) in the adapter plate where the interlock balls are located and that is locking the selectors. Your reverse is also binding in the 3rd/4th striker slot It looks like you have one of the selector forks mounted on the selector rod backwards. The forks for 1st/2nd and 3rd/4th are the same (Pos#5) . The only difference is how you fit them. 3rd/4th the long tab should be down and 1st/2nd it should go over the top of the gear. Because the 3rd/4th striker slot is interferring with reverse, it looks like your 3rd/4th fork is mounted backwards (180 degrees). It's easy to do and will cause all your problems. The good news is it is an easy fix. Swap it around and do the check with a rod to see if the interlocks move correctly. You shouldn't need to hone it and if you do, don't remove too much. The hole diameter effects distance, too large a diameter and you could eliminate the interlock function. I added two of your photos with the area highlighted. You can see the forks are in the same direction and 3rd4th it binding with reverse.

-
I take it the transmission selected all the gears before you dis,antled it? It will not move (jammed) the 1st/2nd selector or you can't select it, meaning the striker rod won't go over into the 1st/2nd selector? I'm trying to understand you problem a little better. It could be a problem with the selector interlock balls. You should have 4 interlock balls (two between each selector rod and three checking balls. The checking balls are installed with the springs and caps after each selector rod is installed, but the interlocks must be fitted during assembly, before you fit the next selector rod. That is in the following order: Insert reverse selector and fit fork in correct direction, drop two interlok balls through the top hole or poke them in through 3rd/4th checking ball hole. I generally drop something like a philips head screwdriver or round rod, or pencil (something smaller in diameter and longer than the hole) down in the hole and move the selector rod to see the balls move up and down freely. Then install 3rd/4th selector rod and repeat process for 1st/2nd. It could be the reverse and the 1st/2nd gear folks. They are the same, but reversed. If you fit them back to front you will lock up the transmission. It they are both facing the same direction (longer tab on fork) then one is not fitted correctly.
-
So the 78 uses the same relay(s) as the 280ZX?
-
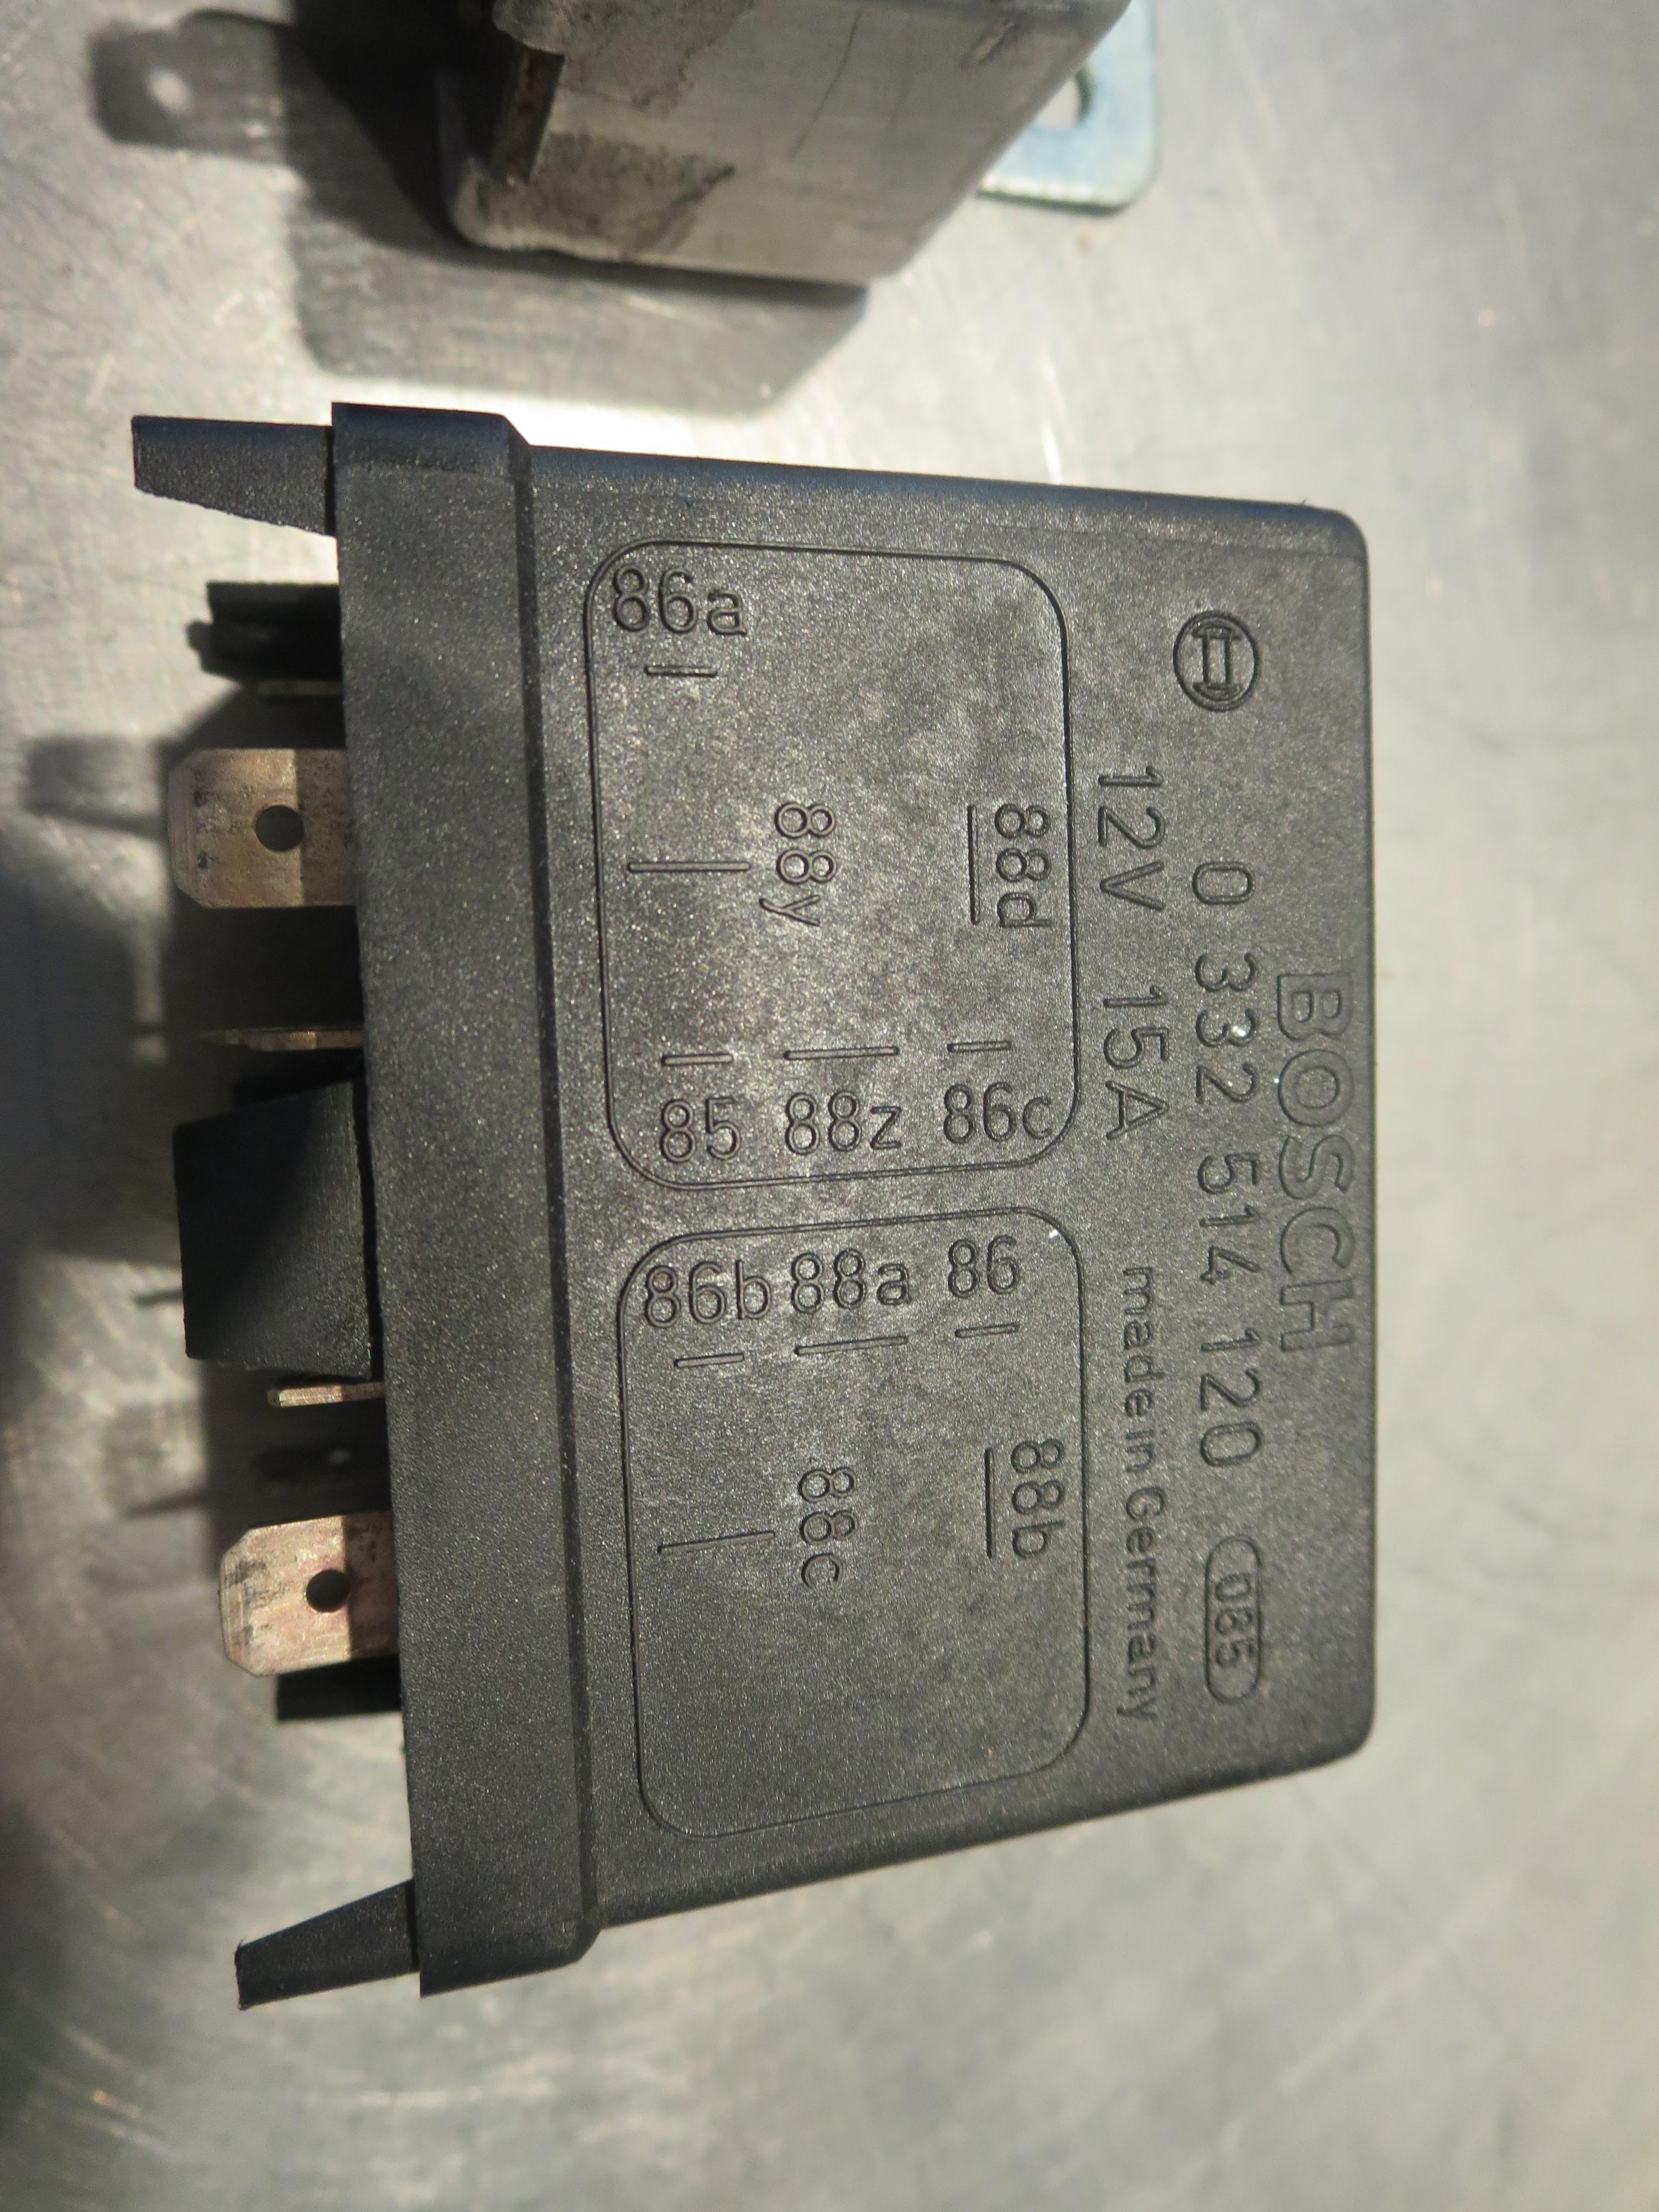
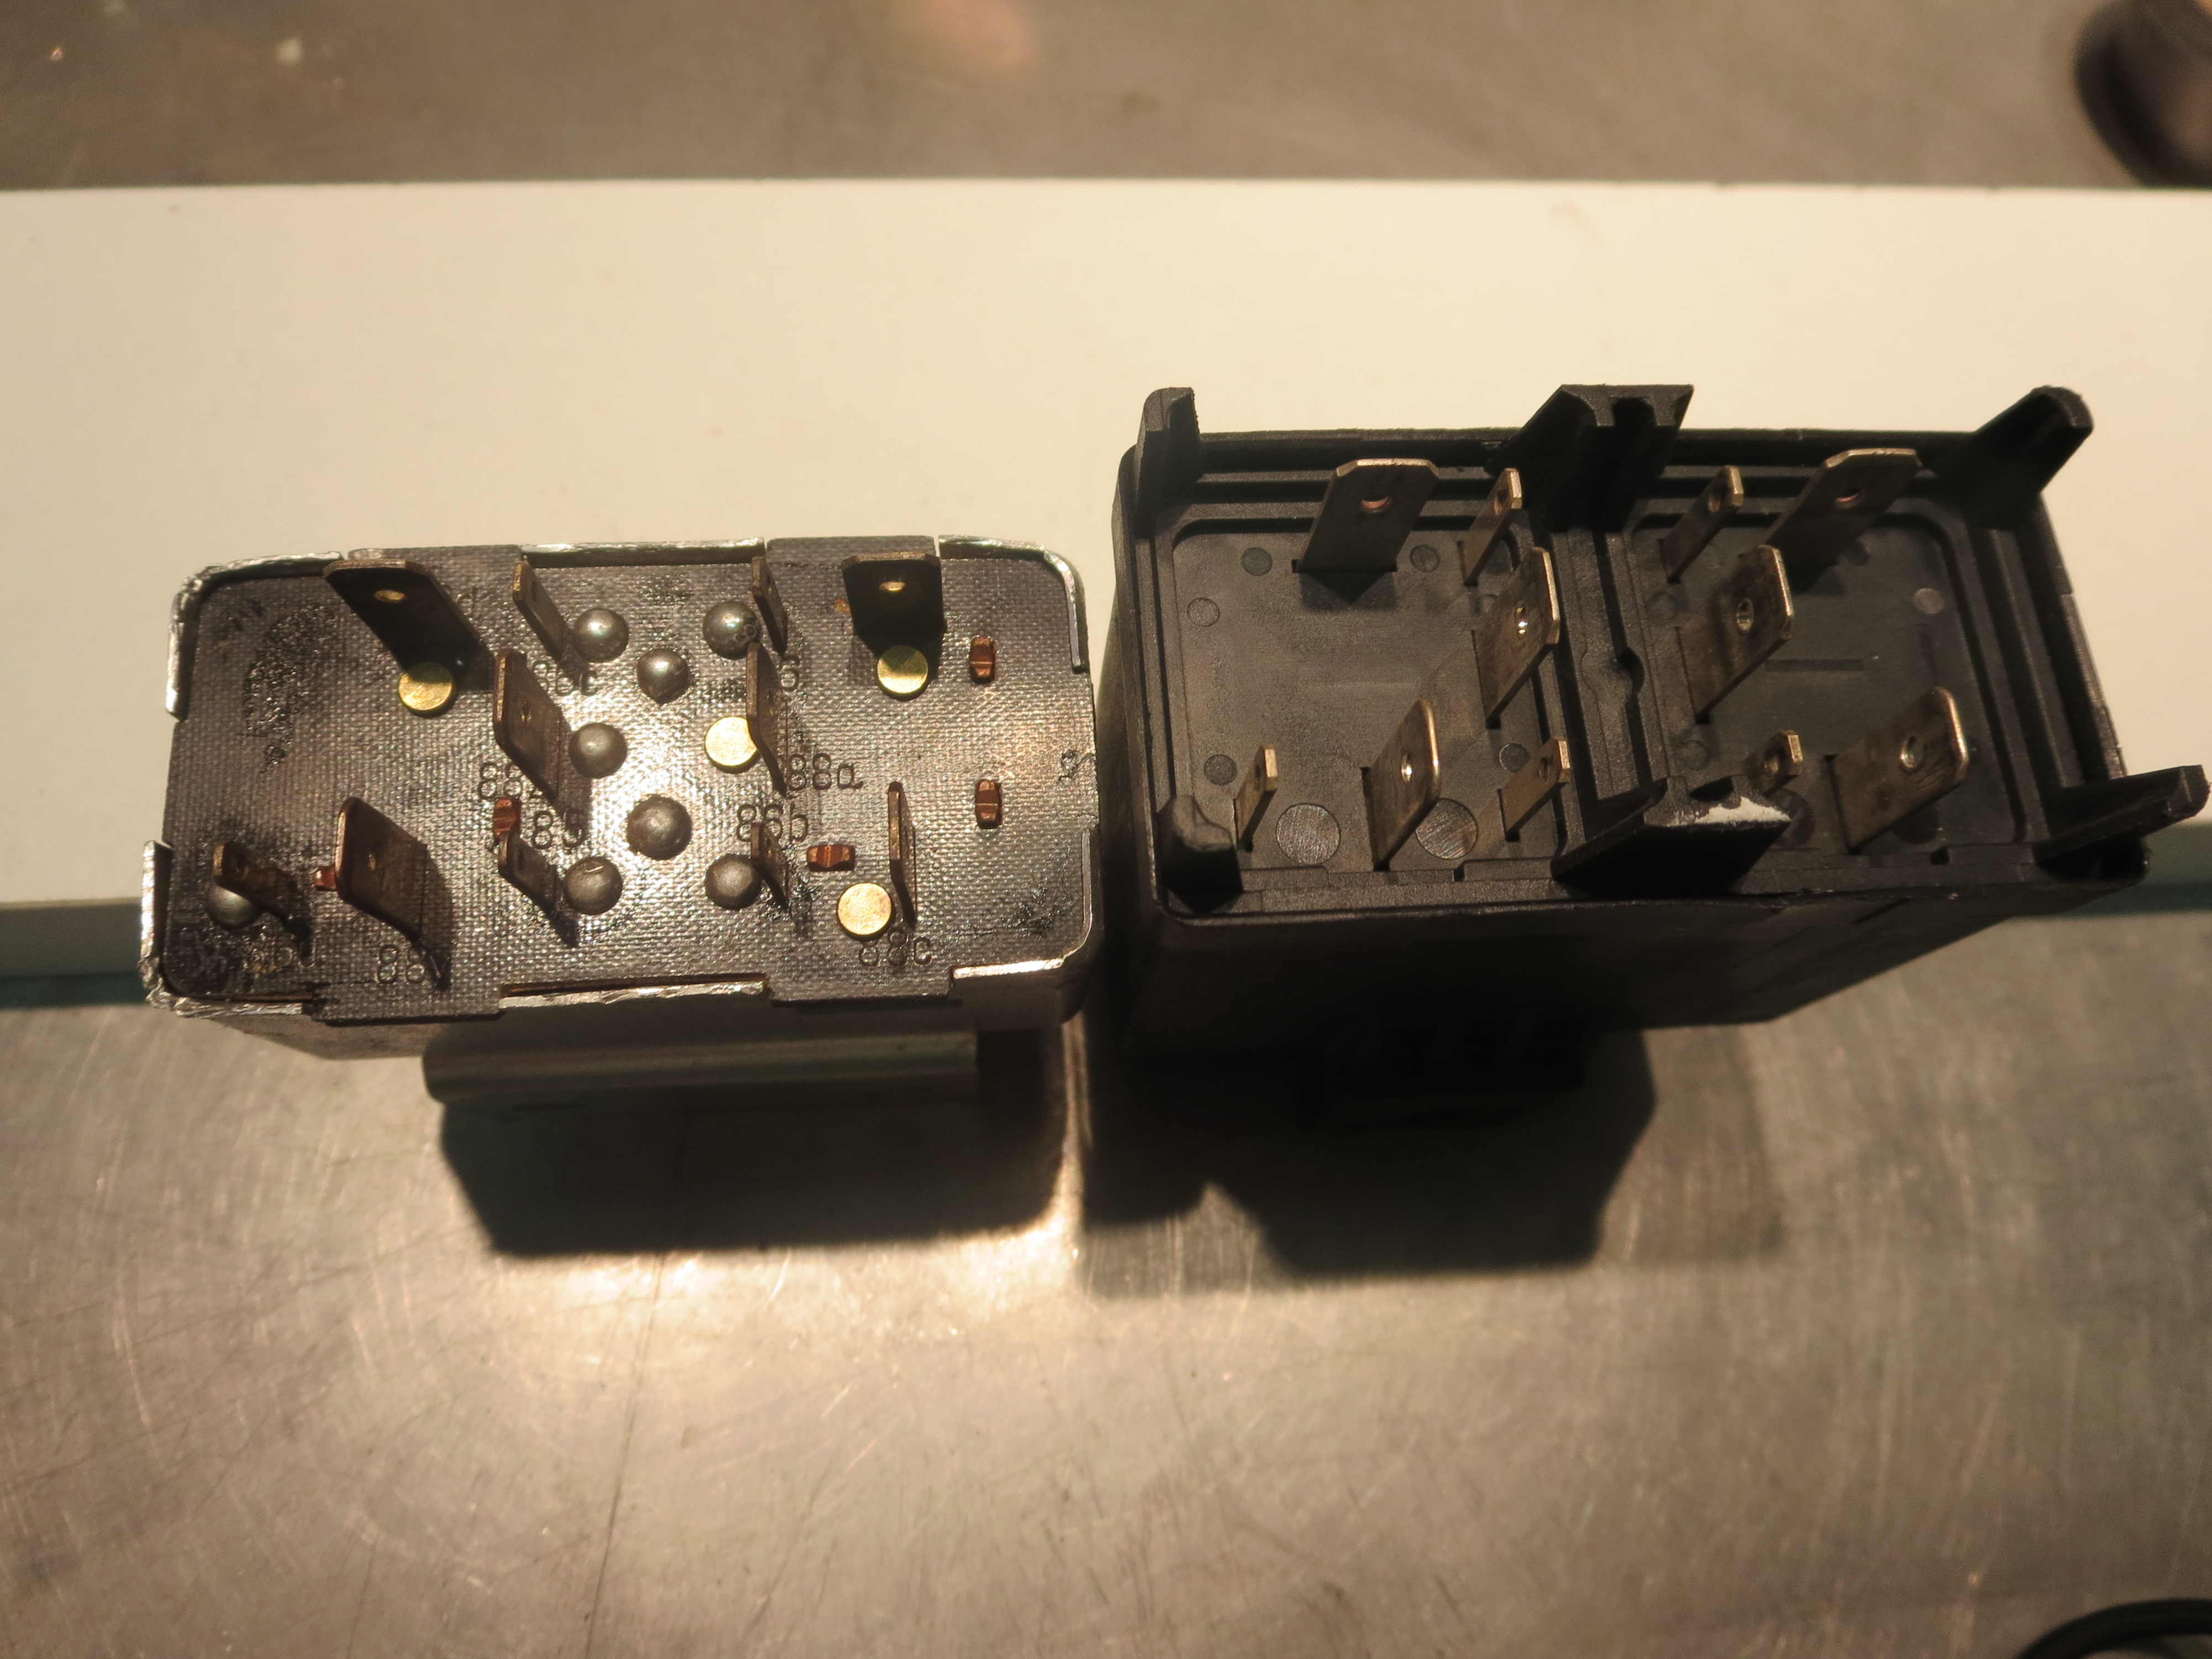
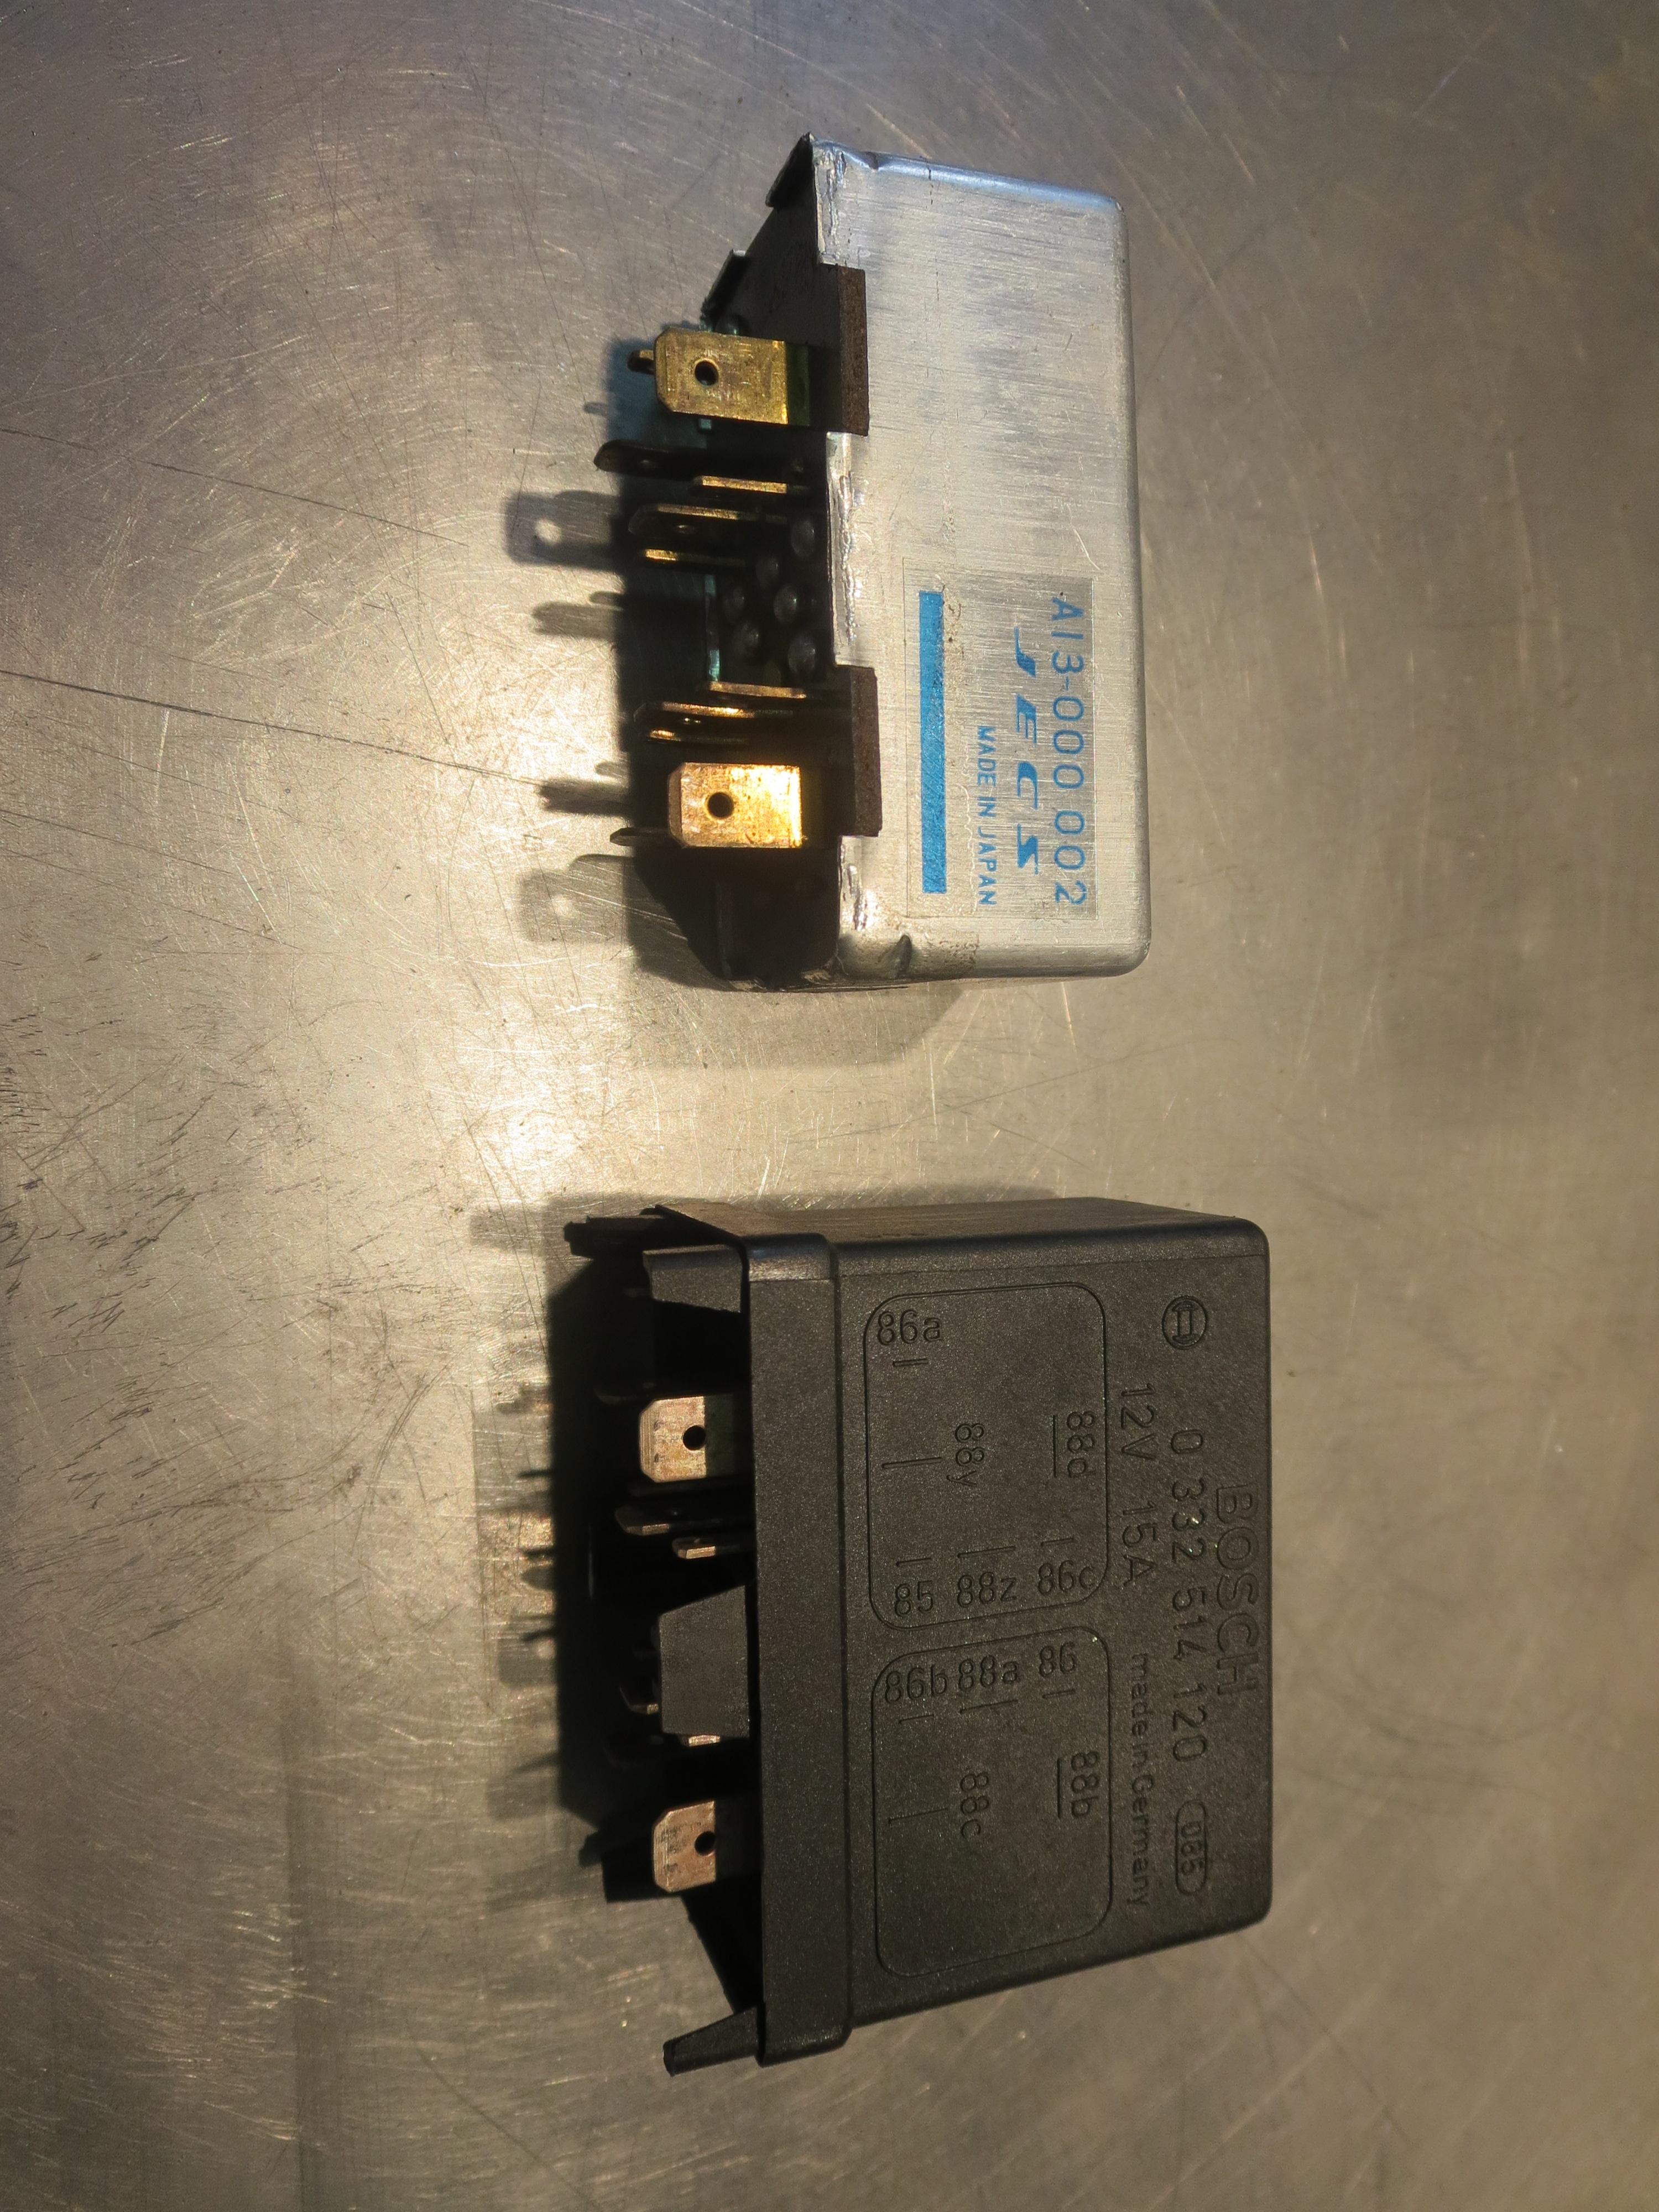
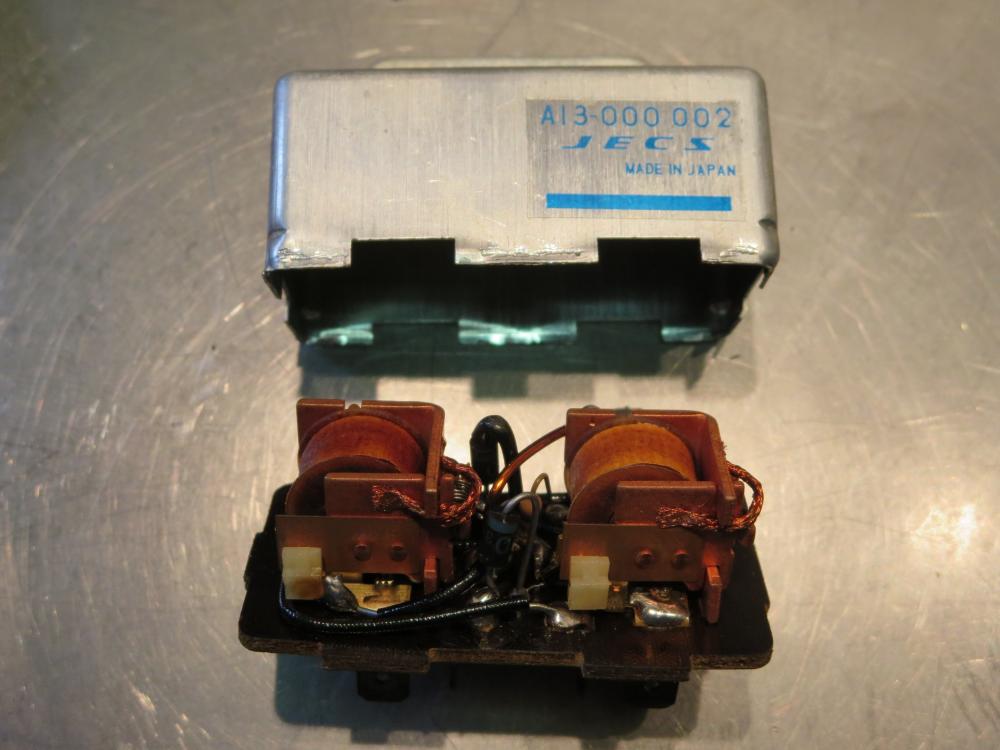
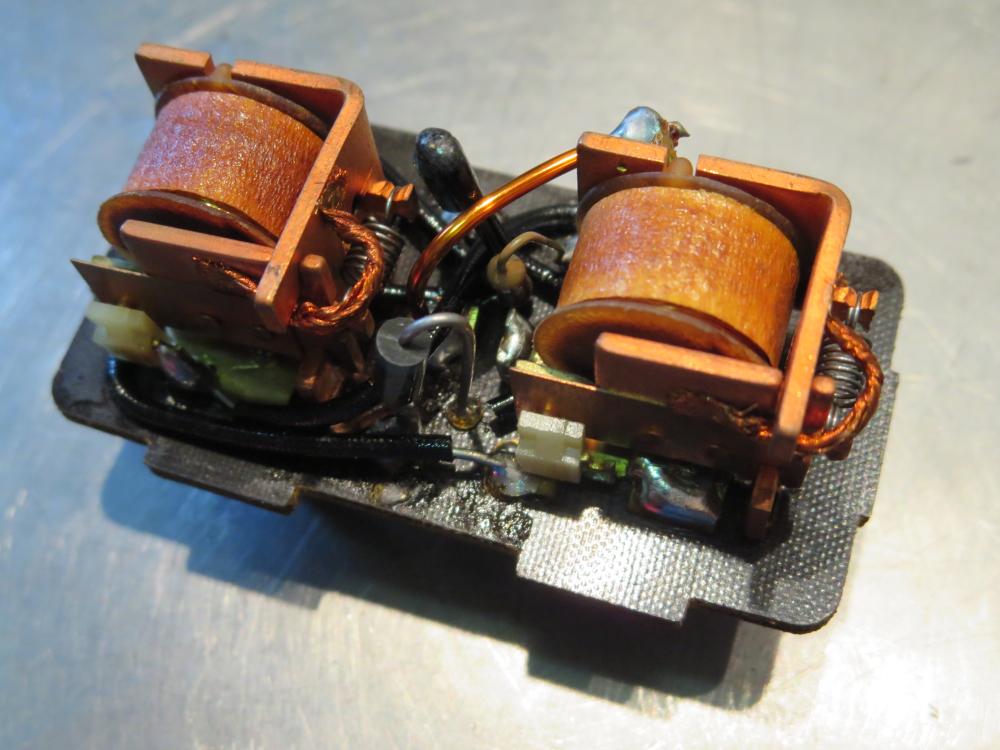
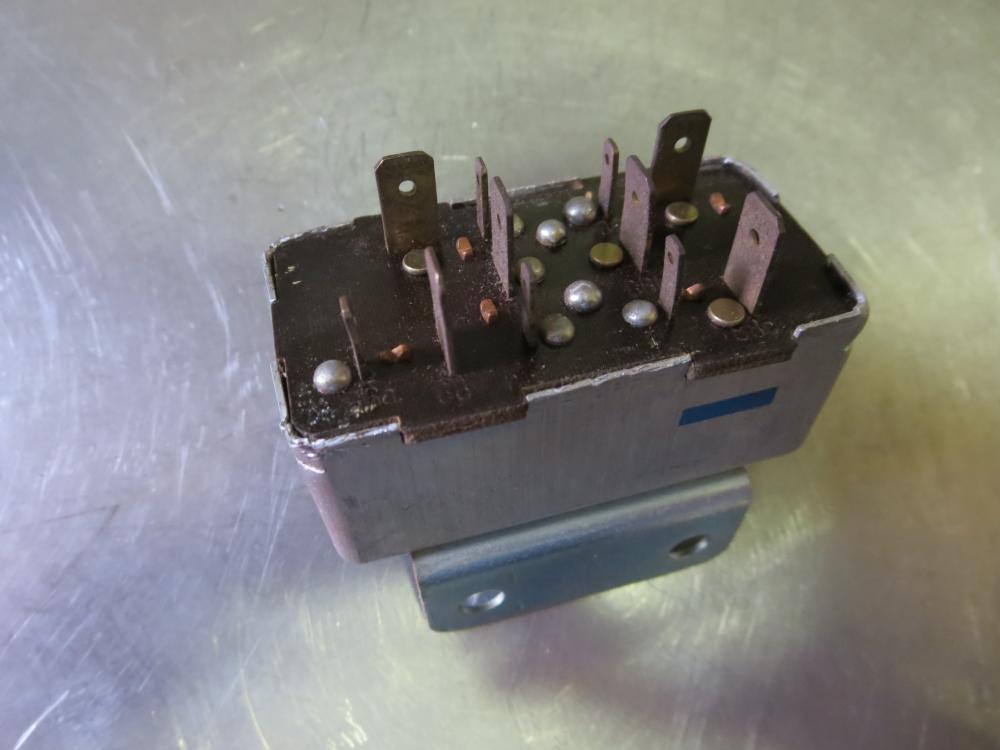
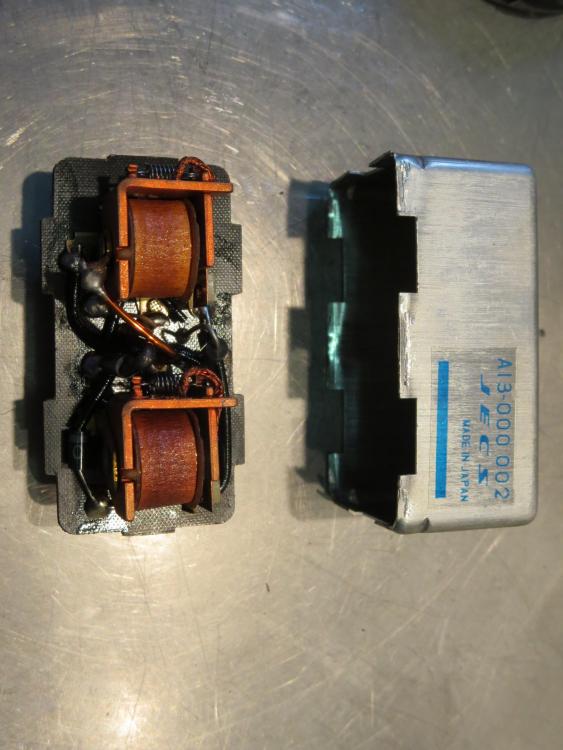
A little information I have gathered about these Bosch relays over the last ten years. I see 120 (11 pole) and 121 (13 pole) mentioned, but have not seen the 127 (also a 13 pole) mentioned yet. I don't know what they changed when they went from the 121 to 127, but it wil not work in a 280Z without altering things. The 120 was used from the end of the seventies through to 81/82 by many manufacturers such as BMW M30 2.8L and 3.2L engines with the L-Jetronic efi (5, 6 and 7 series). It was also used in cars like the Porsche 912/914, Opel, Vauxhaul, Renault R18i 1.6L, Alfa Romeo GTV6 etc, some Fiats, Triumph TR7, Rover 3000i, and a couple of Volvo models, VW and Mercedes. I'm sure I missed some manufactures in there somewhere. Basically a lot of European cars used this system with this relay. Bosch made system "improvements" and changed to the 121 somewhere in 1981/82 depending on car manufacturer and somewhere in 1984 the changed to the 127. The 120 will work on all our 280Z models without any issues. People have been using them for years, including myself for the last 9 years. There are a lot of Bosch parts that will fit the 280Z efi and work perfectly. I use them in my 280Z because they are easier for me to find here in Europe.
-
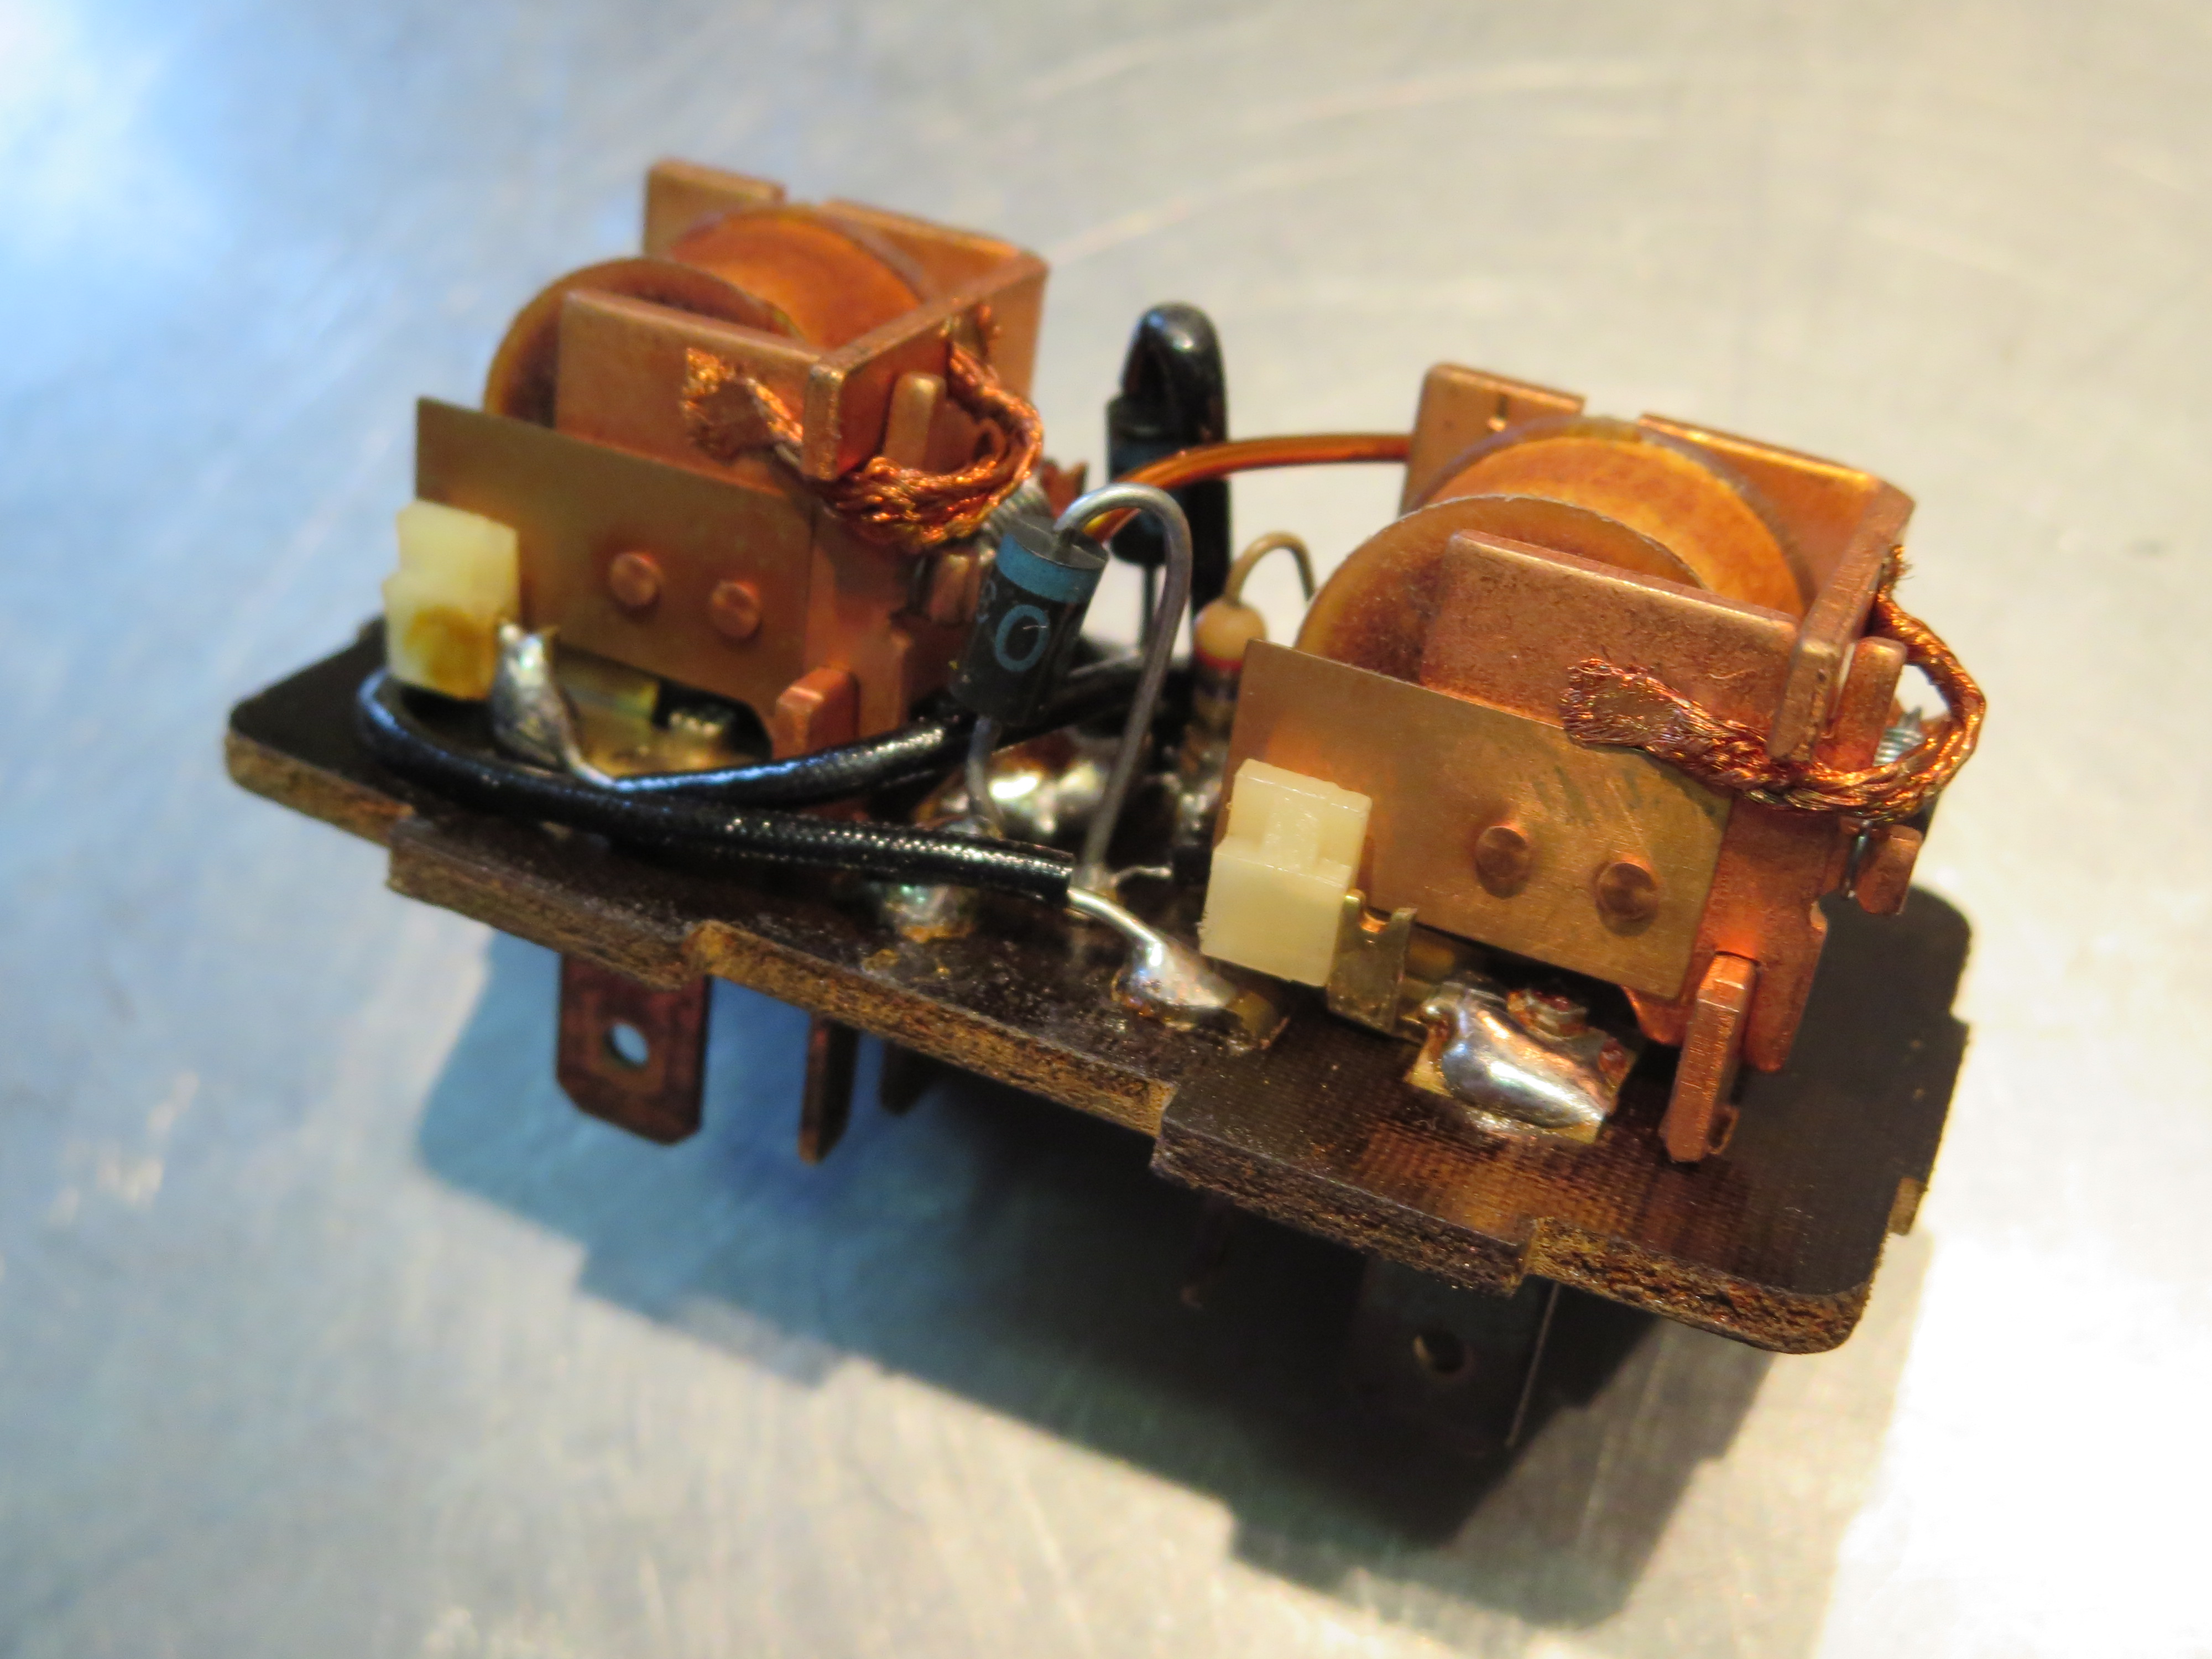
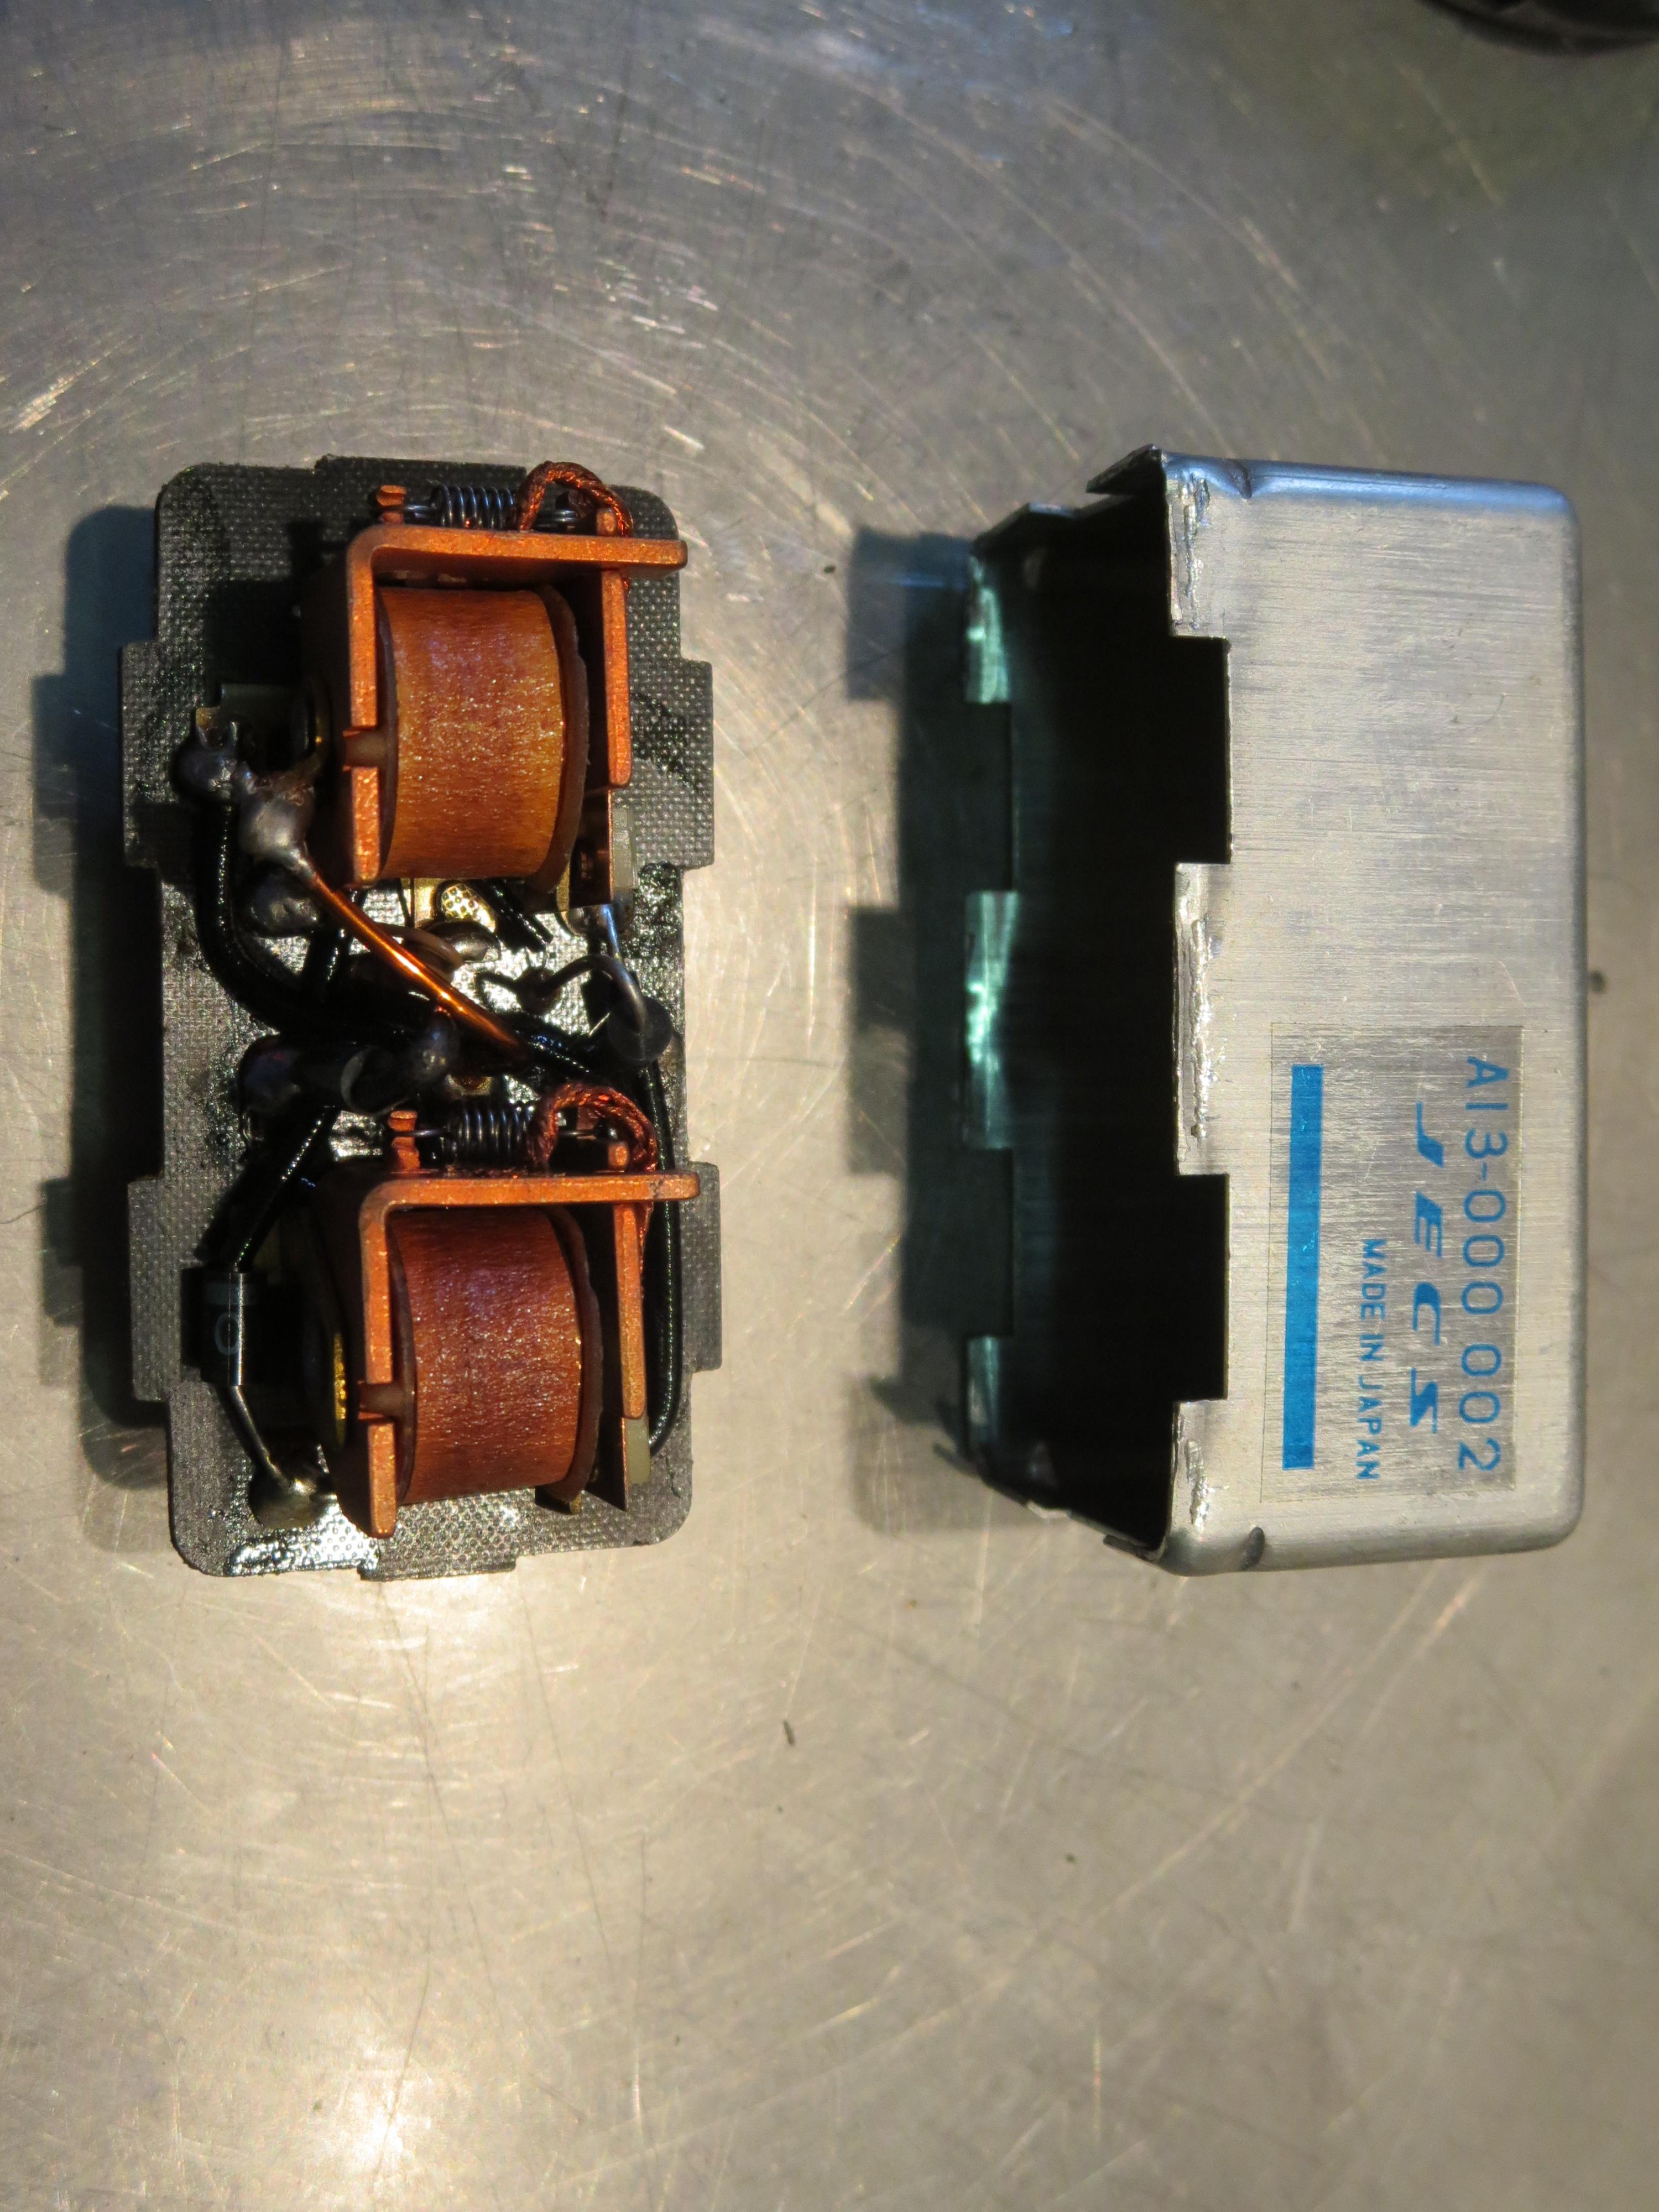
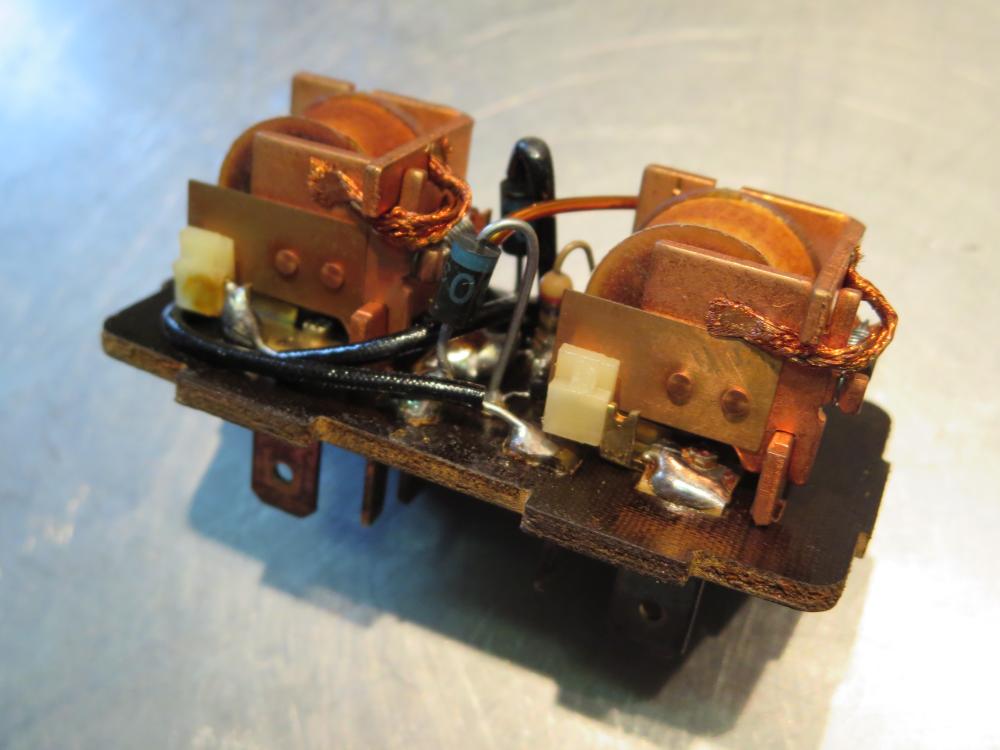
I have been using the Bosch version since 2012 without any issues what so ever. I can't open it without damaging it, so can not say anything about the internals. I did remove the cover from one of my working spare JECS relays. Here are some of my photos.


-
The early 280Z all had Bosch components in the EFI. They progressively changed over to JECS and Hitachi in the years after. First to go was the Bosch ECU in April 75 and the AAR, AFM & Fuel injectors followed that year. I think the fuel pump might be the last of the EFI components to move. Most EFI parts where then JECS and some JECS' parent company Hitachi. Approx. Fuel pump time line Bosch up to mid. 76. Hitachi N4200 & N4700 (black terminals) up to Sep 77 Hitachi N4205 (blue terminals) from Oct 77. The inlet filters and internal pump components from the N4200 & N4700 don't fit the N4205. The filters and pump rollers are different lengths. The o-rings including the motor house o-ring will fit all 3 version and the inlet house and complete pump sections are interchangable so you can swap a pump to another motor etc.
-
Found my old thread. Tip: One thing I did not mention in that thread was the outer ring where the rollers run against. It is not a perfect donut form, but the inner circle is a little off center. Very important to note it's position before dismantling. There is a small notch on the outside to help, but it doesn't have any corresponding marks on the housing. Position it wrong and itwill reduce the pump performance considerably. Mine couldn't reach 35 psi until I tried another position.
-
They are right about the original "Bosch" version. The 280Z had them until July 76. It was a very reliable pump in the Mercedes, Alfa, Peugeot, Volvo etc. The Hitachi variant seems to wear the rollers and impeller a lot faster. I have 3 Hitachis and they all make a little whiring noise. The Hitachi with black terminals is the early one up to 78-79. Then the terminals changed colour to a light blue. They did some small changes to the internals then where the parts ARE NOT interchangable with the older black terminal version. I changed mine to the 044 Bosch pump. The pump is quiet compared to all the old pumps I have. I have a thread here some where on my atempts to rebuild one good one out of the three.
-
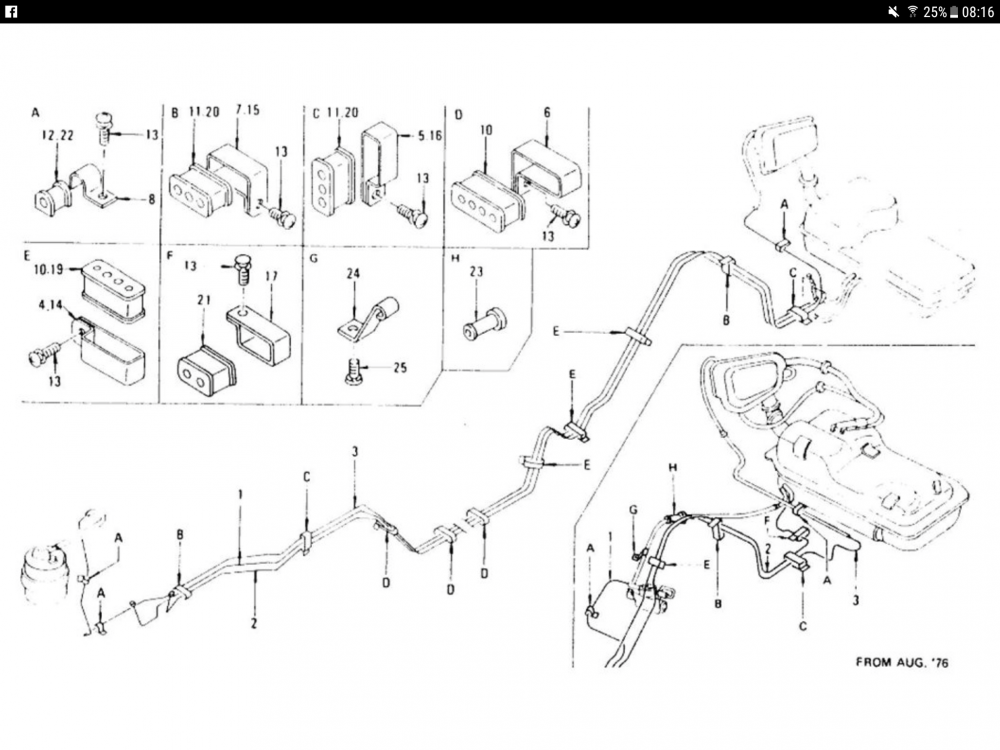
I'm running an aftermarket bosch pump. When I changed the pump I found a split in that fuel hose and changed it. It was a pita getting it out of the bulkhead. In the bulkhead is a ribbed rubber insulator to protect the hose from rubbing through. The insulatorhas ribs on the inside where it contacts the hose. I couldn't get it back in with the hose, so I used a thin piece of closed cell foam and glued it to the hose at the section that goes through the bulkhead. The insulator has Position H. Nr. 23 in the parts list. It has been NLA for years. https://www.carpartsmanual.com/datsun/Z-1969-1978/engine-280z/fuel-piping/23
-
You can do a couple things. 1. Make a tool out of a ring spanner and weld a nut on the spanner shaft at 100mm from the centre of the ring. Use a tension wrench on that. There is a formula to calculate the required torque, but if you use a wrench whereyou dial in the NM, just reduce it by 10% 2. What I do is use a ring-open end combination spanner. Measured the distance to from center of shaft to a position on the spanner where I could attach a bucket to. Calculate the required wieight. Spec is 14 to 17kg/mtr with tool. If you use a spanner direct on the shaft nut, than add 10% (15.4 to 18.7). If the spanner is 500mm long than calculate 1000mm ÷ 500 = 2. 2 x 15.4 = 30.8kg en 2 x 18.7 = 37.4kg. Fill a bucket with what ever you can find to make 31kg to 37kg. The weight of the spanner won't make much difference and you have a fairly wide tolerance of 6 kg in this example.
-
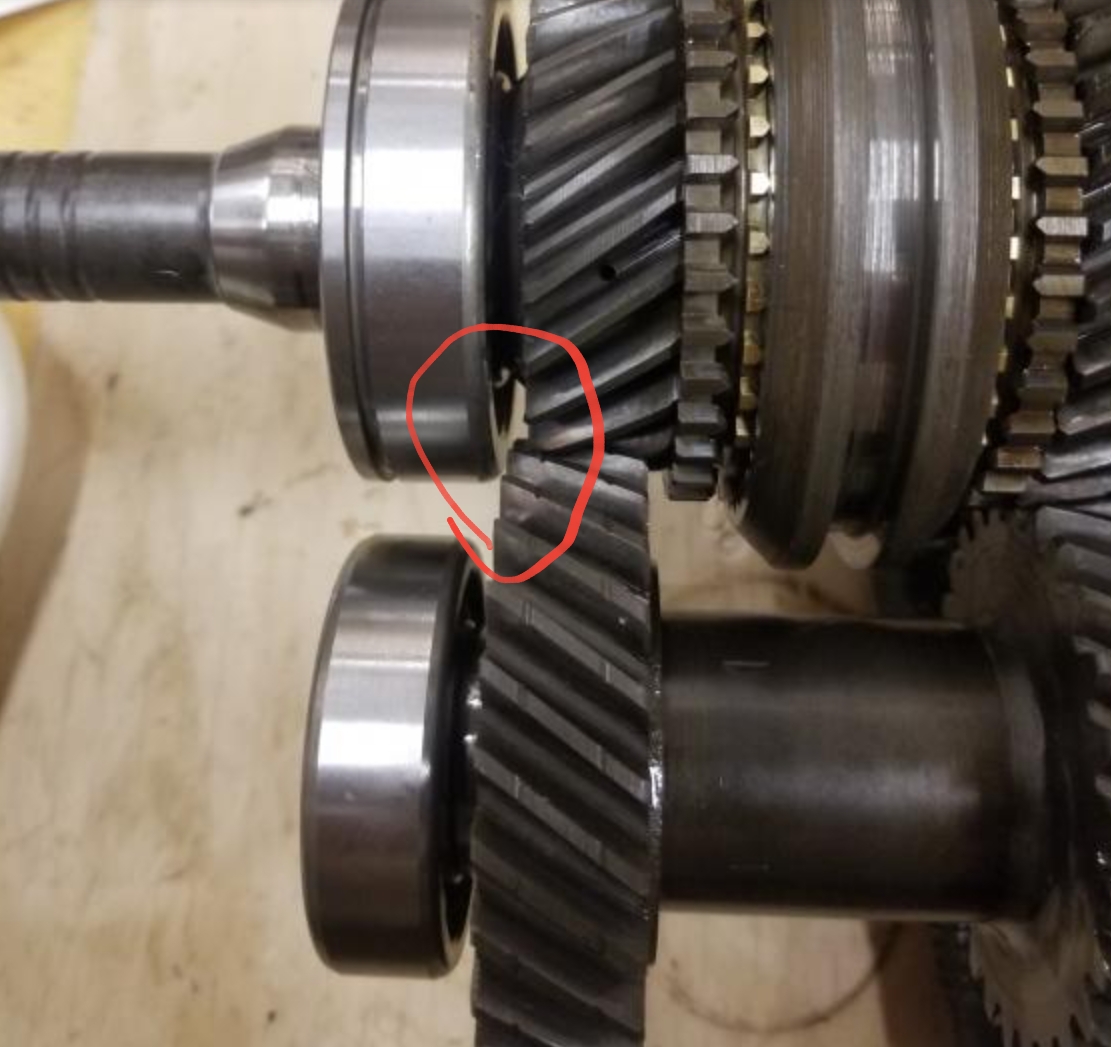
That seems normal. When the input shaft is fully installed with circlip it does not bottom out like it does now in the photo. What you can do to check if its not too rxcessive is measure the distance between the front faces of the two gears. Then install the front transmission housing. Push the input shaft in until it bottoms out and measure the difference between that position and the position with circlip installed. The difference should be pretty close to the gear faces measurement.