EuroDat
Community Member
-
Joined
-
Last visited
Everything posted by EuroDat
-
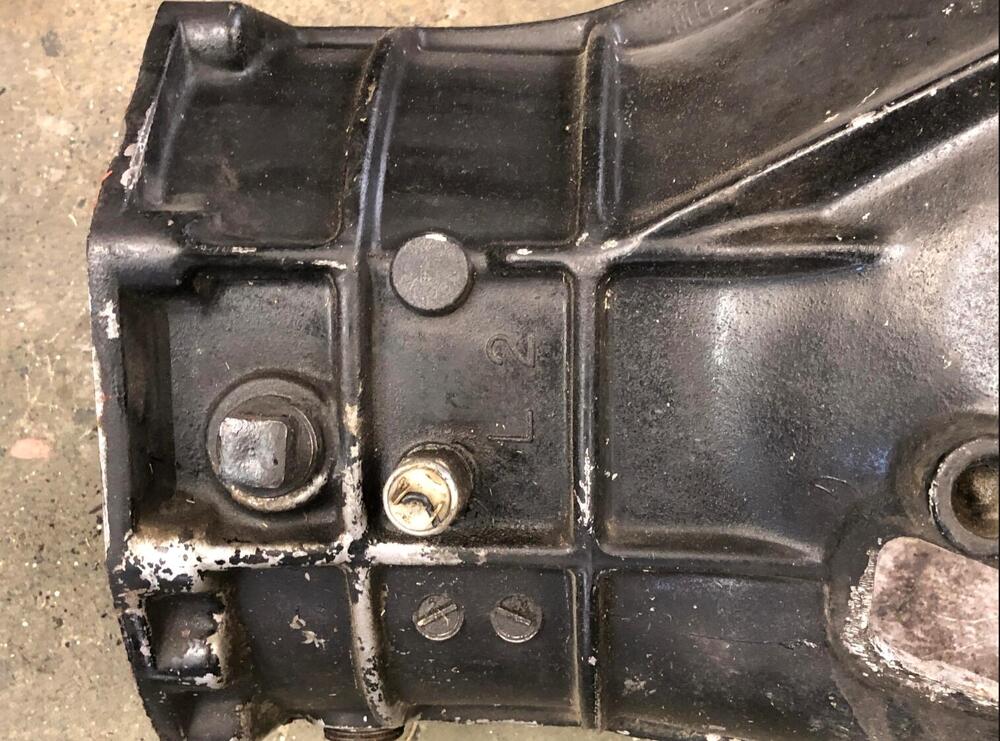
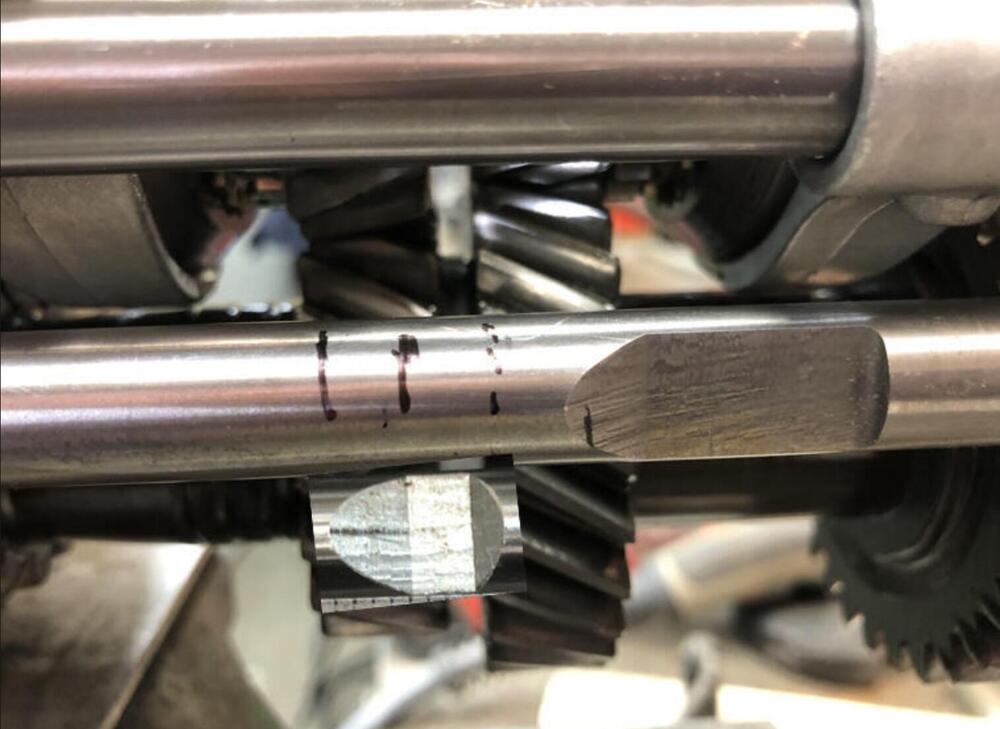
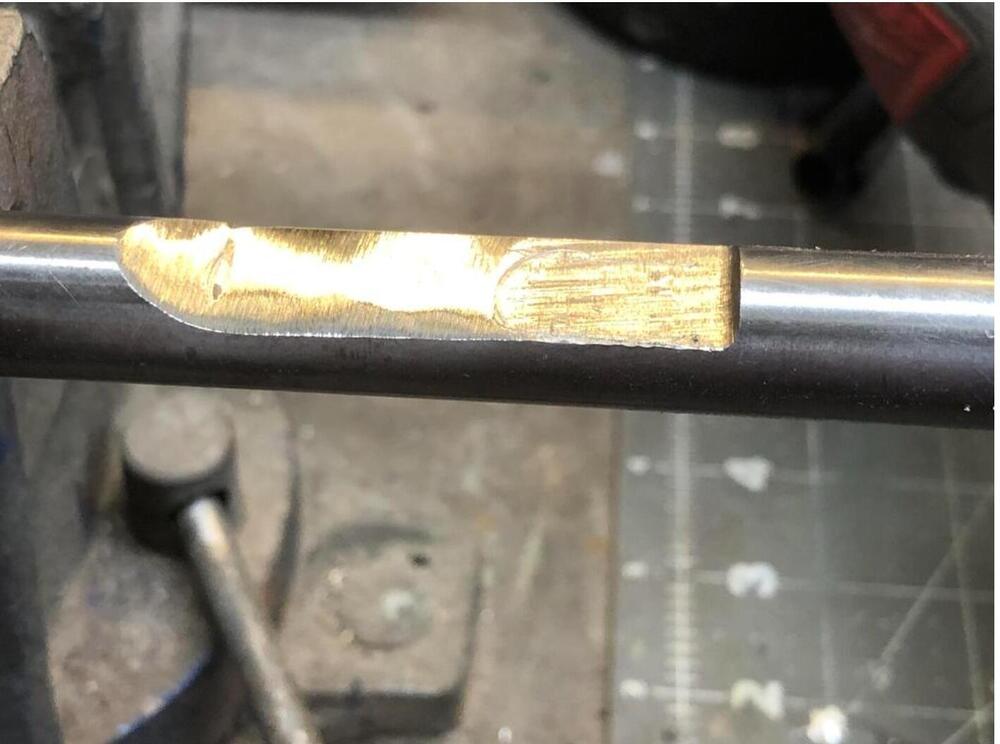
The F4W71B will work. The reverse switch is located at the position of the blind drilling between the fill plug and the 5-speed reverse switch. You only need to extend the flat section on the selector rod.

-
Basically, either an F4W71B or FS5W71B will work. The front bellhousing sections are essentially, for what you want, the same. Some of the later FS5W71B units do have additional drillings for switches, such as a neutral position switch. No need to limit yourself to a 280ZX tranny.
-
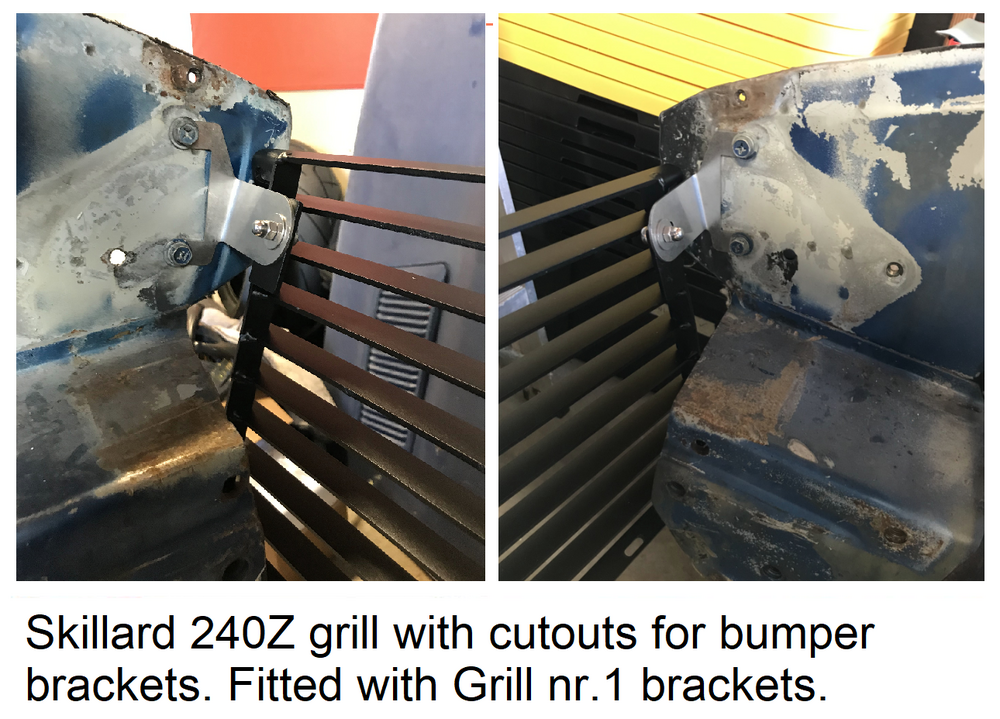
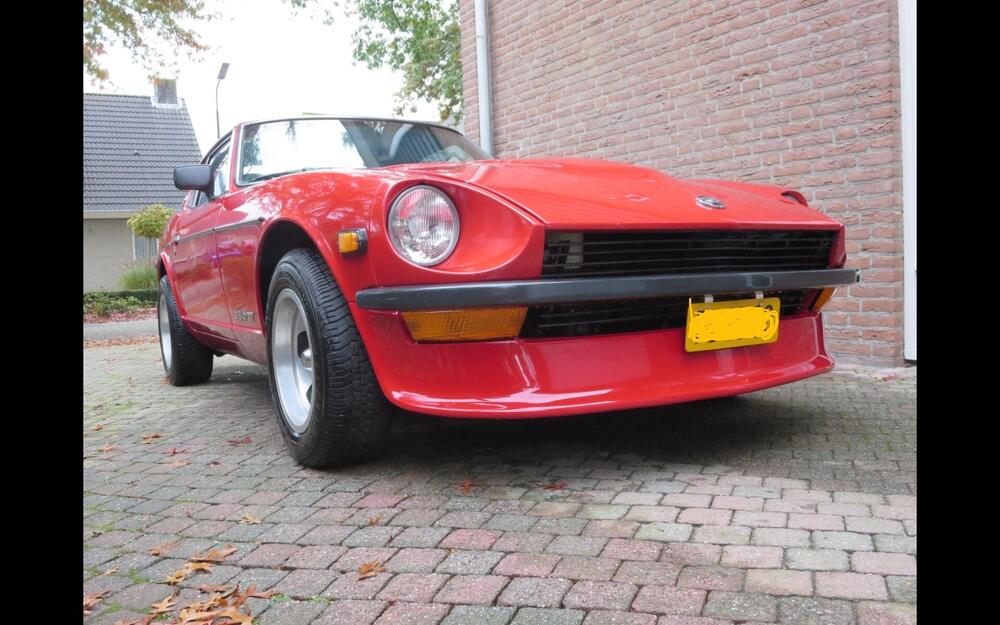
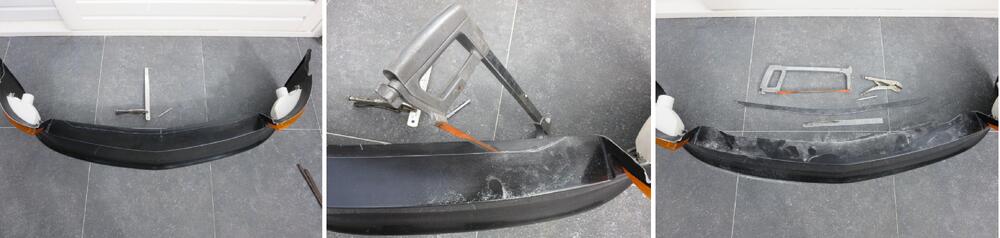
Those Skillard brackets S30.7778.BB1.FF.XX.BK will work fine. Much better then other set-ups on the market. They do have a bit of flex when you push down on the bumper, but nothing problematic. I’ve made sets for members who fitted the grille brackets to the Skillard 240Z grille. That gives the cleanest result, in my opinion. Sorry, I don’t have any brackets and won’t be making them anymore, as my mate passed away during the COVID pandemic. Here’s a couple of photos showing the grille brackets fitted to the Skillard 240Z grille and my car with a modified 240Z grille. This setup requires removing the indicator support frame. If you use a 240Z air-dam, it may require some tweaking.
-
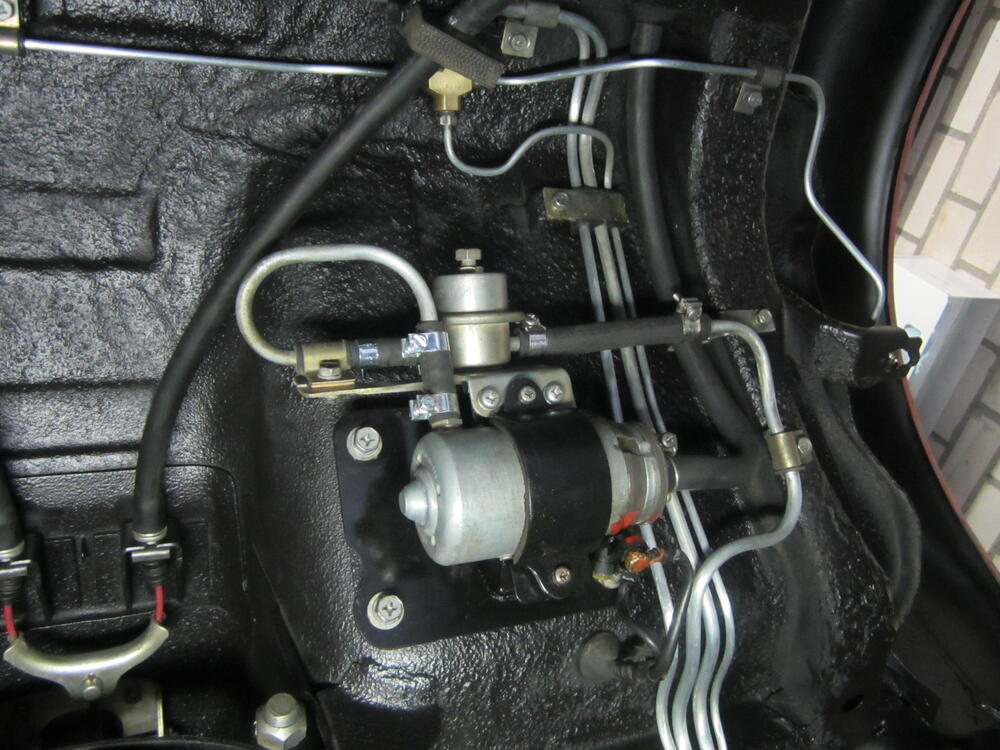
The Datsuns don’t have an excess-flow preventer like the Spitfire, so that won’t be the issue here. If the braking system were hydraulically unbalanced, you should normally get a signal from the brake warning switch. That said, these switches can deteriorate over the years and may no longer operate correctly. I’d be more inclined to suspect a blockage somewhere in the brake line after the brake switch. This could be in the brake proportioning valve or in the single line running back to the rear axle. The car is now in the garage, and they should be able to find the problem. A simple step by step troubleshooting would be to loosen the brake line fittings one by one, starting just after the brake switch and working your way back to the T-piece at the rear axle near the fuel pump. At some point, when you crack a fitting with the brake pedal applied, no fluid will come out. The blockage will be located between the last fitting where fluid did flow and the fitting where it didn’t. The photo of the fuel pump is showing the bronze coloured T-piece just above it Sorry I didn’t jump in earlier; we might have found the problem sooner.

-
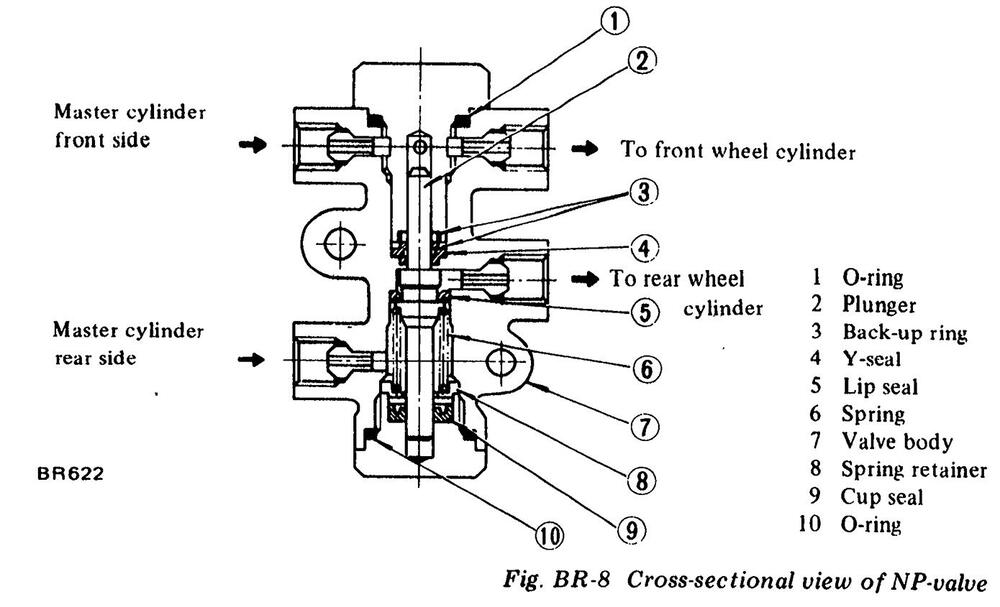
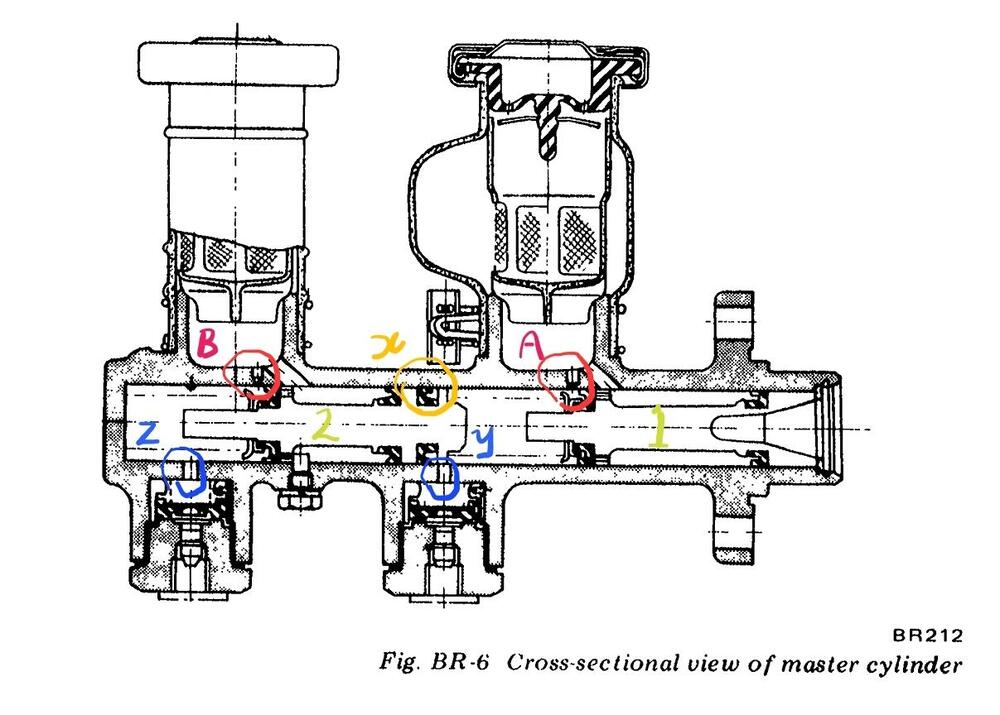
I’m not entirely sure where you’re seeing pressure. Under normal circumstances, there should be no noticeable pressure in the reservoirs. However, there are situations where a small pressure build-up can occur, usually when certain seals begin to fail. How it works - in a nutshell: When you apply the brakes, piston no. 1 moves forward and passes port A. Once this happens, brake fluid can no longer return to the reservoir, and pressure begins to build. Fluid then flows through port Y to the front calipers, while the pressure also pushes piston no. 2 forward. Note: Seal X on piston no. 2 prevents fluid from passing from the first (disc brake) chamber into the center section of piston no. 2. As pressure builds in the first chamber, it continues to drive piston no. 2 forward. Piston no. 2 then passes port B, which prevents fluid from escaping back to the reservoir. Fluid now flows through port Z to the rear drum brakes. At this point, the system is in balance. Leak scenarios that can cause pressure in the reservoirs The most likely cause is seal X. If this seal leaks, pressurized fluid from the disc brake chamber can pass into the drum brake reservoir. With each brake application, fluid is transferred from the disc brake reservoir to the drum brake reservoir, causing a gradual pressure build-up. You will also notice the fluid levels in the reservoirs changing. Another possibility is leakage past the piston no. 1 seal, located directly beneath port A. If this seal leaks, high-pressure fluid from the disc brake chamber can pass back along the piston and enter the reservoir. Because the chamber volume is much larger than the volume around the piston shaft, roughly half of the leaked fluid can end up in the reservoir, creating pressure. A similar situation can occur with piston no. 2 and seal B. There’s more going on internally, but this overview should help explain why you’re experiencing what appears to be pressure build-up in the reservoirs. The conditions that can lead to pressure build-up in the reservoirs: The reservoirs are completely full of brake fluid The rubber bellows in the reservoirs are in a compressed position Under these conditions, there is very little room for fluid expansion, which can result in pressure building up in the reservoirs.
-
I don’t believe replacement screws are available, nor do I think they ever were. The parts manual only lists the left and right complete vent assemblies and the nuts. One of the rear bolts in my left louver let go, and I glued it back in place using a small aluminum plate to help secure it. That repair was done in November 2011 and is still holding up well. You’ll likely need to follow Patcon’s advice: file down a hex-head bolt or similar to the correct size and secure it using a suitable epoxy resin. Here are some photos of my repair back in 2011
.thumb.JPG.27c0d8b45a1bf5057611be6b10174e74.JPG)
.thumb.JPG.63b9f8a7a2bcf2d10947ccd5f0b5e5e1.JPG)
.thumb.JPG.fd7388da18f9701a998e392bb67877a1.JPG)
-
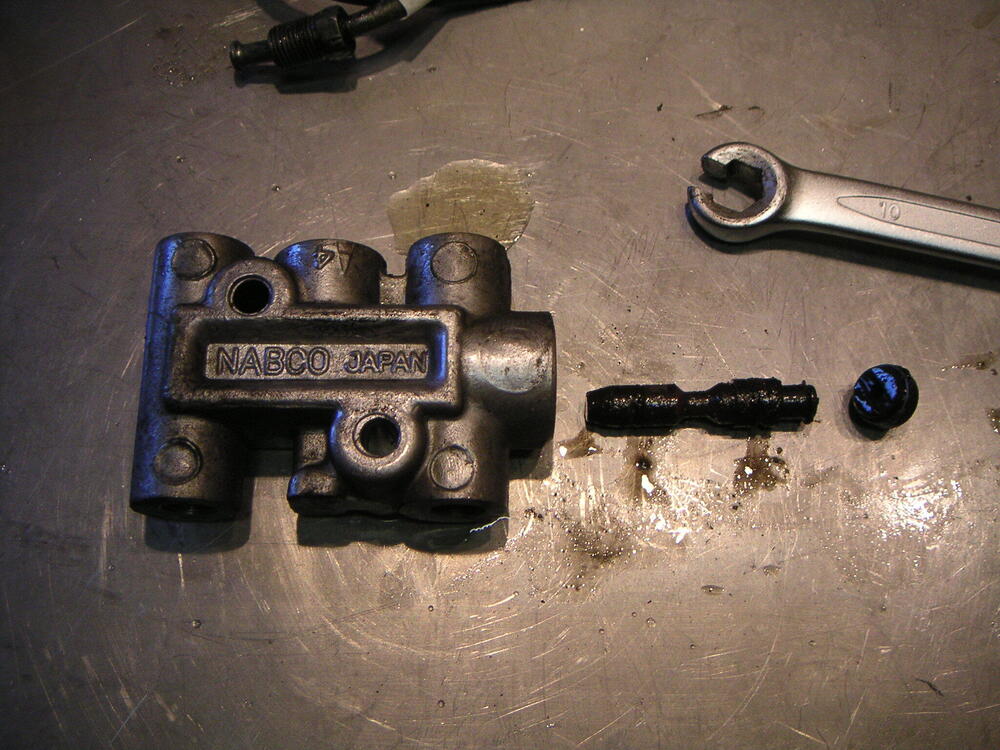
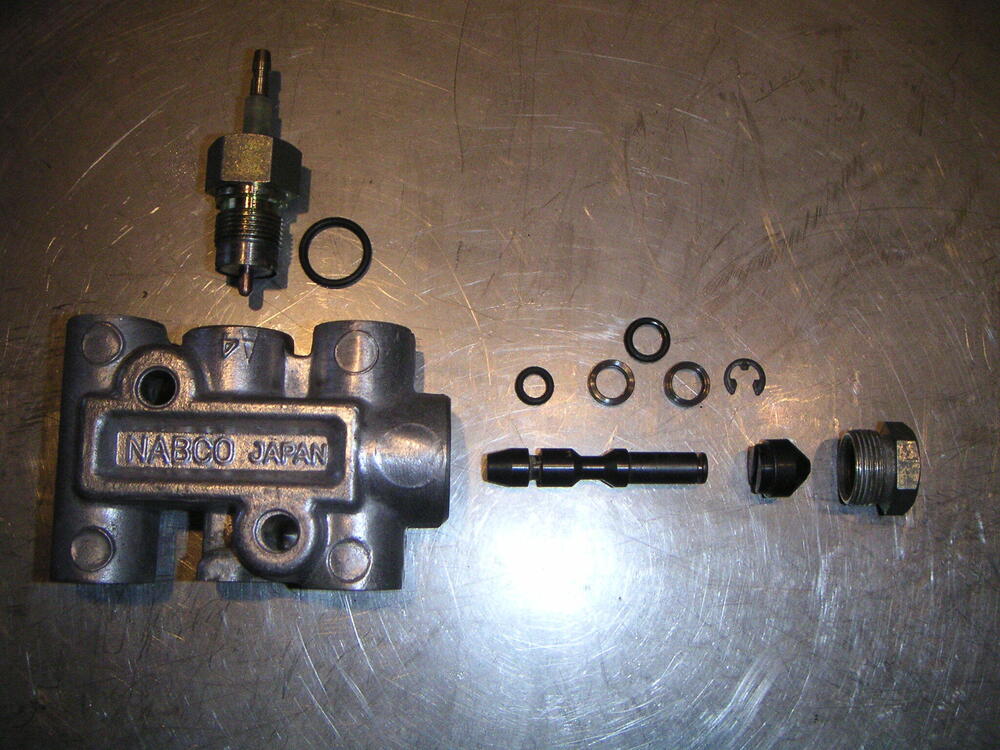
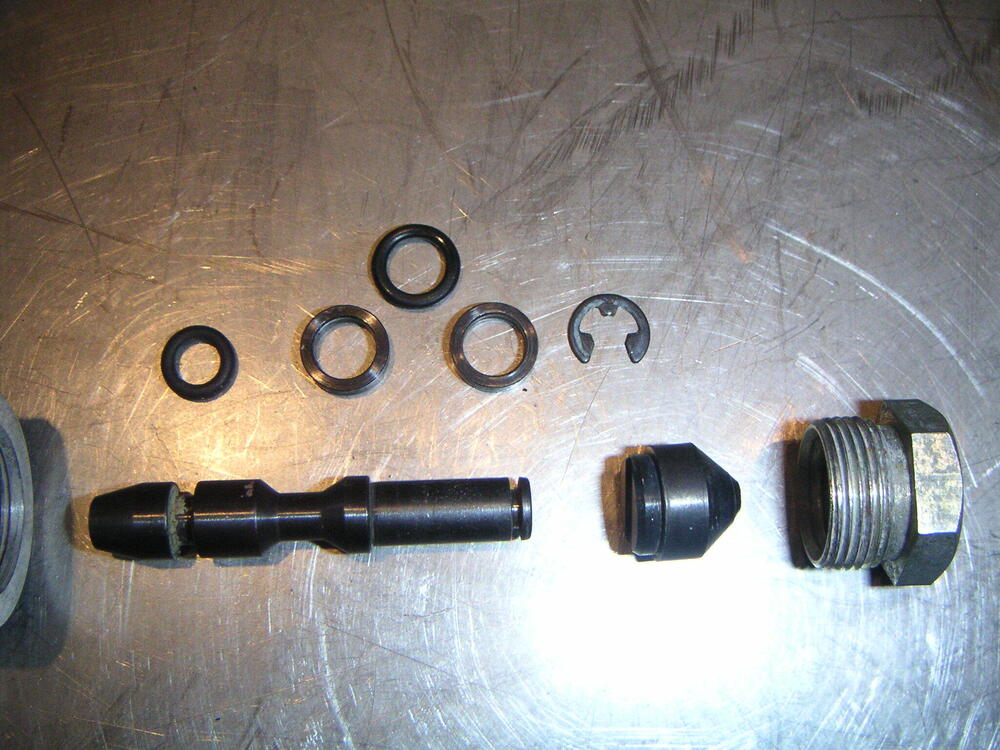
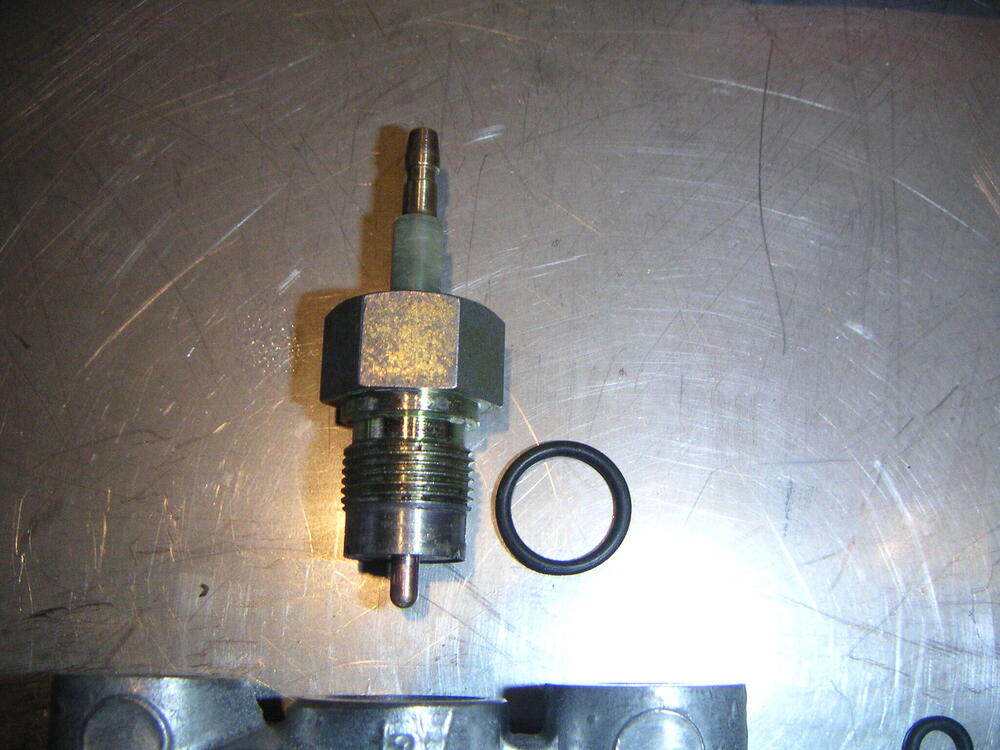
Based on your photos, it appears to be the early version. The O-rings on the shuttle may still fit, but the switch itself looks quite different around the o-ring groove section. Mine has part number 46100-N4200, while the one you have in the photo is likely 46100-26100 or 46100-U5200. Not that these part numbers are of much help these days—all of them are no longer available. 46100-26100 46100-U5200 to 7307 46100-U2000 7308 to 7408 46100-U5200 7409 to 7507 46100-N4200 7508 This seller has a NOS unit, which might be a good option if you’re concerned about yours functioning correctly. https://www.ebay.com/itm/116968622277?_skw=NOS+OEM+Datsun+Nissan+280z+Assembly+Switch+Brake+Indicator+Proportion+Valve&itmmeta=01KEJY4TZYKZX0C8B530RTZSYH&hash=item1b3bdf88c5:g:wKAAAeSw7H5o7k9h
-
It sounds like the clutch disc was stuck (possibly due to corrosion) to the flywheel. When you disengaged the clutch, it would have released from the pressure plate, but remain stuck to the flywheel. It’s also possible that the clutch disc had difficulty sliding back from the flywheel on the transmission input shaft splines. Next time, I would use 4th or 5th gear. In 1st gear, the engine has very little resistance due to the gearing, allowing the car to move forward too easily. Nice to hear it was an easy fix.
-
" I rebuilt this in Jan 20, 2018. I used a small viton o ring instead of the black ring on the end of the sensor" Charles. When doing brake systems, you should use EPDM rubber. Preferably, choose peroxide-cured EPDM, as it offers better resistance and holds its form longer than the sulfur-cured material. Viton (FKM) is not suitable for brake applications, as it will eventually degrade when exposed to brake fluid. I have successfully used O-rings on that switch before. It is unusual that yours travels too far and makes contact with the shuttle. I have the sizes somewhere if you want them.

-
It's no mistery. A N47 with the sensor between 5 and 6 Spark plug is from the Maxima L24e. On a L28 it is a high compression head. N47 Heads with extra CHTS sensor between Spark plugs 5 & 6 are L24 Maxima N47 heads with a "closed" 39cc combustion chamber.
-
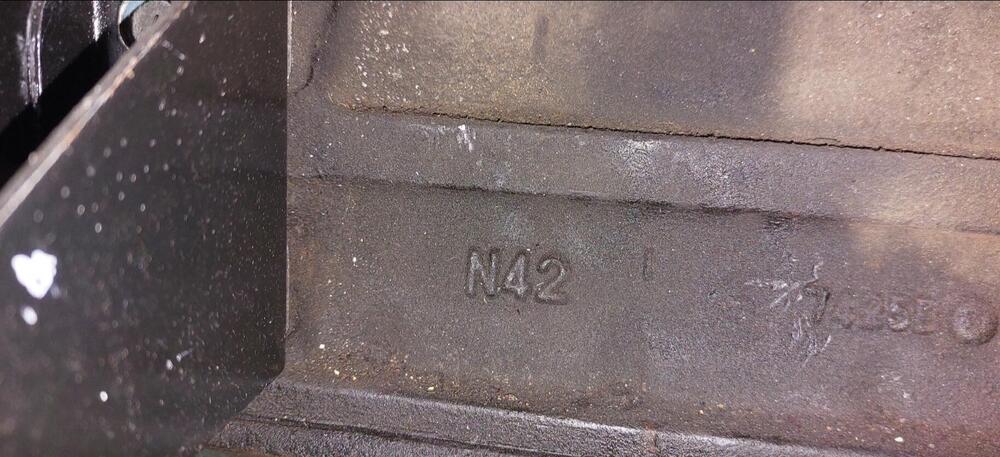
From the information you posted. It looks like a 2.8 ltr N42 block with an N47 head. The 280Z would be the most common in north america. 280Z used the N42 block from March 75 to June 78. After June 78 was the F54 block. The N47 head was used from May 77 to June 80 (S30 and S130) All L24, L26 and L28 engine blocks have the code cast into the side just behind the left side engine mount bracket. I have a photo, but the site is refusing to upload🤔 site keeps kicking me out.
-
This might help you determine the correct colla for your pressure plate. I made it years ago, but never got round to posting it in the tech articles. Teechnical Bulletin Clutch Collar Height 92mm.pdf
-
The chinese look-a-likes could also be Ysist. Look like Webers, but no name in the nameplate. Some of the webber parts will fit the Ysist units. Not saying the quality is at the same level. https://nl.aliexpress.com/item/1005003667804387.html
-
-
If you check the length of part 54, you will find that it is shorter than 48. That is the root of the problem. As a result, thrust washer 64 is clamping fifth gear 48 instead of the inner bearing bush 54. The previous owner may have encountered this issue and attempted to compensate by loosening the nut😪 To resolve this properly, you will need to shim 54 until the specified end-play tolerance for 48 is achieved. You can determine the required shim thickness by measuring with Plastigage and then adding the specified end play to determine the correct shim thickness. Once you understand how the parts interact, this becomes a straightforward fix.
-
" I assume that the no. 64 is to tight to 54 and thats the reason why there is basically no gap between 55 and 64 and therefore the gear 48 is blocked" The photos and video of the loose nut make the situation much clearer now. No. 64 should be tightened firmly against 54. The problem started when the nut became loose, allowing 54 to spin with the gear and wear against the thrust washer (64). Everything being done now is essentially compensating for the wear on the inner ring (54). If 54 is loose, it will also vibrate, which is most likely what is causing it to jump out of gear.
-
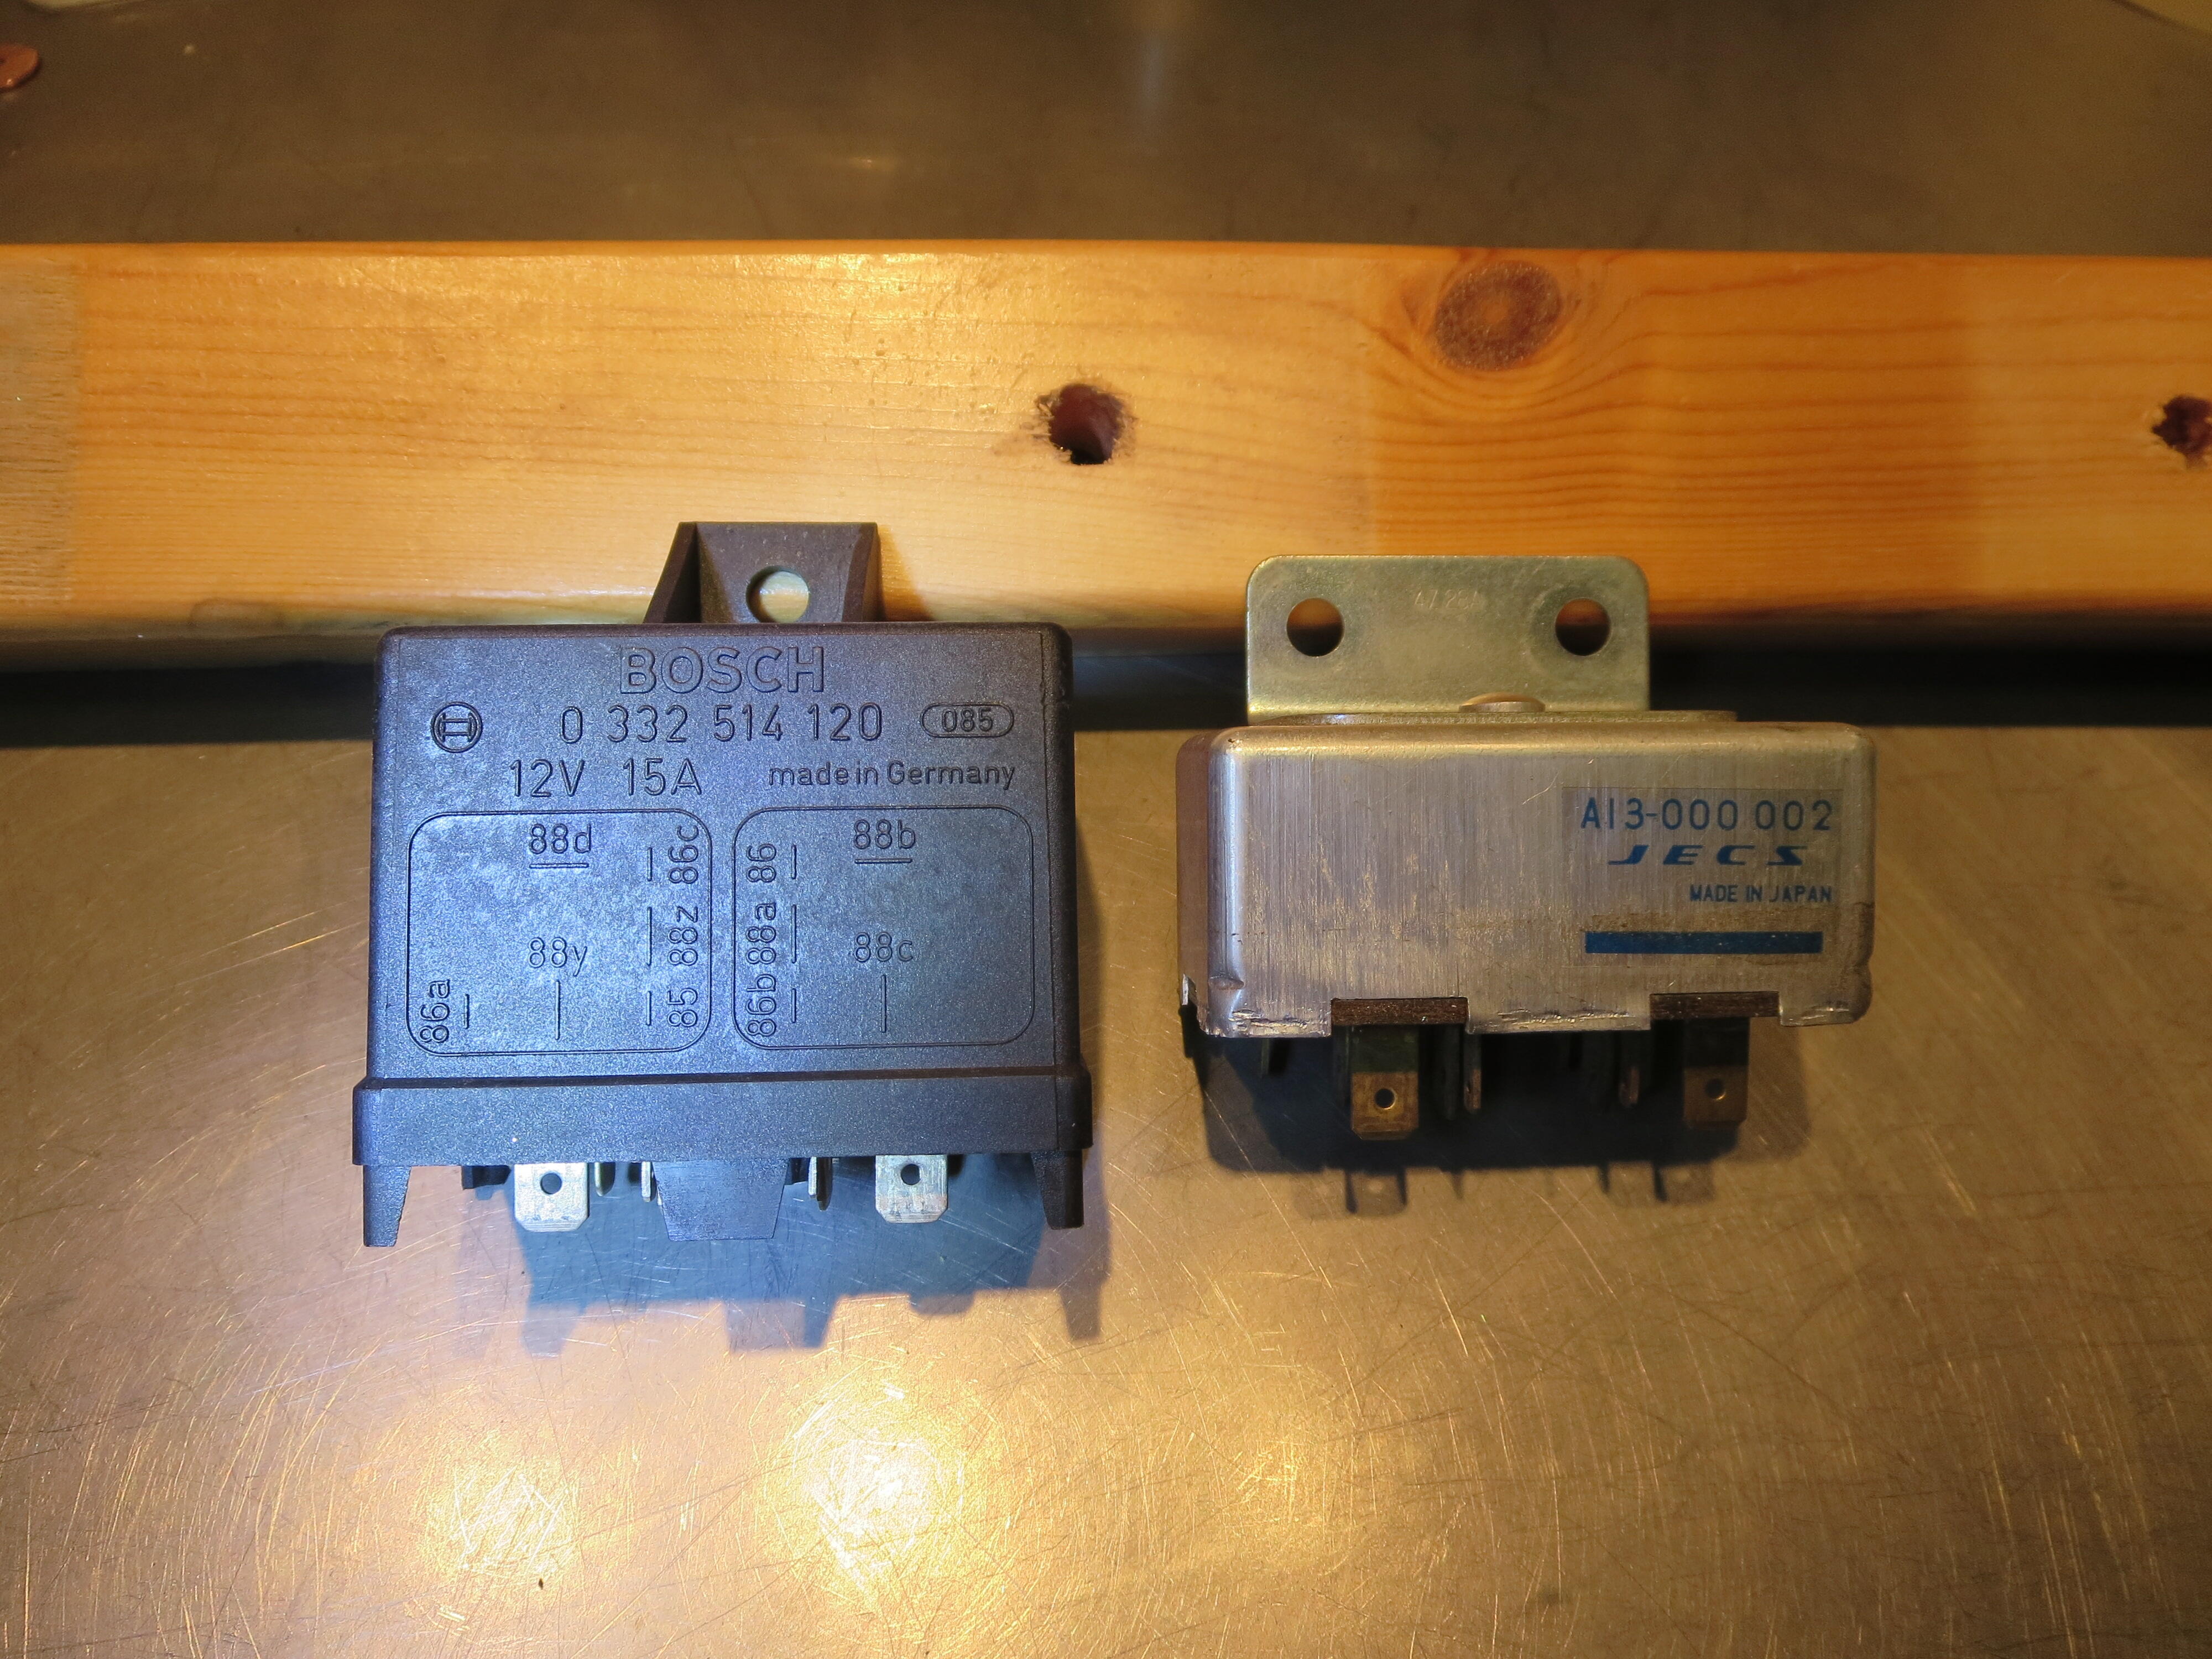
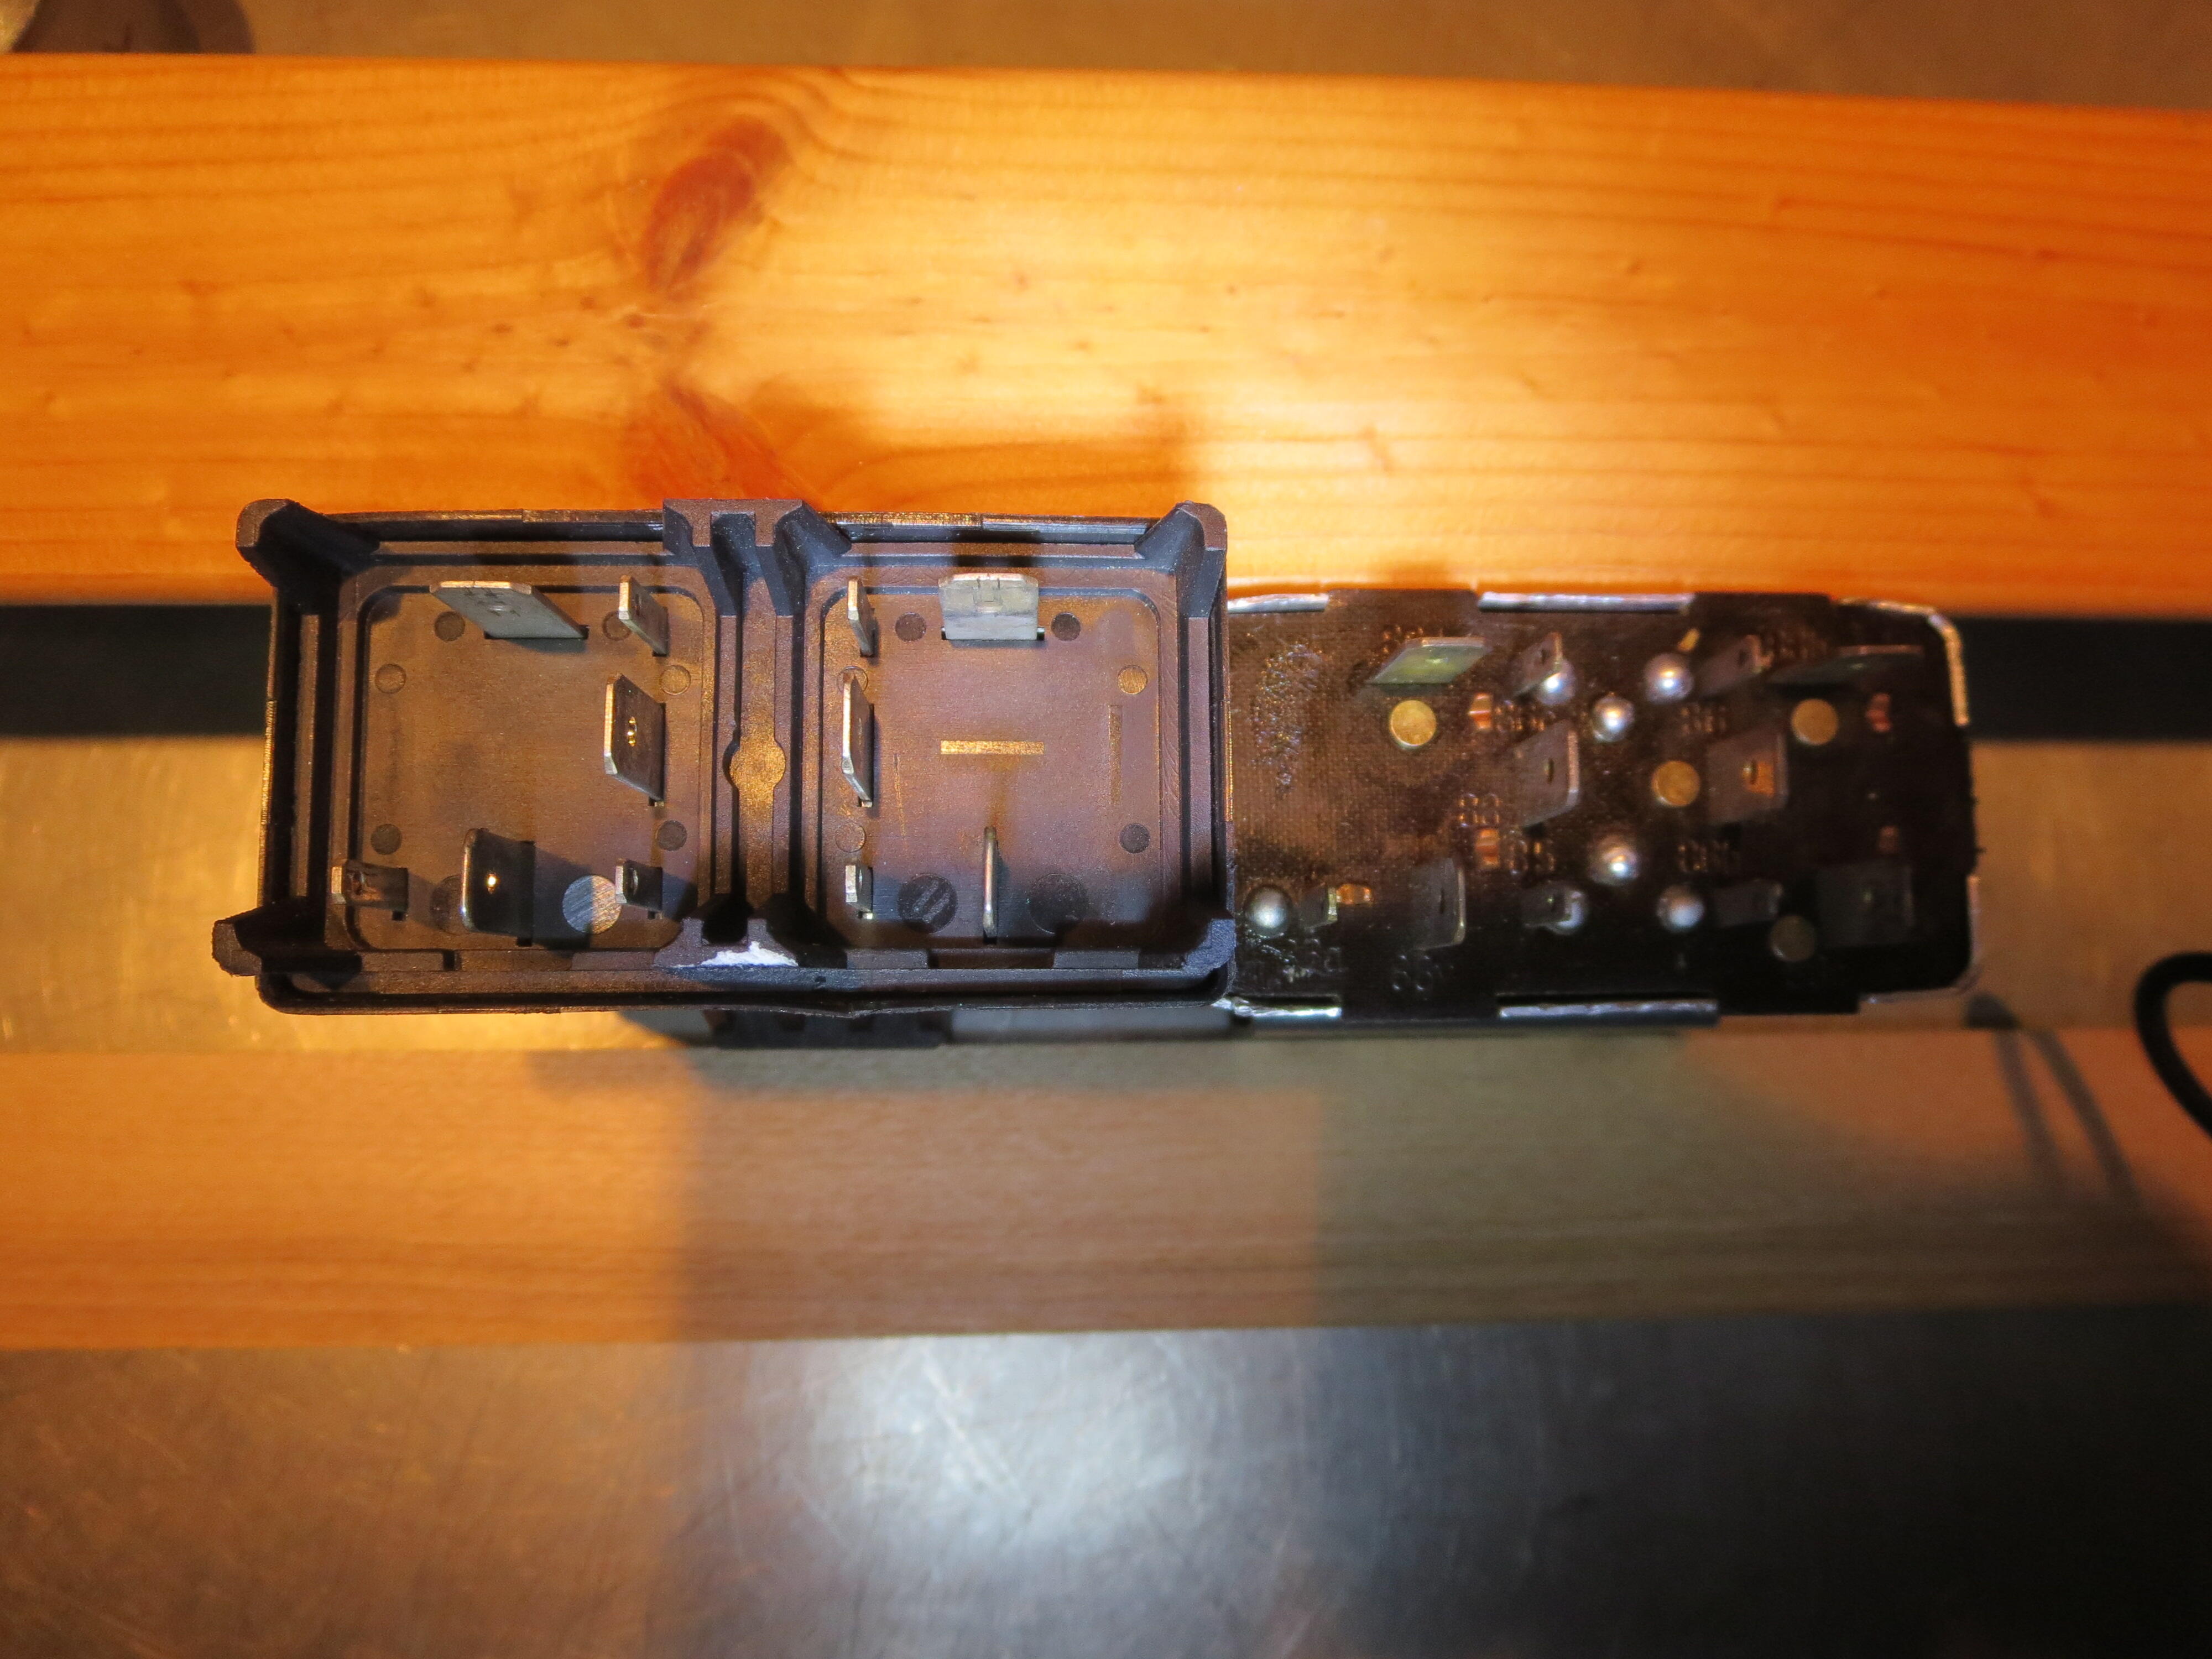
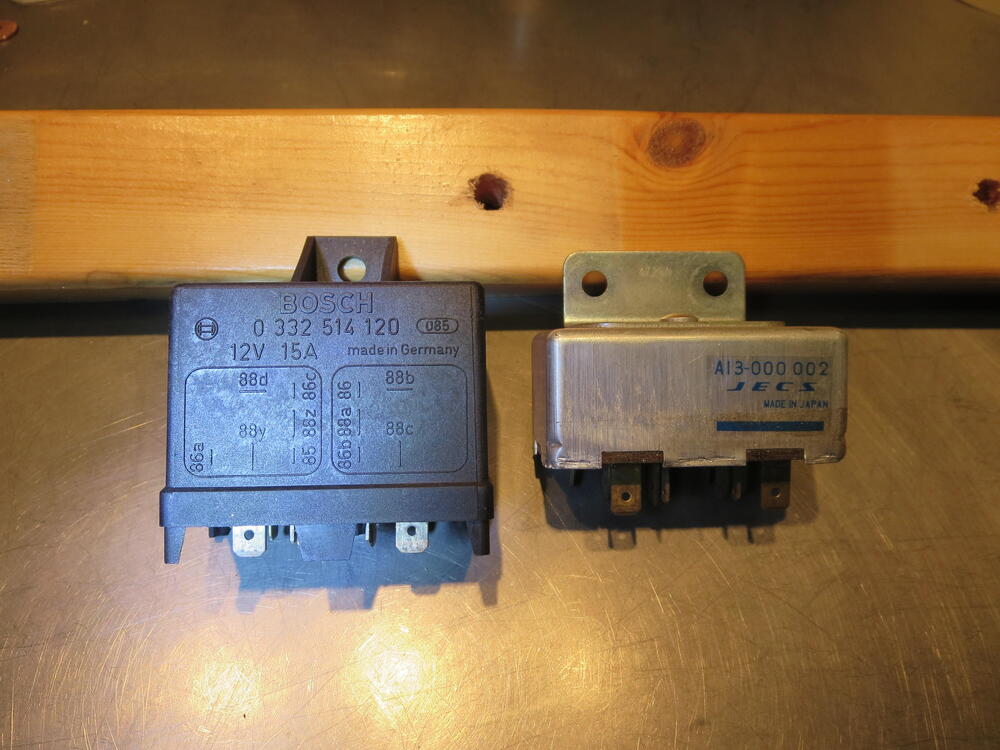
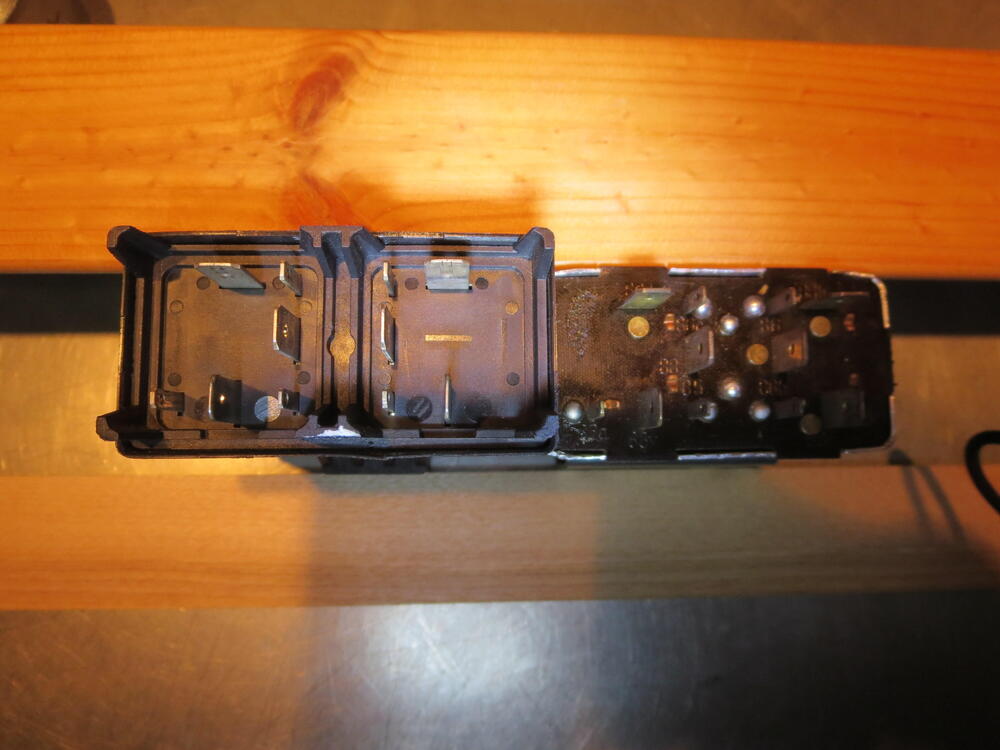
I have been using that bosch relay in the photo since 2012 and no issues. Plugged in a go. The bosch relay was used in the first 280Z in 1974. Datsun used a Bosch L-Jetronic system for the first 6 months of the 280Z production And Hitachi copied it. That is why a lot of Bosch parts will work on these efi systems. I think @Mike had a bosch system in his attic once. I posted an ebay link back in 2018 and it still works😄 https://www.ebay.com/p/77006951
-
Not sure that relay has the same function. It might need some wiring changes to get it to work. The correct bosch relay is 0332 514 120. Bosch have several variants for the VW's
-
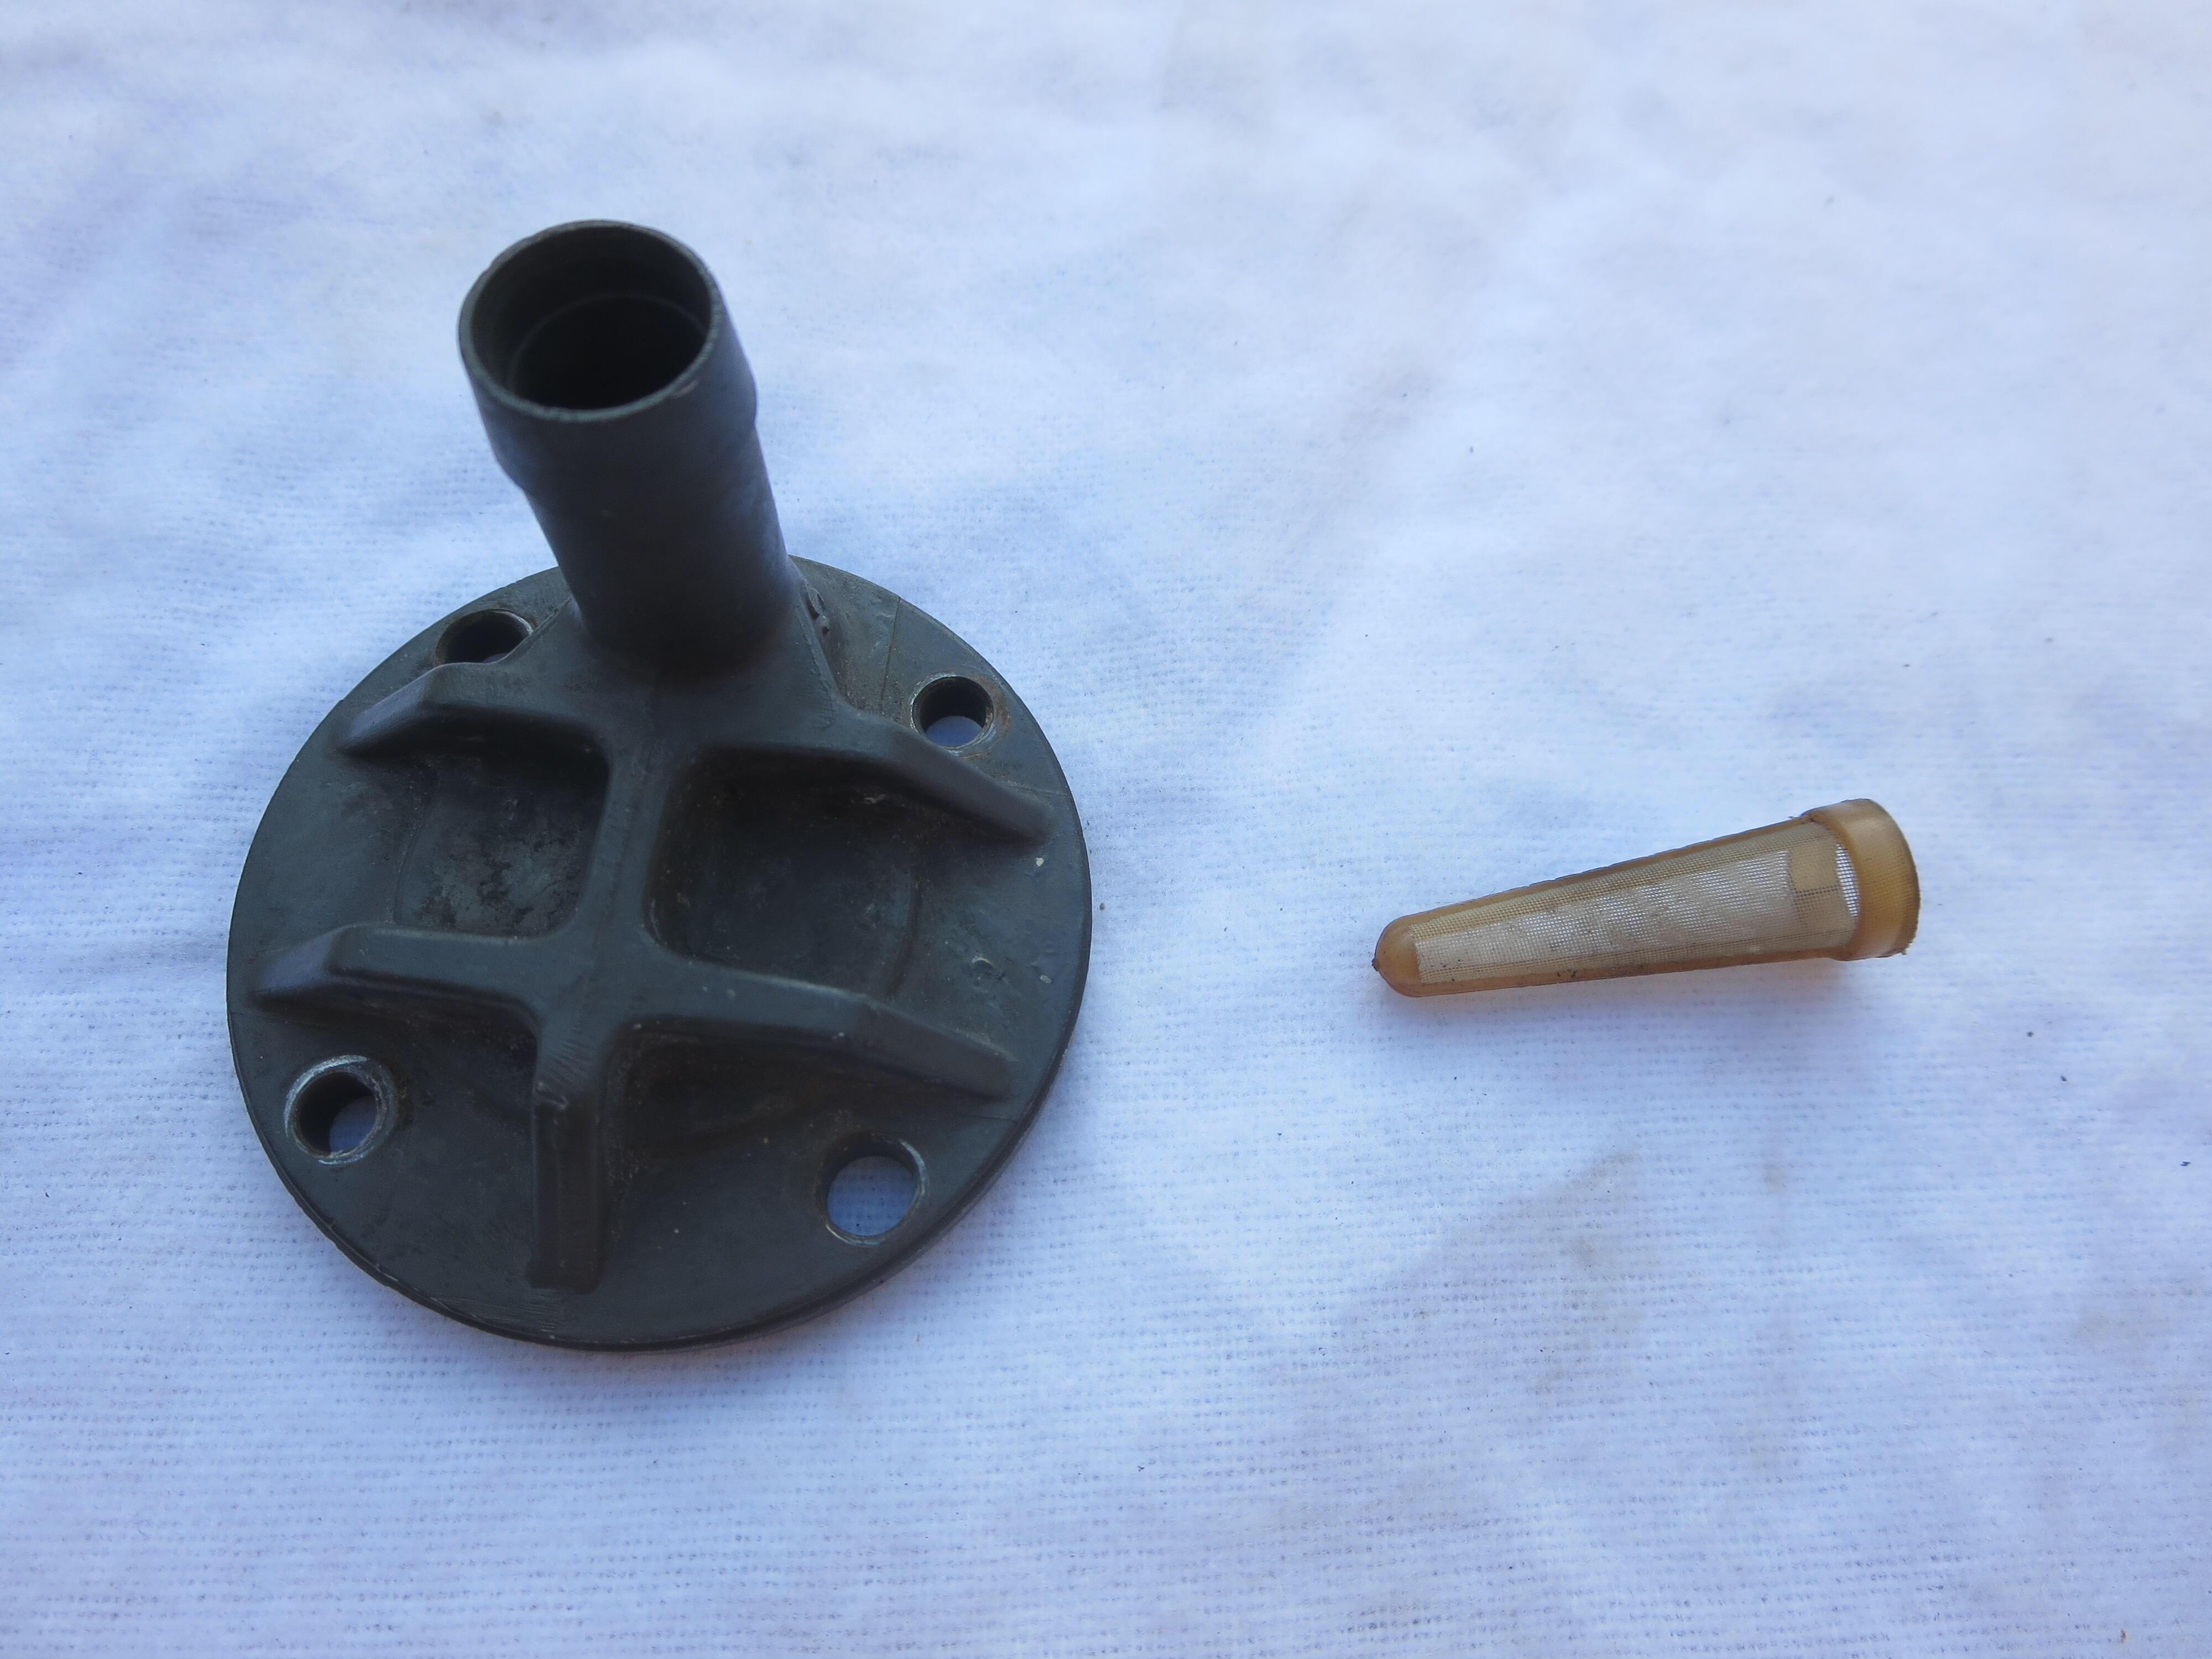
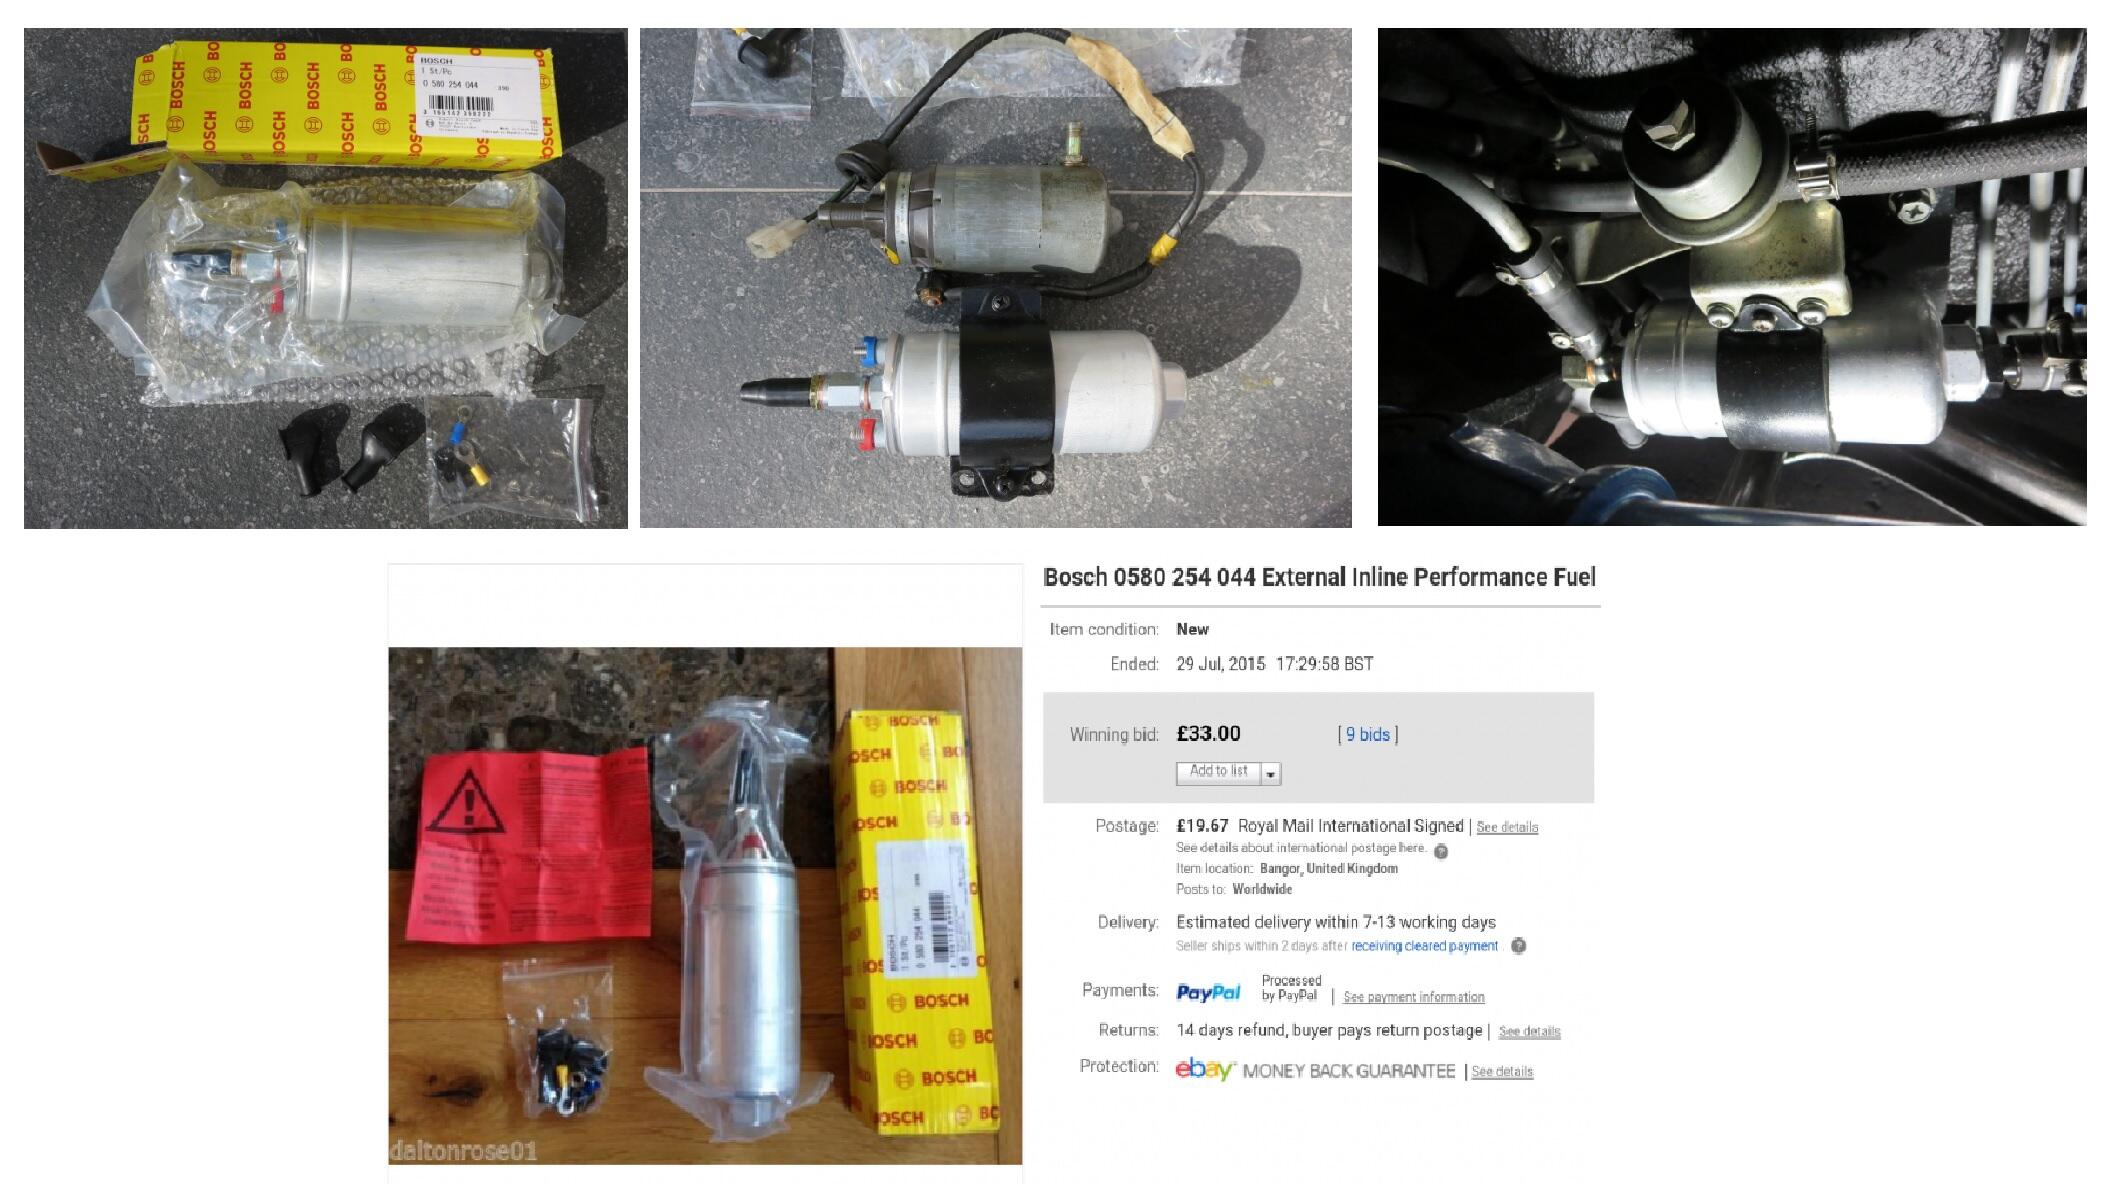
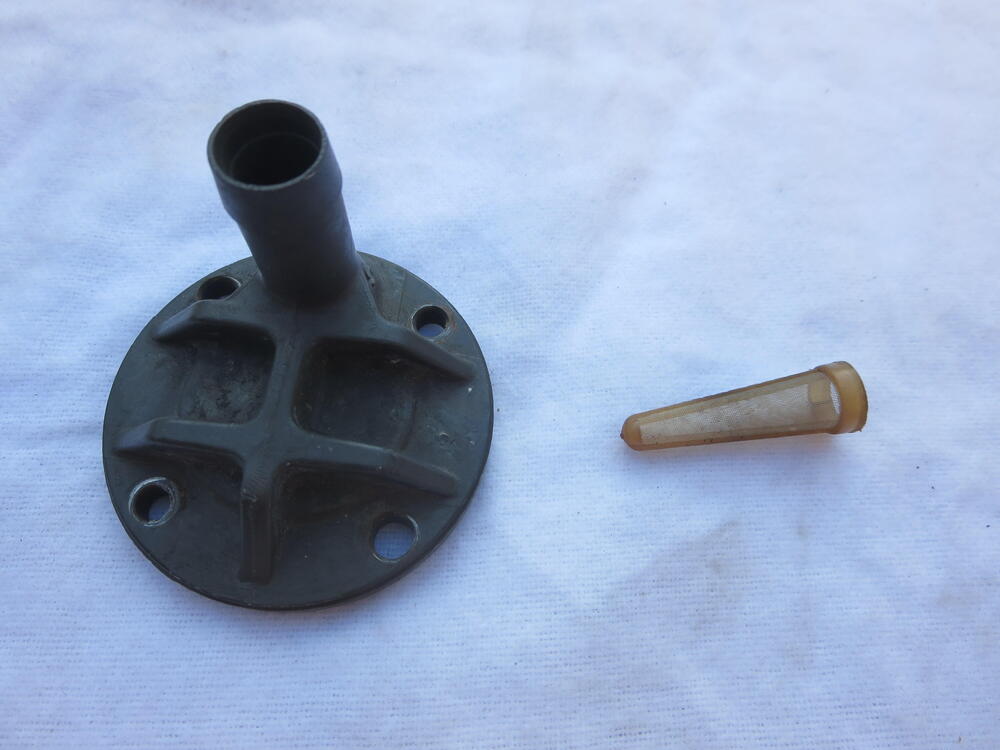
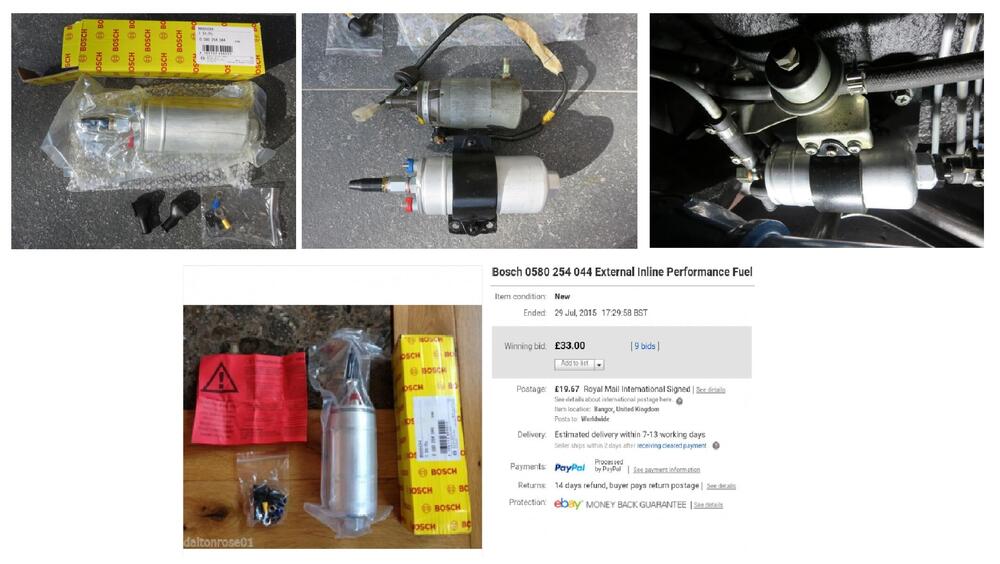
The original pump includes an inlet strainer, but I don’t think the O’Reilly’s E16078 has one. In principle it’s the same style as the Bosch 0580 254 044 that replaced the factory unit. If you want to add a pre-filter, you can install two 5/16" filters in parallel to avoid fuel starvation and prevent cavitation in the pump. Their only purpose is to protect the pump, the filter up front will protect the injectors. 280 Series Fuel pump Alternatives Rev 1.pdf
-
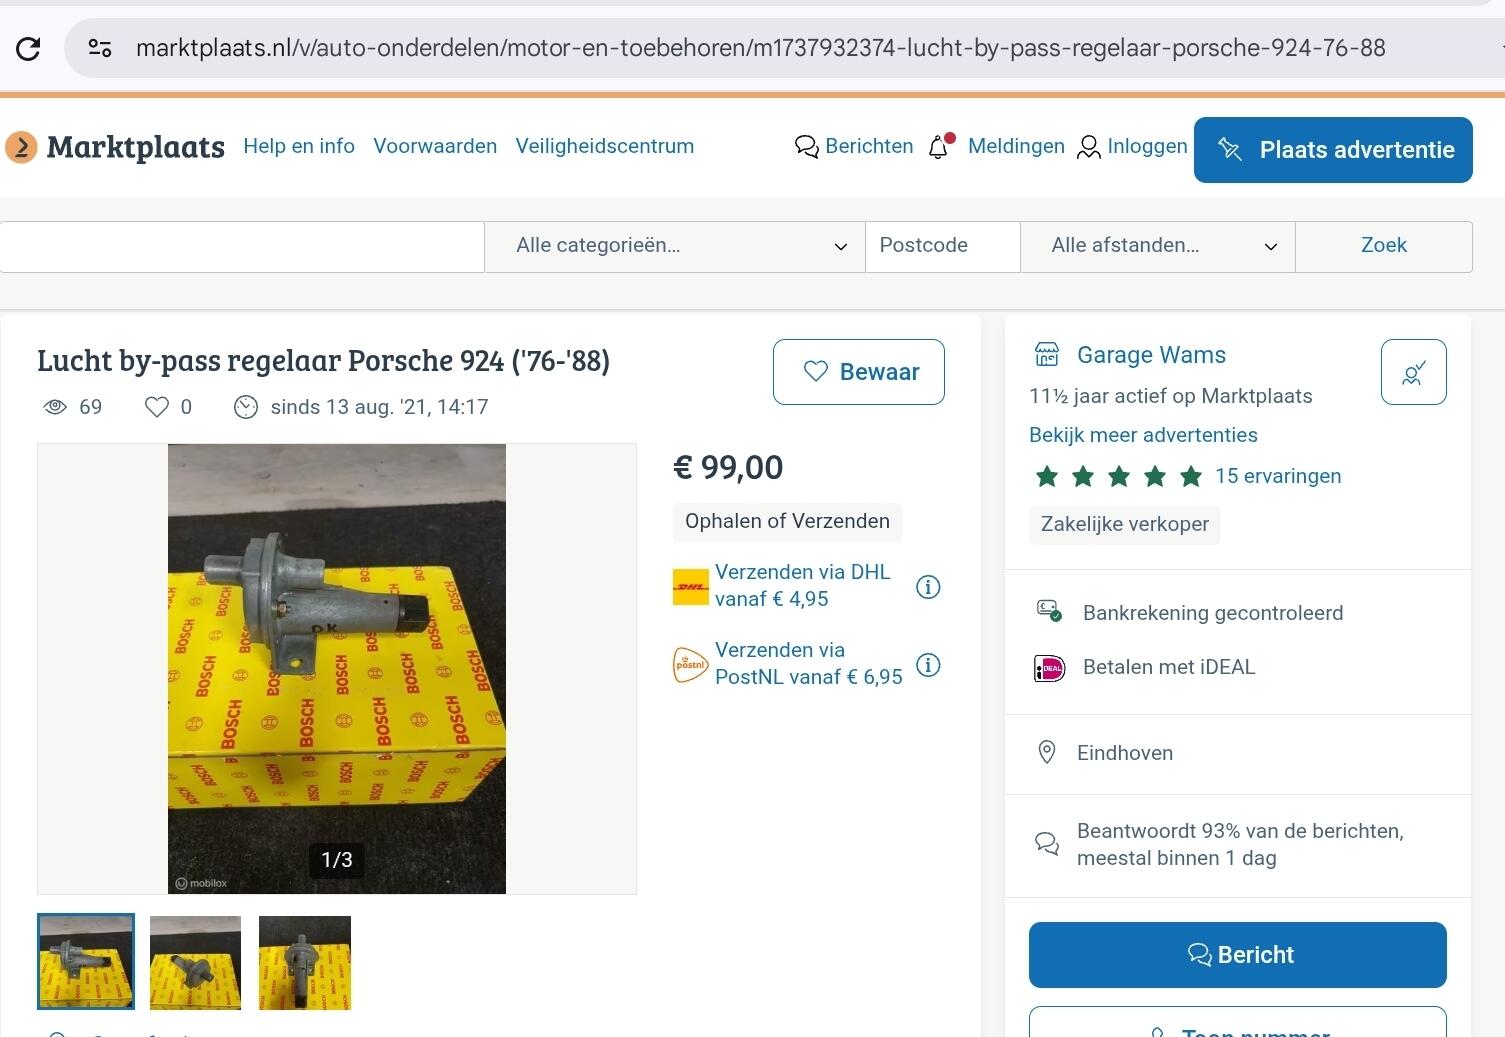
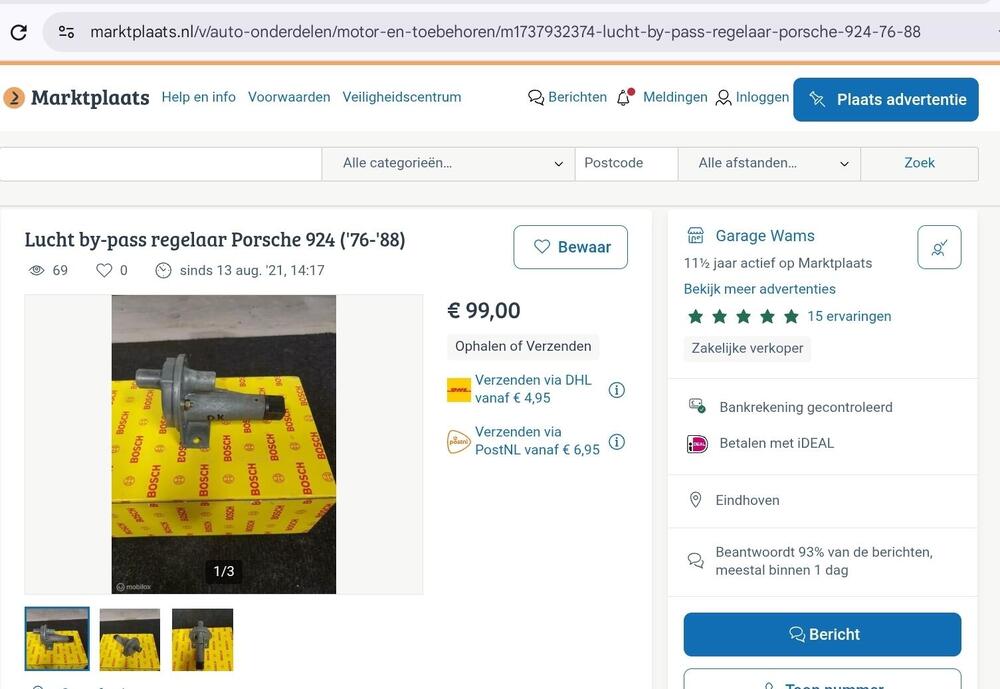
If someone is looking for an original Bosch version of the 280Z auxilary air valve here is one in NOS condition. Its for a 1976 Porsche 924, but it's a very similar system. Marktplaats≥ Lucht by-pass regelaar Porsche 924 ('76-'88) — Motor en...Lucht by-pass regelaar Porsche 924 ('76-'88)Lucht by-pass regelaar Porsche 924-Porsche 924, 2.0liter-Voor koude start regeling (lucht)-Bosch-Getest en
-
Hi Mike, Just back from a holiday in Spain. I have plenty of photo's and I believe I have a video of it bubbling to remove air. Ill see what I can find and post them.
-
That would bd a good find. Don't see any photos of the engine so I'm wondering: Does it still have the engine???
-
I like the Sanden compressor in their kit. It looks visually close to the original Hitachi compressor. The mounting bracket though looks big and cumbersome compared to my original hitachi bracket. If you are spending all the money on the kit for the engine bay, then I would also go the extra for a new evapourator.
-
Do you have the Apex-Engineered front subframe or have I missed it? With the subframe you could reverse engineer it to work out what you need.
-
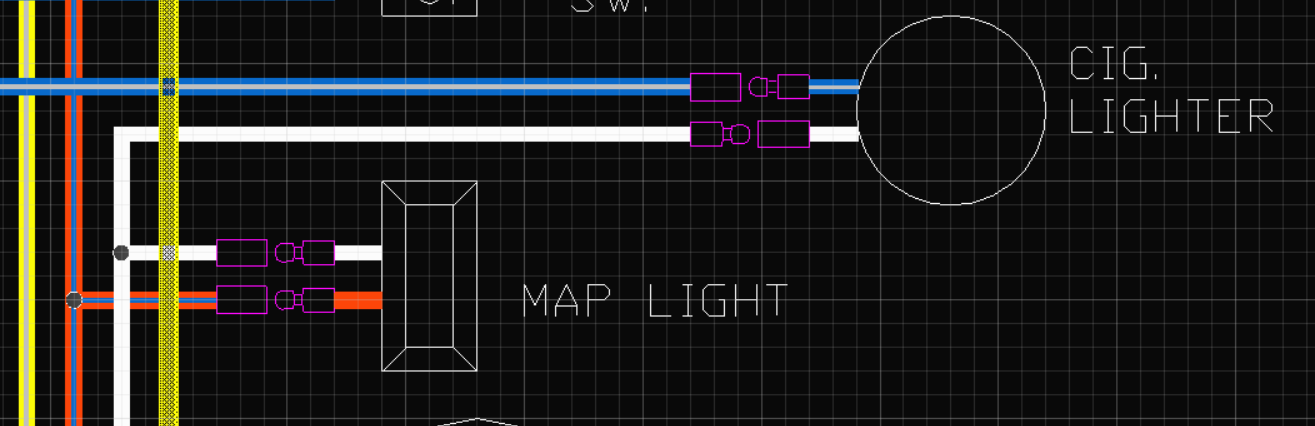
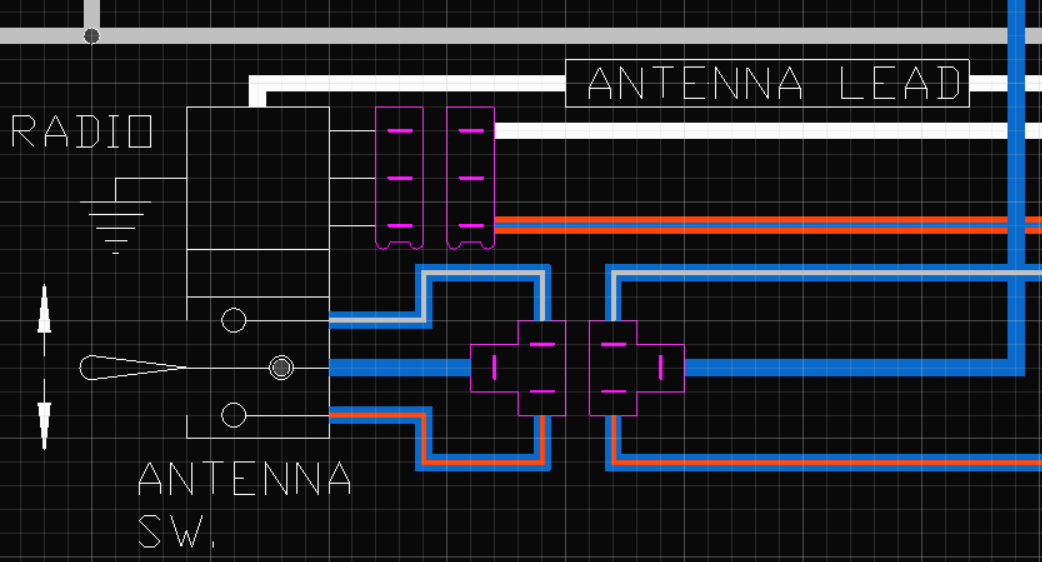
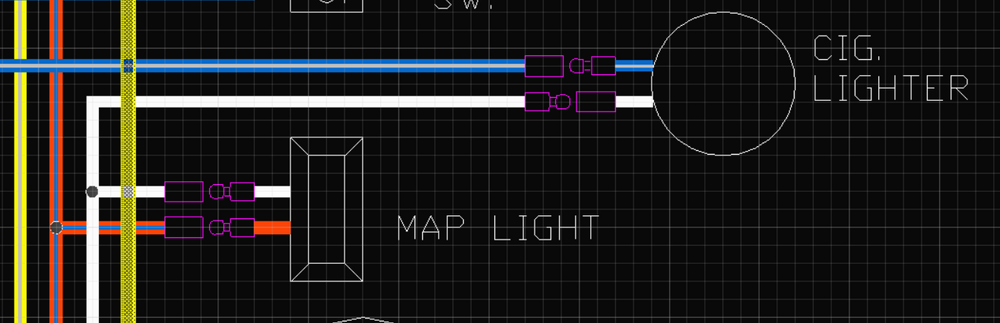
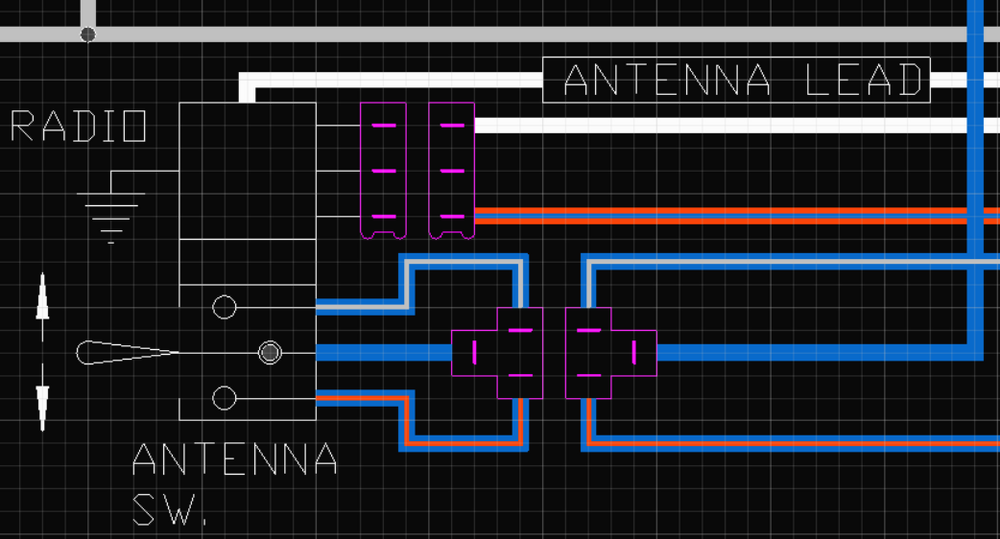
Cig lighter en map light revised. And the antenna switch





.JPG.a905ee65f2b43f042a331d117f3964c3.JPG)
.JPG.bc60012d72964a929a96c72bb3e4651f.JPG)
.JPG.c6c38189c67eafd1d7822171f8303c60.JPG)