EuroDat
Free Member
-
Joined
-
Last visited
Everything posted by EuroDat
-
 Hey Len, @superlen How's life? Long time since we heard from you. Chas
 -
-
I remember when you made that fuel rail @siteunseen. Neat job.
-
No worries. Don't mess with a snake for my "nice to haves" I lost the 4 M4 clips when I cleaned up the garage. Made a kind of replacement, but would like the originals. The fuse holders look like they got really hot in the past and show signs of melting. Still work fine. Btw: Thanks for offering
-
No worries. Don't mess with a snake for my "nice to haves" I lost the 4 M4 clips when I cleaned up the garage. Made a kind of replacement, but would like the originals. The fuse holders look like they got really hot in the past and show signs of melting. Still work fine.
-
Yes exactly. That was my temporary fix until I made the strip for the resistor.
-
If you want maximum spark then you should bypass the resistor. You can do that by bridging the terminals or taking the black/white striped wire and fitting it directly to the coil +. I wanted to keep the original look with the resistor in place but not having any function.
-
Btw. The purpose of using an external resistor is to aid in starting. Specially in cold conditions. When the engine is cranking the battery voltage will drop to around 9 volts. The ignition switch will then bypass a section or the resistor completly given the coil a higher voltage (close to normal voltage) during starting.
-
You shouldn't do anything to the wiring outside the TIU. If you want to bridge the resistor, just remove the front black/white stripe wire and fit it to the second last terminal (from the rear) which goes directly to the coil positive. I'm using that same coil. Flame Thrower 45011.
-
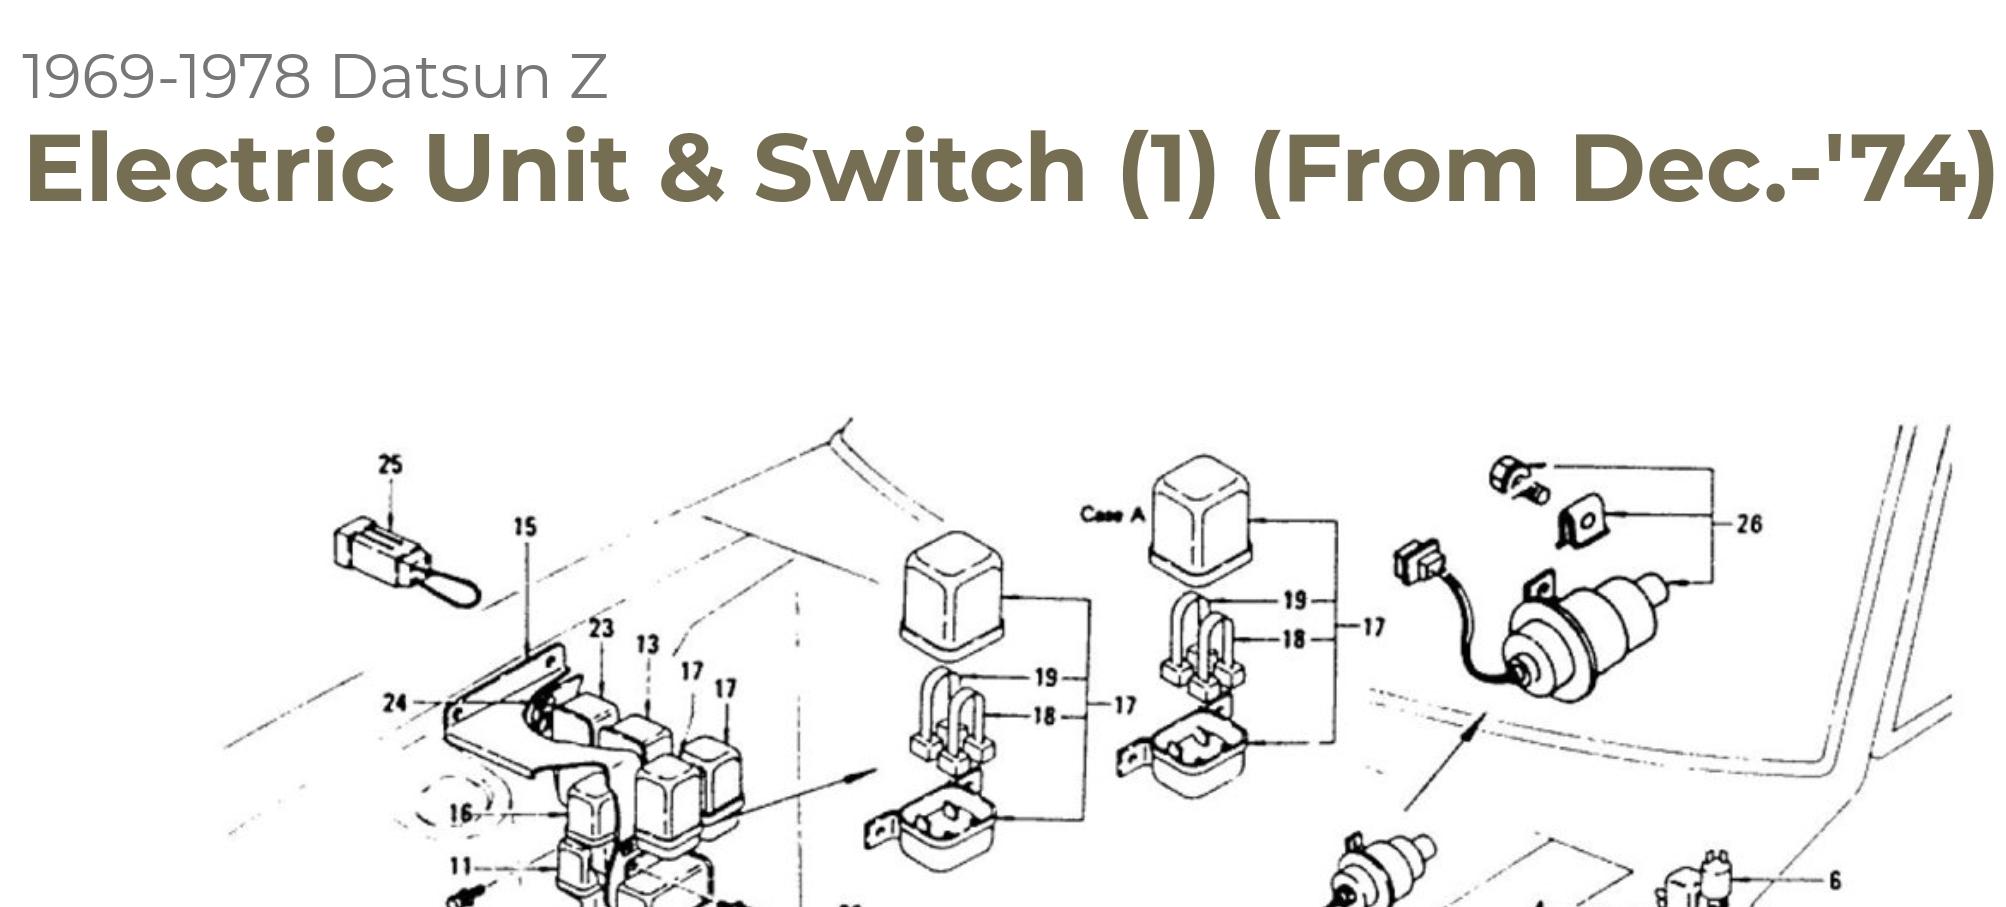
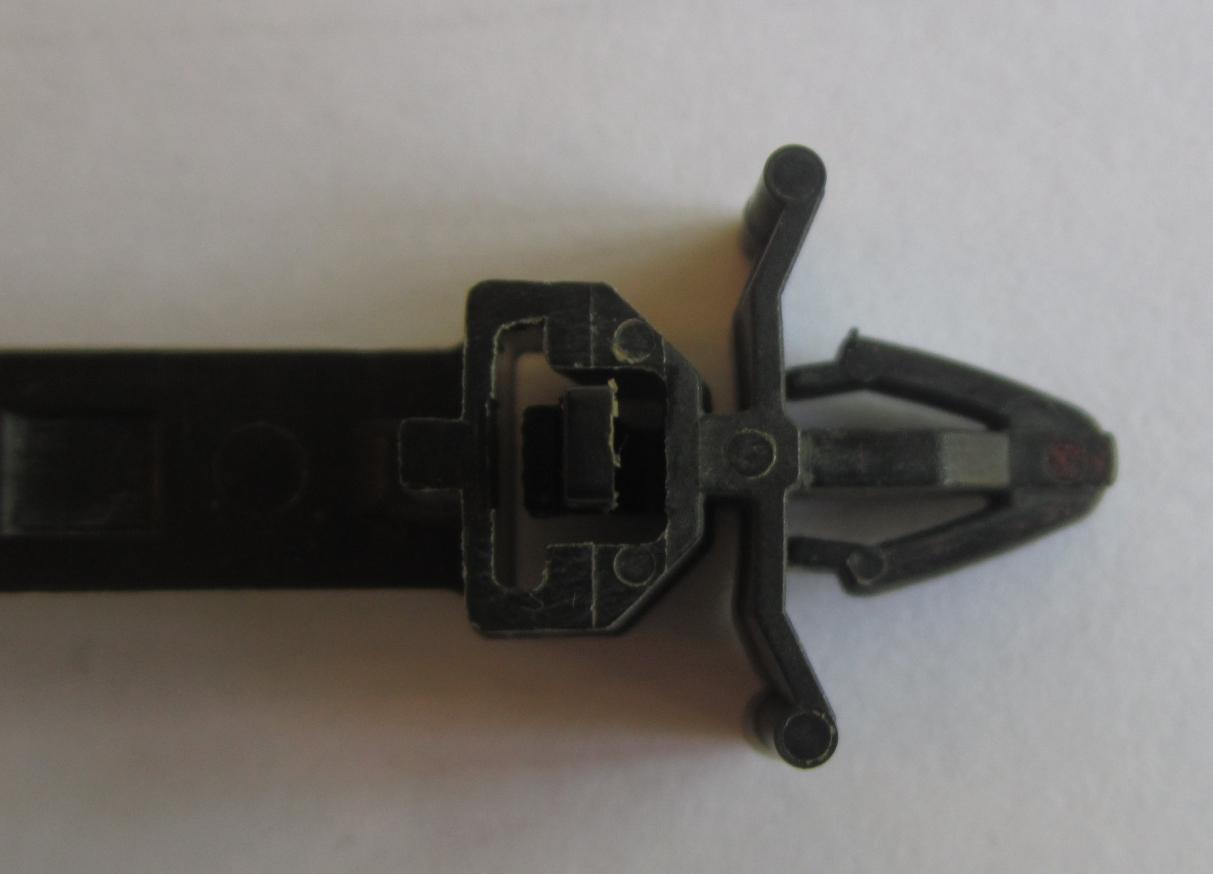
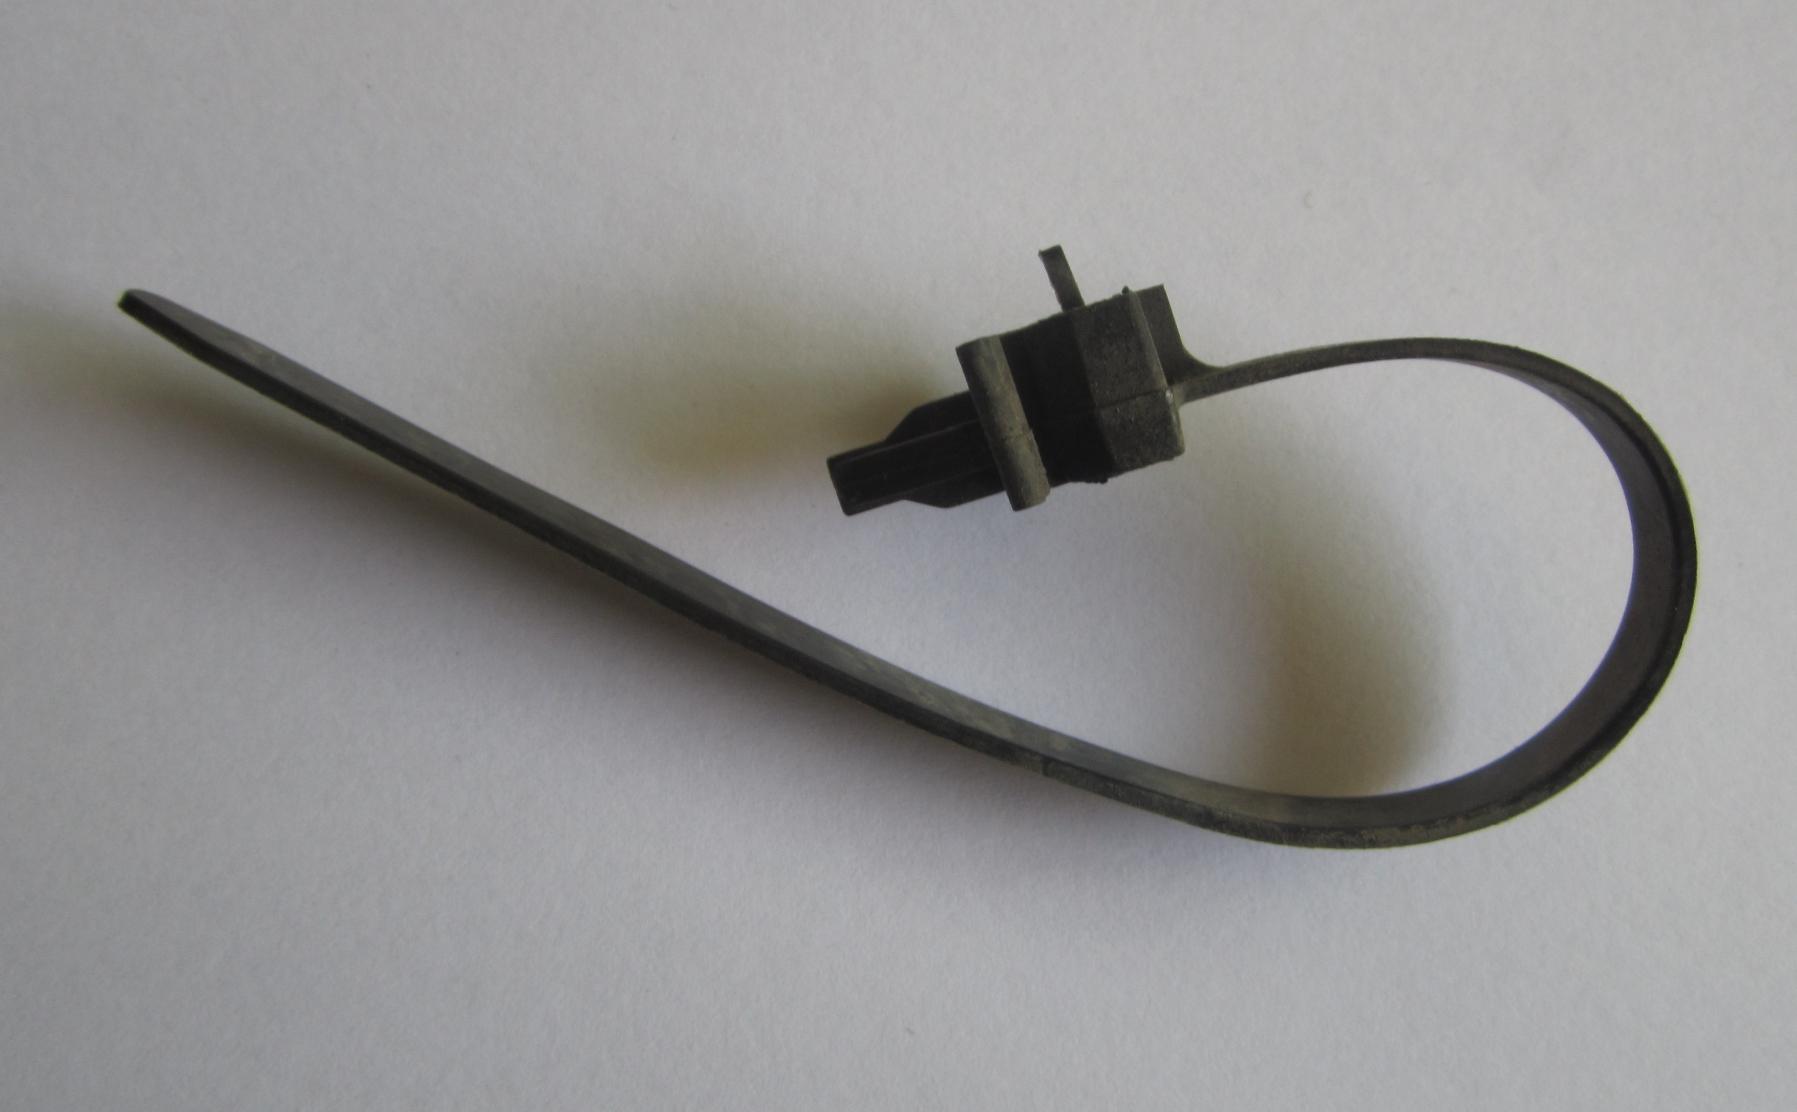
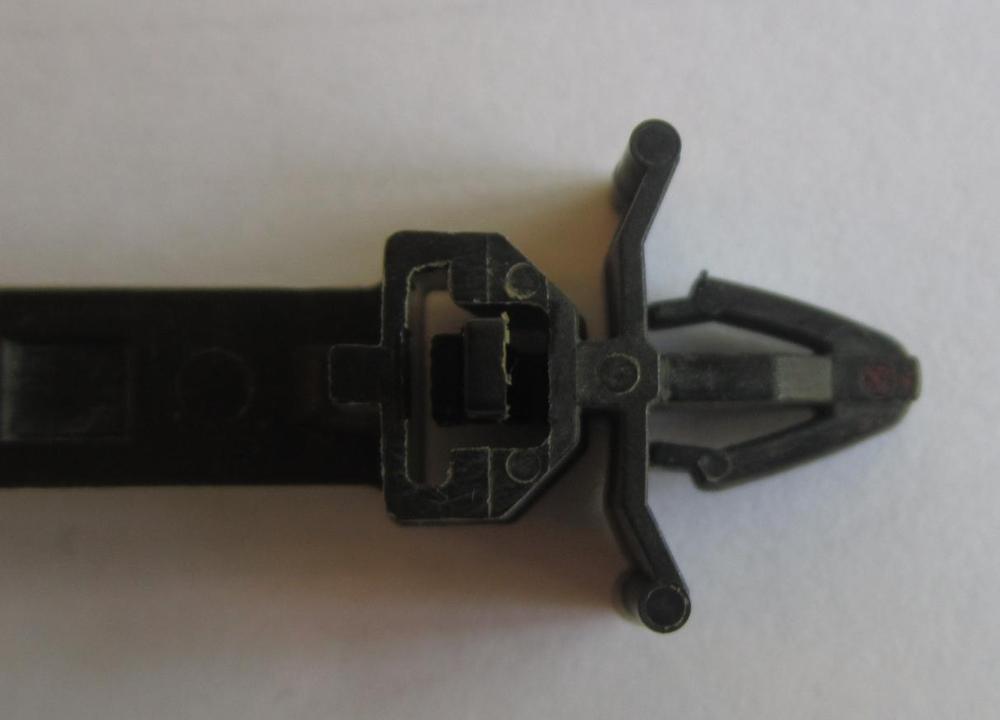
I have a couple of things I would like to have. If it's not too much trouble. 280Z: - The two fusable link holders on the passenger strut tower with about 12 inches of wire. It's the bottom section od POS#17 in the parts list drawing. Don't need the plastic covers or the links. - Engine bay wiring harness staps that click into the panels. - The 4x M3 clips on the 280Z grill. It's where the vertical bar connects to the bottom horizontal bar.


-
Hi Kyle, You can run the original coil with resistor, but you with reduce the current limiting feature in the HEI. Good observation. Yes the photo was with my original Beru coil which needs a external resistor. I ran it with the resistor (without the bridging strip) while waiting for the Flame thrower to come. Two days after that photo I changed coils. The important thing to remember is the HEI needs 12 volts. If you make a temporary set-up next to the coil for testing, make sure you use the 12 volt black/white stripe wire going to the resistor and not the reduced voltage after the resistor (between resistor and coil). If you are buyimg a new coil and plan on using a HEI module, I would suggest buying a 12v coil with .0.8 to 1.0 ohm coil.
-
Yeah, Lenny had a new family member and project stalled.
-
I agree. Put the nut back on just enough to cover the top threads. Tap it with a small hammer or similar. If it won't let go, you can try to heat the arm. DON'T heat the threaded bolt (coter pin). It should release easier then.
-
I would stick with the 76 throttle body. The ZX butterfly is smaller and will restrict flow a little. Years ago there was a modification with a 60mm throttle body and the AFM from a toyota cressida. You had to solder the 280Z electronics into the toyota unit. A resistor in the temp sensor wire allowed you to, all be it little, adjust the ECU to compensate for the extra air flow. Tip: If you do these changes to a running engine. Check the performance before making the changes. The way I do it is this. - Pick a quiet road where you can safely drive up to 70 mph. - Drive in 4th or 5th gear at 25mph and accelerate to 60 or 70 mph. Don't change gear. - Have someone video the speedo and tacho while you do it and plot the values against time (seconds) in excel. That will give you a performance curve you can refer to after you do the mods.
-
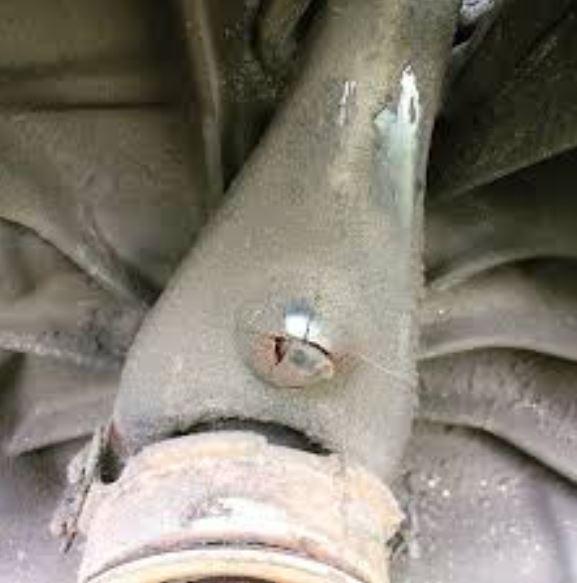
I think these tools are a good choice for spindle pins that are in any kind of salvageable condition. The spindle pin (drivers side) in those photos looks just like my drivers side spindle pin, but Careless' is a little rusty at the front lower control arm joint. I don't doubt the quality of the tool Careless made. It looks great and the bench vice square cut thread is the way to go for sure. The problem comes down to a really seized spindle pin will require so much force that the threads on the spindle or the tool, depending on hardnees of the threaded bar will give way and strip clean. Hardway documented his ordeal in his thread. I think my ealier post repeated my advice (post #7) in Hardways thread 6 years ago?
-
Most of us have some sort of horror story with spindle pins being the center of attention. Mine was the passenger side. The drivers side came out so easily I could re-use it again if needed. I thought, "what are all these guys talking about". 2-1/2 days later I knew all too well. My advice based on my humble experience: If it looks rusted and seized just saw through it. Saw between the strut and both lower control arm pivots so you can get to the seized section in the strut. Be careful not to cut into the strut or control arm. Heat the strut until it has a dull glow, but don't point the torch at the end of the spindle pin. You do NOT want to heat the spindle pin. The idea is to heat the strut so it will expand and release some of its grip on the spindle. Then you can press it out. If you heat the spindle pin ends too much they will become soft. The end will mushroom from the pressure you put on it and it will expand and seize in the strut making it more difficult to push through. When removing the outer two sections of the spindle pin from the control arm. Heat the control arm only. That will transfer through the control arm to the rubber insulator and it will soften release. Hold the threaded end of the spindle pin with pliers or vice grips and keep trying to turn it. Eventually it will let go and you can pull it out with the rubber. The outer tube from the bush can then be removed. That is the easiest way I found to remove these rubbers in general. A lot of people try to burn them out, creating a lot of toxic fumes and smoke. Good luck.
-
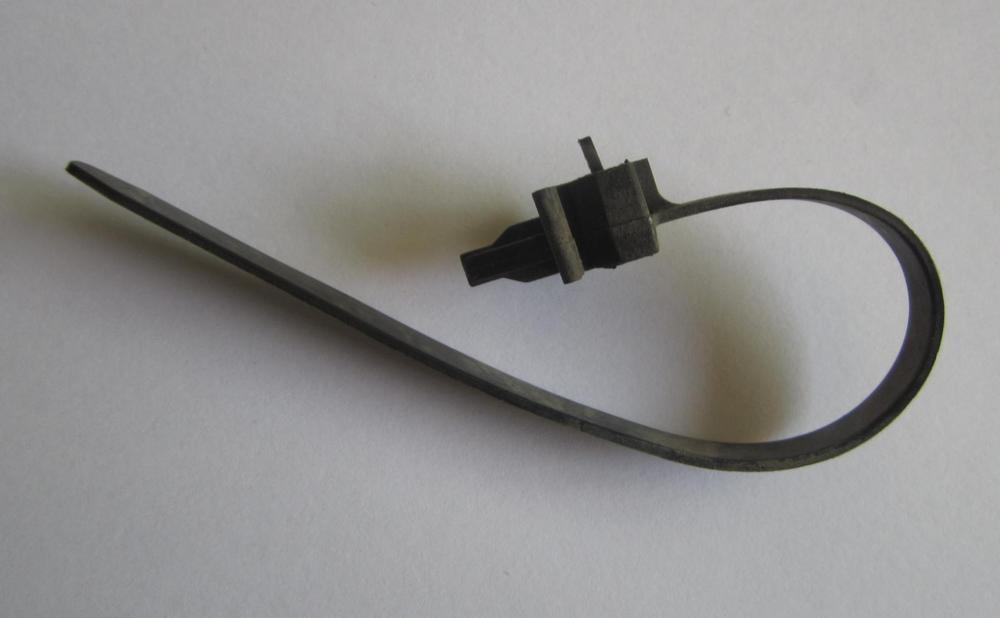
If you rebuild the halfshafts. Replace the hose clamp with the original aluminium straps or a wide sectioned plastic Ty-rap. That hose clamp will add to any balance issues you might had. It won't be a lot, and you probably won't notice it, but all these small vibrations add up.
-
Yes. Mine is a 280Z. Next delivery should be in September if all the rumors are correct.
-
I have exactly the same regrets. I didn't install the dash cap. That was done by the owner before me. They used plenty of silicone to fit it too. I have a lovely new km/hr face (thankyou @moelk) I would to fit, but after two frustrating attempts to remove the speedo I too can confirm the speedo will not come out without removing the dash cap first. The other alternative was to restore the dash. I know others here have posted impressive photos of there step by step progress, but I'm concern about removing the cap. How much more damage that will do, can I remove all the silicone and do I have the skills and patience to complete it. I am now waiting on the fence to see how the sashes from Vintage Dashes go. Last news was they just received a delivery, but it's already sold to customers. Next delivery will be in September. Fingers crossed.
-
The propeller shaft won't be a problem. The splines are the same on all the 4 speeds and 5 speed transmissions including the ZX models. The transmission length is the same. The Type A transmisiions are about 1/16" shorter if I recall correctly. It is so small a difference it doesn't matter. You say you have a 71. At about 10/71 maybe a month earlier they changed the transmission from Type A to the Type B. The Type A has a detatchable bellhousing (3 piece transmission housing). The Type B has an intergrated bellhousing with the front section of the transmission (2 piece transmission housing). This is not the problem though. The main concern is the shifter and where it comes through the floor. The shifter on the B transmission will hit the floor when you try to use 1st, 3rd and 5th, if it is a 5 speed. The shifter will need modifying to clear the floor. As for the turbo mod. I'm with Patcaon. You would be better off looking for a rusted out 280ZX turbo and transplant that. Turbo is not my field, but I would think your budget is a little low. Anything goes wrong......
-
A lot of fellow forum members helping you on the temp sensor, so I will concentrate on the clutch. You have a serious problem with your clutch. The clutch fork should not be at 120mm in relaxed position. The fork will hit the bellhousing before the clutch can disengage. The old pressure plate did disengage before you replaced it, right? The two pressure plates are different in height so that will give you problems, but it's puzzling that the original also won't disengage, There is something other than the pressureplates causing problems. When you put the old pressure plate back in. Did you use the new flywheel? I thinking the new flywheel might have a different height. Can you check the clutch fork for extreme wear in the ball pivot and hair line cracks that allow it to flex a lot? Can you take a photo of the clutch fork from the side? It might be bent and deformed.
-
They look like the standard 73 hitachi flat top to me, but I'm no expert on them. Check the link for info.
-
It's hard to tell if those two pressure plates are the same height, from those photos. I think the old pressure plate could be higher. I take it didn't come with a new matching collar? The problem with clutches is over the years there is less and less demand. The industry simply stops making the less demand units, but they forget to include the matching collar so you can use the alternative. Can you check the position of the clutch fork? Distance from the front of the transmision is a good indicator. You should measure a distance of about 115mm or a little less. See my post on page 2 #41 for a photo. If the distance is 120mm or more with a new clutch you have a mismatched collar / pressure plate. You can also try pushing the rod back into the slave cylinder. It should move about 10mm. If you can push it in more than 20mm, not good. Be carefull when you do this. The fluid goes back to the master cylinder and can overfill it.
-
Driveshaft (Nissan call it a propeller shaft) are easy to get out of balance. Like Mark mentioned in his post, the haft shafts turn less than one third of the propeller shaft speed. If you change the uni-joints, payparticular attention to the end play in the spiders. Check the FSM for the tolerance and order shims to adjust the end play. It would be a good move to have the shaft balanced while it's out. Rear transmission mounts and diff mounts can sag when they get old. Sagging can cause vibrations, especially if the bottom bolt hits the top section of the mount. The transmission or the diff can than tap on the bolt. You WILL hear and feel it. Scroll down in the link and you will see what I mean. http://www.atlanticz.ca/zclub/techtips/suspension/rearend/index.html
-
That is the connector on the ECU down next to the drivers left foot.