Jarvo2
Free Member
-
Joined
-
Last visited
Everything posted by Jarvo2
-

-
until
Hosted by the Windy City Z Club of Chicago. http://www.windycityzclub.com/Forms_pdfs/2013CruisinZshow.pdf -
Thanks. Dave Irwin just pointed out that this is only valid for 70-72 240z's as the 73 with an OEM electric fuel pump needs to be rewired to prevent battery drain.
-
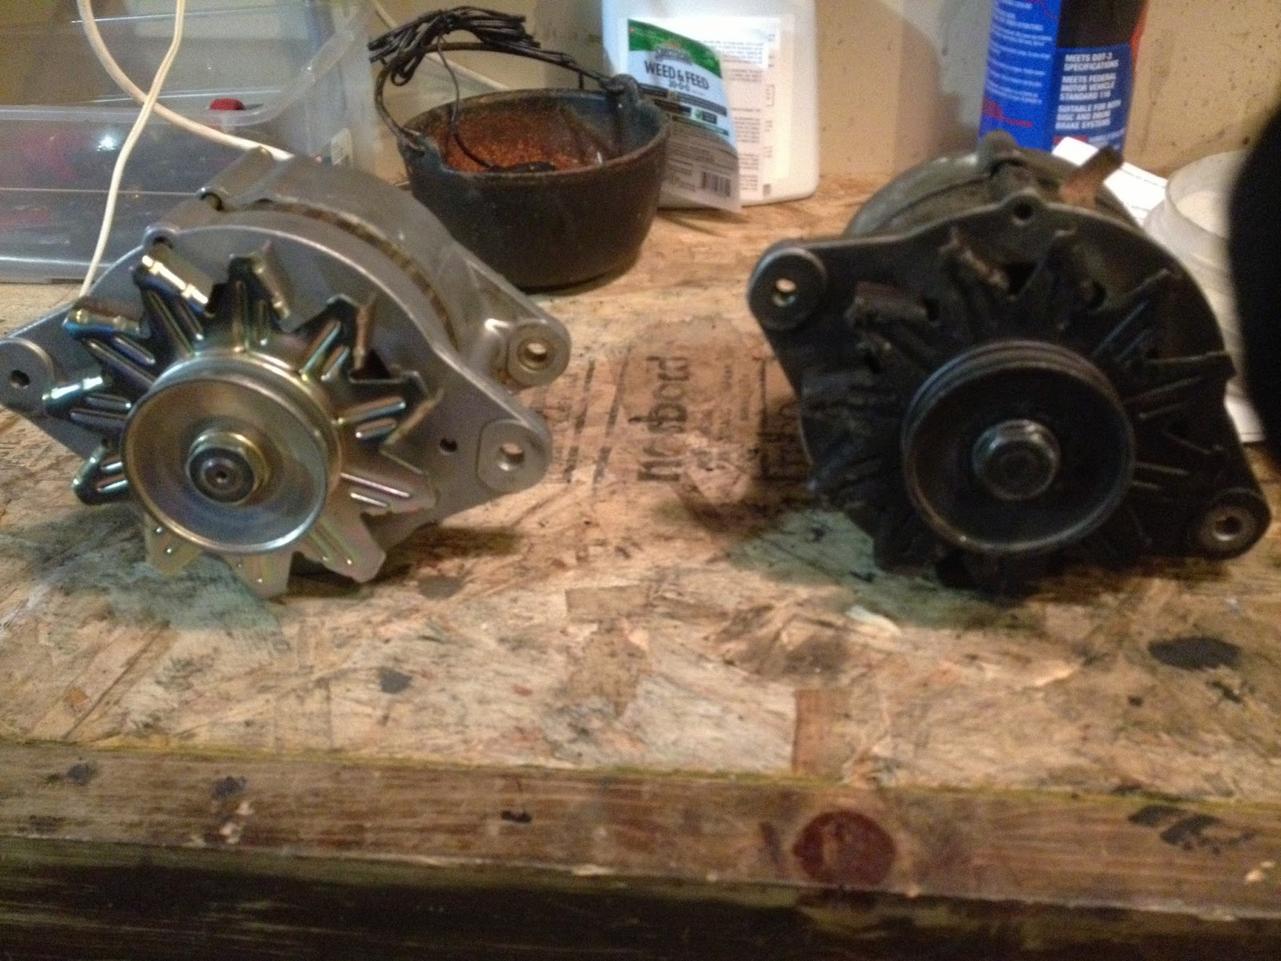
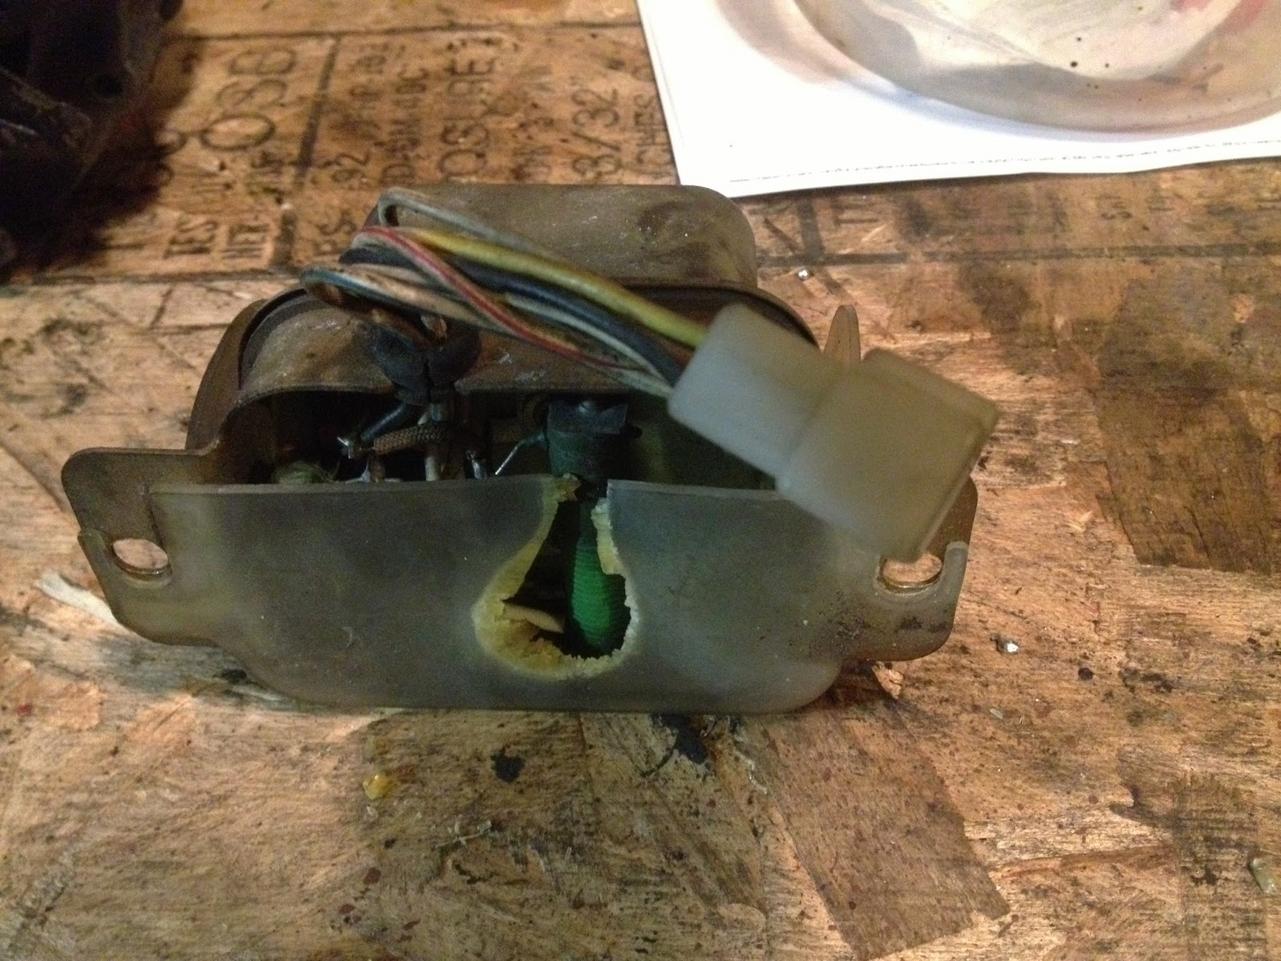
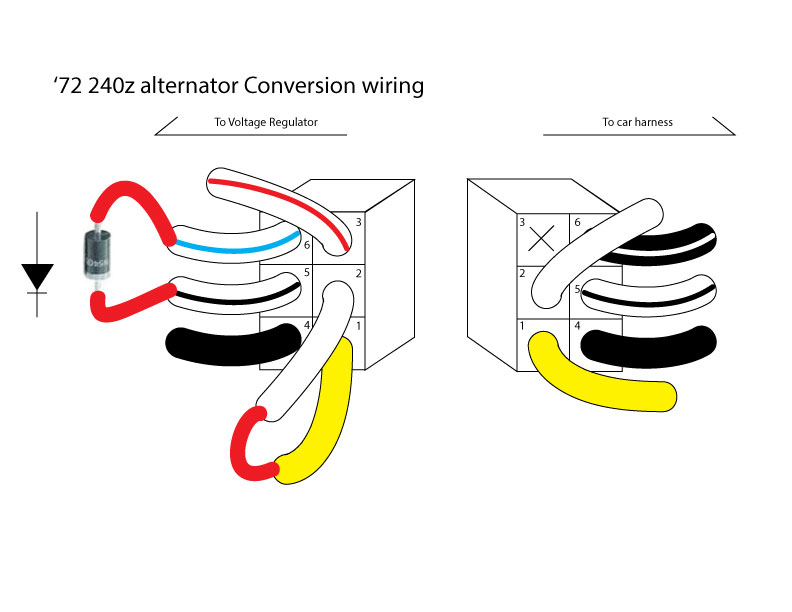
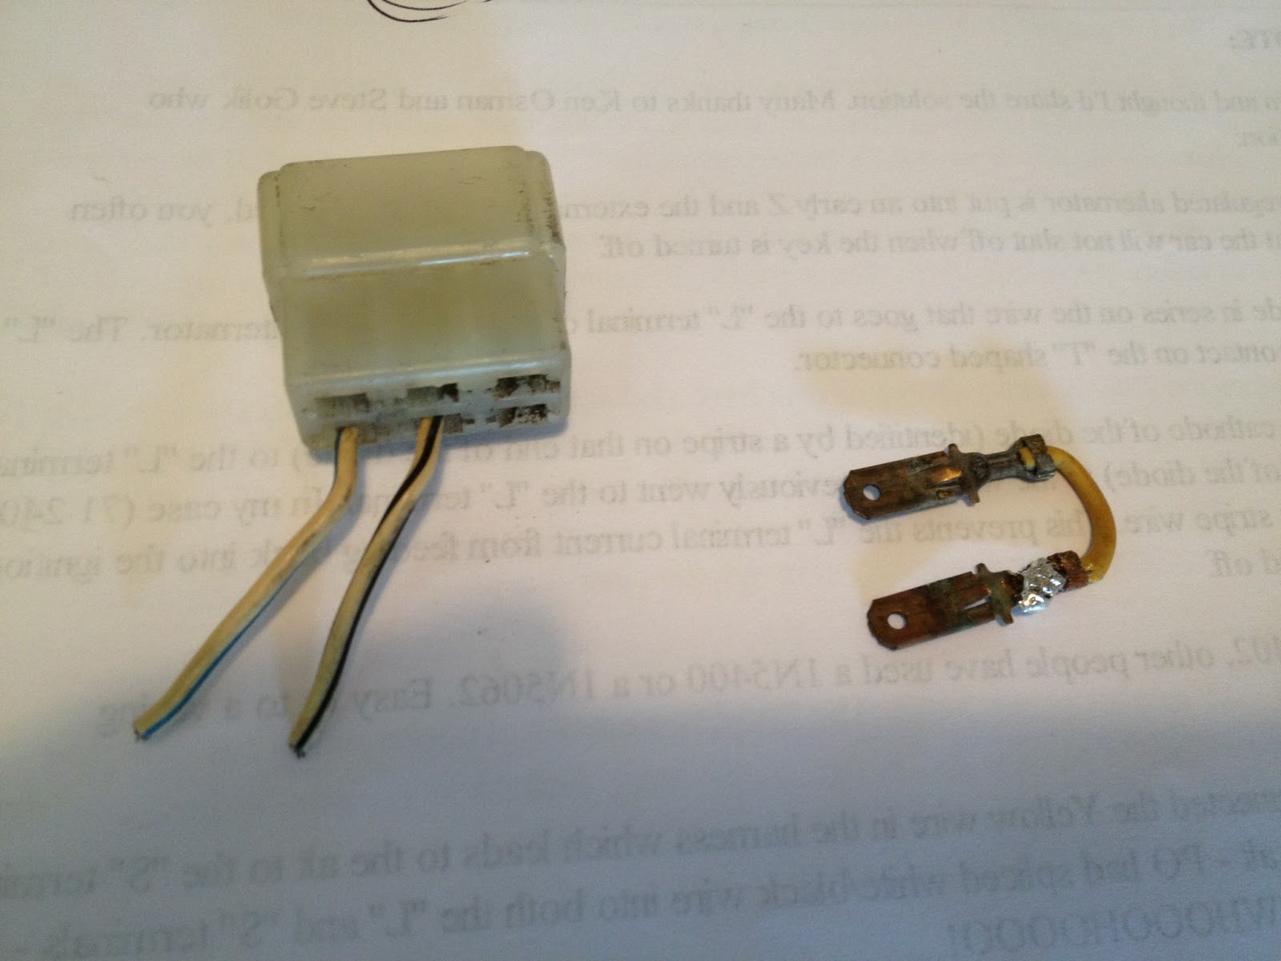
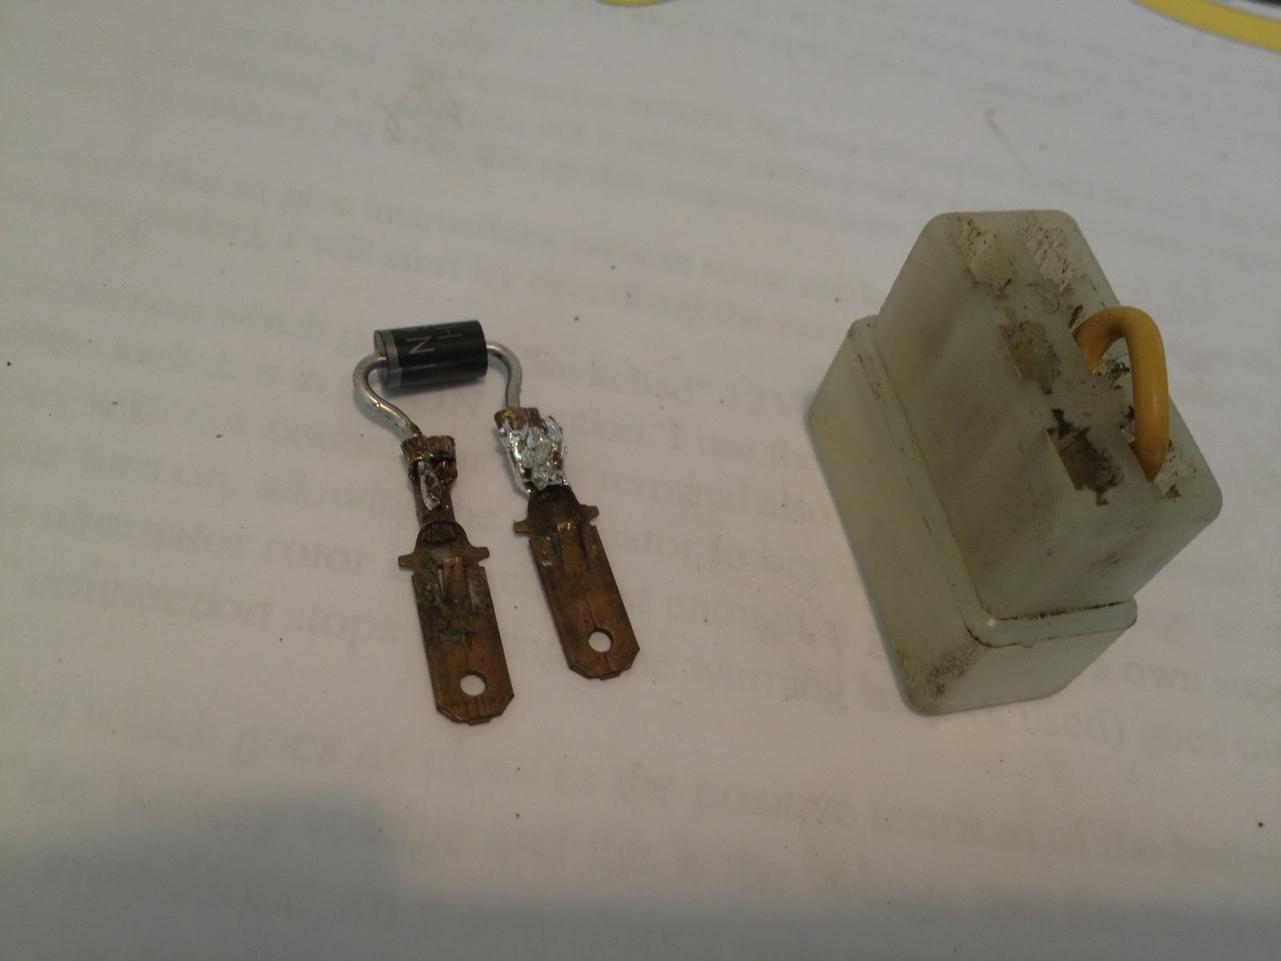
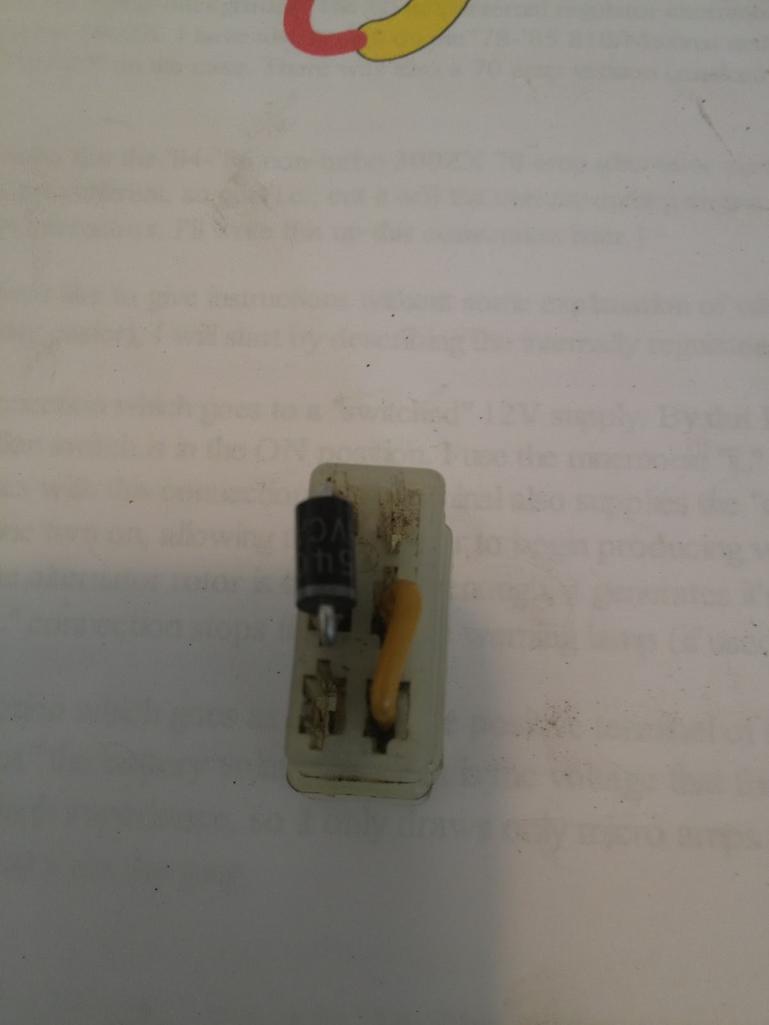
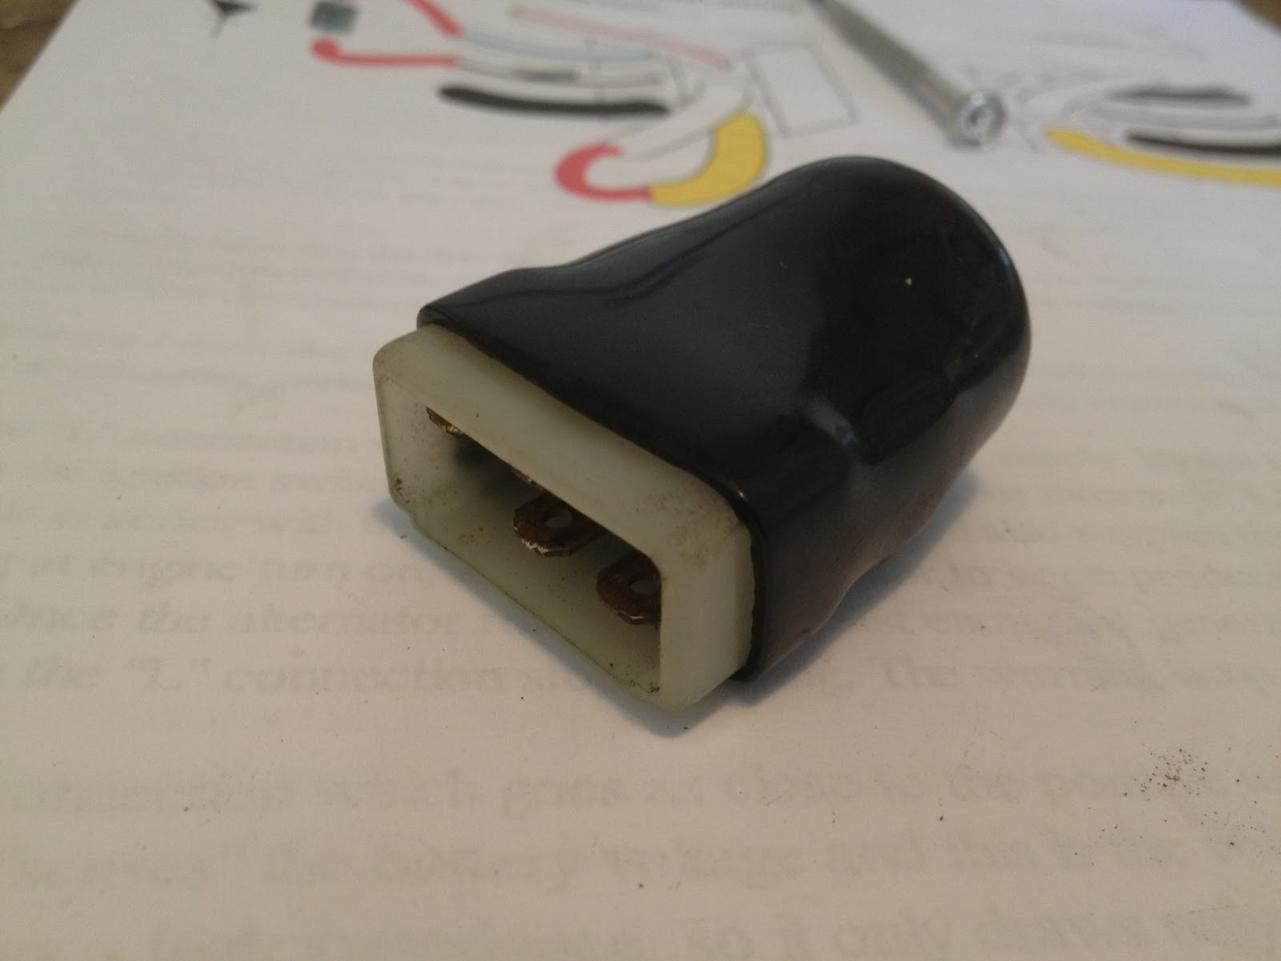
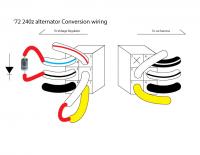
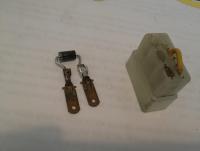
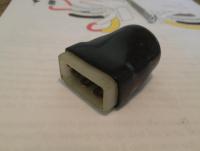
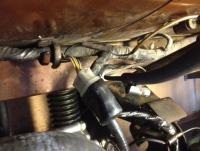
So while digging through my box of parts that the previous owner provided me, I ran across a brand new alternator, which ended up being a 280ZX internally regulated 60amp model. After upgrading to the Pertronix electronic ignition last year, I began to hear that the 240z's voltage regulator and 40amp alternator might not be powerful enough, so I investigated upgrading. All it cost me was the price of a diode ($2 @ Radioshack) as I had all of the other parts already. After removing the voltage regulator I found out why its recommended to go with an internally regulated alternator -- look at how the backing plate has melted! In order to eliminate the external voltage regulator I needed to create a jumper, including a diode to allow the car to turn off when the key is removed. Here is the best diagram I was able to find on the internet (thanks to the user who posted it here first!): I ended up using a spare voltage regulator connector (and kept the somewhat working voltage regulator in one piece in case I ever needed to switch back). This connector then plugs in just like the voltage regulator would. Once installed with the waterproof boot that I had laying around (which fit perfectly), I was able to tuck the jumper harness under the wires and it looks like its always been there. Now that I've been driving on the new alternator without the external voltage regulator I can honestly say the car is running better than it probably did when it was new. This was a great upgrade and should be done by anyone having ignition or performance issues (I thought it was my carburetors, but all along it was electrical issues).


-
For all those who loved the 80's show "The Fall Guy" starring Lee Majors, check out episode 3 in season 2, at 02:40 minutes a series I 240z makes an appearance and then they jump it...I still don't know how Heather Thomas fit in the trunk! Its also interesting that its painted black, I didn't think that color was an option until the 280z Black Pearl edition came out. Enjoy!! The Fall Guy 2x03 Colt's Outlaws [a.k.a Colt Breaks Out] Part 1 - YouTube
-
Seems like something isn't flowing as it should. Here's what I ended up doing temporarily. On the air galley, a black-pipe cap fits perfectly.

-
definitely running rich at idle....any chance the SMOG equipment you have installed is causing a lean condition below a certain RPM?
-
Are you still running a voltage regulator? I was having similar issues and just upgraded to a ZX internally regulator alternator along with the jumpers required...everything is running much much better now!
-
UPS might be cheaper, but like you said the weight is what's raising the price.
-
I'm running the tokico kit (springs + struts) and couldn't be happier. The ride is very good, but I'm running stock steel rims right now, once I go low profile I'm guessing it will get a little rougher as a daily driver. Dave's 1972 Datsun 240z: Suspension Rebuild
-
Lookin good, I'm starting on my '72 restoration as well. I'm working on the mechanicals first before I strip it down for paint & bodywork. What type of lift do you have? Do you like it?
-
I had the complete opposite issue...I wasn't able to move the shifter to the right (4spd into reverse) without totally using two hands to muscle it over. I removed the two springs, cleaned them up and reinserted and now I've got 'normal' spring return to center....not great, but normal for the vintage of the transmission. I found it easiest to remove the shifter boots from the top & access the bolt from there rather than snaking up around the exhaust from below.
-
I've got a box of lightly used ones if anyone is looking.
-
Thanks guys, I'm siding with you all (as usual) and am passing on this.
-
So I have the opportunity to pick up a 5spd transmission fairly cheaply (~$100) but the output shaft housing appears to be slightly crushed. Is it worth my time (and $$) to purchase this with intentions of rebuilding it & putting it into my '72 240z? My concern is if the piece is available, and what my odds are of actually having a functioning (and non-leaking) transmission. Does anyone have this piece & willing to sell it?


-
For all those following the thread, I found this at McMaster Car... McMaster-Carr
-
And part II: SU High Performance Manual The Su Carburettor High-performance Manual - Des Hammill - Google Books
-
Although its for MG's, this is a great SU Carb manual. http://www.mgexp.com/article/all/Tuning_SU_Carbs_Speedsport.pdf
-
Now here's an interesting one I've never seen before... Datsun 70 72 240Z Su Carburator Float Bowl Gauge | eBay
-
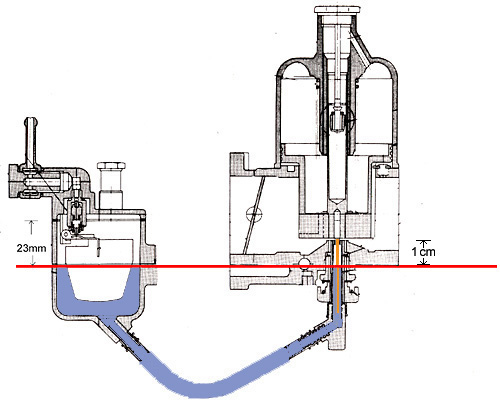
Here are two early designs that I played with to give you an idea...

-
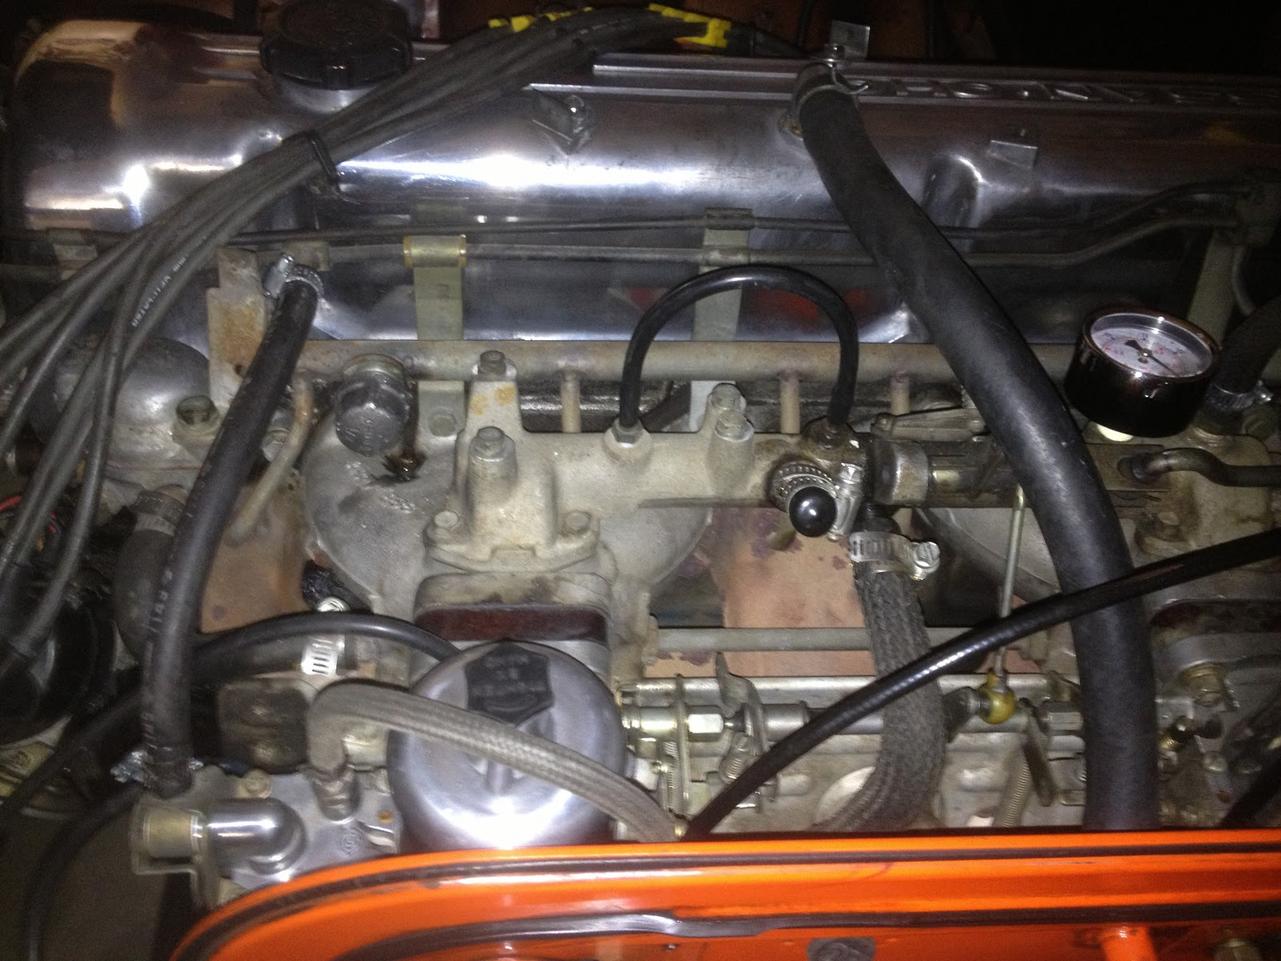
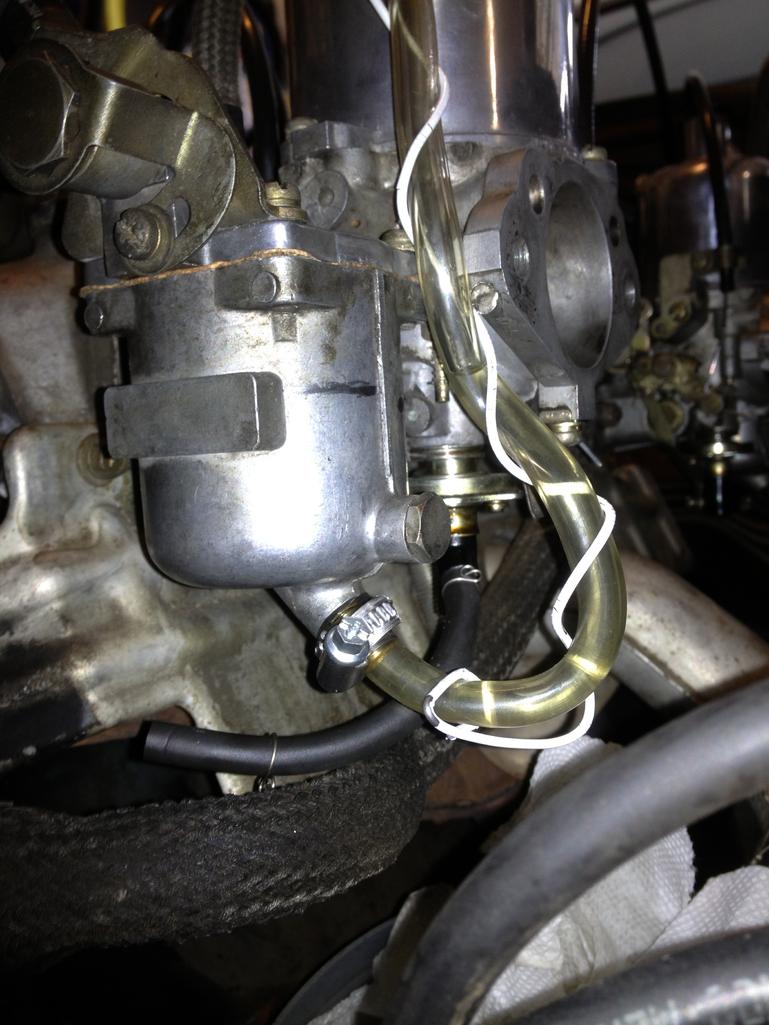
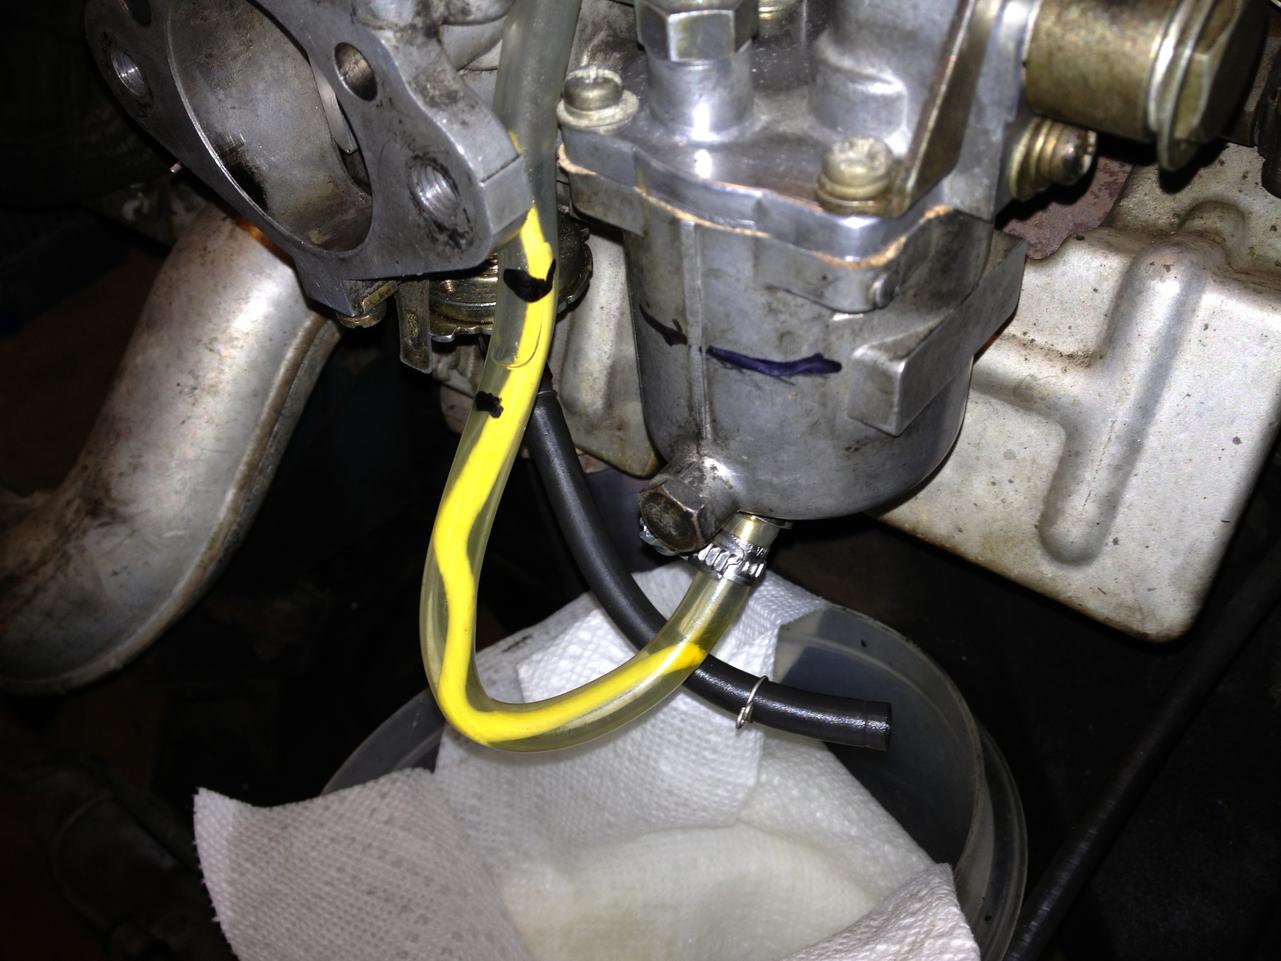
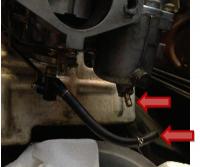
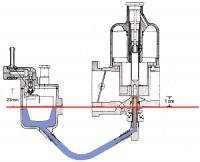
Thanks to gravity and atmospheric pressure, water (and other fluids including gas) seeks its own level. What this means is if you take a tube and hold it in a “U†shape and fill it partially with water, no matter how high you hold one end of the tube, the water will be the same height on both sides. This is the basic function of the sight glass. The level of gas shown in the sight glass is the same height as the fuel in the float bowl. My approach is to pull the fuel line from the bottom of the floatbowl.
-
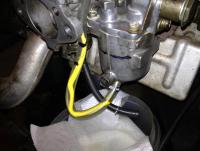
I created this tool out of necessity since now that gross jets are no longer available, its a pain to accurately set the float level on the bench while rebuilding the carb's. The approach I took is for the tool to used temporarily while checking float levels; once set, the sightglass is removed. I pull the fuel hose from the float bowl & connect my sightglass to the nipple. Its preformed and graduated to allow the user to easily see how high the fuel level should be. Then a couple cranks of the engine (coil wire unplugged & trans in neutral), the sightglass fills up. Then it becomes a game of opening up the float bowl lid, bending the tang and re-filling the bowls. Once set the floats should be good for quite a long duration, thus the reason I didn't invest in drain plug bungles. I actually prefer running this test without the engine running.
-
Great point, Jim. I actually just grabbed this pic to illustrate what we were trying to accomplish. I'm still formalizing my instruction manual based on my learnings throughout the years. The funny thing is I was running at about 15mm of fuel and having tons of issues, raising it back up improved the drivability and performance once tuned properly.
-
After continually fiddling with my SU's I've created a fairly inexpensive Sightglass for my carburetor float bowls. My device will allow me to see what the floats are set at and ensure that the carb gross fuel mixture setting is correct. Then I'm able to dial in the fine mixture setting with the adjustment knobs on the nozzle to get back to factory specs. Would there be interest from any members in a set (allows you to see levels in both carbs at the same time)? I'd be willing to provide 2 sightglasses with instructions for $15 including shipping anywhere in the US. PM me if you're interested and I can provide more detail.
-
I think I'm going to try to pop my SM needles out and reinstall the N58's which came with the car when I purchased it.