emptech
Free Member
-
Joined
-
Last visited
-
A friend of mine has a smoke machine, good for finding air and vacuum leaks, if my intake gasket is not leaking, I'm not going to touch it. Jim
-
I was considering a master vac leak, pumped on brakes, pedal went to floor, resivor for rear brakes was dry, filled up, fluid going somewhere. Rebuilt cylinder, now other issues. Should put that on hold and get back to vac leak problem.
-
I can't remember on the gasket, swapped carbs years ago. Going down another rabbit hole now with brake problems. Can we still get the gasket?
-
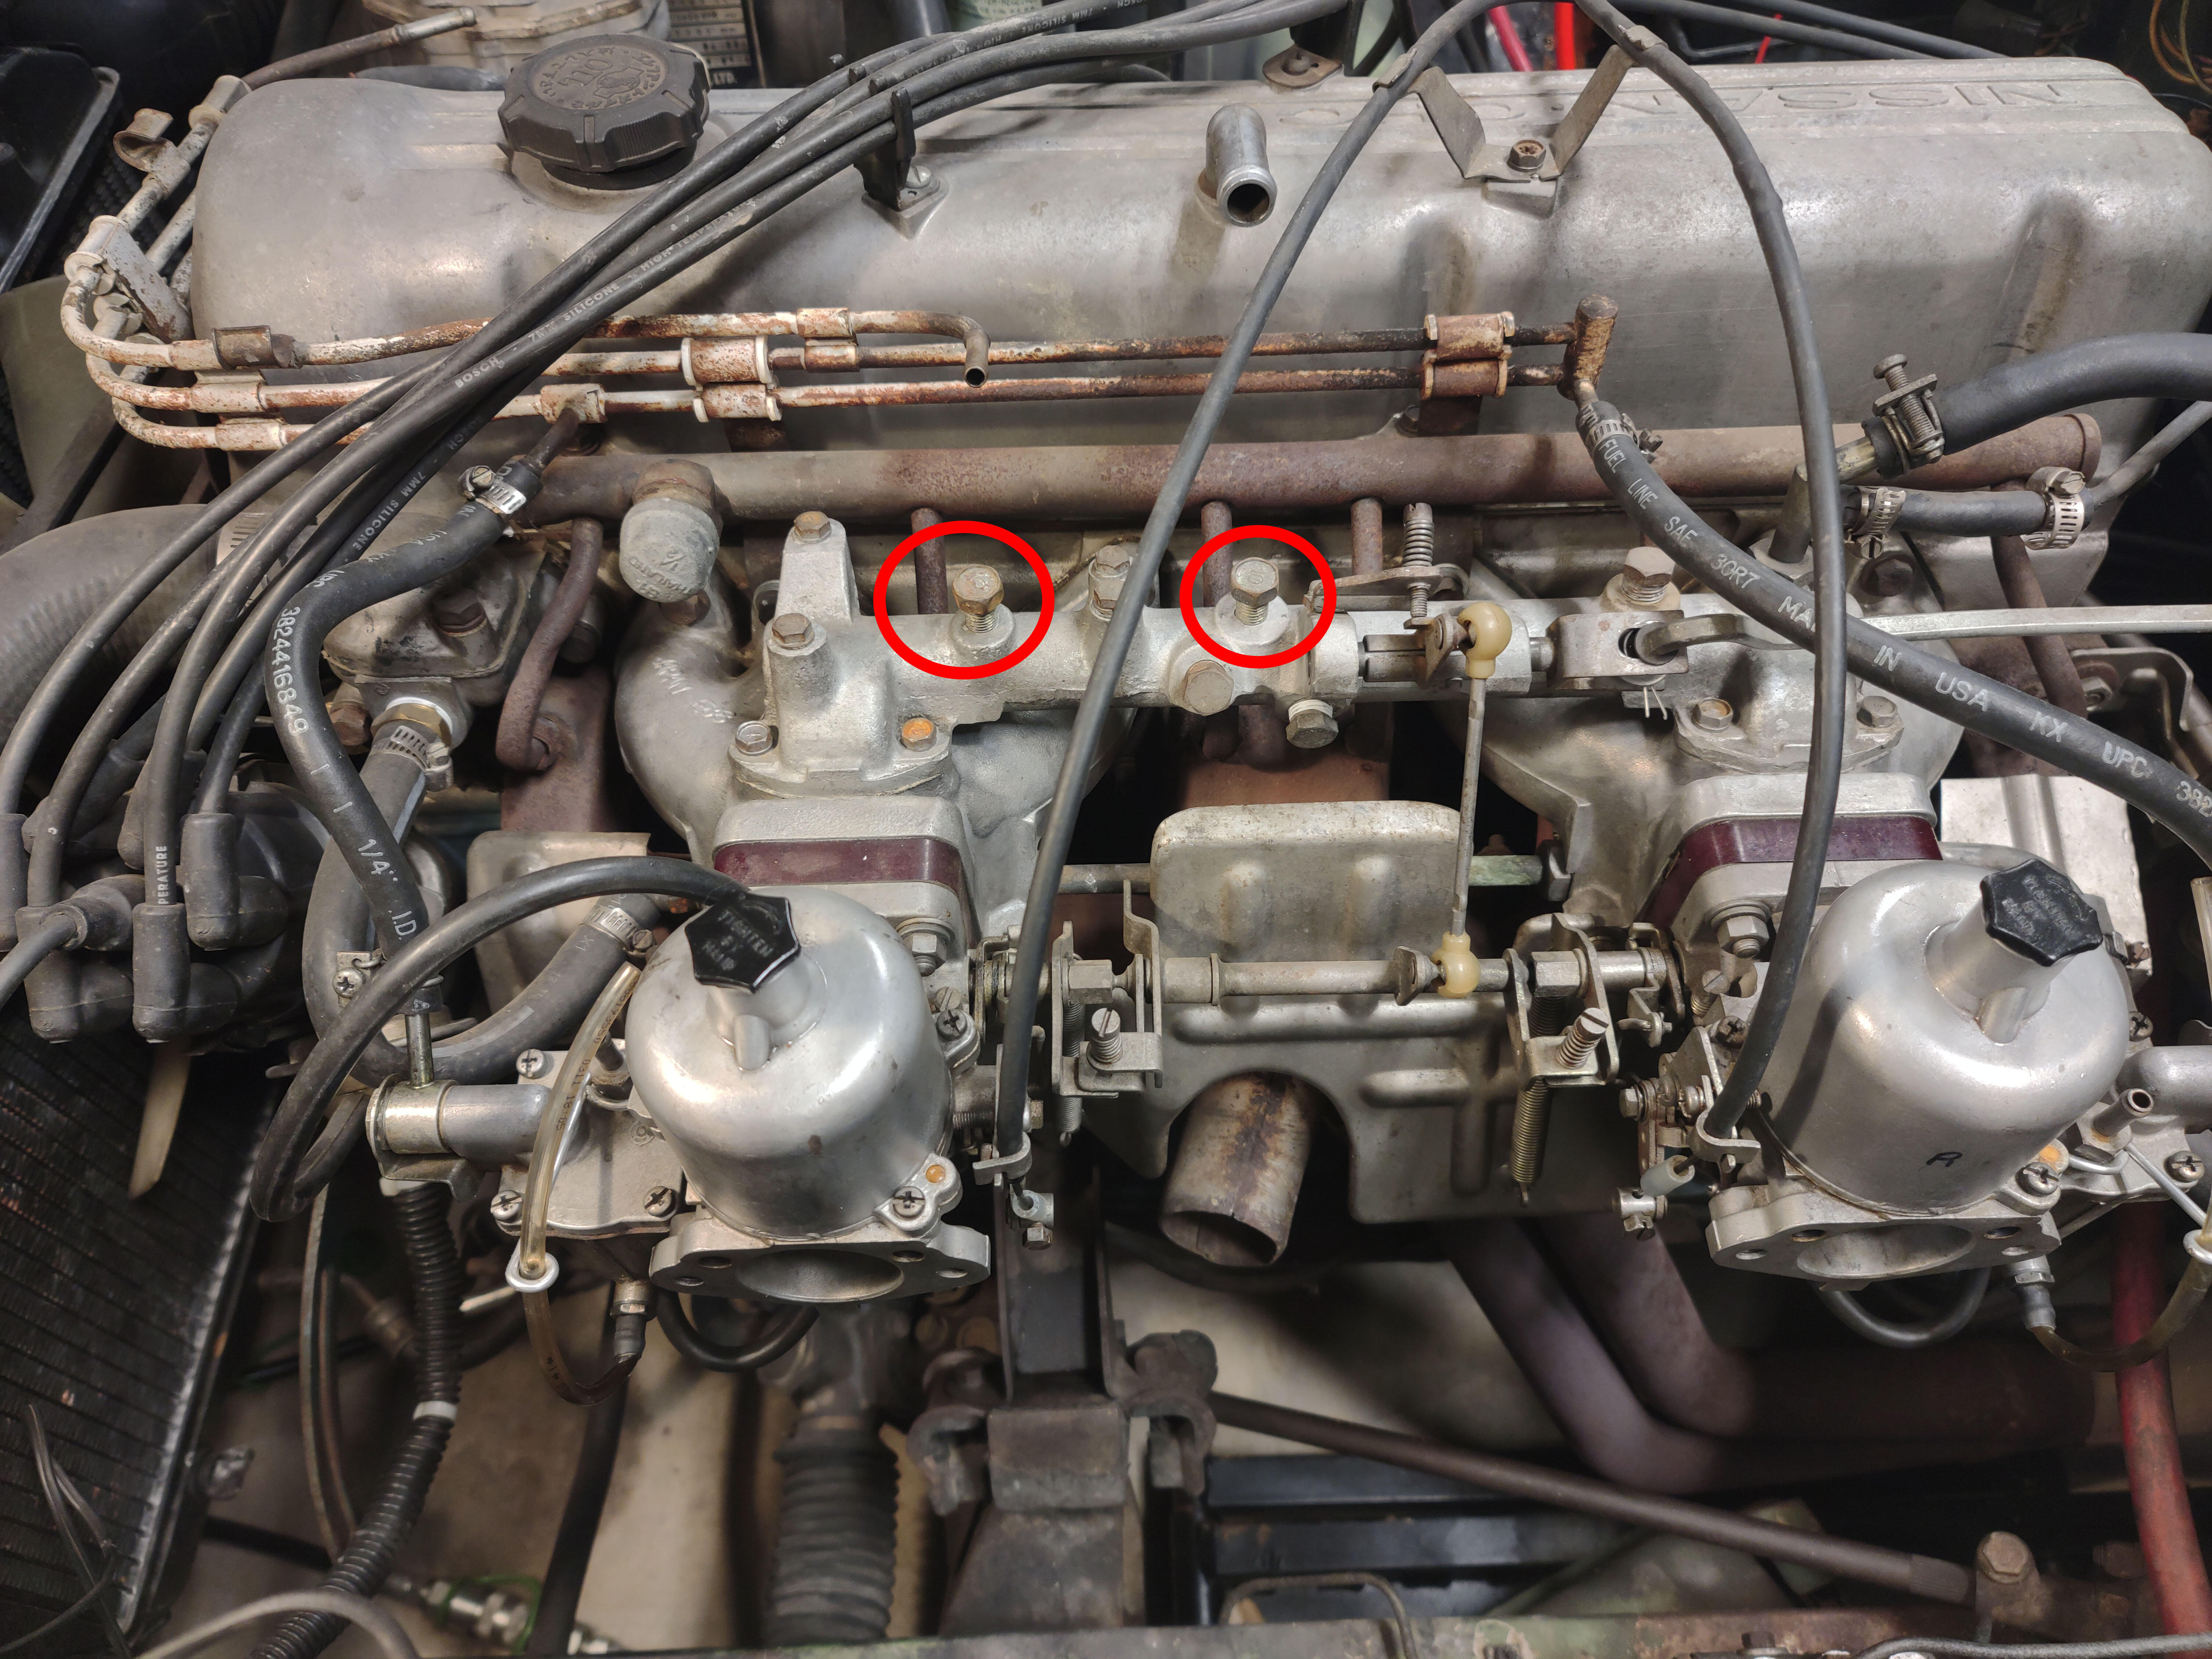
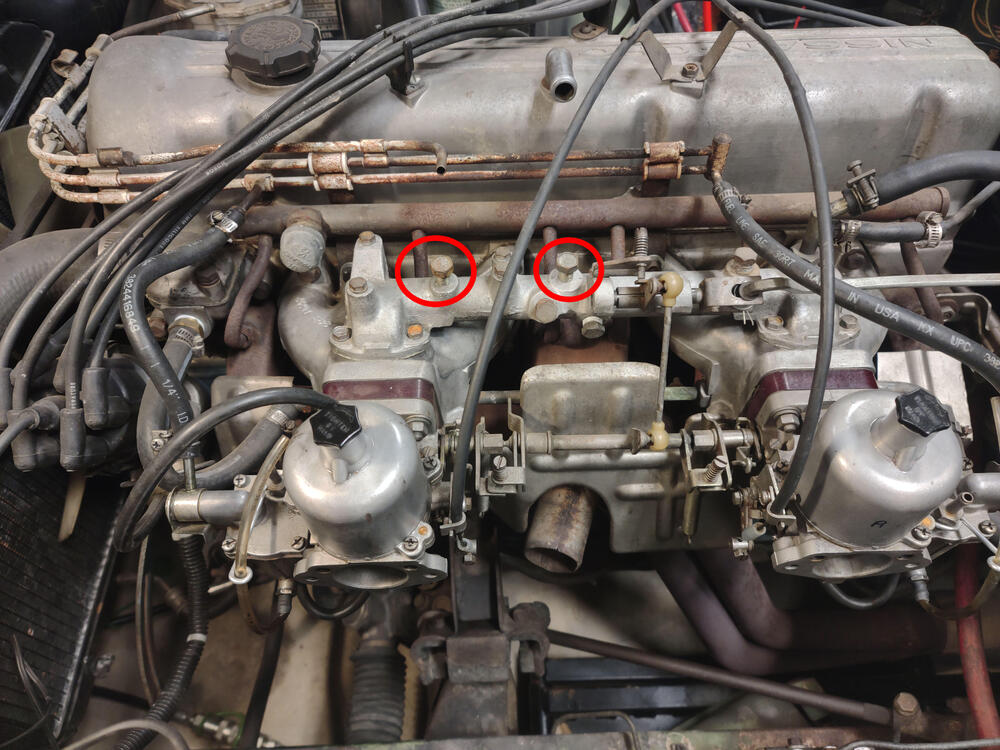
As I'm working on a 260z engine, I found somebody decided to plug some holes in the balance tube by using two 10mm straight thread cap screws (bolts). The original holes were tapered but they forced metric cap screws into the holes, ruining the threads. Notice they were only able to get the screws in part way. I've attach a photo, I circled the two locations. Without drilling the holes out I was able to thread the holes with a 1/8-27 tapered pipe tap, thus allowing me to use 1/8" plugs. All other plugs I've found seem to be the proper threads. Jim
-
CO, I have to apologize on what I said about the barb fitting taken off the 260z balance tube. I went back and looked at the balance tube, the fitting I have with 27 tpi did not come from the balance tube, it was in the box of parts and I assumed that's where it came from. You are right, you know your stuff. As soon as I get the brake problem solved I'll get back to my mixture adjustment and vacuum leak. Jim
-
I mentioned that somebody plugged holes in the 240z balance tube. I was able to run a 1/8-27 pipe tap into the holes, there was enough metal there to get some good threads. I then sealed the holes with 1/8" brass pipe plugs (which I made) and a turn of teflon tape. What's interesting is that I took off a fitting from a 160z flat top balance tube, a barb to male taper fitting. The threads on my 27tpi pipe tap were exactly the same pitch as the fitting from the 260z balance tube. So perhaps Nissan used different thread standards? On to the next problem, vacuum leak. Jim
-
Yes, take it a lock smith. If the core can be removed from the cylinder it isn't that difficult to make a key. Key blanks are common. I can't recall if the core is wafers or pins. Come to think of it, it's a double cut key, so it would be a wafer lock. To remove the core from the cylinder without a key, not a big deal to pick the lock. I have no idea what a lock smith would charge, but it's not a big deal. When I closed my business I kept all the key blanks, I probably have what you need. Jim
-
I salvaged a fitting, barb to male taper thread. A 1/8" NPT 27 threads tap lines up perfectly with the fitting I just pulled. That's what I'm going to chase the threads with, using lots of teflon tape, and install 1/8 pipe plugs. I have lots of brass hex stock available, I'll probably just make my own plugs.
-
Just to let you know, what appear to be bolts plugging the holes in the balance tube are actually tapered pipe plugs. They have a different pitch than most metric bolts and if you force a metric bolt into the hole, you will ruin the threads. I know, I'm working on a 240z that somebody plugged the holes with ordinary bolts, now I have to correct their damage.
-
Some of the holes had real taper plugs, pipe threads. Two of the taper holes were about 10mm and somebody had forced straight thread bolts into the taper holes, ruined the threads. I might be able to chase them and put in 1/8" taper pipe plugs. I don't know that the bolts made a good seal. I"ve verified that some of the threaded holes are 1/8" NPT 27, I'll chase the threads and with teflon tape will repair the holes. I have a 1/8" to barb adapter I can connect my vacuum gage, haven't used it in years. Jim
-
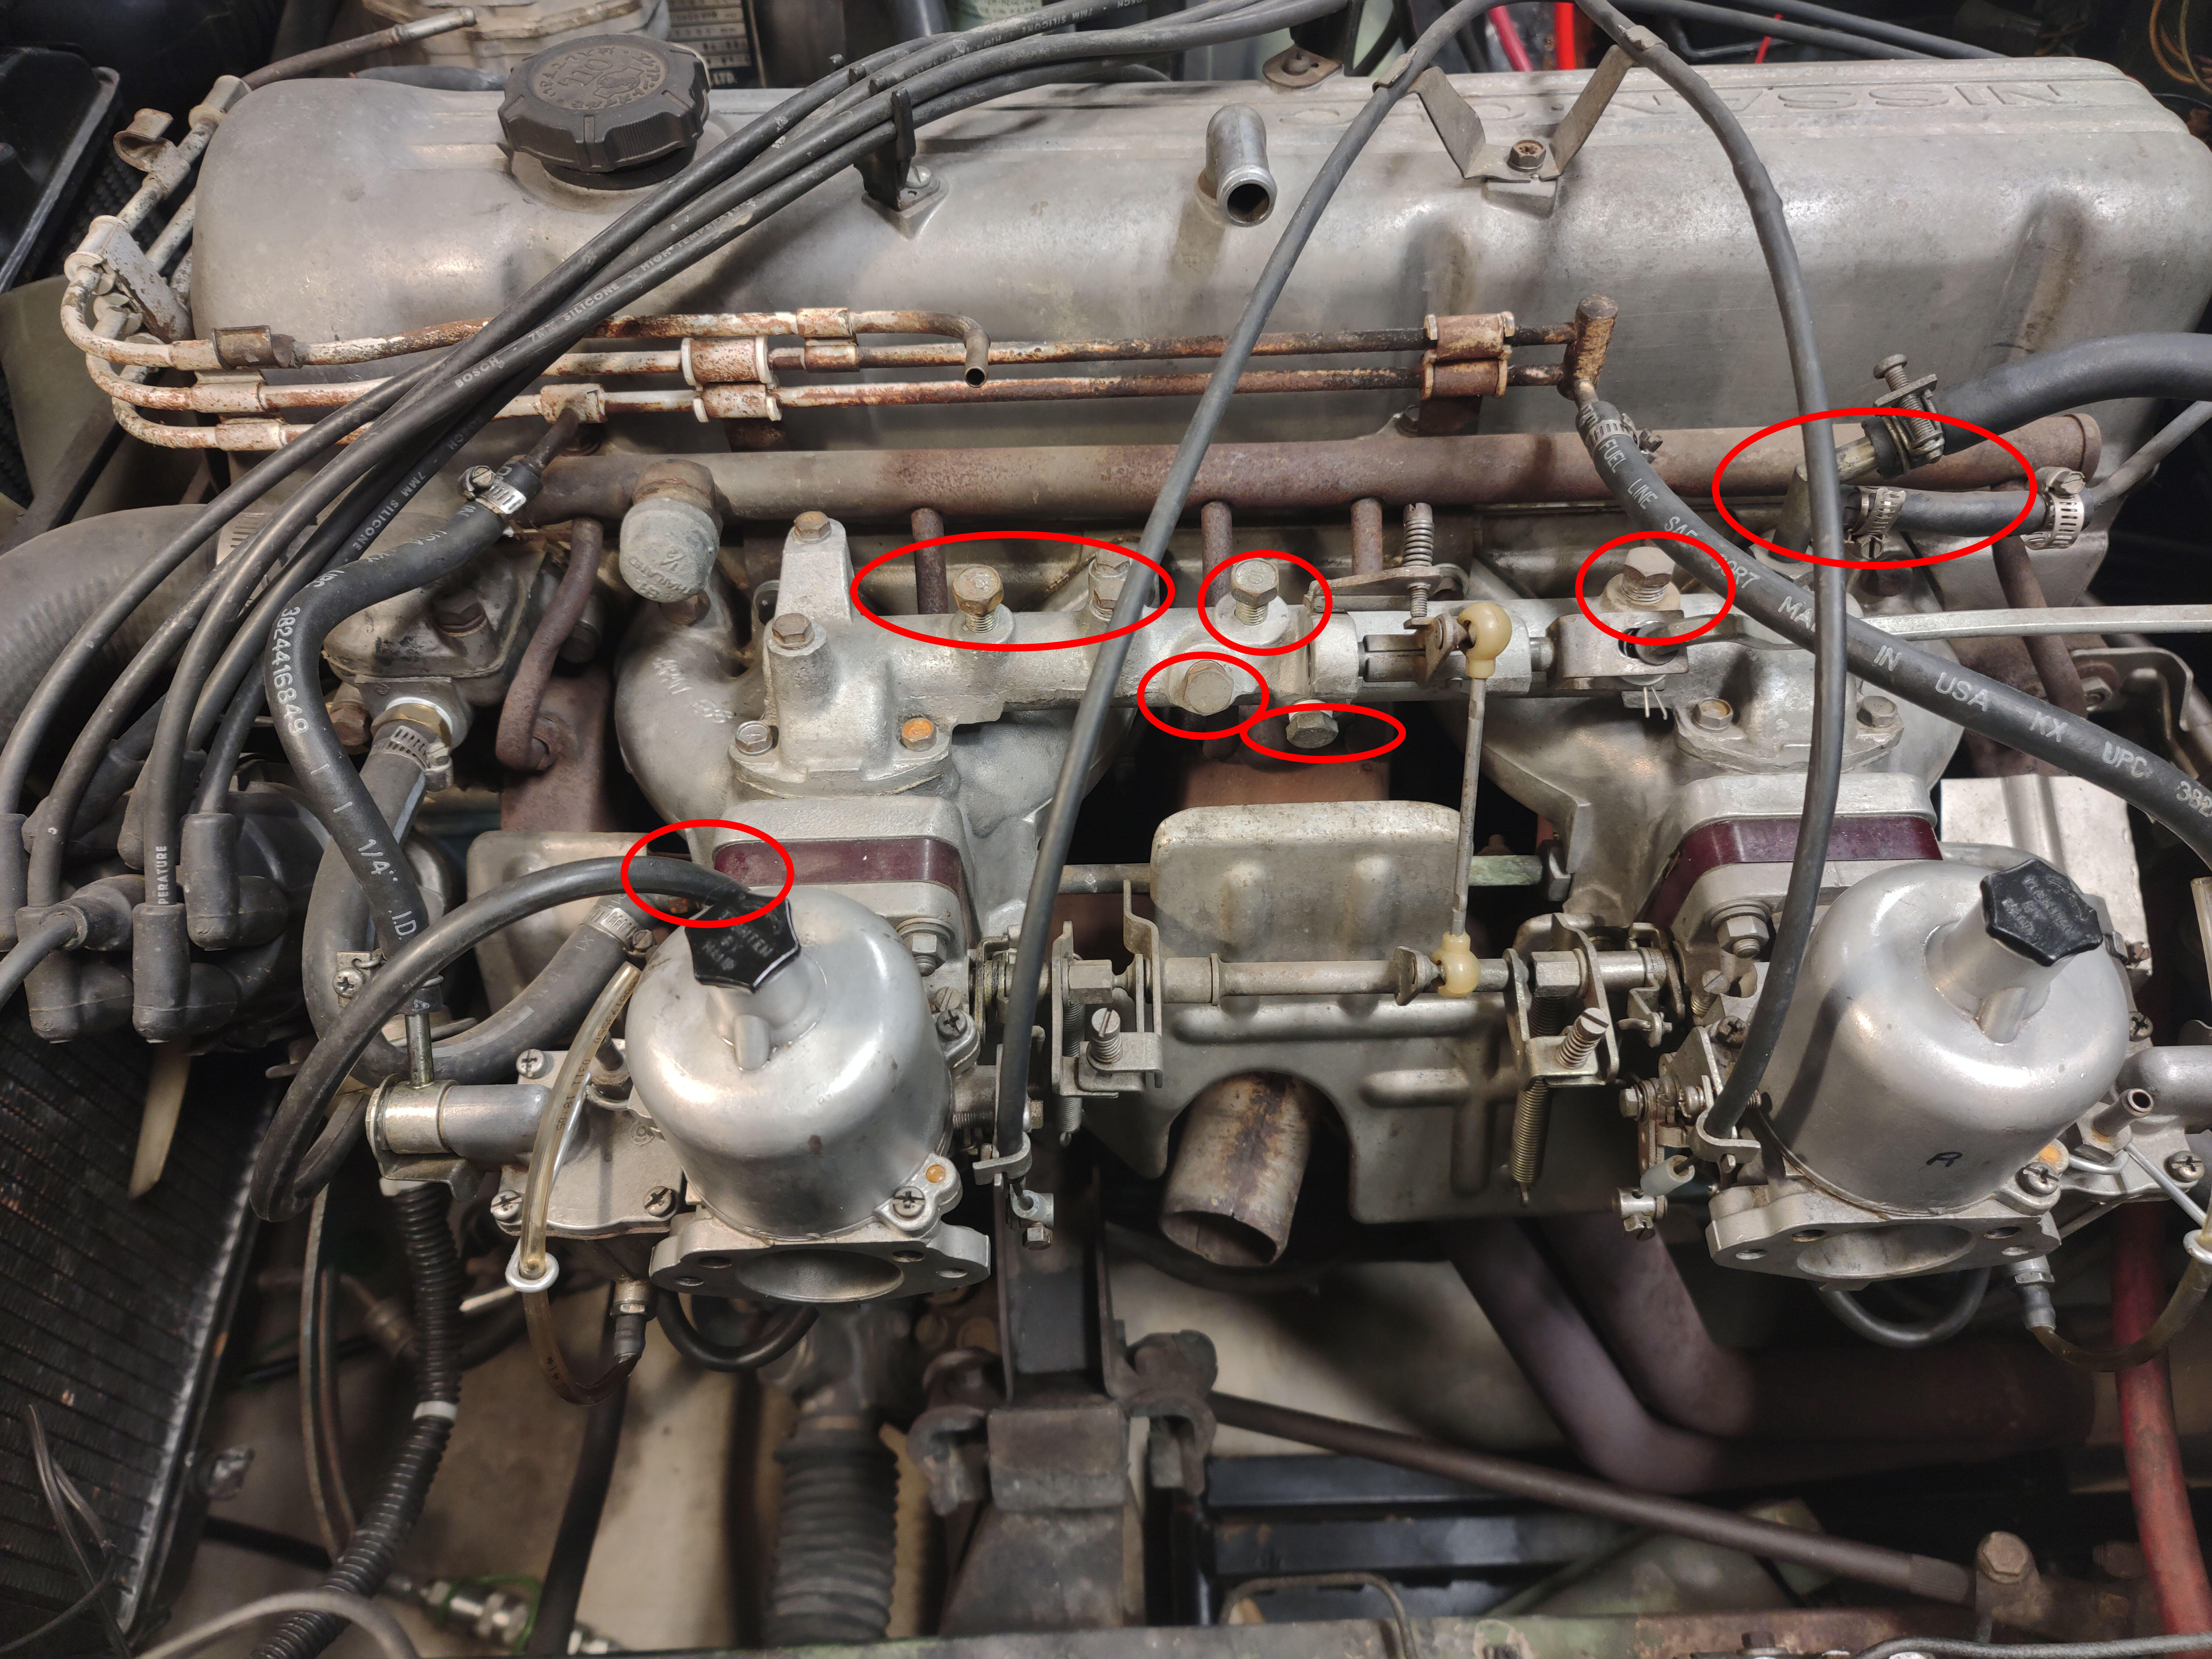
I included a photo. I circled all of the ports in the vacuum manifold, I think they call it something else. I bought the 240z assembly used on ebay, so somebody had messed with everything, I mean everything. They plugged many of the threaded ports where things, mostly emission items attached. They did not use Teflon tape, and I don't even know if the threads matched. I'm thinking about removing all the plugs, which in some cases are just bolts. If the threads are not right, correct them and use teflon tape to seal the threads. It would be easy to seal off the vacuum lines going to the master vac and transmission.

-
I pulled the hose going to the master vac, sucking on it or blowing into it no obvious leak there. I did not try compressed air. This is a 260z with an automatic transmission. I see vacuum lines going to the master vac and down to the automatic transmission. There is another vac line from the front carb to the vac advance on the distributor. There are two fuel rails, one from the fuel filter/fuel pump that feeds the two carbs, another one that feeds excess fuel back to the gas tank. The top hard line has nothing connected on either end, I think it was part of the smog system. I did find a hard line going somewhere, think it was a vent line to the gas tank, probably went on the charcoal filter cannister. The only thing that makes sense to me to have to turn the nuts so far down is a vac leak, but where? Would there be any point in connecting a vac gage to the intake manifold? I'm puzzled. I haven't tried using a propane blow torch to leak propane around suspected leaks but it's not like this car has vacuum lines going all over the place, it doesn't. I'd attach photos but don't know what would help at this moment.
-
CO: I feel pretty confident that the float levels are now correct. I have not checked for vacuum leaks, if the rubber diaphragm in the master vac was ruptured, that could be giving me a lean mixture and turning the nuts six turns down would compensate. Somehow I need to cut off the vacuum line to the mastervac. The engine used to have a carbon canister which I removed. I wonder if it had a vacuum line going to it, if so I wonder what I did about it. I agree, years ago when the car was driven, had to pull the choke back to get it to start, then would back it off a bit to raise the idle speed until it warmed up, not the case right now.
-
I discovered something I was doing wrong. On the bottom of each carb is a small button, the service manual calls it a "lifter." By pressing it with one's finger, can raise the piston slightly, I think the purpose is to make sure the piston isn't stuck. By pressing on the lifter, the piston goes up along with the needle. Logic says that would make the mixture more rich, so I thought and I would use that method to determine if my mixture was rich or lean, bad idea. The manual says to turn the nuts 1/8 turn at a time to find the max rpms. I think I'm in the ball park, I need to find where I get the highest rpms by adjusting the nut on each carb. Once I get the mixture proper, I can return to setting the idle speed and the balance. CO was very helpful in getting the floats adjusted, I ended up per his idea of adding weights to each float. If I'm on the wrong track, please let me know, I'm open to suggestions. Jim
-
The needles are adjust correctly, one takes a straight edge along the piston to make sure the shoulder on the needles are correct. There is a lot of history here, had a very difficult time getting the needles and floats adjusted right in the bloat bowls, that took an enormous amount of time. I have a tach on the coil, next is to turn the nuts to go on the rich side, then rock back and forth to lean, looking for max rpms, at least thats what I understand. I've been running fuel out of a 5 gallon gas can, the excess goes back into the main tank, ran my gas can out of fuel. The fuel tank is somewhat rusty, need to find if it is usable or now.