JeffMopar
Free Member
-
Joined
-
Last visited
Everything posted by JeffMopar
-
 Hello All, I am getting ready to reinstall my Intakes and Header manifolds. It has been many years since I removed them from the engine and do not remember what type of seal was at the end of the water tube between the intake manifolds, O-ring? Some type of rubber gasket? How did everybody seal this tube? Nissan shows the seals as no longer available. Any help would be greatly appreciated. Thank You, Jeff
 -
Austin, You may want to just start with the basics and start loosening line fittings at the Master cylinder to see if you get fluid. If you do go tighten the fitting and follow the line down to the next one and try again. Keep following till you get to the wheel cylinders. Also, the rear ports on the Master (closest to the firewall) go to the front brakes not the rear as previously stated. Thats why the rear reservoir is bigger to hold more reserve fluid for Disc brake systems so that as the pads wear down the fluid transfers to the caliper to maintain proper pad clearance. Hope this helps, Jeff
-
Mitchell, Thank you. On a long shot I went to the local junkyard to check out a 240 that they have had for a while. Even though it is totally rotting away all 4 clips were still there in good shape, they even gave me them for free. Feel like I hit the lottery. I didn't know they just pop off, thought it was part of the welded tab!! Jeff
-
Hello All, On my 72 the right side taillight trim panel has broken clips at the bottom. Has anybody found a suitable alternative to attach the panel without falling off or looking incorrect? Thinking of welding an L shaped metal tab where they used to be and pop riveting the bottom on before sliding the top over. Any ideas would be helpful. Thank you, Jeff
-
Blue, I just built mine about 5 years ago. 25' x 40' x10' ceiling. The 25' side is the front with a double garage door (16') and a 36" walk in door. I had all the walls raised 8" when the slab was poured so that I could hose down the floor and scrub it clean without worrying about the wood rotting. I put on a barn style roof to give more head clearance on the second floor with the stairs wrapping around the back corner. I used a product called "Open Joists" for the ceiling they are preconstructed floor joists for the second floor that allow the entire downstairs to be one big open area without posts in the way. You cant have enough outlets and they only cost a few dollars each to add while you are wiring. Ditto for the lights, I have 5 rows of 8' double bulb fluorescent lights and sometimes its still not bright enough. Each row is on its own switch so I if I don't need them all I don't turn them on. Definitely put in a fridge and microwave. I have a stove but only use it for powdercoating. I didn't put in running water or a TV (nothing would get done!!!) As far as a lift they are nice but it took up too much space so I've got a gantry crane that I can use inside or roll outside if needs be. With all my tools and benches I can still fit 4 cars if necessary before it snows. Compressor is on the second floor and makes a big difference noise wise. All air lines are run inside the walls with steel pipe to water separators by the doors, workbench, 2 on every wall and reels in the ceiling for air, drop light and extension cord. Its about where the front of a vehicle reaches from the door when pulled in to work on. Jeff
-
I'm in Connecticut, I started to see the newer trucks they're buying have the salt come out between the front and rear tires. Newspaper said it was because of the cost to repair vehicles behind them that were damaged. Jeff
-
Thanks to both of you for the reply. I'll look into both options and see what looks best.
-
Well I have searched the forums and haven't found an answer to my question so I figured just ask it. In a lot of pics on the site the hood latch on a lot of cars looks new. Does somebody sell these or were they replated somewhere. I hate to put mine back in after re plating, painting or powder coating everything else. It would definitely stick out! Thanks, Jeff
-
I have a 72, don't know if it is the same but.... The battery tray is 9" exactly to the center of the bolt to the tray on mine. The wiring hole is 1-7/16" diameter and I have attached a pic from the engine side for reference if needed. Hope this helps. Jeff

-
Thanks to everybody who replied. I am heading down to the local NAPA for a few things and will pick up the Mothers Back to Black and try it. I'm a little leary about the Armor All because you do have to keep up on it. May do one with Silicone as I had thought of that also just to see how it goes. grantf, As far as bead blasting the rubber the glass beads actually bounce off rubber and just remove anything on the surface leaving a beautiful smooth surface, but you have to be careful. If the rubber is dry rotted or breaking down it will remove the bad parts also leaving pits and holes. If that happens you have to replace the part anyway. This also works with sand blasting. Jeff
-
Hello All, I am getting ready to install all the marker lights back in the car and everything is going well. The question I have is that the rubber seals are in great shape after bead blasting, nice, smooth, pliable and clean but the color is still not back to the original black like new rubber. Does anybody know of a way to restore the shiny new color that they had new? I hate to install them like they are after polishing all the lenses, stainless trim and screws. Any help is appreciated. Jeff
-
Jimmy I welded mine in first so that I could paint them on the inside before they were closed up. All I did was clamp the floors in where they would finally be and lined up the supports and spot welded them in. Then just removed the floors, welded in the supports and painted them. I then put the floors back in and marked the bottom around the support to mark where to drill holes to plug weld the floors to the supports so they look like the factory spot welds. Jeff
-
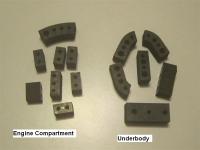
Oops sorry, I misunderstood here is a picture of both sets. Quality looks excellent and there will be no way to distinguish from factory parts when installed.
-
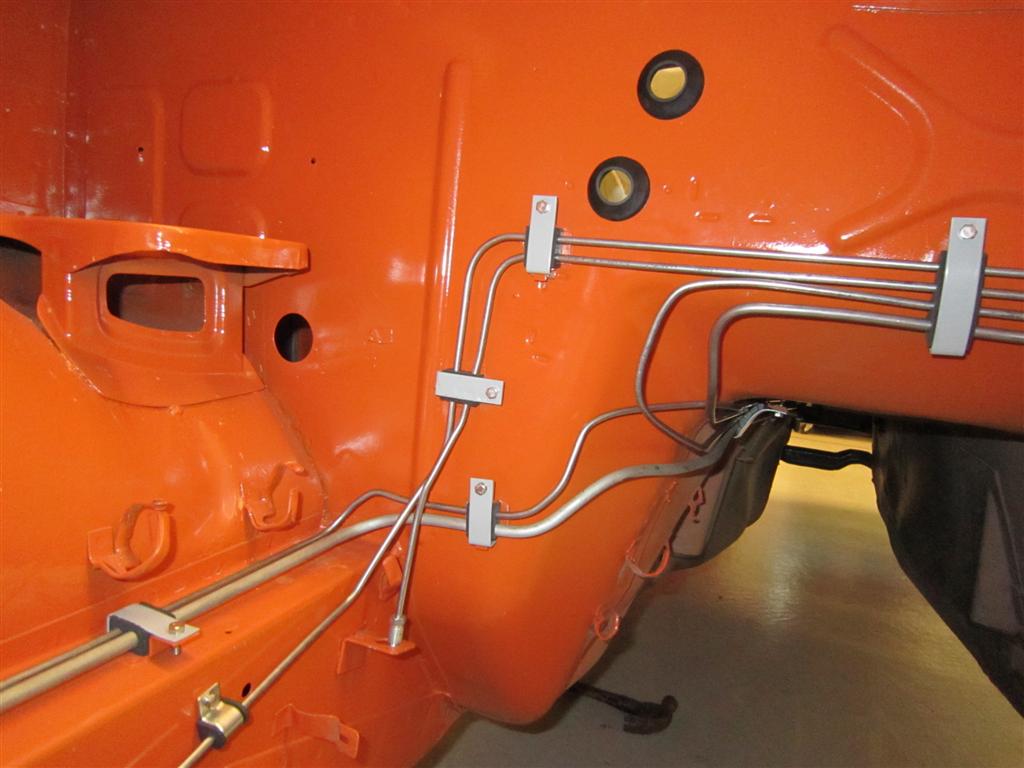
They are not installed yet. I have to figure out what size the brake and fuel lines are so I can order the hard lines and ends. Then copy the old ones to bend them up and install everything. Jeff
-
Just got my set of rubber insulators for under the car and the engine compartment. They all look great!! Thank You, Jim Jeff
-
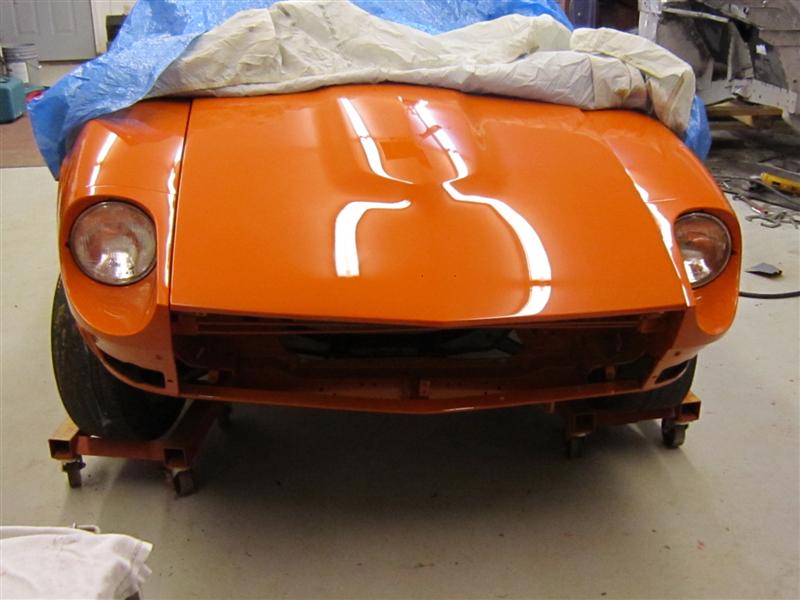
If you have grit or dust in the paint you can block sand it out CAREFULLY with the 2000 before you buff it. You cant do too much with the metallic without affecting the way it looks. I didn't use metallic just Acrylic Enamel with out a clearcoat, blocked with 1500 and then 2000 before buffing it out with the Dewalt DW849 buffer and Norton buffing kit from Eastwood. I taped off the edges with 1/4" painters tape and didn't sand the edges at all. Removed the tape after the wool pad and just took it really easy so as not to cut through with the 2 polish pads and was amazed at how quick the paint polished up. If you don't have any grit in the paint just start with the buffer and see how it looks. you can always go back and redo any spots that aren't smooth enough. The attached pic is how the car looks now. I took a couple of days working really slow so as not to screw up. Jeff

-
Have you tried the dealer? I got mine a couple of years ago direct from Nissan, $18.40 for 2 packages of 10. Its not a lot cheaper but you dont have to pay shipping.
-
Well after spending as much of my free time as possible there is finally some color on the car. Its only the firewalls and jambs but so excited I had to show somebody! WOO HOO

-
Thanks Zup, I'll give them a call today to order. Jeff
-
They have a square top that looks like a plastic license plate retainer, but instead of being square in back they are round with a barb to hold in place and go through a round hole. Every other car I have seen just have a square hole which i can change to, I just hate to change from factory unless there is no other choice. Jeff
-
Hello All, I'm working on the front headlight mounts and Assembly's. They are really rusty and corroded so I figured while I had the time I would glass bead them, powder coat and replace all the rusty hardware. The trouble is with the the plastic round nuts the adjustment screws turn into. They are all dry rotted and falling apart. Only 1 still had the rubber caps on them to protect the back side. After a search in the forums I cant find any info. I don't want to take a file to the mounts to use the newer square style if I don't have to. Does anybody know if the original style is available somewhere? I've called MSA, Black Dragon, Courtesy and a bunch of others with no luck. The Microfiche doesn't even show them. Thank you for any help, Jeff
-
Thanks Arne. Always flip through the catalog when it comes but never did a search on their site. I will be ordering tomorrow. Jeff
-
The part in the picture is the vacumn hoses and check valve for the brake master cylinder. Don't know if they are still available from Nissan but you could try Courtesy Nissan. Jeff
-
That is beautiful!! Not to change the subject too much, but where did you get the new decals? Haven't seen any of those available anywhere.
-
Wow, this site is the greatest!! Every time I run into a problem somebody comes up with an answer or i can find it in the forum search. Thank you to everybody! Jeff