djwarner
Free Member
-
Joined
-
Last visited
Everything posted by djwarner
-
 Glad you are back on the road after curfew.
 -
I am certainly not informed about your particular manifold, but I have been watching ebay and someone is bringing in triple manifolds in from Japan delivered for $288. With throttle linkages, the pictures look like new.
-
Do you have a link? Googling "vintage chrome" yields a bunch of generic sites.
-
I had the '68 for about 18 months and loved it. Enjoyed so much, I decided to trade it on a '70 510 wagon with one of the first Jatco Automatic Transmissions in the USA. Between the lower horsepower rating caused by pollution controls, the solid rear axle of the wagon, and the less than stellar reliability of the early Jatcos, my experience with wagon was a disappointment.
-
Early Datsun speedometers that start a 20 mph were notorious for bouncing at low speeds. This can be caused by a lack of lubrication, a kink in the cable, or binding where the square cable end fits into the speedo. Mine had the typical bounce until I had the dash out for its leather cover. When I re-installed it, I took time to exercise the cable both rotationally and axially to make sure it was free. Then I made sure the cable was straight and in line before engaging it into the speedo. Lo and behold, the bouncing disappeared and hasn't returned. My guess is that the cable had been hanging up on the receiver in the speedo before it was fully seated, causing binding in the cable jacket. A little lithium grease on the square cable before inserting it might help prevent this.
-
The first new car I bought was a '68 Datsun 510 2 door. At that time the longest you could finance a new car was 36 months. Used cars max'ed out at 24 months. Car bodies just didn't last that long back then. It wasn't until government mandated safety and pollution controls started ramping up the prices that automakers realized cars had to last longer to allow longer finance terms to reduce the monthly payments.
-
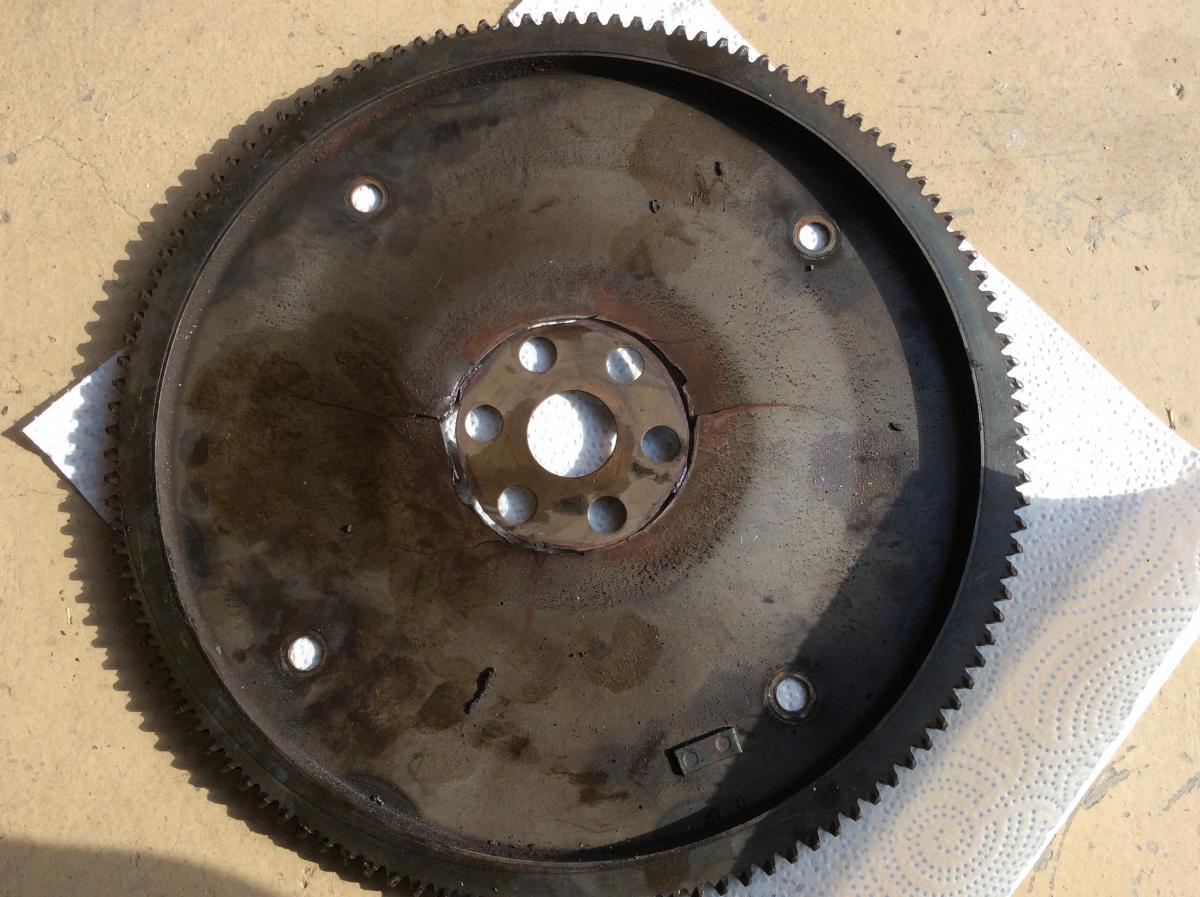
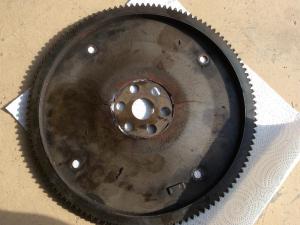
The 3N71A Transmission was slowly eating the low-reverse return spring to the point the car wouldn't reverse uphill when warm. I found a 3N71B out of a 280Z and set about removing the old and installing the new(er). After dropping the old transmission, I took the time to thoroughly inspect the flex plate and found some radial cracks 180 degrees apart. Fortunately, the new transmission came with the flex plate. A second surprise came when we removed the backing washer. There was a circular crack with a substantial gap just underneath the washer. There is perhaps two or three points of contact. I can't tell whether the crank had spun the portion on the backup washer, caught and re-welded itself into place, or if the crack just hadn't finished the full circle. The car drove normally and this came as a complete surprise. Who knows what evil lurks in the hearts of our beast. The only other problem in the installation is a failed diaphragm in the vacuum modulator that is getting replaced tomorrow. Has anyone else experienced a similar failure?
-
Automatic engine plates are a two piece affair. It allows the mating of the torque converter to the flex plate after the transmission is mounted. Parts manual shows two plate numbers L24 through the L28. 30411-E3000 til 7/73 and 30411-R8600 after. Images of both versions show the triangular opening. I have no idea where the round hole version came from.
-
I happen to have a set of Grant rings waiting to go into my rebuild. Since Chickenman mentioned modern materials, I pulled out the instructions that came from Grant. Step 4 states: "Check piston ring end clearance. Check in cylinder near bottom of ring travel. Ring end clearance should be approximately 0.003" to 0.004" per inch of cylinder diameter." With our 83mm bores in the L24's, this works out to 0.249-0.332mm. Nominally, this is 0.29mm. Blue said the average gap would work out to 0.416mm or about 0.126mm too large on average. Since this is a circumferal measurement, it equates to a diameter that is 0.040mm undersized. Or conversely, it could be said the bore is 0.040mm (0.0015") oversize relative to the rings supplied. I think the operative word in the instructions was "approximately". The critical dimension is the low limit. Too low and the gap closes down to solid as the engine warms. When this happens, the rings dig into the cylinder wall with catastrophic results. Remember the allowable taper on the cylinder is 0.008" compared to the calculated 0.0015" oversize. Since Blue's cylinders had little to no taper, I would not think the excessive gap would be a problem. Of course, this comes from someone who hasn't rebuild an engine in over fifty years. If I'm full of it, please educate me.
-
Their Valuation support aside, Hagerty also was refused coverage on my daily driver. Ended up going to Grundy. Found them competitive and would also write a policy on wife's car and got multicar discount on hers. I would recommend them.
-
Collector car insurers will insure for stated value. In the past this was limited to cars driven restricted miles per year, but today the insurers have realized many of us drive our collector cars often if not daily and have begun offering less restrictive policies. Hagerty offers a valuation service on their website that shows values for cars in various conditions. Check their definitions. They also give the average value of their clients cars. You will find that most are not in Concurs condition. There are other sites for classic car valuation, do a search.
-
Put some on about 10 days ago and finally had a reason to exercise them from a little dew and dust on the windshield. Surprise of surprises, they operated slowly, but when I turned the wipers off, they parked perfectly. It could be there was a touch of moisture left to lube the blades, so I waited until the windshield was dried by the passing wind and tried again. And again success. Has any one else cured mal-parking wipers by going back to the original configuration?
-
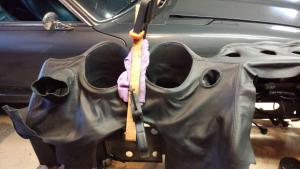
Love the idea of the rubber pipe cap over the transmission output. Do you know what size it is?
-
-
Since you mentioned piston cleaning, I intend to use Berryman Chem-Dip Parts and Carburetor Cleaner after viewing this Video: https://www.youtube.com/watch?v=bRiZOTTel34 Getting ready to post this, I also found this: https://www.youtube.com/watch?v=VcPkLuX4CAU this stuff is supposed to have a modern solvent that penetrates the carbon overnight. Available at Walmart
-
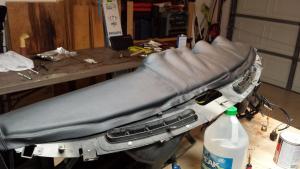
There is sufficient leather to wrap around the bottom edges, side pieces to wrap around the left and right sides. For the Tach, Speedo, Side Vents, and Hazard Switch cones sewn in to fit in the recesses. The three small indicators, glove box border, and glove box latch areas have to be molded in place. The front lip follows the vinyl edge and fits under the metal cowl finisher. Even though they are located in Britain, I have had language issues that lead me to believe they are non-native.
-
I recently bought a set of Grant Piston Rings, though I haven't installed them yet. Have no idea of the quality. www.grantpistonrings.com
-
As of Tuesday morning, Ebay shows the car as sold. Quick turn around, I assume Edd China's reputation had something to do with that.
-
Cliff, I'll watch this thread with interest as I will be doing a bottom end overall myself later this year on my 185K mile engine. My problem is bad oil consumption across the rings. My head was rebuilt in 2002 and pulls very good compression and vacuum, so I will be spared half an overhaul. The only other problem is a worn timing chain and tensioner. I've been slowly accumulating parts and tools for the job, needing only engine block paint and main and rod bearings. Figured I'll have to wait until the crank is pulled to see whether I'll need a regrind and undersized bearings. I took the advice of others on the forum and purchased Tom Monroe's book. My overhaul will be a little different than yours. I am leaving the automatic transmission in place and simply pulling the engine. One point from your post. Why are your removing the head before pulling the engine? I thought the aft-most exhaust manifold stud is the best point to attach the hoist chain.
-
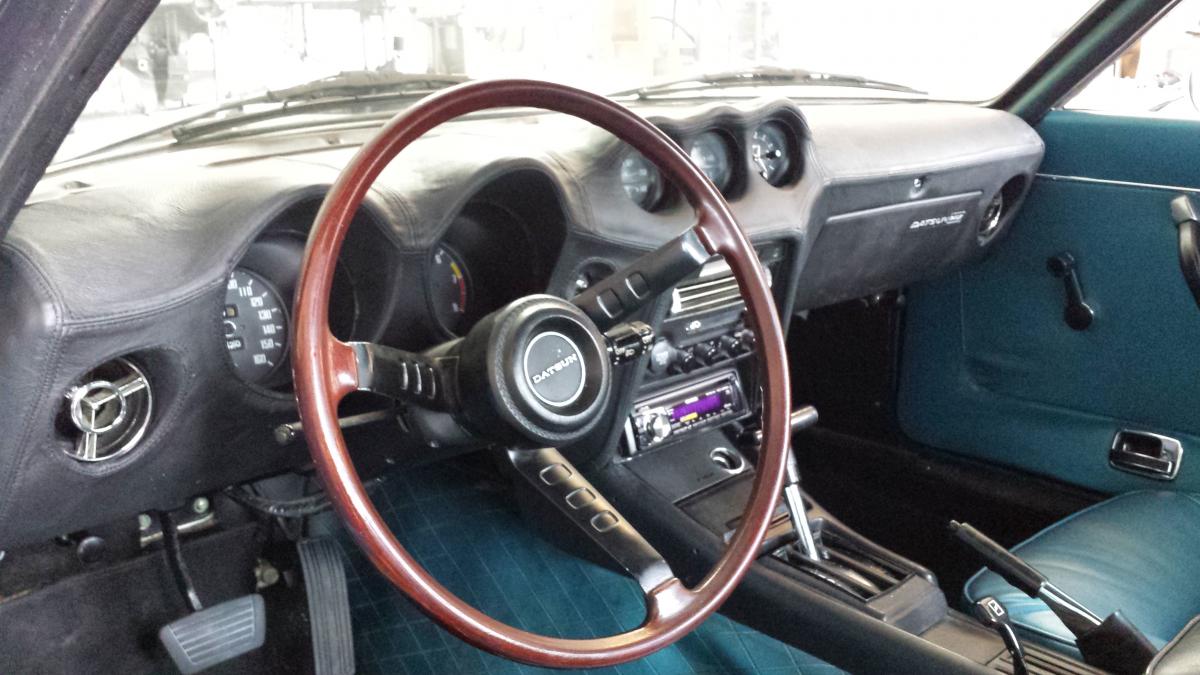
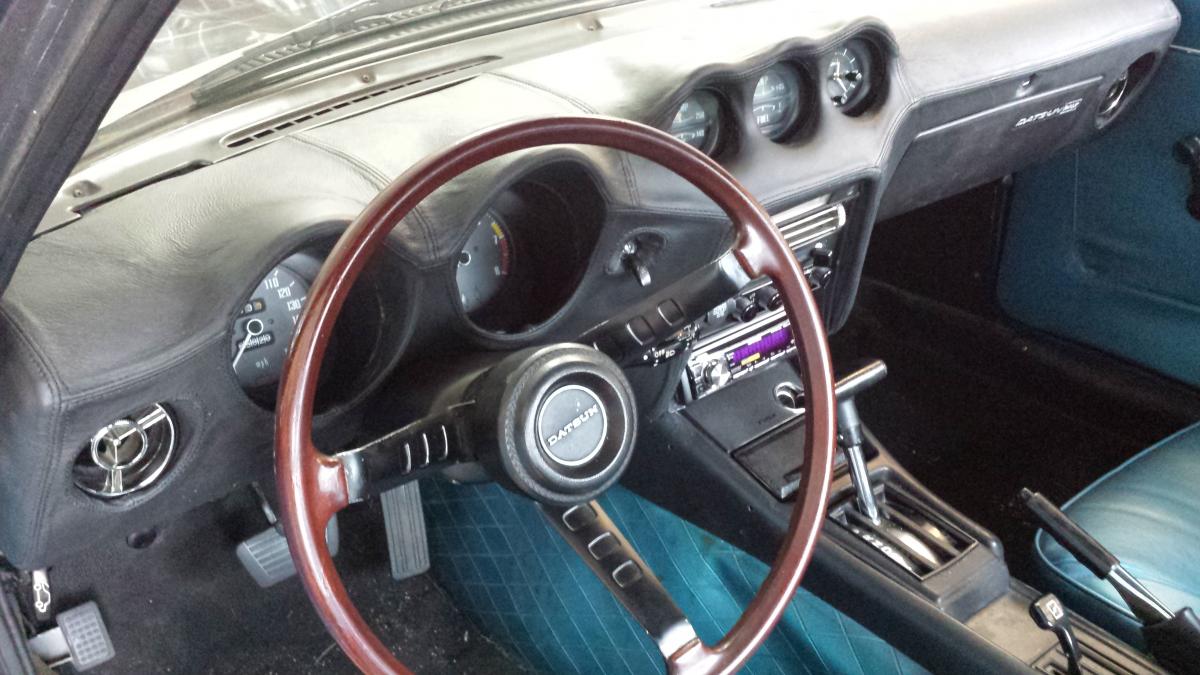
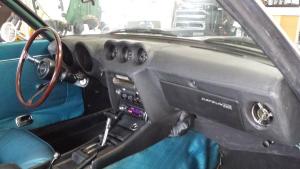
Got the dash reconnected to the point I could start the engine and verify my electrical connections. I still have to do some smoothing with a steamer and clean things down, but I promised some pictures. At this point, you can get a pretty good idea of what is will look like when I'm finished. When I started this, I said I would let you know the vendor if I would recommend him. And to those who have guessed it is an English firm doing business on Ebay as "topgaiters". I paid $225.00 including postage. I have been providing feedback to them as I installed the cover and hopefully your will be better and easier to install than mine.


-
From what I can tell, the dashes were made with two molds. First the vinyl was vacuum formed in a negative mold. A thin sheet of plastic sheeting was placed over an inside, positive mold, along with some threaded fitting. The positive mold/sheeting was placed into the formed vinyl. An expanding foam liquid was injected between the vinyl and sheeting where it expanded and solidified. This foam didn't fully harden and with the thin vinyl outer layer became a "padded dash" touted to reduce injuries in a crash. Over time the soft foam has hardened and the vinyl has become brittle. Honey do's have delayed completing the re-installation and photos. I'm also taking my time to clean up some wiring issues like re-connecting the hatch defroster and adding courtesy lights. Hope to have some photos posted by this weekend.
-
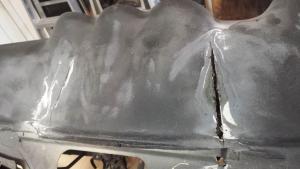
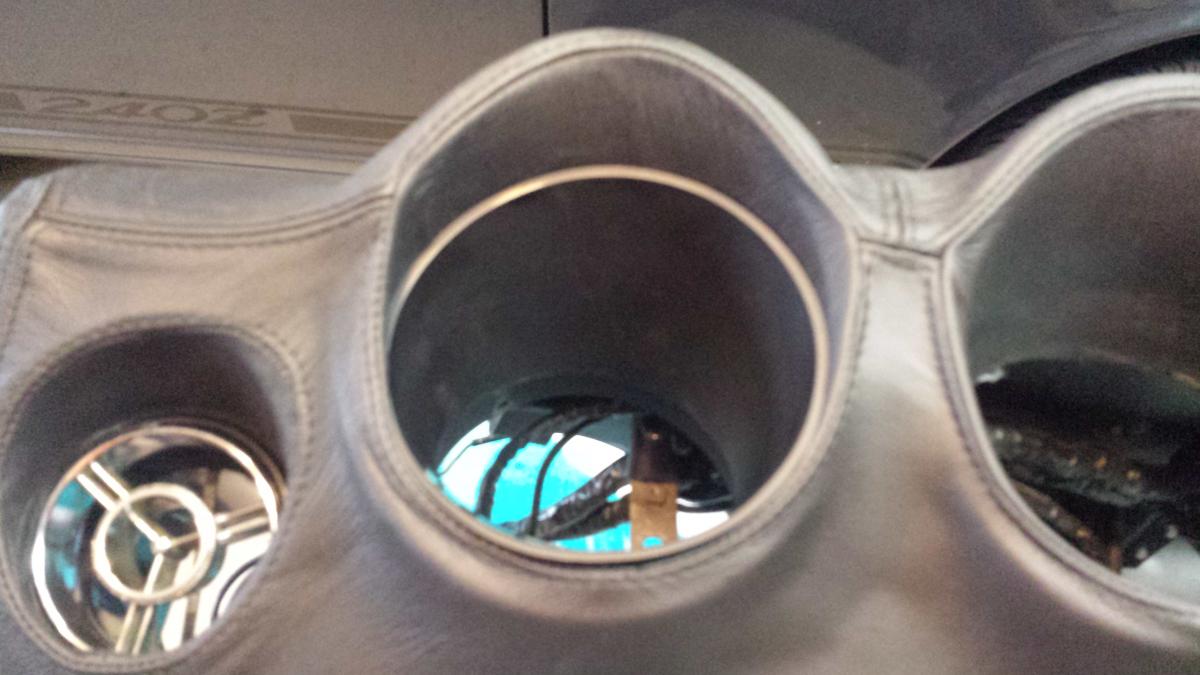
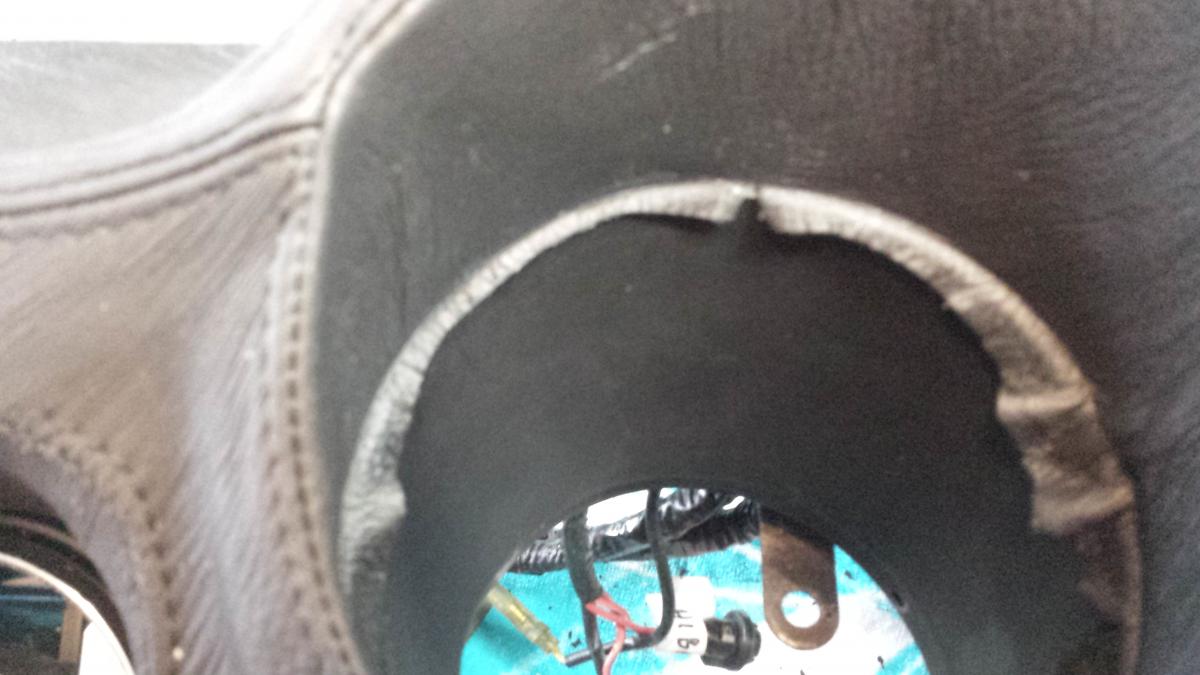
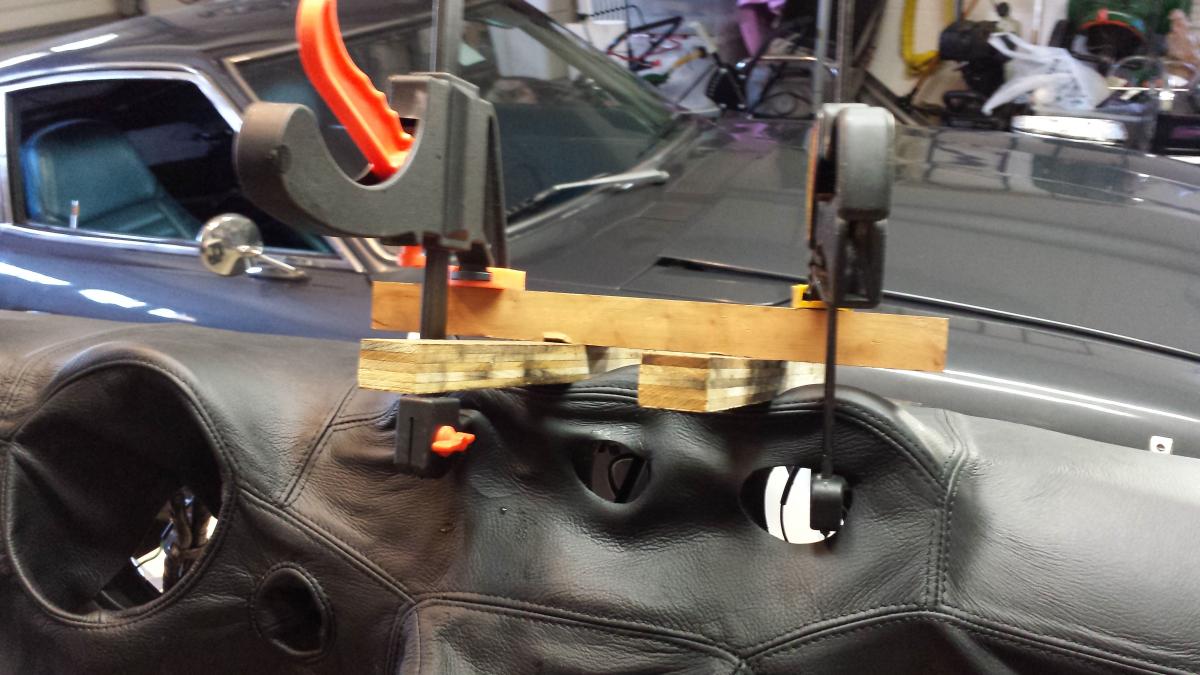
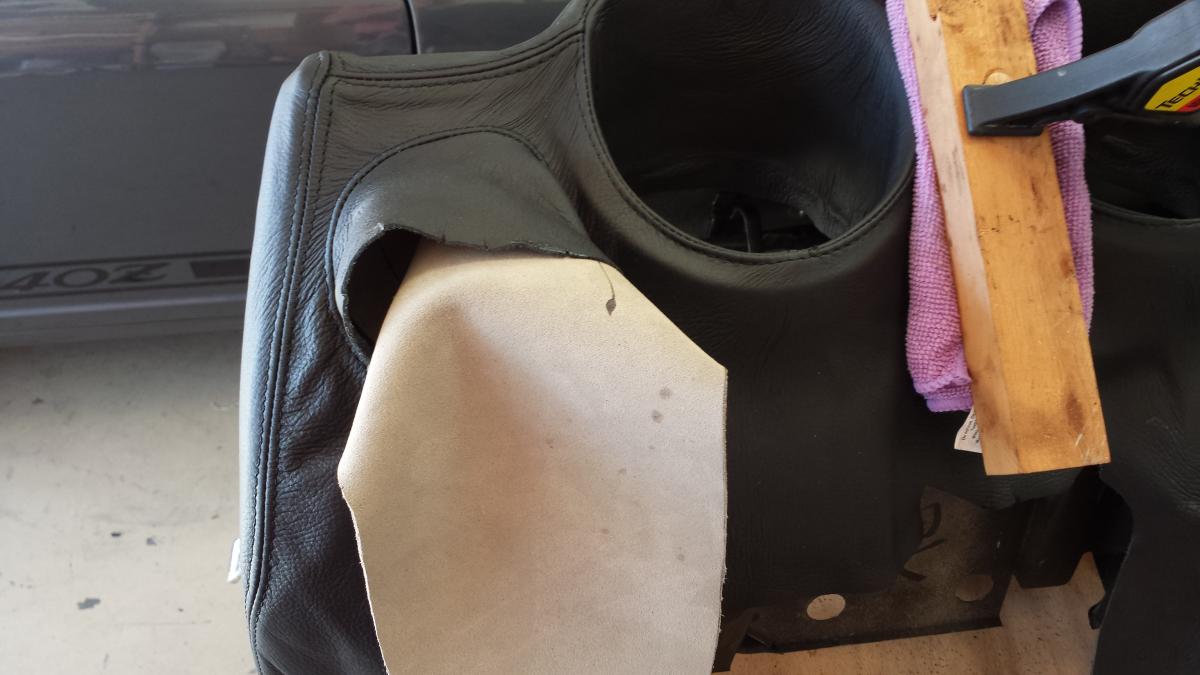
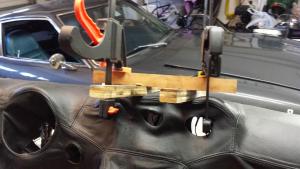
I've finished mounting the leather cover and I am currently in the process of re-installing the dash. Finished pictures in a few days. I did run into problems trying to mount the speedo and tach. Due to the difference in taper angles between the bezel and dash hole, there was no way to get within an inch of properly seating the bezel. Following my own advice about quitting for the night when things looked dim. I realized the next morning that I would have to mount the instruments before installing the leather cover. I worried future instrument removal would be a problem similar like incurred when installing a full plastic dash cover. Then I realized that leather is pliable and could be pulled away from the vinyl when needed for future removal. I mounted the bezel and used a ball point pen to mark the trim. Pulling the leather tube inside out made cutting to the trim mark easy and accurate. Bart, many have talked about making a replacement mold and the problem is finding a pristine example to make the mold from. Then no one wants to be the entrepreneur to make the initial investment. As I mentioned earlier, my prior attempt using Sems Bumper Repair failed and I had resisted another attempt until I had committed to the leather cover. Using the Six10 Thickened Epoxy Adhesive appears to be a stronger solution. I could have followed with Sems texture coating and trim paint and have an acceptable repair. The question of long term survivability with Six10 remains. If it cracks again under my leather, no one will see it.


-
No Mike, that looks like a one-off installation. I'm about 95% through the installation of the cover. I'm contemplating re-installation of the speedo and tach with the extra layer of leather. I'm thinking of thinning the lip of the bezel on a belt sander to give the 0.020" relief. Will be posting pictures later this week.
-
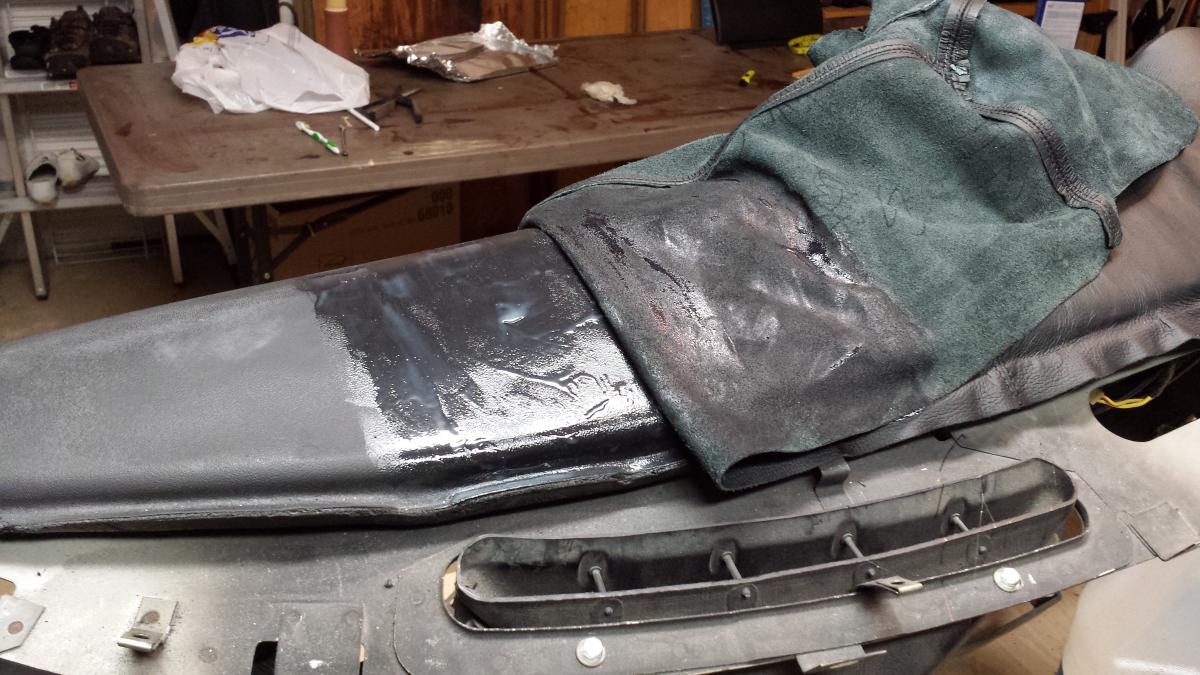
Here is an update. Some things I've learned: Watch the Youtube - several times. Don't expect an exact fit as supplied. The dash has many compound curve to be fitted and with a limited number of pieces of leather, stretching and shrinking will be required. Since you will be fitting over a waterproof covering, I'd soak the leather in water to allow stretching. After soaking, wring out the leather. Without glue and while damp, establish the best fit and stretch where required. Attach with spring clamps to hold in place (you can't have too many). Allow it to dry in position before attempting any glue up. This is not a Saturday project. It is not a weekend project. Due to the soaking, stretching, shrinking and 20 minute drying time for each section of contact cement application. Several sessions will be required. This is not all bad. There will be times when you get frustrated, let it go for the day and come back tomorrow, the leather relaxes overnight and gets easier to work. Also, things never look as bad the next day. Using contact cement allows one attempt at placement and it adheres instantly. But if you find you made a mistake, you can pull it off and try again. Just make sure that any balls of glue are removed to prevent bumps underneath when you re-glue. Clean up messy areas with mineral spirits. I found this feature useful while trying to stretch sections in valley curves. I'd temporarily attach the leather beyond the area to be stretched, wet the leather, and press in place with towels and clamps. Let the area dry and then remove the temporary glue up. Fold back and continue installation process. As with any project, the more features you include in the design, the more things there are to go wrong. I had a problem with the location of the holes for the three small instruments. I've been in contact with the manufacturer and suggested they eliminate the three holes and leave it for the installer. I've been communicating small hints like this as I go along to make the project easier for those who follow and to help make their product better. I've had positive responses from them. For areas that don't require stretching or shrinking, You can use a Loctite Spray Adhesive used for attaching interior panels. The label says "High performance, middleweight bonding, 200 - middle, high initial tack." The SKU number is 79340 68720. This eliminates the 20 minute drying time required for contact cement. When laying down a clumsy area or where there is an opportunity for the coated leather can stick to itself, use an uncoated piece of leather or newspaper to prevent contact prematurely. fold the paper back on itself to slowly expose the two contact cement surfaces when you are ready.


-
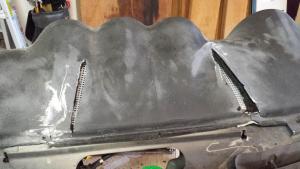
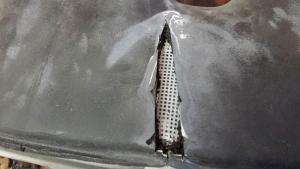
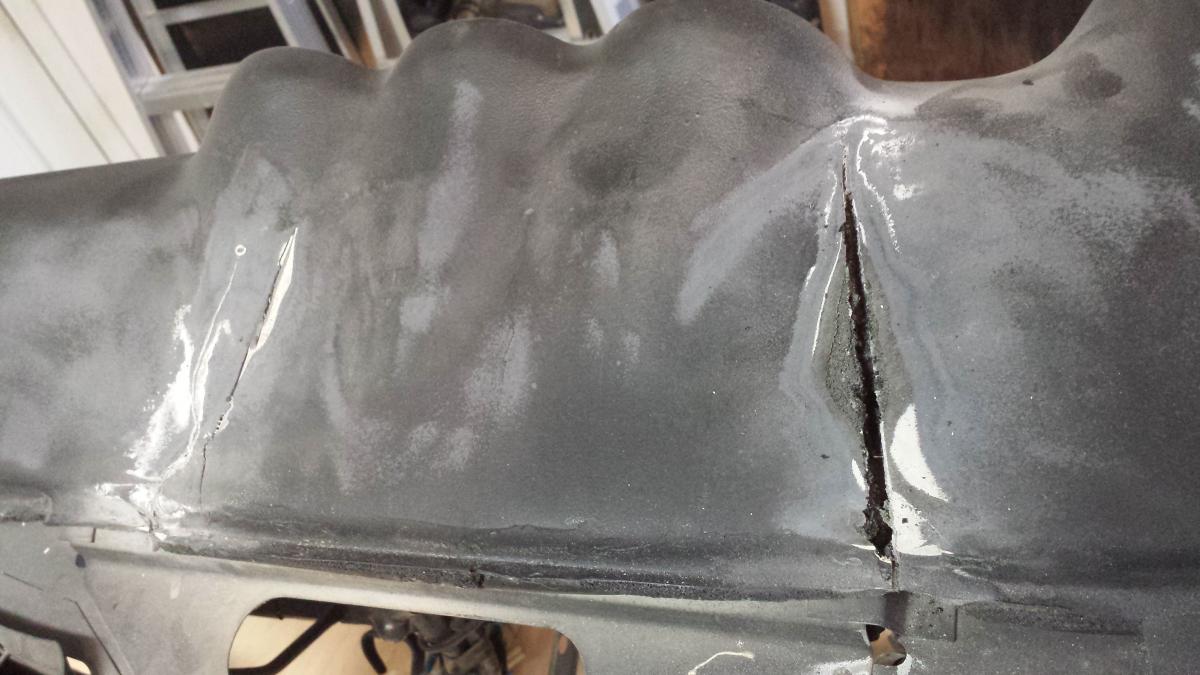
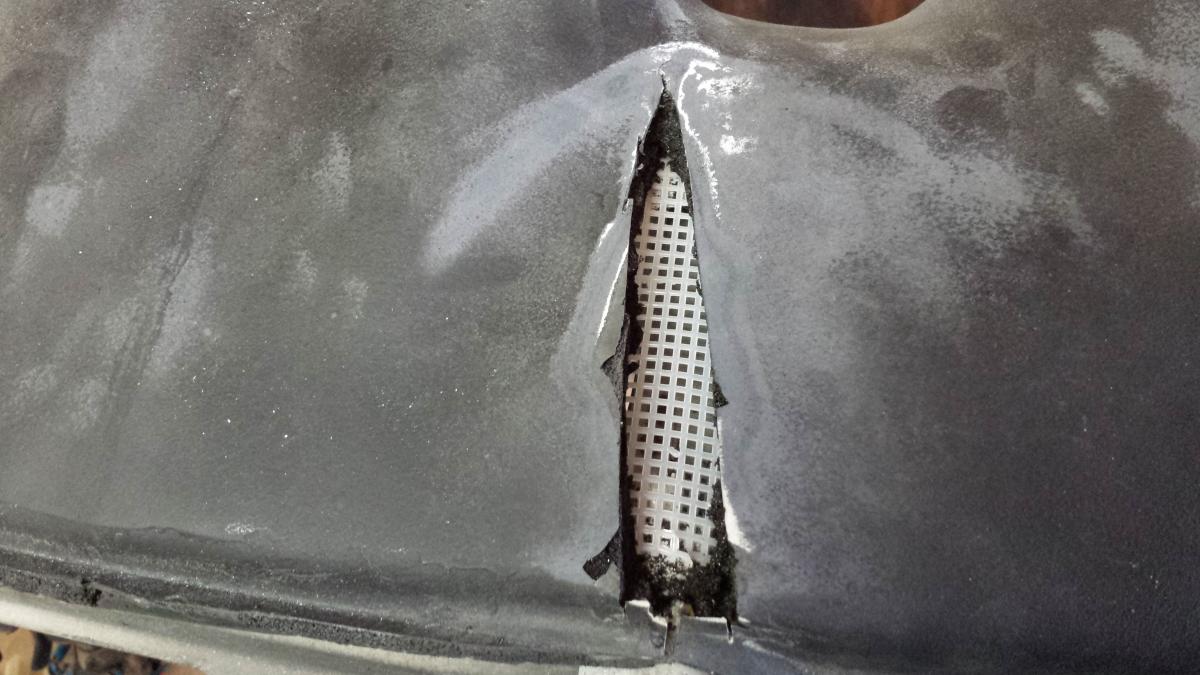
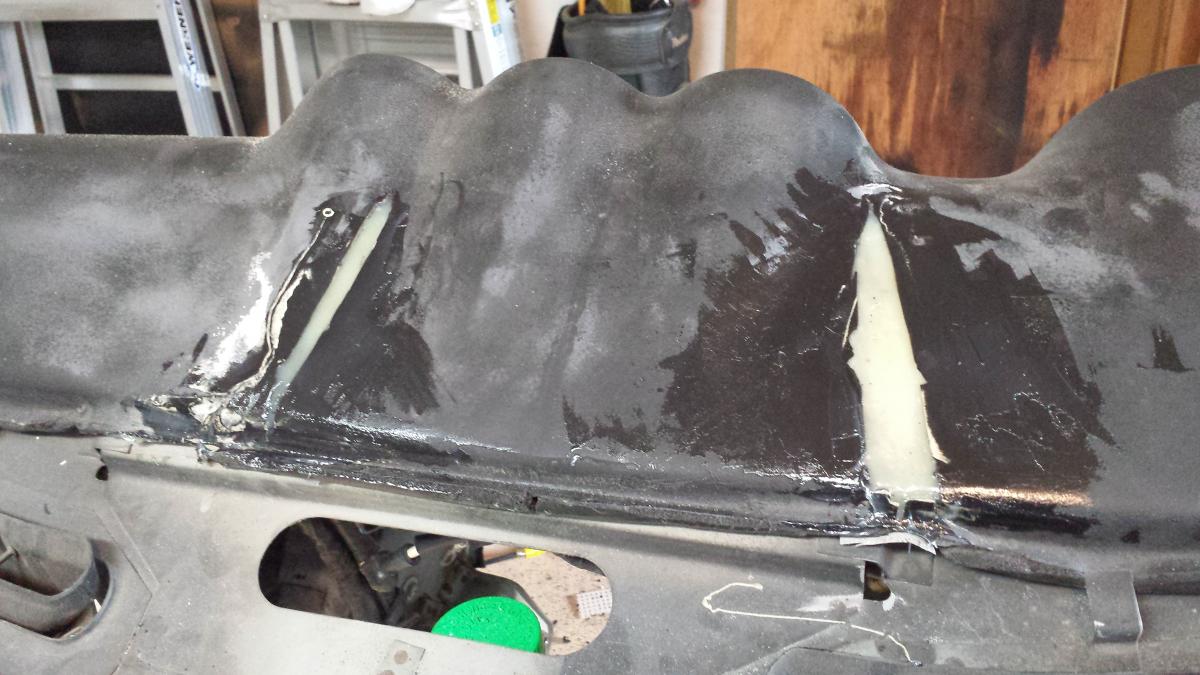
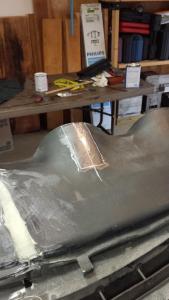
Here's an update on my dash upgrade. Pulled the dash and prepped for covering. Noted the vinyl covering is only 0.5 mm (0.020") thick. Original construction appears to be a vacuum formed sheet of black vinyl and then back filled with an expanding foam using a form to match the metal frame of the dash. Originally this foam was soft to act as a cushion in an accident. Age has turned the foam hard and the vinyl brittle. I had previously attempted a repair with SEMS plastic bumper repair epoxy, but found it difficult to use due to its 15 second working time. I ended up relying on a butt joint between the epoxy and the vinyl/foam. The bond area was too thin on the vinyl to withstand thermal stresses in the Florida sun. Also, the failure points appeared to be in gaps between metal frame members spanning several inches. While cleaning out the gaps and widening to accept the new filler, I was surprised to see the table top rather than metal. So there was nothing there to back up the new filler. So I decided to back the gap with a plastic mesh you can find hobby shop used for embroidery. Cut to fit and secured by Gorilla Tape, it allowed epoxy to spread through the mesh and make a lap joint with the foam on either side. I also cut out the foam beneath the vinyl to allow epoxy to form a lap joint with the vinyl as well. The epoxy used was West System Six10 thickened epoxy adhesive with a 40+ minute working time purchased from a local boating supply store. The material is a two part epoxy in a caulking tube and comes with a mixer tube. The material comes out like toothpaste and is easily spread to fill voids. It is too thick to self level so a putty knife is needed to form the new surface. There is little to no shrinkage as it cures, even though I laid sections up to 1/2" thick. The epoxy skinned up in about 40 minutes and takes 24 hours to fully cure.