djwarner
Free Member
-
Joined
-
Last visited
Everything posted by djwarner
-
 The other day I read an article about robots learning on Youtube. Ask and you shall receive. Yes its a bit long, but it reads like a good book. https://www.youtube.com/watch?v=IaSm3zoWrAo
 -
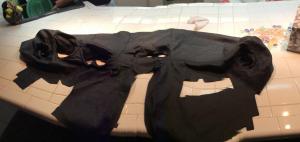
After much searching, I found an overseas source for an S30 leather dash cover made from Italian leather. Finally got it delivered yesterday and will document the installation process here for those interested. I had previously attempted a dash repair with SEMS bumper repair but found problems with thermal expansion/contraction causing failures at the vinyl joints. The advantage of leather is the material will expand and contract with the material underneath without failing. Since this vendor is new to me, I won't give the source until I determine the quality of the fit and difficulty in installation. I am also working with them to verify their design. So far the only discrepancy I've found is in the recesses for the hazard switch and spare recess for fog light switch (as in my series I - believe later years mounted the cigarette lighter there). They only included one funnel shaped recess for the upper recess. This will mean relocating the hazard switch to the upper position for my installation. I am anticipating the manufacturer will be adding the second funnel in future production. There are also funnel shaped additions to wrap around the recesses for the speedo, tach, and fresh air vents. The shallow recesses for the three gauges are not included and will be molded in during installation. After a trial fit I've determined I will pull the dash to install. As with any compound curve fitting with leather, there will be shrinking and stretching involved. Unfortunately, most of the stretching will be in the valleys between the gauges and in the recesses. Here is where I can use some help from our more experienced members. I've custom molded pistol holsters by soaking them before molding and then boning them to shape. Shrinking with a heat gun should be no problem. I am anticipating rough sizing wet, allowing it to dry in place and then a final fit and glue in place. Any suggestions here would be appreciated. The leather itself measures 1 mm thick, so I am pondering whether adversely affect installation/removal of the speedo and tach.
-
After 186K mile, I've decided it's time to rebuild the bottom end of my L24. Figured since the engine would be out, it would be a good time to paint the block. Researching this forum, I saw a reference to Glidden code GL31557 as the Nissan OEM color. I decided to contact Glidden to see if they would have formula for that color. When I contacted them, it appears the automotive paint products were sold to PPG. I contacted the PPG color library. They could not match the code but found two engine codes for Datsun, a Blue-Gray # 19885 and a light green #48104. Unfortunately, these codes only came in an expensive, single stage Acrylic Urethane paint and would require an Epoxy Primer. While this combination would be a hassle, it would be worth it to get a fresh, non-faded color sample for others to color match. They did not have any color chips or online resources to confirm the color and referred me a local distributor. So this afternoon, I took a 30 mile trip to the nearest distributor and had him mix up a pint. I was expecting a darker teal blue from my memory of my '68 510, but when they brought up the can with a sample dot, it was definitely a medium gray with just a tinge of blue. They double checked the formula it was correct - just not anywhere near the color needed. So just another blind alley. Hope this posting helps others avoid the waste of time.
-
26th Thanks for the input. BTW, my page 10 shows item #27 Throttle Control Lever even though it was never offered in the US. Other images of the area do not show it.
-
Blue, My '97 Owner's Manual agrees with yours.
-
Found a NOS Series I owners manual on ebay. After winning the bid, I re-read the description and discovered it was actually a Nissan re-print from 1997 for their re-build program. It didn't take long to read through its 40 pages. Chuckled when I considered my 2015 Mazda 6 owner's manual was over 600 pages long, with a smaller font, and warranty and service info printed in separate documents. However, I found what appears to be typos in the Z's manual. Was wondering if anyone with an original manual could verify whether Nissan erred in 1997 or whether the errors also appeared in the original. Specifically, on Page 15, the rightmost panel text describes the horn button but the picture shows the rear window defroster switch. In fact, the rear window defroster is never mentioned! On page 25, in the Recommended SAE Viscosity Number chart, the labels for "Single Viscosity" and "Multi-viscosity" are reversed. Also, the wiring diagram looks like no other I've seen with the battery in the top row. Anyone with an original manual, your comments please.
-
search ebay
-
While looking for an engine stand, I ran across this http://t.harborfreight.com/automotive-motorcycle/lifts-stands/6000-lb-capacity-scissor-lift-with-hydraulic-pump-46604.html
-
Several years ago, when my wife had a 2008 Mustang Convertible, Ford sent me a market survey. In it, they asked my opinion about a direct injected turbo four as a base engine for a future 'stang. I think my response, along with hundreds of others caused Ford to delay introduction for several years. I am at a loss to come up with the US market light convertibles cited in the article.what will they will compete against besides the FRS and BRZ. At any rate the small Z platform will be the parts source for the Dx, so I hope it goes forward.
-
I have the 16750 valve tool and the Sealey. The 16750 is impossible to use with the cam shaft installed. The Sealey unit relies on the cam shaft as a lever pivot point. The only place where I've had problems with the Sealey is on the valve next to a cam tower where you can't engage both hooks.
-
I have an upcoming project that may require a tach and speedo removal. Will have to attempt a calibration at that time. As for frozen calibration controls, I also had a problem adjusting the voltage regulator on the oil/temp gauge. It was a matter of 40 years of corrosion at the pivot point. Once broken free, the control moved as expected.
-
My on board tach reads a consistent 200 RPM high. This is compared to a top level Sears timing light and a CenTech automotive meter from Harbor Freight. A post on another thread stated the CenTech unit inductive pick-off was useless. This is not true but it is used differently than those used on a timing light. The CenTech inductive probe is placed on the HT lead between the coil and the distributor. You then select the number of cylinders on the dial and the readout is the RPM/10. Thus, when my idle is set on 800 RPM, the coil fires 3x800/60 seconds or 40 pulses/second. With the Dial set on 6 Cylinders, the microprocessor in the meter converts it to 80 (800RPM/10). I imagine there is a calibration adjustment on the back of the tach, but I have yet to see a procedure on calibration.
-
My timing is around 32 degrees with the vacuum advance connected. Drops to about 16 degrees without. I would look for a vacuum leak. Balancing the air past the throttle plate with one carb richer than the other means extra air from somewhere.
-
If adjusting the valve clearances increased compression, there must have been a valve not fully closing. The fact that both carbs were flow balanced would suggest a leaking exhaust valve. Enriching the mixture on the front carb to increase power would indicate initial mixture was lean. This is why you enriched the mixture in the back carb after fixing the valve problem.
-
I know there are some Zs in Orlando, if you don't here from anyone closer, I am north of Clearwater. I'll be watching this thread.
-
Always a stressful situation when a deal goes bad. But you will start feeling better as soon as you realize the disappointment is over and not just beginning. Not to cry sour grapes, but the pictures of the bottom of the car did not show enough detail to judge its condition. I also was not impressed with the engine bay photos. We wil never know if the first buyer found deficiencies or was a creep himself. The seller may have been trying to screw ebay out of a commission or screw you. But his reaction to your inquiries didn't bode well. Better luck next time.
-
Supposedly it says "Datsun".
-
If you have not signed a contract, how are you obligated? Even if you made a contract, how would it be enforced? What court would have jurisdiction? You have nothing to worry about other than your $500. I would have concerns with a deal outside of Ebay. You have to ask why the other buyer turned down the deal. Was the car misrepresented? Was there a title problem? It should be up to the seller to satisfy your qualms. You sound like you have already made up your mind, go ahead.
-
Got this link from a post on another forum. you might be interested. http://teespring.com/datsunkanji#pid=212&cid=5821&sid=front
-
You paid him a $500 deposit as earnest money. If you back out of the deal now, he will keep your deposit. You have not committed any fraud and risk nothing except your deposit. I cannot say why he is jacking you around. Sounds like he may not have business savvy. How did you find him in the first place? If it was through Craig's List, it is poorly regulated - like no regulation at all. Ebay on the other hand does a fairly good job of monitoring transactions. At the distance involved, you have every right to feel 100 % comfortable before transferring additional money. If it gets to Norway and you find it is not as promised, you have little recourse. Tell him you are taking all the risk and to satisfy you doubts immediately or you will walk. By the way, if you haven't already done so, Google him and the company name he gave.
-
Hi Carl, Since I was not the at fault driver, i wasn't dealing with an adjuster from from my carrier. No, I didn't have Hagerty insurance at the time, but they offer pricing and historical valuation on their website. Their reputation serves us well in these cases. Putting the onus on the insurance company by telling them to find a replacement vehicle of equal condition doesn't hurt either. The at-fault party has an obligation to make you whole, not just throw dollars at you. When it comes to personal injury, it may be impossible to be made whole and money is the only substitute recognized by the courts. In our case, the at-fault driver had minimal coverage, but it was still enough. Now as for Florida's no fault insurance, PIP, that was another matter. The first trip to the emergency room was billed in excess of the $10k coverage. Even though the insurance carrier eventually beat the hospital back to usual and customary, it didn't happen for several months. In the mean time, other medical coverage was denied and had to be put through our health insurance.
-
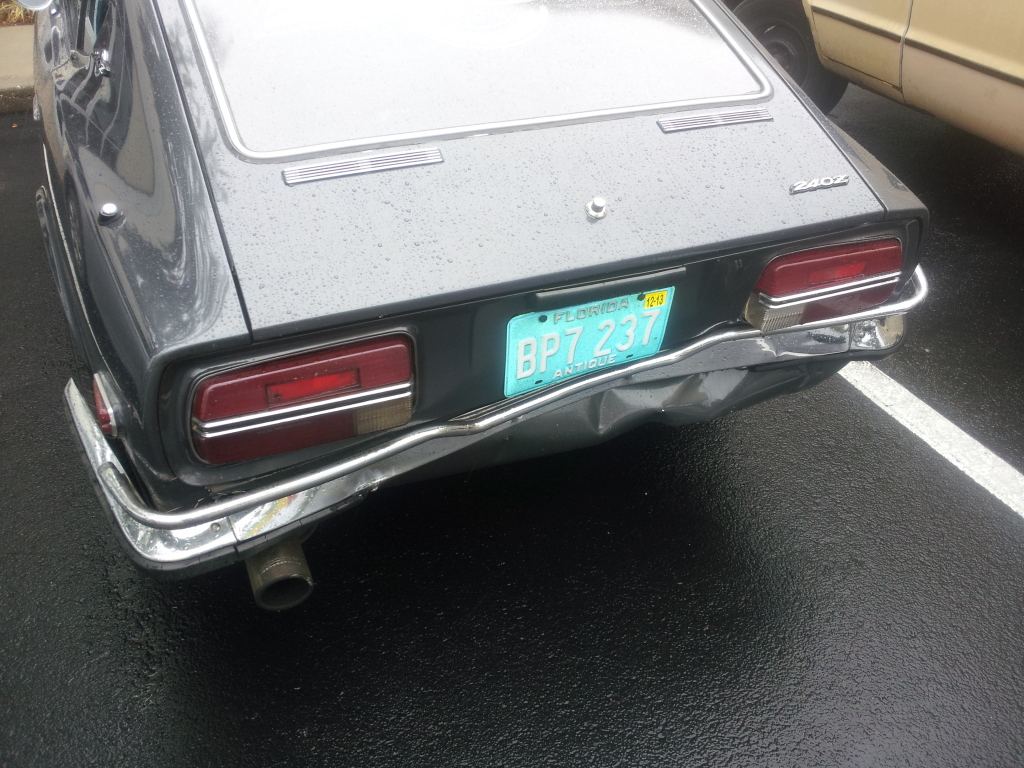
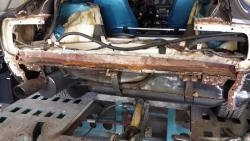
In May 2013, I was rear-ended in much the same manner as you. At first I thought the insurance company would total it. The rear bumper was crushed forward 8.5", the floor pan was wrinkled and the right rear fender was buckled at the top of the wheel well. In fact, my spare was properly inflated and when the spare wheel well collapsed, the spare tire spread the loads minimizing the damage on the driver's side. In preparation, I down loaded the Hagerty price guidelines. When the adjuster arrived, I showed him the average value north of $14G and told him I could produce receipts in excess of $10G. Told him that if he wanted to total it, I would demand the insurance company find a replacement vehicle in like condition. The adjuster admitted that he also had a collector car and understood my position. He also admitted that it would probably take them a year to find a vehicle in similar condition. After that all talks of totaling the vehicle were dropped and he wrote a repair estimate over $6.6K. The body shop pulled out the car on a frame straightener, cut the floor pan in half and inserted a salvage panel and new spare tire well. They then removed the rear valence and rear panel with intent of replacing them with salvage panels. They found the original panels had little or no rust and were much better than any salvage panel they could find. So they ended up mending the original panels and reinstalling them.

-
Like the new look and improved speed. Only problem I had was my that my "favorite" entry opened the home page instead of the forums. Took me awhile to figure out why clicking on "View New Content" didn't open to the forums and returned "no new content". Looking for the Classified section to re-appear. I understand it still has it's free standing site, but adding the link to the menu would be helpful.
-
If you click on the STORE tab and scan down to the bottom row on the left, my wife's car has the red leather with grey suede inserts. These are first quality, professional grade units and well worth the money. I even wrote up an installation tech article for NICOclub.com 350Z Custom Upholstery / Seat Cover Replacement DIY
-
Phenolitics are thermoset rather than thermoplastic and won't soften with heat. Might I suggest you form a piece of acrylic plastic to shape and mount LEDs with crazy glue feeding the leads to the back. Use silver paste you can get at Radio Shack to ink your own circuit. Failing that, run jumper wires from LED to LED.