djwarner
Free Member
-
Joined
-
Last visited
Everything posted by djwarner
-
 Re-reading what I posted, I'd try to remove the washers in the nut cap first. They are actually called shims in the parts manual which usually indicates they are meant to adjust something. Since they are part of the bill of materials, all three should be in there even if they are not needed. Too many shims will raise the pressure.
 -
Steve, normal, warm oil with a standard oil pump you should see 14.2 to 17.1 psig at idle. At 2800 rpm you should be generating enough pressure to open the pressure relief valve in the pump. At that time the pressure should be 54.0 to 59.7 psig. Nismo does sell a high pressure regulator spring for this pump. I don't know what the specs are for that pump, but the stock spring should have a free length of 2.24". Fully compressed it should measure 1.54" The pressure relief valve (regulator) simply returns excess oil back to the inlet side of the pump. Our oil pumps are a constant displacement type. That is it outputs the same number of CCs with each revolution and generating whatever pressure needed to make that happen. Once the pressure is sufficient, the piston in the relief valve moves back, opening a port back to the inlet side of the pump. Once cracked open, the relief valve will trade off additional oil pressure for additional volume of oil bypassed until the volume of oil put out to the engine and through the relief valve equals the CC capacity of the pump. - or until the piston in the relief valve bottoms out. The piston bottoming out is exactly what happens with a cold engine starts with thick oil. At this point it would probably be worthwhile measuring the relief spring free and compressed to verify it is to spec. Also - the exploded parts drawing shows there are three washers in the nut-cap that are used to adjust the set pressure for the regulator. Removing one two or three washers will reduce the regulated pressure.
-
The two plates you are referring to are bearing caps that hold the outer race of the output shaft bearings. Under the bearing caps are shims that account for the machining tolerances and apply a proper pre-load to the bearings. There is an o-ring that seals the bearing cap to the housing casting. It is not necessary to remove them unless you are changing the output bearings or unless the O-rings are leaking. You can remove the shaft lip seals with the bearing caps in place using a seal puller you can get at Harbor Freight. If you chose to remove the bearing caps, I would have a set of O-rings on hand and only do one side at a time to preclude mixing up the shims from one side to the other.
-
Good follow-up Blue, but tell me how did you teach your dog to use a spoon?
-
My 3.54 R180 differential had the usual whine between 45-50 that changed pitch from driving to coasting. The FSM says it was due to excessive wear between the ring and pinion. This is usually blamed on pinion bearing wear. My solution is somewhat different. The clearance between the ring and pinion can be affected by the fore/aft movement of the pinion shaft. Differential rebuilding calls for inserting shim washer to adjust this clearance. In actuality, the shim assortment is used to accommodate machining variation in the manufacturing process. Since the bearing tolerance is much tighter than possible machining castings, you can normally replace the bearings while re-using the existing shims. Because the ring/pinion gear is essential a bevel gear arrangement, there is a second way of introducing excessive clearance between the ring and pinion. Namely by shifting of the differential carrier left or right through output bearing wear. The outer race of these bearings are held in a bearing cap. Again, shims are used between the bearing caps and differential housing to account for manufacturing tolerance. The FSM gives formulas to determine shim thickness by measuring the machined surfaces. These formulas are calculated to establish a proper preload to ensure proper operation as the differential warms up. This was a clue to my wear issues as the differential was quiet when cold and became increasingly noisier after a 20 mile warm-up. With this knowledge, I ordered a set of output bearings. Upon tear down, I found that some mechanic tried to cure a leak around the bearing cap by packing the o-ring joint between the bearing cap and differential housing with RTV. Some RTV was even found between the shims, reducing the bearing pre-load. This delayed re-assembly two days waiting for new O-rings. Fortunately, during the previous mal-maintenance, the shims were weren't mixed side to side. To anyone attempting this bearing replacement I would suggest ordering new O-rings with the bearings. Replacing the output bearings was straight forward after removing all the RTV. Once done I verified the ring/pinion free play was back to factory specs, though near the high limit. Being in Florida, I refilled the differential will the heavier grade of oil. The net result was that I all but eliminated the whine. In fact, it was now almost as quiet as my wife's 350Z with only 30,000 miles. But now the final solution. I tried putting Zmax in my automatic transmission and was impressed with how it quieted the 180,000+ mile unit. Recently, I read about someone reducing differential whine by going to a lighter weight synthetic oil. So I thought why not add some Zmax into the differential. Now Zmax is pricey. A search for its MSDS indicated its only components is mineral oil and a coloring dye. Zmax claims that is doesn't remain in suspension but soaks into the metal surfaces. So I decided to experiment with baby oil instead. - Again a note to anyone trying this. Verify the ingredients listed on the label say mineral oil and fragrances only. Based on the ratios Zmax recommended for the transmission, I added 1 ounce of baby oil to the one quart of differential oil. I must say the results were almost immediate and dramatic. I can't believe how it quieted the differential. As for those of us who poo-poo the use of additives, Zmax was originally introduced as an oil additive for light aircraft engines. For those who know, the FAA is very particular about modifying aircraft and operations from the certified standards proven by the aircraft manufacturers. Even manufacturers of aftermarket devices have to specify exactly how their products are to be used and prove their products do not compromise safety. Considering that an aircraft engine failure is a much more serious event than in a car, the FAA came down on Zmax, demanding proof of Zmax's claims and safety. The end result, after extensive tests, Zmax (now sold to the aviation market under the trade name AV-Blend) is actually an FAA approved additive. To summarize, after replacing the output bearings and verifying the ring/pinion free play was restored, I had a differential that was mechanically sound. I would have been satisfied with the performance, though still short of perfection at this point. However, it was the dramatic difference after adding the baby oil that prompted my taking the time to write this post. YMMV.
-
Thanks for the heads up Jim. He states the unit he has is for 70-76 models and is probably the 6 bar unit as the 10 bar unit was only used in the 69-70 production. I made some tests on the gauge. It appears to be looking for: 0 psi - 83 ohms 25 psi - 60 ohms 50 psi - 40 ohms 90 psi - 24 ohms A note to anyone trying this, the water temp/oil pressure gauge has an internal voltage regulator that is a bi-metal mechanical type that is to slow for our digital meters.
-
Thanks Dan, Your attachment confirms what I have found. I was hoping someone found a 10 Bar sender from a different application that would work. Many modern senders appear to be voltage based rather than current based, so finding a substitute sensor may be problematic. I will probably rig up a 500 ohm pot to simulate a sender to extract a set of specs for my search.
-
Hey Mike, I double checked with Courtesy Nissan and that part number was discontinued by Nissan as I was told.
-
My Series I has the original 140psig gauge and the sender was leaking when I bought the car. A trip to the local auto supply store sourced a compatible (?) sender. Later I found out that the original sender part number was superseded with the same part number as the ones found on Series II and later cars. Still later, I found out that the shop instructions state to also replace the gauge with a 90psig when replacing with the superseded sender. This makes sense for the then modern model car, but sucks when trying to restore a 43 year old car and desire to keep the original gauge. From what I can tell, the original sender was a 10 Bar sender (10 atmospheres or 145psig) and the replacement sender is a 6 Bar sender (87 psig). So what readings do I get when I use a 6 Bar sender and a 10 Bar gauge? I did find a modern 6 bar sender that had the following specs: 6-8psig open circuit (this explains why our gauges go to zero when idling after a hot run). 15 psig - 50-79 ohms, 70 psig - 10-30 ohms, 90 psig - 8-22 ohms. I have no idea what the original sender specs were, but the 6 Bar specs seem pretty loose. Does any one have specs for the 10 Bar sender? Or better yet, does anyone know of a suitable sender from a different model/make?
-
Hr369, Thanks for the links. After watching the rebuild video, I have confirmed the parts did come from the return spring. I also learned I did not want to enjoy the experience. So I guess I will drive it til it won't. The real question is how the parts escaped the clutch basket.
-
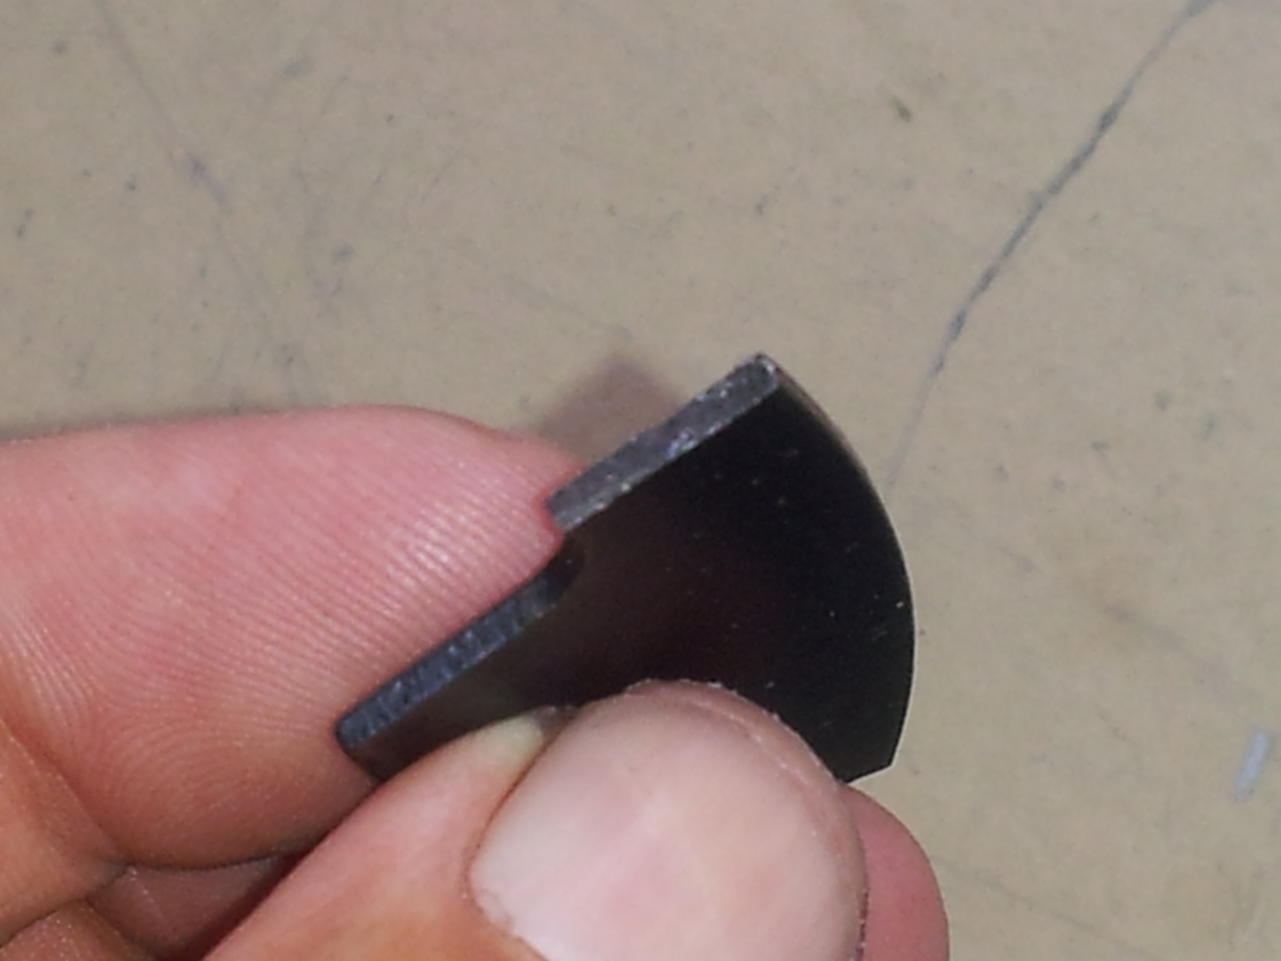
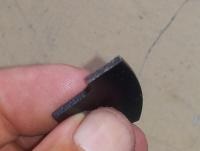
When changing the filter and gasket on my AT a while back, I found a piece of metal in the bottom of the pan where one would expect to find a magnet. But this one showed no magnetism to speak of. Unfortunately, the new gasket did not fix the leak so recently I took the pan down again to flatten the flange where someone had over torqued the bolts. Lo and behold there were now two almost identical pieces in the pan. Looking at exploded parts photos, I believe they are parts of a broken "Low and reverse return spring". Could explain the occasional whining and slippage I get in reverse with a cold engine. I even found a replacement part for a whopping $4.53. Question: Just how difficult is it to replace for a novice? I've even found a 1980 Z FSM that gives detailed tear down and assembly instructions.
-
Welcome, There is an active Z car club covering Tampa - Orlando. see our Facebook page. https://www.facebook.com/SunCentralZClub/photos/pb.107714405962141.-2207520000.1408219678./709832635750312/?type=1&theater
-
Carl, with such a significant vehicle I feel the same way. The consolation is that other than the bolt holes for the spoiler, everything thing they did is reversible. Hopefully, the owner saved the original parts.
-
Noise is relative, not just based on the differential design, but also on the body of the car. I purchased a new '68 510 2 door stick shift and traded it in for a new '70 510 wagon automatic. The rear ends of these two vehicles are about as close to identical as you can get. Even though the coupe only had a rubber mat in the trunk, the differential was noticeably quieter in the coupe compared to the wagon with a finished interior. I've always attributed this to the seal between the trunk and back seat. On that basis, I would expect our Z's to have some noise intruding into the passenger compartment. That said, the factory service manual provides a trouble shooting guide for differential noise. You can pull the back cover and measure the backlash between the ring and pinion. At only 83,000 miles, I wouldn't expect to see any excessive in the gear teeth or bearings.
-
Welcome Aren2014, First question is what carburetors are installed. The stock car came with 2 SU style carbs. Some have replaced the stock carbs with downdraft Webers. Many have replaced these with 3 dual carbs (Weber, Solex, or Mikuni). The triple carbs have one barrel for each cylinder. Triple carbs have a different intake manifold and lack a vacuum port for the distributor. Getting the triples set up properly is problematic. If you have triples, others will have to help you further as I have no experience with them. Other versions have fuel injection and even turbos. With the age of our cars, engines swaps are not uncommon.
-
After working on Rustprone Datsuns, this looks like a joy to work on. BTW Keith Martin mentioned in his latest blog about visiting Concours of America where a restored FJ sold for $68,750.
-
My car came with a set of 14 x5.5 0 American Drag Master 6 hole mags and rock hard 10 year old tires. After doing some research, I found that 205R70 fit quite nicely and had the same revs/mile as the original 175HR14. Ended up getting General Tire Altimax RTs from Walmart for something like $70 each. - And an accurate speedometer to boot.
-
When I lost mine, I faced the same problem. Ended up making a countersink for the head with drill bit. Of course, later I found the original screw.
-
Must be another Gray Z, I live up in New Port Richey.
-
Fixed mine using the info given here, Thanks. Used a smaller Irwin Locking C-clamp Vise-grip and a regular C-clamp to urge the bracket back into position. Applied force with the Vise-grip, held position with the regular C-clamp, removed and tightened the Vise-grip and re-applied. Repeated as necessary. Once the bracket was back in position, I drilled a 1/8" pilot hole and then a 1/4" hole in the drip channel and secured with a button head cap screw and locking nut. Released the clamps and then added a second socket head cap screw. Through all this, the intact 3rd tack weld maintained its integrity.
-
Hi Carl, meeting usually last at least 2 or 3 hours. Actually the drive is opposite the rush hour traffic, so it shouldn't be too bad.
-
Kindig has a new tv series starting on Velocity called Bitchin' Rides.
-
TwoSixteeZ, The club is having a monthly get together 6:30PM Thursday, Aug 7 at a Sonic Drive-In, 2523 N Dale Mabry, in Tampa. Would be great to meet you there.
-
Besides the classic Sta-Bil use for storage, there is a new product called Sta-Bil 360 that deposits a rust preventing coating from the top of the gas tank through to the combustion chambers. The latter product is designed for continual use and not off season storage. I have no idea how effective Sta-Bil 360 is, just letting you know there is a difference.
-
Hi LC, I mounted the compressor on my Series I in the air pump location. That mount bracket cost me north of $200.