djwarner
Free Member
-
Joined
-
Last visited
Everything posted by djwarner
-
 Considering AC parts, compressor mount, building custom lines, electric fan and control, and labor, $3200 might not be that far out of line. I assume a warranty comes with it as well. As a CA car, I am assuming your air pump is still in place and the compressor will be installed above the alternator. Check to see if the harmonic balancer (pulley on the crankshaft) has an unused groove from the removed AC system.
 -
Besides Carl, for references and support there is an active Z car club in the area: https://www.facebook.com/SunCentralZClub
-
BTW there are replacement braided heater hoses for sale on Ebay.
-
My Series I had rubber mats but they were a dealer supplied option.
-
The design intent of one time use bolts is to stress the bolt to a point beyond its elastic limit. This causes the bolt to deform (read lengthen). This leaves a residual tension near the point of yield. As the engine thermal cycles, some additional creep may occur. As the bolt yields, the crystalline structures inside the bolt grow. Repeated torqueing to the point of yield causes the crystals to grow more. The weakest part of the steel is the boundary between crystalline and non-crystalline elements. As the grains grow in size, a bolt becomes weaker and more likely to fail catastrophically. So you may be able to re-torque the bolts up to the specified limit for a second time. They may fail as you torque them down, after a heat cycle or two, or the next time you try to remove them. Point is that it is a shot in the dark. And the question is the expense in time and labor to pull the head and removing broken bolt shanks versus the cost of new bolts now while the head is off. The professional engineers say replace them now.
-
As I went to close the rear hatch the other day, I felt something give and then the ball joint on the bottom of the gas strut came out. On closer examination, the metal bracket attached to the C-pillar broke partially loose. Being away from home, I left the strut detached and closed the hatch. When I got home, I cannot figure just what failed and the manuals are no help. Is the bracket spot welded to the body? Can't tell without pulling the interior. It appears to still be attached somewhere inside. I'm having a problem trying to bend back into position. What is the proper repair procedure?
-
There was a recent thread about using a 50-50 solution of ATF and Acetone to loosen frozen nuts. Worth a try. http://www.classiczcars.com/forums/help-me/34955-penetrating-oil-research.html
-
Tomo, try these people Body Side Molding, Truck Molding, Car Molding, Vinyl Trim
-
You sound like you re-installed the carbs in the same position. With multiple units installed, a good trouble shooting technique would be to swap two carbs and see if the trouble followed the carb or stayed. Since you mentioned it your first post, it points to the carb. Did something happen to change your mind?
-
I would think it would be hard to get a Z owner's estimate of such a Z sight unseen. Very few Z's are in original condition today and their value varies widely. A highly modified Z is even harder to value sight unseen. Try http://collectorcarpricetracker.com/auctions/make/Datsun/years/1970-1986/ also www.autotraderclassic.com
-
I would like to hear from him as well. I am aware of the Scarab Z's. I don't disparage V8's in our cars, but the Nissan 3.5's and 3.7's are no slouches. Besides keeping the Z's pure Nissan, there are several advantages to these engines/transmissions with modern fuel injection, tunable ECUs, and modern fuel compatibility. You can buy an LS crate engine, mate a transmission, drive shaft, and IRS for twice to three times the money. Just thought a factory designed drive train from front to back would be a less troubled installation. Zfever here in Tampa does packaged conversions.
-
Other than the thought that 8 is sexier than 6, why not a drive train from an Infiniti G35 or G37? We routinely have totaled cars with reasonable mileage coming up for sale for around $3.5K. Find one with rear end damage and you have engine, rear wheel drive train, electronics and wire harness in a single package. A quick, easy way to get 300+ HP. Oh, if 300 HP isn't enough, there are turbocharging or supercharging kits readily available.
-
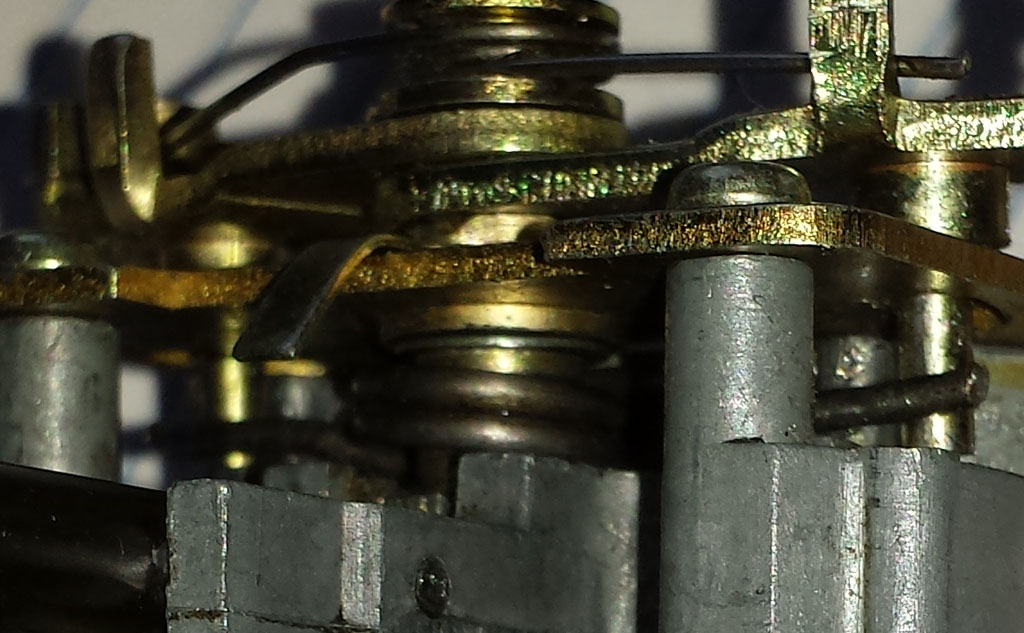
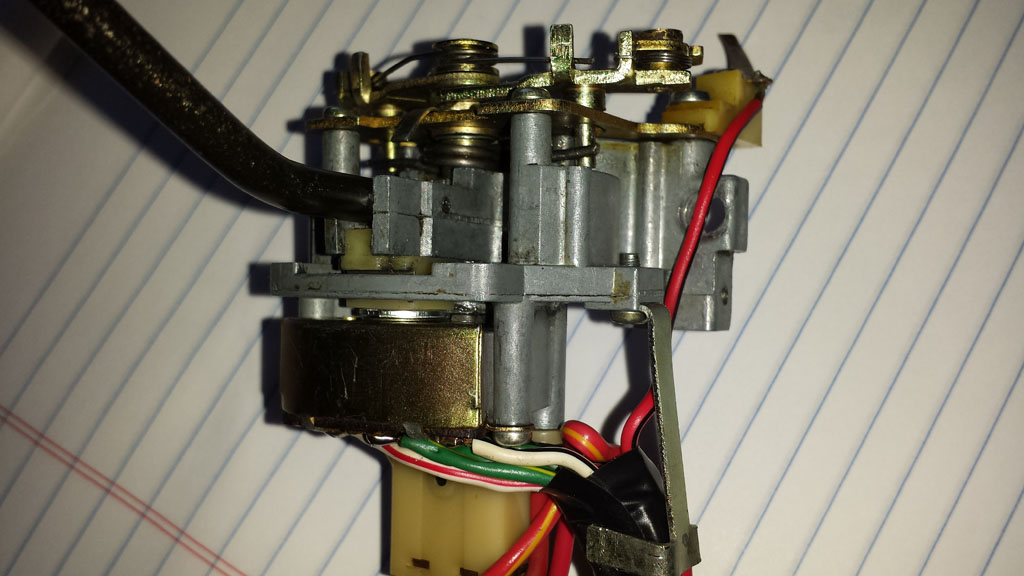
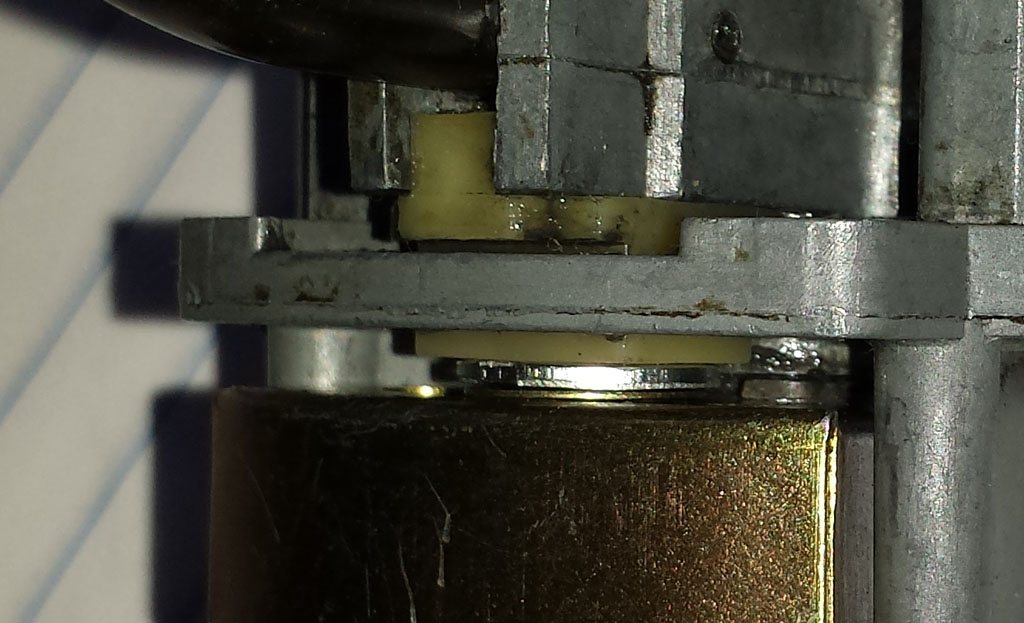
Stanley, I had the same problem of no right front turn signal and found this problem: The die cast center section of the switch holds the lever and couples to the nylon slide on the bottom. On the top of the part, a pivot pin is press fitted into die cast and passed through the return spring. The other end of the pivot pin rests in the top stamping of switch. In my switch the press fit between the pivot pin and die cast part had worked loose allowing slop in the joint coupling the nylon slide. This allowed enough free play in the switch pin so that passenger side did not make contact. Also 40 years of age allowed the nylon part to lose water and shrink, aggravating the situation. I inserted a 0.050" thick washer between the switch and nylon slide for some relief. However the free play at the press fit still allowed excessive slop. I solved this by adding a 0.015" thick wave spring washer on the pivot pin under the top stamping. (If you follow my example, try not to disturb the return spring). The additional spring removed the axial free play that allowed the slop in the press fit. The turn signal action is like new and dirty contacts no longer appear to be an issue. I purchased a '68 510 coupe and a '70 510 wagon new. Both had the same turn signal switch. After inserting the 0.015" washer, the action felt exactly the same as the 510's. The loosy-goosy action on the 240 is now only a memory.


-
I suppose someone should ask what model/year Z you have. Early Z's had two different keys, one for the doors and a different one for the ignition. Later they changed profiles and eventually changed to a single key. There are two different locations to find the key codes. A tag on the back of the glove box door and on the door lock body. Having the code will make the locksmith and your wallet happy.
-
When I got my Z, it had no door keys. A competent locksmith was able to determine the correct key profile and code from the drivers door. His key also worked with the hatch and glove box. It wasn't until I got home that I discovered it didn't work in the passenger door. I pulled the passenger door lock and made the trip back to the locksmith. Apparently the door had been replaced without retaining the original lock. I asked if he could re-key the existing lock and he said he could, but he needed new chrome bezel rings as the old ones would be destroyed in the process. This raised a problem for the hatch lock because of its unique profile. Since we already had a working hatch key, I asked to re-key the passenger door lock. This turned out to be a problem because the passenger lock had a different profile. I ended up getting a set of door locks for a '90's Sentra, so I ended up with a three key set.
-
The function of the dual point distributor is to retard the timing when the air temperature is below 32F. This helps the engine maintain the idle load of the automatic transmission when cold. Should have no drivability issues for a manual transmission.
-
Assuming you can get these off the car, you might want to try a product called Evapo-rust. It works by chelation and transports the rust away from the surface. Haven't used the stuff myself, but might be worth a try.
-
I suffered an oil leak between #3 and #4 since acquiring the car. When I went to replace the head gasket, I bought a Felpro gasket only to discover after pulling the head that the car already had a Felpro gasket that looked every bit as good as the new one. So I went ahead and installed the new one. A leak in exactly the same place returned. Neither one had and gasket shellac or other sealant added during the installation. Learned from another member who had exactly the same problem with Felpro that Nismo has an OEM gasket that solved the problem. The difference concerns the oil passage to feed the head. The Felpro has an additional line of soft rubber around the opening that is supposed to aid sealing. The Nismo gasket had a crushable copper grommet in this location. I measured the height of the rubber ring on the Felpro after I pulled it. It measured just about 0.001" high. The new Nismo head gasket crush ring measured 0.012" before installation. The Nismo gasket fixed my oil leak. Also, the Nismo Gasket had much less extra material beyond where it was needed. This means that clamping forces were spread over fewer square inches of gasket material and hence had more clamping force per square inch. All this said, the Nismo gasket was something like 8 times the price and at last check Nissan Sports only had like 43 left. From what I've seen on the internet, it appears the Nismo gasket was made by Ishino. I've seen Ishino gaskets for sale closer to Felpro prices rather than Nismo. After pulling the head twice and paying the Nismo price in the end, buying the Nismo gasket first would have been the more economical solution.
-
LeonV, the gasket doesn't make any difference when current can flow through the head bolts. Here is the link, Ya pays ya money and ya takes ya choice.
-
In case you guys have forgotten, our aluminum heads sit on an iron block. Talk about dissimilar metal corrosion. An alternative solution (pun intended) is to use waterless coolant. Jay Leno's garage had a video on it. I began using it after installing an aluminum radiator. I've been using it for more than a year including high speed cruising in 92+ degree days with no problems.
-
The original 3 watt bulbs in the instruments have a round glass sphere that sits in a green plastic hemisphere to give the instruments a bluish white illumination. The BA9s bulbs will fit in the socket, but because of the oblong plastic envelope of these bulbs, the bulbs will hit the green hemisphere and will not allow the socket to seat. Depending on how original you want to keep your Z, you could remove the green hemispheres though this will require you to remove the instruments. Otherwise, you can get strips of LEDs that aim off the side of the mounting strip (as opposed to pointing away from the surface). These can be mounted in the instrument can so that light is pointing towards the dial. This also requires removing the instruments.
-
Mark is correct. It is used on a Series I to hold the jack in place. The ends of the wire loops hook on to mating parts on the floor. Slip the jack under the center part and raise the jack to secure it.
-
Here is a recent blog by Keith on the subject. How Many Mods to Your Collector Car?
-
For the price they are asking, you would think they would have cleaned the over spray on the passenger side of the dash. The color mismatch on the glove box door is another. Makes you wonder what a close inspection would show. Also no underbody shots. Overall the car presents well - it only makes the exceptions stand out all the more.
-
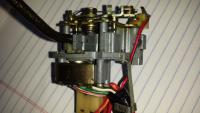
I admire your preservation efforts but I think there are a couple of issues here. First is the "collectability" of the car itself. I realize that most of our Z populations have been attrited through rust, driver error, other driver error, teenager mod hacking, race car modifications, and abandonment. But collectability is different than rarity. It is held in the mind of the collector - not the numbers crunchers. A few years ago my daughter bought a 10 year old Firebird convertible, thinking "it was the last year of production so it is going to be valuable someday." I think you can understand there is a difference in the collector value of a first year Firebird. Second is the utility you will get out of any modification. A major part of the Gestalt of a car is driving it from point A to point B. Restoring a car to concourse condition so it can sit a garage is less a car in my mind. Preserved, yes. An example of the automotive art, yes. But it is but a pale reflection of what it once was. So if a modification extends its life, increases your safety, gives you increased enjoyment, or leads you to drive the car more, I would lean towards doing it even if it may effect some future "collector's" opinion of desirability. As I watch my Australian Shepard puppy mature, I know after ten years with advancing arthritis, he would still prefer to be out, running the sheep and not lounging on the porch. When I replaced the original heater with a VintageAir AC, I did preserve the removed components for the sake of a future owner. I mounted the compressor in the old air pump location to preserve the original under the hood appearance. And I only hacked the center console for the new controller after I was assured that replacement OEM panels would be readily available. The utility of AC in Florida far outweighed the extra distance from concourse condition. If you are not in the business of concourse restorations, and your efforts at preservation are successful, you may well be selling to someone who IS in the business of restorations. It is almost guaranteed his estimate of the value of your preservation efforts will be less than yours. Yes, weight one factor against the other, decide and don't look back. Enjoy!