Dr. 240Z
Free Member
-
Joined
-
Last visited
Everything posted by Dr. 240Z
-
 WOW - Outstanding, Lazeum!! Great post - I envy you for your knowledge of metal properties and skills working with them. Thanks for sharing. Could be a patent opportunity?? Cheers, George
 -
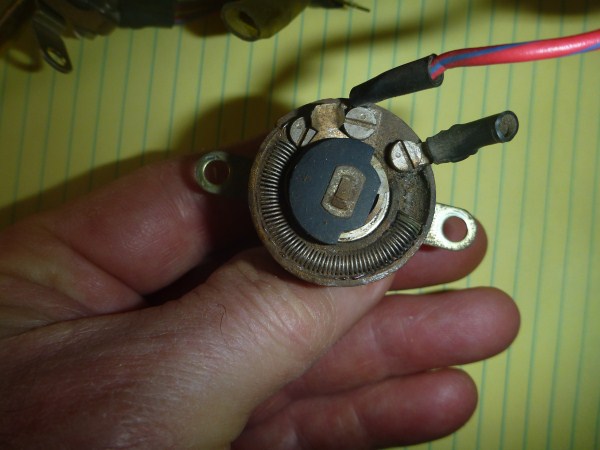
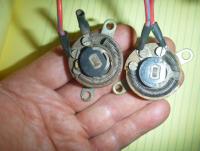
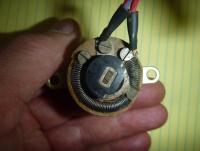
Hi Mike, I think the failure of the original rheostat resulted from a form of burn out in the resistor coil. Note the coil in the old one does not extend to the nut in the 1:00 position. Secondly, the arm which slides over the coil as the control knob is turned was loose and not rotating properly. Hopefully, Mike, the pictures will make up for my rather weak explanation. Cheers, George


-
Hi Blue, I just came in from the garage to find your pictures - Thanks so much. Here's the good news: Changing the rheostat on an early 1971 Z is not a difficult procedure!! Follow these steps: 1) Remove the driver's seat and place cushions in front of and behind the front of the seat support cross member for comfort. 2) Lay on your back and slide forward so that your head is up against the clutch and brake pedals. 3) Using your left hand, reach up and remove the two wing nuts that screw onto the two threaded posts which support the tachometer. 4) Carefully push the tachometer forward so as to remove it from the front of the dash. 5) Once it's out of the front, make a drawing of what wires go where in the rear of the tachometer. 6) Remove the wires and then remove the tachometer completely out of the way. 7) Using a stubby Philips screwdriver, reach through the hole in the dash for the tachometer and remove the two supporting screws that hold the rheostat in place. 8) Unplug the two wires to the rheostat and remove the plastic knob on the stem. Now remove the rheostat via the same hole as you used to access the two Philips screws. 9) Reverse steps 1 through 8 to install the new rheostat and re-install the tach. Voila!! Cheers, George
-
Hi Jim, I returned under the dash for another look and noted a wing-nut that appears to hold the tachometer in place. That being the case, I think if I were to remove the wing-nut the tachometer might (hopefully) be removed via the front of the dash. With the tach out of the way, the rheostat might then be readily accessible. Does this approach seem reasonable to you? Regards, George
-
Jim, What you suggest is the exactly where it stands. However, like I stated at the beginning, it's the only thing that's not working, and I have a new (used/ebay) rheostat to repace it with. I can't imagine Nissan made this task as difficult as it appears - It would have cost them a fortune to replace if they had to pull the dash out when these were under warranty. Cheers, George
-
These are 195/60 X 14" Hope this helps Cheers, George

-
This might be worth a try: Datsun 240Z 260z 280z TRW Stock Camshaft New | eBay Cheers, George
-
Hi, If there is anyone who has changed the dashlights rheostat and didn't find it too difficult - I need your help please. As is, I've removed the driver's seat and placed numerous cushions and folded towels down to make lying on my back relatively comfortable. After that it's all up hill - access is tight and visibility is limited. There must be an easy way; I just haven't read about it in any forums or been able to figure it out for myself. Everything else on the old girl works so I'd really like to have her 100%. Thanks, George
-
Hi Bryan, I purchased my POR products online direct from the company. The company has a great website which really does a great job explaining their various products. Additionally, if you do need any help, contact 'support' and you will be amazed how fast you get a response. I give them an A+. Cheers, George
-
Hi e-tek, I visited your site as you suggested - Thanks for sharing your years of experience and subsequent insight. Cheers, George
-
Hi, Please learn from my costly mistake from last October. Do not use synthetic oil. Use a quality 10-30 regular like Castrol GTX. Important: Always supplement your choice of oil with ZDDP - Especially if you are breaking in a new cam. ZDDP is cheap - $6 to $8 per oil change - On sale right now at Eastwoods Cheers, George
-
Hi, I suggest you look on ebay - less than 48 hours ago I spotted a couple of tool sets with bags and wasn't searching for them. They looked like mine - Series 1 Regards, George
-
Hi, Just thought I'd add a comment or two for what they're worth: For internal coverage I used Eastwood's, 'Metal Protect', a Zinc Chromate sprayed inside the rails etc via the 18' wand that is provided. As such, I applied it generously and used 3 cans. For external coverage where there is no wear and tear, and hard to access I used, 'Fluid Film'. It goes on nicely straight out of the can or with the Eastwood wand I've already mentioned. This consumed 2 cans. For easily accessed areas such as the floor pans I used POR15 over raw metal. A little POR15 goes a long way - I used less than 1 pint. For external coverage where there is wear and tear I used Eastwood's, 'Rubberized Undercoat Aerosol' over a coat of POR15. This consumed 4 cans. Products like Fluid Film require repeated/periodic applications - no question John, is no doubt correct in his 'rant on rust' above, but it's hard to stand back and do nothing to attempt to slow it down. Also, there's satisfaction in just knowing you have tried.
-
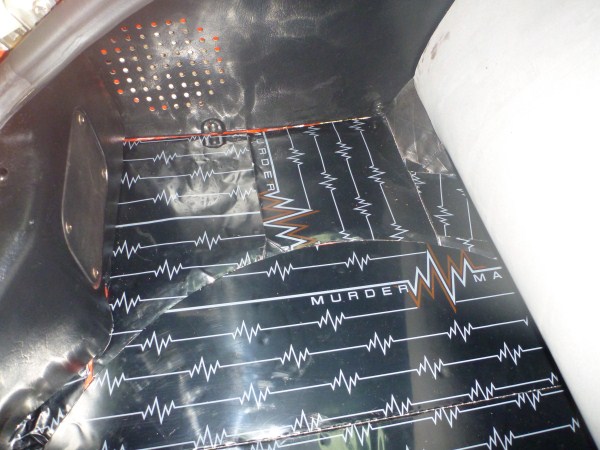
Hi mgmoreau, I could/should have taken a series of pictures while I was installing the material. That said, its now covered up with foam and carpet. As such, I rolled them back in an attempt to give you at least a small look at the material in place. Cheers, George

-
-
-
-
-
-
-
-
-
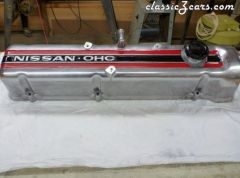
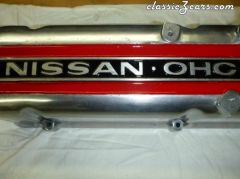
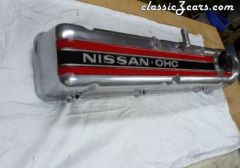
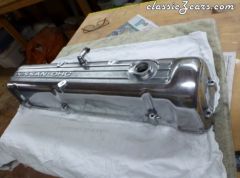
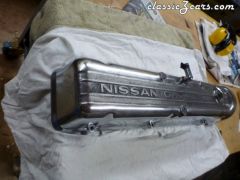
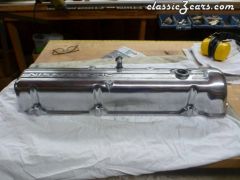
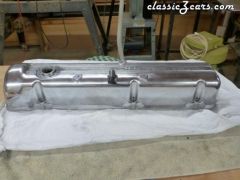
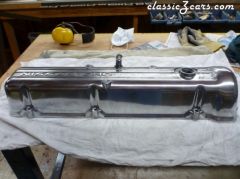
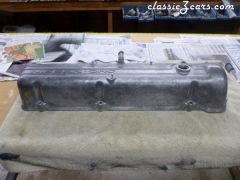 Valve cover polish and paint
 -
-