bacarl
Free Member
-
Joined
-
Last visited
Everything posted by bacarl
-
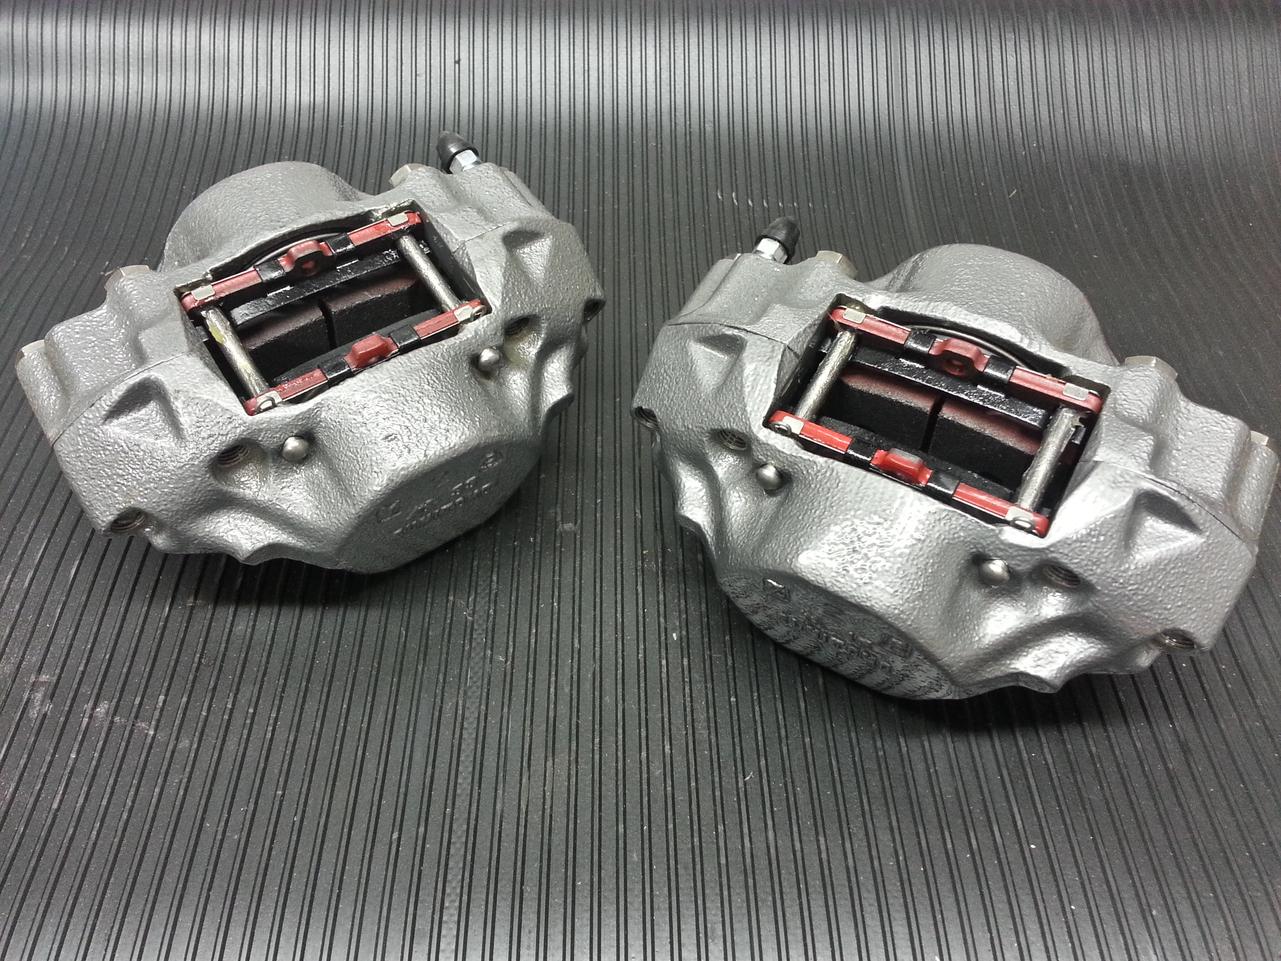
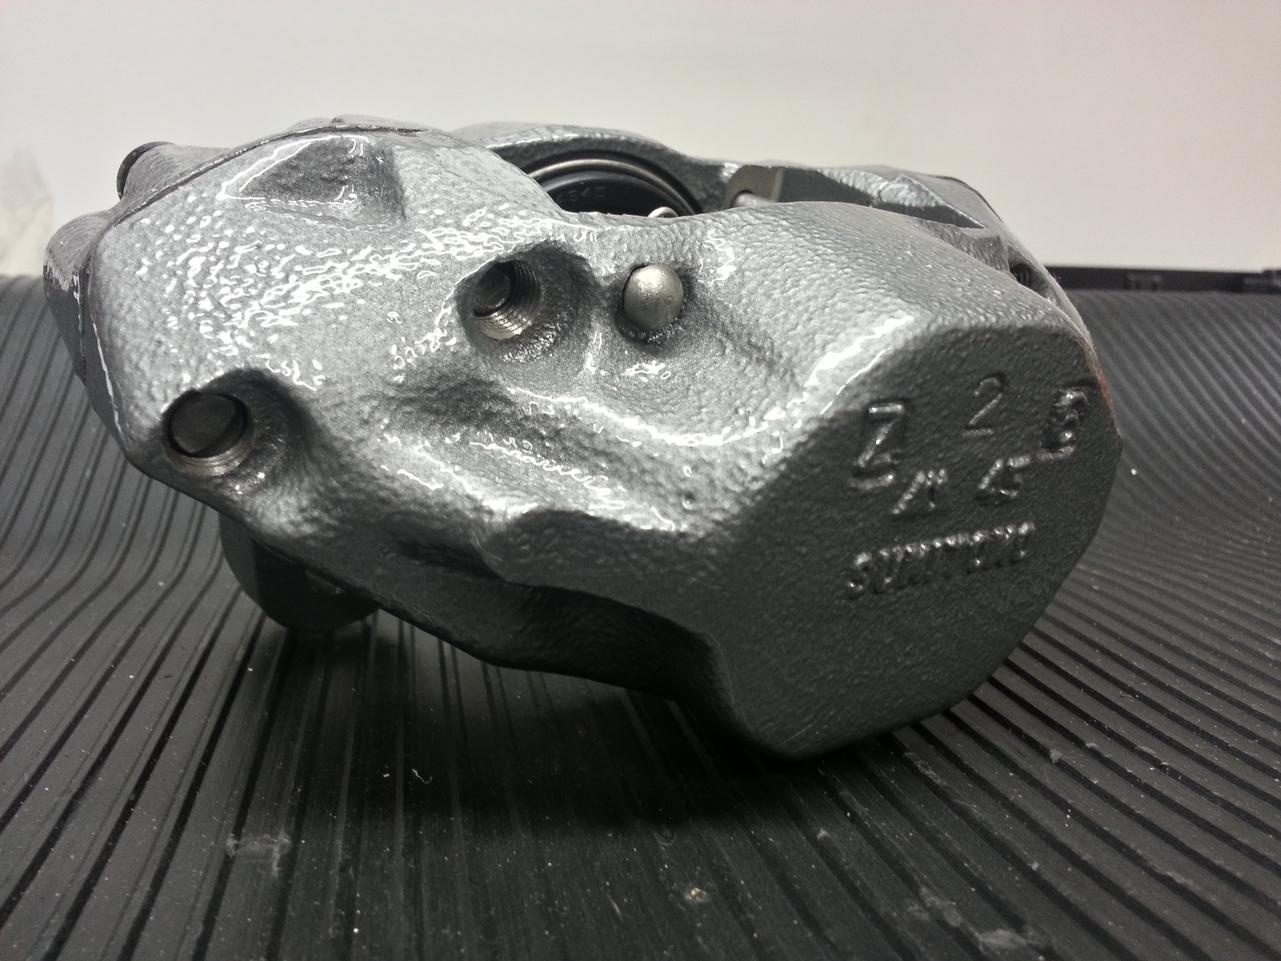
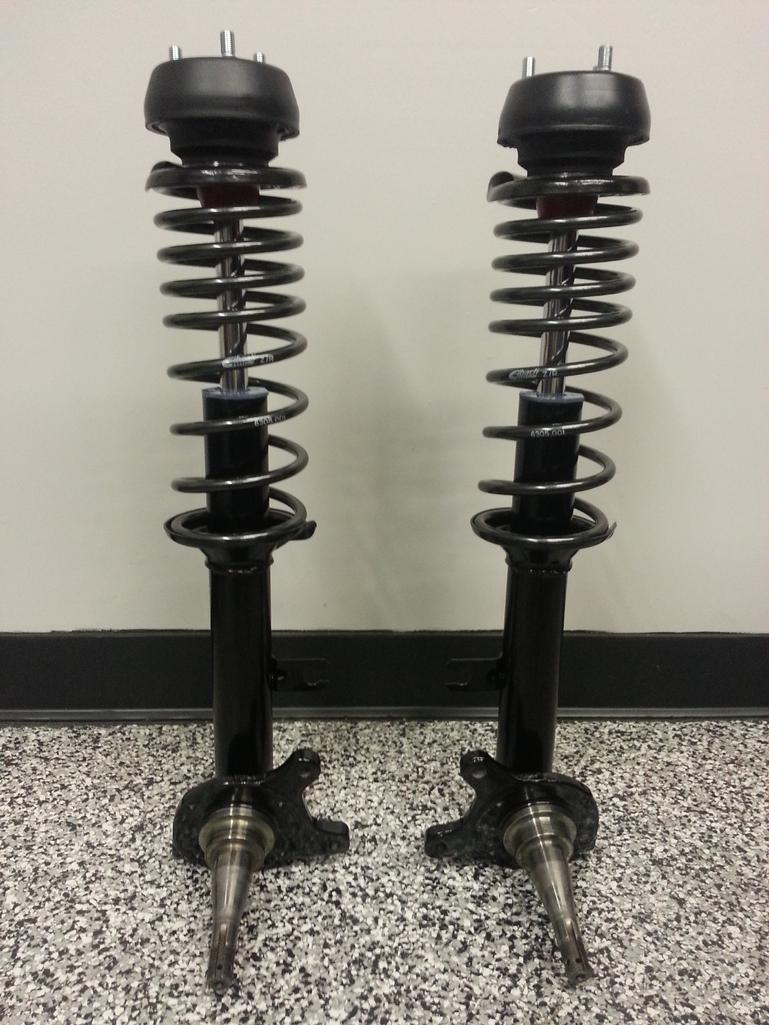
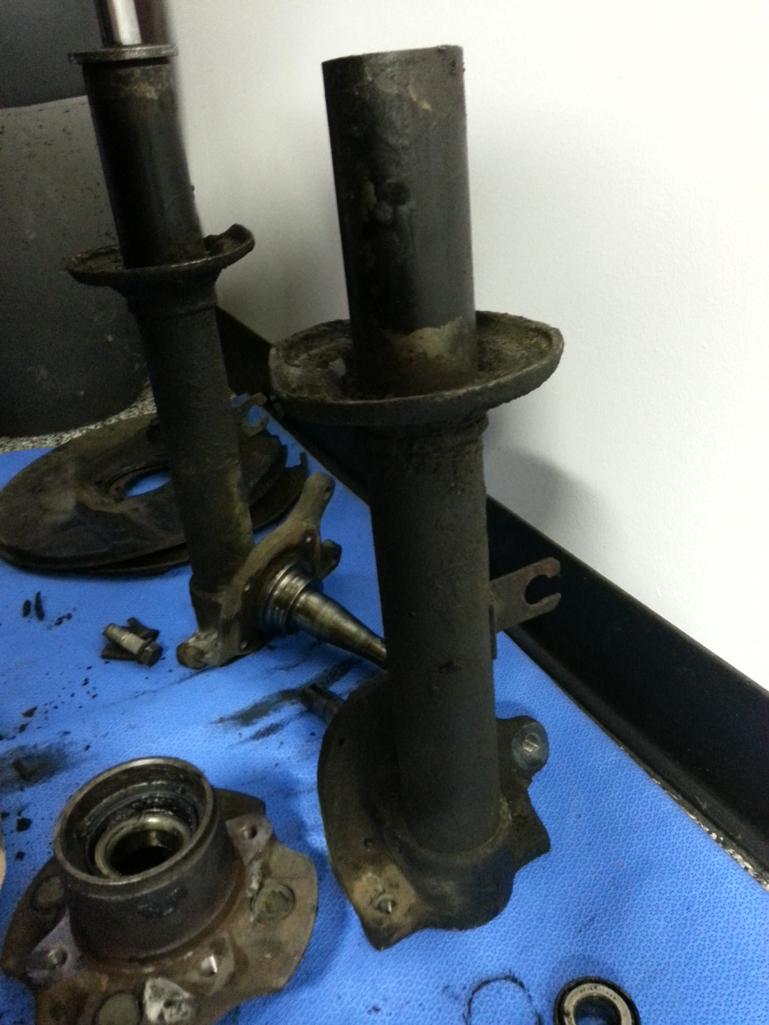
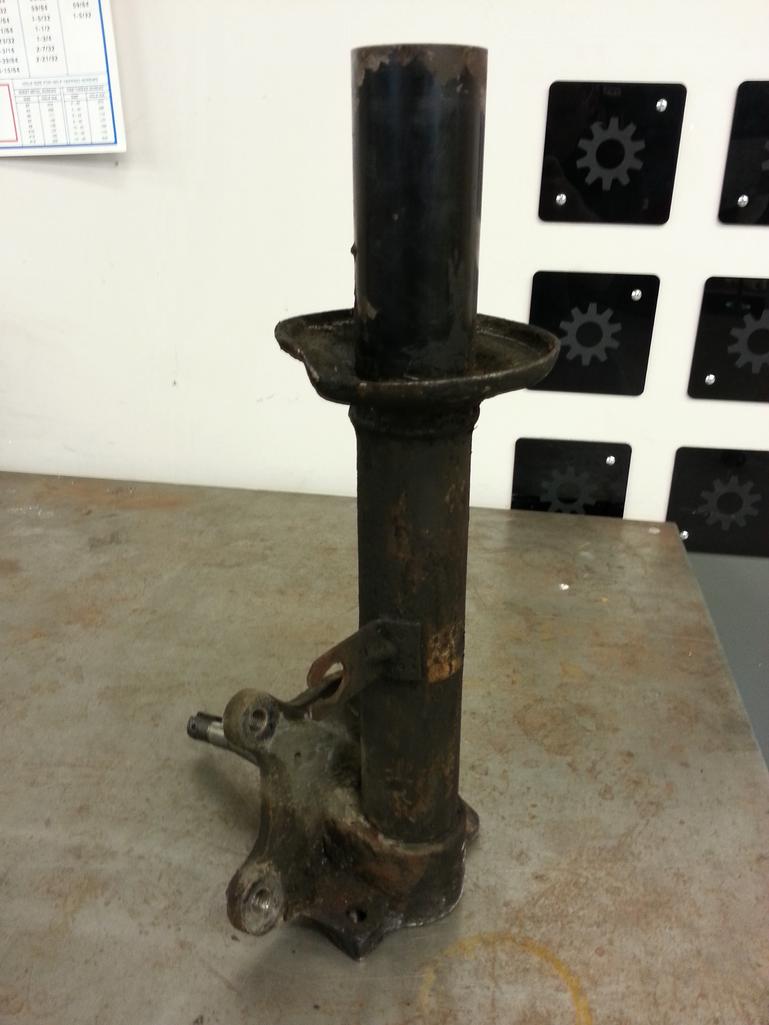
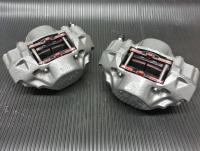
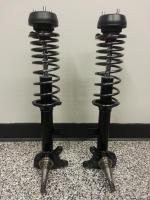
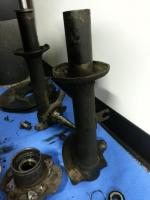
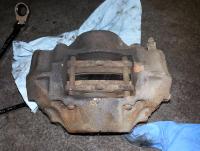
I had wanted to have PMB Performance restore the calipers, but I found a local place that specializes in caliper rebuilds so I went with them in the interest of supporting local business (and saving lots of money). Before they reassembled everything, I went ahead and powder coated the calipers (like a crazy person). They're loaded with Carbotech pads, which I've used as track day pads in my daily driver and liked. These are a less-aggressive "performance street" compound which is supposed to provide excellent modulation and initial bite, low dust, and low noise. Here's a close up of the finish, which turned out really nice. This is a fairly high-temp powder (600F) which recommended a clear coat for exterior use/UV resistance. So yes, I clear coated my calipers. Told you it was an affliction :-/ Here's the before And most recently, I've just put my struts back together. I used to be a chassis guy at work, so things like springs and dampers are near and dear to me. I wanted adjustable shocks (never had those before) and I would have loved to play with spring rates, coilover style, but I don't want to hack up my struts. So I went with the tried and true Illumina + Eibach combo. Before After - powder coated struts and spring seats, Tokico adjustables, Eibach Pro-kit, poly jounce bumpers, and new isolators. You can't really tell in the pic, but I did the gland nuts in a different color - a powder close to "Datsun blue" - just for fun. One of the best things about powder coat (maybe the best thing) is ease of cleanup. Changing colors is as easy as blowing out the gun with compressed air and dumping the new color into the hopper. Makes it possible to do silly things like blue gland nuts with a bunch of other black parts. Here are some shots of the nice crusty strut housings during the process.


-
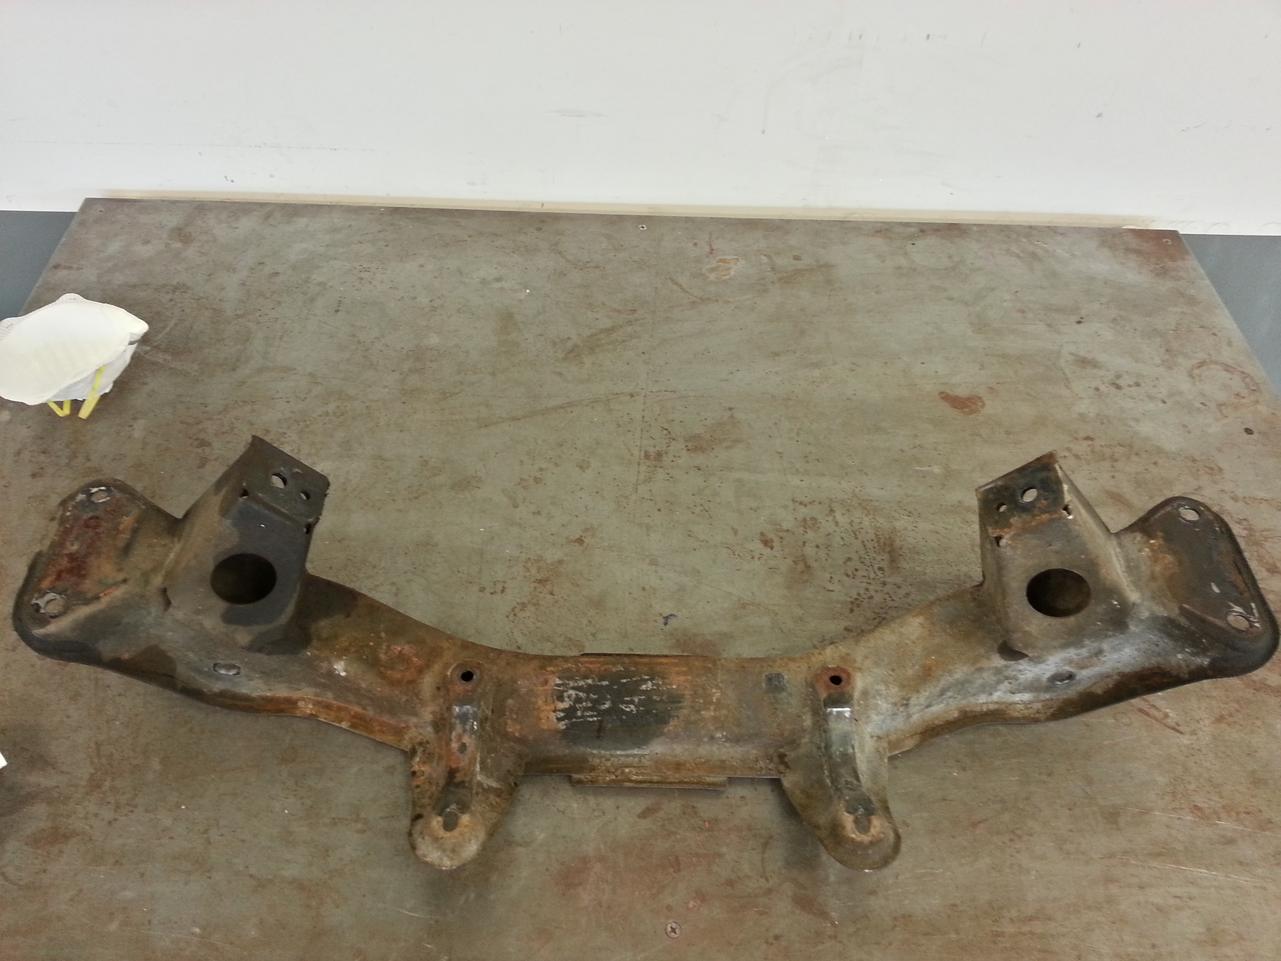
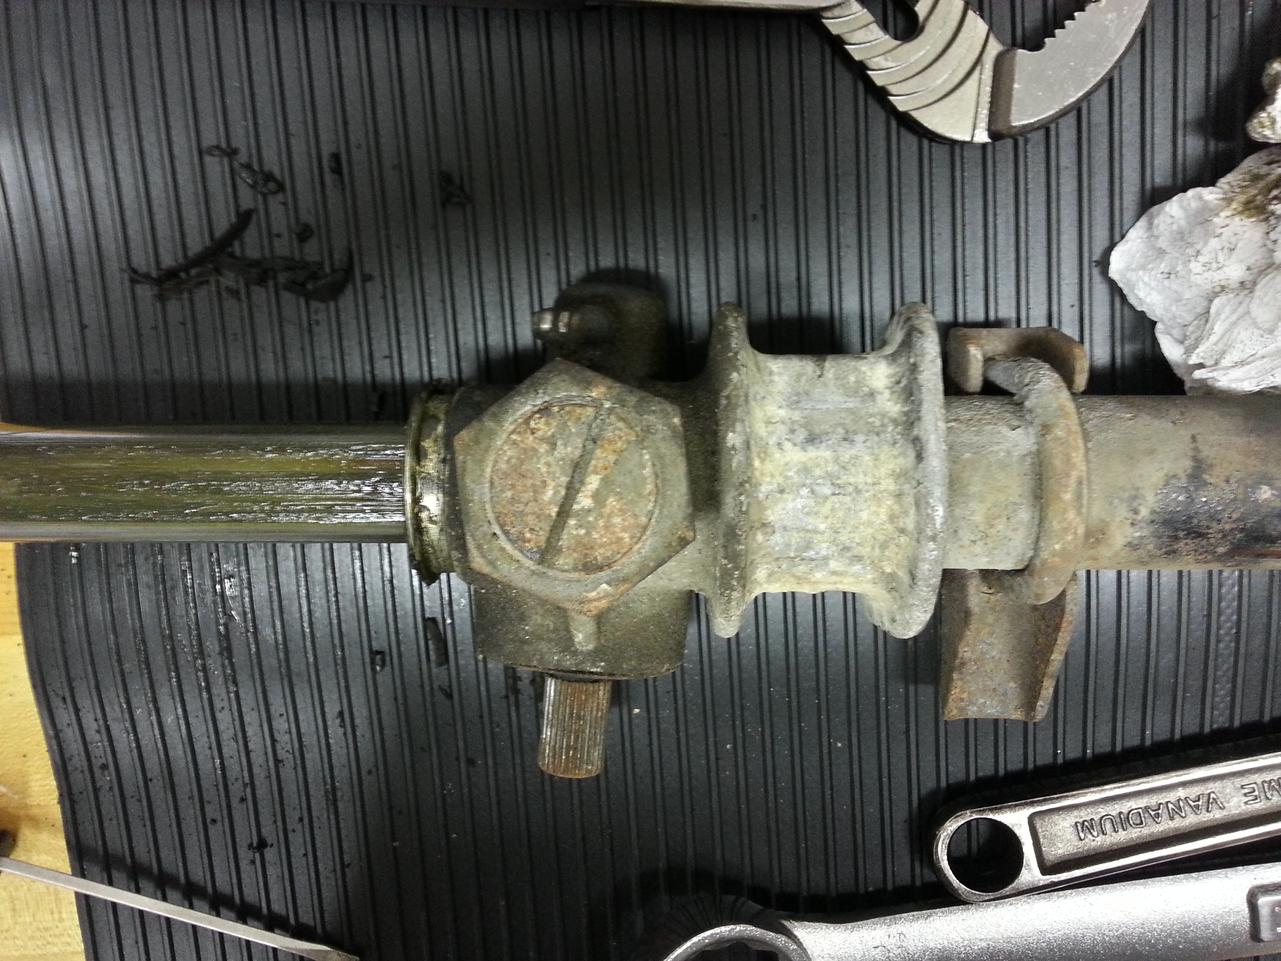
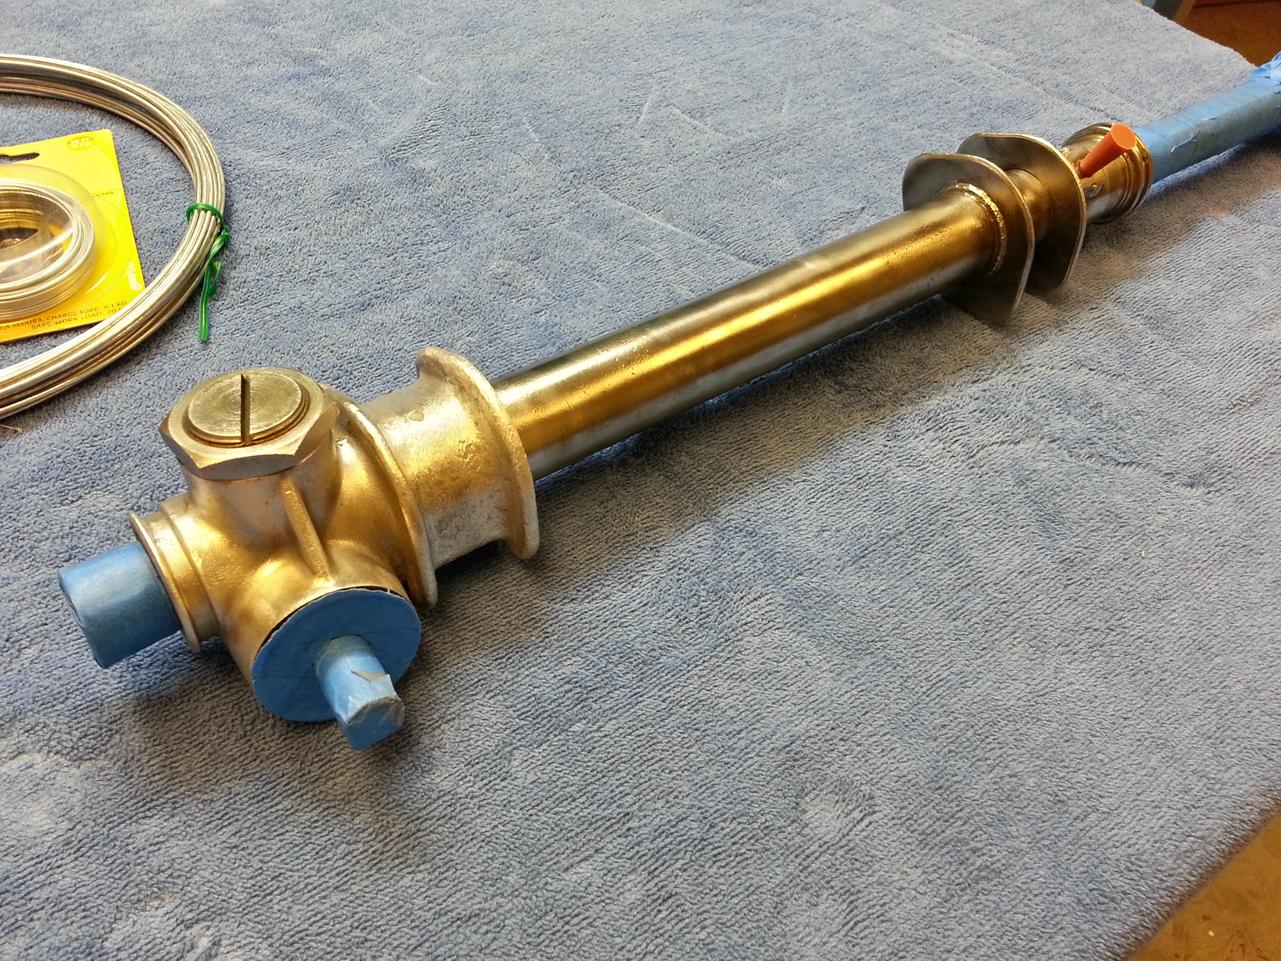
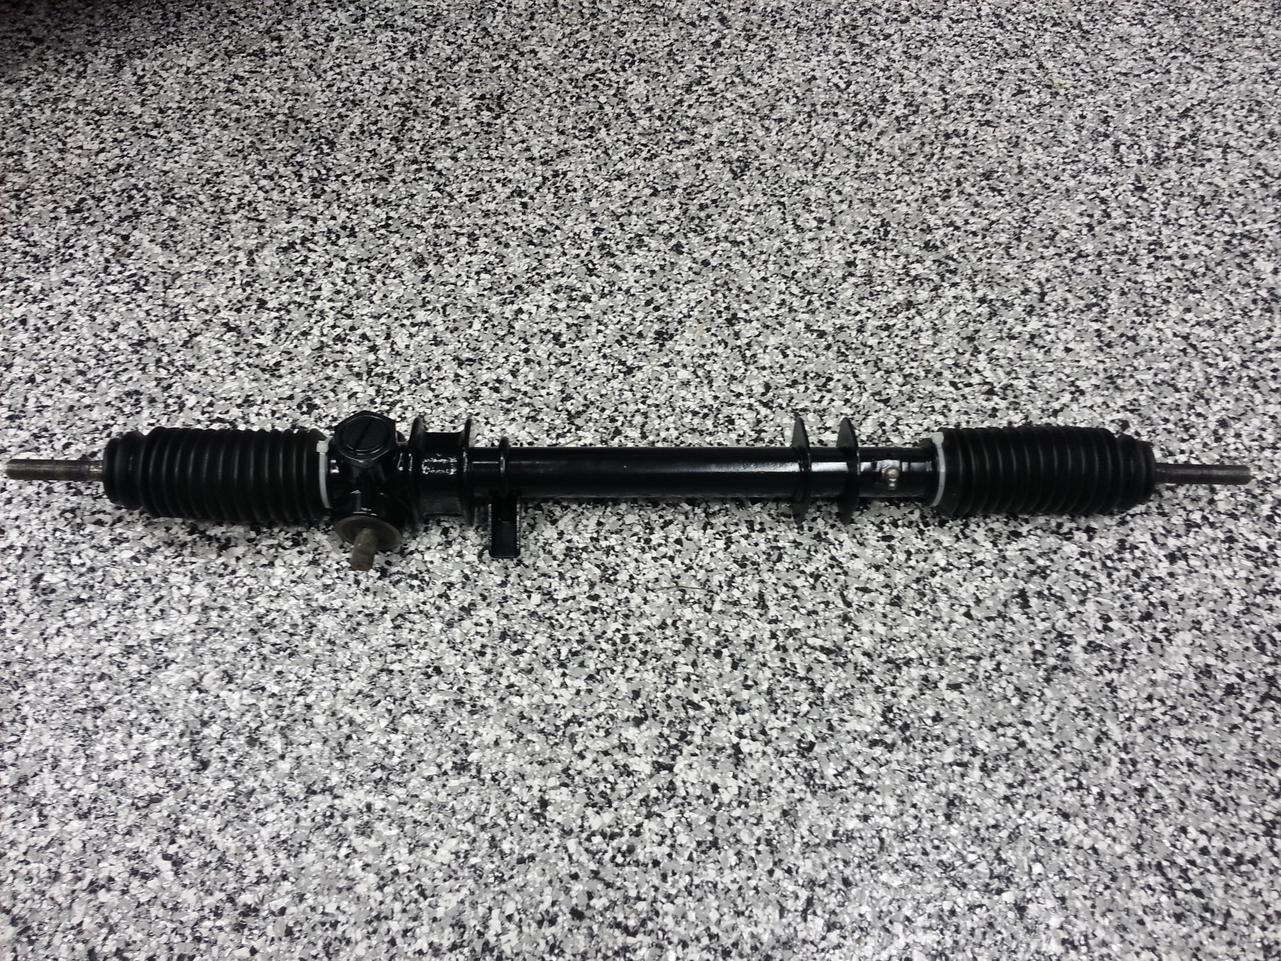
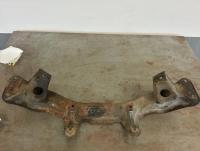
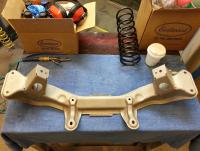
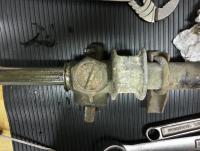
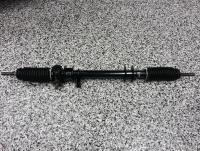
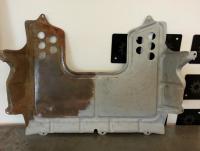
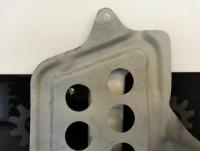
Update: It turns out that me and my obsessive compulsiveness are highly susceptible to the "while I'm at it" affliction, which results in me diving deeper into projects than I originally planned and getting hung up on a lot of little details I have a hard time skipping steps or leaving things done improperly. Good thing I don't have a time table for this thing. I had not intended to remove the front crossmember & steering rack, but I ended up doing it anyway. I powder coated the crossmember and partially disassembled, cleaned and painted the rack. K-member Before Sandblasted After Rack Before Wire wheeled After (sorry for the seizure-inducing epoxy floor chips!)


-
John, do you know how it affects feel/feedback? It doesn't affect lateral stiffness of the rack, only rotational stiffness (if that). Any idea what were the customer complaints that it addressed? It would seem that any axial rotation of the rack would be absorbed by the multiple joints in the steering shaft, and wouldn't be perceived by the driver.
-
I thought that might be the case. Thanks for getting back to me. You must have email alerts turned on to know to respond so quickly! Cheers
-
1.5 qt, huh? What diff have you got? My FSM says 1 qt and I'd hate to end up with too little once I get started. This stuff is not so easy to come by. Per the product descriptions, the NS is for Non limited-Slip applications (like an R180).
-
Sorry to bring back an old thread with an off-topic question, but Chas - do you have a write up on your steering rack resto? Finished product looks really nice!
-
What's wrong with the front bumper? Looks just like the original bumper on my '73.
-
Do you mean that your pads are used up, or that the Centrics aren't available anymore?
-
Ok, piggy backing off my own thread here... while I'm on the subject of original springs, it seems my options are pretty limited for refreshing the suspension... I can 1) reuse my original springs with KYB dampers (any other choices??) 2) go with a lowering spring and appropriate shock (Tokico Illumina and Tokico Performance springs, if I can find some) Am I missing anything? I've never been a fan of aggressively lowering a car. Yes it looks great. But it generally alters suspension geometry and details that are very carefully developed by the manufacturer. Also the higher rates of lowering springs degrade ride. Everyone knows this. That being said I wouldn't mind a subtle decrease in ride height and corresponding handling improvement, I just feel that most "performance" springs are too aggressive. But if I keep it stock-ish with the plain-jane KYB's, the gas pressure in the shock will increase ride height?? So long story short, are my only options to lower the car significantly, or to raise it slightly from stock?
-
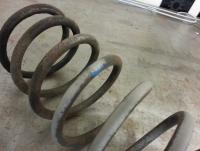
Thanks for the info, Dan! I had searched for stock spring color but it's tough to wade through all the threads from people doing suspension rebuilds when you do a search like that. So the rears have white dots (since they're equivalent left to right), the right front has blue paint only, and the left front has both blue and red paint? I checked the FSM and sure enough, Blue's right. The left and right front spring rates are both 1.48 kg/mm, and both are 10 turns, but the free height on the left is 373.5mm vs. 386mm on the right.
-
I thought for sure that my car had stock springs but tonight I was sandblasting and found blue paint under the rust and crud. I was expecting simple black paint or plain e-coat. The blue blasts off easily and there is a very tough black layer underneath. The car is almost completely original; I bought it from its first owner who kept everything from the original worn out tires when he replaced them, to the original sealed beams when he had the car painted. So I was expecting stock springs. The car did have Koni inserts installed in 1975, so perhaps new springs were installed along with the gas shocks? Does anyone recognize these? They look pretty similar to Jetaway's springs in this thread.
-
Your first problem will be the same one I'm currently experiencing, which is that Illuminas are (temporarily?) no longer distributed in the U.S. I know that Tokico was bought out or otherwise absorbed into Hitachi Automotive a while back, and I wonder if the current lack of a distribution network has something to do with this. I just started looking for Illuminas the other day and they can't be found anywhere. Now, Hitachi is one of our suppliers at my job, so I've contacted them in the hopes that I can somehow source a set of Illuminas from Japan. If you're interested, I can try to get two sets and ship one to you, but no promises yet. I'm very interested in hearing feedback on sectioning the struts. I hope that this is not necessary to install Illuminas since I would like to keep my struts stock. I hadn't read anything about needing to section them. Hopefully they can be installed in non-sectioned struts for my sake, and also in sectioned ones for your sake I'm also curious about the correct spring to pair with Illuminas. Are you running stock springs?
-
I used the G2 kit on my Mazdaspeed3 daily driver and it's in great shape after three years, including one track day during which the front calipers got hot enough to scorch off a vinyl "mazdaspeed" sticker I had applied over the paint, but the paint itself has held up perfectly. It is black paint so it probably shows wear/damage less than a brighter color would, but as far as I can see it's been a great product. That being said, I do not plan on painting a set of calipers again. Cleaning old grungy calipers on the vehicle is just too labor intensive & messy. I suspect part of the reason my Mazda's paint has held up so well is due to extensive cleaning and prep. For my Z it's a different story since everything's coming apart, so the calipers will be sandblasted and powder coated like my other suspension parts.
-
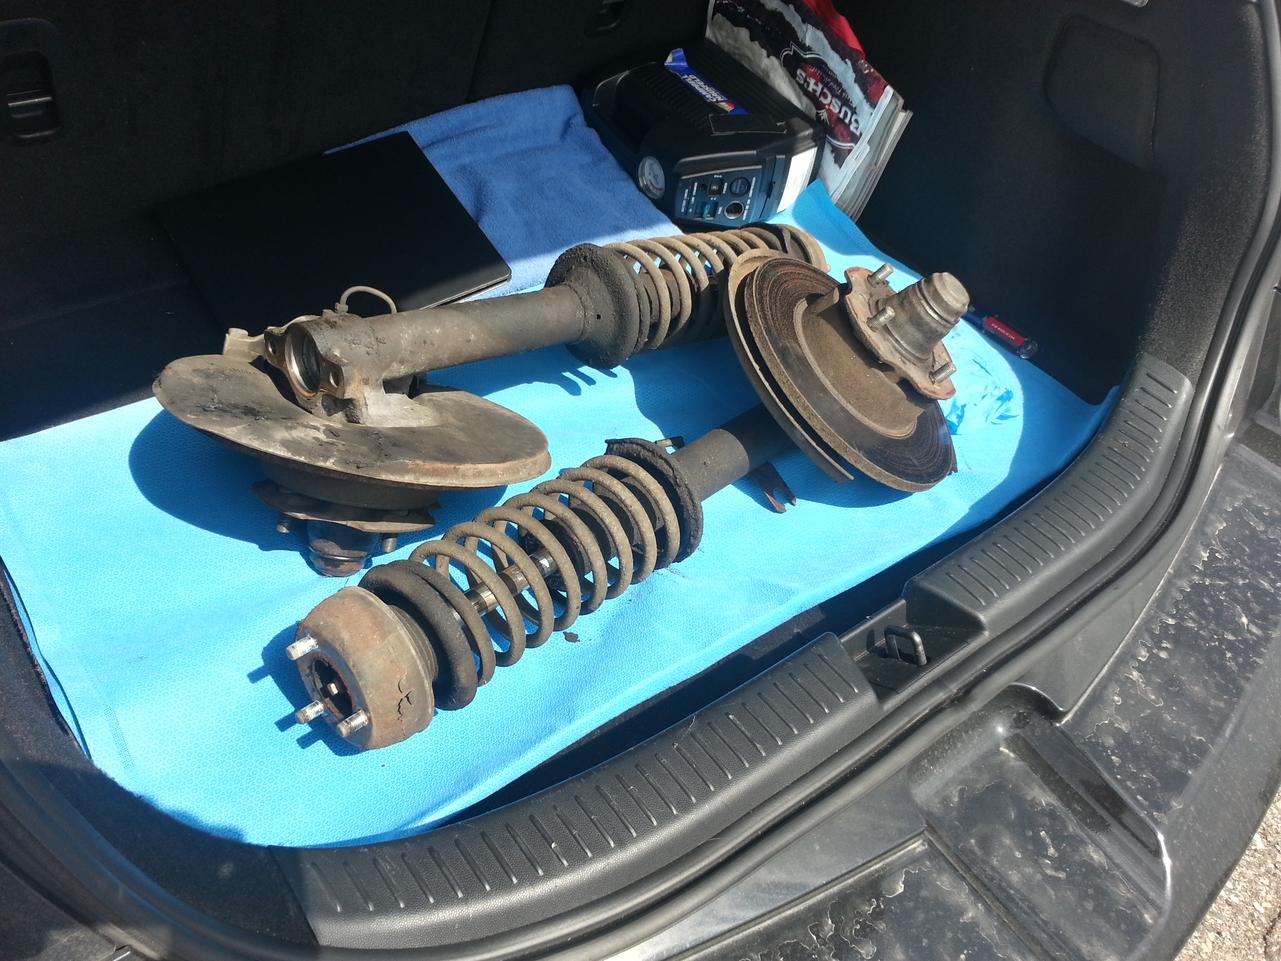
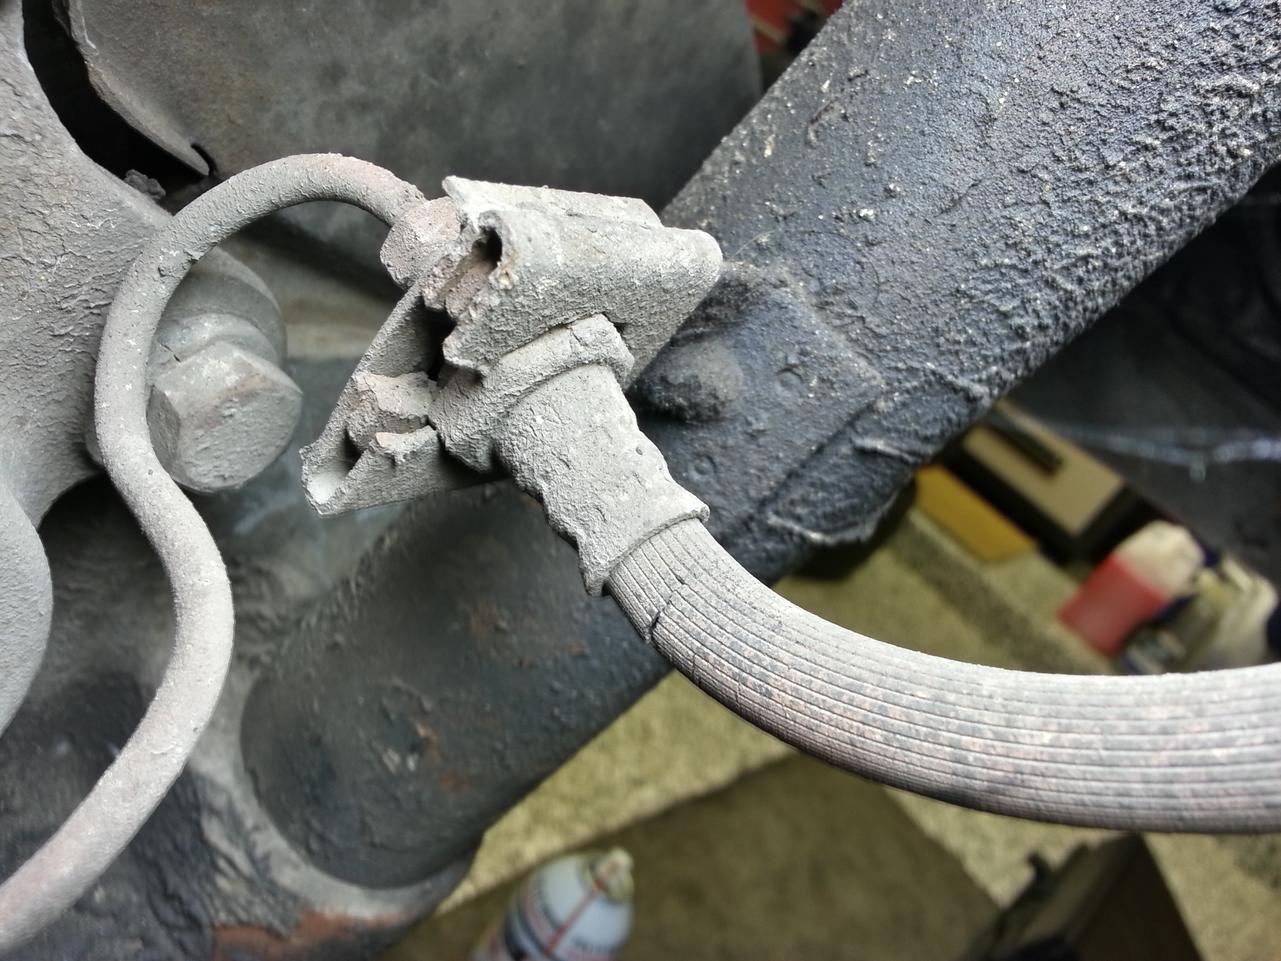
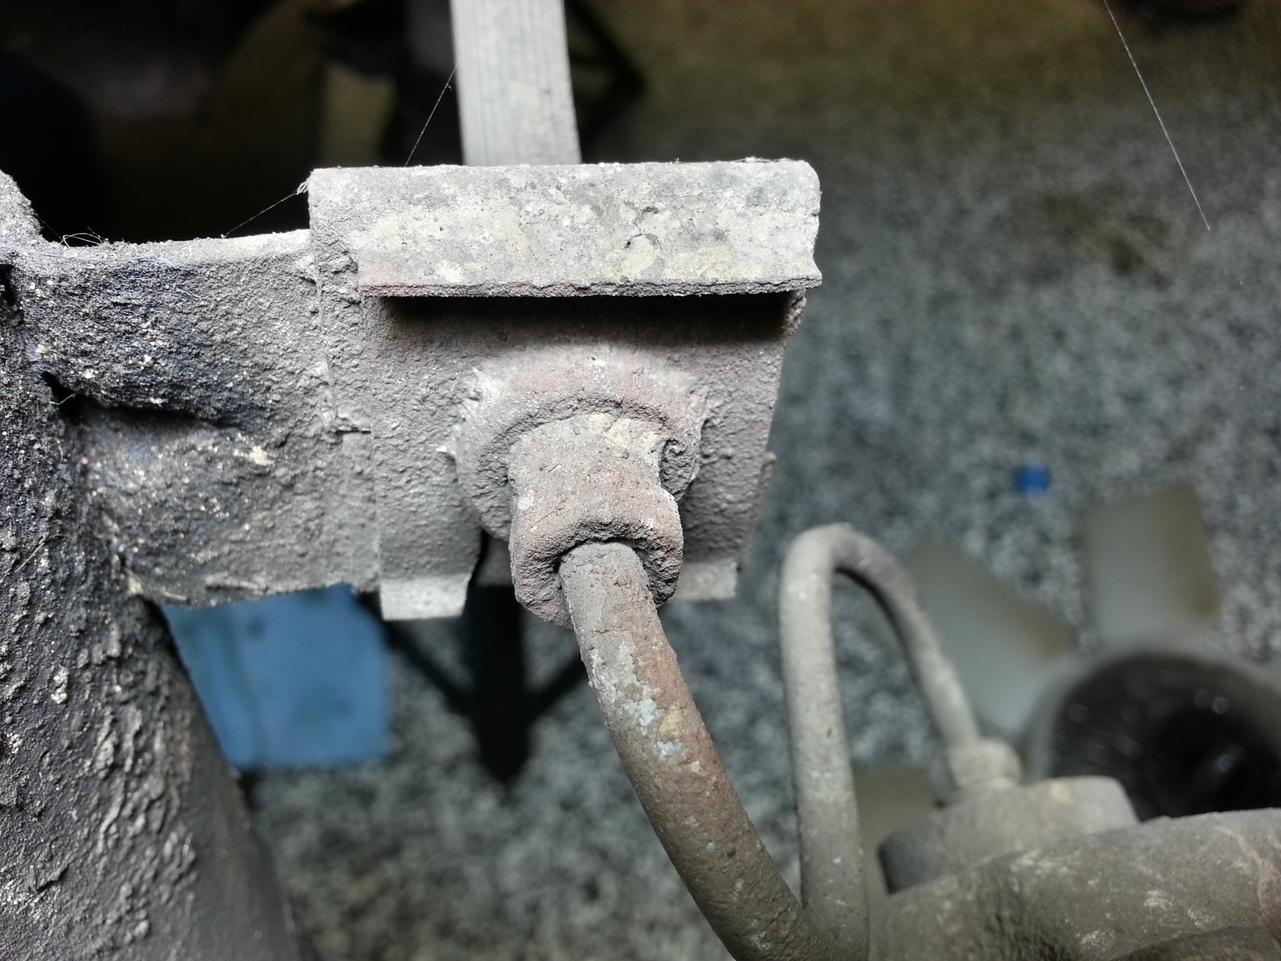
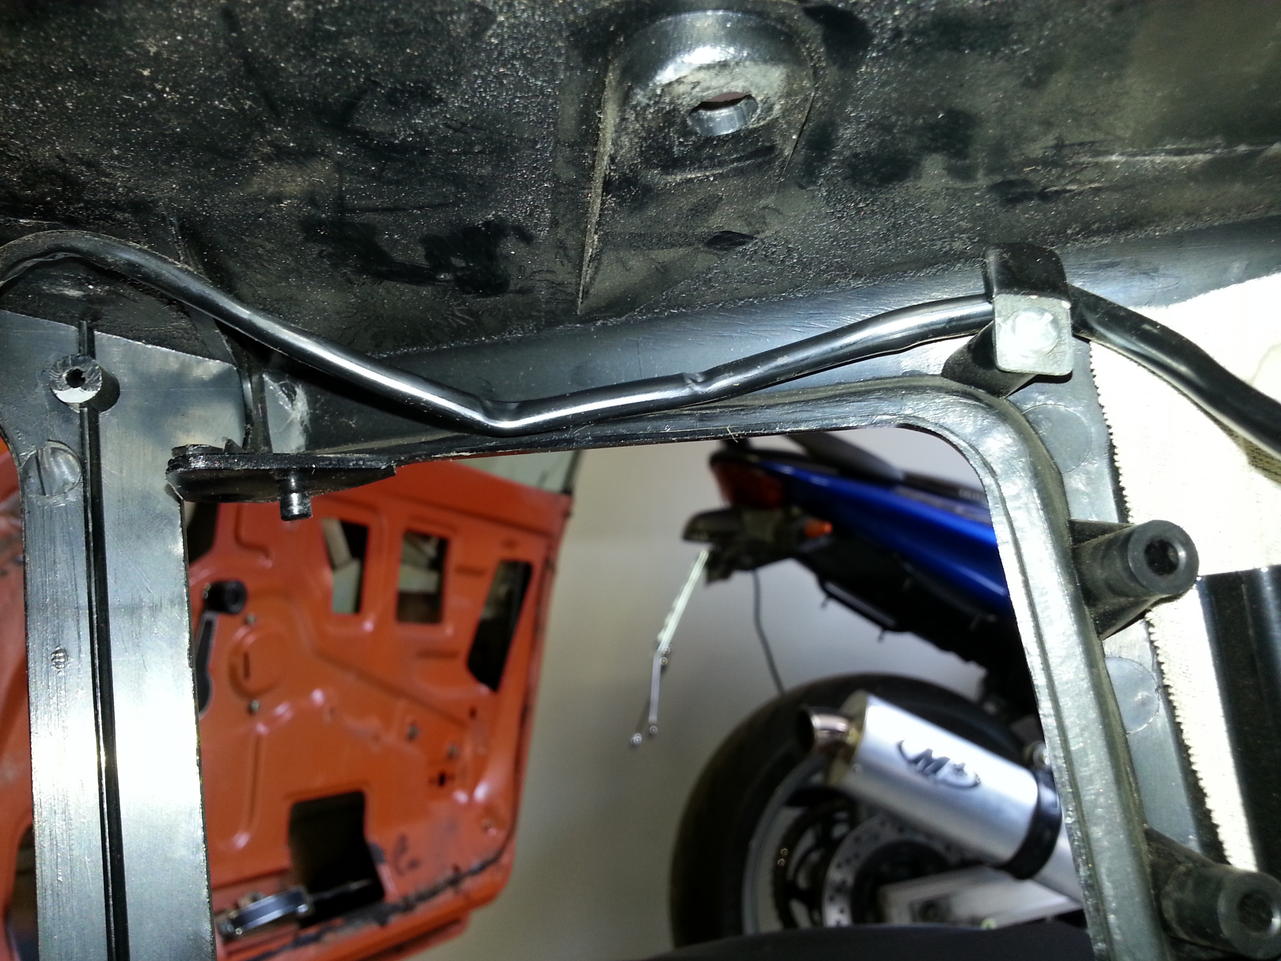
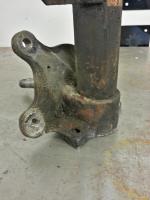
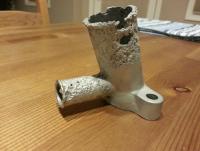
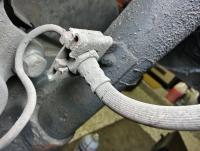
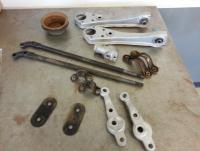
I had new bushings pressed into the control arms and was getting ready to re-install everything, but my hubs and struts are just as nasty as everything else and I'm having a hard time bolting the nice new stuff back onto it. I can't afford new shocks at the moment but I'm tempted to take the strut housings and hubs in to powder coat while I have everything else apart. I'm replacing the soft brake lines at each corner, so while I have the brakes apart I'd also really like to have my brake calipers refurbished by PMB Performance... All of this of course delays getting the car back on the road so I'm still going back and forth. Here are some shots of the crusty brake line connections. I wasn't even sure how these came apart but after some PB blaster and some FSM, I figured it out. Can anyone tell if the brackets have been cut? I don't think that slot in the first pic is supposed to be there. I suspect that when the shocks were last changed (in 1975), the mechanic cut the bracket so he didn't have to separate the brake lines to remove the struts... just a guess. Kind of an amusing story about the shocks - during my first test drive I could tell they weren't doing much so I asked if they were original. Brian proudly told me that he'd had Koni shocks installed "a few years back". I got a lot of paperwork with the car and it wasn't until I spent some time going through it that I found the receipt for the shocks, dated 1975! Yeah, they're basically brand new I wanted to post this up, too. While I was waiting for the powder coating situation to sort itself out I did some work on the cooling system. The water pump and water inlet both seemed to be leaking so I replaced them. I started sandblasting the water inlet, intending to reuse it and this is what I found. 40 years of coolant-turned-acid will do this to aluminum, apparently. No wonder it leaked.

-
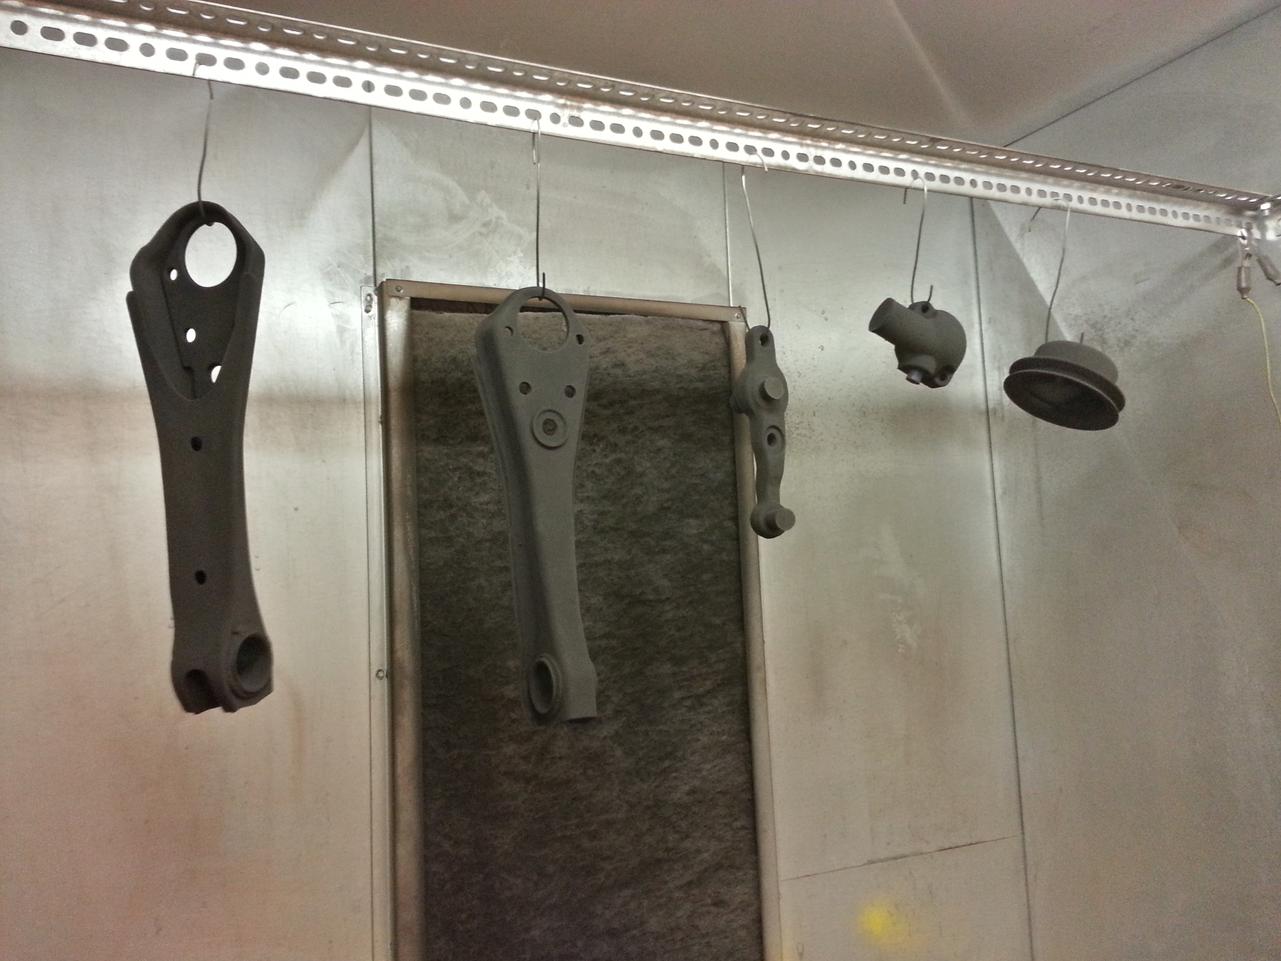
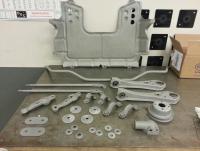
After sandblasting, the parts should be cleaned with Tri-Sodium Phosphate then wiped down with acetone. They rust extremely quickly at this point so it's important that they’re dry and to get the powder on quickly, then get them into the oven. I didn't get many pics of the process since I was working alone and getting parts cleaned and in and out of the ovens was keeping me busy. Here's raw powder on some parts: And some of them cured: All done! Pretty pleased with these results.


-
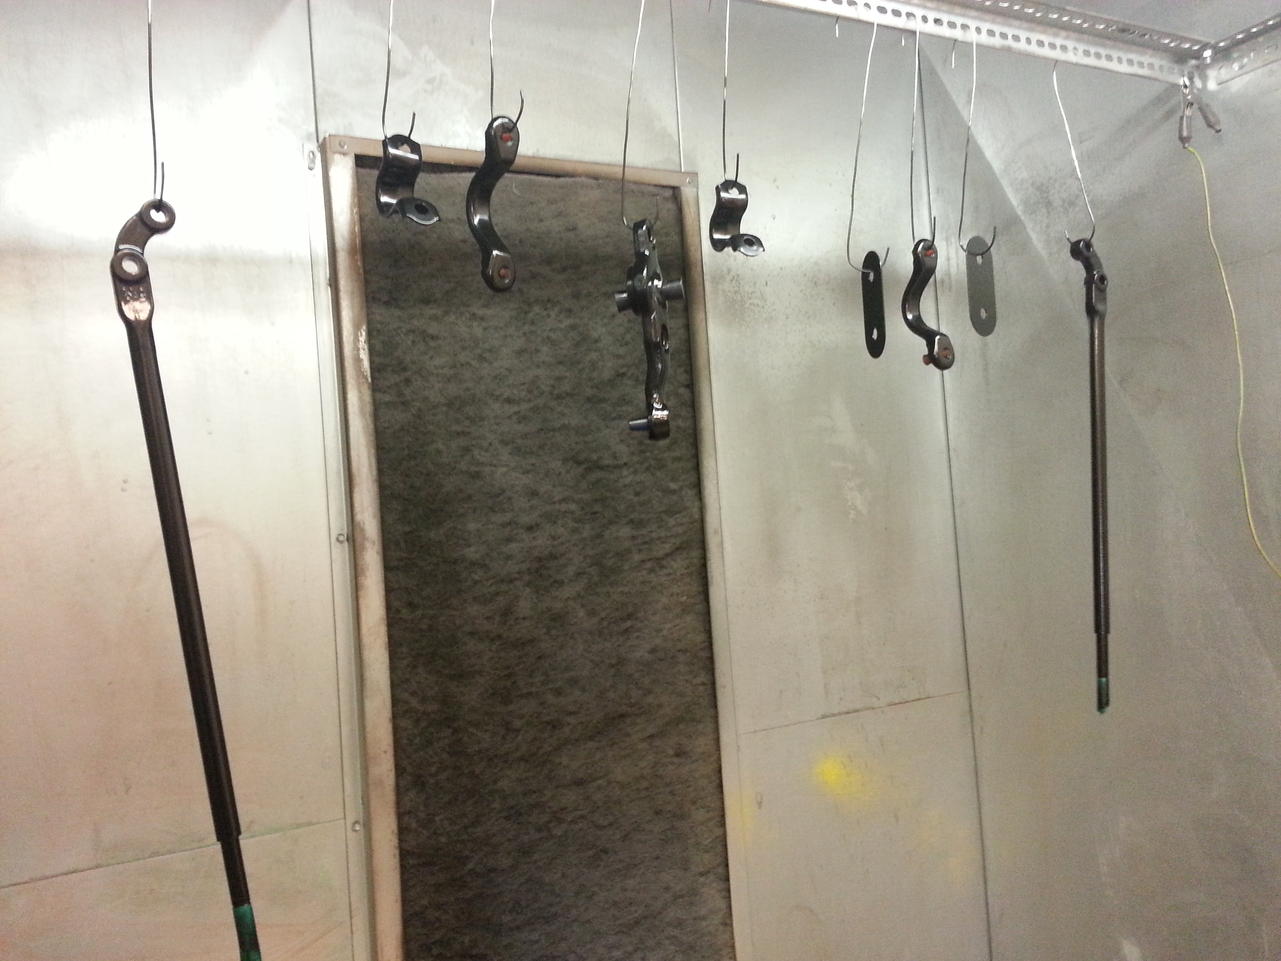
Time for an update. I finished my first batch of powder coating! Everything turned out well I think, for my first time. Here are some before & during shots while sandblasting the parts: Sandblasting is great but awfully time consuming. Everything sandblasted!


-
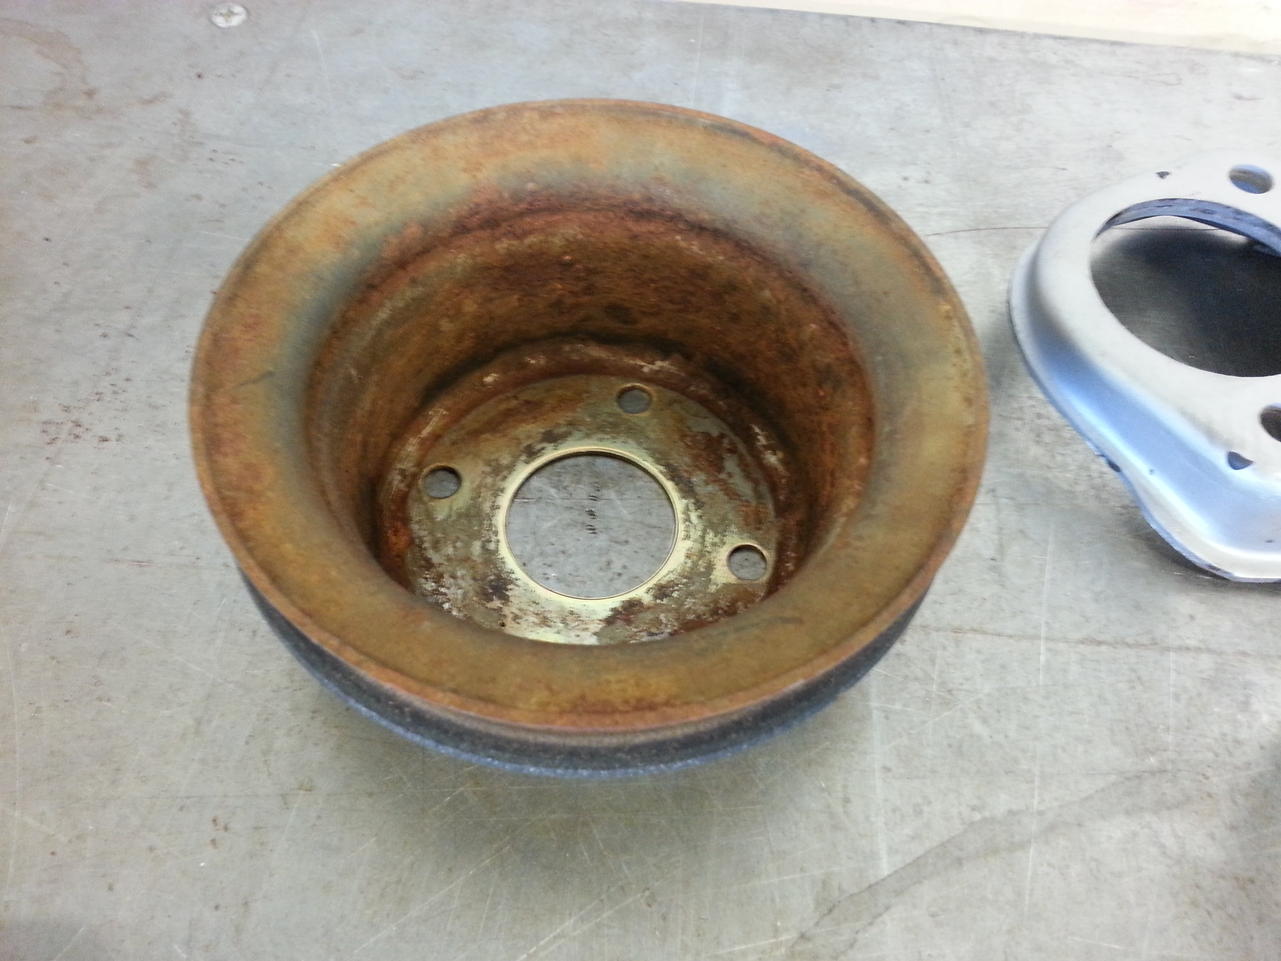
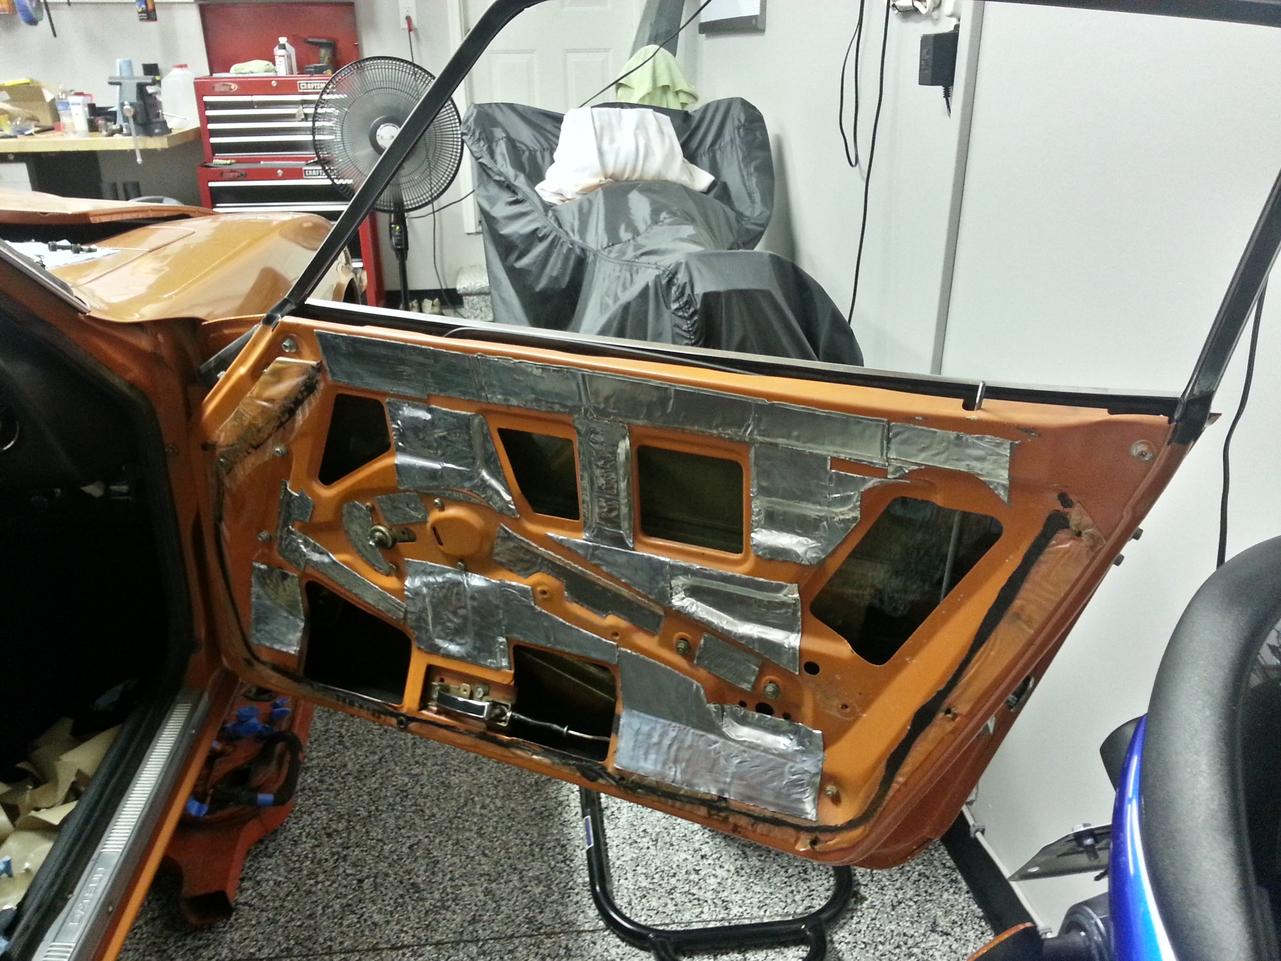
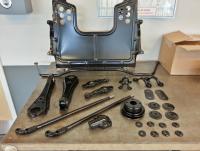
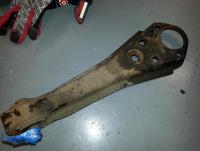
Re: flat tops and smog, just look at this mess. Wouldn't you rather have a shiny set of properly sorted ZT SUs sitting in there without all that other nonsense? I'm lucky to have a facility nearby that allows all kinds of DIY machining and fab work. I'm trying to get in to use their powder coater for my front suspension but there's a long wait to take the certification course. So the suspension has been apart for weeks. In the meantime I've been working on the interior. The passenger window wasn't working well and the driver side lock wasn't working so I removed the trim panels and poked around inside the doors. I was able to fix both issues and added a bunch of RAAMmat (Dynamat type stuff) to the door panels. The choke lever was so stiff I could barely pull it back, so I also removed the console and choke cables, cleaned and greased them, and reinstalled the choke lever assembly welded onto a metal plate as suggested by ZTherapy. The lever feels so smooth now! Unfortunately I failed to take any photos of this process, I don't know what I was thinking. "While I was at it" I replaced the completely MIA shifter bushings, so the shifter feels much better. Once I get the powder coating done I'll really be able to make some progress. My bead blasted control arms and knuckles are just sitting and waiting (and rusting). Here's the before... gross.


-
Thanks for the nice replies, guys. Rich, you're right, the PO didn't mess with it hardly at all. He seems to have taken great care of the car but I don't think he was particularly mechanically inclined so he didn't mess with it or install aftermarket parts. You're also right that my opinion of the flat tops has been colored by what I've read here as well as input from a local Datsun shop and ZTherapy (which must be taken with a grain of salt since they're trying to sell a non-flat top product). But also, the car runs pretty terribly and definitely exhibits the difficultly with warm starts that I've learned is common with the flat tops. The carbs need an overhaul, and I'm not sure whether to refurb the flat tops or change over to SUs. I didn't go into this intending to keep a very original car but given this one's condition it doesn't seem right to mess up too much. Thanks Hardway! The car is pretty solid but there are soft spots in the floors and you can tell there's rust in both rockers. I'd like to completely re-do the car eventually but I have neither time nor money for that now. Since the car is pretty solid I just want to put the suspension back together and address driveability and have fun with it. The chrome is decent, just a little dull and slightly pitted. I haven't looked into polishing products/techniques yet. The interior is really nice, I'll get some shots since I just finished putting it back together.
-
Thanks Mike, I'll continue updates as I progress. I have some more progress made by now but it'll have to wait for another time.
-
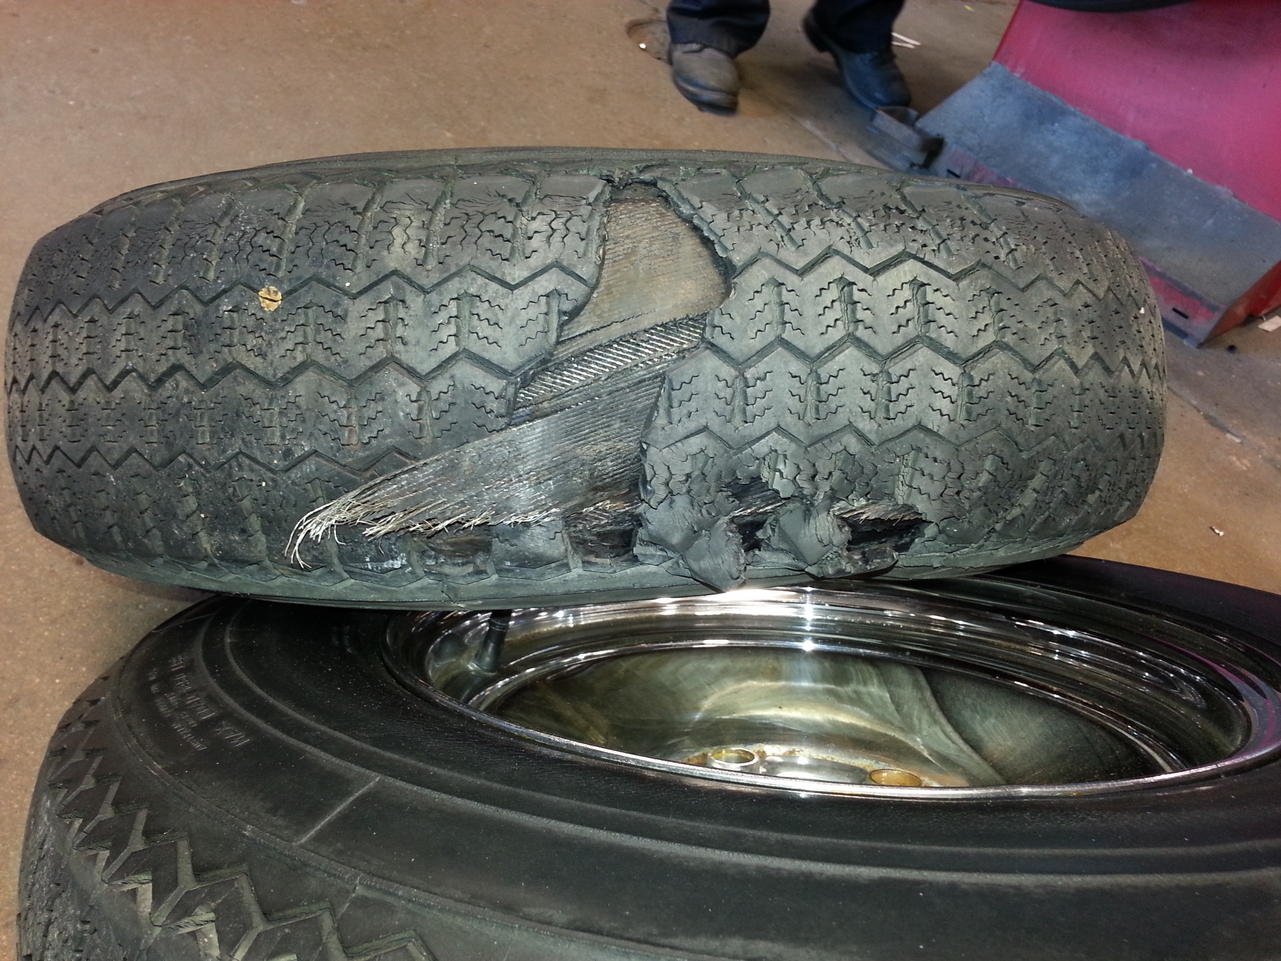
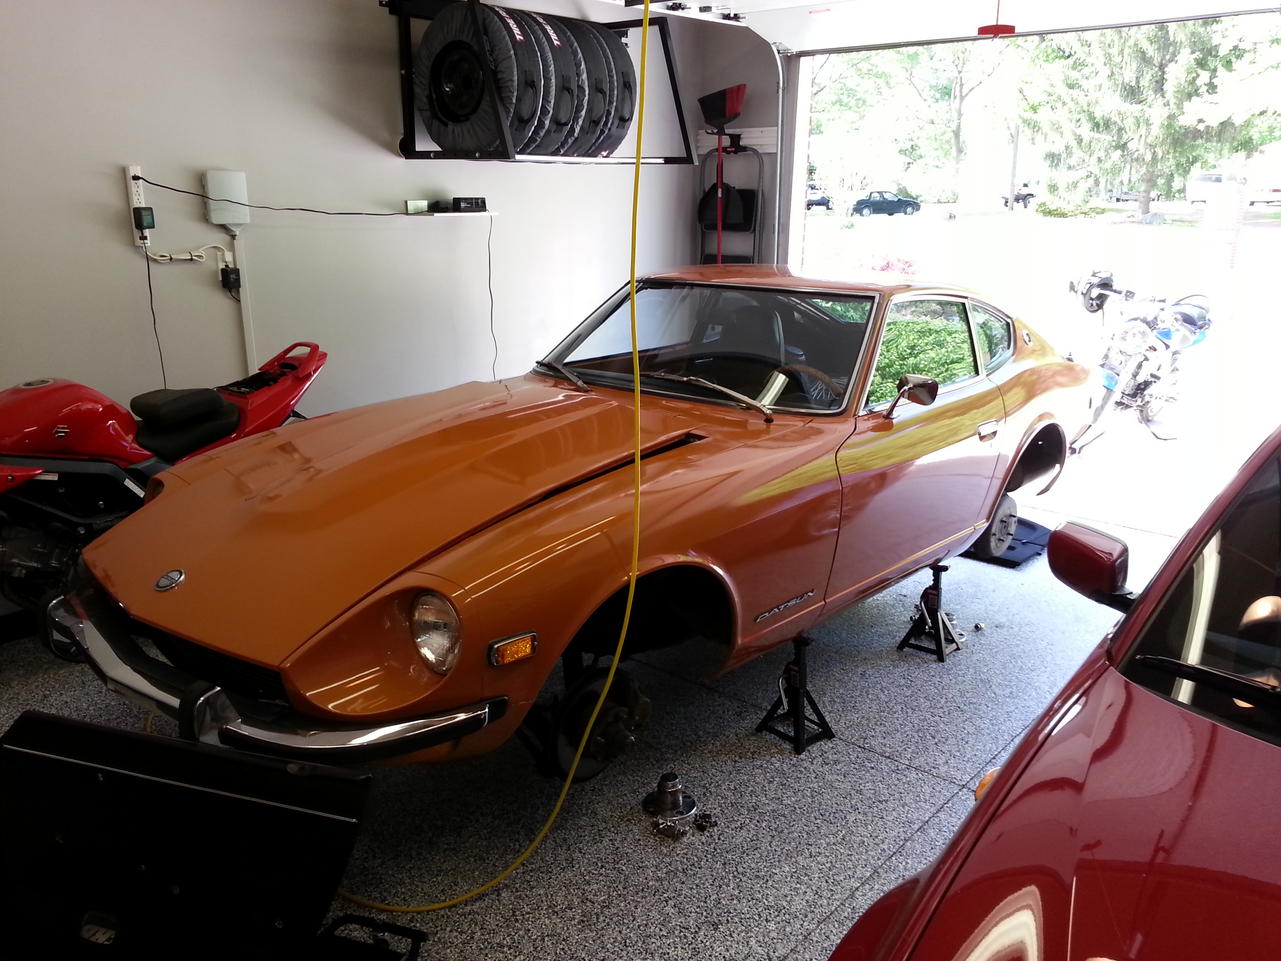
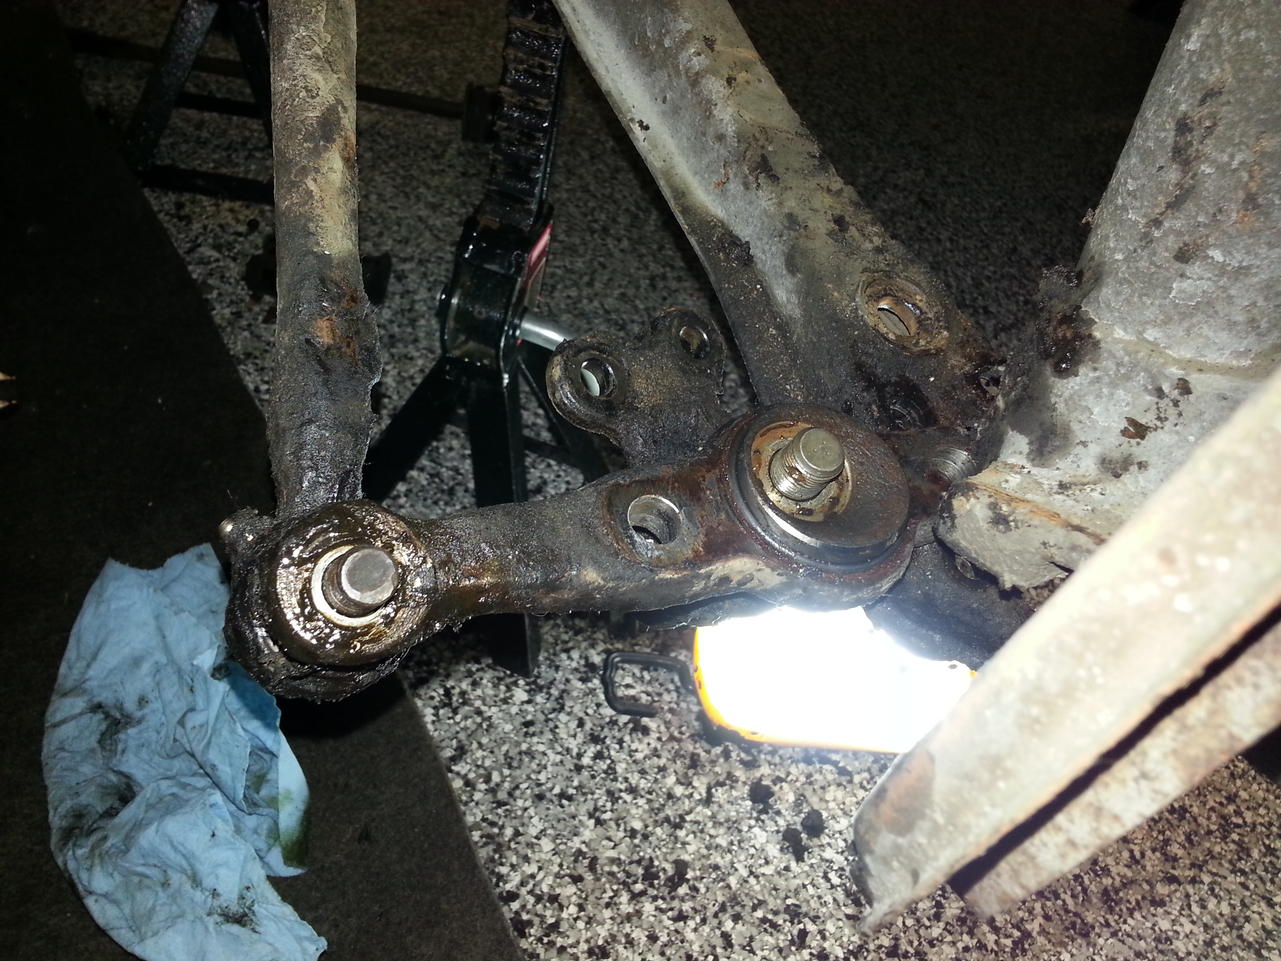
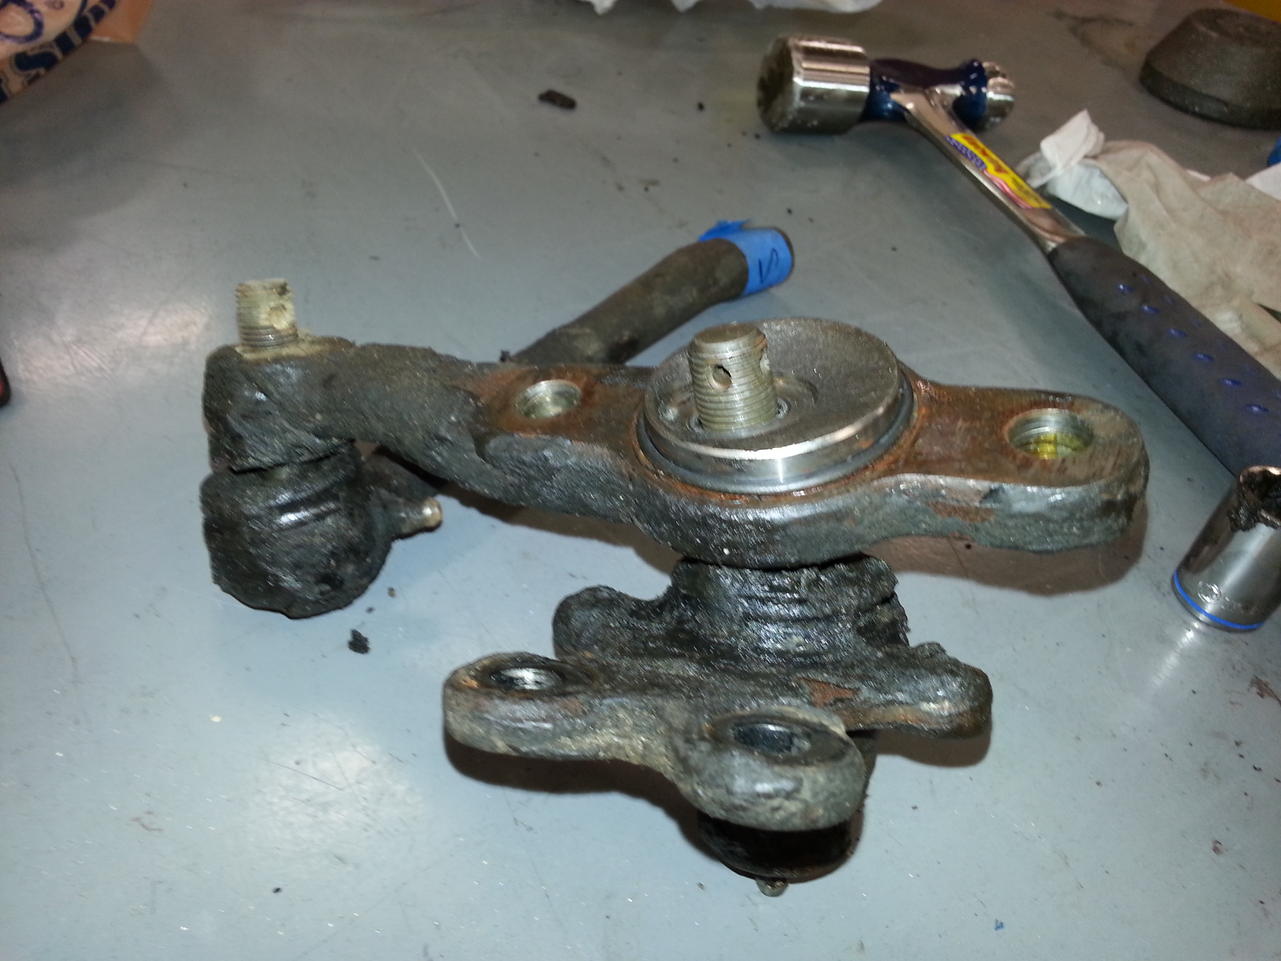
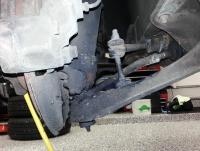
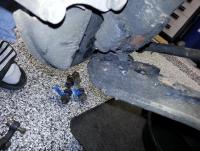
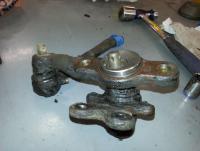
The car and I made the 150 mile drive home from the PO's house, despite tires so old they didn't have a DOT code that I could read. I drove the car all of three times on short trips around town before the left rear tire finally gave up. As I've mentioned in another thread, this happened during my girlfriend's first ride in the car The tire shop dated these to roughly 1985! Due to the aforementioned spare tire from 1973, a flat bed was required to get the car home. Whether it was coincidence or negligence, the key decided to stick in the ignition as the flat bed operator was pull the car off. We pushed it into the garage. Not a glamorous day. So the car went up on jackstands so I could get new tires and troubleshoot the ignition. With the car up in the air I got to see just how much work I get to look forward to! The bushings are cooked, the ball joint and tie rod end boots are ruptured and dumping grease everywhere, and the steering gear bushings fell apart when I removed them. I couldn't get the joints separated so I took the whole filthy assembly to a friend's shop for separating and cleaning. These pics were taken after I'd already removed a third of a pound of gluey old ball joint grease from the joints.


-
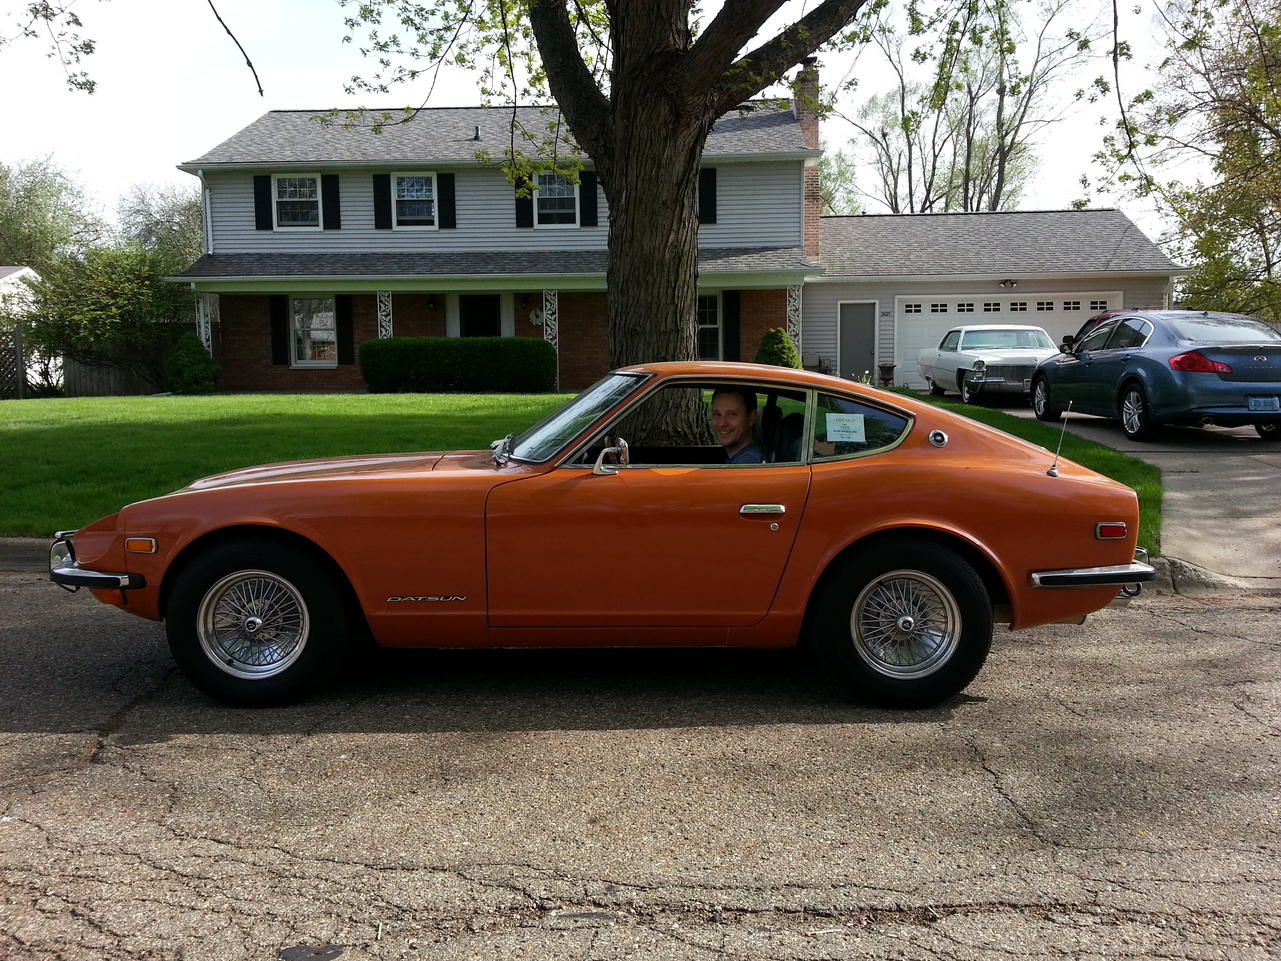
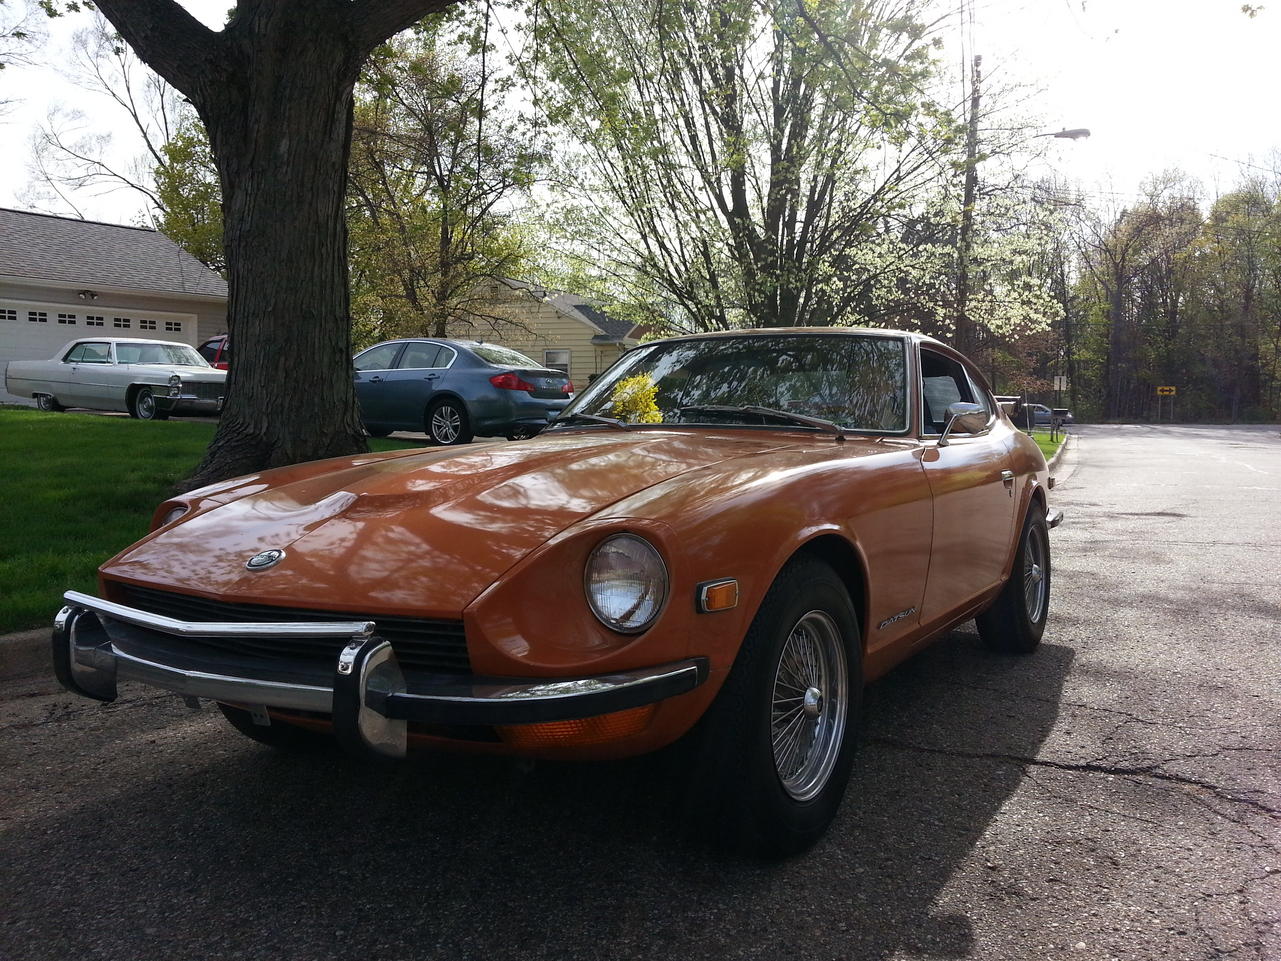
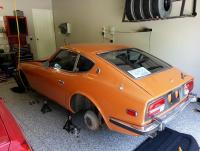
Hi everyone, I'm starting a thread to document my progress and share my experiences in the caretaking of my '73 240Z. I don't remember the first time I saw an S30 Z-car, but I've been preoccupied if not obsessed with them for several years. After taking some advice from Carl Beck and taking into account 1) that any project takes me months longer than it should and 2) my limited mechanical and fabrication skills, I decided I should shop for a running Z in fair to good condition. I had resigned myself to the fact that I would have to travel cross country to find such a car when I found this one while perusing random Craigslist cities in Michigan. First to introduce the car: I bought this car from its original owner (who was also named Brian) this past May. It's VIN HLS30-151534, it was built in March 1973 and purchased in Massachusetts in February 1974. It was daily driven for almost a year, then shared driving duties with the owner's wife's car in the winter of '75-'76. In 1976 he and it moved to Michigan, at which point it was garaged in the winters. The car has 63k original miles and is almost completely original & stock, down to the spare tire from 1973, the flat top carbs (boo) and emissions equipment. For some reason, he even kept the original wheels and tires when he changed them, and wrapped the hubcaps up in newspaper dated 1977. Picking up the car


-
^yikes, that would be even more challenging than the screwed in tabs. It's probably a Series I vs. II thing, when the consoles changed. My smaller tab (with blue tape) definitely goes in the empty screw hole in the upper left of my second pic. Does anyone recognize the larger tab? Still don't know where that one goes.
-
Wow that seems like a really great price for that car! Especially being numbers matching, mechanically sound, low rust... I think you got a great deal. Enjoy it! Quick thanks to Hardway for compiling the fuel vent info (post #13), really helpful to have that in one place.
-
I've just finished a center console R&R and I have parts leftover Namely, they're two tabs/clips, one of which I had labeled "choke cable hold down" (the one with blue tape). I failed to photograph this part when I took it off and now I'm at a loss as to where it goes. There doesn't seem to be an appropriate boss underneath the console to screw it into, and the choke cable seems to hold itself in place just fine. It's not a very long run from the lever assembly to where it tucks under the radio. Also it's so close to the shift boot and the choke light switch wire, I don't think there's room for hardware to hold it in place. Here are the tabs in question. Can anyone recall where they live? This is on a '73. Here's a shot I did take so I'd remember how a similar tab was oriented to hold down the choke switch wire. I remembered to put this one back... Context: this is taken from inside the car with the console tipped up towards the passenger side door, which is open there in the background. The "window" we're looking through is the fuse box lid. Maybe the tab goes in the boss in the upper left corner of the photo?


-
Thanks Blue! I appreciate both the pic and the follow up Very glad to know I'm not crazy and that the nuts actually belong to what I tagged them for.