inline6
 Subscriber
-
Joined
-
Last visited
Everything posted by inline6
-
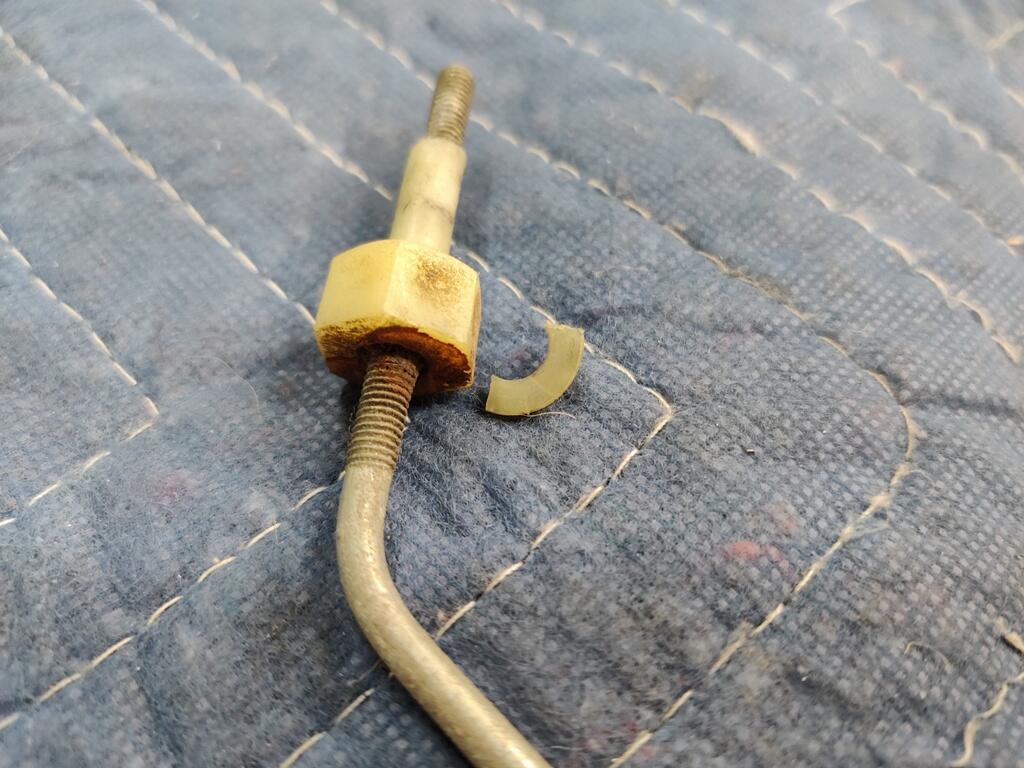
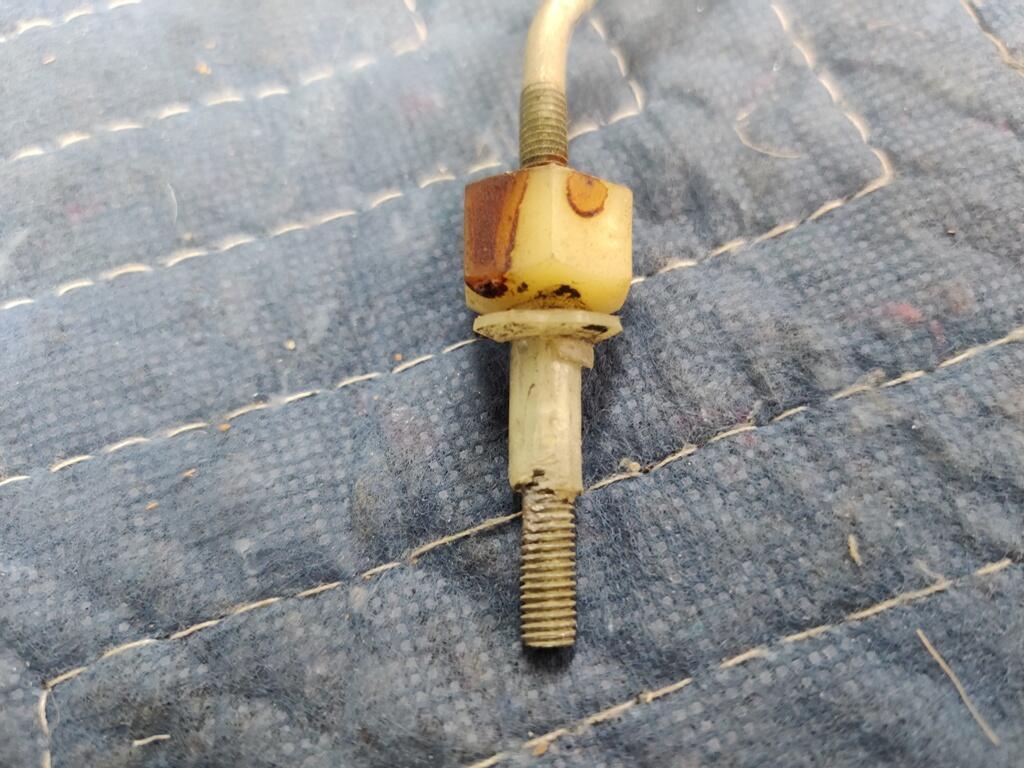
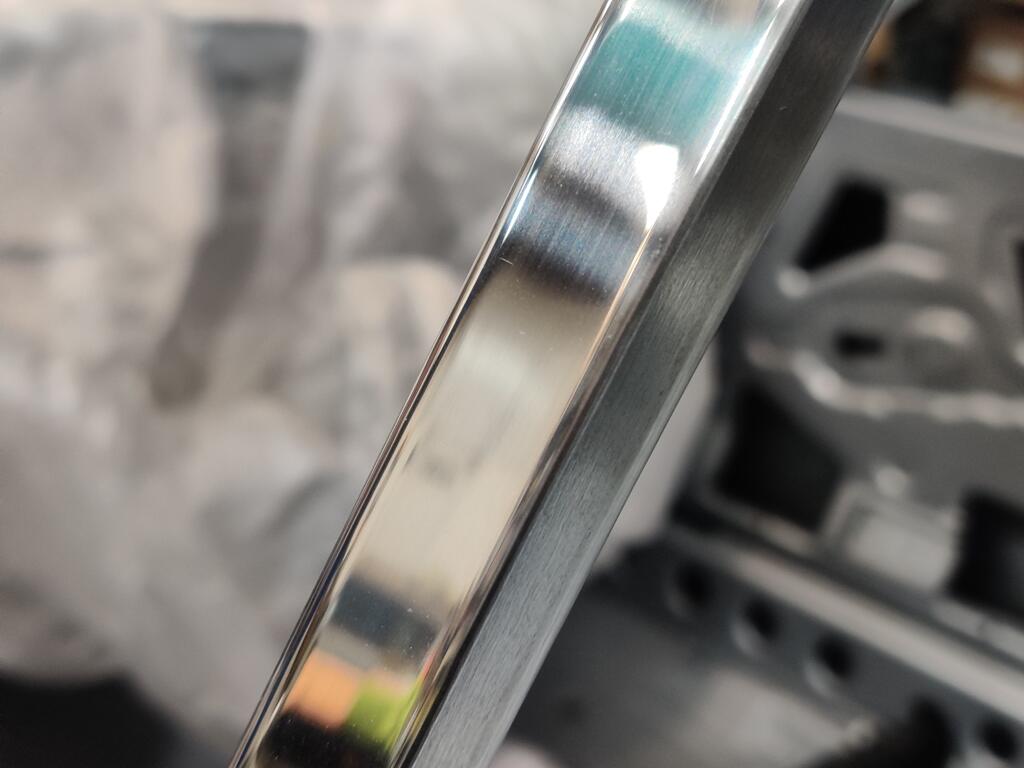
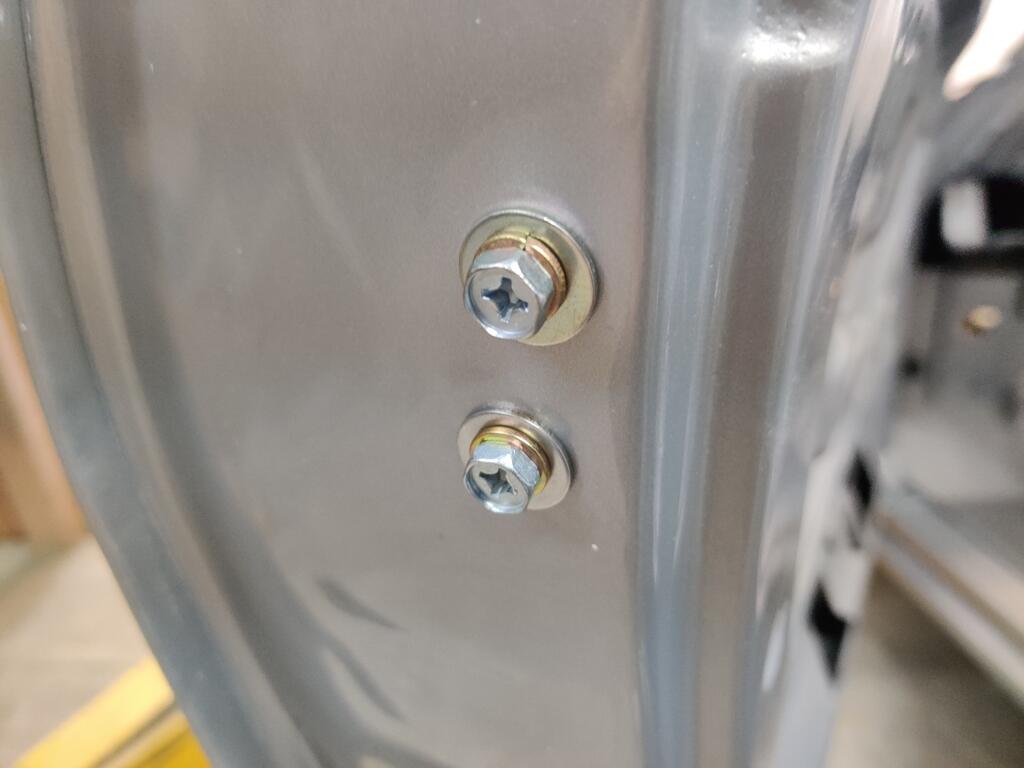
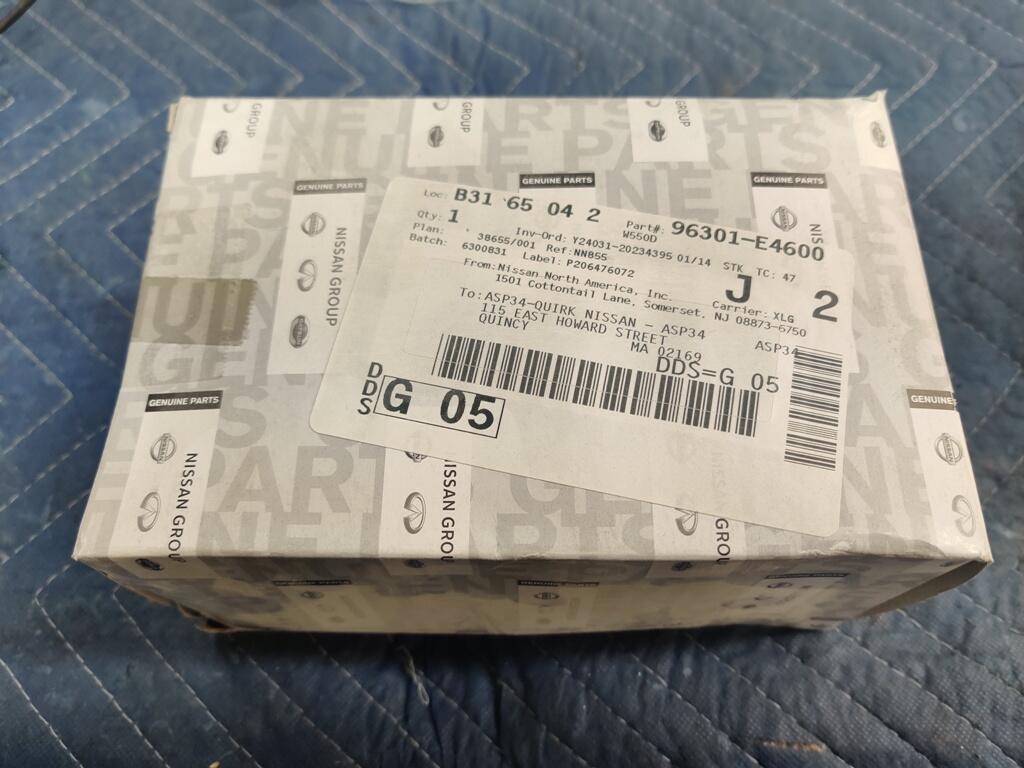
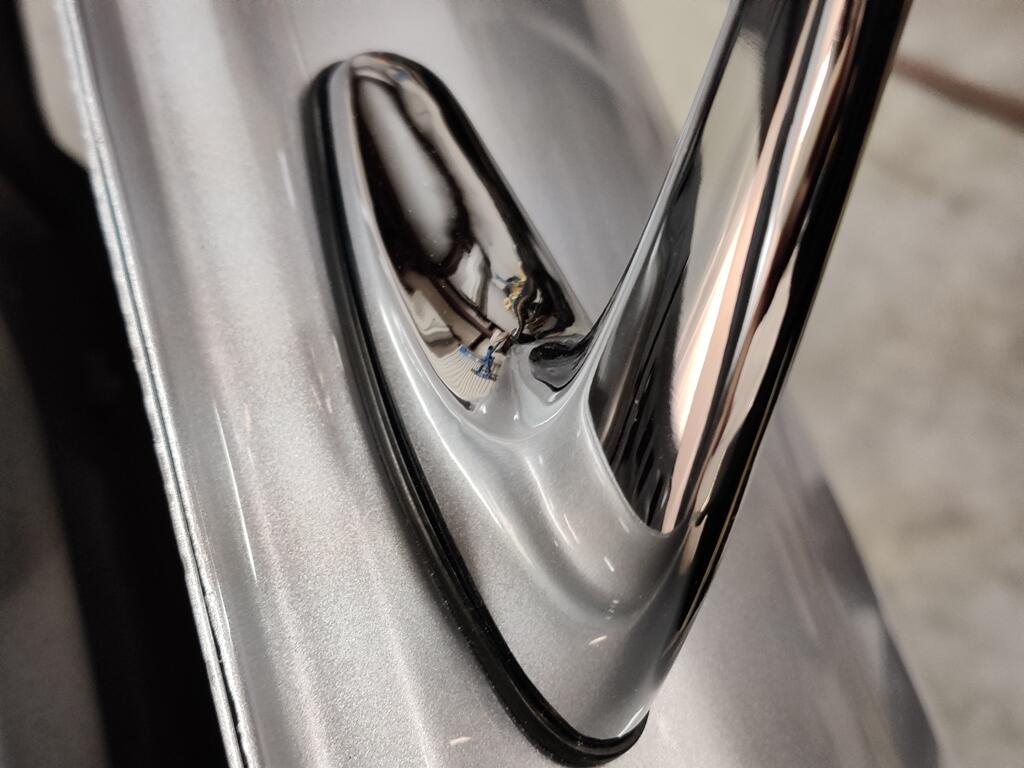
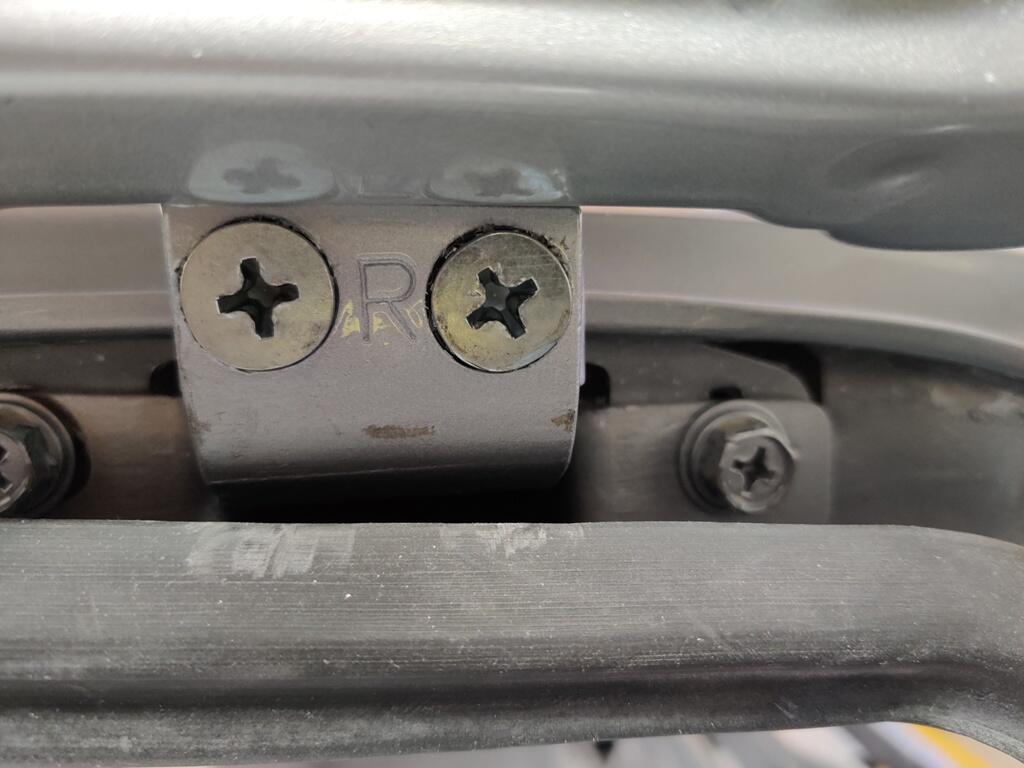
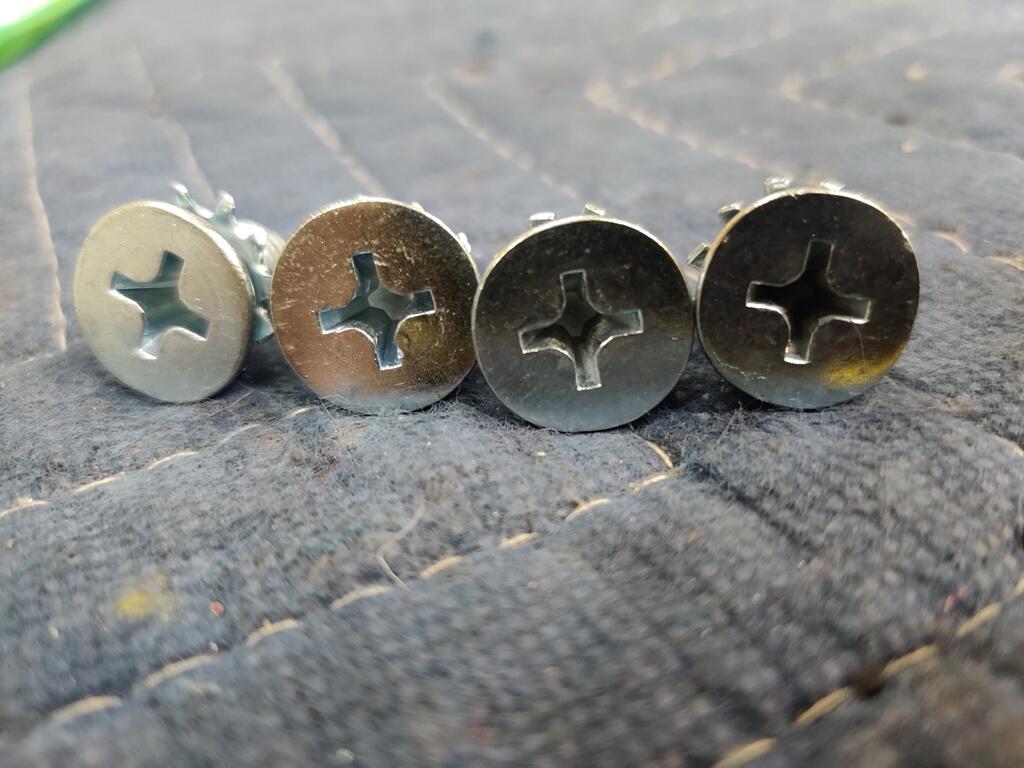
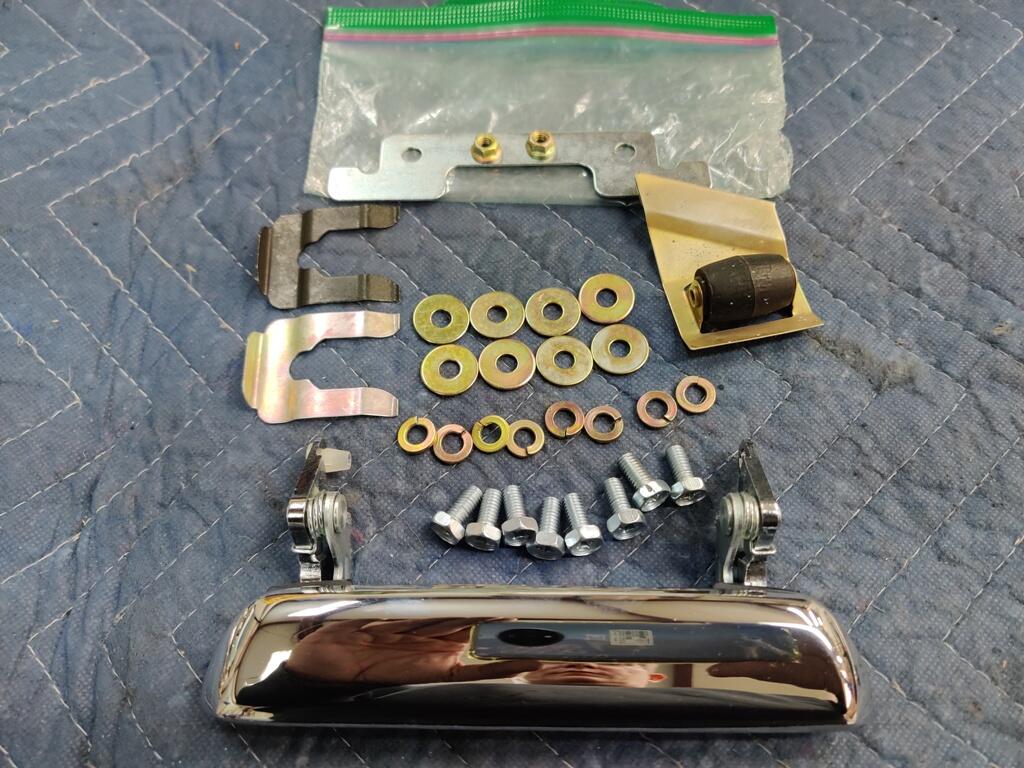
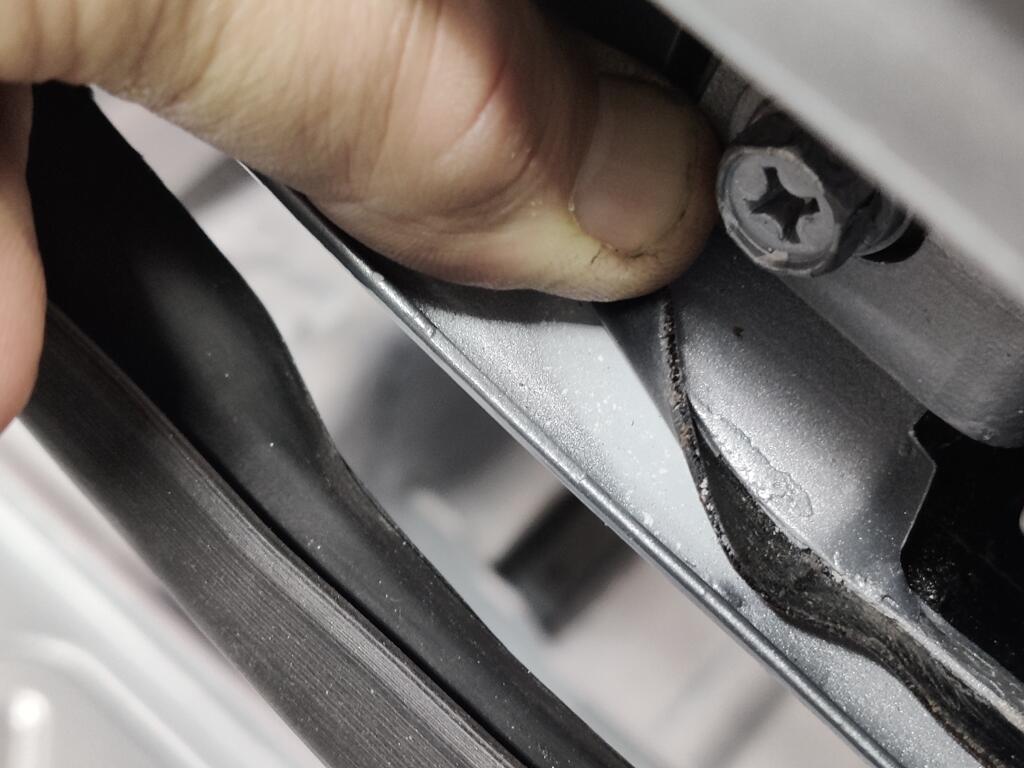
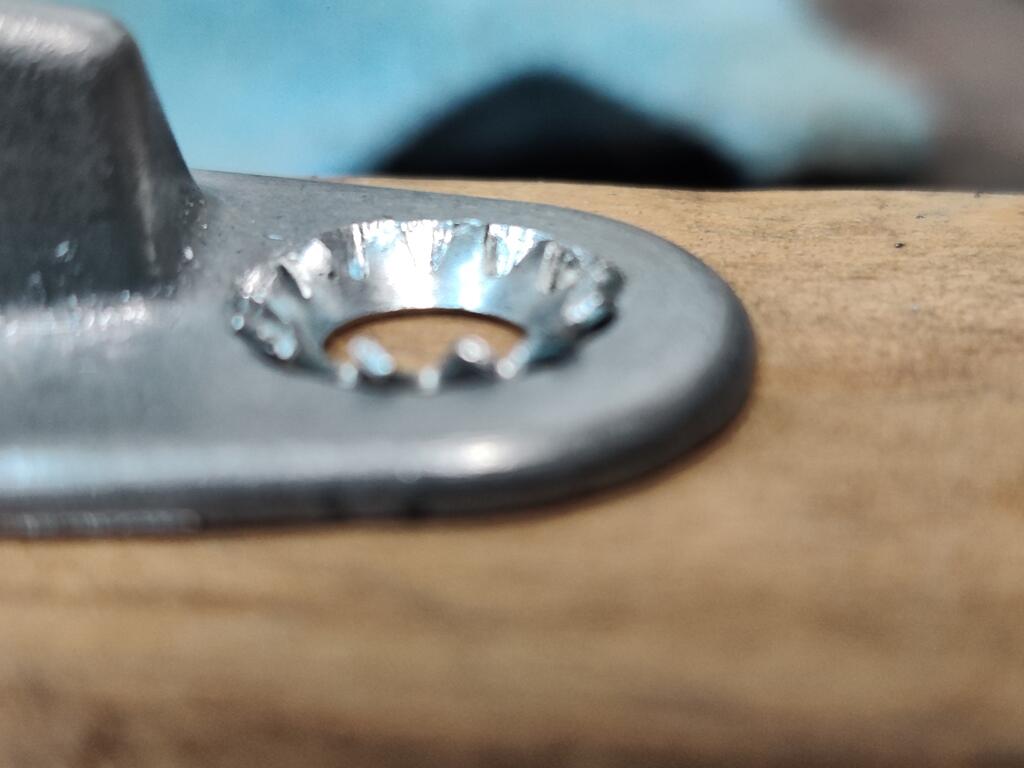
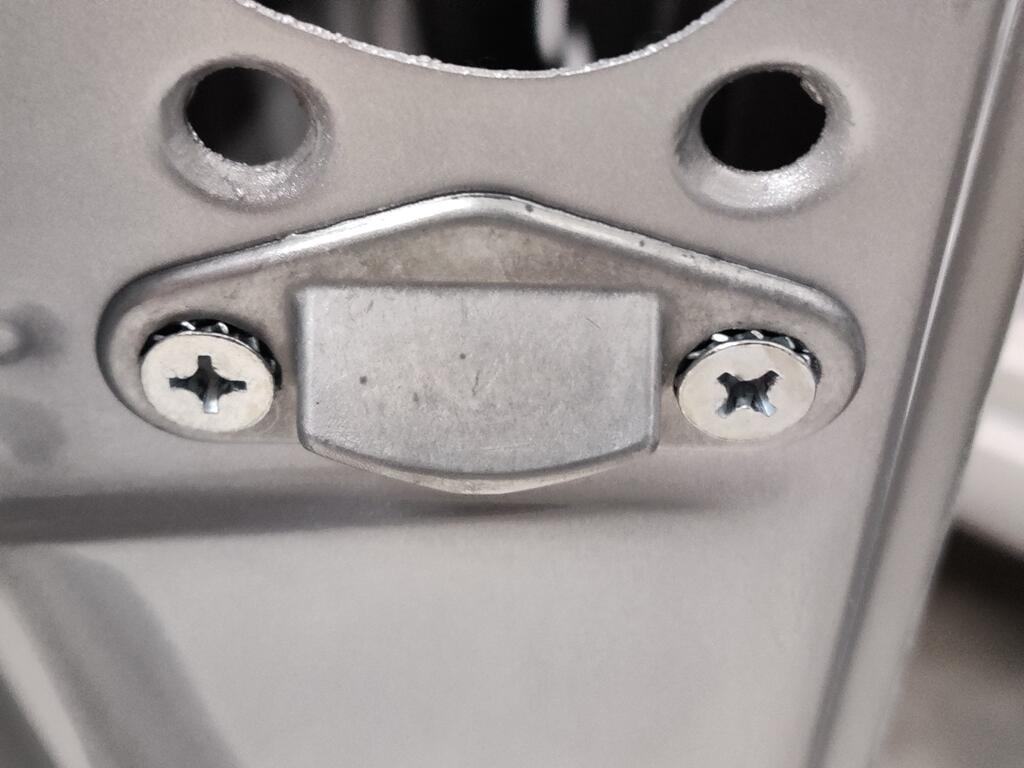
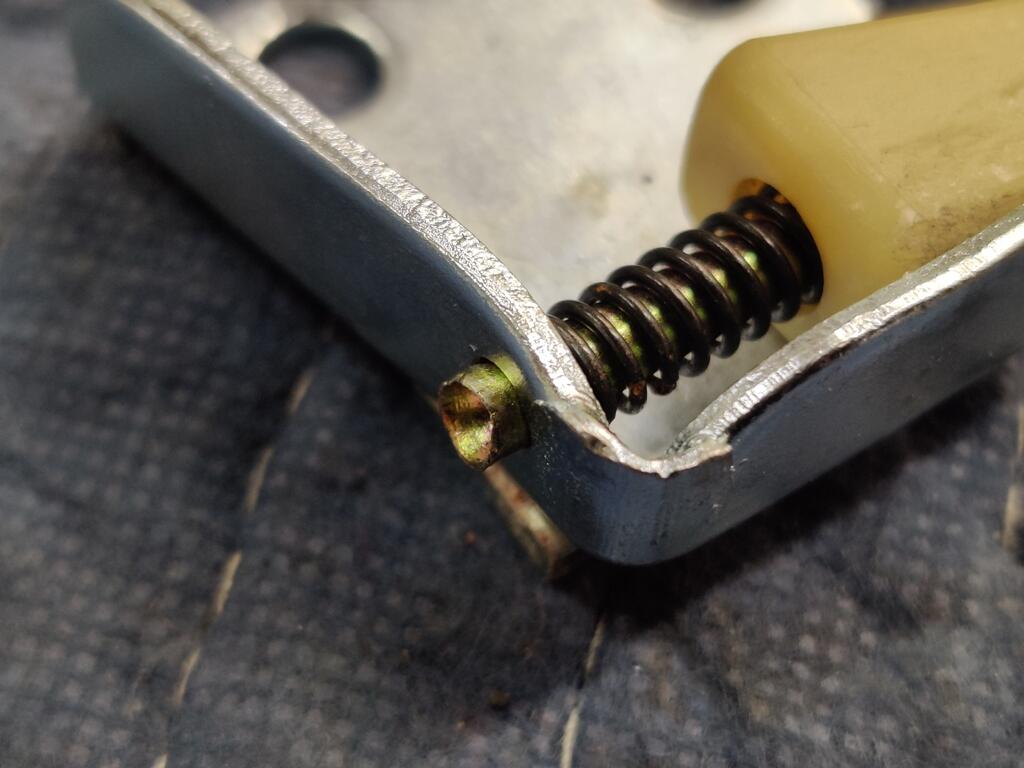
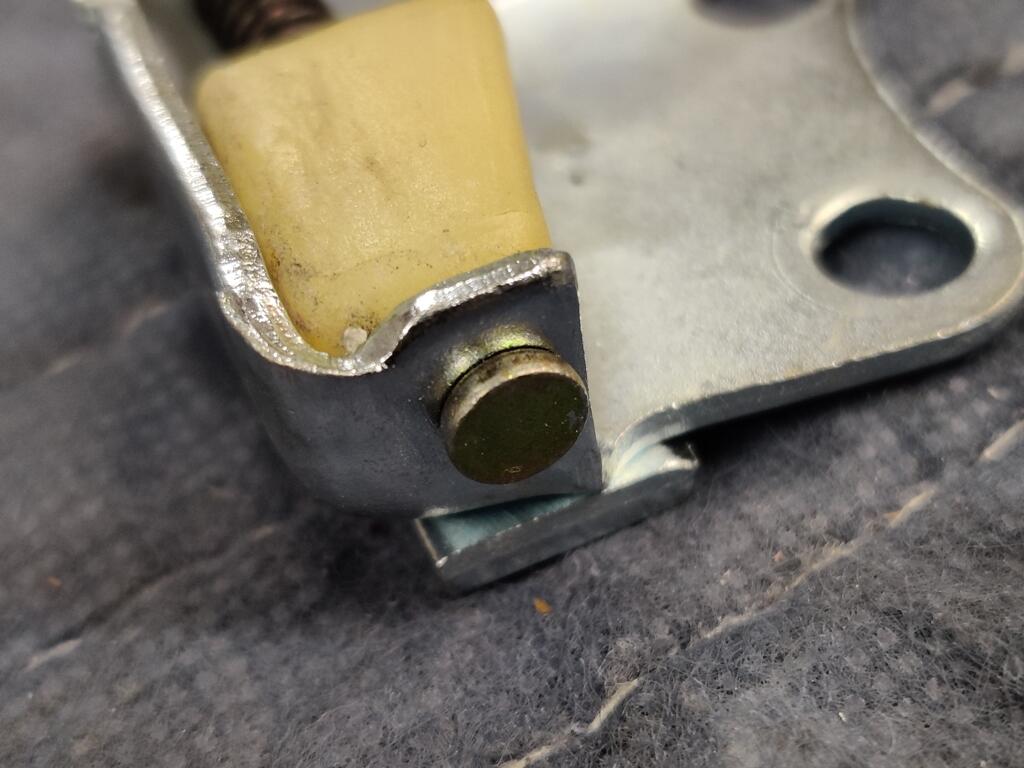
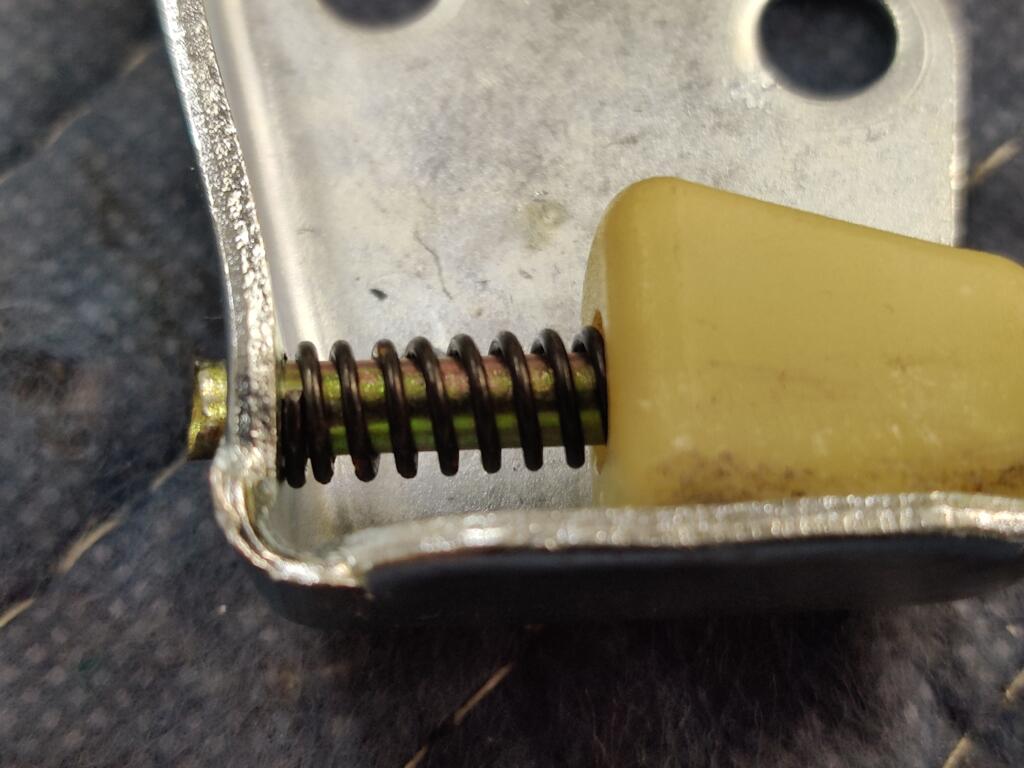
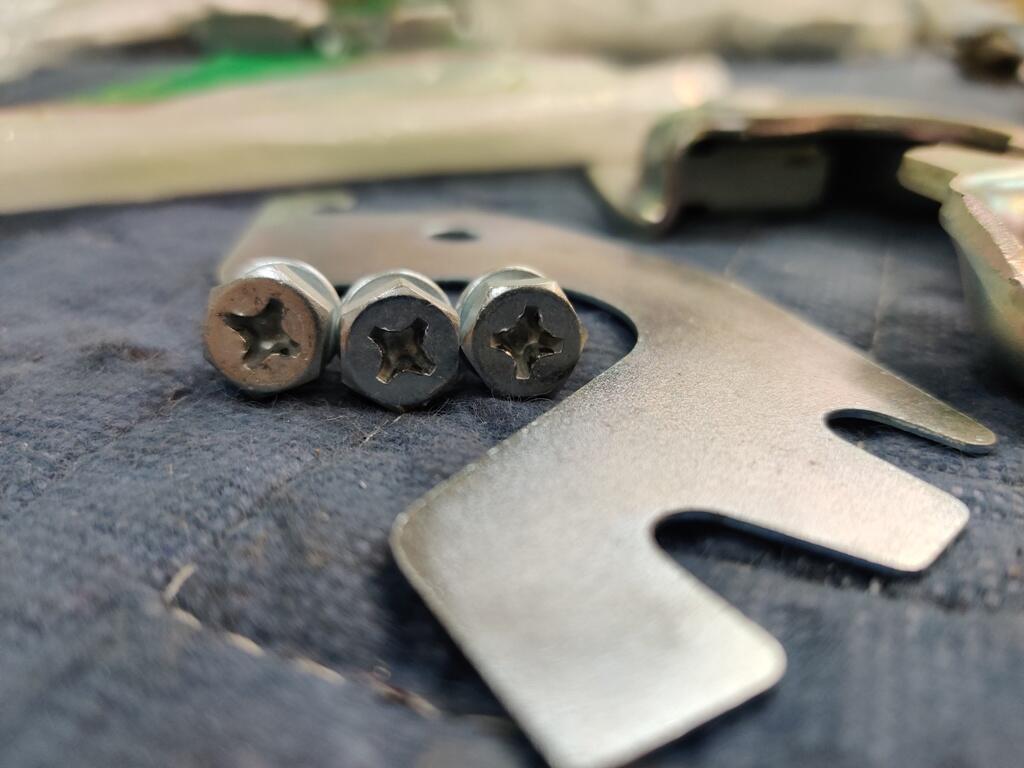
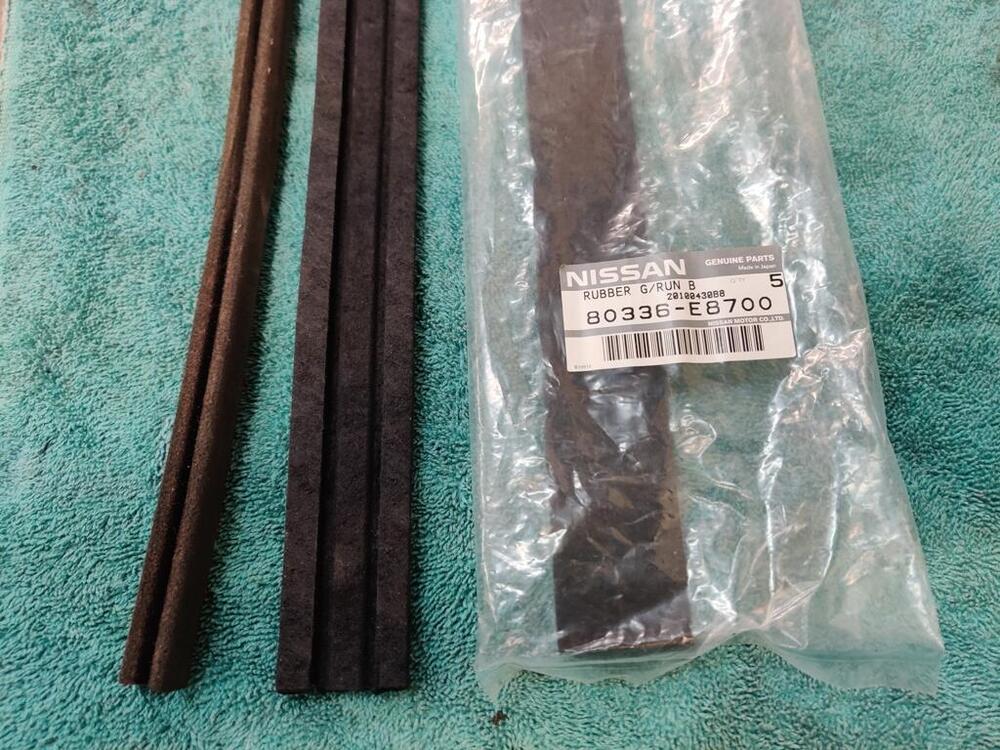
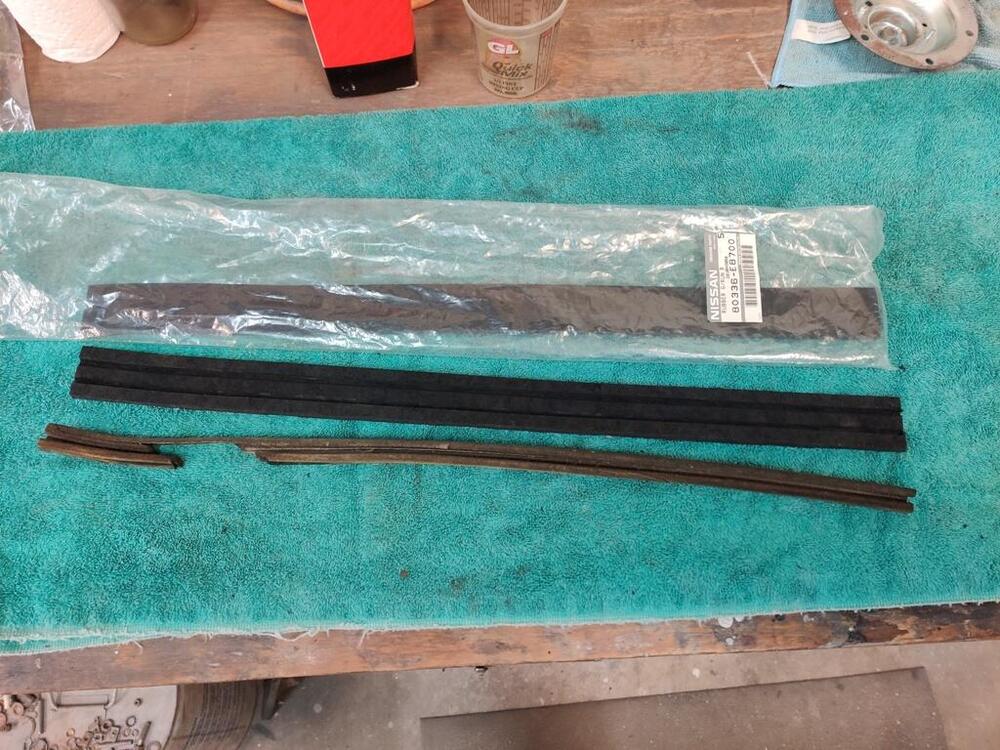
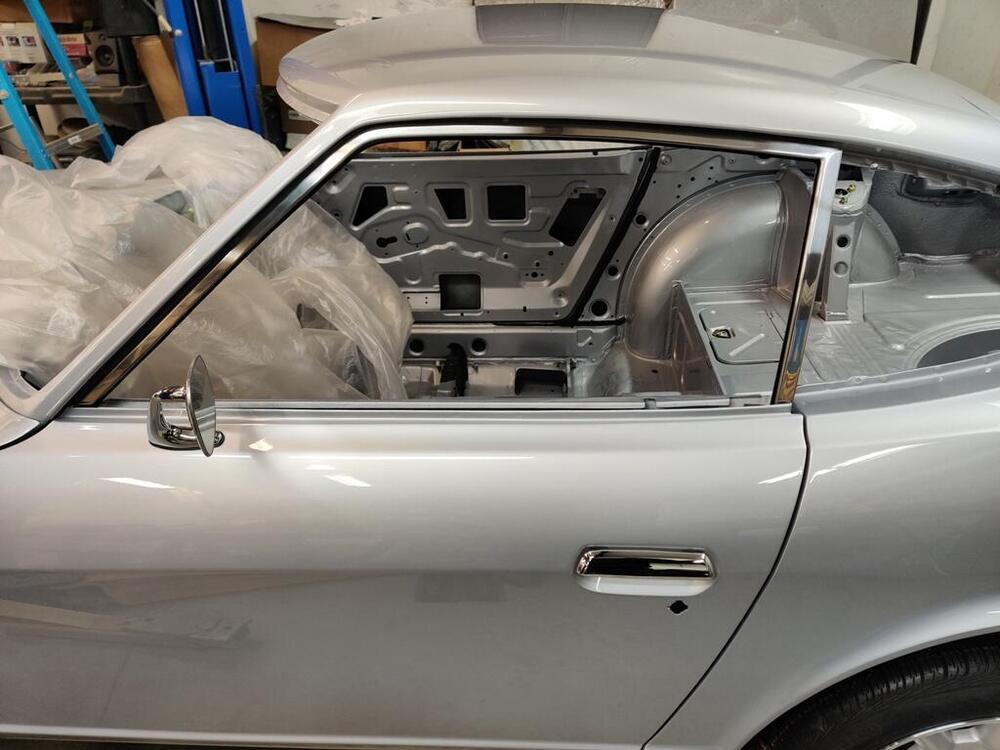
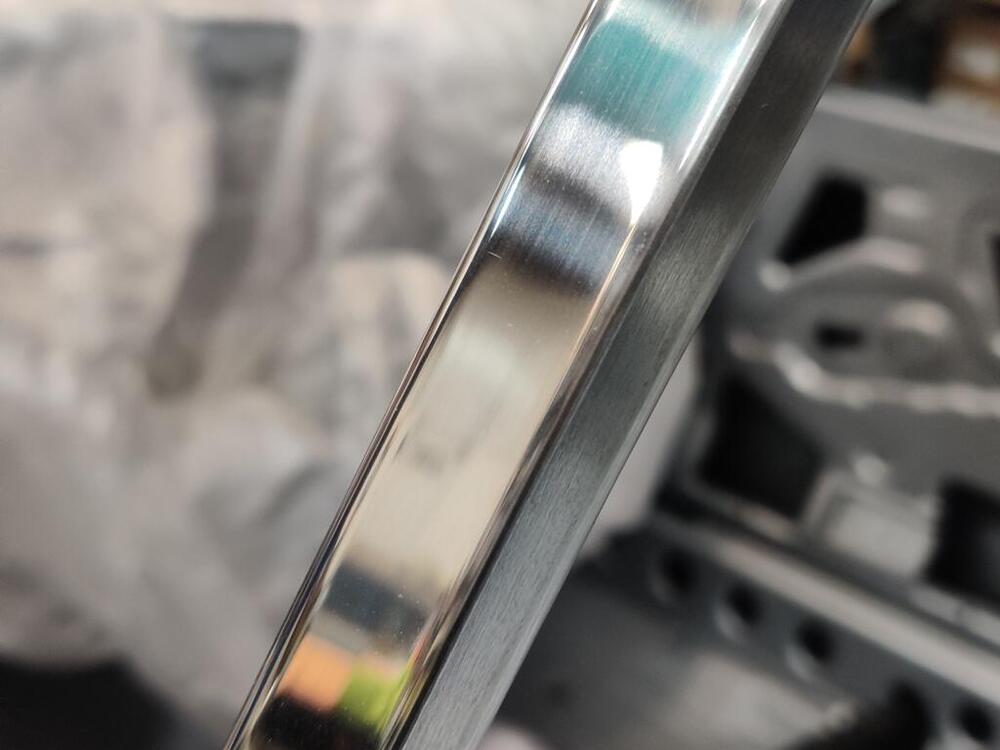
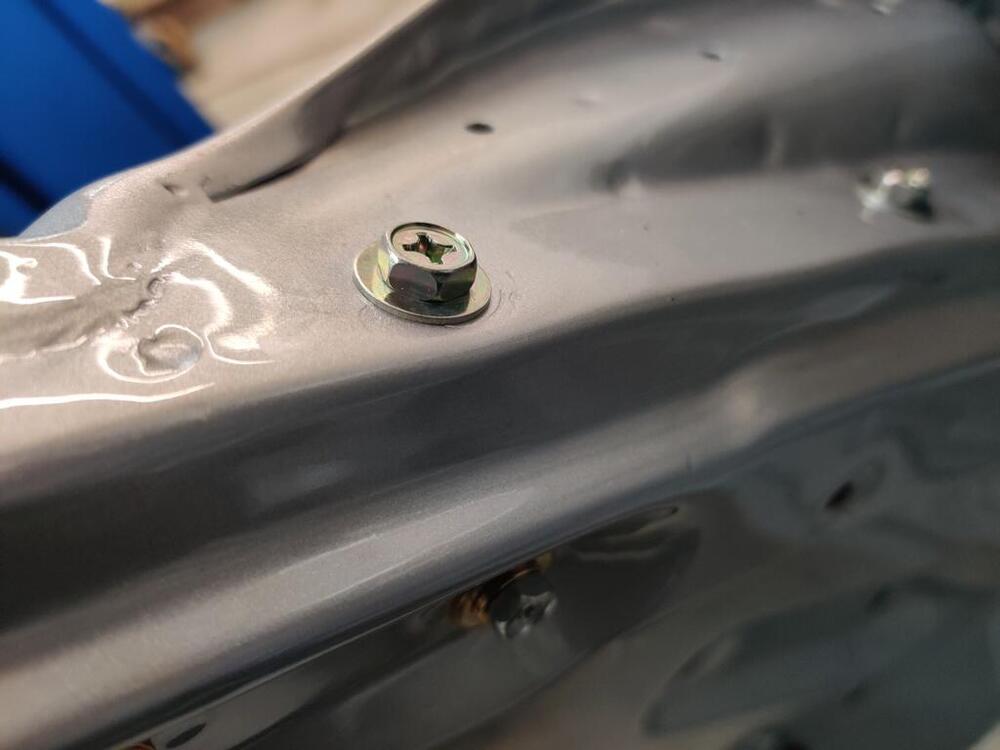
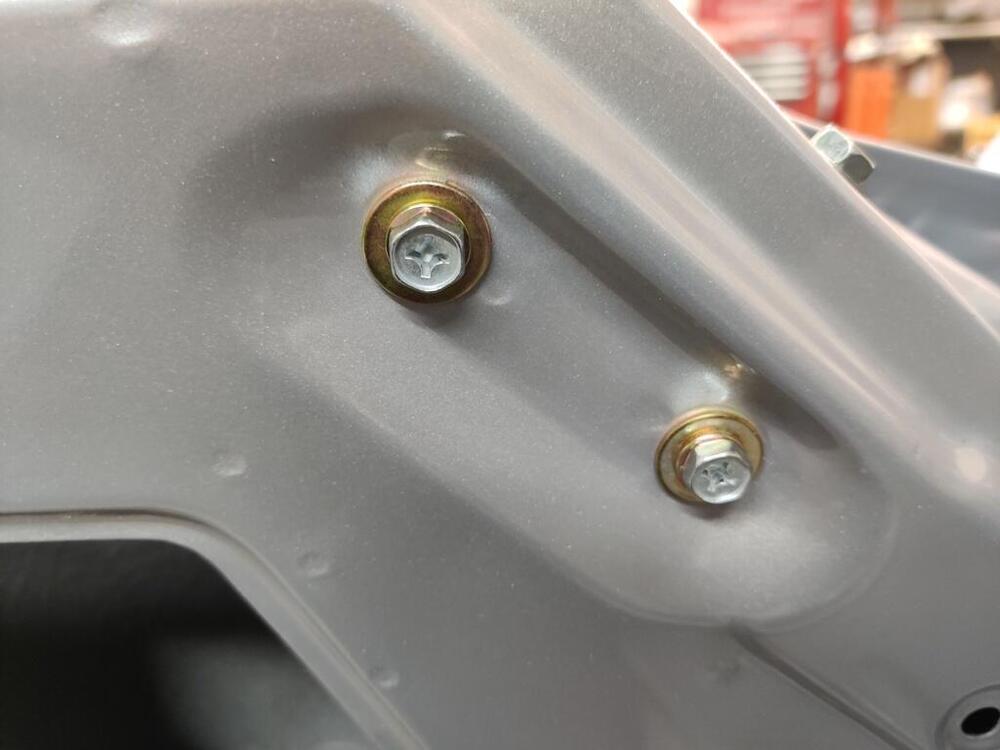
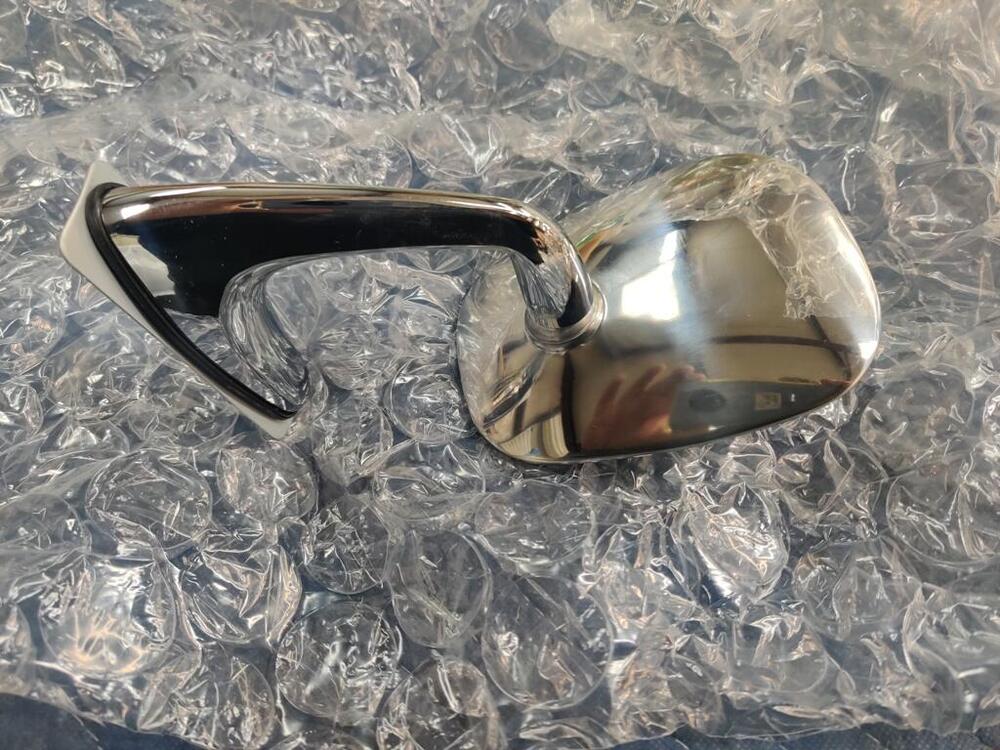
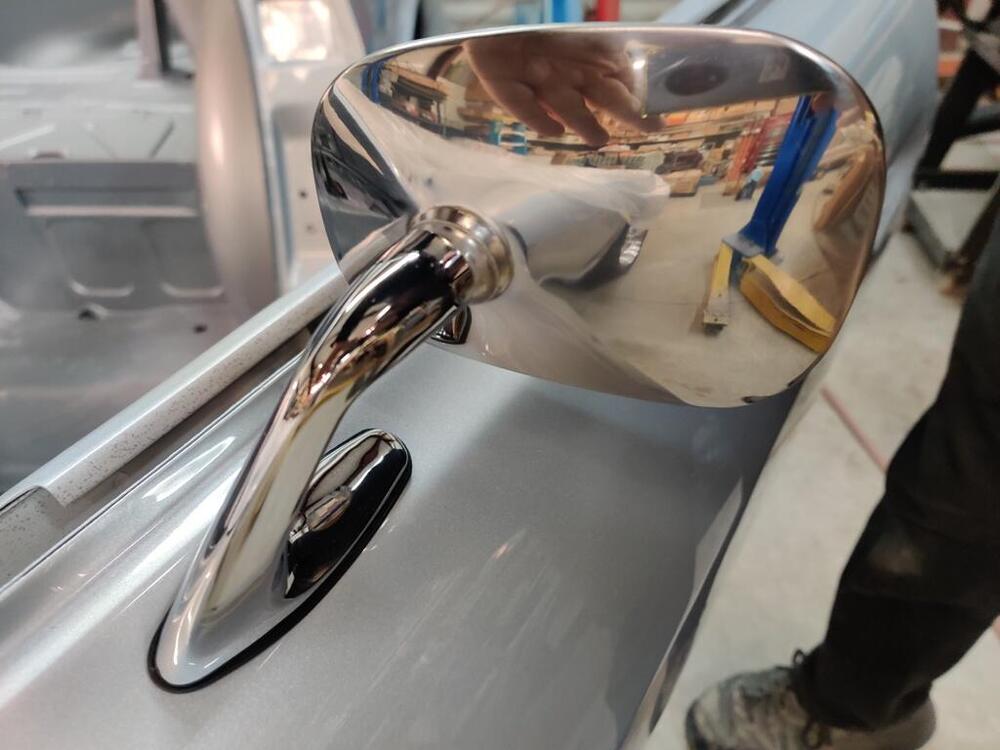
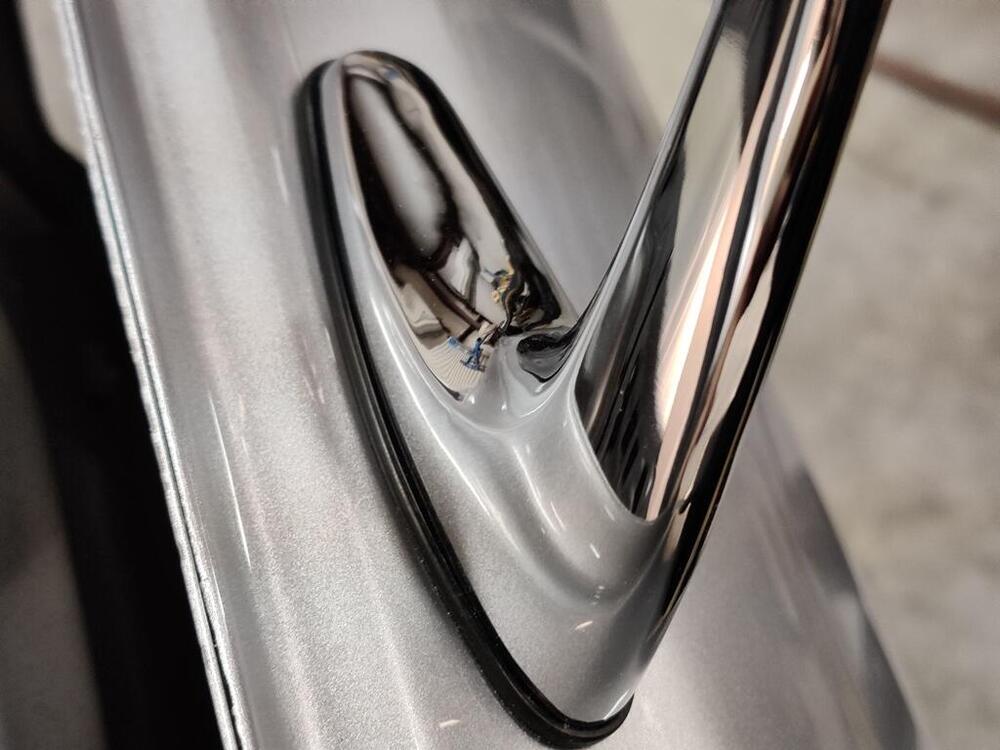
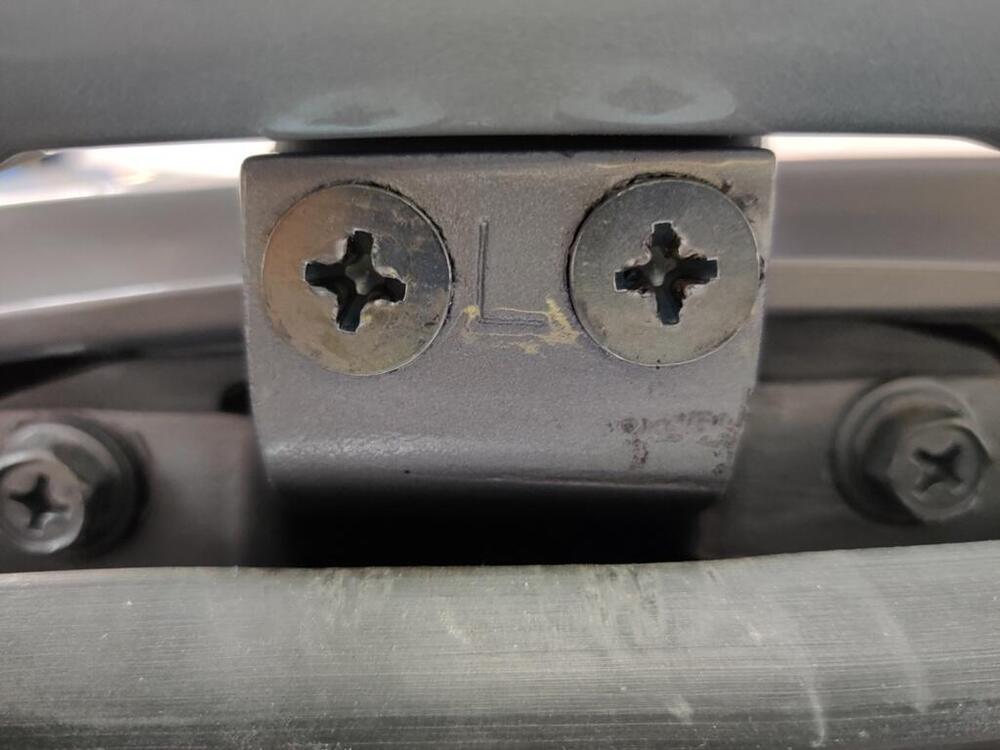
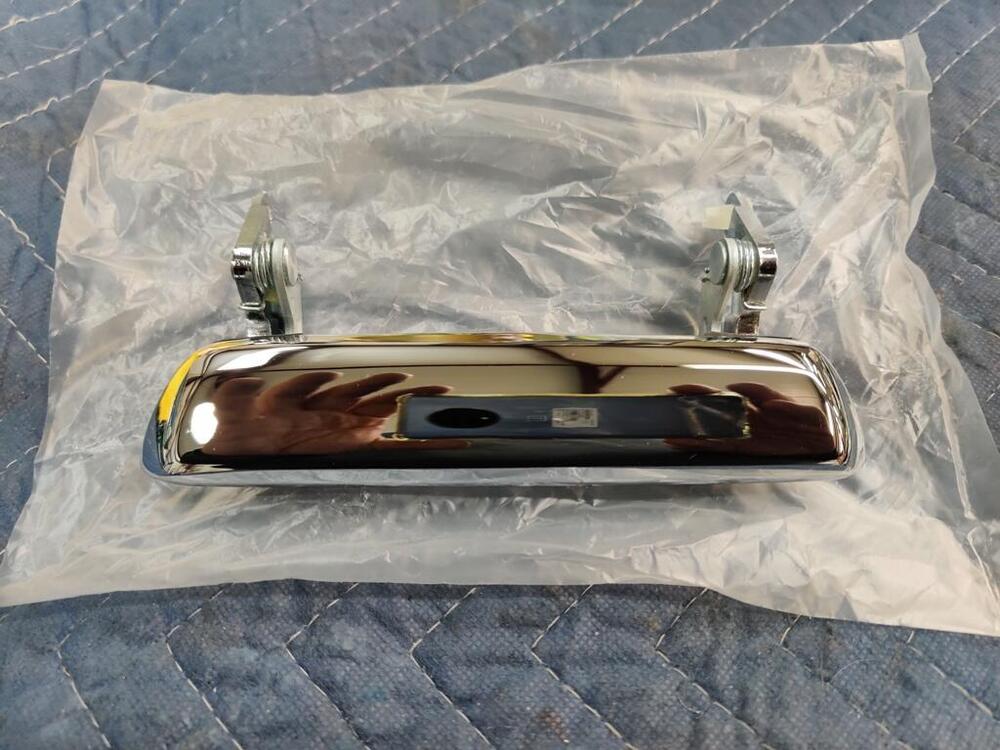
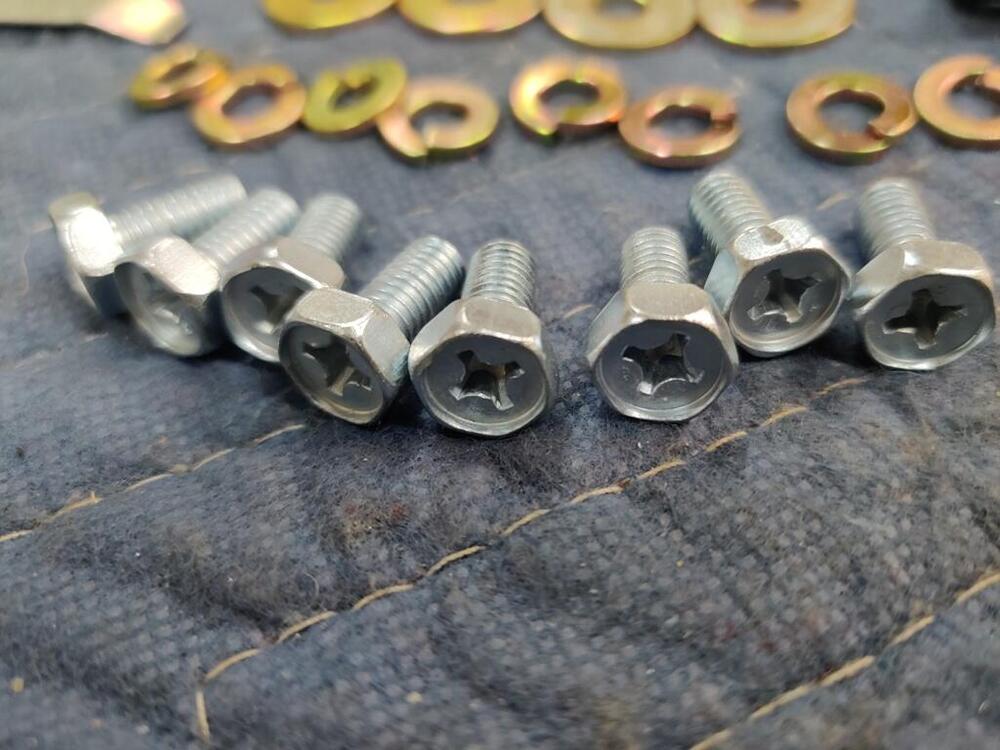
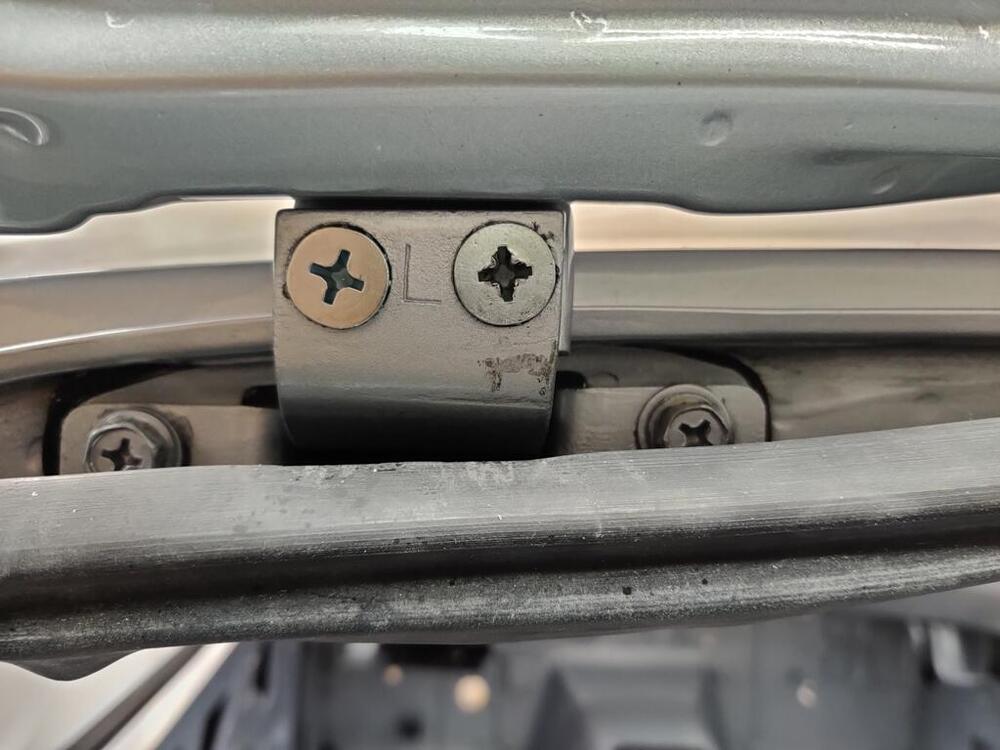
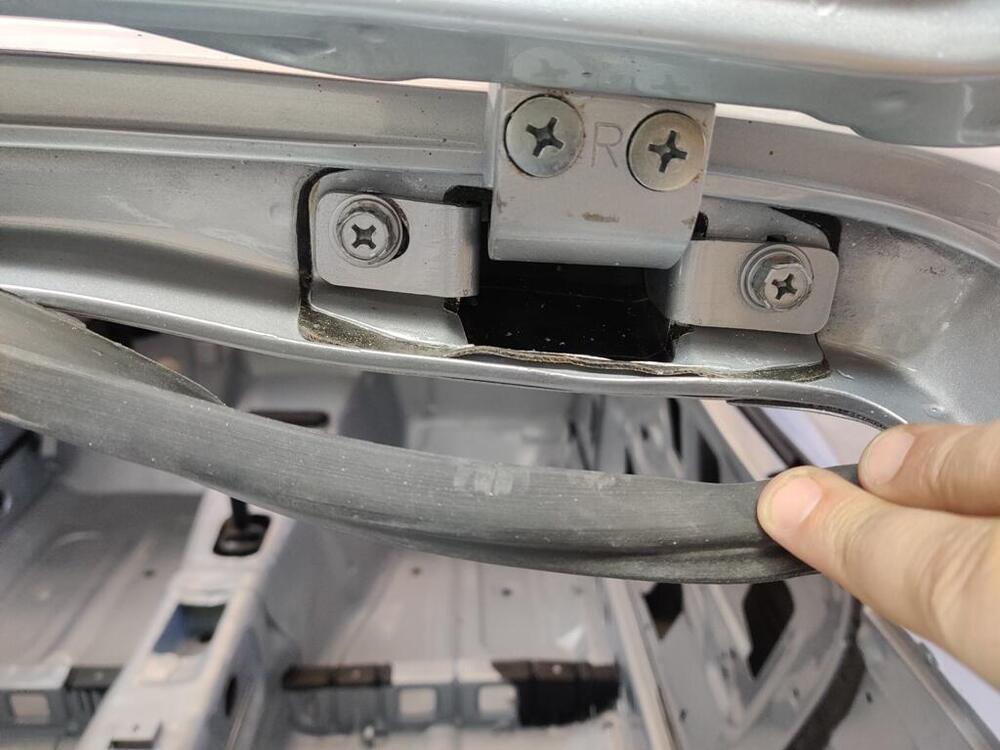
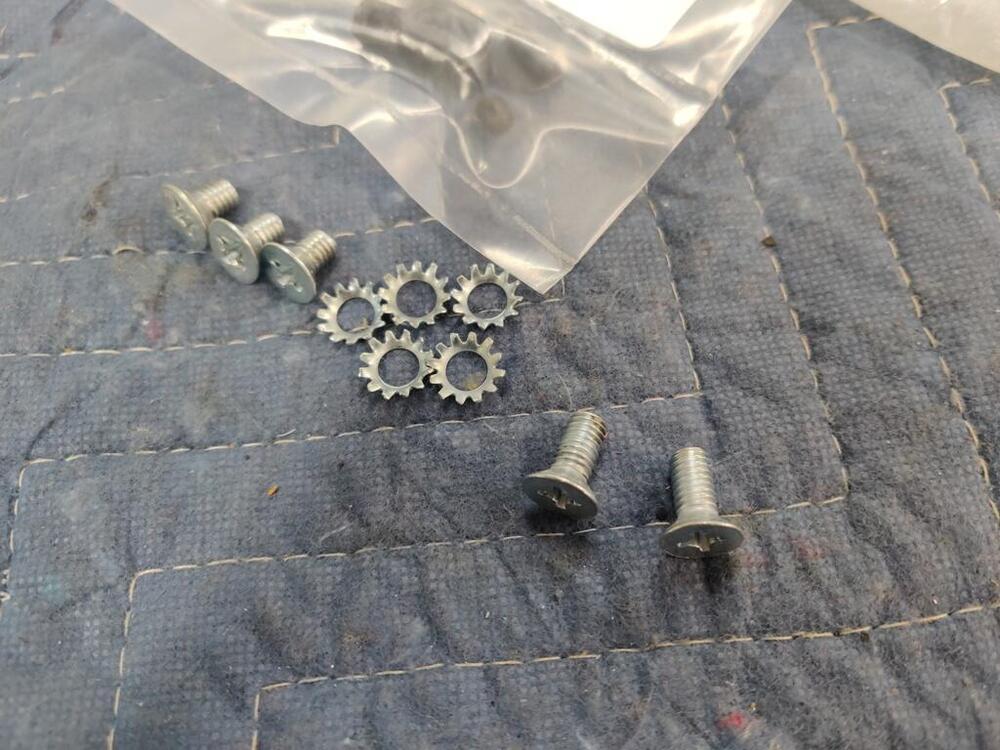
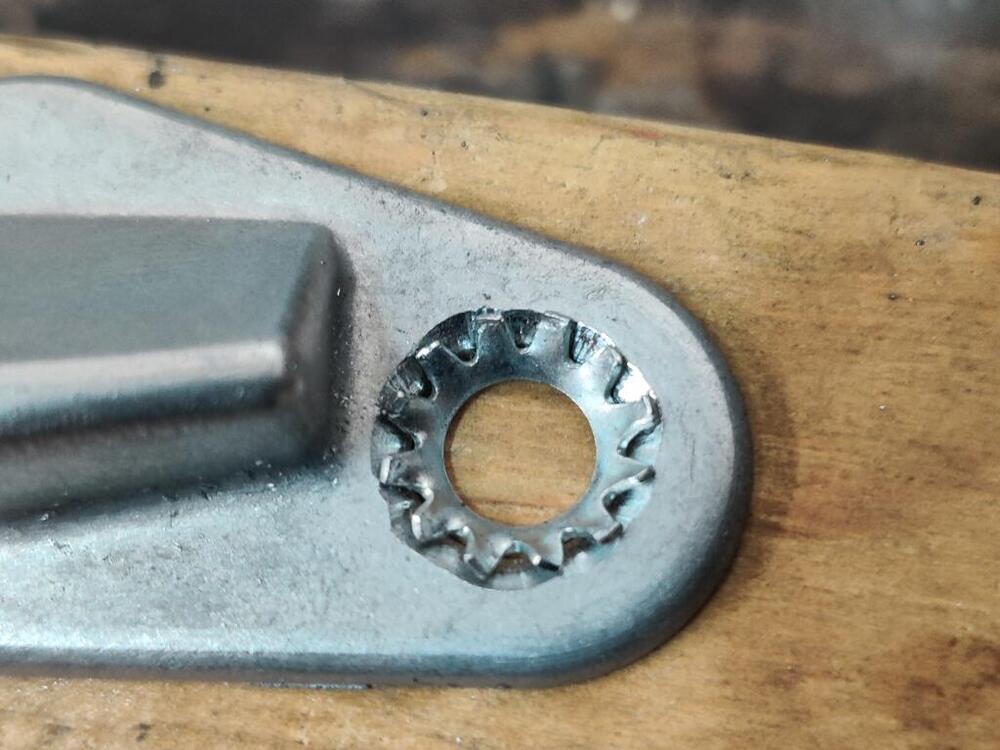
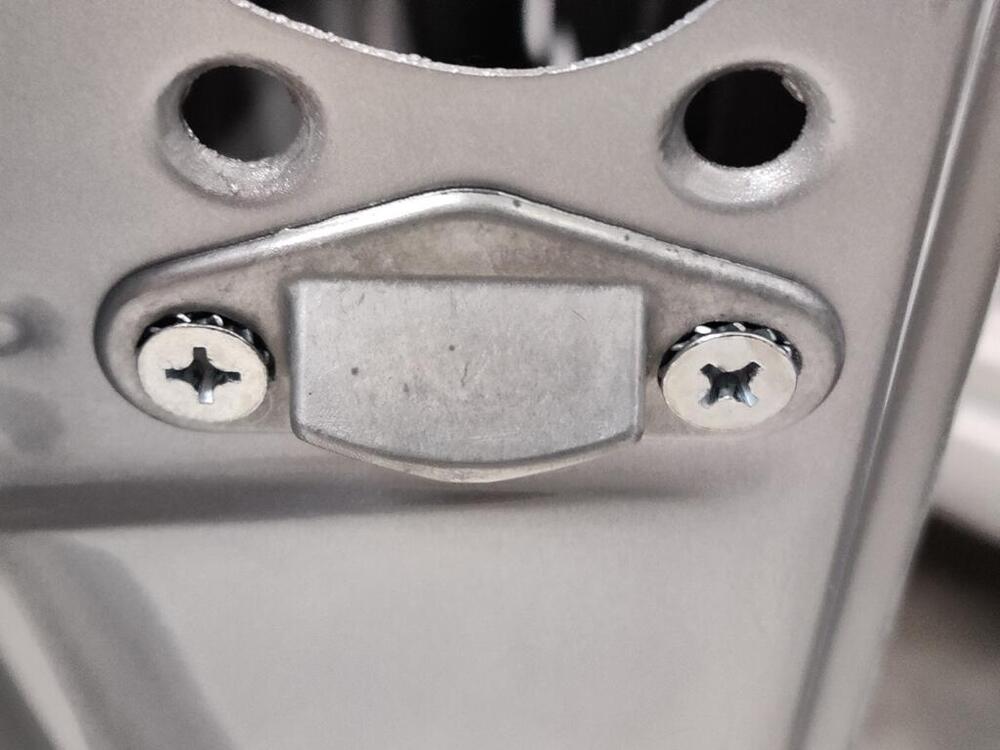
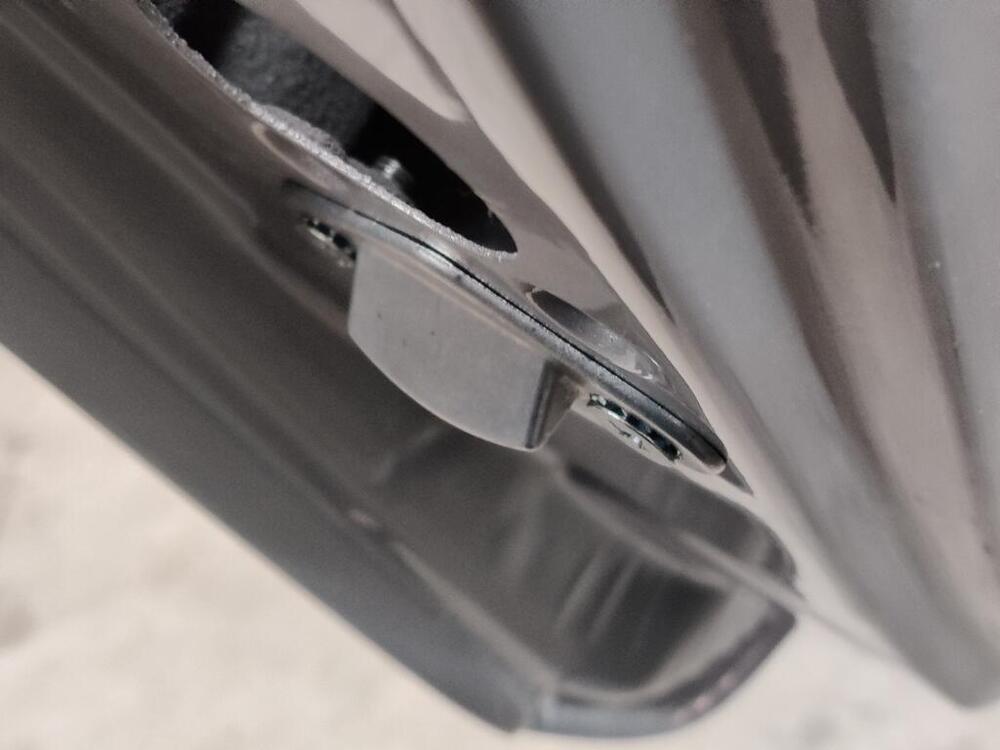
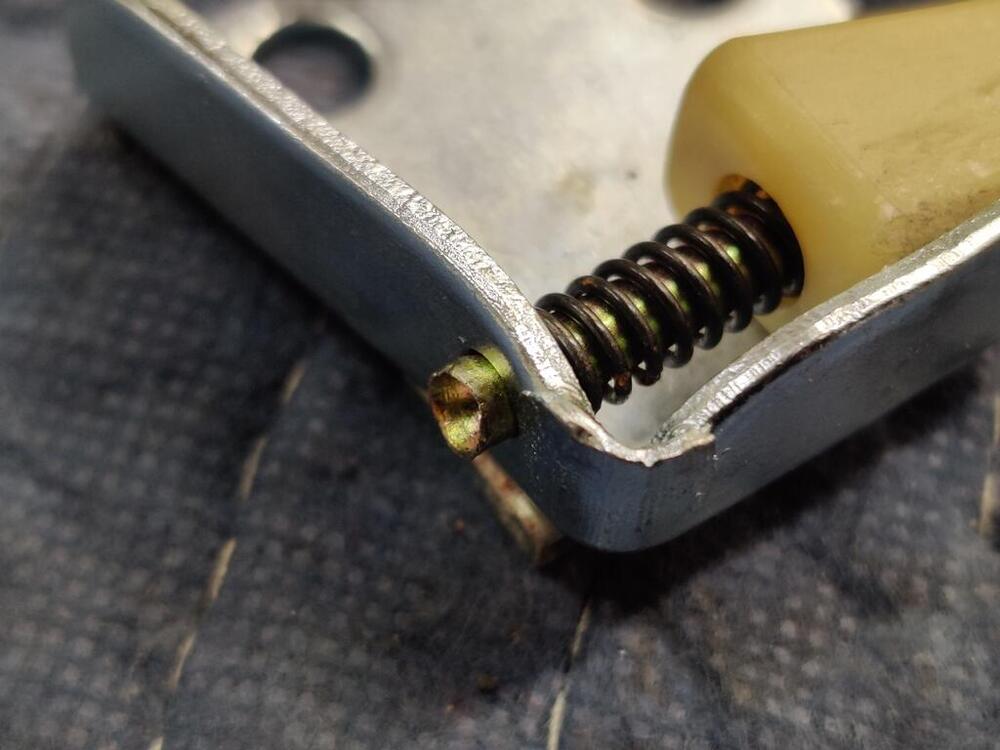
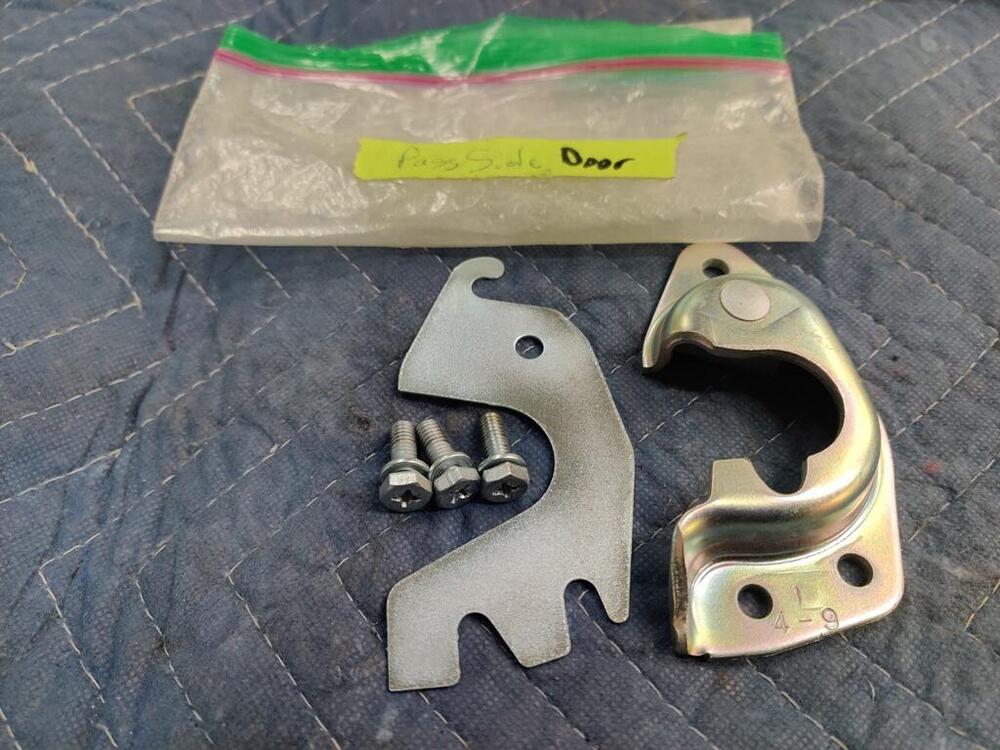
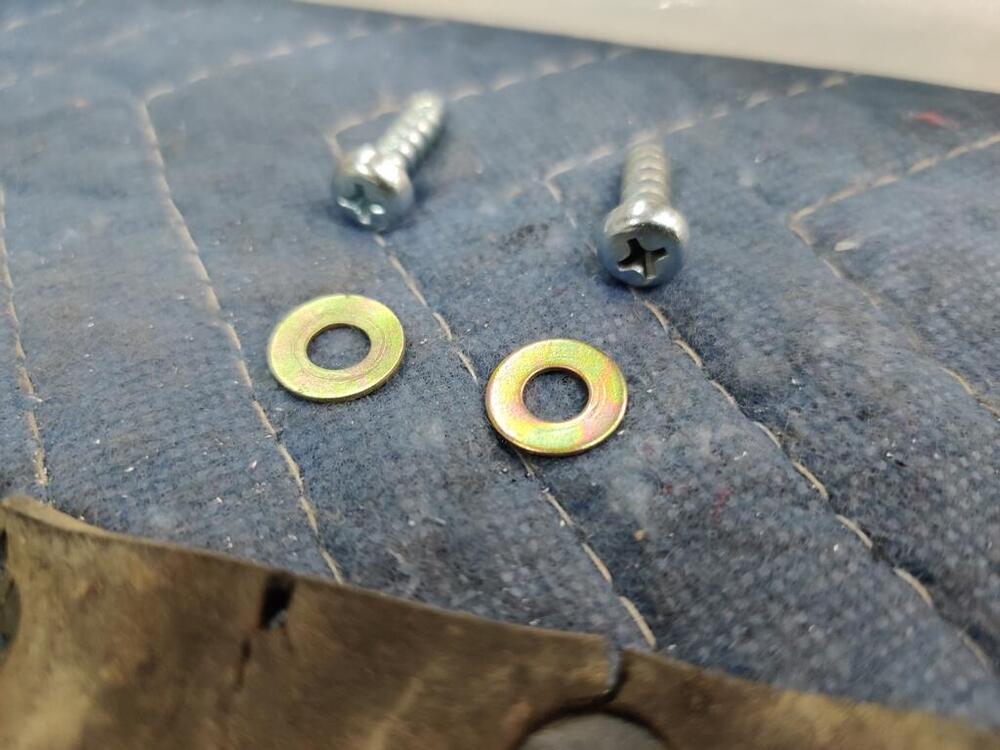
 Here are some pics from the work completed this weekend. New factory original parts like this mirror and door handles are so nice to install! Little remnant of plastic piece (middle and third photos here) was a sleeve that sits on top of the door latch lever. When those disintegrate, the amount the door handle has to move increases. Obviously, you can adjust the height of the plastic part on this rod to achieve proper handle movement to operate the latch. I am second guessing the plating of the hardware for the bolts that attach the stainless window frame to the door shell. Yellow chromate on the washers isn't looking right to me. I think I have the original bolts here (clear zinc), but I think the lock washers and flat washers should also be clear zinc. Also, in the first pic here, I used some bolts that have a captive flat washer and no lock washer. I believe these are incorrect and I will have to swap them out. New window weather stripping is nice - it will make for some tight (and quiet) windows when they get installed. I mainly used 1000 grit on the stainless window frame to remove light scratches. I used 600 grit in a couple of places, as there were a couple of deeper scratches. Then followed with 1000, then 1200, then a light finish with 2000. I like the finish. You can still see some "grain" which is how the original finish appeared to me. I found another thing the body shop did that I was unhappy with. The hatch was not well aligned - the left side was a little low. I instructed them to align the hatch, and then remove only the hatch panel, leaving the hinges in place to be painted (as they did at the factory). I have no idea what they did here with the hinges. They didn't remove them to paint the inside of the hatch frame, as can be seen in the pic where I am lifting up the rubber hinge seal and you can see primer underneath. That is fine, and what I wanted, but why is the hatch hinge seal not painted, and yet the "seal cover plate" is? I don't know how they did that. The bolts securing the hatch hinge to the body were loosened and the hatch shifted/aligned after painting! I specifically wanted to avoid that. Now the paint on the bolts is chipped and there is an unpainted spot on the right hinge - you can see where the bolt was when the hinge was painted. And they managed to mess up the phillips screws... Fortunately, I had a spare set of screws on hand, so I swapped them out. Swapping out the messed up screw for a nice one (first pic below) makes a big difference cosmetically. Details like this matter to me. I wish this was done as I instructed. Live and learn. Next time, I will make sure I complete everything - everything, before I hand off for paint.
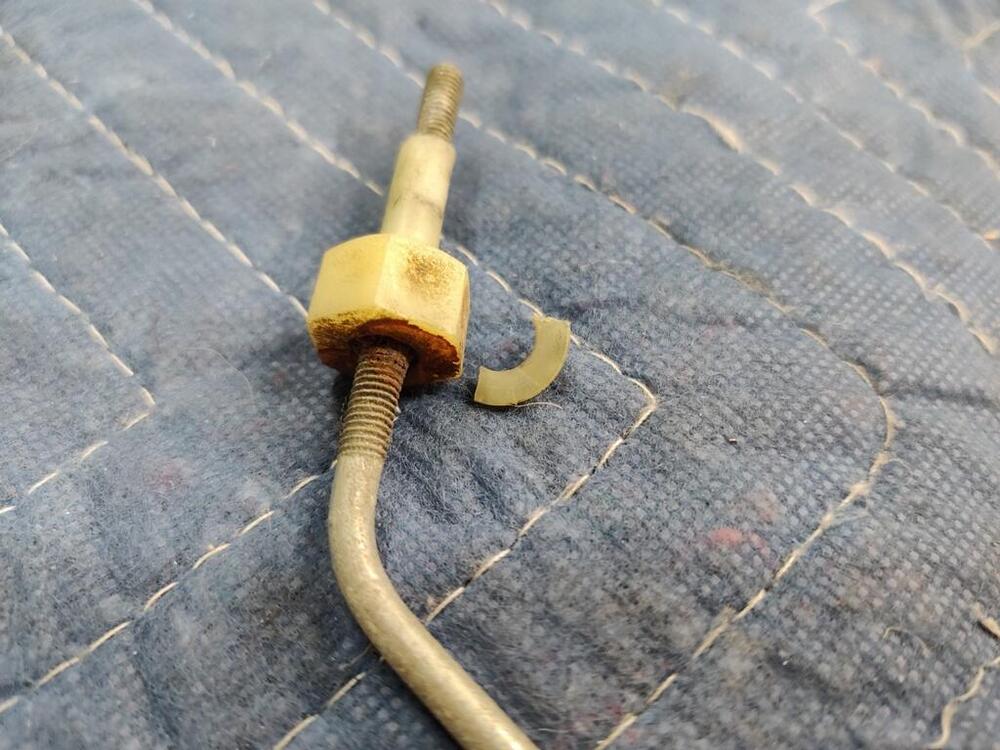


-
11/70 currently on ebay: https://www.ebay.com/itm/386199400448?hash=item59eb473000:g:lcwAAOSw5cxlKtGb&amdata=enc%3AAQAIAAAAwEBg9%2FdWu7nKPA0i7J29WlF0OtBSA4EH8Z6sbTca%2FT82FbIRphOkU4bLlbUJzdqWlkYrlG6hEHztMXzoCv63VQl9MPMRHAD1Tq5ykejshUMZ%2FrlRXJhO3k2iJ4IRftLC47feTmRcPRuOxNM0sXrXmjNV1yrYZ%2FylOK6aSwouV1rjpDUtLOWFtjIxVsucB72YZ0FFNvF5zOrDYDKjsiD4cV7ixNAZ3rynAgntzLRK2Ha7ixShbLDRwwuIQ7%2FJA0Lgmw%3D%3D|tkp%3ABk9SR9jSjoiYYw
-
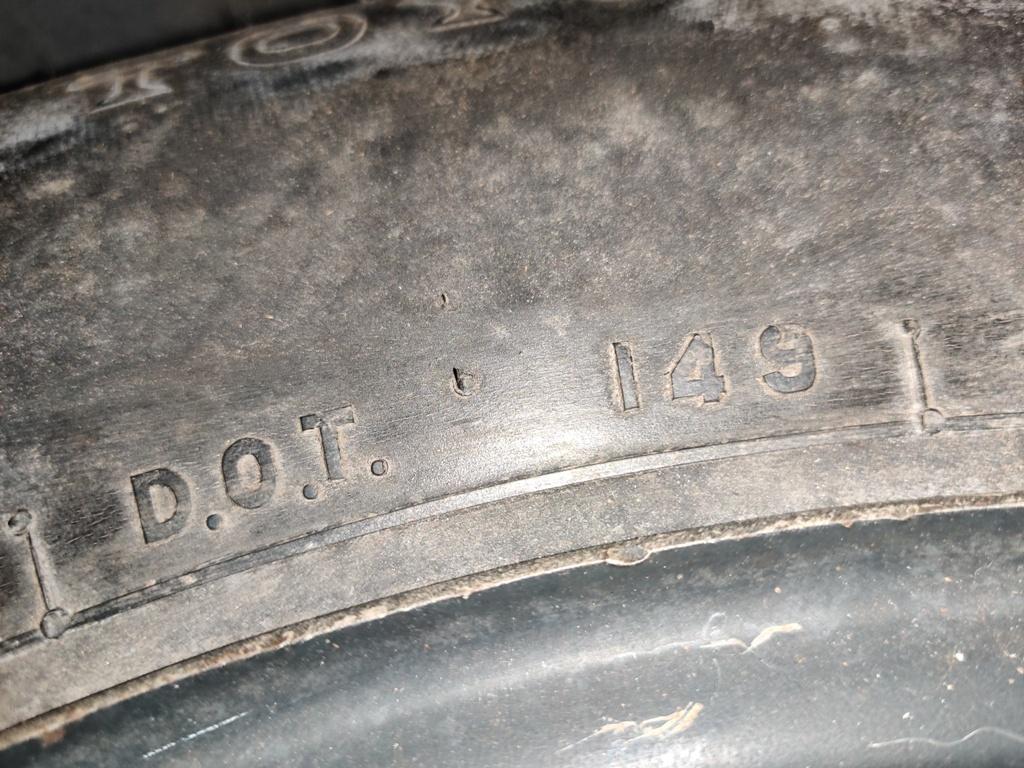
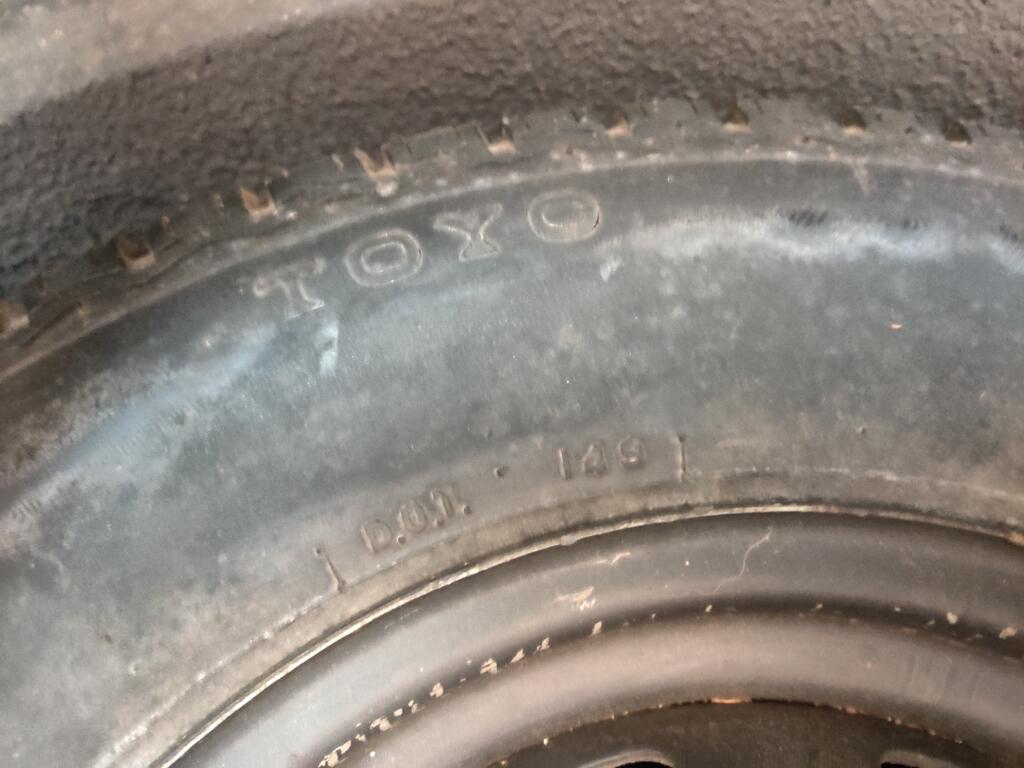
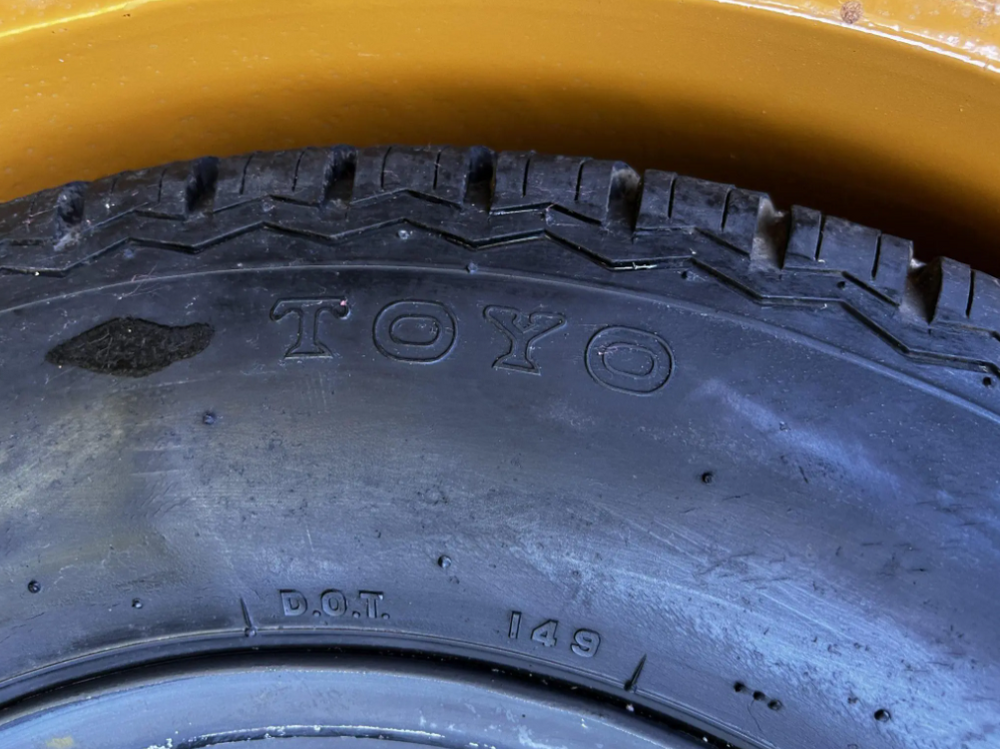
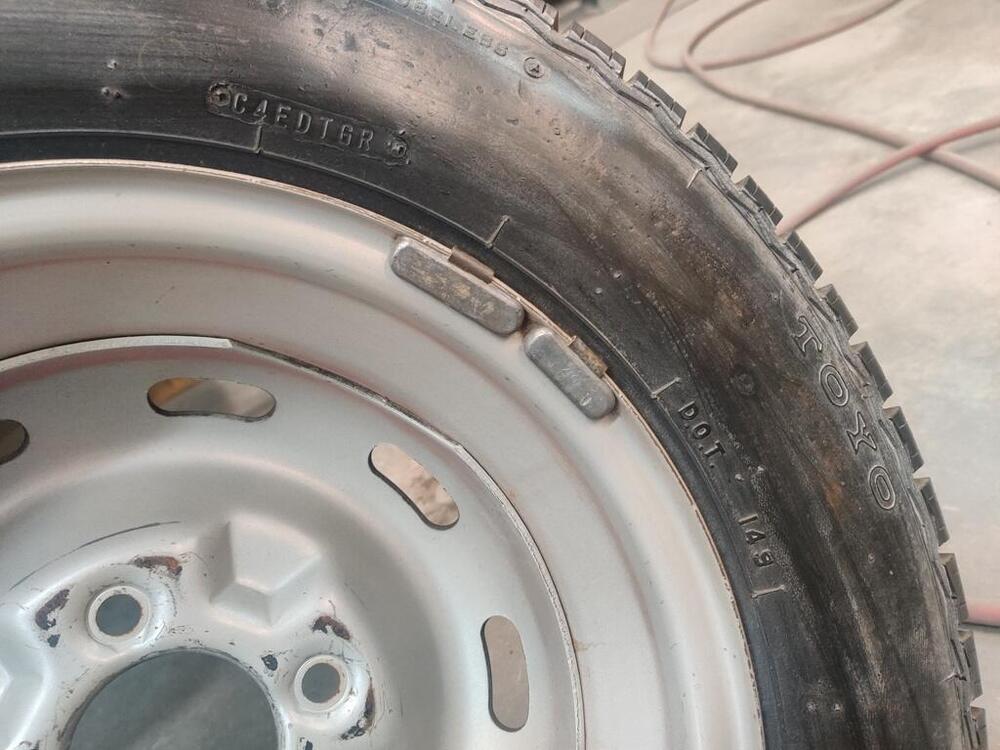
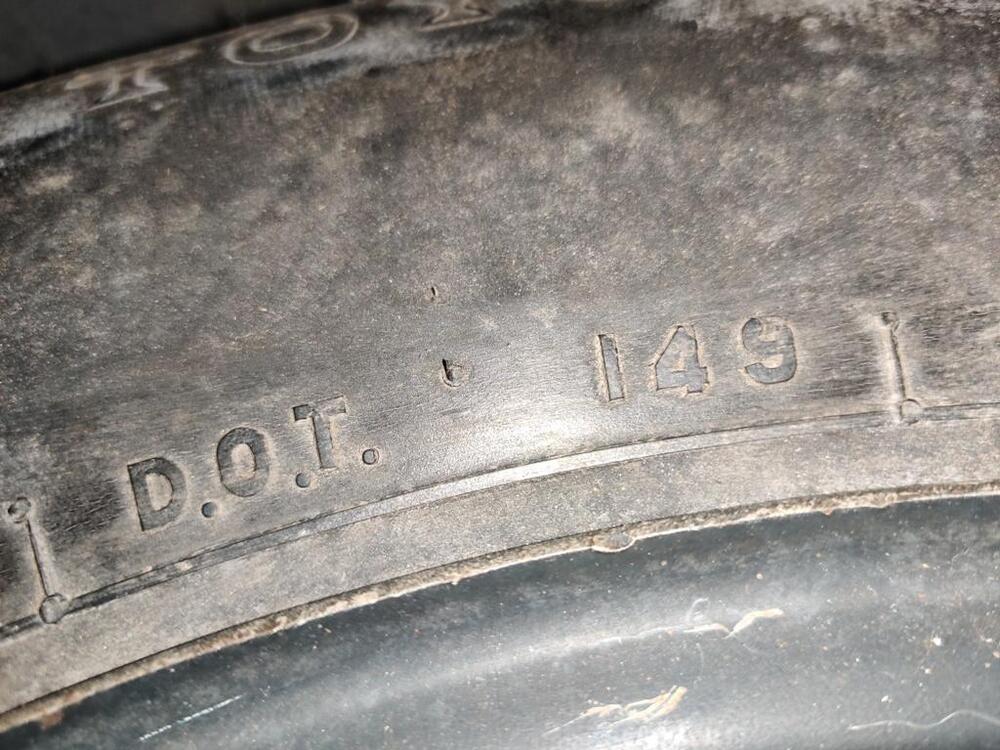
Also, DOT 149. Odd. Also, someone looking for original tires could contact the two of us, the two BAT folks, and could purchase a matching set!
-
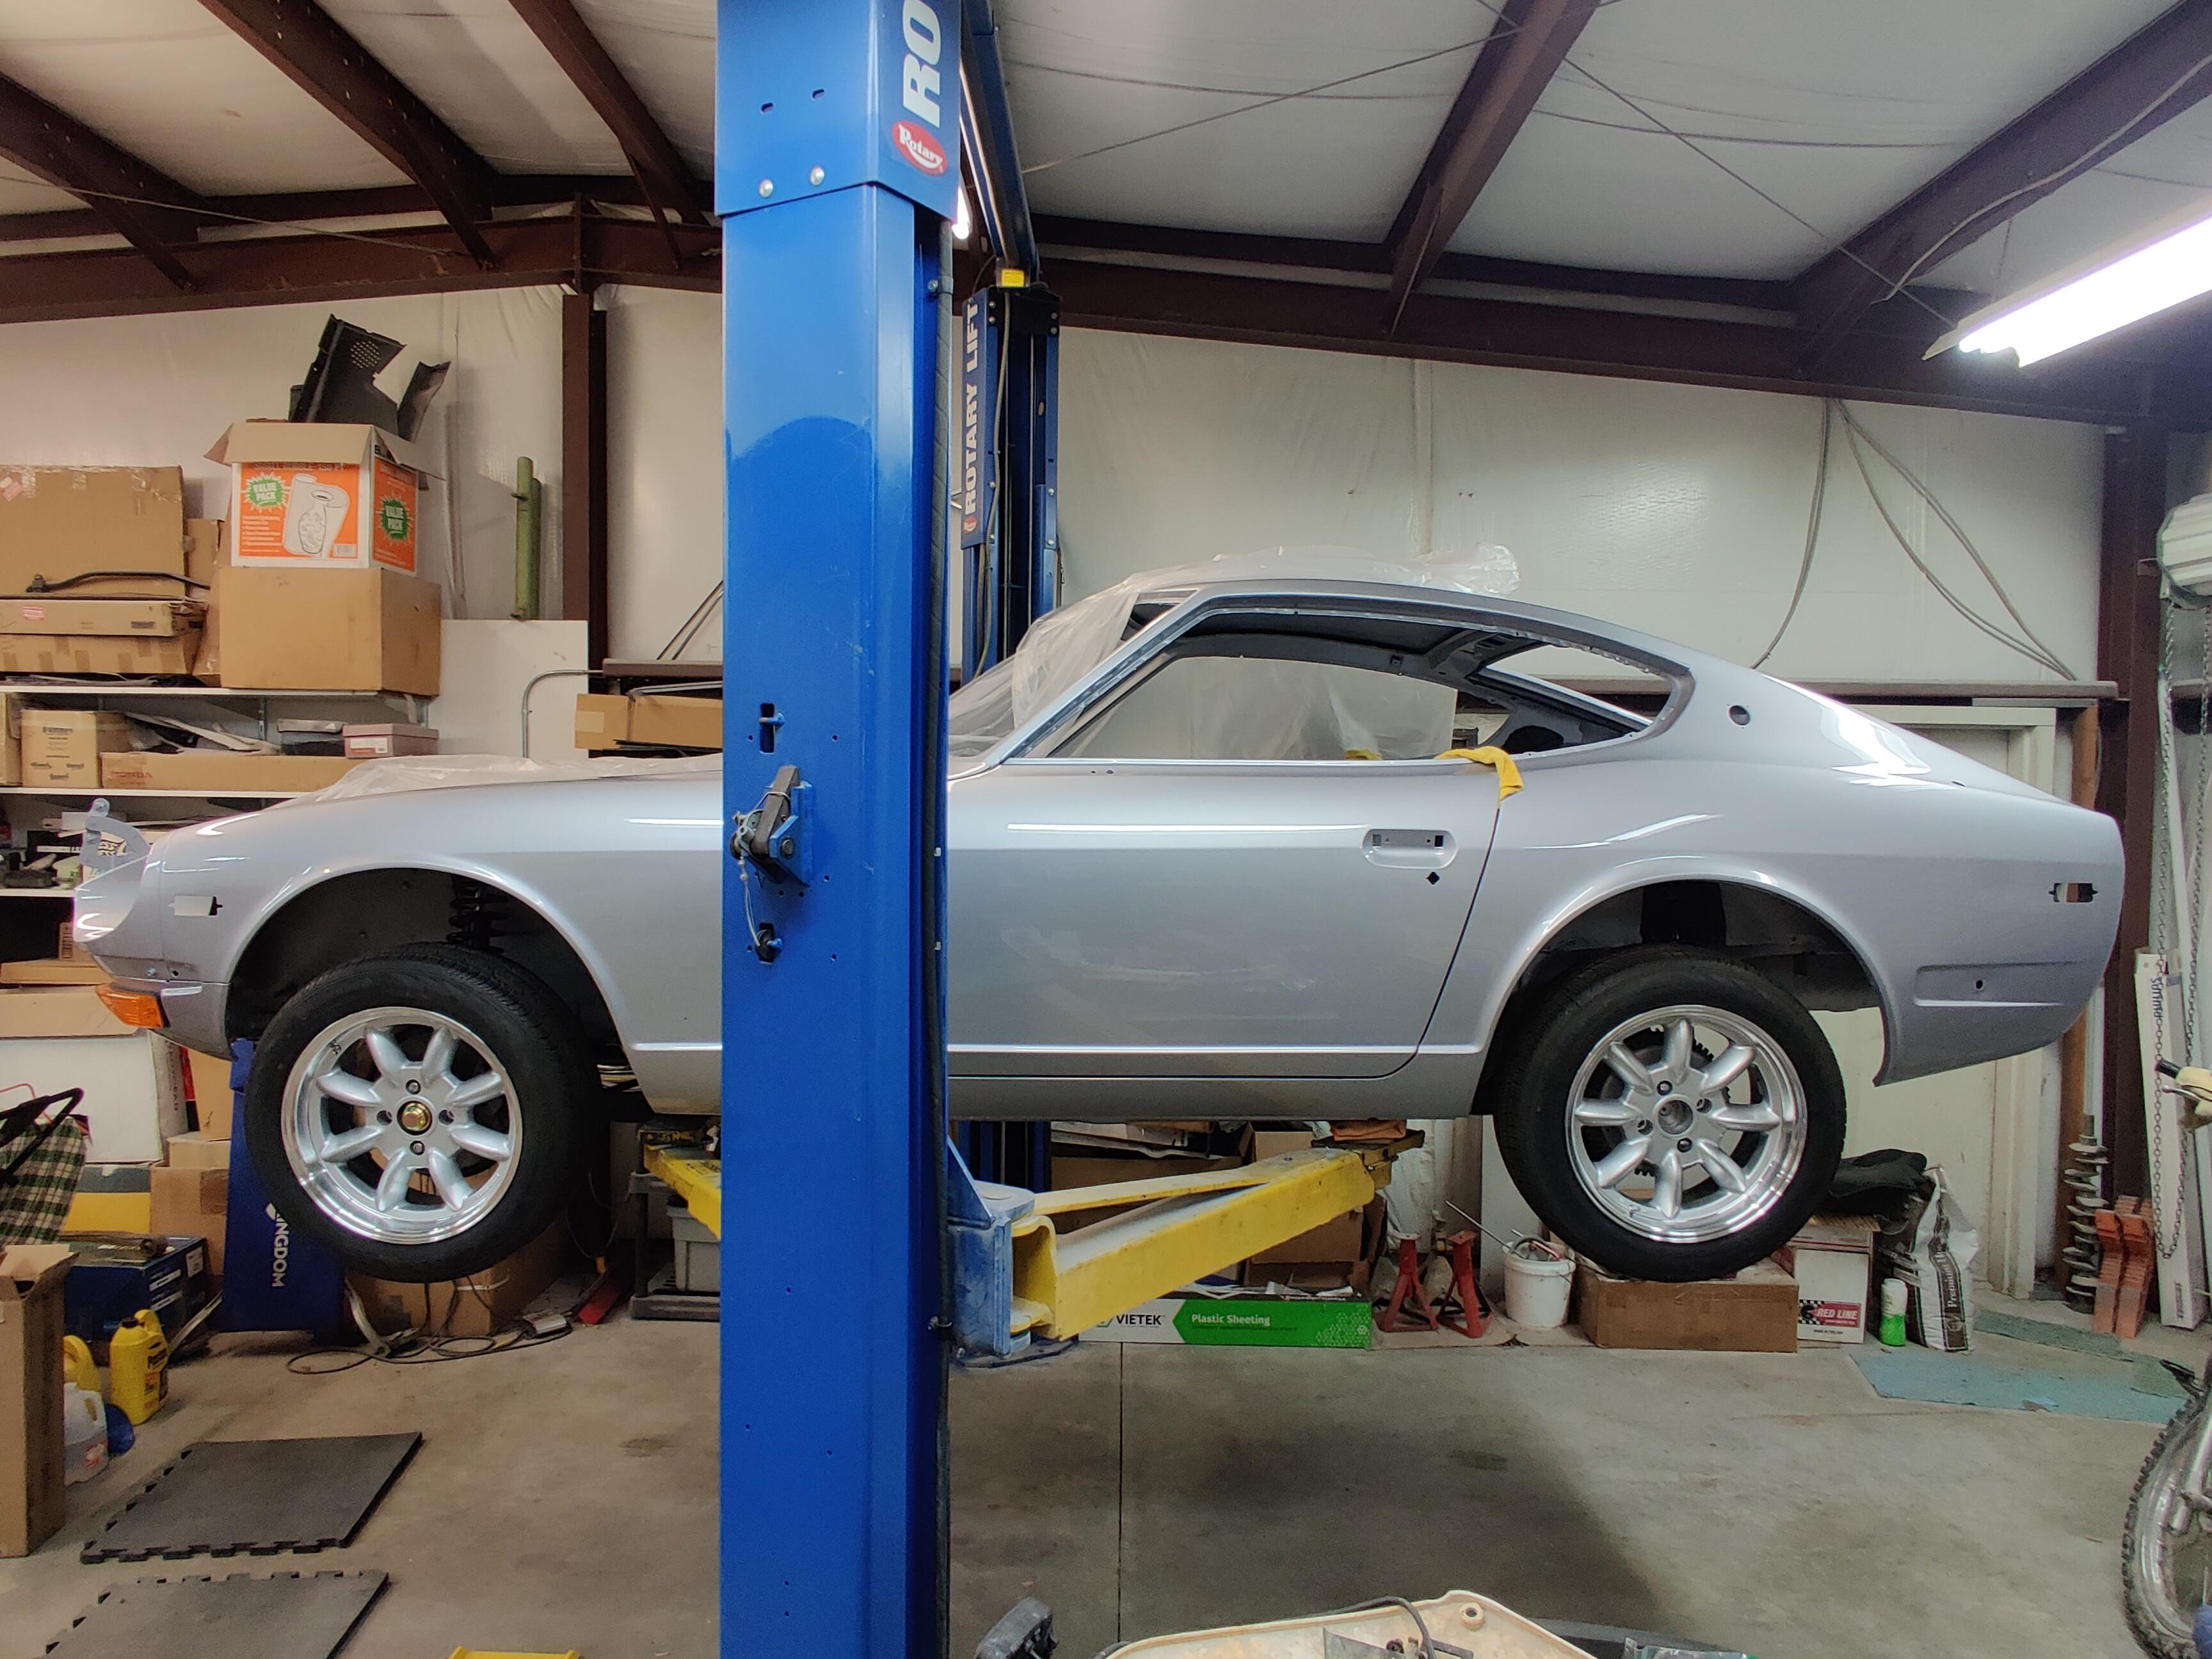
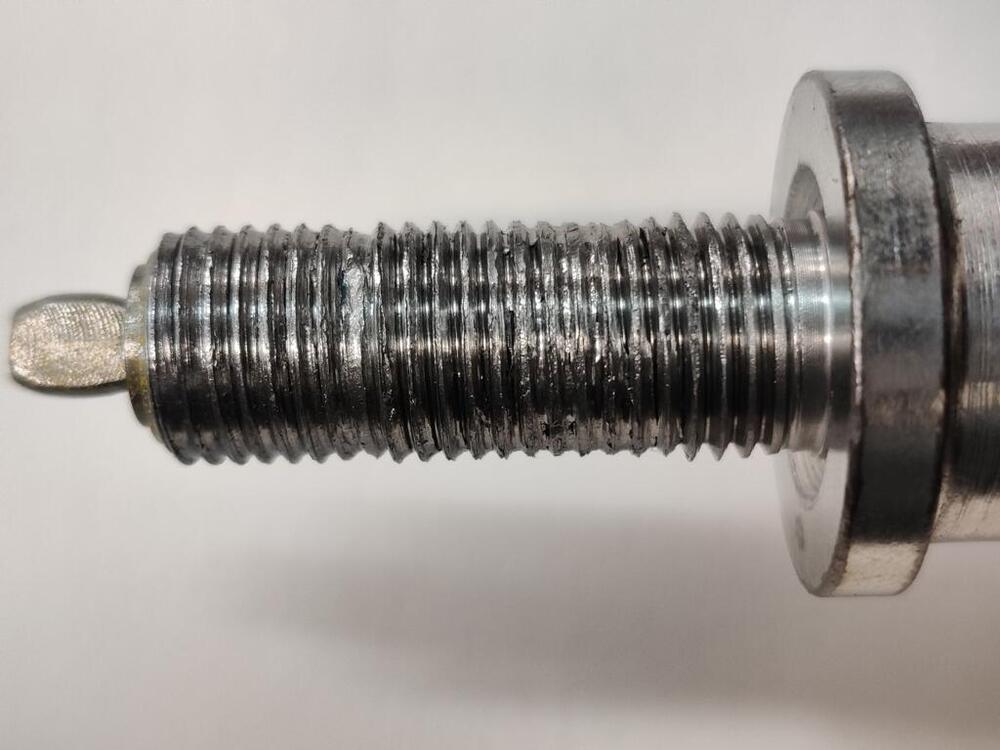
I also made a quick walk around video as the car sits now. There are still a lot of parts to add to the car. So, I am hopeful that the gap between the wheel wells and the tires shrinks quite a bit, giving the car a much more pleasing visual stance. I am guessing that the car is easily 500 lbs lighter as it sits now without hood, glass, interior, bumpers, fluids, etc.
-
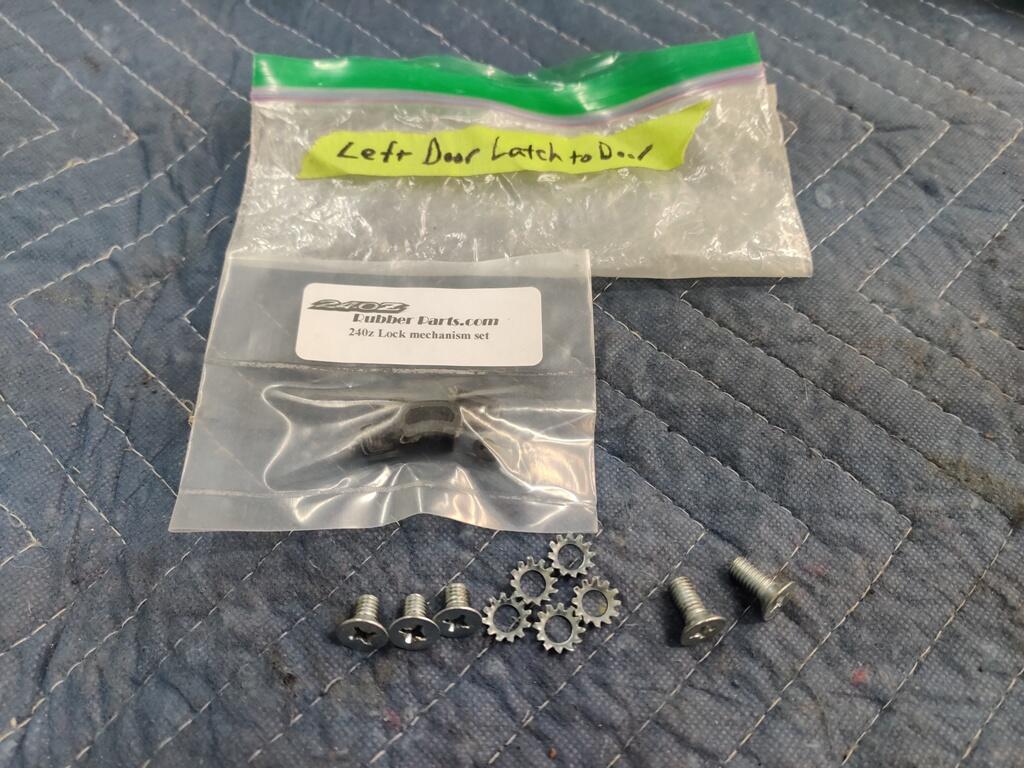
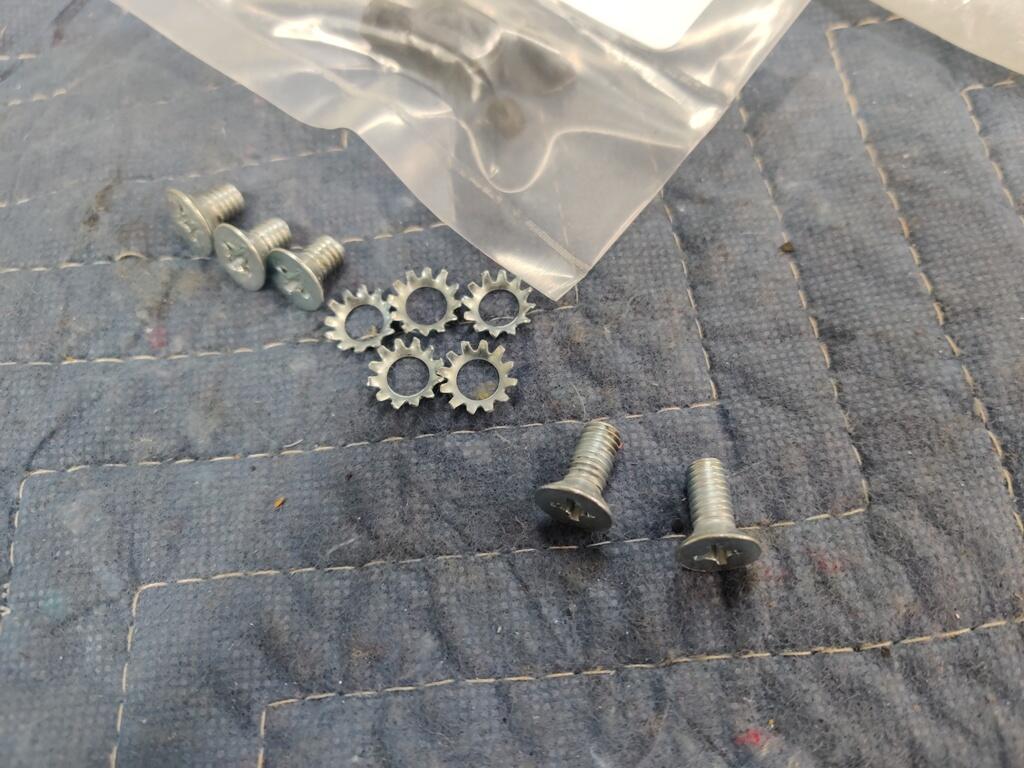
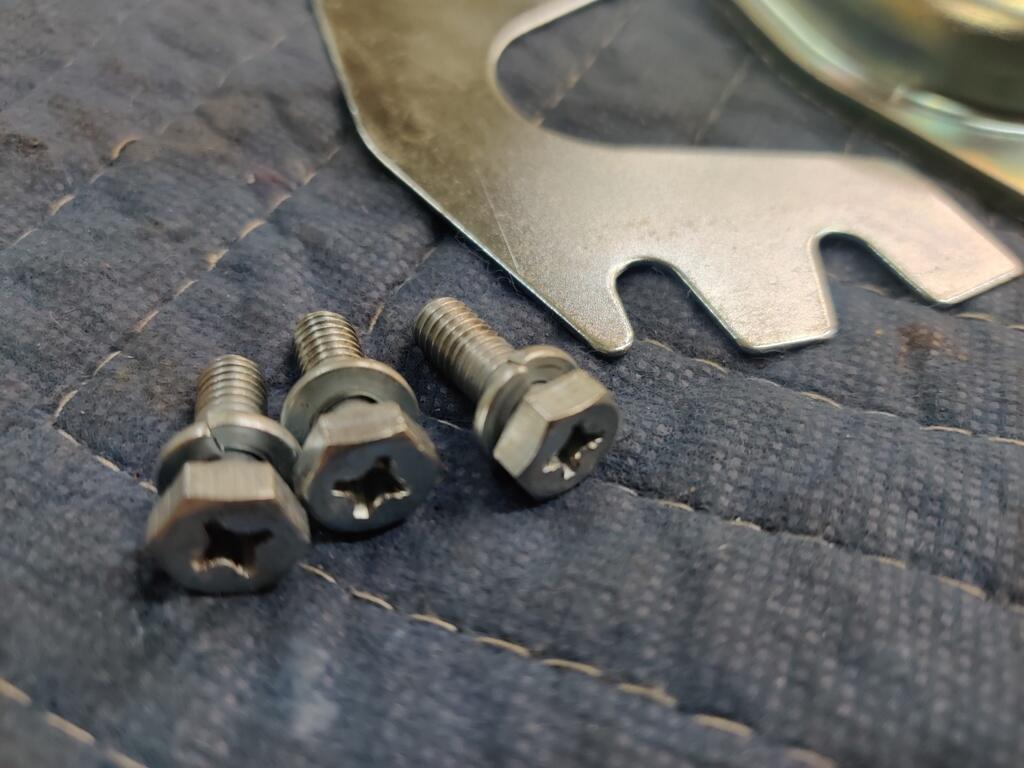
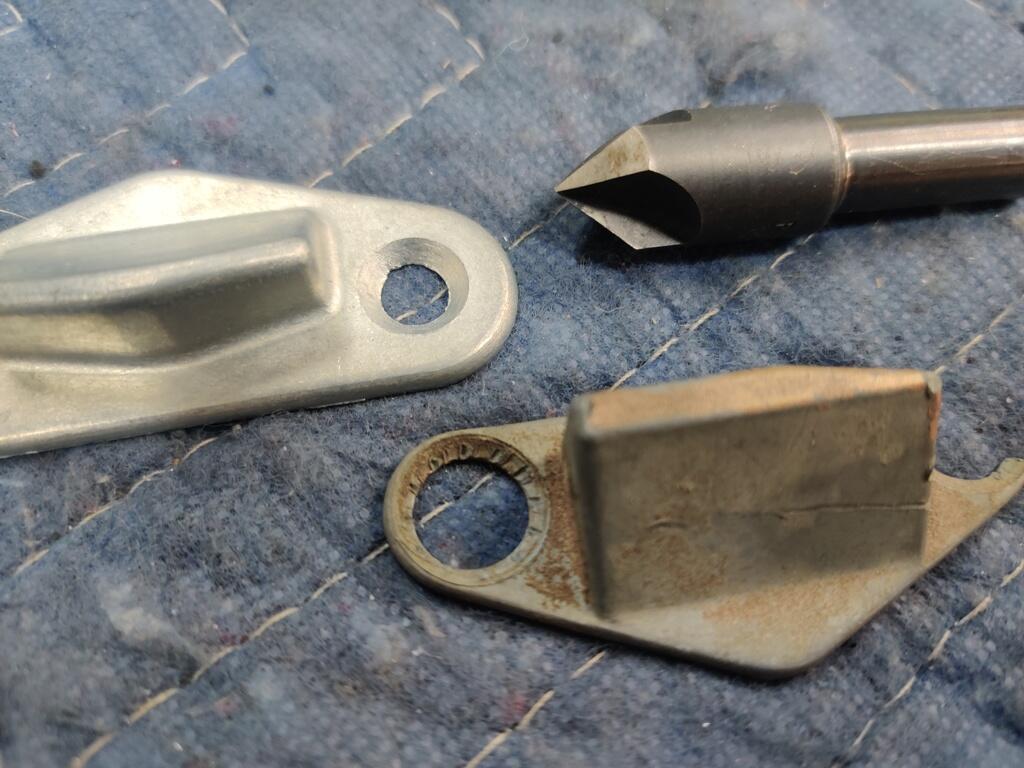
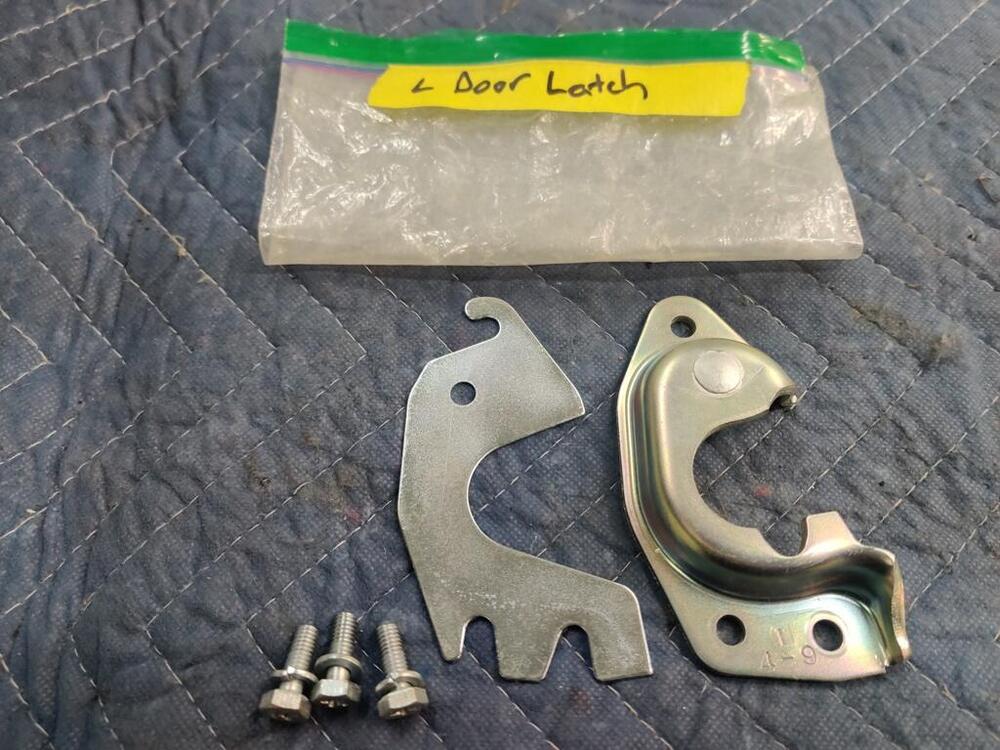
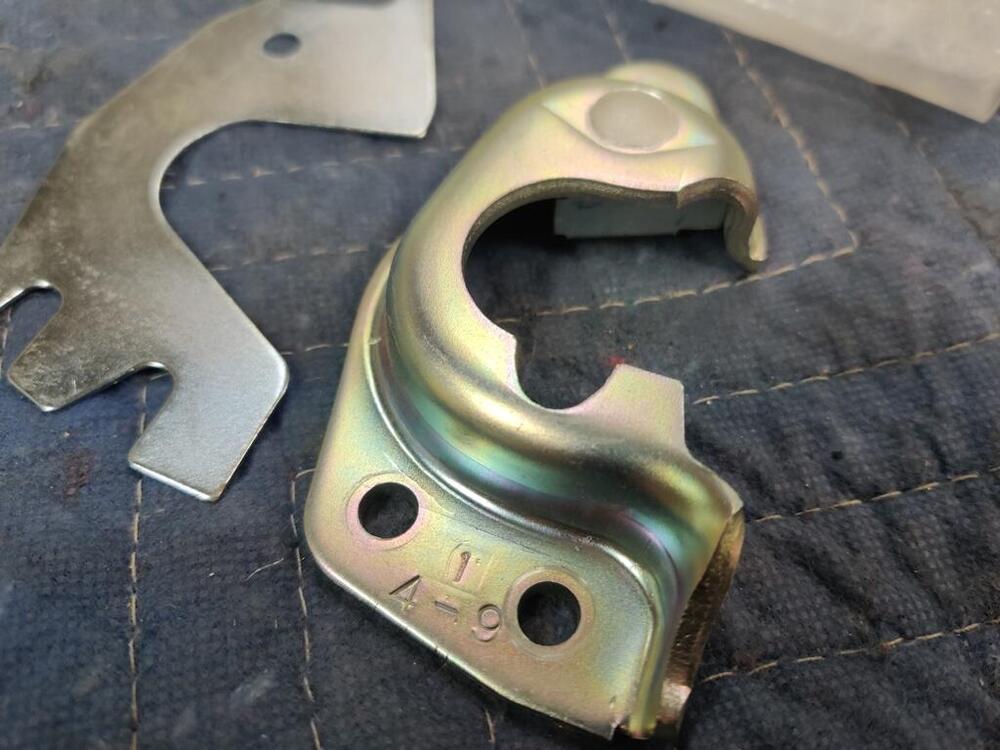
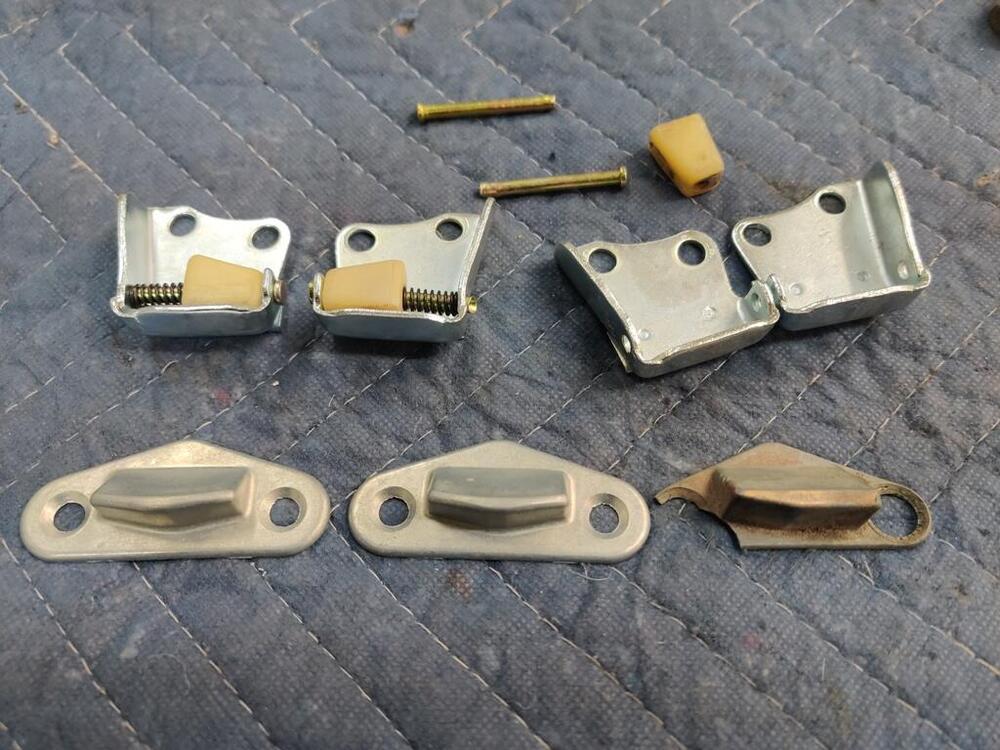
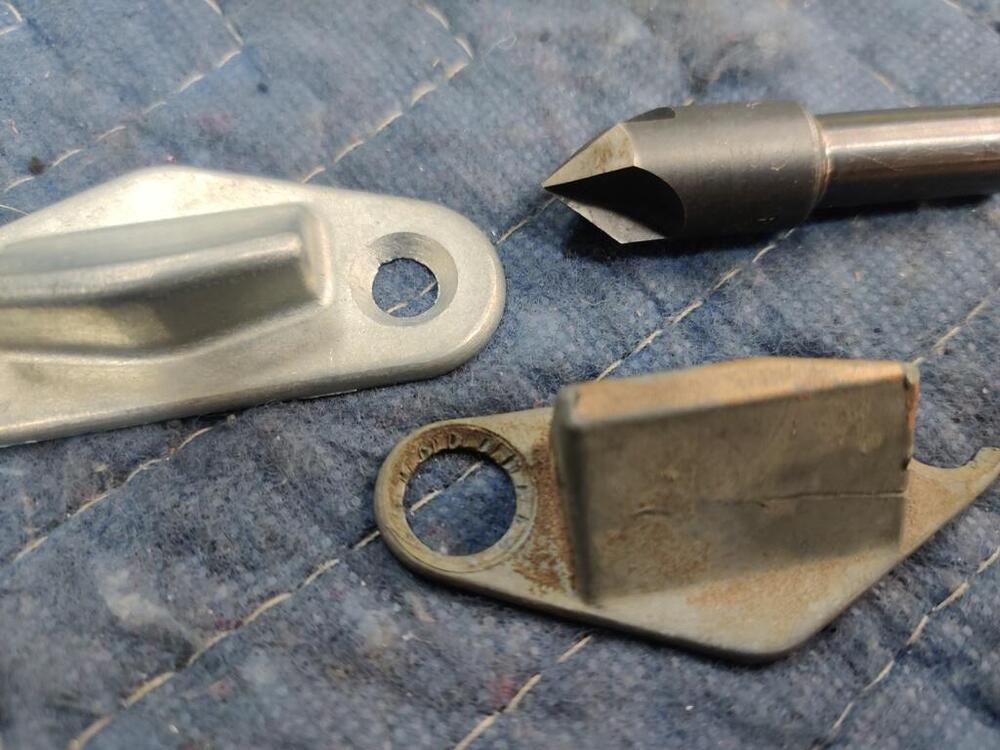
Here are a bunch of pics of the door latches and receivers. I will say my efforts here were excessive... that I pulled apart two sets of latch components to acquire enough parts in very good condition to make one excellent pair. The plastic wedges can wear. So, a passenger side wedge to replace a driver side wedge that is worn is a good option. I had the parts plated individually. Springs received black, tubular rivets received yellow chromate, and the dove tails received clear zinc. NOS strikers were sourced along the way of my very many hours looking for parts for this car online. The new dove tails are symmetrical, while the old ones are not. Also, the new ones have much smaller openings for the screws and conical serrated washers. I used a deburring tool to open up the screw holes which allowed the screws to fit closer to flush - more like the originals. Semi tubular rivets were press out of the receivers, plated and will (hopefully) be reused after re-plating. I will need to fold over the metal pn the end of the rivet to secure the rivets in place:


-
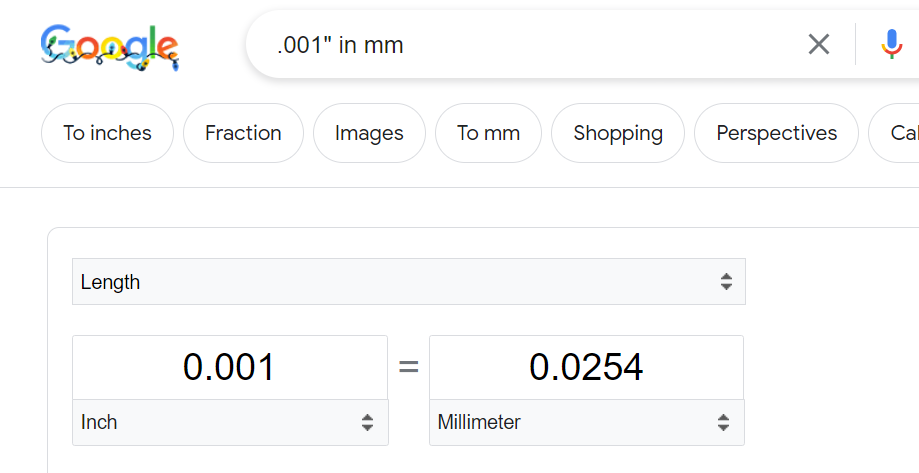
Oops - yes, I entered the wrong number there. The washer is .126" not .140" thick. I fixed it in my post above. When I was in grade school, we were taught the metric system because we were taught also that America would be transitioning over the next couple of decades. That did not happen, however. I found a comment from a machinist friend of mine about the metric system to be interesting. He said that the tolerances typically used for machining (thousandths of an inch) did not have a good equivalent in the metric system. Consider: So, when working with tolerances of thousandths or "tenths" (.0001") for machined parts, how well does the metric system work?
-
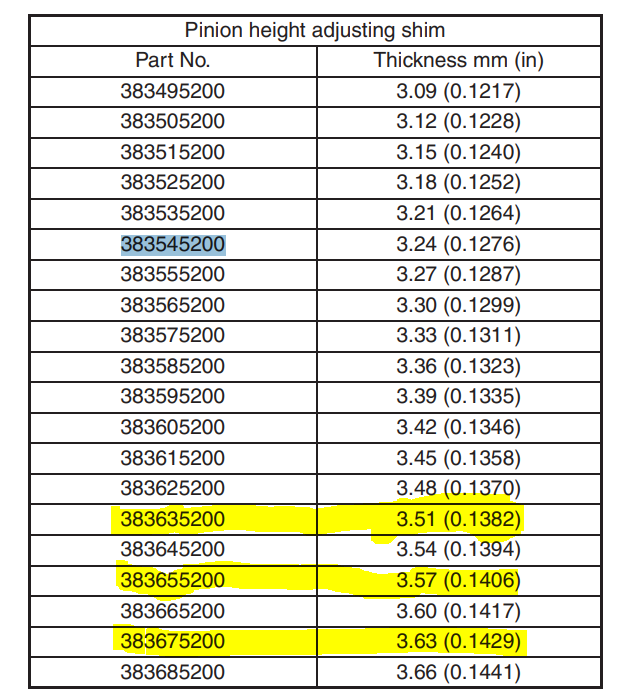
Yep - understood. I found this listing of part numbers (Subaru) - only the yellow highlighted ones sh ow as available: To make matters worse, I measured my shim's thickness today while off of the pinion shaft, and it is only 0.126" thick - not the 0.140" I measured before. So, the one that is coming (if it is coming) is many sizes thicker. I wonder if it would be a bad idea to surface grind the new washer to bring it to the necessary thickness after determining what that is with the shim stock from Amazon?
-
Just spent a couple of hours trying to find shims from other applications that would work, but I didn't find anything.
-
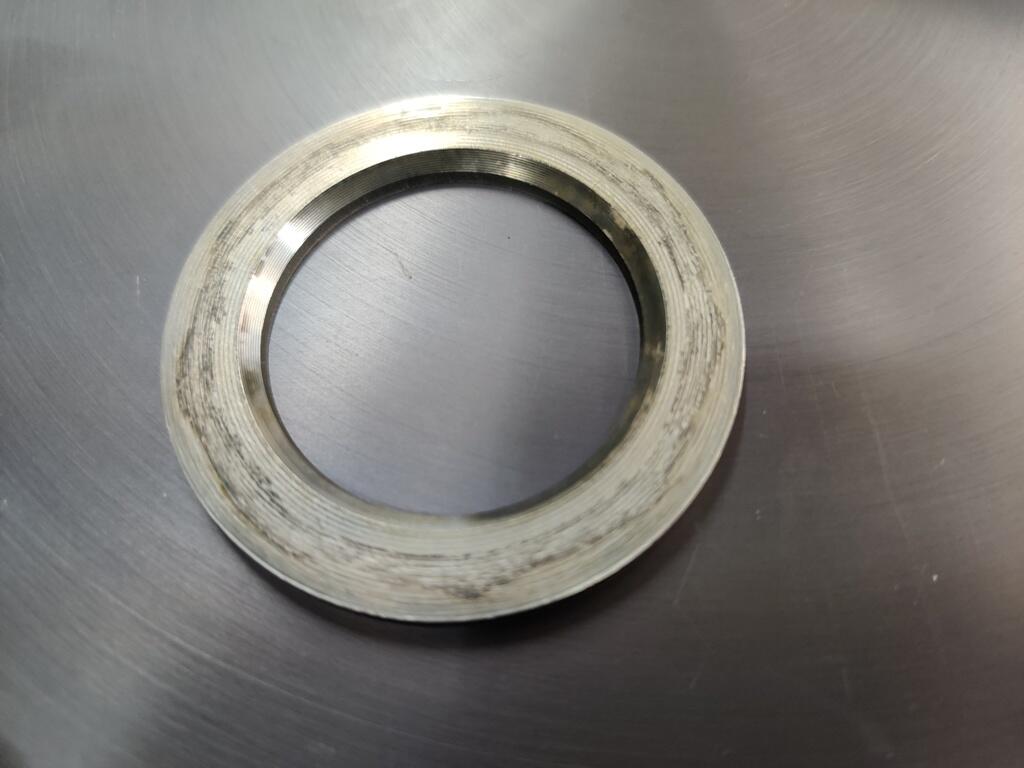
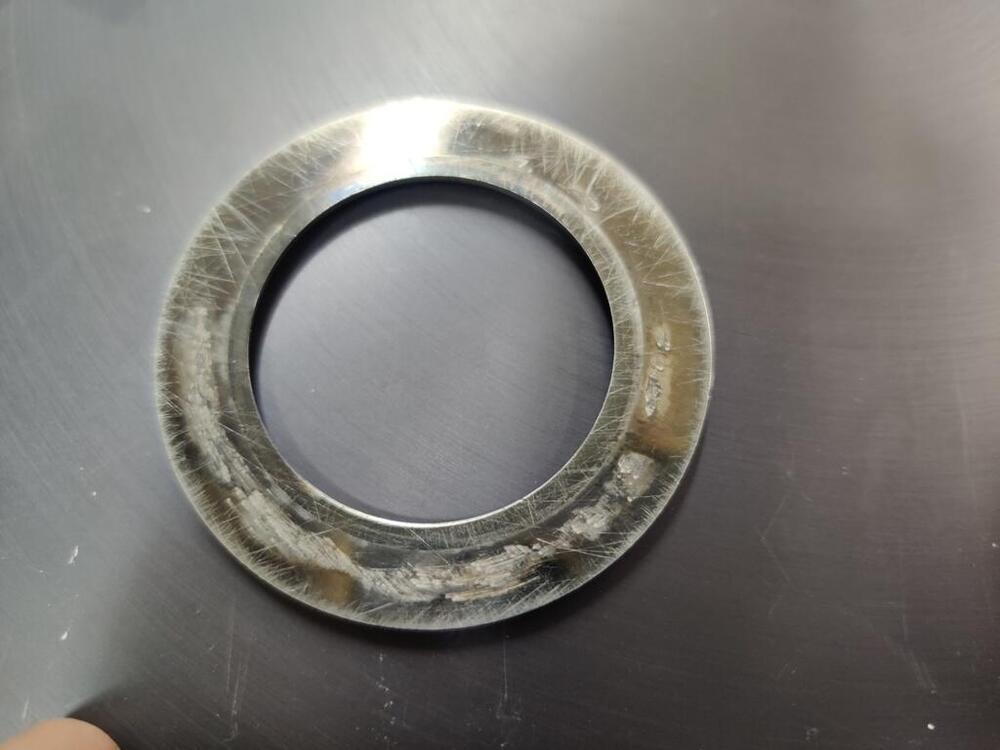
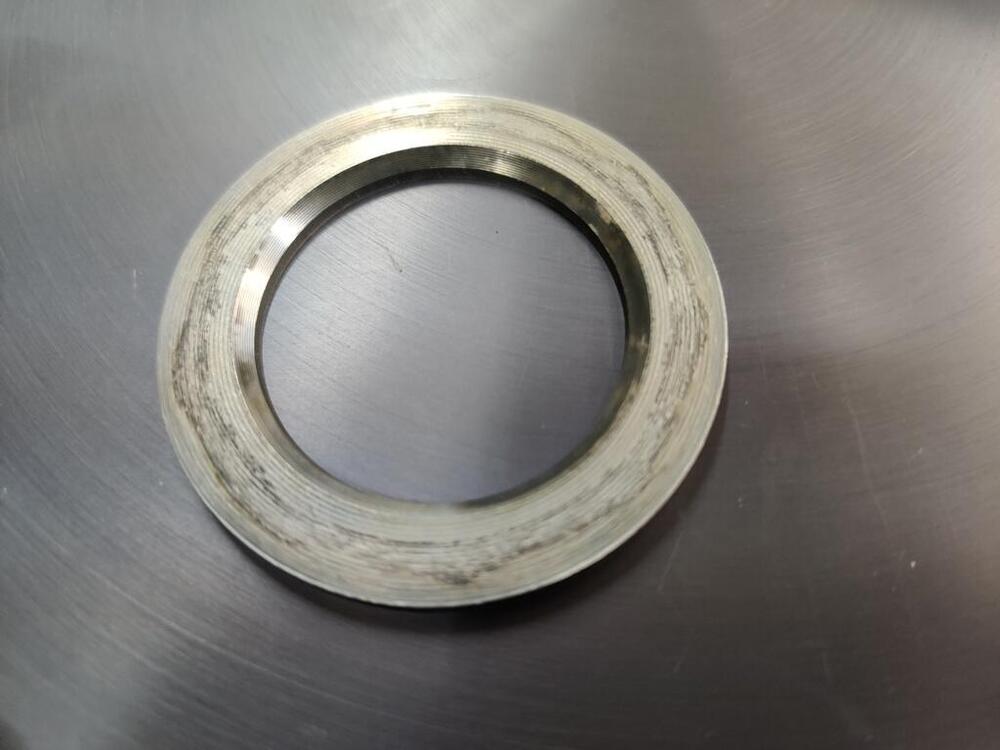
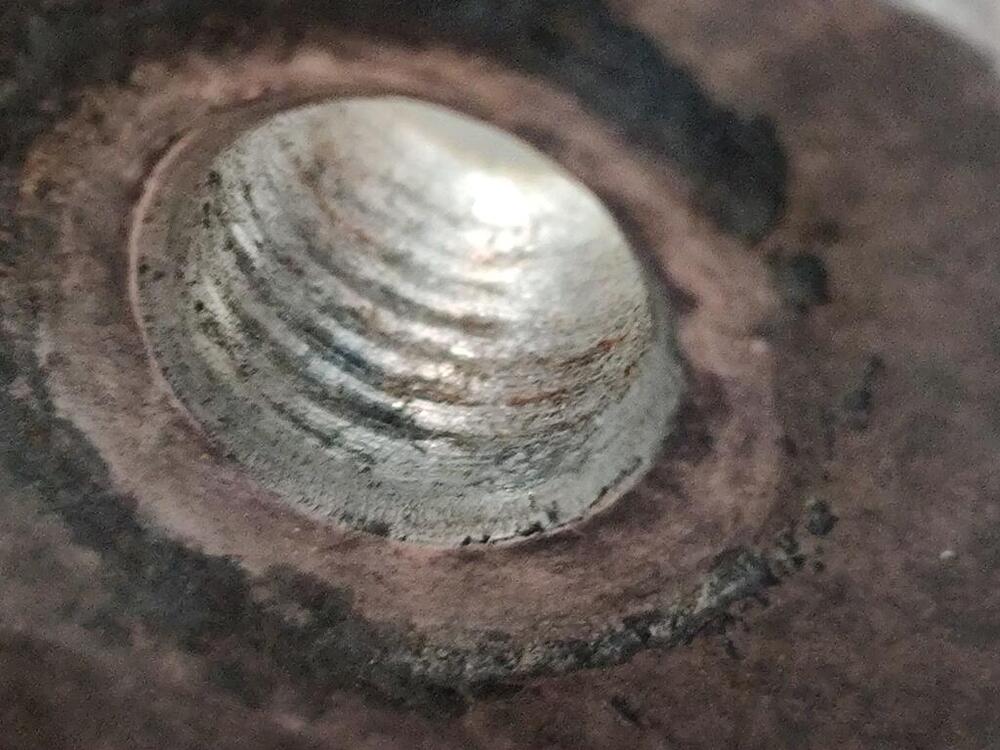
Thanks for the suggestions everyone! Unexpectedly, the order the shim was on has shipped! I am suspicious, however. I think they may have let the 90 day time frame they originally quoted for the "national backorder" run out and then crossed that shim off the order and shipped the rest (some side shims). I don't know that though. I will have to see what shows up. In the meantime, I was able to remove the rear pinion bearing today and free the existing shim for measuring and test filing: Shaft collar side and gear side, respectively: The OD is 53-54 mm and the ID is 35 mm. With regard to filing, I ran a fine single cut file across the surface of the left picture very lightly and it immediately started removing the dark coloring from the outer edge of the shim. I want to say that where the "collar" contacts... or sits against the shim, it is now lower (compressed?) than the outer edges of the shim. I did not want to, nor did I file more than a few light strokes on the surface of the shim. I also note some very light chaffing on the surface of the shim. I suspect that would be hard to achieve on a "hard" shim. I think this thing is actually pretty soft, for whatever that is worth.
-
Hmmm. Running into a snag on the ones in Japan. Looks like they are for an R200 pinion. I assume they are different than the R180 ones. Link shows application. https://www.nissanpartsdeal.com/parts/nissan-washer-adj-drve~38154-p6034.html
-
So, it would appear that as of right now, I have options of: Buying the shim from an active auction (in Japan) Measuring the "id" and "od" of the existing shim and attempting to cross reference with shims available for other vehicle differentials - to get a suitable stack of shims that can replace the existing one Finding a suitably hard .003" shim to add to the existing one Having custom shims made Finding a suitably hard .003" may not be possible, however.
-
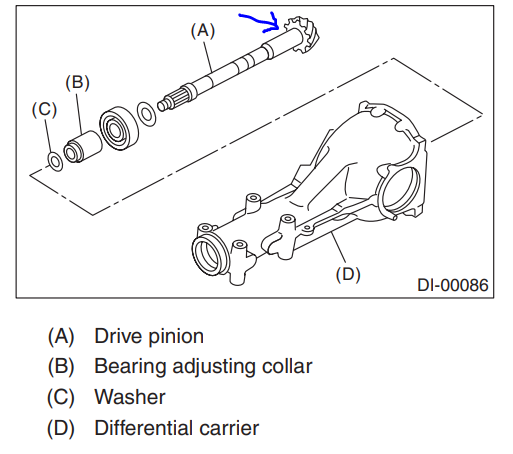
The shim I have on order from Subaru still hasn't shipped. At the time of my order, they indicated it was on national backorder and provided an eta of 90 days (they have no clue when it will be available again). That 90 days is up in a couple of days. I expect they will contact me to say it hasn't come in and I can either cancel my order or wait another 90 days. So, I find myself thinking of other options. Any engineers on here have thoughts on using a shim like this? https://www.amazon.com/Precision-Carbon-Assortment-Temper-Chemistry/dp/B00065UXD8/ref=sr_1_3?keywords=Steel+Shim+.003&qid=1703611083&s=industrial&sr=1-3 My thought is to use the existing shim I have, plus another shim or shims made from this shim material. I would put the new shim under the existing one to change the location of the pinion gear height in the case. For example, I would make a .003" shim from the new shim material, and then place it here on the pinion assembly:
-
Hey Mike, does the roof still have a good head liner on it?
-
I saw this on a recent 240Z auction on BAT. So much for my claim of the oldest Toyo for a Z!
-
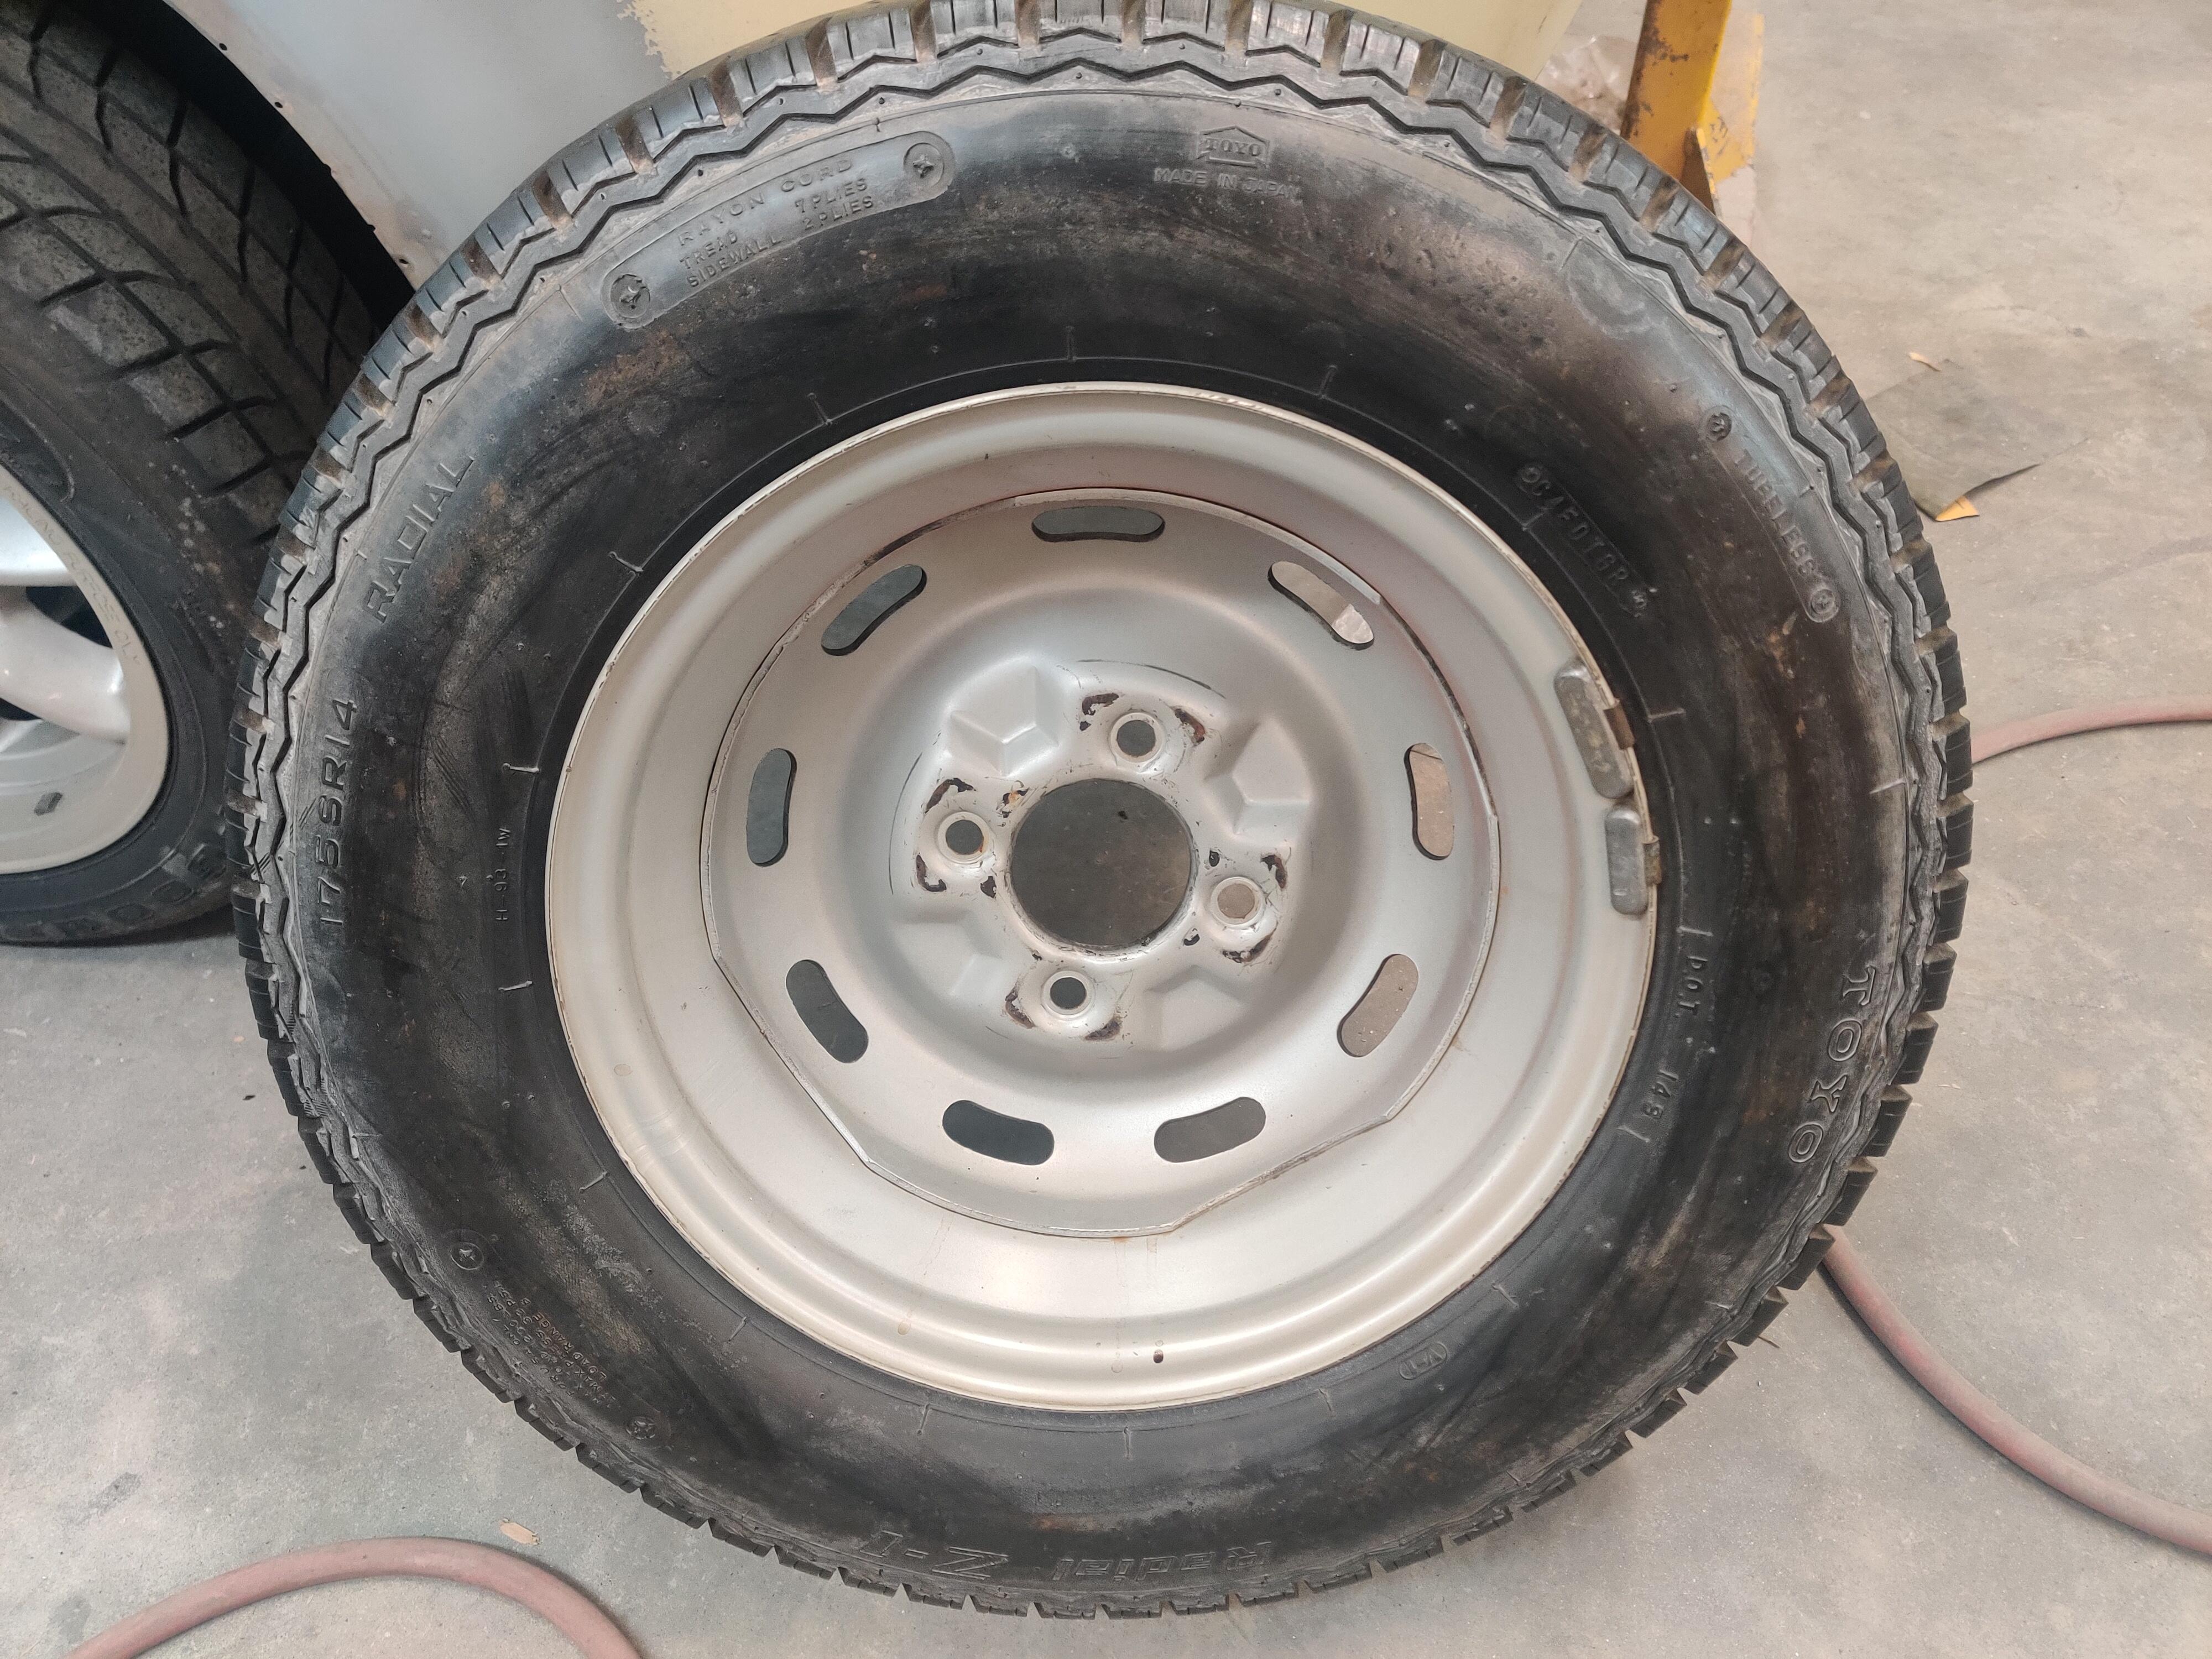
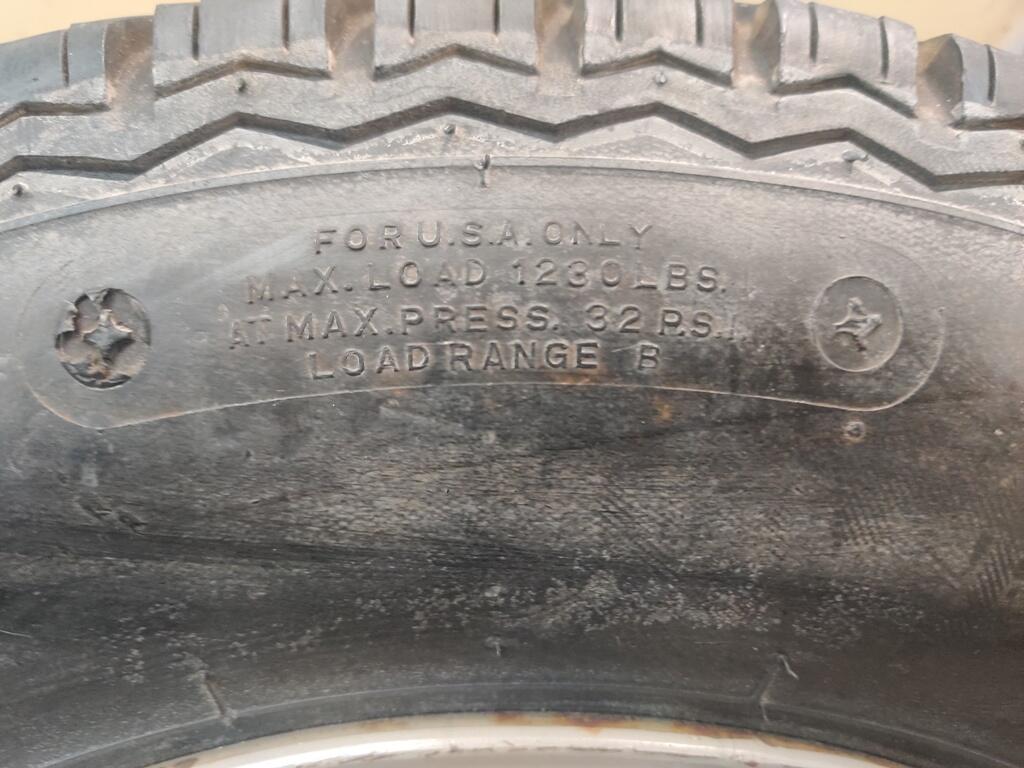
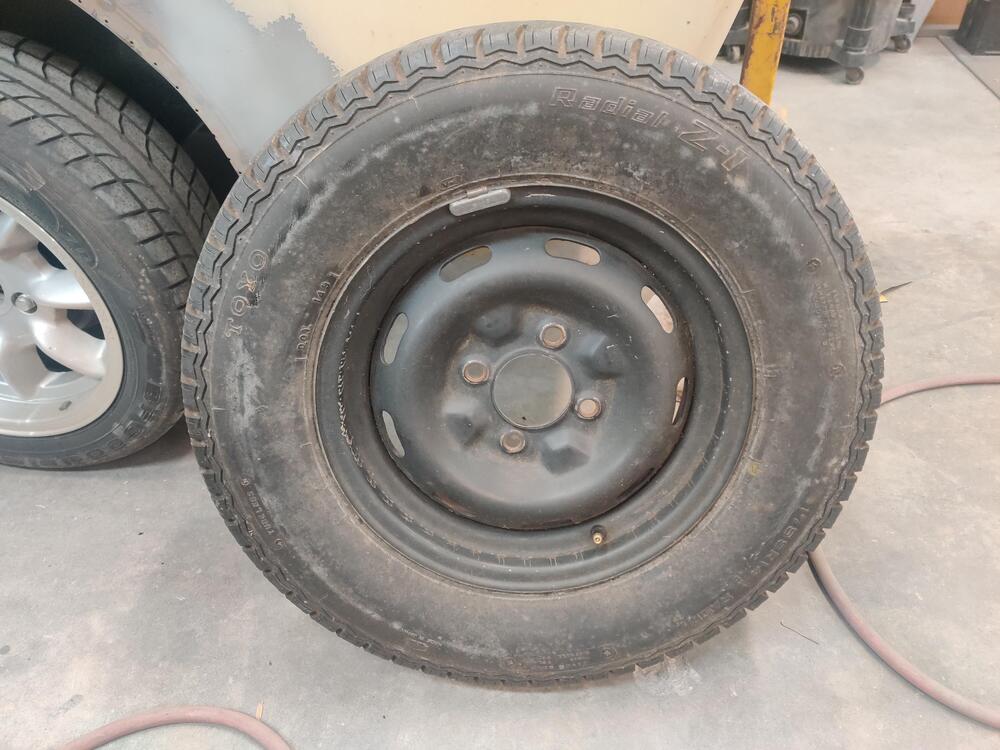
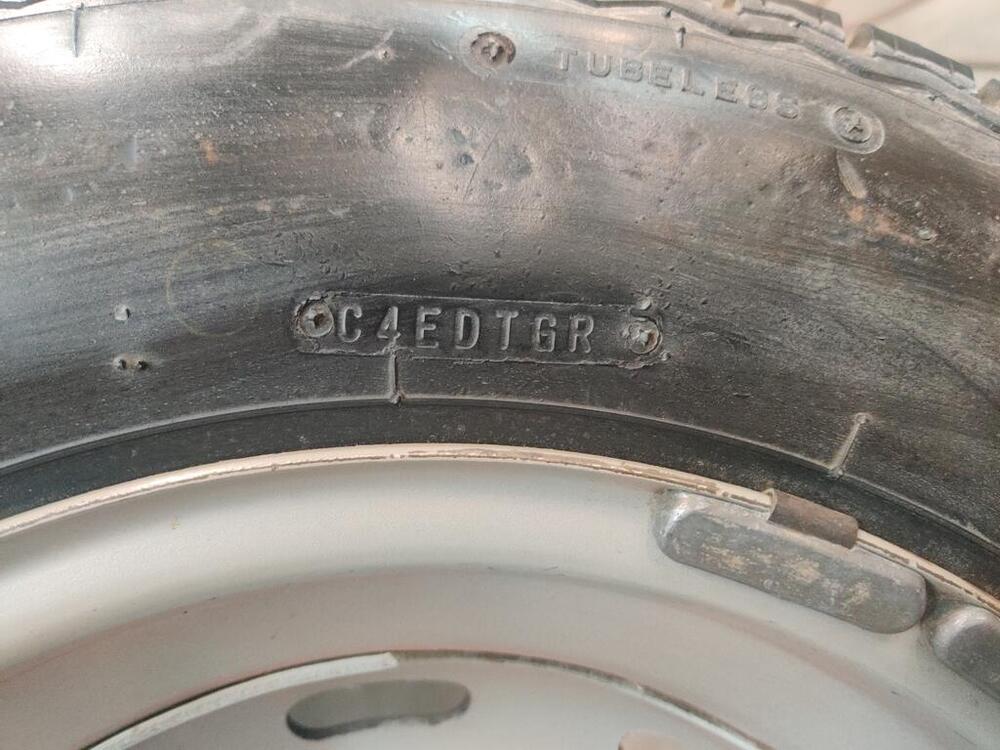
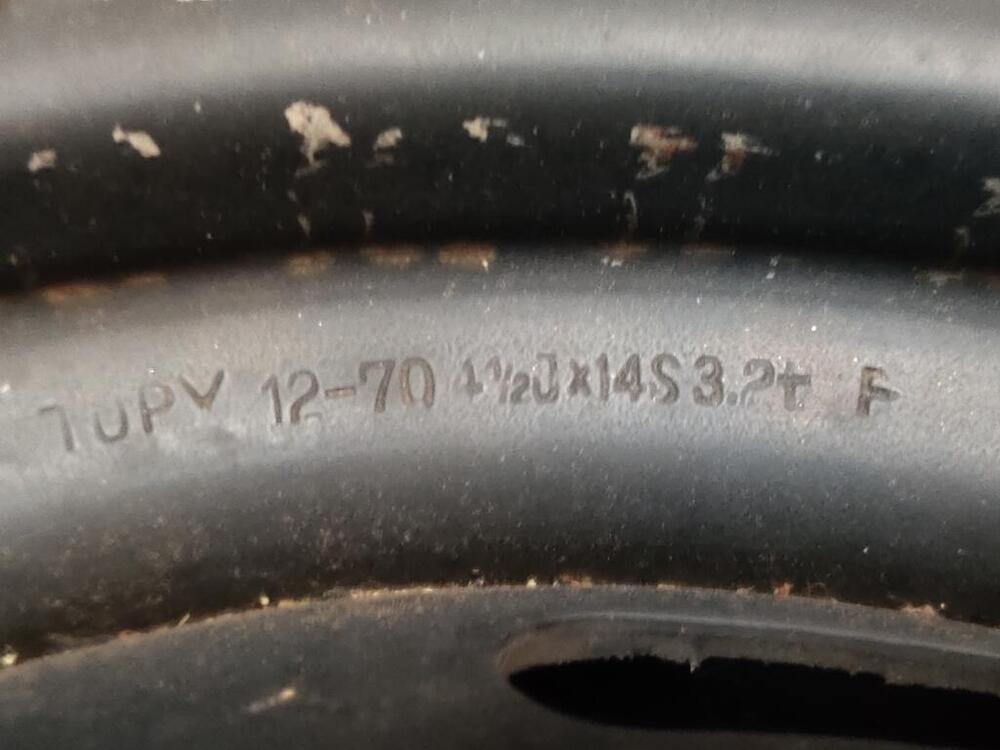
Here are some more pictures of my spare. VIN HLS16530 - 12/70: High resolution front and back: I claim that I have the earliest Toyo Z tire for 240z's still in existence - someone prove me wrong!


-
Yes, they are. Thank you!
-
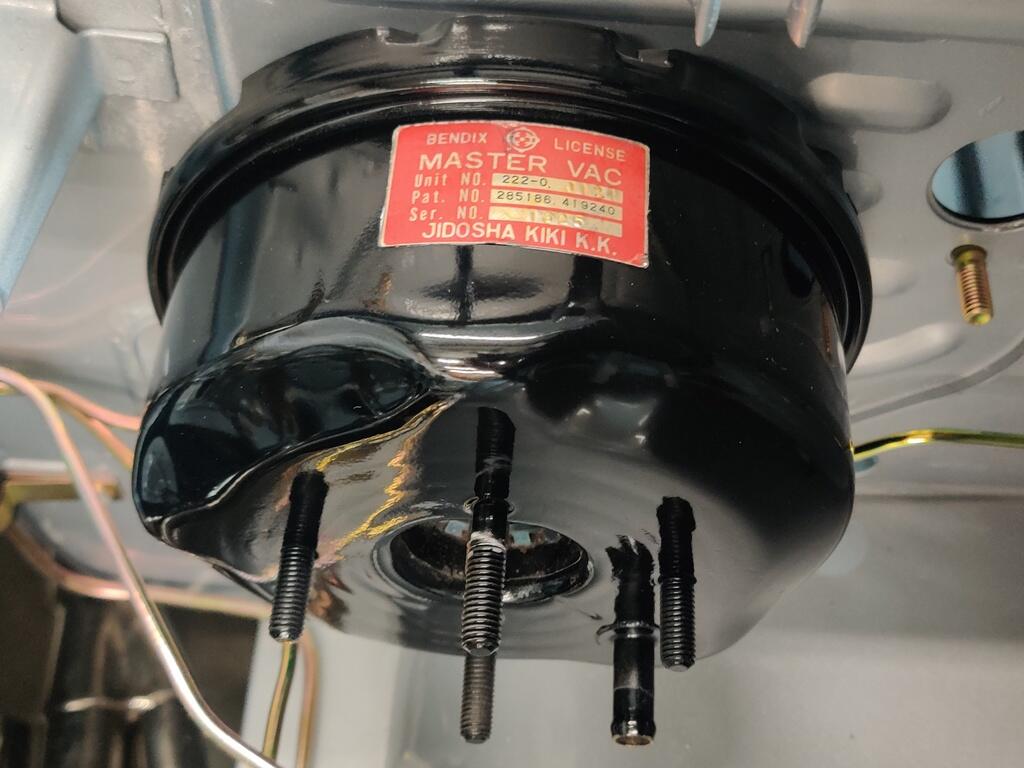
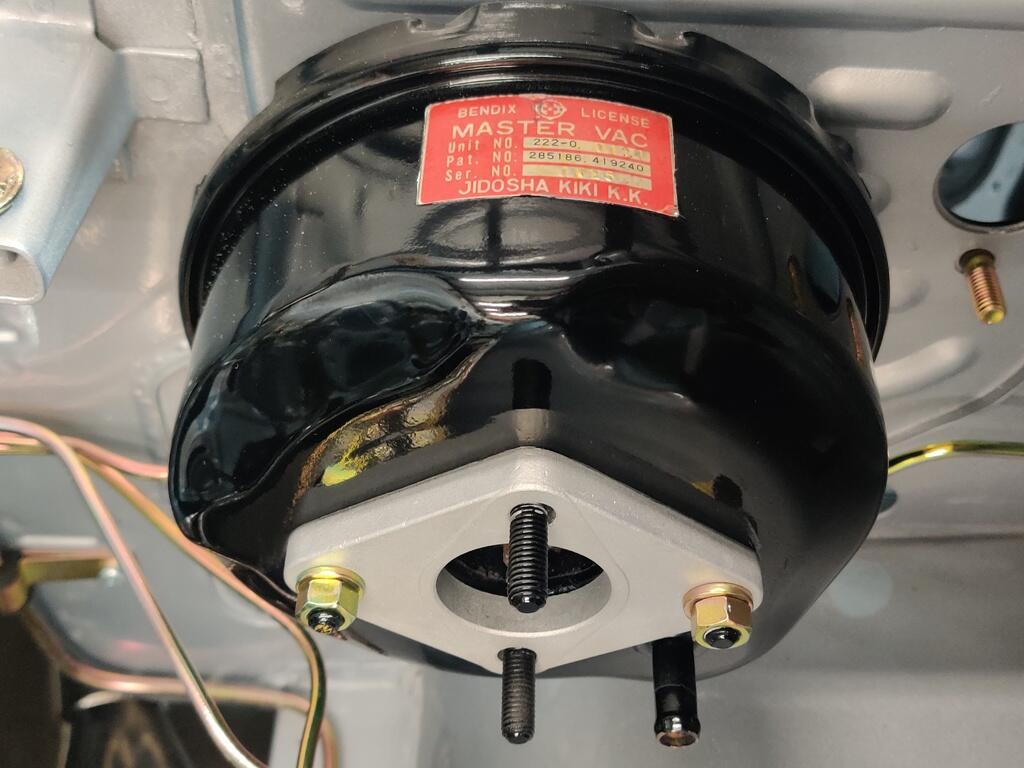
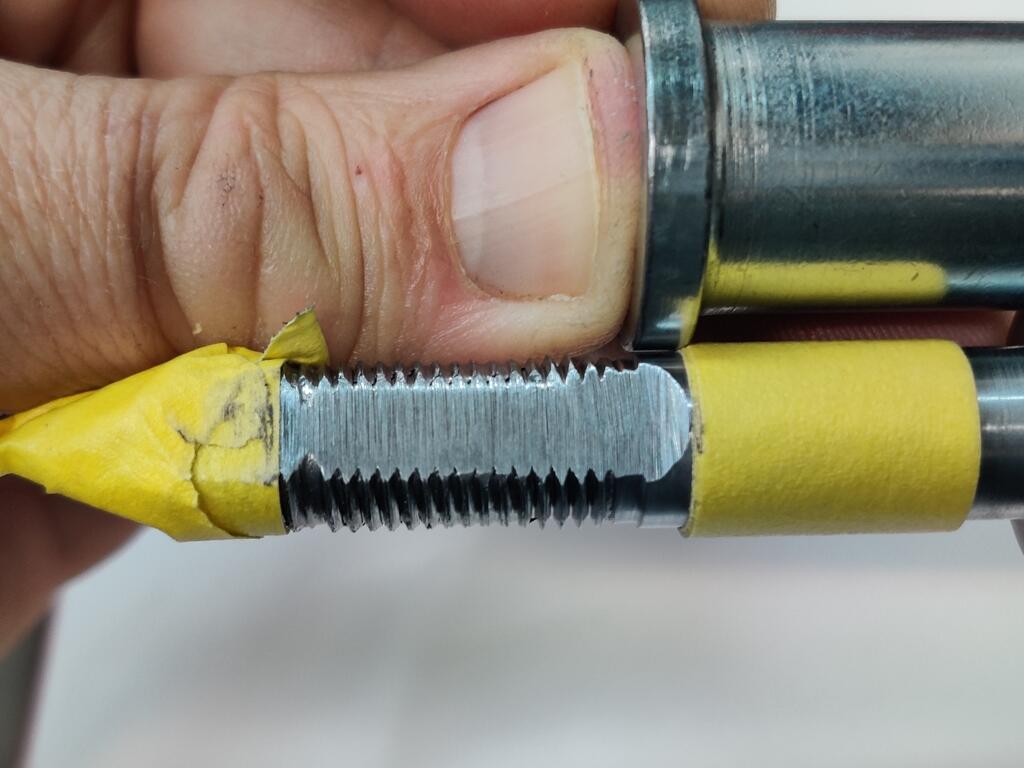
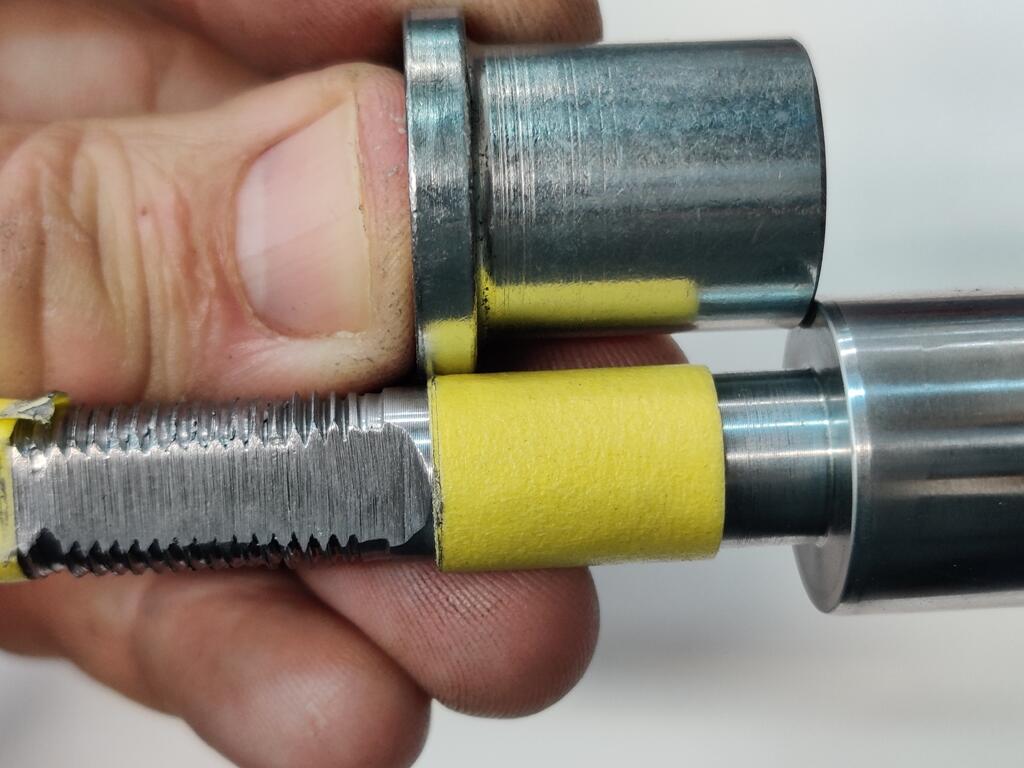
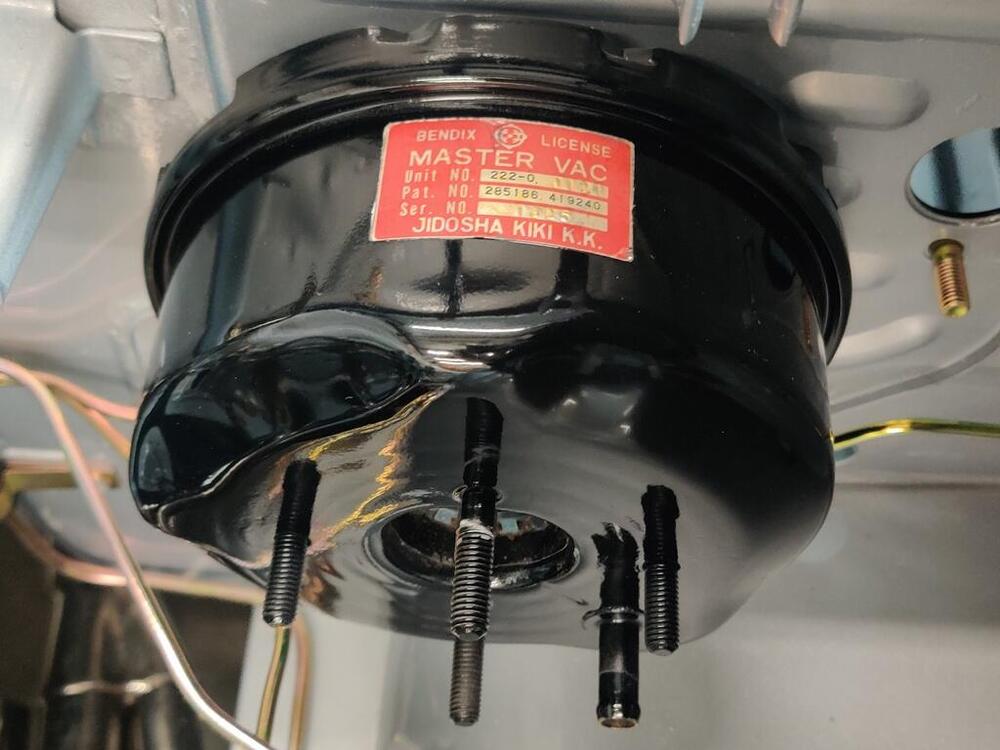
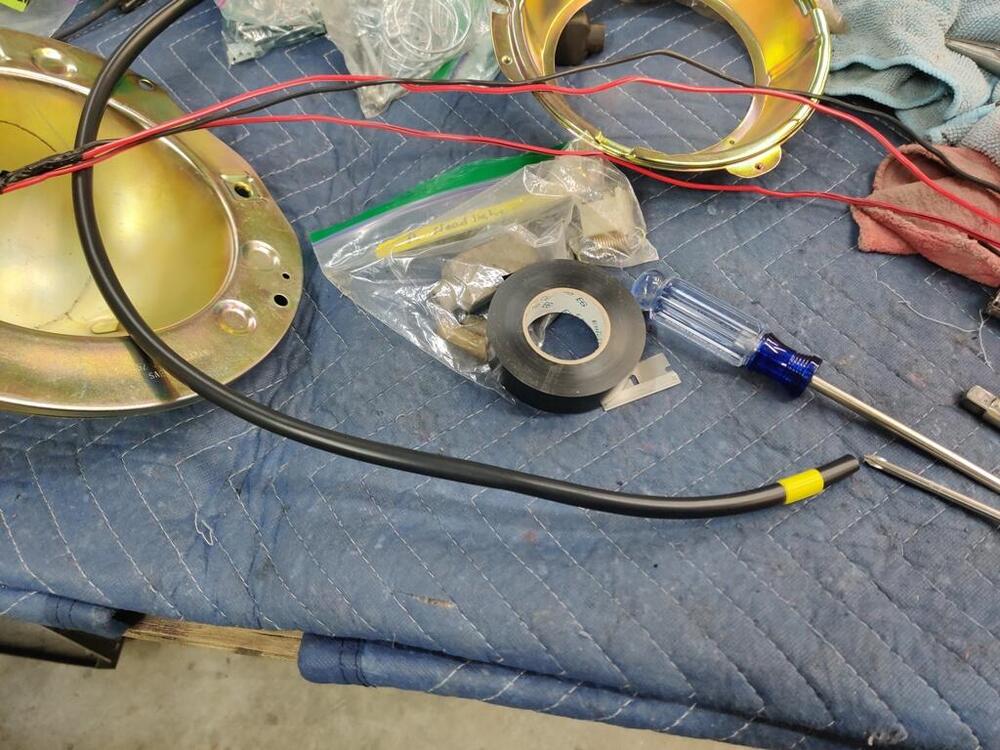
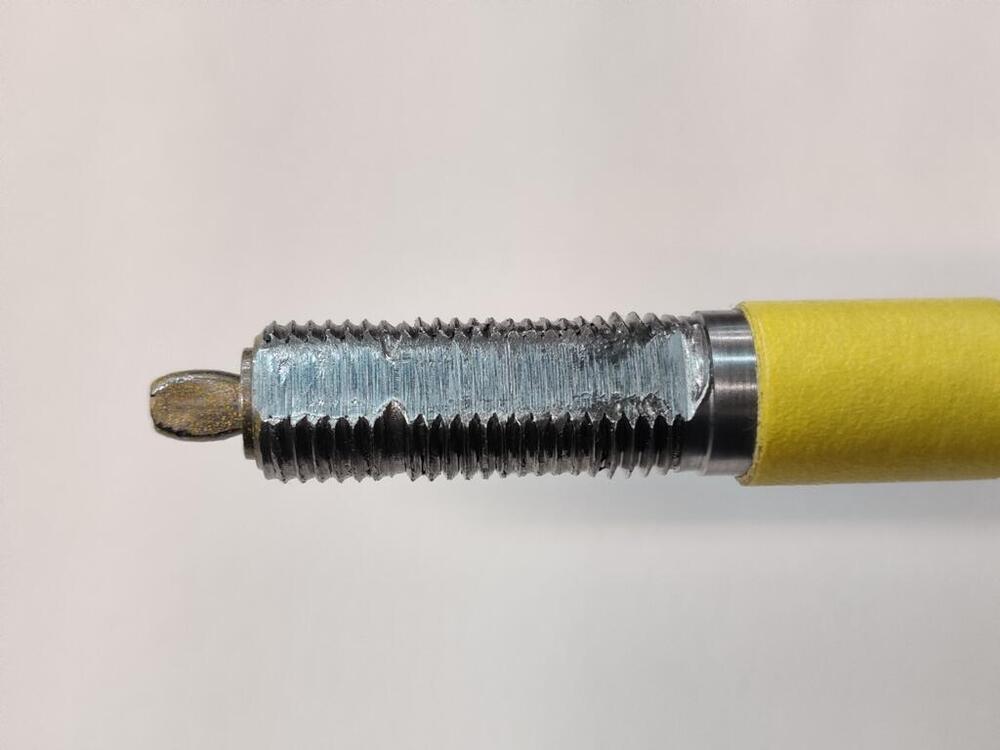
I wasn't able to spend much time working on the car today. Just a few pics: I used silicone rubber between the master vac and the firewall to keep water from finding its way into the car in the future. I like how the master vac paint came out. I was able to save the original master vac sticker. I also pulled out the box of OEM rubber items that came with the car. I put the main hatch seal in place all the way around the hatch opening (without glue) and shut the hatch on it. I will leave it like that for a few days, which ought to help it relax/fit the opening a bit better than straight out of the bag. I also started assembling the headlight buckets with the new bits I got from 240zrubberparts.com. I bought the headlight harness rebuild kits, which include new rubber grommets to keep water from entering at the point where the wires go inside the bucket, new sleeves for the wiring, and new rubber enclosures for the plastic connector. Can anyone tell me which ends is supposed to have the yellow tape (bucket side or harness connector side? And finally, I also changed out my signature picture with a small version of this pic:


-
Thanks for all of that info. So, what can we conclude about my Toyo Z radial spare tire? Is it possible that Toyo was using the 3 digit dating system before it became standardized? Or, is my tire from the 14th week of... 1979?
-
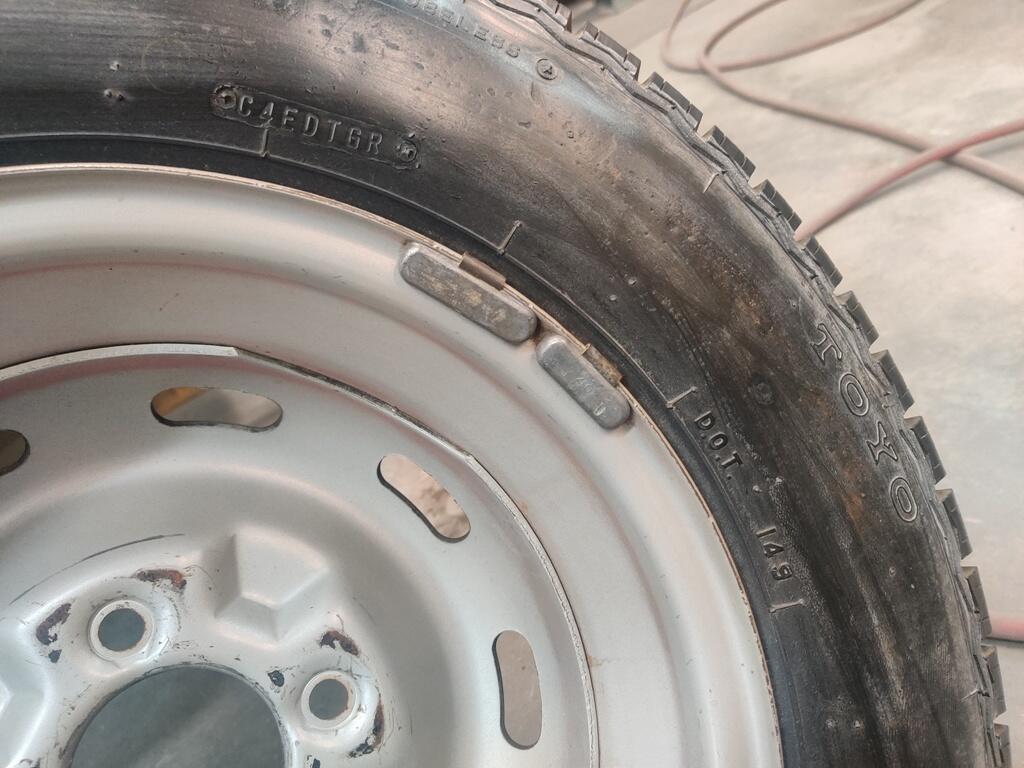
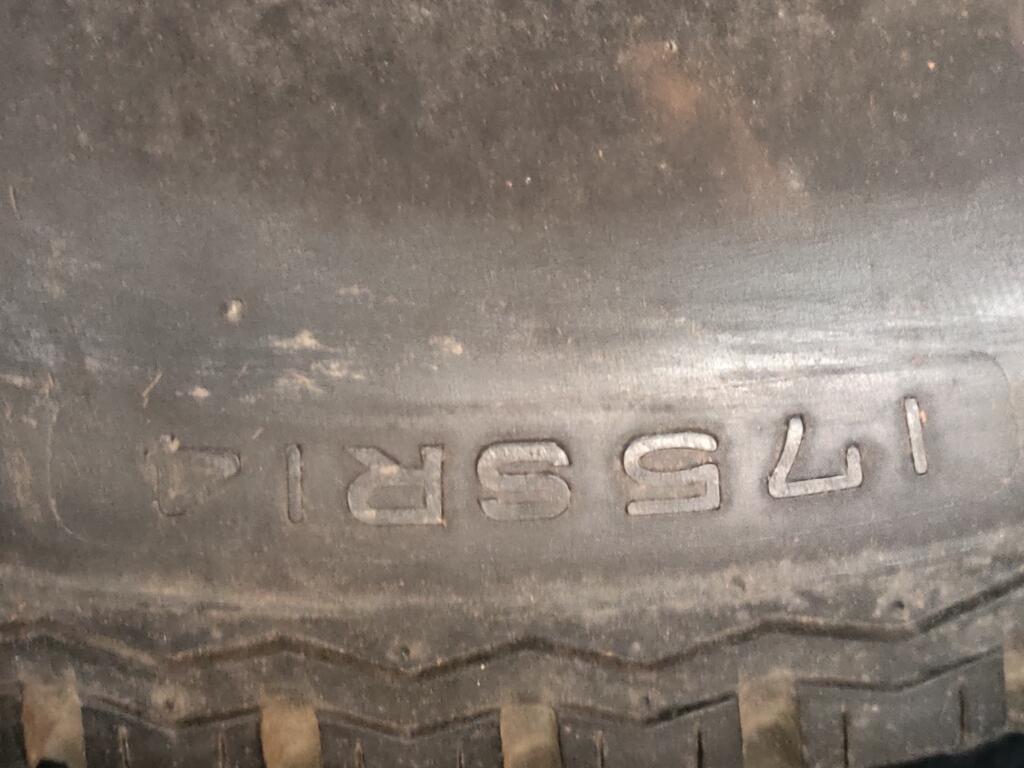
I have been searching for an original tire for my 6/1971 240z which I am restoring. I have read through all the threads I can find about what tires the 240z's came with originally (Bridgestone or Toyo). I knew my other 240z (track day car) still had the original spare tire in it, so I took a fresh look at it. I was surprised to see that the date code is 149 (fourteenth week of 1969). That is a lot earlier than I expected for the car given its 12/70 door tag date. It seems unlikely that it would have been swapped out for an earlier tire at some point. Anyone else see that kind of wide date range difference comparing your original spare tire and the manufacture month of your car?


-
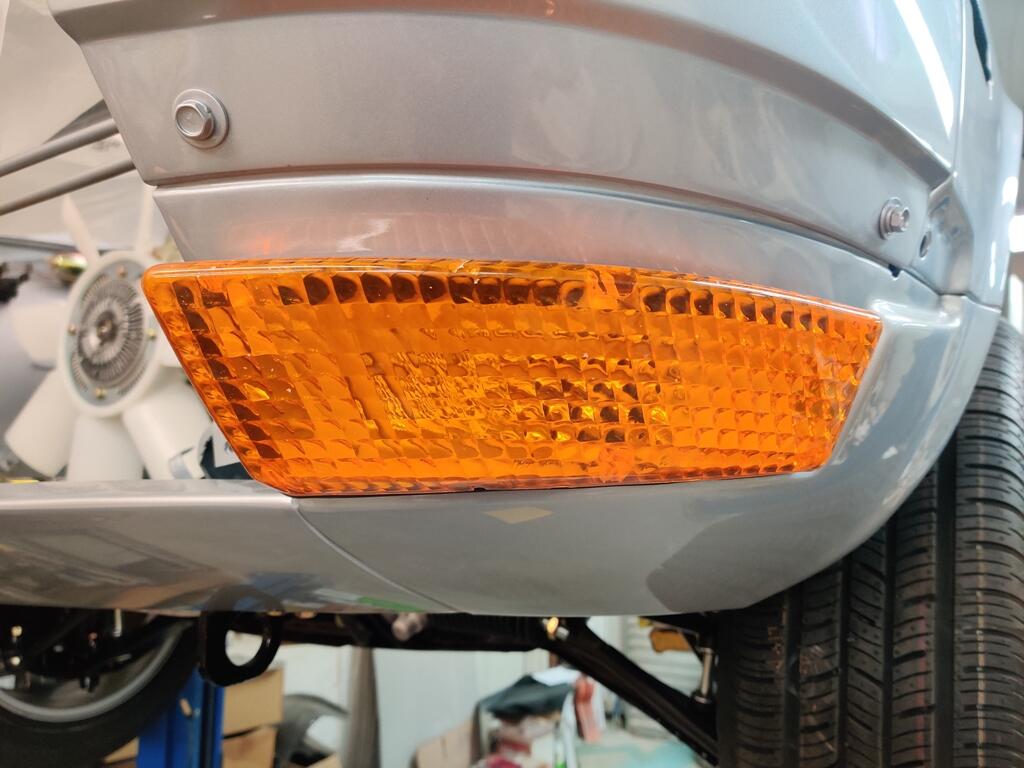
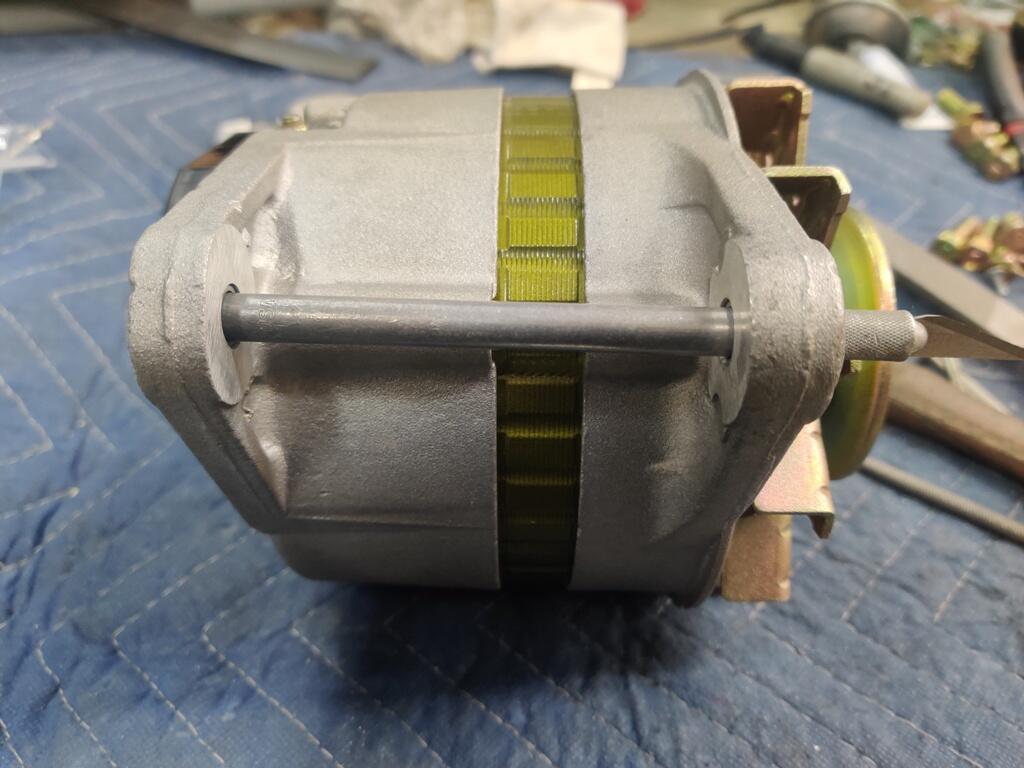
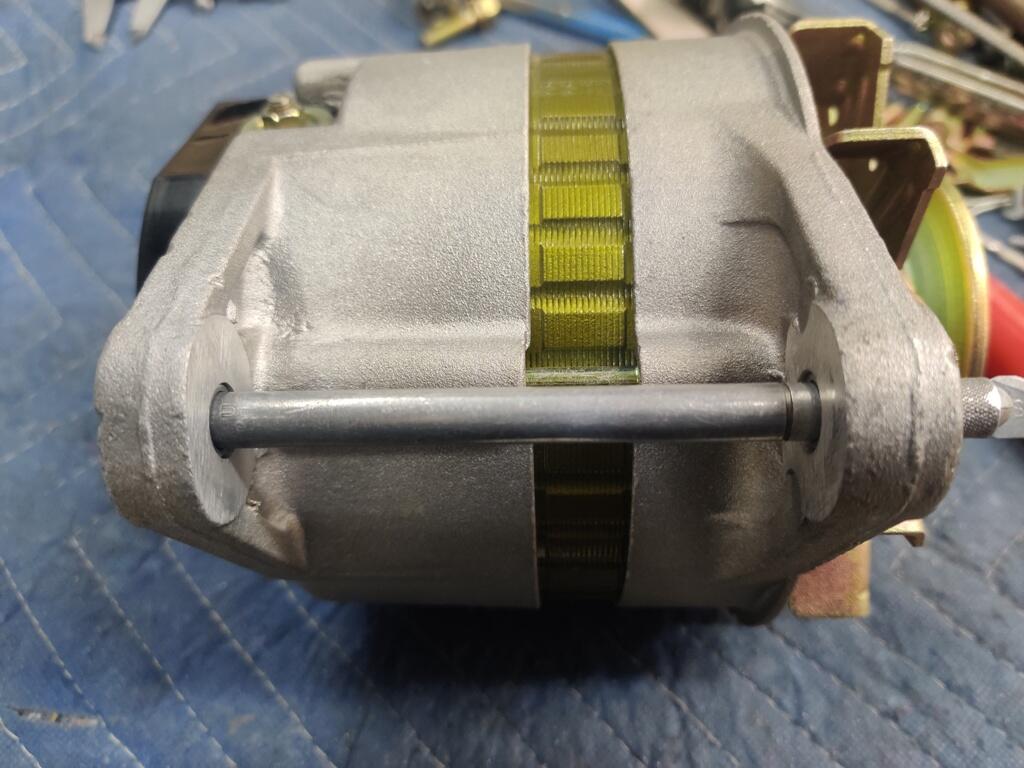
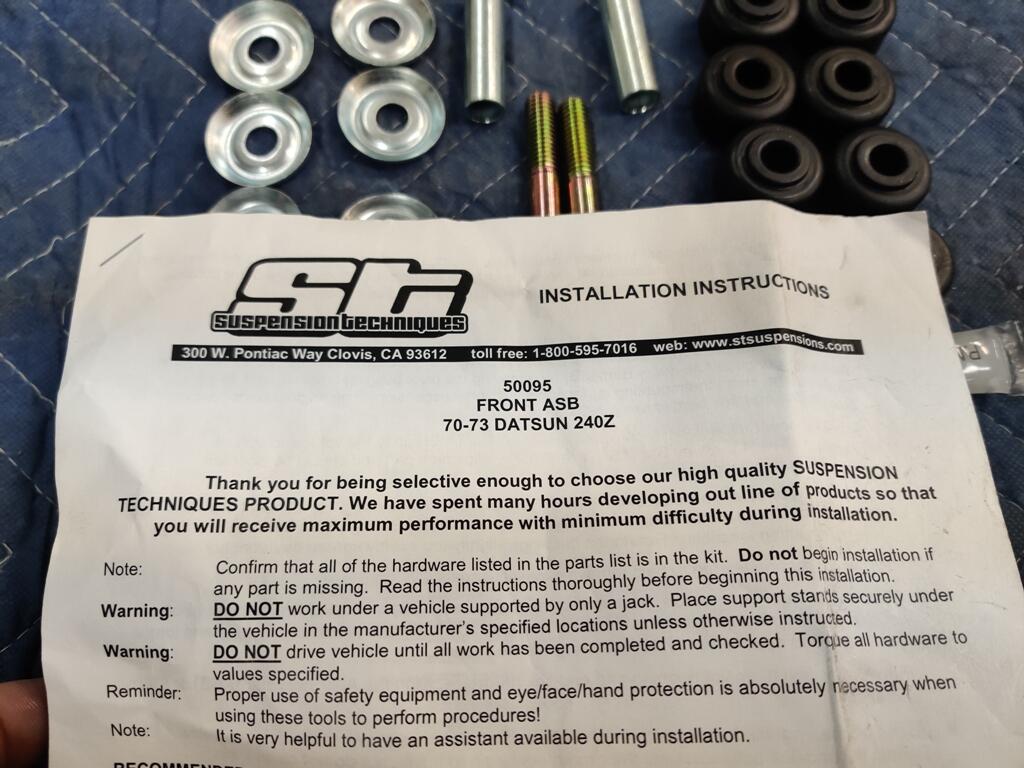
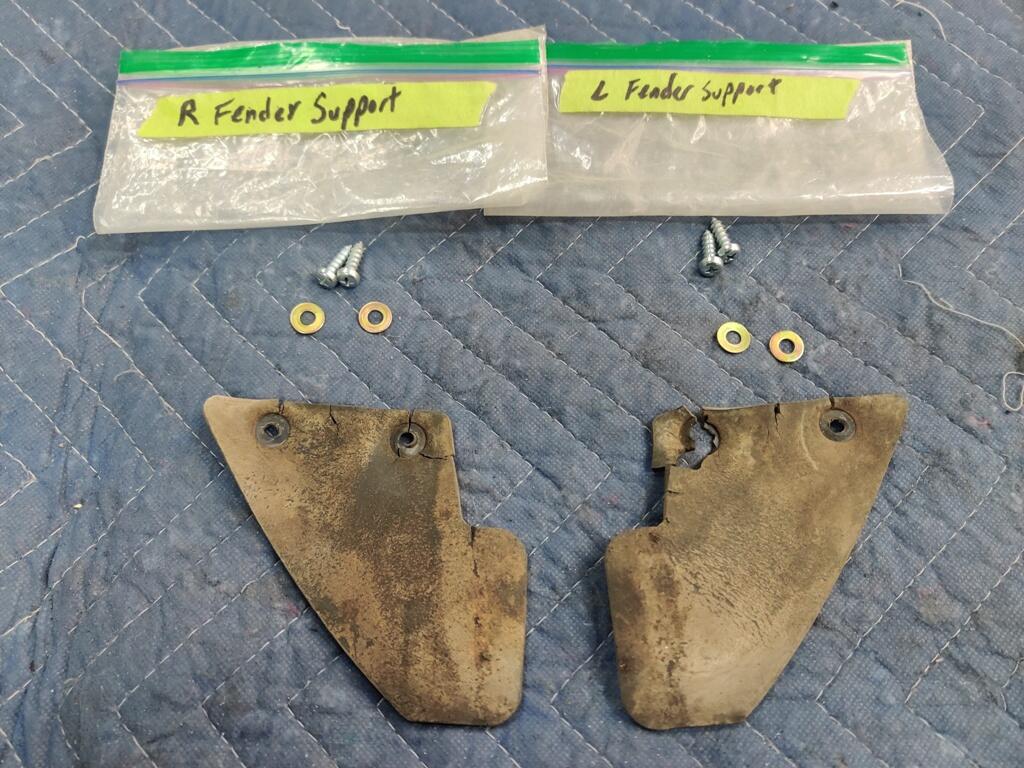
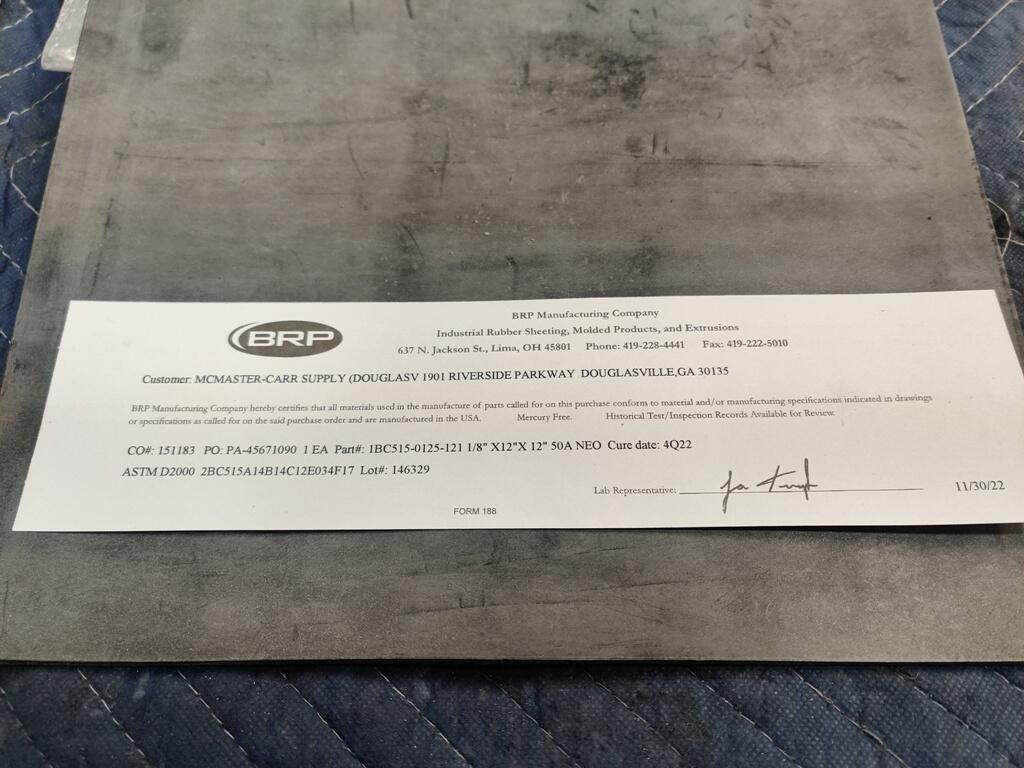
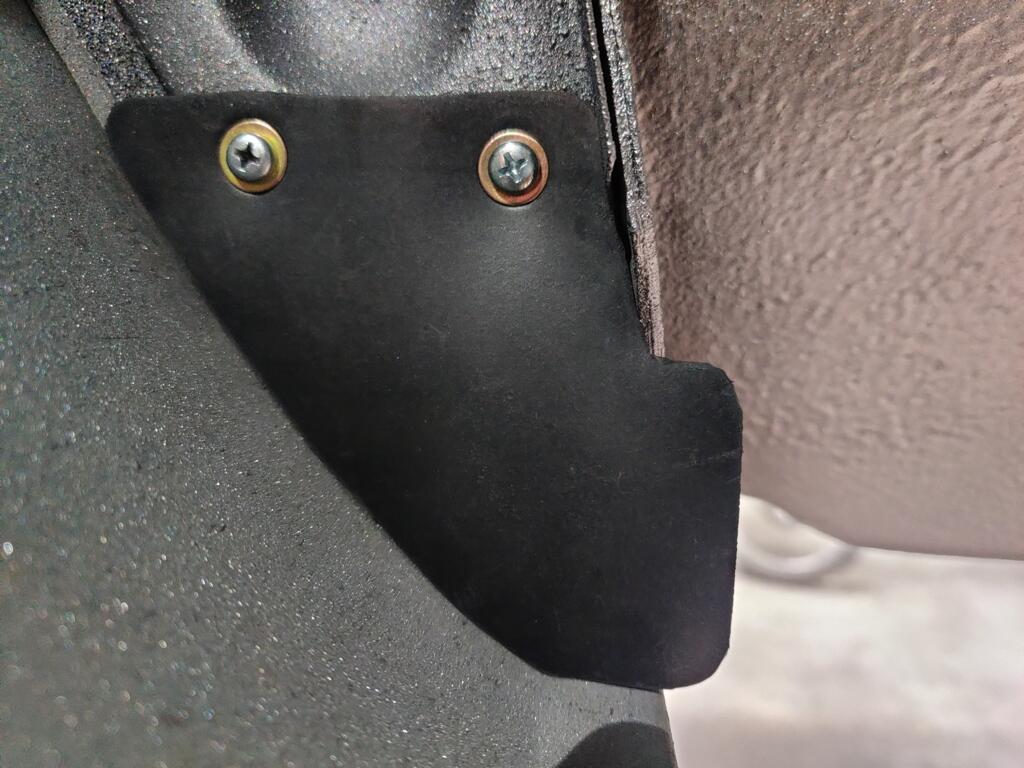
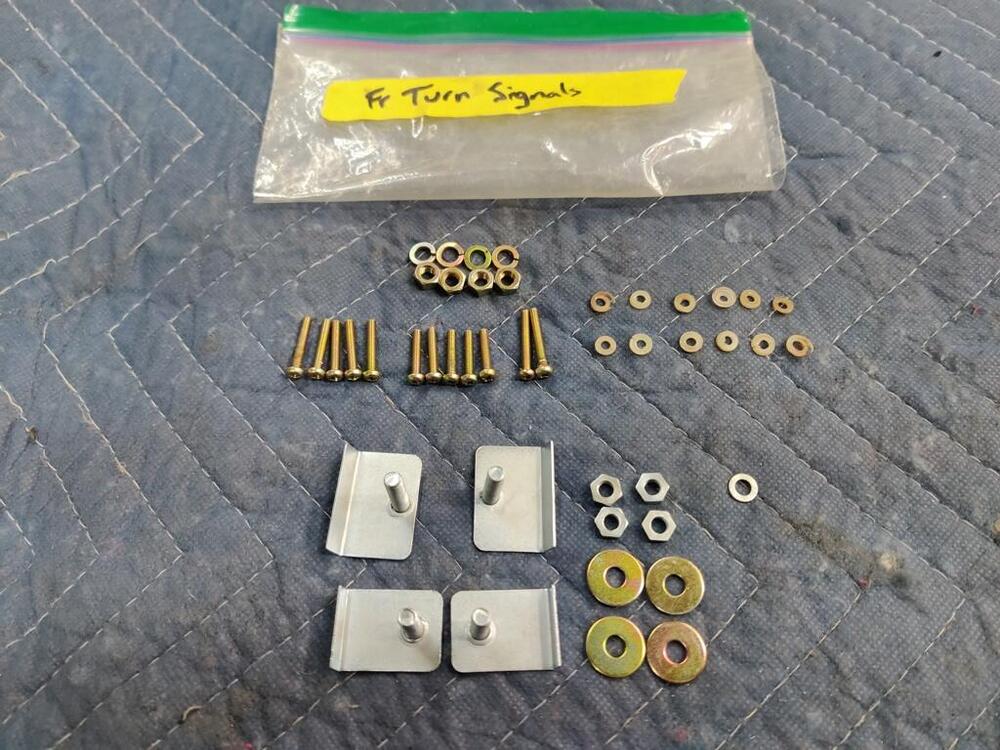
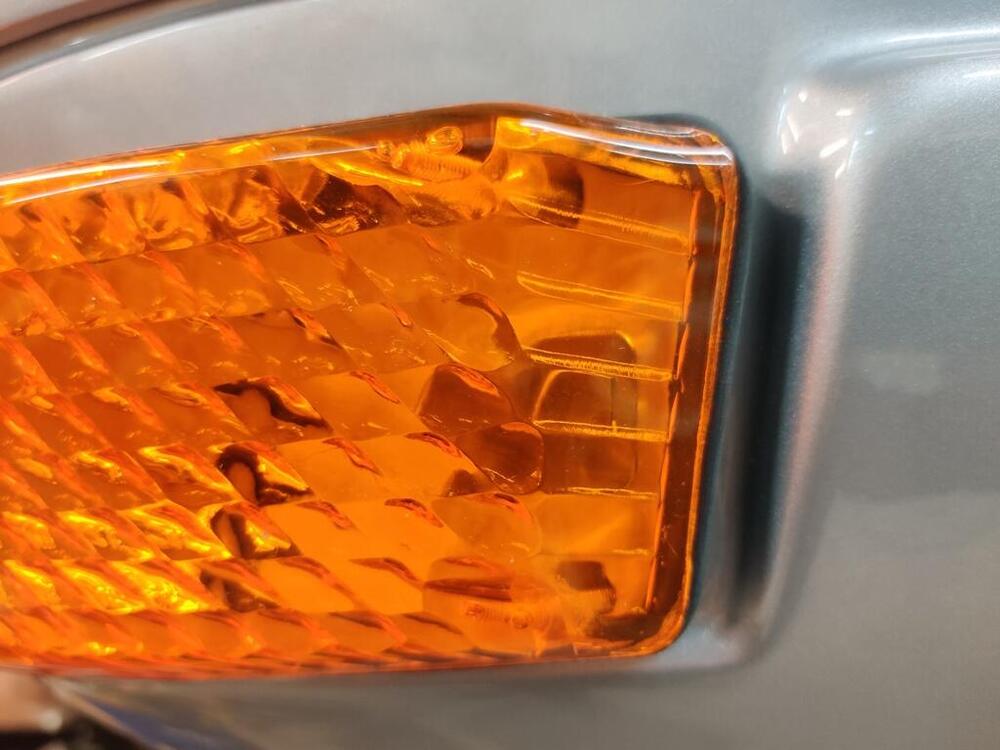
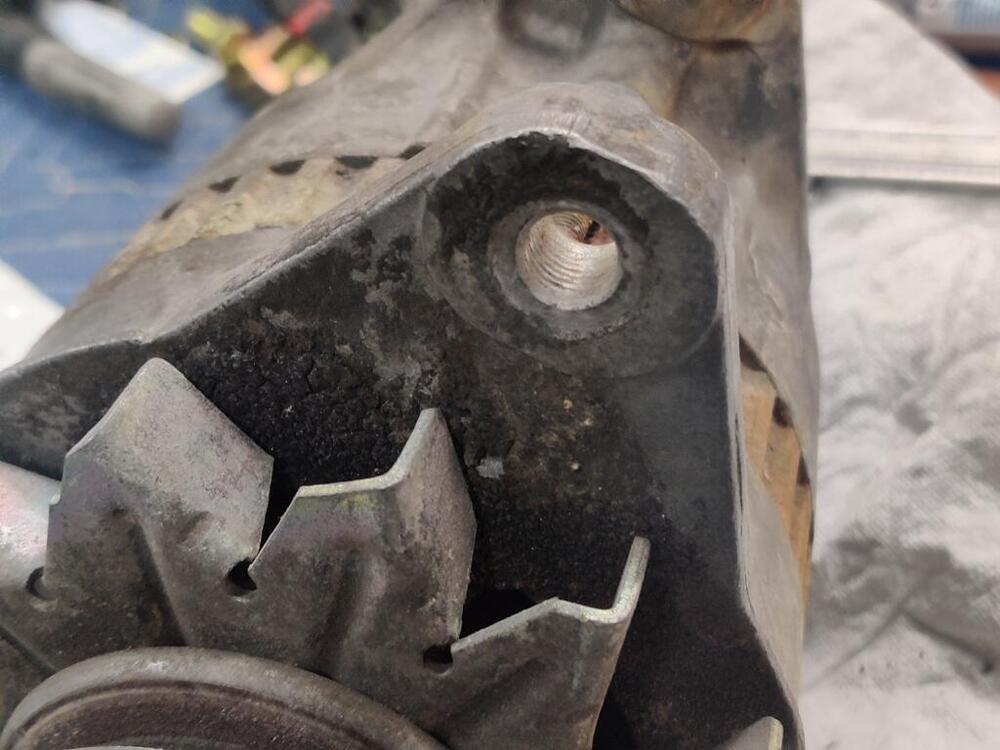
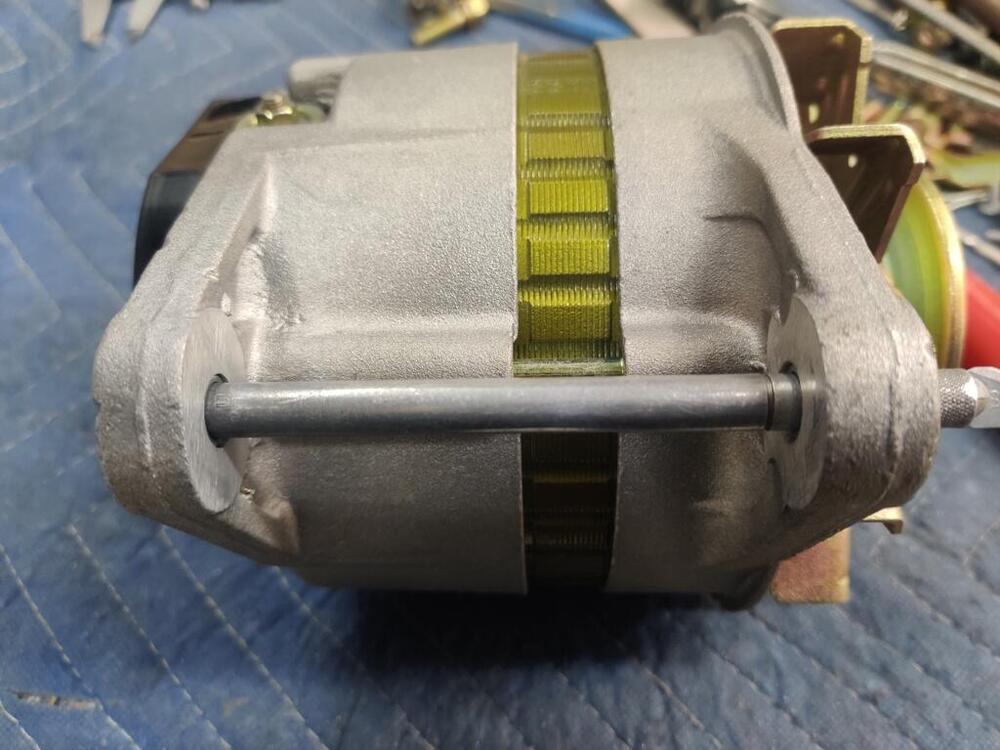
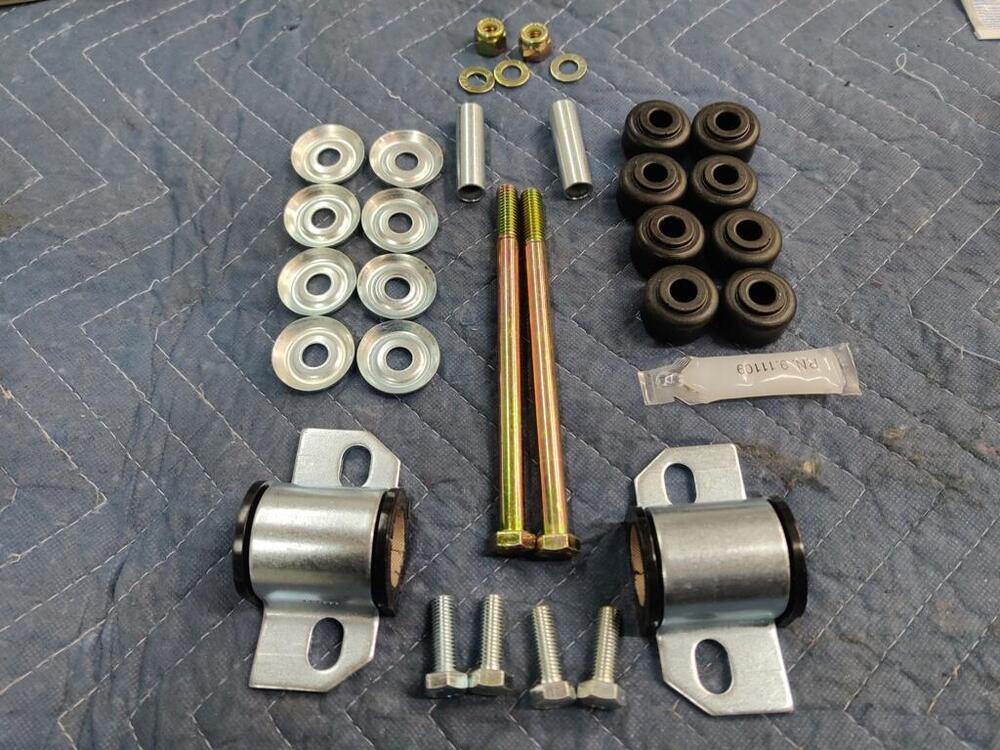
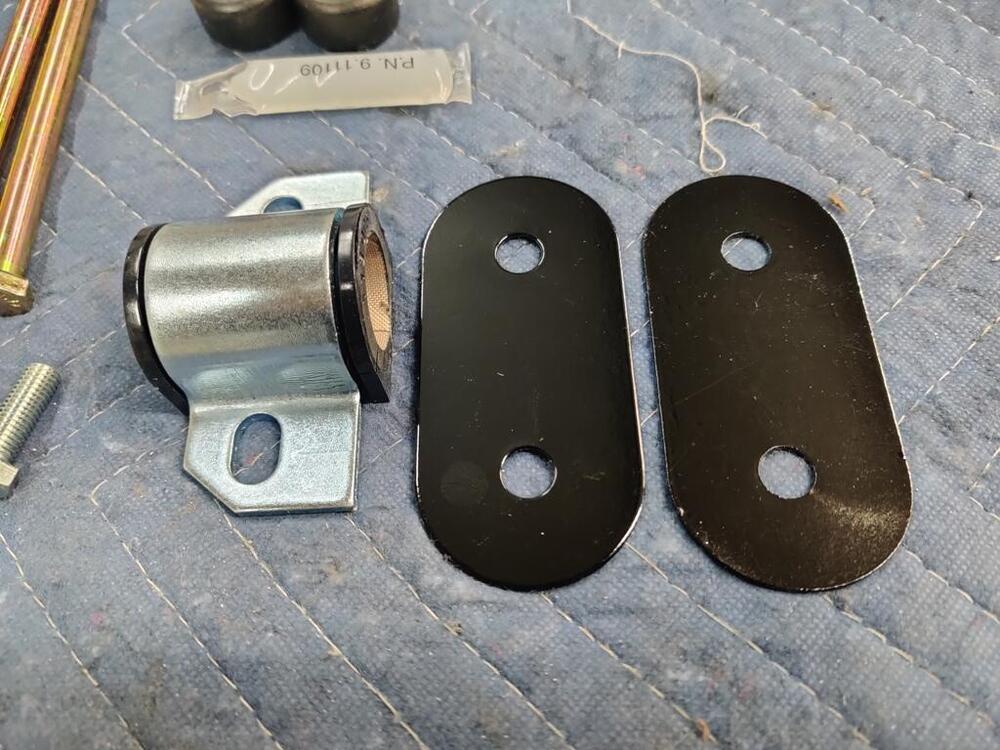
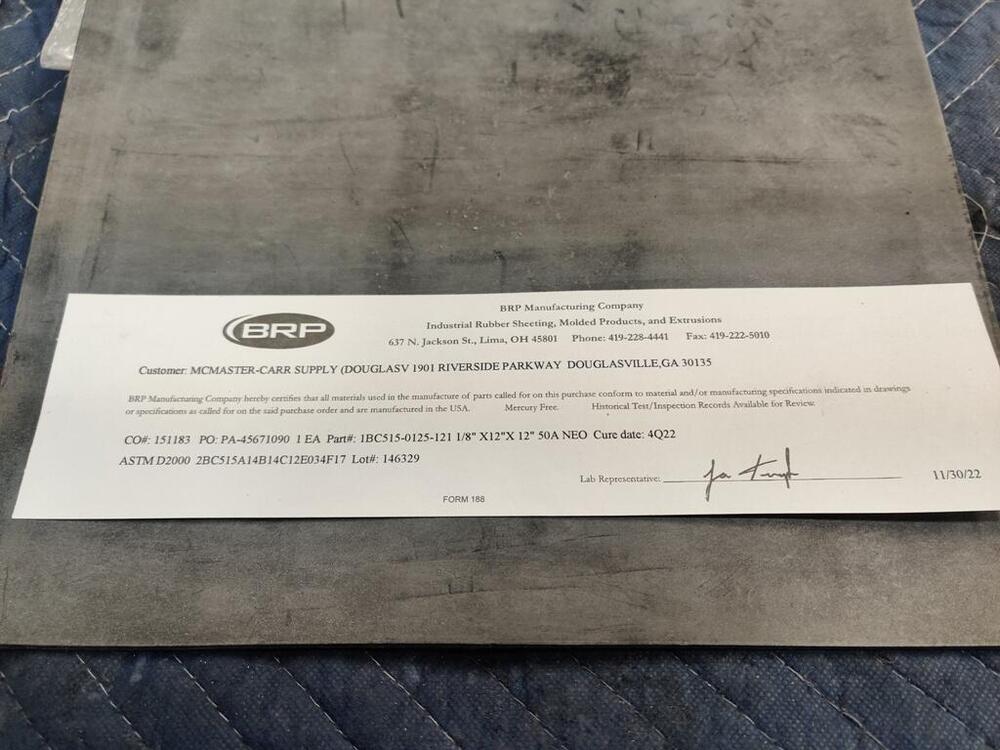
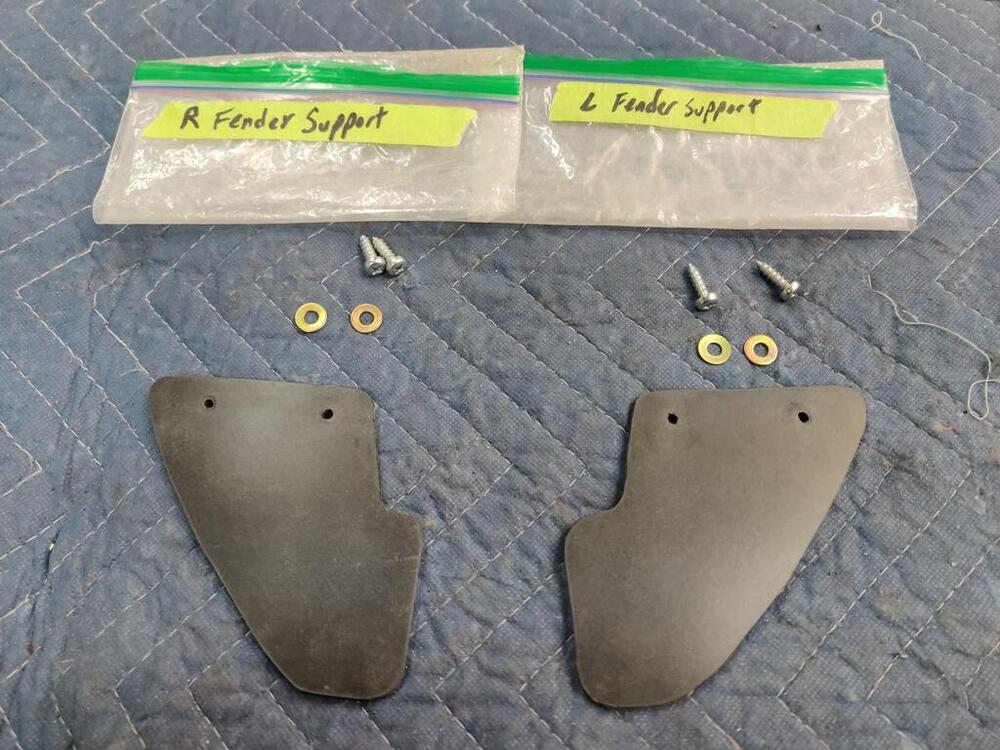
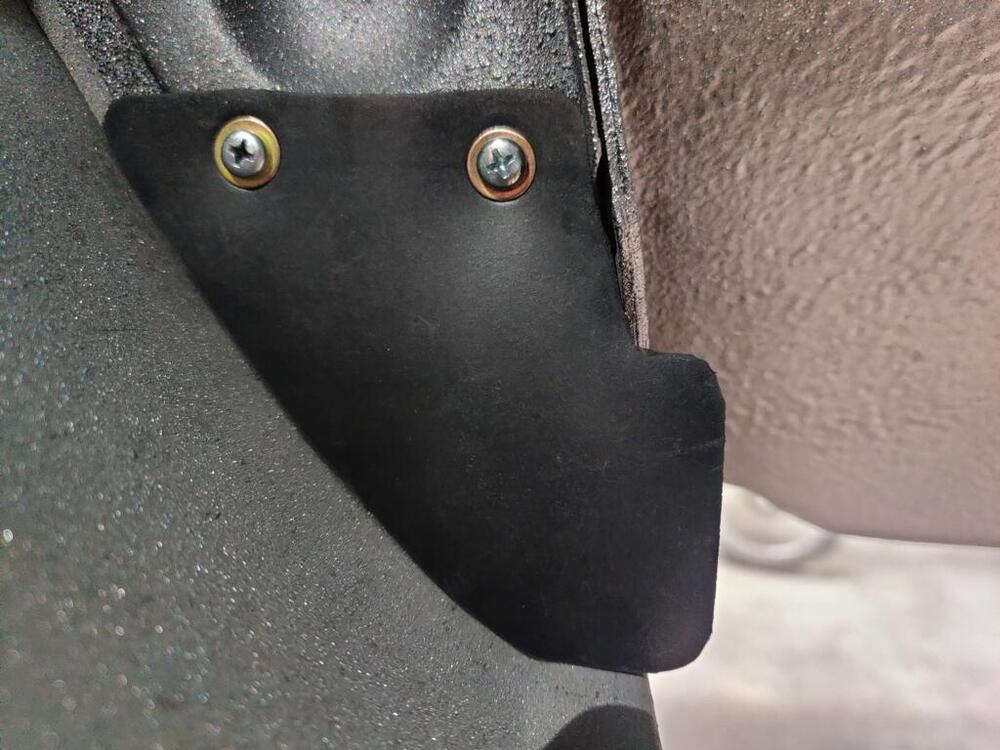
Upon closer examination of the both the alternator that came with the car, and the new replacement, I found the lower mounting holes to be more similar in ID than I thought. They measured out at about .400" ID for the old one and about .410" ID for the new (rebuilt one). I used a 27/64ths drill bit (.420") to enlarge the holes on the rebuilt alternator so I could install some split sleeves I bought from McMaster-Carr. I had to shorten the spacers a bit to fit the tabs on the alternator. Doing what I have done here with spacers is not actually necessary, but I am glad I went this route. You can see the impression of the threads in the old alternator bolt holes from the way it was installed before. With the sleeve, things were tightened up nicely. What I did not count on was that the distance between the alternator mounting tabs was about .015" narrower than the alternator bracket. How frustrating is that, when you go to bolt an alternator on one of these cars, and it isn't a "bolt on" part?! I very carefully hand filed the inside surfaces of the mounting ears of the alternator. Lots of measuring with calipers... with very careful filing. Even after the spacing was correct, and I could get the alternator to slide tightly onto the mounting bracket, the rear tab would not align so I could thread the bolt in. I thought for a moment that I must have filed the inner surfaces out of plane. But, then I slid my Exact-o knife (aluminum bar in the pic) through both mounting ear holes and saw the issue (middle pic below). You can see that it is at an angle. When rebuilt, the front and rear case halves were assembled "cocked". I loosened the three bolts that held the front and back together, aligned the holes in the mounting ears and retightened the the bolts. In the third picture here, you can see how the Exact-o knife (bar) is square after re-alignment. Installation went perfectly after that. Next, I cut replacement rubber shields for the inner fender supports. I sourced this rubber sheet from McMaster-Carr as well. After that, I unpacked the Suspension Techniques front anti-roll bar and hardware. Installation went very smoothly. While part of me wants to have the car look 100% stock, I really don't want to drive a 100% stock 240z. The four speed, the 4.5" wide wheels, and the stock suspension are... not great. I have never run this combination of suspension parts: (ST springs and front and rear bars, with "the new" yellow Koni shocks). It will be interesting to see how this car drives when it is fully assembled. Next, I pulled the restored front turn signal assemblies out of storage and grabbed the re-plated hardware for them. It is very satisfying to assemble and install parts like this which need little or no additional work.


-
Thanks for the reminder. All of the control arm bushings/bolts are still very loose. I will wait until the car is fully assembled to do that.
-
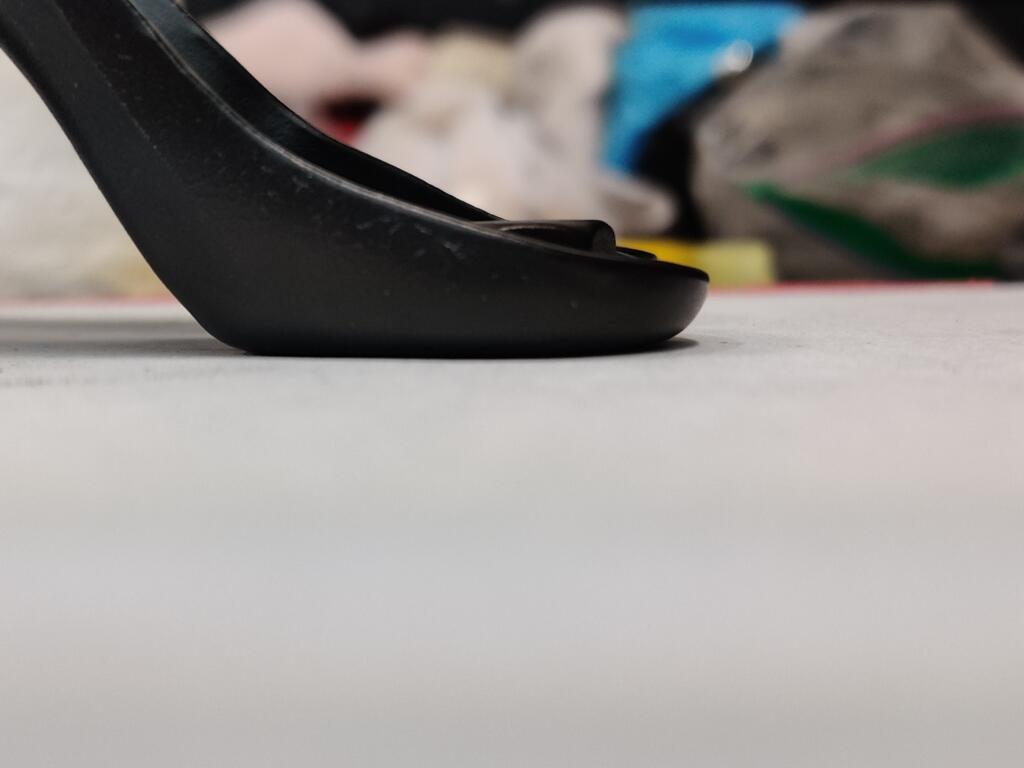
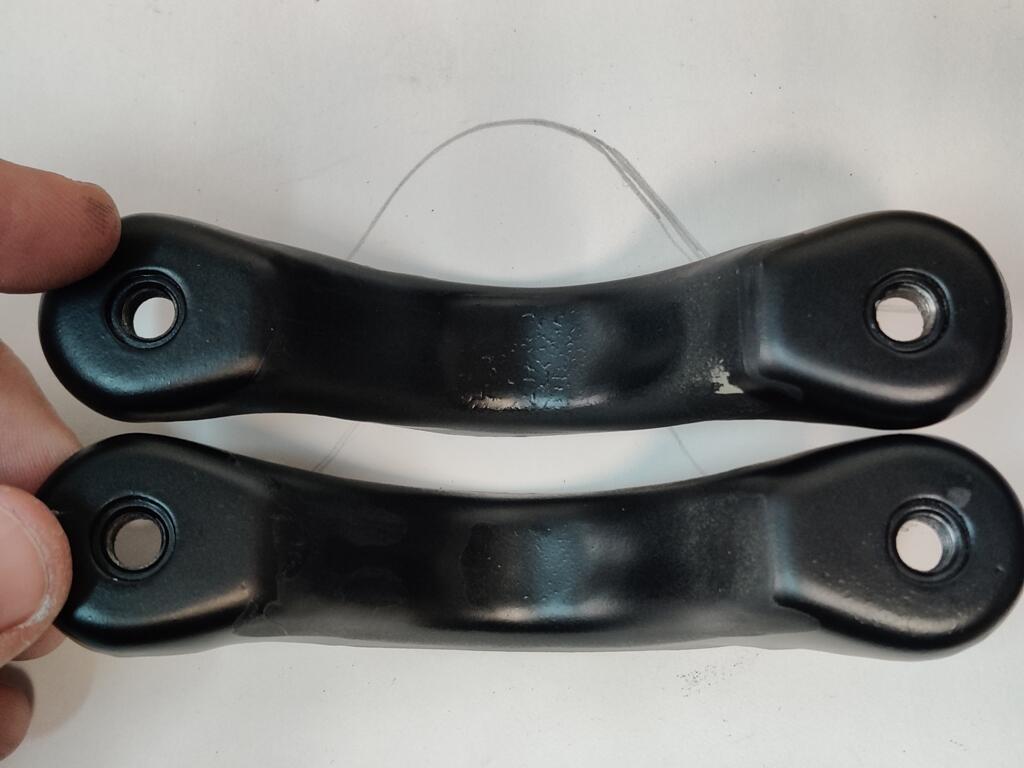
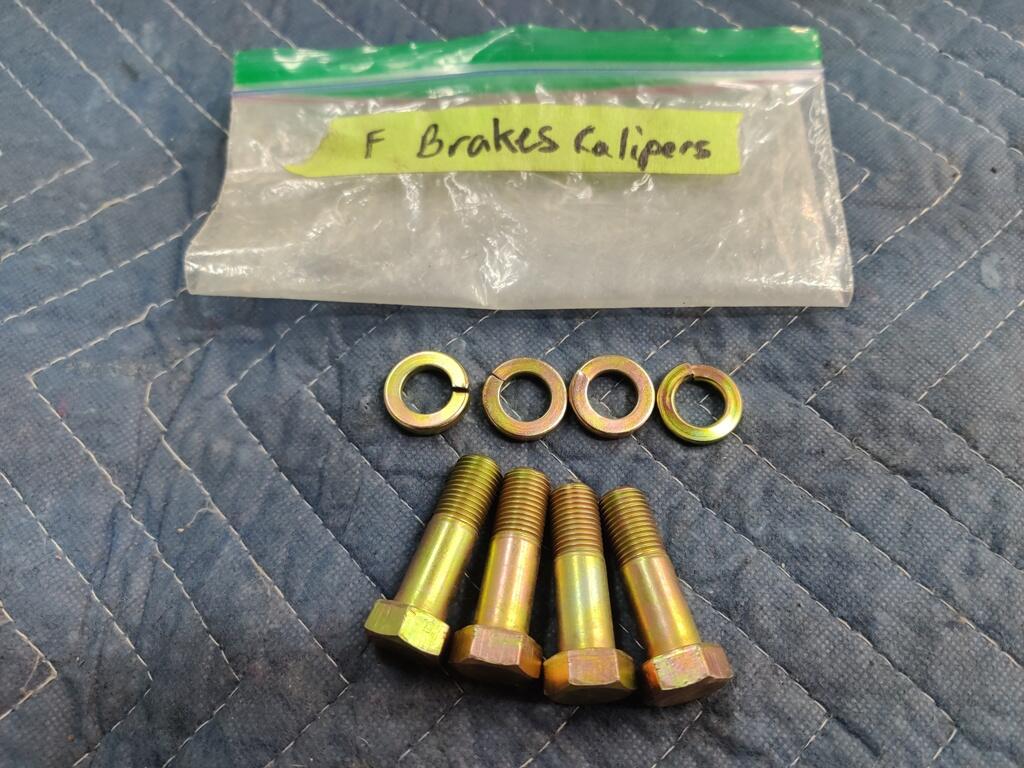
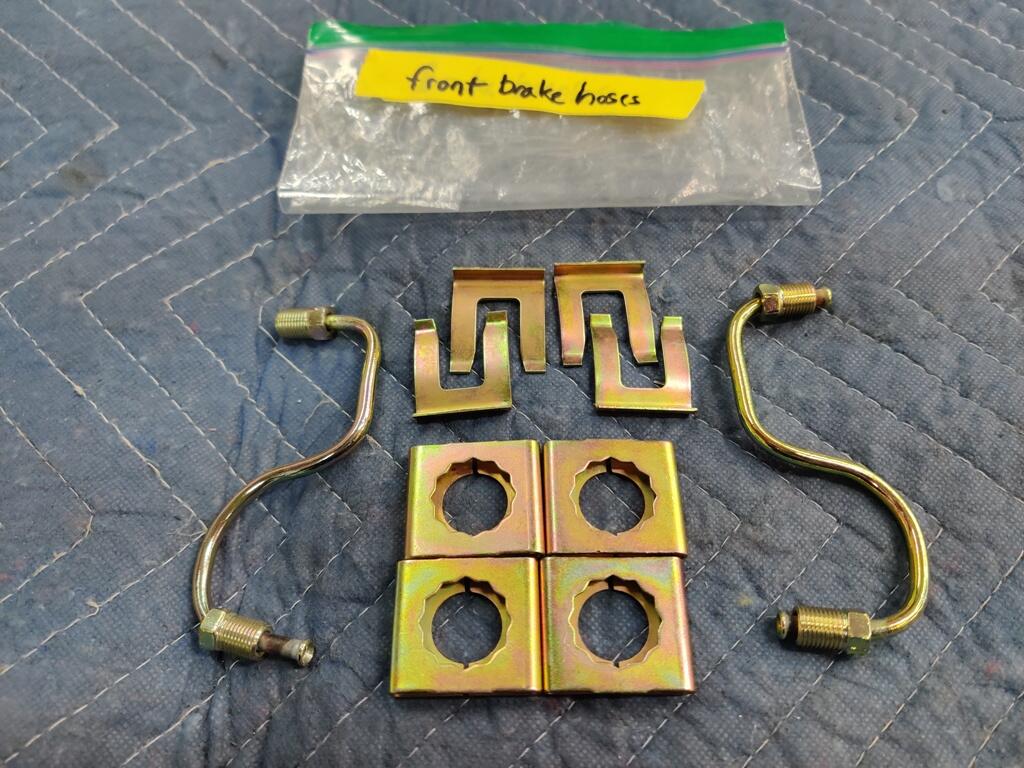
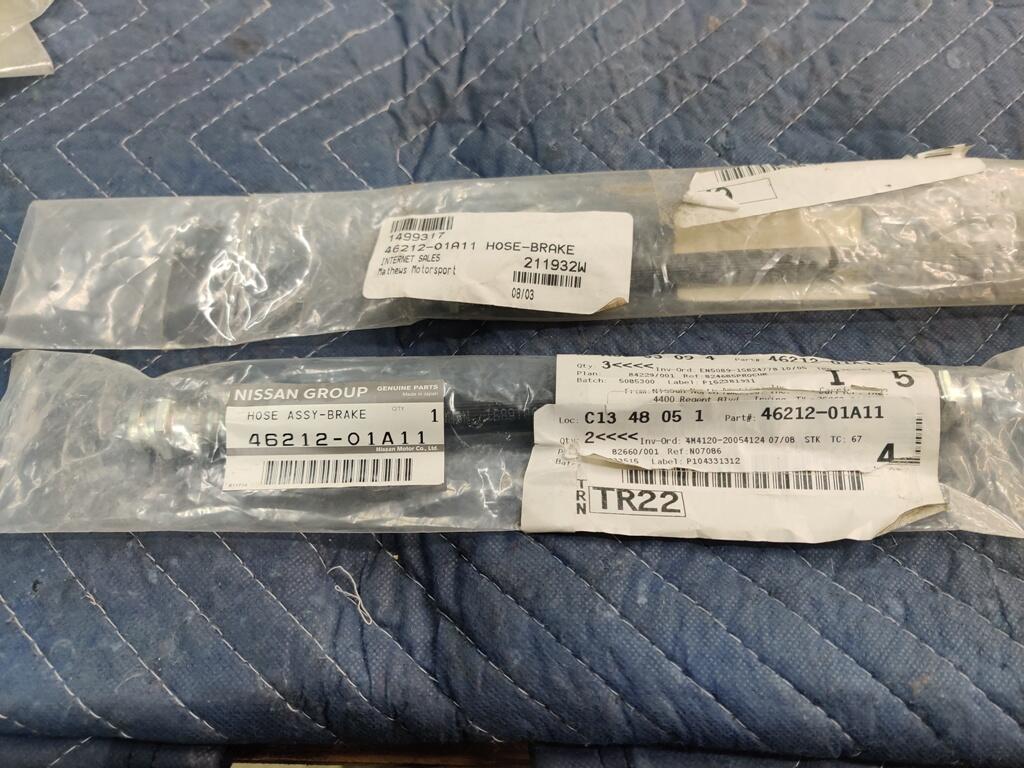
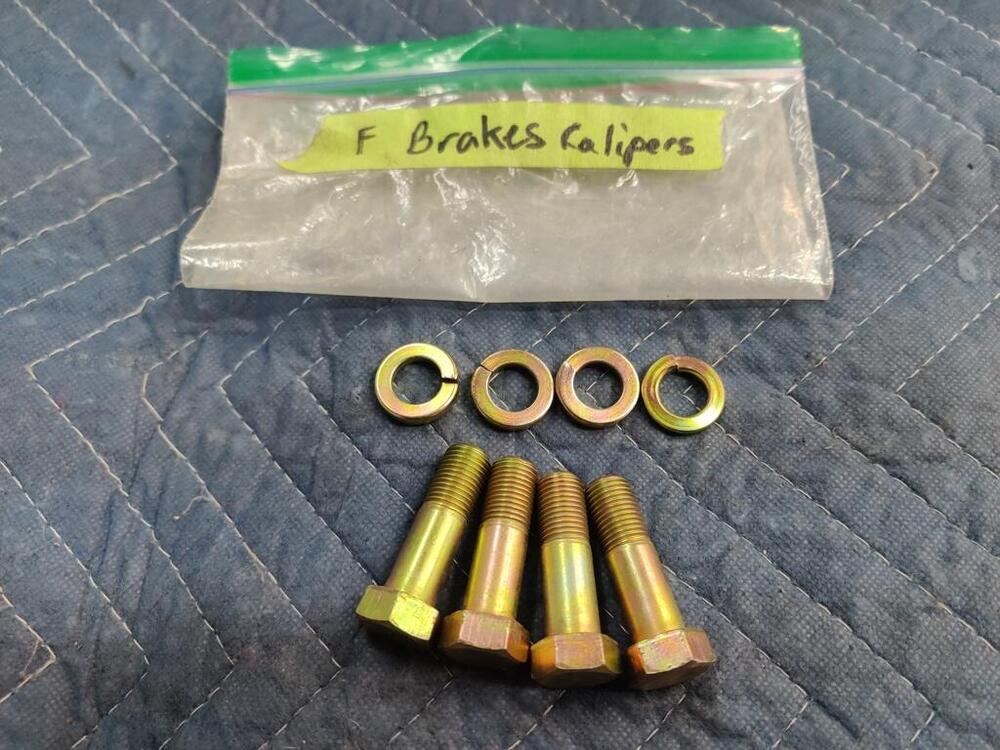
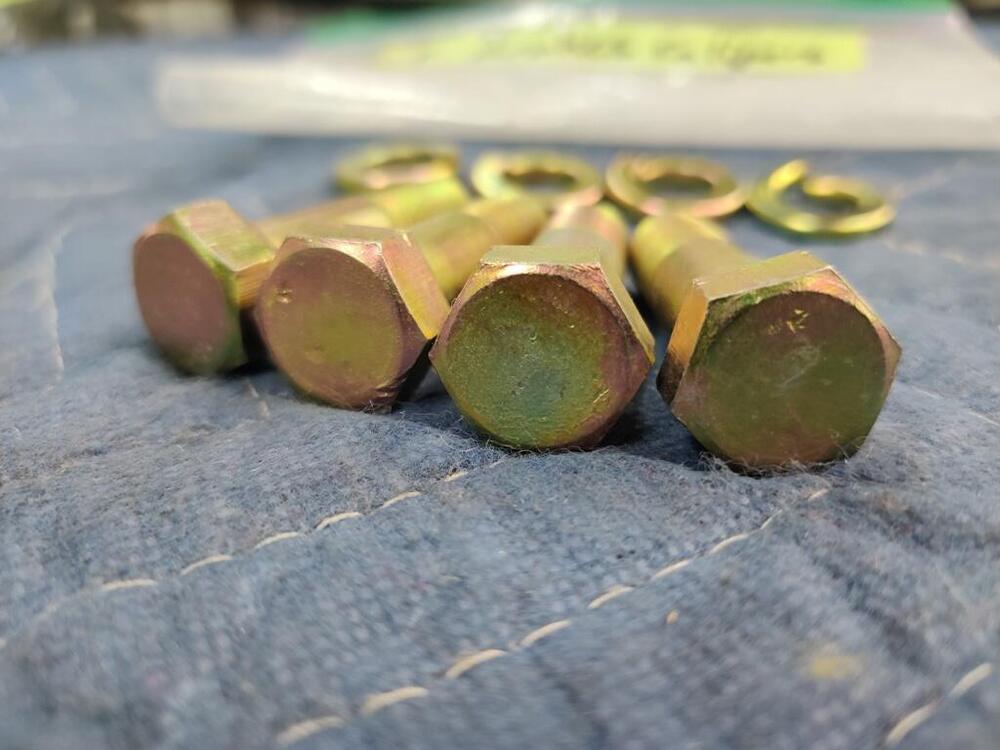
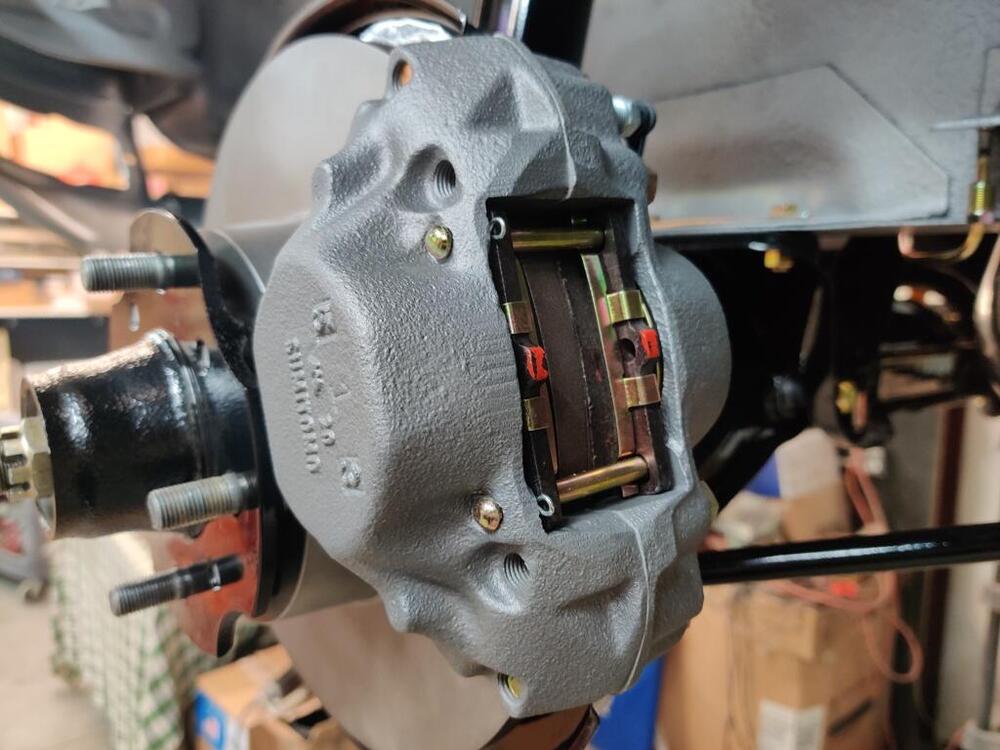
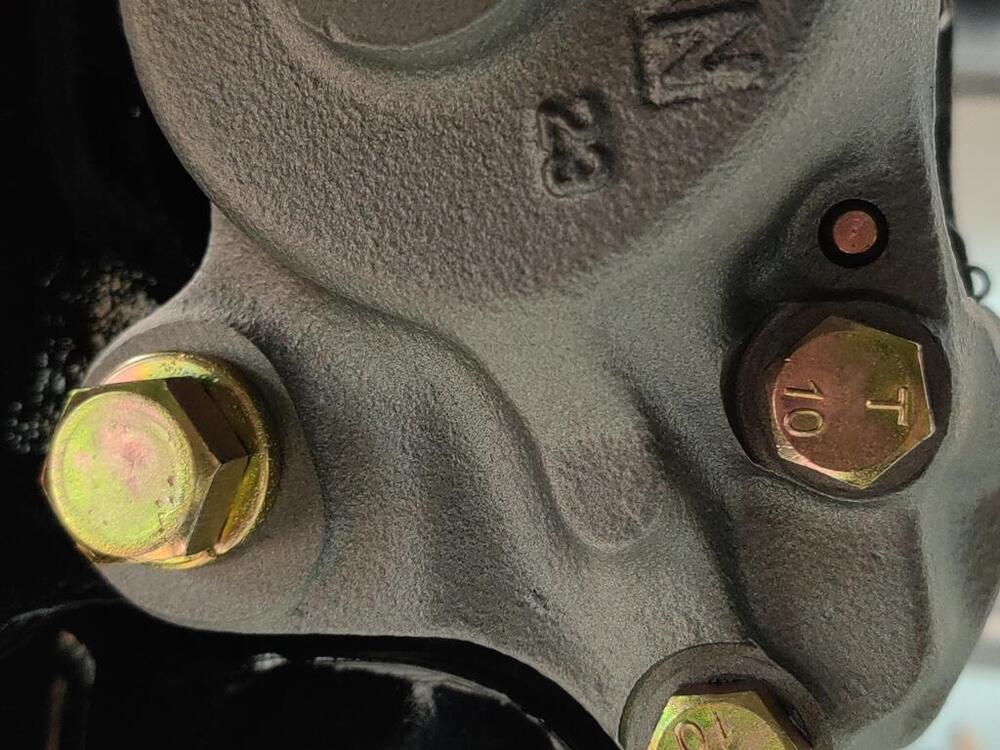
With the left front strut on the car finally, I was able to move forward with getting the front suspension assembled. I also put the outer tie rods on, and the front brake calipers, little "s" hard lines and brake hoses. I also removed the steering rack clamps and took a couple of pictures of them, trying to capture the differences from front and rear that I saw. I hadn't torqued the brake caliper "bridge" bolts (the ones with T 10 on them), so I did that (~39 ft-lbs.) before installing the calipers. The "s" hard lines required a lot of fiddling. Literally every hard line I sent to get plated got "jacked up" - I don't know why. For the steering rack "clamps", I didn't see a difference in the "arch" portion. Instead, I noted that the angle of the "feet" is different. In these first two pictures, you can see that one "foot" sits flat, whereas the other, does not. I also think I see that one "foot" is slightly longer than the other - in the third pic here, the "foot" on the right has a bit more length from the hole to where it starts sloping upwards. I found it difficult to install them incorrectly. The back bolt won't thread easily into the bracket if you have it reversed (front to back). I found the best fit by placing the longer "foot" it in the back location. After completing these things, I was able to set the car down on all four wheels for the first time in 5 years! Even with the Suspension Techniques springs, the car looks like it's four wheel drive. Bummer. Part of the issue is there is still a fair amount of weight that is not yet on the car. It has none of the interior, none of the glass, none of the door hardware, no hood, no bumpers, etc. I hope that additional weight will make a big difference. However, I think the tires I bought are part of the issue. They are 195/55-16, which have a 24.4 inch diameter, whereas the stock tire diameter was 25.3 inches. So, not quite 1/2 of an inch of tire is "missing" from the wheel well. I'll see how it looks when it is fully assembled and has been driven for a few hundred miles. If it still looks awkward, I will swap the tires out for something a bit bigger. Starting to come together though!


-
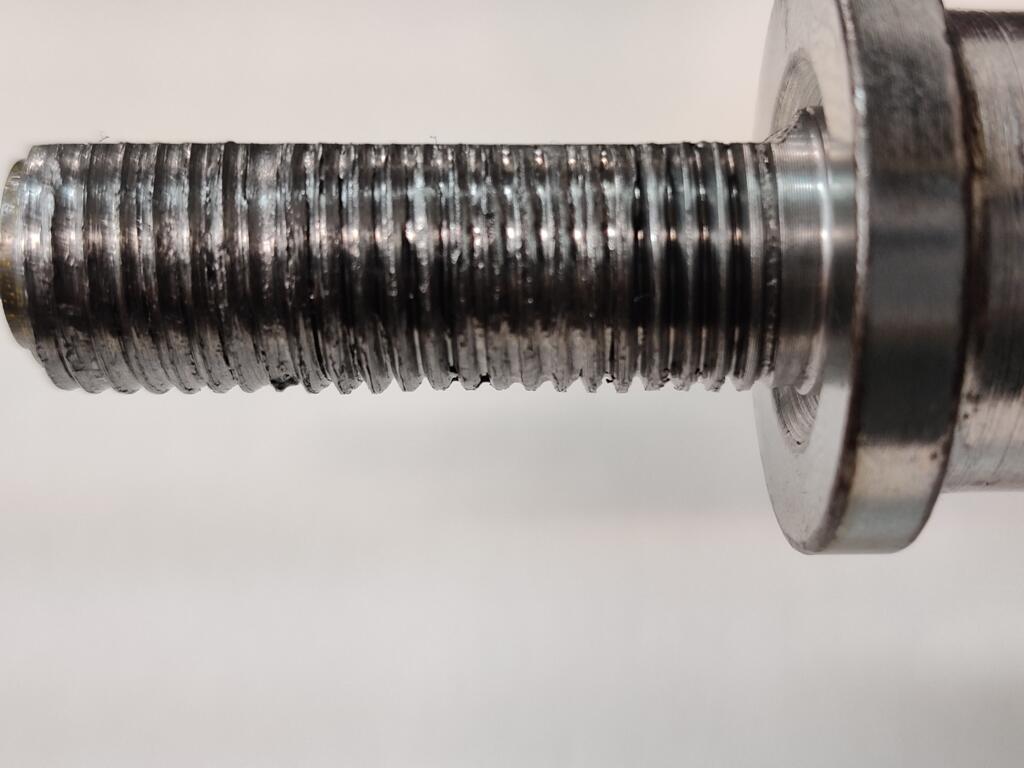
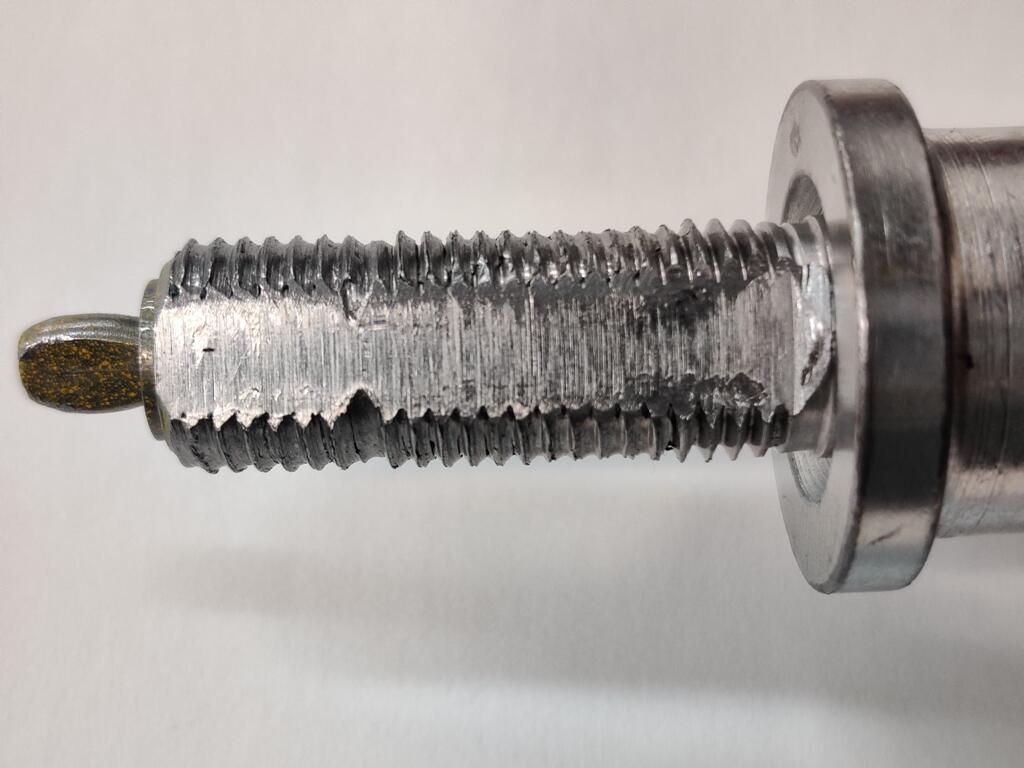
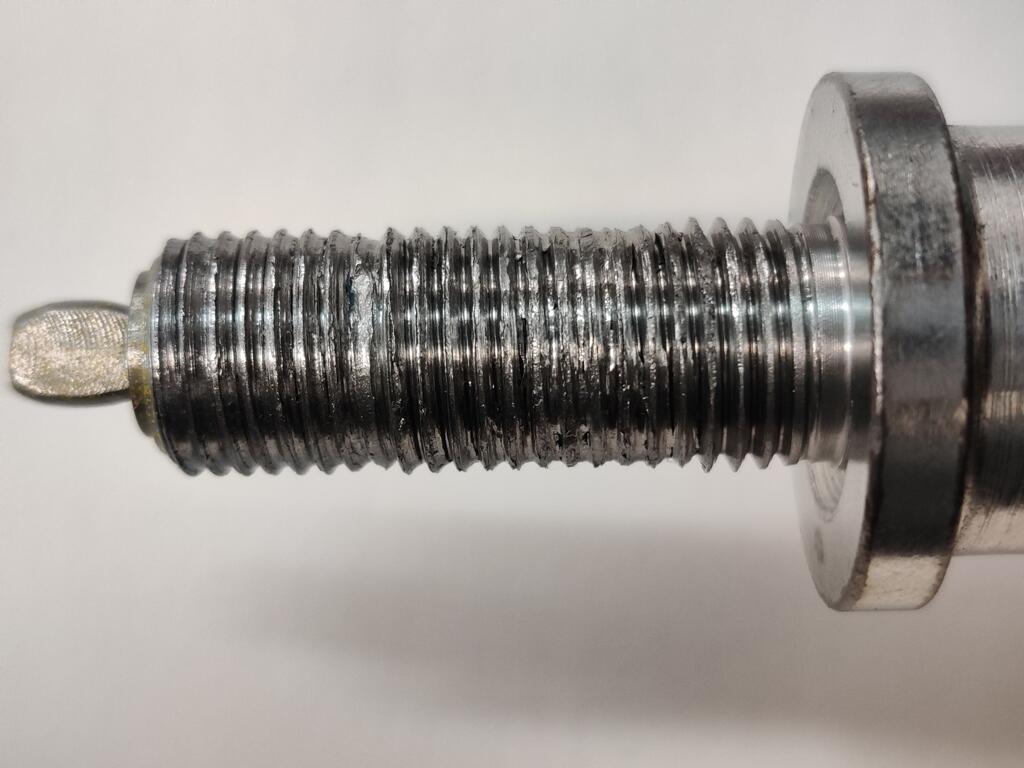
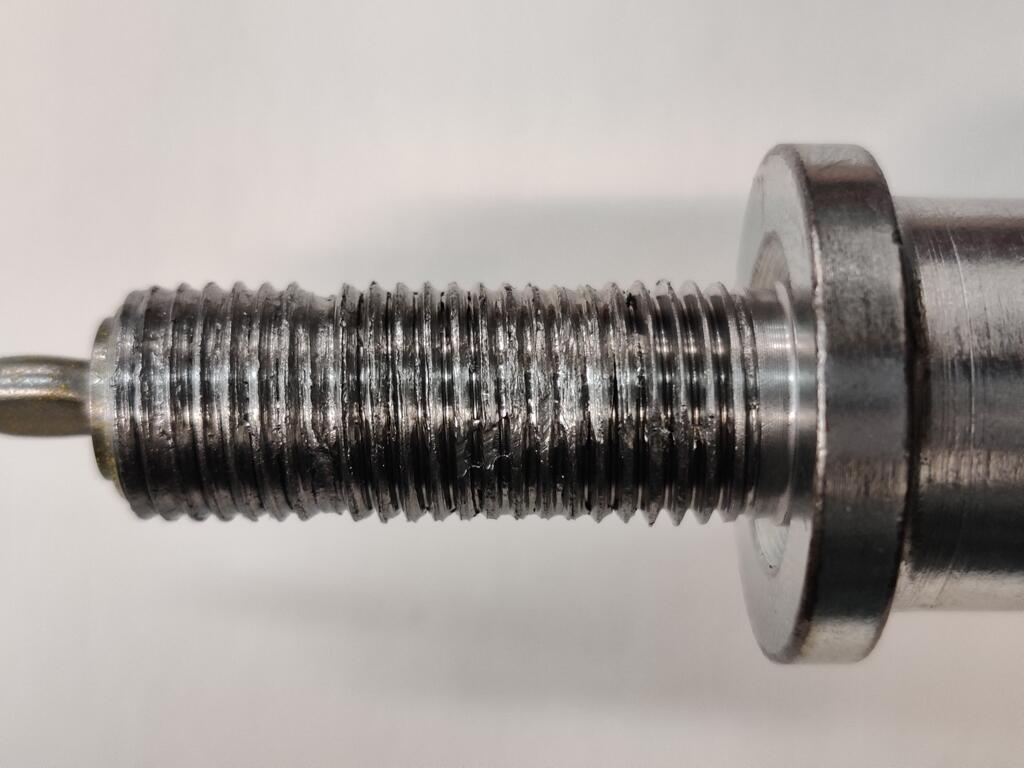
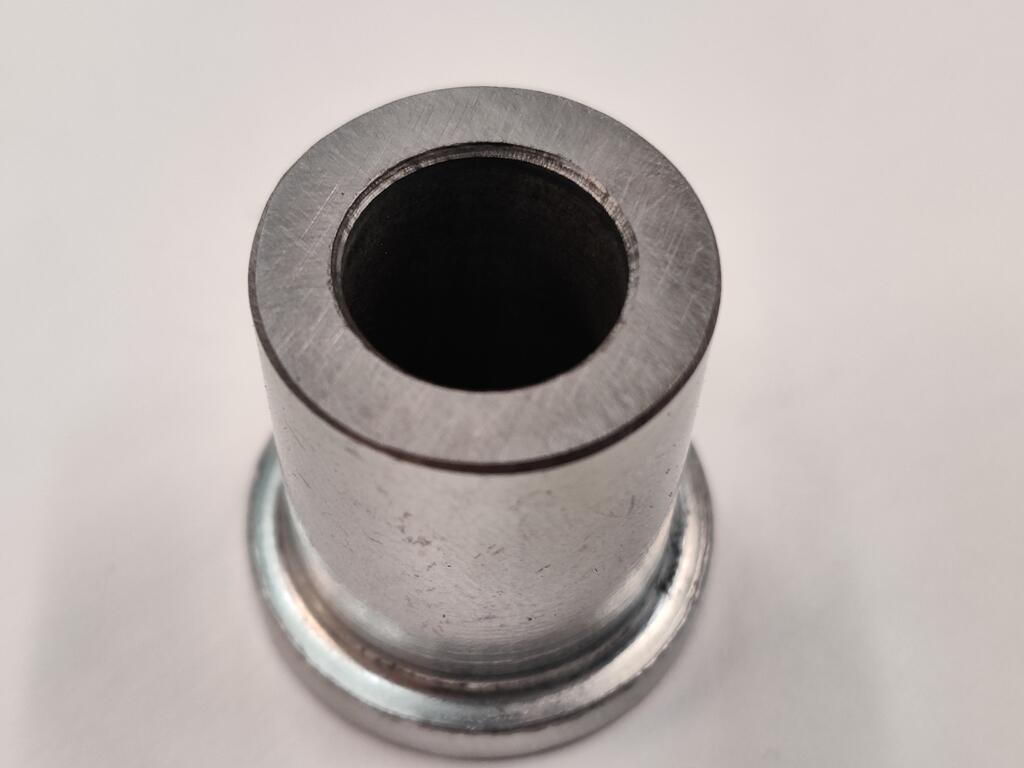
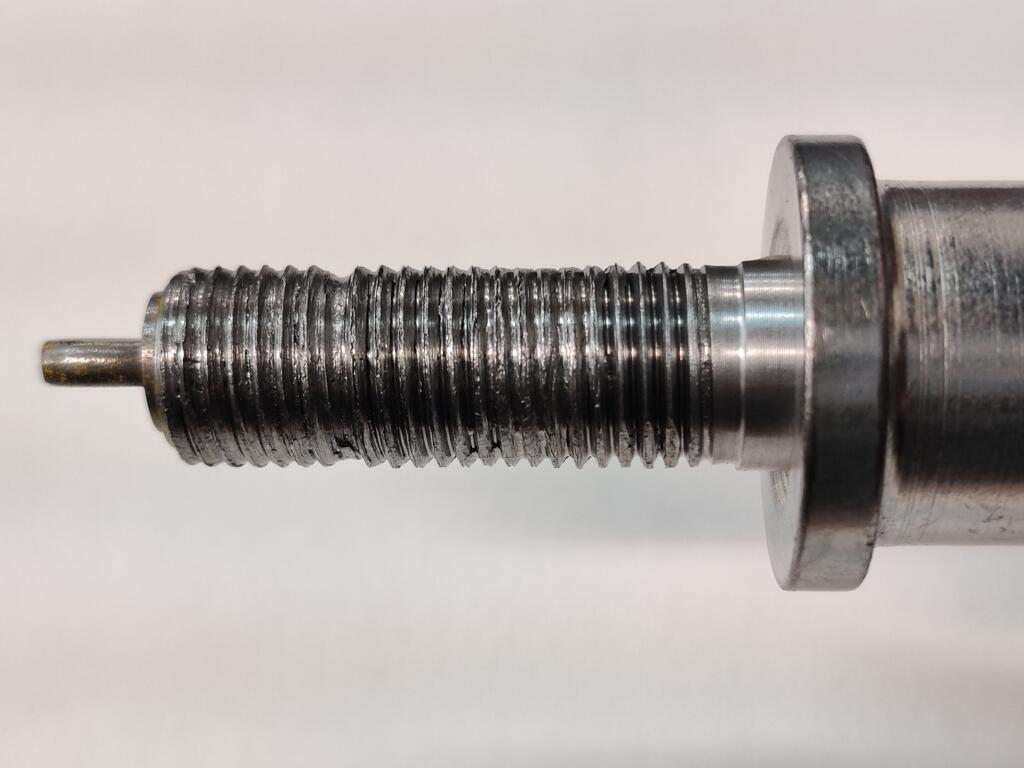
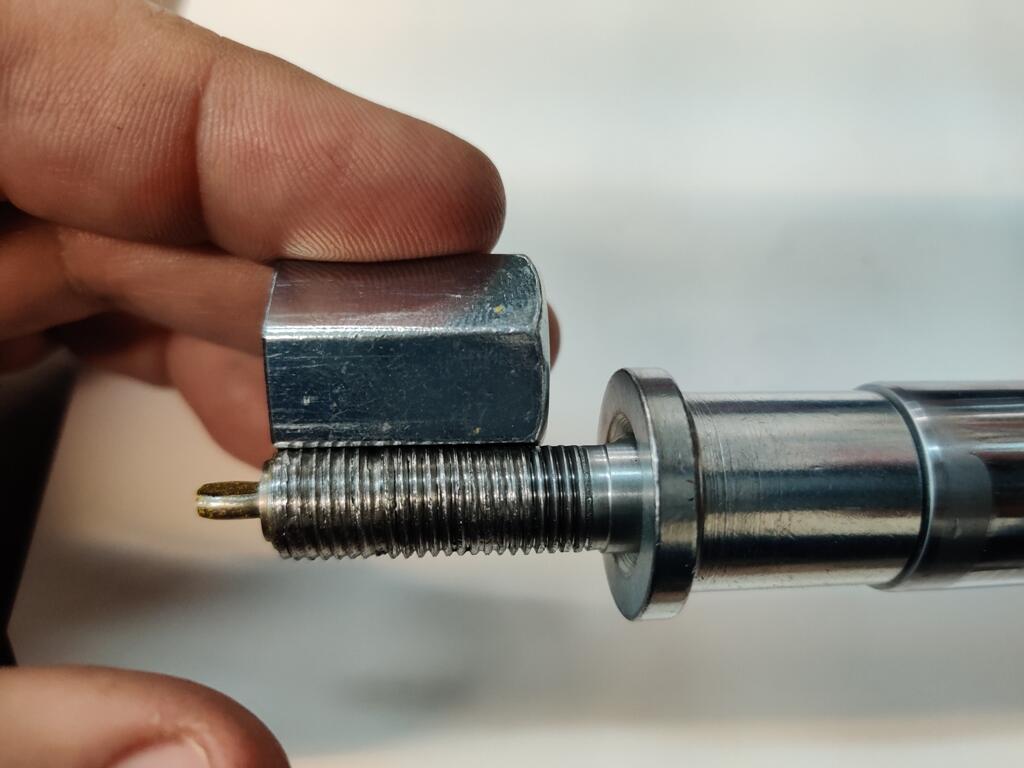
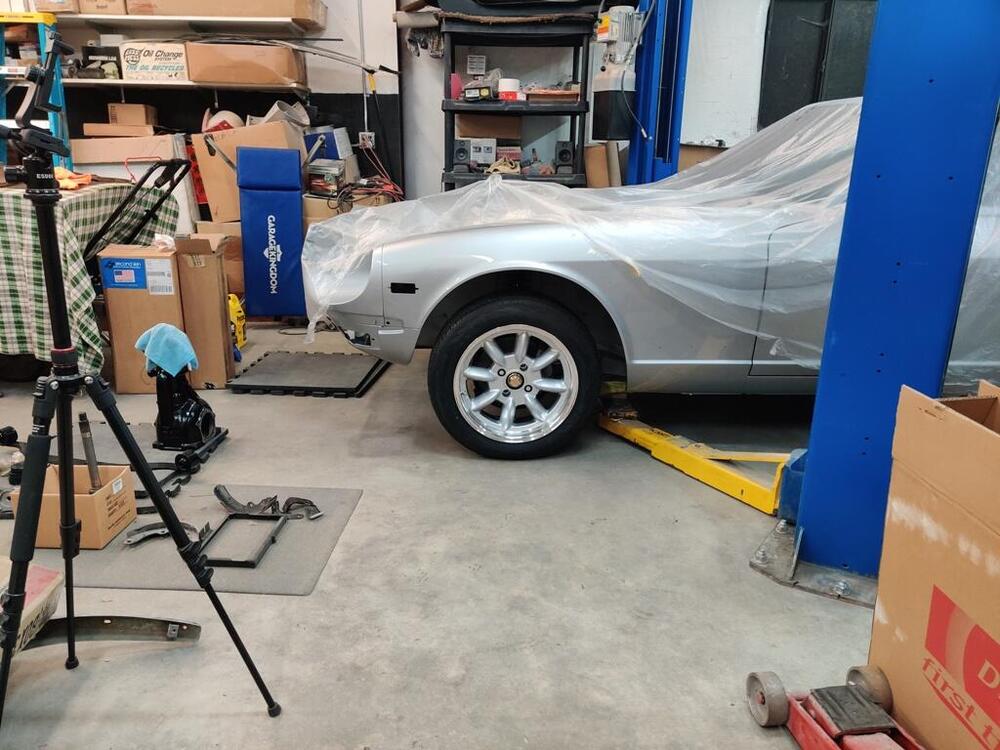
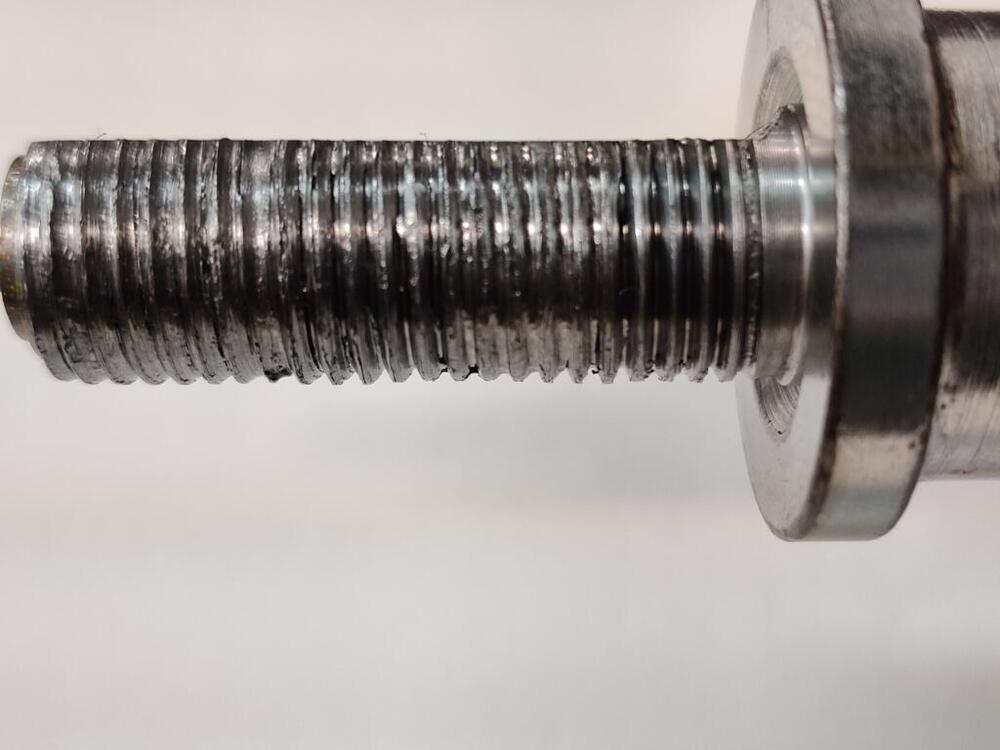
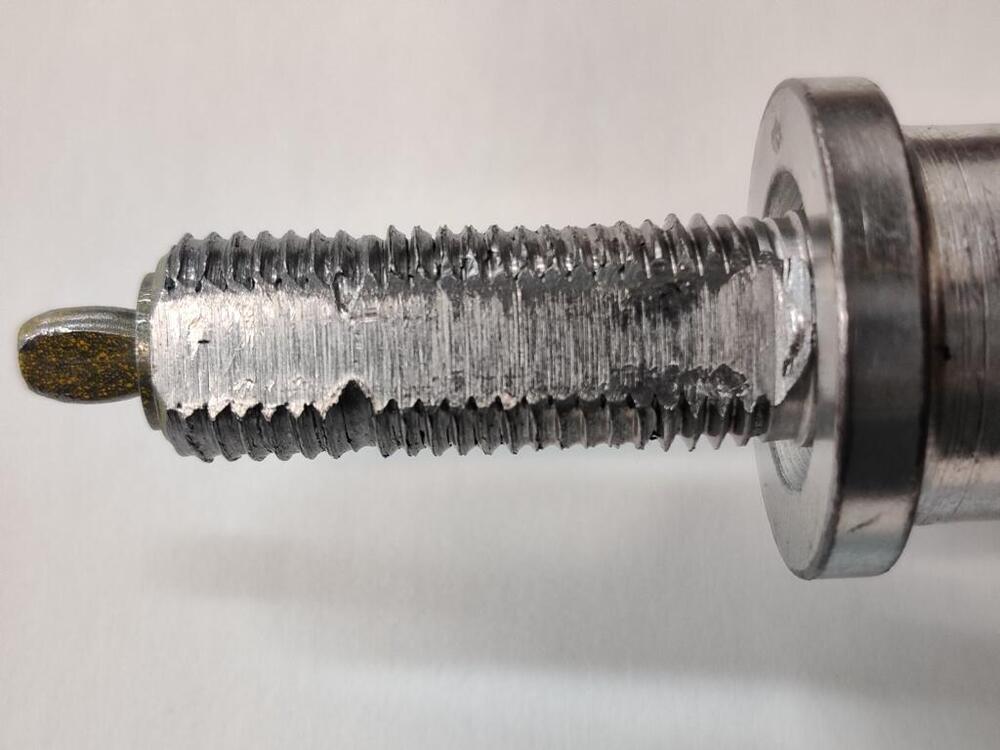
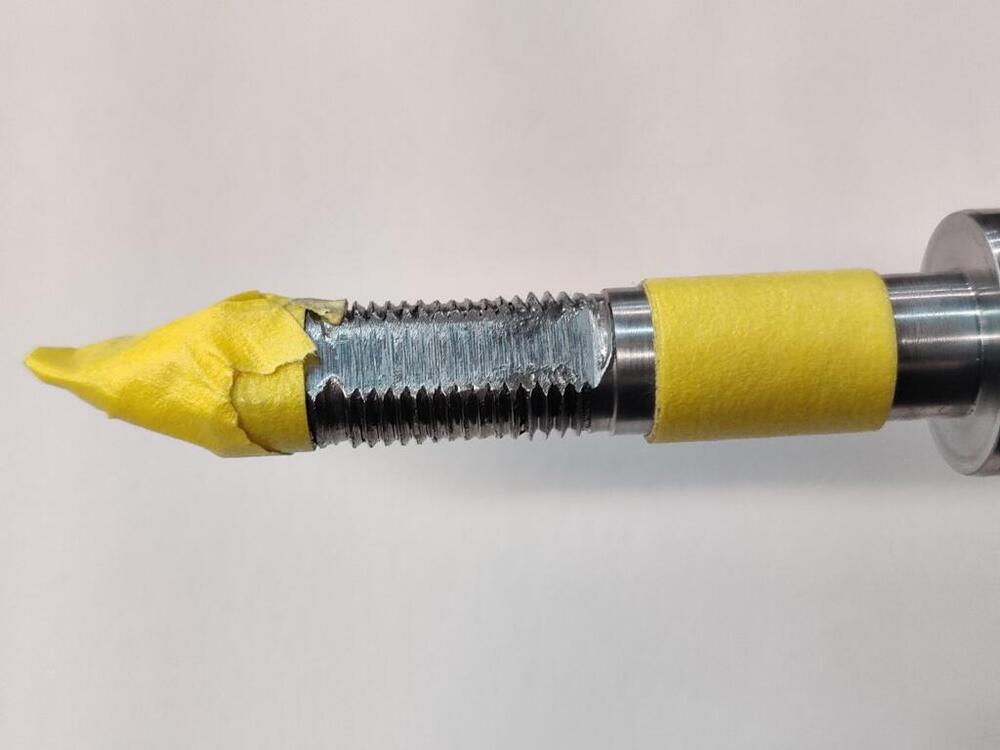
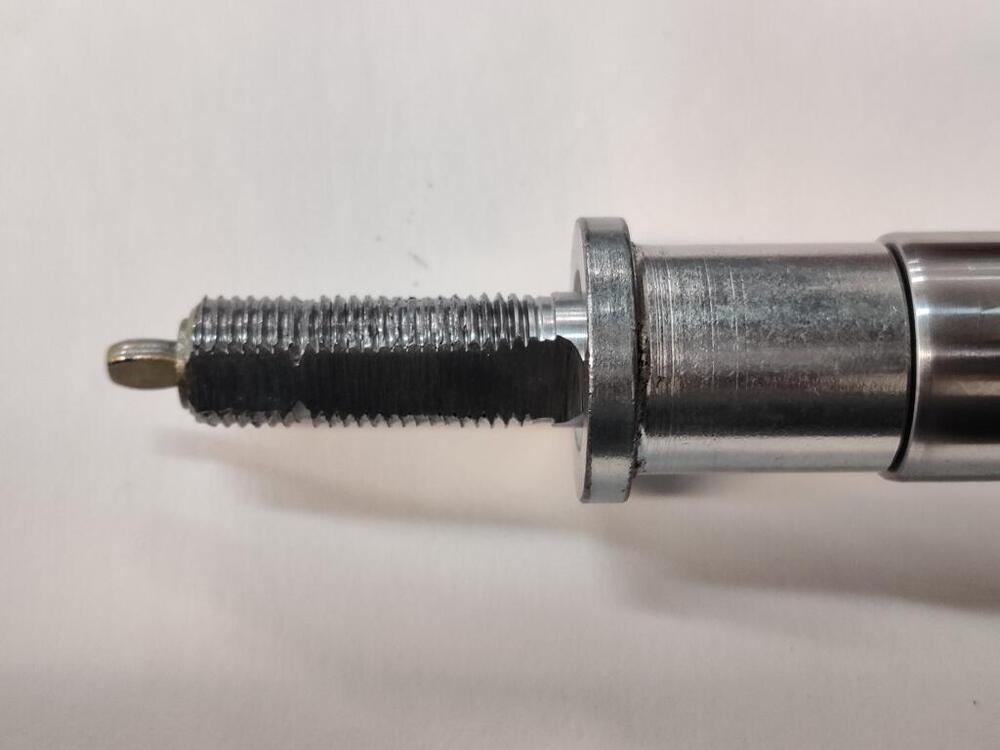
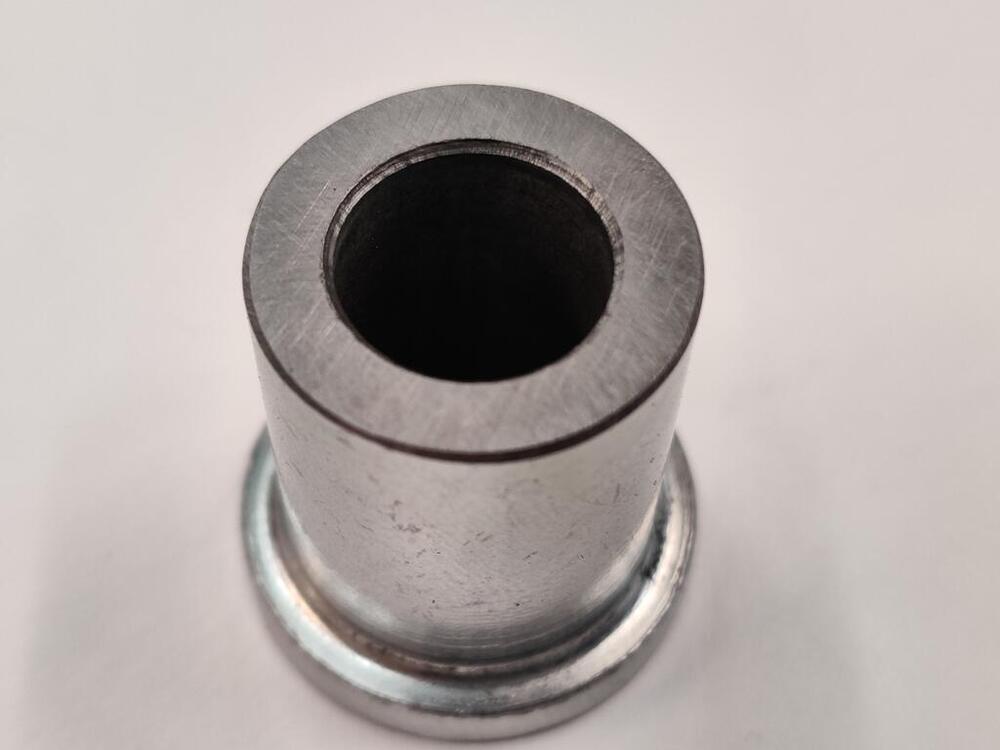
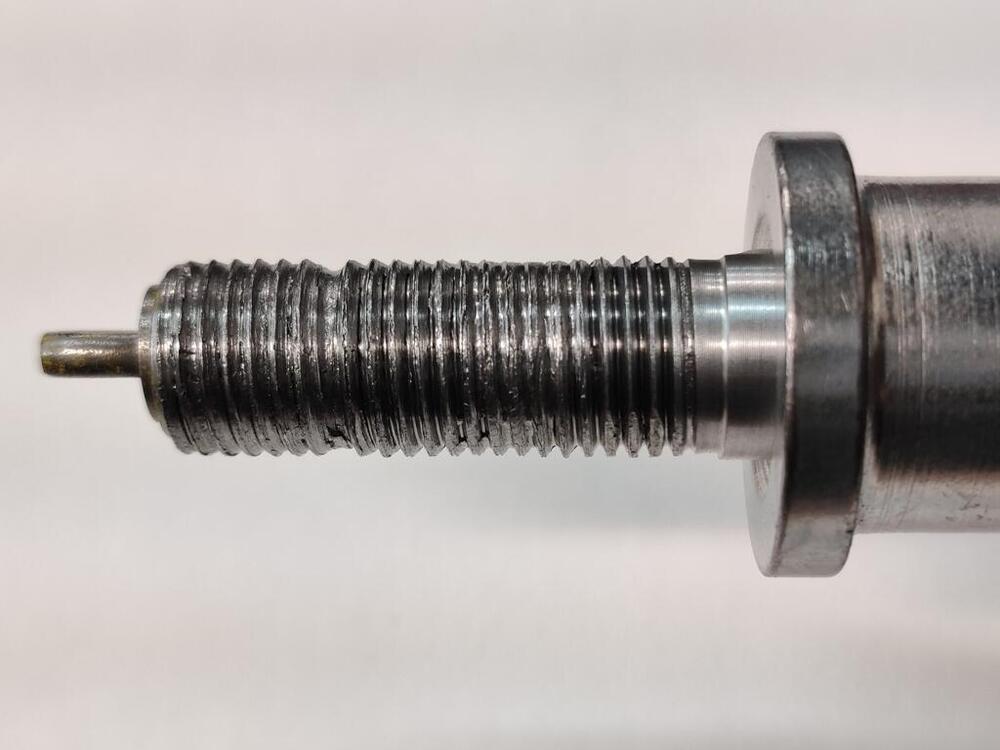
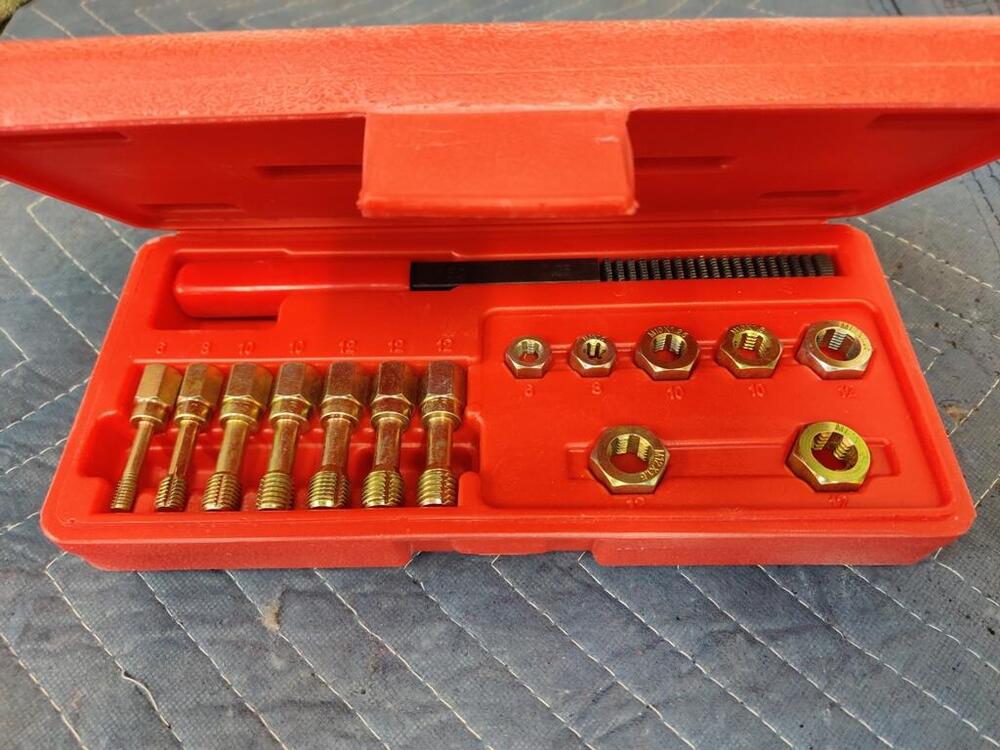
Yeah, it is not obvious which is the right torque value. I decided to try to save the strut insert and spent a couple of hours giving careful attention to the threads. I used this tool which is for repairing threads: Using a lot of patience, I kept at it until the new coupler nut would thread on without difficulty. Here's how it looked after all that effort - these pictures capture how it looks all the way around the circumference. While not "great", the threads look better than before. Also, note that the 4 to 5 threads just above the spacer (a bit more than a 1/4") were not mangled because the thickness of the isolator stacked on the spacer protected them. As I examined the situation, I determined that I could "alter" things a little bit, so I could utilize those threads. Basically, by shortening the spacer, the isolator can slide down further on the shaft and expose those threads to the fastener. I started by putting tape on the shaft to mark the area that I needed to grind to fit the "D" in the upper strut mount isolator. And, I taped off the adjustment mechanism to keep metal dust from getting into it. After using a belt sander to grind the "flat" in the shaft a little lower, I had to remove the same length of material from the bottom of the spacer. I don't have a lathe, so I had to be very careful with grinding. After removing some length, I very, very carefully used the side (which I have never used) of my 8" bench grinder wheel and kept measuring with vernier calipers until the cut side was square with the non-cut side. Then, I chamfered edges (middle pic). The shortened spacer length matches the shaft again (third pic here): Final pics, with the third pic here showing the coupler nut after shortening it also. I could have shortened the spacer and the nut a bit more to pick up another couple of good threads. However, given that the original nut only engaged about 7 threads, and this one engages more than double that (though some are in very bad shape), I felt grabbing those last two was not necessary. Today, I assembled the strut, put it on the car, and used that same torque wrench to set the nut to 37 ft lbs without any issue whatsoever. I used a good bit of blue Locktight, which will keep the nut from backing off. I plan to check the torque on that nut repeatedly as I put the first 500 to 1000 miles on the car. If it turns when retorqueing or feels odd at all, I will swap the insert for a new one.


-
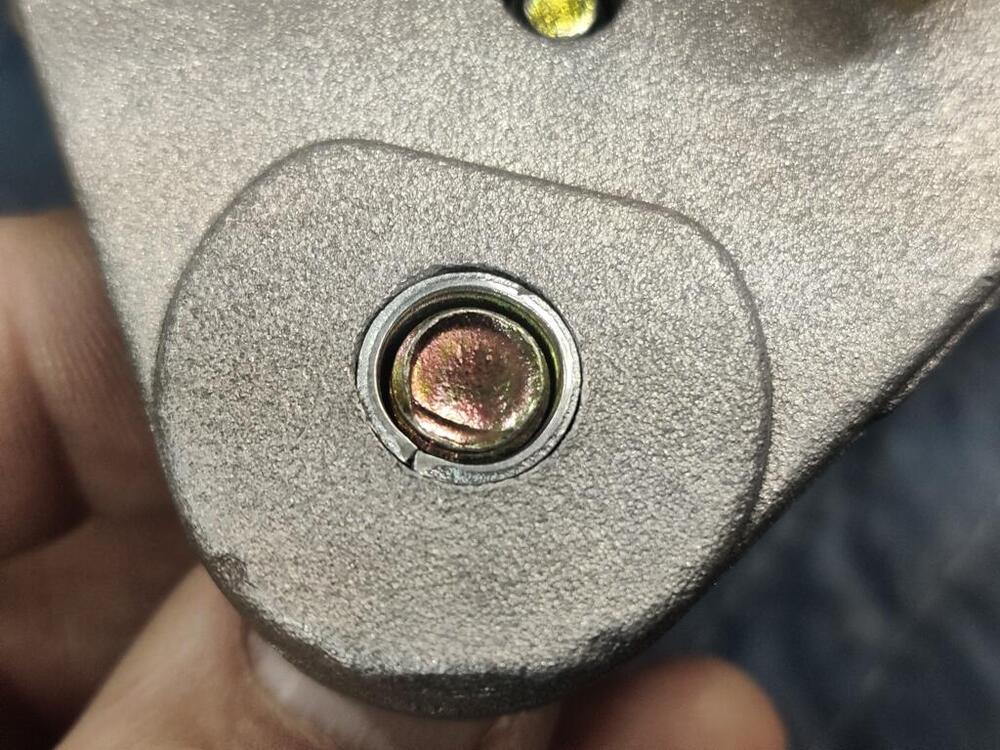
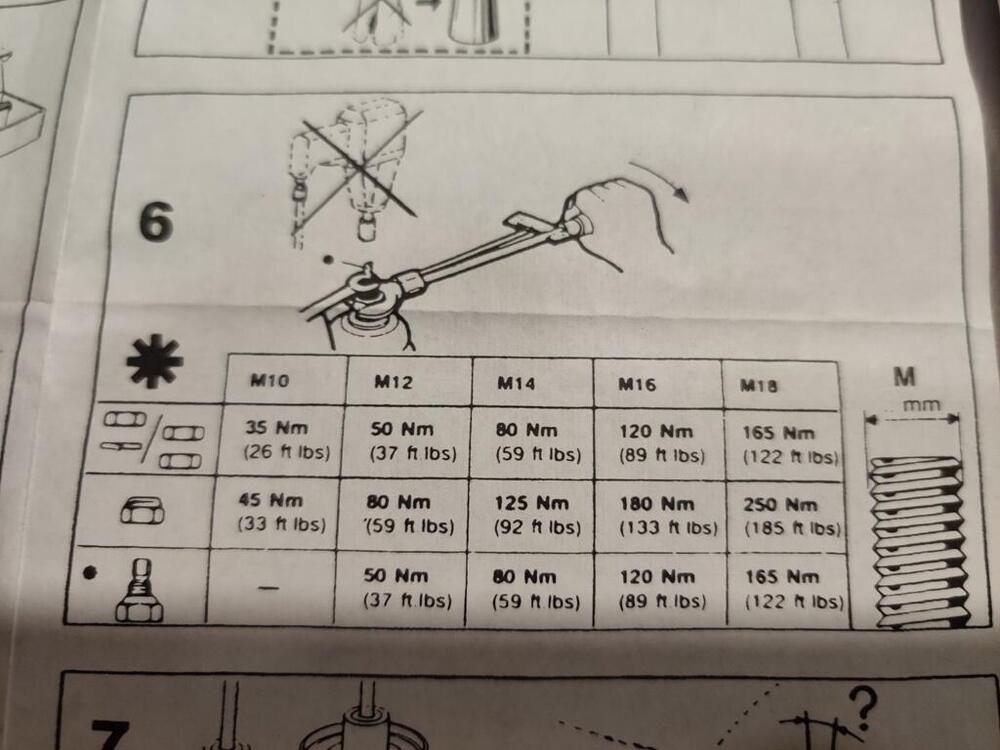
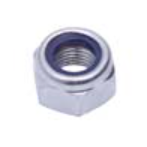
Appreciate the info and thanks for the support. I don't want to say, but it is accurate to say... that for that one nut, I know I tightened it more than the 37 ft-lbs. It just became obvious from my experience of torqueing fasteners, even though the digital torque wrench failed to indicate when I hit 37 ft-lbs. It has an "auto off" feature after about a minute of time to save battery life, so maybe it turned itself off before I used it on that nut. However, I still believe I was being exceedingly careful and believe I checked the display to confirm the correct setting just before attempting to torque that nut. As far as the directions go, I definitely did not like them. There were hardly any words... an over reliance on pictures. Saves on translation, but doesn't convey info precisely either. I already mentioned that I used coolant in the strut tubes originally because of the snowflake symbol. So, now take a look at this and tell me what you would torque the nut that is supplied with the struts to. I will give you a start with the threads being 12M X 1.25 and a picture of the supplied nut: Think everyone gets it?
-
Heard. Die was supposed to be delivered yesterday. Tracking from USPS still just shows "in transit". Lame. Trying to accept my fate. With all the money I am spending on this car, another $190 isn't the end of the world, but the dollars aren't fully my issue either. I hate the waste of an otherwise new and perfect strut insert. 😞