inline6
 Subscriber
-
Joined
-
Last visited
Everything posted by inline6
-
 Updated.
 -
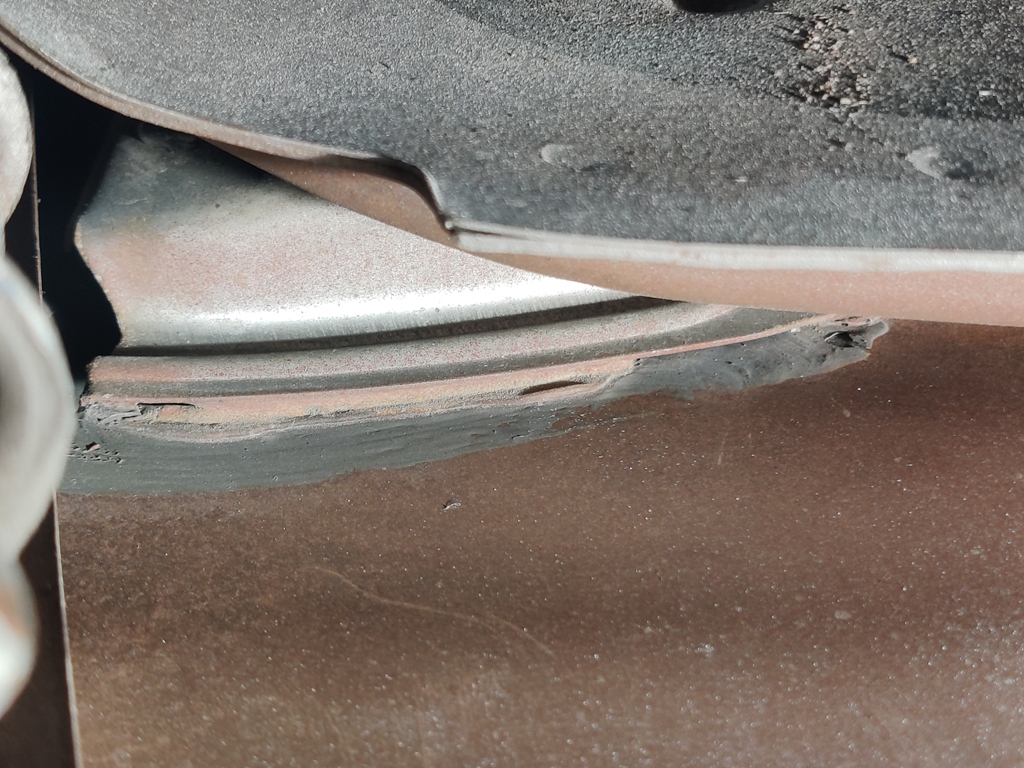
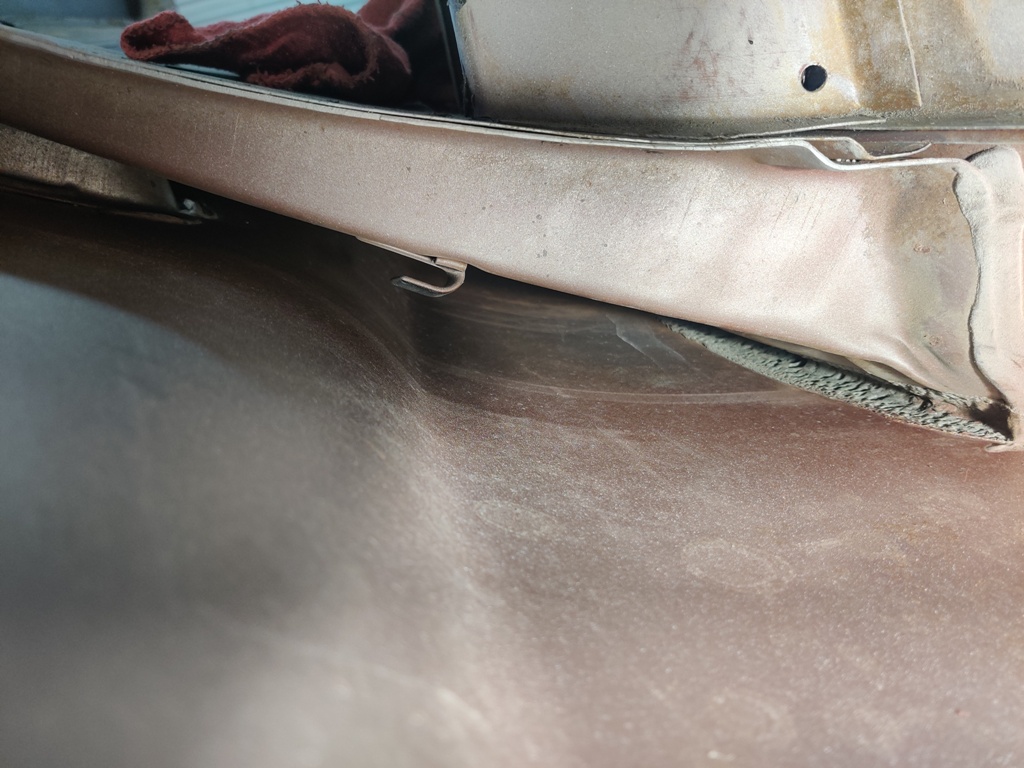
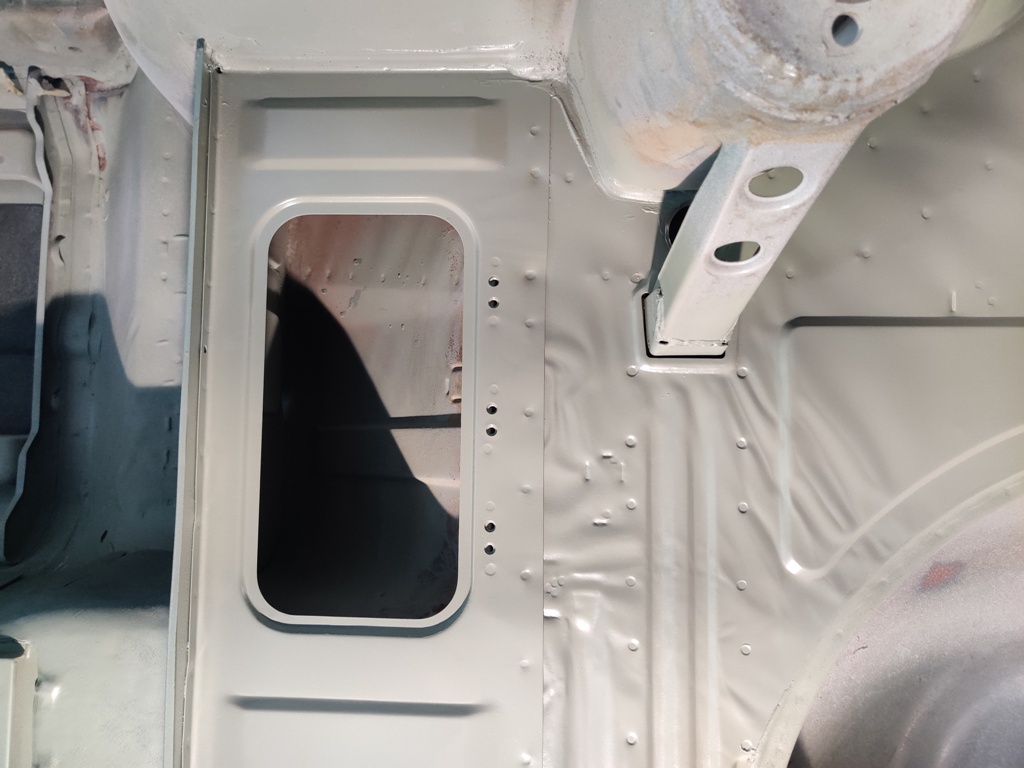
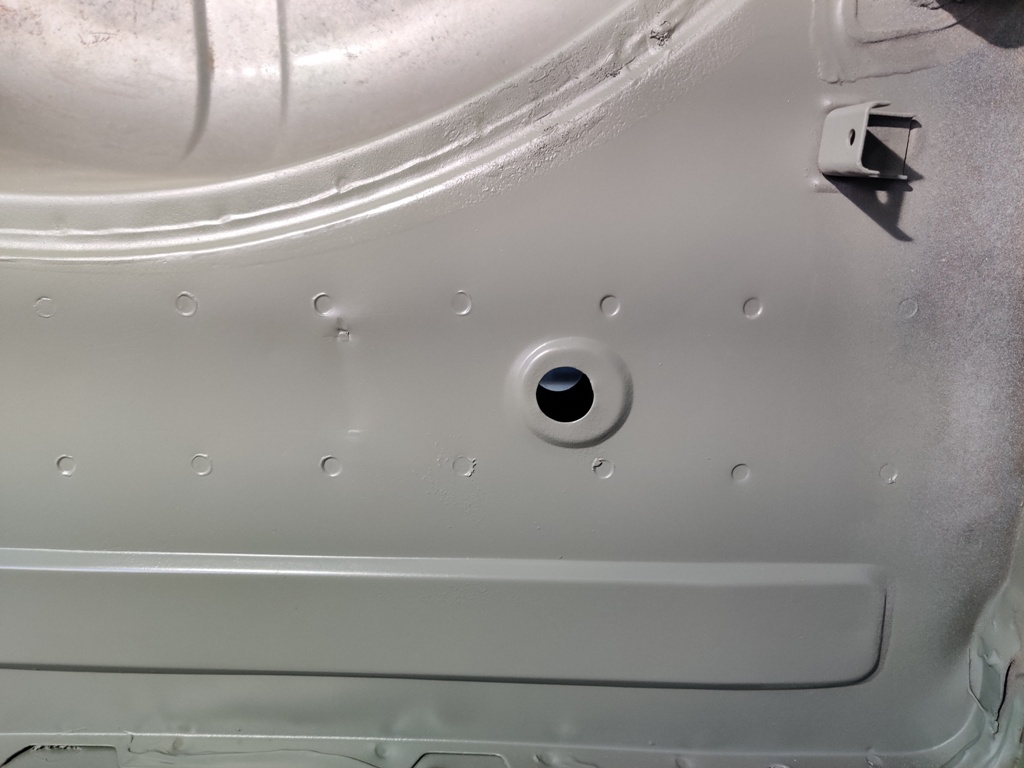
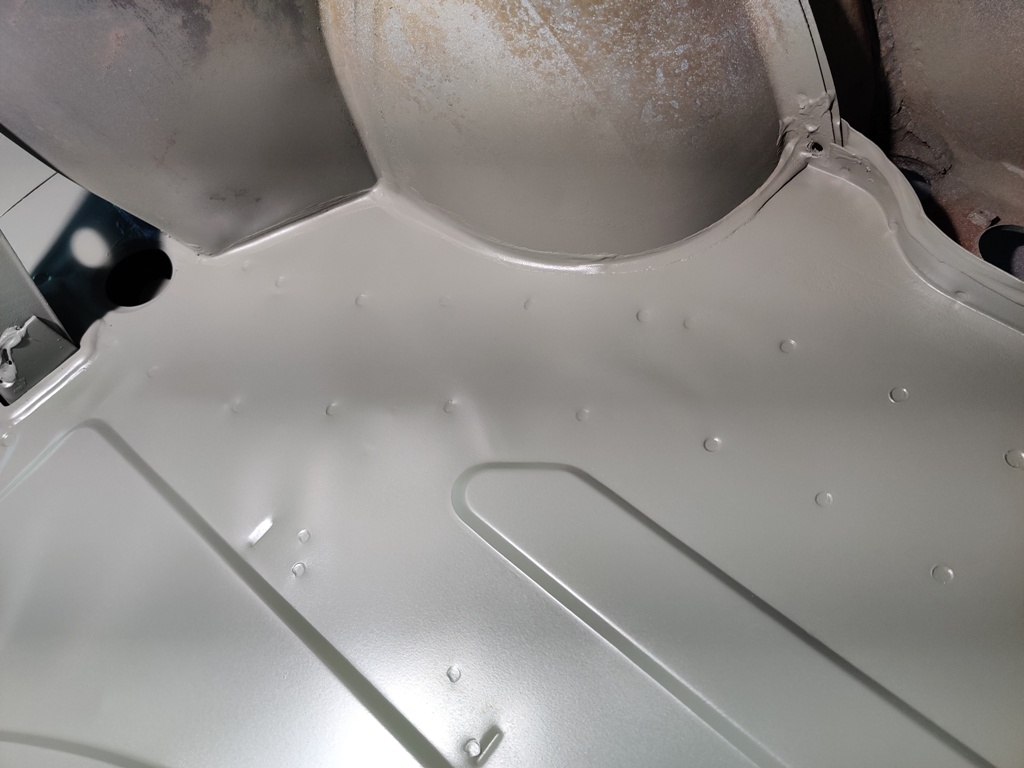
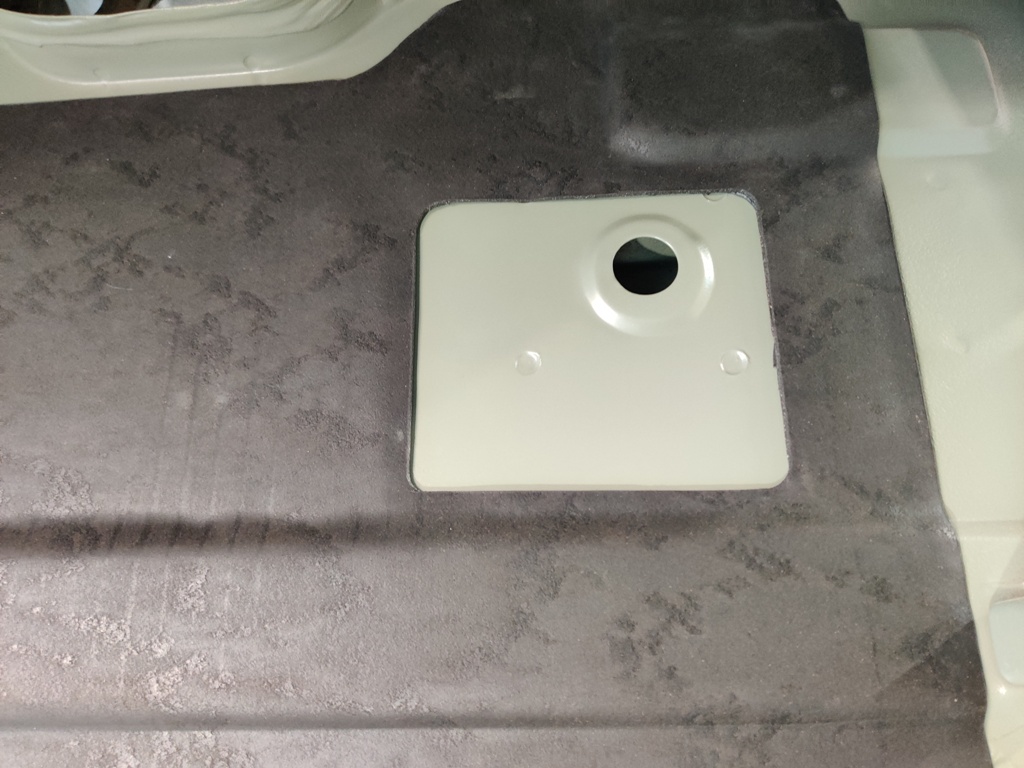
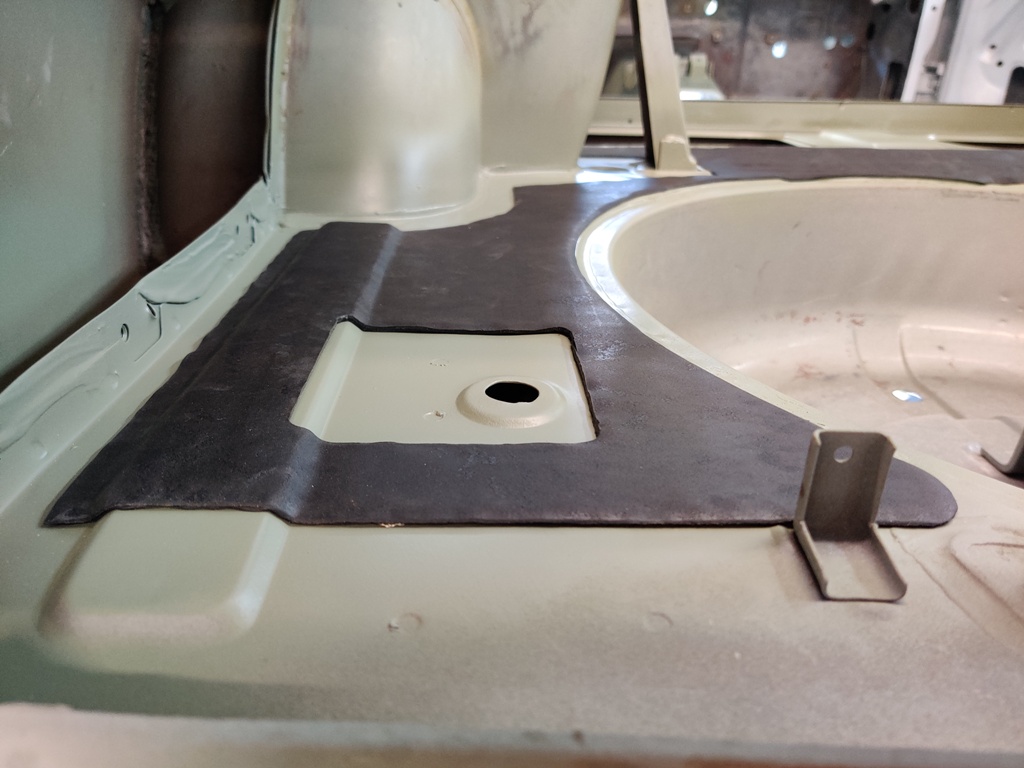
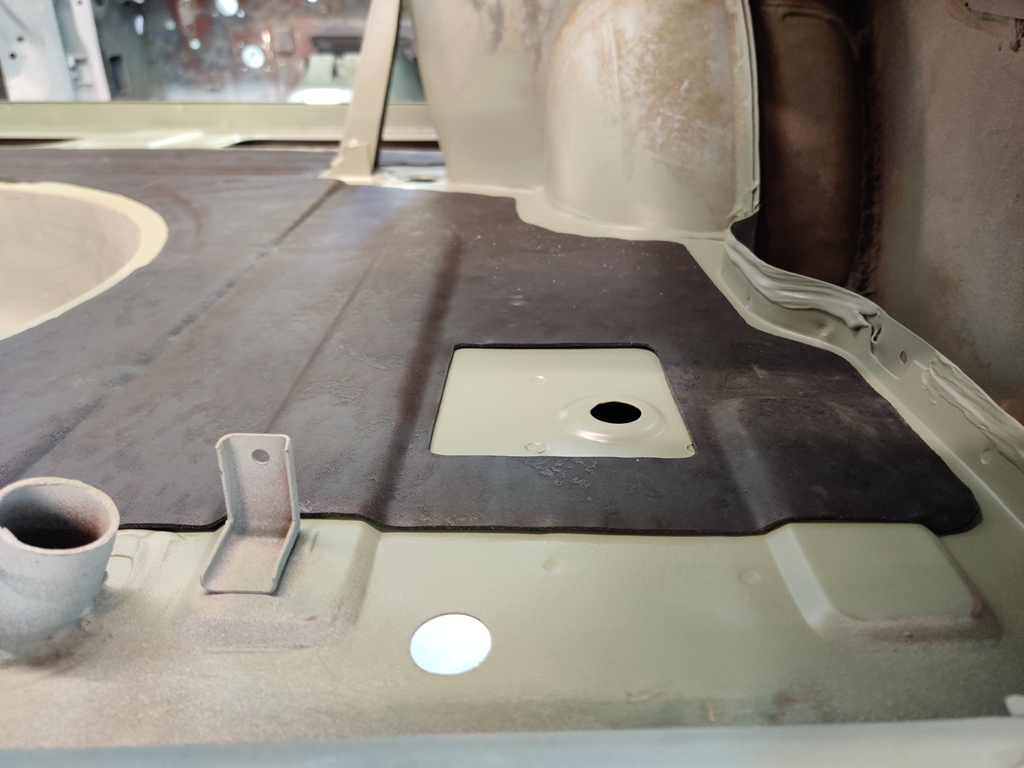
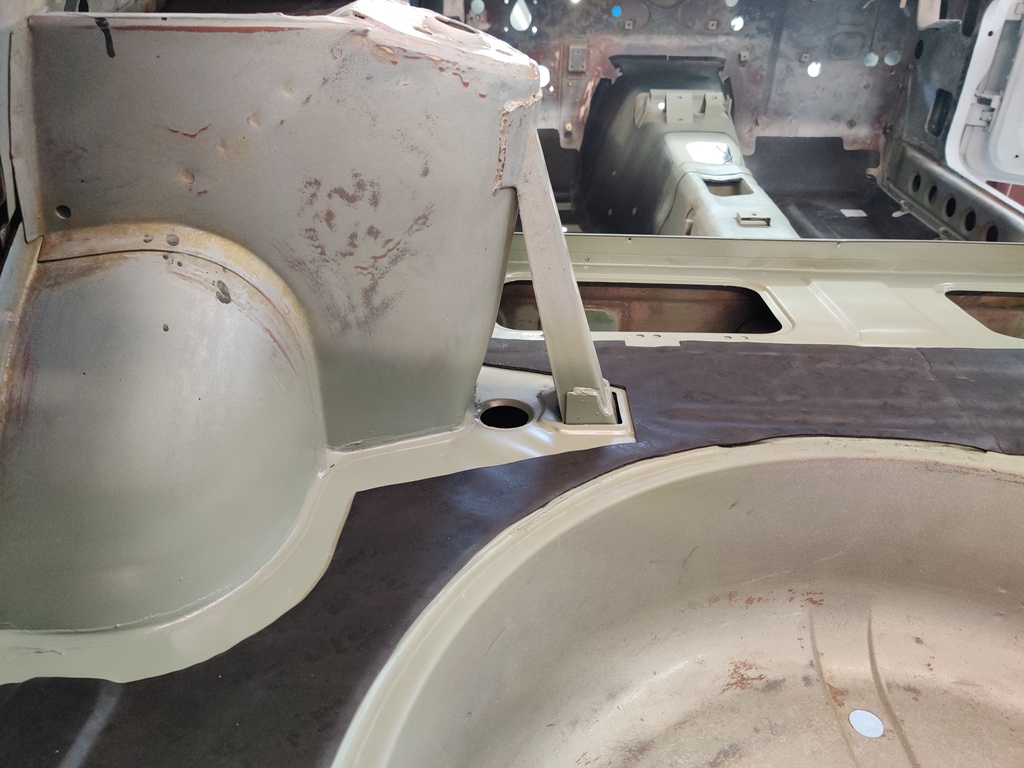
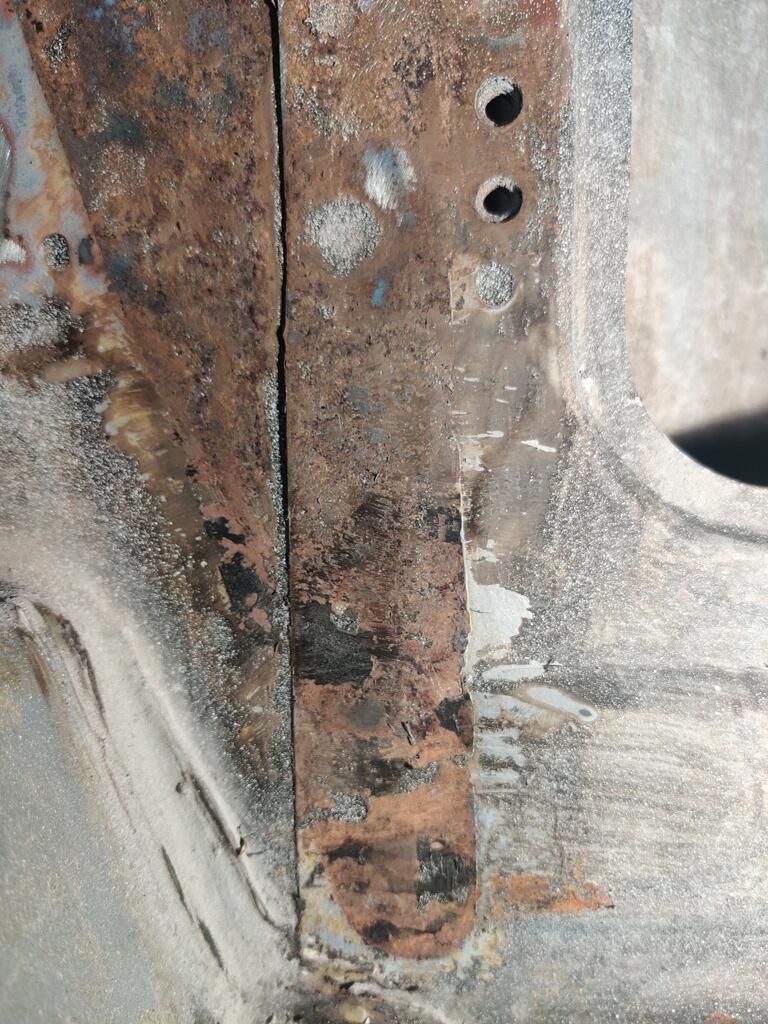
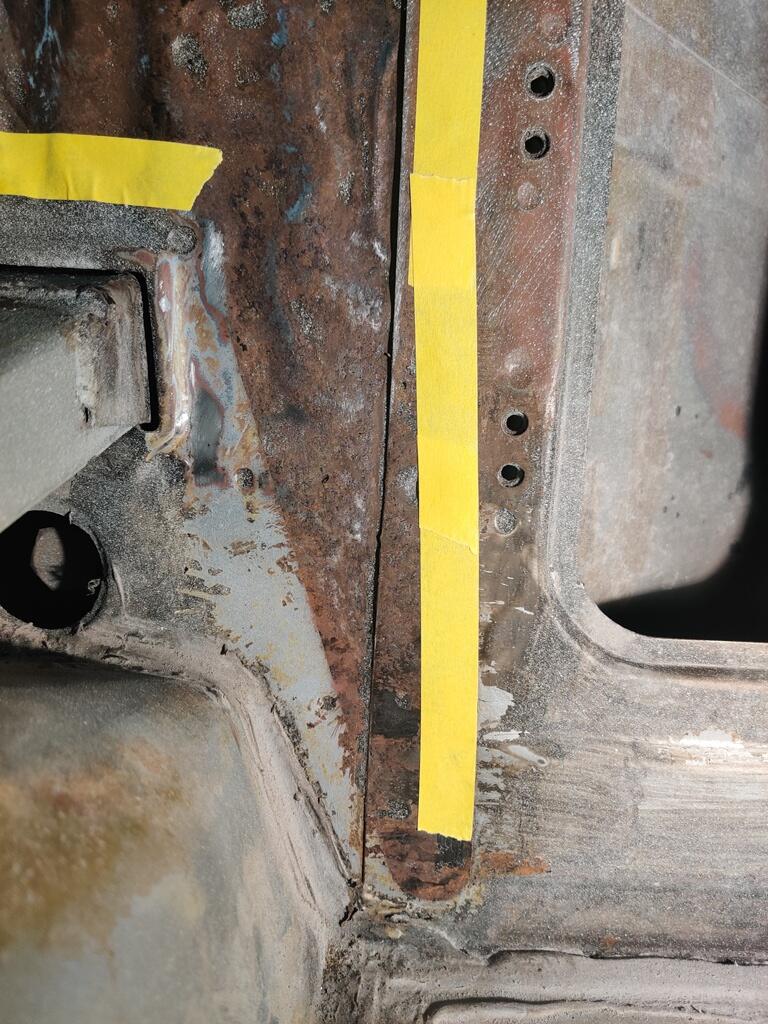
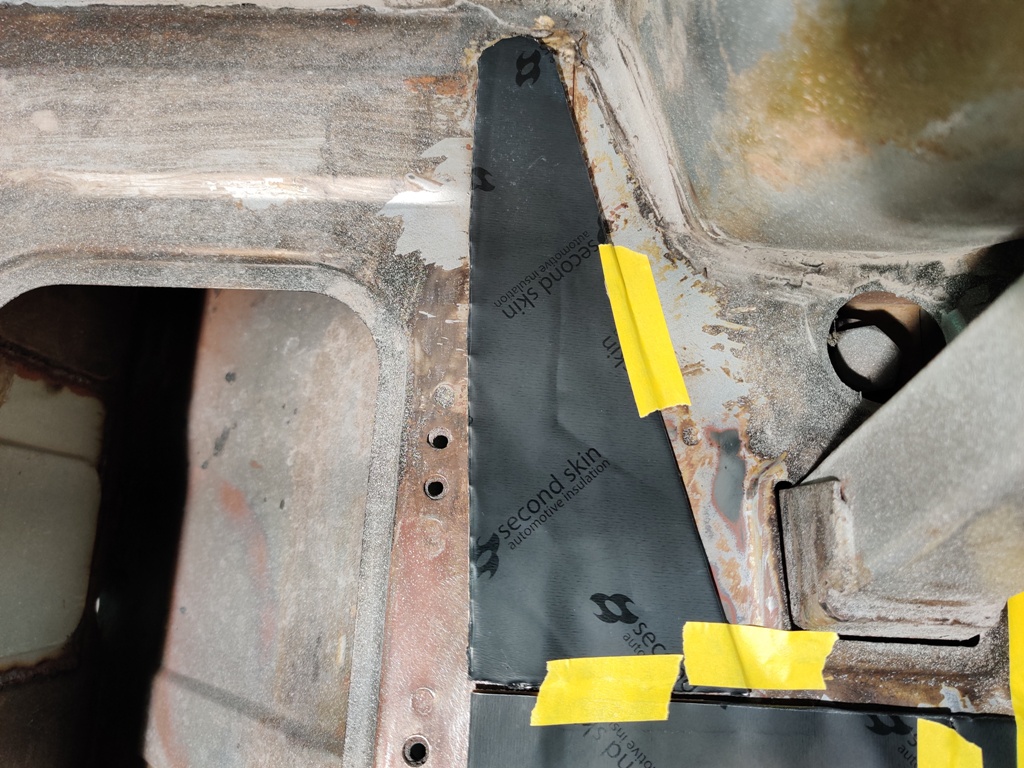
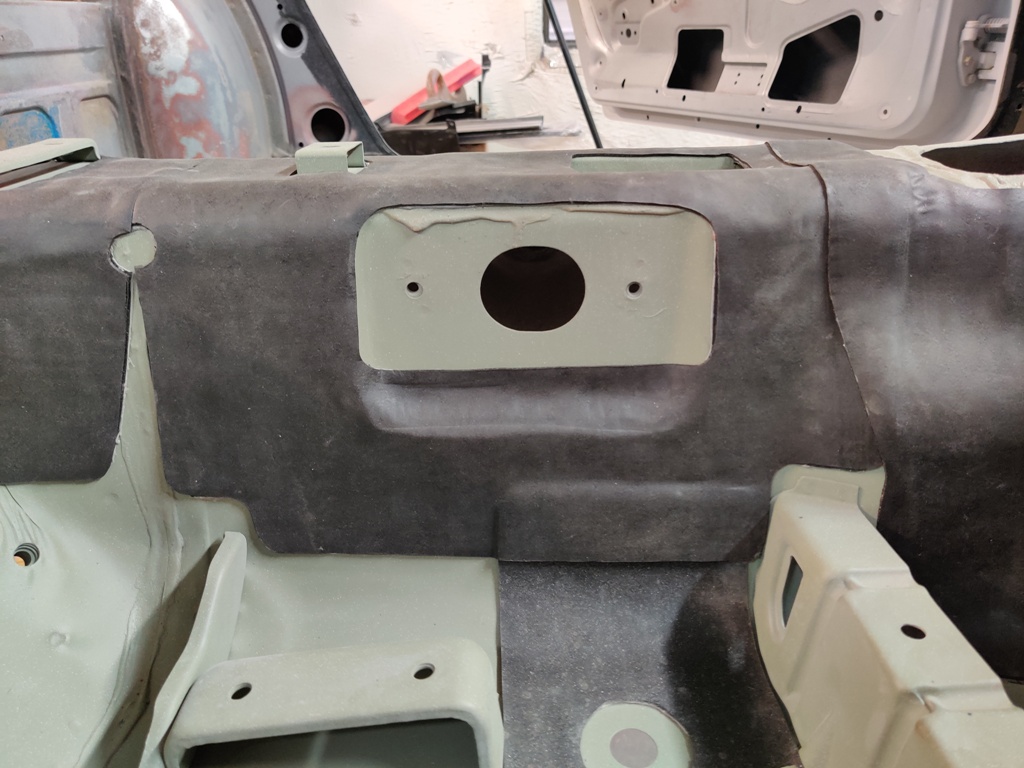
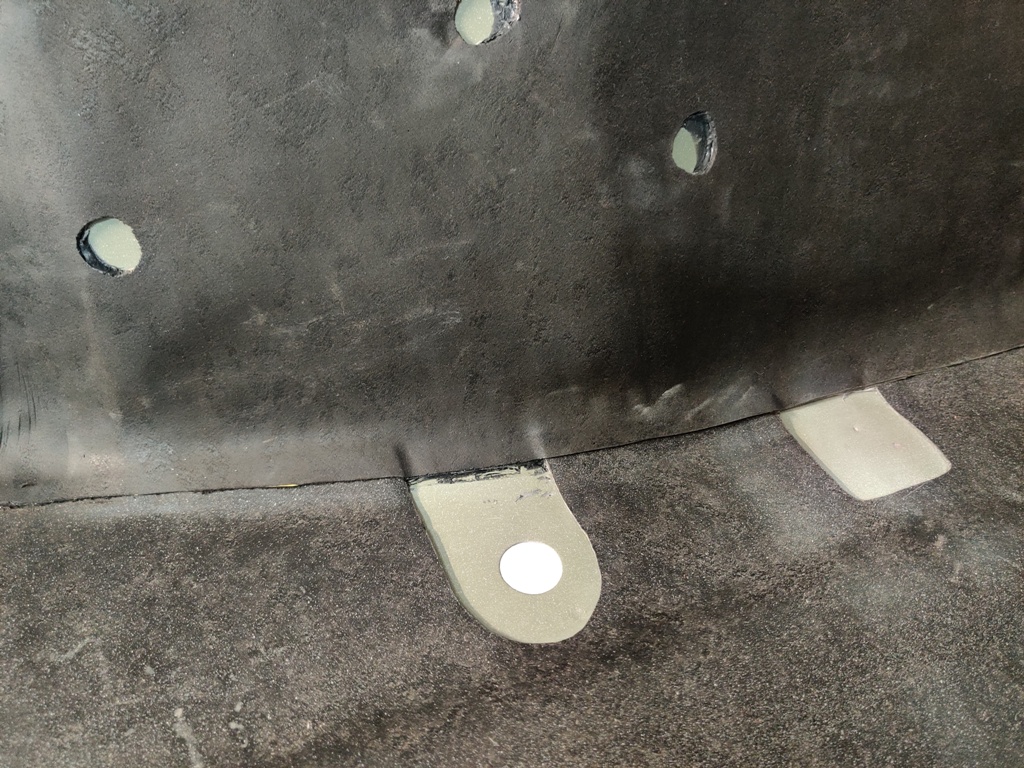
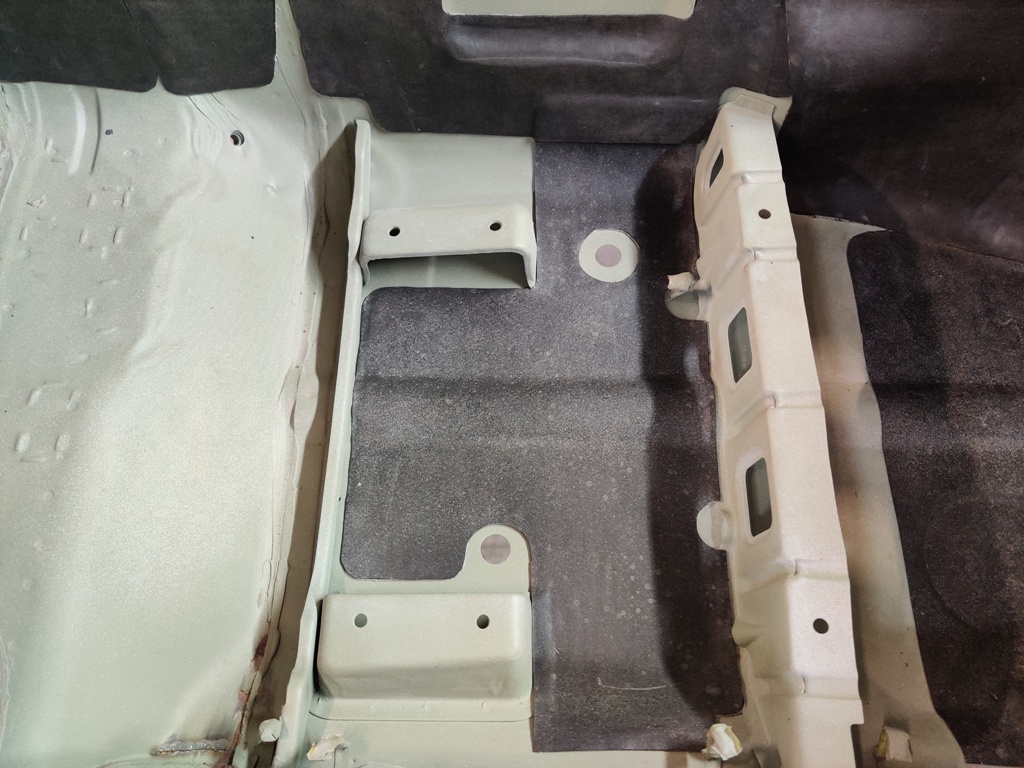
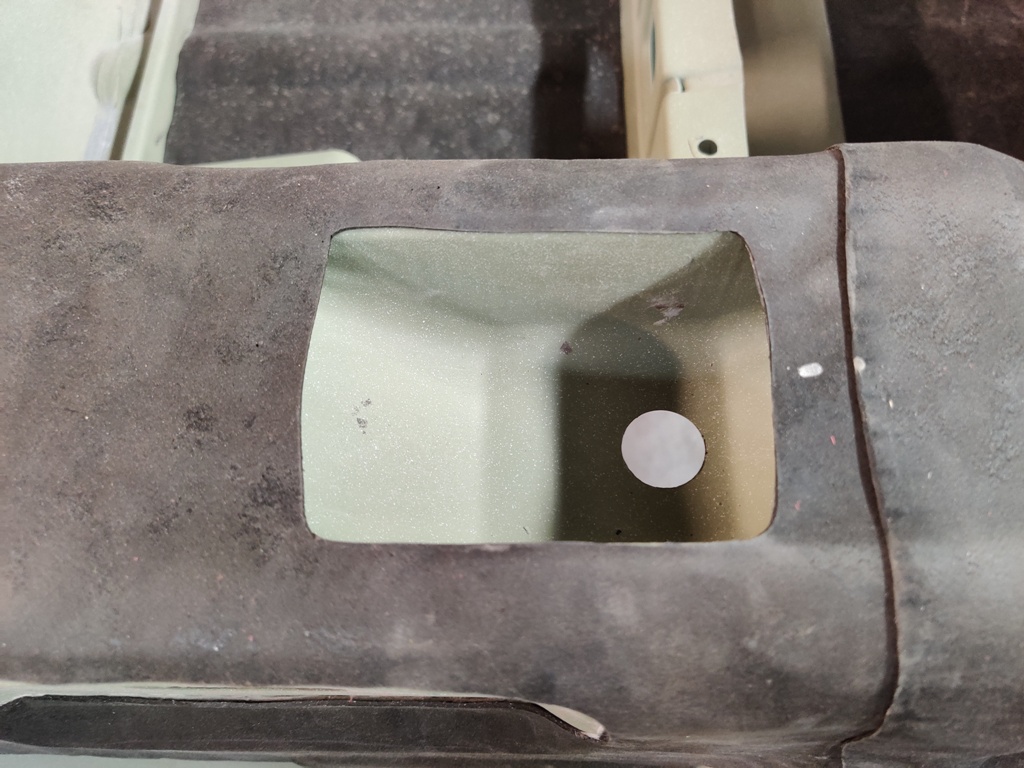
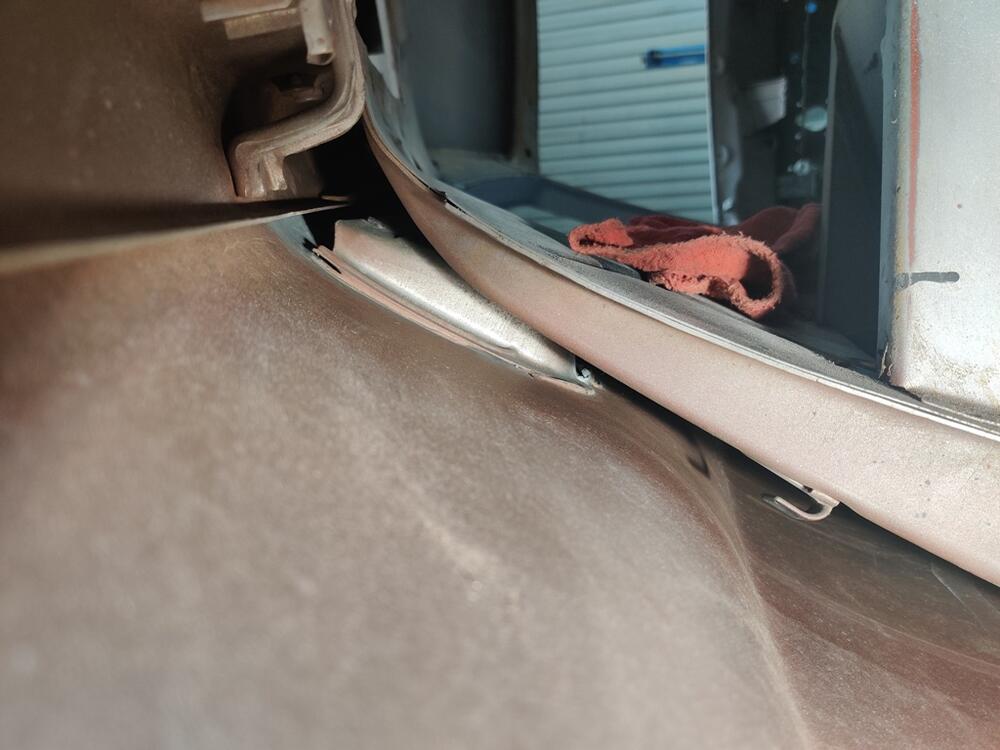
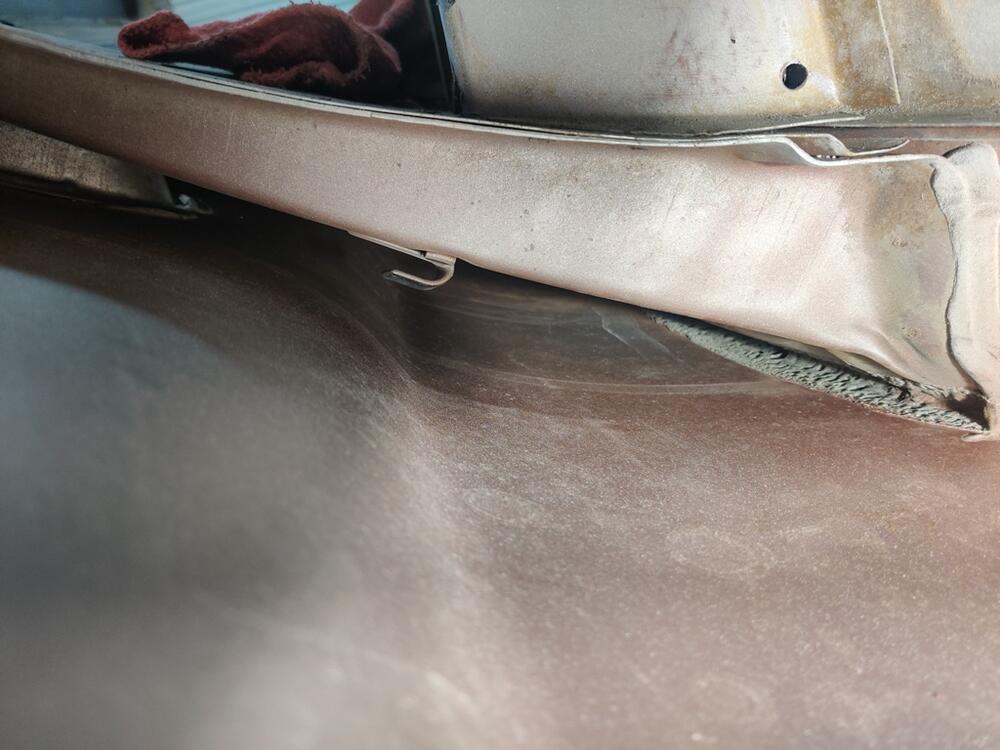
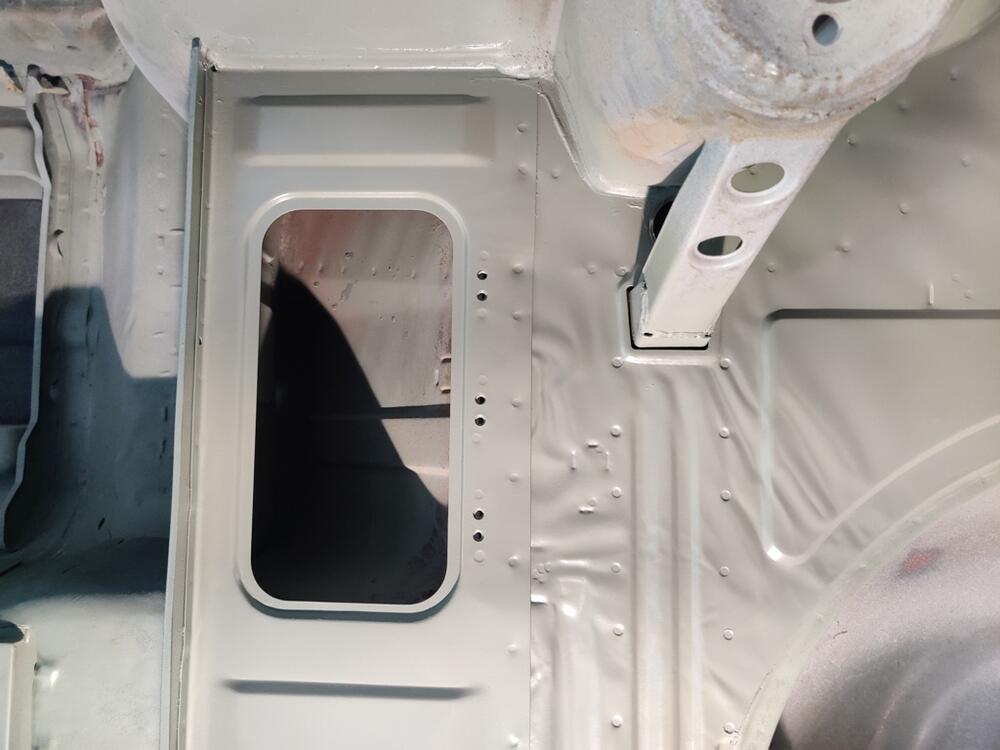
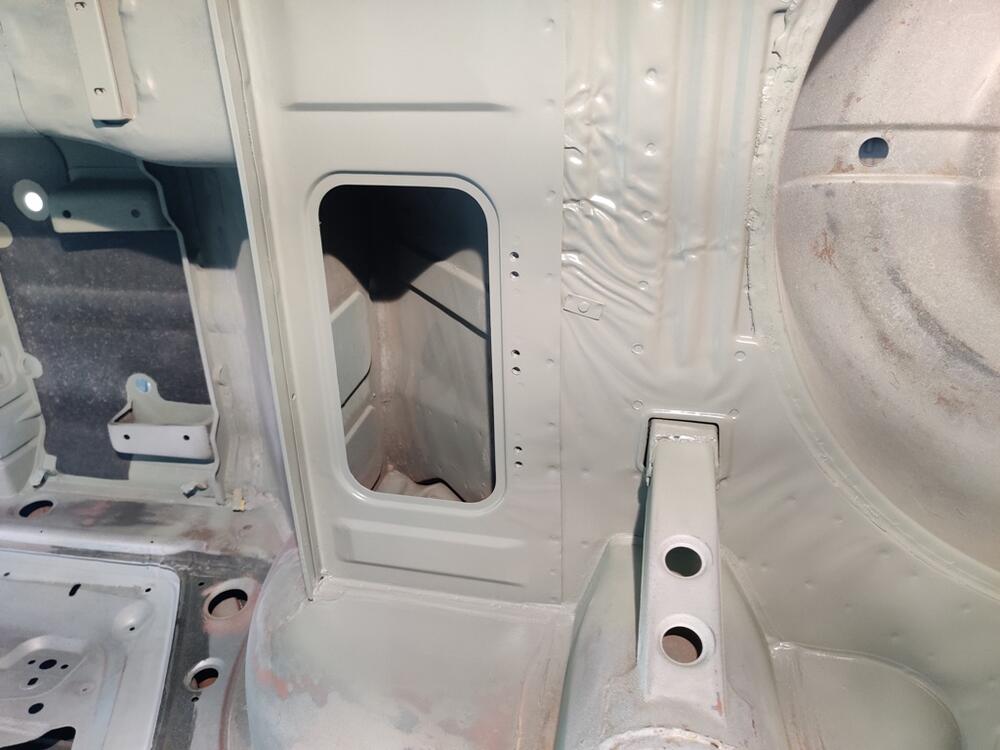
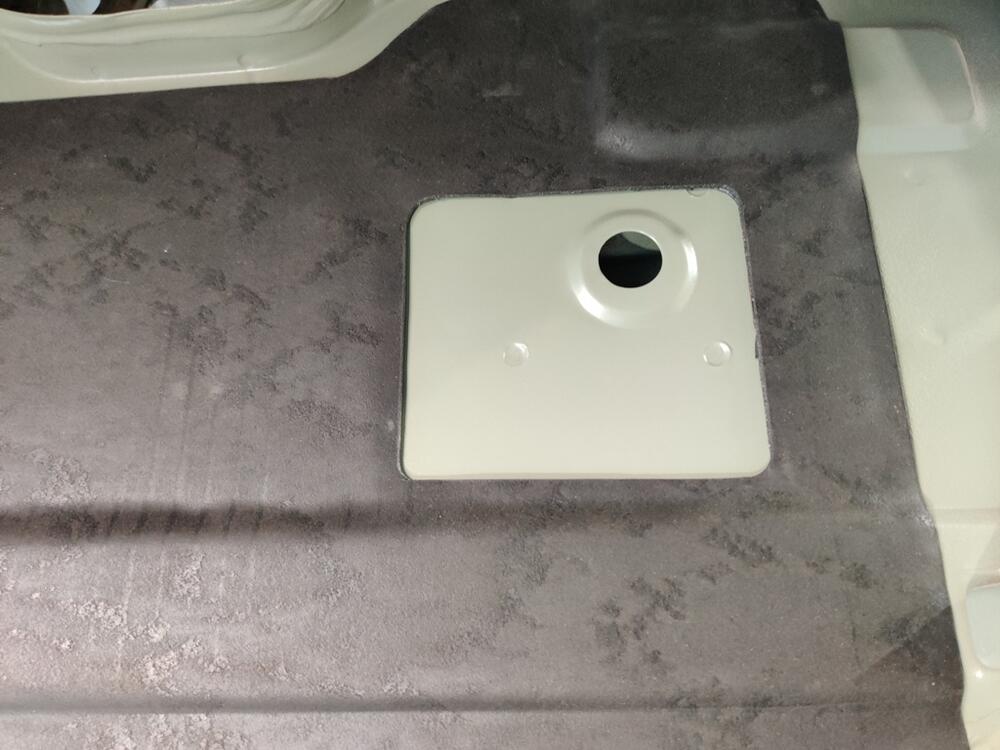
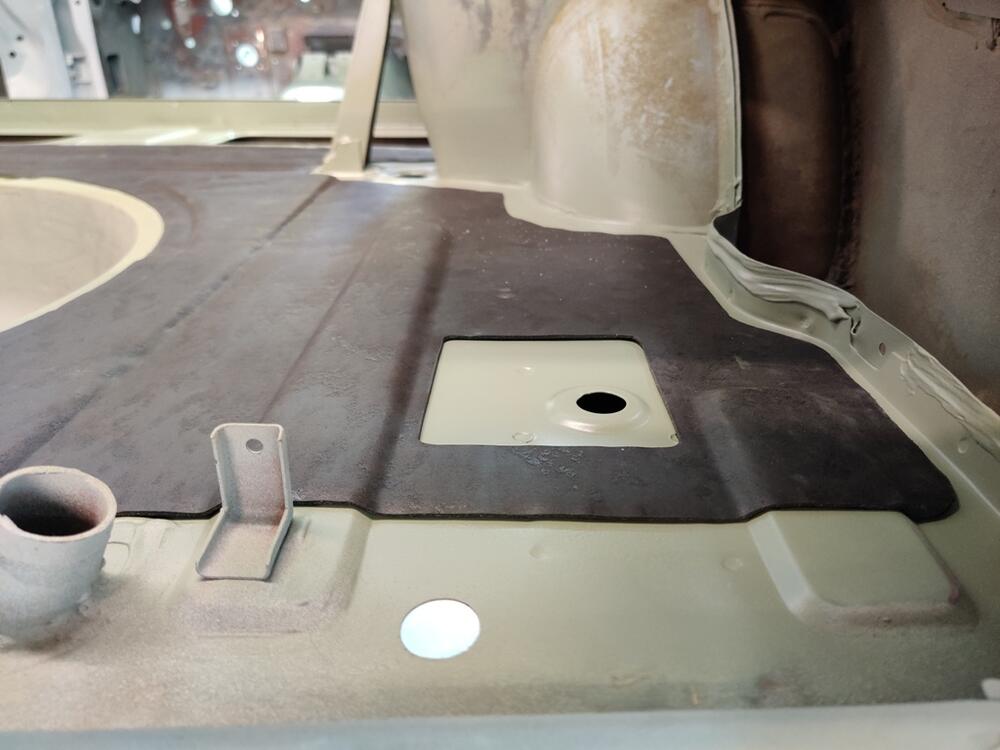
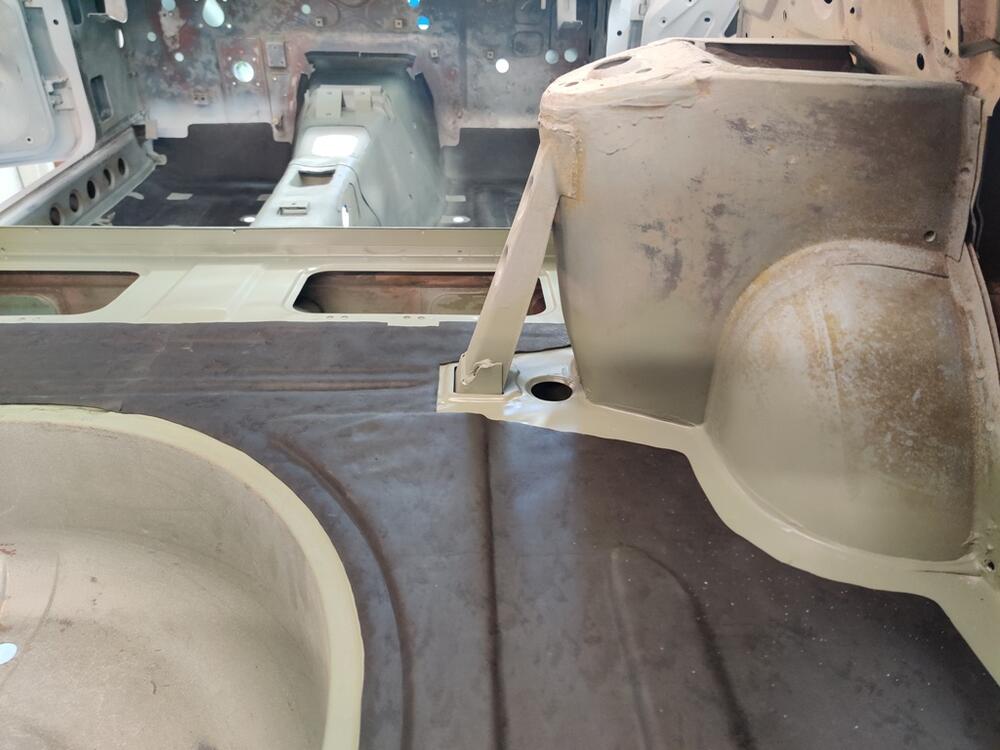
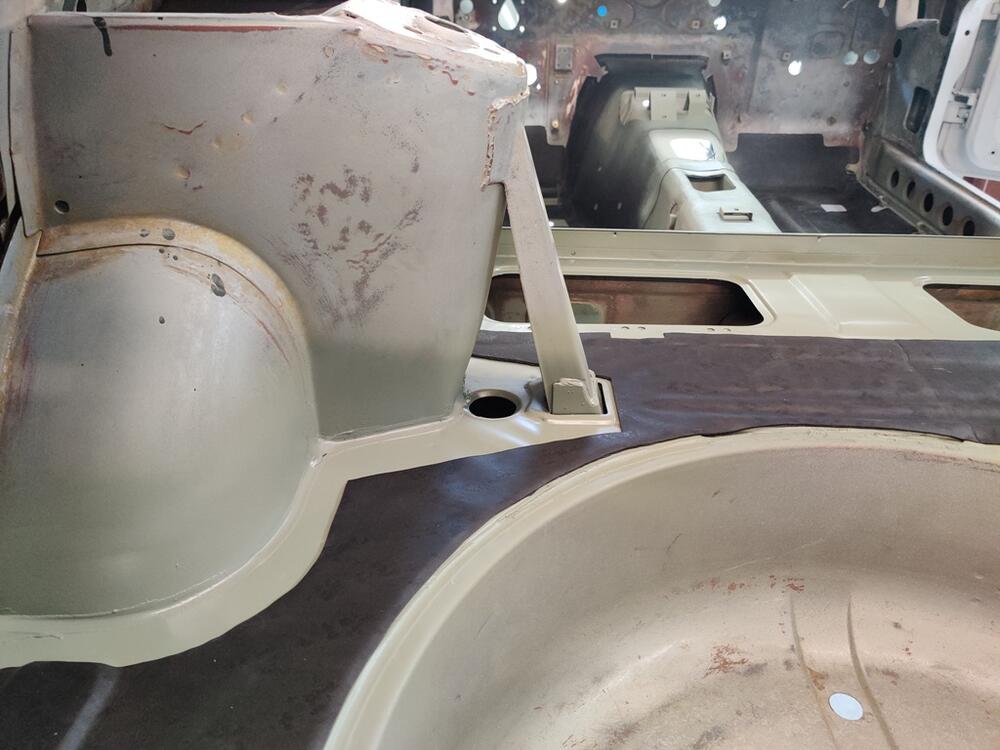
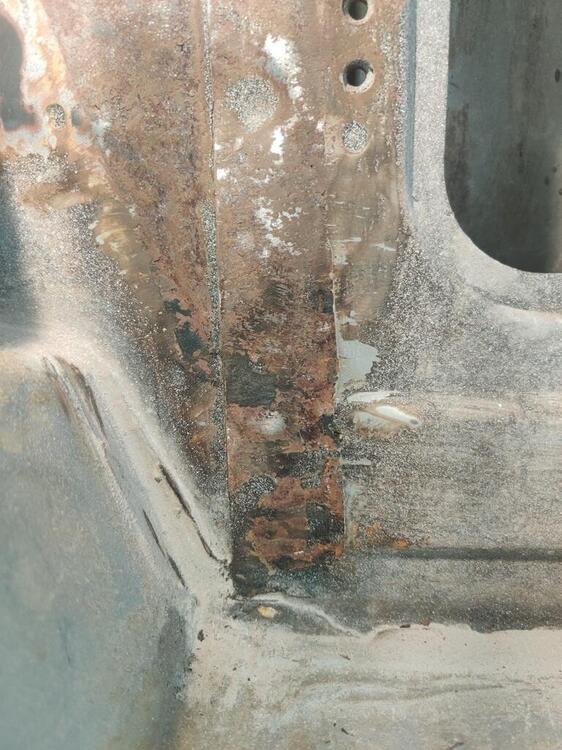
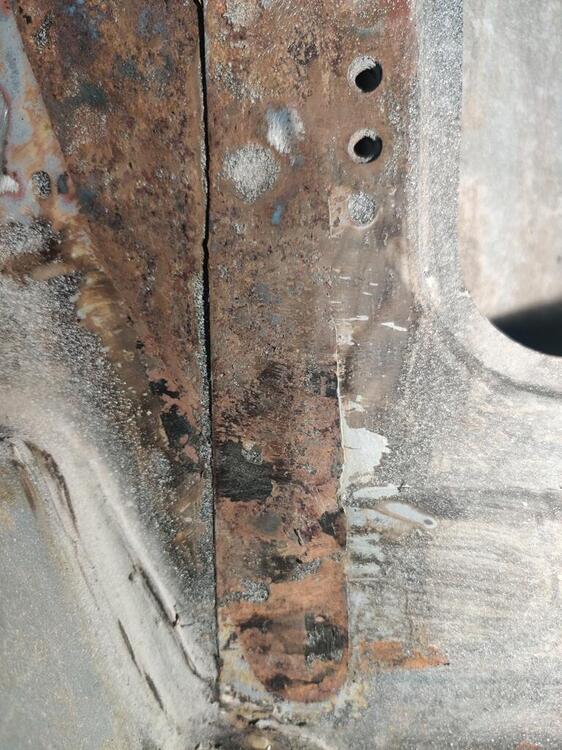
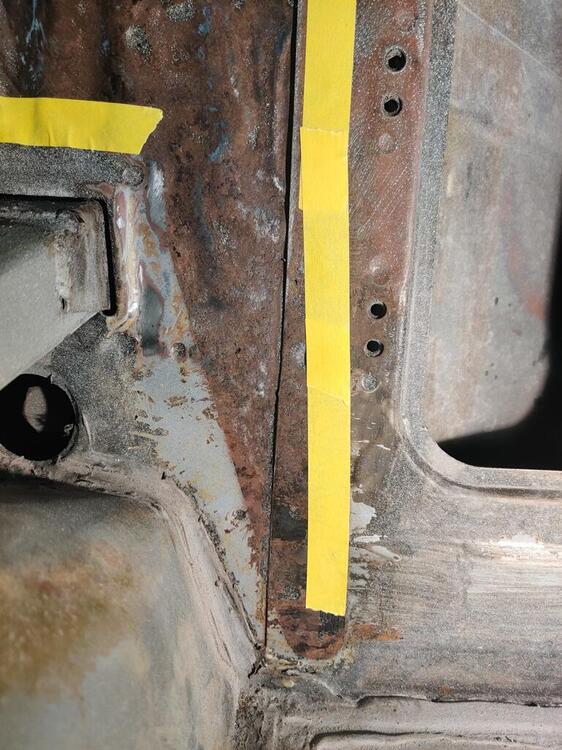
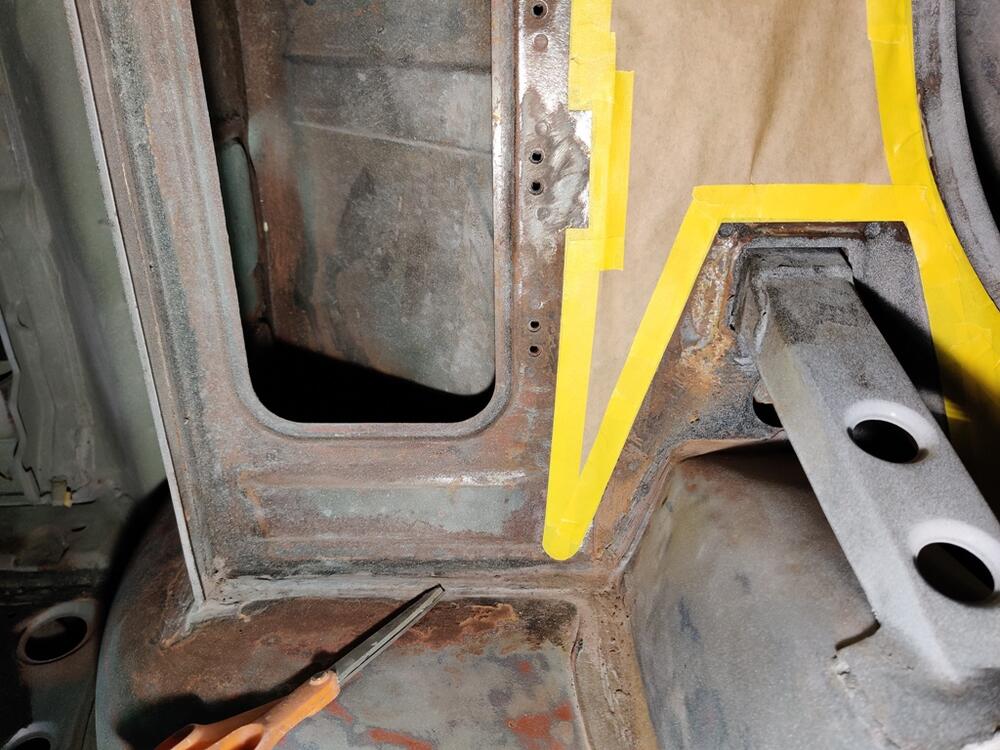
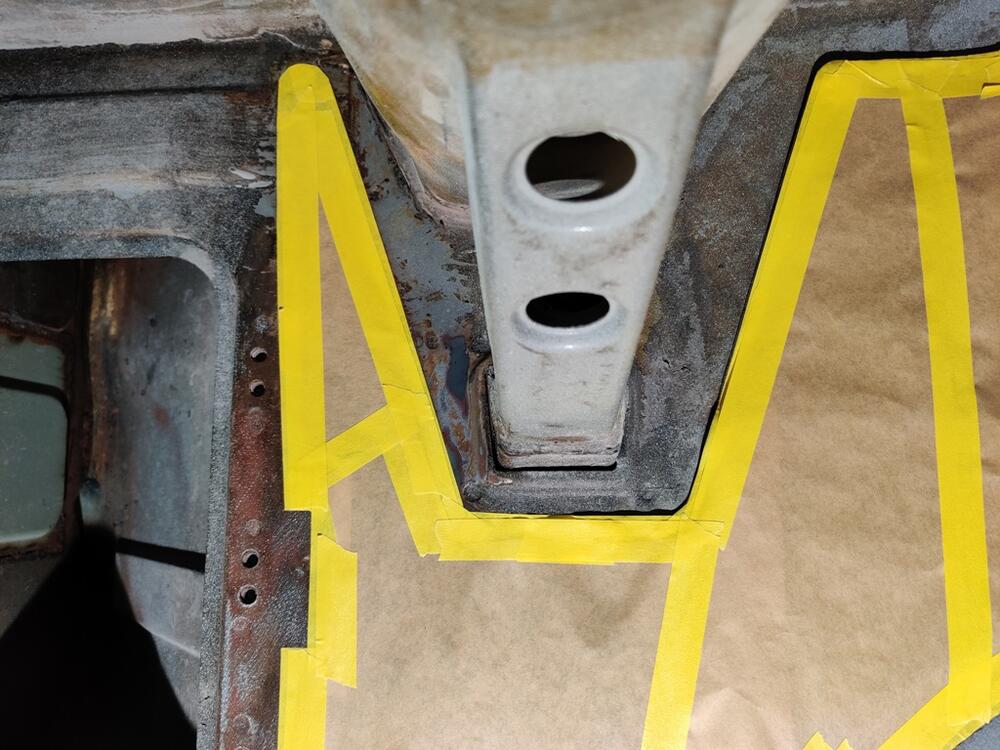
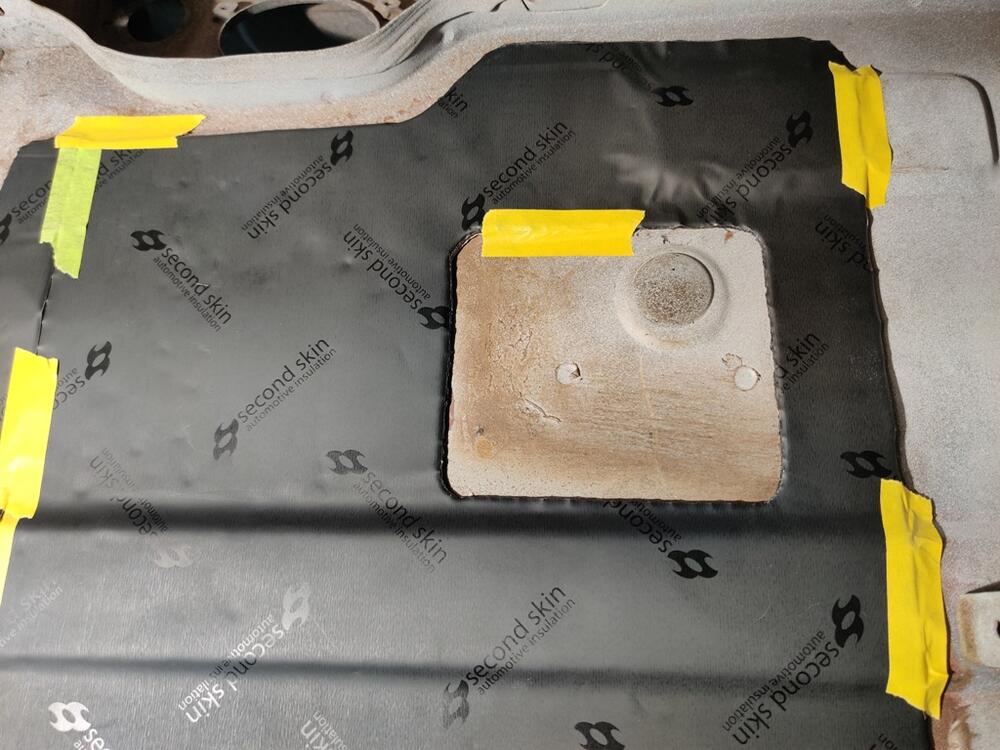
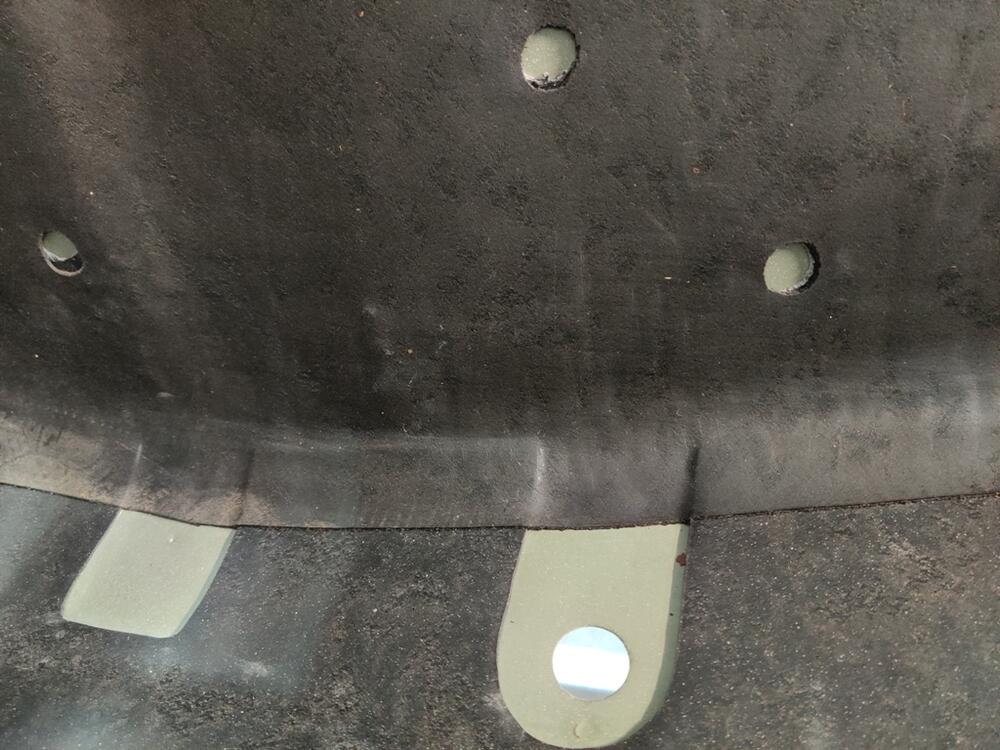
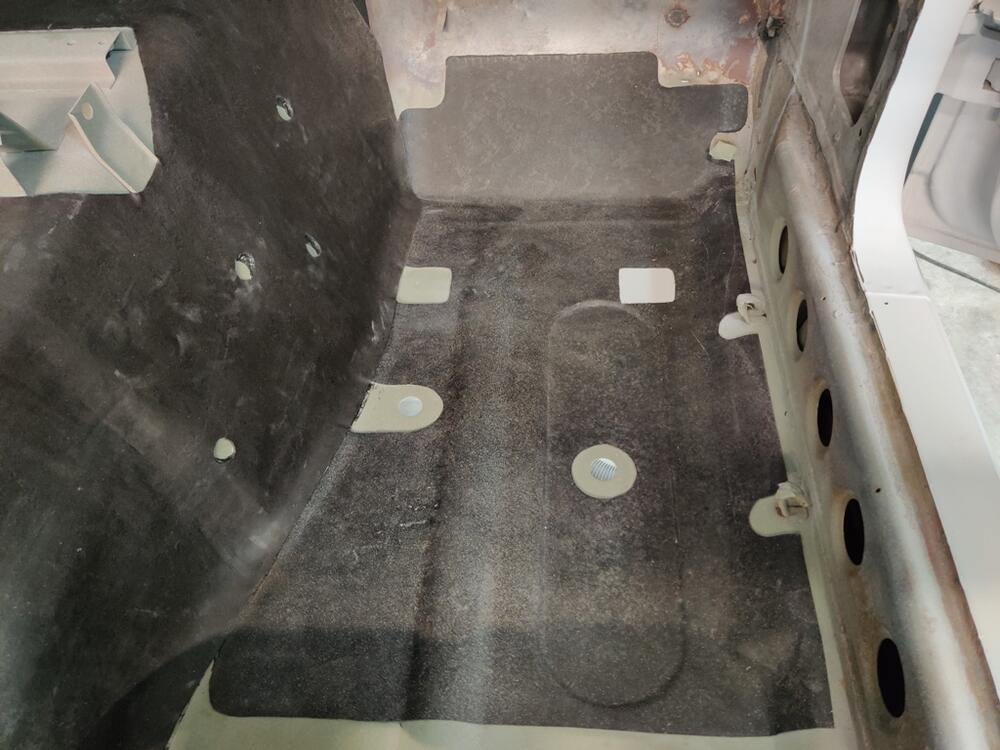
While I was doing the above work, I snapped these pictures which clearly show evidence of how water came into the car from the quarter panel vents. The hole in the quarter panel has this "U" shaped plate behind it which has some sealer not very well applied to the edges where it meets the inside surface of the quarter panel: In the bottom right hand portion of this photo, you can see where water ran down from the vent to the junction of the inner fender wheel well and the quarter panel. The car is at 90 degrees on the rotisserie with the left side of the car facing the floor: It seems wise to apply more seam sealer to the "U" shaped piece to make sure it doesn't let water in along its edges. That said, the top of it is open. So, it is not a good idea to hit that vent with a stream from a hose. 🙂 I will be be applying some spray on sound deadener to the inside surfaces of the quarter panel. However, before that, I will be prepping and addressing any suspicious areas of factory sealant to ensure no water can get in to cause trouble. *edit - I also noticed today that the bottom of the three holes that hold on the Z emblem is located below the bottom of the "U" plate, whereas the two others are contained within it. So, the bottom hole is more problematic for letting water in for what that is worth.

-
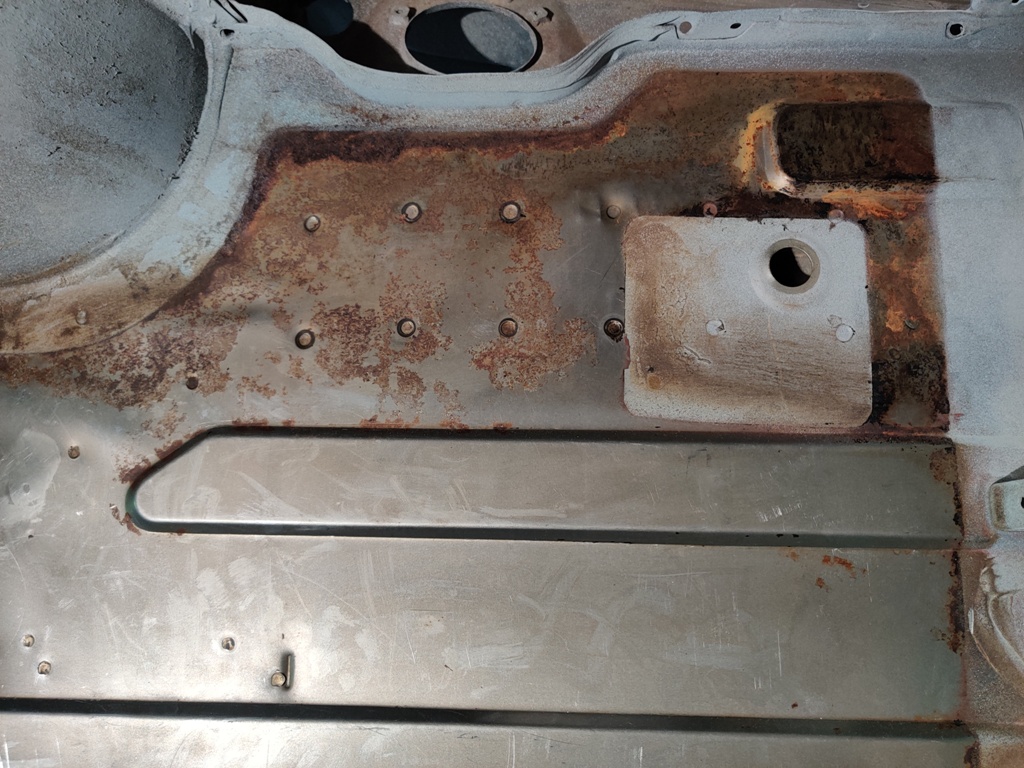
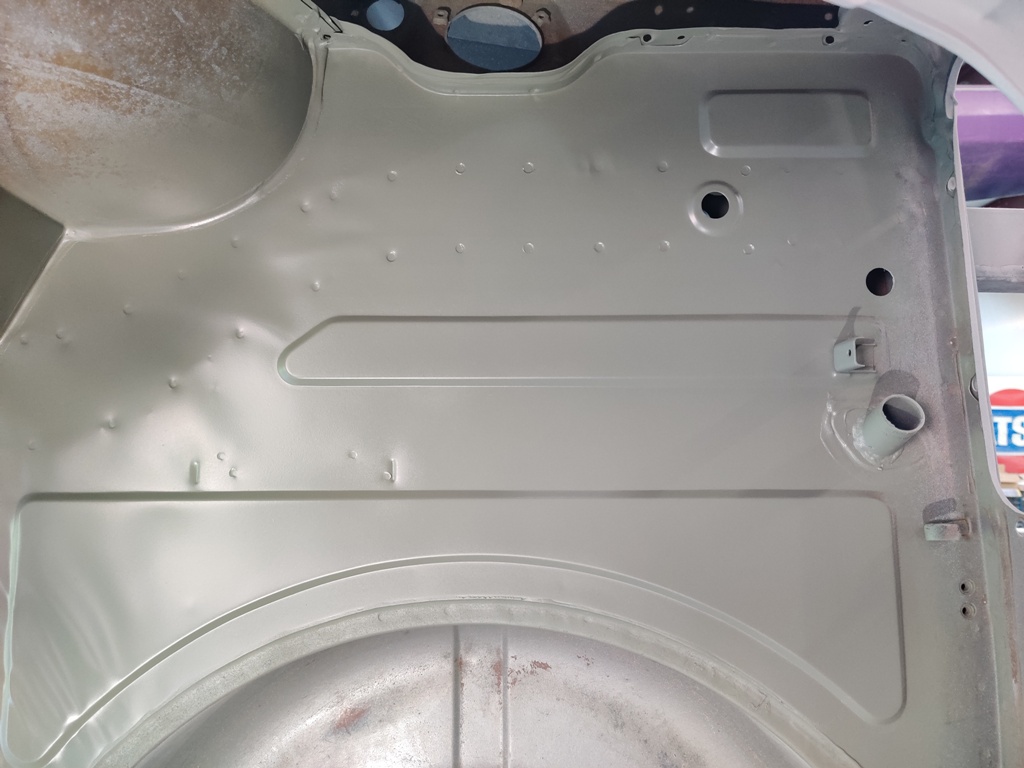
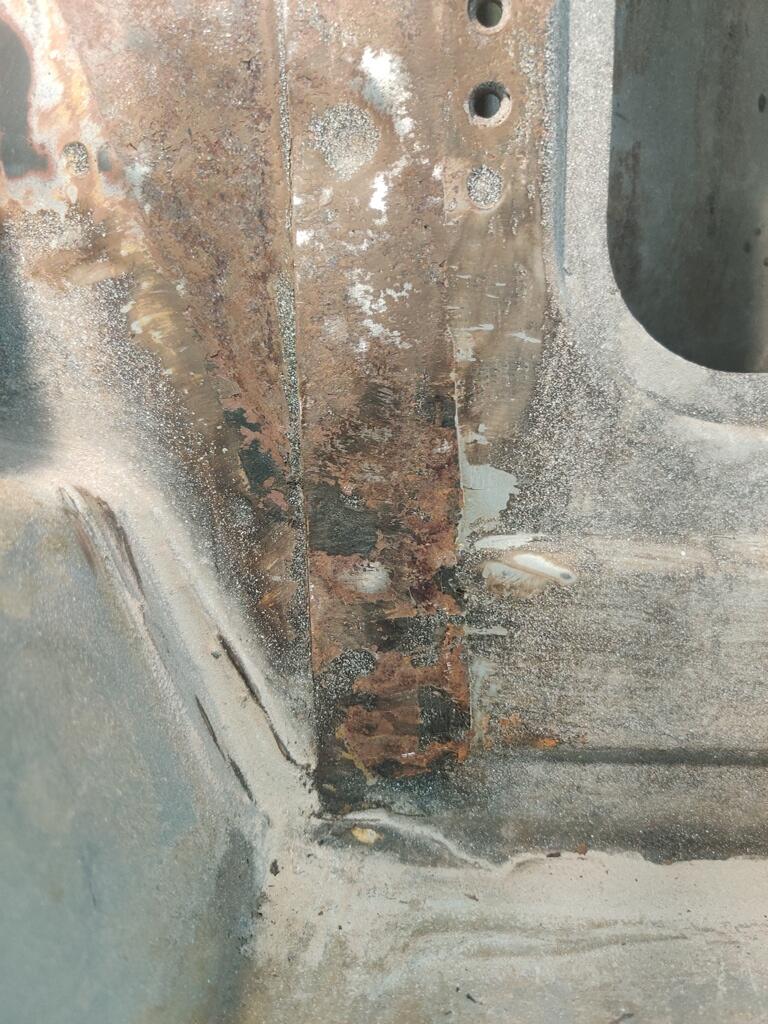
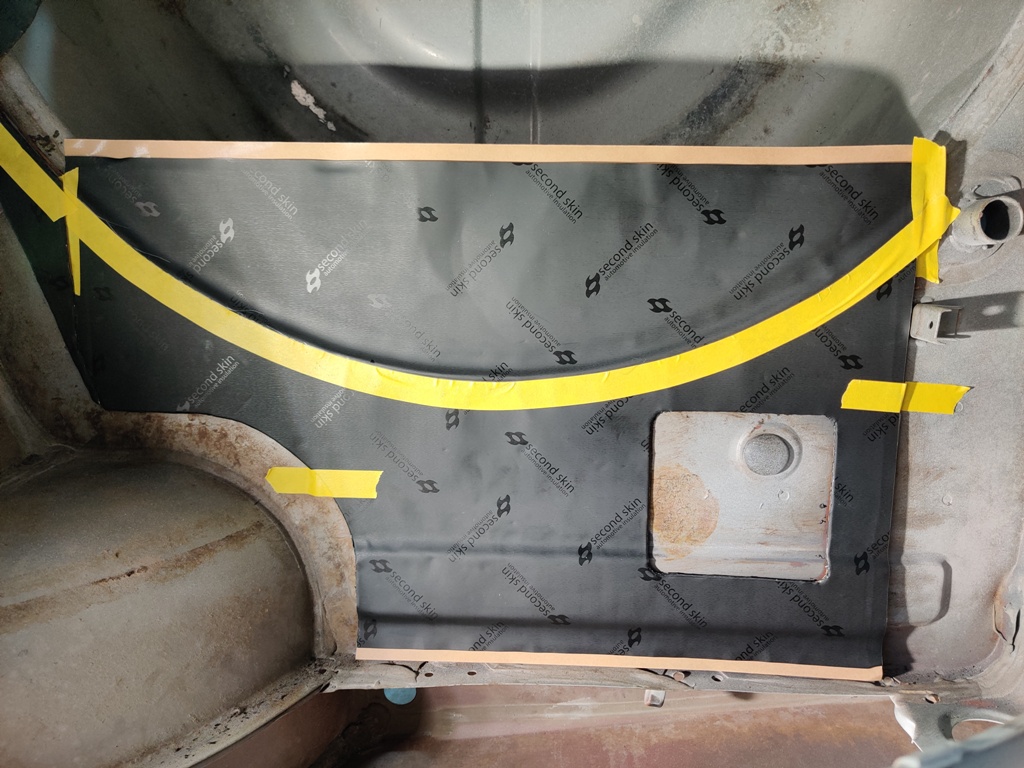
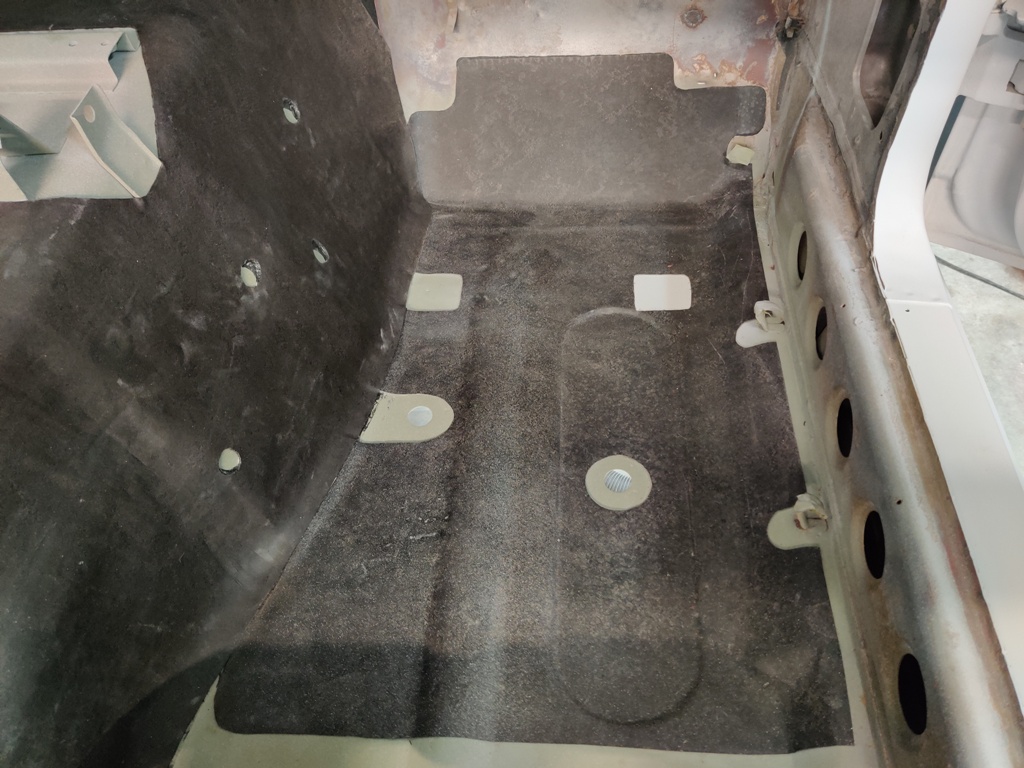
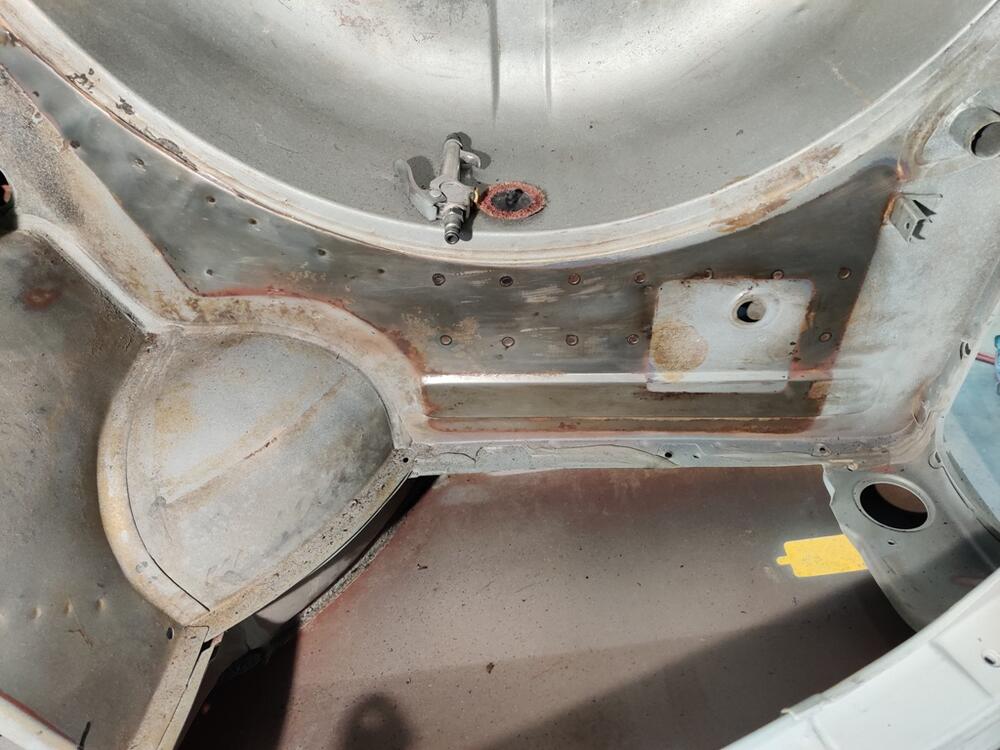
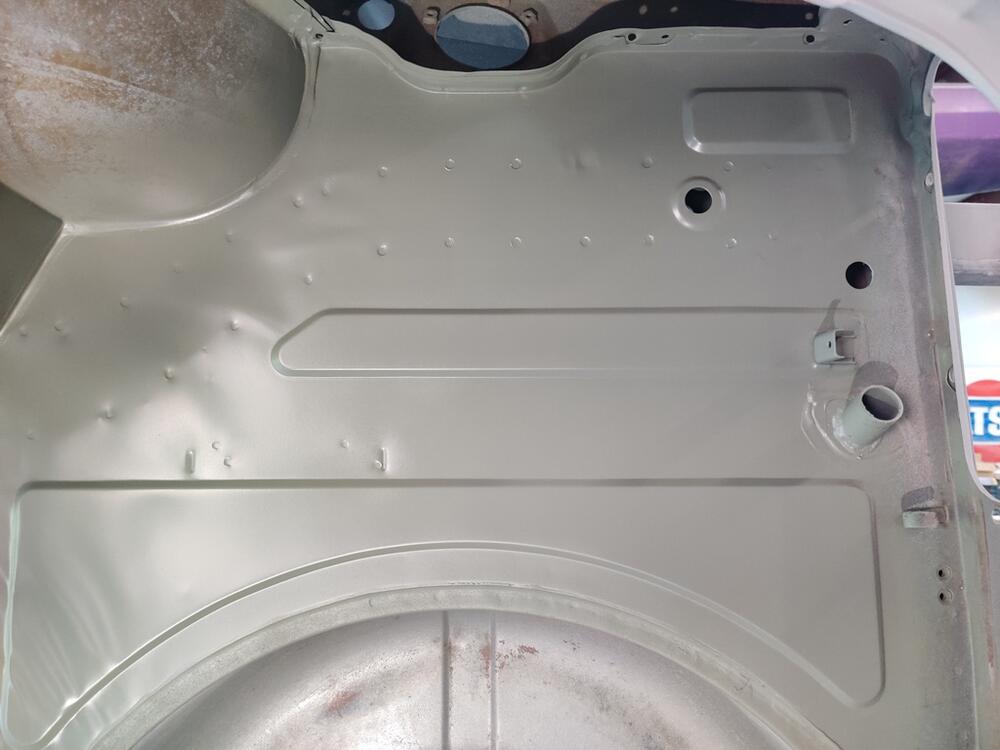
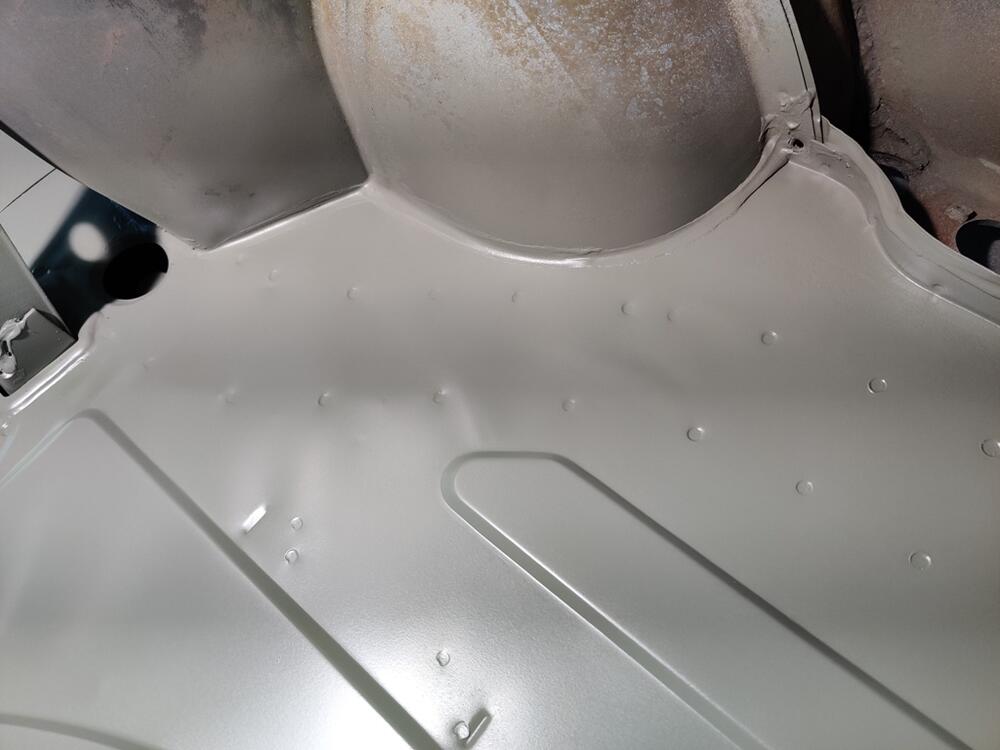
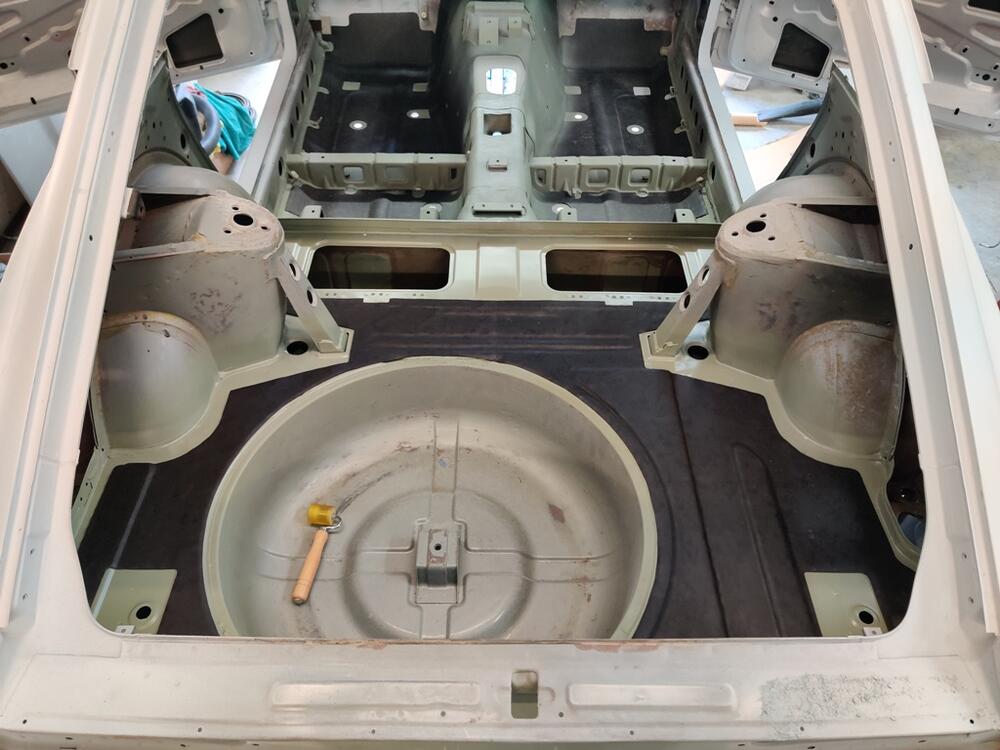
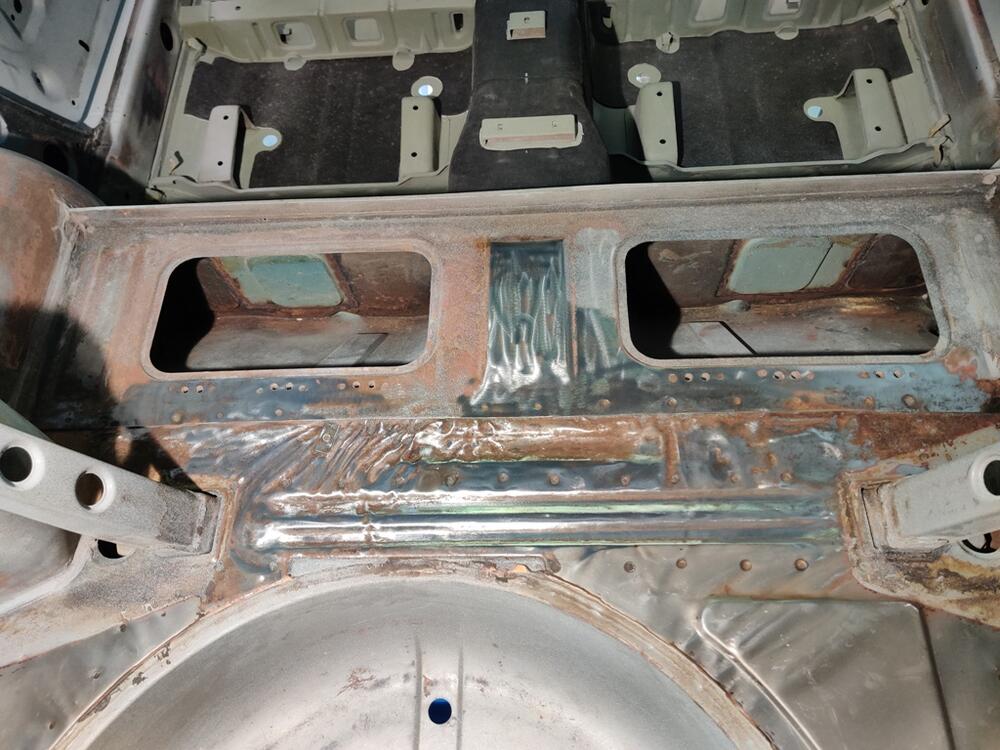
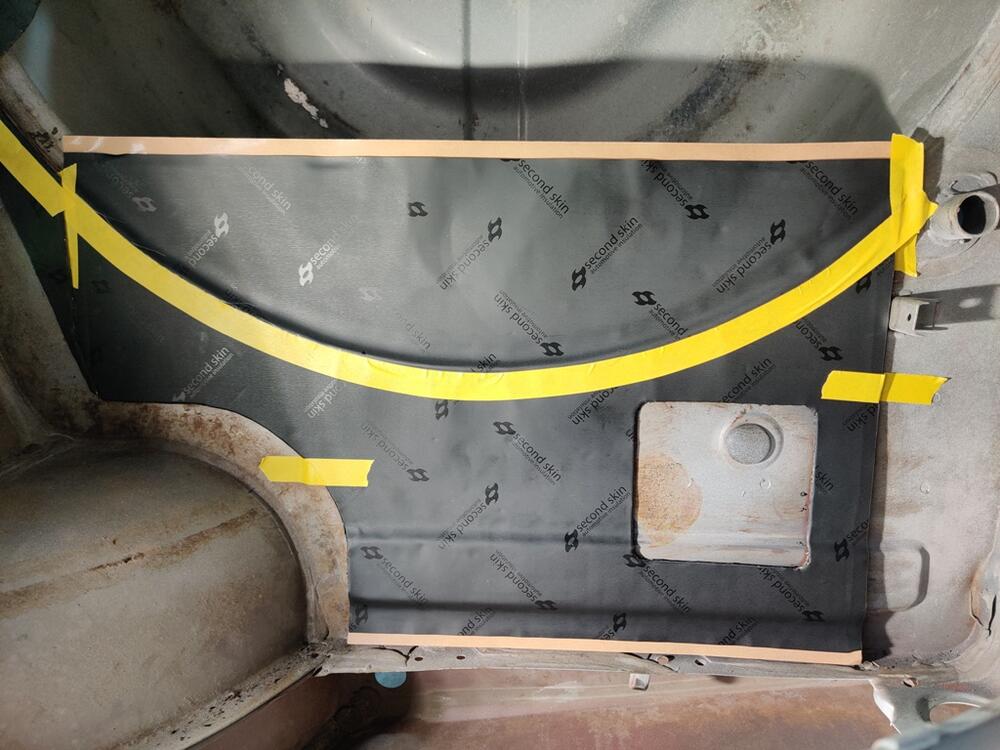
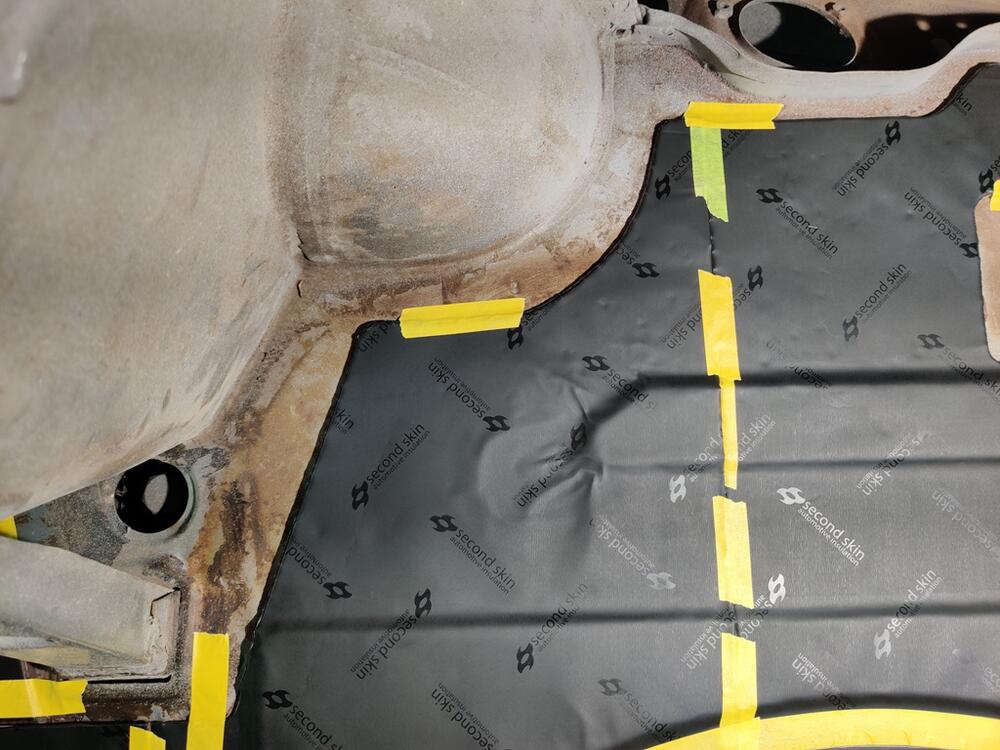
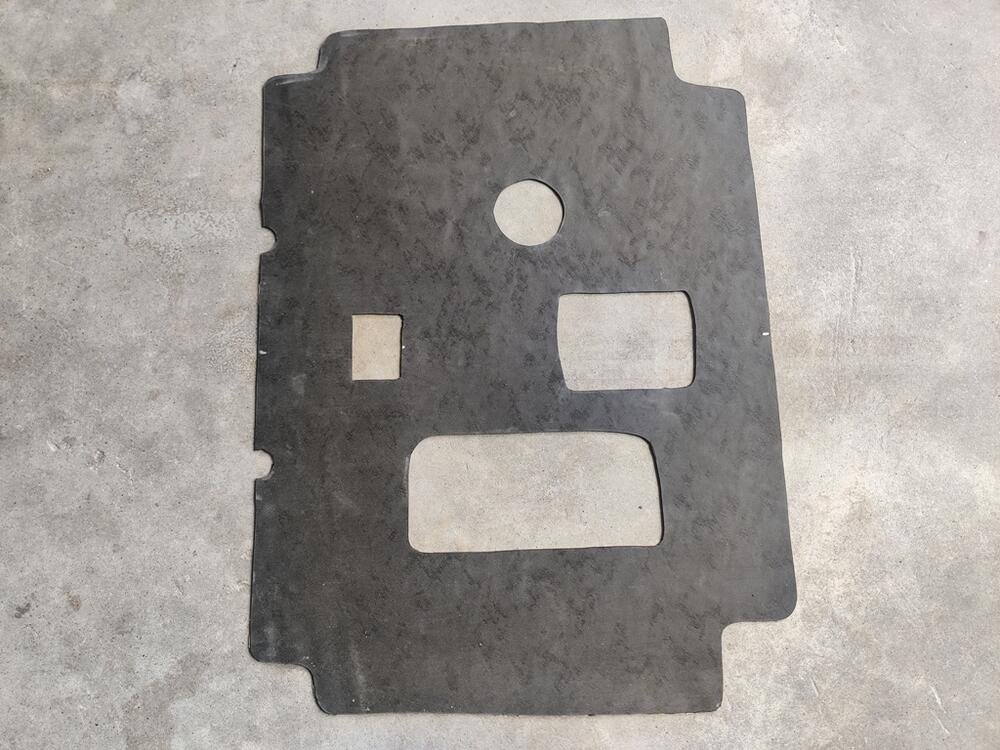
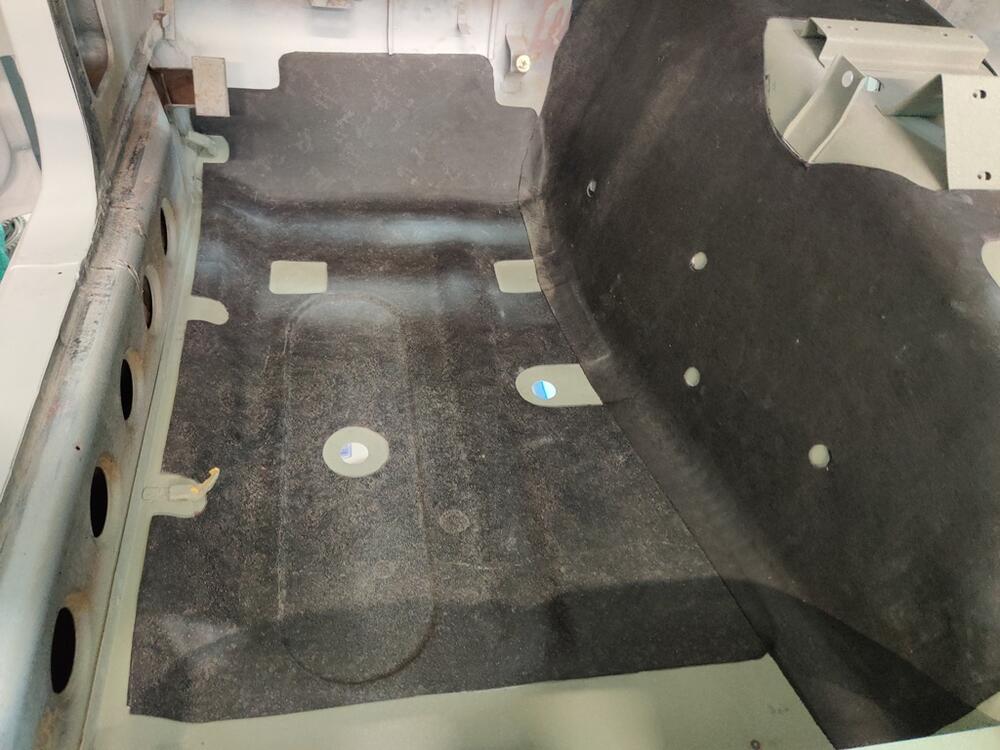
I picked back up on the work in the rear hatch area. I removed the remaining portion of the old sound deadening mat and found a bit of rust under it. I tried to remove it with a wire brush on a 4.5" grinder, and some hand sanding, but when you have the ability to strip with a "sand" blaster, everything else feels inferior when considering the result. Unfortunately, sand gets everywhere, so time for clean-up becomes a major factory. I should have stripped the rear hatch floor at the same time that I did the passenger compartment floor. I would have saved a lot of time in the long run. After sand blasting, I sprayed epoxy primer to the bare metal: I then applied the Second Skin pieces which I fabricated last weekend. The adhesive on this butyl rubber sound dampening is very strong. You have to be very careful when it first contacts the car to have it positioned correctly. After those were all in place, I used the backing paper from them as templates for the factory type of insulation. These templates are more accurate than my initial paper templates. When cutting the factory mat, I made the cutline about 3/32" outside the template edge. This makes the factory type mat a touch bigger and allows the edges to radius over/around the second skin mat for a slightly better look in my opinion. Finally, the effort to replicate the factory sound deadening mat is nearly complete, just a bit more to do at the firewall. I will be applying a 3M flexible seam sealer to all of the edges so that water can't get under it anywhere in the future. I am pleased with how it turned out. It is difficult, in my opinion, to distinguish it from the factory applied original, however it has the benefits of more modern technology - butyl rubber, strong adhesive, metal foil for heat shielding. The factory type stuff on top which looks nicer though and conforms to compound curves more easily. The resulting sound deadening is noticeably better.


-
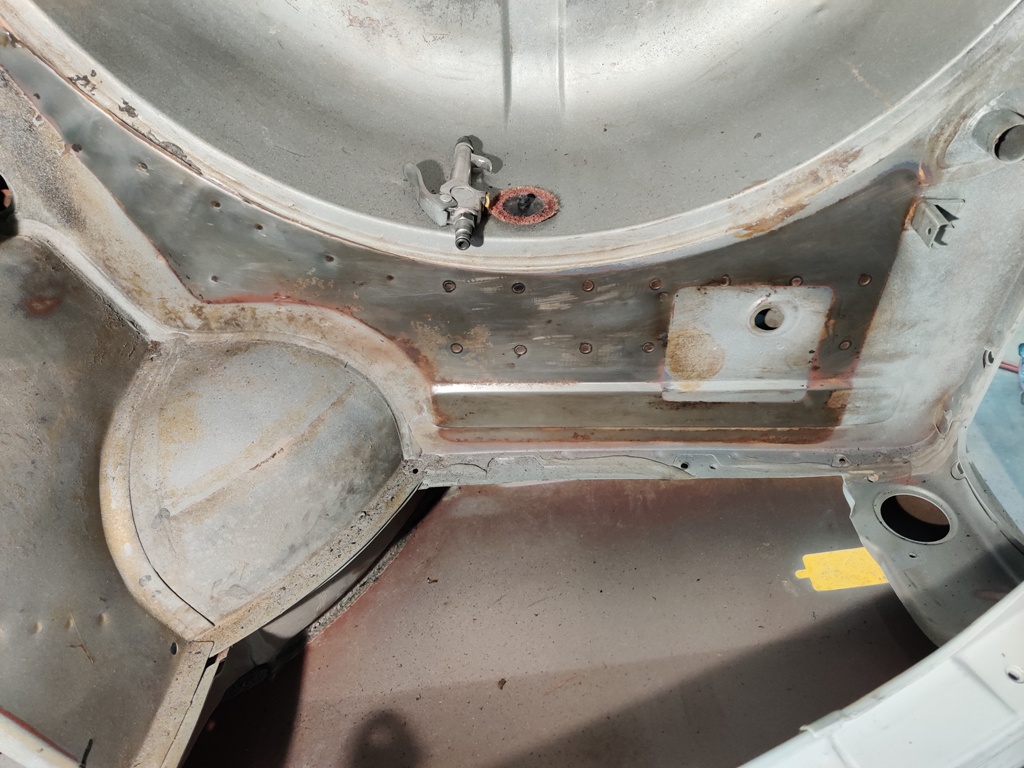
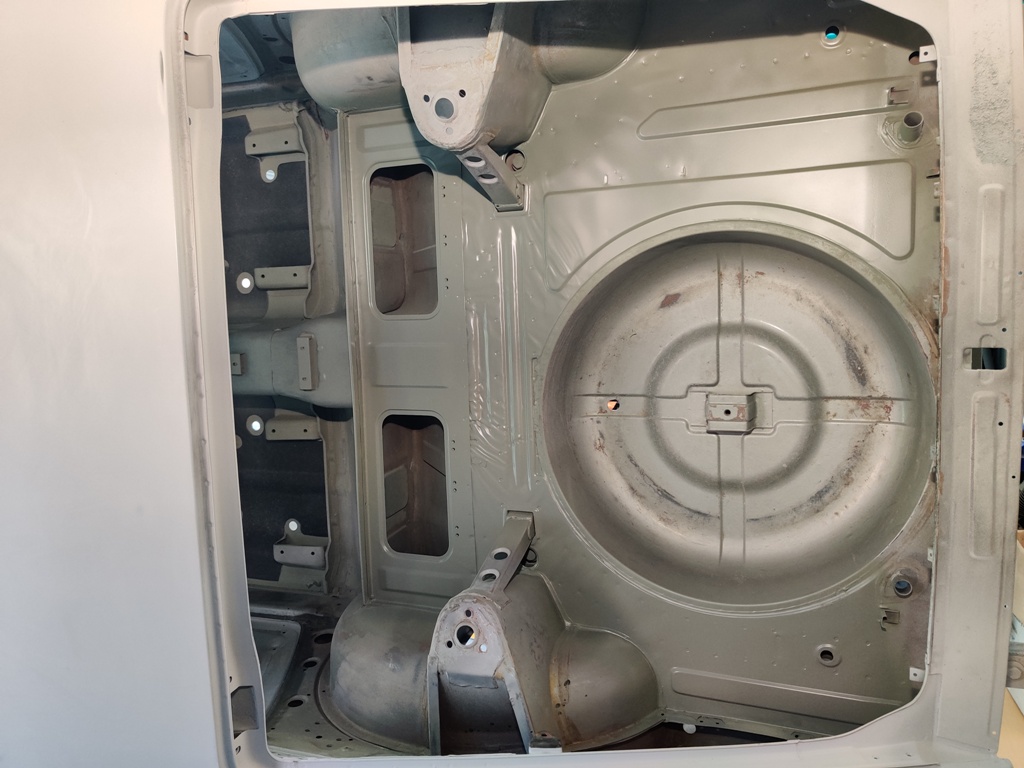
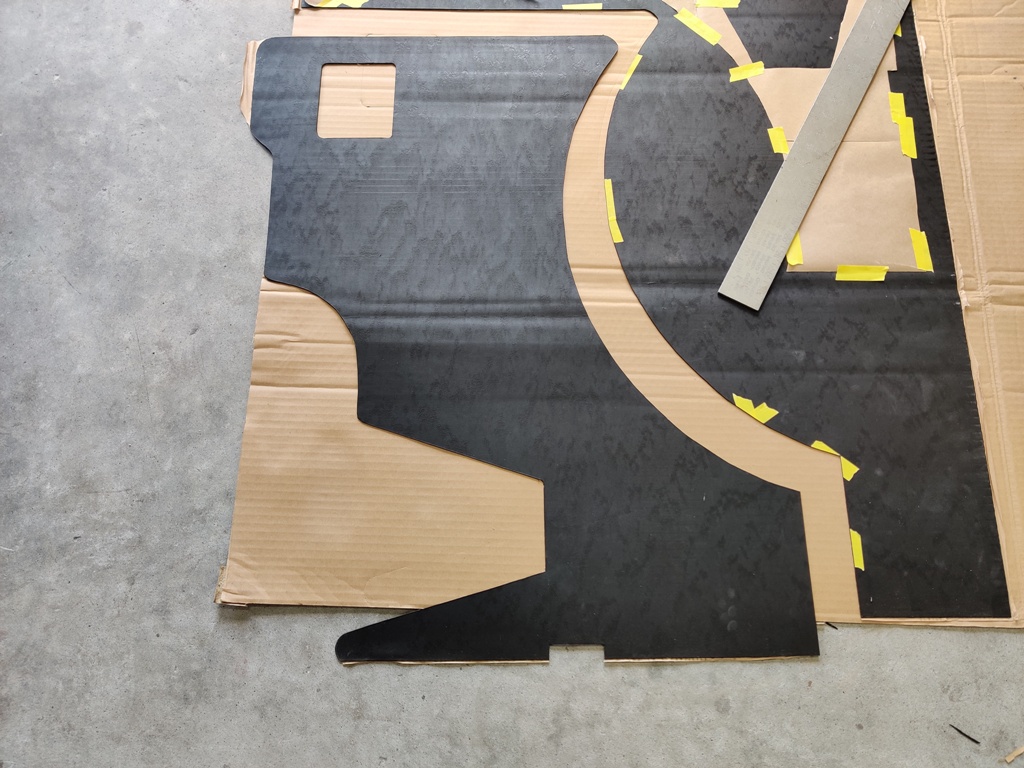
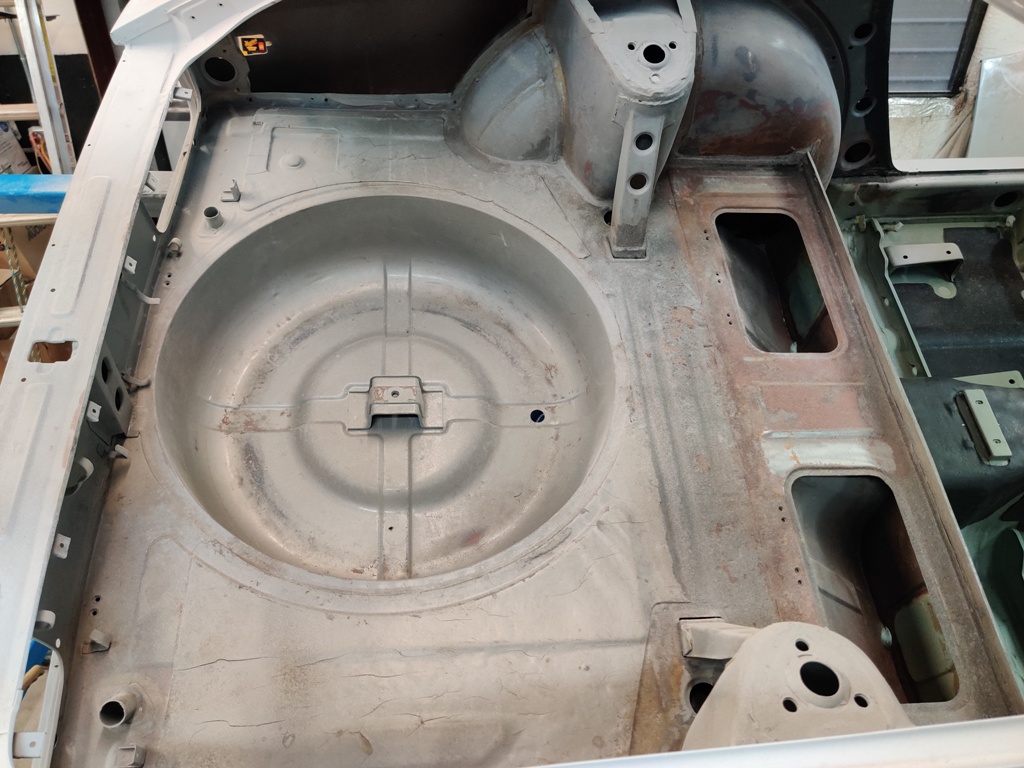
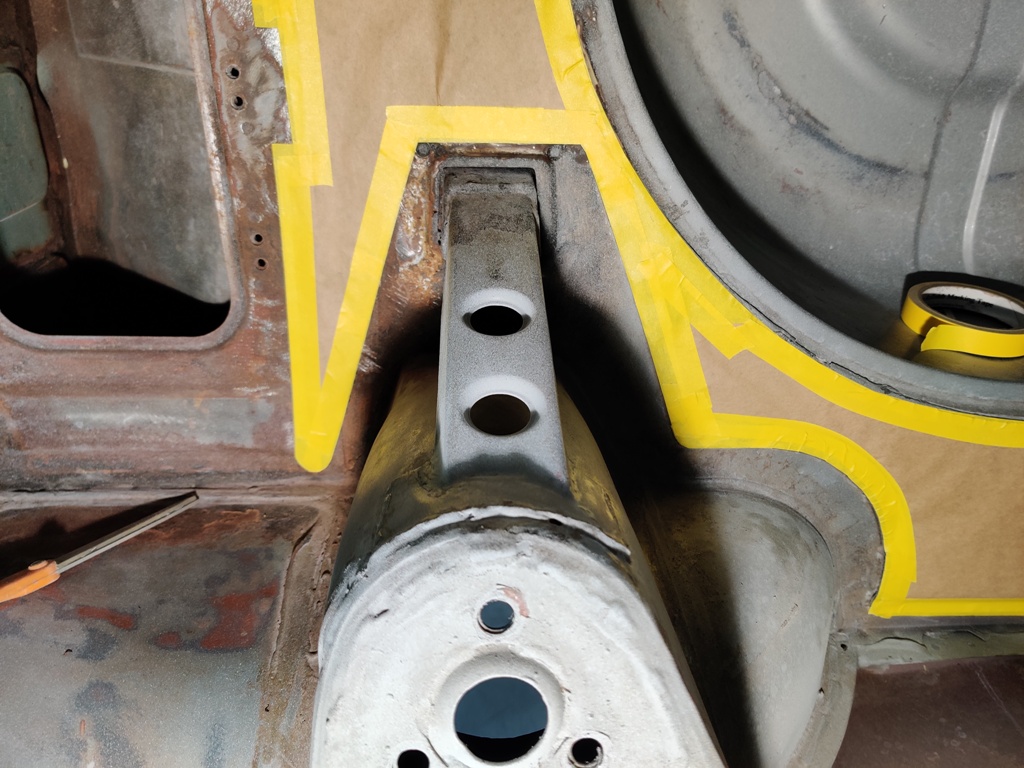
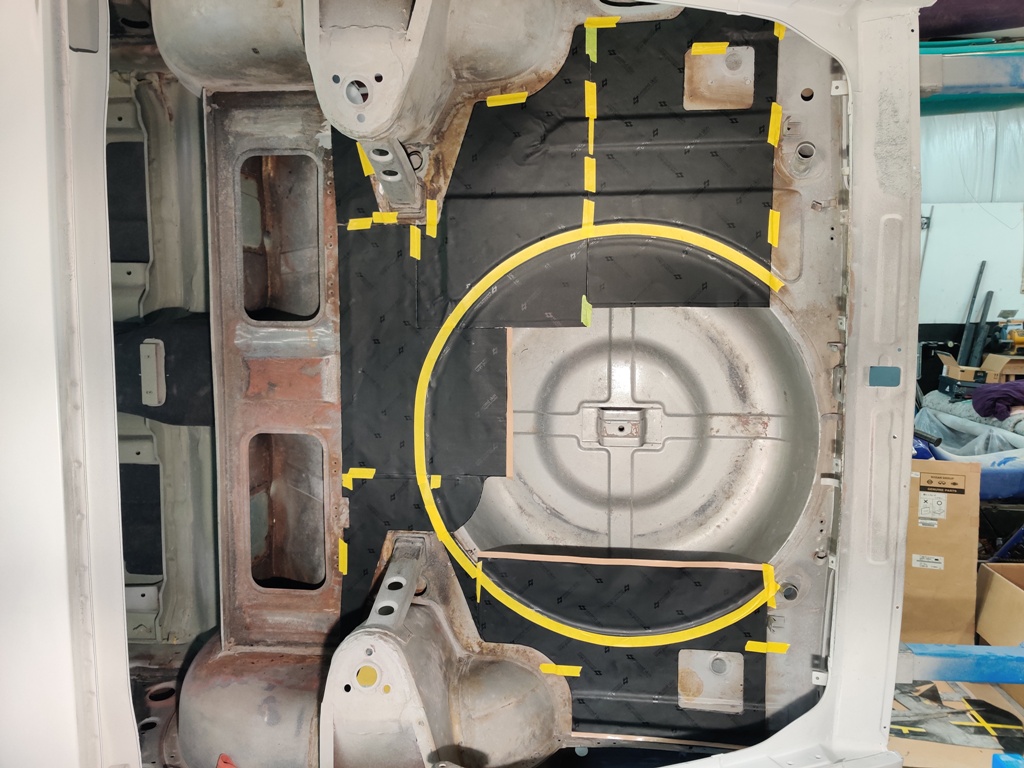
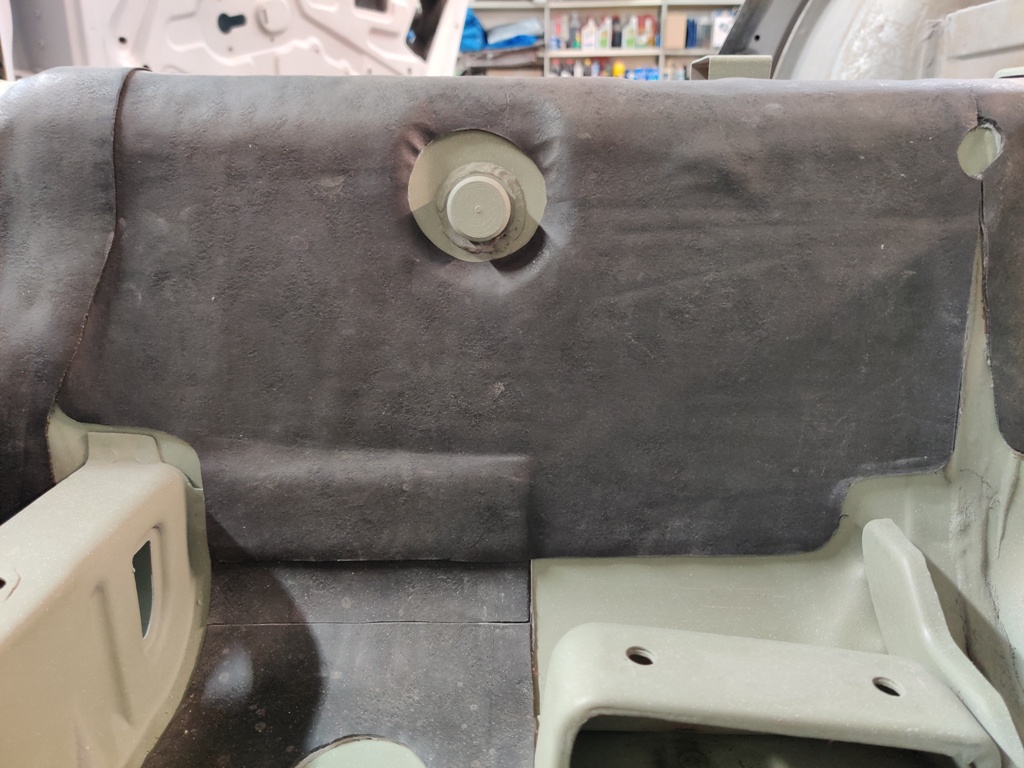
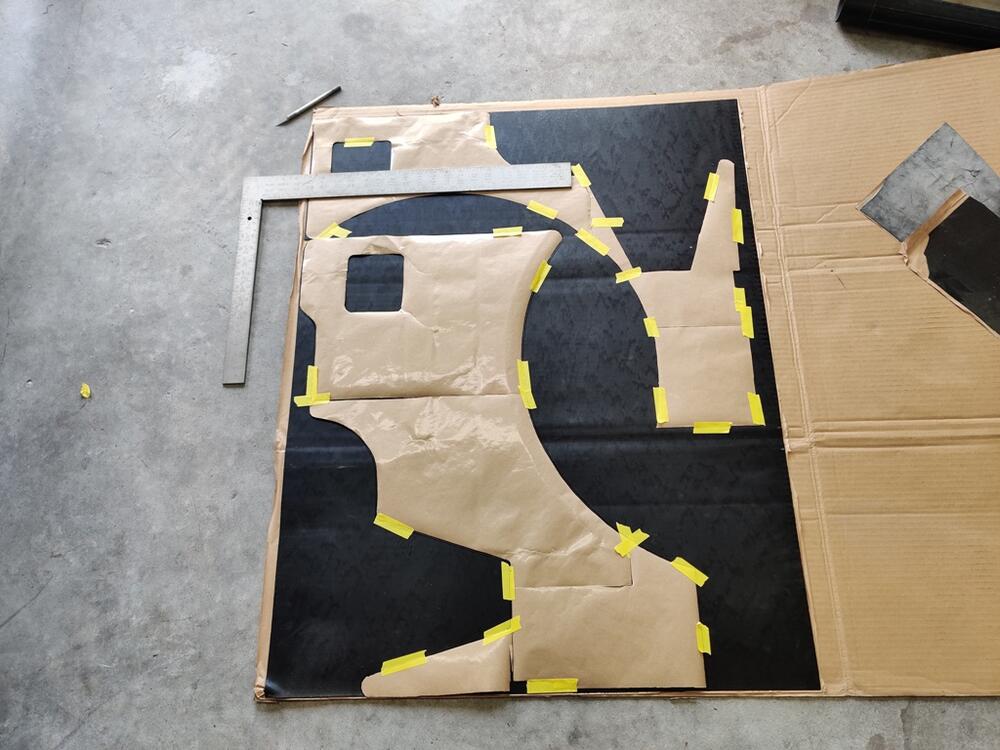
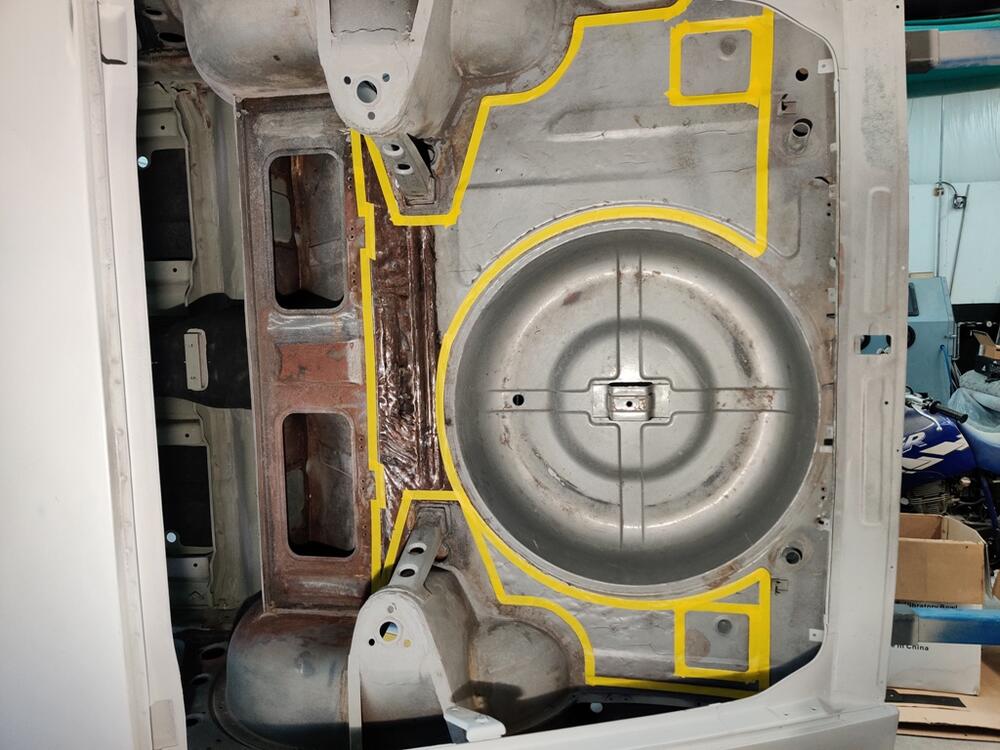
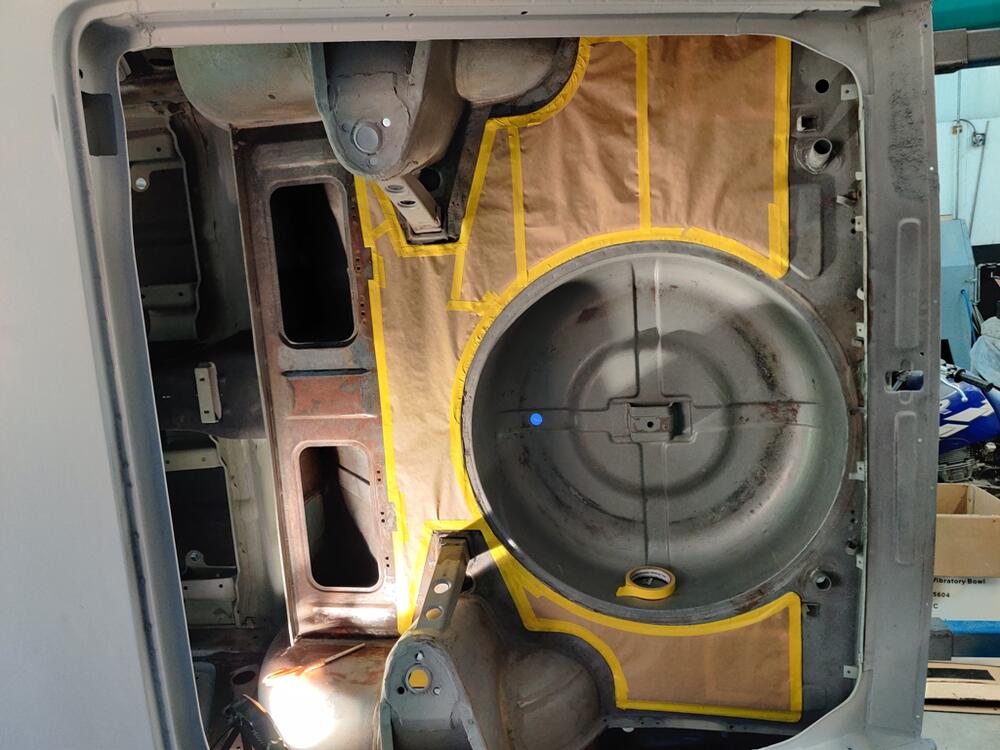
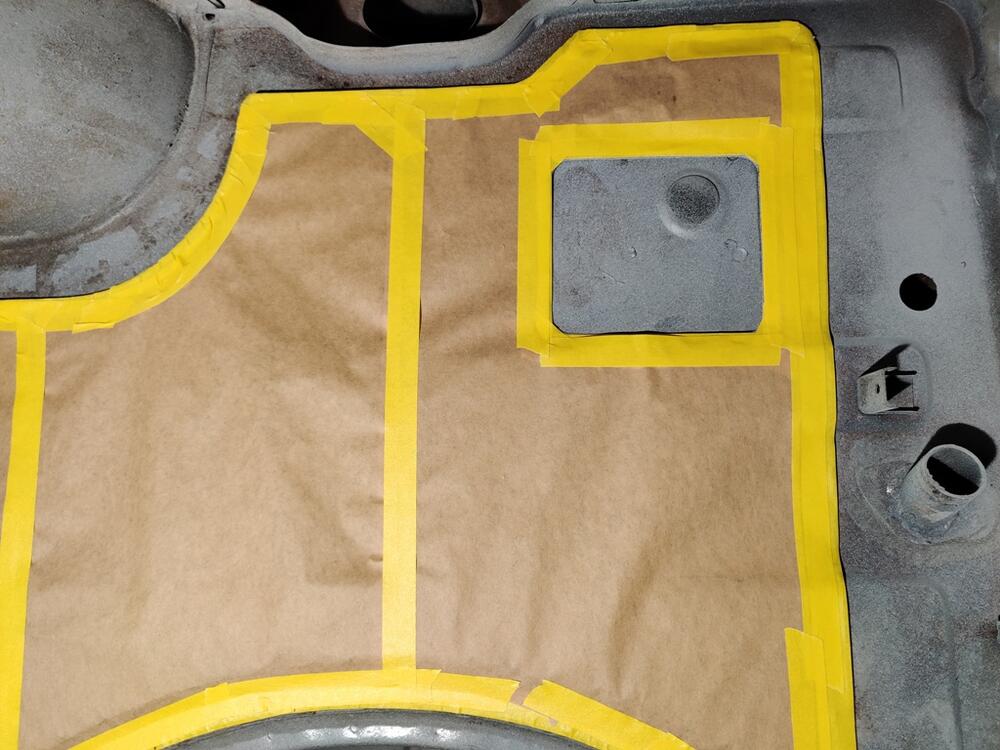
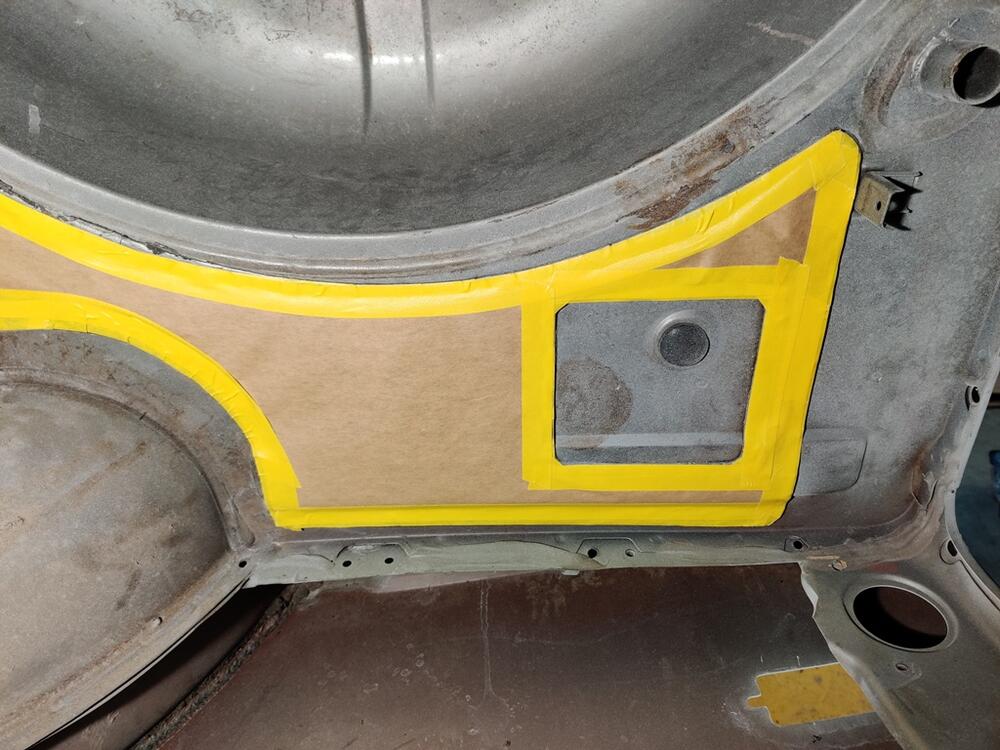
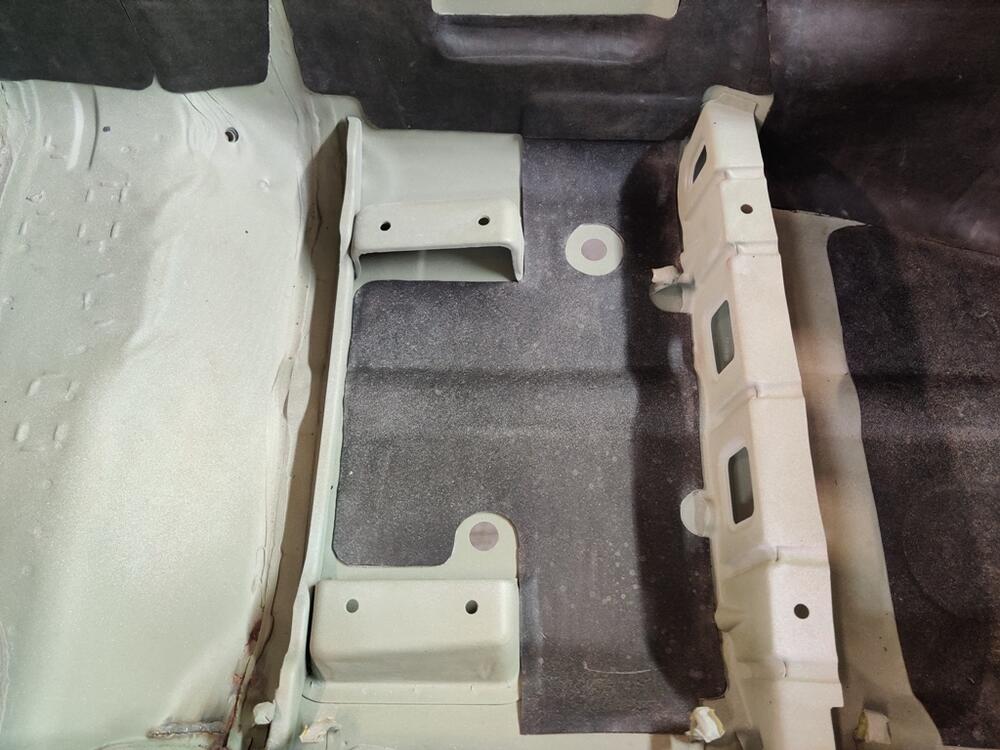
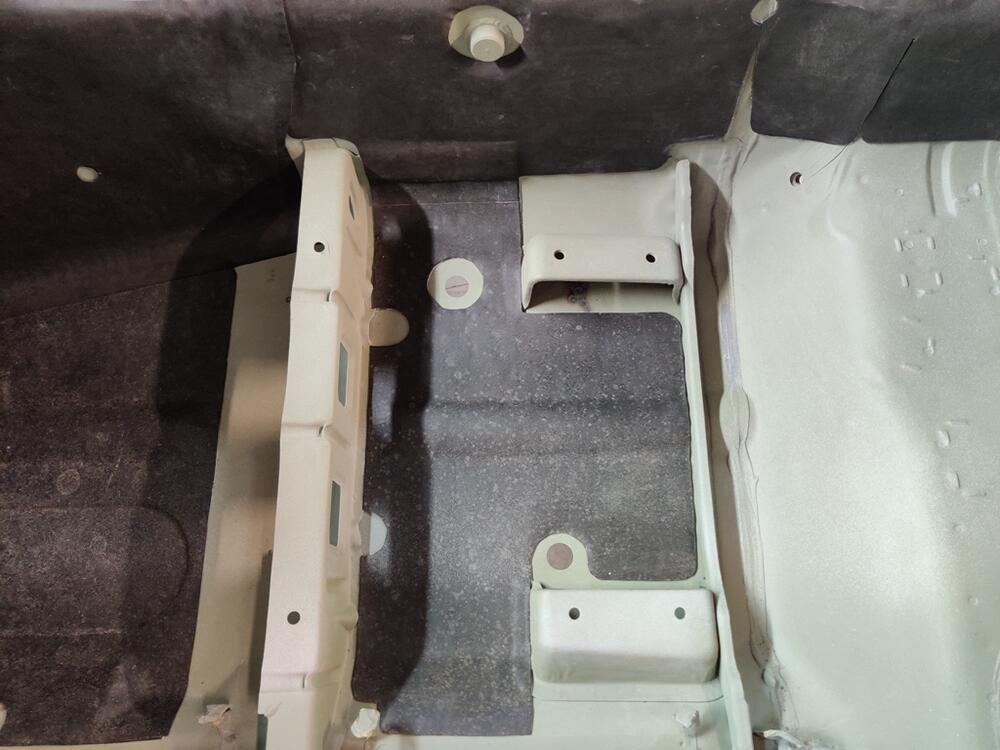
Thanks! This past weekend I started on the hatch floor area. In looking at the templates you created, I realized that those are for a series 1 car. So, they differ a bit from my series 2. Once again I had to do some investigative work, looking closely at clues on my car to decipher where the original sound deadening mat was. My car still had the mat present behind the shock tower, but the portion between and in front of the shock towers had been removed by a prior owner. After careful removal of some kind of black coating, likely applied by this same owner, I was able to see where the original mat use to be. The original silver paint outlines where it was. I started applying tape so I could make a template: The outline was taped off. Then masking paper was used to fill in the outline. Next, I removed the remainder of the factory sound deadening. Then, I used the template to cut the Second Skin mats. The adhesive backing is still in place on each mat. Fitment was done first with each mat held into position by using masking tape. Next, I will properly strip the hatch floor so it is prepped for a coat of epoxy primer.


-
Decided to switch over to installing more "tar mat". Where I left off was with the passenger compartment floor surfaces finished with both a layer of Second Skin mat and a layer of factory mat cut and installed. I had only installed the Second Skin on the tunnel. So, cut and installed the factory mat on top of that on the driveshaft tunnel. I didn't take as many pictures showing step by step progress, as this is a repeat of sorts of similar prior work. A bit of finishing work is needed for the front tunnel piece where it meets the fire wall. After that, all that is left is the rear hatch area.


-
Top notch, Mike! Well done. I haven't taken the time to make my own template for the hatch area yet. The other ones I have already done and mostly installed replacements (linked if anyone would like to check that out). I will benefit from your work and sharing here. Thanks very much.
-
Ah. Yeah, I can see that. I like your solution. I will take some extra care with gluing the pads in place and will apply sealant around the edges of the foam to keep water from getting in under them.
-
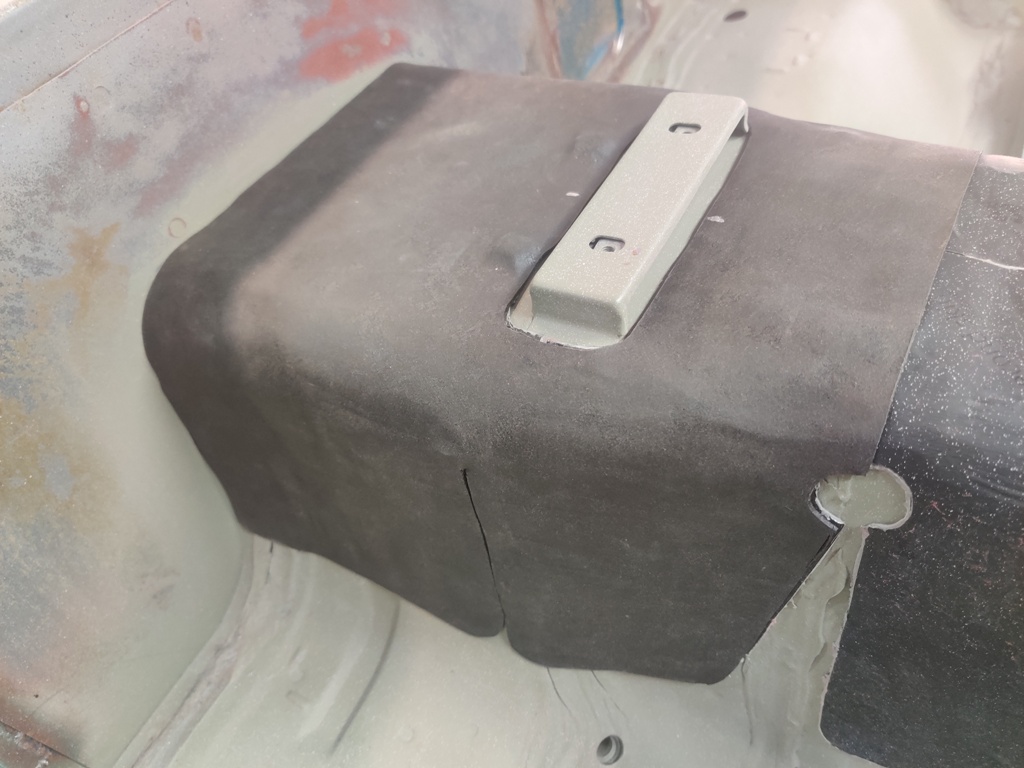
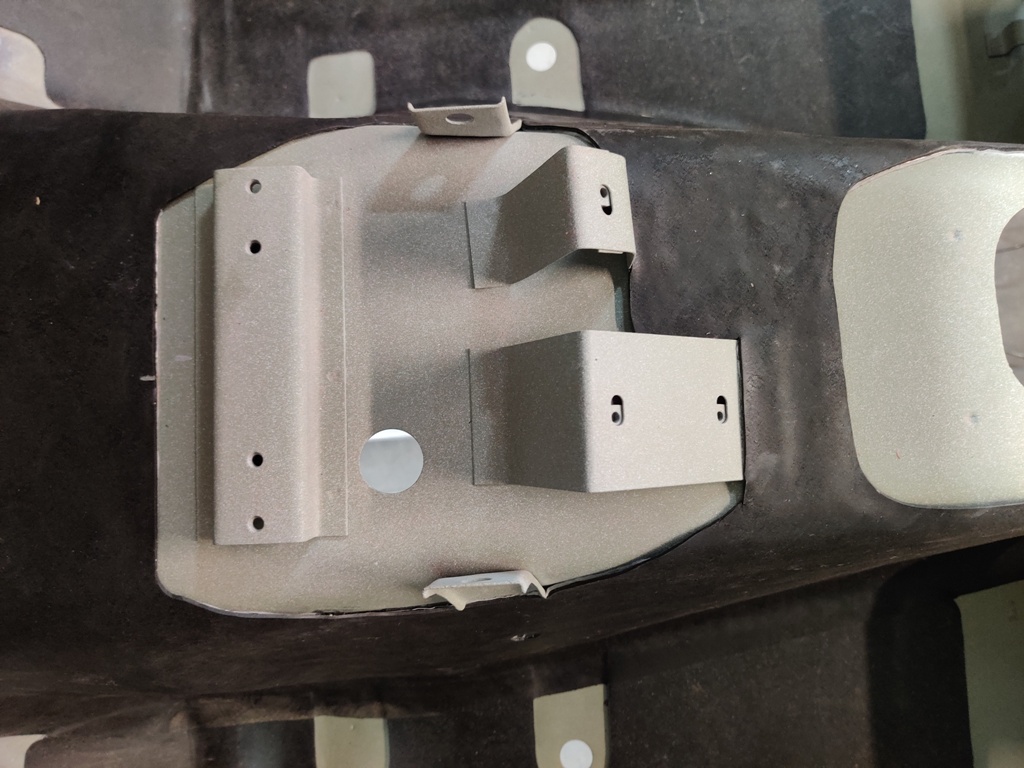
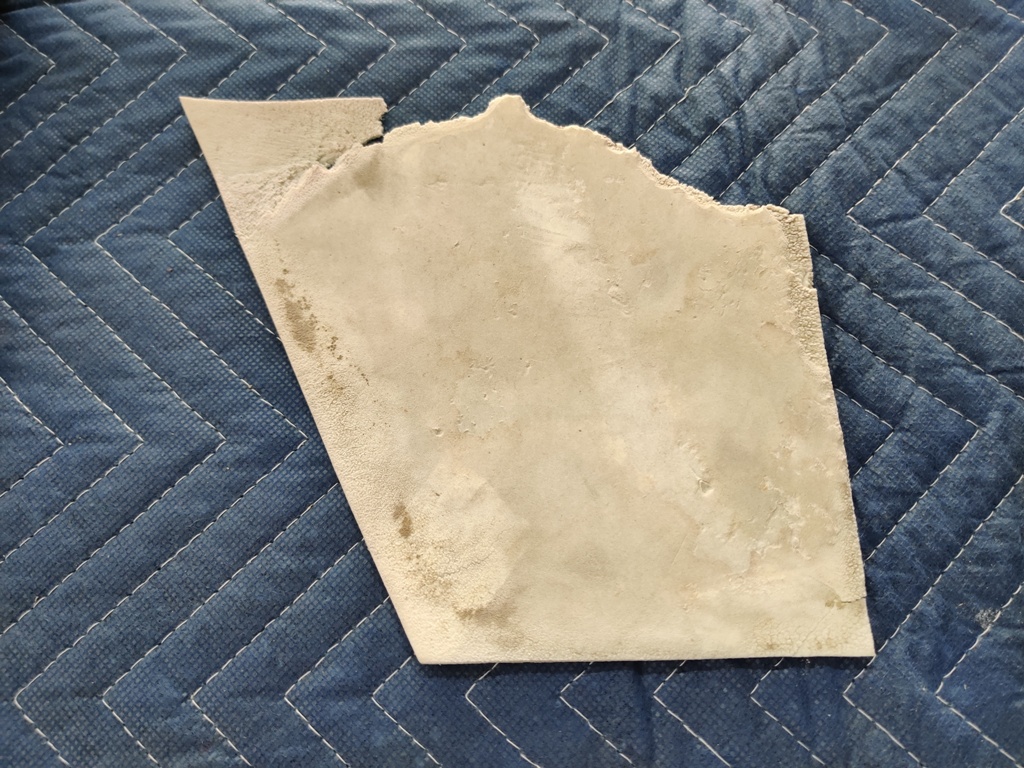
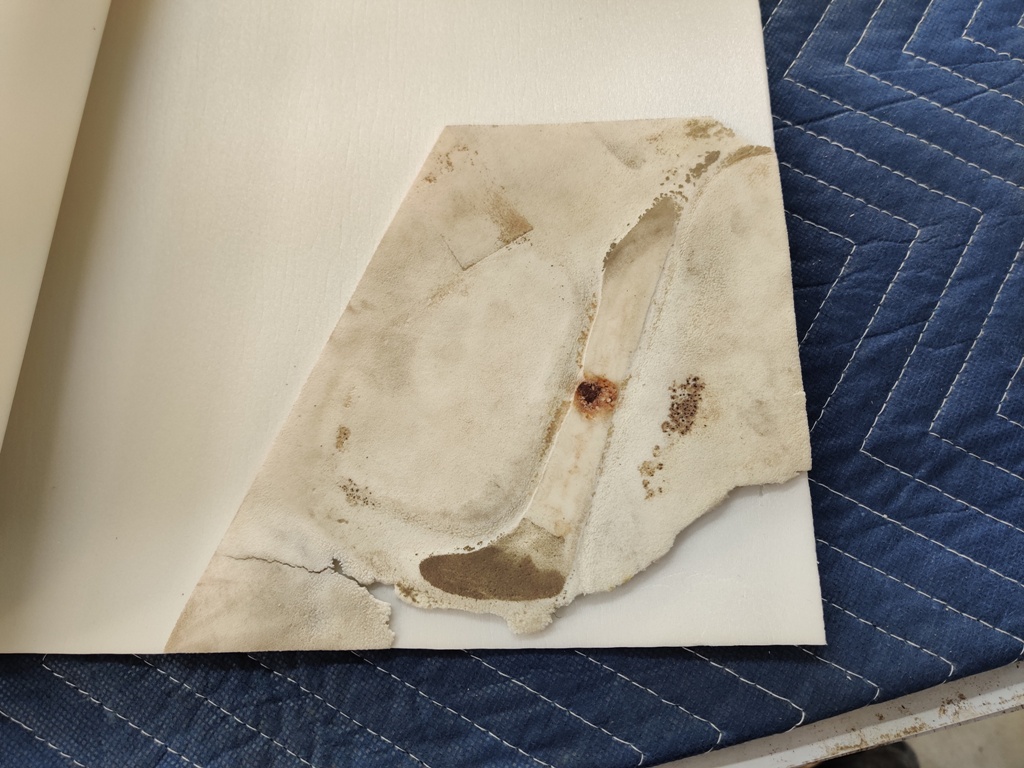
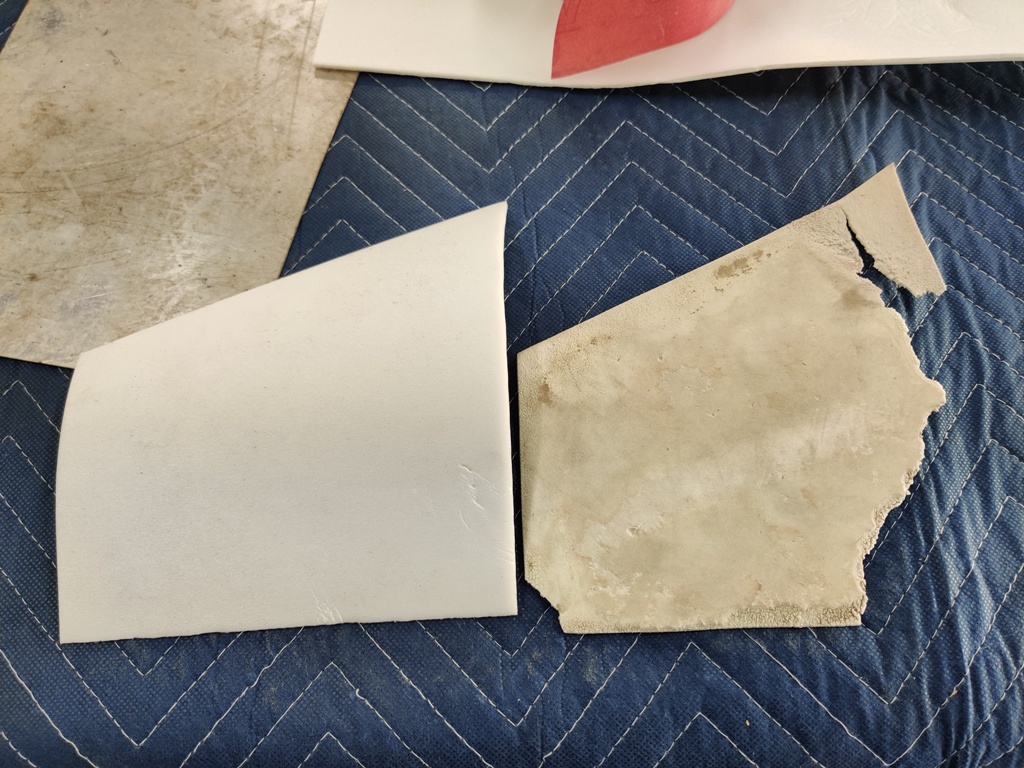
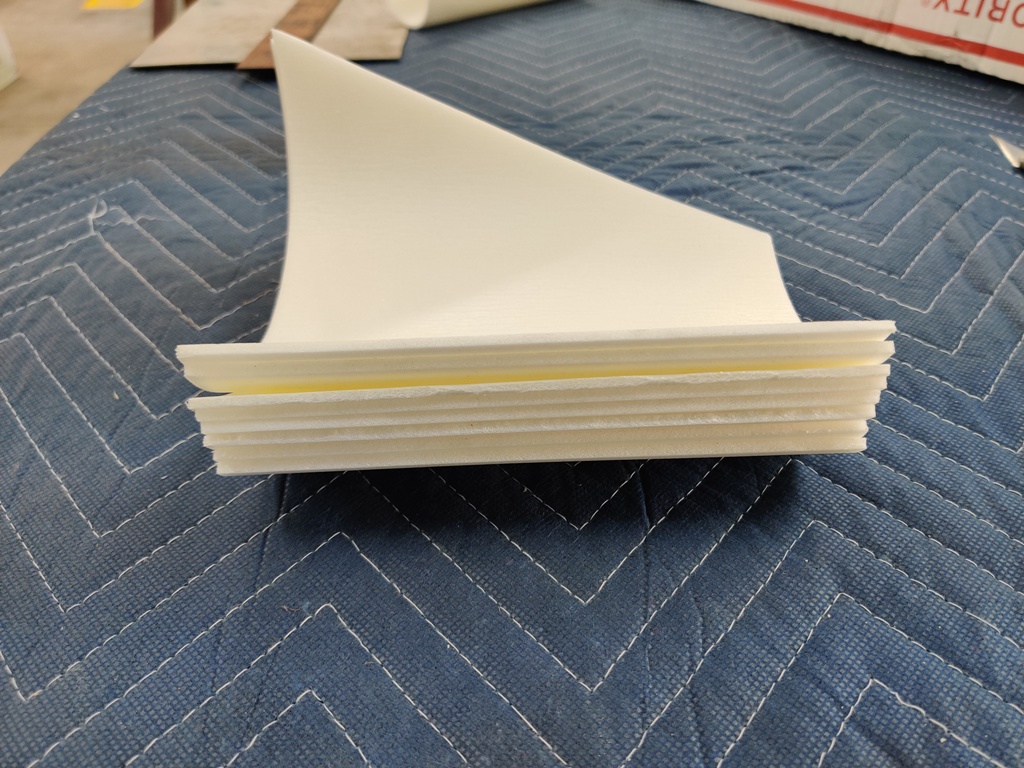
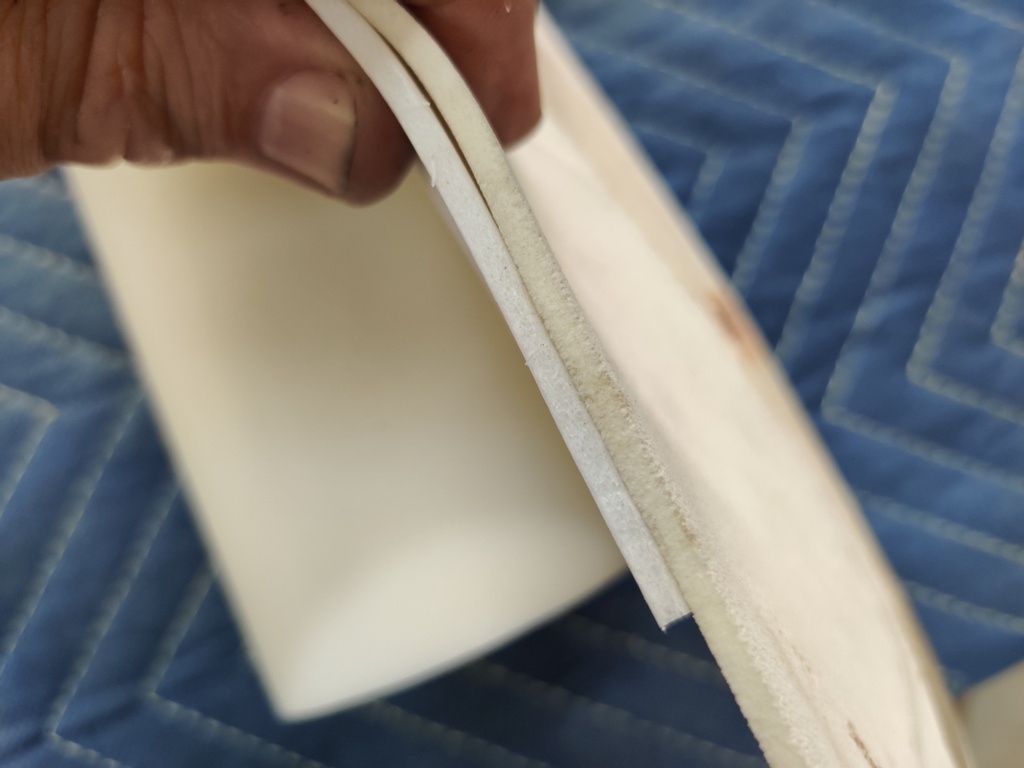
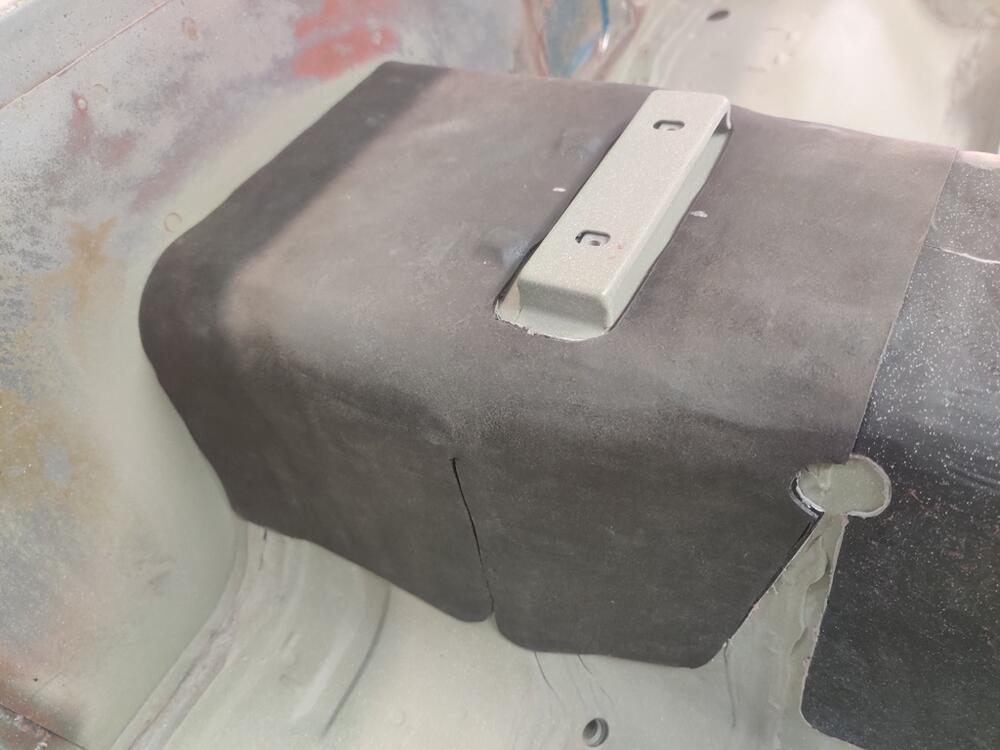
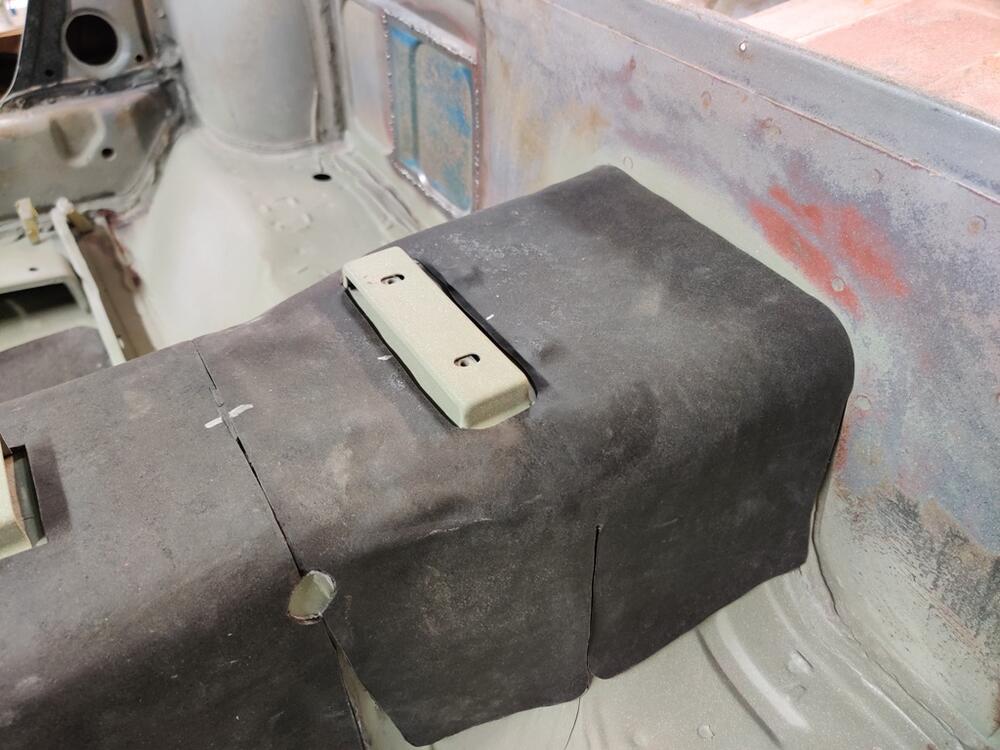
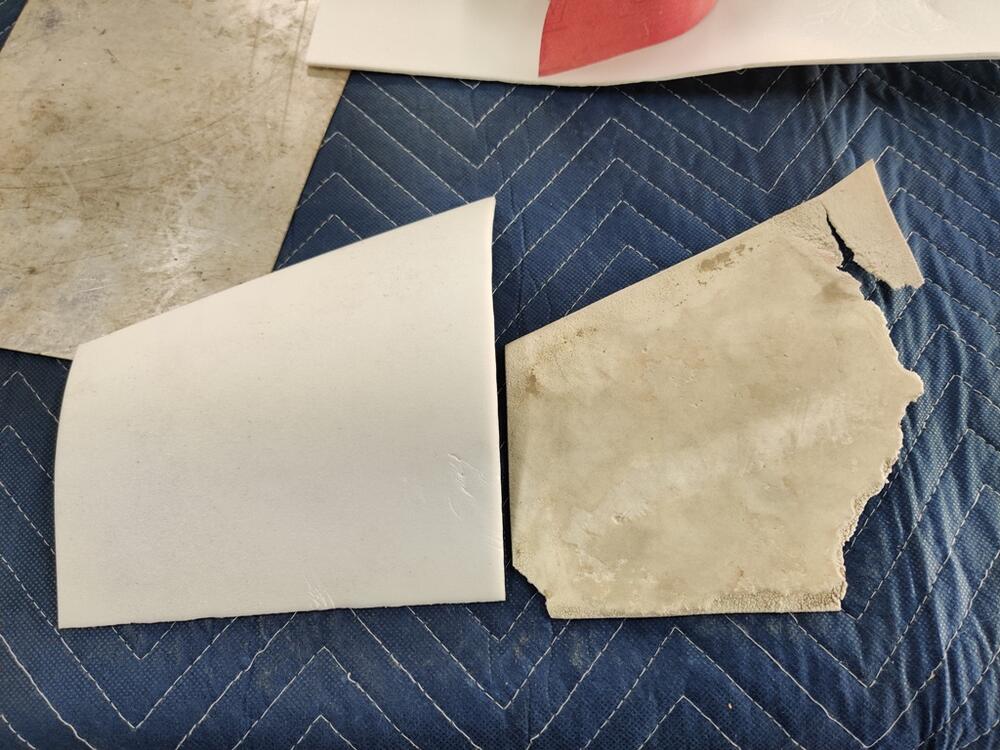
I took a break from working on parts/hardware prep this weekend and worked on a few other projects. My plan is to finish up with that prep and send everything off for plating in a week or two. When I get everything back, I have some sheet metal that needs to be bolted to the car a final time before commencing on the last round of priming and blocking. Some areas of panels "move" significantly when they are bolted in place. This is true of the fenders, and especially the cowl panel... which brings me to a cool little project I did this weekend. From the factory, Nissan installed some closed cell foam under the flat corner areas of the cowl panel of my car. It wasn't there on very early cars, but was a production change. This foam sheet is sandwiched between the unibody and the cowl panel eliminating an "air gap" which can cause the panel to vibrate. I am quite pleased to say that I have found replacement foam that I honestly can't tell apart from the original, other than it is new of course! It looks the same, feels the same, and has the same density (to the best I can feel). I made up some replacement pieces today: Old for first pic... then old on top of the new sheet for the second pic... and pic showing thickness of old stacked on new: It's great when something goes so well. I made some extras. If anyone is interested in a set, let me know. Be aware that if you've done final body work or paint on your cowl panel without your foam pads, installation of these will likely move your panel somewhat. Best to utilize them during final bodywork prep. When I get the hardware back from being re-plated, I will be able to bolt on the cowl panel with these new foam supports which will positively locate the flat areas of the panel so that I can proceed with the final sanding required to get it prepared for paint.


-
Another possible source is Motorsport Auto. https://www.thezstore.com/page/TZS/PROD/classic08f03/40-2691 I have read that there are two manufacturers of replacement foam. I confirmed with the person I spoke with at Motorsport Auto that the version they sold me was made (or sold) by Distinctive Industries, makers of a good quality replacement re-upholstery seat kit also. You want to be sure to use both the seat kit and foam from the same manufacturer to avoid issues with fit. I believe the other manufacturer is "Seatz".
-
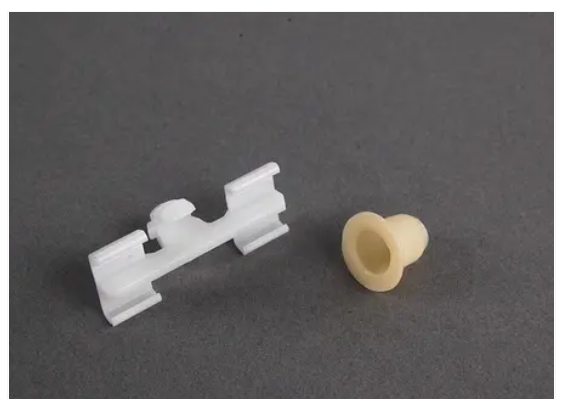
Ha! Some of it is obsessive - no doubt. I appreciate your input. My first car was a 4-door 510. Being just 16, it was a prized possession, and I used to wash it about every week. Water got into that car and under the floor mats something fierce. One day, to trace the sources of the leaks, I set up a hose so that water showered down heavily on the car. After about 20 minutes, I got inside and looked to see how water was getting in (I had removed the kick panels and floor mats, etc.). I was quite surprised to see that a main point of ingress was one of the bolts clamping the LF door hinge to the car. A steady stream of water was wicking along the bolt threads from outside to inside the car and running downward from there, collecting into a pool on the floor. Interestingly, though I thought the windshield seal might be leaking, it was not. I also recall finding that if I pointed a spray of water from the hose at the c-pillar vents, water would fly in... it would get directed upwards by the internal part of the vent, and then drop down onto the trunk floor, where gravity would direct it to the lowest area under the rear seat bottom. When I restored my first 240z in 1993, I had to reconstruct the dog leg areas of the car with new metal. A few weeks after I got the car painted I was shocked, and upset to find standing water in the dog legs of that car. I couldn't figure out how it was getting in and just drilled a hole in the bottom of the dog leg area so the water that was collecting there would drain out. For this car, I'd like to know that when I wash it, or if I get caught in a thunderstorm with it, no water will enter through the emblem holes and dribble down into the dog legs, or down into the back edge of the rear hatch. Newer cars tend to utilize water proof solutions like this BMW clip, which utilizes a rubber plug, of sorts: Given my previous experiences, I figure I might as well address these known water entry points.
-
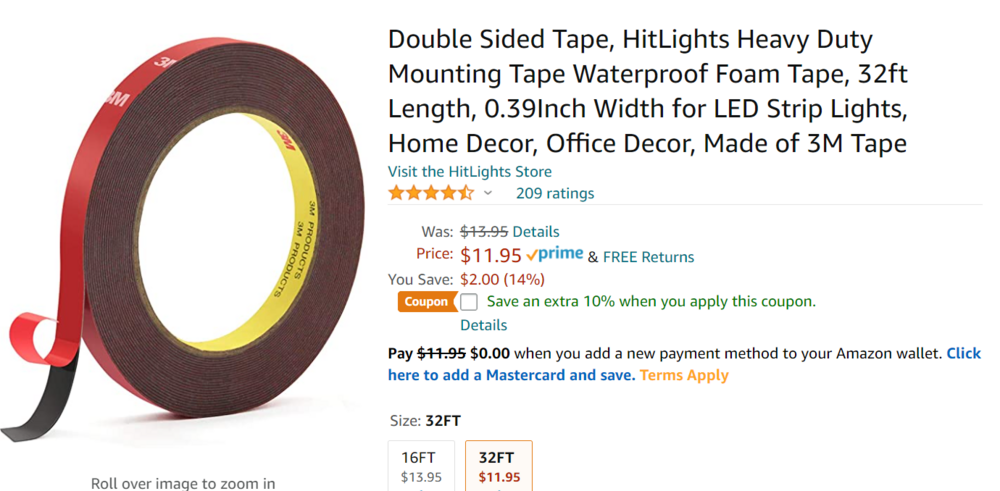
Instead of the tubular clips? Hmmm. Or maybe just make a gasket of it around the posts and still use the tubular clips. I've blobbed on clear silicon before and crossed my fingers that it sealed. It makes a bit of a mess. I am looking for something I can be more sure of getting a waterproof seal. Are you thinking this? https://www.3m.com/3M/en_US/p/d/b40069443/ Or maybe this?
-
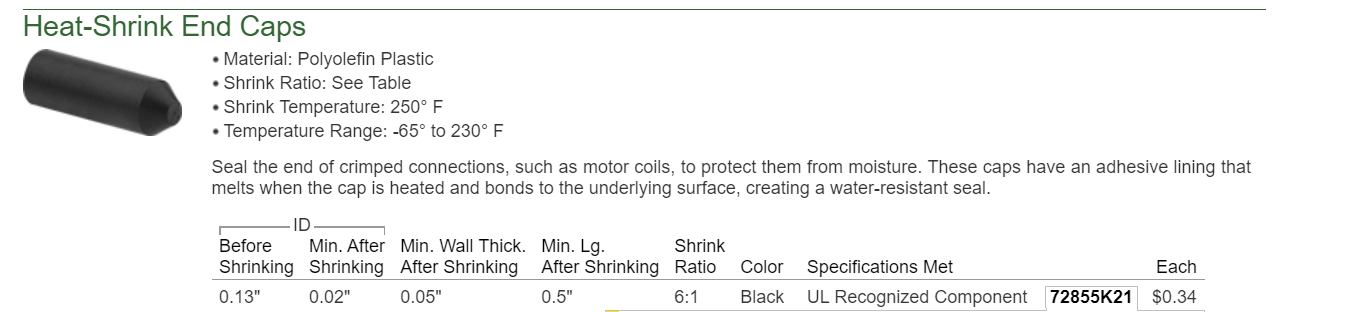
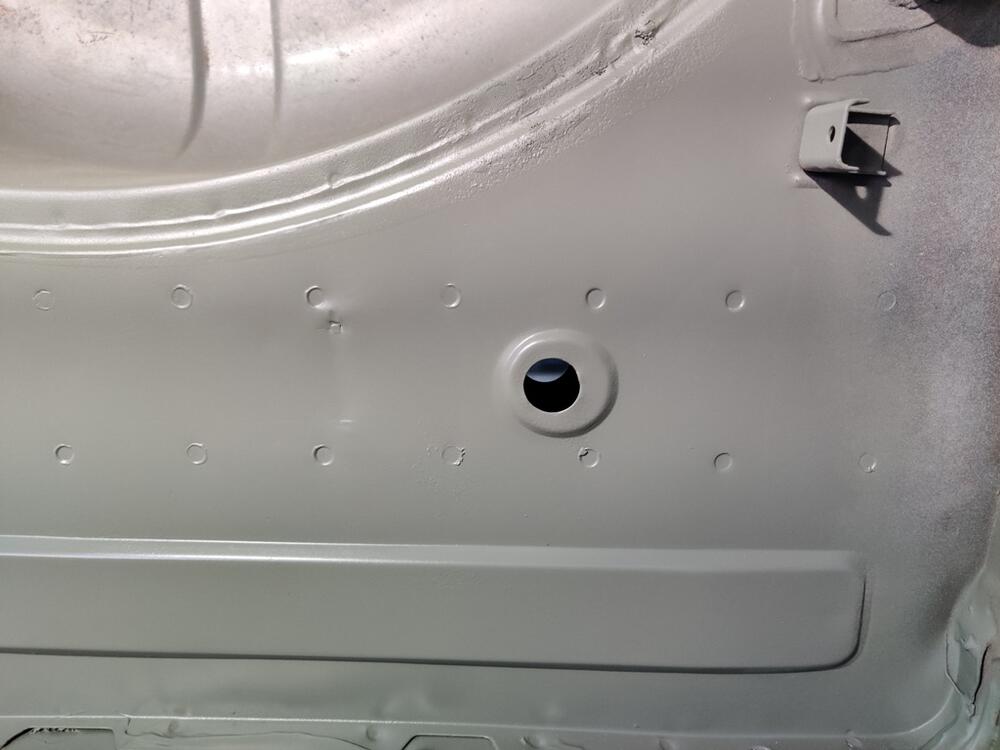
One of my goals for the car I am restoring is to address points of entry for water into the body of the car. If you look at the design that was originally used for the emblems on the car, (hatch panel and quarter panel in particular), it is obvious that water enters through the holes in the panel. I've been thinking of a way to seal them. These may be a good option. I am thinking of continuing to use the factory metal clips on the posts of the emblems, but to put these on and heat shrink them around the clips. I think I will give it a try on a test panel. I need to come up with a few other things for my order with McMaster-Carr.

-
The 240z hardware Google sheet has been updated. I spent some time organizing, and more hardware has been added. For organization, I have added some sections and grouped the items within each section. And I have ordered from top to bottom the sections in the order that I plan to reassemble the car. I am curious if with the existing permissions, any of you can expand and collapse the grouped rows. Also, I am curious if the filters on the column headings are functional for you.
-
Hmmm. Well, I thought I put a link when I commented earlier today, but I guess not. I just now added it to the post.
-
I know you were asking CW240Z72, but I will post my Excel spreadsheet for sure. It just isn't "finished" yet. So, I made that Google version which anyone should be able to access in the link I provided if they have Google account. The link can be shared with anyone. If it helps, I can upload an Excel sheet, but again, it is not complete and will need to be updated and then reuploaded with each round of changes/updates. The Google version at that link will update whenever I make changes to it. When it is "done" I will certainly upload an Excel version for those who want to consume it that way. I have all my zip lock bags which are labeled with where they belong (they are currently empty 🙂). When I get the hardware back from the plater, I will fill the bags with the correct hardware, and during that process, I will take photos. I'll attempt to find a way to associate those photos to the entries in the Google sheet, so it is easy to find the hardware info, and easy to click to see picture(s) of those as well.
-
Pictures are cool. How do we take this to the next level as a resource?
-
What is CLR? I use a heavy duty basket from Skat Blast for the media blasting. I string some parts onto a wire to keep them from moving around too much. How do you wire wheel small parts? I can't hold on to them and wire wheel them without worry of wire wheeling my fingers! I used zip lock bags to keep things organized as I dis-assembled the car. I've created a sheet like you describe also. I will update this google sheet version from time to time until it is complete for my restoration project. Maybe we could consolidate if it makes a better version. When I get things back from the plater, I plan to put all the hardware back in the respective zip lock bags. I think it will take a few months for me to re-assemble everything after the car gets painted.
-
Have any pics of the parts after plating?
-
I talked with Irina at TFC a couple of months back. When I told her I prepared the hardware by bead blasting and tumbling, her reaction communicated to me it was clearly unusual. I didn't ask much about their process, I think because I didn't know the right questions to ask? All she said was to separate the hardware and label what type of plating color: clear, yellow, black, or olive drab. I will give them another call and ask them about their process given what I have learned since. I'd like to know they are going to put all my parts through their normal process, how they will handle the items with plastic on them, and some other things. I recall now that I got their info from Duffy Mahoney's thread. He said it was the third plater he has used, that Ztherapy used them, and "If zinc is intact and oxidized or whatever, then I don't do anything. Rust has to be removed, paint has to be removed, some places can acid bath before, so not much prep is needed at all." Consistent with what others are saying here. I am curious what kind of finish is achieved just from muriatic acid and neutralizing. Shiny?
-
I watched a couple of Youtube videos of using muriatic acid. Looks like that stuff has some pretty serious fumes. And it can cause "everything in the shop to rust" if not stored properly. Can one simply store in a sealed plastic container? Do you typically use it outside instead of indoors?
-
I don't think I am exaggerating when I say I have probably 20 weekends of time invested in fasteners: going through all of my labeled zip lock bags, measuring and writing down details regarding nearly all of the fasteners on the car, identifying any non-original hardware that was on my car, replacing it from my 510 fastener collection (I was young ok... and I wrecked a couple!). I may have more than two hundred hours of glass bead blasting, lots of hours of dremeling, and a dozen hours of polishing with #0000 steel wool - all "invested" in prep for plating at this point. Today I spent a bunch of time going through all the boxes of parts on my shelves looking for any fasteners I missed. I found a couple of clips for side marker lights. I found a couple of clips that hold the chrome tail light trim bar to the lens. I found that my throttle rod that Paltech did is just ok, not great - so I will have it redone. I found a few other odds and ends. Soooo... I'd love to find out that my time spent glass beading and tumbling and steel wooling... was completely unnecessary. I am tired of it. And my restoration is just dragging on. I thought I had a chance at getting the car painted last August. Now it is this August, and I haven't done any additional bodywork since last year. I've got a 510 sitting in the corner of the garage that will go through a similar level of restoration sometime after I finish this car. It would be great to just dump all the fasteners in a couple of boxes and send them off, and have them come back like new. It sounds like that may be possible based on a few of your comments here. I plan to use http://tfcplating.com/. I forget how I heard of them. Anyway, if anyone can share more detail about their platers, maybe some before and after pics, then maybe I can discover the even easier way than my "easy" way of getting good results.
-
Thanks for these pics - again... I was able to reference them and bend my front tube to the appropriate shape using this reference. I appreciate it.
-
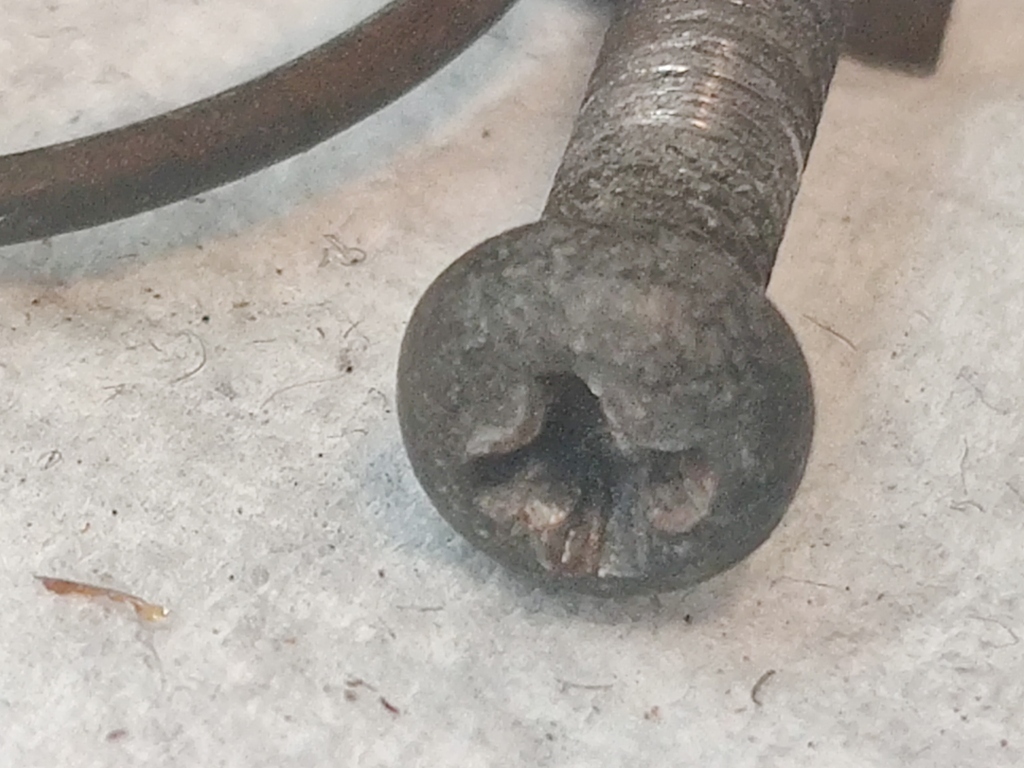
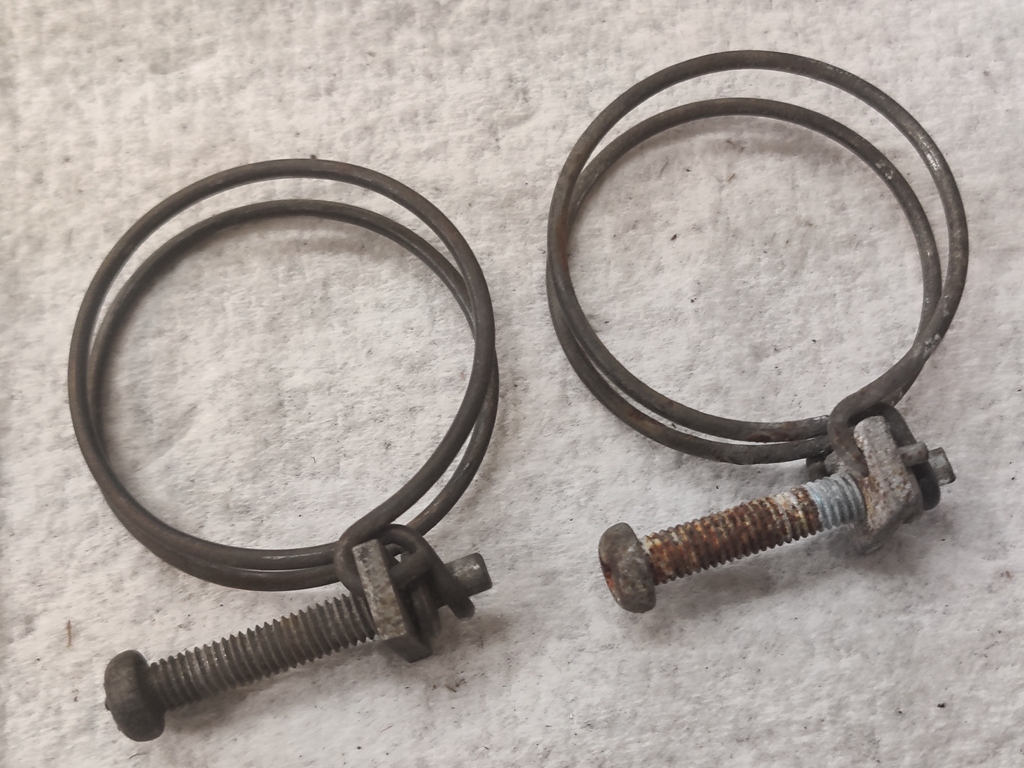
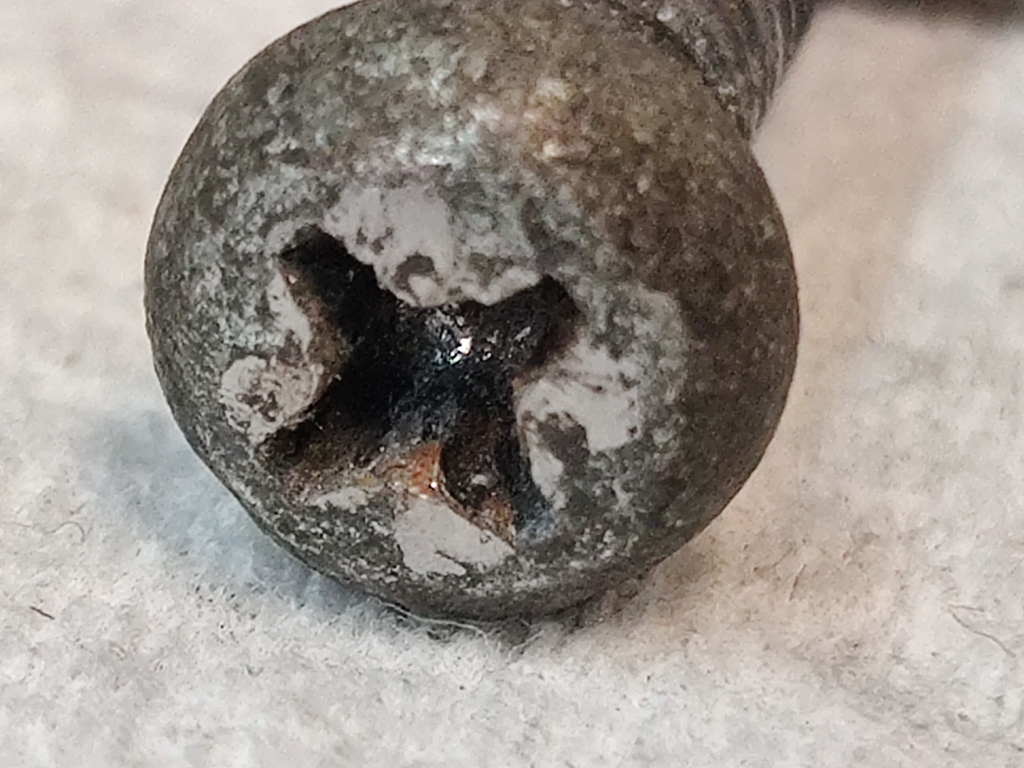
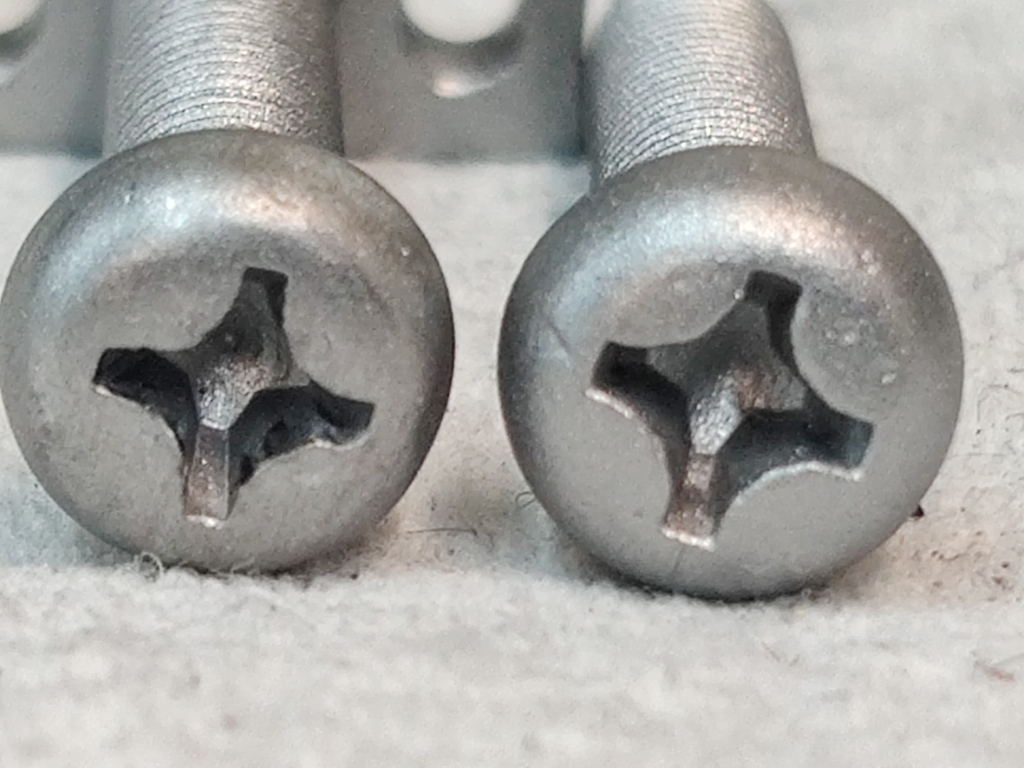
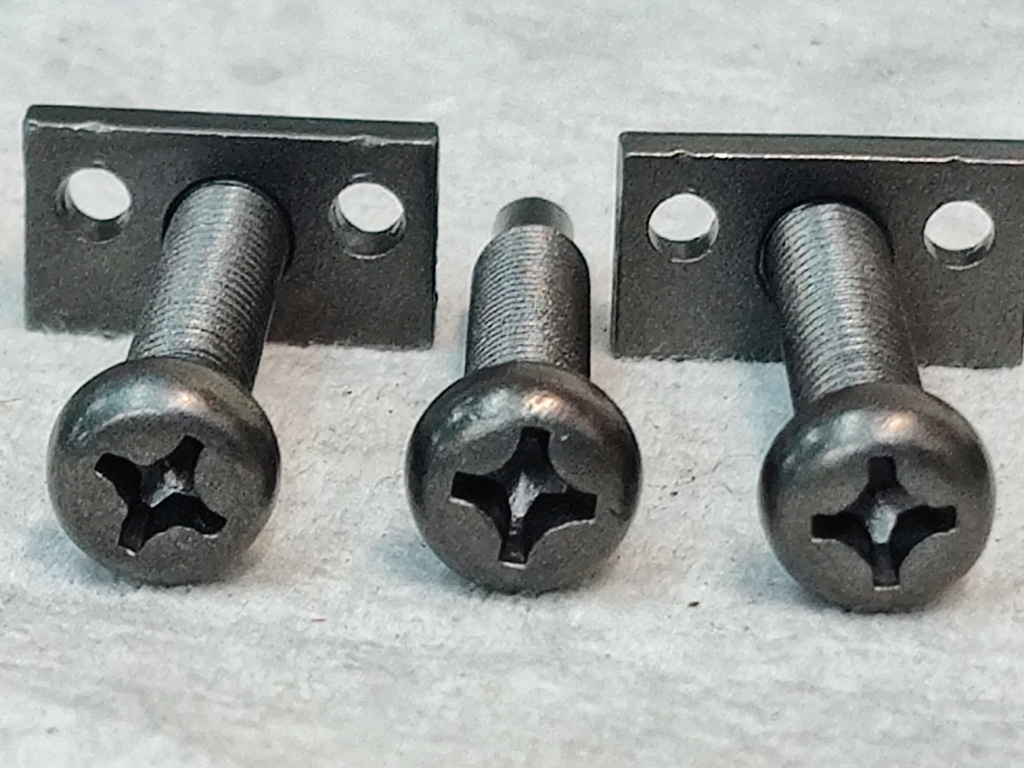
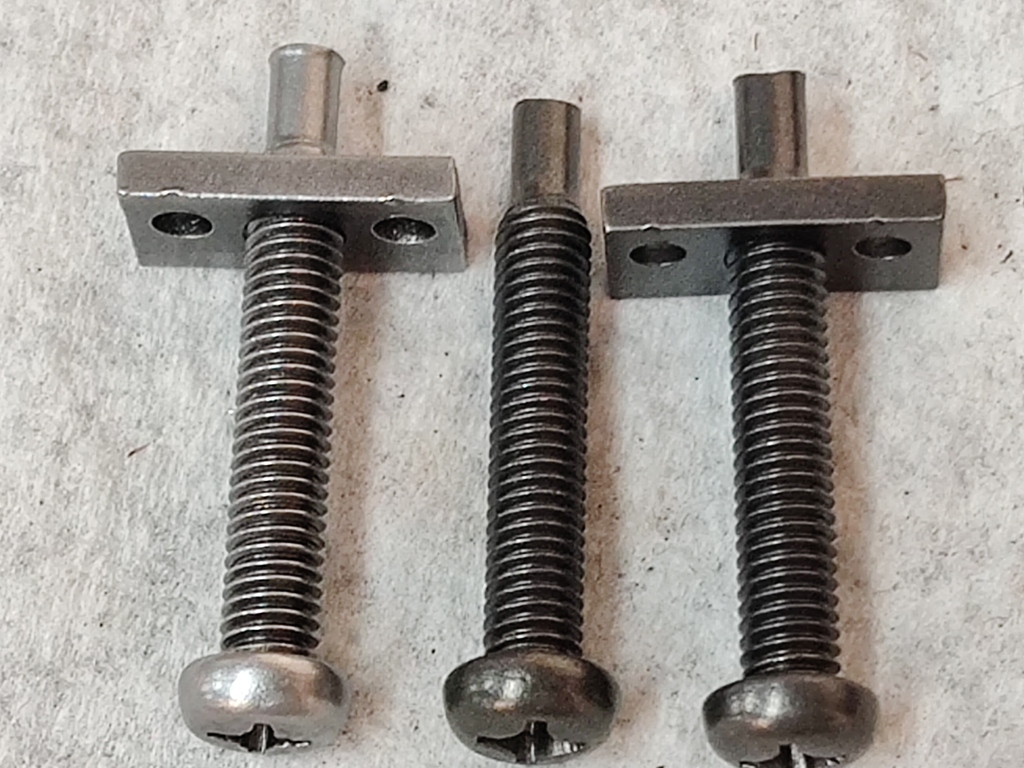
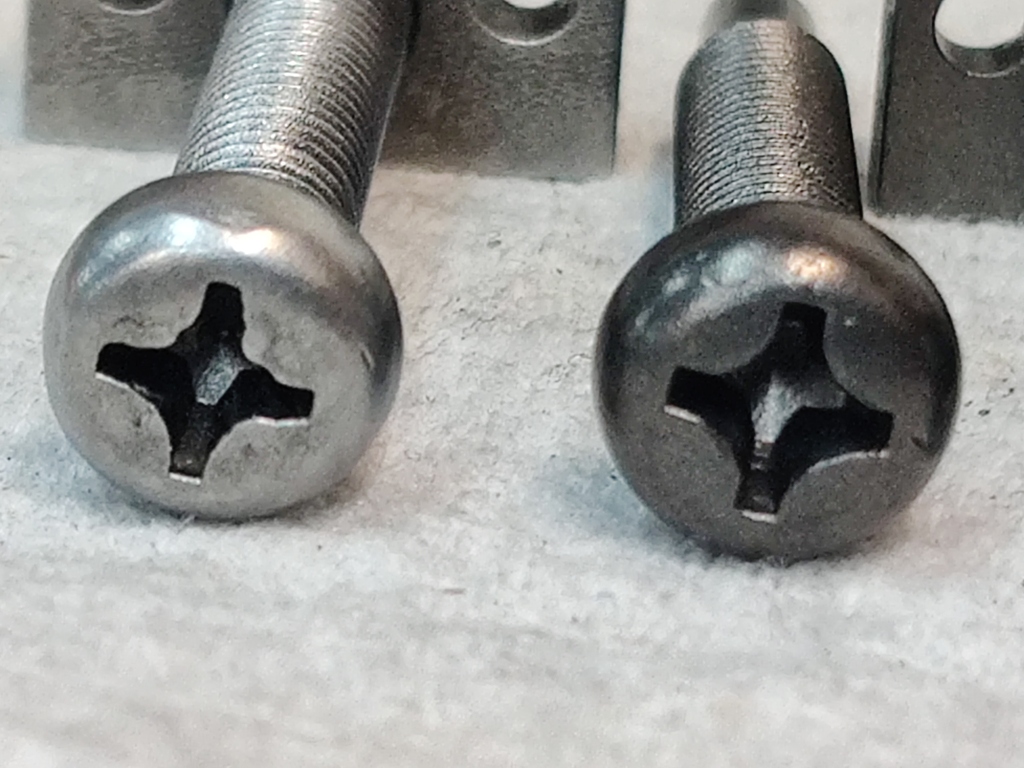
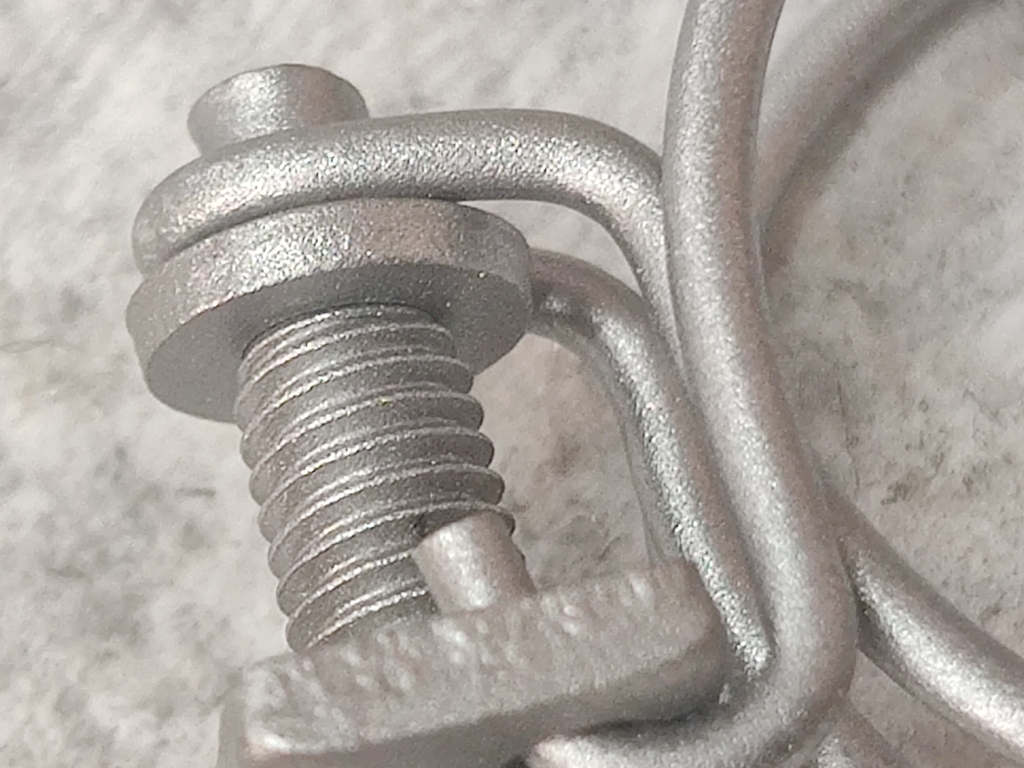
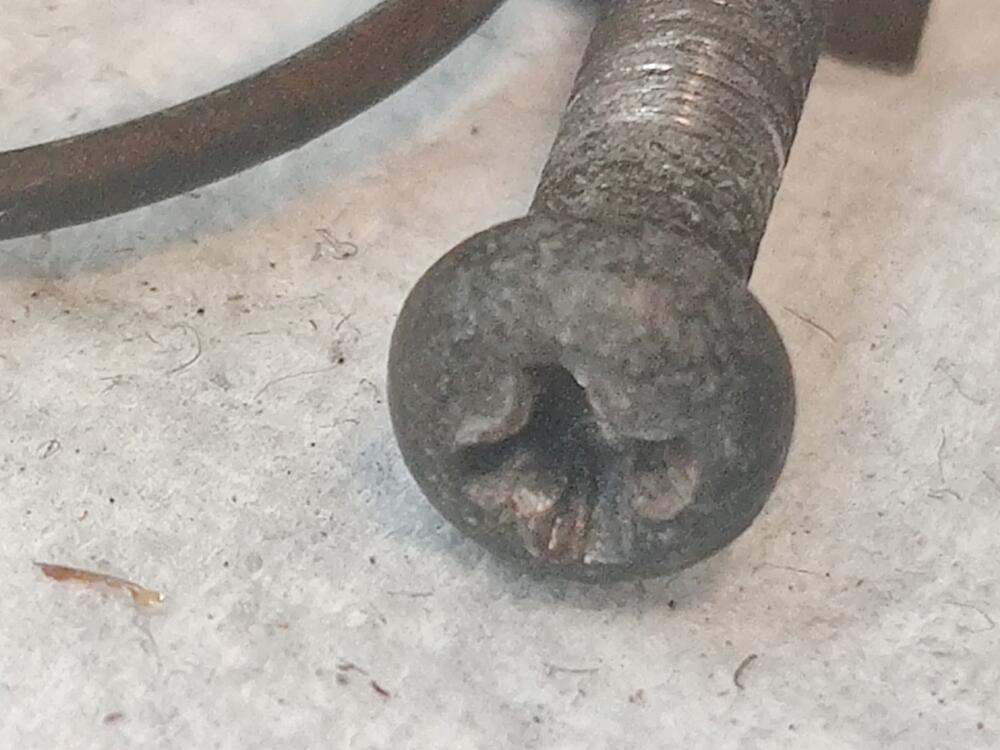
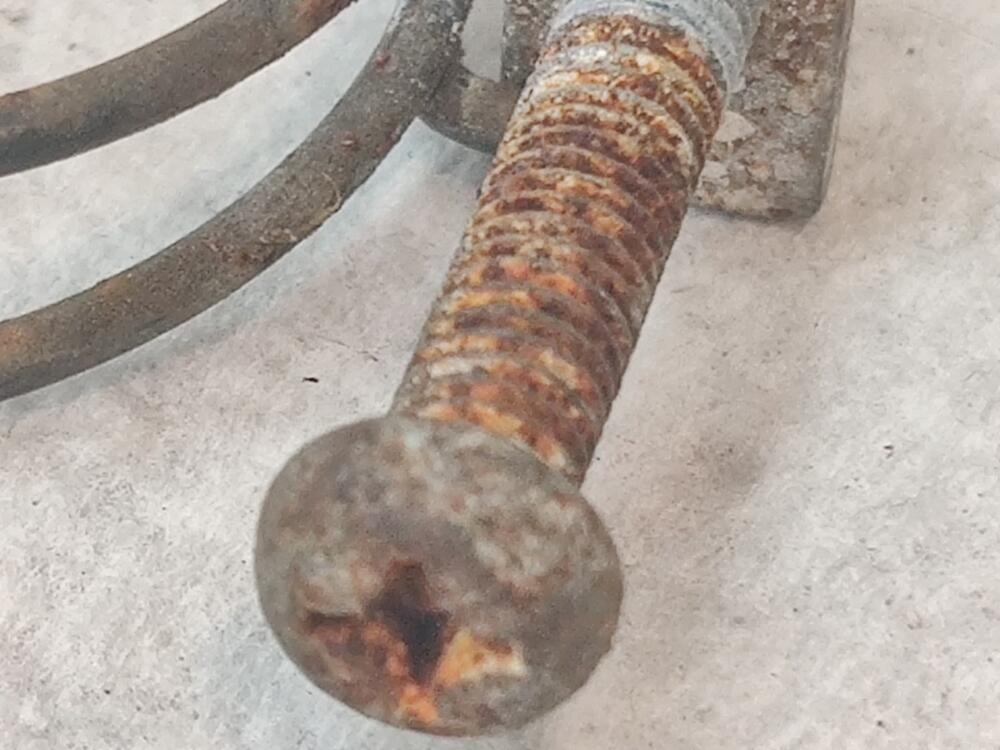
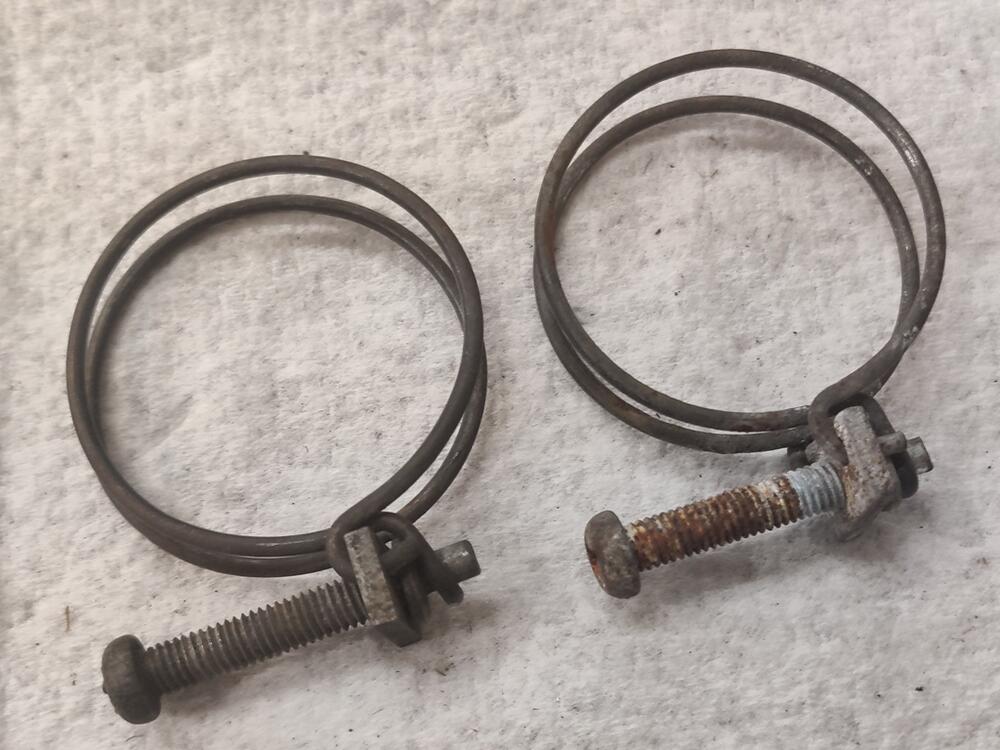
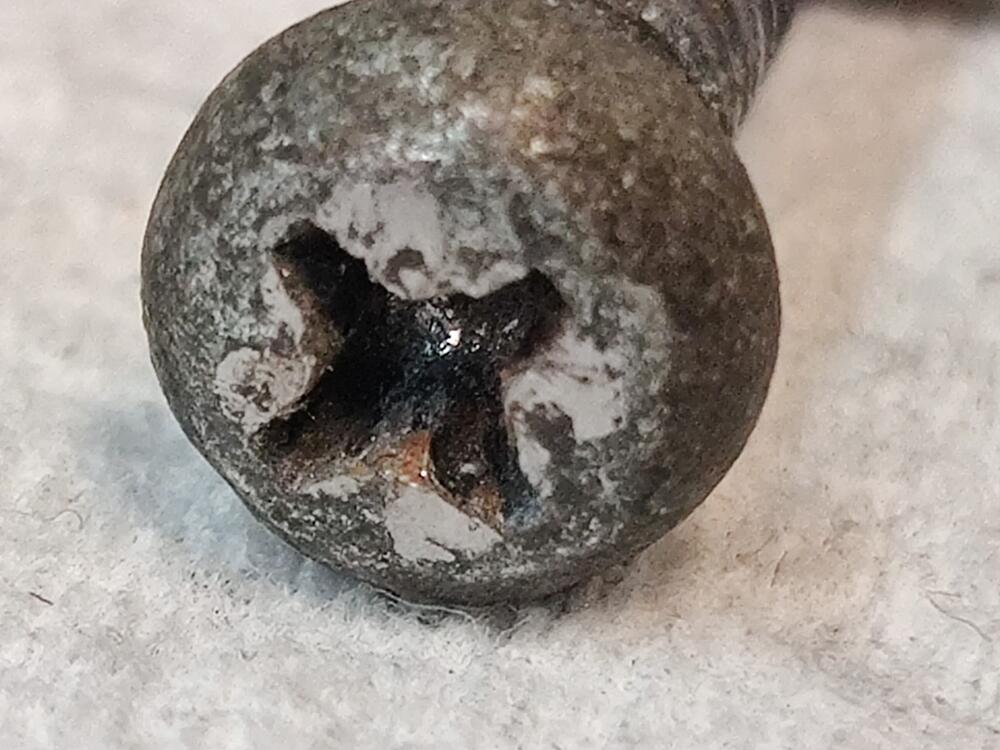
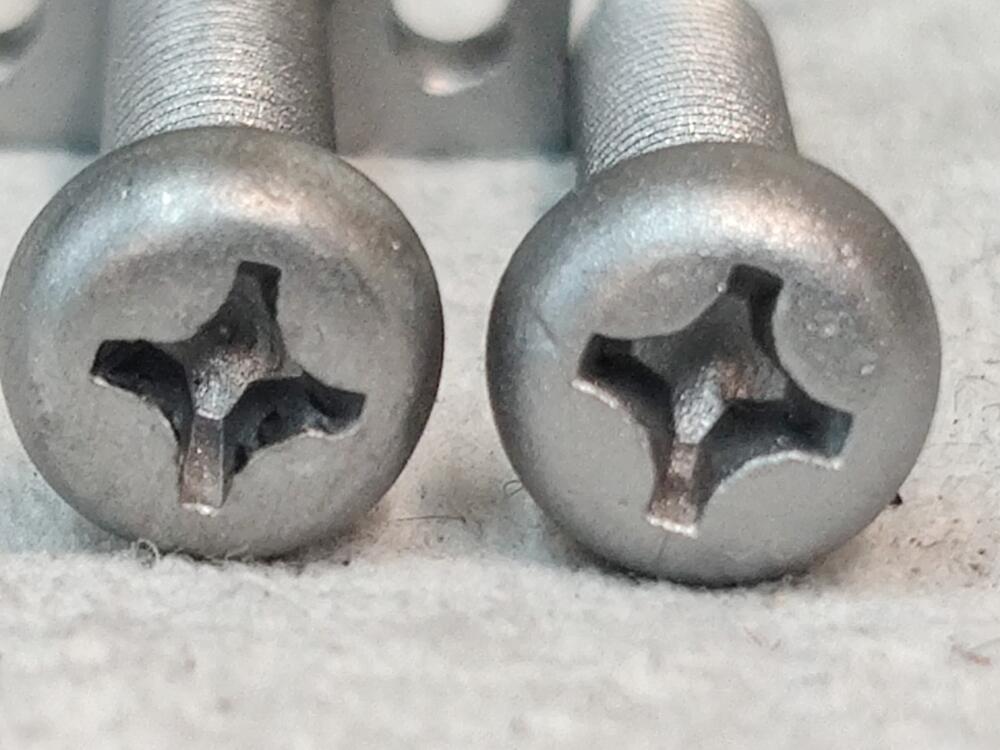
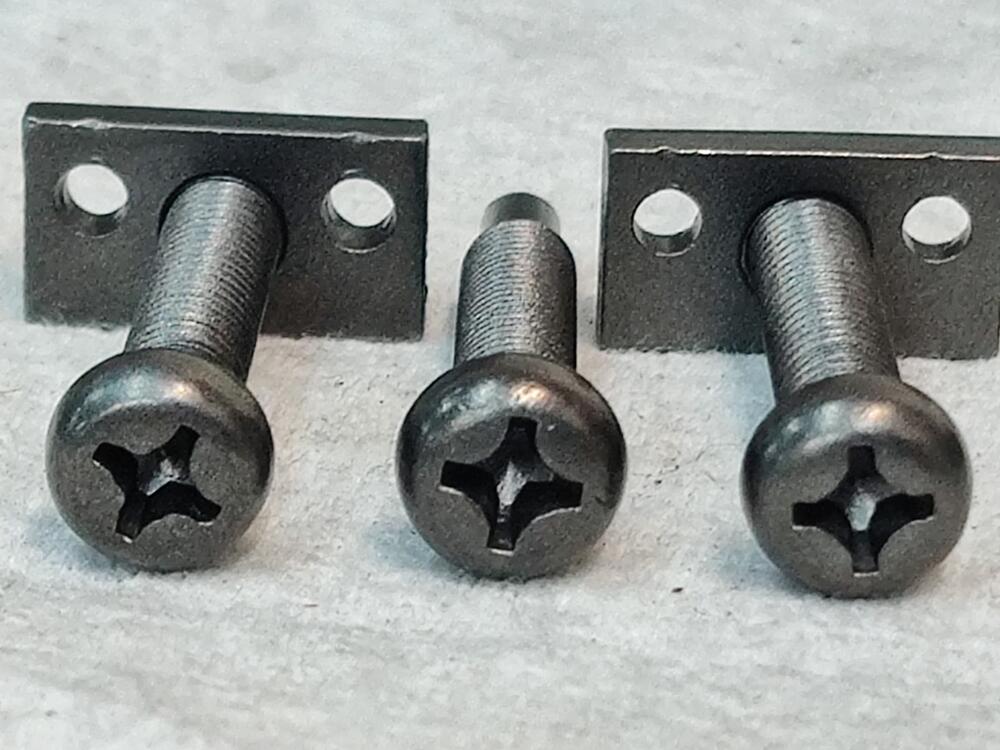
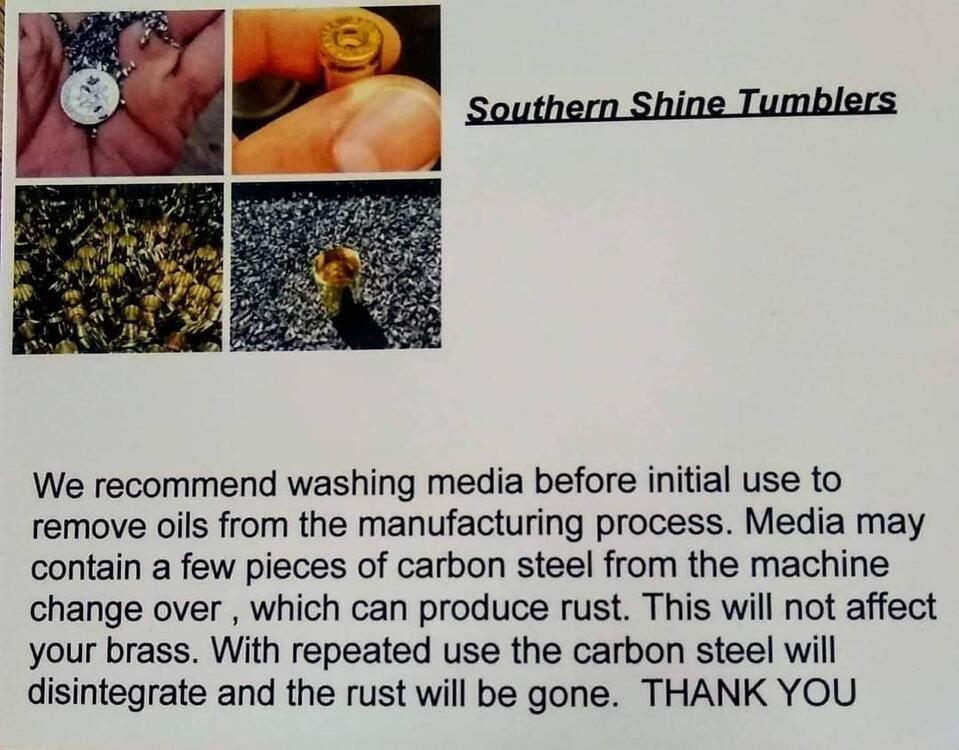
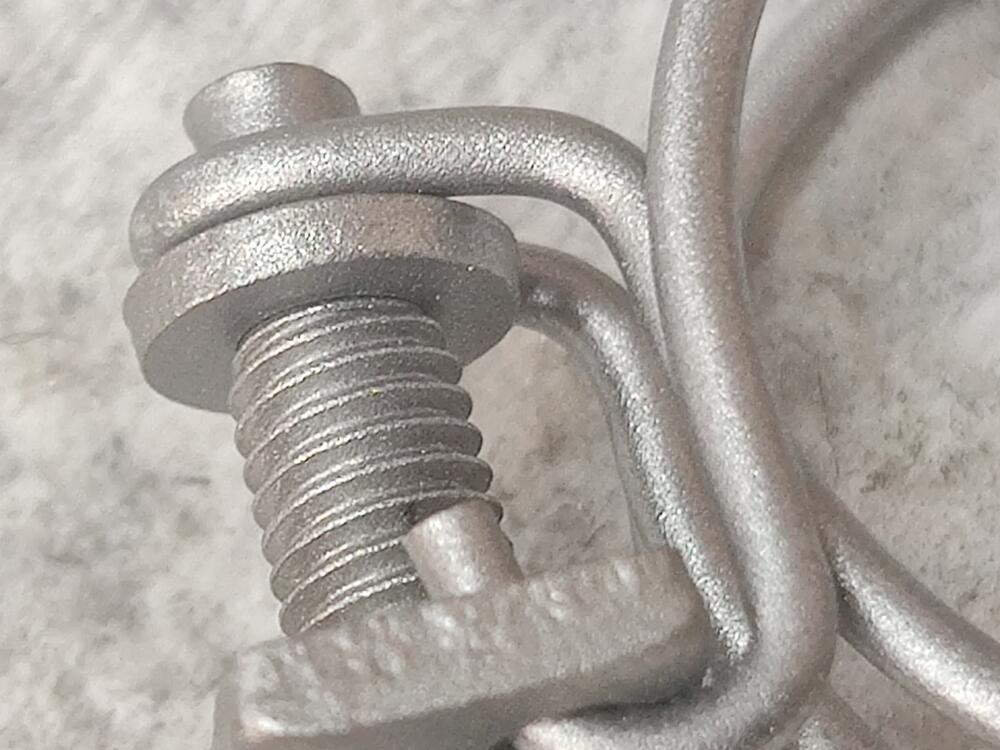
I thought I would take content from a post in my "build thread" and share it more broadly here. I've been working to prepare almost all of the hardware for my 6/1971 240z for re-plating, and have learned some, improving my process along the way. Here is some example hardware I ran through the process this week: These hose clamps are in pretty average condition after 50 years. Note that the less rusty one has some common damage on the phillips head. It has been mangled a bit. Something I have learned is that you can restore most philips screws with this type of damage by tapping the area with a hammer. I place the bottom end of the screw on the flat surface of my vise, and then use a hammer with a smooth face to tap on the top of the screw, working the metal back down where it belongs. I chose this one as an example to show that even when mangled this badly, decent results can be achieved (more pics below). So, here is a description of the process. Use these glass beads from Northern Tool and Equipment, important for size of grain, and bead blasting at 90 psi with a 1/8th inch nozzle to remove all rust, and to establish a consistent finish. I use one of these baskets and find that putting a variety of hardware (big and small) is great for trapping the parts in place so I can blast them without them flying around too much. For large parts, you don't need to use the basket, and you can then go back over them with the pressure at 50 psi to put a smoother finish on them. This smoother finish allows "second stage prep" by hand with less work. After glass bead blasting, all hardware (bolts, washers, nuts, screws and odd small bits) then goes straight to tumbling in one of these vibratory tumblers. I now use a stainless steel media (bought from Southern Shine Tumblers on Facebook). See pic below. It consists of tiny little bits of stainless steel that are good at getting into tight spaces, like between threads, phillips head recesses, etc. And I now use it dry. I was using water and a bit of citric acid, but I think that is best for doing brass shell casings. I was fighting keeping the parts from starting to oxidize/rust, and have found that the media works better and faster dry... to put a nice finish on the hardware. Minumum time in the tumbler is about 2-3 hours. You can add 2 to 3 times that and get an even nicer finish. For large parts that I can't tumble, I use a Dremel tool and the little wire wheel brush attachments after the glass bead blasting (first) step. For final, more consistent finish, I follow that wire brushing by hand rubbing the large parts with #0000 fine steel wool. It doesn't take a lot of work at that point by hand, but the combination of using the Dremel followed by fine steel wool by hand does end up taking some time. After hammer and top of vice on the screw head, then after glass bead blasting - with comparison to head that was not damaged, and lastly, close up of bead blasted texture: After tumbling, the hardware has a dark grey look to it. After wiping with lacquer thinner, the repaired screw in the second and third picture here is notably lighter in color. Sanding the top of the screw briefly with 320 grit or 240 grit would have been a good idea before tumbling, as I see some surface imperfections, but the screw looks pretty good compared to its initial state. Most of the screws I have done this to were not in as bad a starting point as this one. If you want to get the same media, send an email to Southern Shine Tumblers first to inquire on pricing and availability: southernshinemedia1@gmail.com They accept PayPal.


-
Several questions... expense relative to something like Black Diamond? Can it be cycled many times? How aggressive vs. glass beads or soda? Subjective, but your opinions are fine. I will look into plastic availability and cost. Maybe buy some and experiment.
-
I have used Play sand... yes Play sand with good results. Play sand is a finer grain (smaller) than is oftentimes recommended for sand blasting. You may want to check out my restoration thread and pictures. The sand that is typically used is larger grain, more jagged, and is very likely to cause panel warpage. That said, sand is too dangerous because of silicosis. Look it up. Basically long term exposure will cause a build up of particles that are too small for your lungs to do anything with other than trap. Lung capacity is negatively impacted. Using masks (various types) is not sufficient protection. Glass beads, as far as I know, do not have the same problem. They are finer still than Play sand though. I don't have experience with soda blasting or dry ice blasting. Dry ice might be a really good option if it is available to you.