inline6
 Subscriber
-
Joined
-
Last visited
Everything posted by inline6
-
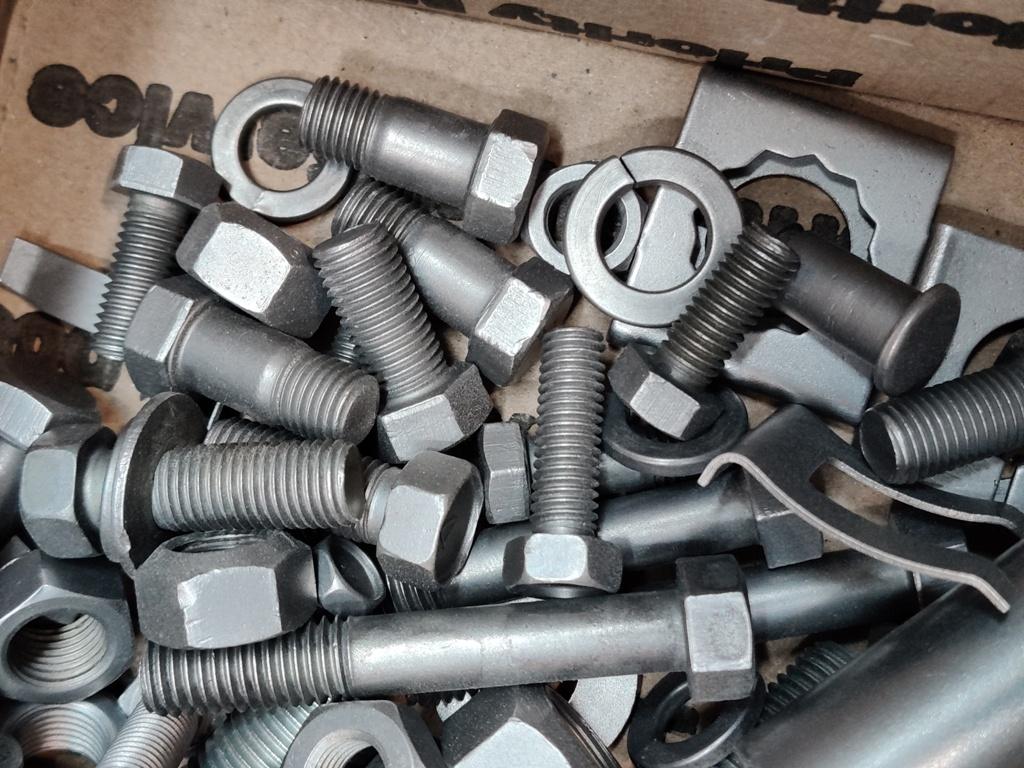
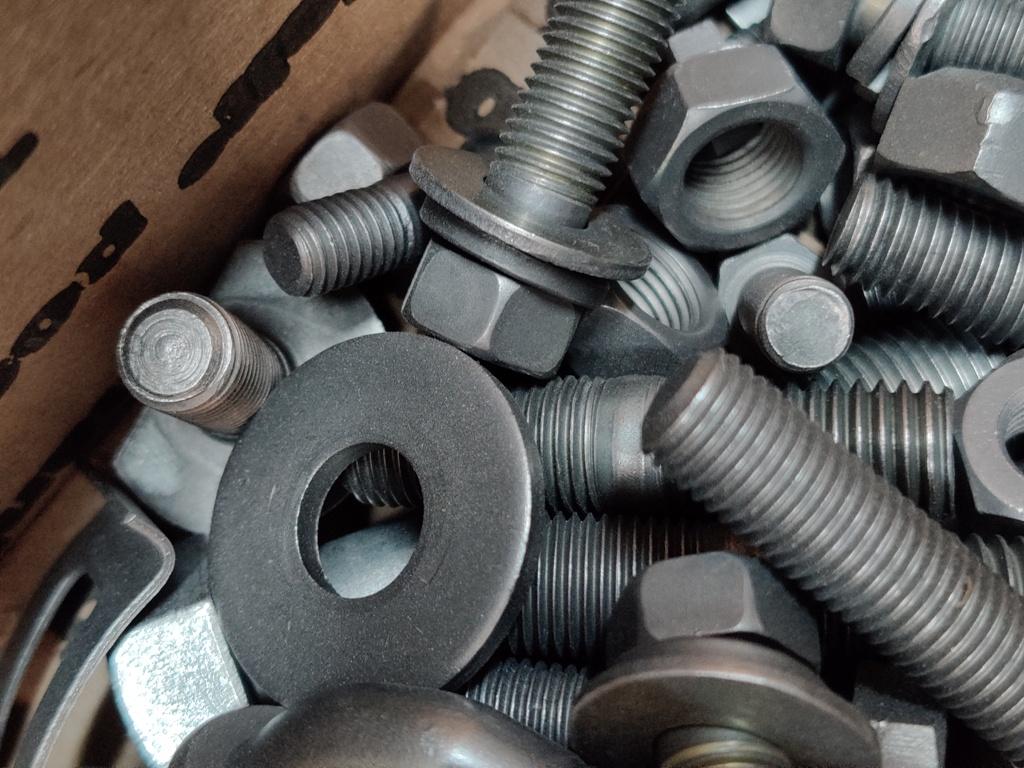
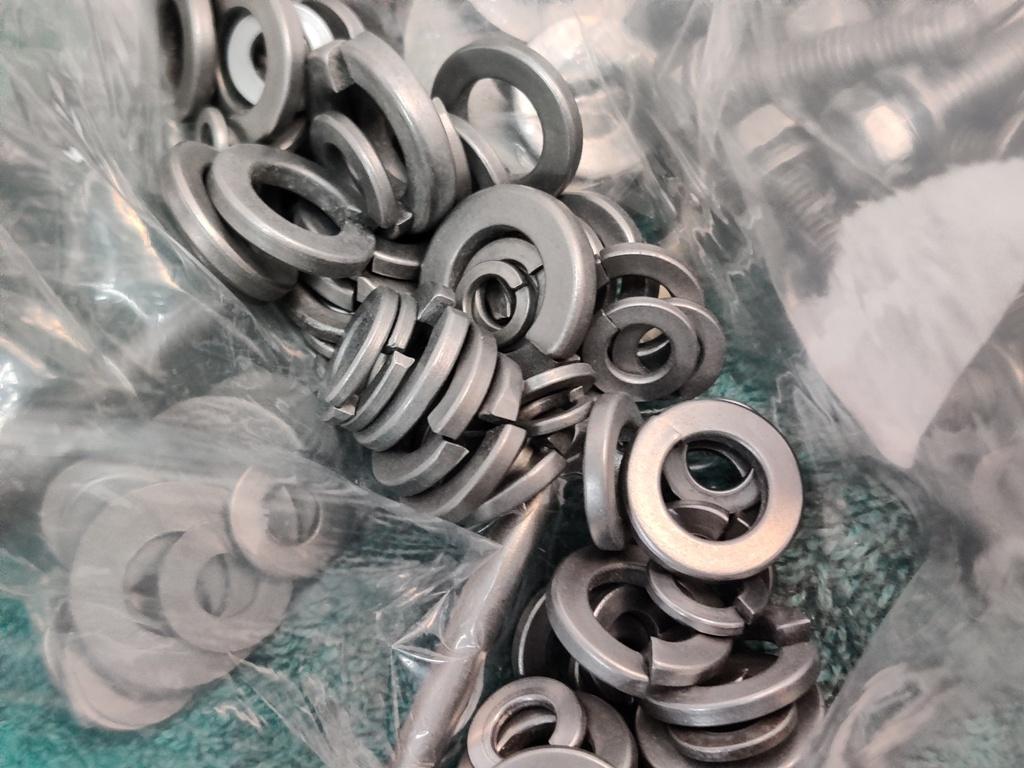
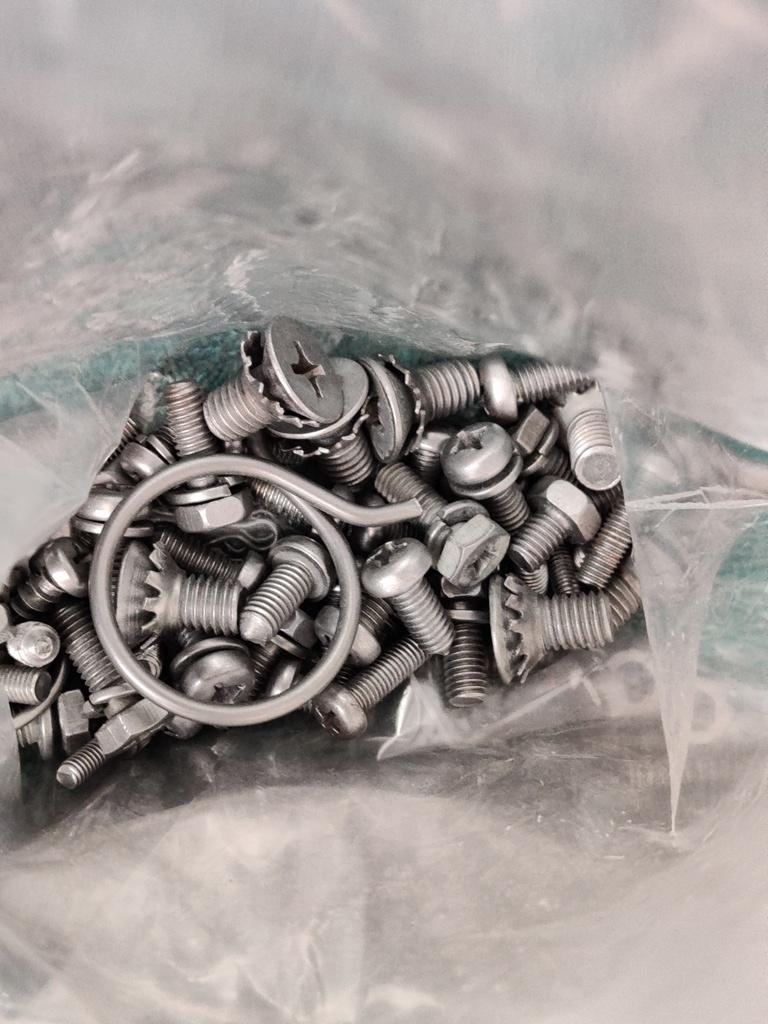
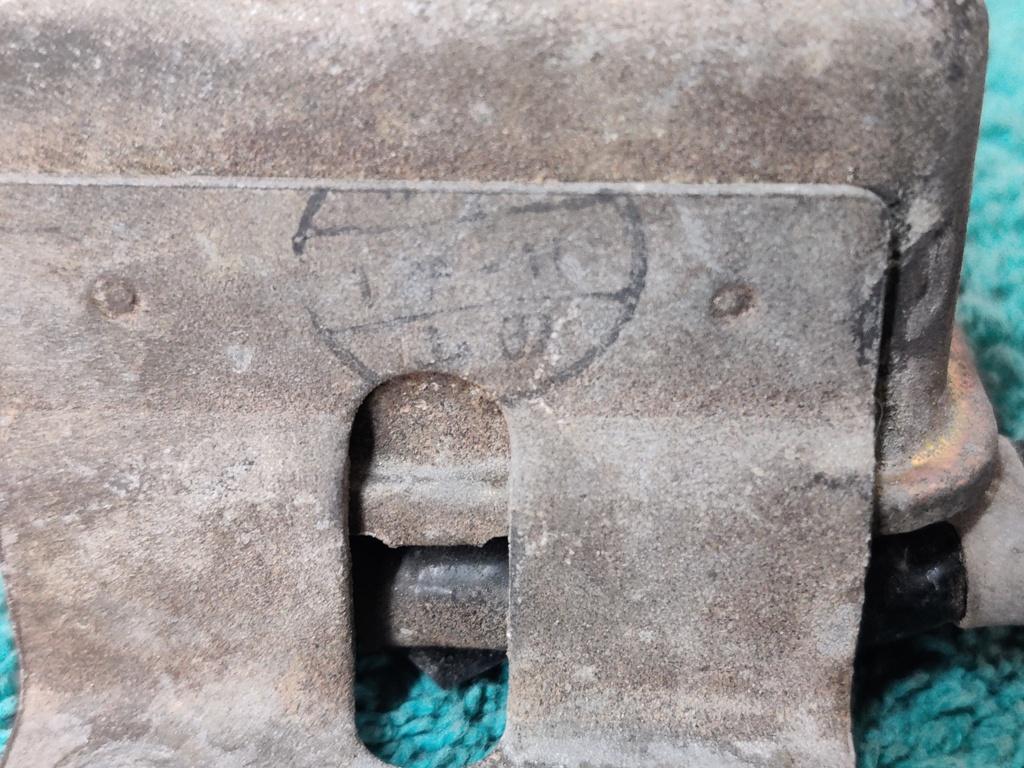
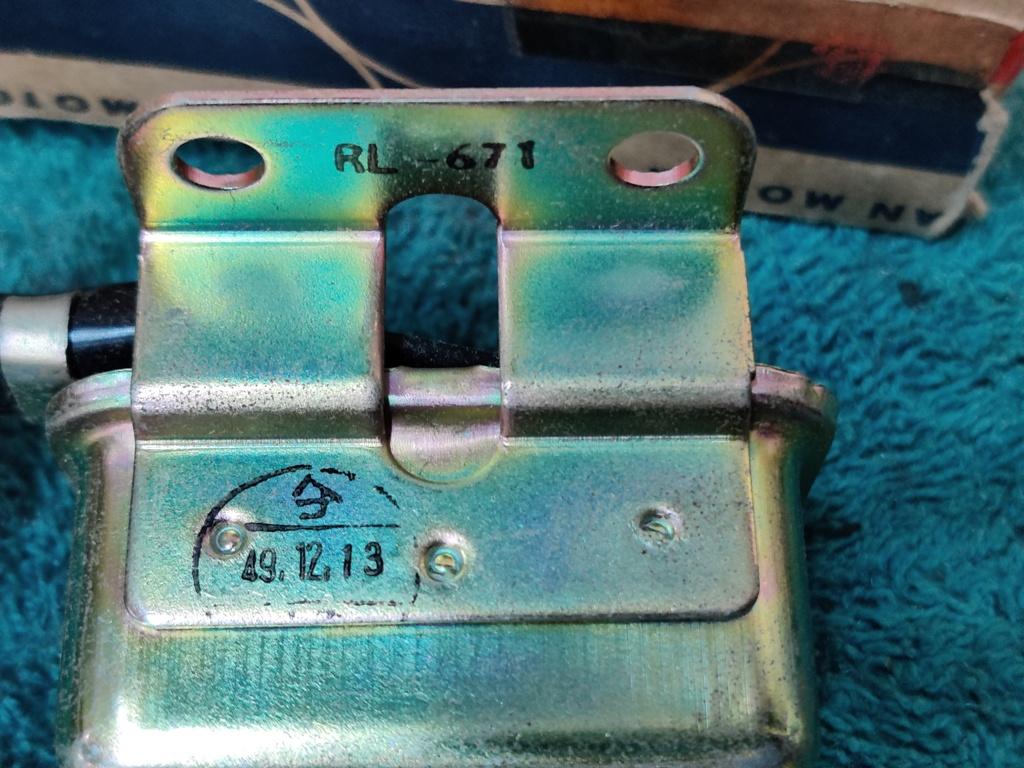
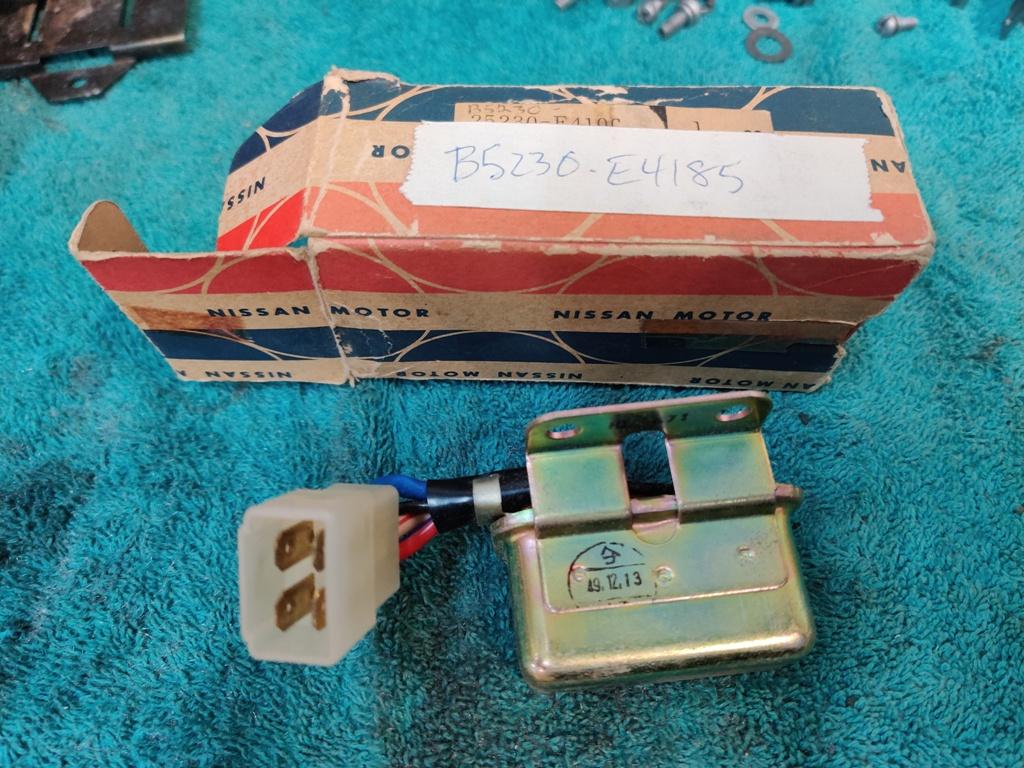
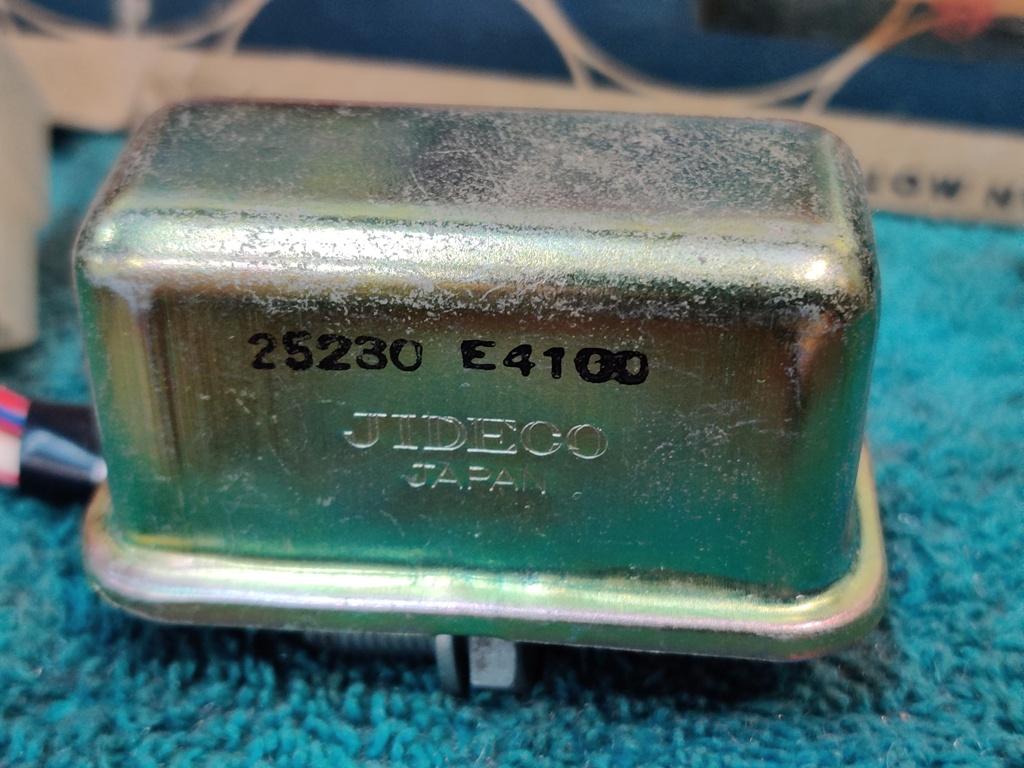
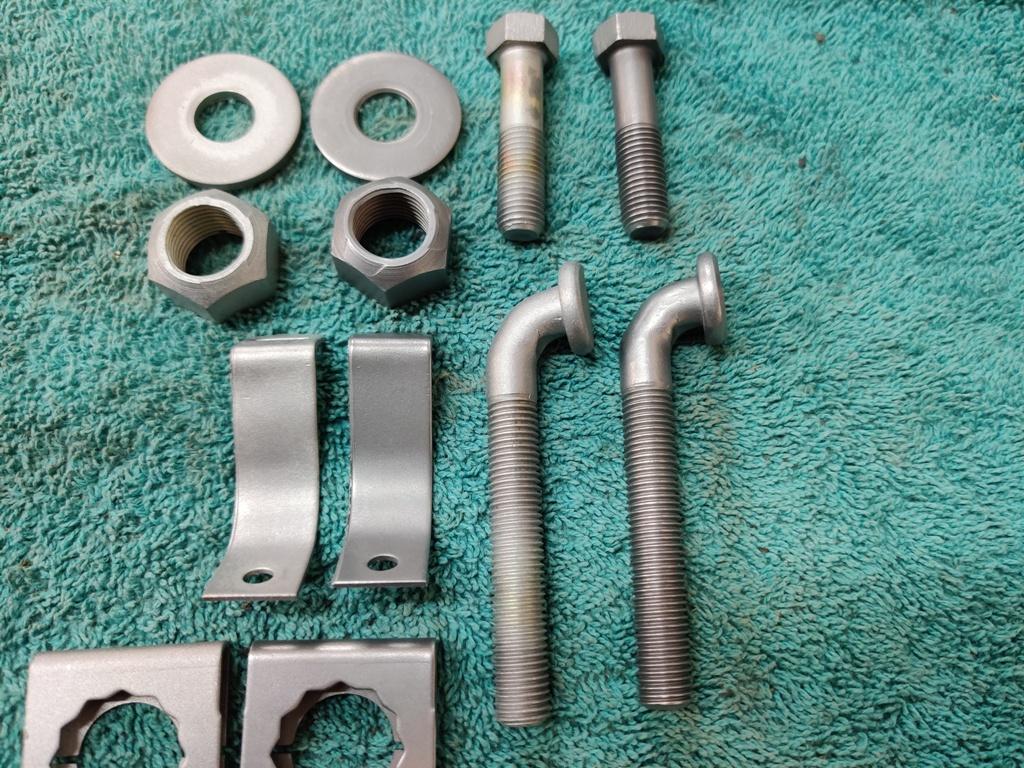
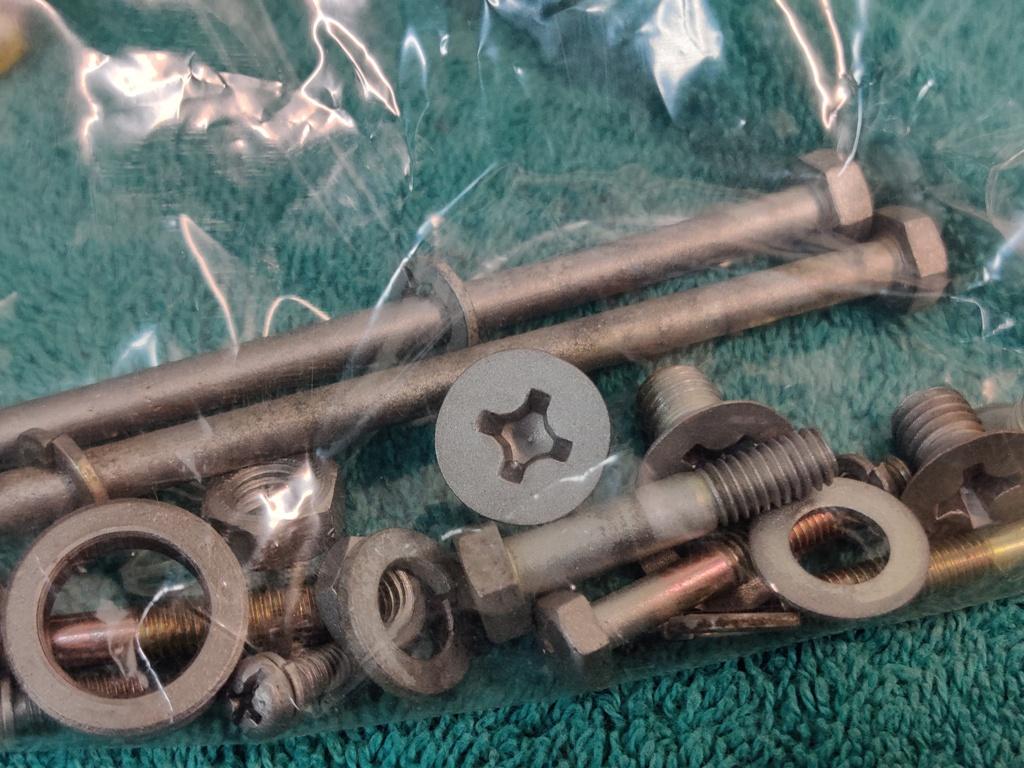
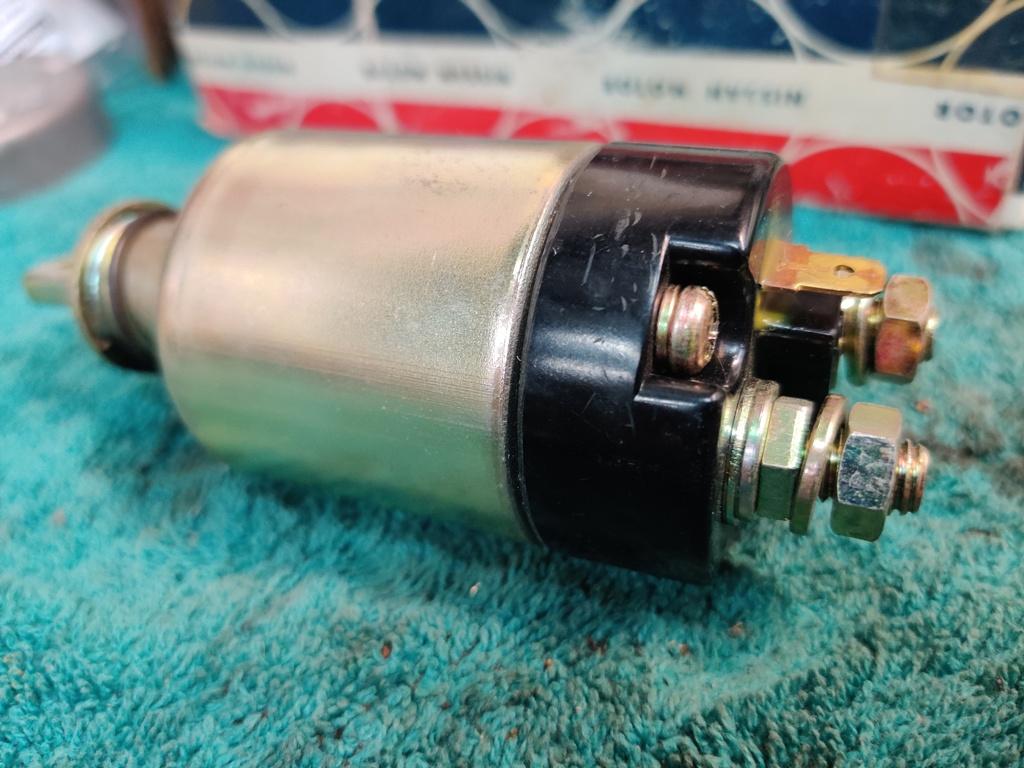
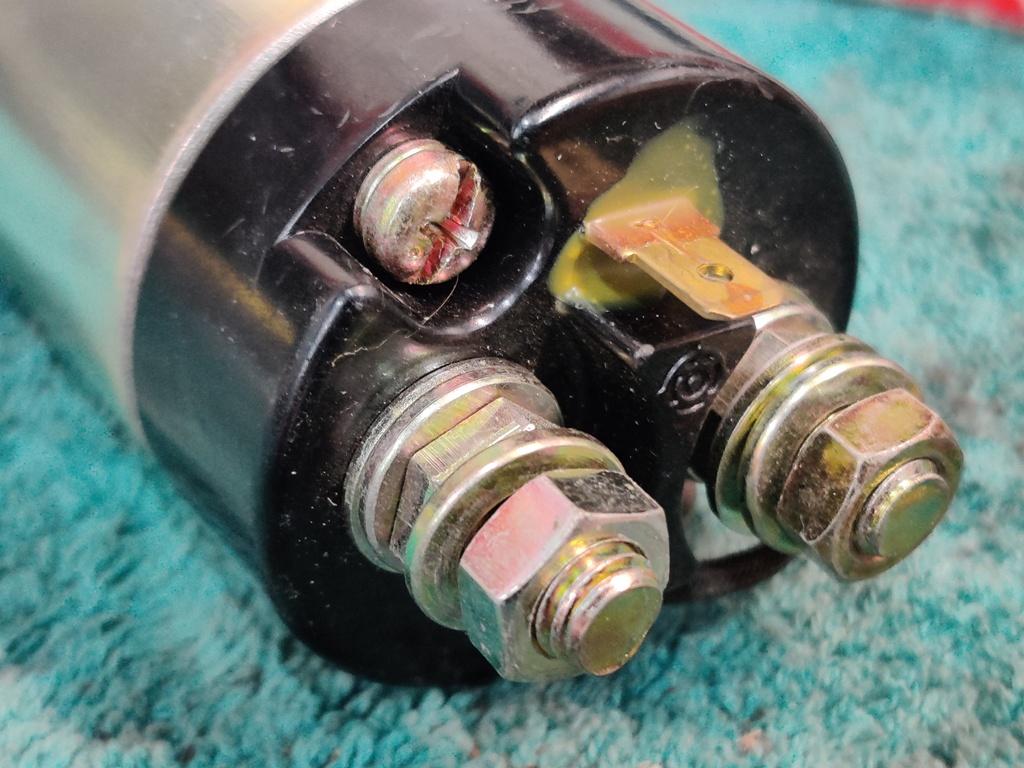
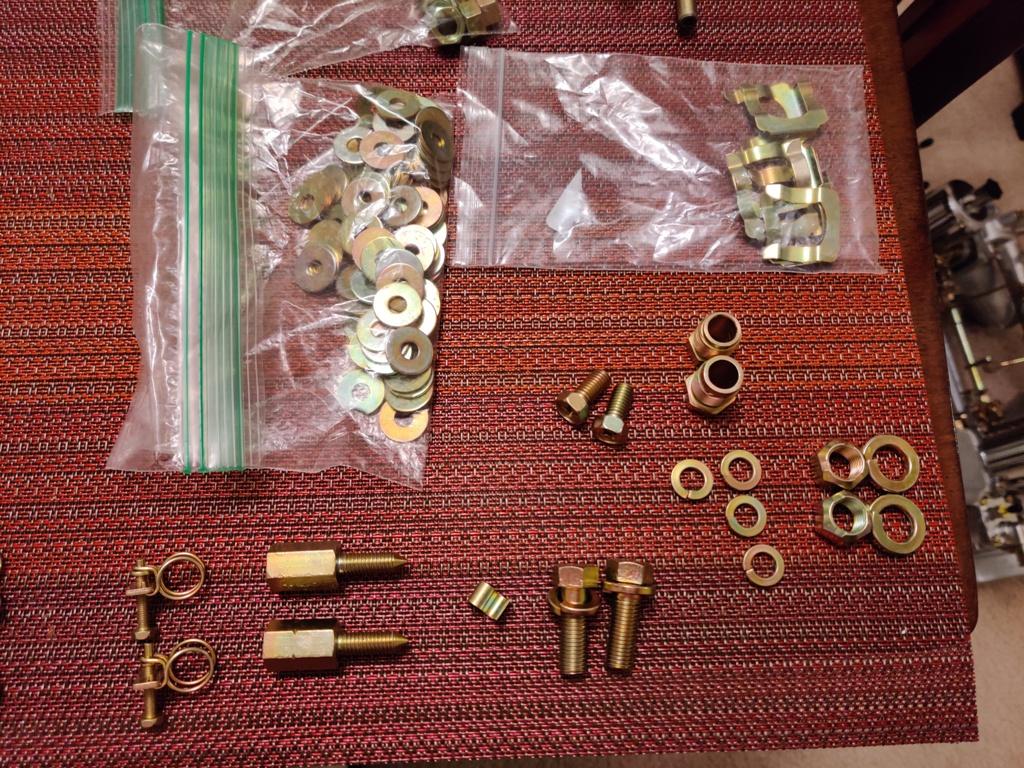
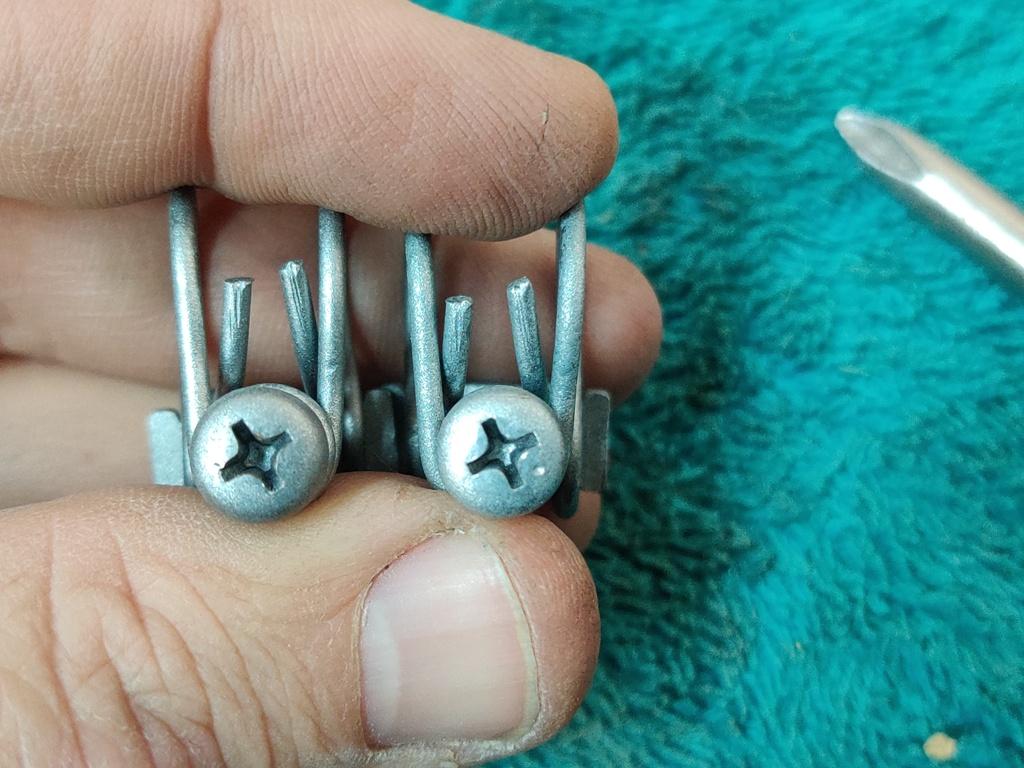
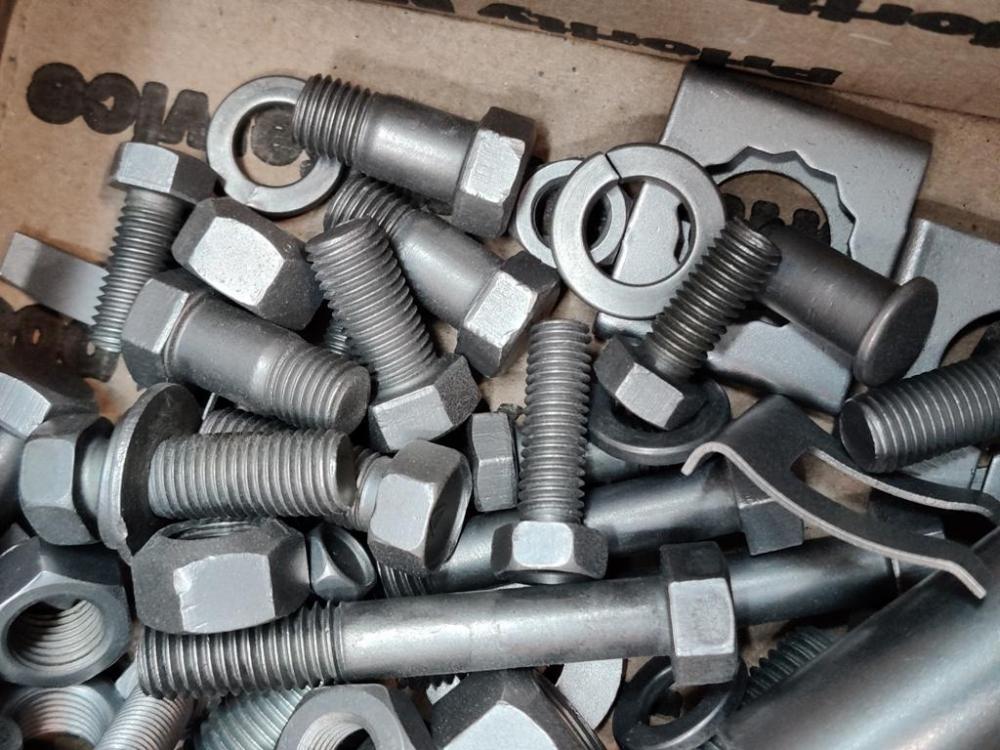
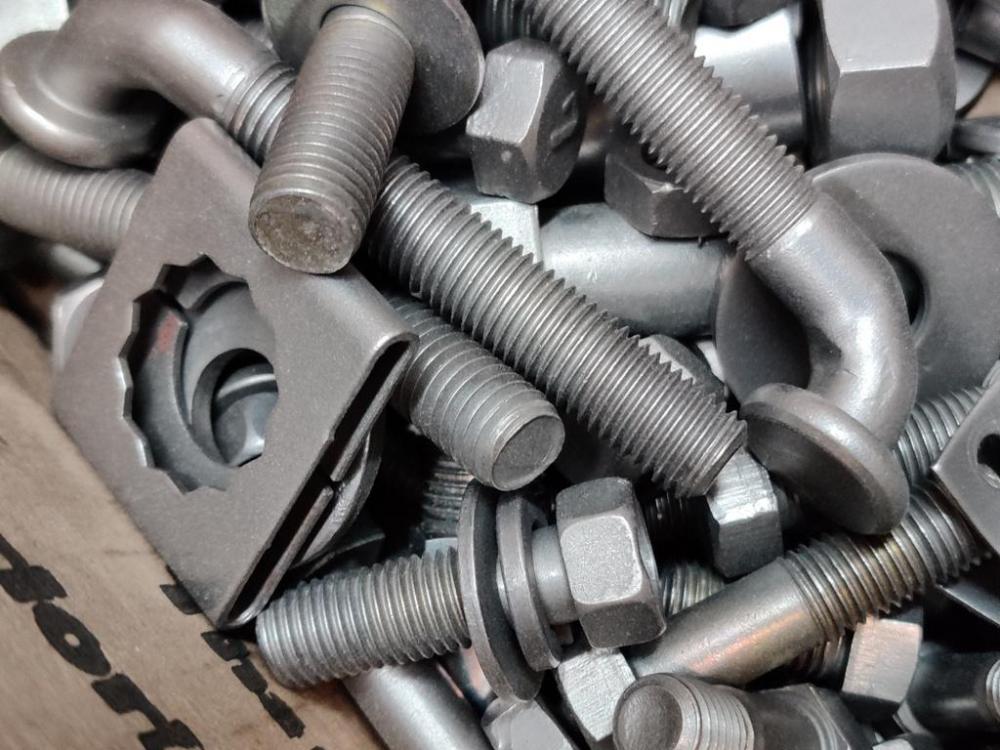
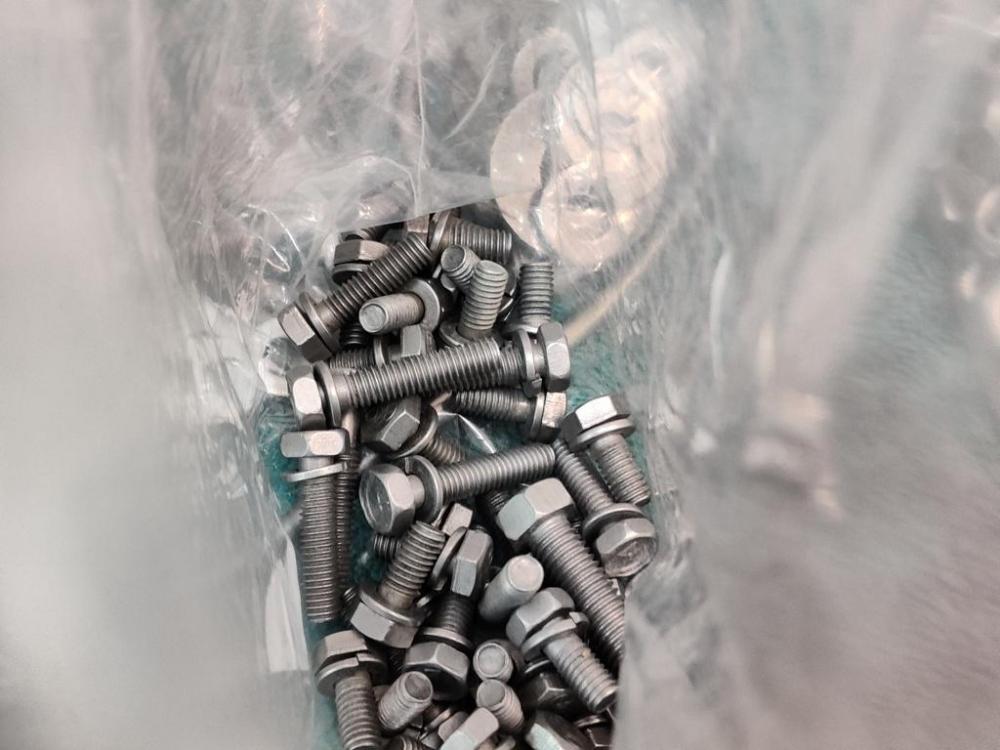
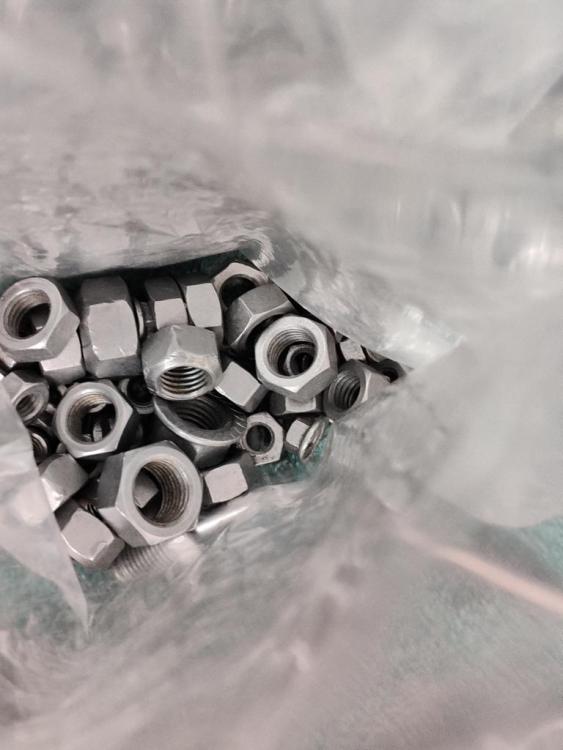
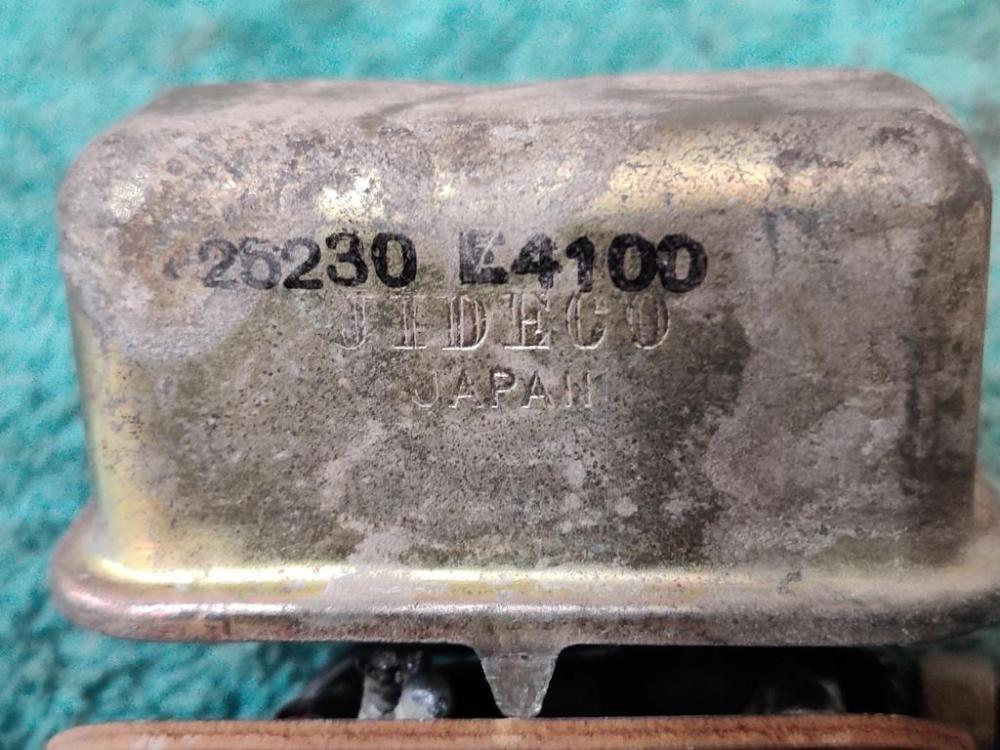
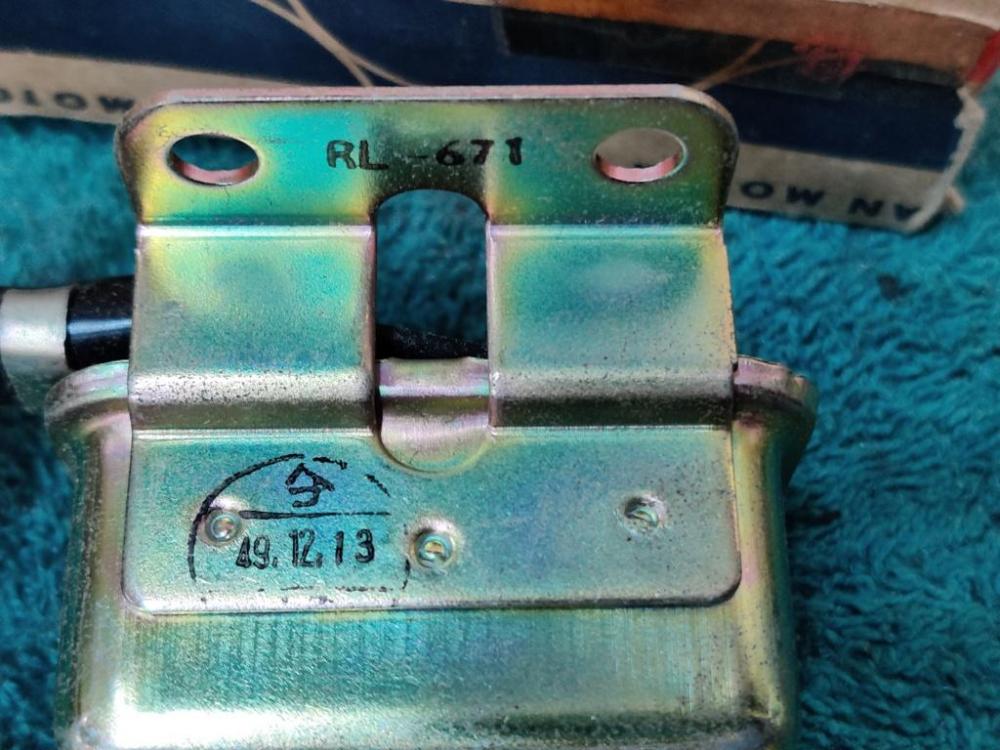
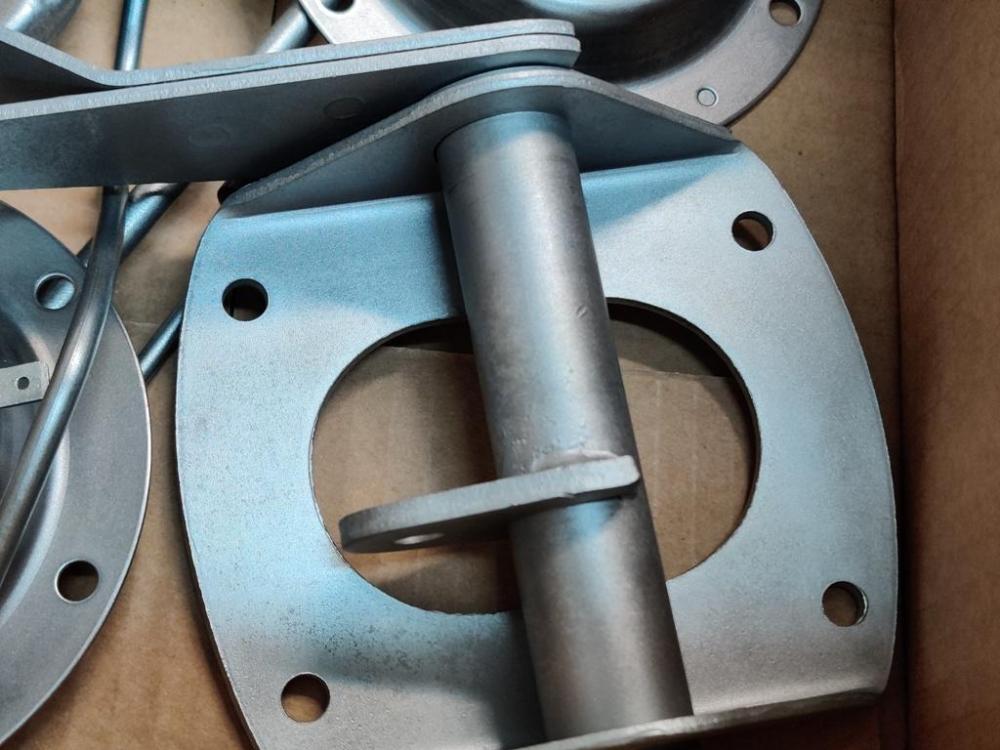
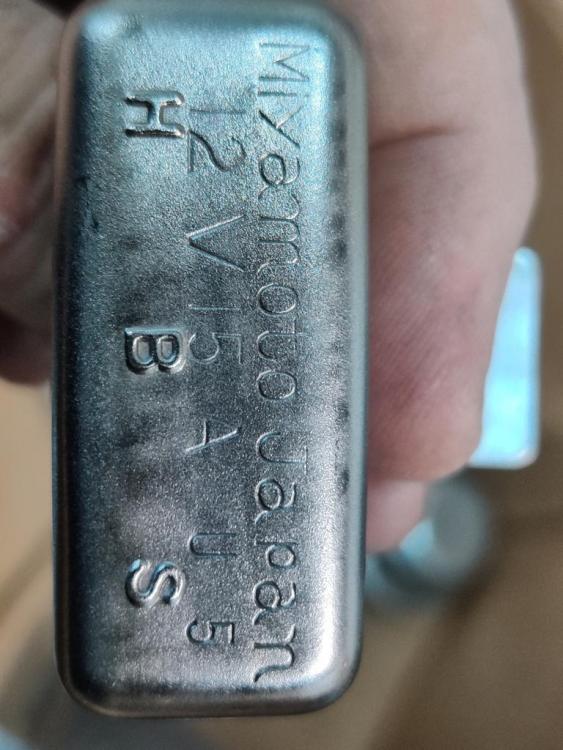
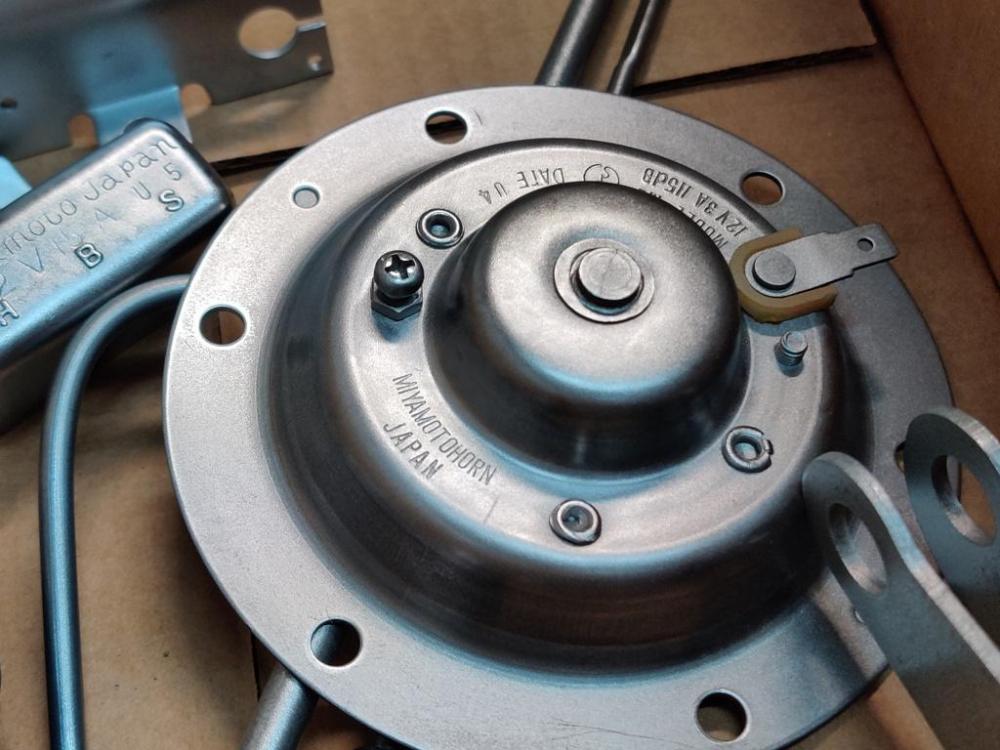
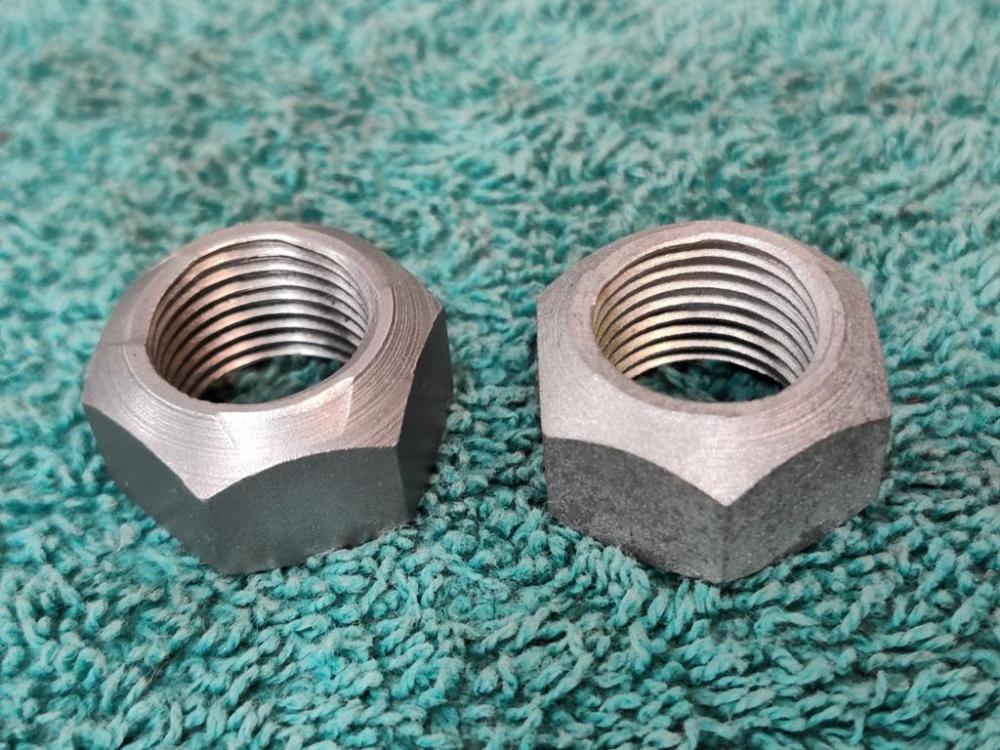
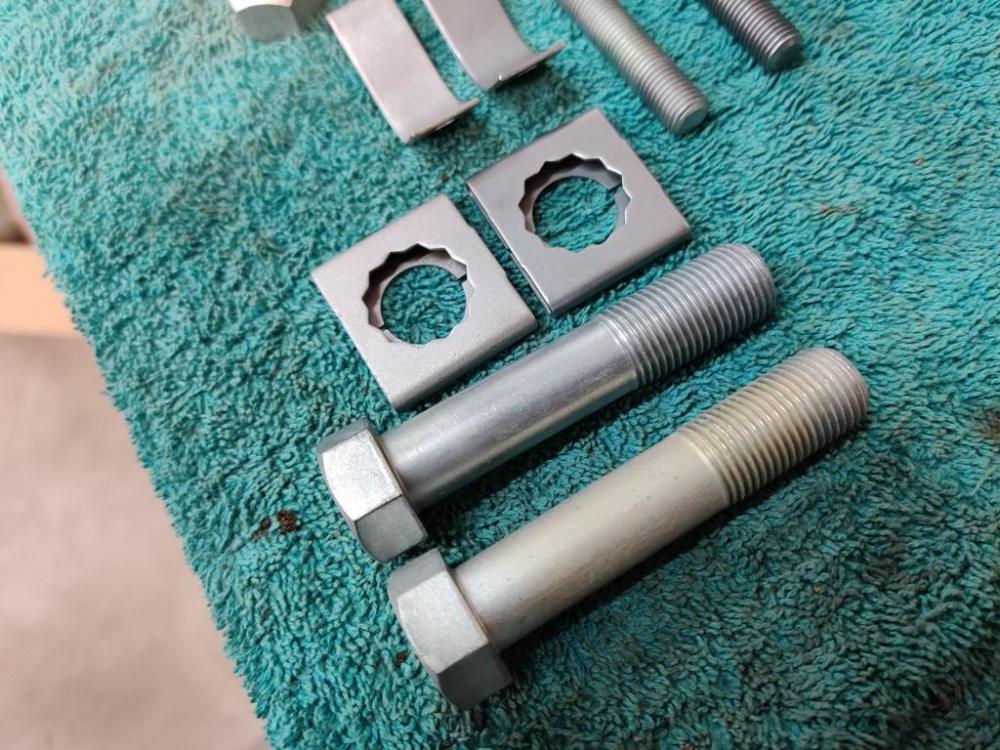
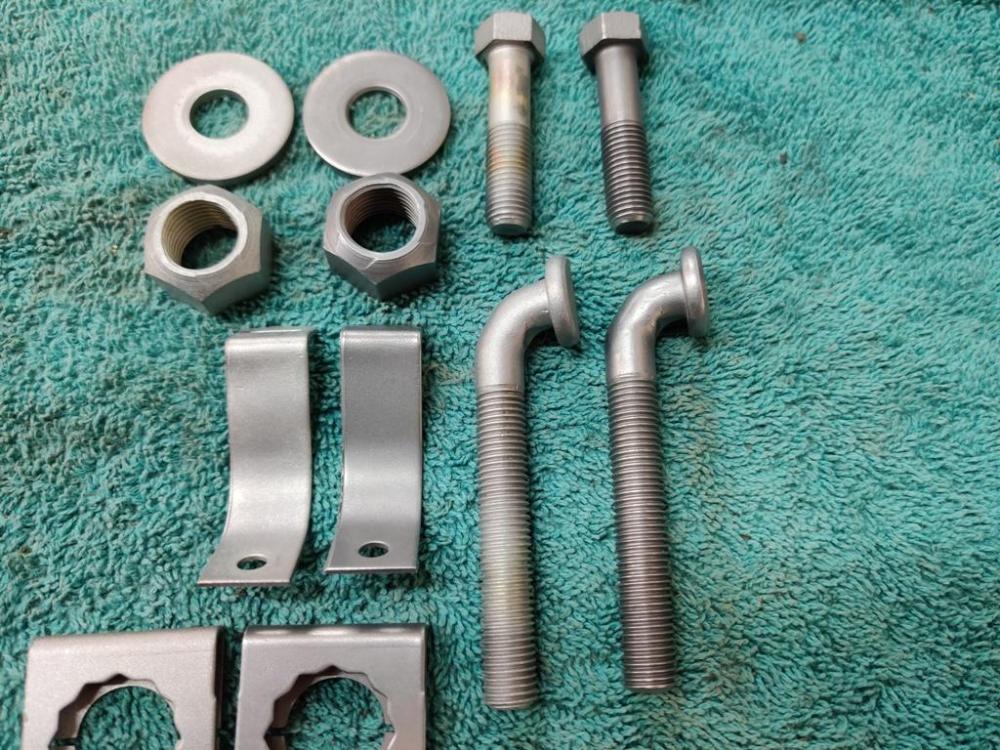
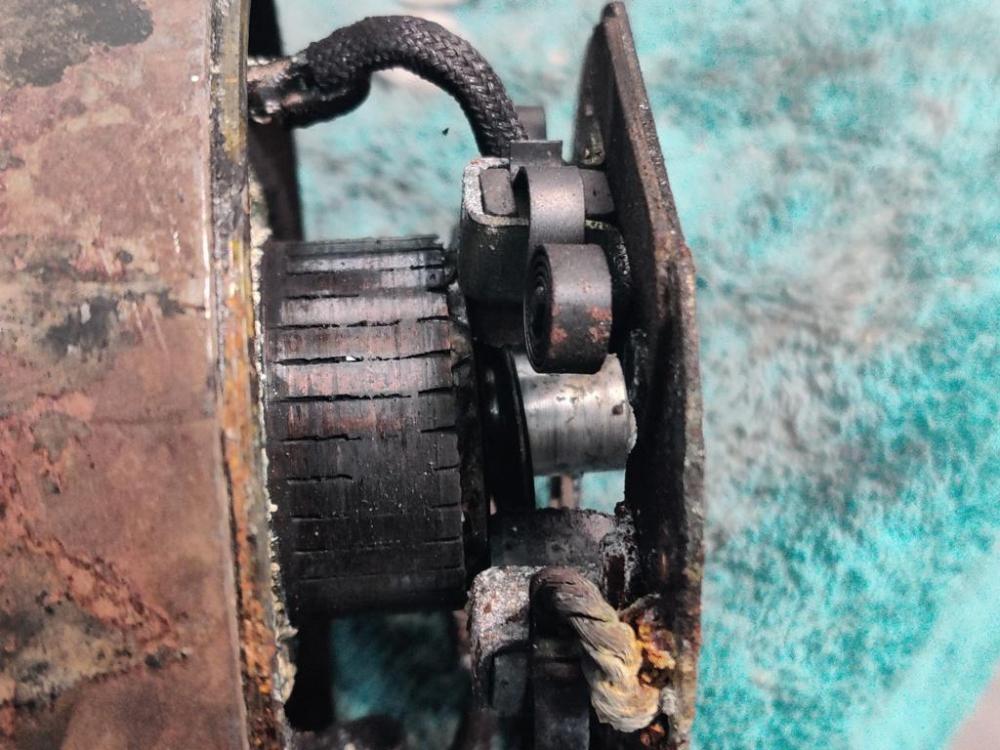
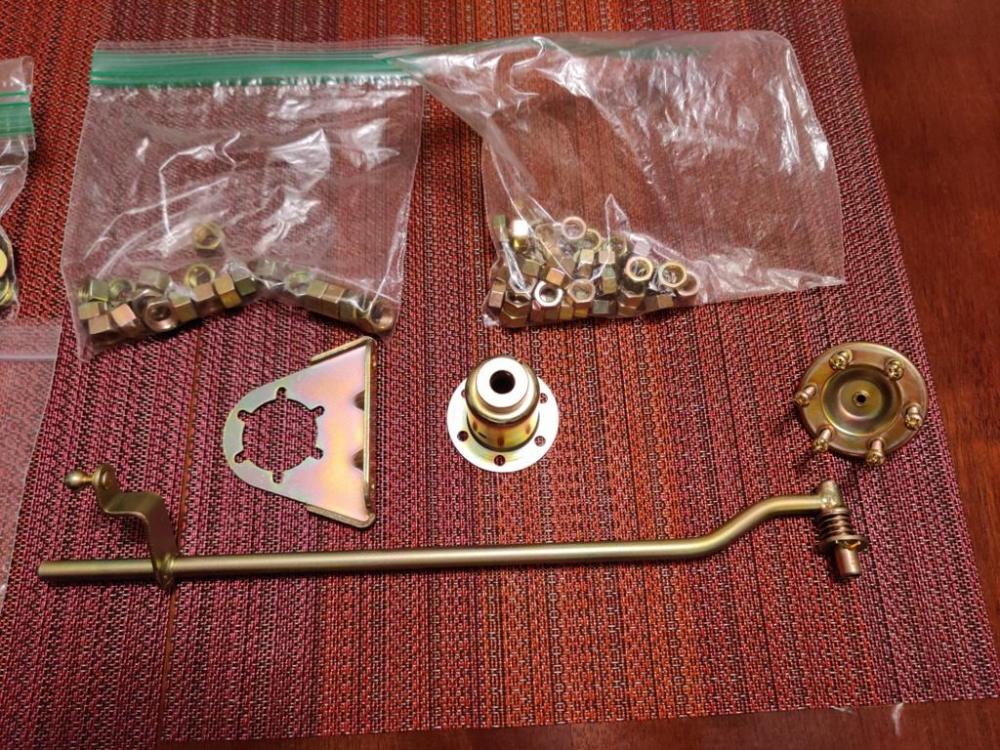
 I see. So, full removal is not necessary. Interesting. I took some pics of the hardware that has only been glass bead blasted and run through the tumbler for 2 hours: This is maybe half of the fasteners. Doing them with a wire wheel by hand would be a lot more time. And holding them would be crazy difficult as so many of them are small. I am hopeful I don't have to resort to wire brushing all of these. I have one more treatment in mind to try out in the tumbler. I bought some corn cobb media and have some "semi chrome" metal polish. When I get all of the fasteners through the beading and stainless bit tumbling, I will try a batch in the corn cobb and metal polish. Theory is that the corn cobb will pick up the polish and act like little polishing rags. Will just have to try it out. However, I may not need to prep the fasteners further to get close to the factory finish? It is hard to say without some first hand experience, I guess. Another NOS item I had laying around (pics of original relay first): New Old Stock Relay:


-
Ahhh. I was wondering about places the wire wheel can't get to. My prep thus far for all nuts and bolts and washers has just been to degrease, then glass bead blast (I have beads that are not roughing up the surface much), and then 2 hours in a 18 lb capacity vibrating tumbler with 15 lbs of stainless bits (media), some water, and a tiny bit of citric acid for 2 hours. Then, remove from the tumbler and dry with a towel and compressed air. For parts too big or awkward for the vibrating tumbler, after bead blasting, I do a bit of hand "polishing" with #000 fine steel wool. For the horns, I used a dremel lightly and then followed with #000 steel wool. I have experimented a bit with using #000 steel wool on some parts after running in the tumbler for 2 hours. I am going to try one more media experiment in the tumbler to follow the two hours in stainless bits and see how that turns out. OHHH! I was thinking I'd be able to send anything, no matter how small. Wow. That is going to be a big help. I have tiny washers and screws... tiny hardware from parts like the front turn signal lights, for example. Thanks!
-
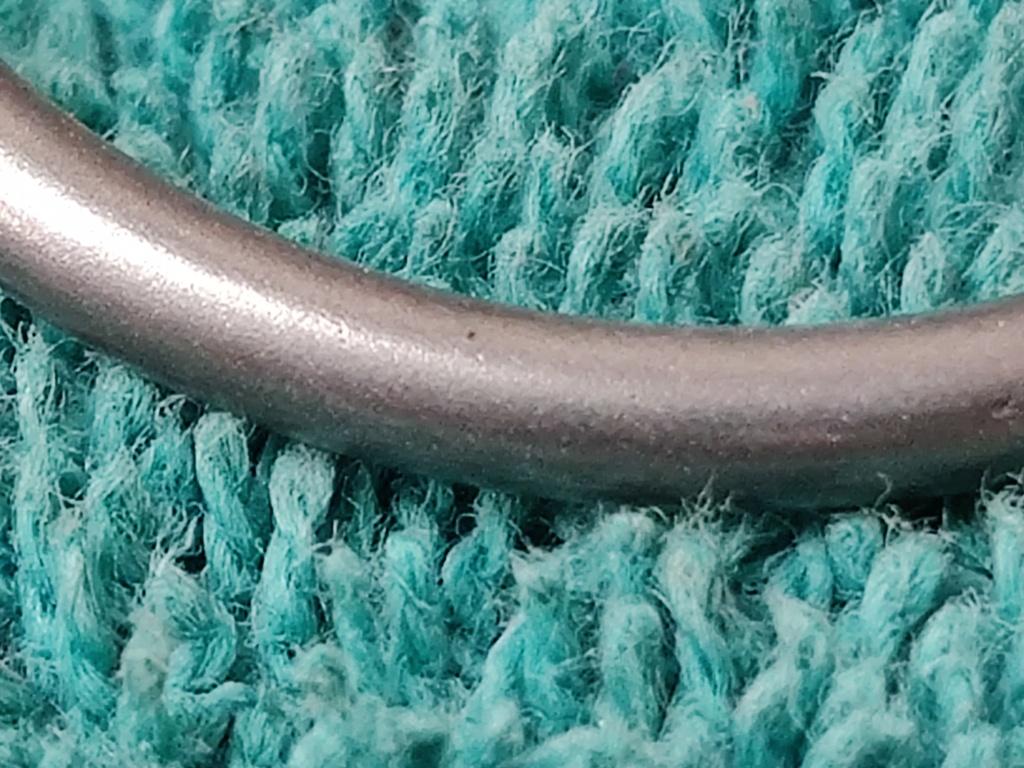
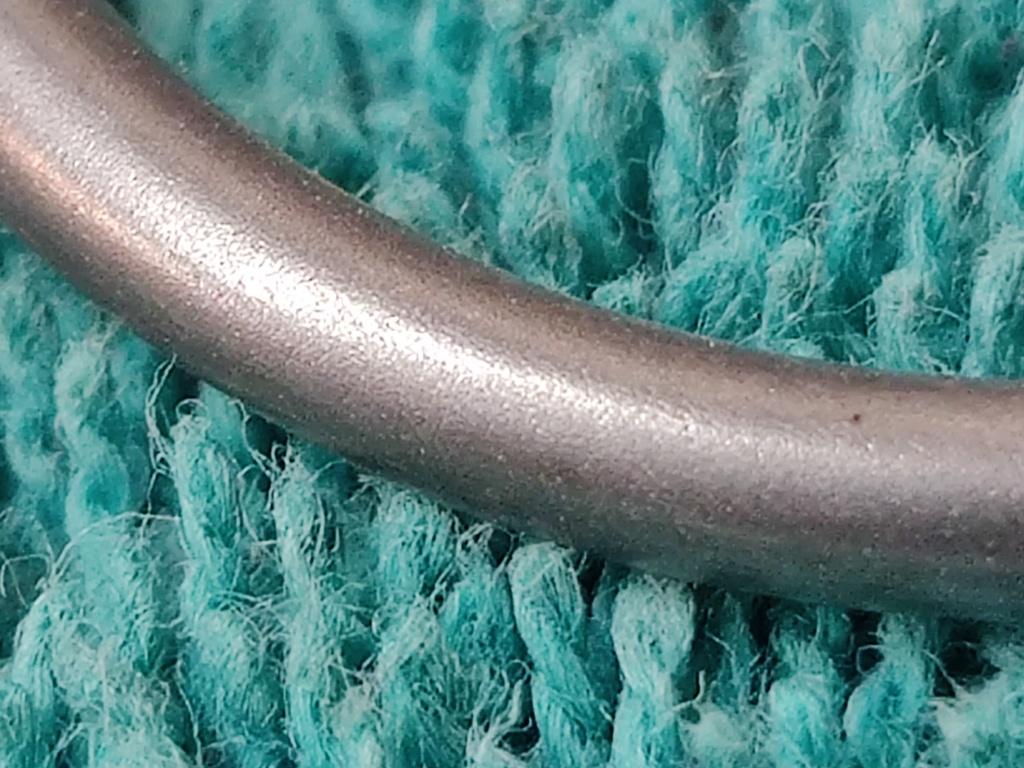
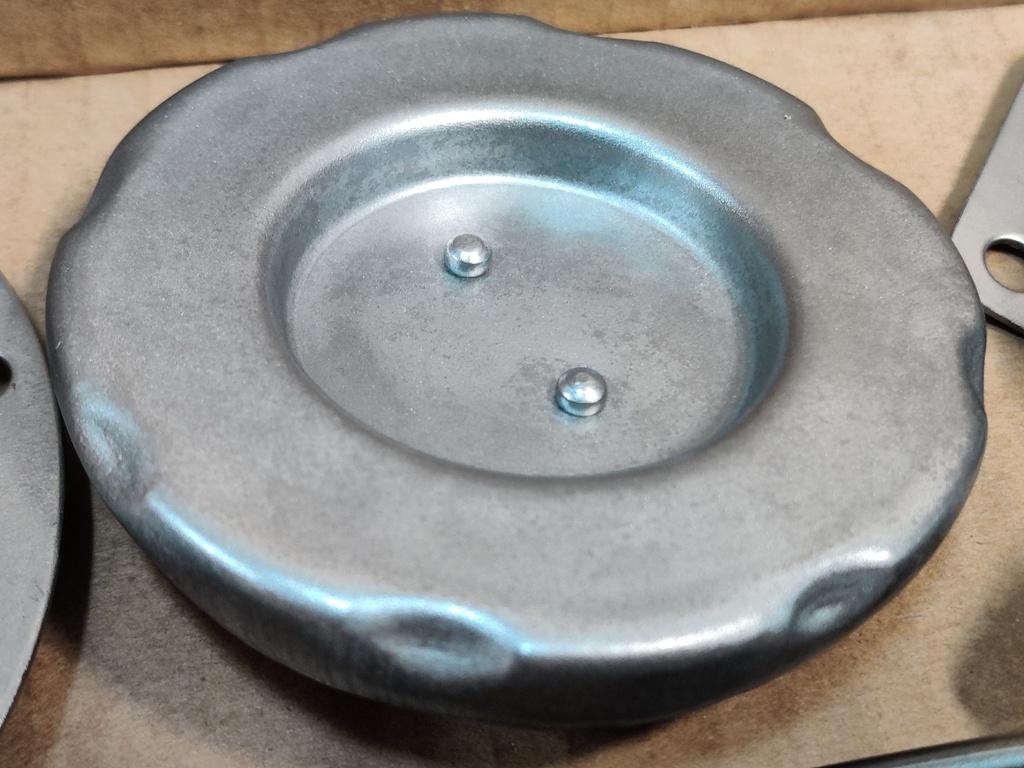
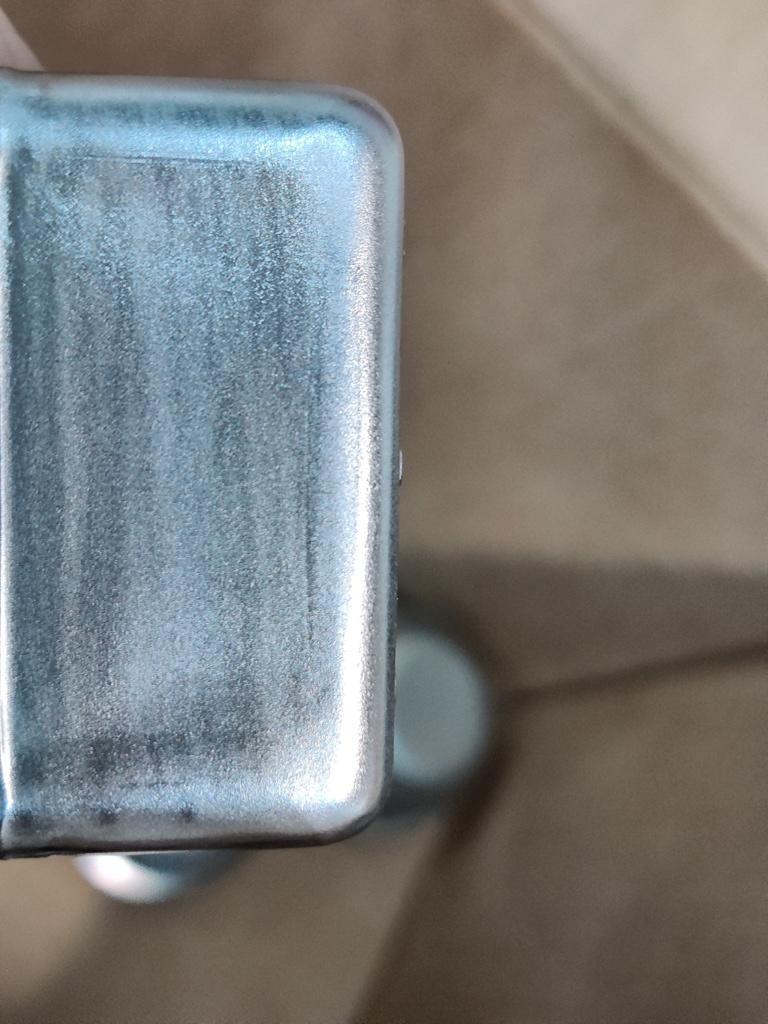
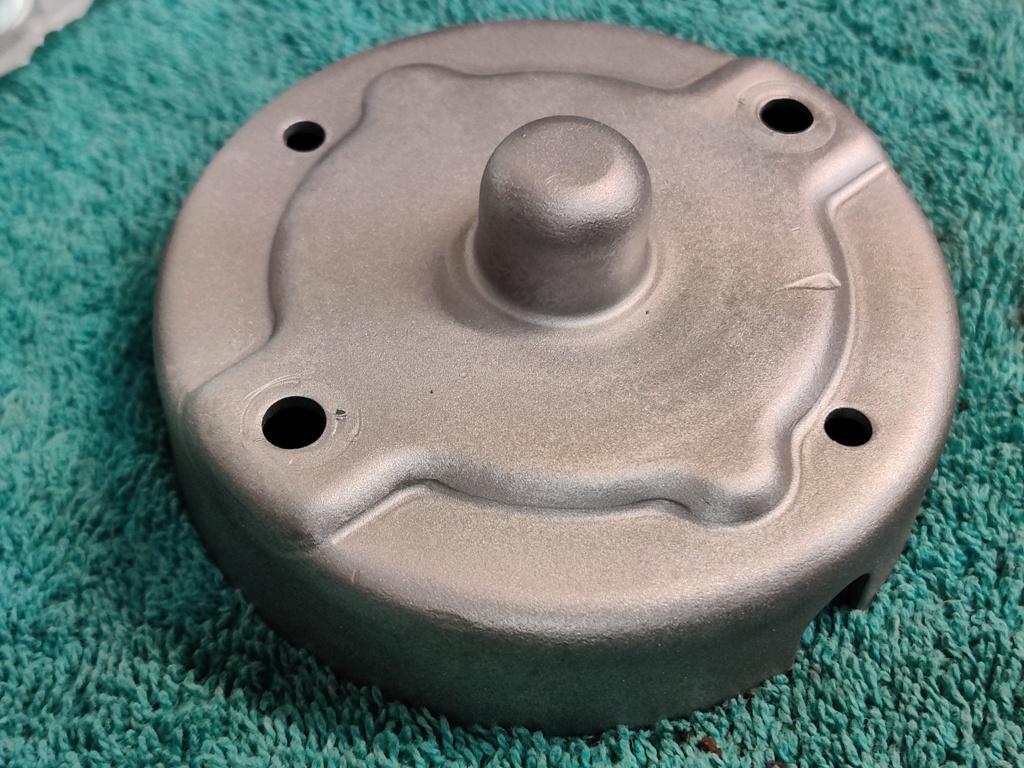
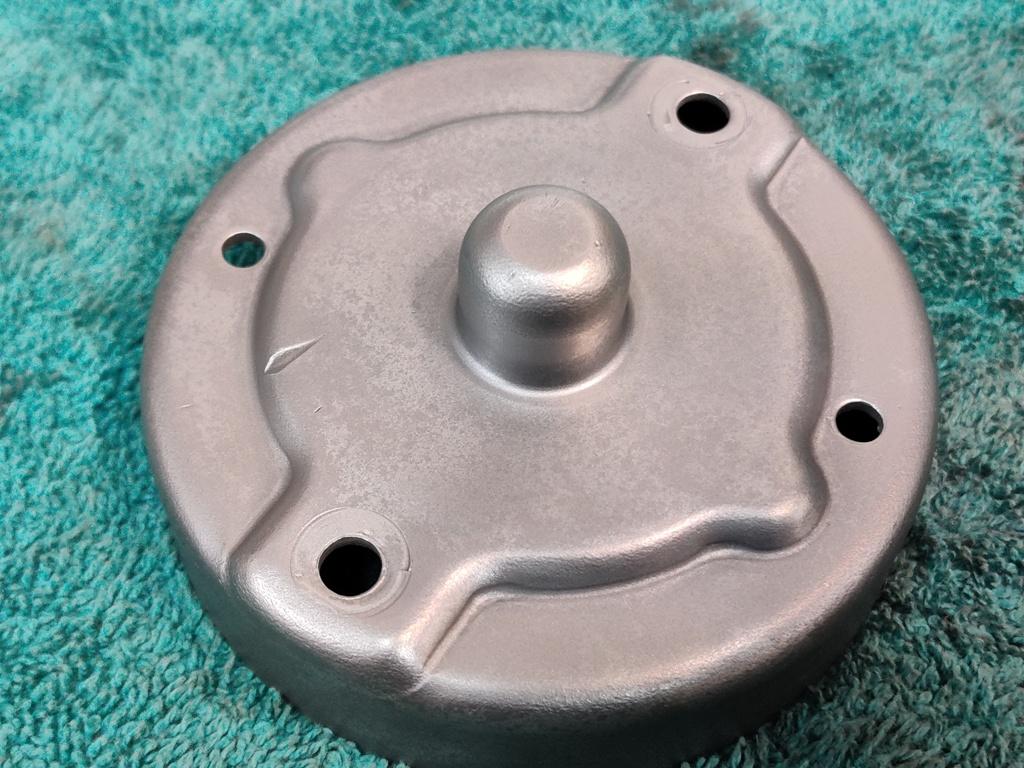
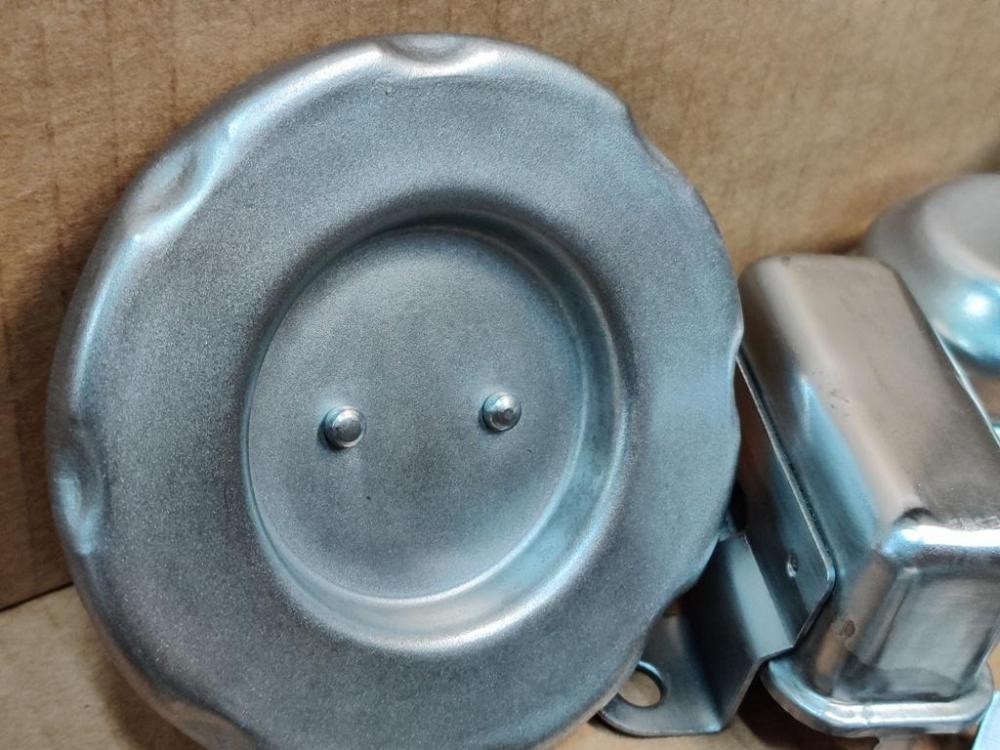
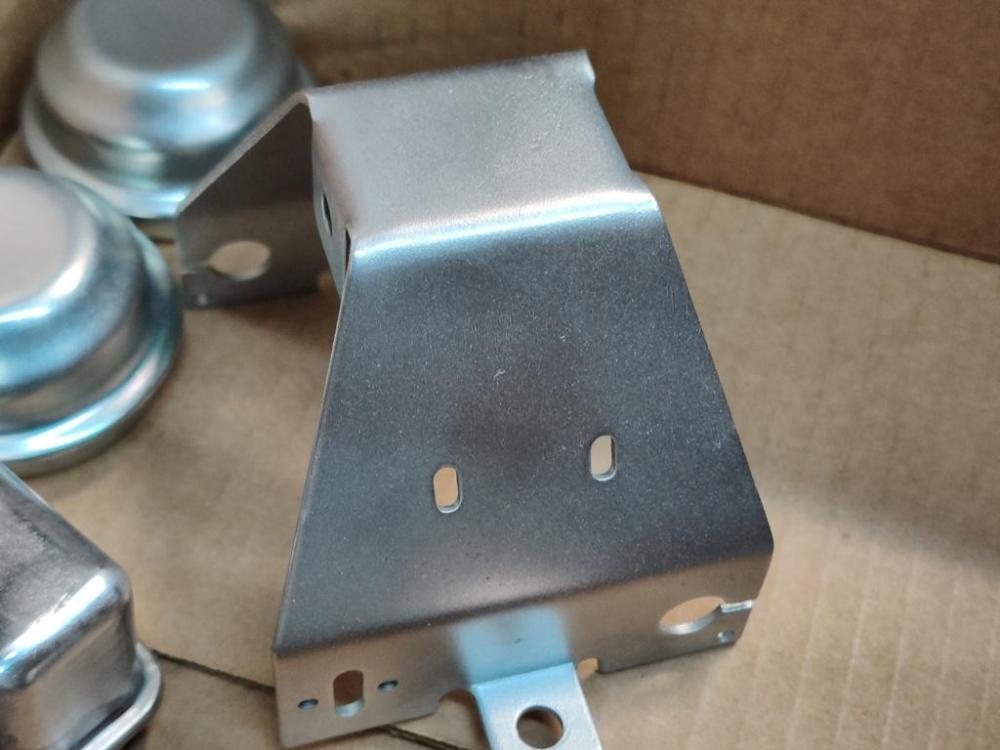
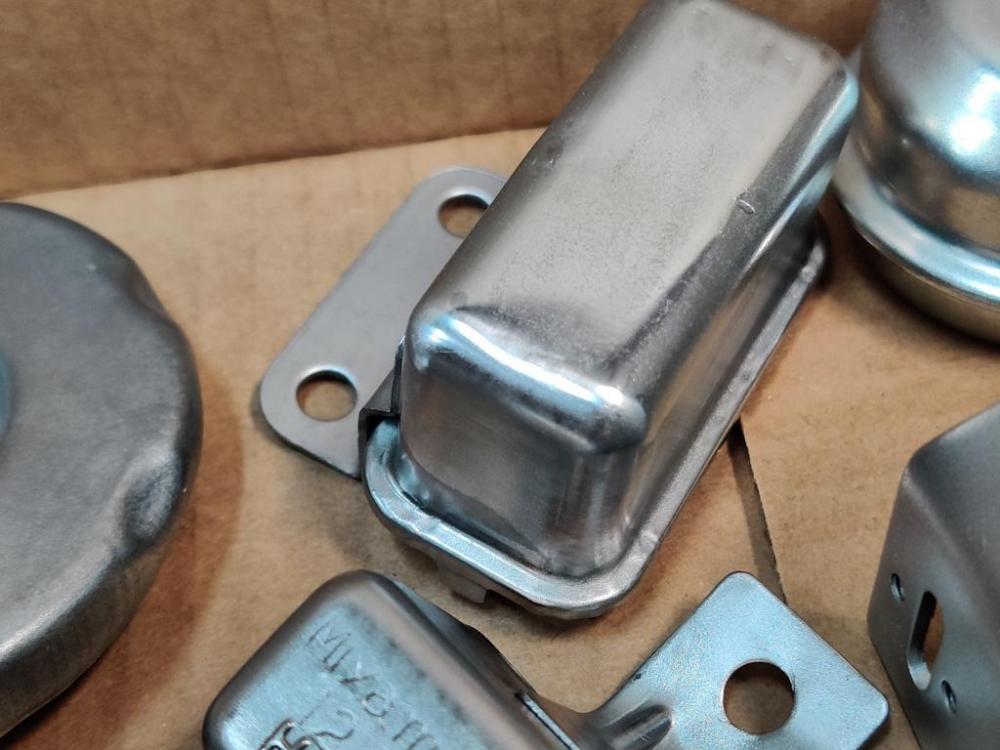
Oh, interesting. I didn't realize all the old plating has to come off. Good to know. I have a few new parts that have clear zinc on them which I will be sending off to be get plated again and finished with yellow chromate. I see. Well, I have a couple of questions then. How do these look? Additionally, when using the dremel with stainless wire brush I am getting some of this (uneven polishing): I assume that is not desirable? These horns - they need more work? With regard to this relay cover, it had some imperfections (dents) which I straightened. I ended up hitting it with 1000 grit sand paper (wet) for a bit to try to help it. It is notably more shiny than other pieces in this cardboard box which I have hand finished. Should I be shooting for that level of shine for the larger pieces if my desire is to come close to replicating the factory finish?


-
As I get further along in the process of prepping parts for plating, I feel my anxiety level rising with regard to getting the results that I hope for. At the moment, I don't know what level of shine needs to be on the parts to get the results I am looking for. I am having a hard time finding relevant videos on Youtube that provide guidance in that regard. Surface finish has an effect for sure. But, what surface finish should I be shooting for? I don't know. Also, I had some level of comfort relying on knowing a plater that returned good results .vs using a plater for which I have not seen pictures of their results. Granted, I understand now that my level of comfort may be misplaced given your experience. I think the parts, as they come from the vibrating tumbler after 2 hours in stainless steel media, are not shiny enough. For some parts, like hard brake line brackets, for example, I have experimented with polishing them by hand briefly with super fine steel wool. Also, some parts will not fit in the tumbler. For those, I have bead blasted and used the same super fine steel wool (aggressively). But that is a lot of work. Also, I have purchased some corn cobb media and plan to experiment with that, instead of the stainless media, plus some amount of "Semi-Chrome" metal polish added to see what that does as another treatment. I will post some pics a bit later.
-
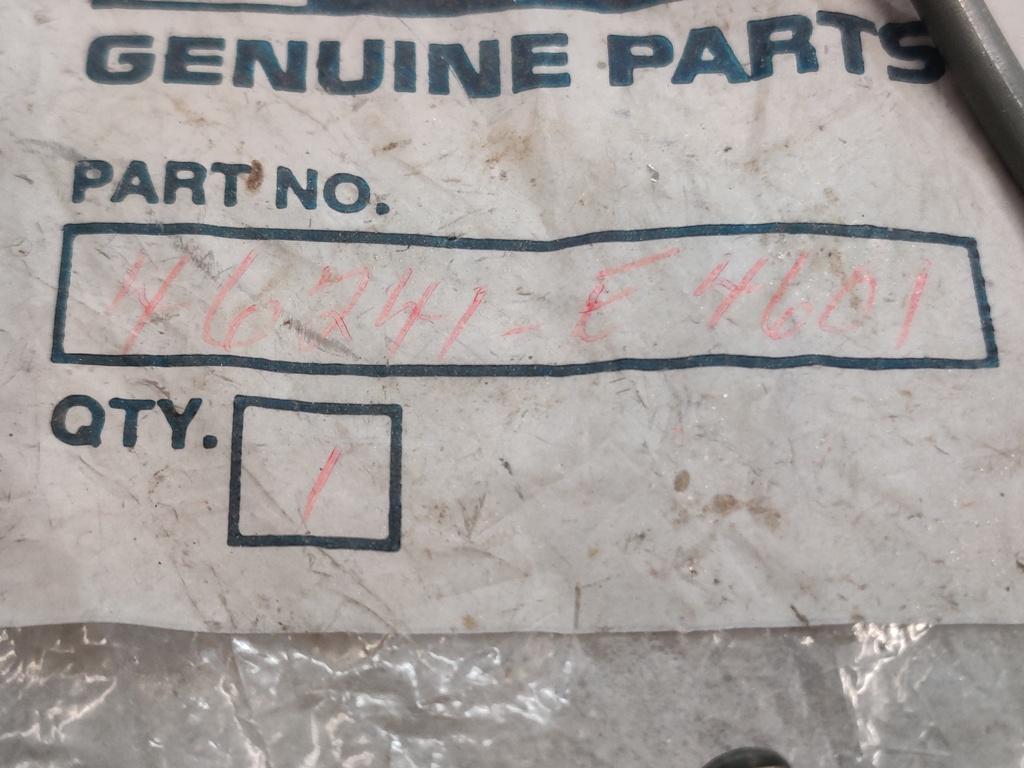
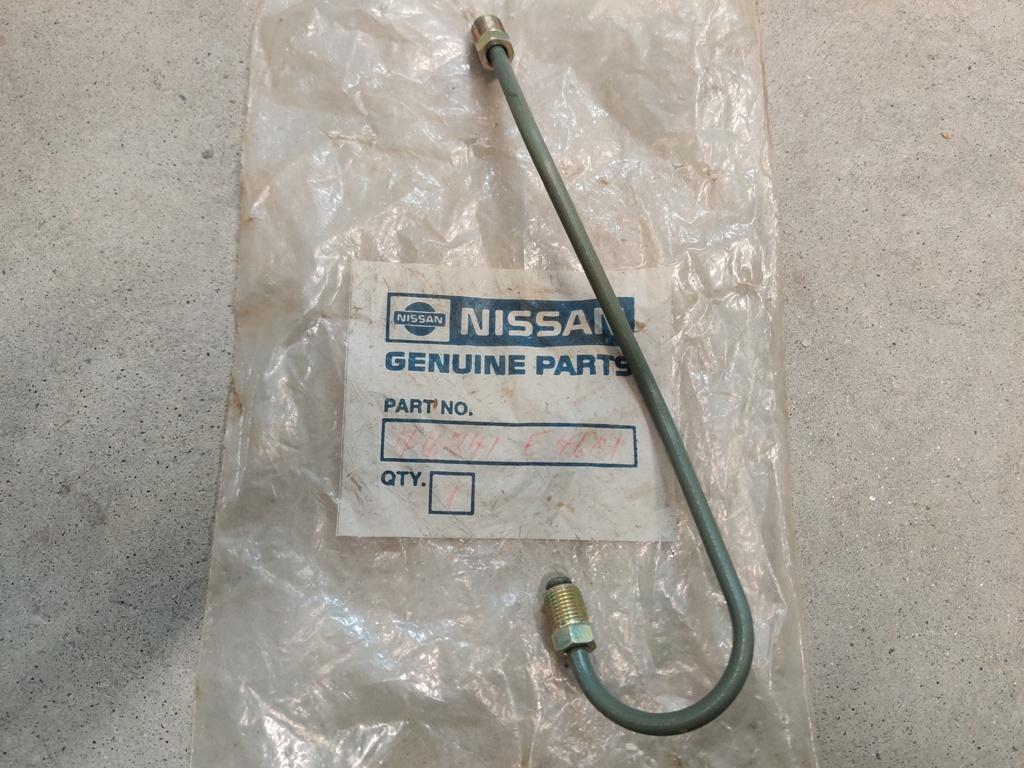
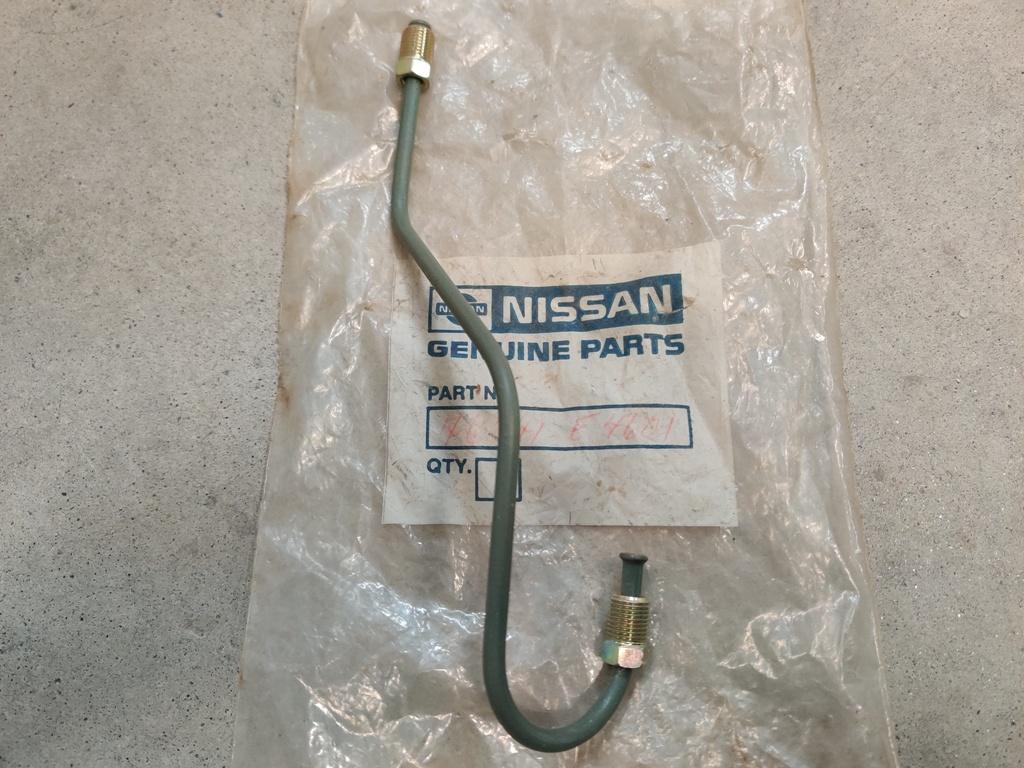
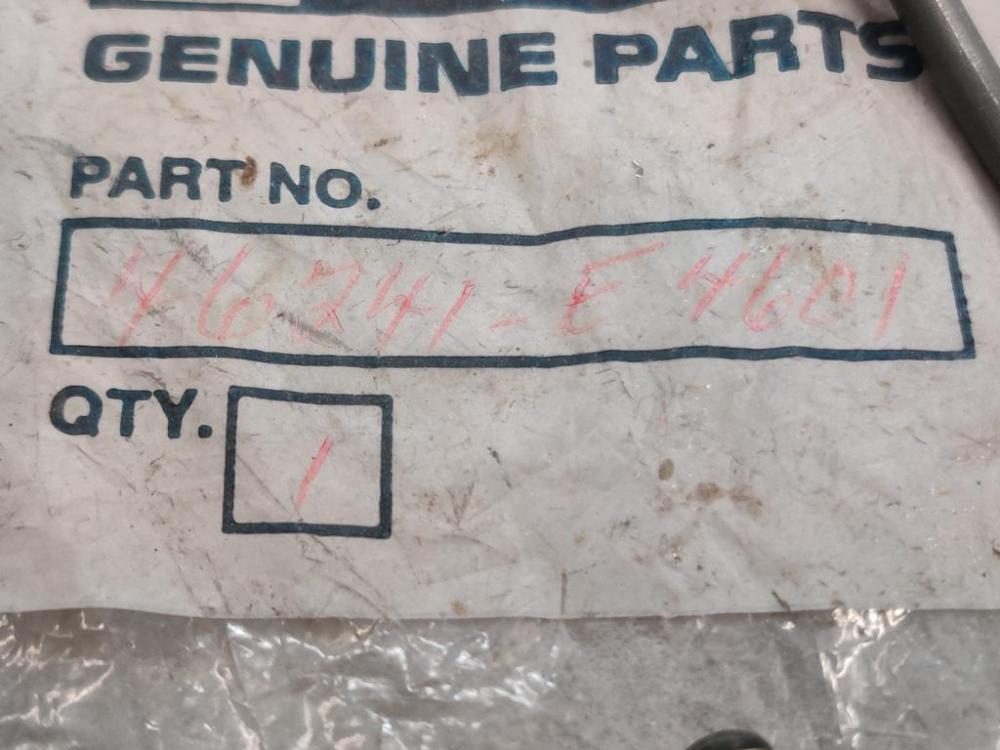
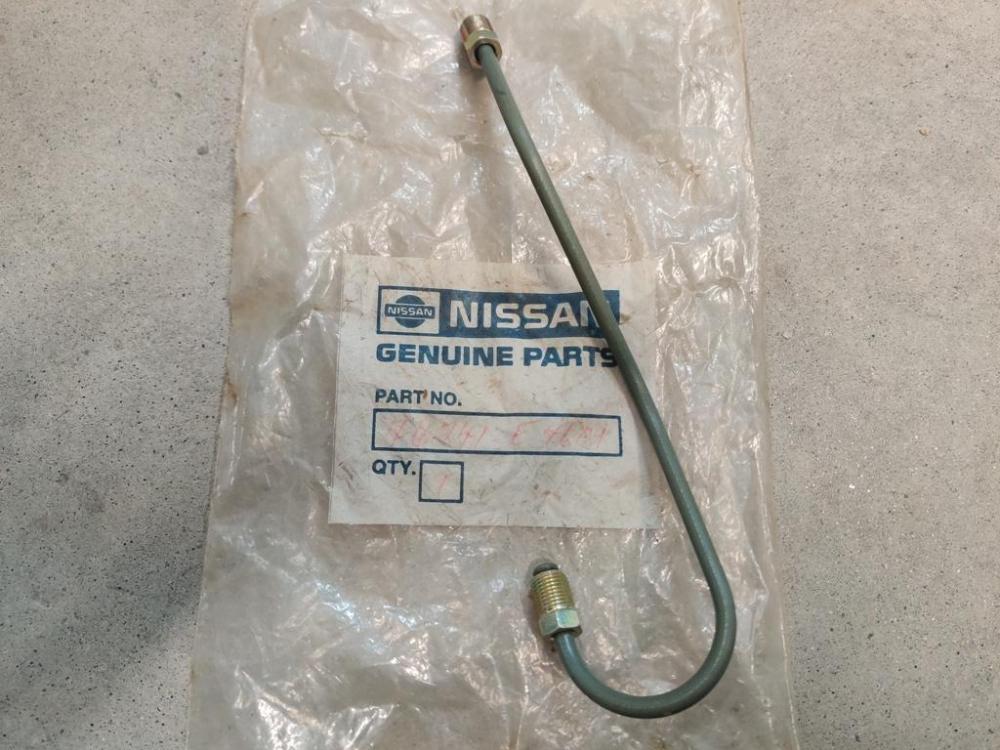
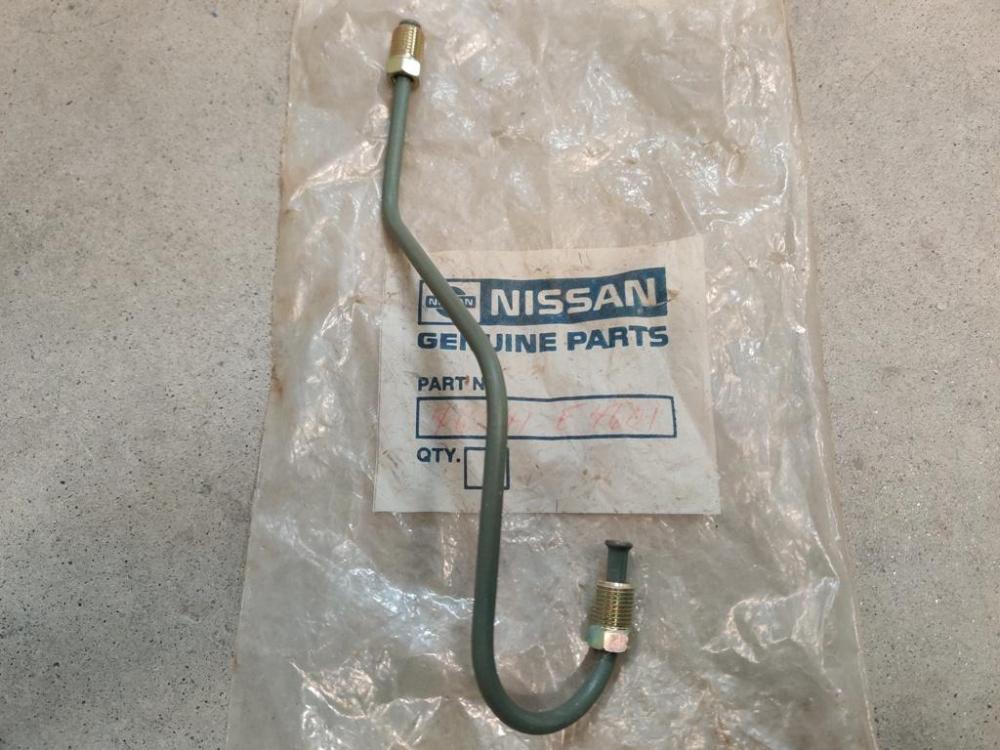
Not saying that the lines weren't gold colored, but I sourced this part in the early 90's from the dealer and it has whatever green coating that the later cars have. I find that of interest. Not sure why they switched to this treatment. Part is for Z's up to 9/71: 46241-E4601
-
Today, I experimented with my vibrating tumbler. I chose from parts I had already bead blasted and grabbed one of a few parts. I ran them in the tumbler for about two hours. I will post a few pics of my set up and media later. I did some searching on Youtube before deciding how to proceed. Following are some pics. I am not going to resize them like a typically do so the difference is easier to see. Glass bead blasted part is on the right (glass bead blasted and tumbled on the left): Glass bead blasted part is on the right (glass bead blasted and tumbled on the left): Glass bead blasted part is on the bottom (glass bead blasted and tumbled on the top): Glass bead blasted part is on the bottom (glass bead blasted and tumbled on the top): Glass bead blasted part which has been tumbled is on the right in each pair: For the large bolts in bottom of pic, blasted and tumbled one the top one.


-
Whoa! Thanks for the piece of information. https://www.facebook.com/JIMC123/ "For your auto carpet needs call Jim at 760-877-3403". I agree. I think I will take a shot at deconstructing them and switching a passenger side nylon piece for a driver side one and reassemble. I am sending parts off to be replated, so, will wait to reassemble when they come back.
-
I find the piece I am talking about difficult to name, but it is actually these things I am after: The plastic part wears. The pin that holds it and the spring in place could be driven out, and possibly reused, I guess. Or another pin made to replace it. The dove tails (the parts that are cast and break easily) are still available new from Nissan, though the tapered holes in them for the screws and lock washers are smaller in diameter than the originals on the 240z. Come to think of it, one solution would be to deconstruct a passenger side one (less wear on the plastic) and swap that piece over to a driver side. 😎

-
I would have, gladly, but I came across info a year or more back that Chester and Herod closed. Their facebook page has an indication that the business is permanently closed. https://www.facebook.com/chesterandherod1924 Carpet is relatively cheap compared to other parts of the restoration. I would love to have authentic reproductions made.
-
A few parts I have had a hard time finding for my 1971 240z rotisserie restoration and would love to source either from OEM or a faithful reproduction of original: Carpet jute (dark color, correct thickness, etc.) Carpet (best option that I have found that is currently available) Differential rear crossmember washers (upper and lower) with the rubber bonded on them Rubber bushings for the steering rack A quality windshield without the non-factory blue tint strip across the top Antenna... and/or antenna parts Dove tail receiver (bolted to lower part of door latch receiver) Shift knob Hub caps Hand brake handle
-
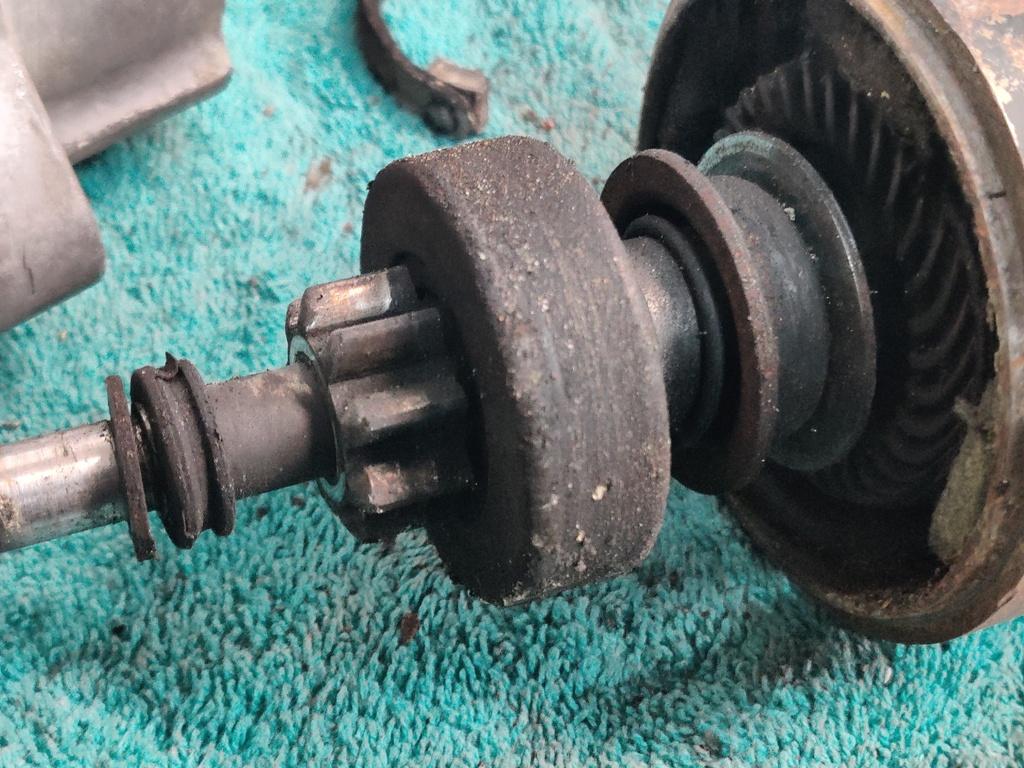
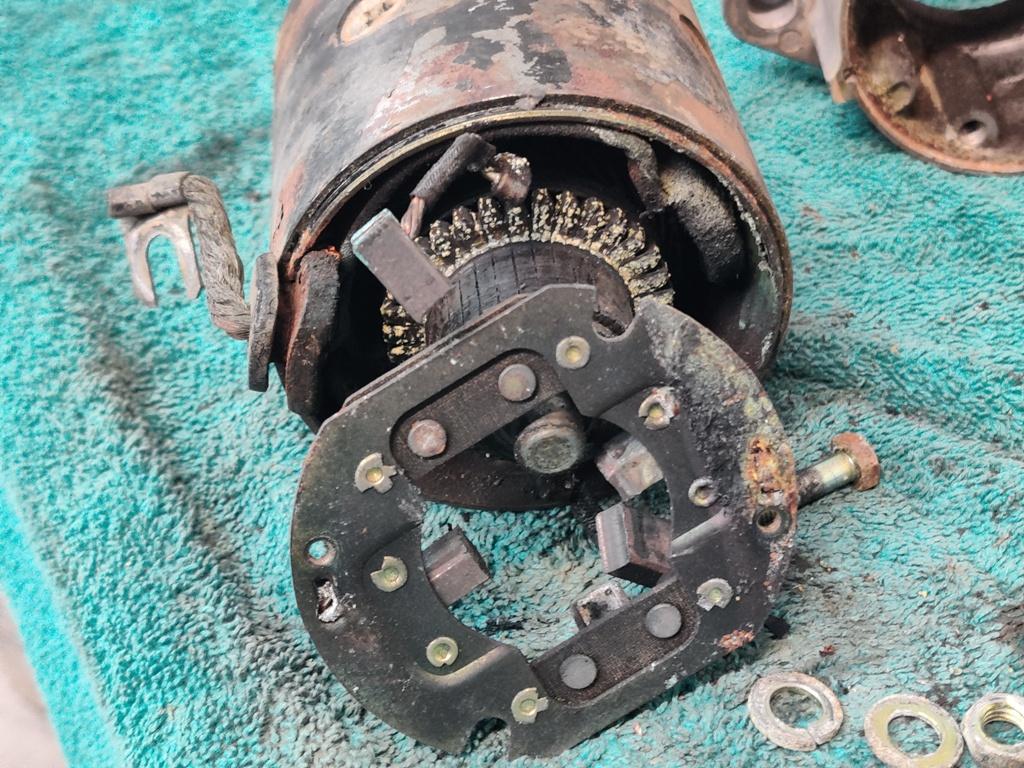
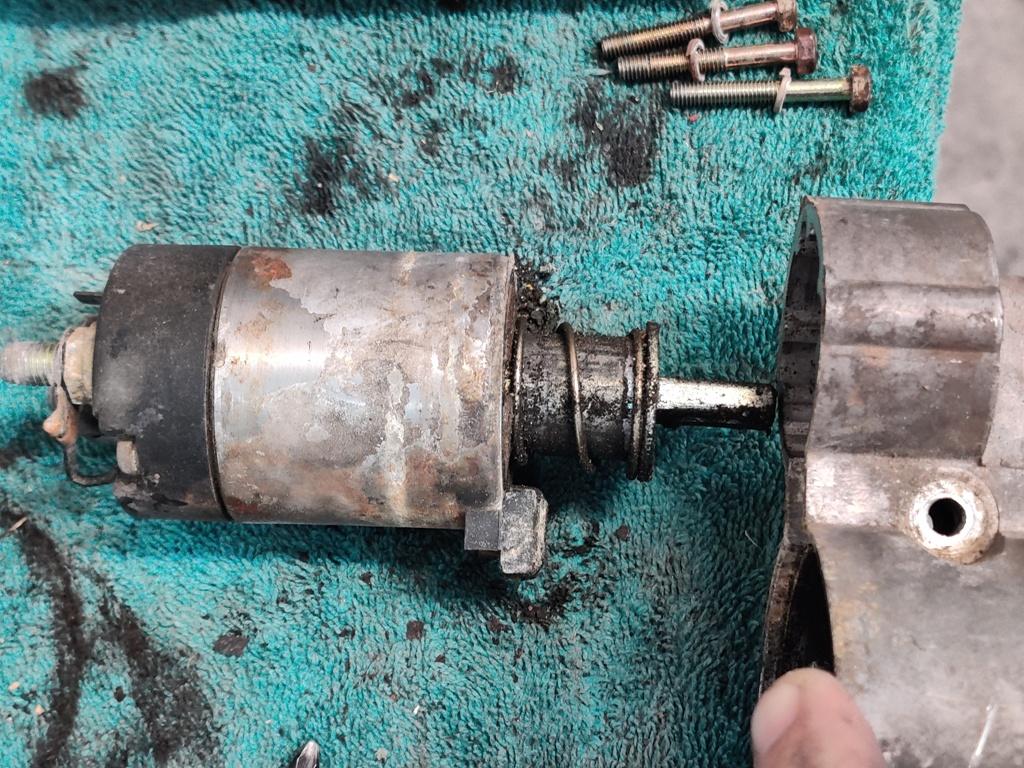
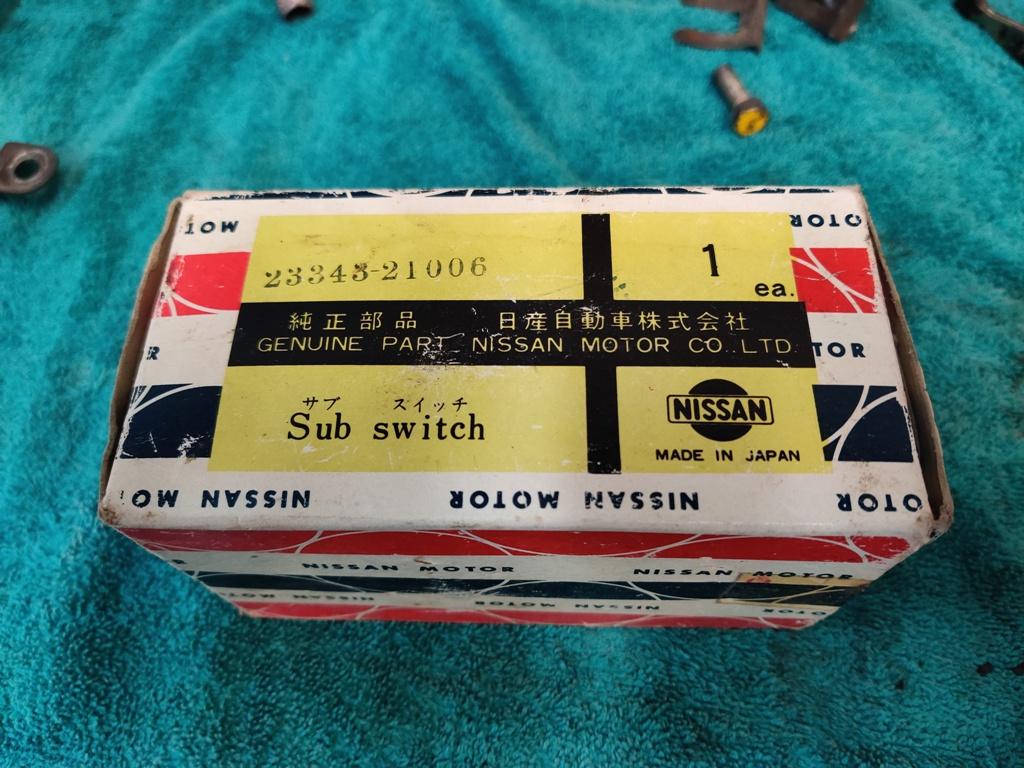
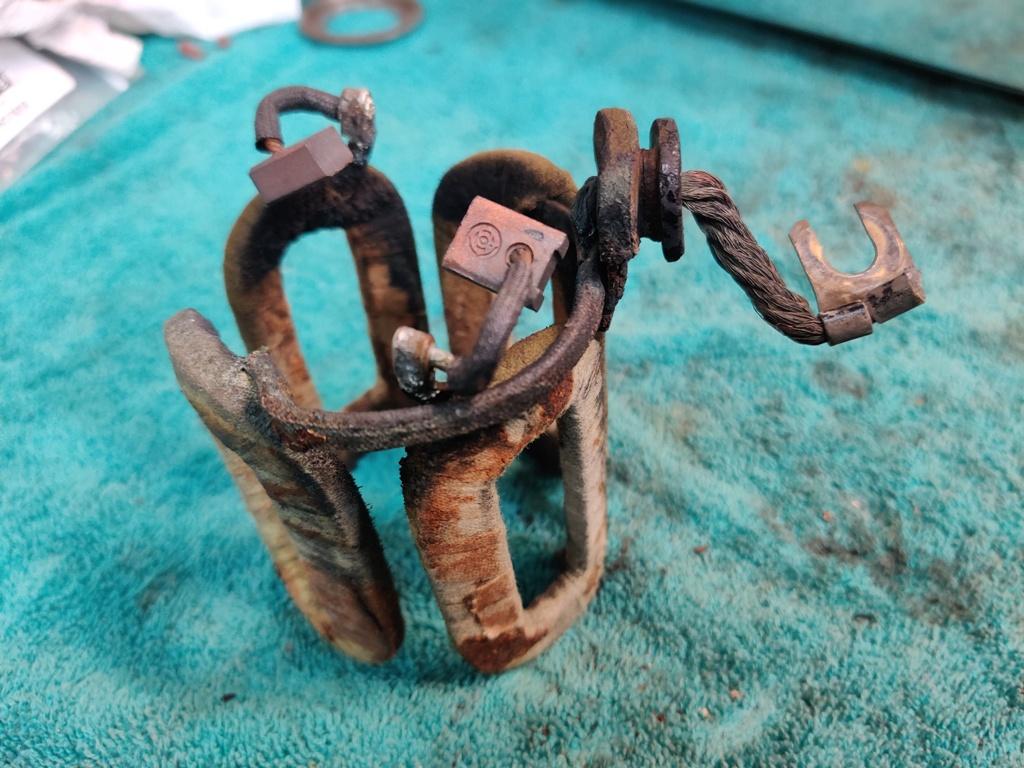
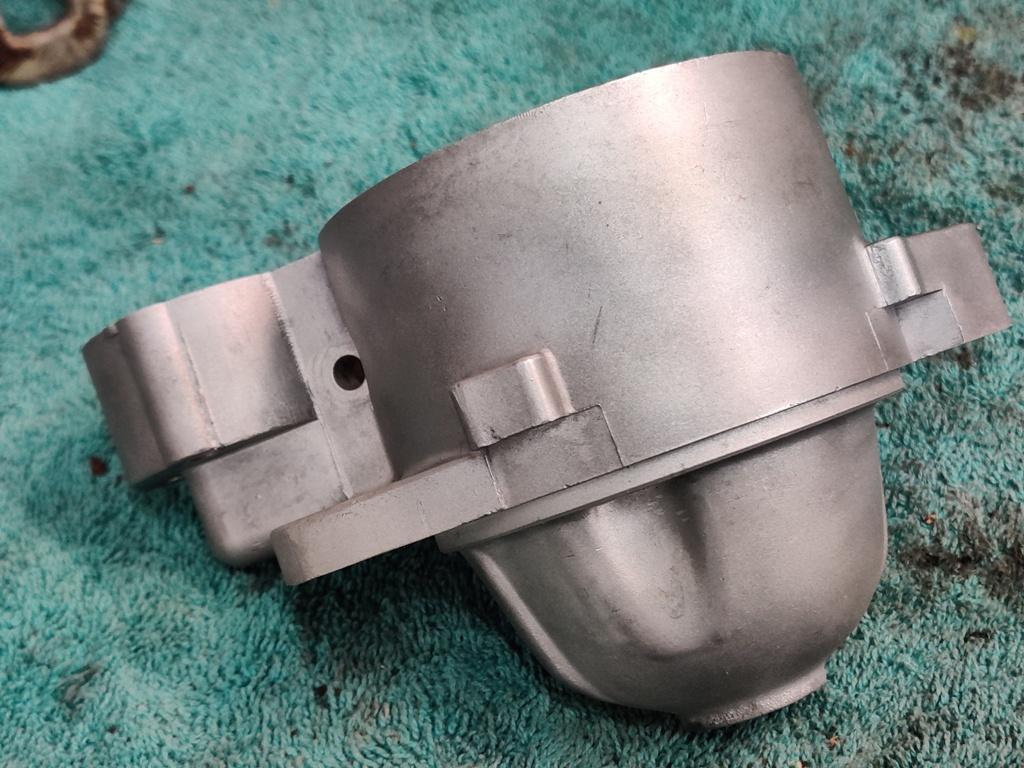
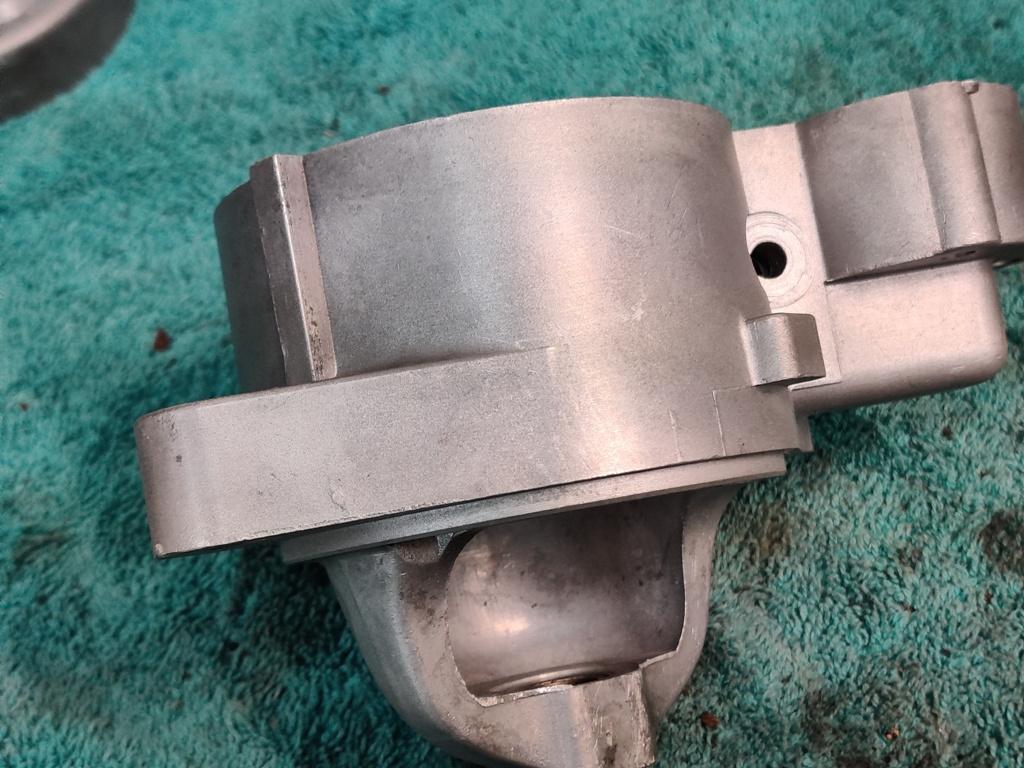
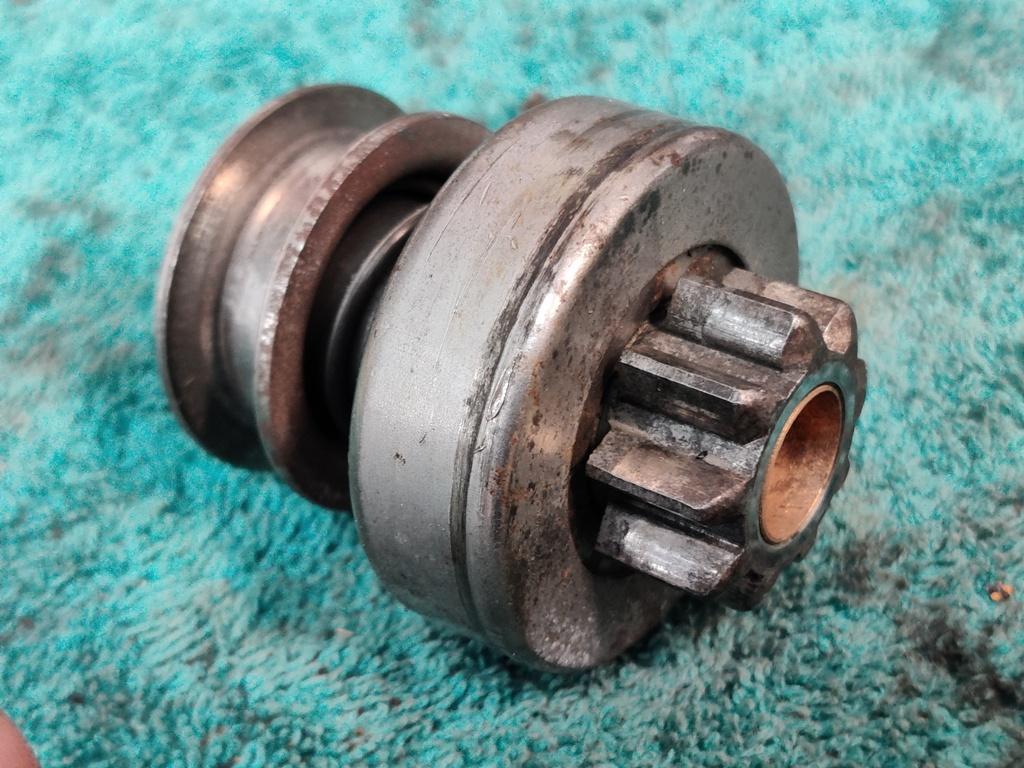
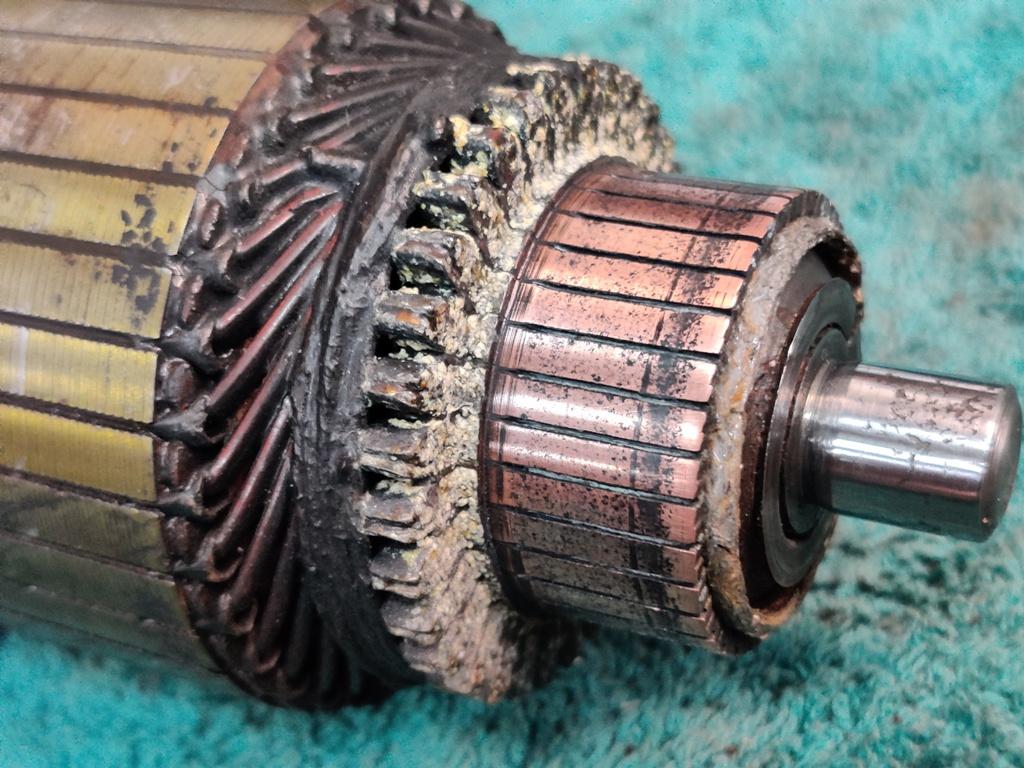
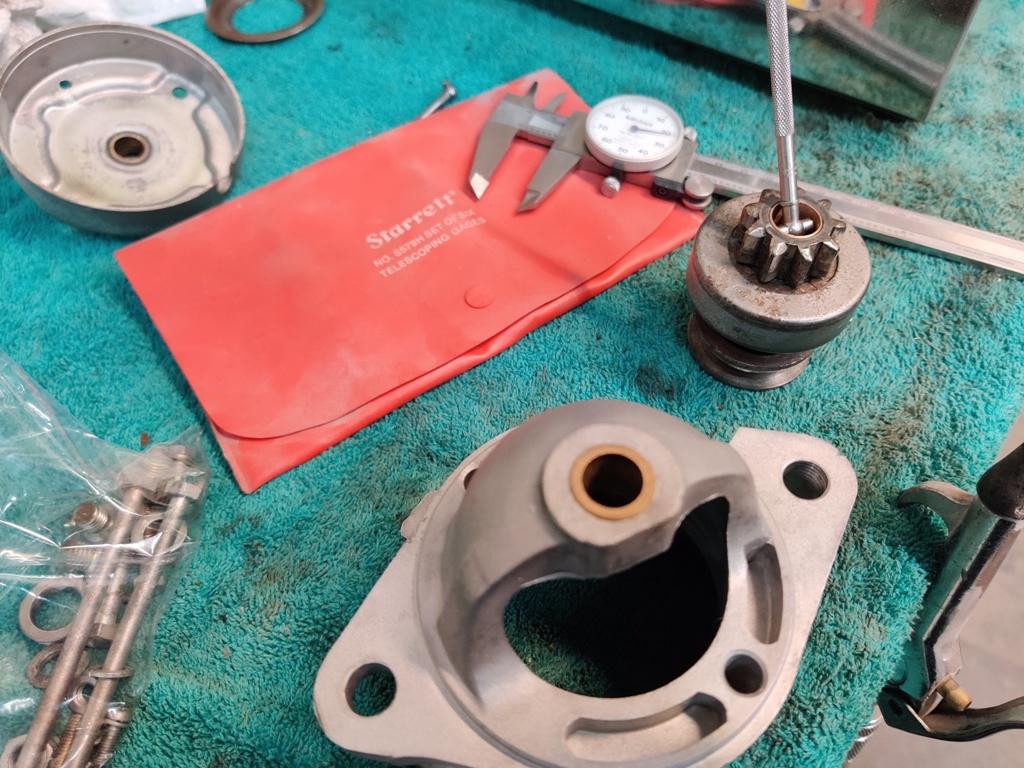
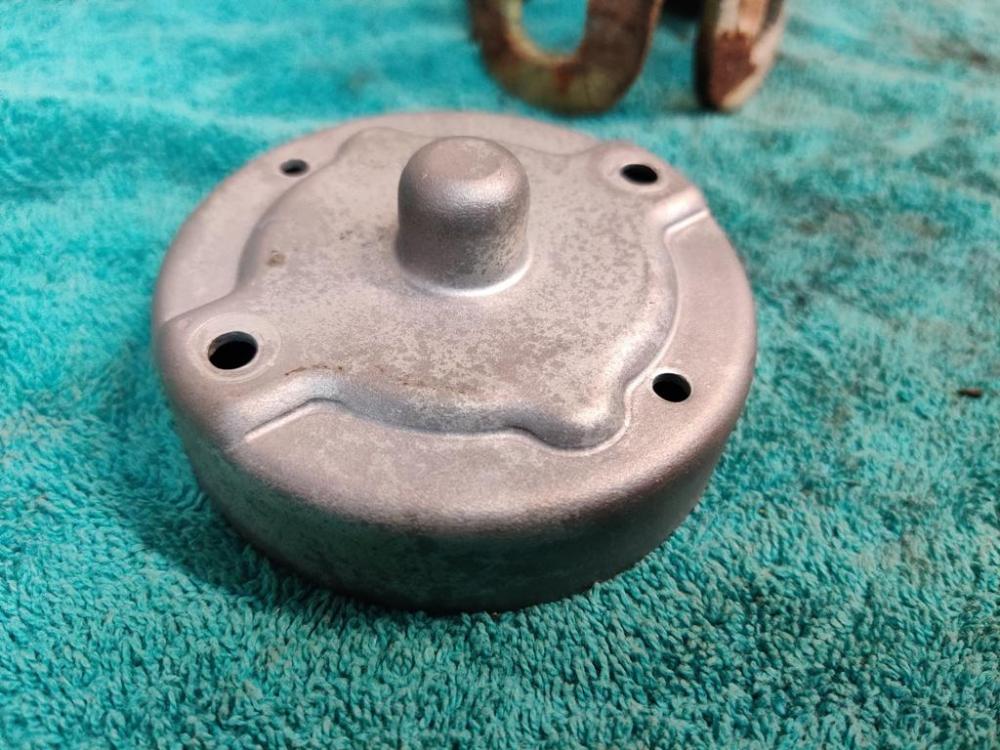
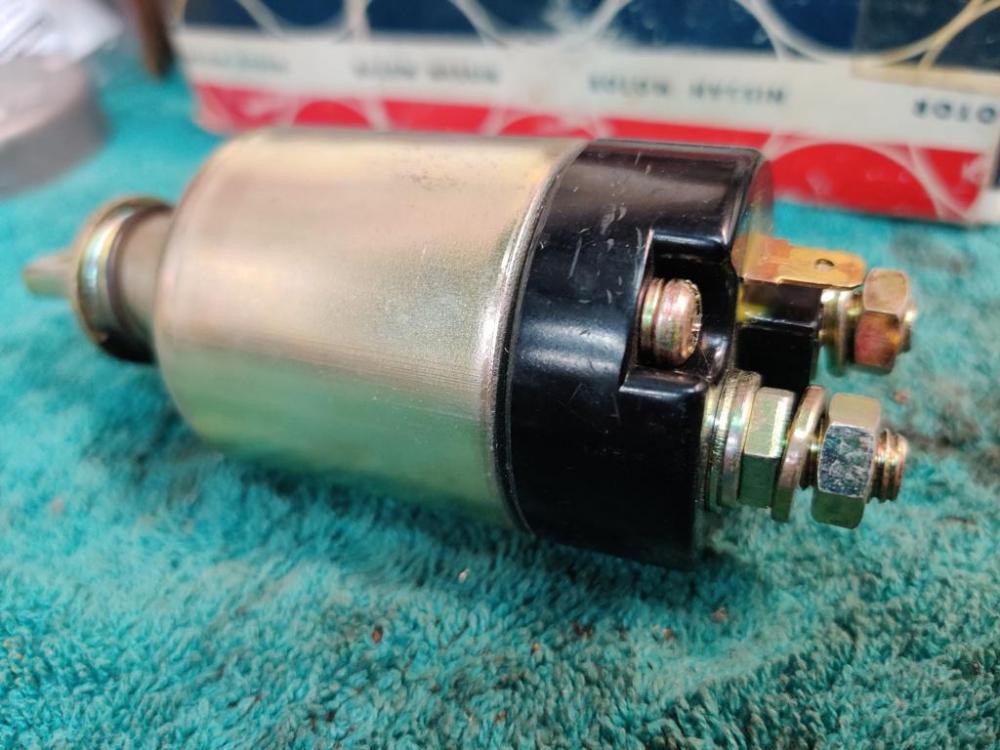
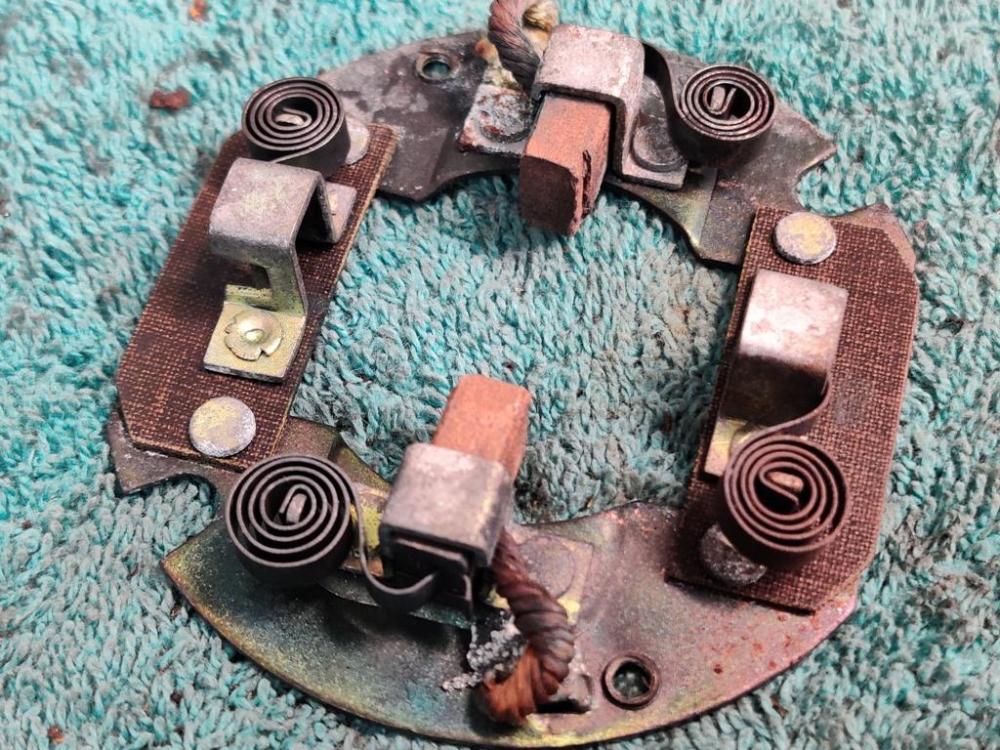
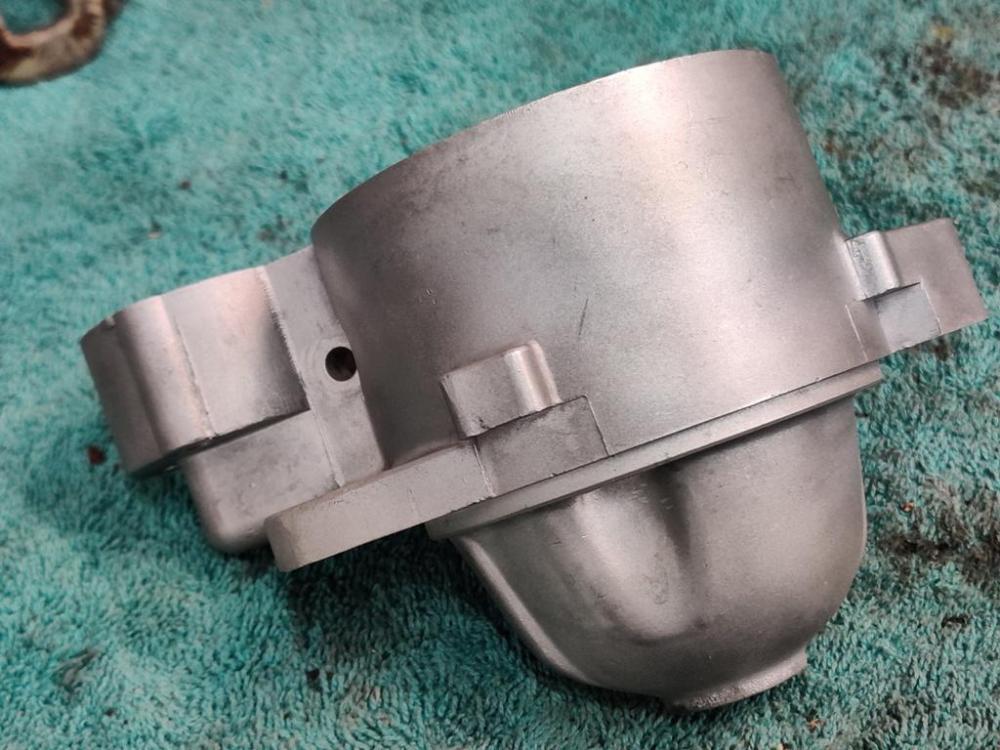
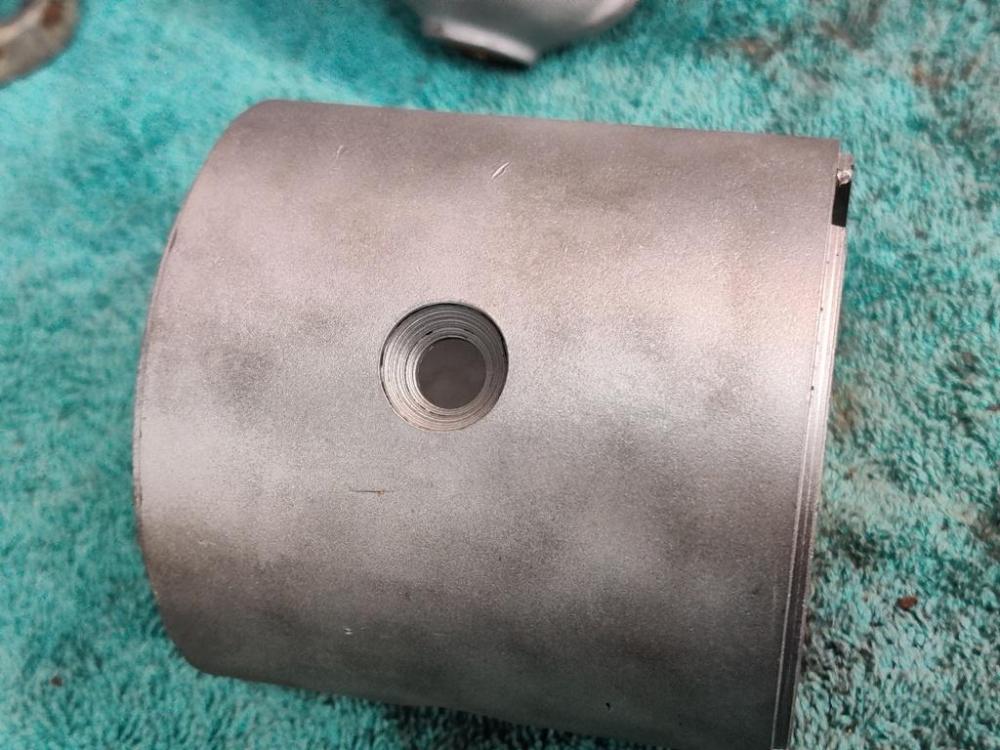
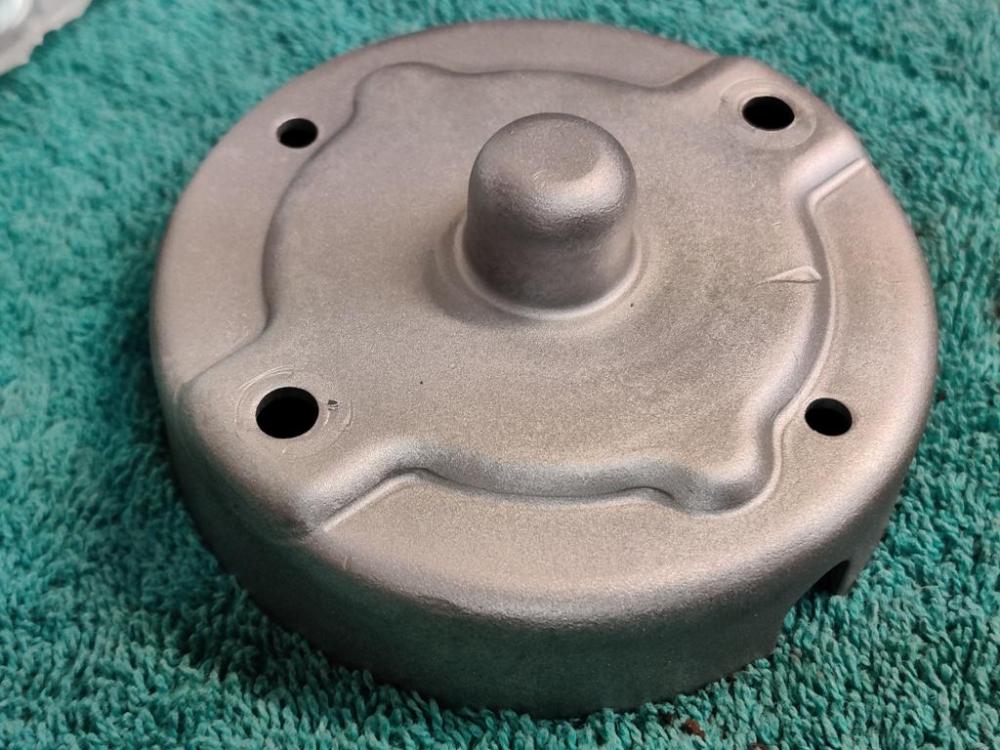
I am still rounding up hardware to prep and have re-plated. That quest led me to the starter. I forgot to take pictures of the state it was in, but basically, the plating on the starter and solenoid looked like it was mostly gone, surface rust, light corrosion, etc. It was functional, as it started the car before I removed it. I can find remanufactured starters for around $50 delivered. However, it is a bit of a guessing game as to whether the starter will come with the same parts plated as the factory did. And remanufactured starters are not all remanufactured the same way - some are lower quality, some are higher. After doing some searching, I determined that bushings are available for the front and rear of the commutator. I took some measurements of my starter components and compared them with the factory specs in the workshop manual. Still trying to determine which way to go (rebuild mine, or go with a remanufactured unit), my decision came down to the fact that I could not figure out how to get the solenoid case off (to re- plate it). I was about to go with remanufactured when I dimly recalled having purchased an OEM solenoid many years before (like more than 30) for my 510 that I never used. So, after finding this in one of my 510 parts boxes: I decided to rebuild my starter. Pics of tear down: After tear down, I put most of the parts in an ultrasonic cleaner: The brush holder came out nice: I glass bead blasted some of the parts (front cover, hardware, rear aluminum housing, steel housing) Some slight corrosion on the steel casing where the rubber grommet goes. Front cover before glass bead blasting: Starter drive (gear and clutch) looks pretty good overall and functions properly. Armature seems ok (measures within spec and shaft ends are within spec) Further glass beading of the front cover gave a more uniform finish. In the last picture, in addition to the glass beading, I took a piece of very fine steel wool to put a bit more shine on the surface. Next, I will have to order the bushings, and do the work to replace the old ones and size them to fit properly.


-
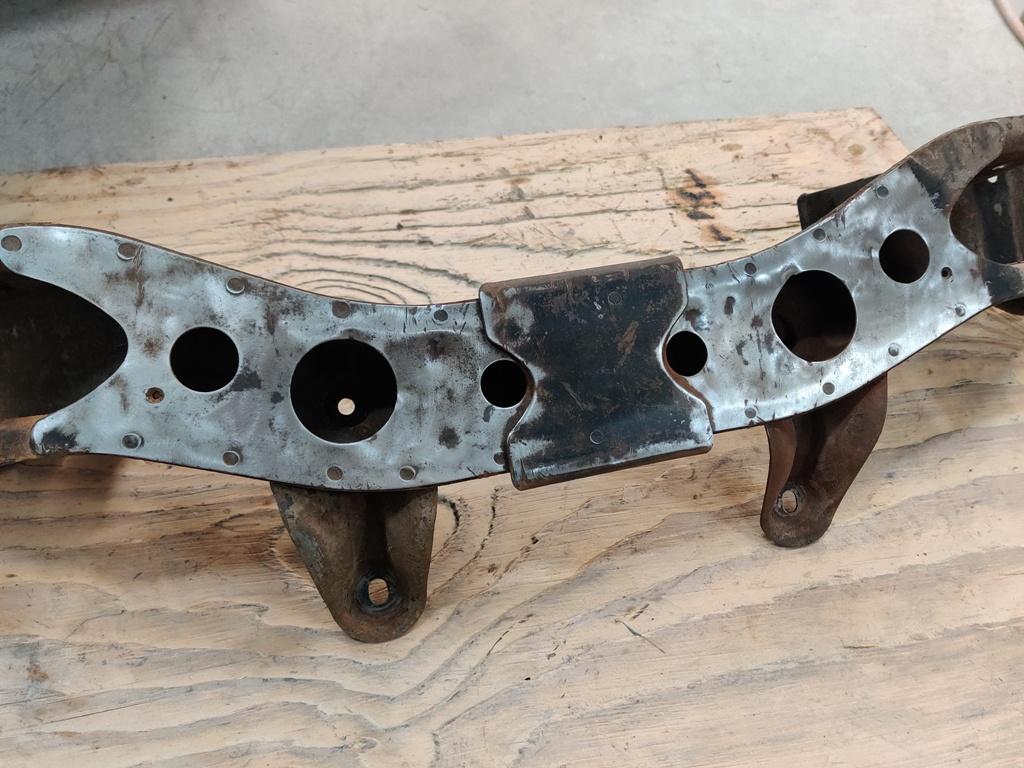
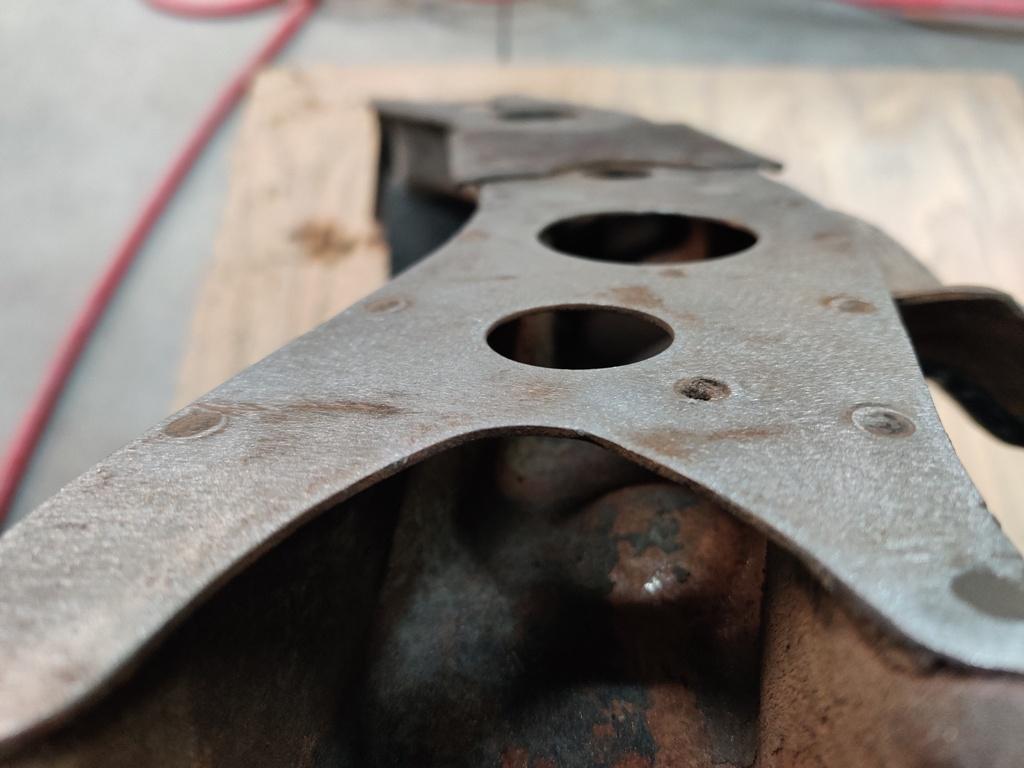
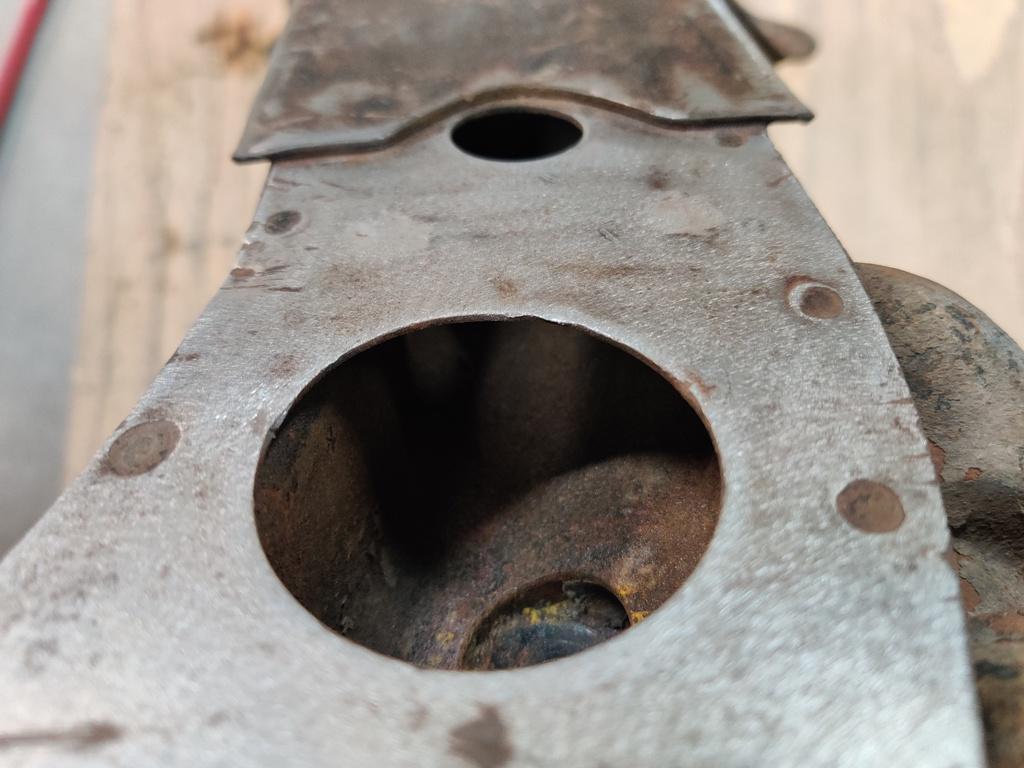
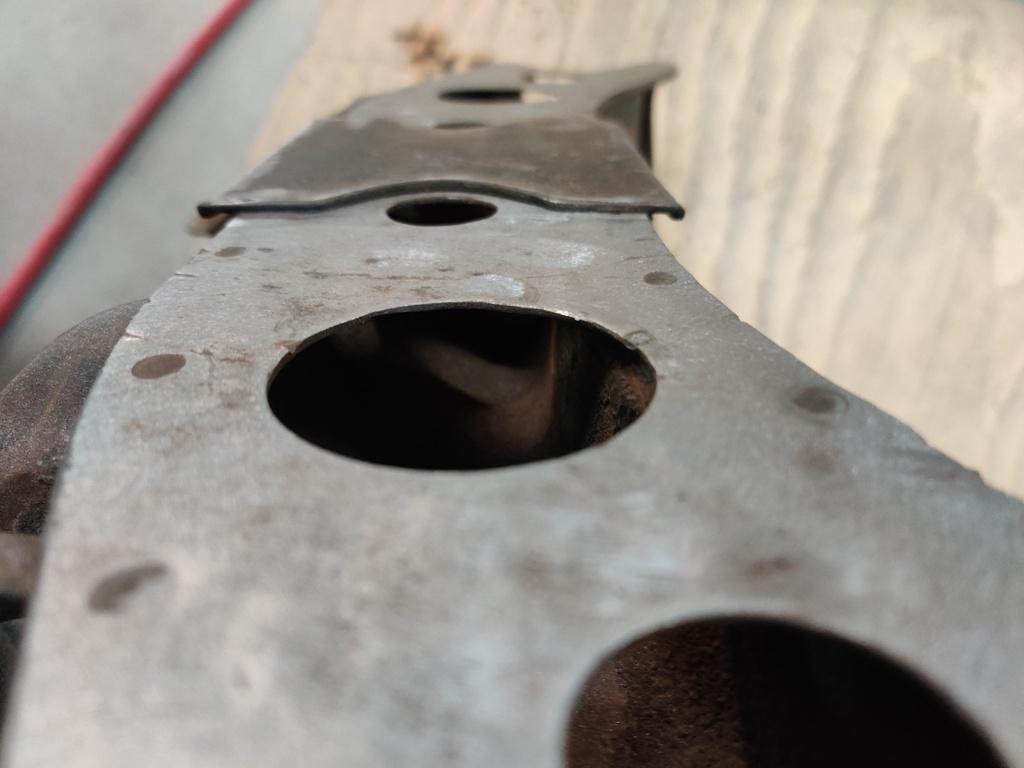
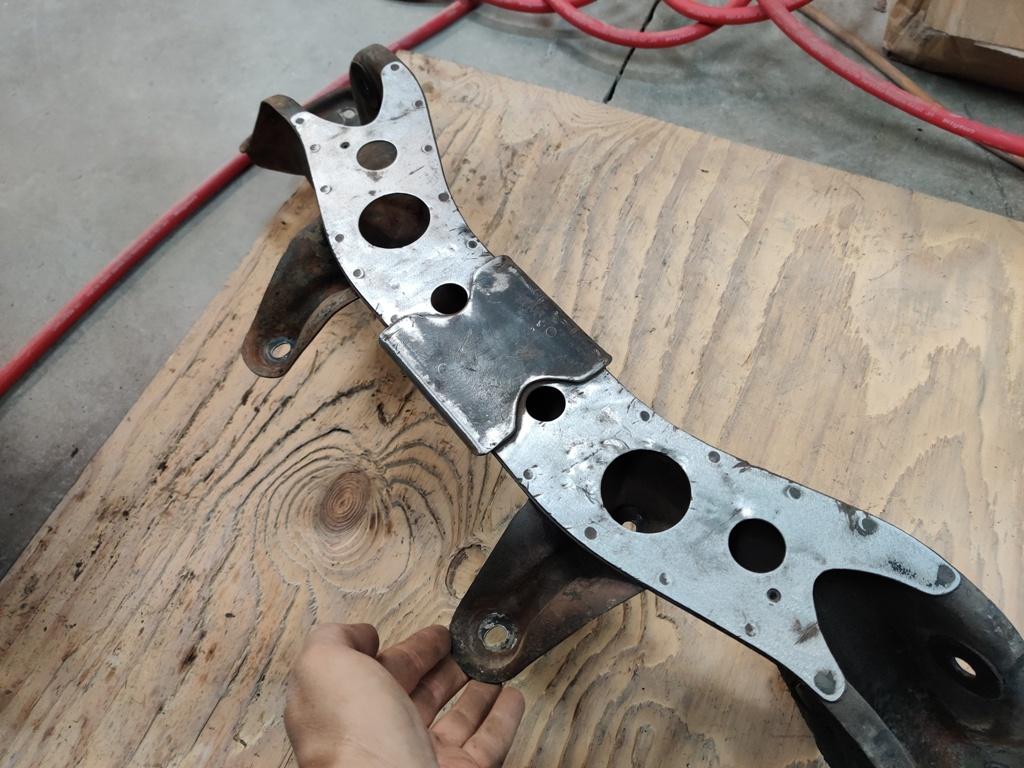
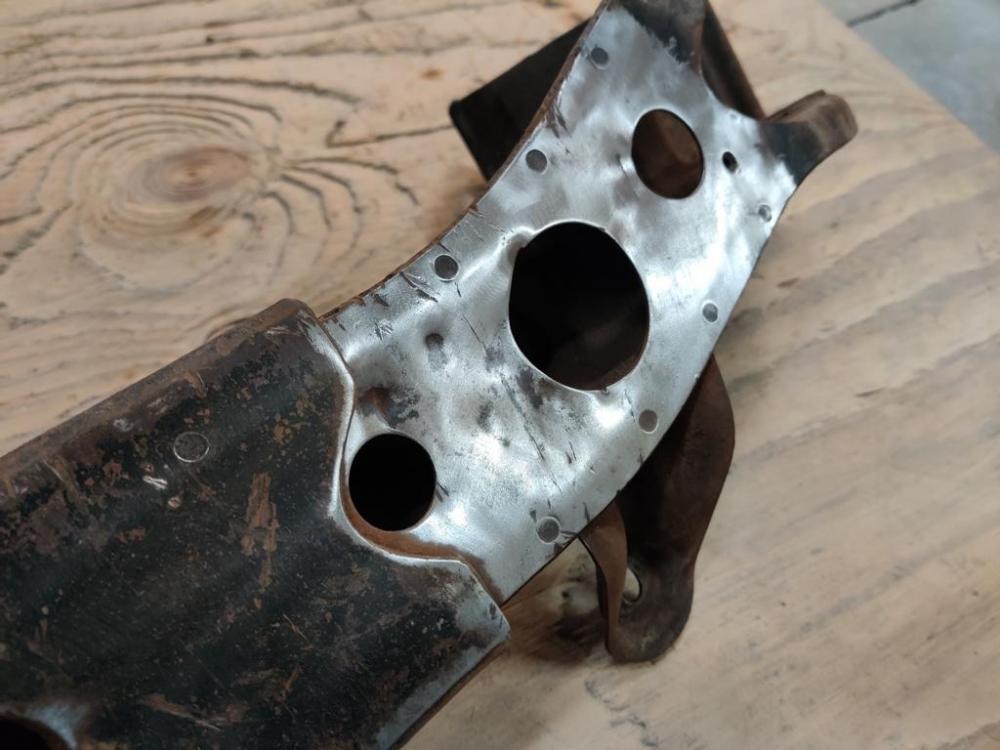
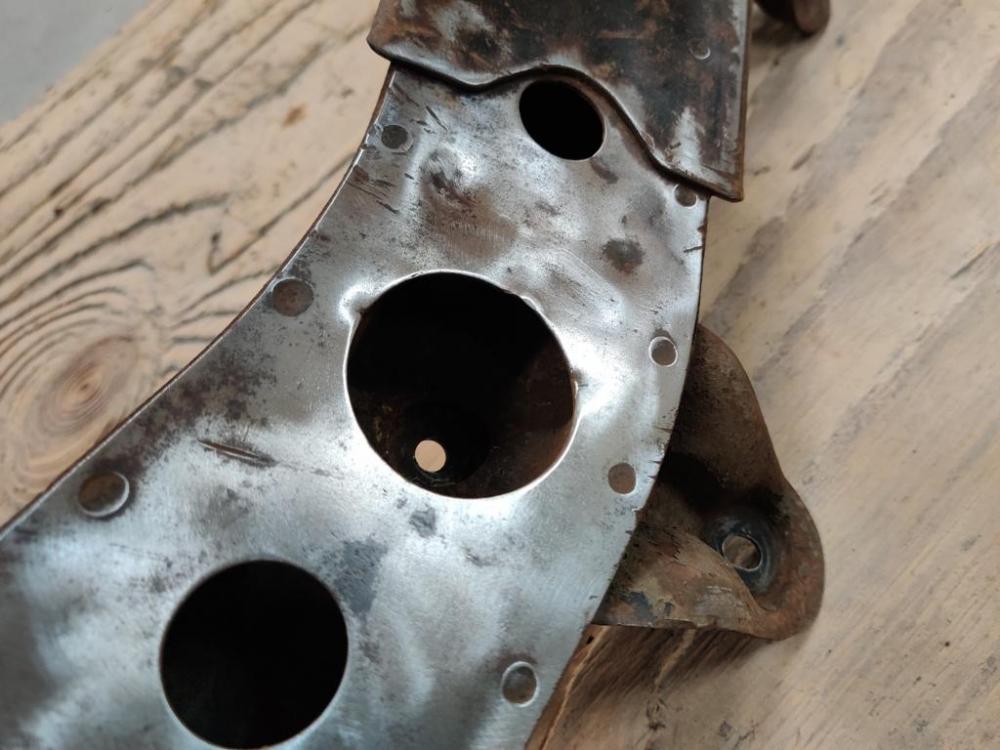
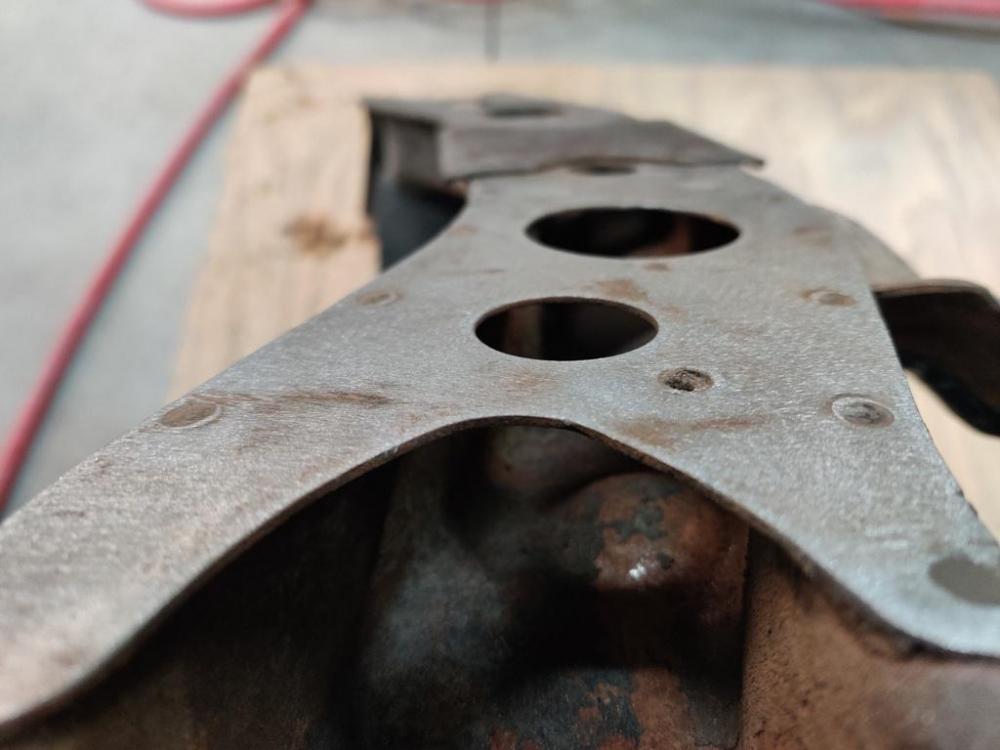
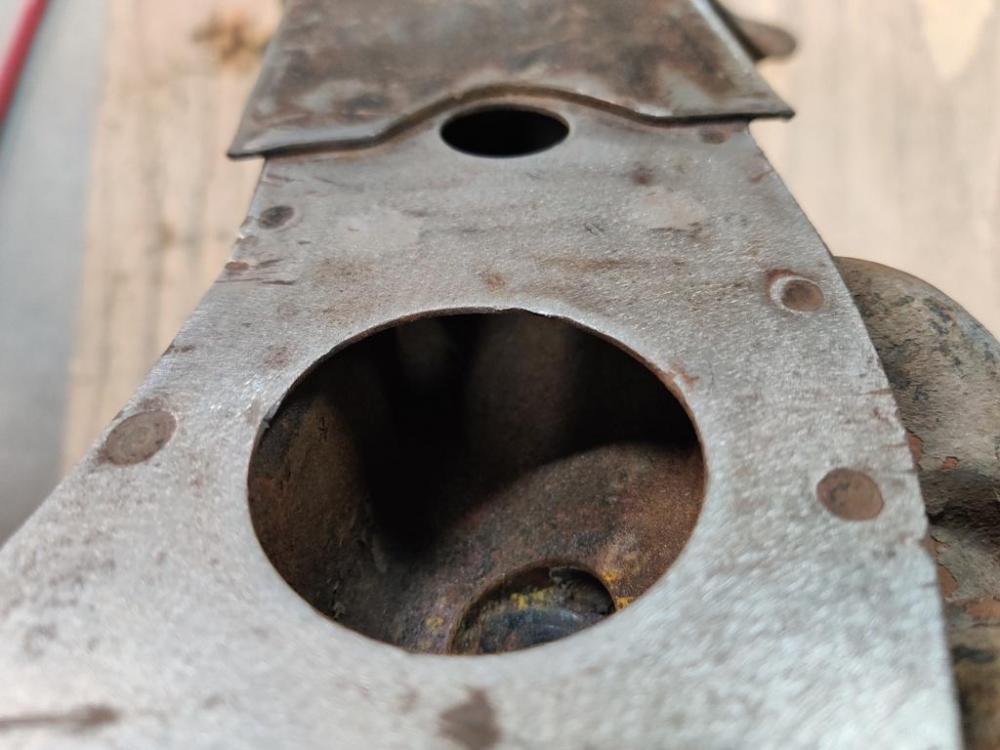
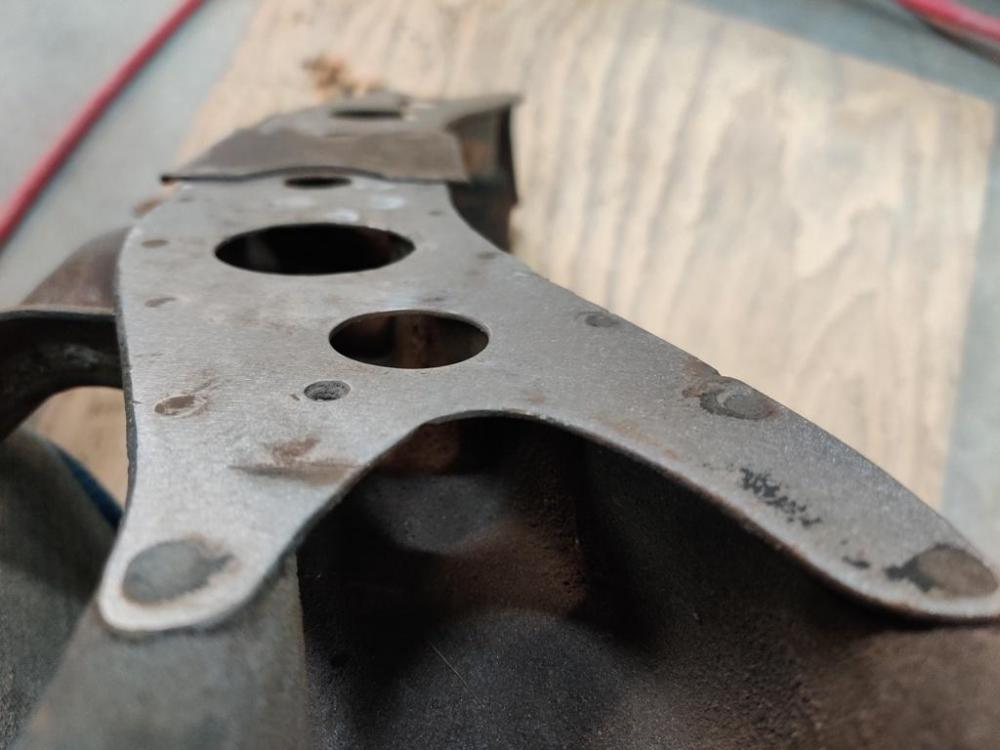
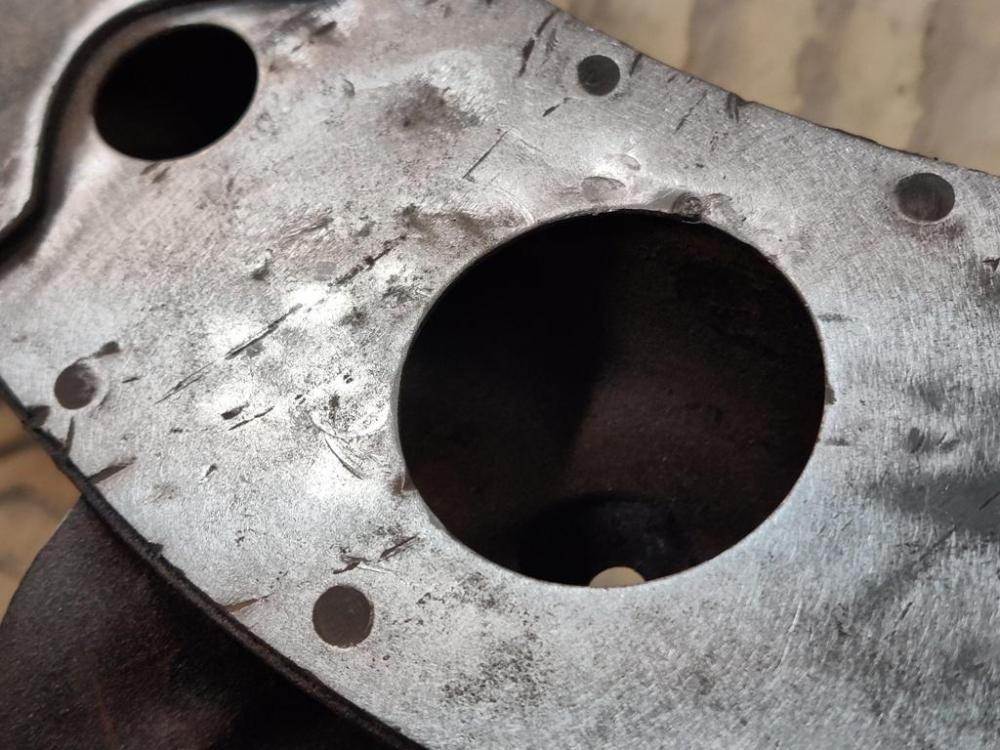
Further disassembly of the suspension components was undertaken yesterday. With the front crossmember bare, I turned by attention to addressing the dents in the bottom that had occurred over the cars time on the road. A few pics after grinding surface gunk off: Where possible, I use different sizes of sturdy C clamps and some 1/4" thick steel plate pieces to straighten dents such as these. Putting the plates (small rectangular ones) on the inside and outside of the metal to be straightened and then clamping very tightly with the clamps pulls the metal back where it was originally. I also used the stud welder and puller tool on a few small spots. Finished with a light sanding by the DA sander and 80 grit. The scratches and slight imperfections/low spots are easily resolved with just a touch of body filler. Straightening was only about and our and a half of work. The final result after sand blasting priming and painting should be really nice.


-
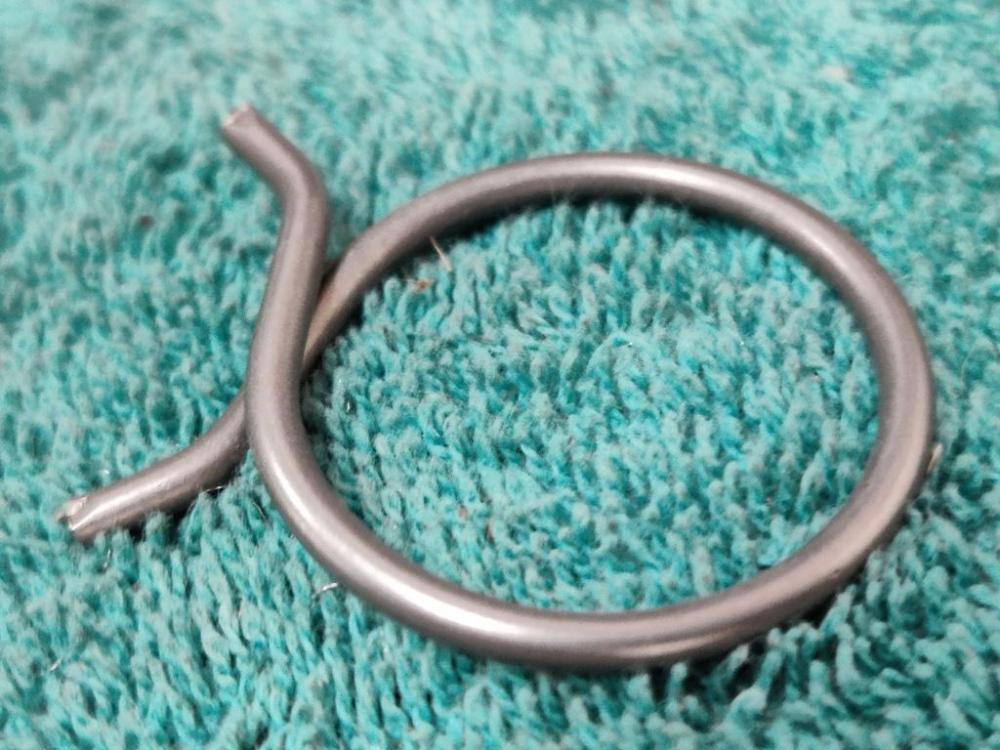
I found another, yes. I have about 20 lbs of Datsun hardware leftover mainly from 510's I went through years ago. I found the correct hose clamp amongst that hardware. Heard on plating. I guess it is worth spending my time on prep work. I think I will try utilizing my parts vibratory tumbler on some of the parts that I have already blasted with glass beads. The beads I am using are not very aggressive, but get to areas of the fastener that wire brushes have difficulty reaching. I am hoping that the type of media (or mixture) in the tumbler can be "adjusted" to give a "shiny" finish to the fasteners. Then the prep work should mostly be done, and hopefully, I can get great results. I loved the plating done by Jeff Palya at Paltech. When I had my carbs done by him, he agreed to let me send a few parts just for plating by his plater. I'd like to find a plater to work with directly that I know is good. I did try looking online for platers near by to me, but all I have to go by as to whether they are good or not is online reviews. I posted these pics once before, but these were the extra parts I had plated by Jeff:
-
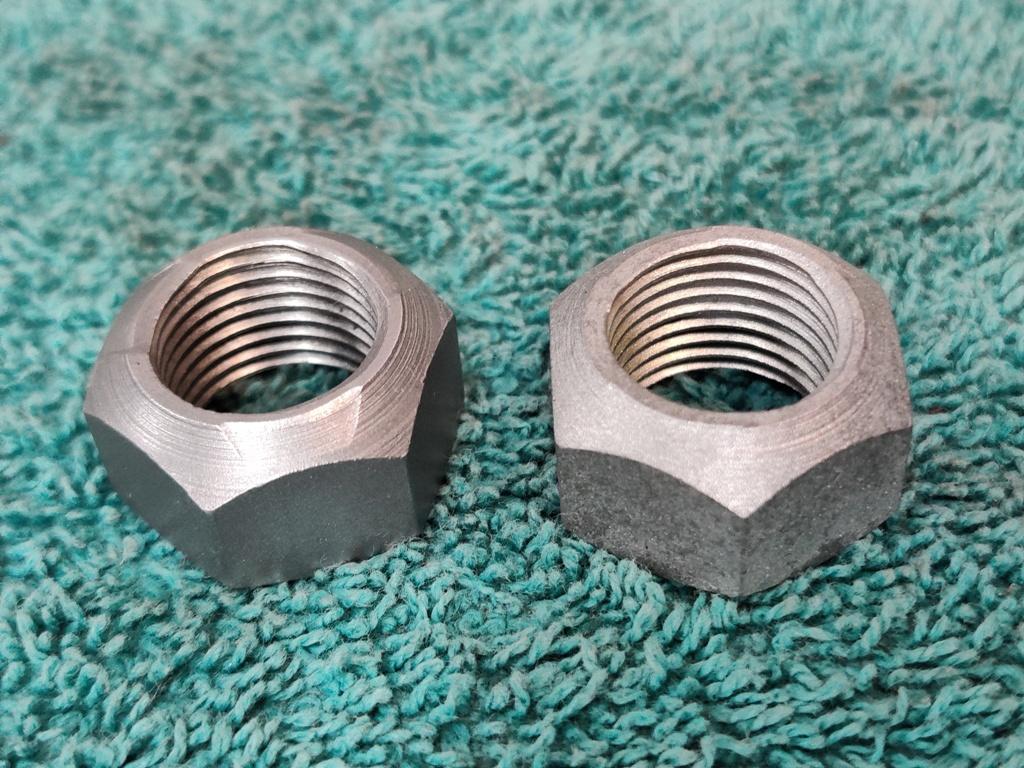
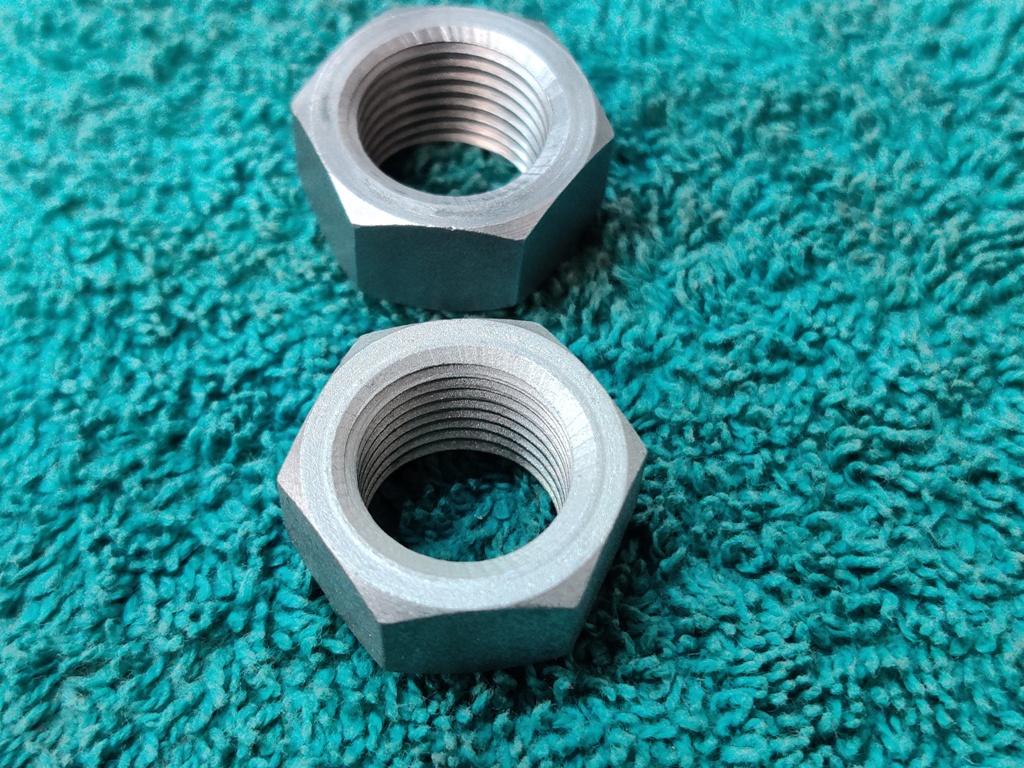
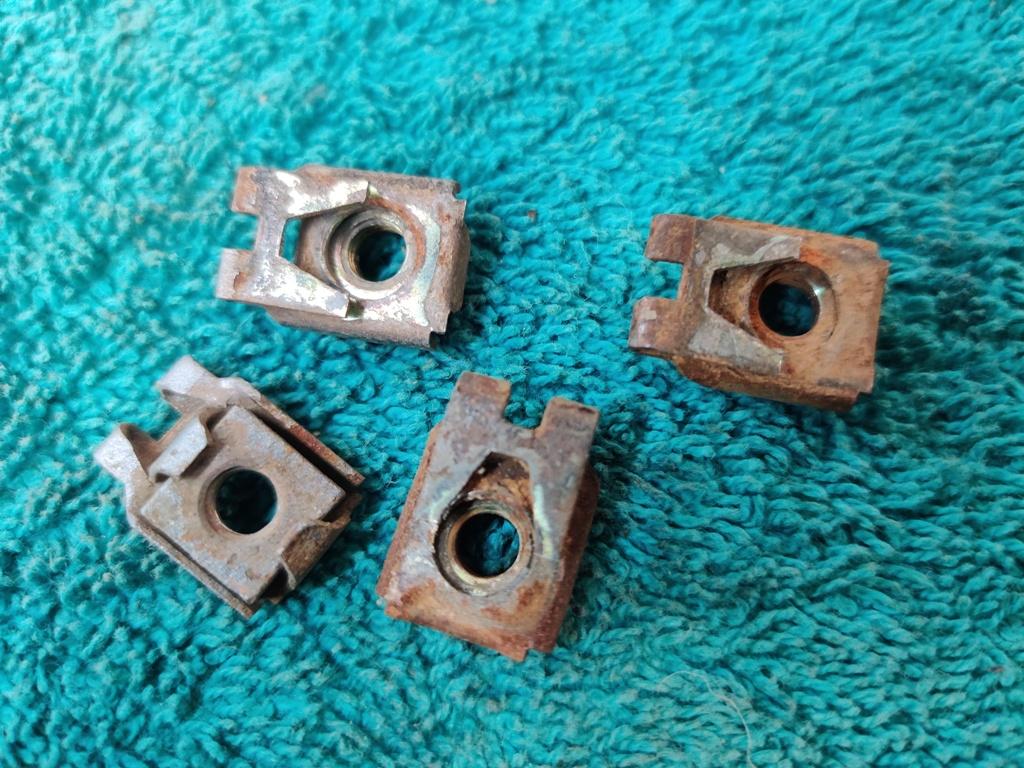
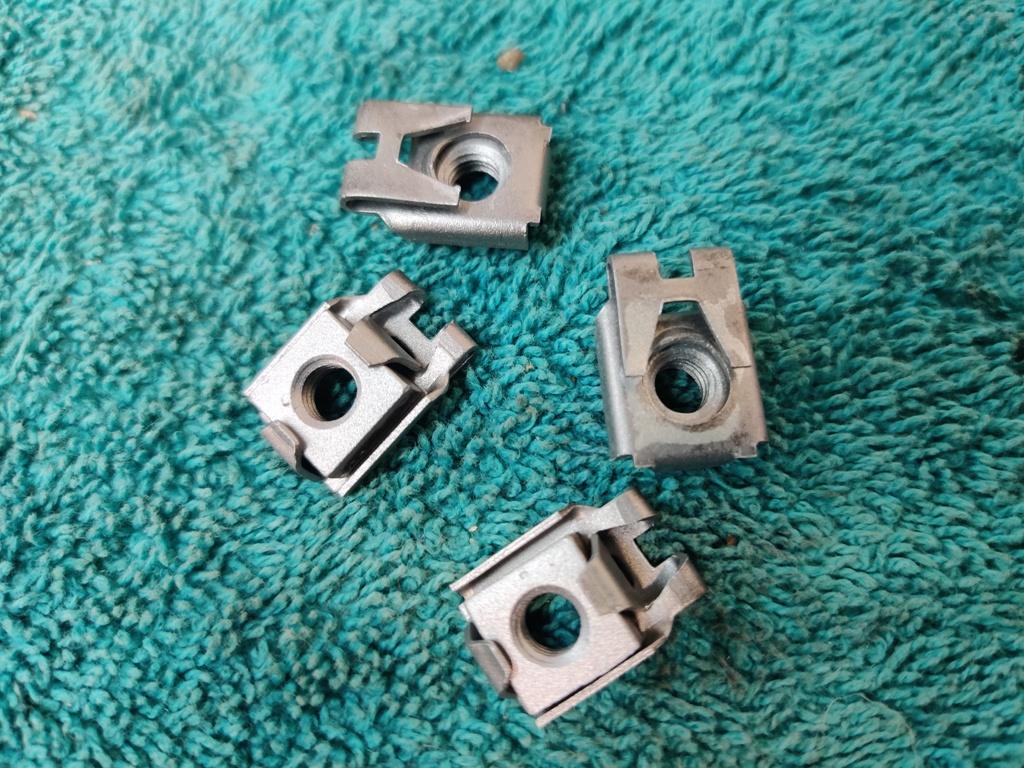
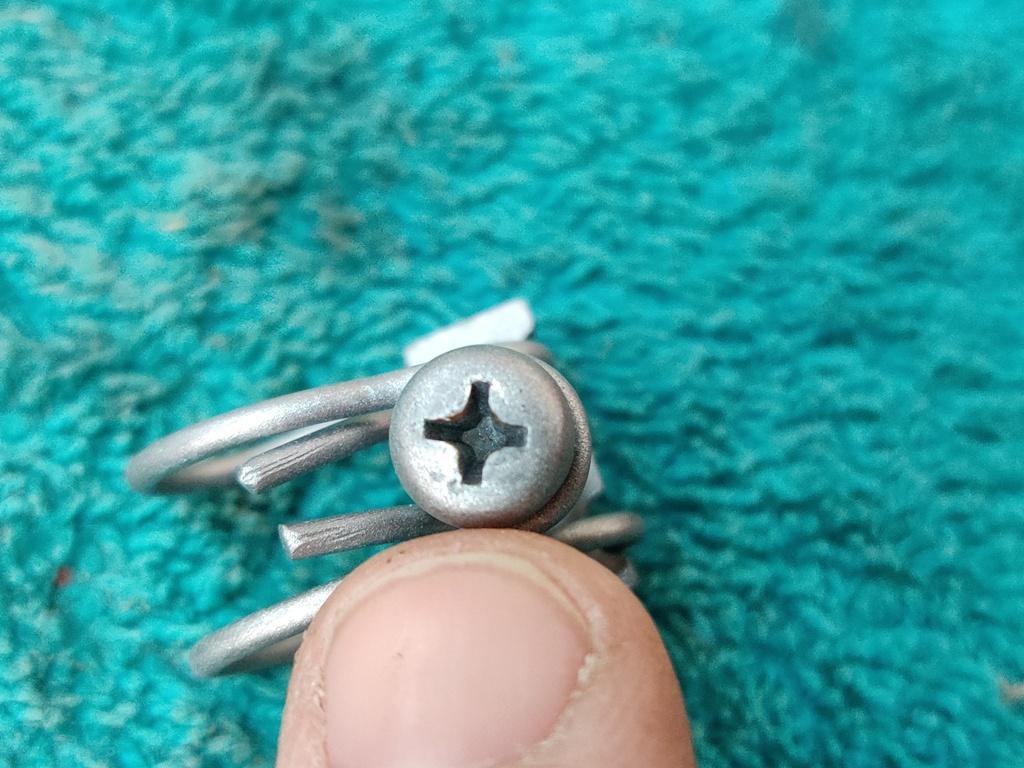
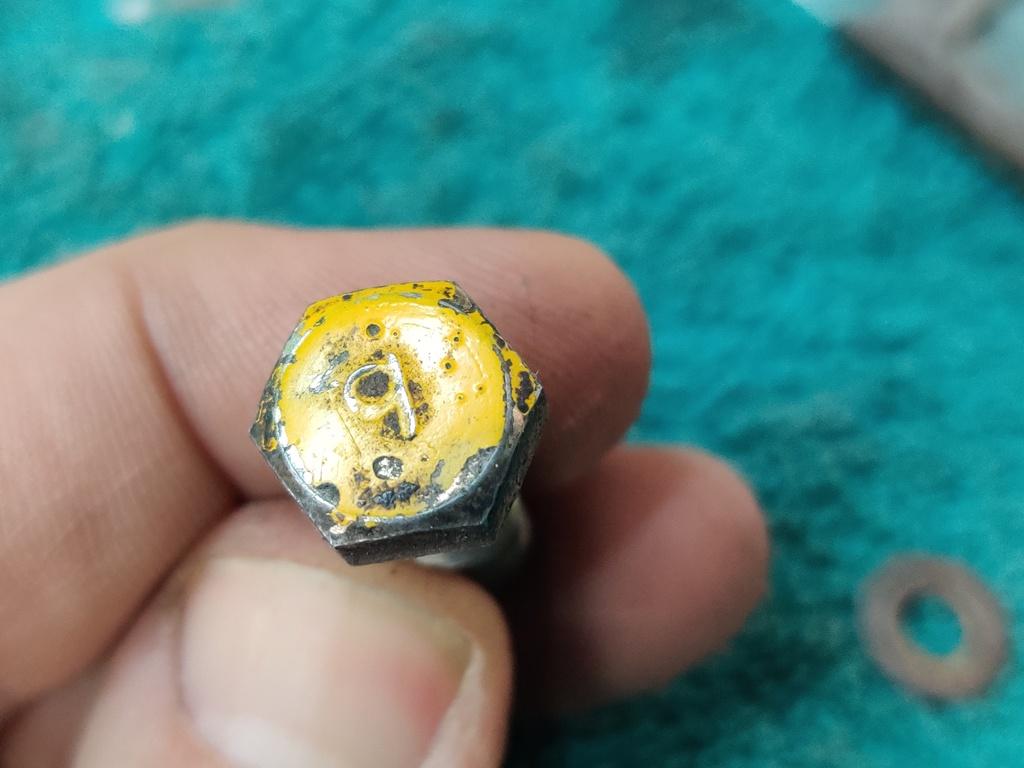
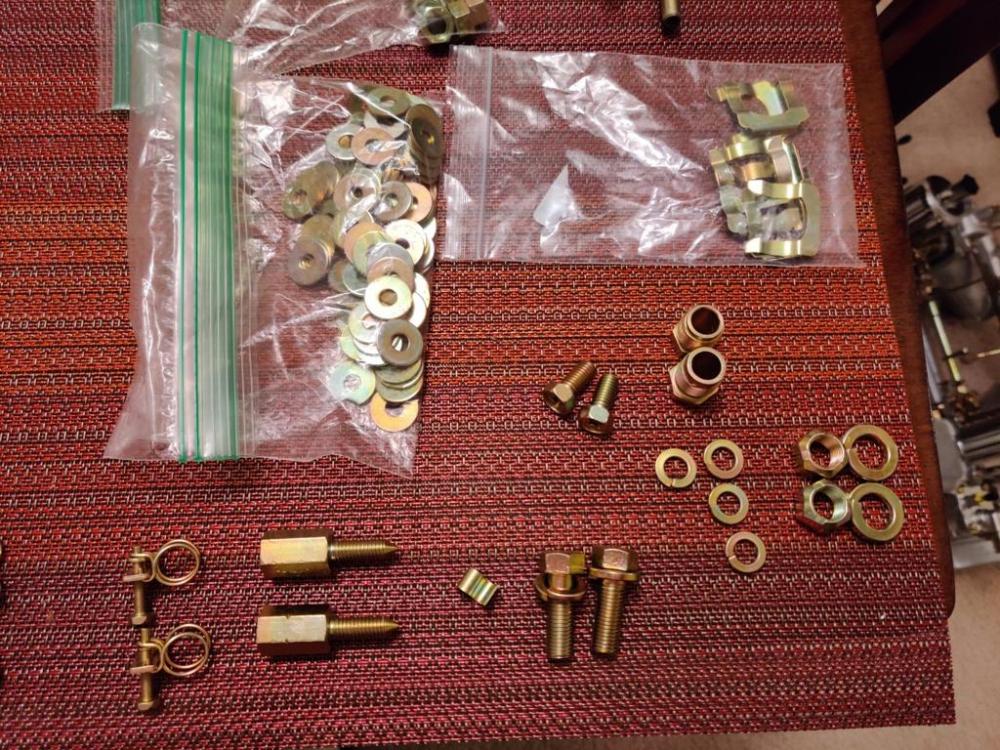
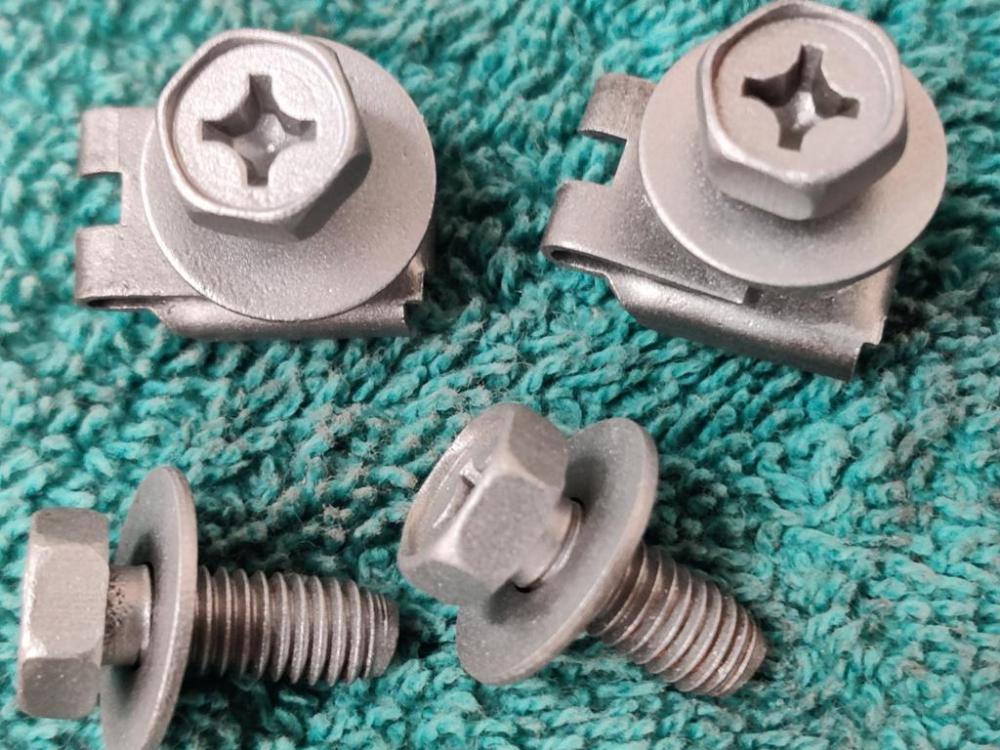
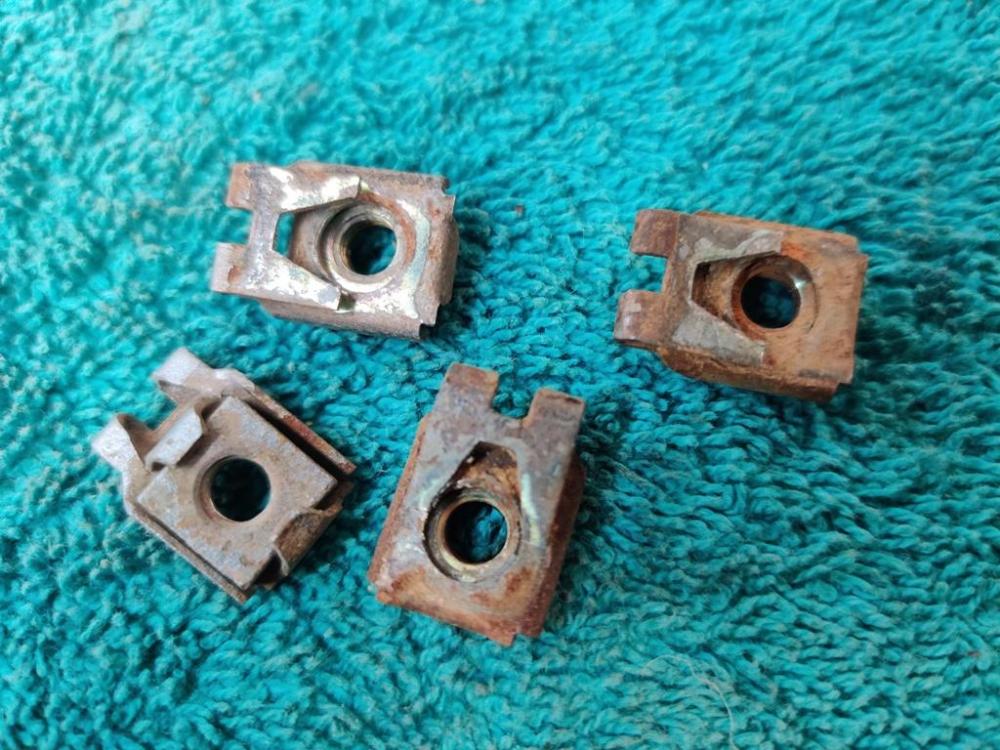
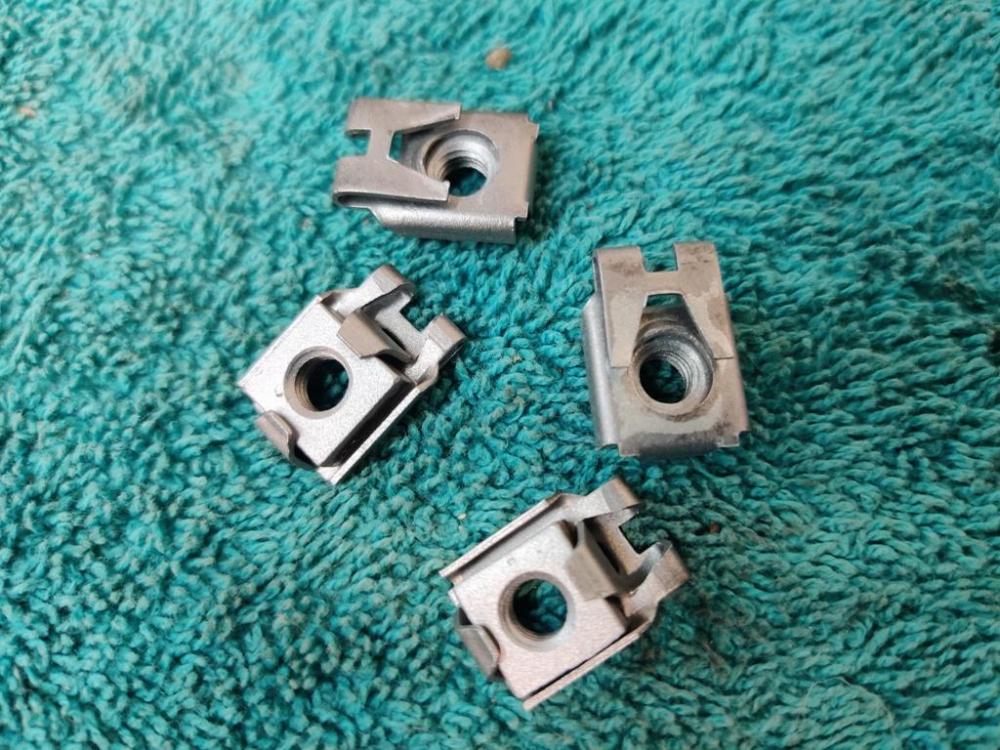
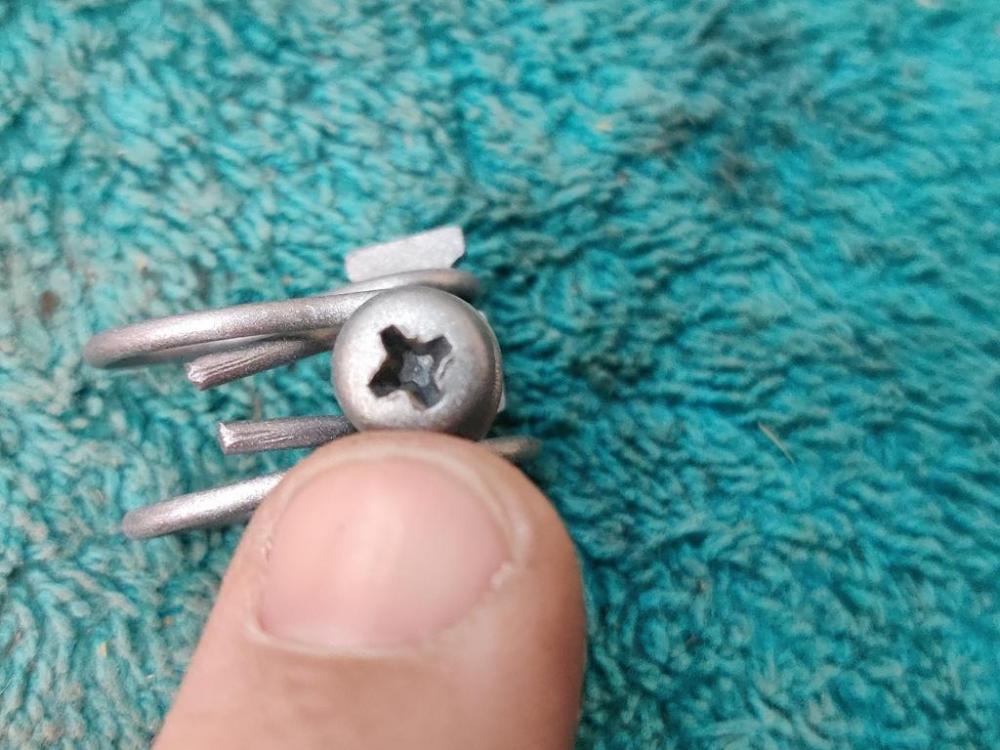
I am still working to round up the fasteners and send them off to be plated. I find myself bead blasting some of them like these. I wish I knew if it was necessary... From a comment by @motorman7 in "the Orange" rebuild thread, I think the plater he uses (and I plan to use) might prep the fasteners, and so my bead blasting may not be necessary. I just don't want to take the chance that they aren't prepped properly? Another nice thing about working with a car that spent its entire life in the southwest/in storage, the fasteners, even ones is "wet" locations like the front valence, are nearly corrosion free: After bead blasting, they look really nice: Clips: After bead blasting: Here is a little tip to pass along: I have found that it is possible to "fix" phillips head fasteners that have had slight displacement of the metal by the screwdriver. Oftentimes the fasteners are slightly rusted and hard to break loose. And the screwdriver slips causing miner cosmetic damage, like on this one: I have found that placing the screw on solid metal surface (like a vice) and tapping on the phillips area with a hammer an restore or nearly restore the factor fresh appearance. It only takes a couple of seconds and will make the re-plated part look a lot nicer. This bolt came from the front anti-roll bar brackets to the frame of the car. Note that the yellow paint used by assembly like workers on this car was a gloss yellow. I think I'd like to replicate the yellow on the fasteners underneath the car during final assembly. We'll see.


-
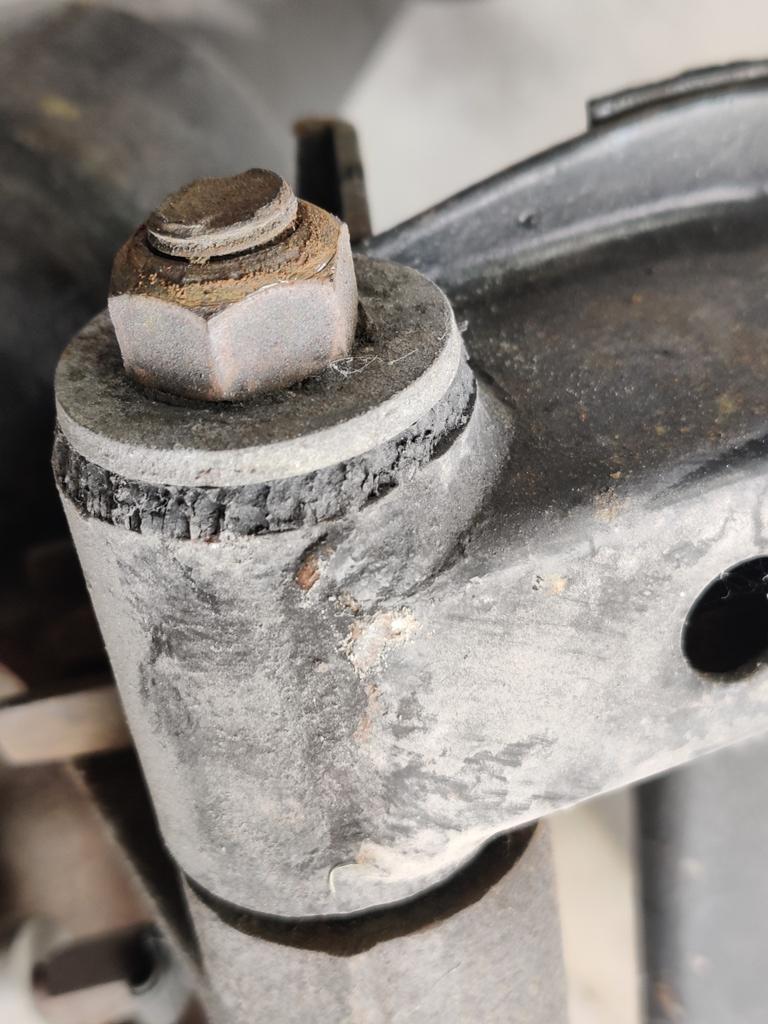
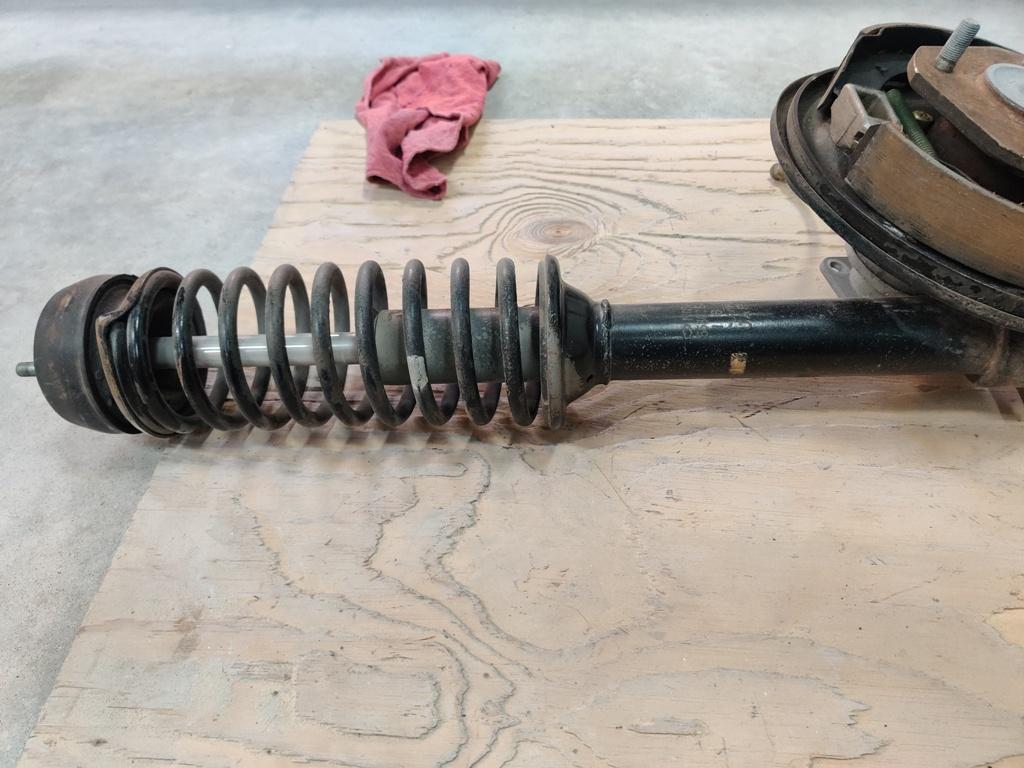
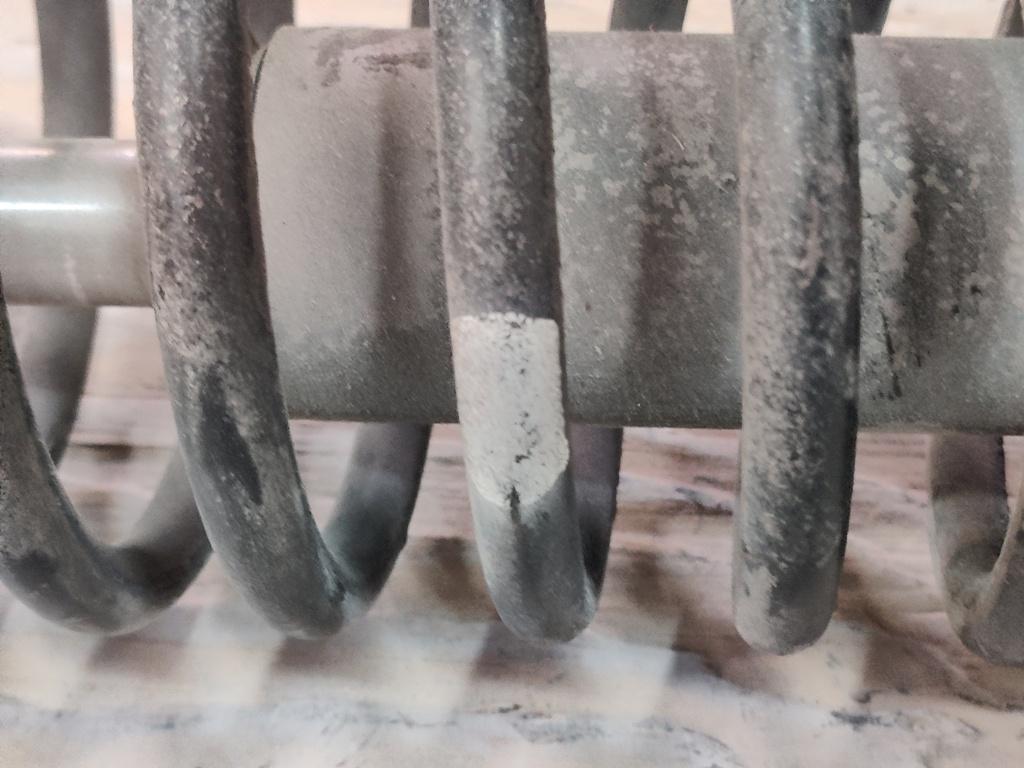
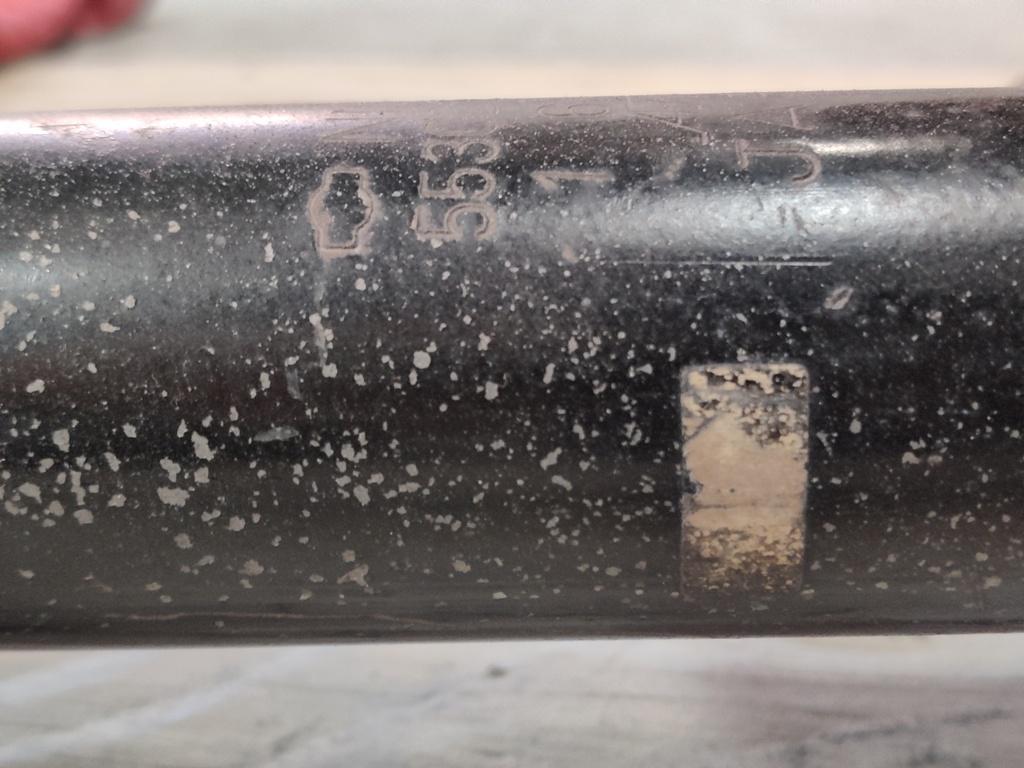
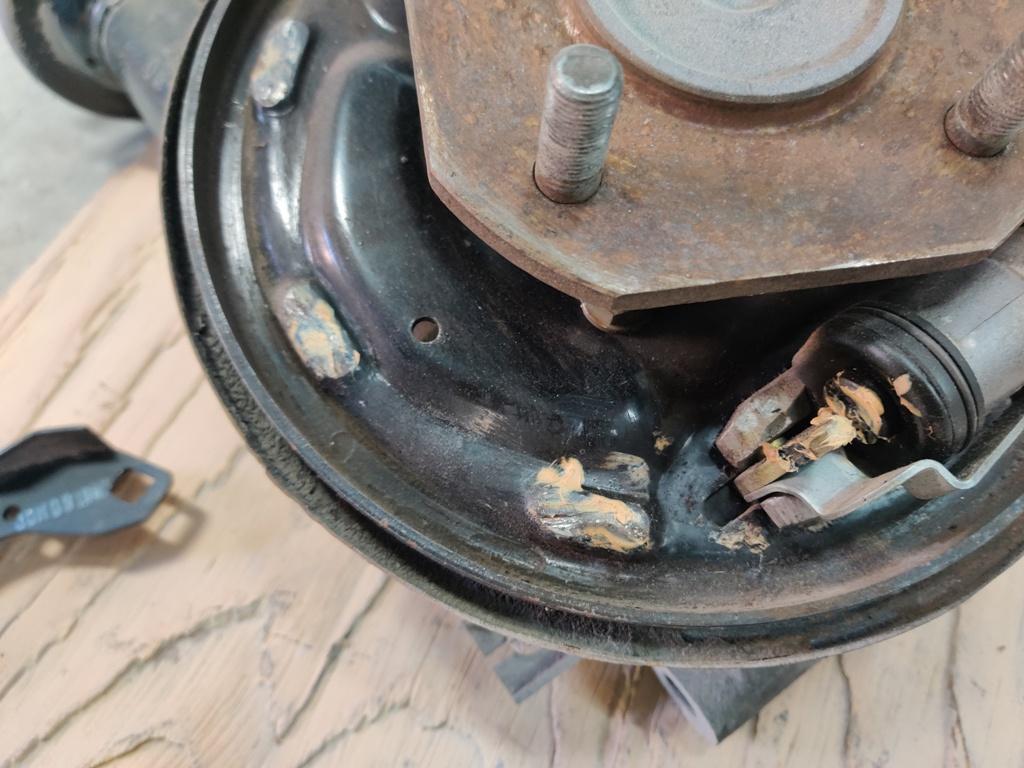
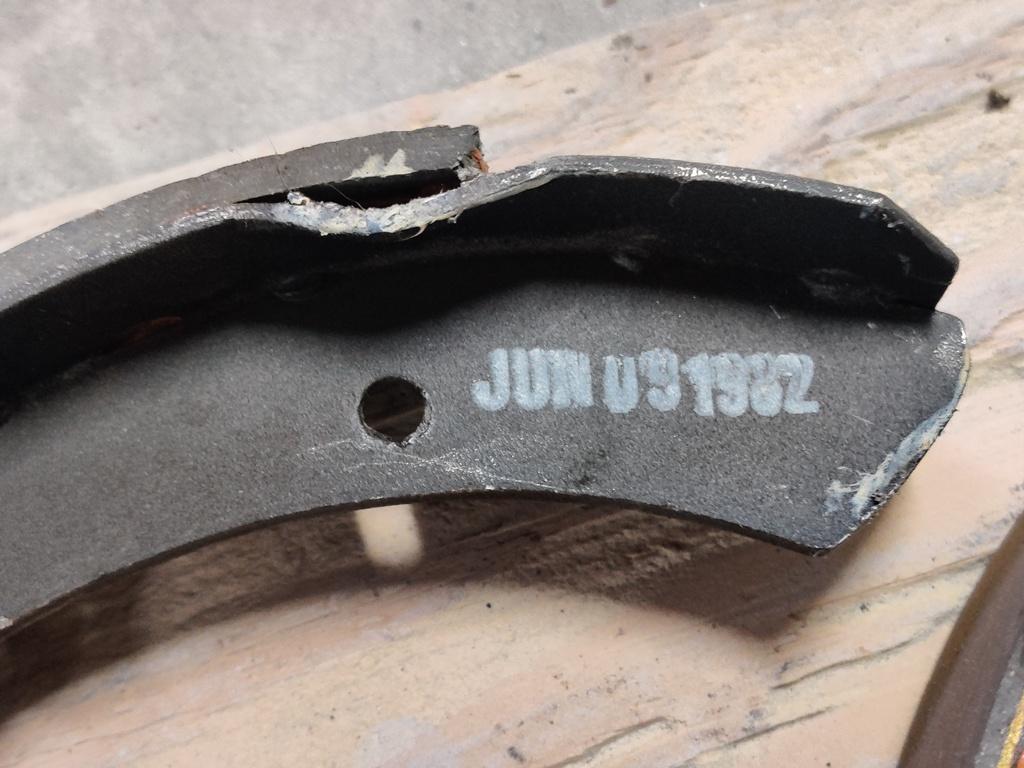
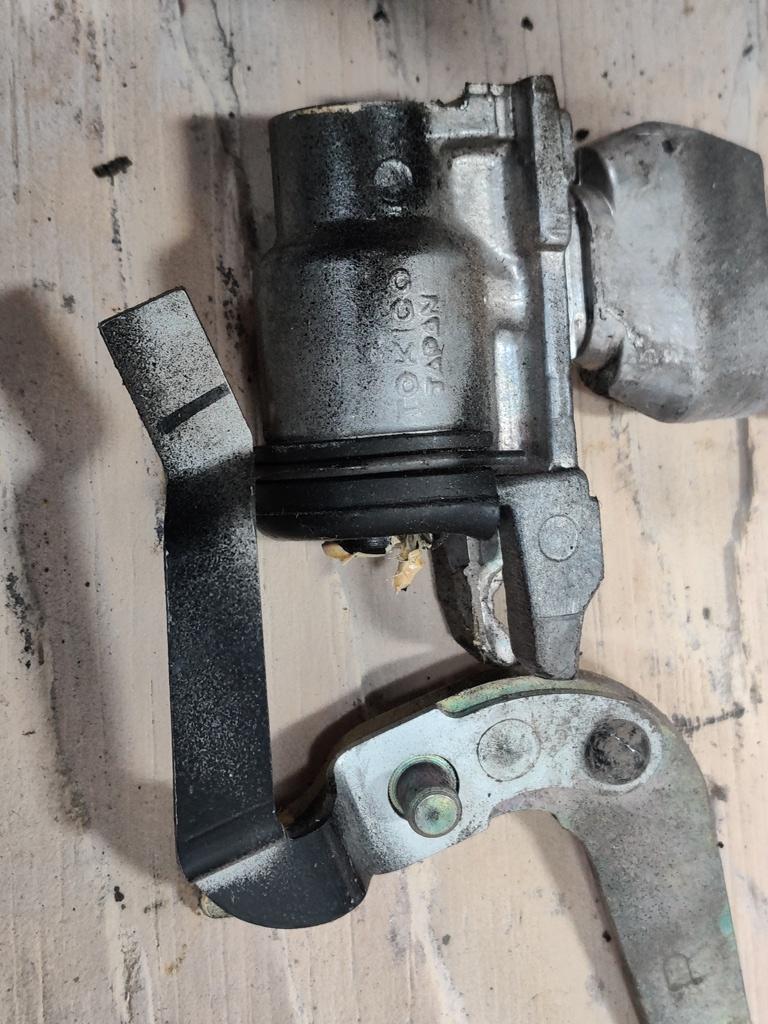
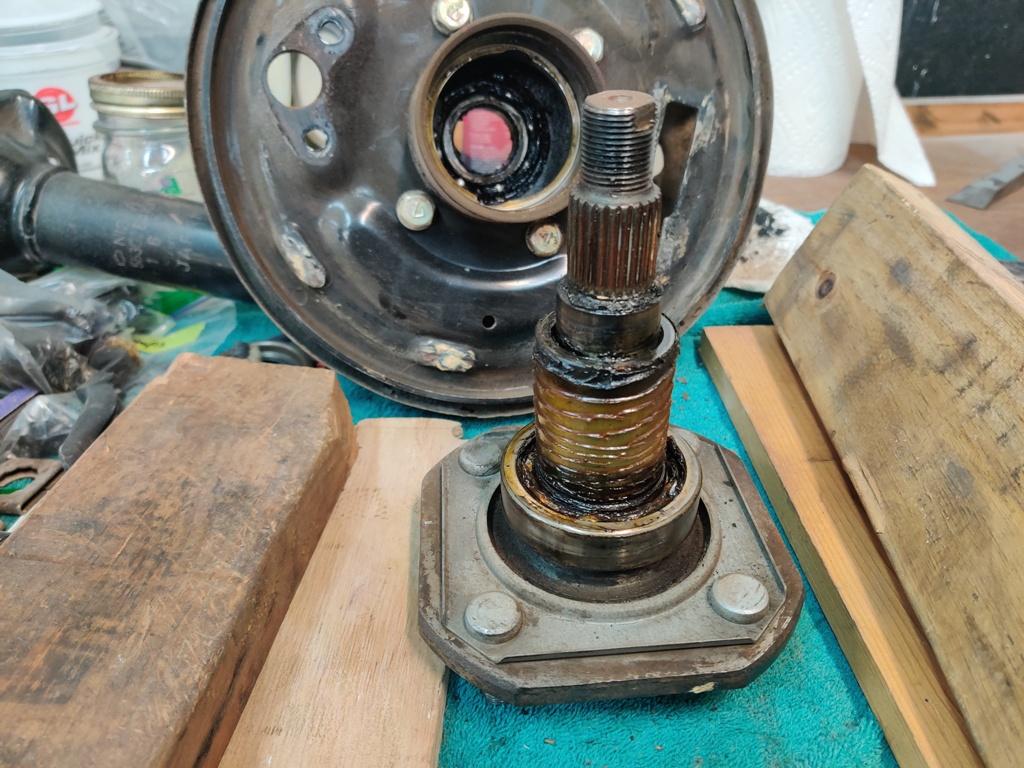
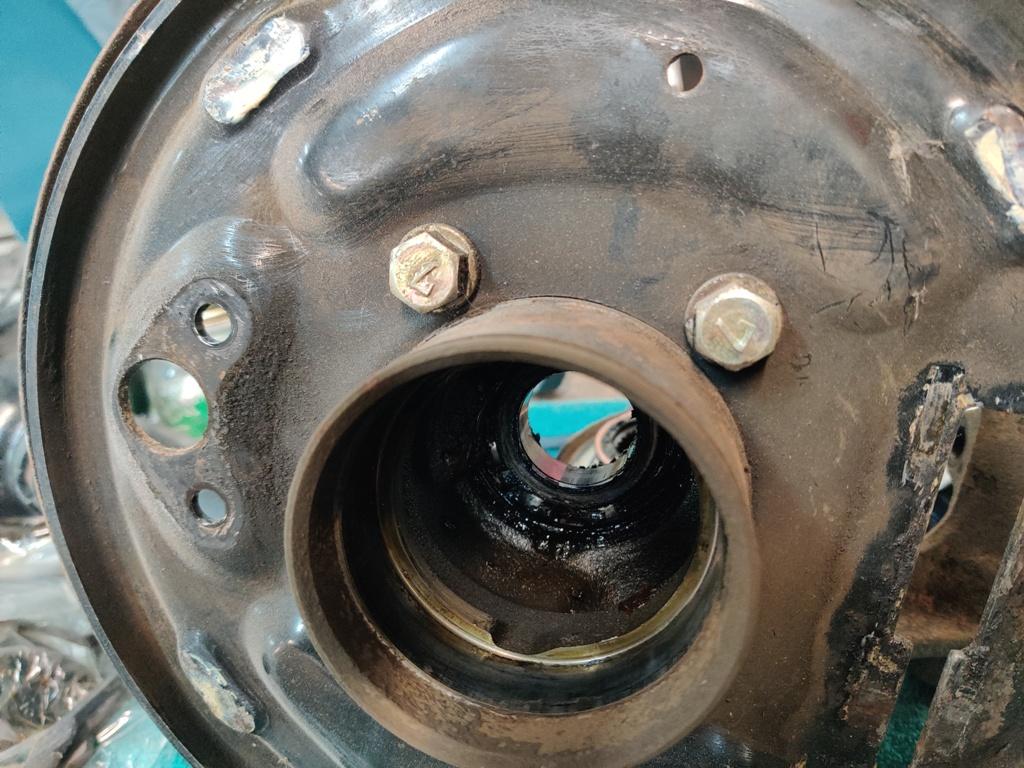
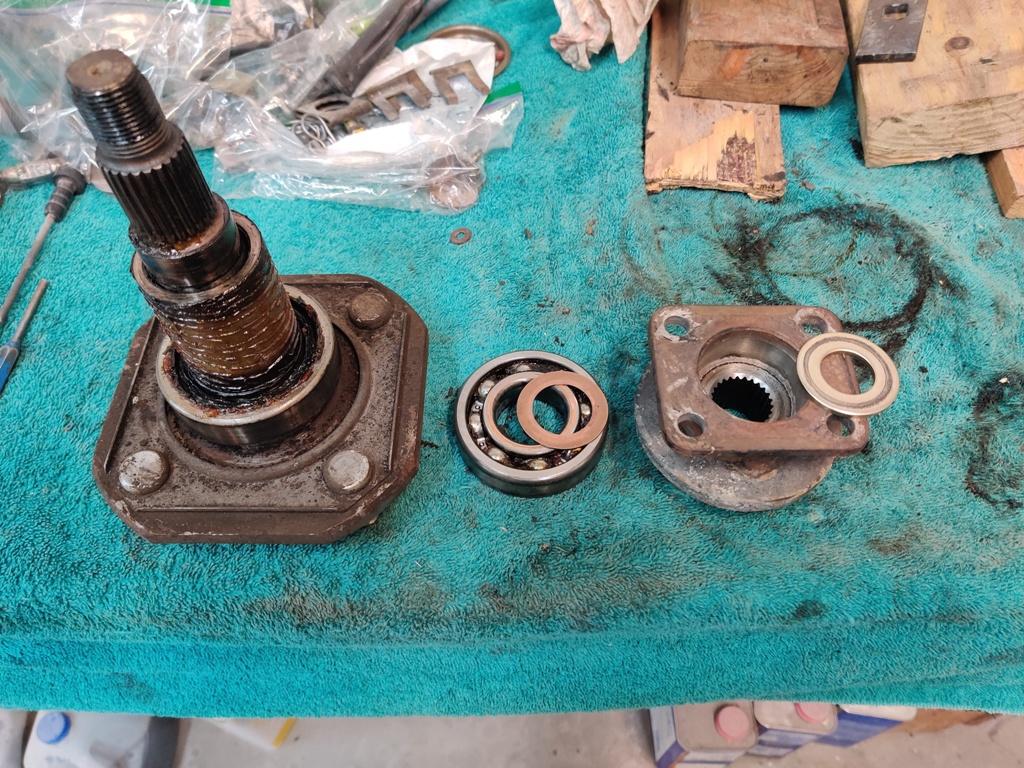
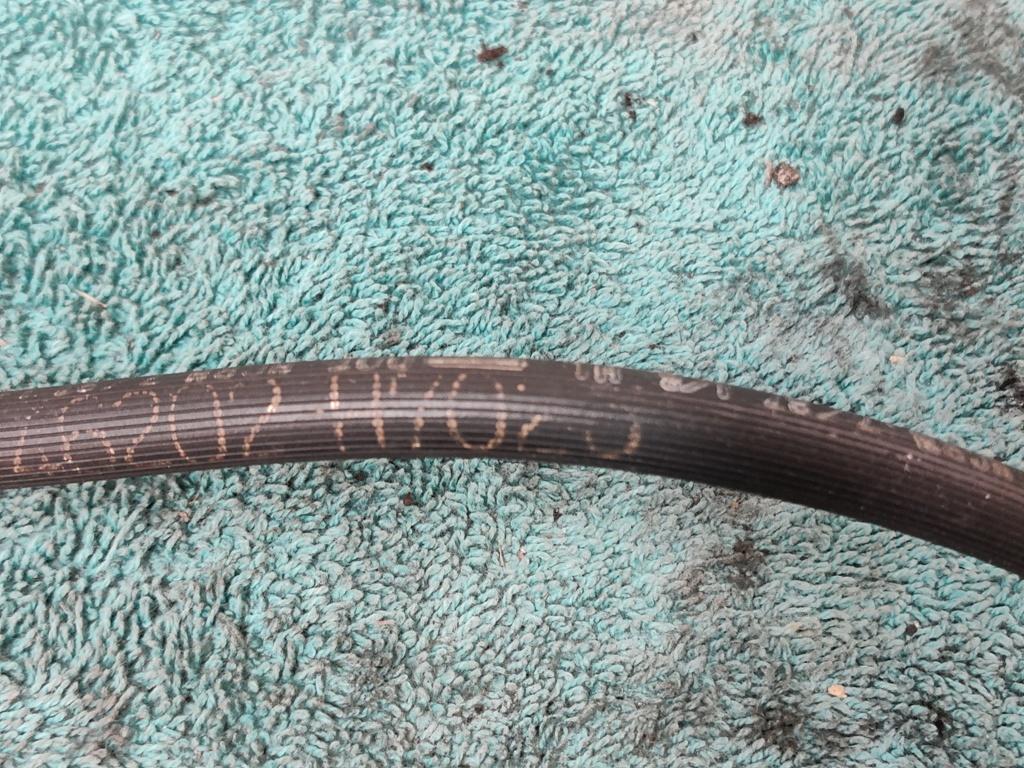
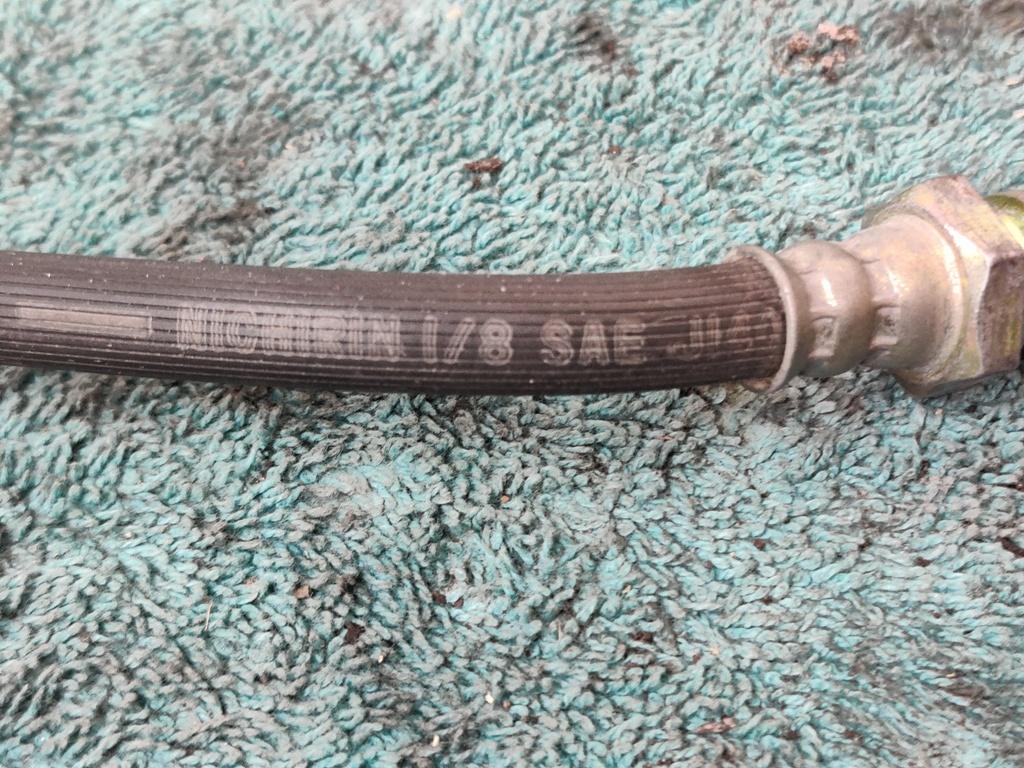
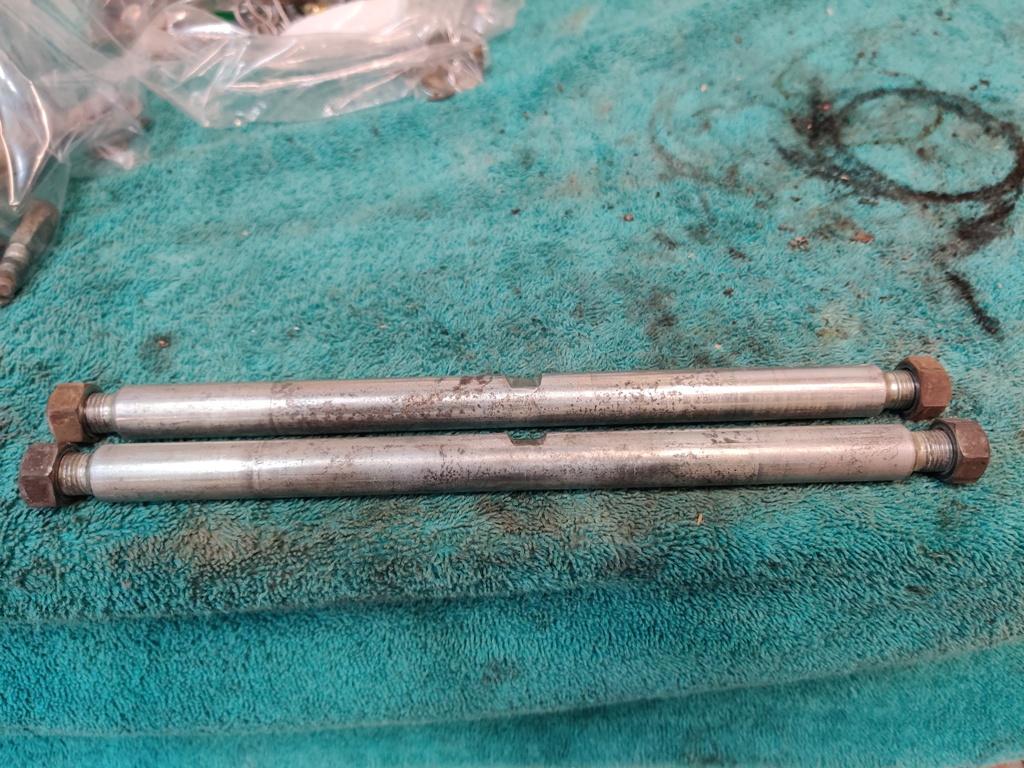
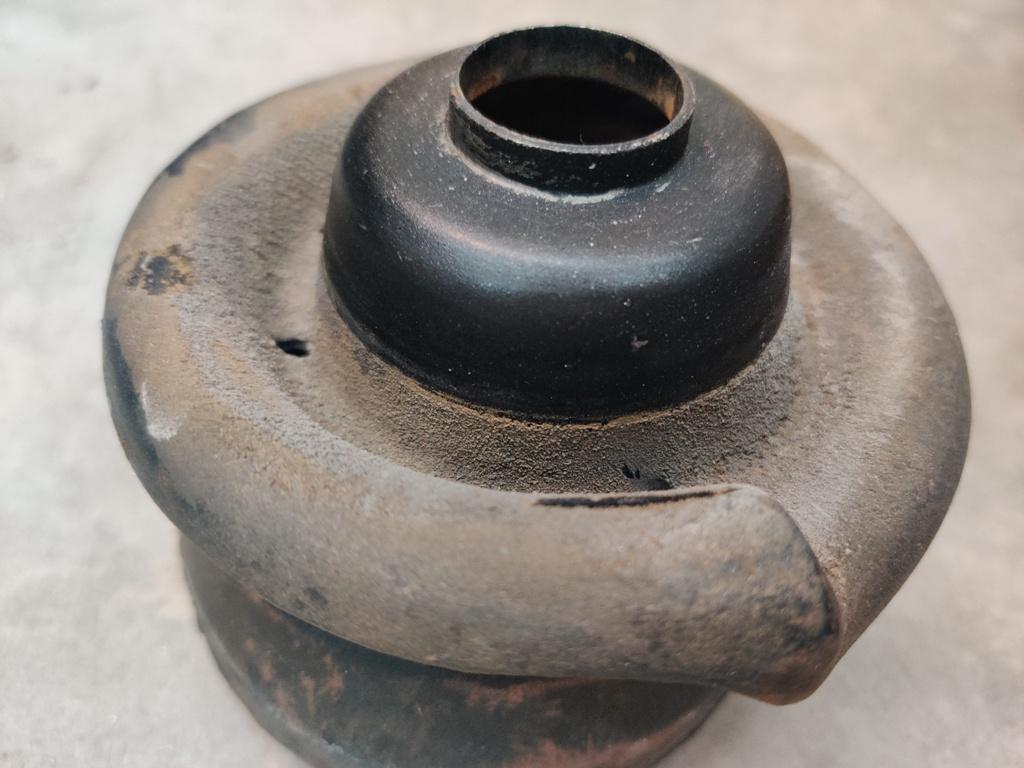
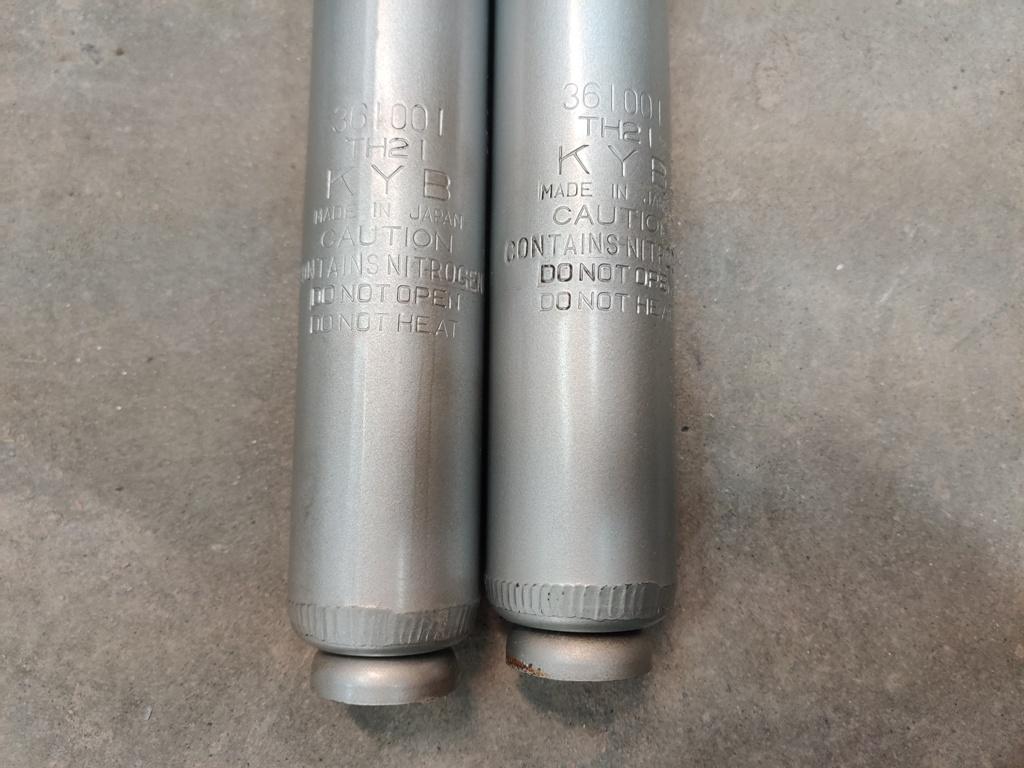
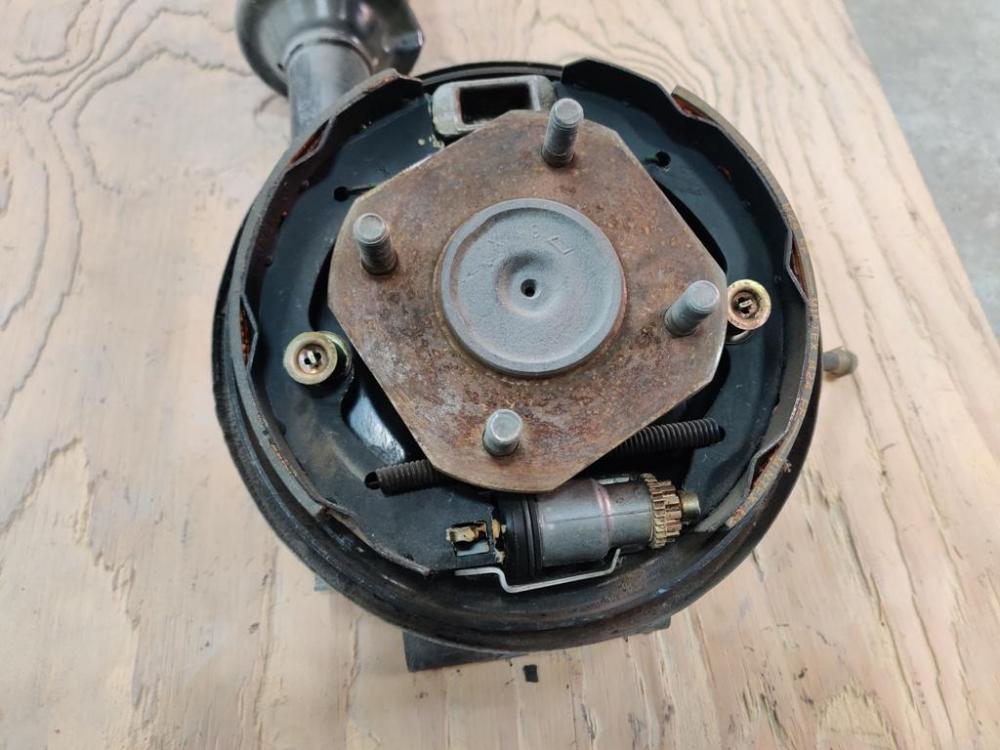
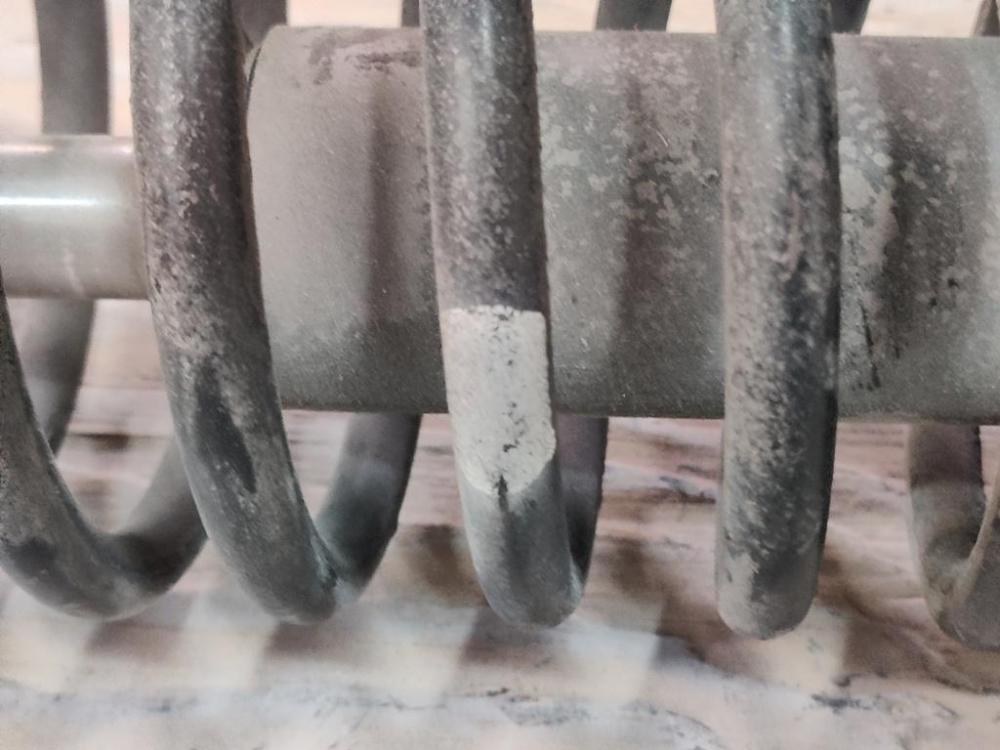
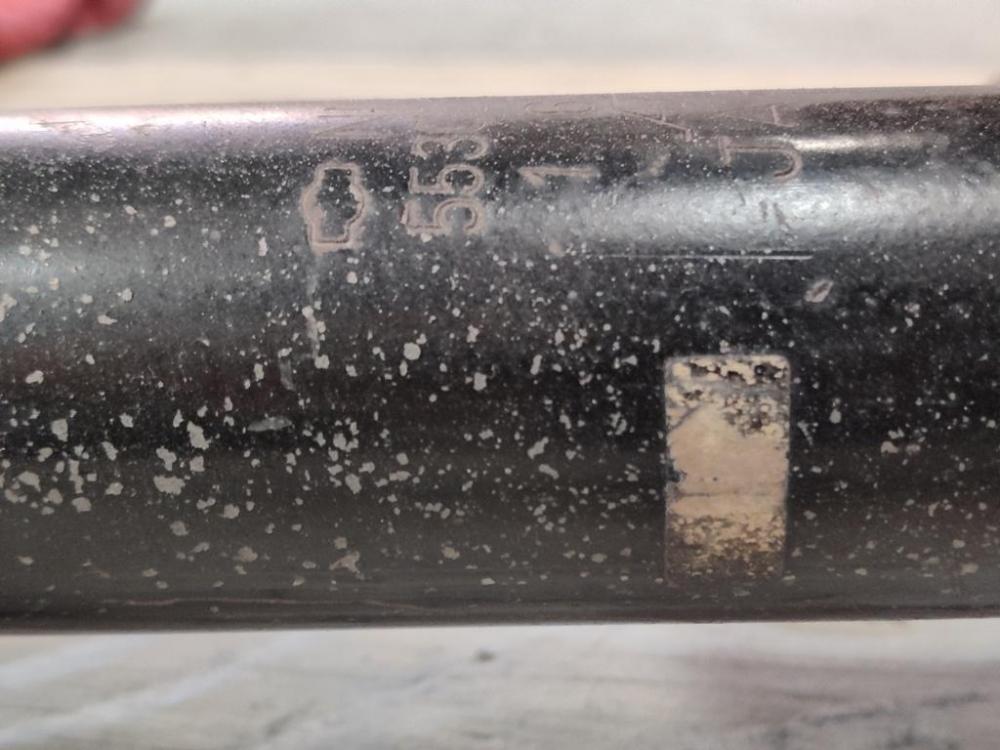
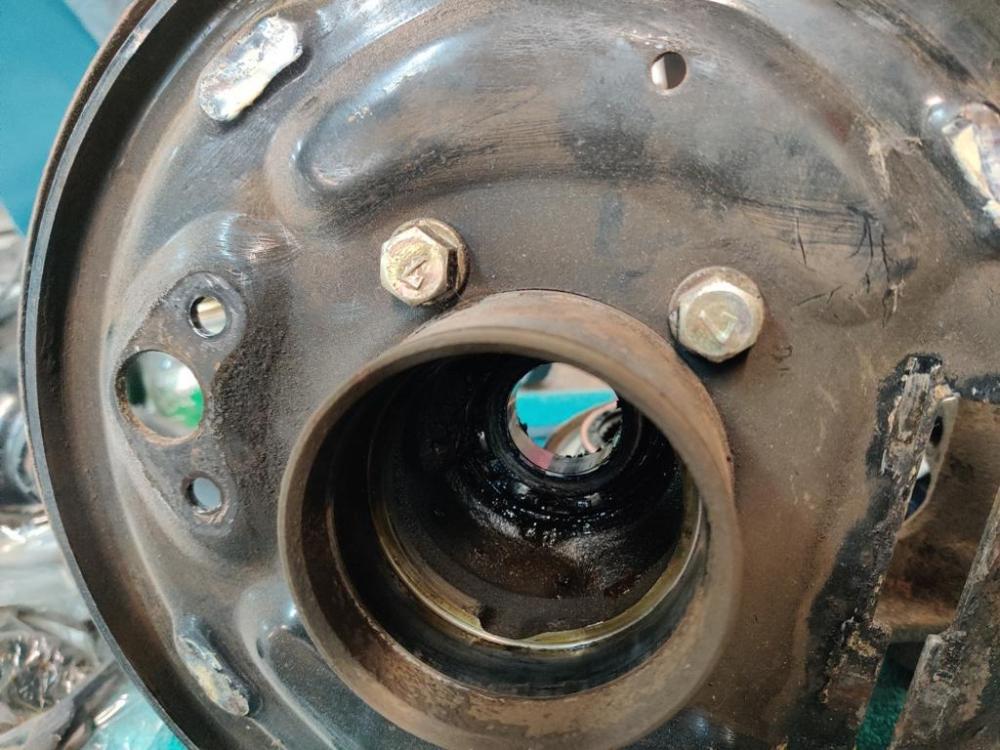
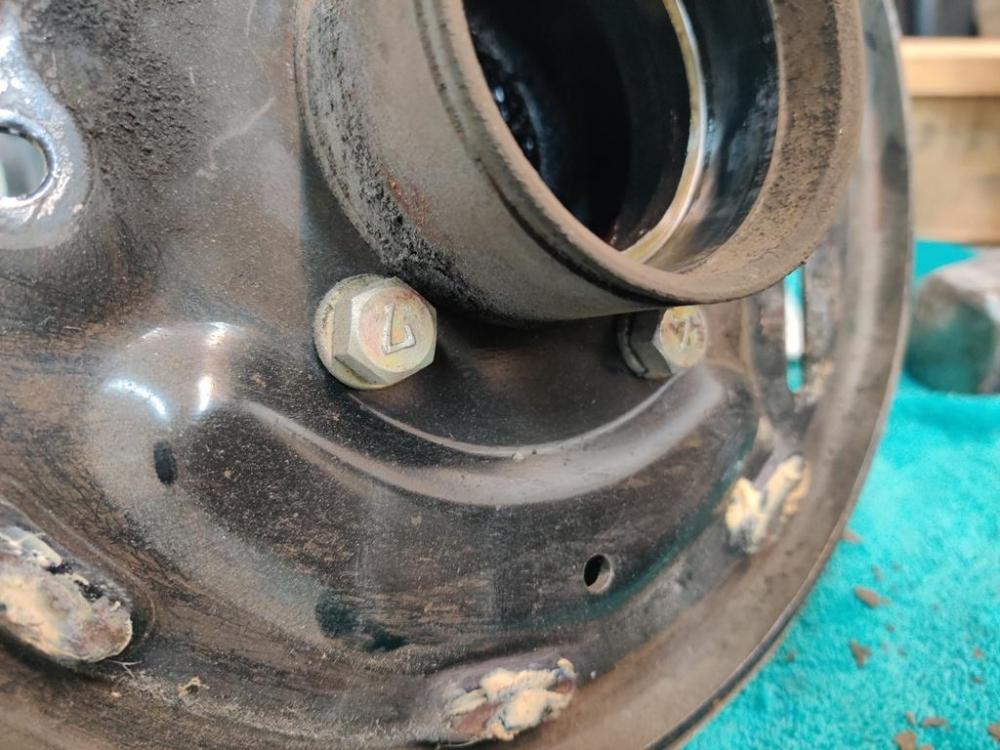
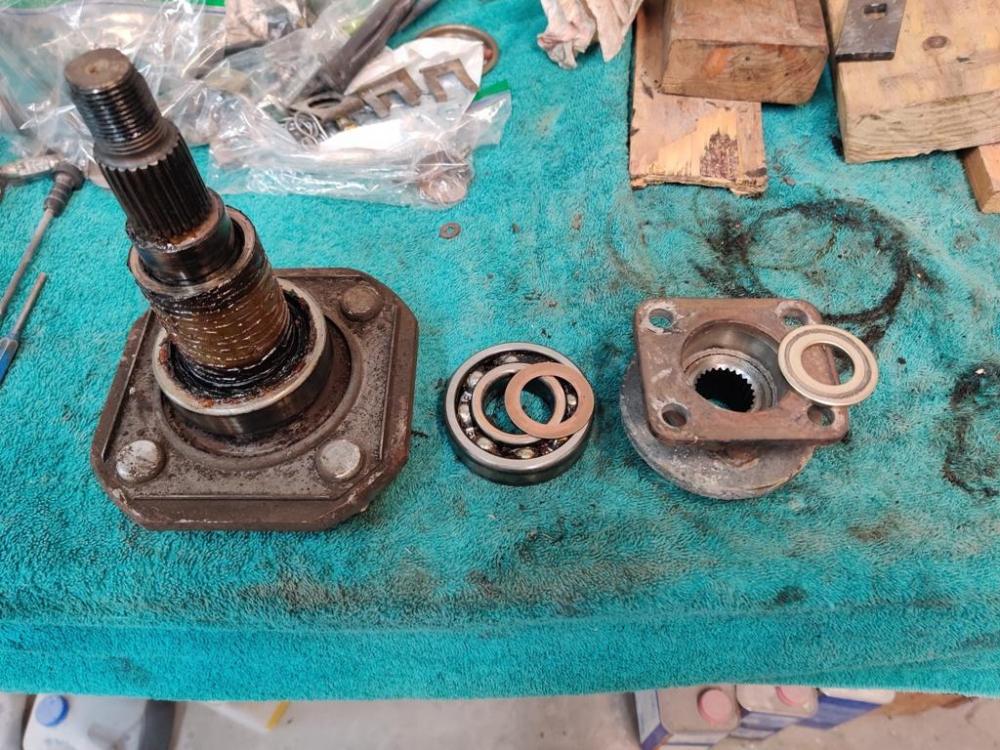
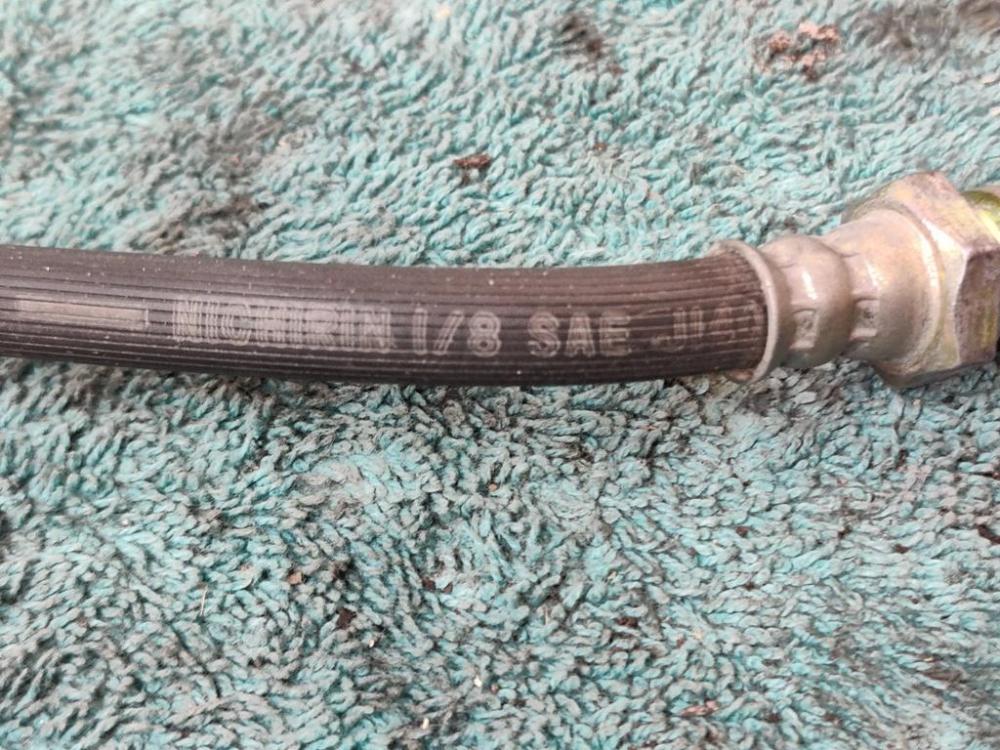
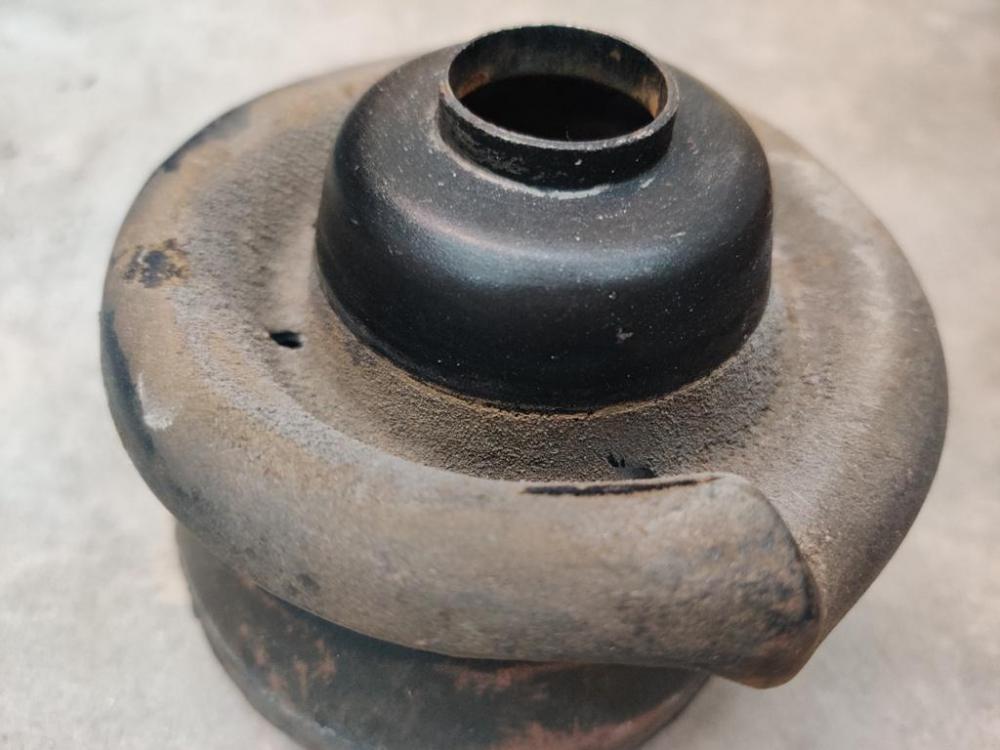
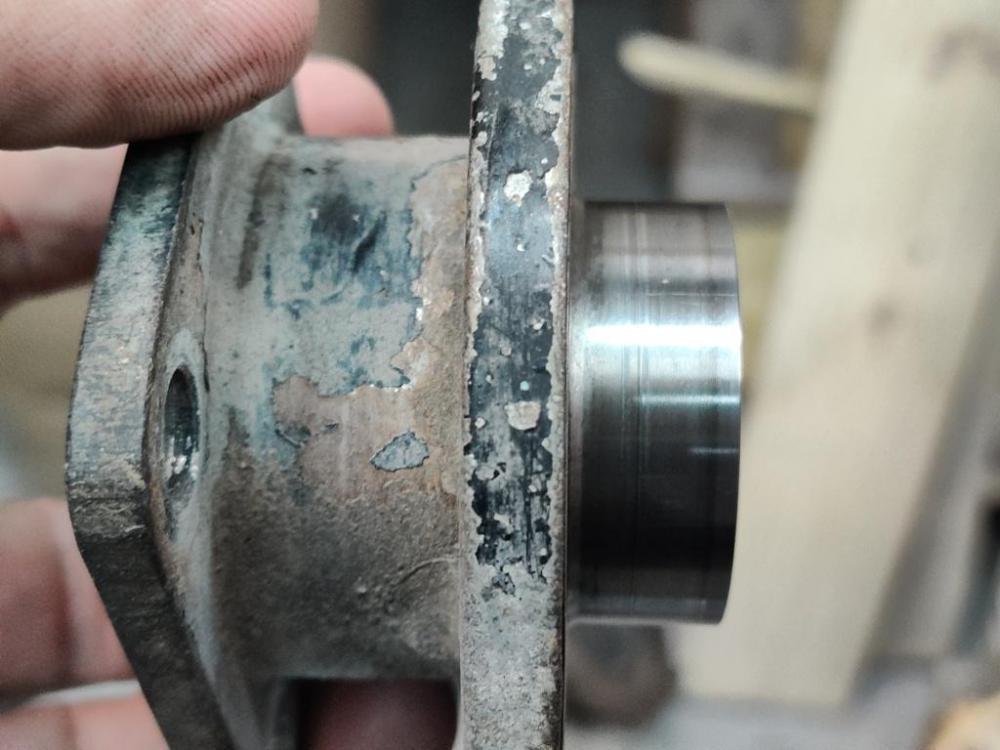
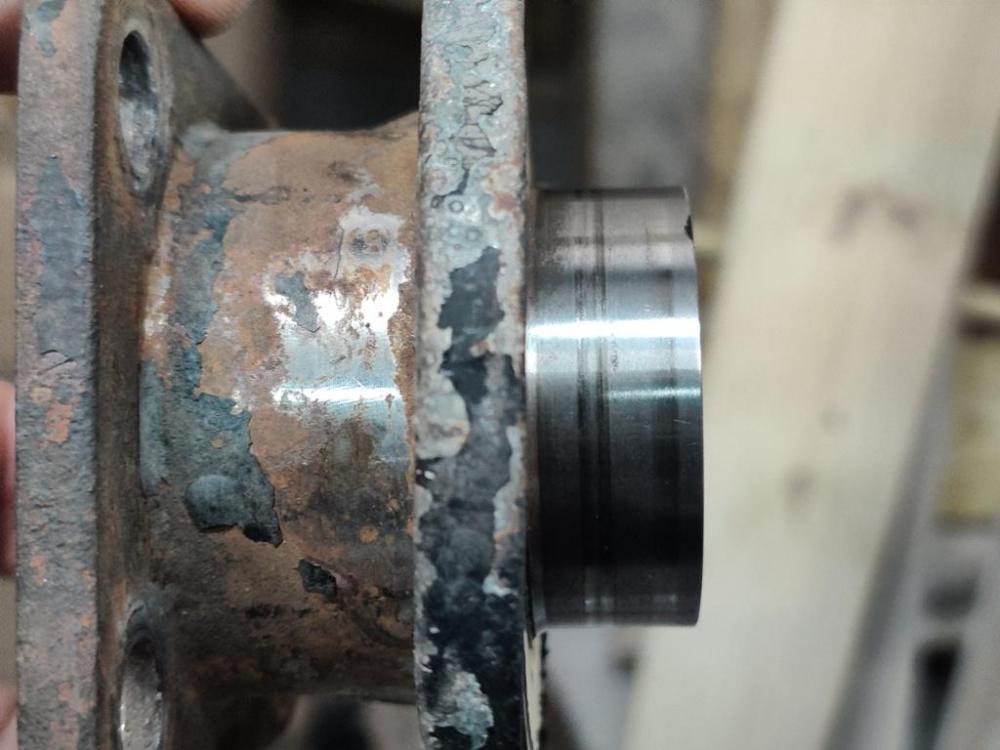
I am getting closer to sending all of my hardware to be re-plated. I am going to try to do it all in one shipment, so I needed to disassemble some parts which up to this point, have not been. The rear struts and arms were the focus today. The pictures I took reveal some interesting details. For example, the condition of this rubber washer suggests that the spindle pins have not been out since assembly at the factory. Yet the pins actually look good enough to make me think they were replaced: The rear brake shoes look like replacements. I believe they were installed by the prior owner of the car as part of the work he did to "restore" the car. I note the word "MINTEX" printed on the edge of the brake material. I think these are aftermarket, but will do some searching on the internet to try to determine. Also of interest is the pink (I think) paint mark on the factory rear springs. As a relatively rust free car, it is reasonable to assume these are original factory markings. Additionally, the right strut shows evidence of a rectangular label that was adhered to the outside surface of the tube. This could be an indication that the black paint visible is actually the factory applied black enamel. Rear brake cylinders are Tokico units and appear to have been new replacements installed by a prior owner. The previous owner acquired the car in February of 1989 according the Bring a Trailer listing. However, the stamp on the shoes (June of 1982) seems to indicate the brake work was done prior to his ownership. Black overspray on the cylinder and the handbrake lever indicate an attempt to respray some black on the right rear strut backing plate. However, the bolts that secure the plate to the strut do not have black on them. This seems to suggest the black paint on the backing plated is at least in part, original. Removing the axles, it was plain to see that the rear bearings were original. The brake hoses also have the appearance of being replaced at the time the cylinders were installed as evidenced by the part number (46202-H7025) - the correct replacement part number for the prior part number (46202-N4500). New replacement KYB strut inserts had also been inserted by a previous owner. Also, the black paint on the upper spring perch was protected by the upper strut mount. Interesting to see the lack of gloss here. I will clean the parts and examine them more closely. Also, the axle flanges have very little wear where the seal rides. Interesting for a car that had ~ 130k miles - 5 times the distance around the world. Also, it is interesting to notes remnants of original black paint on these: Anyway, though interesting, I now have more of the hardware in hand to send to be re-plated.


-
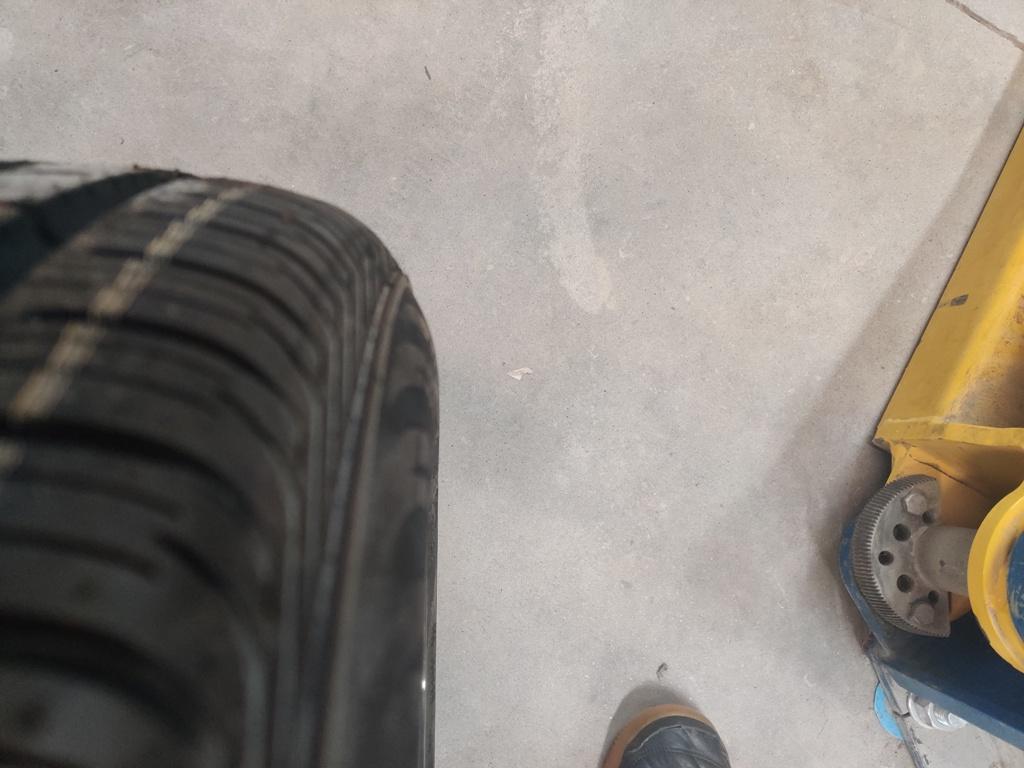
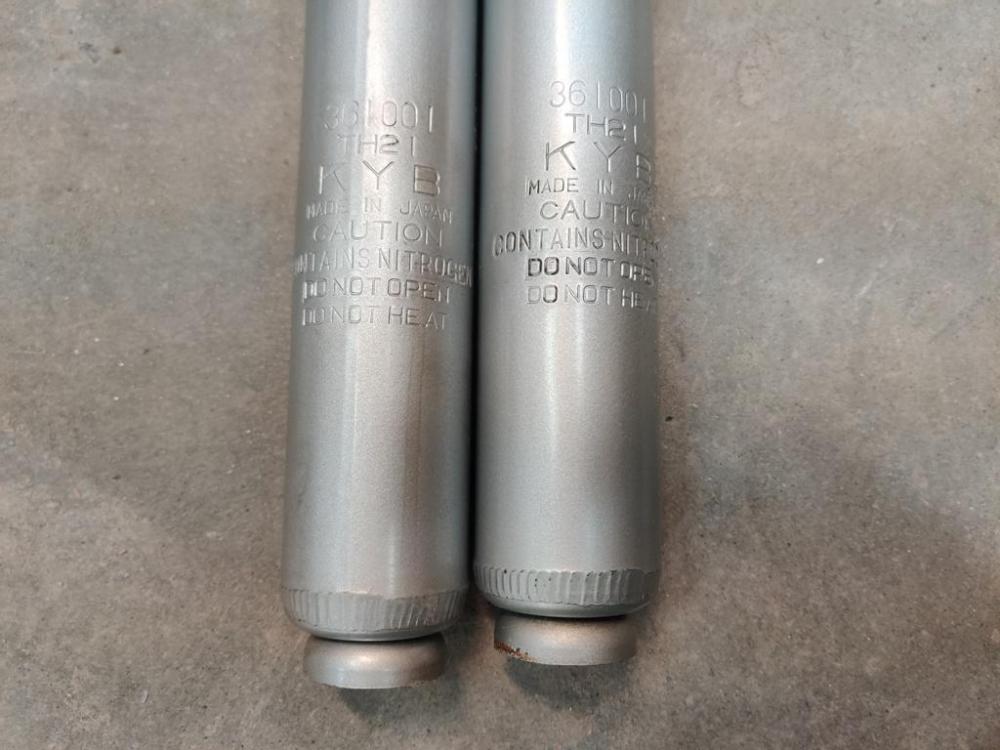
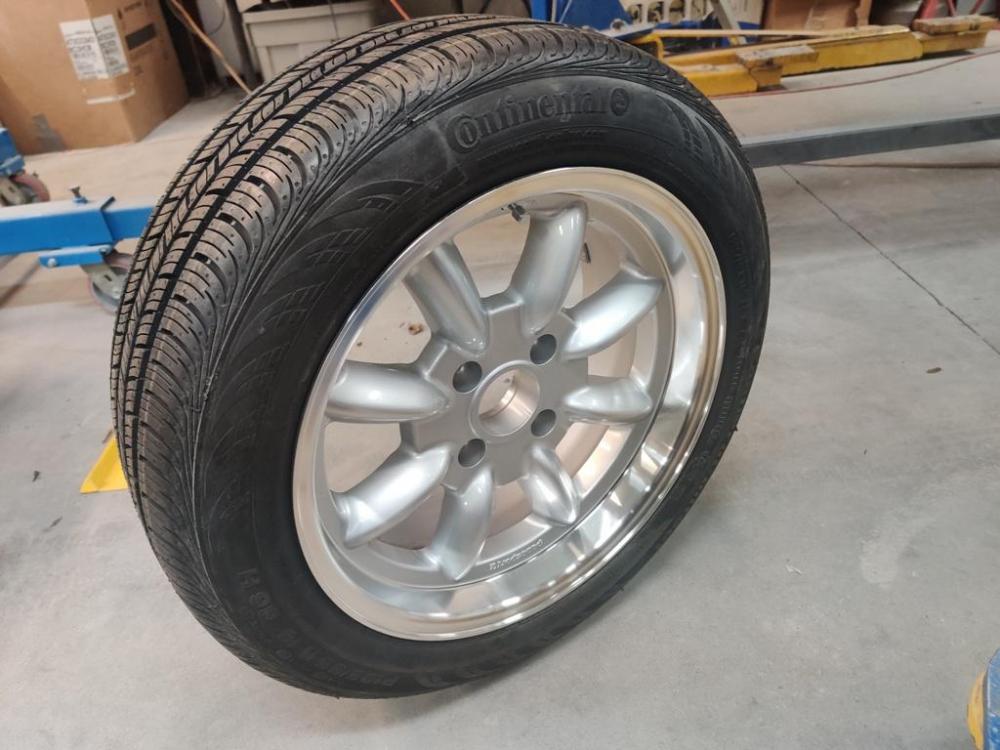
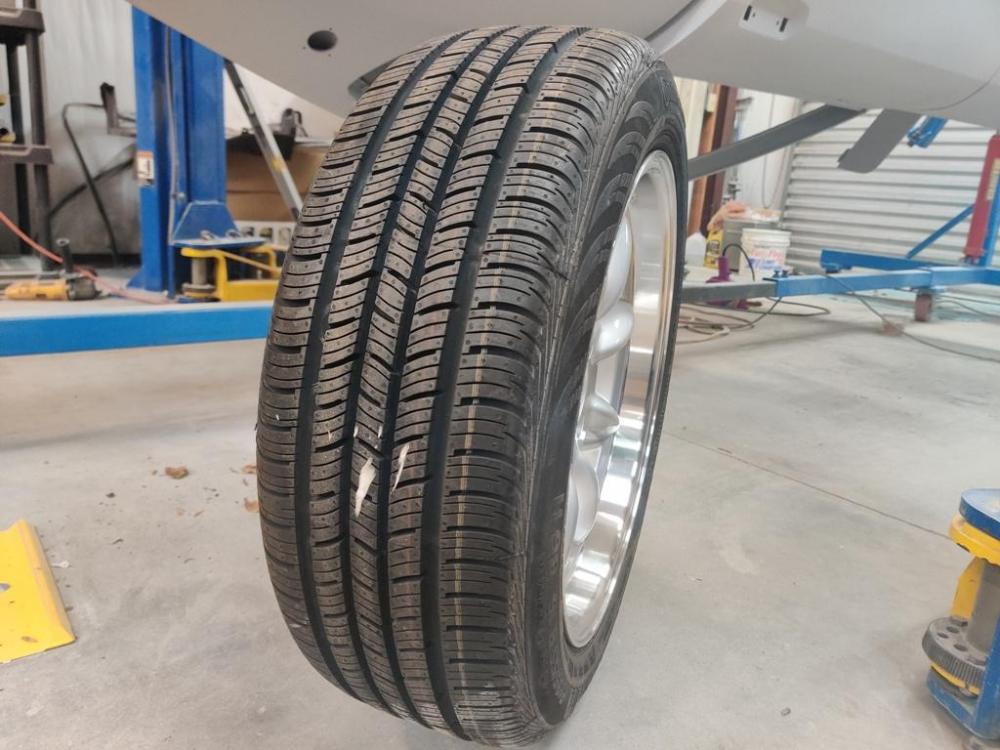
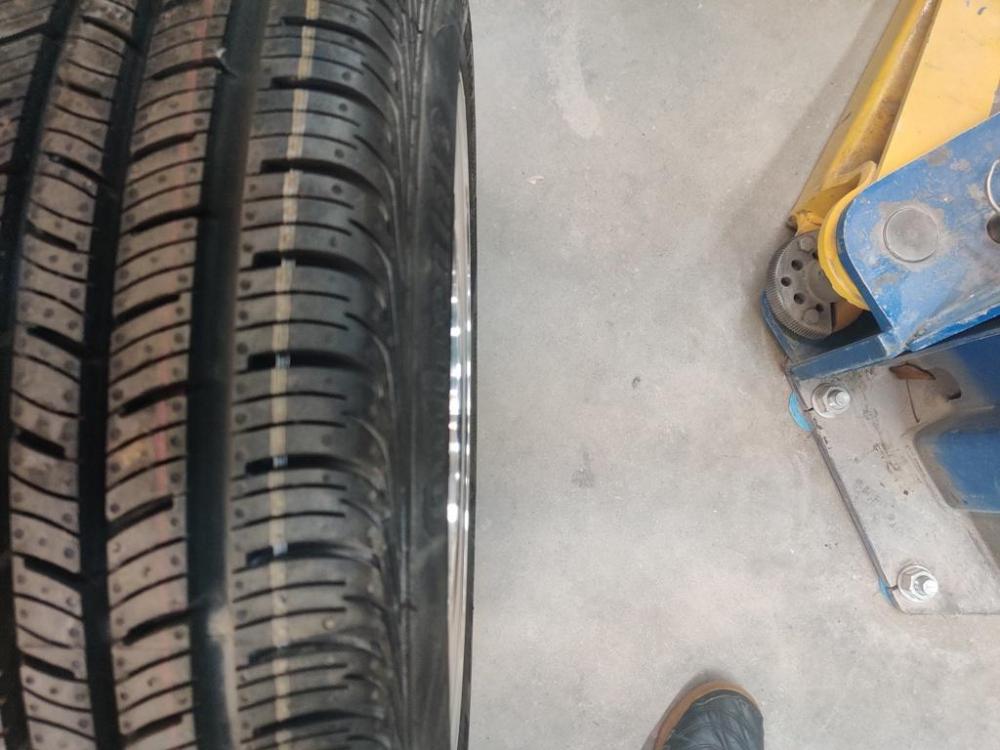
Got some tires mounted on the new wheels today! YAY! I have had such a hard time finding a place that can mount and balance wheels without f*$@&^$ing up the wheels! I did not want to take a chance on the brand new Panasports. This place (in Marietta, GA) has the right equipment: https://www.weaverbrakeandtire.com/ The technician who did the work, Shawn, was nice and very careful. I forgot that the wheels came with stems, and went with one they offered. Even after mounting one tire, (when I found the stems taped to the bottom of the box in which two wheels were packed), he broke the bead and replaced that stem with the Panasport supplied one. The tires I went with are CONTI-PROCONTACT - SIZE: P195/55R16 (rim width range 5.5-7"). I chose this size as it is the closest to stock diameter as I could possibly get with a 16" diameter wheel. Additionally, it was of critical importance to me not to modify the stock sheet metal in any way. I have read various posts from others about tire sizes. Sometimes people would say that the tires would rub on the stock lips and sometimes not. I decided to go as conservatively as possible on tire width because of those posts. The tire here is maxed out on a 7" width rim, and I am ok with the final look. The tread width is approximately 6.5" wide. It is what it is. I wanted to err on the side of not rubbing, as the car will utilize ST (Suspension Techniques) springs which will lower it a tad. A few pics from different angles which show the profile: I didn't quite get as much video as I wanted here, but it was hilarious to watch Shawn mount the tires. He had to use a special "tool" to get the bead to seat: The tool is a "Bead Bazooka". It's use was necessary to get my P195/55R16 (rim width range 5.5-7 inches) to inflate properly on the 7 inch wide rims. This tool shoots a quick blast of air at the tire/bead area which assists with pressurizing the tire enough to get it to seat fully on the rim. I'm a long way from mounting the tires on the finished car to check the final look. I am curious how much clearance I will have between the outside face of the tire and the lip around the circumference of the rear wheel well. My suspension plans include Koni inserts inside unmodified struts with Suspension Techniques (ST) springs and ST front and rear anti-roll bars (a set up recommended by the late John Coffey). Everything will be reversible. That is, if I, or someone after me wants to return this car to pristine stock condition, it is something that will be possible with 1 afternoon of work. 😎

-
Yes, the finish looks a bit more polished. I had an issue with one rocker in a set of twelve that I sent to Delta. It came back with the tip end ground out of parallel with the cam wipe pad. I sent it back, and it came back worse (even more out of parallel). I sent it back again and they got it right, but the pad was noticeably thinner than the other rockers when all was said and done. I think their fixture is not as reliable.
-
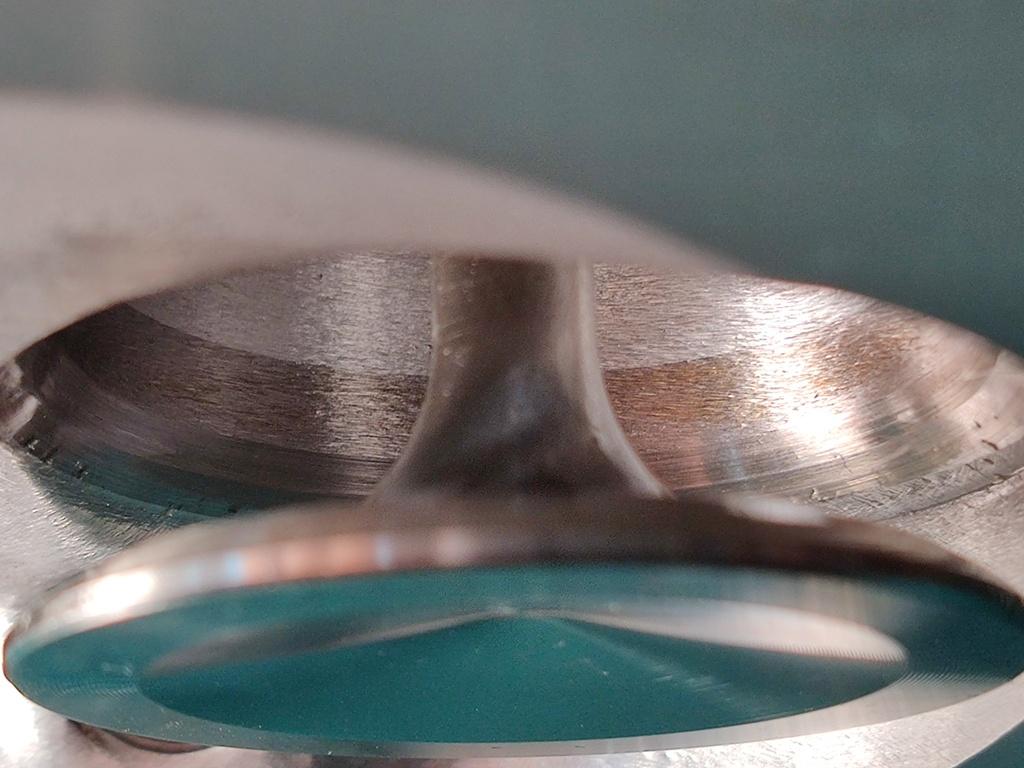
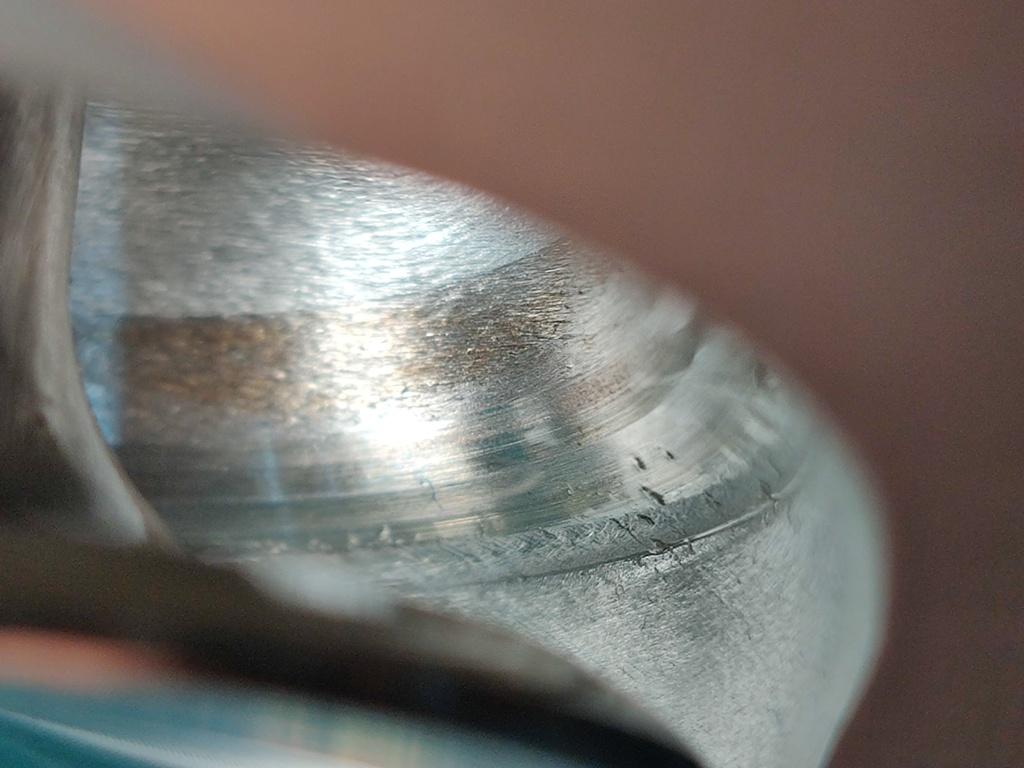
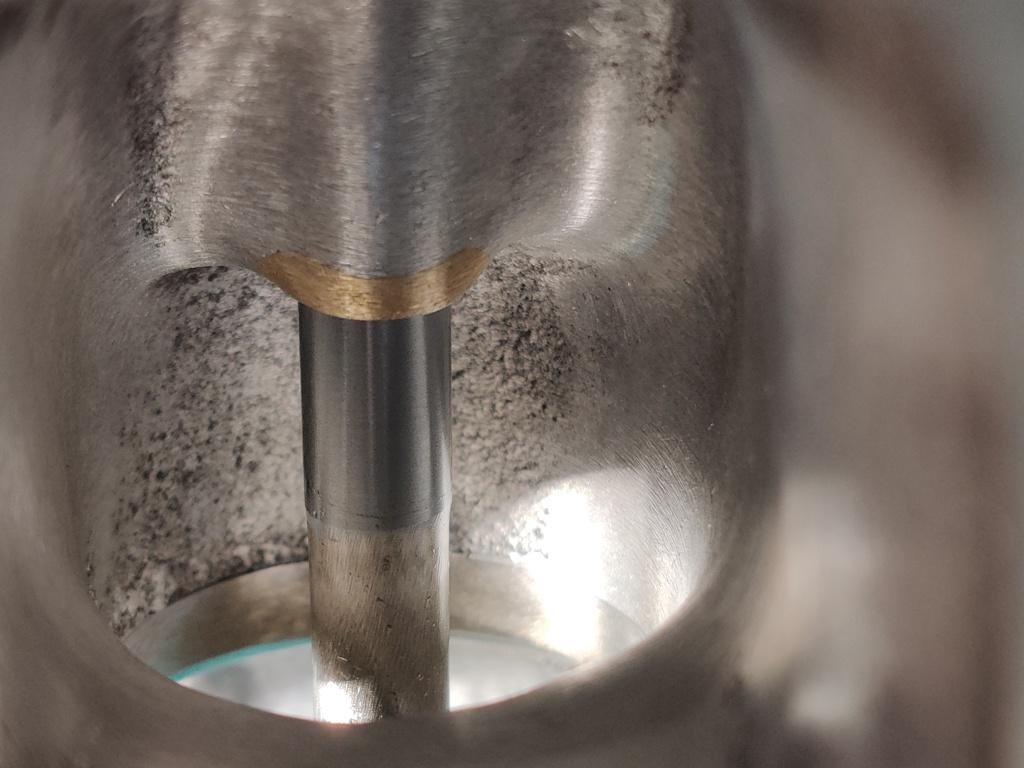
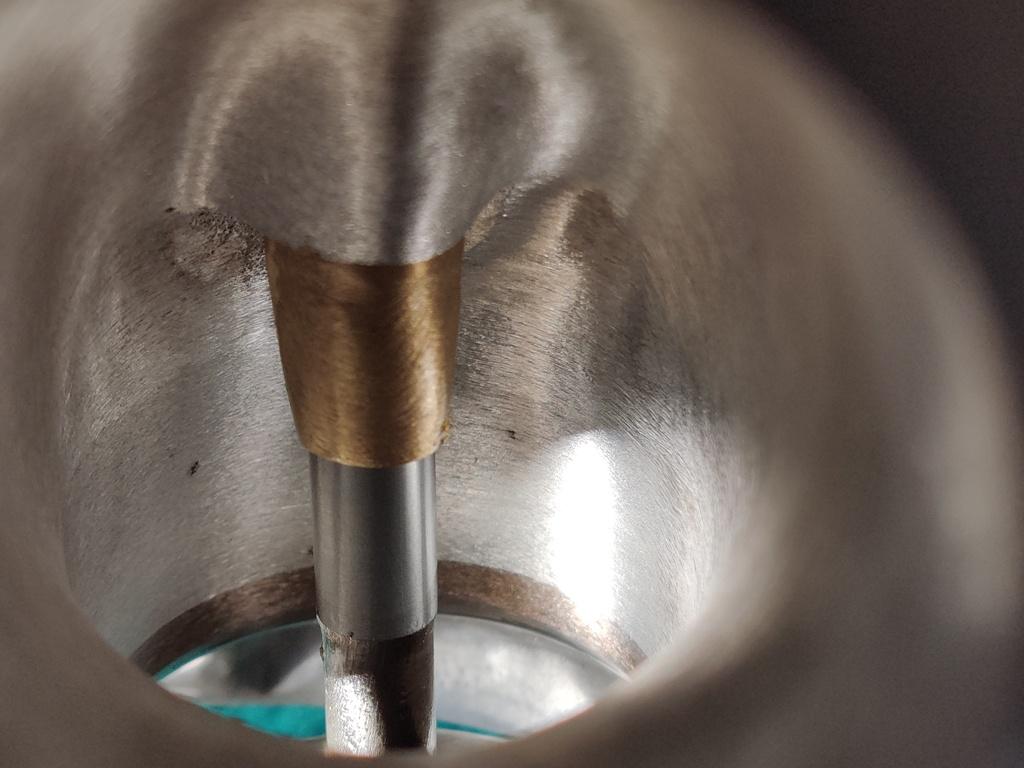
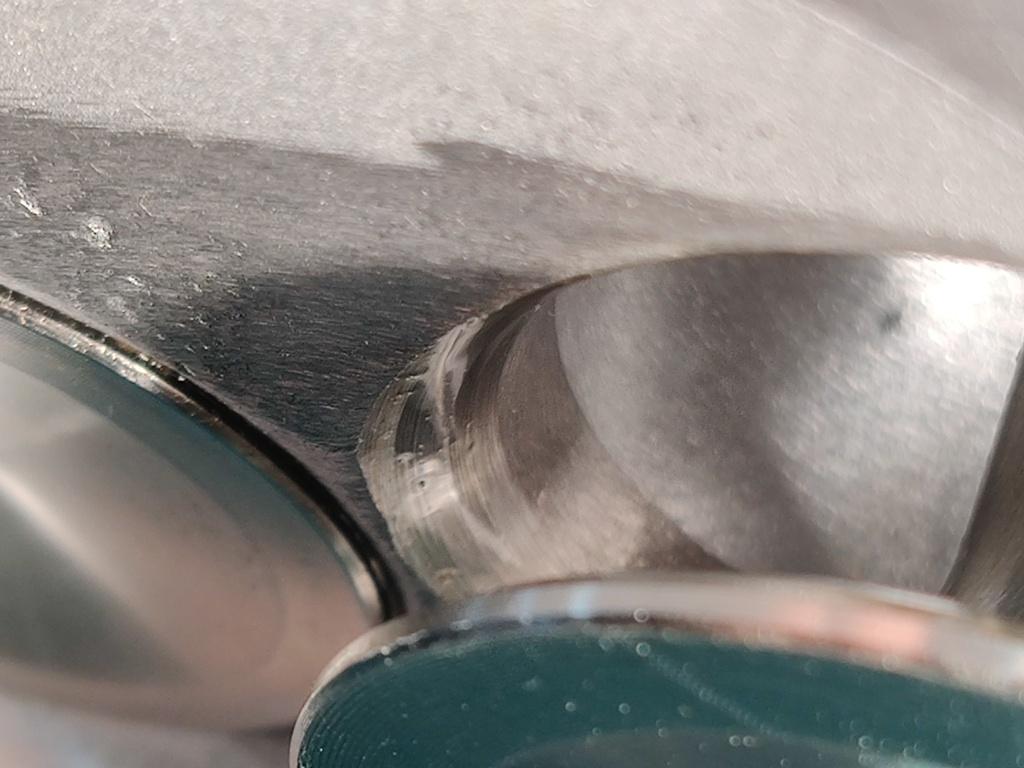
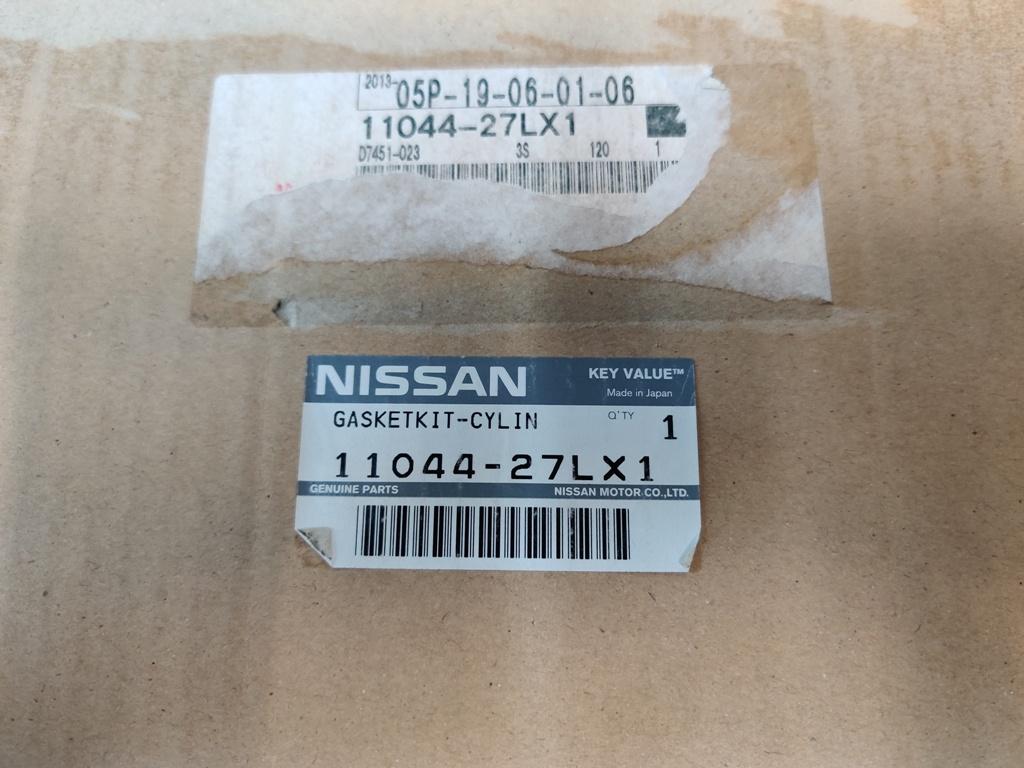
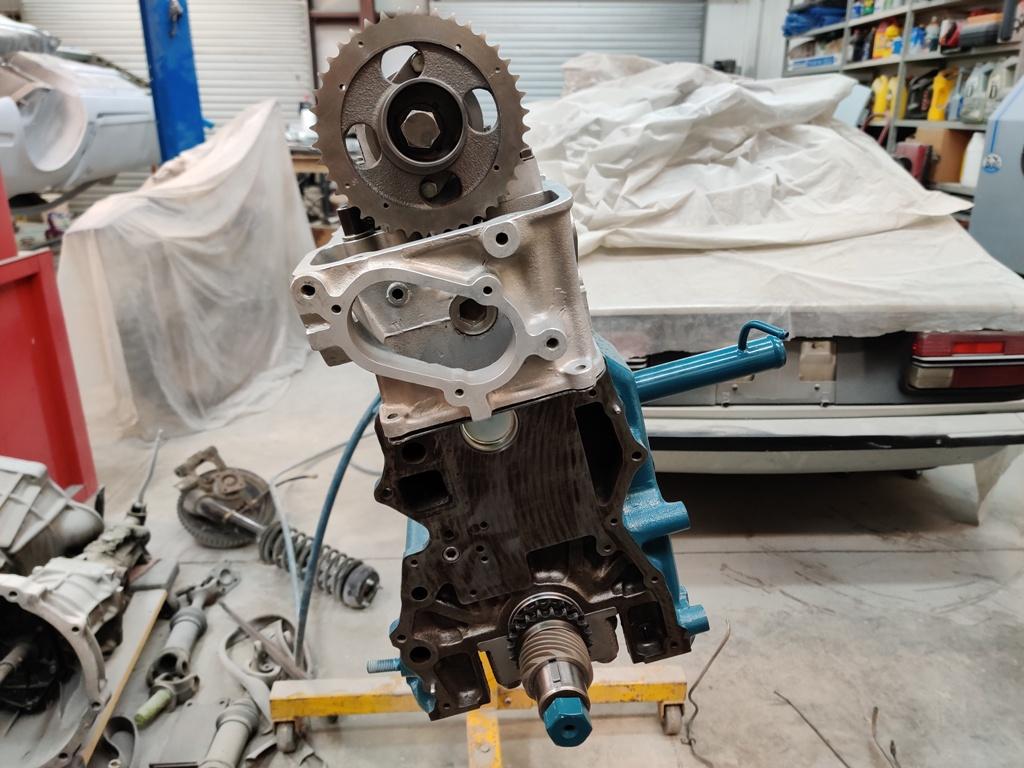
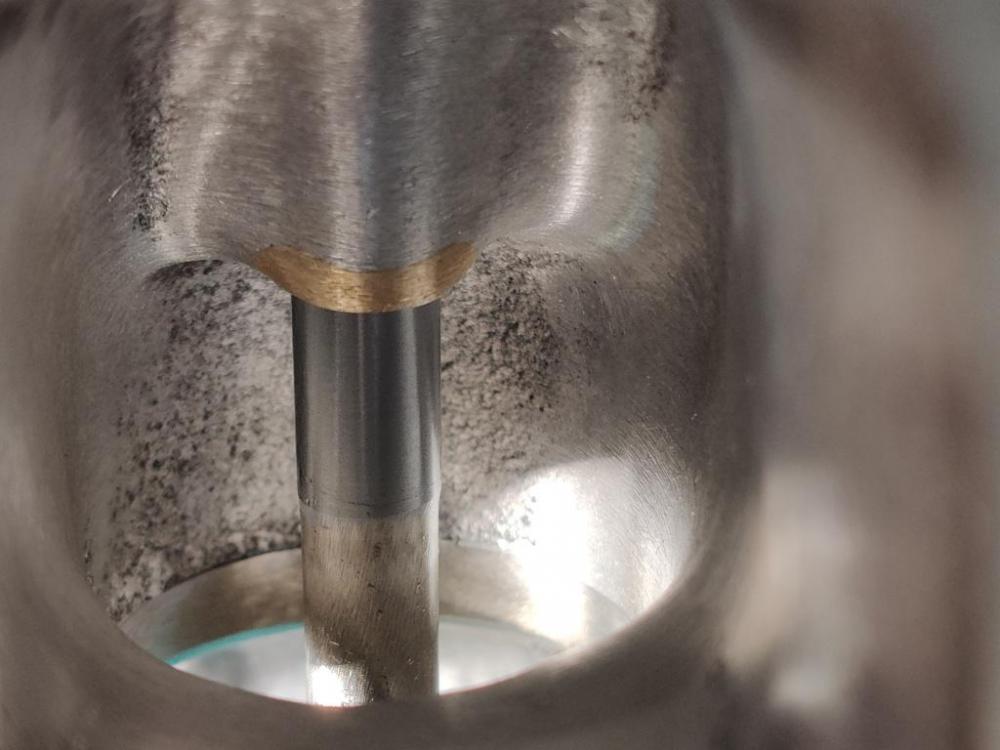
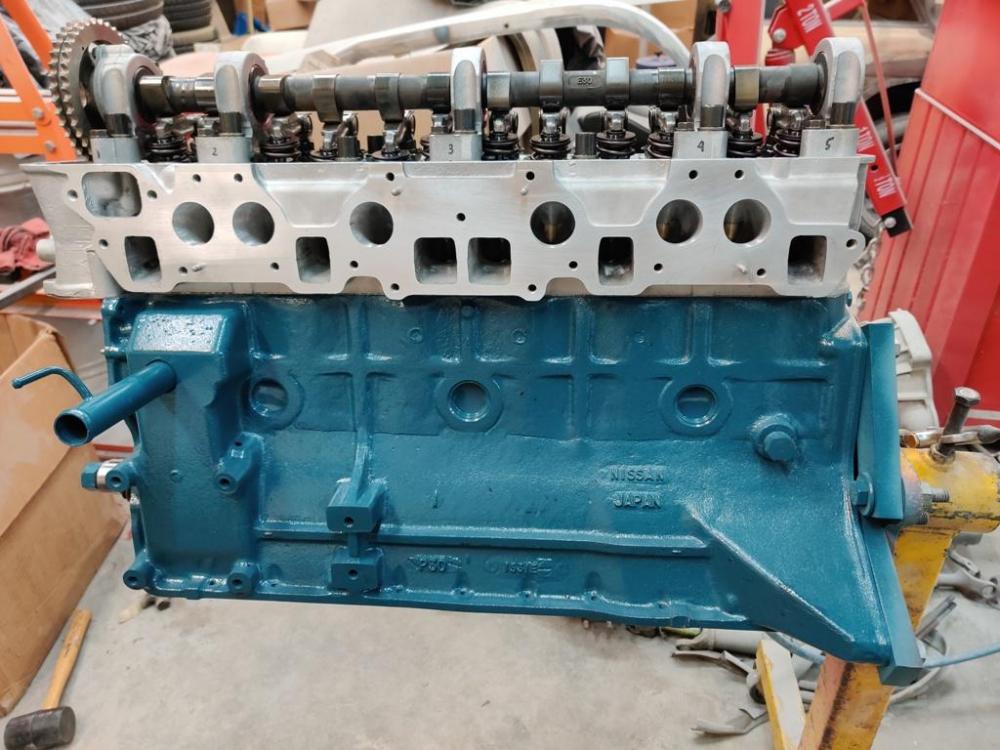
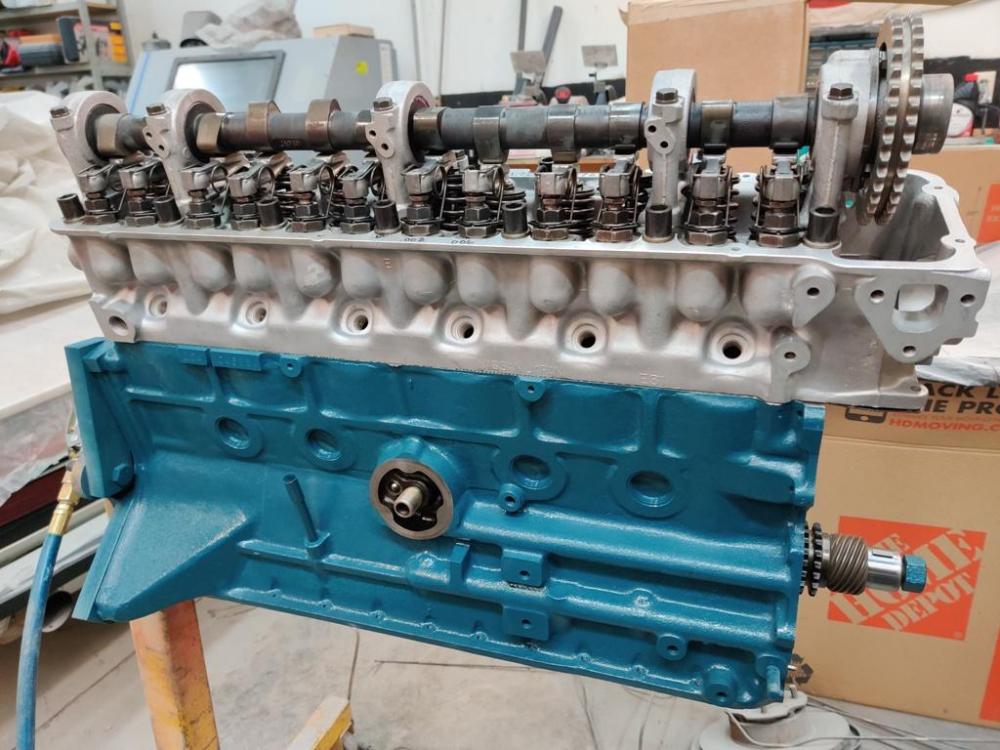
Picked up where I left off on the engine today. I assembled the valve train. Lash pads used were .180" on the intakes and stock (~ .120") on the exhausts. The rockers were reconditioned by Rocker Arms Unlimited in Redding CA. I have had some done by Delta, but I think this place does a better job. With the rocker arms adjusted to the correct clearances to the cam, I was able to inspect a few of the valve seats and bowl area: Also, light from the combustion chamber side illuminated the ports, so I took a couple more pictures of the port work. One exhaust and one intake port are shown in that order: For installation of the head, I referred back to the discussion earlier regarding head gasket thickness. Stock Nissan thickness measurements provided earlier in the thread indicate about 1.20 mm. That is about .047". This is the head gasket that I purchased: I measured it again today, across each firing ring between bores, as well as in a couple of areas around the outer edge of the gasket. My measurements were typically between .057" and .058". 1.5 mm is .059". So, if this gasket compresses to .047", then that is about .012". That seems reasonable, but I don't know how much it compresses. My piston, as mentioned a while back, pops up .025" above deck. So, at the highend, I've got .058" - .025" or .033" (with no gasket compression). And, at the low end, I've got .047" - .025" or .022" (if the gasket compresses ~ .011" to .012" inches upon installation). This is not a race engine, so I think this will suffice. 🙂 A few pics of the engine as assembly continues:


-
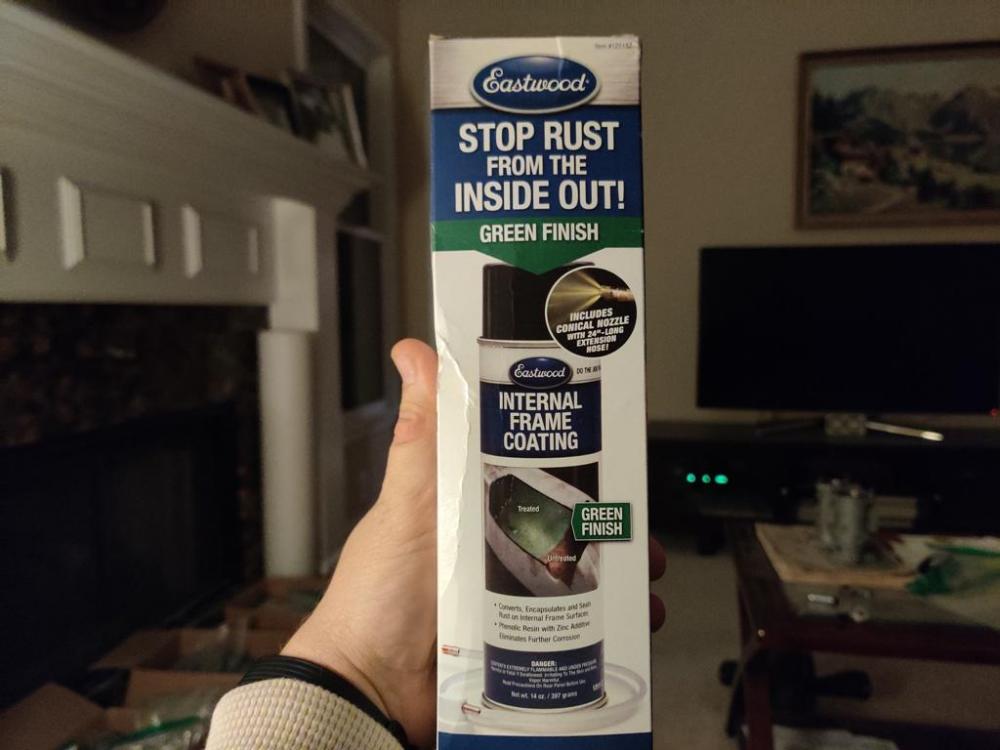
Hmmmm. That is what I have - I know I got it from Eastwood. I thought it was wax. Welp - here it is:
-
Yes, I have in mind to shooter primer and paint through certain access holes to cover some of the bare metal, and also plan to utilize cavity wax to coat the hardest to reach areas. I think I will be able to plug all sources of "water entry", which will go a long way toward eliminating rust in the future on this car. And the wax should keep rust away from inner cavities of rockers and frame rails, etc. But, of course, rust never sleeps. And this car too will succumb to the elements one day.
-
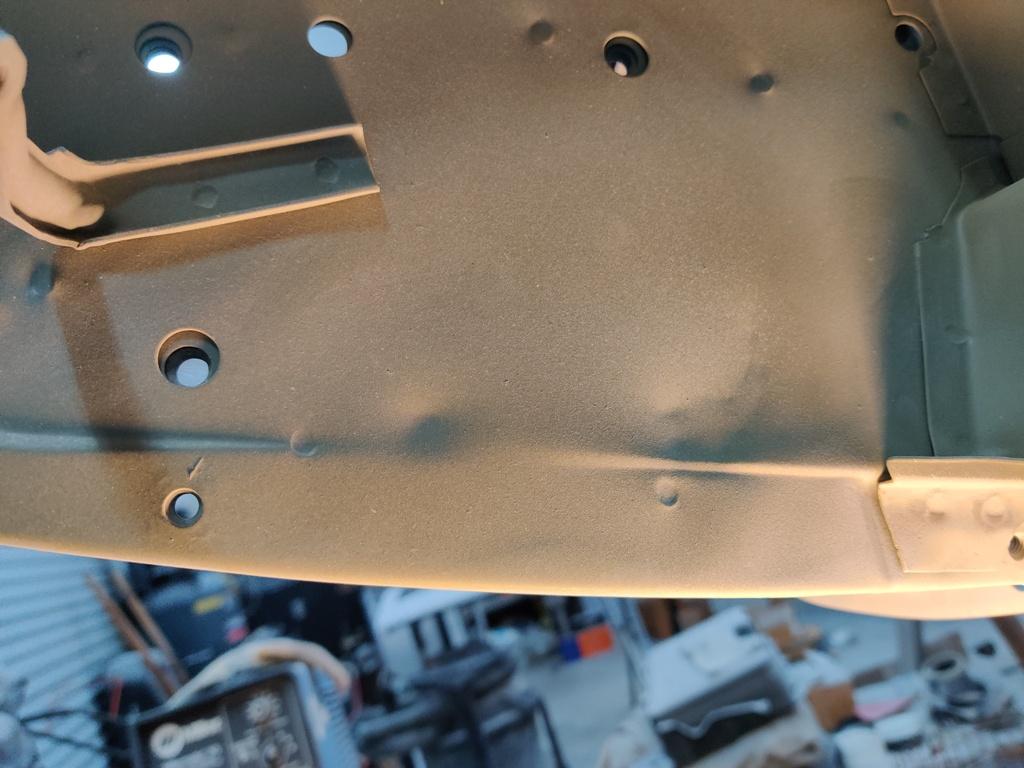
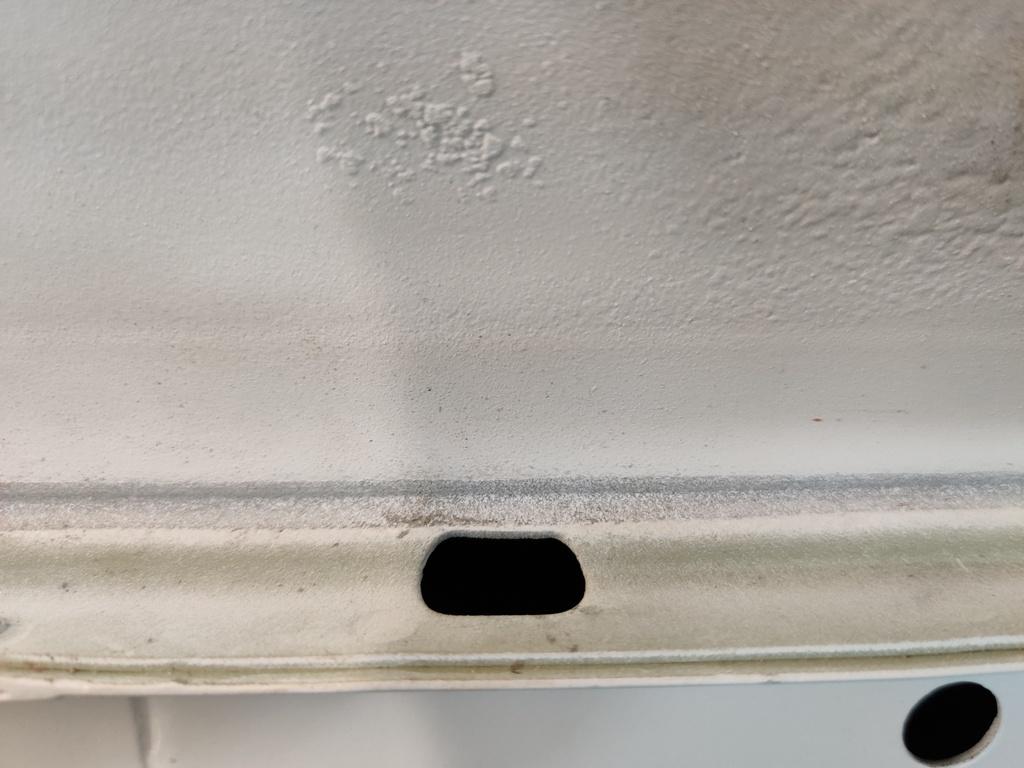
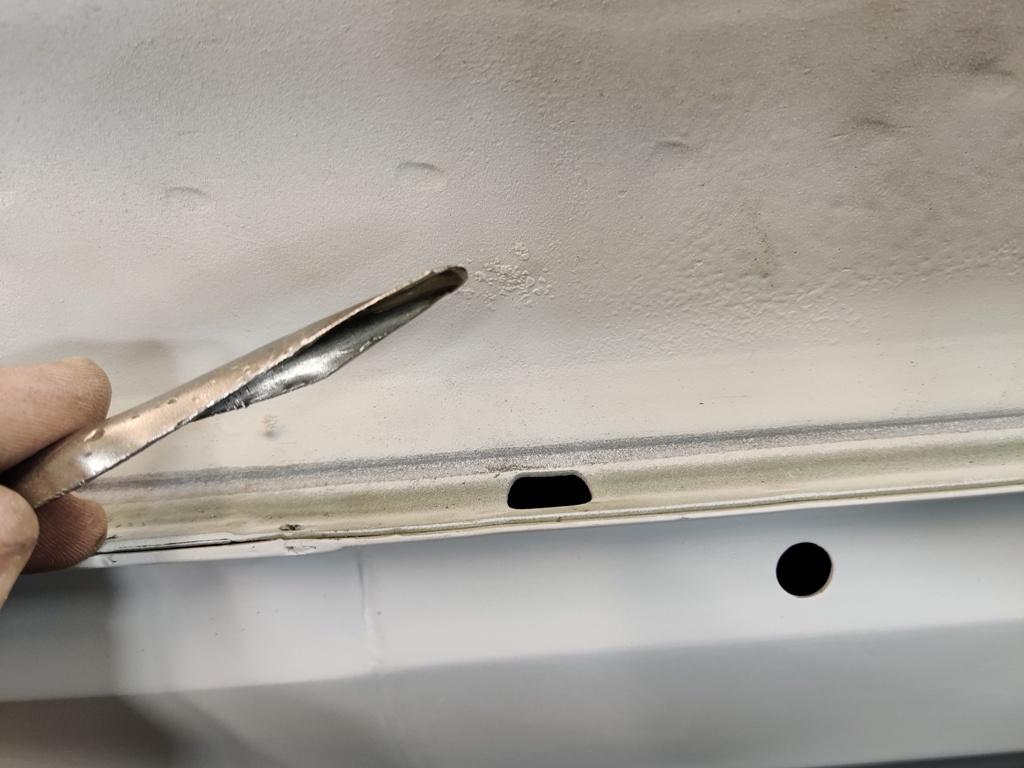
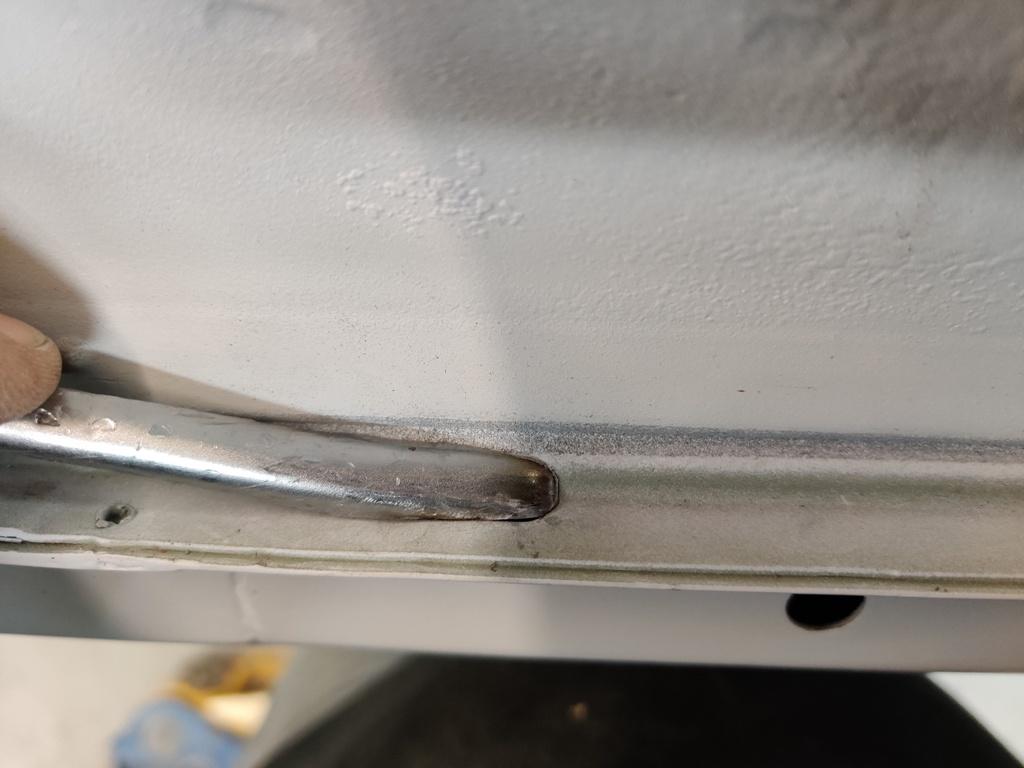
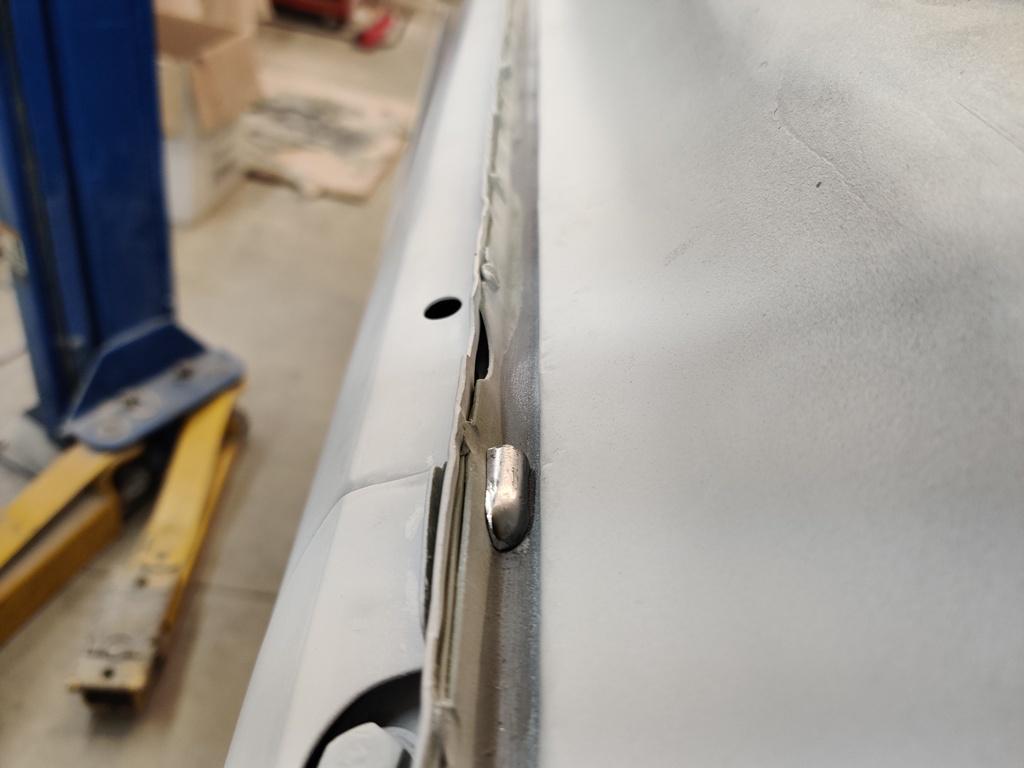
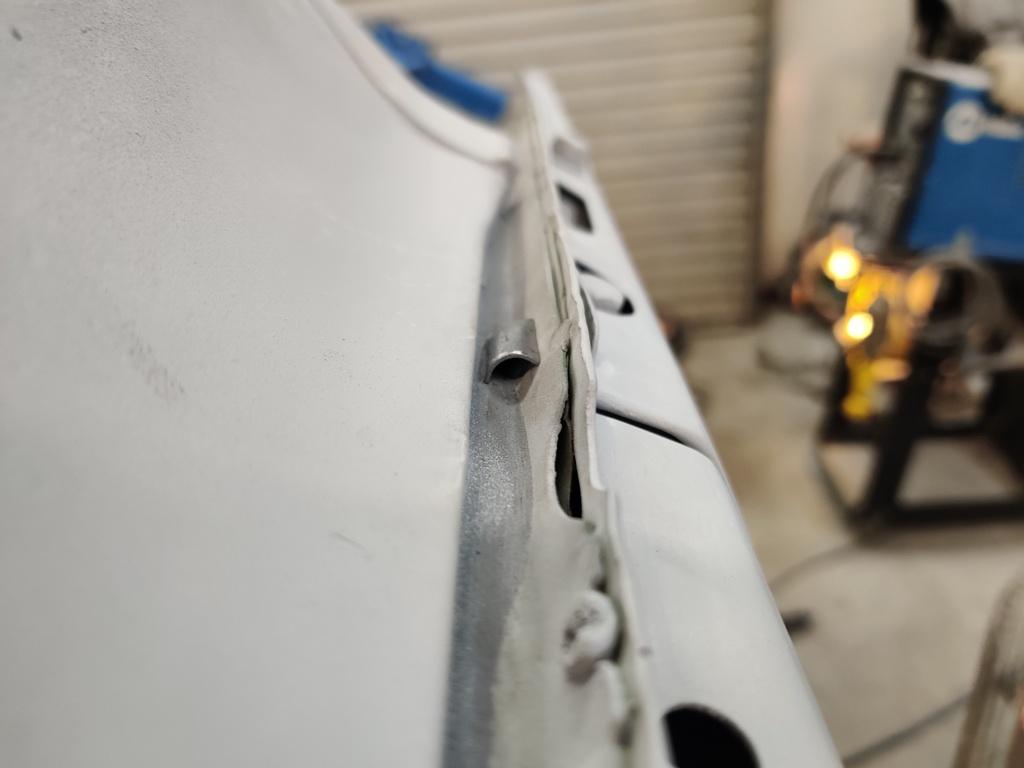
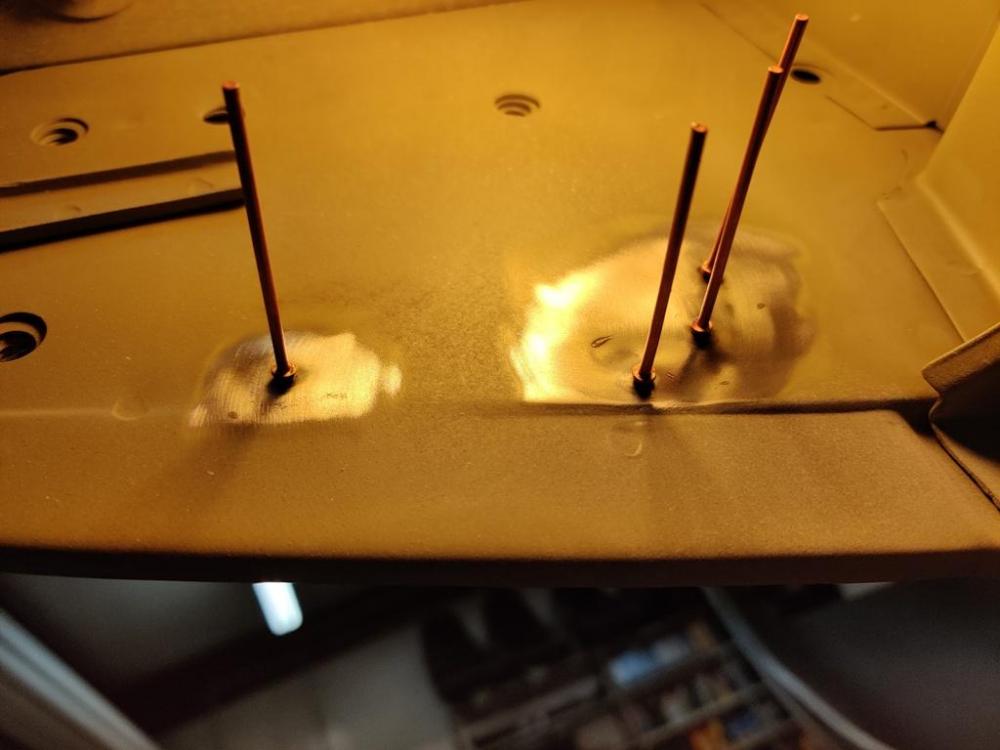
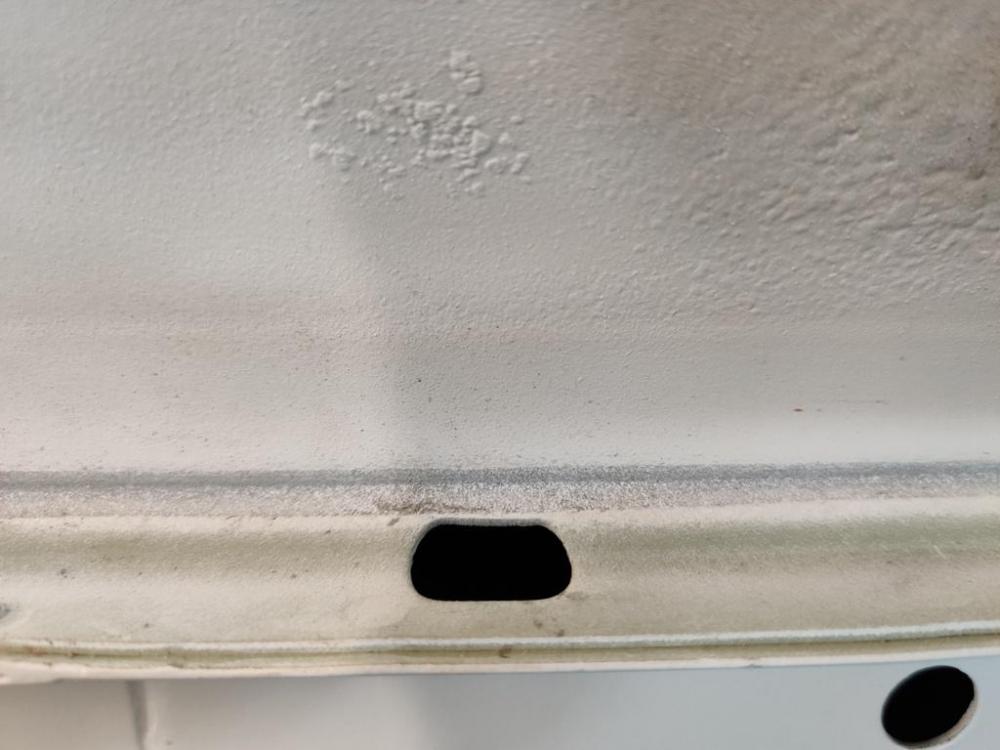
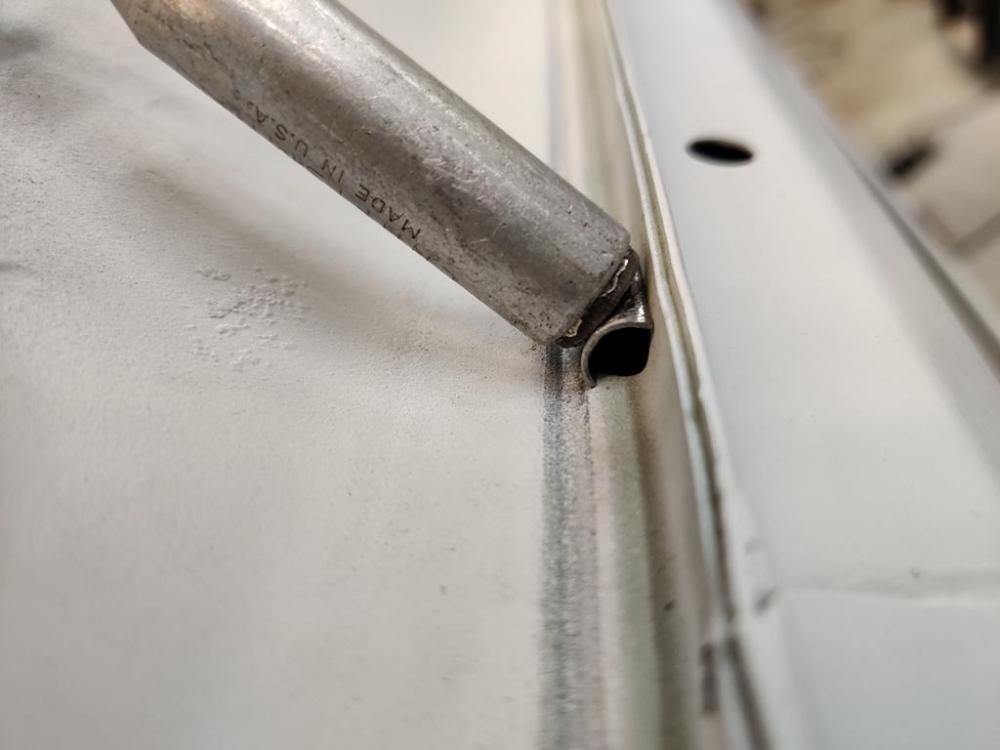
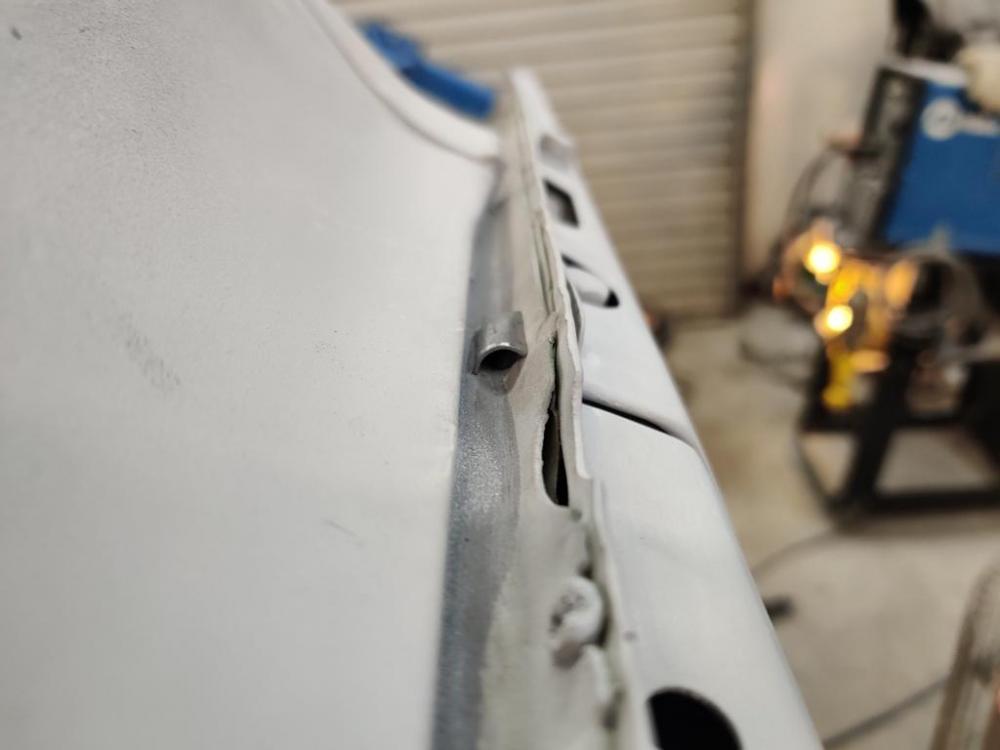
Switching back to the unibody... I found another place that needs some dent removal with the stud welding gun and puller: A few rounds of welding pins and pulling and tapping with a hammer and punch, and things are flattened out nicely. I use a touch of body filler to finish it off. Also, it is time to execute on the plan to address these holes from the factory in the bottom of the rockers: There are two of these oval holes in each rocker along the bottom, inside edge of where the inner and outer rocker panels are spot welded together - one at the front and one at the back. It seems the factory wanted these to be there to drain water out of the rockers. Well, water should never be getting in there! And that is my plan. This oval design acts as an entry point for water that blows down the bottom surface of the rocker panel. It allows entry into the rocker panel and that is not acceptable. To address that issue, but still allow for drainage in case water finds its way in, I made these and plan to weld them in place: Held in place with a magnet to keep it from dropping inside, these are little shields that will allow water to drain out, but shield the opening from water running from front to back on the bottom surface of the rocker. I have other plans that I will implement to eliminate water from getting into the unibody structure. I will be addressing, with a water proof solution, the emblem attachment holes, door tag rivet holes, door sill screw holes, etc. The metal surfaces inside this car's rockers will never see moisture again!


-
View Advert N42 engines and parts I bought spare N42 engines a while back because I was building a track motor (N42 block with an 89 mm bore), and sometimes it is hard to find N42 blocks that will take that much bore oversize safely. I got lucky on the first engine I disassembled and now have two spares. Additionally, I have some parts from the engine I disassembled. I can take more pictures of anything - these ads cap pics at no more than 10. Just let me know. ITM valve guides - set of 8 - $10 plus shipping N42 engines - both blocks and both heads have N42 on them - $500 for each engine Misc parts from an N42 which was disassembled - if you see anything you want there... possibly even just pay shipping and they are yours. I am posting them mainly because that stuff tends to get thrown away, and if you truly have need of just one useable stock valve, for example, or something you see there then it would be nice if I may be able to help you out. Advertiser inline6 Date 12/05/2020 Price Category Parts for Sale
-
View Advert Pro Car Seat ProCar Seat. Never used. Make offer please. Advertiser inline6 Date 12/05/2020 Price Category Parts for Sale
-
View Advert 16 X 7 zero offset Panasports (two) - low useage I have two of these for sale. They are in really nice condition. One of them has finger nail size scrape on the outer edge, which I dressed lightly. That spot is at the 6 o'clock position in the first photo. Boxed up and ready to ship. Price is $400 plus shipping. There is also an ebay auction for two going on right now - you can get a set of four! https://www.ebay.com/itm/16-panasport-wheels-16x7-4x114-3-Datsun-240z-260z-280z/193809847090?ssPageName=STRK%3AMEBIDX%3AIT&_trksid=p2060353.m1438.l2649 Advertiser inline6 Date 12/05/2020 Price $400.00 Category Parts for Sale
-
View Advert 14 X 7 wheels - deep dish I think these are American Racing - can look and get more details if any interest. Lips have some curb rubbing, but the wheels are not bent or cracked. Not looking for much for them, just putting them out there in case anyone is interested. Advertiser inline6 Date 12/05/2020 Price Category Parts for Sale