inline6
 Subscriber
-
Joined
-
Last visited
Everything posted by inline6
-
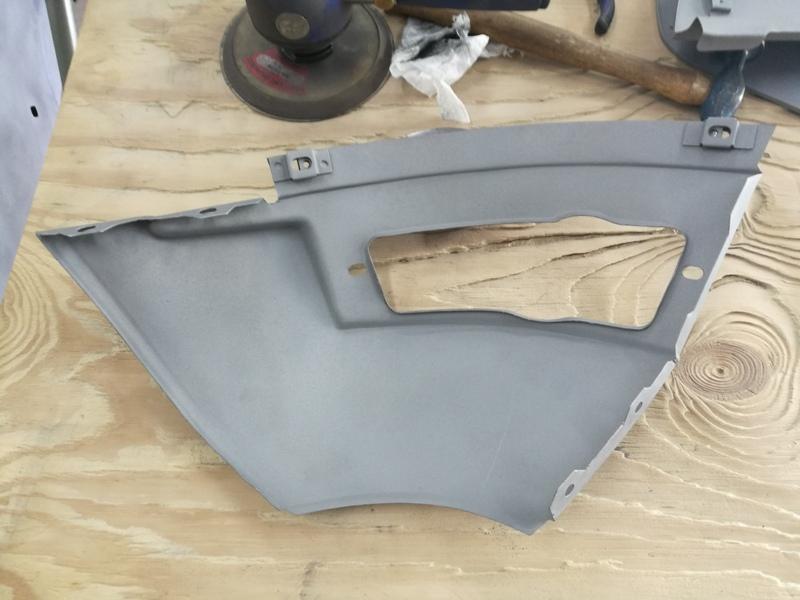
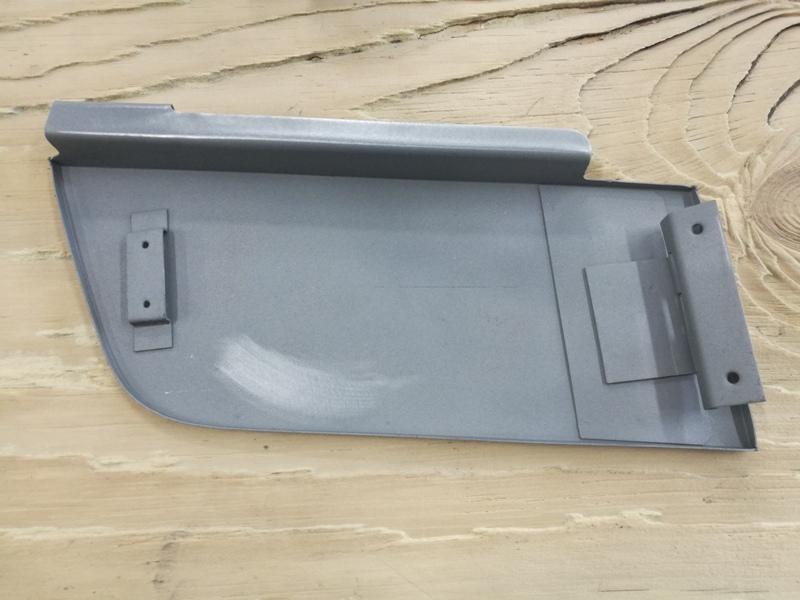
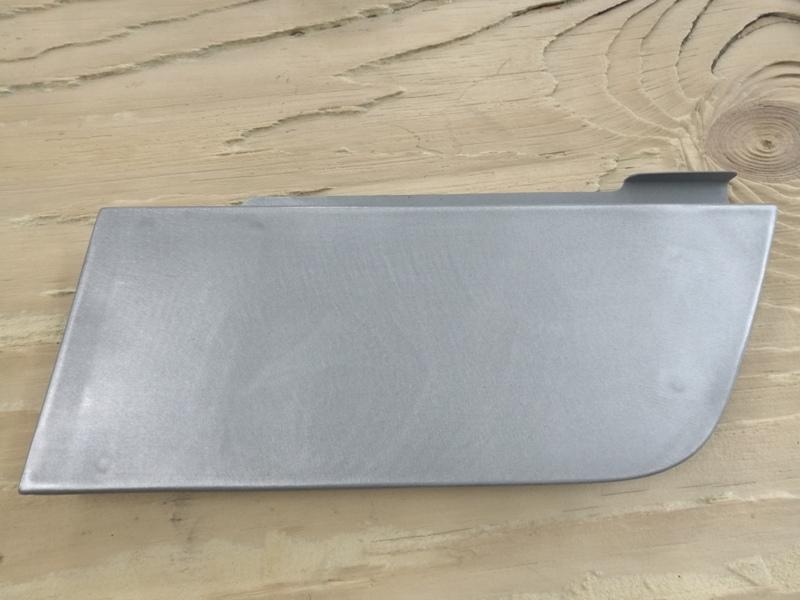
 Some of the smaller panels after dent straightening and sand blasting: And other parts getting stripped. Lots of stripping!
-
Whoops, yeah, Patcon. I am using play sand from Home Depot. Once it has been used and recycled a couple of times, it is very fine. As you can see in these pics, I was removing the repaint layer first and then the original paint and primer. Varying distance, and being careful with "used" play sand works at keeping distortion minimal.
-
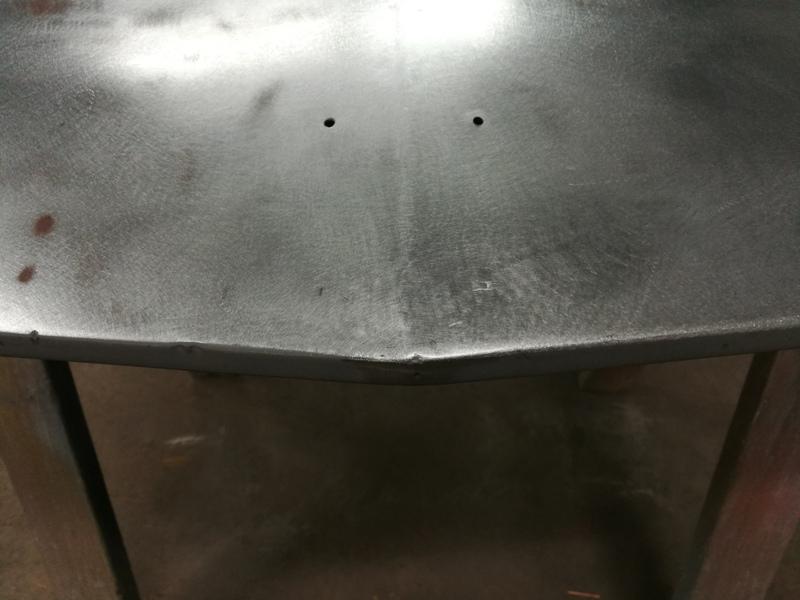
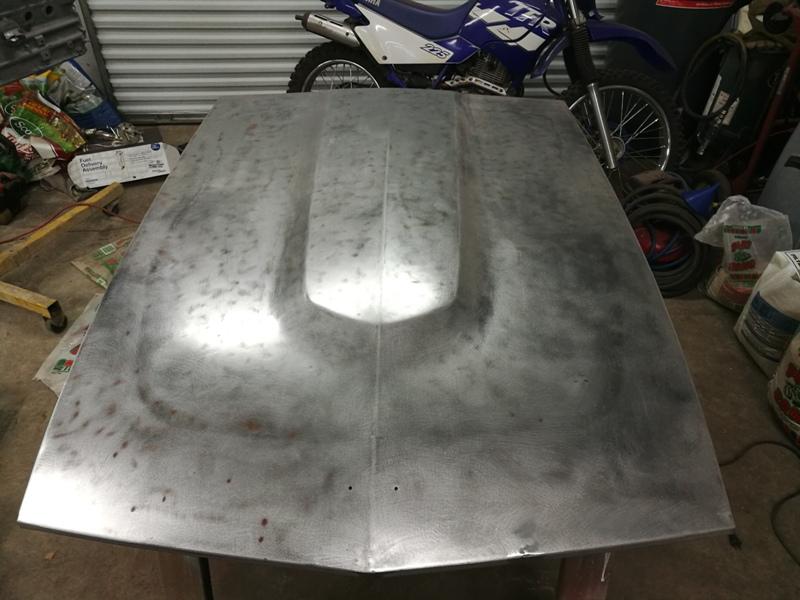
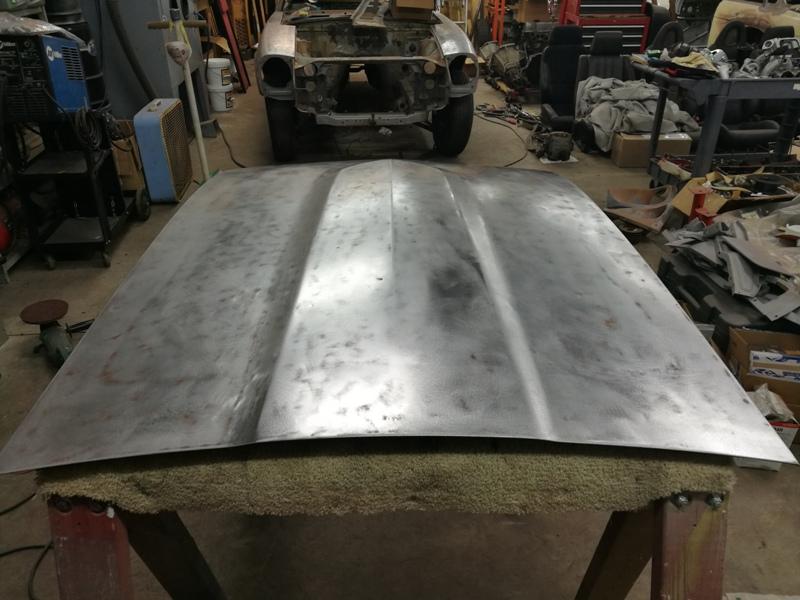
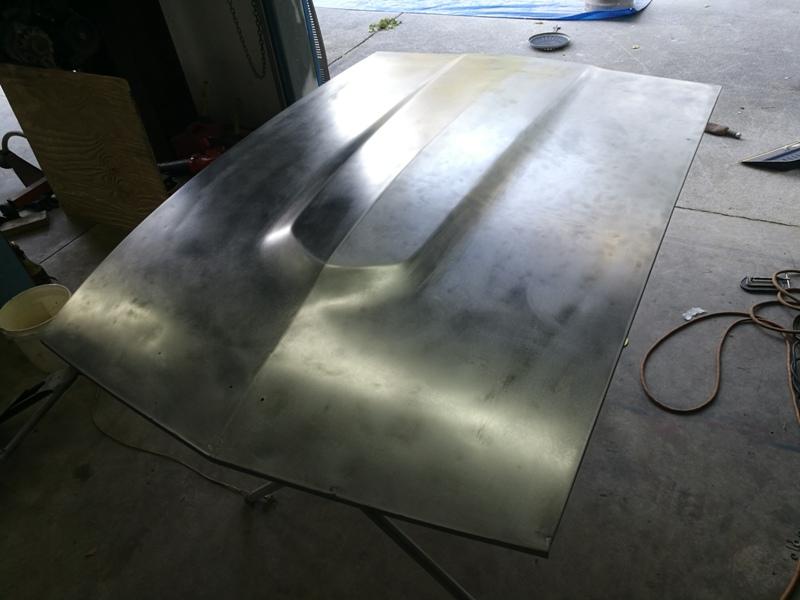
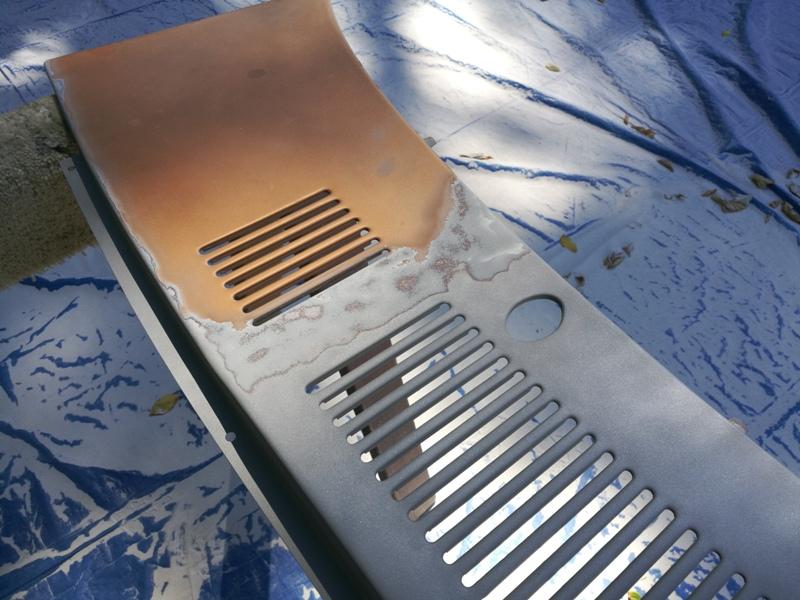
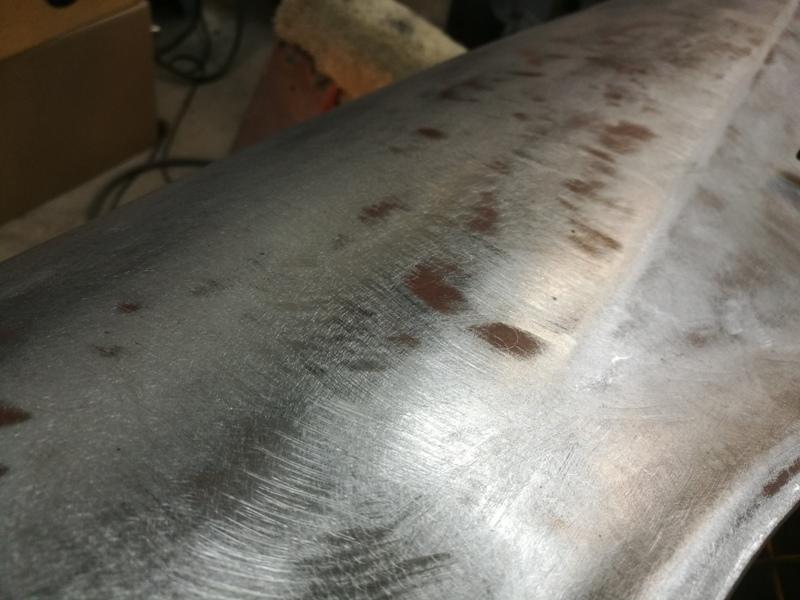
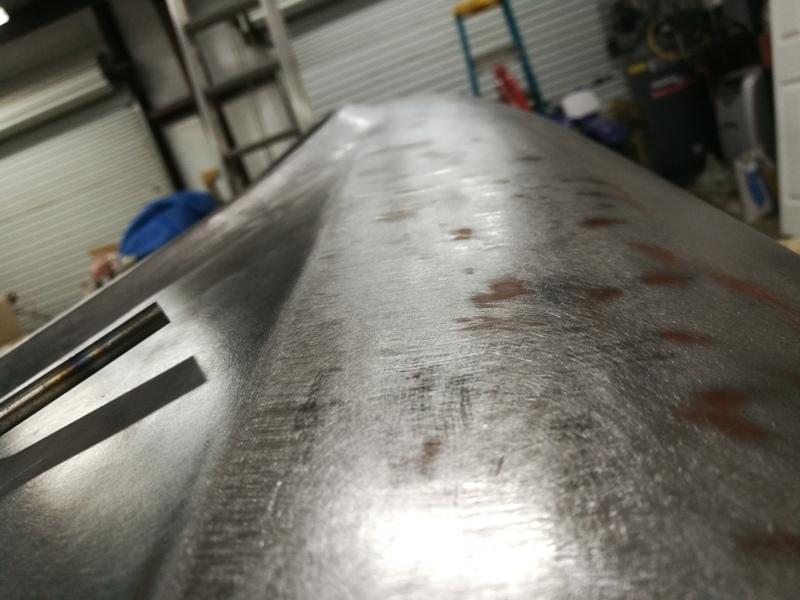
Here is the hood stripped inside and out to bare metal. The sand blaster was used on the inside frame parts. The high speed sander was used on the large, flat areas. There was some hammer and dolly work on some minor dents, and some stud pulls on the pointed nose at the front. 80 grit on the DA was used to get it ready for epoxy primer: These pics show the sandblasting the cowl panel. As mentioned by Grannynot, you have to be careful about sand blasting thin panels such as this one.


-
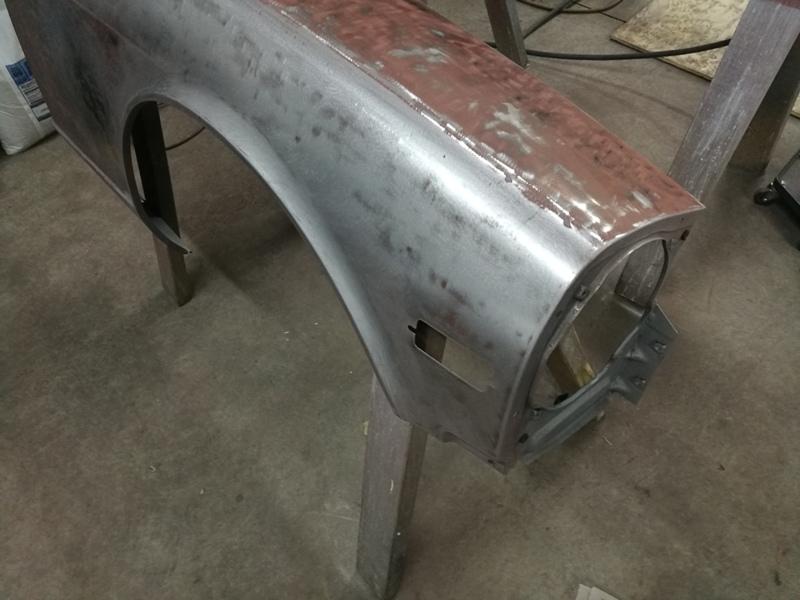
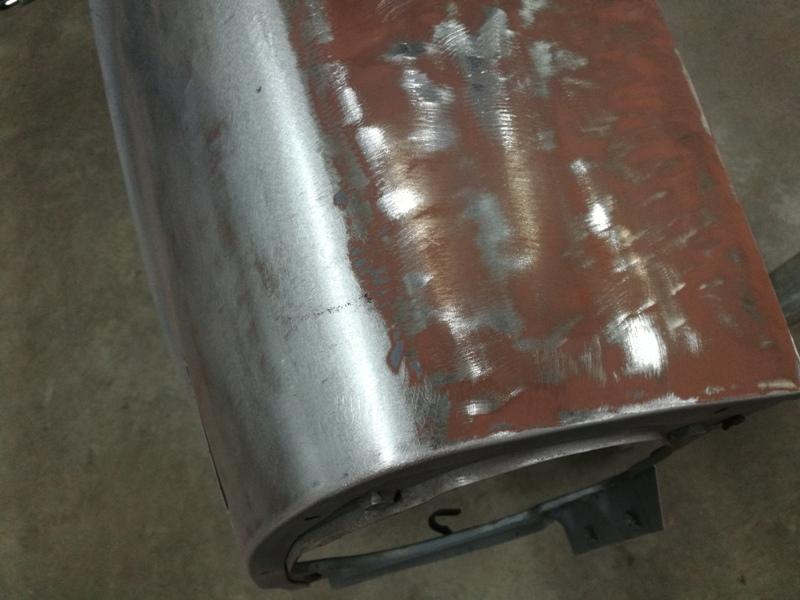
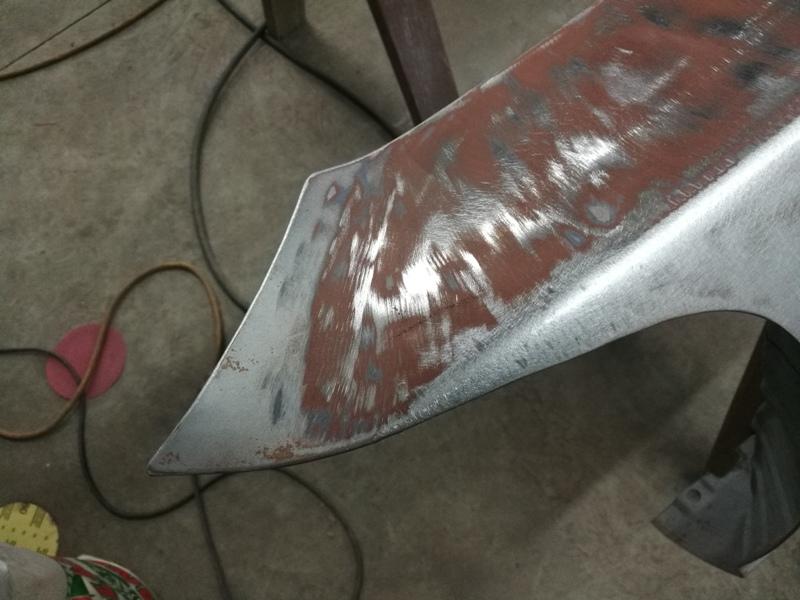
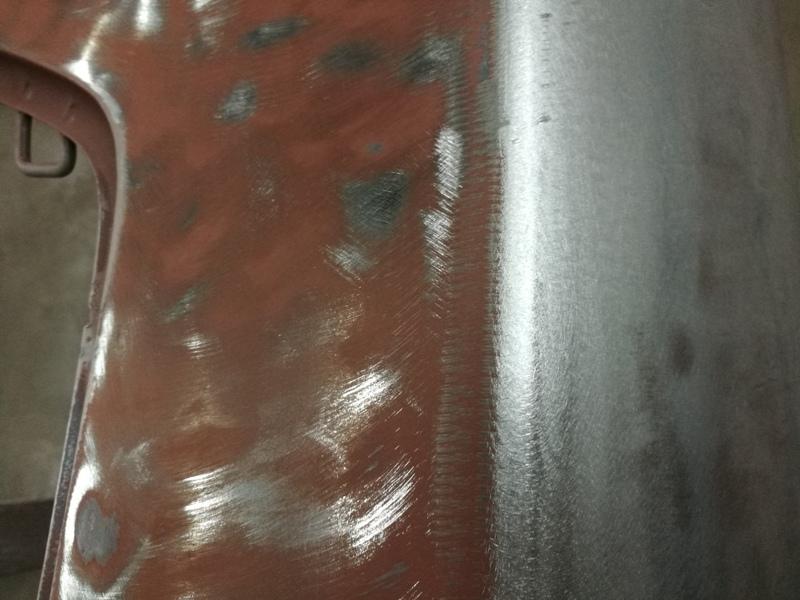
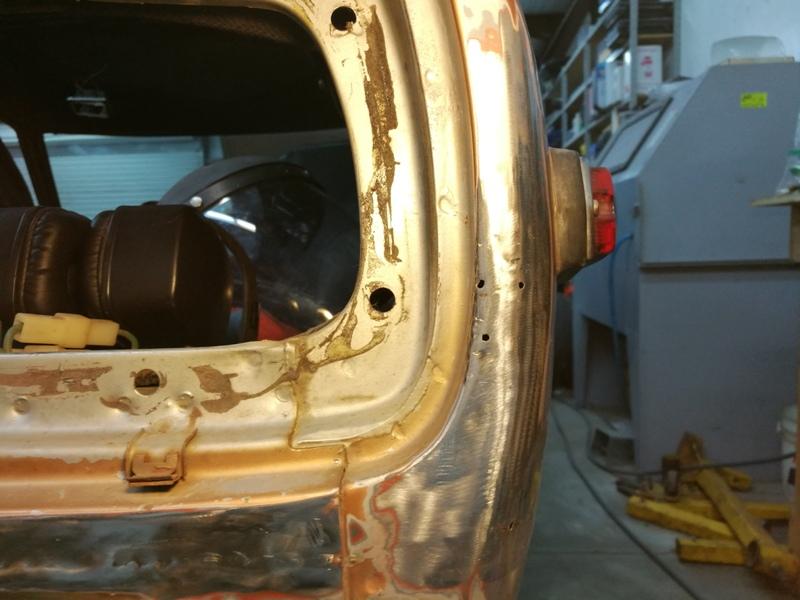
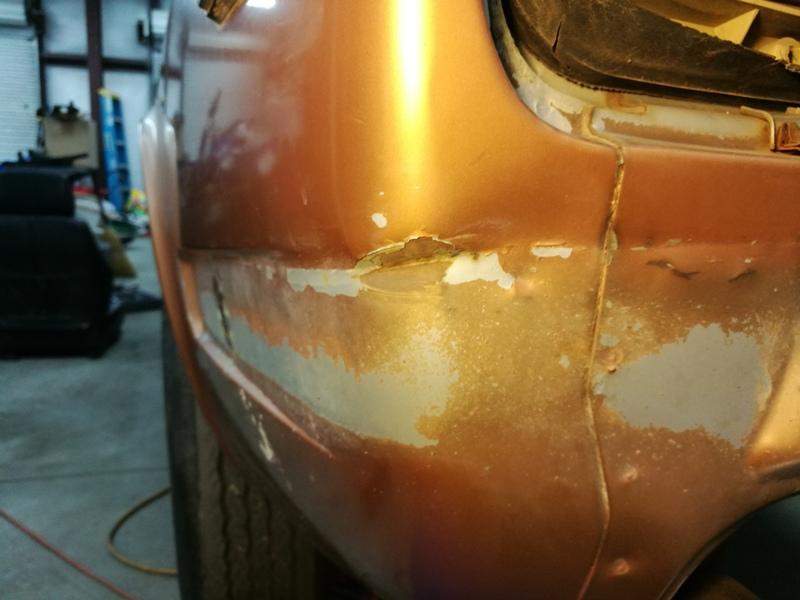
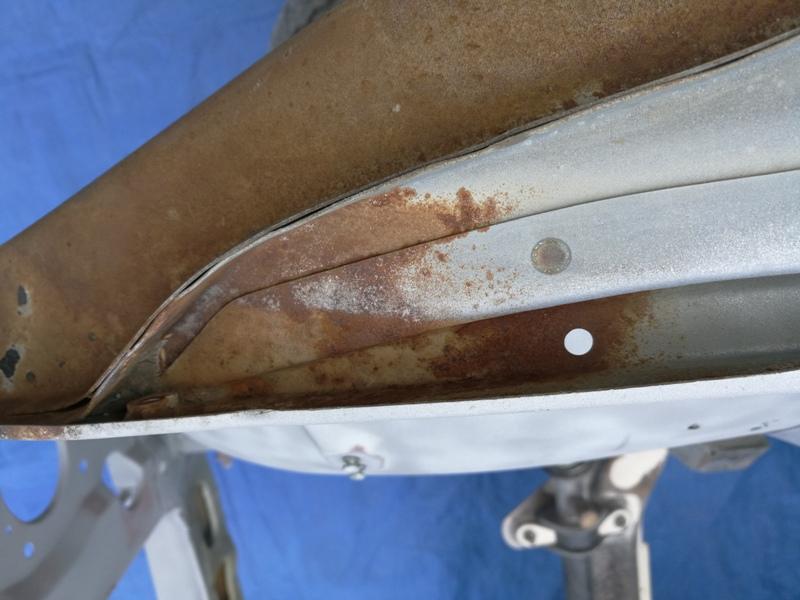
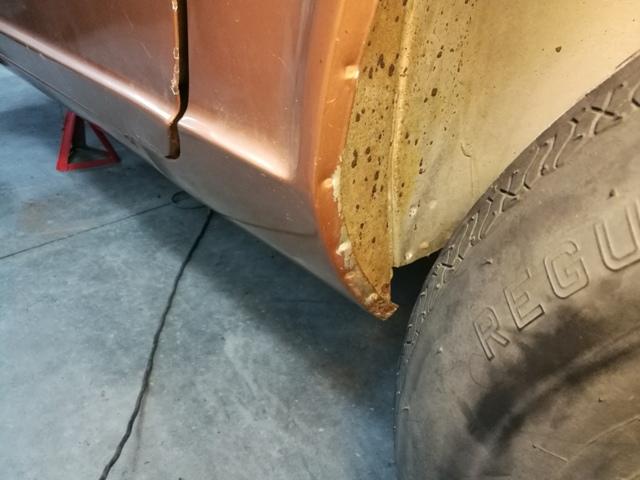
Sticking with paint removal for now, I found that one of the bigger jobs was removing paint from the exterior panels. Certain areas, I was ok with sandblasting after some testing. But for the large surfaces, I switched over to a high speed sander similar to this one, and some 36 grit paper with supporting, backing disc. Interestingly, the disc removed the one layer of repaint, the factory silver, and the factory top coat of primer (dark grey I think - I am colorblind) and left the red (oxide?) primer behind for the most part. I then used a DA sander and 80 grit paper to remove that. It was helpful the way it worked out because the red primer stayed where there were dings and dents. This gave me a visual aid for hammer and dolly work, and hammer and flat punch work. I found some of the dents were best handled by locating the flat punch on the inside of the panel and tapping with the hammer. Here are some representative pics of this work, done on the fenders:


-
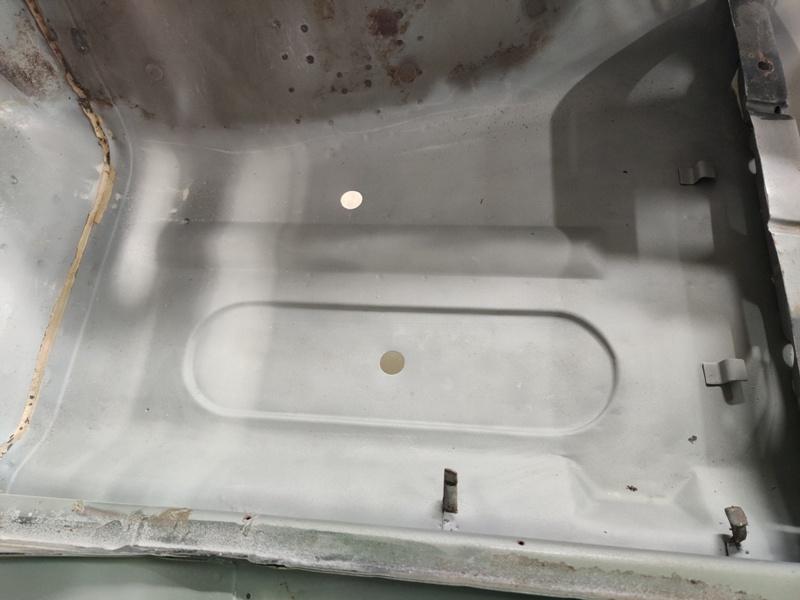
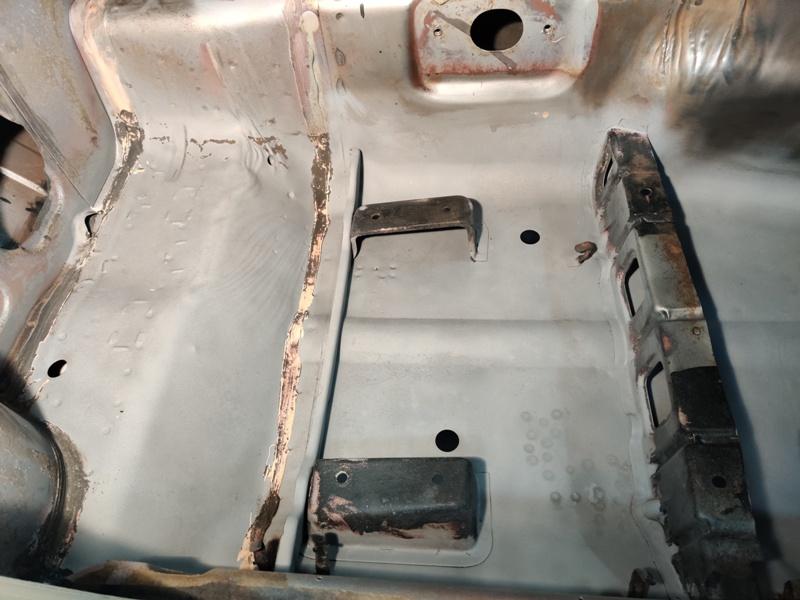
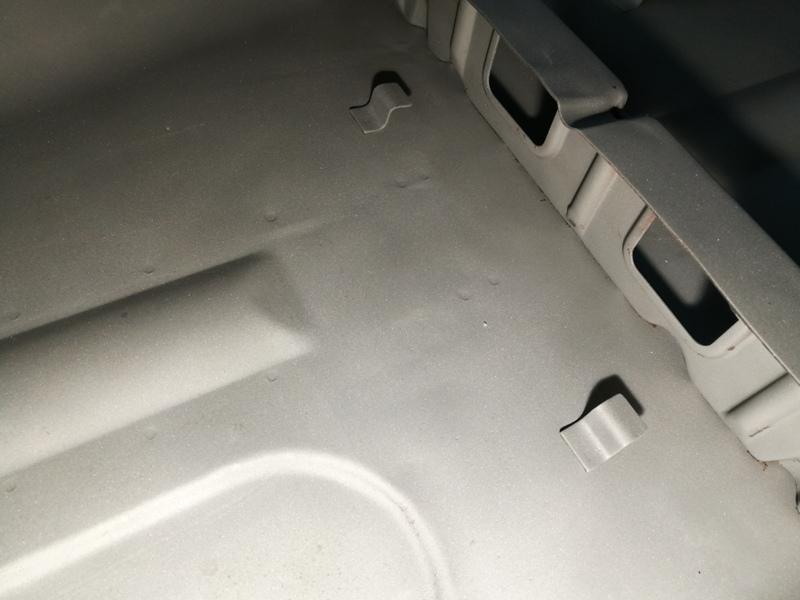
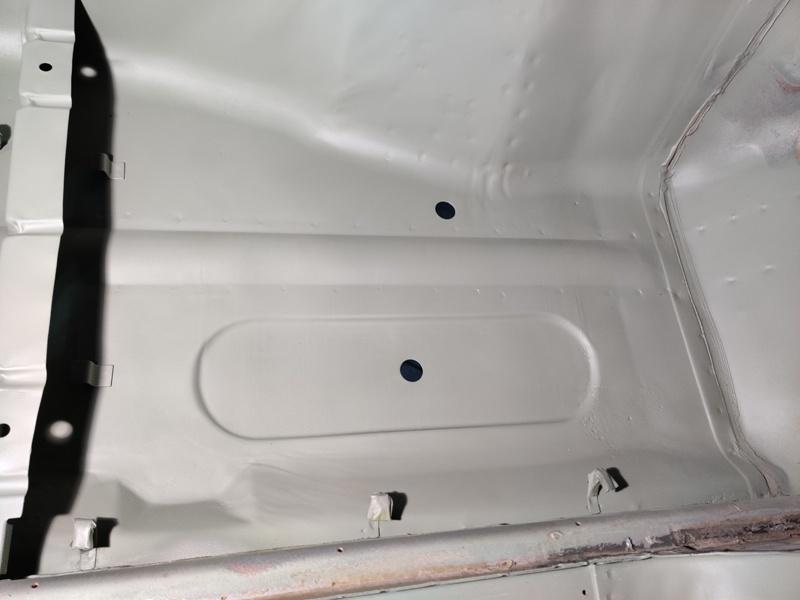
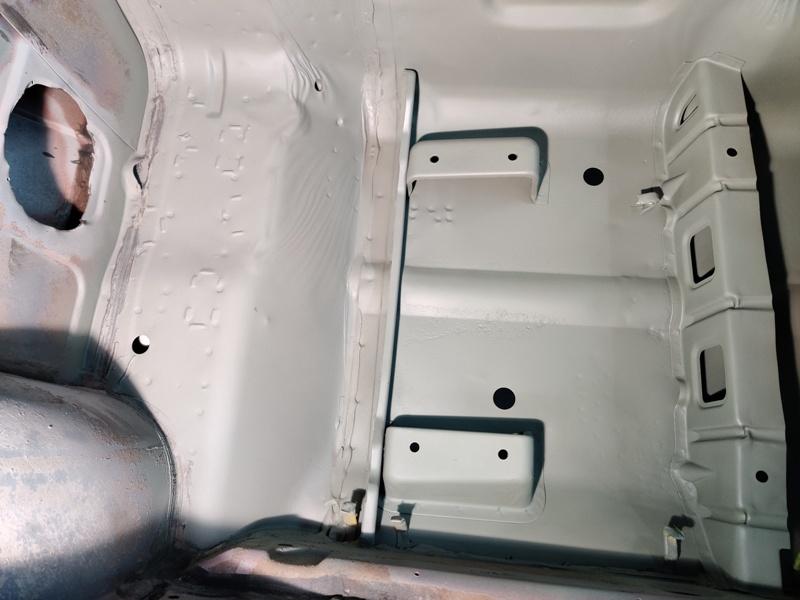
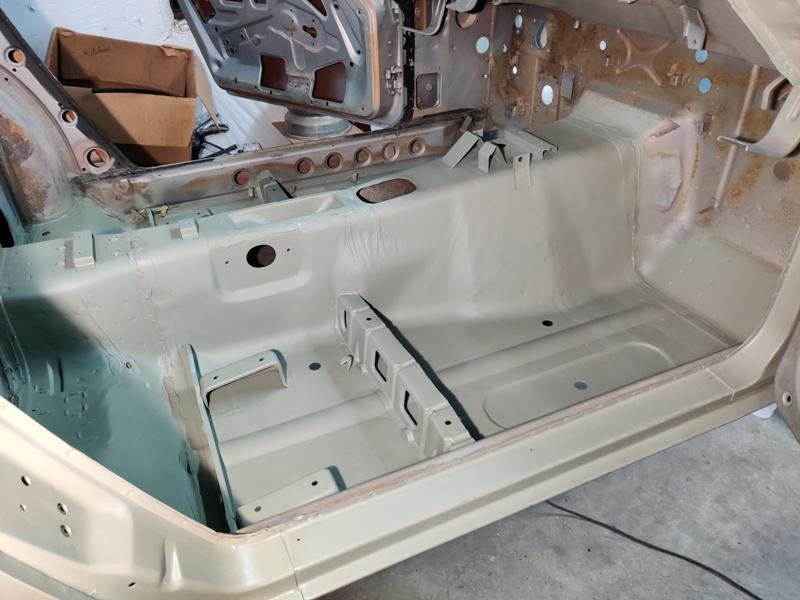
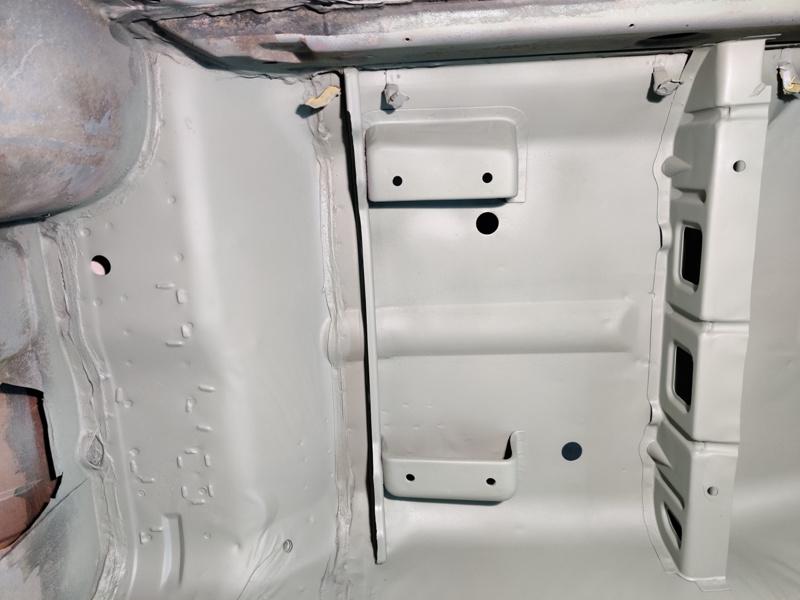
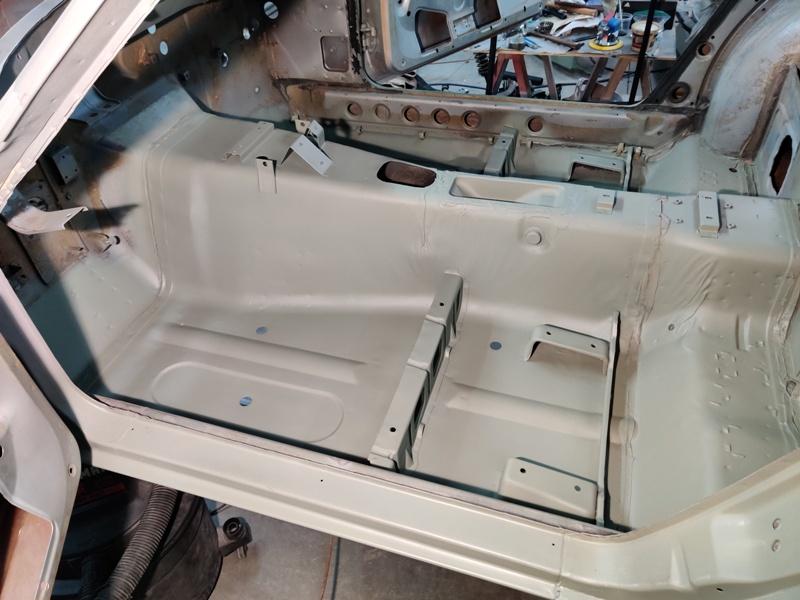
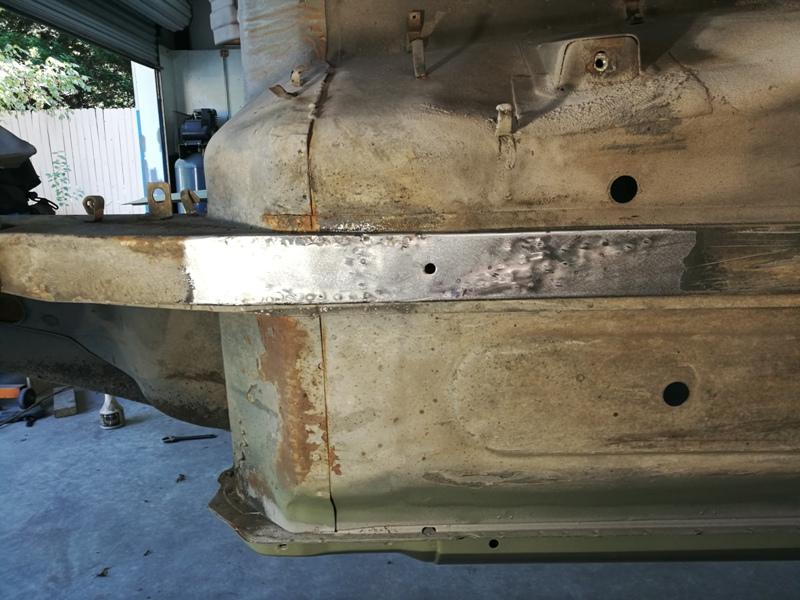
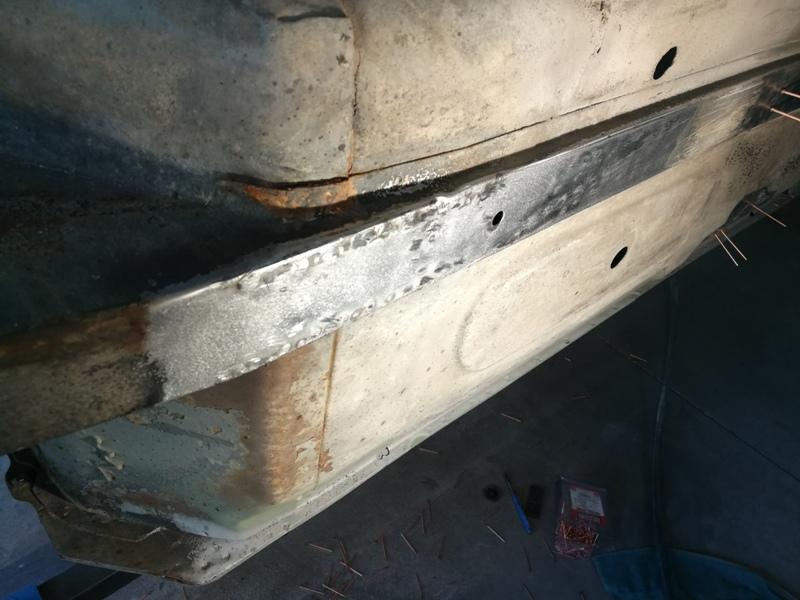
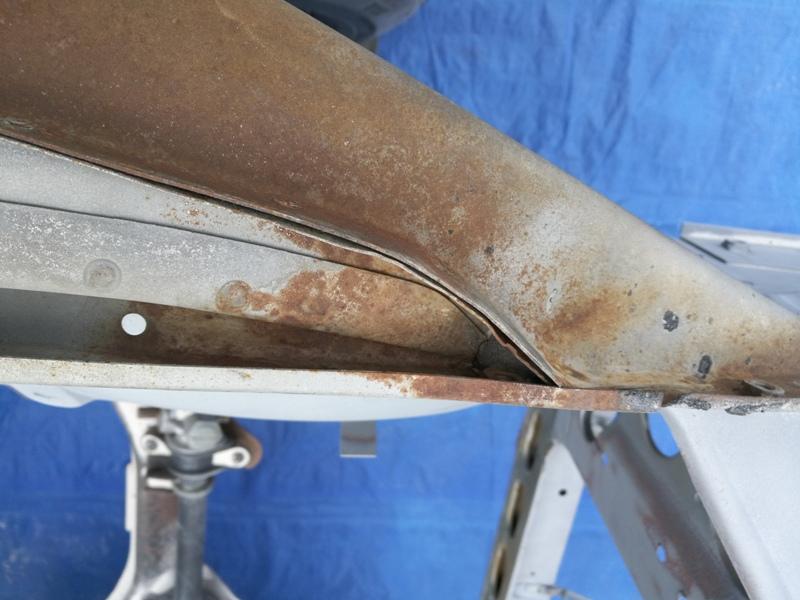
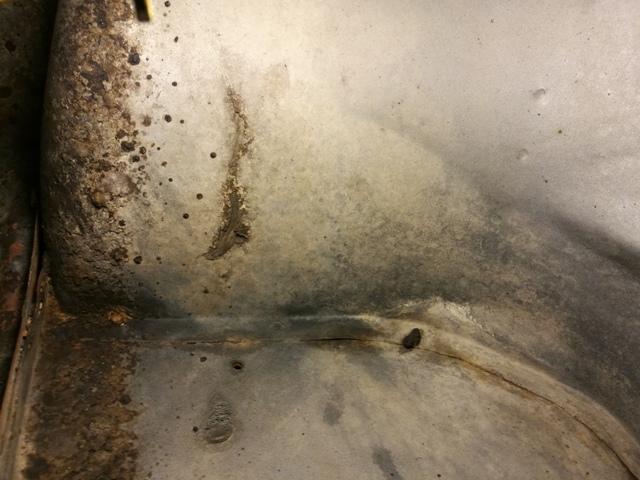
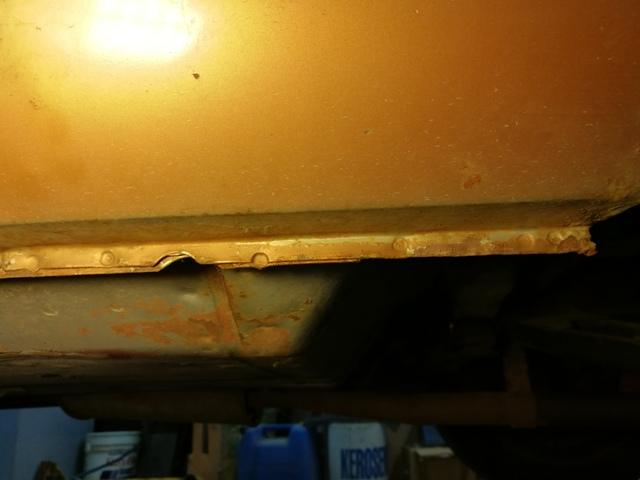
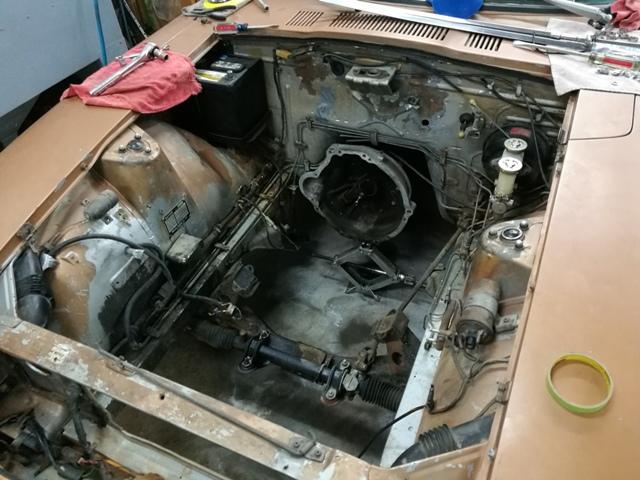
After finishing the work to straighten the floors, I sandblasted them, careful to avoid hitting the wiring clips. I followed that with a coat of epoxy primer the next day. If you don't prime quickly where I live in GA, rust will start developing again, typically in the pitted areas where rust was before. Epoxy primed:


-
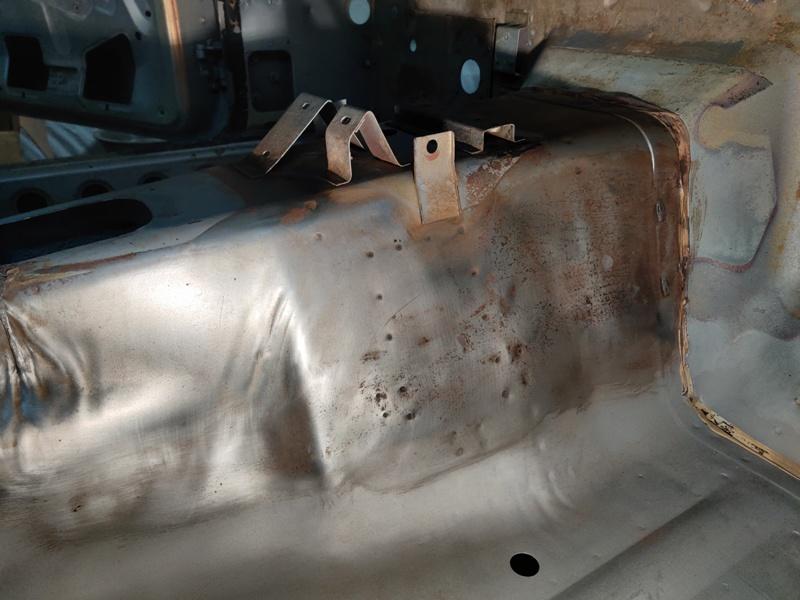
Yes, I have some previous experience, mainly, what I learned came from restoring my other 240z back in the 90's. With that car, I got lots of experience with cutting out rust and welding in new metal! However, using a stud welder and pins is new to me. No, I put the end of the 2 X 4 section (section was about 12" inches long) on the inside floor, with the 3 and 1/2" side right up against the edge of the hump which runs over top of the rail. And then I hit the other end of the 2 X 4 with the 5 lb hammer. Doing that transfers the force directly onto floor where the weld flange from the frame rail attaches - where it is spot welded to the floor. It is double thick there - floor panel and frame flange. Hitting it repeatedly along the sides of the hump where needed is quite effective at removing the arch (that developed during the cars active driving life) from the front floor section.
-
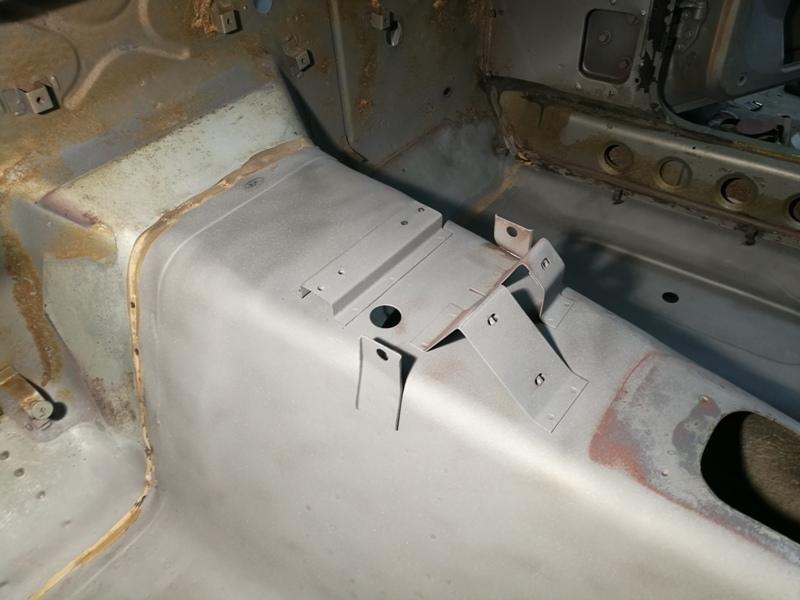
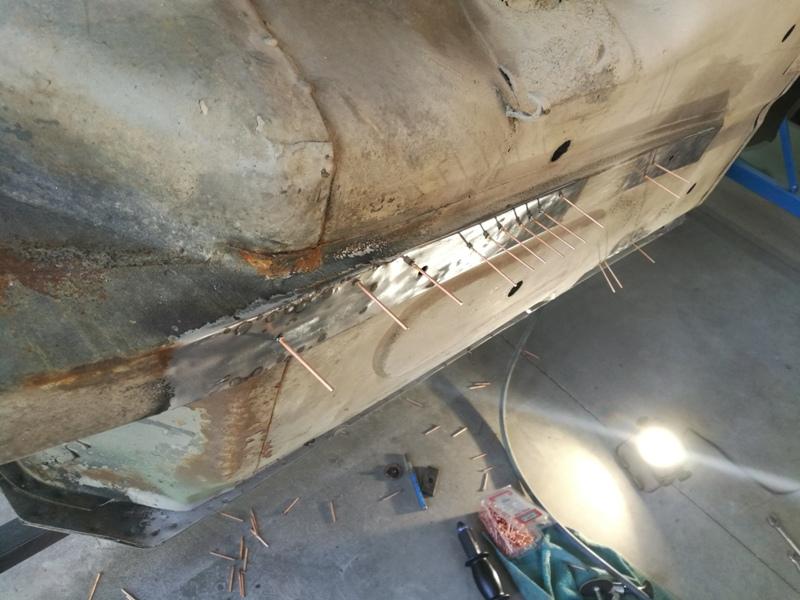
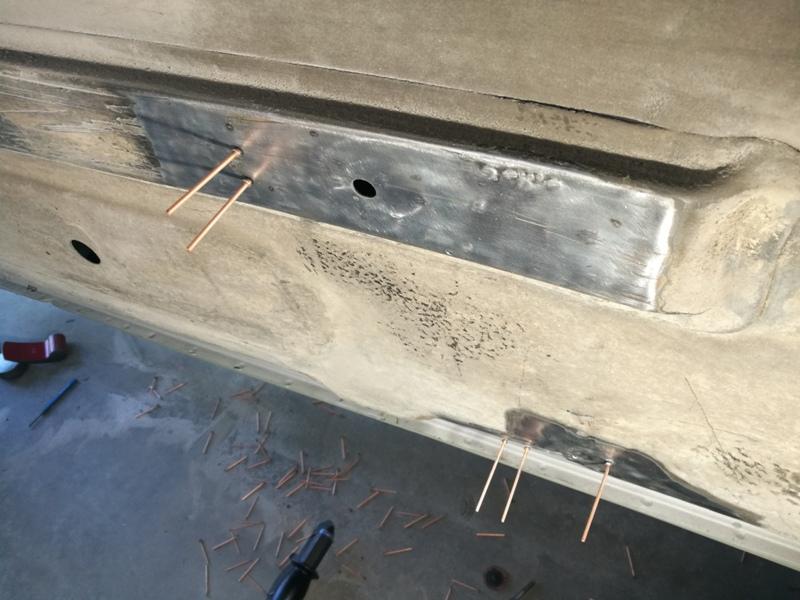
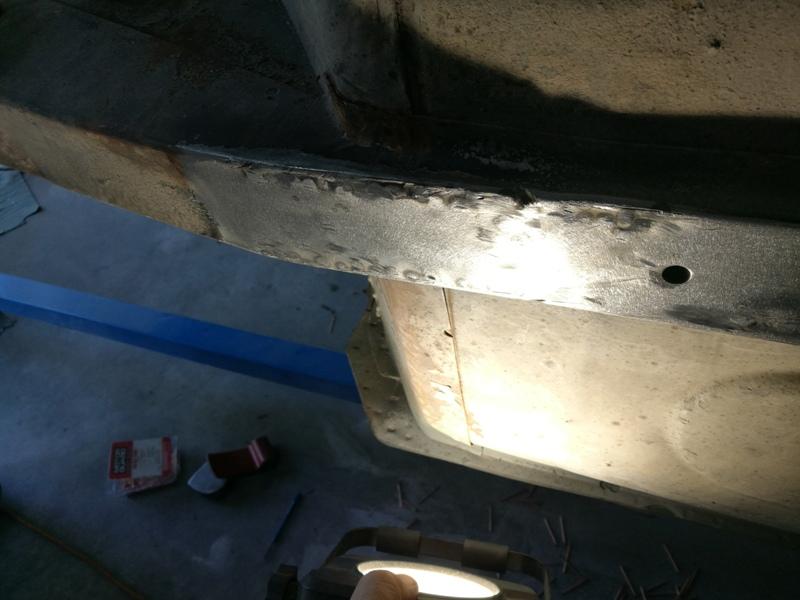
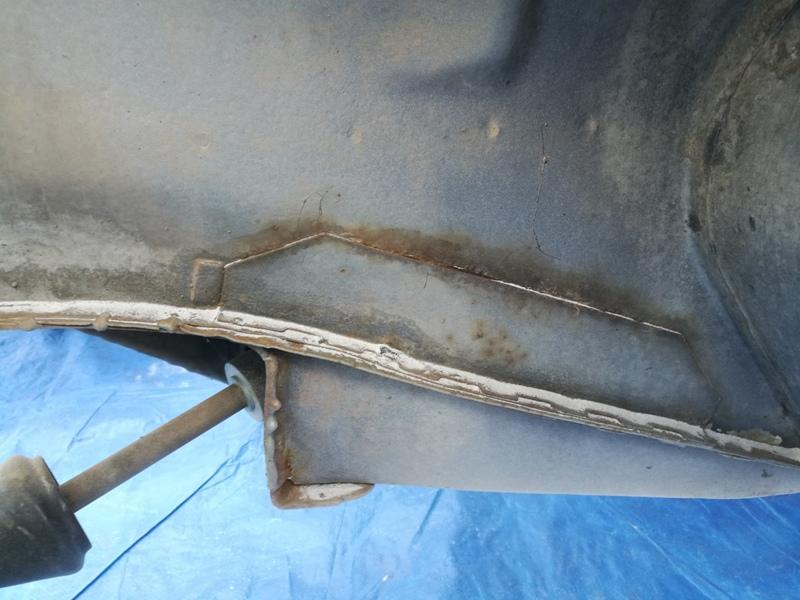
Here are some more pics showing work done with the stud welder. The frame rails and floors typically take a fair amount of abuse on these cars. To straighten the dents in the rails, I used the 2.5 mm pins a fair amount. The 2.0 mm pins also got used in this application, but only for areas toward the center of the rails, away from the side walls. Dented areas on or near the edges require more pulling force. Also, the floors often get bowed from the impacts to these rails over the years the car is on the road. They should be flat. So, when looking front to back and side to side at the lowest surface of the frame rail, they should be flat. A section of 2 X 4 and a 5 lb hammer used judiciously will set things "straight". ? Placing the 2 X 4 strategically on the inside surface, I hammered hard against the wood to move the floor surface downward. There were also a few areas like this which received impacts. I spent two week ends shining a bright light at sharp angles onto both the inside and outside surfaces of the floor to find dents and imperfections. Welding studs and pulling, hammer and dolly work, and using flat punches and hammers, I straightened every imperfection I could find. Then did final clean-up with the sand blaster on the inside surface and sprayed epoxy primer.

-
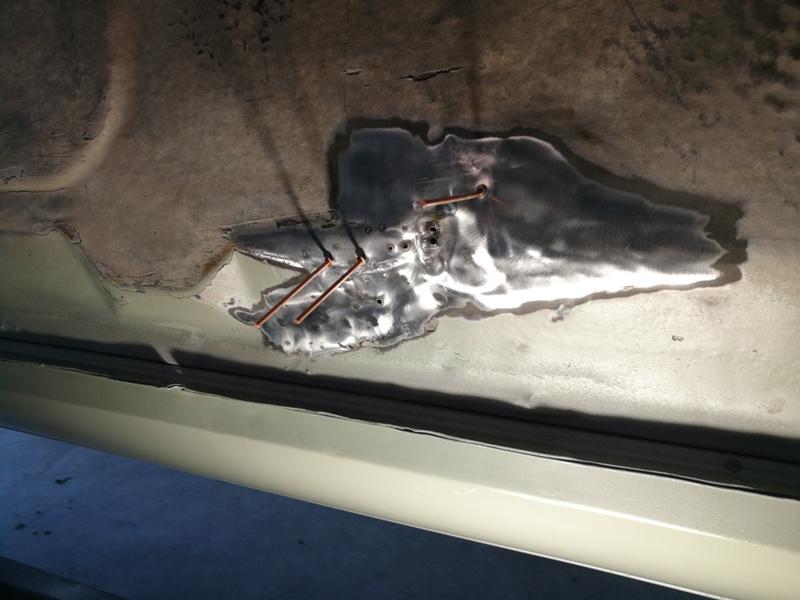
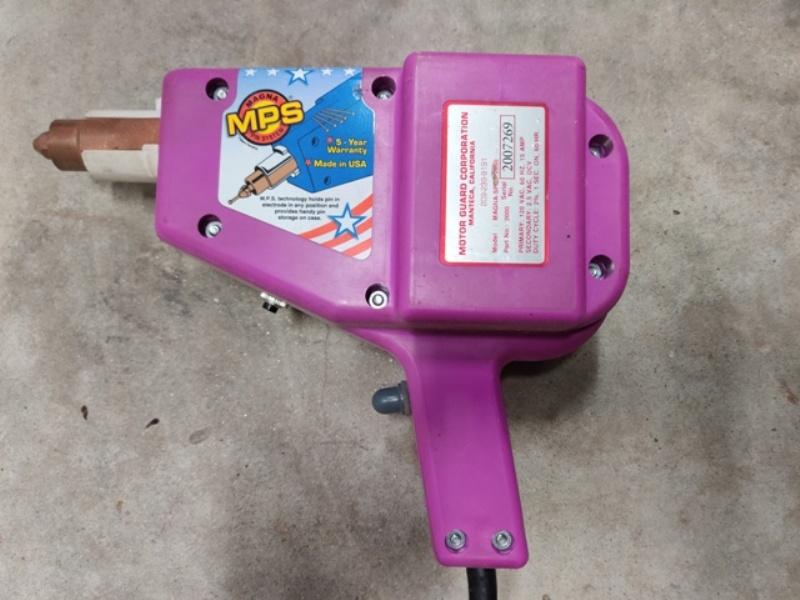
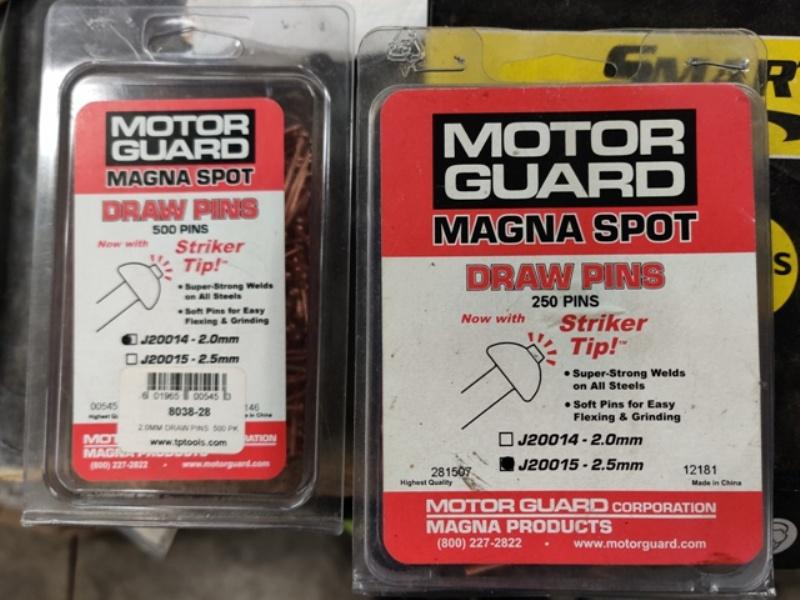
One of the new tools I bought to utilize with this restoration is a stud welding gun: I also got two sizes of pins, 2.0mm and 2.5mm: I had never used one before and was looking forward to learning how to use it well. It's important to me to improve skills and to become good at doing a thing because it becomes much more enjoyable when you can spend a 1/4 of the time (than you used to) to get results that are twice as good as your original efforts. Here was the one of the first dents that I worked on at the rear edge of the right quarter panel. Note that the metal is pushed in enough to bulge outwards on the left side into the tail trim panel opening area. As I welded pins on and used a slide hammer to pull on them, I had to work that area back flat as well. Here is after my efforts. Three of the pins broke loose causing the small holes. I think I could do it better, without making holes, now that I have more hours of experience behind me. A touch up with the welder will fix these holes up. If you look closely, you can see other areas that have been worked with the stud welder and pins: This car was hit lightly in the rear, and the bumper caused some indentations in the tail panel and quarter panels: A couple of in progress pics:


-
Interesting. What do you think of using a rust converter liquid and brushing it on and soaking that part of the battery tray? I don't want to alter the cosmetic look - I want to keep the factory spot welds.
-
That is a nice design. I will look at that one next time. I have one, from 3M I believe, which is similar. I may go with that one next time as field of vision looks like an improvement. I have been using play sand because of it's light weight. I haven't detected distortion using it. Years ago, I learned that distortion could result when I used a heavier grain sand. How does the coal slag perform? I assume that it is safer because it doesn't break into particles as small as silica does, and thus the respirator is more effective?
-
I am indeed. I contacted a company at the start of the project to see about getting the entire car soda stripped, but they said they don't do cars. I have had the sand blaster for years. You don't want to read about how bad silica is for you.
-
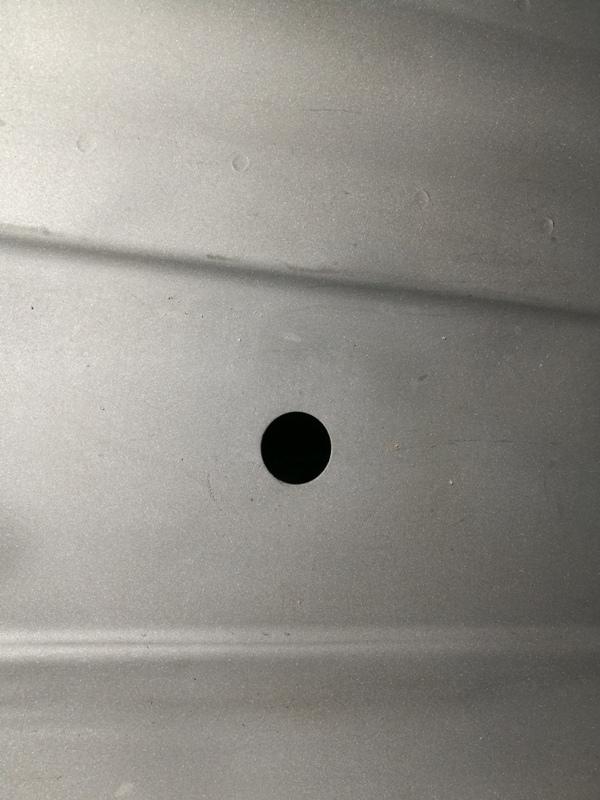
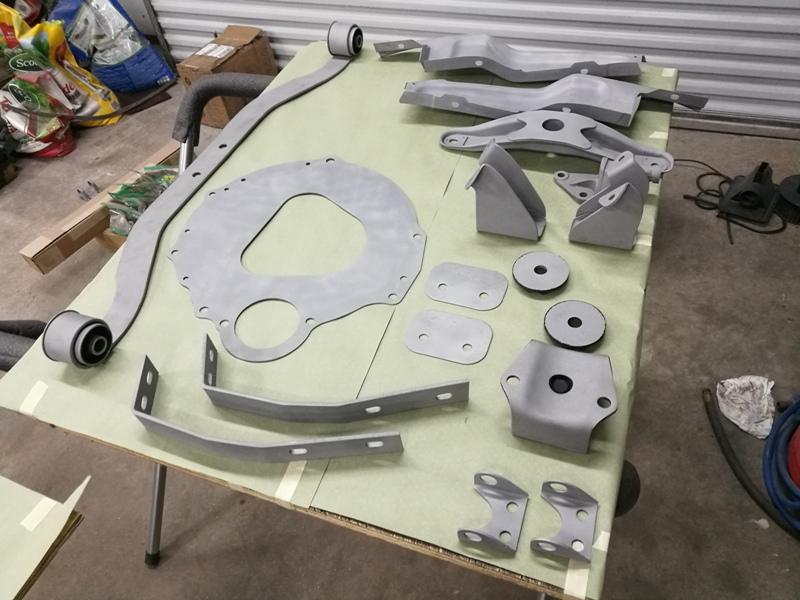
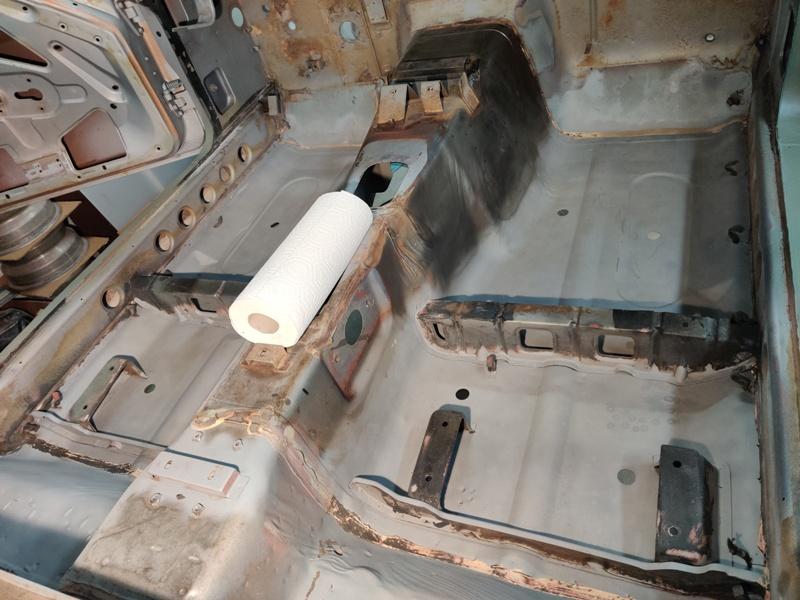
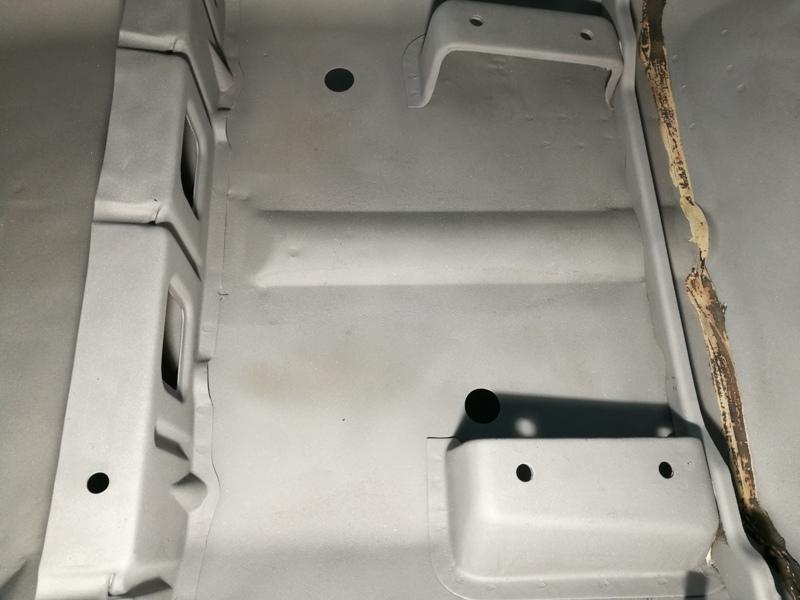
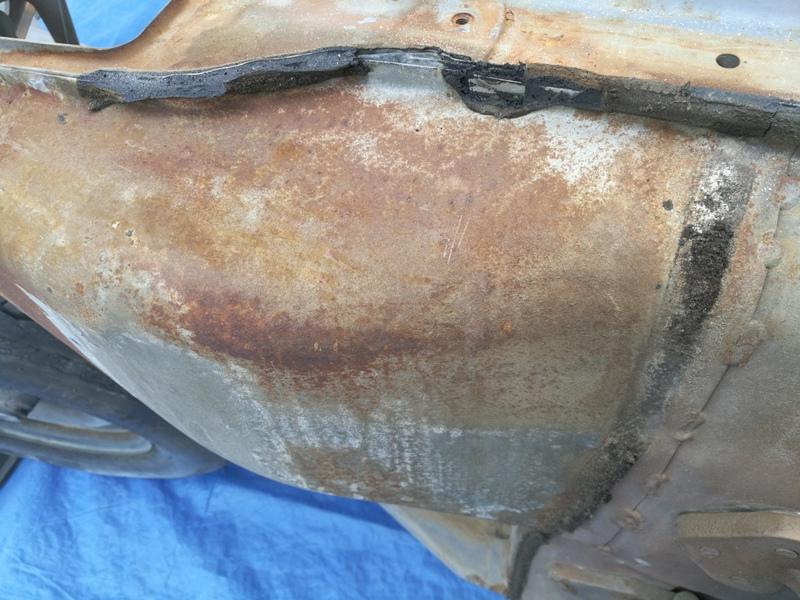
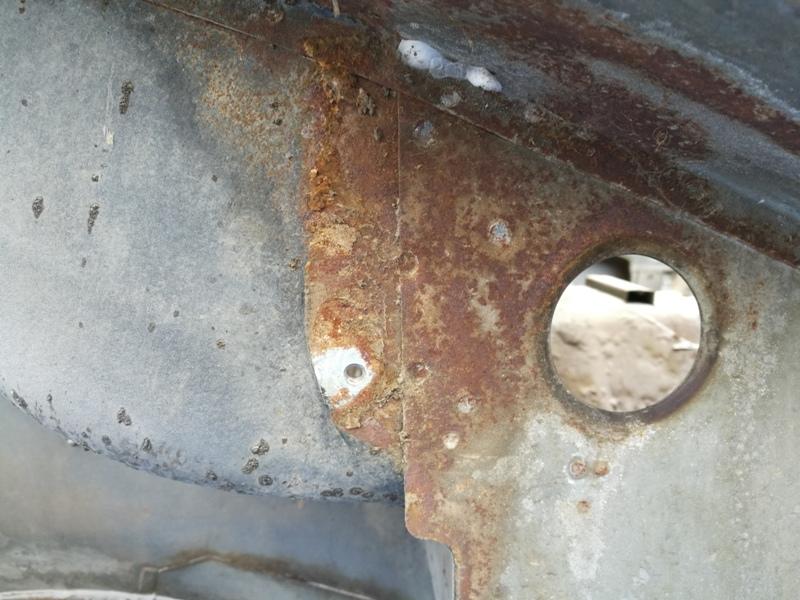
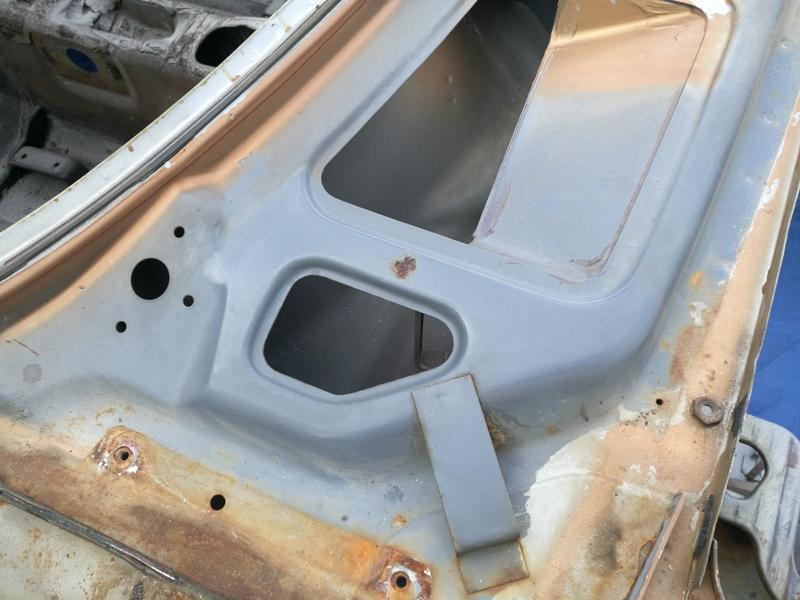
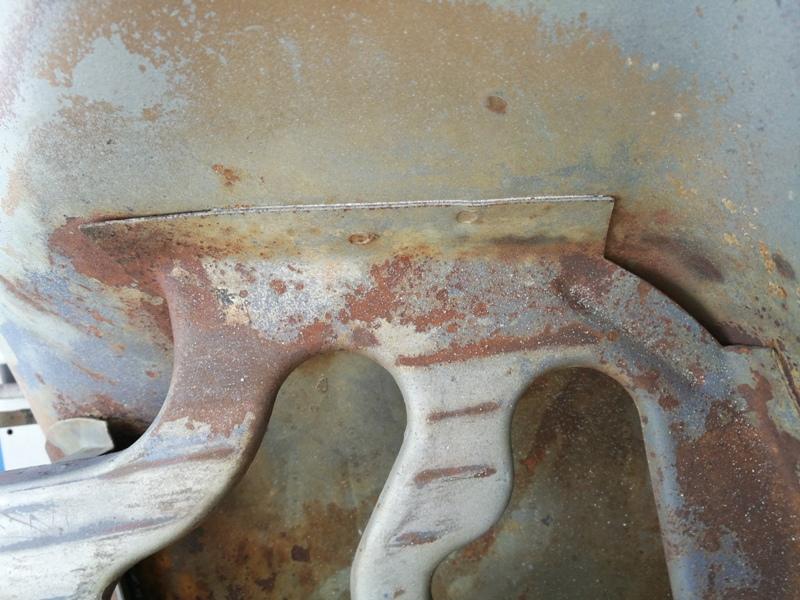
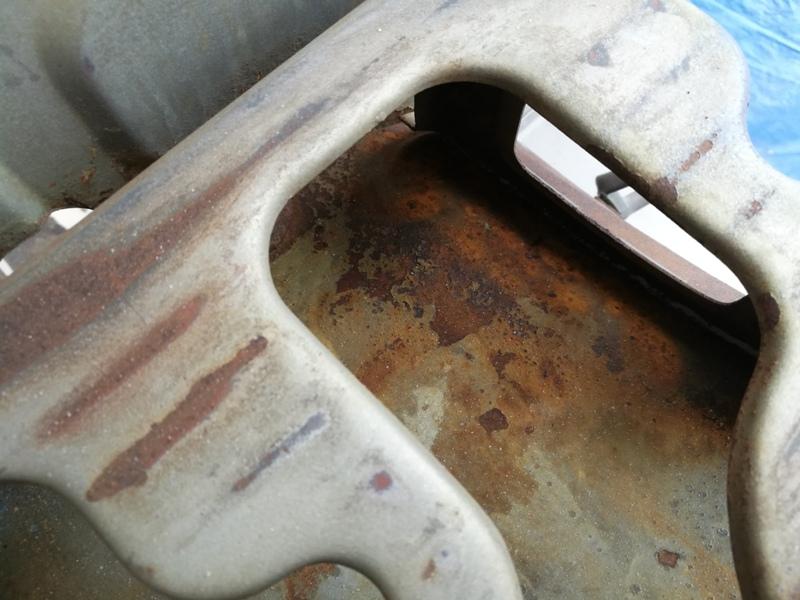
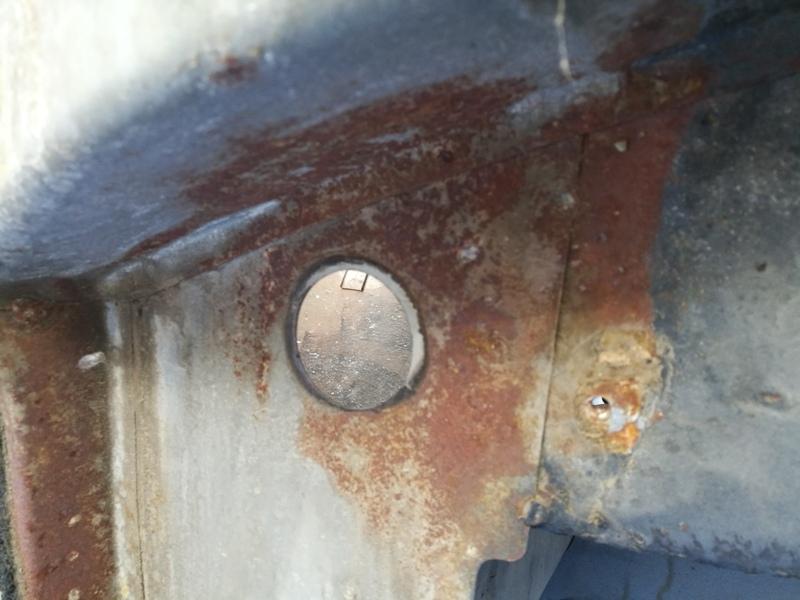
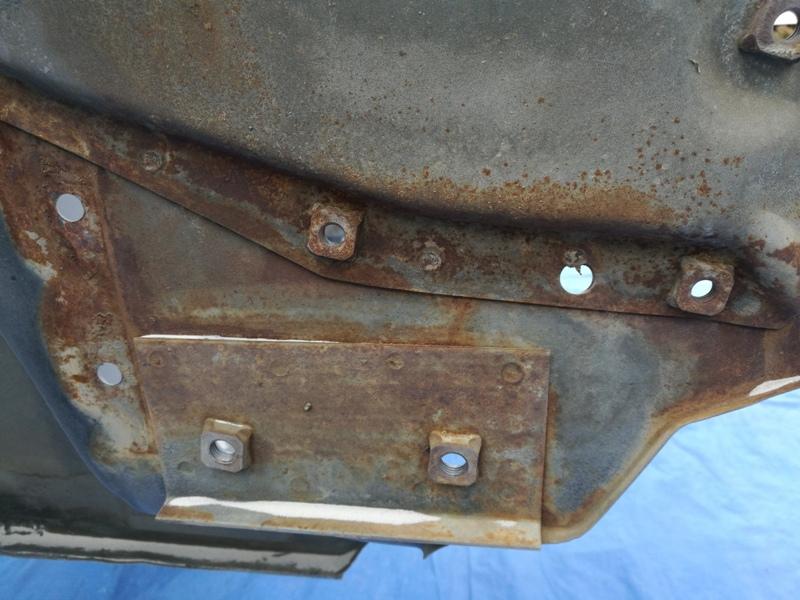
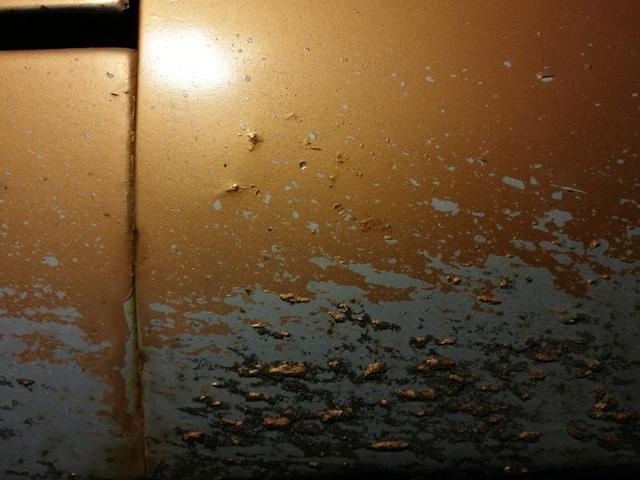
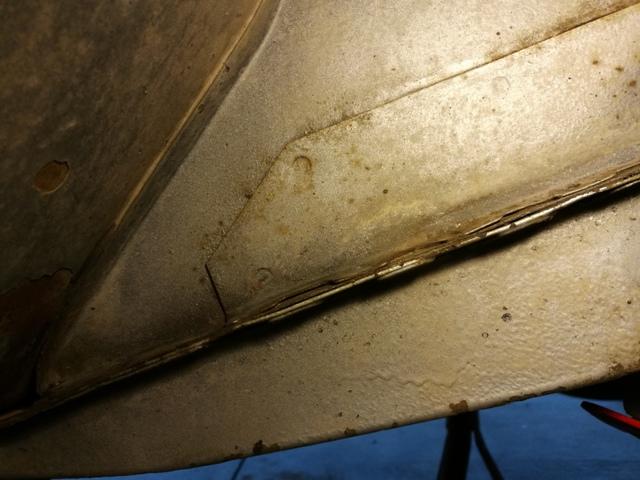
Here are some more areas of the uni-body showing condition before I sand blasted them:


-
Thanks Grannyknot. Virginia (my original home) was bad enough for rusting out Datsuns. I can't imagine one surviving up in Toronto unless it was stored most of the time away from the snow and rain, driven only when roads were dry and salt free. I've noticed that my modern cars used clips which are water proof for securing emblems and trim items. The Z, on the other hand, has holes in the sheet metal with just metal "barbed" clips. They are not water proof, and let water into the rear quarter panel and the rear hatch. My BMW, as an example, has solid plastic plugs with little gaskets around the flange which seat against the sheet metal. They snap into holes in the sheet metal to secure the trim to the car. I've been thinking about doing the same with this car. Whatever solution I come up with, it would have to be 100% invisible. Silicone rubber is always an option.
-
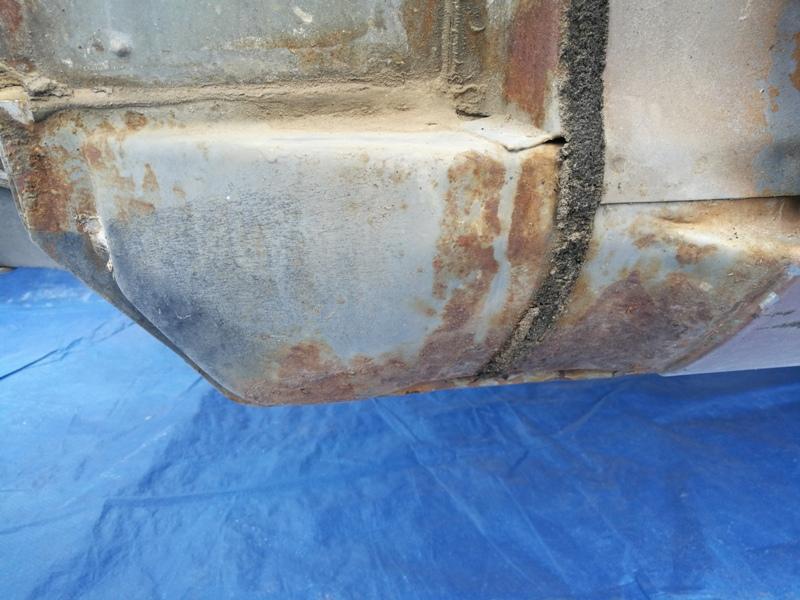
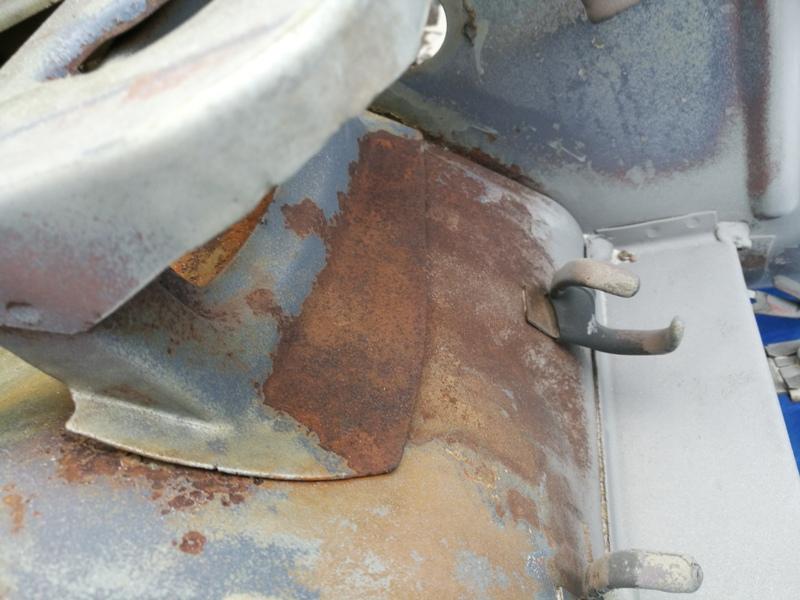
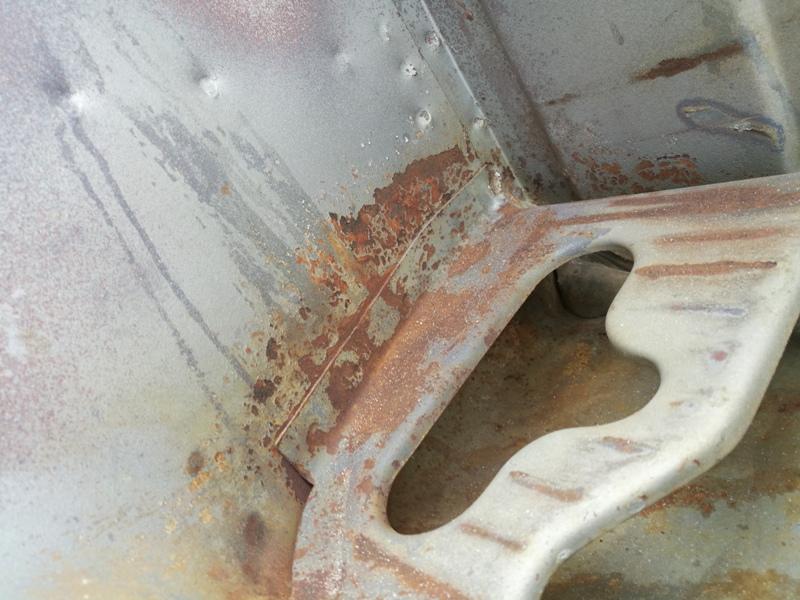
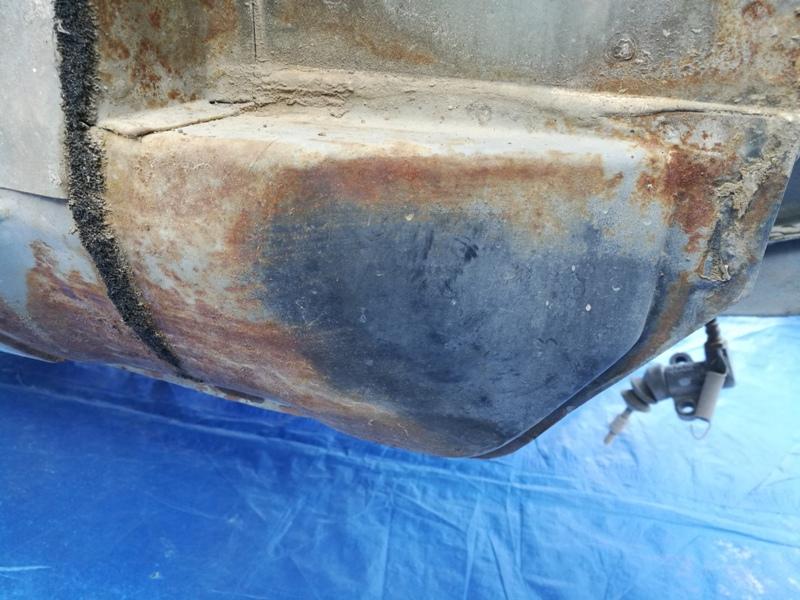
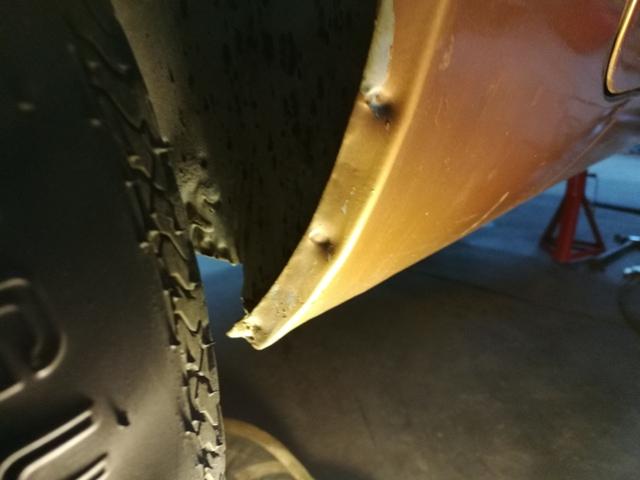
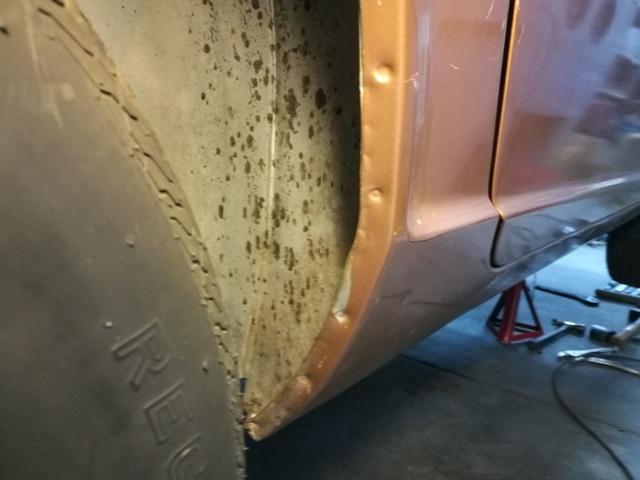
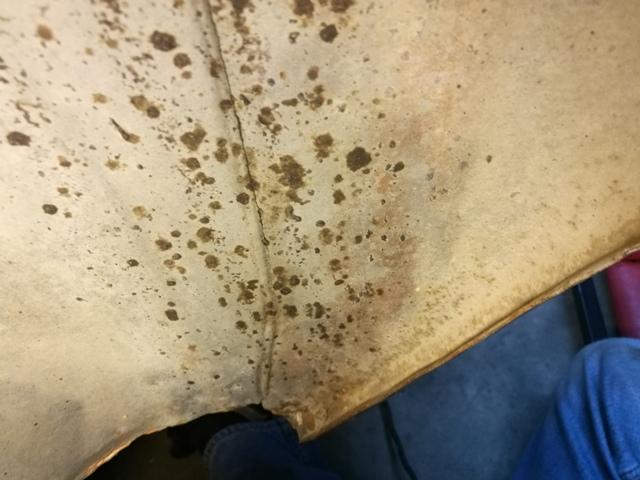
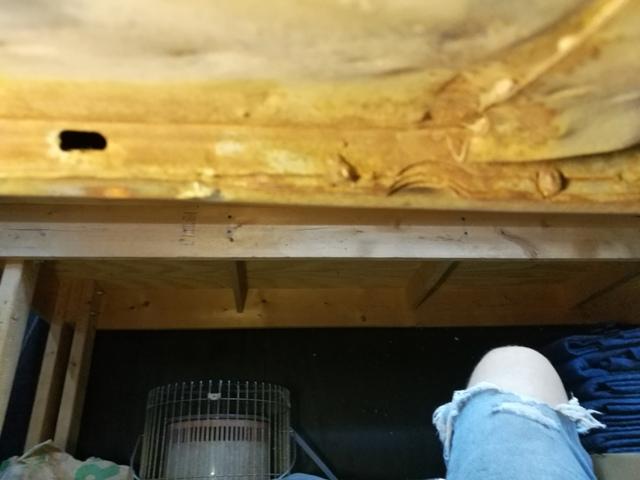
Love it every time I look at parts that usually rust out. Here are some pics as I went around the car when I first could examine it well: Right rear wheel well at bottom corner of rocker: Inside bottom edge of passenger side rocker: Outside bottom corner of passenger fender (fenders are original to the car) - note rust pitting, and inside frame double panel at tension rod mount location: Passenger front inner wheel house area: Driver side wheelhouse and rocker lower corner: Inside driver side rear wheel house looking at bottom, front corner, and from center of car looking at inside of same rocker corner: I didn't take pictures of the floor as delivered, but here are some of them in their sand blasted state: What little rust there was is gone now


-
View Advert Need Sheet Metal from Doner 240Z Hi, I am restoring a Z and I'd like to get my hands on the area of this picture where a previous owner cut holes for speakers. Ideally, to save the effort required and to cover my needs, I just need enough of this to replace the damaged area. Vertical cuts from top down, with about 1/2" on either side of the indentation area and a horizontal cut below it should be sufficient. I need both sides. Anyone have a rusty heap they can pull this from? Garrett Advertiser inline6 Date 11/03/2019 Price Category Parts Wanted Year 1971 Model 240z
-
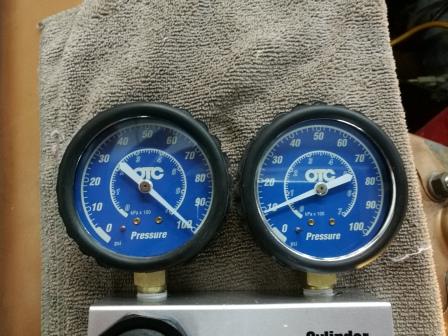
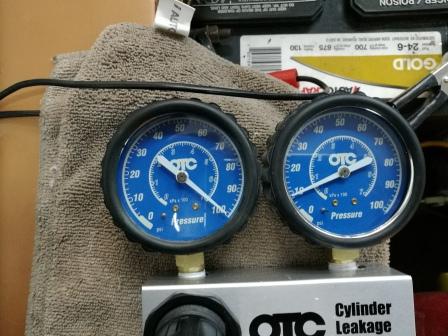
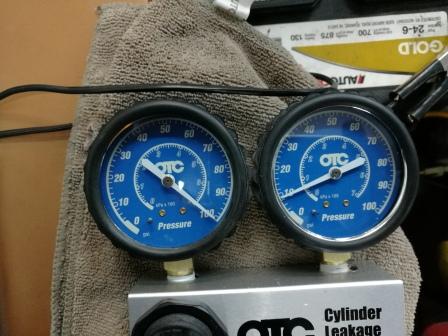
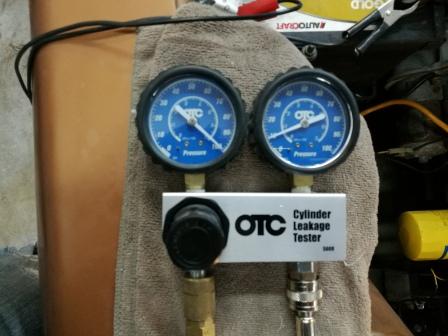
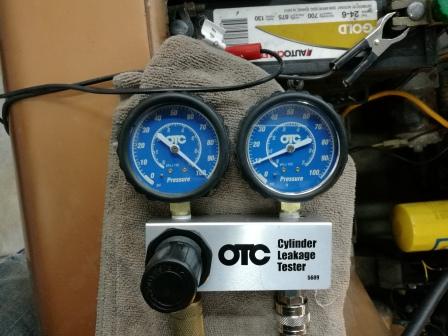
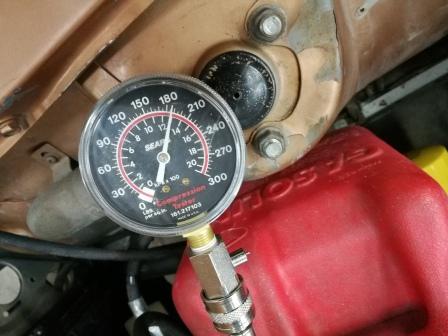
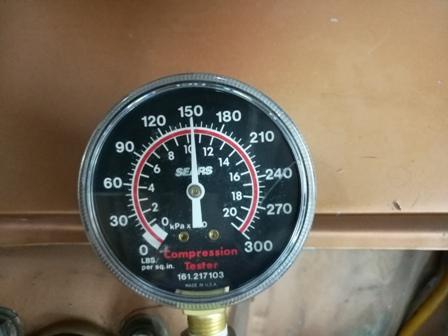
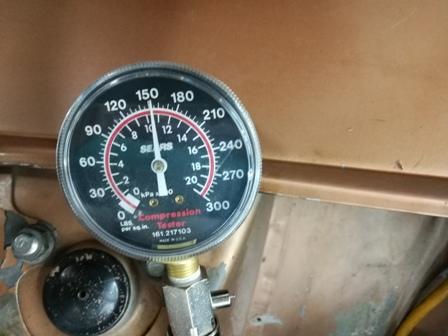
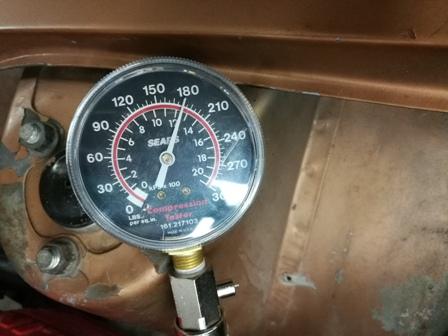
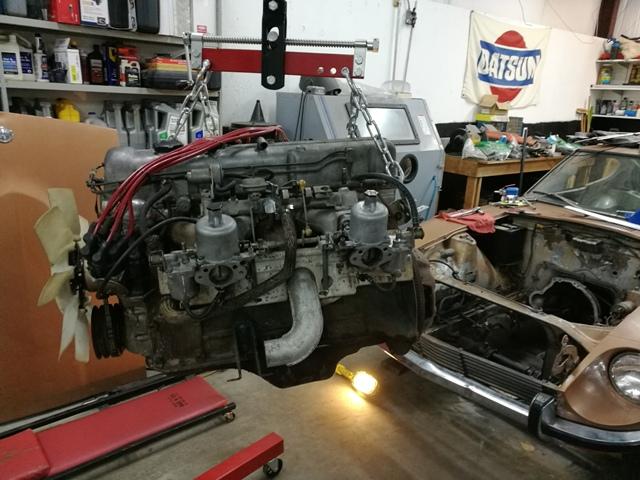
After I had let the engine run several times, I did both a leak down and a compression check. The leak down tests showed about 9% across the board: 1, 2, 3: 4, 5, 6: The compression tests showed more variability, with cylinders 3 and 4 and 6 generating lower numbers: 1, 2, 3: 4, 5, 6: With those tests complete, it was time to remove the engine:


-
Thanks! I kind of have this picture in my head of a 240z from the past... one that was modded by the original owner. Back in like 1972, when the car was a hot item, the mods: a bump in engine power, a nice sounding exhaust, and meaty tires, would have been rare on a 240z. And to complete the vision, the recently removed air pump, and exhaust manifold, etc. is sitting in a box tucked in the corner of the garage along with the original wheels and tires in a stack on the garage floor. ?
-
Shipping the car by itself from CO to GA ended up costing $850. All of the extra parts, I knew, was going to be a pain. I looked prior to auction close for rental availability and flights, but long story short, flying out, renting a pick up truck and loading it up, and getting all of the parts back to GA cost $1,654.18 and took 2 days (and into early morning of the third). Total with 5% for BAT was $9240, so delivered total of car and parts was $11,744.88. I am keeping track of costs very precisely and will be sharing with everyone as well as time spent (not nearly as precisely). Regarding the direction of the resto, I plan to do a high quality restoration back to stock, except for the following: The engine had pitting on cylinder 6 that was bad enough to require a re-bore. Pistons are ITM - .030 over. Stage I Isky cam which has a higher lift than stock but the same factory duration (won't be able to tell it has a cam from listening to it) Some bigger valves to allow better breathing Zstory stainless header and exhaust Mild porting to make the valves, cam and exhaust work well together 16" x 7" wheels and performance tires The goal I have in mind is to have the car be like "new" back in 1971, but with "upgrades" for exhaust and wheels. Both of those mods will be fully reversible, if at some point I want to sell the car, and a future owner wants to go 100% stock. The car was originally silver, and I am nearly certain I will put it back to that color. I like the factory orange a lot, but I want to keep it the original color. Silver looks nice on 240z's too. ?
-
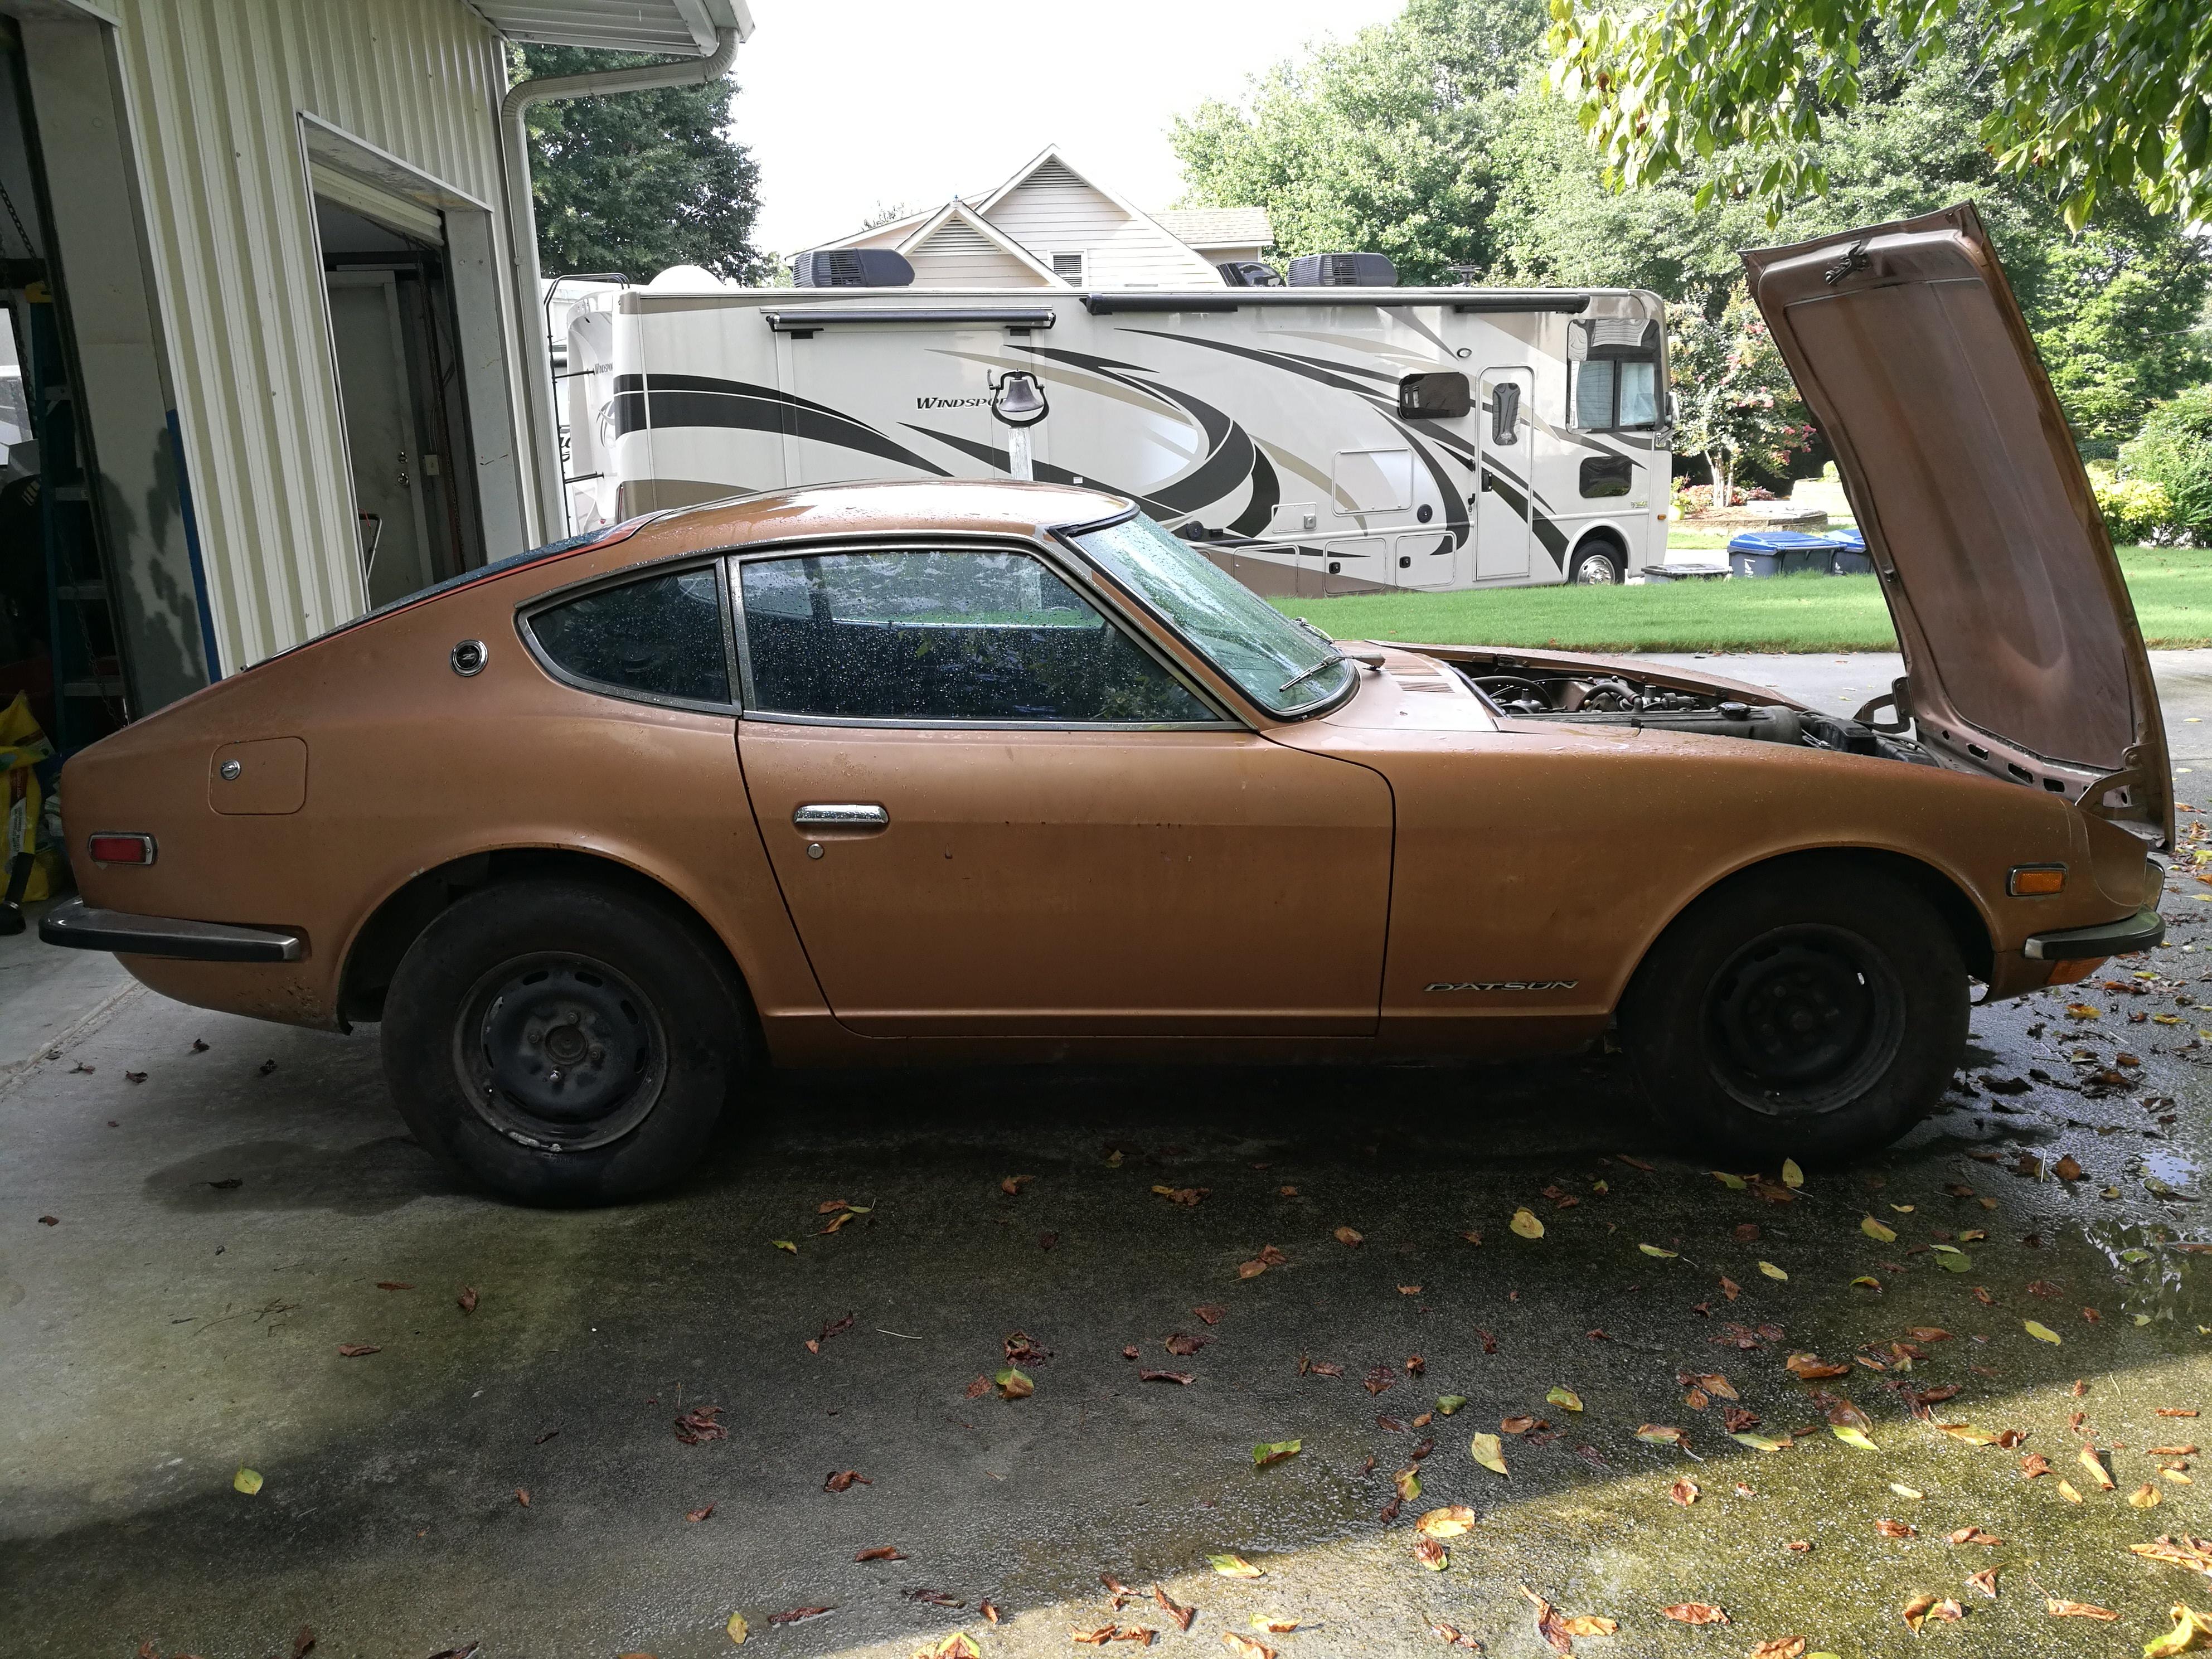
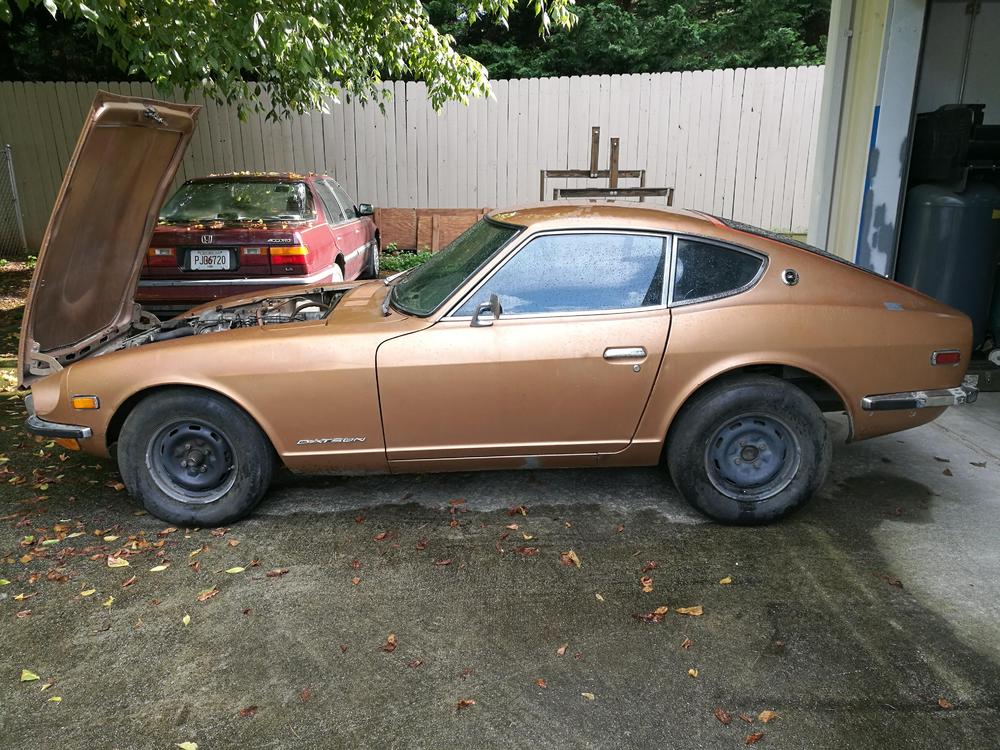
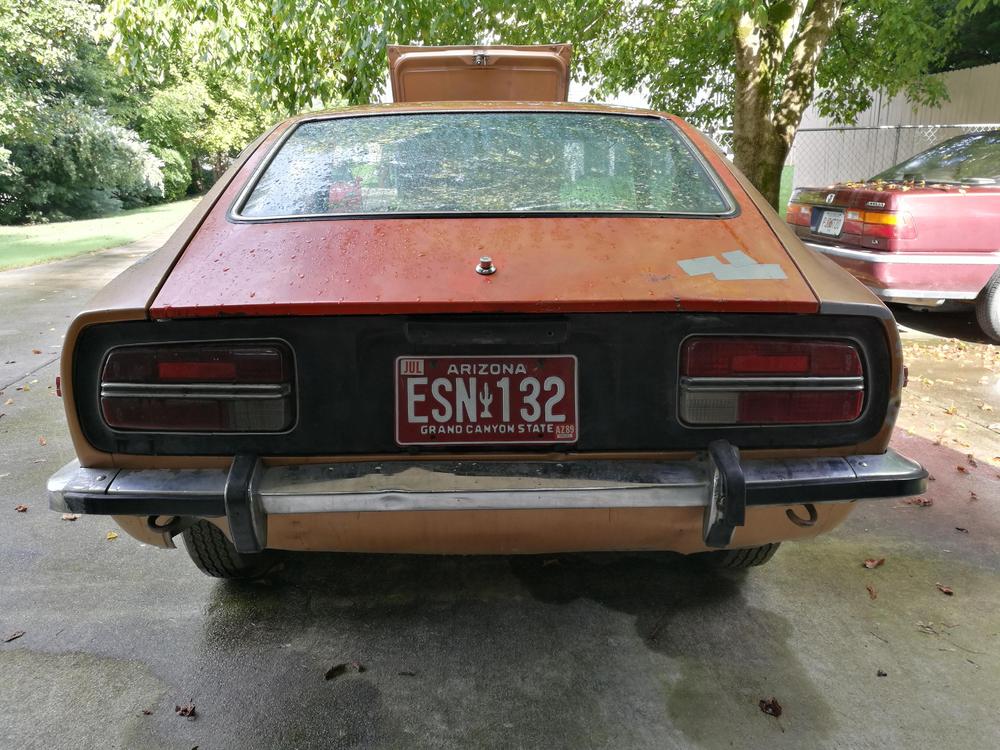
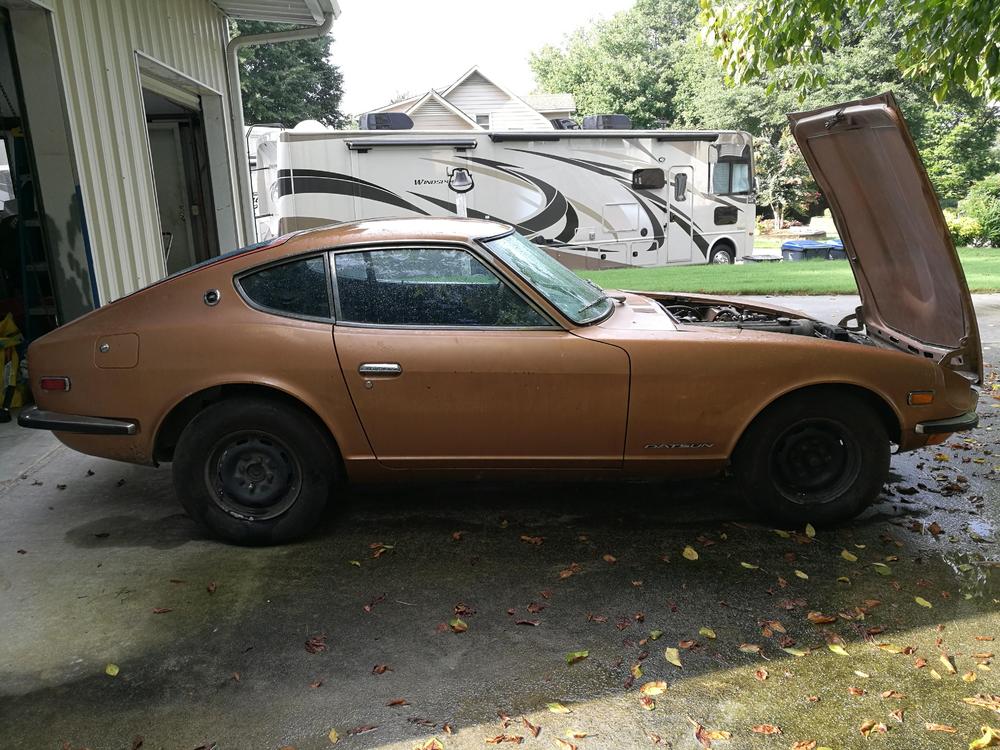
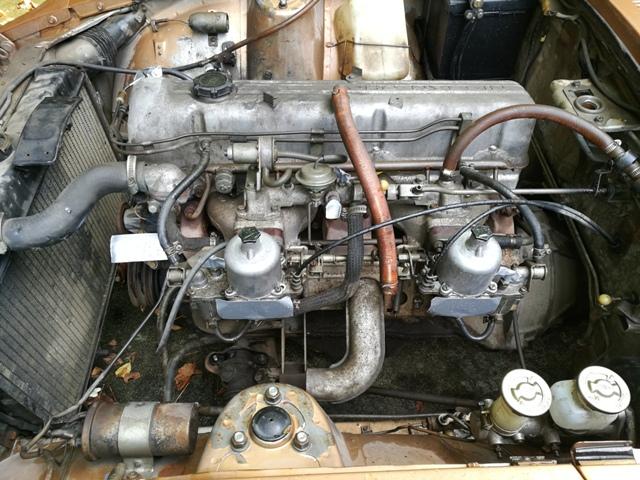
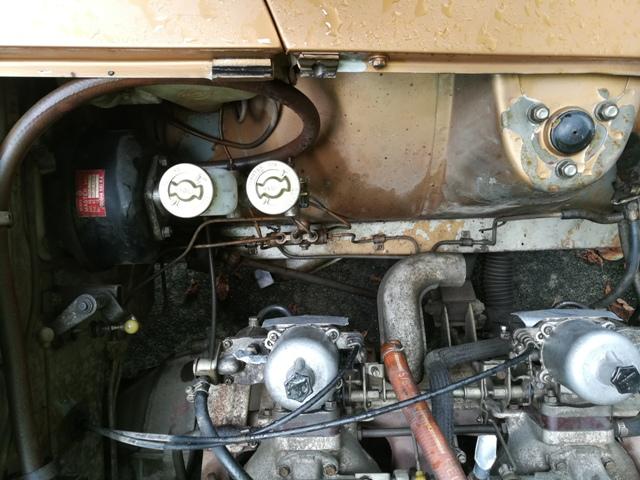
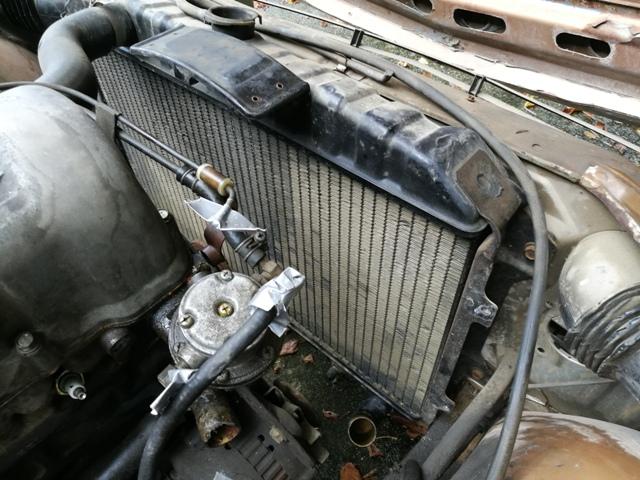
I got an itch to acquire another Z last year... This car on Bring-a-Trailer got my attention and I couldn't let it go. A project car, the previous owner acquired most of the important rubber parts, a NOS dash, a bunch of spares, etc. and did very little to it other than keep it stored in his garage in the Denver CO area for over 25 years. Prior to that, it was in Arizona. So, having restored one Z which had a fair amount of rust, I was super excited to think about restoring one with next to none. I've been at it for a little over a year now, and so I have a pretty good amount of the work done. My hope is that within the next 12 months, I can complete the restoration. I've got lots of pics of progress so far, so, I'm also hoping I can post updates pretty regularly. Here are a few pics after it arrived in GA: The previous owner said he never started it. If true it hadn't run in over 25 years, but the engine turned over by hand. Before taking it apart, I wanted to see if I could get it running and then do compression and/or leak down tests to learn of its condition. I power washed the engine to get all of the dust and gunk off. Then I took the carburetor domes off and cleaned the domes, pistons, needles, inside the carbs, float chambers, etc. The "choke" was stuck in the on position (jet nozzles down) and carbon was caked on the inside of the carbs keeping the pistons from moving freely. Here's the engine after cleaning: Here is the clean engine after it dried. The distributor shaft had a lot of play, so I snagged the one from my other Z. Fuel lines were completely clogged, so I disconnected at the hard line coming into the engine bay. Fuel pump was gummed up, so I grabbed a spare mechanical one (once was on my other Z), and ran the rubber line down into a gas can. Oil in the engine seemed like oil, so I left it as is. After a few tries of the starter, I got it fired up. Still no coolant in the system, no radiator hoses, etc. I just did a quick sync on the carbs and got it running well enough to know that nothing catastrophic had happened to it. Here is a video after only a few minutes of tinkering with it. Next, I put radiator hoses on, put water in and other misc. things so I could run it for a while. I wanted to run it for a minimum of 30 minutes so I could do the compression check or leak down test. Here's another video. The exhaust is original Nissan parts (verified part numbers of center section and muffler), by the way... and very quiet. Garrett


-
Bump: Hood sourced from VA in the 90's is still available: $300 Headlight housings (metal) are reduced to $80 each Fender still available: $250 Ask questions if you like and I can provide more pics as necessary.
-
pm replied. This dash was sold.
-
I sold it.
-
G5930-89902 is discontinued. This one brings up a diagram at this site which is not a 240Z, but still shows it is available: G5930-89904. It may or may not be. I've ordered items from that site that have a price, but turn out not to be available any longer.
-
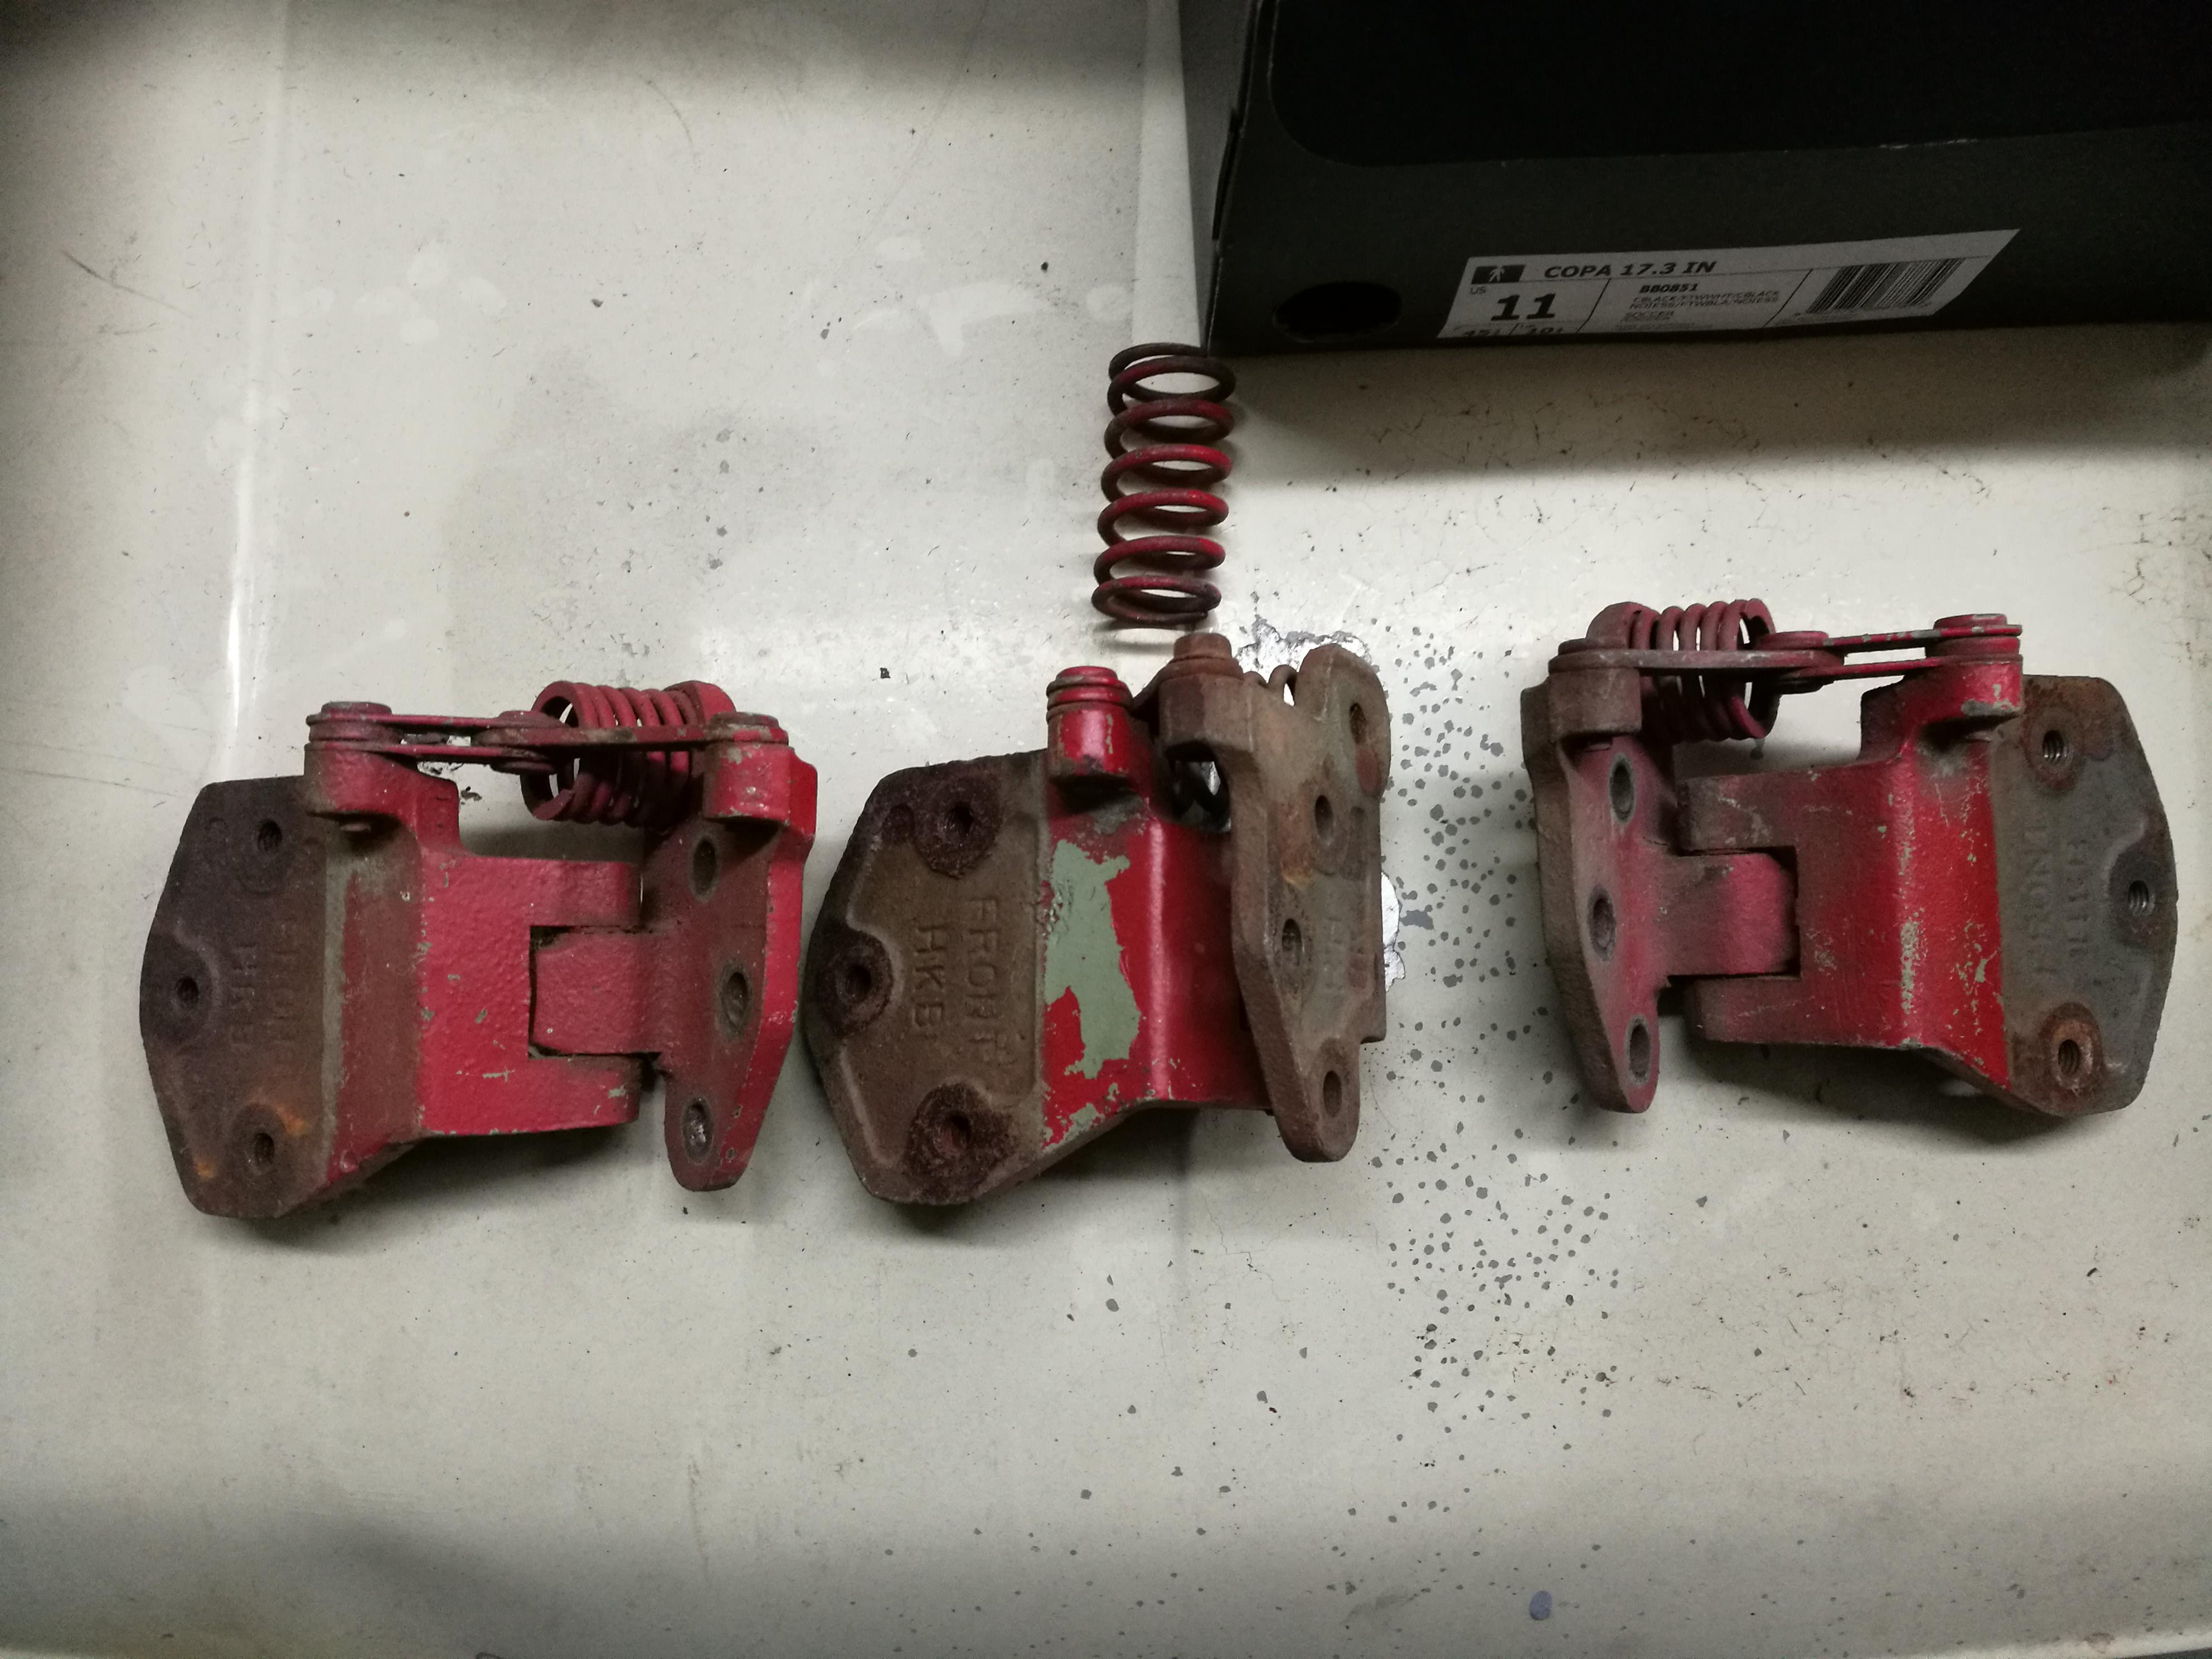
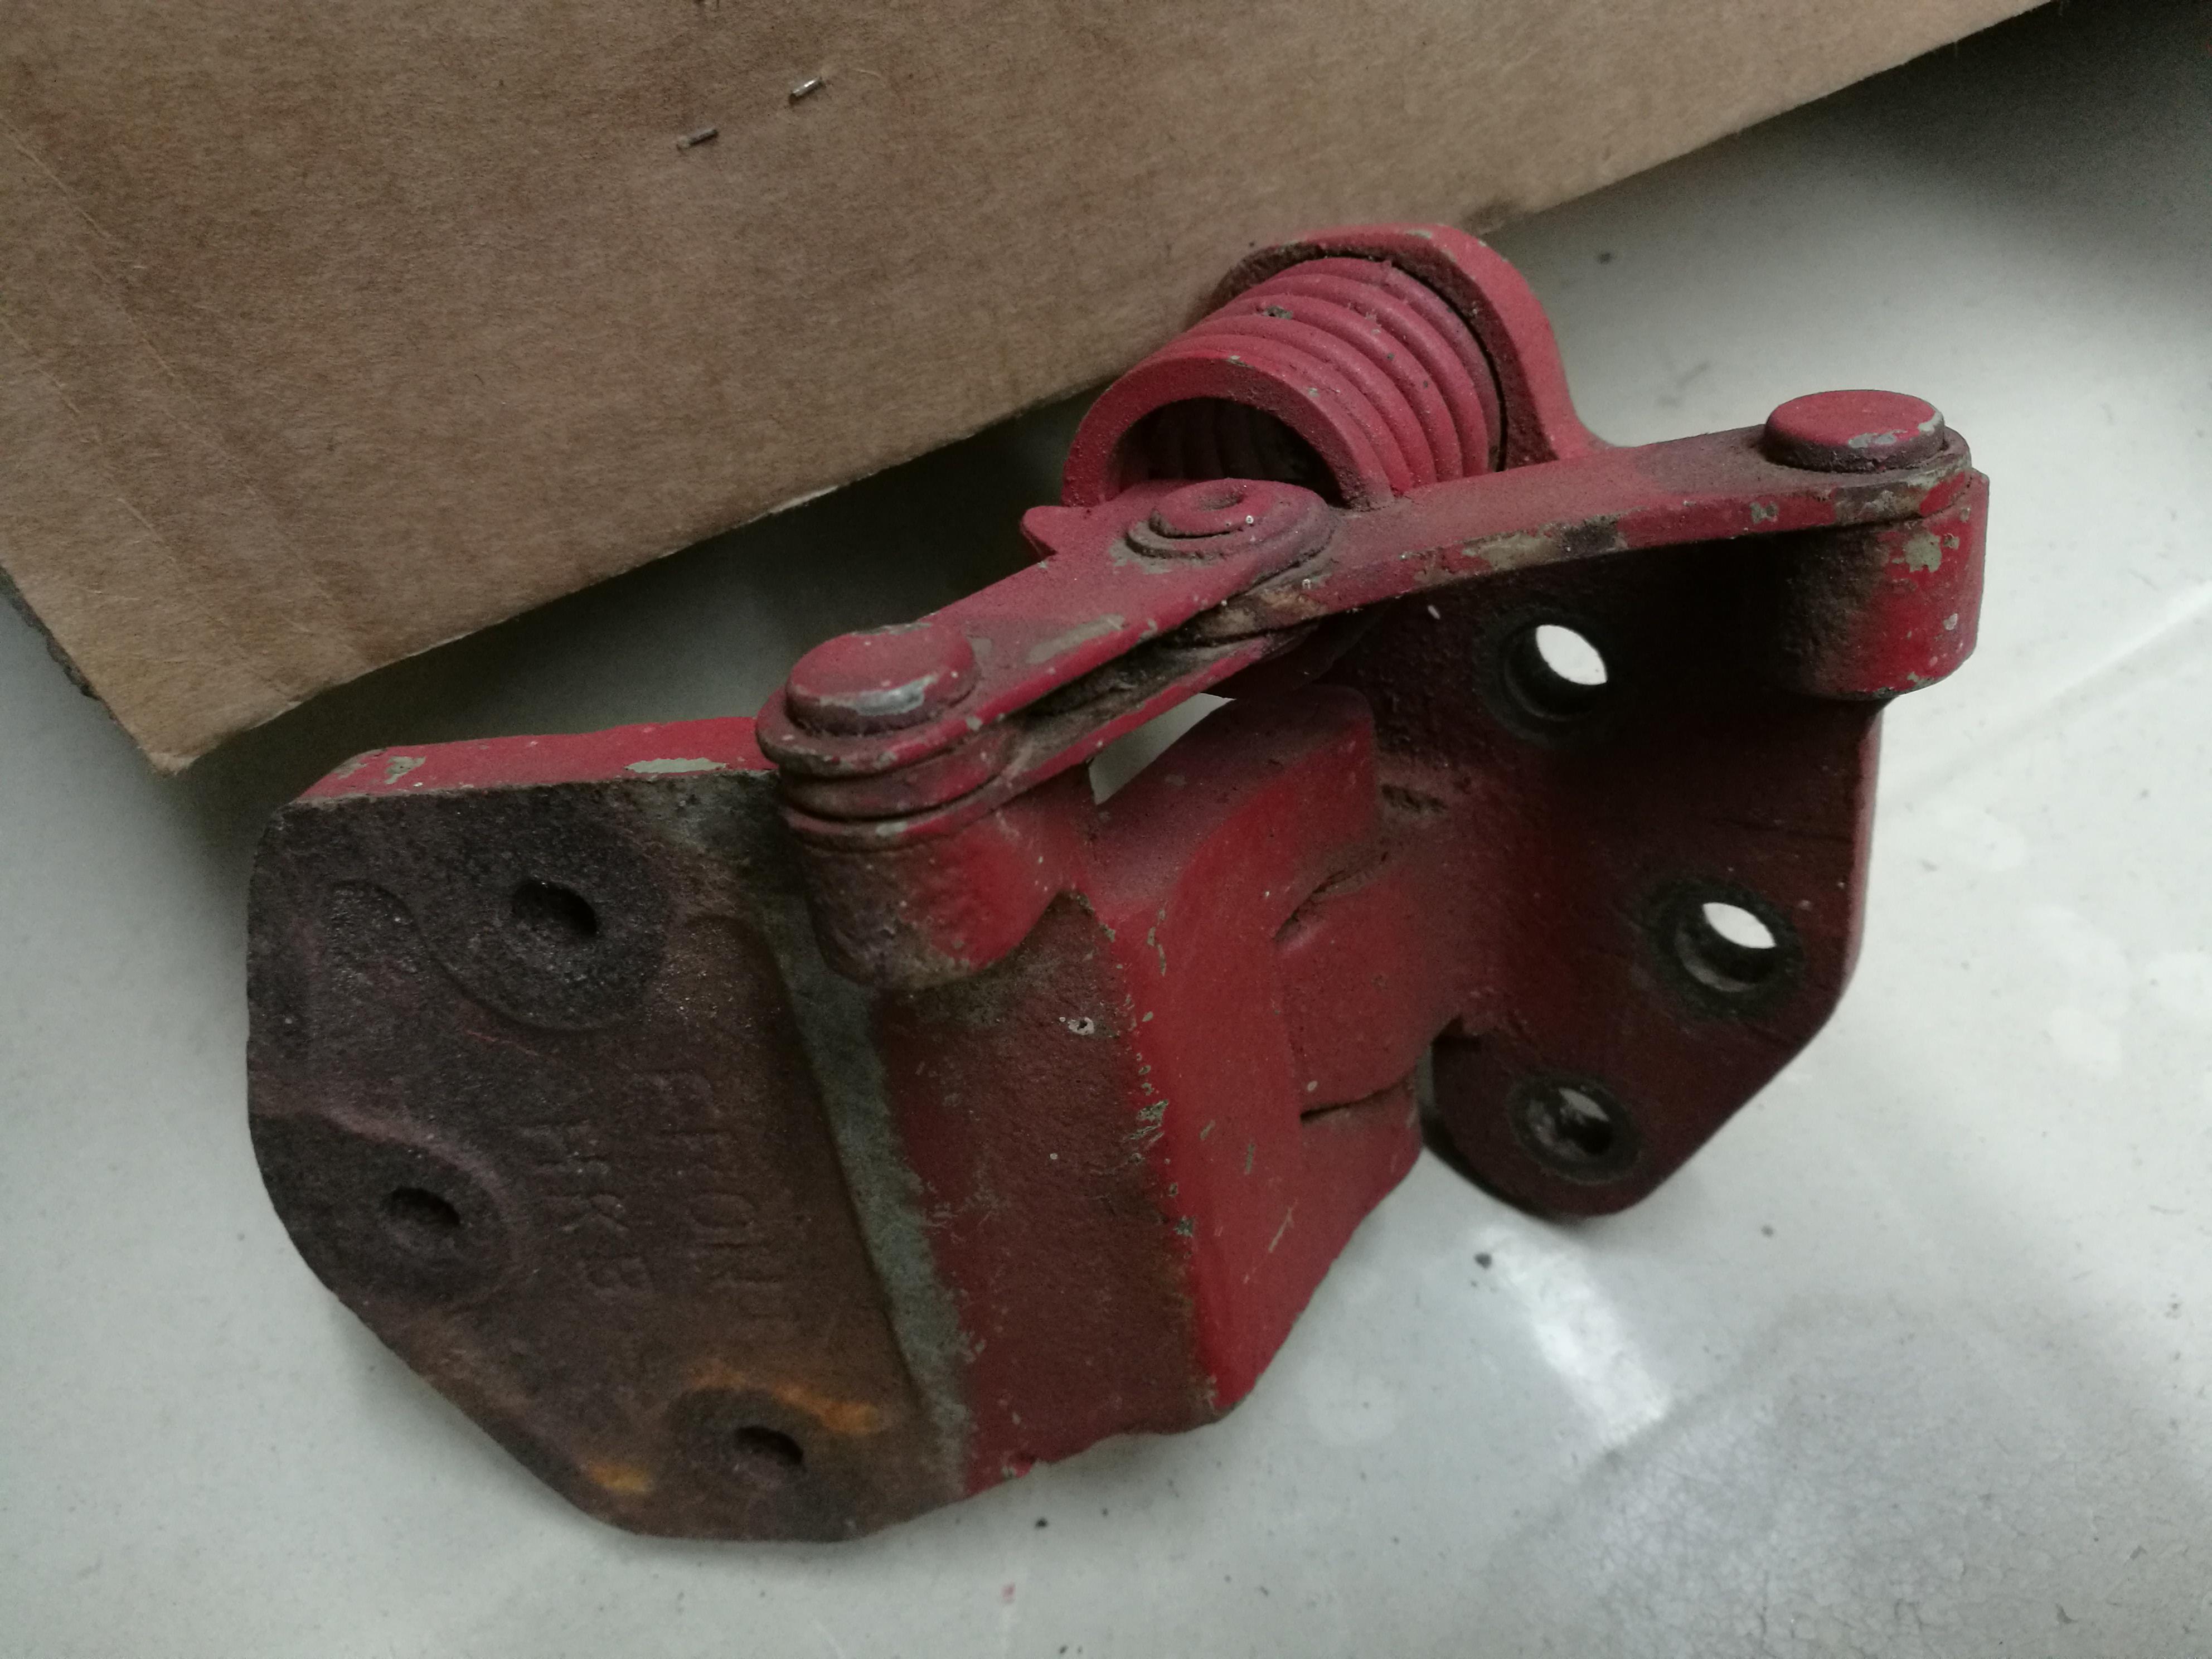
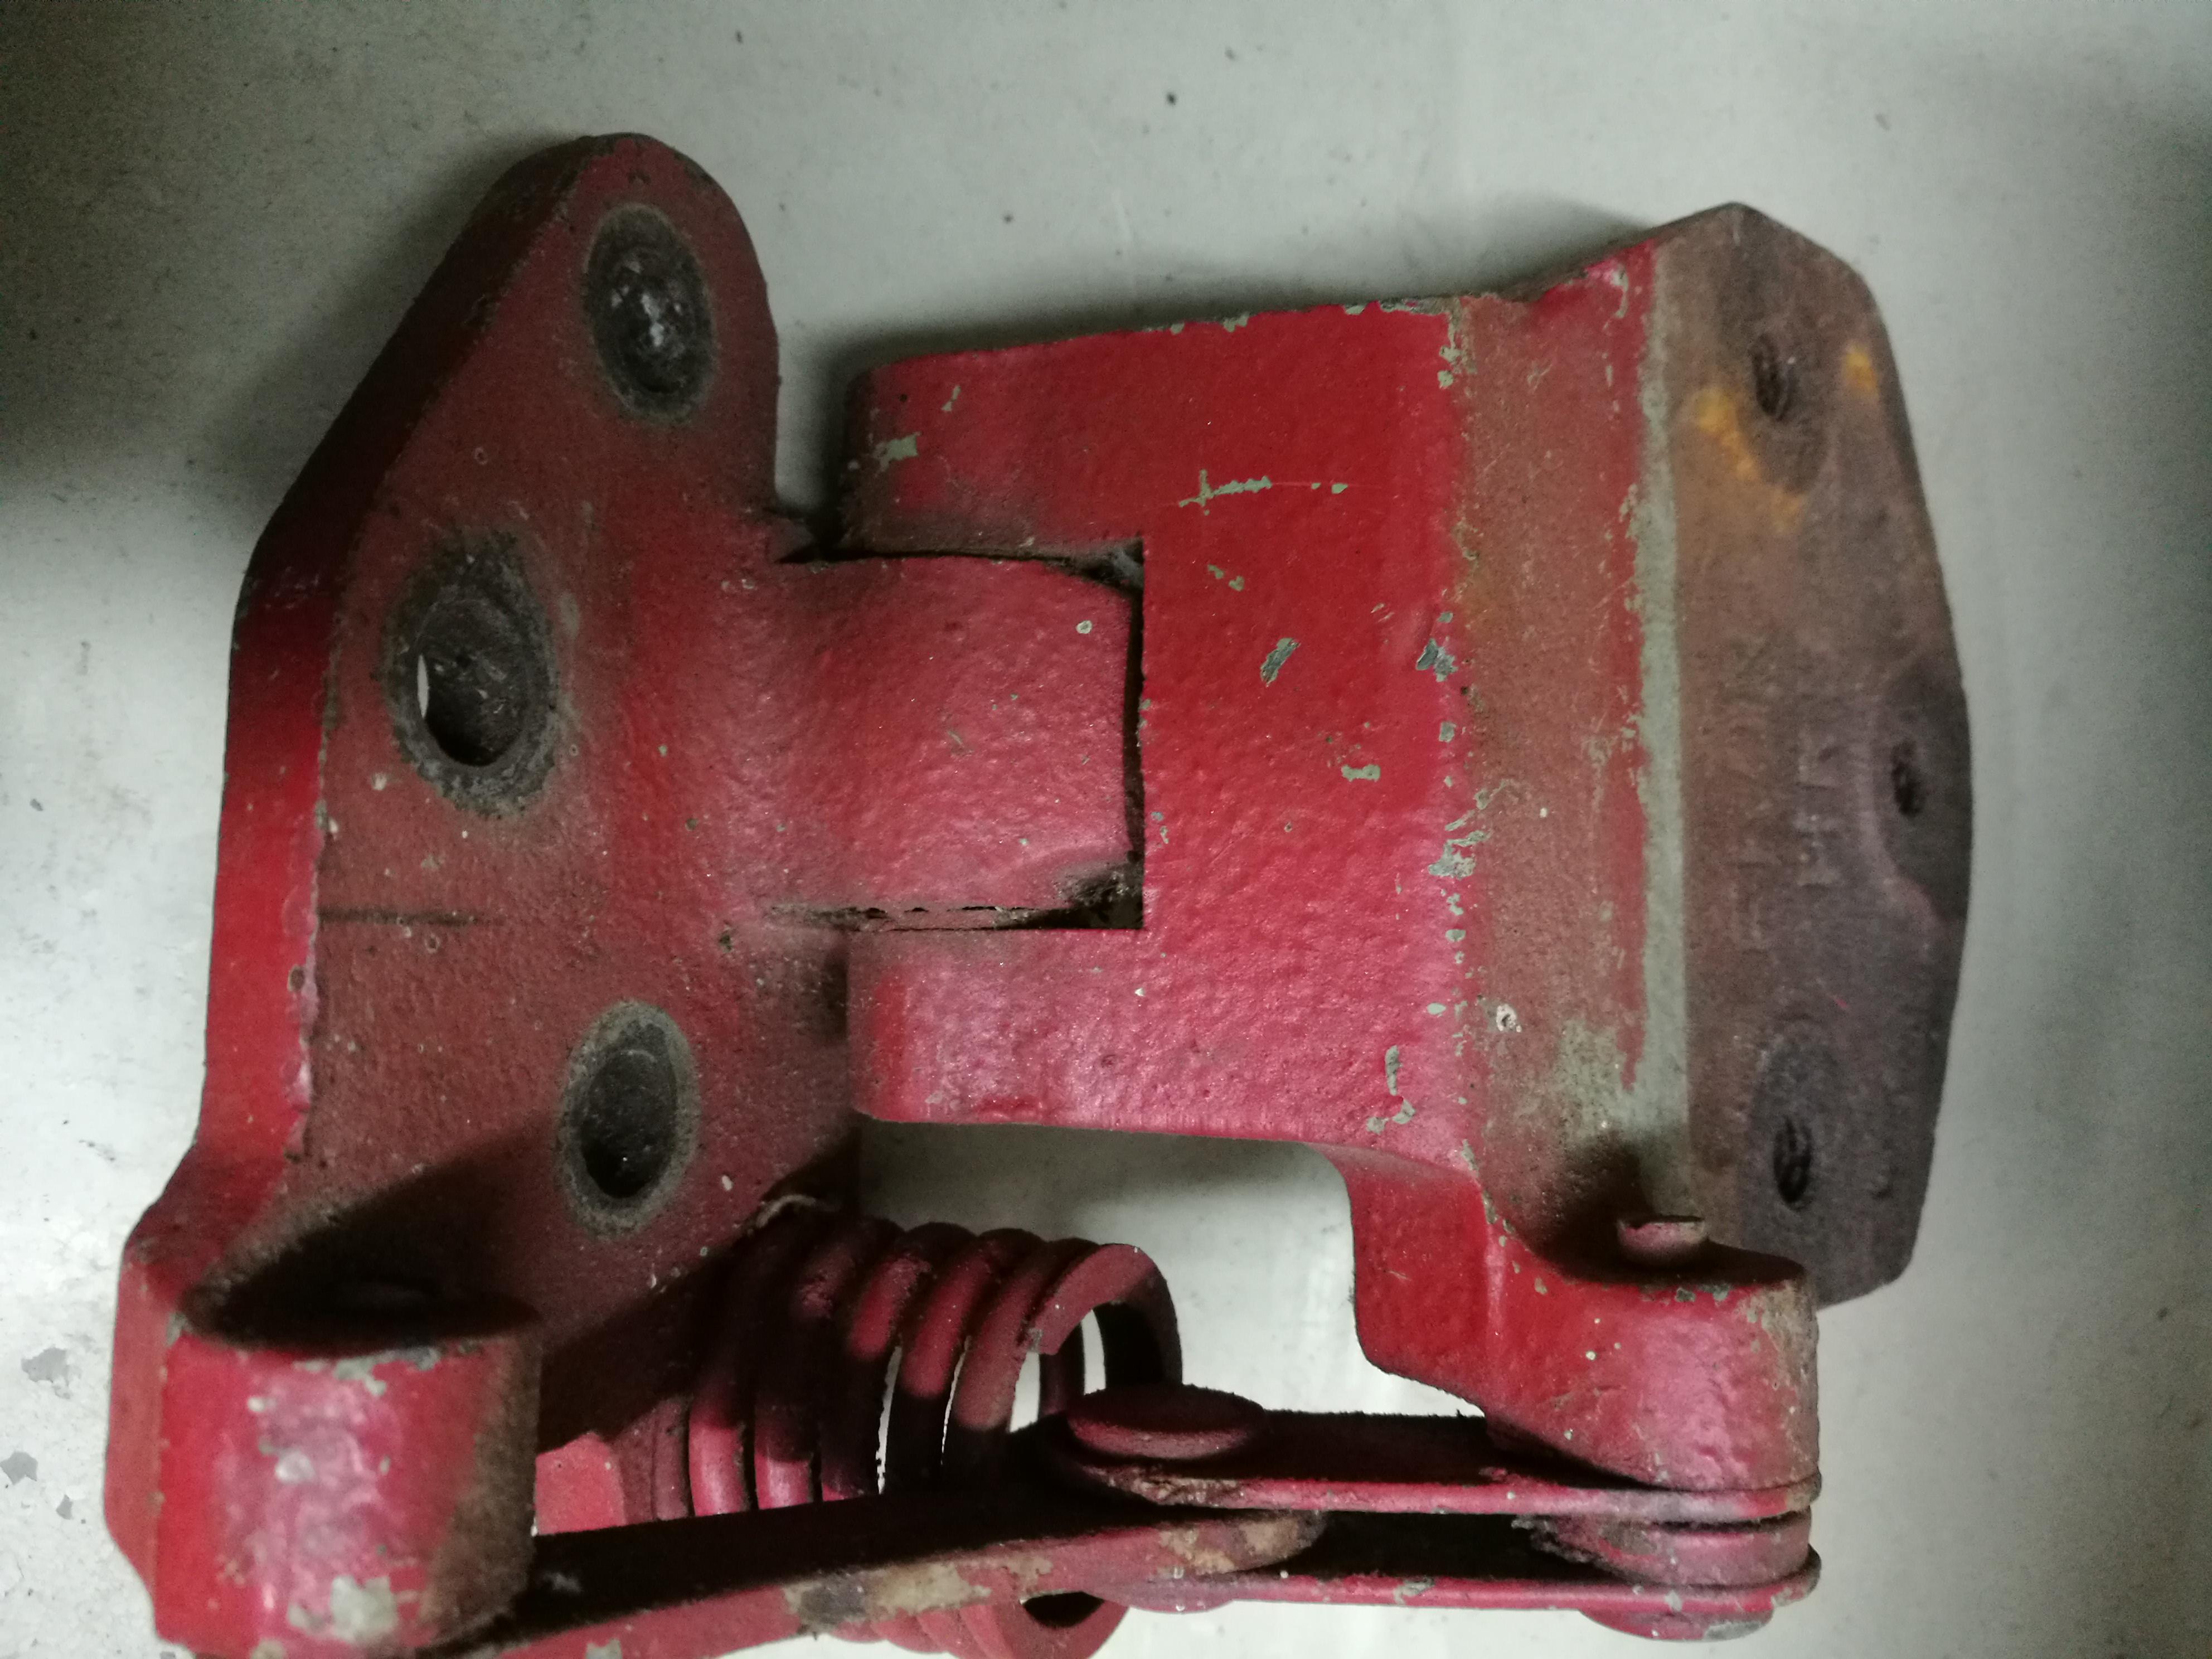
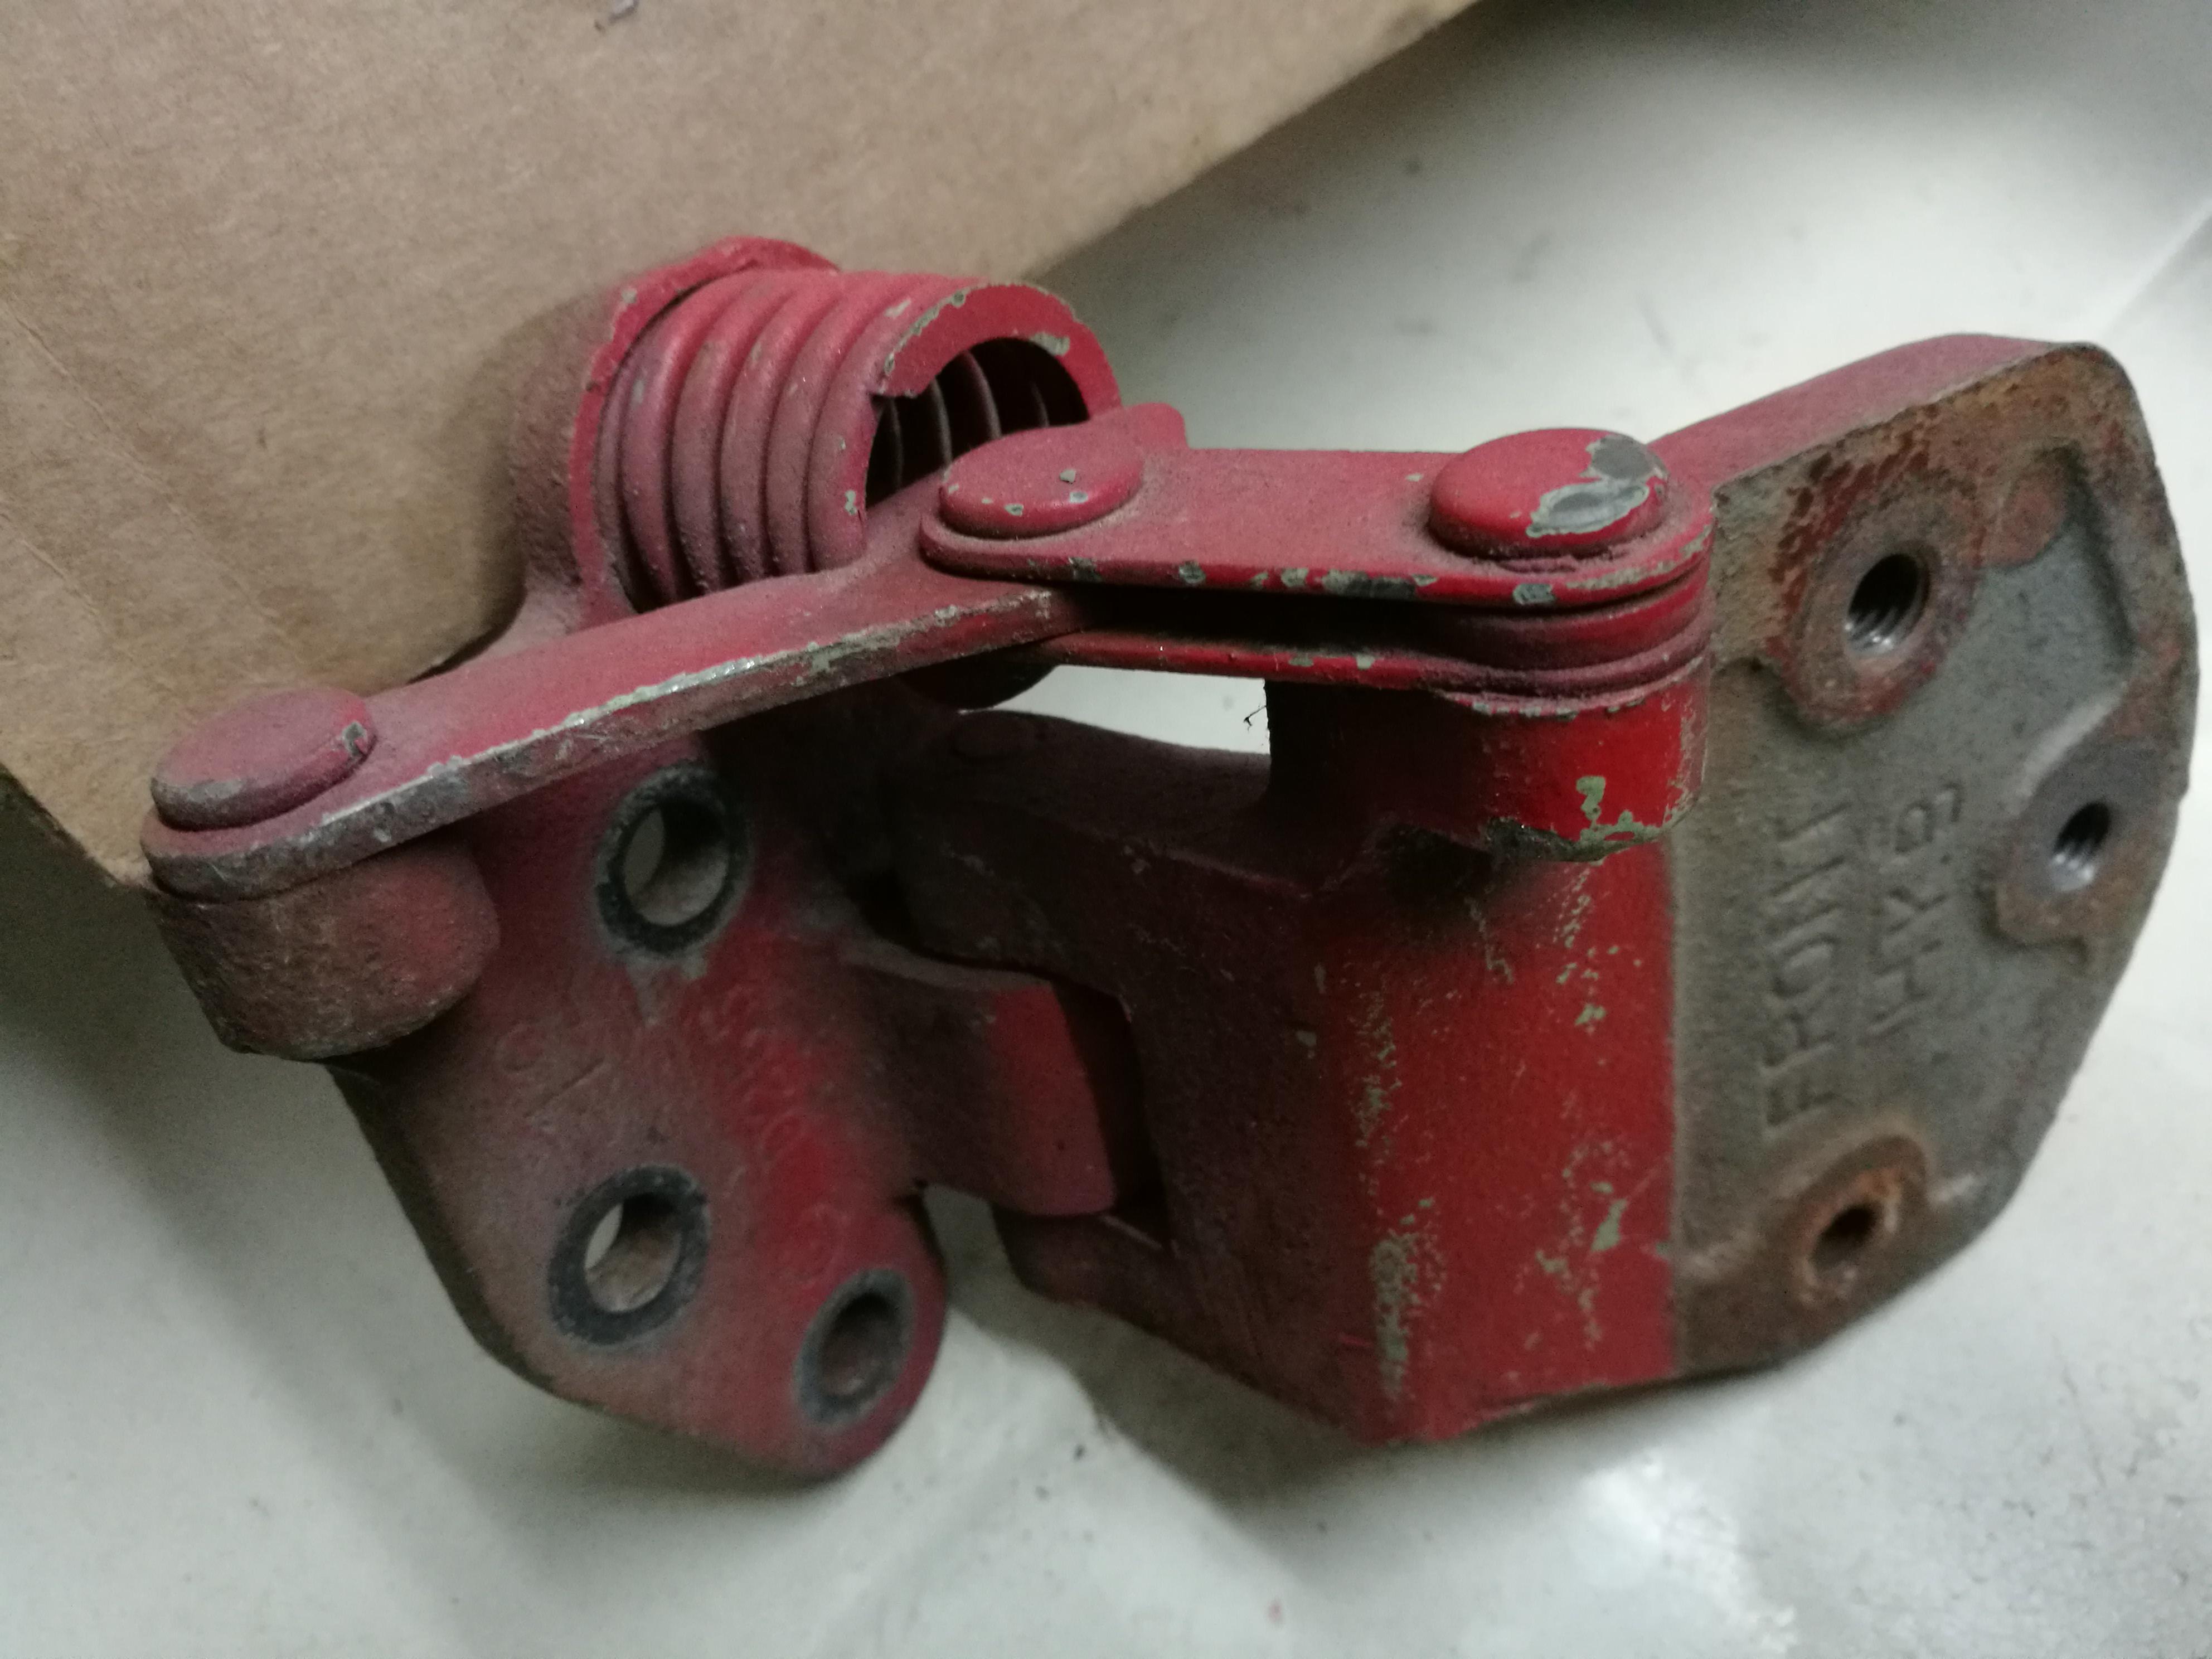
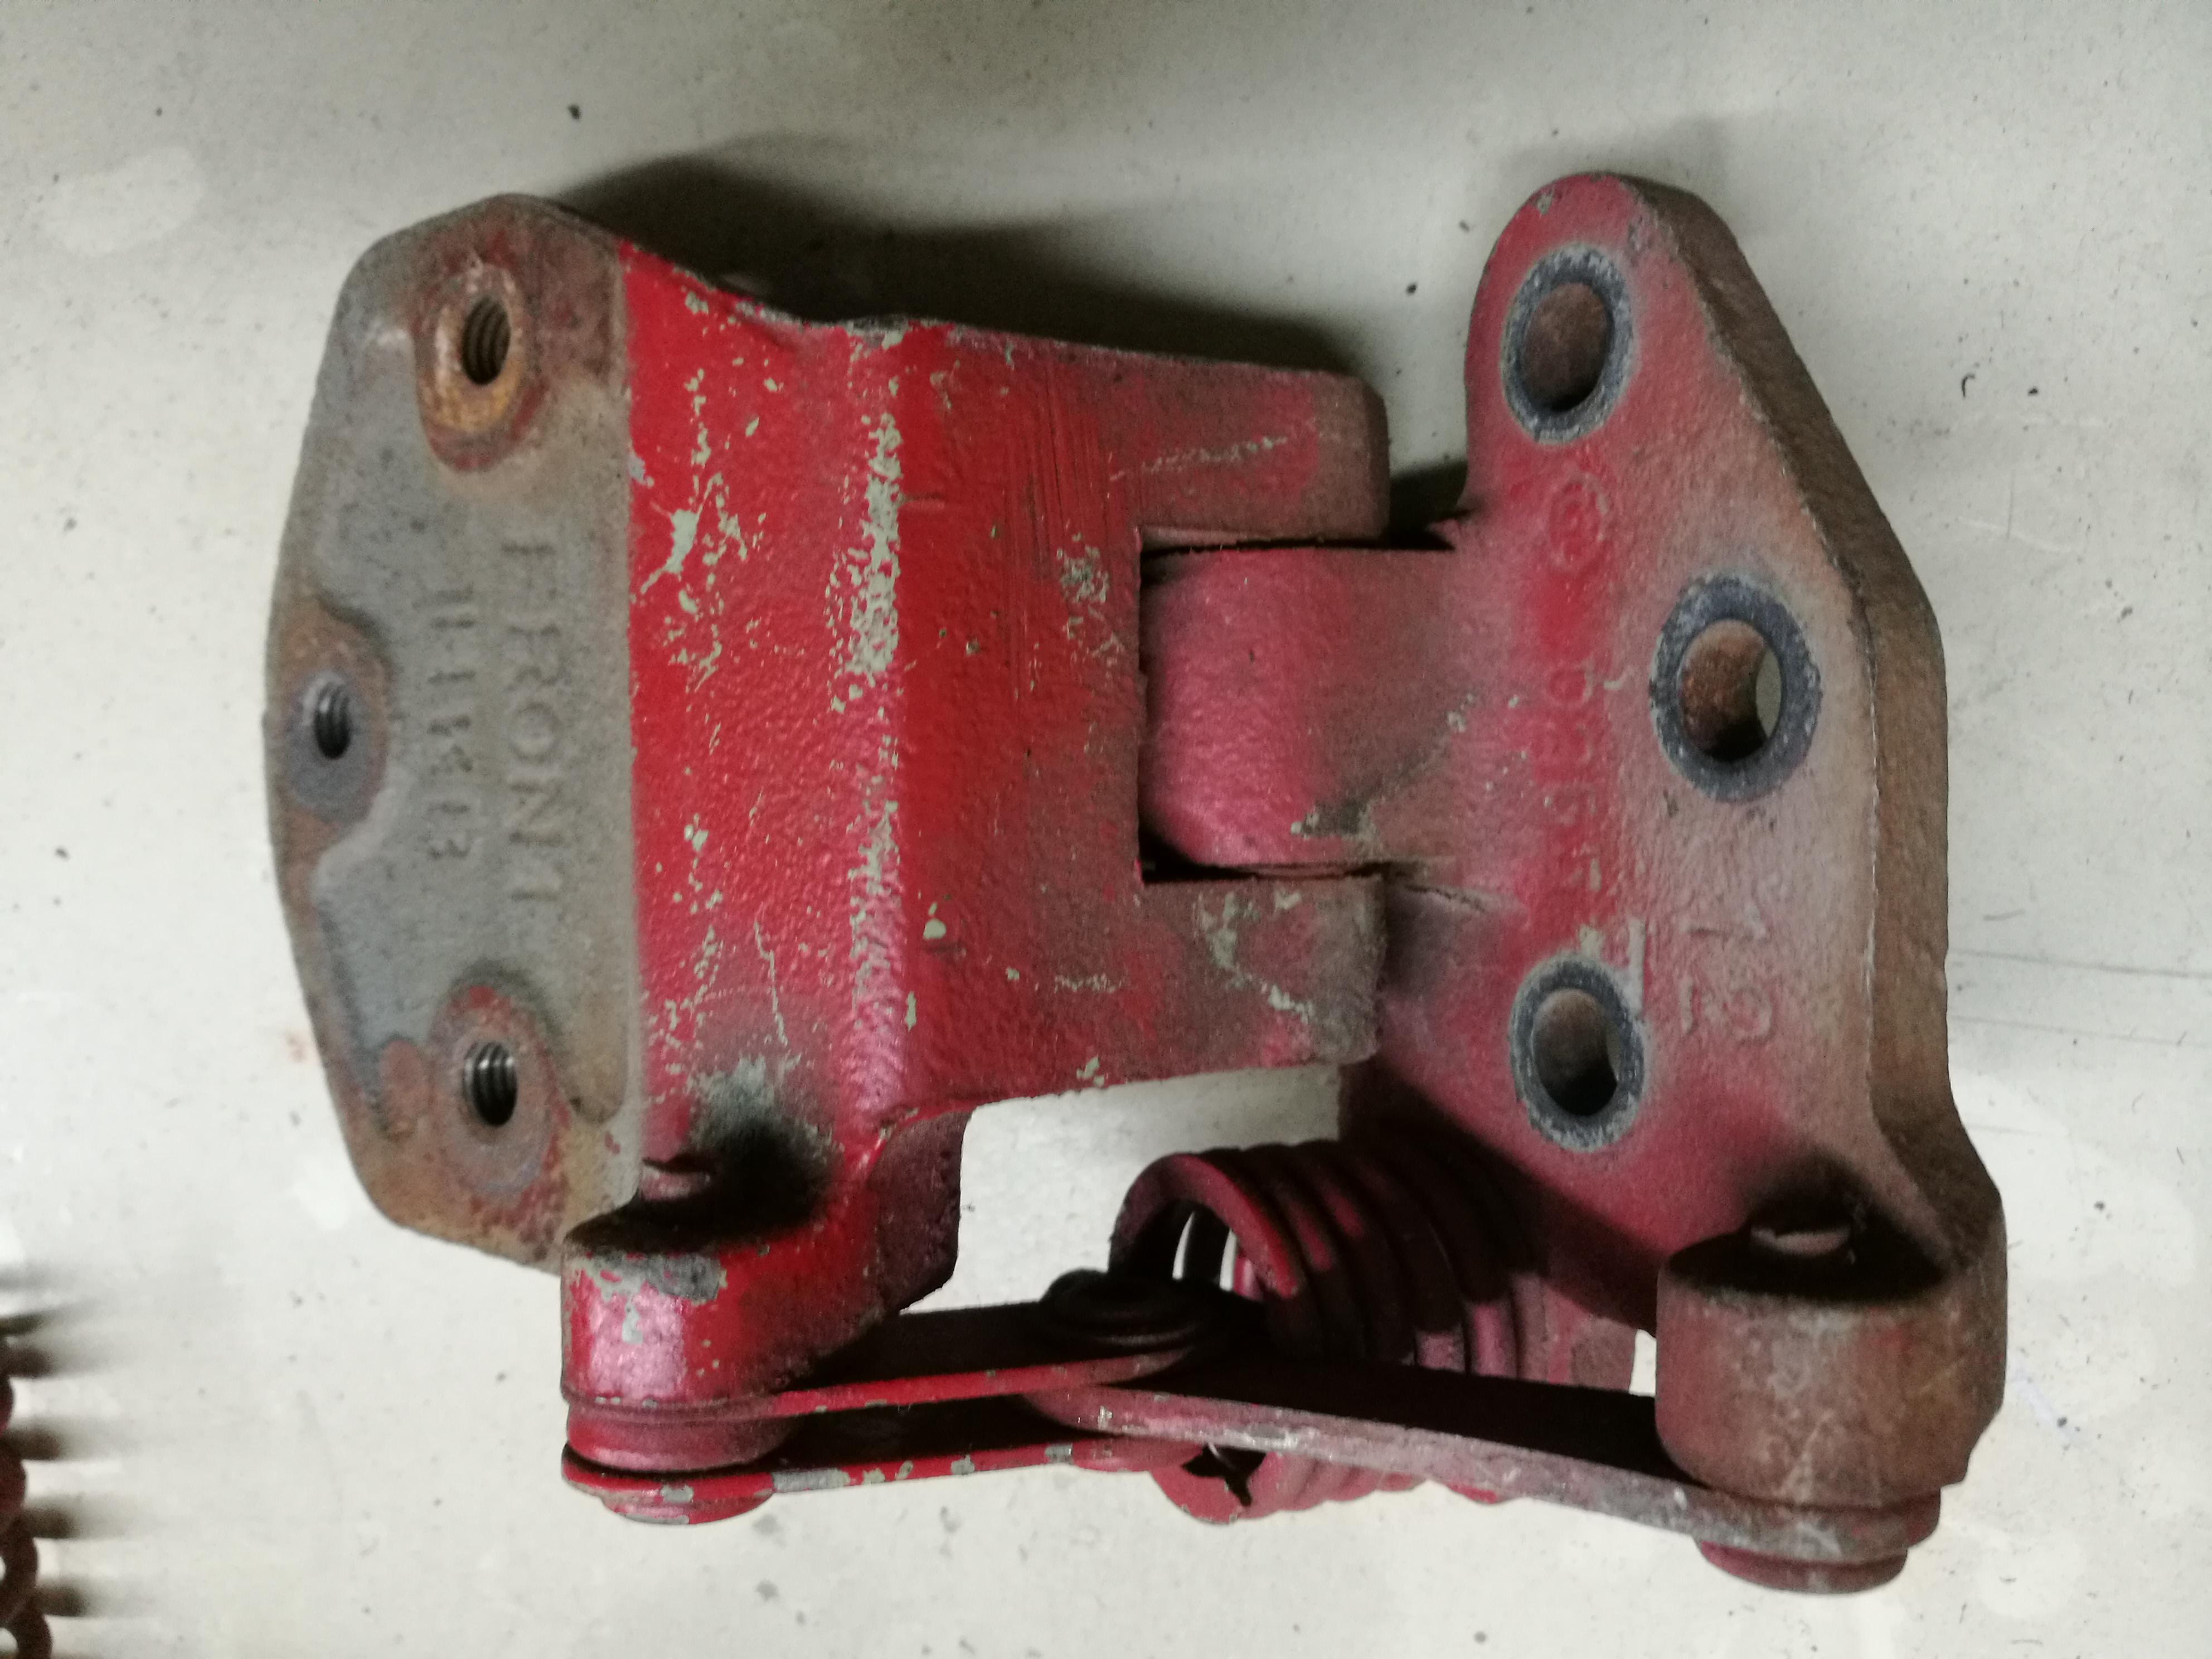
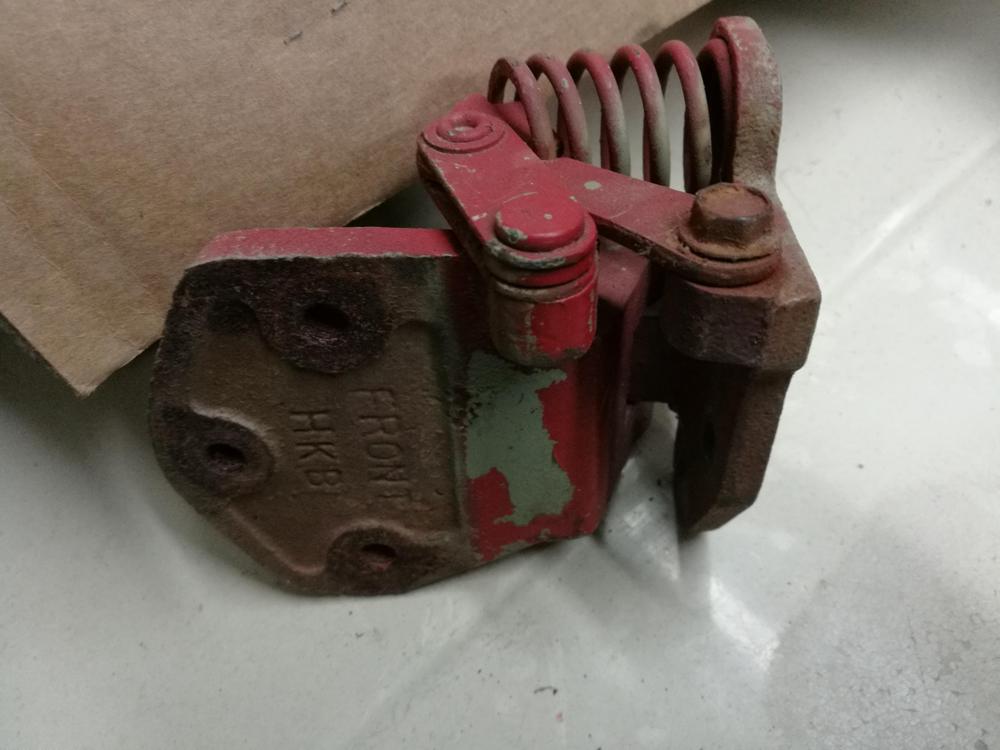
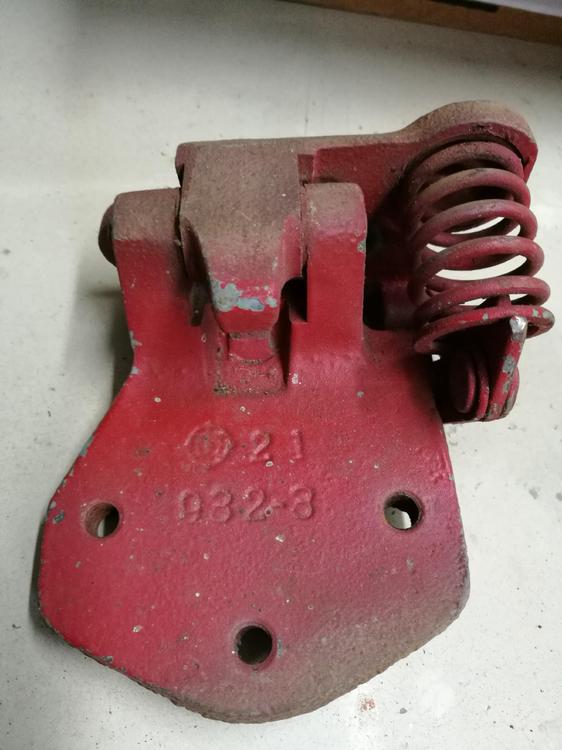
Ok, it looks like I have two rights, a left and a spare spring. These were from a four door sedan (my first car - RIP!) Been in storage since 1987. From left to right above (1, 2, 3...) This is 1 - passenger side, all good (2 views follow): This is 2 (note a bolt replaced the pin for the upper mechanism - I never noticed that before and again two views follow): This is 3: (driver side, and 2 views follow) So, you need what, a left, and a right, and the spring? Garrett


-
Hey, I've got some 510 hinges in a box. Mine came from sedans. Are they the same part numbers? I can take pics for you to see.