Kingbird6
Free Member
-
Joined
-
Last visited
-
Mikes Z car, To answer your question, the condenser used to secure to the same screw that attaches to the regulator bracket. It had a wire with a bullet connector that plugged into a separate lead coming out of my harness. Otherwise, my connector looks just like yours with the empty slot. Sounds like you are missing that condenser lead but I recall it only was there as noise suppression for the radio. Maybe someone clipped it off at some point ?
-
Yeah I'm pretty sure the 6 wire modern replacements will work ok. I definitely ran a 6 wire for years on my 5 pin harness without paying attention and I never did reconnect the free bullet connector lead to a new condenser (just left it hanging). I did have a possible battery overcharge situation at one time years ago but cant recall if that was a result of the wrong regulator or the old regulator or a higher am alternator since I screwed around with so many components. In any event, the car ran fine for years afterward so I probably answered my own question but didnt want to experiement with a newly restored harness without knowing for sure.
-
I am restoring my 1/70 240 and my wiring harness has a 5 pin connector with a separate lead that connects to a condenser. All of the replacement voltage regulators available have a 6 pin connector and no supplier seems to know for sure if it is a plug and play fit for my setup. At one point I'm sure I replaced the original regulator but the car was completely disassembled for a "frame off" resto several years ago and the shop misplaced my regulator so i'm going from scratch here. Any advice ? Thanks Brian
-
Thanks for the info. Thats about what I figured and my painter had painted them a satin black but I'm trying to replicate factory. Brian
-
Anyone know if the the metal inner splash shields were originally black or painted the same color as the car ? thanks Brian
-
Anyone know if I have a correct manifold for my 1/70 build ? One is marked N36 on the casting and has two bolts to presumably mount a heat riser tube and the other manifold is marked E30 and has no bolt holes for a heat riser. Thanks Brian
-
Yes, my paint code is 905......
-
Carl, Definitely a mistake on my part with engine number. I was playing off memory knowing that it was a 4 digit low number. with 4's in it :-) Won't matter anyhow at this point because my understanding is that Dave used a 280z crank in his mod of my L24. I believe he calls this build the "Purist Build" on his website taking the bore and stroke up while refitting a different cam, valves, porting of E31 head and intake manifold and recurve of ignition with lightweight flywheel. Supposed to put out about 230HP at the crank with re-jetted SU's or 270 with triple carbs. I am leaving the original series 1 four- speed manual and rear end for purposes of originality and he said they are plent tough to accomodate the additional HP. I wont be tracking the car or making it a regular driver anyhow Brian
-
Jim, I'm contemplating adding a spoiler like the one in your photo. Cant seem to locate one similar. I'm only interested in adding something that looked like a factory or dealer option in 1970, not a large aftermarket air dam or something that requires me to drill the hell out of my original pristine panels. Thanks Brian
-
I certainly appreciate everyone's inputs ! The lighting has a lot to do with it for sure and I forgot to mention that I did order some original paint from an automotive touch up group in Louisiana called automotivetouchup.com...I have to say their spray can was a dead on match for my remaining areas under the dash that I described. That's what got me going. So, I sprayed a nice metal sample about 6" by 6" and clear coated it and held it up to the car for comparison. It had a lot more orange in the spray sample and also produced a more vibrant color. In the end, I like both shades but it sounds like everyone thinks it's close enough to stick with what I have. My painter mentioned that he thought the color was labeled "Pagoda Red" when he ordered it, and as it turns out, that name comes from a bright red hue that Datsun used on earlier sedans in the mid-late 60's. To answer the other questions here, I'm building it for me. I'm a 30 year owner and it's serial number 001635 so I want to keep it true to how I found her but a few shades off probably wont kill me. One other thing I should admit as a self proclaimed purist.......I couldnt afford to rebuild the motor as a broke high school kid so I dropped an L28 motor in around 1984. I got tired of stepping over the old motor block (serial number 001434) so I eventually dontated it to the scrapyard when I was young and stupid. As luck would have it, I was able to locate a low serial number L24, complete with an E31 head and early oil pan when I started this project. But since it would never be my original motor for collectible value, I sent it off to Dave Rebello for a rebuild and a 230HP upgrade. But before you kick me out of the purist club, be advised that do I intend to run the stock but rejetted SU's and keep the engine compartment totally original to the eye otherwise. Dave knew what my intent was to begin with so he thinks I'll be just fine with the OEM manifolds etc. Not optimal for taking advantage of his fine work, but I could always keep the OEM parts and have fun with triple Webs. Just don't tempt me to gun it at the stop light or I'll give myself away :-) Thanks again
-
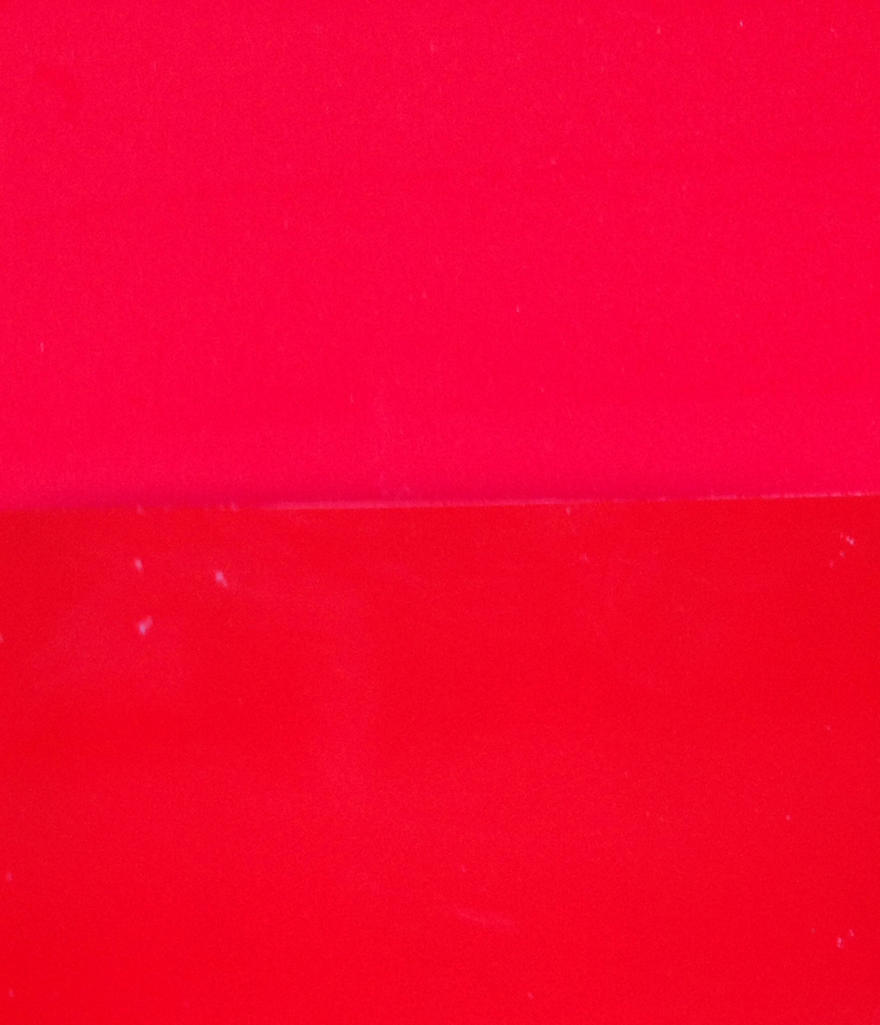
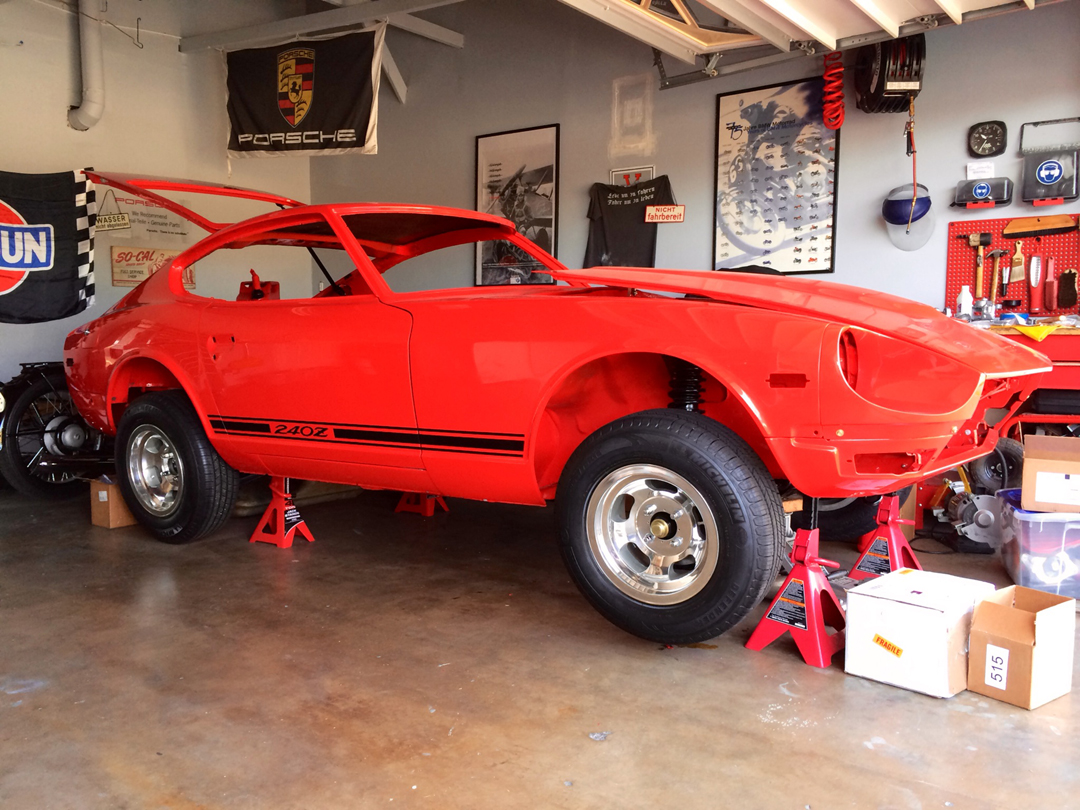
Here's the paint colors guys. The color chip sample I have is the actual "camera eye" photo. The top (lighter red) is what is on the car now. The lower color is the original shade. I also included a photo of it as it sits now. The color in my photo is pretty close to how the human eye see it I think. Brian
-
Was mixed with a formula...I was told every manufacturer has a different variant. When i hold the two paint samples in sunlight as you describe, the original color looks darker due to a higher orange content.
-
Thanks for the thoughts...It's a few shades off. When you hold the two colors on a chip side by side you say one is red and one is almost orange with the orange tint being the factory color. The car was stripped to bare metal and painted completely disassembled on a rotisserie...The only reason I noticed the color difference was because a corner under the dash where the drain tube passes had an original shiny swatch letf and I noticed it was more orange in color value. Thats all it took to get me on my obsession :-)
-
Guys, After recently spending 15K on a complete tear 3 year down with concours quality body restoration on my 1/1970 240Z, I came to realize that the shade of red that was sprayed did not match the original paint shade as delivered from the factory ! This is driving me nuts ! What the painter used was a water based PPG that is more of a Ferrari red than than the red/orange Datsun supplied (I was convinced he had the correct shade until I discovered original paint afterward under a place covered by the dash). Now since this was my original car from high school owned since 1983, it has become an obsession of originality and utmost restoration for me. I have every nut bolt and screw replated and the car's suspension is completely restored and installed but everything else is still out (interior, motor, wire harness etc. I'm really tempted to have the whole car resprayed all over again now that I have the original shade dialed in. Am I crazy or should I go for it assuming I'm not going to do a repeat of the $15K expenditure. Forget personal preference, I love the shade of red that is on it now. But as a classic, it might just eat me up later knowing that it fails to be a historically accurate example... Brian